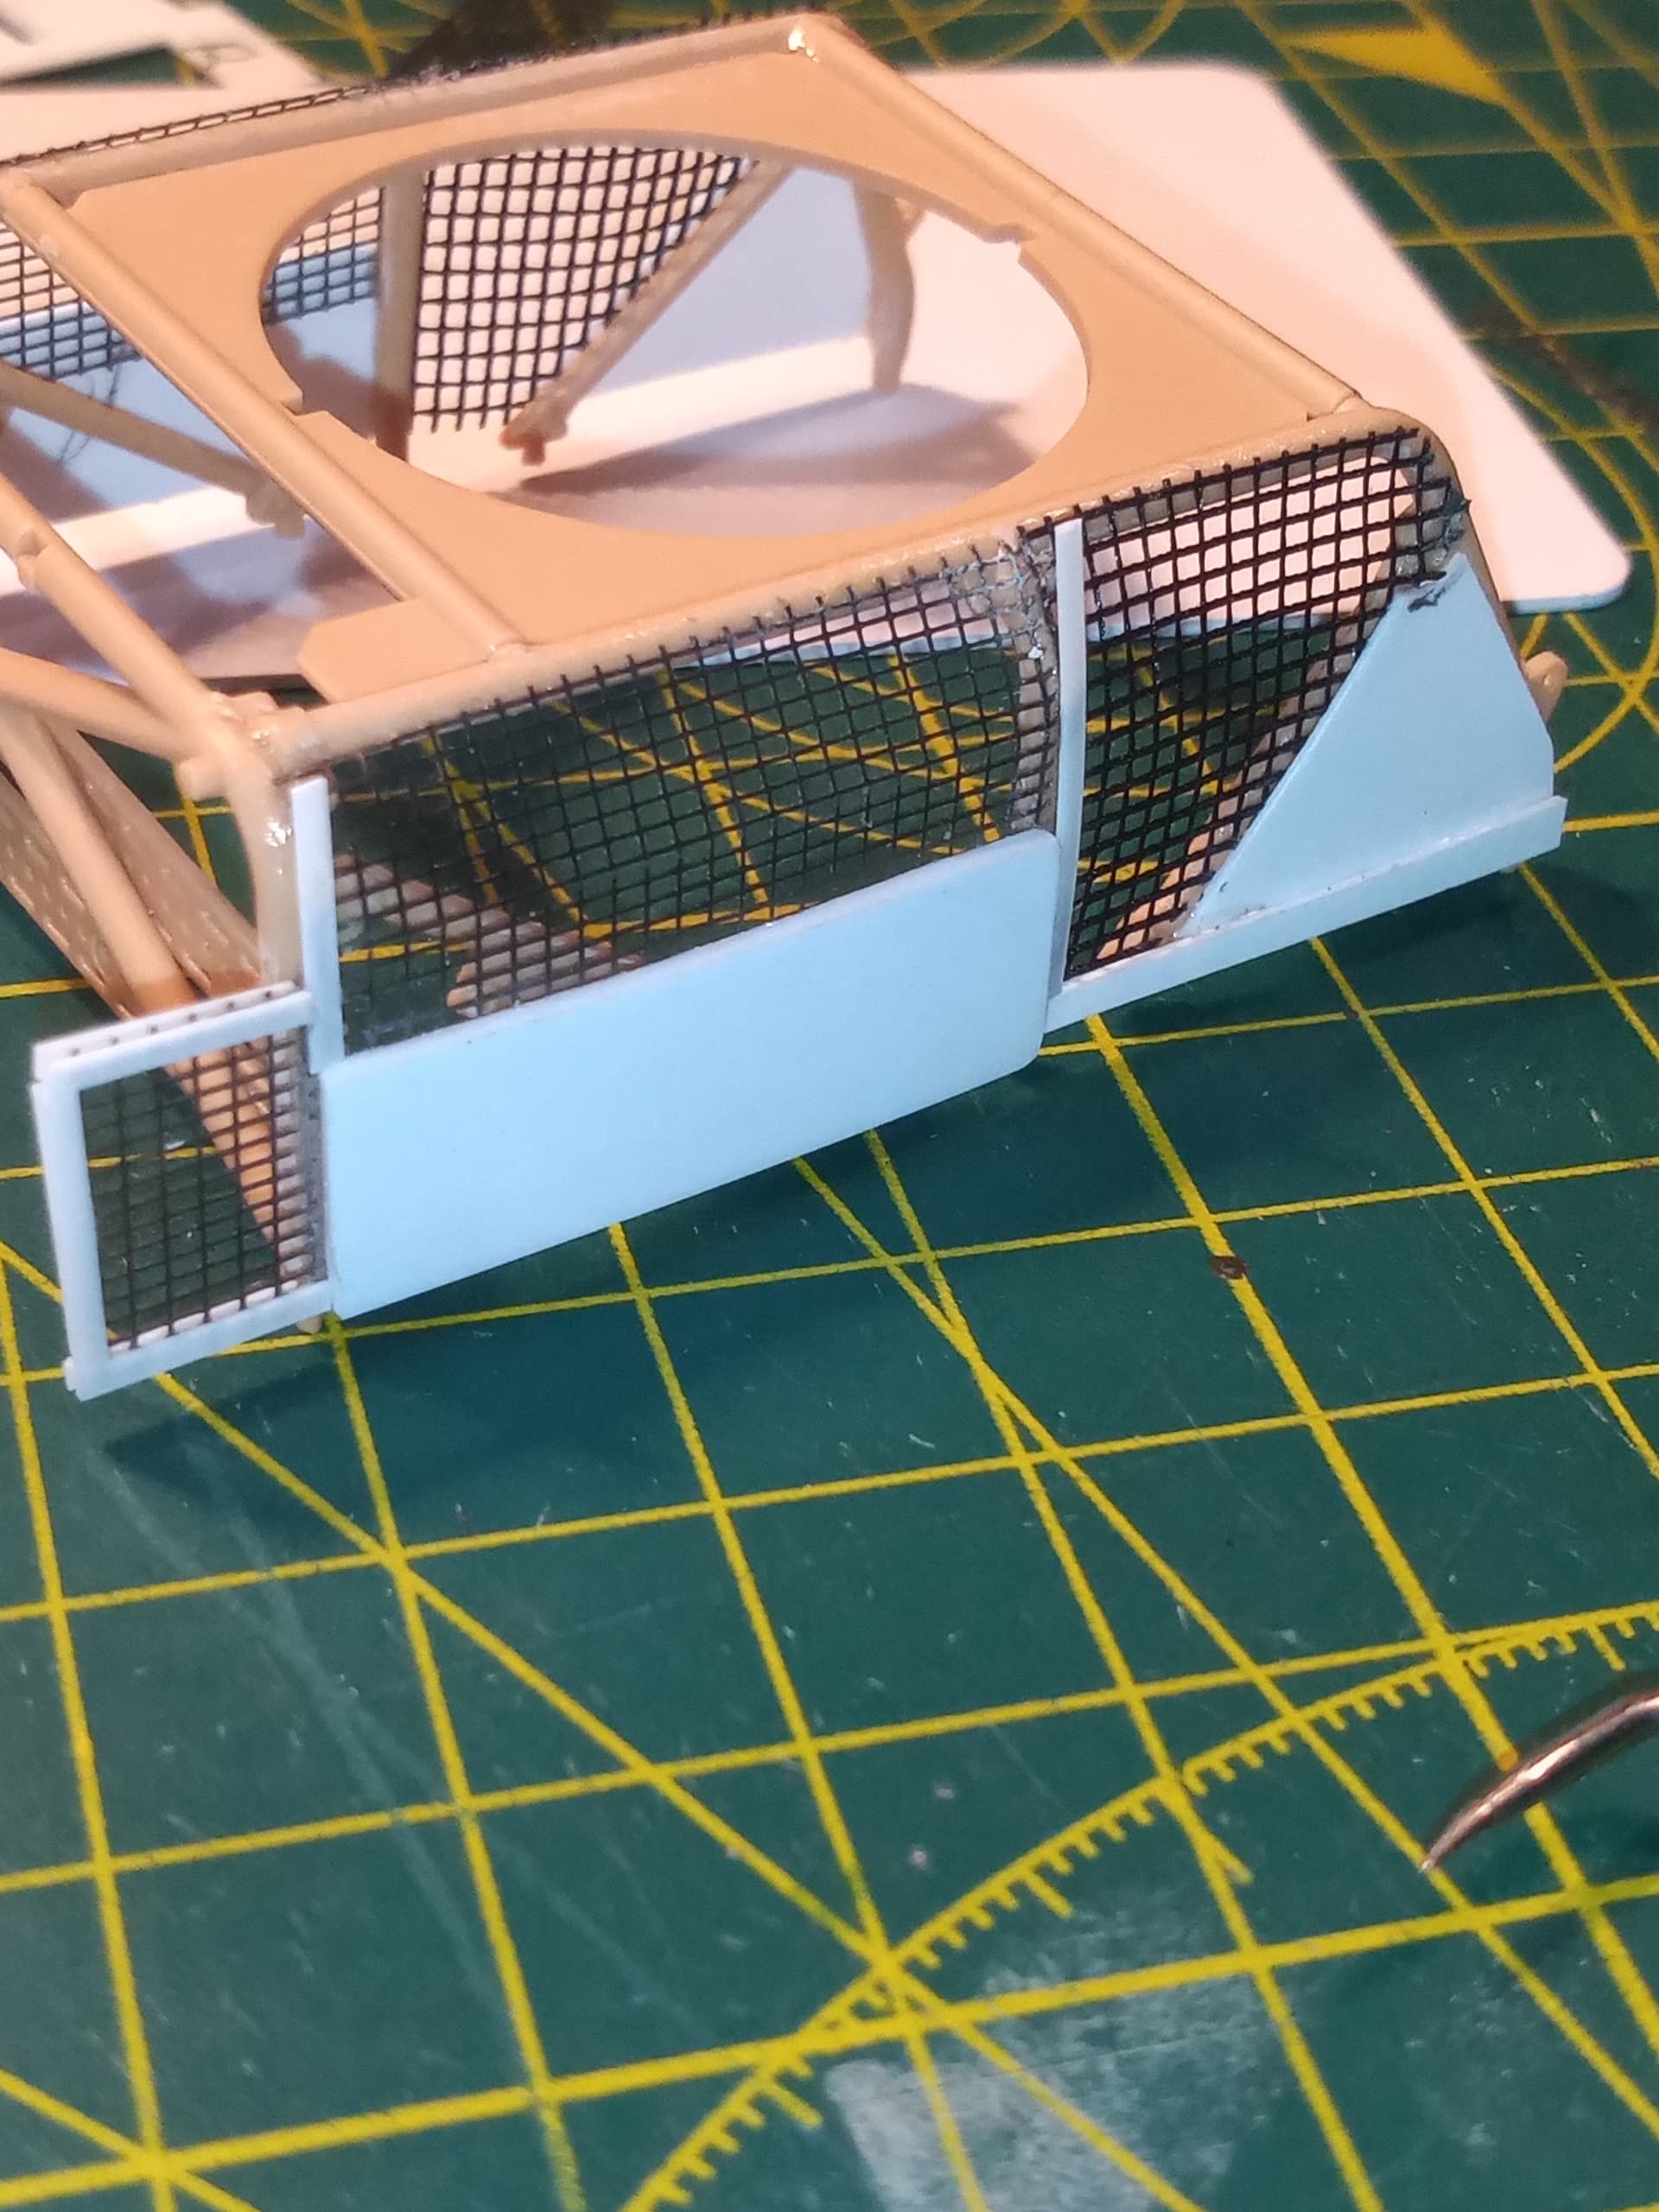
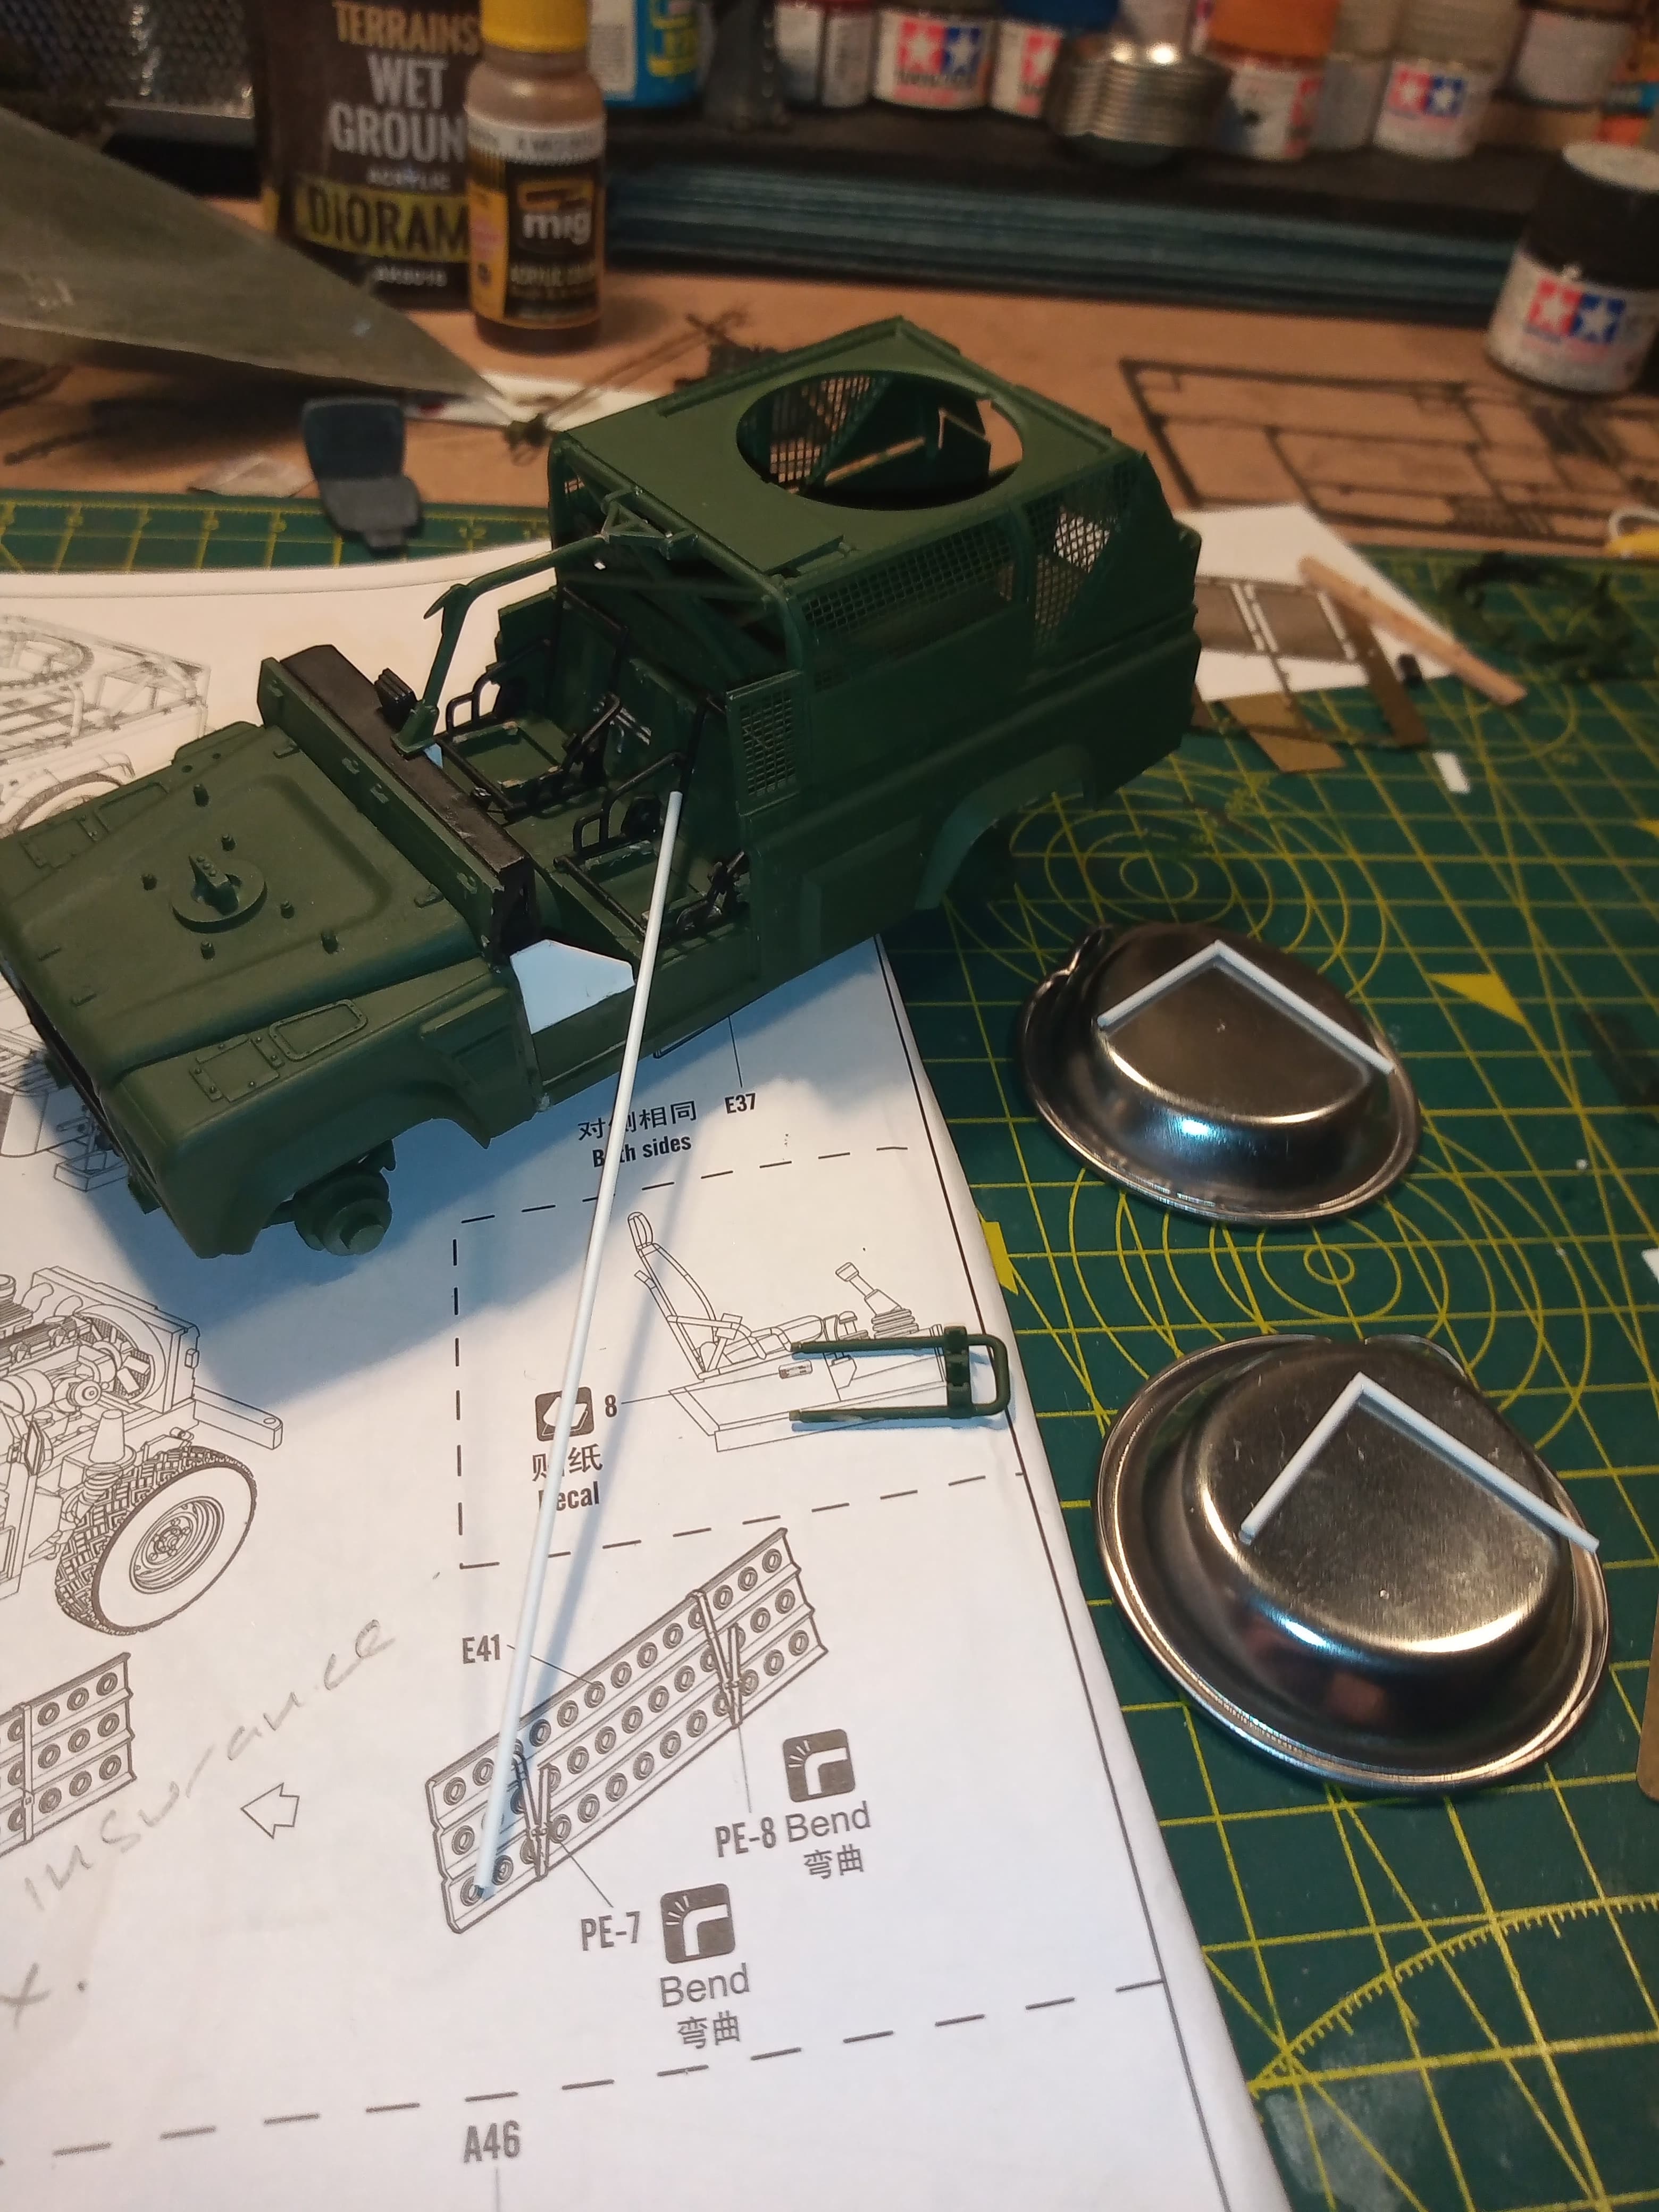
The edges and joins will all have 1.5 styrene strip running over them eventually with MENG bolt heads added… Have started 2 in the image below in front of the blade…
Glued them in the vertical to begin with, and once that dries, will then glue the curves
My current plan is to build an exploration and rescue vehicle for use during a World War II era nuclear winter. That may change because I am currently watching Gerry Anderson’s UFO and playing X-COM: UFO Defense.
Ah, X-COM UFO Defense. I played the PC and console versions so long ago.
Tips (and spoilers): When in squad combat, the waypoint Blaster Launcher is a key weapon in defeating aliens behind cover and tough aliens…just waypoint the bomb to the targets or close to them. I normally have two or three members carrying Blaster Launchers. Never mind the collateral damage the huge waypoint bombs create, but do beware of the huge blast radius in that your squad doesn’t get caught in the blast.
And the jetpack is critical for hovering above everything for better line-of-sight.
I may enter this build campaign once I get a couple of other build campaigns completed first.
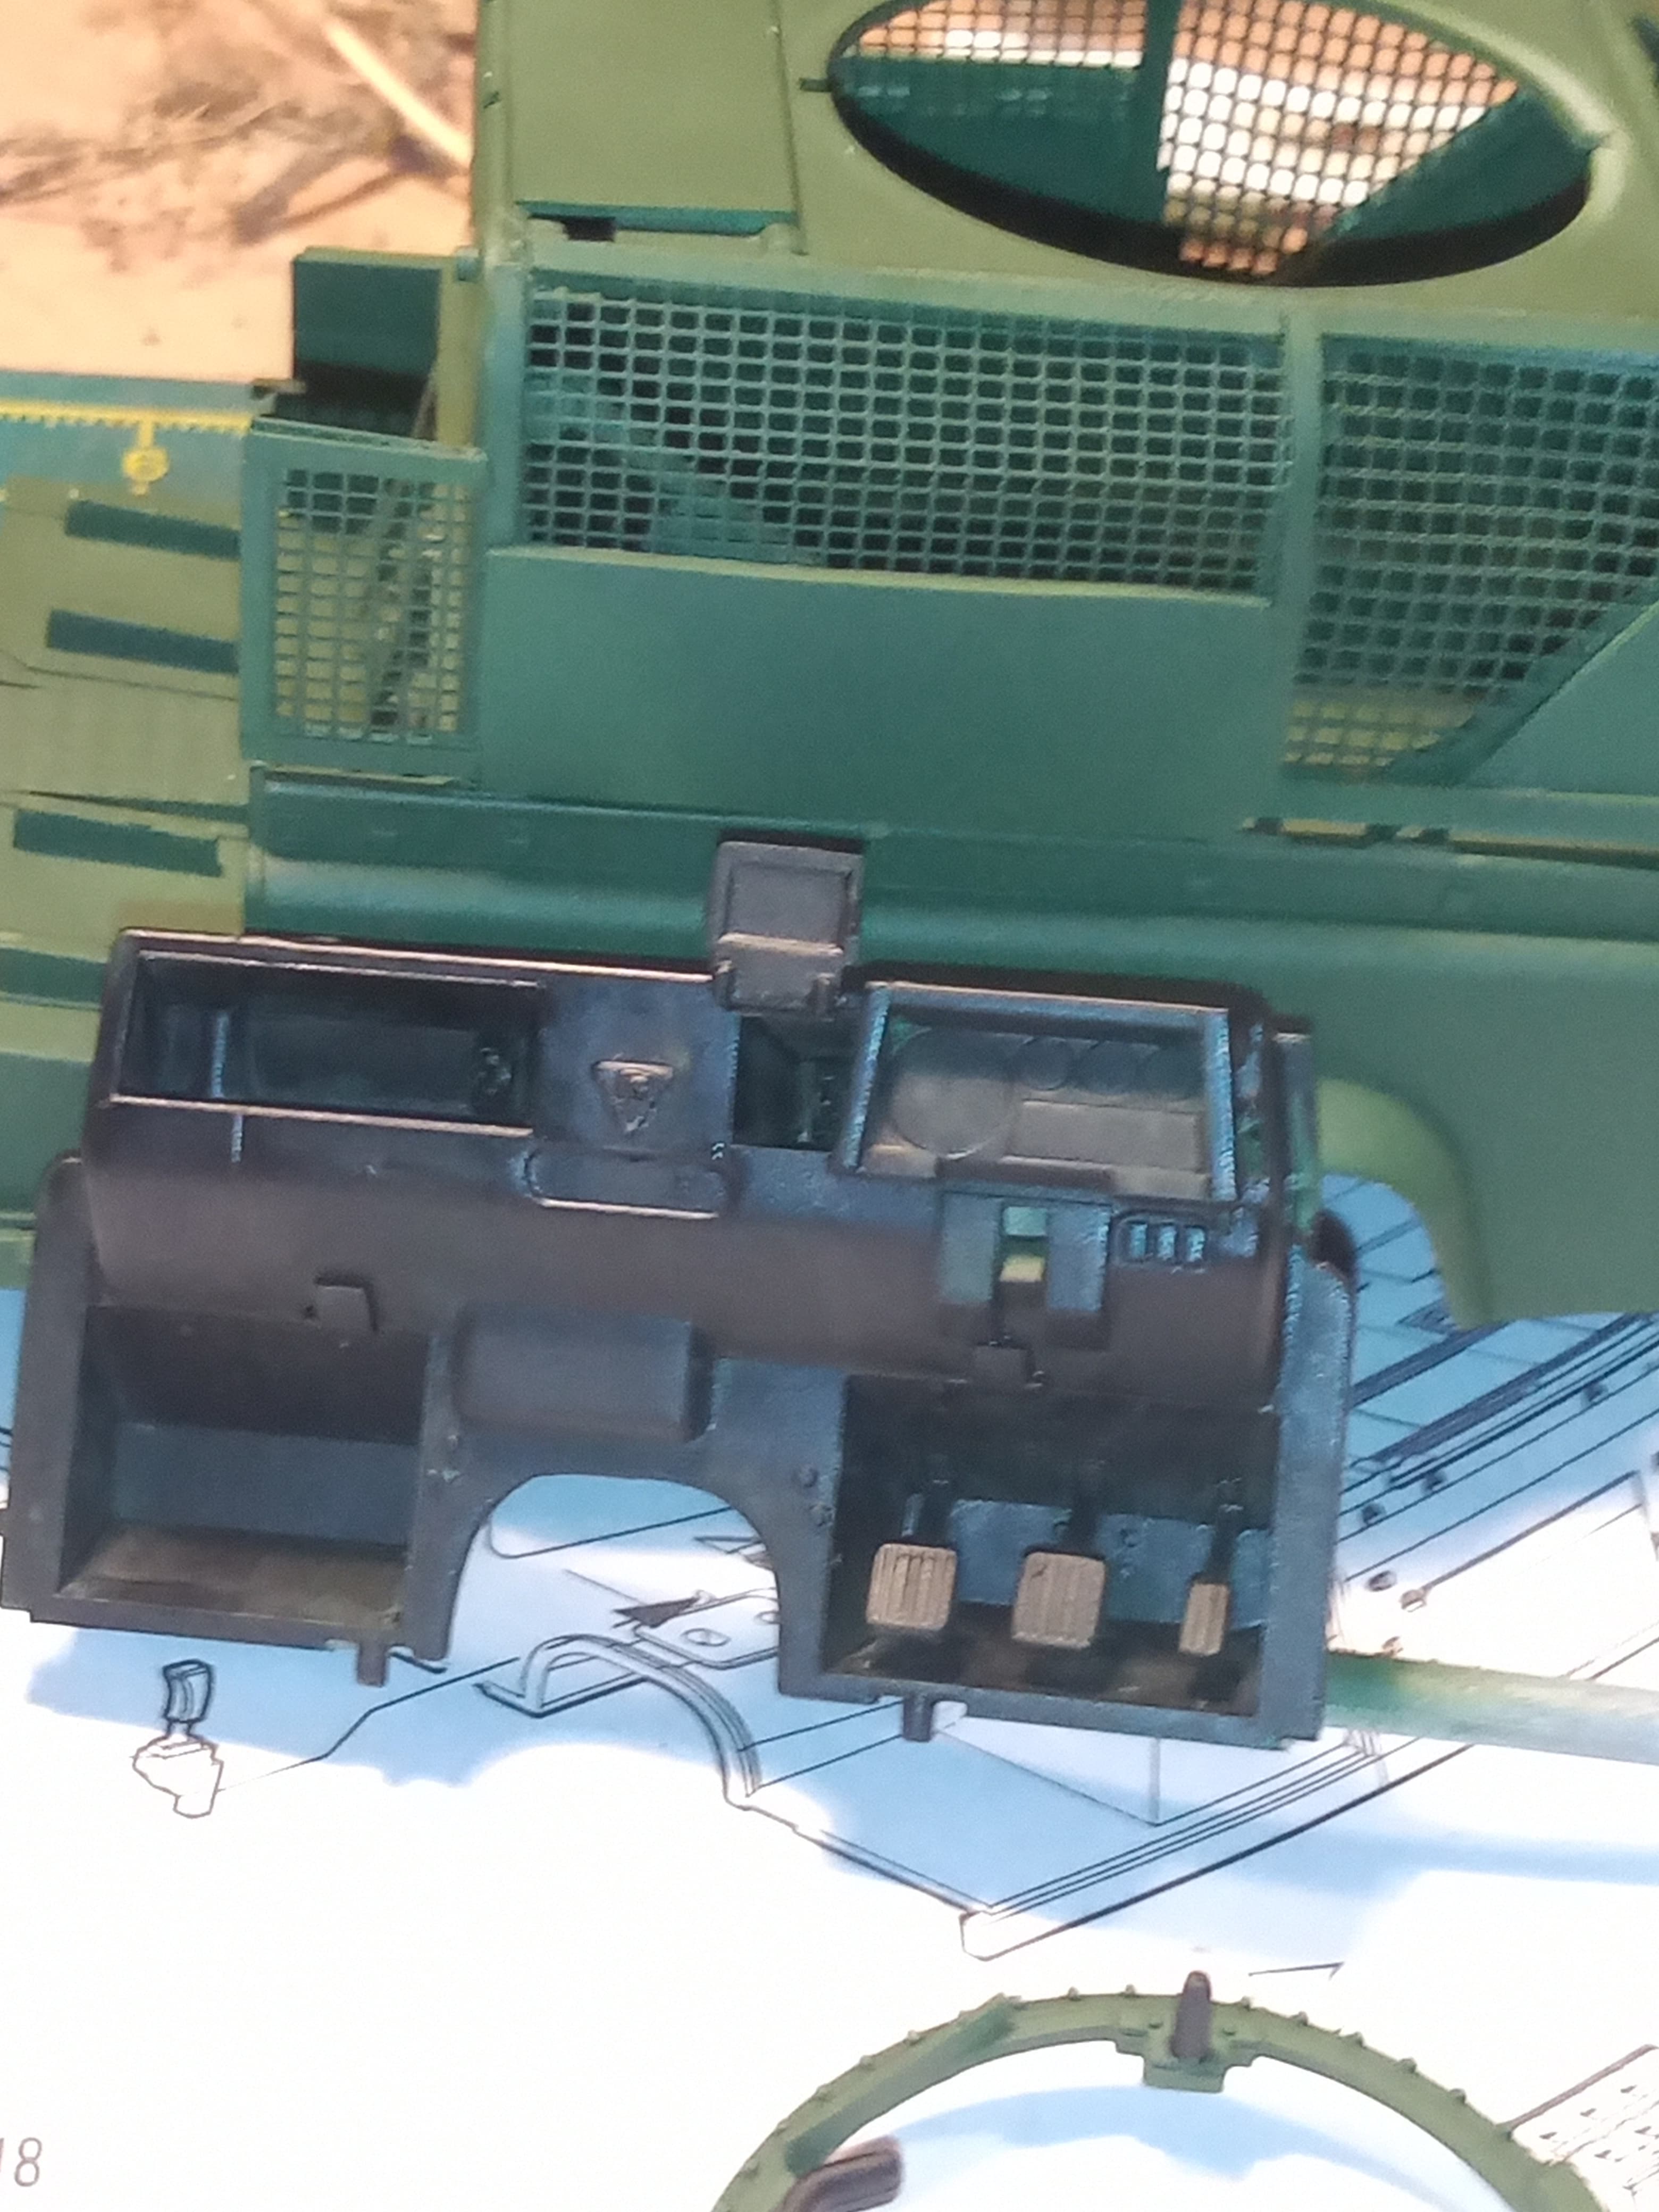
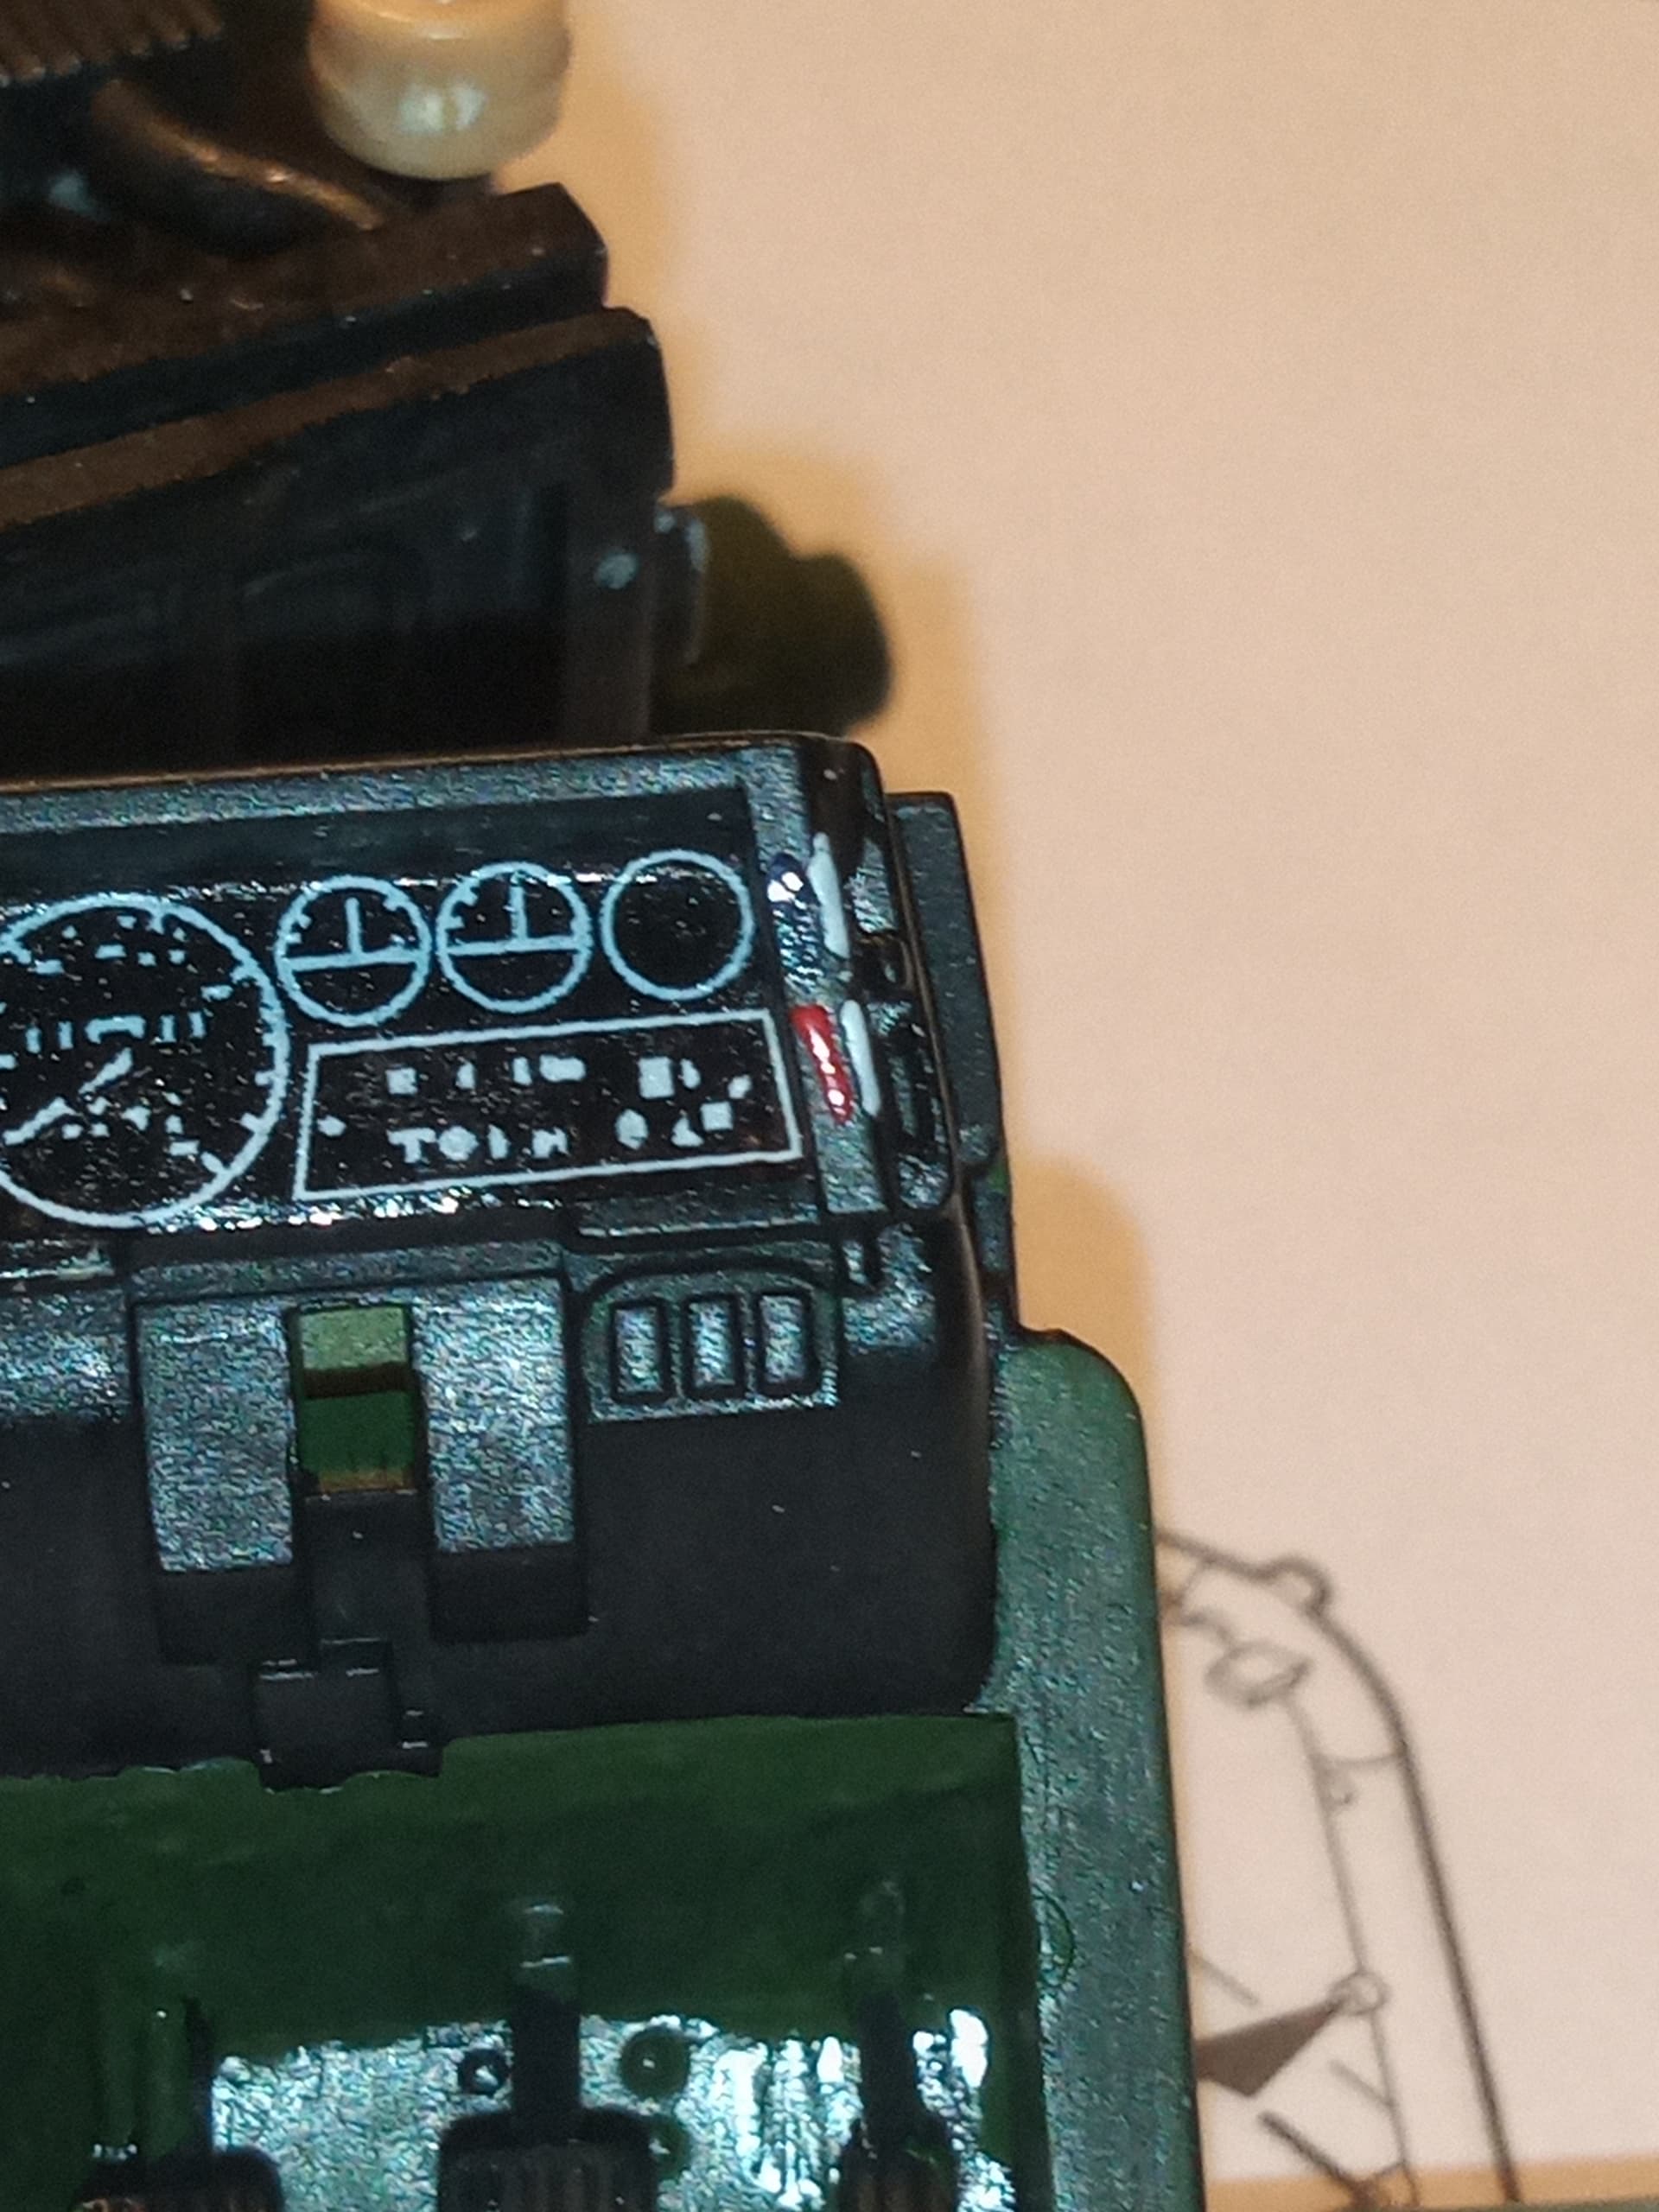
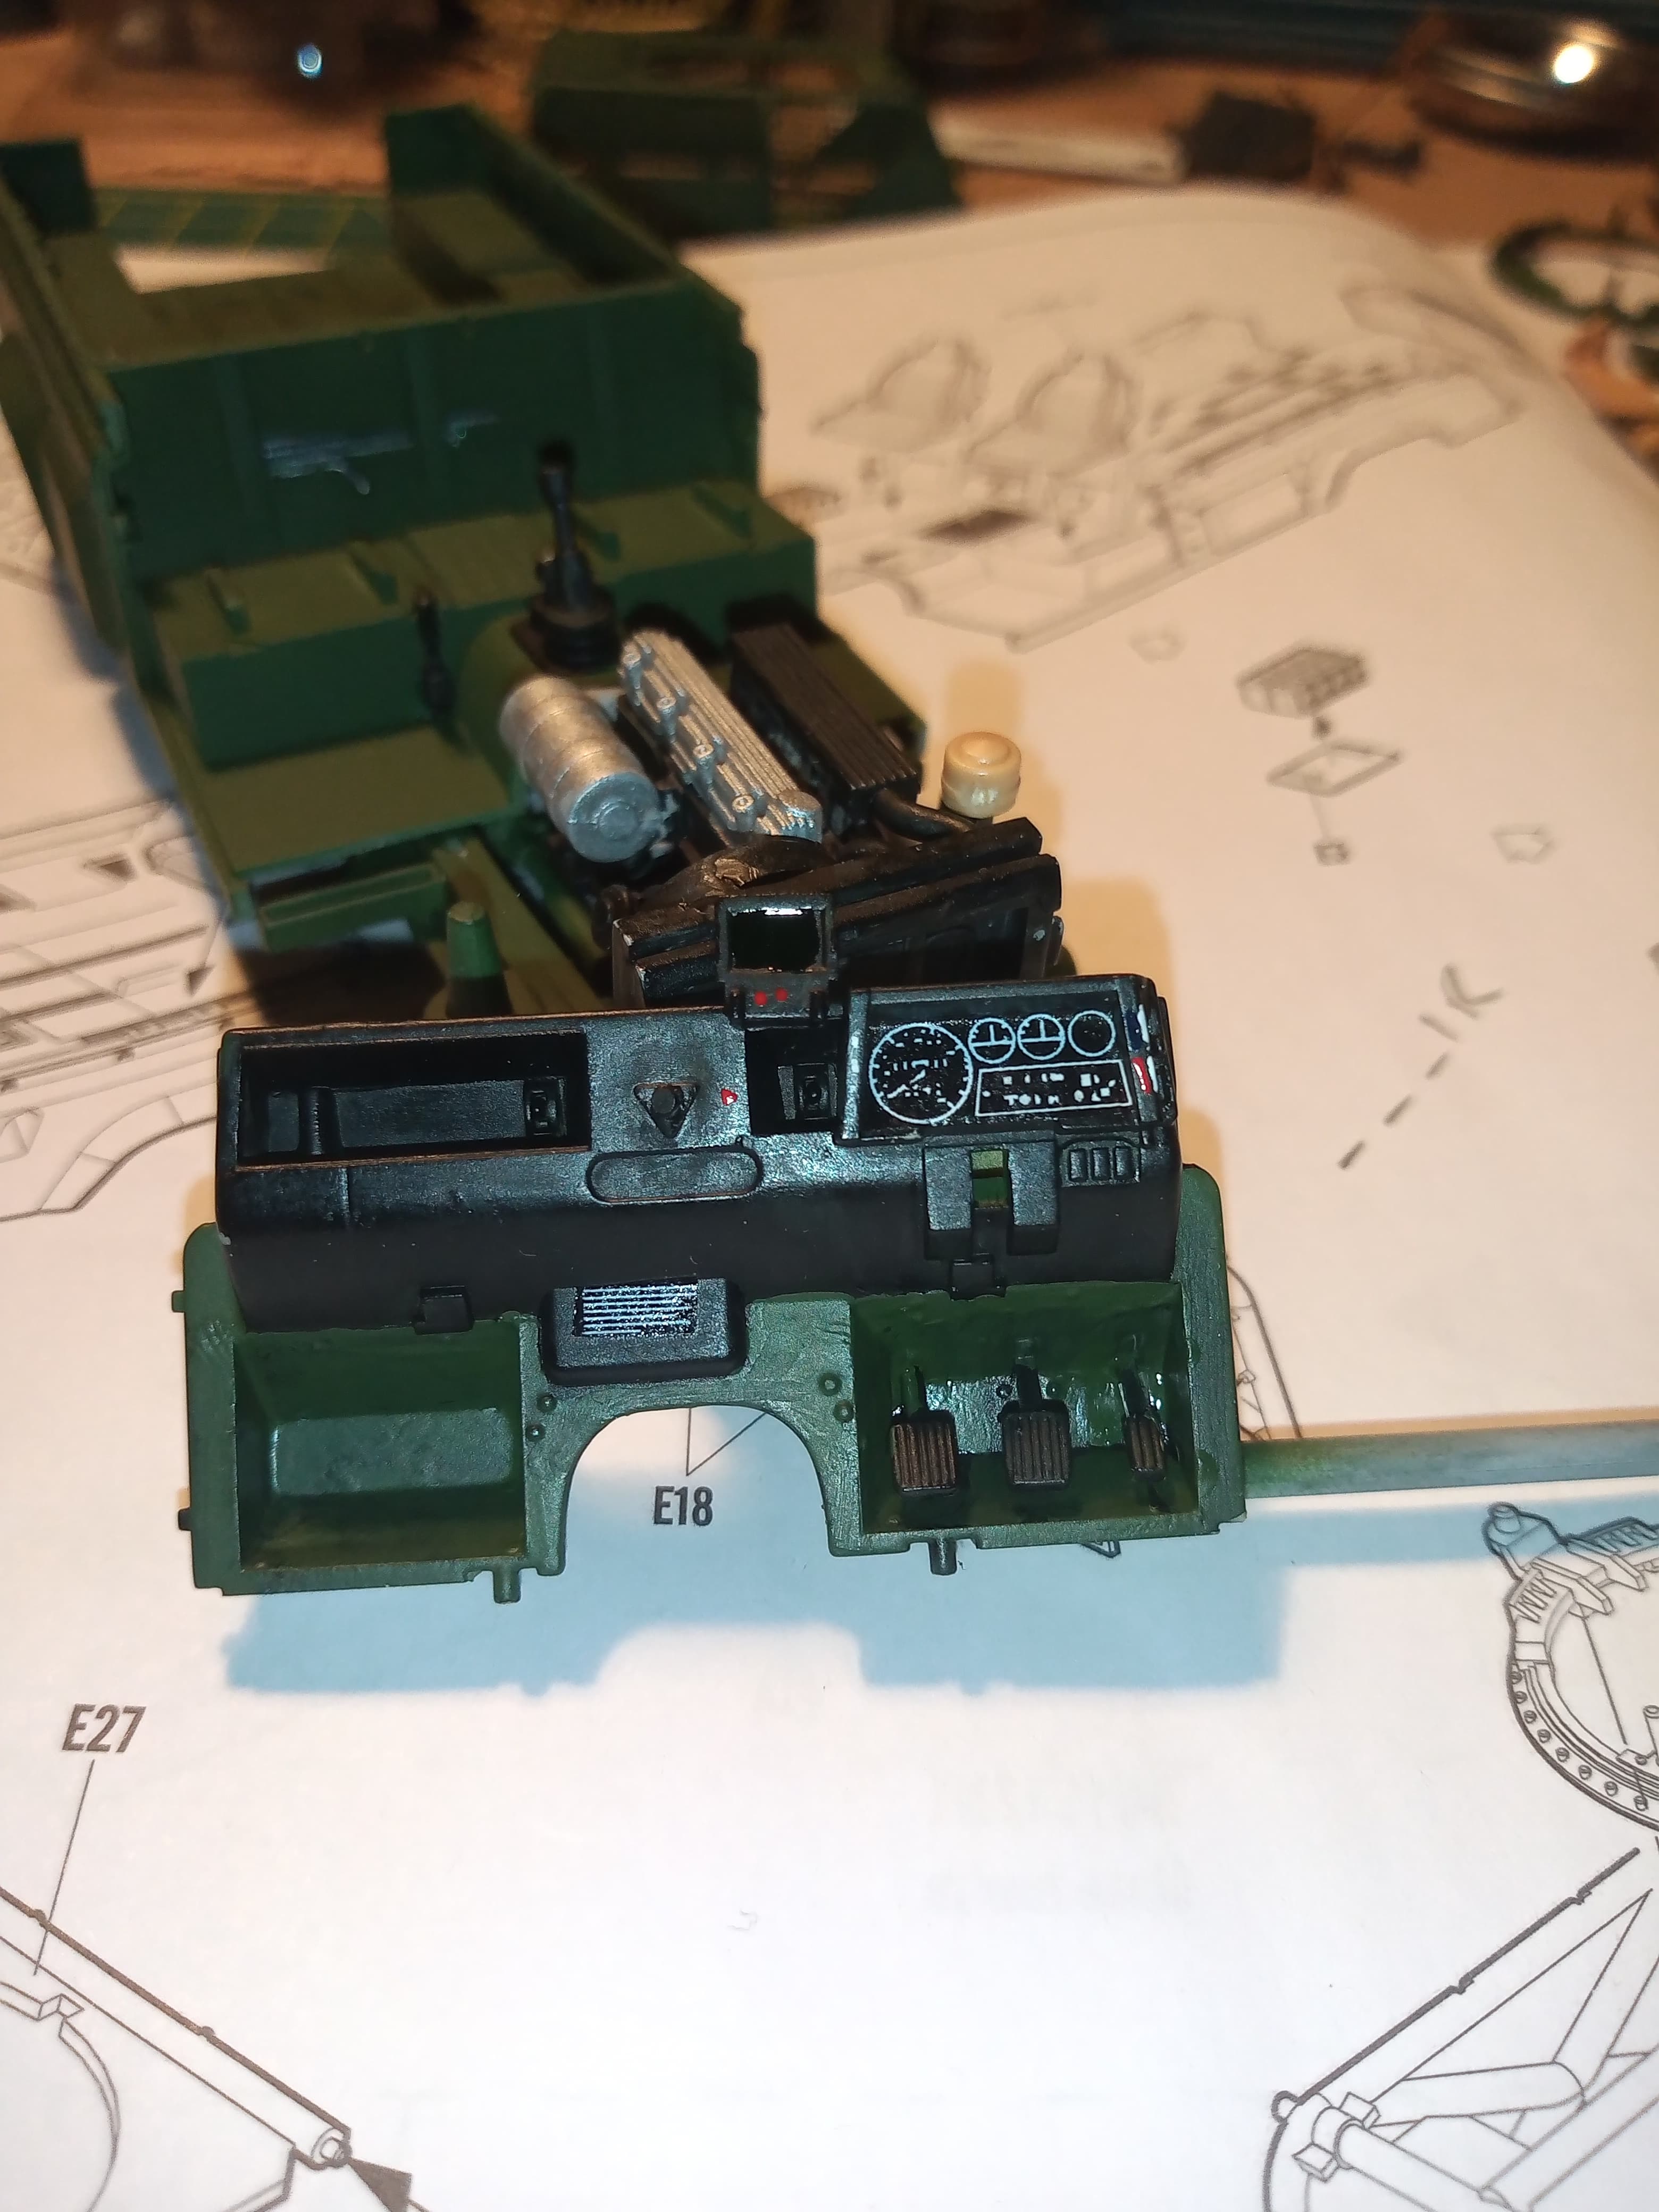
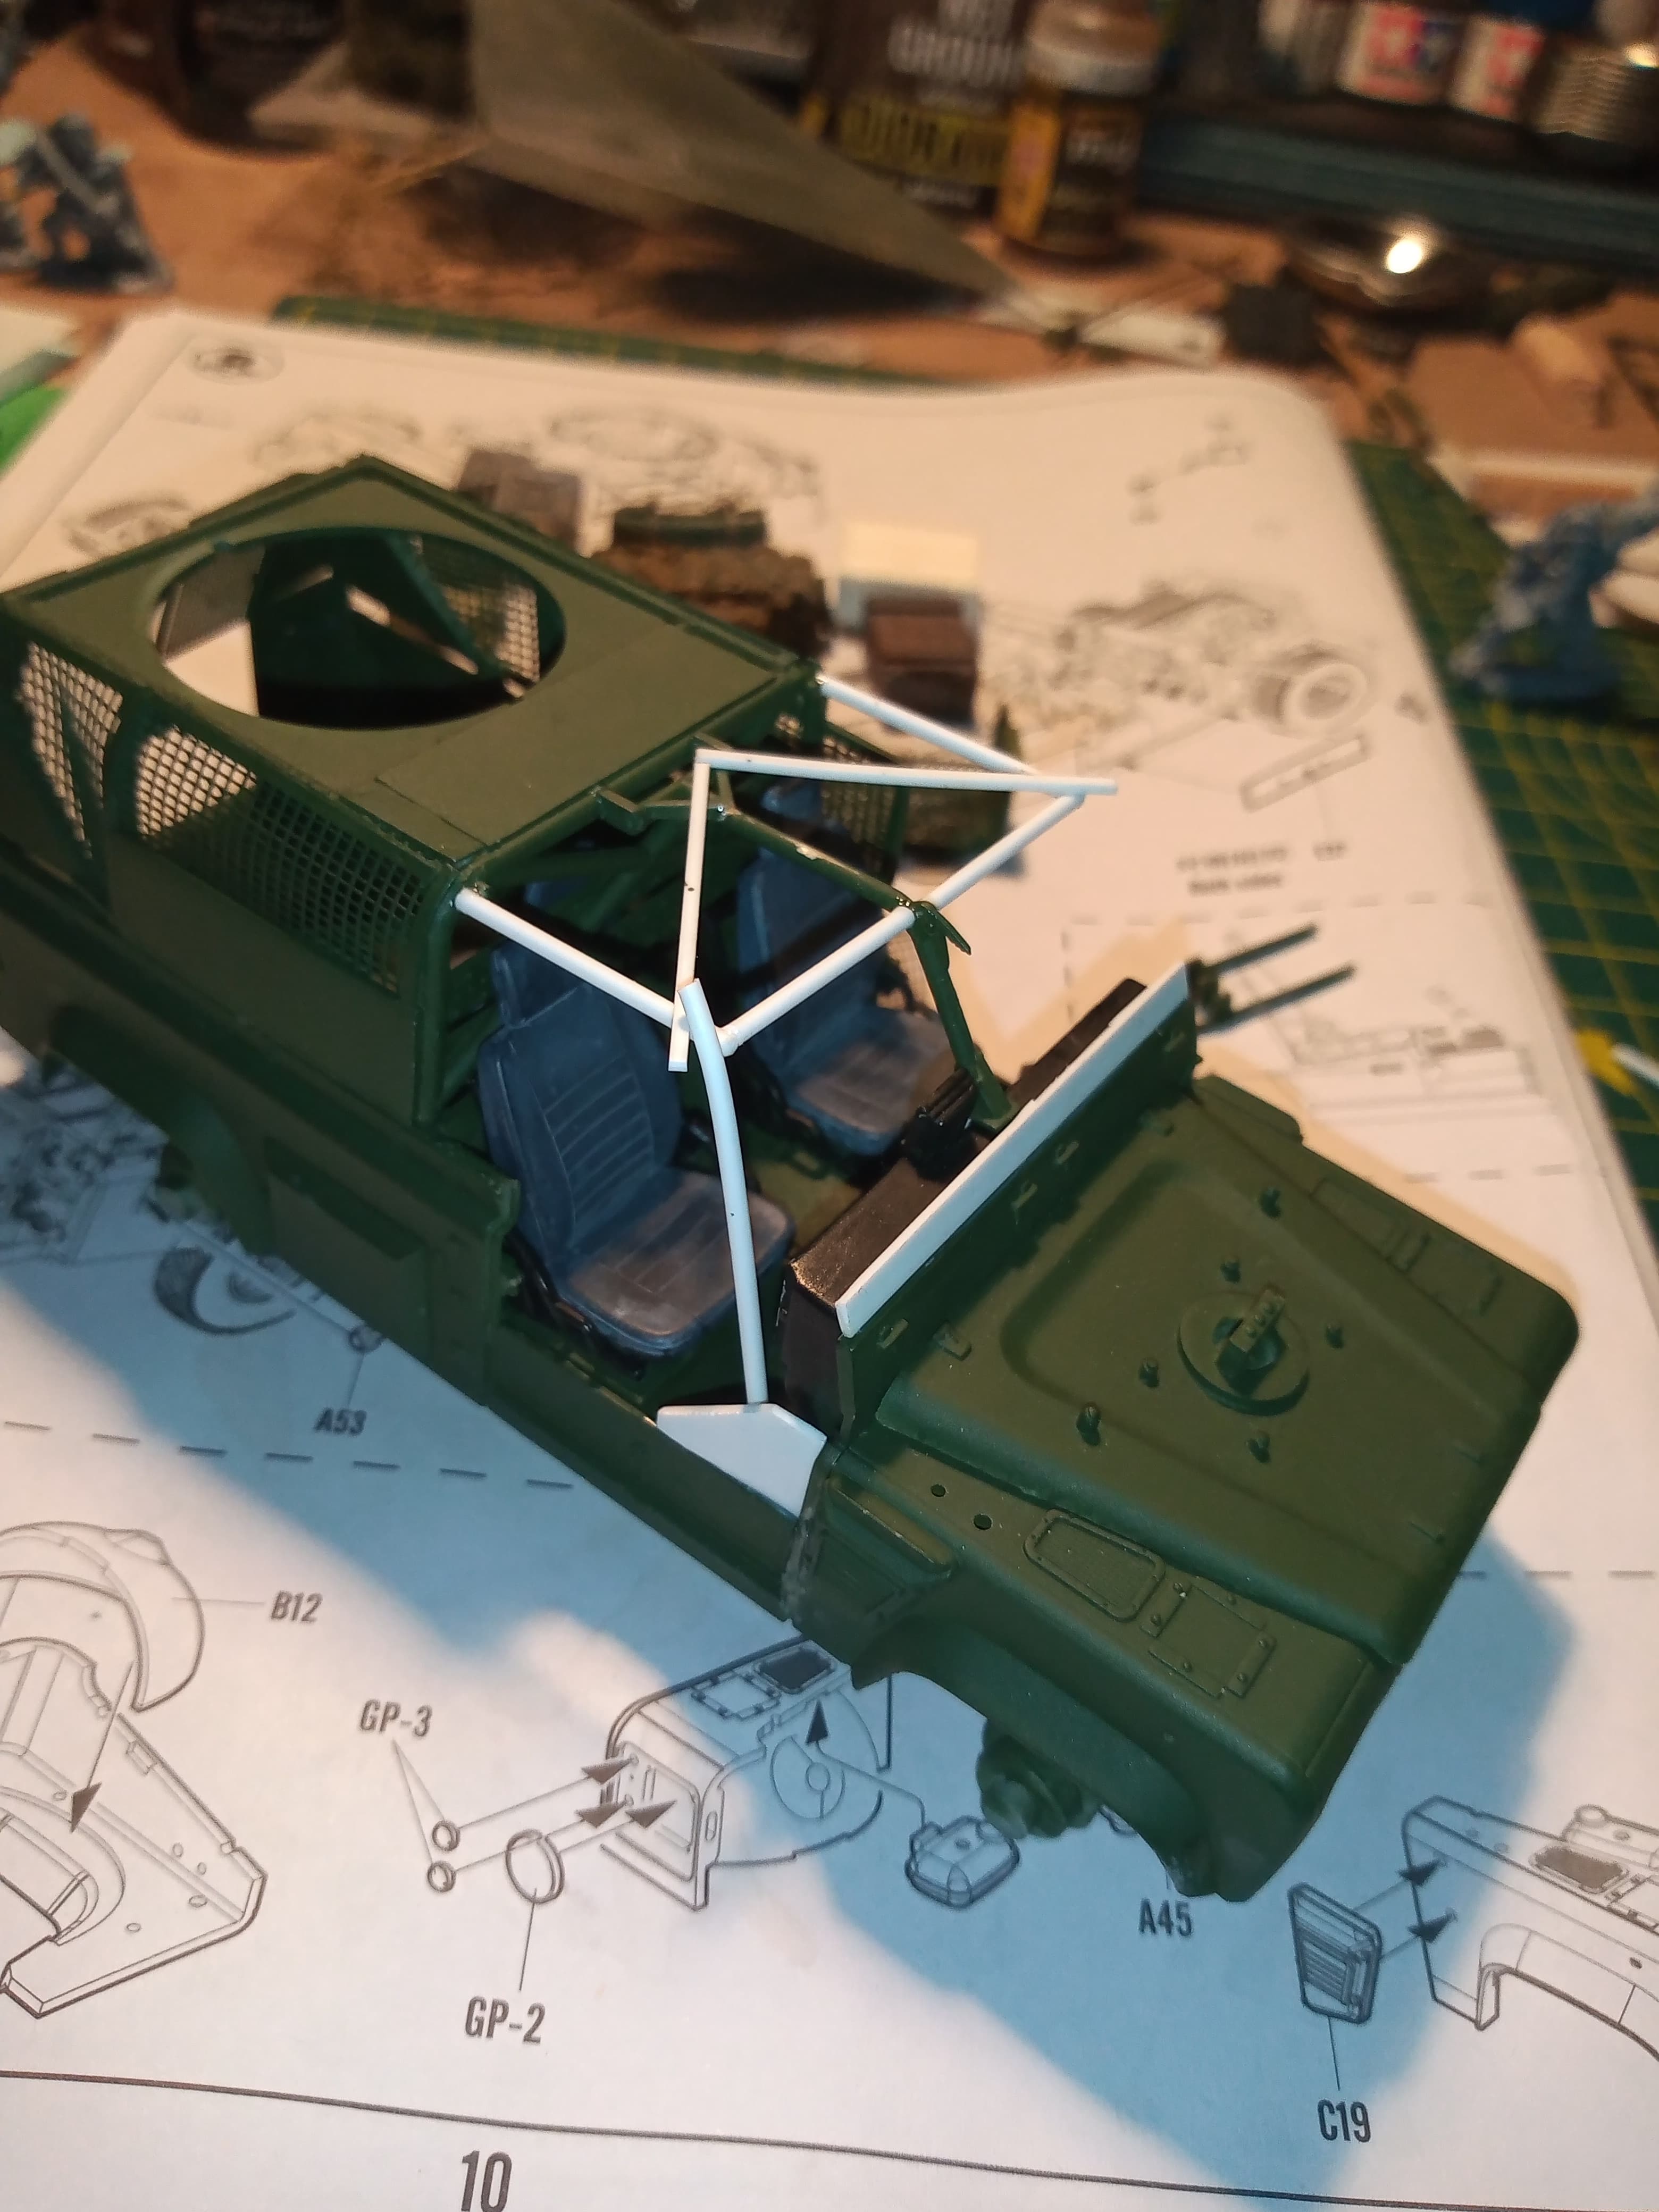
Once the Matt black has dried on the front panel for the cab, I Wil add the decals for the dash then detail paint some areas. Then secure that to the chassis and I can then do the side armour where the doors would be, and then extend the height of the drivers roll cage … And work out how to do the folding windscreen…
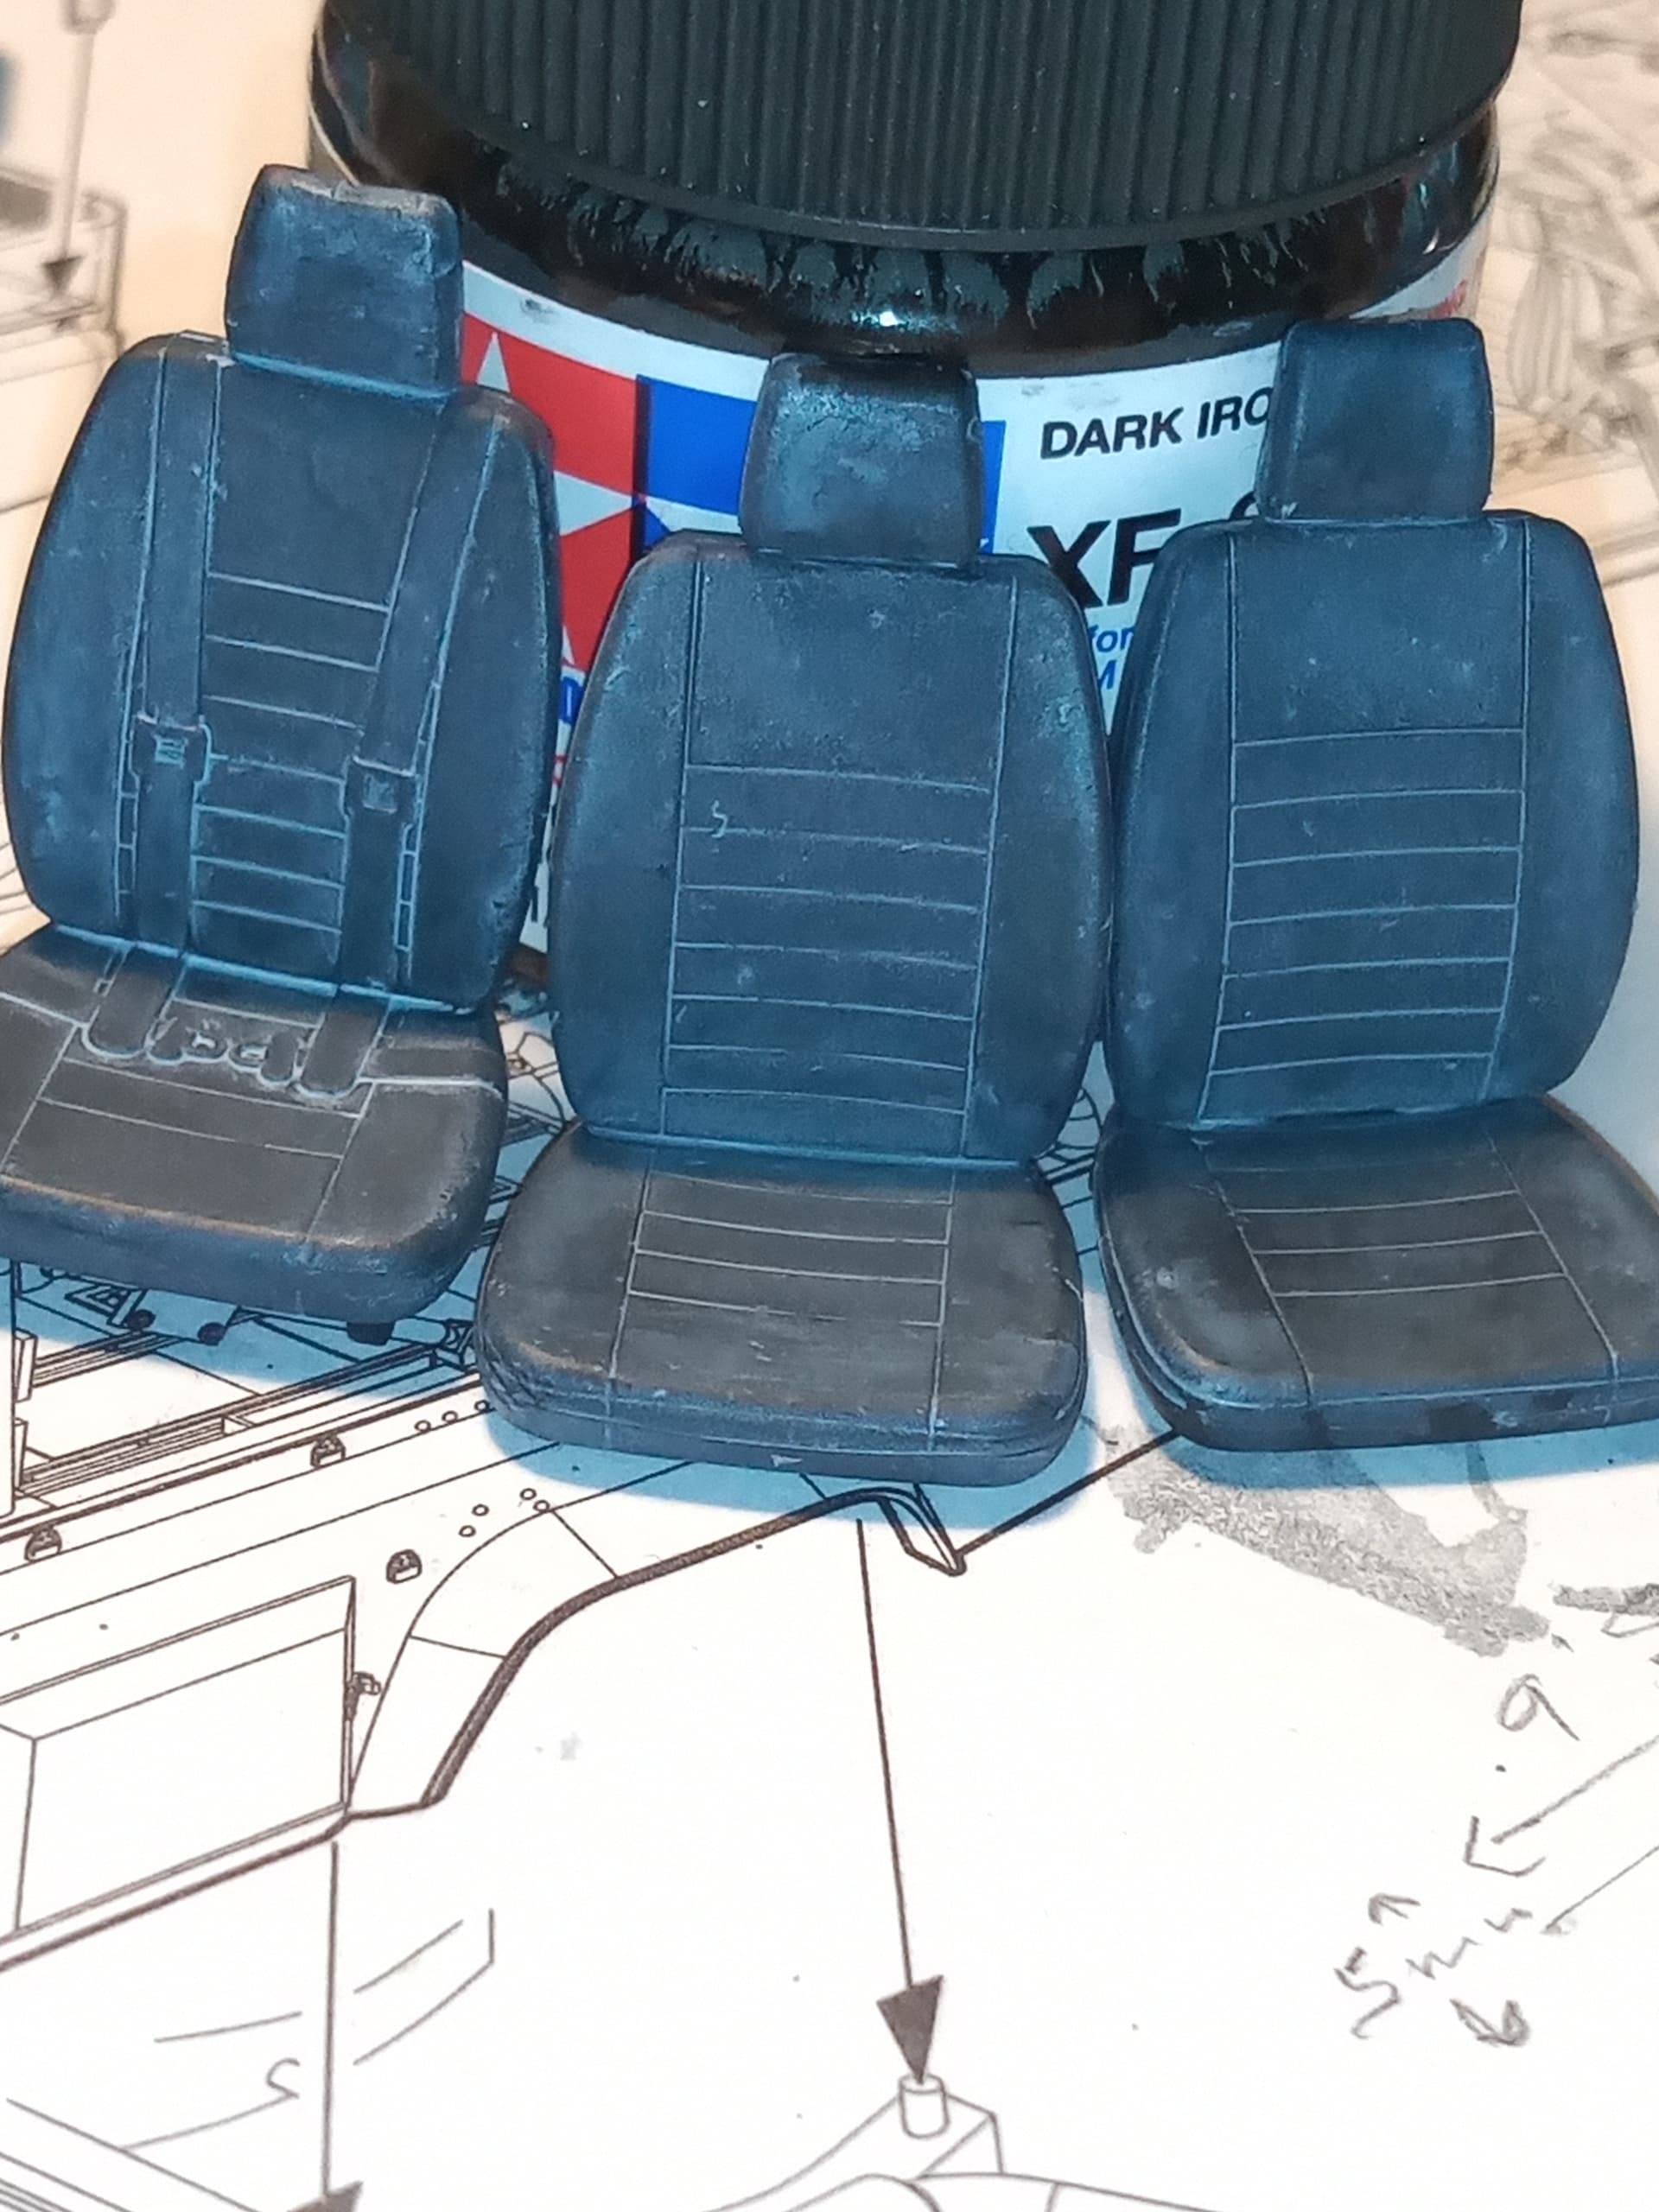
The seats look good Johnny. Kind of like a neoprene seat cover. For the one with the seat belt molded in, maybe it is taken out and a “homemade” jumper seat is in it’s place.
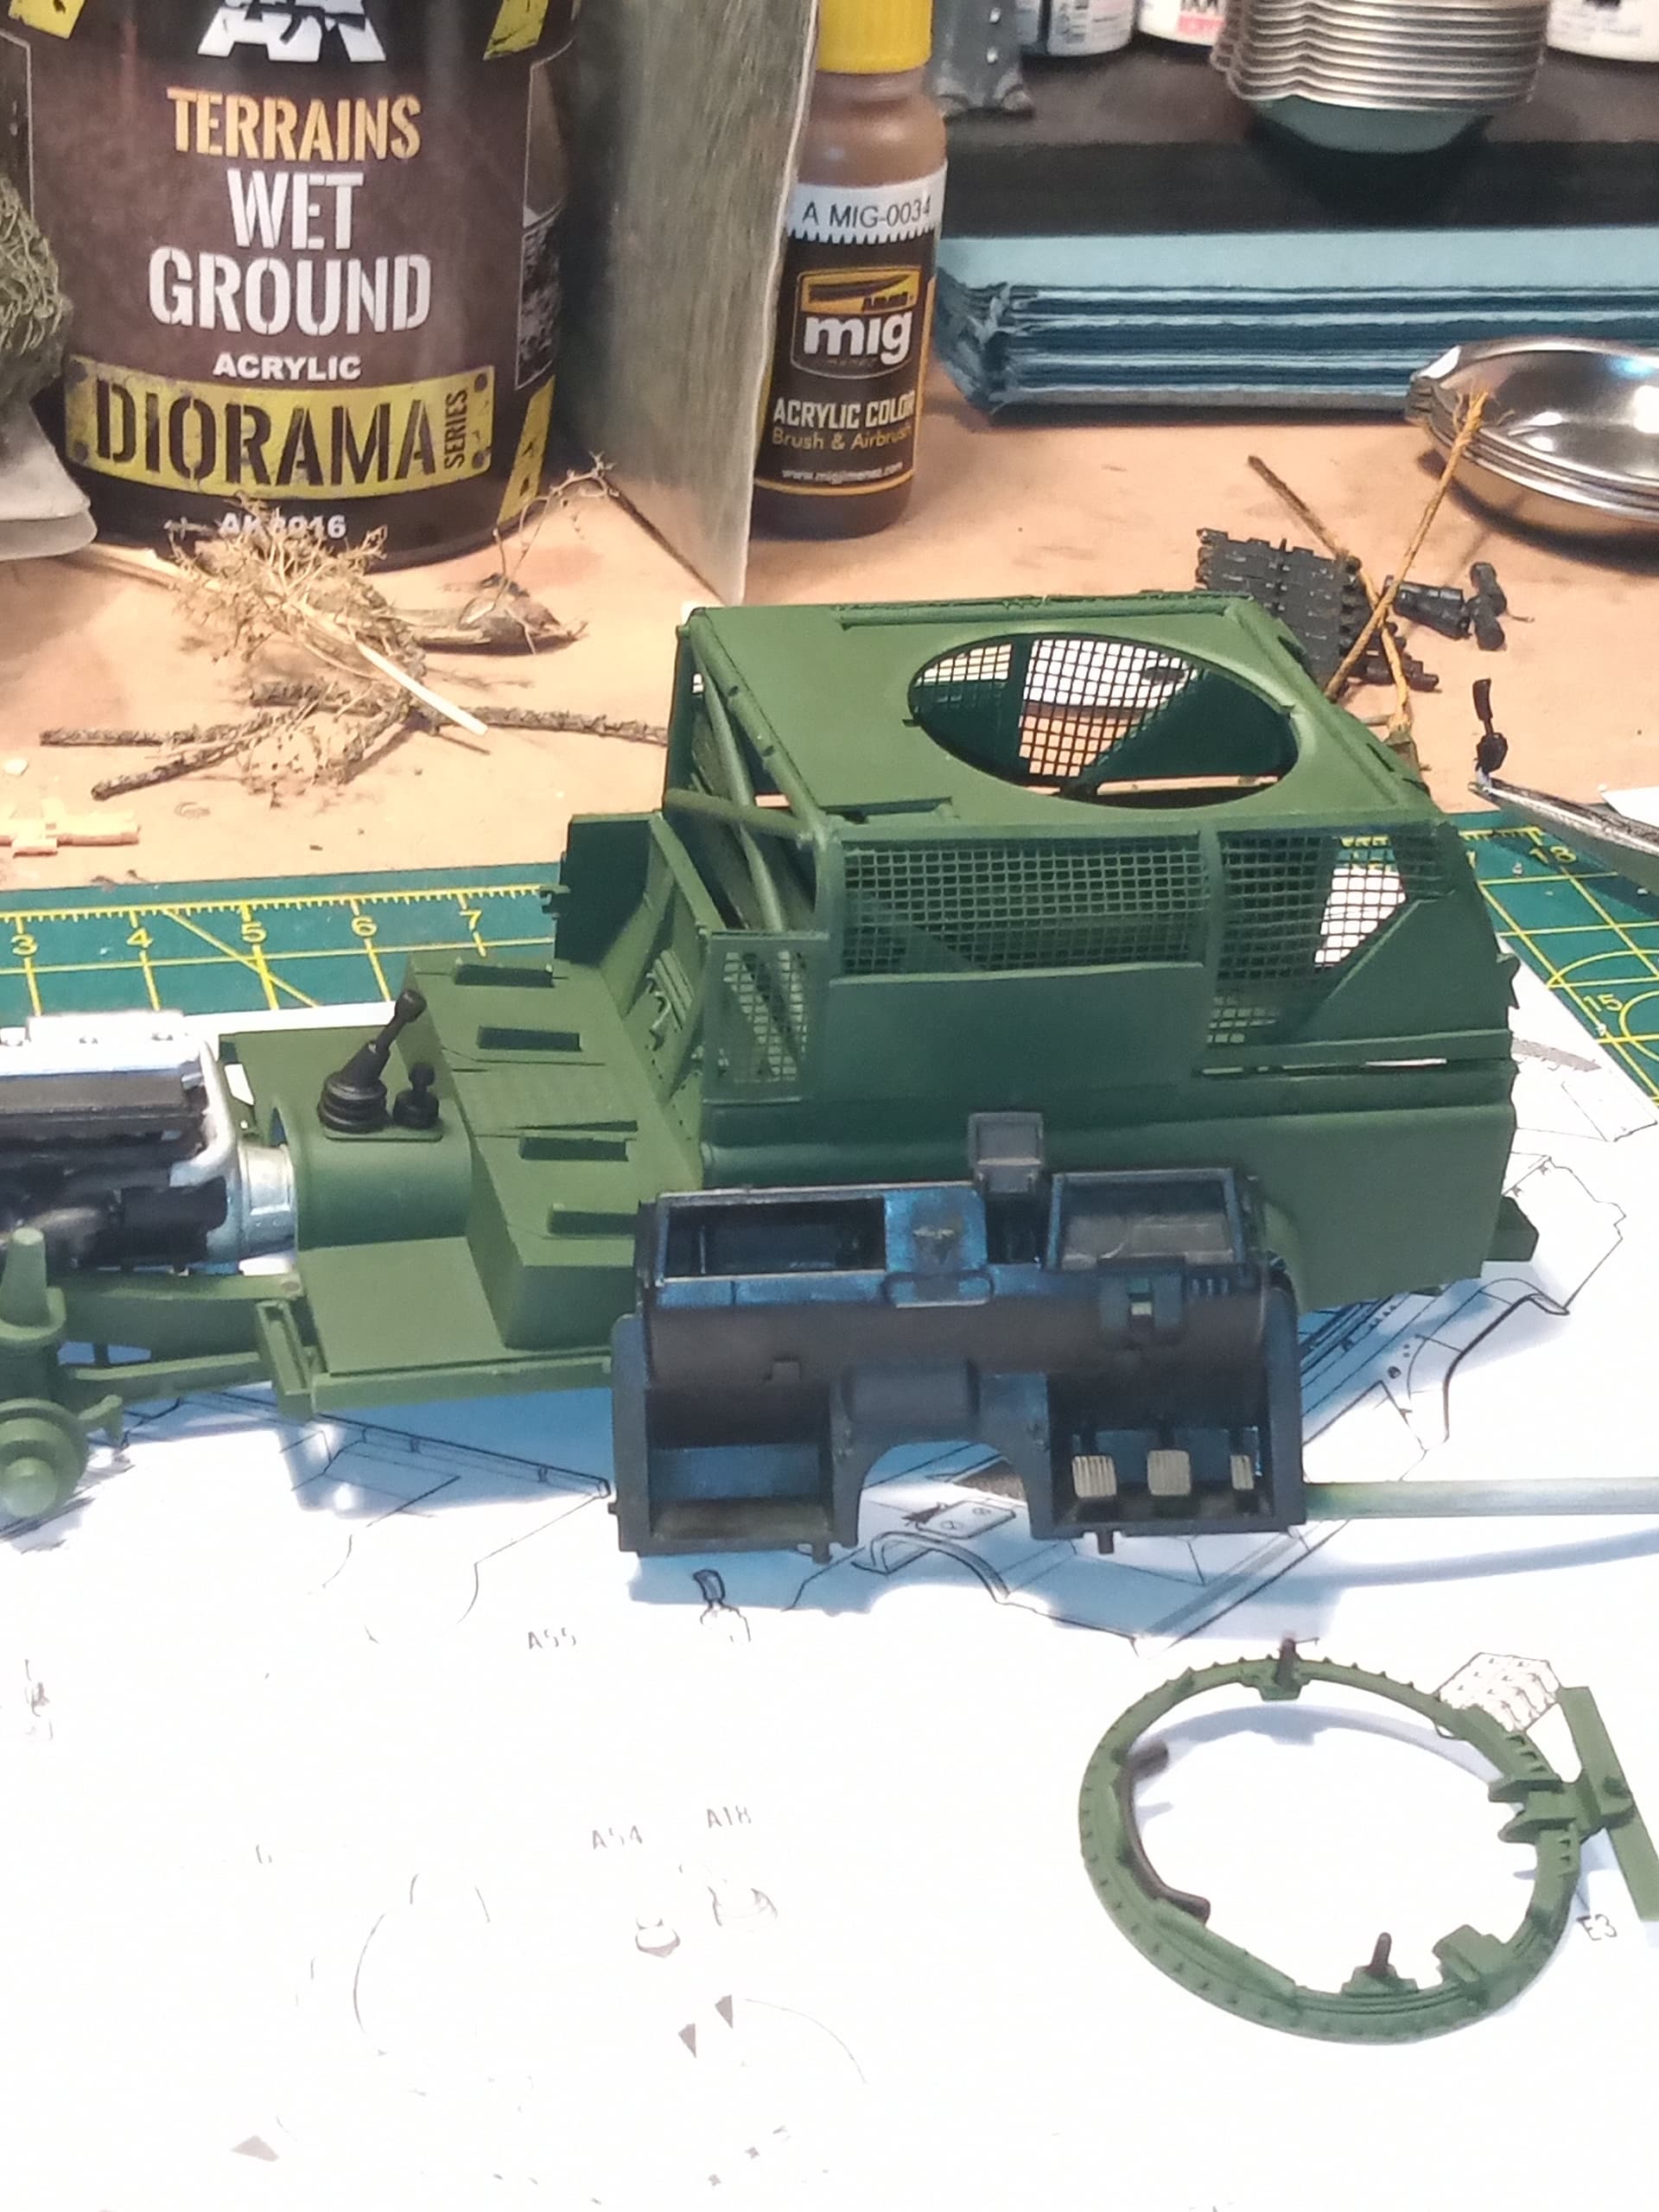
Subject will be a fictional M23 Endurance tracked winter rescue, shelter, and supply vehicle based on an M4A3E8 tank chassis. The vehicle is designed to conduct armed rescue and survey missions in a post nuclear winter environment.
Just spending some time building up a complete roll cage for the front …
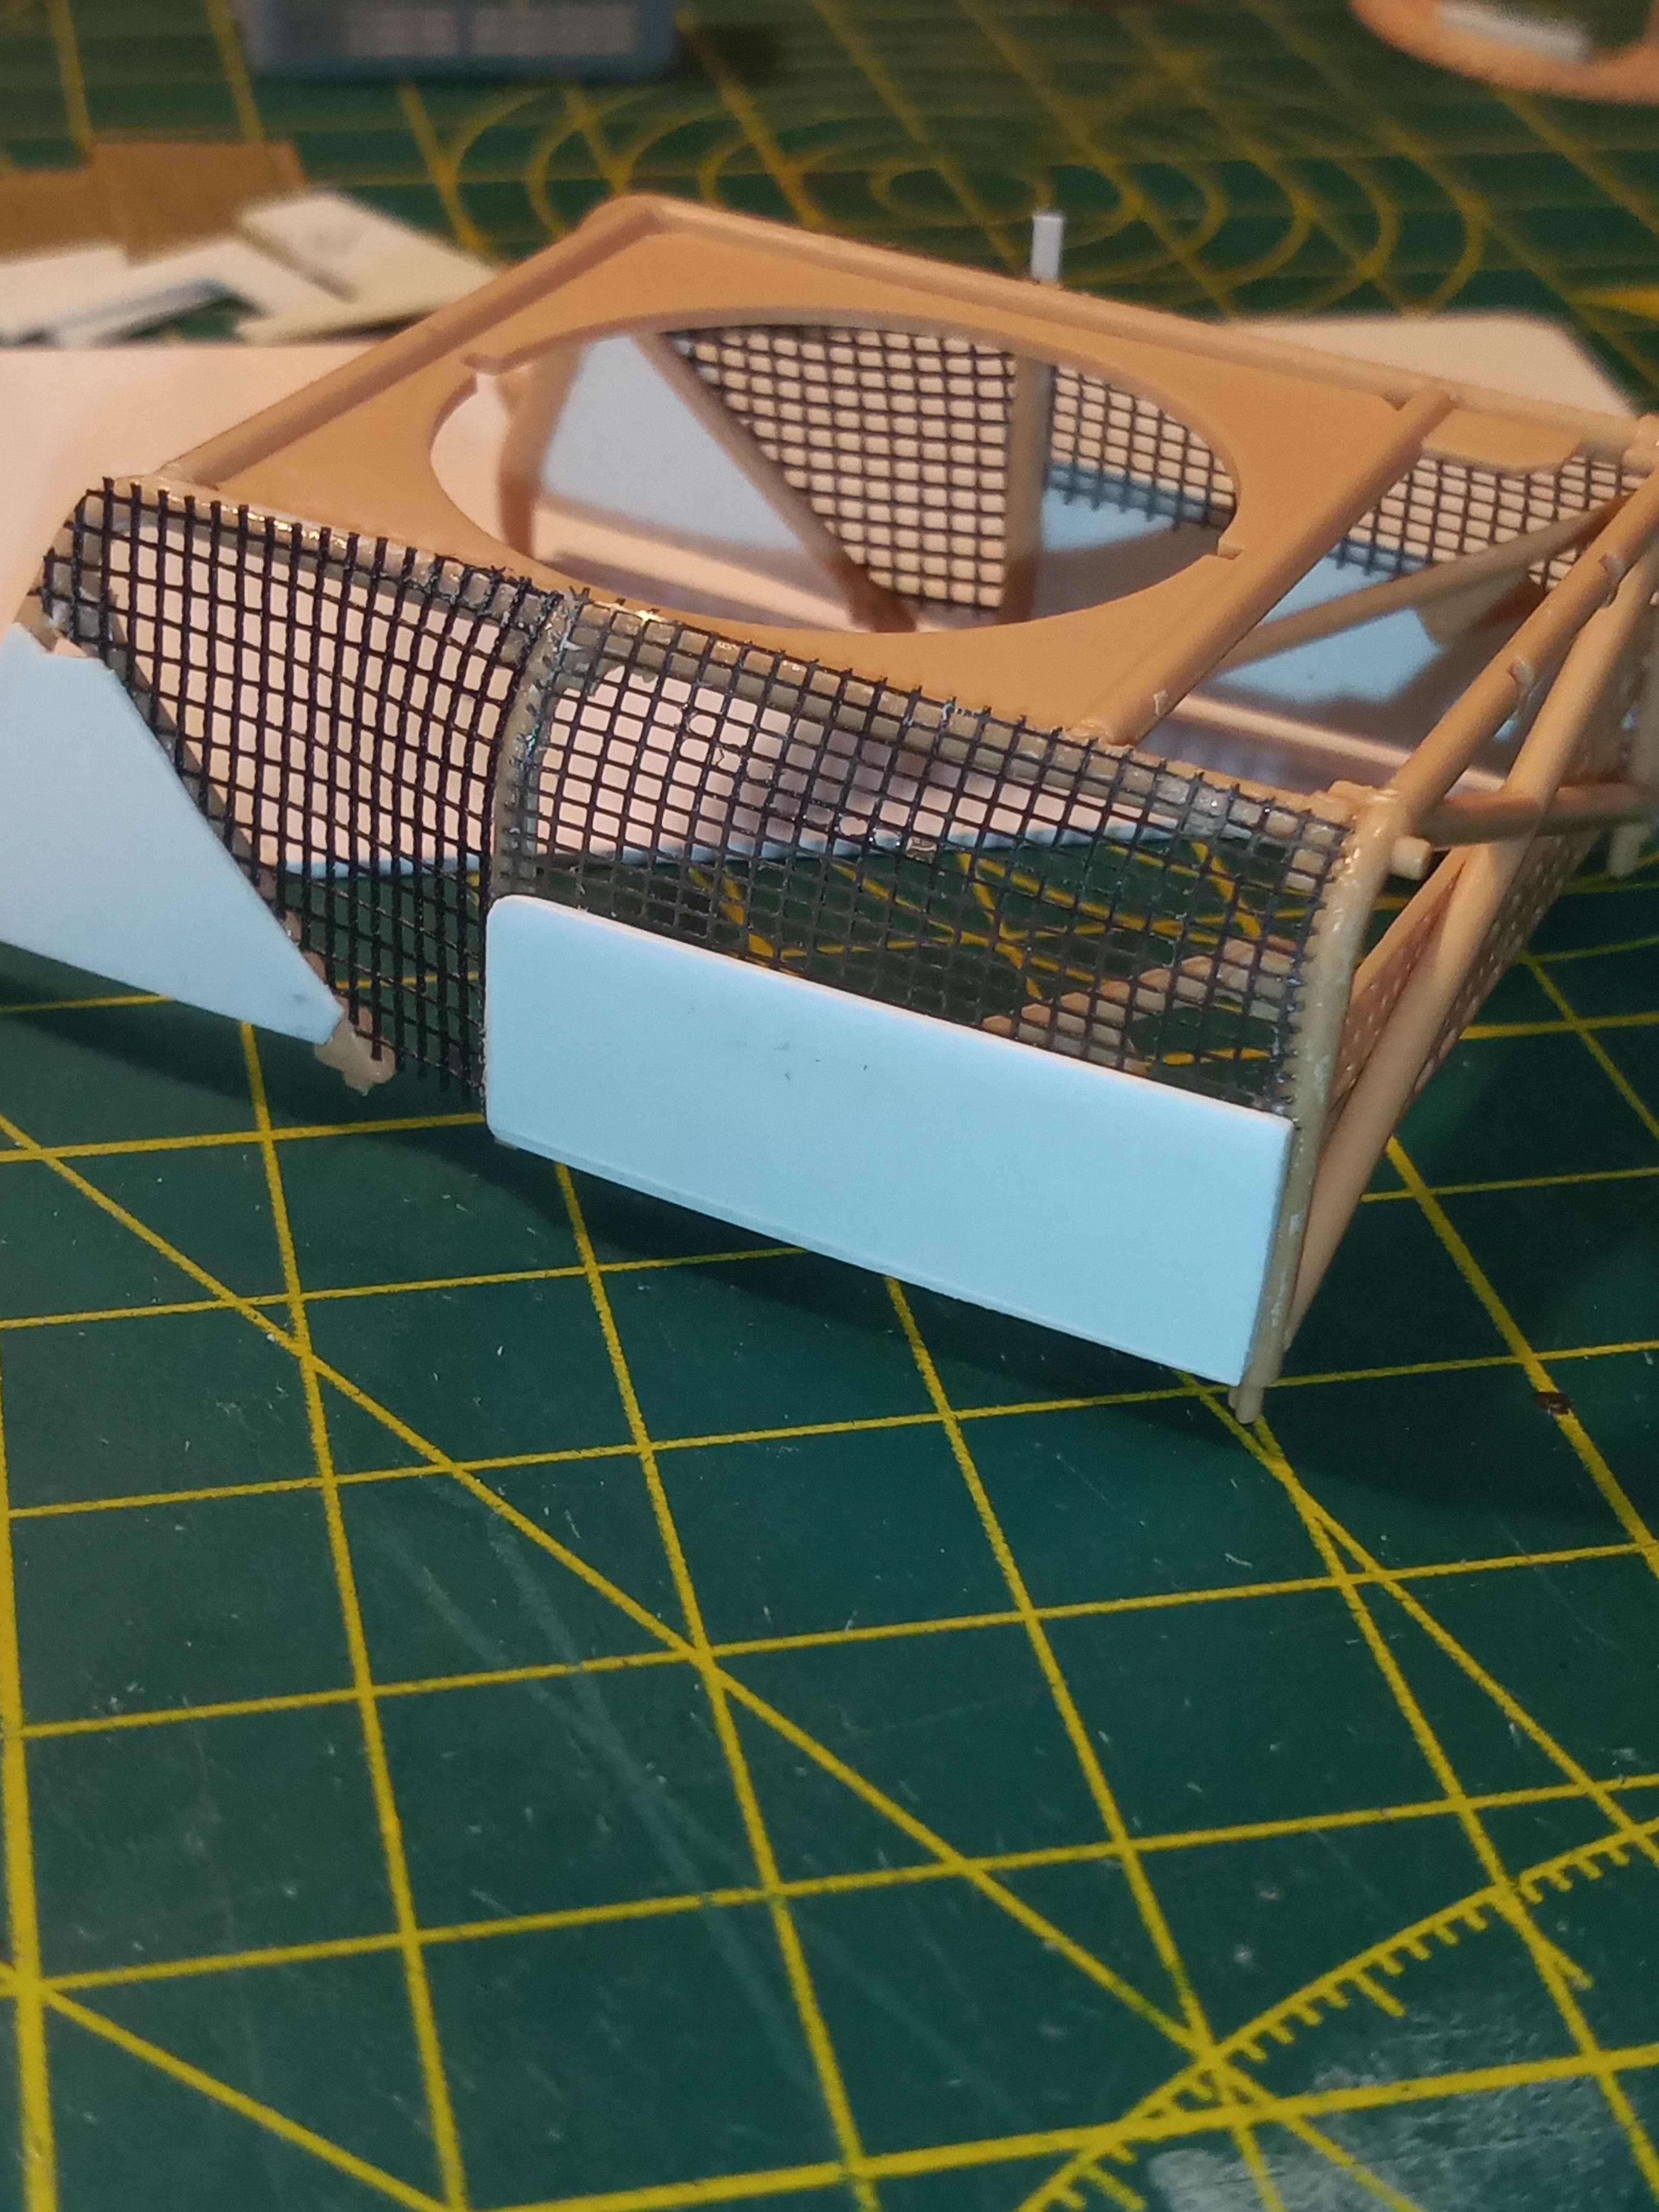
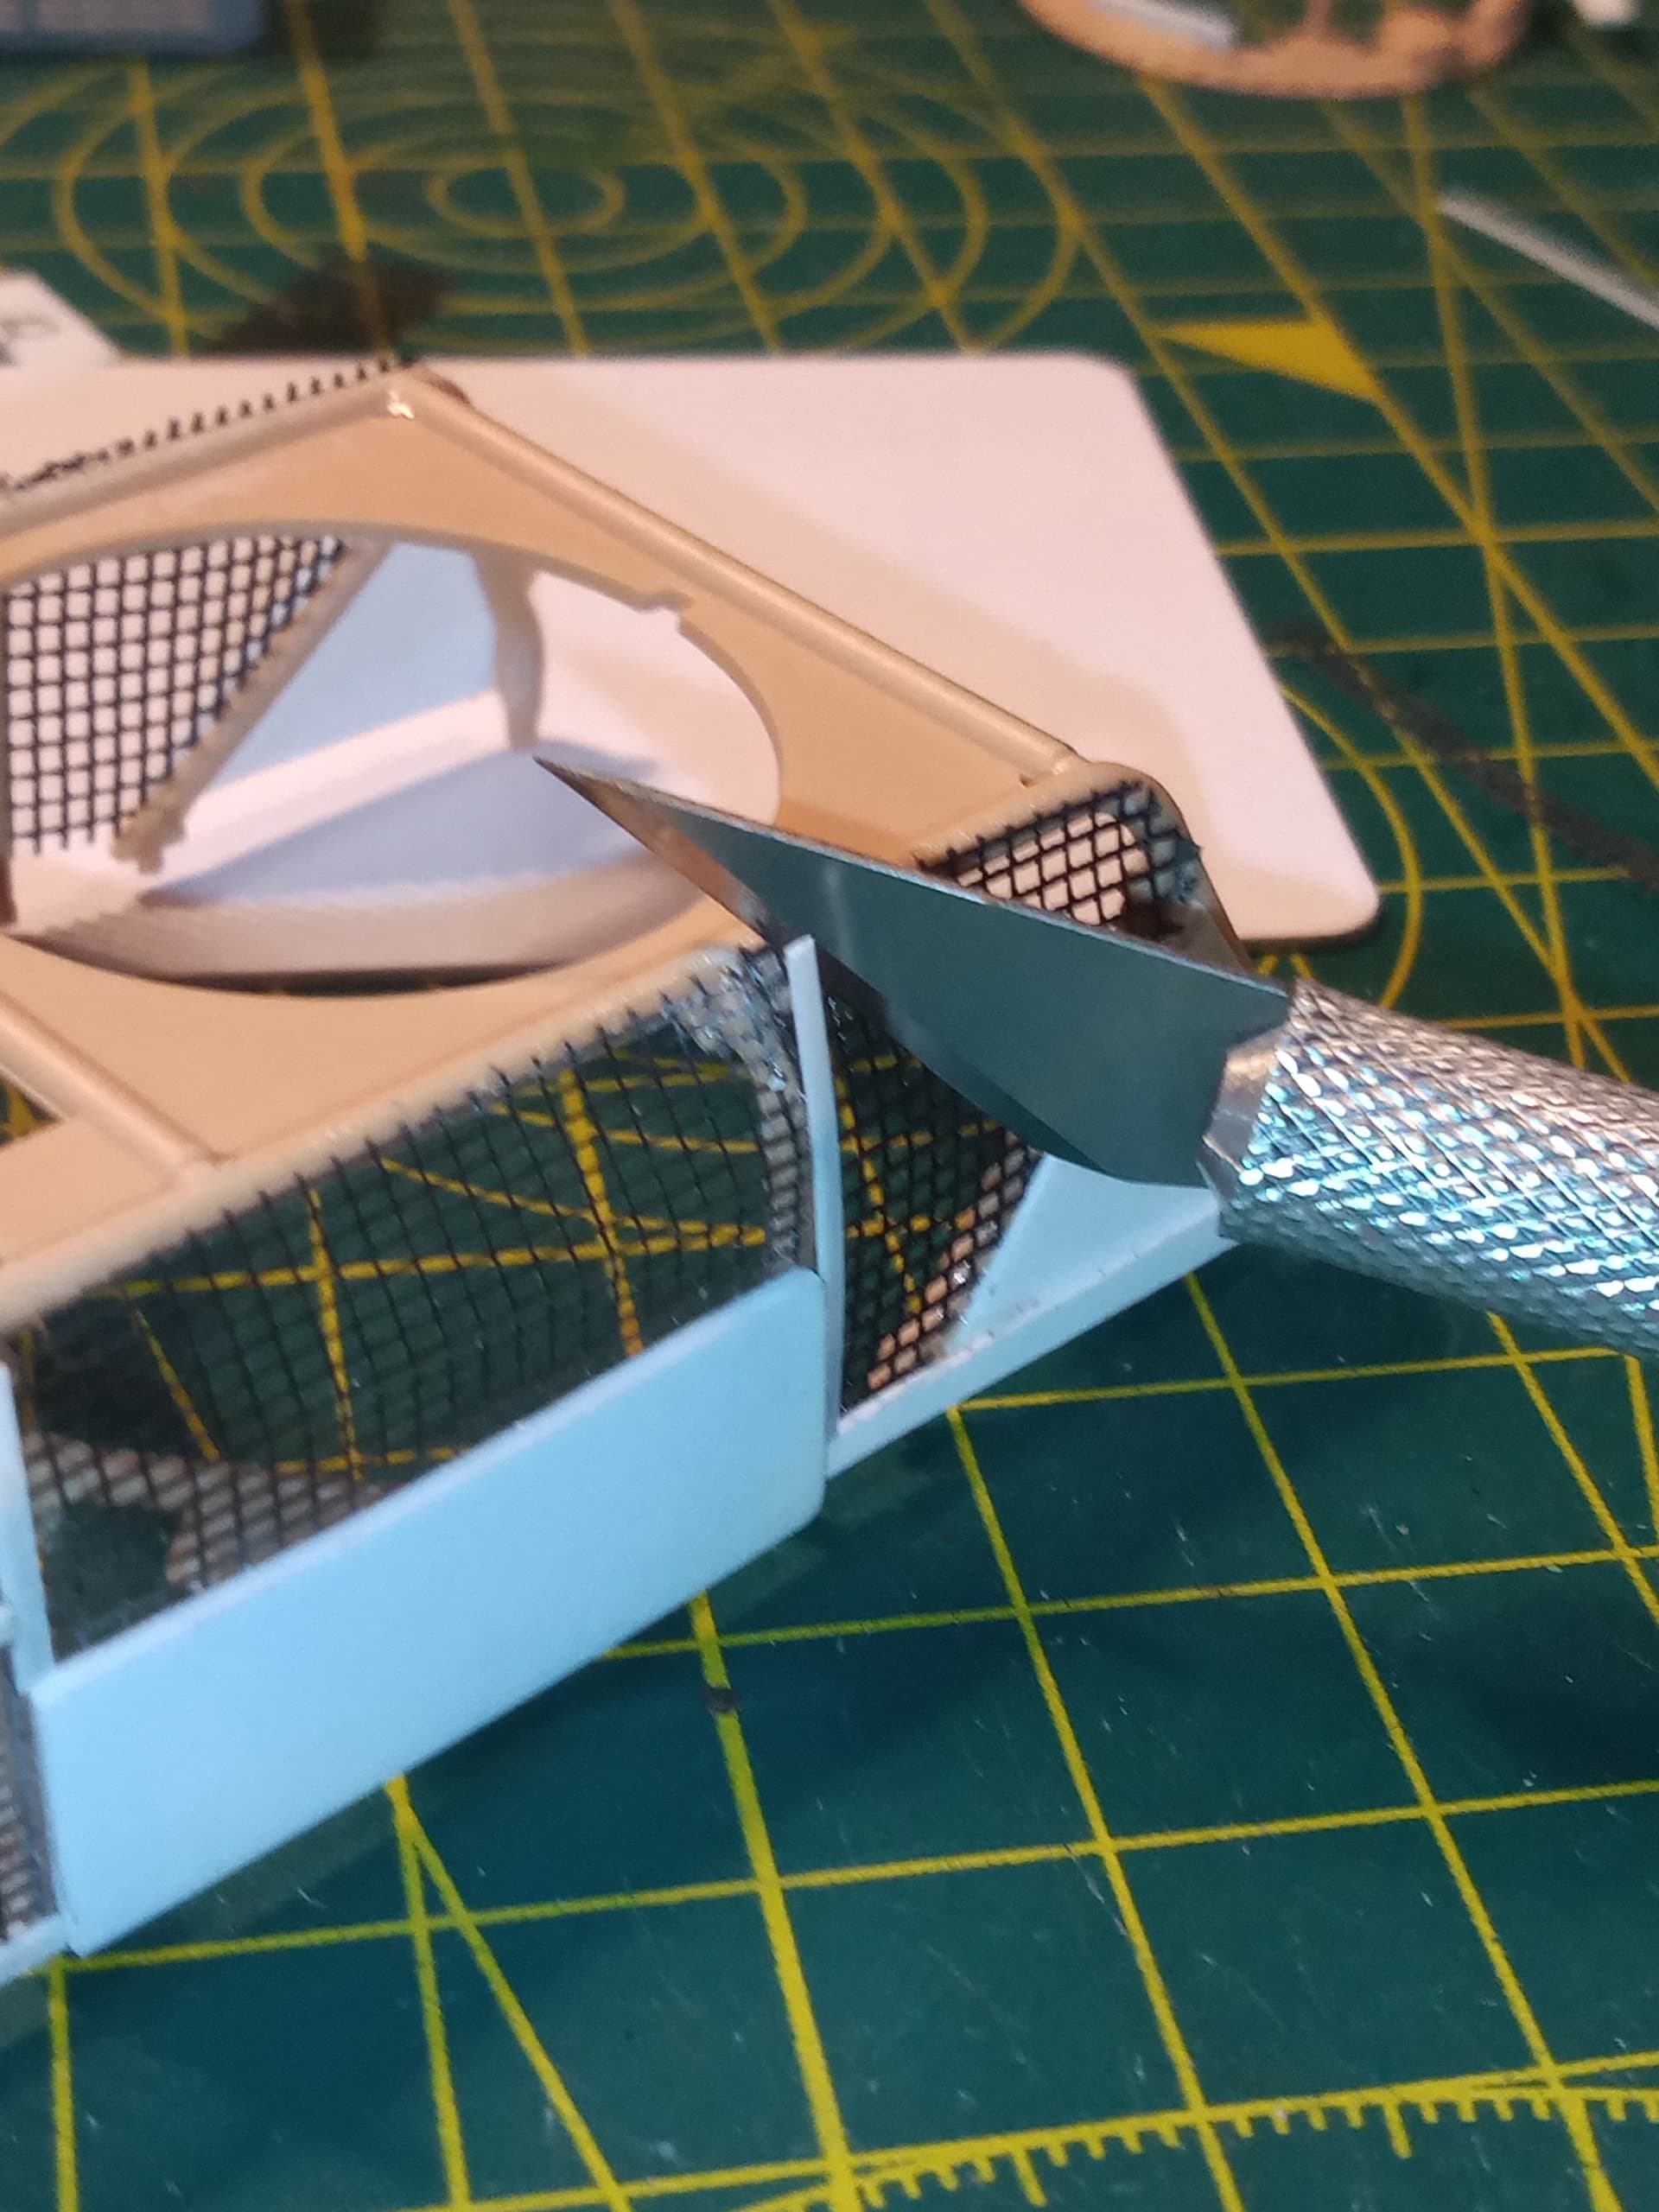
Once the frame is done, I will add some more mesh and light armour plate protection.
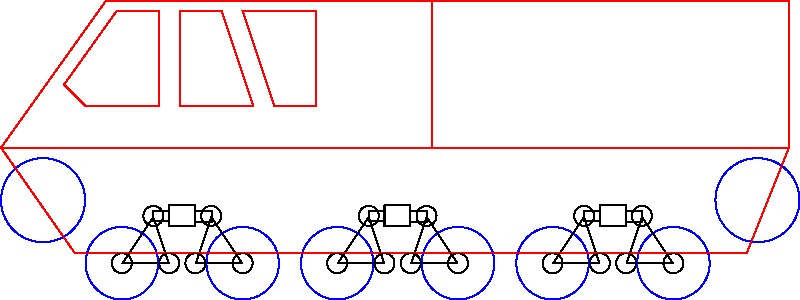
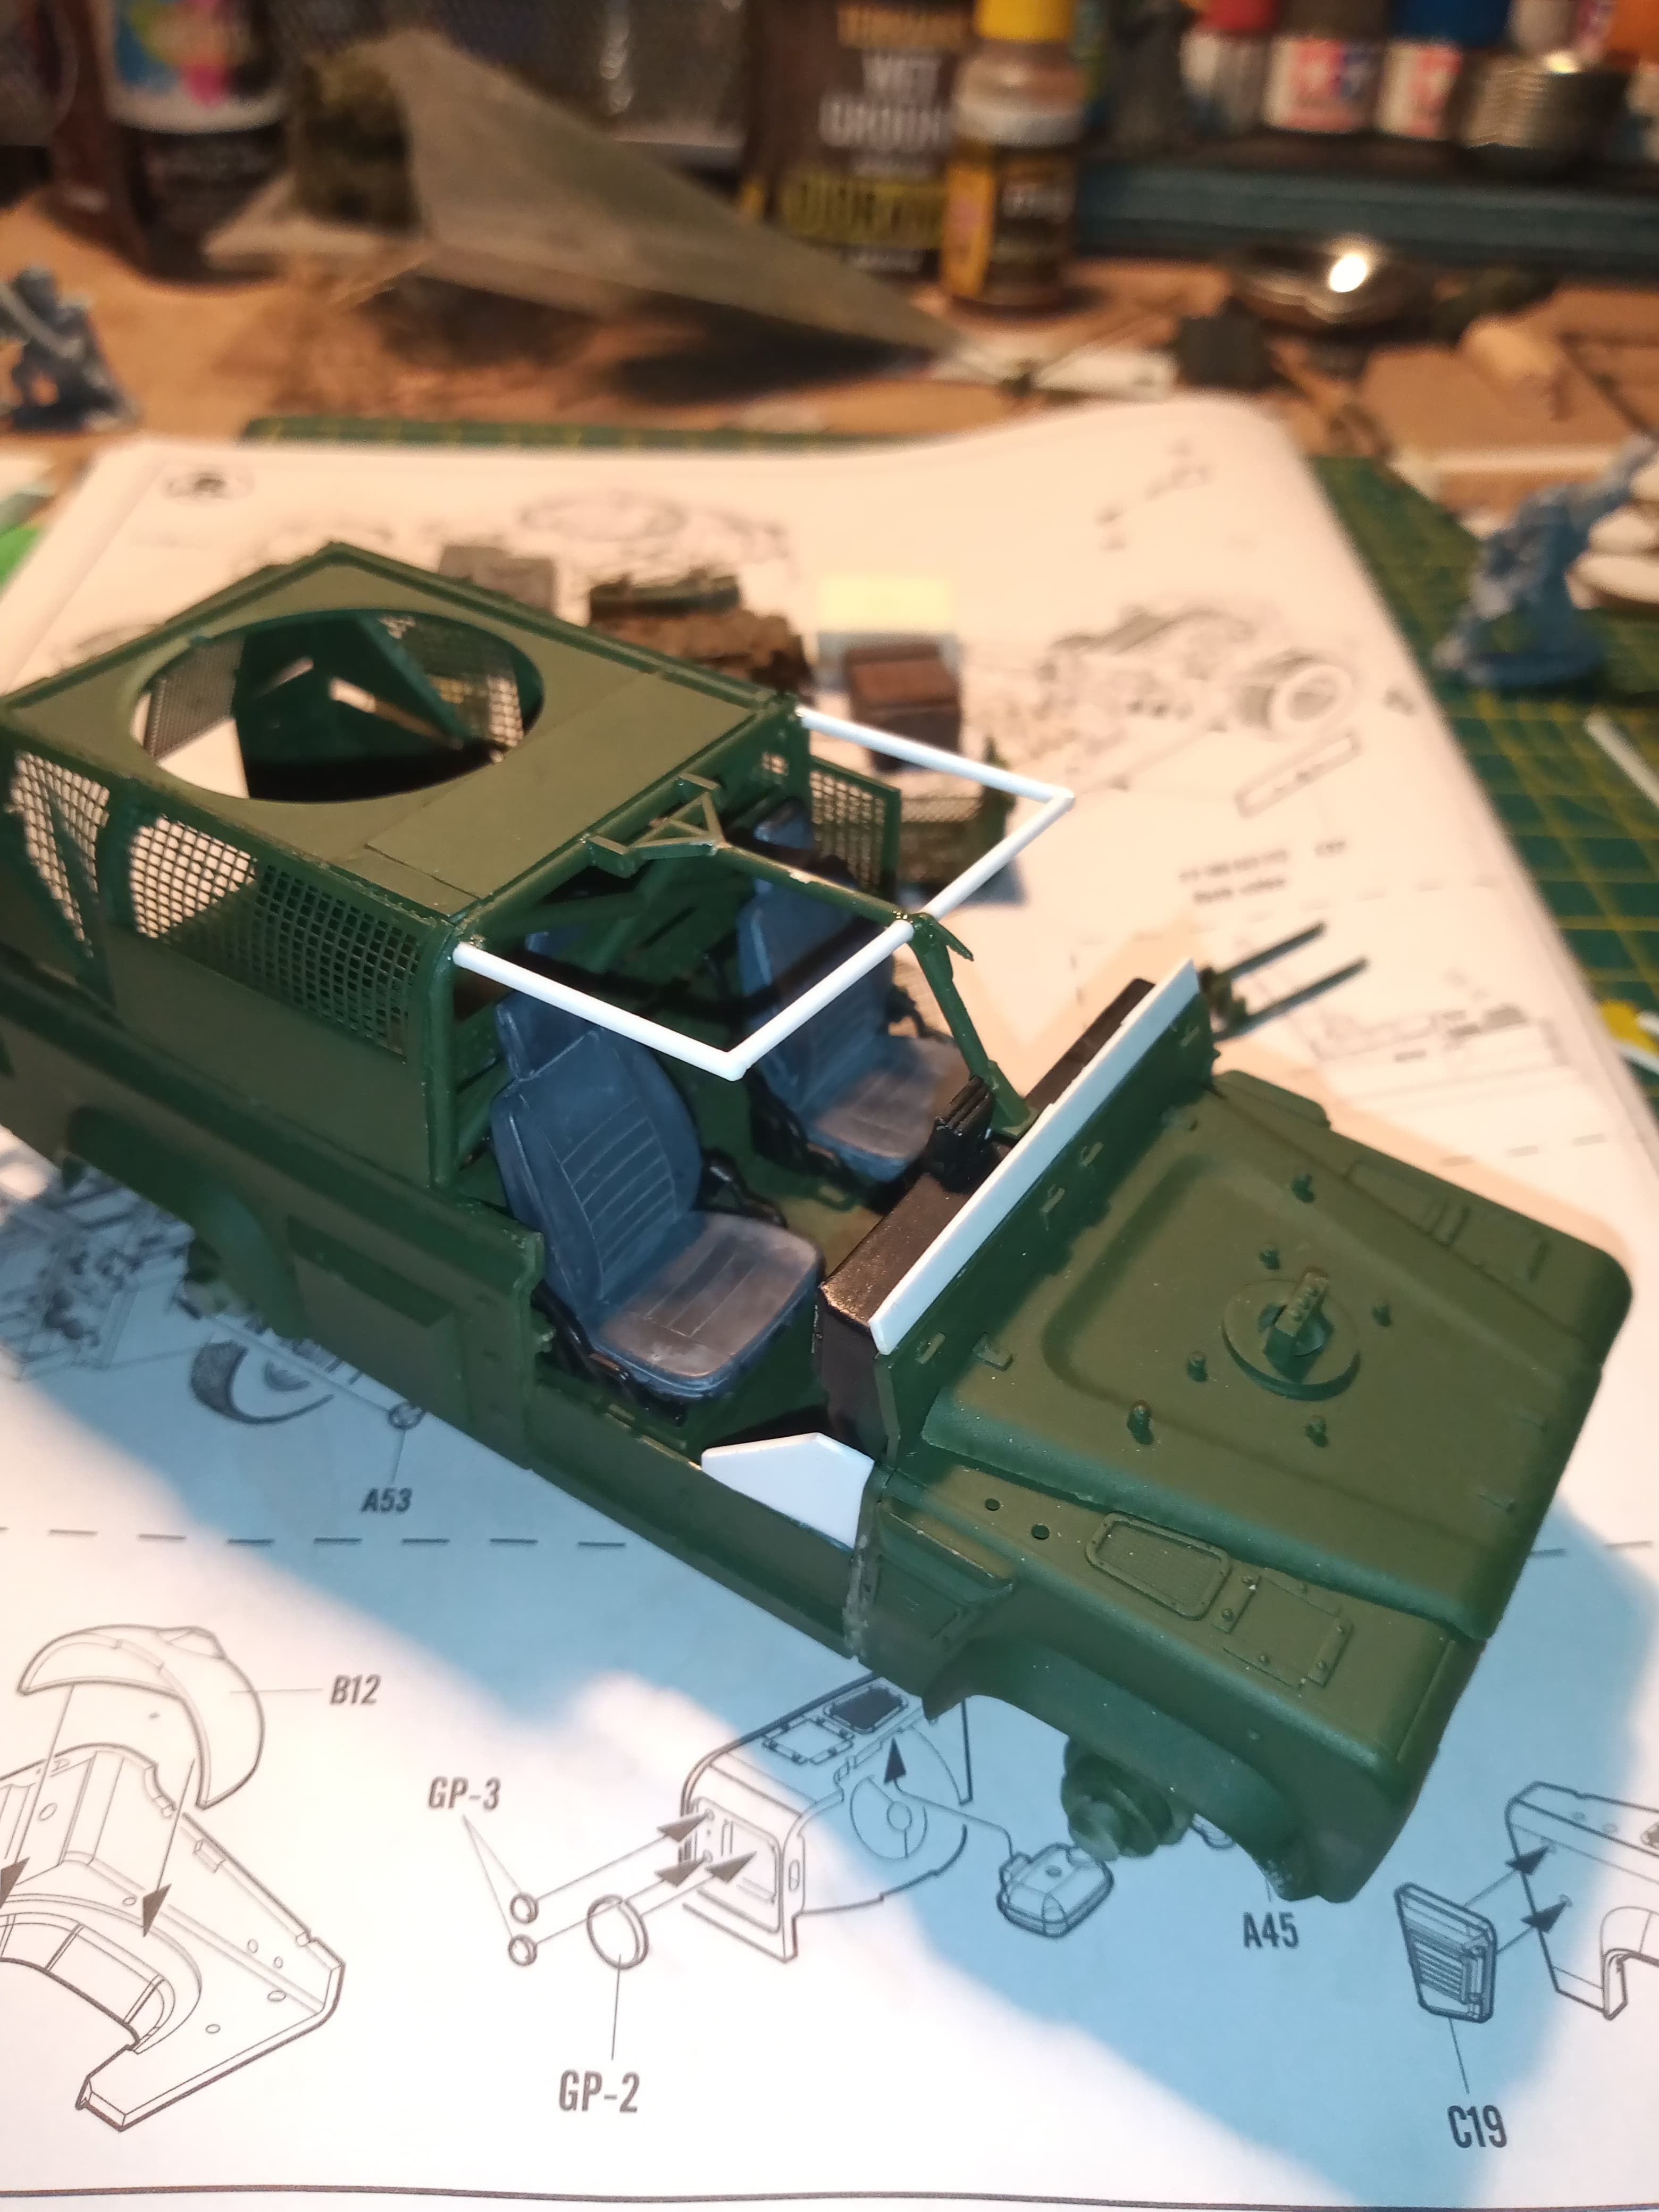
Next shot is just a mock up. There will be diagonal bars as shown, and then angled uprights from inside the bottom corner of cab to corner area of the upper frame.
Will also be using more mesh and thin strip as light armour.
Still figuring out how to do a folding windscreen and if it should be driver only or passenger/ side gunner as well…
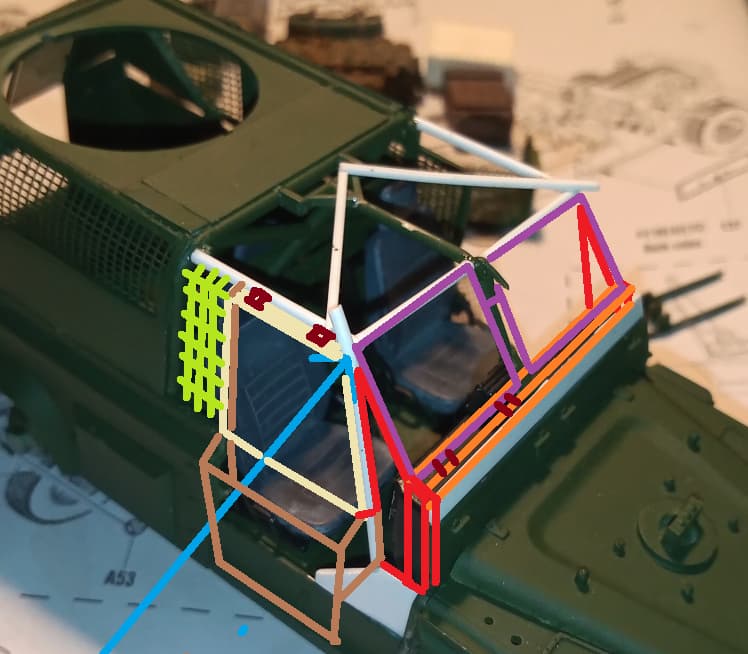
When you originally posted this, I had some thoughts of how I would do it. Maybe some of this will be of use to you.
If you move the upright from outside the front angle of the roll bar to under the join, that would be stronger. That would then give you some room to add some frame and ‘plate’ in the area behind the front guards - see in red below. That would strengthen the upright support and give you the ability to add some square tube across the dash and that is where the windscreen could be fixed/hinged. (Orange and Purple)
For the doors, have you thought about a ‘fold down’ plate at the bottom, with a pivoting upper section? Maybe have that hinged at the top like Gull wing doors? The upper door part could be longer to allow the bottom plate to be fixed and still have room to get in and out.
If the passenger is going to use the MG, its location on the post outside means the windscreen protection for him is pointless, it would need to be dropped to swing the MG around. Instead of a windscreen for them, you could always fit a shield to the back of the gun mount, in front of the ammo liner holder, and just have some other protection to fill the gaps somewhat. Or maybe even have that screen lift up gull wing style too. That would give a lot of room, plus you could also have a shield on the gun mount as well.