Use enamels. As YouTube’s Martin Kovac (Uncle Night Shift) says… “The more it smells, the better it holds”
2 Likes
I ah e used both silly putty and the MiG Camo mask. About the same results. You get more with the MiG tin. But yes roll the putty into snakes or worms and fit to your pattern, I use a wood coffee stir stick to get the putty set the right way.
1 Like

Done ![]()
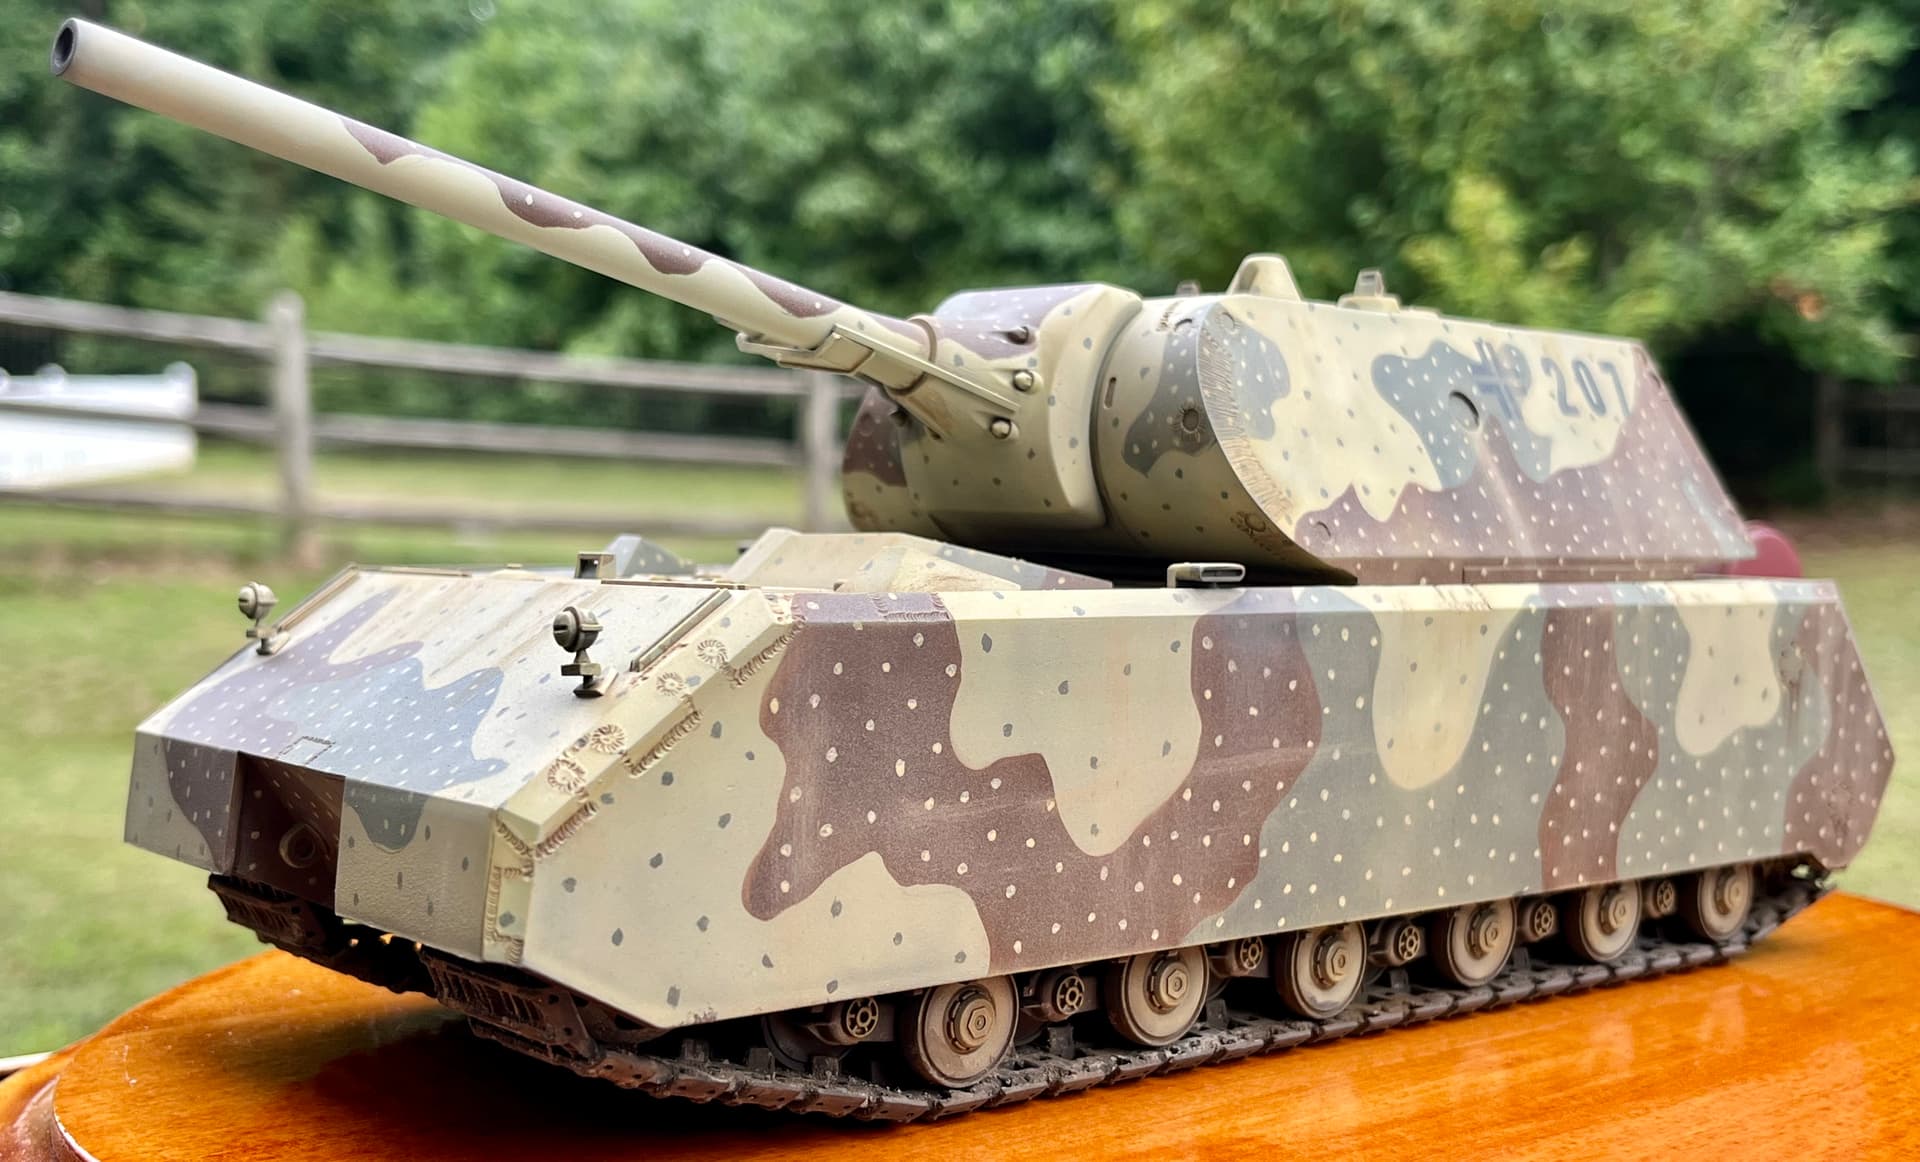
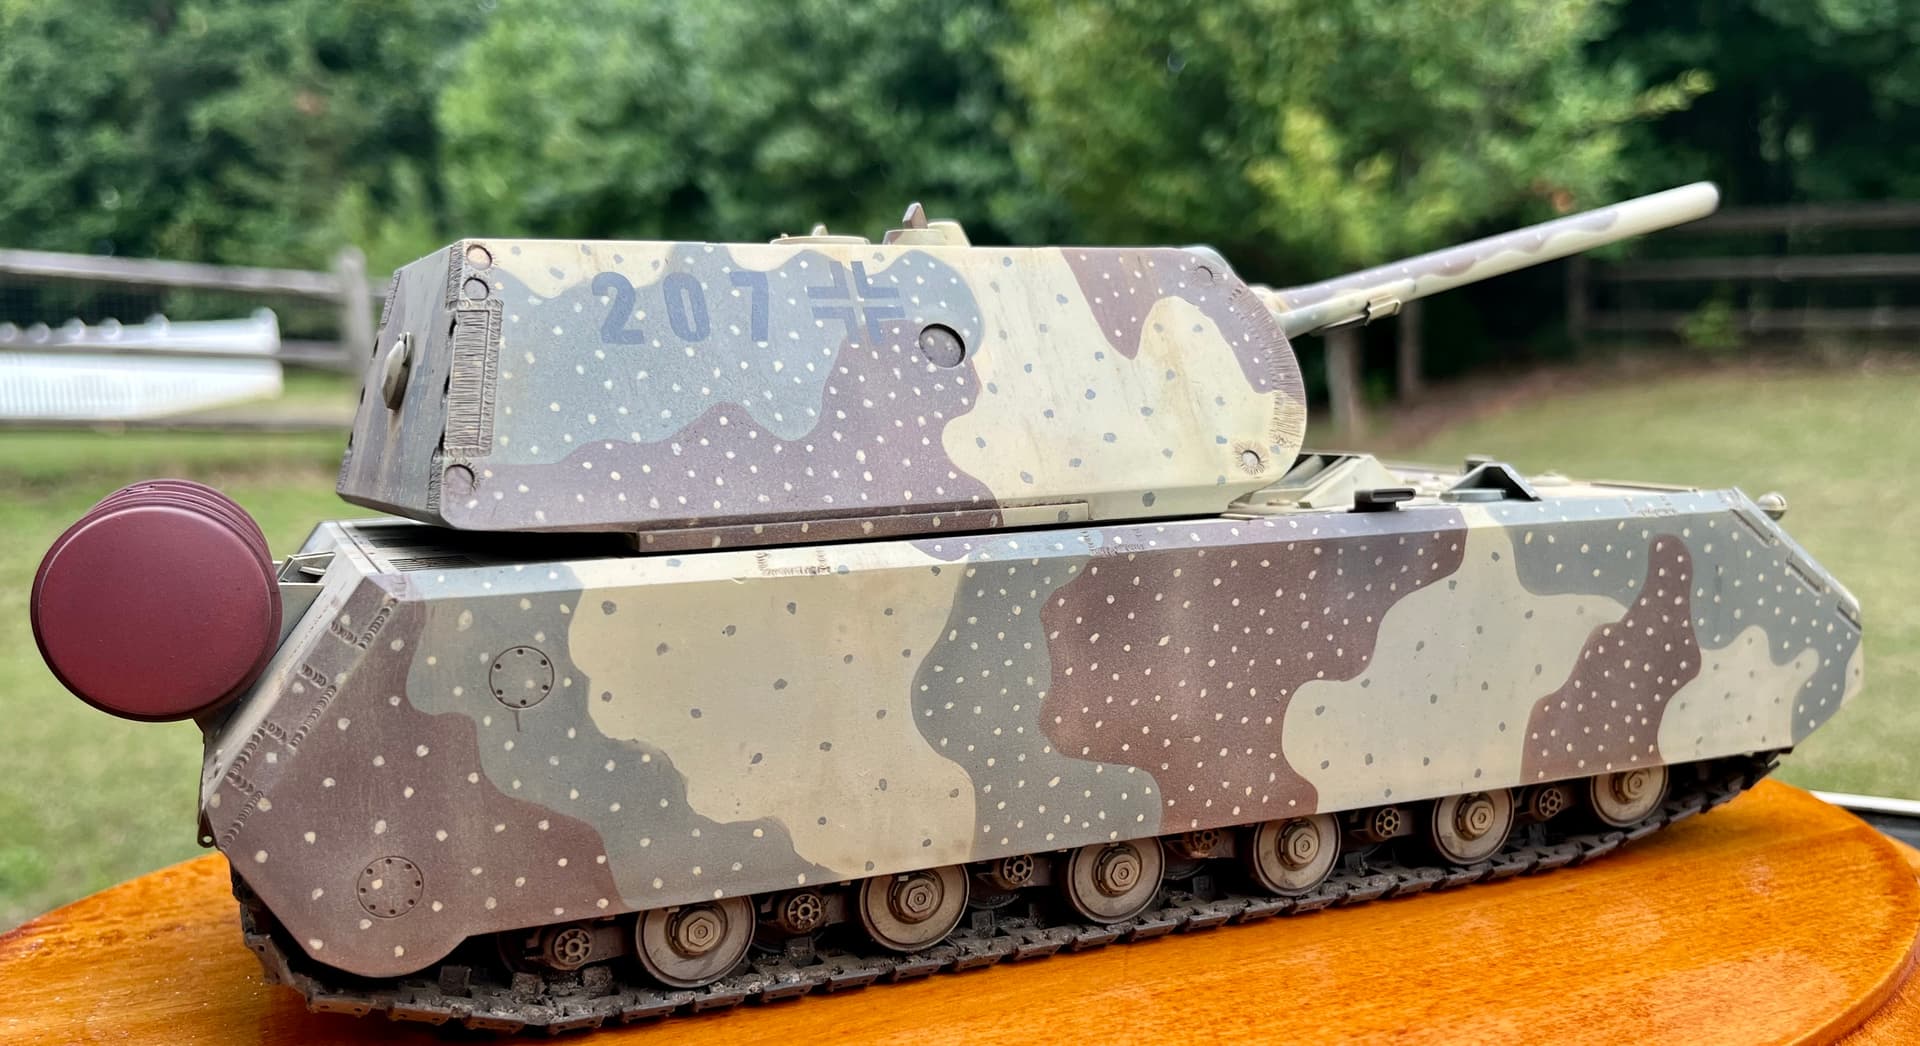
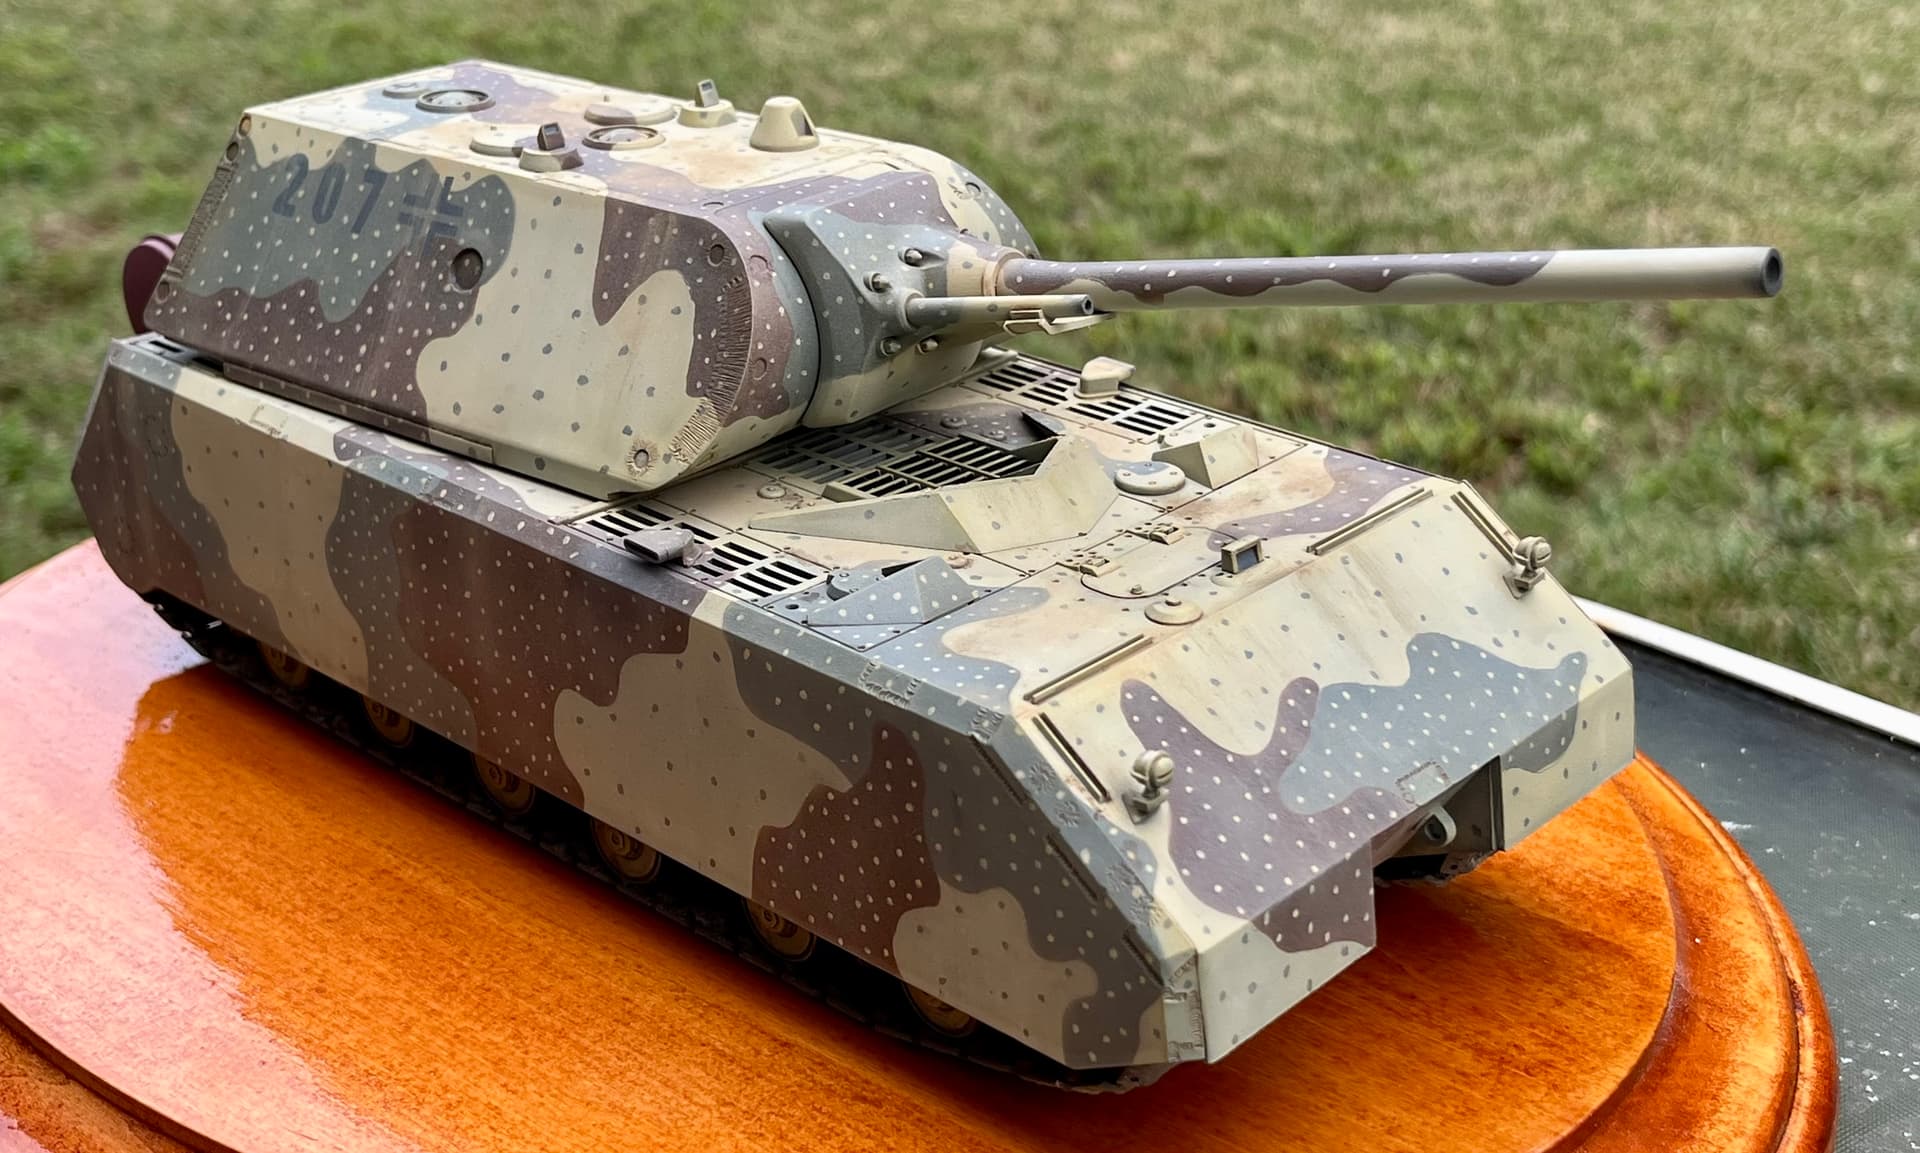
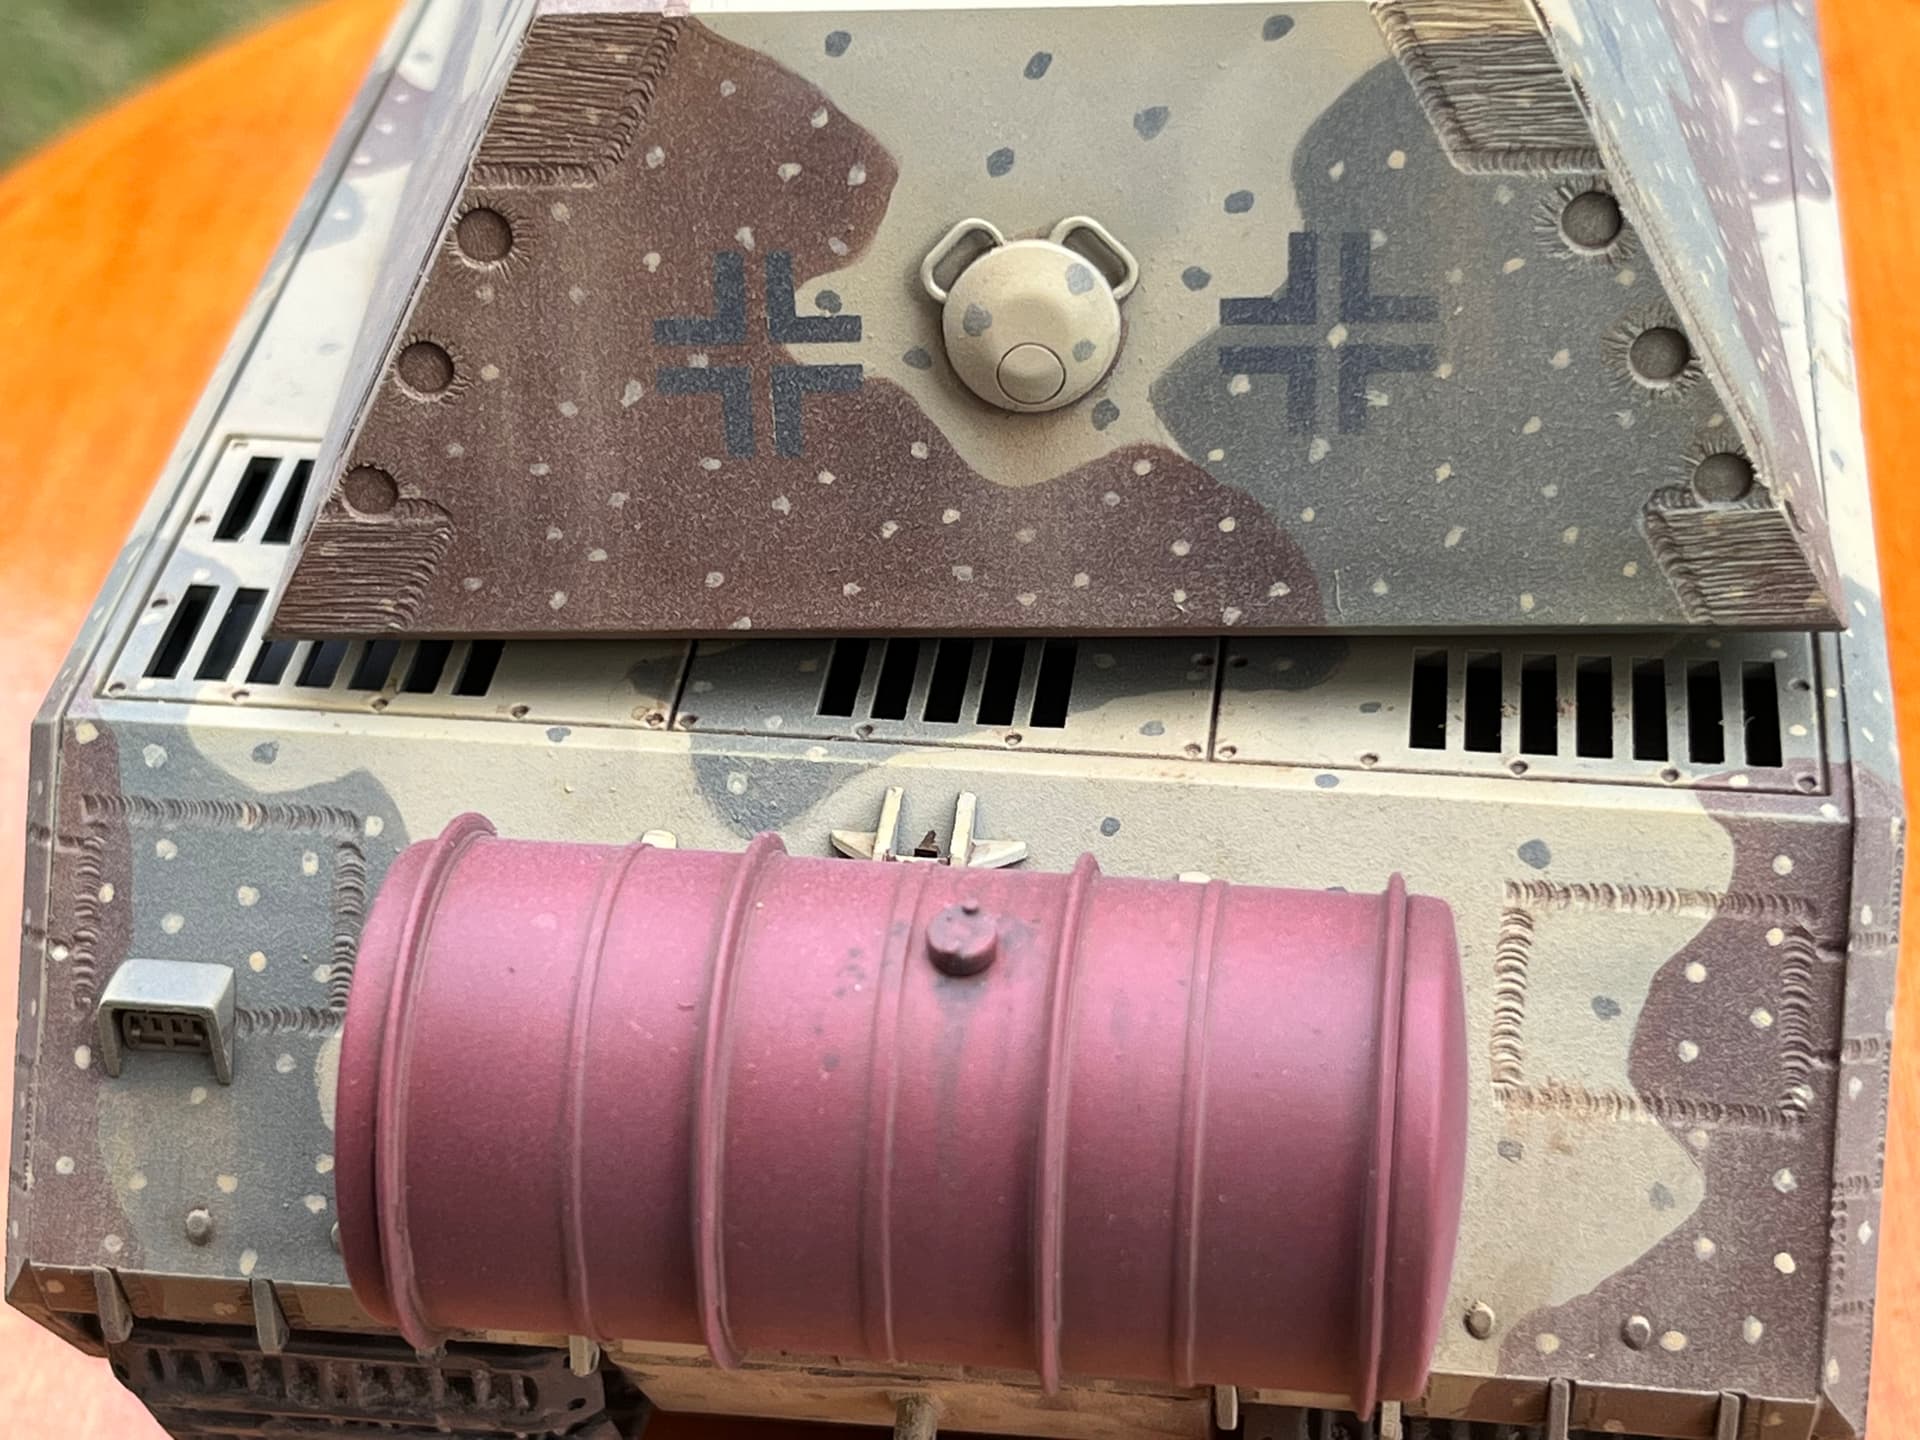
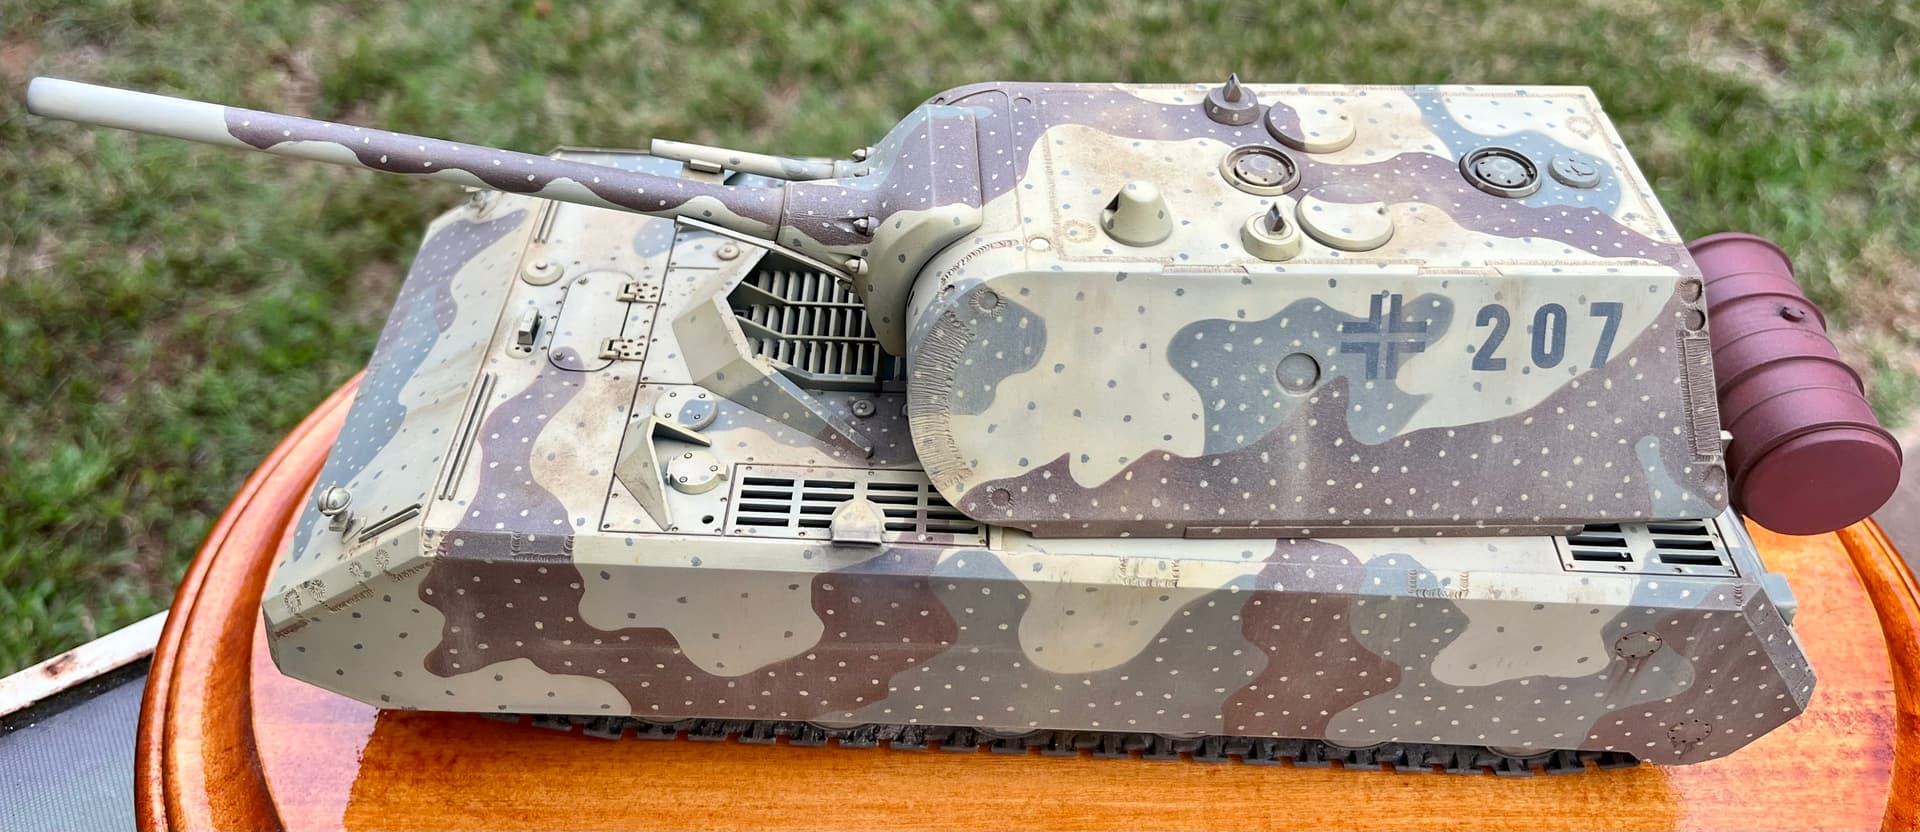
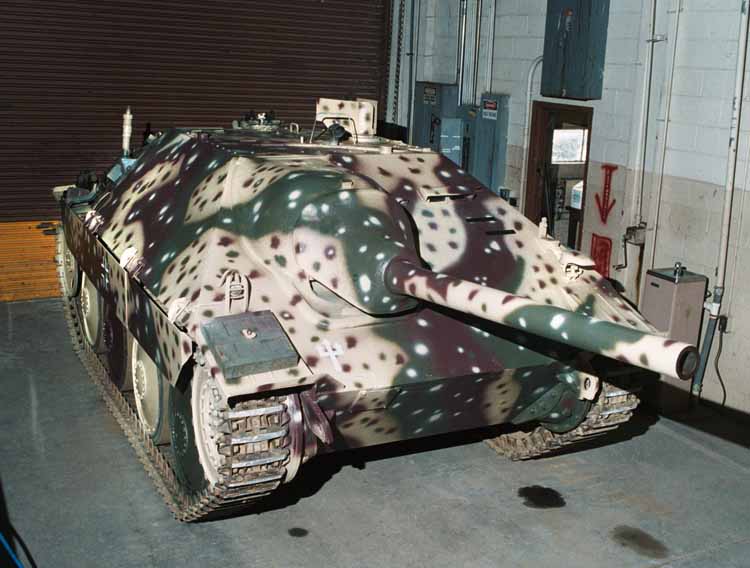
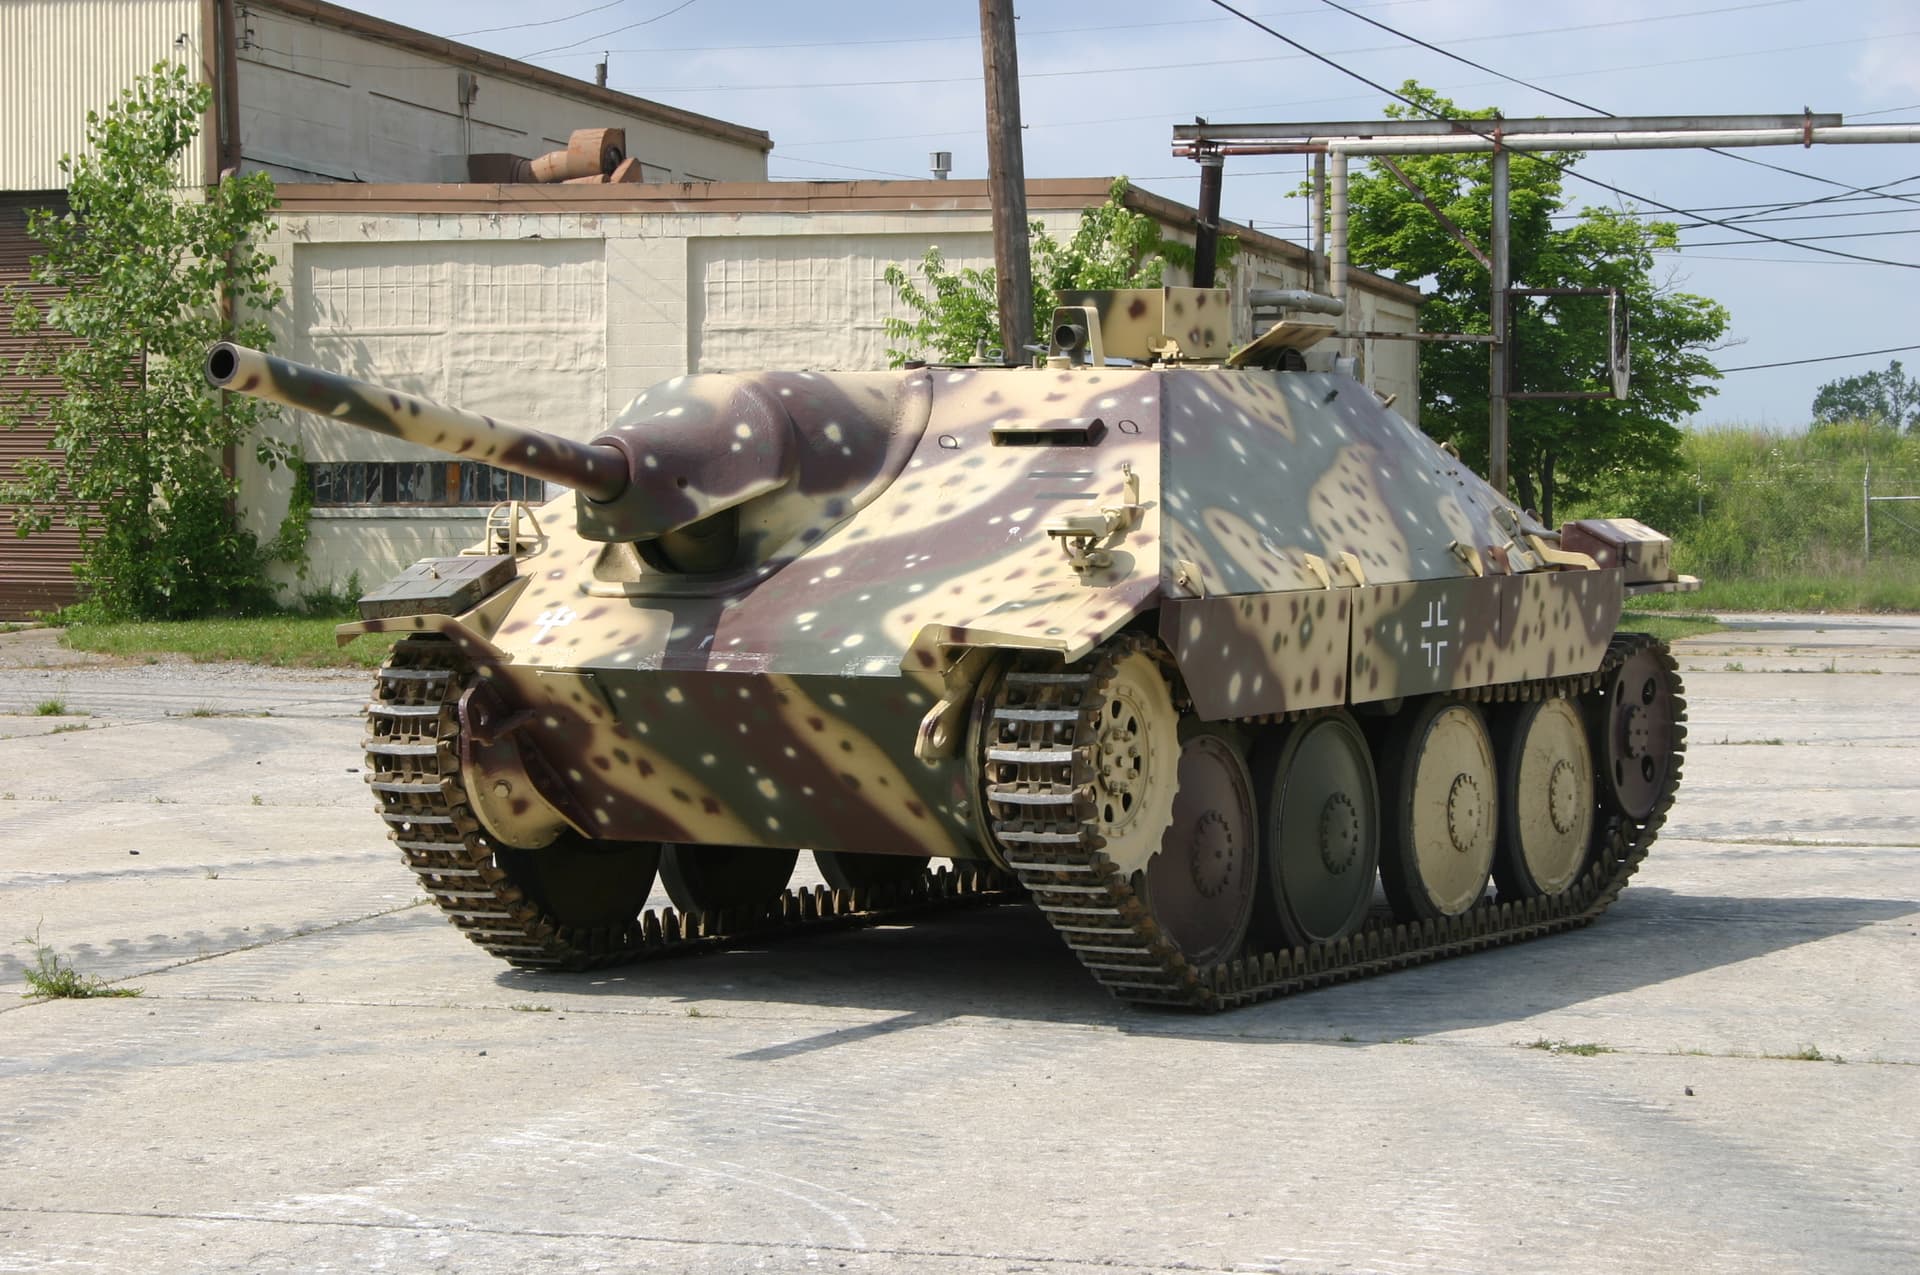
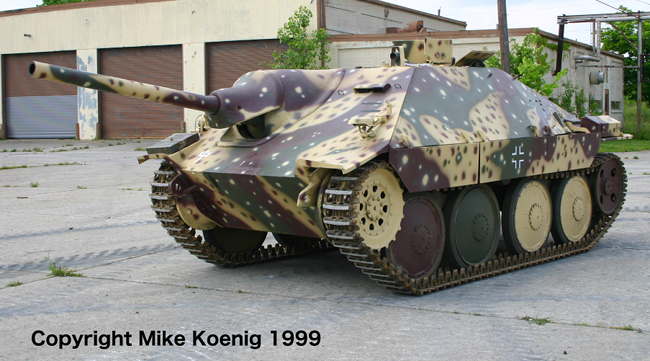
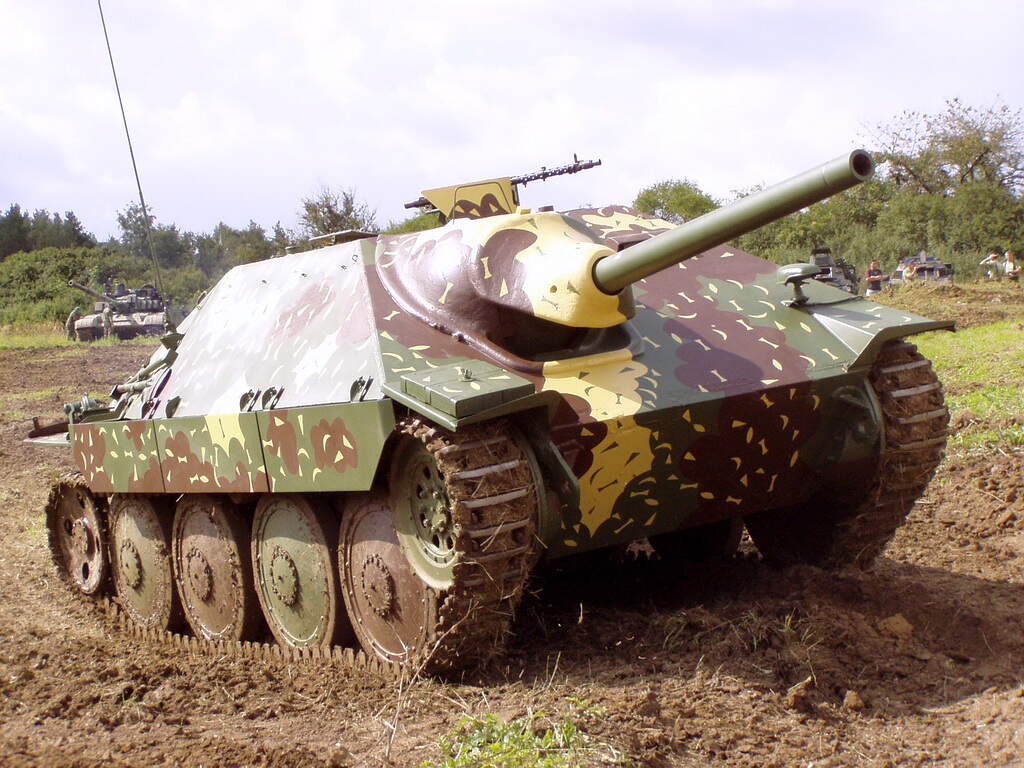
Came out ok in the end. Mistakes were made. I also learned sharp edge ambush is harder than I thought and painting hundreds of small dots is almost therapeutic. The old Shanghai Dragon kit kinda sucks. I stenciled the markings and my son chose the turret number.
Thanks for looking!
15 Likes
Turned out really well ![]() .
.
2 Likes
I agree with many here. I think it came out very well. Not an easy scheme for such a big beast. Your doing well, keep it up and hopefully show us more of your work. ![]()
Best,
Walter
Somewhere in Ohio
1 Like
It turned out awesome! I found this today and thought of your post it reminded me of your wok in progress. MENG MODEL 1/35 PANTHER G/air defense armor【How to camouflage painting】#scalemodel #tankmodel - YouTube .
Cheers,
Todd
Thanks Todd
Funny I was watching that earlier too, still have to finish
That is pretty funny…I watched it last night. He really did a great job explaining everything, and the results with the Blu-Tak are awesome.
1 Like
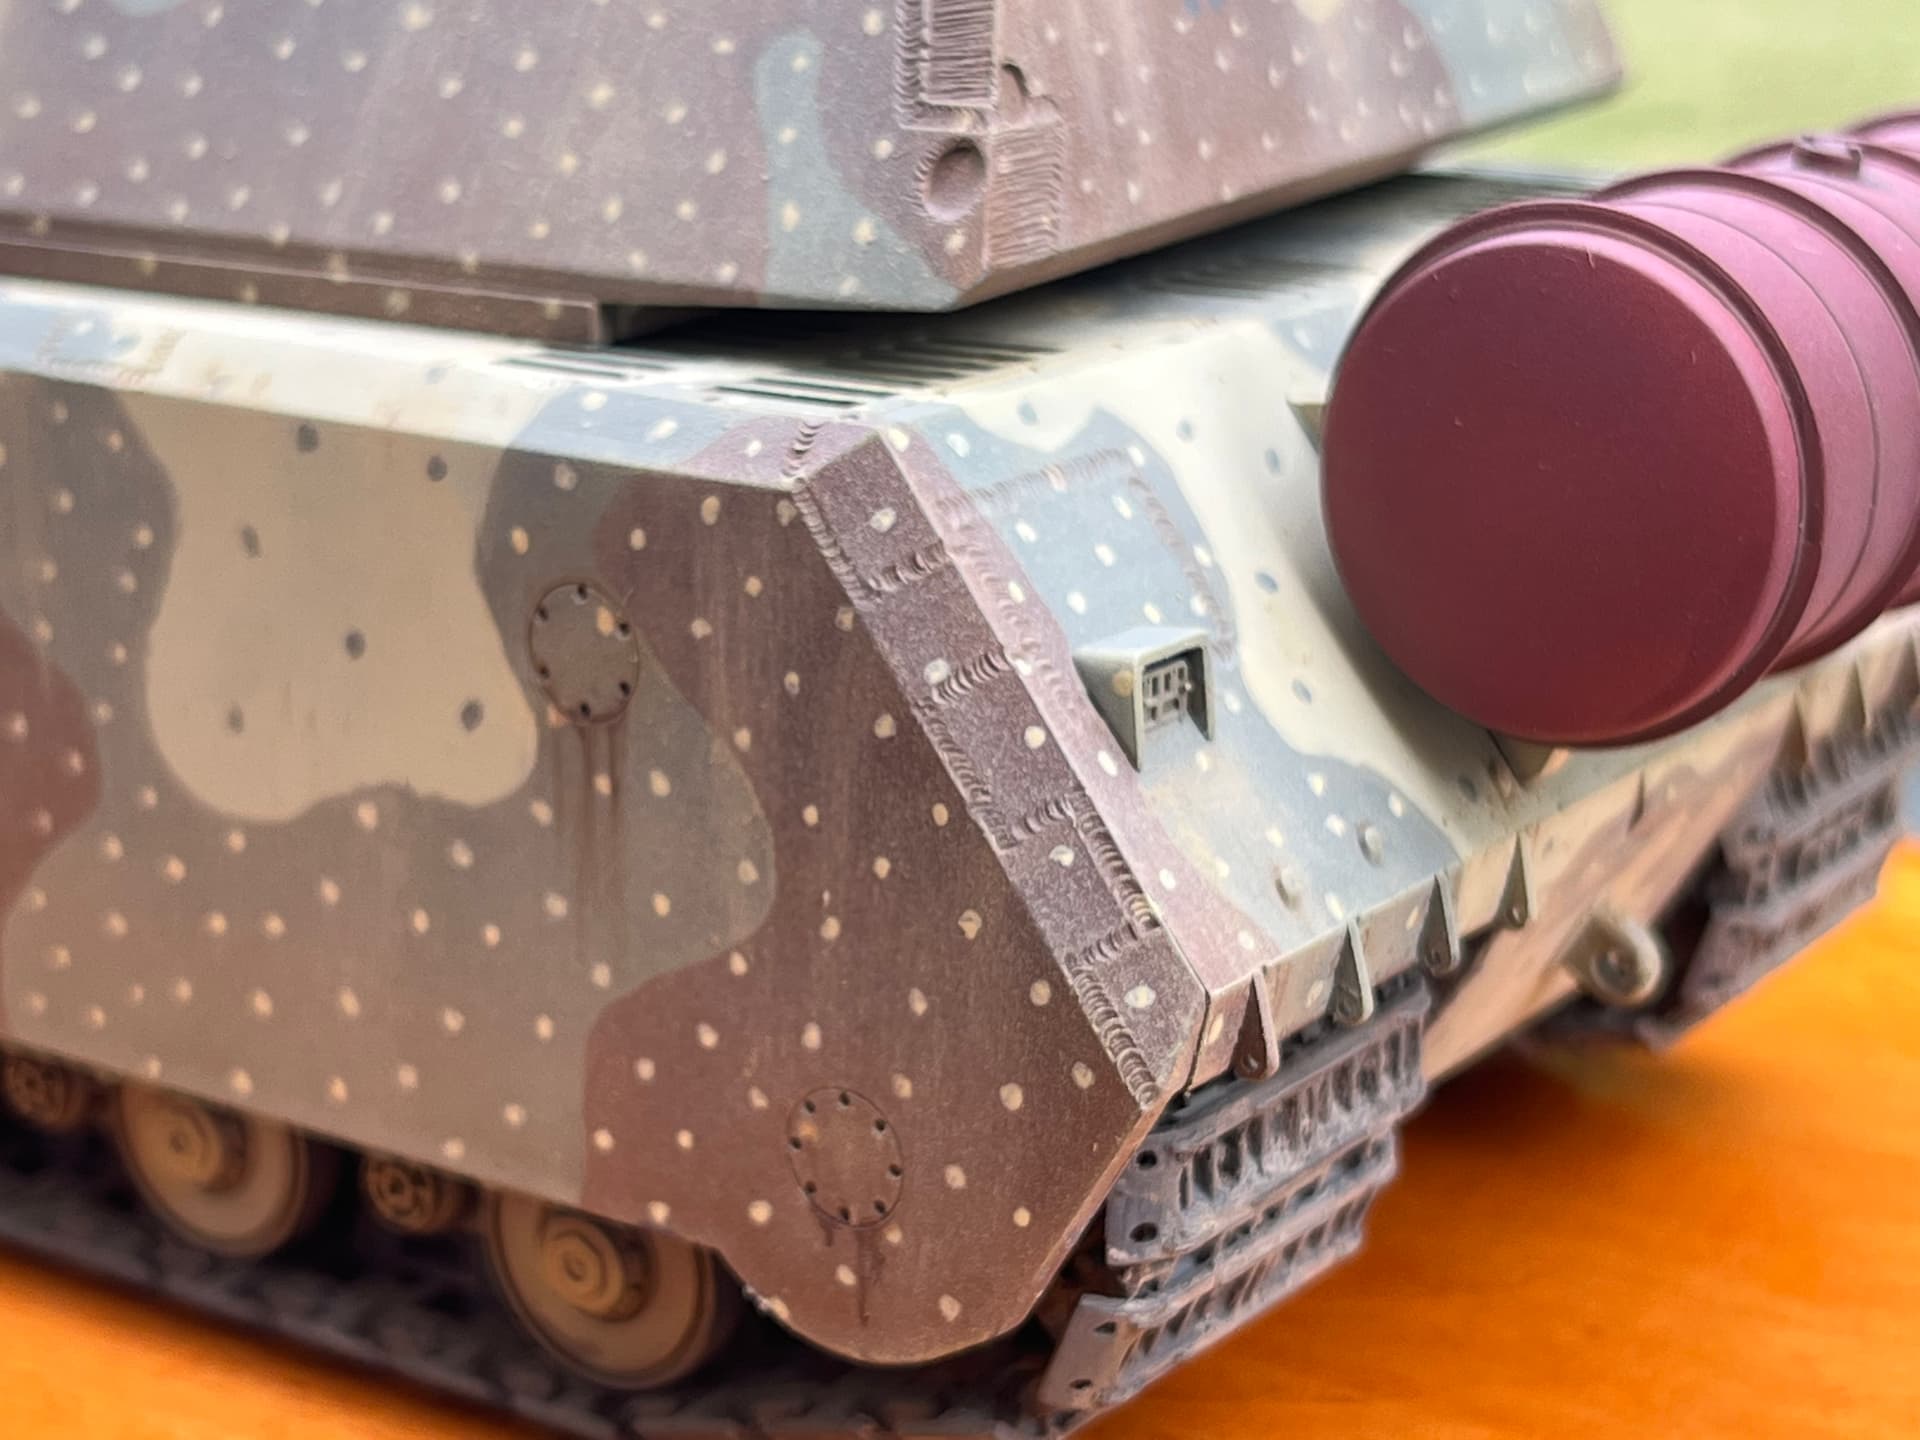
Not doubting the correctness of the paint scheme but those small sized dots seem to disappear when viewed from even close to medium distances.
The ambush schemes that I have seen seem to use more of a leaf sized irregular shaped “dot”.
Again not doubting your great work here.
Admittedly this Jagdpanzer IV is my somewhat childish first attempt at any sort of ambush camo. Please excuse.
Also I should have varied the colors of the dots.
2 Likes
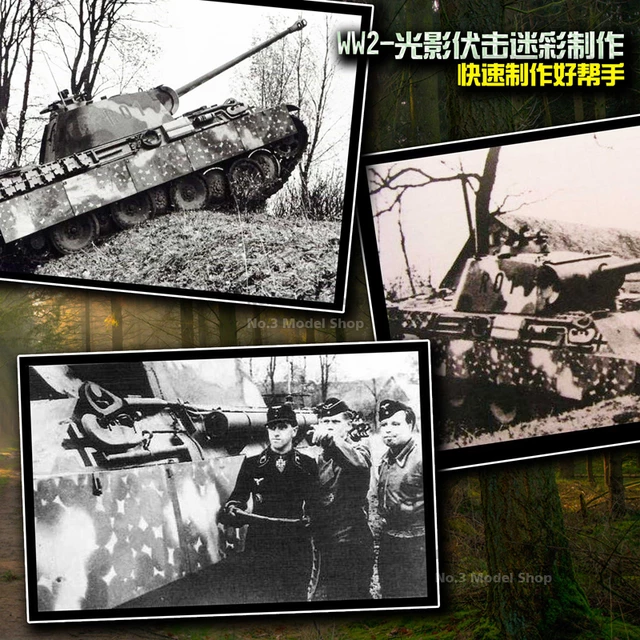
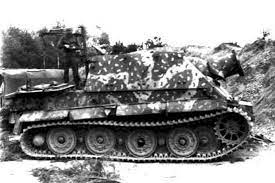
Different ambush camo’s were applied using different methods. Some (like on some Tiger ll’s seen during BoB) had uniformly shaped dots applied over a 3 color camo job. Others (presumably from different factories) used a circle template to make the “cloud” patterns. The spaces of background colors visible between circles formed irregular concave triangles, odd “dog bones” shapes, and some little-bitty leaf shapes.
![]()
![]()
A recent ambush paint pattern applied to the then Patton Museum’s back-dated Czech Hetzer.
I unfortunately had nothing to do with the painting of this camo pattern. (I wish I could take the credit!) That honor goes to Robert “Stick” Decker, another Volunteer at the Museum.
1 Like
Ok. I am just going to jump in here and I will probably catch a lot of flak with this.
First thing let me say that the gentleman’s artistic workmanship on this model is outstanding and I dont question that here, not in the slightest.
However I will put fourth an idea and please feel free to post actual wartime photo examples to prove me wrong here.
I believe that as modelers we are under the general misconception that the ambush camo pattern was a grouping of small round dots laid over the basic 3 color camo. I propose that we are incorrect in this.
Alixpress already offers a metal painting mask that reproduces what I think is the actual ambush pattern.
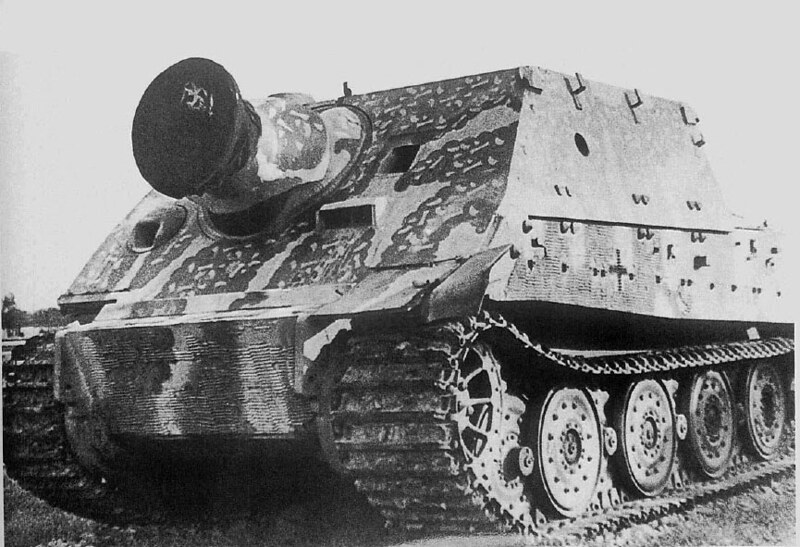
The “dots” we all speak of are actually large round overlapping circles nearly 5-7 inches in diameter.
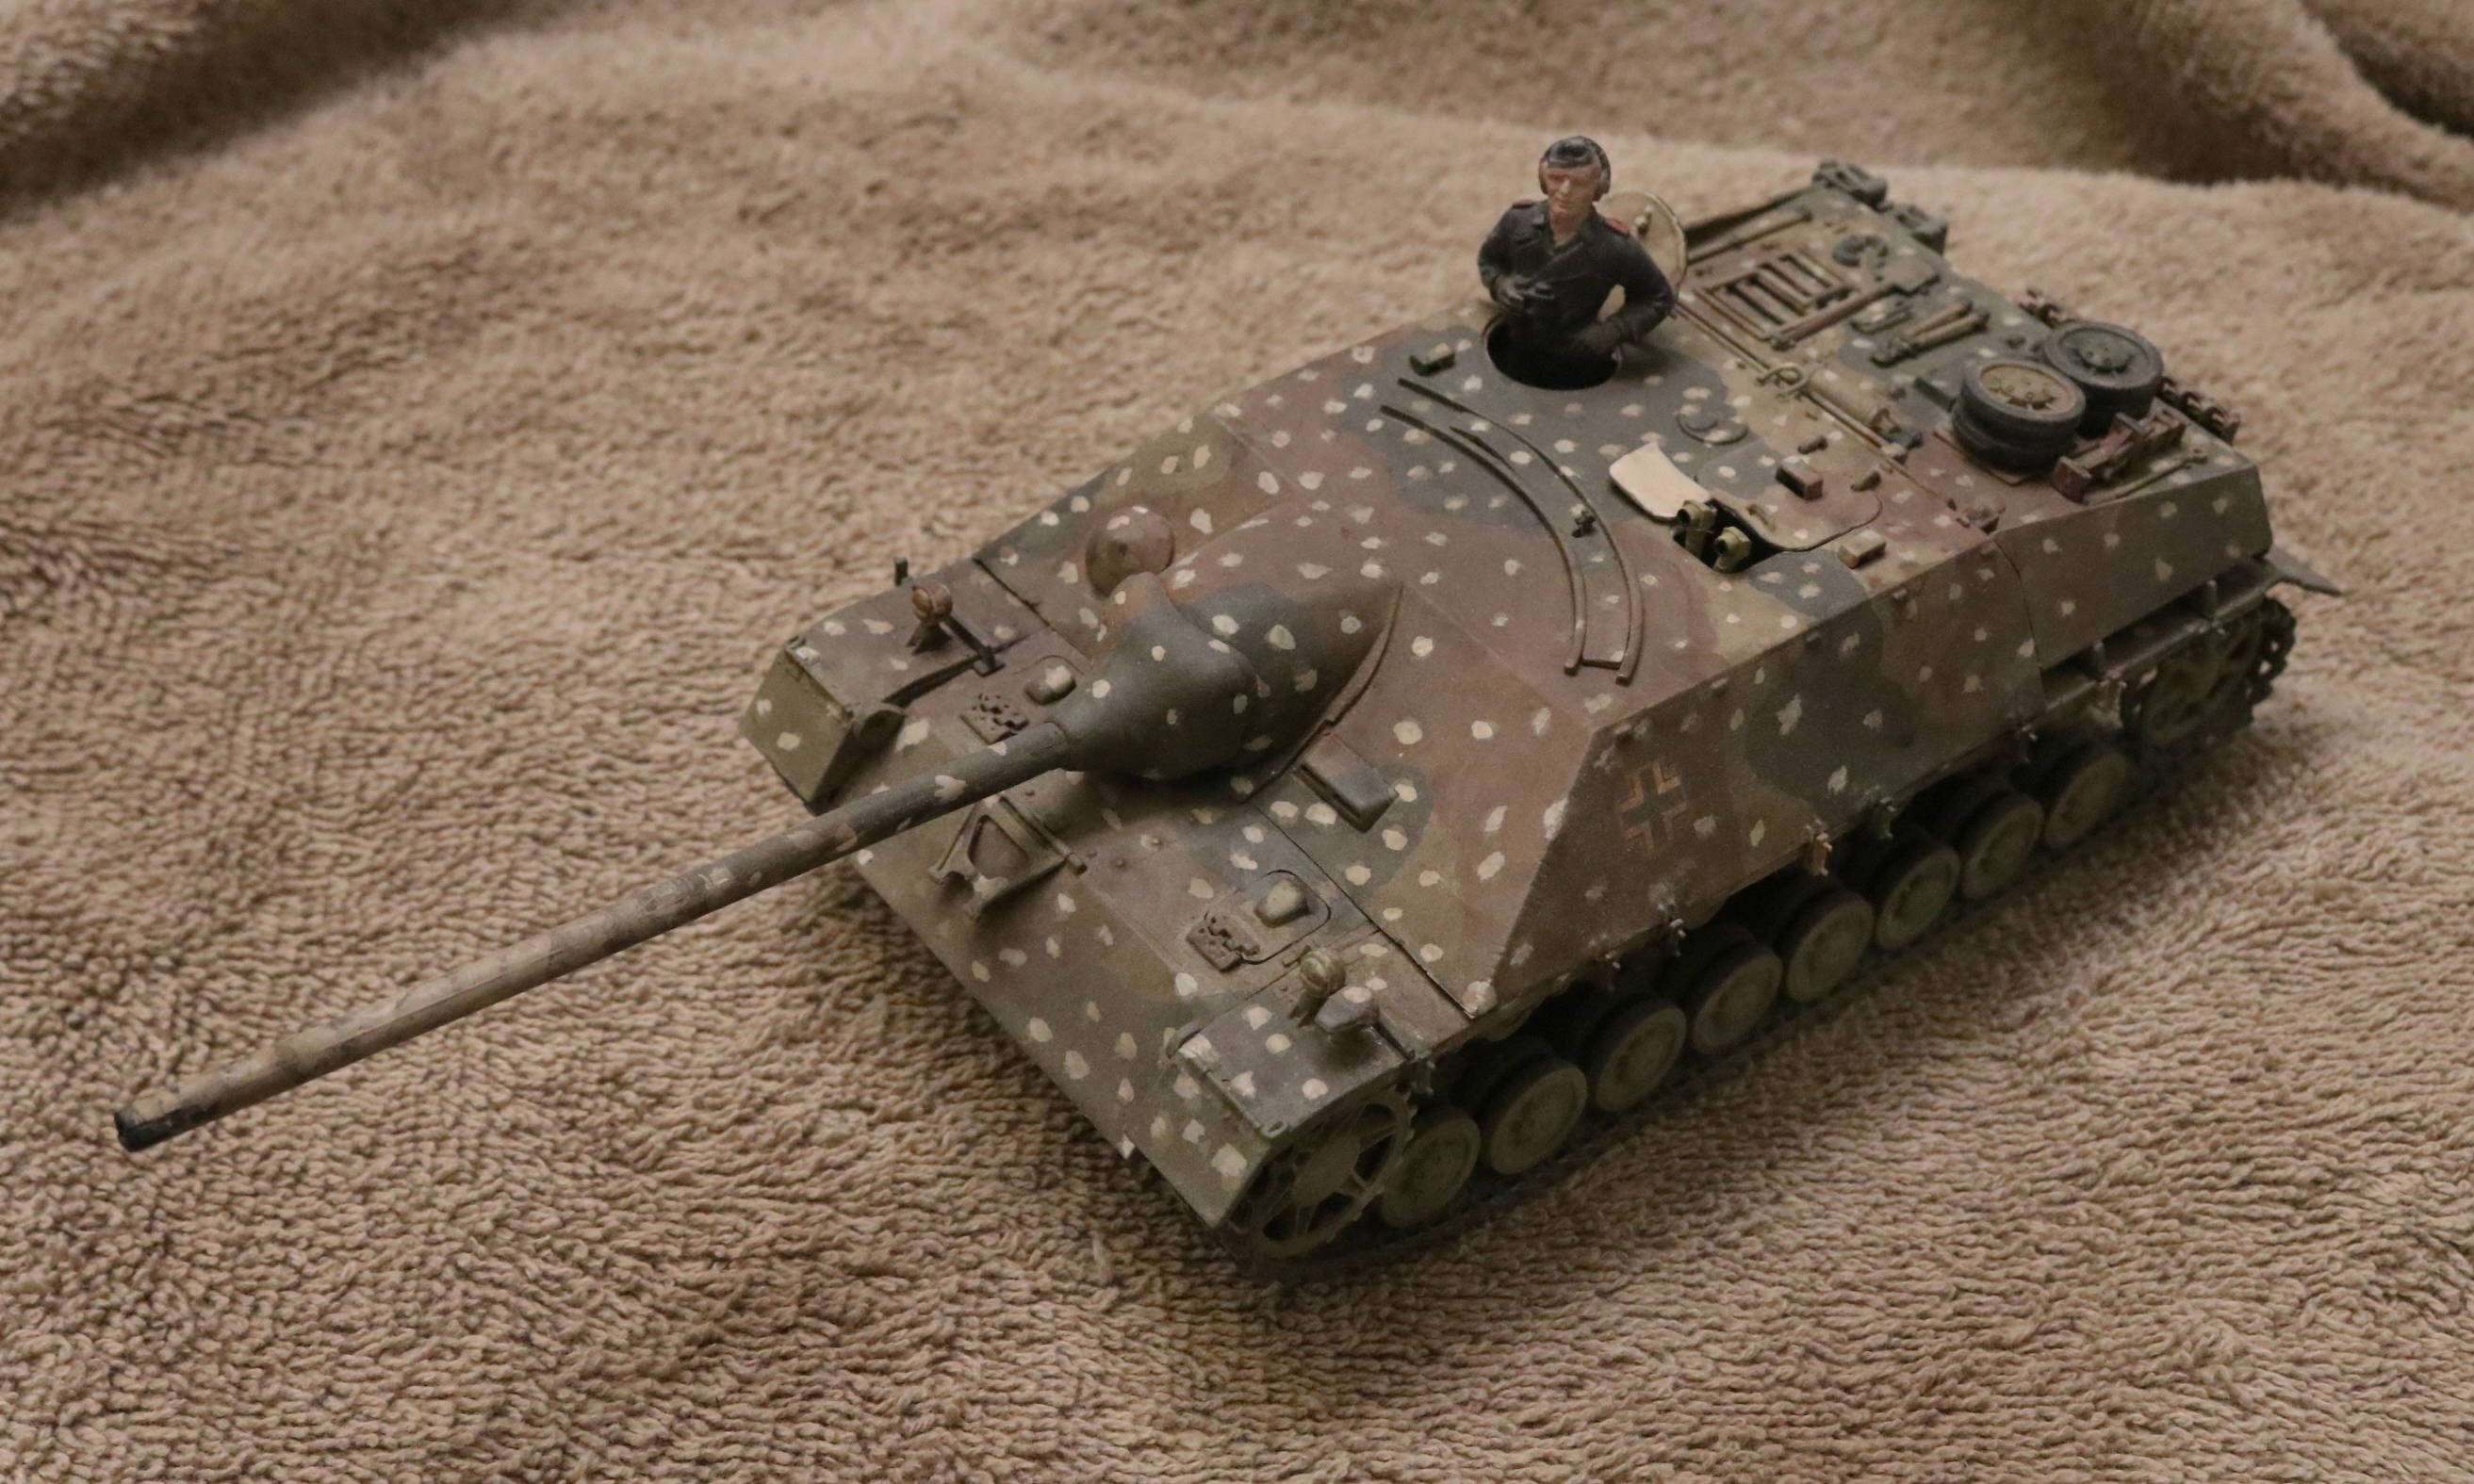
Interesting take on the circles creating the ambush pattern on that Panther. That sure looks to be the case there. Also it is something to ponder that it looks like only the schurzen plates have that pattern, and not the hull or turret of the tank.
If it were me doing the painting back in WWII Germany, I would have FOCUSED this camo scheme on the top surfaces of the vehicle as the intent here was to disguise the tank when seen from the air.
Actually I would have reproduced a slightly larger con pattern. Also I would not have used the round circle masks to paint the dark colors. I would have used a con shaped mask to paint the highlights after the regular 3 camo color was already in place. But that is just me.
Having been a graphic artist for these many, MANY years, we used a trick to check the contrast and the appearance of small details in our artworks:
We squinted!
If you squint at your artwork while holding it at full arms length and your small details are tending to disappear then that tells you they are either not large enough or they have insufficient contrast to show up like you want them too at the planned viewing distance.
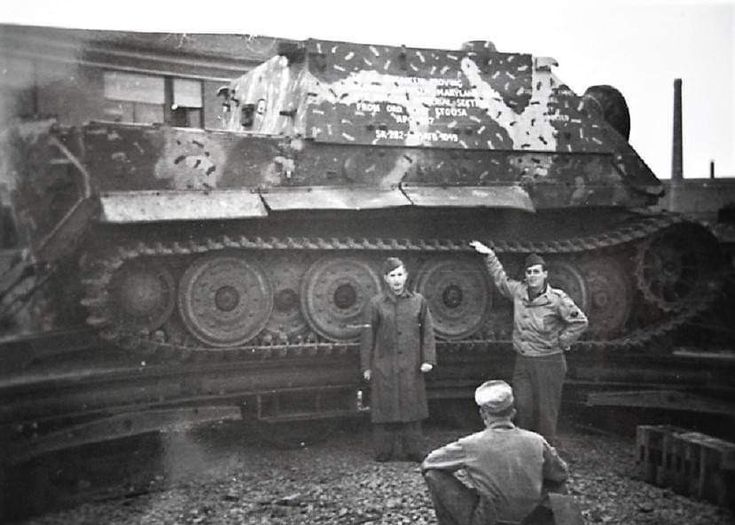
I invite everyone to squint at the large full sized photos of the Maus, as seen above, and to ask yourself if that smallish dot pattern would even be visible from a P-51 moving at high speed, 500 feet up?
Again I am NOT trying to criticize the man’s work. What I AM trying to do is to say we as modelers may have had the wrong idea entirely as to what is/was really going on with the German “ambush” camo pattern.

The “dappling” spot styles varied with the manufacturer.
Some manufacturers (ex. MAN and MNH on Panther tanks) used a mask / stencil cut from (presumably) a piece of linoleum material laid out with varying sized round circles, the intersection areas being the stencil areas cut out. BTW, with these, the basic 3-color pattern was painted and then the “ambush” stencil was used with just the dark yellow over the entire tank (probably just avoiding the majority of the large dark yellow base pattern areas but some overlap can be seen in photos along with sharp edges from the sides of the stencils). Close examination (if the photo is clear enough) often allows you to identify the repeating nature of the pattern and find the sharp-edged “ghosts” of the edges of the actual stencils used.
Some manufacturers used freehand sprayed “dots” over the base factory 3-color. Examples are DB on their Panthers and also observed (with larger, softer sprayed spots) on some Pz IV (both tanks and variants).
Other manufacturers freehand brush painted “dapples” over the base 2-color as seen on the Sturm Tigers (the “dog bone” pattern of dapples).
Finally, there are examples (very few!) of field-applied “ambush” cammo that used circular masks to apply (presumably by spraying) the green and brown cammo through the circles over the factory dark yellow leaving dark yellow “dapples” showing between the green and brown circular spots. Another (presumably) field-applied technique was hand painting the circles leaving the dark yellow intersection “dapples” visible.
There really was no singular, universal method used by ALL the different manufacturers to apply the “factory ambush” cammo. However, AFVs built and painted by any particular manufacturer were done pretty much using THAT manufacturer’s selected method. Thus, it’s often possible to identify the manufacturer (for example in the case of Panthers) by noting the particular pattern / method of applying the “ambush” pattern on that particular tank or AFV.
3 Likes
Once again, not doubting you as I am sure you are right but can we see some historical reference please?
Dots make more sense and would be far easier to apply in the factory or in the field than these many interlocking roundels.