Templates:
Tree branches
Whoknowswhat?
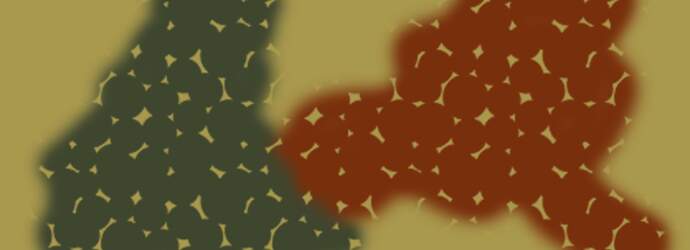
Random dunkelgelb dots
Random dots of dunkelgelb, green and brown
Templates:
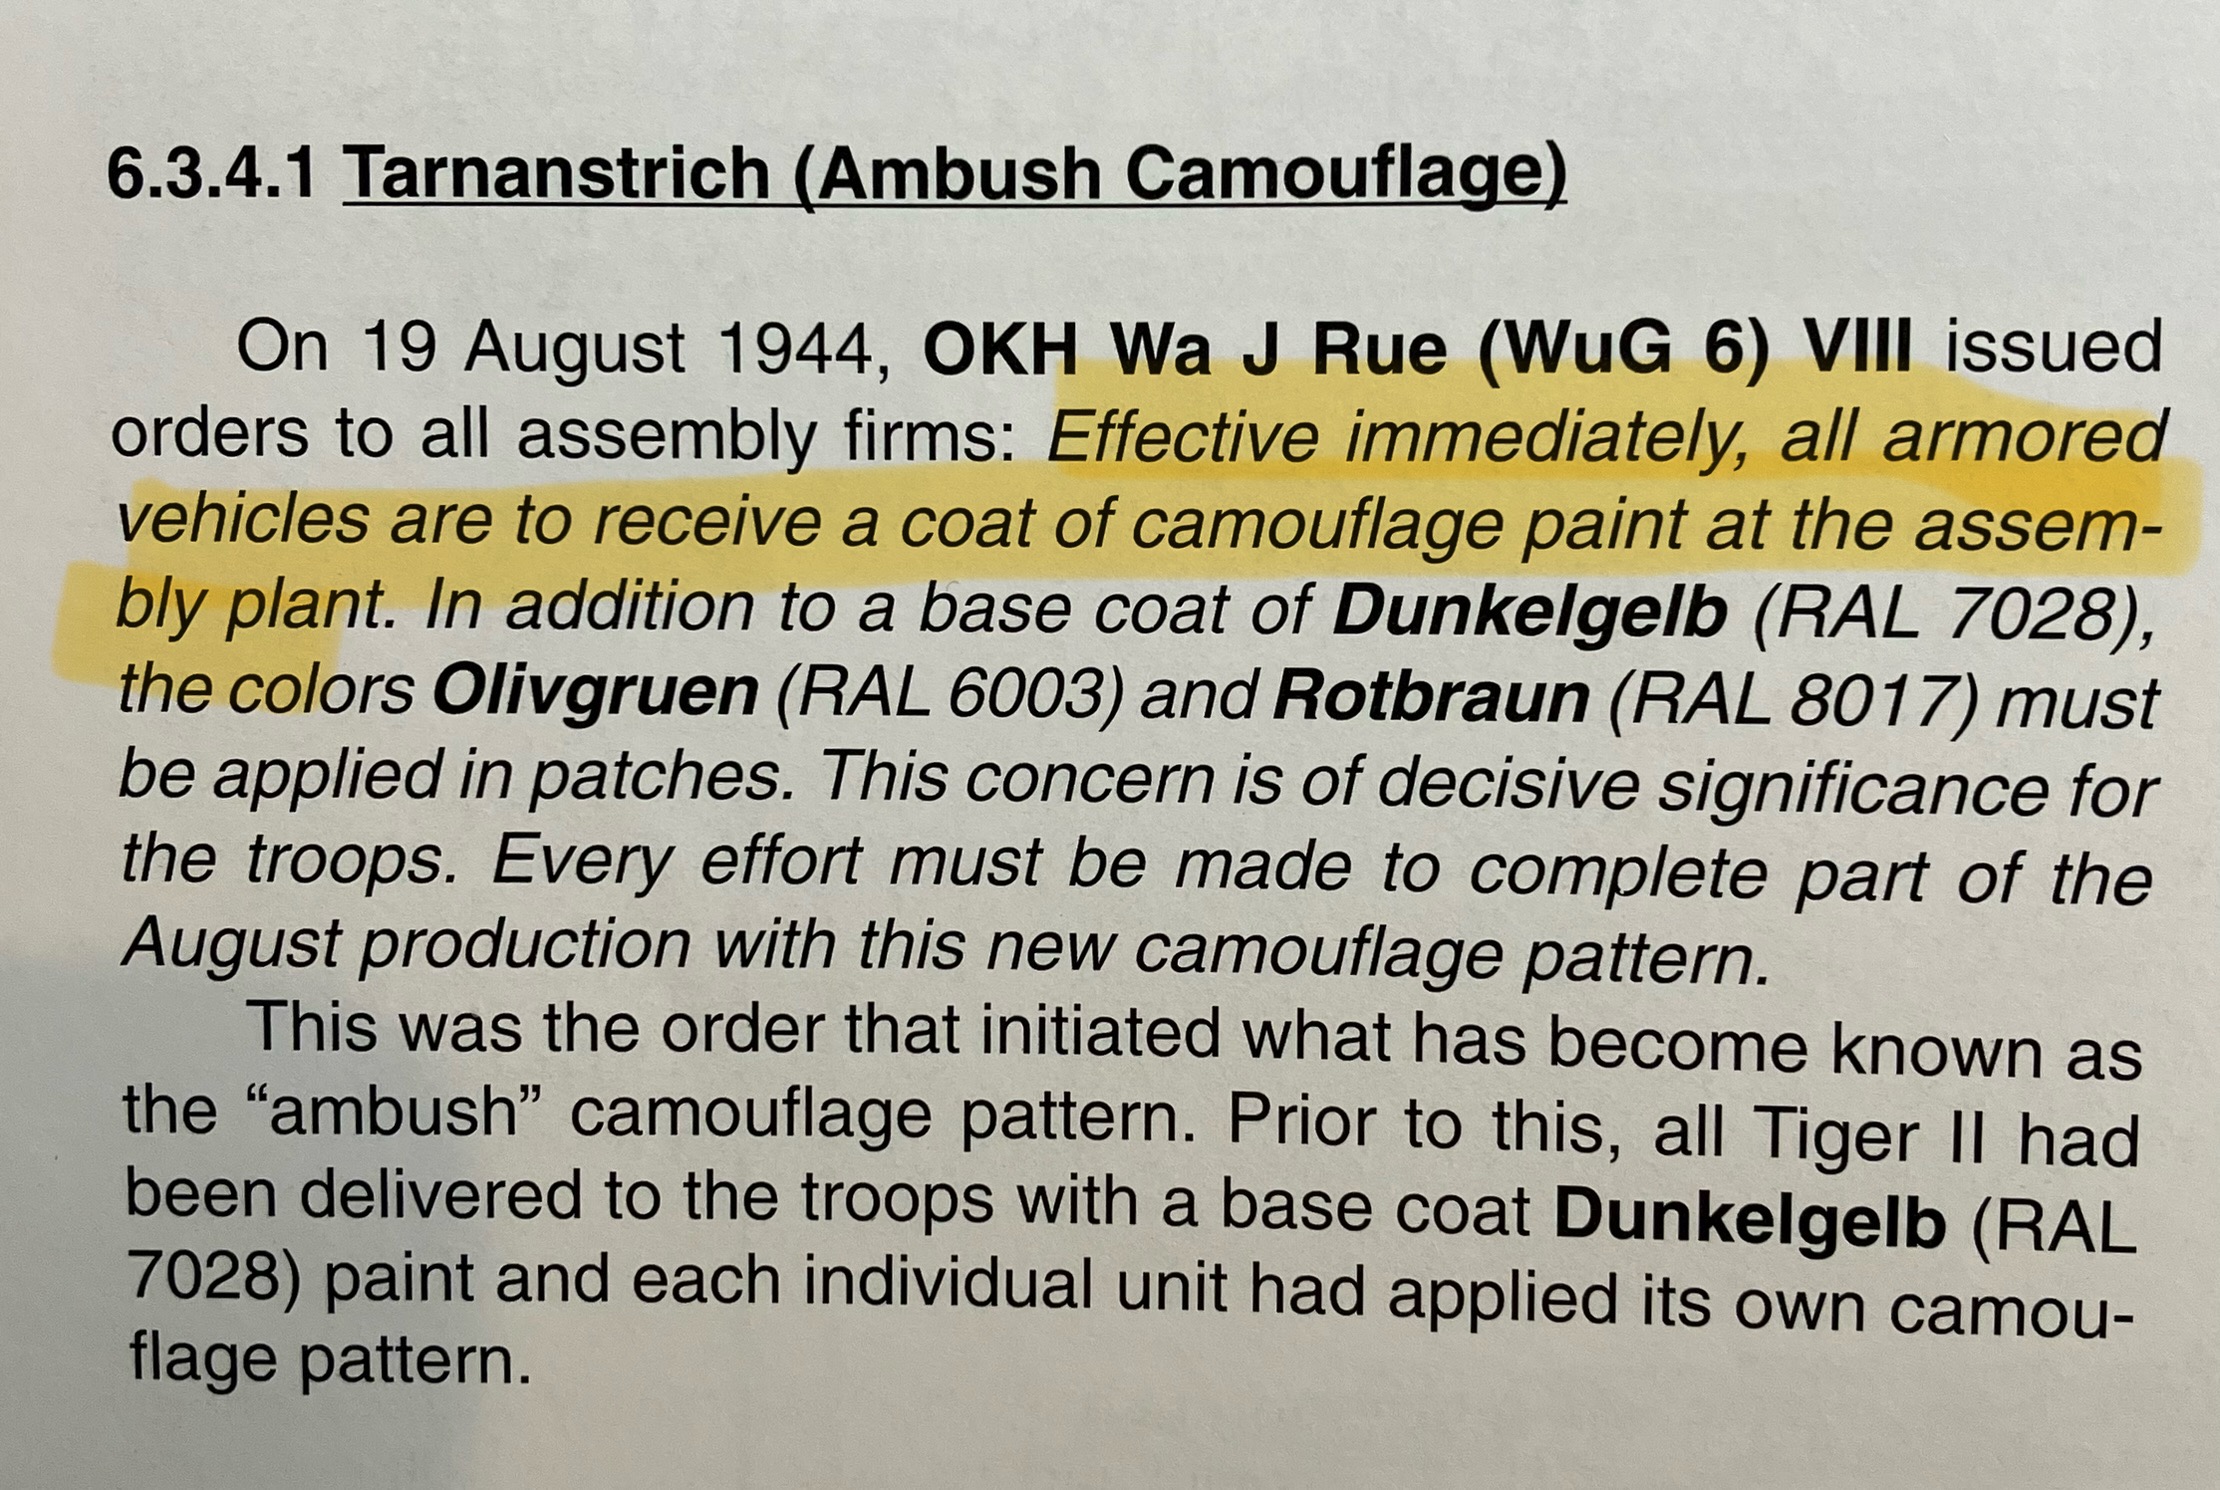
Some of the examples you have shown are still showing cons (bow ties or dog bones) and not dots but you have answered my request as some of these photos definitely show the ambush scheme as being made using dots.
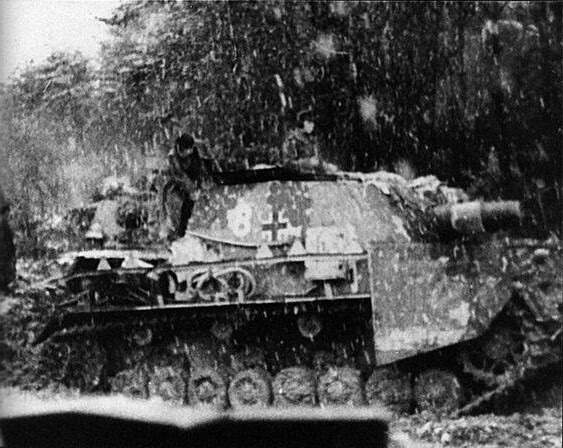
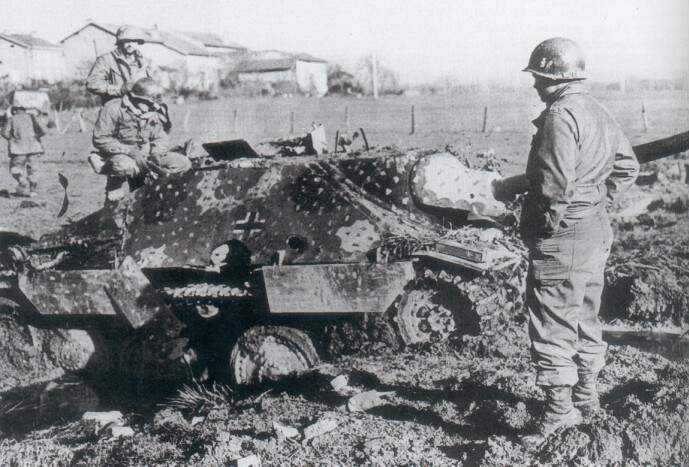
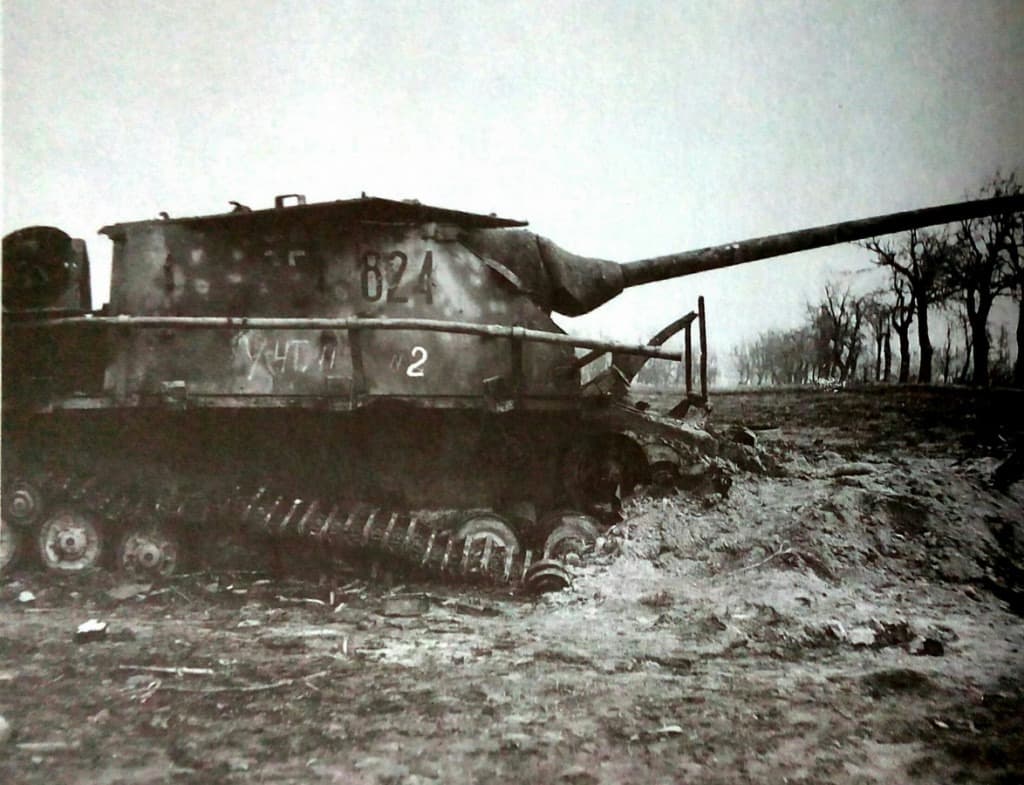
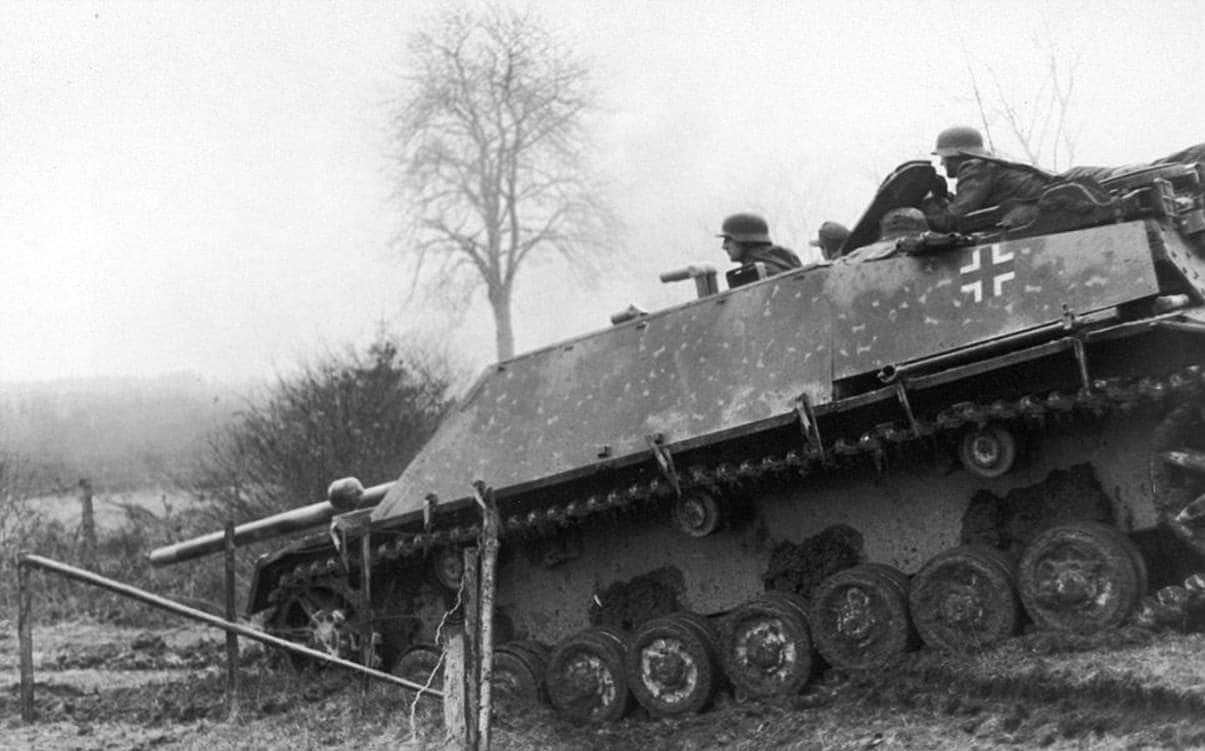
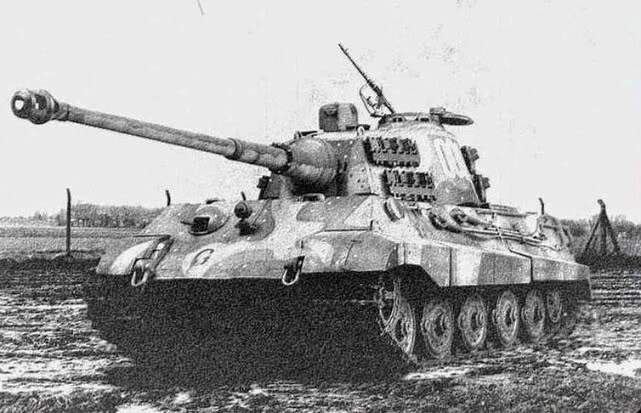
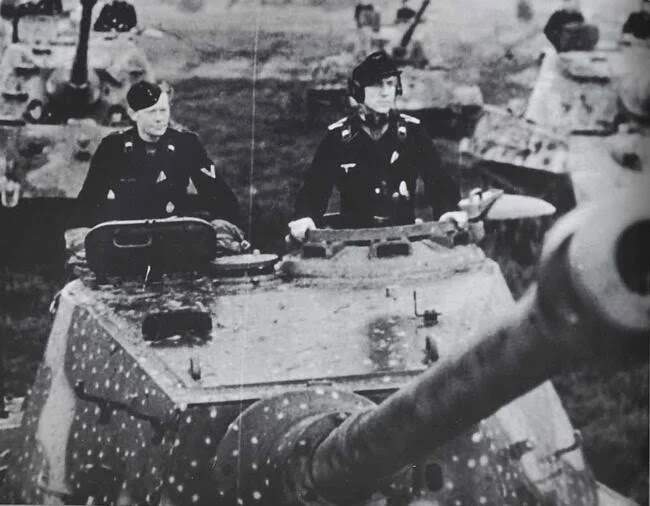
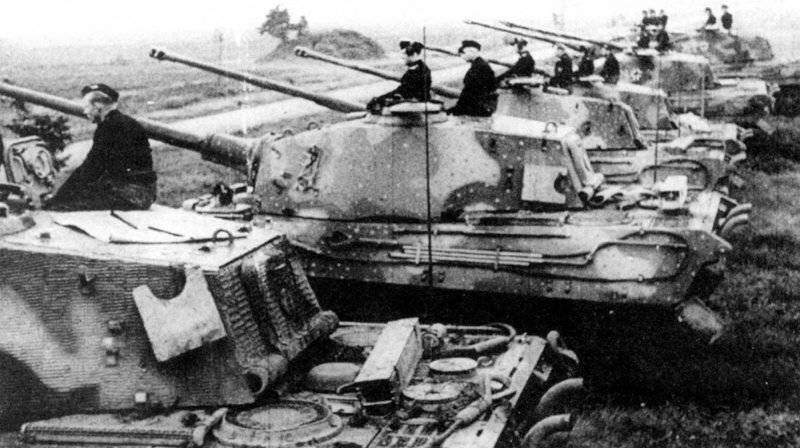
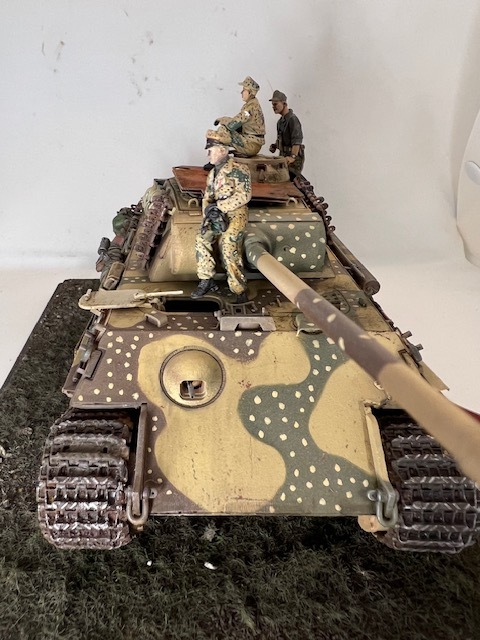
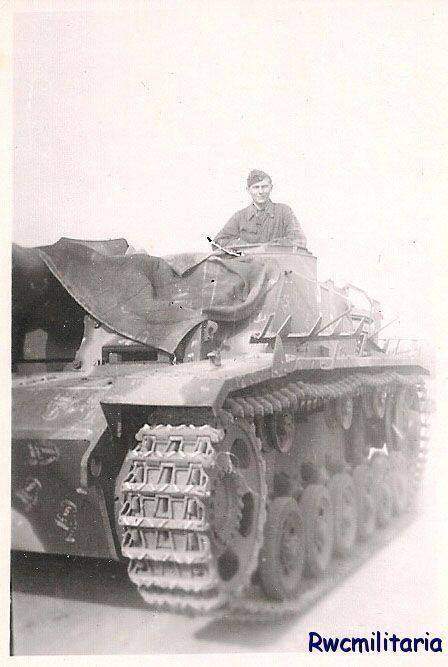
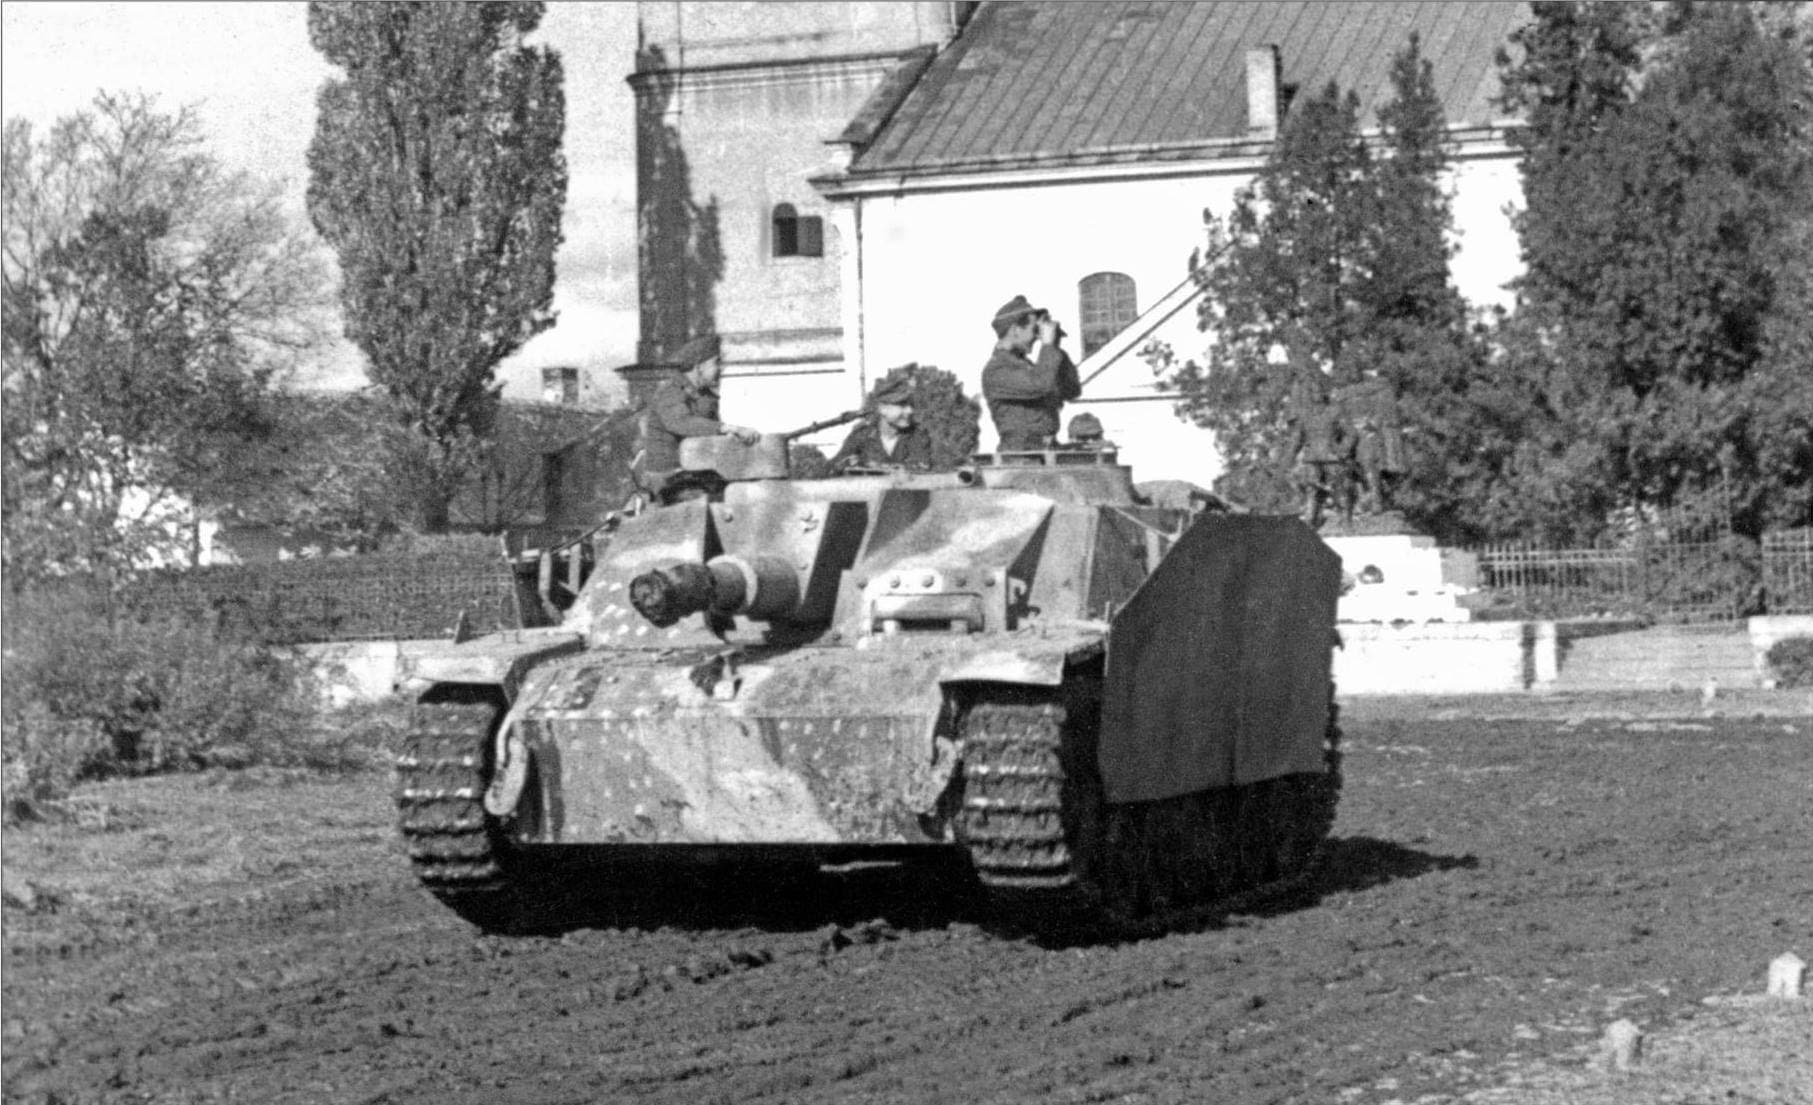
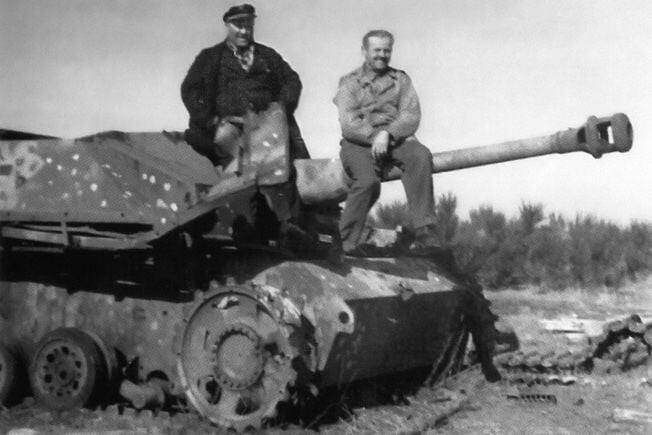
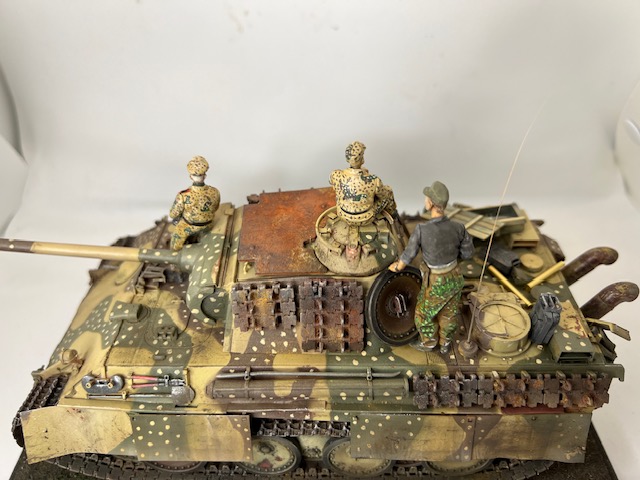
I recall von Rosen’s book “Panzer Ace” mentioning this camouflage pattern when applied to his battalion’s King Tigers (which I think these last 2 pics are); I think he describes it as being the latest state of the art vehicle camouflage or similar. There is quite a well known film clip of the same - all the vehicles are shown utilising transport tracks.
Dear Sir
New to the forum. Great job. What brush did you use for the dots?
When I was a kid doing all of those Bandai 1/48 kits, I’d sometimes “invent” a scheme. I posted about a month ago about one that used a gray base with green “zebra” striping. For almost fifty years I thought I made it up, and then recently saw a vehicle with almost exactly the same scheme. Back then there were very few references available to a young modeler, except possibly for watching the World at War series.
A lot of these schemes were done in the field, and the soldiers who did them had quite a bit of latitude in how they were executed. I saw this myself - give some SF guys cans of Krylon and you’re going to get all manner of camouflage on weapons, helmets, and even Toyots trucks.
Even so, about thirty years ago, long after my last WWII German “phase” I decided to try it again, only this time armed with Japanese Panzer and Tank Magazine books for reference.
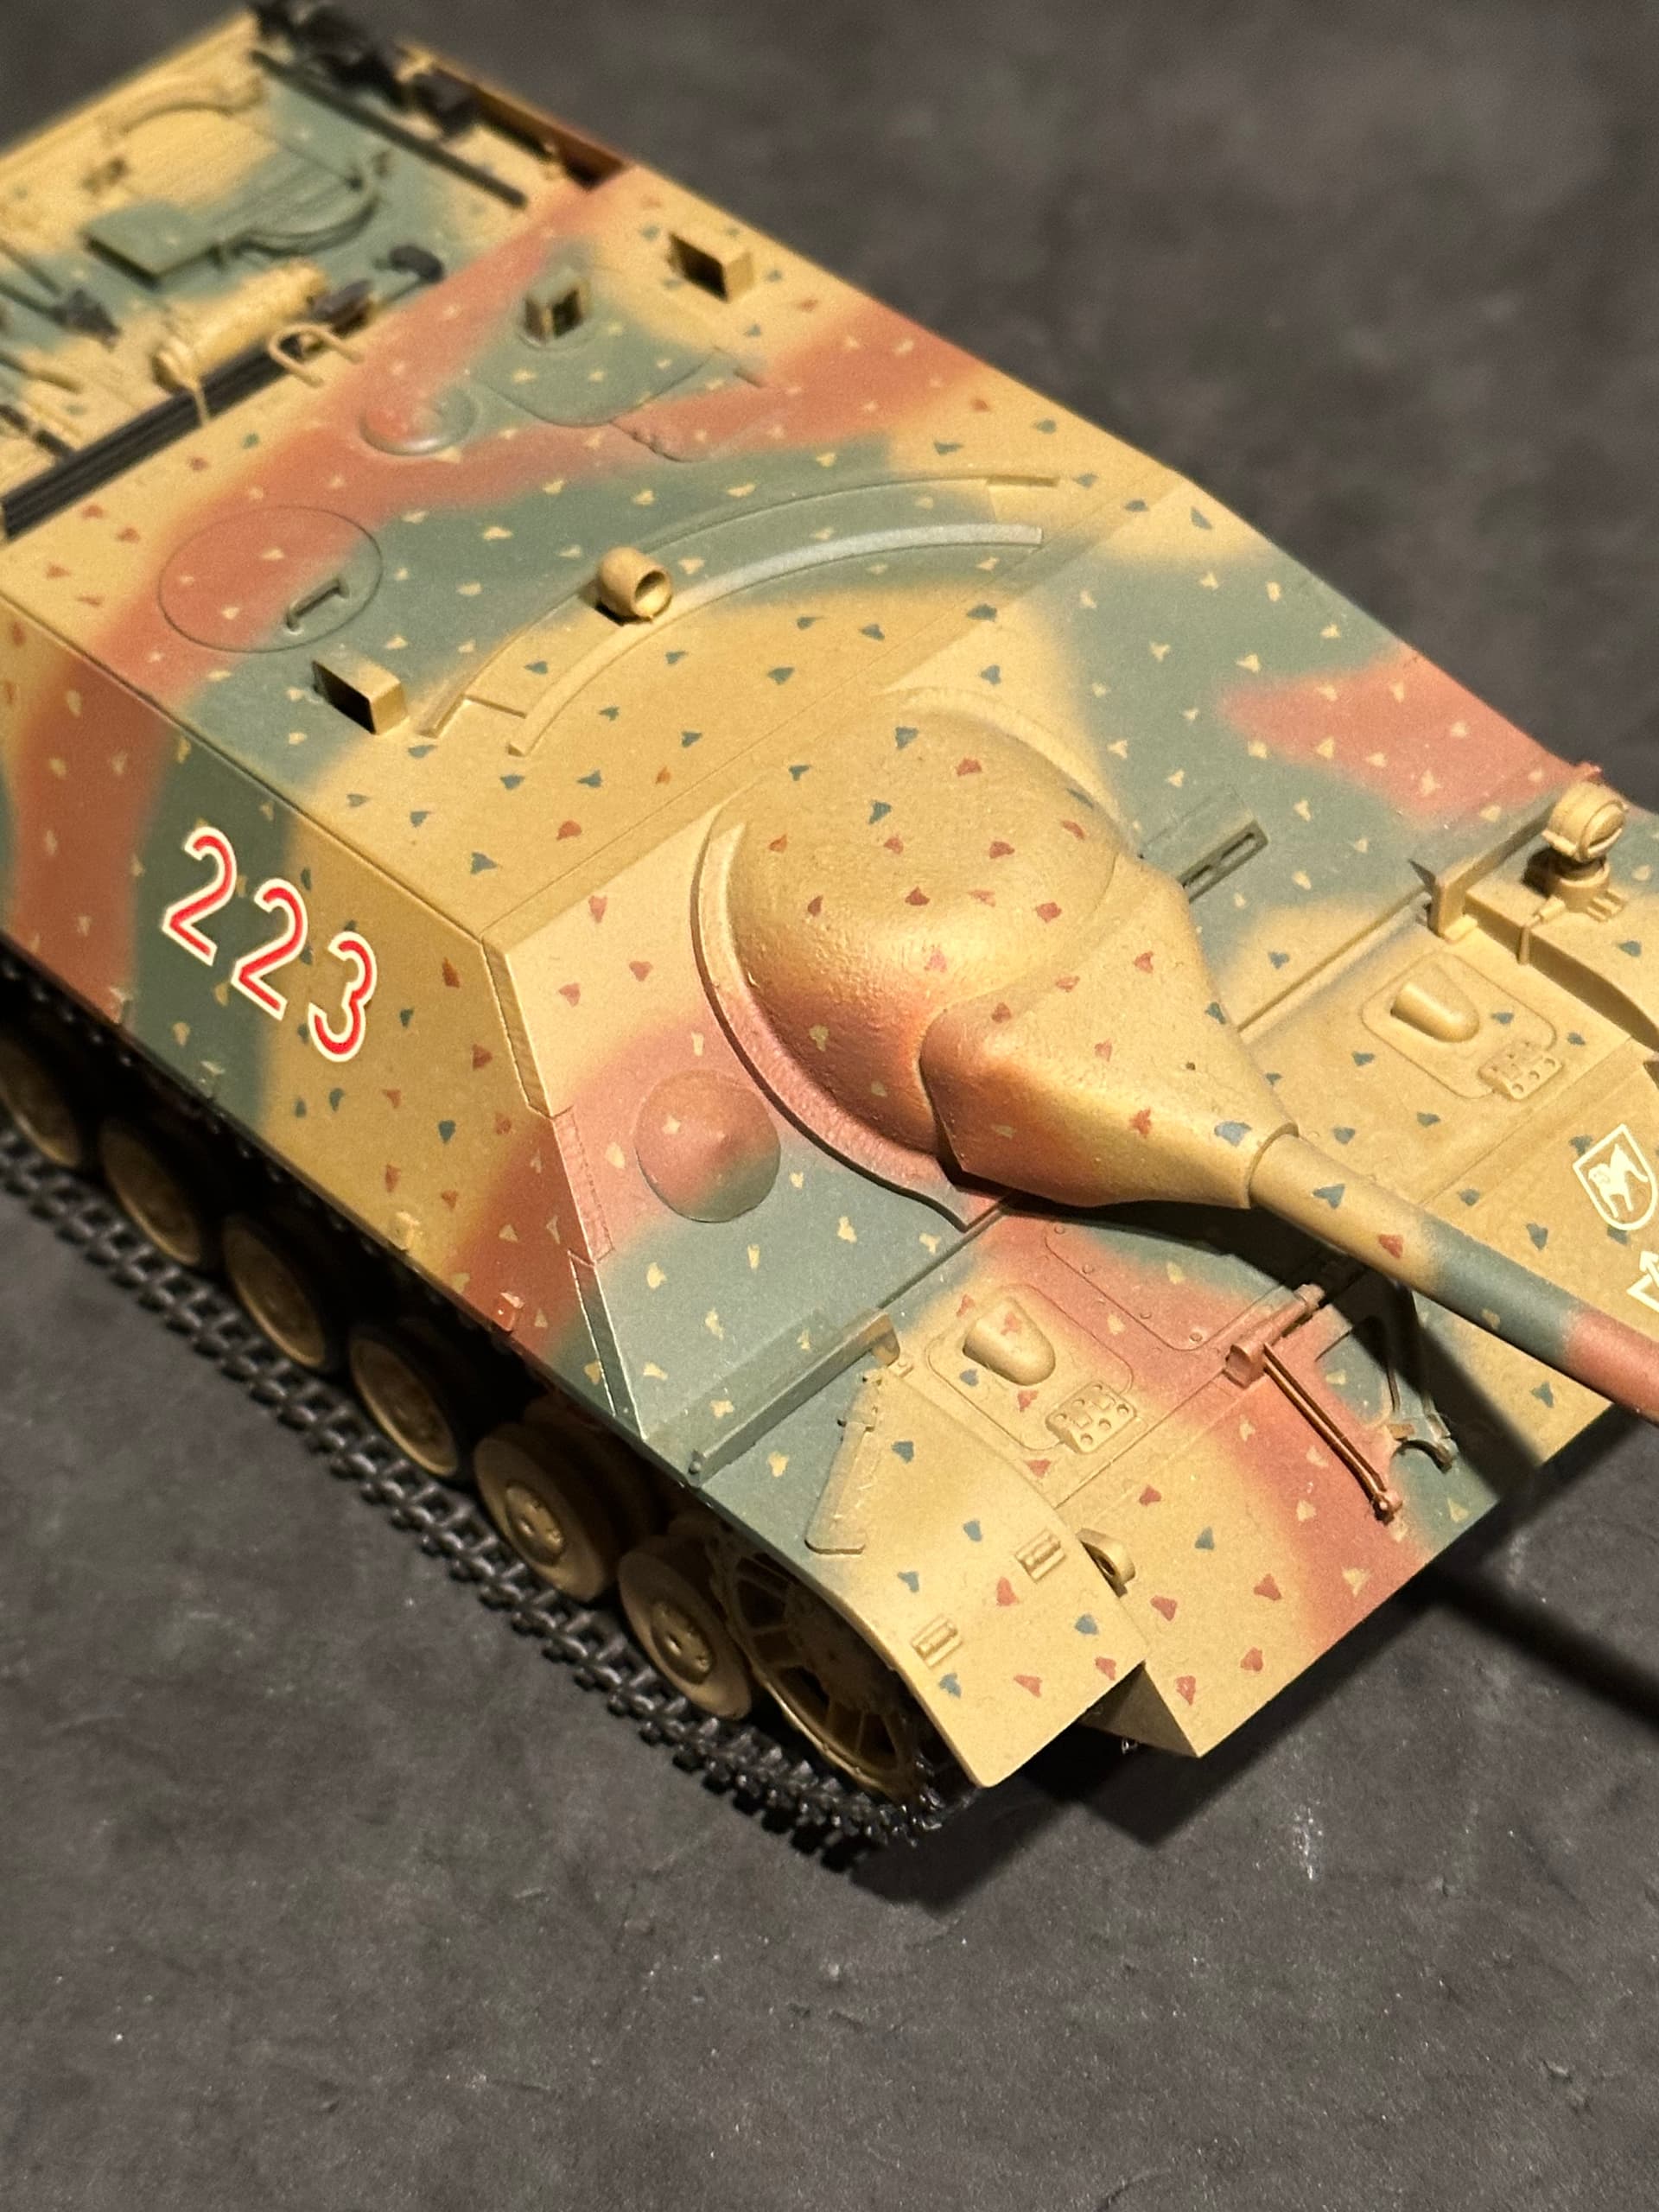
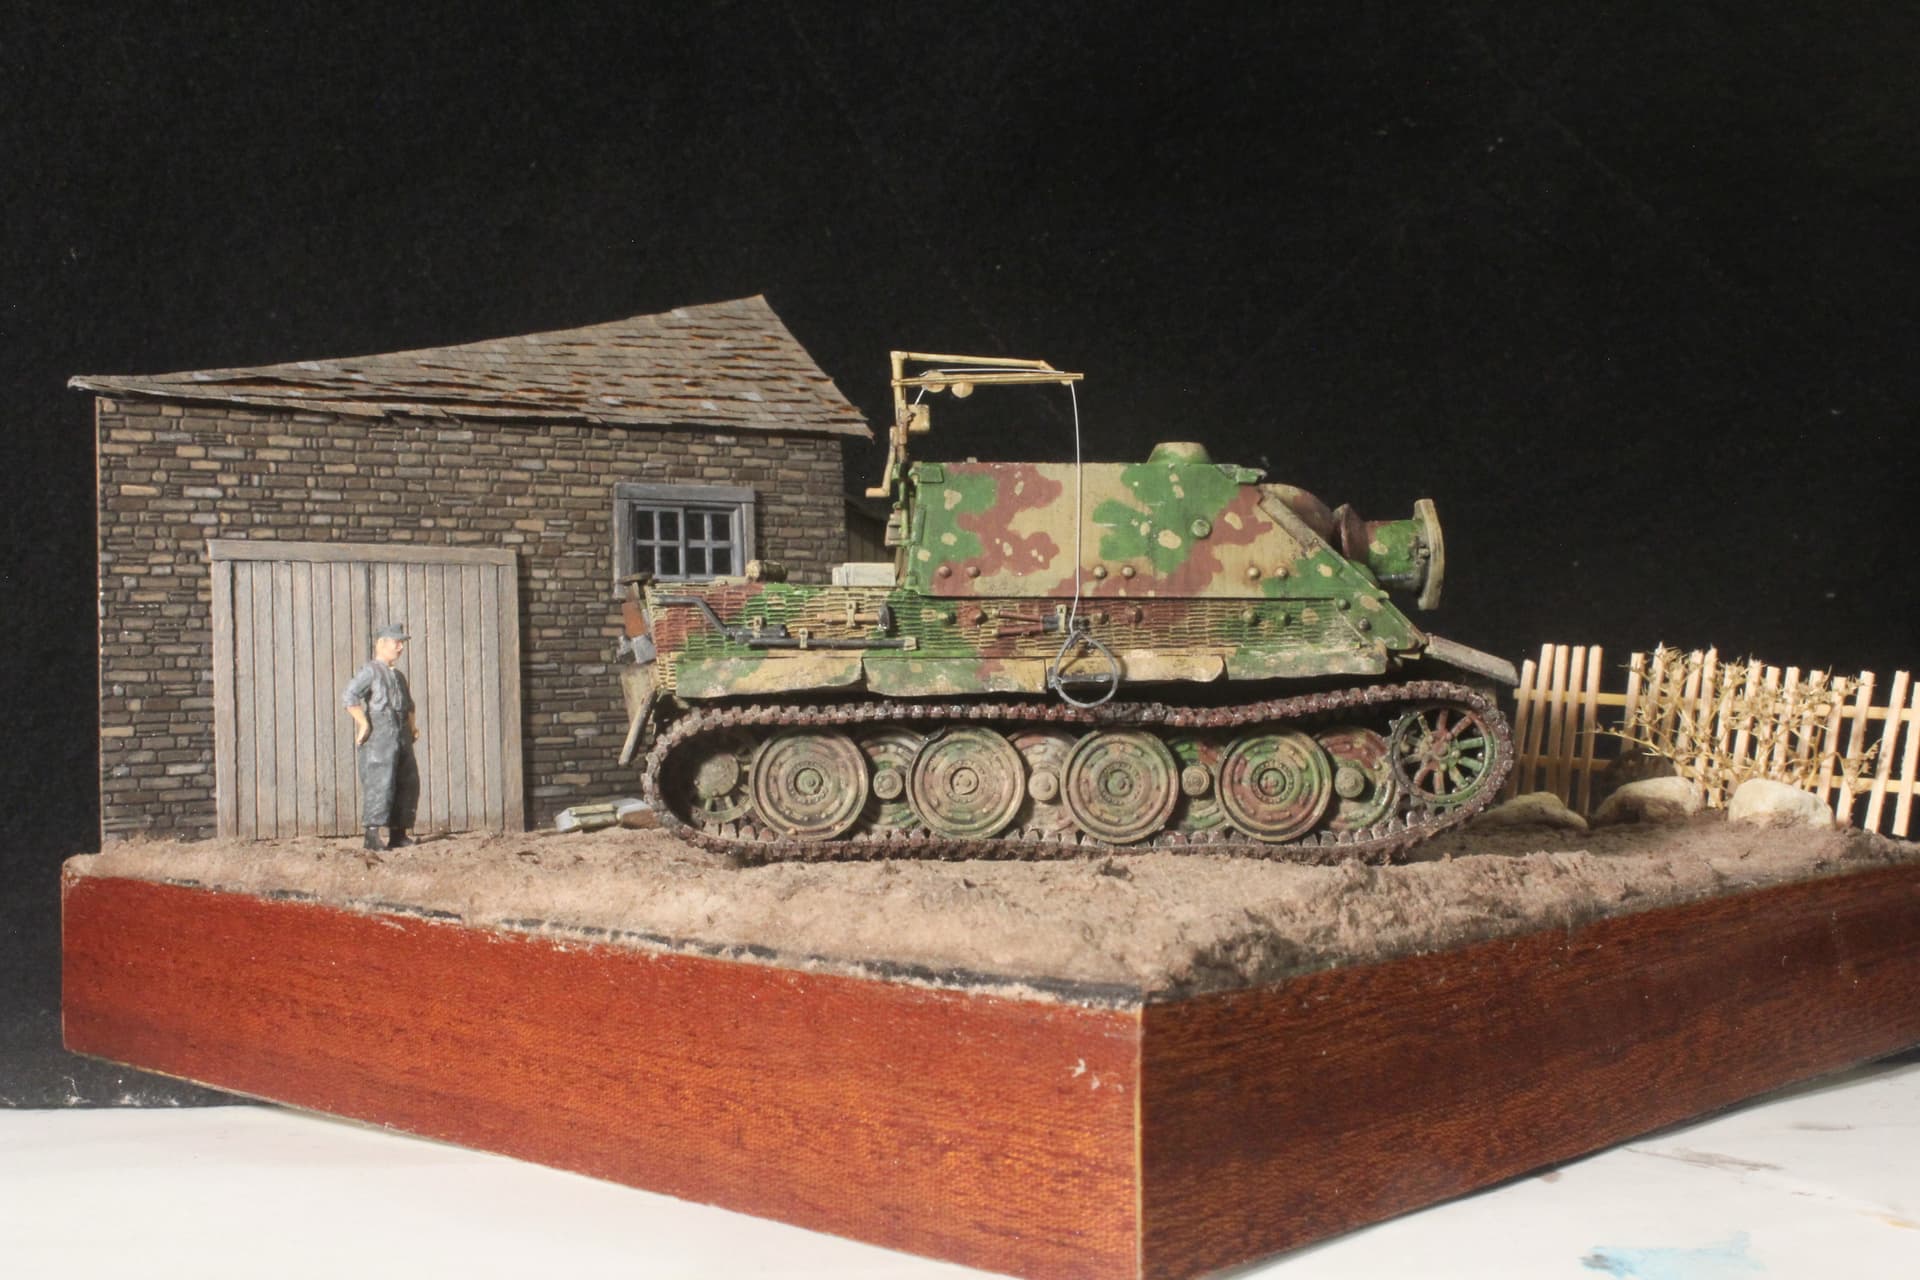
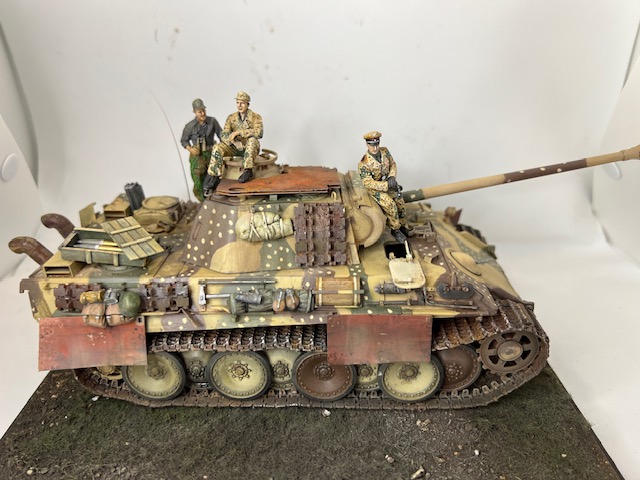
I wanted to be as “accurate” as I could, so I copied what I saw. In this case, little triangle shapes. Dark yellow over the green and red brown, and both darker colors over the dark yellow. I was working from a few black and white photos of course, yet the results look surprisingly similar to the Hetzer near the top of this thread.
Ambush is my nemesis.
I screwed up a really nice Panther build recently by getting brave and trying to brush paint the dots. The build would likely have gone on to be my best work had I left the dots off, was so annoying.
The thought process was that the dots were not a uniform shape and size, and that making a mask for the dots would be a nightmare as the dots would need to go on all sorts of tight spots on the model where it wouldn’t go flush so I’d have all kinds of overspray to deal with. I reasoned that brush painting the dots would be much easier and as long as I thinned the paint enough and did them in two layers, the brush marks would not necessarily be an issue.
The build at that point was super - the camo and highlighting were lovely and it really was shaping up to be something really special.
I did the dots and between that and some really poor crew figures, it killed it stone dead, I was devastated. Such a great and time consuming build as well.
Gutted.
What I learned from this was:
I won’t comment on your uniforms, I can’t do any better myself.
As for the dots in the camo pattern; that’s exactly how the Germans did it, at least for field applied camo, with a brush.
Ken
I did this Sturmtiger. It’s all brush painted, except for the Dunklegelb base coat. There are flaws in the model, but it’s still WIP. Of course, this was pretty easy seeing it’s 1/72.
I’ve only done a handful of Ambush schemes, and I either do airbrush base camo with hand painted specks, or all hand brushed for a hard edge look.
I believe some of the ‘dots’ were applied with paint pads so they could quickly dip them in the cans and stick it against the vehicle and be relatively uniform. Pretty sure the schemes where they did little triangles instead of spots were done that way.
So…perhaps make a little paint pad about the size and shape of ‘dot’ you wish to make and use that to do them quickly and evenly. I think if you thin the paint appropriately you can even get that softer edge you want.
I figured the triangles (which is the route I chose) were done by putting the edge of a wide brush against the vehicle and rotating one end while the other remained stationary.
There have also been examples of markings that resemble the hourglass shape on black widows - I think they could have been made in a similar fashion. Put a loaded brush edge wise on the surface, give it a twist. Only this time use the center of the edge as the pivot point, while the two ends of the edge decribe an arc.
Whatever the shape - disc, triangle, hourglass - I have serious doubts that most crews would take the time to make a mask to make every shape uniform. Except for the most OCD, it simply wouldn’t have mattered that much to them. In fact, in most cases I’d say the models you see have far prettier paint jobs than those tanks they’re trying to represent.
I’m guilty of it. I know how sloppy the invasion stripes were on C-47’s, and yet I strive, and will continue to strive to make them as straight and uniform as possible.
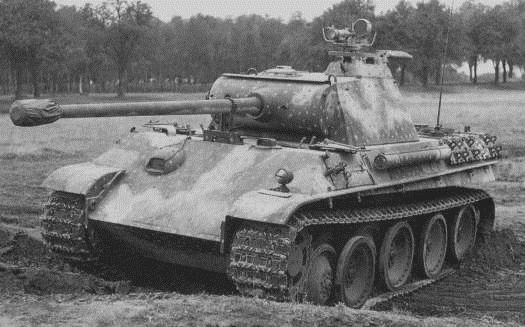
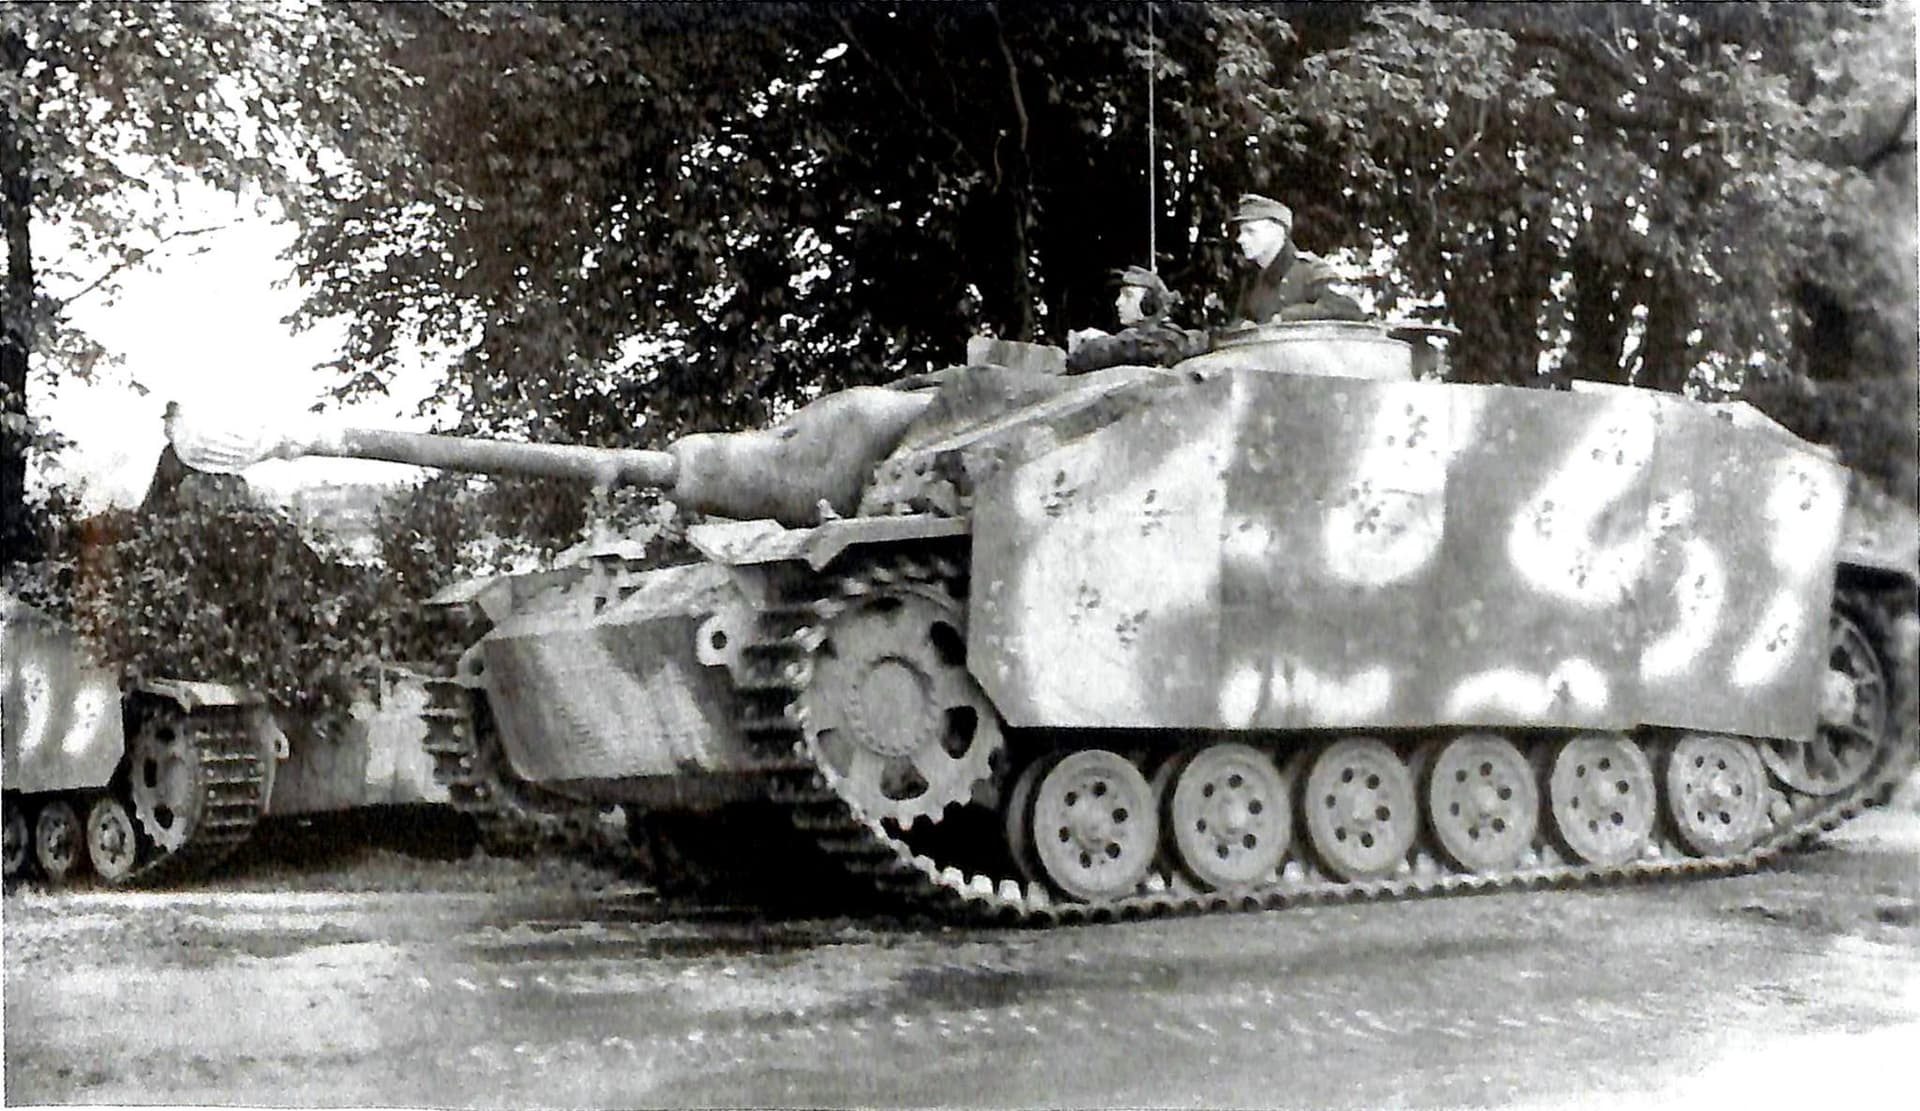
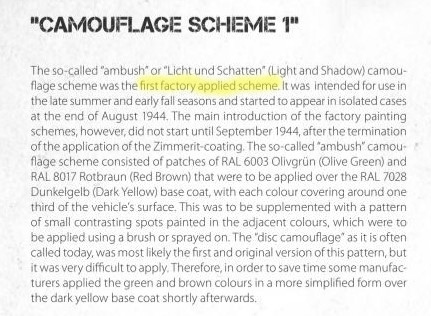
Ambush camo of the type in question (Hinterhalt-Tarnung) was typically applied at the factory. Daimler-Benz used the spots, which were sprayed on using masks after the tri-color scheme was applied.
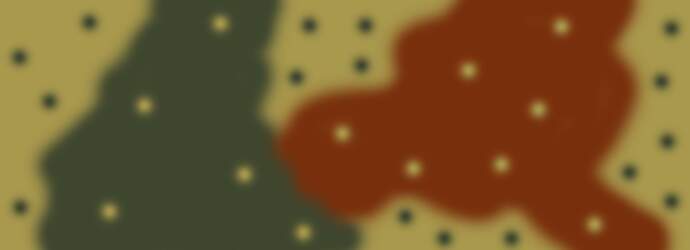
MAN and MNH used stencils to create the ‘overlapping circle’ version you see on Hetzers a lot, plus a few others.
Also, Hinterhalt-Tarnung as a factory application was in use primarily from mid-August to October of 1944. Then they went back to the simple tri-color. To be fair, ambush is more of a ‘Fall’ camo in my opinion so would have been useless in the coming winter months anyway.
why so hard on yourself ? That’s a great build! think about it: much of the camo was applied in the field with paint brush dots. unless someone can point a source .
bravo! 18!
Germany’s Tiger Tanks VK45.02 to Tiger II, Thomas Jentz and Hilary Doyle, ISBN: 0-7643-0224-8, page 138.
Real Colors of WWII, page 70
Please quote your references.
Wow, nice. I thought that was 1/35!
The whole “Ambush Pattern” (ABP) is a very murky topic starting around Sept. 1944.
You have Panthers with Zimmerit and ABP applied at the factory showing up with the PzBrig. 111 in Lorraine / France.
Zimmerit was then dropped and the various Panther producers developed their own ABP, including the “Disc” variant, which they startet to apply till around early Nov. 1944. The Disc pattern was applied to maybe 25- 30 max. tanks many to be found with SS -Pz. Regiments in the Ardenne offensive. A few Panters even had hulls with Zimmerit their turrets didn’t in ABP.
Strangely the “Steel-Wheel” Panther variants didn’t sport the ABP although produced around the same time.
A retrofit field application of the ABP with Panthers seems quite unlikely.
Henschel begann applying the ABP to their KT around the same time and continued to do so till the end in March 1945. They had developed 4-5 standardised schemes they applied with a gradual decrease of the “Dot” density which can be observed from Oct. 1944 onwards.
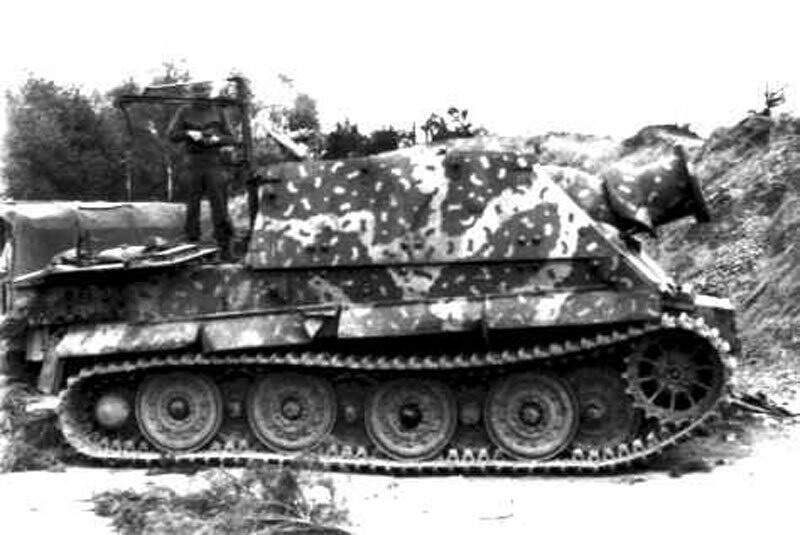
Other vehicles with the ABP would be the PzHbz. 38t GRILLE, JgPz 38t, and IV L70 & V70A, Sturm Pz. IV,. The application of the ABP on some Pz.IV. also seemed to be extended past Nov. 1944.
These mentioned vehicle had a wide variation of schemes, some with larger sprayed “DOTS” and “Splinter - Typ” inlays.
Panther and KT producers took a more scientific / standardised approach and are fairly well documented.
The rest seems to be a more individual interpretation within the various producers.
Here you would have to choose a specific vehicle to replicate.
To date I couldn’t find any documents / orders indicating to field apply the ABP to already fielded vehicles.
Hope this helps
Cheers
Christopher
I’ve been toying with the idea of using a pencil that has an eraser on the end. Trim the eraser nice and flat with a sharp blade, and use it like a rubber stamp. I’ve never got around to actually doing it as most of my builds are 1/72, or 1/700 ships. I’ve also successfully used sticky dots (stationary supplies) as painting masks. Each dot has to applied individually so they are time consuming. This also only works in 1/35.
![]()
![]()
Have been tackling this topic myself recently …