Joseph,
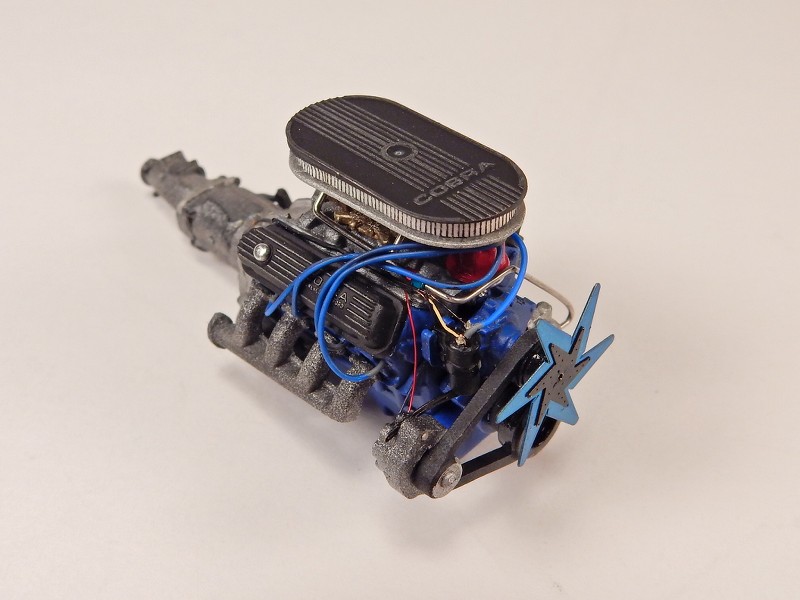
The Ford V8 looks really great. Back in the days when i use to build just AMT and MPC kits, the “floating” Alternator always annoyed me, but I never did anything about it. Your fix looks amazing.
joel
Joseph,
The Ford V8 looks really great. Back in the days when i use to build just AMT and MPC kits, the “floating” Alternator always annoyed me, but I never did anything about it. Your fix looks amazing.
joel
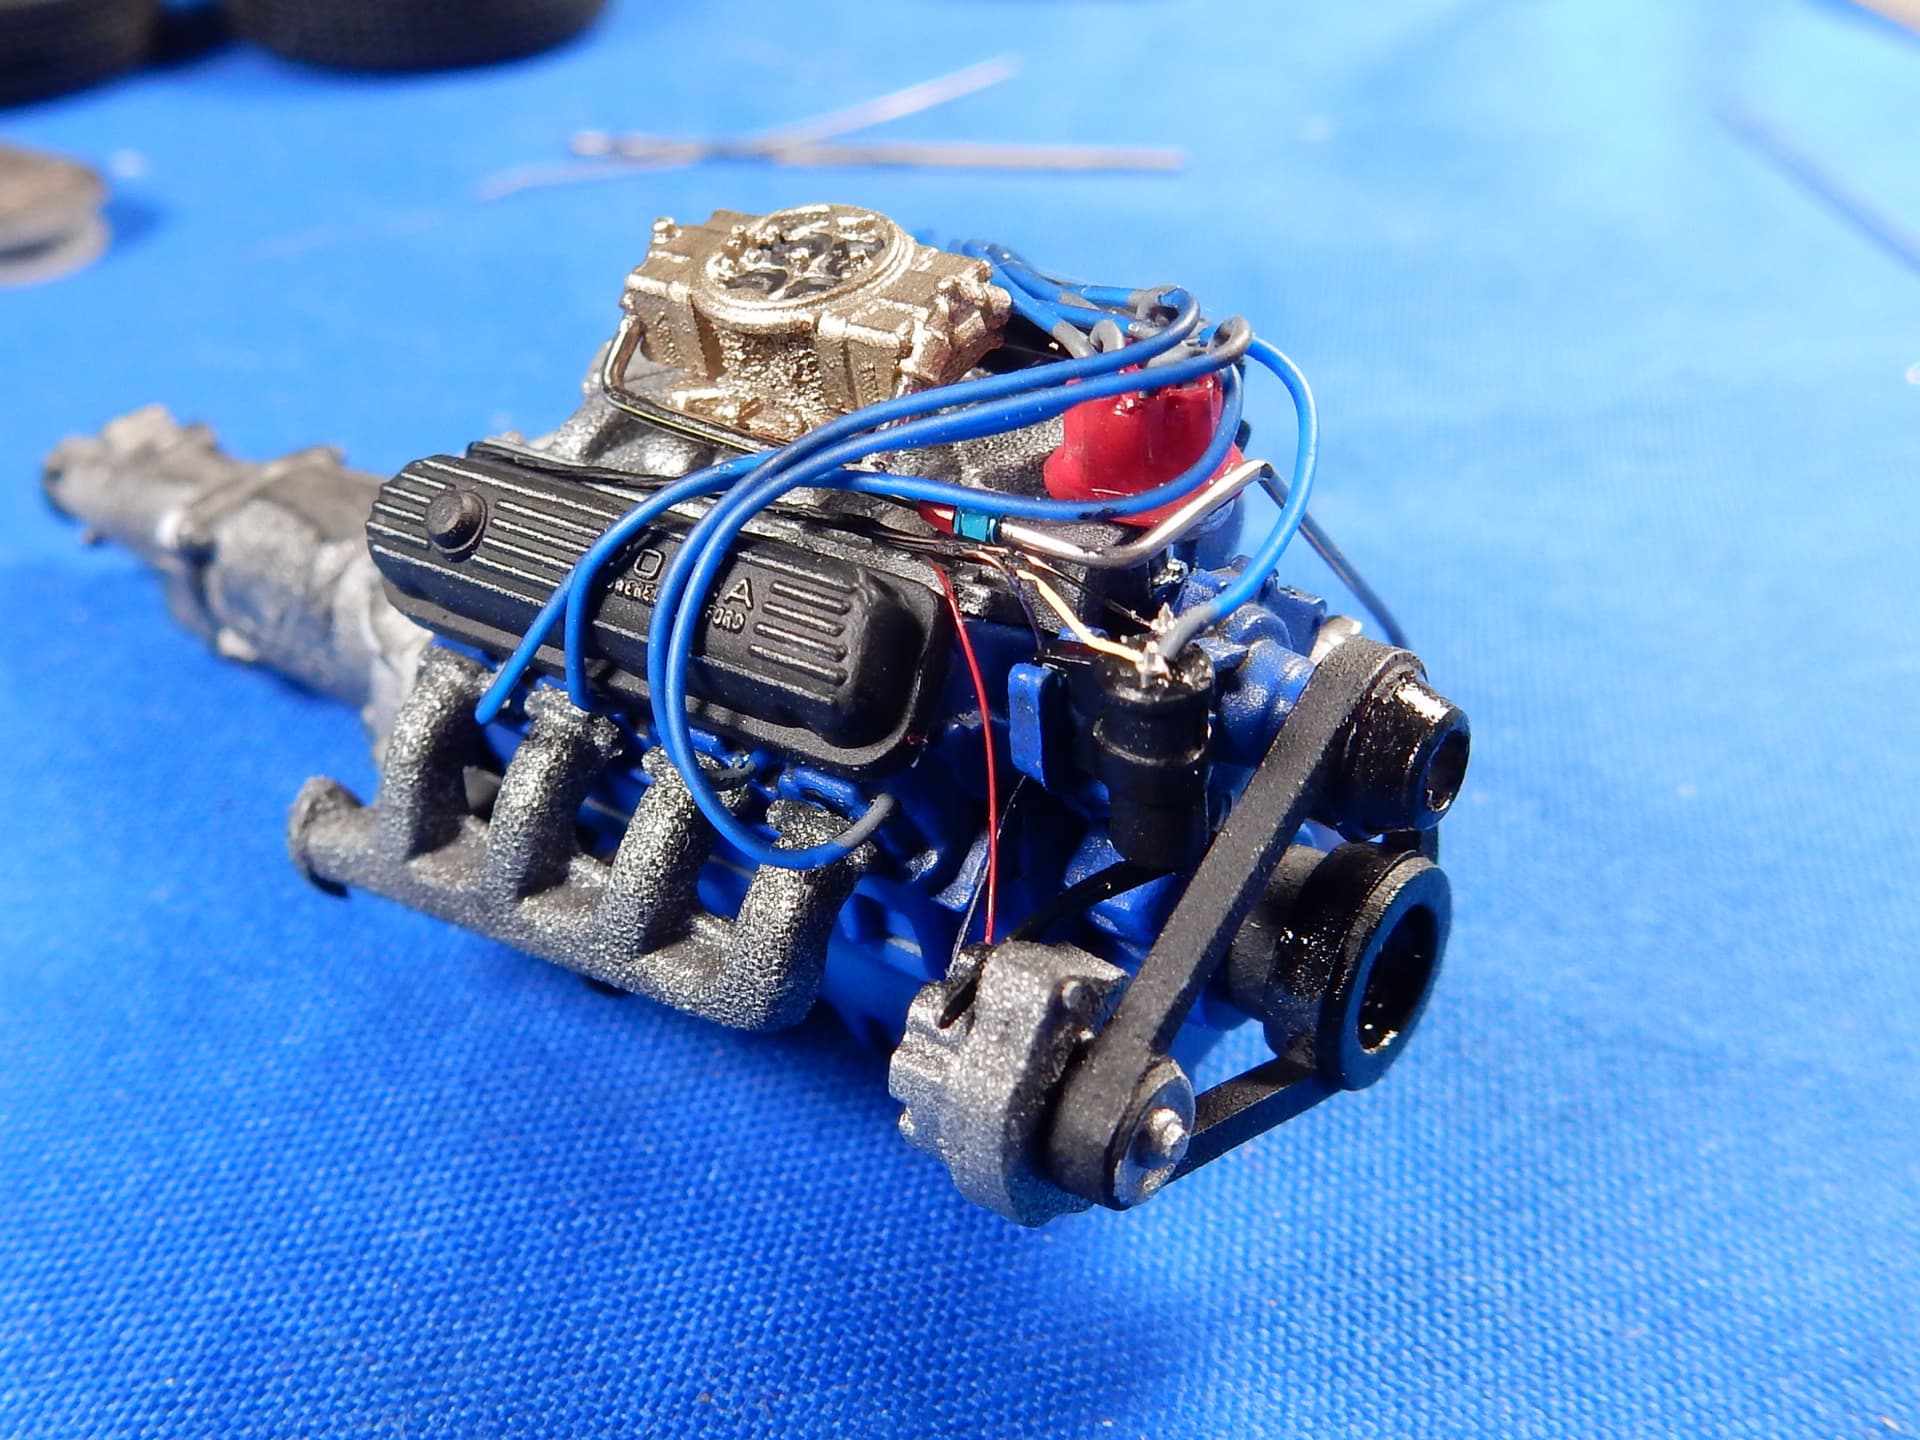
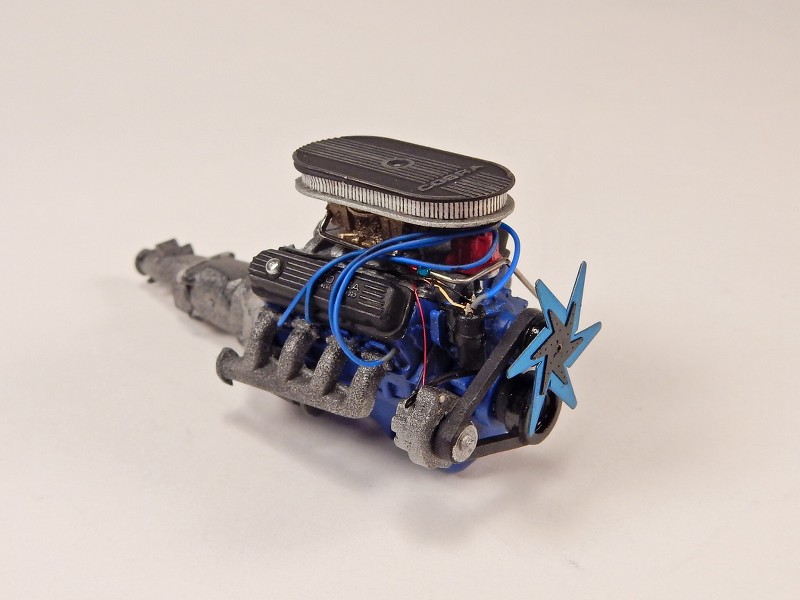
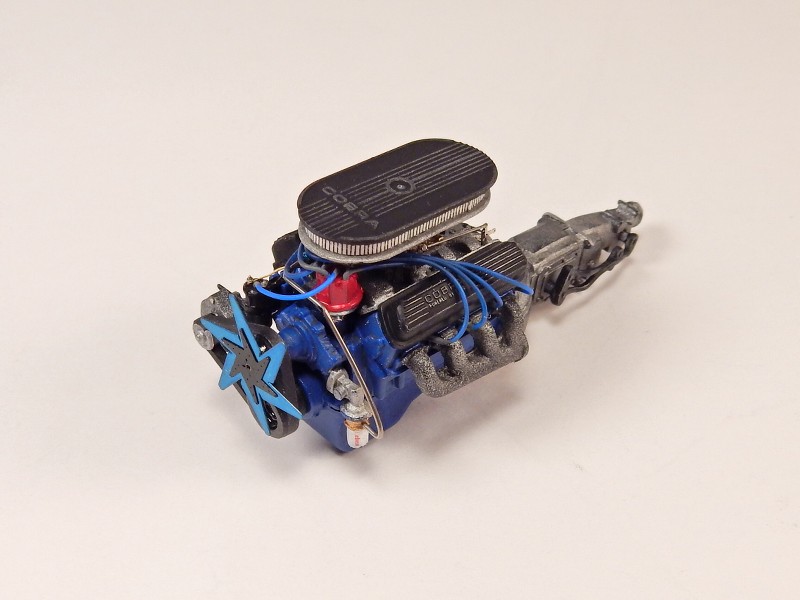
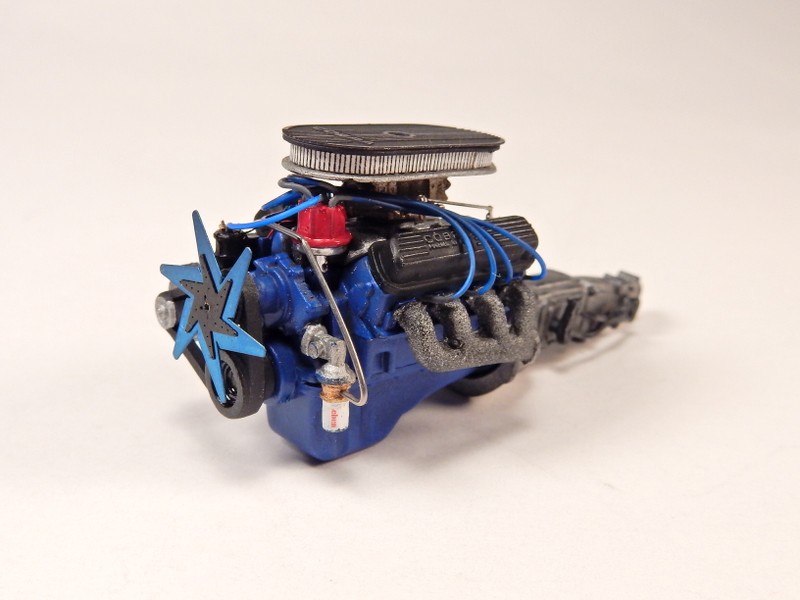
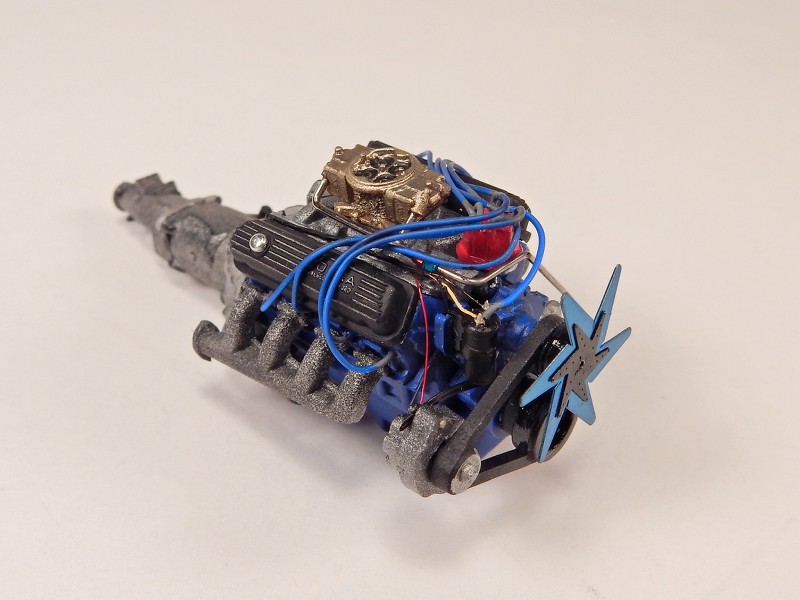
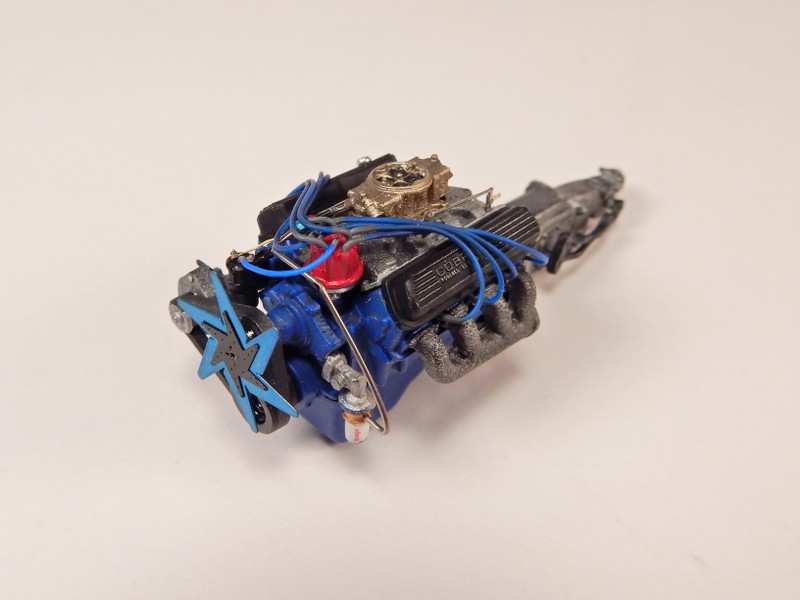
Thanks you guys. The one thing that I really don’t like at this point is the belt but there’ll be enough things around the engine once she’s dropped in the engine bay that’ll hopefully distract from that. I managed to get some extra bench time in last night. It’s always nice to find surprise available time to work on modeling as I get that much further ahead on the build.
Got the engine electrical wiring installed…
Finished the engine up this morning aside from a wingnut that I have to fabricate and put on the air cleaner.
Glamour shots before she gets tucked away till a later part of the build.
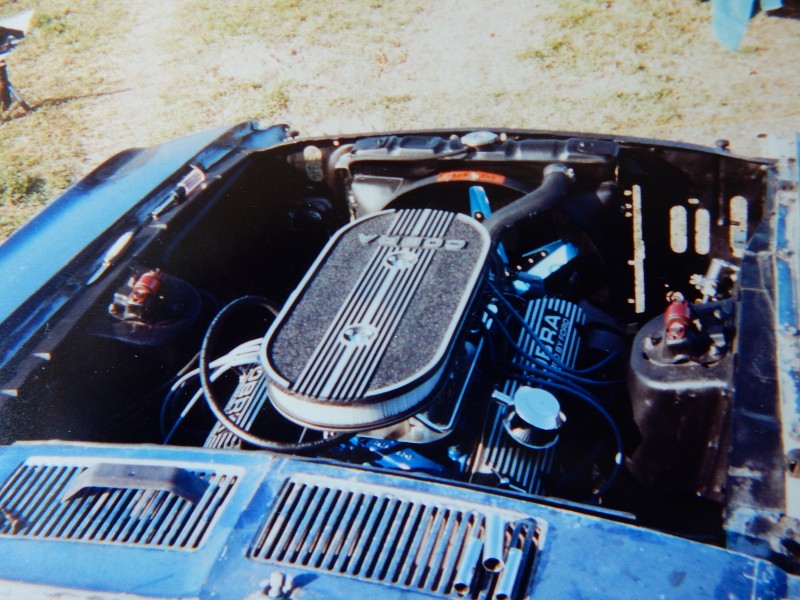
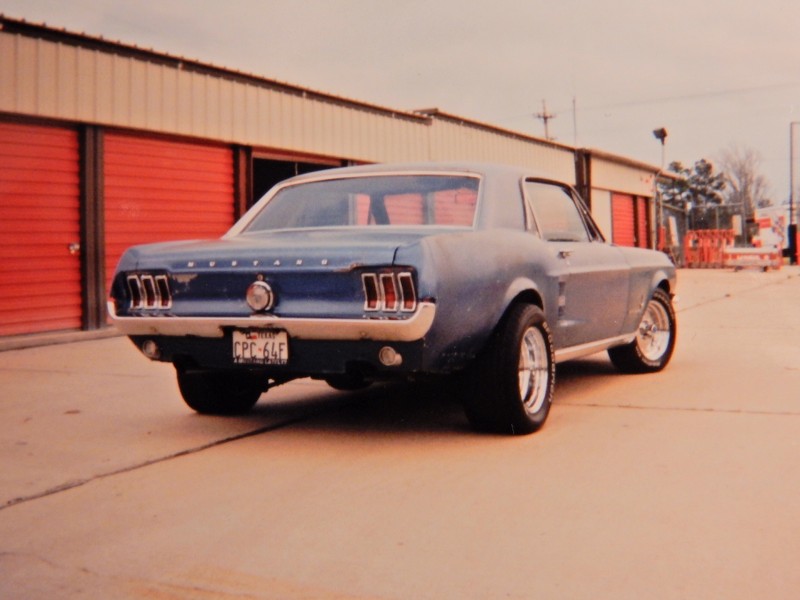
It’s pretty close to my original 351W that I had waaay back when:

Very nice!
Cheers, D
Beautiful engine. Great detailing.
Thanks you guys. Really appreciate the comments.
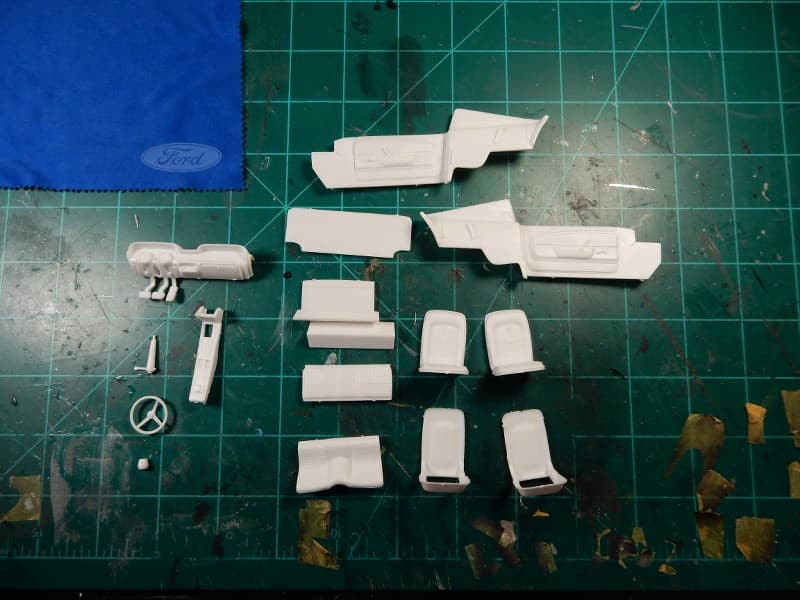
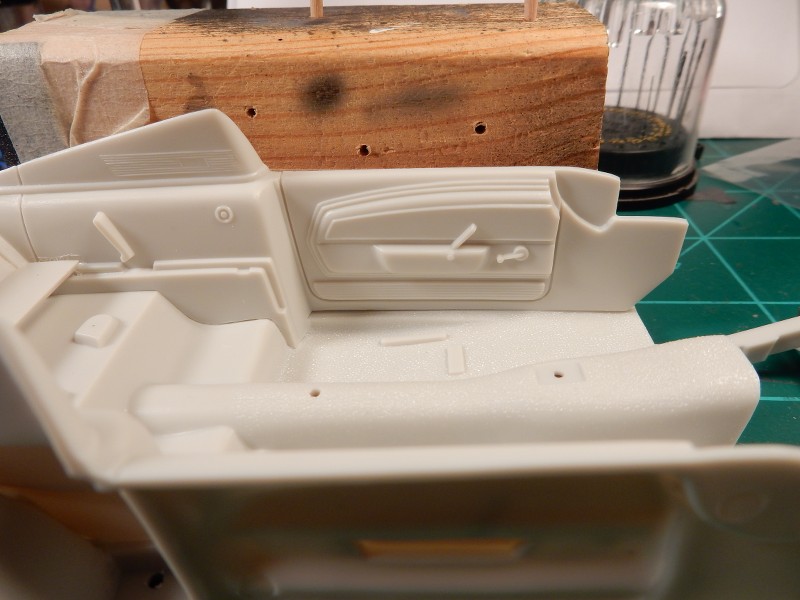
Moving on to the interior now. This is going to equally as fun as the engine was and there’ll be a few changes in here as well.
This build is very near and dear to me. Never got my fastback that I wanted in real life so for the time being this one’s gonna have to do. lol
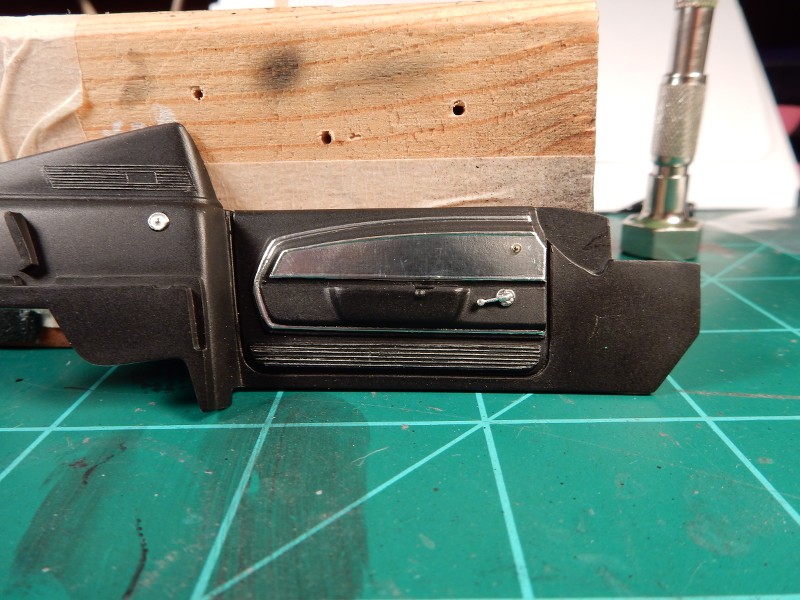
Started with the OOB panel. Got it adhered onto the chassis of my GT-350 mock up car here just to show what we’re starting with.
After 2 attempts at applying the BMF to the brushed aluminum strip on the door and fouling it up right around the door handle area…I decided to just remove the dang handle altogether and order metal ones from Ted’s Modeling Marketplace. I also cut the pocket out of the armrest for the door handle.
There…that worked out ALOT better for me in terms of getting the aluminum panel to look right.
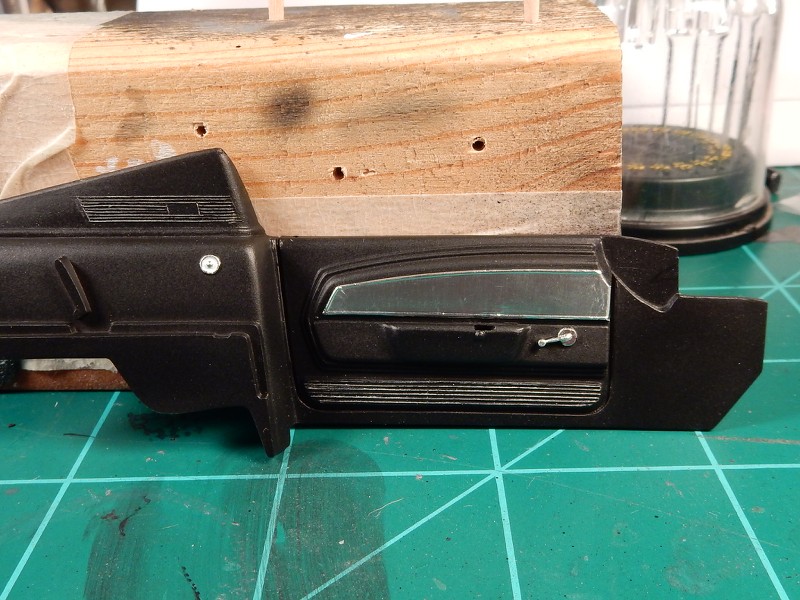
and then with the chrome strip BMF applied around the door panel insert.
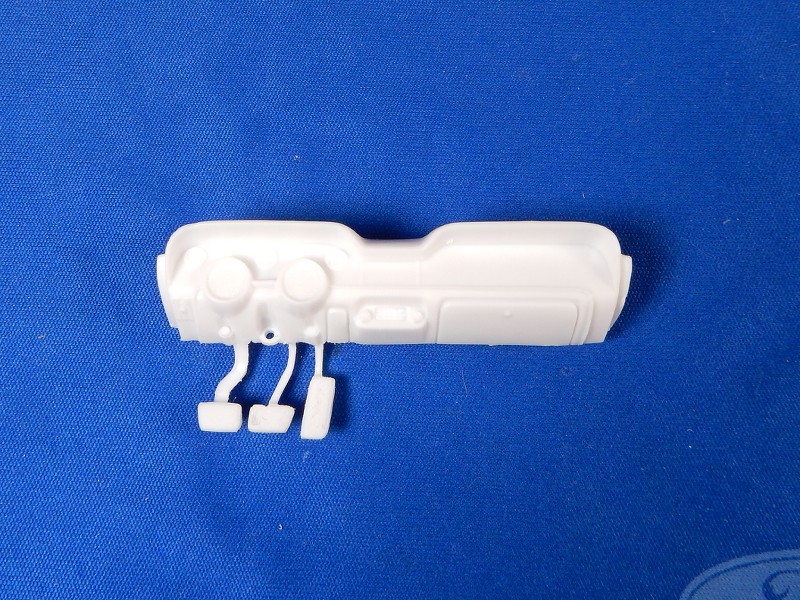
I had to do something about the swing pedal levers because these are what?? A scale 2 inches wide??? Crazy!!!
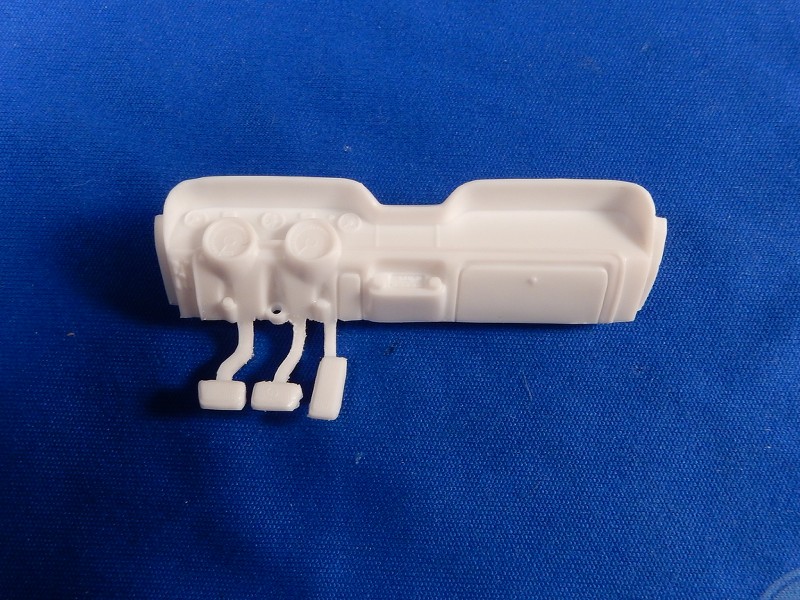
I usually cut the pedals from the levers and use needles swung from the rear of the IP and adhere the pedals to the “levers” like on my Maverick build:
But I decided to thin these instead because they are already molded onto the dash and the Maverick had them molded onto the floor. The accelerator and brake levers here have been thinned and the clutch pedal lever is still OOB to show the difference:
Door panels look great. The thinning, of the pedal levers made a big difference.
Thanks potna!! 
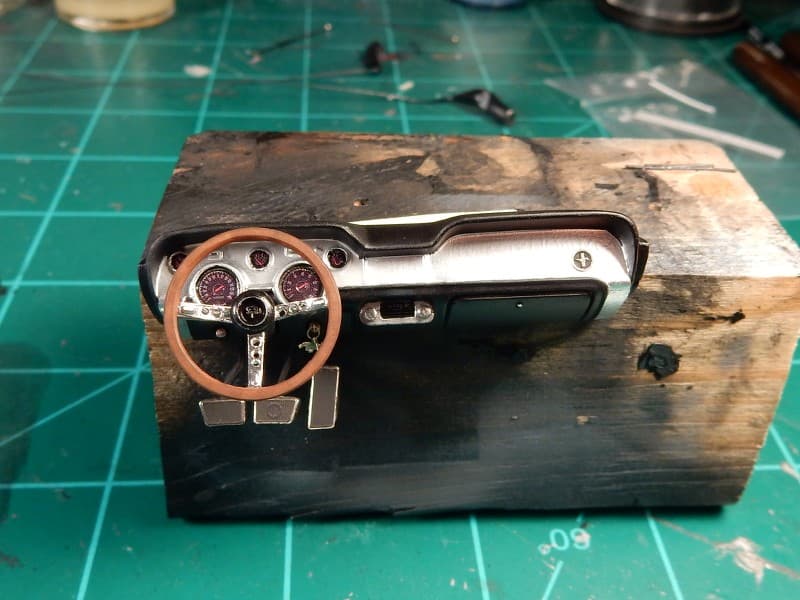
Moving on to what is normally my favorite part of the interior…the dash. Again…this one presents very difficult obstacles. How to BMF that bad boy and NOT get any wrinkles.
Y’all…I’m really looking forward to the seats on this one. Deluxe dash panel inserts look like this:
And again…BMF ing this was dang near impossible. I tried chrome silver paint which looked good initially and then over time it did some weird stuff. Set up wrong or something. Anyway it looked like hammered dog crap!!!
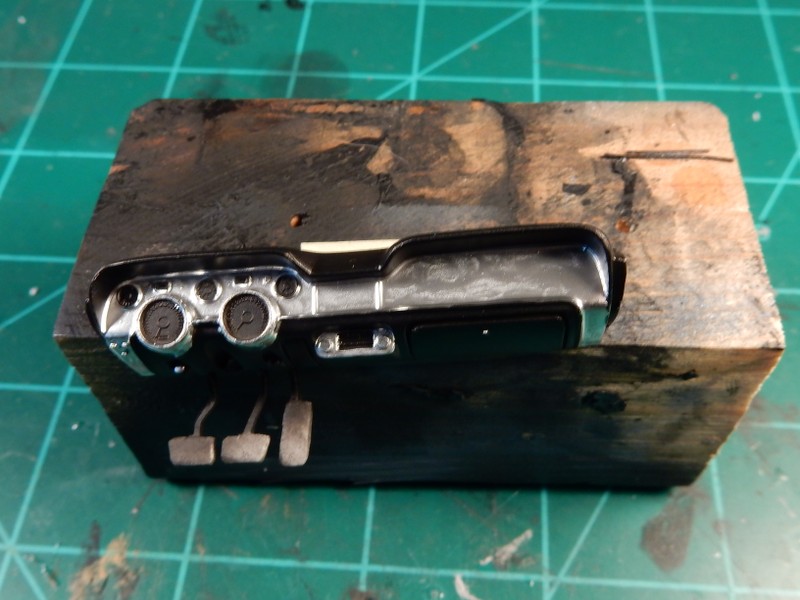
This is where drastic measures are called for. Some may call me crazy for this but hey…ya gotta do what you’ve gotta do in modeling. I had a spare dash sooooooo. I cut it in half and cut the dash pad/ cover off of it to gain easy access to the outline of the passengers side of the dash for being able to cut a template out of BMF in which to place a perfectly cut BMF piece on that side.
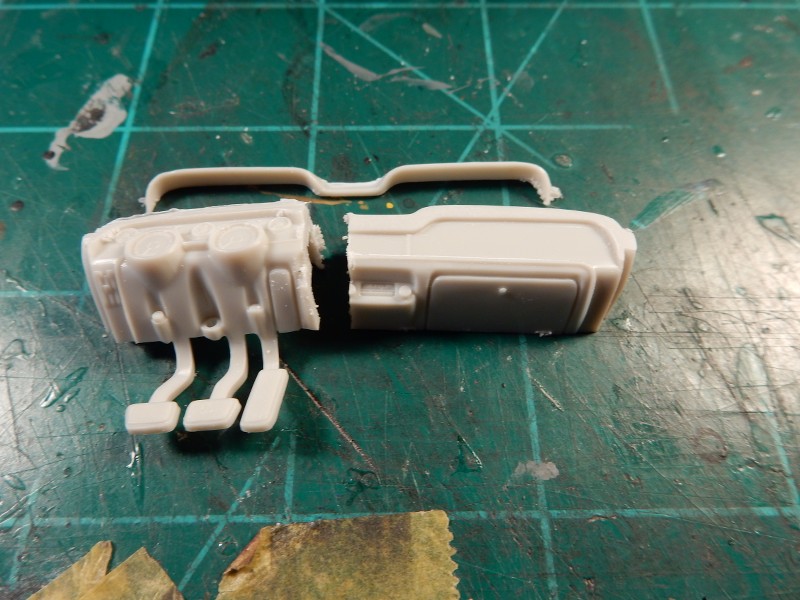
After creating an outline onto the BMF I cut it out to the exact shape and laid 'er into place. Not perfect…but I can live with this alot better than that other job.
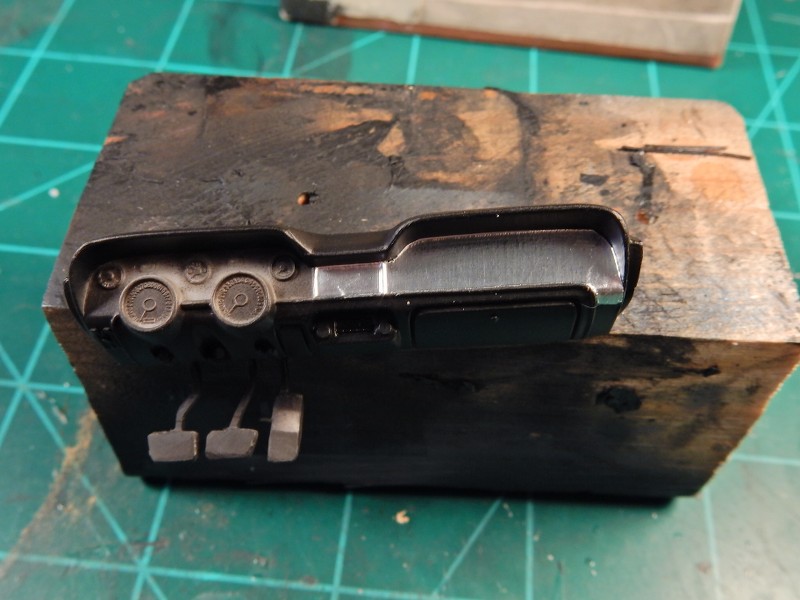
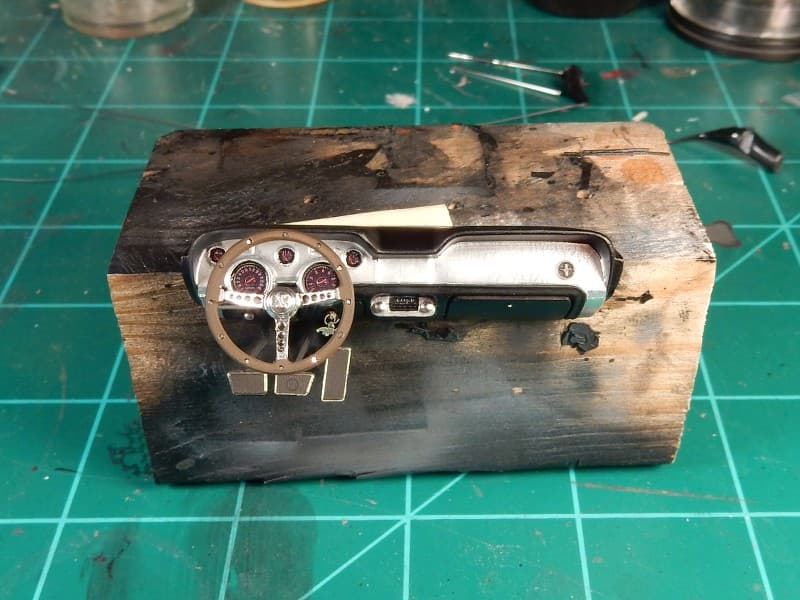
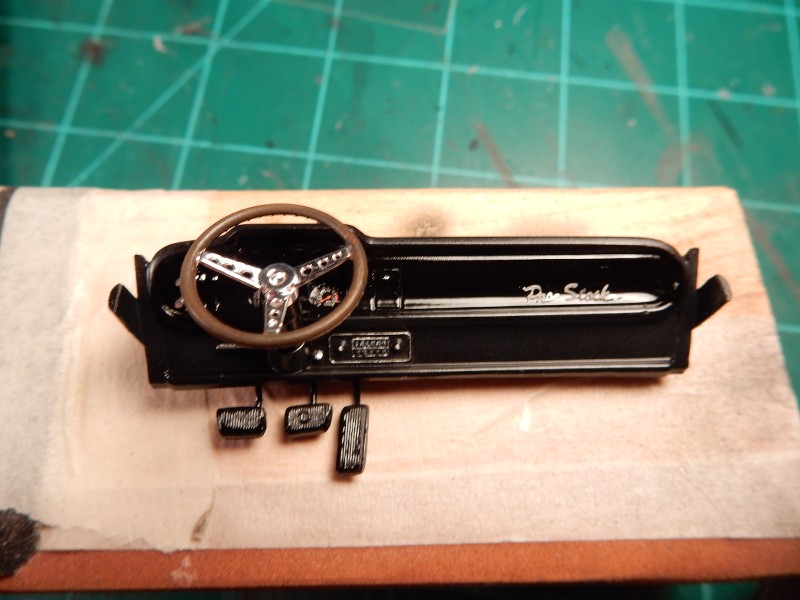
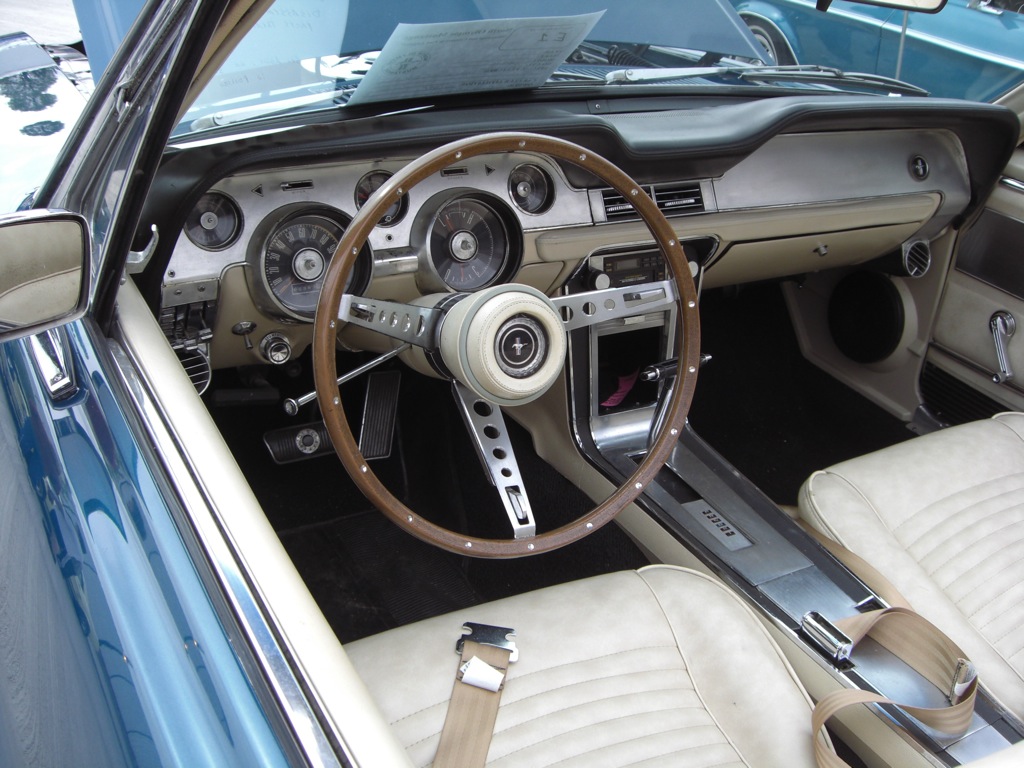
I ended up going over the left side of the dash with Molotow chrome and because of its flow properties it made its way into the nooks and crannys of the gauge clusters corners. After the Molotow had dried I shot a uniform coat of MM Acrylic Flat Coat over both sides of the dash trim bringing everything to a uniform finish. I then applied the Mustang medallion to the left side of the dash. Then the decals for the instruments went on and I painted the radio up, applied the chrome to the radio and light switch knobs. Ignition cylinder bezel went on and I inserted the keys into the ignition switch. PE pedal faces went onto the pedals and I picked out the chrome trim around the pedals.
I’m mostly content with this dash despite the difficulties presented with it but…I’ve had better.
Looks pretty fine from where I’m sitting Joseph! Definitely worth taking the extra effort to get it to a point where you’re happy with it.
Cheers, D
Great looking dash Joseph.
Love the brushed alu, on the deluxe interior. Not available, in '66, but can be bought as an after market package. The dash, in my '66 Mustang is black on black, with some chrome trim. I’m seriously considering buying the alu. inserts. I’m sure it will look dashing 
Thanks you guys.
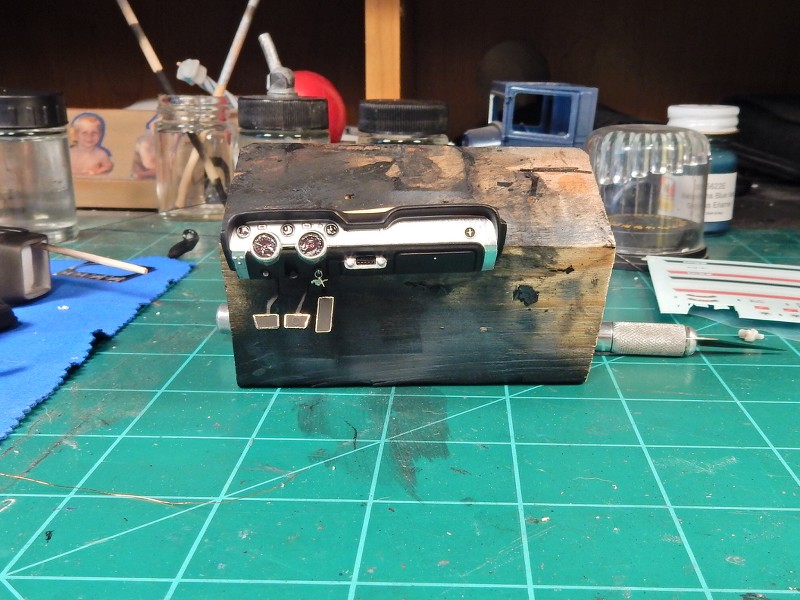
I made an attempt at a wood grain steering wheel a few days ago and just wasn’t happy with it. Just looked all plain Jane and all. Plus I had used the stock Mustang steering wheel with that big ol’ bonker pad on there and I never could stand that thing in my car so I replaced it on the real car with a woodgrain wheel with a normal horn button. Aaaaaaaaaaaaaaand I did the same thing here too.
First attempt:
I knew this was going to be alot of work so I stayed up late last night laying the groundwork for the steering column and wheel completion today. I woke up this morning and managed to get this to a point to where I’m going to be okay with it.
I used some scale PE rivets that I have from the Model Car Garage that I inserted into each one of the cavities once I had everything painted up.
Take II…which I am MUCH happier with.
Take II looks amazing.
Joseph,
The wheel looks so much better with the rivets added.
joel
Whats your address again? I have a few dashes…
Thanks you guys. Been out for a few days now. Just haven’t been feeling all that well. Should be back in the swing of things pretty soon though. Really appreciate the comments fellas.
Joseph,
So glad you’re feeling better by the day. Getting sick sucks for sure.
joel
Thanks Joel. Been a few weeks of this crap but getting better now.
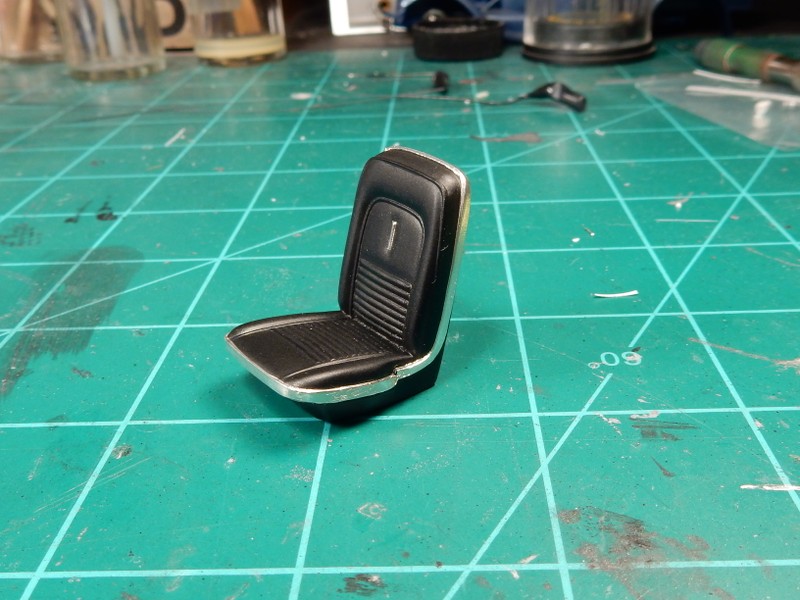
Been working on and off on the console, seats and seat belts guys. I finally have some pics worth showing.
Still have the back seat, front floor mats and shifter to go…

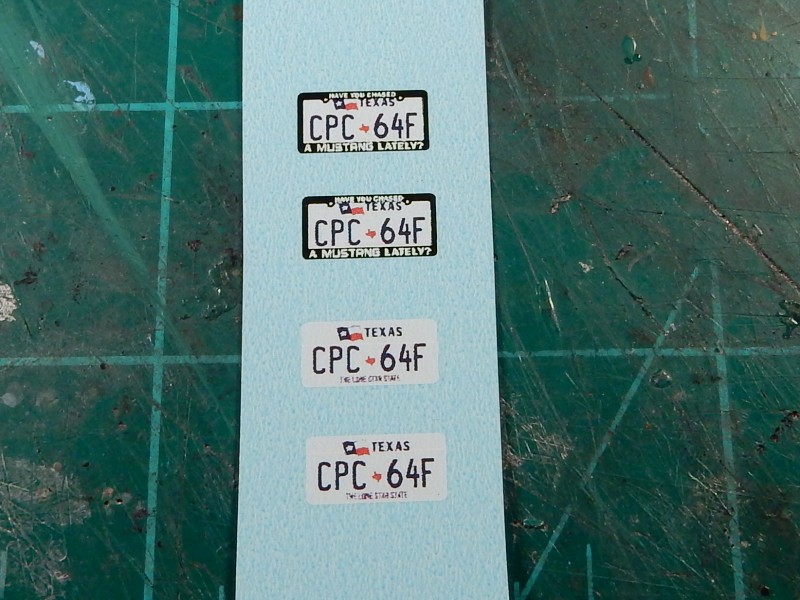
and THEN…I got my license plates in the mail today…juuuuuust like the one’s on my old car…
Even got the “Have you chased a Mustang lately” tag frame on it.
Joseph,
that seat looks fantastic. Love the chrome molding as my Mustang seats had them too but not my MGB.
The floor is really very well textured. I don’t recall ever seeing that before.
As for the license plates, you’d be hard pressed to tell them apart from the real ones. BTW, nice license plate frames.
joel