Your Mustang is really coming along nicely. I like the undercarriage and the engine wiring details.
Jim
Your Mustang is really coming along nicely. I like the undercarriage and the engine wiring details.
Jim
Thanks fellas!! This morning I finally got the PE grille and the fog light system put into place. Have to touch up the fog light chrome but will wait until I’ve got everything on the car so I don’t risk messing the touch ups up with excessive handling.
Joseph,
Wow!! That PE grill and those Fog lights really look the part. You’re taking this build to a whole new level for sure.
joel
I agree with Joel. ![]()
That PE grill makes a huge difference. Great job.
Thanks Joel, Ryan and Jesper.
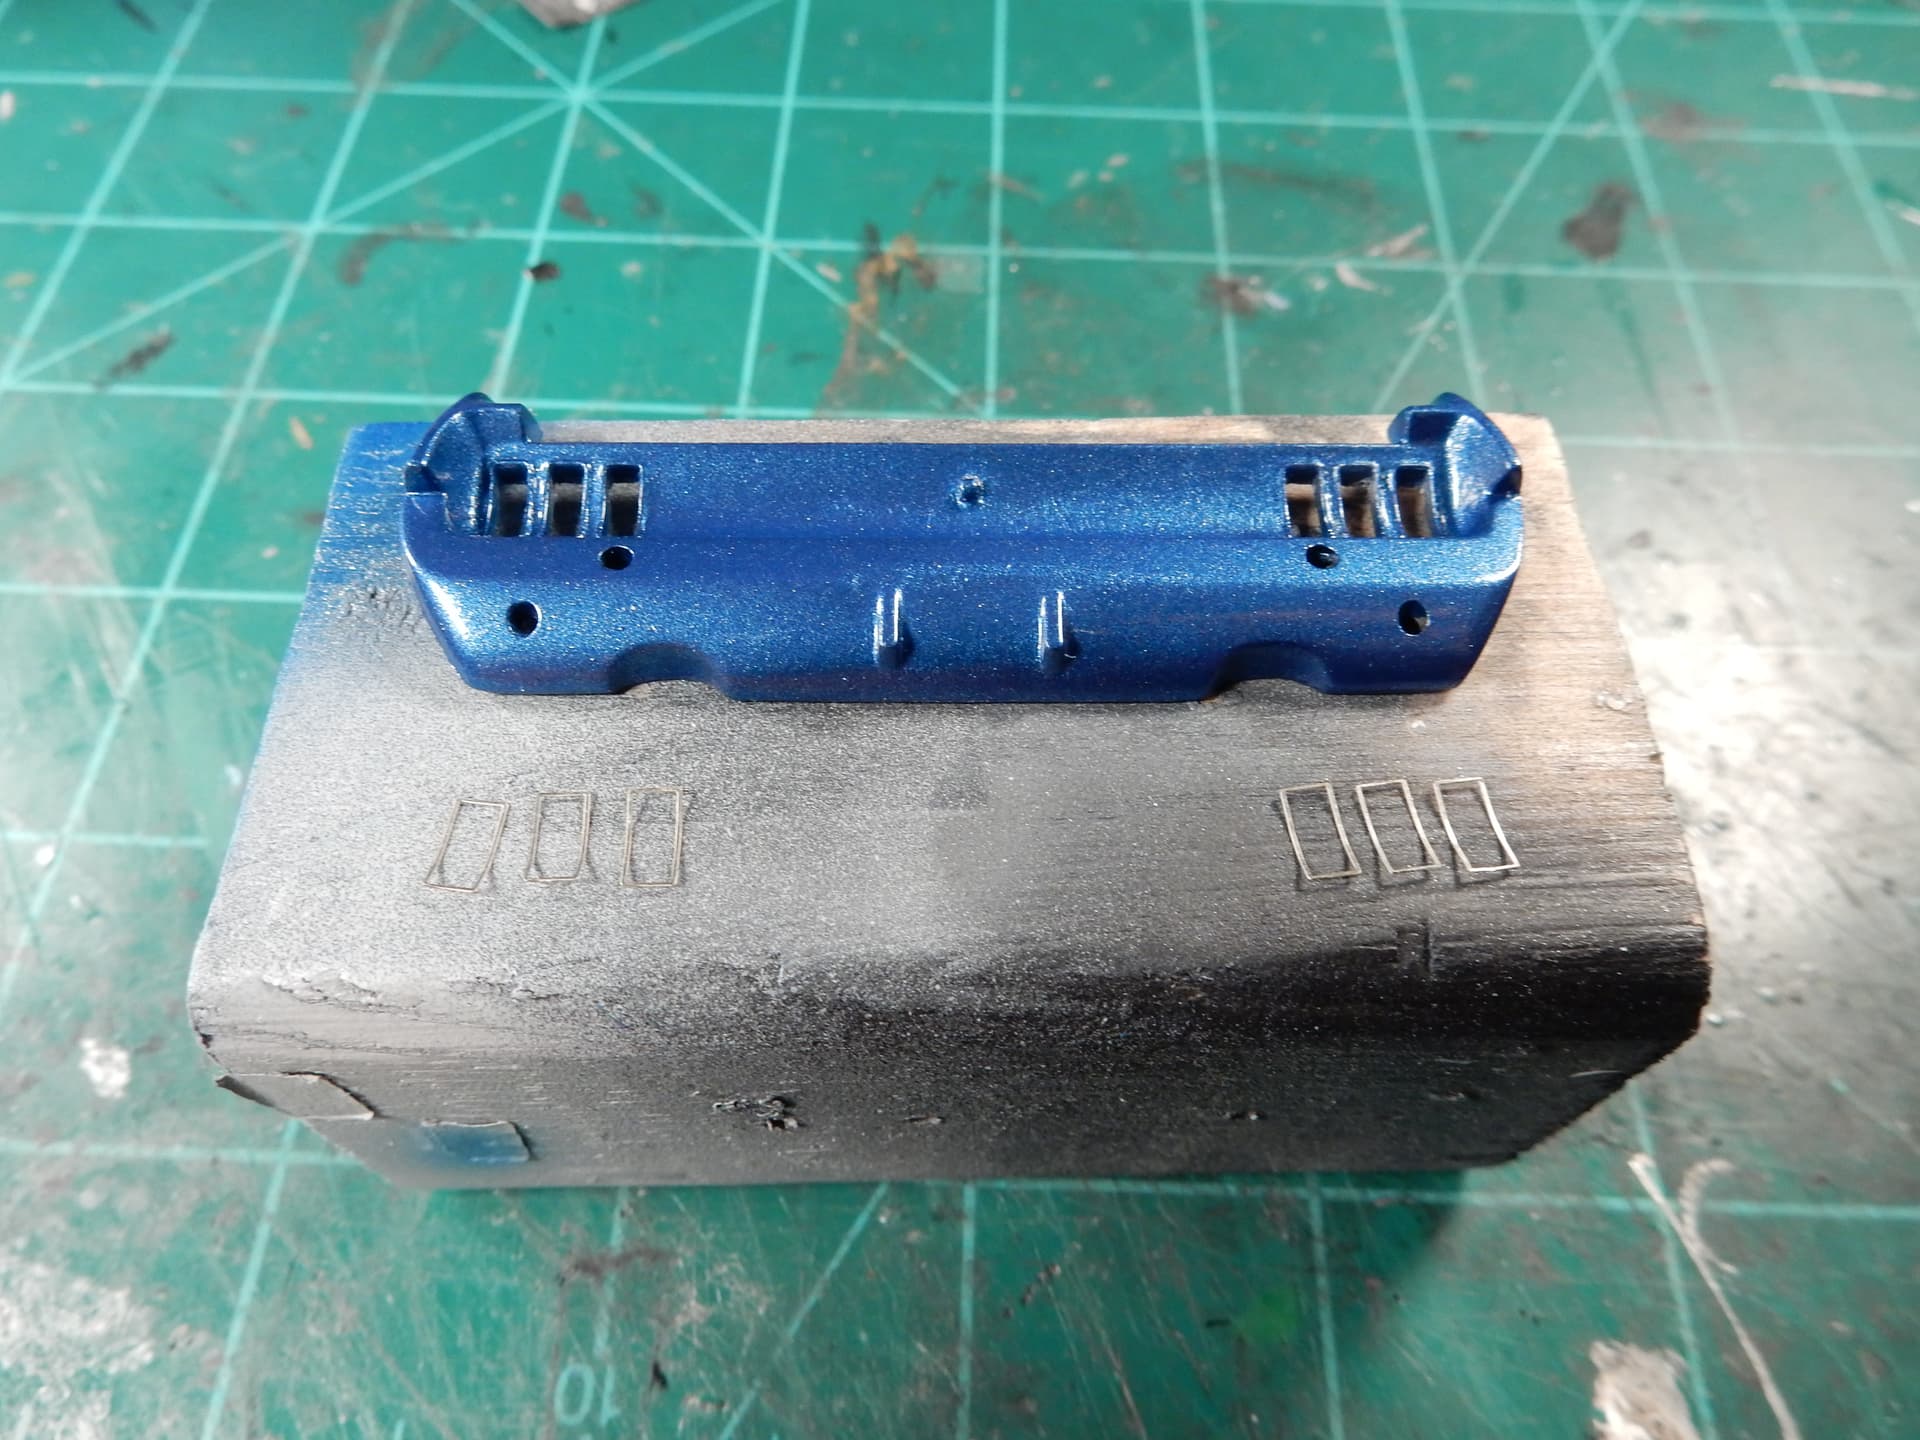
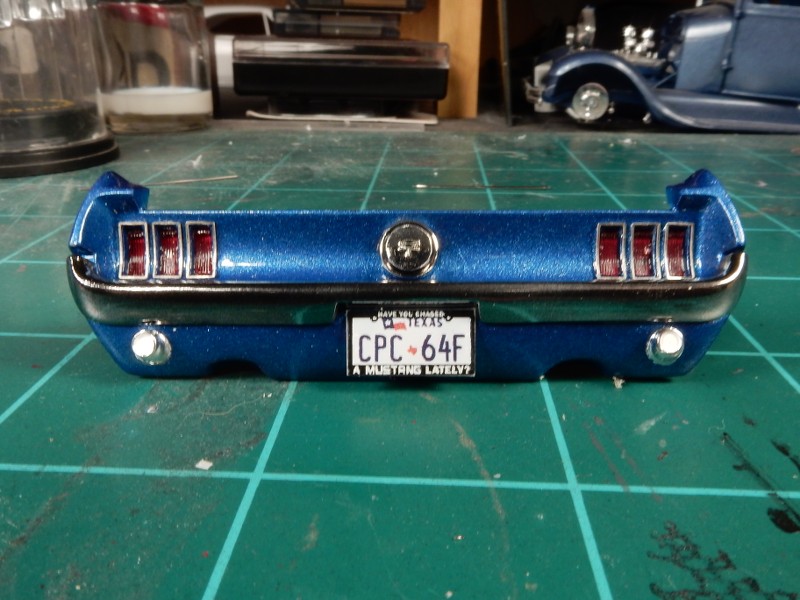
Concentrating some of my efforts on the rear panel now. I looked at the fuel cap fit on the panel and it was just waaaaaaaaaaaaaay too thick. Probably a scale 4-5 inches thick which is not the way it should be.
I mean look…here it is on mine:
the one one the right is how far it WOULD have stuck out. So I broke out the sandpaper and went to work. The one on the left is about how it SHOULD be…
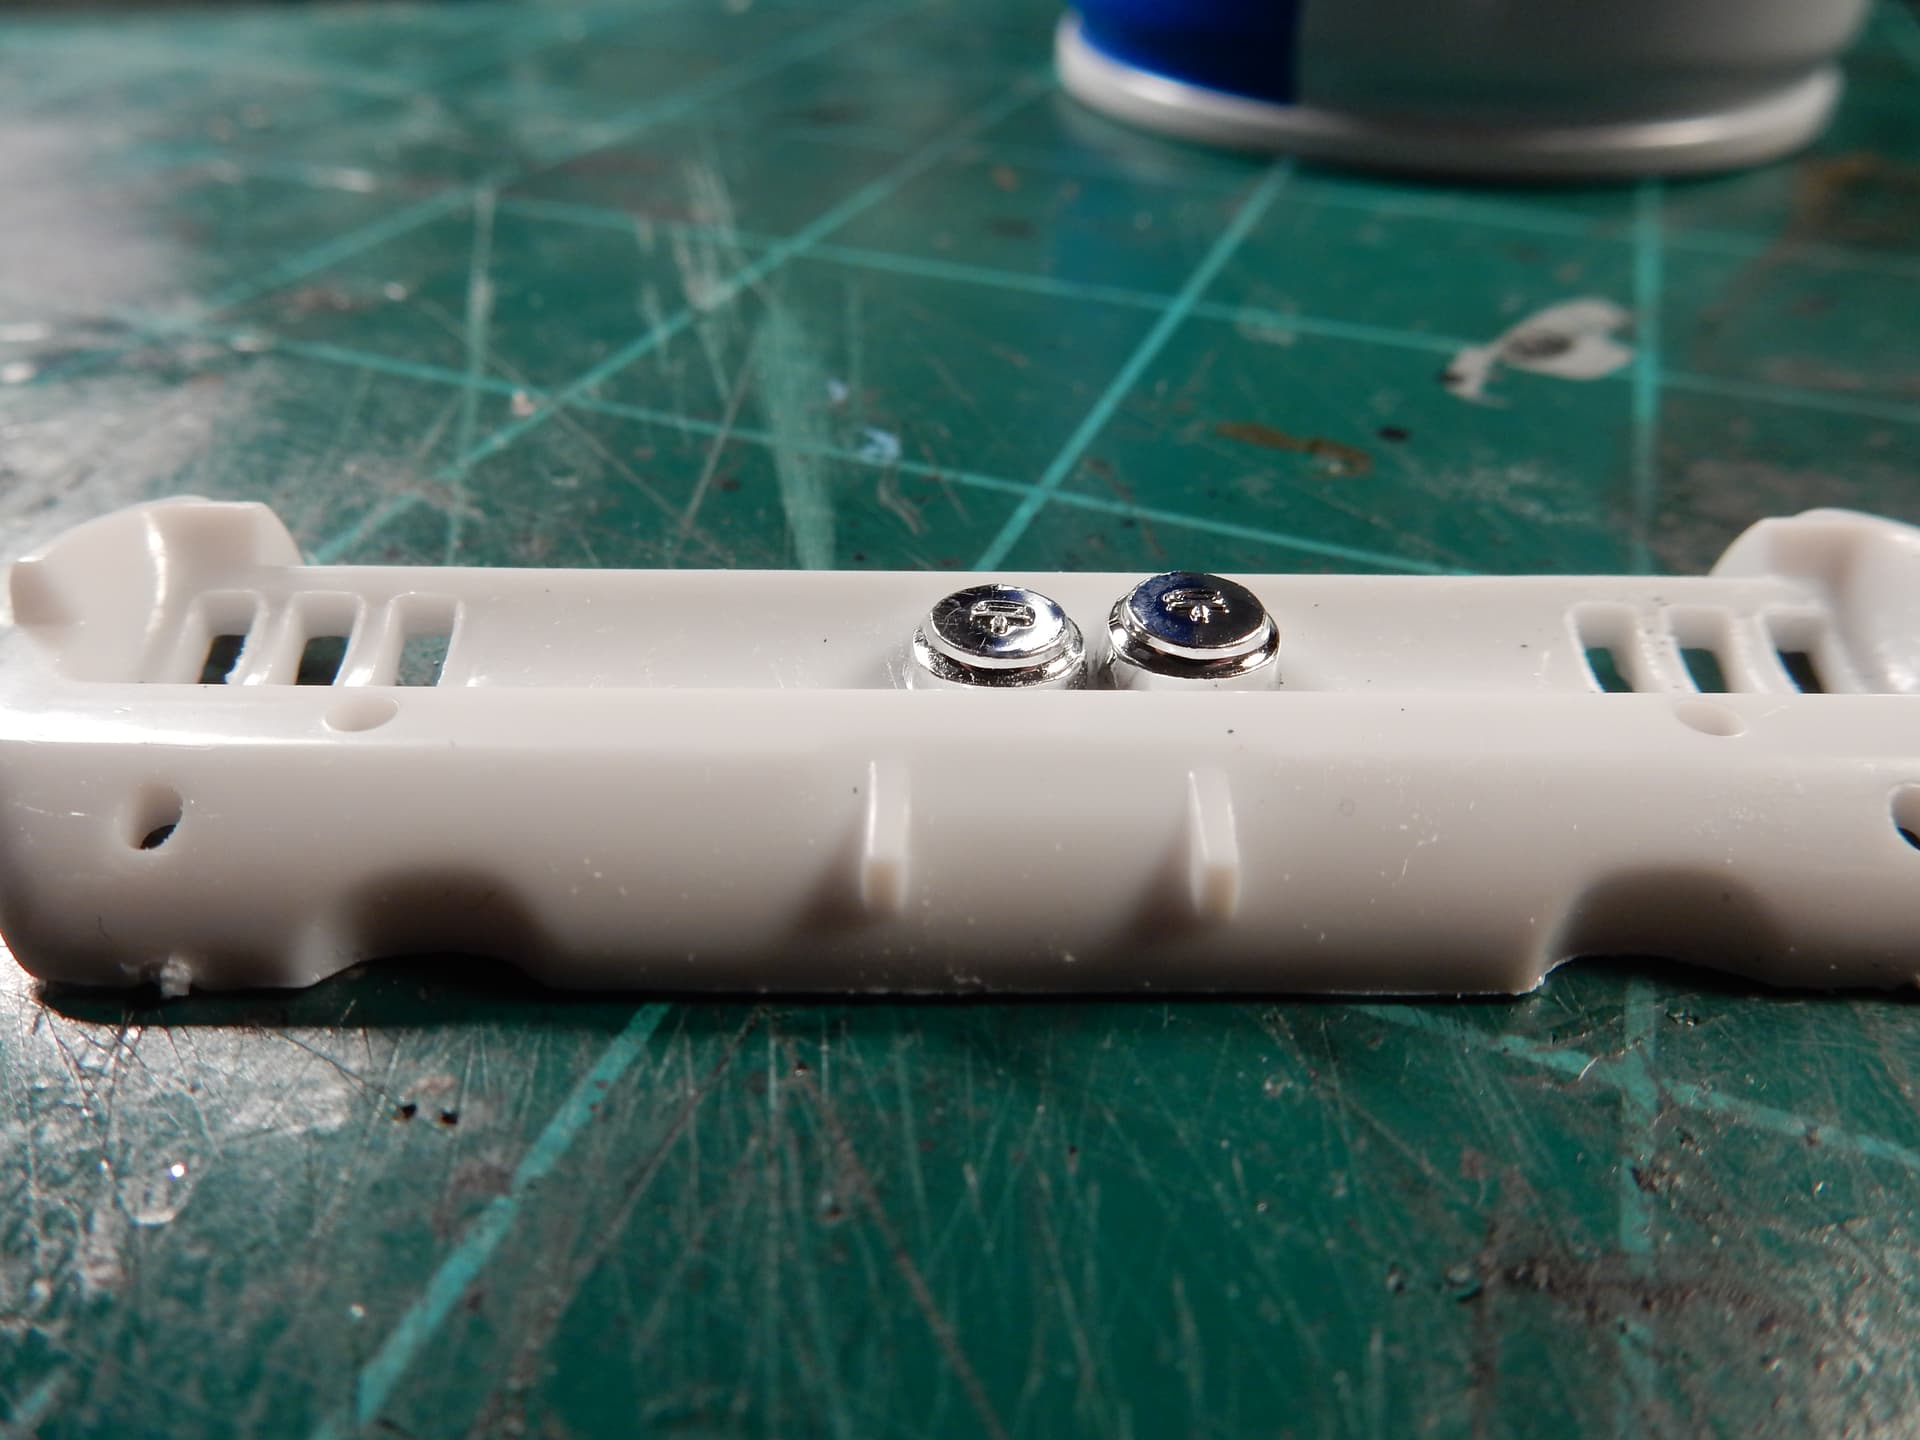
and I’ve also got the tail light chrome bezels all cut out and formed.
Looks like that fuel cap is way out there. Fortunately an easy fix.
Lovely work Joseph, that grille looks amazing and the attention to little details will really bring results!
Cheers, D
Joseph,
You’re certainly taking this kit to a whole new level for sure. To say that I’m once again really impressed with your work standards, is putting it mildly. Your attention to the little details are adding up quickly to another truly outstanding build.
The gas cap is a perfect example of your attention to the little details. As a former 1970 302 Mustang owner, little details like this not done would have just nagged at me if I were building this kit till I got off my butt and fixed it.
As for the detailing of the rear light bezels, I’m truly impressed. Once finished they should really looking outstanding.
joel
Joseph
Nice work on sanding and scaling down the light - looks the part for sure.
Peter
Thanks Jesper, Joel, Peter and Damian. Really appreciate the supportive comments.
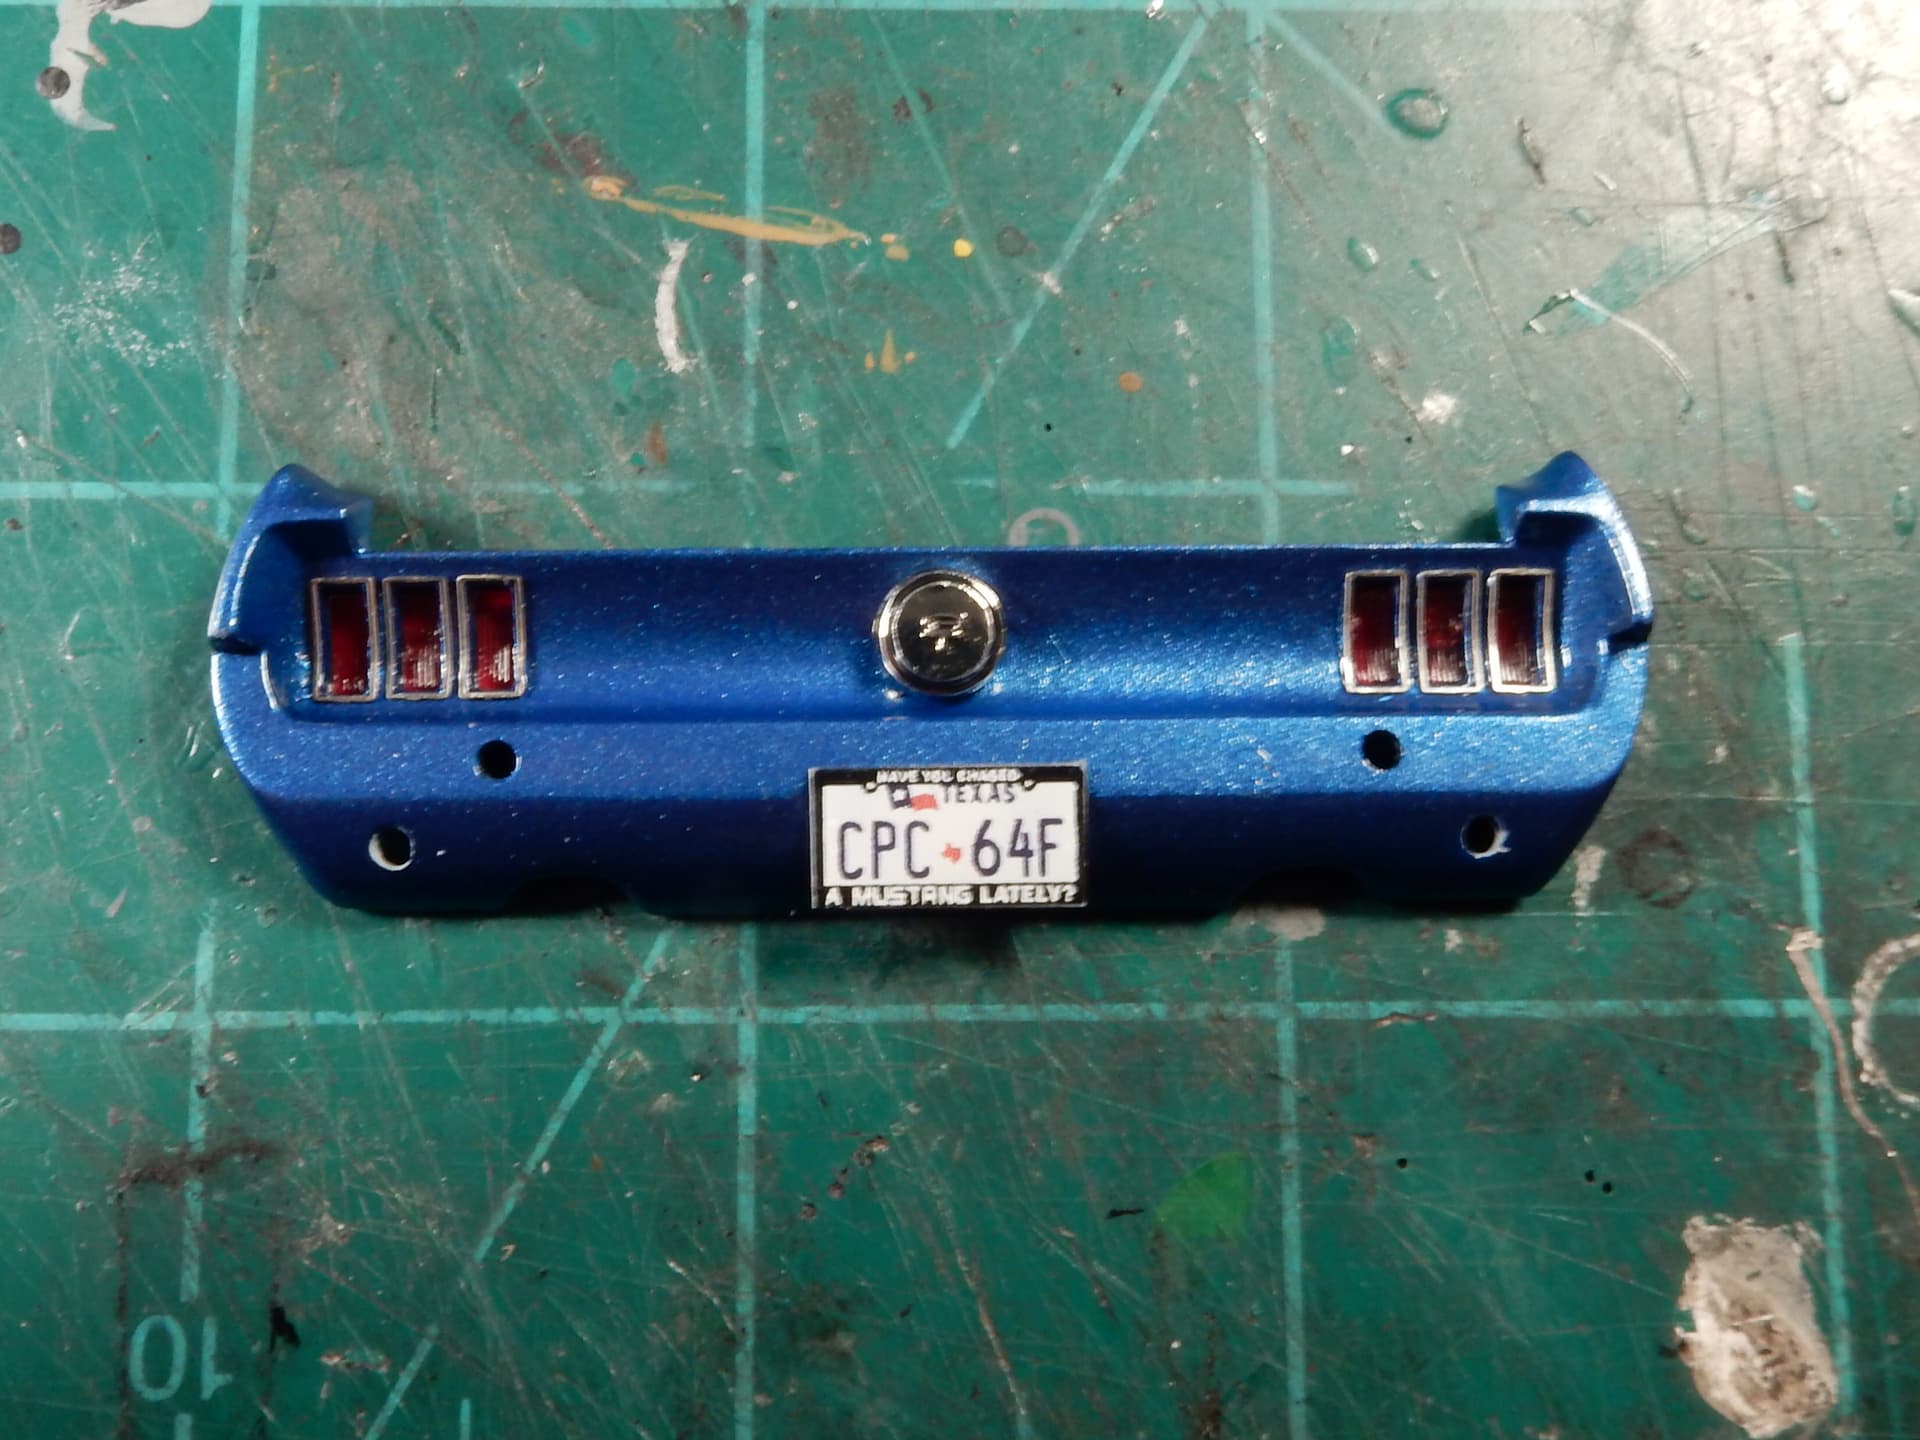
Well…here we are so far gang. Got the lenses, bezels, fuel cap and license plate installed. I will go into more detail on the rear bumper in the next post but I made some much needed changes to it. My plans are to strip the chrome off of the bumper and re-apply in lieu of the mods.
Here’s the latest…
That is really taking shape. ![]()
Joseph,
That’s some amazing work. Easy to see how it really improves the overall build, especially the rear end.
joel
Thanks fellas!
To me, the front and rear panels of this model make or break the whole build. All the efforts in the world can be put into what’s in between these two panels but if either one of these are messed up it’s like a black eye on the entire thing.
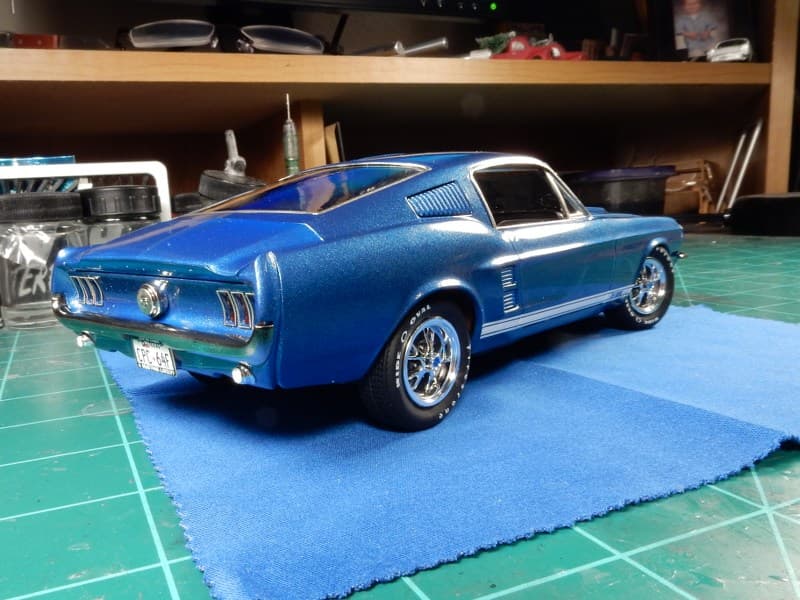
Finished up the rear panel this morning. I’ve never really liked the lower bumper guards on either side of the license plate on these cars so I stripped the chrome off of the bumper, cut those off and smoothed everything out. I then began the Alclad re-chroming process. All in all I’m REALLY happy with the turnout…
Joseph,
The rear clip really looks outstanding.
joel
Thanks Joel. This has really been a fairly enjoyable build so far. Not just a whole lot of drama.
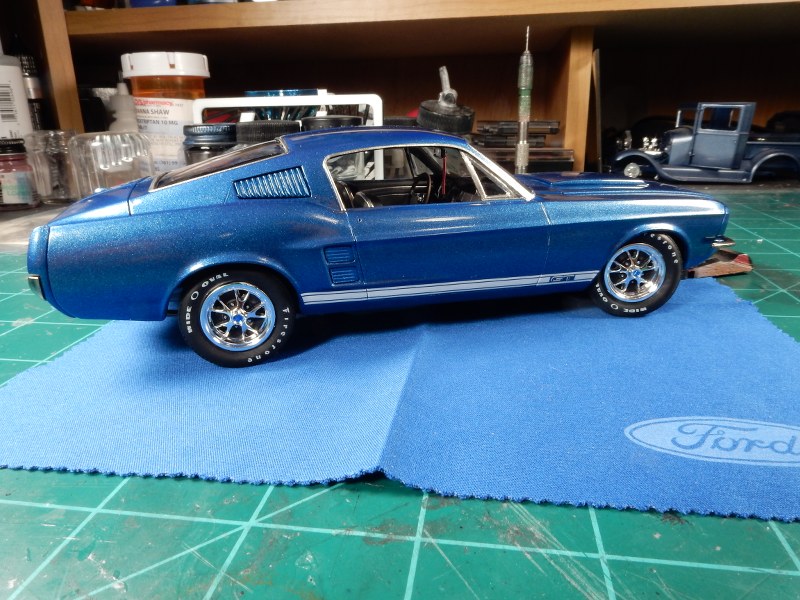
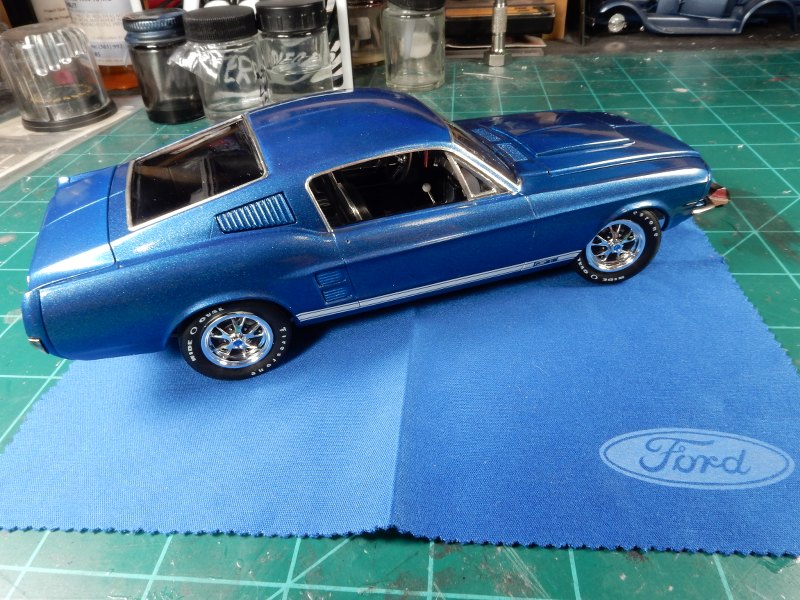
Well guys…this one is going to be coming to a close a little quicker than I thought. I had a block of time yesterday that I hadn’t planned on having and was able to get alot done. Here’s the final mock up before I go any further and will be the last pictures I’ll post in this thread until I’m either done or have a major catastrophe with the build.
I’ve still got a couple of things to do like
Anyhow…here’s where we are right now. (Couldn’t resist throwing my “REMOVE BEFORE FLIGHT” tag from the mirror. I’ve had this tag on all my 1:1 scale rides for the last 32 years now. It was in Mustang #2 of mine, my blue #3 Mustang, my 89 LX Coupe and now in my Silverado truck.
Very nice Joe . Good to see someone carrying the Blue Oval torch !
Many Mustangs in my Family - Dad had two coupes - 65 and 66 and a 69 Mach 1 . Sister had a 66 coupe with straight 6 and 3 on the floor and brother a 64 1/2 fastback 289 4 bbl and 4 speed . This was the first car I ever drove - I was 14 and he let me drive it home from the barber shop !
That’s a beautiful Mustang! Can’t help seeing Steve McQueen bouncing it down the hills of San Fran…
The only Mustang ever in my family was my mom’s '65 GT350, which my dad talked her into selling a long time ago. All I have is the pic of me in front of it as a toddler.
But I still like all the early models and the modern ones that keep the aesthetic. My car stash is mostly VW buses but I have several of the 60’s Mustangs and the '71 Mach 1 sitting next to them.
I have this kit so I am going to be referring back here when I finally unbox it.
Looking great Joe, very nice!
I see what you mean about the trunk, it looks a bit lighter in a couple of shots there, but it might just be the angle of the shot. These metallic paints can play tricks. Have you taken shots from a different angle to see if it’s still there?
Cheers, D