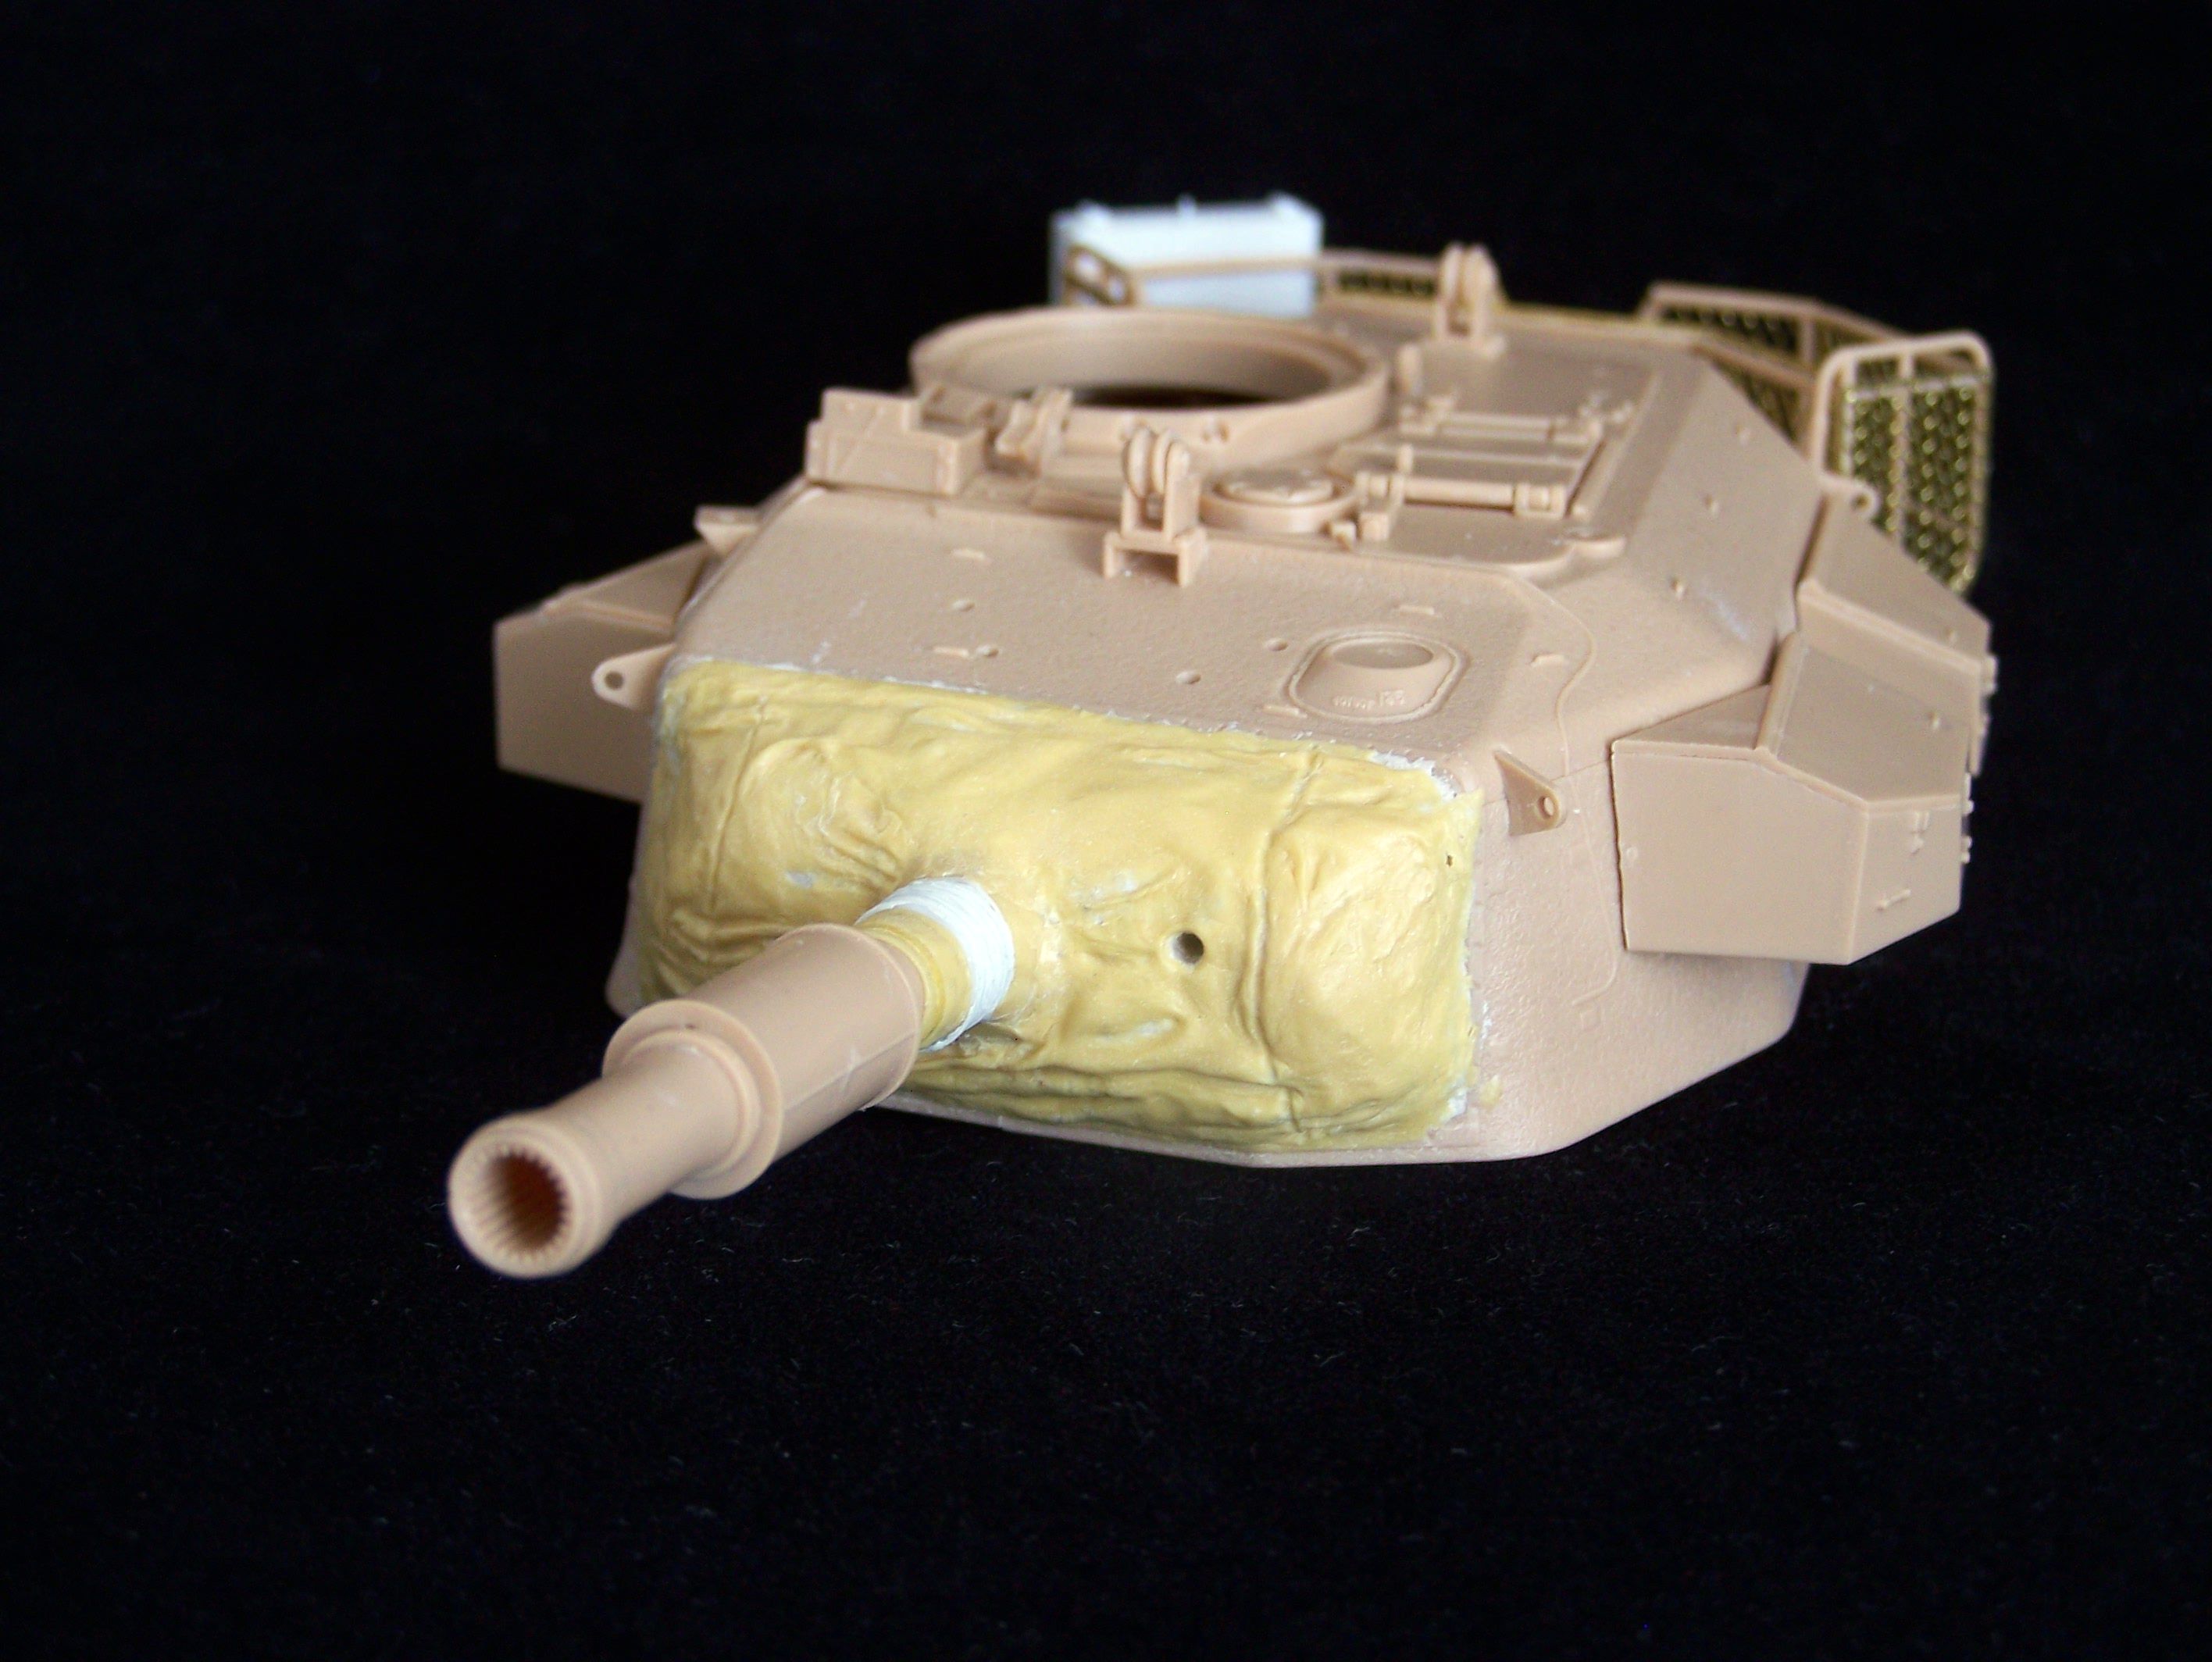
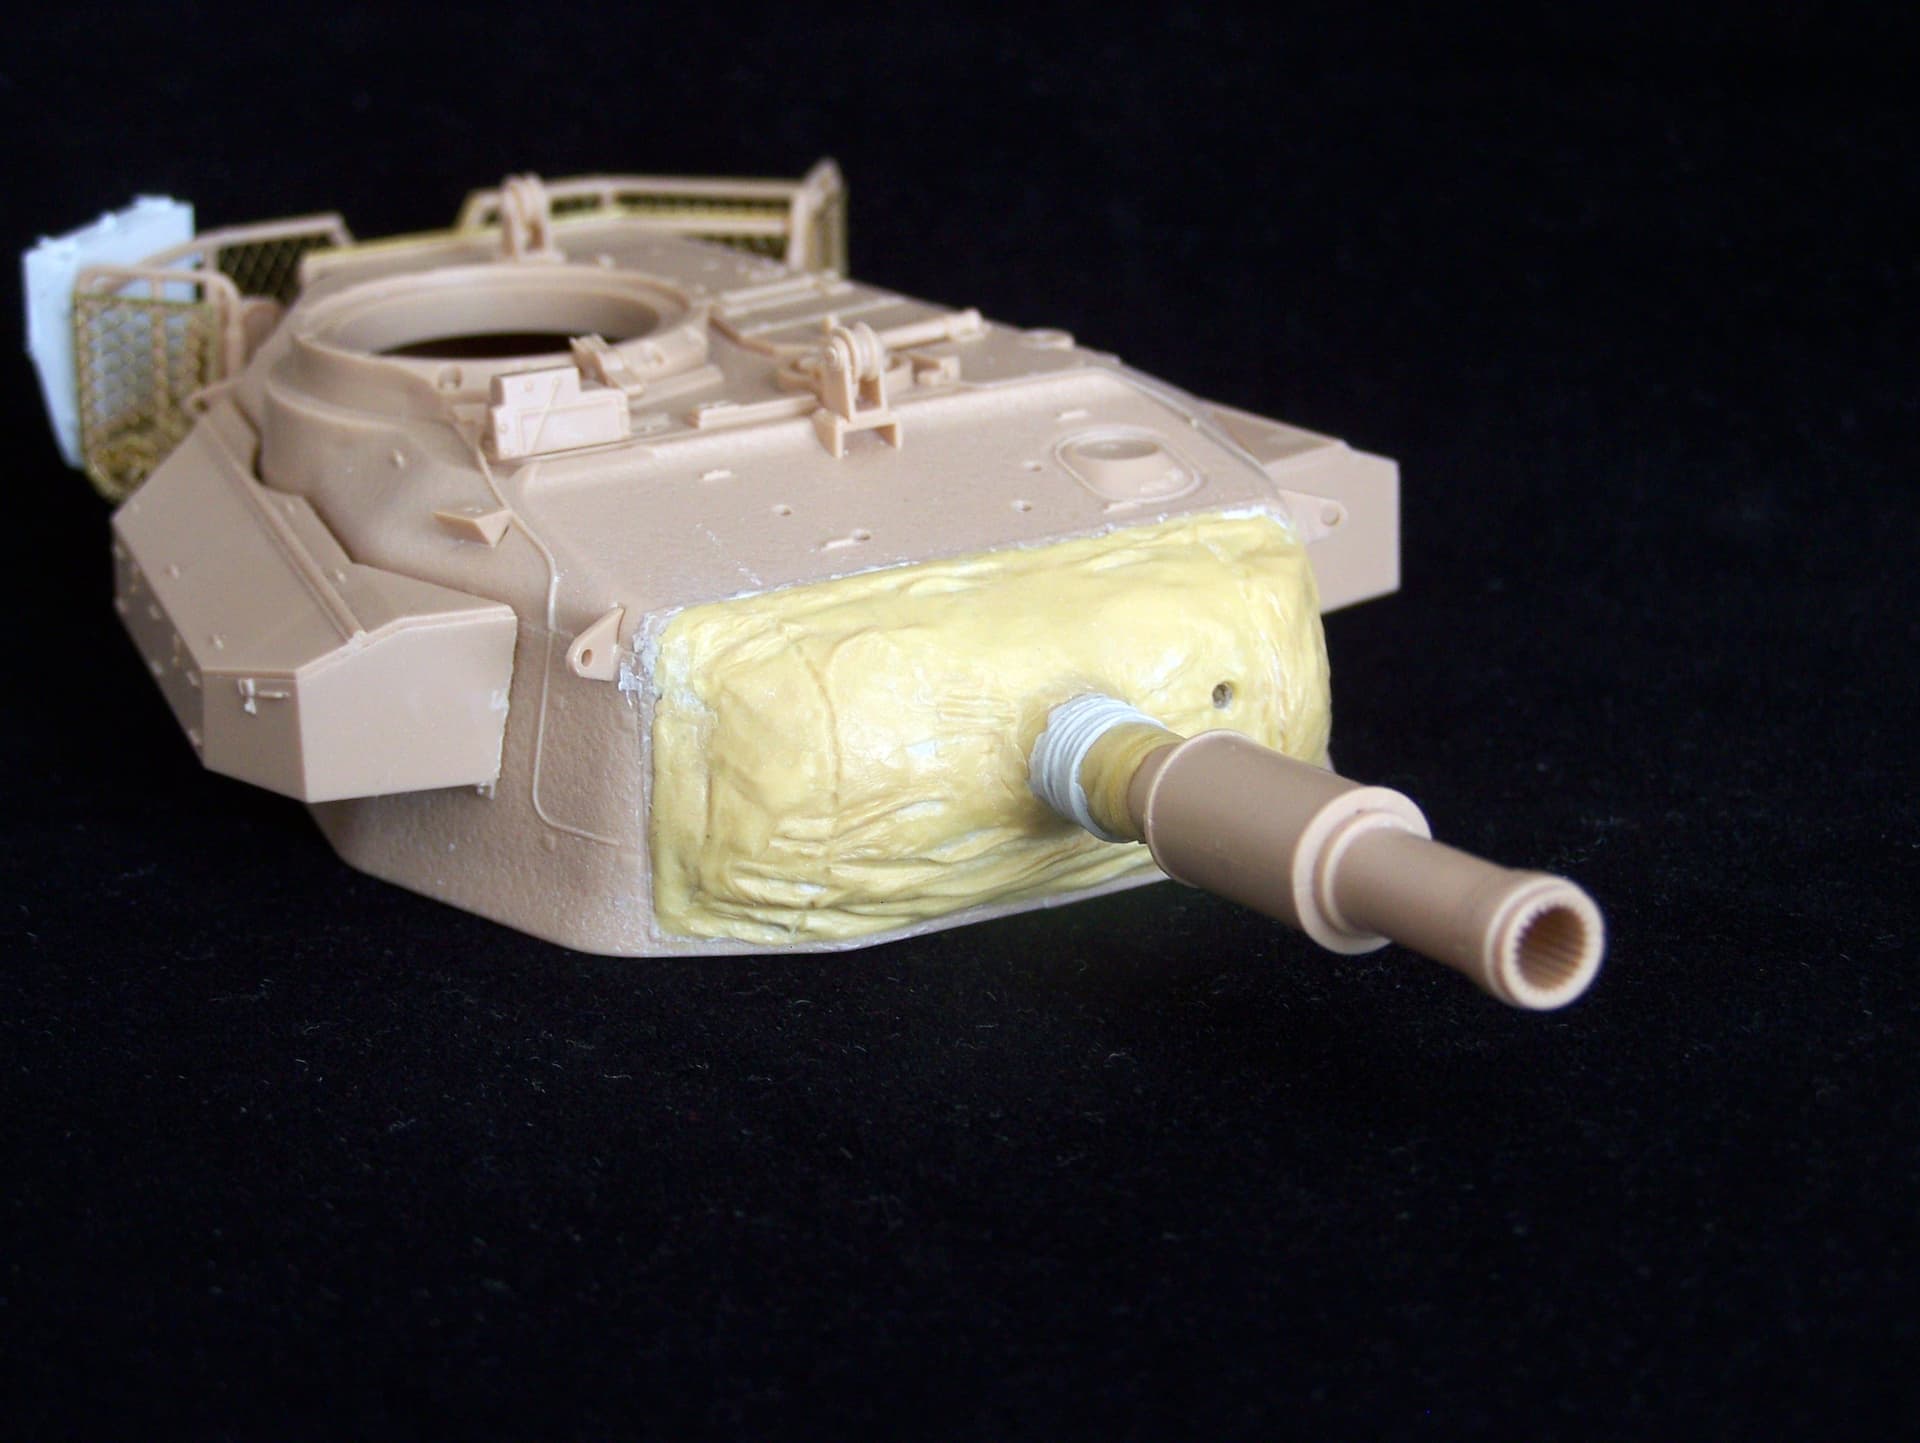
I was not fully happy with the canvas cover for the mantlet and some friends on a French forum confirmed my feeling.
So I decided to cover the whole canvas with a thin coat of epoxy putty in which I created folds before it was dry. I think it is better even if it’s not perfect.
I also applied the first coat of paint on the running gear. I still need to paint and weather the tracks a bit before I can assemble the side skirts.
Olivier
5 Likes
That’s a terrific improvement Olivier, the folds give it loads of realistic feel now. Really clever work … 
1 Like
Other ways to do this is:
- use aluminium foil pressed around a bolt thread to shape it. You can twist the foil slightly so the ends line up for ridges. Use epoxy glue to fill the inside of the thread to strengthen the ridges for handling and to stick it to the barrel
- Make rings from wire and glue to the barrel. Moisten gift wrap tissue in water & PVA mix and wrap around the wire. Use the back of a scalpel blade to press between the wire to form the valley.
- Place a piece of styrene tube inside a drill. Secure the drill and using a saw blade with the appropriately spaced teeth (if you have one), or use a scalpel blade form the ridges in the styrene.
2 Likes
Johnny
I’m glad you like it.
Very clever Peter. If I have to do this again I’ll try one of your suggestions.
Olivier
2 Likes
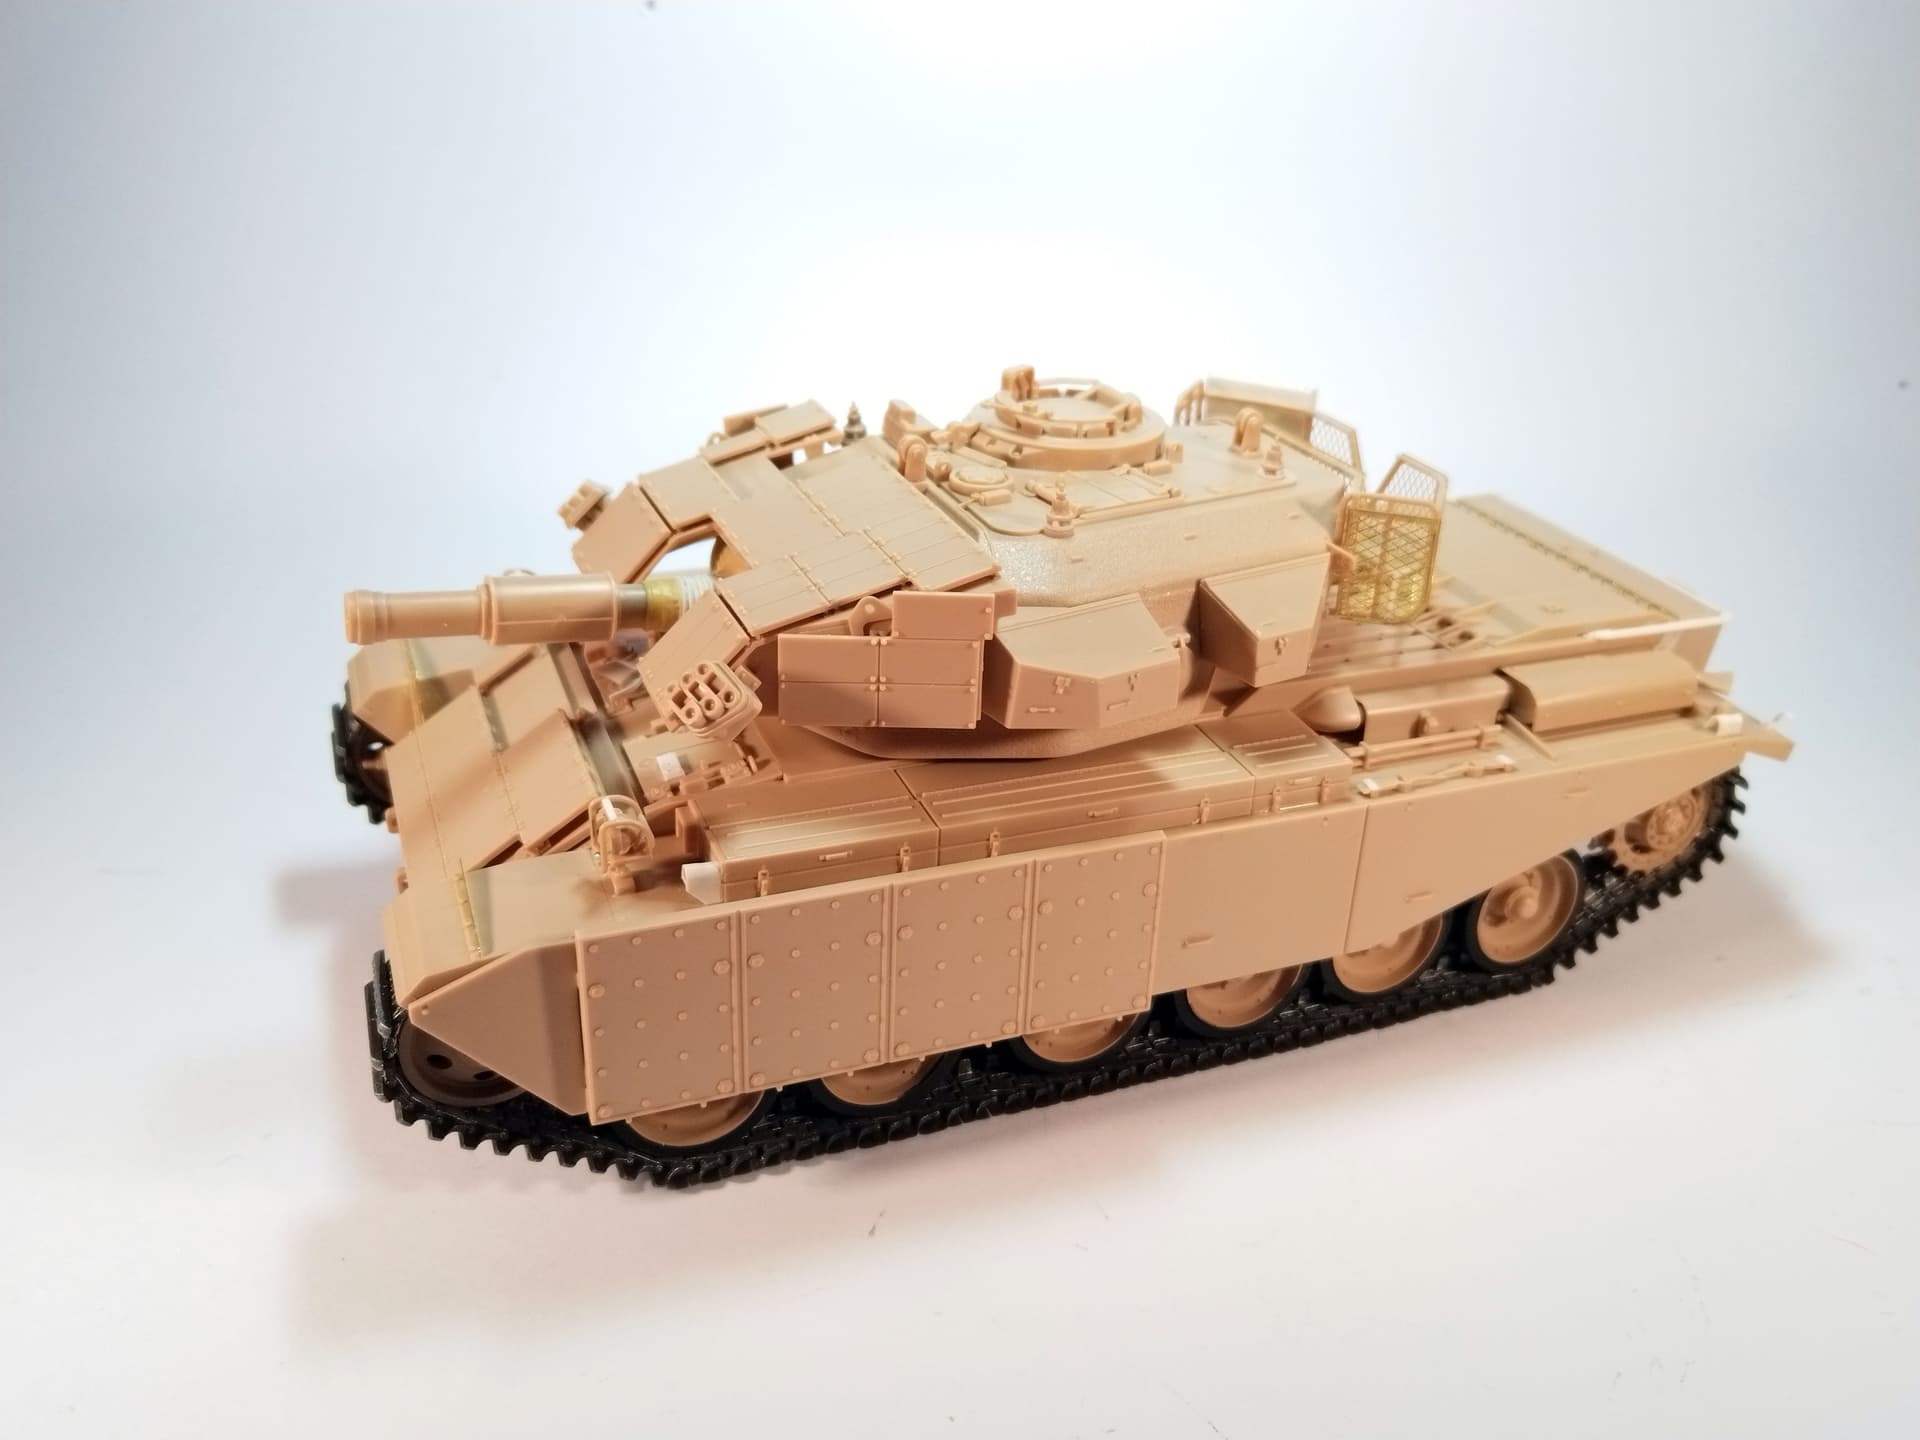
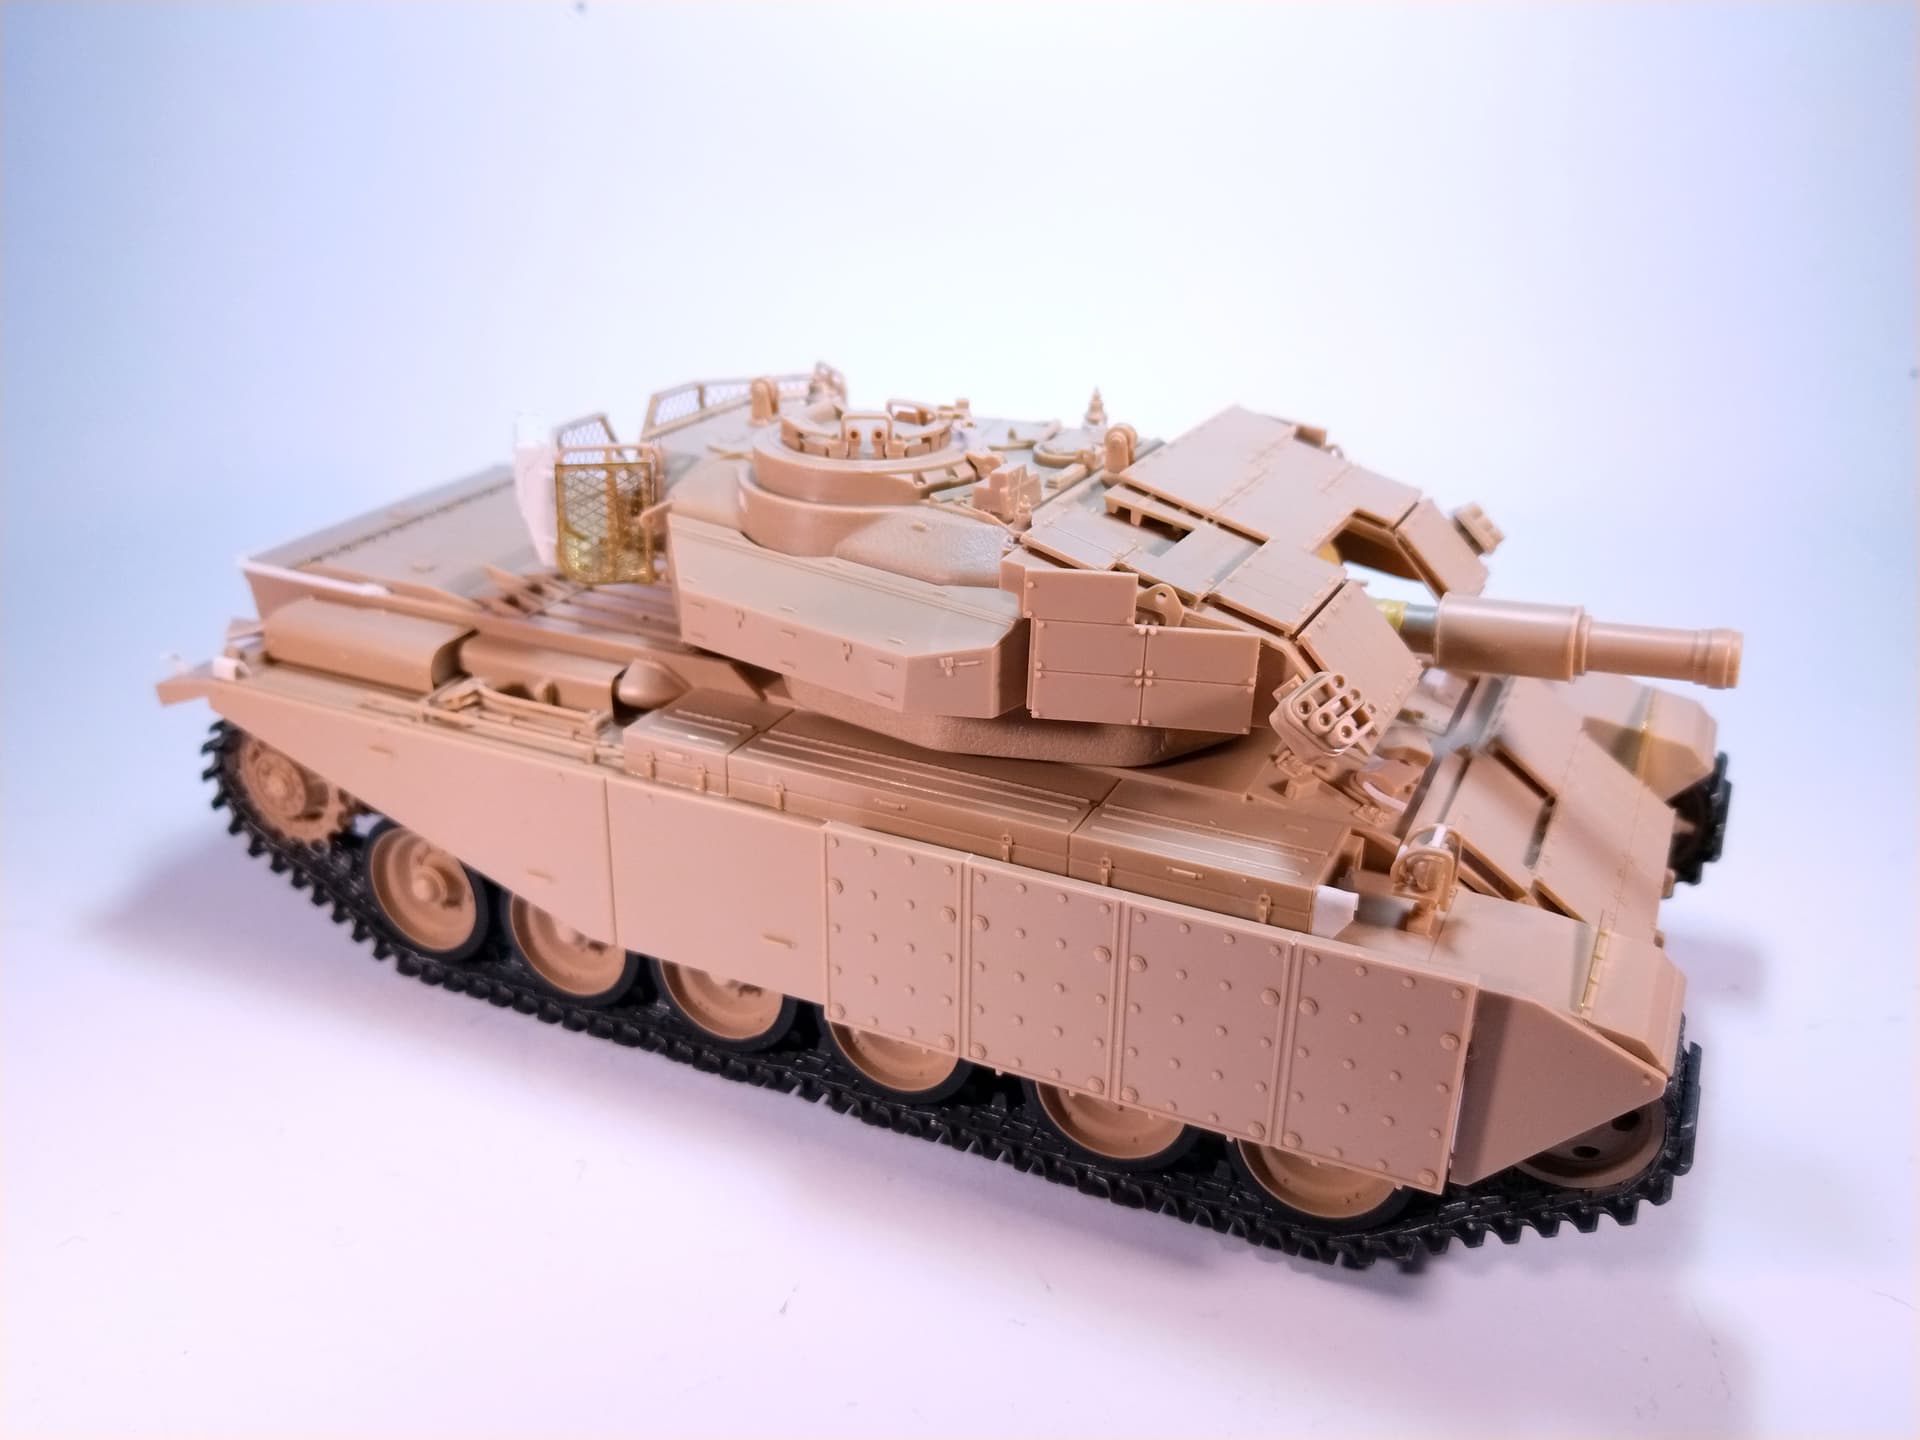
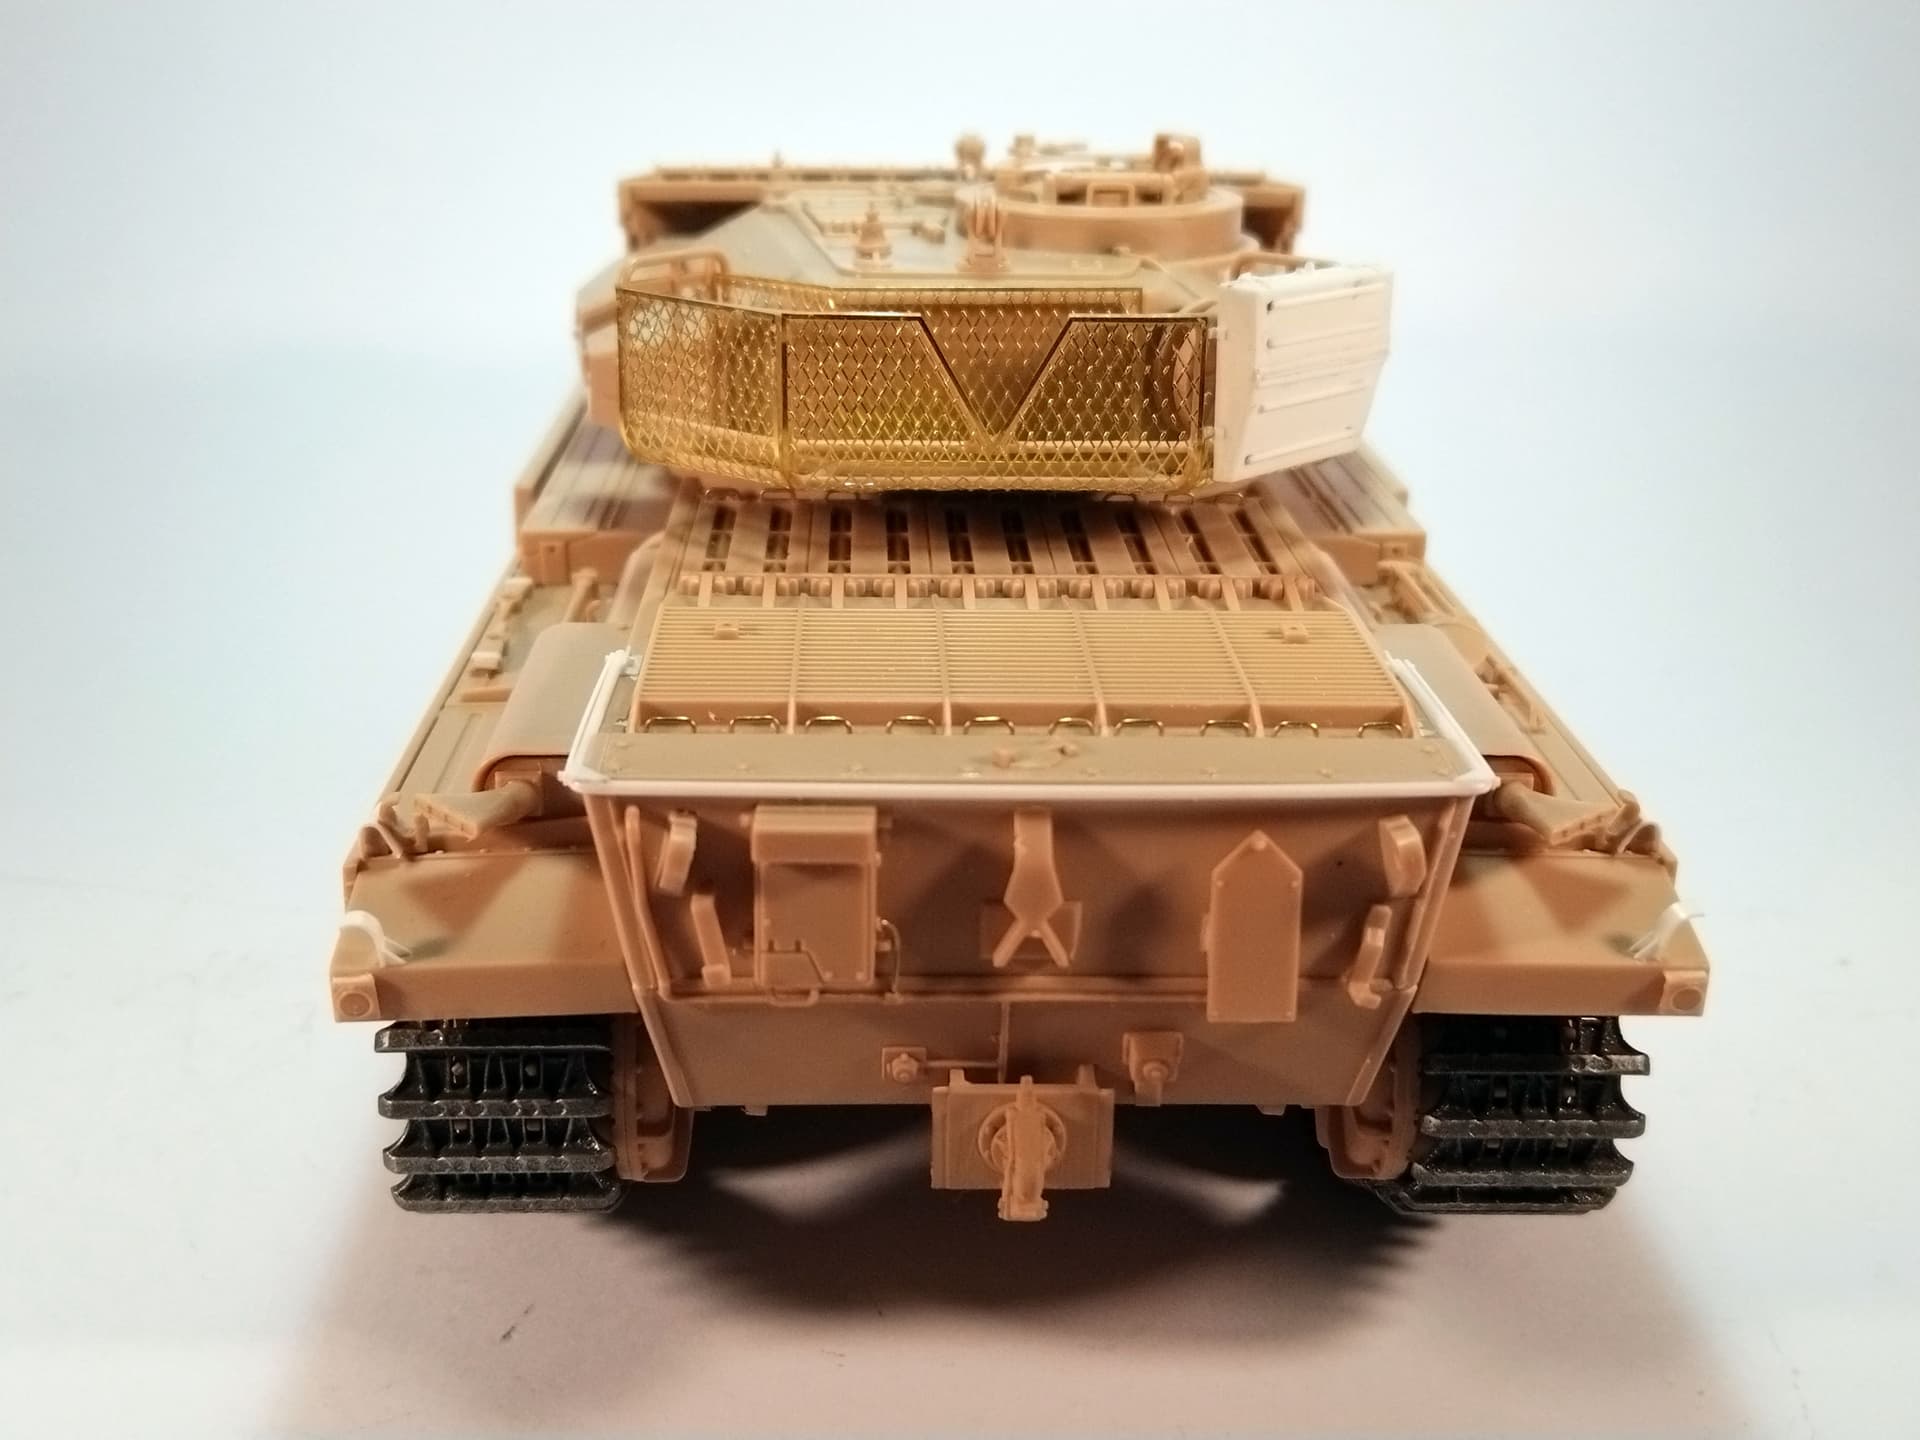
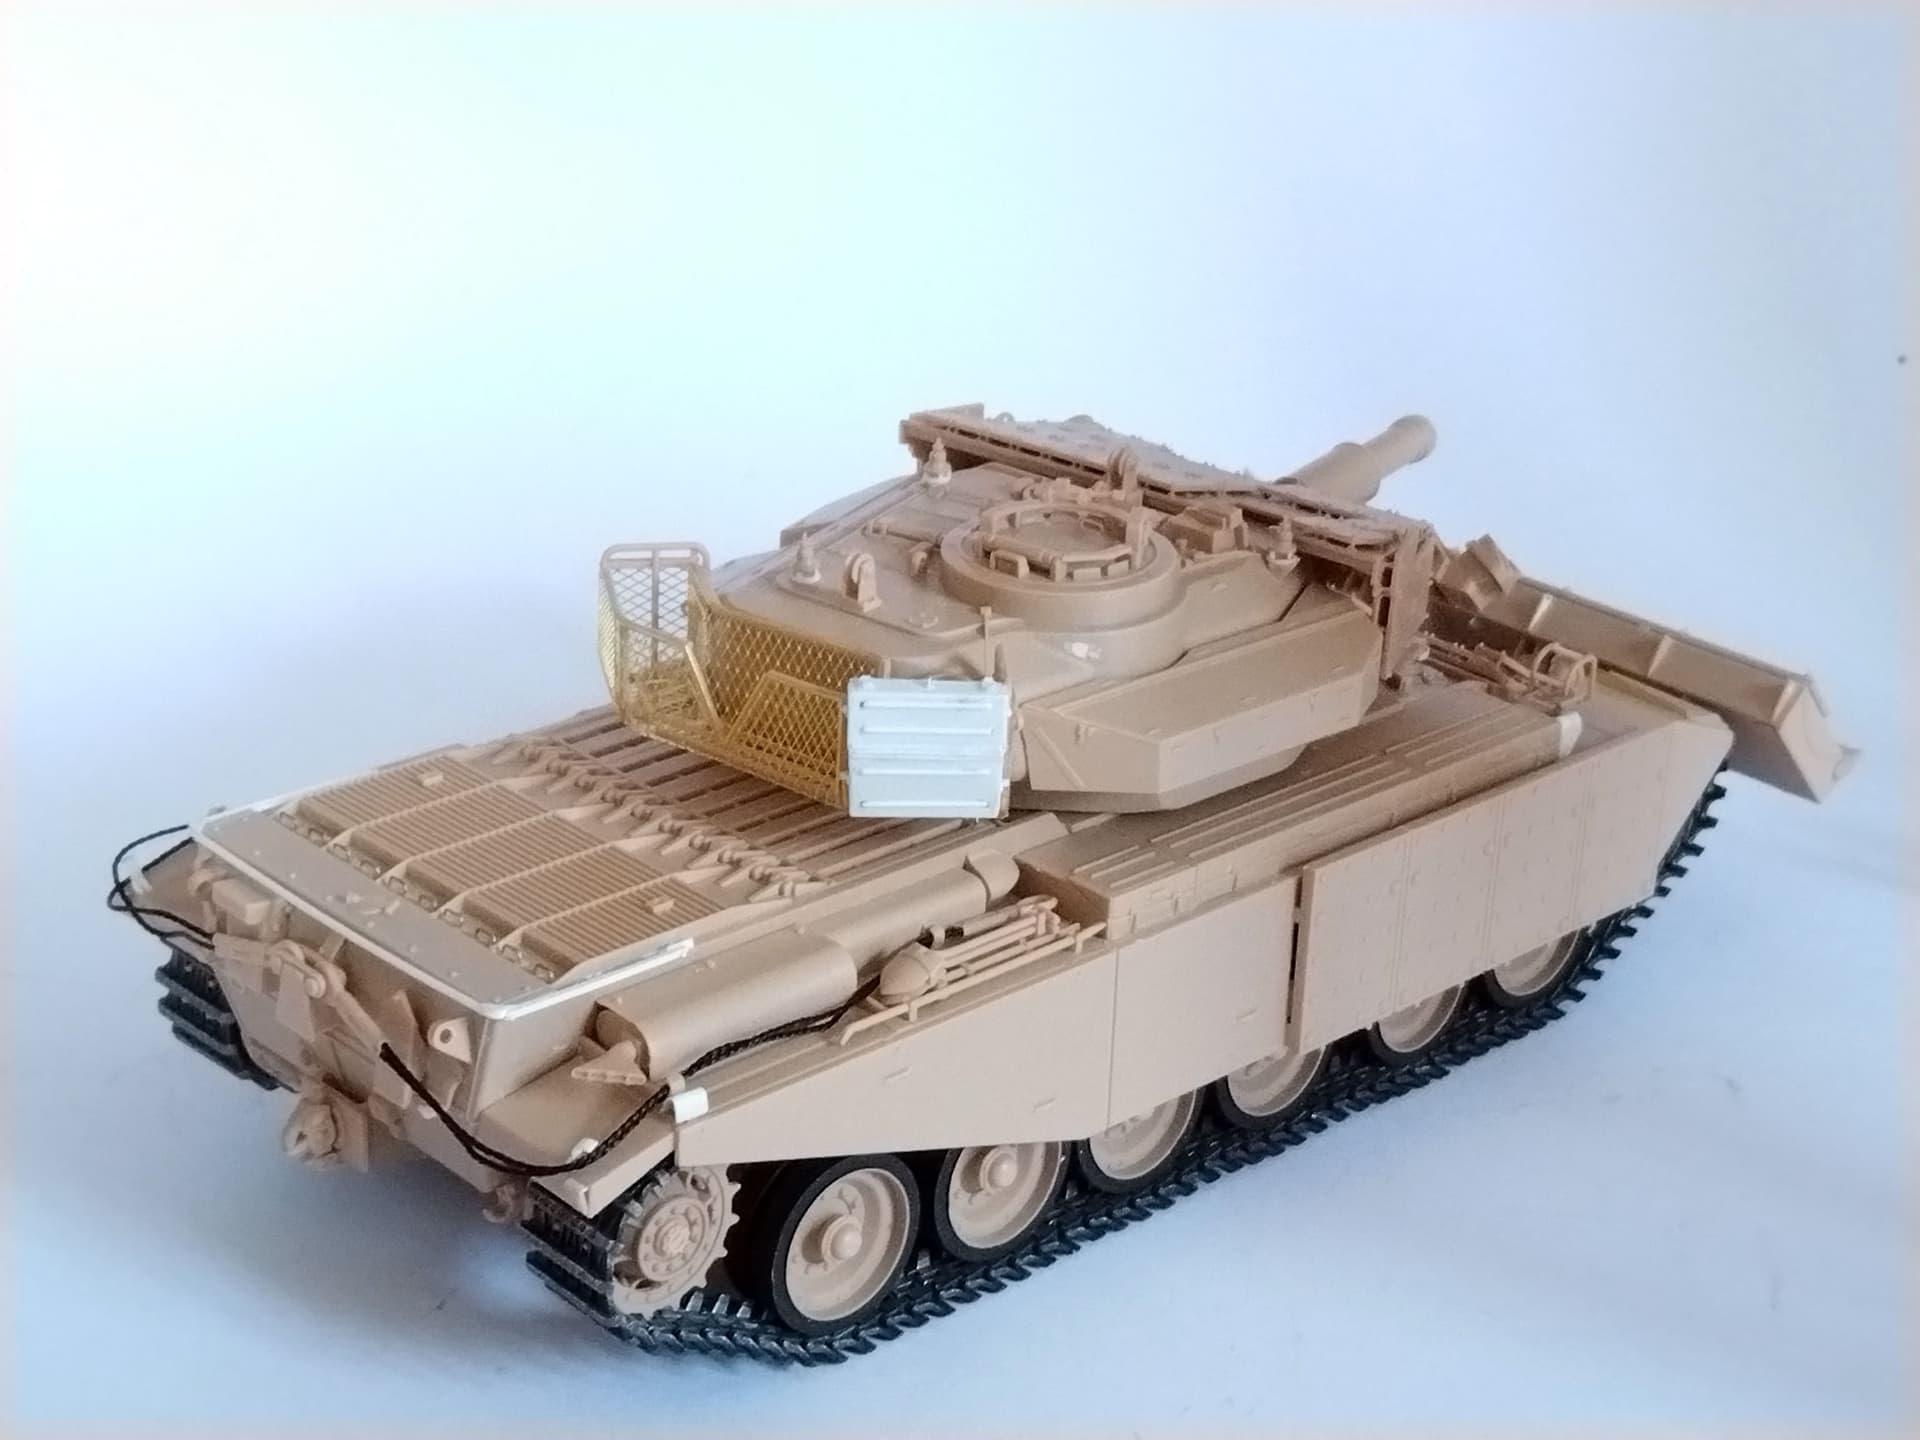
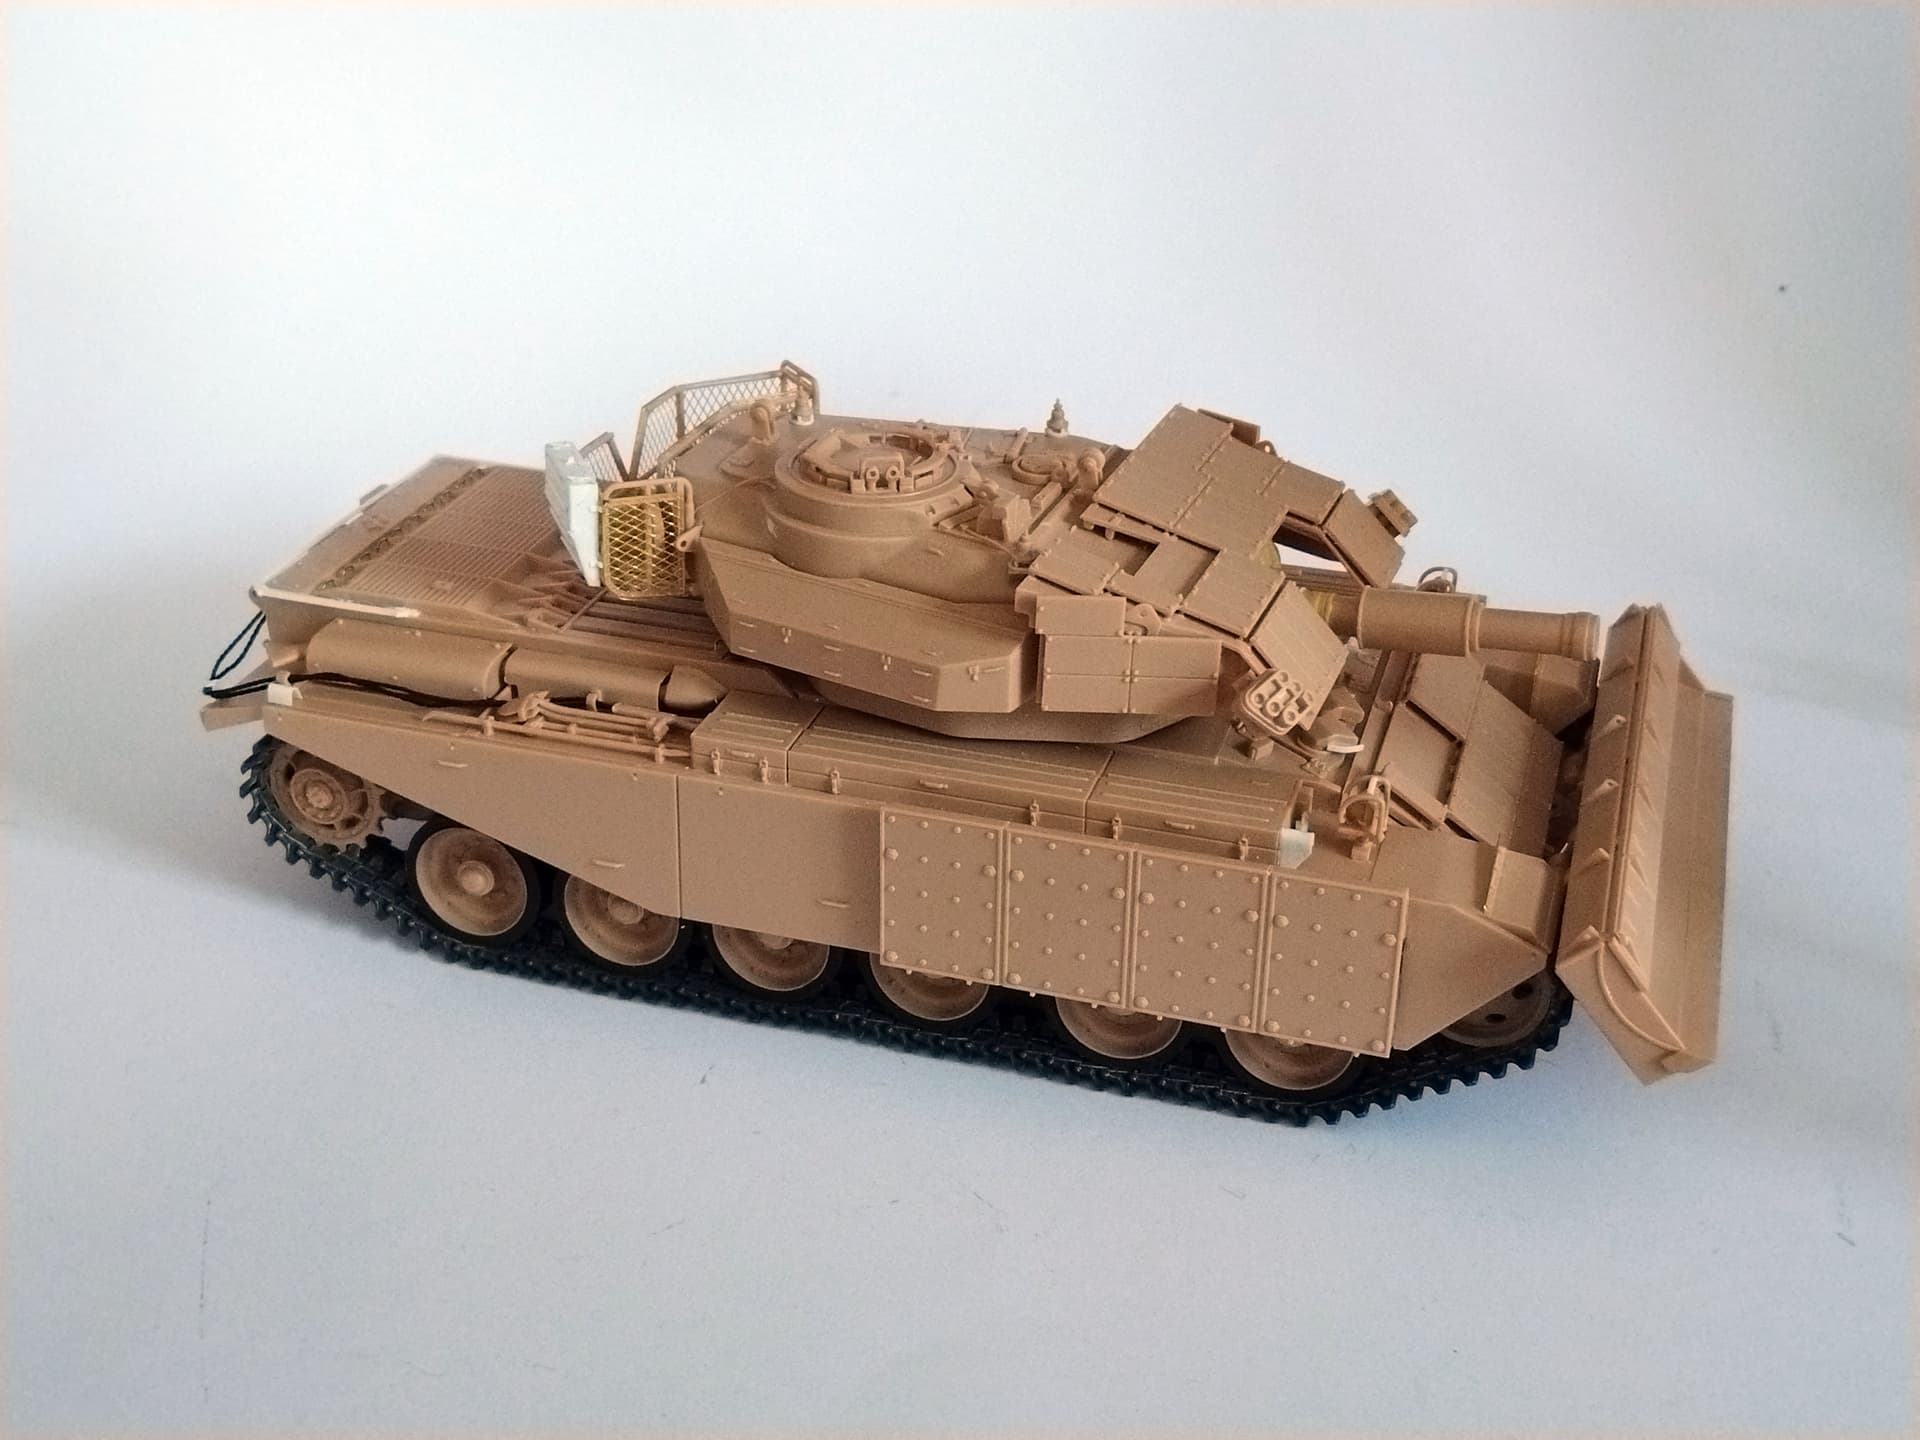
I’ve basically painted the running gear so I could add the side skirts. You first have to cut the original one piece skirts in two ends and add the up-armored portion in between. Amusing Hobby molded the necessary recessed lines to help cut the plates.
I still have a few details to add before I start the painting. The commander’s MG will be glued at the very end.
Olivier
7 Likes
Ditto. Will you add chain armour?
Mal
1 Like
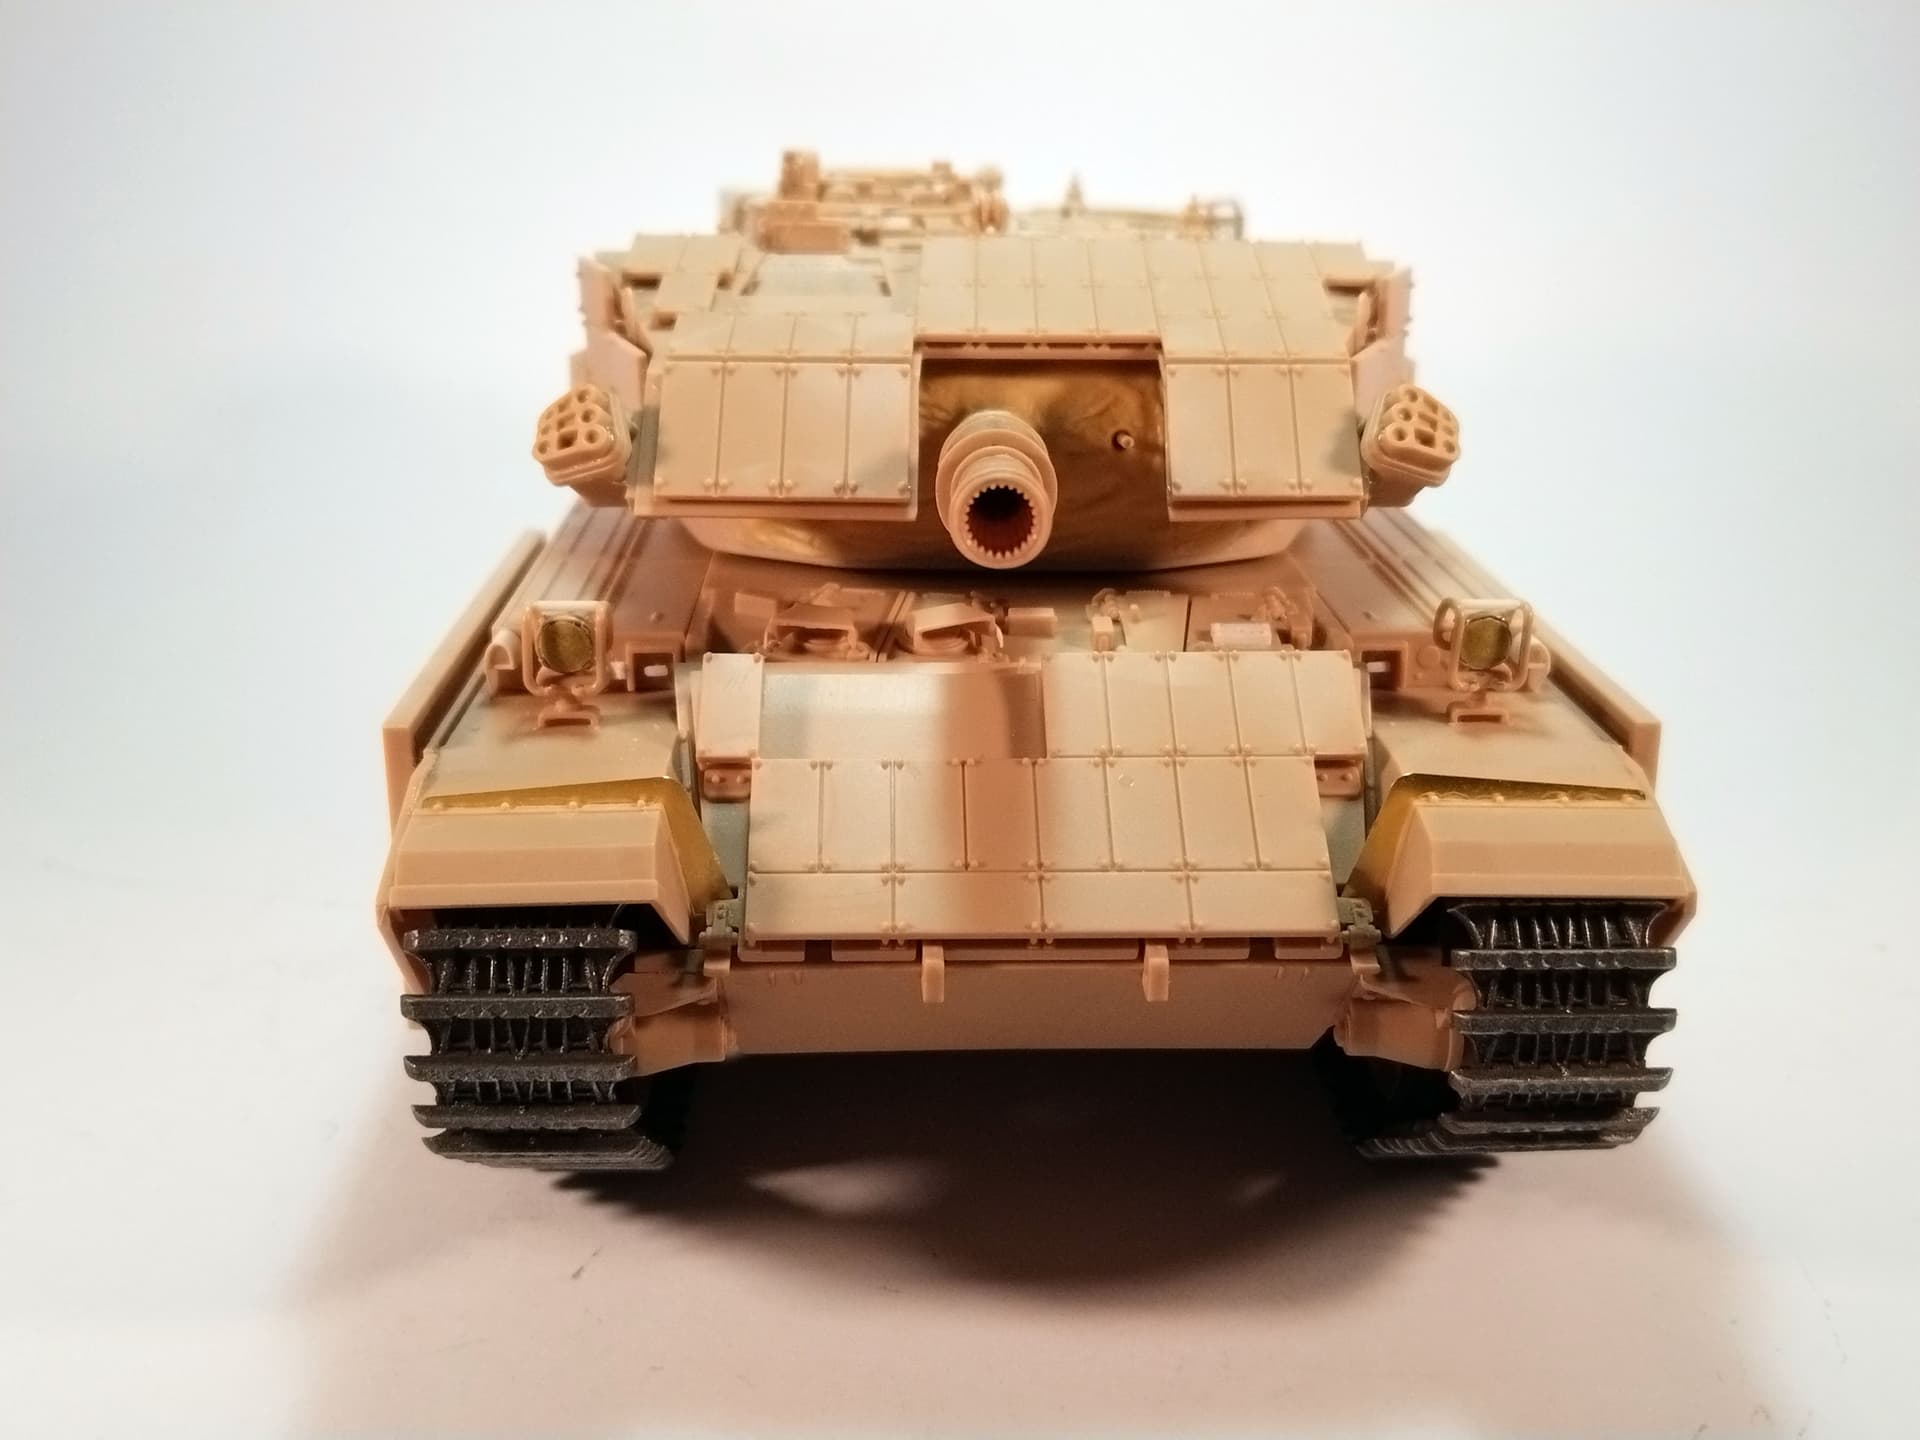
Looks very nice…and with the front turret armour in place, you get a nice glimpse of the canvas mantlet cover
1 Like
Mal,
it looks like not all the AVREs had the chain armor. At least the one I’m depicting didn’t have it.
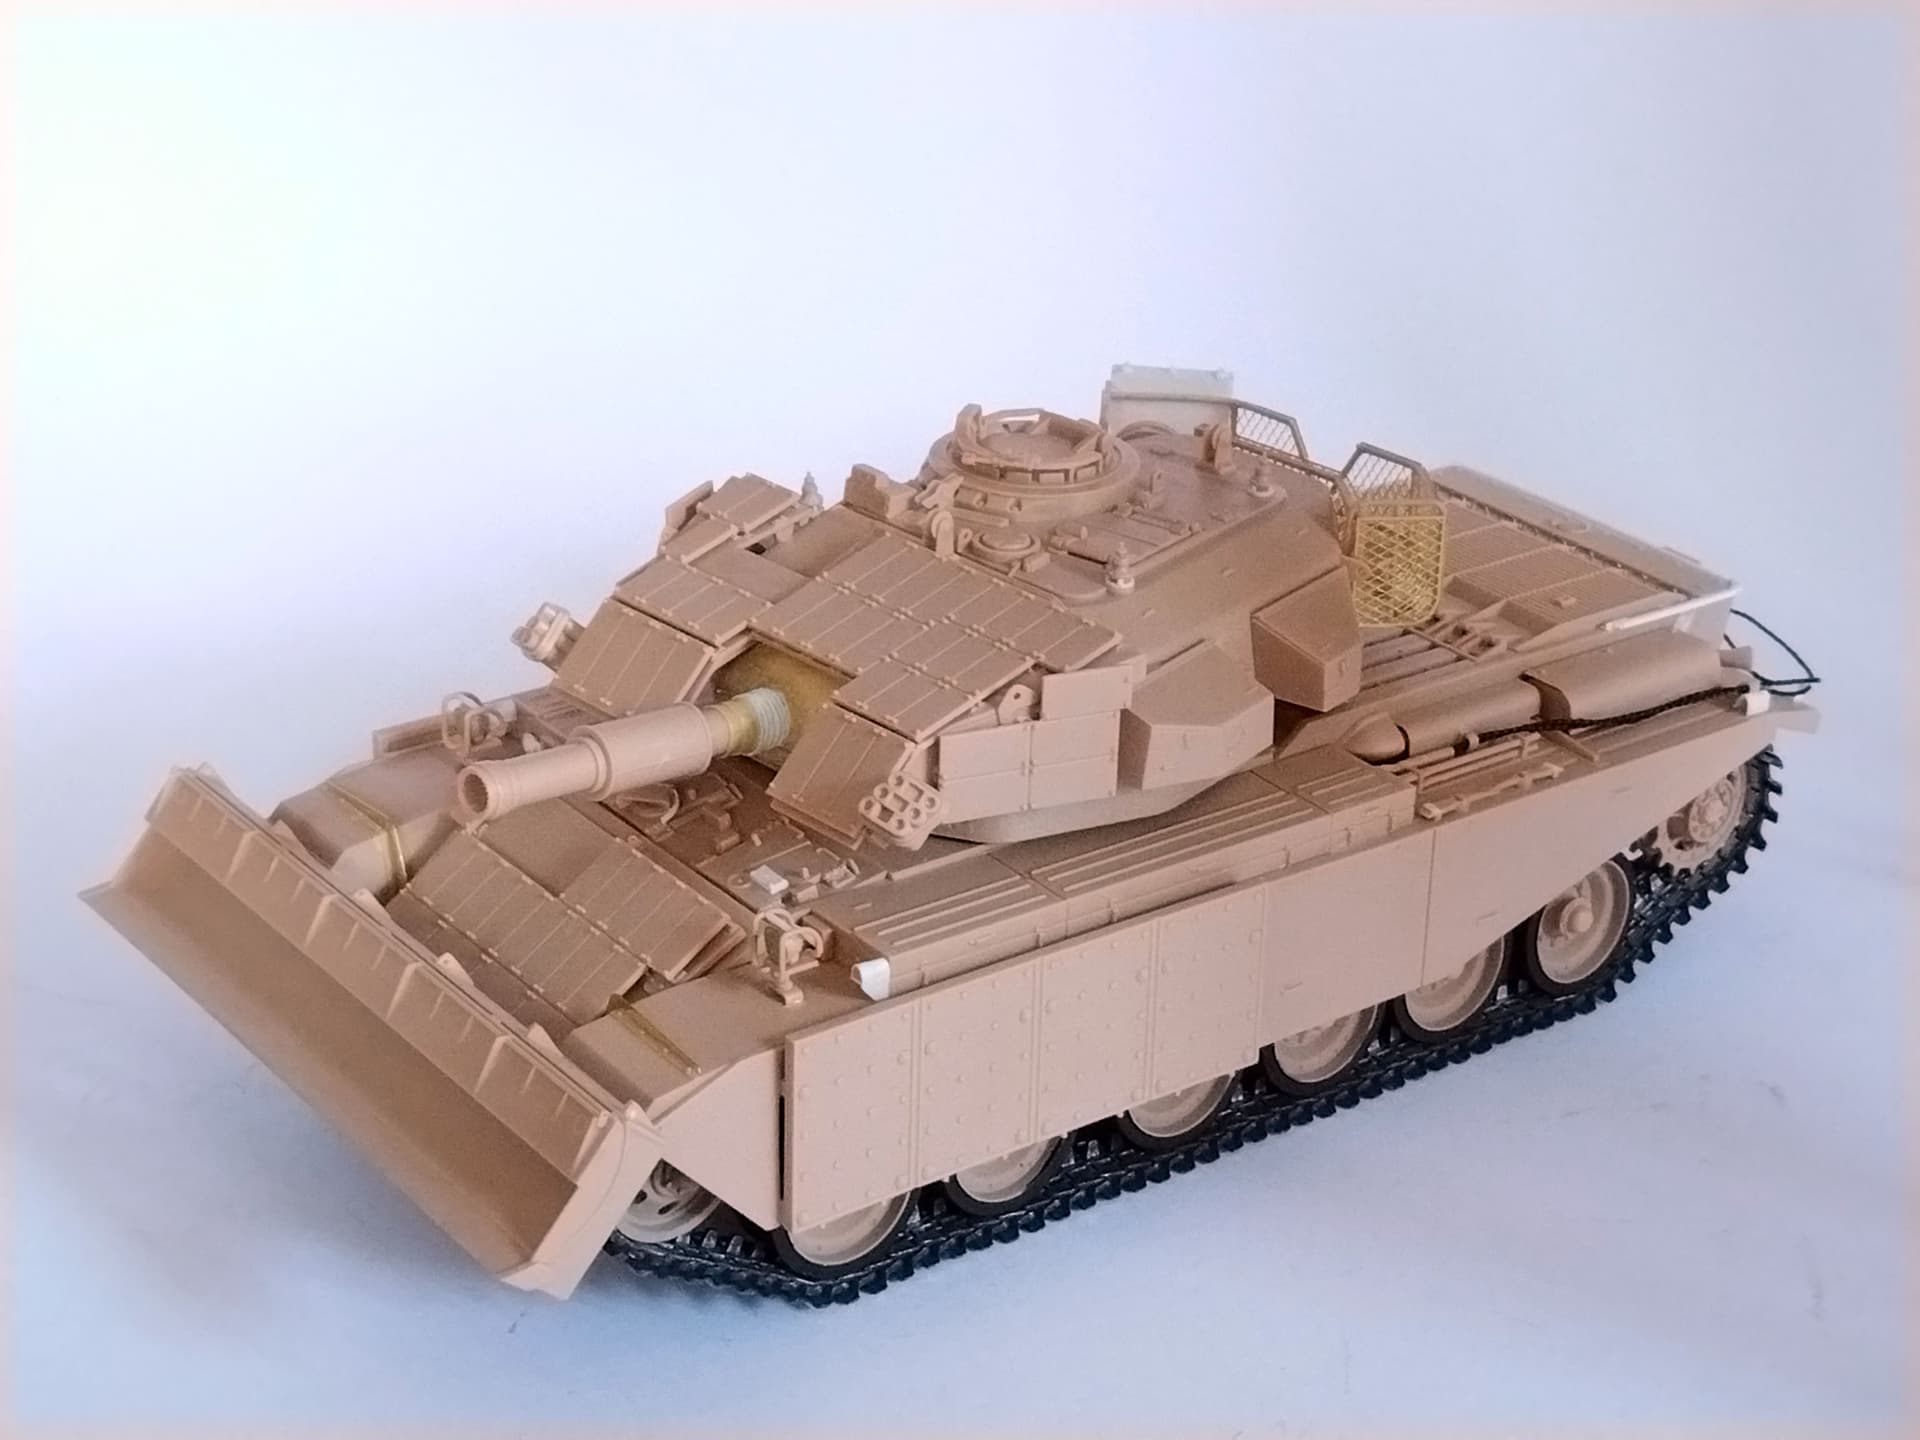
Here are the latest pictures with the blade fitted. I also added the tow cables. I noticed that the AVRE did have the latch for the eye at the rear of the bin on the fender. So I modified the both bins and the eyes.
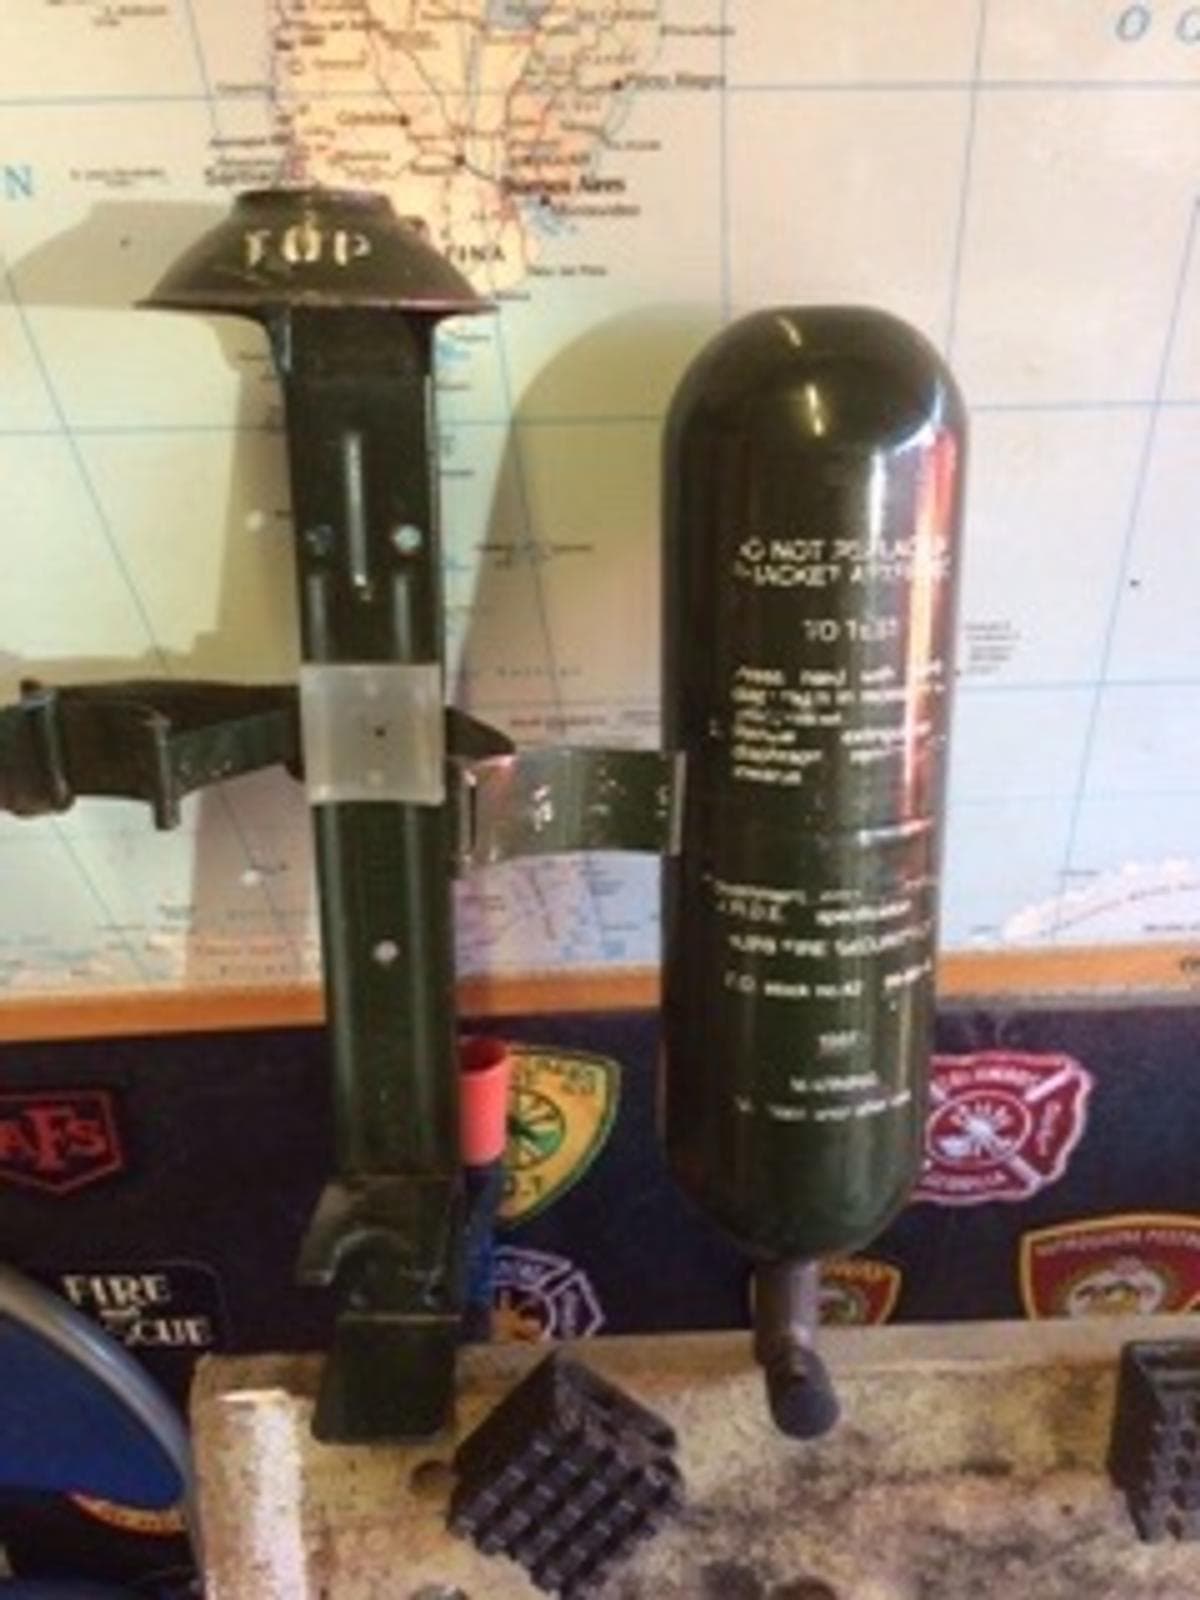
To complete the turret I need a confirmation about the extinguisher type. The ones provided in the kit seem to be an early type. I’m not sure it was still in service during Granby.
Here is AH offering. In grey this is an extinguisher from the FV432 kit.
Olivier
1 Like
Looking terrific Olivier. Some great details going on it
Ref the extinguishers. The AH ones are very old types and I’m 99% sure the grey version is to new… I don’t think they were fitted yet on Granby, I think it’s the older type handheld BCF extinguishers.
2 Likes
Thank you for your answers. I’ll see if I have some in the spare parts box. Otherwise I’ll scratch them.
With the new customs regulations if I buy a set from AA they’ll cost me twice the price. A bit too much considering I just need 2 extinguishers.
Olivier
1 Like
Try looking through any spare or old bits of sprue for the cylinder part Olivier, (if you hadn’t already thought of it  )
)
1 Like
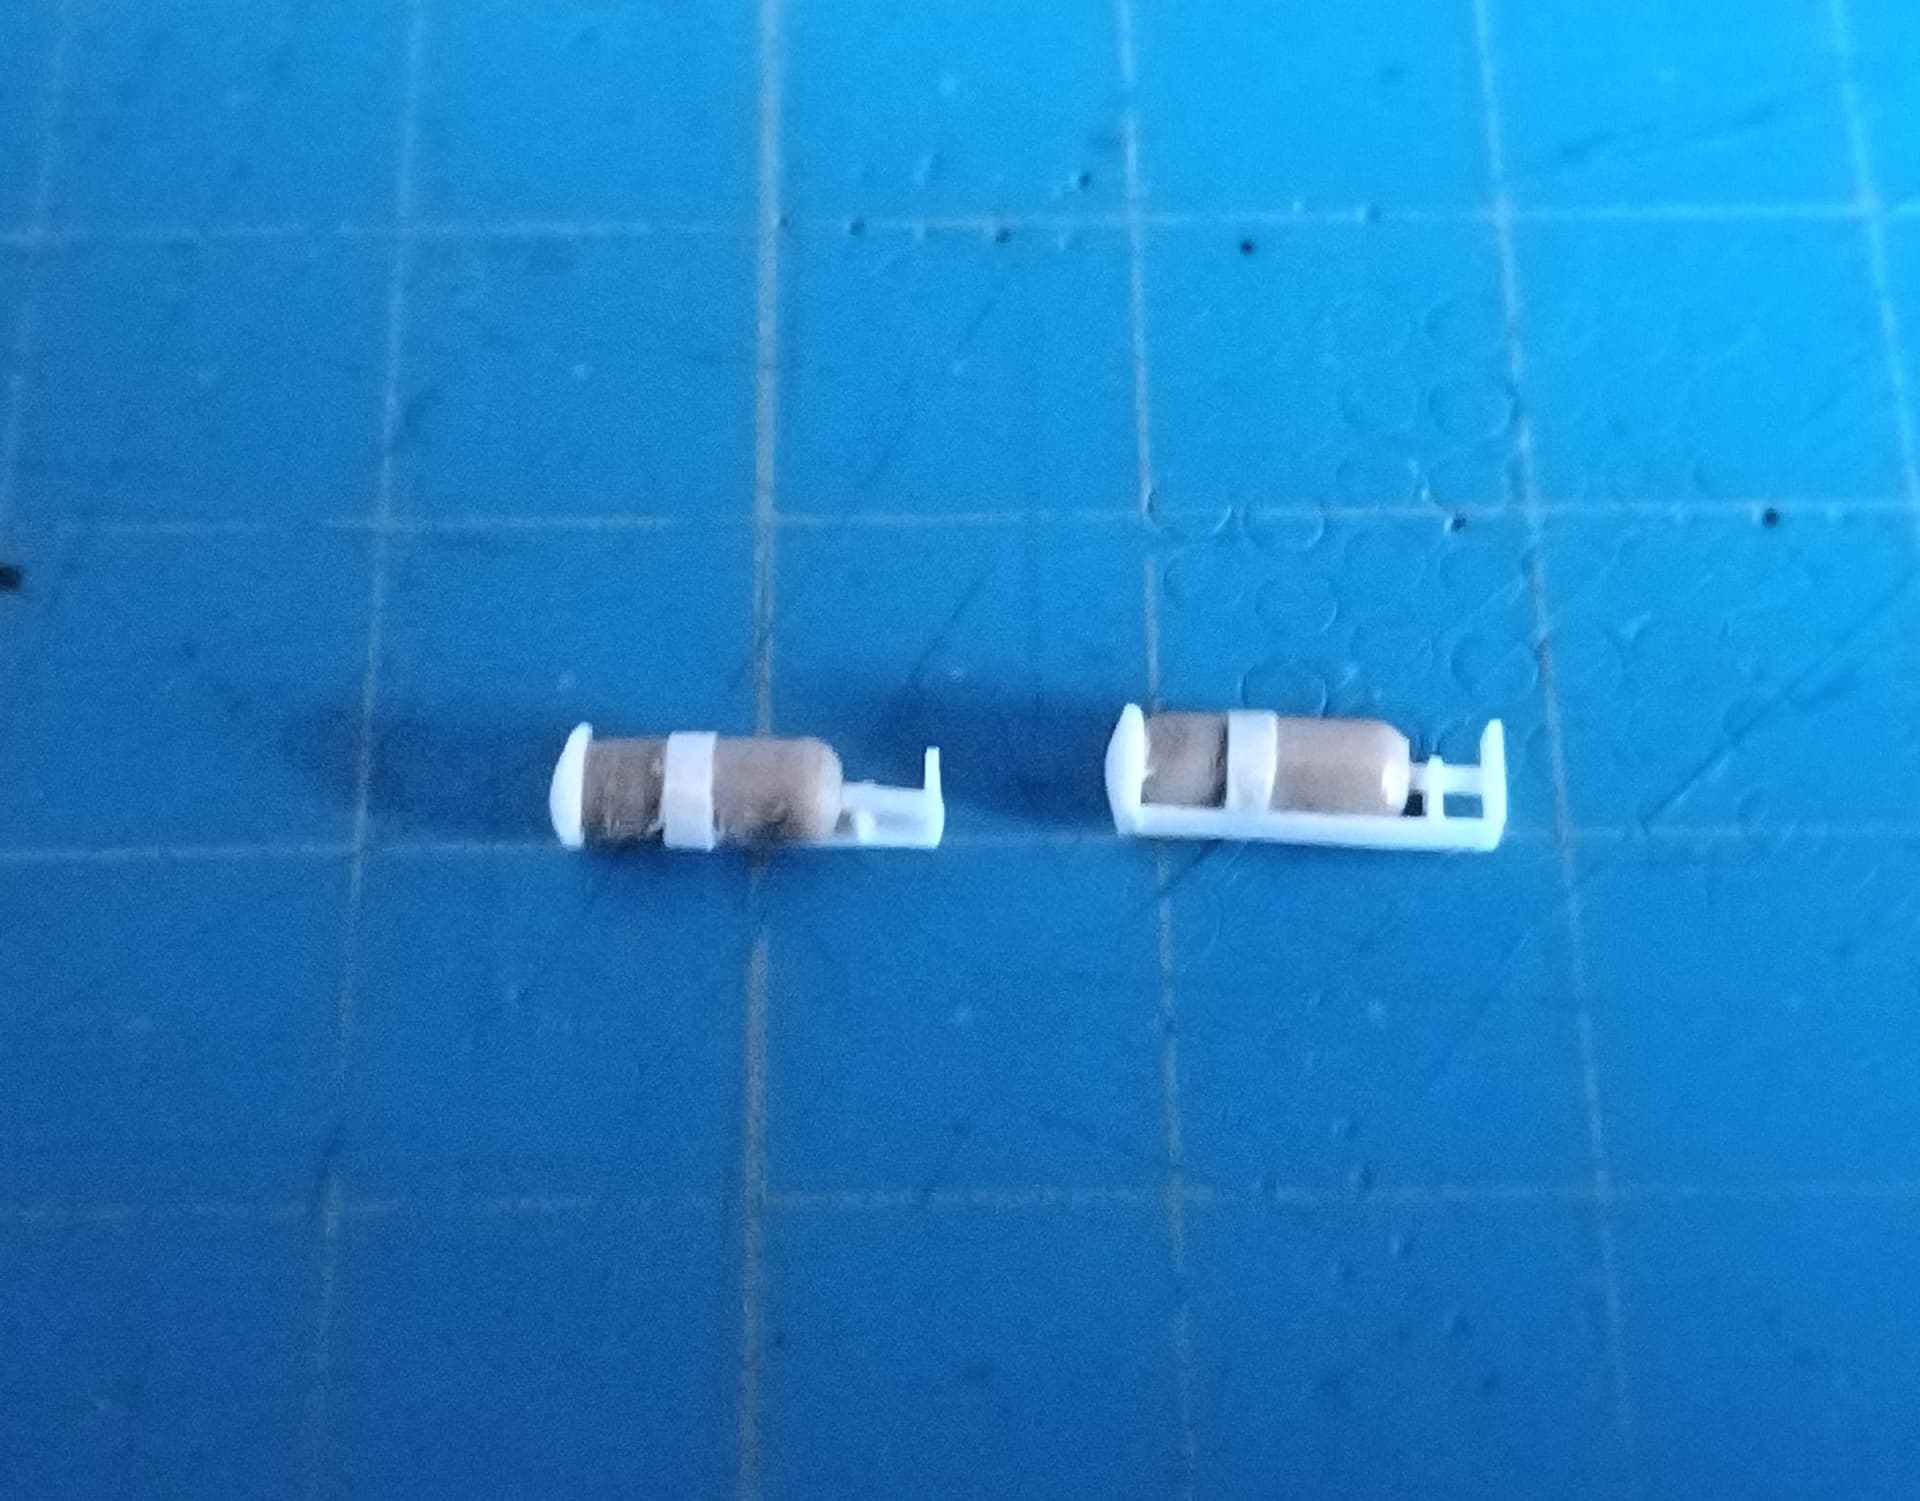
No luck with the spare parts. So scratchbuilding them is the way to go. As you suggest Johnny sprue length is the best starting point. I’ll take the measurements on one of my many 1/35 British vehicles.
Olivier
1 Like
Hi Olivier
Cool with that, saw them on one of Ossie’s photo’s, possibly just a one off? Still looked like a neat feature.
Mal
1 Like
Hi Mal and olivier
the vehicle with the chain mail is again different form the one that Olivier is building , every AVRE was different in little things.
chain mail is ONE AVRE and is different all together different track adjuster and loads more differences.
so Oiliver has opted to build 11BA46 most photographed AVRE for two reasons . this is also the one with the tent frame on the rear decks and the one at Duxford. also the one the kit is based on .
the two sets of flags about also the pulling down of sadams picture wall.
hope it helps
Ossie
1 Like
If you have a Chieftain or a Tamiya Challenger 1 in the stash, you could try casting them up. Not as nice as the AA ones, but are passable.
Nice. Very clean looking build.
1 Like
I have taken the measurements from my Tamiya Challenger 1 and scratched mine.
By the way I have a question about how they are installed on the turret. Am I right if I put the extinguisher the head/nozzle down?
Olivier
2 Likes