Gentlemen,
Thank you for the kind words! I hope to have some updates this week
David
Gentlemen,
Thank you for the kind words! I hope to have some updates this week
David
Lovely pe work there Dave… 
Great to see this one moving forward
thanks Russell - was hoping to get a few minutes on her today but that fell through - maybe tomorrow
David
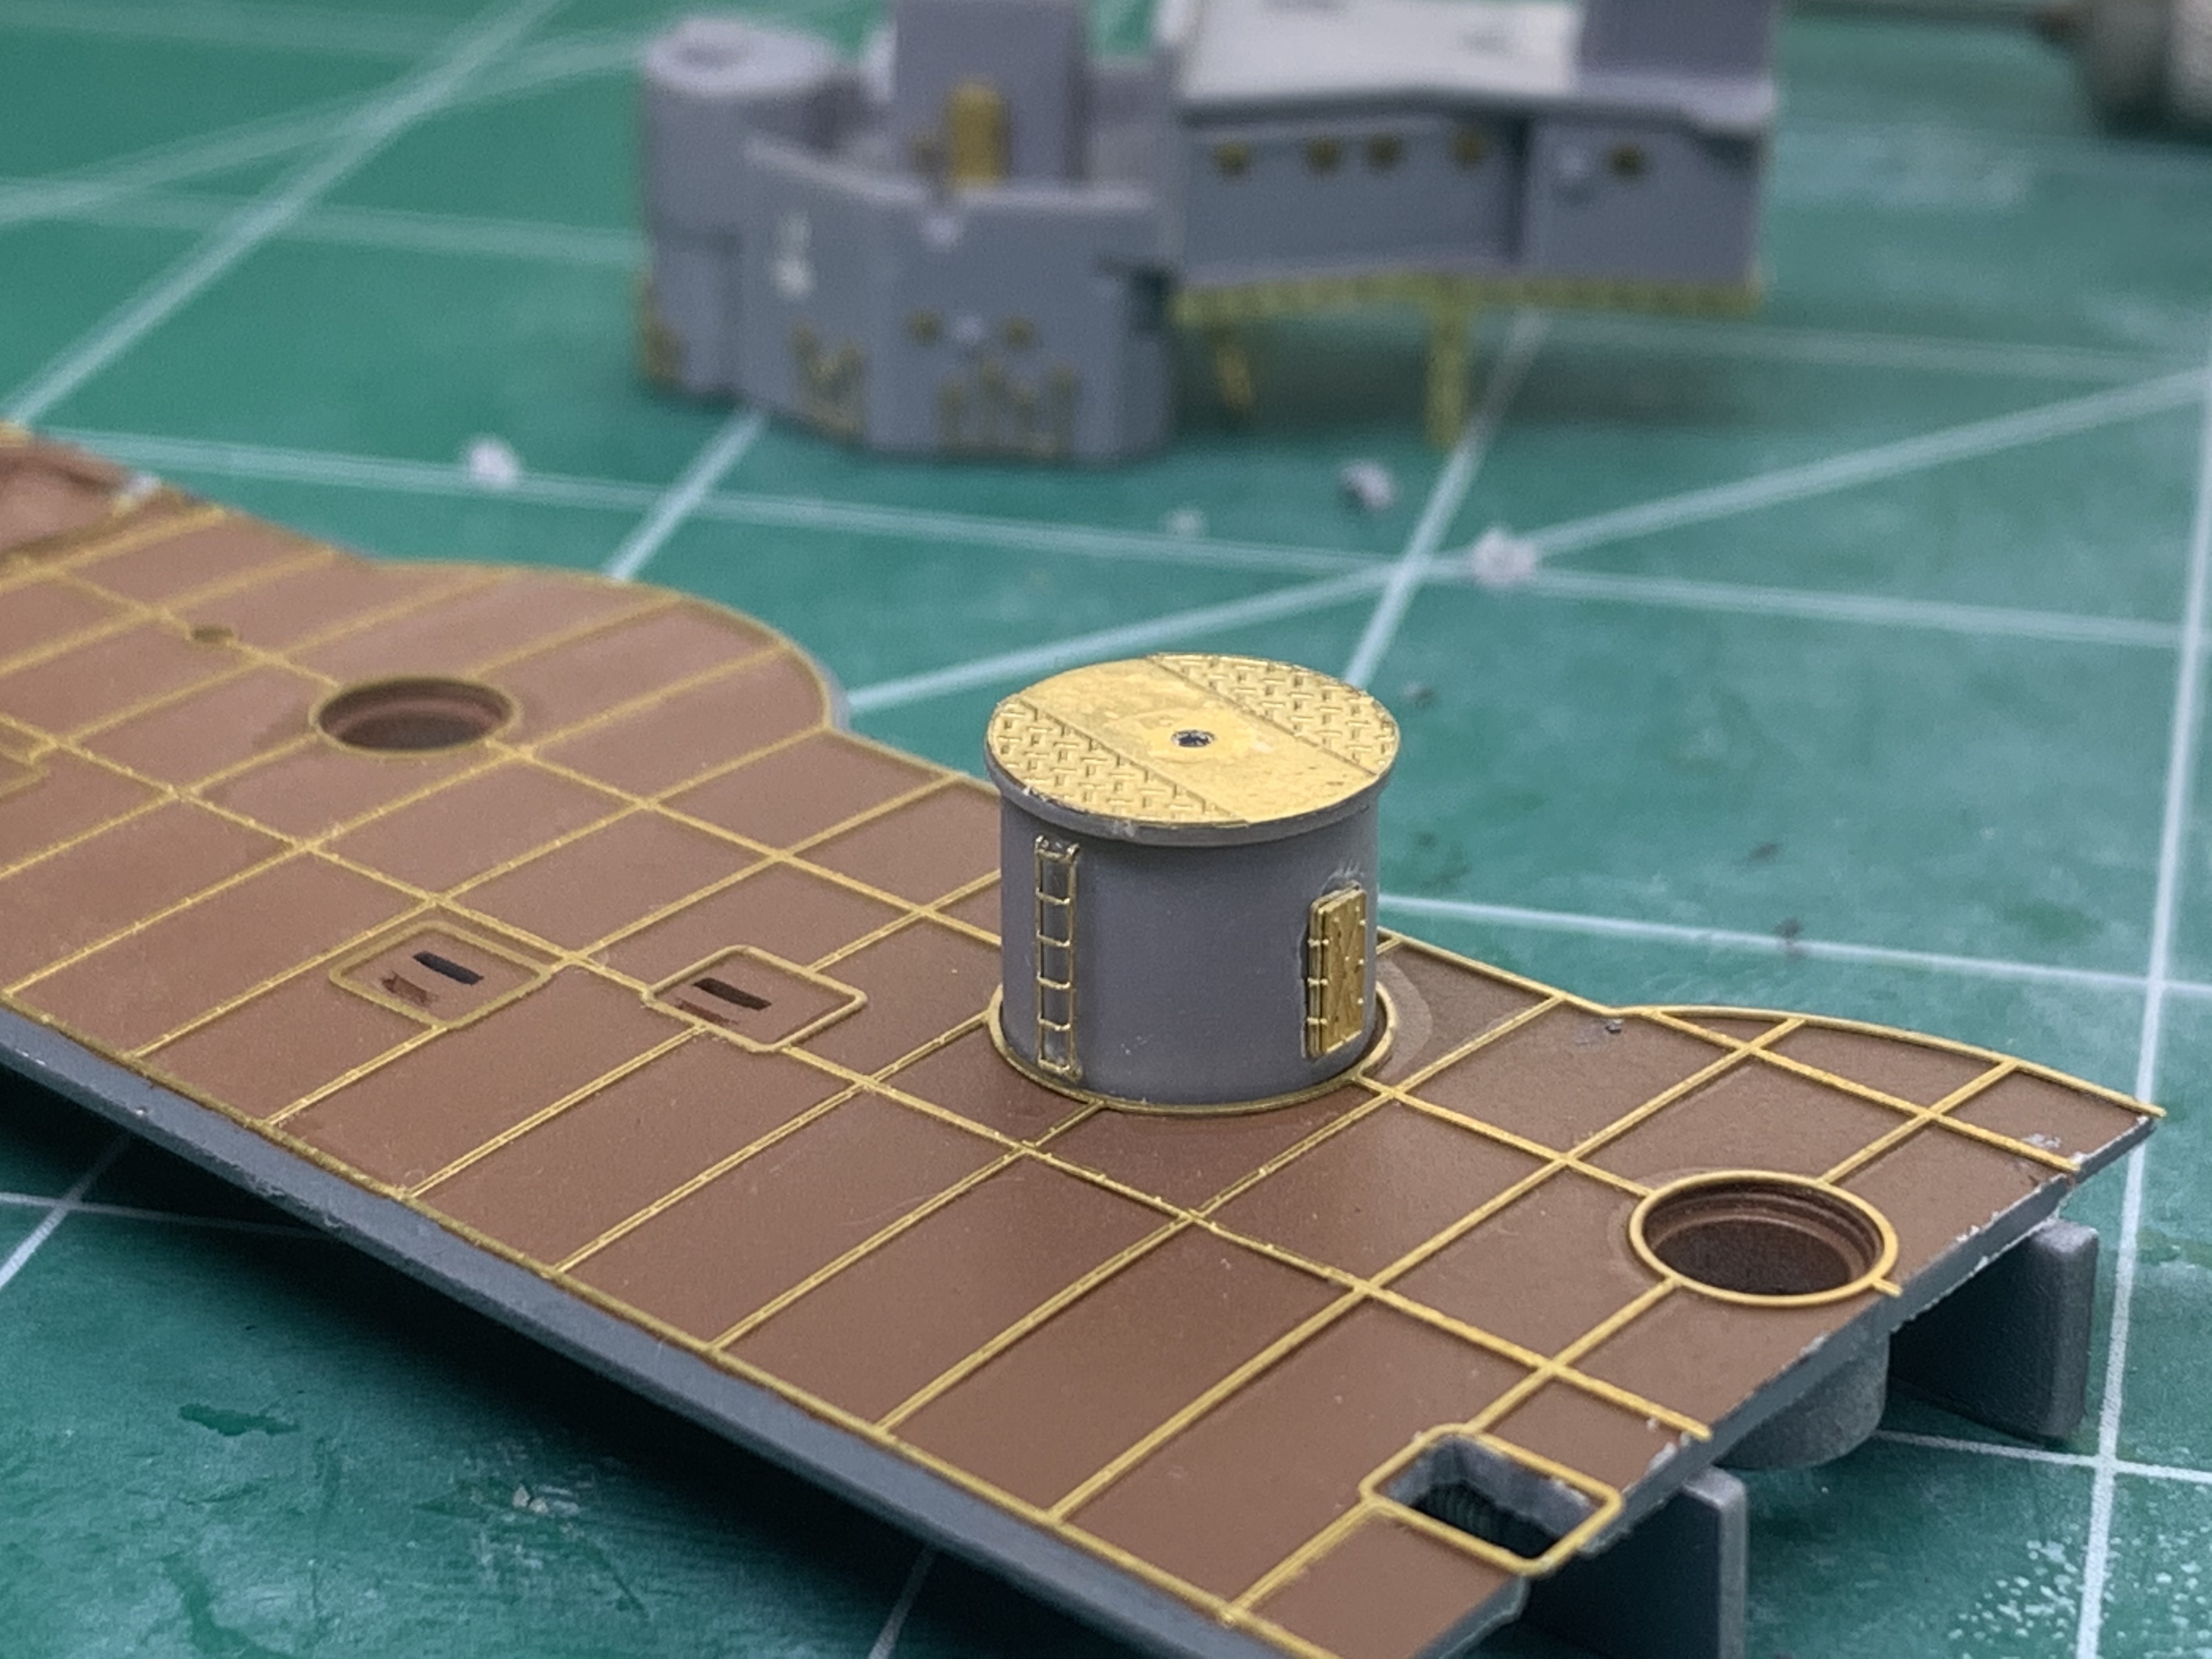
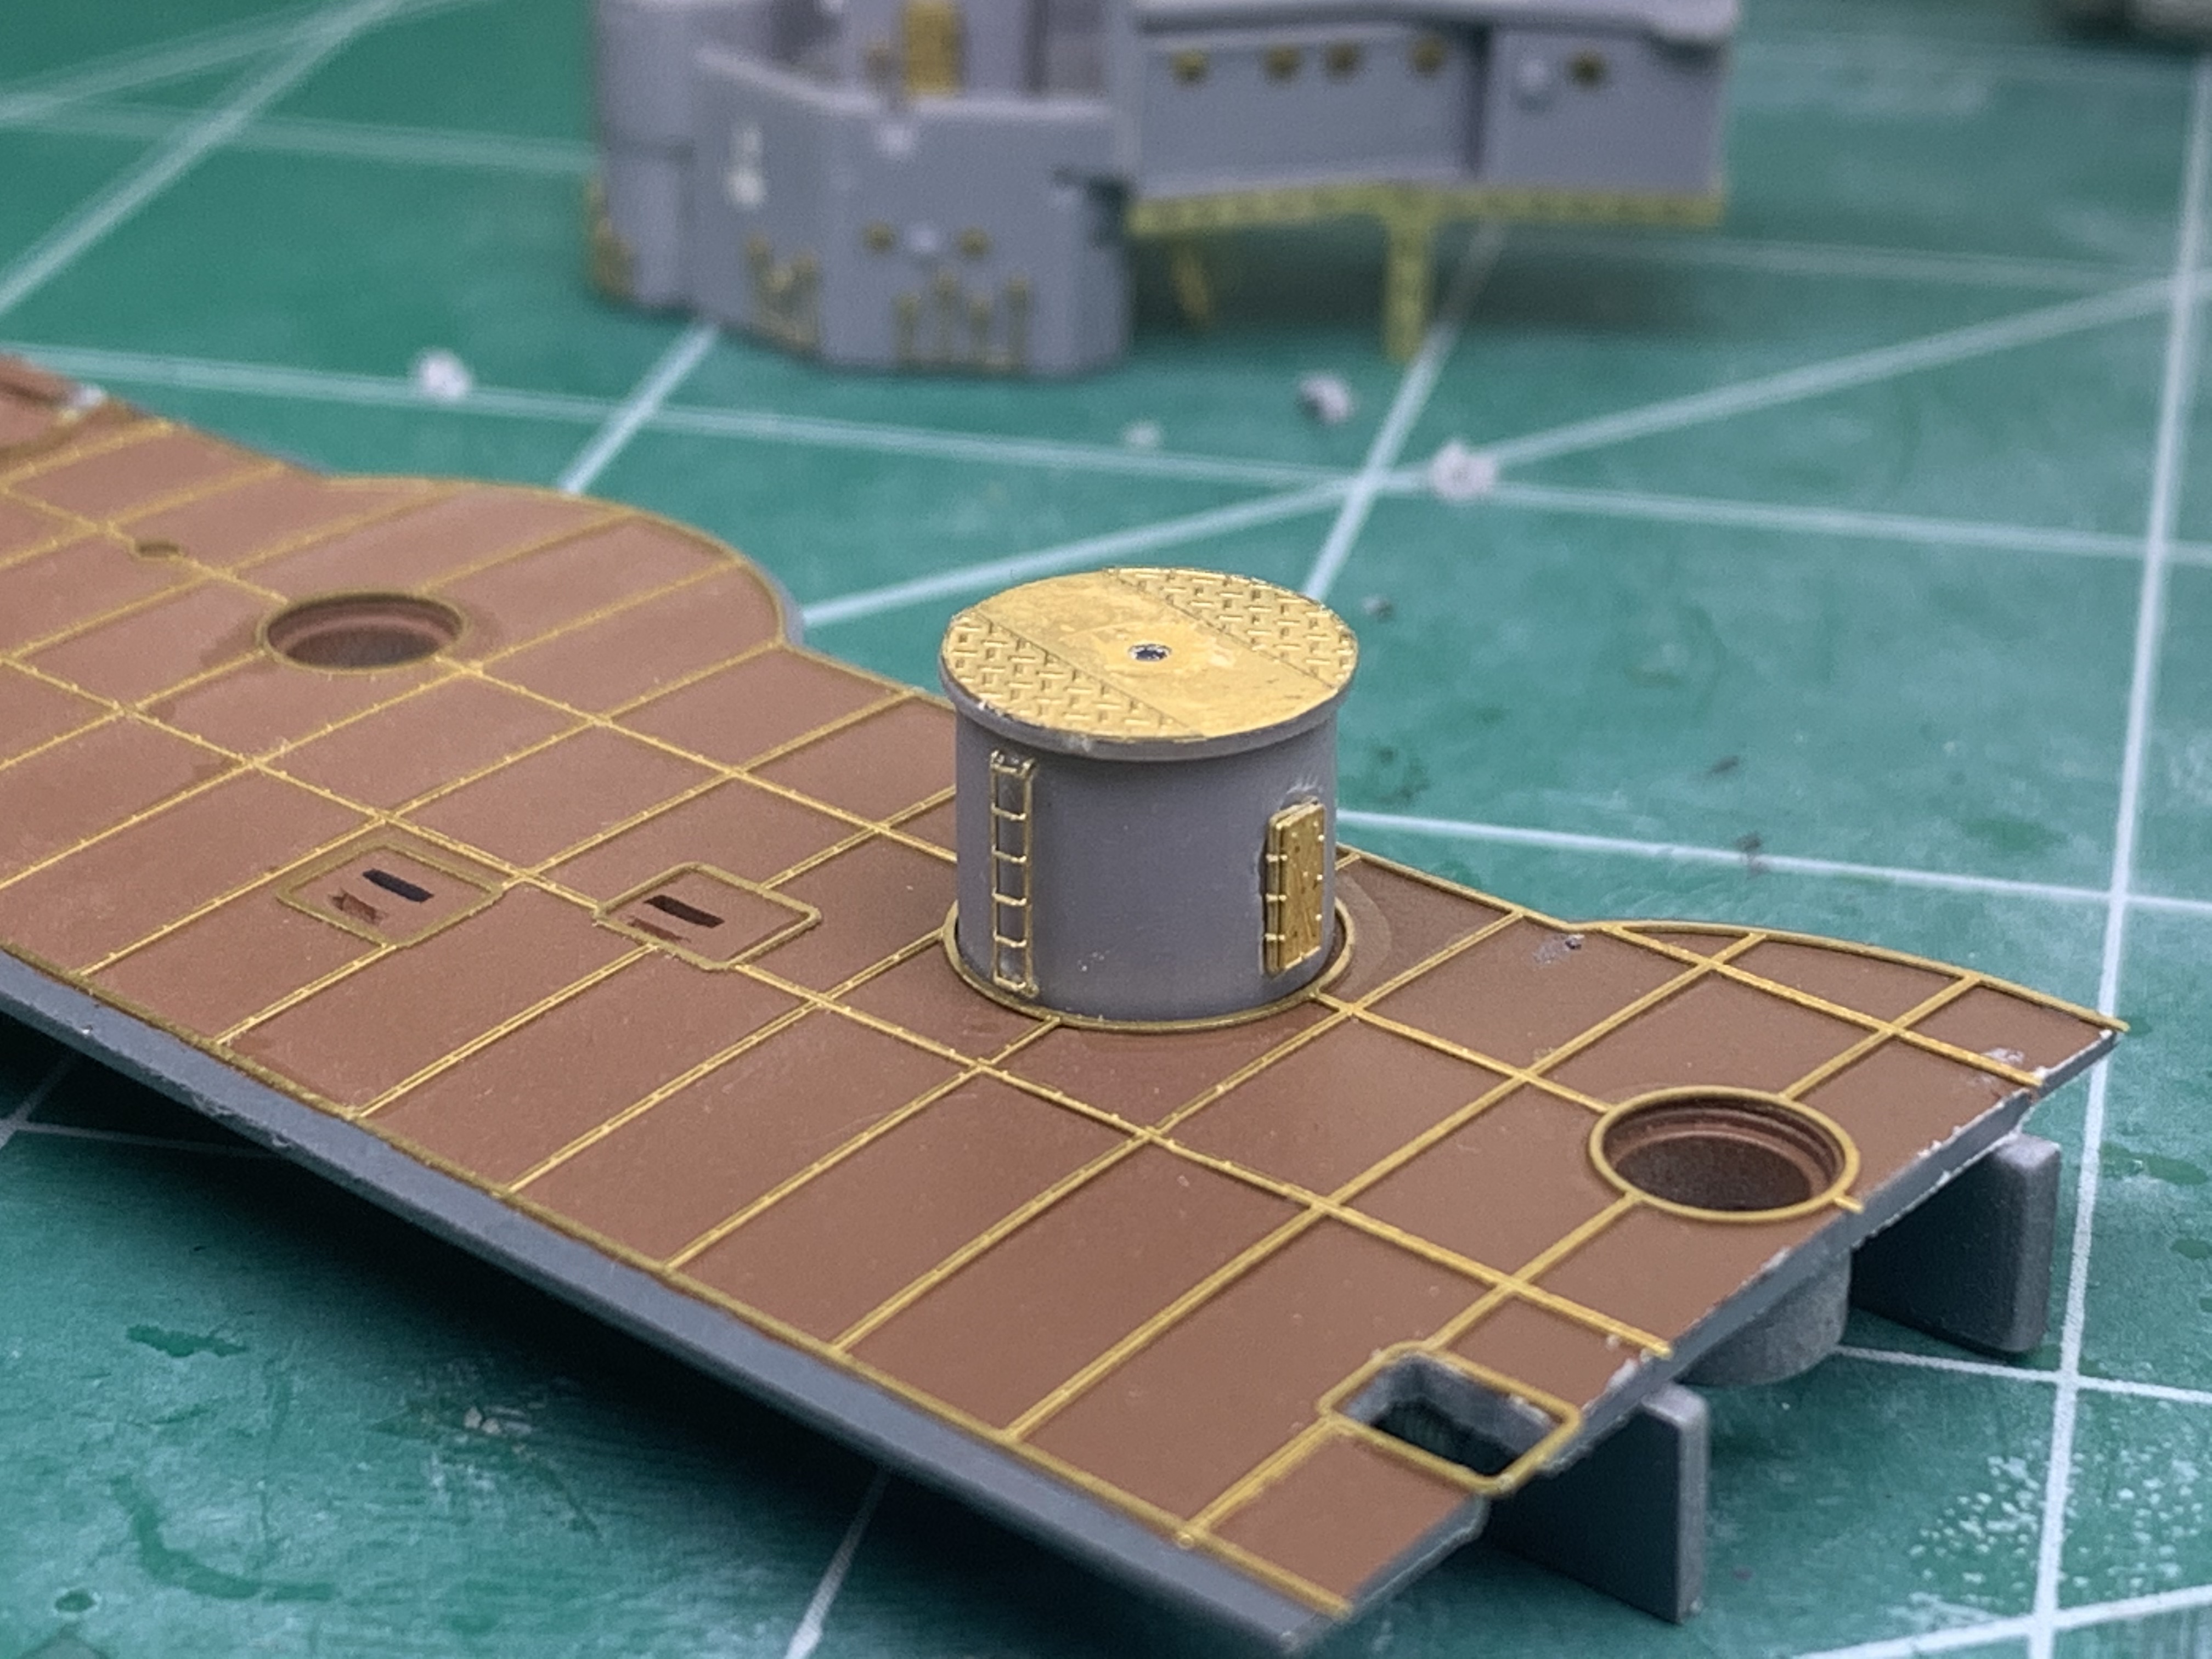
David, that photoetched brass over the deck linoleum looks great! It is clearly a fussy part of the build, but I couldn’t imagine a painted representation being anywhere near as effective. Well done!
Great work on this ship!
Thank you everyone for the kind comments and support
Tim- oddly enough it was not as finnicky as you might think. Rainbow did a good job of aligning the brass strip with the parts deck. Only minor issues of alignment - it took me a bit of time to figure out the best way to lay it out but once I did it was off to the races.
Russell - Thanks - great to have you back on board
Gazza - Thank you
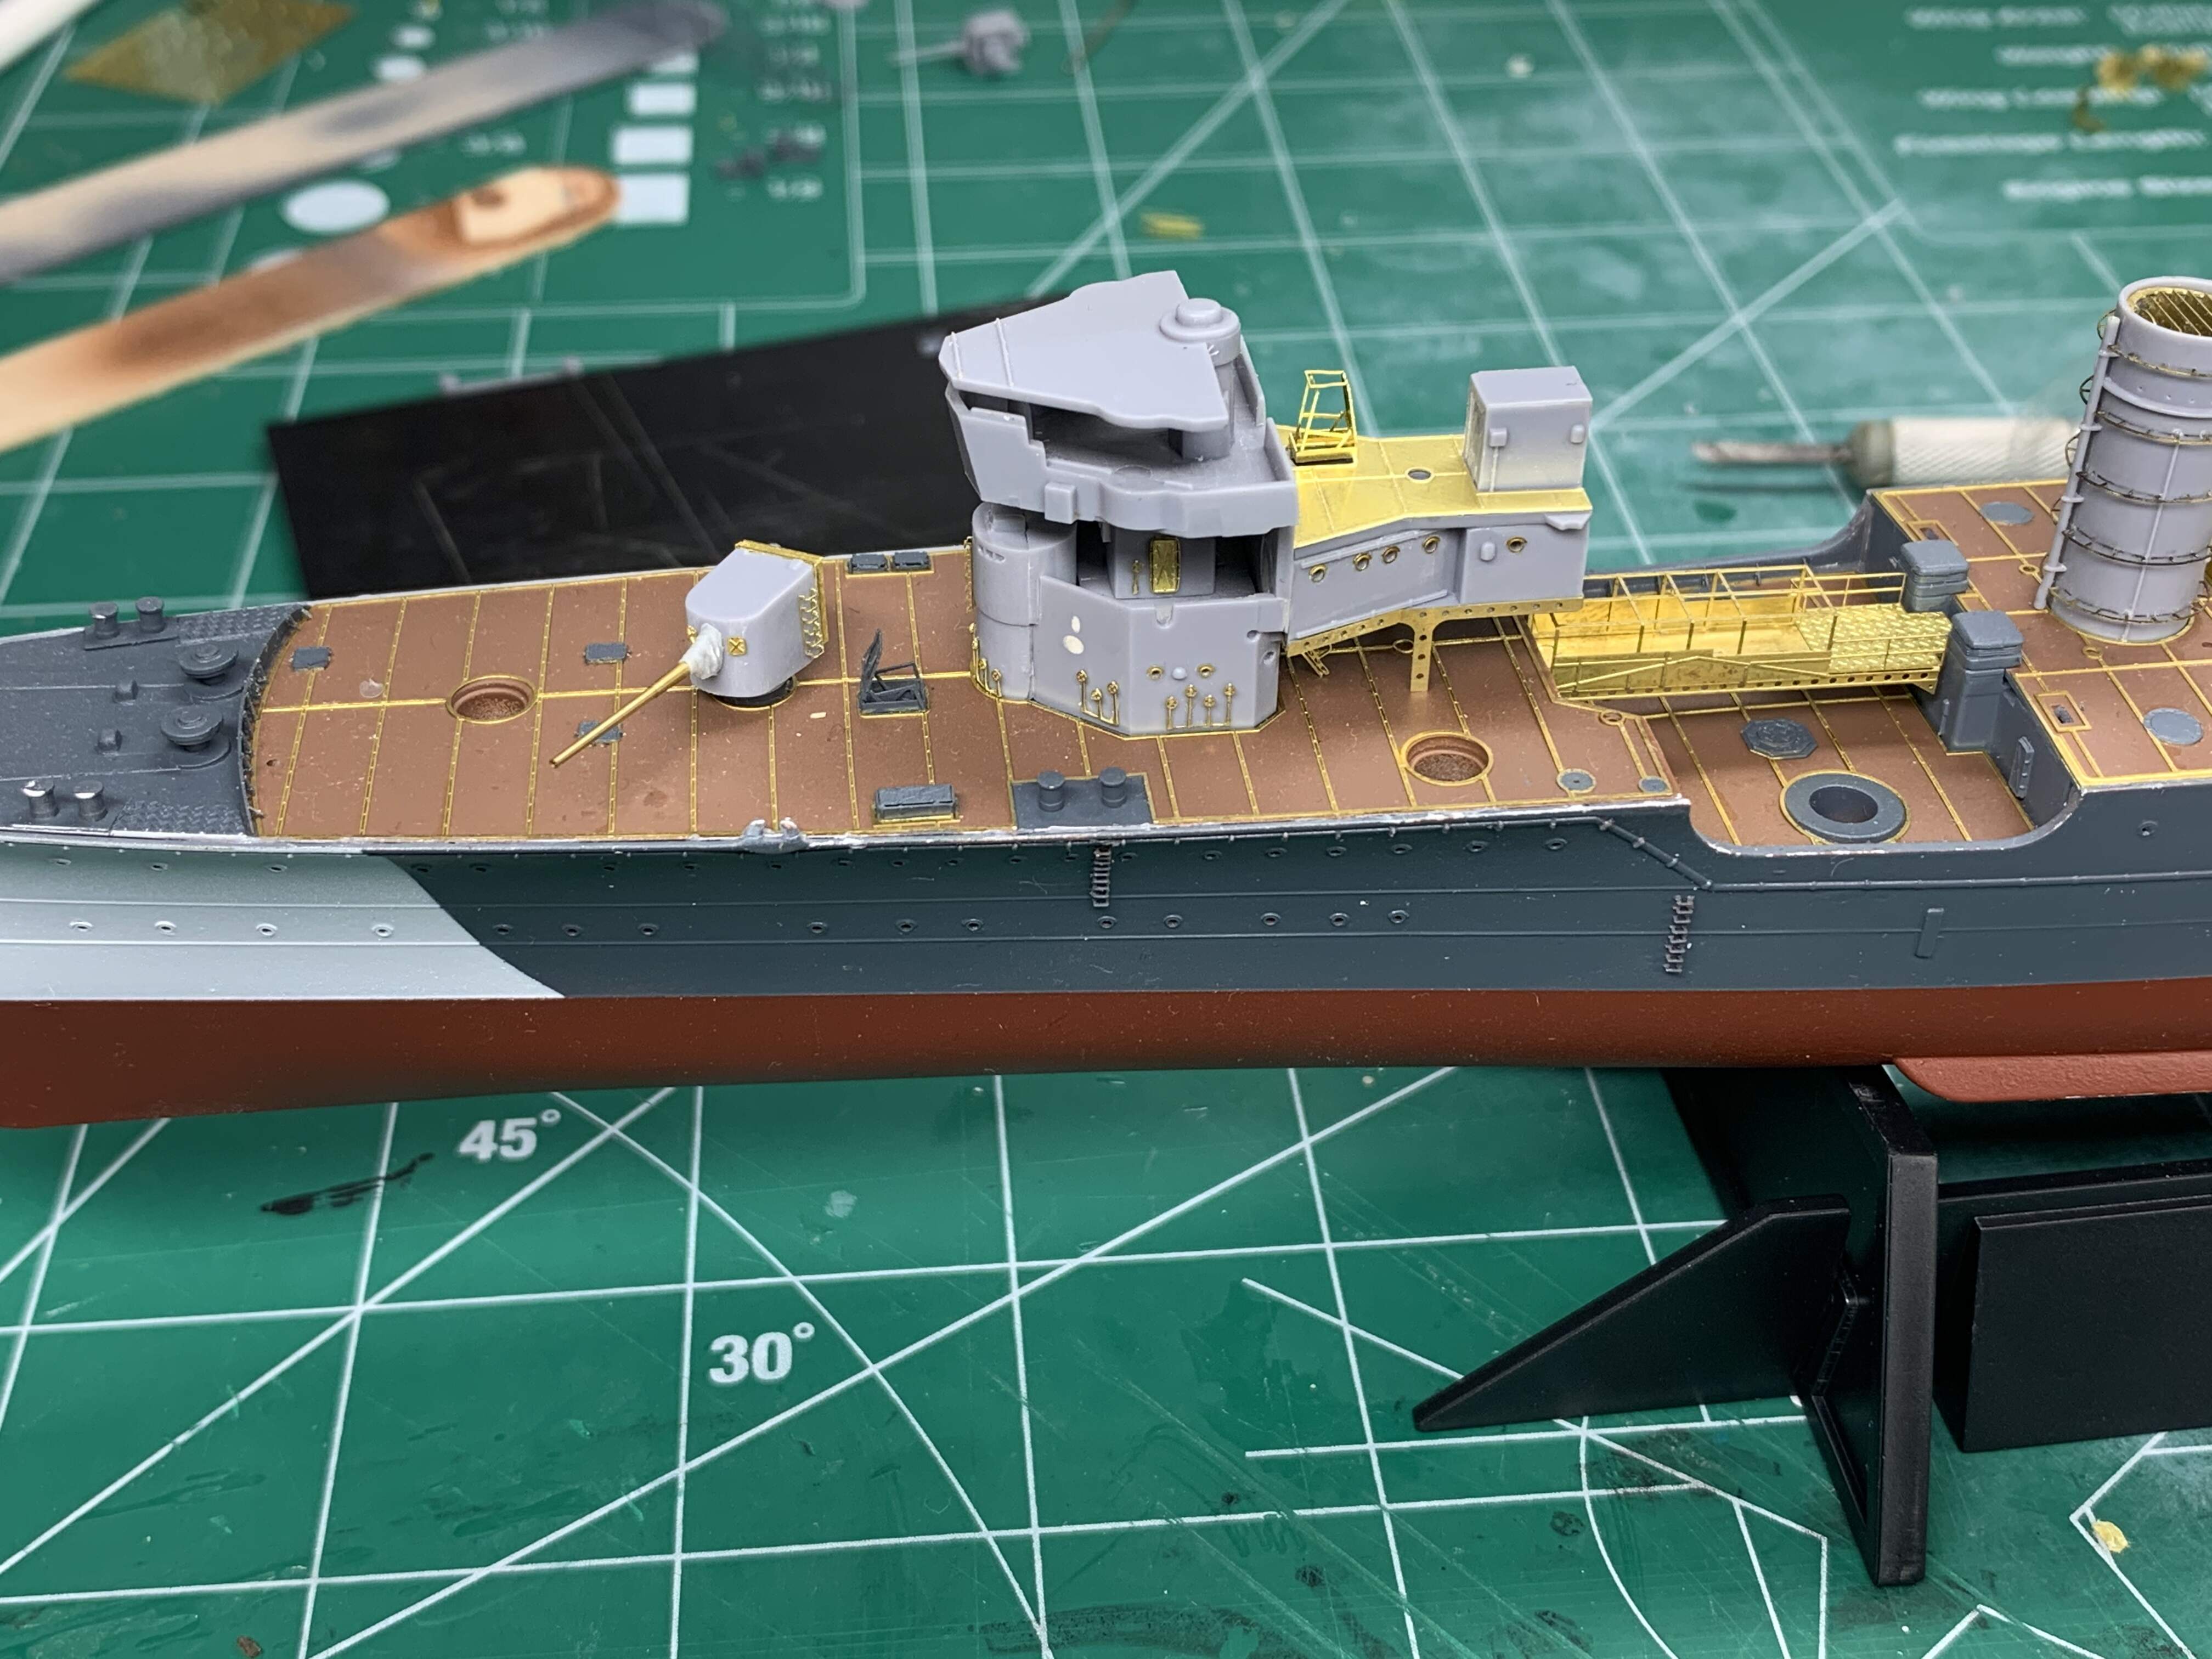
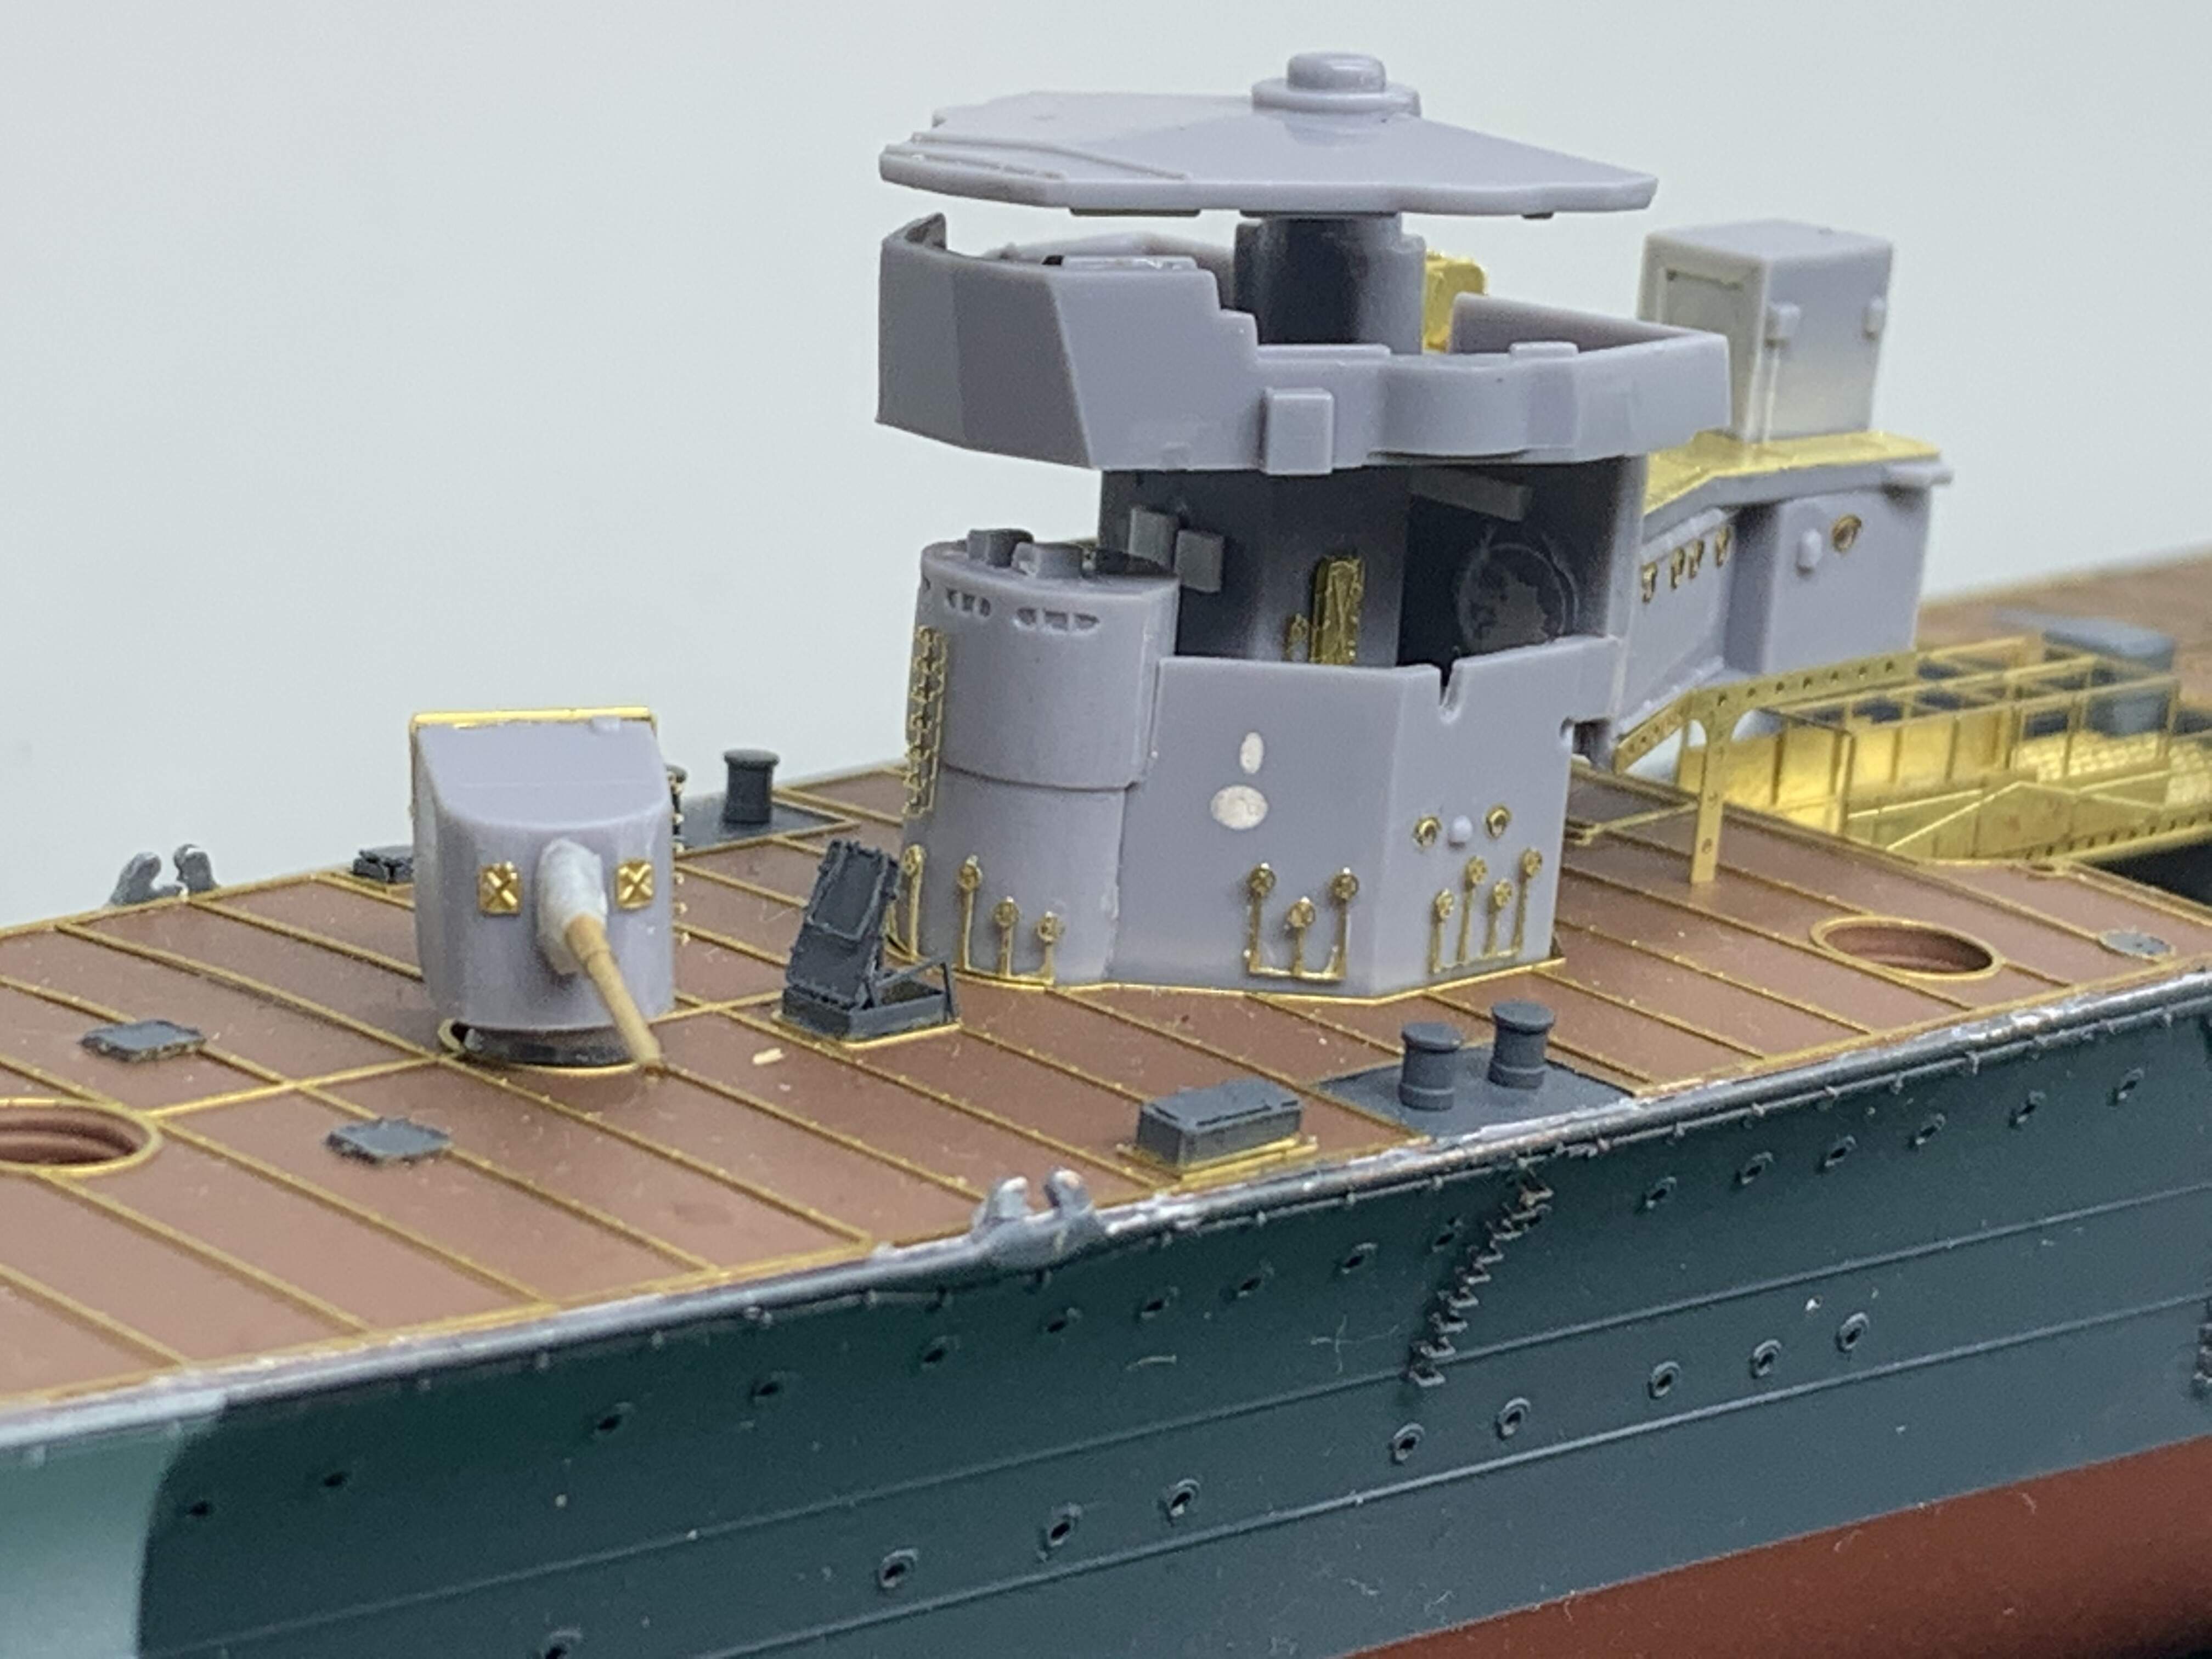
I did get about an hour on the bench yesterday so I finished up adding to the port holes to the aft portion of the bridge housing. After that I had this overwhelming need to see one of the main guns added tot the deck.
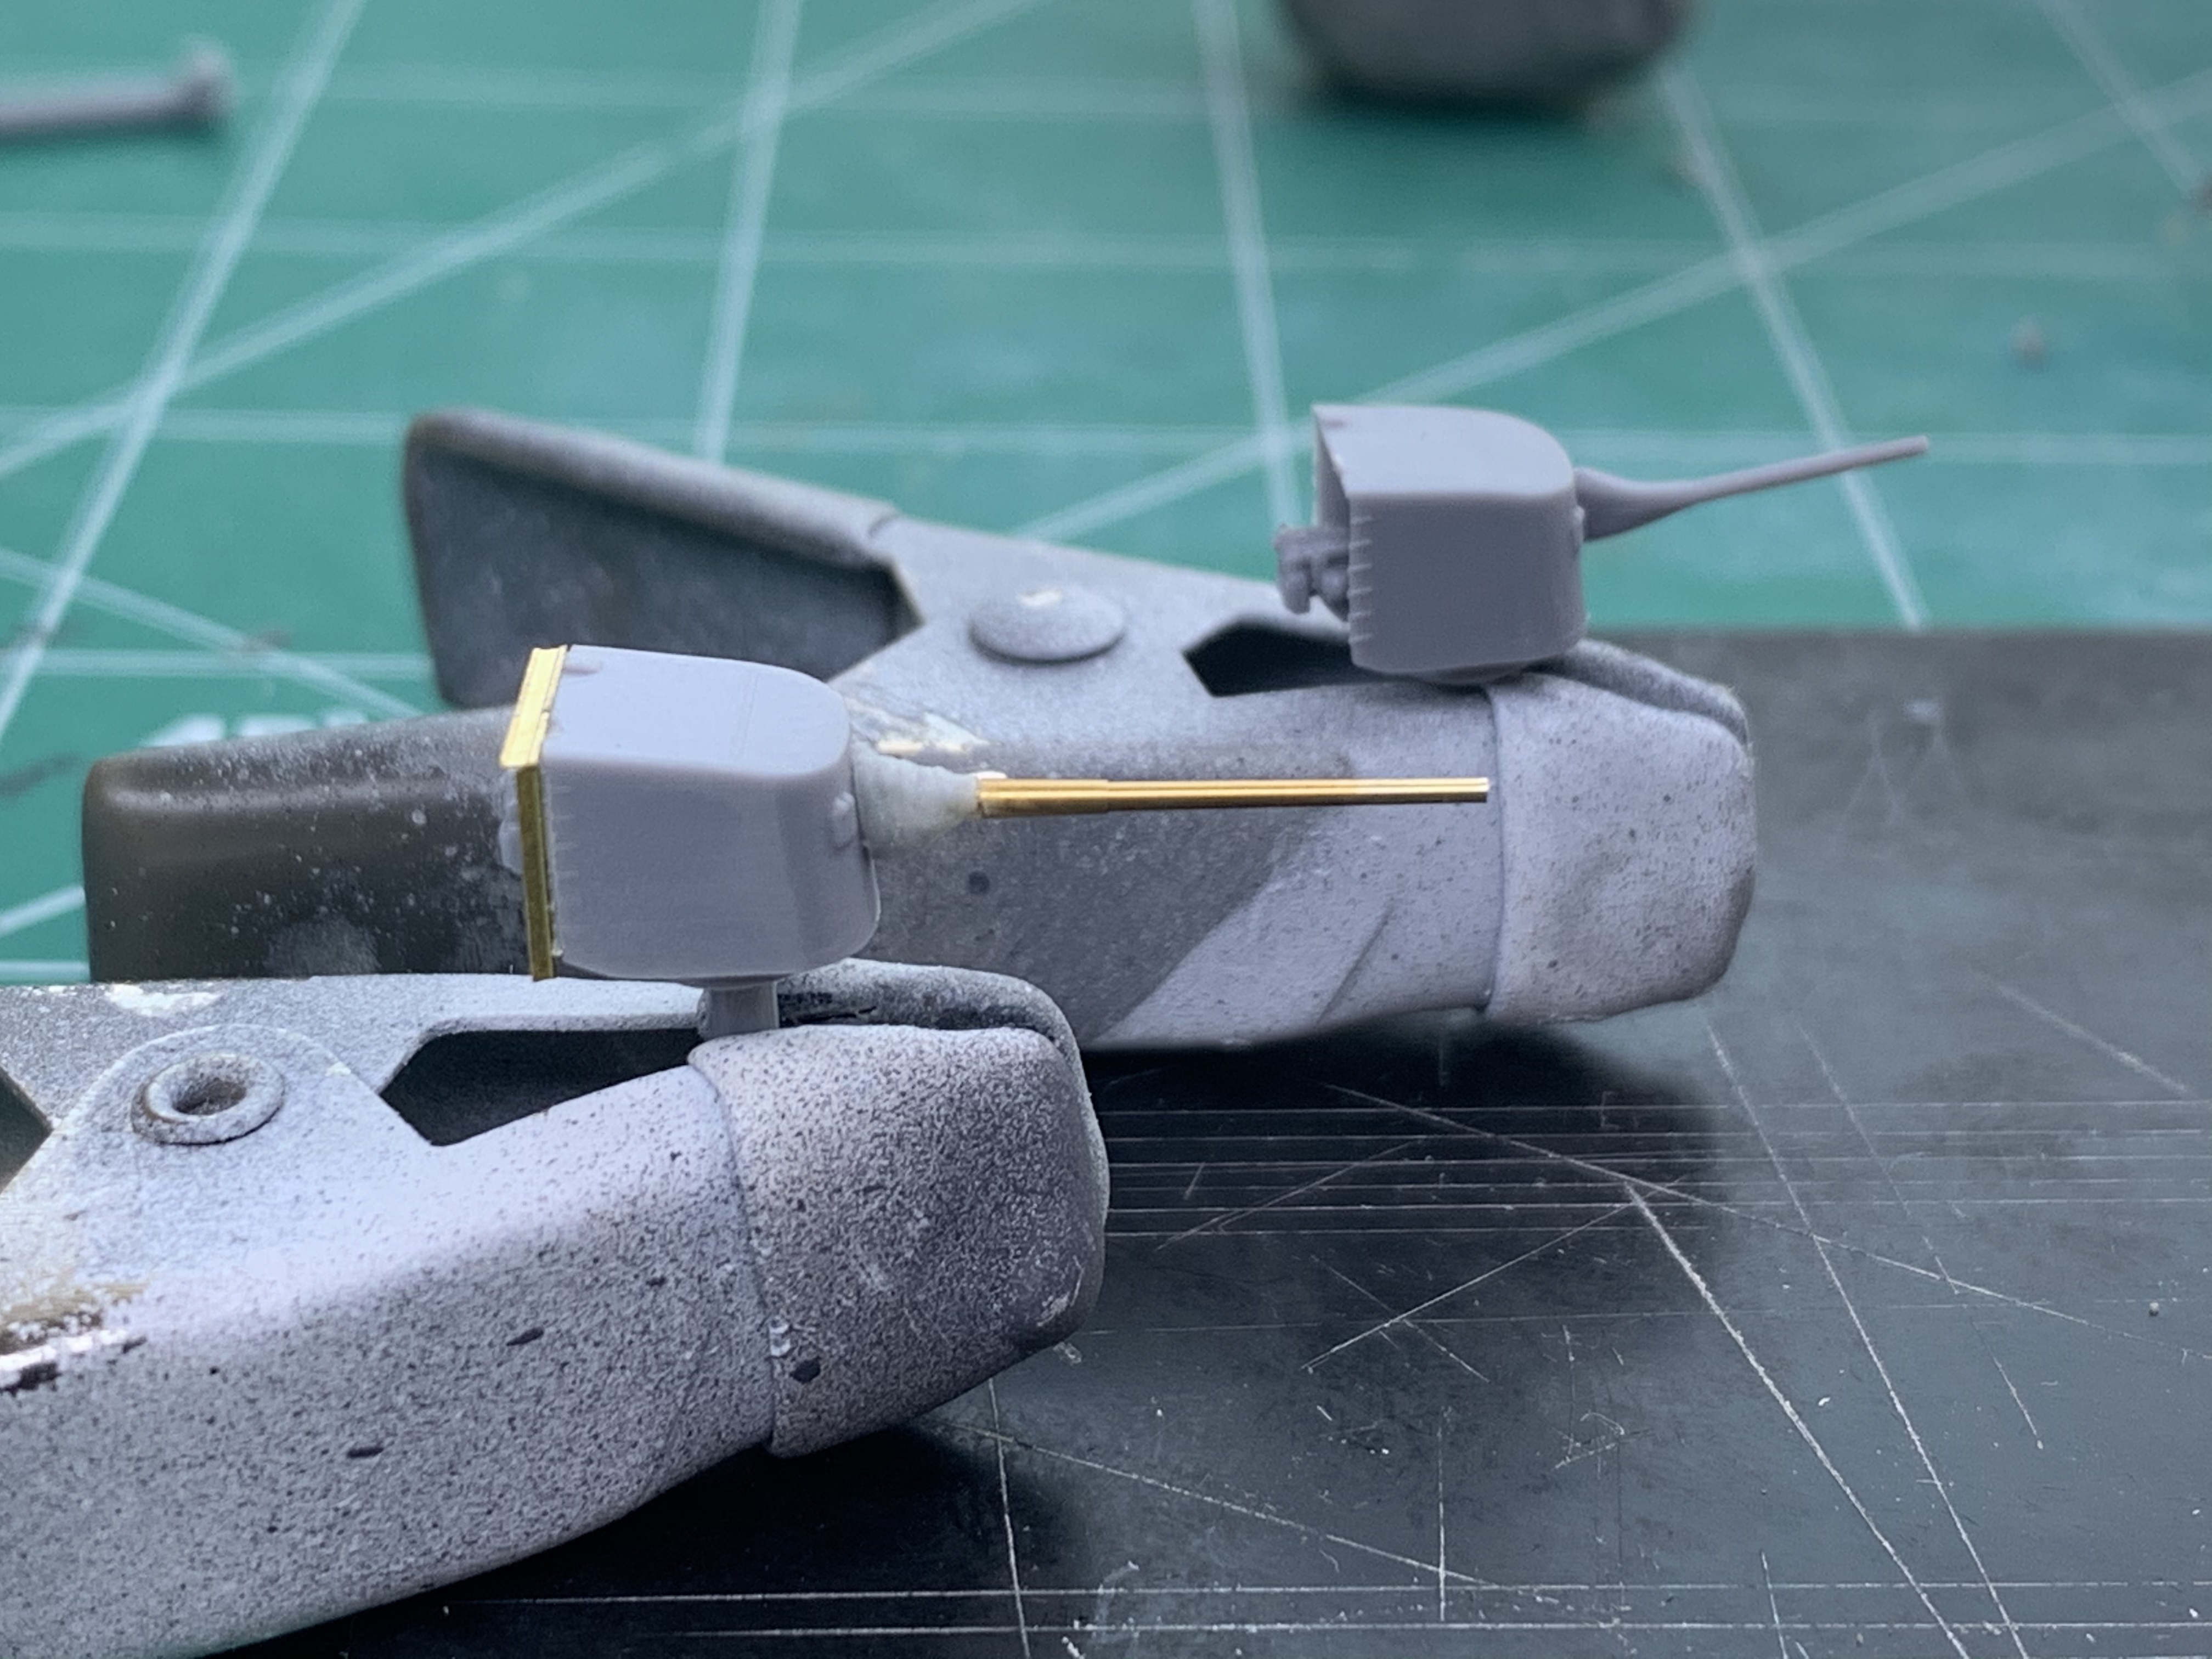
I didn’t take any in progress photos but I did make some comparison photos between the upgraded turret and the part turret.
!The brass barrels are significantly longer than the kit provided plastic barrels
Also I think I might have mounted the blast bag on upside down - not sure
In any case here they are dry fitted to the forward deck
!Well that was it for now, hope to sneak a little more time in this week
Thanks for stopping by and as always comments, suggestions and criticism are always welcome
David
Akio,
Thank you and welcome aboard at Model Shipwrights!! Glad to have you along for the voyage!!
David
Looking good David… The pe is a big improvement to the kits guns 
What Russ says - that’s a big improvement, your enhanced guns are looking really sweet!
Cheers
Jan
Russell / Jan - Thank you kind sirs! I will admit though that the length of the barrel had me a little concerned. Still trying to find some pictures that show the true alignment in relation to the deck.
Now to find some time to go back and clean it up some more. After that back to the deck! The rest of the main guns will wait until later.
David
Great looking artillery!
Thank you sir!! There are 6 more to build but at a later time.
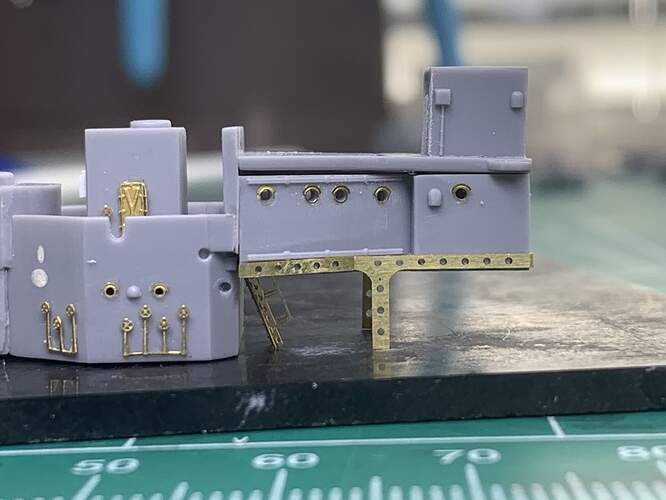
Speaking of building - I was able to finagle a bit of time on the bench yesterday. I cleaned up and finished the Main gun by adding the view port covers and readjusting the PE on the back entry point.
Of course I didn’t take a picture, will grab one tonight and update this post
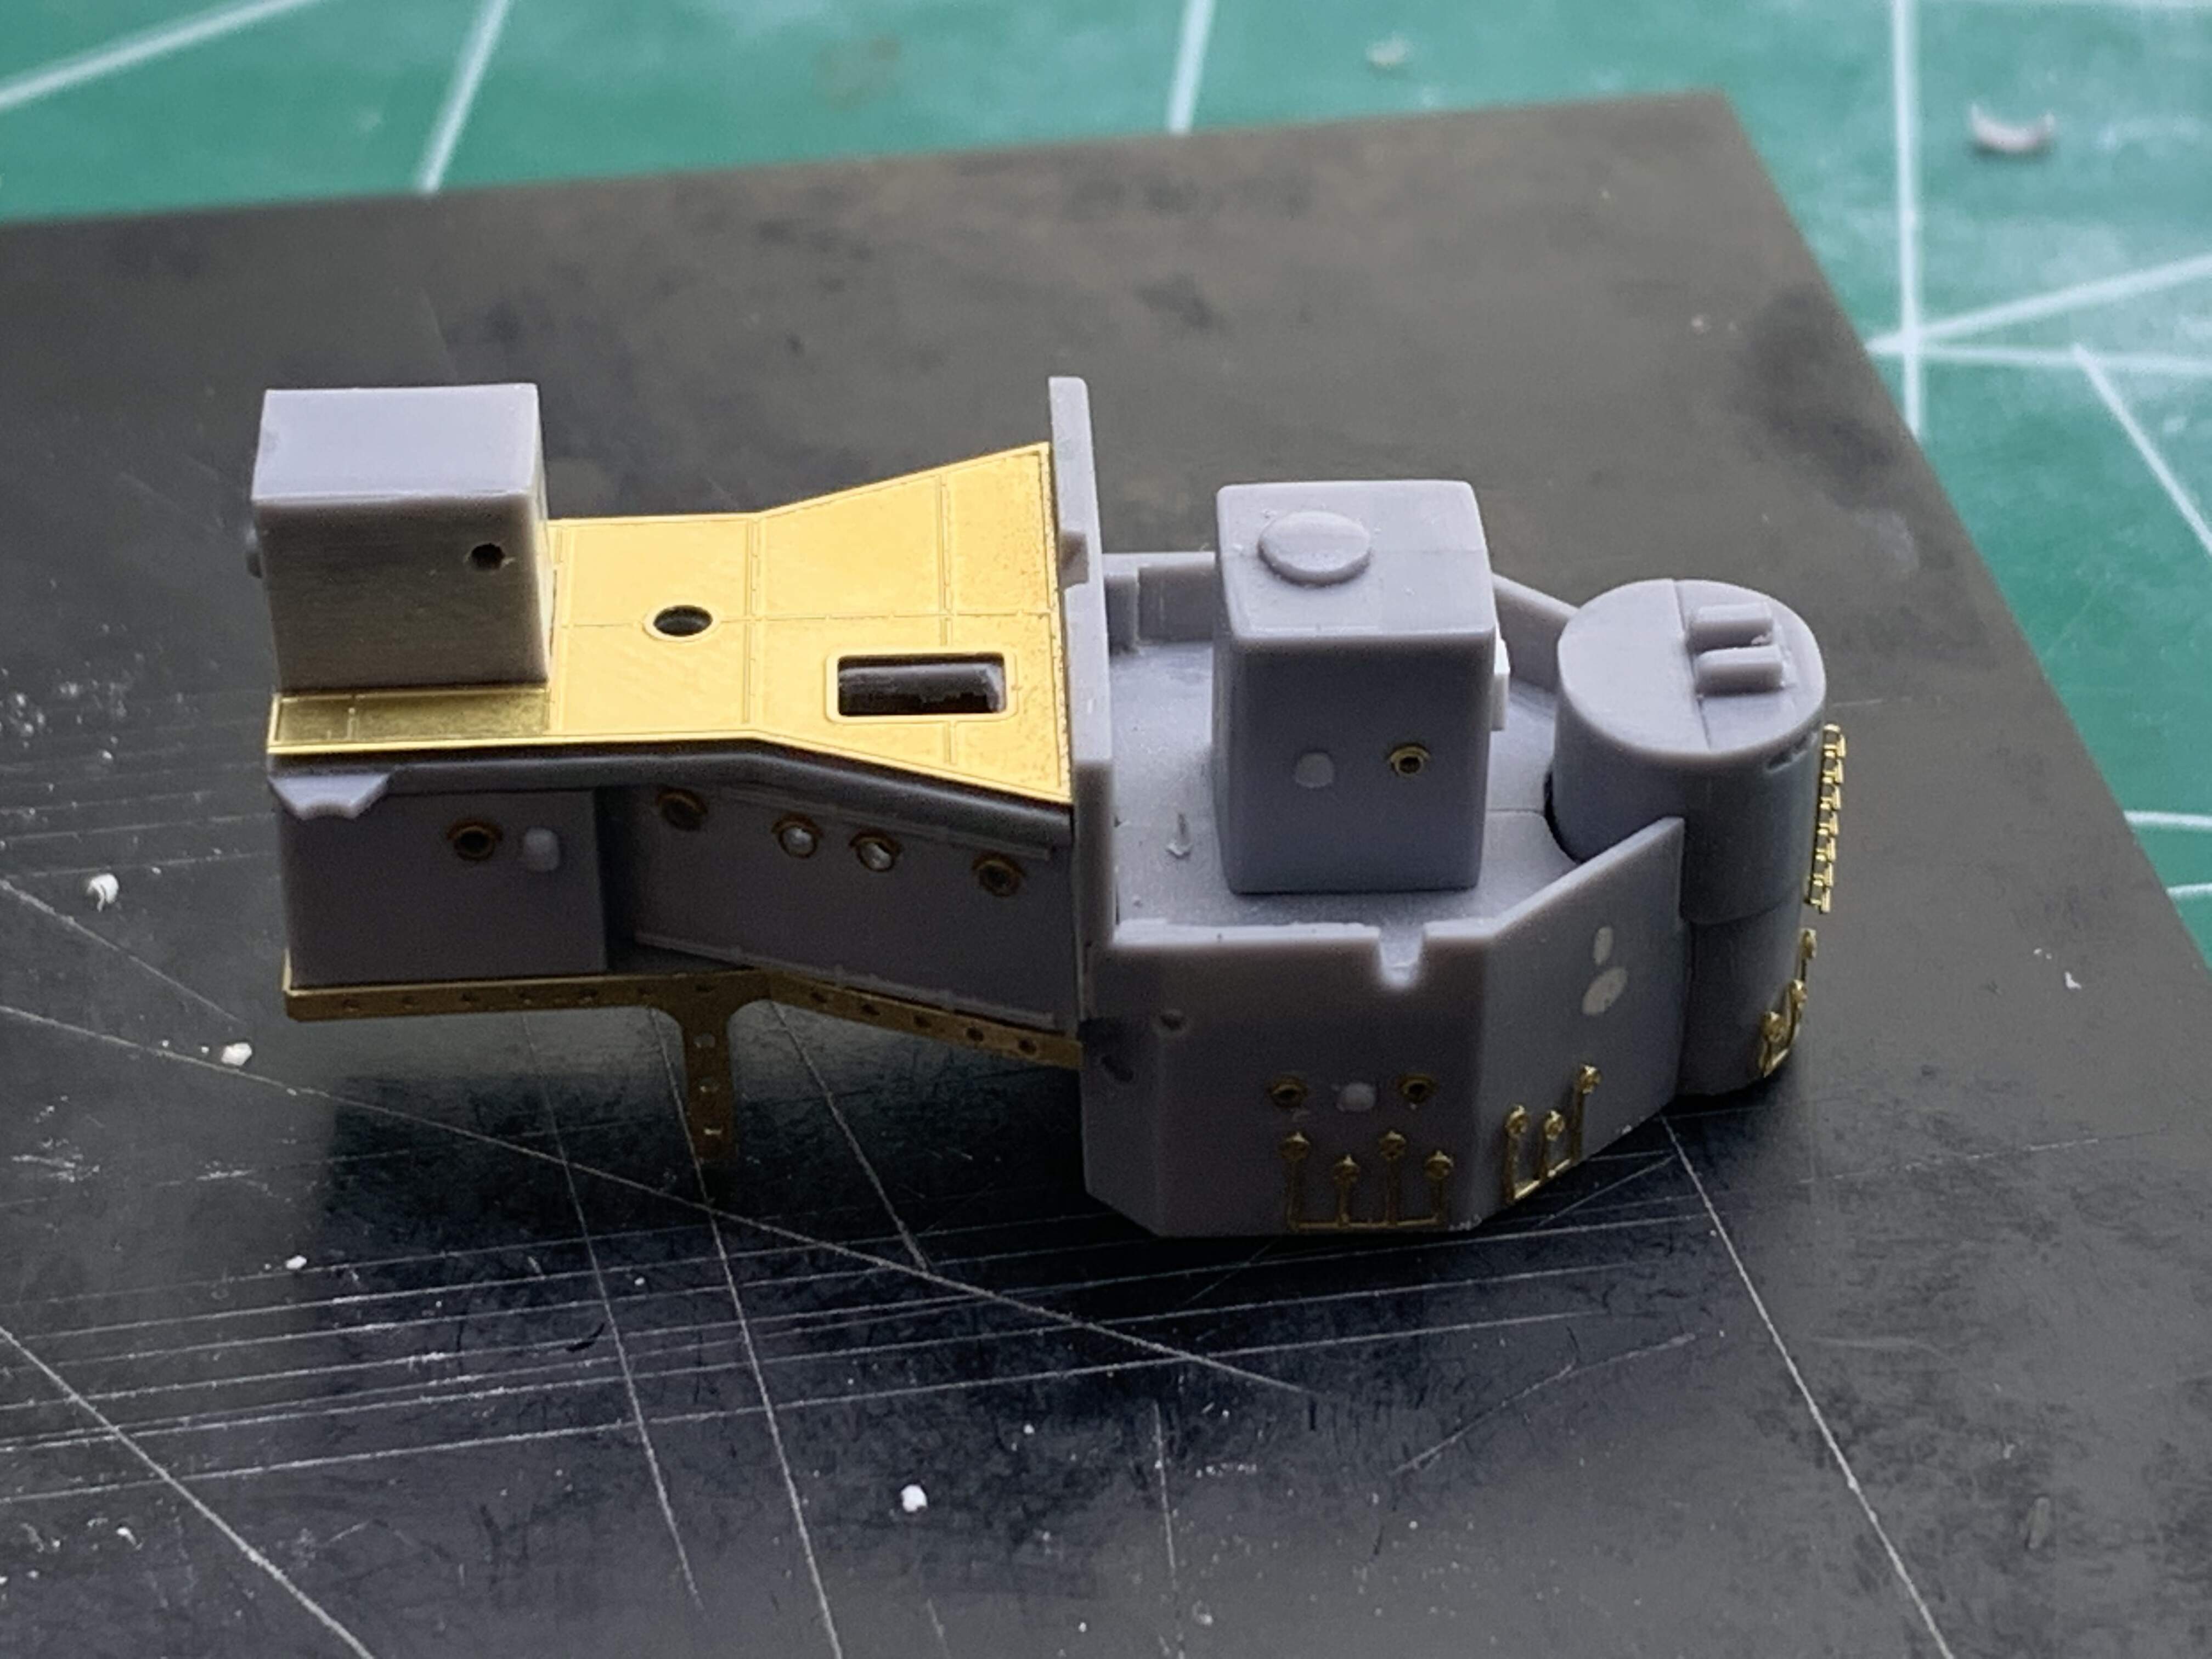
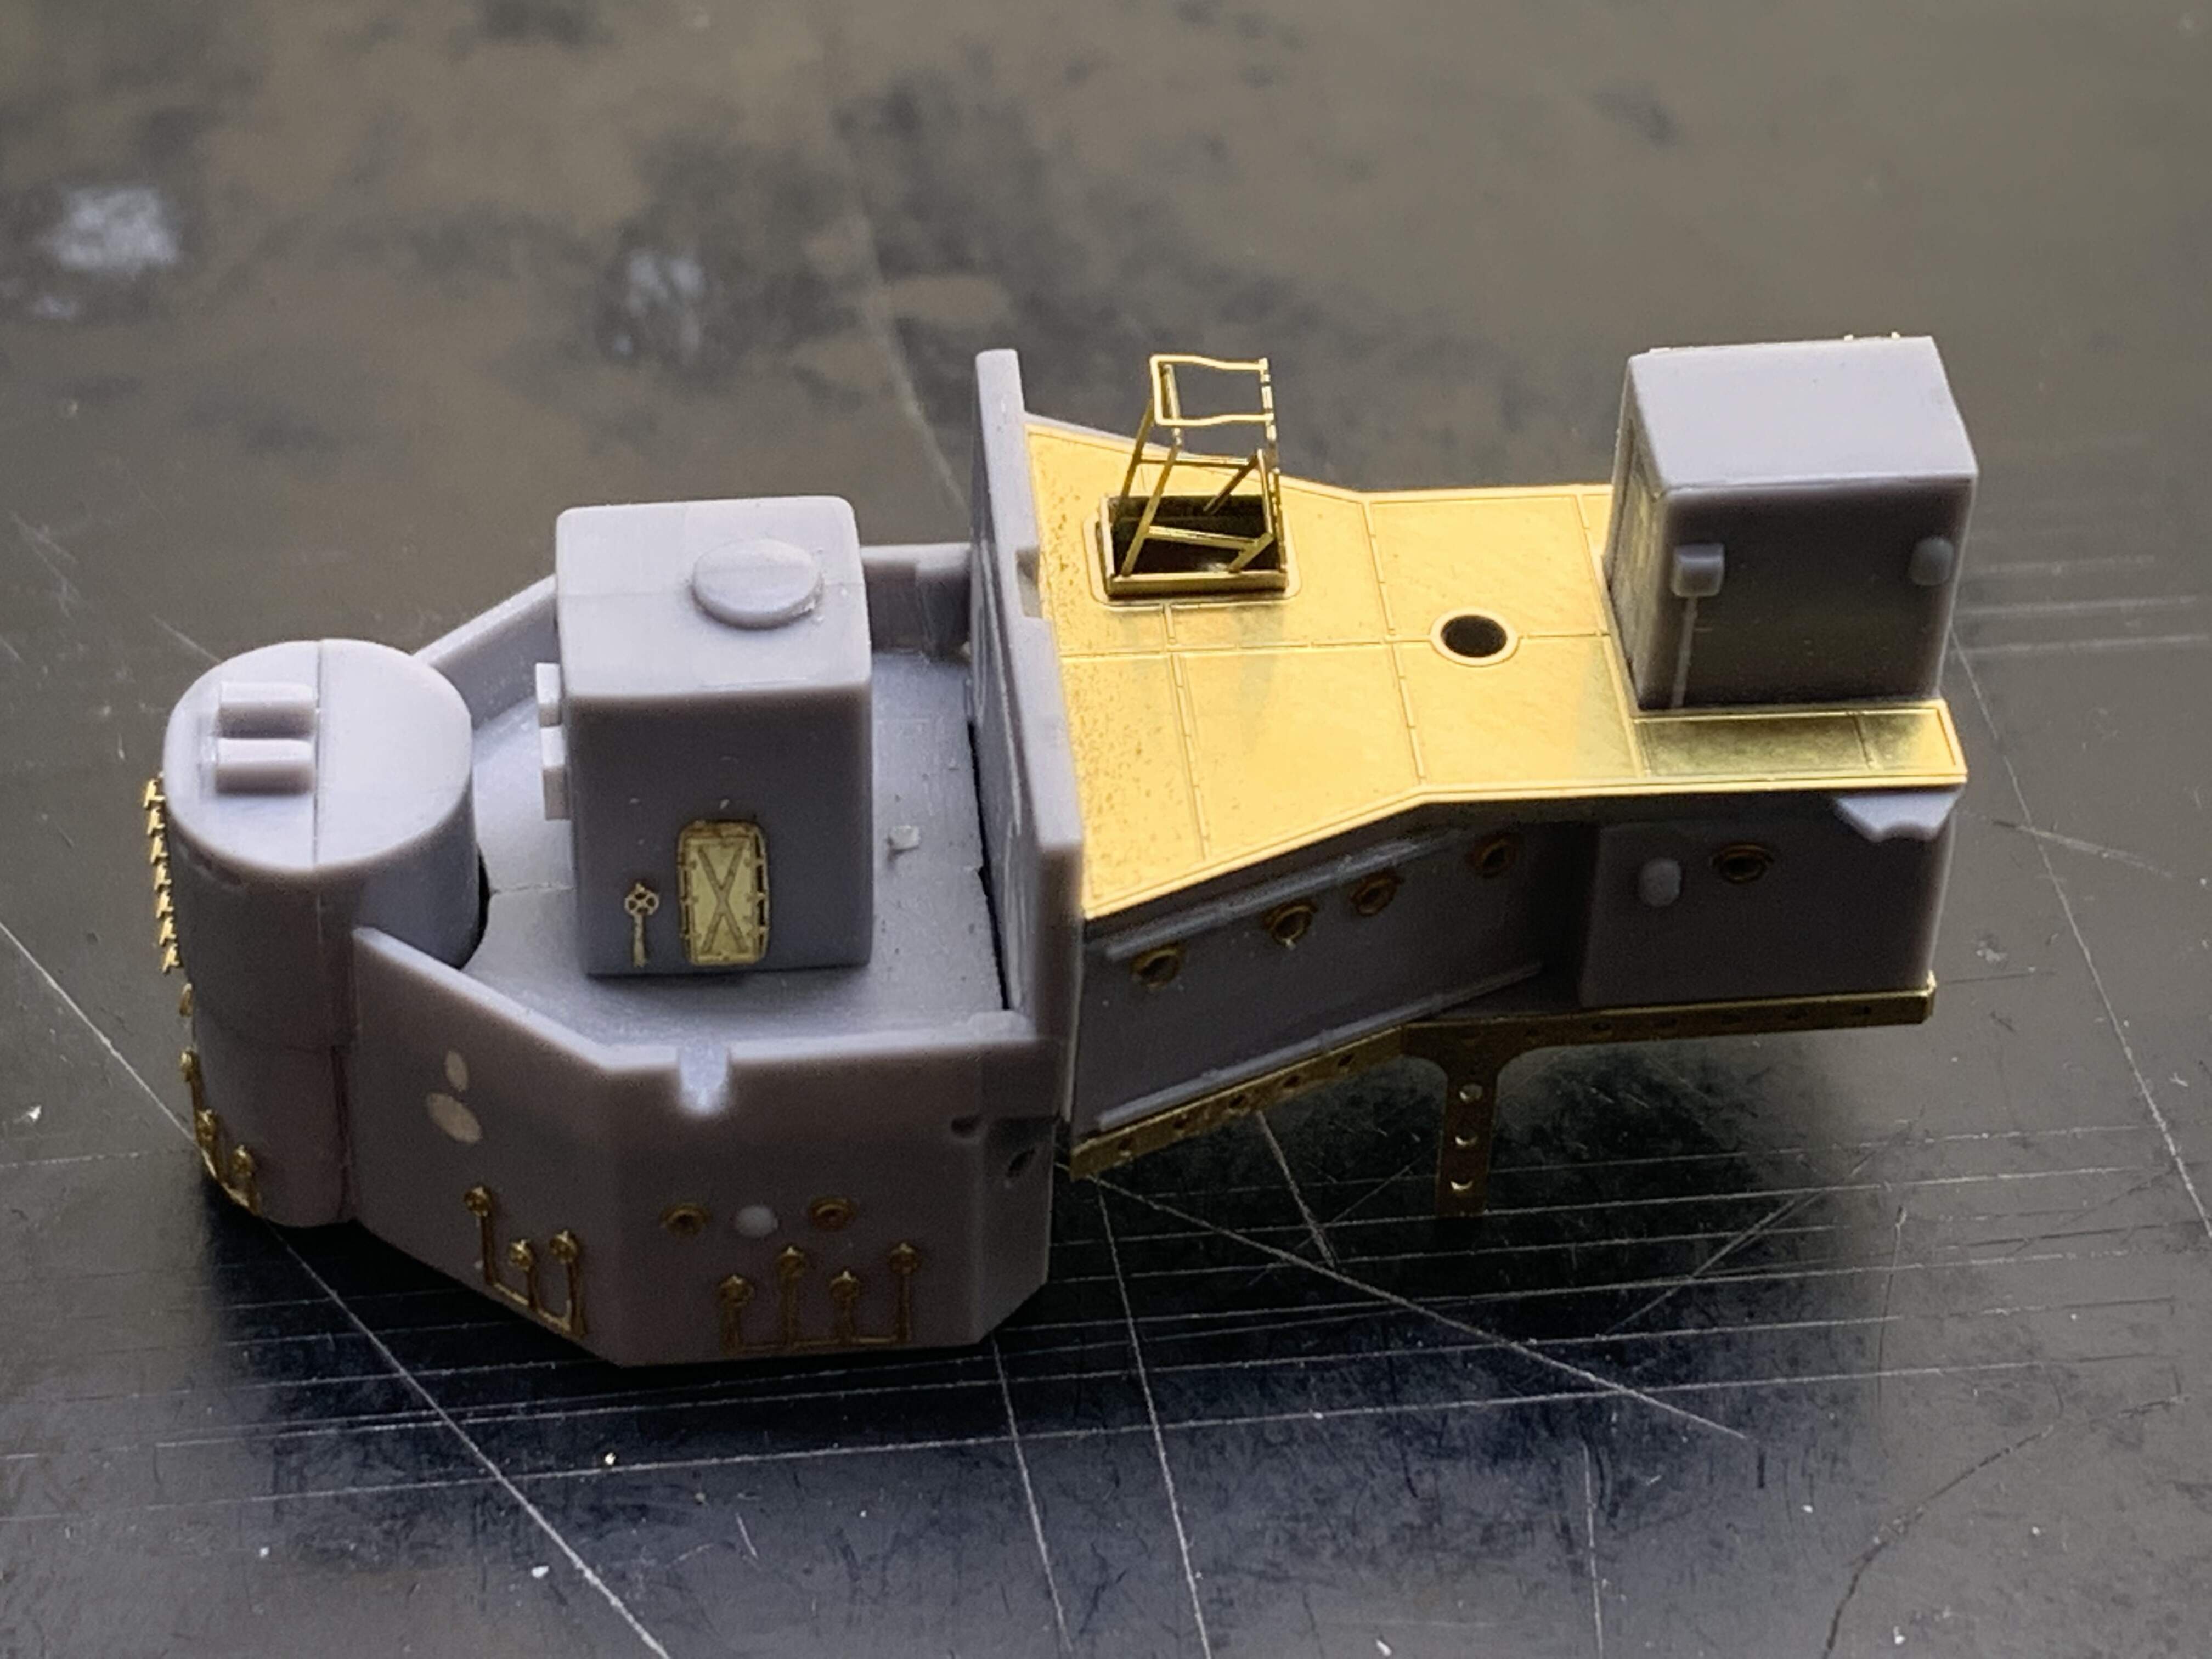
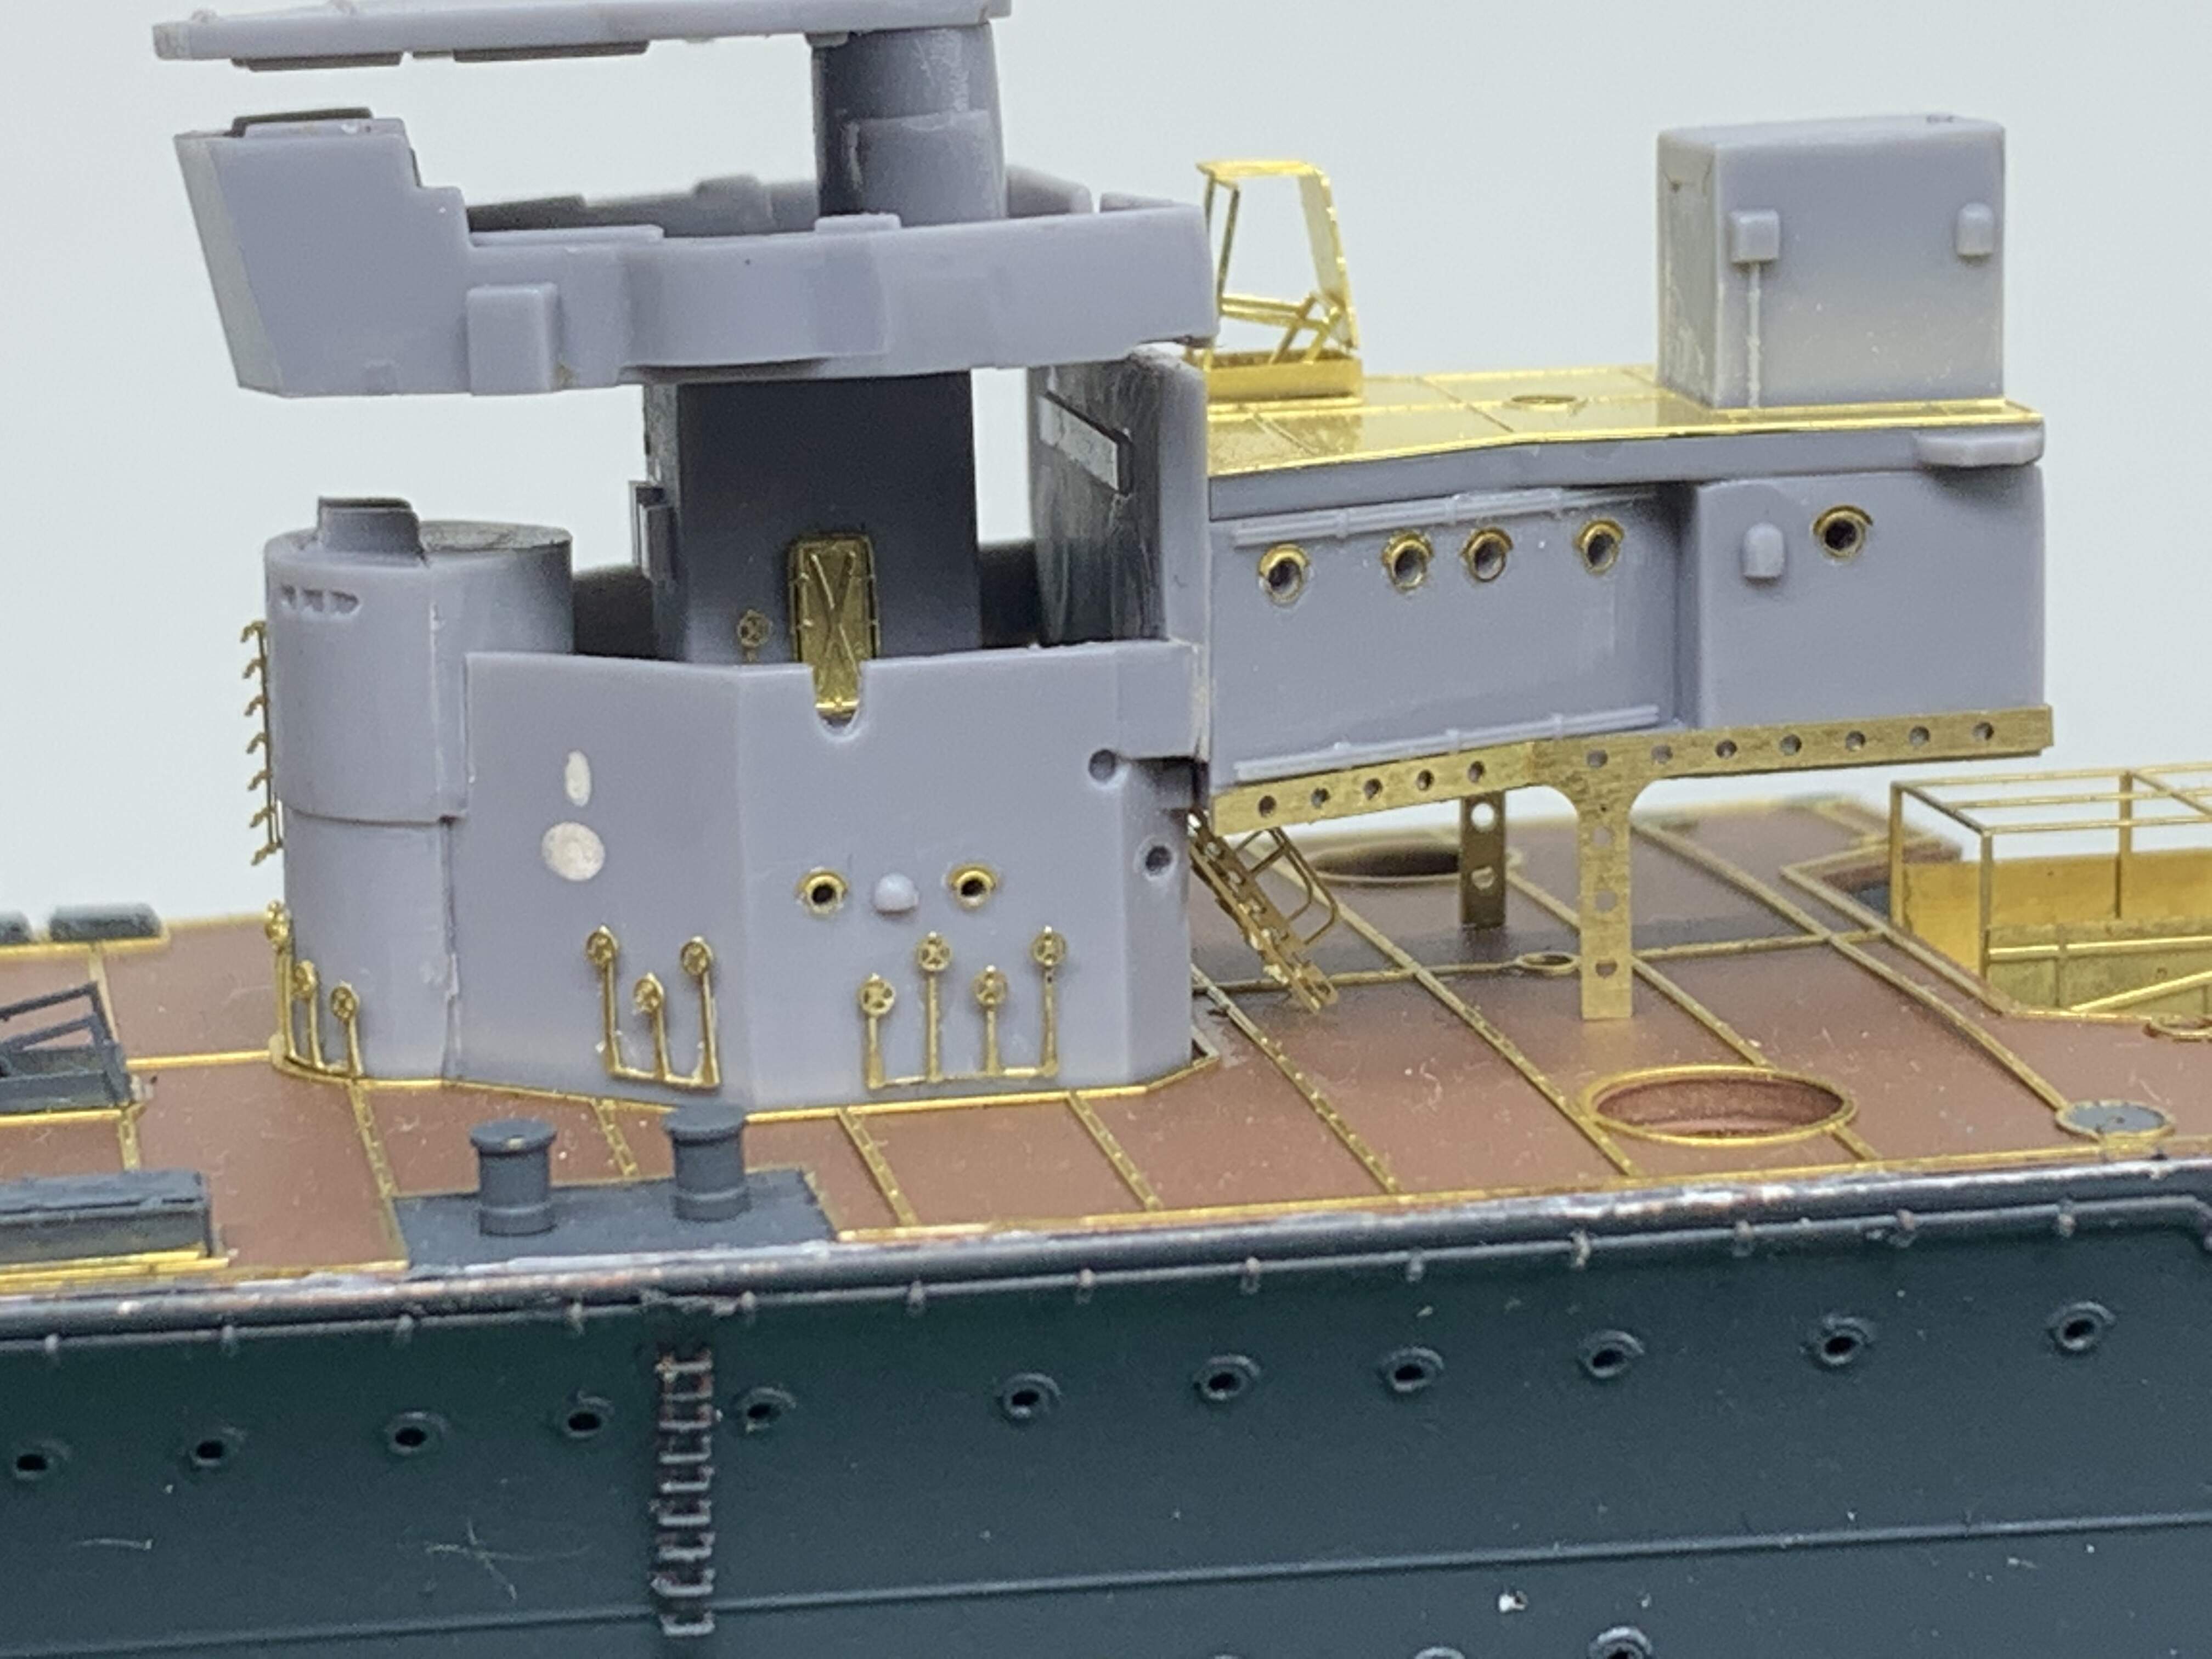
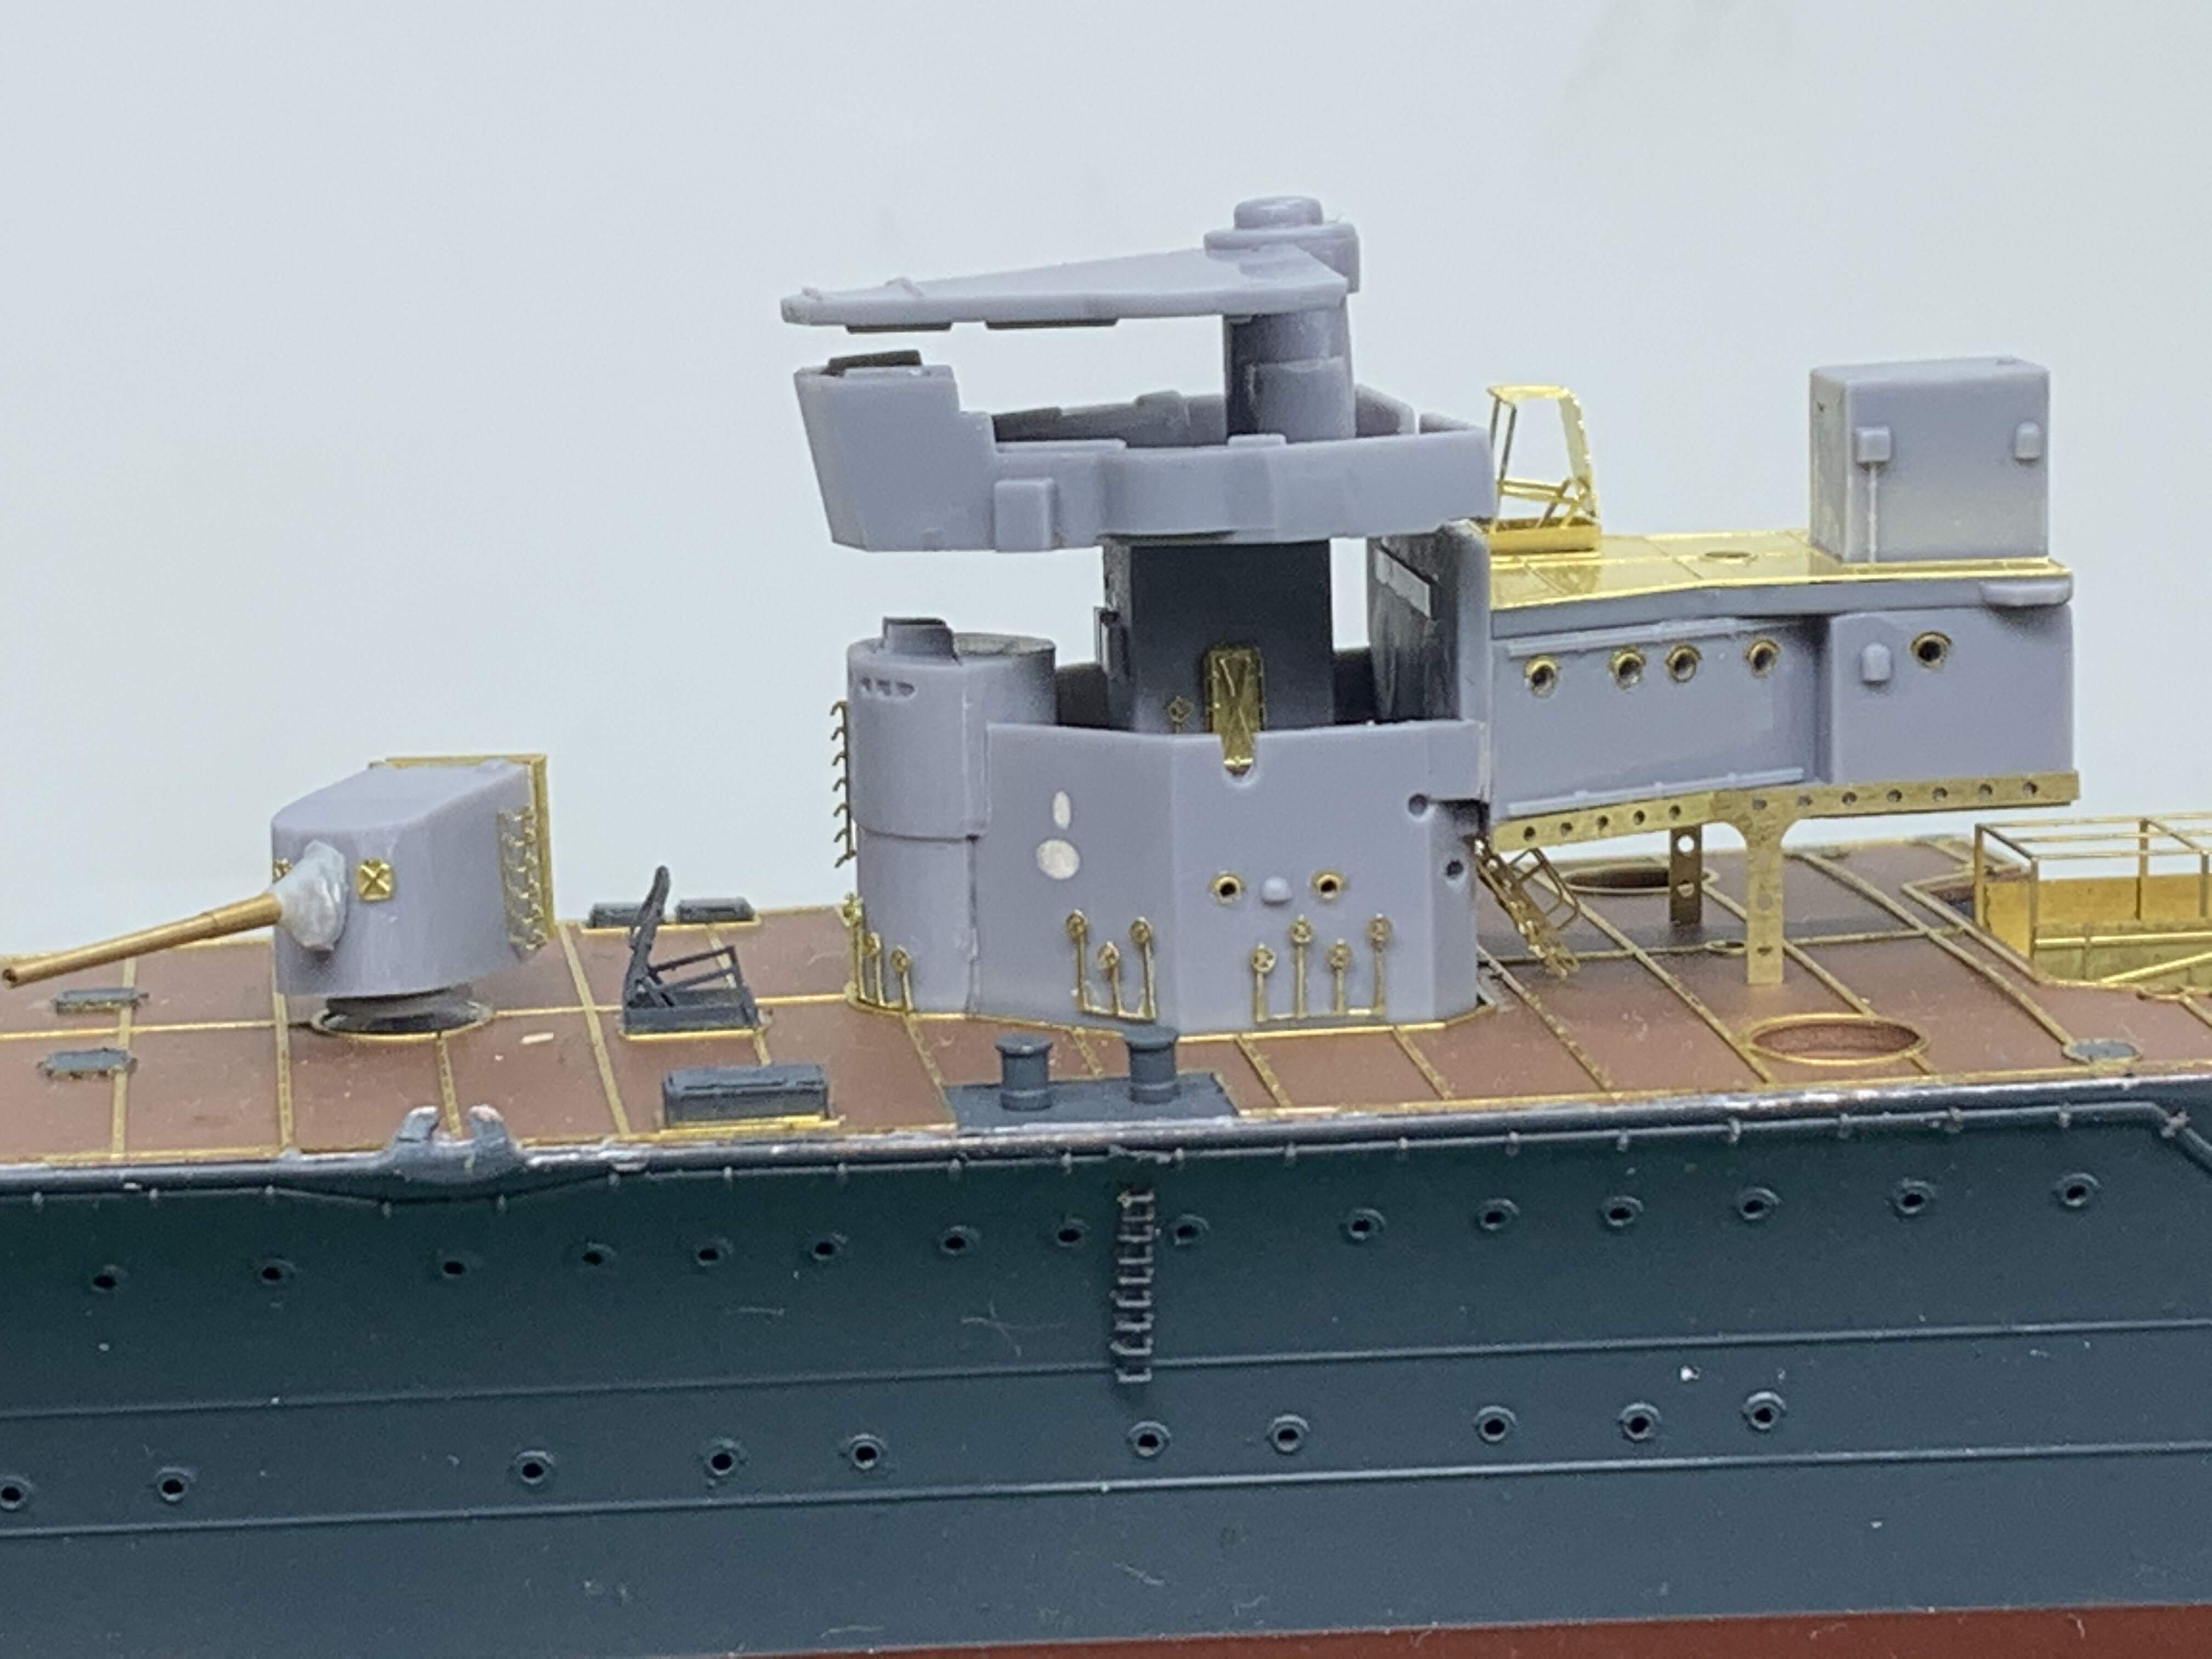
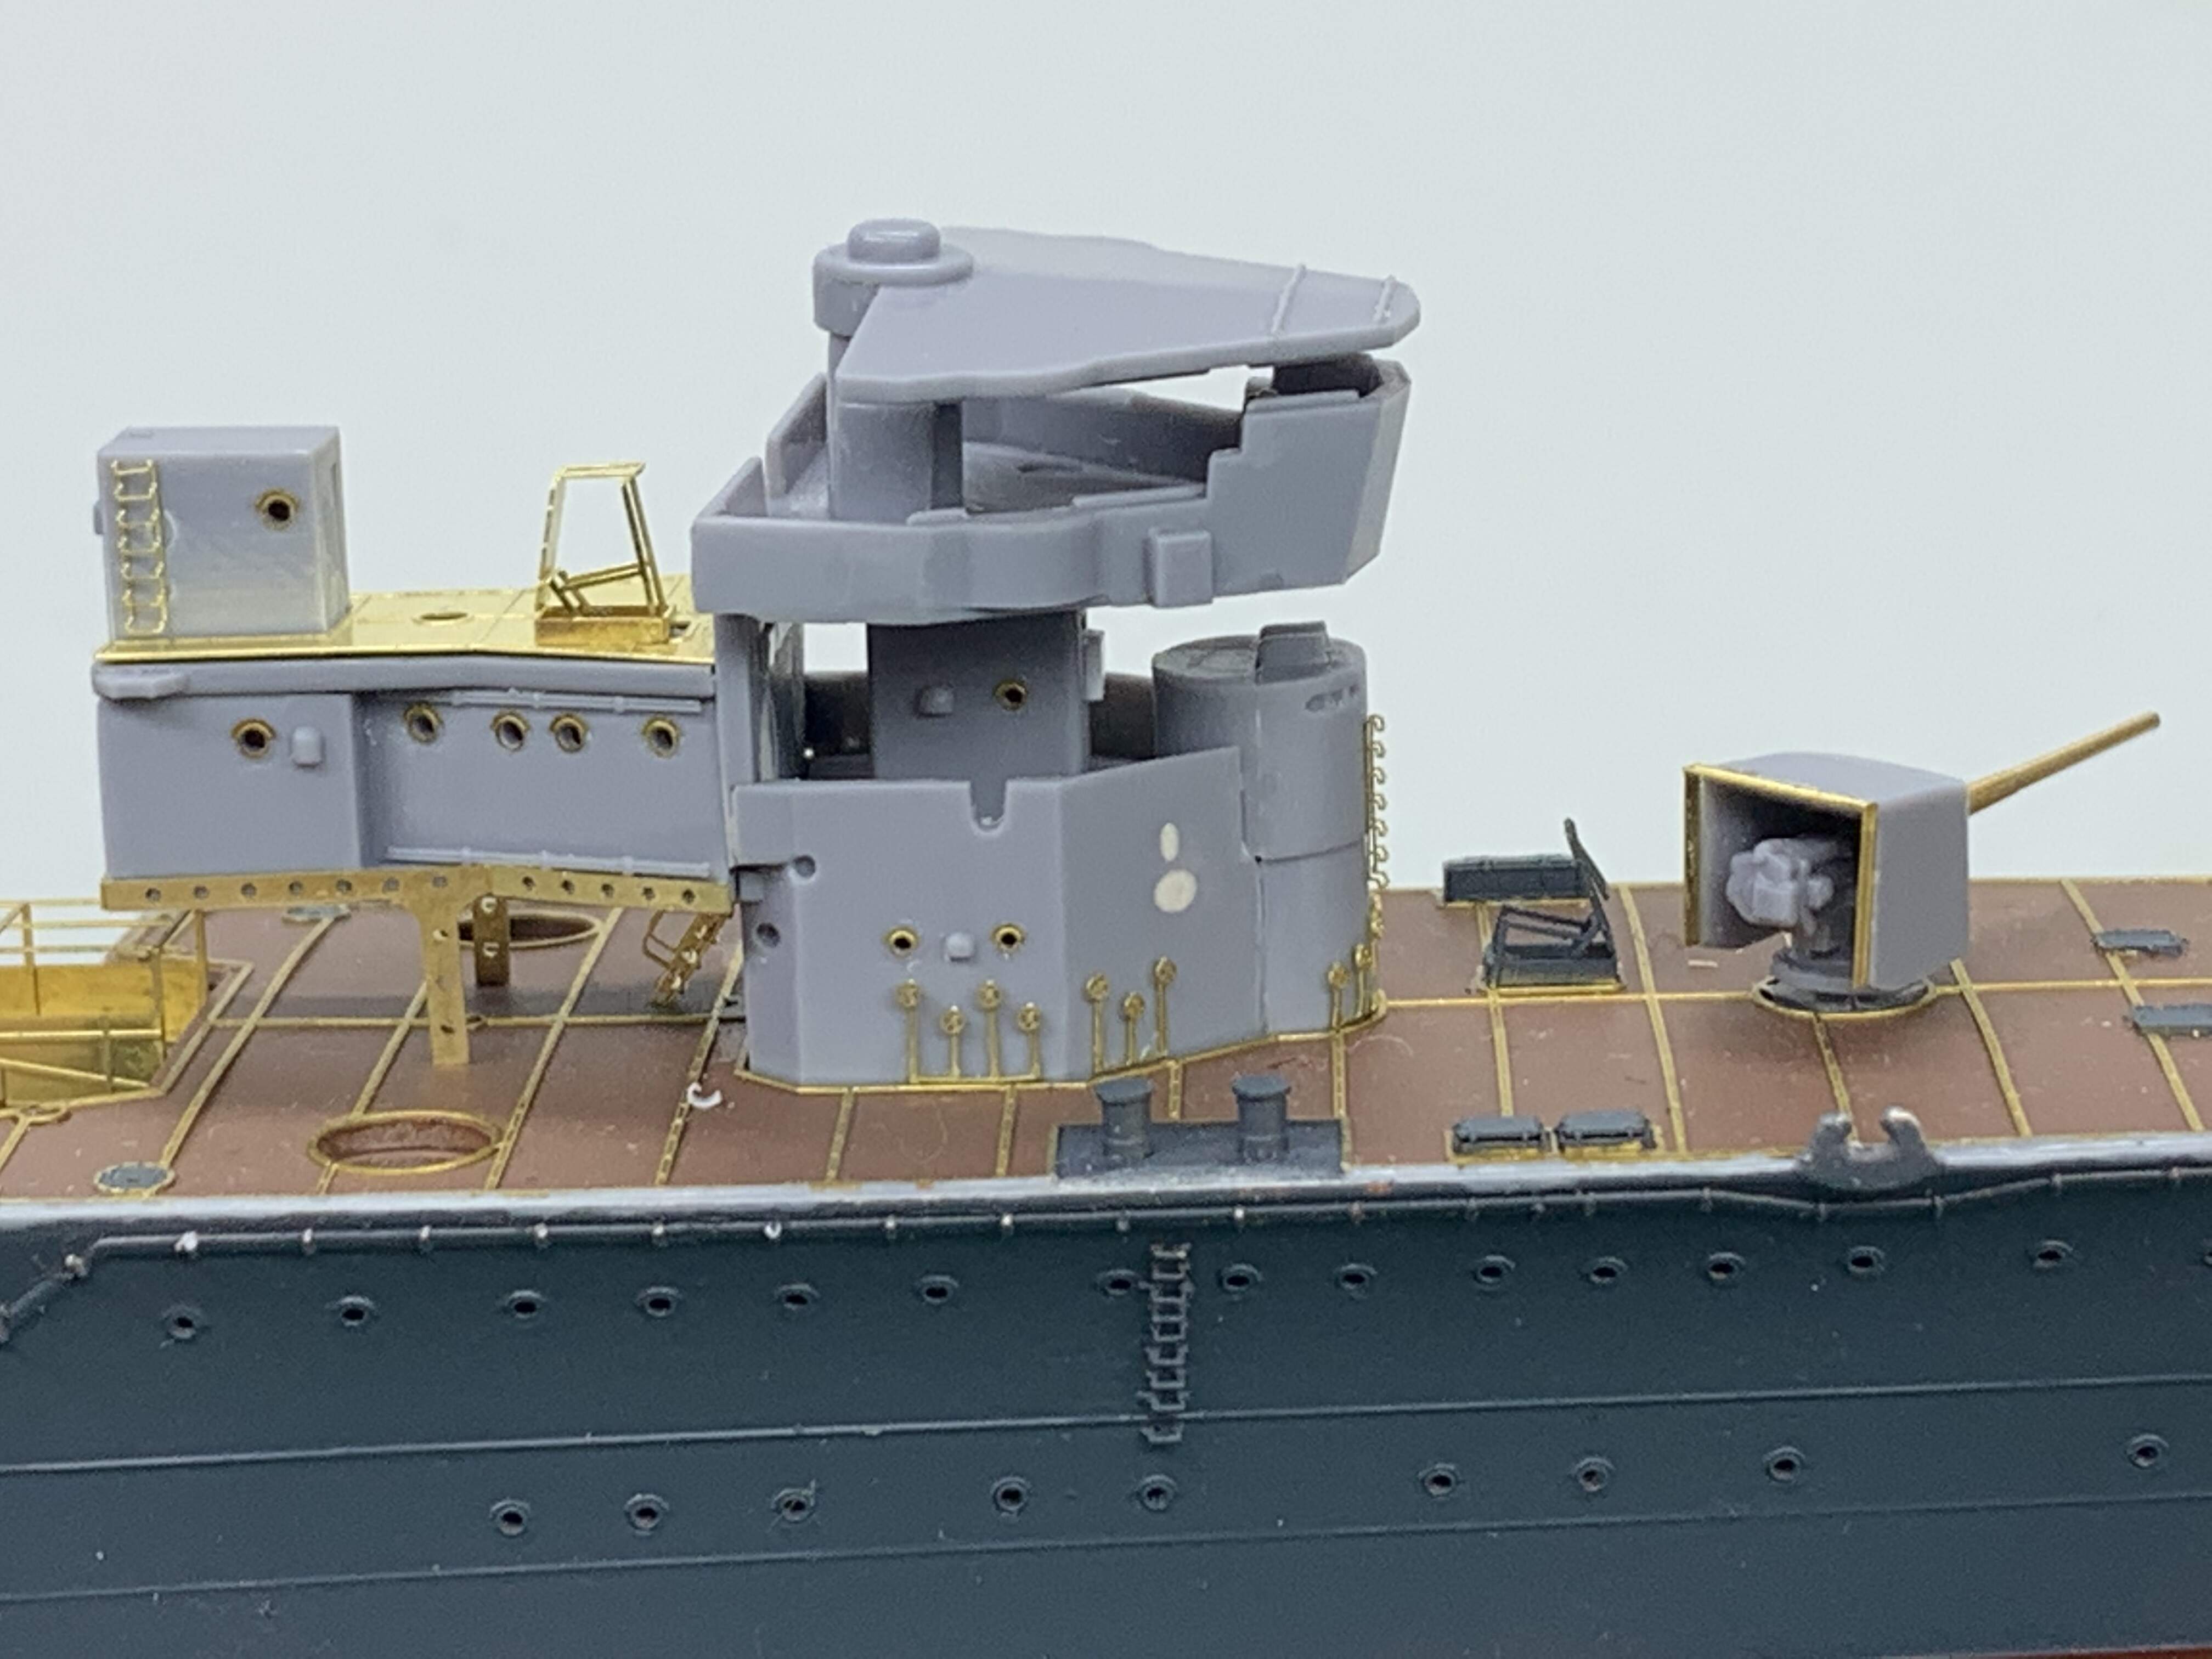
I have identified an fit issue which I am unsure how to address. As you can see there is a significant gap and slope to the rear bridge assembly. I considered just removing the placement tab but concerned it will lower the upper structures and cause further fit issues.
I could add some shims and make it level, thinking of leaning in this directions…thoughts?
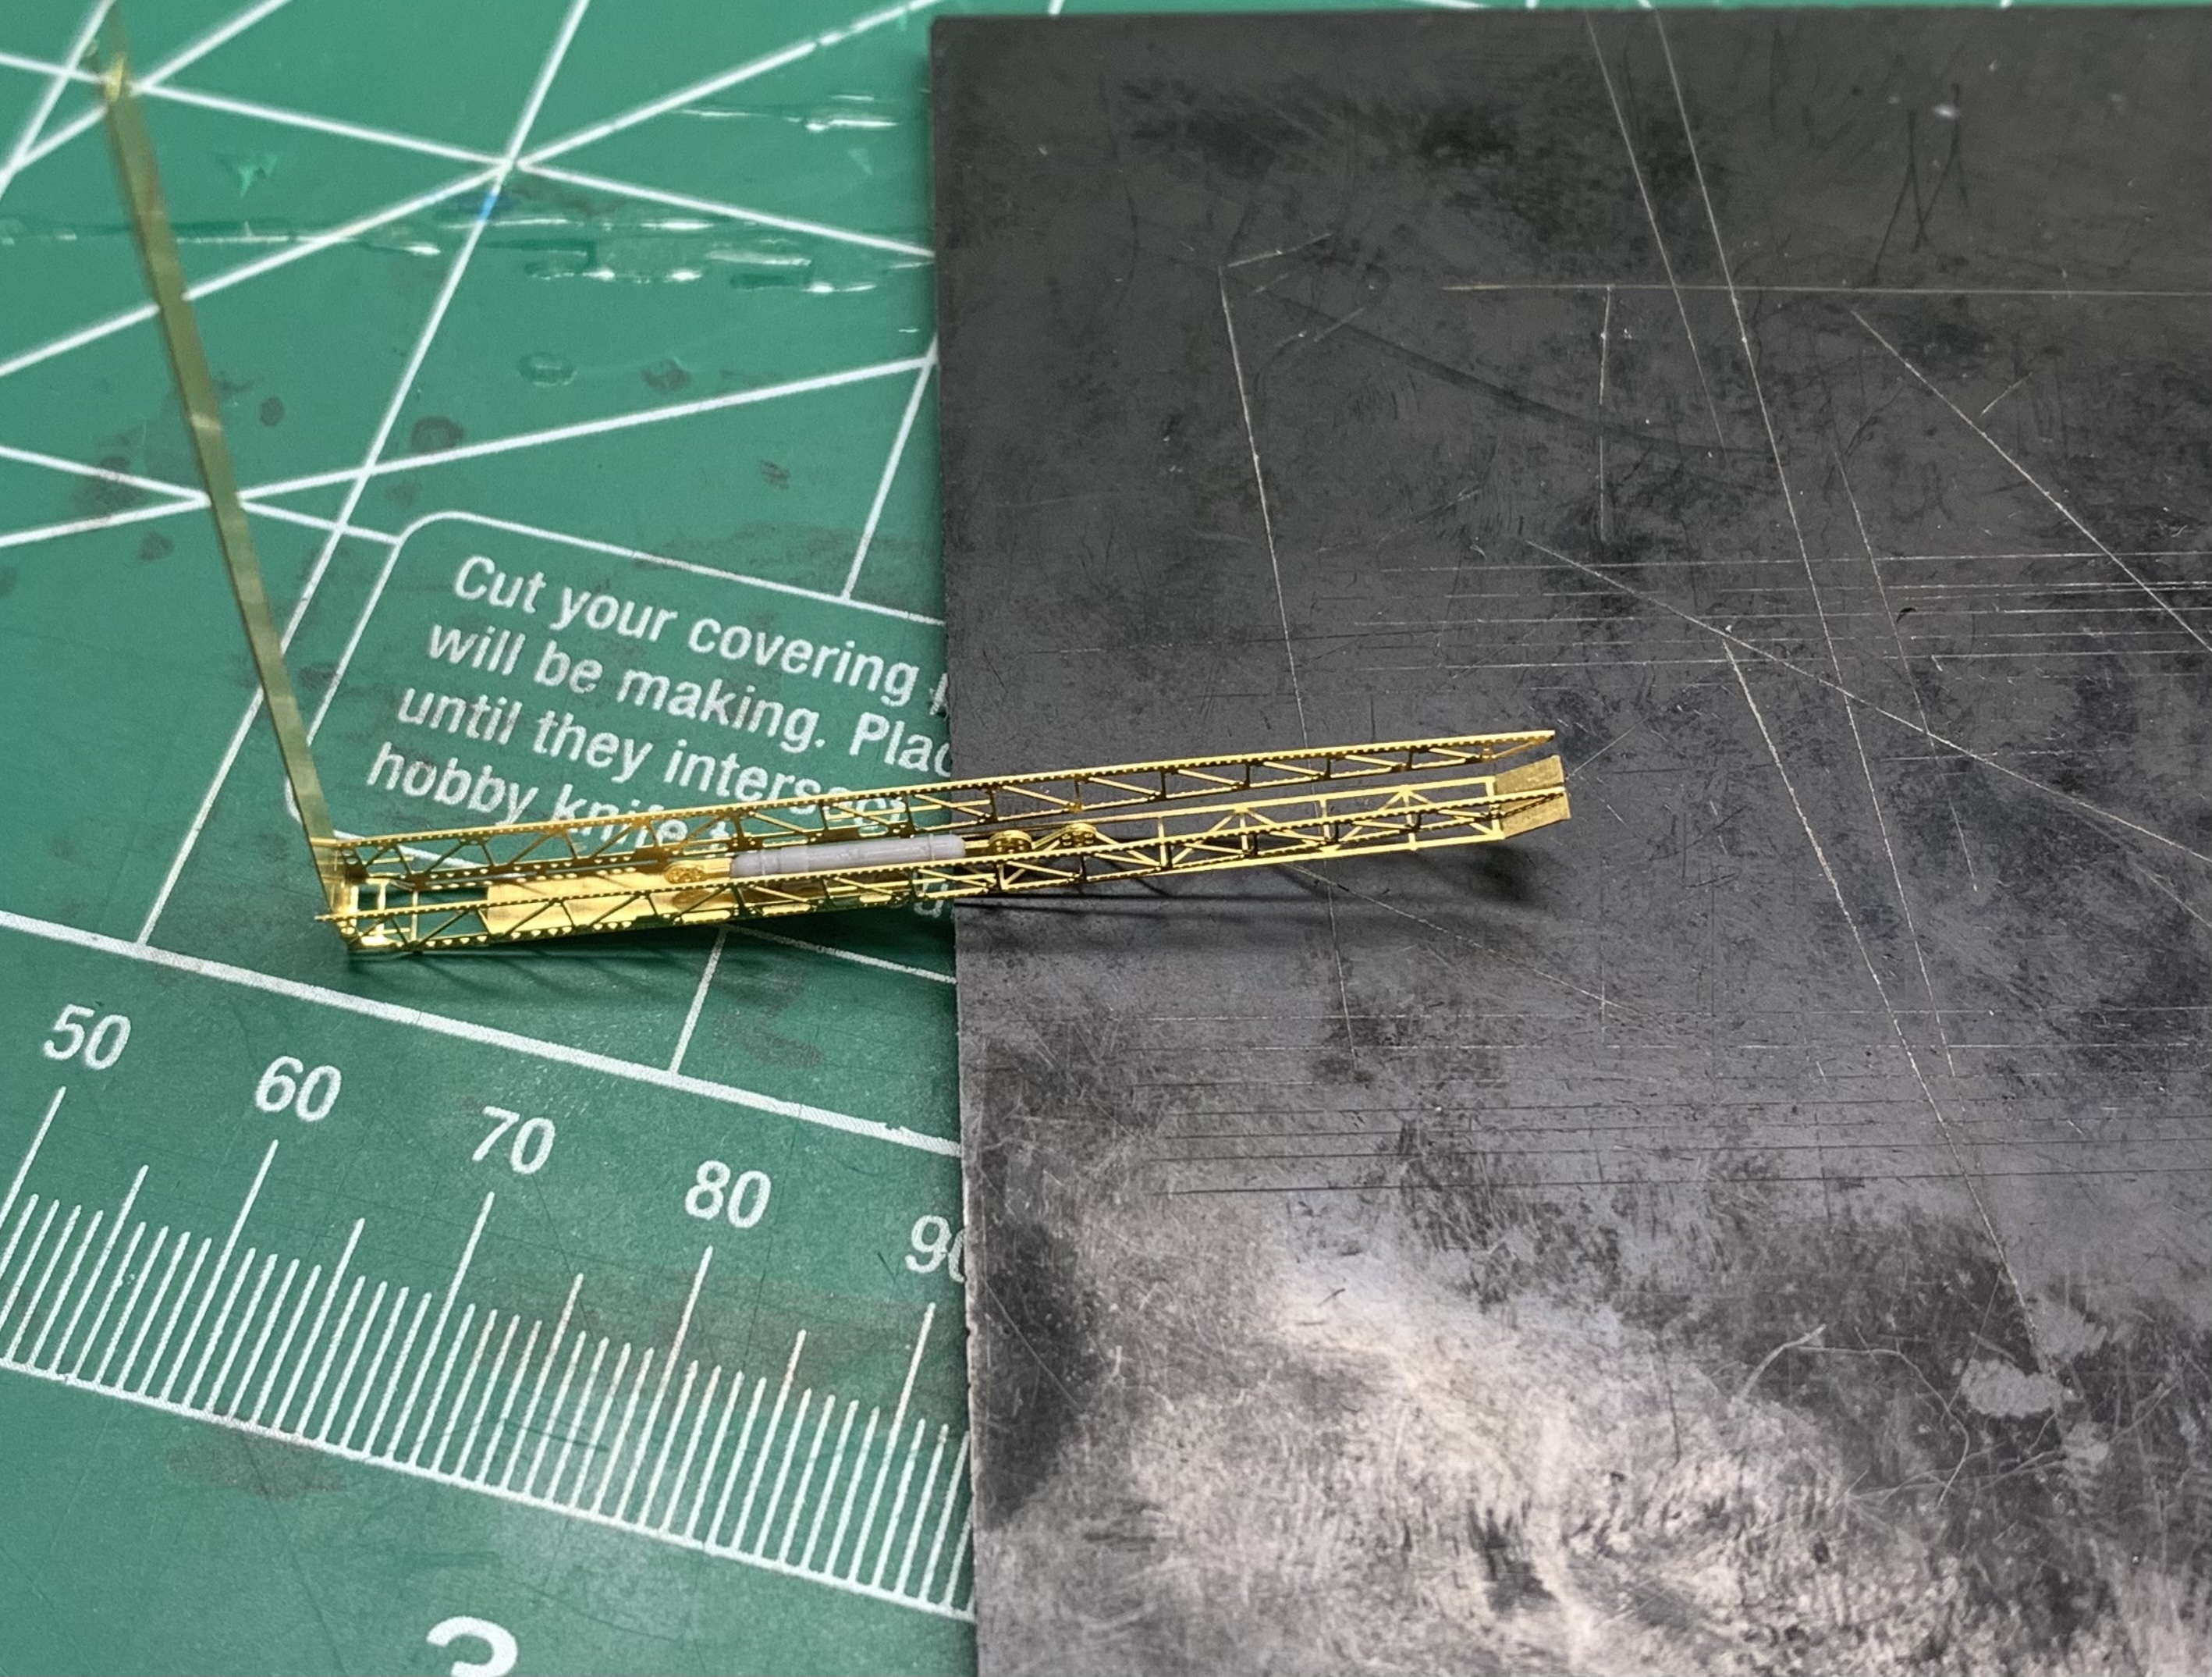
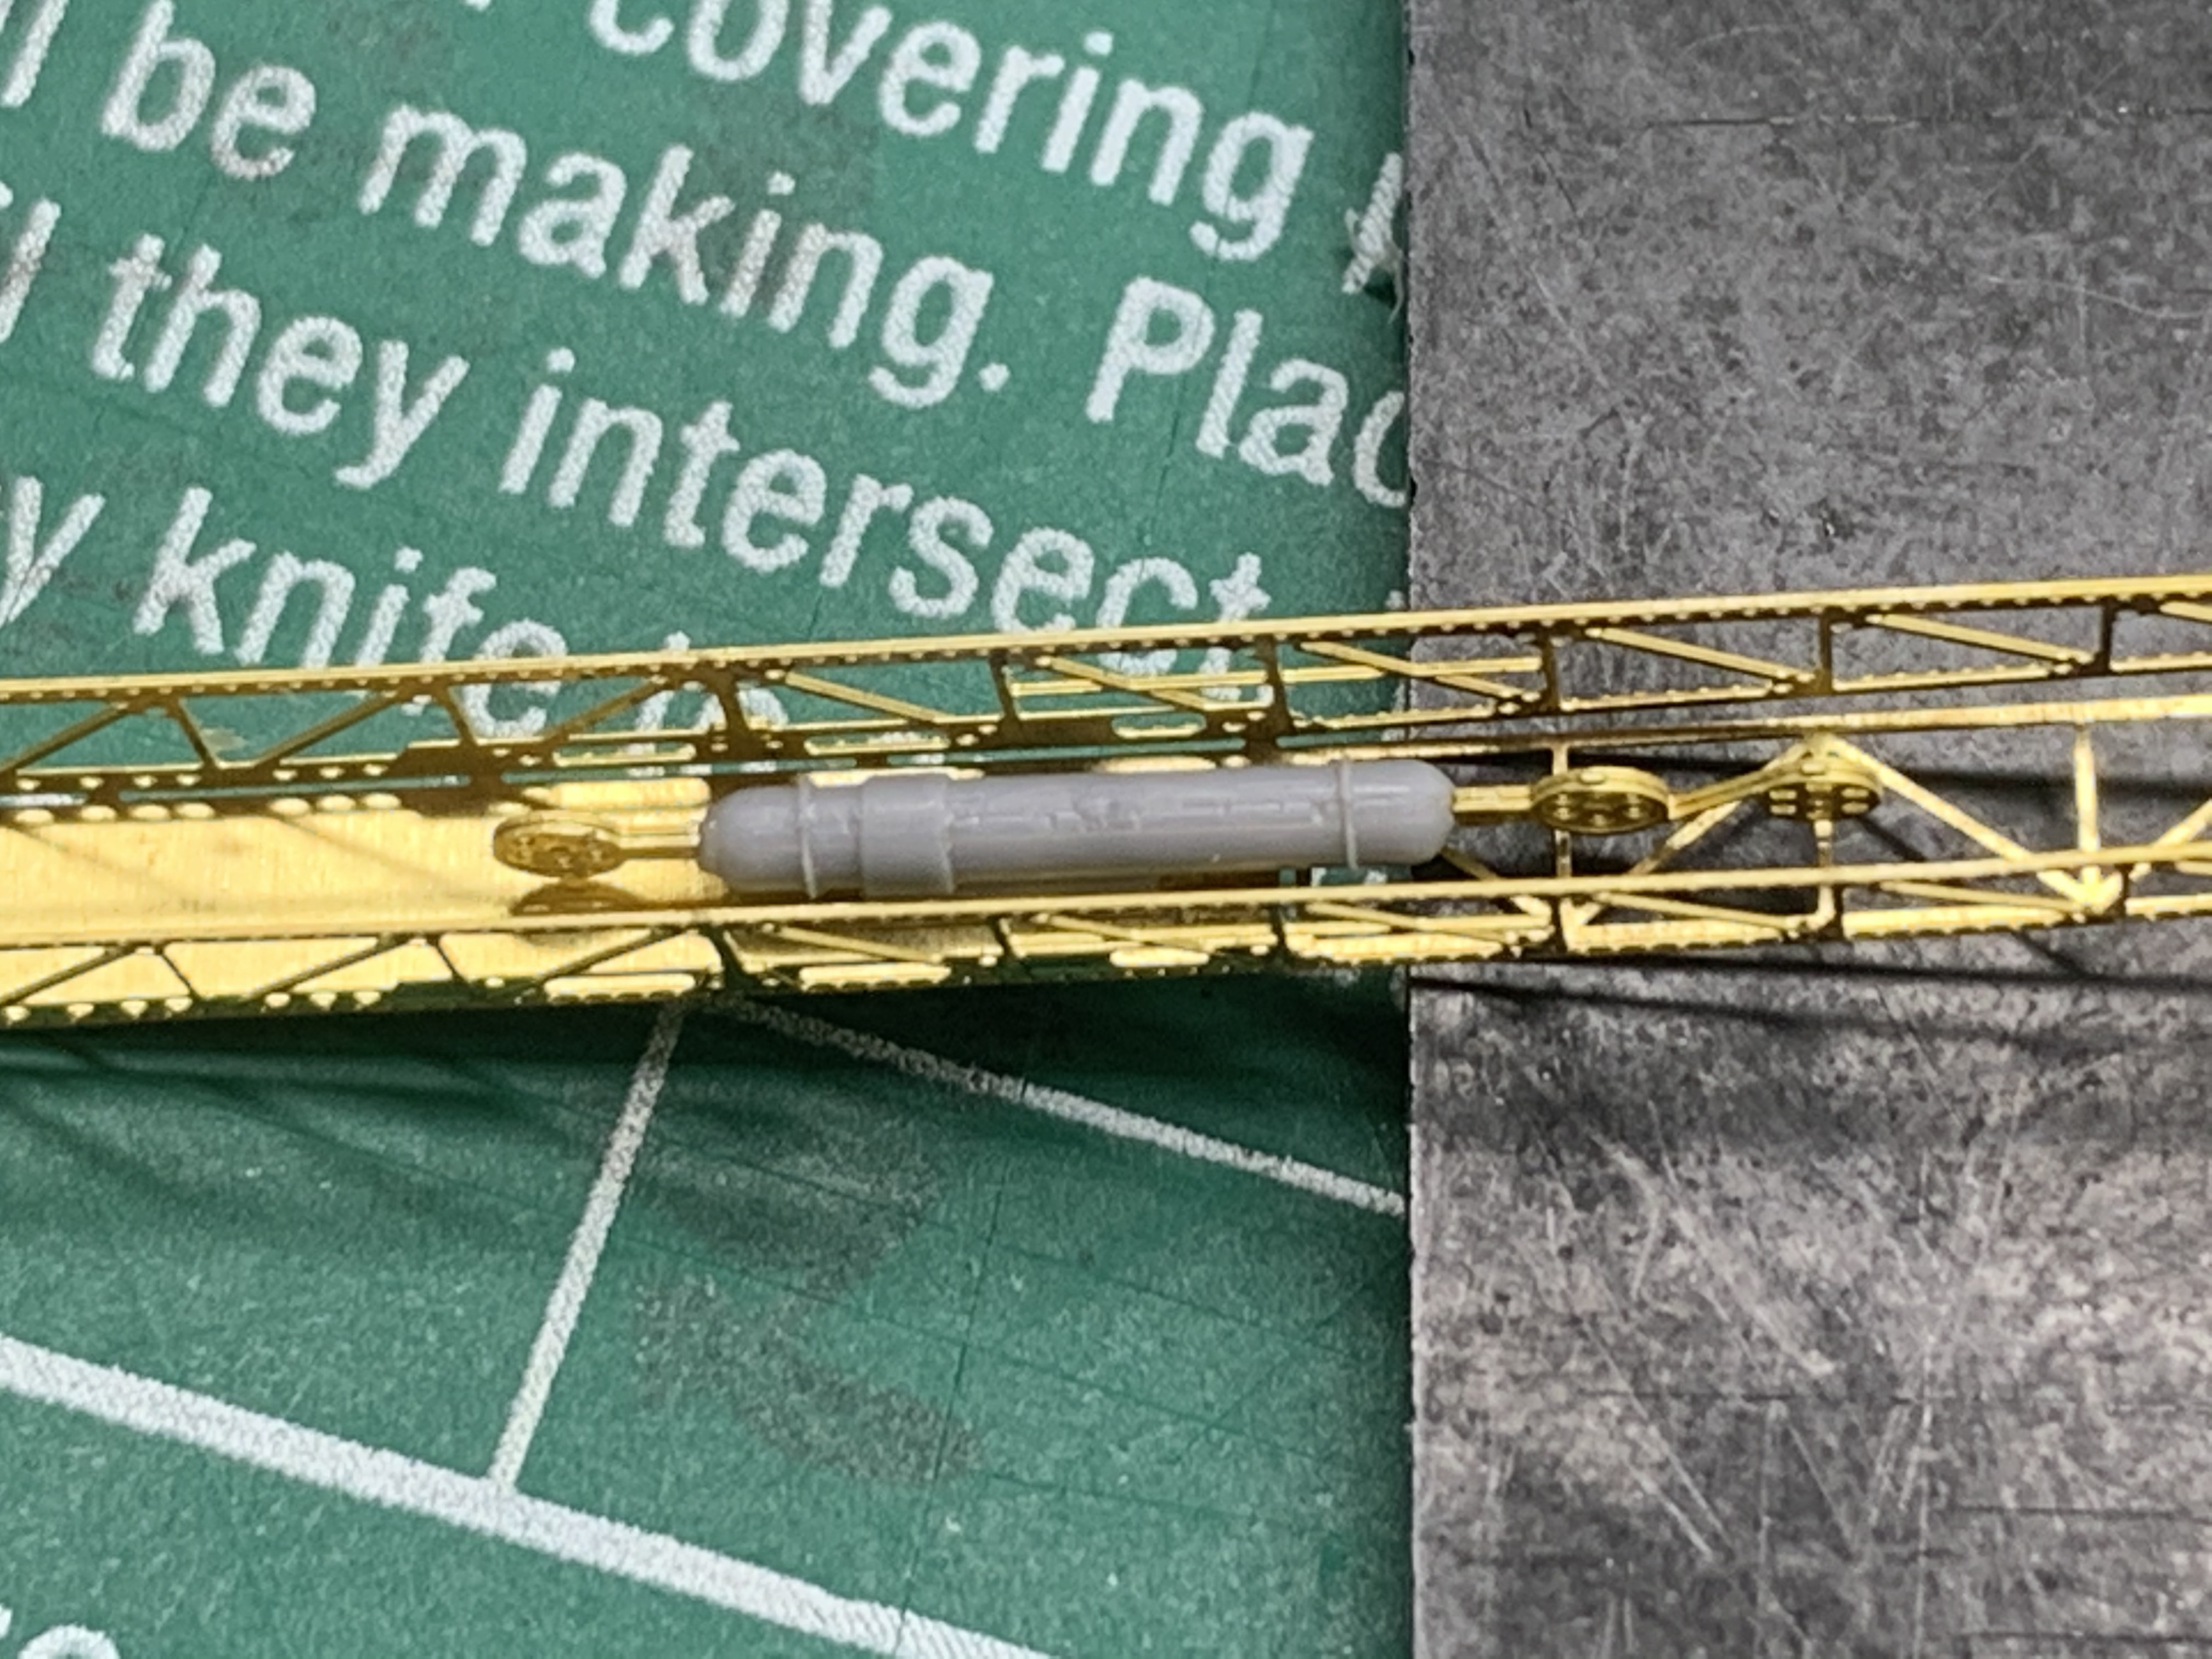
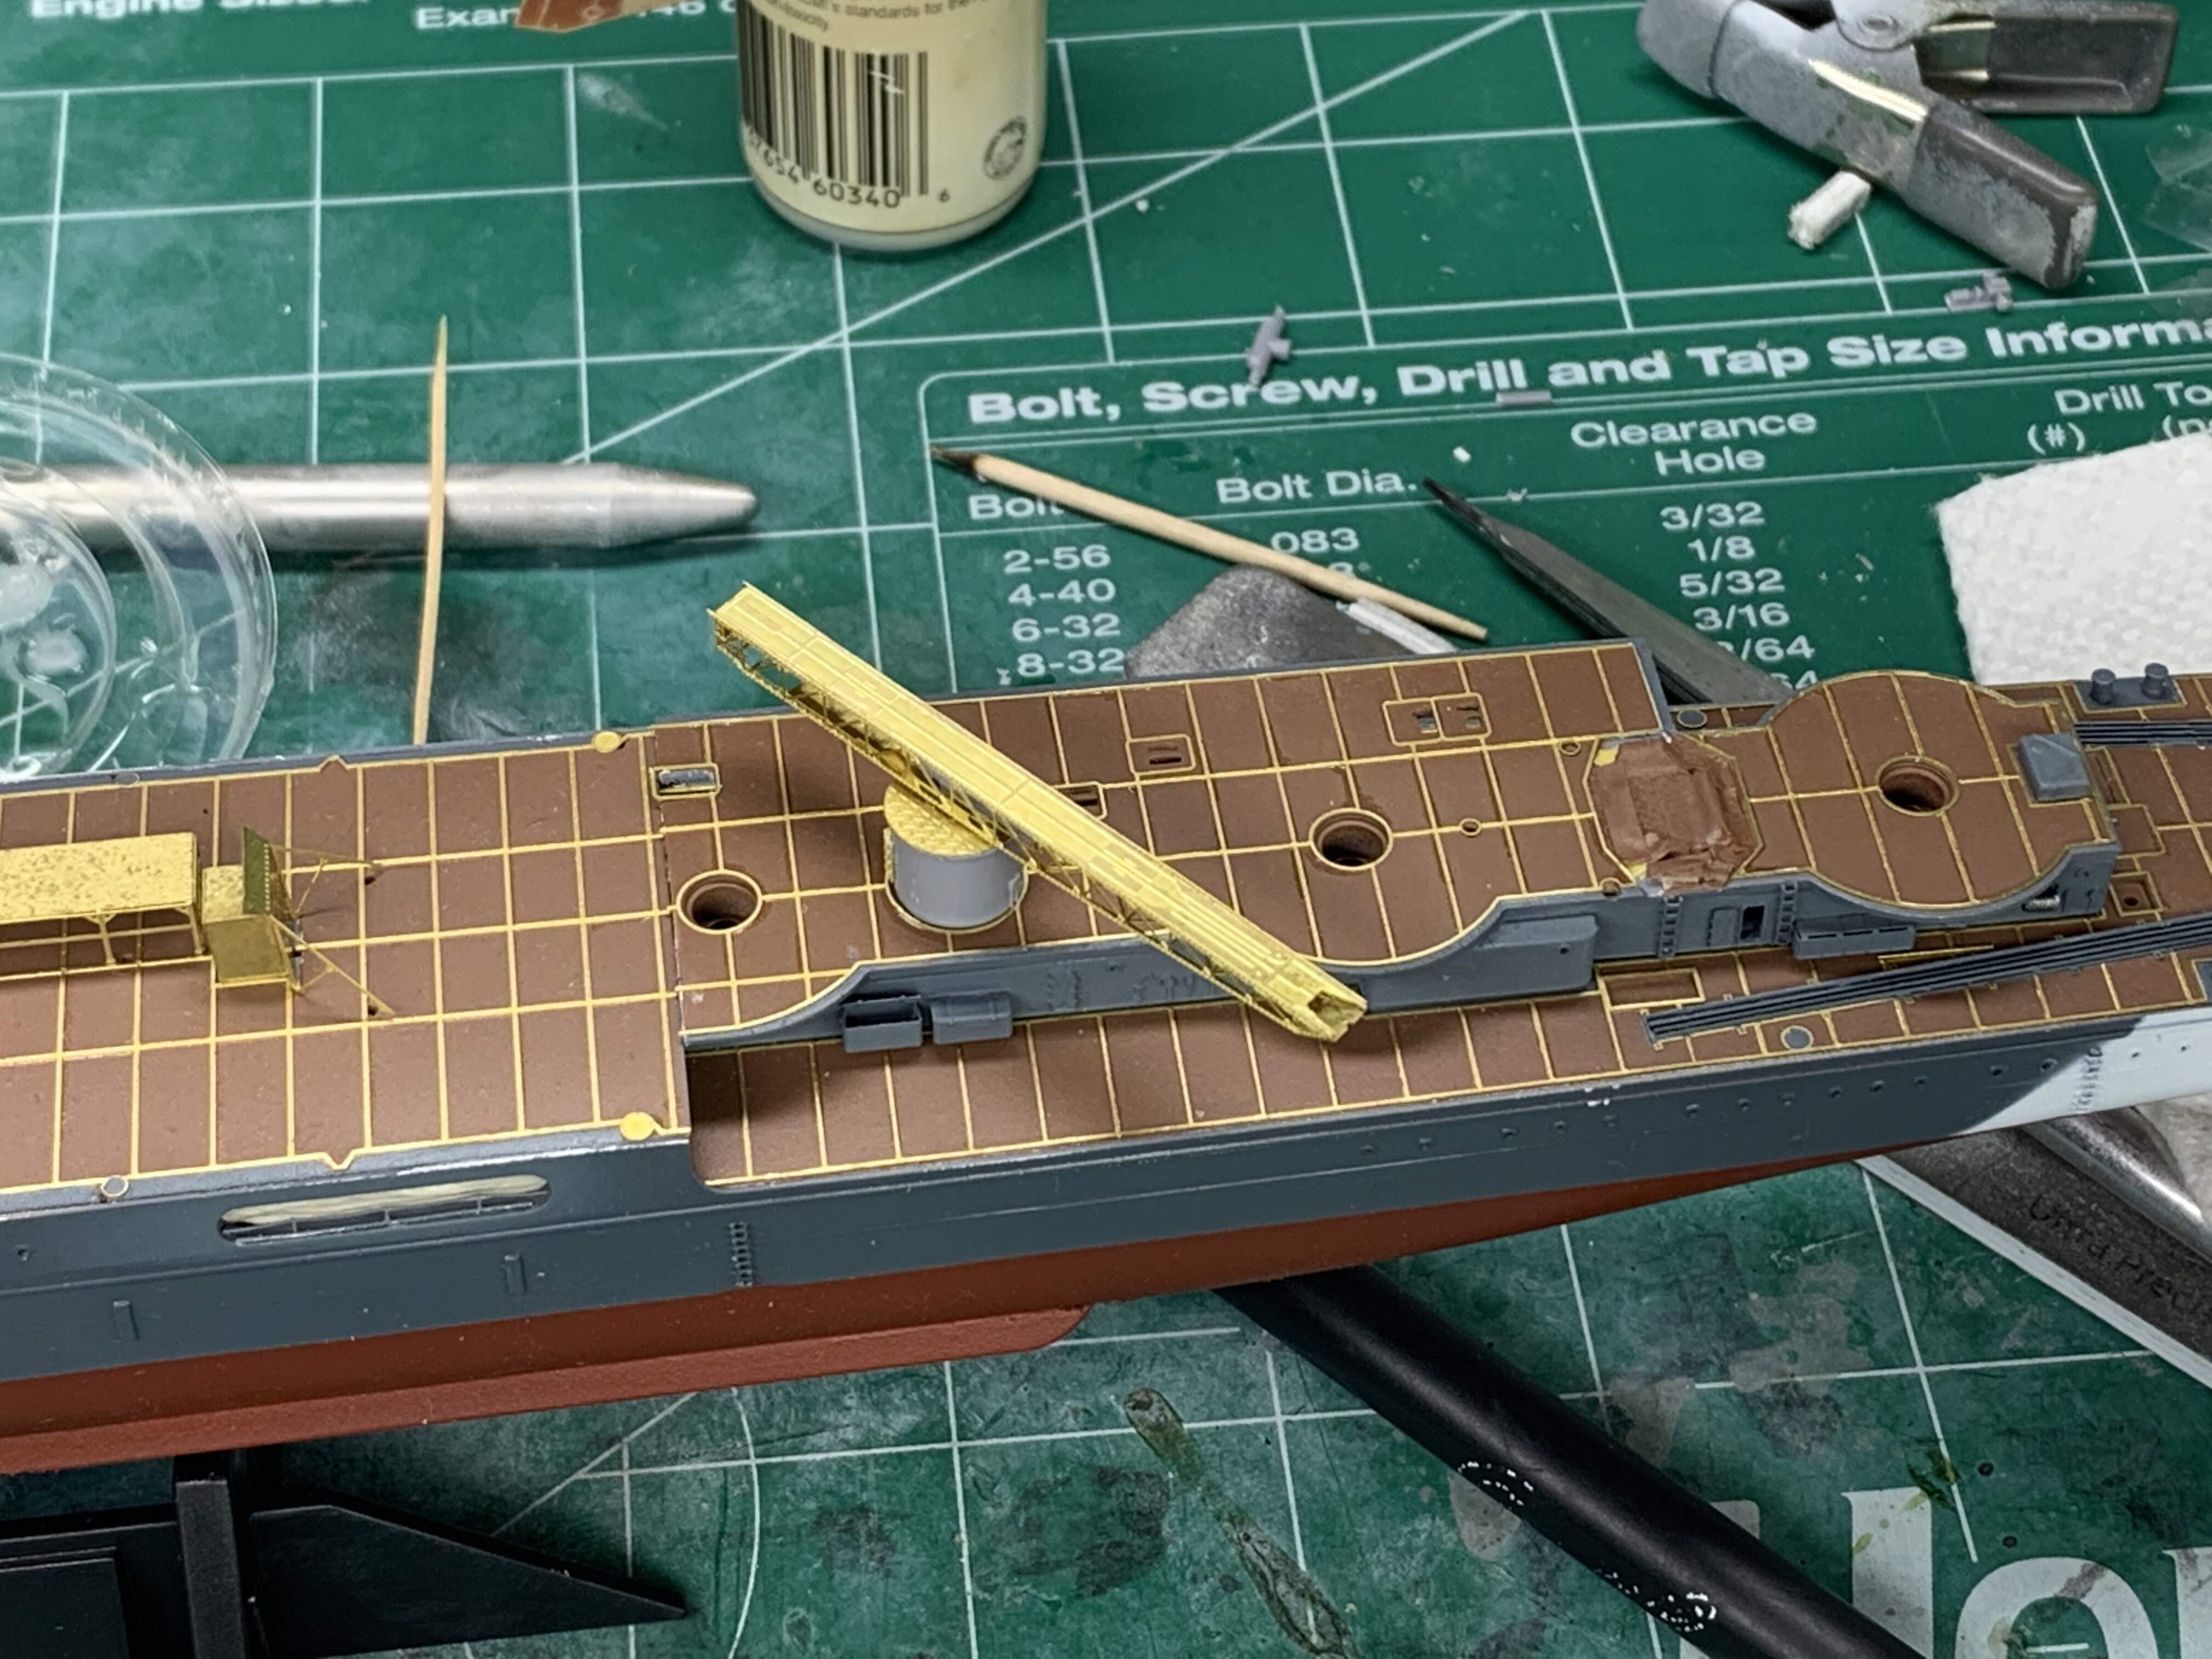
Since I knew that my time was short I decided I would knock out the catapult, it was an easy bend and utilized some kit parts. It still needs some work and some CA added to it to make the sides flush but for now it was a good start.
Well that was all I was able to get, for now this will be my last opportunity for meaningful work until 8 November - real life and work continues to be an obstacle!!
Thanks for stopping by and as always comments, suggestions and criticism are always welcome!!
David
Hi Dave! Looking great!
Personally, I would not shim the deck-as soon as you do that, it will throw everything out of alignment…
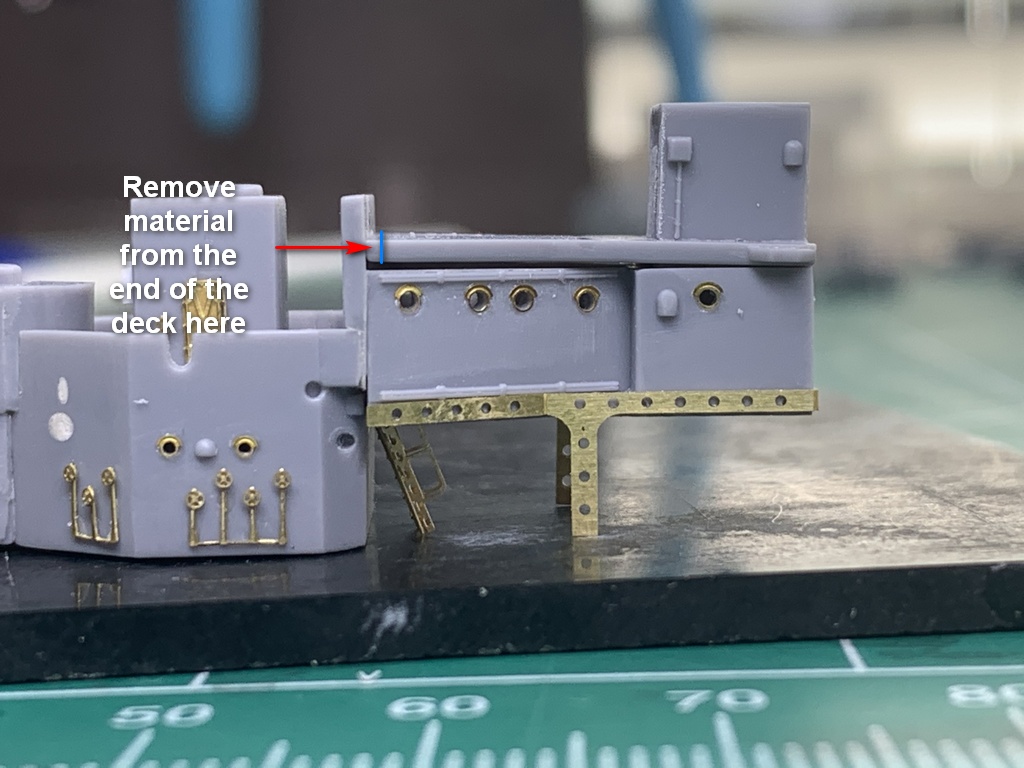
It looks to me like the end where it butts up against a vertical wall is too tight and causing the deck to lift… I would carefully remove a small amount of material from the end of the deck and then test fit again. Keep repeating this until it sits down nicely
Russell,
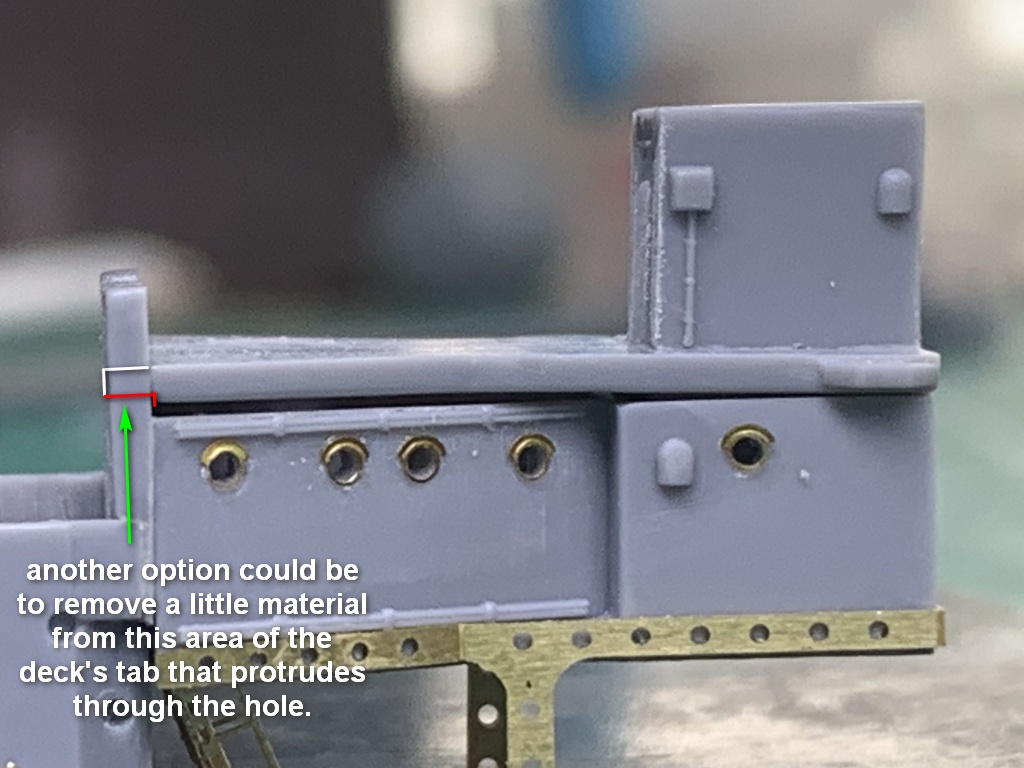
There is actually a locating tab on the end of the deck and a slot on the vertical wall which I could remove and allow it to sit flush. My only concern with doing that is it may throw off the alignment of the remaining pieces such as the mast and the ladder that is supped to connect that aft deck with the forward bridge.
David
I see your dilema, Dave!
Can you show me a picture of the final assembly from the instructions?
An alternative to cutting off the location tab completely could be just to refine the fit a little bit…
You could try shaving off a bit of material to seat the deck correctly…
whether or not this affects the alignment of the remaining pieces will require dry fitting them all prior to doing any adjustments to get the deck seated correctly…
it may be a case of choosing the lesser of two evils 
Hi Dave,
I’d simply cut off the tab from the deck edge and attach the deck level with the structure below it (the horizontal alignment of which is fixed by the supporting photoetch). If this creates any alignment problems with whatever is attached above, these should be easily correctable through some judicious trimming.
Russell / Tim - Thank you for your thoughts and suggestions - I am definitely going to follow your suggestions and go with removal of material verse the shim idea.
I am going to try and get some time on the bench tomorrow so I can execute that plan!!
Thanks again gents - really appreciate the support!!
Dave
Hey everyone,
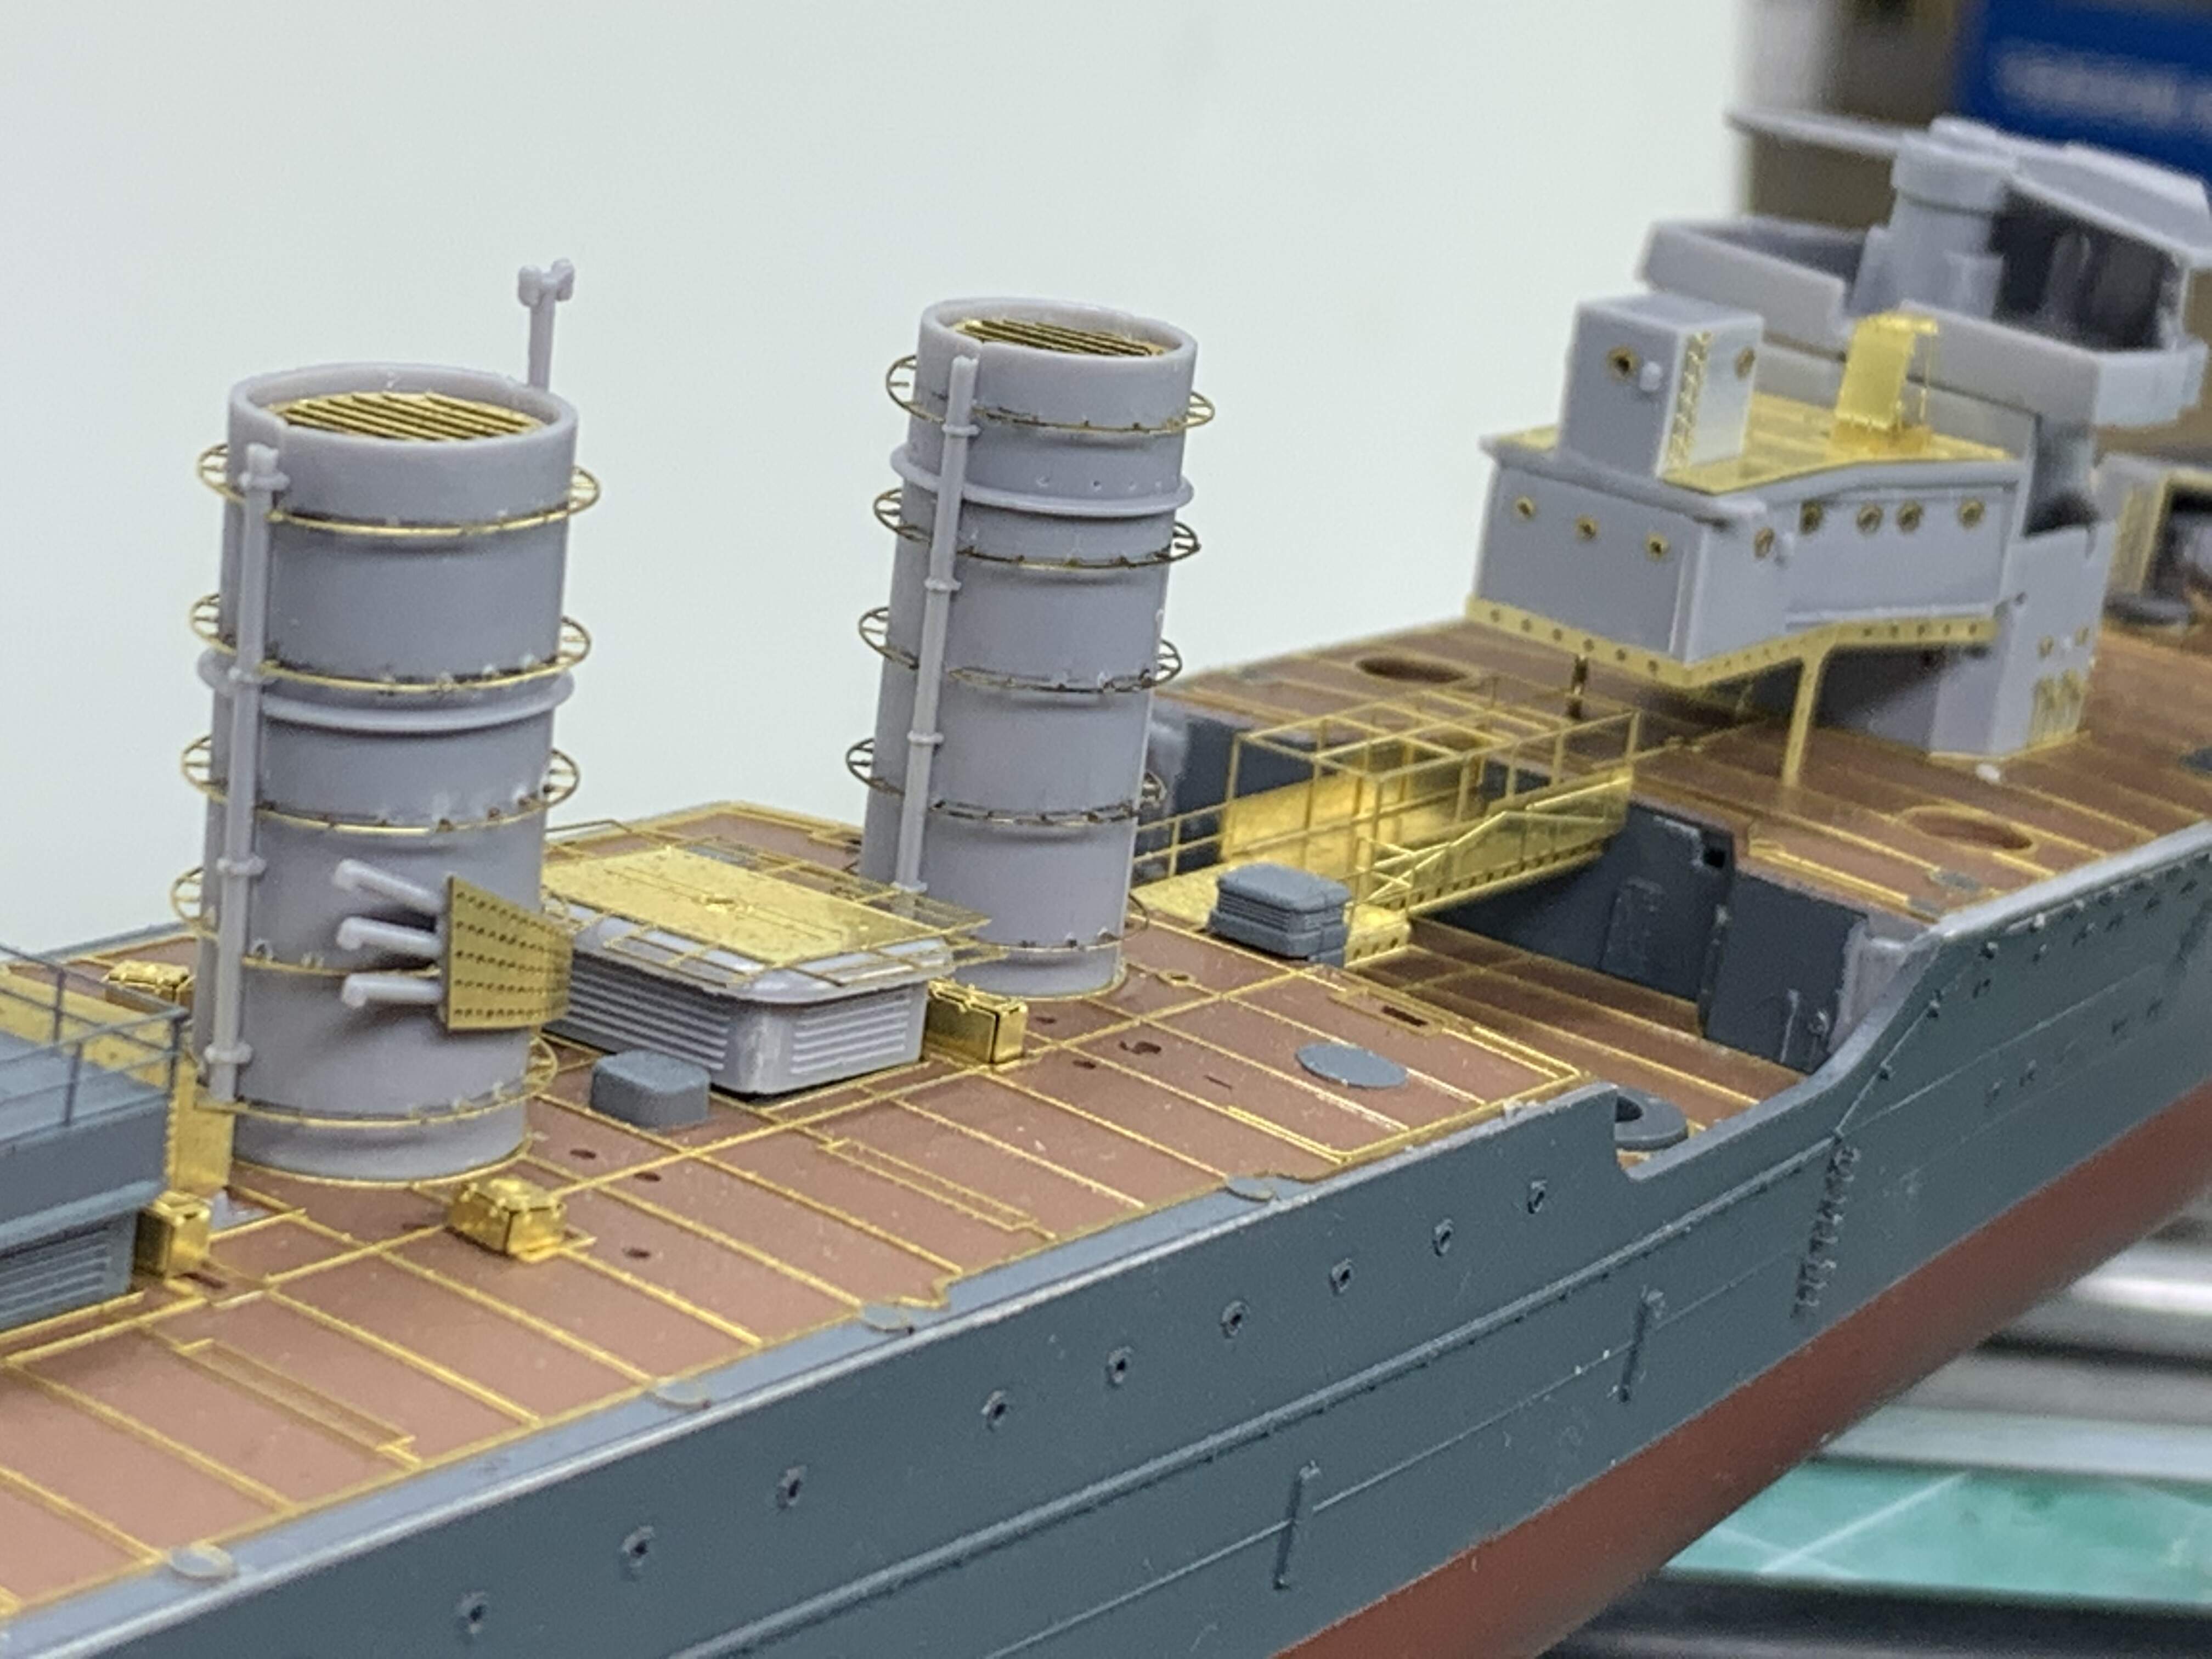
I chiseled some time out yesterday to sit in the dockyard and got some workers to make some progress.
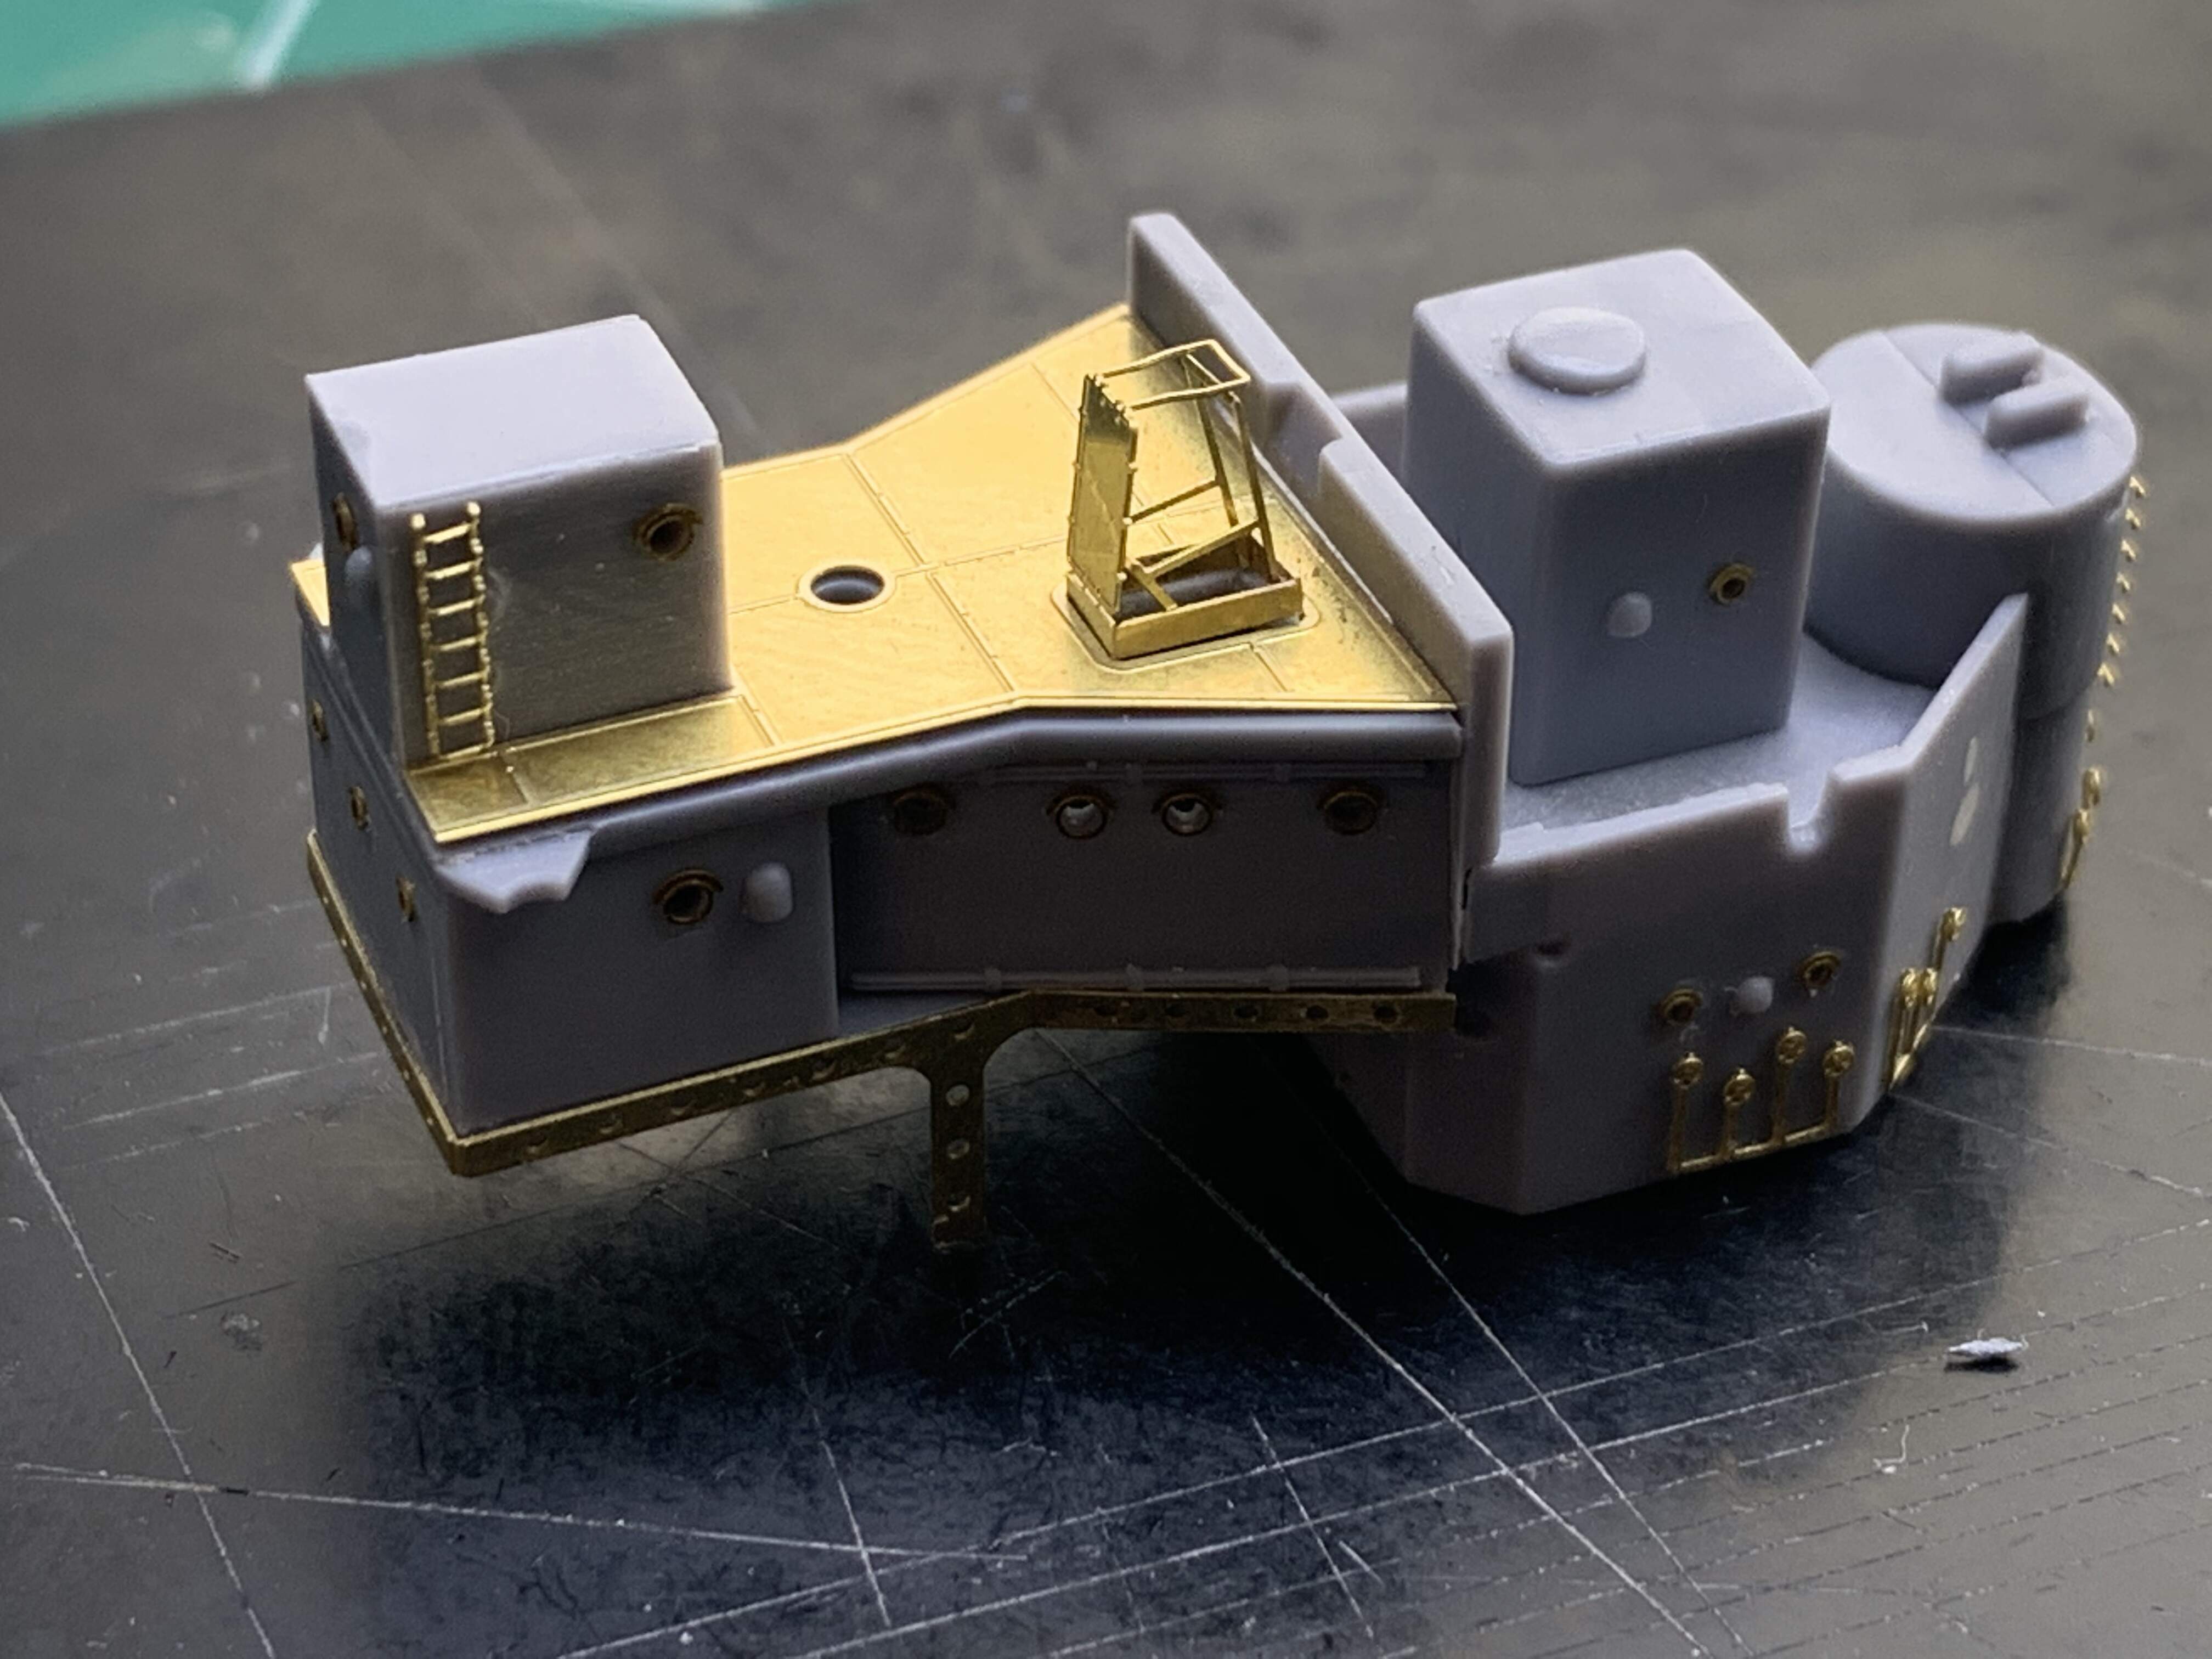
After discussions concerning the aft bridge deck I to your suggestions and removed material. It ended up being quite a bit more than I expected but in removing the material I realized that the tight fit was causing the deck to buckle. Luckily I did not realize this until later - reason being is that I would have removed the locator tabs in the rear portion of the deck which would have then caused the deck to overhang when its not supposed to.
In either case the material removal worked - secondary affect was having to sand down the brass deck sheet so that it too would not buckle.
After this was done I glued down the deck, worked the deck hatch and inclined ladder that will be added later. I also finished up the aircraft catapult and added some details to the housing structure on the aft bredie deck.
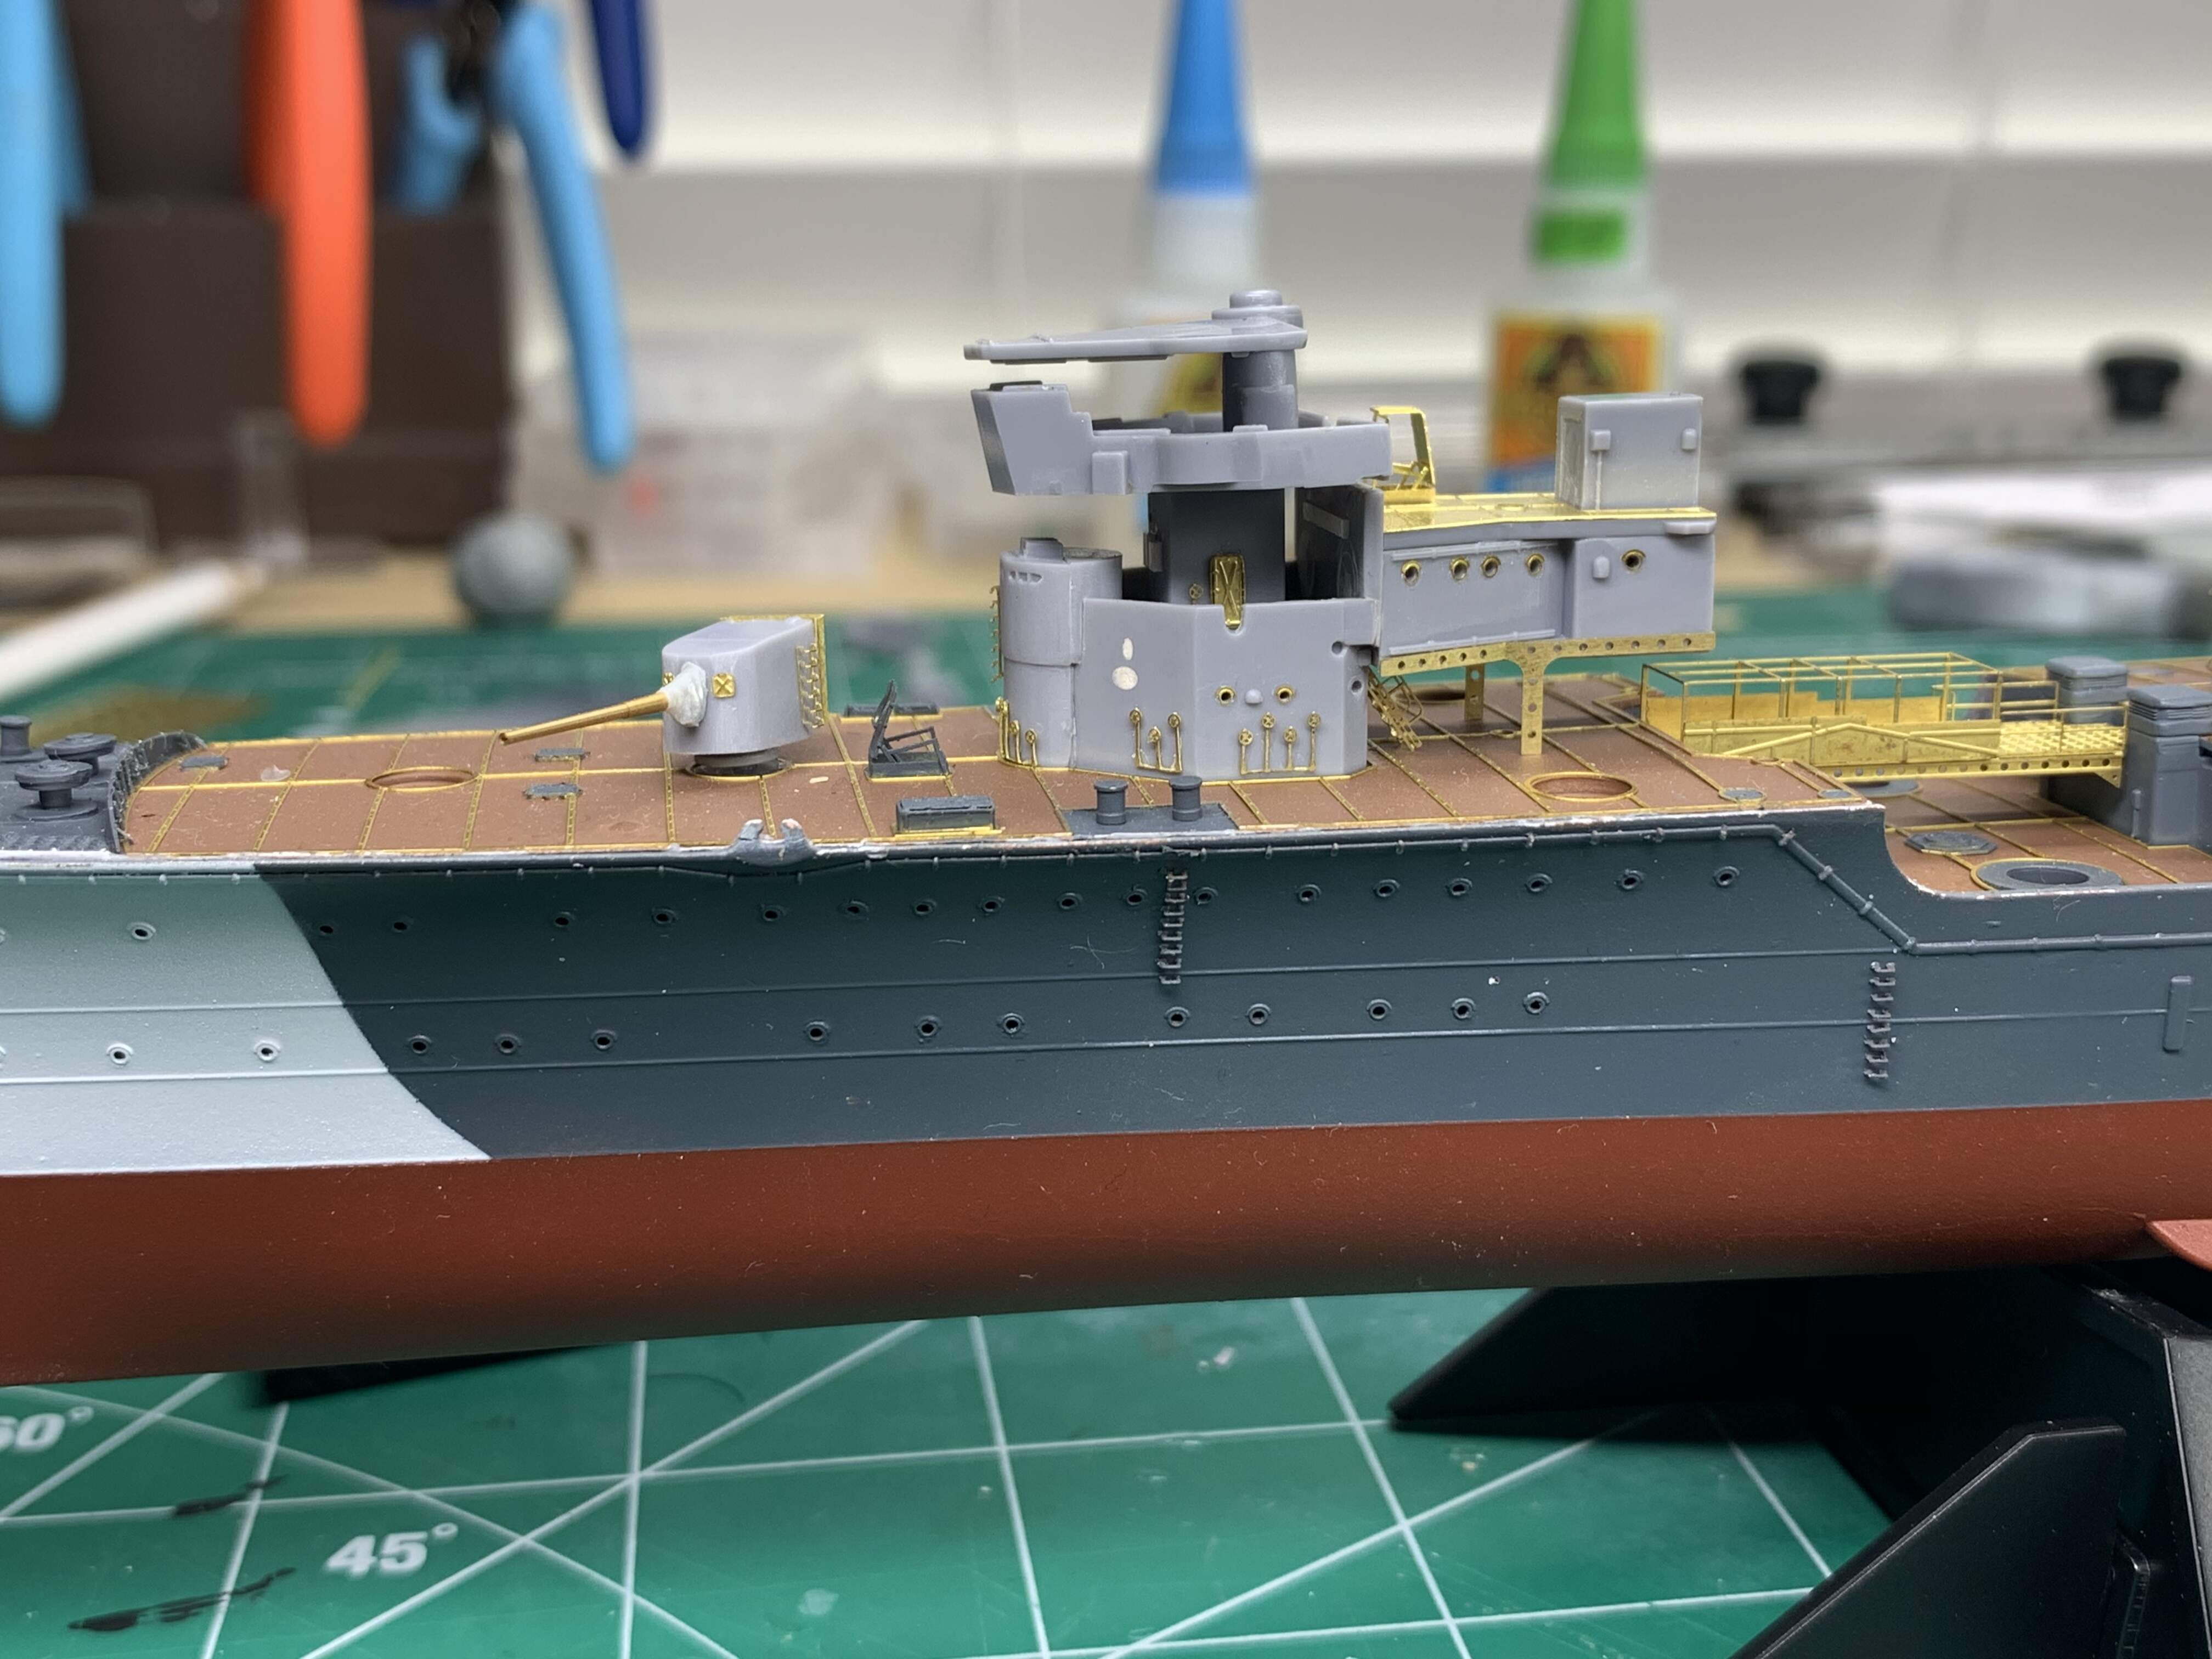
For fun I then threw everything on the hull to see how it looked.
Sorry for the disjointed update but I am steeling a couple minutes at work to write this update.
Hopefully soon I will get some more time for the build and updates.
I love the fact that on this new site I can write the blog on the computer and then edit from my phone to add the photos - so much easier than the old site.
Well that’s it for now, thanks for stopping by and as always, comments, suggestions and criticism are always welcome.
David
You are cracking along at a great pace! She is looking very good.
David,
very good fix to your deck issues. And she looks awesome so far, with everything dry fitted on board. Very cool! Sometimes you need that for your motivation!
Cheers
Jan


