David, those plans are indeed a find! I love being able to get to the heart of what I’m depicting with accurate, detailed information. Of course, this also means you have to find out what got missed too!

David, those plans are indeed a find! I love being able to get to the heart of what I’m depicting with accurate, detailed information. Of course, this also means you have to find out what got missed too!
David,
what Tim and Mark say, I can fully understand that you are exited about the plans and it’s certainly a big win for you to have those. And mighty fine work with the PE!
Cheers
Jan
Hi David,
you put some very fine metal-origami on the Tama.
And such plans are an enormous help to rectify most errors.
Splendid build so far.
Alex
Gentlemen,
Thank you for the kind comments and support. I will admit with the limited time I have available it has been difficult to make any progress or to even find the motivation at times, but you continue to push me forward.
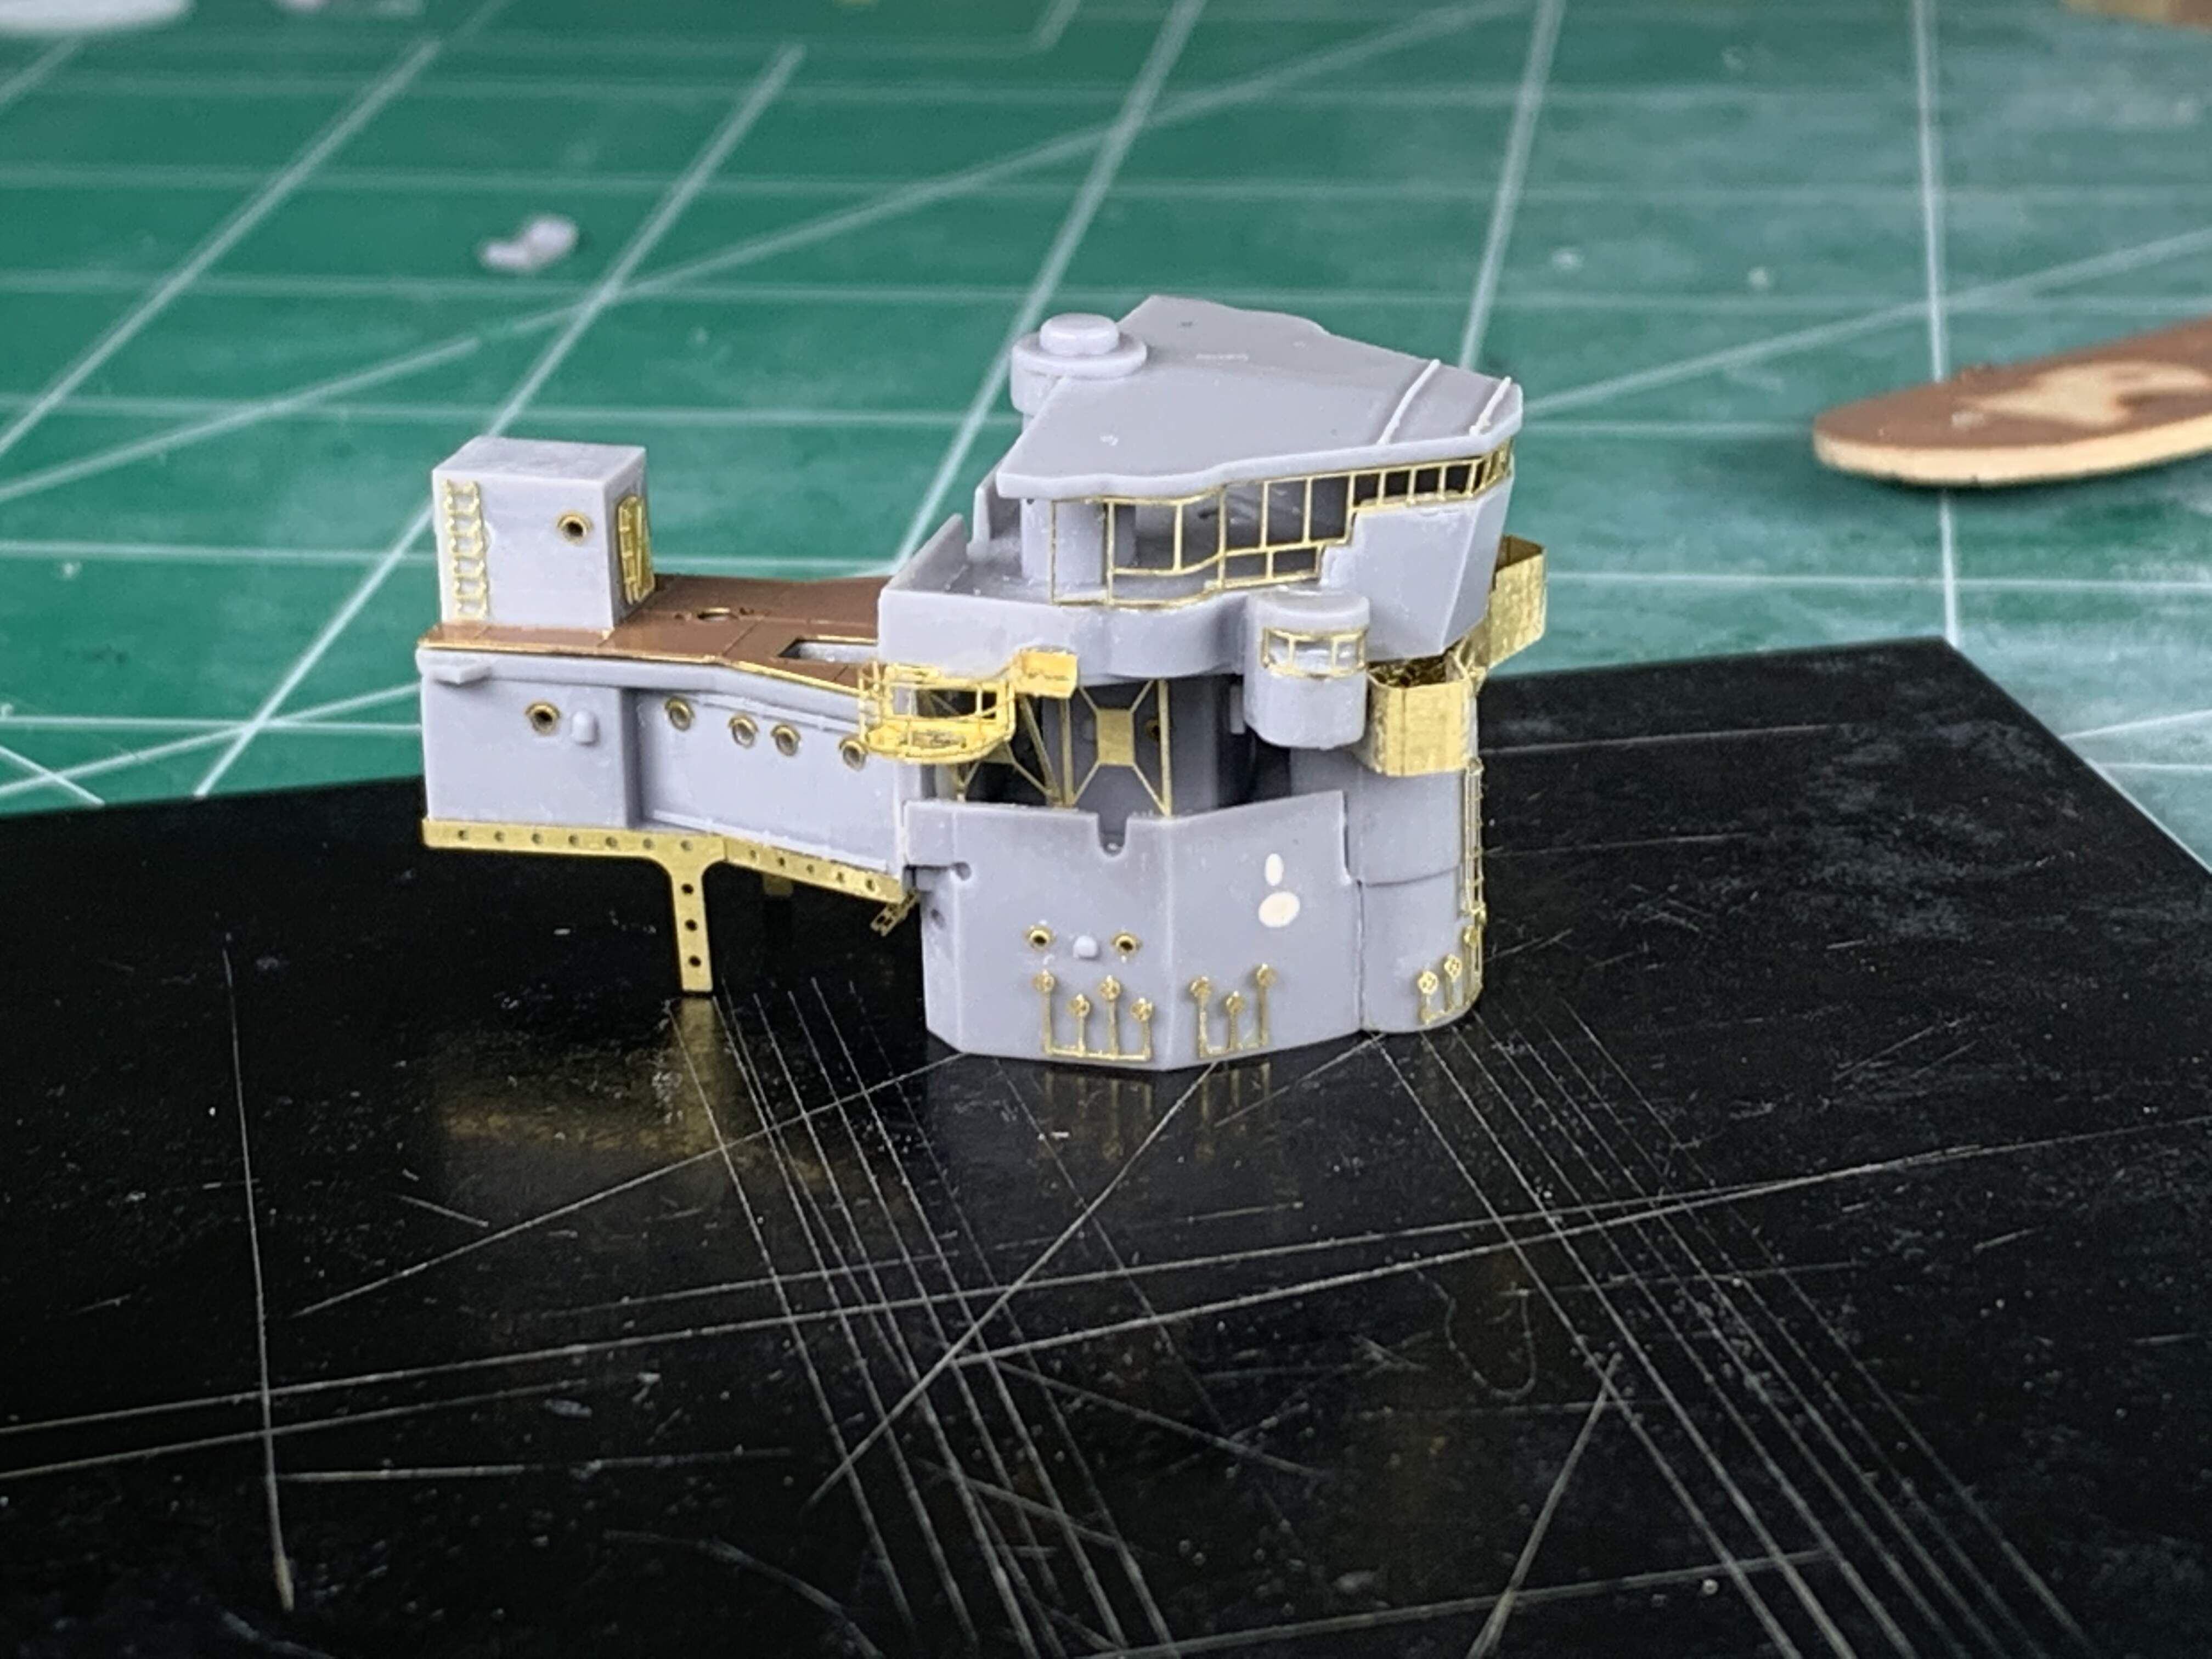
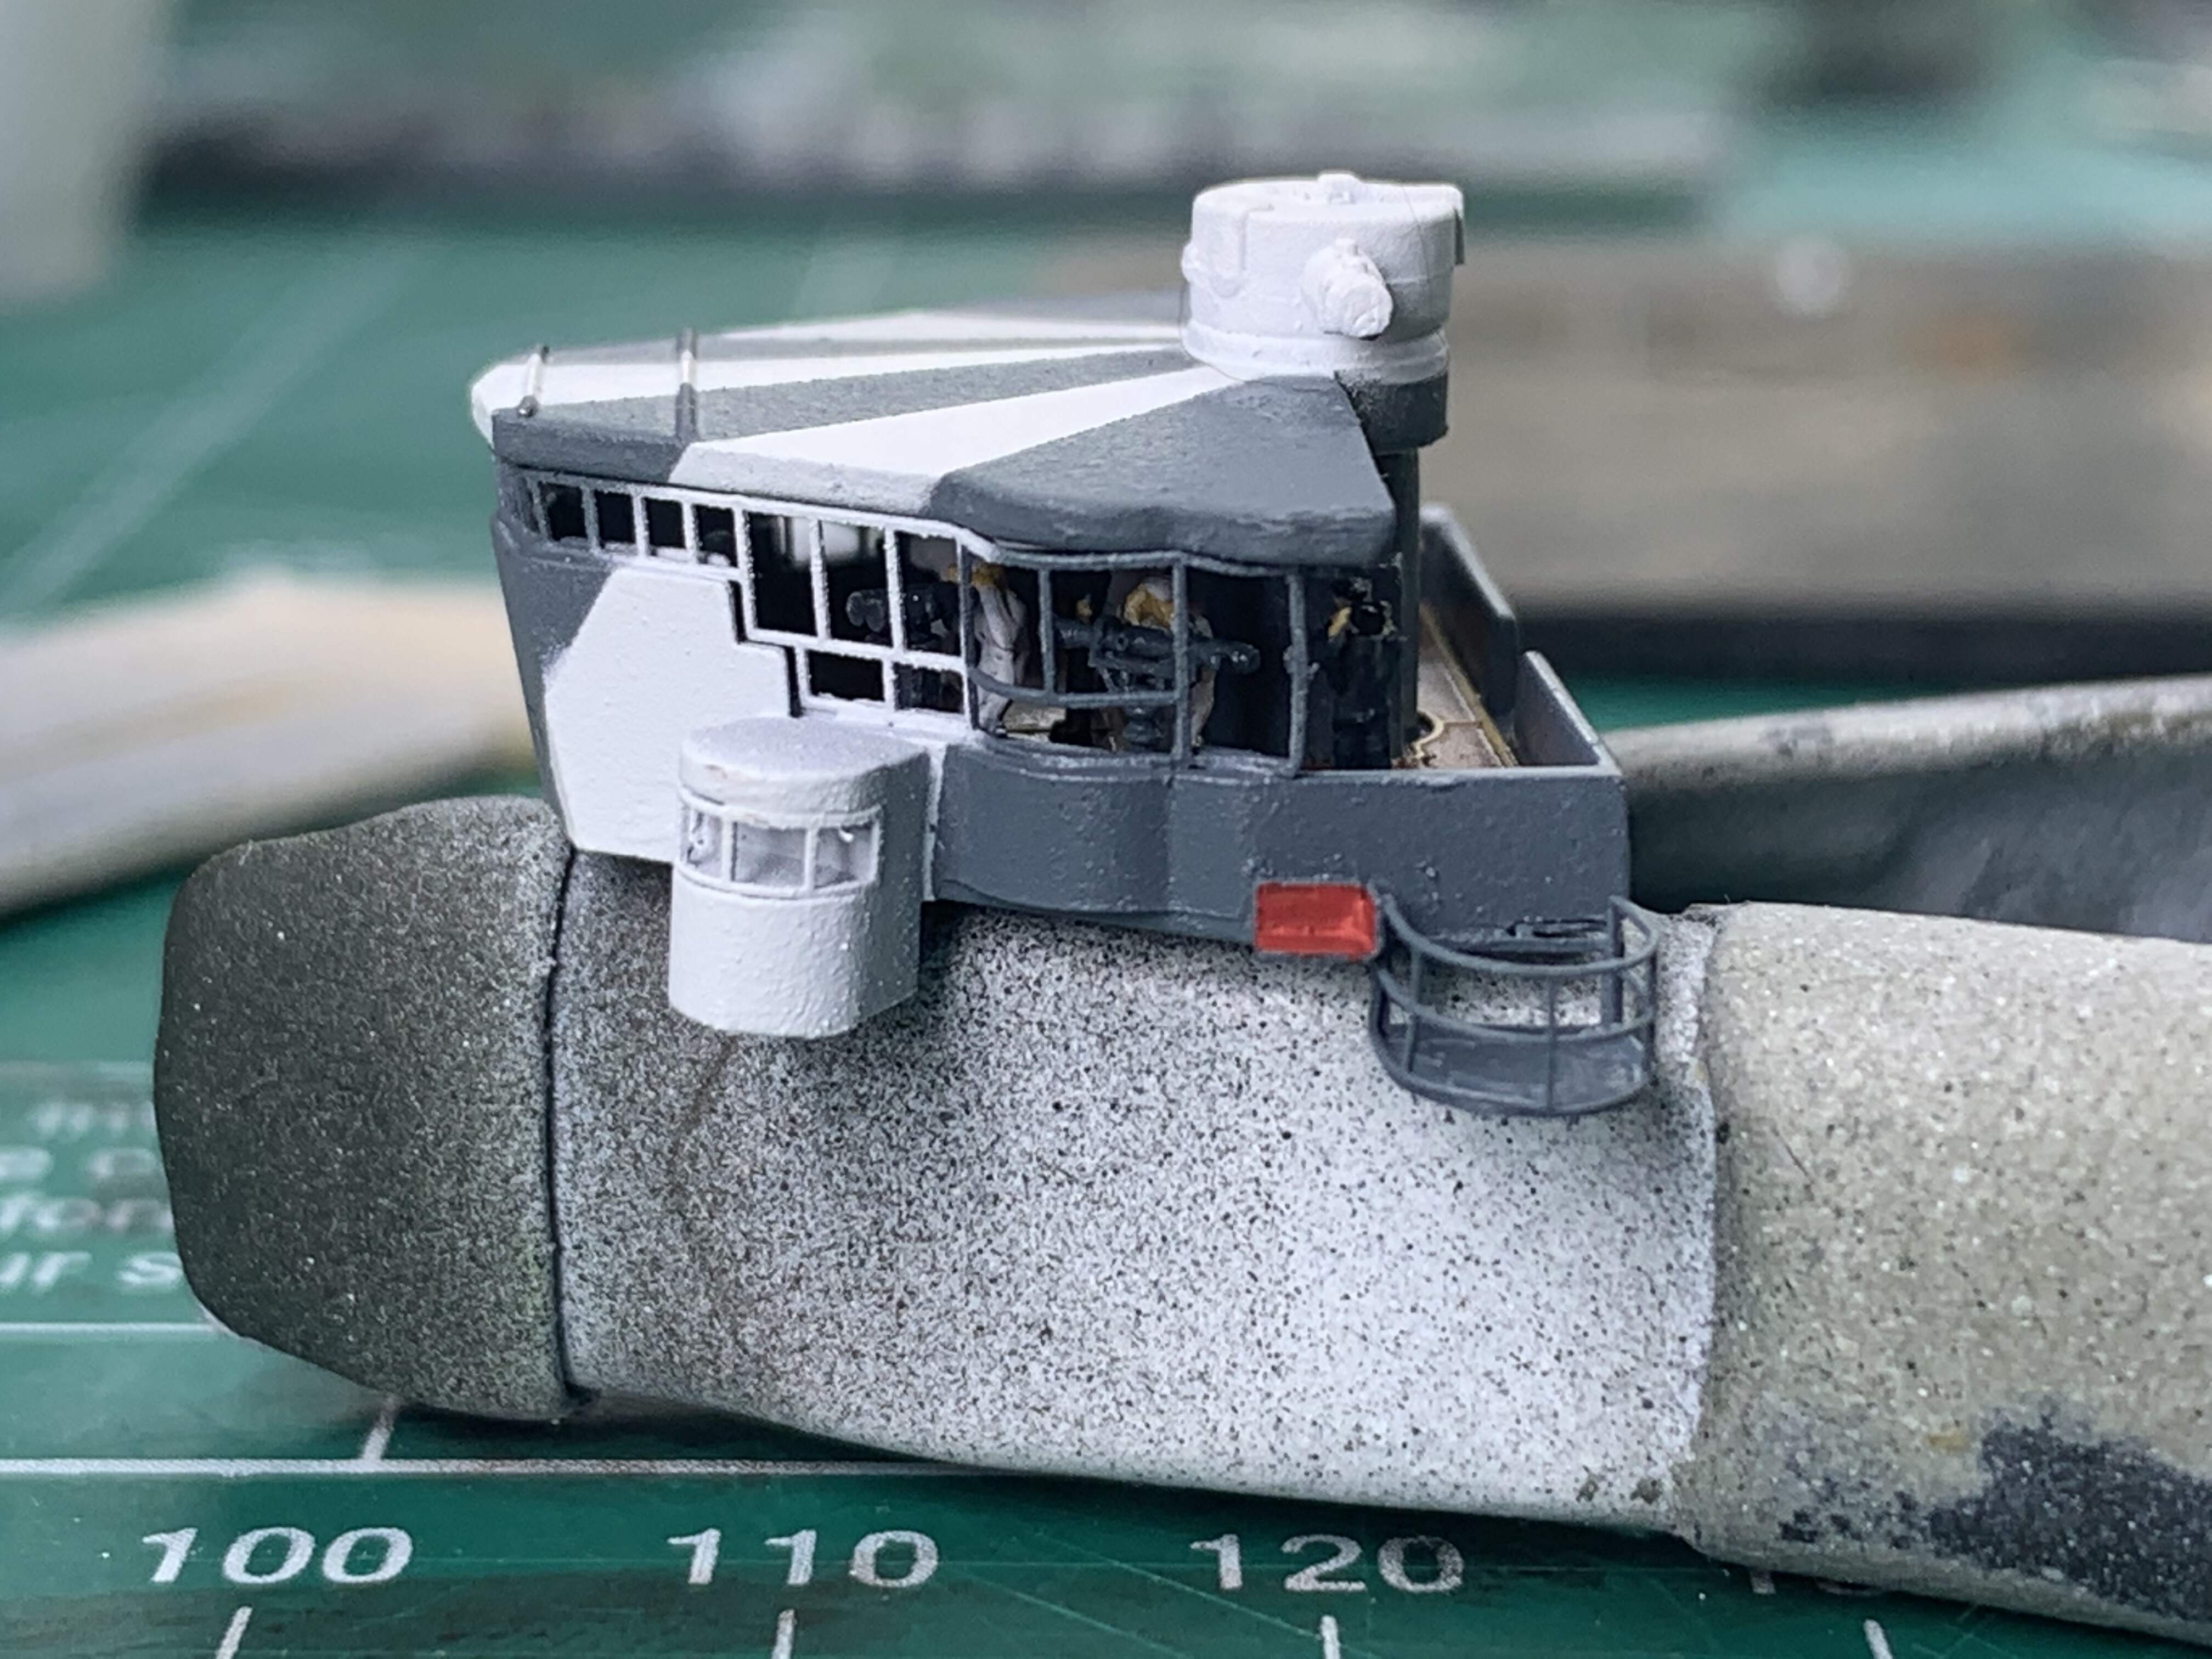
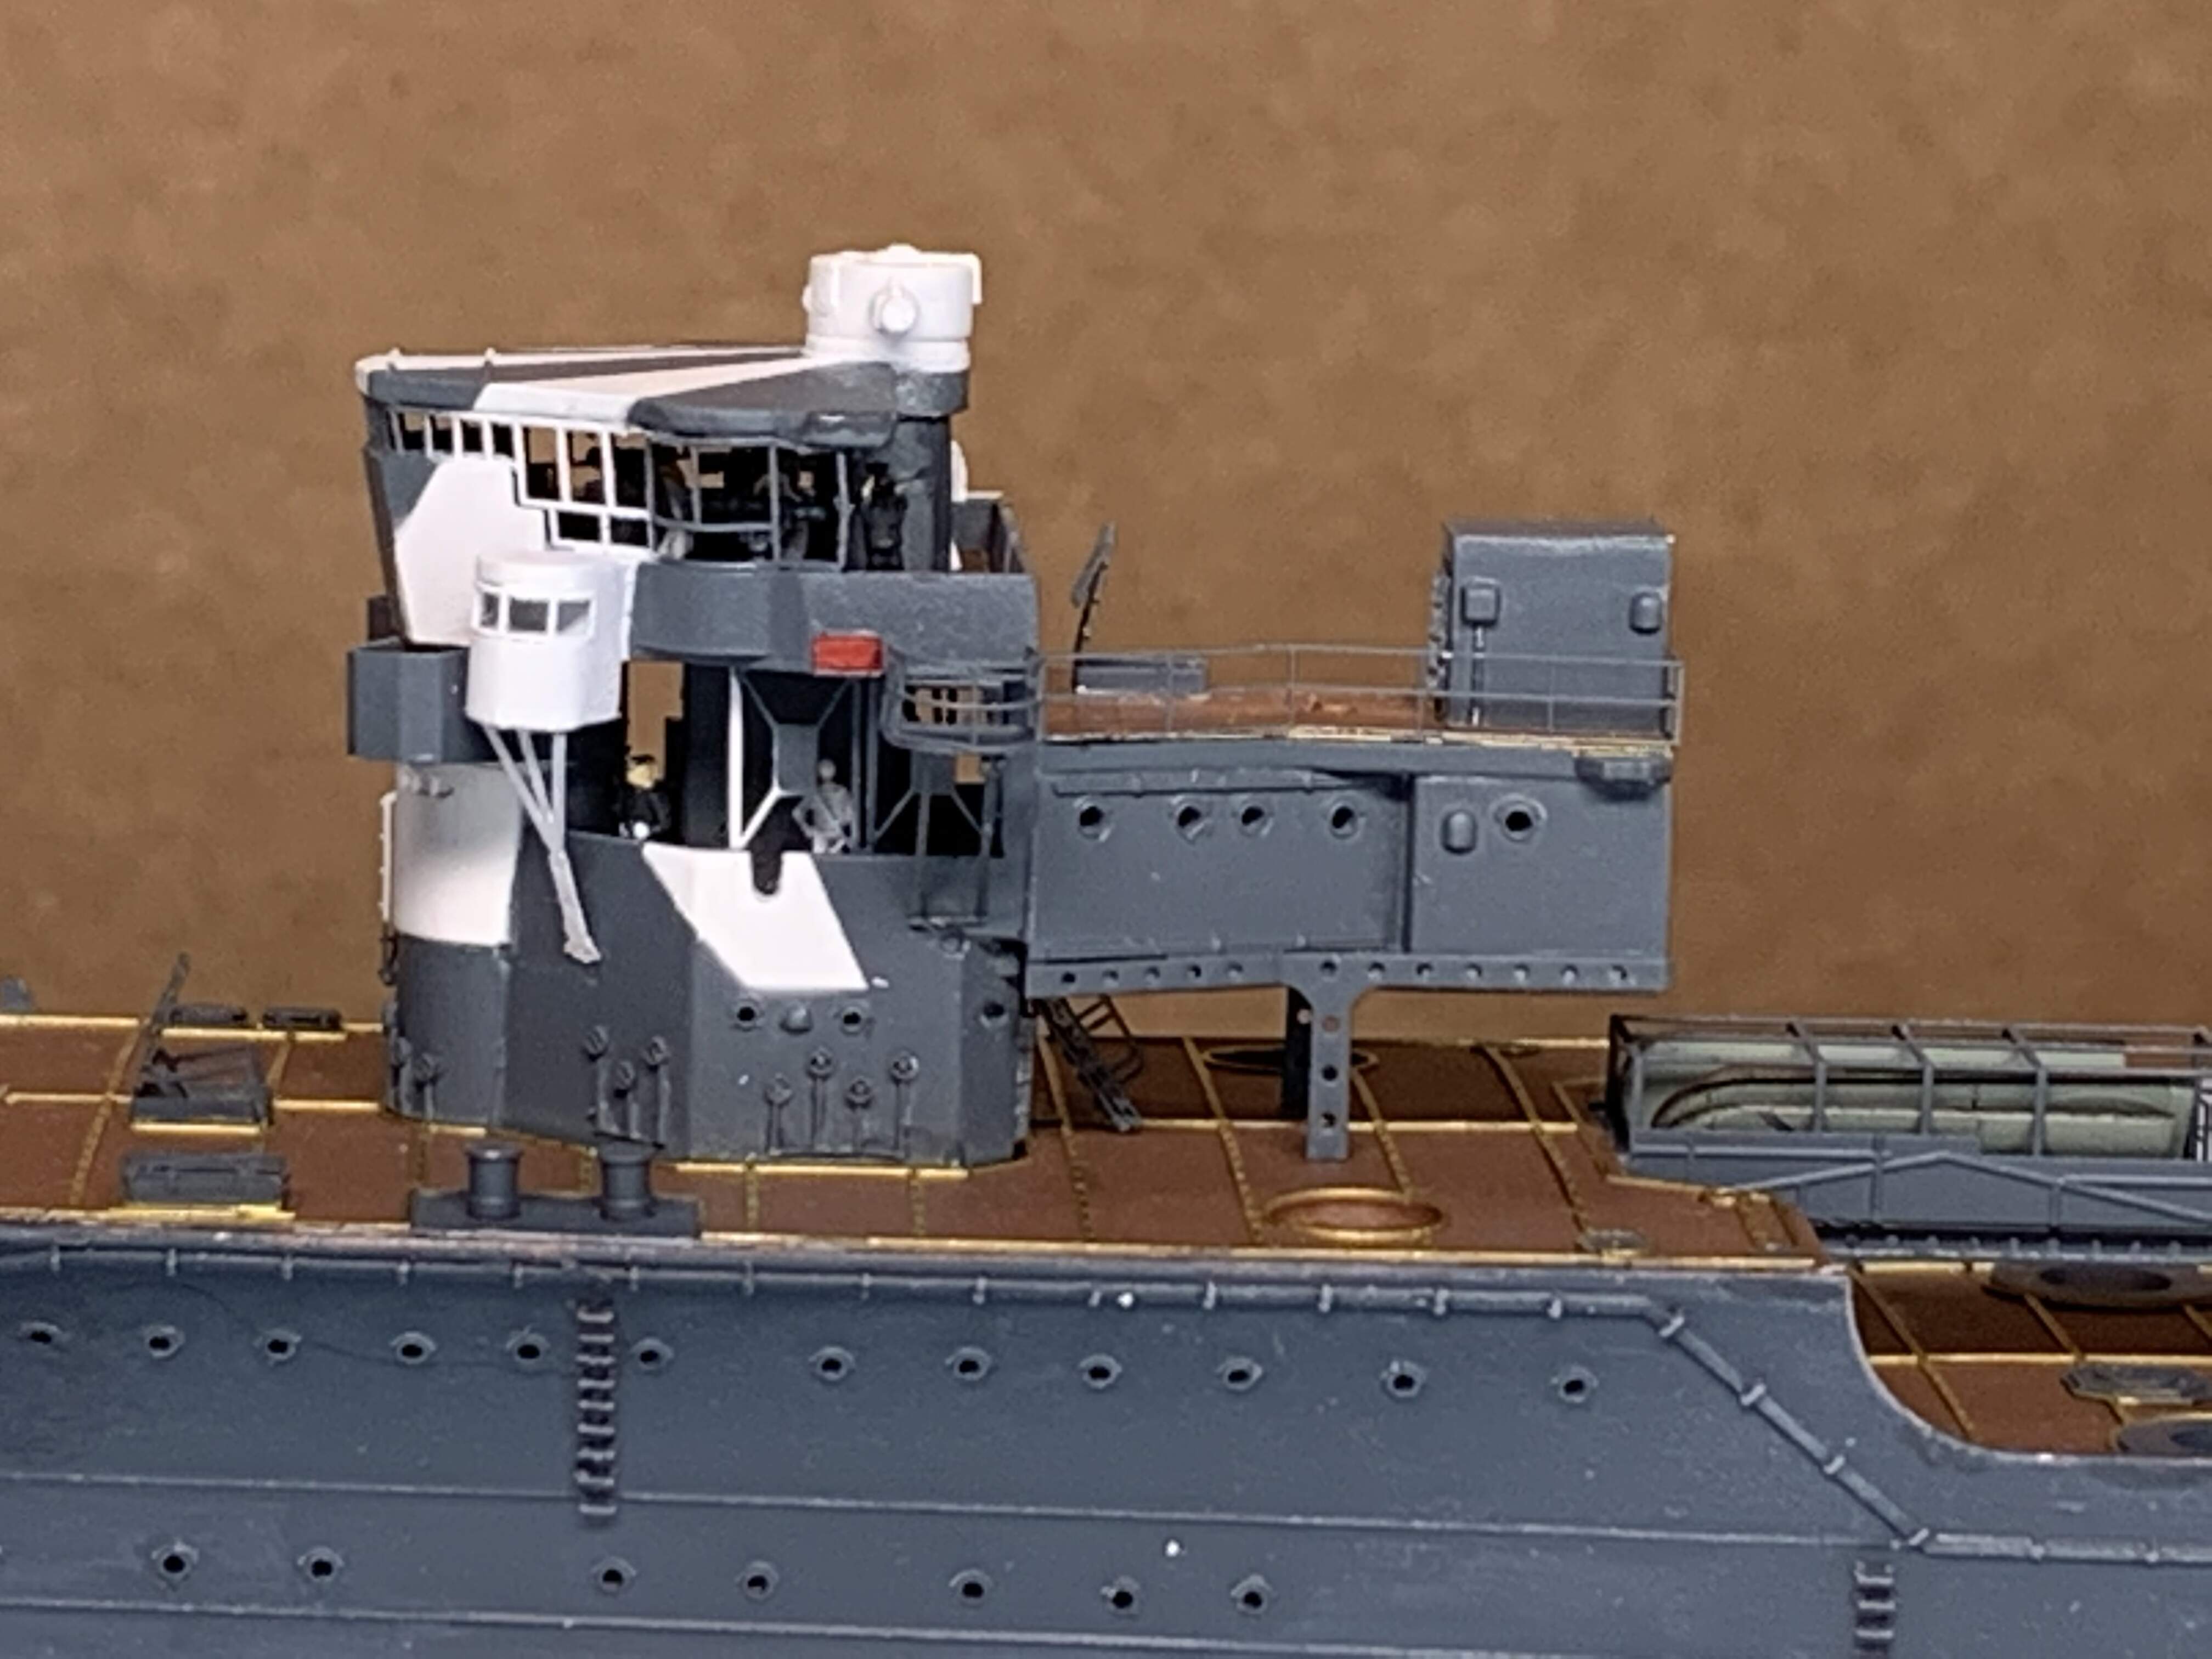
With the time I have I focused on getting some fiddly parts completed along with finishing up the bridge.
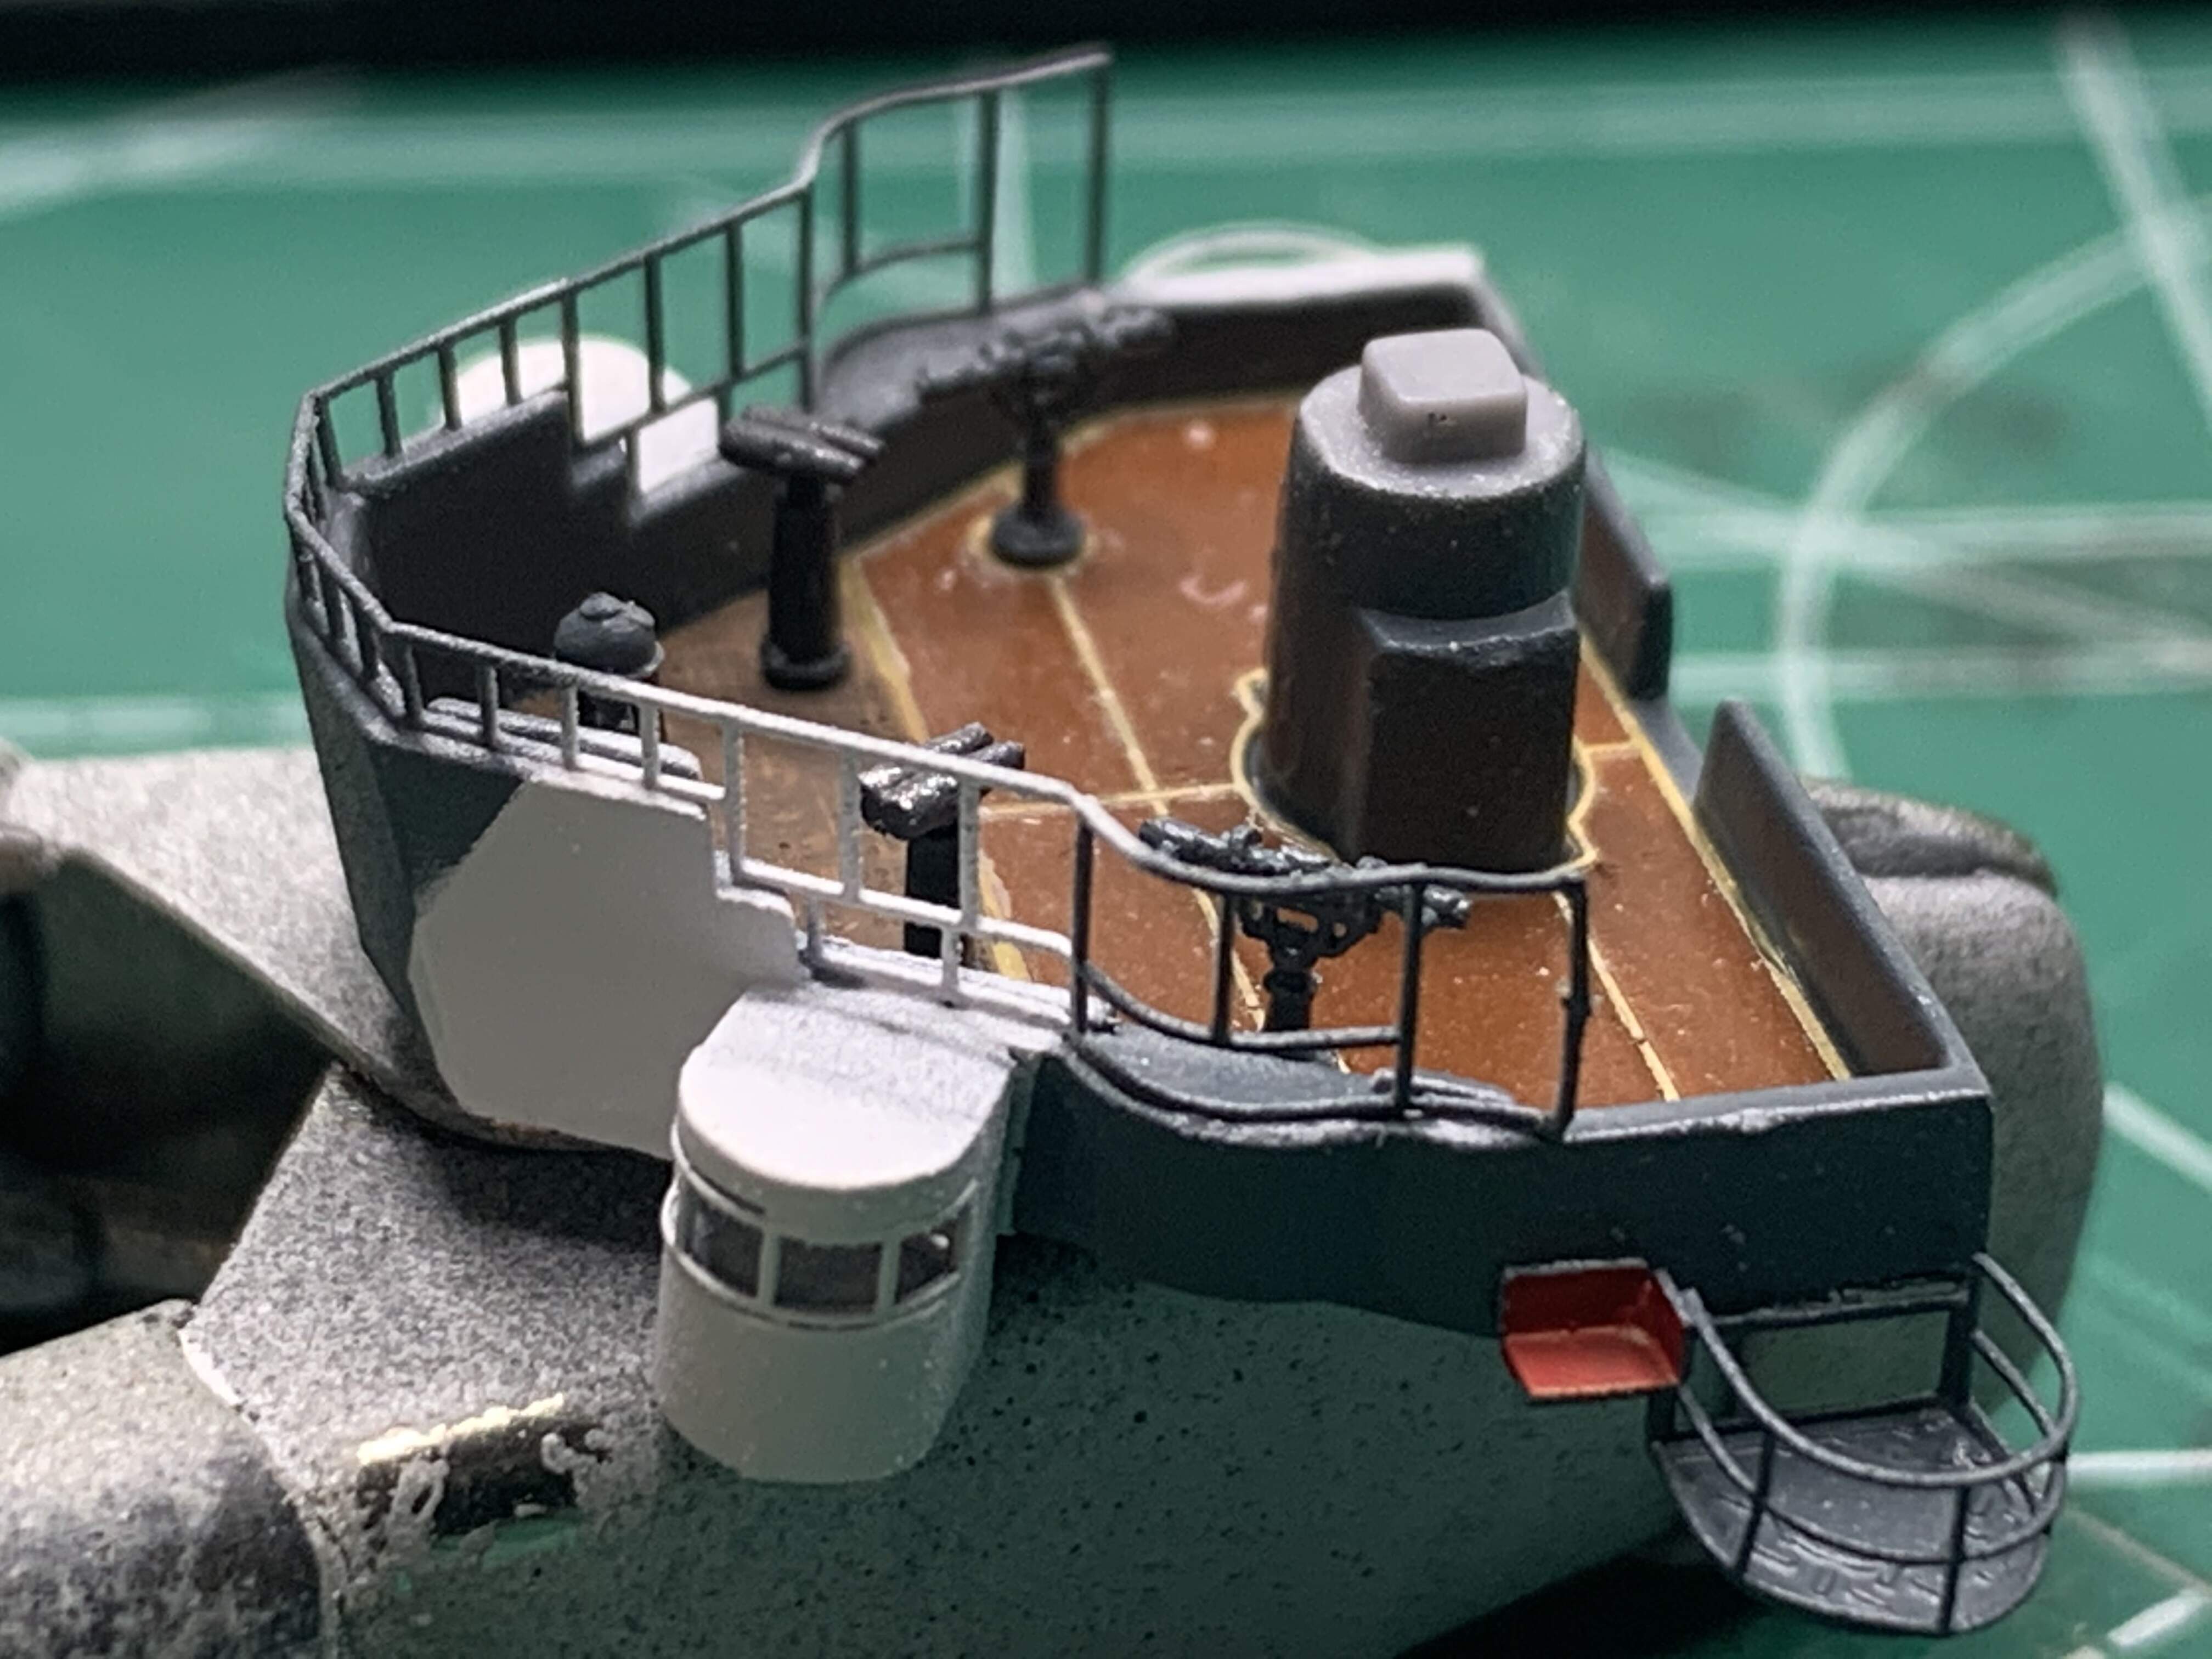
I have to admit, the bridge windows for the Tama are probably the most complicated I have undertaken so far, beside the different bends and rolls I got it twisted a bit and also caught in the tweezers but after hours of messing with it I finally was able to get it secured to the bridge.
So here is the bridge in it’s current status
The rear signal light platforms need a bit more tweeking - they were fine until I dropped the parts on the floor while trying to secure the bridge windows 
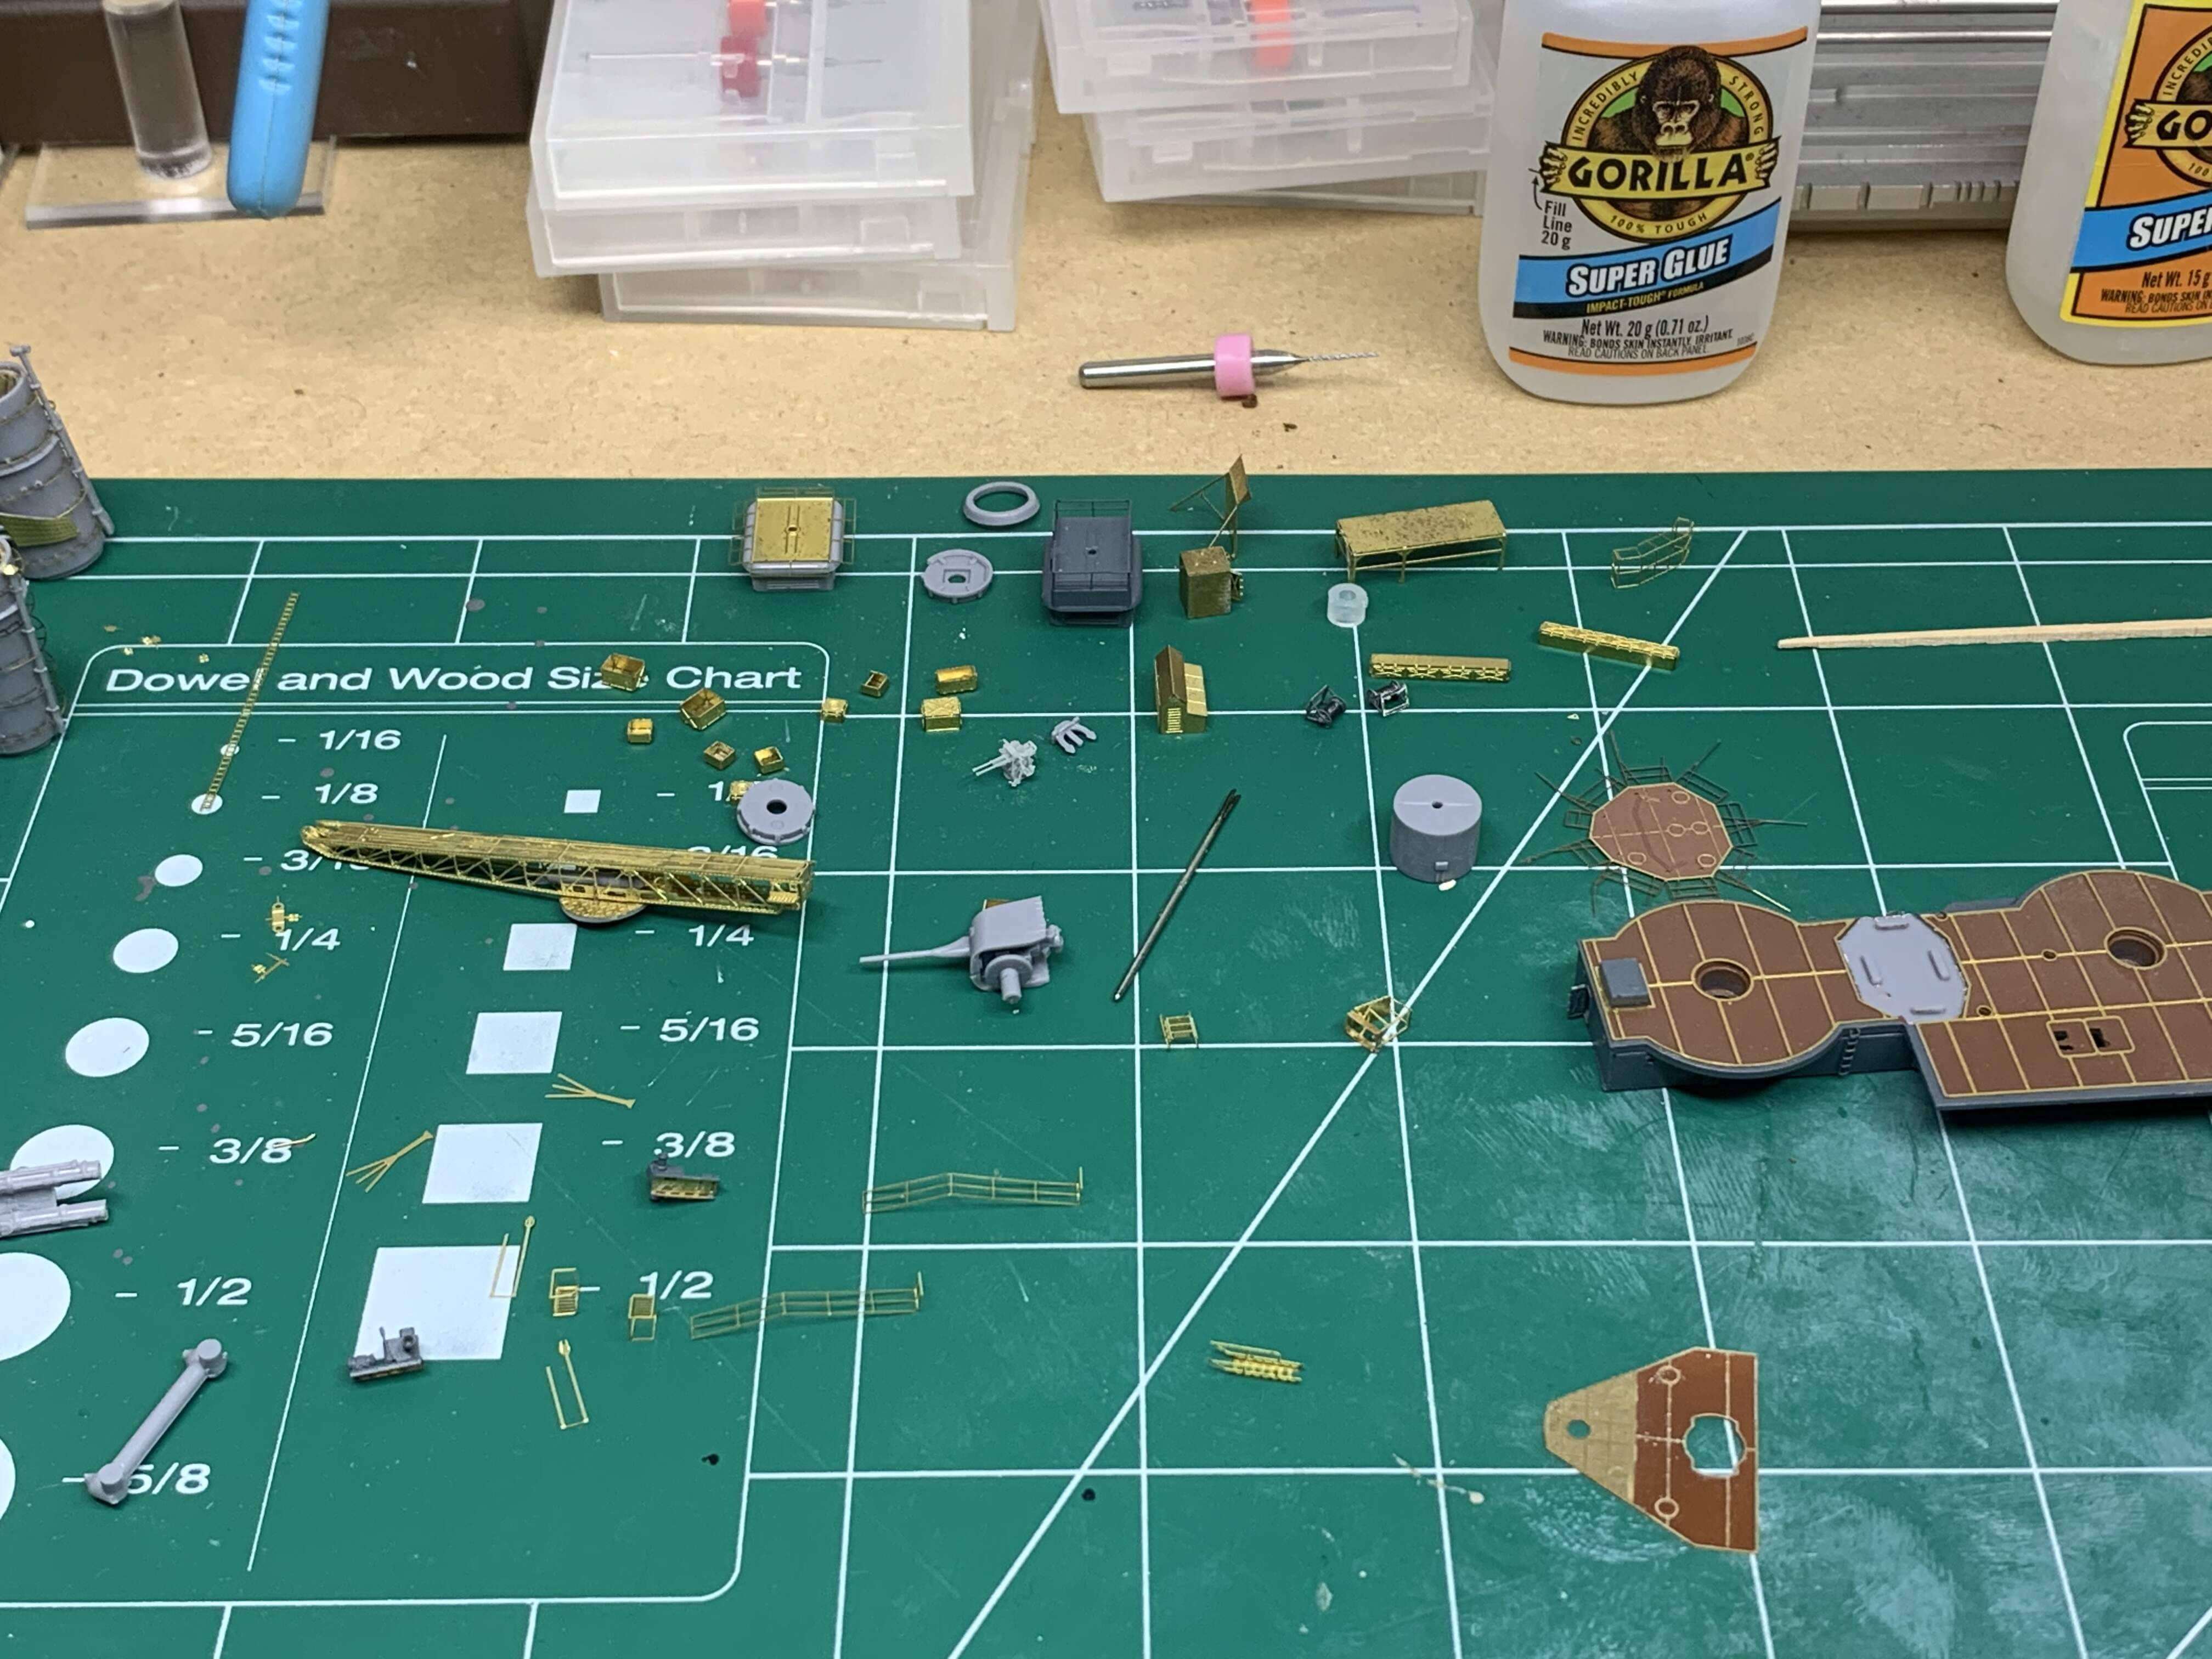
And here is a picture of all the fiddly parts that I need to get into the paint booth.
That’s about it for now but it looks like I will actually get two days off in a row so look for more updates soon.
Thanks for stopping by and as always comments, suggestions and criticism are always welcome.
David
David,
the bridge windows look outstanding and YES - it’s quite clear from just looking at them that this was a rather complex operation…
Cheers
Jan
Dave, I agree with Jan: that’s some very fine pe origami work with the bridge windows…
Will look great painted up and assembled 
David,
MIghty fine PE work with the bridge, really a lot of needed detail.
Mark 
Gentlemen,
Thank you for the kind words - it really keeps me going especially when I have a build in mind for another kit and I just want to start verse continue with the Tama.
I had time this weekend so I present an update - for the most part all of the major assemblies are built so now it is on to fiddly bits and slinging some paint.
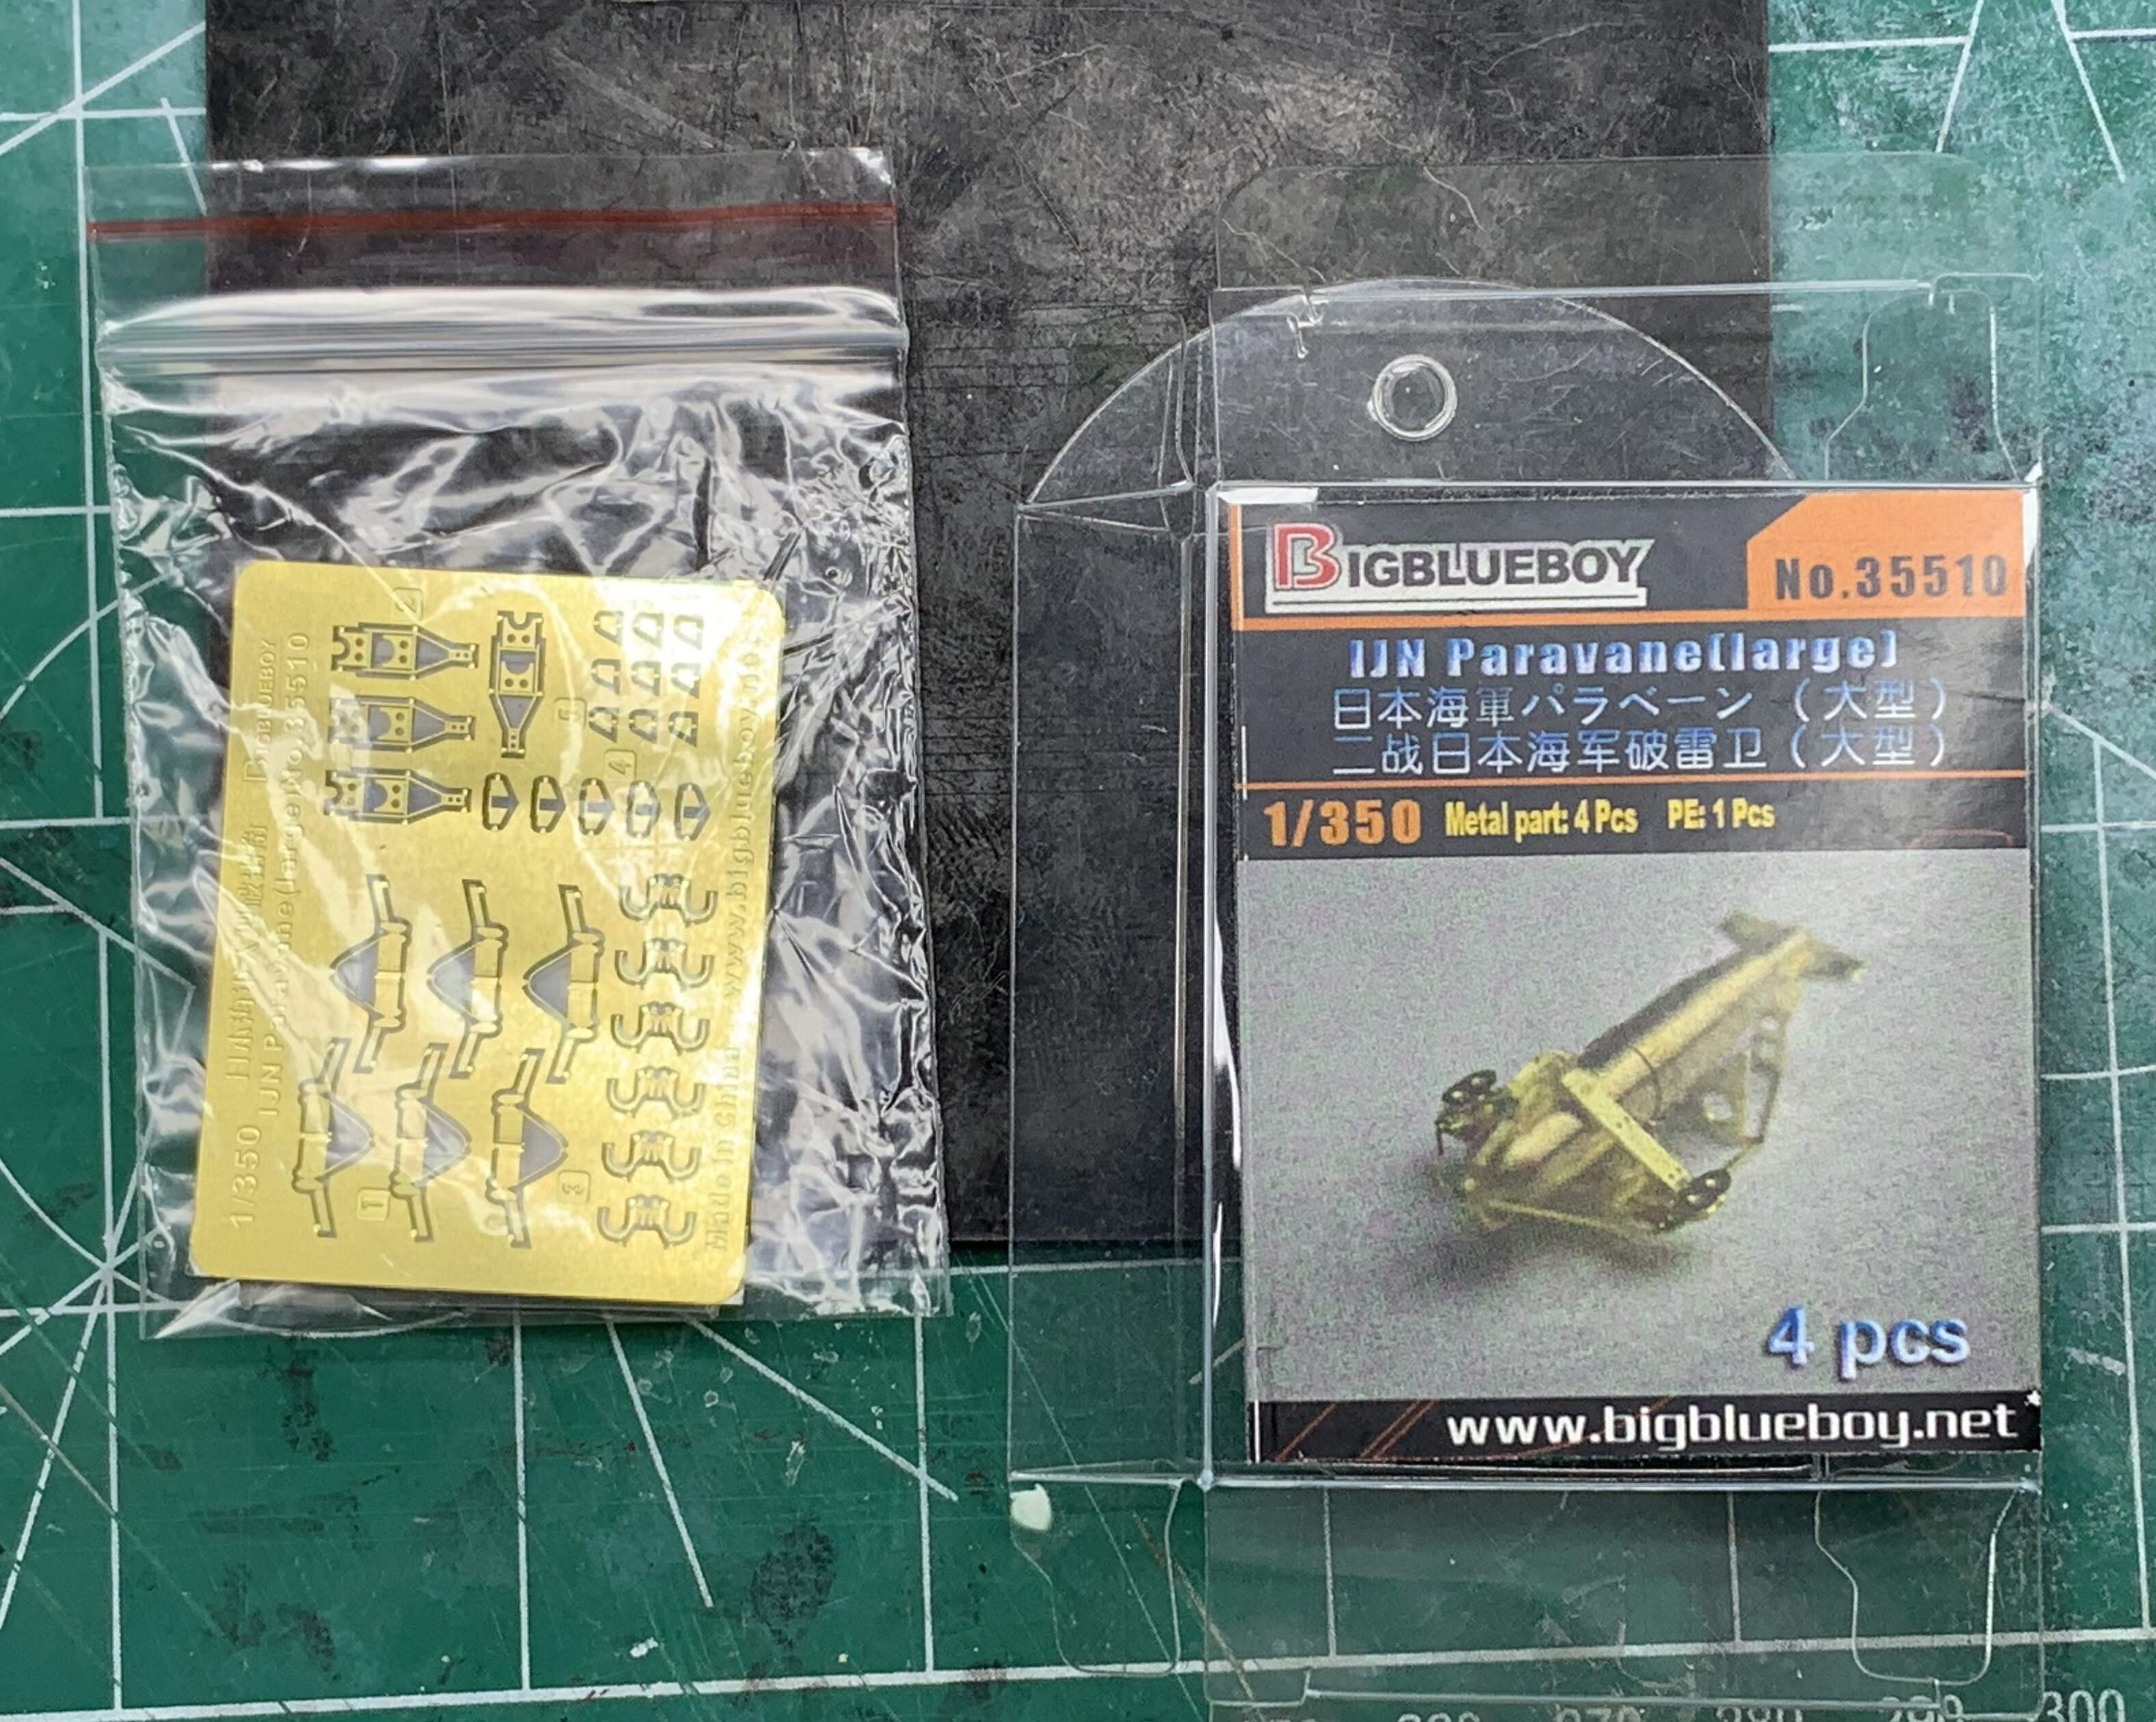
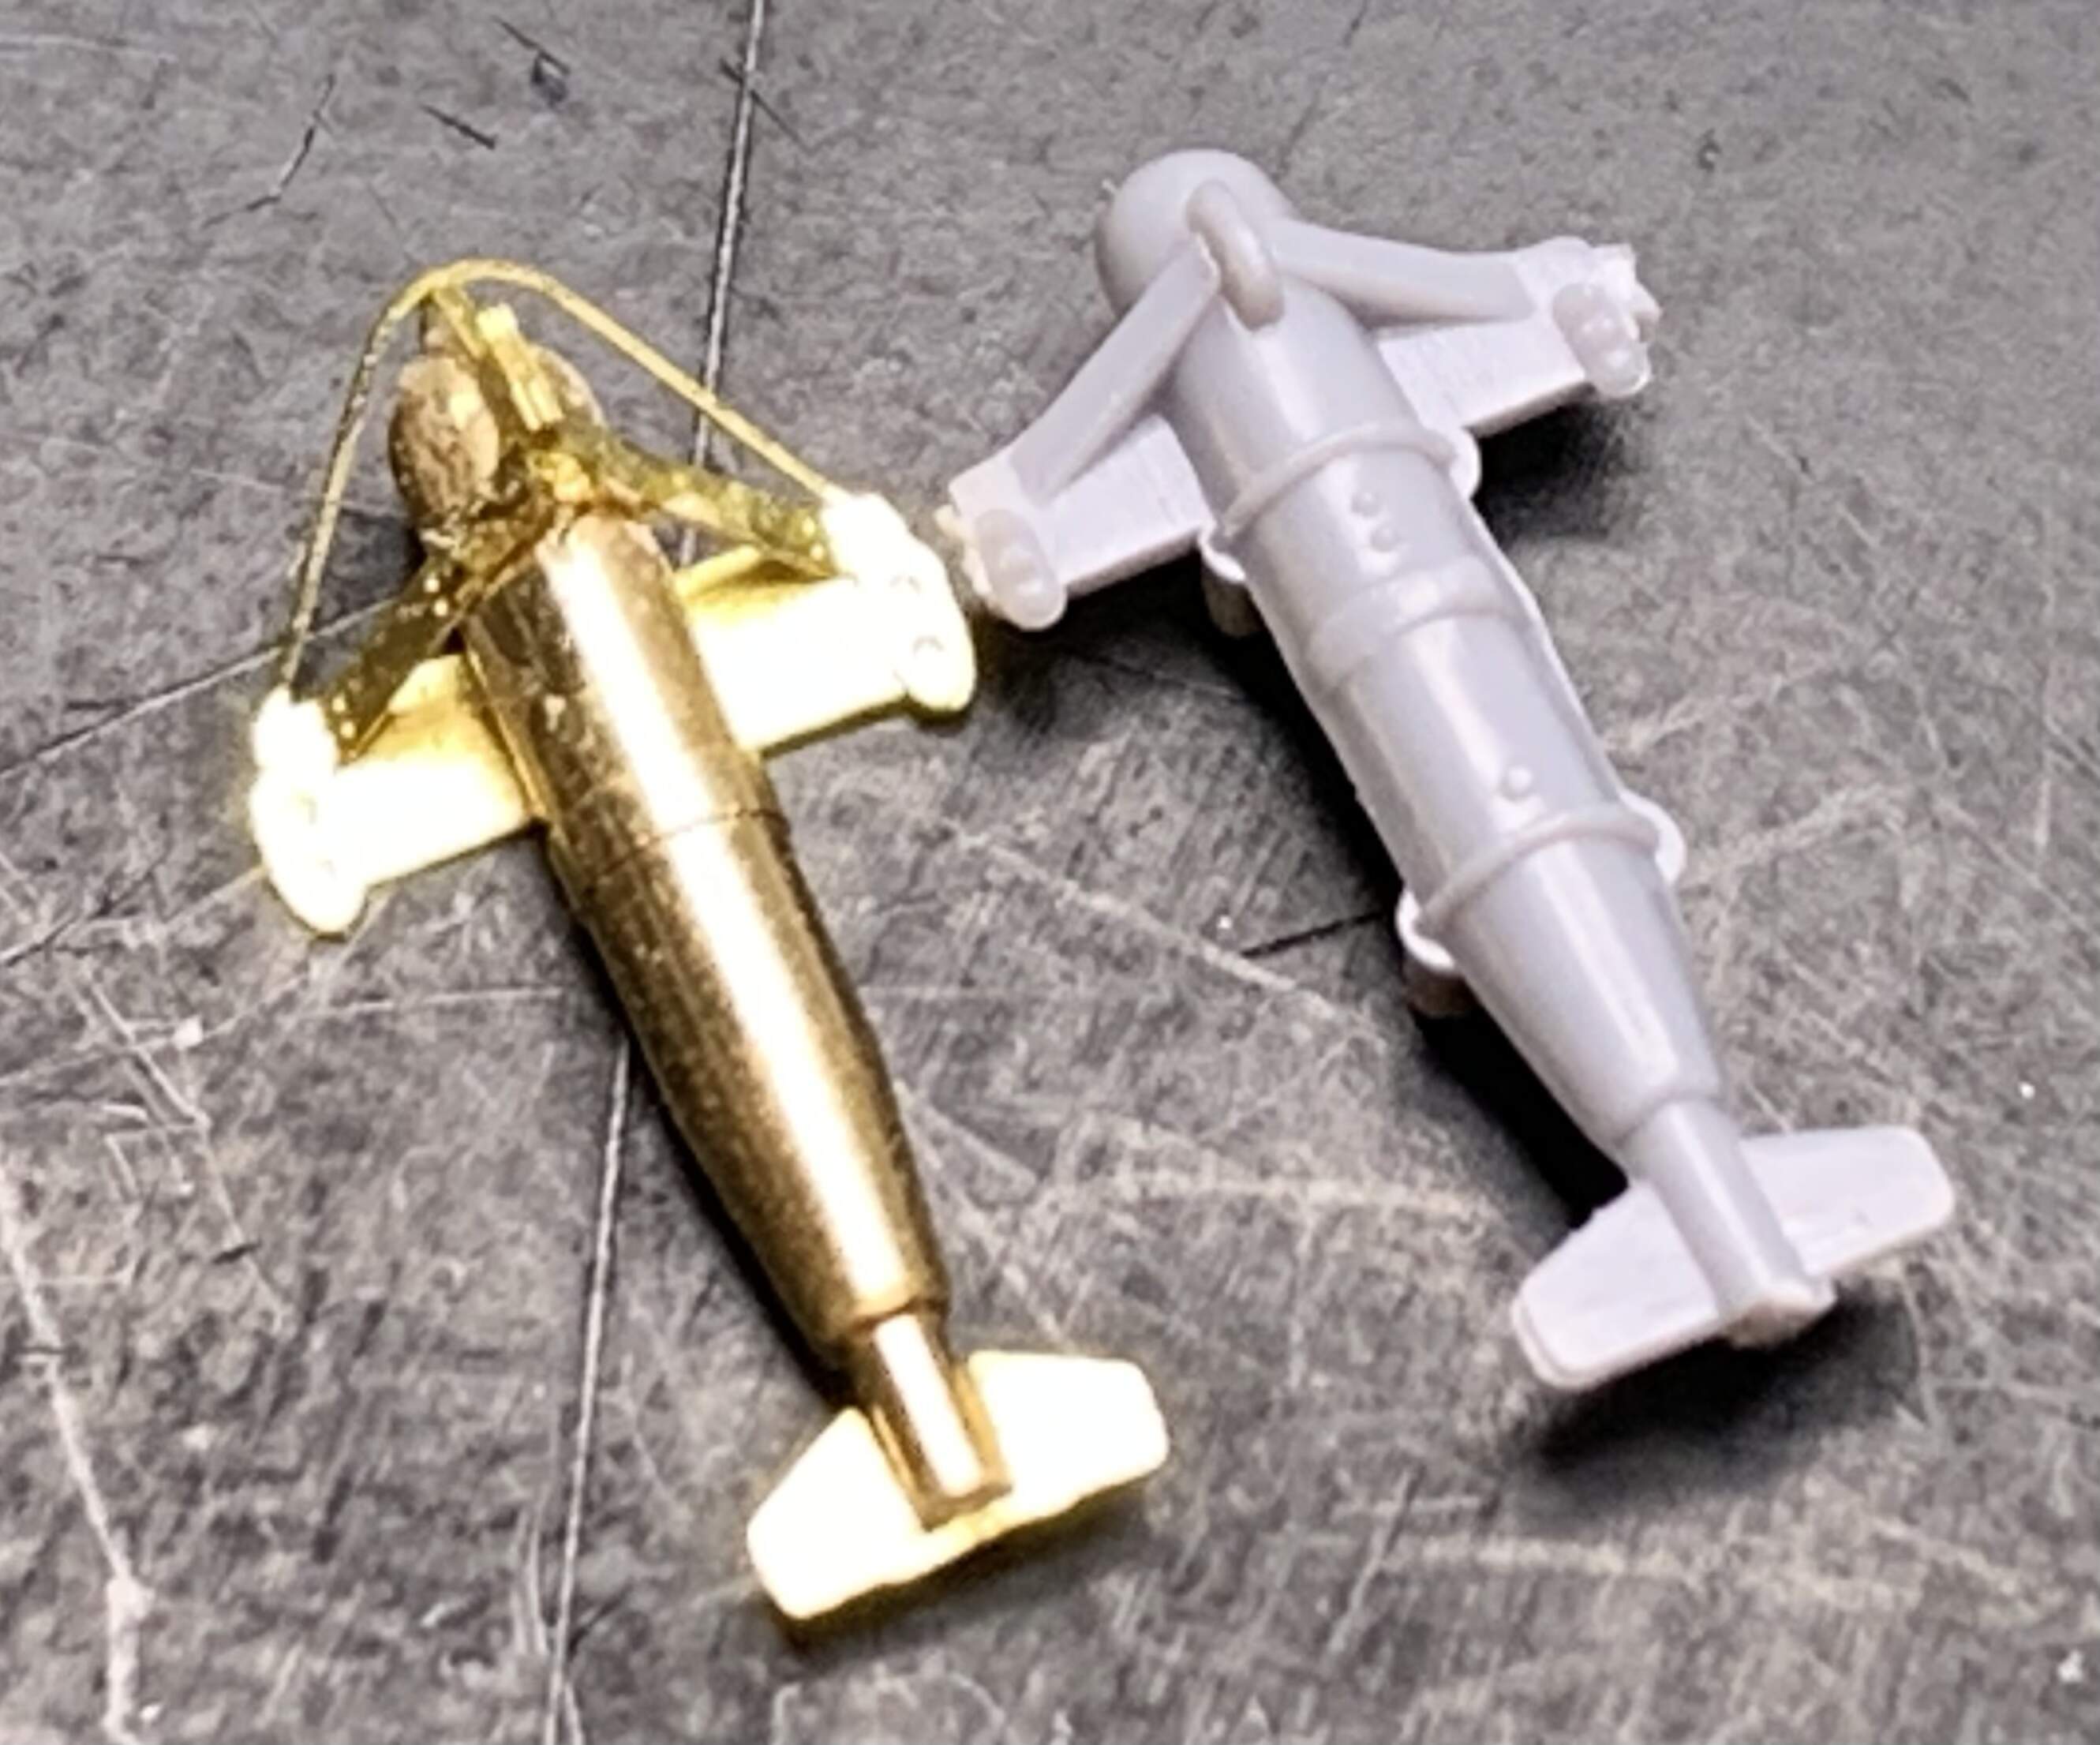
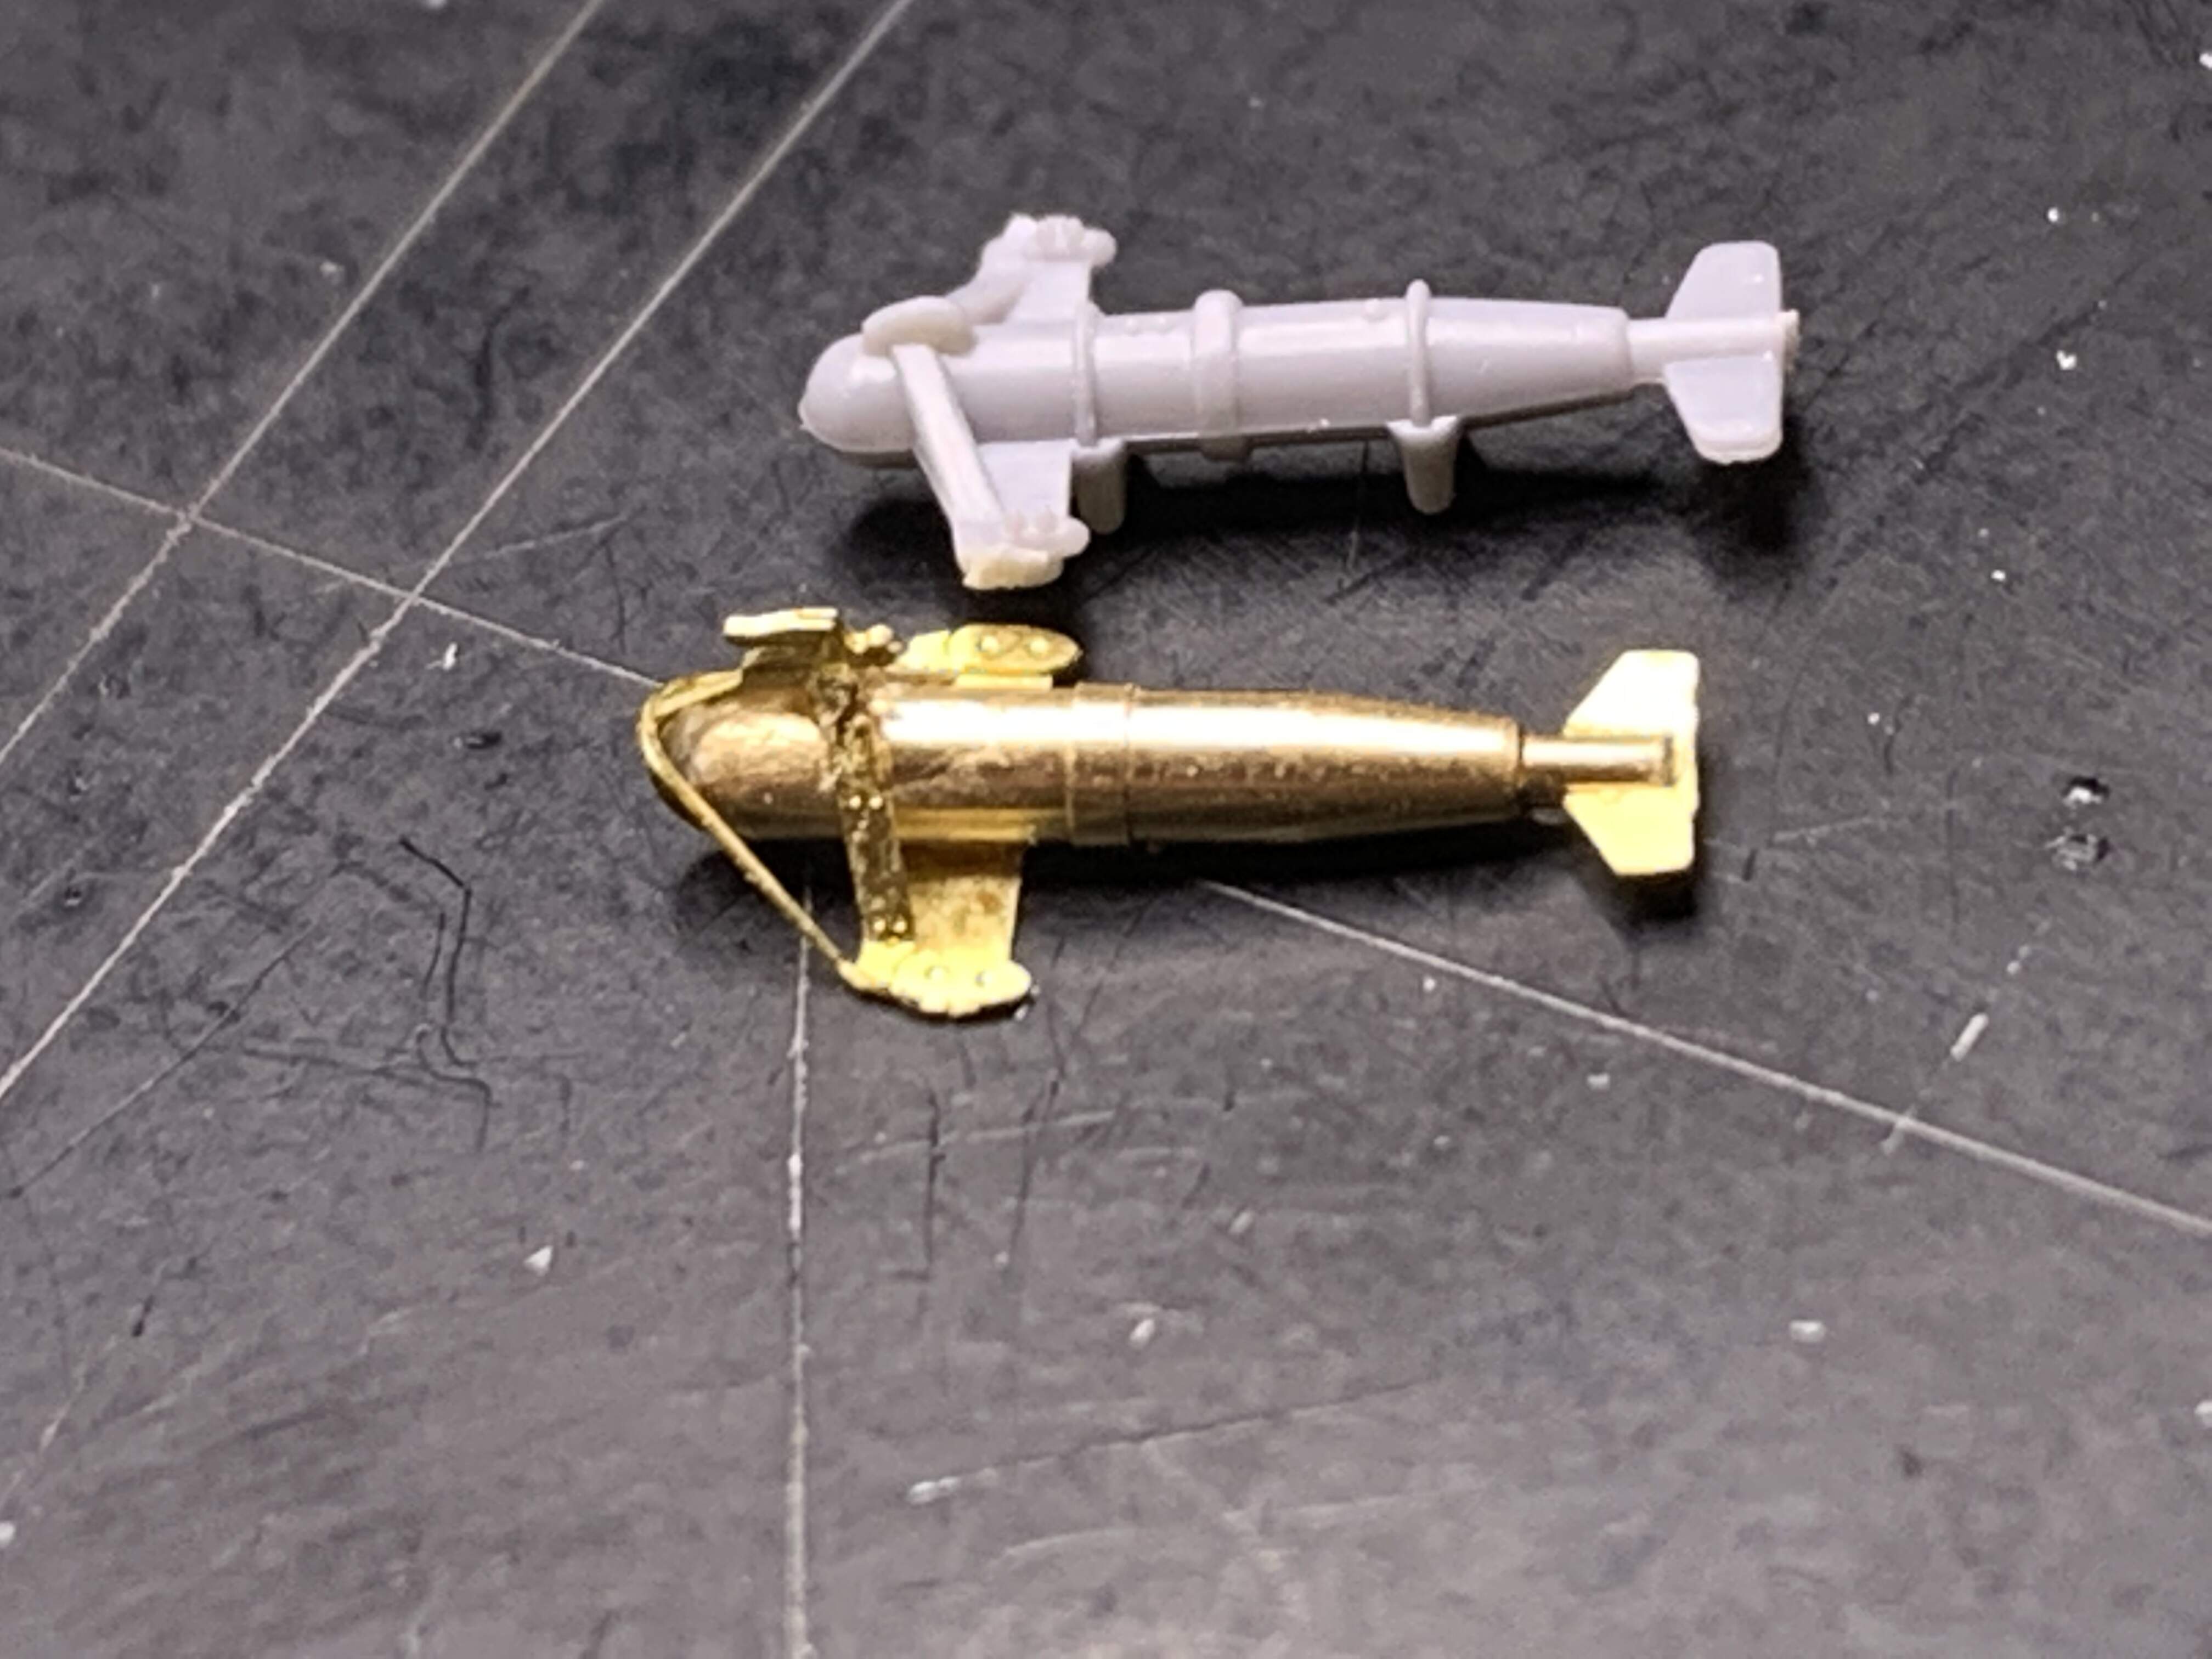
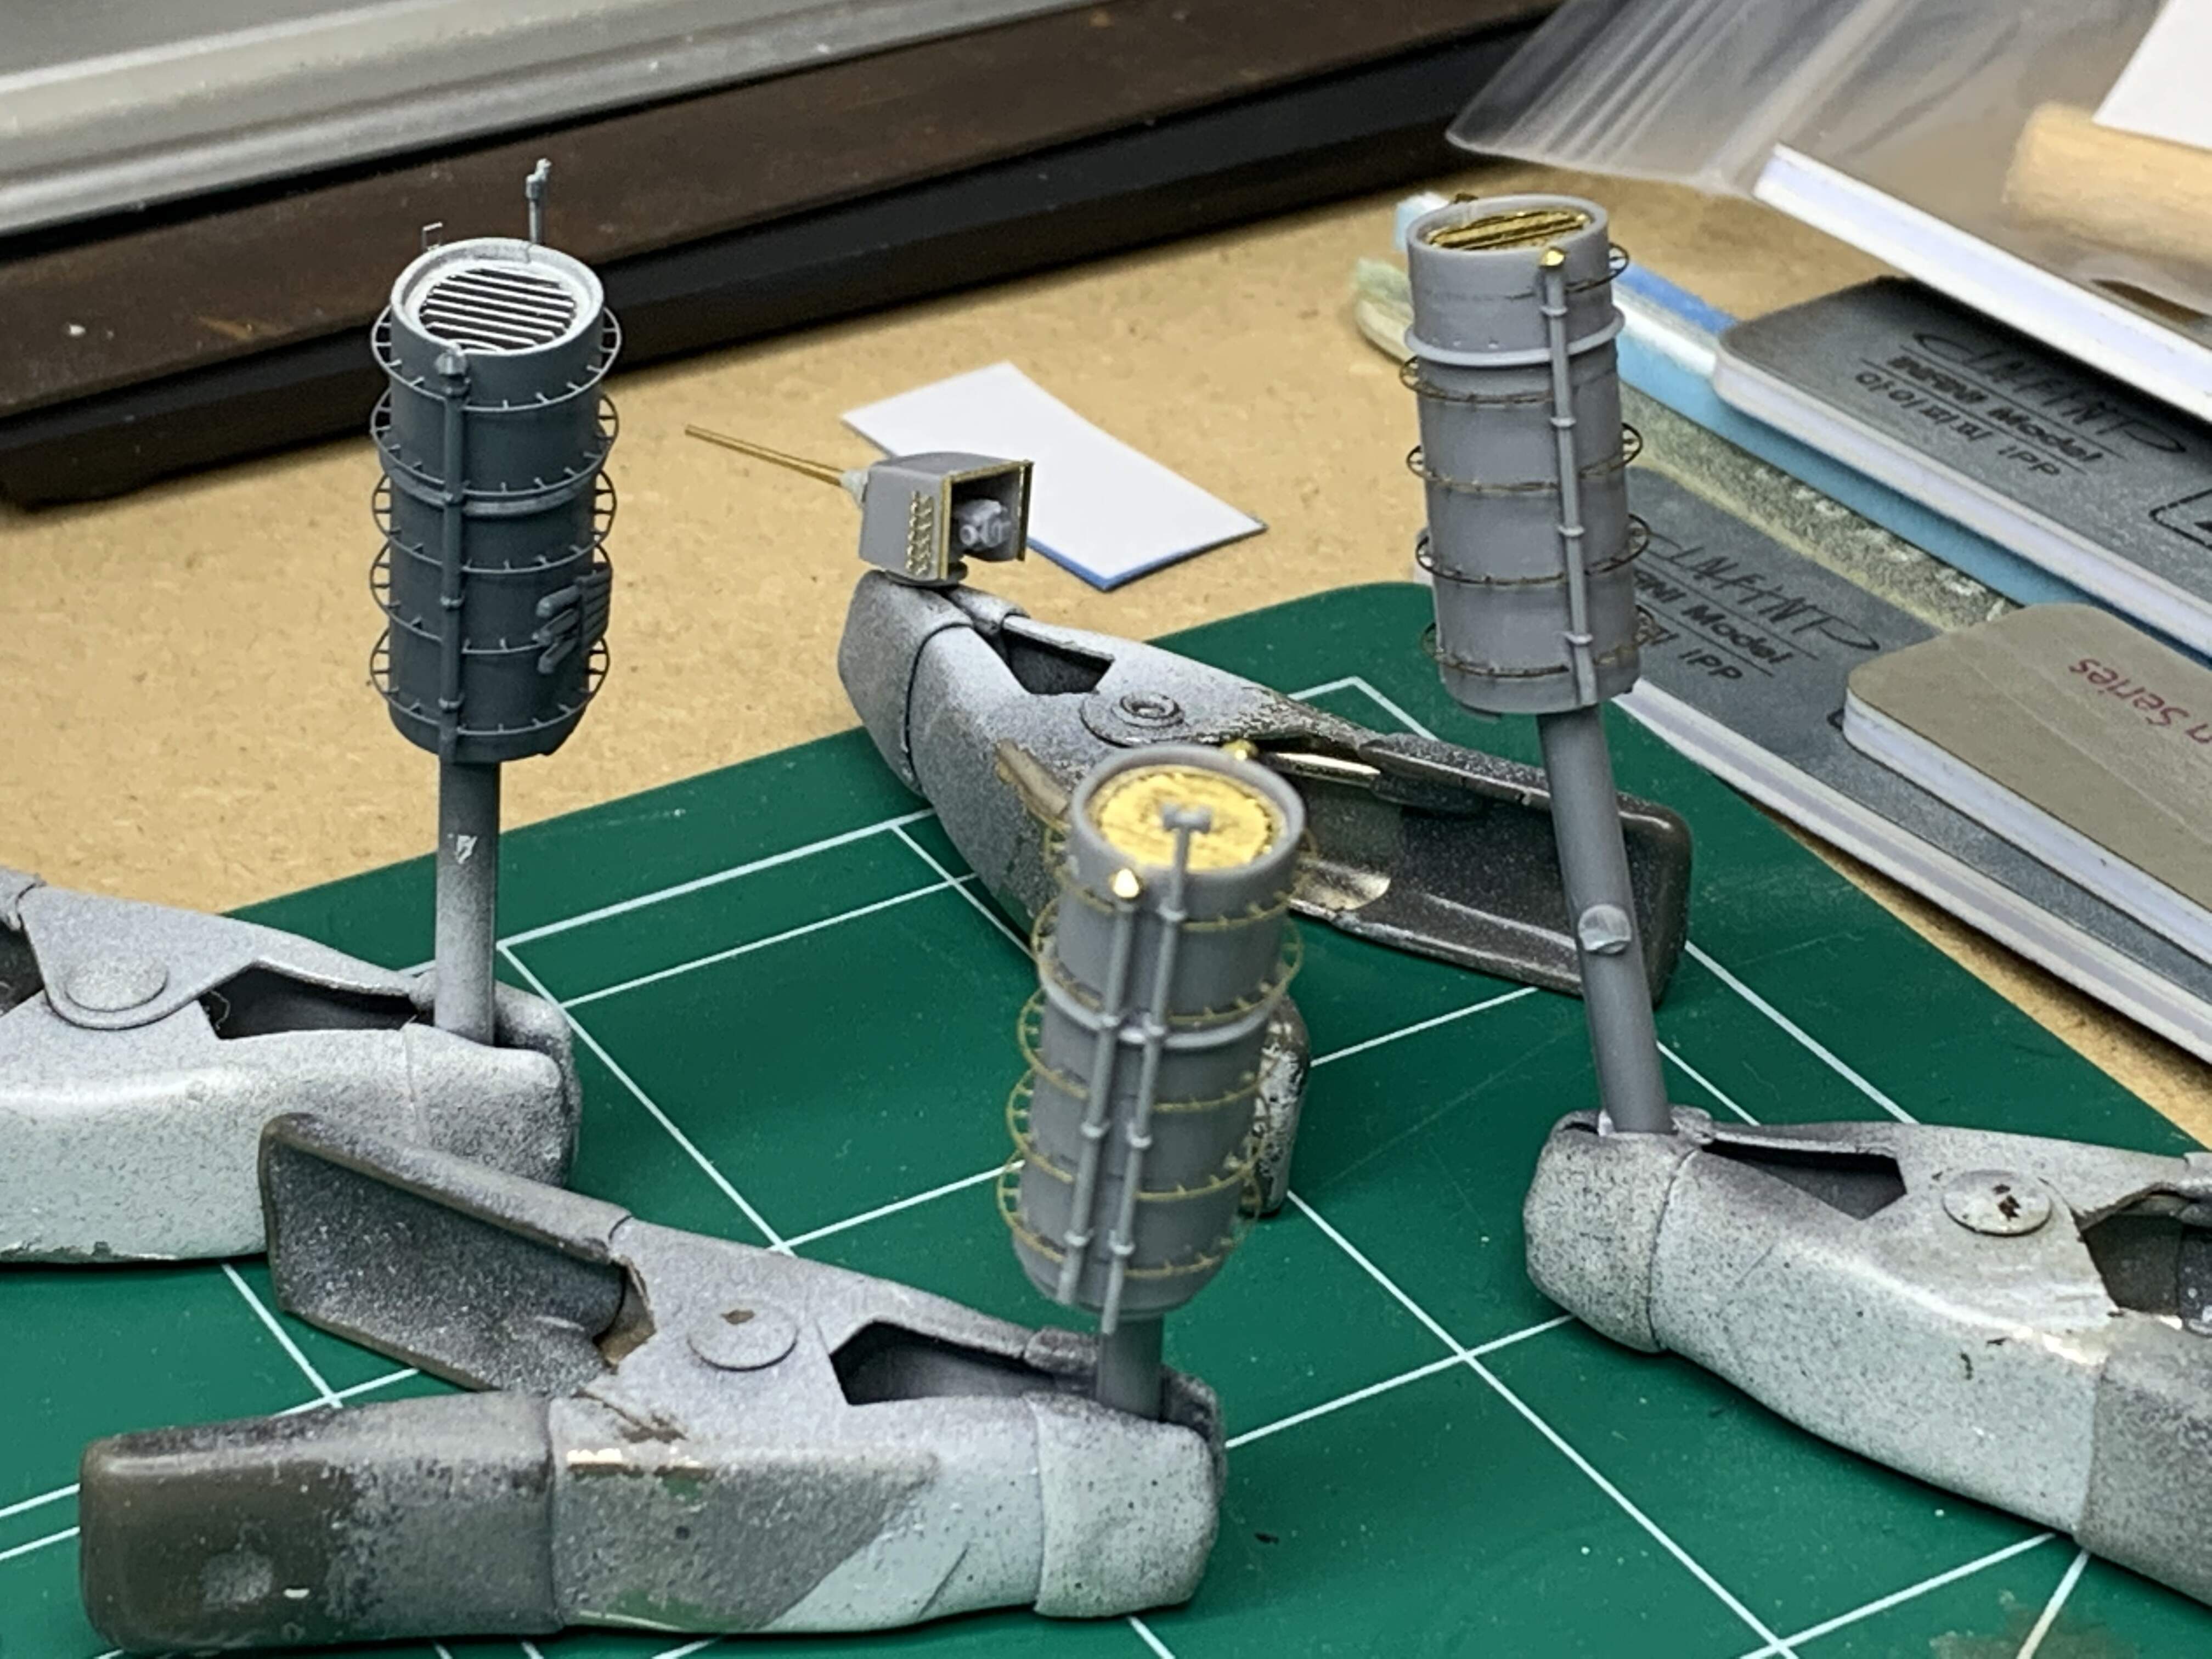
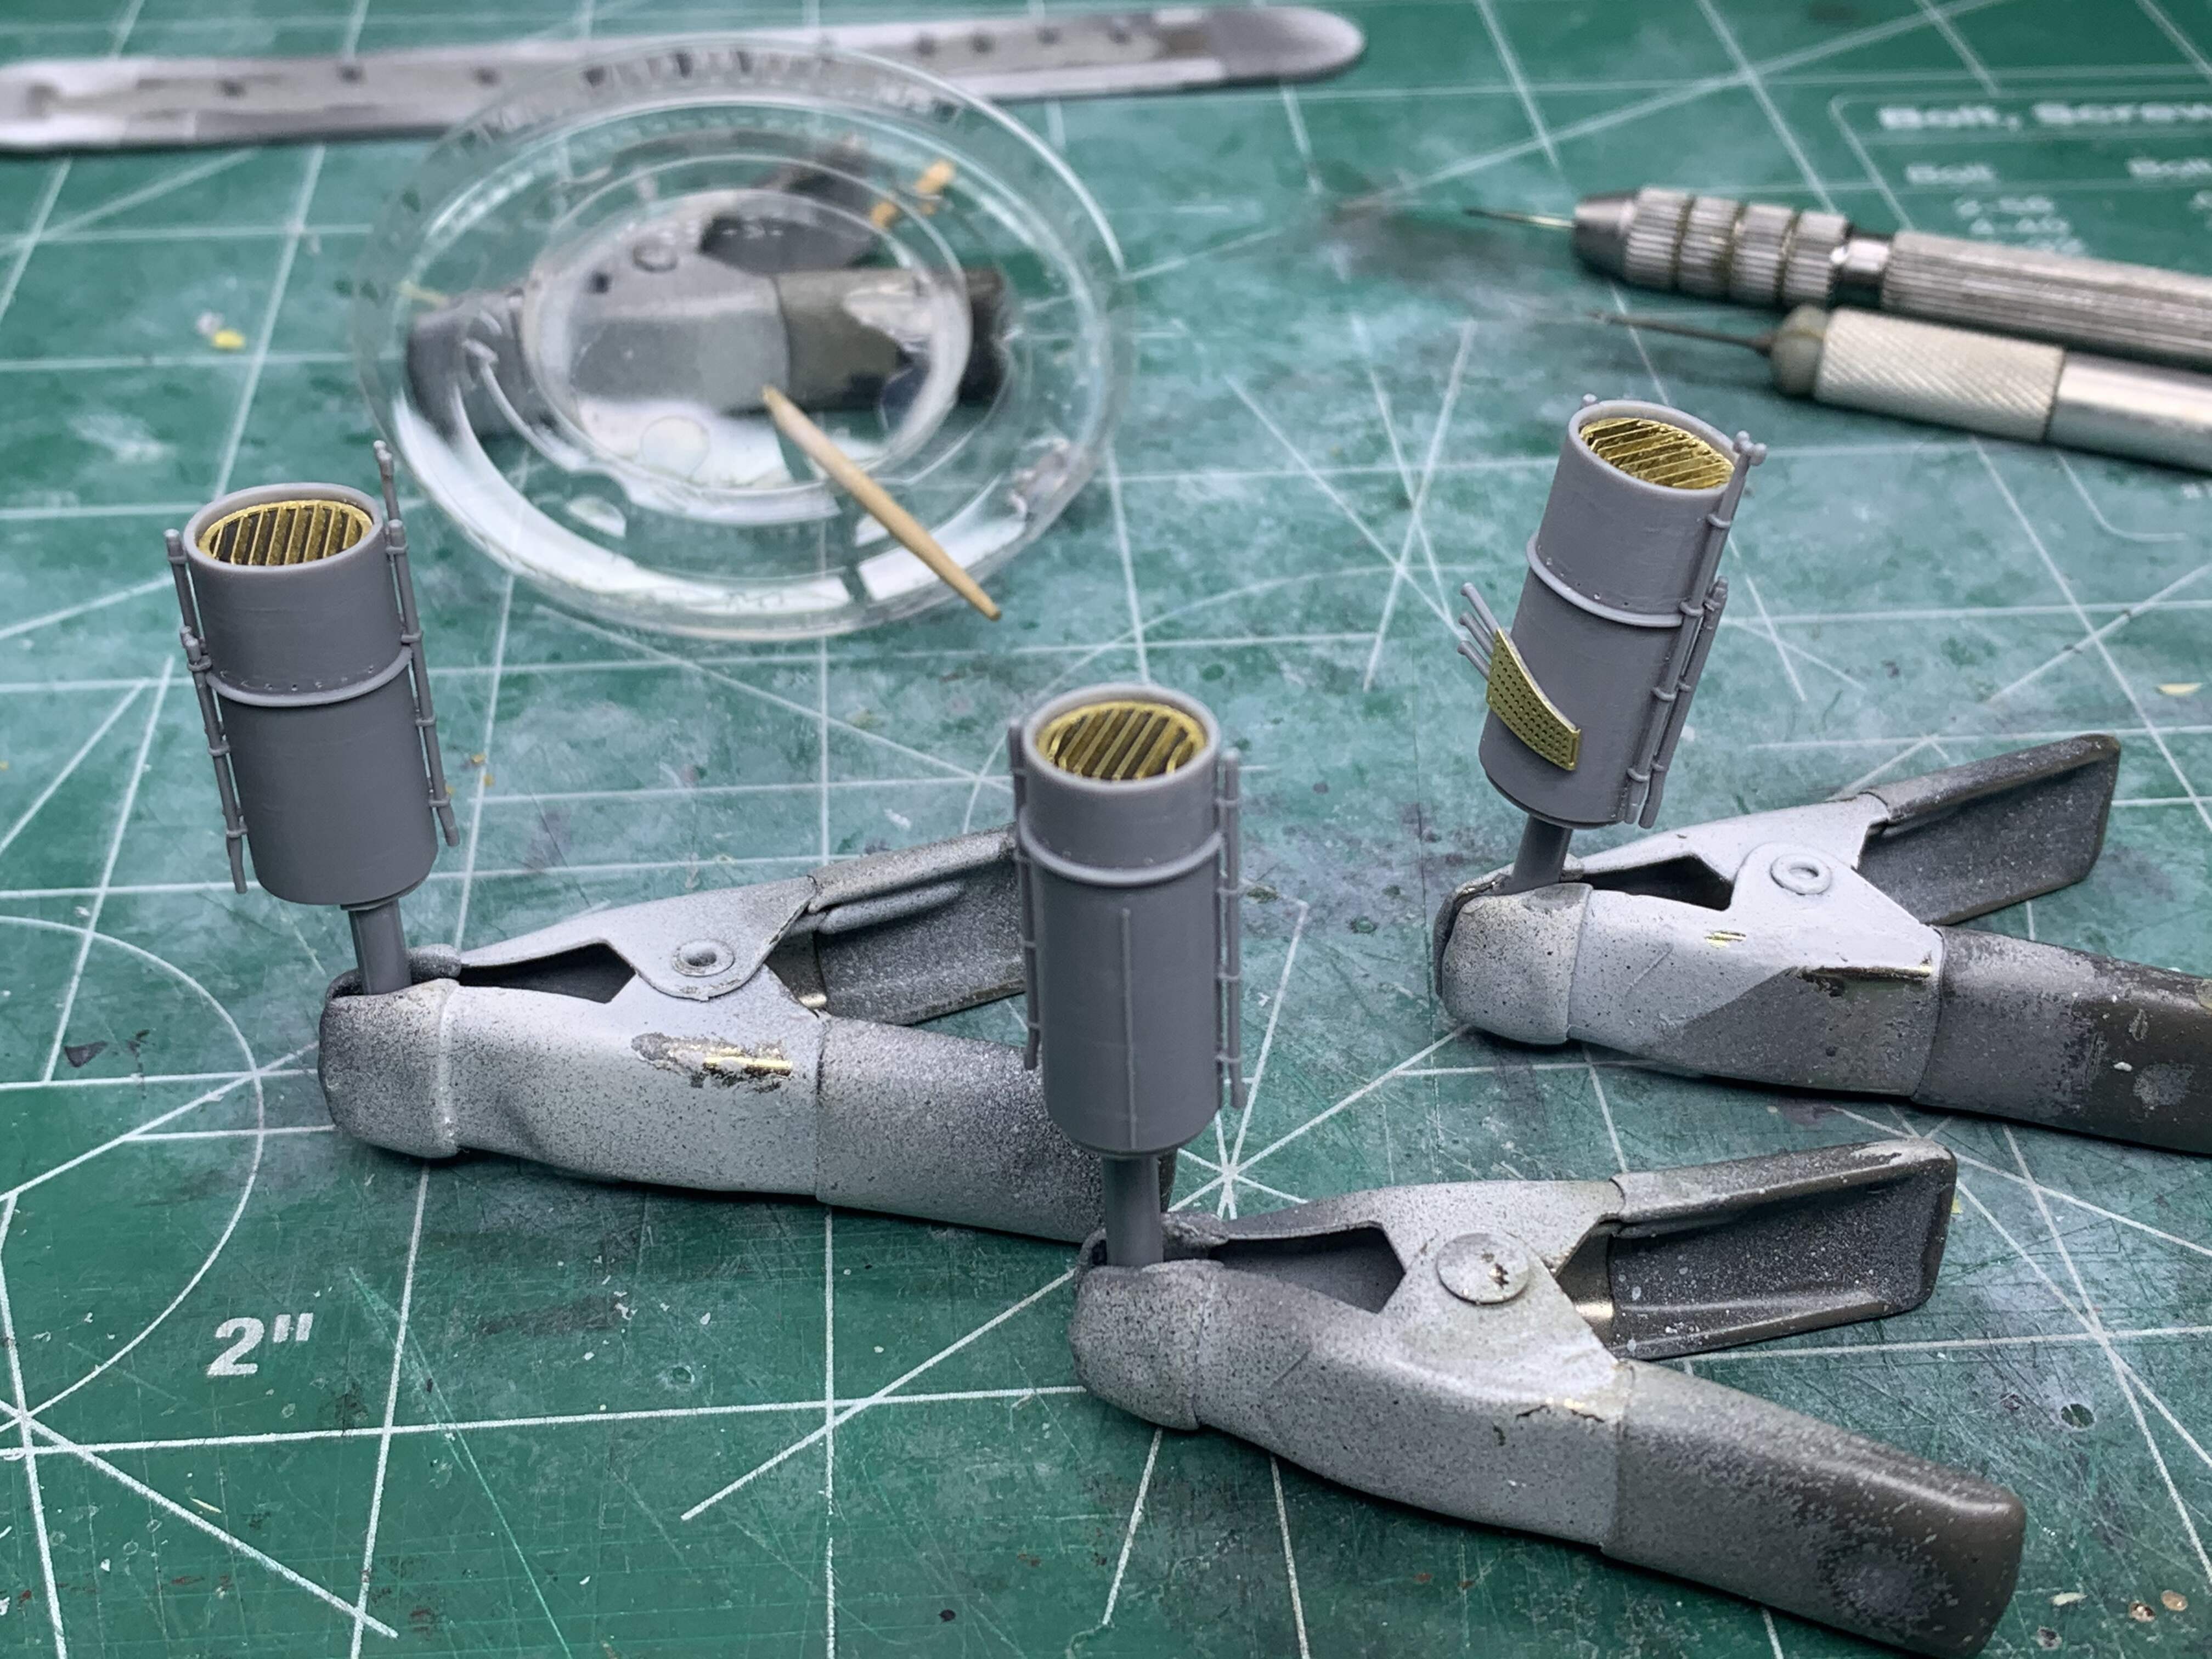
The first steps were building the paravanes that will be attached to the aft side of the bridge - I only worked on two and will complete the two stored on deck later. The kit paravanes are klunky plastic blobs with little definition so I chose to use the Big Boy Blue Large Paravane set.
They are a little challenging to put together but after dropping them a couple of times and reattaching parts I finally finished. here they are sitting next to the kit parts.
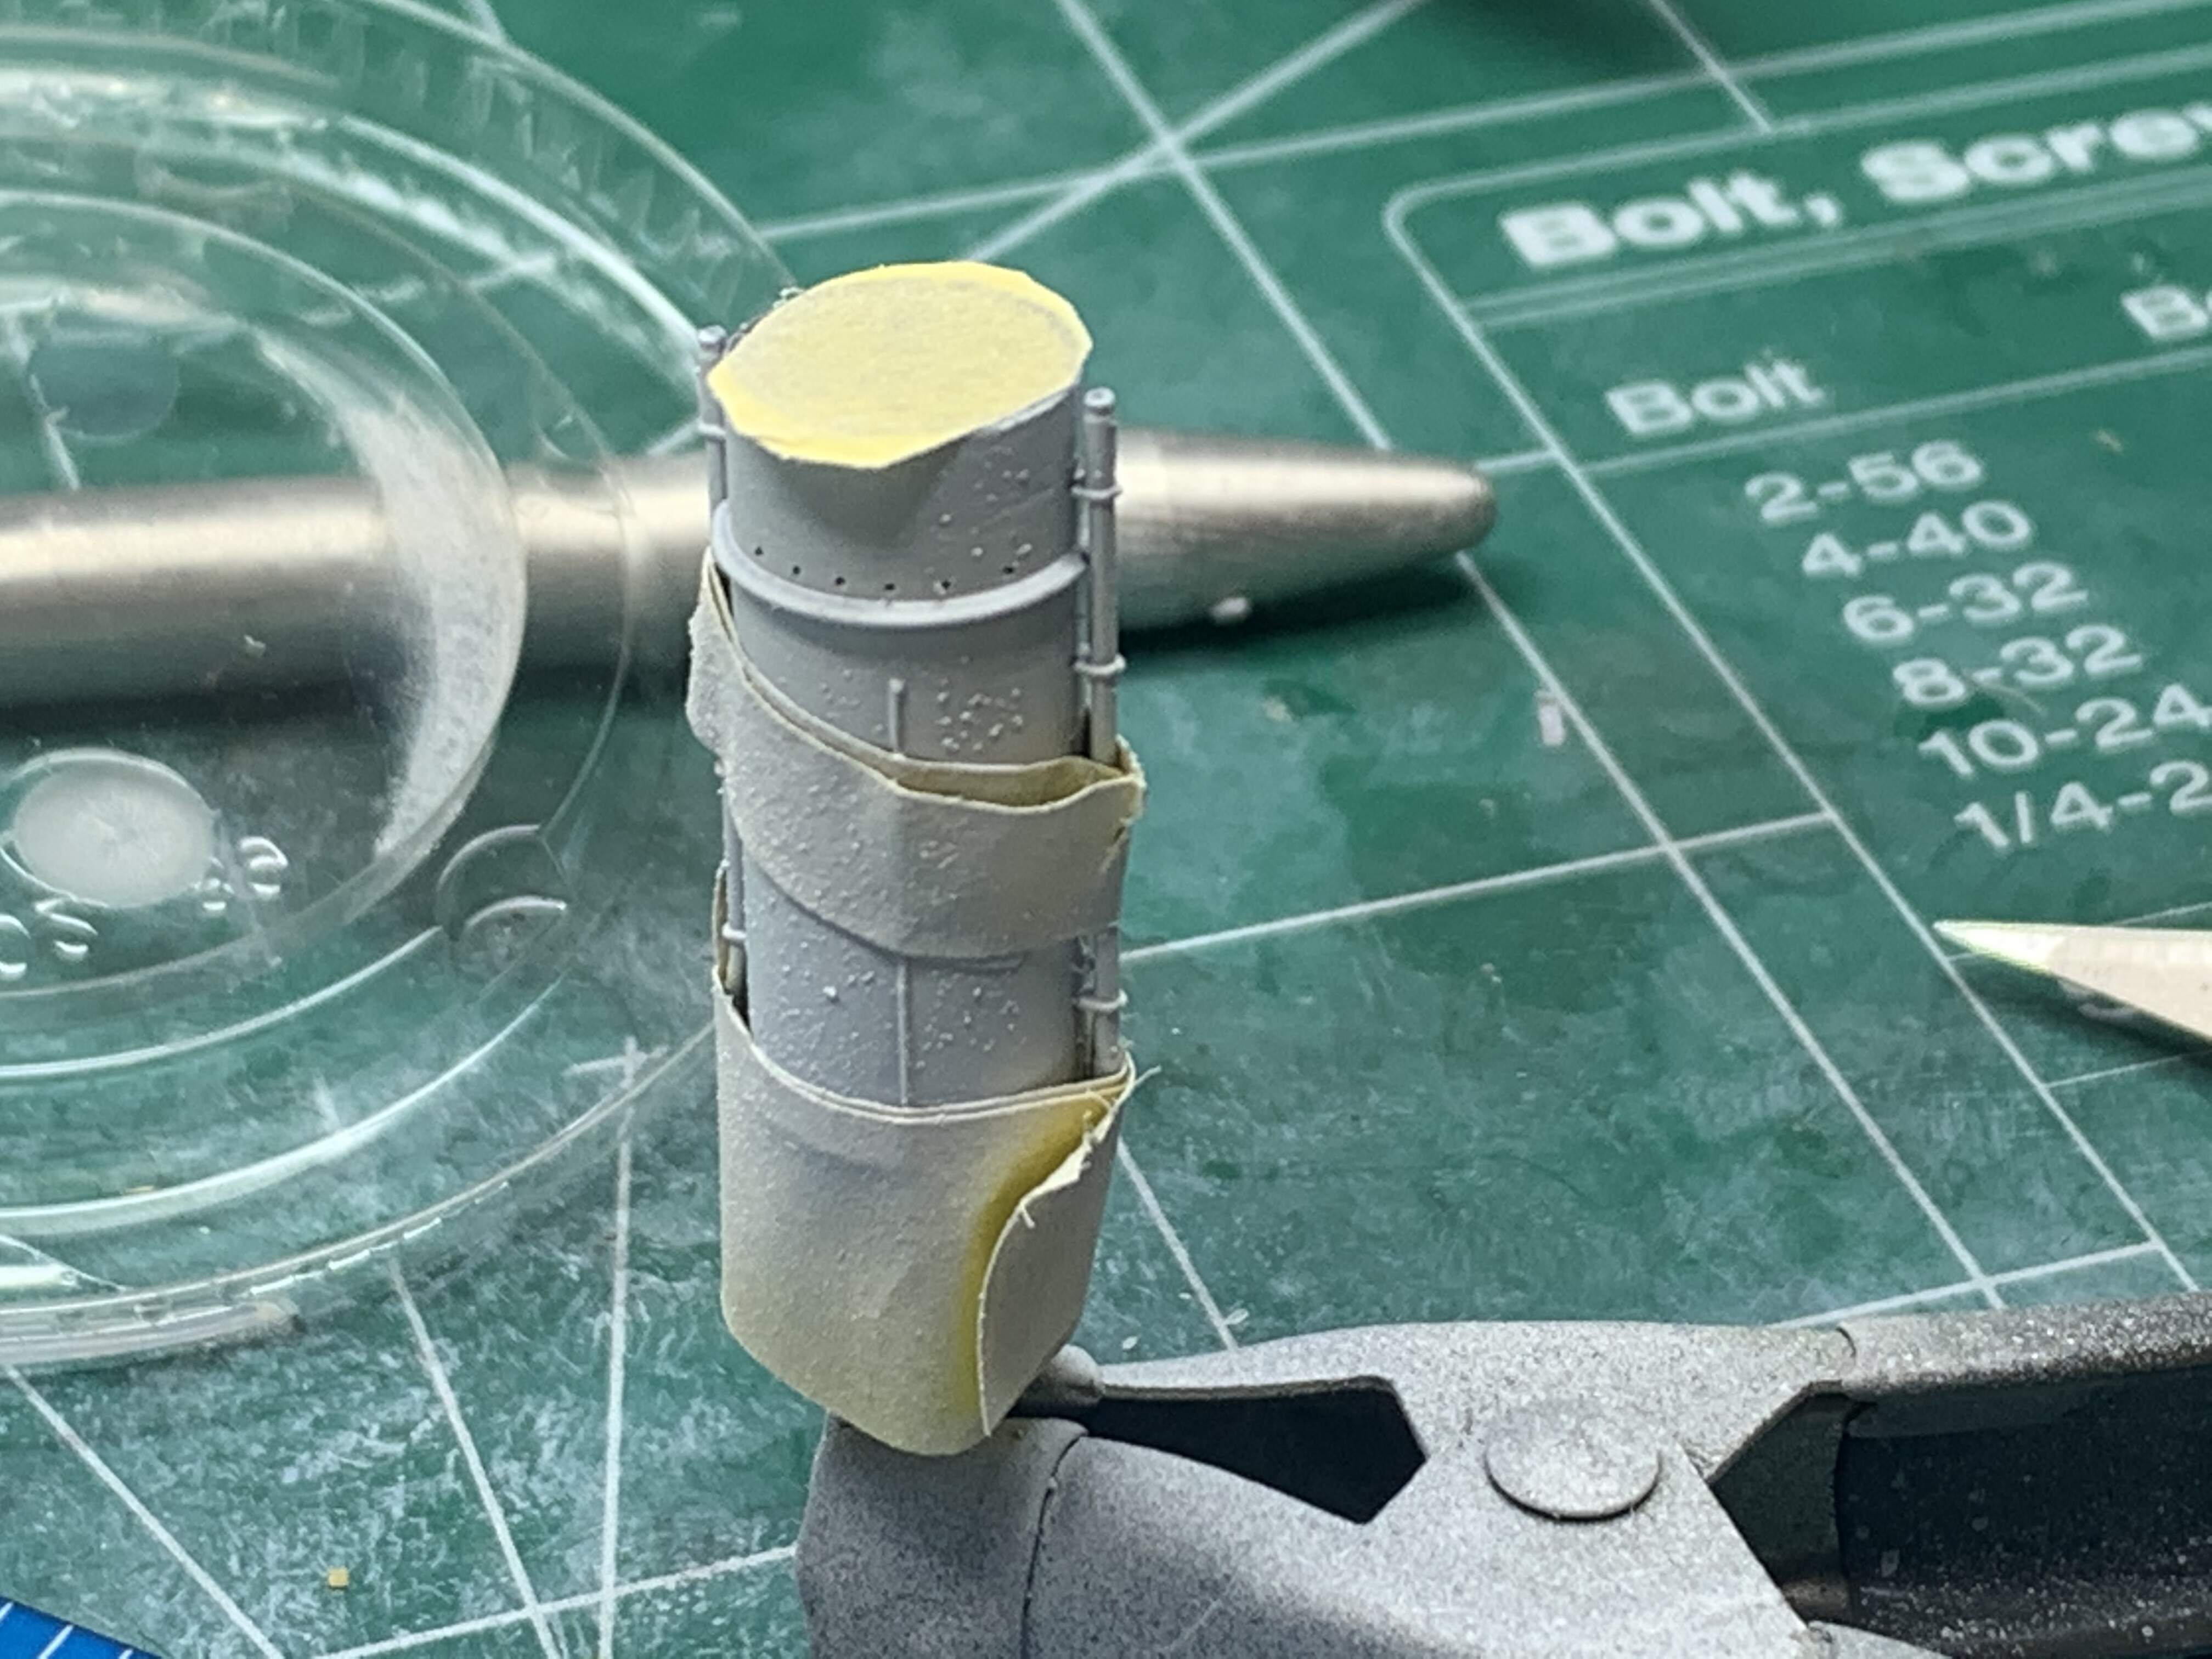
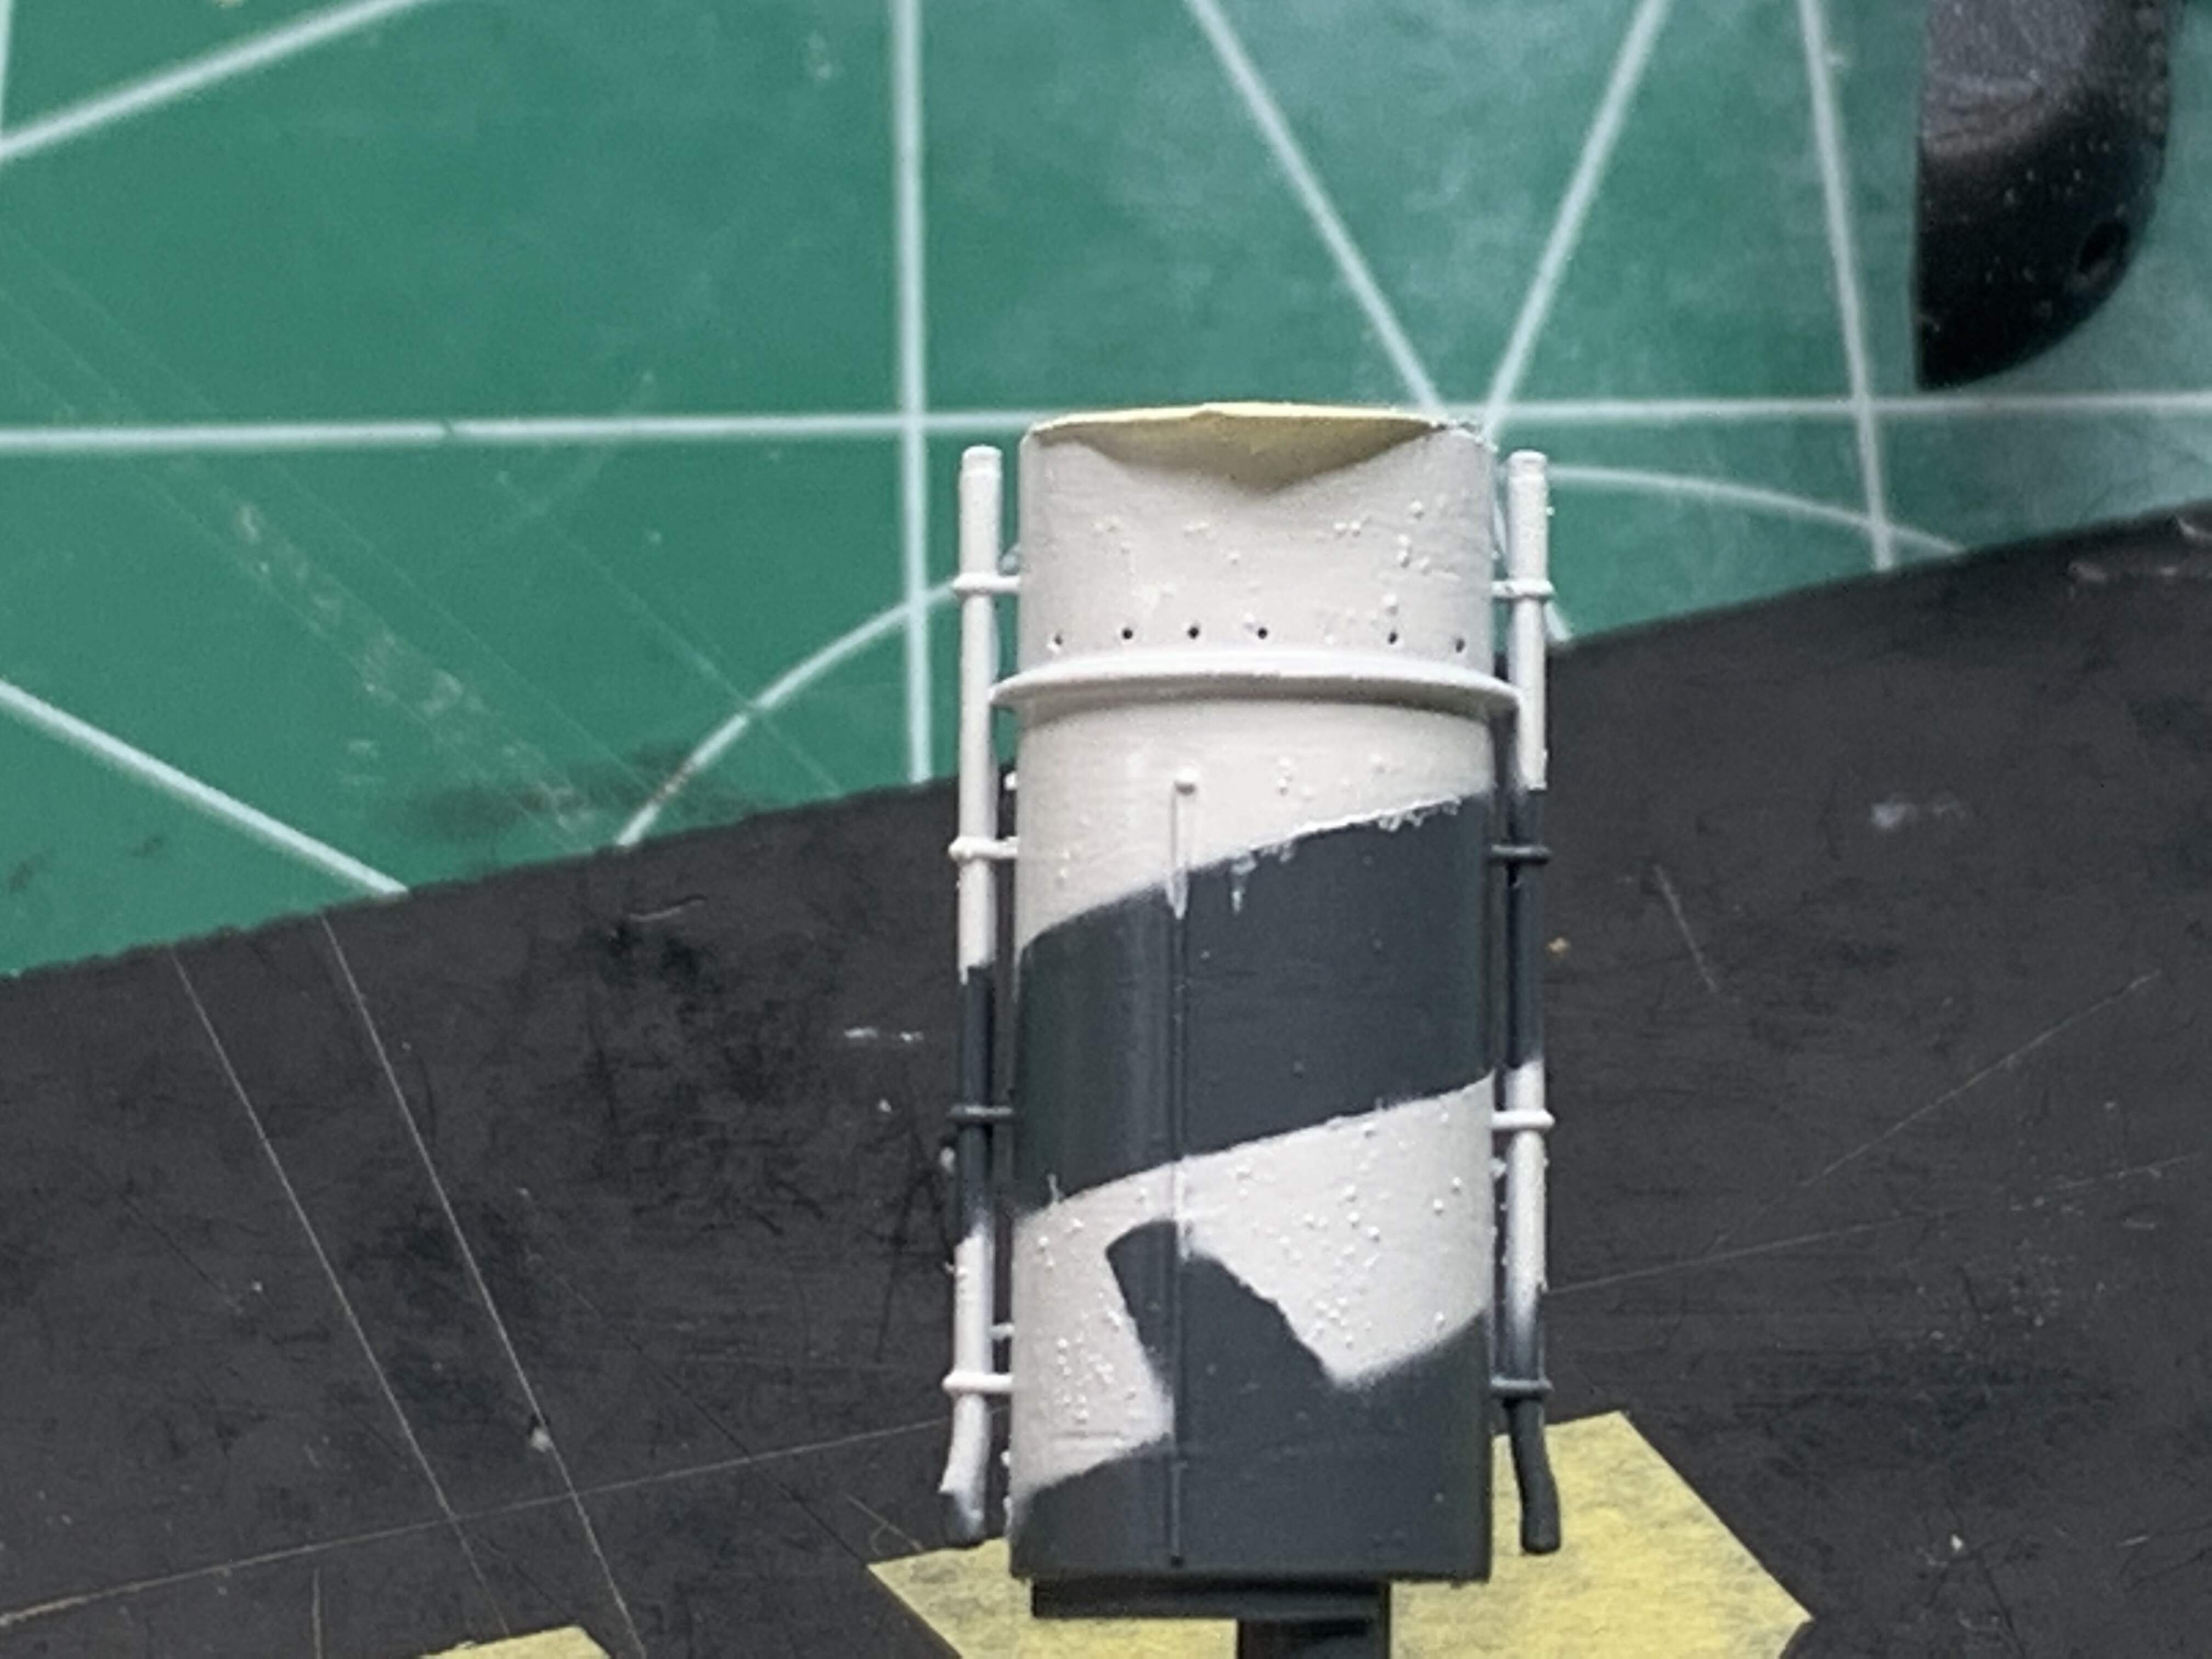
After that I began playing with the torpedo tubes a little more but I will leave that for another update as my efforts were unsuccessful
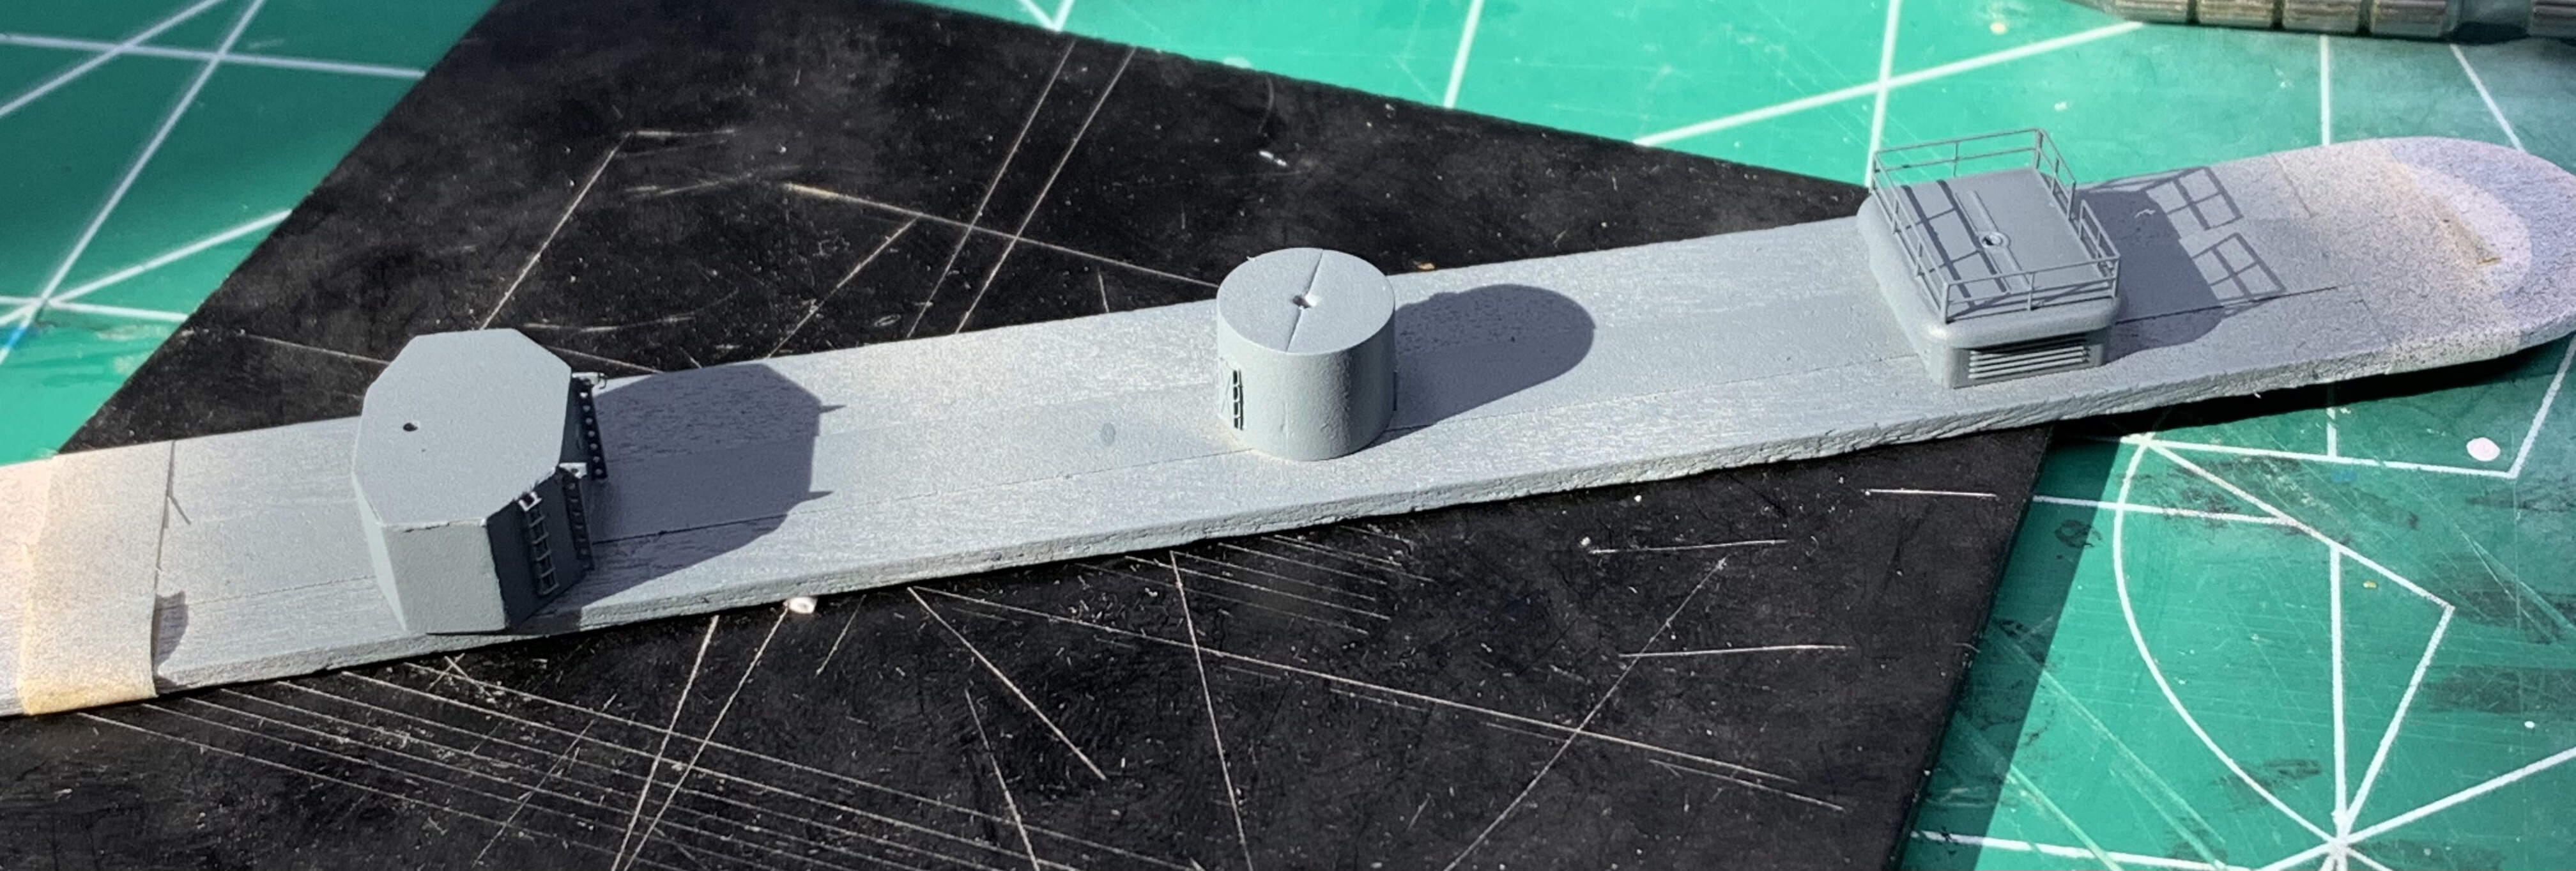
So I moved on to painting the subassemblies for the aircraft handling deck - as always I first sprayed with Tamiya White Primer followed by a layer of Scale Colors Yokasuka Grey lightened with some white. Pretty happy with the results.
After that I test fit everything -
Next weekend it is finally time to weather the lower portions of the aircraft handling deck before finally mounting it permanently to the ship. Not much of a choice as there are hard to reach areas once it is mounted. After that I will focus on painting and mounting the funnels = this will be a significant challenge since I already added the handrails - still haven’t figured out how I am going to mask them but that being said I will work one at a time so that I do not rush. First step was applying a coat of primer to the middle funnel (no picture)
Well that’s it for now - thanks again for the kind comments and thanks for stopping by -
David
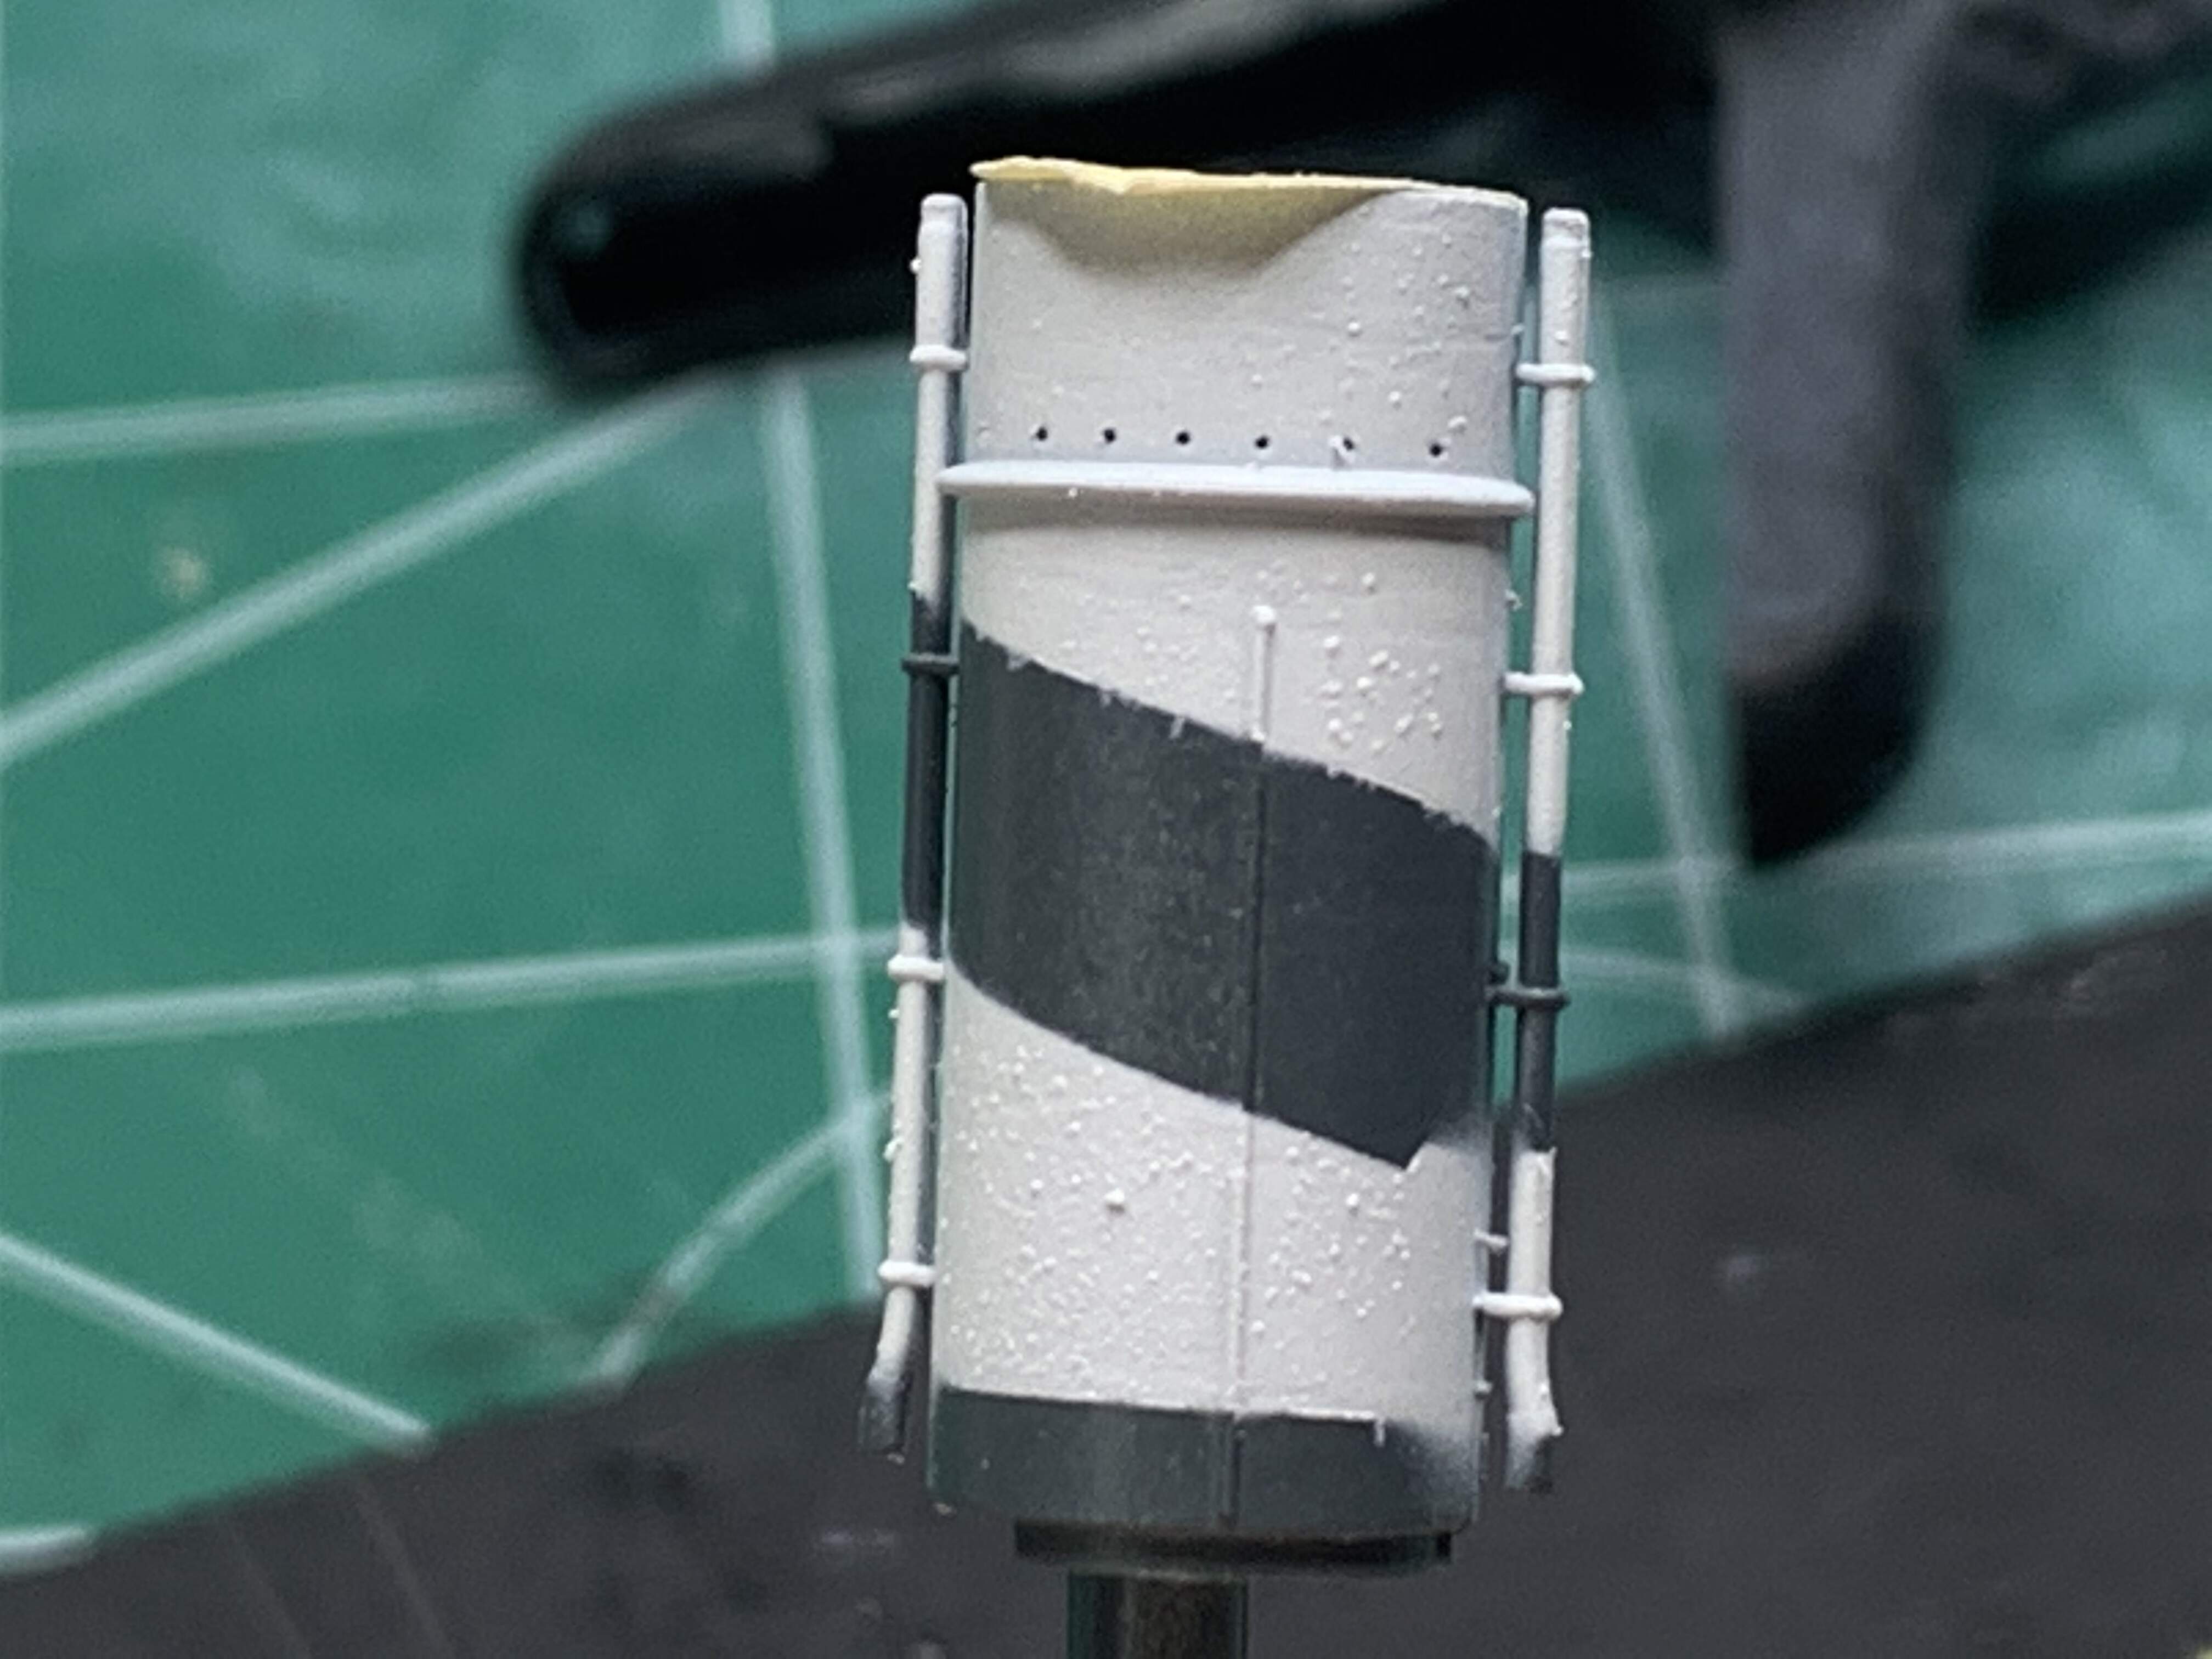
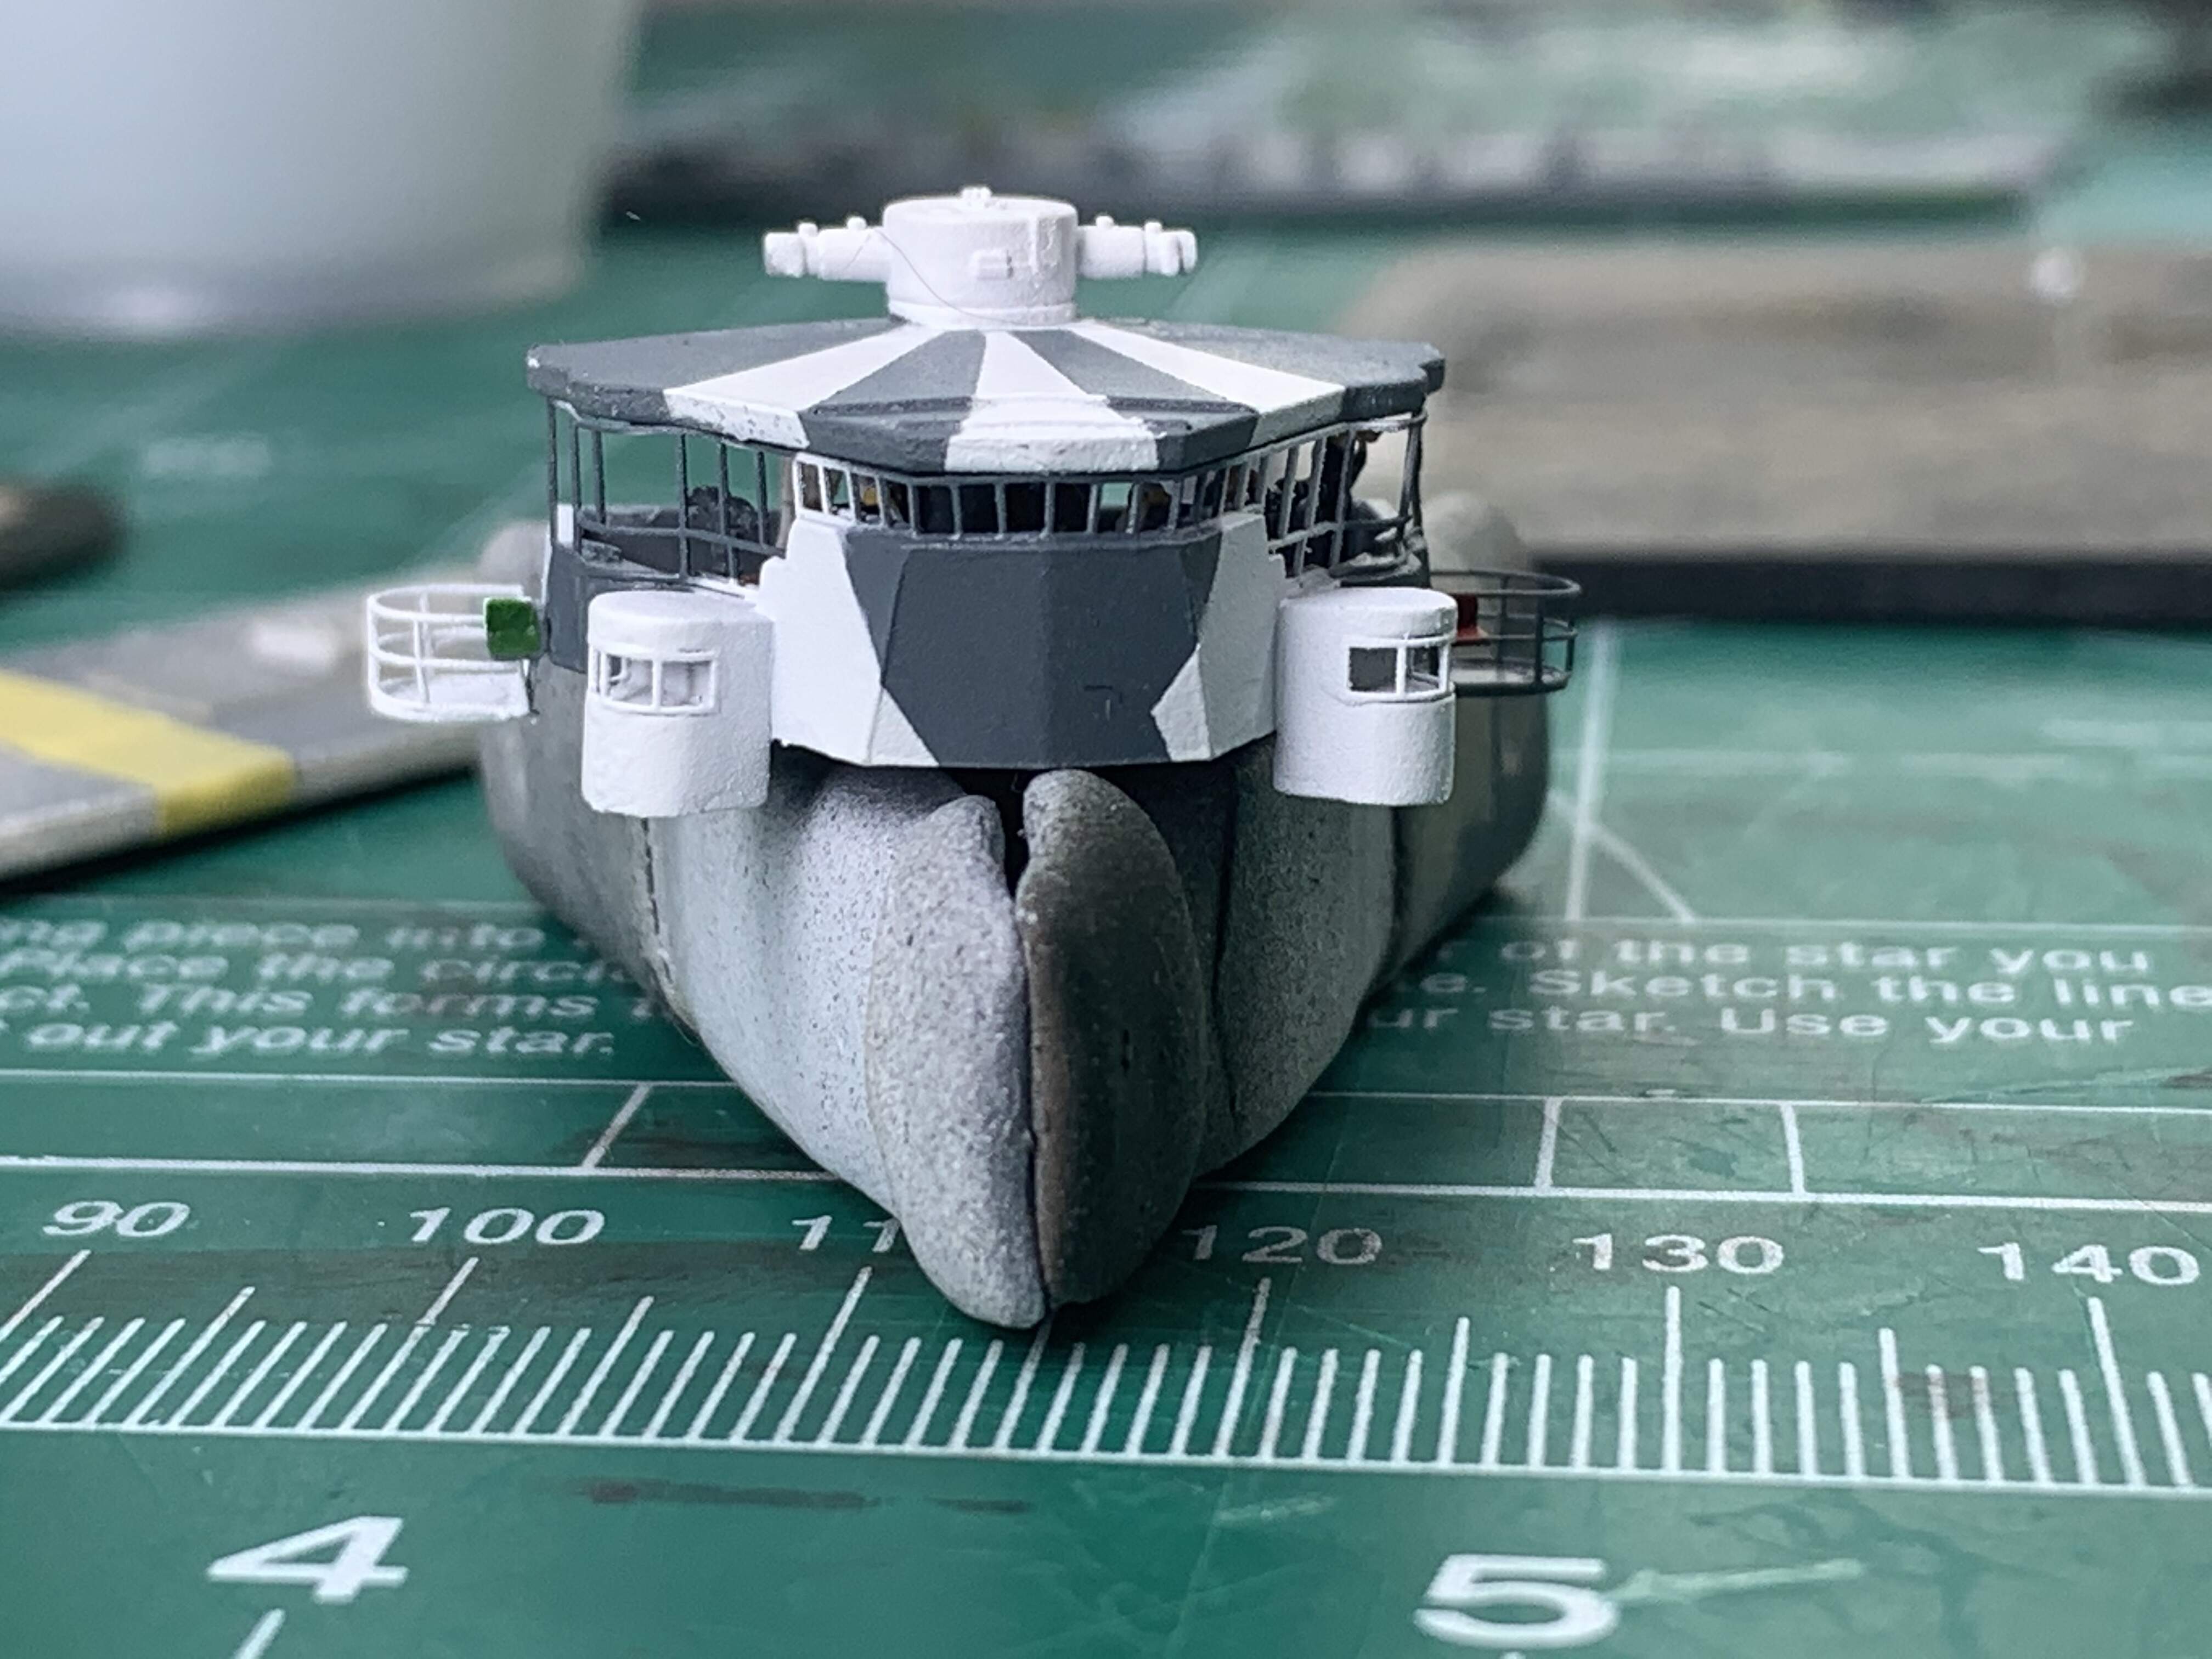
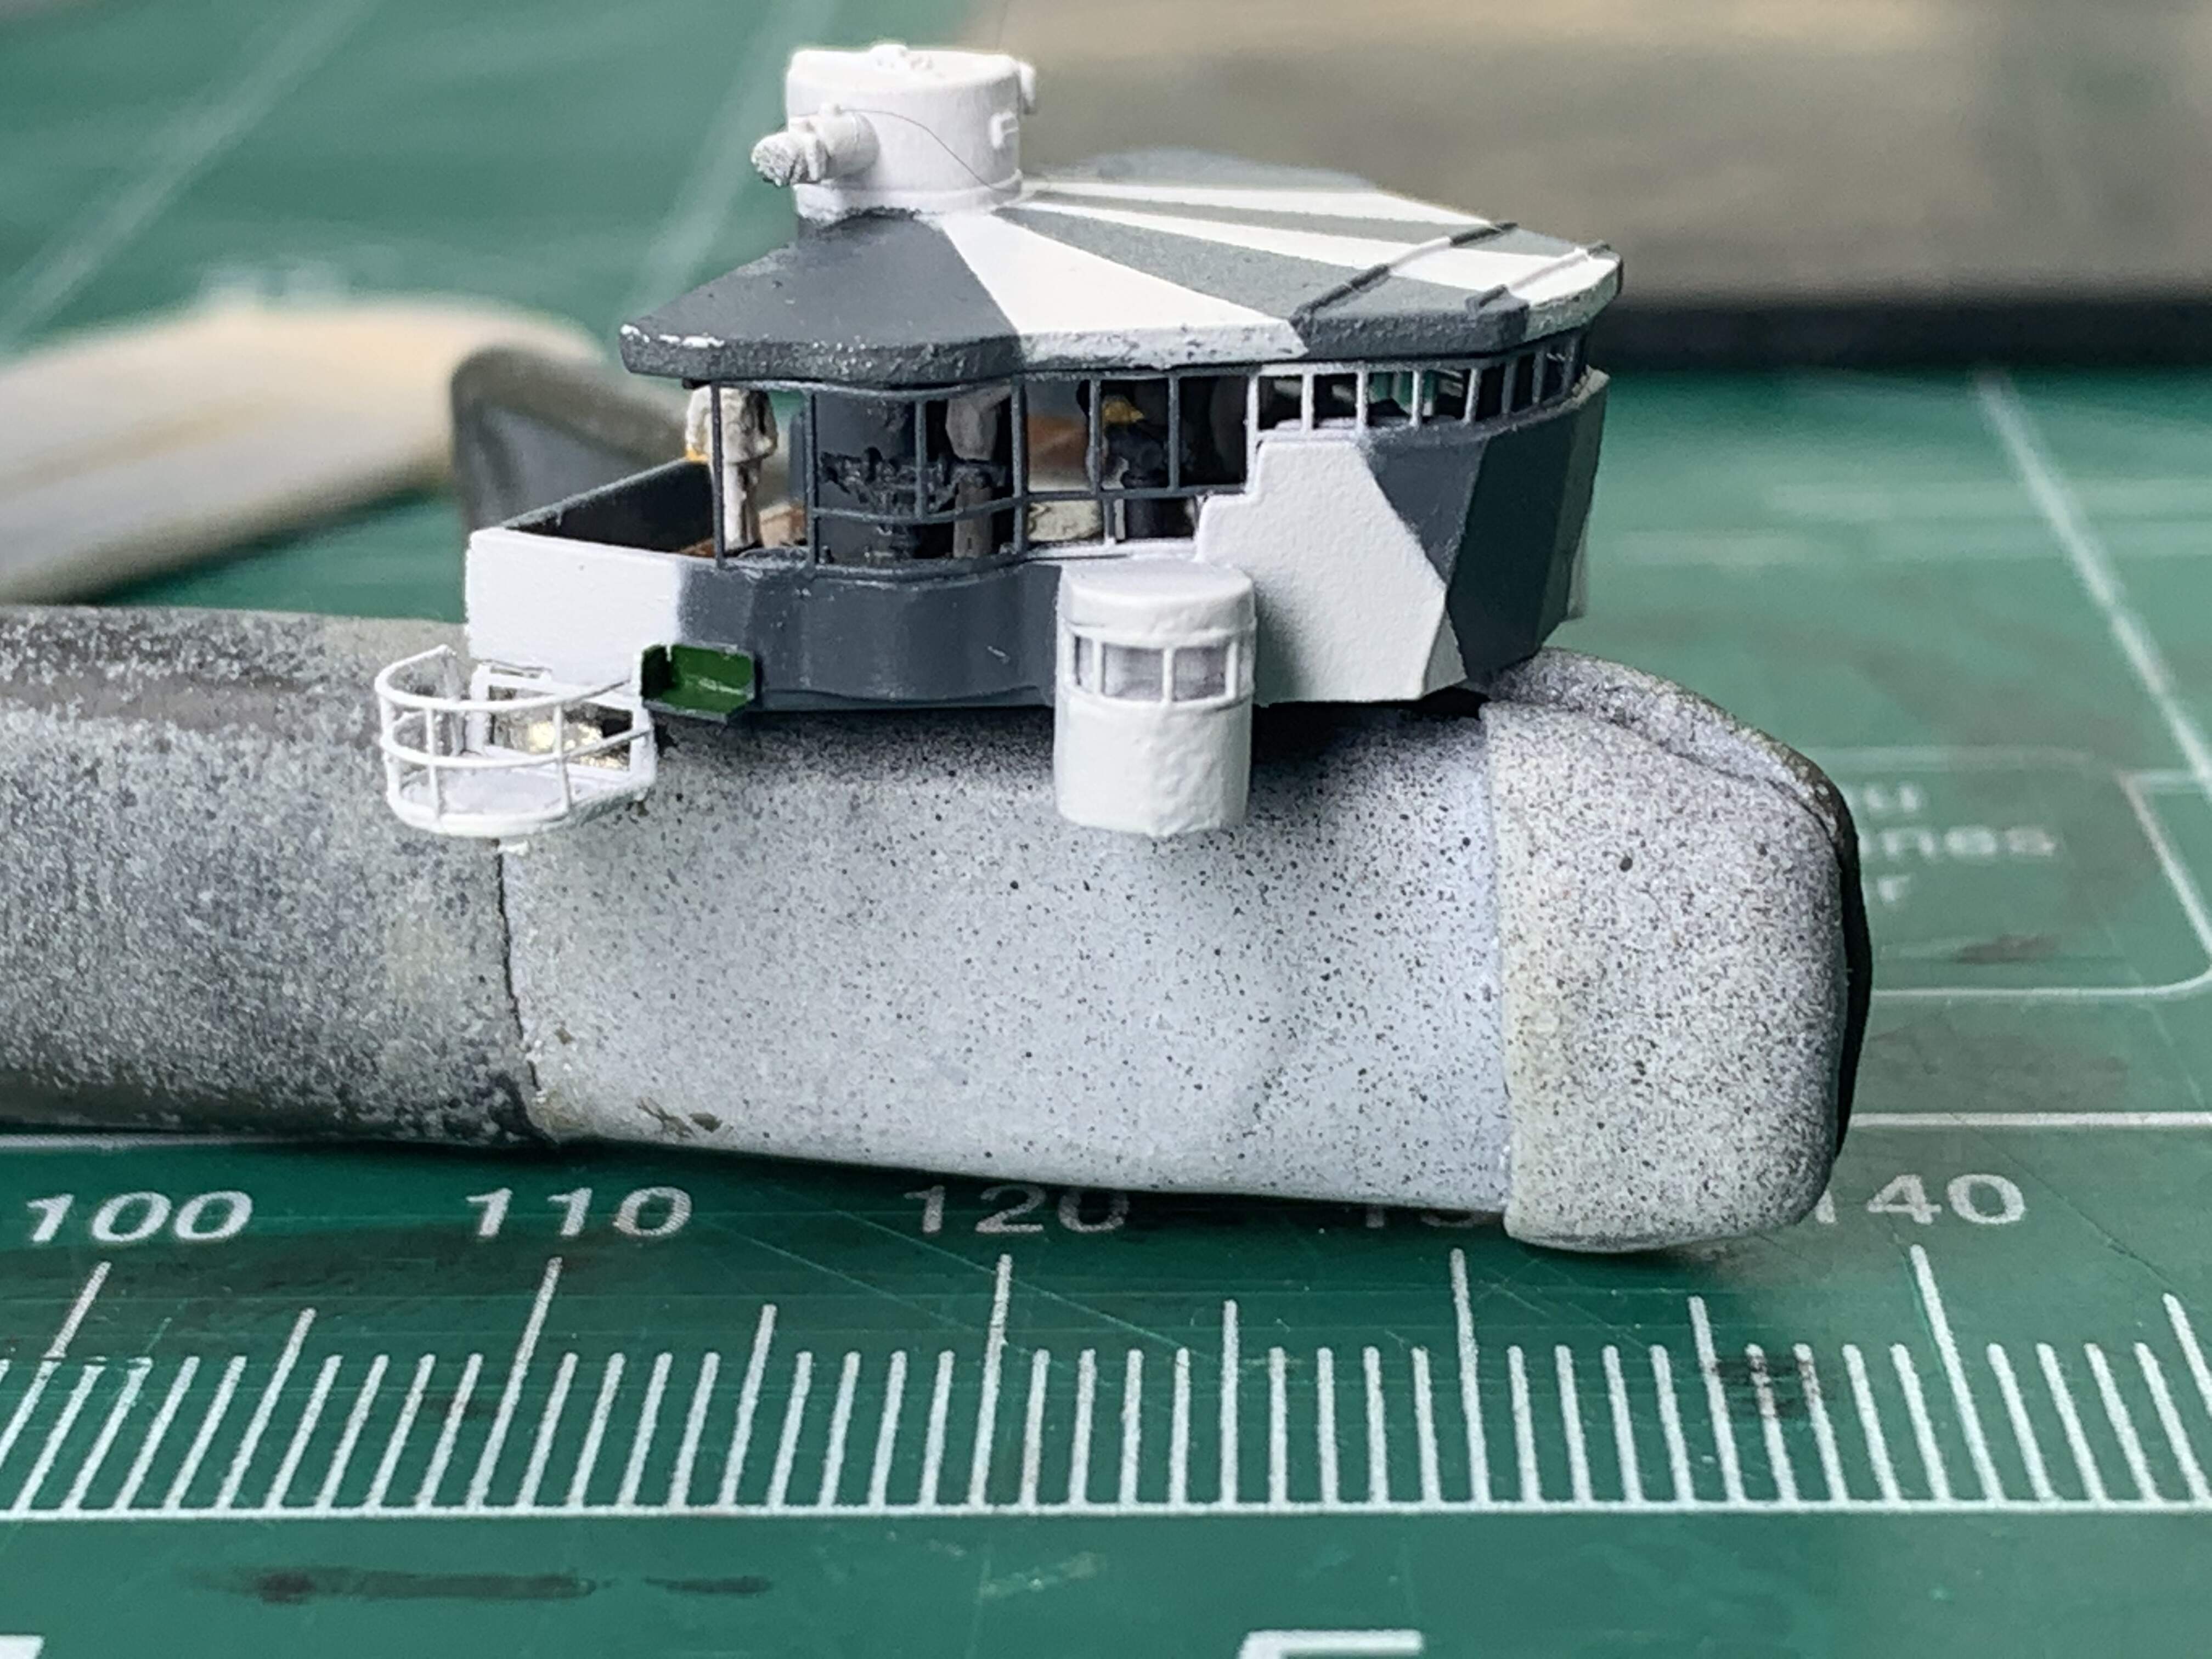
So here I painted the stacks and realized there was no way that I would be able to apply the white camouflage without knocking off the hand rails - luckily enough I have a couple Kuma Class kits and a few of the Tama PE sets so starting over was easy
Here are the stacks rebuilt without the hand rails and ready for painting
Painted and needing some attention on overspray and leaks under the tape
As you can see in subsequent posts I bounced around alot
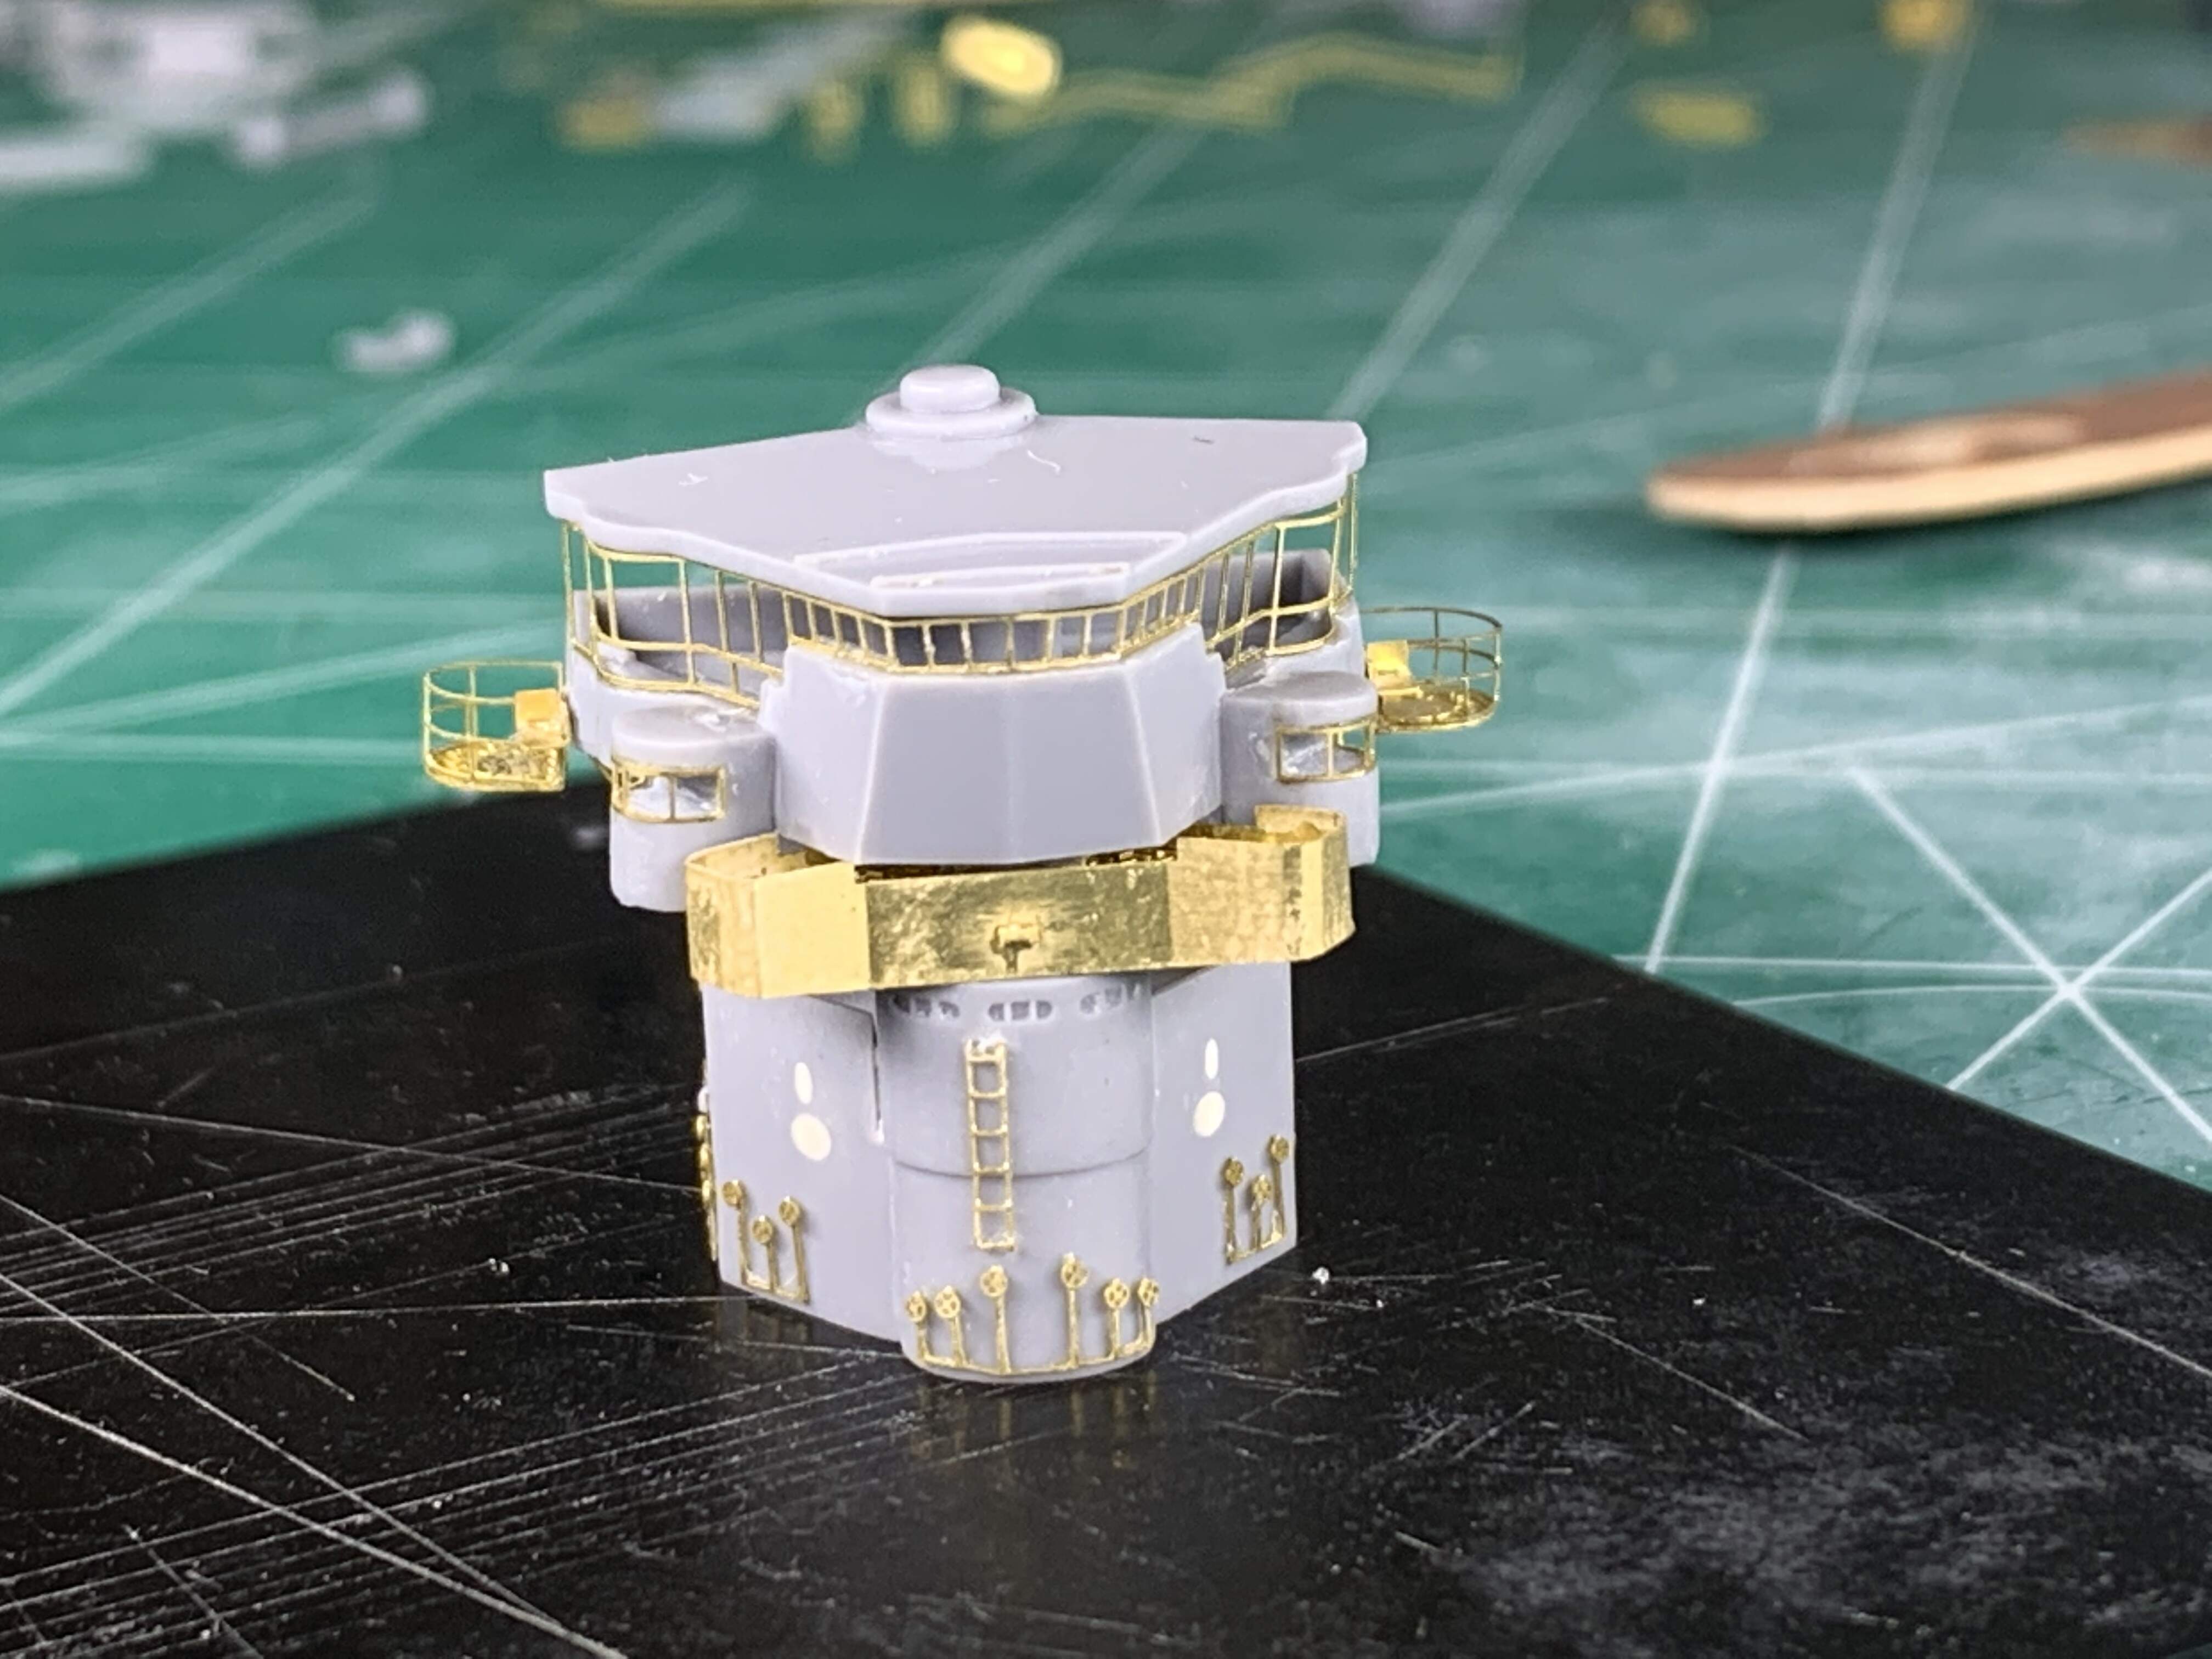
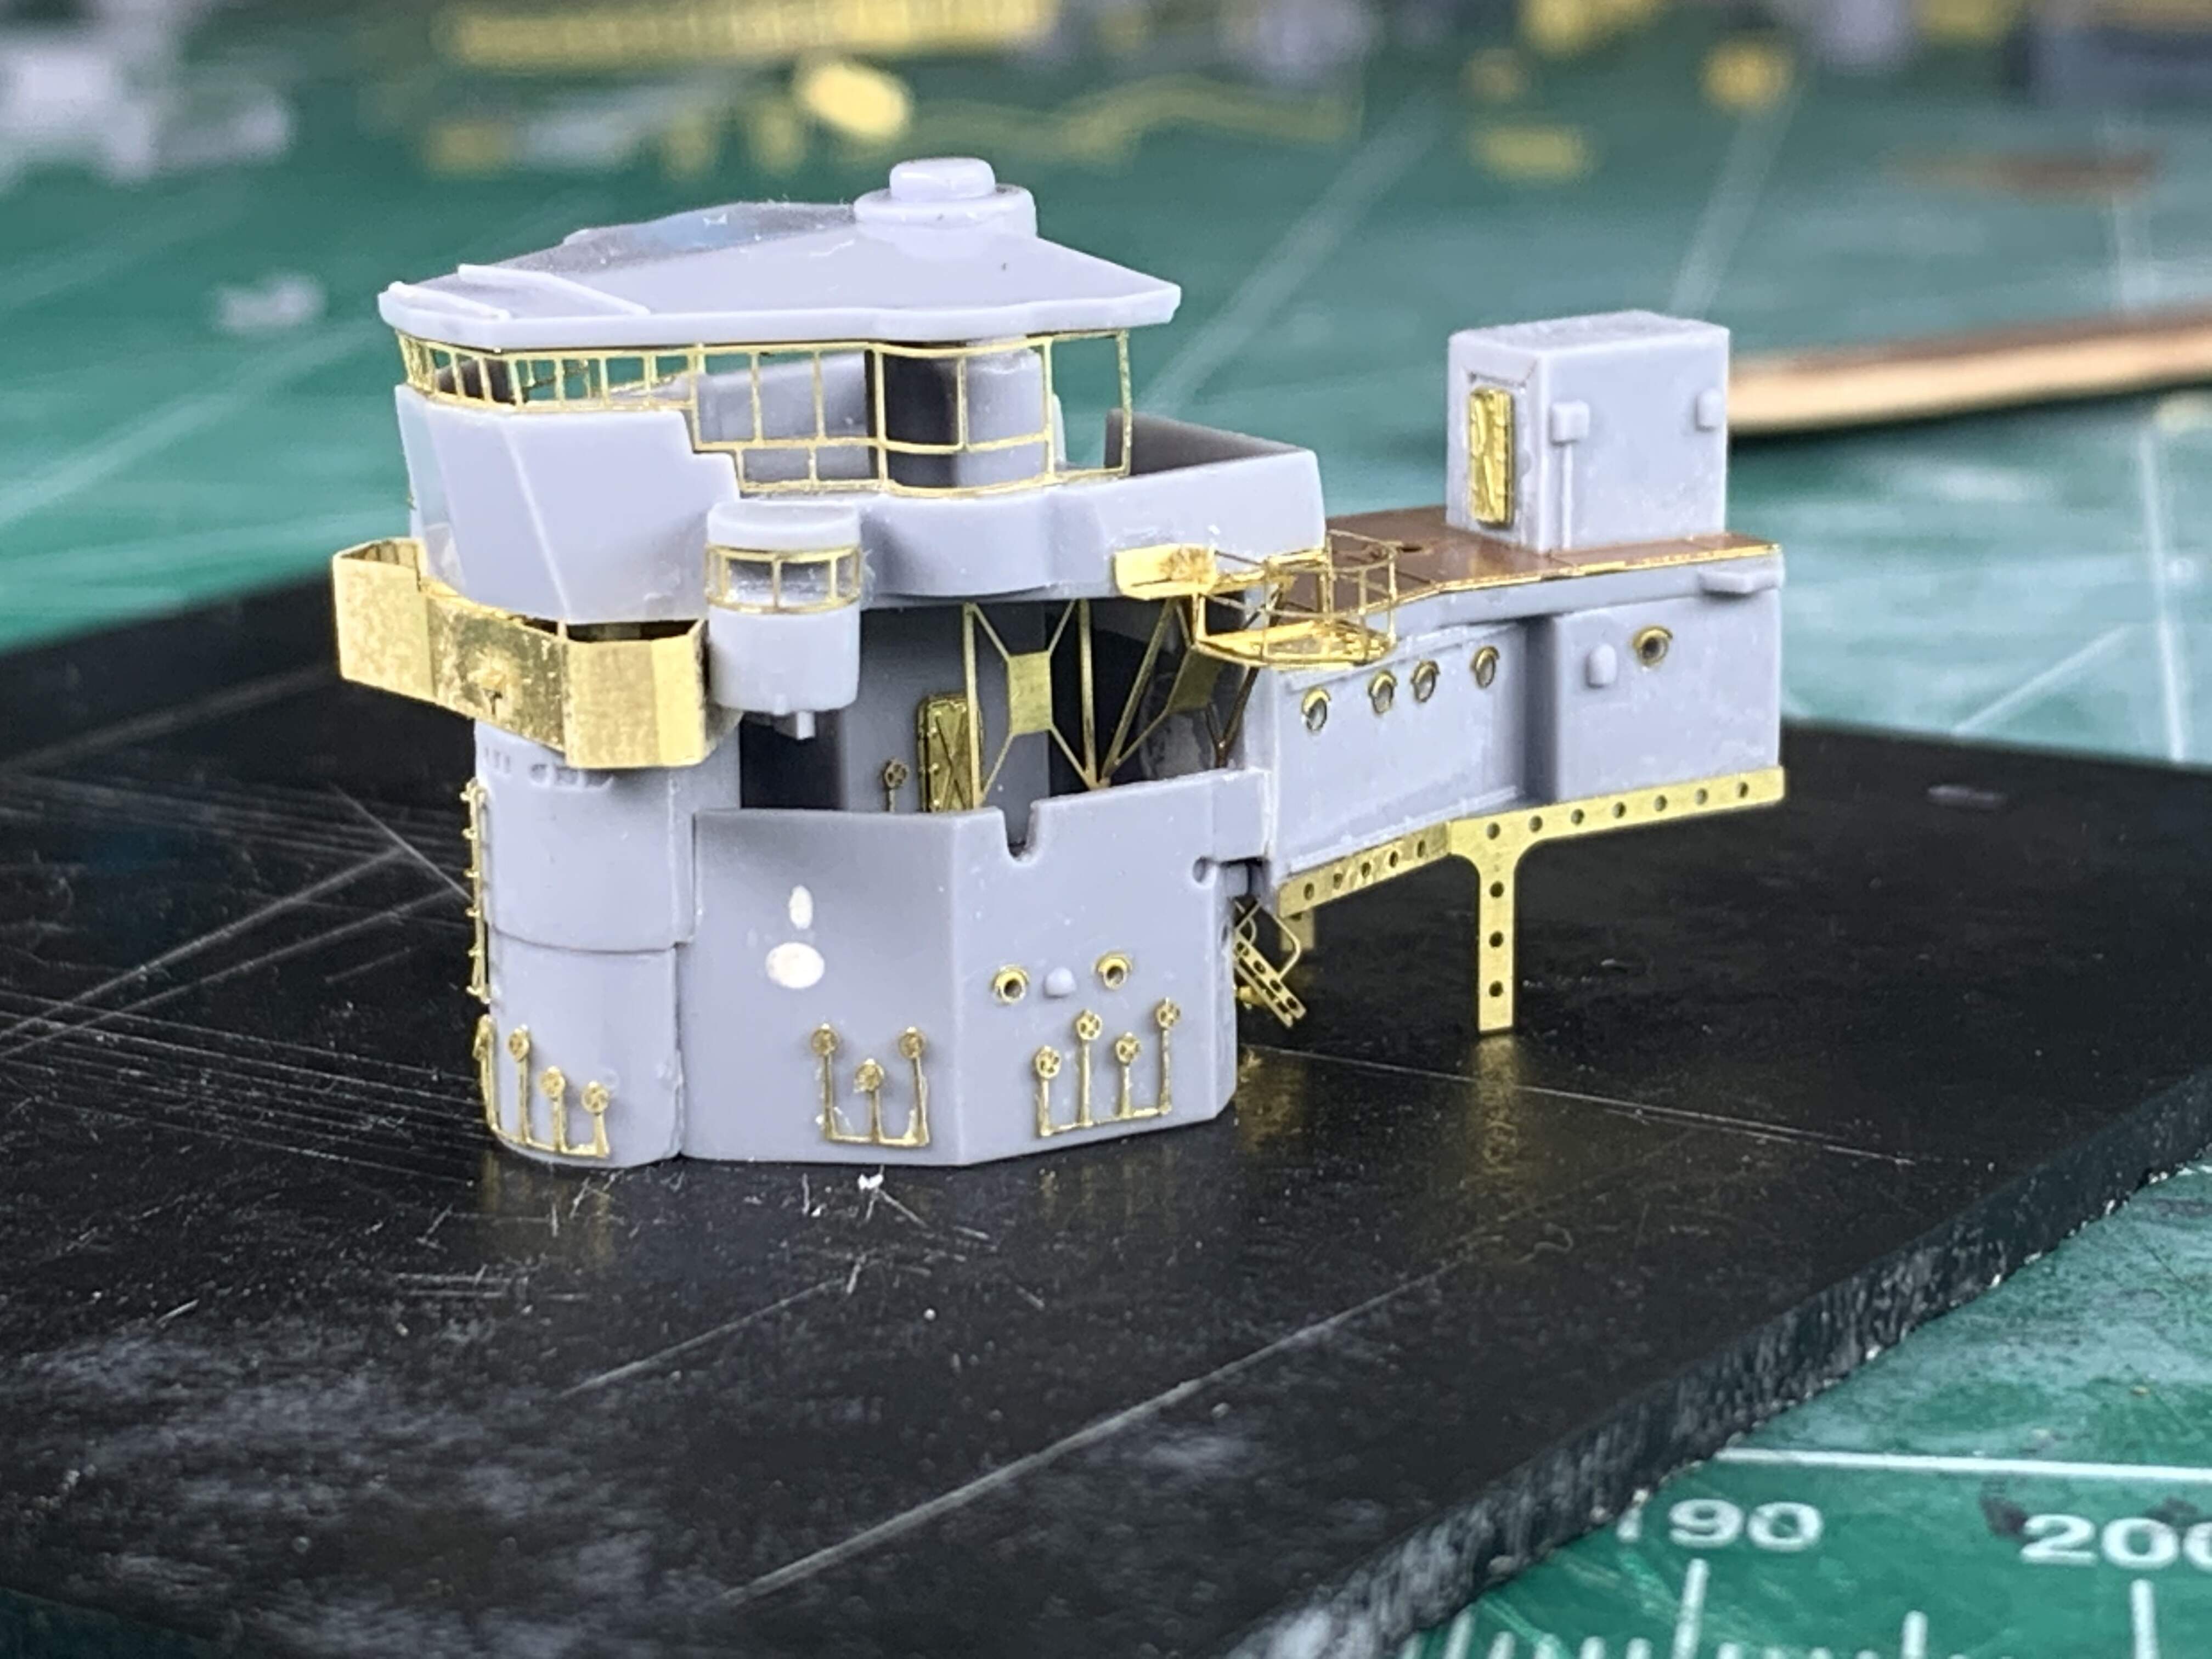
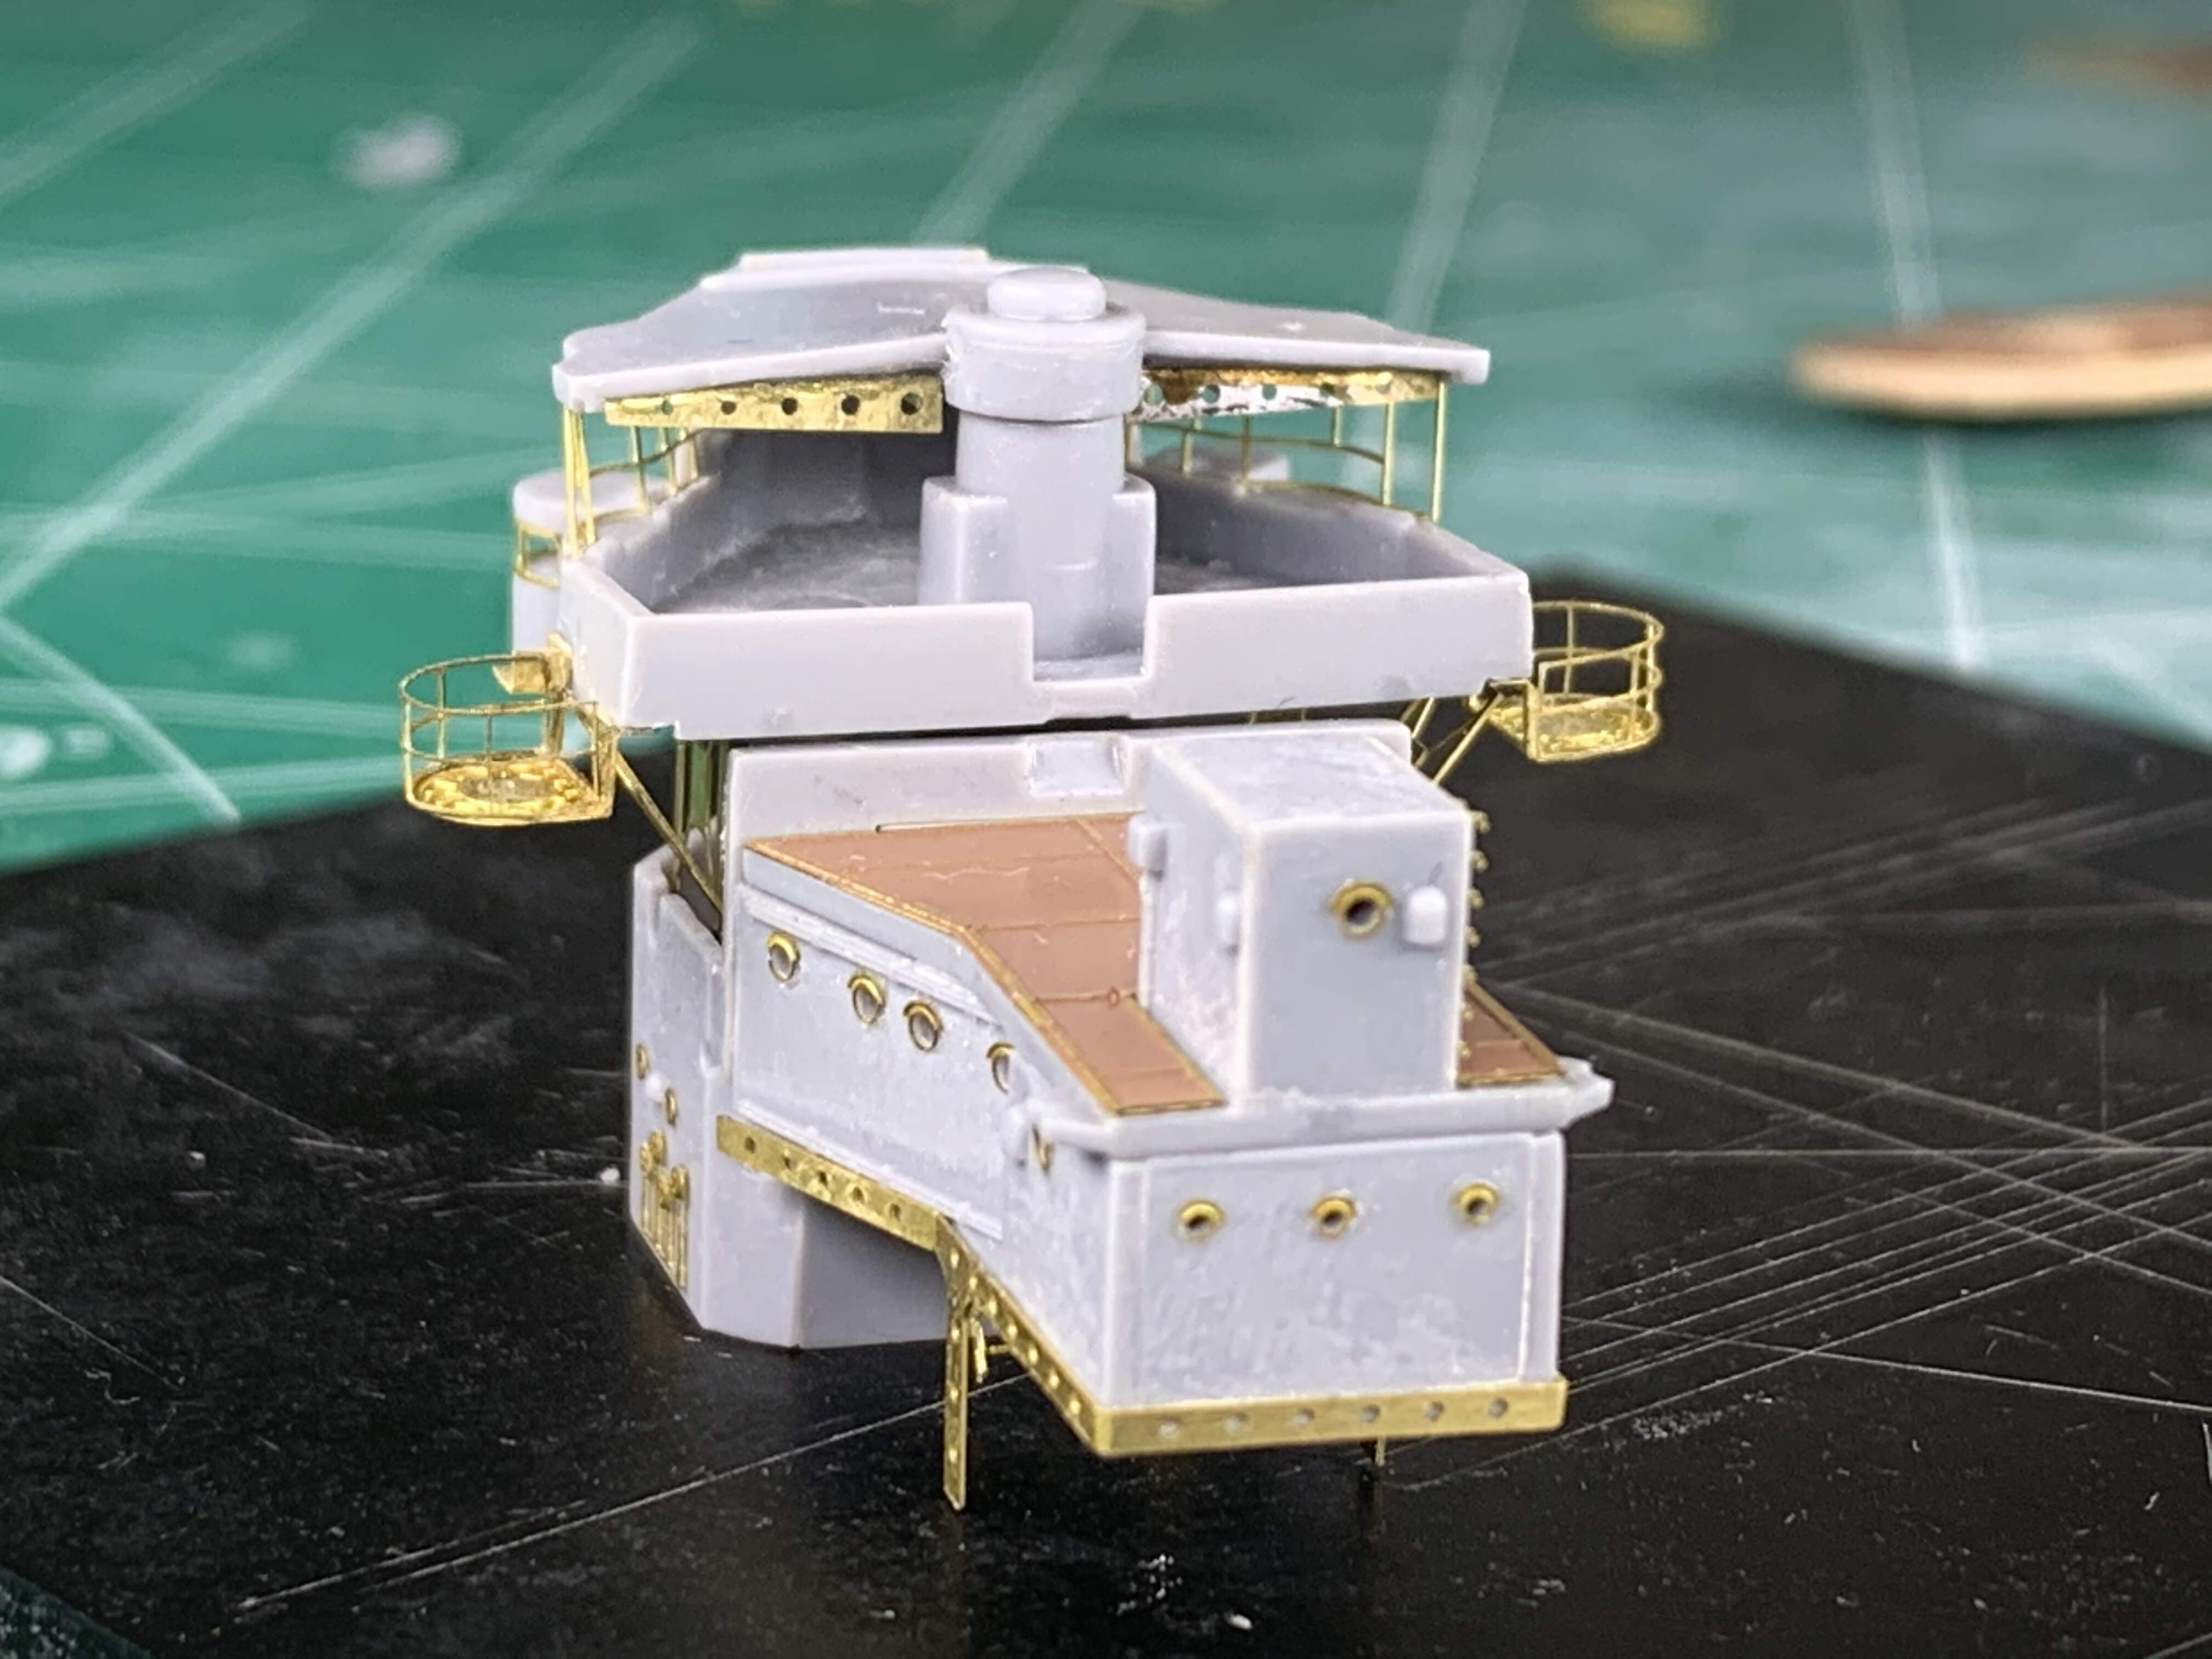
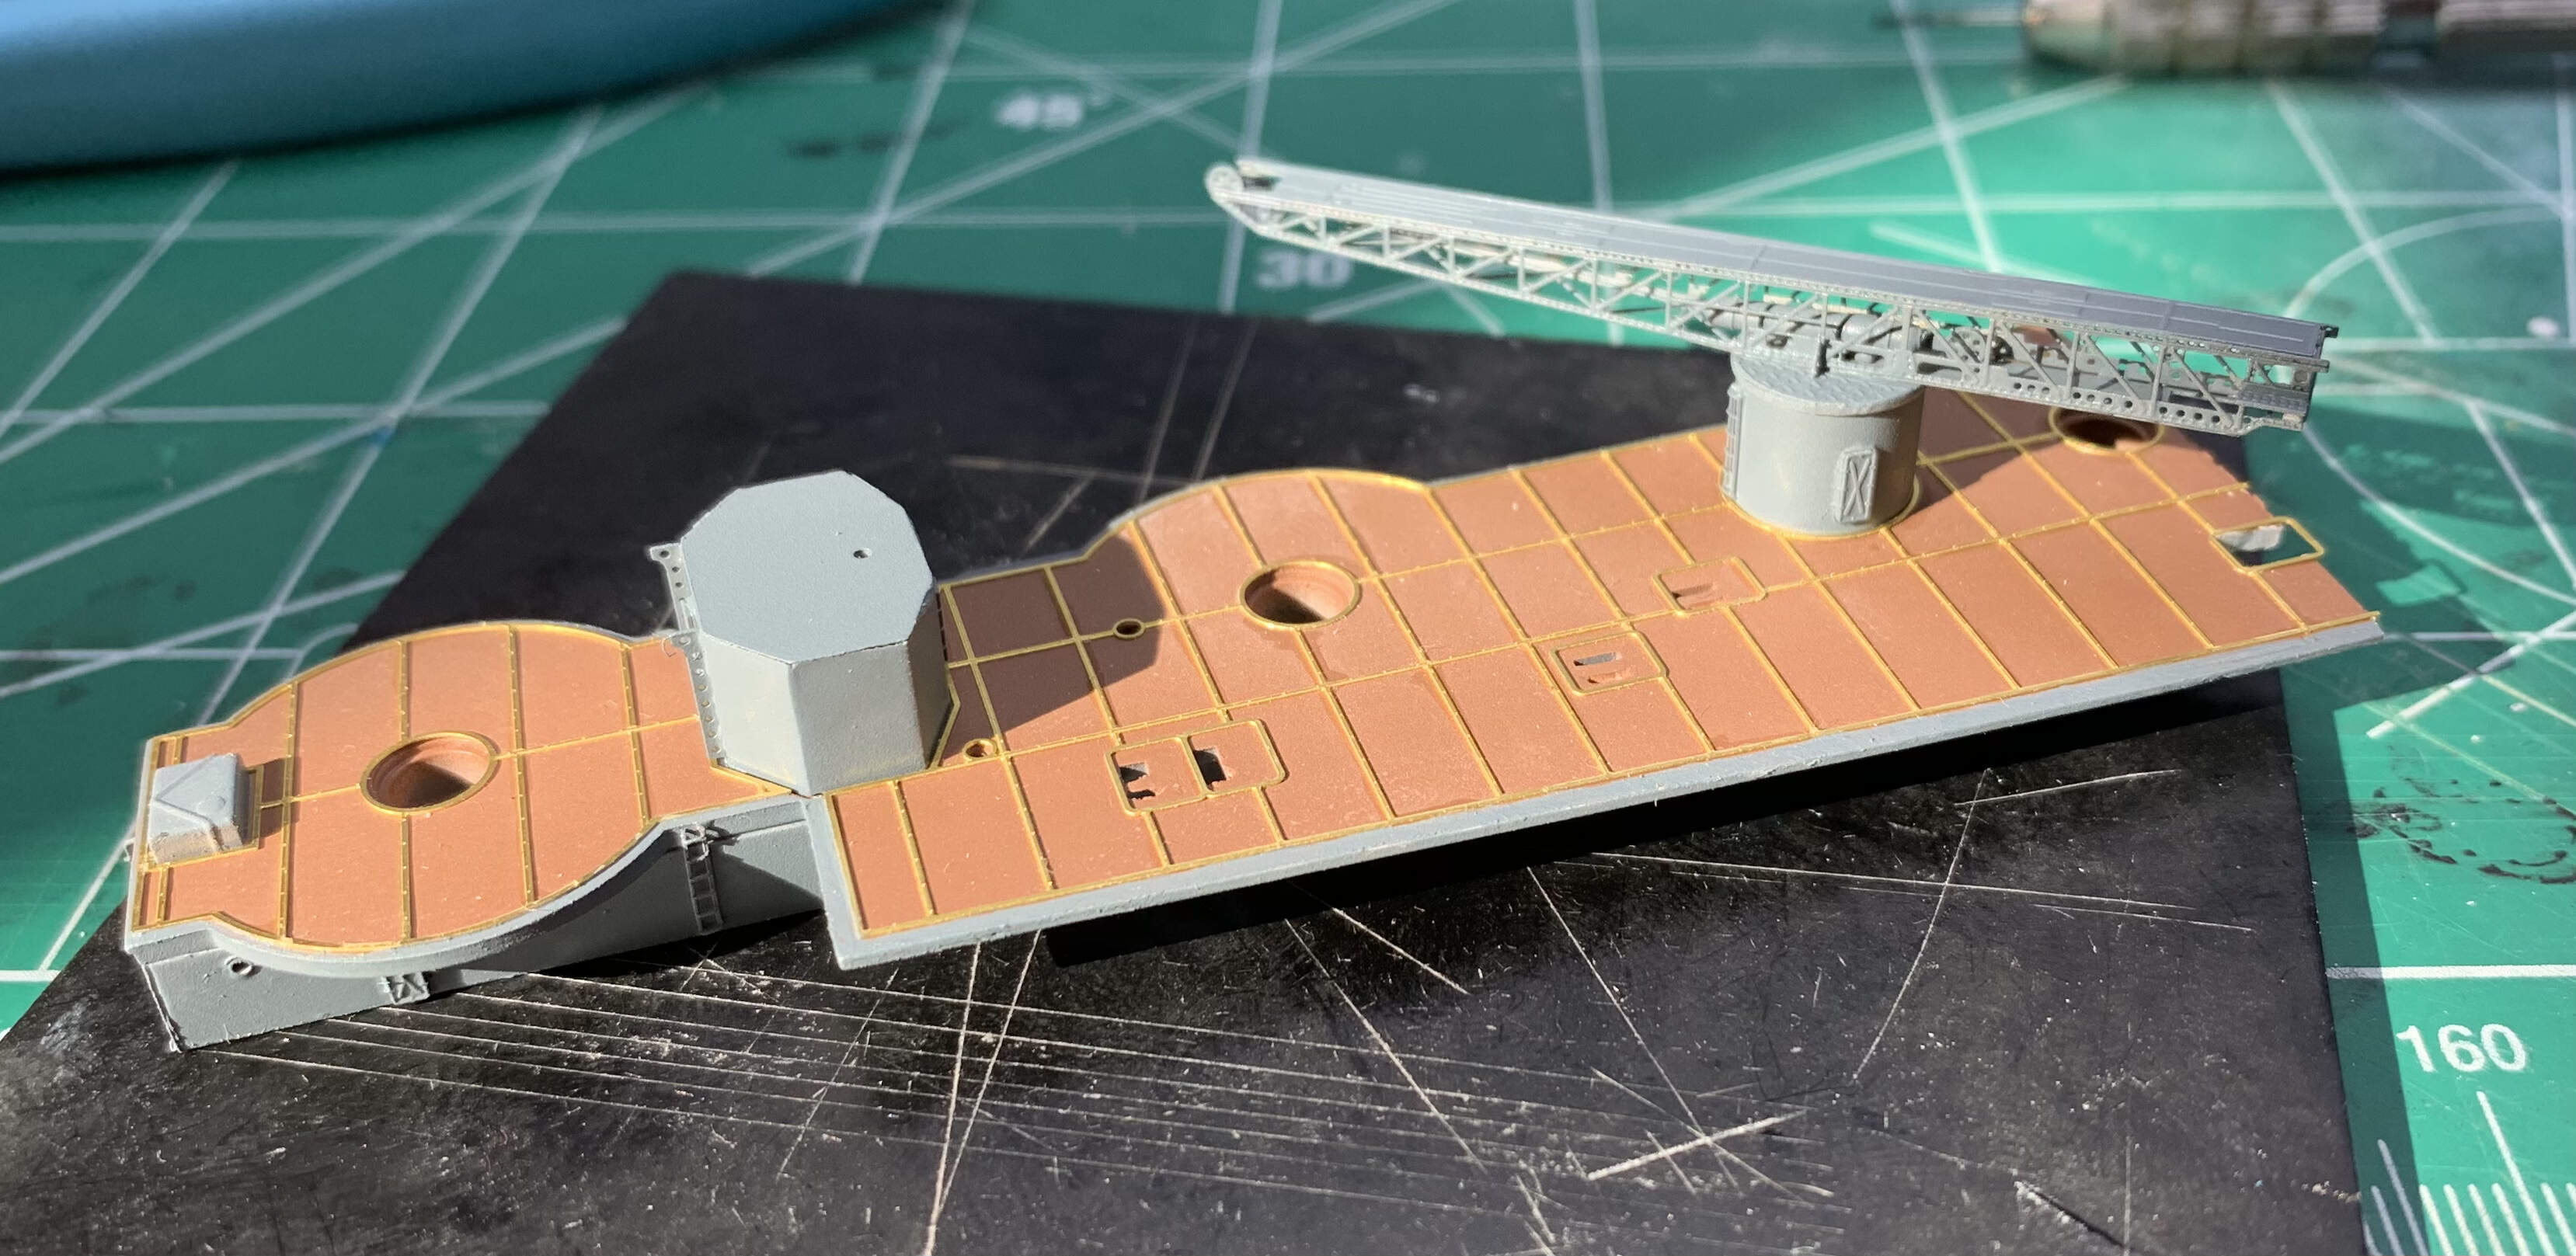
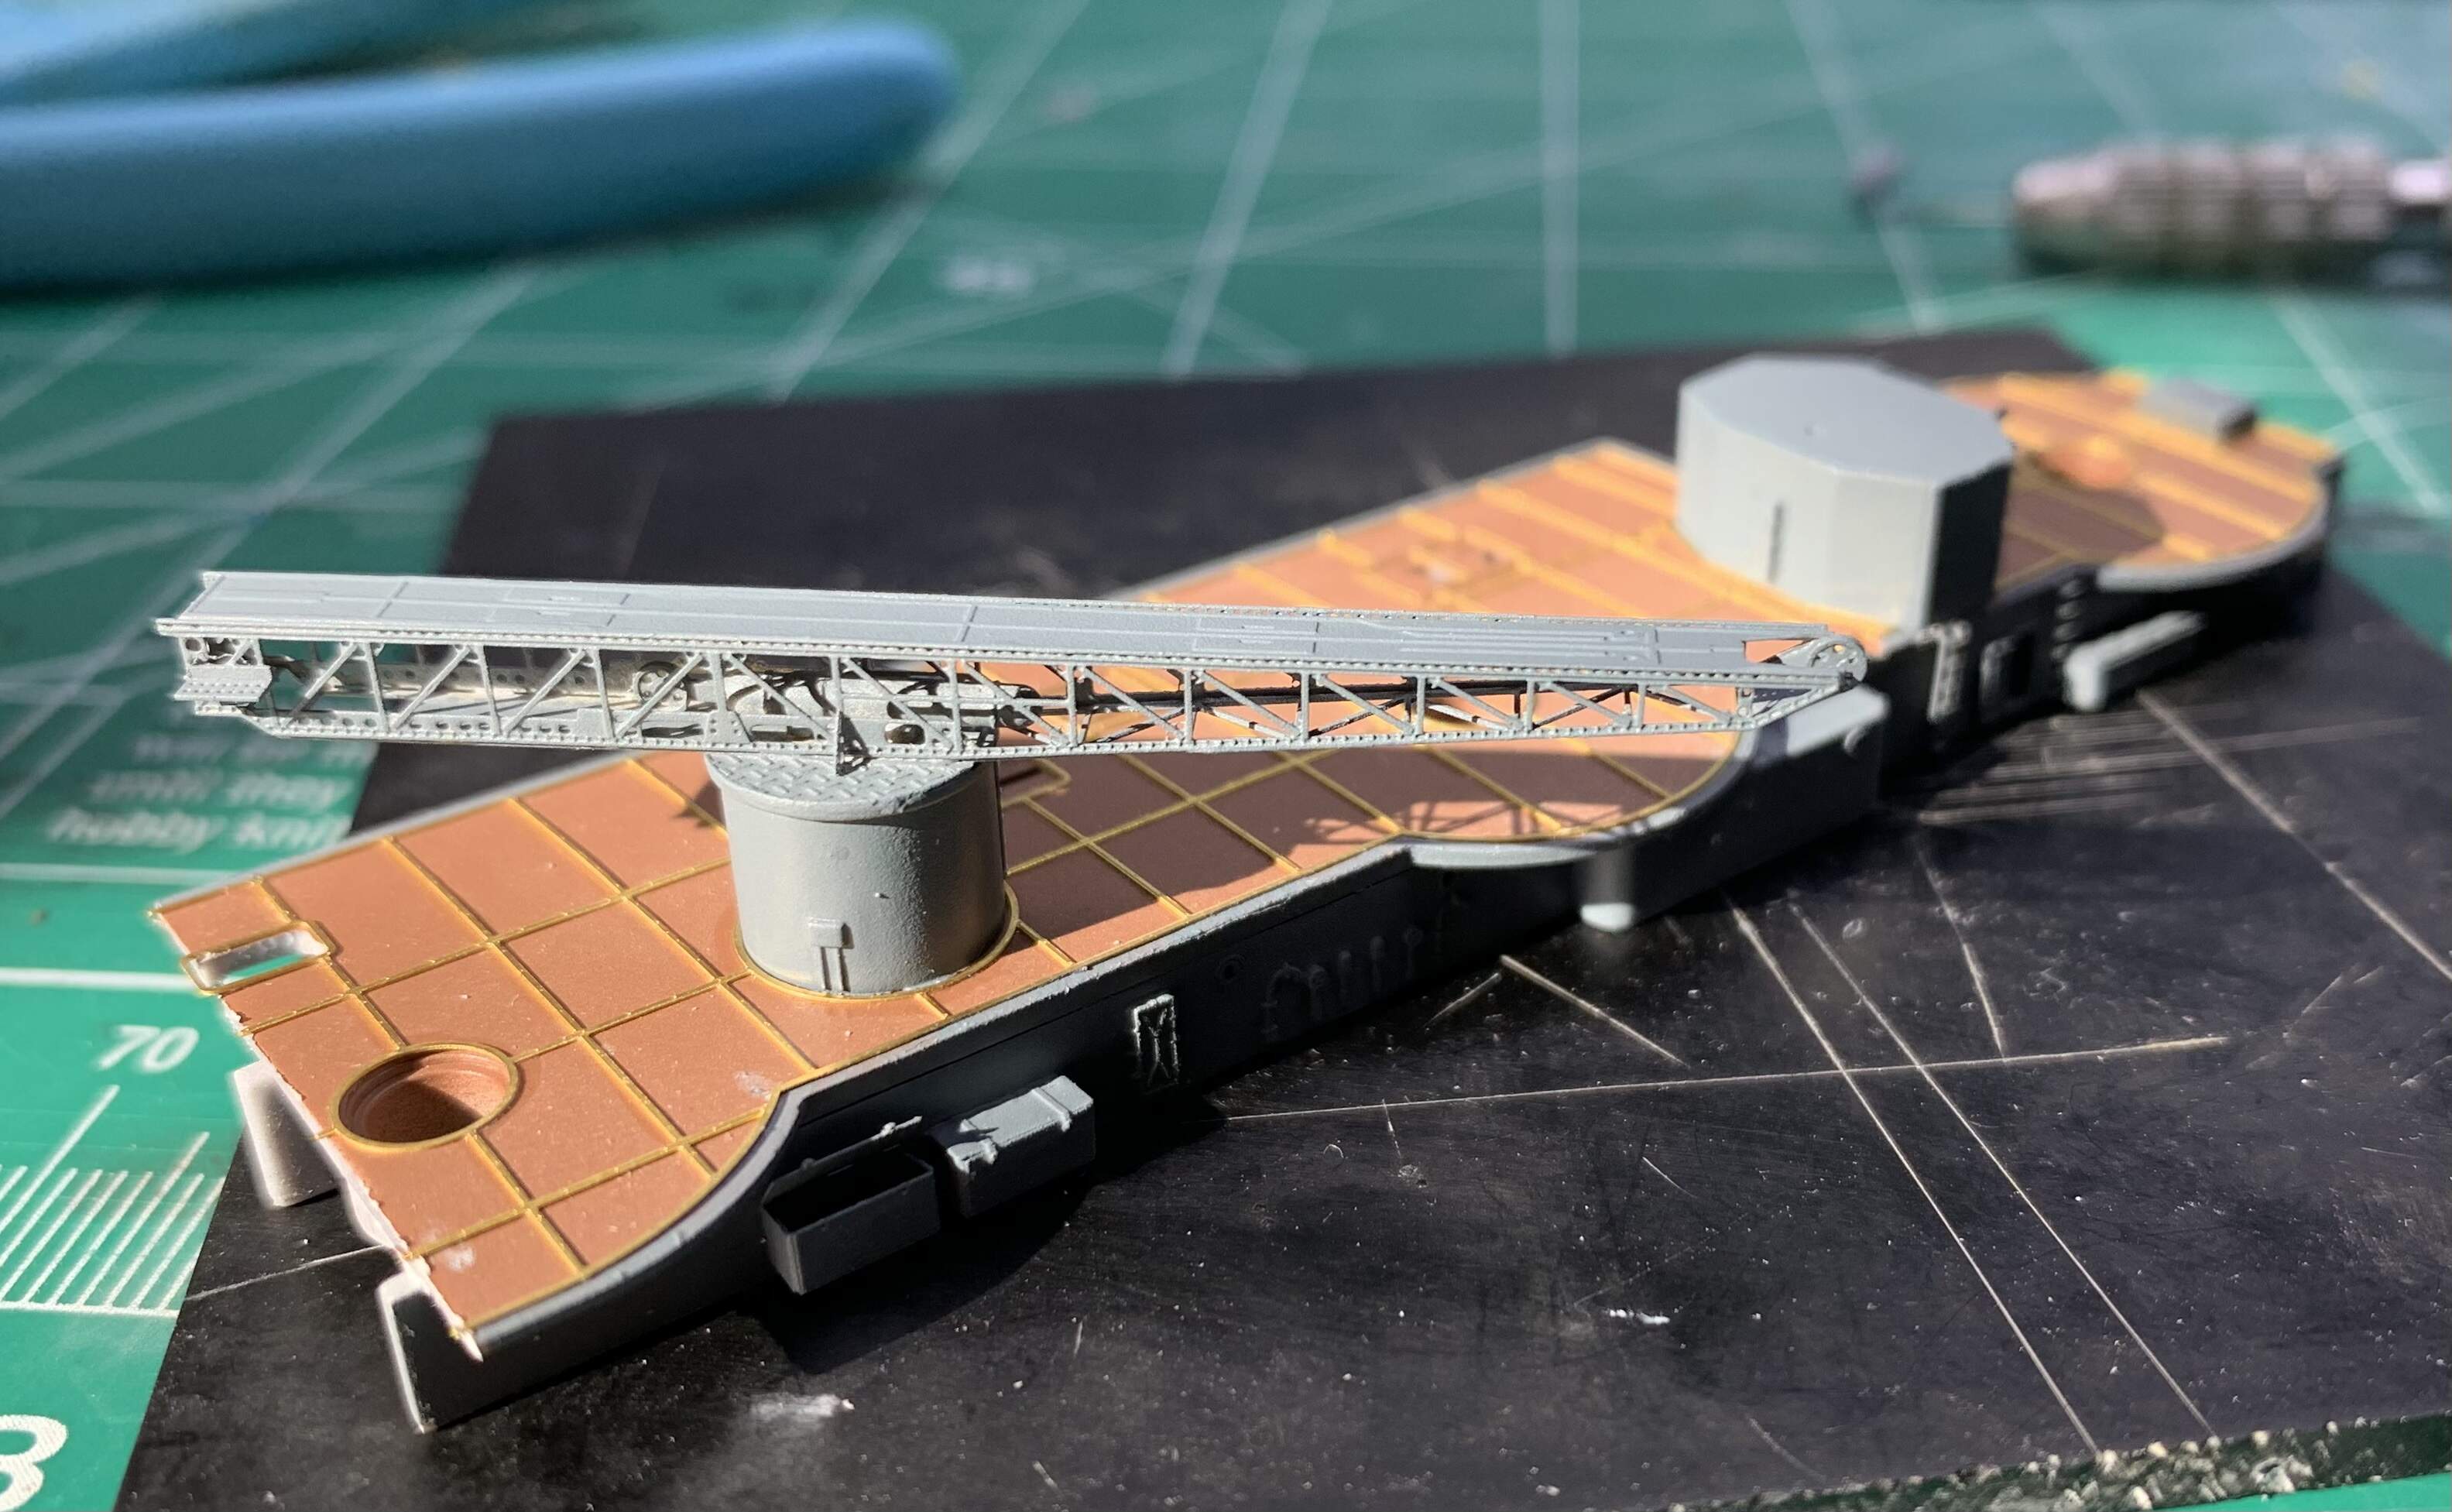
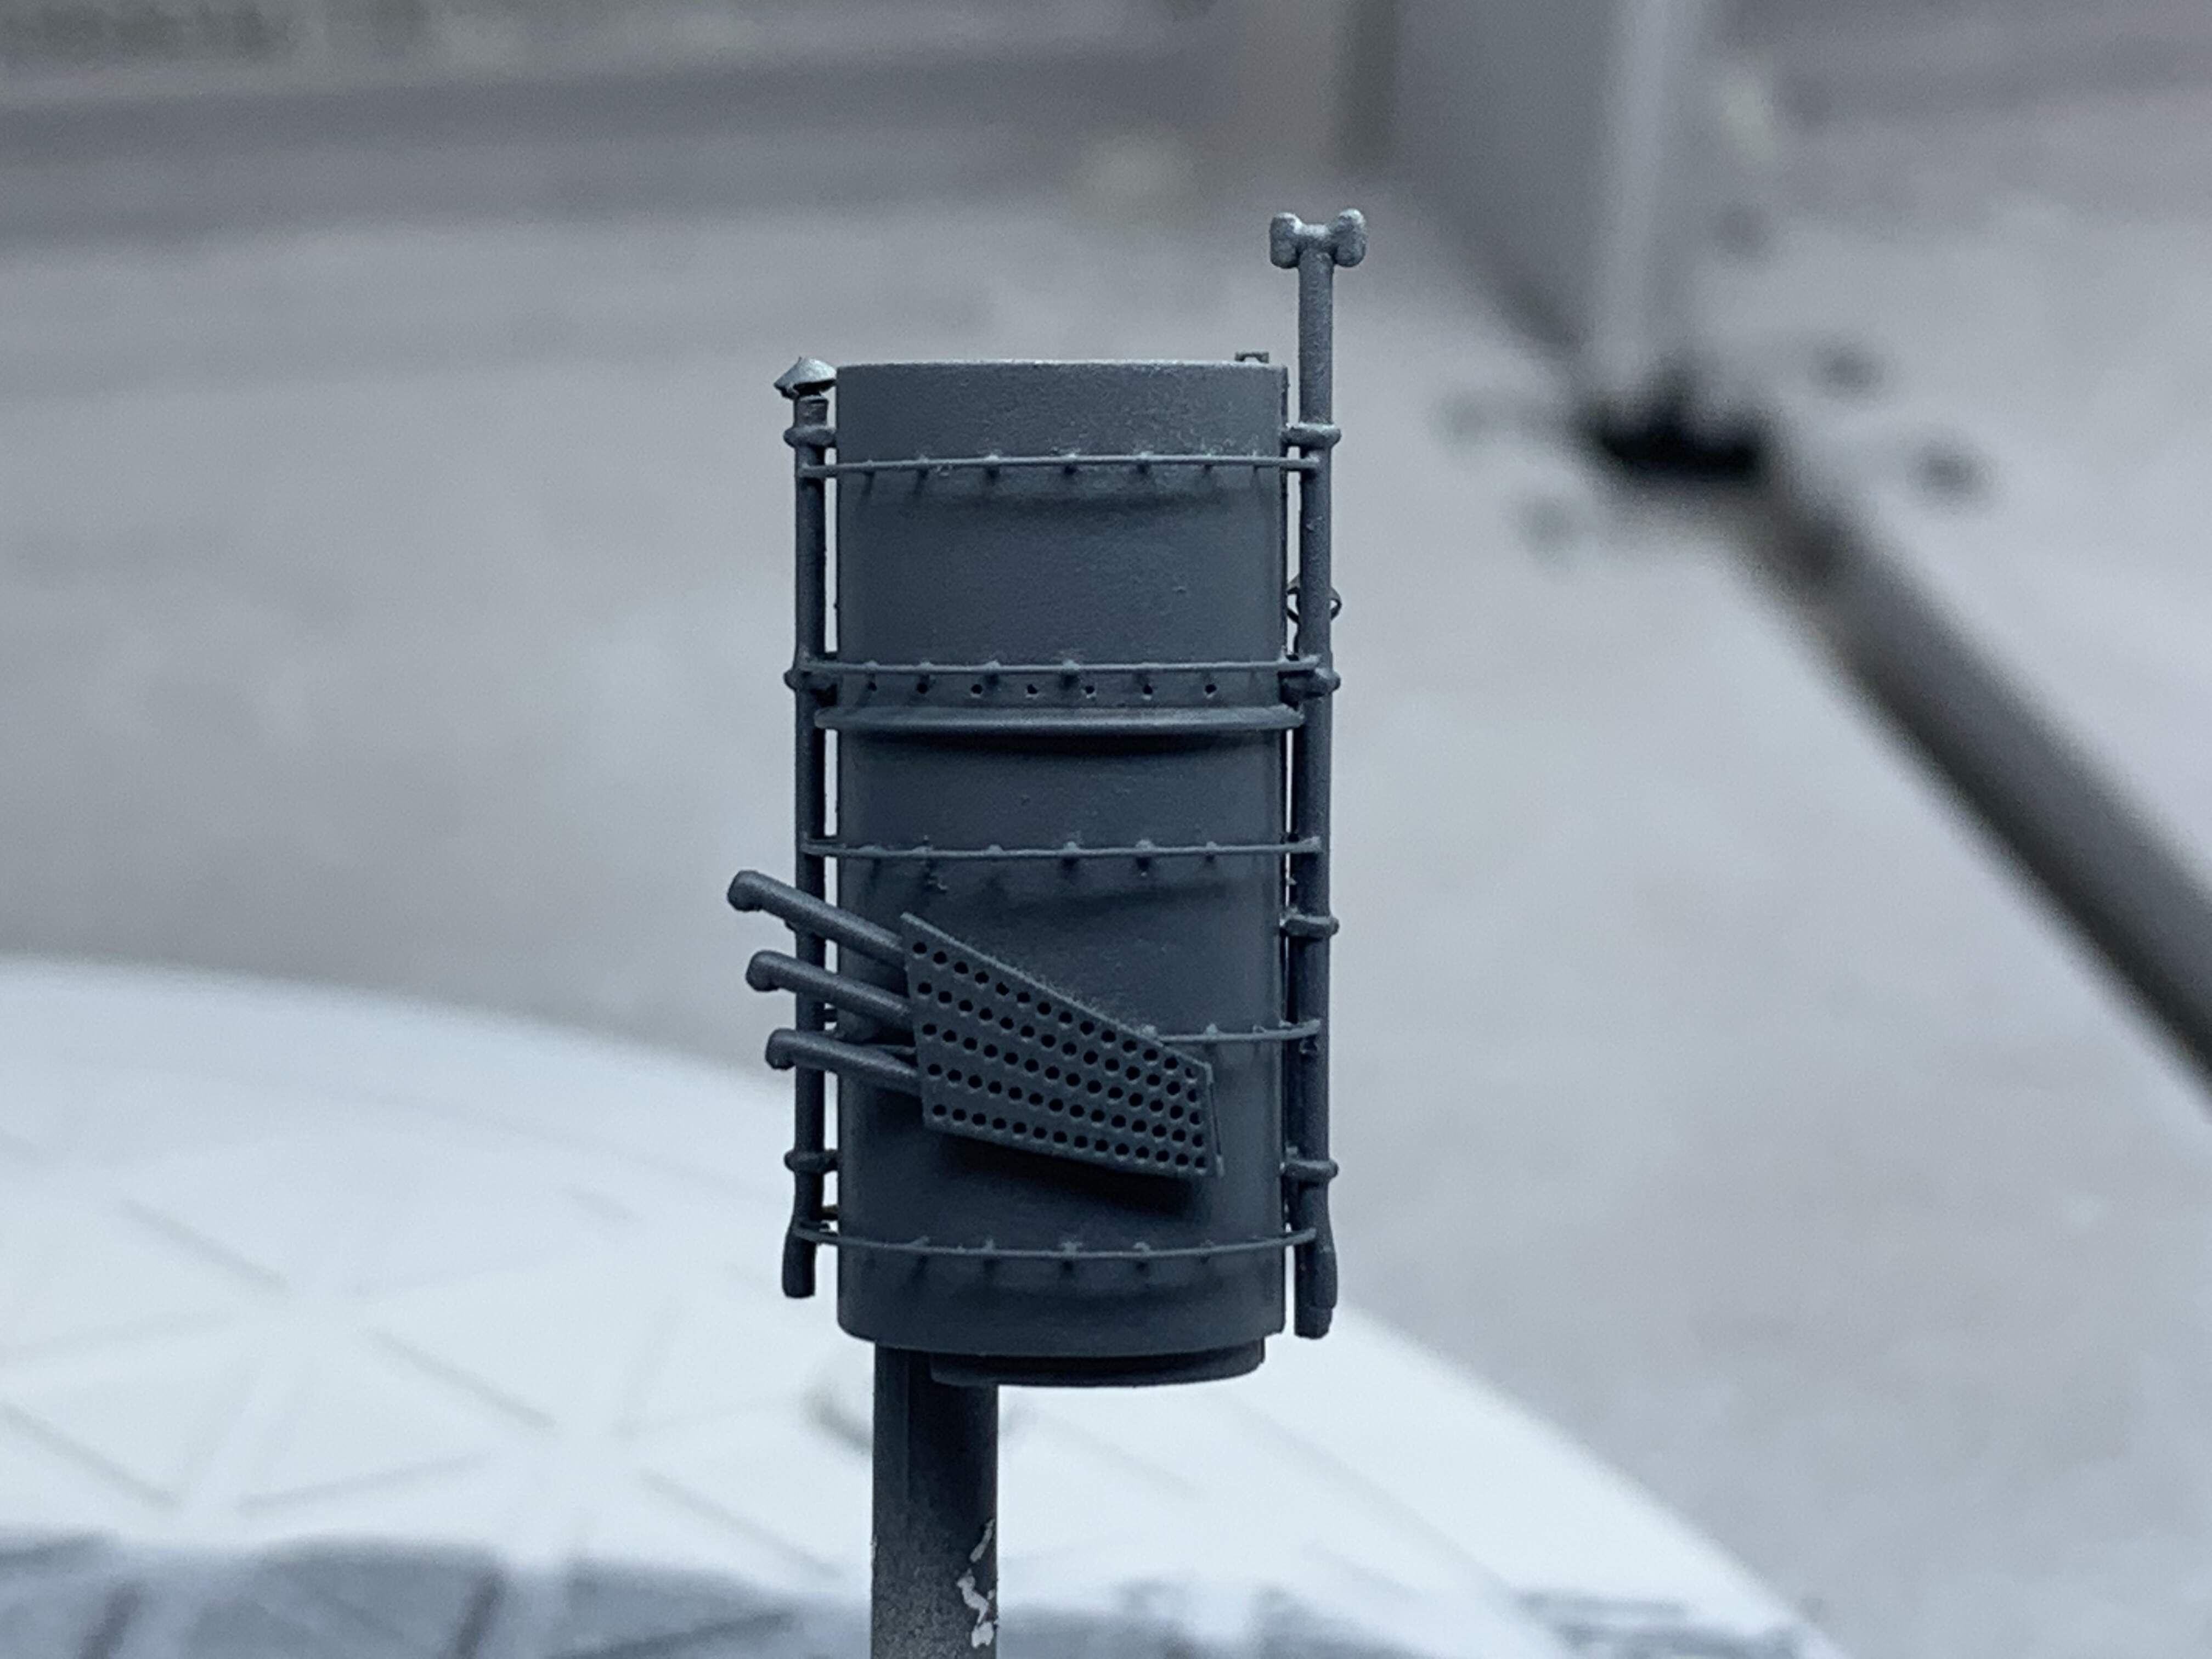
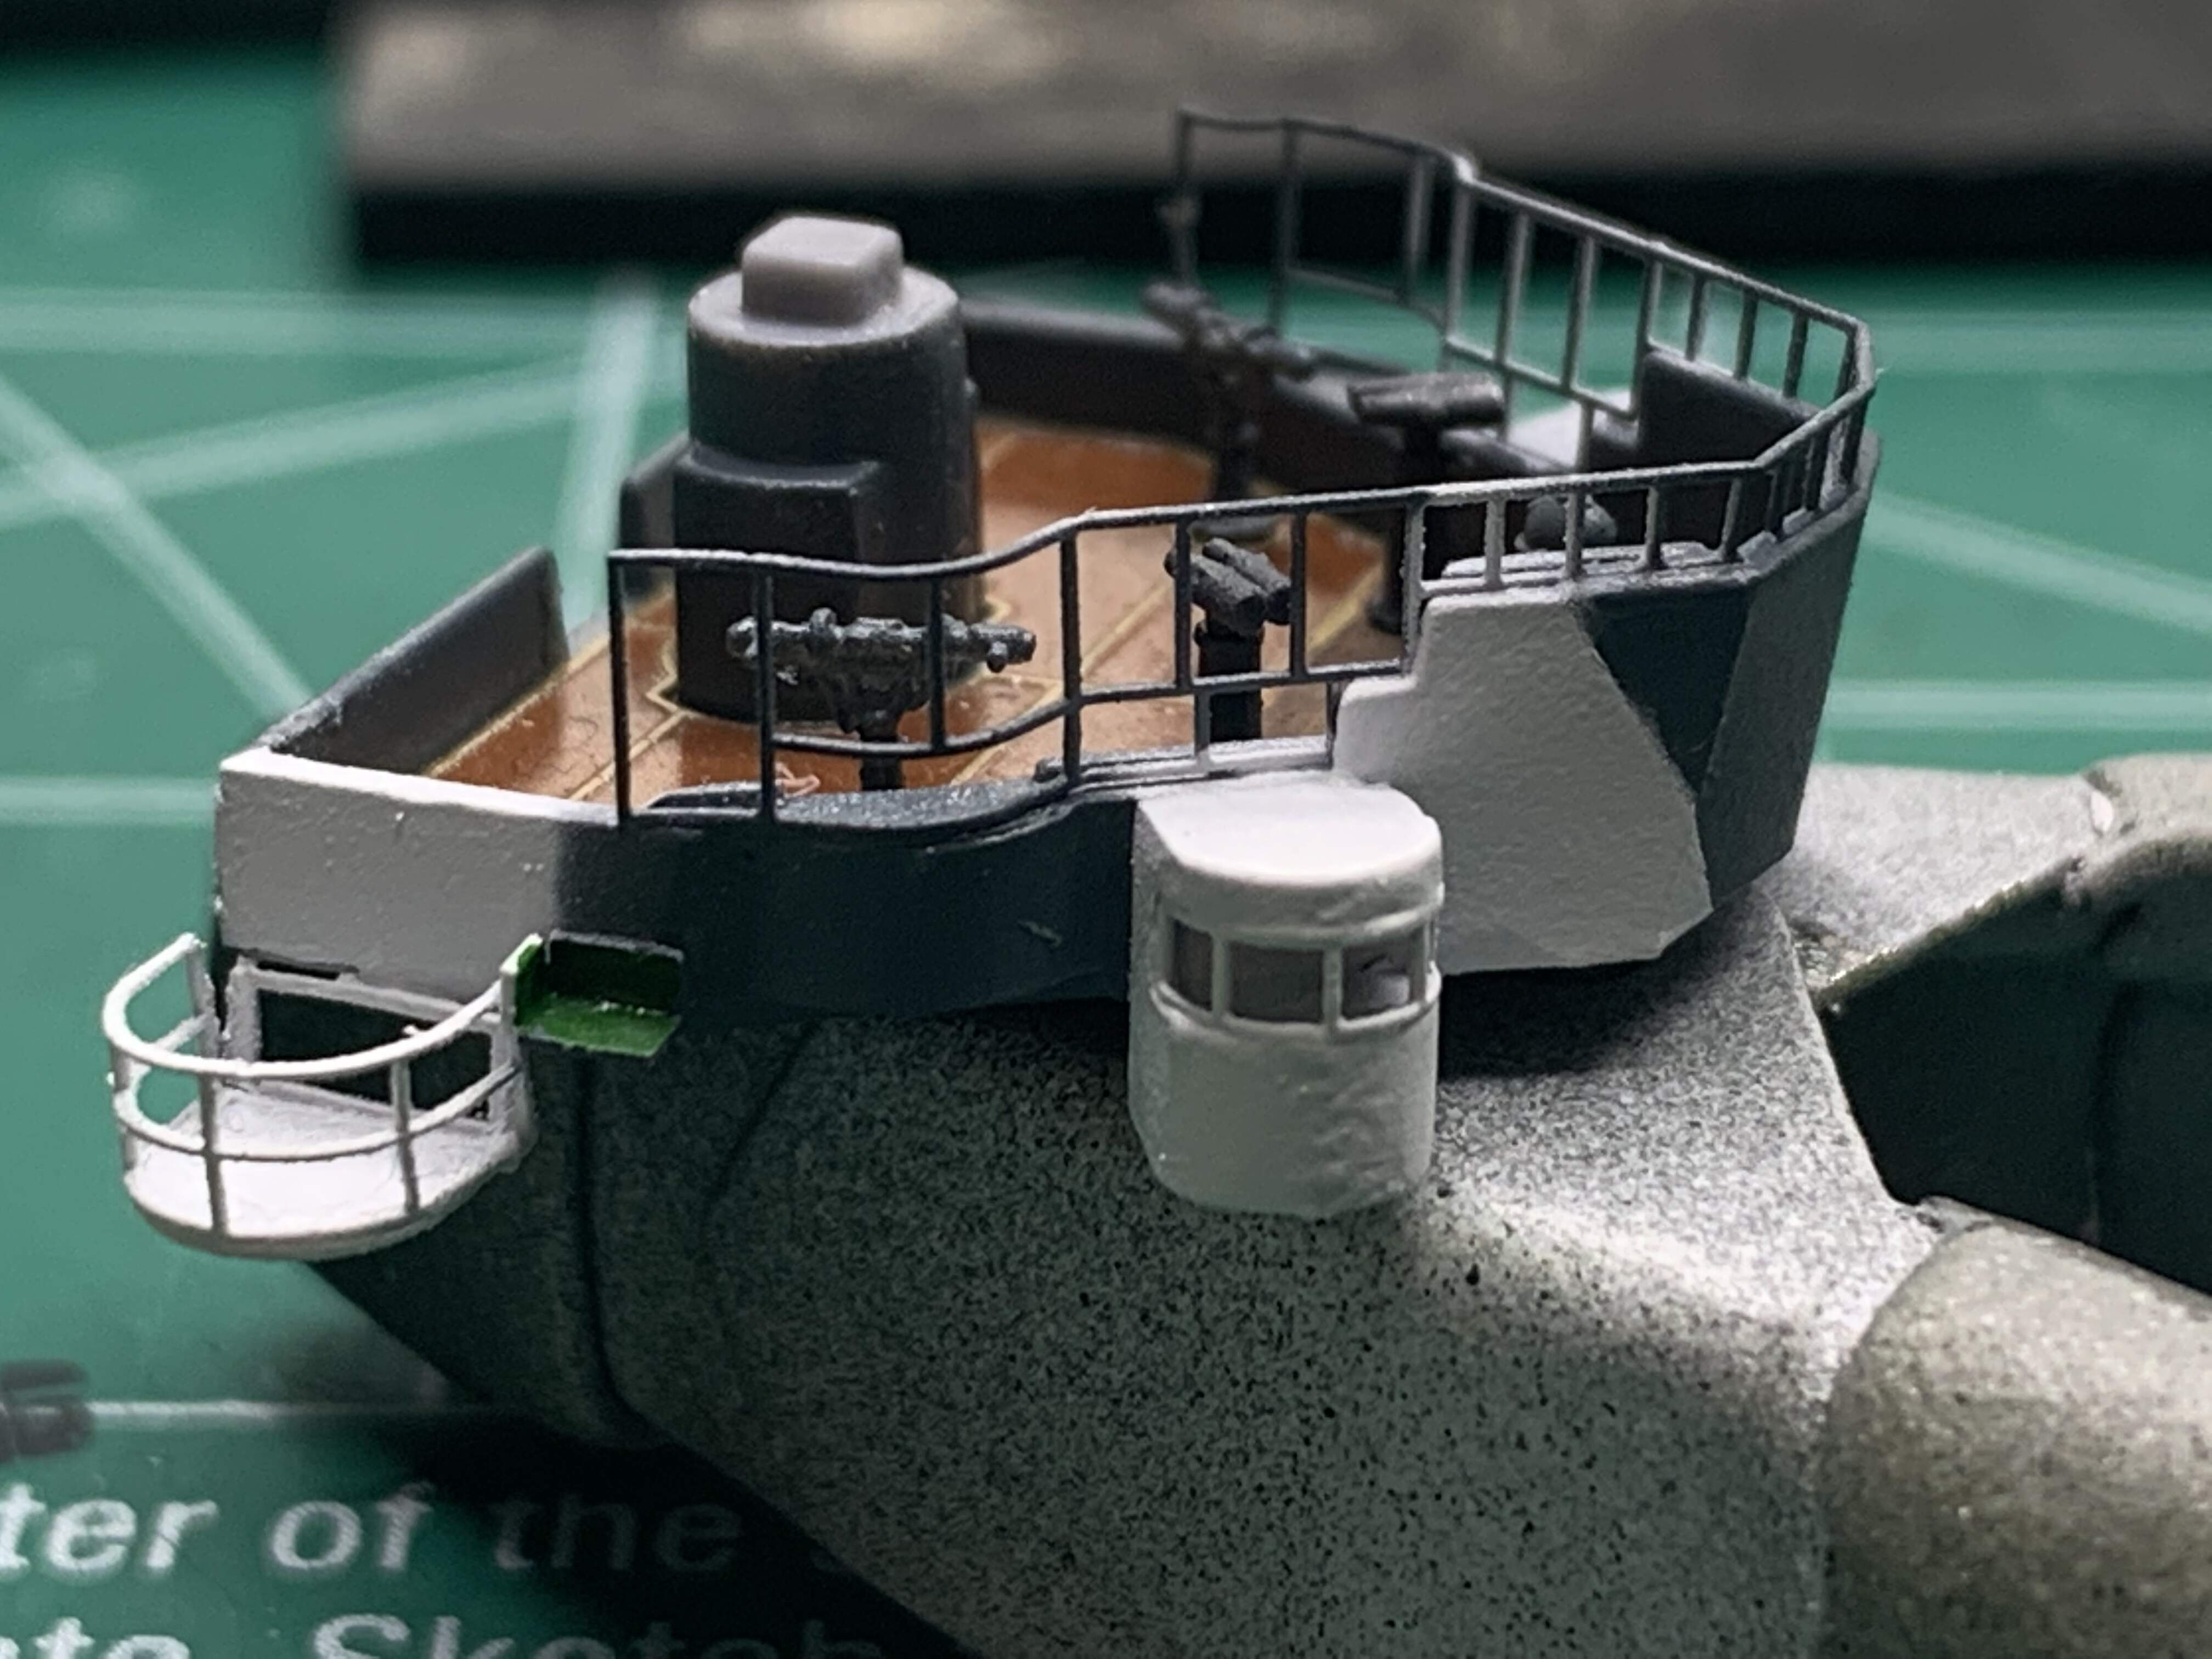
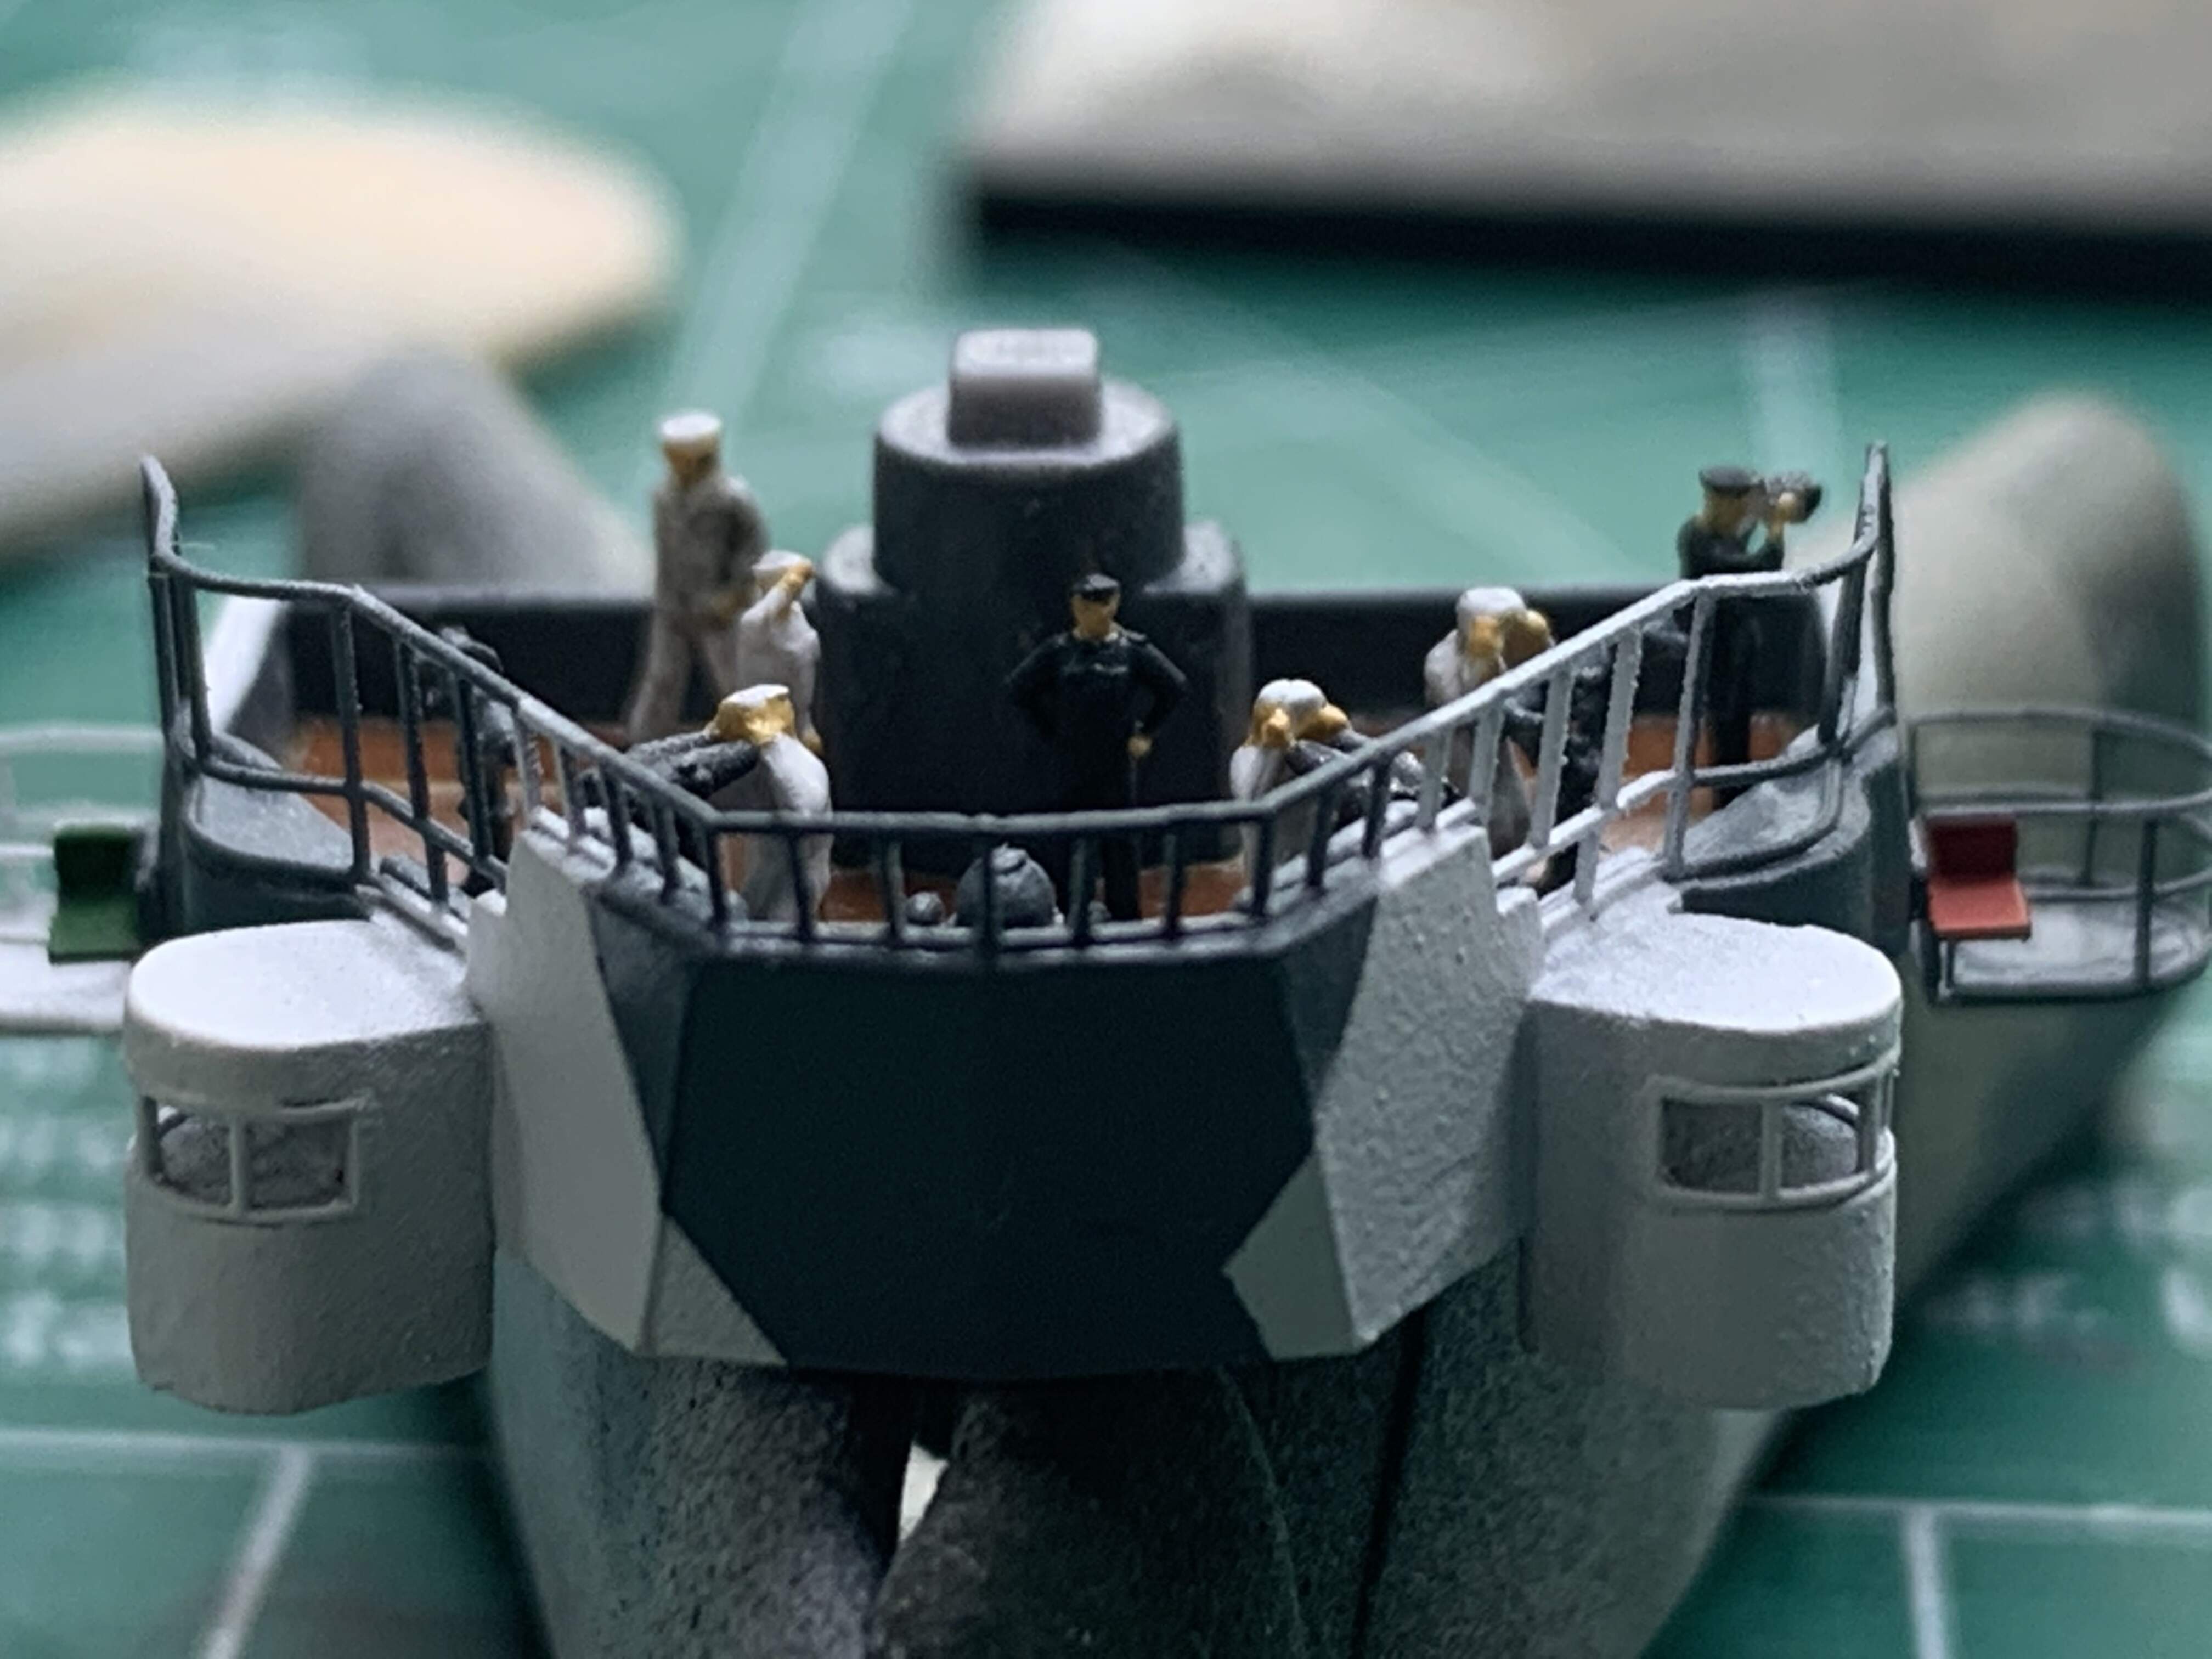
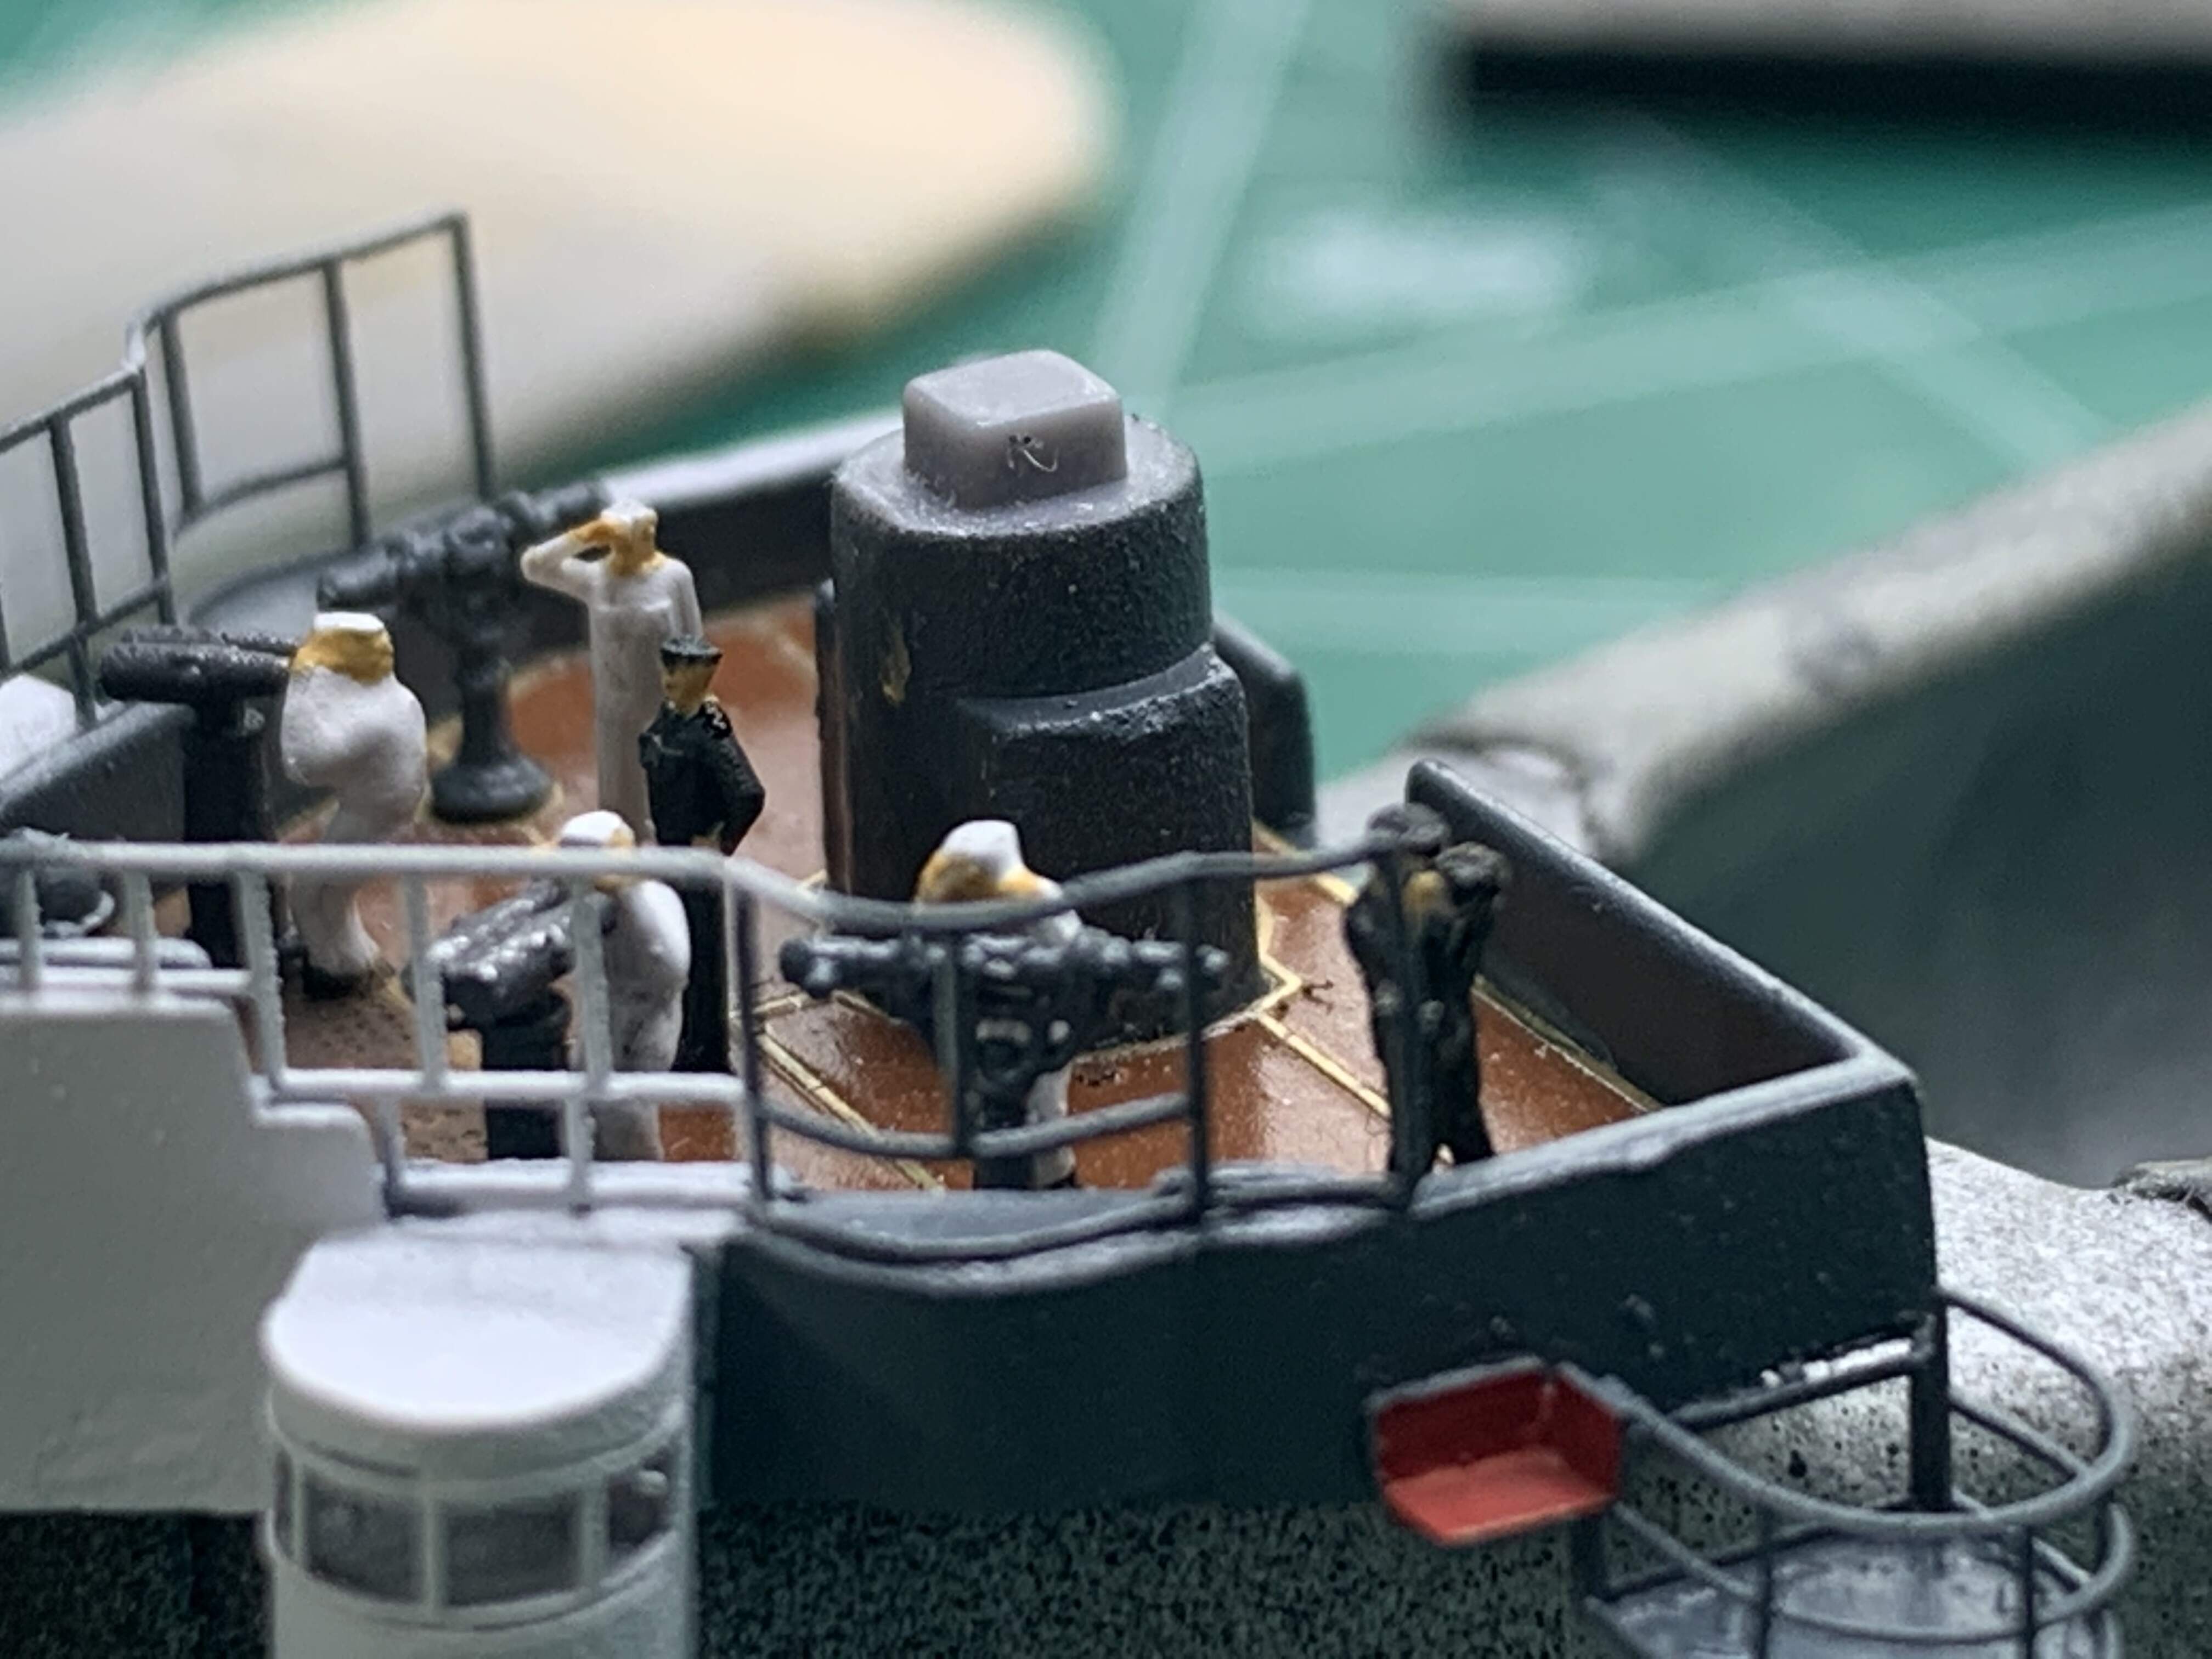
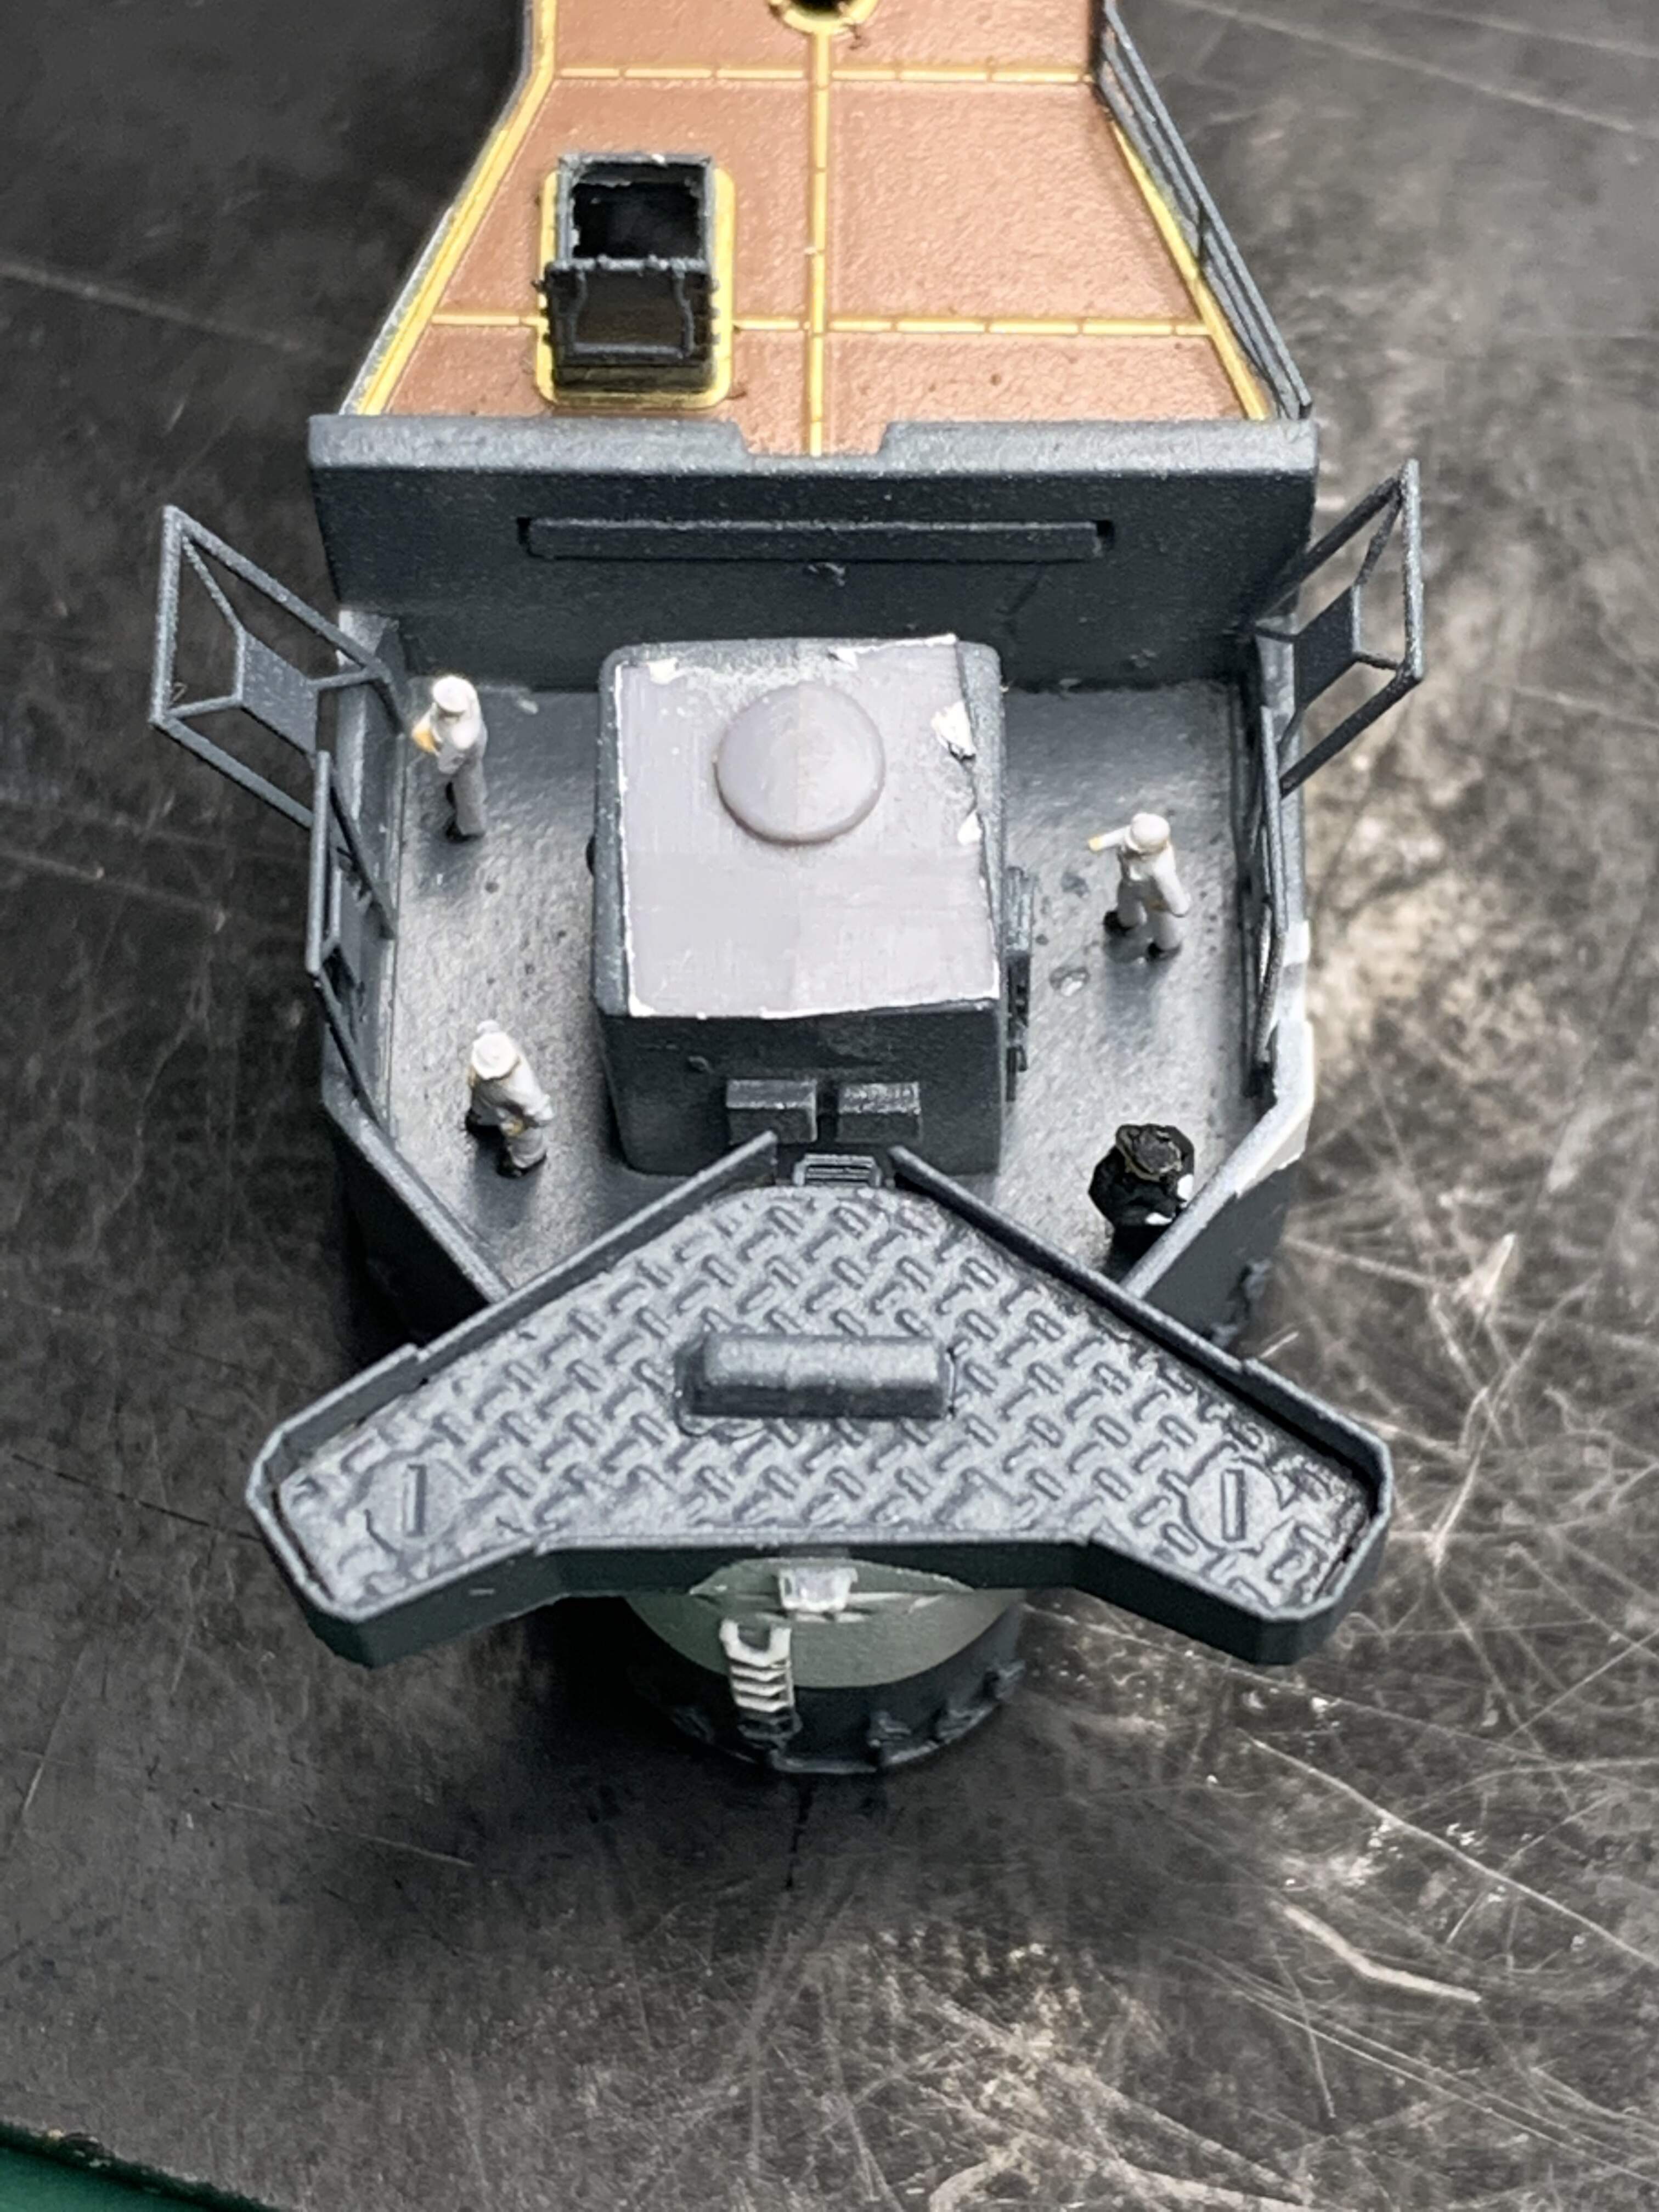
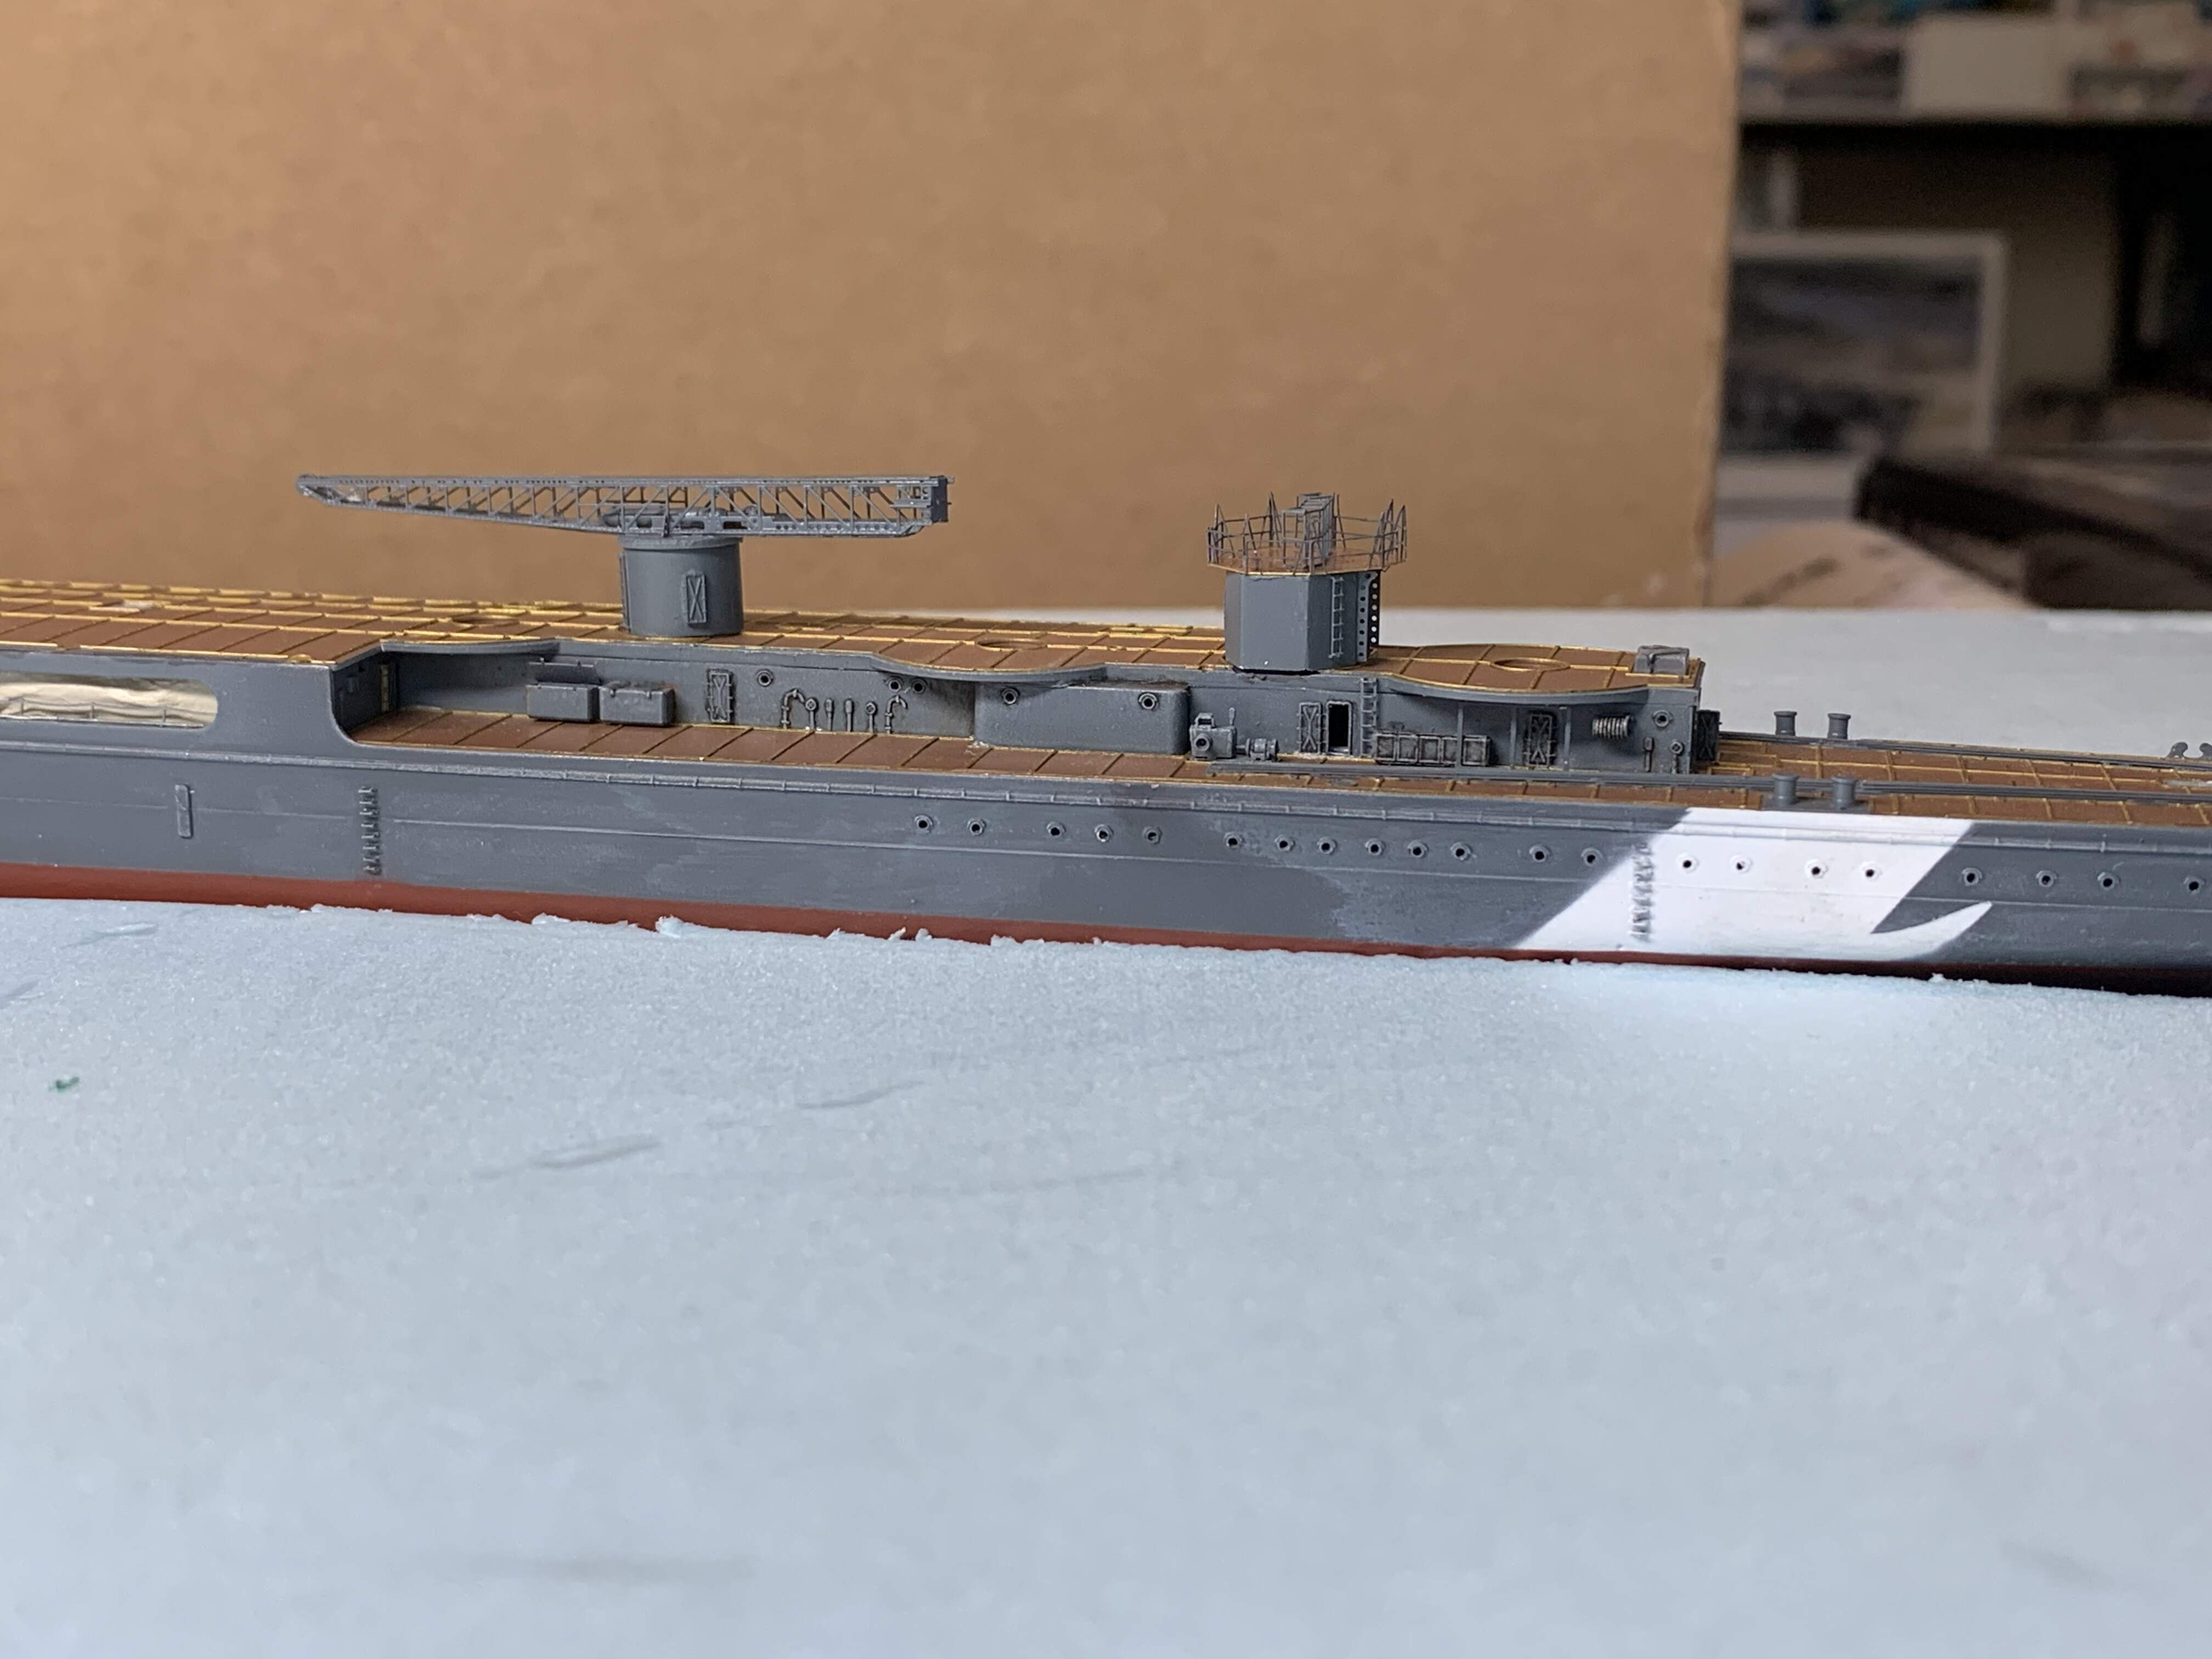
The following pictures are the compass bridge coming together. Thanks for the plans I have I was able to add the two 1.5m Range Finders. The Tama instructions indicate binoculars and no range finders
The figures are a combination of Fujimi, North Star and Black Cat
Looks awesome! Great to see your back at this build again!
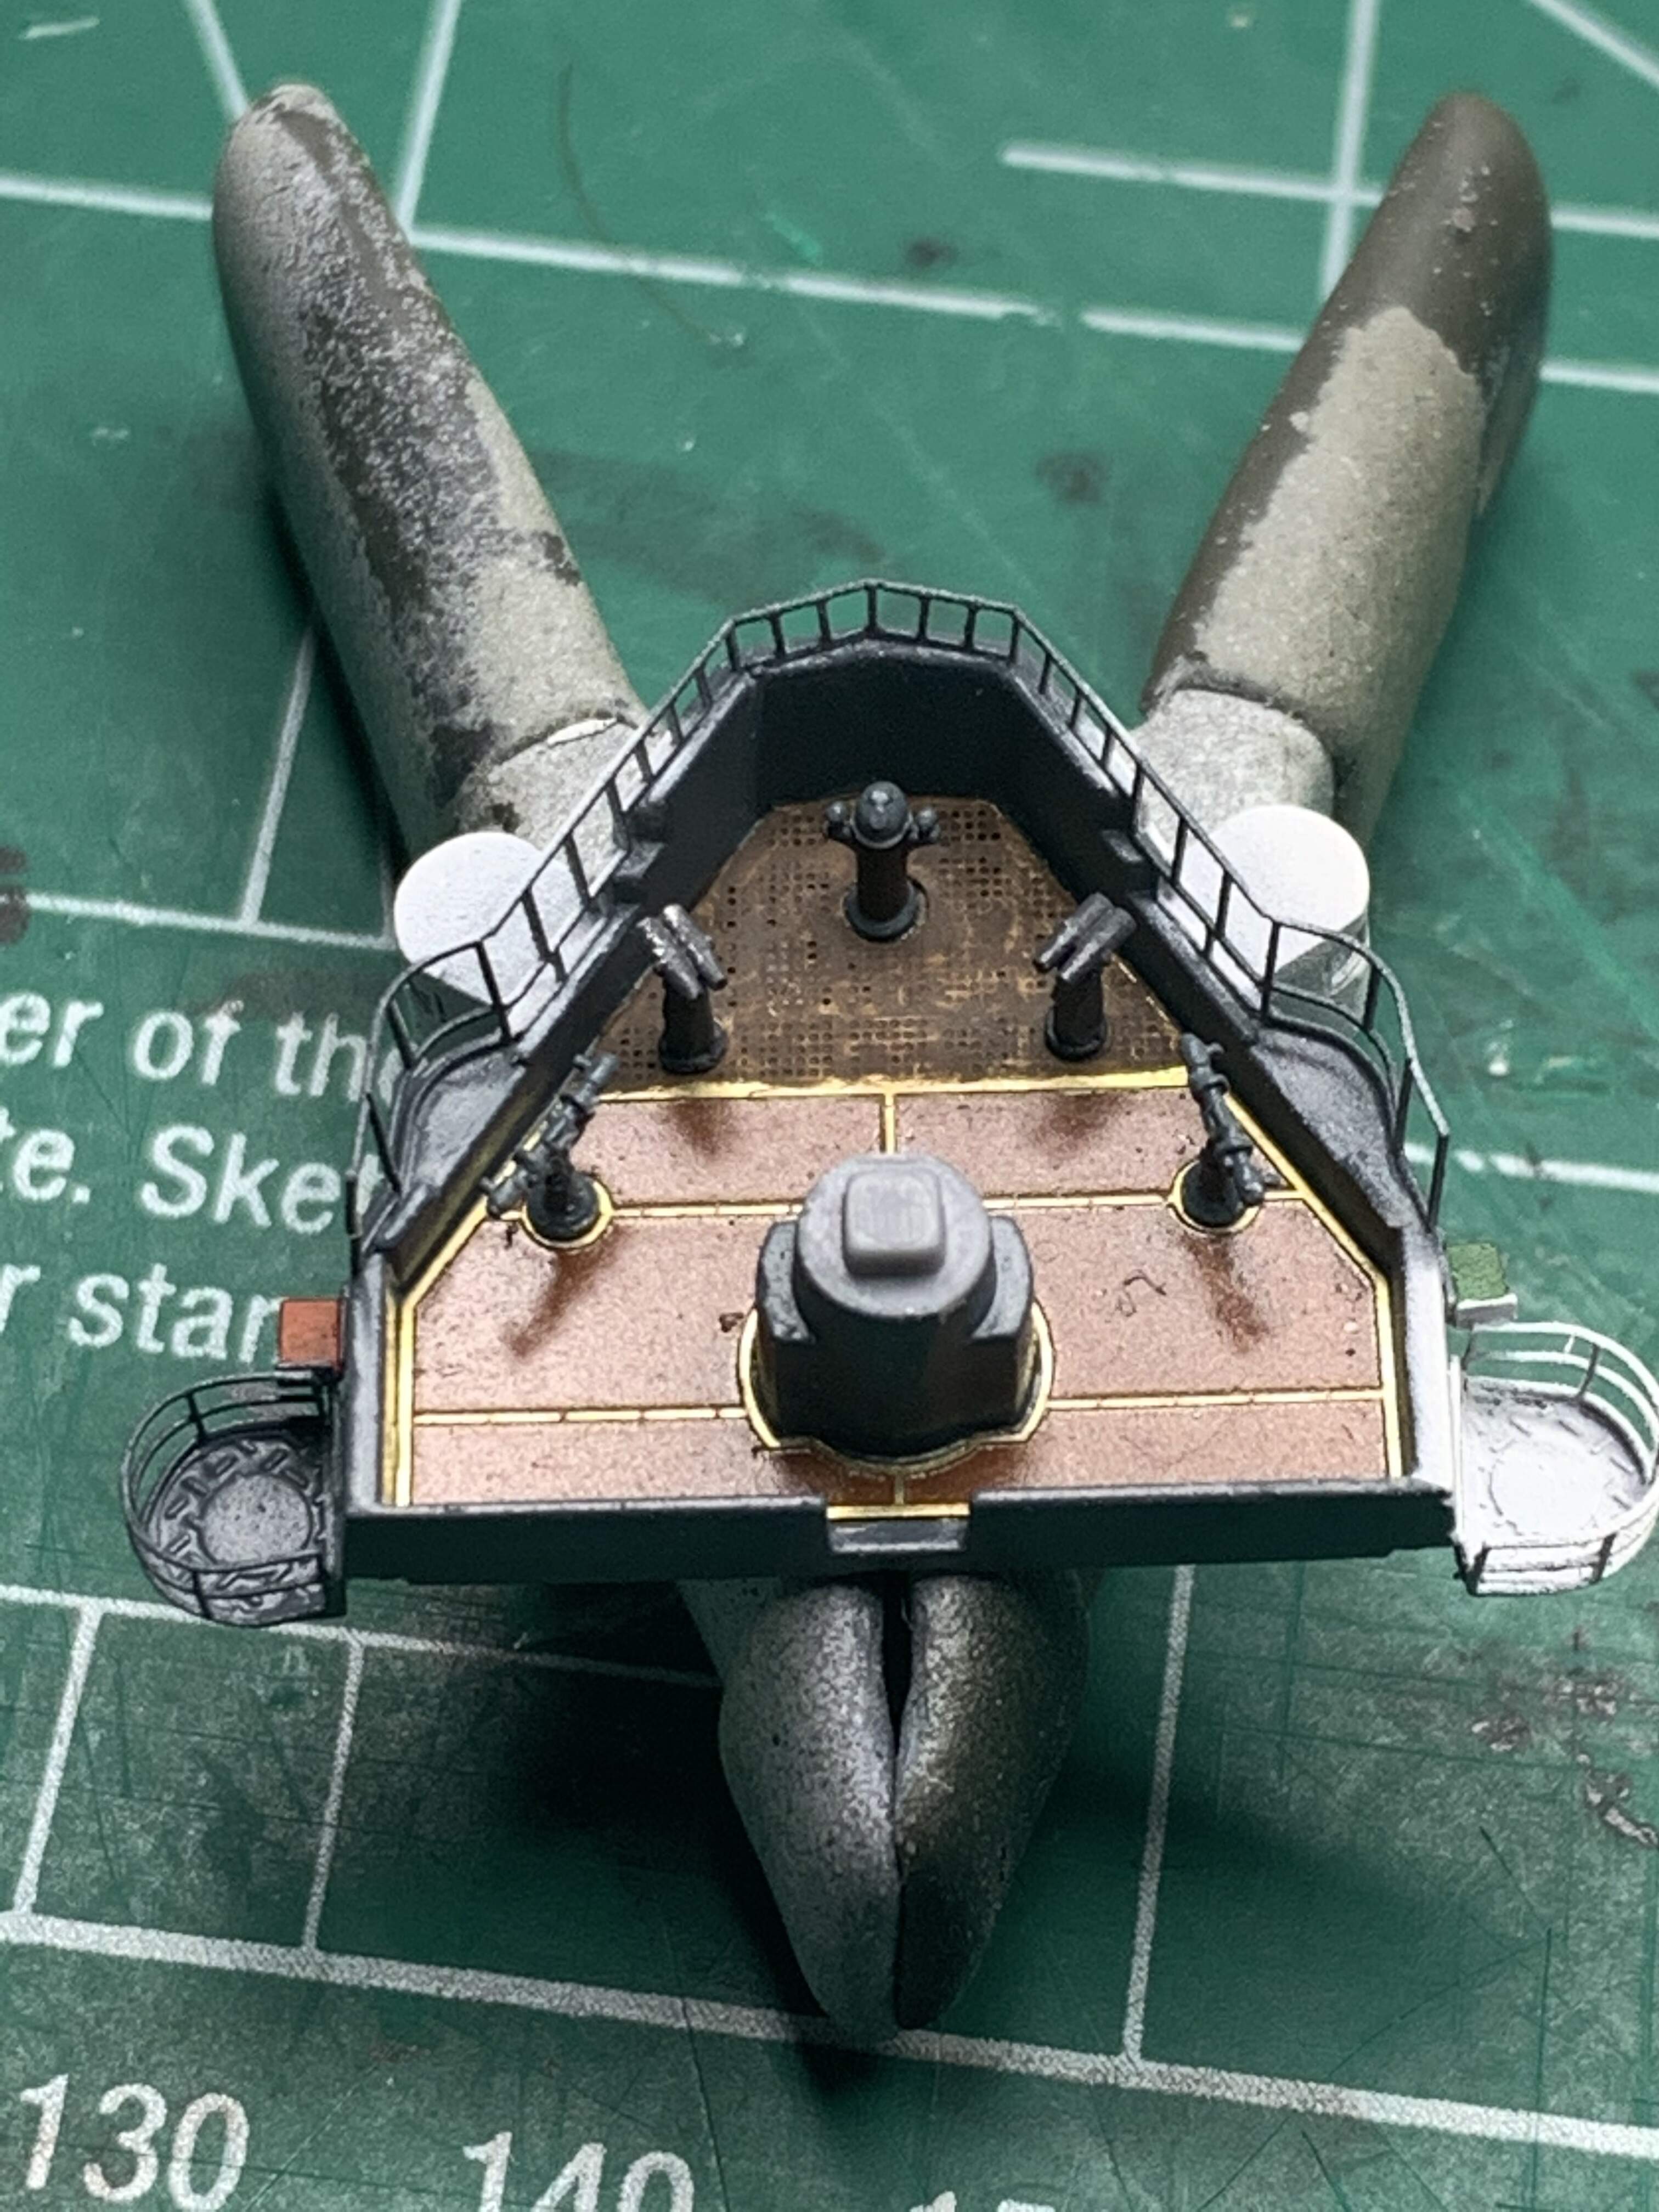
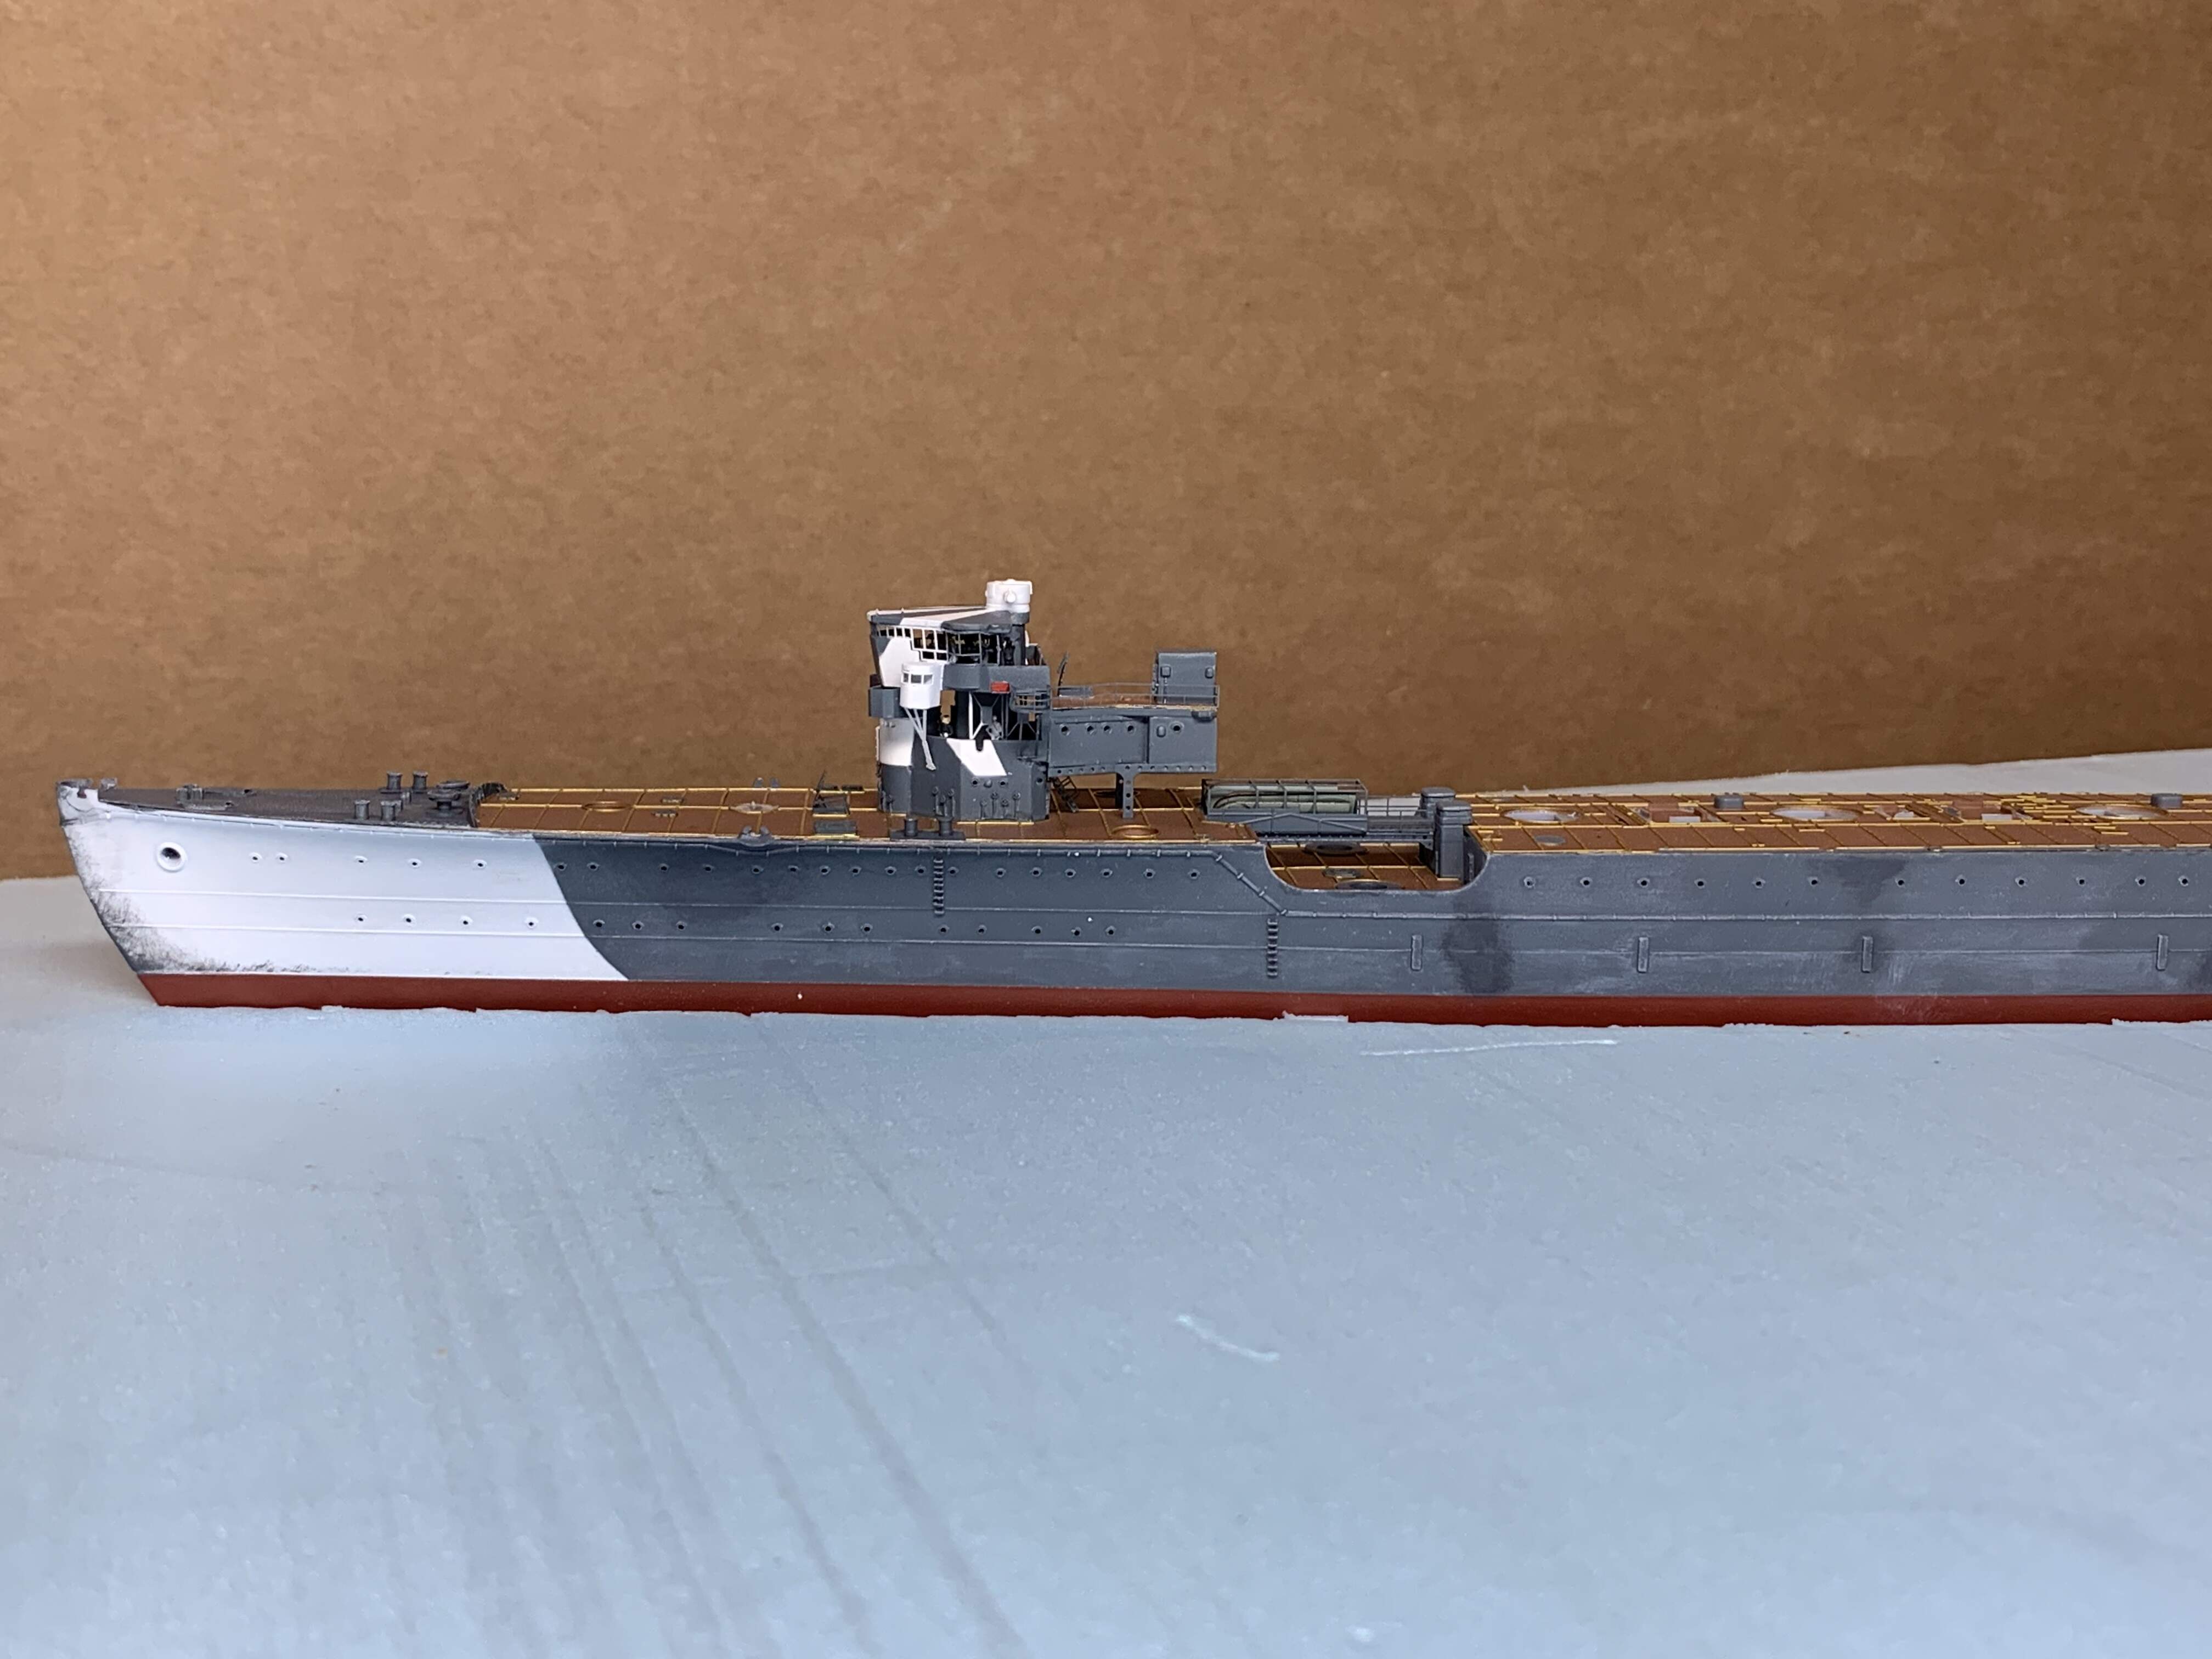
Some pictures taken with everything dry fitted. Starting to look like a ship
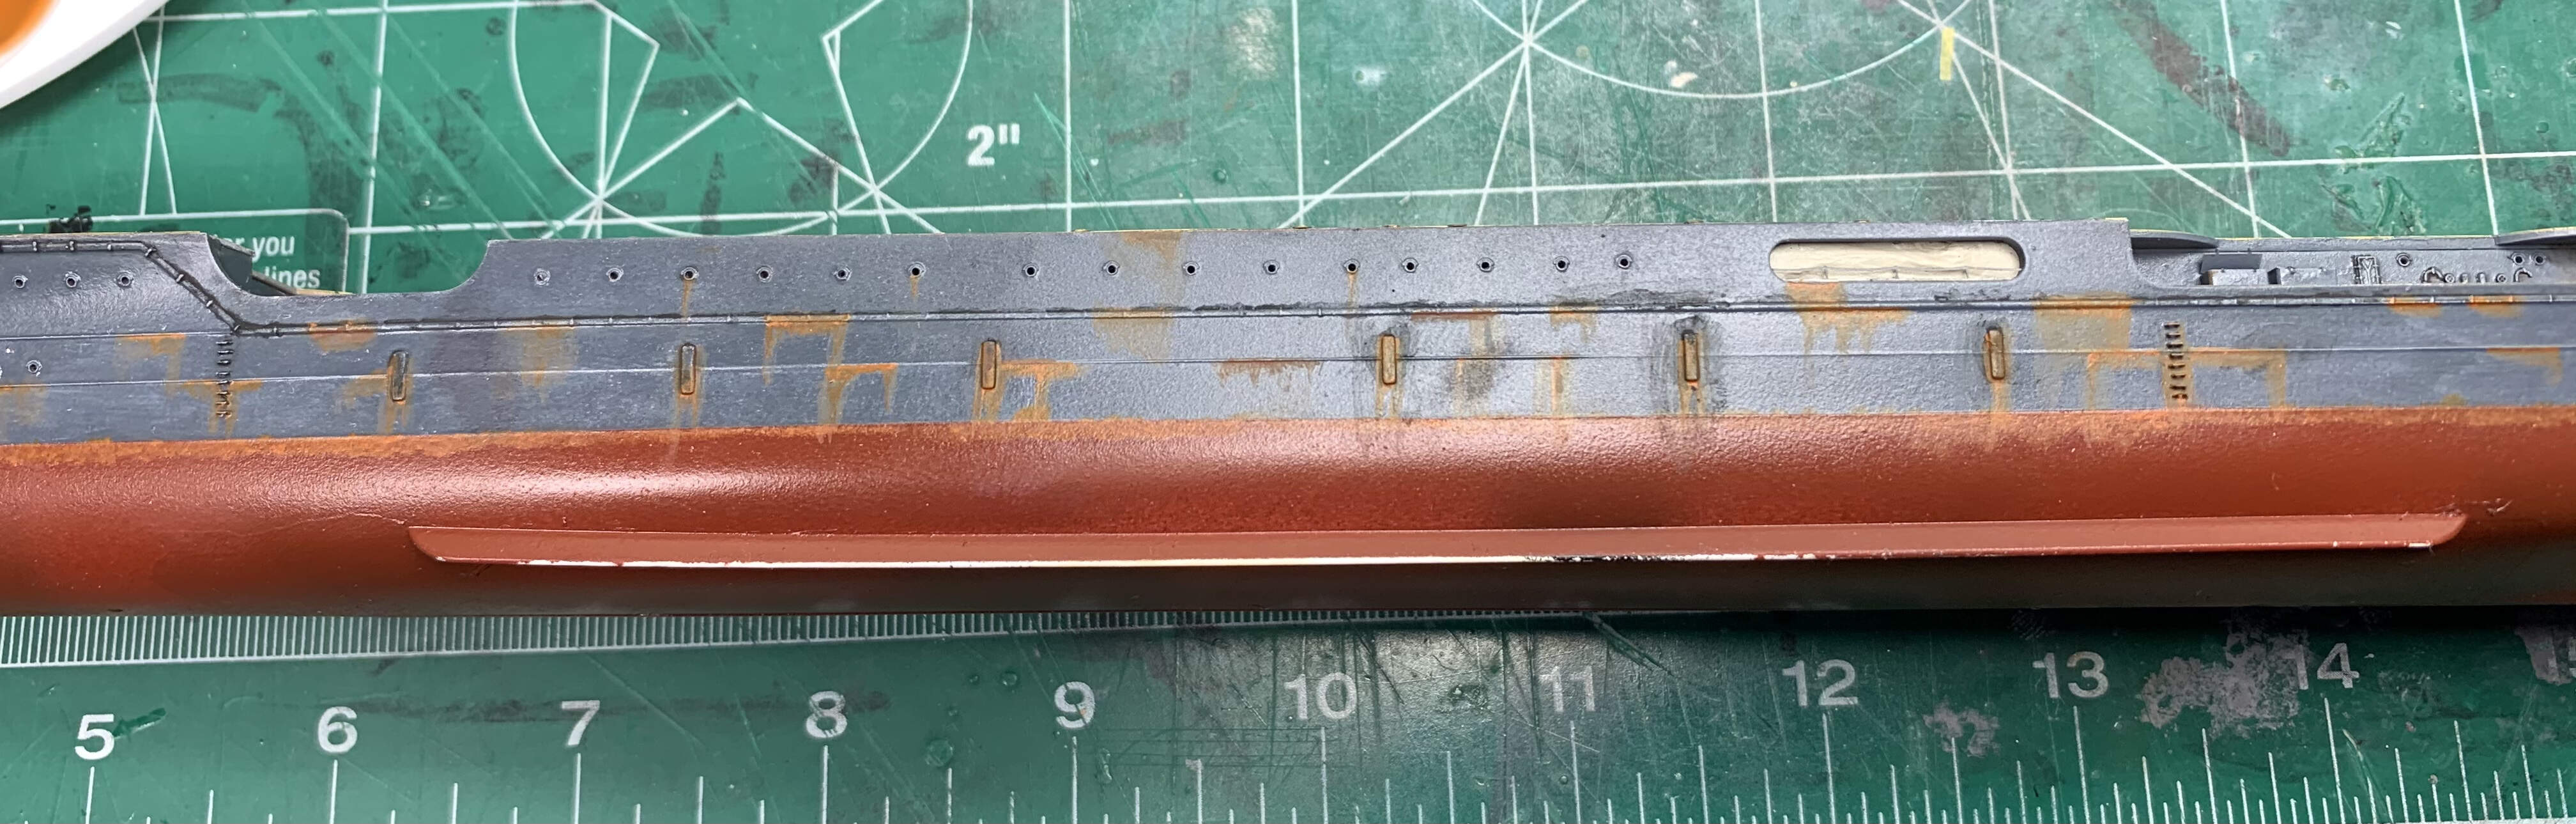
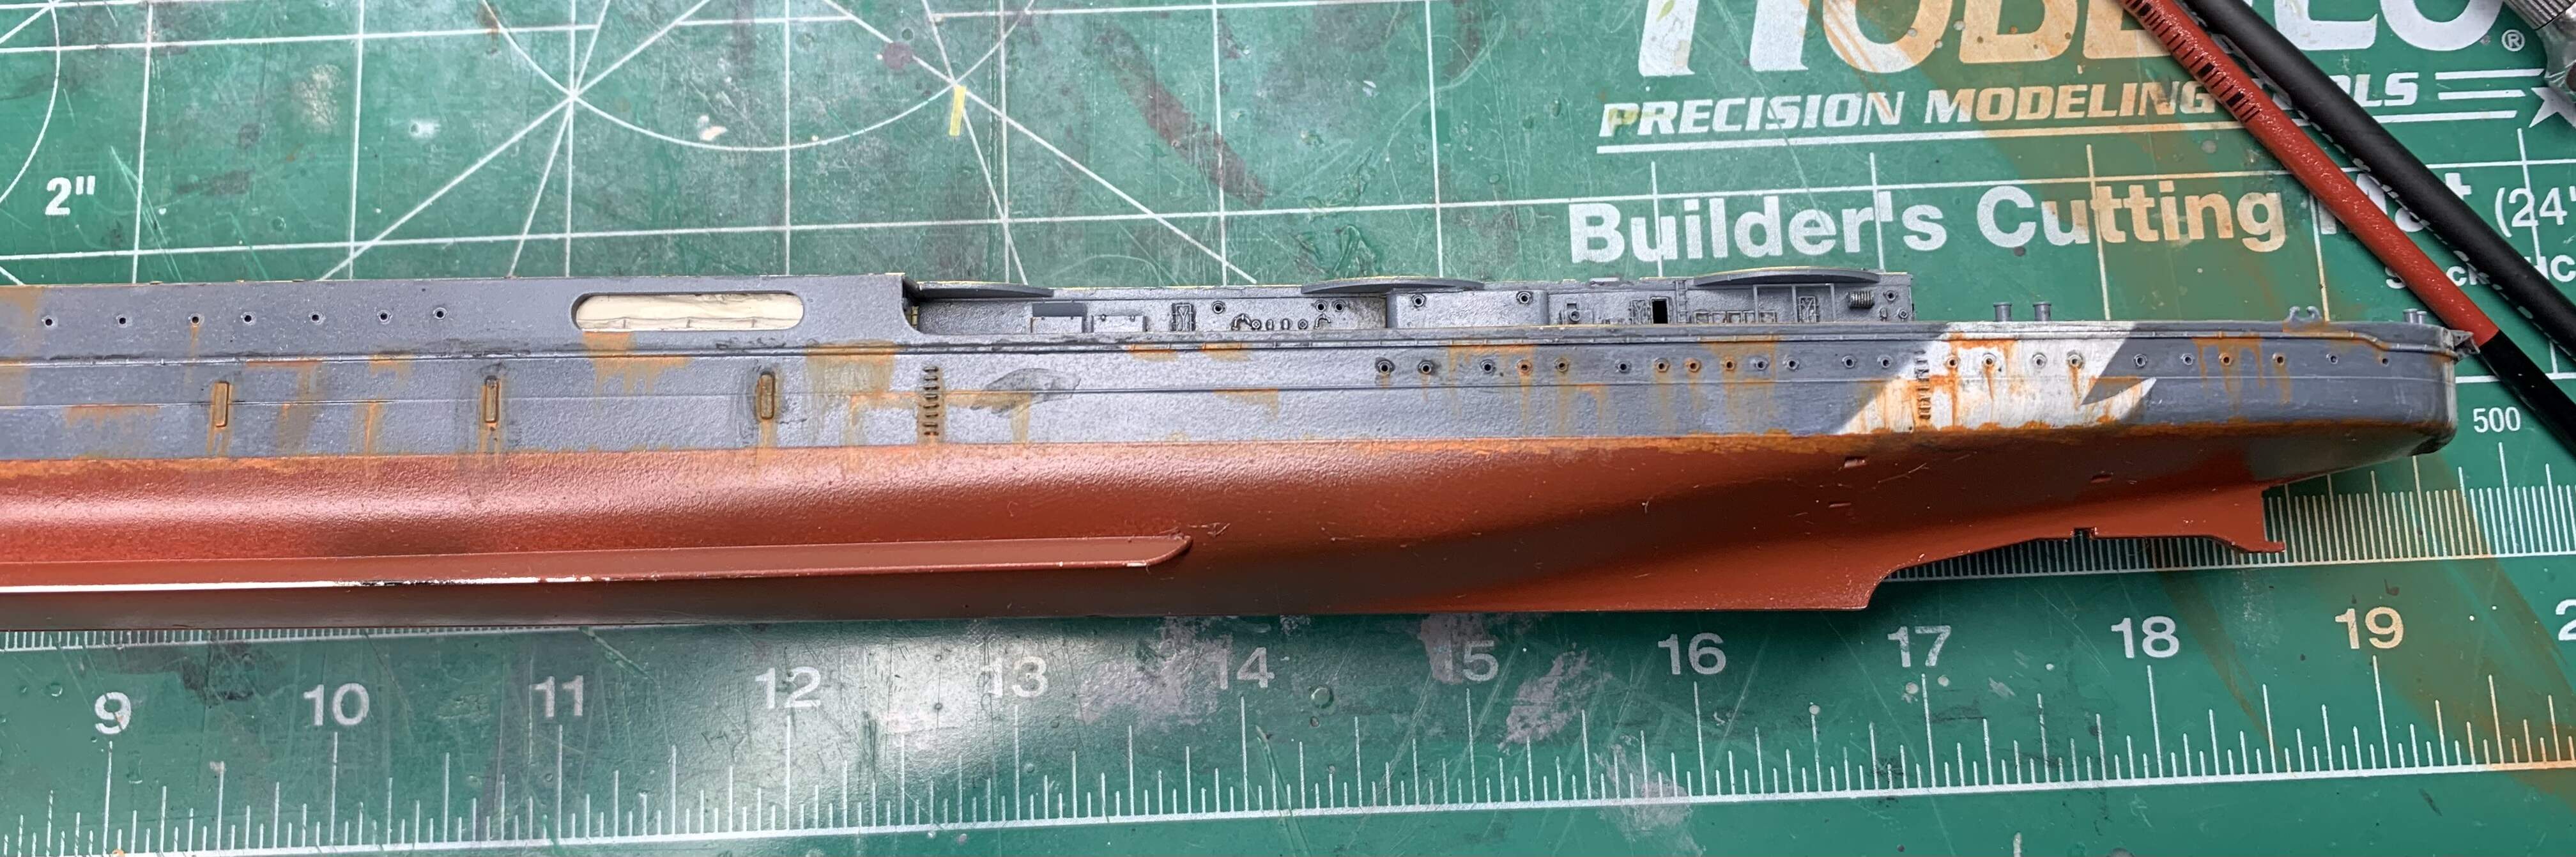
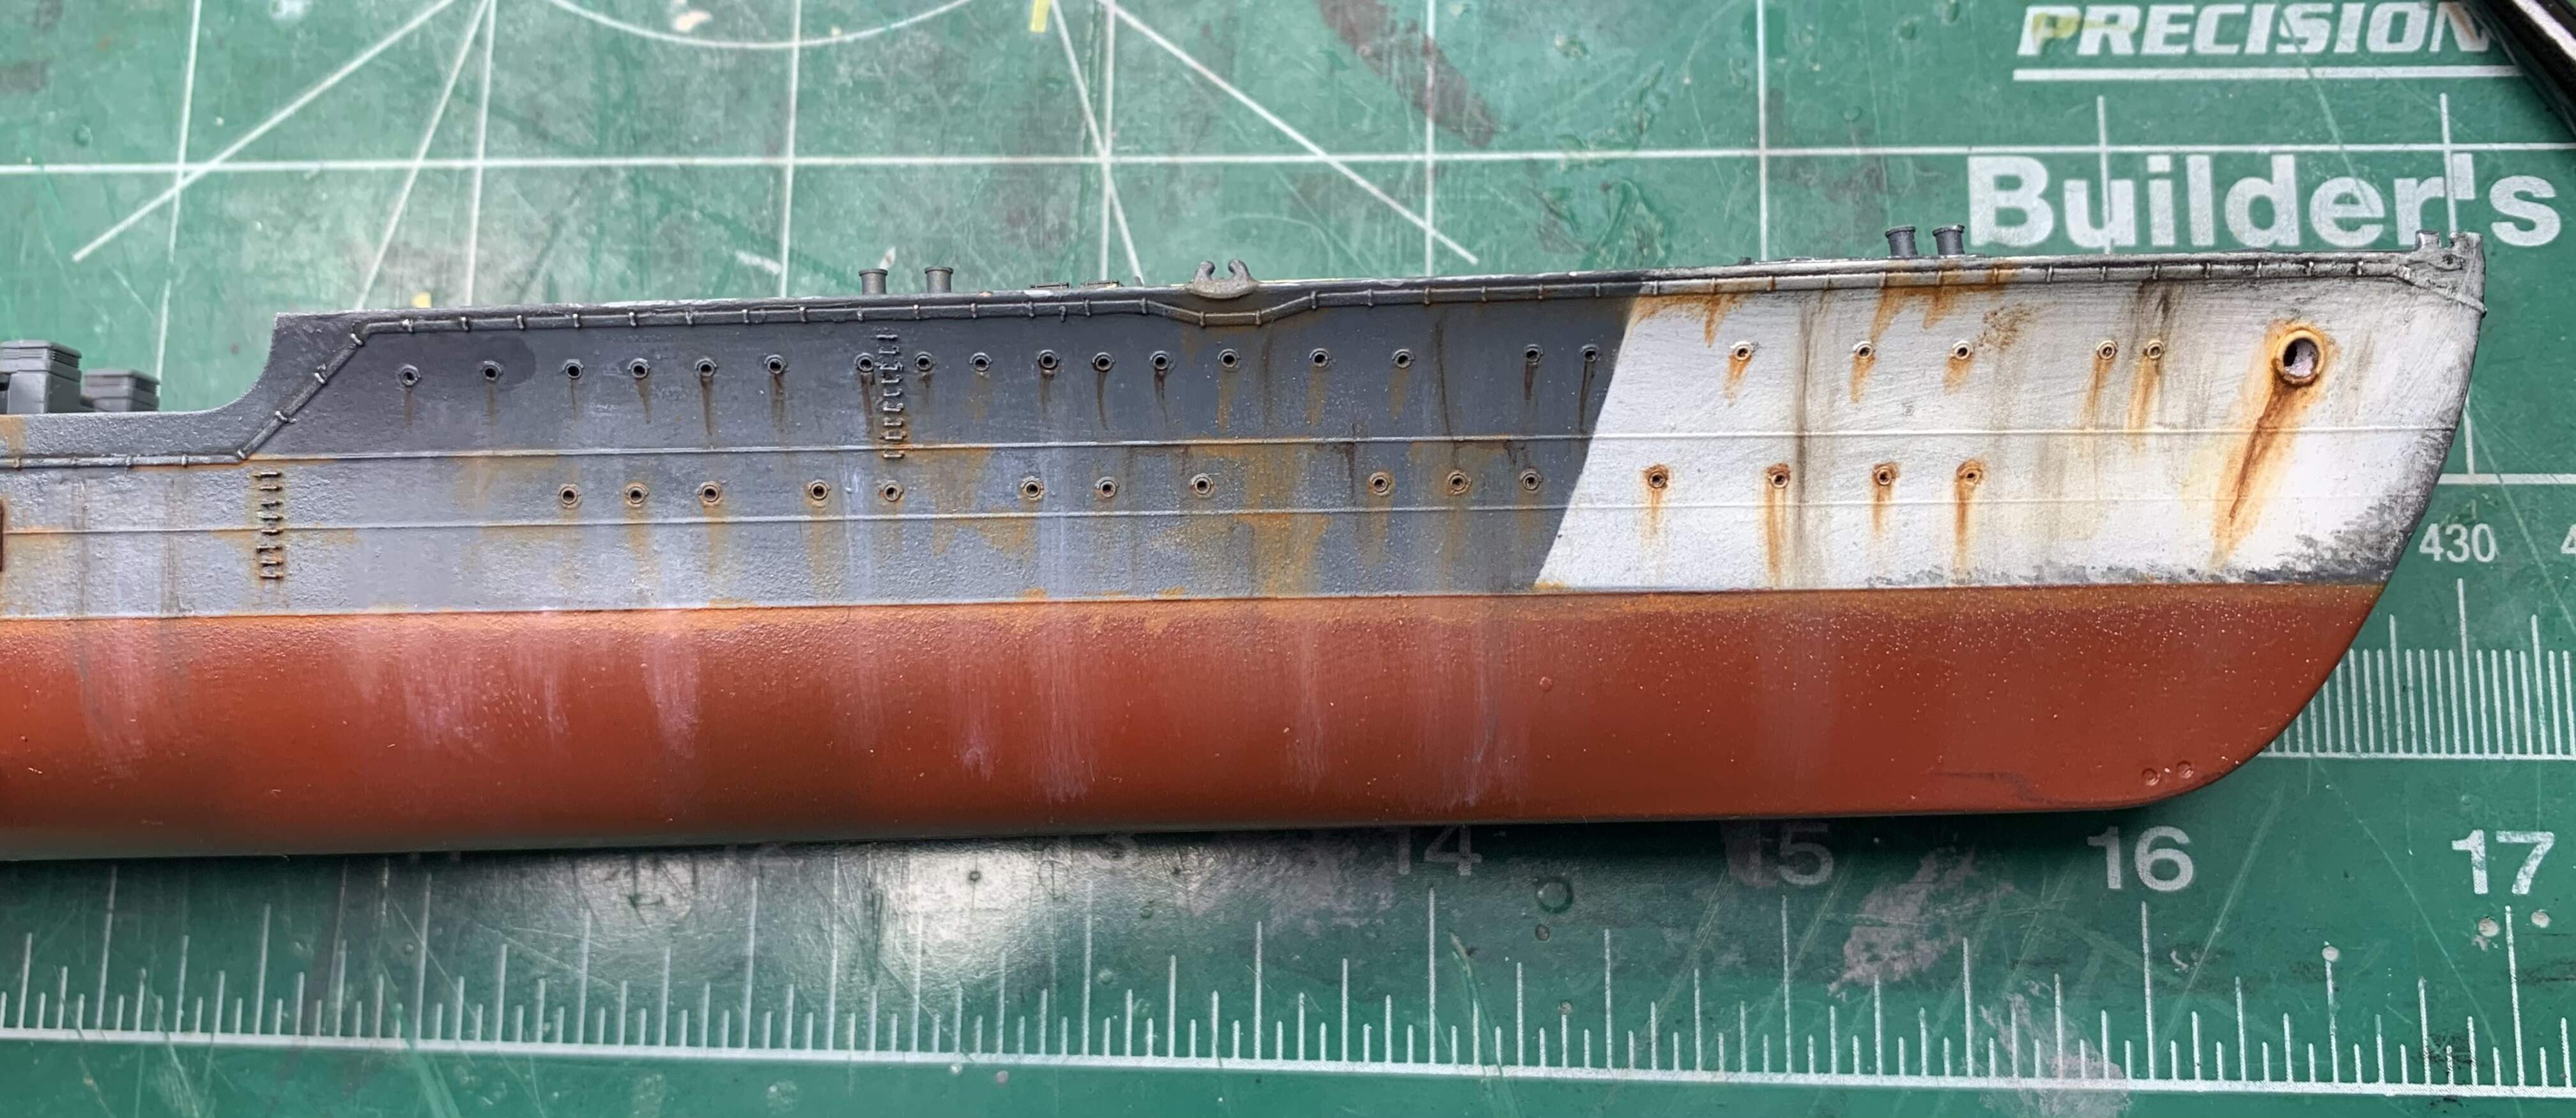
According the the Tama’s Tabular of Movement on the Combined Fleet page, the Tama continued to operate for over a year without refit. So with that in mind and her operating primarily in the North Pacific I wanted to represent her with some extreme wear and tear. I admit the rust might look a bit over done for now, going to tone it down a wee bit more when I apply some oil filters
Veryyyy nice! The bridge detail is stunning and the weathering looks amazing!
David,
Great progress on your Tama! This ship has been a favorite of mine since I built the old 1/700 Tamiya version as a kid long ago…
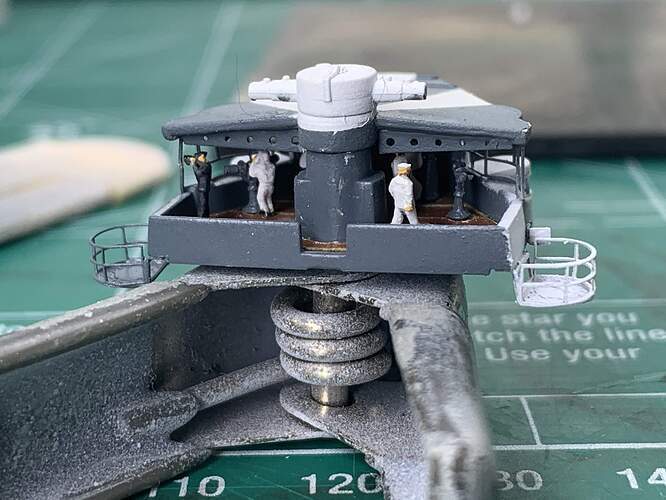
Anyway, I’m very much enjoying your excellent work on this one. I especially appreciate the crew added to the pilothouse. They will be a little difficult to see once things are buttoned up, but they will draw the viewer’s eye into the interior space there. Outstanding!
Great to see you back in business David! Superb work with that intricate bridge detail  looks like you’re approaching the finish line.
Marty
Thank you sir - work has progressed slowly but consistent for the most part. I hope to get a lot done this weekend
@TimReynaga thank you sir - believe it or not that pilot house is as buttoned up as it is going to get so some of the crew will remain visible. Really enjoying this build, just wished I had longer periods of time to work on here
@Panzer_modeler thank you for the kind words. She is coming along at a glacial pace but that’s because real world work prevents me from spending time on the bench.
Thank you all for the kind words. I’ll try to do a better job of keeping this thread updated. More to come soon
David
Great to see this one back on the workbench and getting some TLC… 
Are you to add heavy scum line weathering if going in for a “used” look?