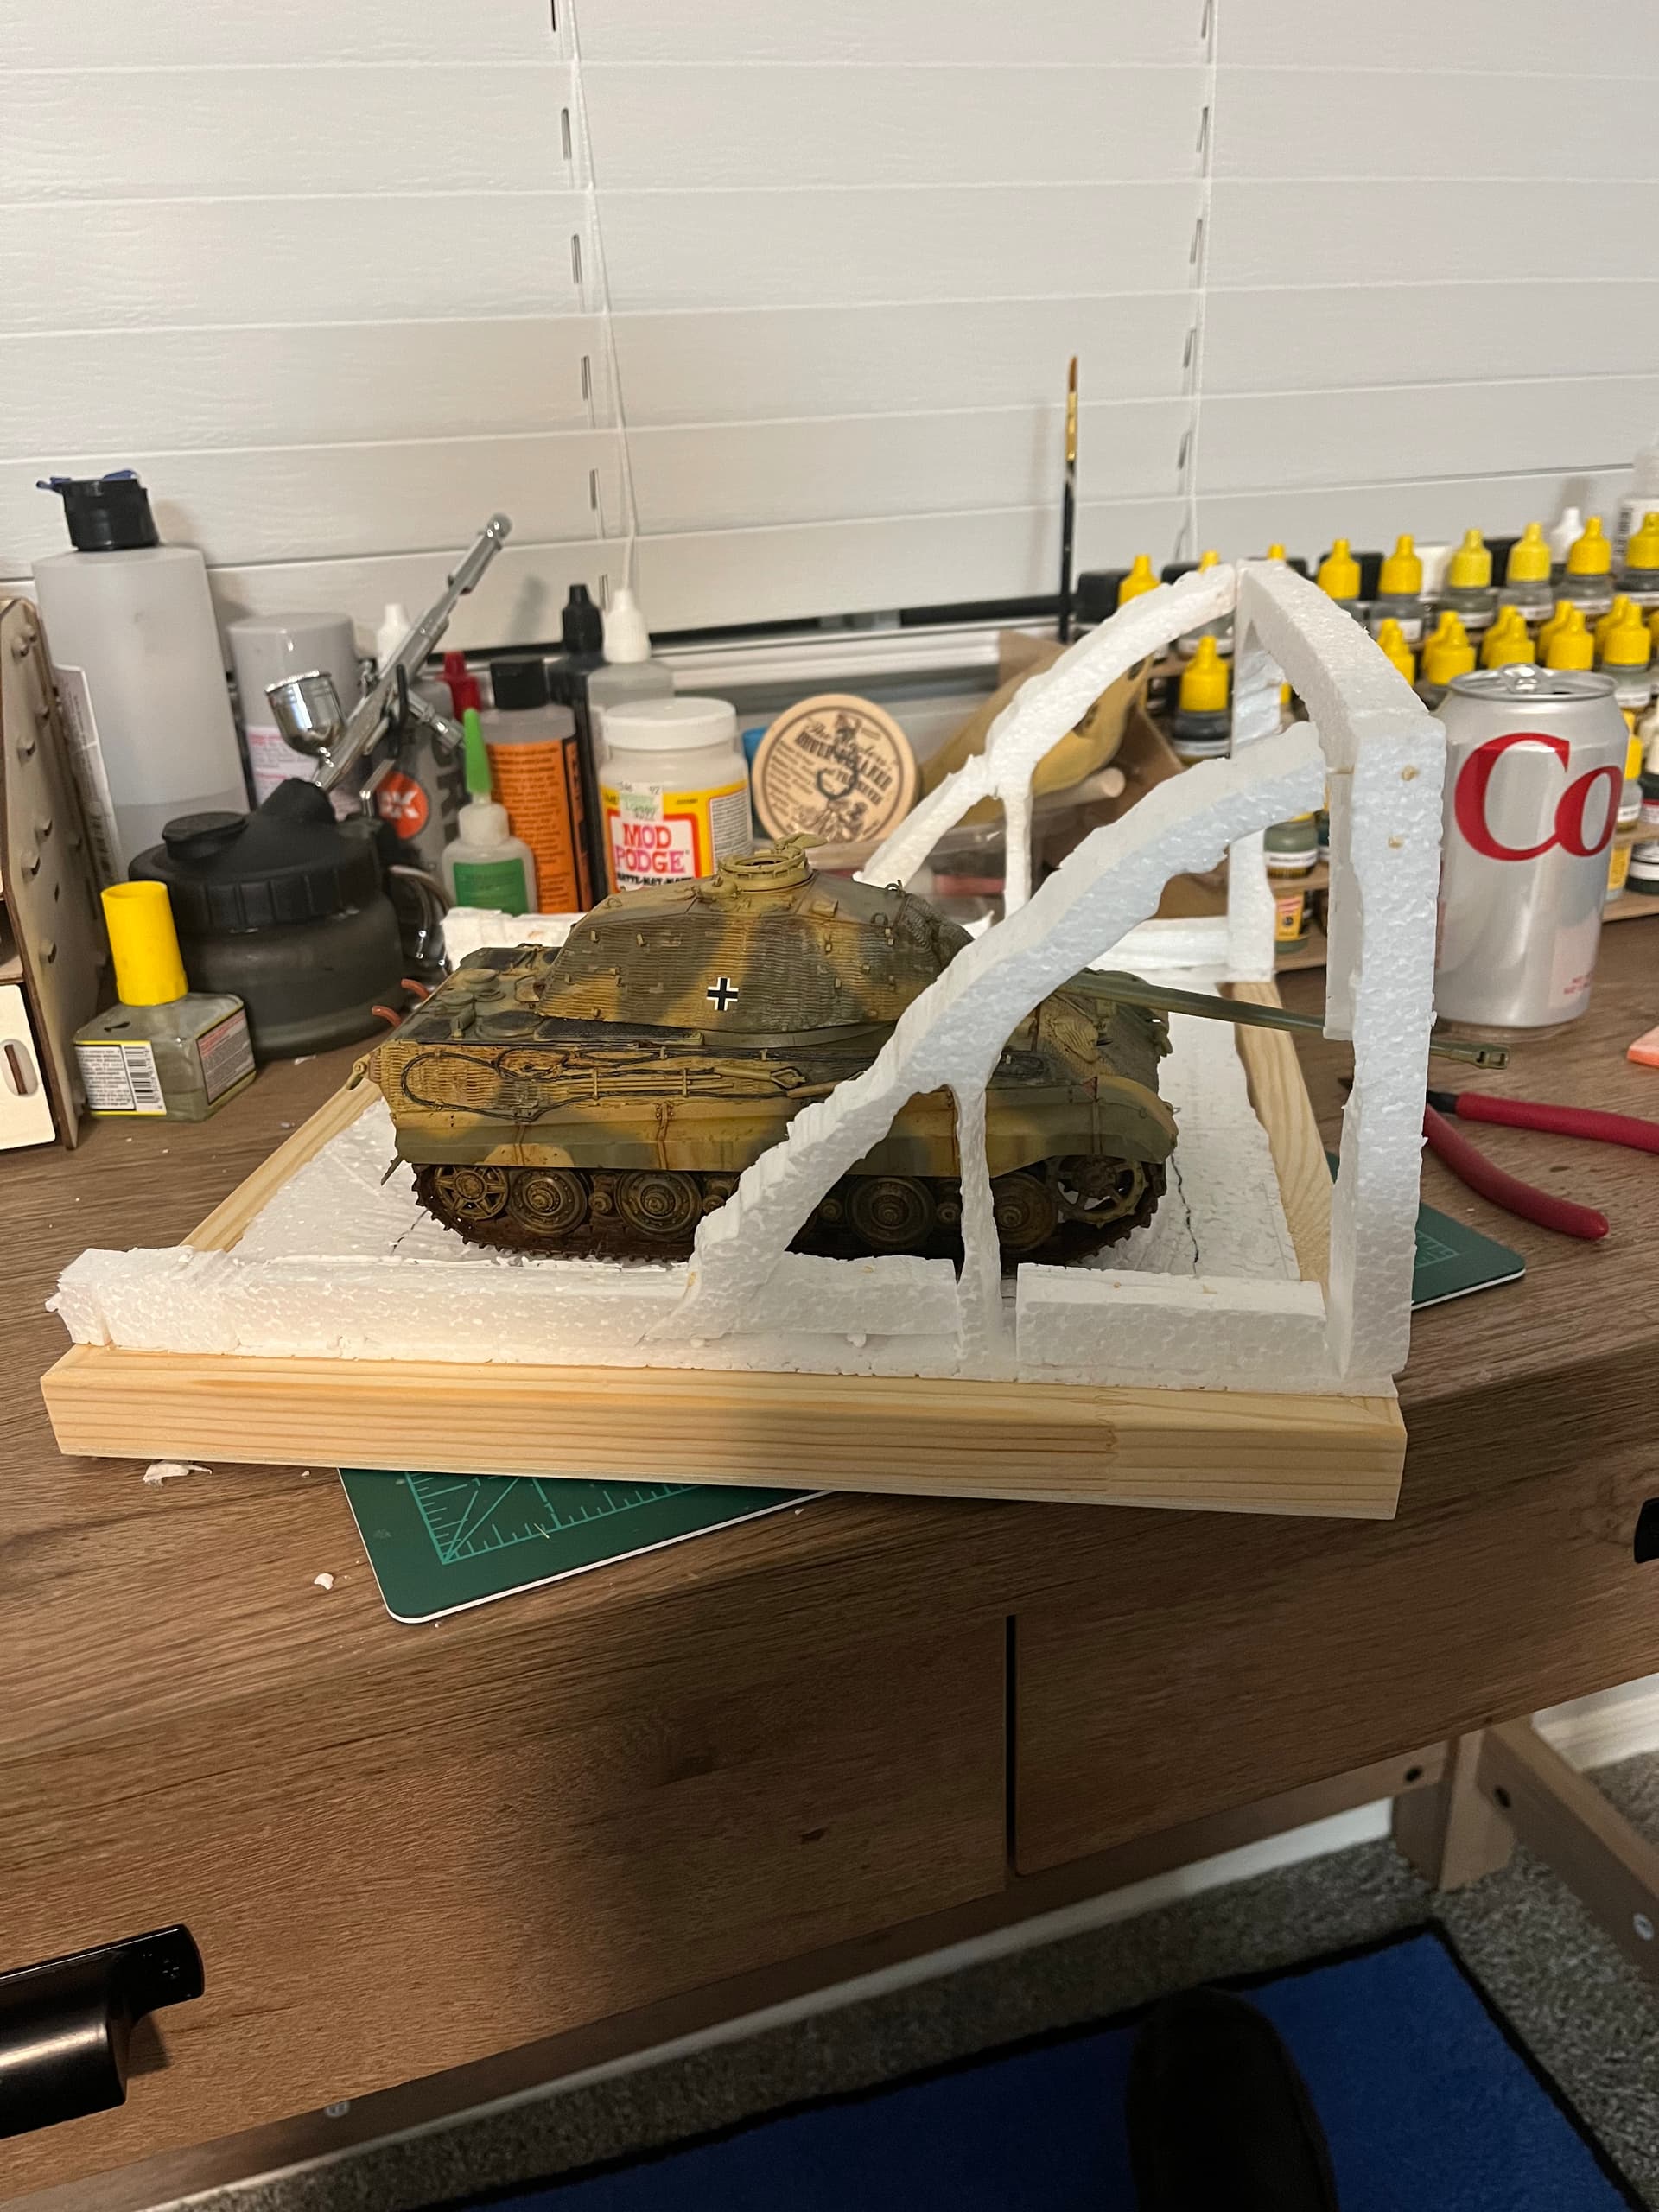
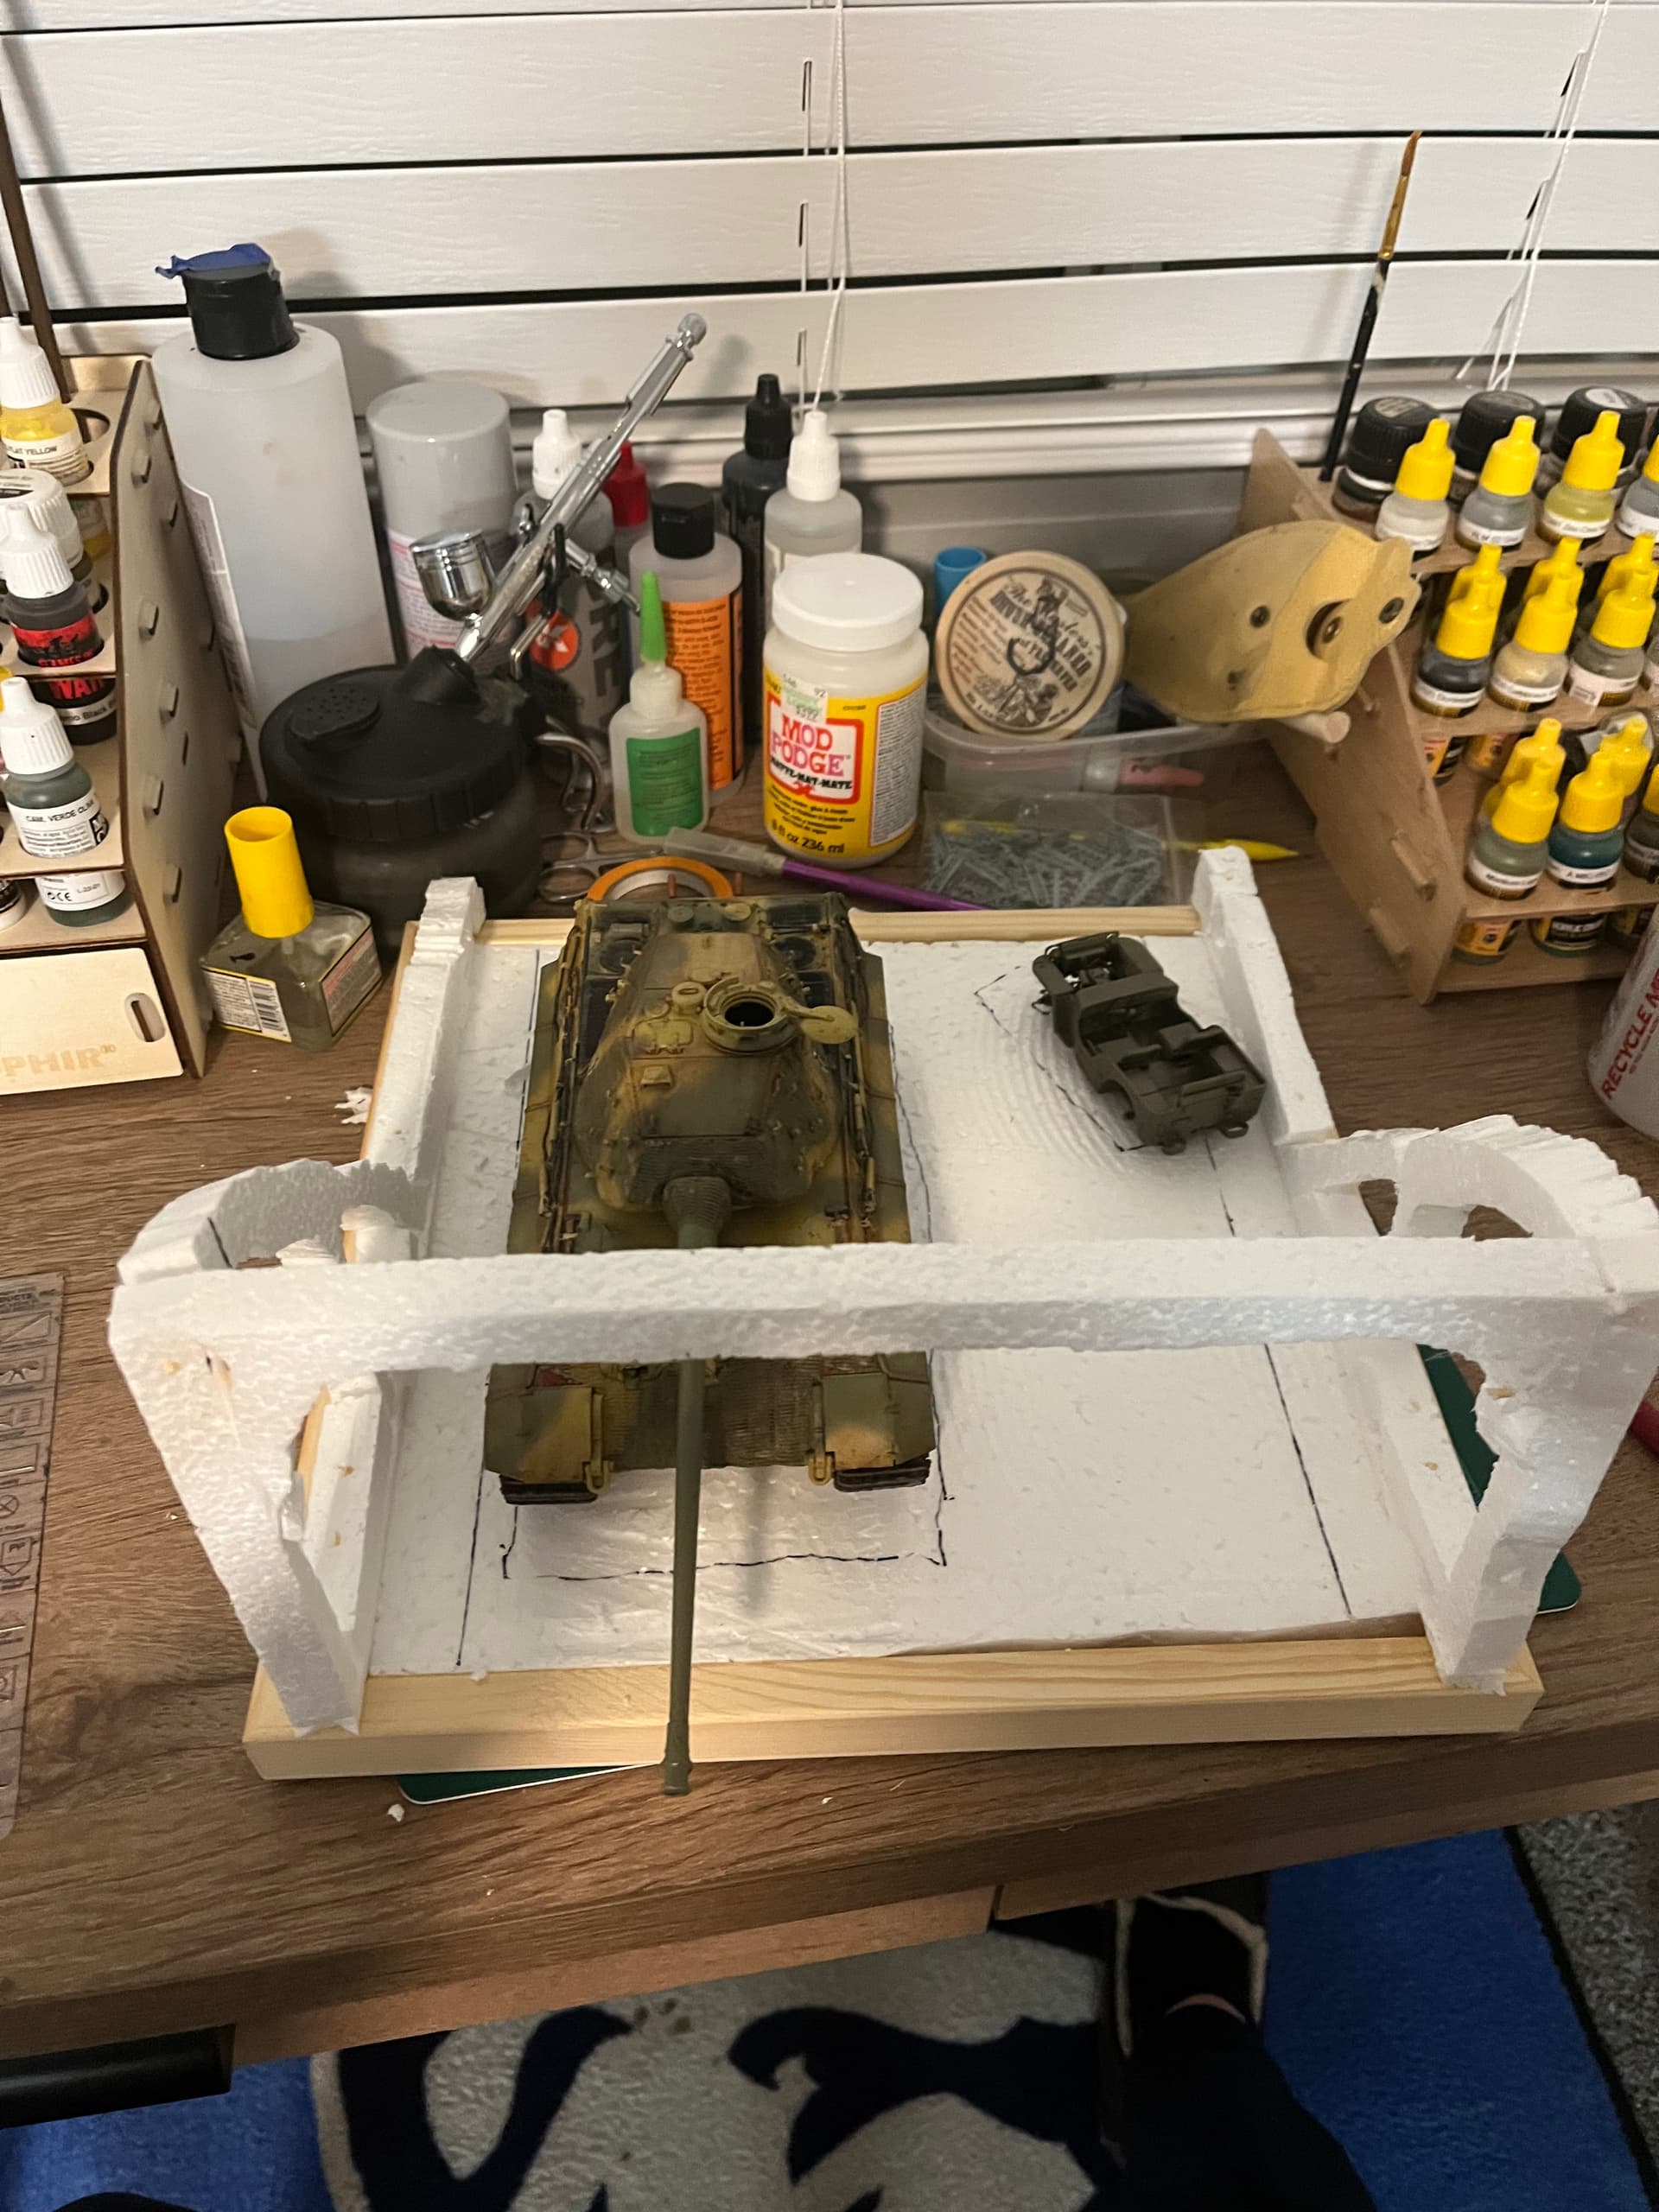
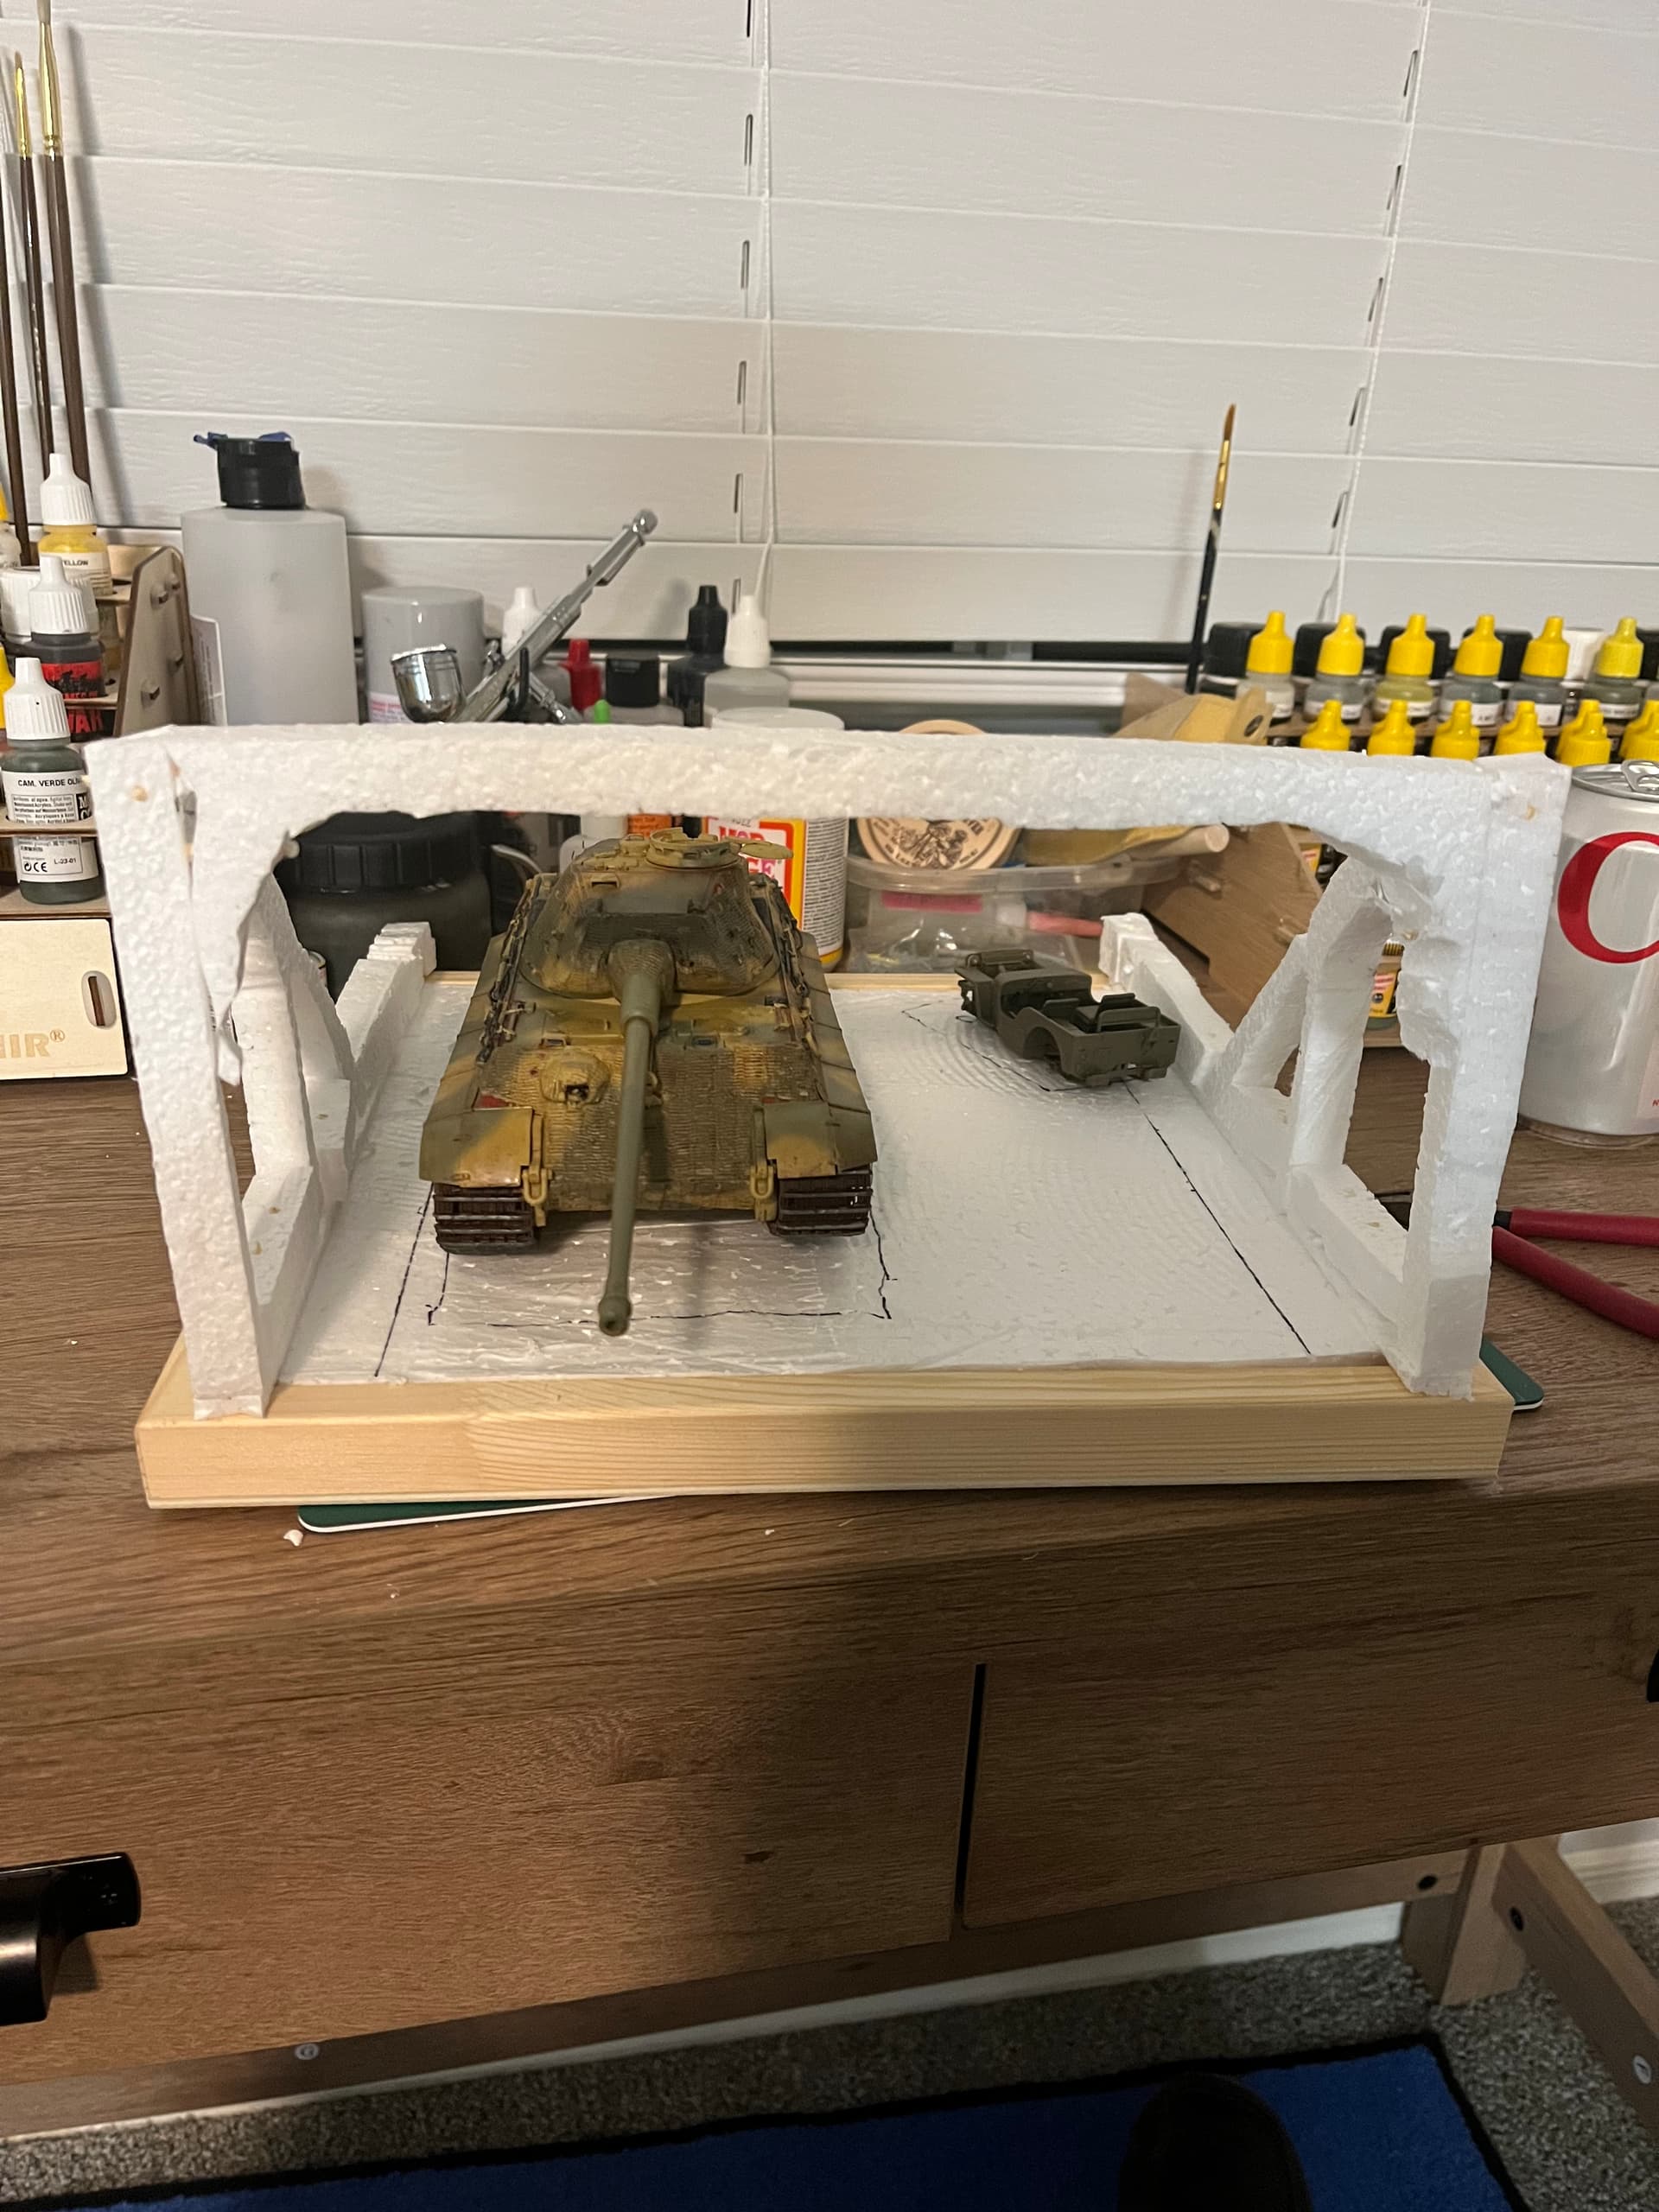
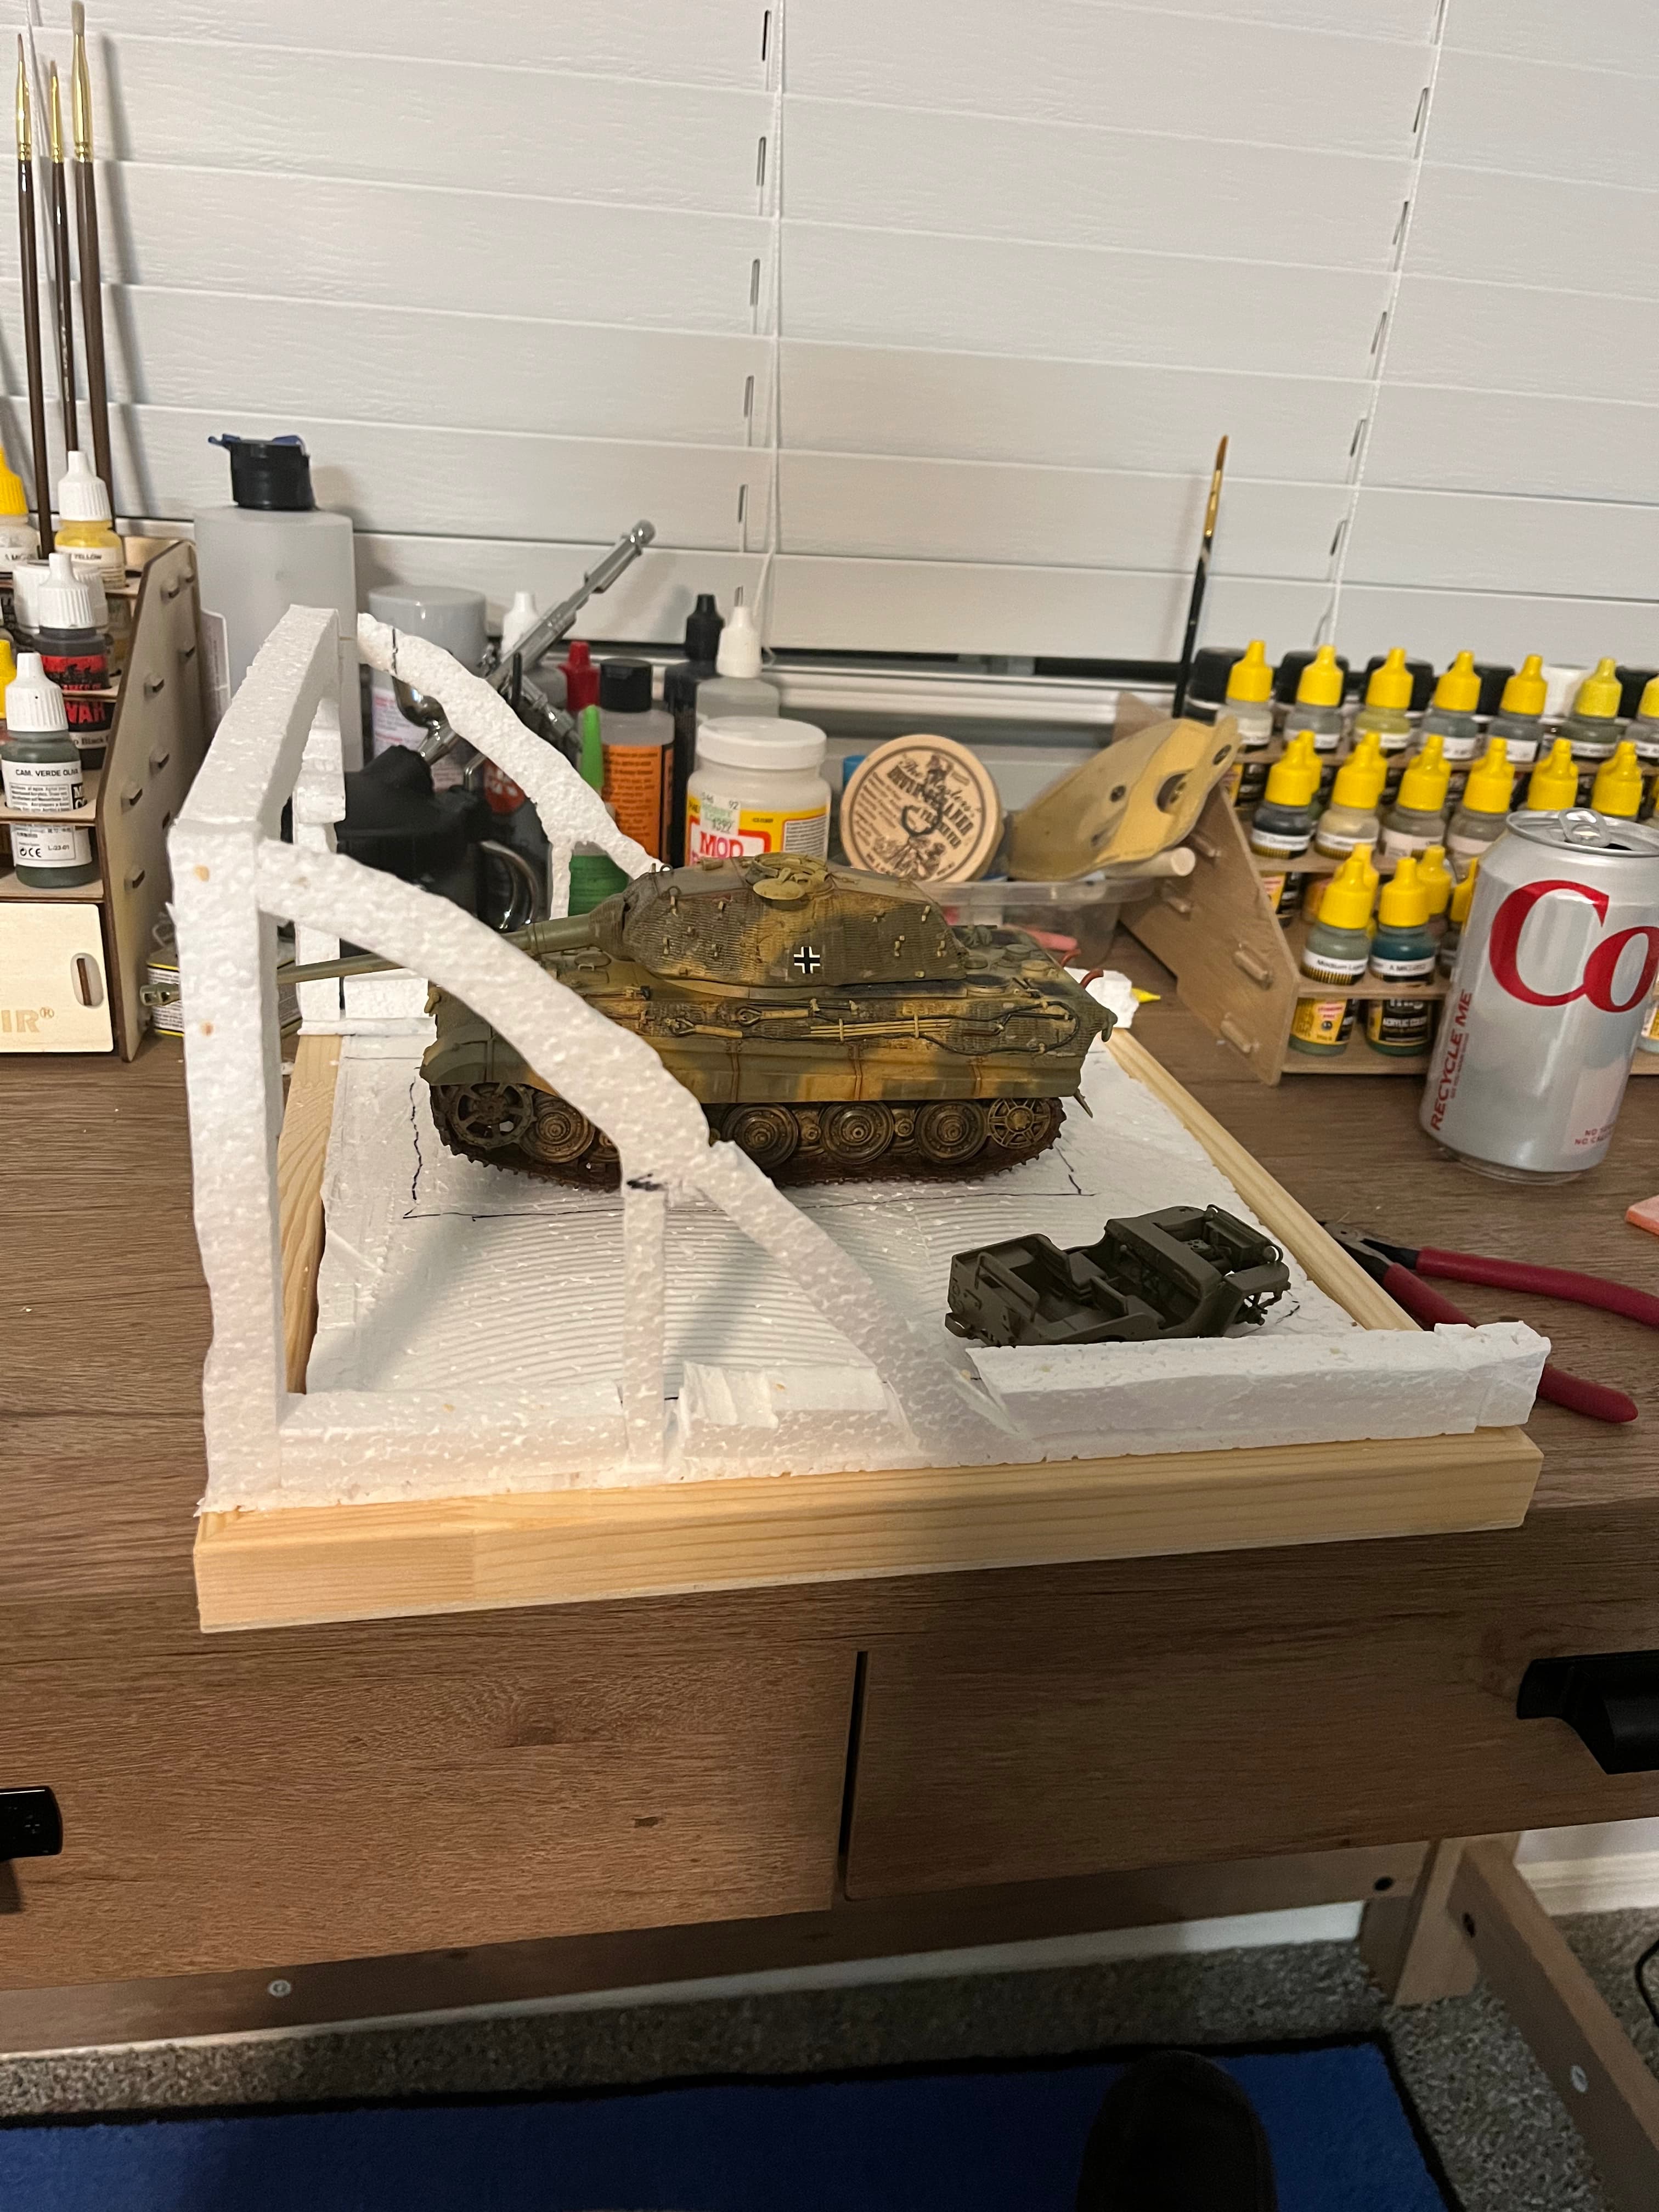
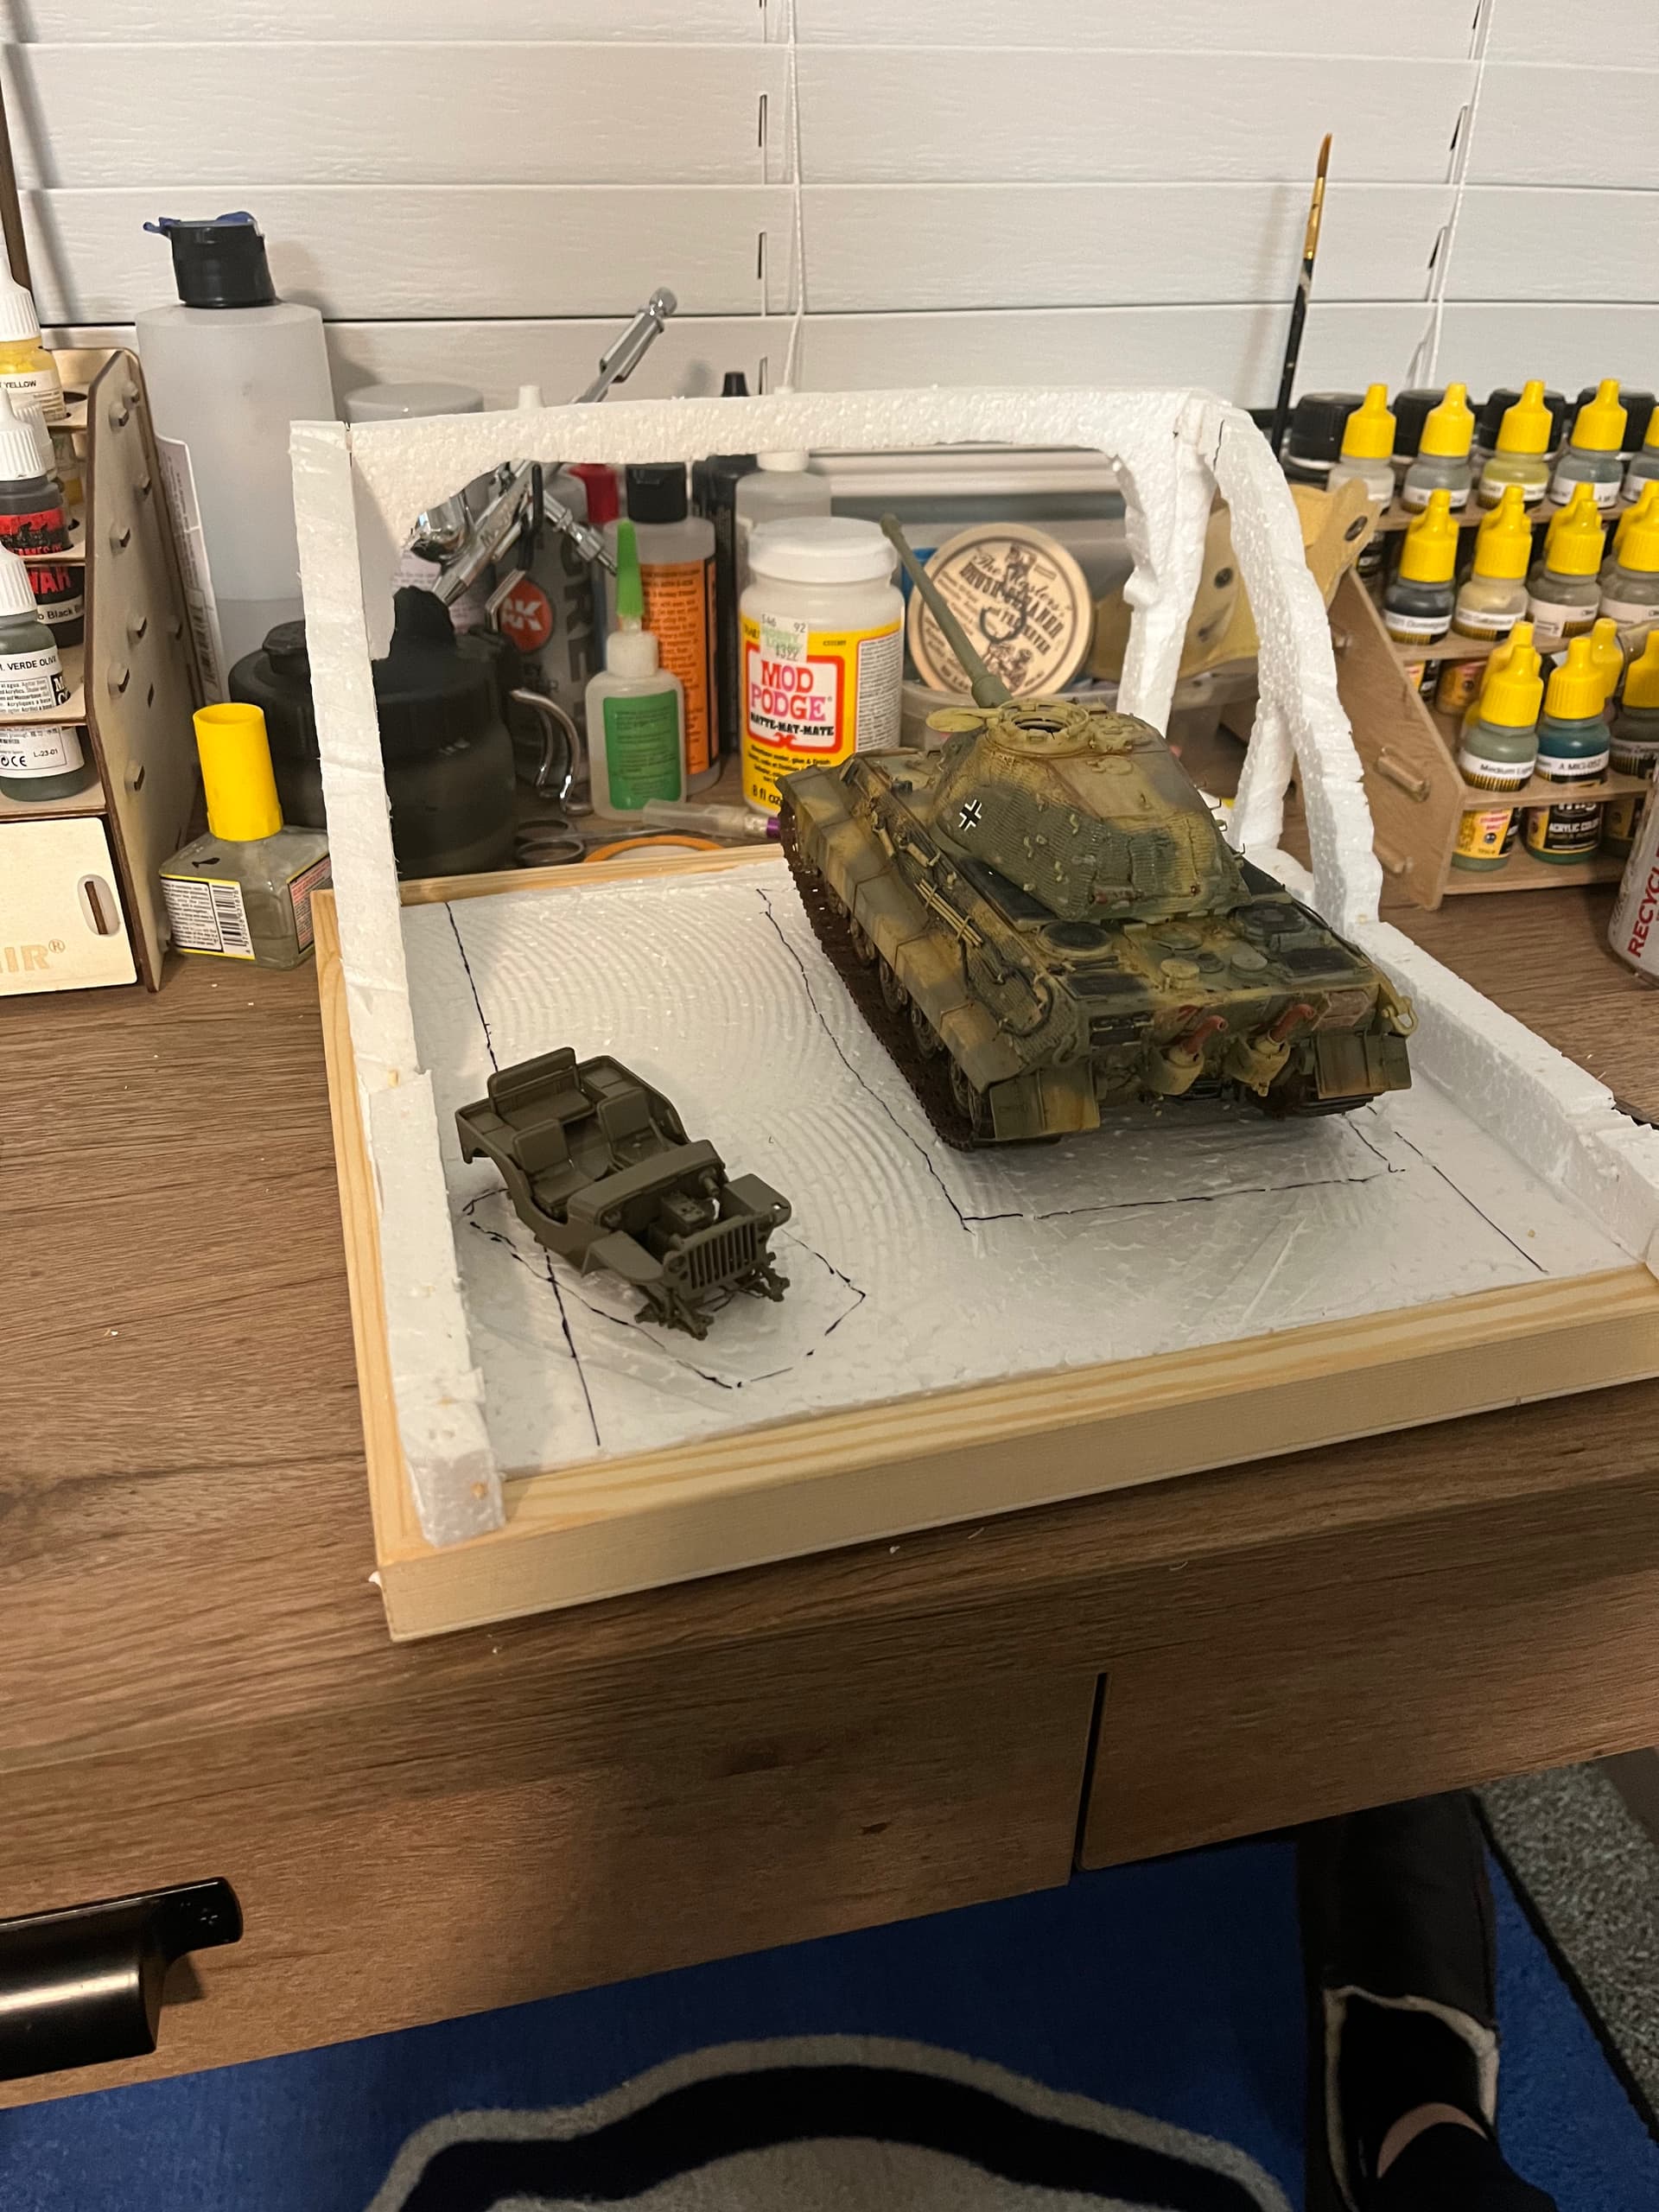
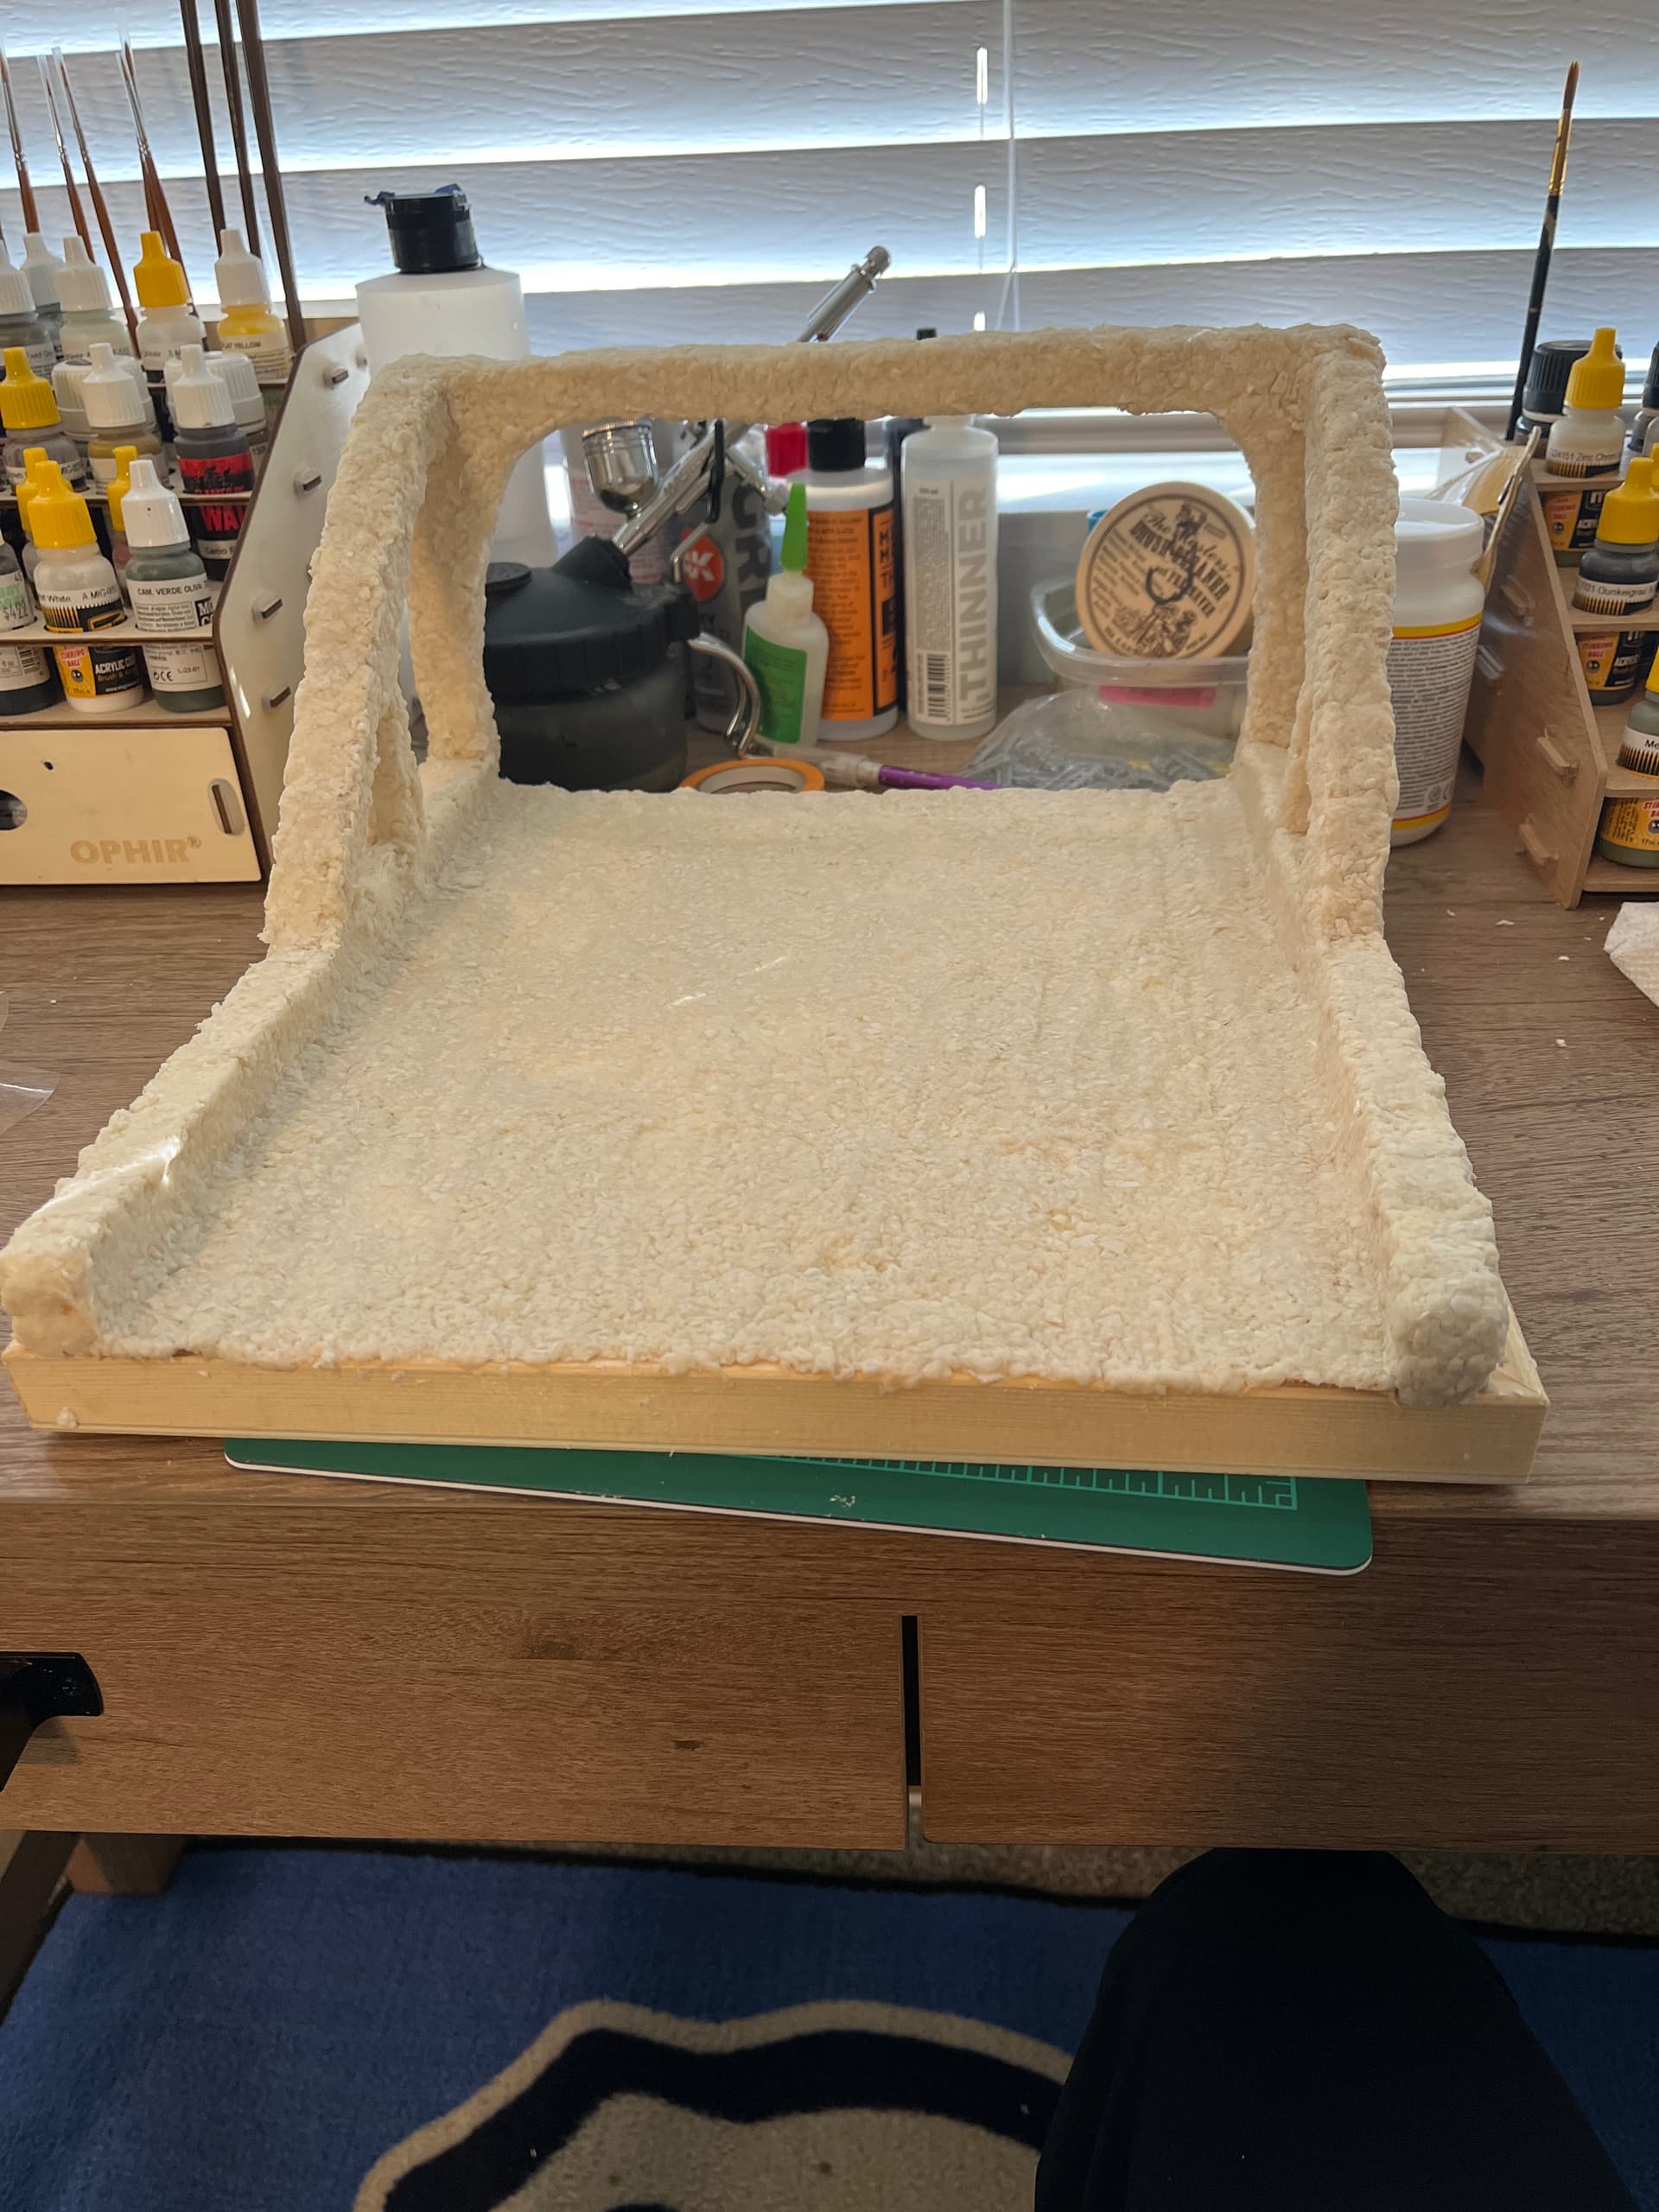
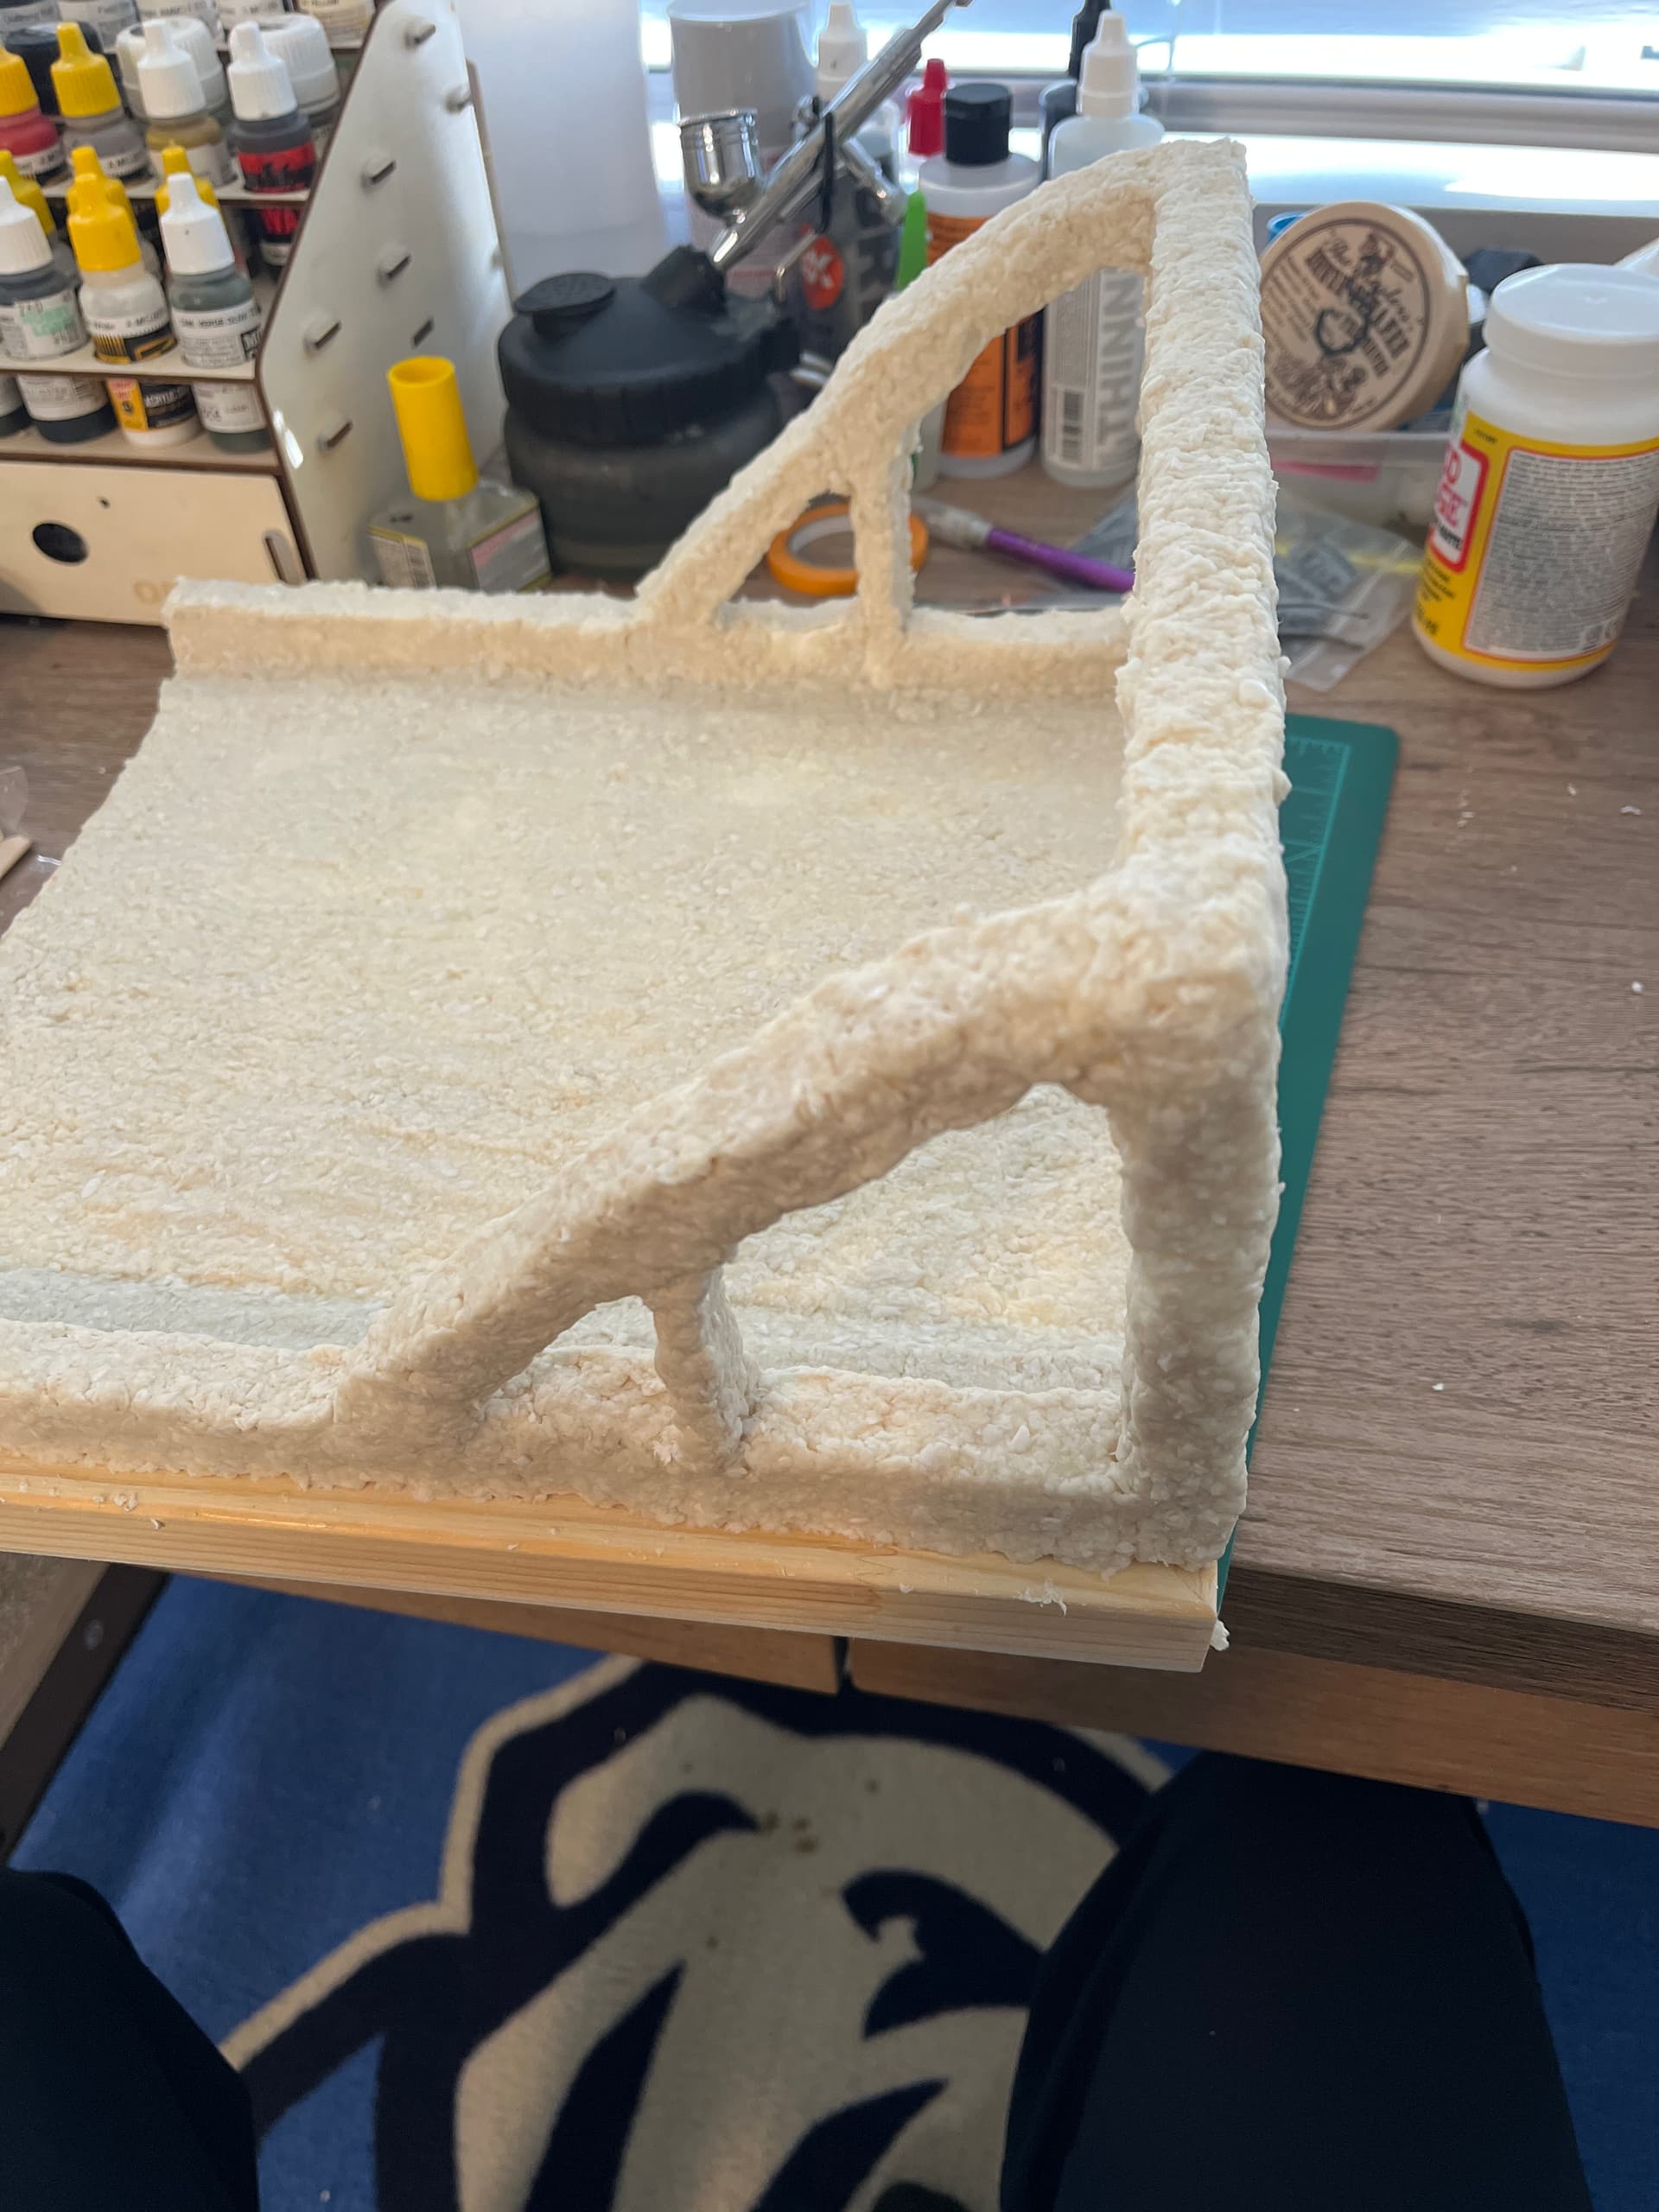
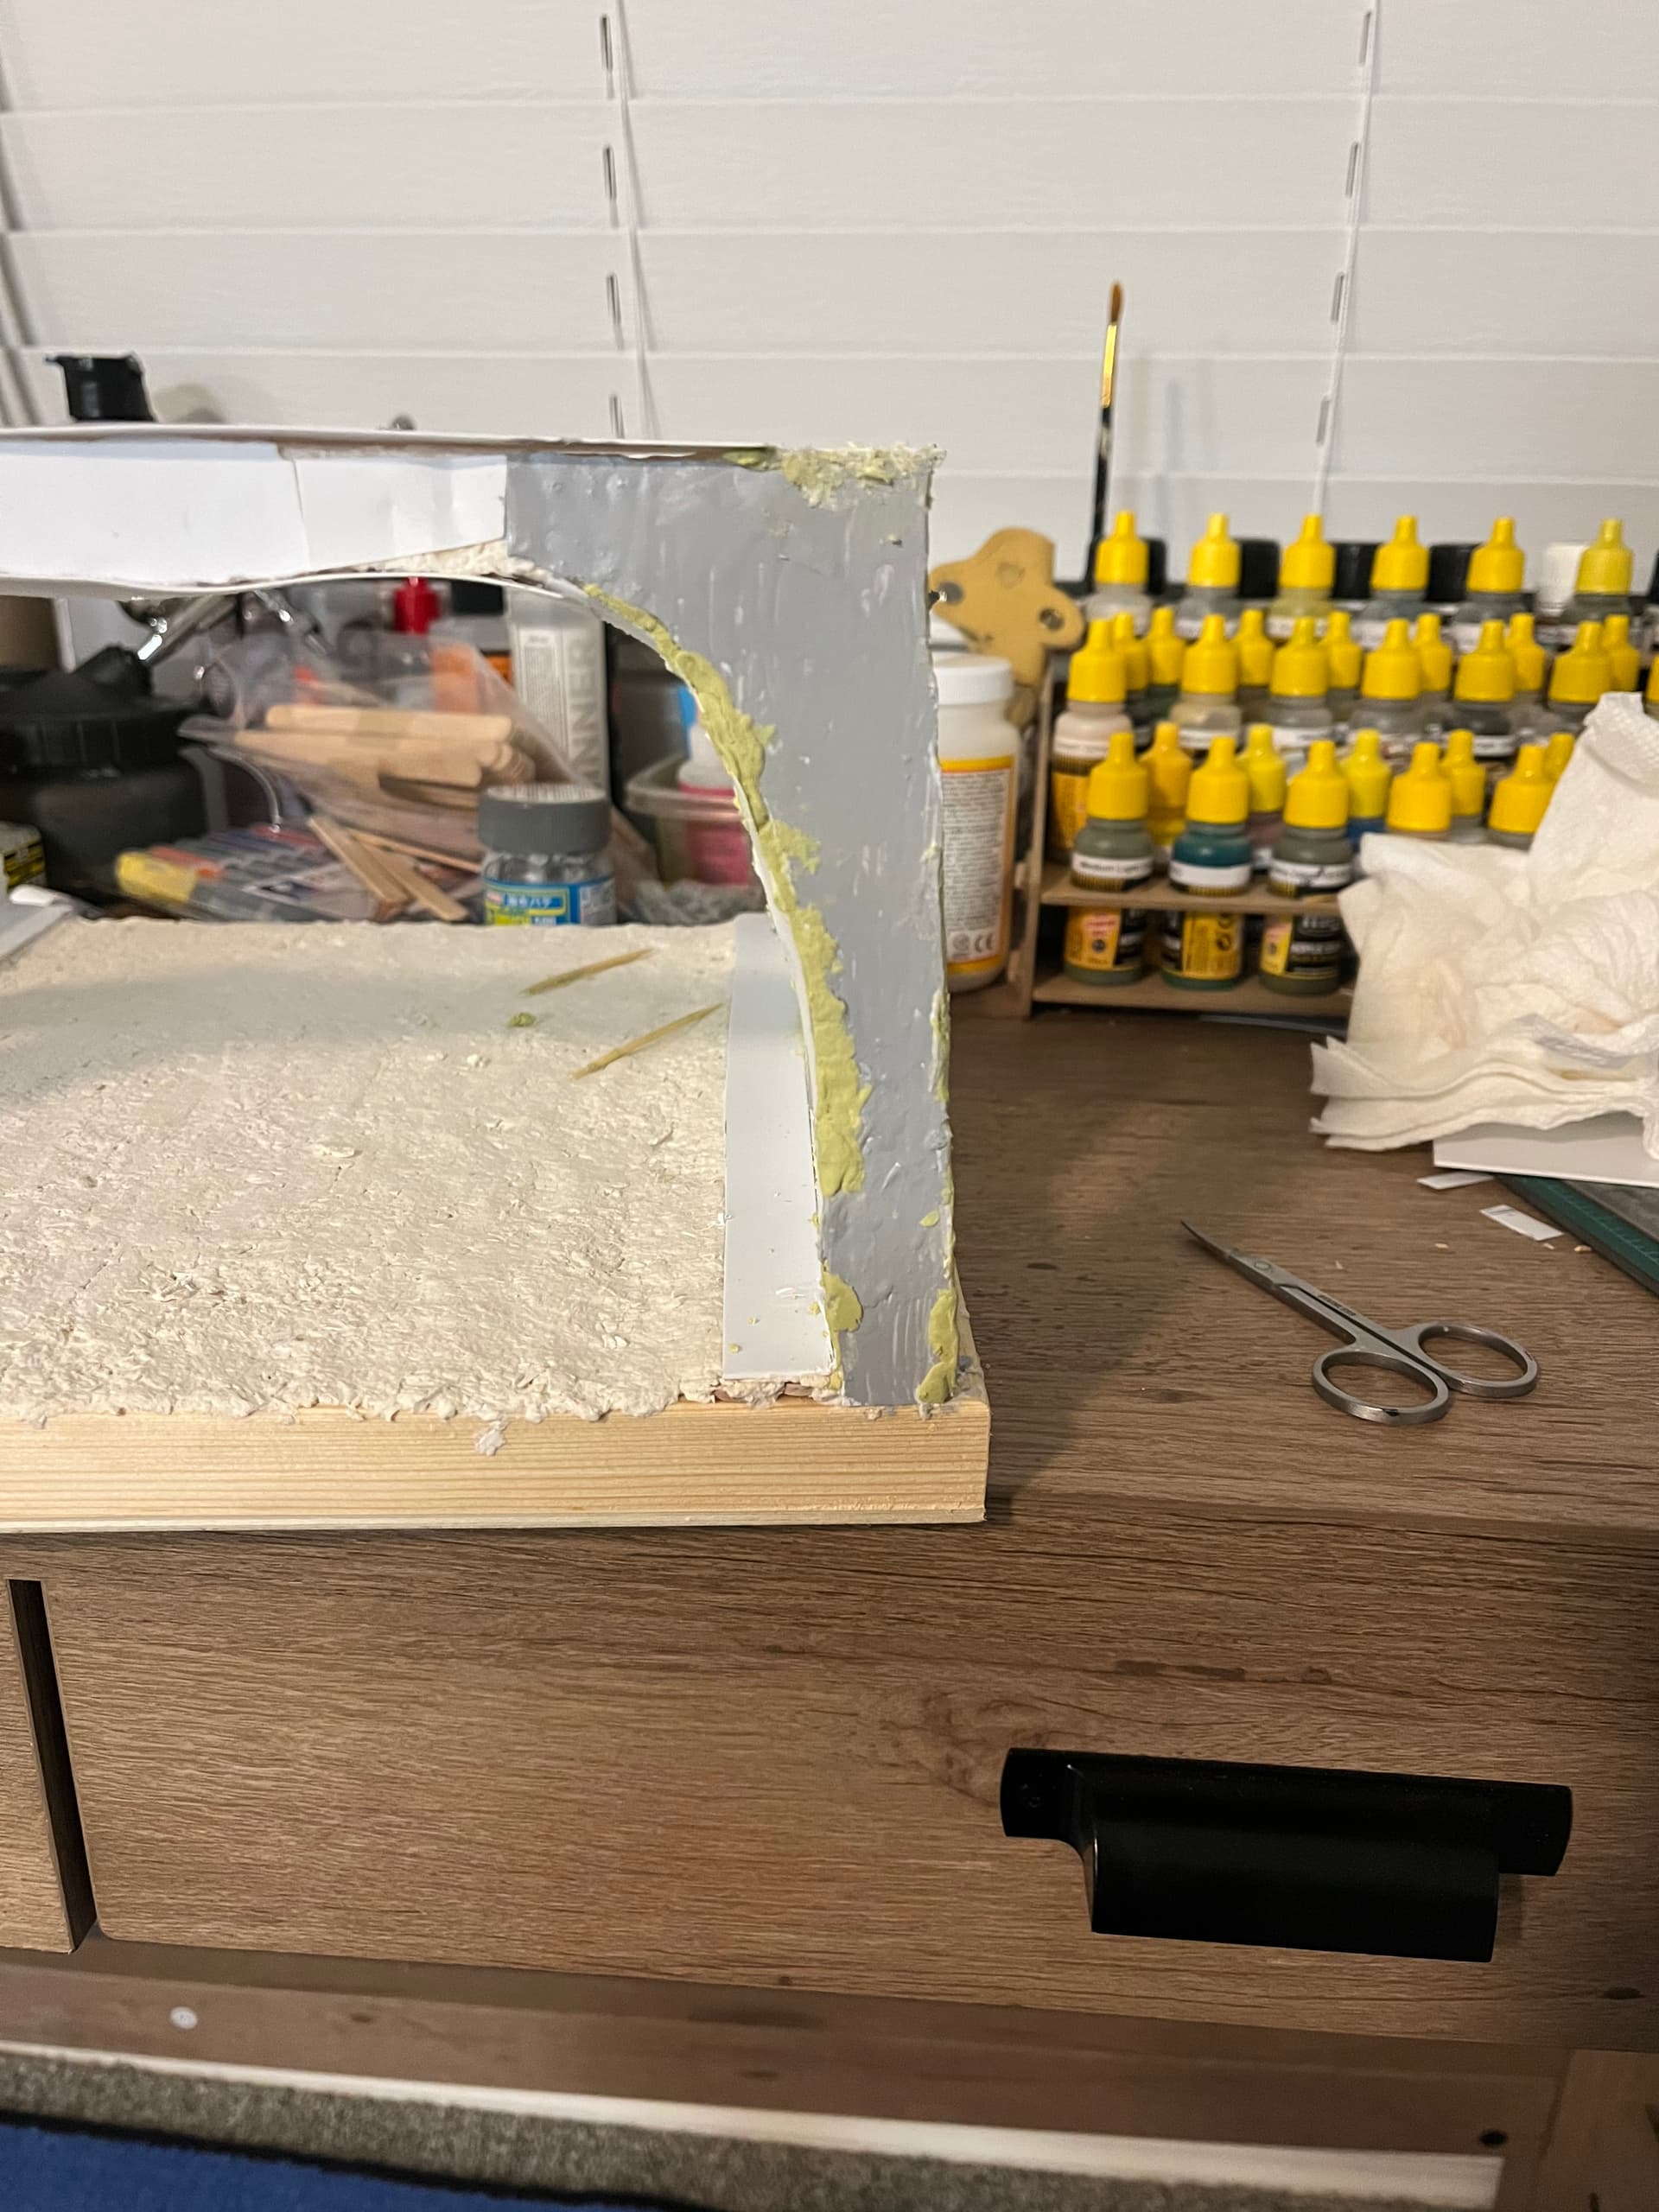
If you followed my 506th king tiger wip this is the next phase of the diorama build. If you haven’t yet i am building a diorama based off of a painting i found of the 506th heavy tank battalion moving its King Tigers towards Nijmegen over the Arnhem bridge on the 25-26 September 1944. I had the afternoon off today and decided to begin building the frame to the bridge and the base. The base is a master touch 12x12 wood canvas from hobby lobby and the bridge frame is made from styrofoam. The intent behind the frame is that i will use it ,after water proofing it with modge podge, for when i put a thin layer paper machete then sand it down so that i can make steel beams with styrene sheet plastic. After this i will then use photo etch or at least try to use photo etch rods to make steel bolts. If all goes according to plan it will loosely look like the panting and photo i found online for reference.
The figures i plan on using are Alpine Miniatures Schwimmwagen crew, panzer commander one set # 35176 and I’m considering using HJ figures in the pea dot pattern set #35246.
I hope the foam is just a mock-up to see how it looks since the actual bridge is all metal. You could do it all out of sheet styrene, or look at Plastruct as they already have construction shapes (beams, girders, etc.) that may work.
Yeah so my plan is to use the foam as a frame. I’m going to do paper machete over the foam and then use styrene plastic to cover it. I plan on doing a lot of sanding and making the paper machete very thin for the bridge span. Of interesting note i was not aware that plastruct has all those items you described, could you shoot me a link for it. If my original plan fails I’d like a better back up.
Judging by the quality of the work on the tank, I think that’s a safe assumption.
The gussets can be made out of paper. They’ll be close to scale thickness and you can add all the rivets you want very easily. You can use a gear from an old Tamiya motor, or even this:
I’ve done railroad bridges this way. I’ve still got one in the motorcycle/model storage facility, otherwise know as my garage. Properly painted and weathered, the wood/paper bridge looks like steel. In fact you can even use heave paper on the sheathing as the rivets can be added to that as well.
@HeavyArty thank you I’ll give them a look, i think i saw that they had the pentagon shaped bolt heads.
@18bravo thank you, yes the styrofoam is just for framing purposes. Hopefully my first go around with paper machete is good and it levels it all out then I’ll cover with styrene plastic.
Here’s a quick progress update from today, i went to hobby lobby and got paper mache. I took the last three hours to cover the entire diorama, now it’s time to wait and let it dry some before doing some smoothing of the surface. Next up after this i will begin cutting styrene and fitting it when it’s dry I’ll start glueing it down and doing detail work.
Cool Diorama idea! I think you’ll find that paper mache is kind of a pain in the @ss to sand. At least that’s the conclusion I came to when I ended up sanding it on a dio that I over used it and had to rough sand a bunch off. I think sanding it to a specific thickness to add plastic might even be more difficult. You might find that Plastruct or Evergreen structural plastic is an easier alternative.
At any rate, I like your concept and idea for the diorama and hope to follow your progress.
@creading another idea i was thinking of was while the mache was still wet I’d begin cutting and covering with plastic and using the mache and some glue as an adhesive.
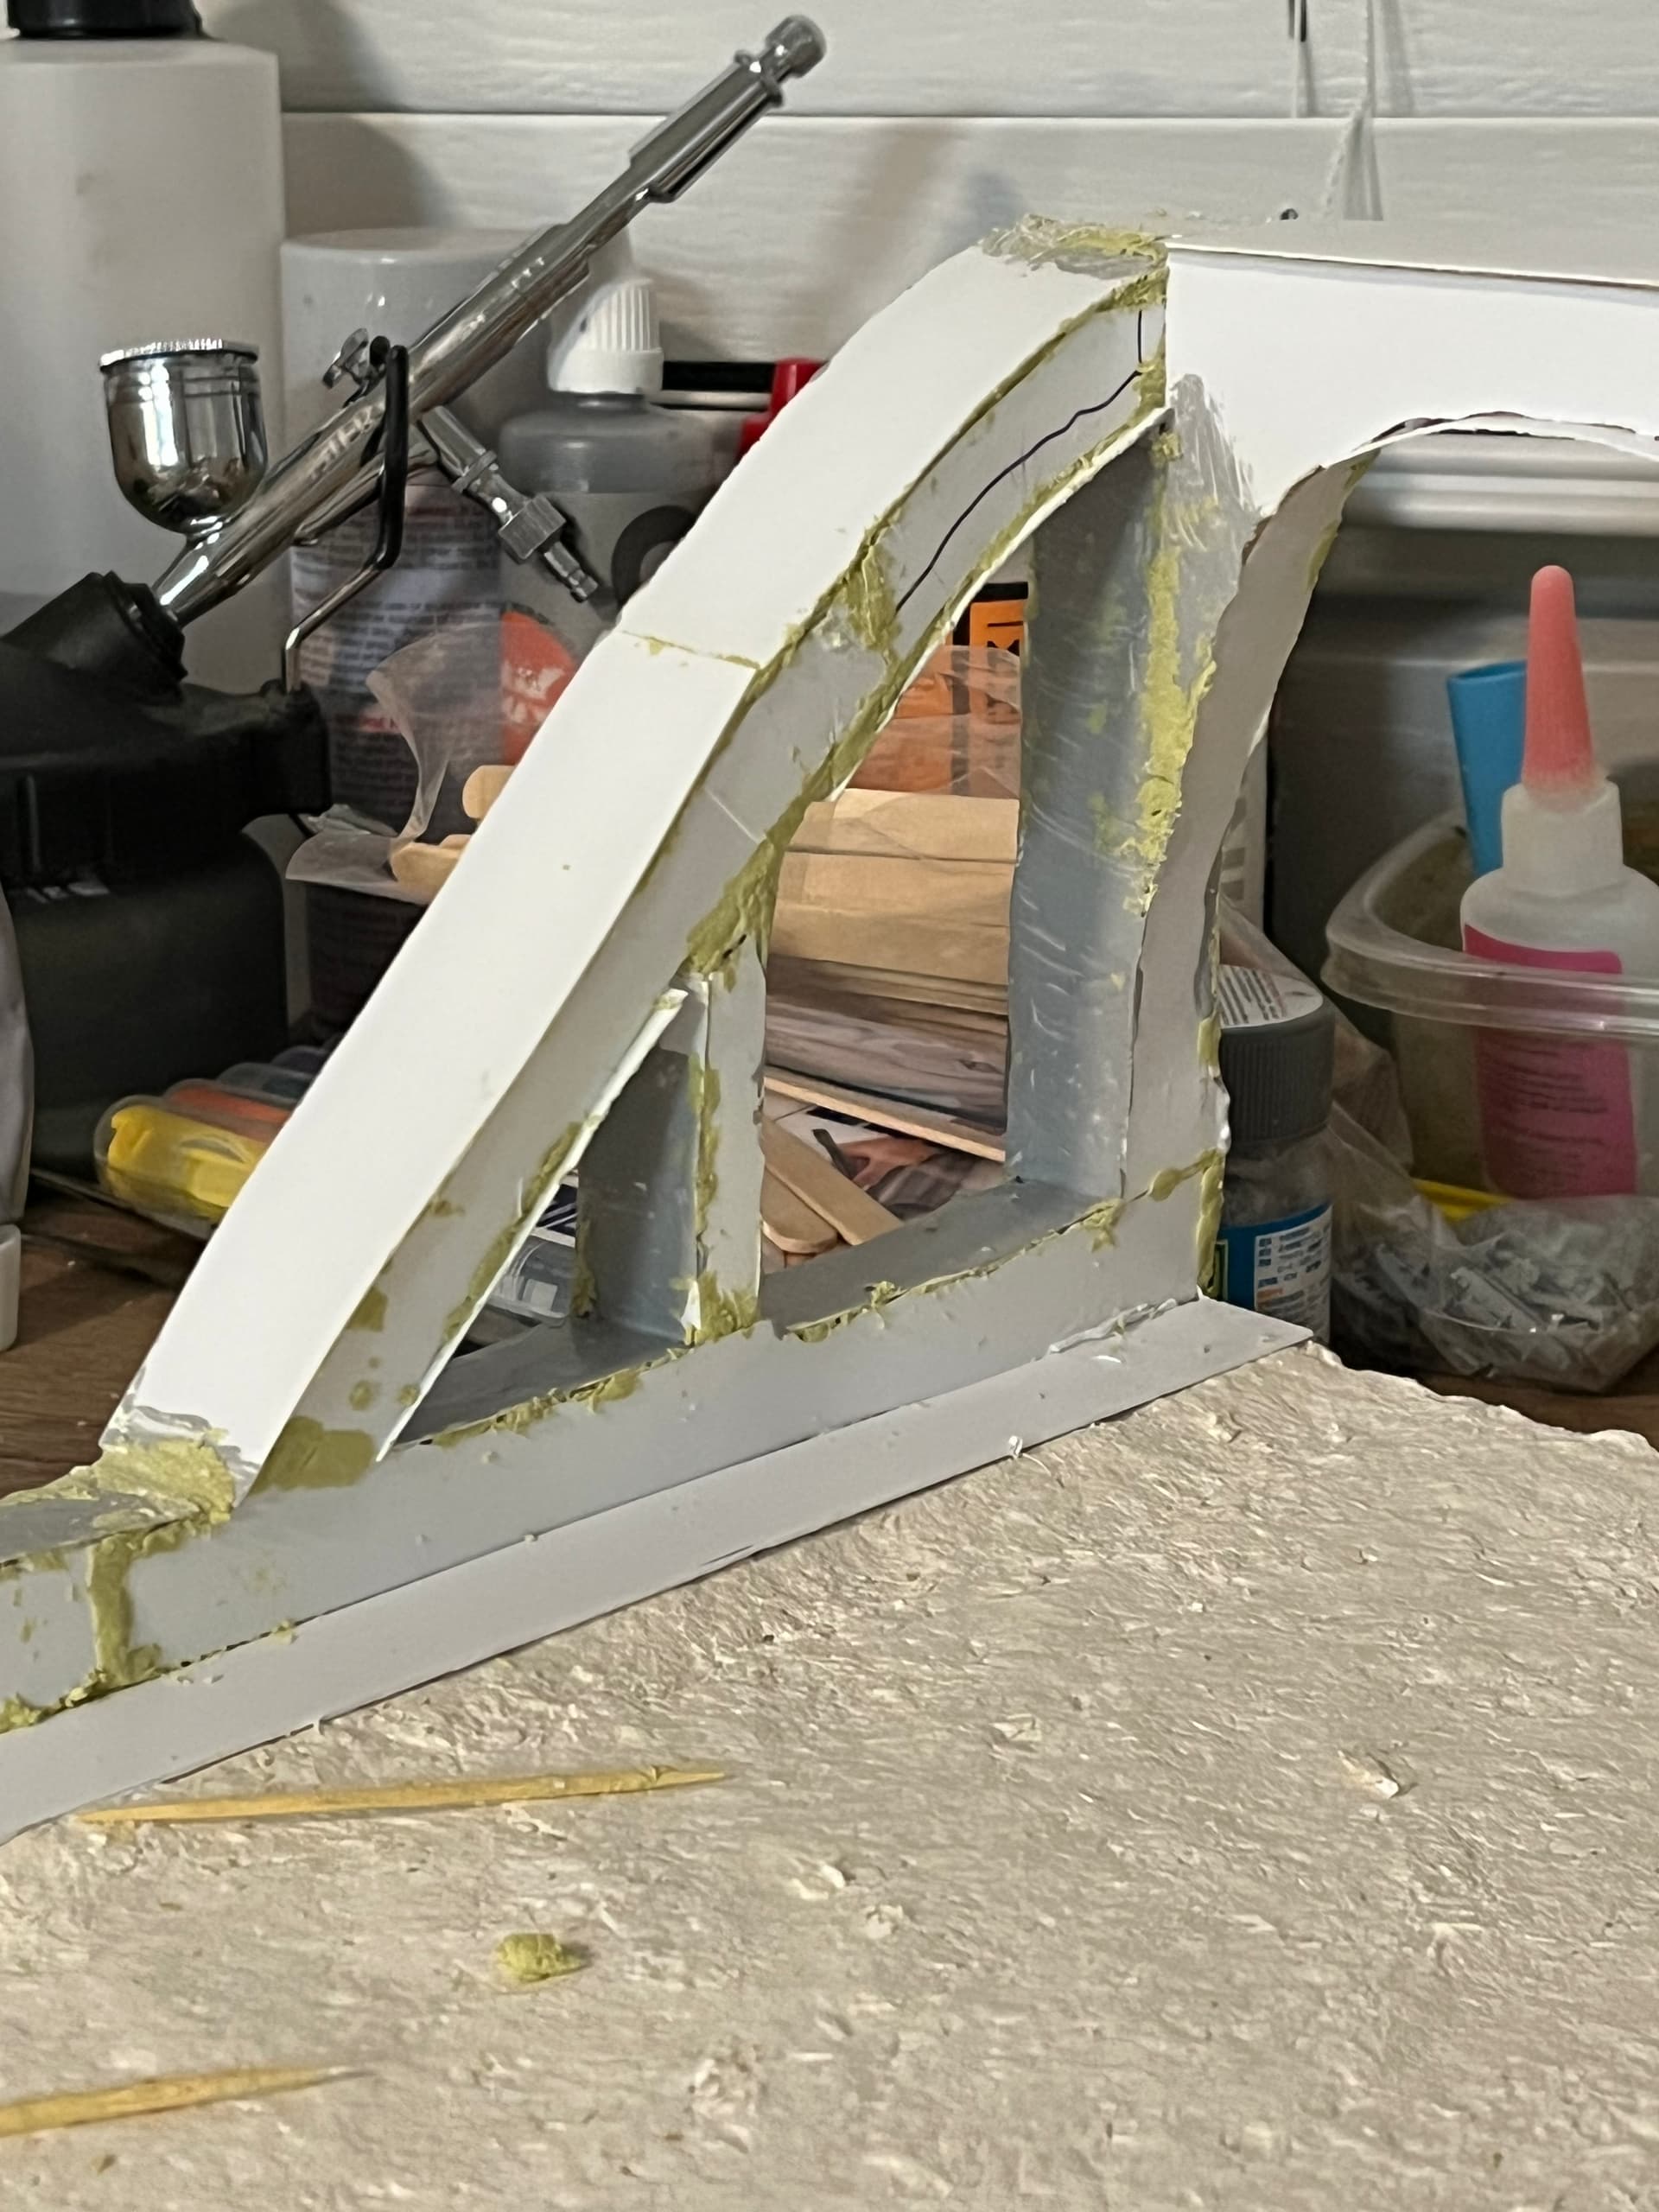
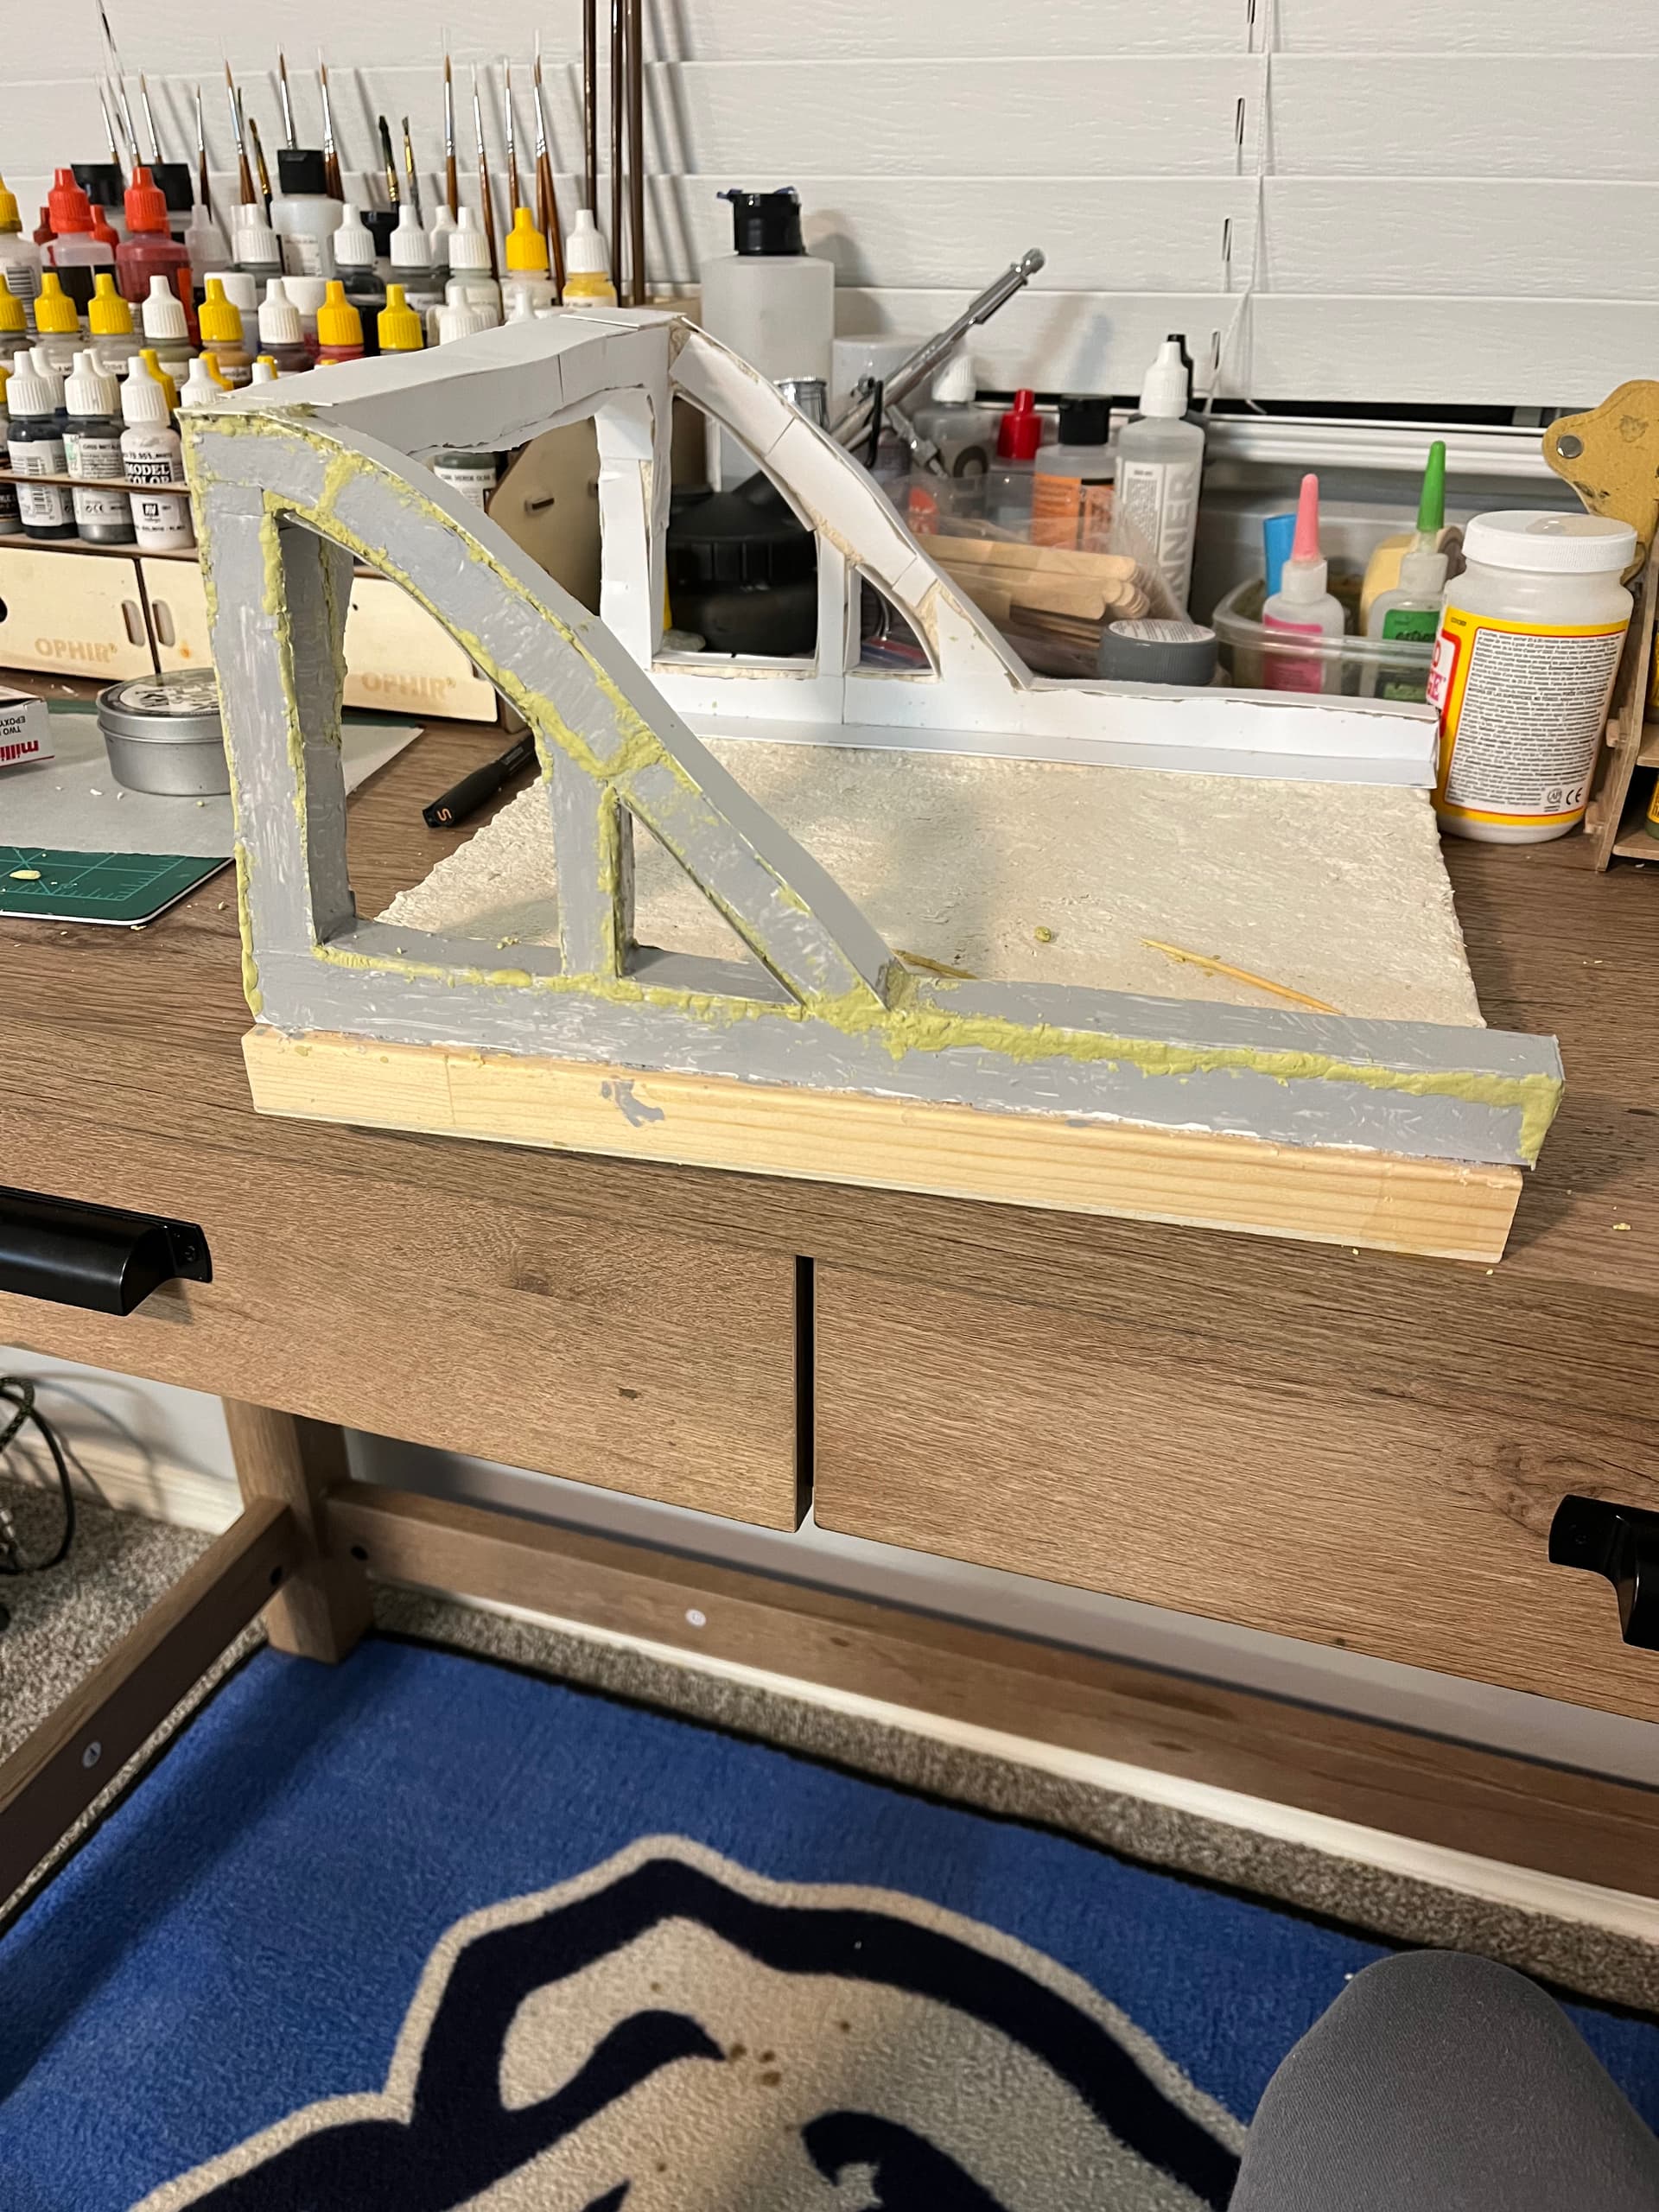
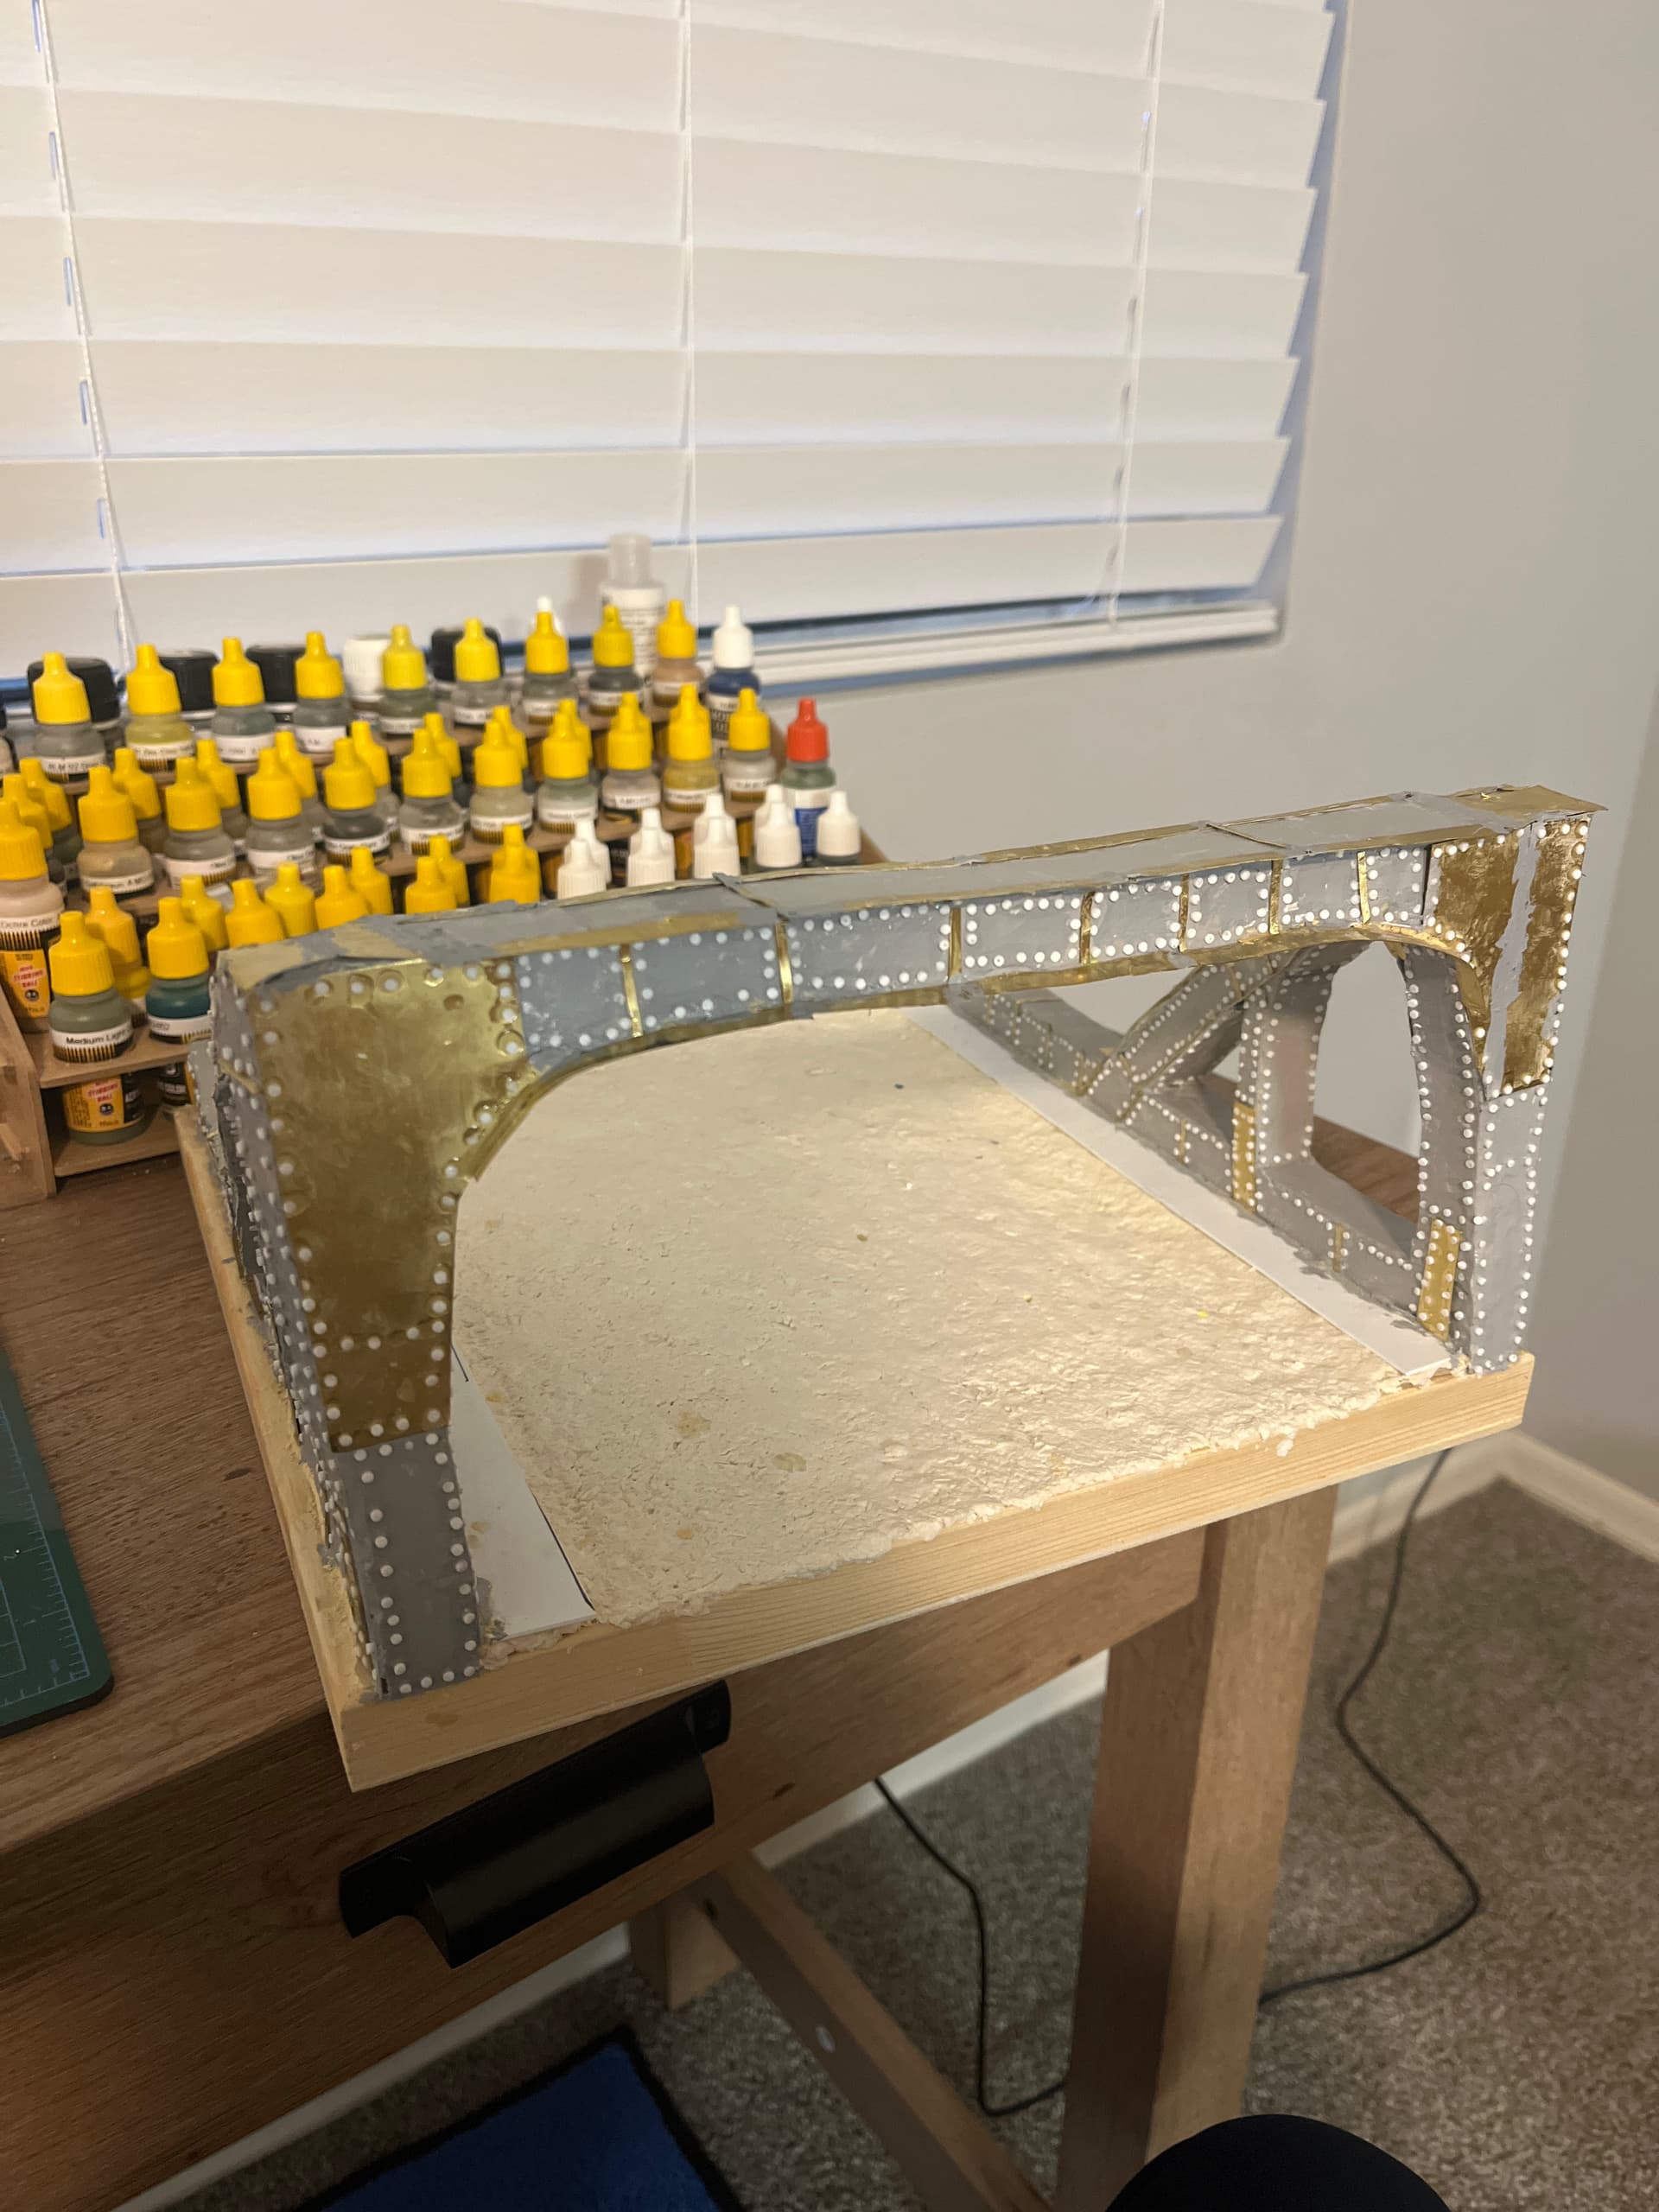
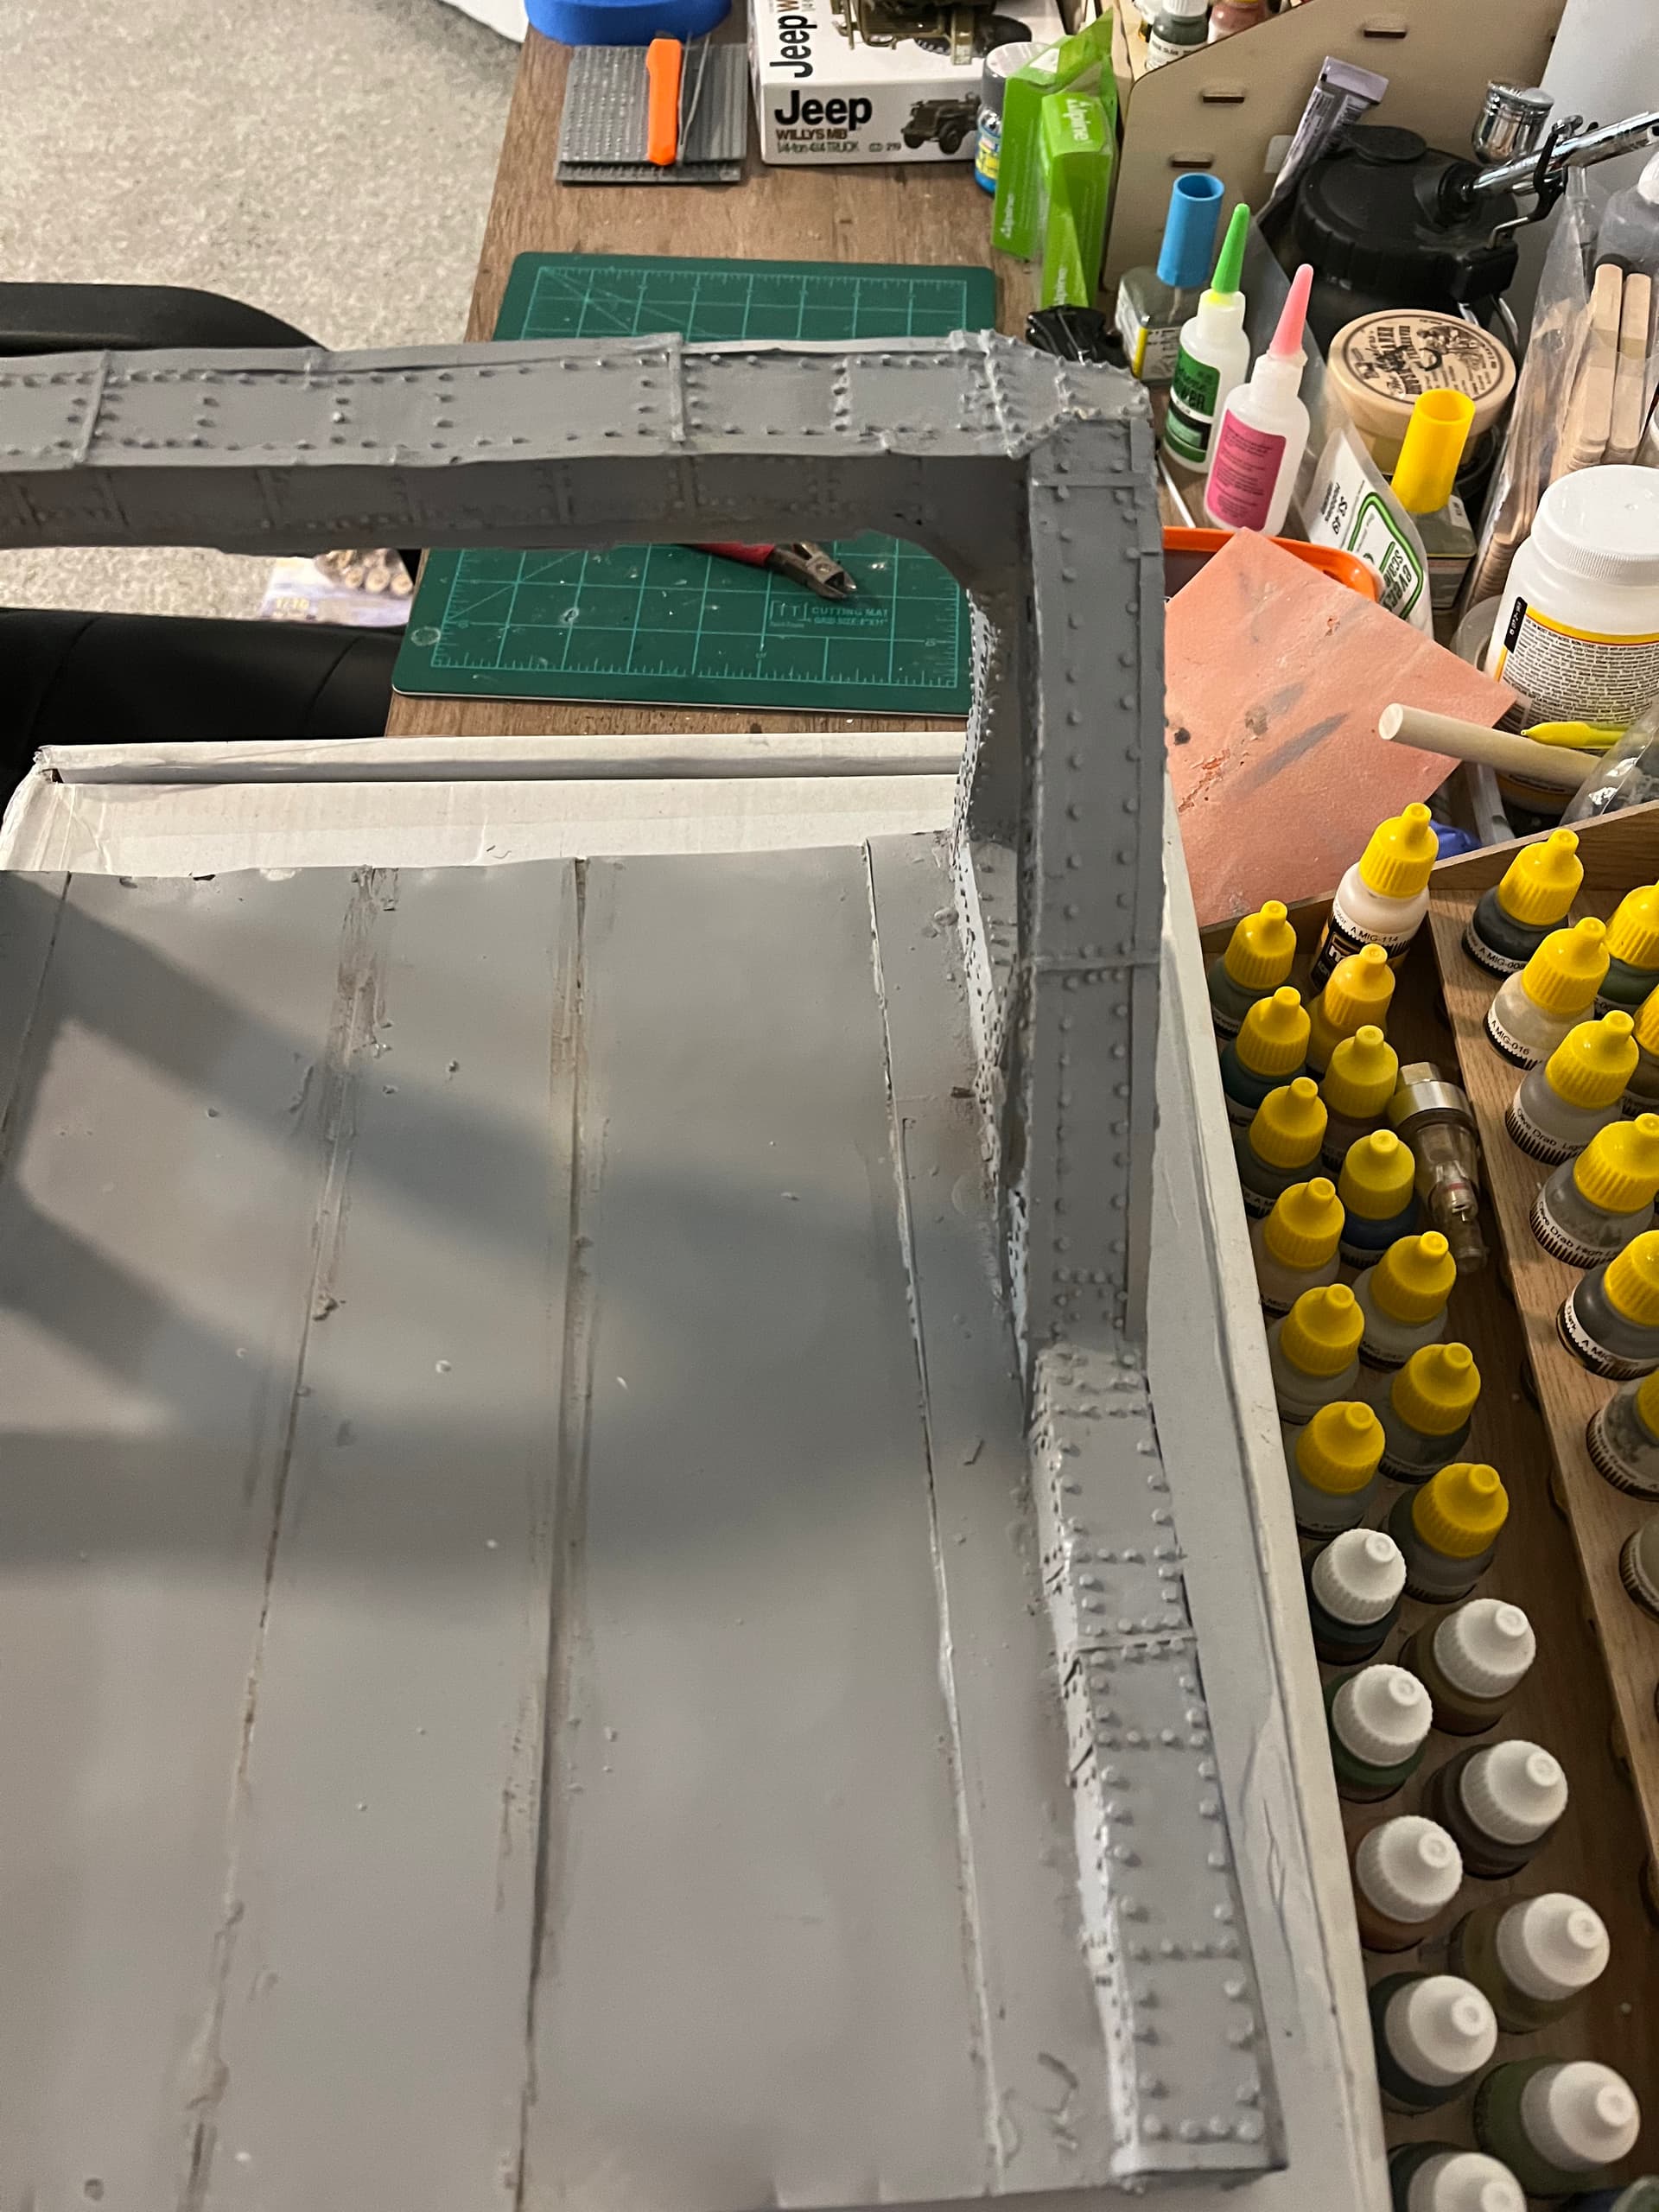
I was able to put in some considerable time this weekend on the bridge. After letting the paper mache dry for a day i began cutting out plastruct and applying it to the bridge. I’ll be honest it’s not beautiful and it will take some use of putty and milliput but i think I’ve got a good foothold on this. So far the left side of the bridge has been puttied and will be sanded by tomorrow afternoon. Here are some progress pictures below:
Once i think the bridge is satisfactory i will begin putting metal sheeting down to recreate the reinforcing pieces on the bridge, i will then cut out bolts from metal rods i picked up at hobby lobby the other day.
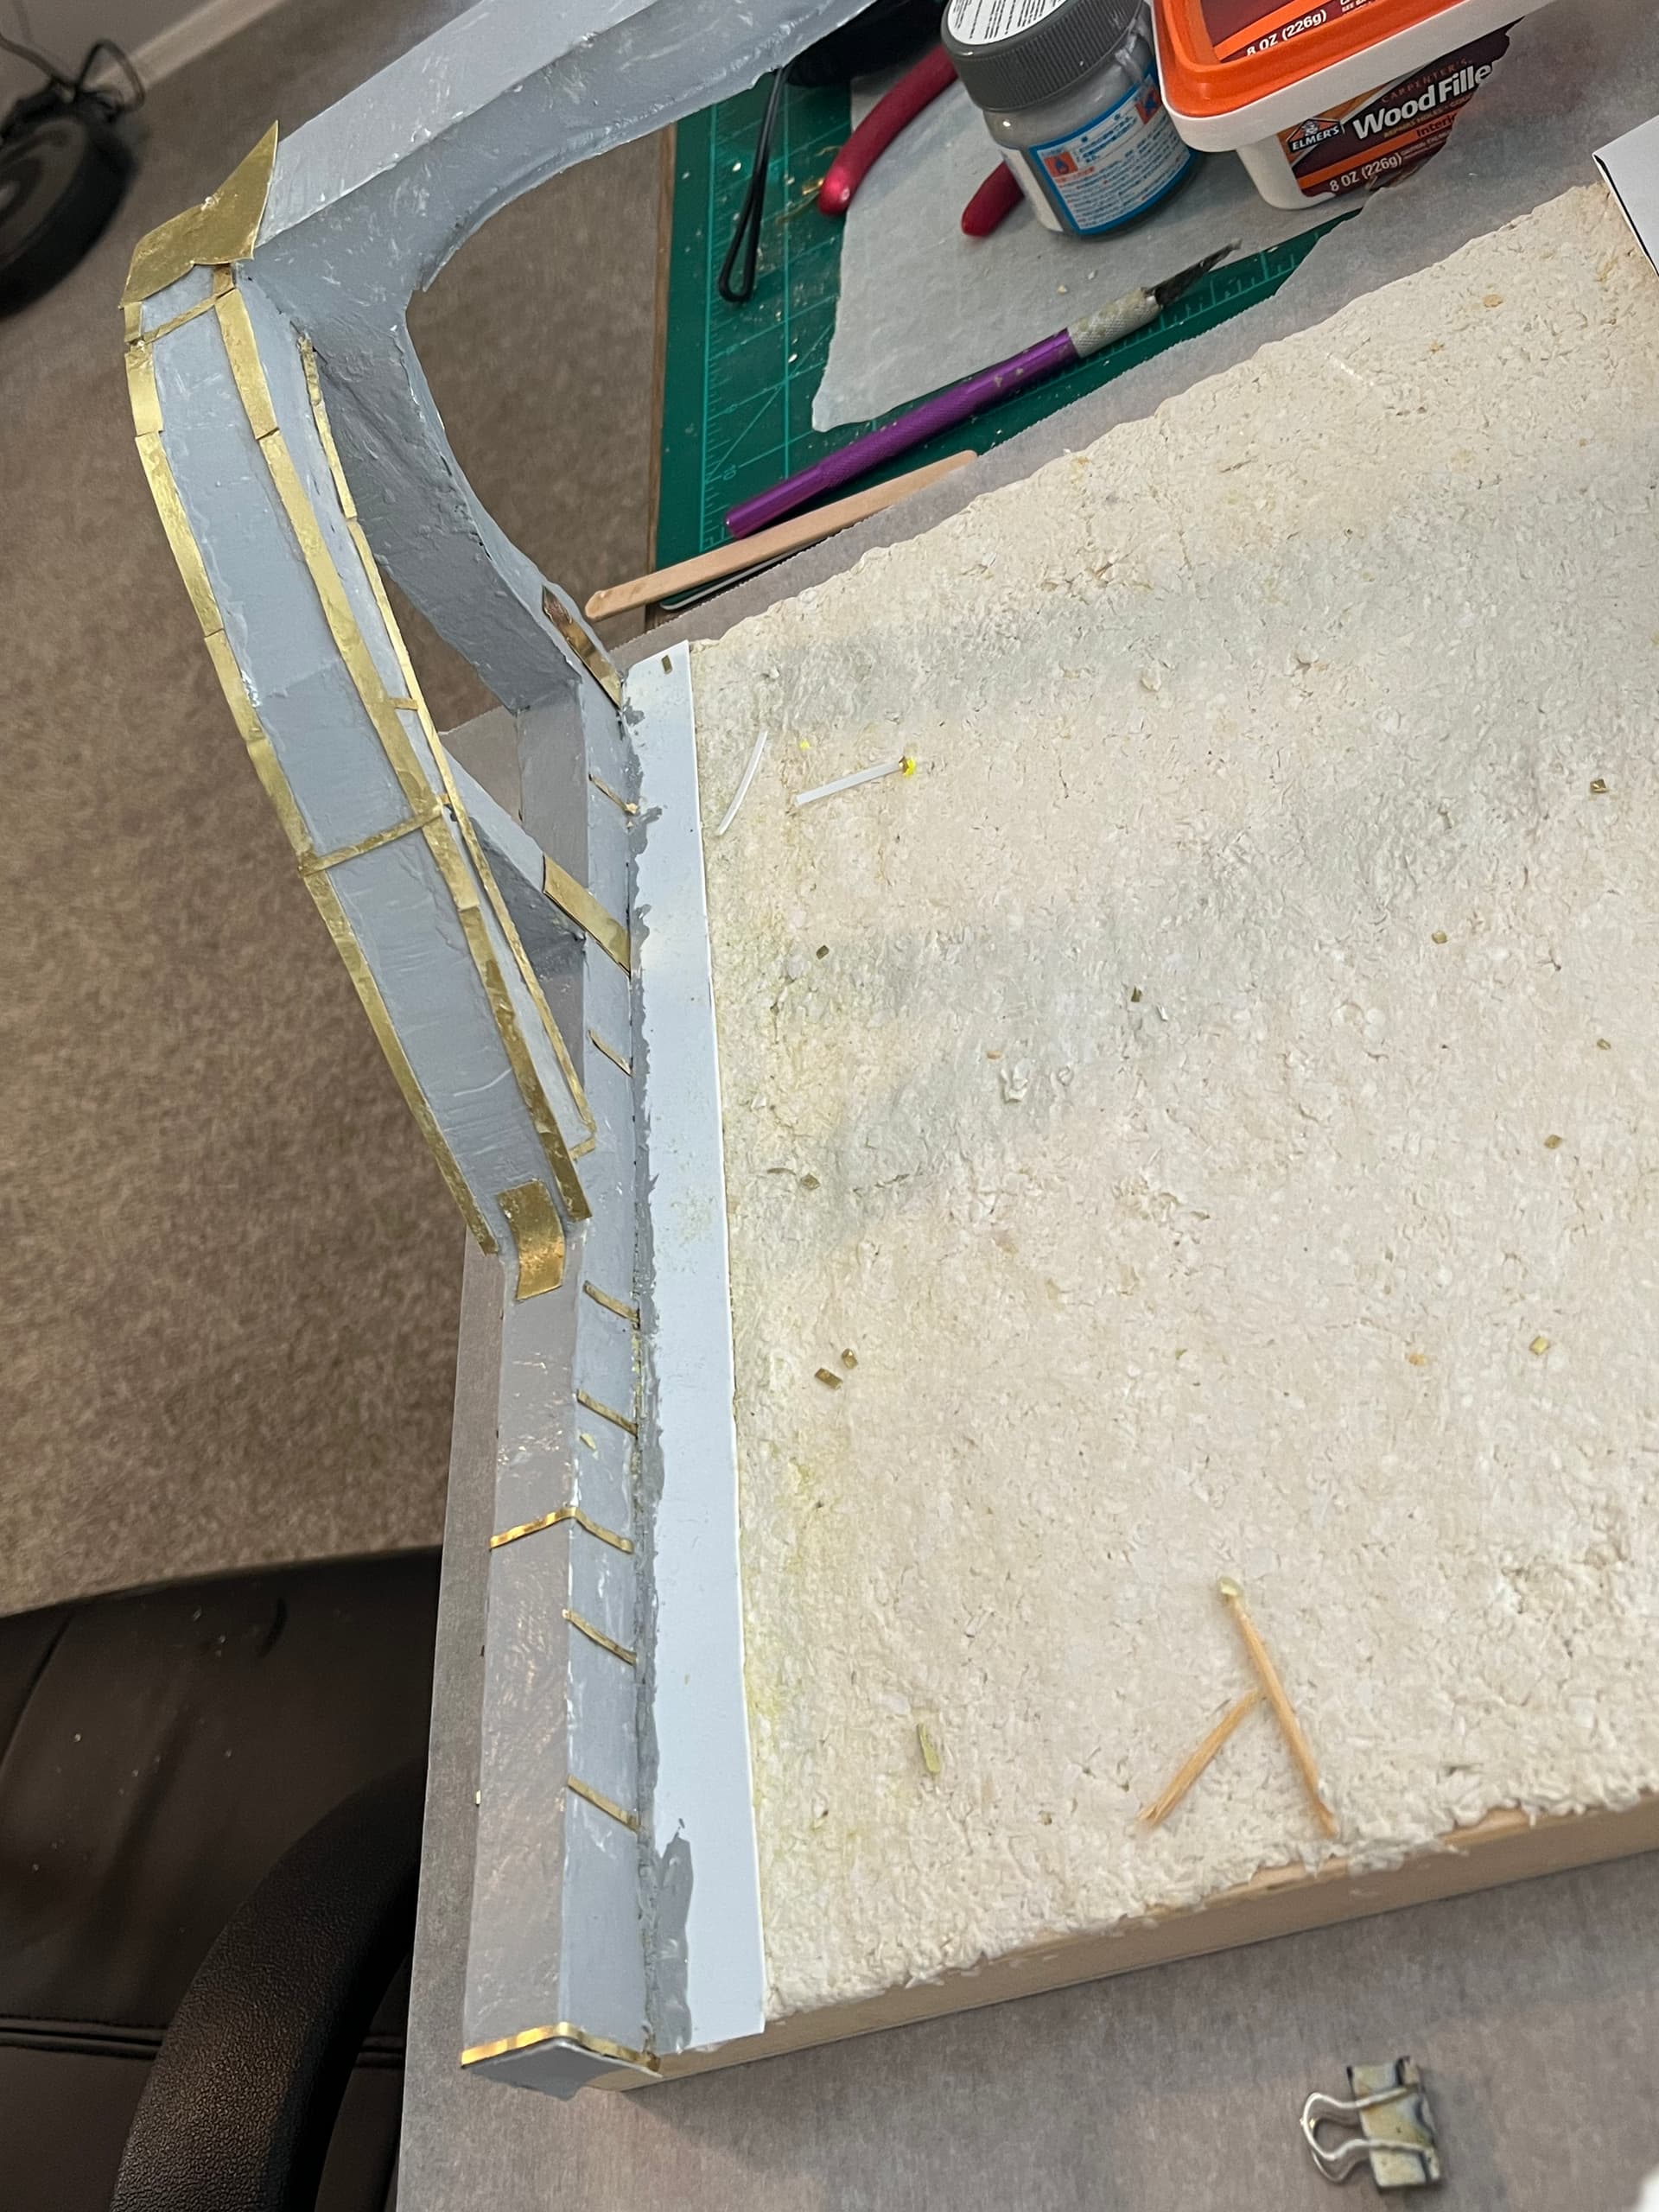
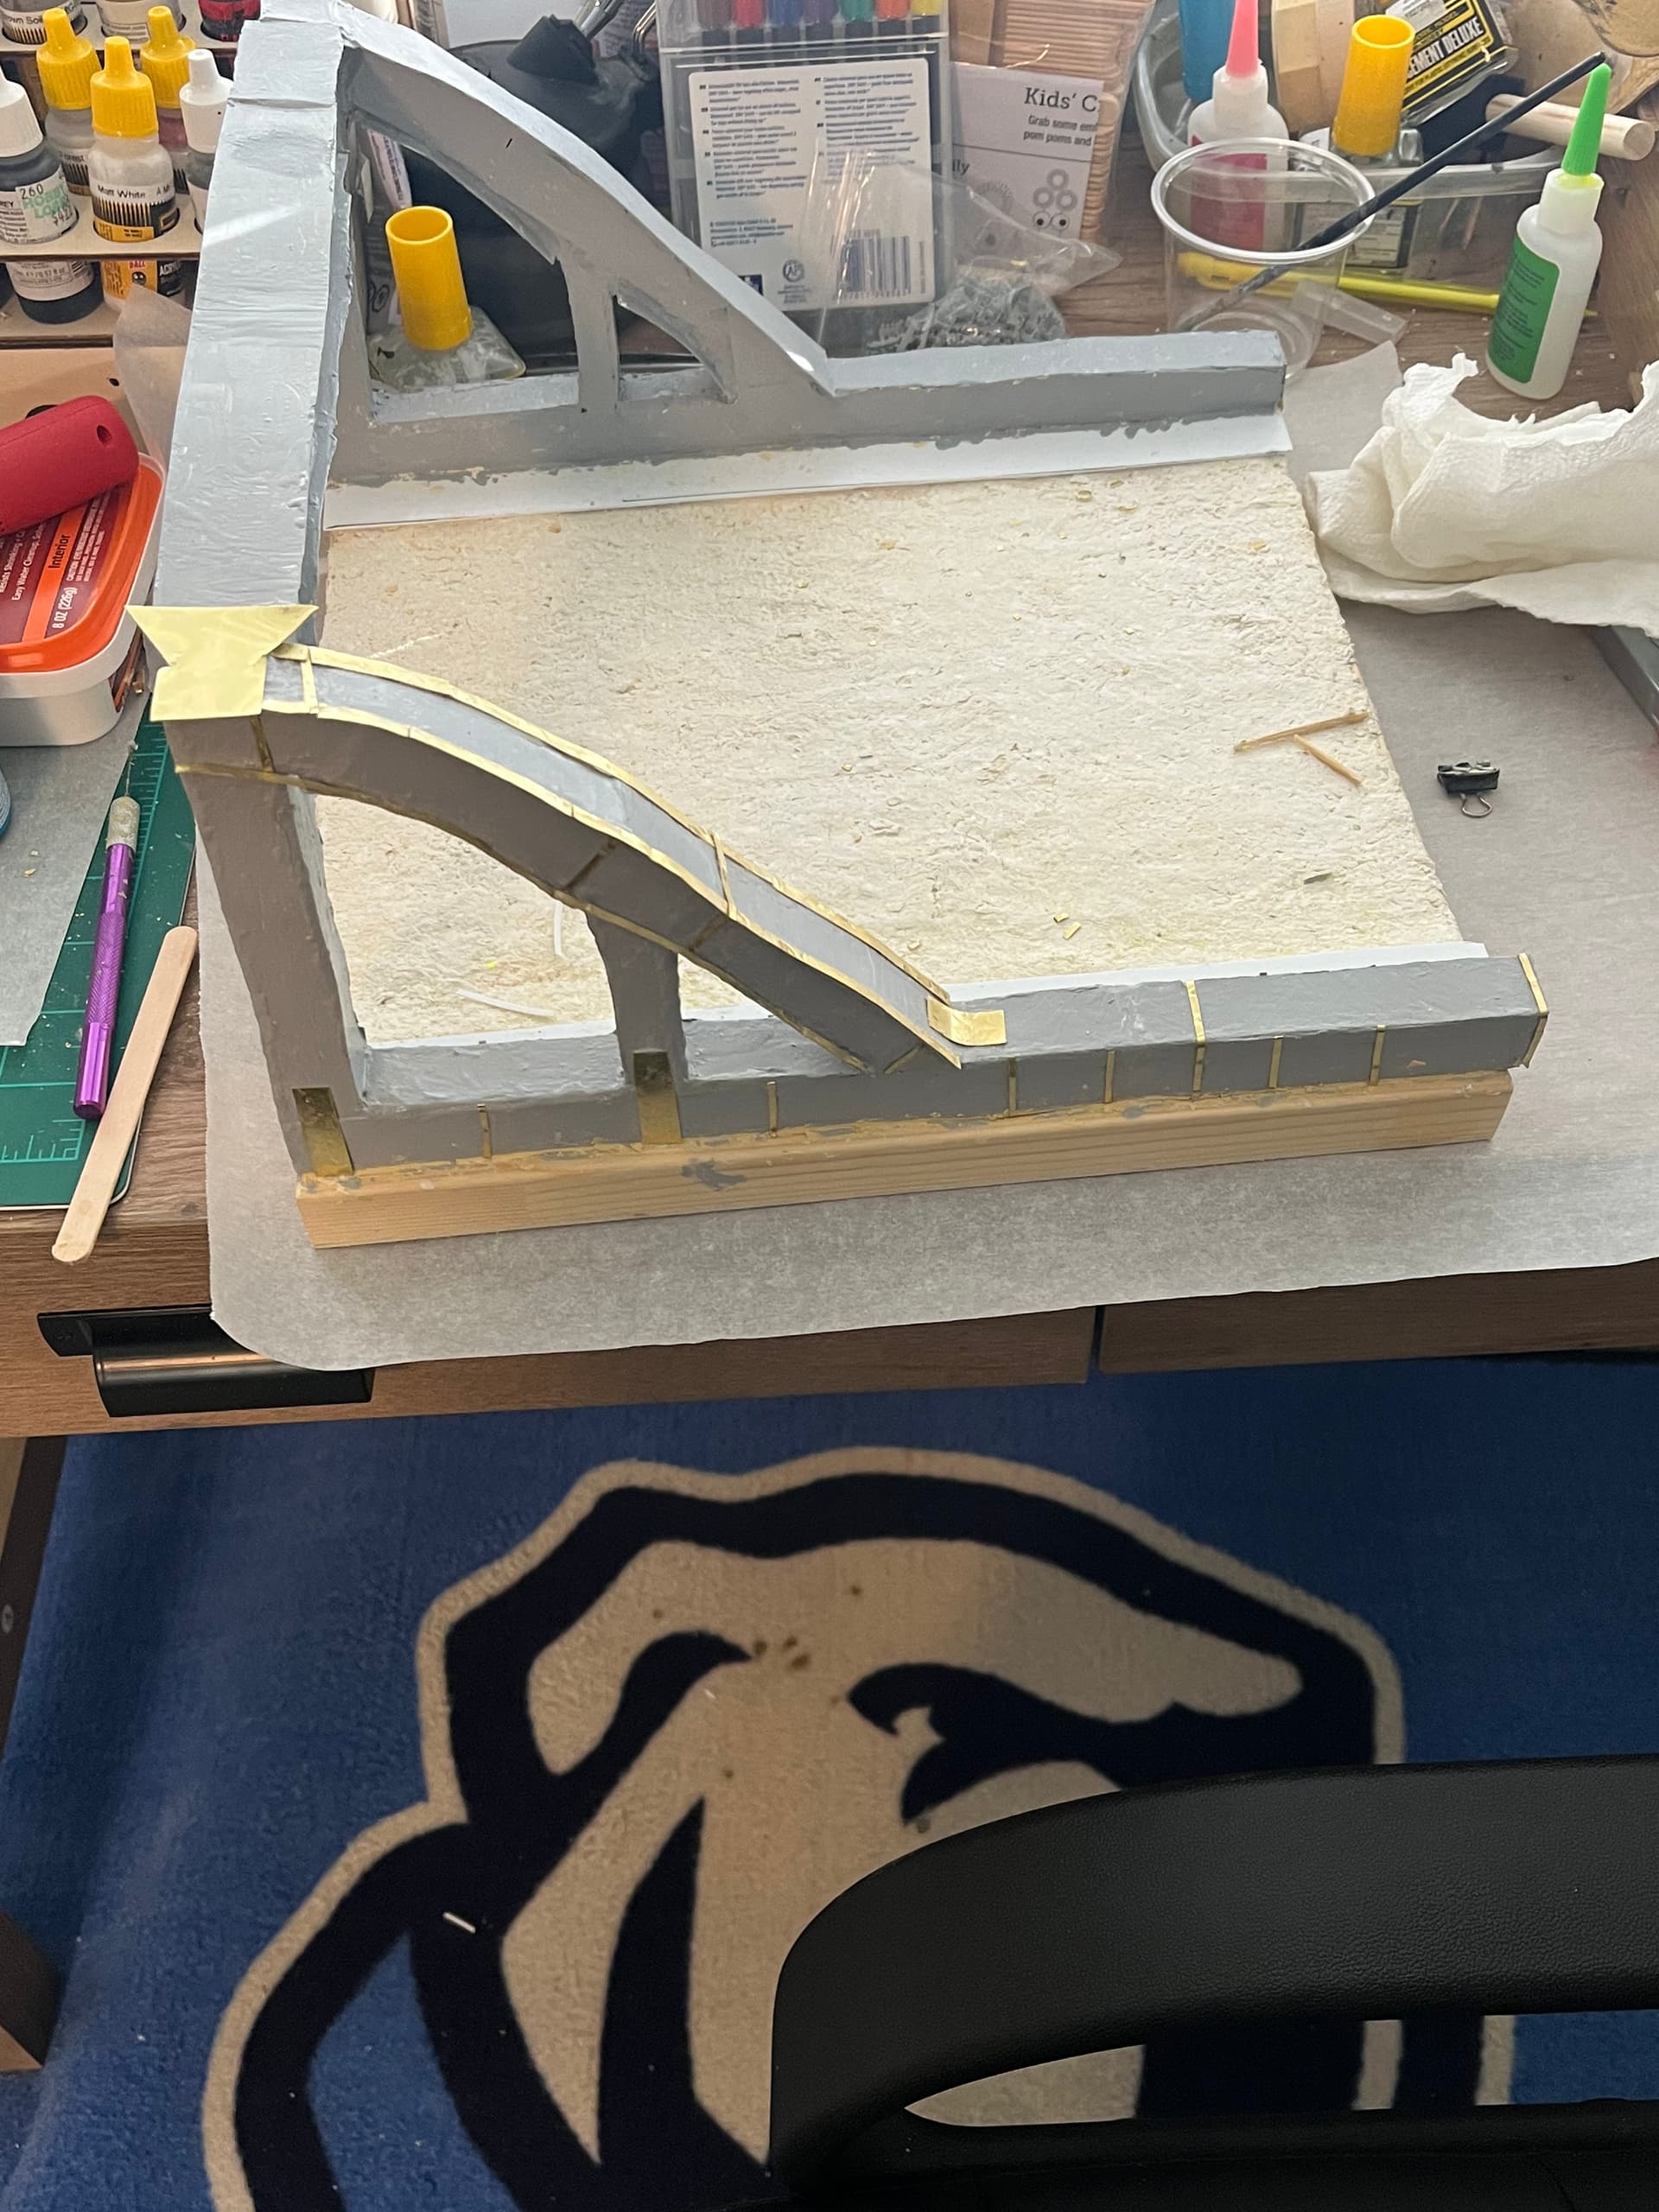
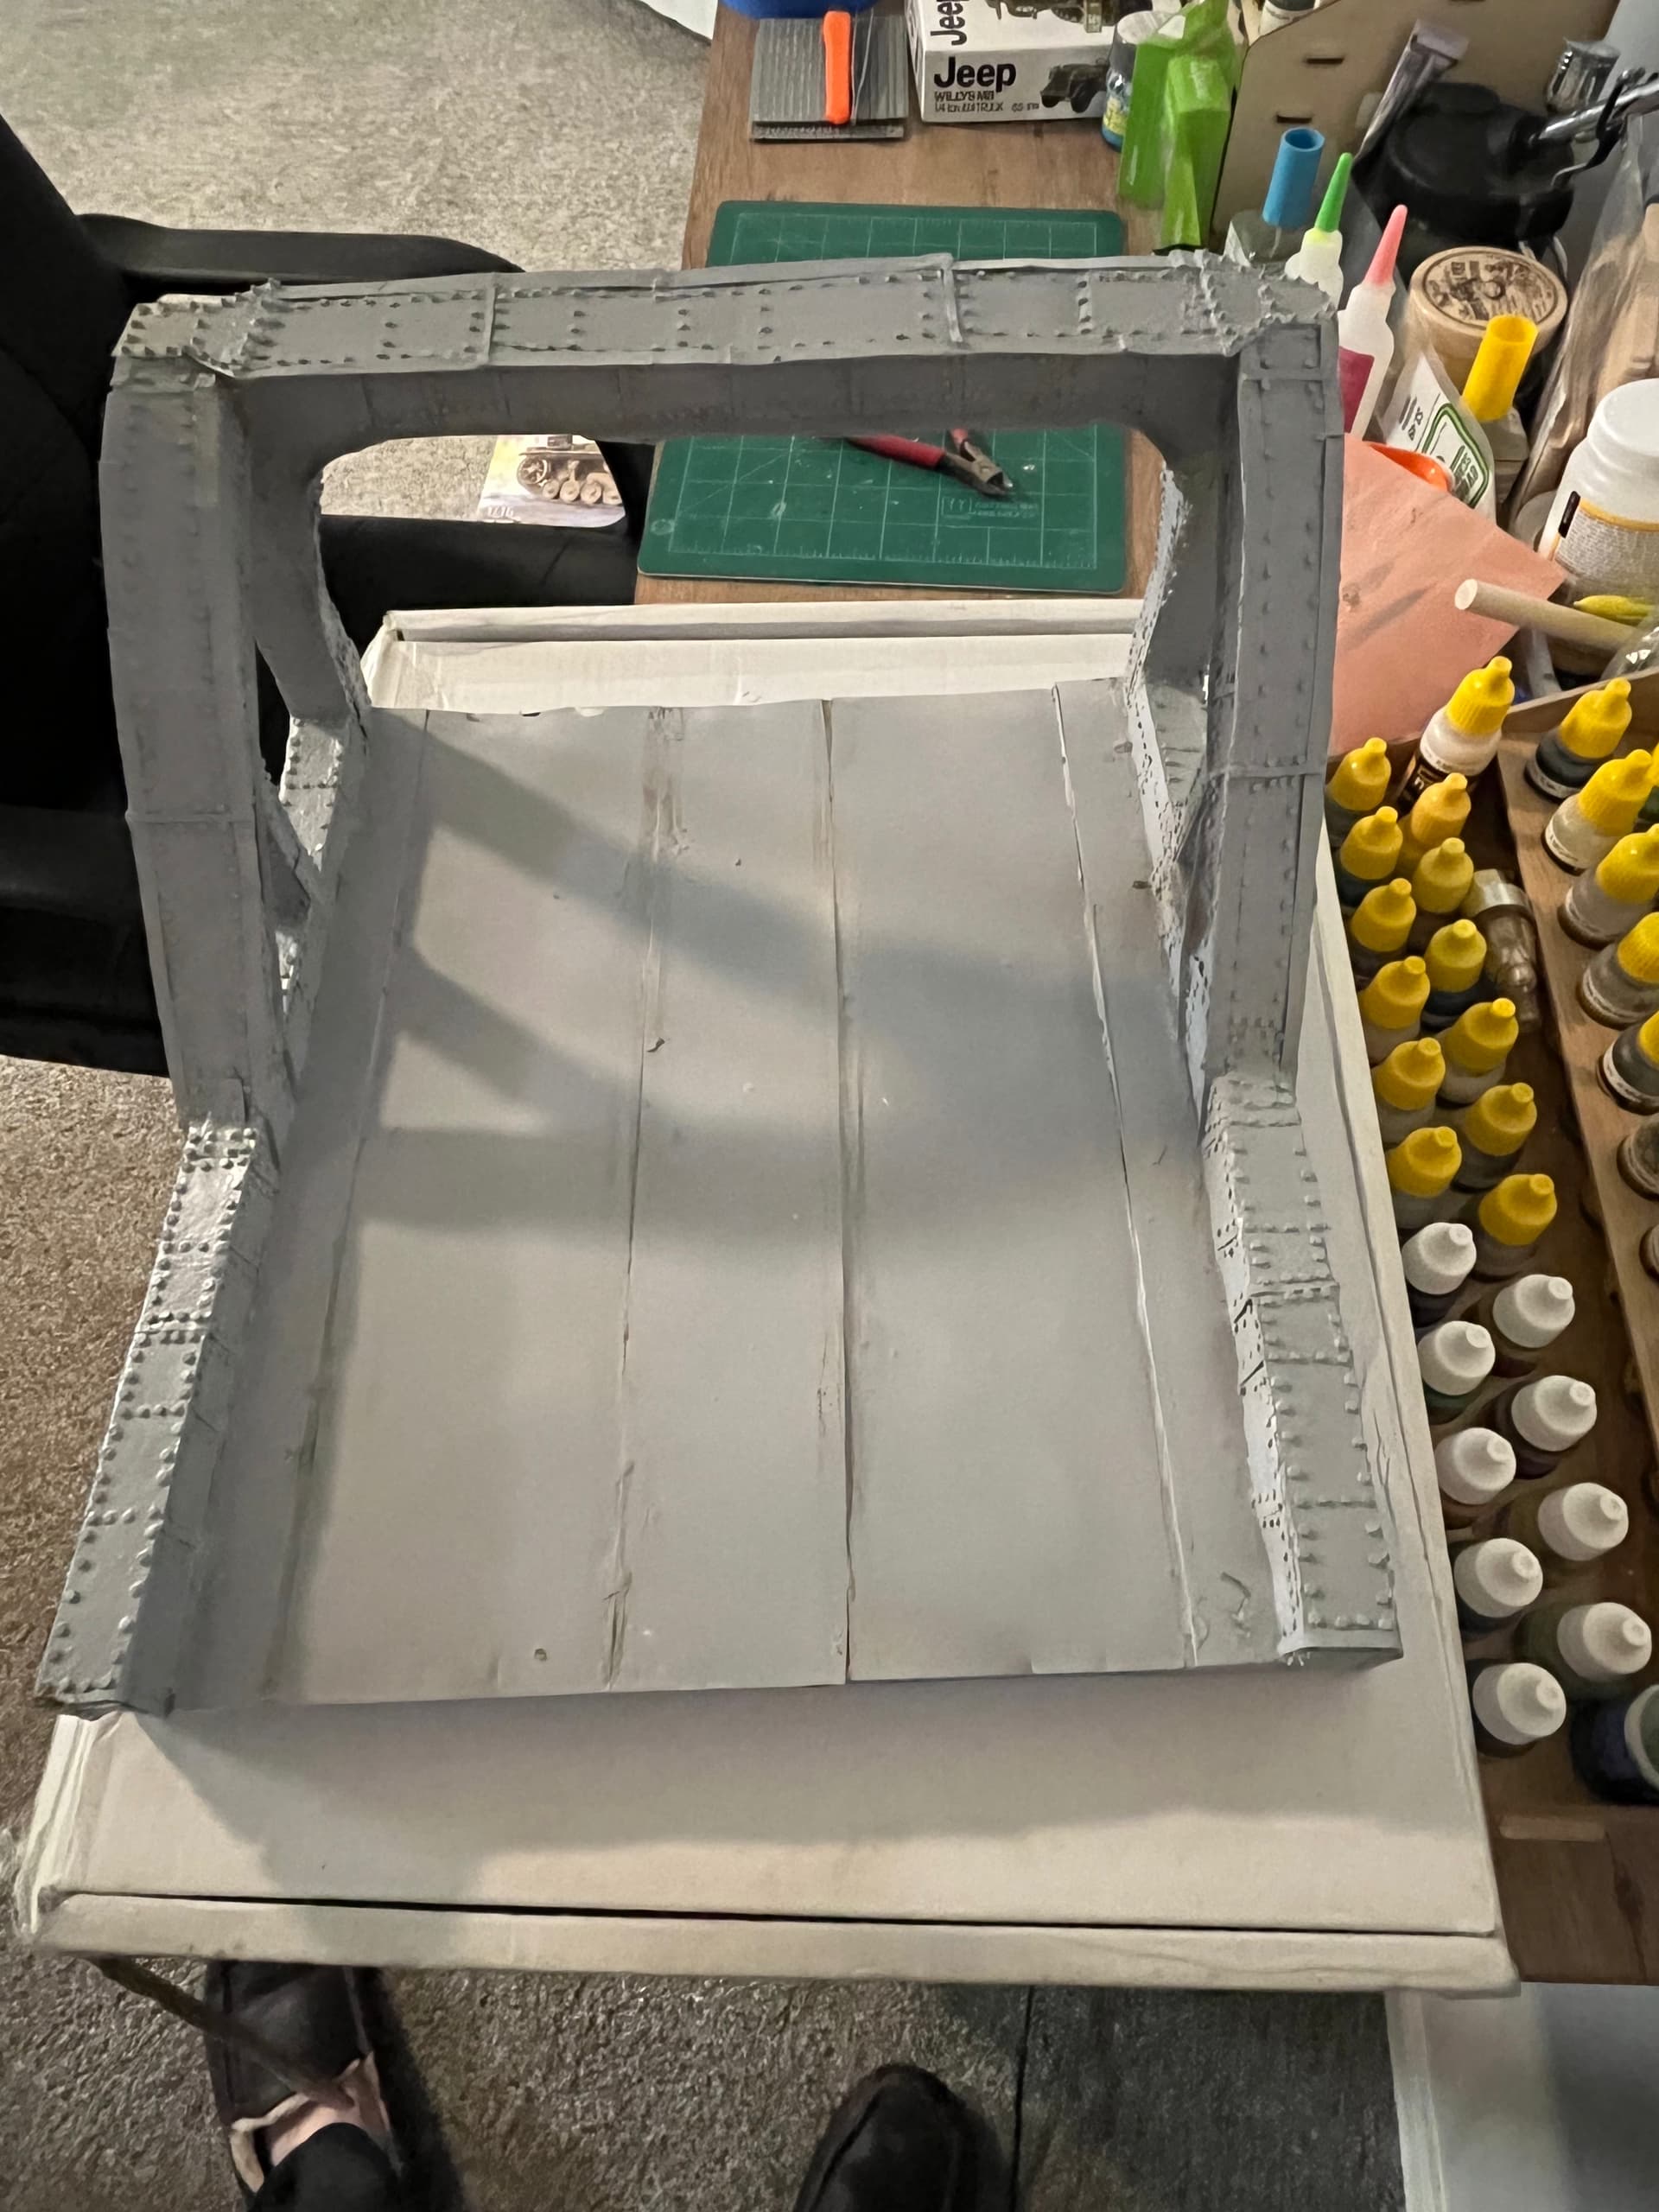
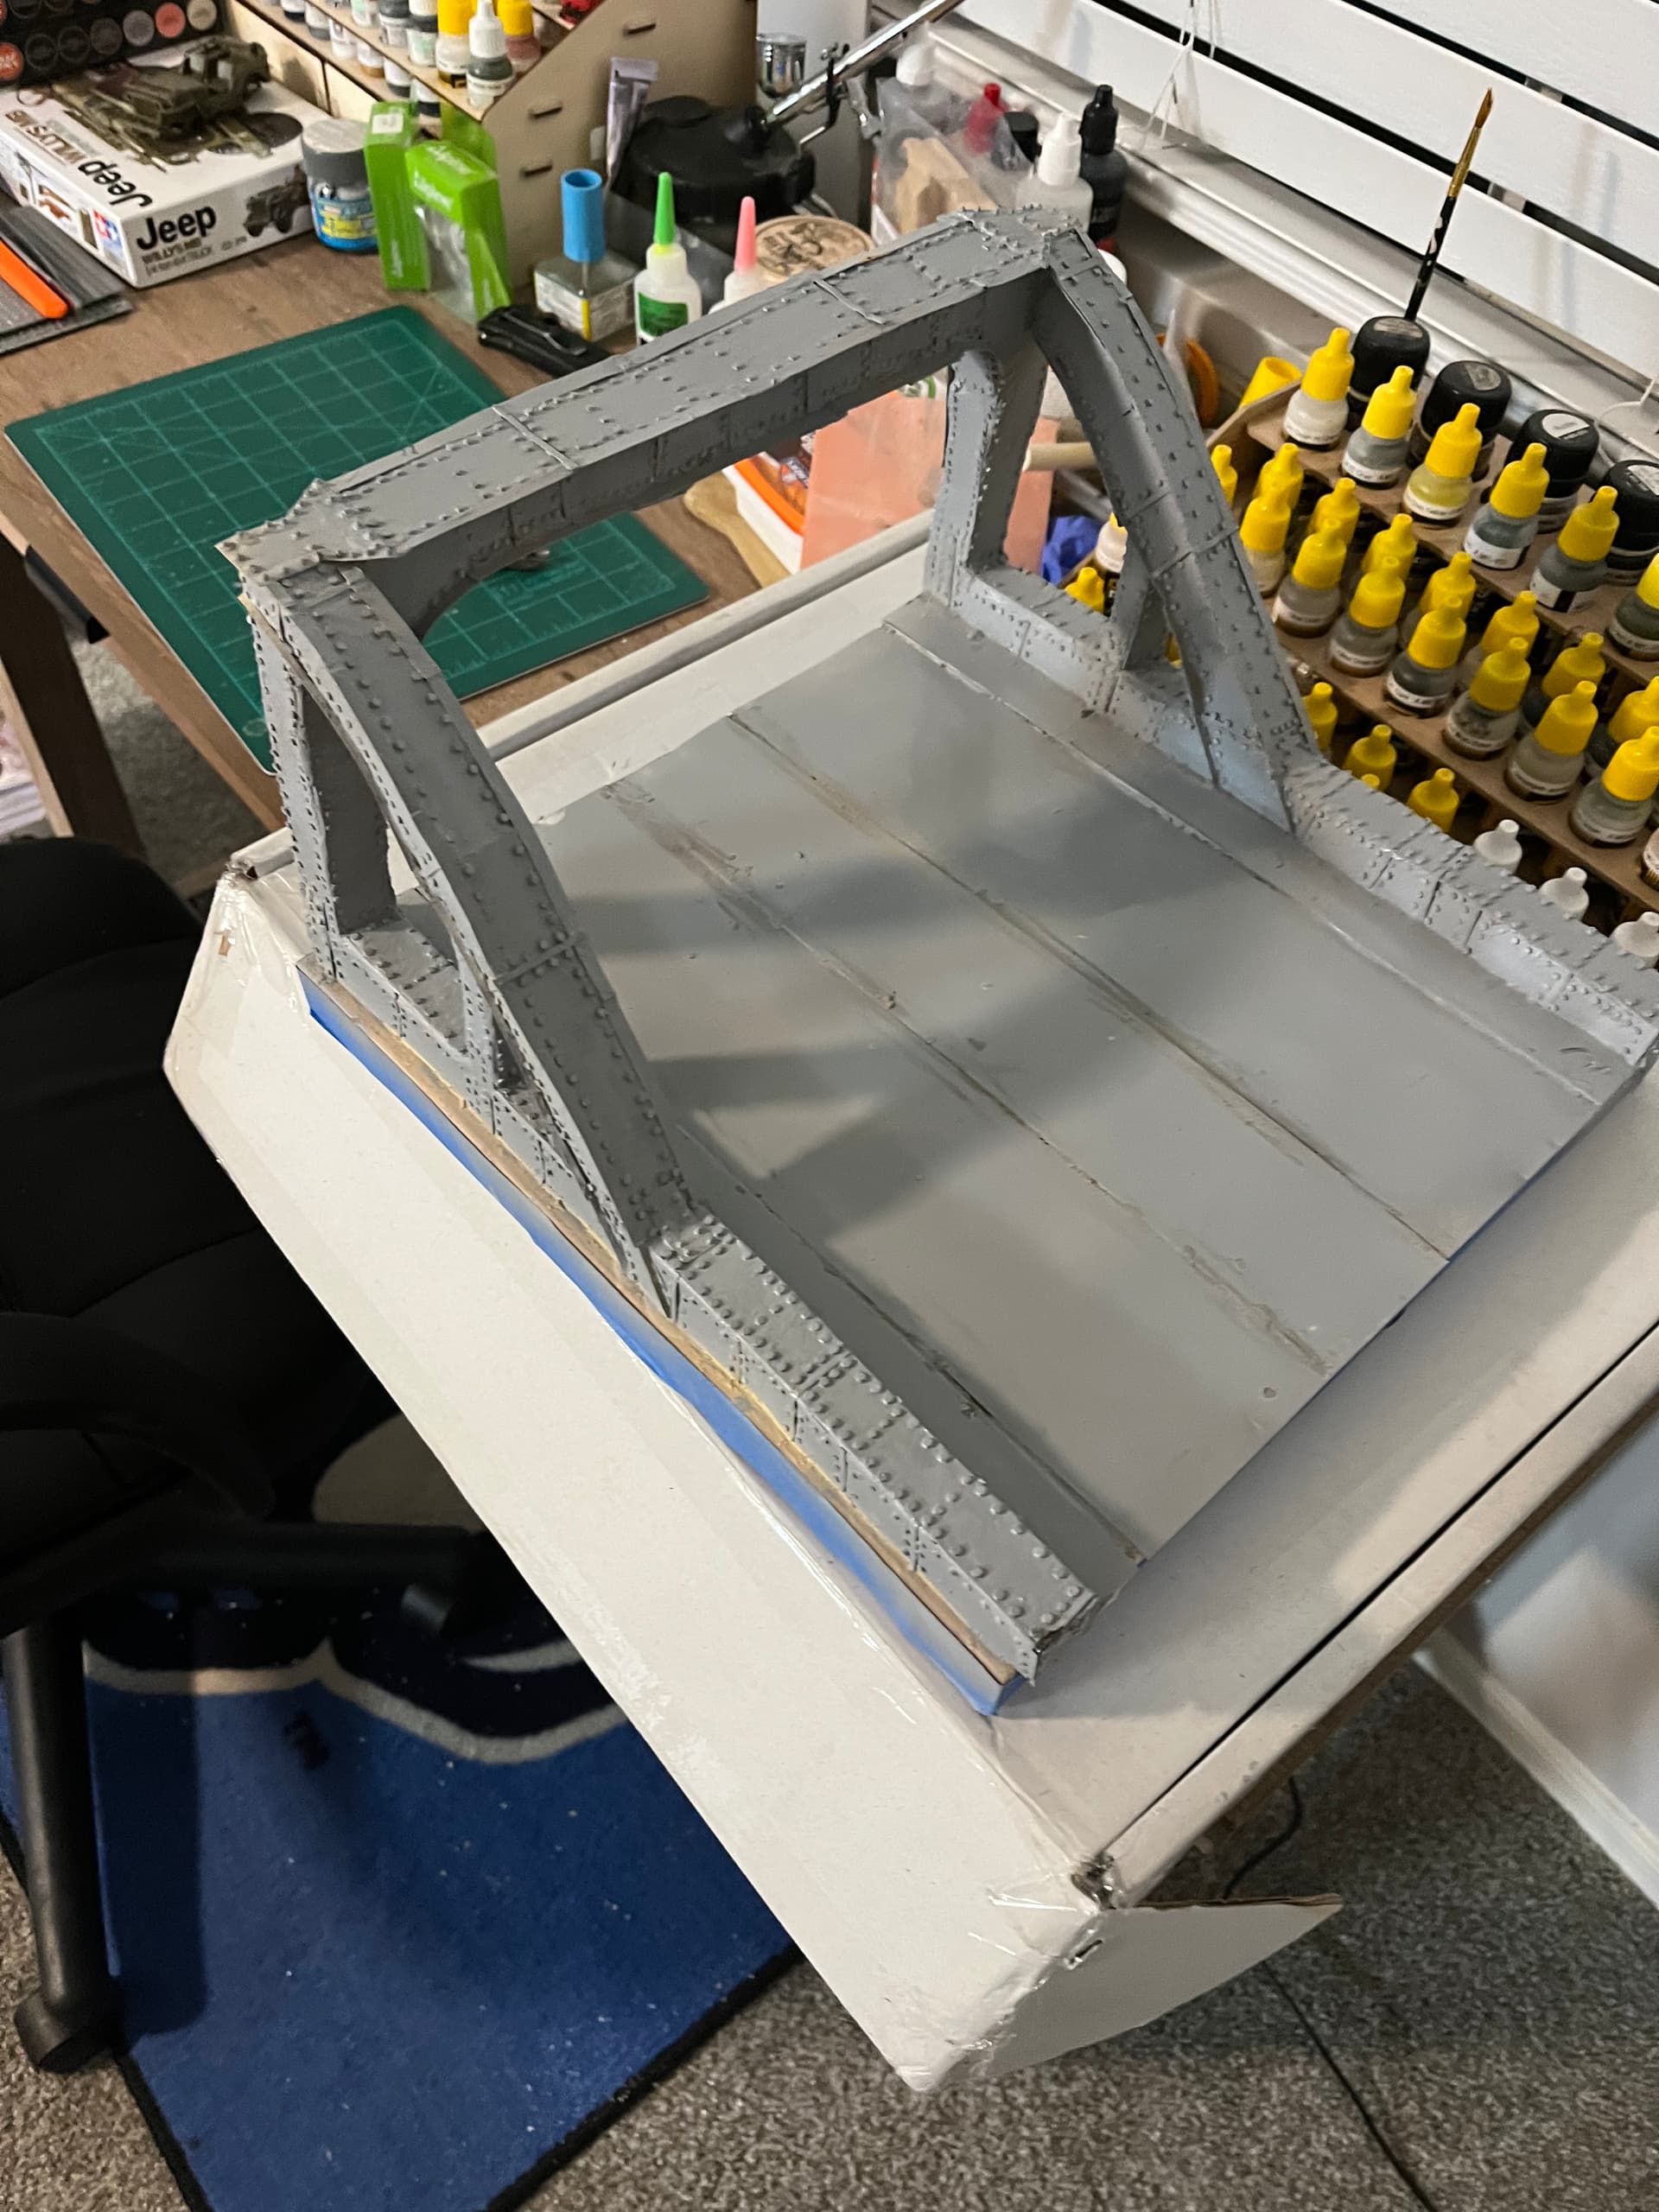
I’ve done some more work on the bridge this week, i will be taking a break until Sunday night to spend time with family for the holiday. I was able to sand and cover the bridge with me surfacer 500 . Next up is to add metal detail along the bridge for detail, I’ve begun this process and will show it in photos below after the major detail had been added i will go back and try and bolts alone the bridge.
Progress so far:
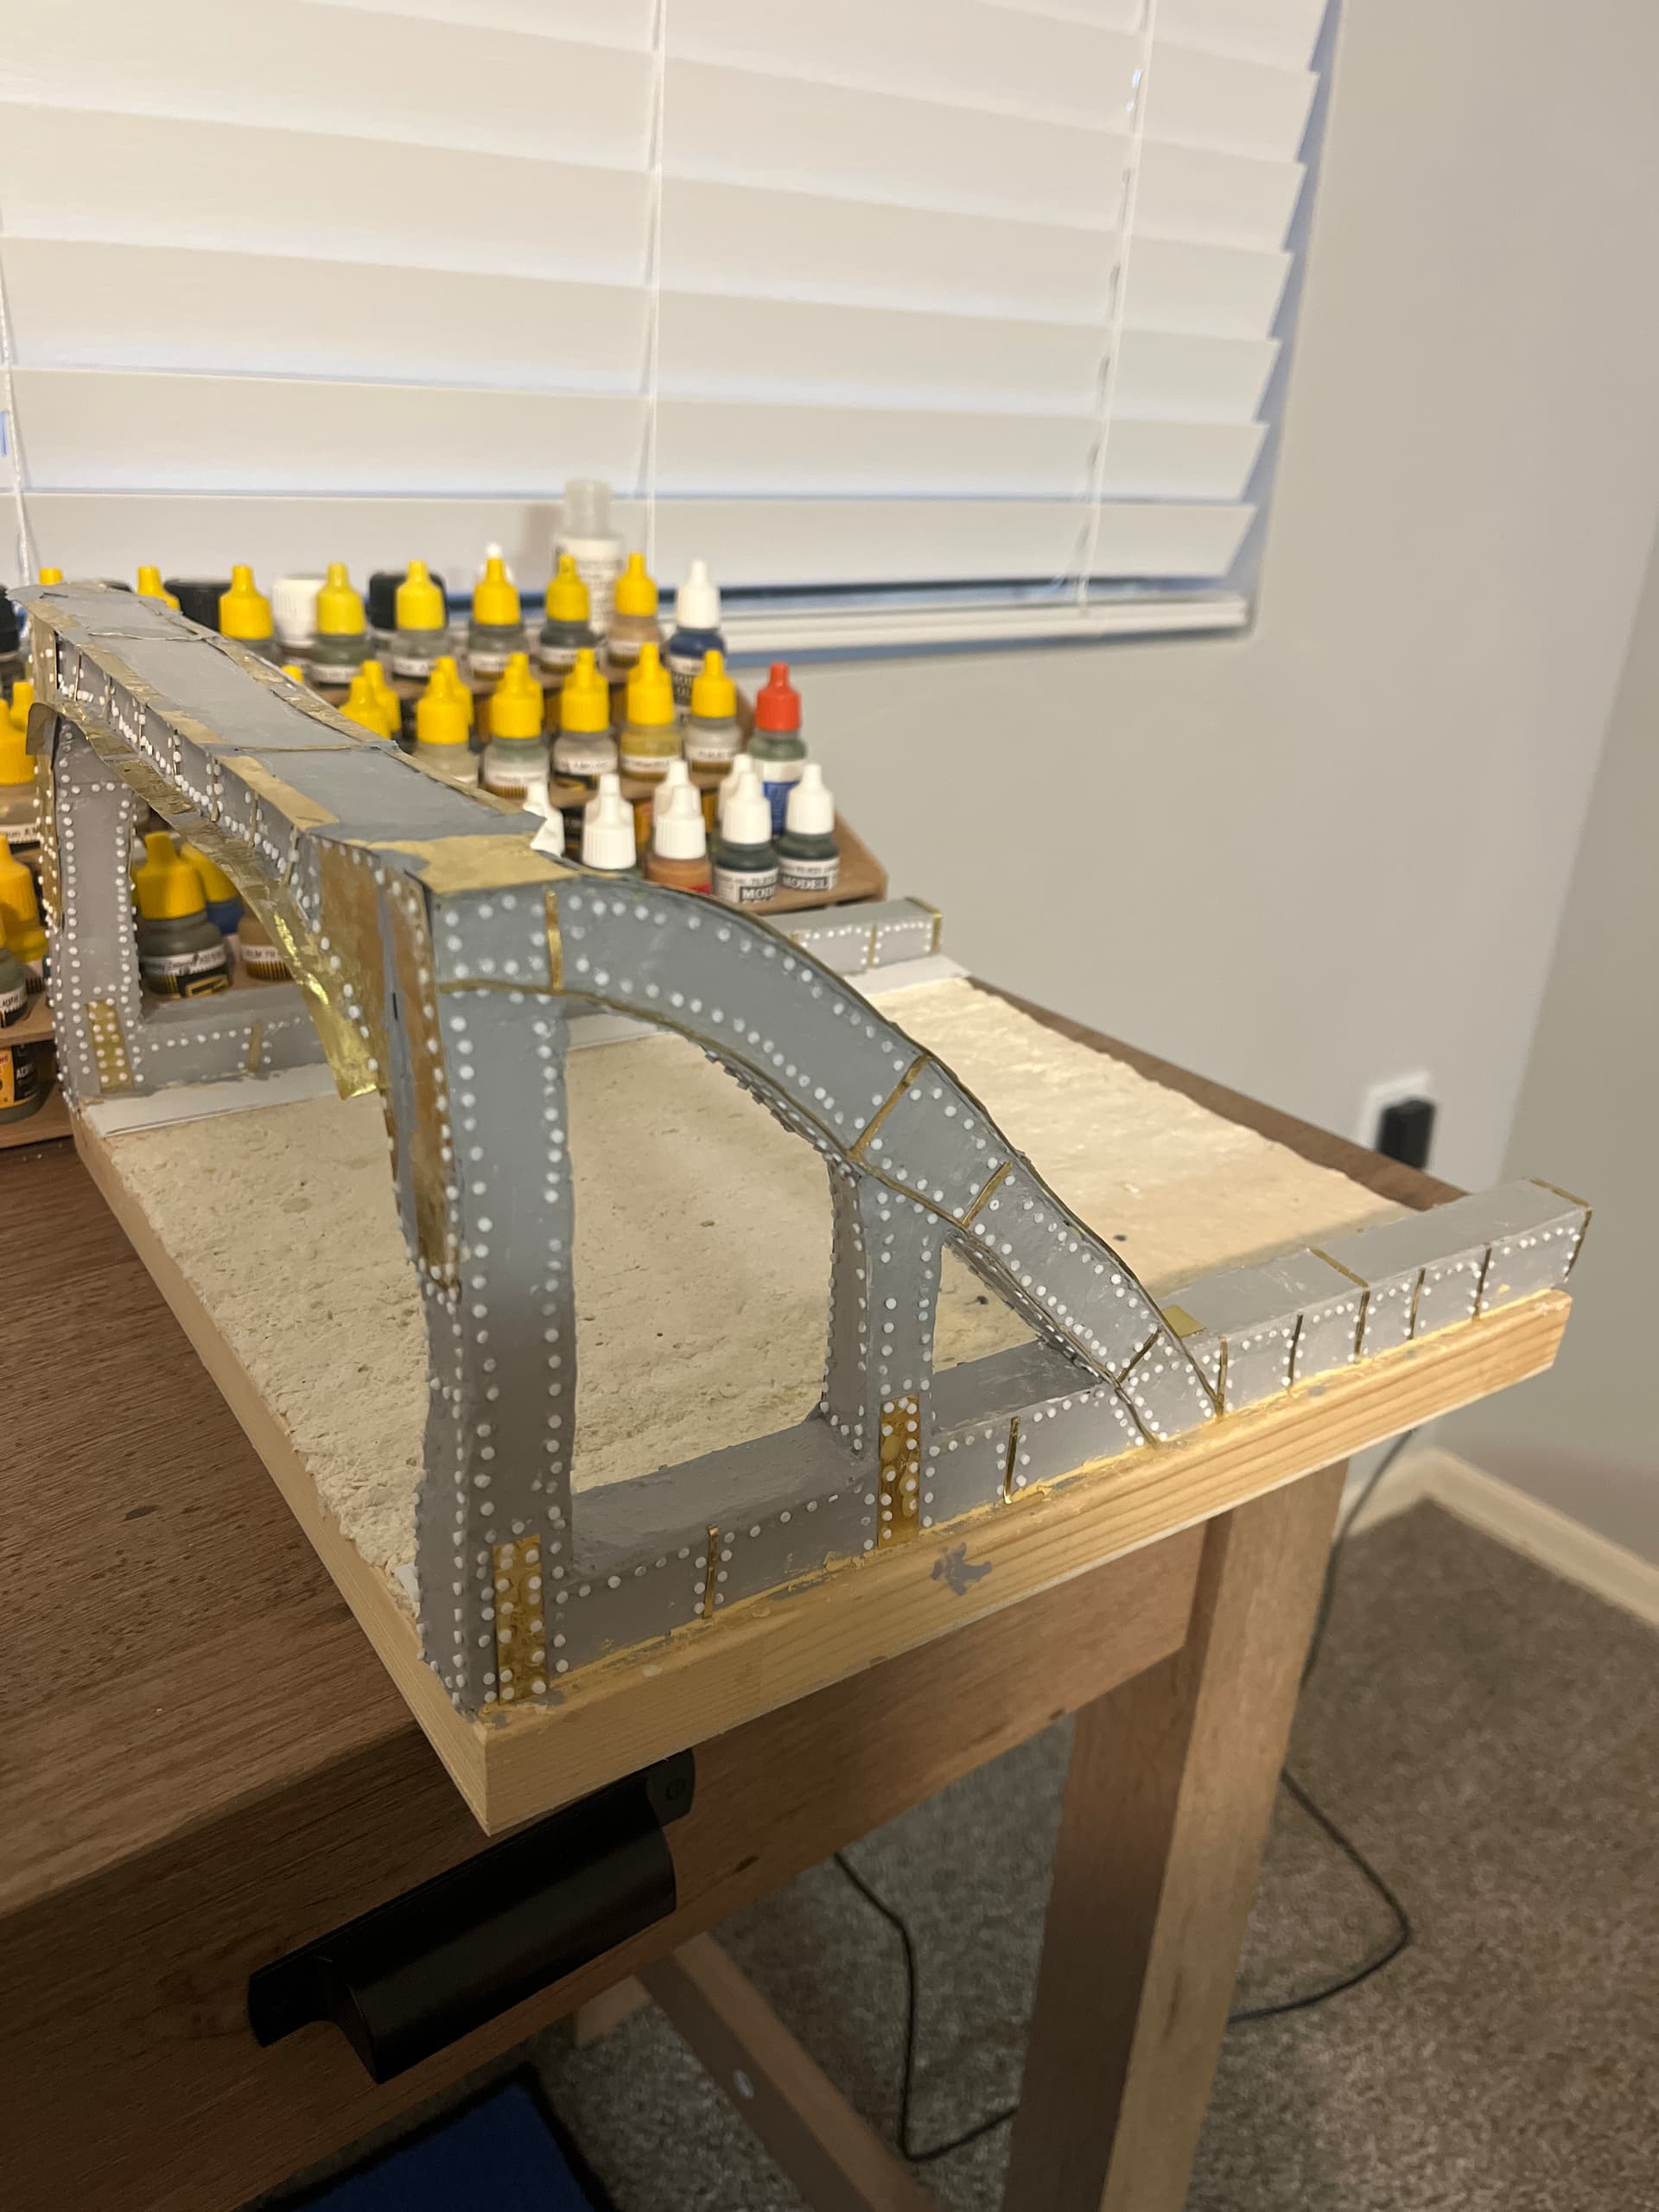
Another update for this weekend; i was able to take the time and put bolts/ nuts in my bridge. I used styrene rods to accomplish this. The only spots that don’t have bolts are on the top surgaves of the bridge, i have left these spots empty as i have bolts coming from Meng models that i ordered a weeks ago through spruebrothers. My hope is that by wedneaday night I’ll be complete with bolts and will do the final srace, the road, which will just be a few sheets of styrene plastic glued down. Then i will prime and begin the arduous job of painting this beast. Unfortunately there are a lot of imperfections in my opinion and ill have to learn from those. Fortunately for me i can call these imeorfections battle damage from rouge piat and flamethrower shots from the first night/ day of the fight.
Was able get a primer coat on from a tamiya rattle can tonight. Tomorrow I’ll do some shading with black and then continue with the base color. Right now I’m leaning towards doing an ammo Mig track rust as the base then doing a hairspray coat. Following that im going to do a grey coat then begin the chipping process. I’m currently going with this plan but feel like the bridge can be a few different colors, im looking for some other recommendations for a bridge if this size and build as most photos are black and white. Closes i was able to compare it to was a YouTube video titles a bridge too far where he painted his railway bridge in a grey with sky color mixed in too.
You are really making A LOT of unnecessary work for yourself building that section of bridge. I suggest you study historical photos of the real bridge and available reference (on line) of actual bridge construction.
I will just leave it at that.
p.s. I do have a personal belief that our model bridges should be as anatomically correct as the model tanks we display on them.
FYI ~ Evergreen plastic shapes are far easier to form and to work with than Plastruct. Though Plastruct has now started offering a similarly workable white plastic formula. Their gray material being too brittle also it does not seem to respond to the more common model solvents.
Thats because the grey stuff is ABS, not polystyrene. It does need a stronger solvent glue, which is why it is not as popular for modelers. Plastruct, and other makers, do sell cements that work with ABS.
Ken
@165thspc yeah i agree, i was trying to use some references from the 30s that i had found and model it off that photo, as well a painting of the 506th crossing the bridge too. The contraction in my opinion was a bit over the top. I shouldn’t have used paper machete but since I’m this far I’m kinda committed. So far i was able to prime, paint, chip and a now doing oil washes. I think in the future i want to rebuild the bridge but using a different method. More than likely i will frame it with flash cards and build each part in sections. The styrofoam wasn’t a horrible idea but it wasn’t awesome. As for bridge building i should have looked at construction methods like you said. Anatomically speaking the bridge i have built has its good sides and WTF sides so you are correct there. This more or less was a great practical exercise to see where my scratch building skills were at.
I do realize this tankerken ~ I am one of the modelers who does not favor the brittle ABS material.
Though popular with Engineering model makers I honestly do not understand why Plastruct continues to make the product at all!
Also FYI ~ The softer, white Plastruct material appears to be extruded so the shapes seem to “puff out” slightly in a “Marshmallow effect” as it hardens making it less dimensionally accurate than the Evergreen product. The Evergreen appears to have been sawn to correct size. (You can see the saw marks!)
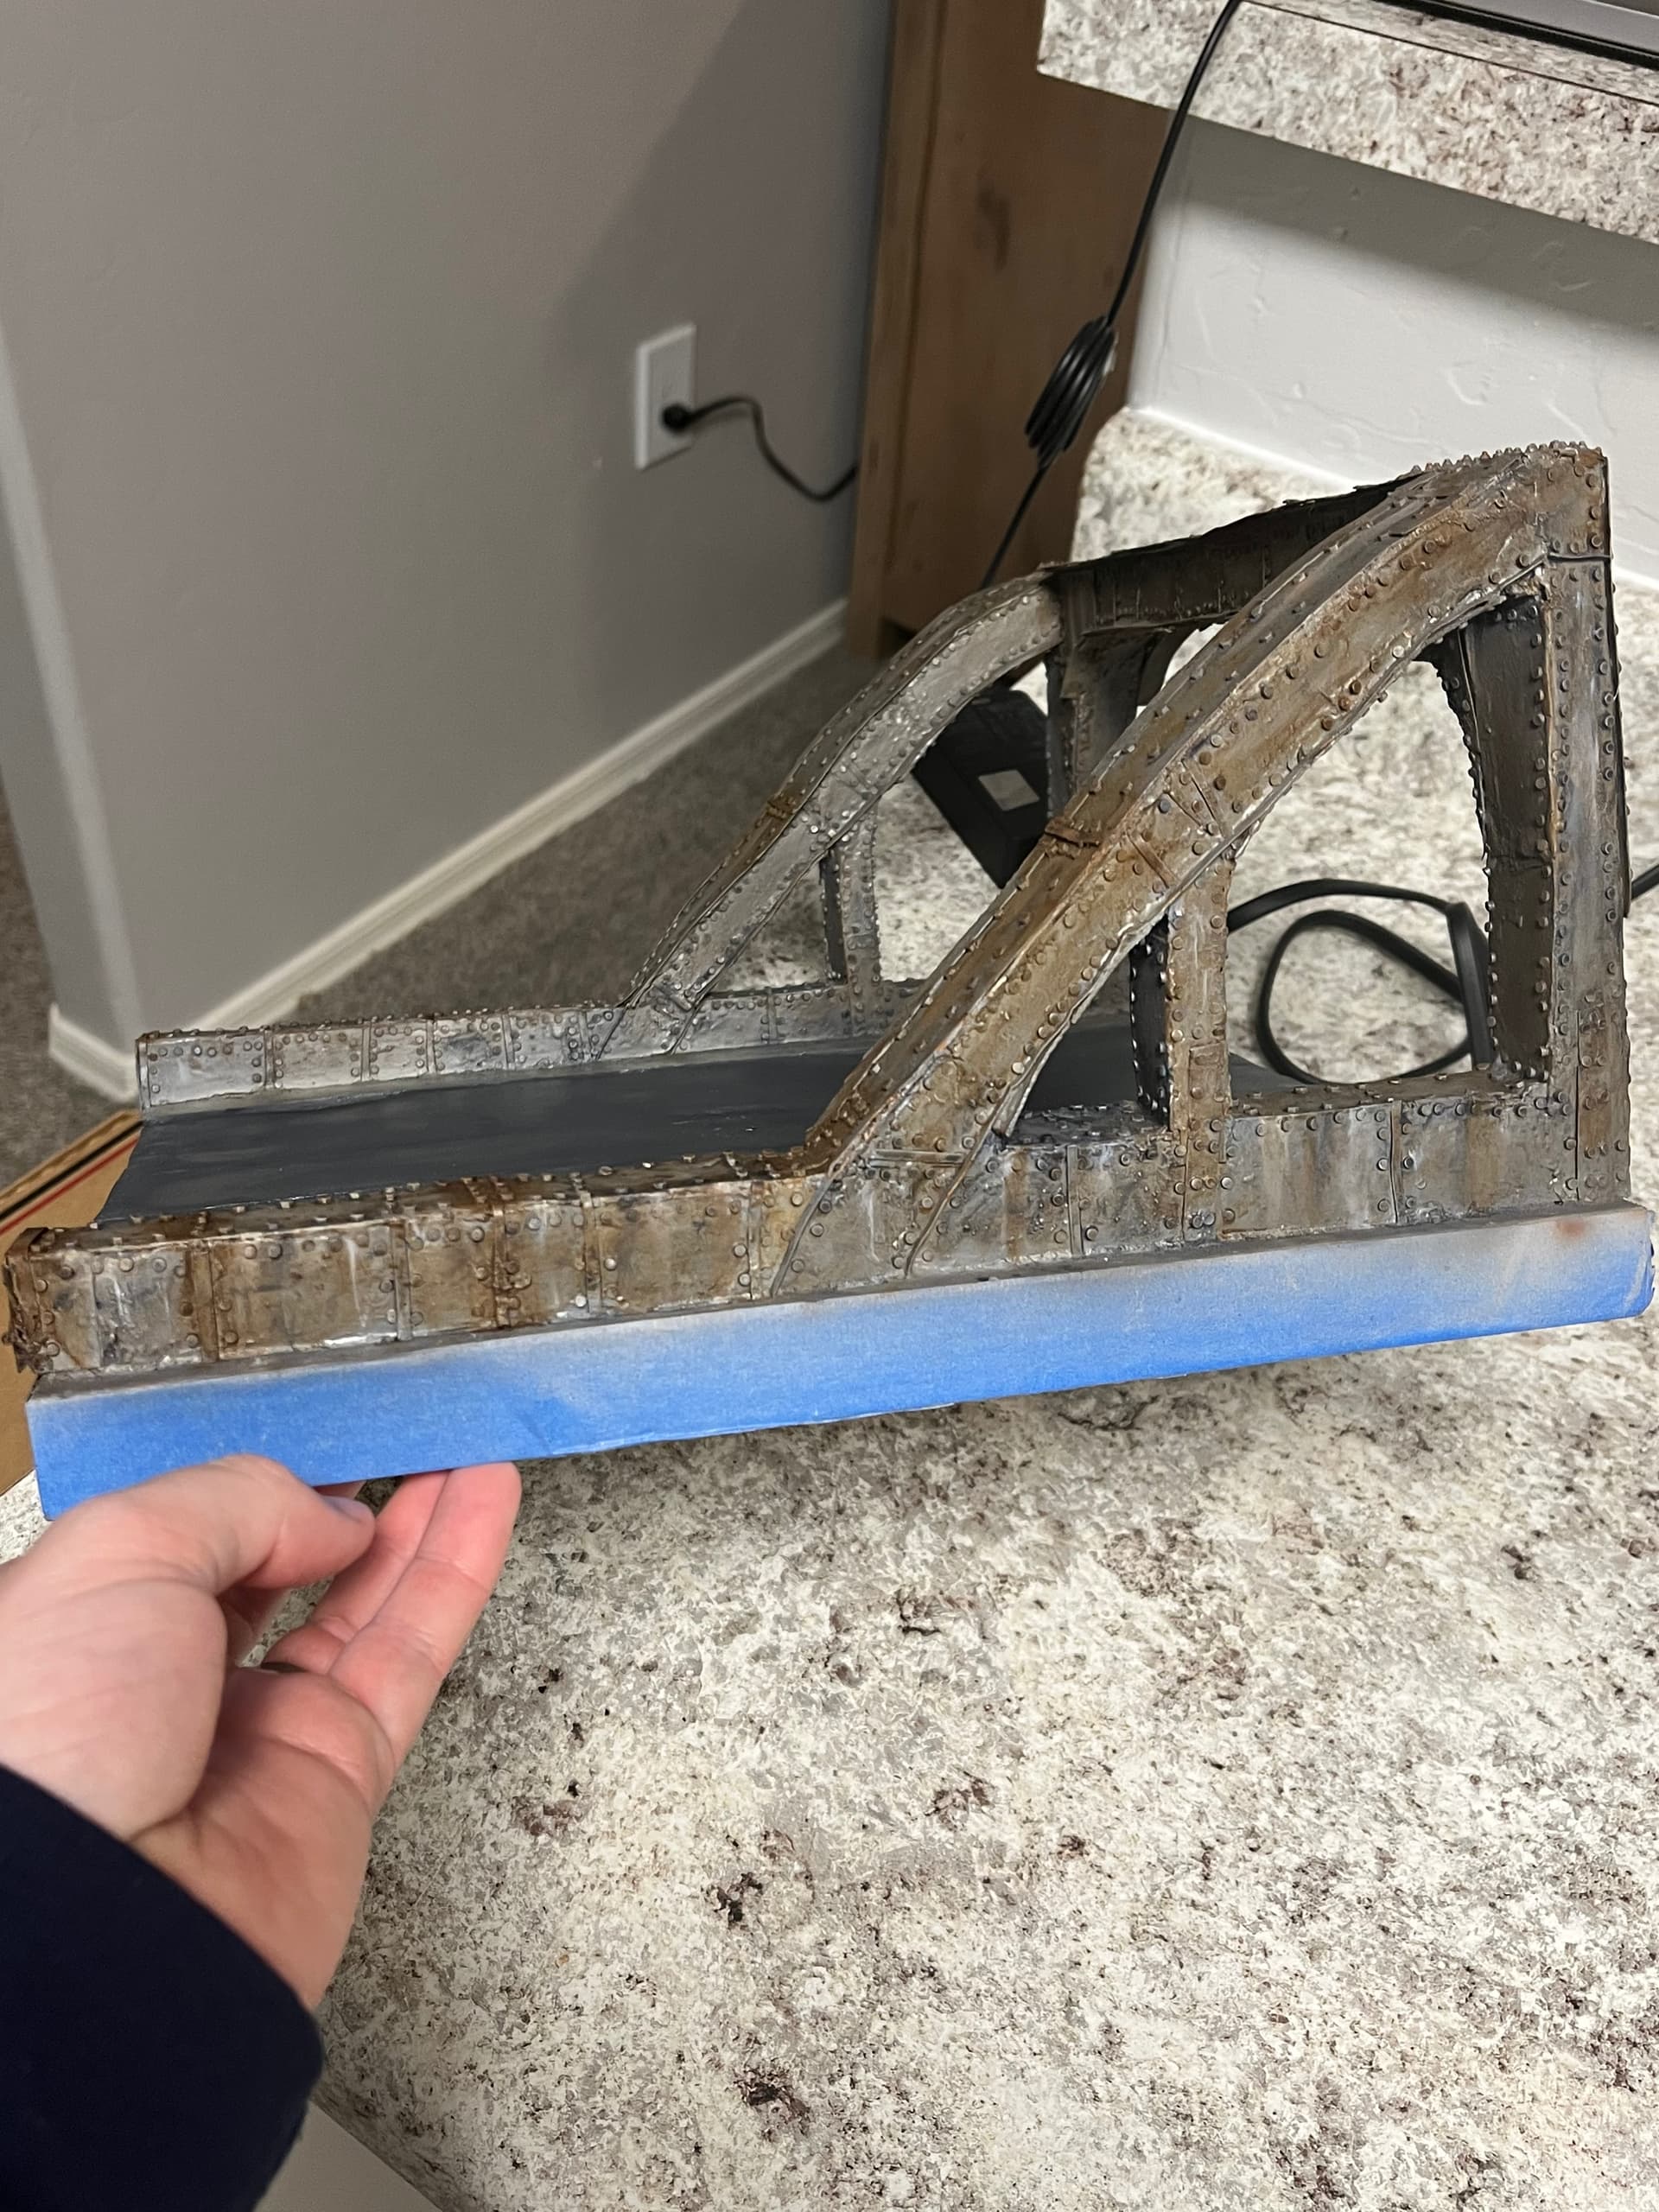
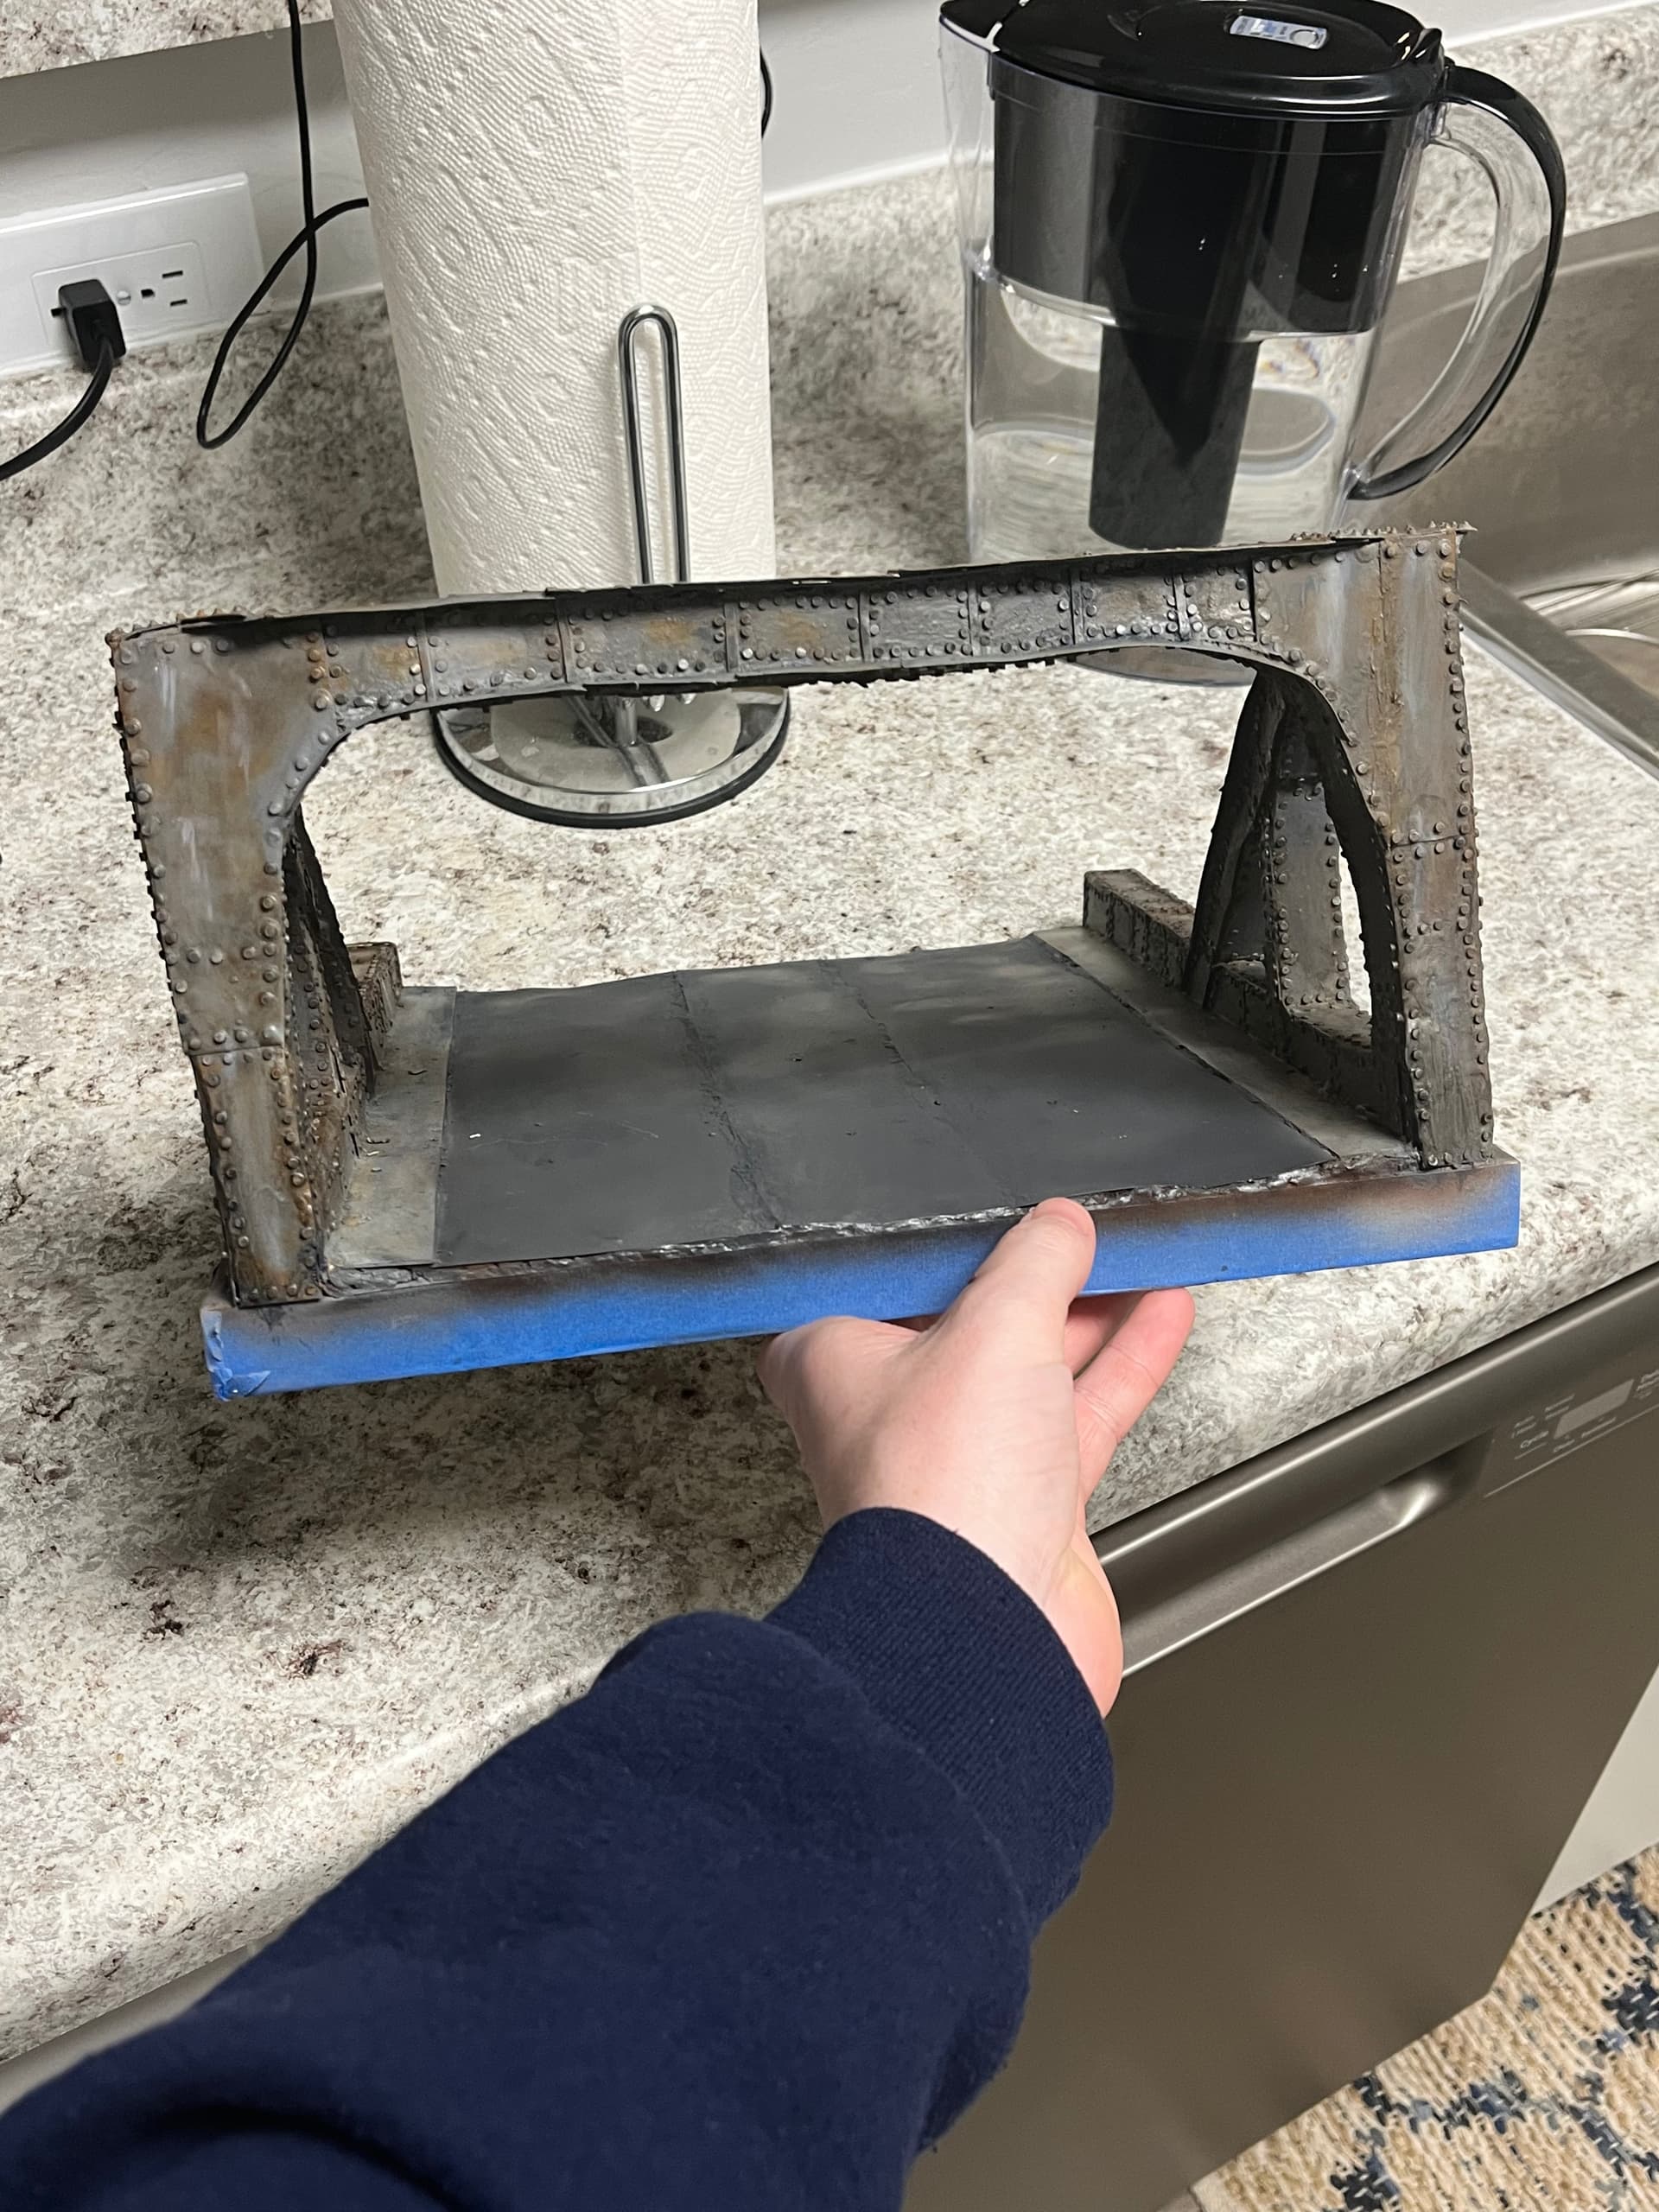
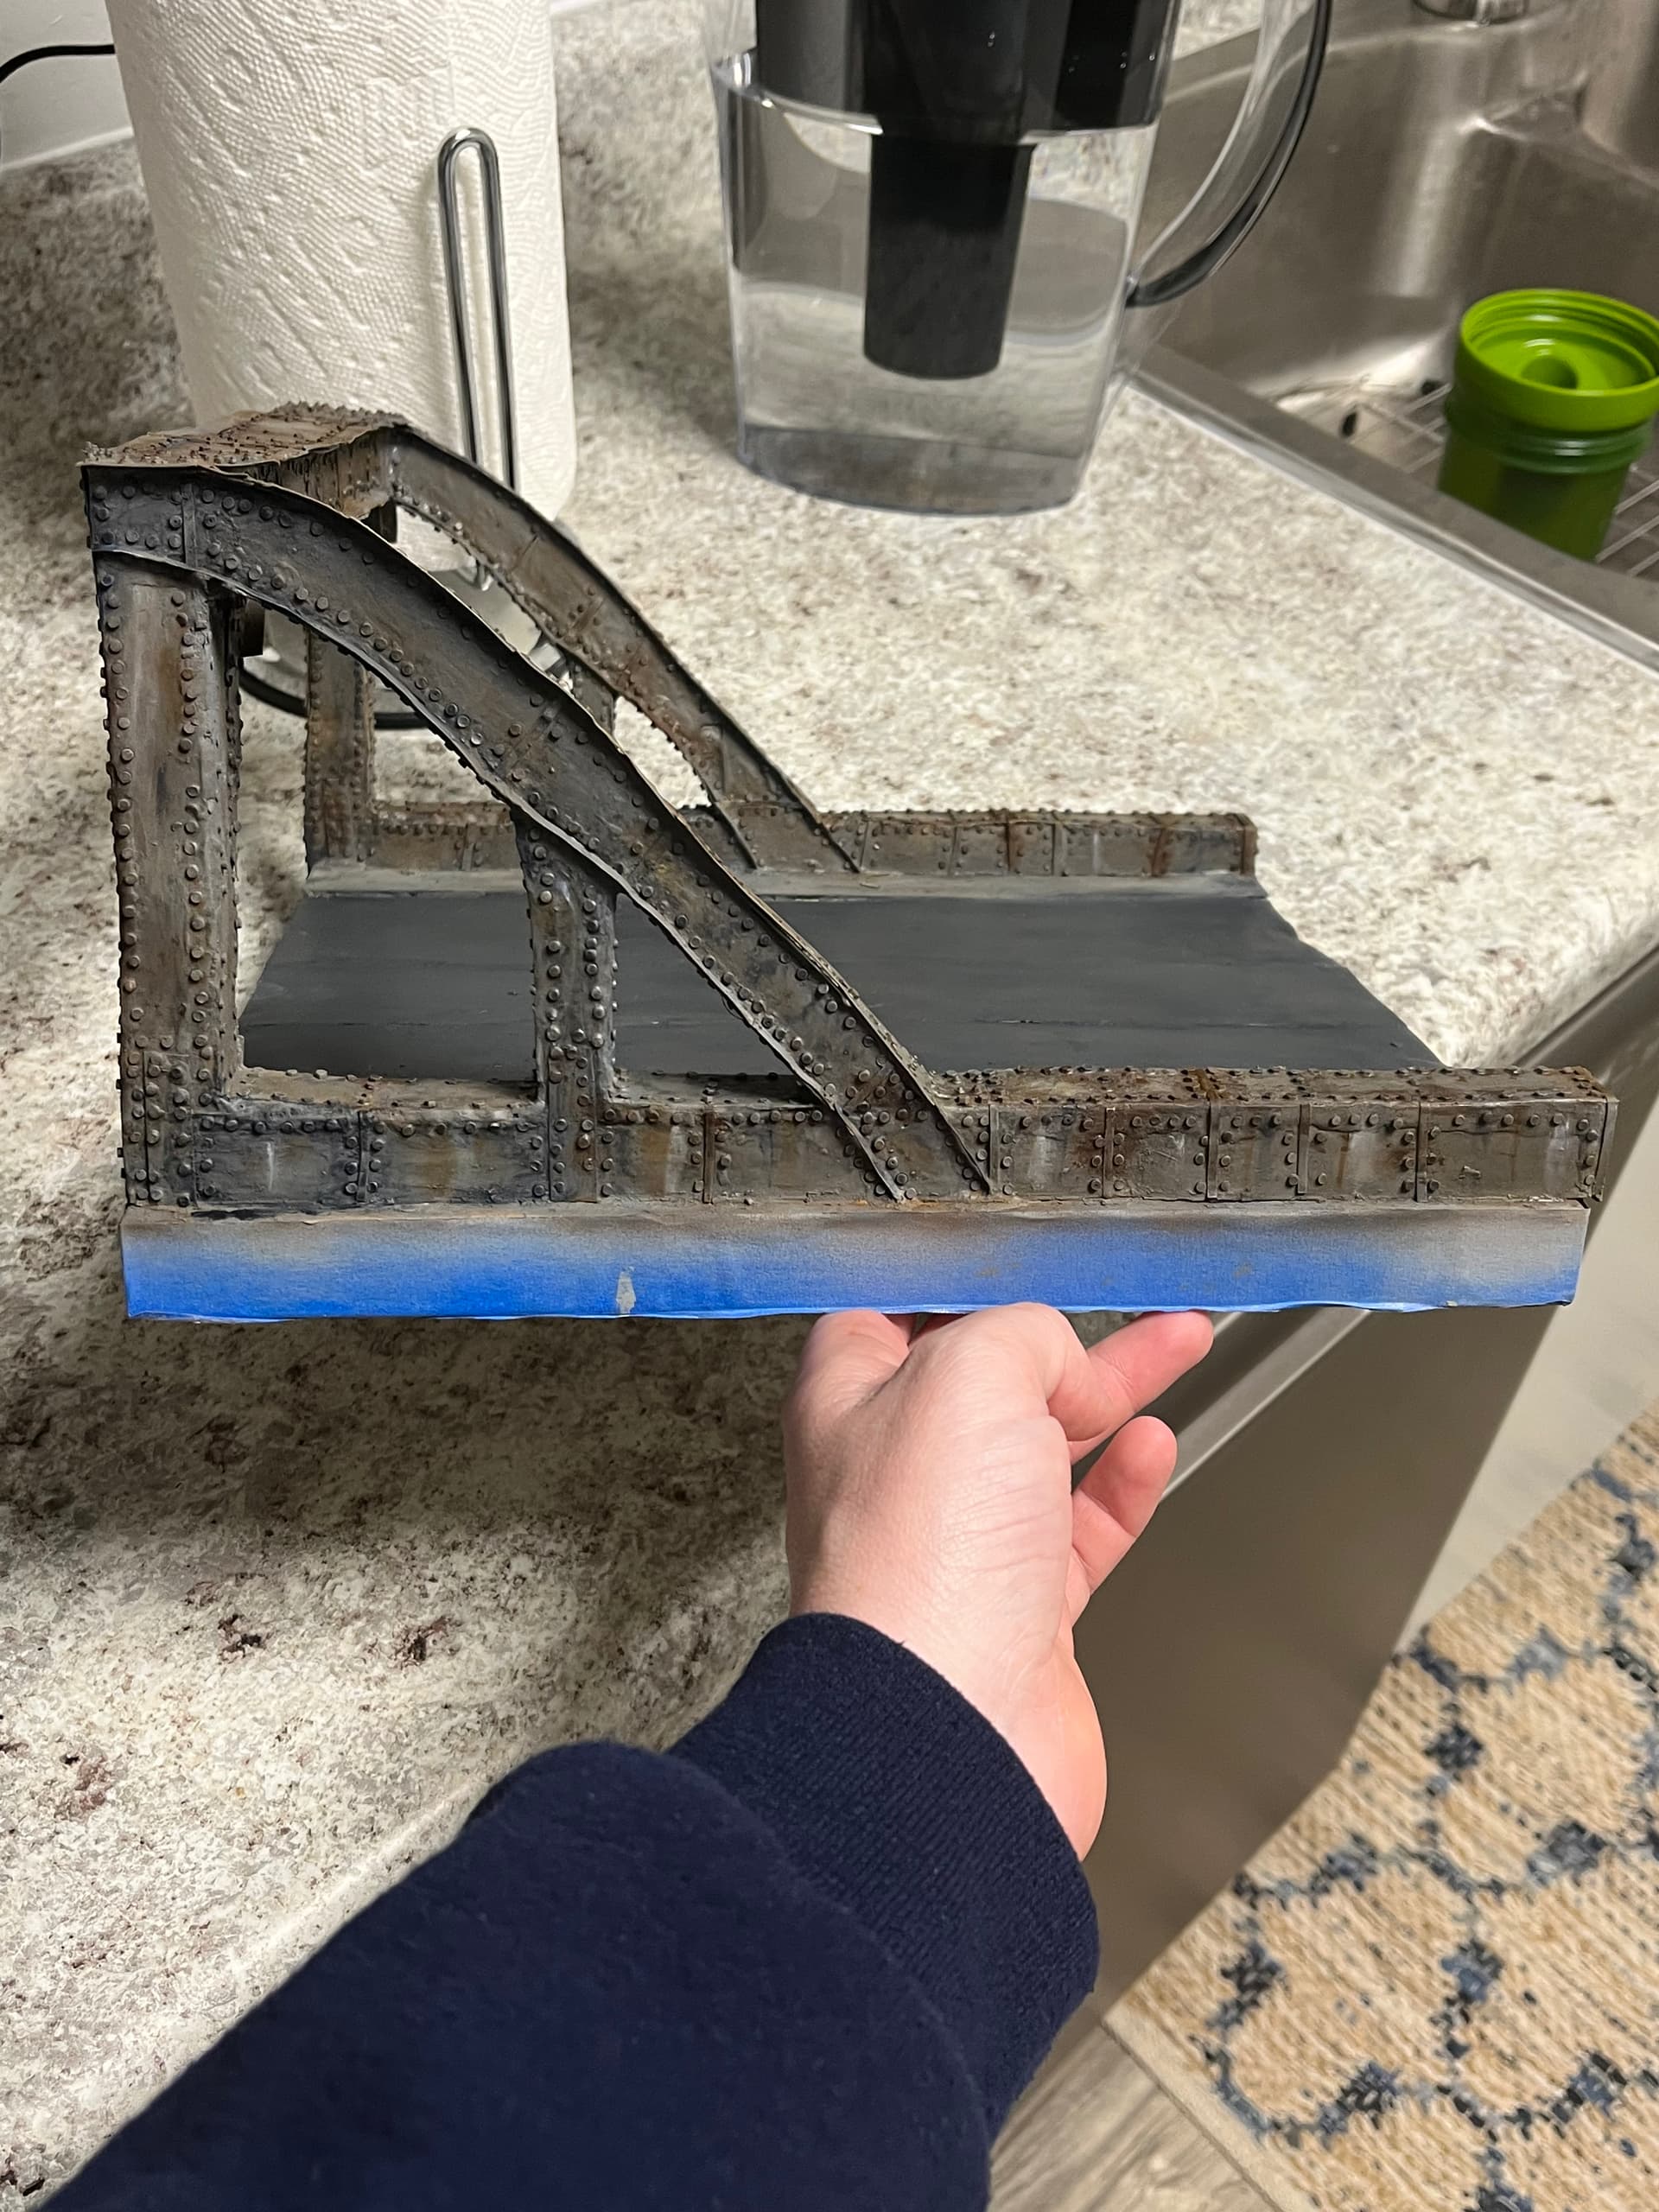
Alright guys, this part of my diorama build is finally complete. The bridge has been painted, chipped, washed and weathered to my liking. The wash i gave it was made up of burnt umber then a follow on wash of Payne’s grey after that i did some minor streaking with white, burnt umber and Payne’s grey. .Next i will paint the Willy’s jeep and then after the Christmas holiday i will finish my three figures and put it all together for a final diorama.