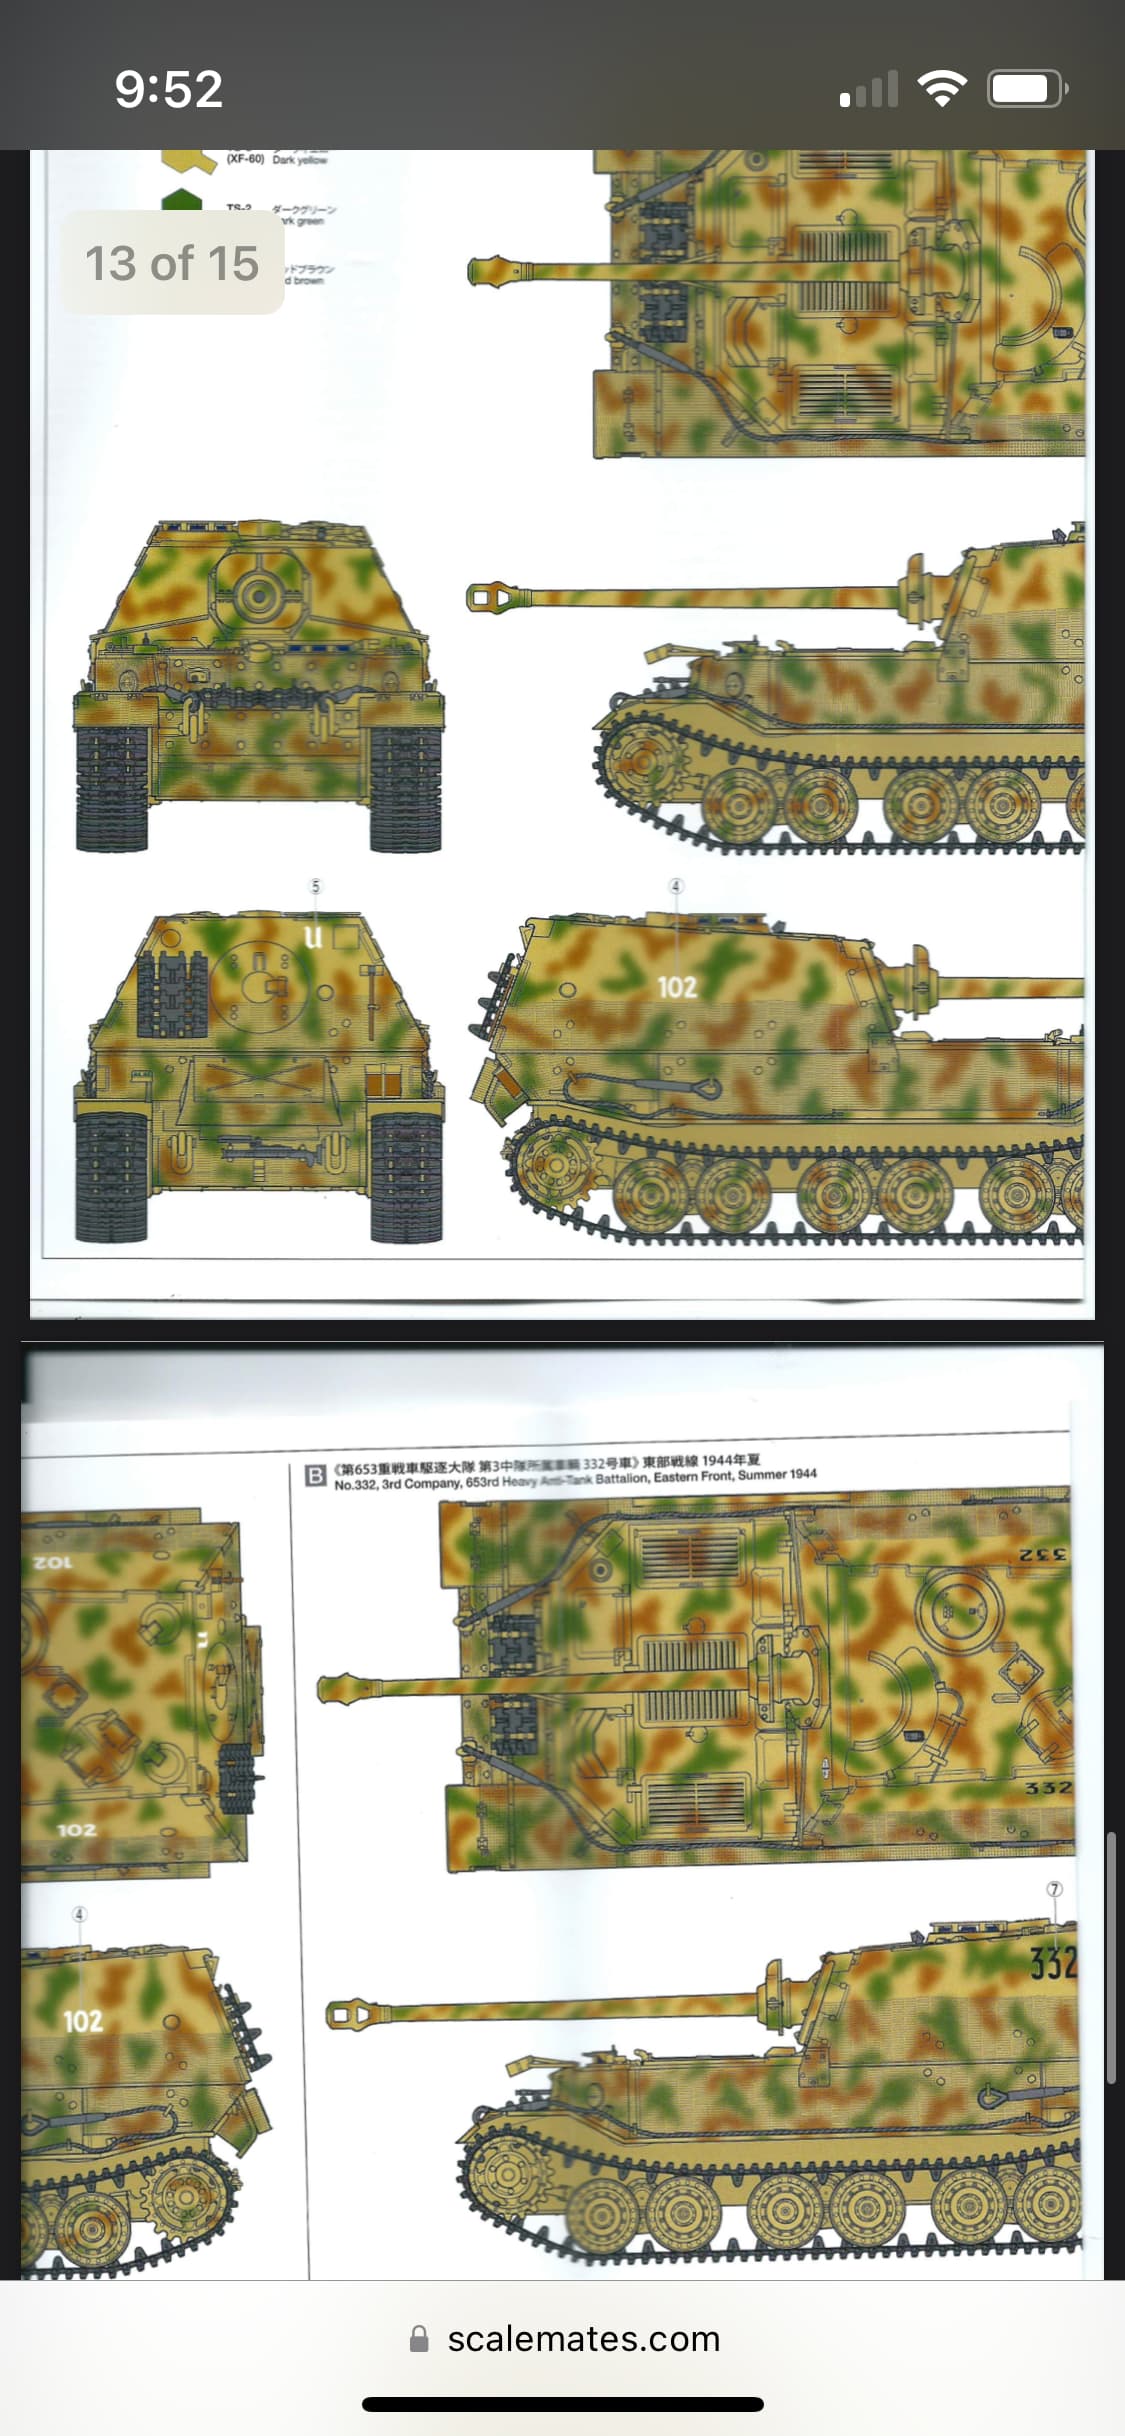
You’re quite welcome. There was no such requirement for a three tone camo, In fact, looking around at photos, you’ll even find photos of some that stayed in Dark Yellow in places like Sicily, Italy, Greece, and Russia. No secondary camo colors beyond the base color.
2 Likes
@Stikpusher I do remember seeing vehicles in just dark yellow, especially Otto carius vehicle. This all makes sense now i can’t believe i didn’t catch it ![]()
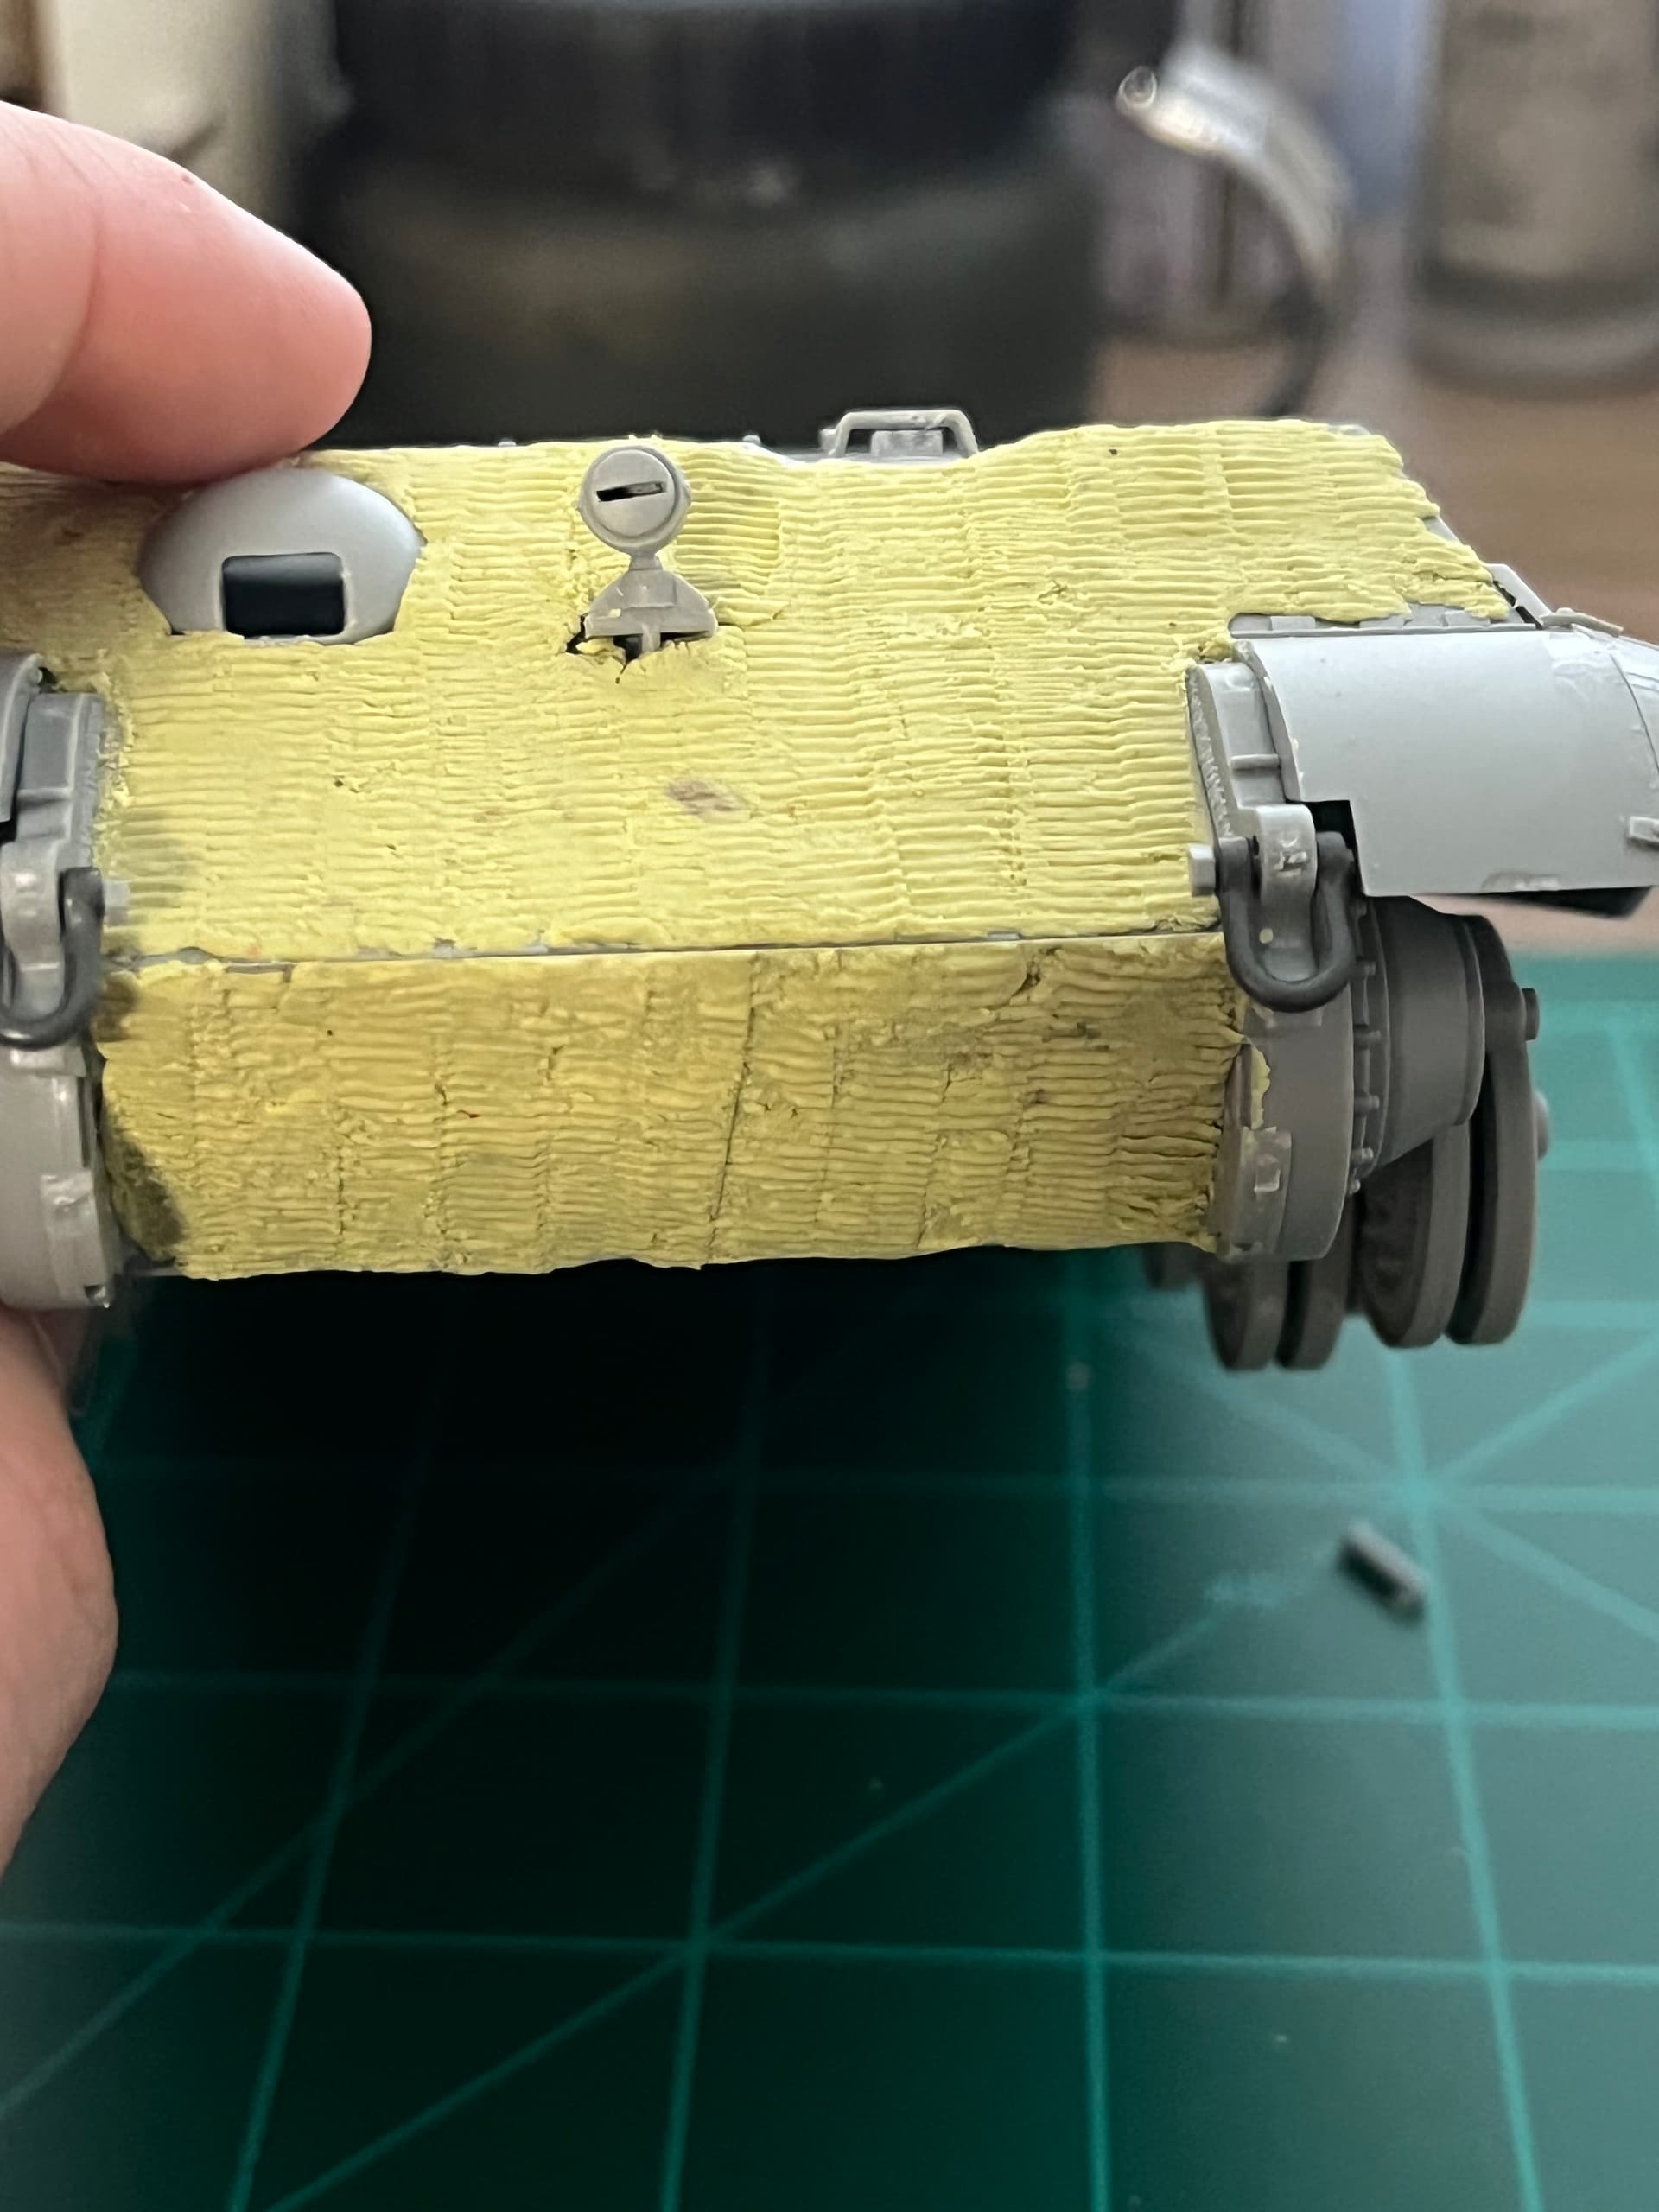
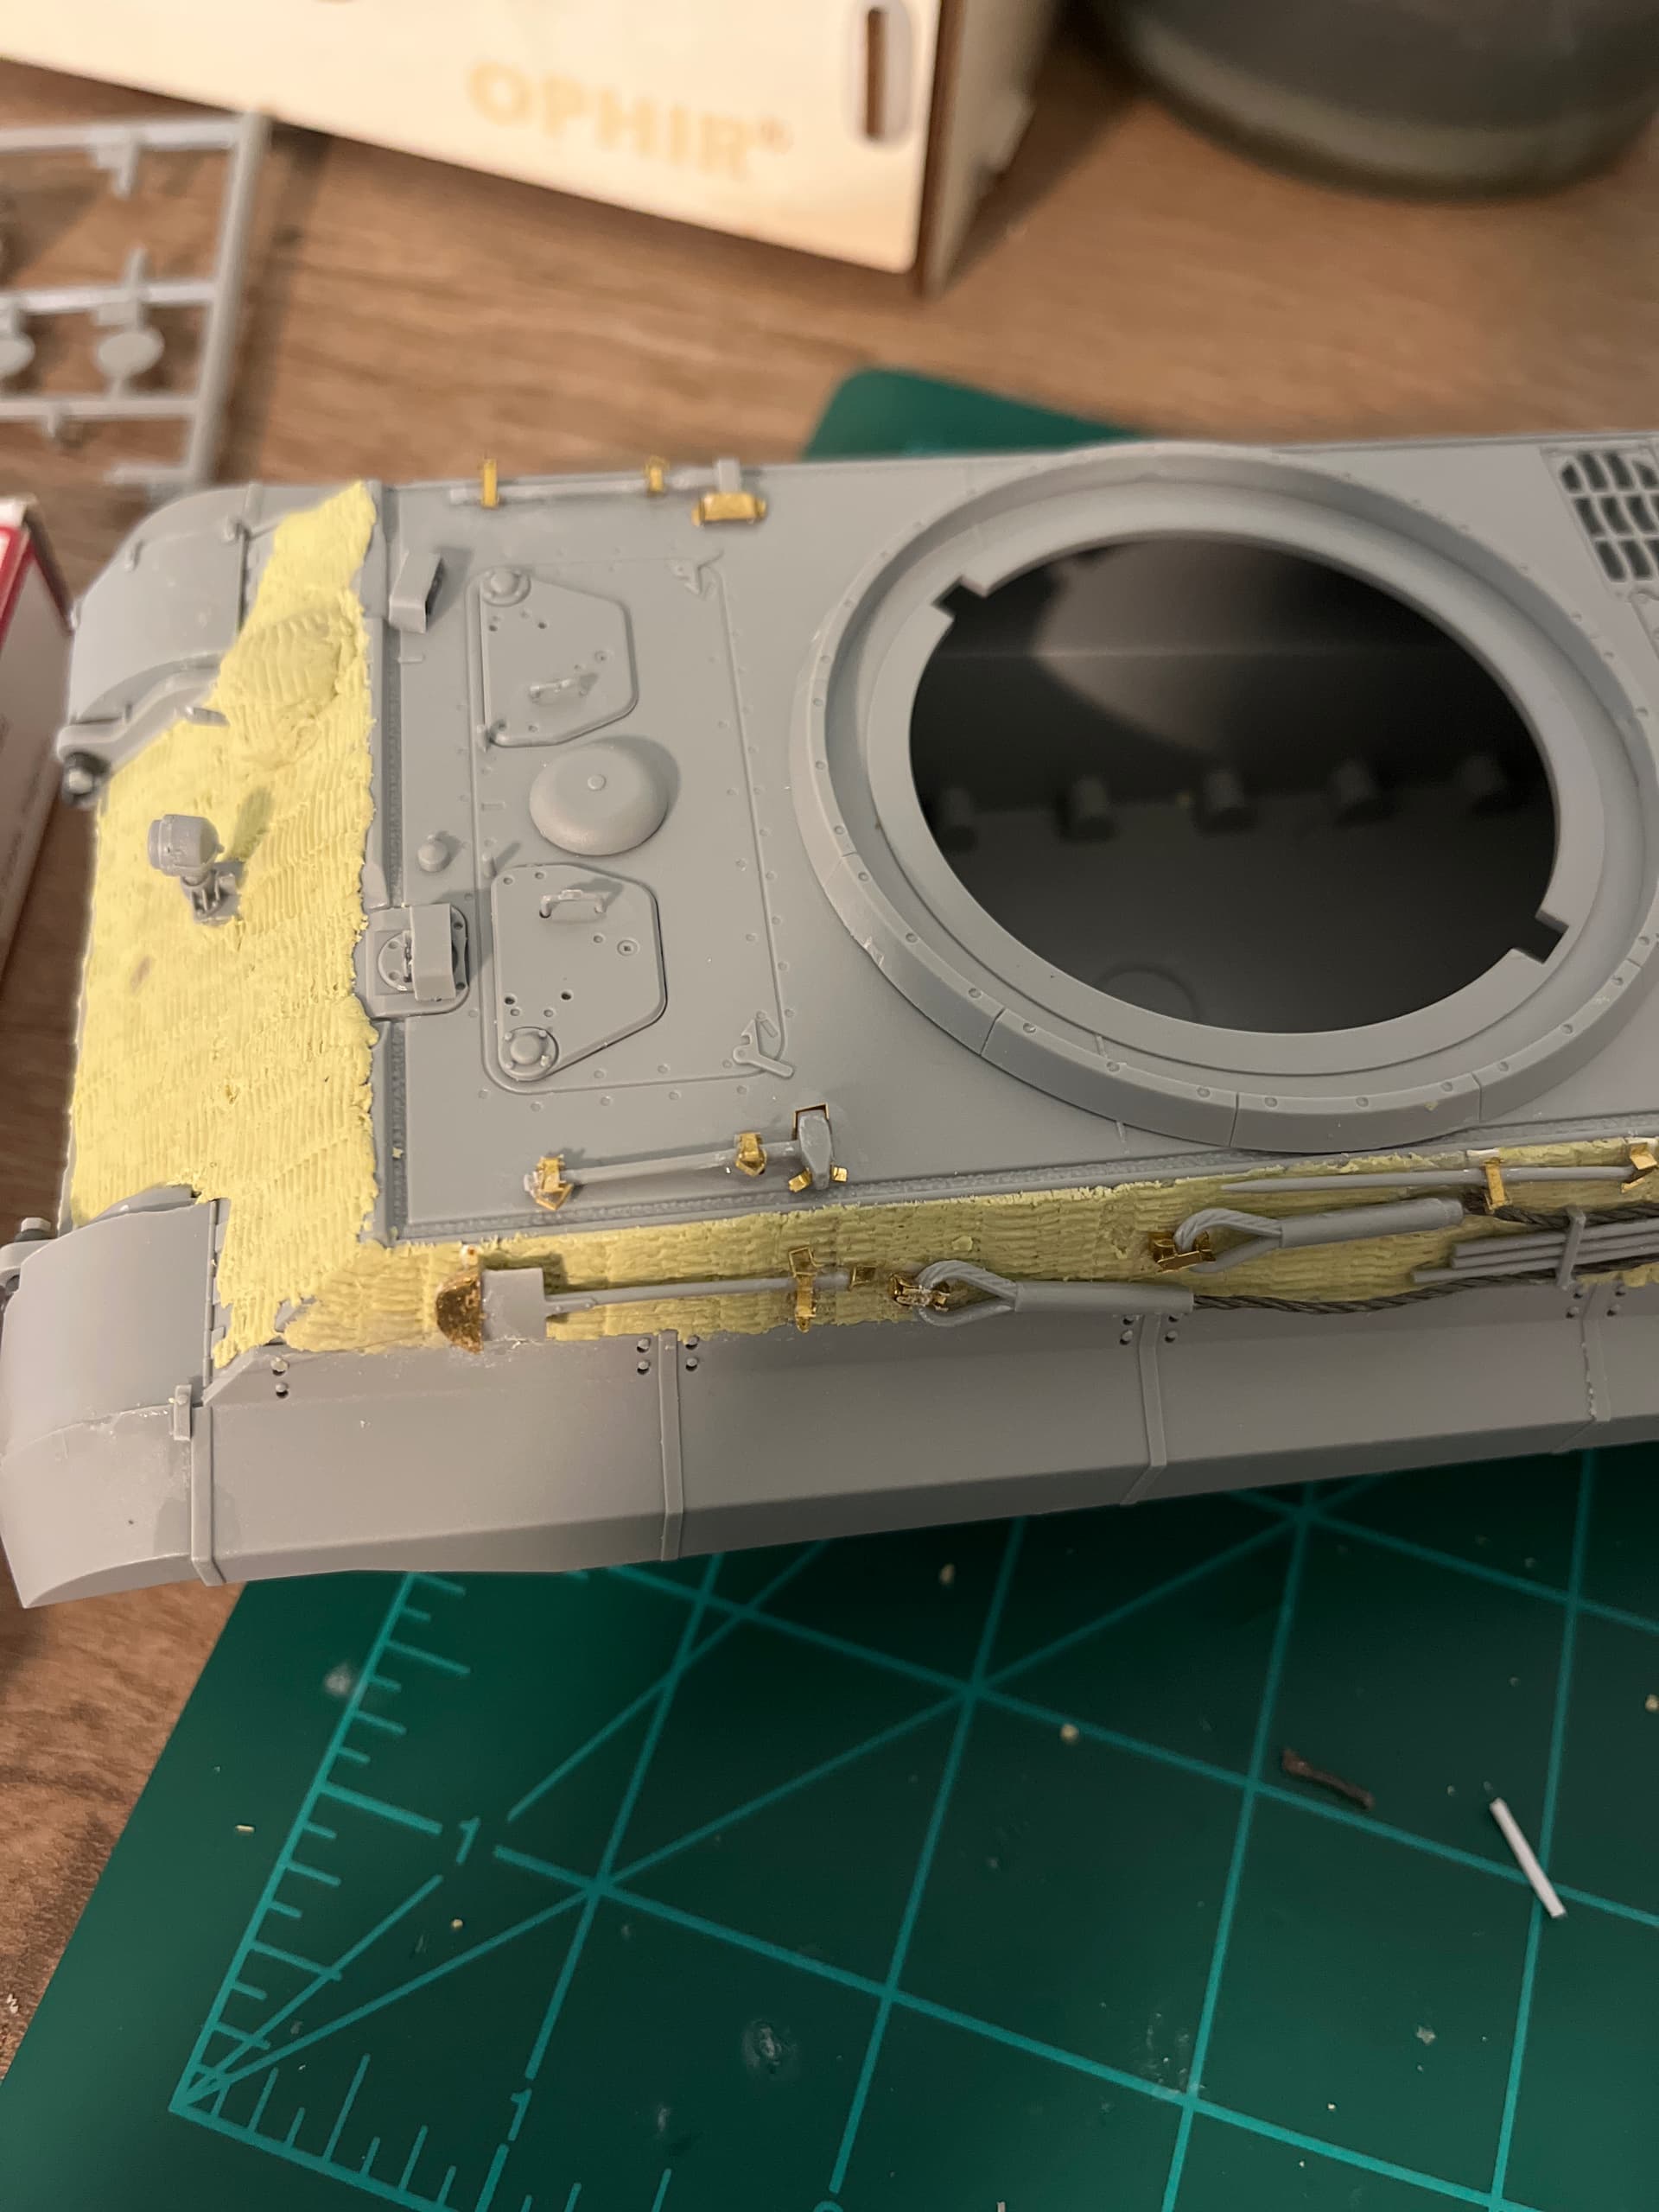
Did a little putty work last night and decided on using milliput for the zimmerit. I’ll say it came out really well for my first attempt since i was 18, I used the trumpeter zimmerit roller and it is a gem, only 1 minor issue with it and that’s that it does fill up after doing a few sections and needs to be cleaned of putty residue.
5 Likes
Looks very good, I would never have the patience to do that…my hat’s off to you.
1 Like
@Floridabucco yeah it was a bit tedious so i need to do it by section or it’ll get chucked across the room lol
1 Like
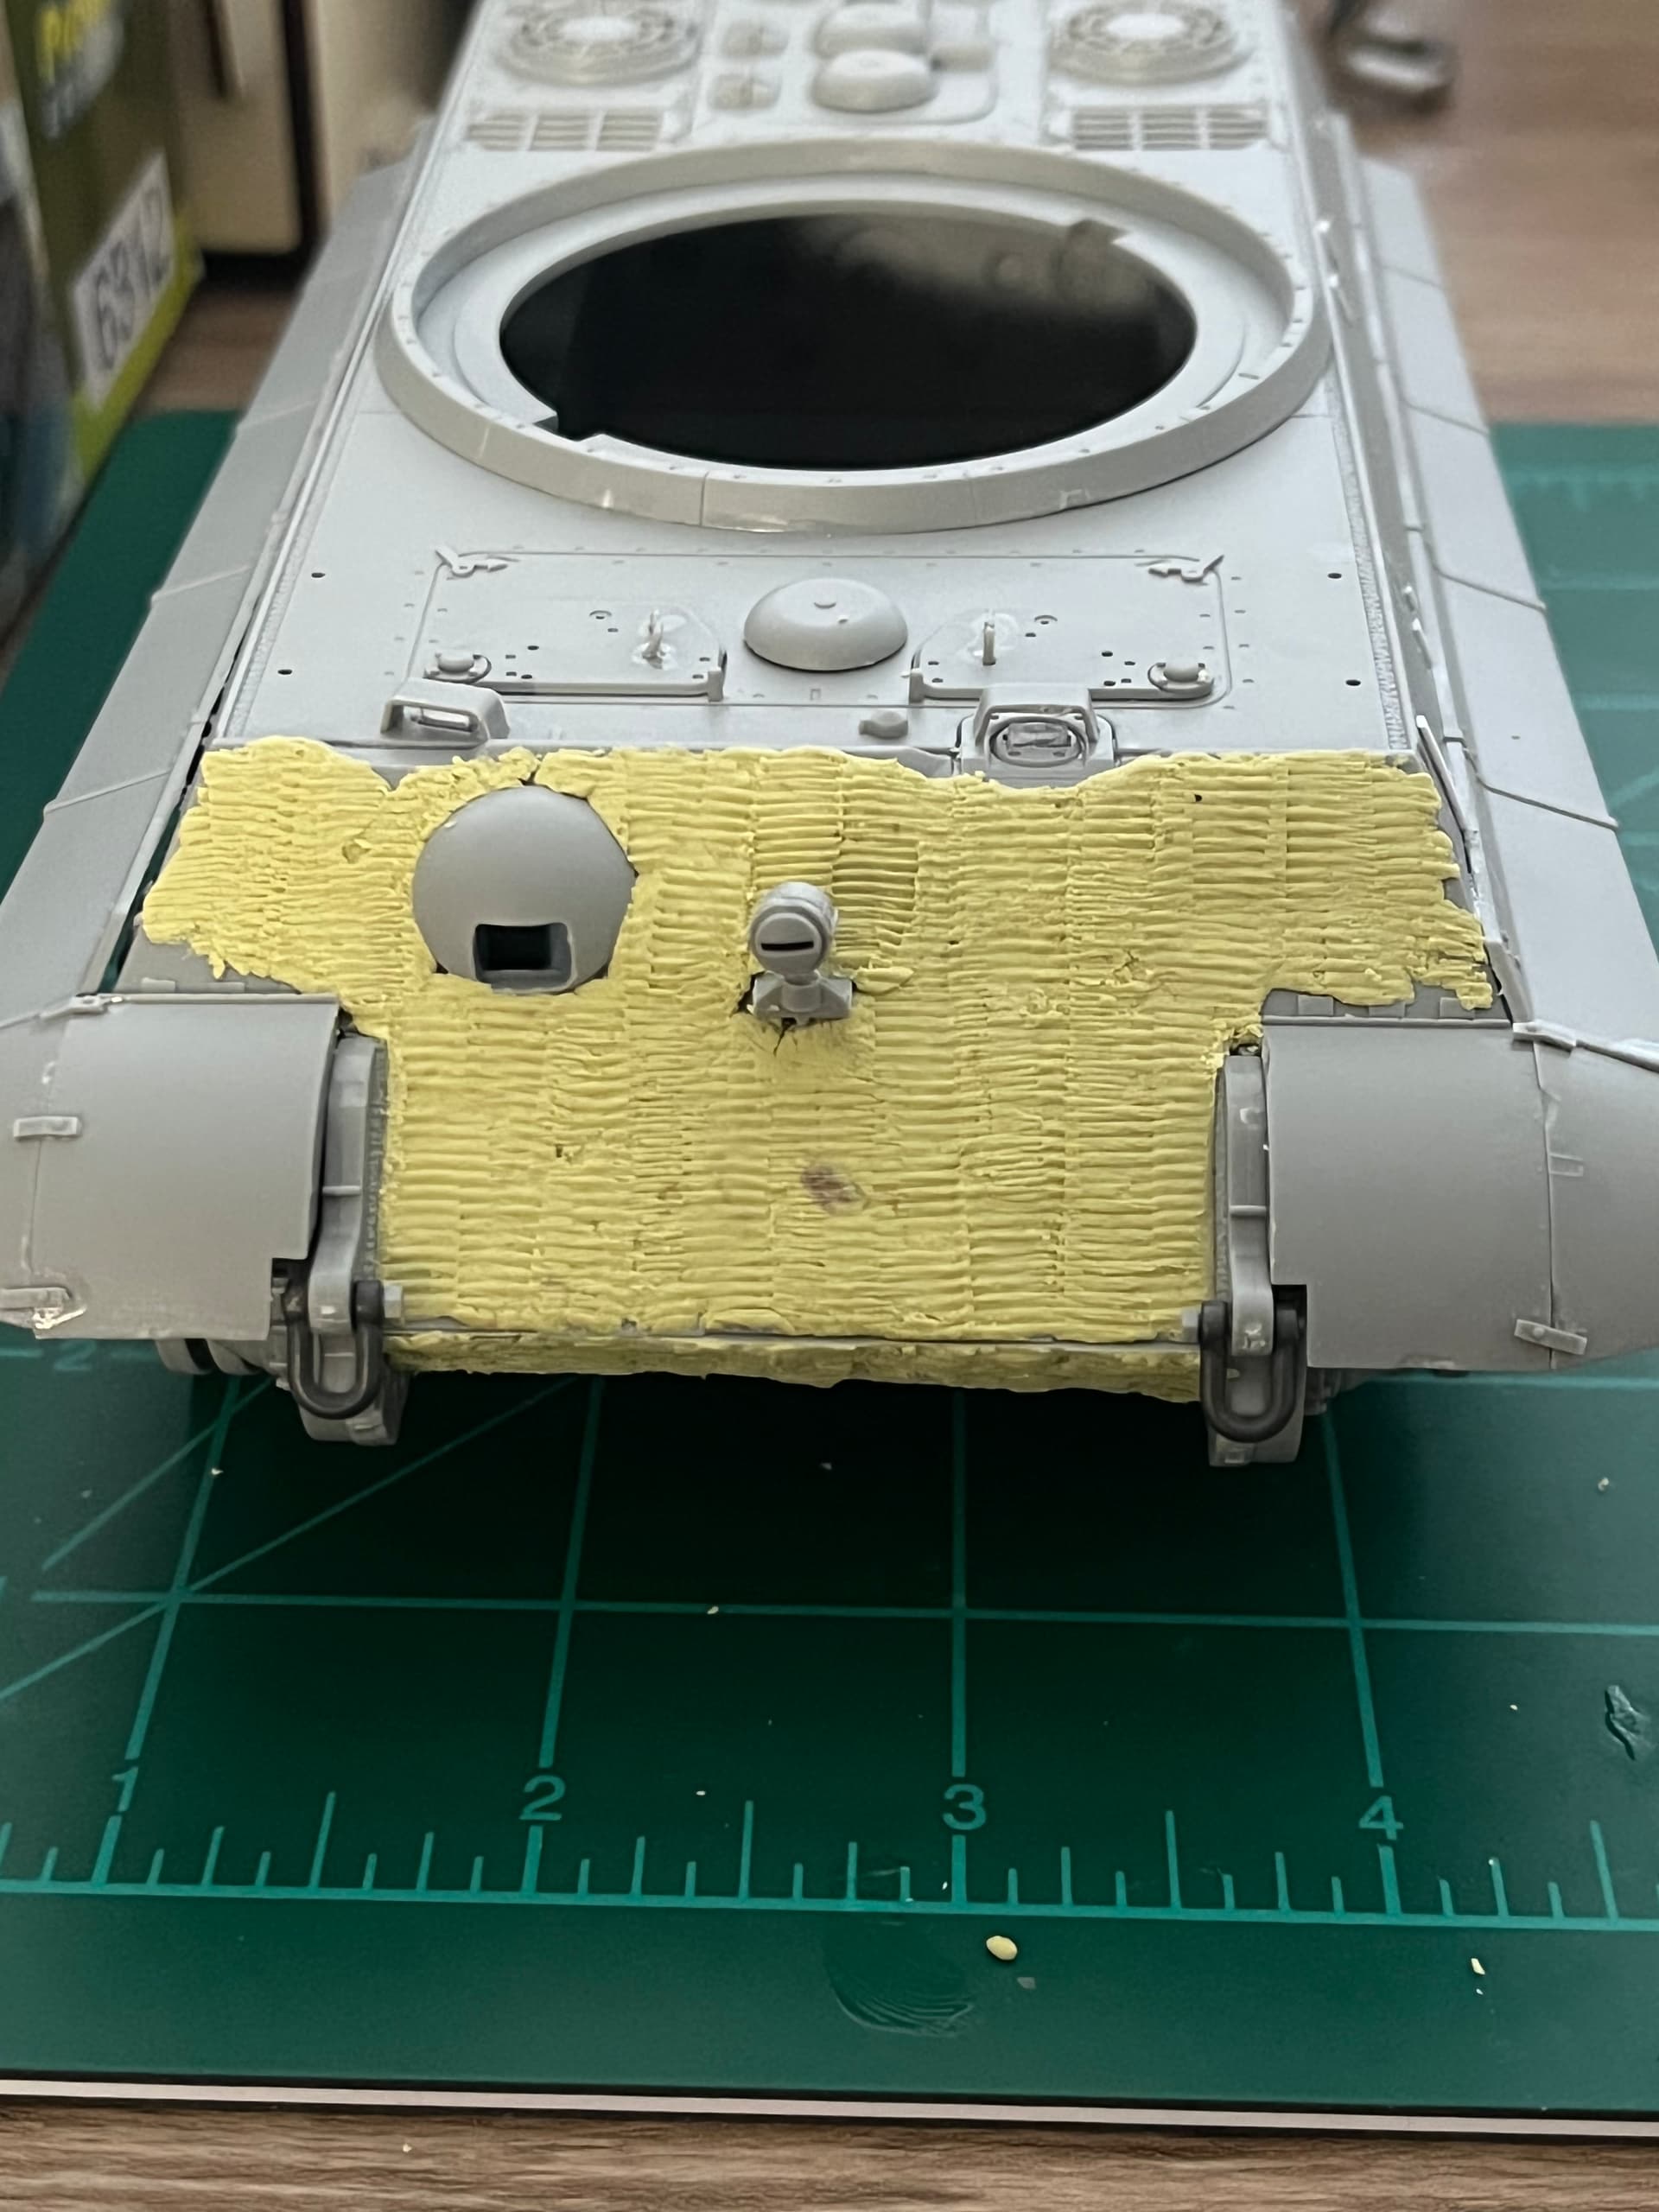
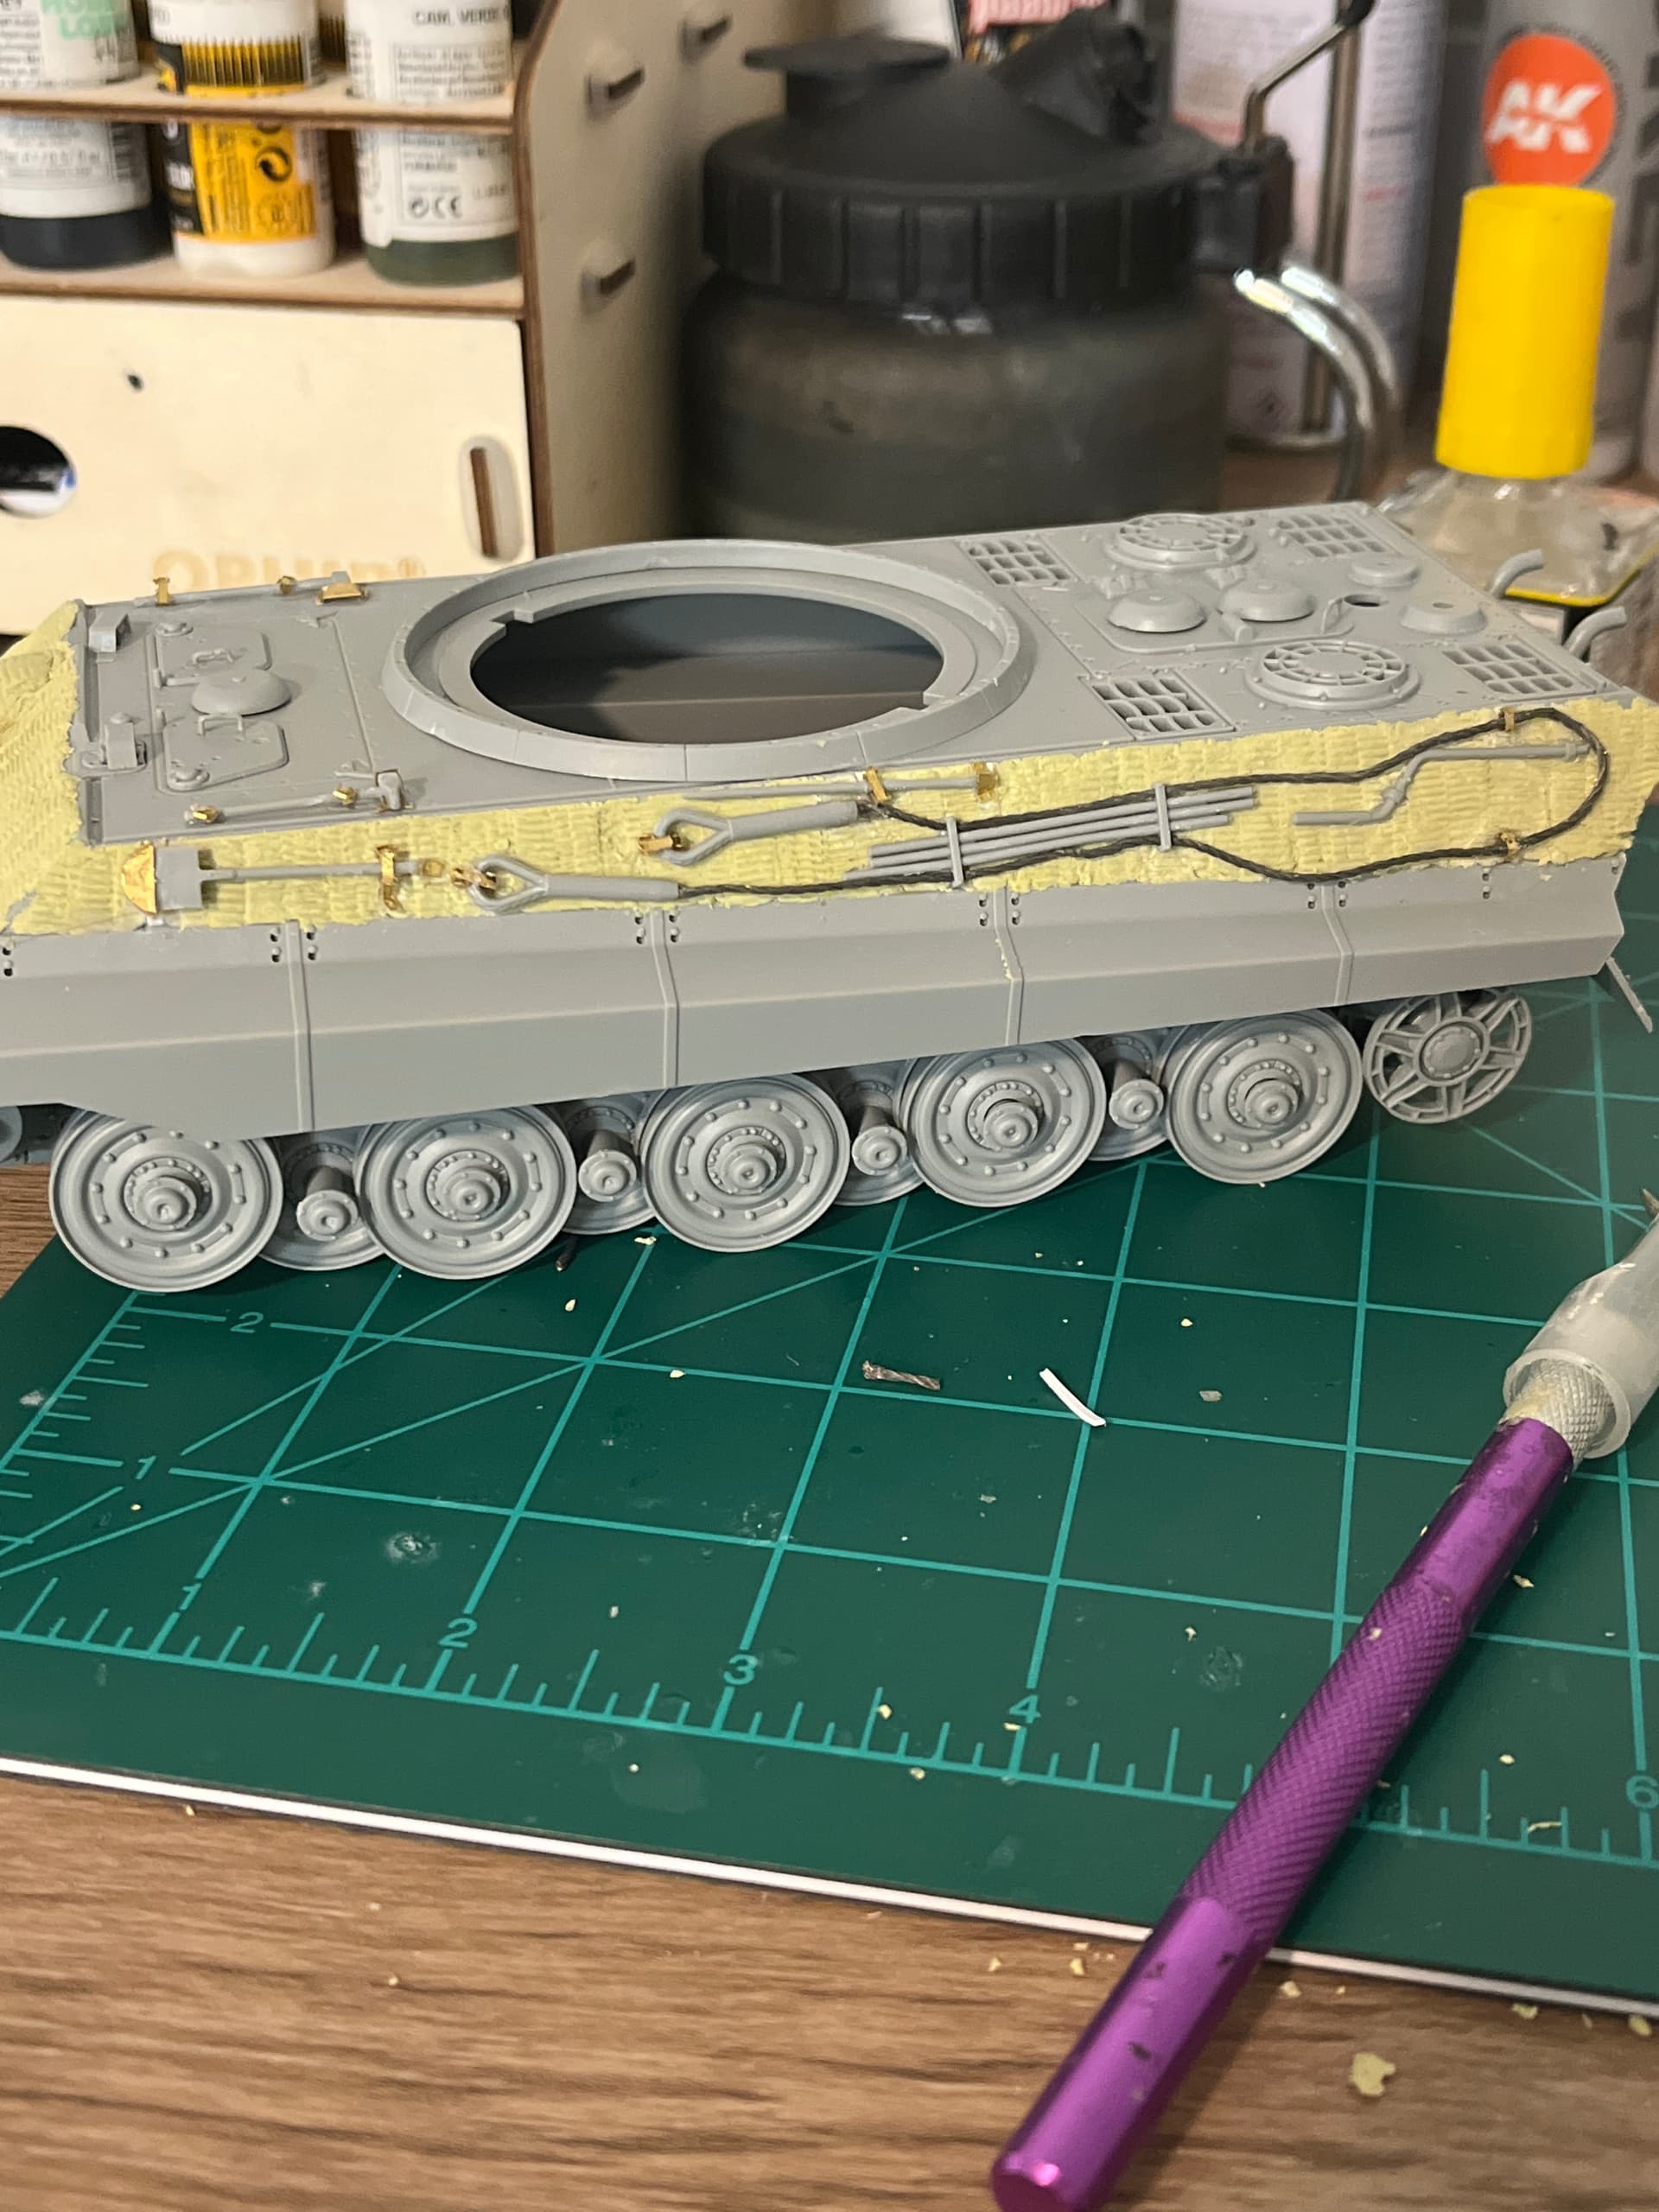
Did a little more work today, I added zimmerit to the front left side of the hull and was able to add styrene to every part that was going to house a took or a hook for the crews equipment. This is my progress so far:
5 Likes
The back plate of the hull is were the real patience will be required.
@Floridabucco oh yeah I’ve been trying to war game that the last few days. I think i have a pretty solid idea of what I’m going to do on it, may involve me using an xacto knife to cut some of the zimmerit seams in but that shouldn’t be to hard. I have the other side of the hull and it’s cables but that’ll be done by the weekend, I’ll be posting more photos by Saturday night.
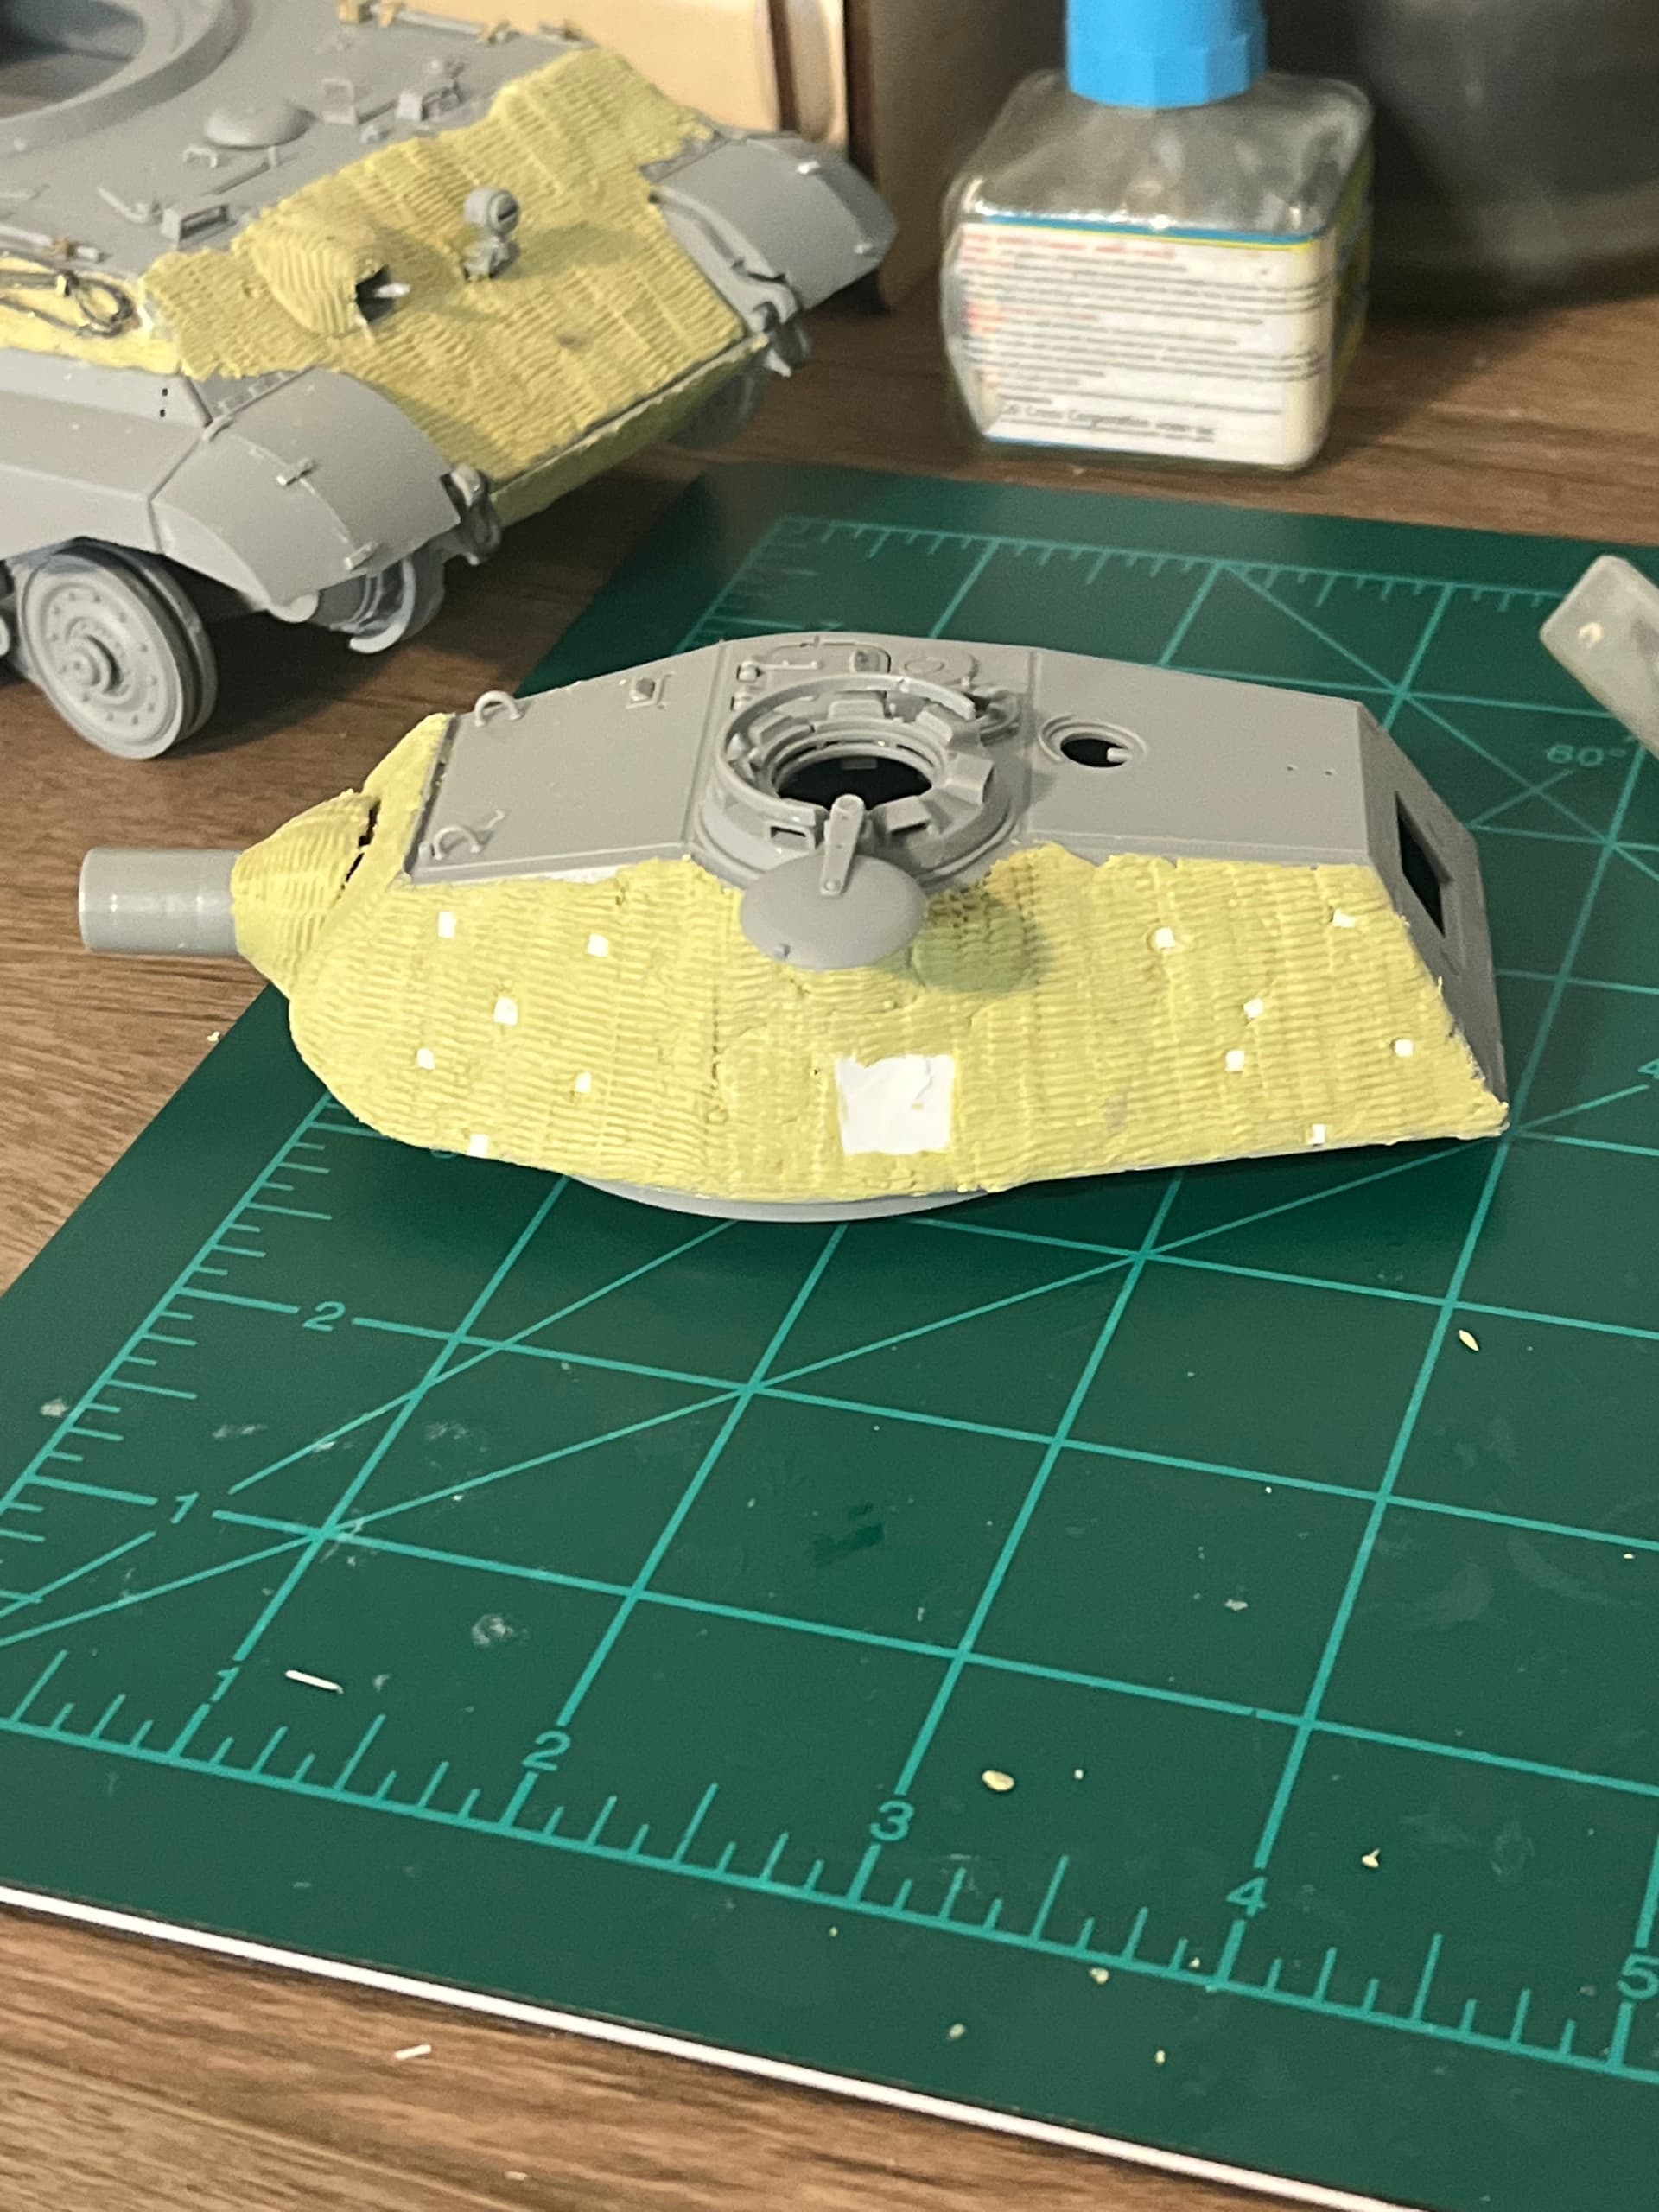
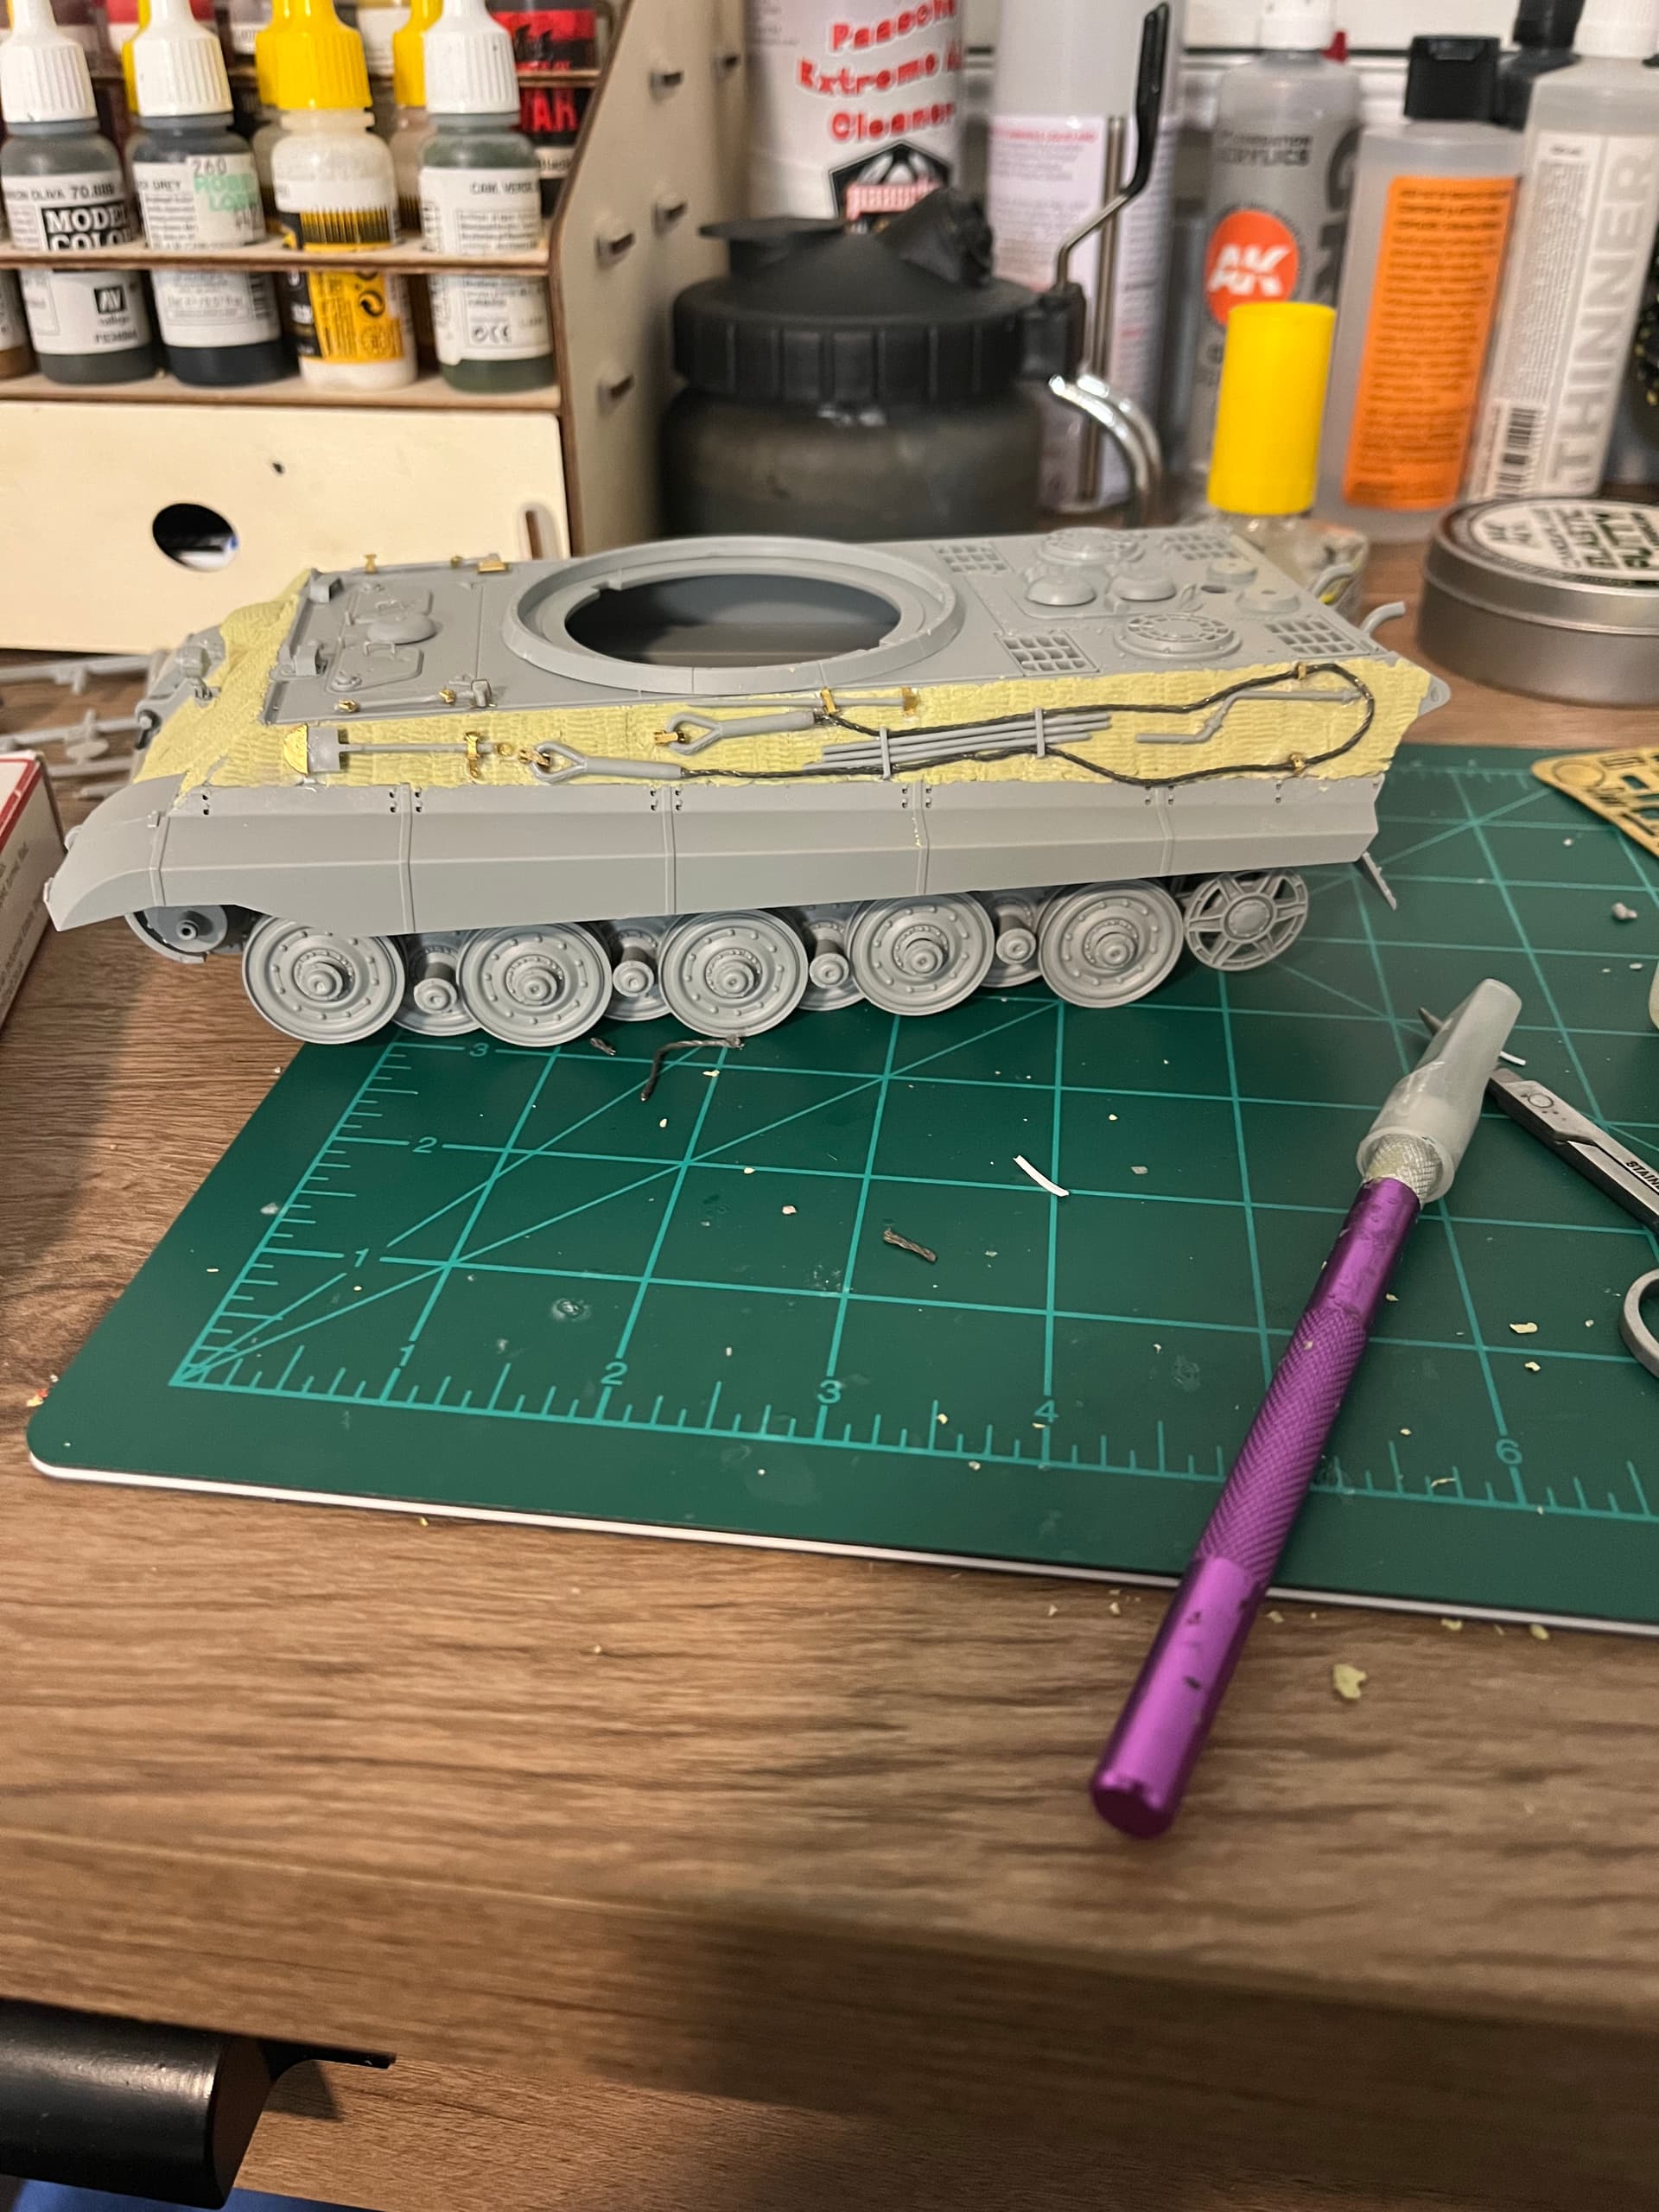
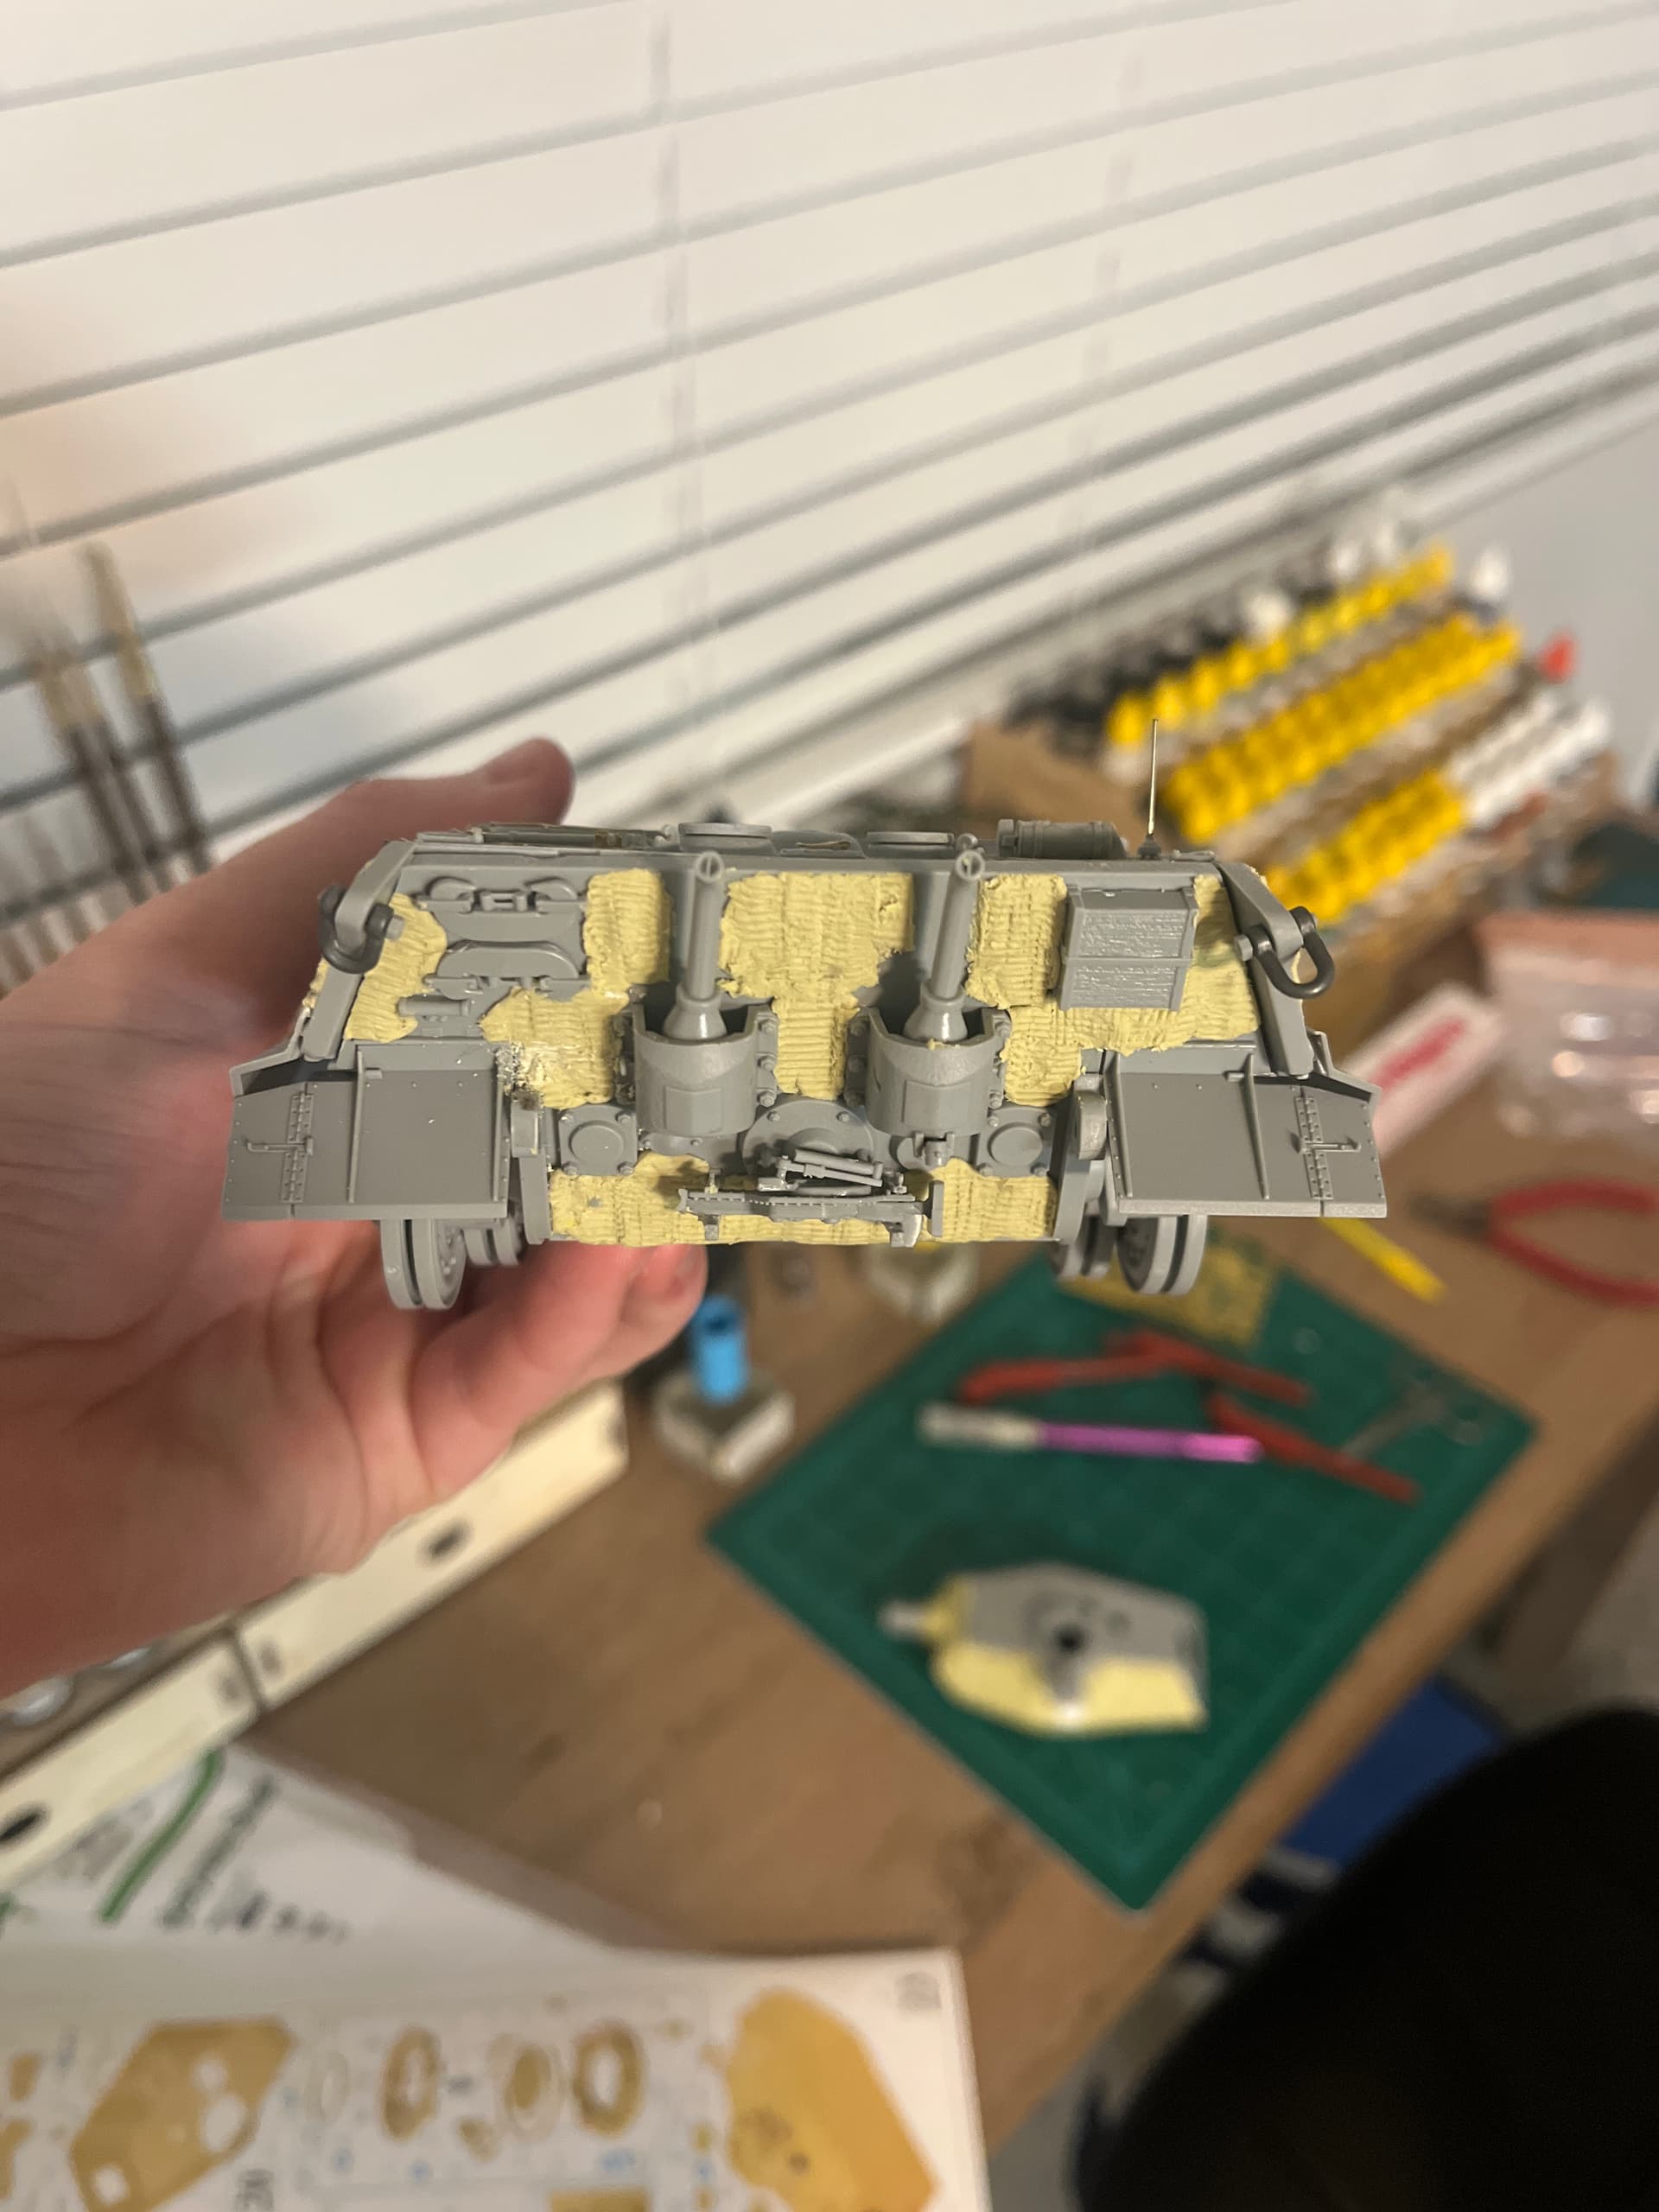
Another weekend update, I’ve completed the lower hull including the rear this week, unfortunately i didn’t do the rear hull until after i added all the tools so i did a work around. I suppose i can say that the coat fell off during transportation and normal wear and tear. This weekend i began the turret, half the turret is coated in zimmerit and i will hopefully finish by Wednesday with it. Prior to coating the turret with zimmerit i added some styrene plastic to areas that will be covered with parts after application. I have also added two square areas for decals after i complete painting. Tracks will be the last to be put together then it will be painted.

4 Likes
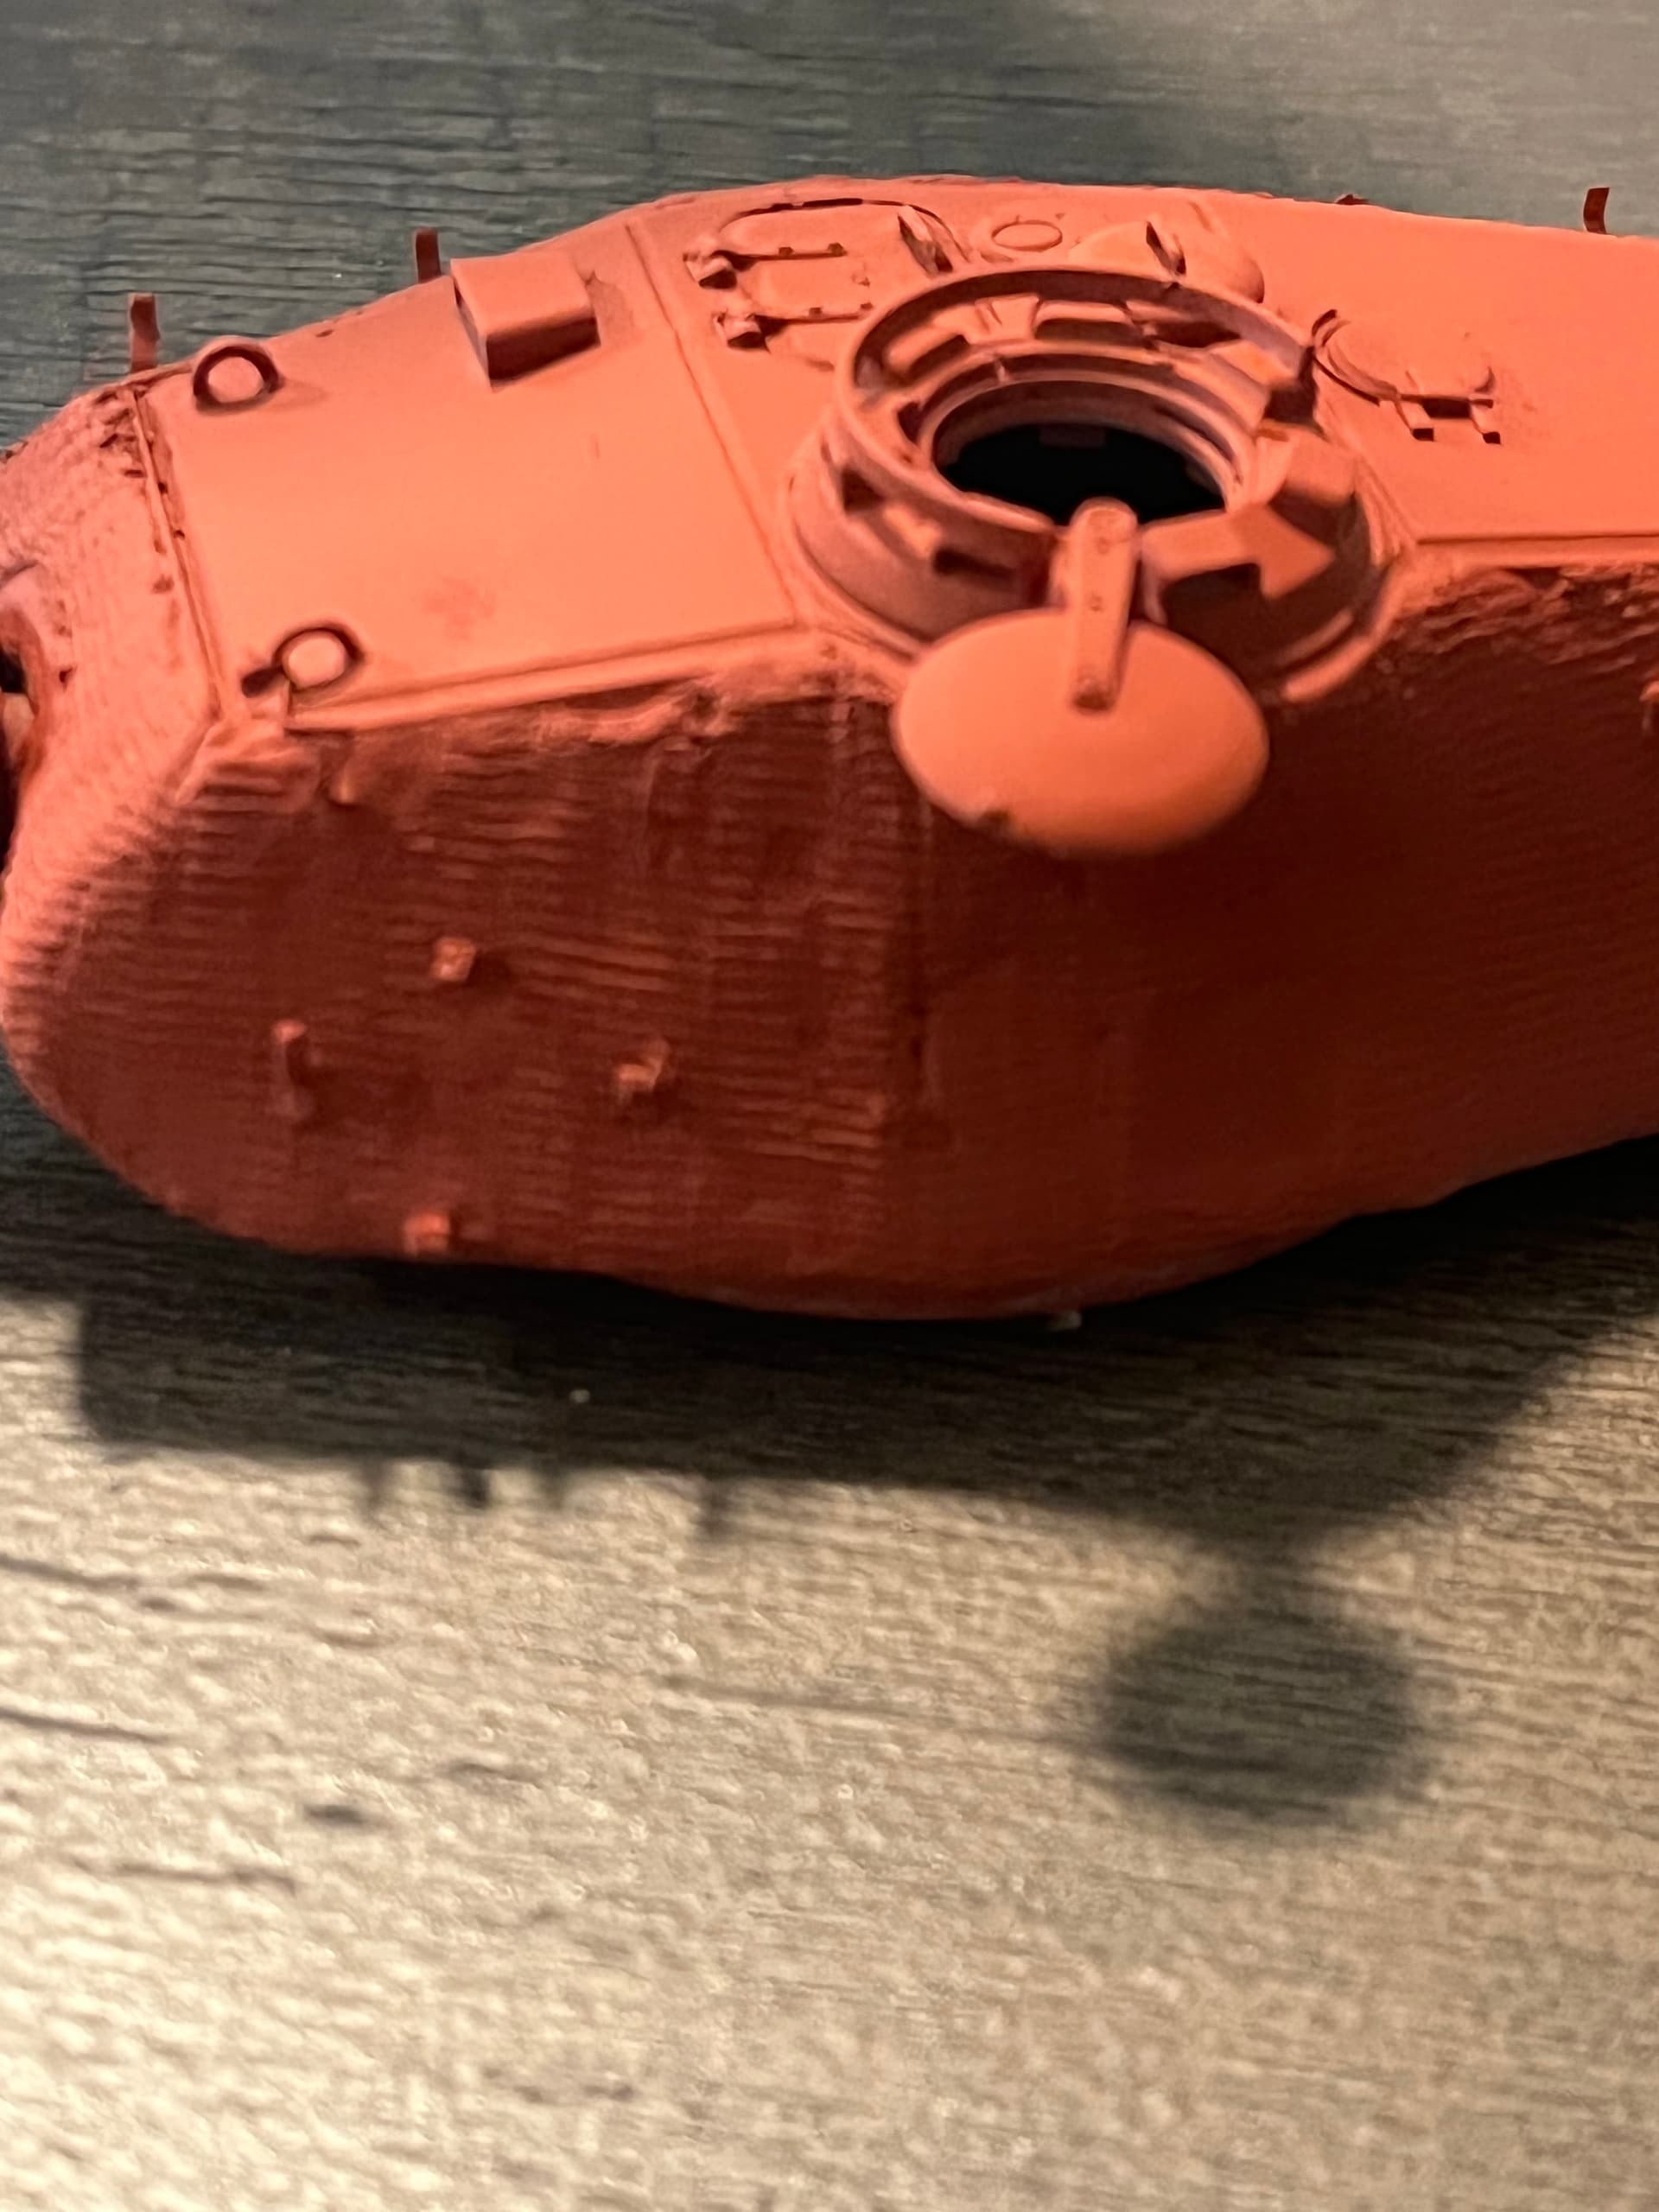
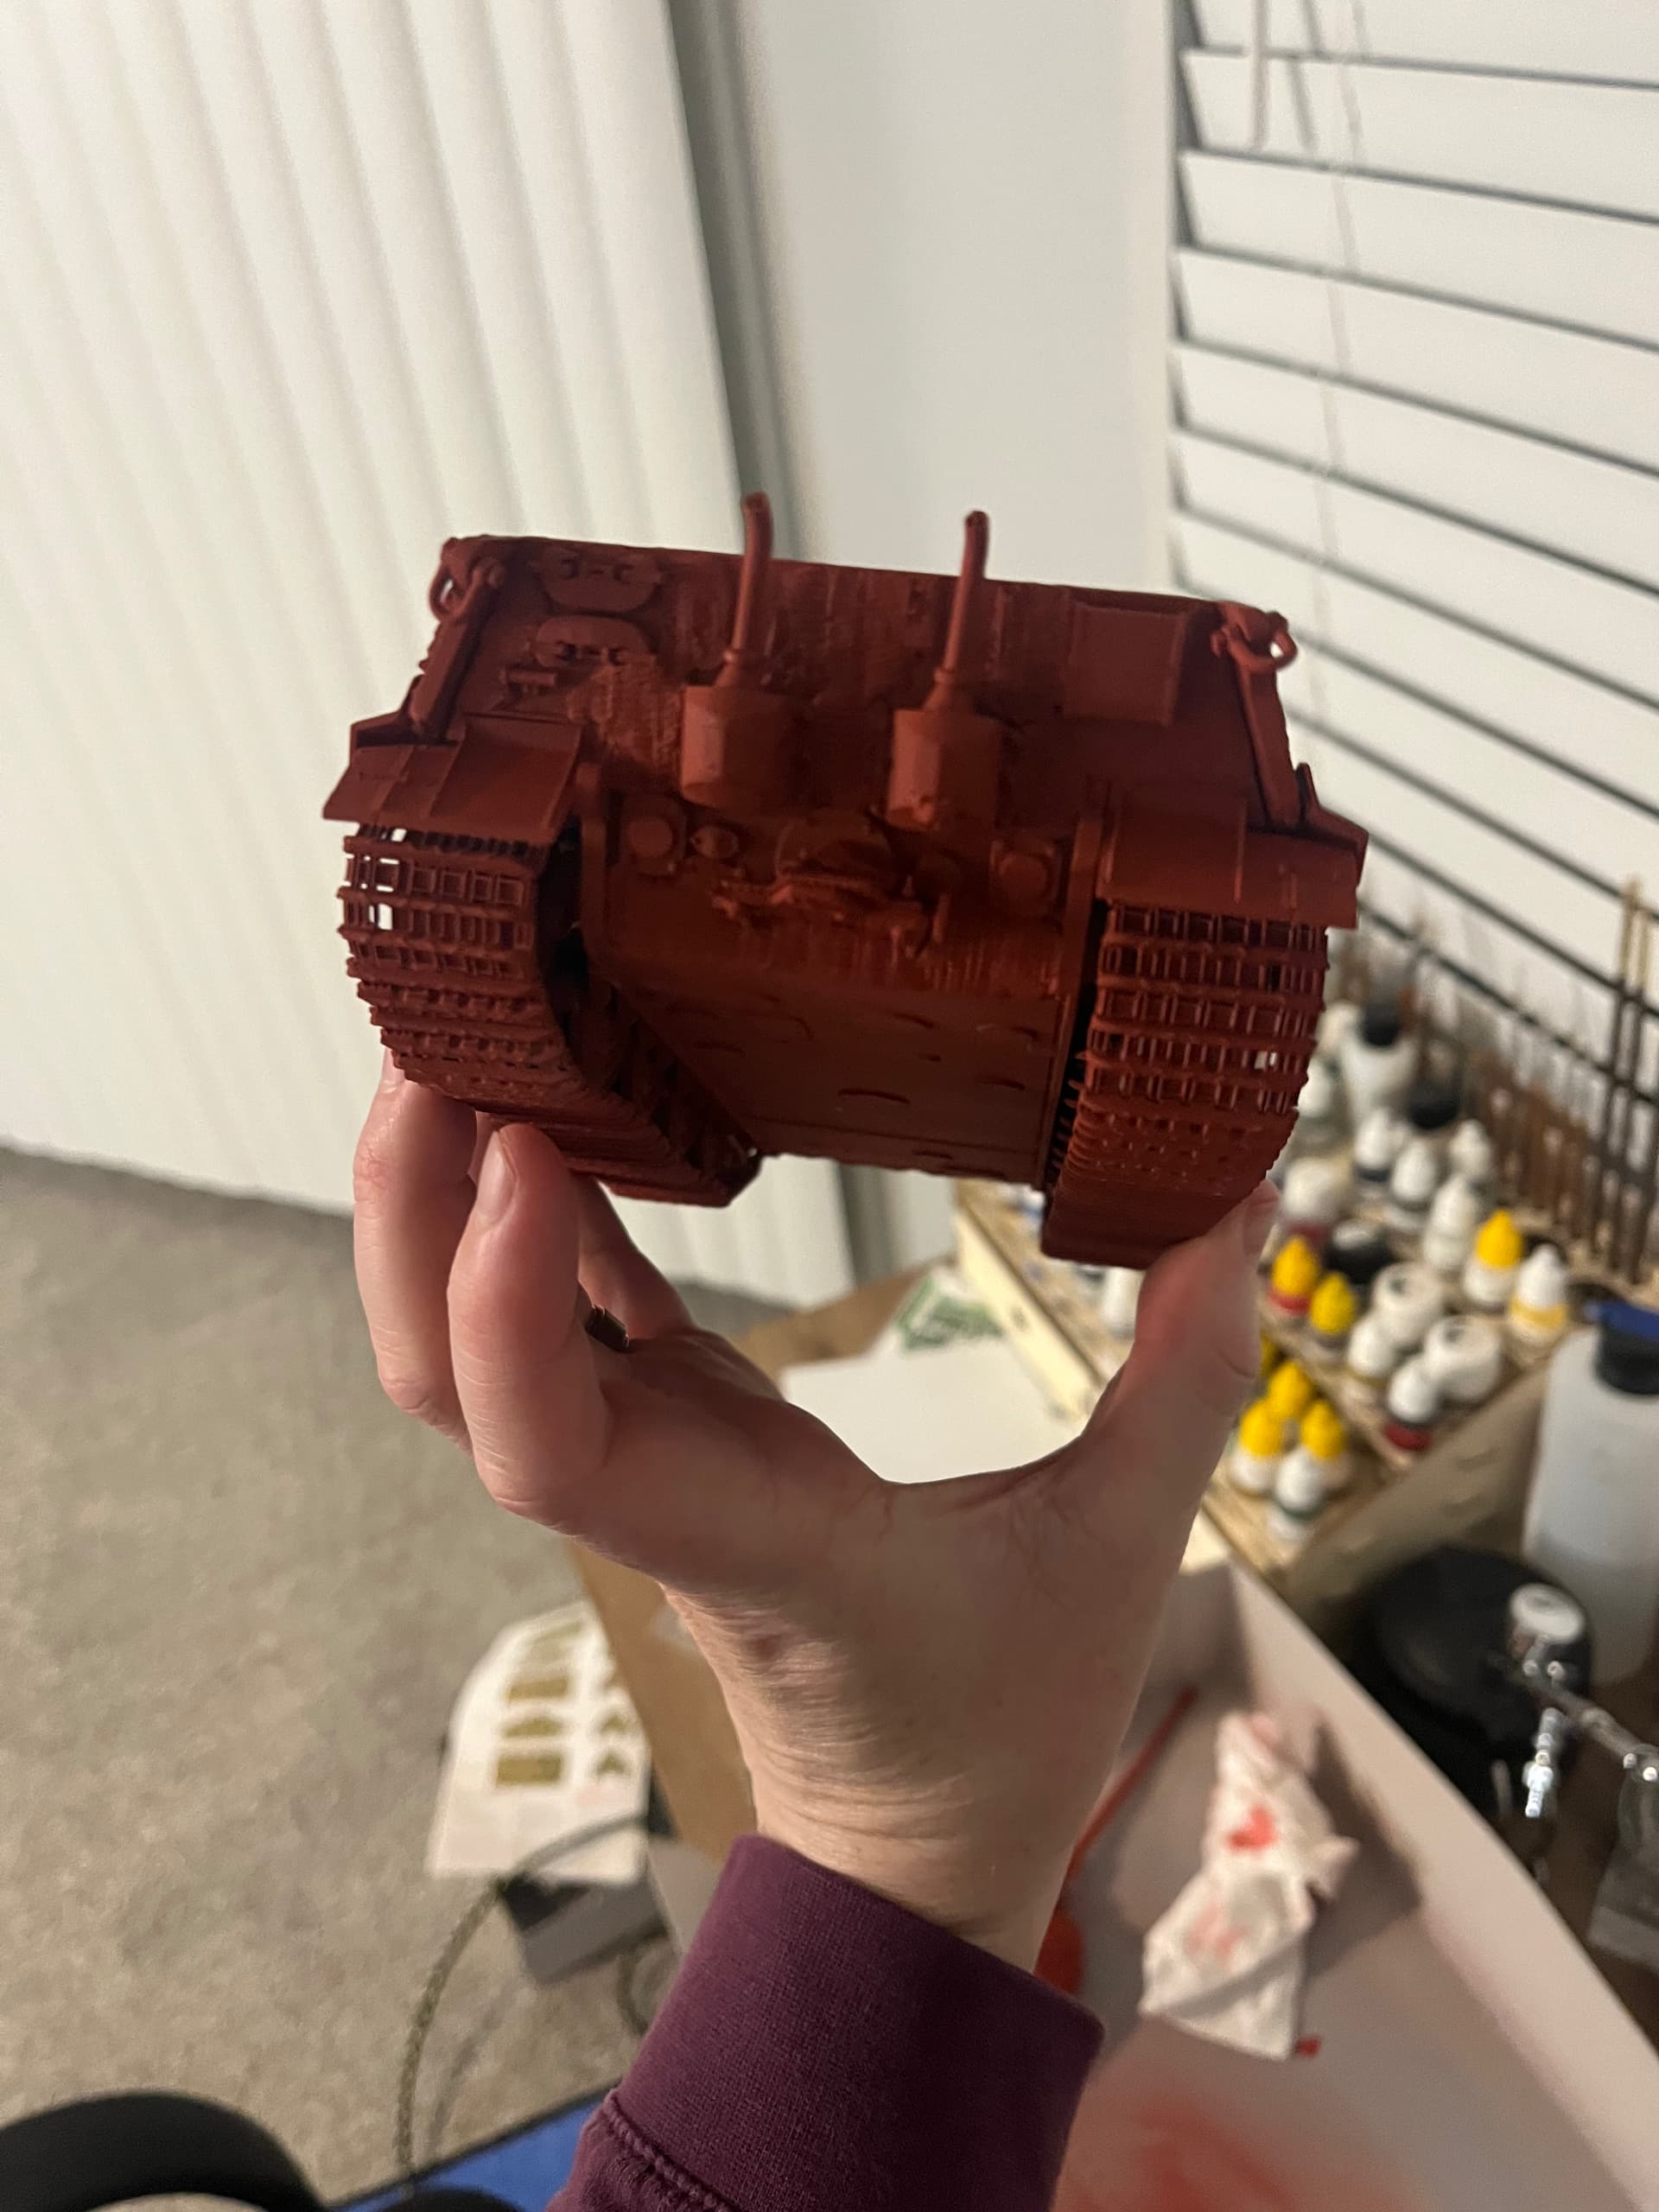
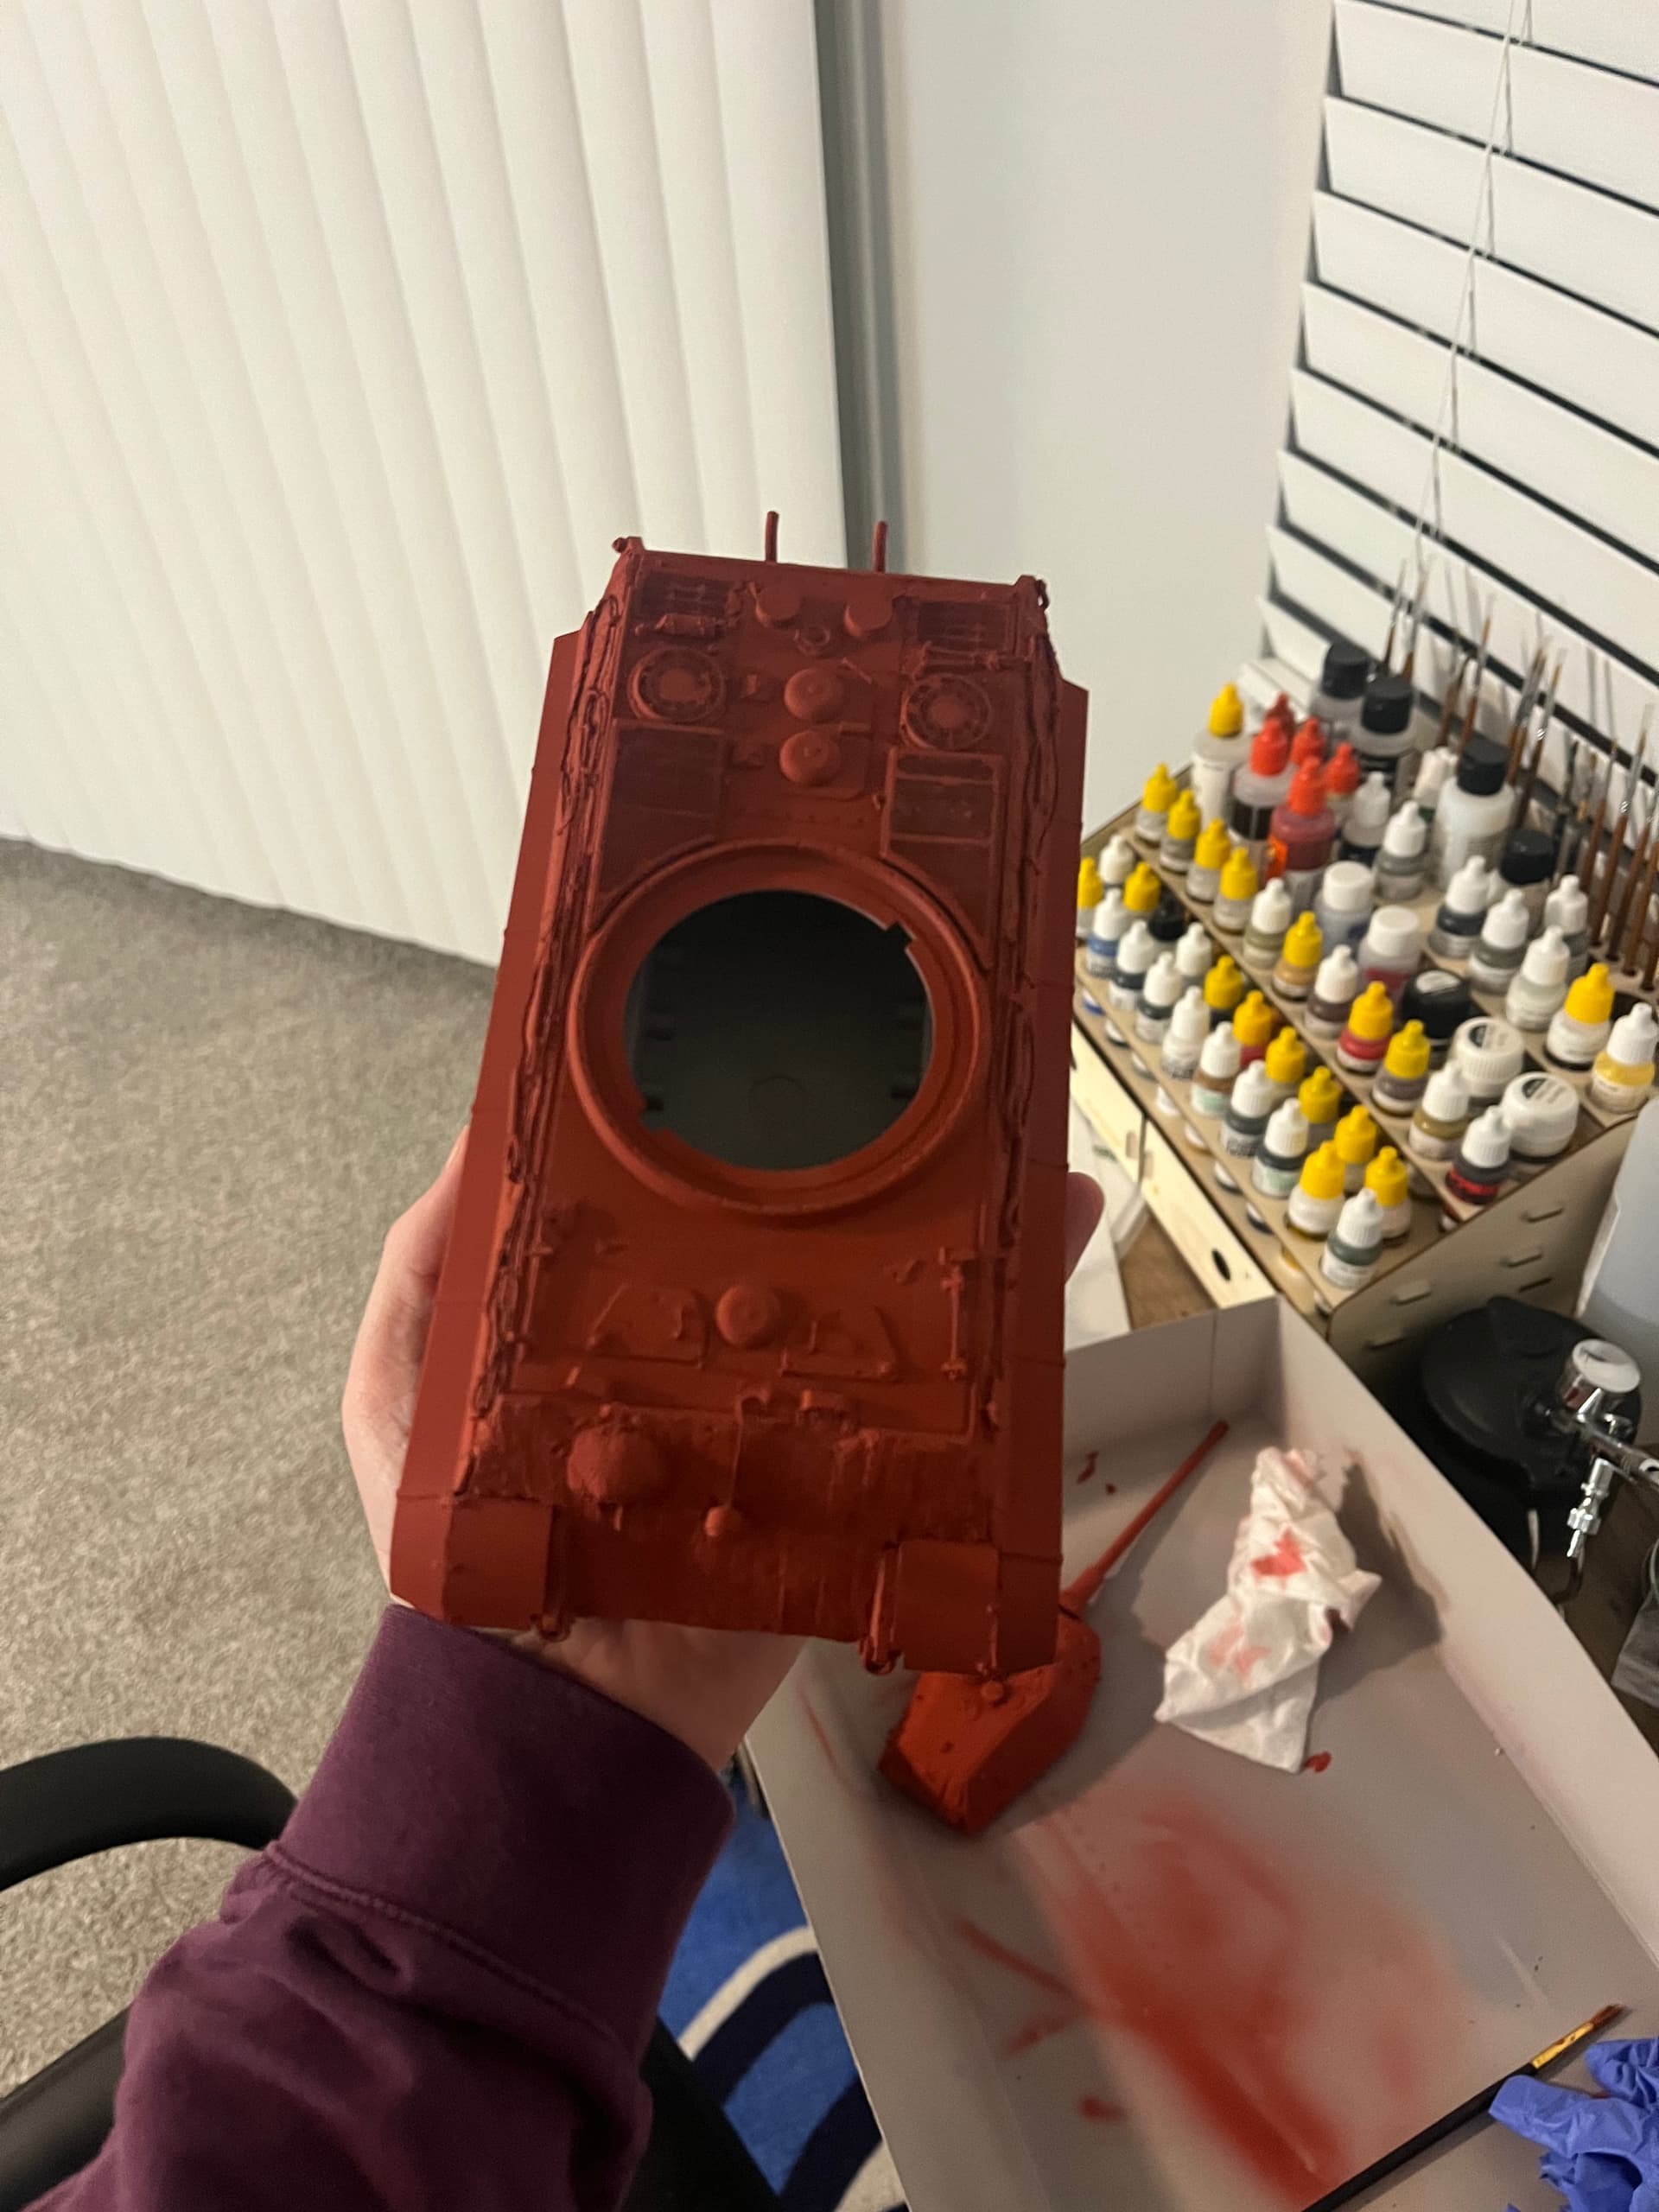
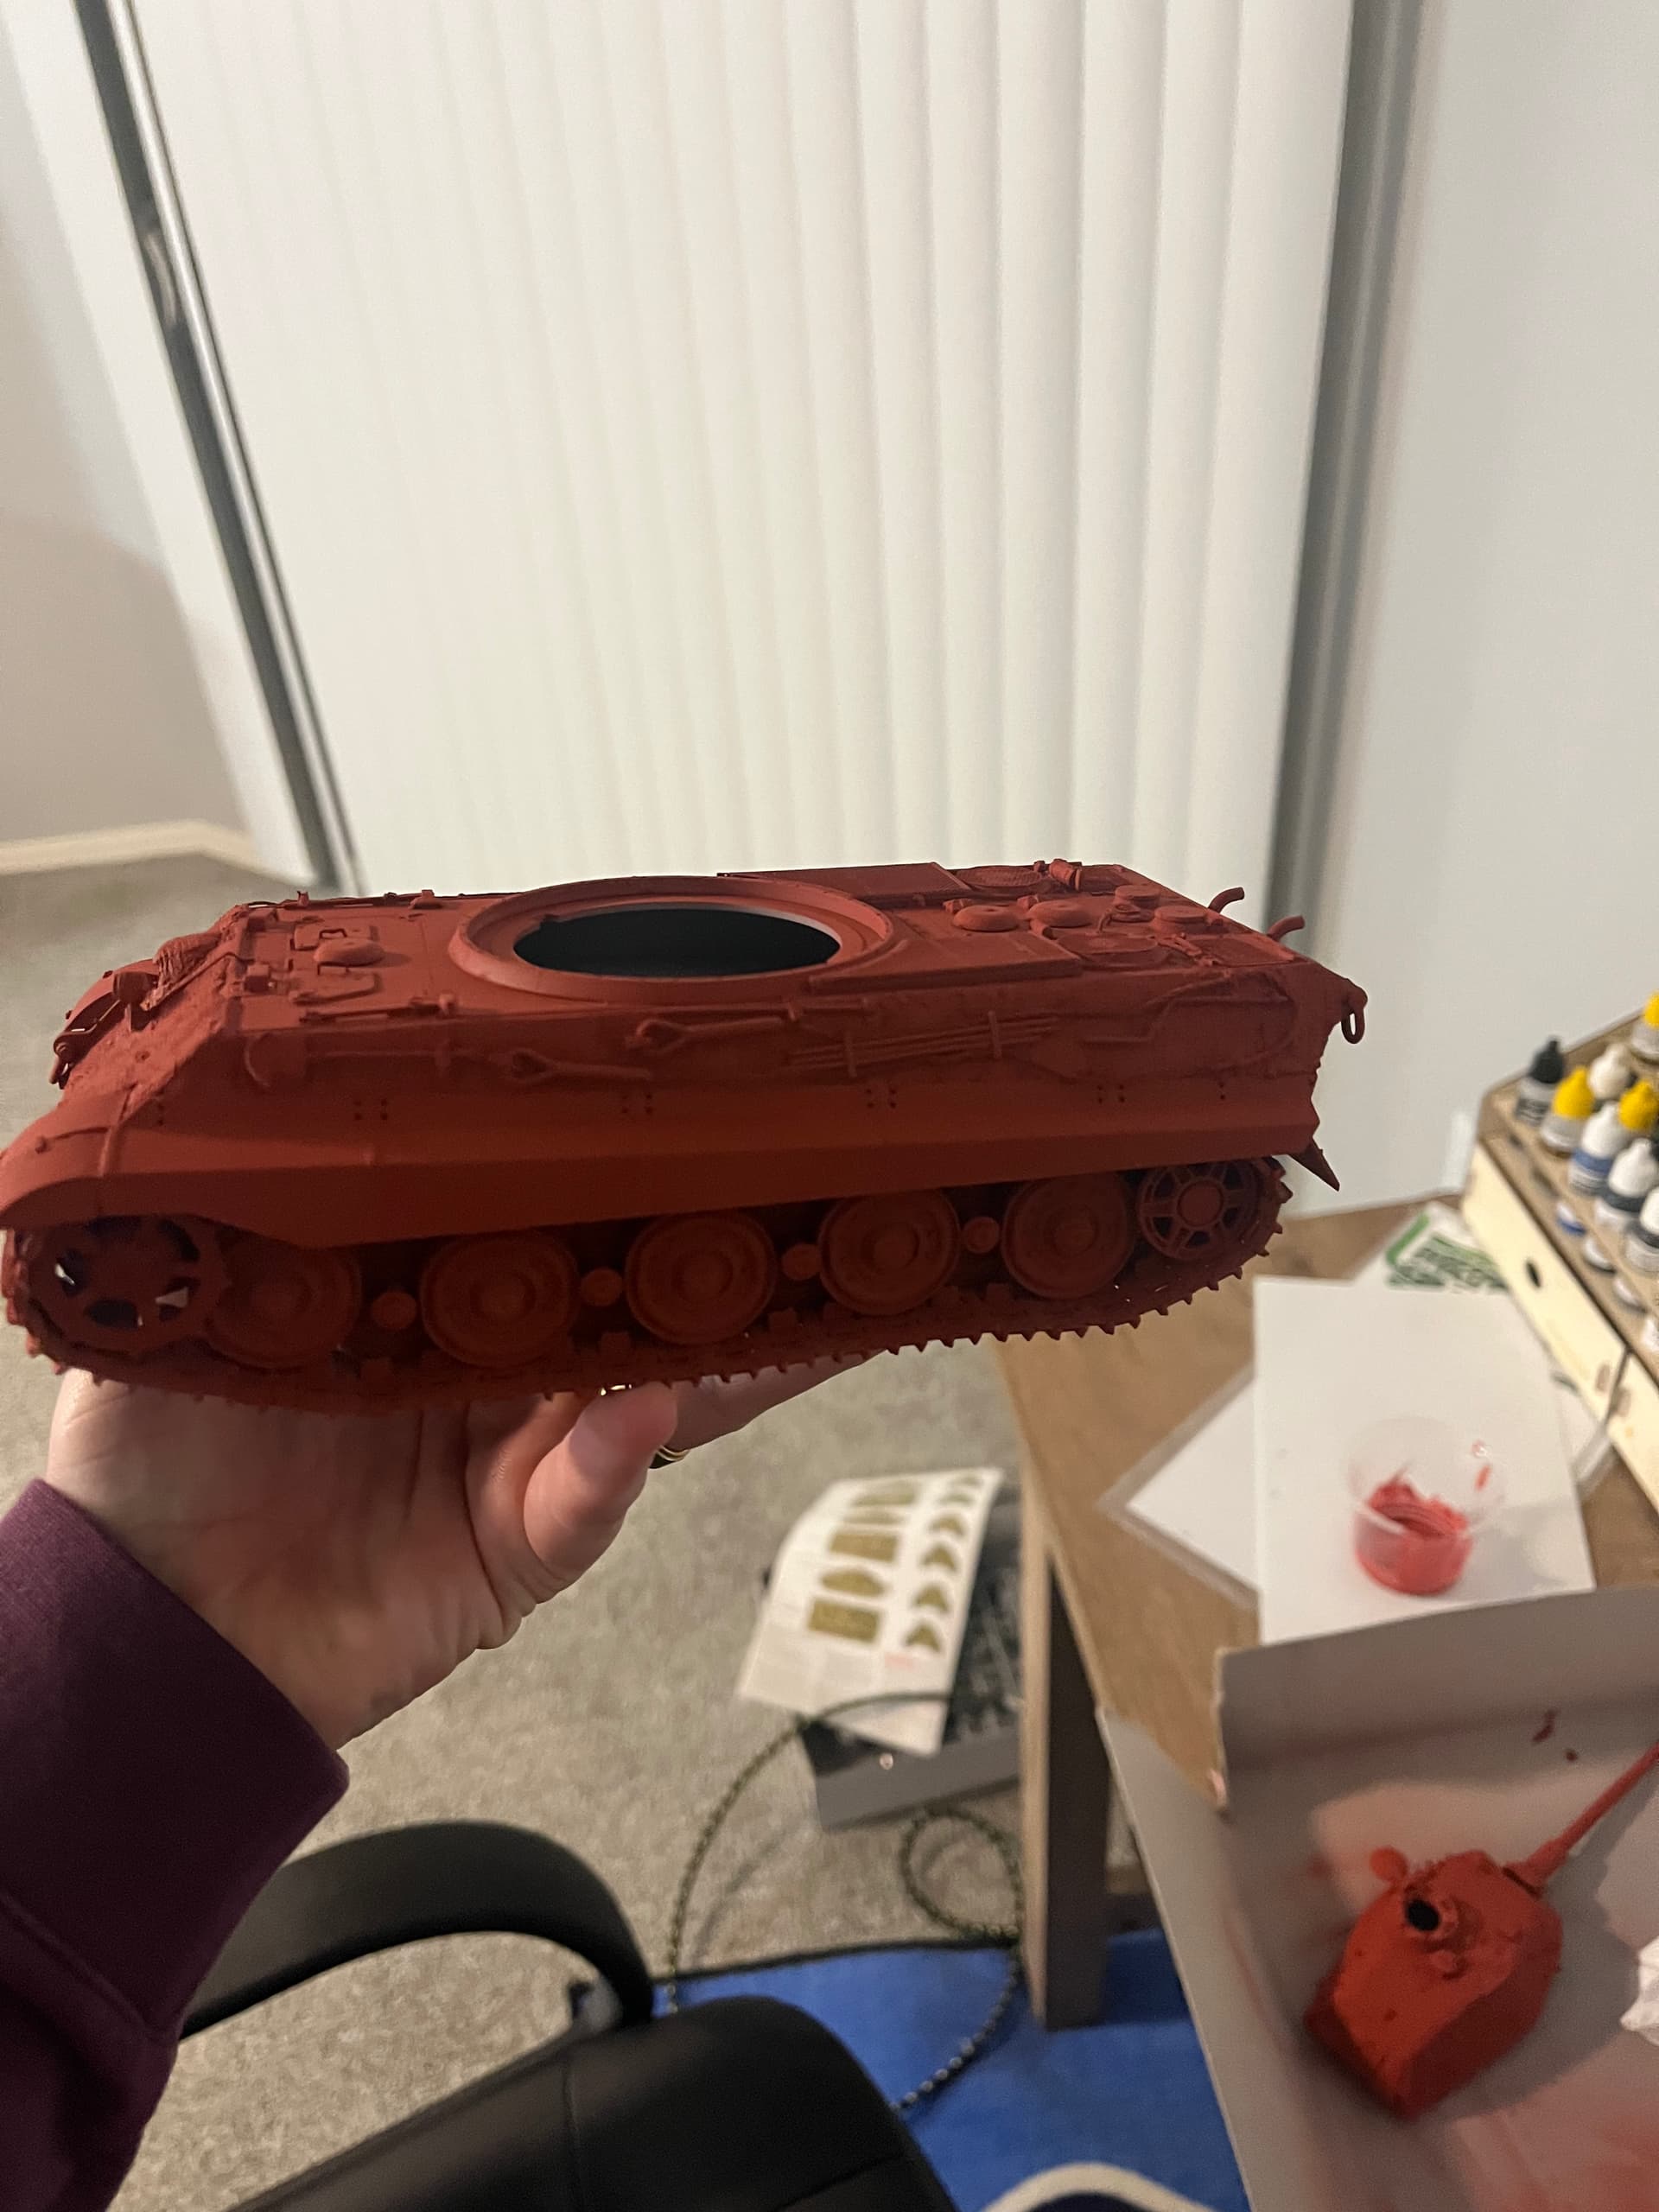
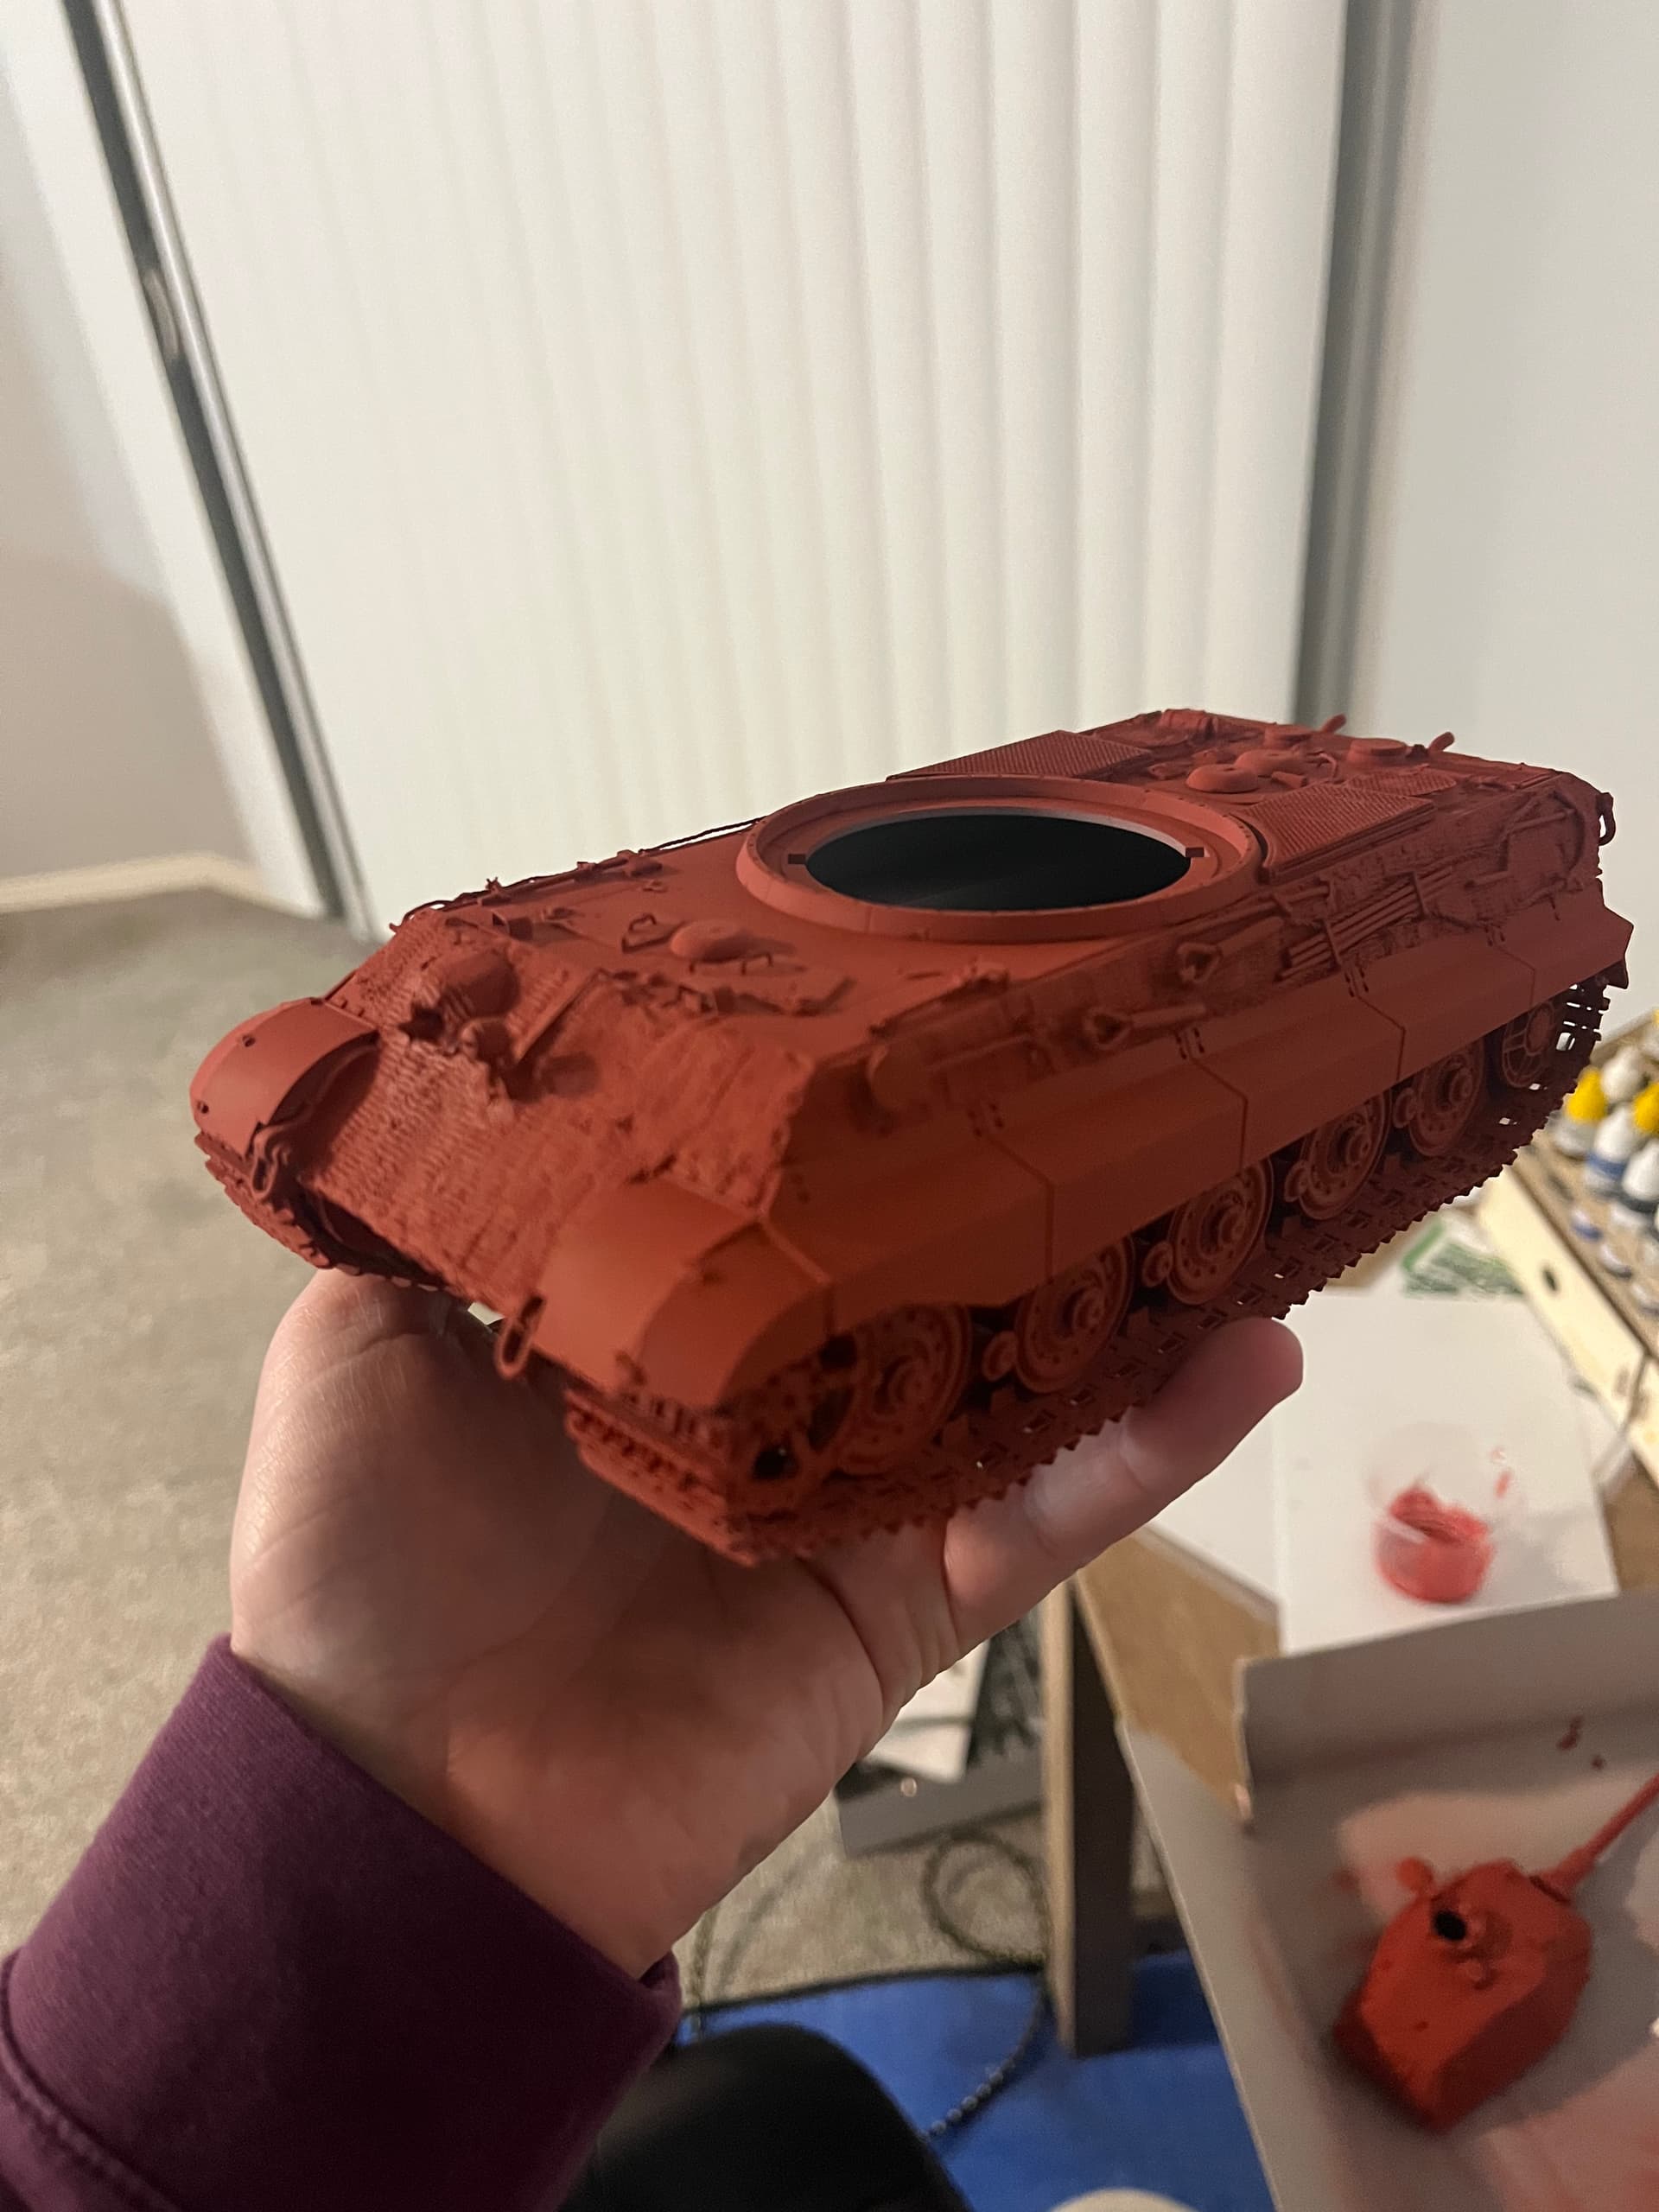
Was able to finish the tracks during the week and get two days of painting in over the weekend. On Saturday i put on my first layer of primer using Tamiya’s rattle can surface primer, this stuff works greats when your kit has a lot of photoetch parts. This afternoon i gave it a second shot of primer but this time it was red oxide from ak interactive. The surface primer from Tamiya did a great job of unifying the whole surface and now the red oxide gives me a chipping base, i did the chipping base a day just in case especially with some parts not getting a zimmerit coating i figured it would be feasible for some red oxide to show through. Here’s a few photos of my progress:
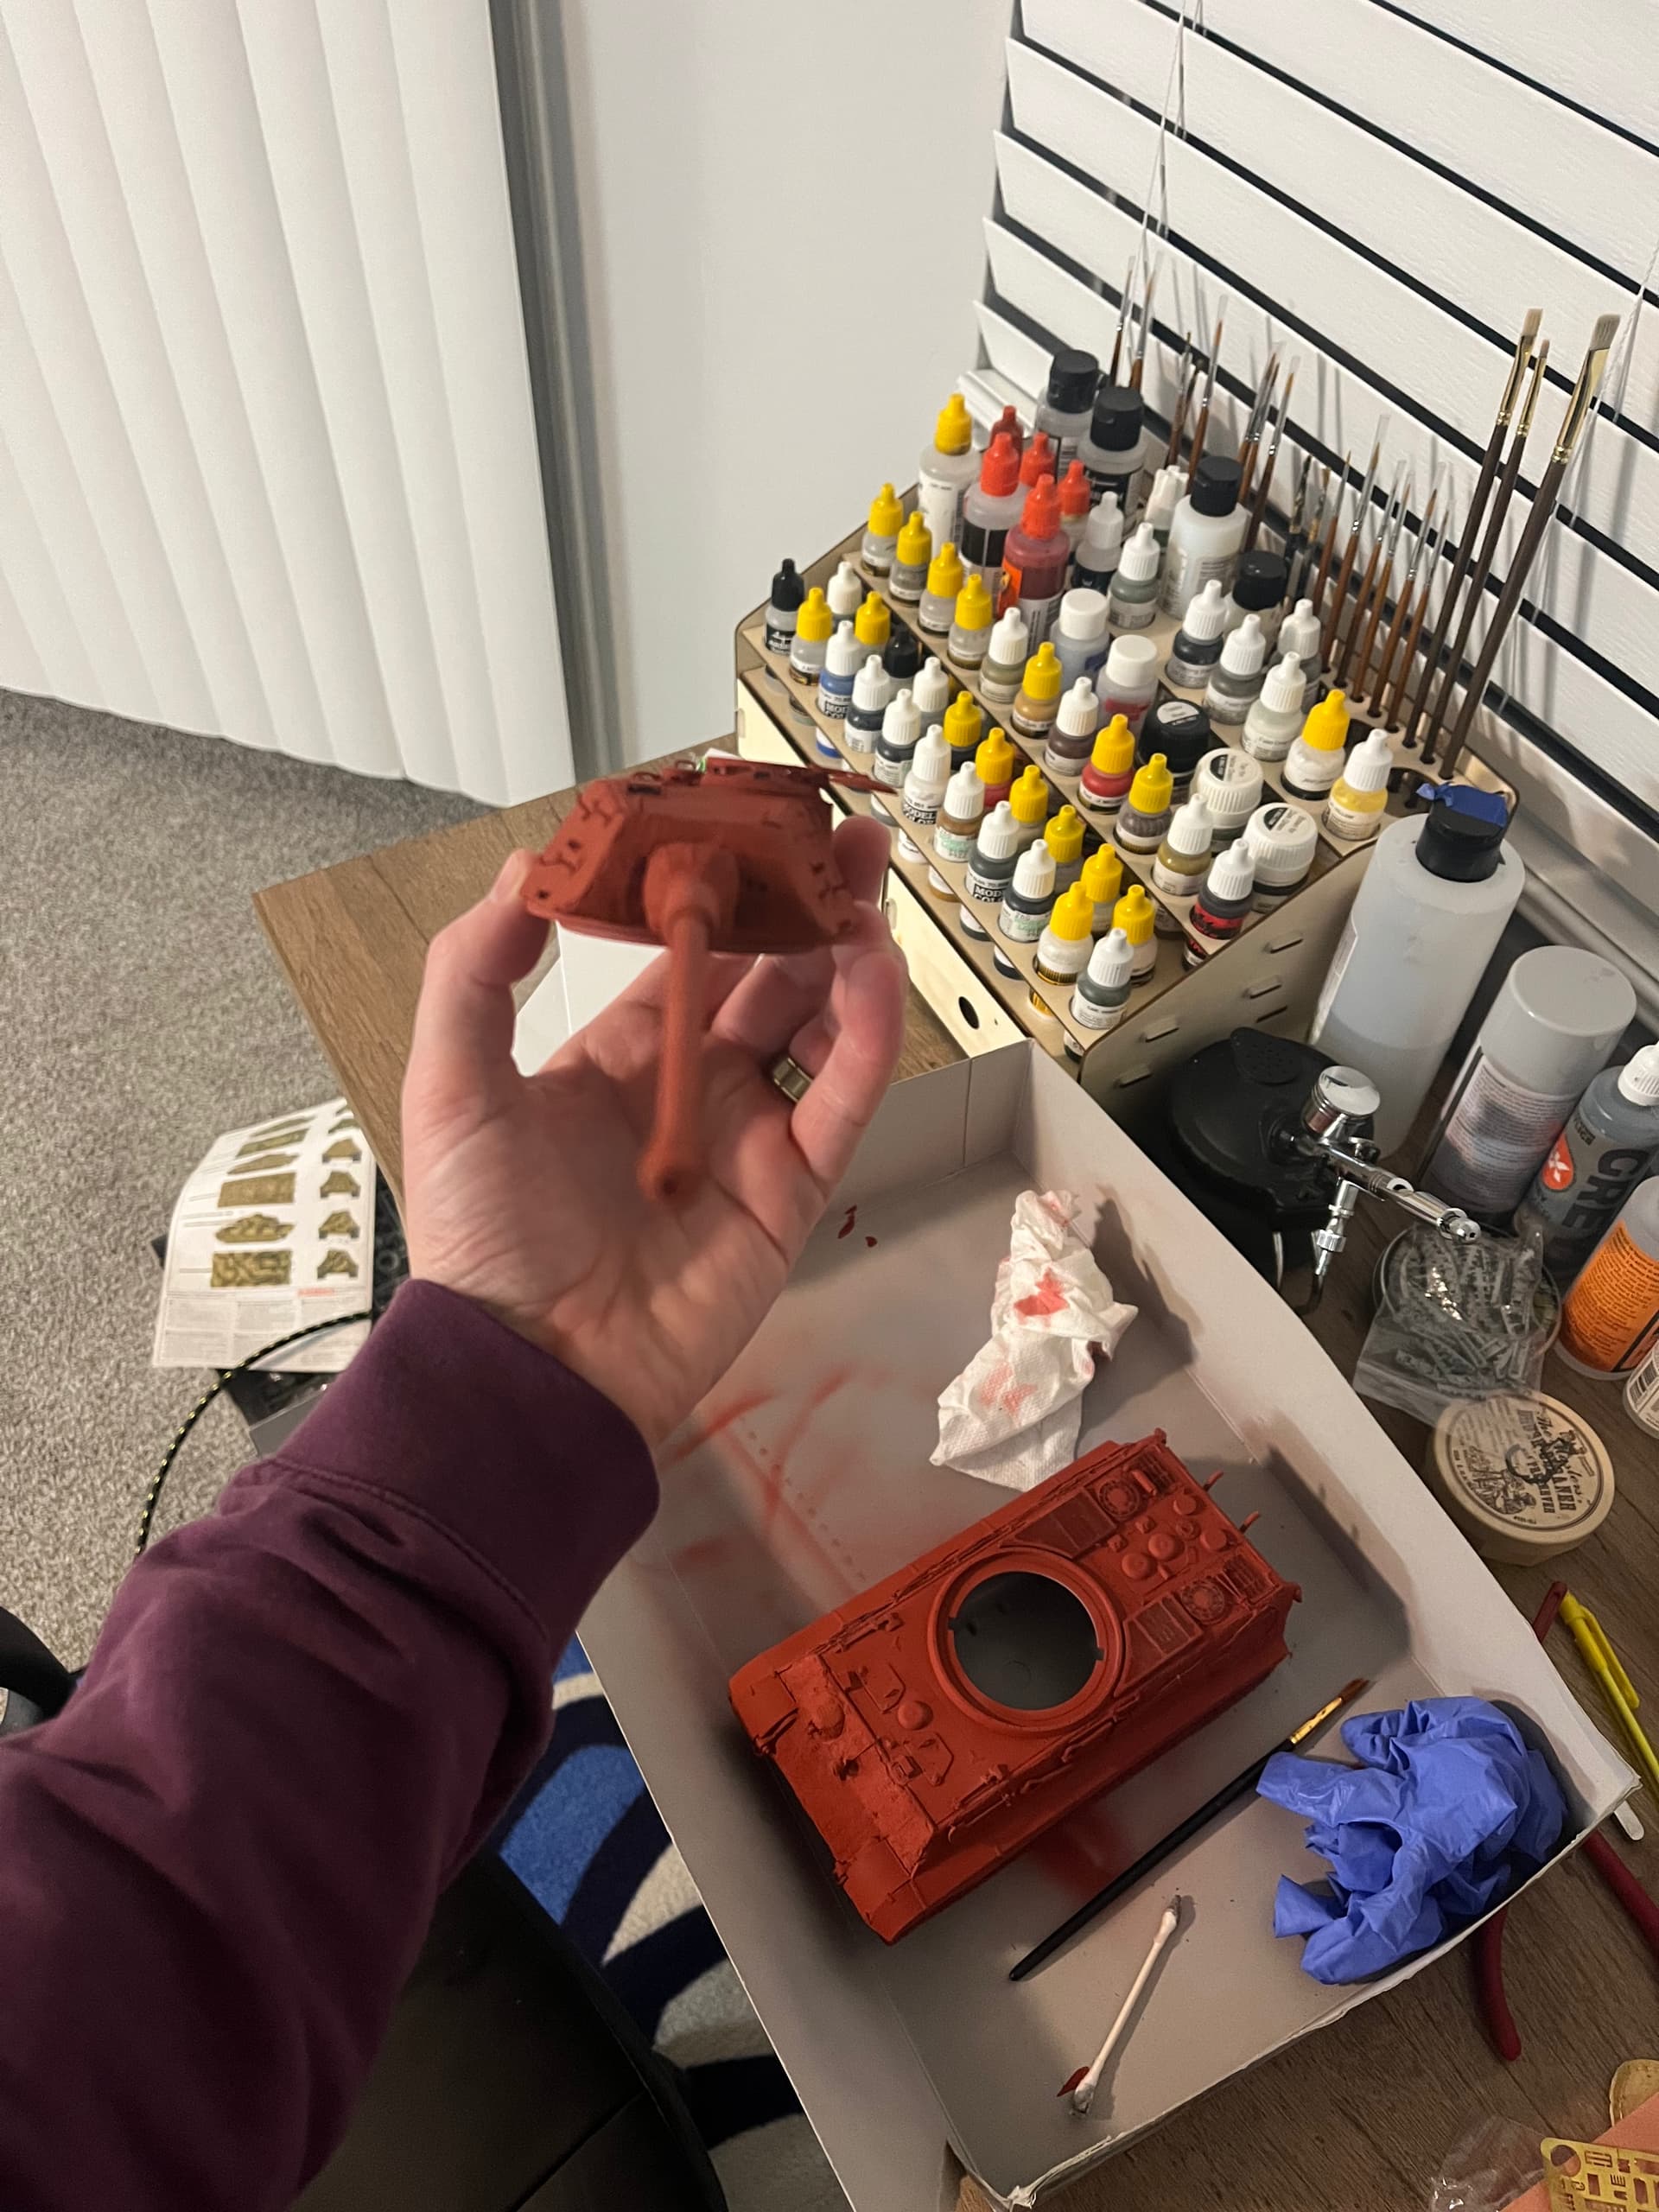
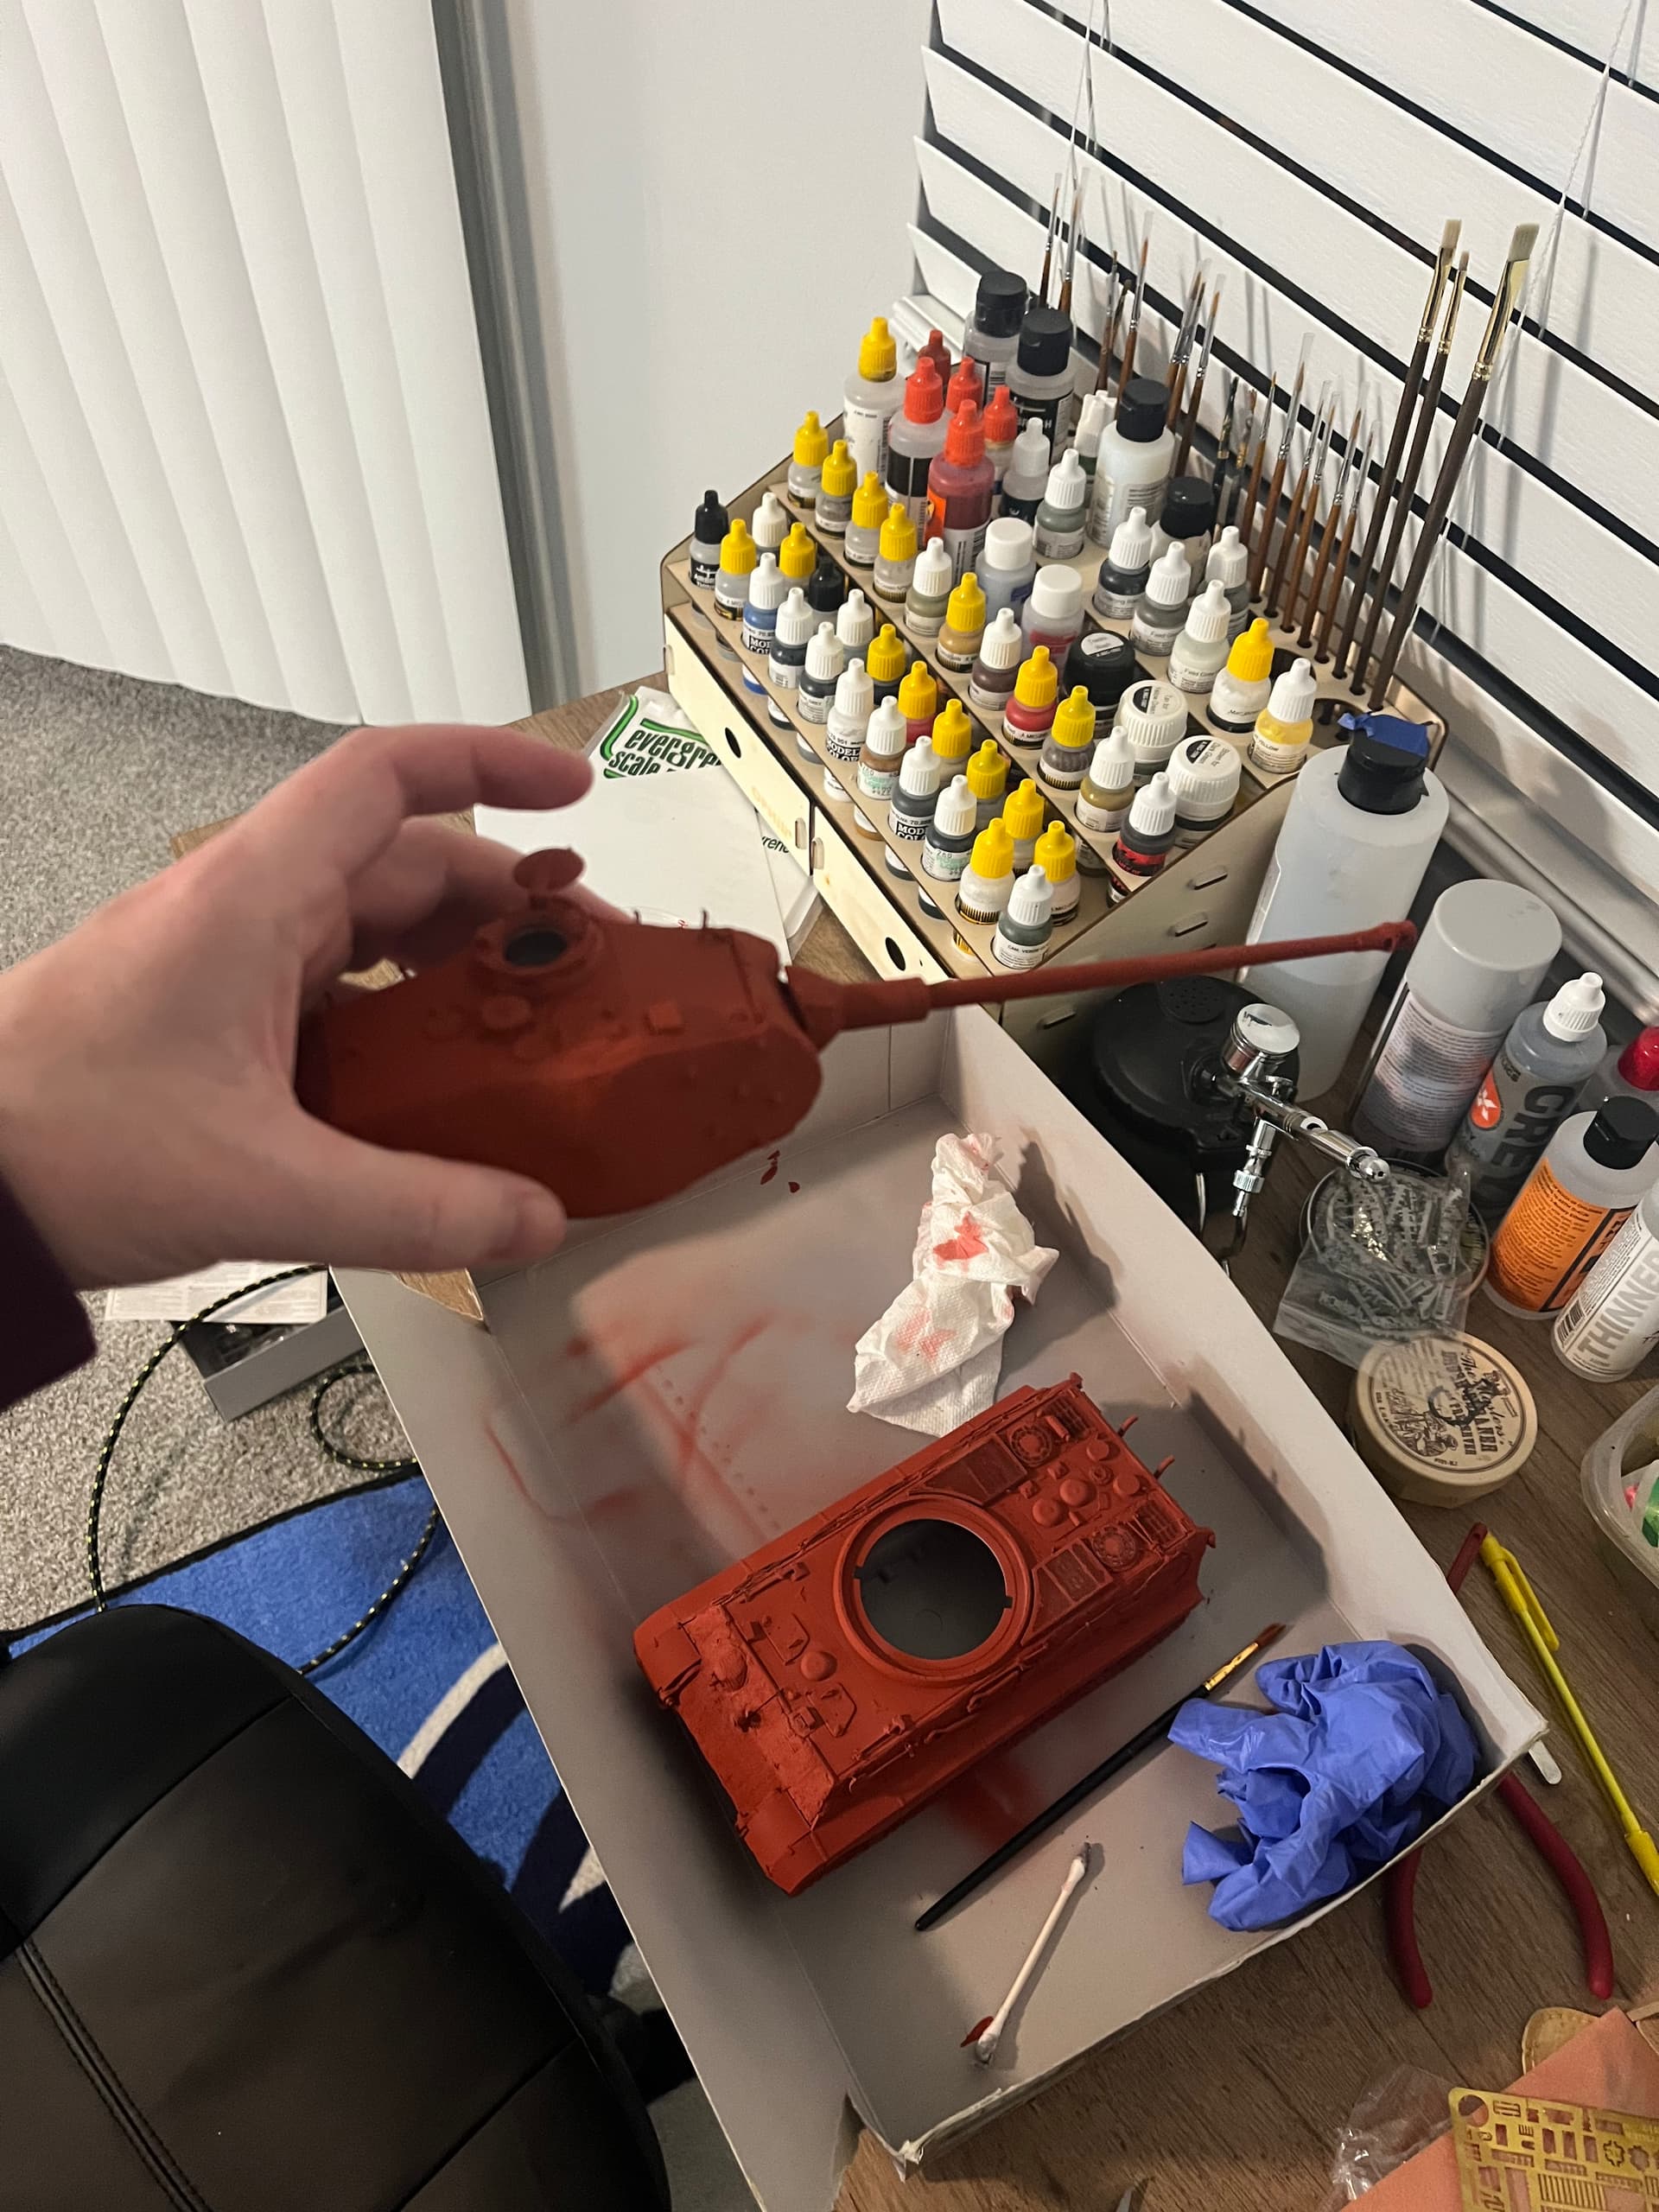

Next up will be a coating of dunkagelb mid was as a base color then will apply highlights. Following that I’ll give it a olivegrun camo scheme and add a highlight coat to that as well. Should be finished with the paint job by the weekend.
4 Likes
If I could give you some constructive criticism, before maybe it is to late. The red oxide primer was applied to the metal of the tank before the zimmerit was applied. The only red areas should be where there was no zimmerit applied, or where the zimmerit is damaged down to the metal. The color of the bare zimmerit before it is apinted is like a paper mache grayish white.
So basically for chipping you would have 2 layers, first the gray of the zimmerit, then below that the red oxide primer.
1 Like
@Floridabucco i don’t think it’s to late, my idea was to do some chipping on the rear of the hull, i figured that the zimmerit would have a different color and can rework some of the imperfections like you stated. Thank you for the heads up, i would of hated to have done it all up just to be wrong.
Your welcome, just trying to help a fellow modeller, as so many here have also helped me.
1 Like
@Floridabucco do you think like a stone grey would work for a cement color ?
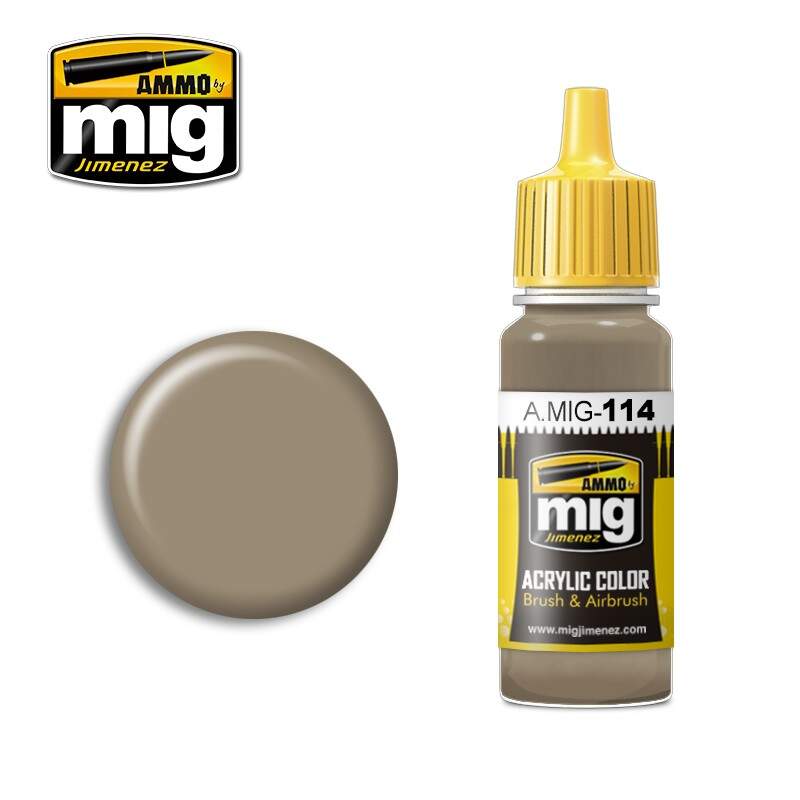
This is a color splotch from Mig, it seems to be not so much a grayish white, as a yellowish gray.
Composition of zimmerit:
25% polyvinyl acetate (matrix)
10% saw dust (filler)
40% barium sulphate
10% zinc sulphide
15% ochre pigment (coloring)
It would have had a slightly yellow-gray color. That made it easier to blend in with the Dunkelgelb basecoat applied over the zimmerit when applied at the factory.
2 Likes
Thank you for the mixture number too this will make it easier to get, I’m going to try and order this today so i can have for after I’m done with camouflaging the cat.
Excellent subject, tracking!
1 Like
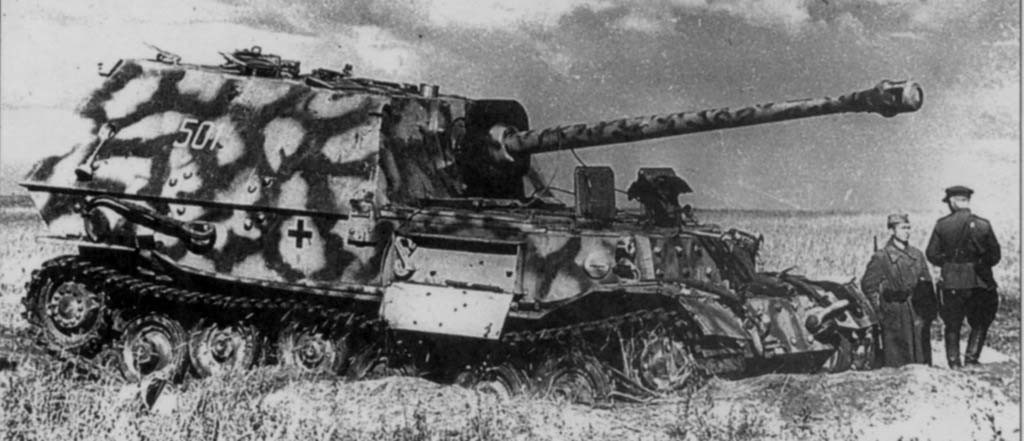
Elefants are quite commonly seen in only dark yellow and green. Not sure why but they spent a good amount of time in Italy where I am guessing red brown isn’t a common color
1 Like
@Mead93 probably just because of the environment I’d think in Italy brown would be used because of the mountains