creating a thread so I can find it again in the future, and hopefully so others can find it easily
So, I’m starting to assemble them and am wondering about glue. The instructions say to just glue at the base of the pin for them to remain workable. I believe that. I’m thinking Tamiya extra thin might not be the best choice here? I don’t like to use superglue ever. Perhaps a slower setting plastic cement that doesn’t flow quite as freely as extra thin? Experiences?
I used the Tamiya, but I would try to wick a fair amount off the brush before touching the pins to avoid as much seepage as possible.
After the point where you would wrap static tracks around the suspension for painting or arranging sag, you can try to gently work the joins and see if you can get the pins to set without the links setting as well. Not always 100% but I can usually get the majority to stay loose so I can still pose it as I need. It’s not like I am going to roll them across the carpet when done.
You may choose thick ABS glues like blue bottle one from tamiya. I think Mr.Hobby’s common blue one is okay, for its brush are much more like a needle/cone to glue percisely.
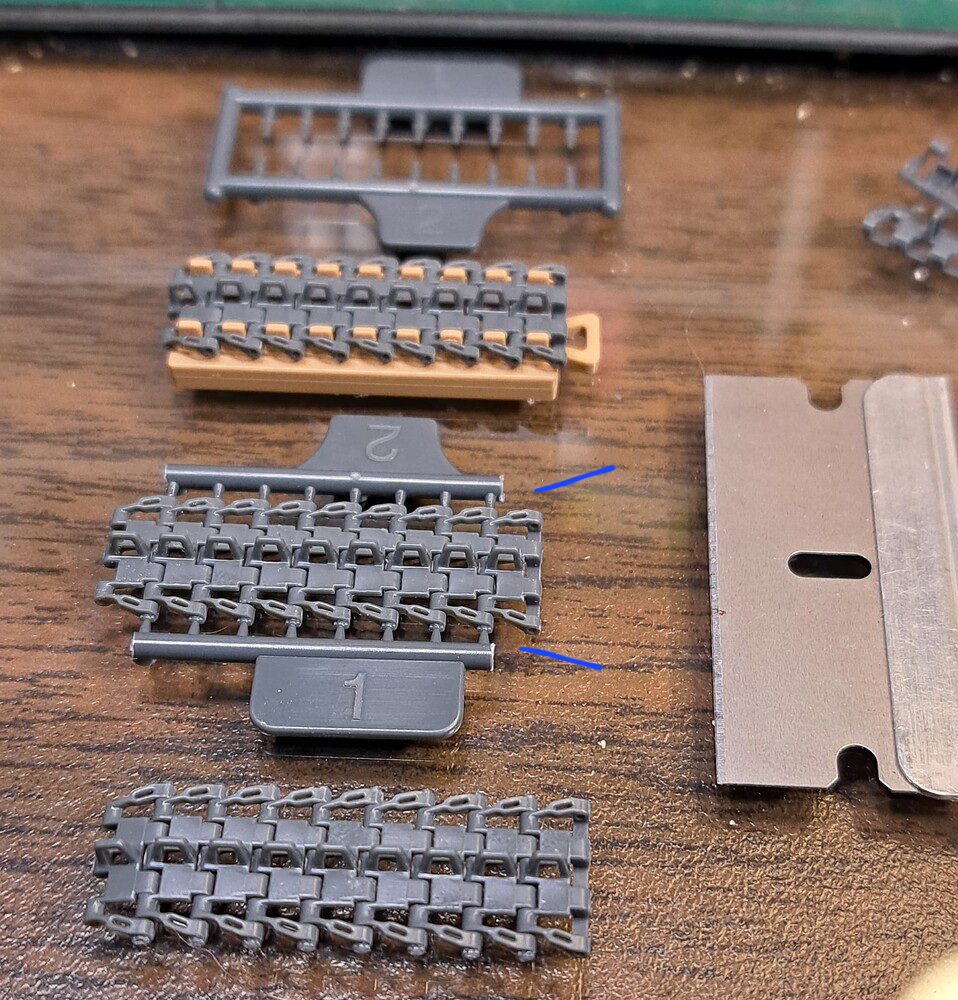
Slide in the appropriate all the pins on each side at one time. Links are handed so the pin placement matters.
Lightly glue the pin heads in place. I used Testor’s Liquid Cement with the Tamiya Extra Tin brush*. The Testor’s is thicker and stays put better. Capillary action isn’t your friend in this step. As mentioned above wick most of the LC off of the brush to help keep the application light.
One can do this with Tamiya Extra Thin as @brekinapez says. I could go faster with less issues using Testor’s.
Let dry an hour or so. Cut pin heads flush with razor blade. Articulate tracks. Occasionally a pin may fall out and needed tacked back in place.
*An empty Tamiya Extra Thin bottle full the slower thicker Testor’s Liquid Cement can be very handy on the work bench in my experience.
FWIW - After a little experience, I glued three jigs together for 27 link runs and cut assembly time in half. I’m always happier with RFM Pz IV workable indy links over any set link & length tracks despite the RFM’s taking a bit longer.
You are correct about the thicker formula being even better; Extra is all I usually have handy as I bought a ton of it at Hobby Lobby before they stopped carrying it.
Don’t know if this is something everyone generally thinks of, but when cutting small things like those pins loose, I usually hold the sprue along an edge of the cutting board so it is closer to the cutting surface and things don’t get flexed as much while pressing down with the blade.
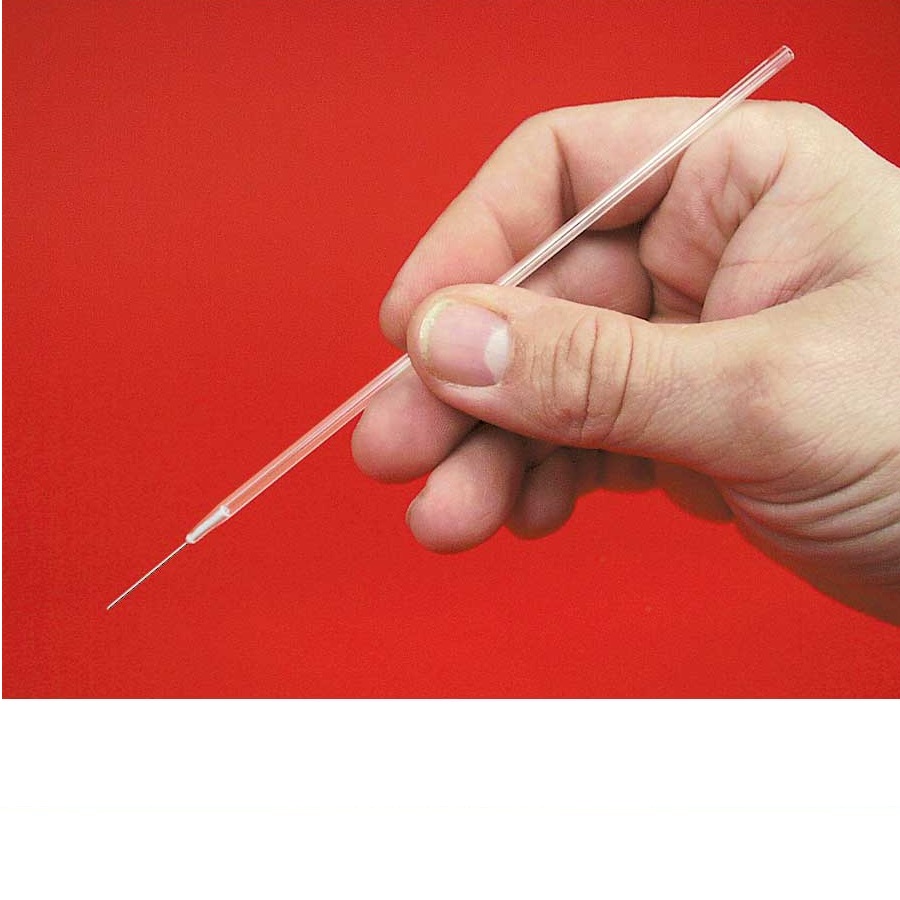
Who still uses a brush for liquid glue ?
I have been using these for years now.
Just insert the needle end into the liquid glue and
use the squeeze bottle to draw the glue into the tube.
To apply just touch the needle end to where you want the glue and it will flow out.