Very good progress @Armor_Buff Following this build closely…This has all the indication of a great model ![]() Thanks for sharing
Thanks for sharing ![]()
1 Like
Oh the woes of a great armor builder. C doesn’t match D and F won’t fit because you mis - glued A and B two weeks ago. In the words of Clint Eastwood - “Adapt, improvise, overcome!” Excellent save Wade!
1 Like
Matt, thank you for the kind comments. That exactly sums it. Far too nice of a kit to allow modeler error to derail project.
@Mukund Mukund, thank you happy to share.
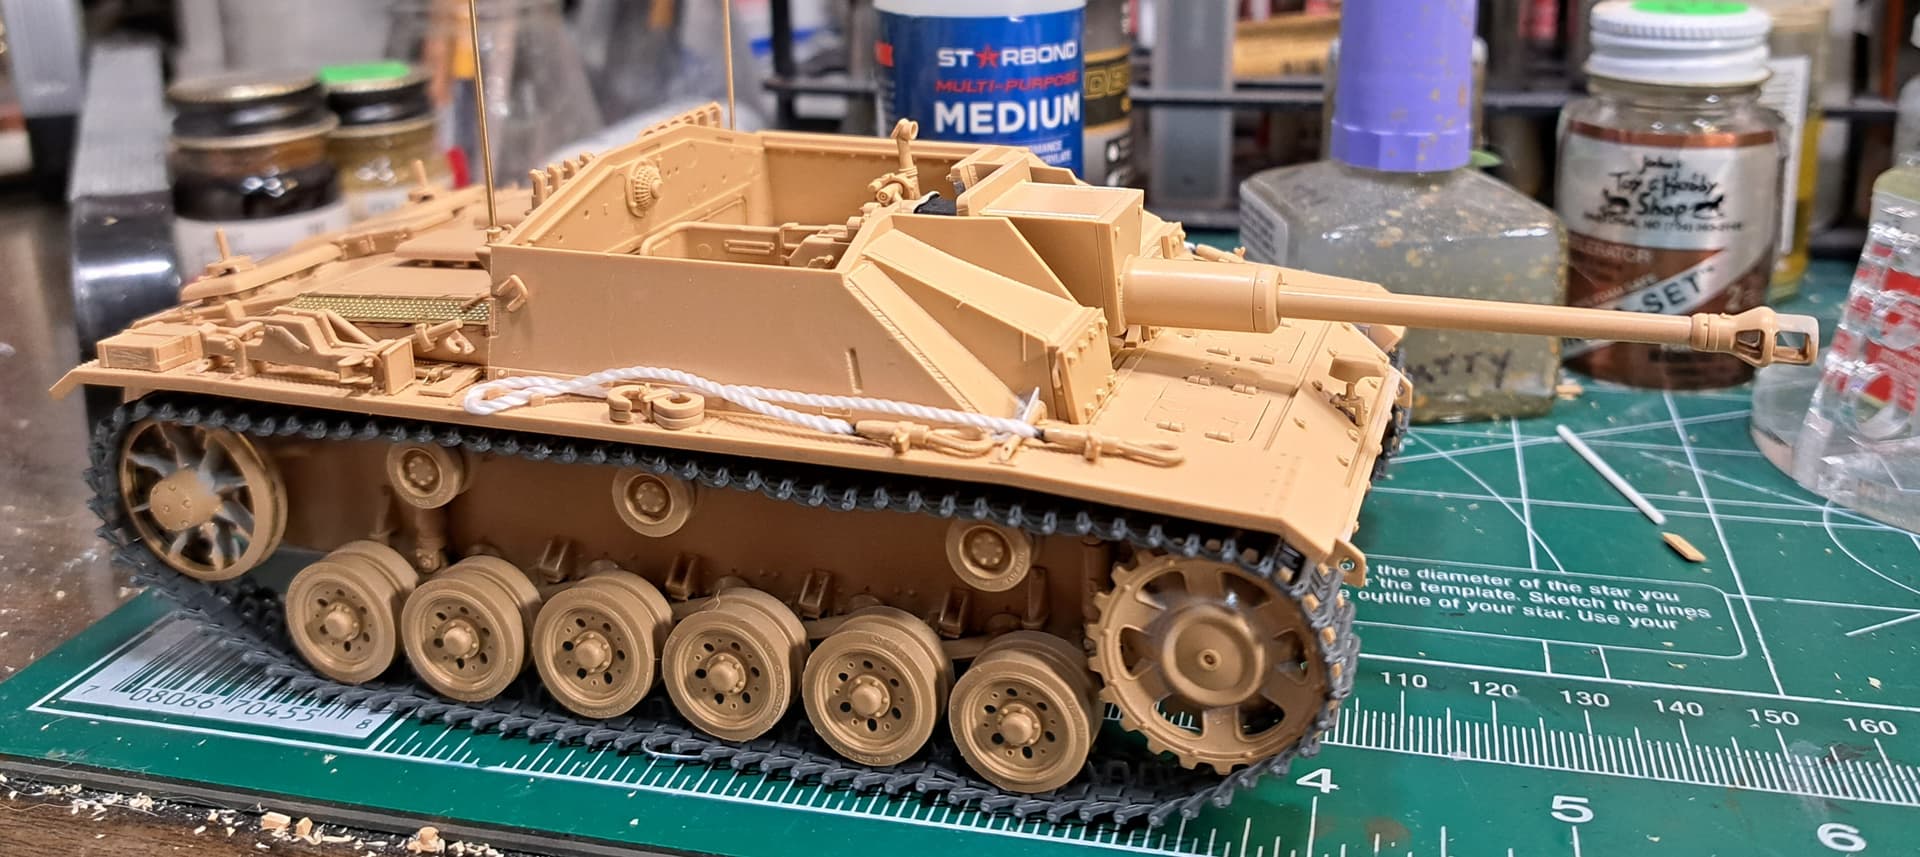
To this point, I think the RFM 5069 Stug III G early is an outstanding kit overall. The only weakness if one wants to call it that is the non-interior versions will be a little more complicated than strictly necessary due to sharing the same foundation with the interior kits.
Here’s another take on the RFM Stug III Late G by Panzermeister36 an avid Stug III aficionado. Based on his comments comparing early G & late G features, I think the early G is probably a hair more accurate out of the box.
While not well versed in Stug lore, I did notice RFM missed two prominent weld seams on the top of the early G’s main gun mantlet.

It’s on top, it’s very obvious and it’s triggered my OCD - must get the welder out and fix. ![]()
3 Likes
This is moving along great Wade… Lots of time and effort but it’s showing it all to be well worth it. ![]()
![]()
2 Likes
Thank you, John.
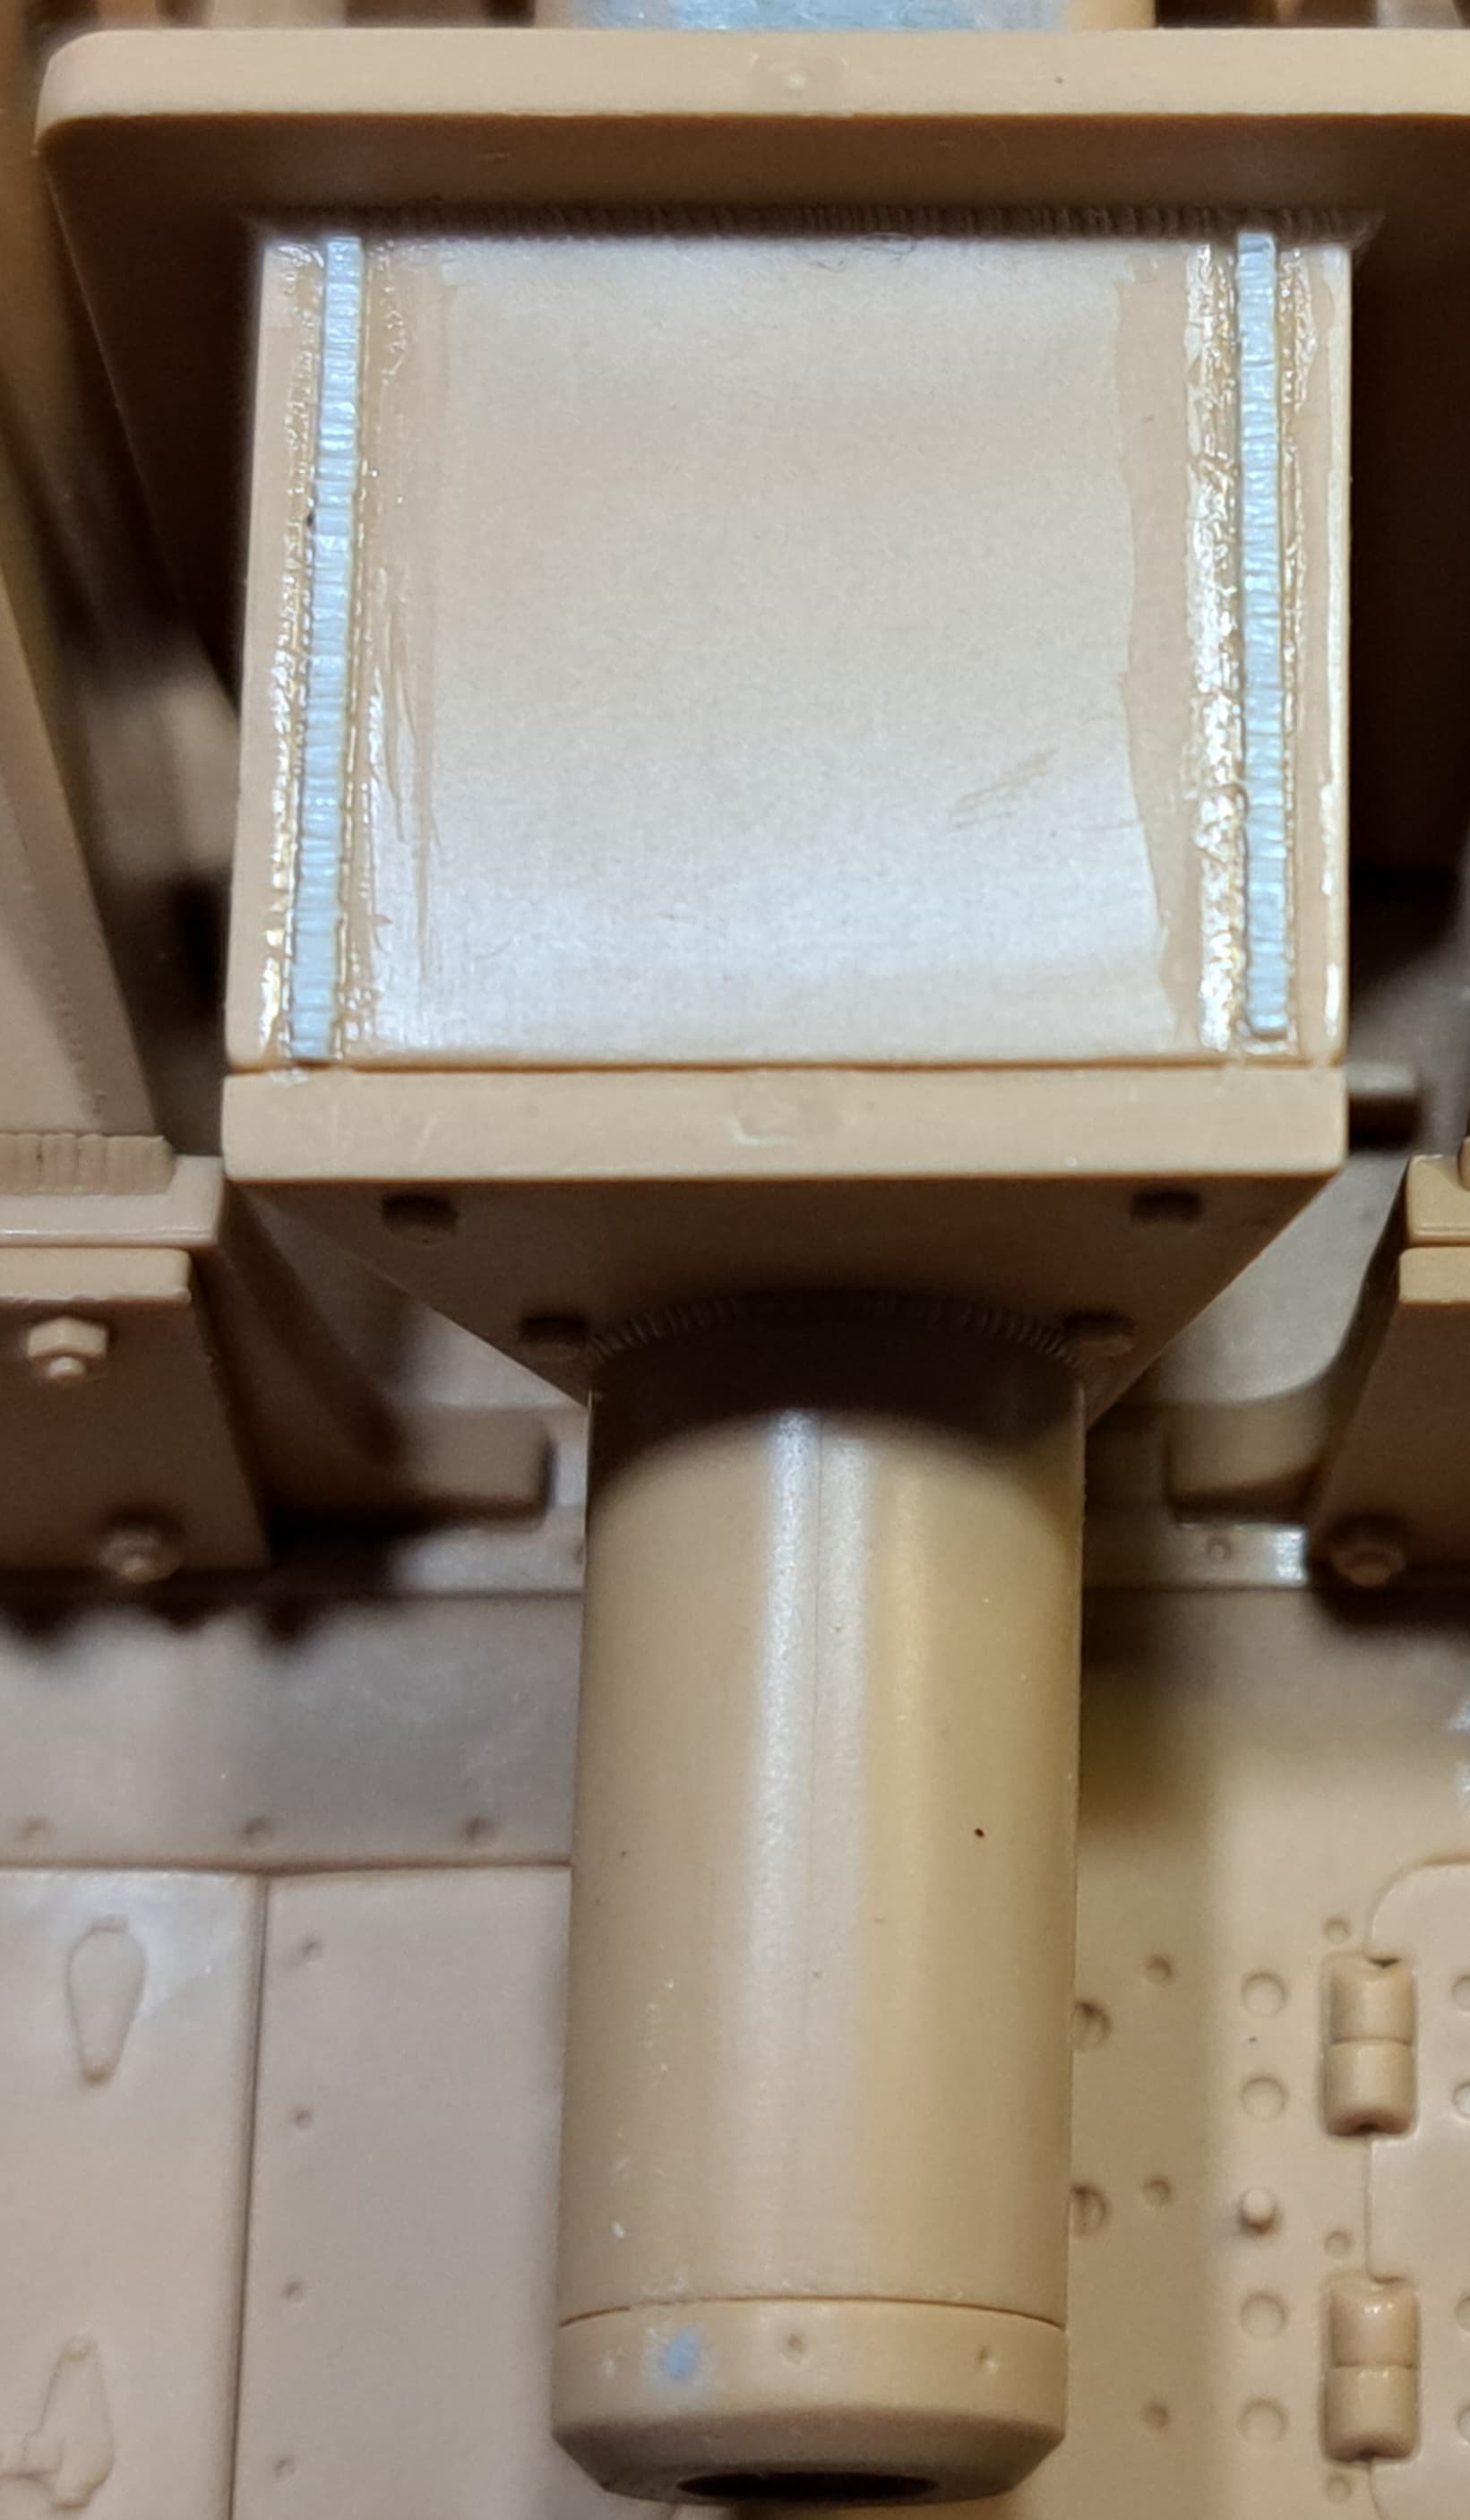
Added a bit of weld details to top of mantlet.
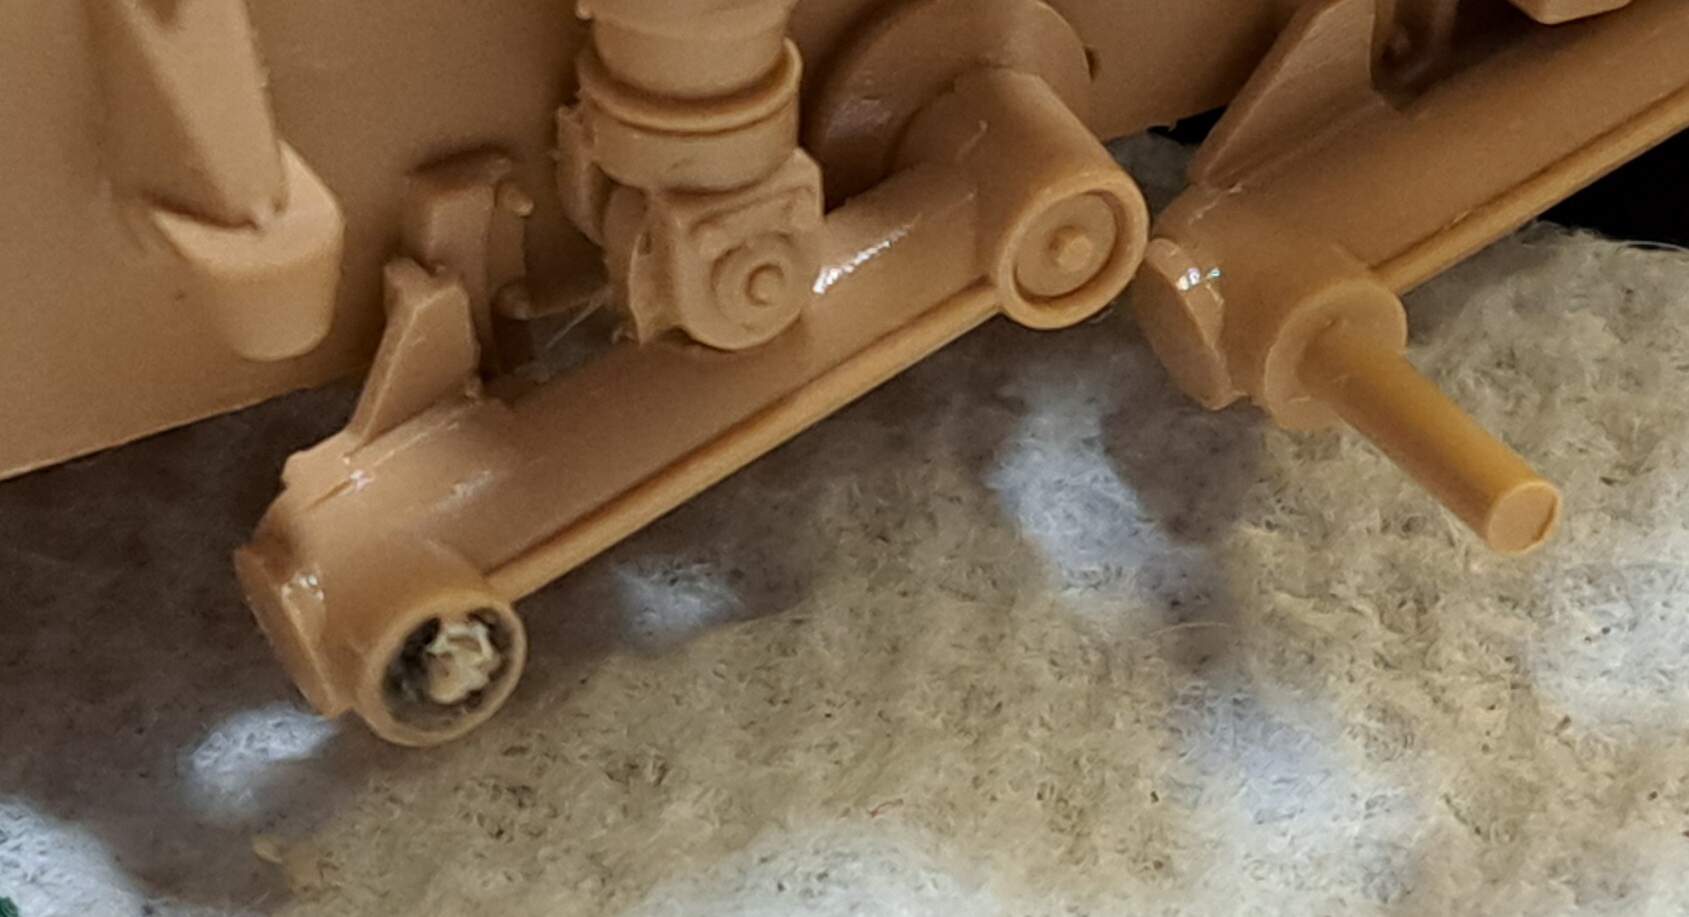
Of course no good deed goes unpunished. Some how I managed to snap off the previously repaired torson arm pin AGAIN!
As Paul Abrahamian said on Big Brother 18…

Time for the Six Million Dollar Man treatment of rebuilding better than before…with a pin made from titanium, tungsten & depleted uranium…
…Joe-flation sucks…budget only allowed for crappy plastic rod basic chinesium grade repair. We all know, I’ll break that six more times before this model gets wrapped or pitched in the bin ![]()
Someone whispered, "Just stick a stainless steel pin in that thing. Trying to sleep here!

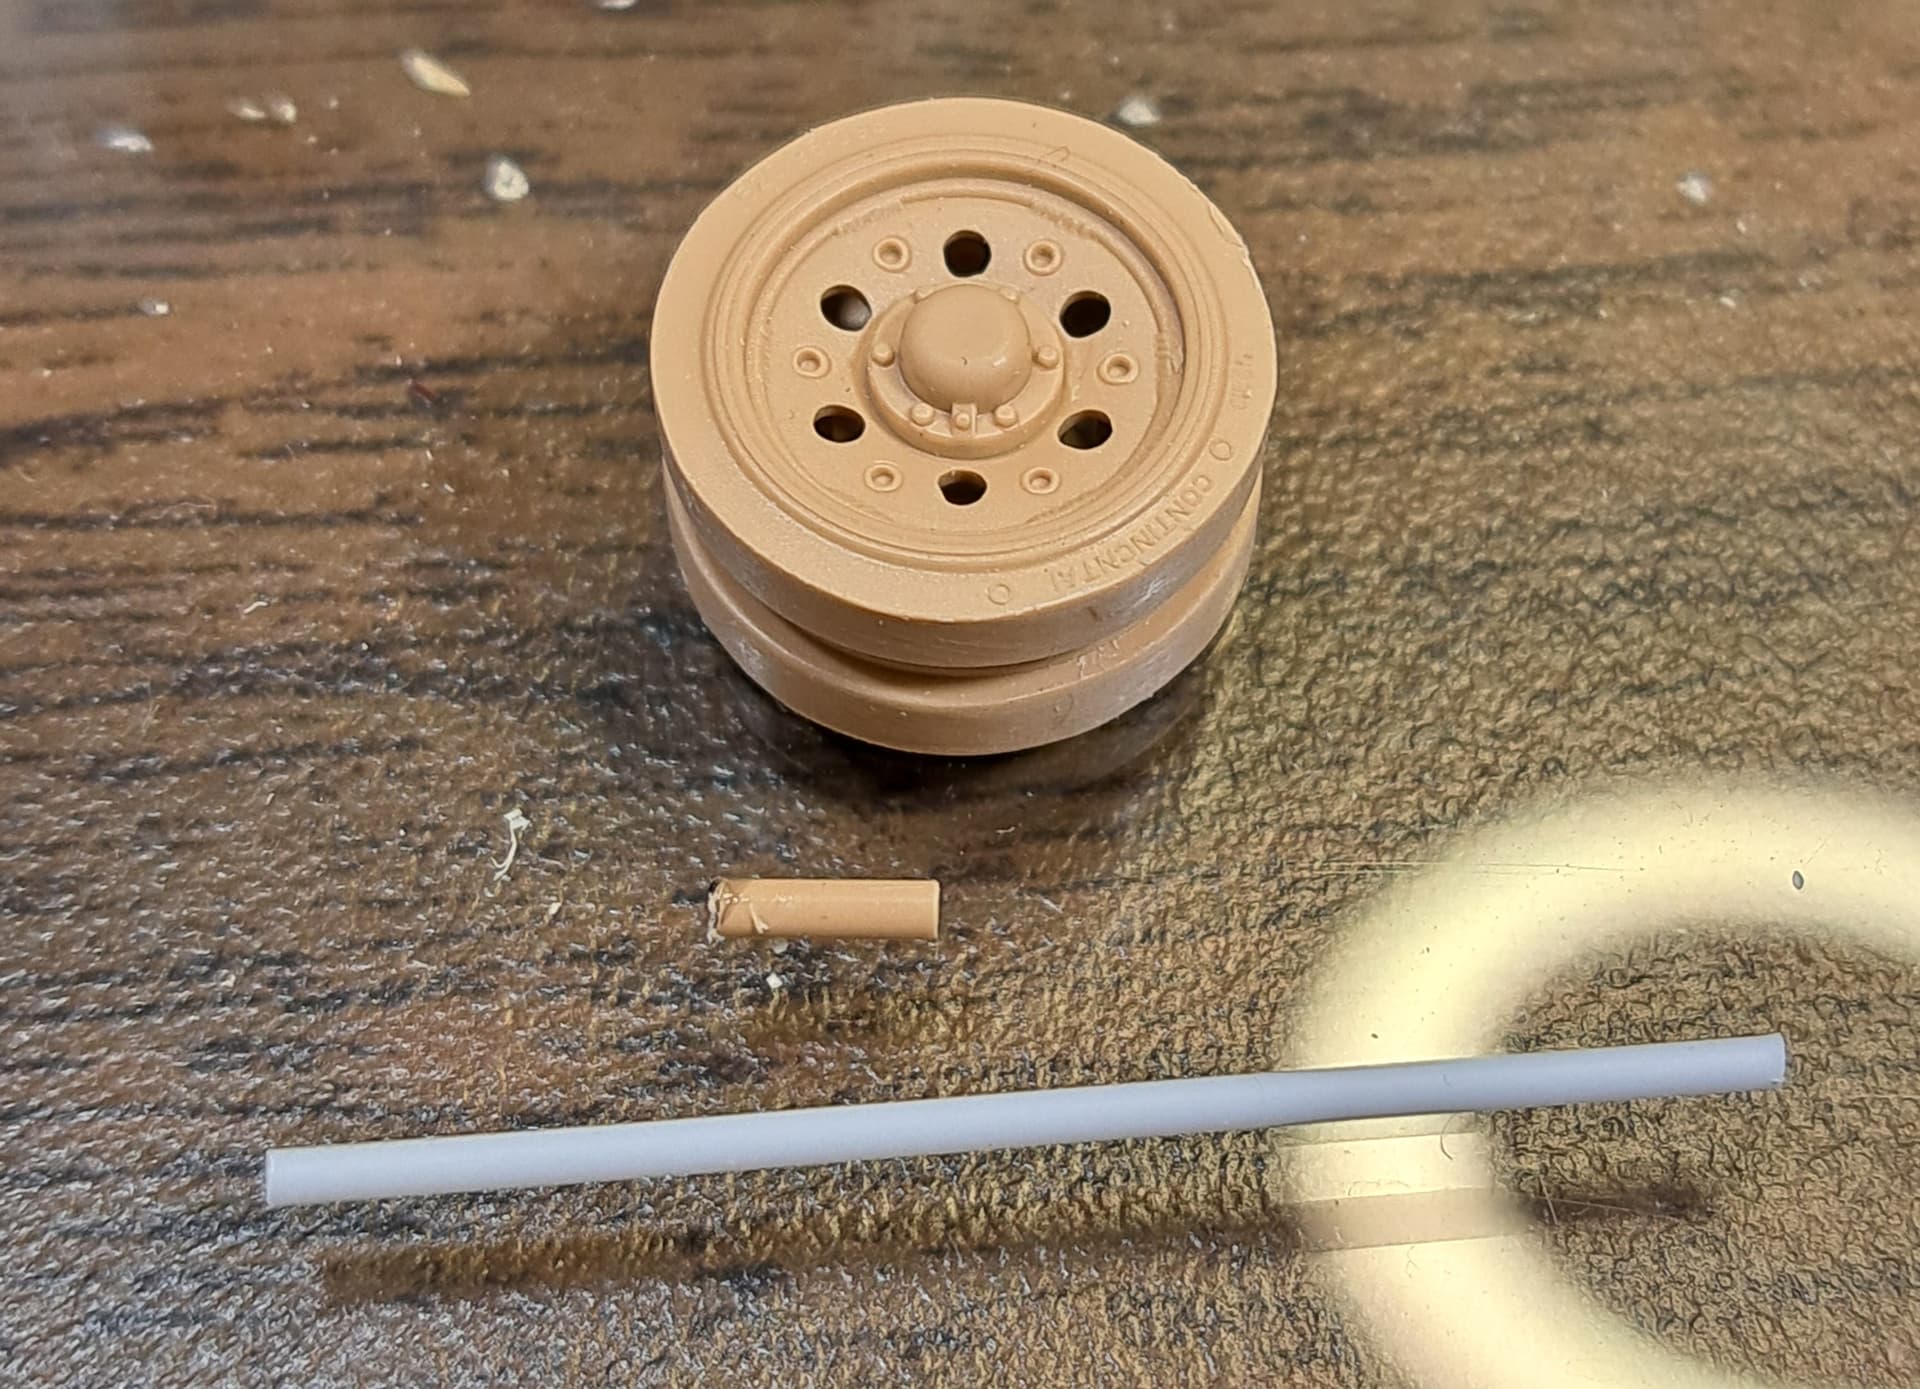
New plan of attack…

Make pilot divit for drill bit with divider. Use Mark 2 Eyeball (Mk1 eyeball + optivisor) to center.

Cut stainless steel pin to size and adjust circumference with tape to fit poly cap in road wheel.
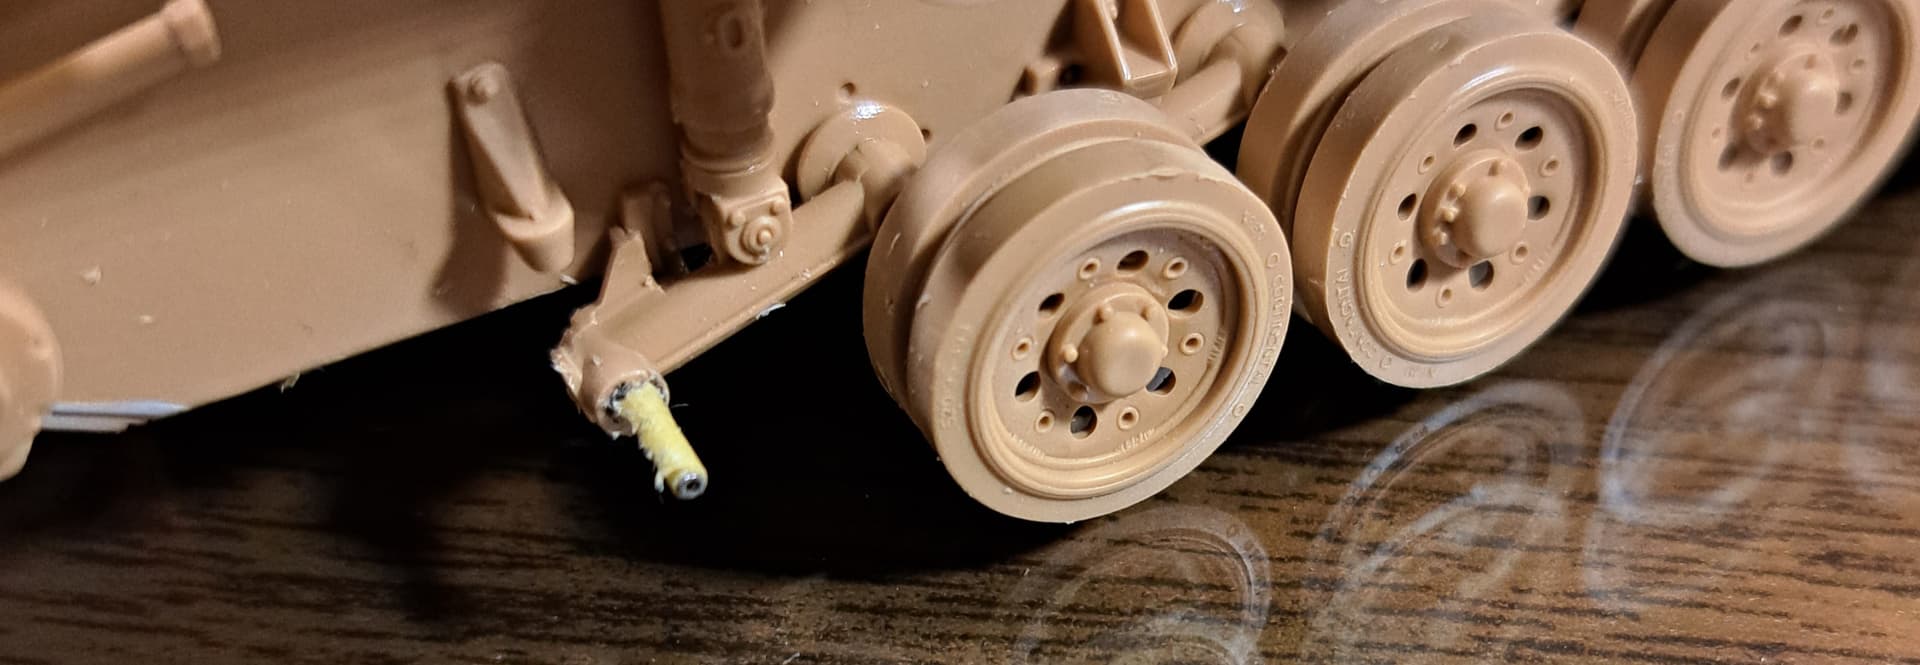
Check alignment with straight edge and on glass desk top.

6 Likes
Good save. Was hoping to see DU pin however.
2 Likes
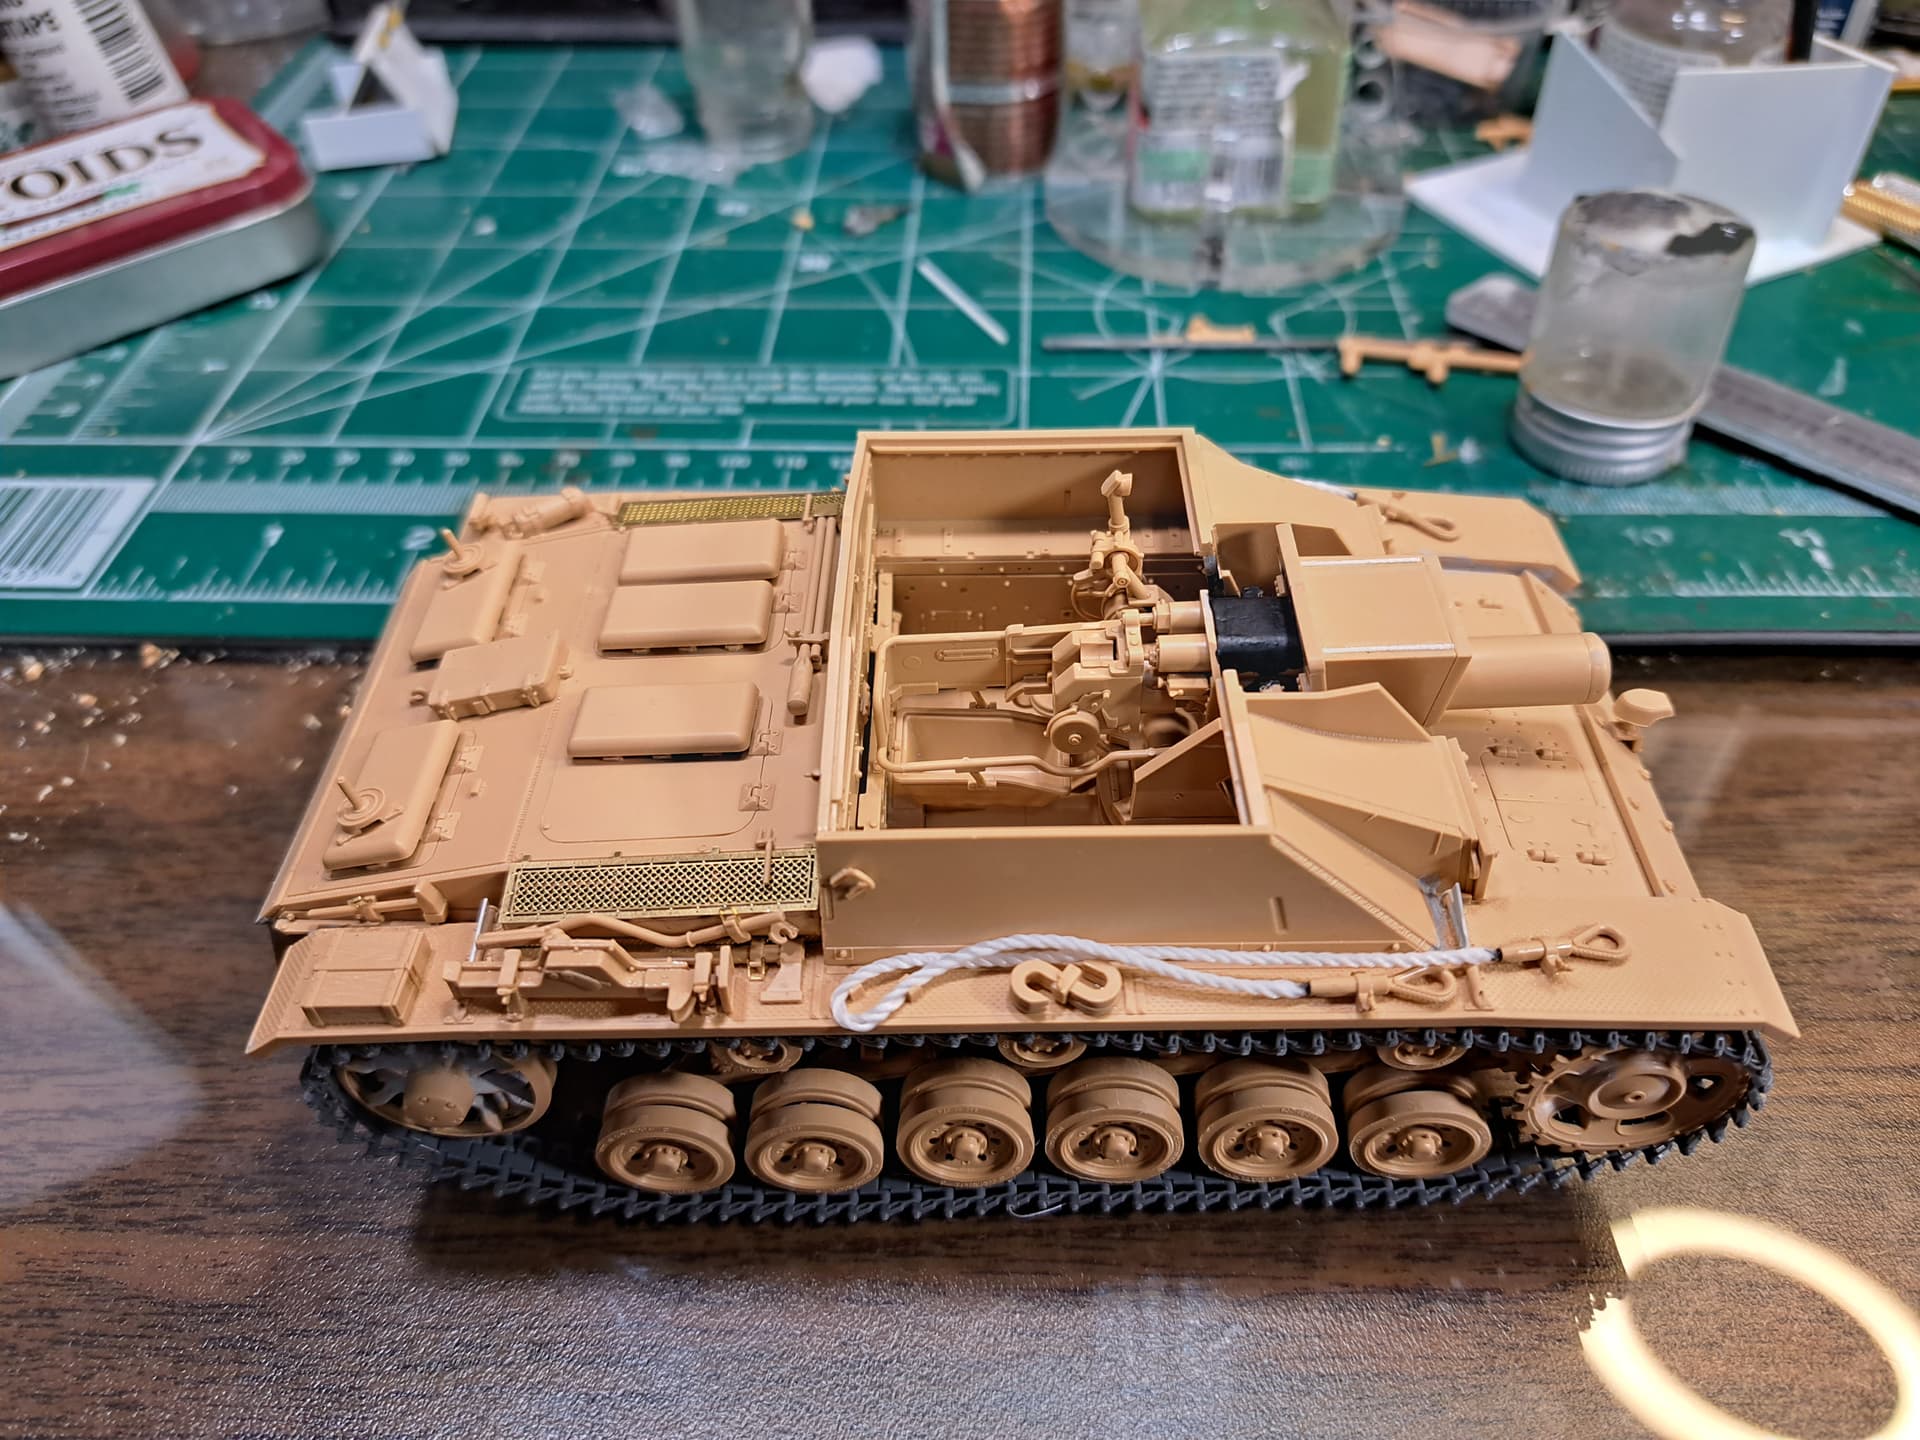
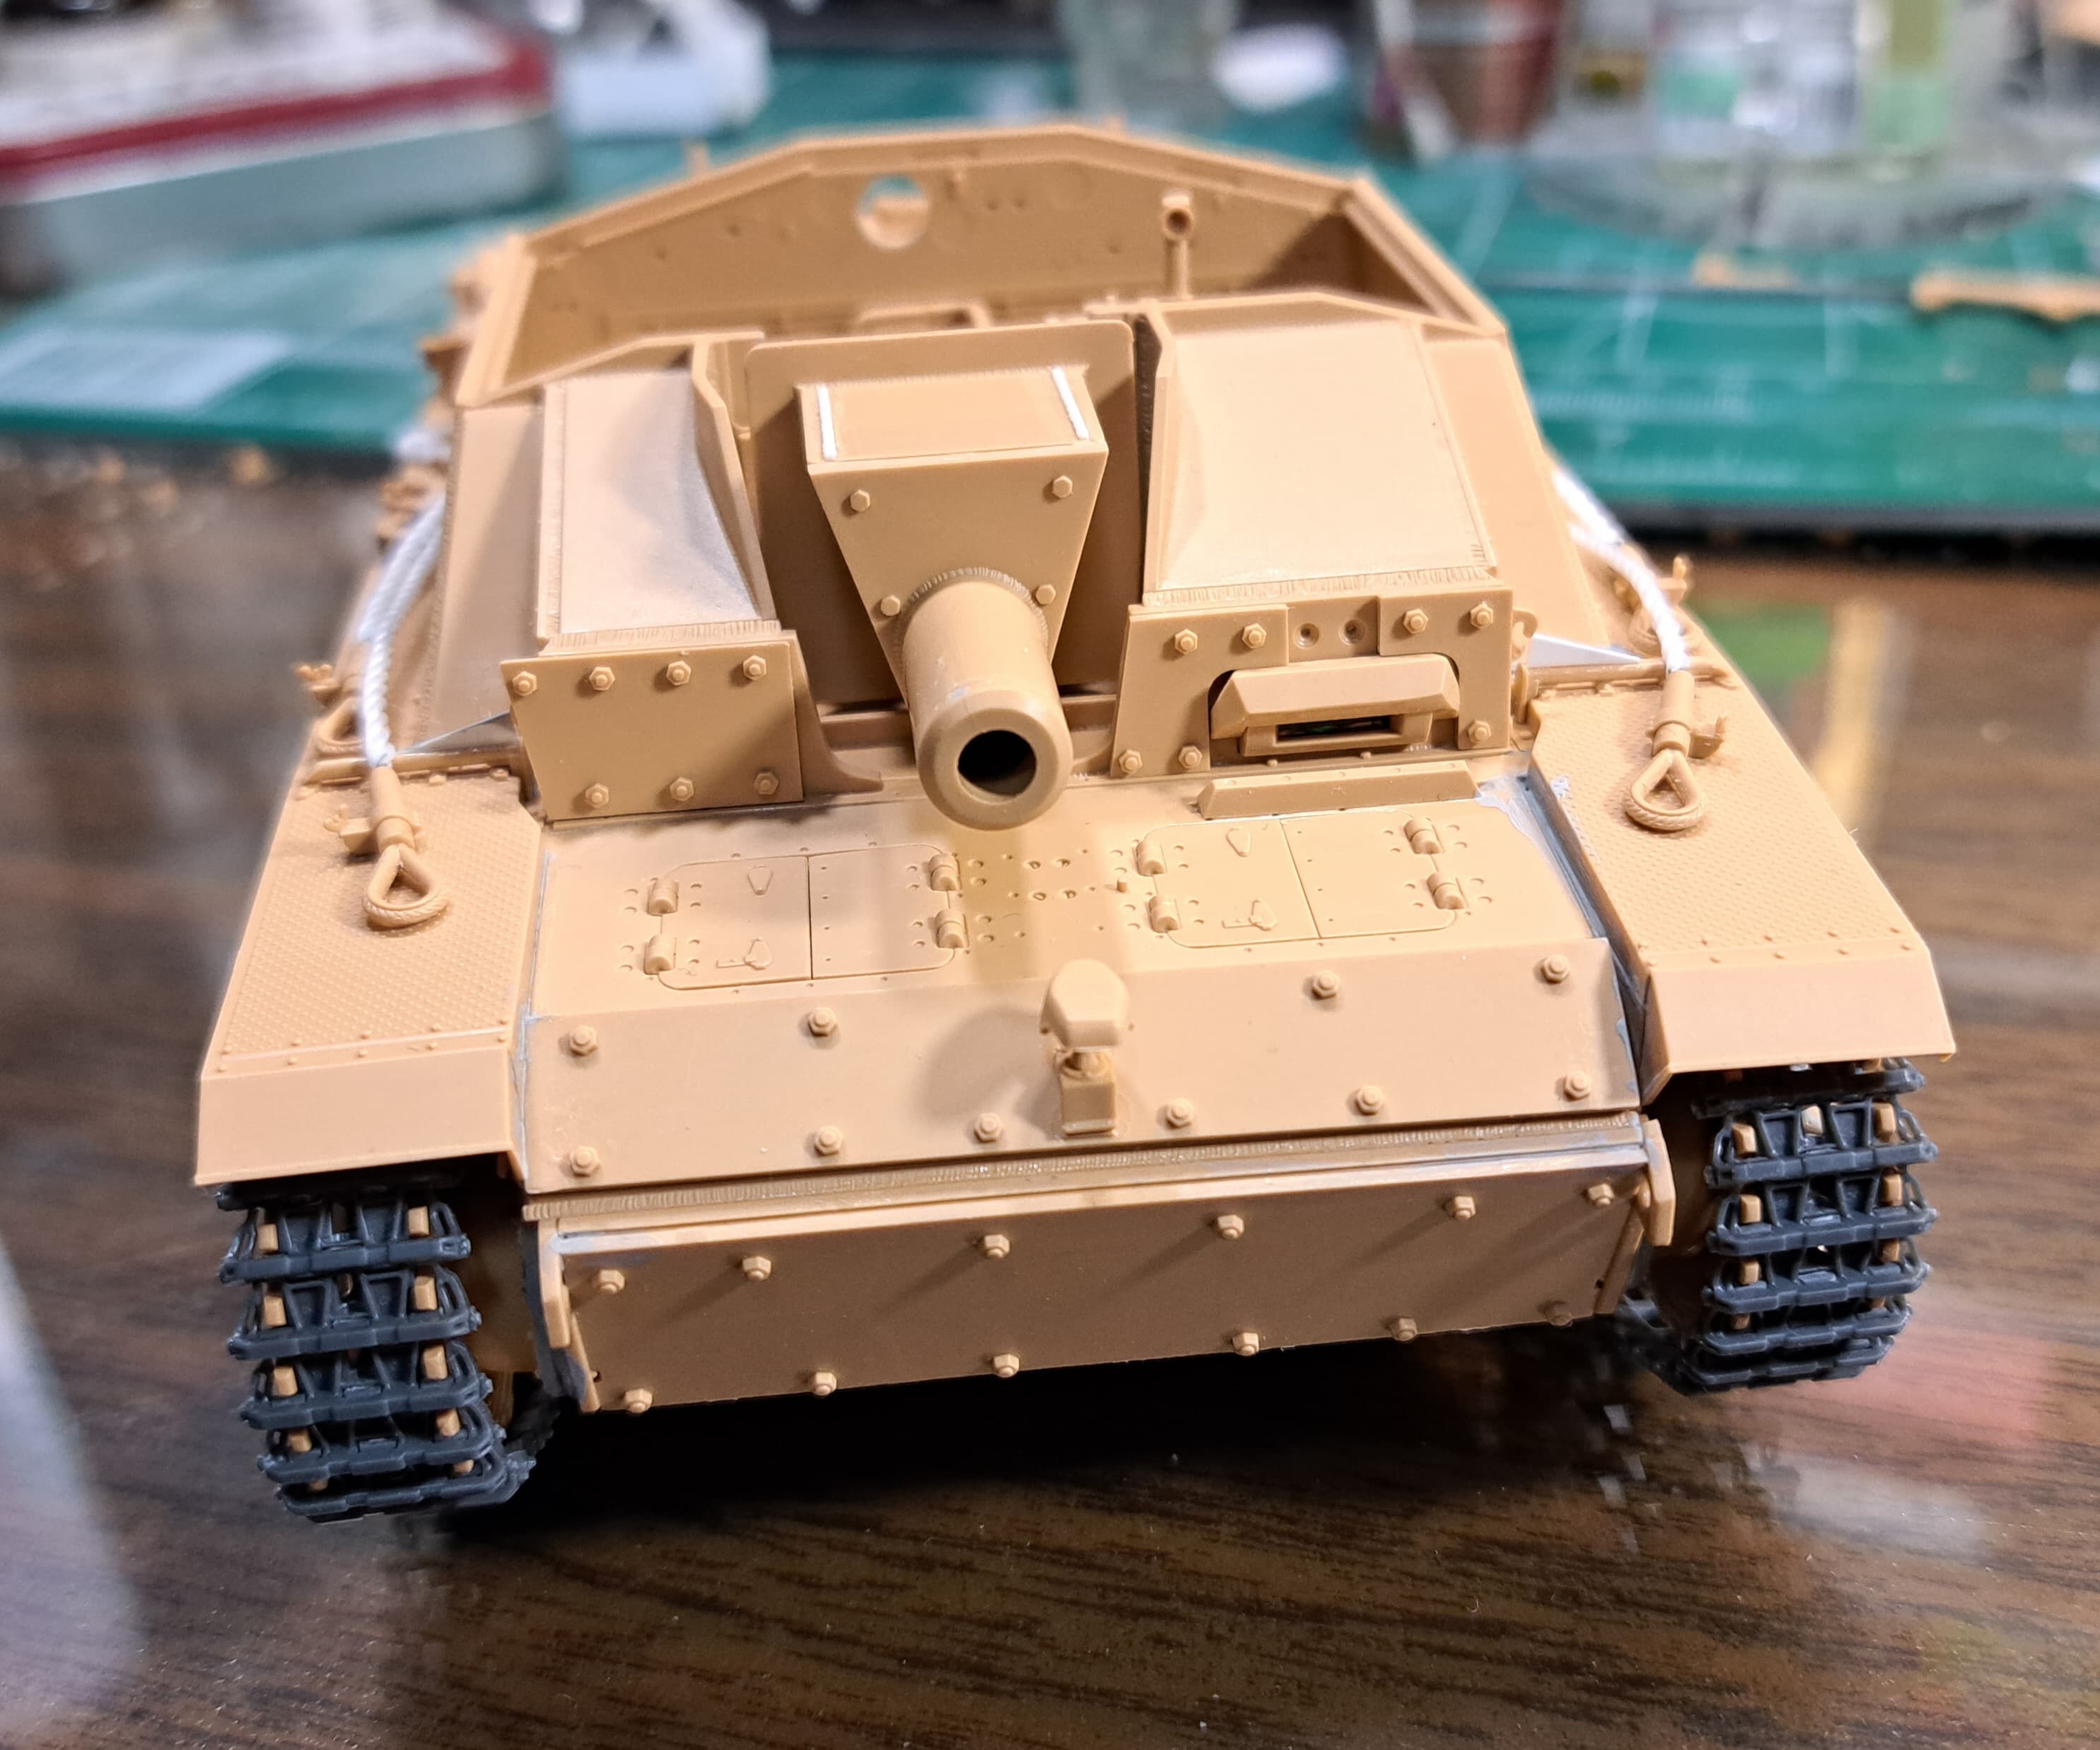
Step 20 - Rear Engine Deck & Sub’s A7 & A8
Zero issues with this step. Decided to do the 3 PE tool clasps, spare wheels & spare travk pins until later after rear engine deck is mated to Stug to avoid damage during installation.

6 Likes
Looking great so far Wade
2 Likes
@metalhead85 Richard, thank you. Feels good to be building again.
Step 21 - Attach Engine Deck aka Sum Of All Fears 2
Test fit of the engine deck immediately went side ways with a ~1/4 inch gap at the back of the superstructure. The problem was obvious.

With that thing chopped off the engine deck soon fit with a few minor sanding tweaks to the left side air intake’s front.
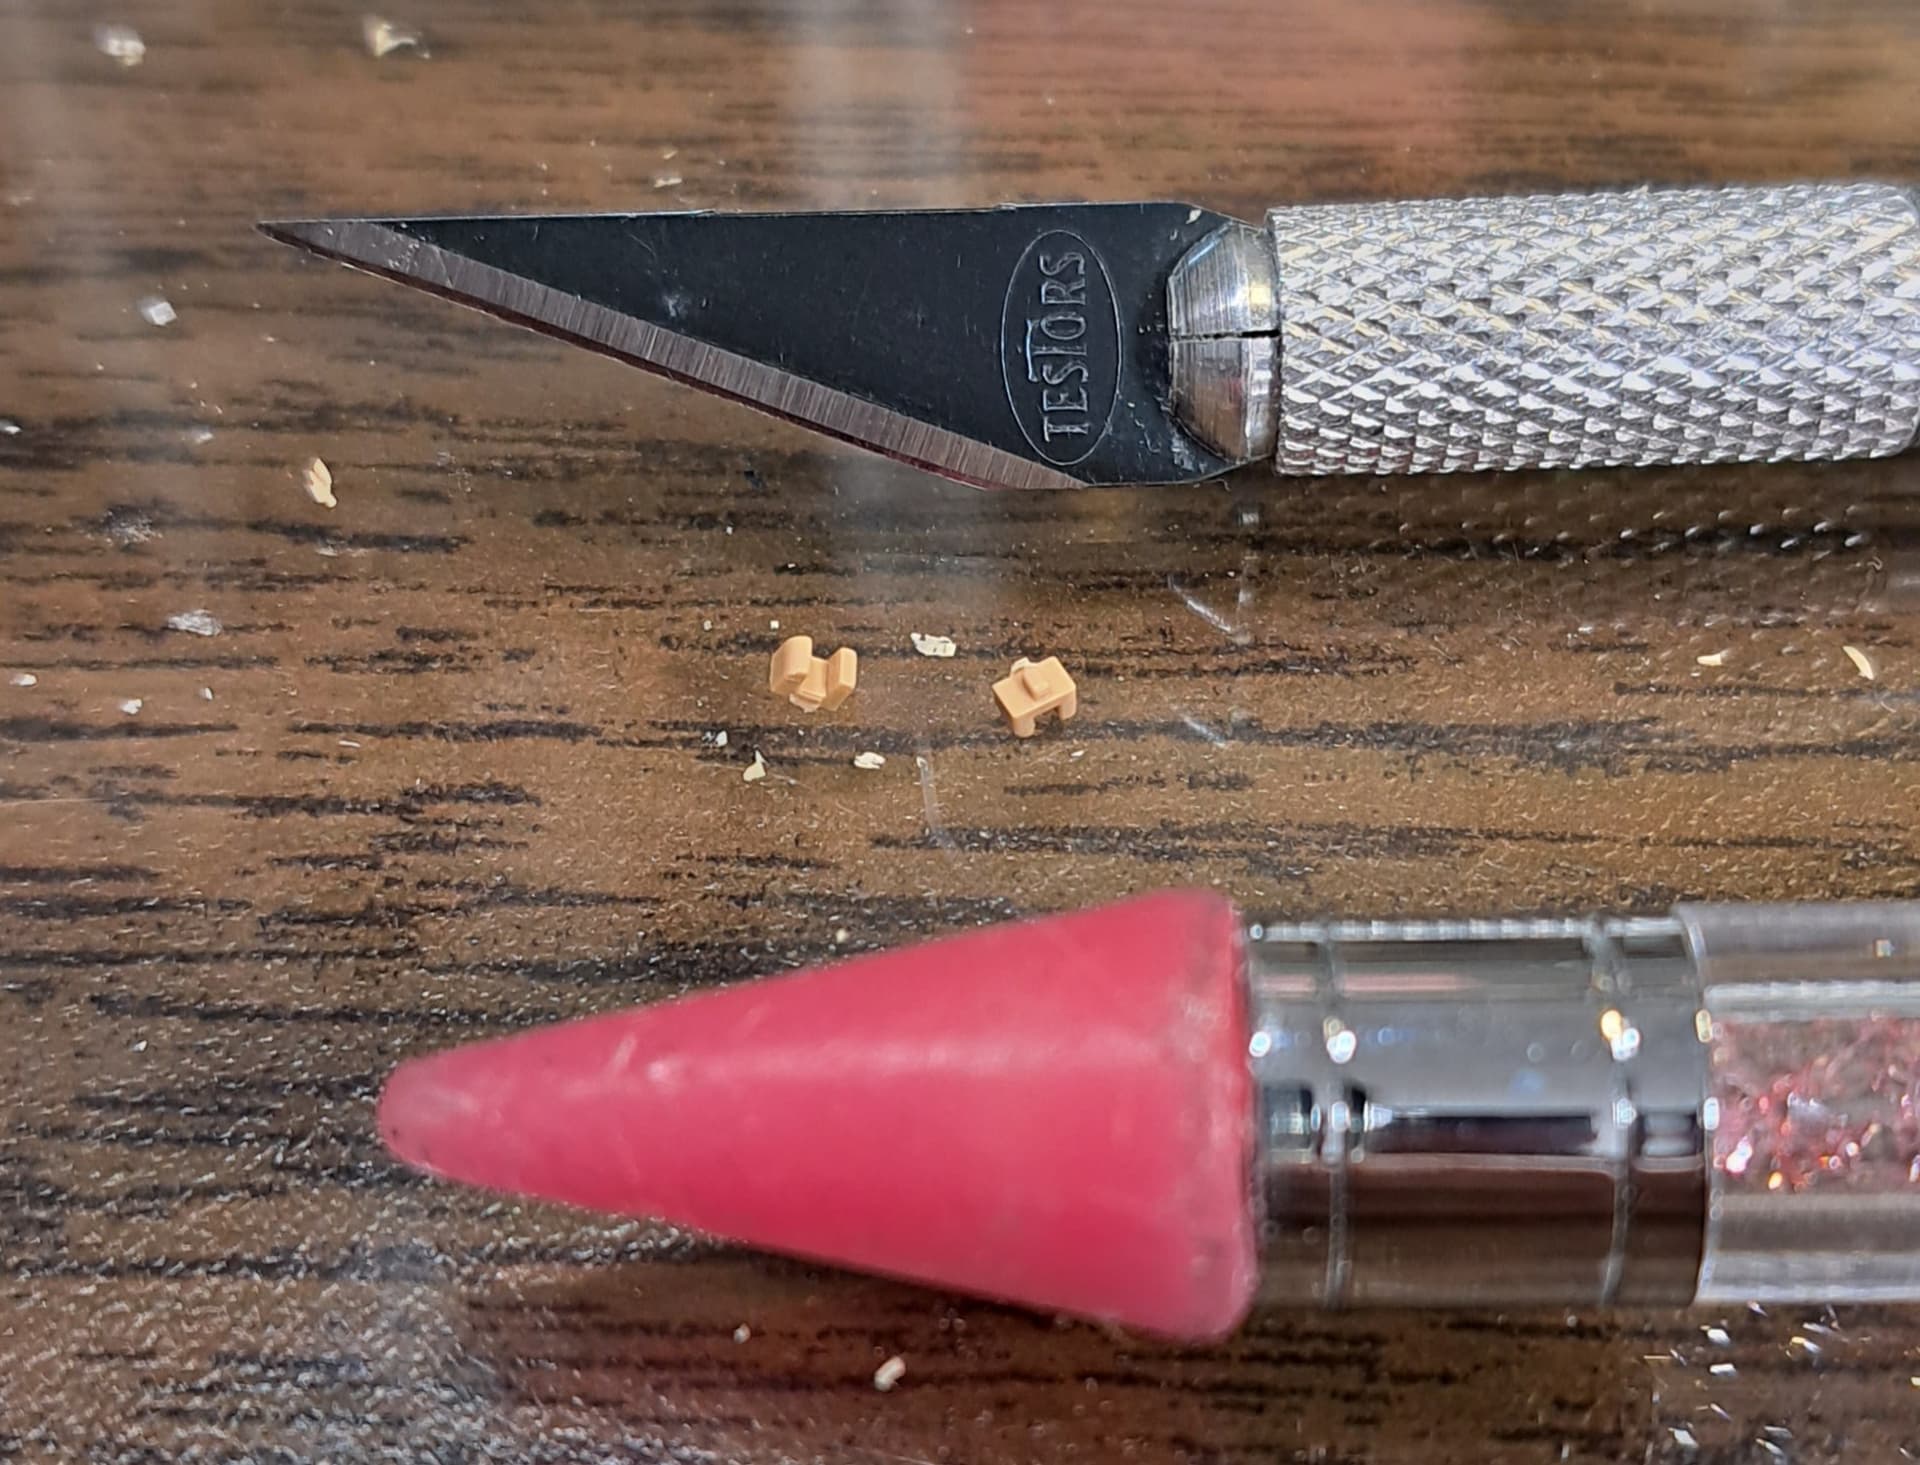
Next a few small detail parts to add. Turned out a kids toy rhinestone tool is perfect for picking up small parts.
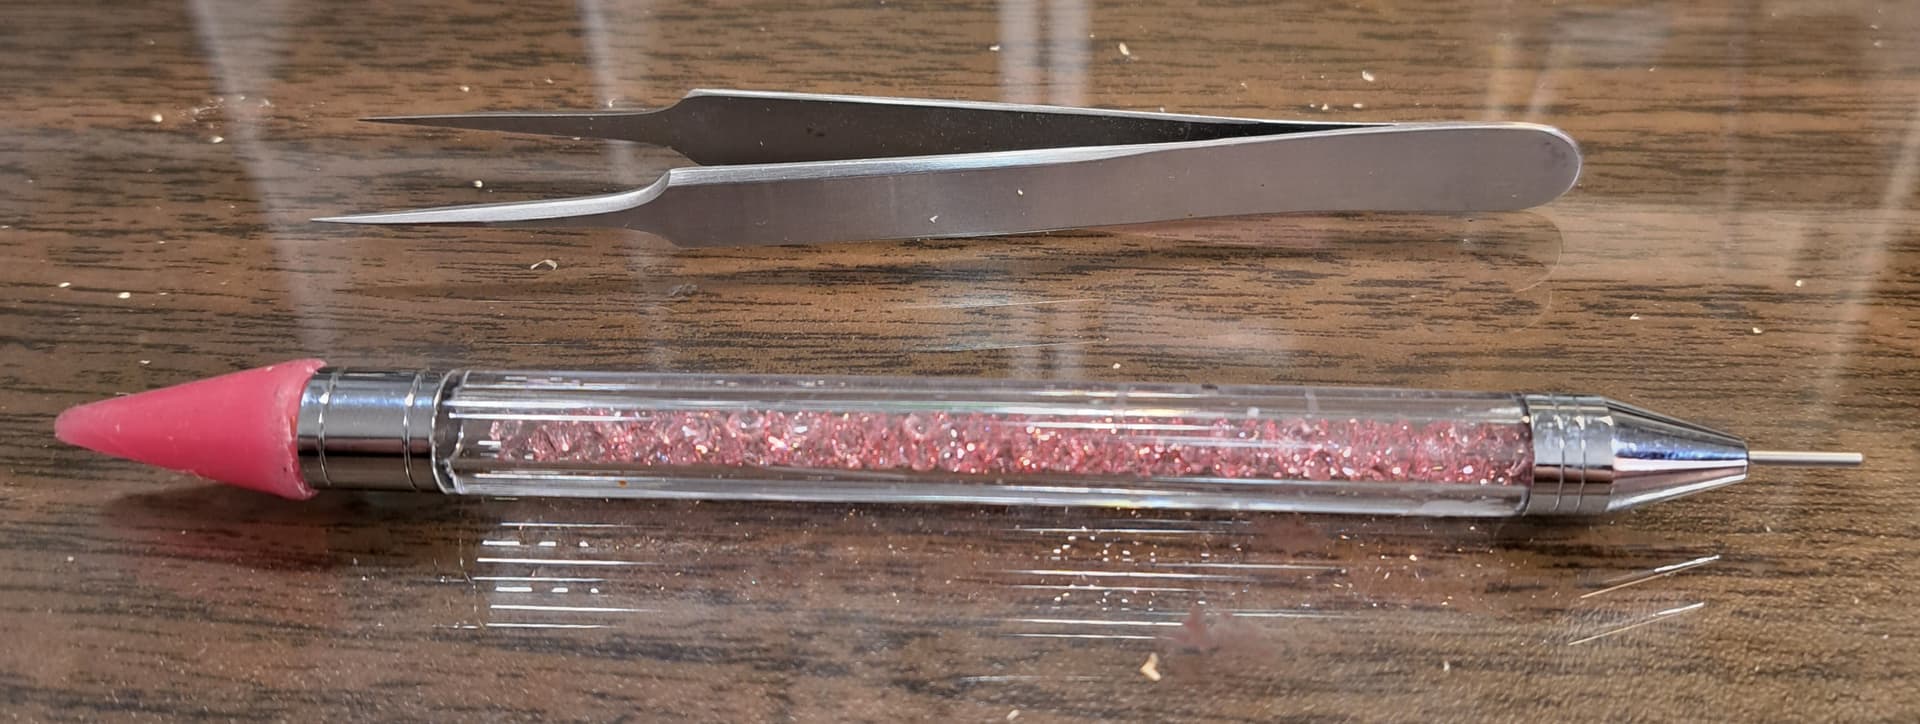
The pink rhinestone picker doesn’t tweezer launch.
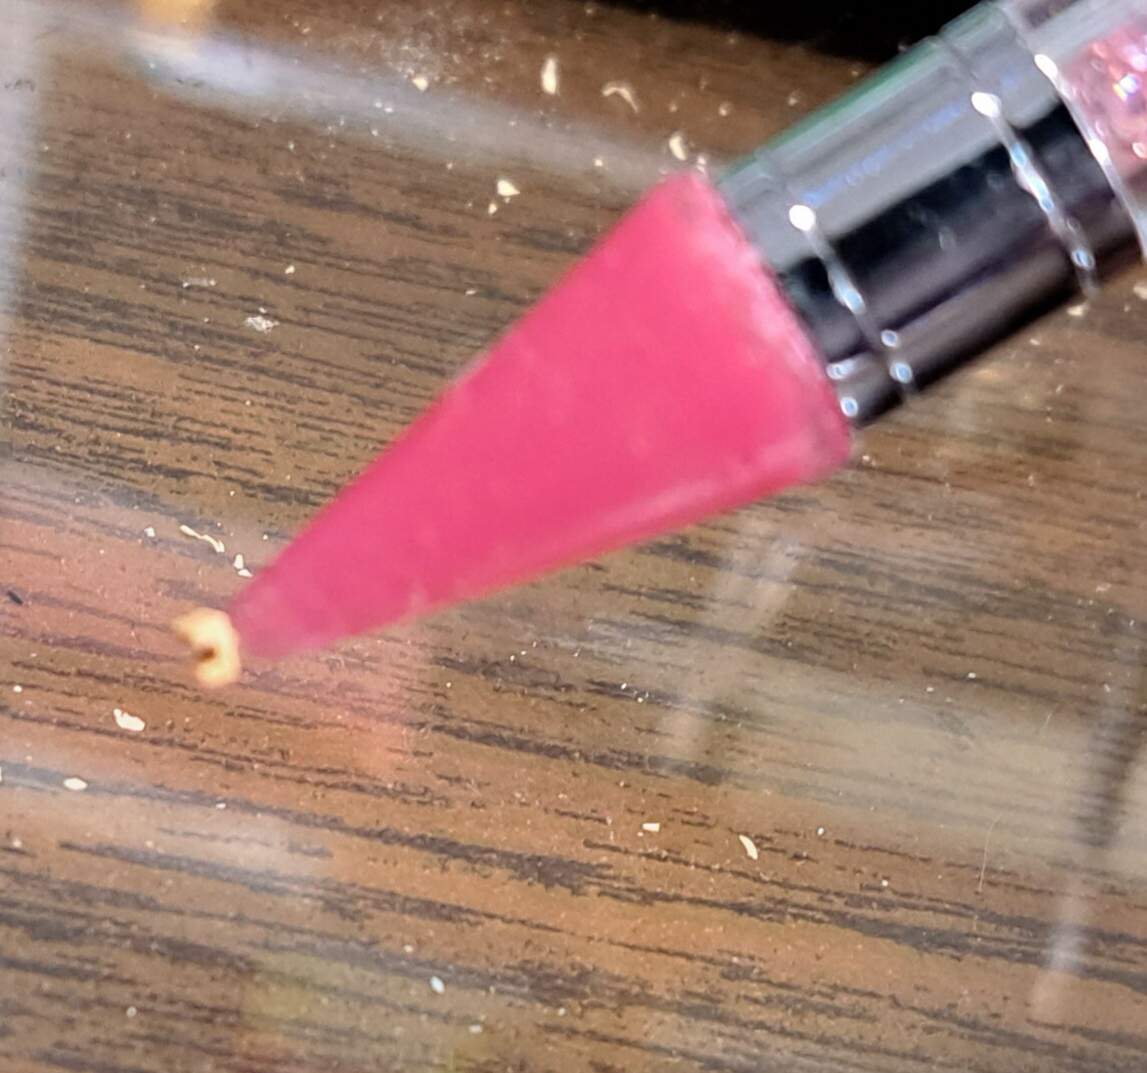
Part sticks perfect with a little Testors Liquid Cement preapplied to where the part goes and releases like magic. The pink rhinestone picker pink ![]()
![]()
![]() rocks.
rocks.


11 Likes
GREAT tip with the rhinestone picker Wade. Every modeler should have one, especially if you’re doing PE. I have a wax pencil rhinestone picker. They’re available at Hobby Lobby and Michael’s and they are indispensable for placing rivets and bolt heads (and other teeny things).
4 Likes
Had to Google your “pink tool”!
Cheap on Amazon.
5 Likes
@CKPlasticModels Colin, thank you! Hopefully, assembly will wrap this week.
Got bored today, grinding on step 22 and distracted. Started slapping some of the many spare parts together that are in the box…as previously noted basically an extrra lower and upper front hull are in the box plus fenders etc…not sure if I started a 2nd Pz III model or not with all the left over spare parts…lol


5 Likes
No problem! Who knows, you might get a full model and a half-model! I don’t know if you get an extra engine deck and back of the tank. Either that or you could depict a tank in the process of blowing up. Keeping an eye on this build and can’t wait to see what happens!
1 Like
Step 22 Commanders Cupola
The concentration of small plastic fiddle bits plus small PE fiddle bits makes this step a true ![]() fiddle bit. Kept W1, the vison blocks separate for painting purposes. Again The Bug came in very useful for clamp & bend of small PE. Likewise, the magic pink rhinestone picker (wax pencil) proved invaluable.
fiddle bit. Kept W1, the vison blocks separate for painting purposes. Again The Bug came in very useful for clamp & bend of small PE. Likewise, the magic pink rhinestone picker (wax pencil) proved invaluable.
Went Roque closing commander’s hatch with sissorscope extended. Thinking in terms of observation given the two aerials for command Stug. Artistic License etc
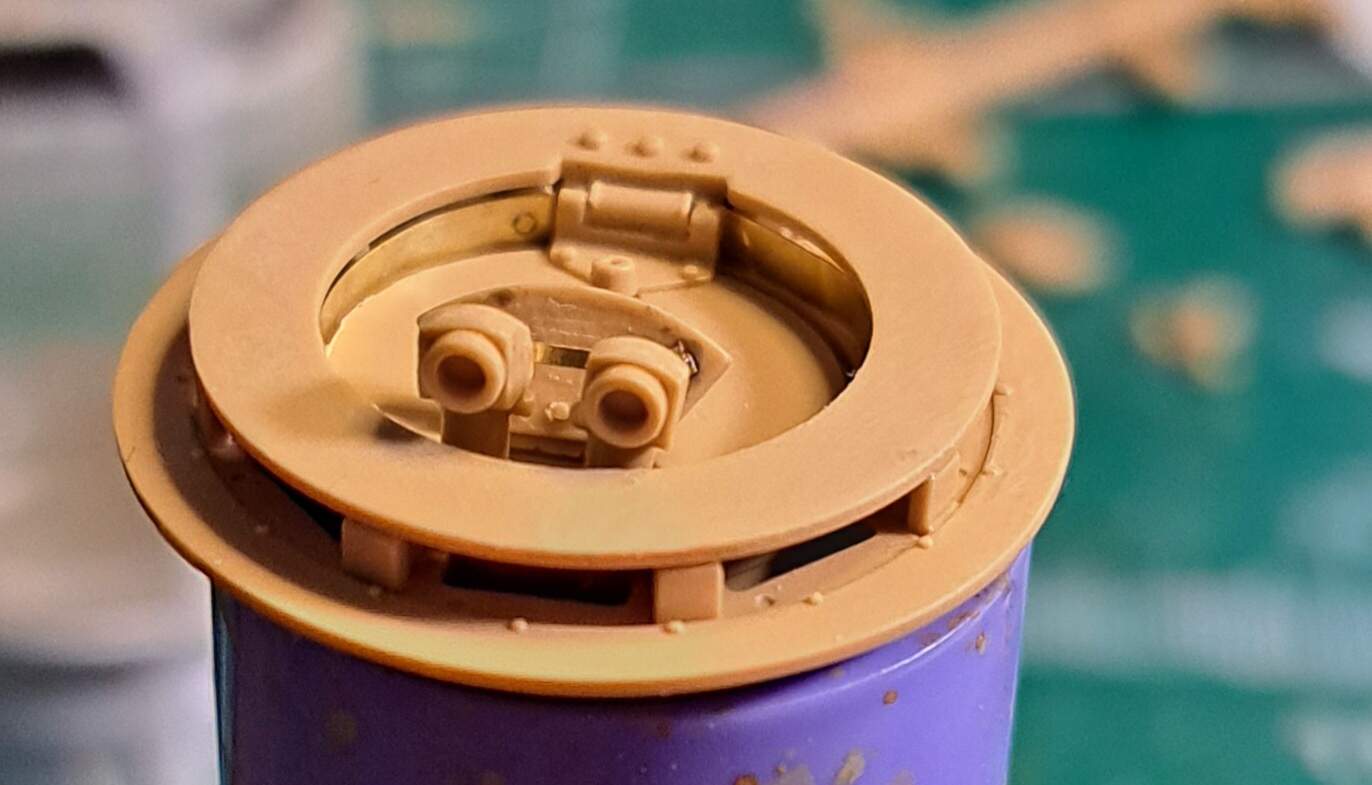
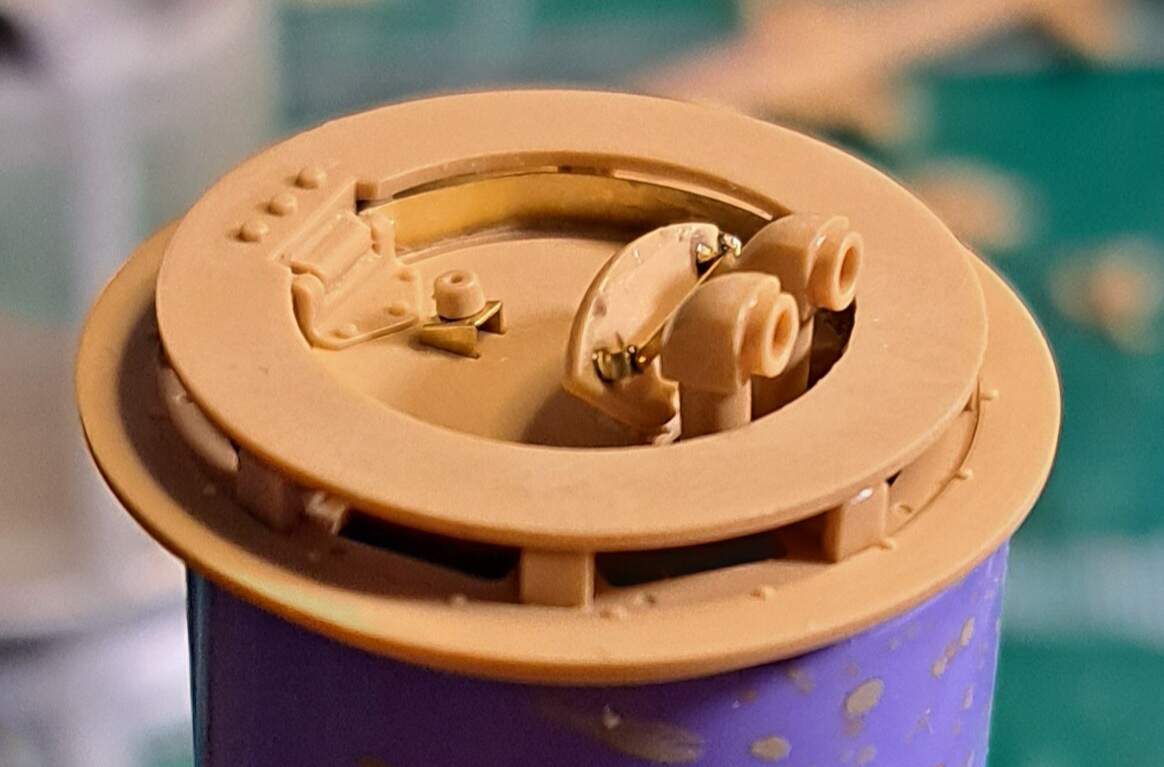
I really like RFM’s hatch rest stop bumper and its thin PE bracket in middle of hatch.

5 Likes
A unit command Stug would have the star antenna on a special base.
Two ordinary antennas (2m long) would put this Stug one layer down, e.g. at the platoon command level.
David
2 Likes
Okay, you’ve convinced me. I’ve ordered a rhinestone picker thingy with its own zipper case and special tactical low visibility tweezers, because you can never have too many tweezers to launch stuff across the shop, ya’ know?
5 Likes
@DByrden David, Thank You! ![]() Much appreciated information. This one will be a platoon level comand with two antennas.
Much appreciated information. This one will be a platoon level comand with two antennas.
@Arch-Stanton Al, sweet! I think you’ll find the wax pencil rhinestone picker useful. Let me know what you think after a test drive. The gold & silver tips look more professional btw…good call!
If I had stealth tweezers, I’d never find them.
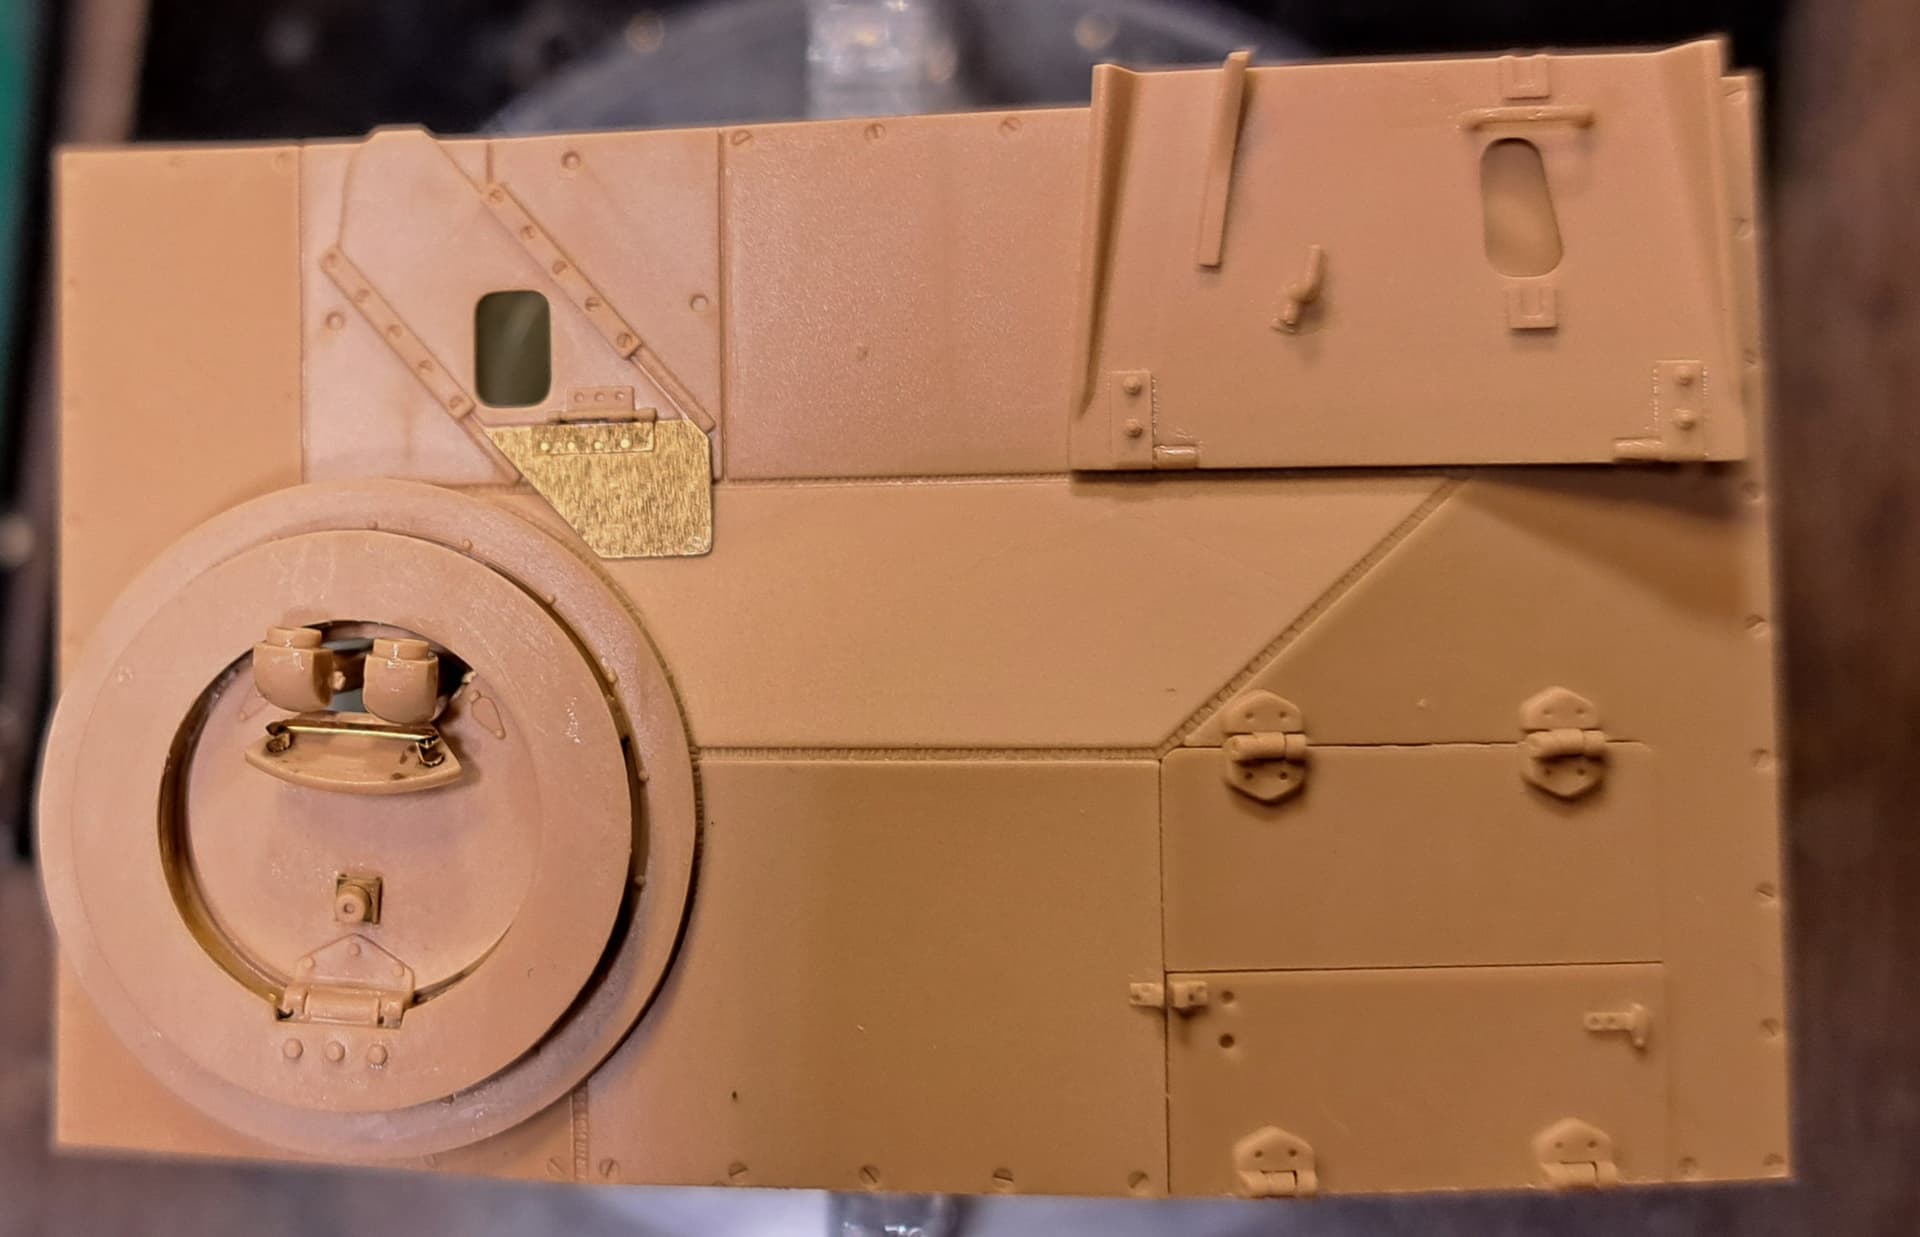
Step 23 Roof
Very straightforward, closed the loader hatch since going buttoned up. The MG shield checked nicely vs Achtung Panzer #5 Stug III. I wasn’t sure about the exposed details but it matched the drawing on page 57 so I’m going to call it within reasonable due diligence. Left the cupola unglued for painting purposes. The gunner sight’s cover in PE is nice. Great spot to show a thin scale edge.

6 Likes
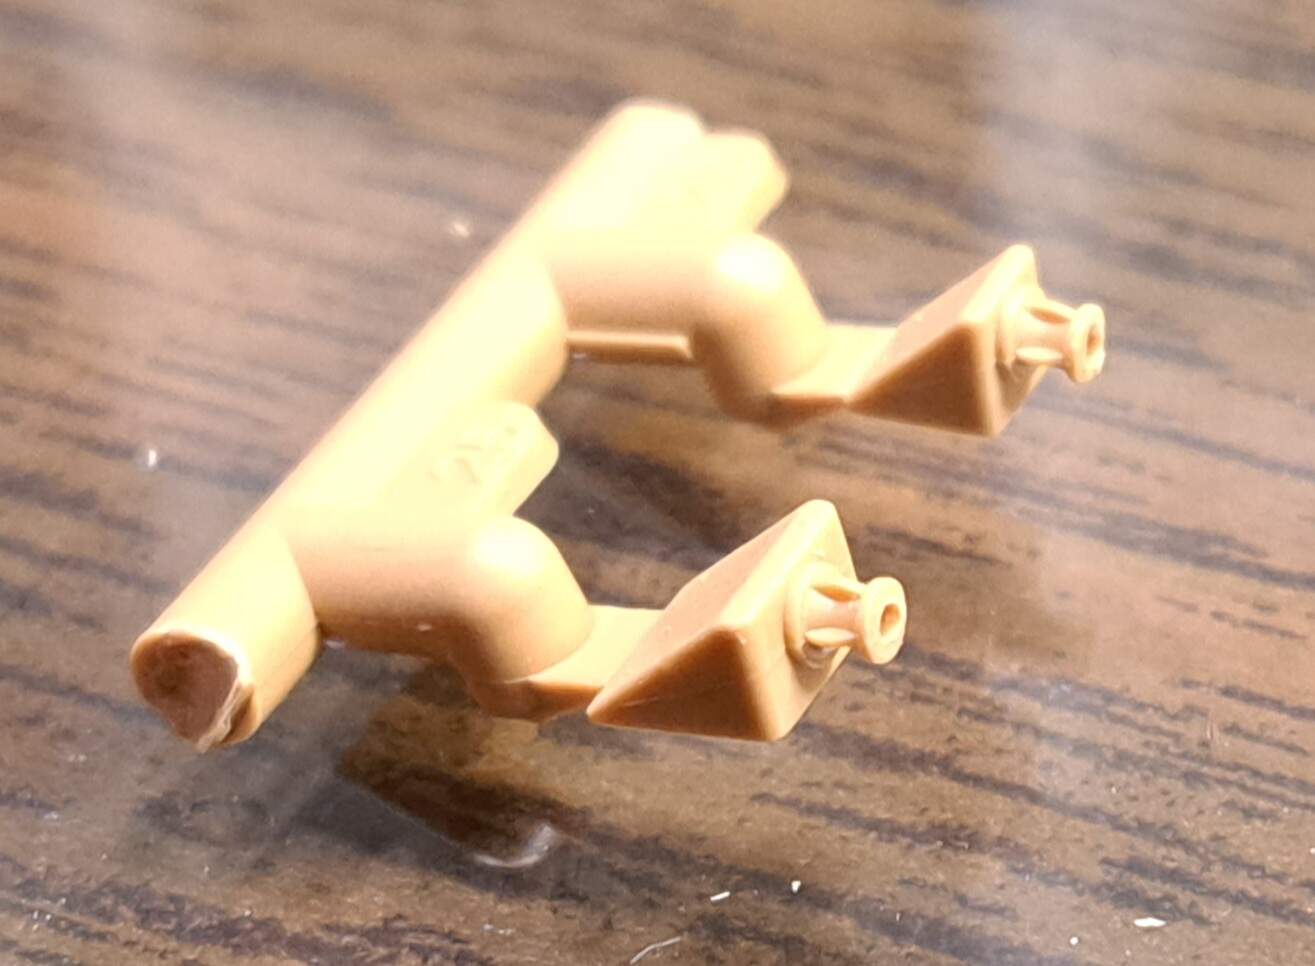
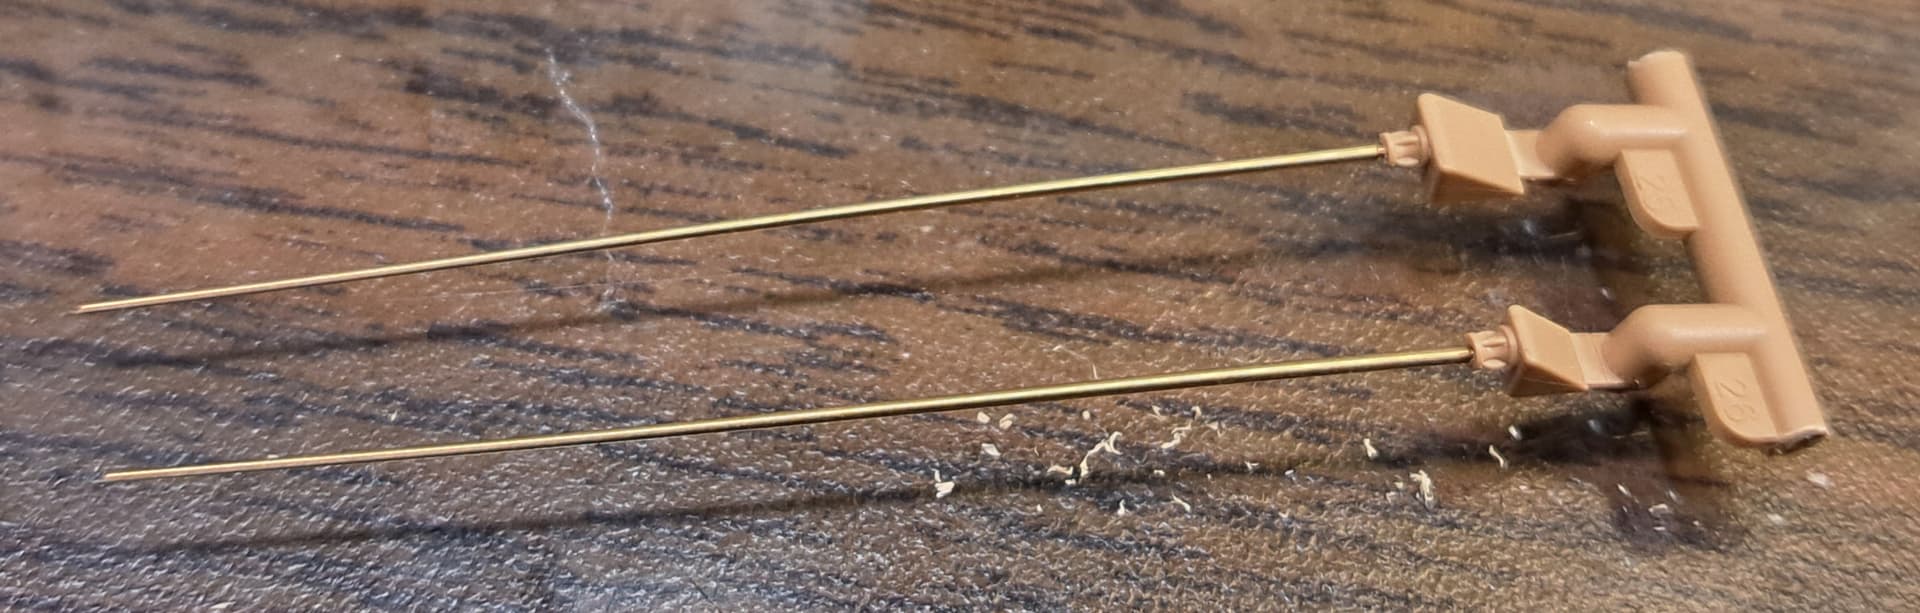
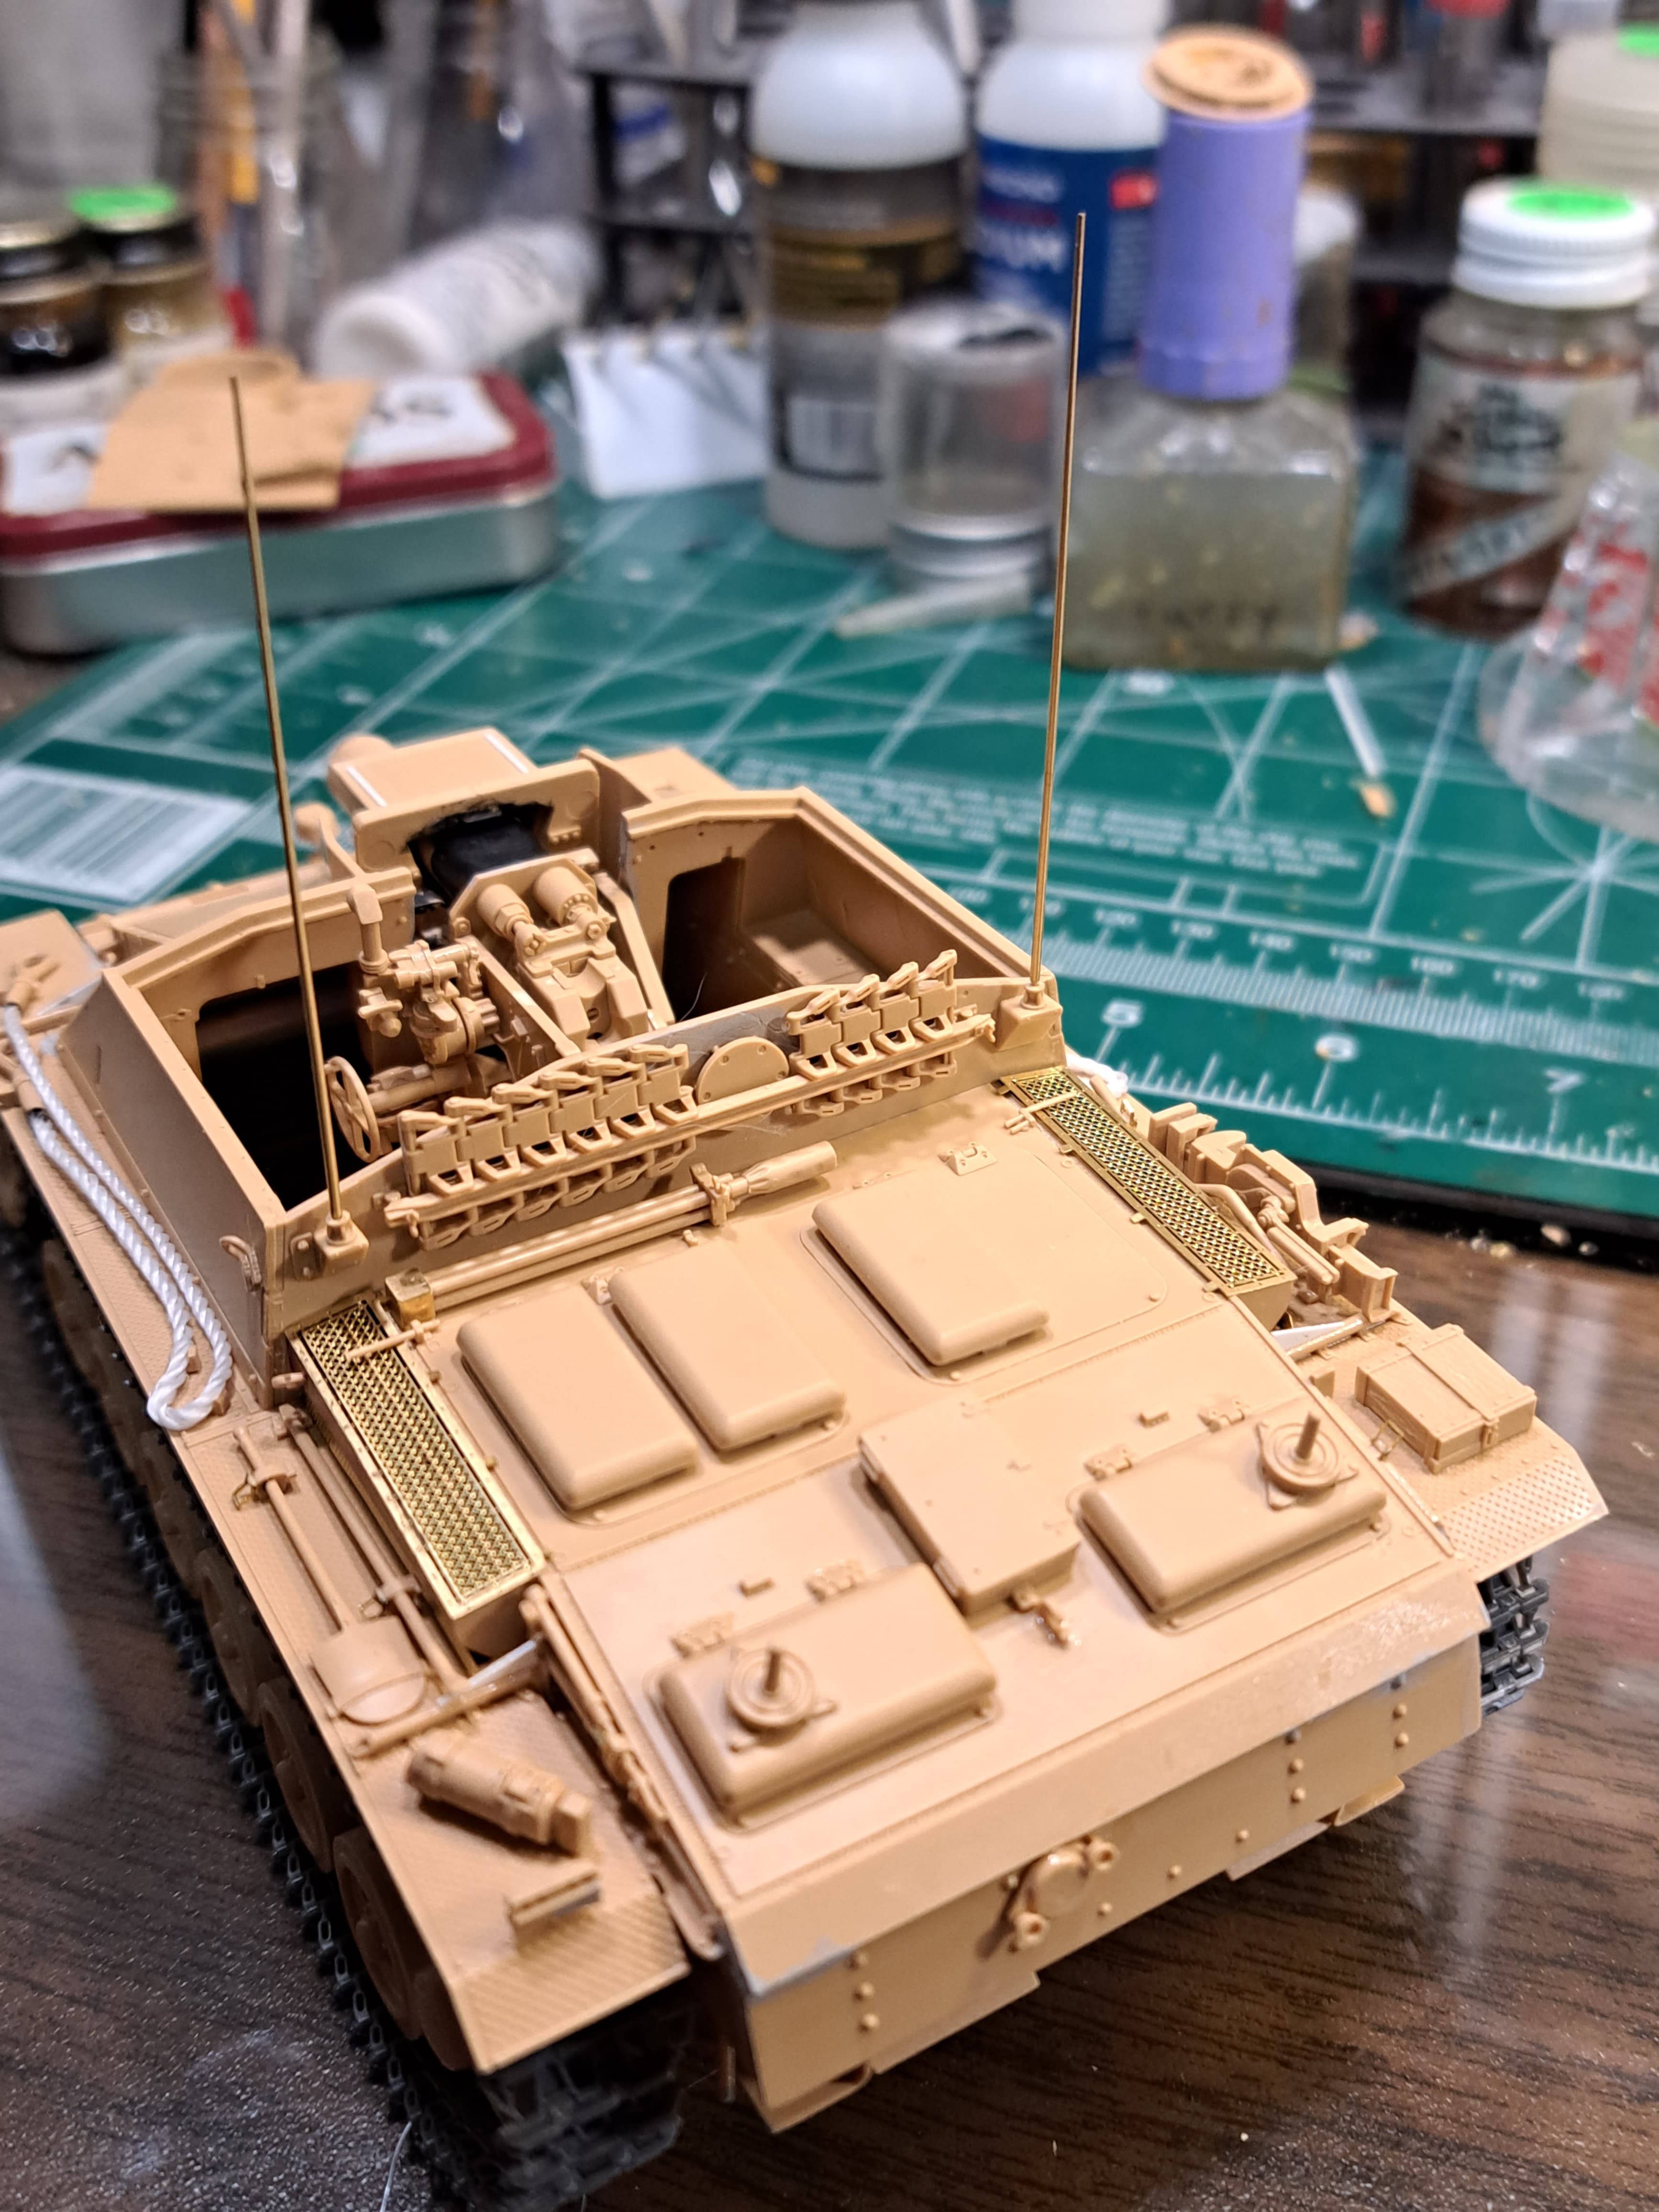
Step 24 Spare Track & Antenna’s
I greatly dislike fragile stretched sprue ![]() antennas despite using them for most models over the years. Since discovering Aber’s brass antennas, I’ve gotten spoiled.
antennas despite using them for most models over the years. Since discovering Aber’s brass antennas, I’ve gotten spoiled.
Mounts, snipped, sanded flush, pilot divet with divider, divet alignment tweaked with #11 blade, drilled .4mm holes for Aber antenna
Test fit, tweak to suit.
One sweet detail RFM includes is the fan for the ventilation. Pretty trick the way it centers the armored cover. A+ RFM.
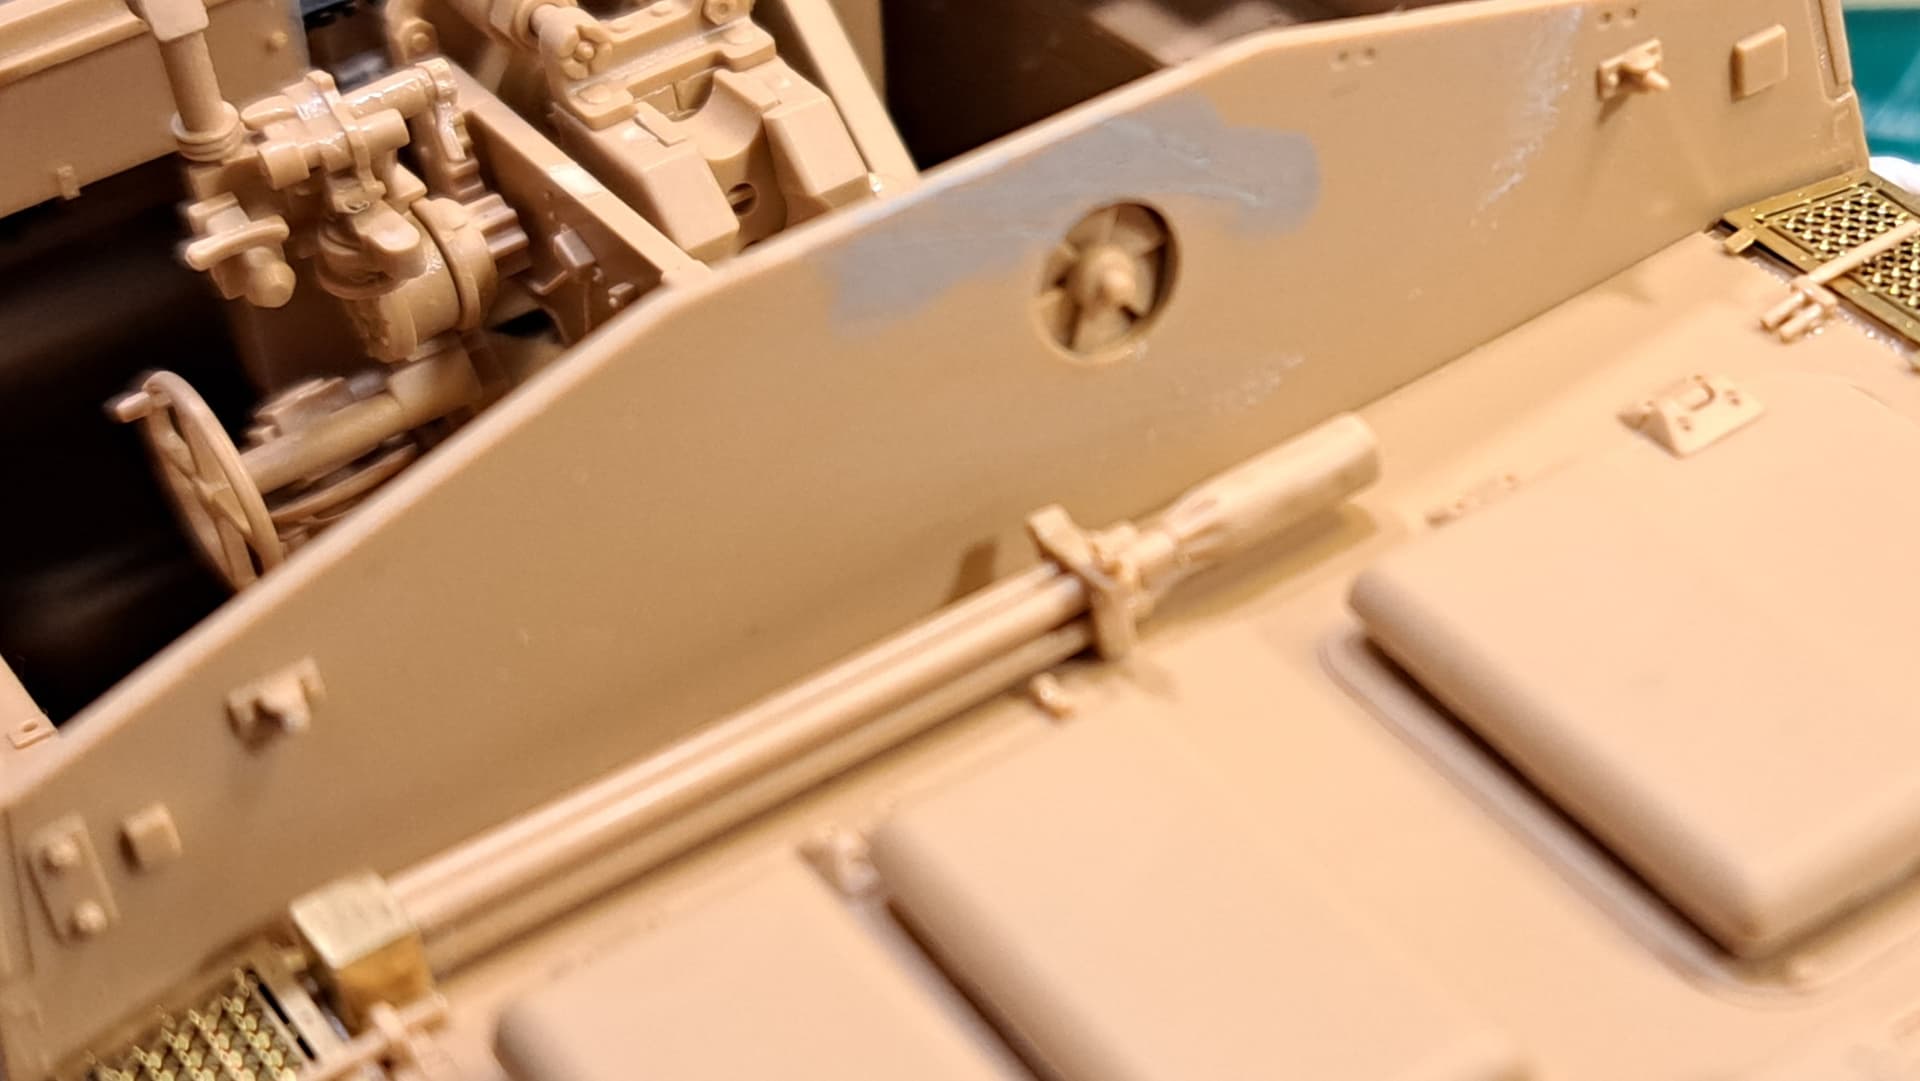
Naturally the spare track isnt cemented in place so it can be removed for painting. Likewise, the antennas fit snug and aren’t glued in place.
Closer

Two build steps remain…
9 Likes