I’ve hit more than my share of roos. Cars always come of second best. I’ve had a male roo stand up to me while I was in a large 4x4 tractor. They are not to be taken lightly. Very few don’t have an aggressive streak.
I’m still to learn the history behind the shield and why its not standard on all Australian m1a1s.
Ouch! I know how that goes. We have lots of big animals around here, too. In January I almost got taken out by a bull Elk, about 1000 lbs or 490 kilos. Luckily, he missed me.
Ken
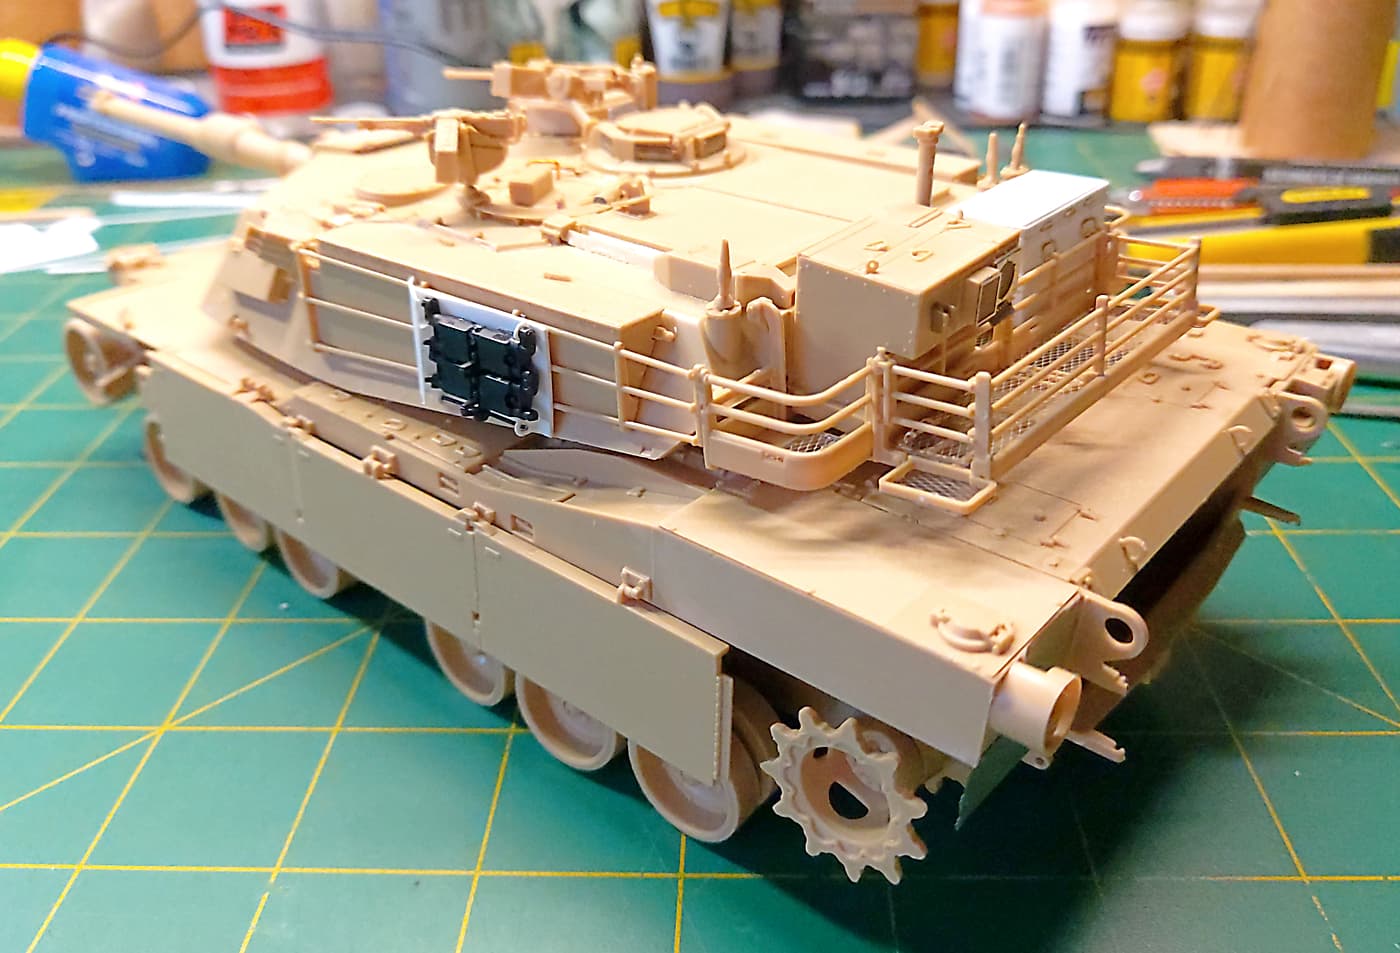
An update. Some tidying up to do but thanks to some new input I thinks it’s ‘ok’. ‘OK’ enough for me.
I’ll know when the paint hits the scene. (Doesn’t look square but it is. Optical delusion!!).
If one thing is consistent in these threads… When someone like you scratch builds that small niche part … a manufacturer will suddenly produce a resin or 3D one about 2 months after lol …
I’m informed the spare track carriers were first seen in March 2016. And that the whole fleet now has them.
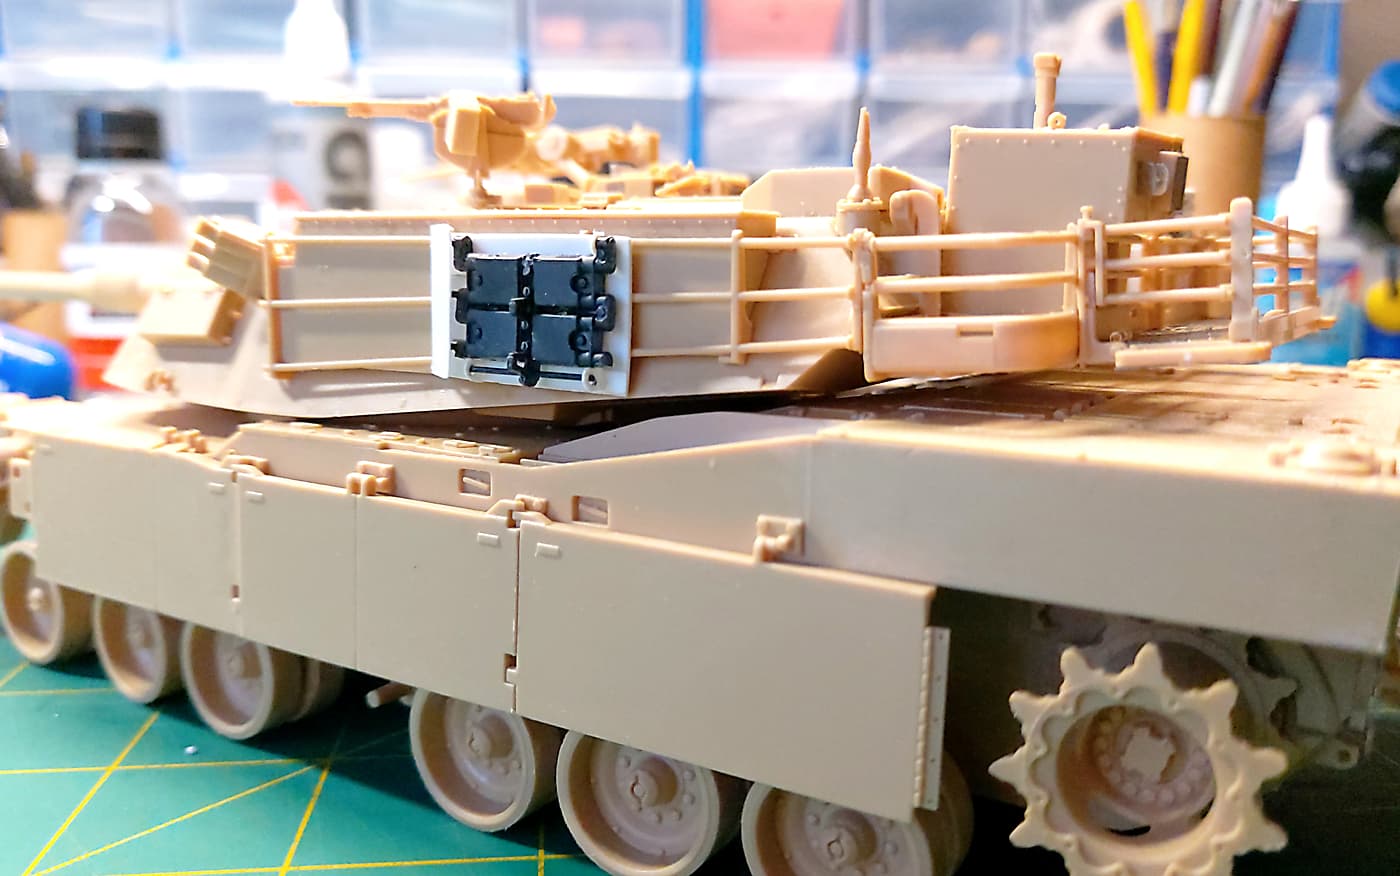
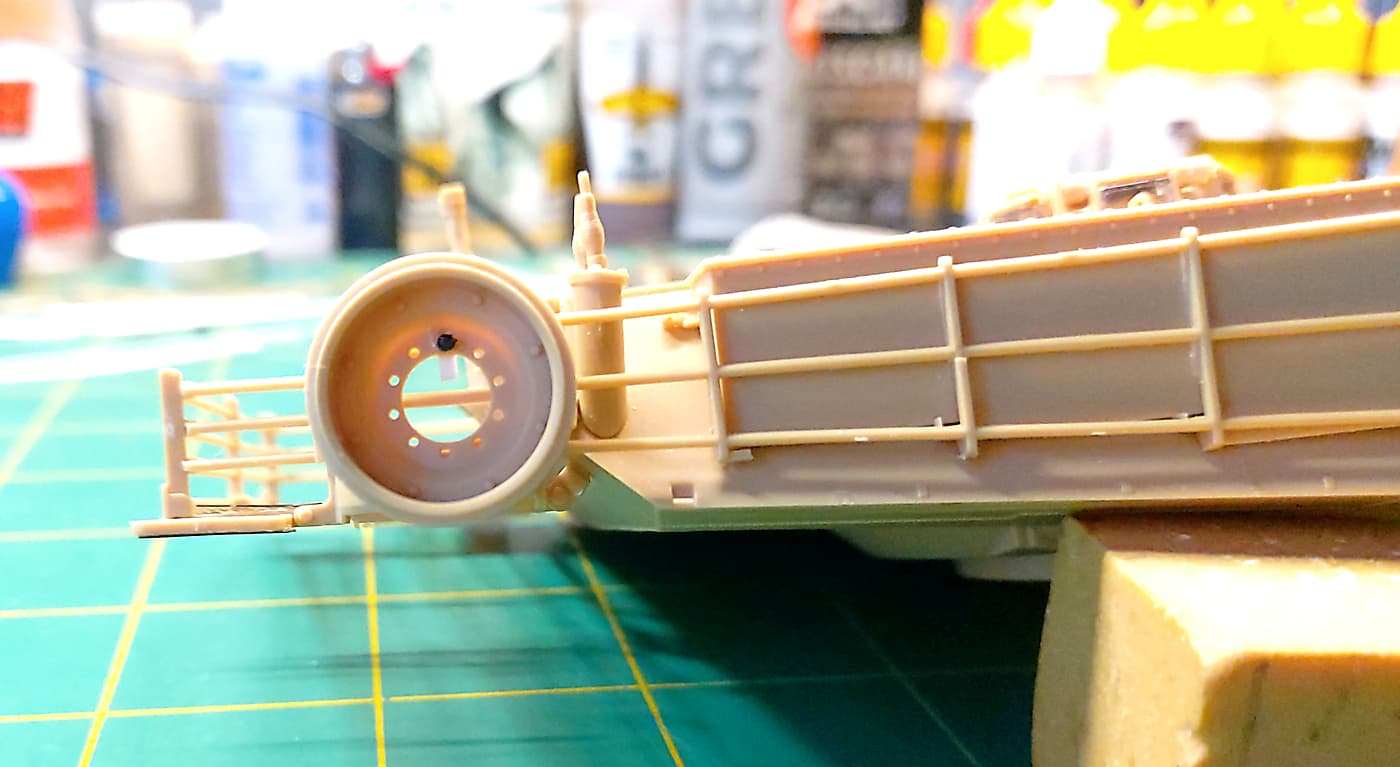
Now for the spare wheel mount!! Where do I find a spare wheel? Thinking.
Ever had a bright idea and no brain to match? Well the spare wheel caught my attention. So I just spent time on the computer looking for a local supplier to get some from. No luck. Darn.
Back to tidying up the desk to get ready for the painting. I was packing up all the sprues and there waving at me were two spare rims on the sprues. Well who would have guessed, or remembered, them being in the kit?
So now a spare wheel is going on the build. Next question. I only have images of them on one side. Were they on both sides?
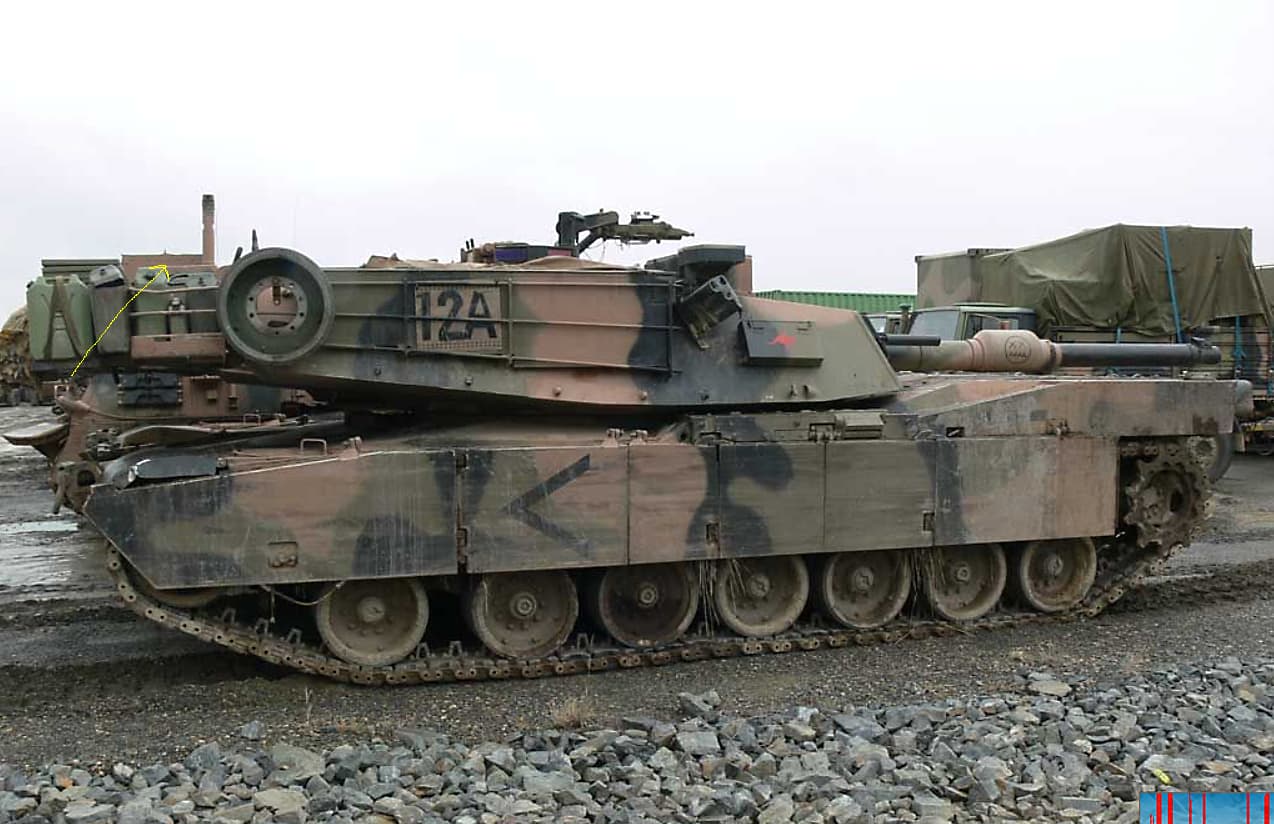
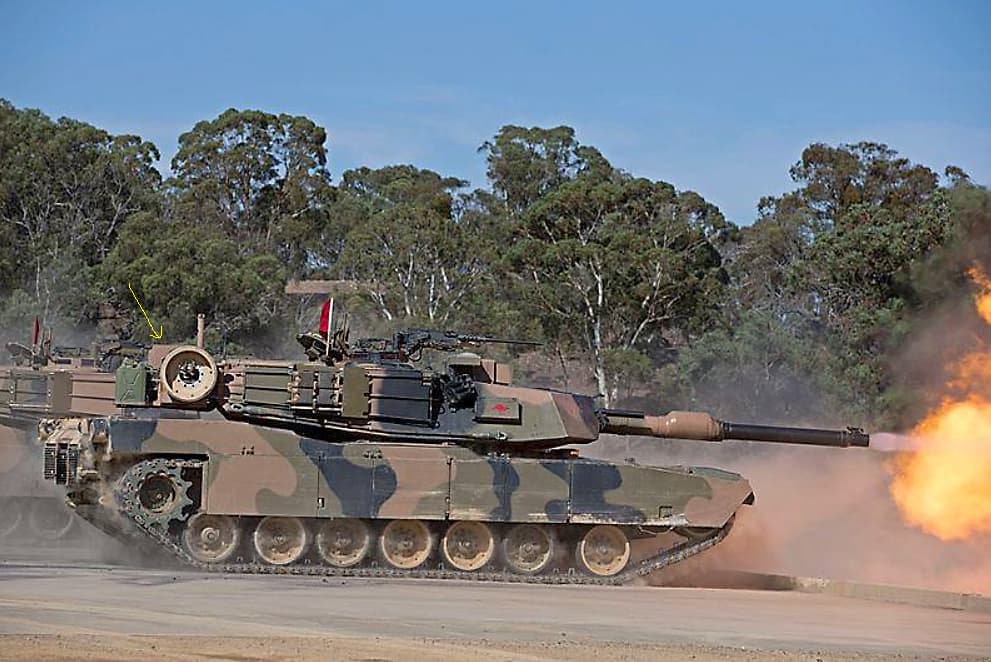
That depends. In the US Army, the number and location varies by unit, and is usually specified in the unit SOP. The Australians may be similar. Looking at the photos in this thread, it looks like the road wheel is only on the right side of the turret, and in some cases; not mounted at all. Your best bet is to find photos of the vehicle you are building, or at least the same company, squadron, etc. and go by that.
Ken
Looking at the photos you posted I did not see one on the left side. To be fair, also had photos with no wheel on the right side. I would lean towards no wheel on the left side.
Note the location of the spare wheel in both images. Yellow arrows. (Yes one turret is facing backwards). Note the relationship to where the fridge is. Seems they hung the spare wheel where they felt like it.
As a side note. In the bottom image you can see a second m1a1. Note the spare track carrier with no track mounted.
The top photo is the Abrams in its normal resting state. It allows the driver’s hatch to be full secure from the inside and aligns the “tunnel” so the driver can get out through the turret.
As consumable items the wheel and track can be added or removed as needed.
One thing I did noticed is it appears to be two different bracket methods to securing the wheel. The top photo has a single bolt in the wheel and a bracket hanging down, almost as if it’s a clip on. The bottom photo appears to have two hooks holding the wheel in.