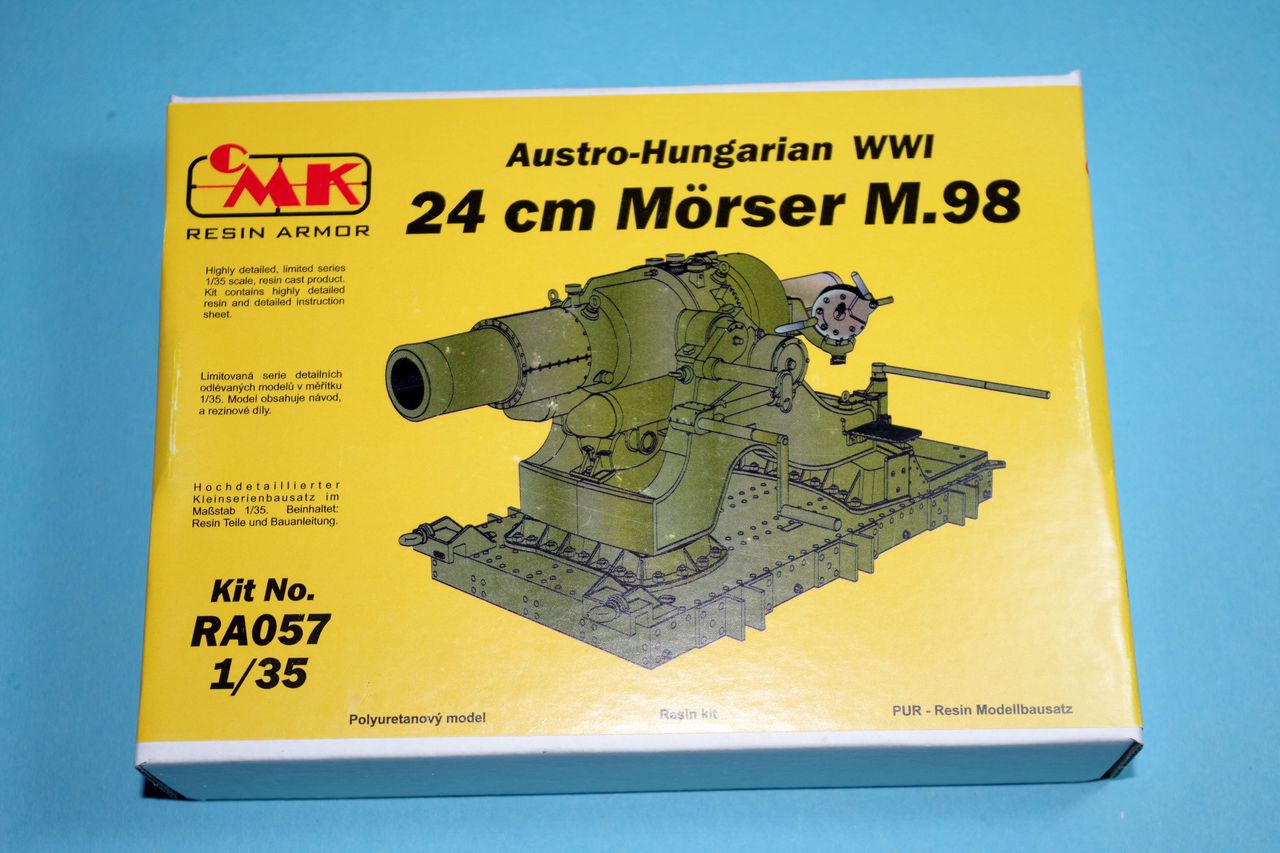
I am building CMKs Skoda M.98 24 cm mortar. Once the backbone of the kuk siege artillery it was dated at the beginning of WW1, but still useful. It was in service along all the Austro-Hungarian campaigns, against Russians, Belgians, Italians and other powers. The Austrians also sent a unit to support the Turkish Army fighting against the Allies at Gallipoli (but it went there only in the final stage of the fighting). Call it a dirty joke: Once the Turks besieged Vienna, now Vienna is sending siege artillery to support the Turks!
The kit:
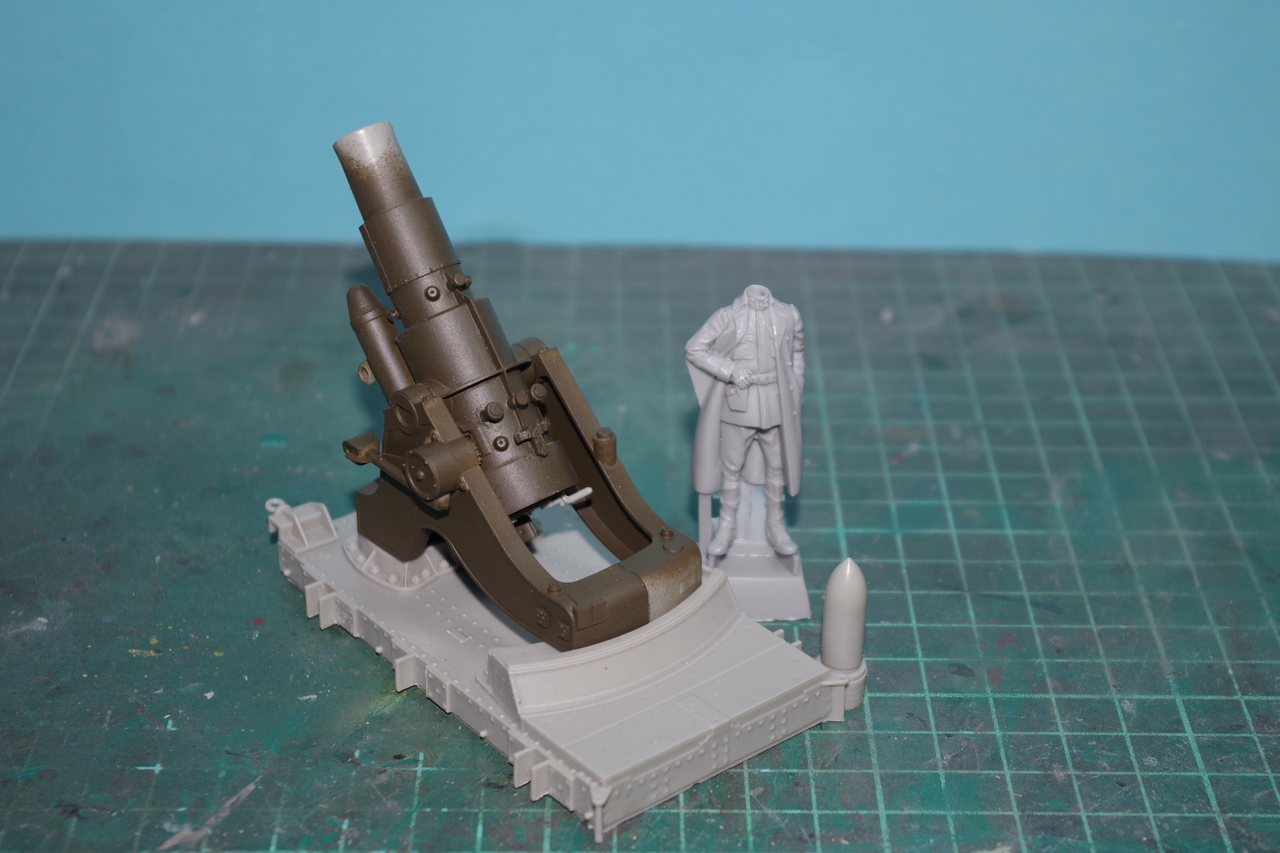
Good fit so far:
Keep care of the small parts not to loose them to the carpet monster. No flash, no air bubbles, nothing distorted. Nice kit! There is even a rifling in the tube!
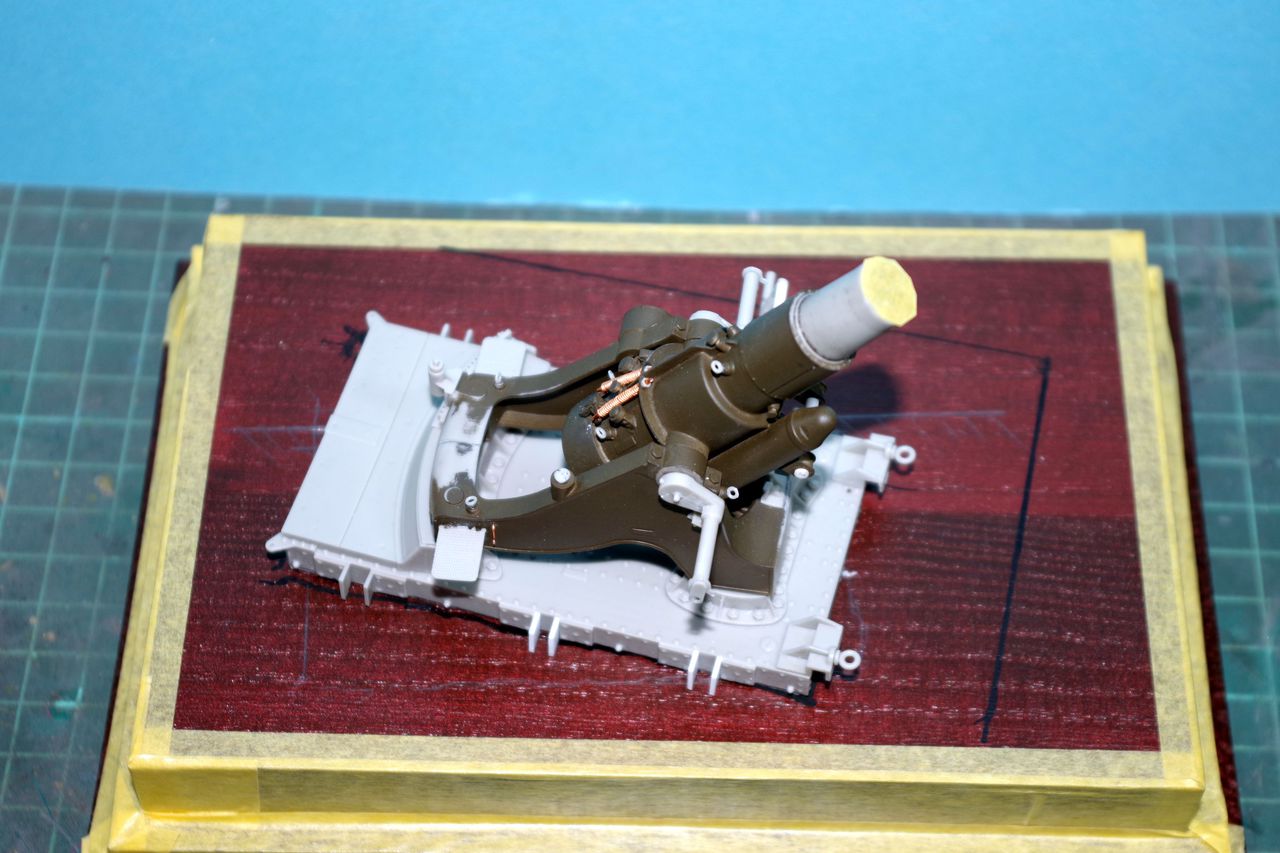
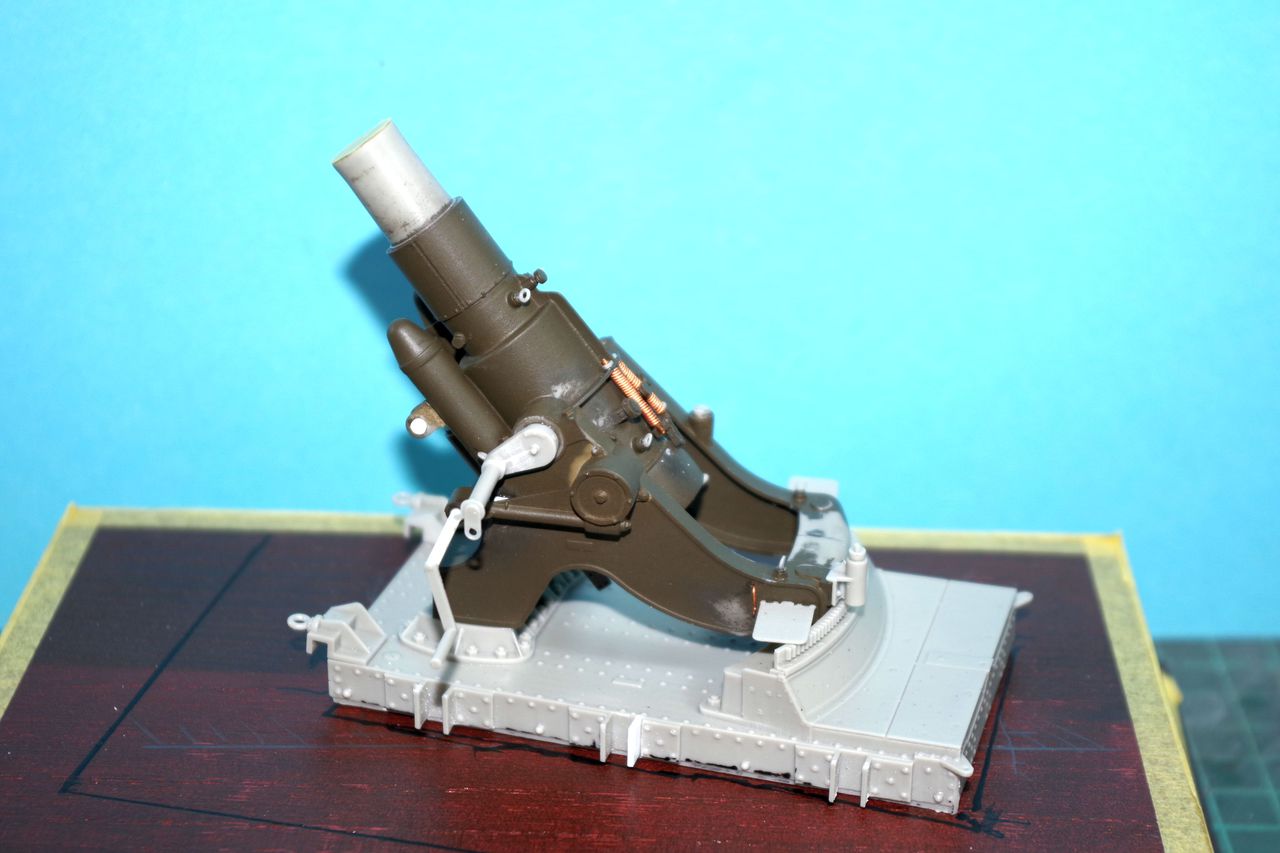
More parts added. Some of the vertical side supports of the base plate were broken off in the box. Easy to replace with styrene strips. This was the only damage of kit parts in the box. CMK took some care to protect them. The tube is hollow at the front but not fully down to the breech. And rifled. The breech block is posable. You can show it in the closed position like I did or keep it open, adjust the barrel horizontally and make a nice loading scene. The guns ammo tray and a shell are supplied in the kit. Your choice! Replaced the resin spiral springs on the top with wire coils and some small disks and nuts for a better look. All the small lifting eyes are prone to breaking, so be careful! Also the other small and thin resin parts sticking out all around…
About the color: CMK calls rather generic for “green”, “grey” or “brown”. Hmmm… I’ve choosen a brown. RLM 82 (a German late WW2 Luftwaffe color) simply because I had it right at hand and wanted to divert somewhat from the common plain green military hardware look.
From what I’ve read Austria/Hungary painted their steel helmets brown. I wonder if their artillery wore the same color? I looked up RLM82 and the interwebs is calling it a light green color.
Then is is RLM81. One of these late war Luftwaffe colors is a light green, the other one a brownviolet. To be fair: I always mismatch which number was the brown and which the green, thats why I note the hue for my readers.
The one I get always right is the undersides greyish light blue called RLM76
Well, RLM is not really an austro-hungarian color system. But it doesn’t matter if this color here is te true austrian brown or not, has a wrong tint or something else. This is just the canvas for the wheatering, which will change the overall look a lot. Stay tuned!
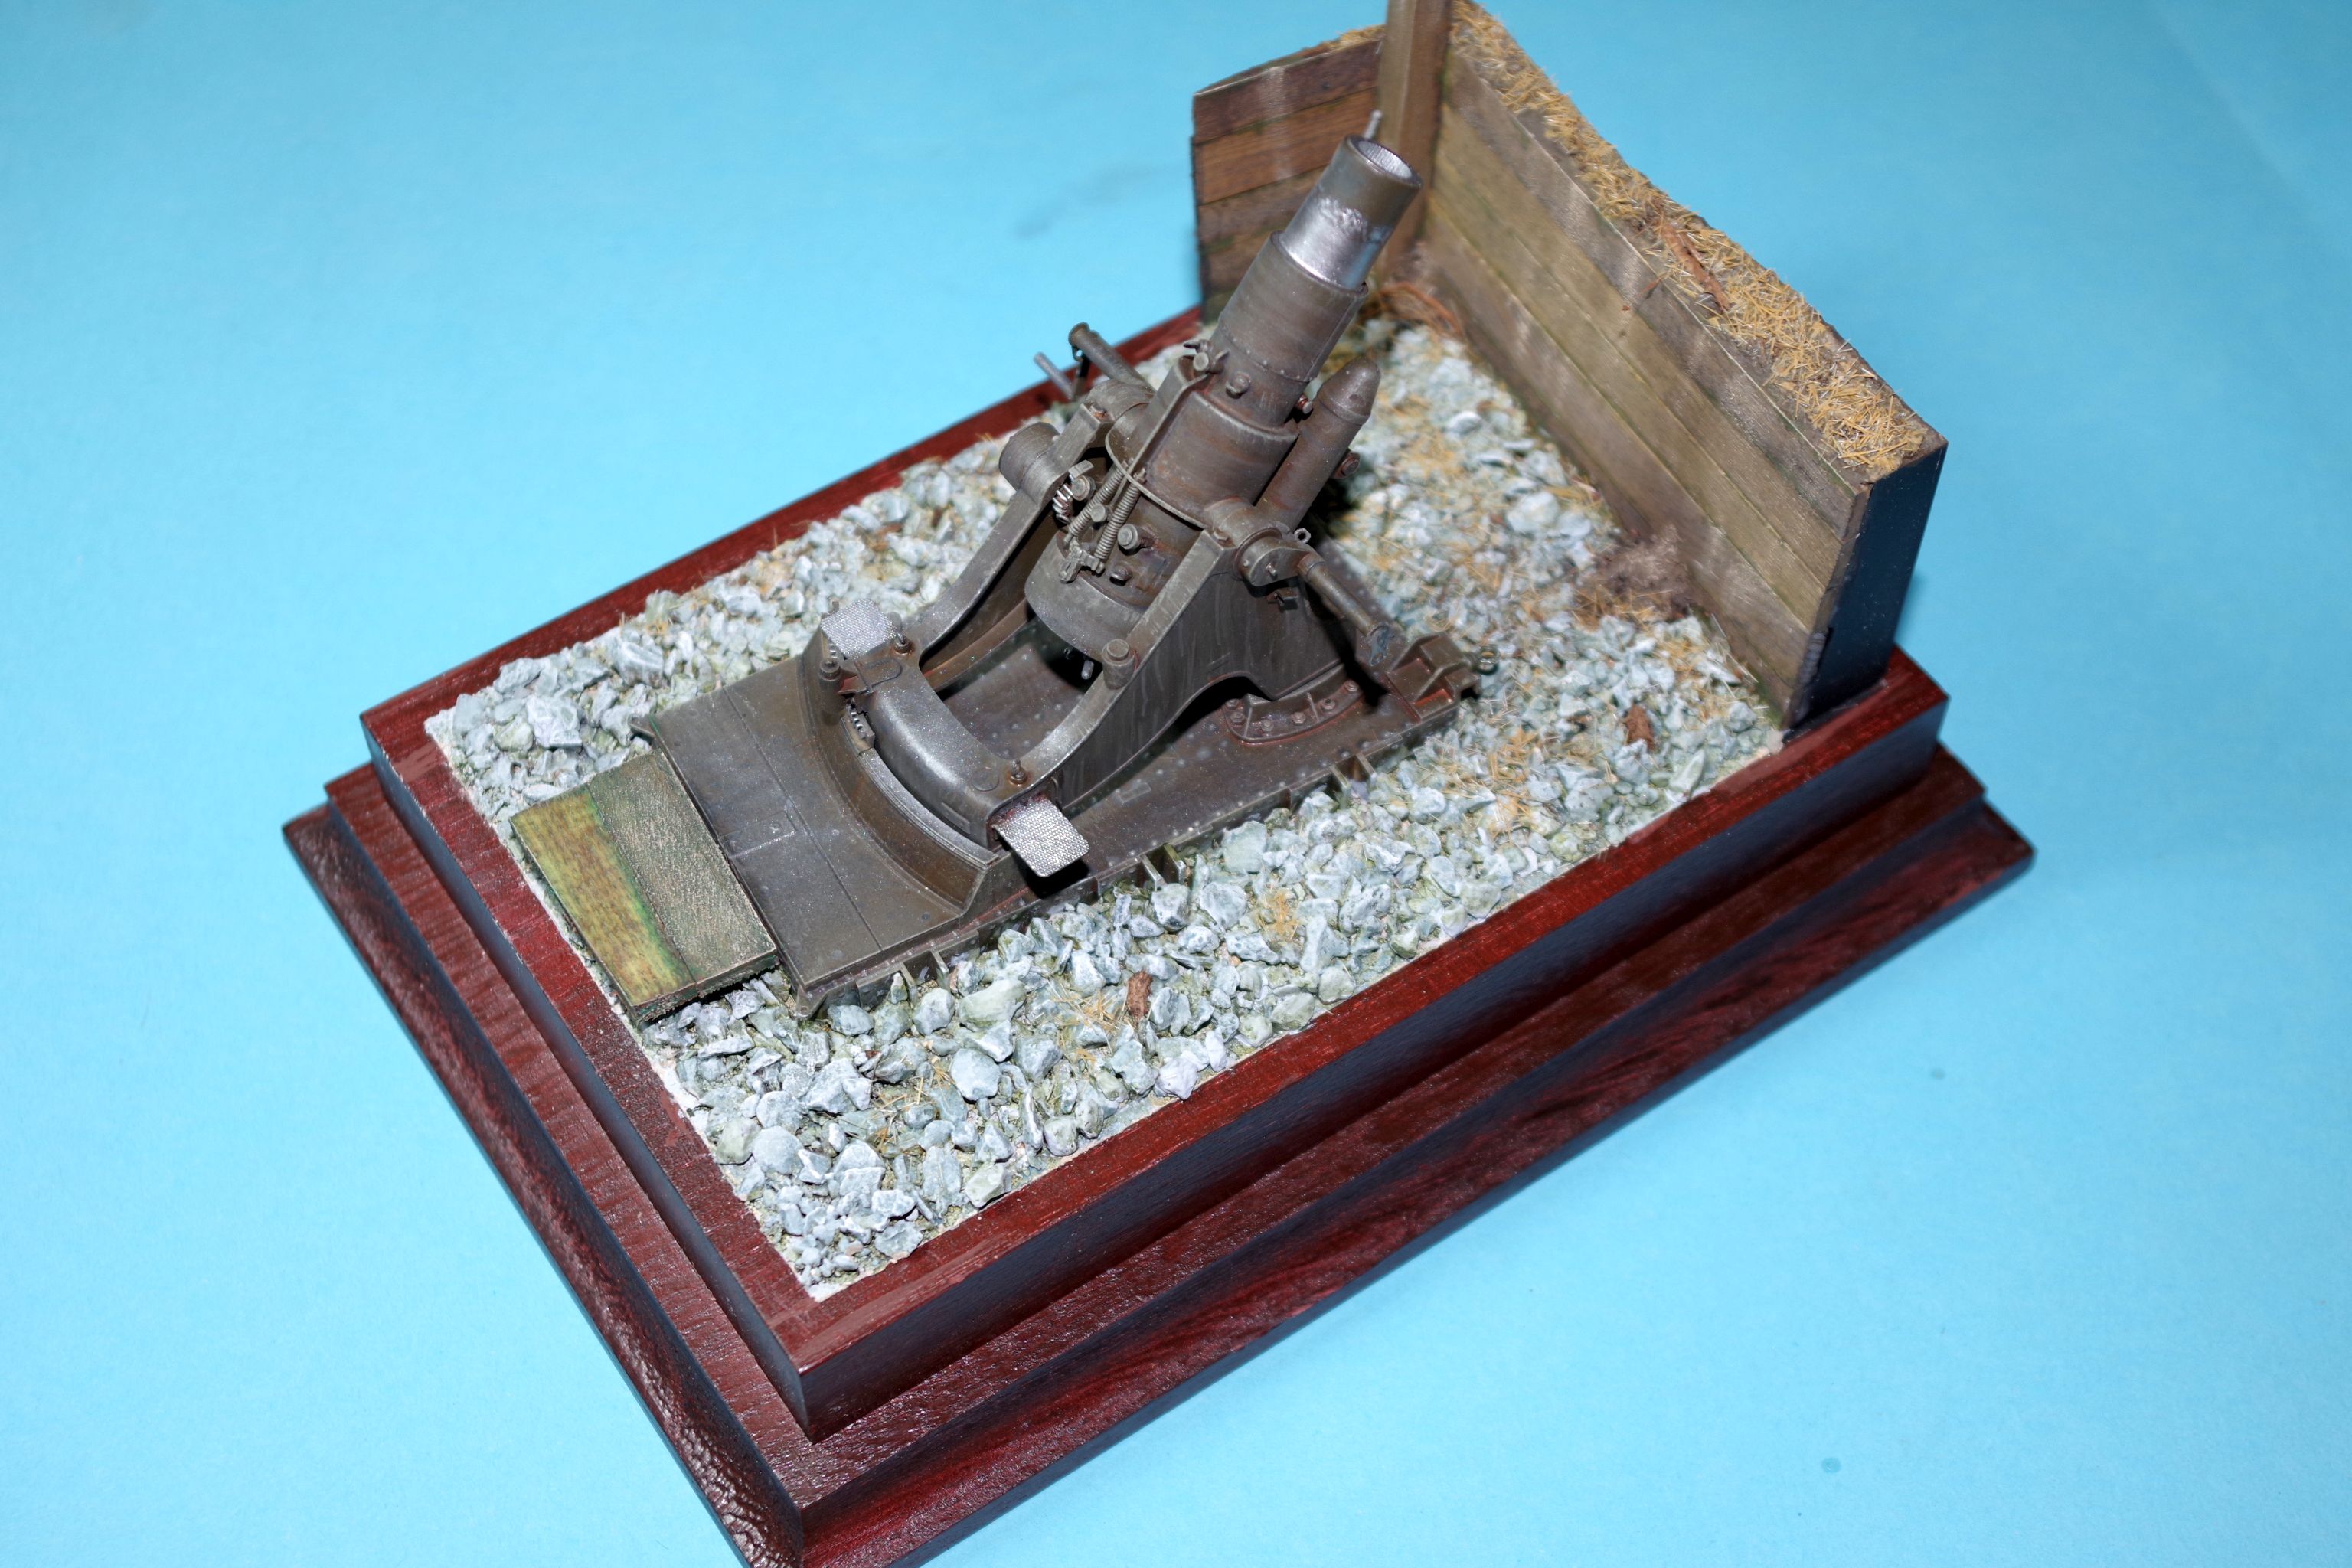
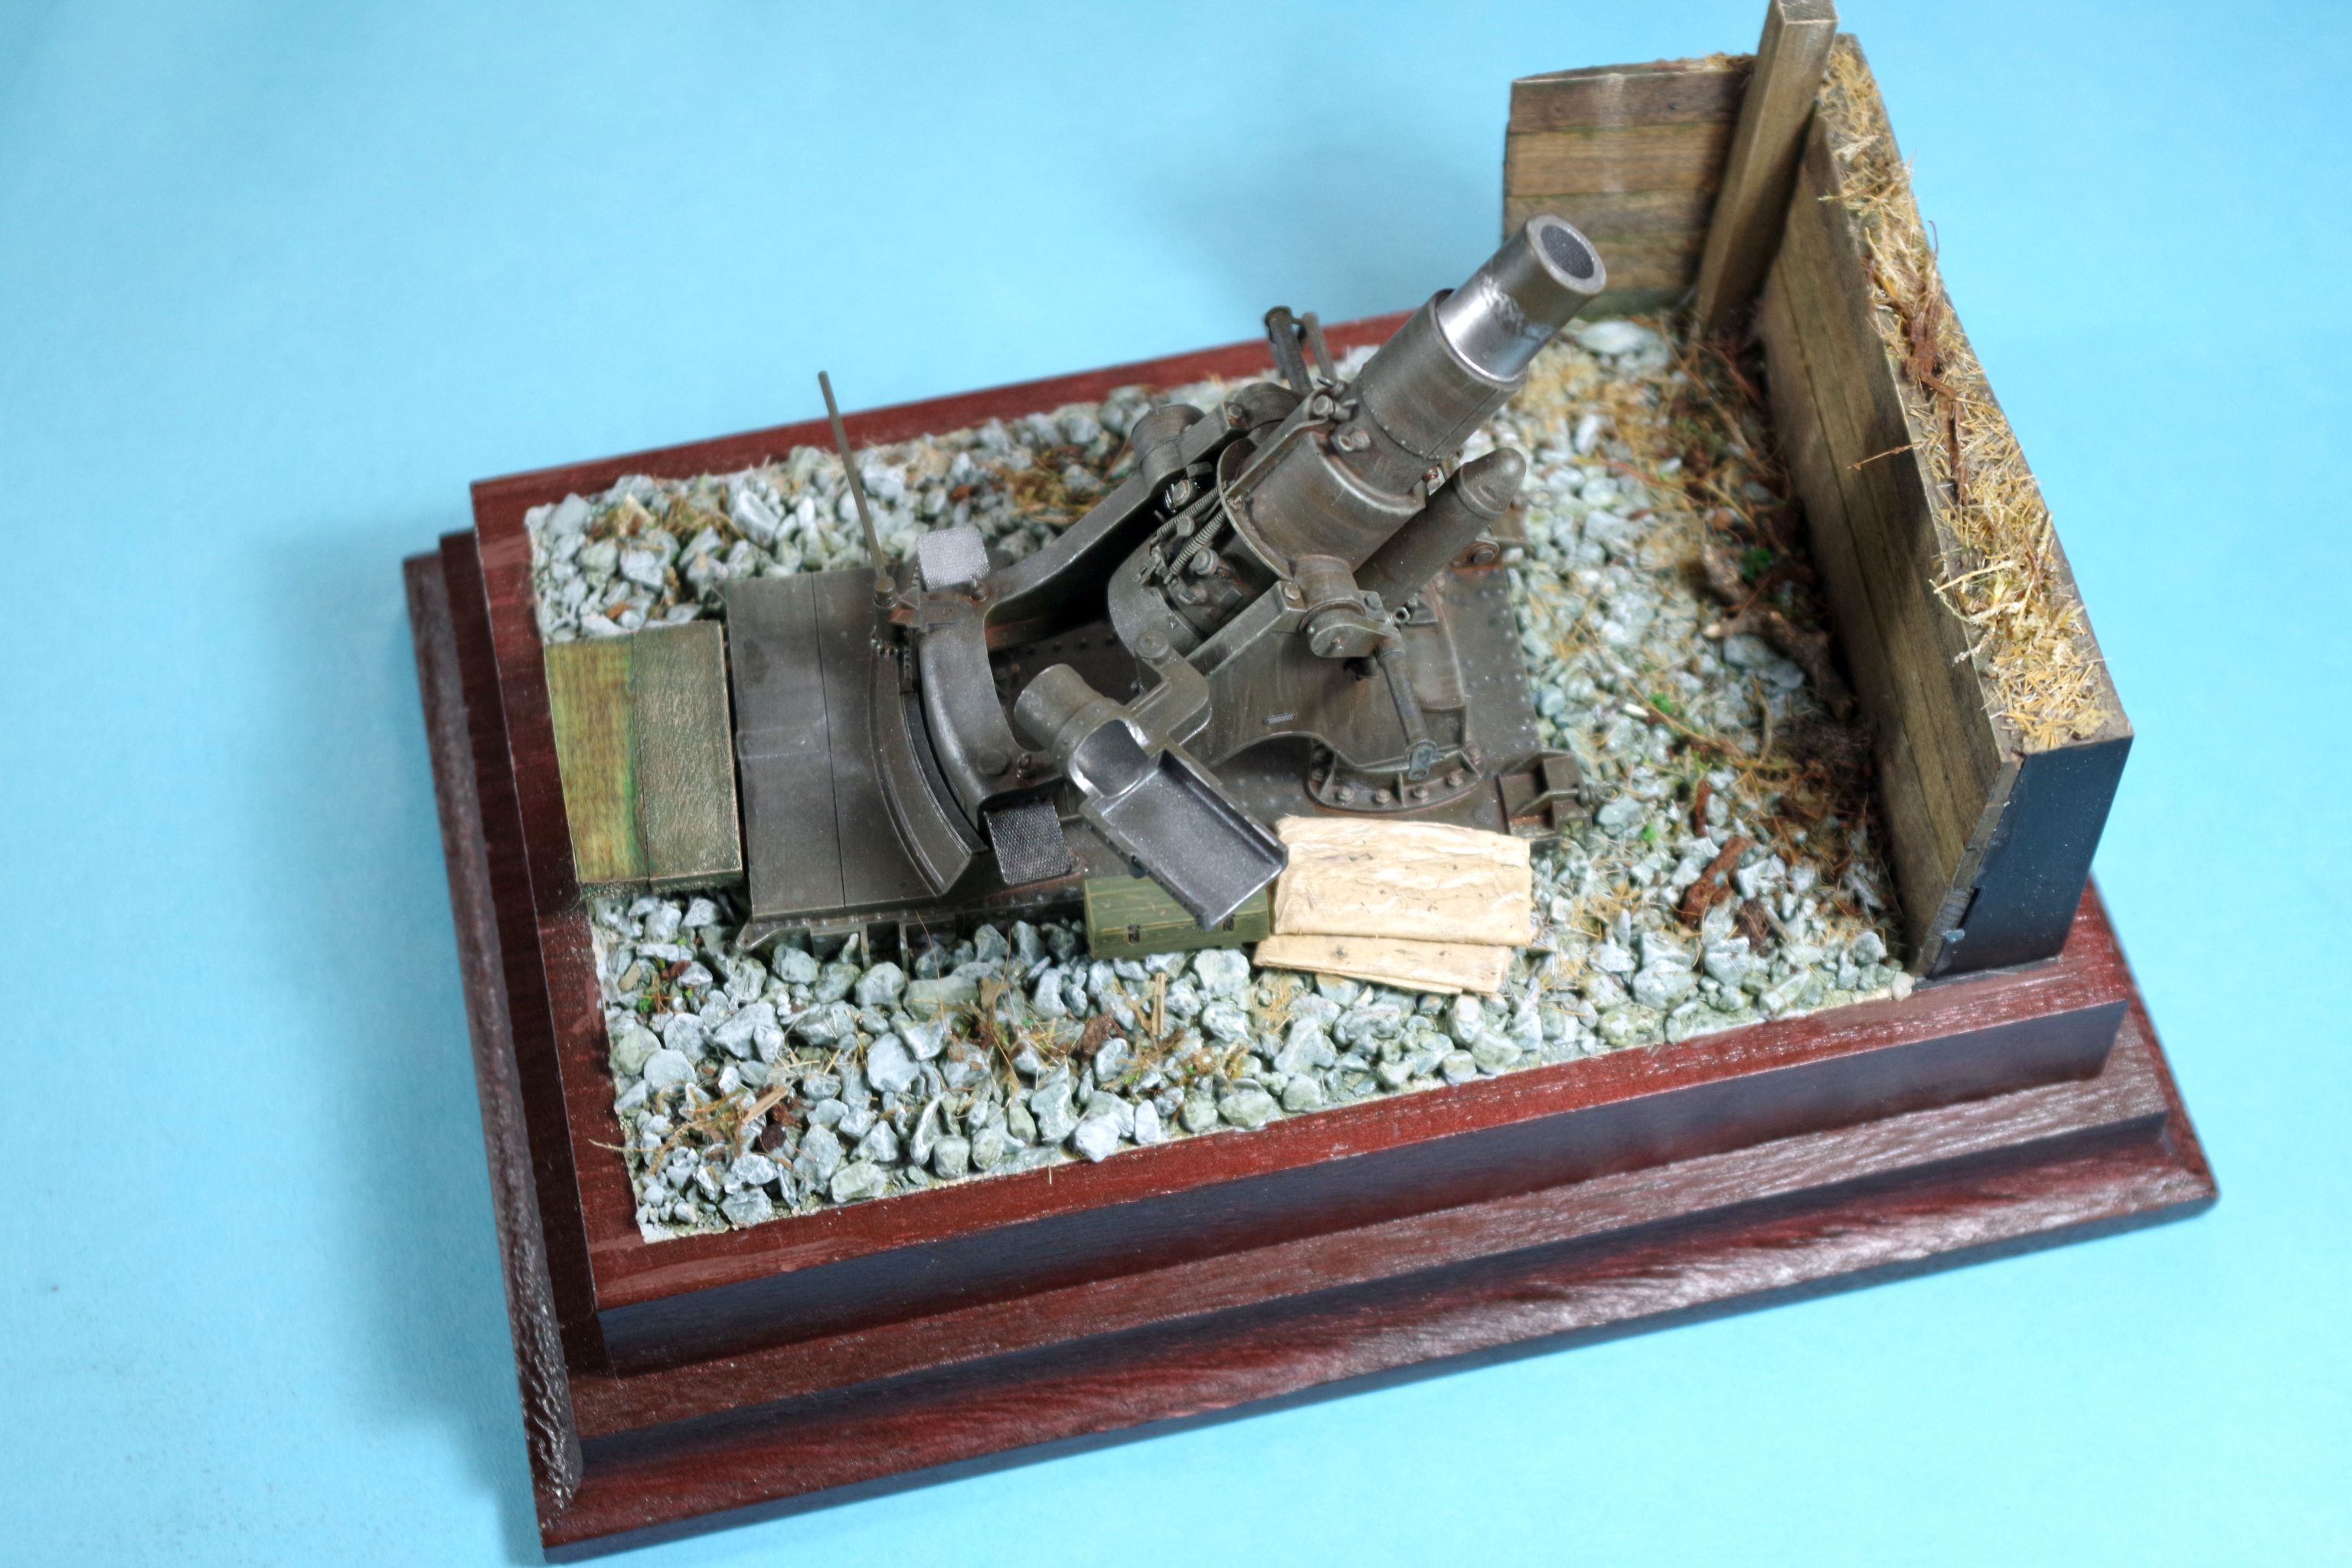
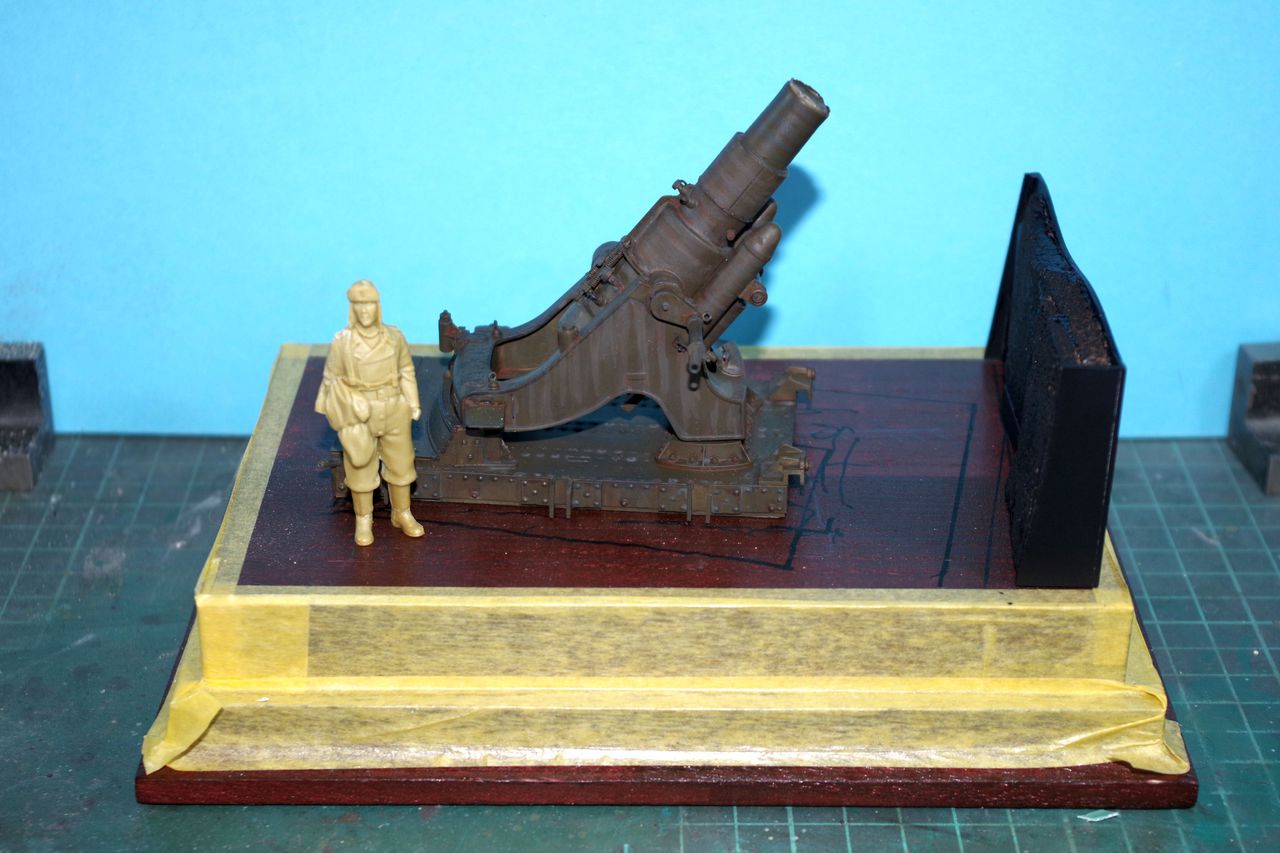
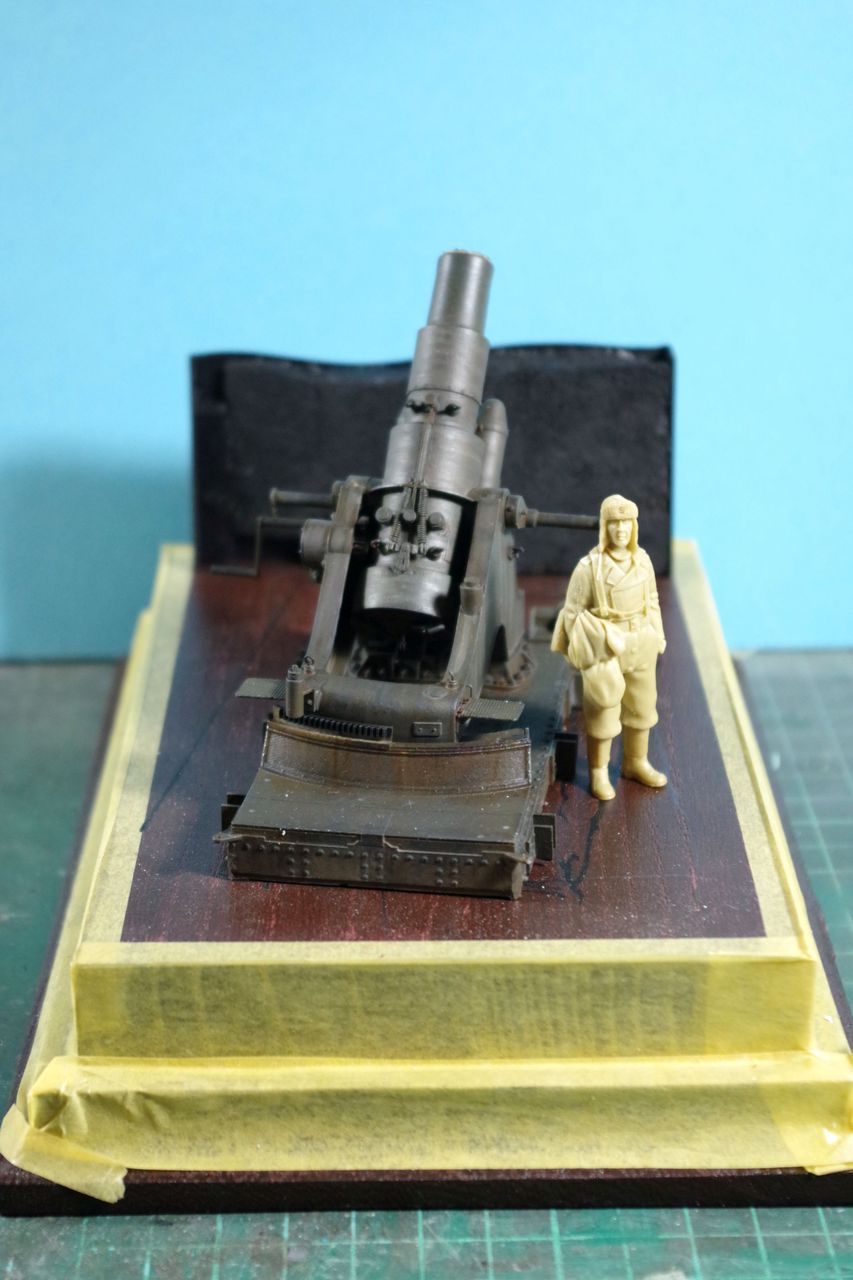
Built up minus some parts interfering with painting and/or base construction (mostly for the risk of breaking them off). Painted the whole gun and added a pinwash (blue for Panzer grey filter by AK) around each rivet. There are a lot of rivets Started overall wheatering with some Mig filters. This may take some time now. Also added one of the walls to the mortar pit. This will not become a fully enclosed mortar pit, because the base is too small. But it adds the sense of an entranchment to the whole thing.
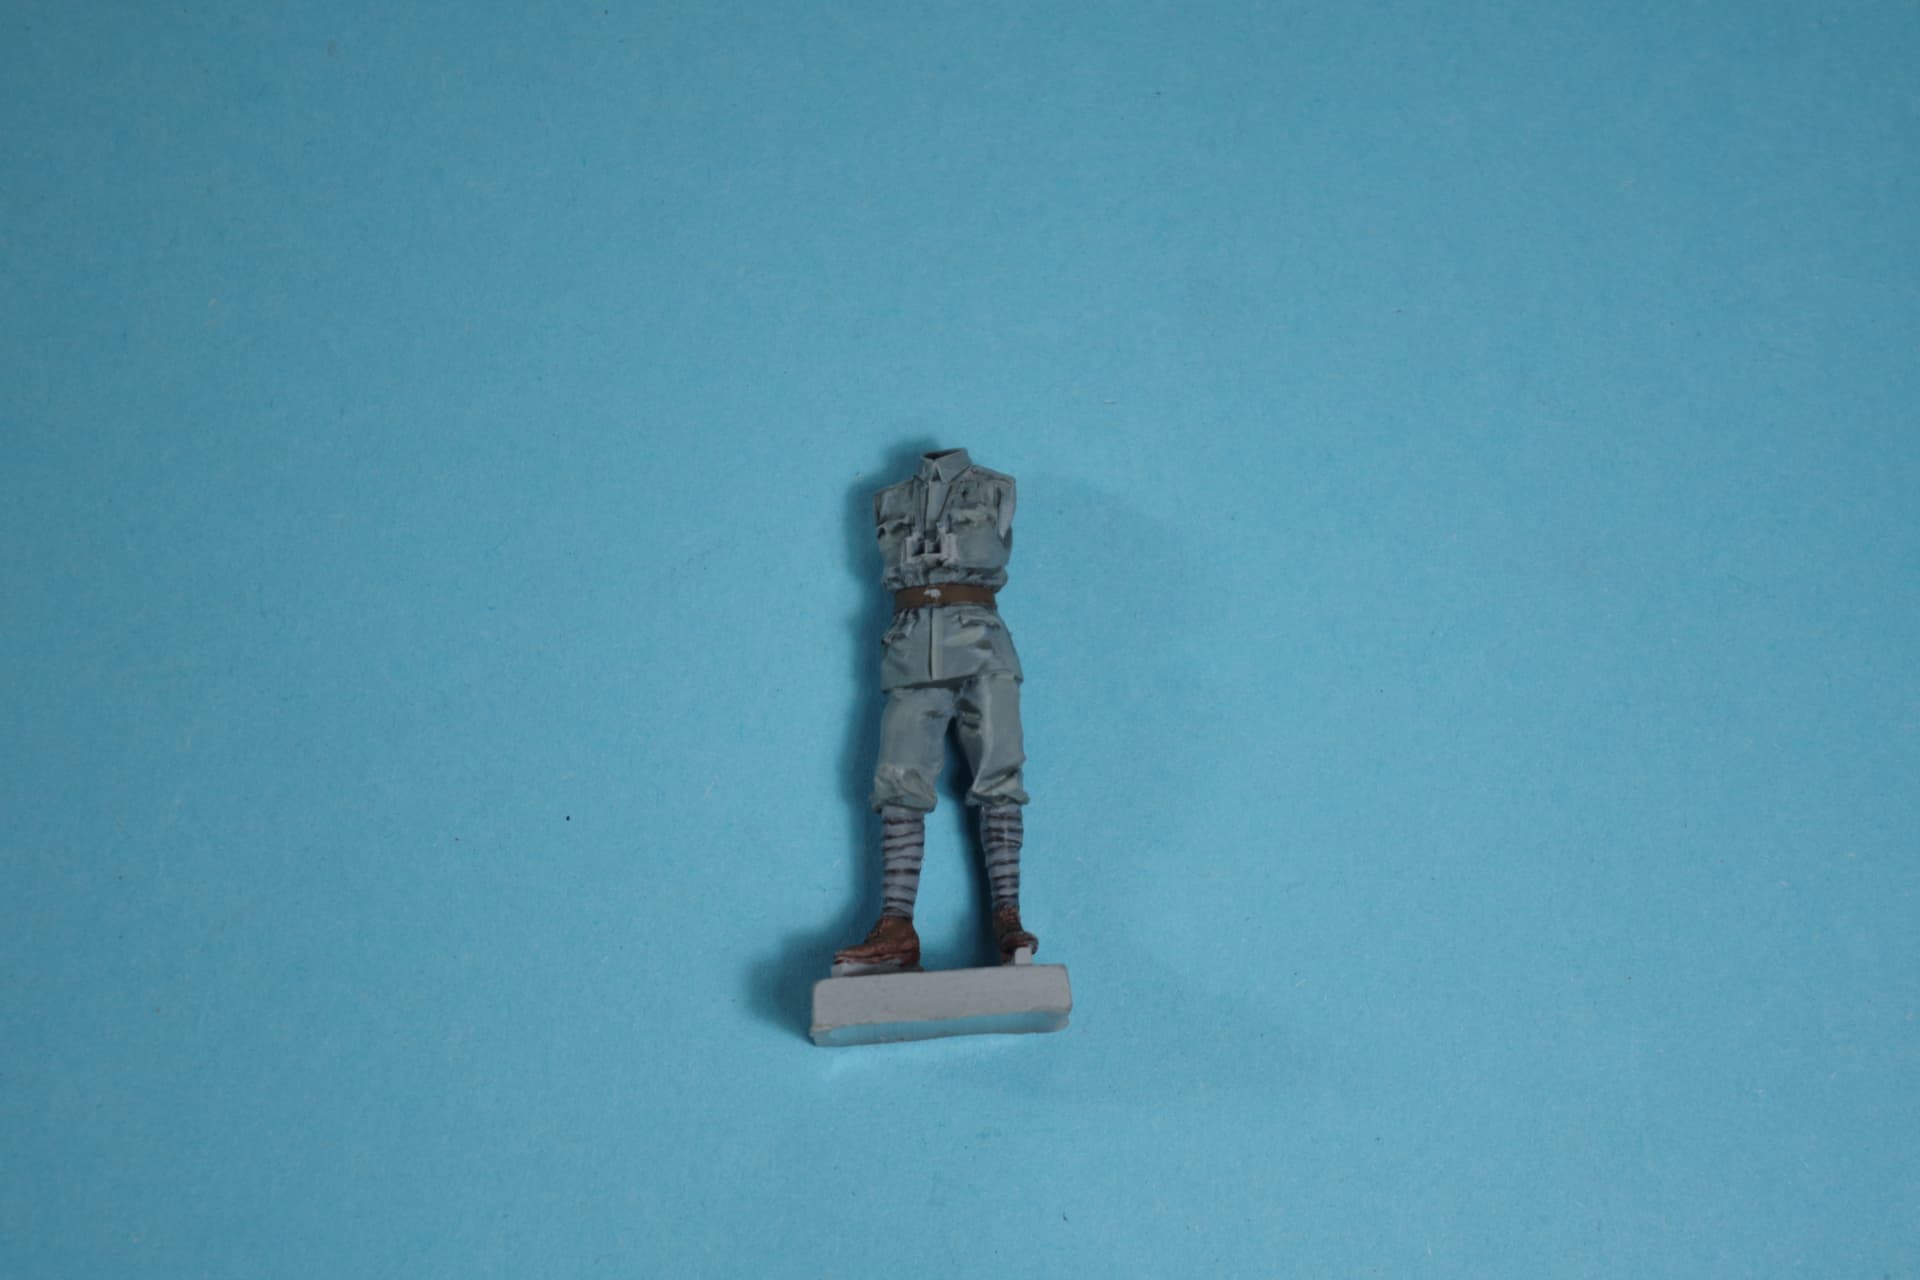
The figure is just for size comparision. No, it’s not an Austrian. It’s even not a WW1 figure
Regards
dutik
p.s. The photos are not that small. You may open them in a new window at full size. I am still not used to the new forum software, so I have no idea how to add “self-expanding” images to a post.
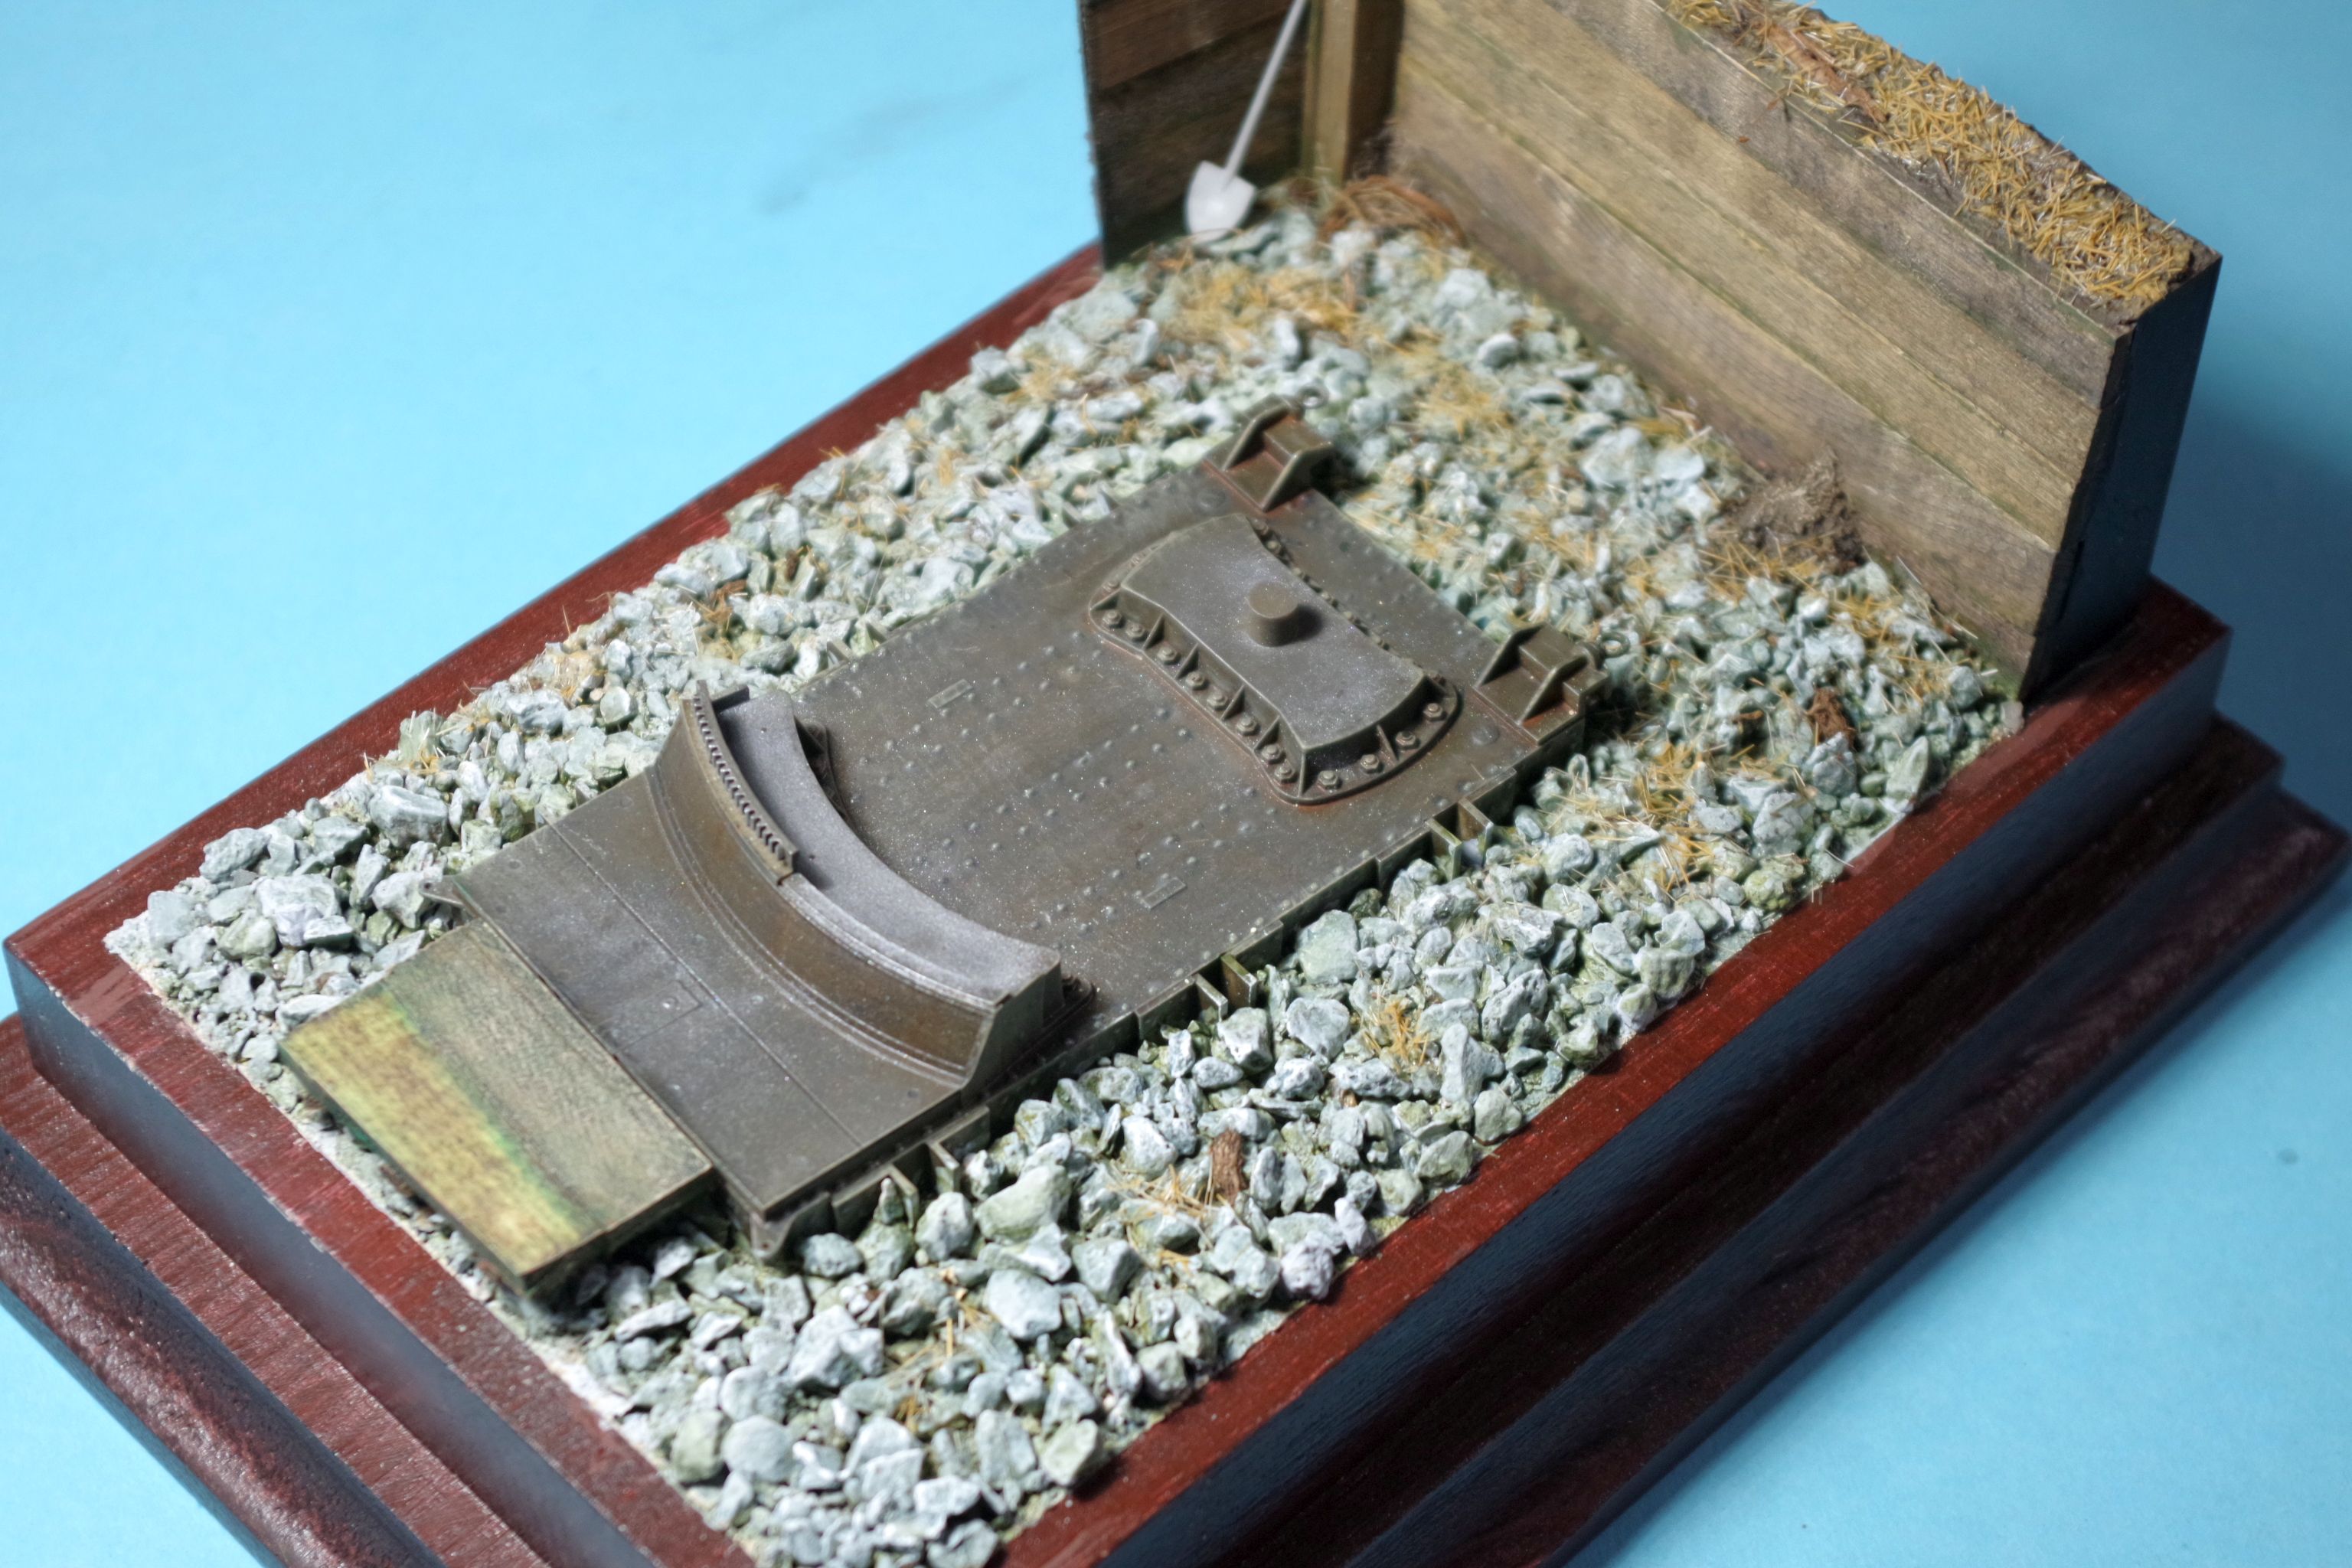
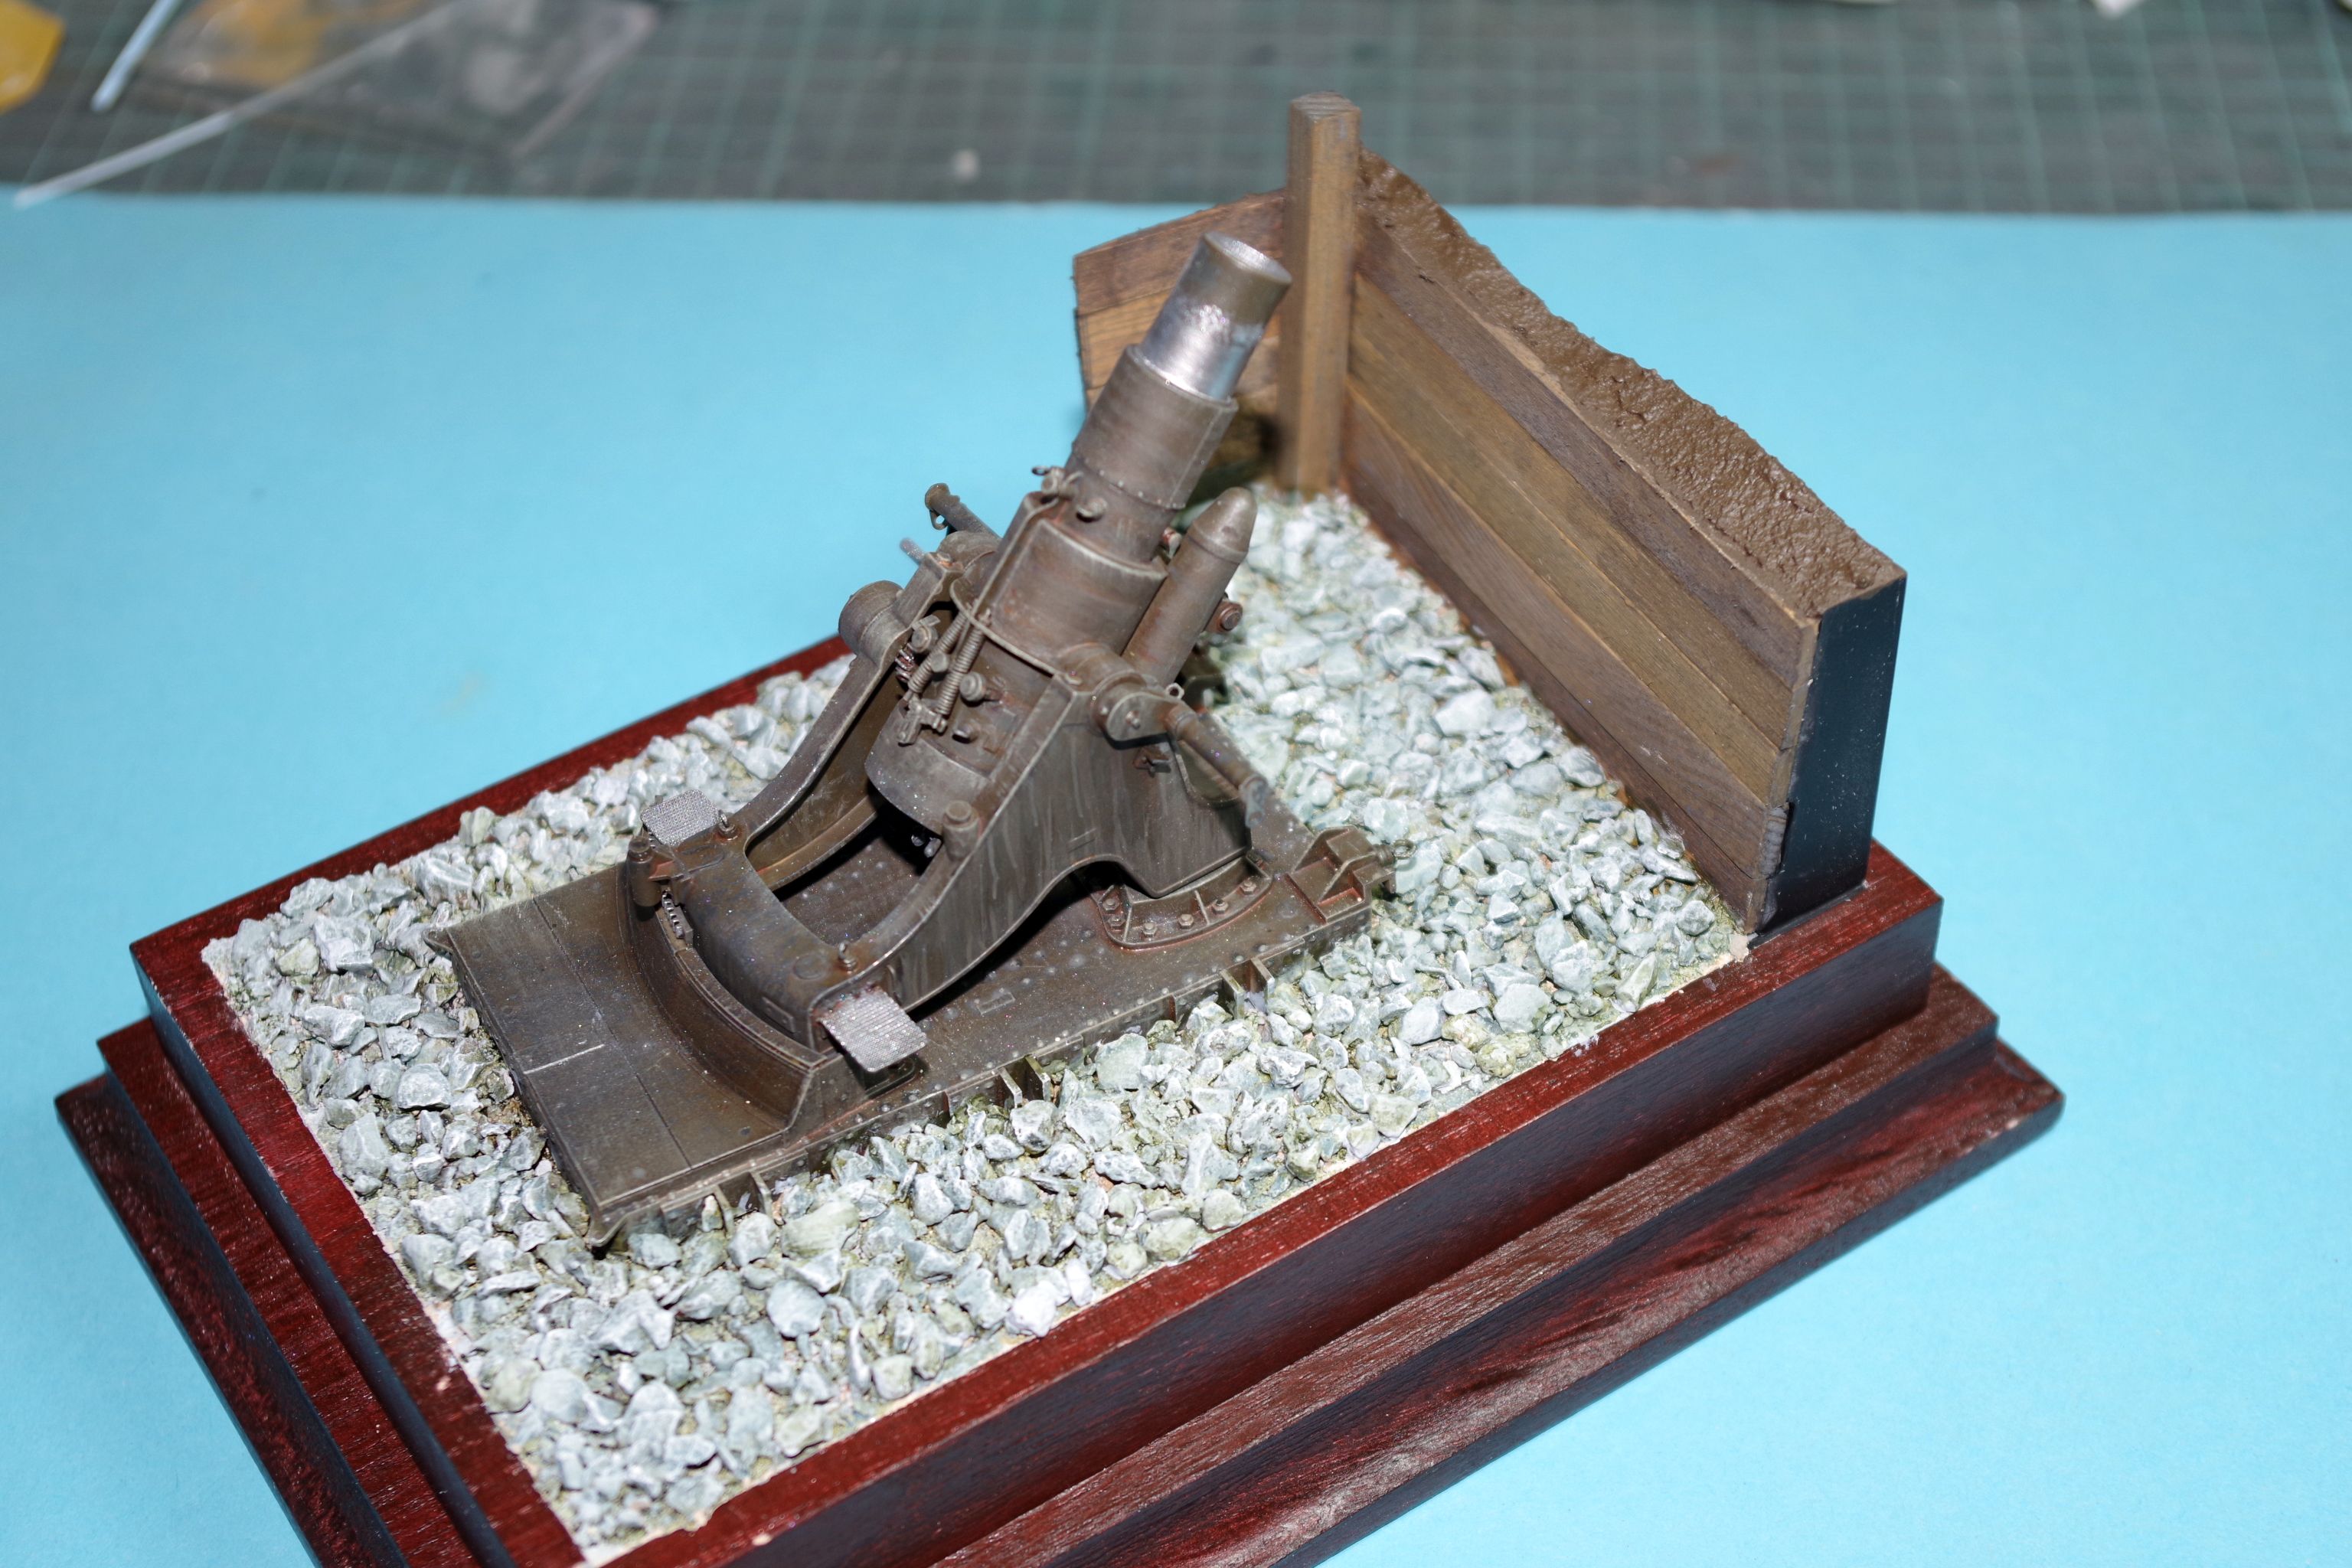
Pinned the baseplate in place. The gun itself is still removable to reach all places of the base. Added a rocky floor (these are the Alps…) and painted the stones blueish grey (pale grey blue), followed by a green wash and drybrush of a light grey while the wash was still wet. The wood was painted with stains of green, different browns, black. Added Vallejo dark ground paste on top of the parapet. Set the base aside to dry thoroughly.
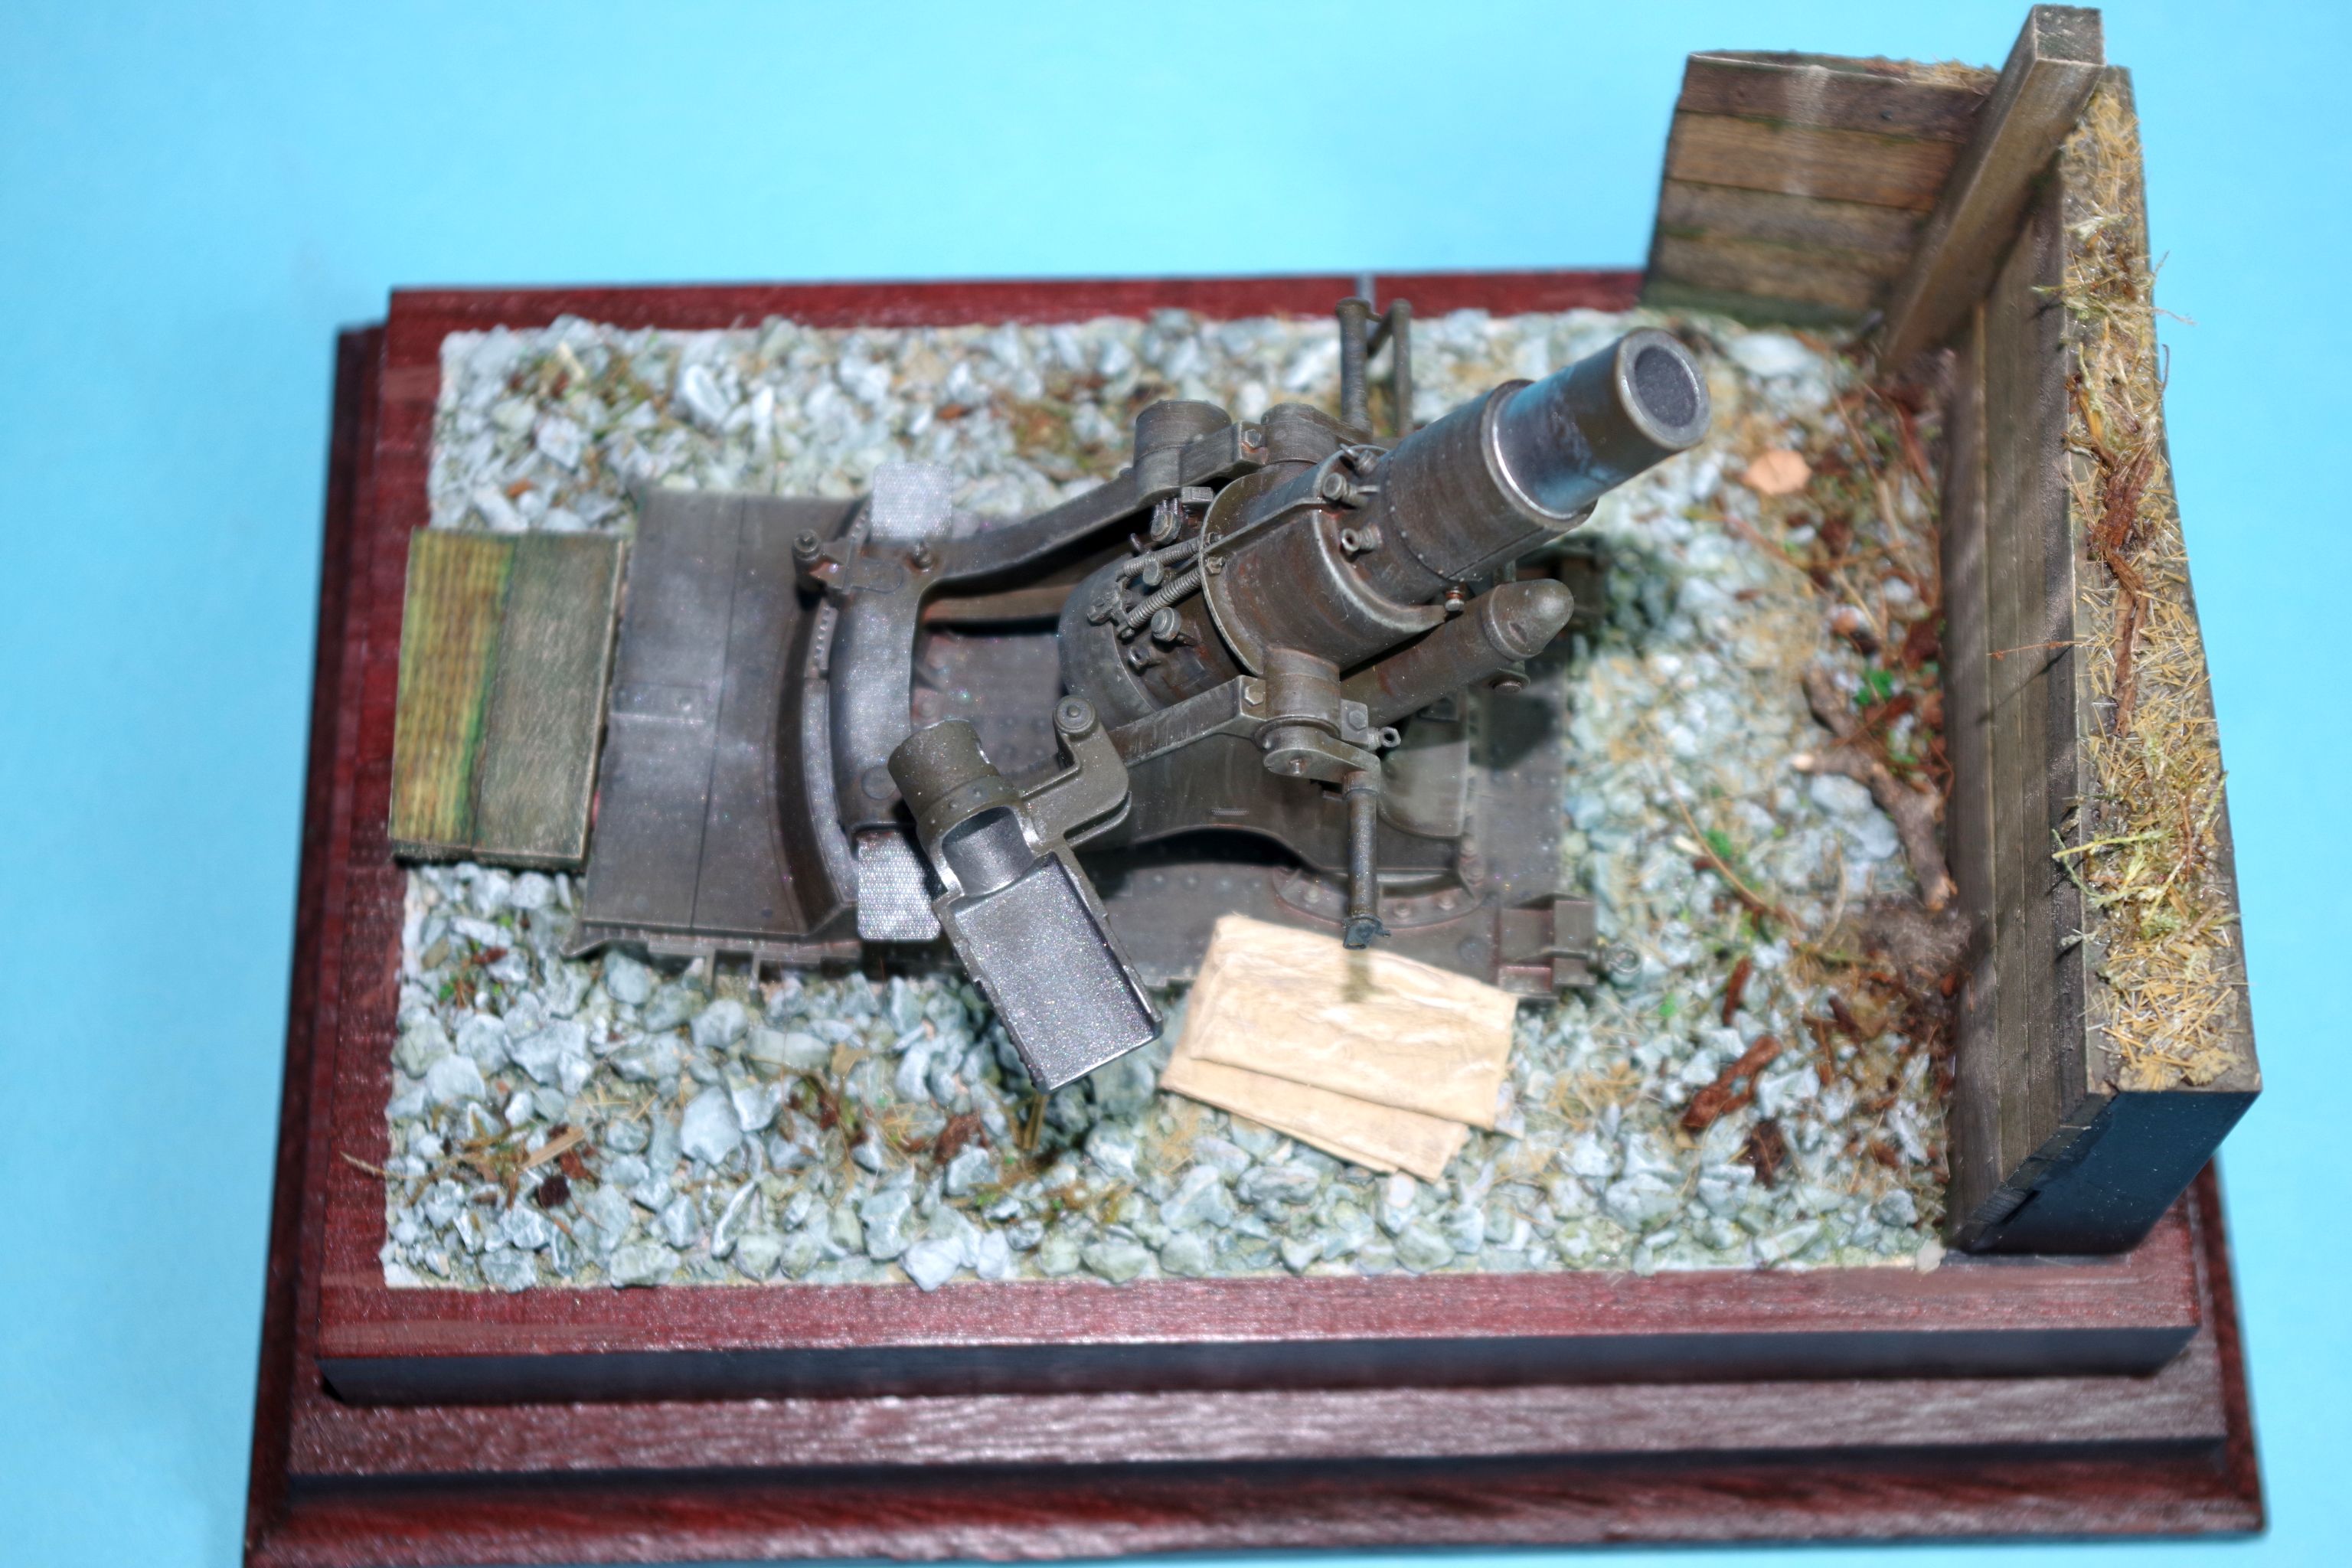
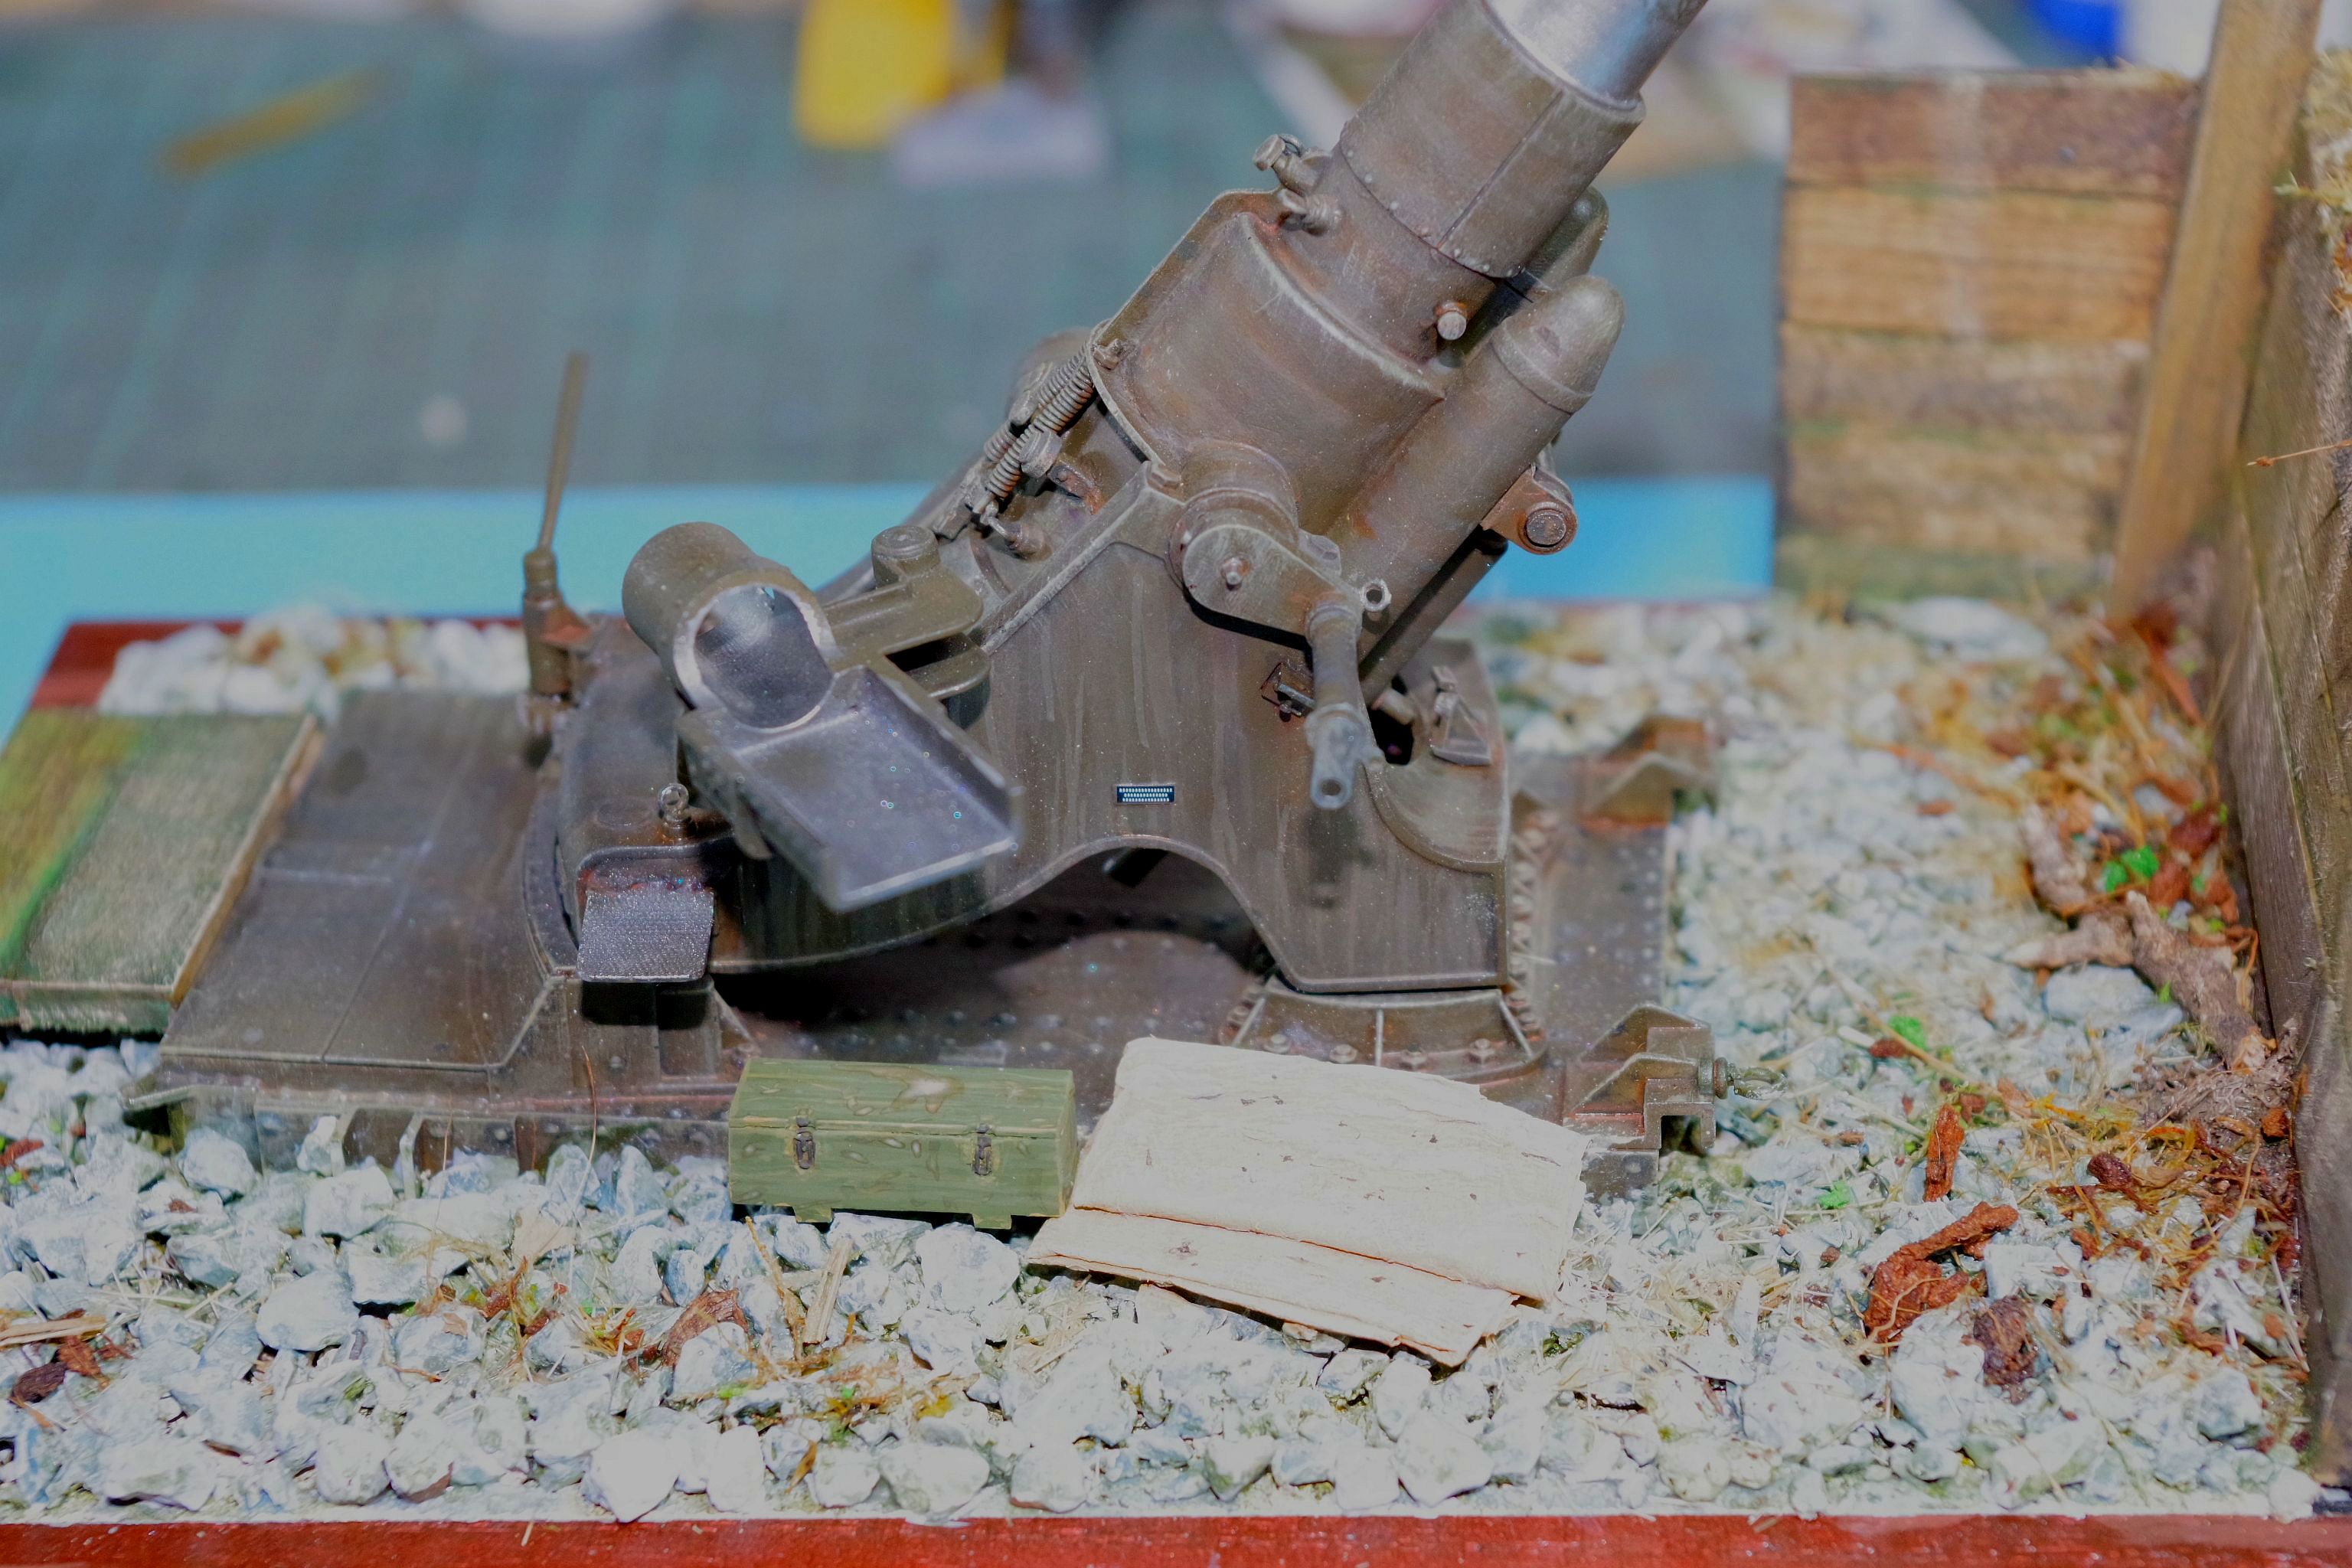
The gun got metallized with Vallejo Aircolor aluminium and metallic pigments by Ammo of Mig. Also added highlights along all edges.
Nice Job ,very nice,you also nail the colour of the granite of that area ….my Great grandfather Luigi was on the “fronte dell’Isonzo” with the Italian Alpini
The pine needles are brush bristles cut to size (2-3mms long) and glued onto the ground. Lots of brush bristles Then painted in place with Vallejos “German camo ochre”. Also added some generic ground cover scatter here and there.
After checking the first image I’ve removed that bright scatter particle from the corner. Was too bright for the setting. Scatter are ready to use “meadow ground” and “forest ground” products (one from Reality in scale, the other RT modelling).The tarp was made from paper tissue soaked in white glue and painted accordingly. Now I am painting a box for the guns optics and other stuff. I think there will be then enough eyecatchers on the ground. Thinking about a figure now.
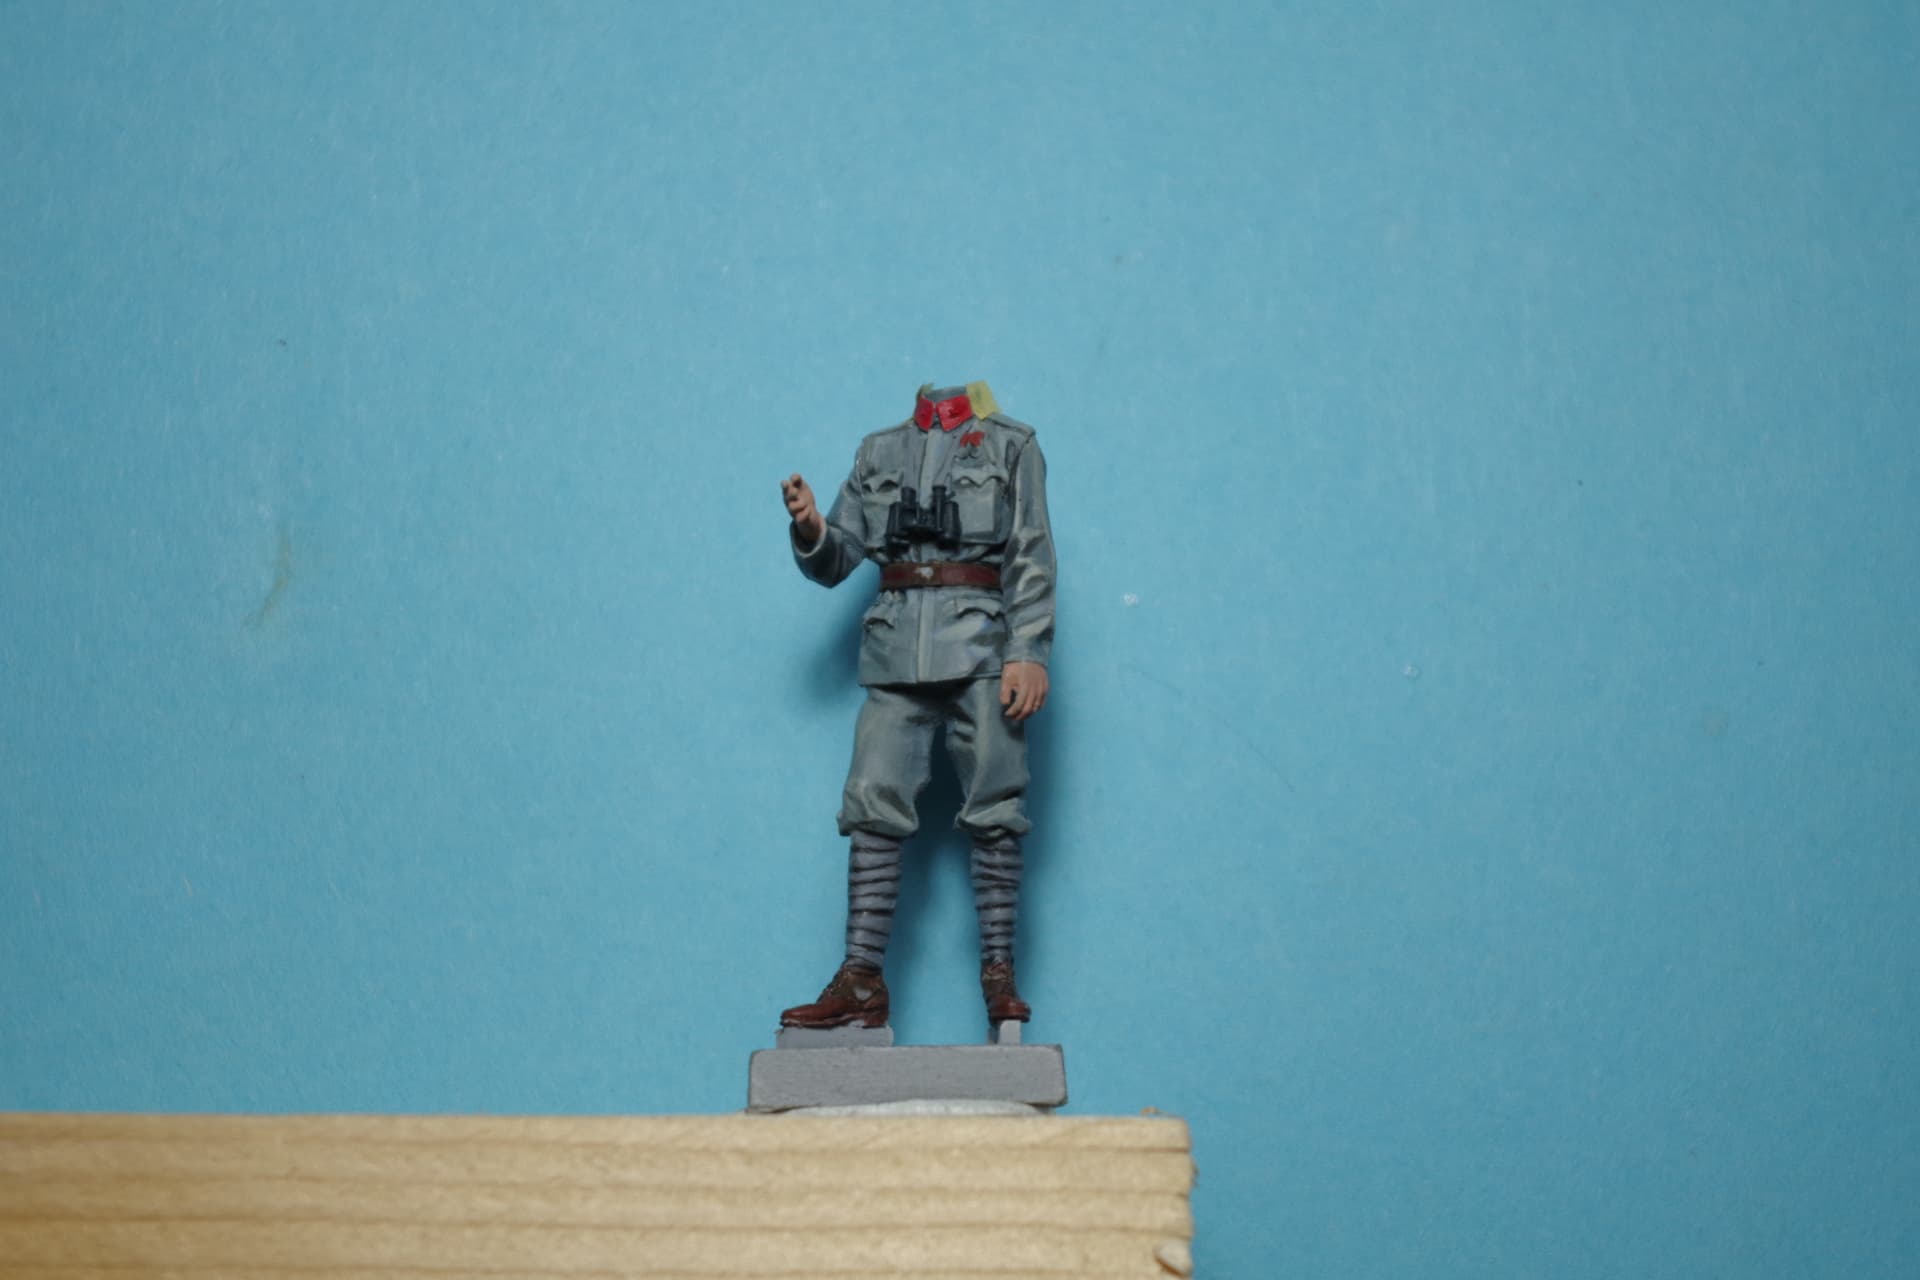
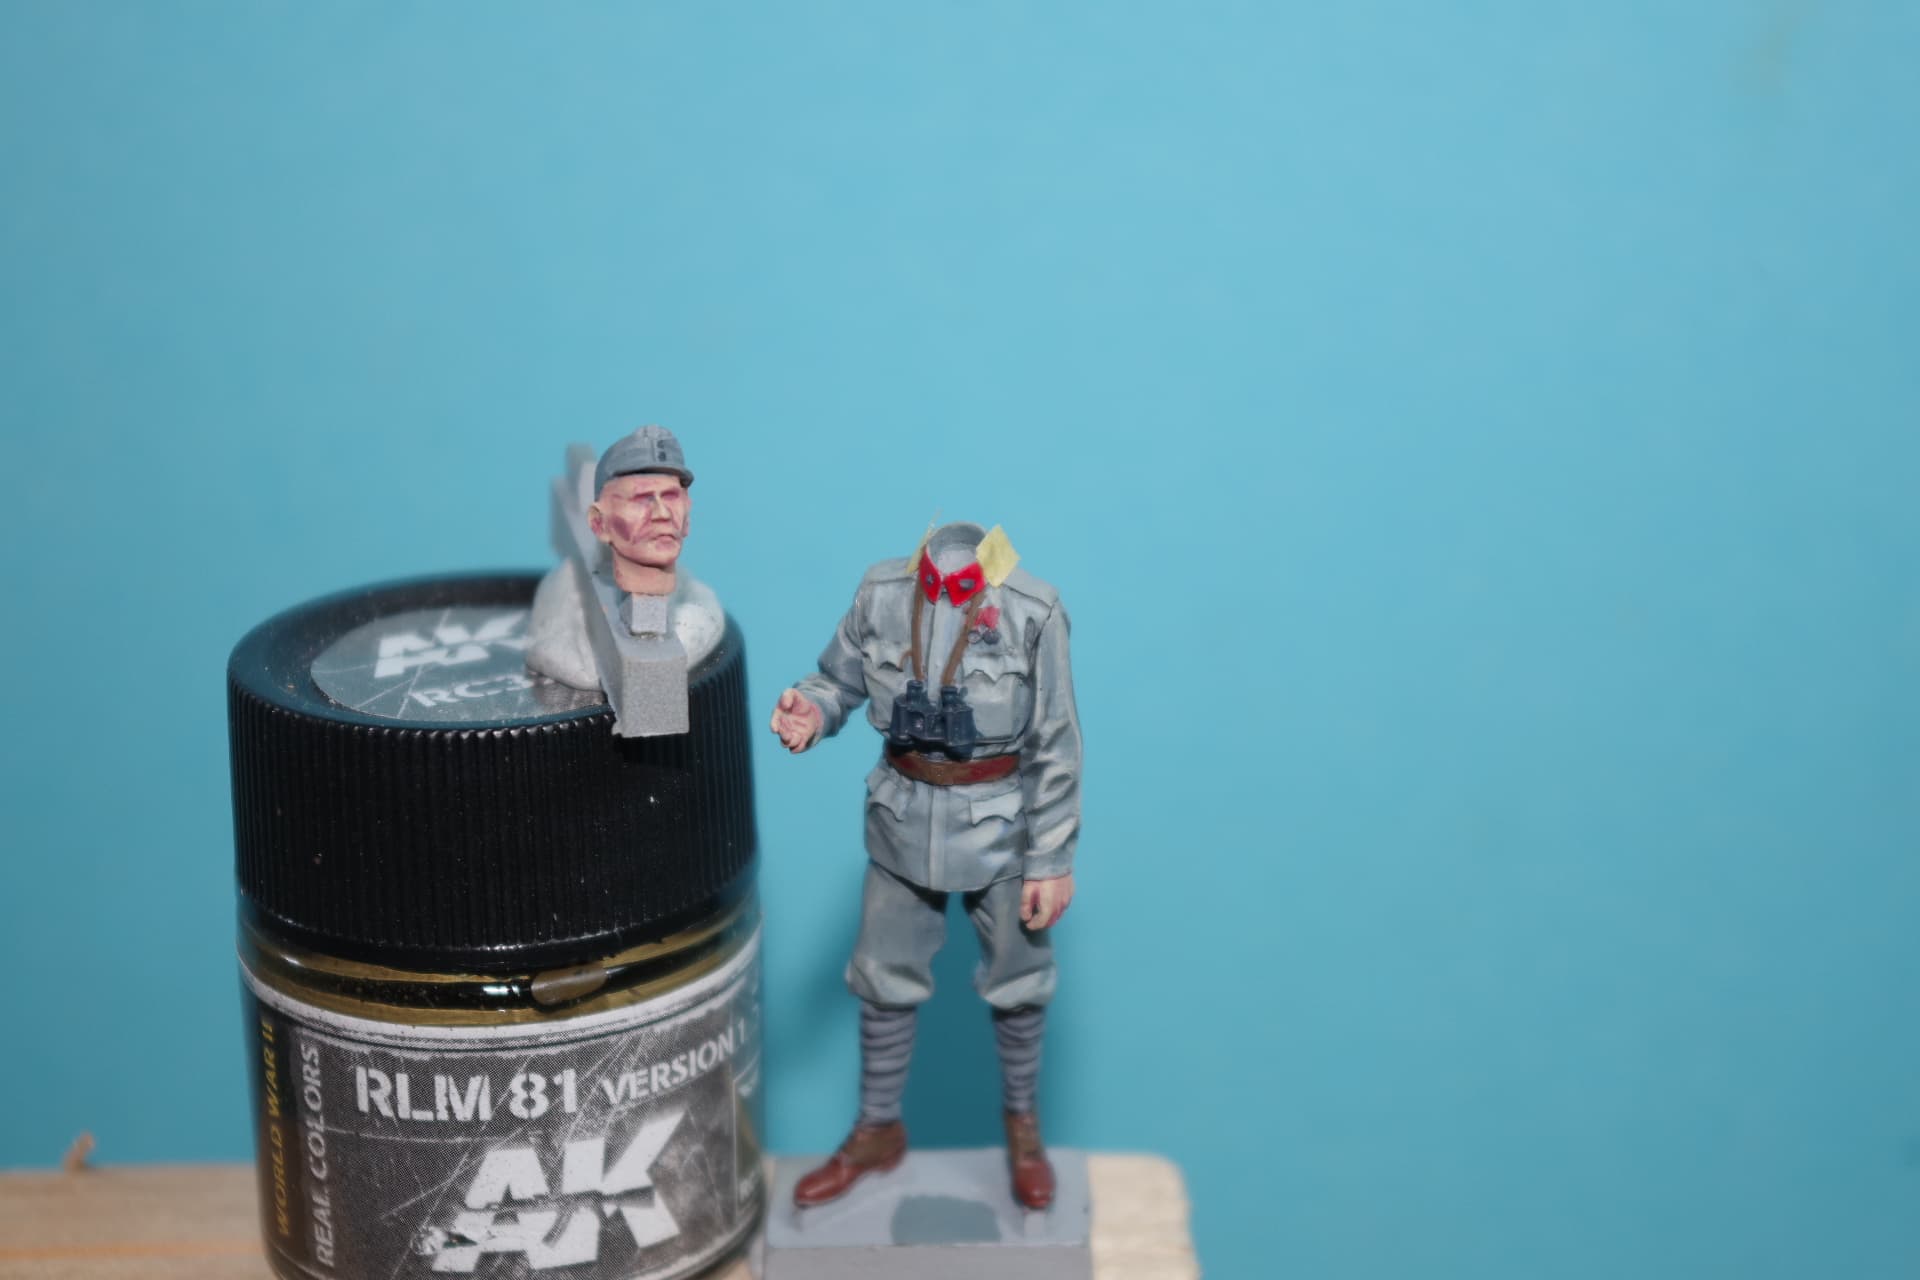
Figure painting: This is CMKs Austro-Hungarian officer. Simple pose, good details, well cast.
AFAIK the kuk uniforms were pre-war “Hechtgrau” colored, “pike grey”. The Austrian designations were colorful with a good degree of artistic license. “Grassgrün”, “grass green”, was not what you might think, but a dark bluegreen. So “Hechtgrau” was not grey, but a light/middle blue-gray. During wartime the uniform color changed to “Feldgrau”, “field grey”, that in fact was a grey. Not like the German fieldgray, but a grey nevertheless.
So I’ve primed the figure with Tamiyas grey primer. I had serious troubles before painting grey uniforms (insert WW2 Germans here…) but I discovered Ammos “Field grey uniforms” paint set. This works fine! There is a bottle of the base color, a light and a shadow and a bottle of outlining black. Just remember to thin down the paints for the lights and shadows to make them more transparent for smoother transitions between the colors. I use Ammos “Transparator matt”, which works like a charm. To get the blueish tint I mixed a drop of blue (Vallejos "Ultramarine/Ultramar blue) into both the base and the shadow color. Don’t do this with the light color, this will turn the paint mix into some kind of baby blue.
Back at the work bench. Figure painting is at least for me a lot time consuming and somewhat demanding. Not just like working with a wide brush loaden with wash and filters along a flat surface. But at least doable


 Started overall wheatering with some Mig filters. This may take some time now. Also added one of the walls to the mortar pit. This will not become a fully enclosed mortar pit, because the base is too small. But it adds the sense of an entranchment to the whole thing.
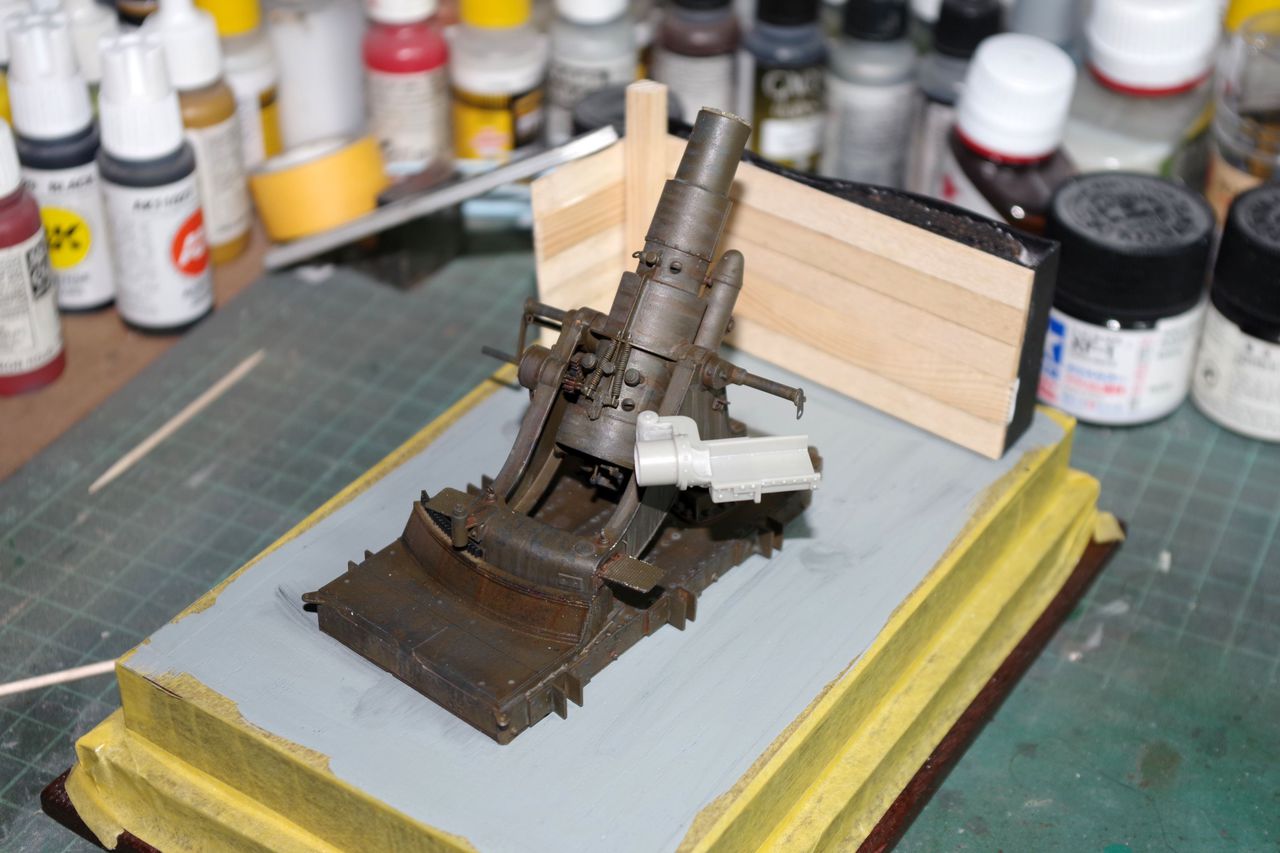
 ….my Great grandfather Luigi was on the “fronte dell’Isonzo” with the Italian Alpini