I’m new here and my first new topic post and it’s been years since I’ve posted on a forum so go easy on me if I flub something.
I was an avid builder in my youth but put it aside due to life getting in the way but some years ago I started collecting kits for my retirement and became interested in the German artillery because of the variety of pieces they used. The many variants, captured. Pieces, conversions,…etc. and by extension have become interested in the minor axis powers guns as well. The builds are challenging due to the many small intricate parts and I don’t have road wheels and track links to deal with. I enjoy finding models of some of the more esoteric pieces and converting scratching ones that no kits are made of in 1/35 scale. As well as converting figures into gun crews. Because of Ebay my home looks like a hobby shop and I’ll probably die before I build everything but what’s the old adage about being scale modelers. We have two hobbies, building models and collecting them.
My last conversion was a 12.8cm K81/2 and my next I think is a Romanian 7.5cm Resita model 1943.
I just wanted to introduce myself and see if there were any other afflicted individuals. I apologize if this is posted in the wrong place.
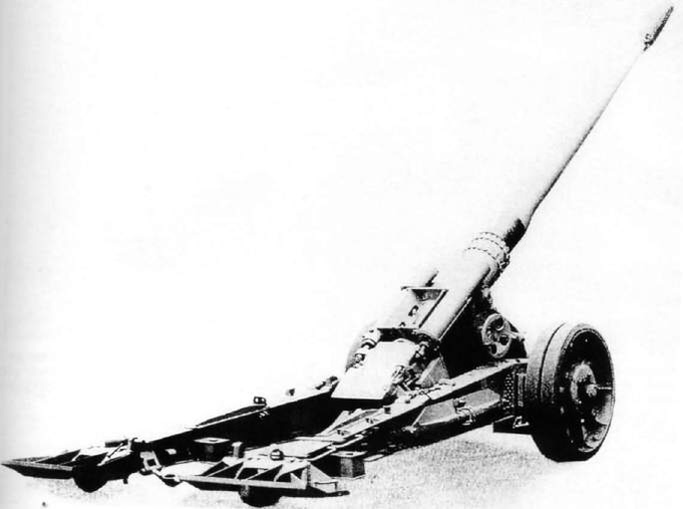
This is a K81/2. A12.8 cm gun placed on a modified Soviet carriage.
I want to attempt a K81/1 which is the same gun placed on a French 155mm GPF-T carriage which is the father of the US Long Tom.
14 Likes
Welcome aboard David! I am also a Redleg; but, focus on US artillery 1900 to current. Arty provides some challenges due to the small parts and then due to the small surfaces to weather.
2 Likes
Welcome David.
You’ve joined a friendly and helpful forum.
The problem of looking at your stash and knowing you’ll be long gone before they’re finished is pretty common. Have a quick scroll through the “Let’s see our Stash” thread and you’ll find you either fit right in or your problem is minor league and you should really do a little more shopping. 
Cheers,
Colin
4 Likes
Thankyou Taylorri
The US did have some appeal but lacked the variety that the axis powers offered. I can’t imagine how their logistic system dealt with it all.In my new discovery of the hobby I’ve come to hate resin,photoetch, and white metal kits. These mediums offer me some subject matter and detail that injection molded kits may lack or don’t cover but I’ve yet to master the art of “super glue.”
1 Like
Collin
I’d be ashamed to show anyone my stash because of the size. I buy kits not because I’m going to build them but because they have some component (s) I want for a conversion.
2 Likes
It’s looking great David, I have always been interested in attempting a Japanese 150mm piece used during the island battles in WW2.
2 Likes
Type 96 15 cm howitzer is/ was made by Pit Road in 1/35 scale
They make some other IJA guns as well.
3 Likes
David, being into artillery, you will need to get comfortable with cast resin, 3D printed resin, white metal, and CA.
I end up bending a fair amount of stuff from the left-over PE frets from other kits for those ubiquitous brackets and braces that arty kits omit.
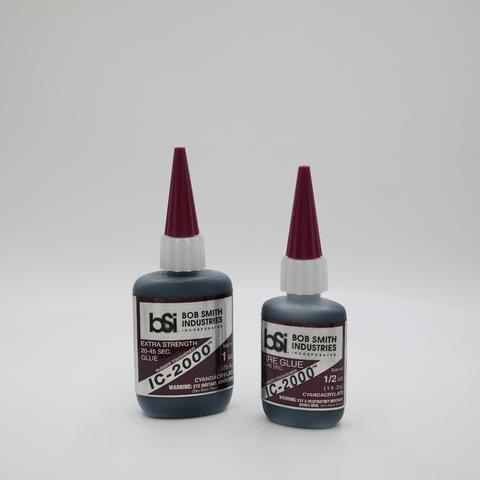
I’ve switched to using black, tire CA glue for most of my CA needs. It contains powdered rubber. This gives it better shear strength. It also has a slower “set” time and is a bit sticky allowing you to position the part before it grabs. As it is black, it is easy to see any excess so that it can be cleaned up with a bit of CA debonder and an old brush. The black CA is also my filler for resin parts. It works better than any of the styrene fillers on resin. I buy the Bob Smith International IC-2000 in the smallest bottle I can find as its shelf life is only a year.
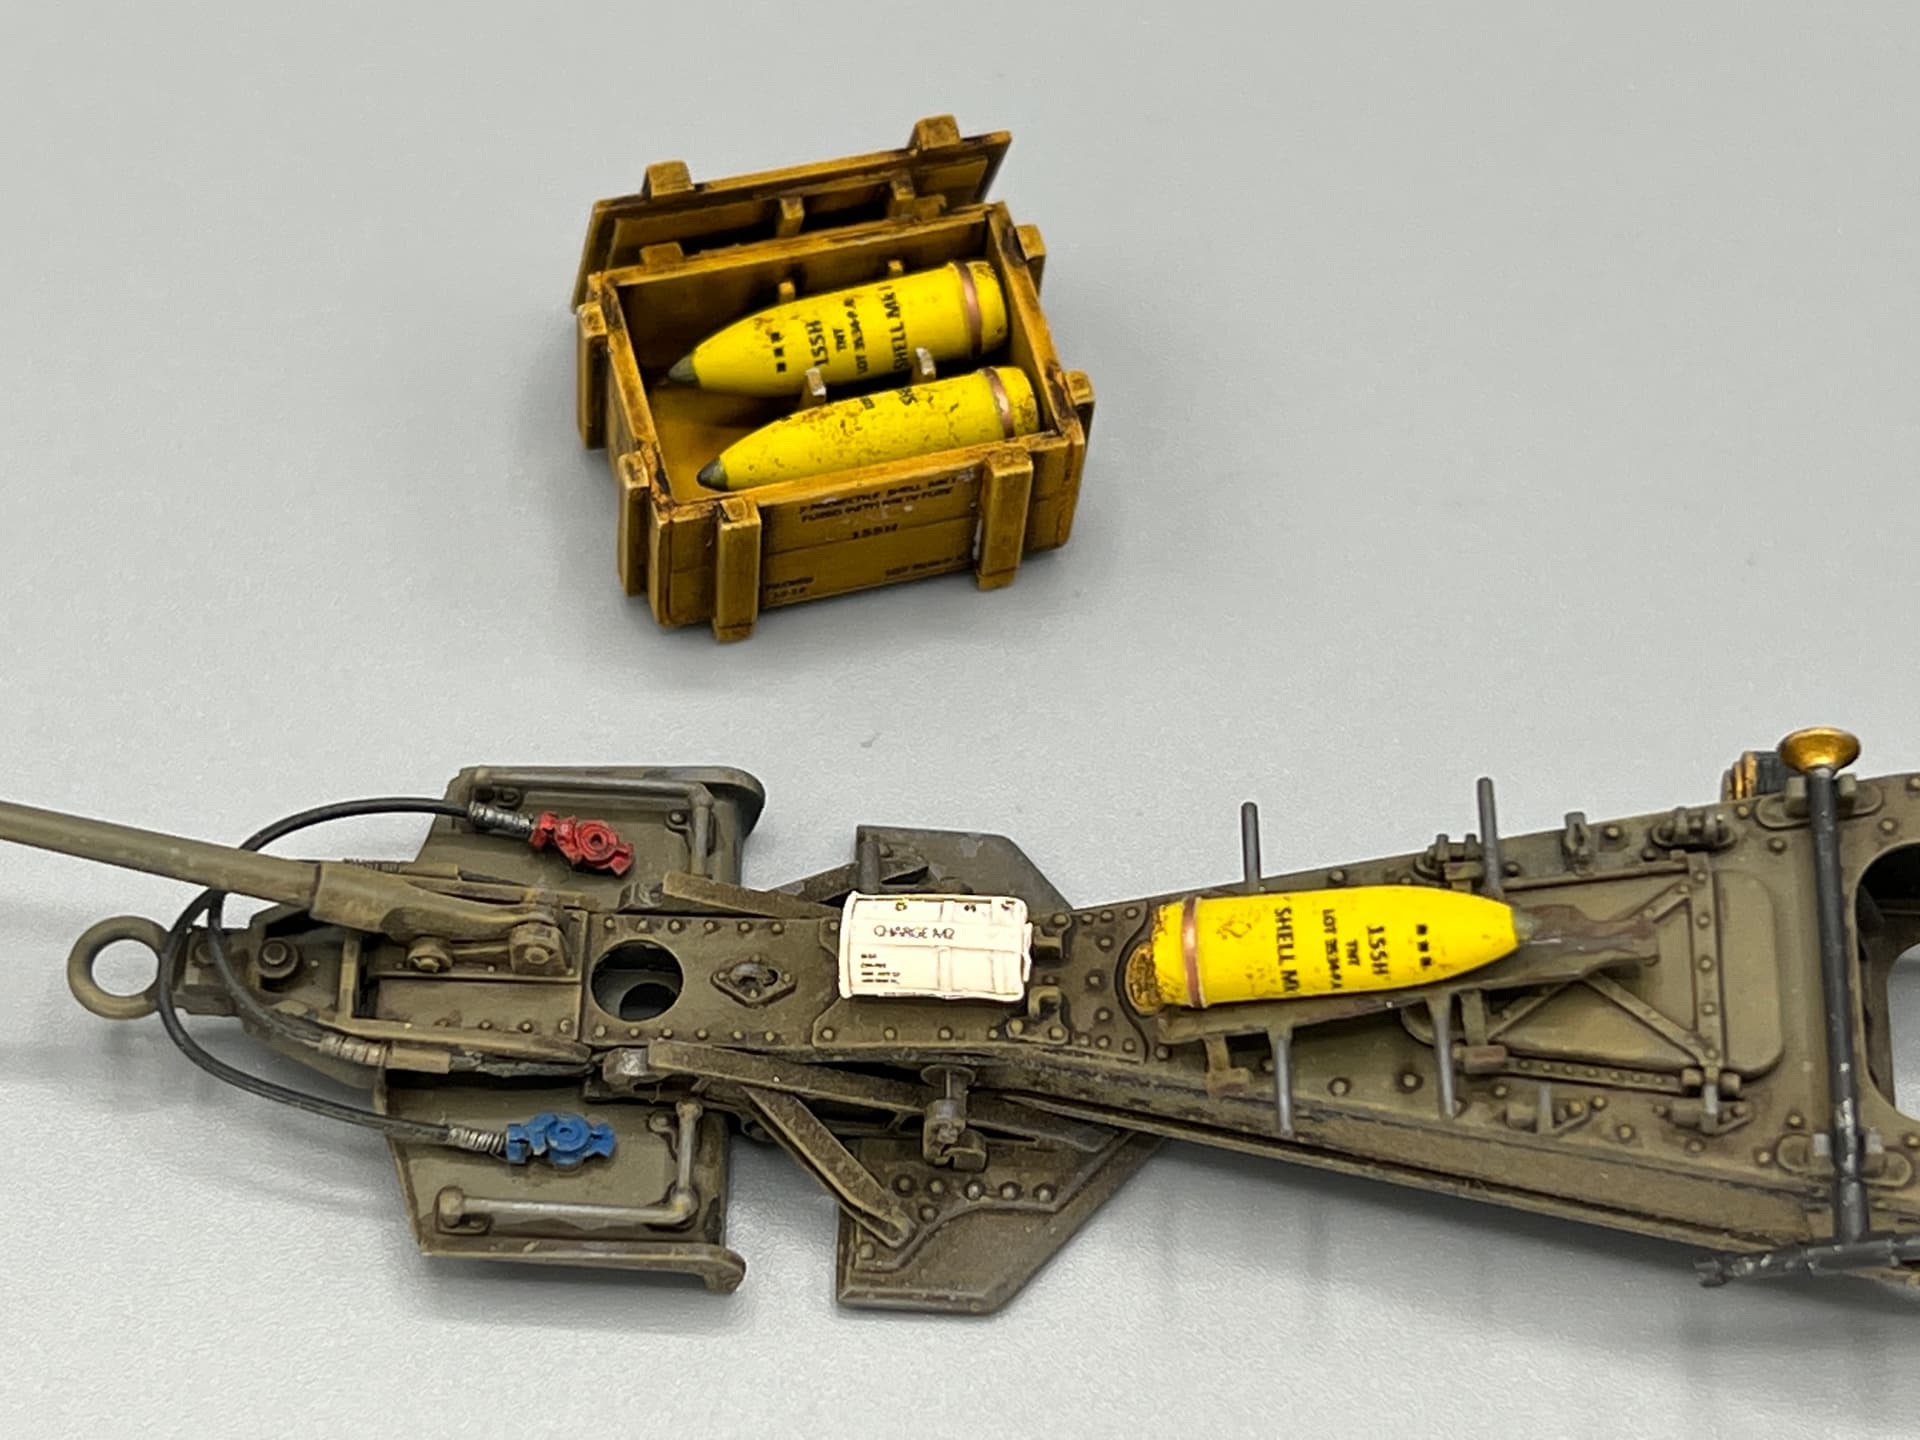
Another skill you will want to develop is making your own decals. Although artillery pieces themselves rarely have decals, every projectile, powder charge, ammo box, and fiber are covered with markings and warnings. Thankfully, making your own decals is simple. I create mine in MS Word and print them on my home-office inkjet on decal paper. You will have to experiment with the printer settings - paper type and print quality, etc.
Enjoy!
9 Likes
I don’t have a problem (yet) working with PE and resin.
It’s the glues tack or lack of that I have issues with at times. I have some BSI super glues and all the VMS ones. I use copper wire in a pin vise as an applicator. It’s getting use to the set times. I need to find a better accelerator (I have the BSI) or a better way to apply it. The BSI pump bottle is like using a shotgun.
I have the VSM black which the Suggested for the white metal and their glue they make for resin. It’s just trying to get parts positioned correctly. The glue either bonds to guickly or not quickly enough. I’ll figure it out. I’d really like a trick to keep my tweezers from getting tacky. Nothing more frustrating than to position a part and find it’s stuck to the tweezers. I try my best to keep glus off them and burn any off that gets on them. I might try putting a coating of debonder on them though I hesitate putting anything on them that might act as a lubricant which will ensure the part is shot across the room into the void.
I do like using them as filler. I can harden them instantly and sand.
I was working on a resin Gebirgshaubitze 40 and had to step away because it became so frustraing…
2 Likes
‘Zap Zip Kicker’ is what I’ve been using for years. However, I ditched the pump spray head. I don’t like having to wet an entire assembly just for one tiny part addition. Not to mention the toxic fumes.
Instead of spraying, I dab the kicker on or near the part with these really handy brushes:
‘500 PCS Disposable Micro Applicators Brush…’
Another trick: When the bristles are worn-out, I pull them off, clean the stem tips and repurpose them as CA applicators or as small parts holders.
HTH. 
—mike
2 Likes
David, the BSI accelerator is fine. The spray pump is just useless for modeling. Being lazy, I just unscrew the pump and use the siphon as the applicator. Others transfer their accelerator to a recycled Tamiya extra thin bottle and use it with a micro brush.
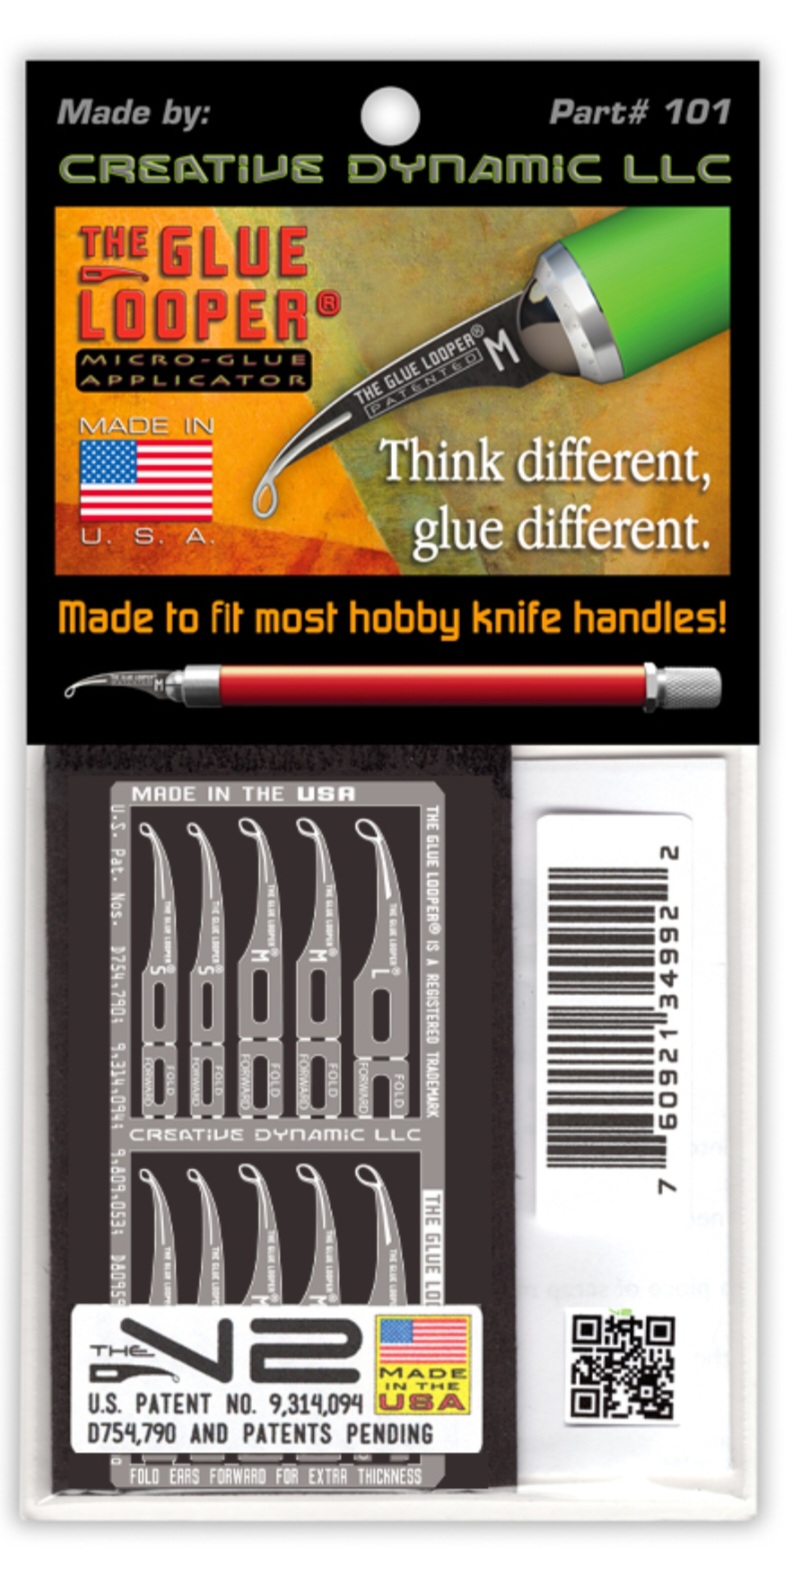
Pick up a glue looper, or two, for your glue applicator. They have several different types for different viscosities of CA. These are a great tool and take much of the frustration out of applying CA. THE GLUE LOOPER Micro-Glue Applicator (creativedynamicllc.com)
I had the same issue with bonding too quickly or too slow before switching the black tire CA. For me it is just right. Its stickiness allows me to position the parts before the glue grabs. I now only use the black tire CA and have a bottle of extra thin for making seams disappear. I no longer have medium or thick CA on the bench, and I don’t miss them at all.
4 Likes
Thanks, I ordered those micro brushes.
I understand applying some to the area first but you’d have to be spot on when you apply the part, which I seldom am. I have a “third hand” x-acto tool that I need to dig out when I was mechanic that I used for soldering but that would only help in certain situations. My main problem is securing the model,holding the part in place till it’s stable. I dont have a free hand to apply the kicker if it doesn’t tack quickly enough. What does applying the kicker by the area,but not on it, accomplish? I’m learning through trial and error and youtube videos.I stumbled onto this site while researching a project.
To be honest I didn’t plan on taking the hobby back up until I retired as work and home life provided for very little free time.but due to some FMLA and LOA at different times I found I had too much free time so I cracked open a box and started building as a destraction a couple of years ago. 50 plus builds later I’m hooked again but things,materials,and selections have changed. I love building different variants of the same piece.For example I have built 4 Pak 40 versions as well as a Pak 97/40, Fk 7M85, and a FK 7M59 which are all PAK 40 derrived. These pale in comparisson to the number of Pak35/36 variants and relatives I’ve built. All of this and I’ve yet to paint a single piece. I never intended to become so immersed in it all at this time but I fell all the way down the rabbit hole. I just got another desk to use as a paint work station and have been trying to settle on my first air brush. Brush painting was the norm when I last was in the hobby and Tamiya was the king and local hobby shops abounded and I awaited for my Military Modeler magazine every month.The Monogram models with Shep Paine diorama inserts were like some map to another world. I appreciate, more than I’ll ever be able to express, any aid or direction y’all may provide because while this is a great hobby it is much needed distraction that I can become immersed in when needed.
All great suggestions that I’ll take to hart.
2 Likes
Often times I don’t need to wet the actual part (mating surfaces dependent). I just hold the brush applicator very close. Holding the kicker’s cap nearby has even worked for me at times. The best explanation I can provide… it causes immediate evaporation which sets-off the CA.
Also, I take special care whenever I do touch the applicator brush to be quick at it and not to let it get stuck to the CA. … For now, you can experiment with a toothpick or even a wire.
Welcome to the Rabbit Hole! 
—mike
1 Like
That is a very impressive long gun you have going there Sir!
1 Like
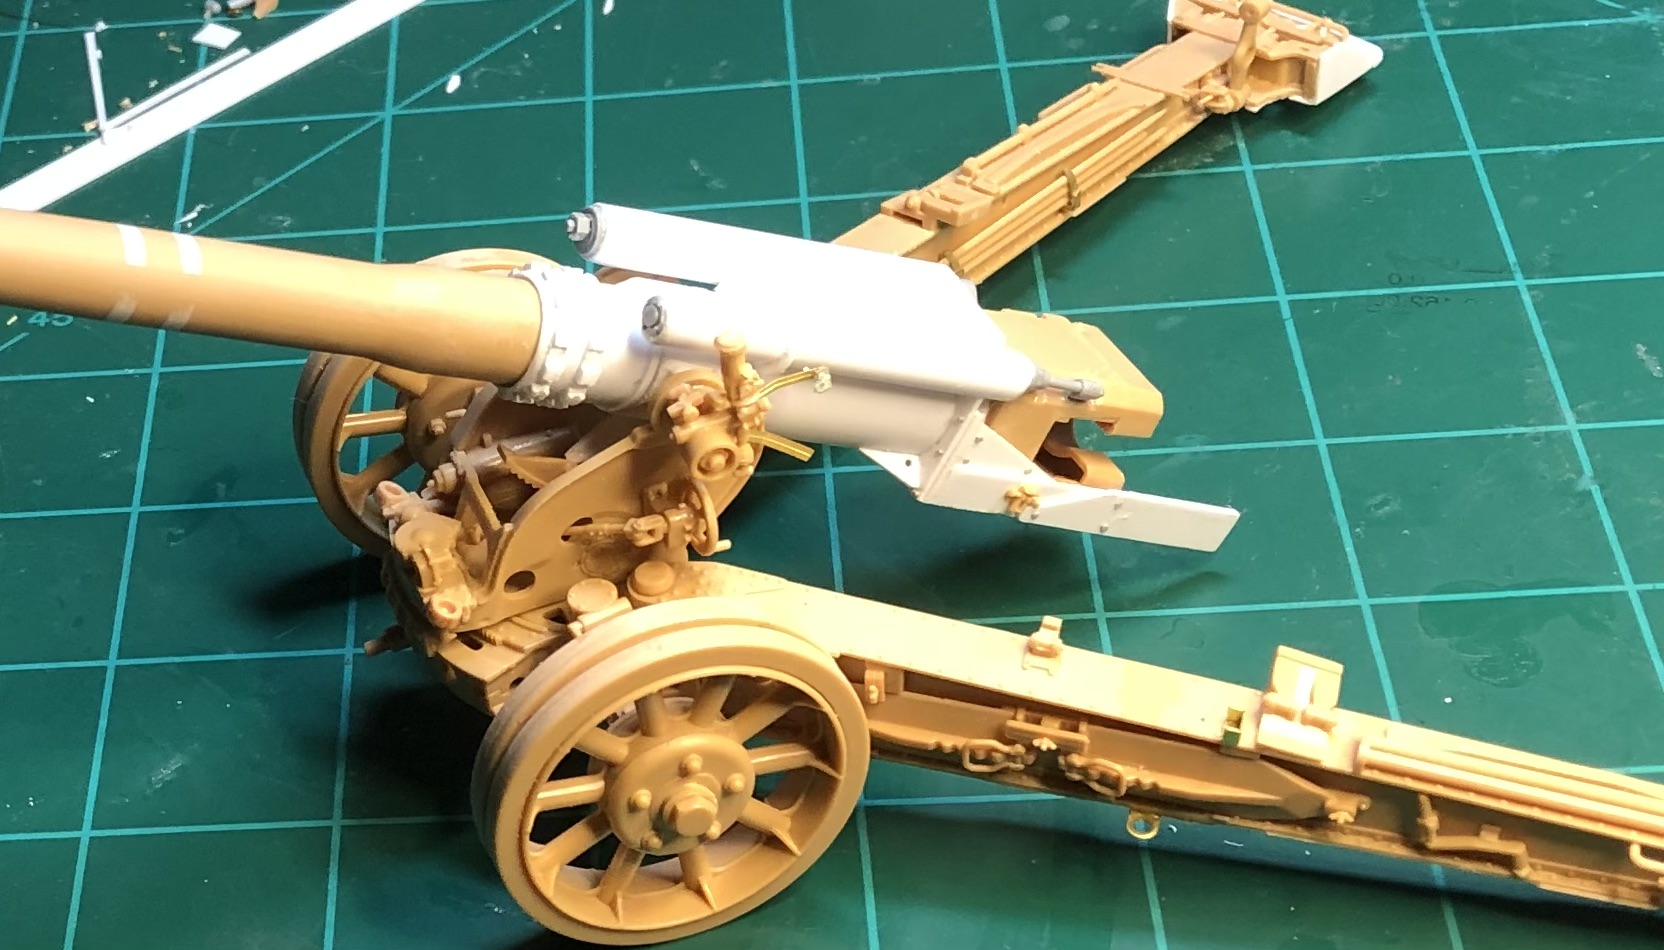
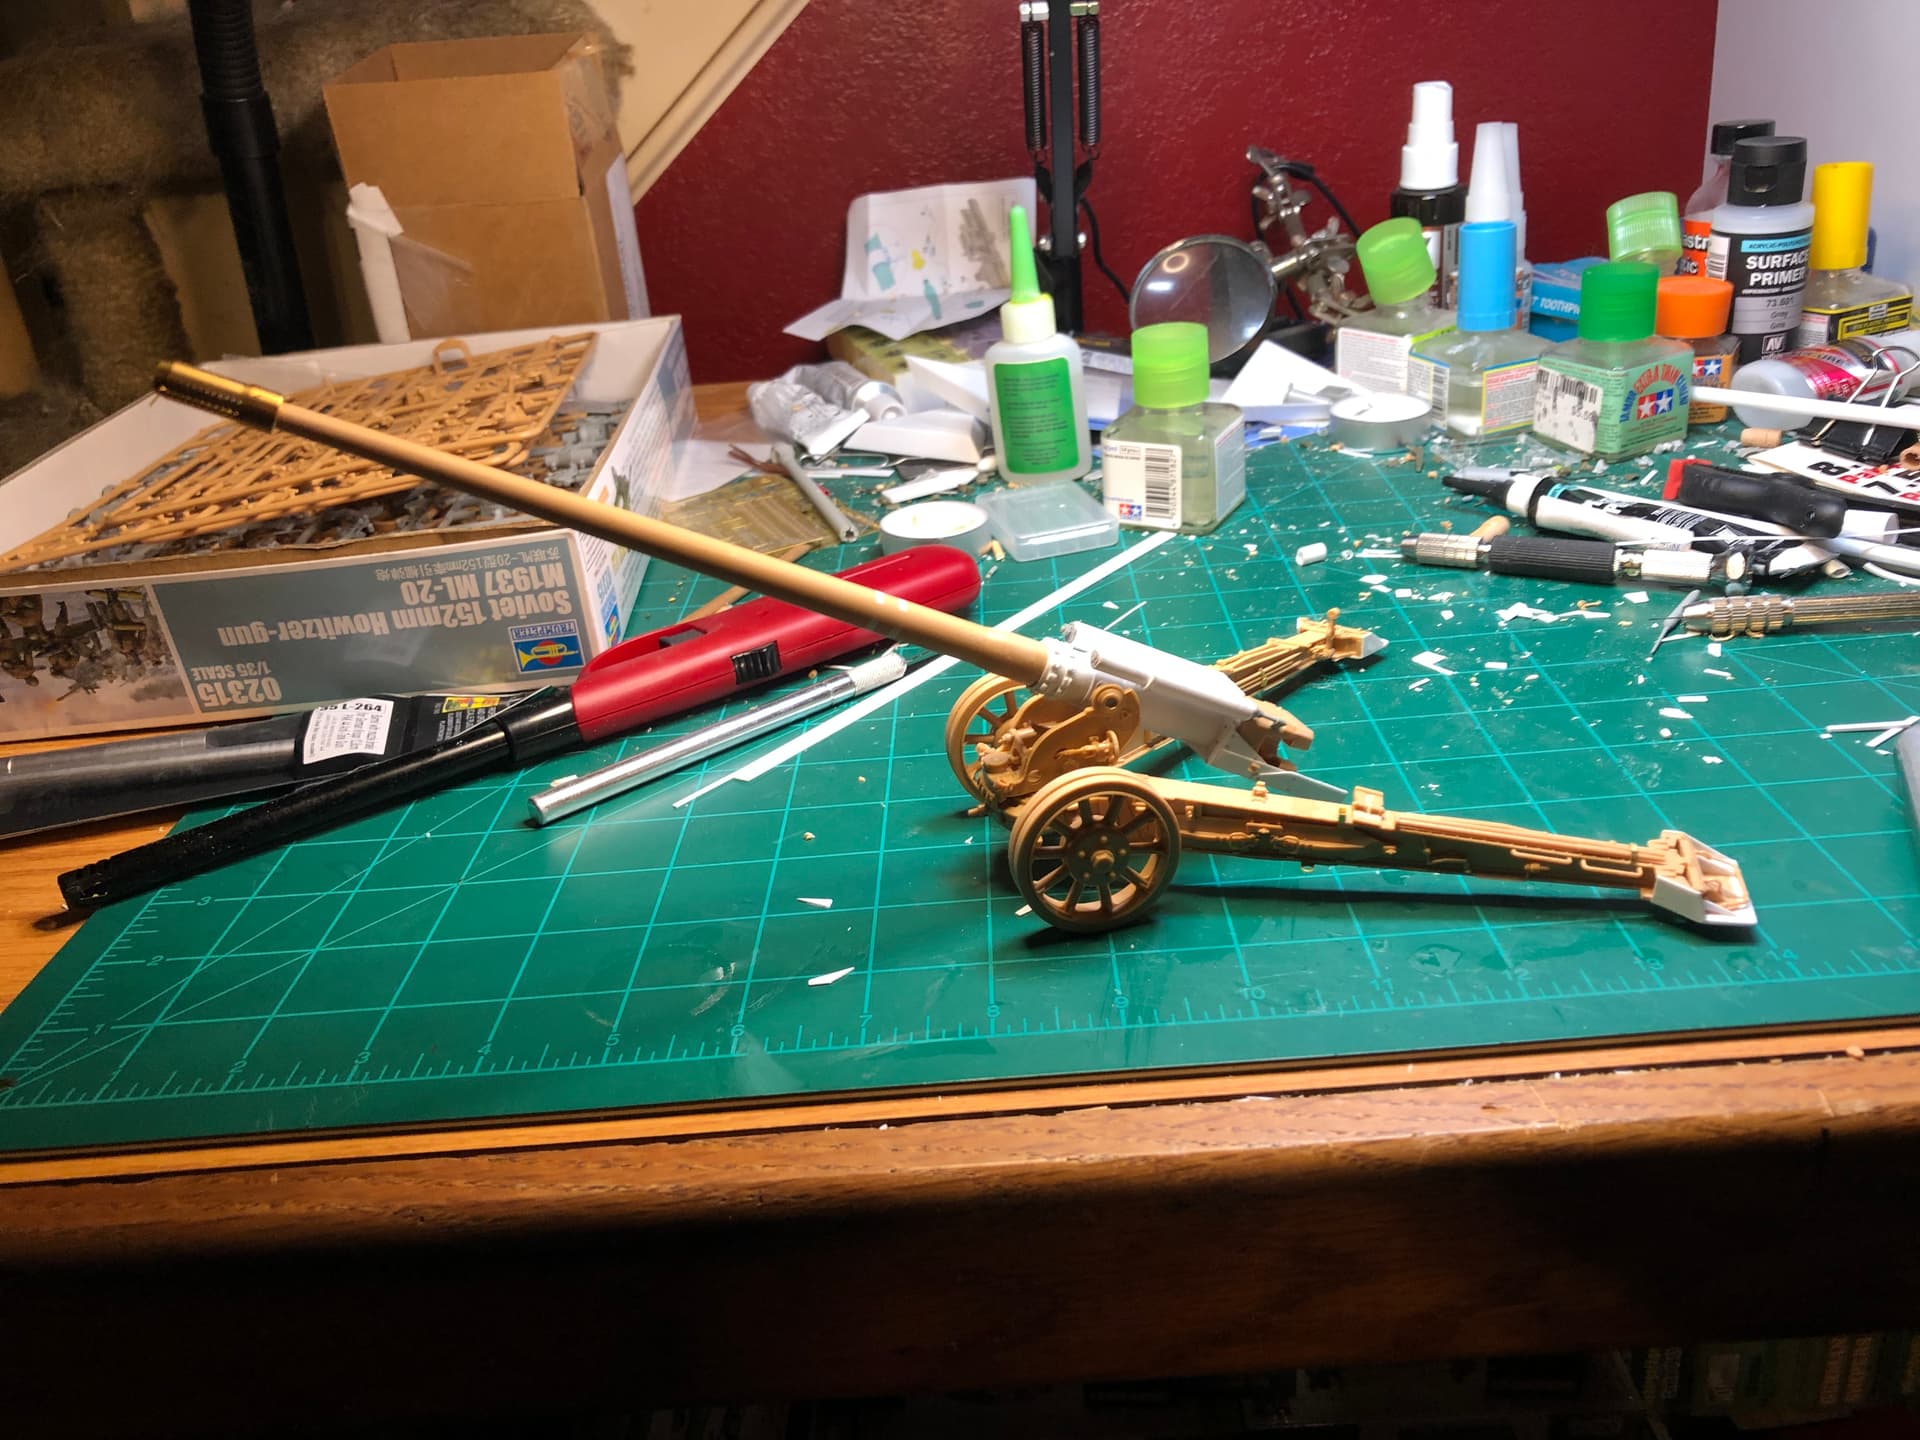
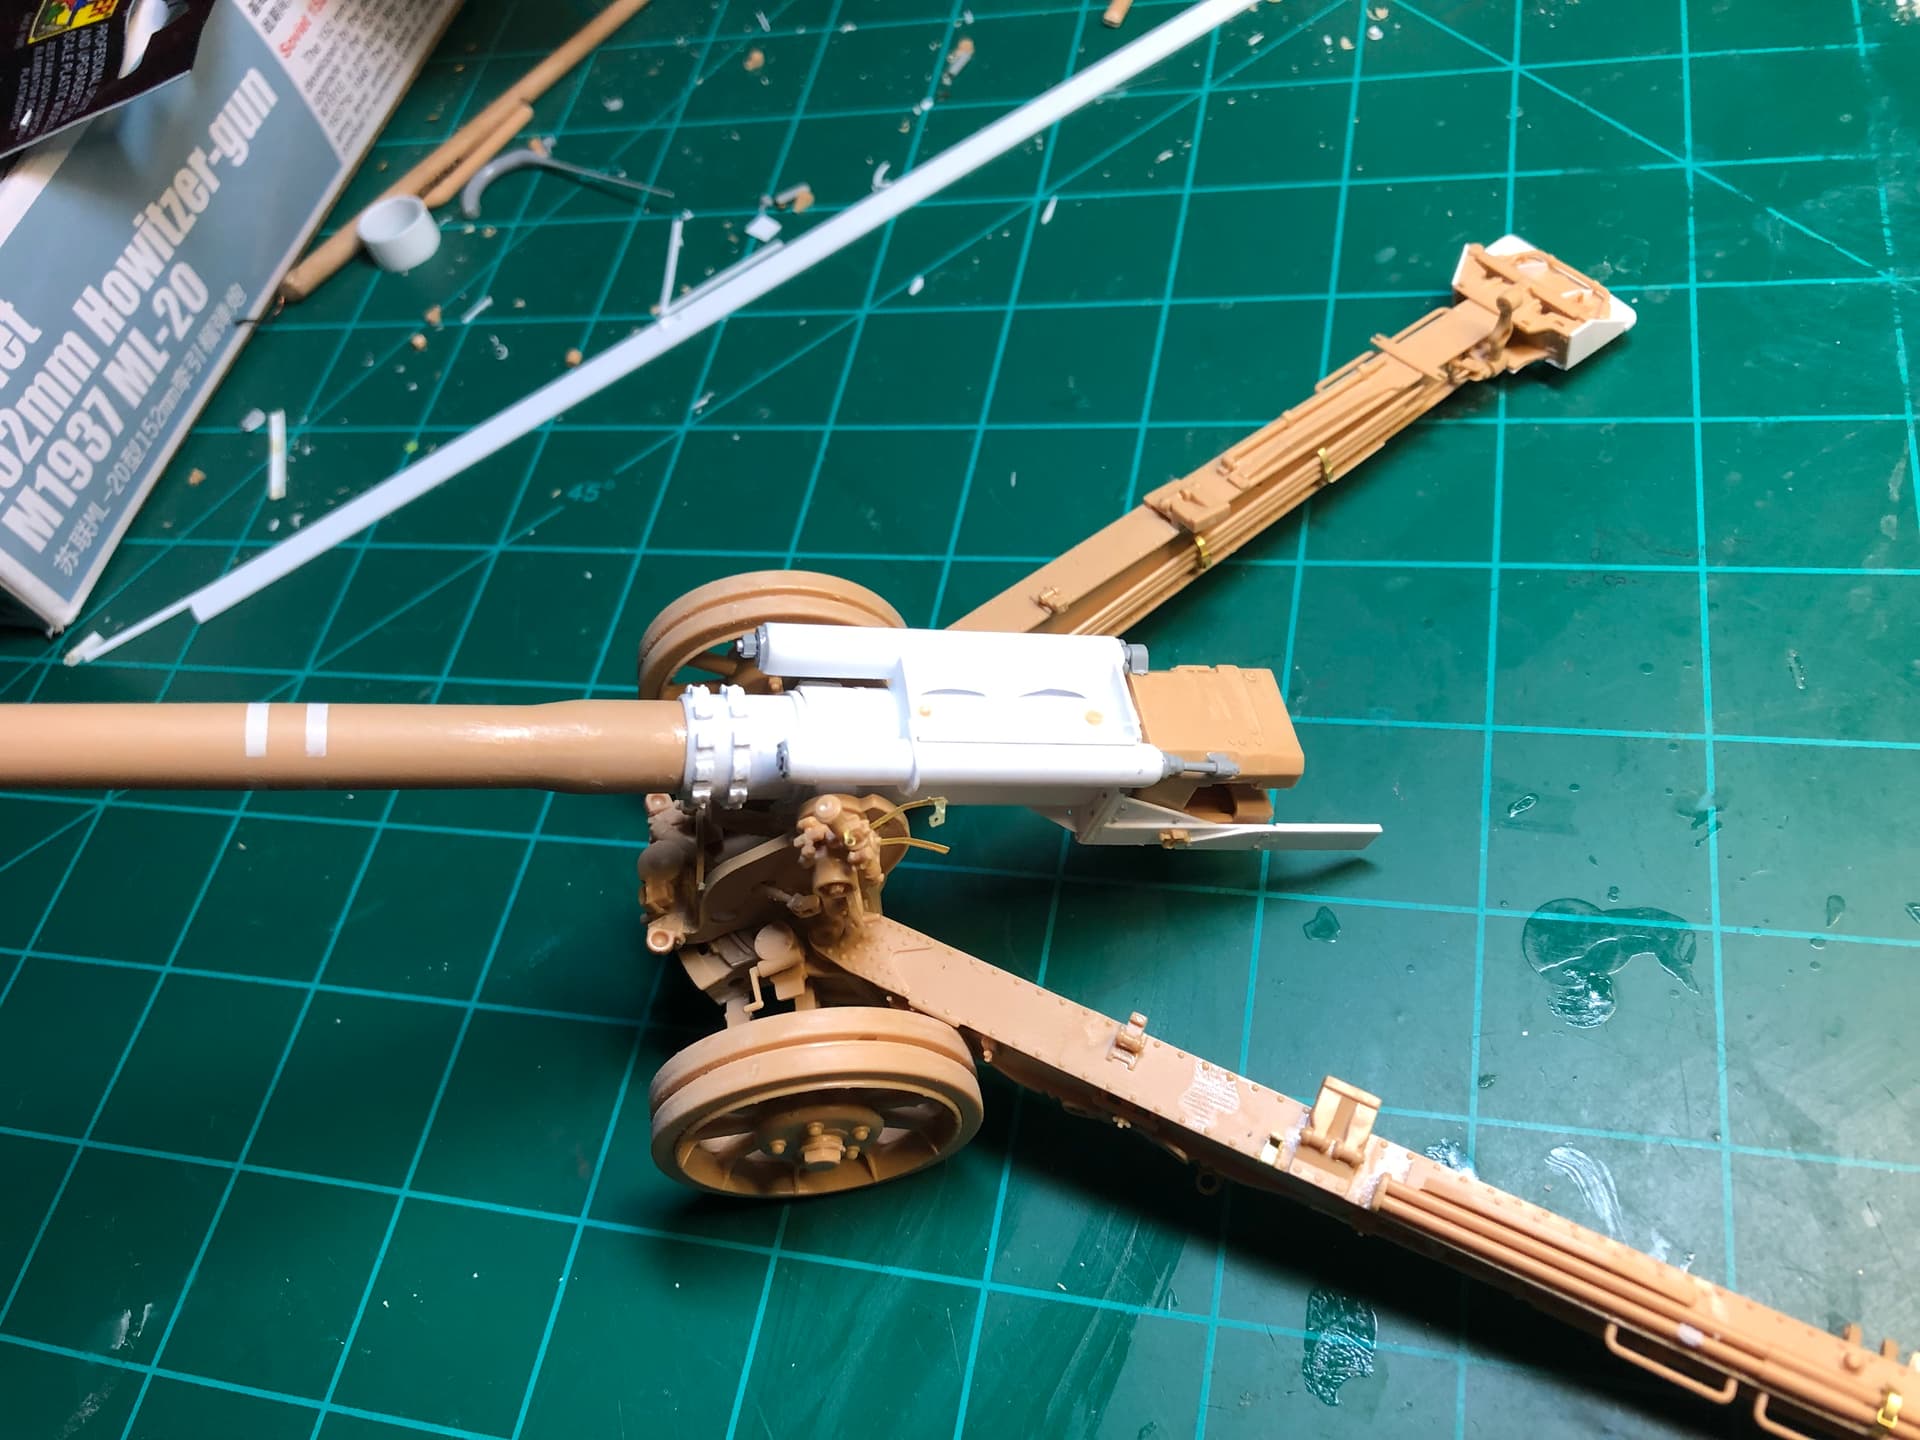
My interpretation of a German K81/2 combining parts from 5 different kits along with some styrene. I have a bunch of pictures of captured K81/1’s and K81/2’s taken in an allied collection depot. I’d like to say that I meticulously scaled it from the photos but I pretty much used if it looks right it is right rule.
I enjoy buildIng obscure guns… I’ve collected what I think will be sufficient to build the 75mm Romanian Resita, which some think might have been the best all around field gun of the war. I have plans and diagrams of the Gebirgsjaeger version of the leig18 that I’d like to tackle but using an existing leig18 as a base presents a problem. I don’t want to use the Tamiya white metal version. The Italeri ones are horrific and under scaled. I have a Dnepro resion one I might use. I also have two of the excellent Vision Models versions but don’t want to sacrifice one as they are presently not in production. I might practice and “perfect” It on an Italeri one and transfer my results to the Vision one.
1 Like
Welcome David, great conversion, looks excellent. I have built a few German guns as well and will have more in the future (Bronco Flak41 is a gem, and look forward Trumpeter Morser 21).
As for the glue, I love acrylic ones like Ammo Ultraglue or Gator’s grip. Although they are not as strong as CA, the easiness of use and cleanliness absolutely pay off for me
2 Likes
After using BSI CA for decades and trying VMS products, @Armor_Buff turned me on to Starbond CA products https://starbond.com/ and they are just the best CA I’ve ever used. Their black medium CA gives 30 seconds of positioning time with immediate tack. It’s changed the way I use CA. Starbond is actually ballsy enough to guarantee their glue for shelf life and adhesion.
@taylorrl +1 for the Glue Looper. Never knew these existed until a year ago. I was fumbling around with toothpicks. What a revelation the Glue Looper is! The perfect, precise CA applicators. Don’t know how I built without them.
2 Likes
Matt, The Glue Looper looks like a tool I didn’t know about but definitely want! Thank you for the heads up.
My current ‘applicators’ are old #11 blades and thin beading wire. The Glue Looper looks like an excellent upgrade.
Also as Matt mentioned, Star Bond is easily the best quality super glue(s) I’ve used.
3 Likes
David, I only use the accelerator when I am using CA as a filler. It allows me to immediately start sanding. For just bonding the parts together, I never use the accelerator. The CA sets in seconds on its own.
2 Likes
Thanks all. Good suggestions that I’ve taken to heart and ordered accordingly. I can’t tell you how much I appreciate everyones efforts to help me find some uses for my money. I was running out of ideas.
3 Likes