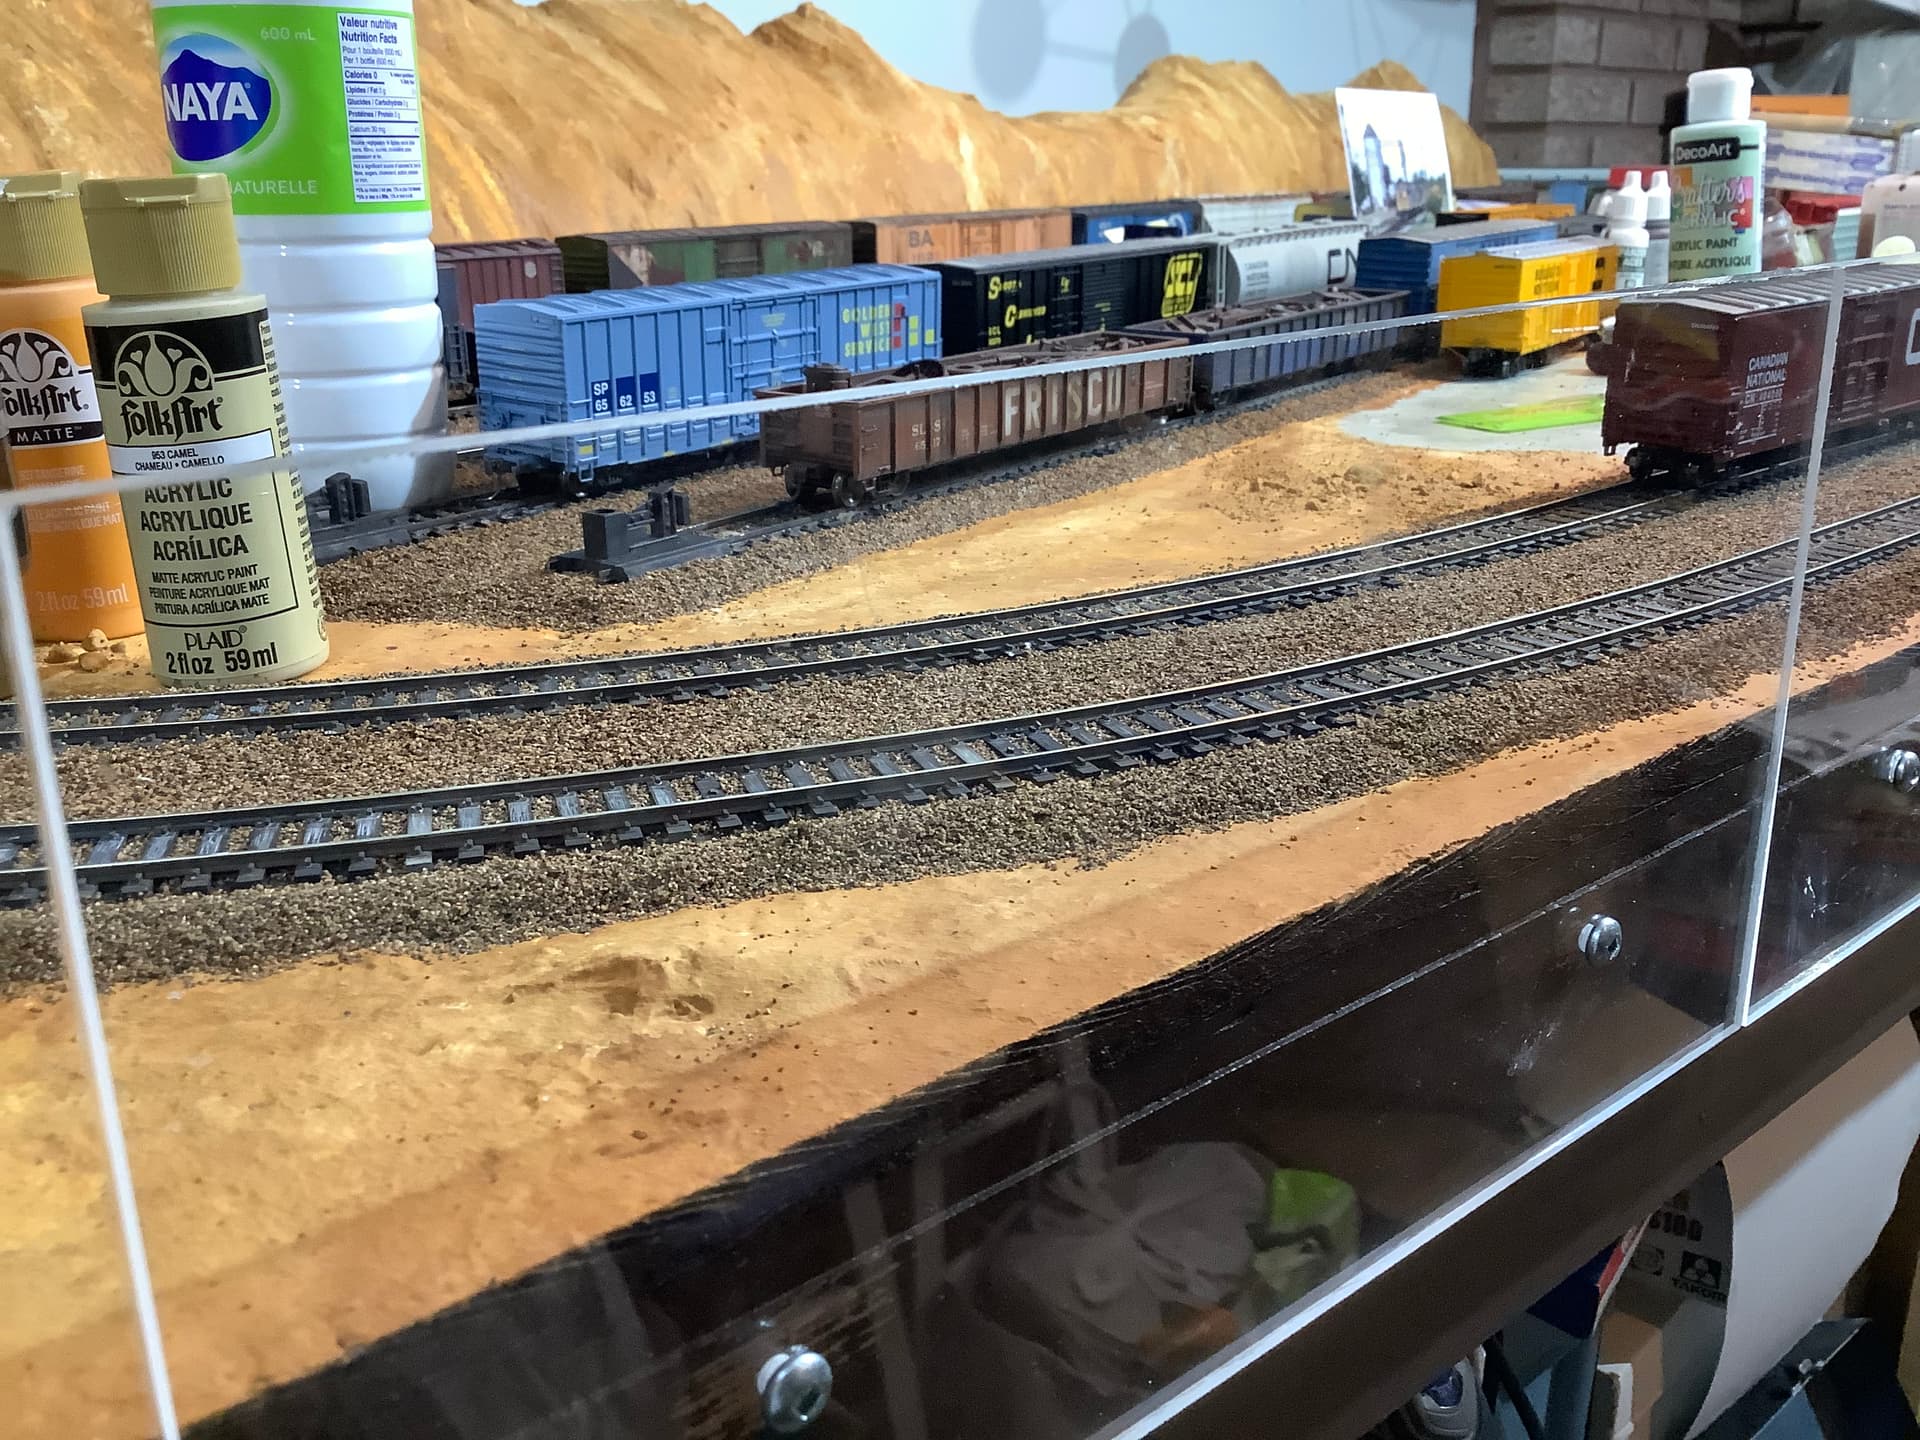
I have never done HO ballasting b4, so I watched a bunch of YouTube videos and was off to the races…
Generally speaking the videos make it look easier than I found the process to be…
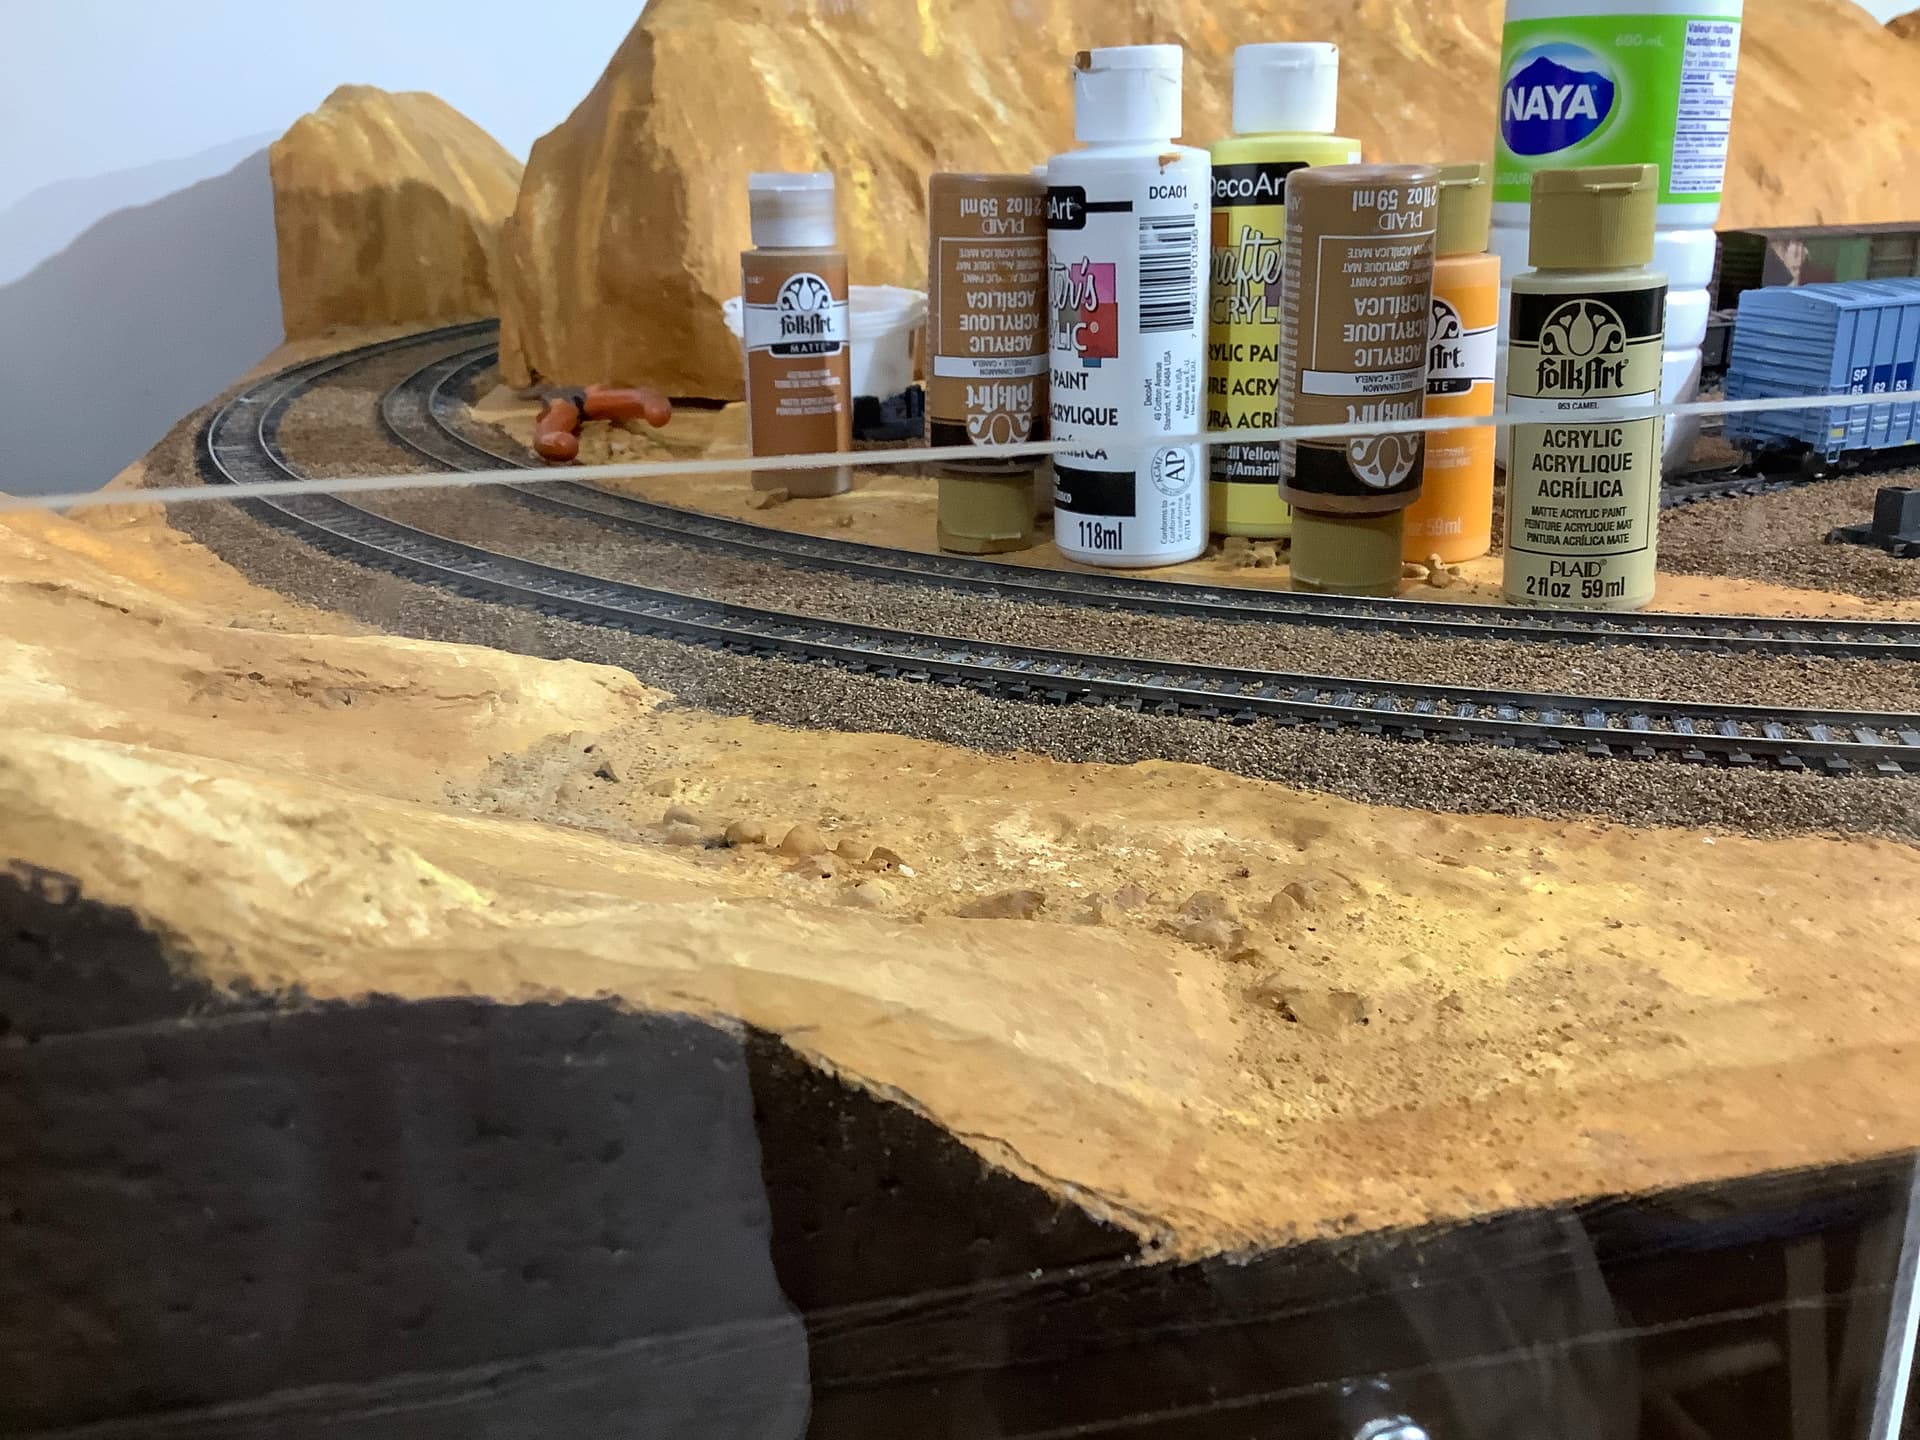
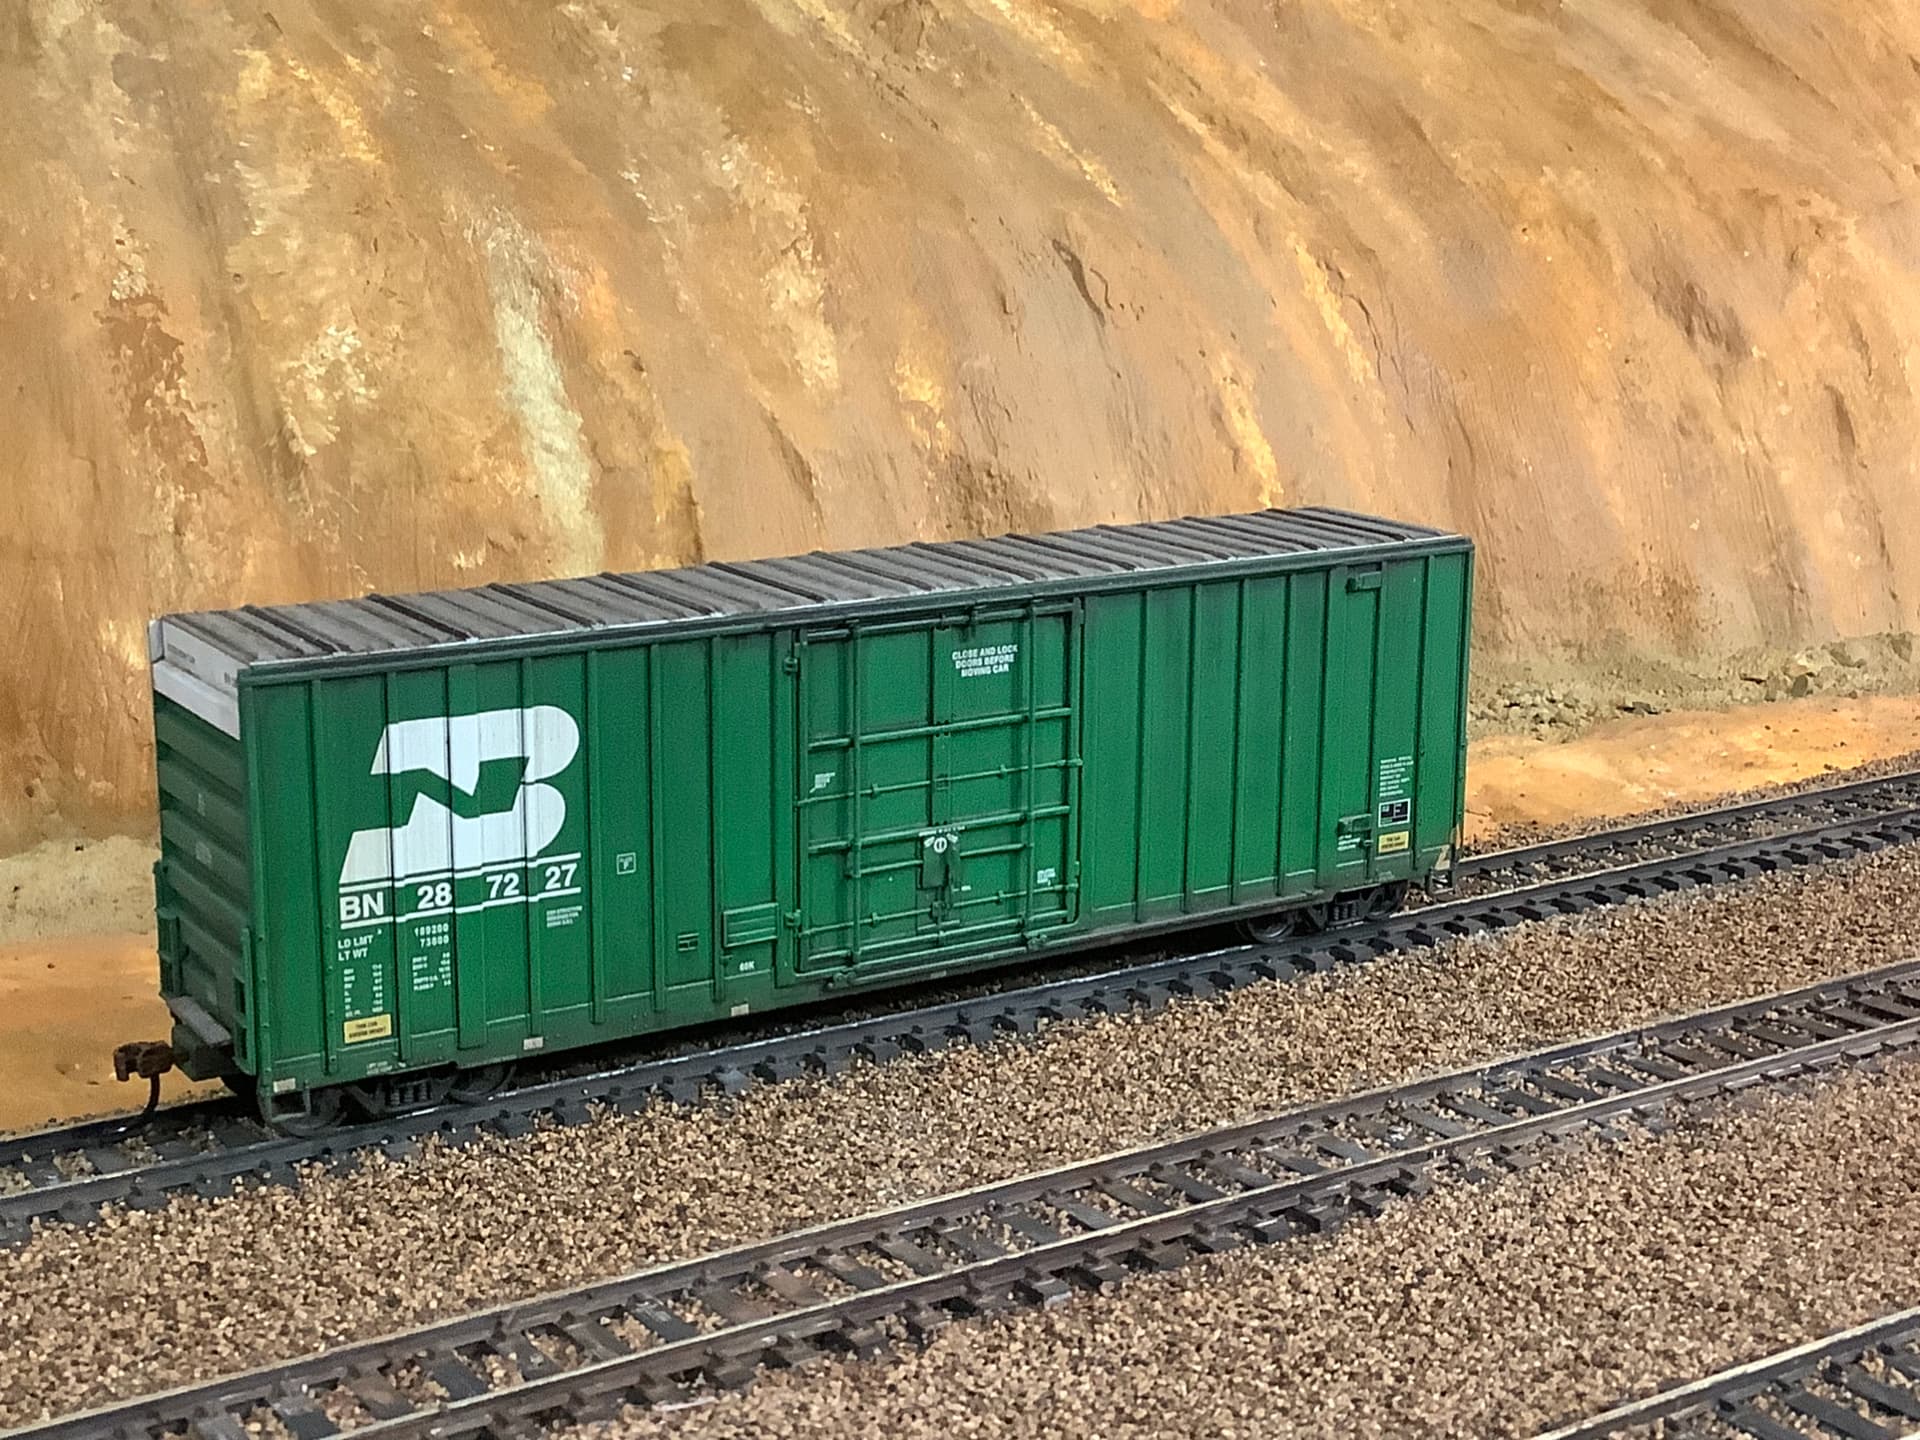
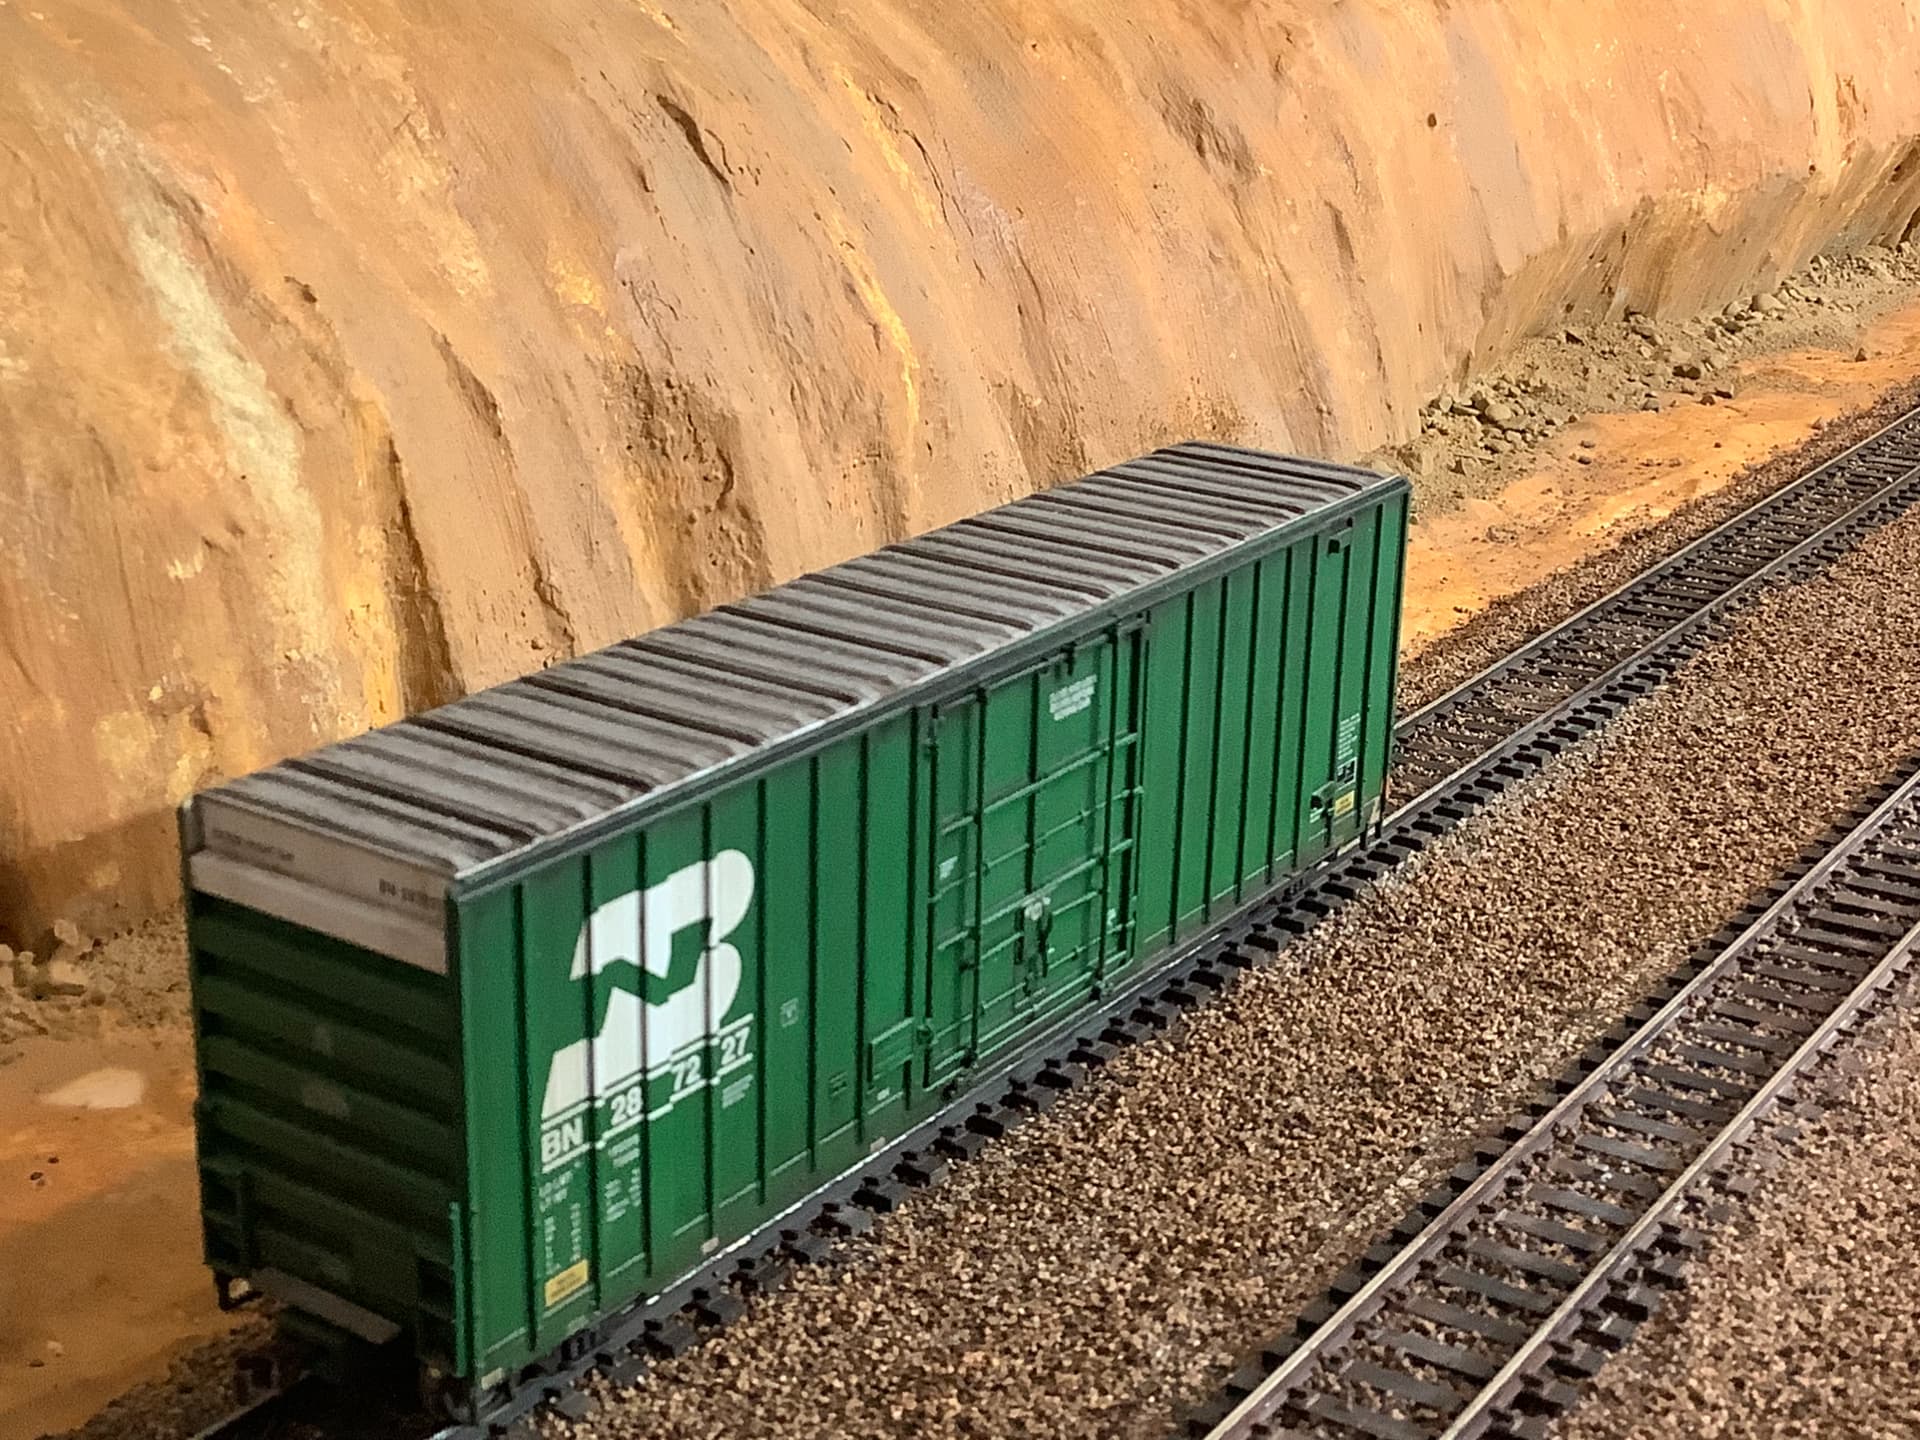
I am using Woodland Scenics Fine and Medium Ballast in mix of colours that I shook up in a 4 litre bottle
Adhesive roll lint removal sheets are great at picking up stray ballast on the ties…
I found that a spray bottle is better than a pipette or syringe to apply the alcohol/water mix wetting solution…
Applying the white glue / water / soap mix thru a syringe works better if you pull the plunger out of the glue loaded syringe and start a dispensing run…there is less chance for a sudden blast that moves the ballast…
5 Likes
Still have to touch / clean up ties-rails-levels in spots…but I want to finish this tedium before I begin that…

5 Likes
 kids!)
Ballast looks really good!
It only took you sixty-three years to find me out. ![]()
![]()
2 Likes
Ballasting is much easier to do the closer the track is to you…
The pic below is from a siding area working at arms length…
Uncomfortable and not back-friendly…
I started doing the main lines which are on the outside of the layout and getting the ballast down cleanly is much easier… my main concern is smooth running trains…going back and picking at the inner rails with an xacto to remove stray ballast is not fun
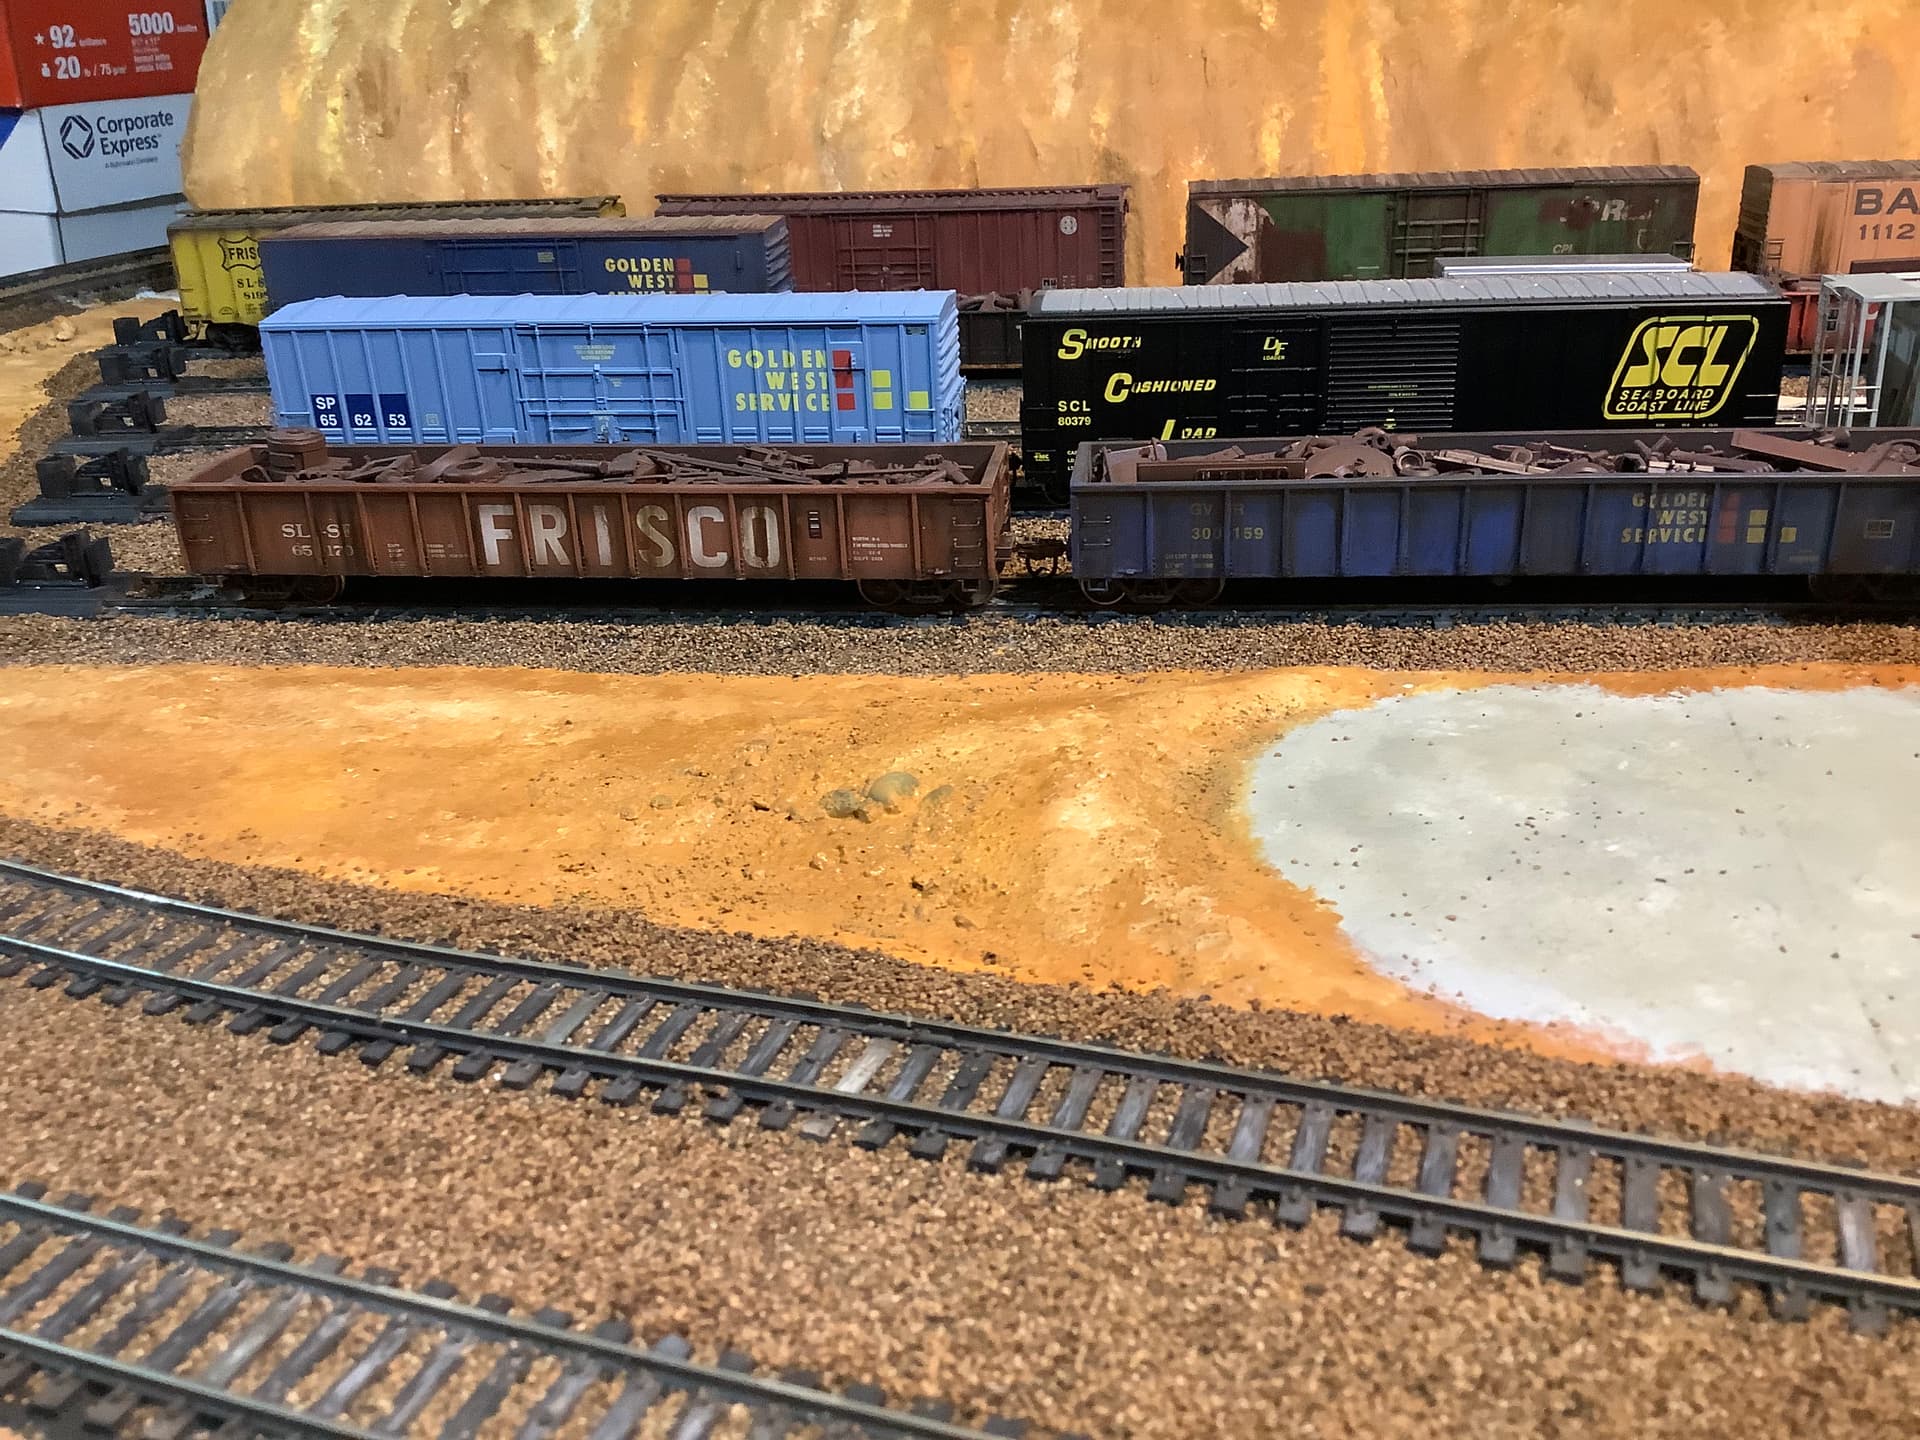
Due to space limitations this layout is a 8’ by 51” rectangle featuring 2 perimeter circuits and 6 diagonal sidings….
The sidings are basically serve as ready tracks to swap out cars and display weathered rolling stock…
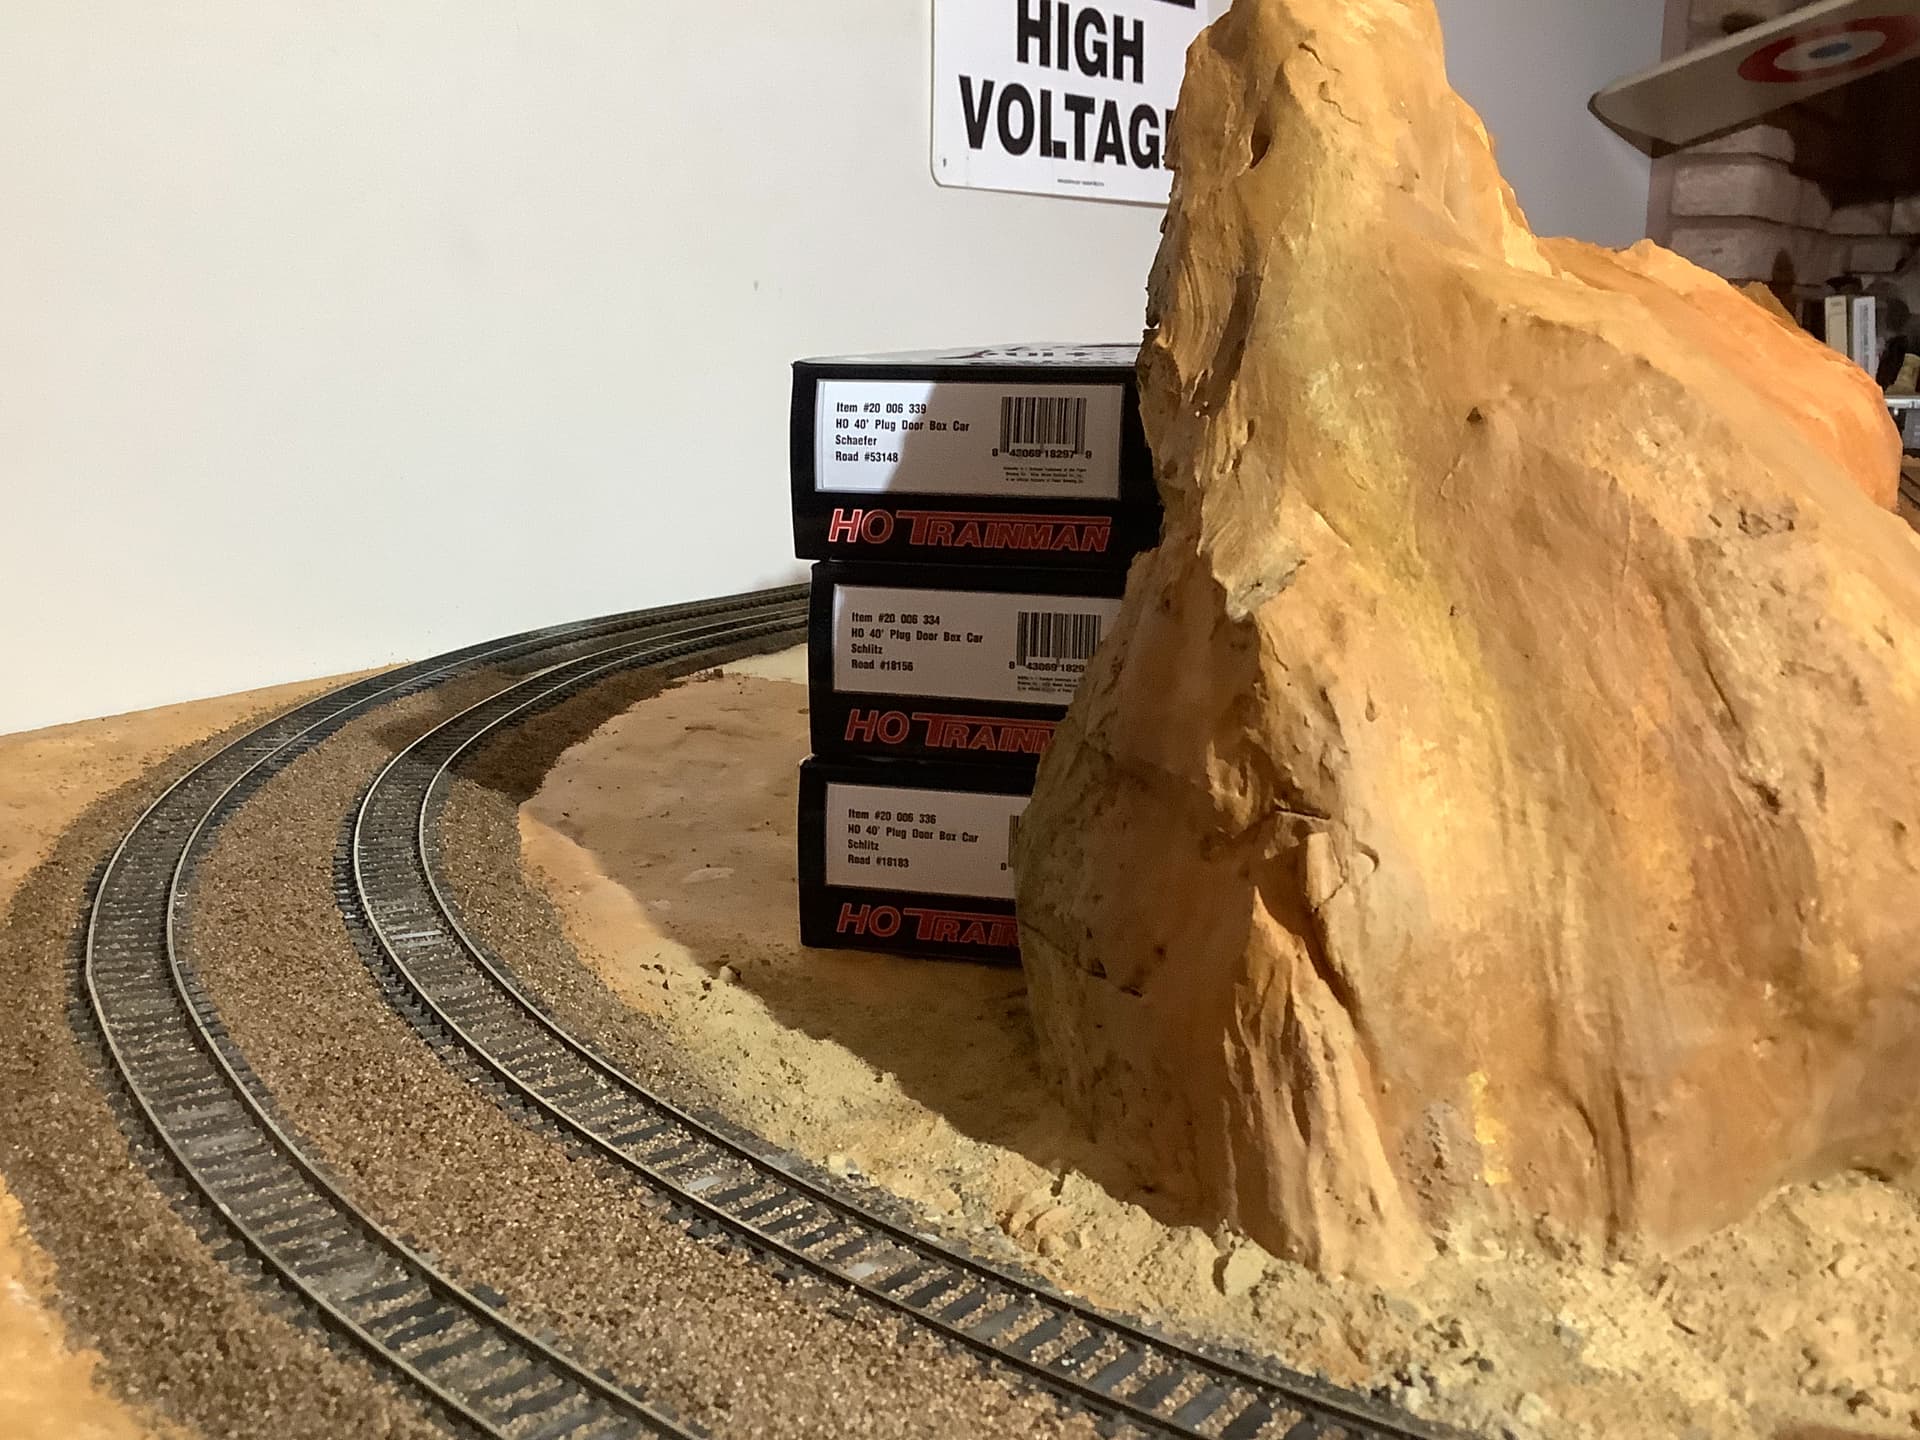
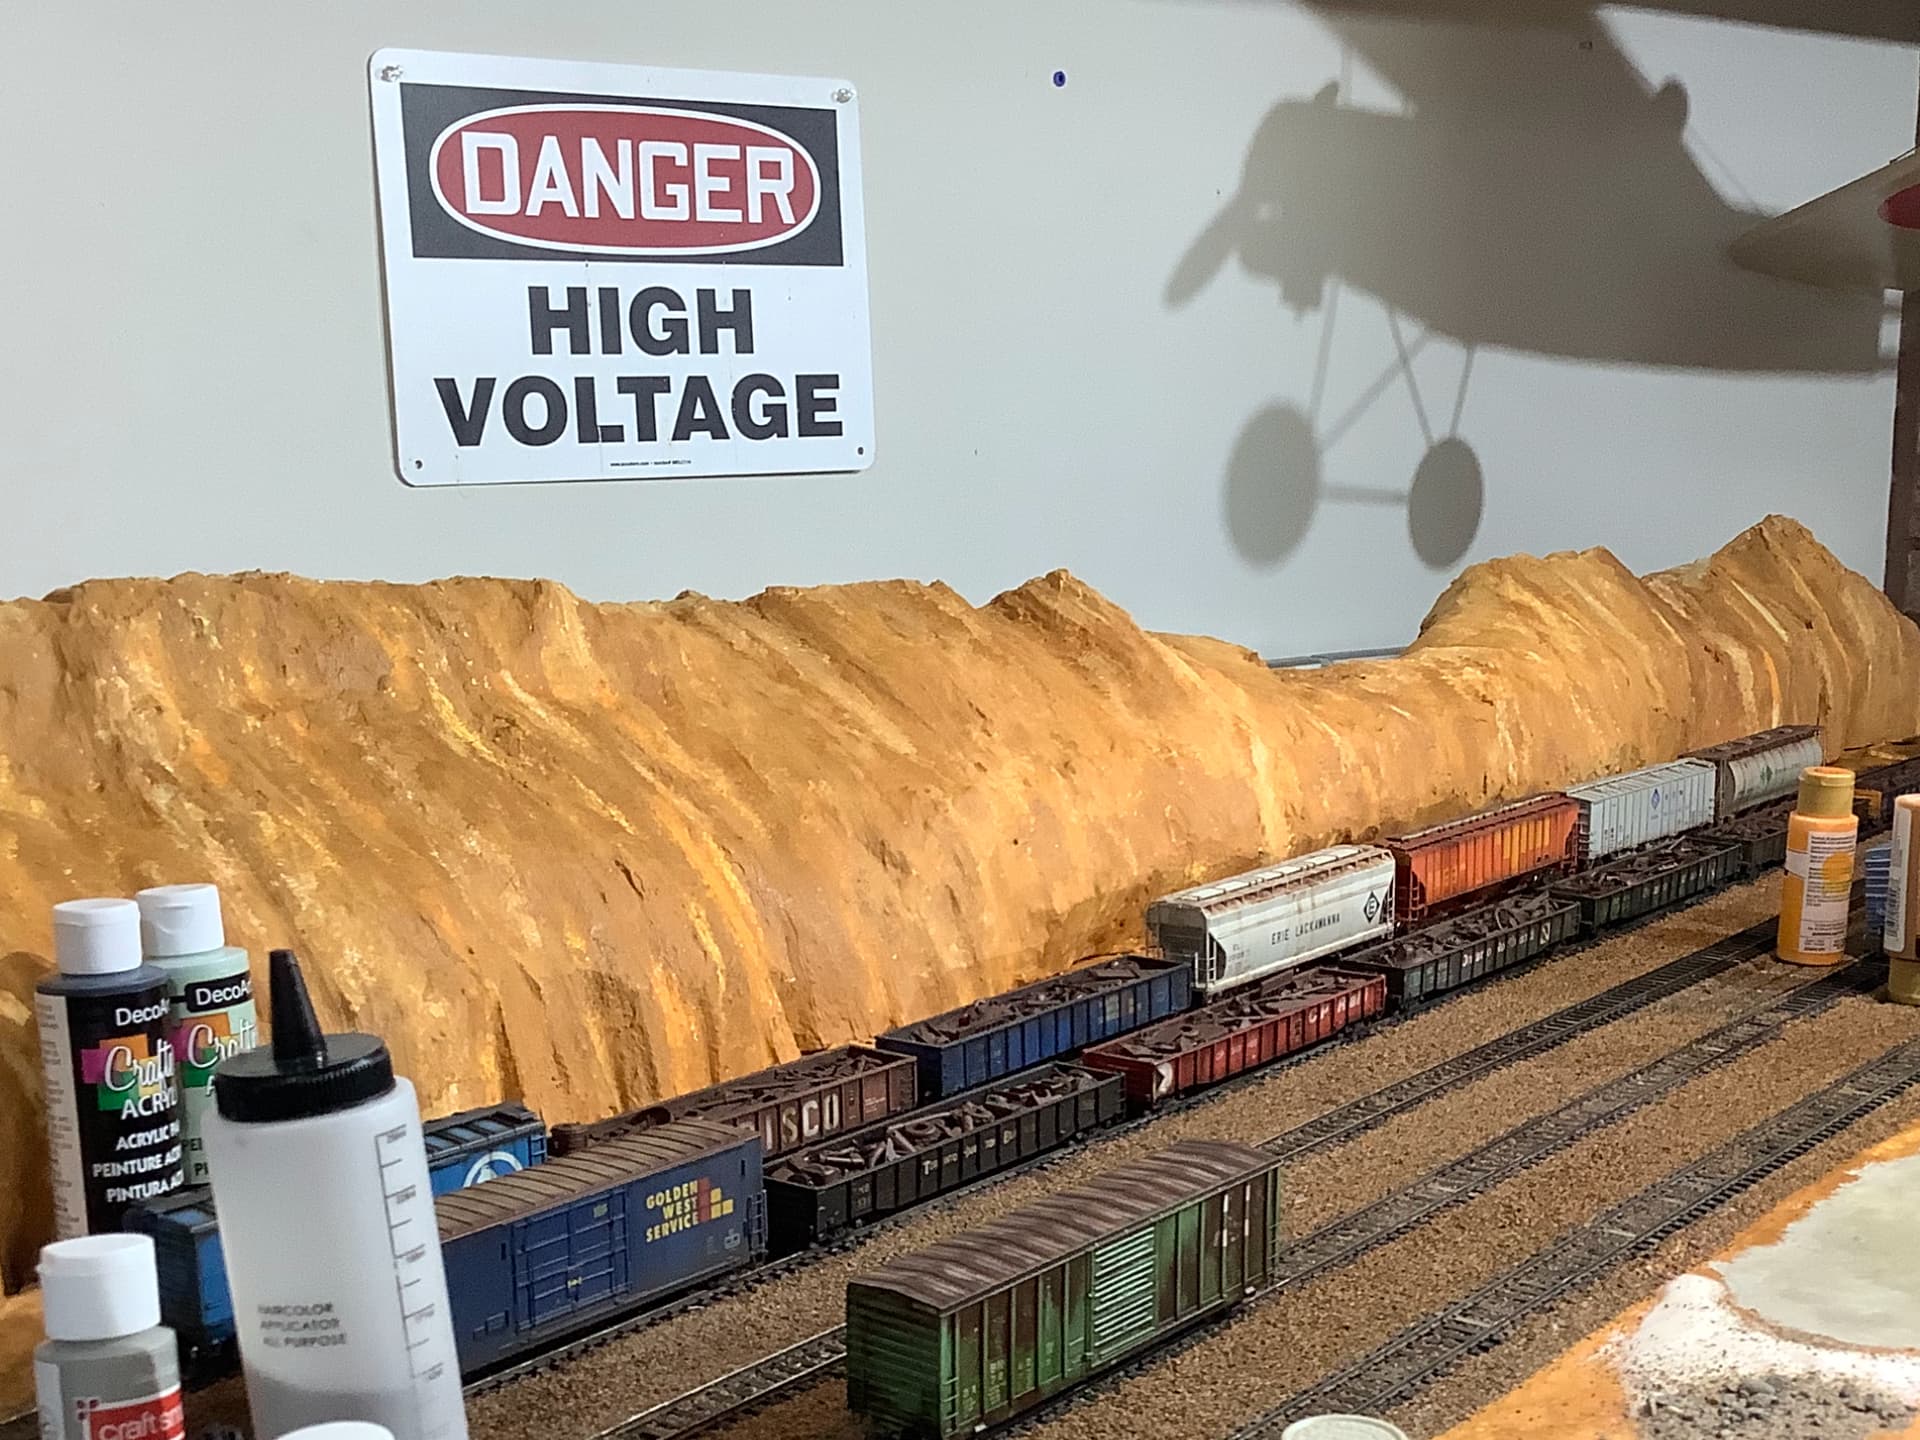
The rear side of the 2 circuits is mostly hidden by a outcrop…there is a dip where the rear traffic is visible
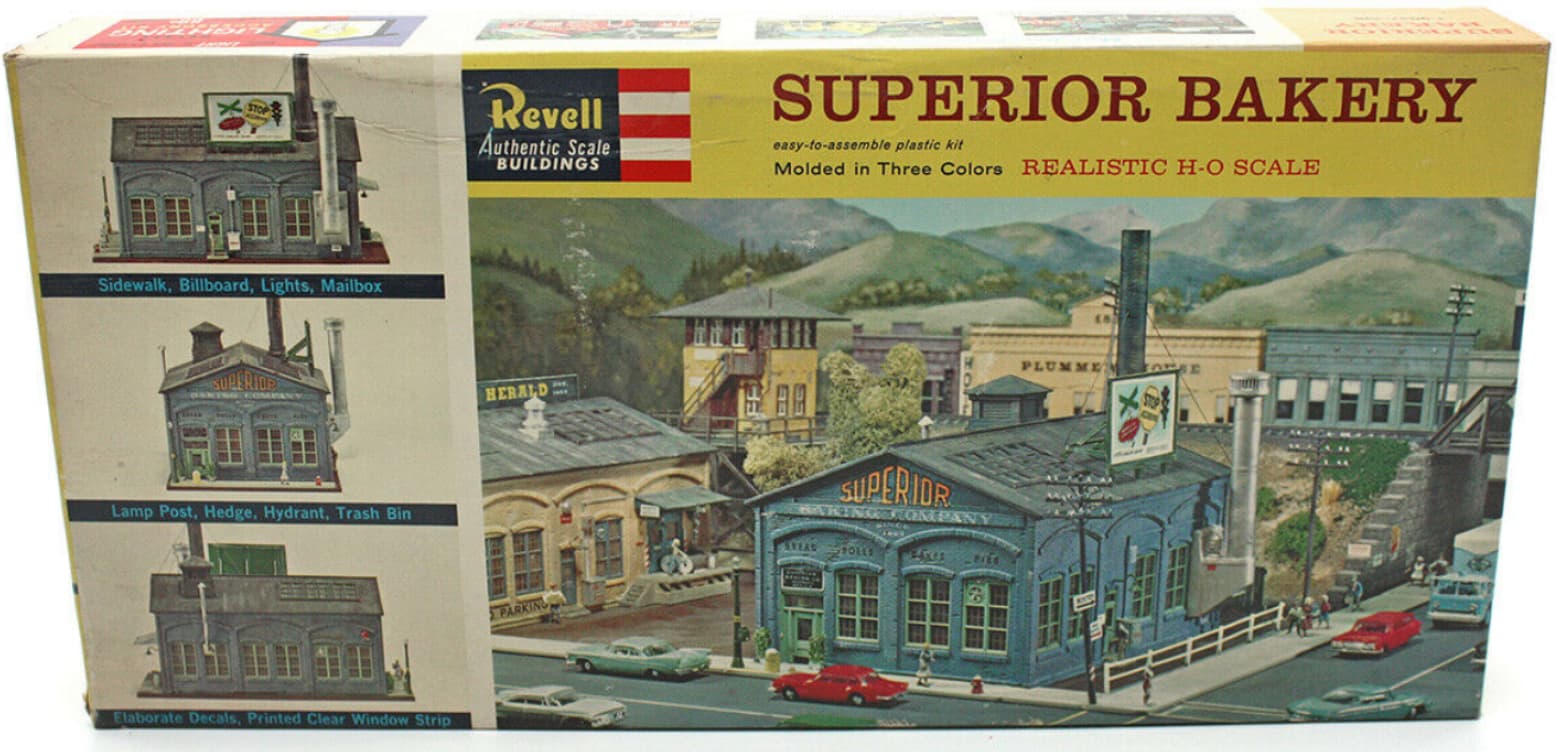
In the foreground between the mainline and sidings there will be a salvage yard and a couple Revell HO bakery buildings that I am using as generic factories…I got these kits as I had them as kid in the 60s…

6 Likes
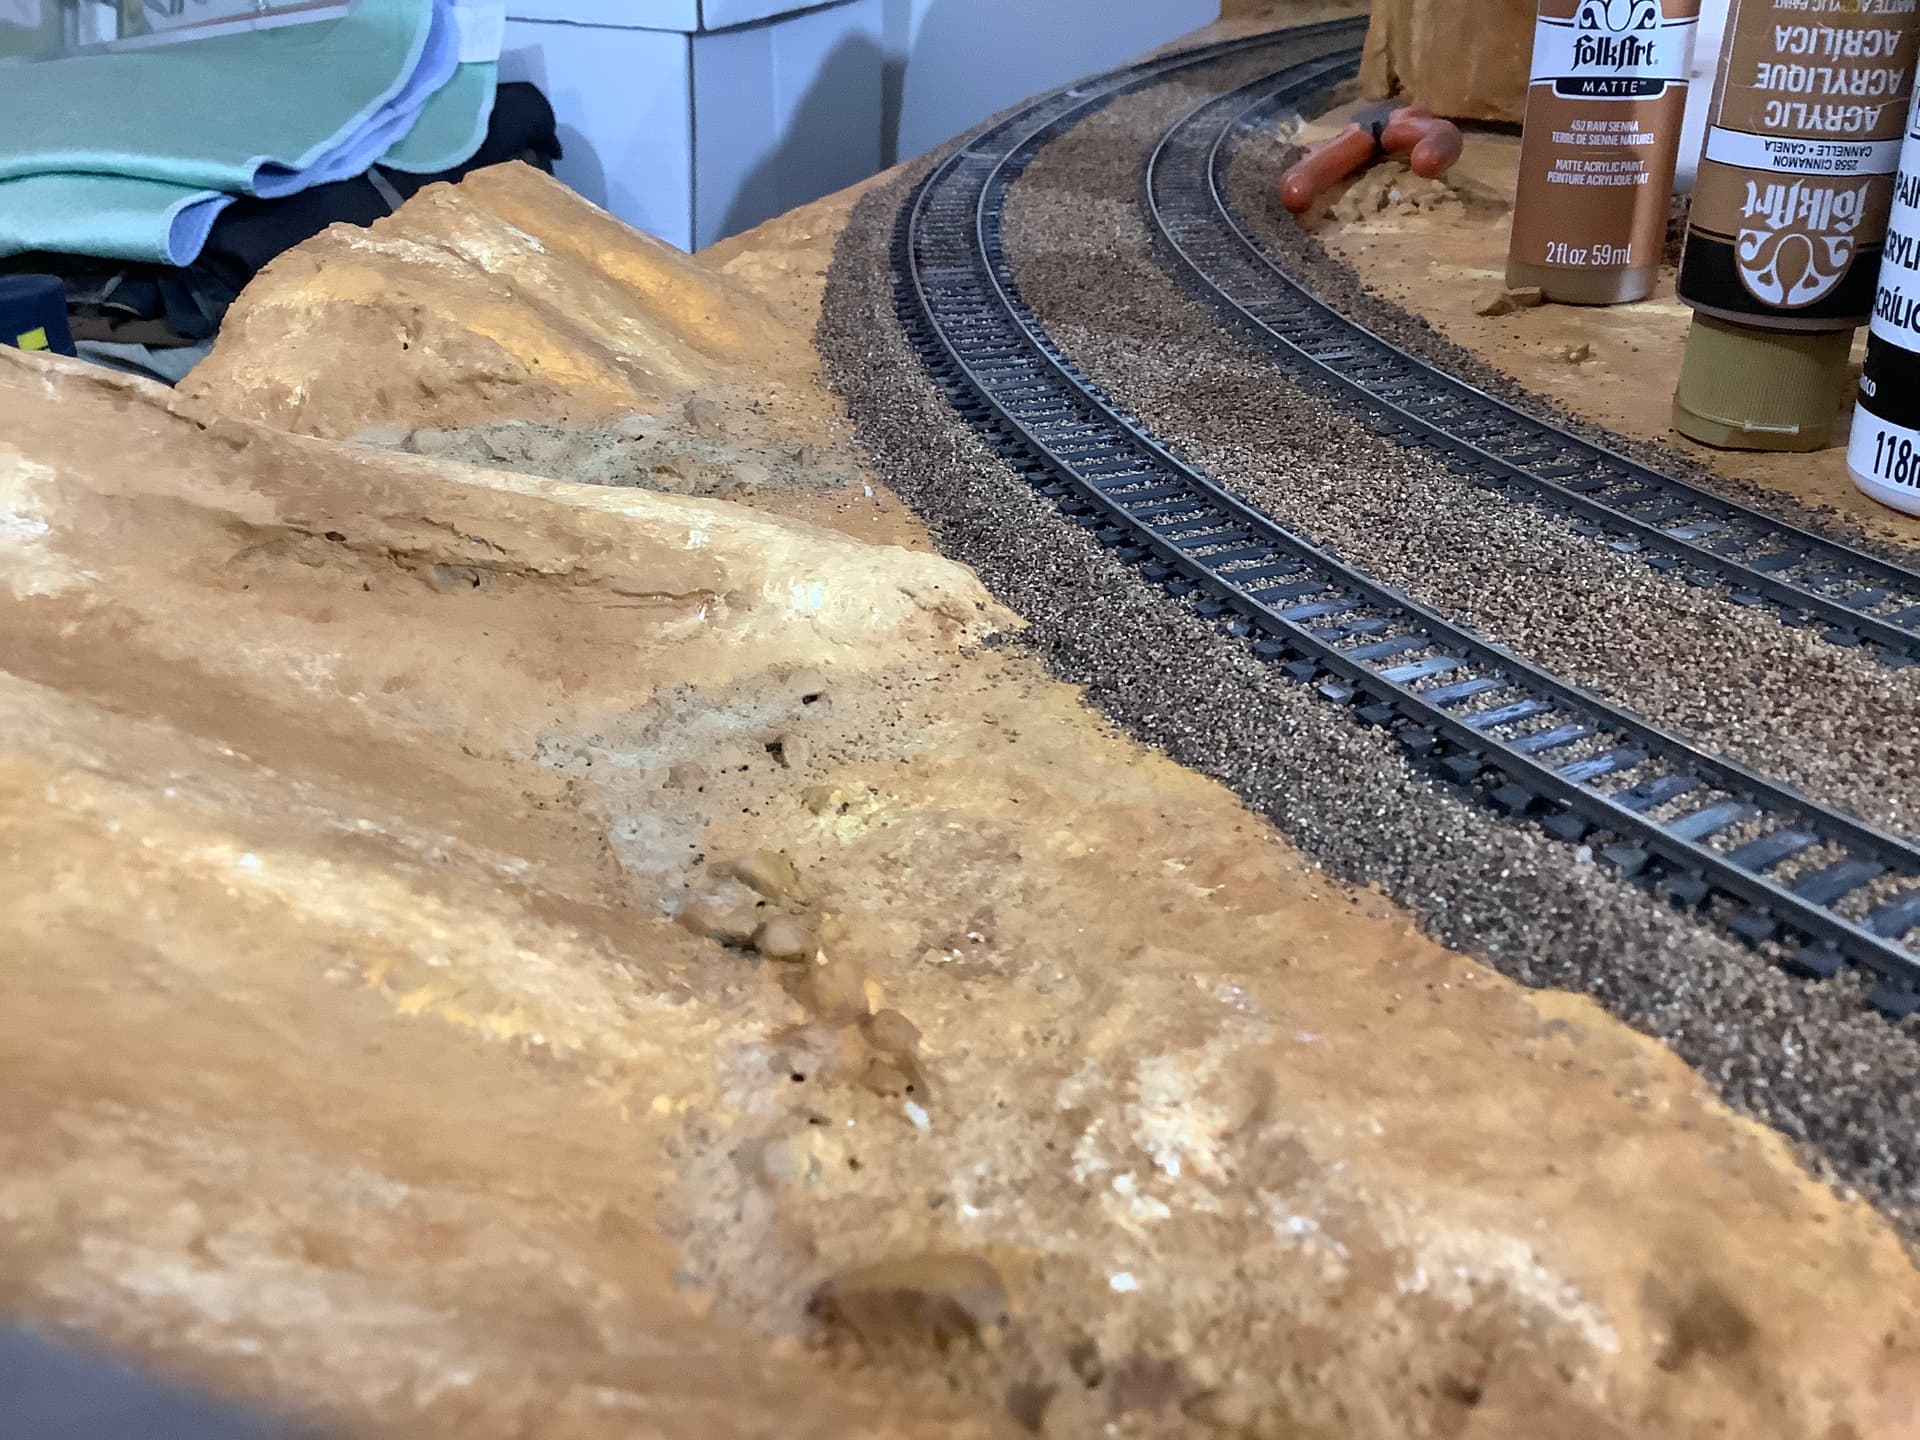
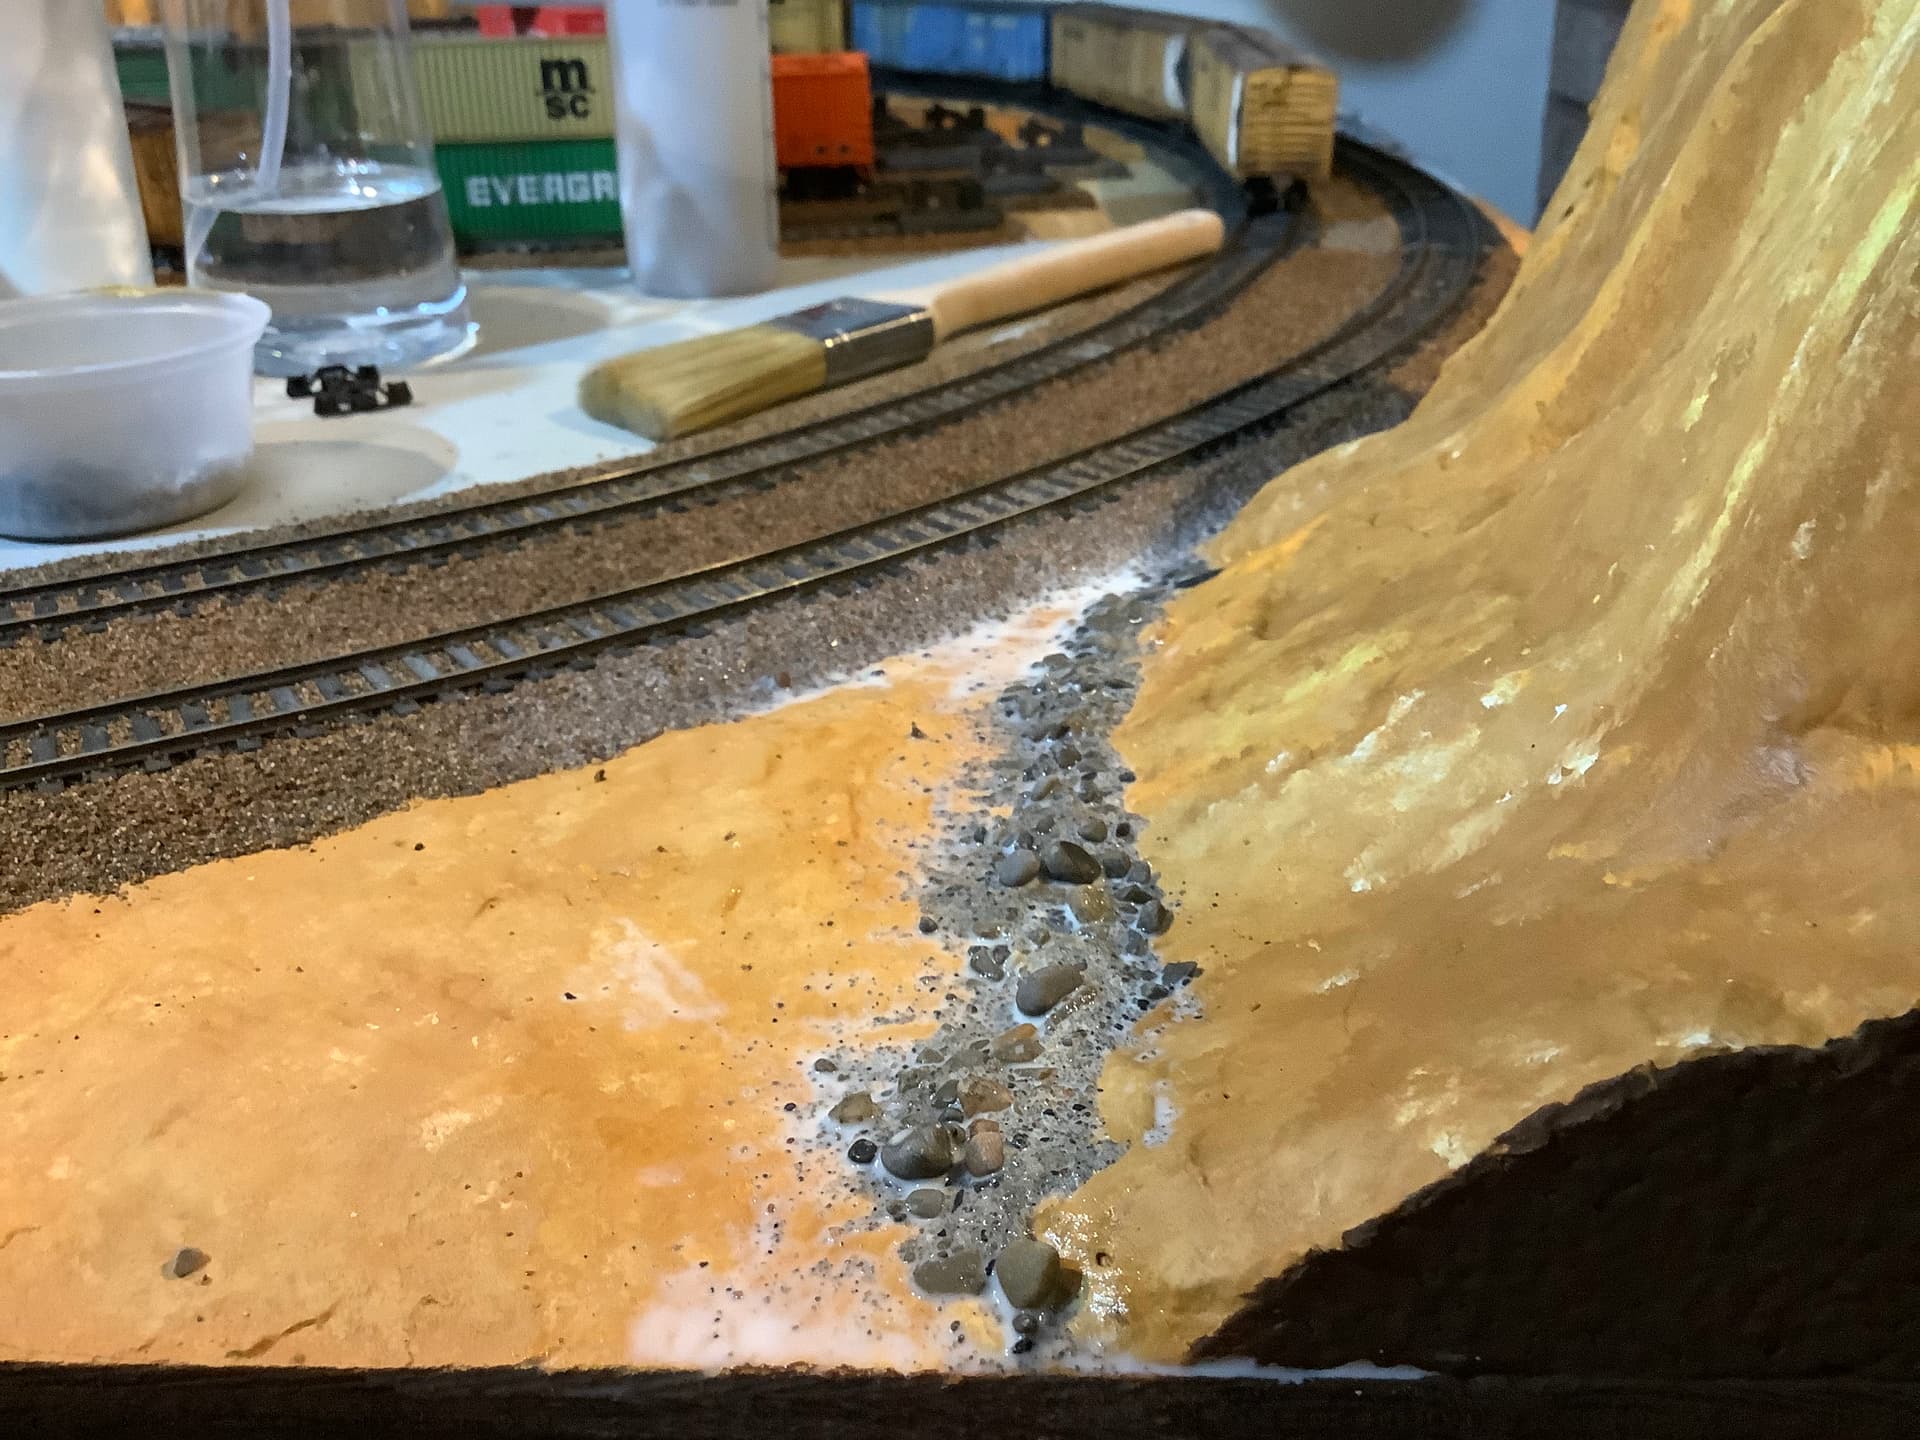
Ballasting continues…along with base coat painting… in this case the small mound at the end of the salvage yard…
I don’t know how guys build larger layouts…the time factor is nuts!
3 Likes
That’s some nice looking rolling stock also. 8’x51", ho, looks efficient - if you have a layout diagram I’d be interested to see that.
2 Likes
Yeah, I see some modern rolling stock (my favorite subject, auto racks and reefers) in there. Looking good
1 Like
Hi Phil…
This is pretty basic DC…trains go round and round and round…
2 max radius curve tracks utilizing the 51 inch depth running around the perimeter of the layout…no switches
6 sidings that run diagonally ( these are not connected to the working lines - they have bump stops at each end )
I put them in to take up the otherwise big empty space inside the working tracks…
They provide a place for rolling stock that I weather and ready tracks for swapping cars…
The outcrop blanking off viewing of most of the rear side of the layout also will allow me to store some more cars behind it…
Just offset center of the layout the outcrop dips for about a foot to allow viewing of the tracks on the rear…
6” clear acrylic sheet along the front edge keeps trains from falling off…
My main interest here is weathering cars…and having a place to look at them…
I started building this mid November…and it’s pretty much stalled every other project I had going. It’s really not efficient design as the sidings don’t function as traditional sidings…
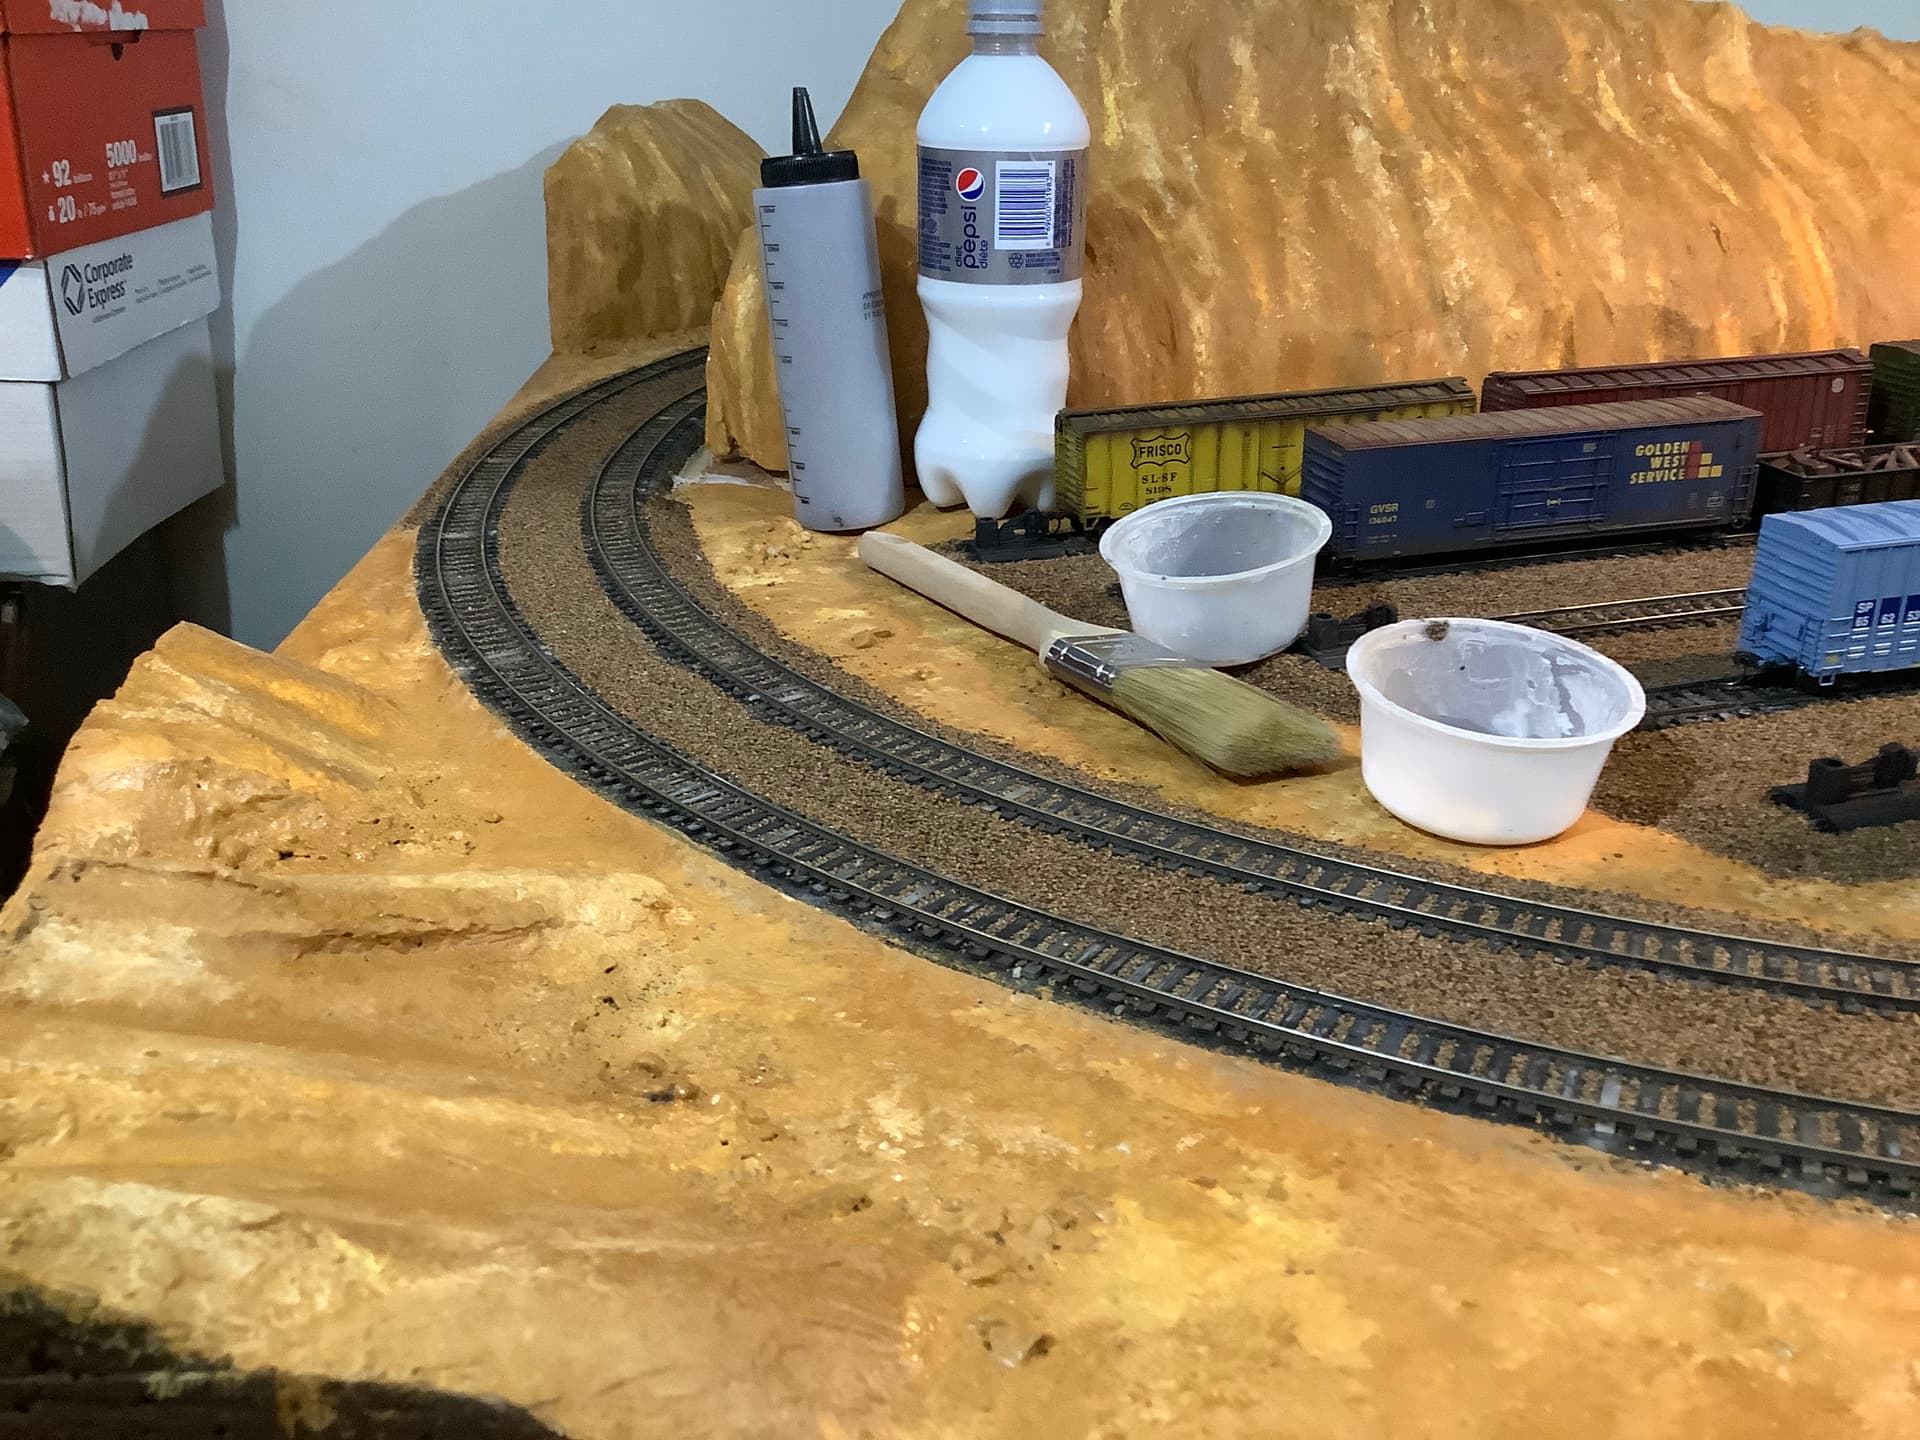
Once I have emptied the first white glue bottle I then use that to mix and dispense the thinned white glue/water/alcohol mix.
You might try either dishwashing liquid or a photographic product called “Photo-Flo” it breaks-down the surface tension of the thinned fluid so it hunkers down into the gravel/ballast.
Those Revell Bakery Buildings make for great generic industrial factory buildings! Plus the engine house and the printshop/newspaper kits are both based on the same moldings so there are a lot of kits and scrap parts out there to be had.
Car Weathering looks great ! ! ! ! ! !
Thanks…
I am using 50/50 mix of 90% IPA and water as a pre-glue wetting solution…
the glue is Lepages white glue / water / dish soap…it dries clear and flat…maybe 50/50….it’s not exact
I looked at the other Revell buildings…but I already had the 2 bakery kits on hand…
More work today…
2 Likes
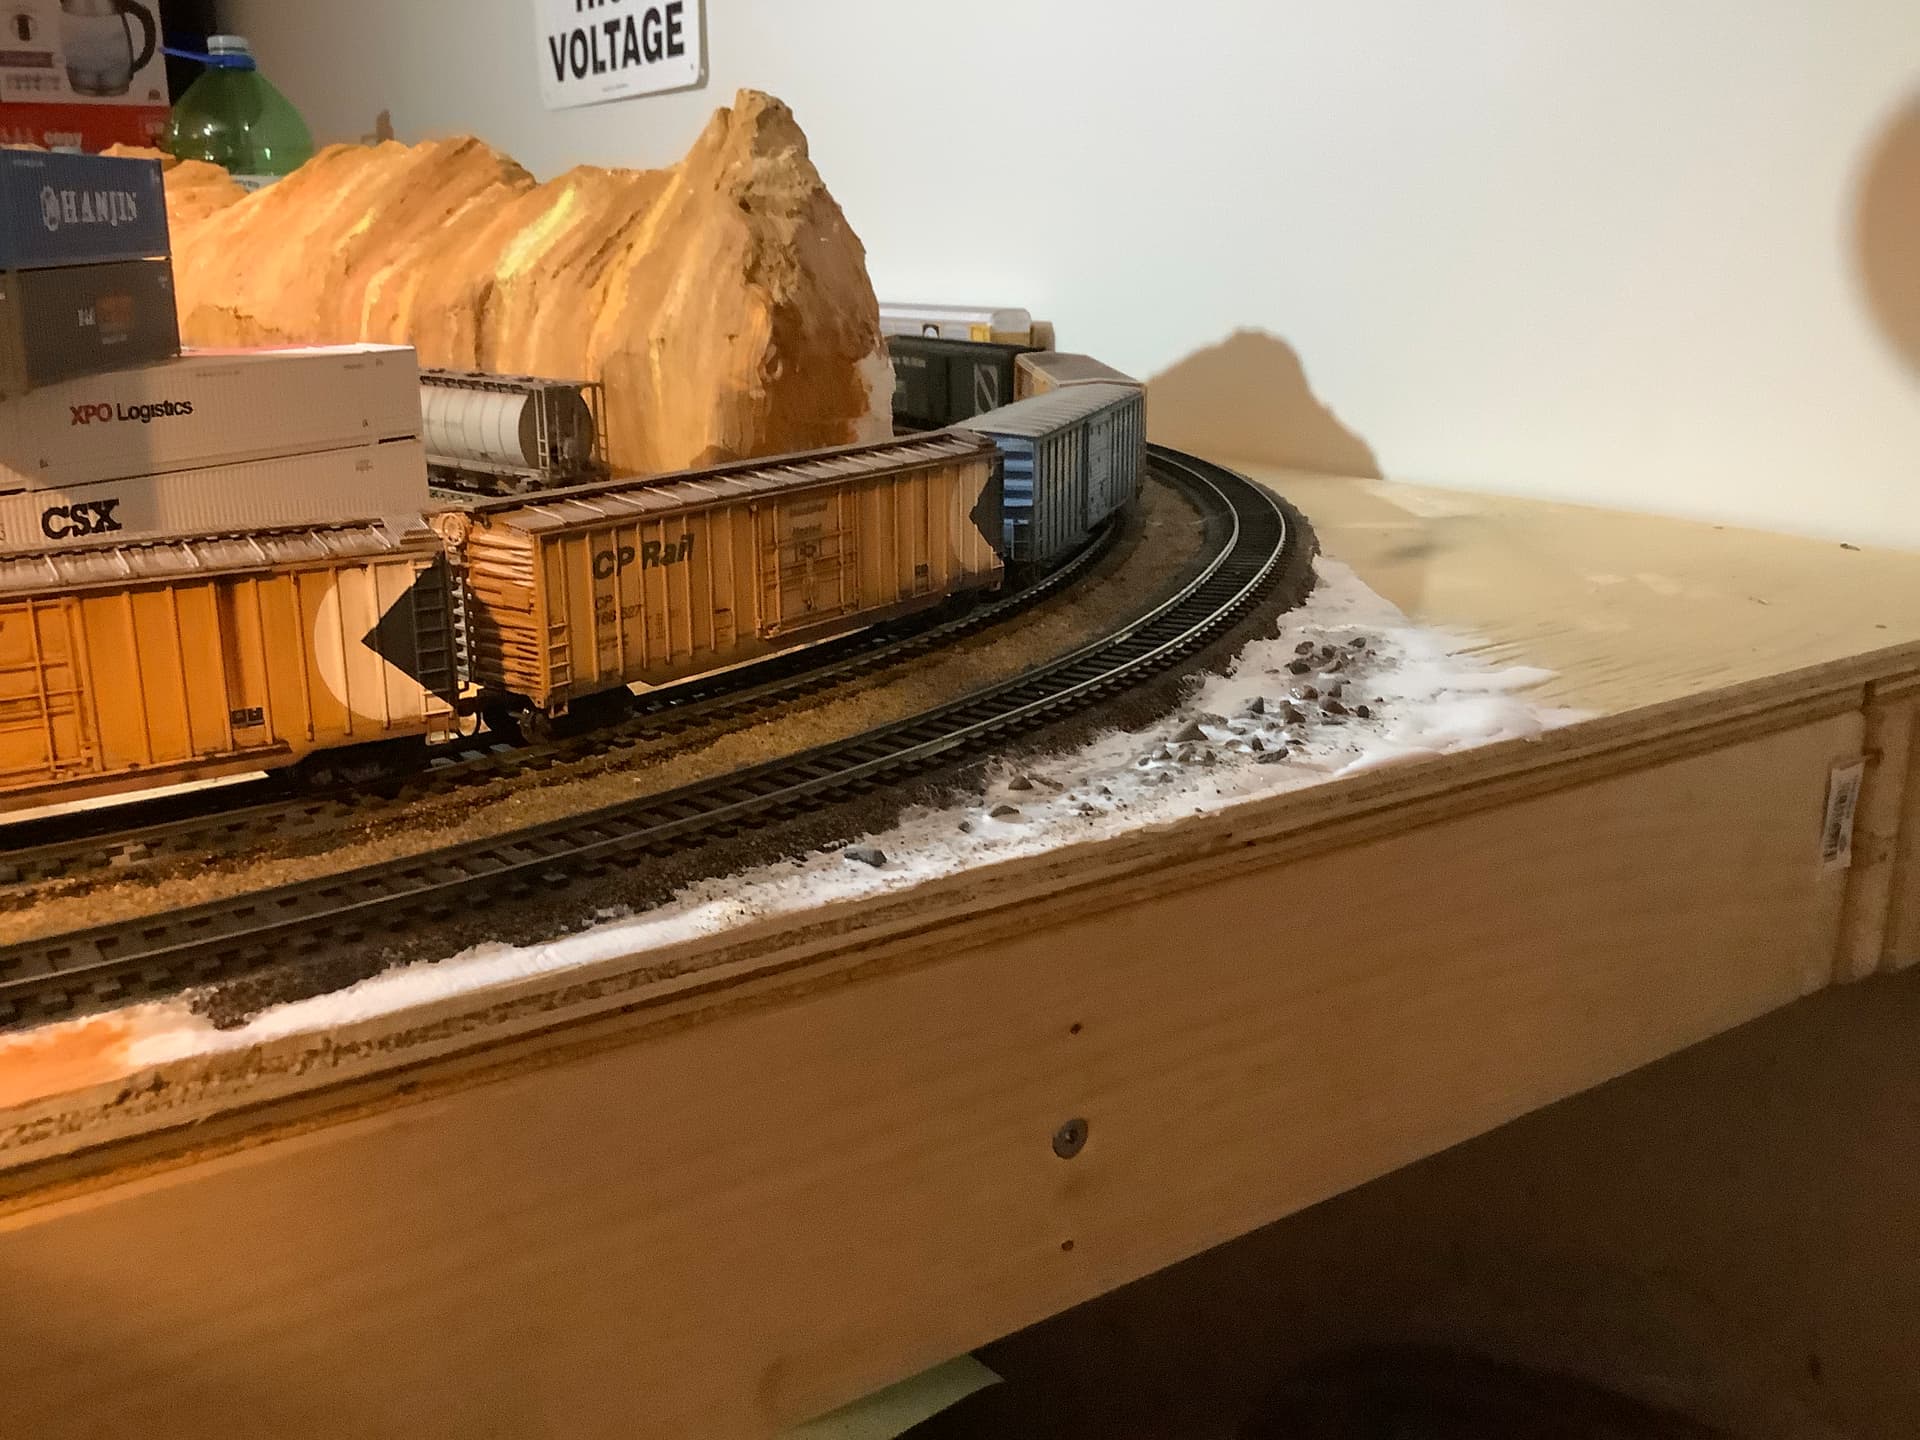
Today…more ballasting…some talus at the ridge bottom…just some construction stone I scooped up when they were putting fibre in front of my MiLs house a couple years ago…it looks better than Woodland Scenics talus
started glue cartridge groundwork toward the rear corner….it’s quick and easy to apply and dries in a few hours
1 Like
Around the corner of the outcrop…once this is painted I can finish ballasting the adjacent rail shoulder…as well have to touch up white glue marks on some of the ties…level ballast in spots…and lots more little things

1 Like
I like your choice of ballast color/mix. From an model ascetic point of view I just don’t care to see miles and miles of bright gray/white stone on my layout. (Even though that may be more true to life for a Class 1 Railroad. ~ taking a bit of modeler’s artistic license here.)
I have always been more of a Branch Line Railroad sort of guy myself! I want my trackage to sort of melt into its’ surroundings as I add the scenery.
Recent video of the daily Norfolk Southern Intermodal train heading Southbound thru Lexington, KY at the Rosemont Crossing.
Thanks…I picked up a coffee table photo book a few years called Big Sky - Wild West Panorama…
I wanted to capture the oranges, yellows, browns, with a backdrop of purples and blues that are in the book photos of the US southwest…with minimal vegetation…
Doing this in part for my laziness in going crazy on detail and a realistic appraisal of the amount of time I have/wanted to invest on this project.
I started this 4 months ago with many multi hour days going into it so far…
For me it’s more about the feel than any prototype realism
As I say that is all about the “Artistic License” we all take with out modeling.
I totally agree with you!