That flak and range finder absolutely amazing… Incredible detail…
1 Like
That’s right, there’s nothing better than veteran in aftermarket
@TimReynaga
Thanks Tim
In my opinion, working on ships from the inside out is an advantage.
The risk is very high of getting caught in one of the many filigree ones and tearing it off.
I can still get a few pictures before I have to go to work.
Next came the transom skylights. Again, the richness of detail of Pontos is fantastic.

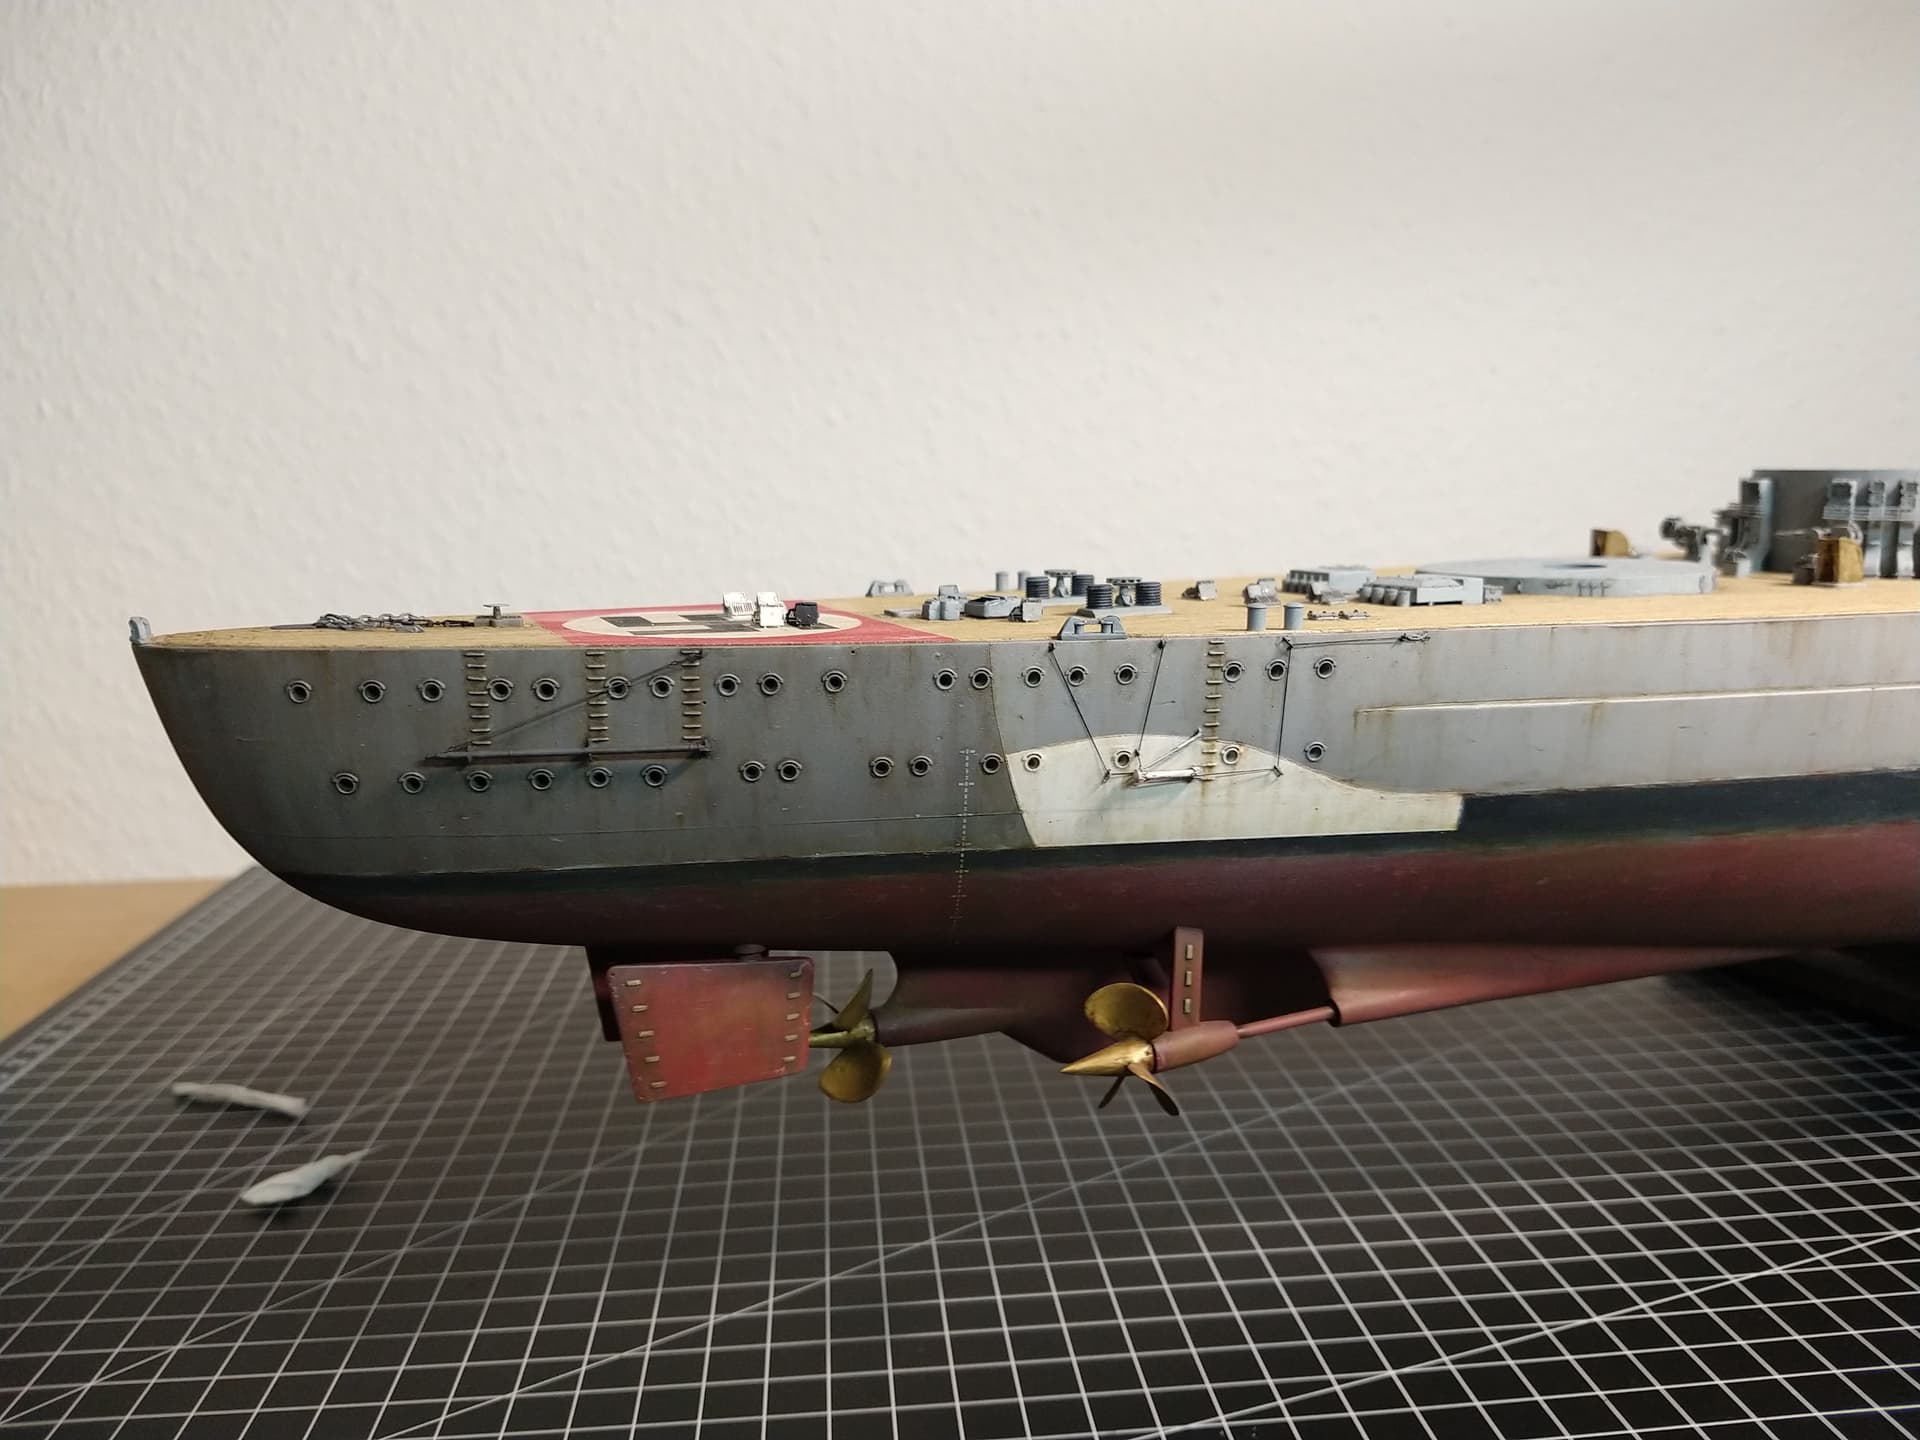
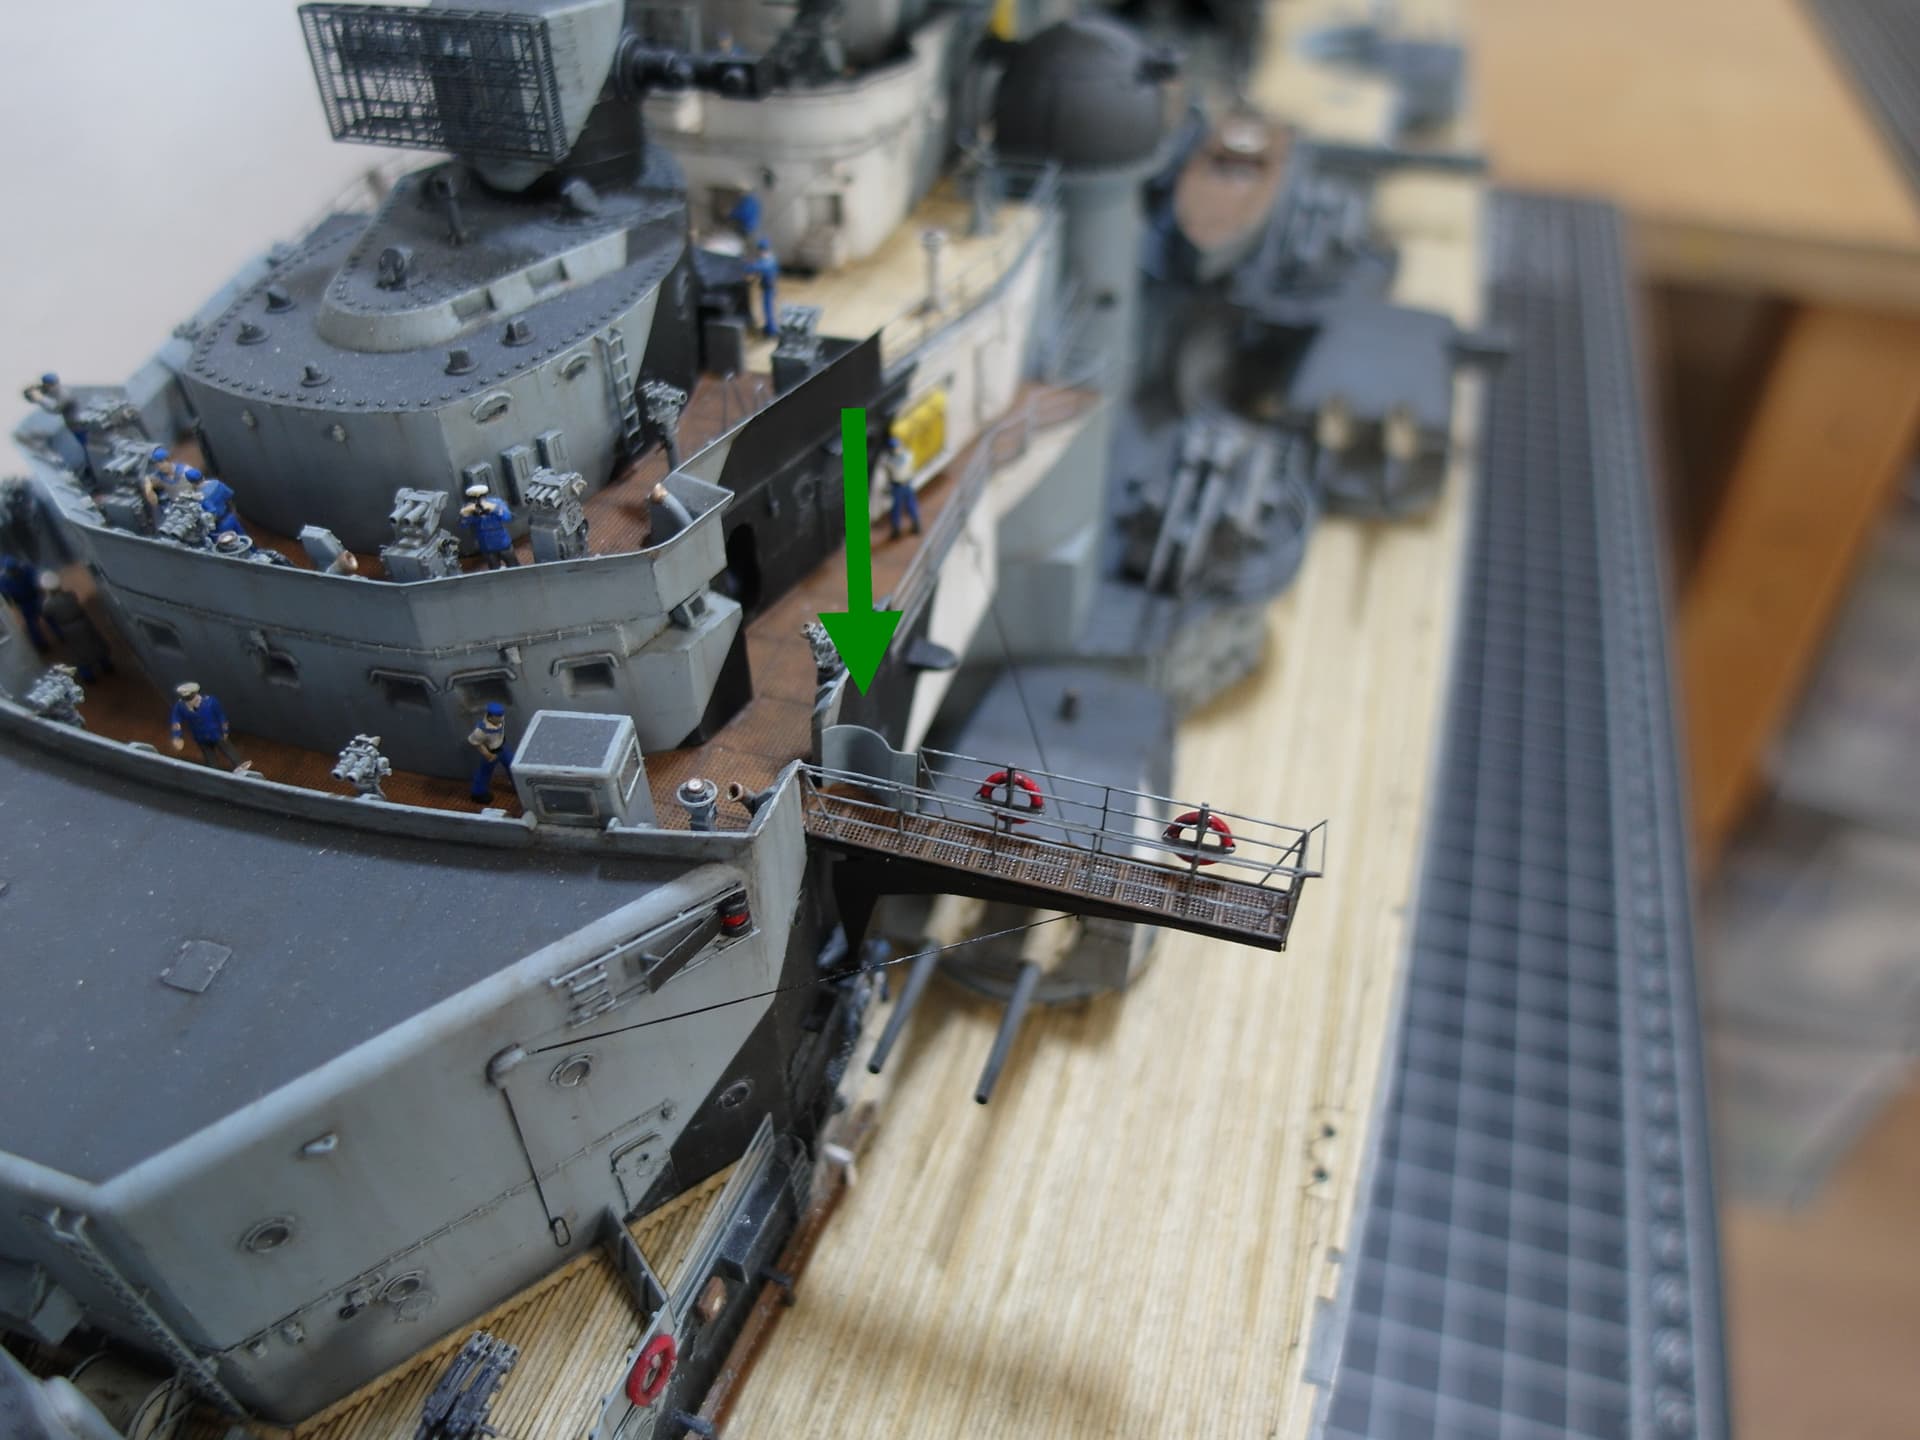
Here is a picture of the gangway in place with the brackets scratched.
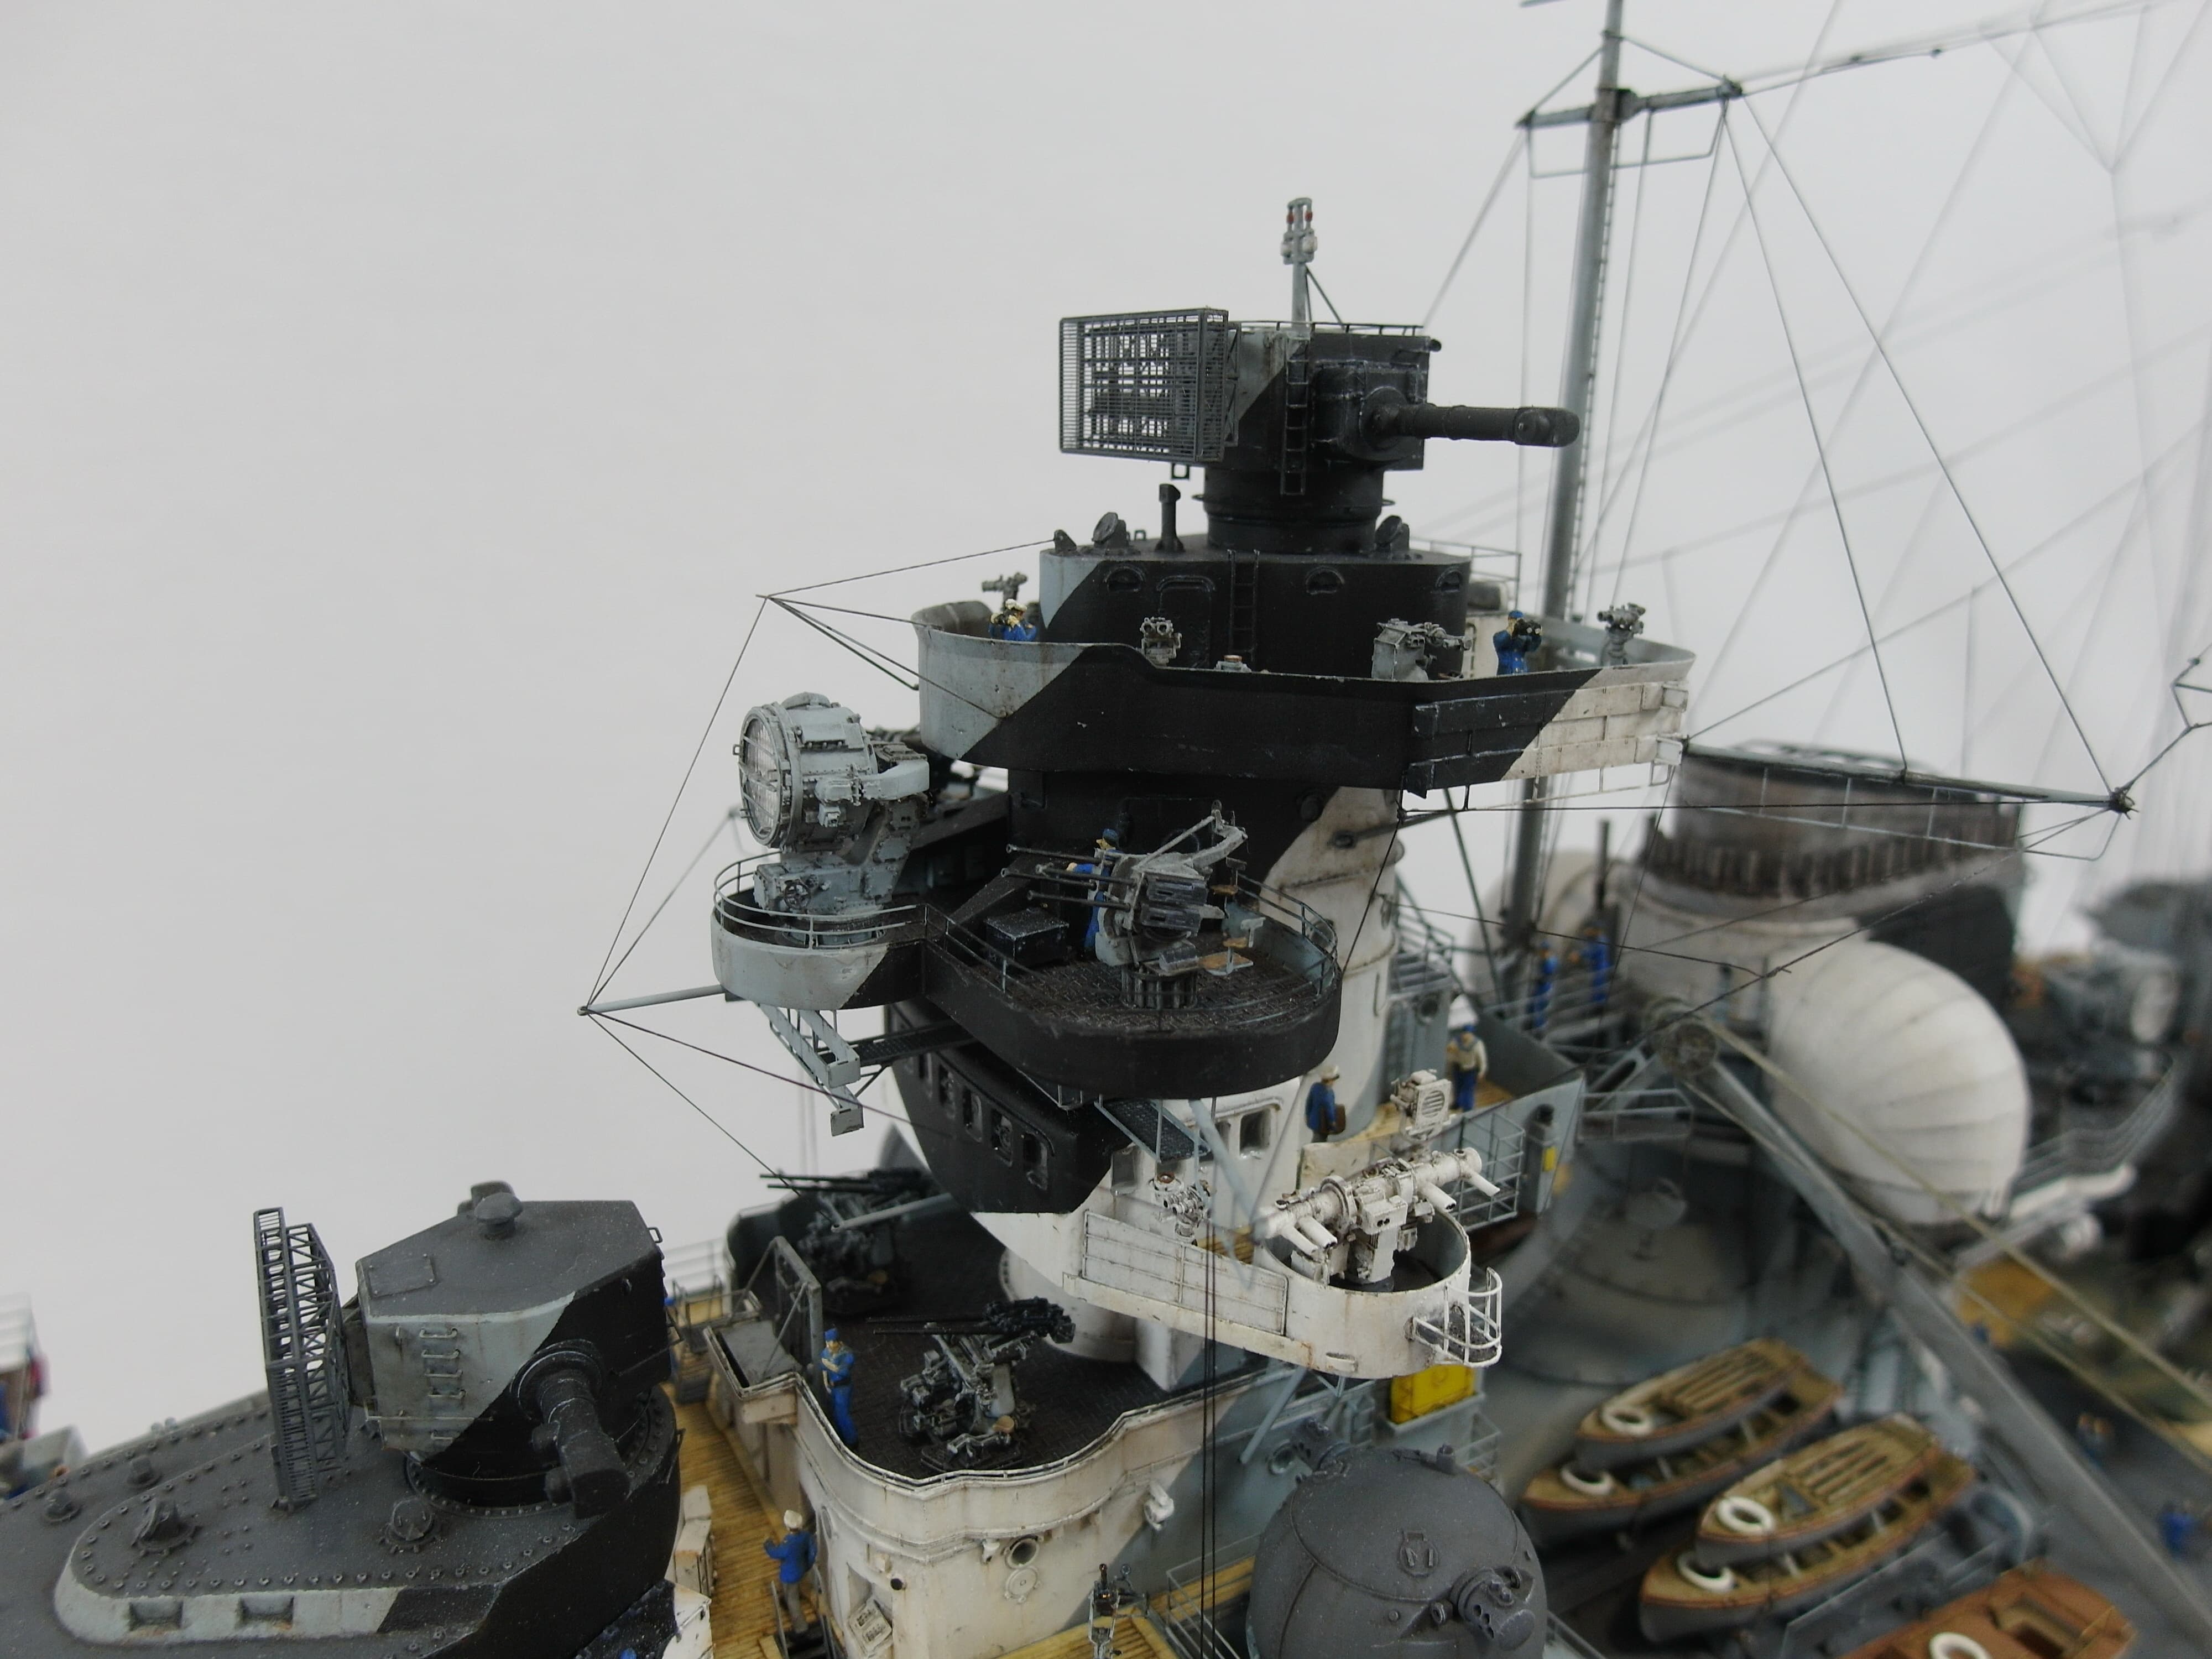
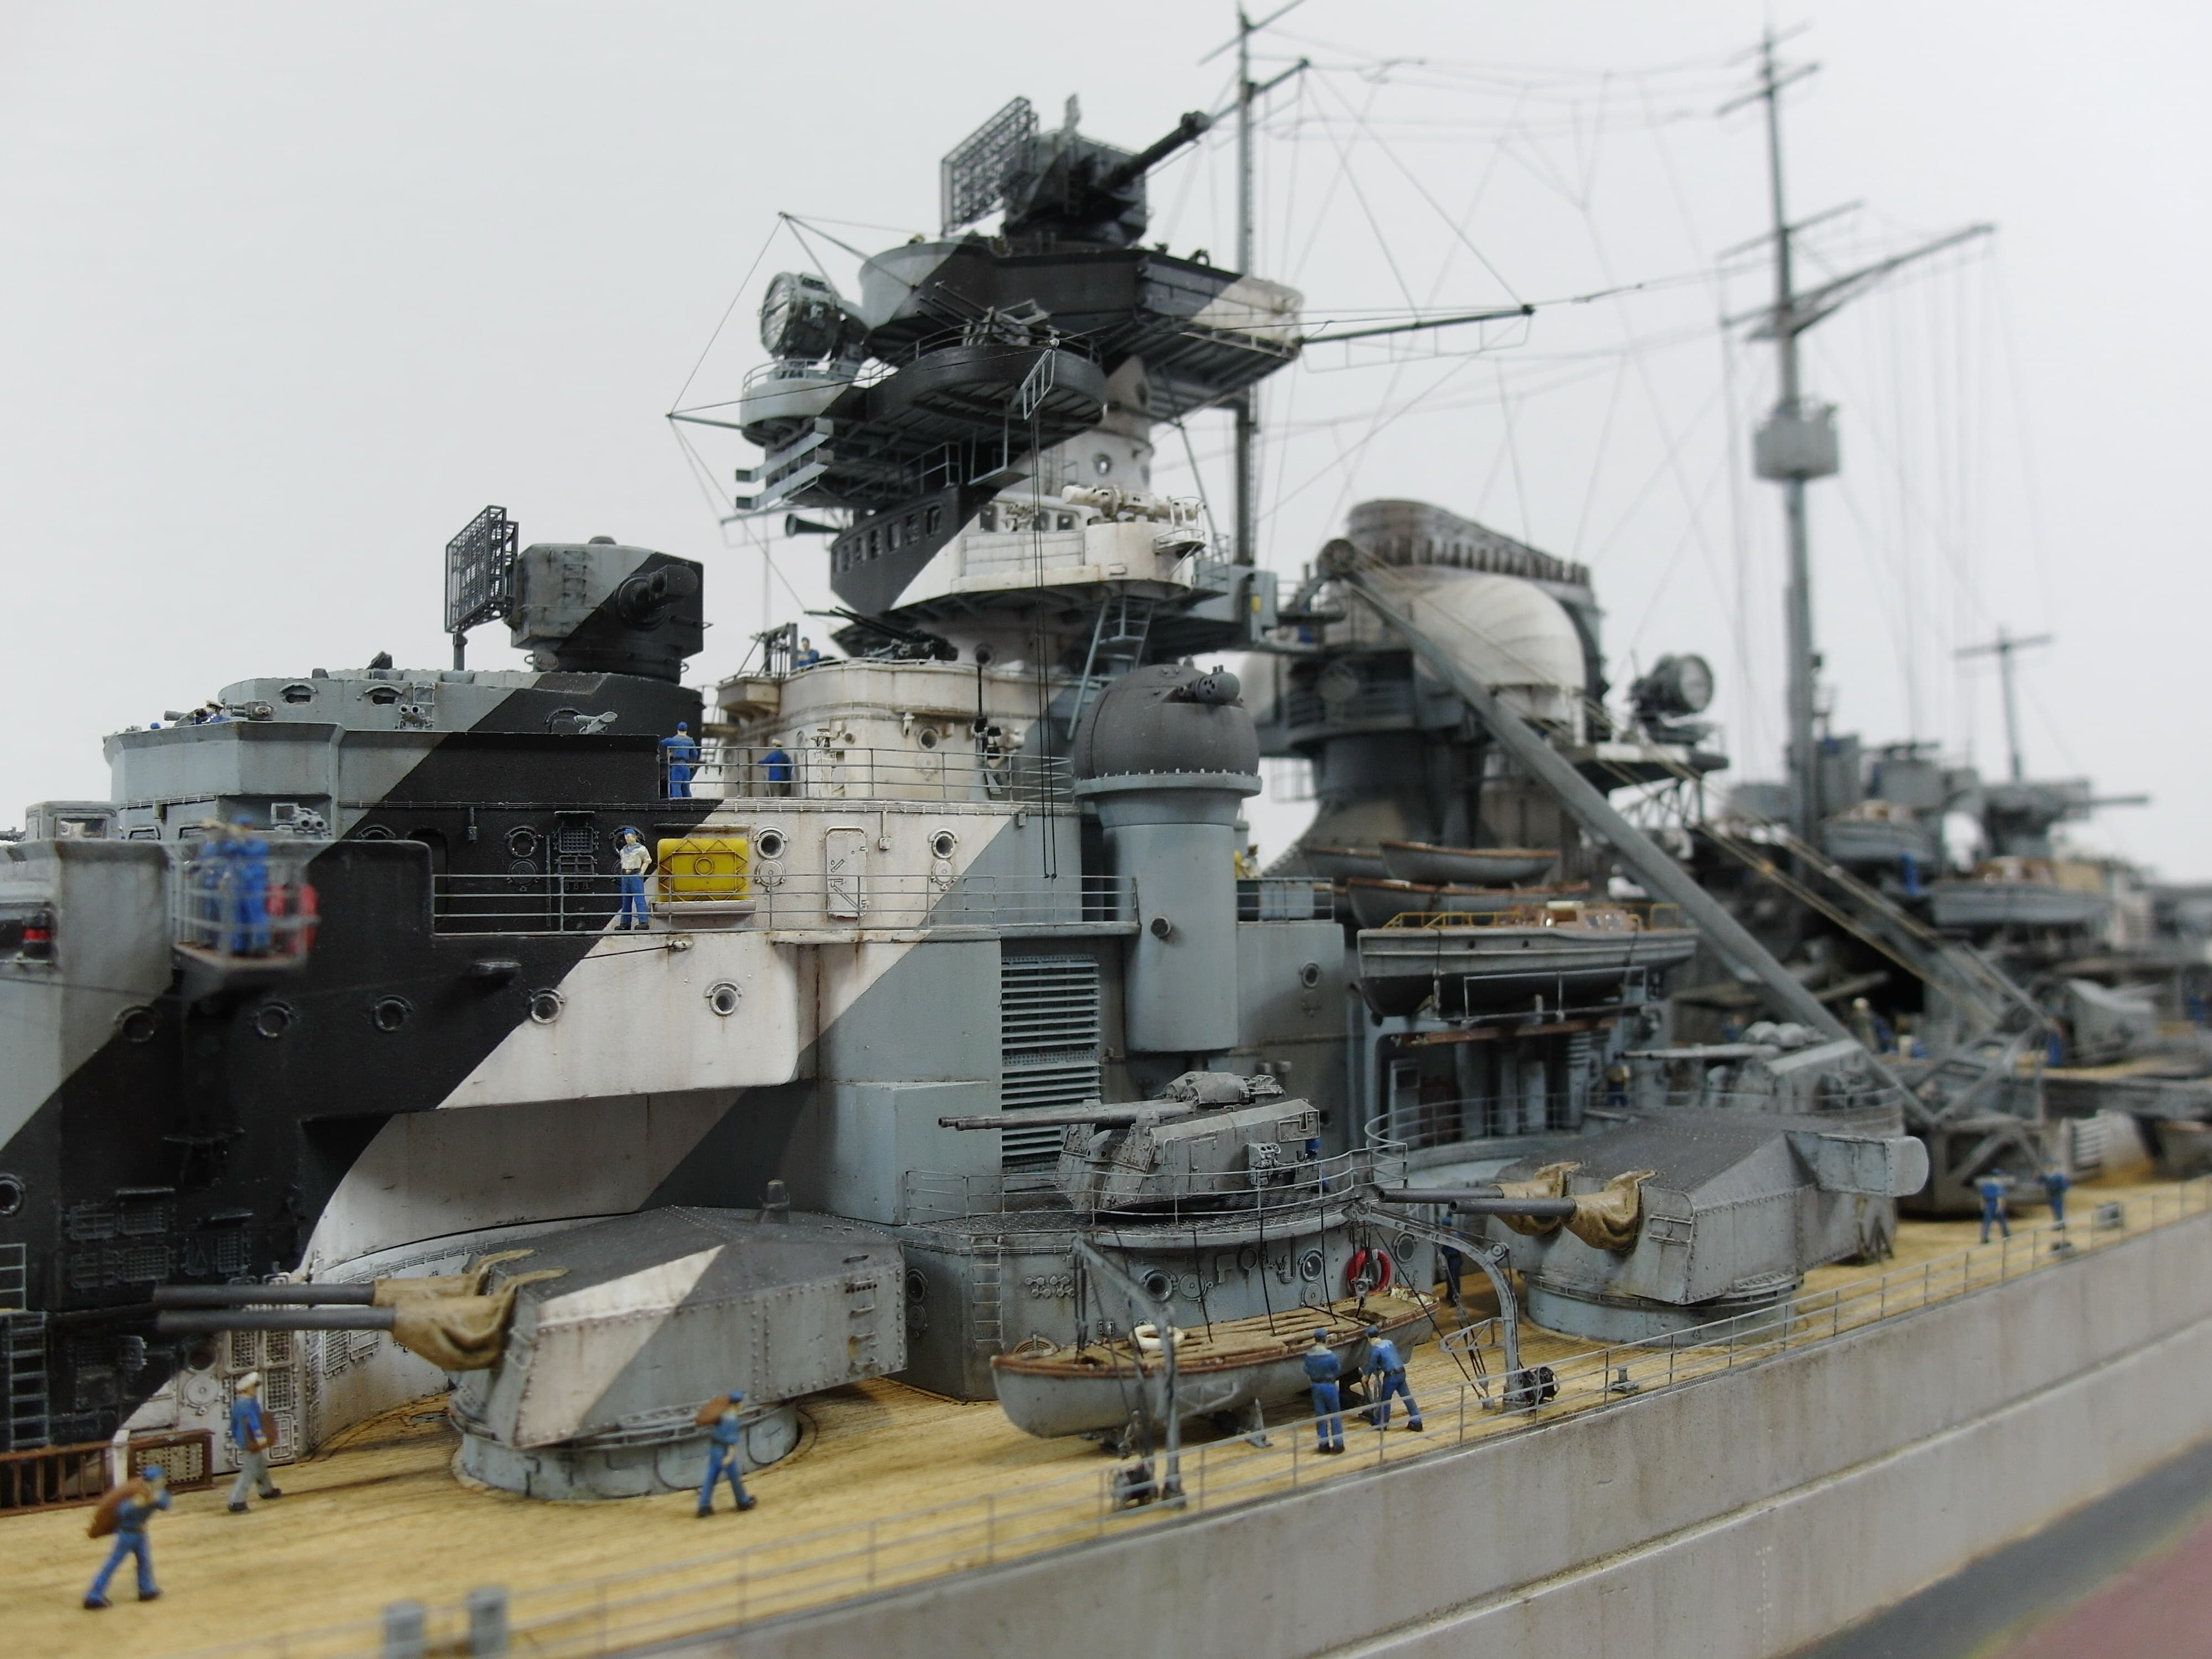
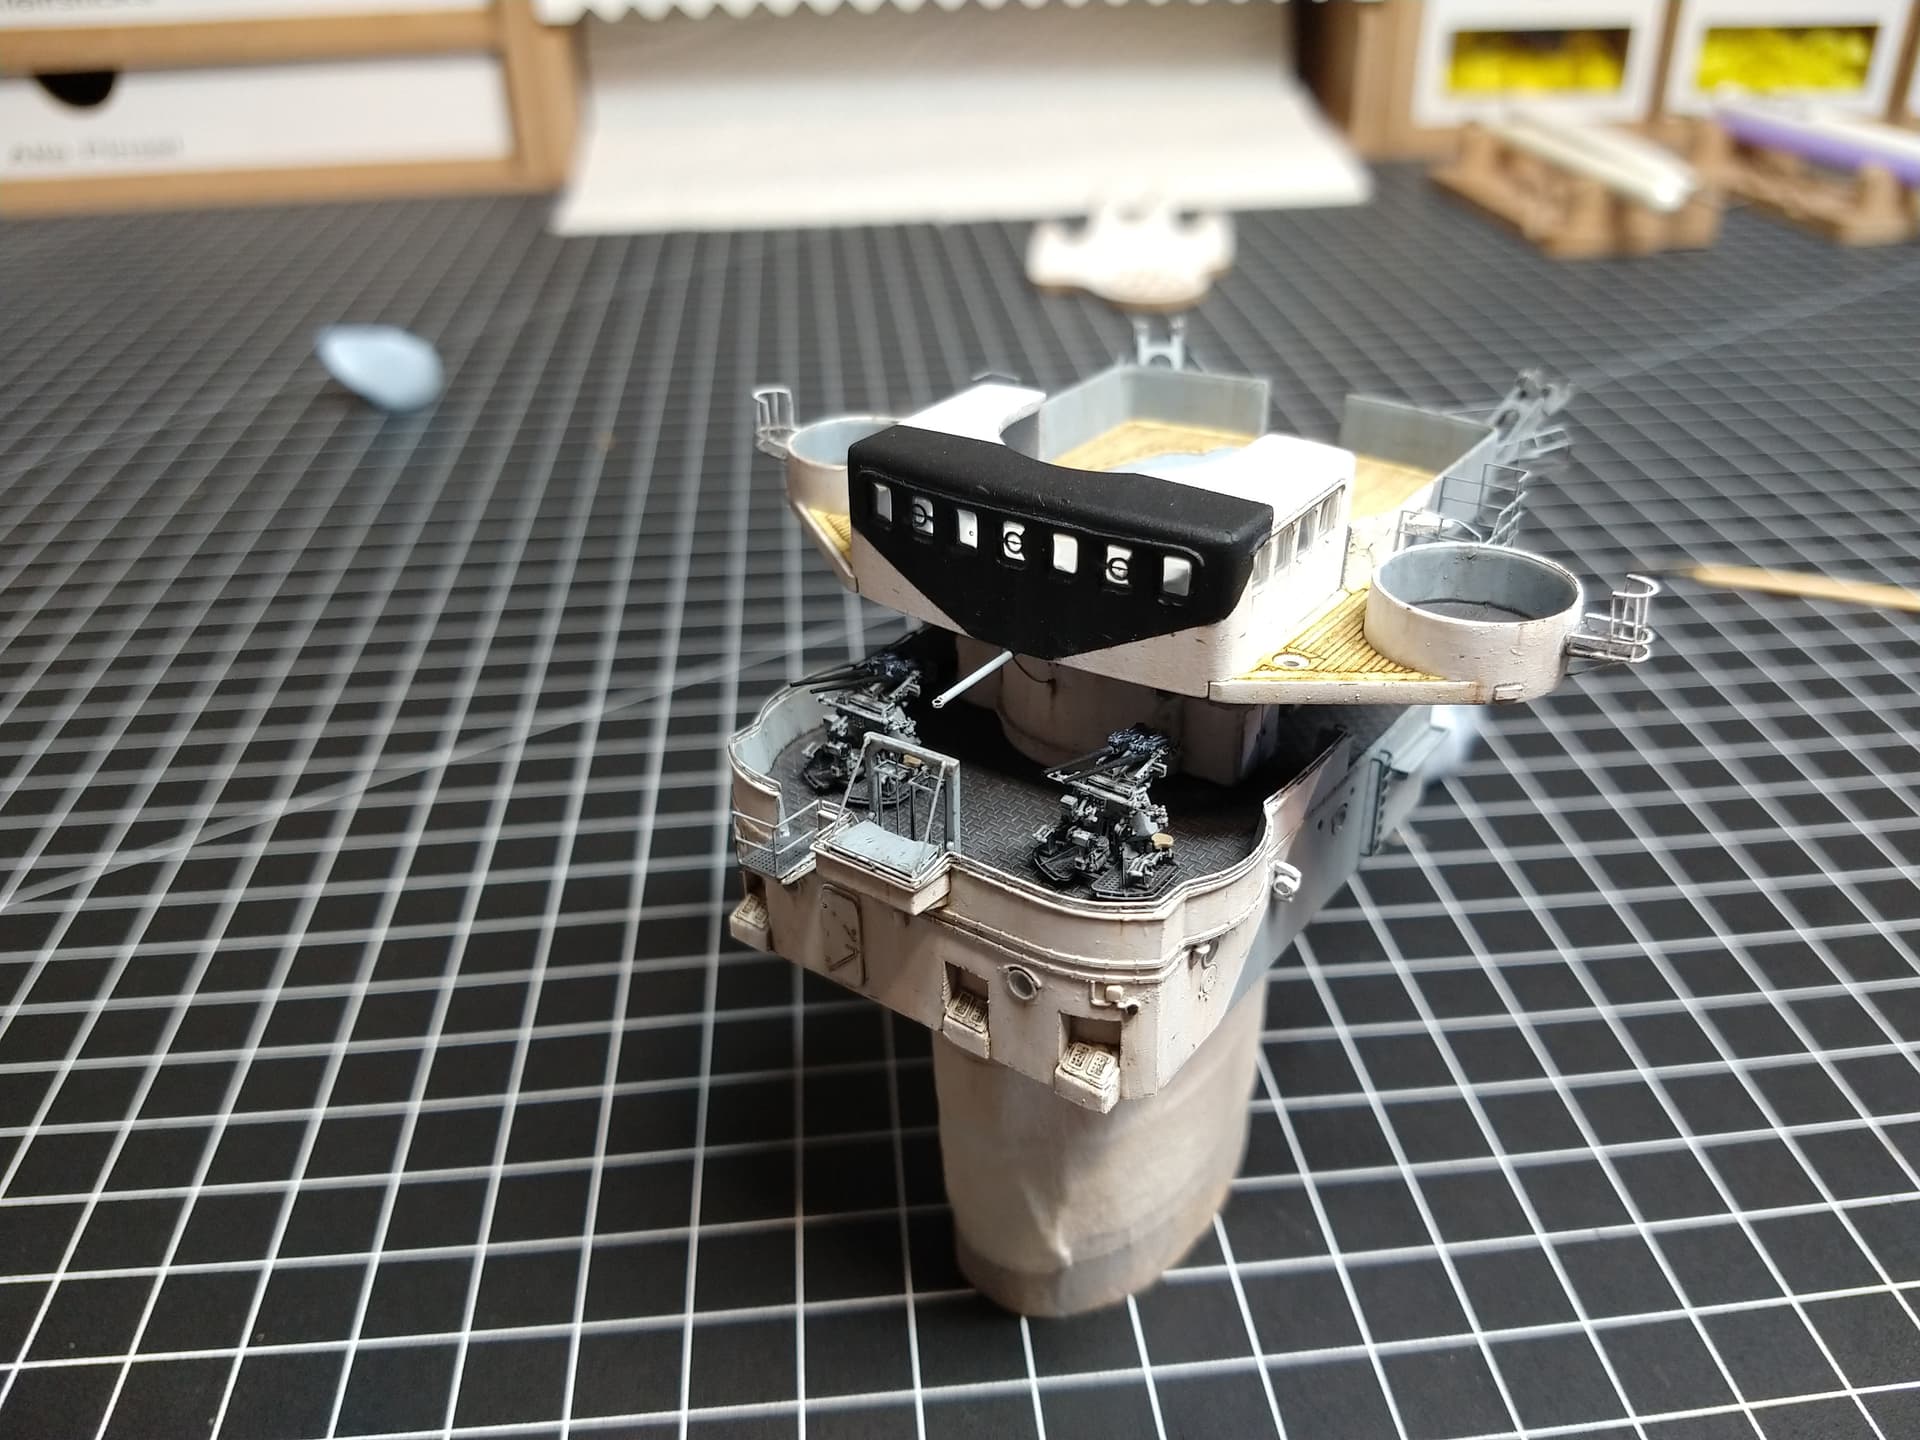
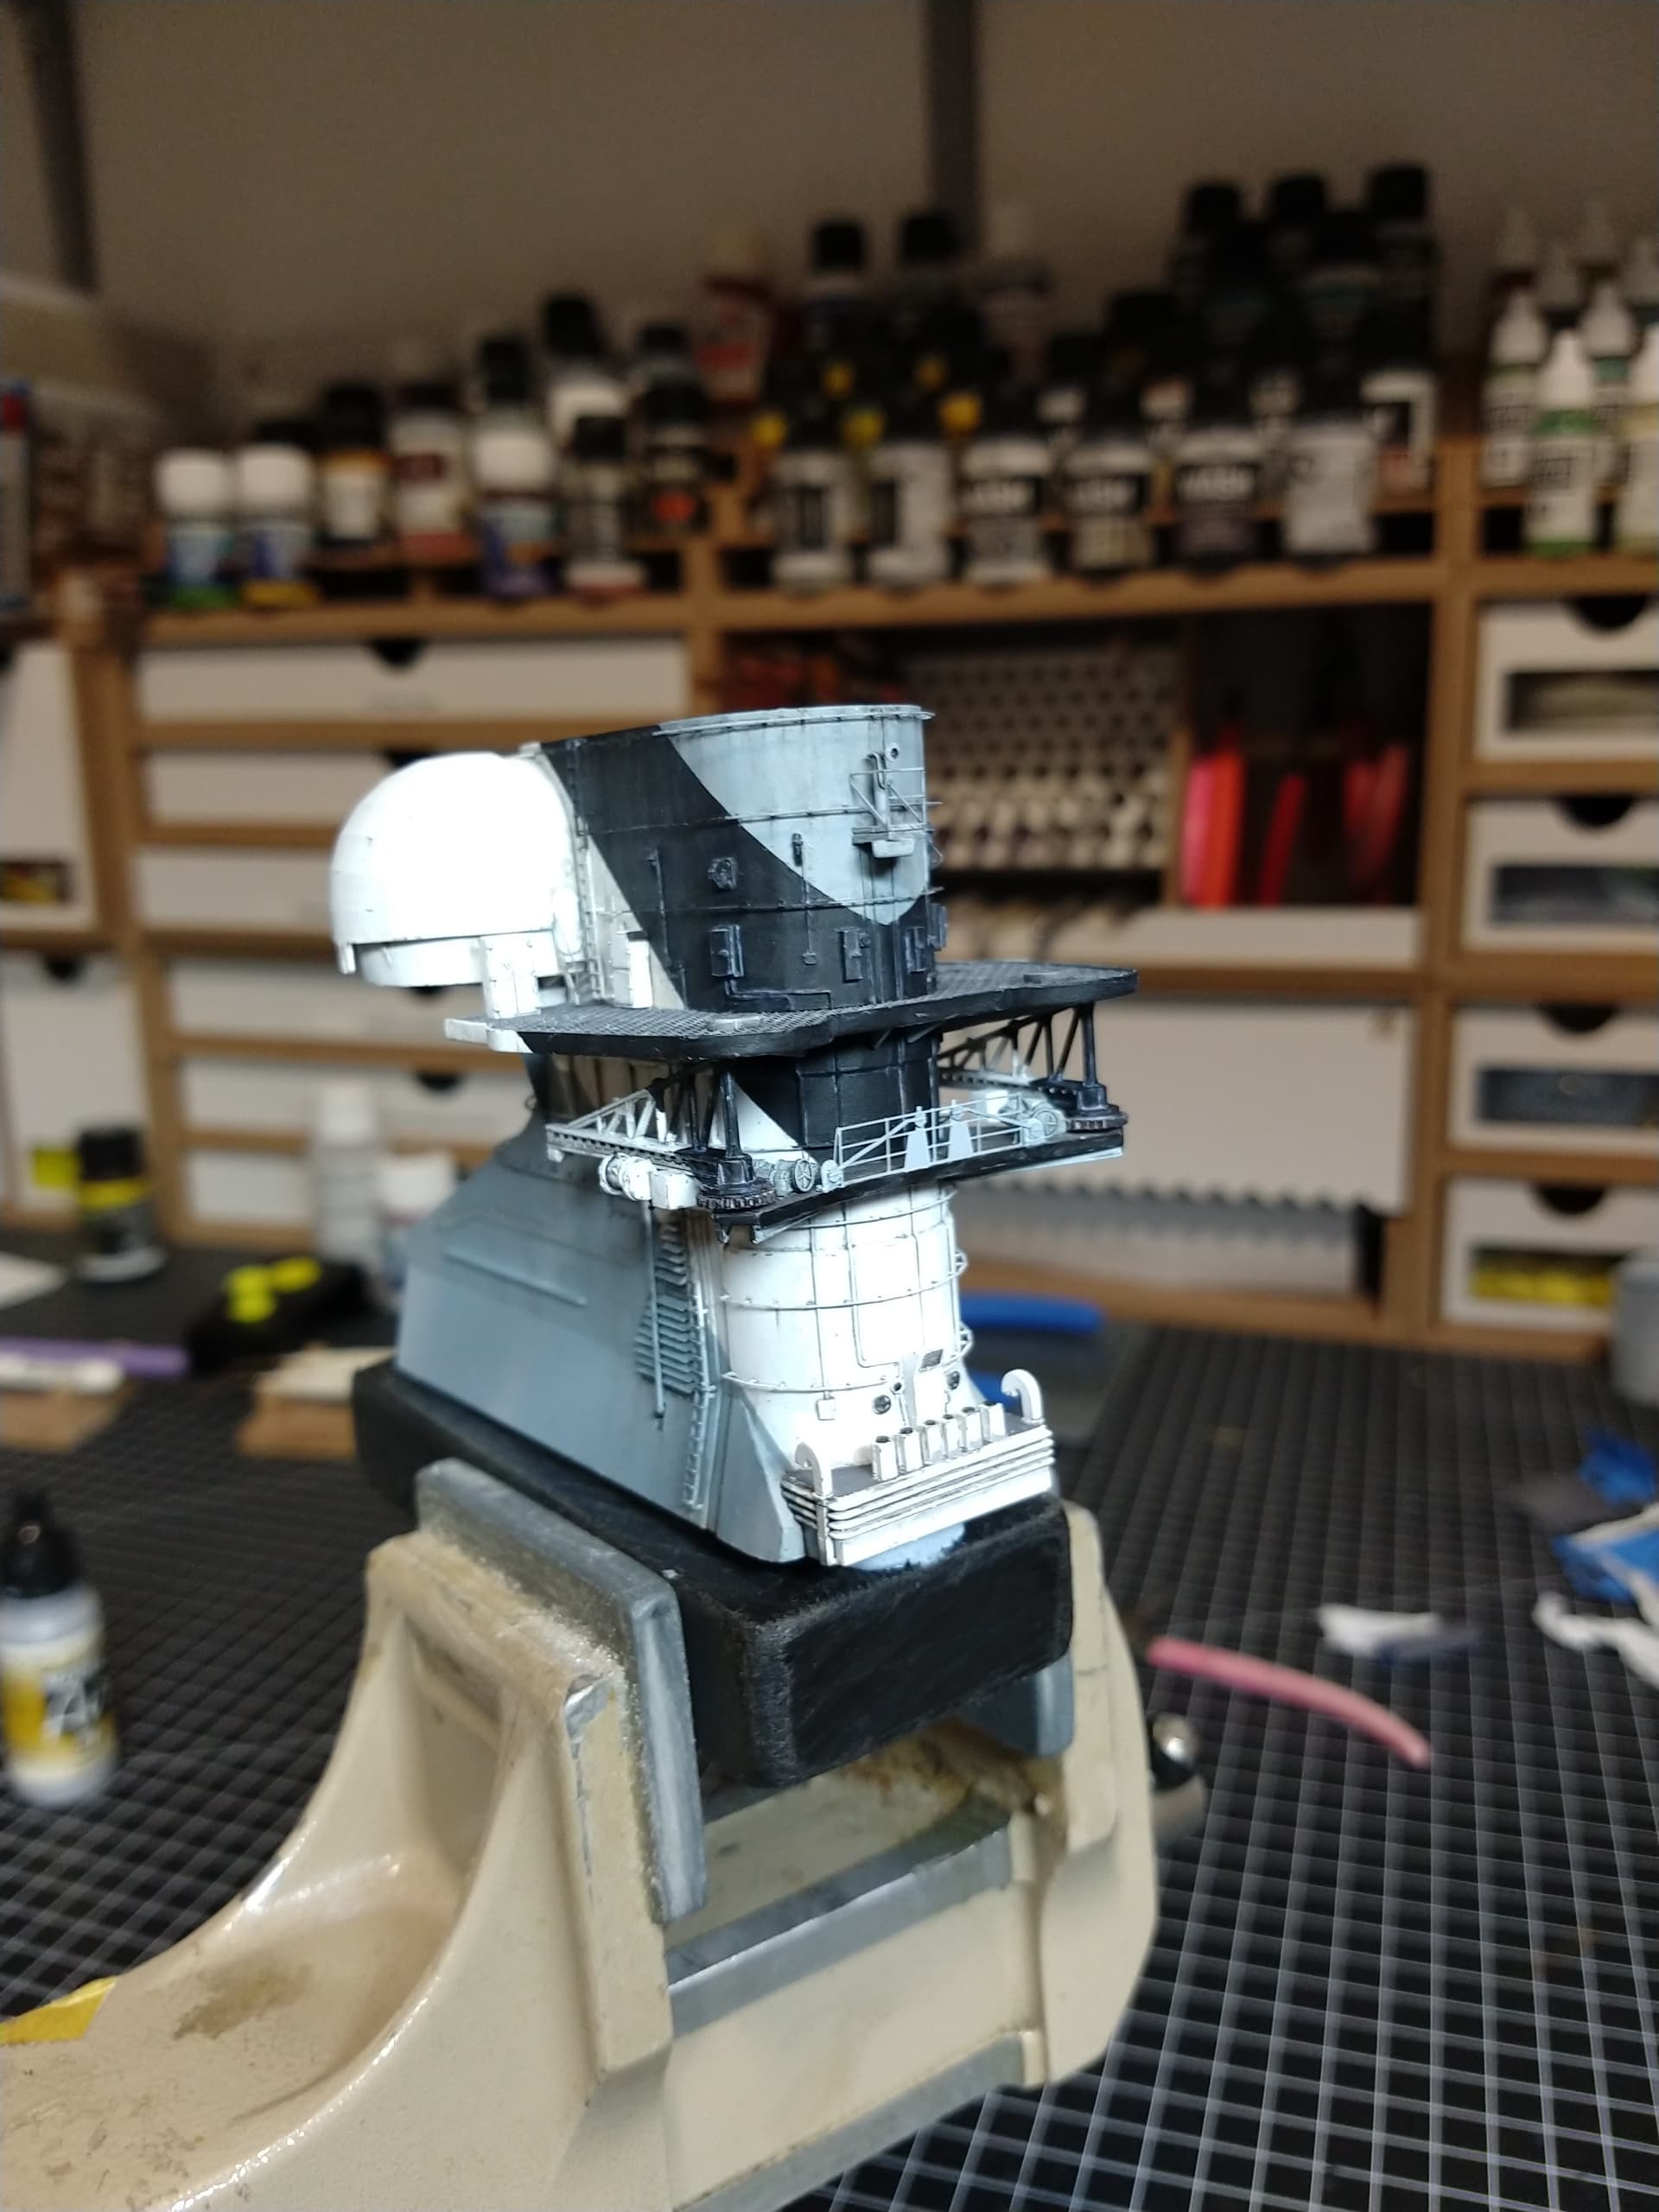
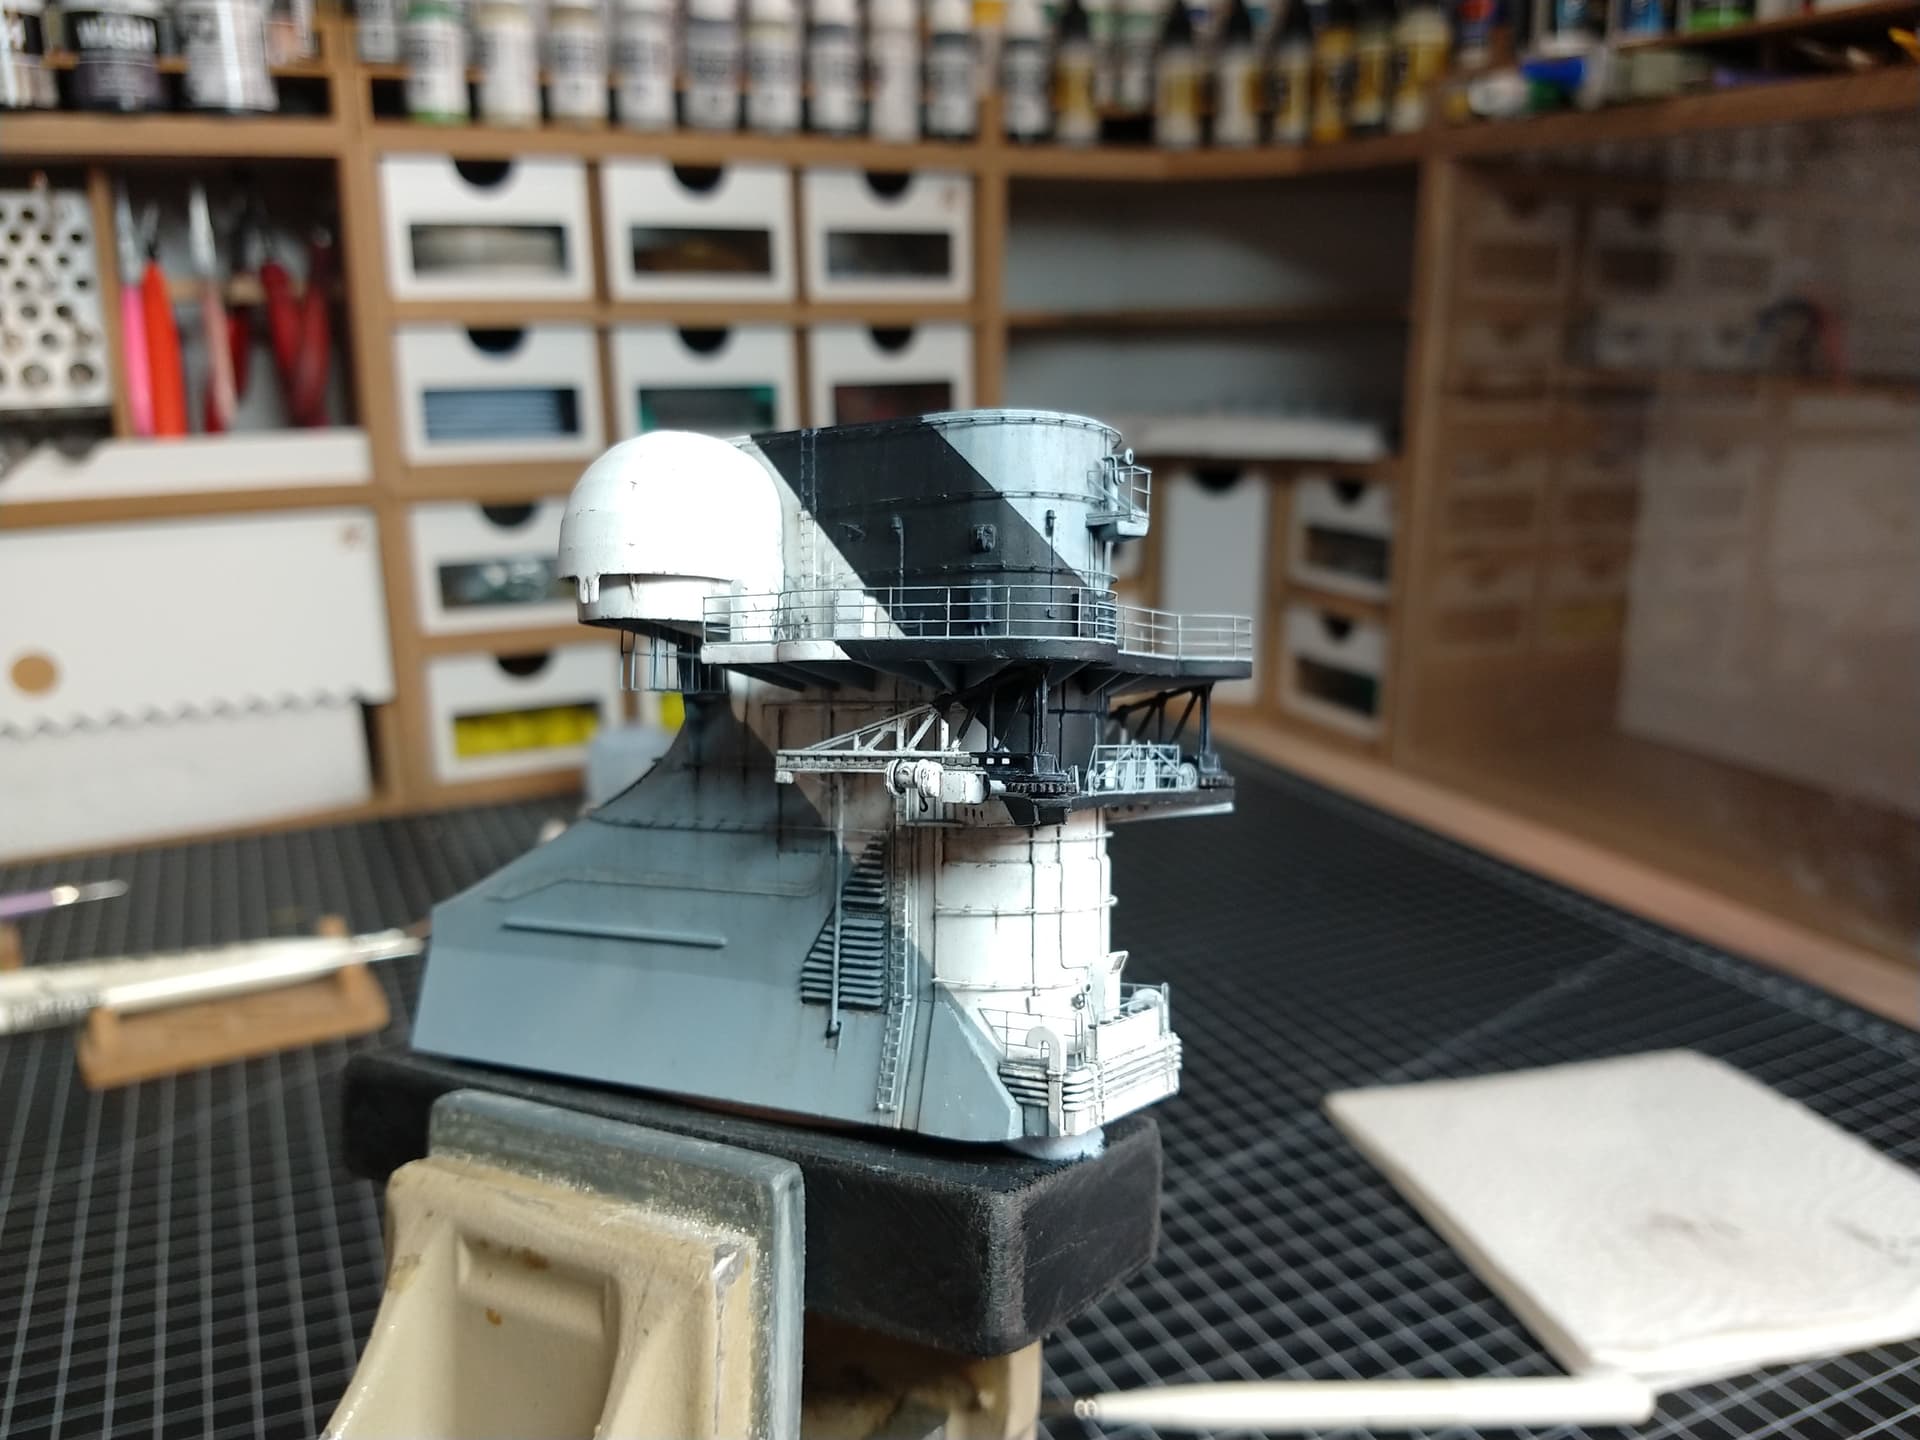
The admiralty bridge with the built-in anti-aircraft guns from Veteran.
It grows upwards
Well, work is calling.
7 Likes
great work
2 Likes
The detailing is mind blowing… And gets better and better…
1 Like
Thank you gentlemen.
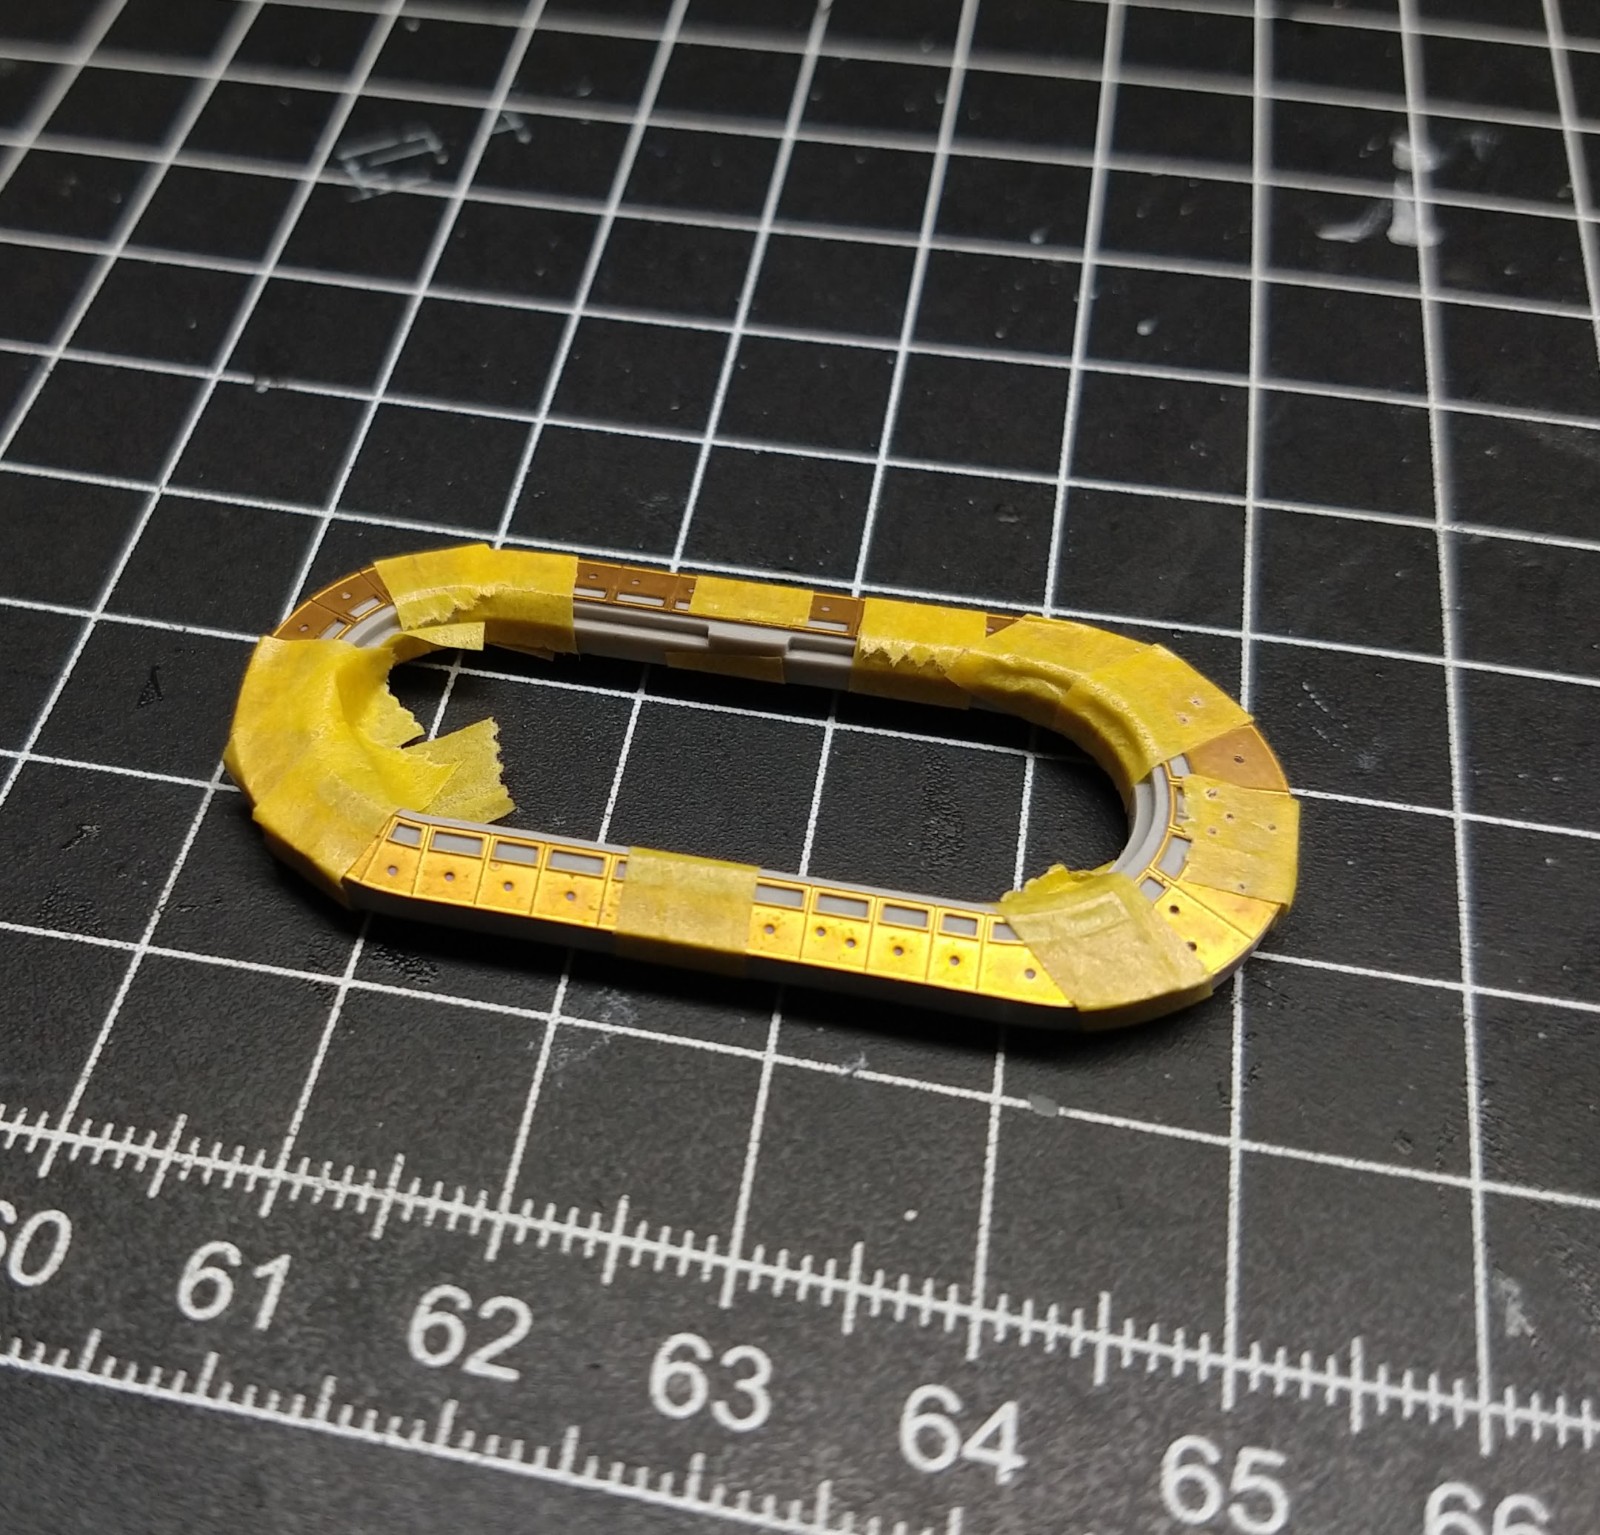
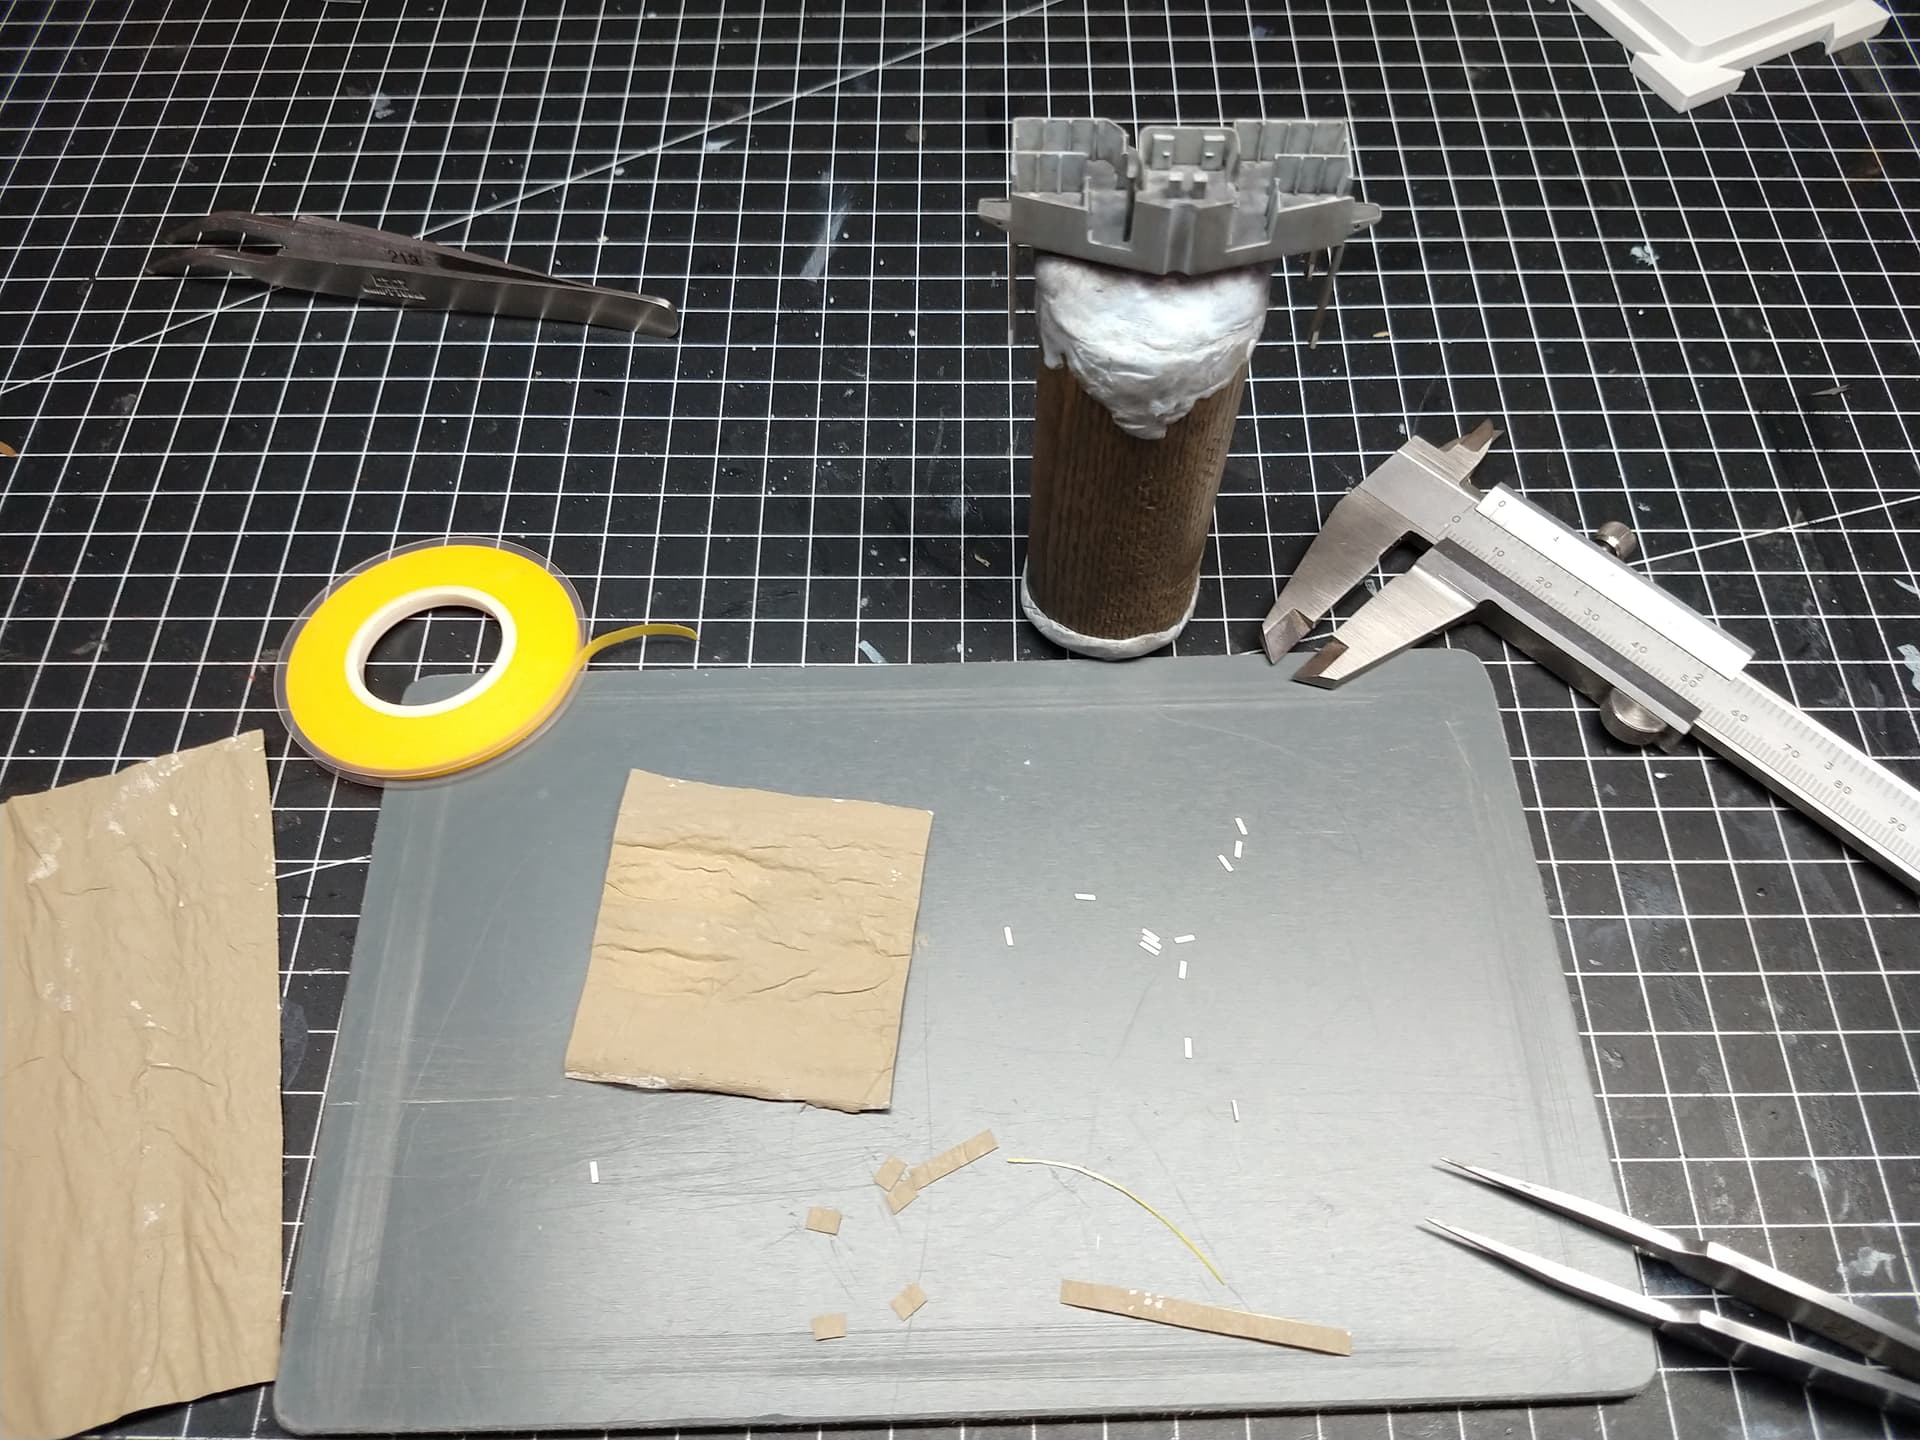
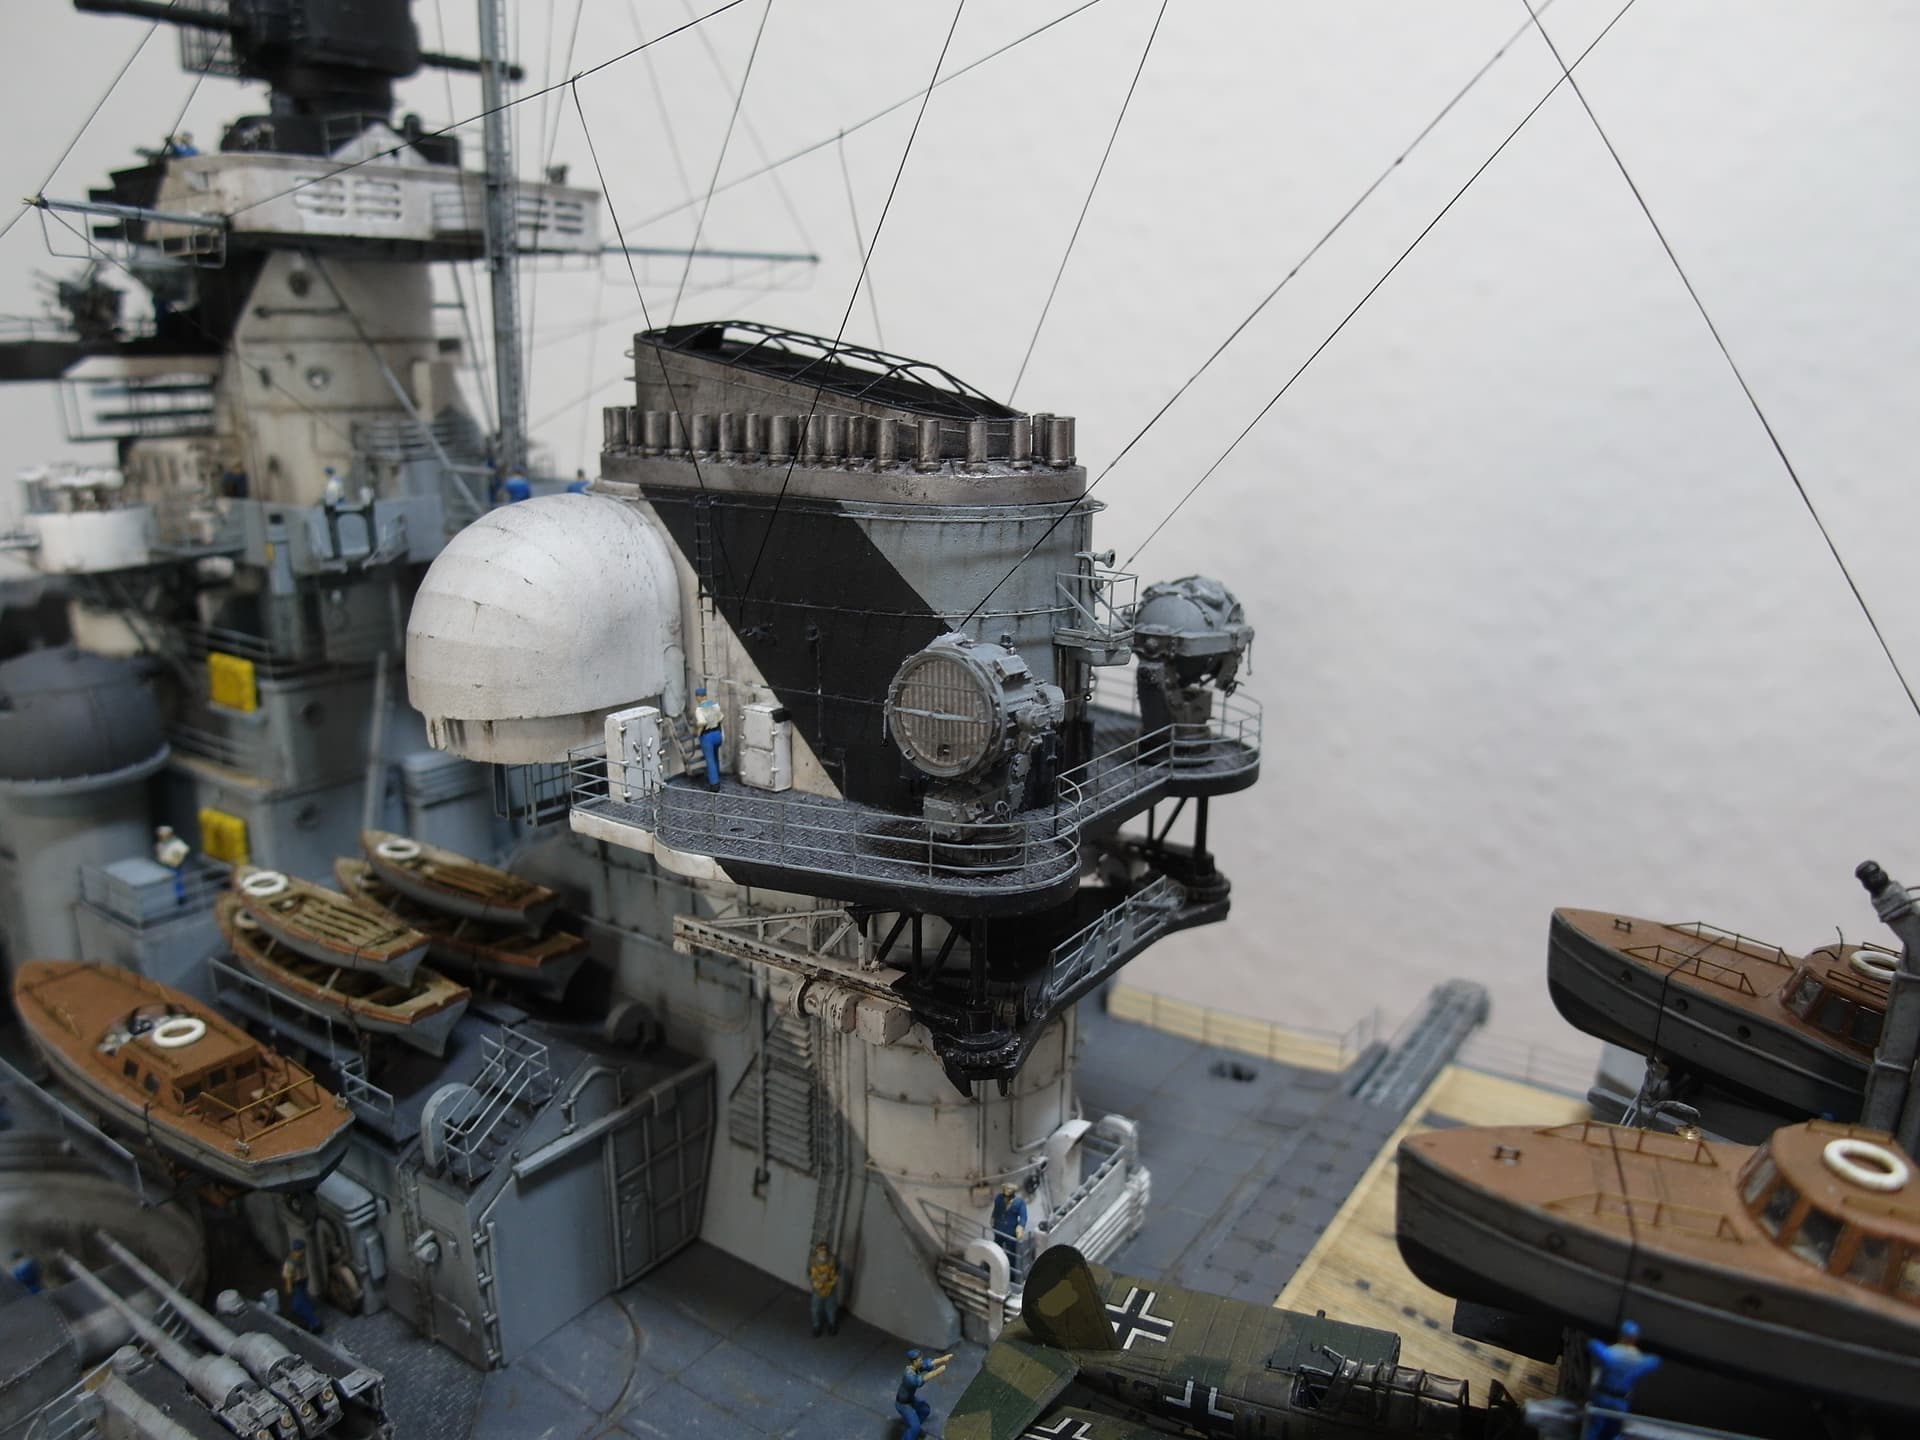
Next up is the funnel. This one also needs some upgrades.
The usual, styrene, lead wire and Pontos.
Because Pontos is the crowning glory.

They will be exchanged for the rough plastic cast.
So away with it.
One of the things I like far more about the Pontos than the MK 1, for example, is the fantastic drilling templates.
The tubes are then inserted…
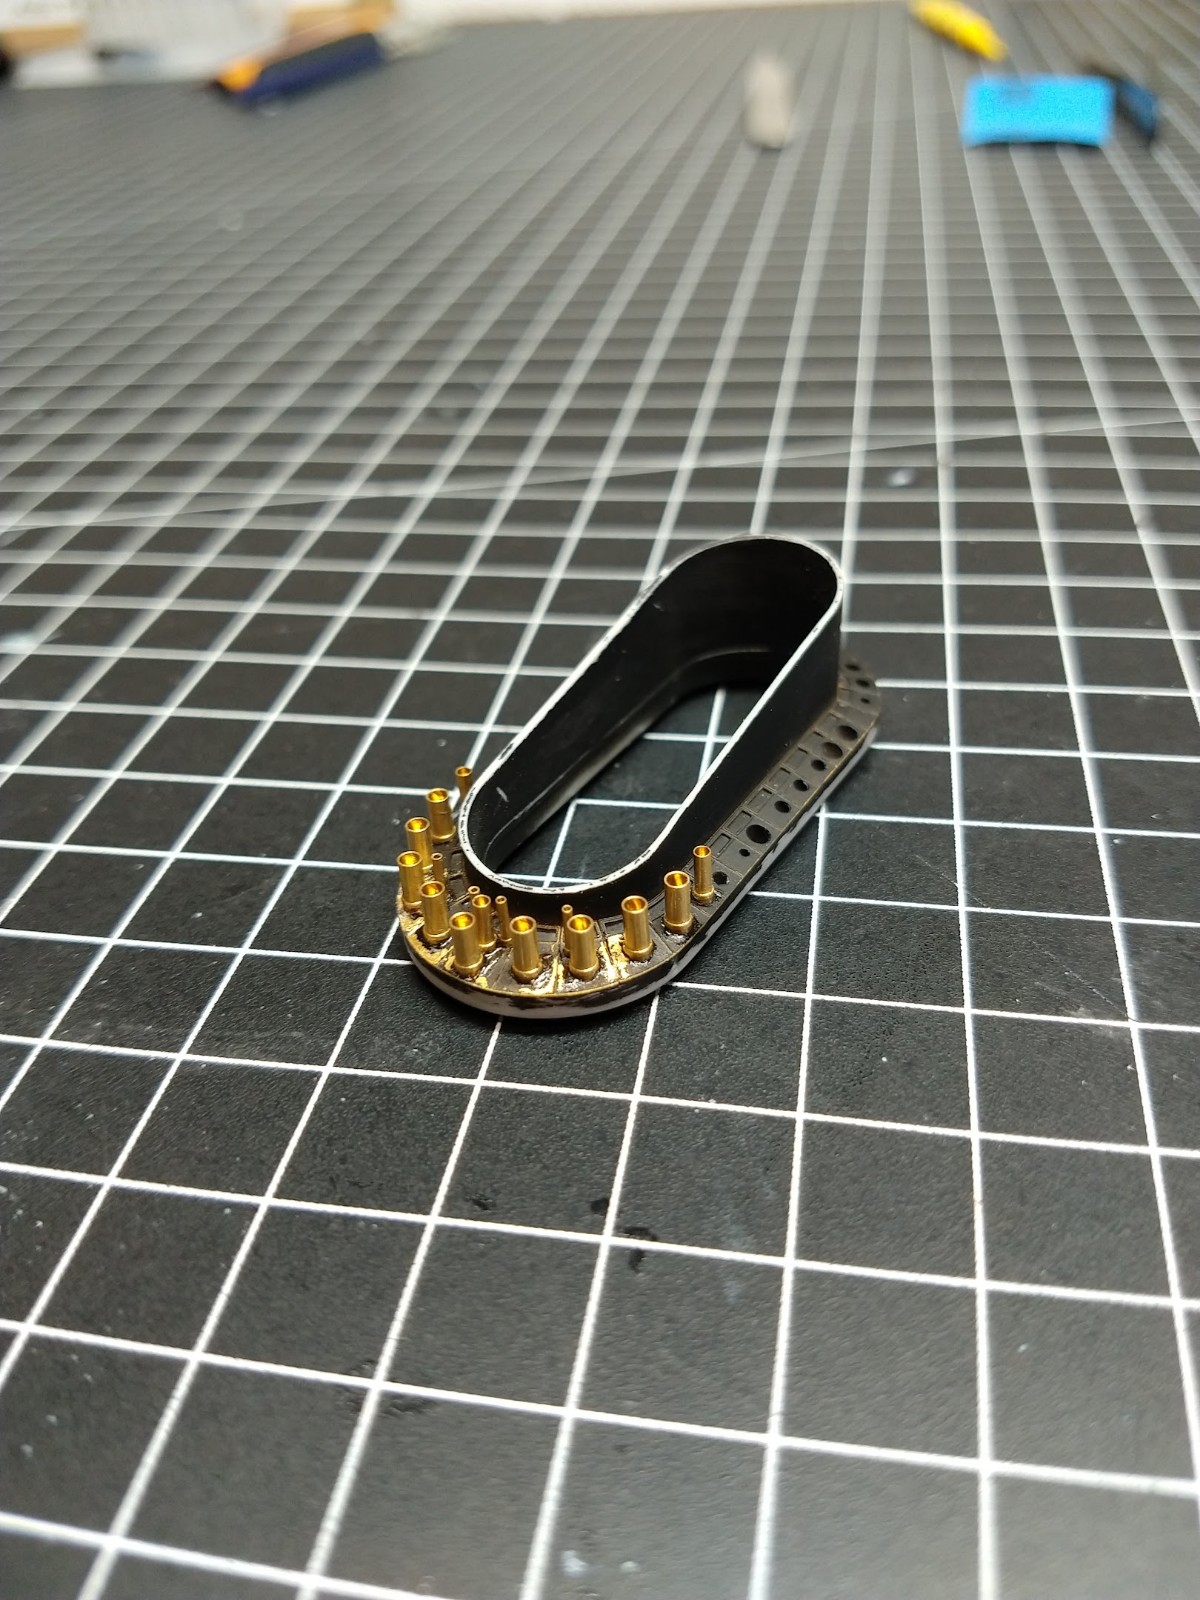
Aluminum paint on it.
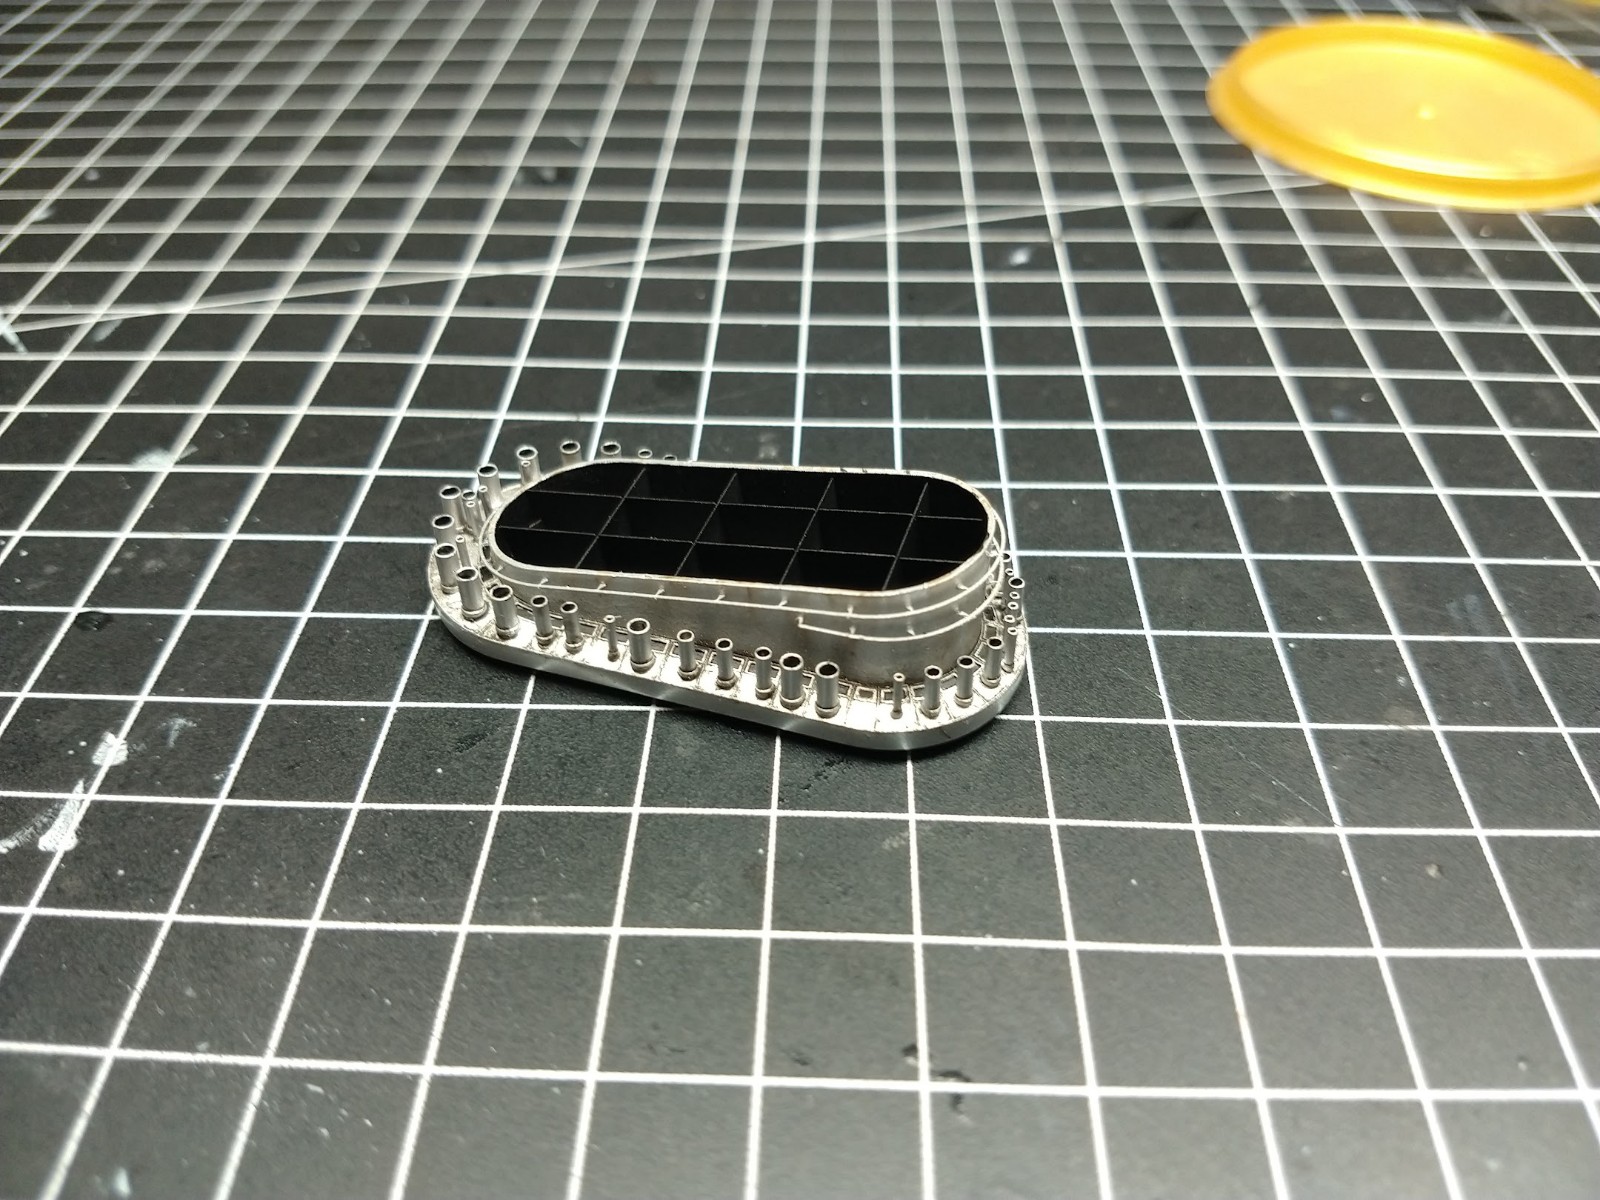
It’s already going to the coronation.
8 Likes
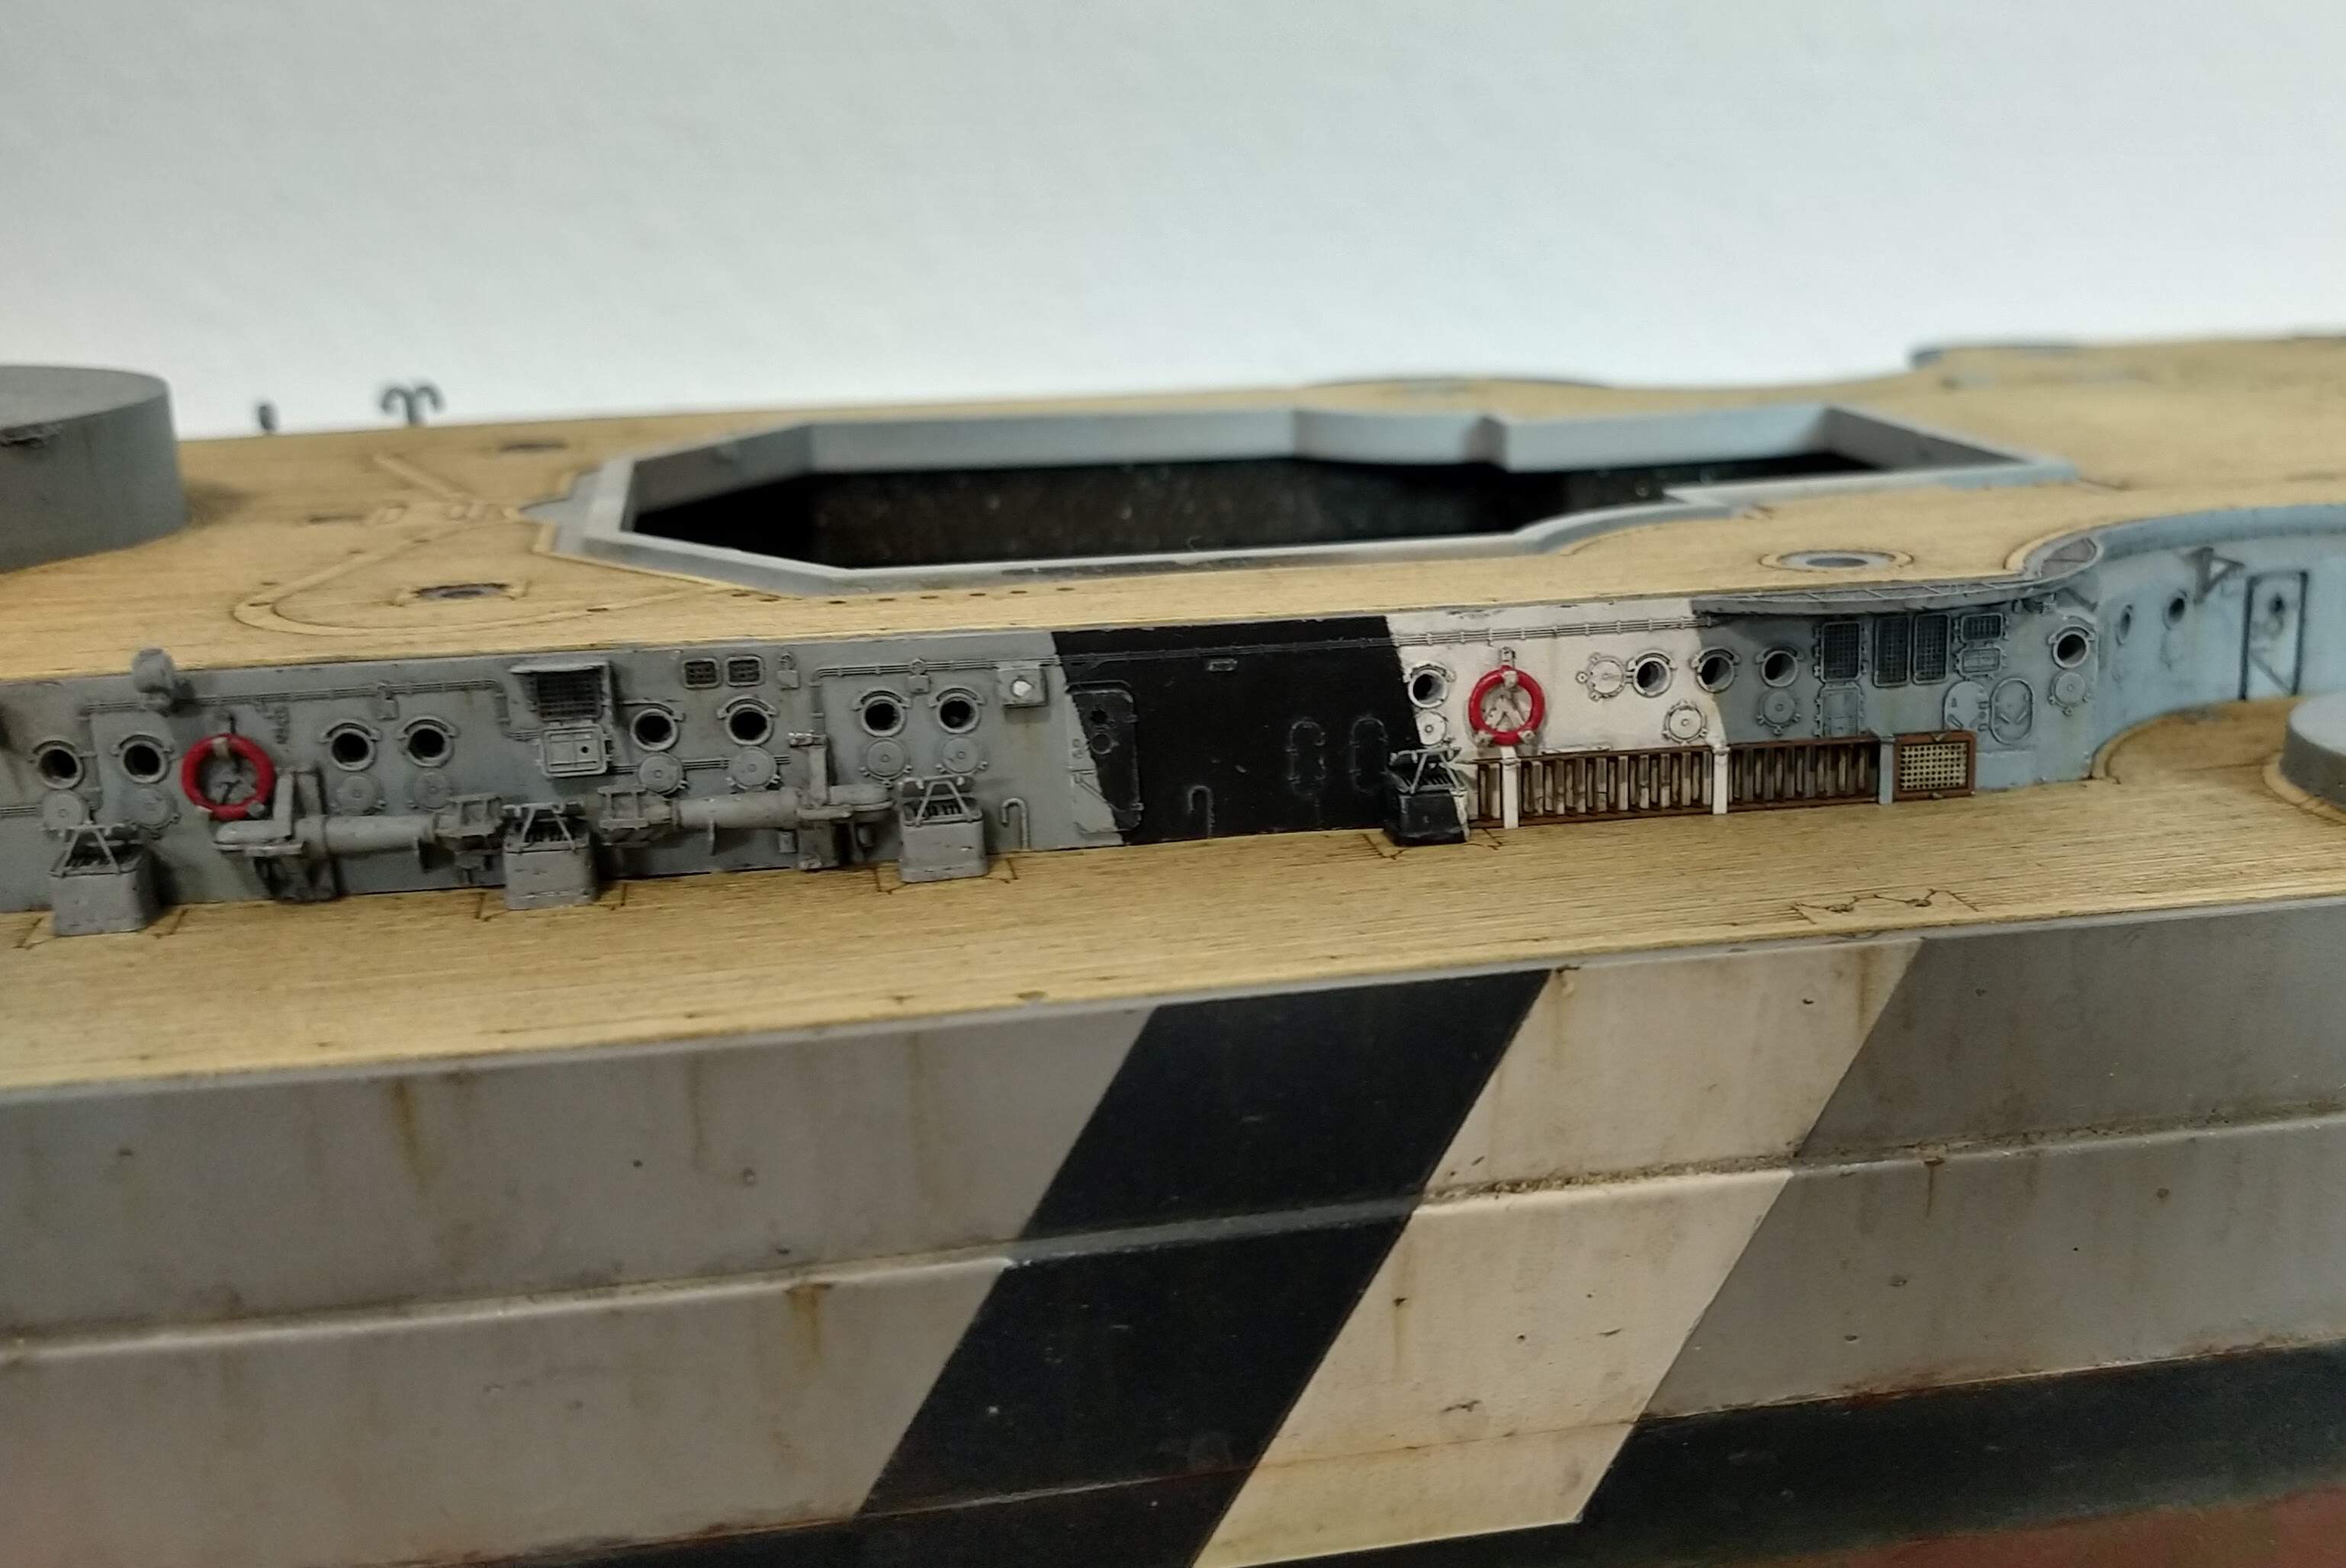
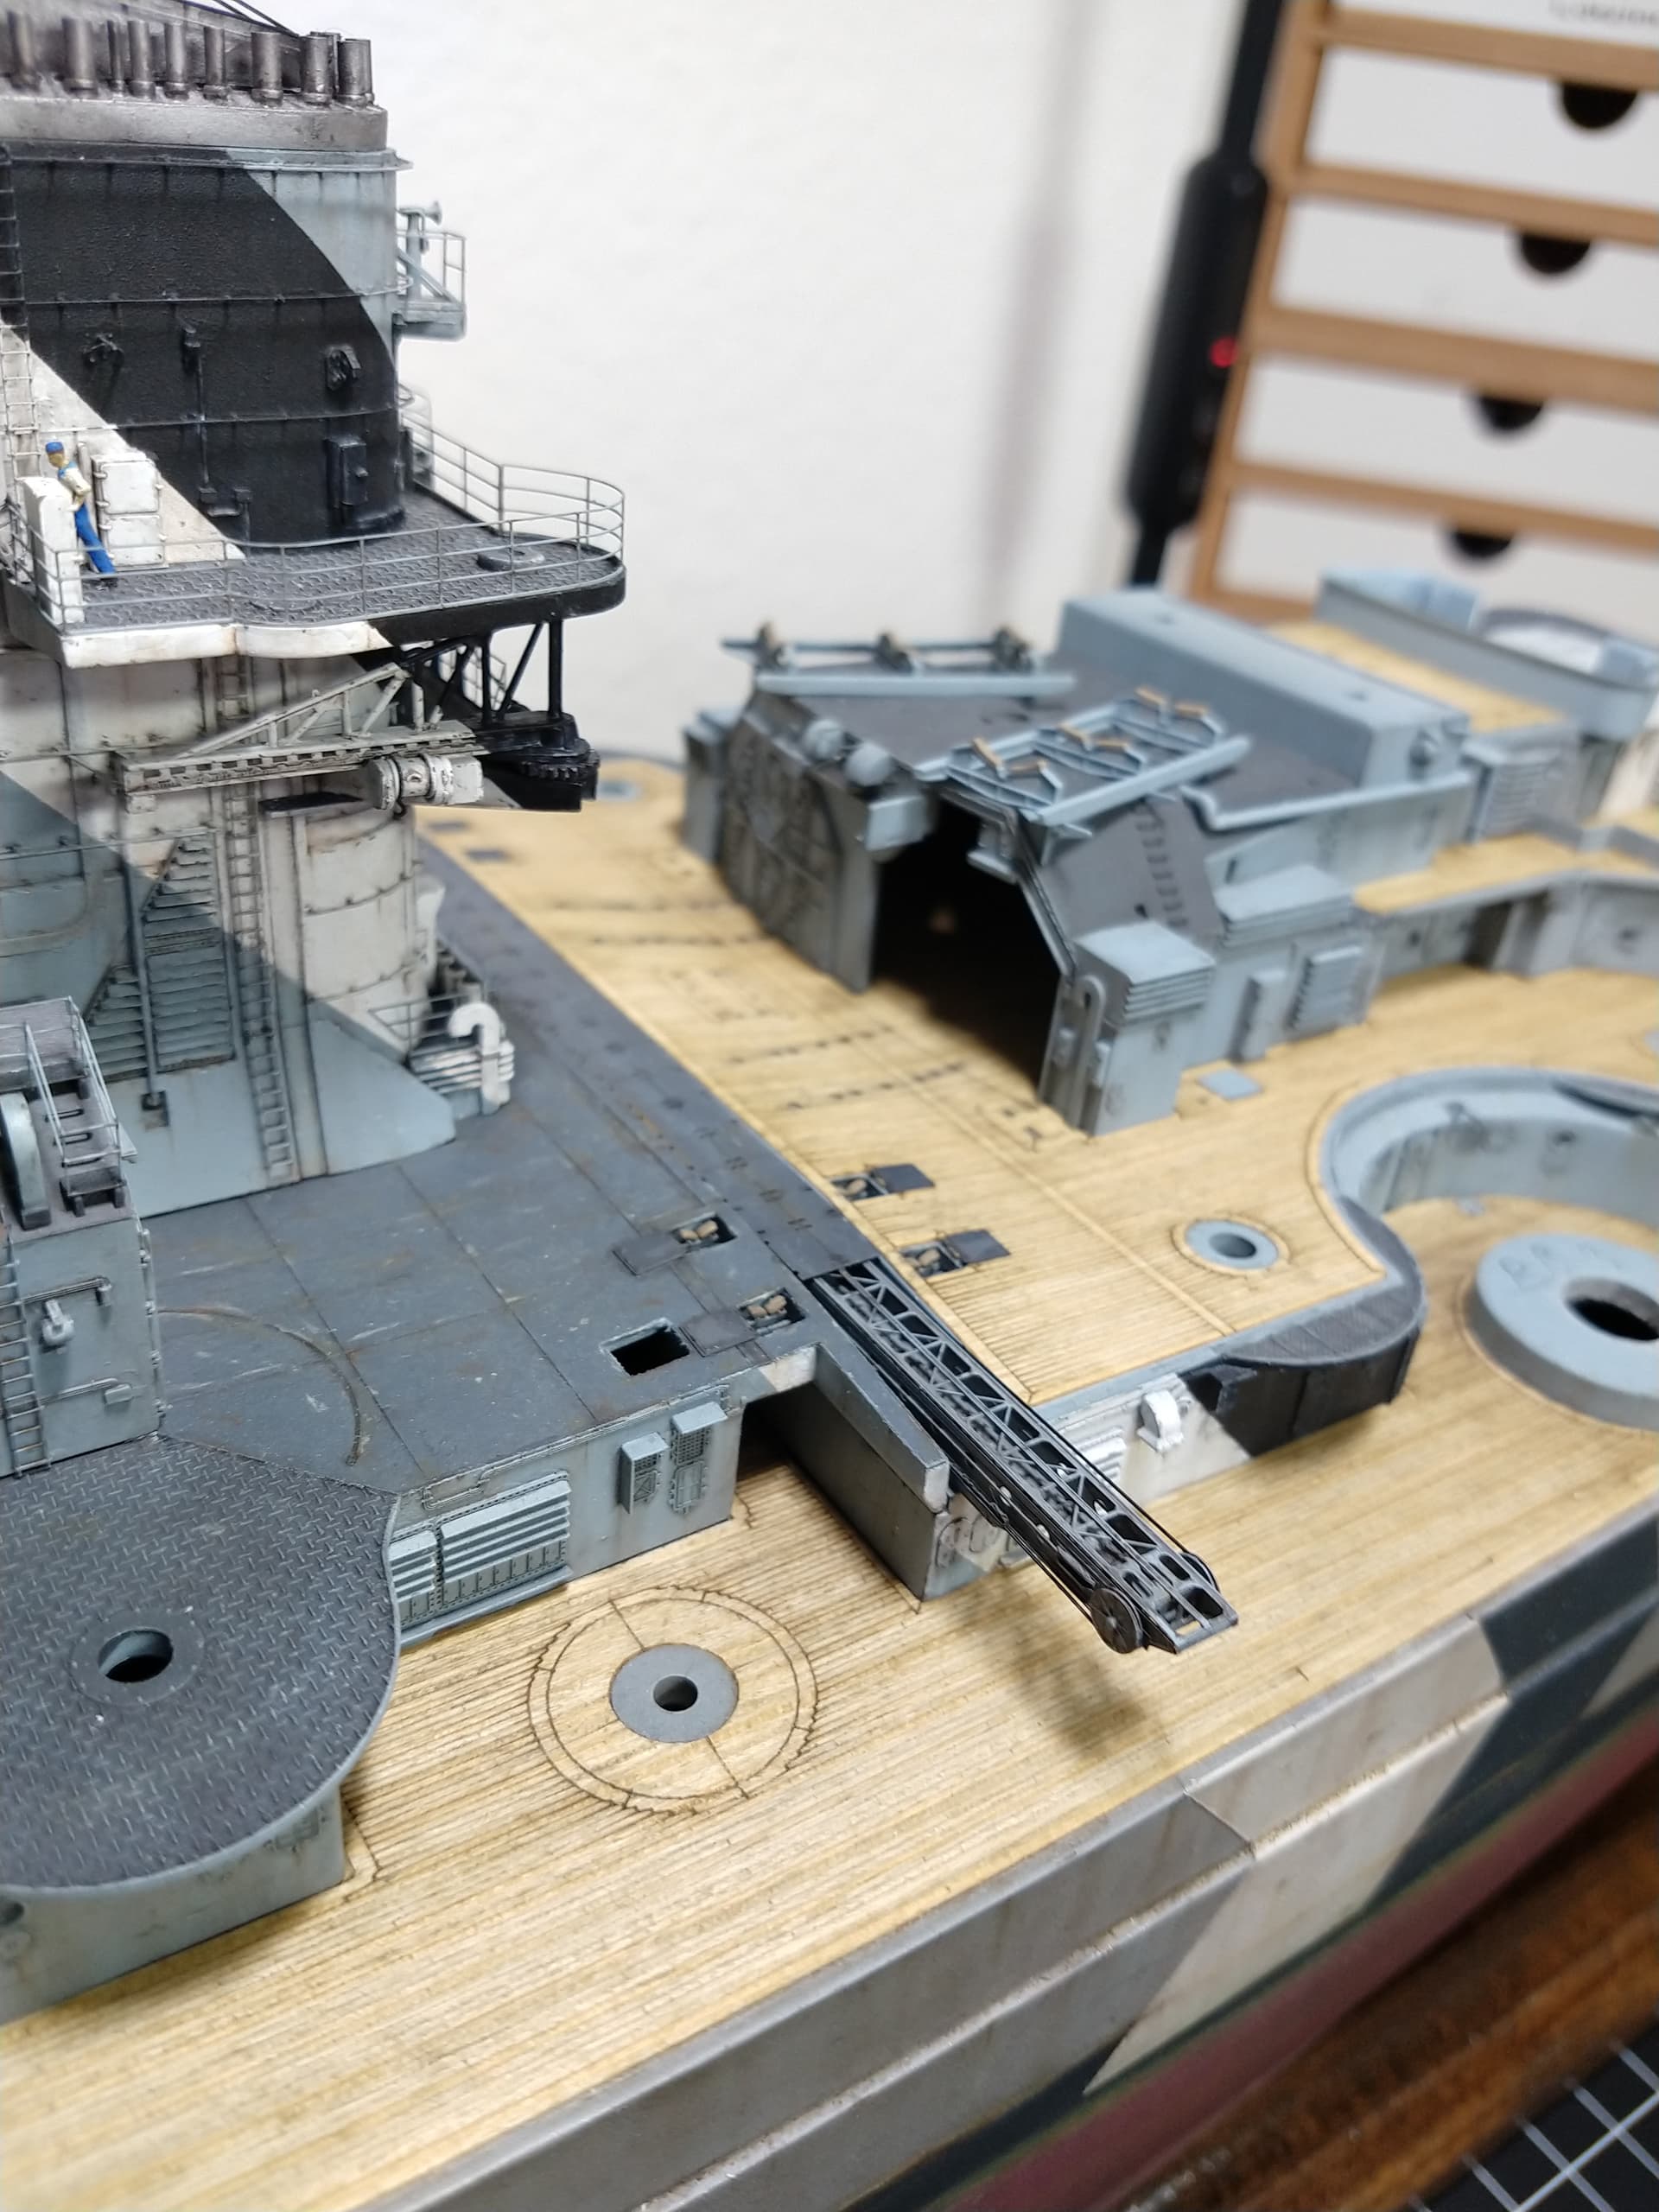
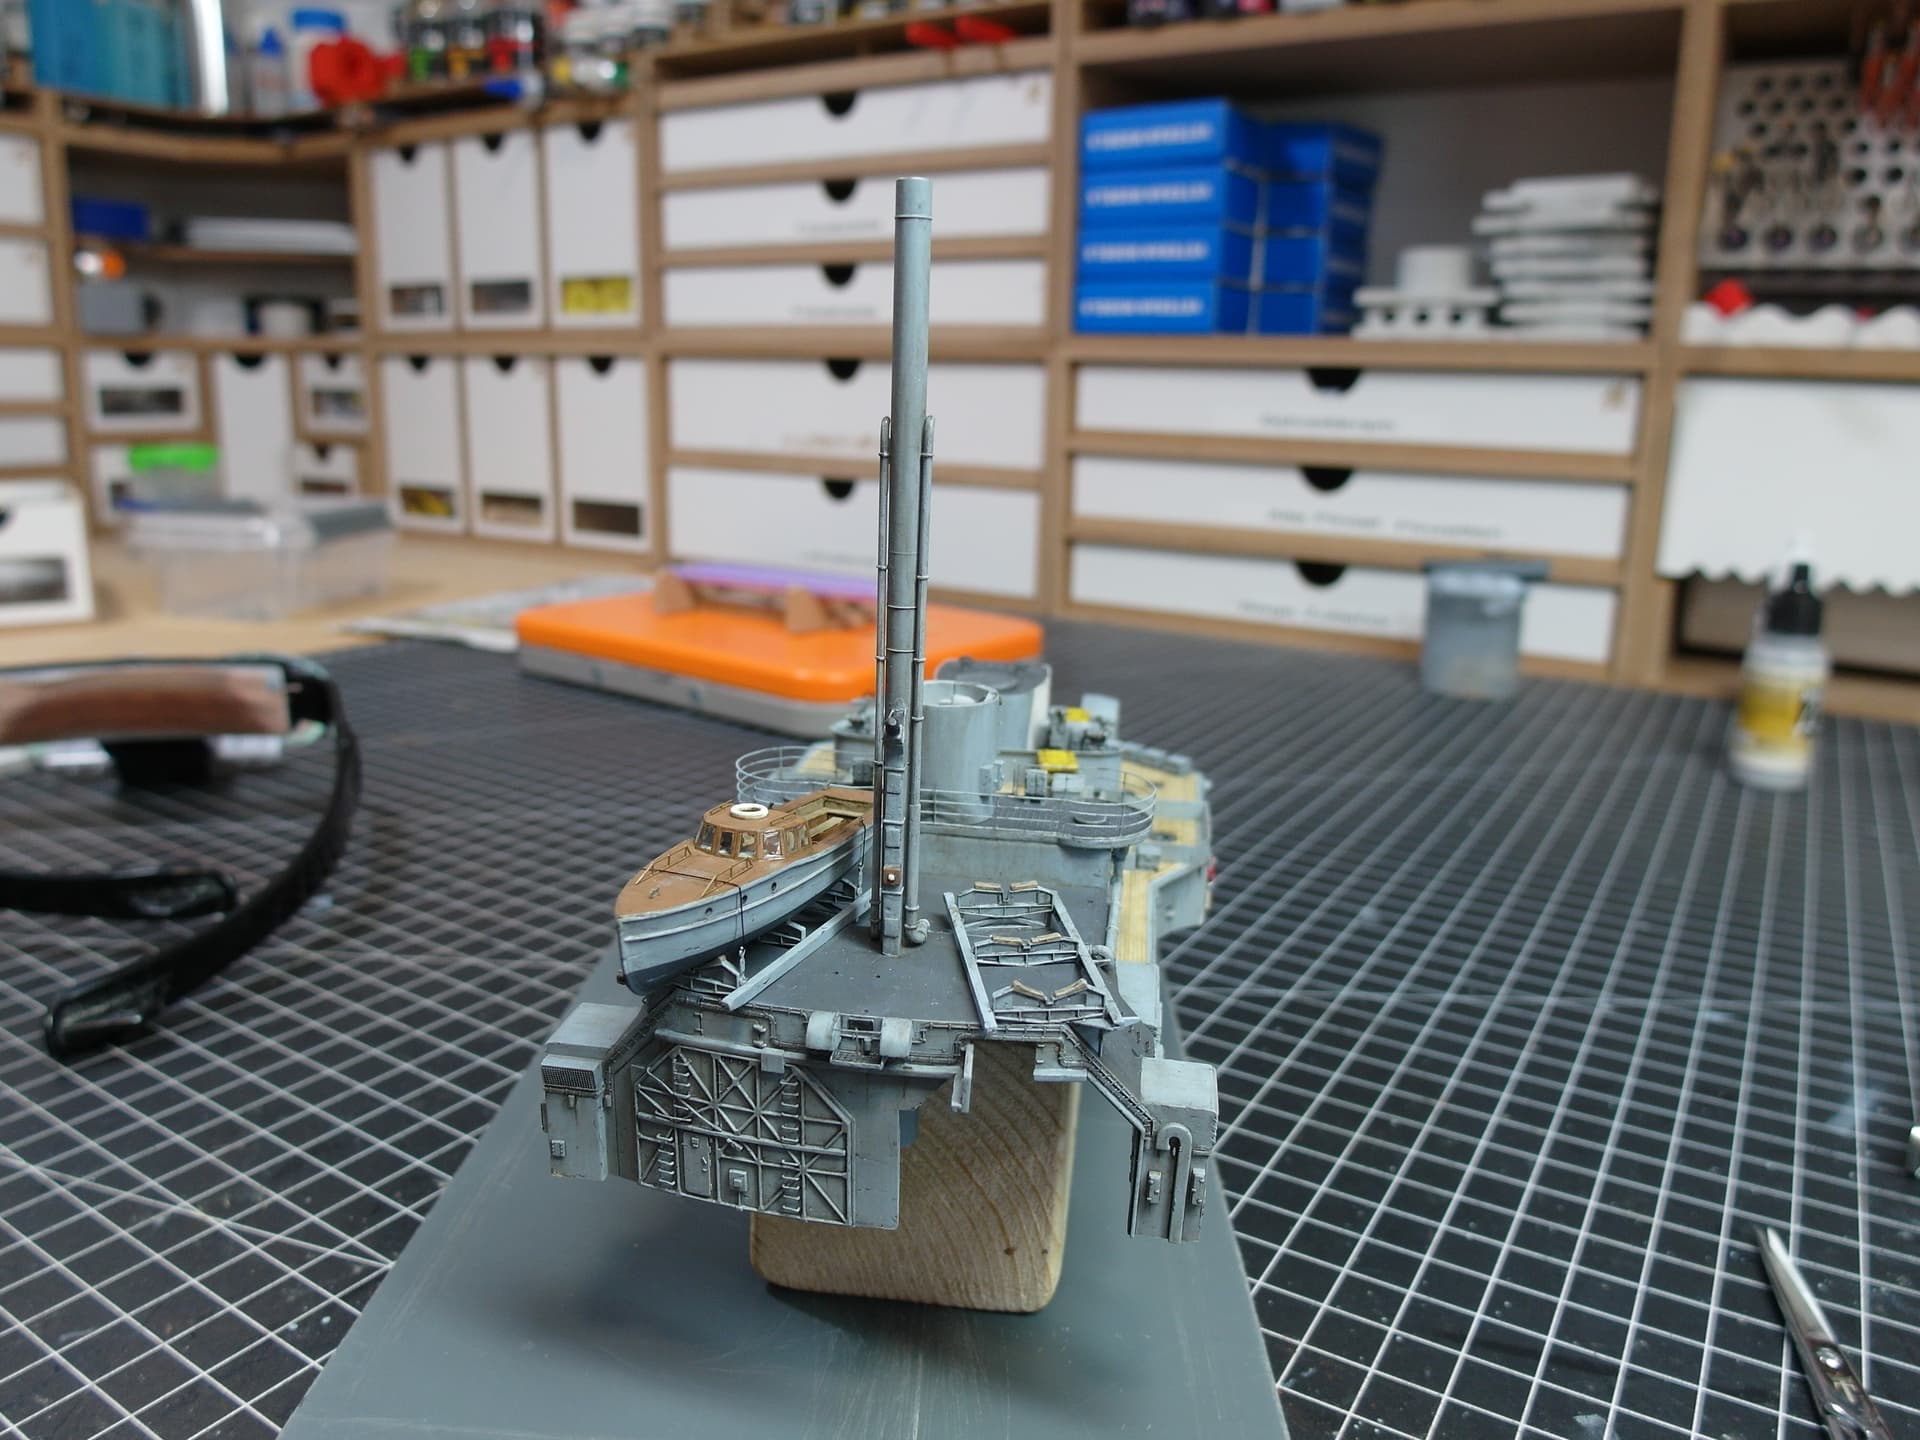
Let’s move on to the final details on the hull. I always do this quite late to protect them from damage for as long as possible.
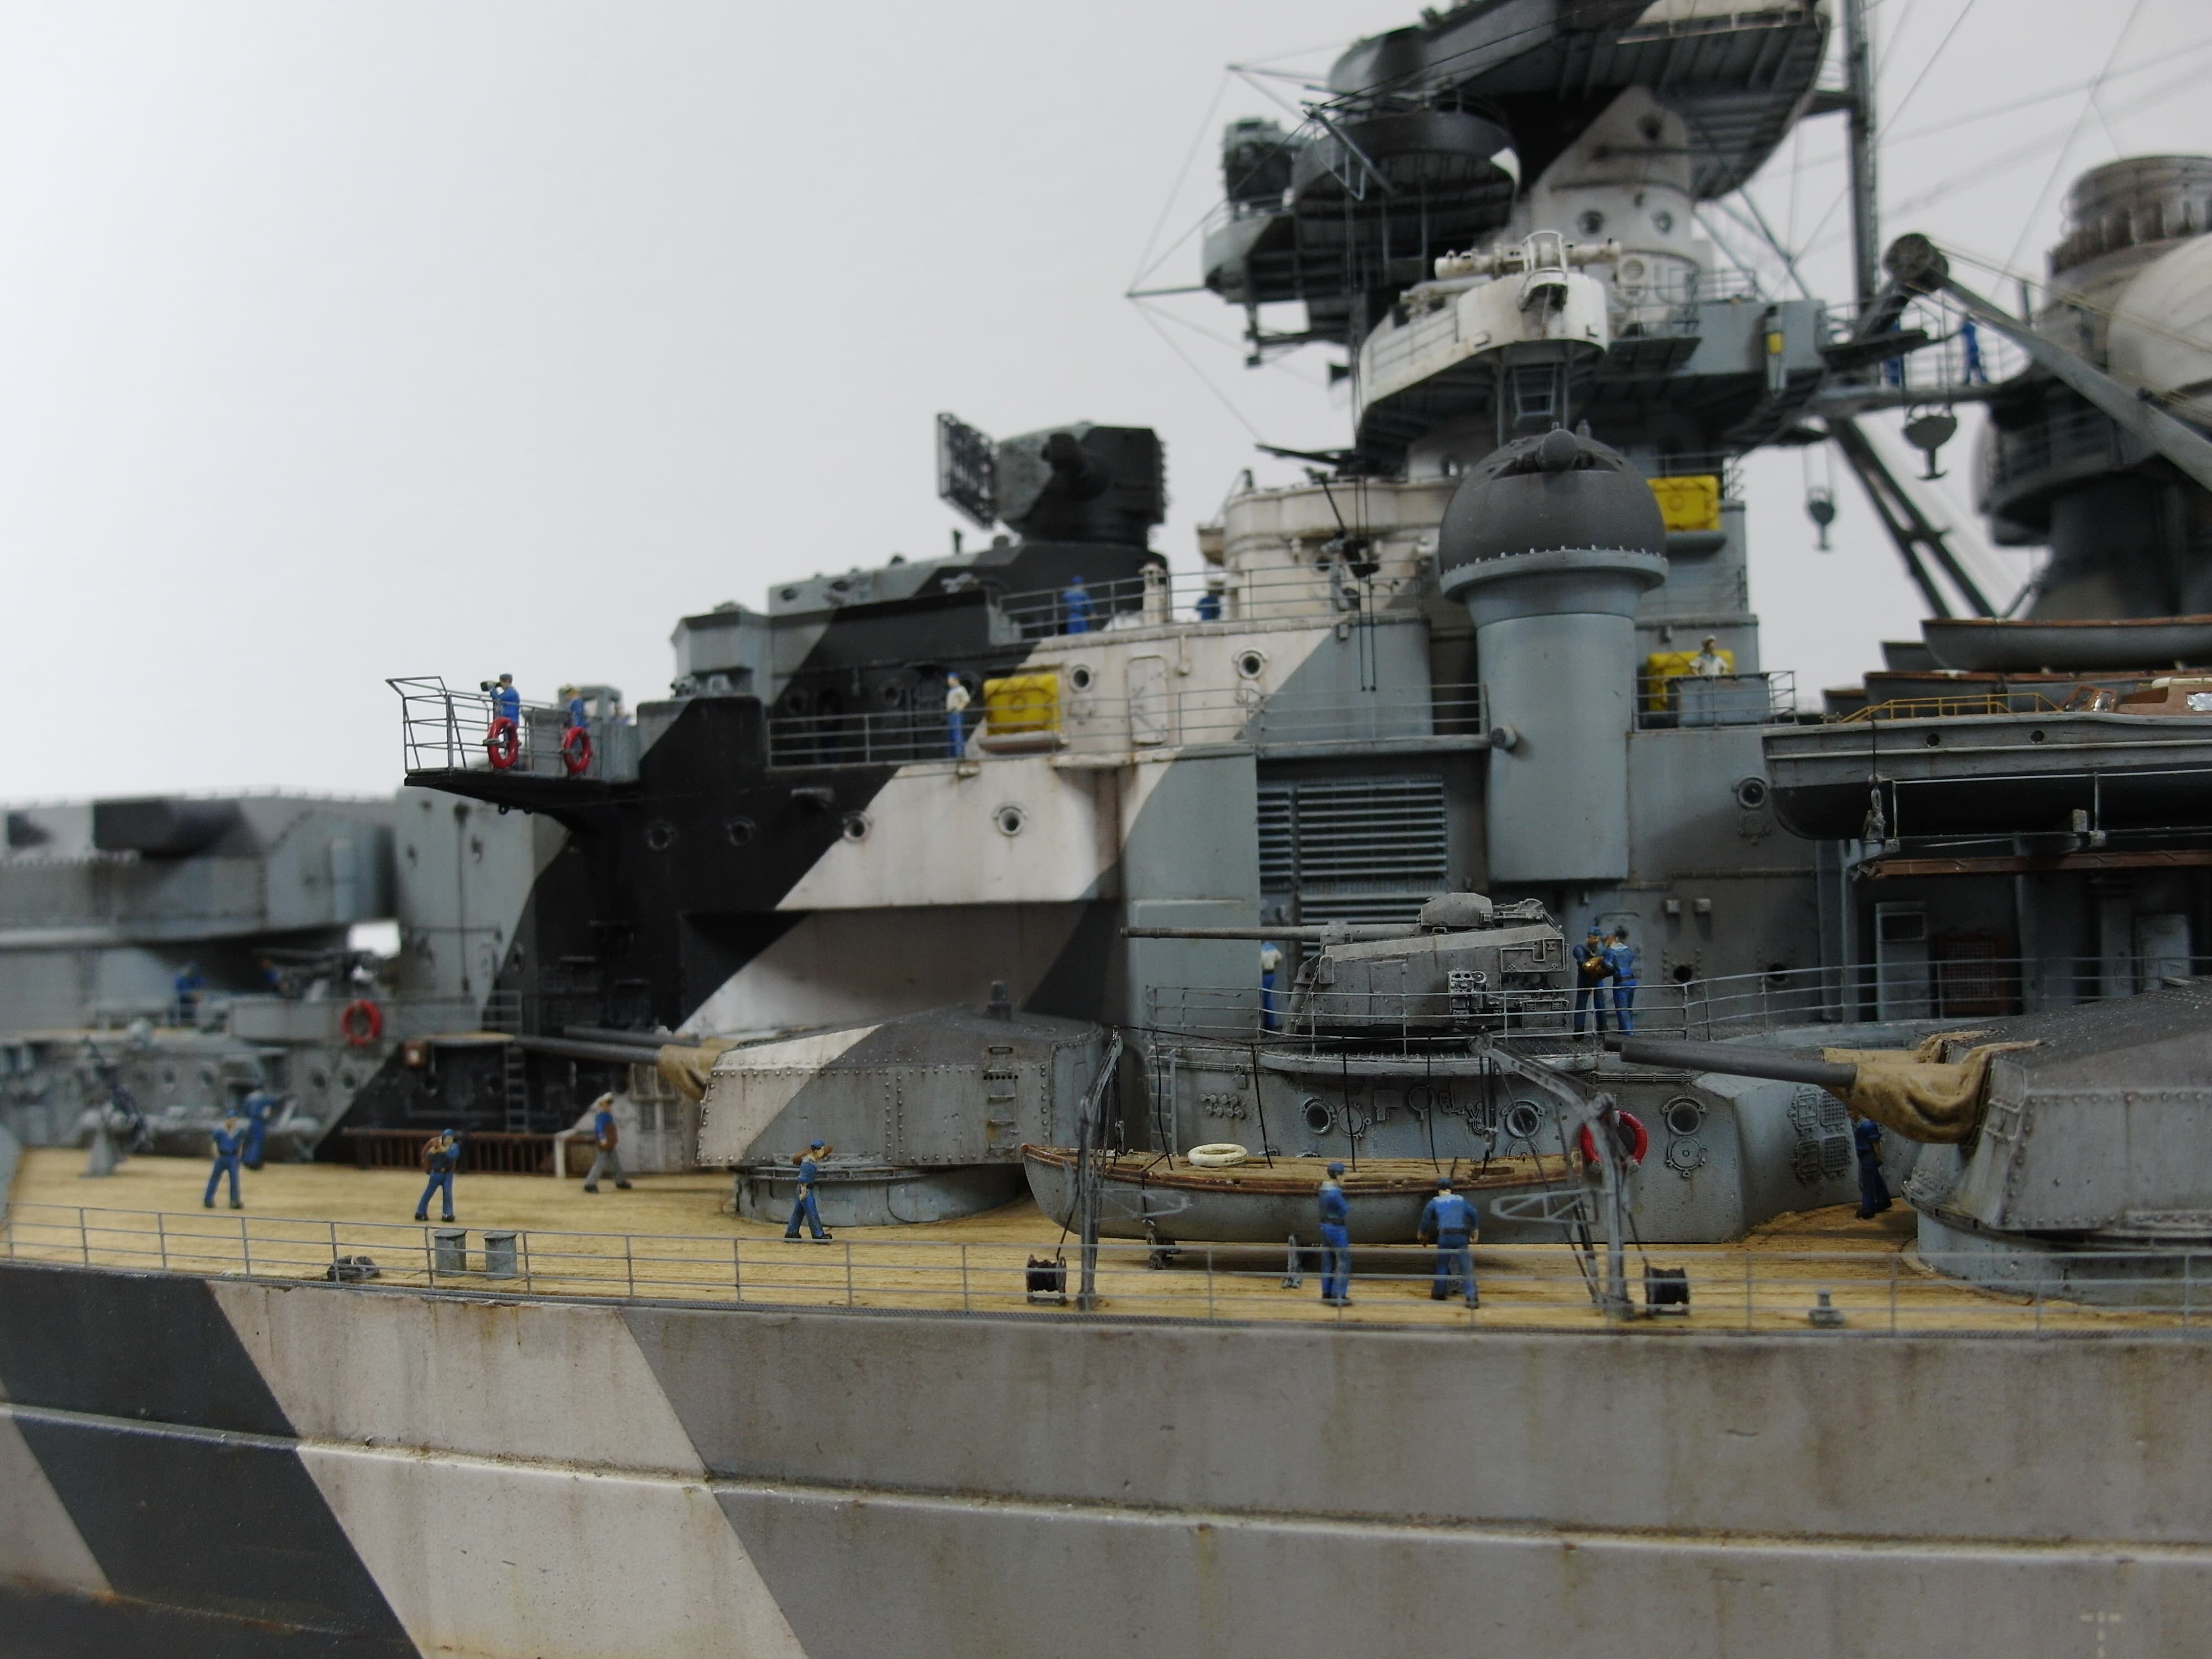
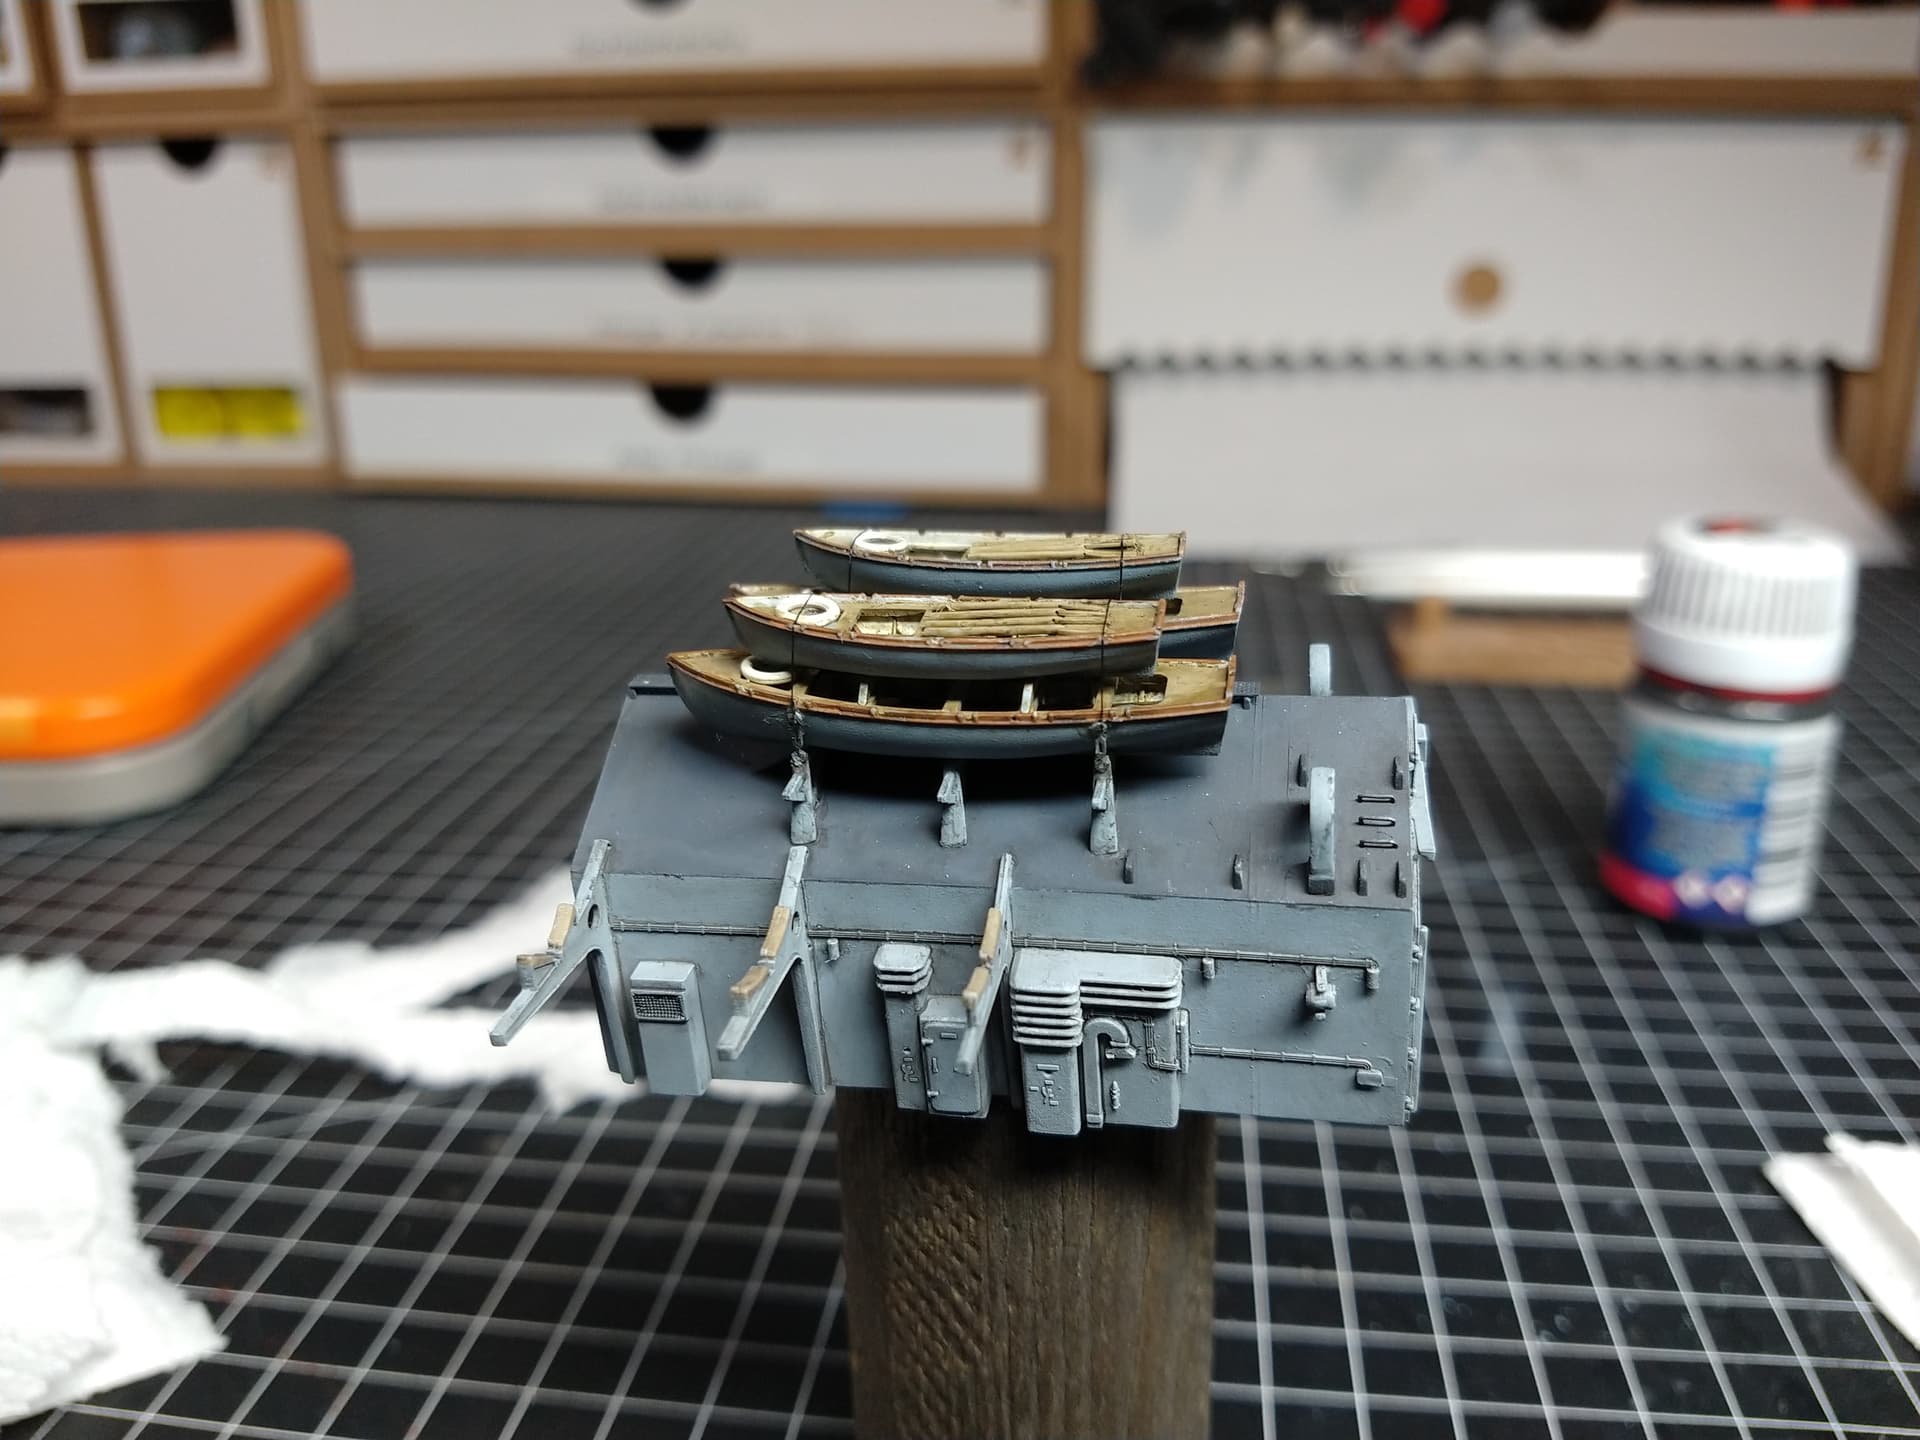
Then it goes far to the hangars and the dinghies.
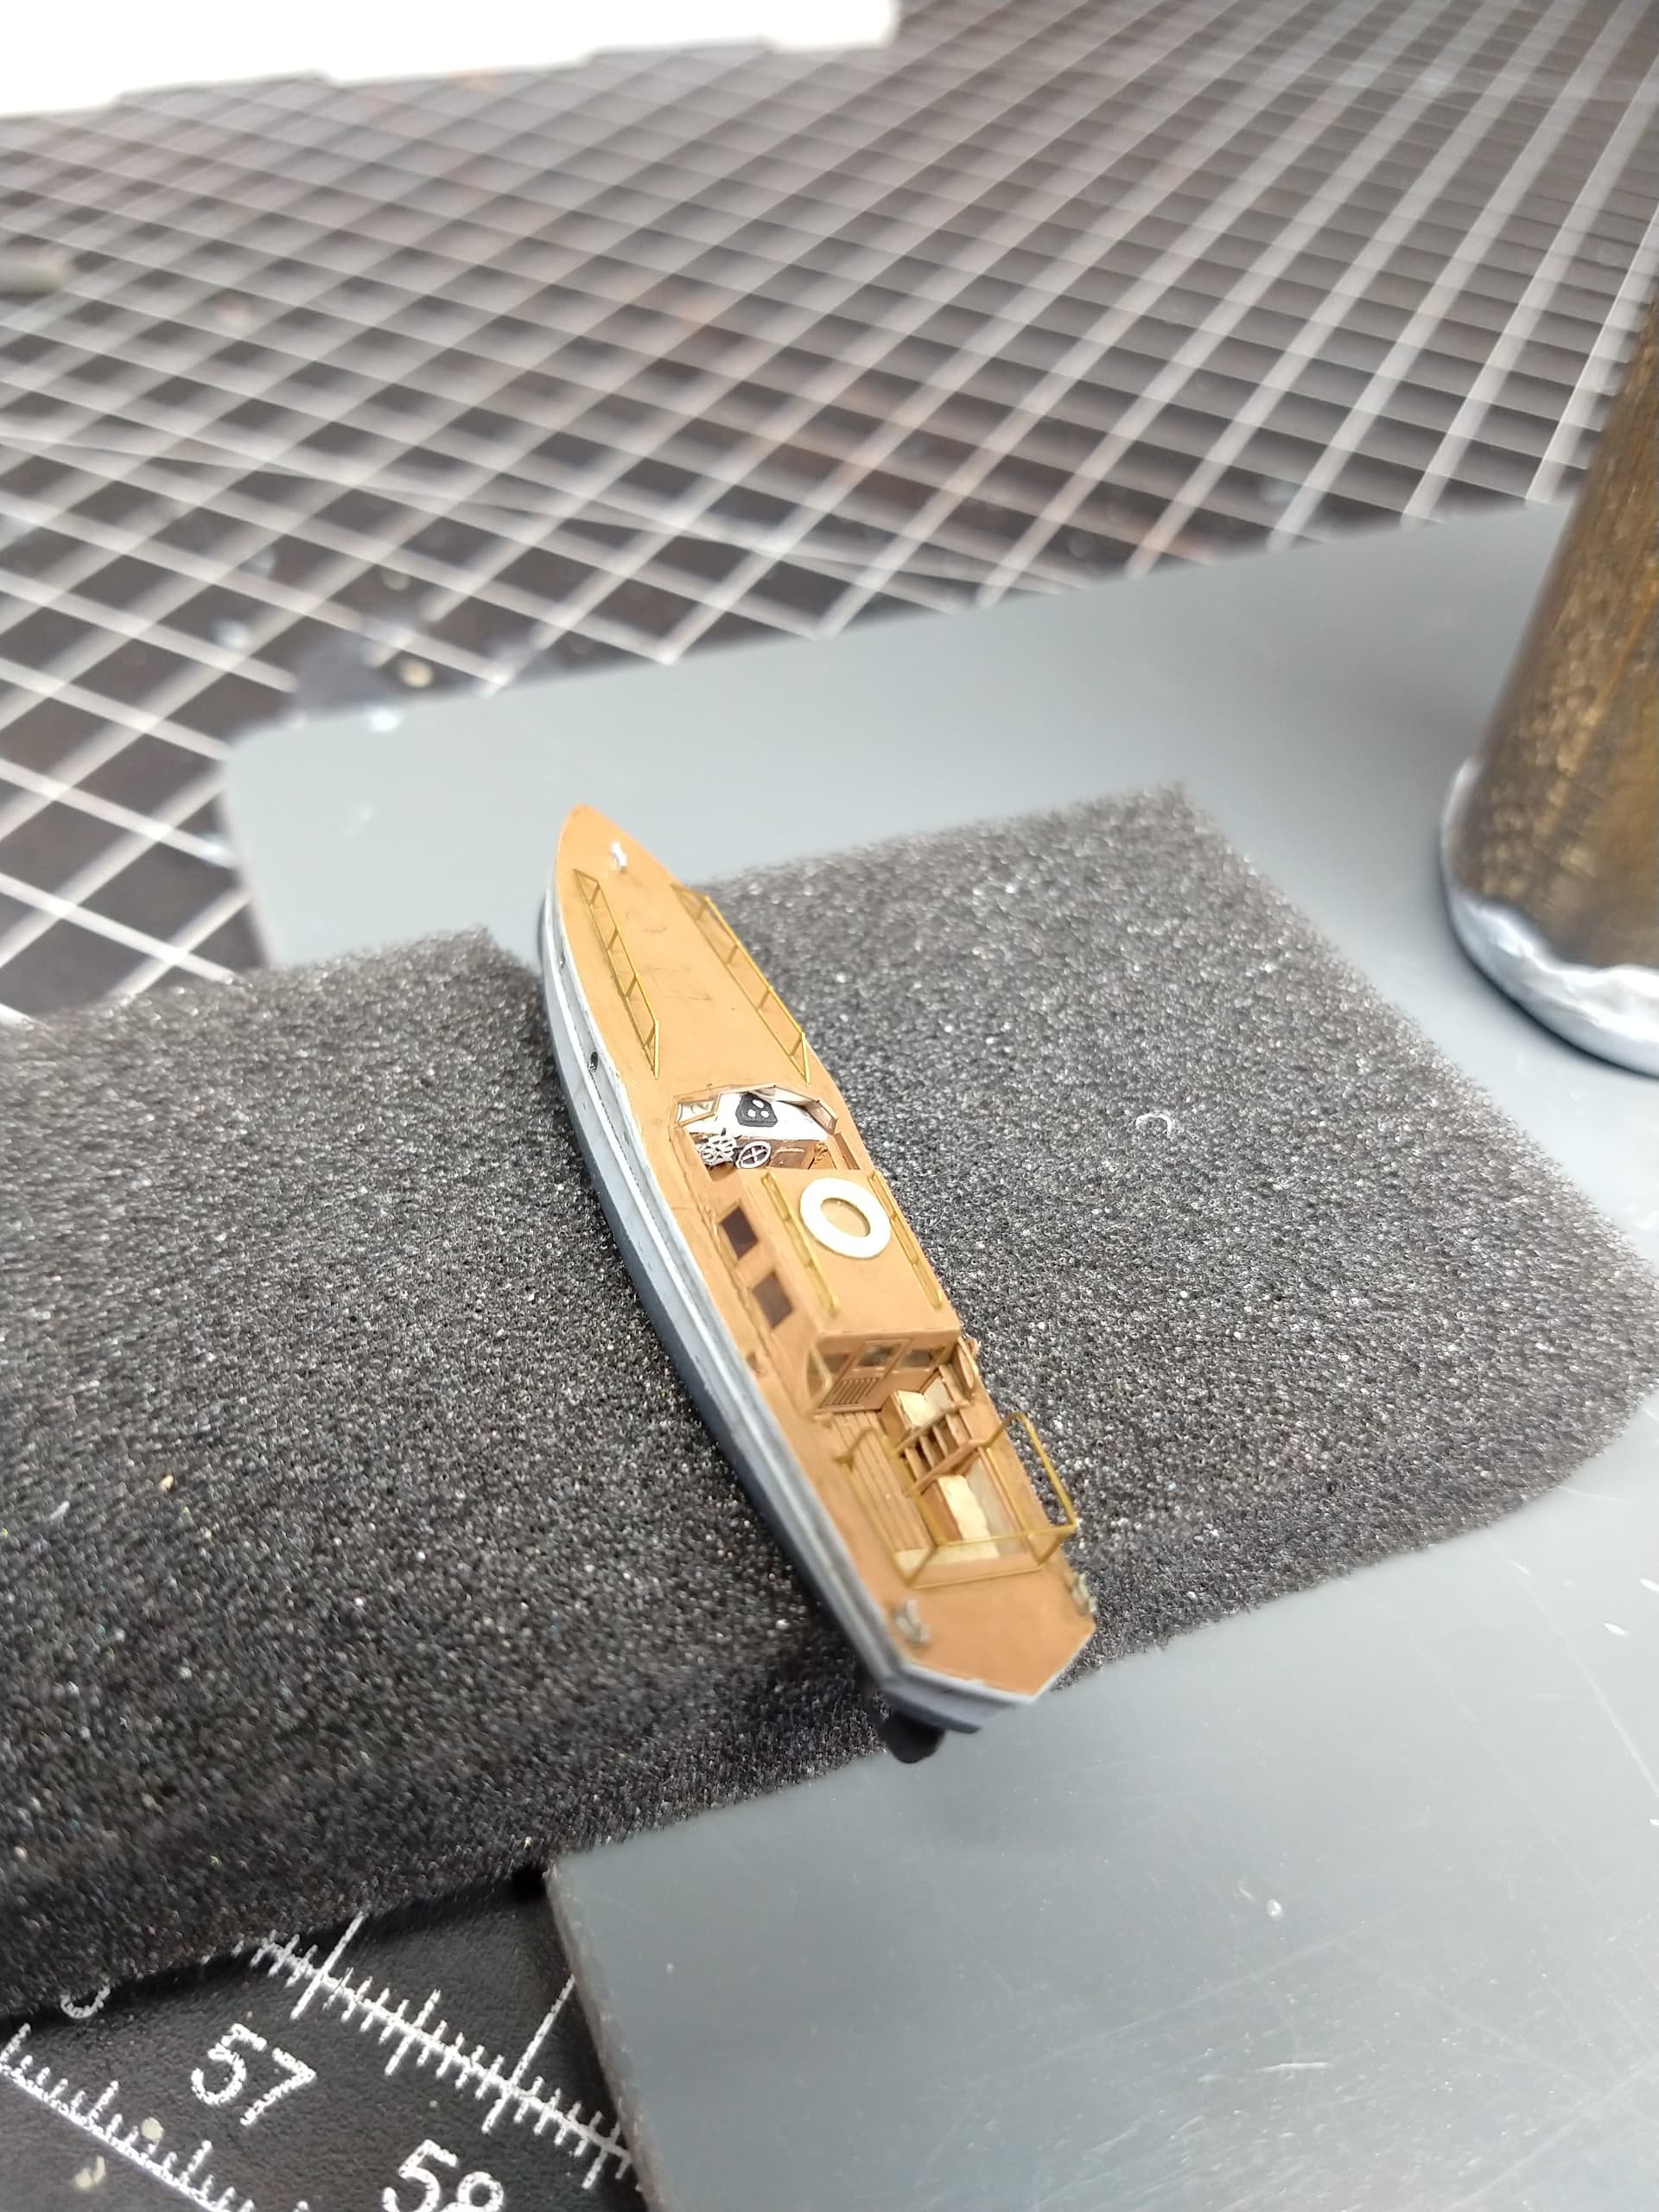
The Admiralty Boat is another of Pontos’ jewels. And a little upgraded by me.
Scratched the gangway to the hangar and it can be installed.
Set the foremast
The tower is also equipped with everything and can be locked.
Only the catapult is missing in the front area.
11 Likes
That’s a monster kit, and the detail you are putting into this is awesome!
1 Like
Many Thanks.
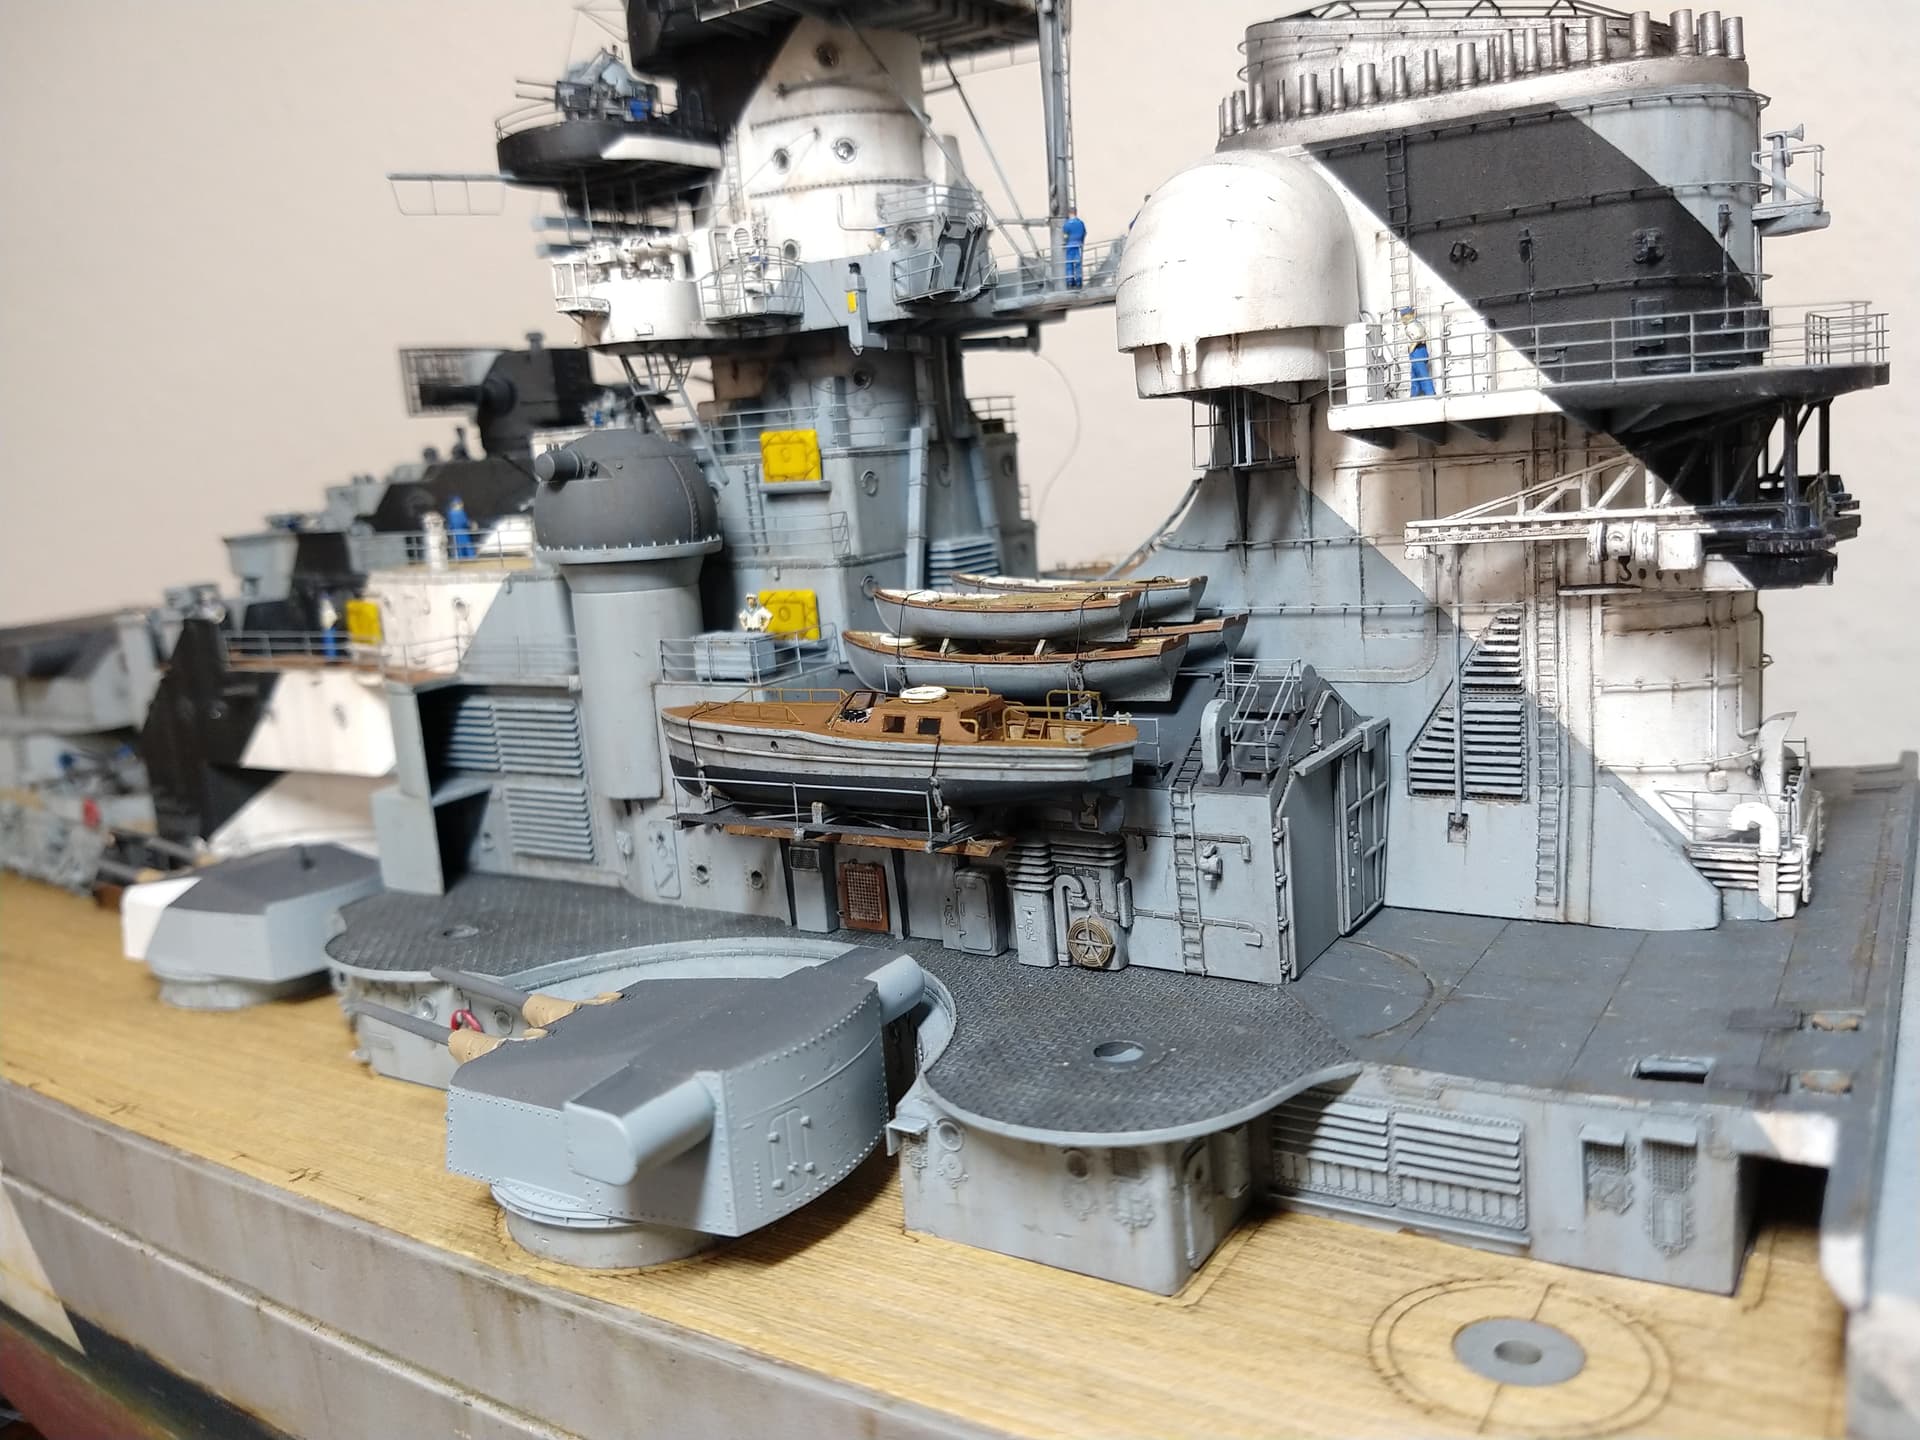
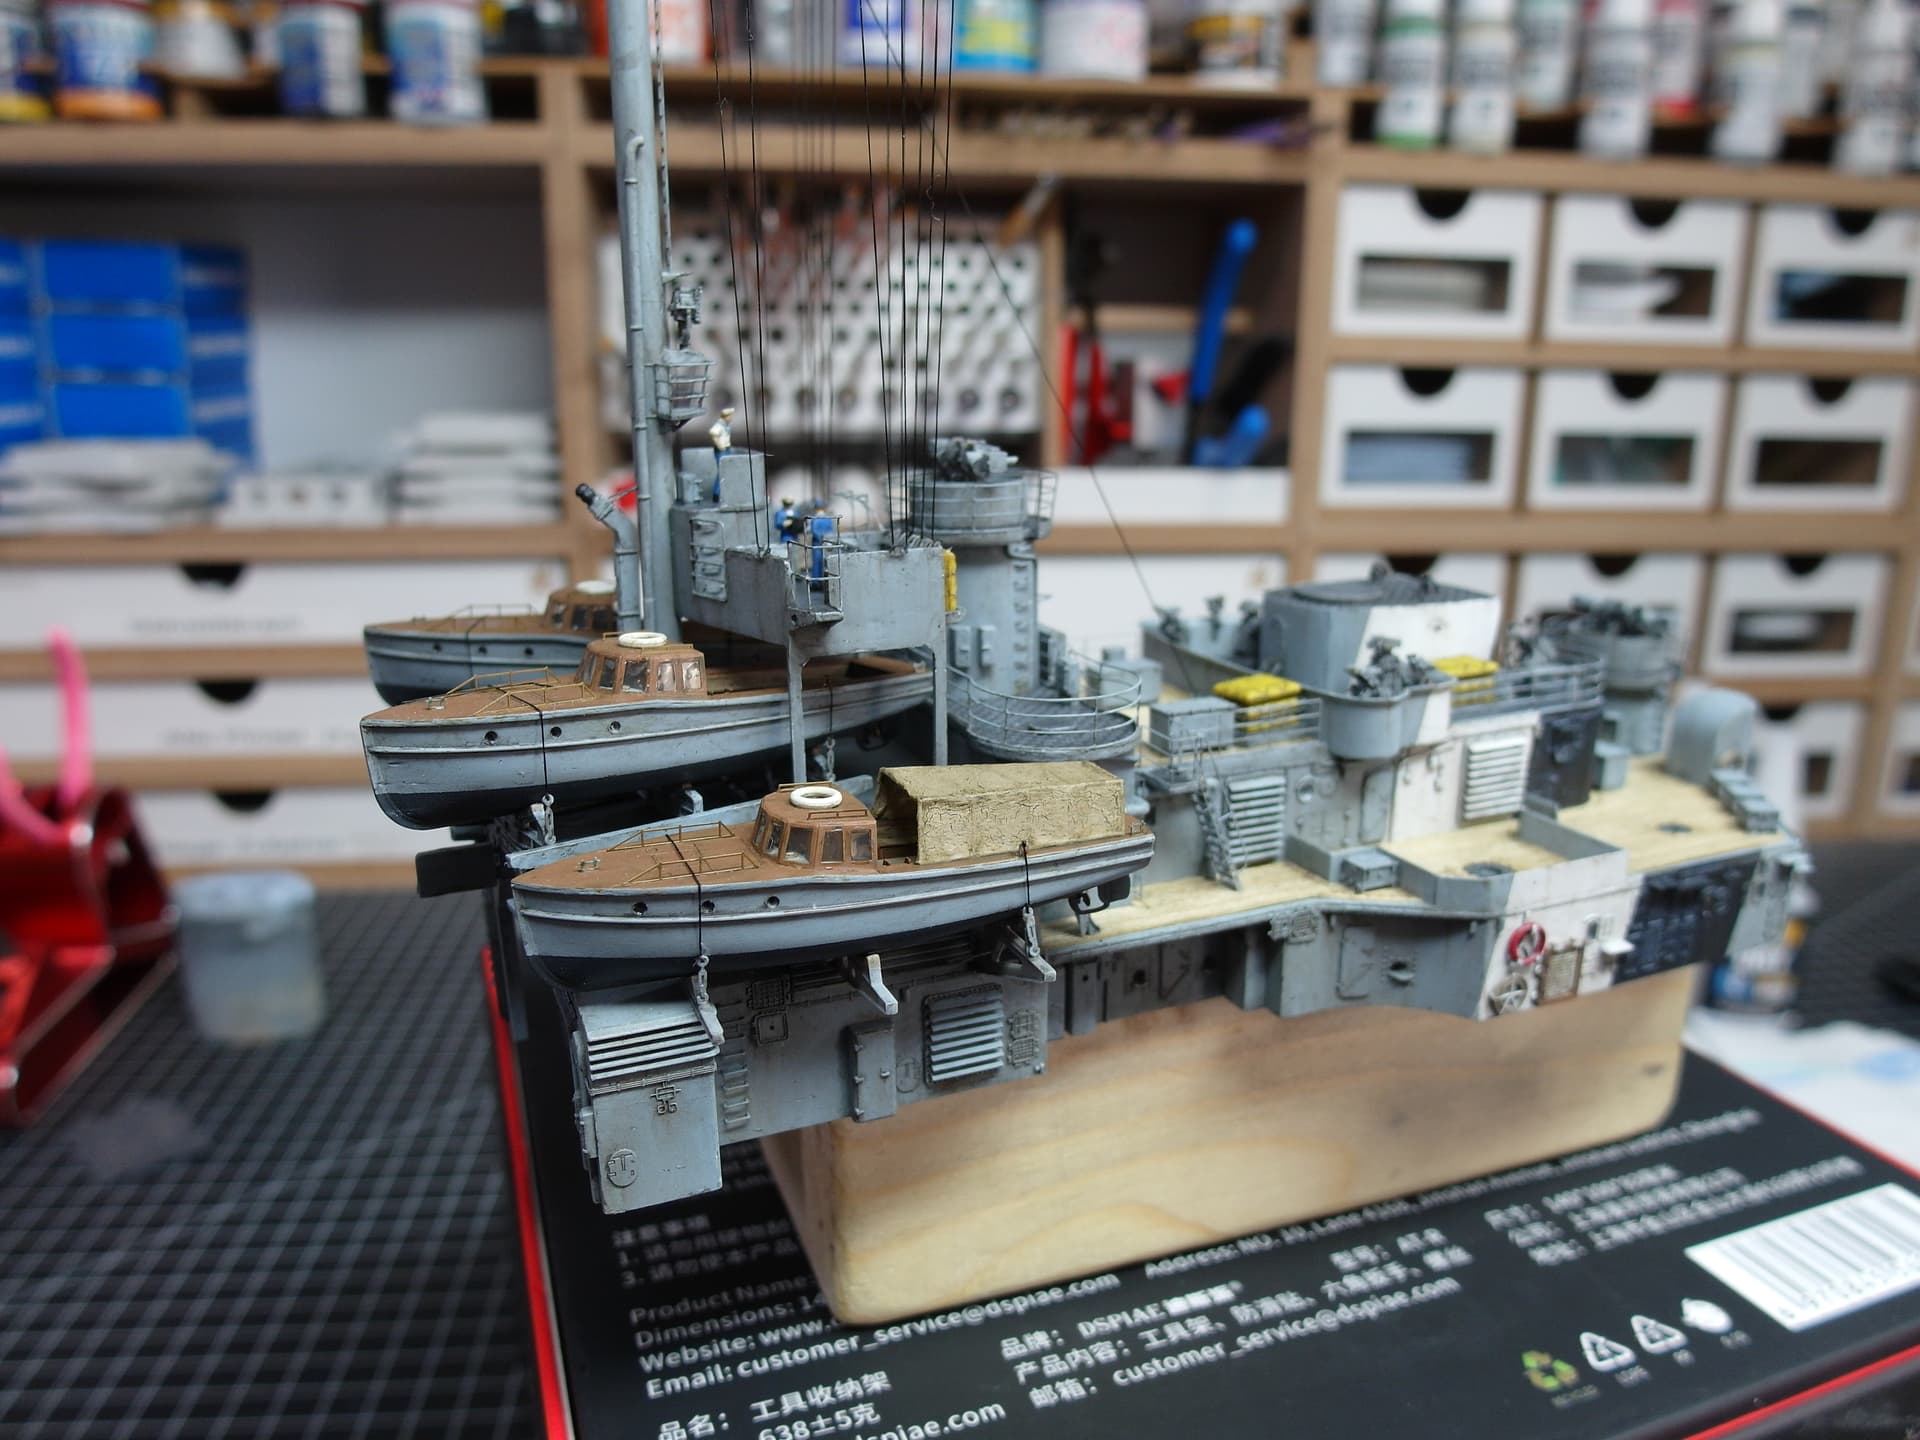
Let’s go to the rear deckhouse.
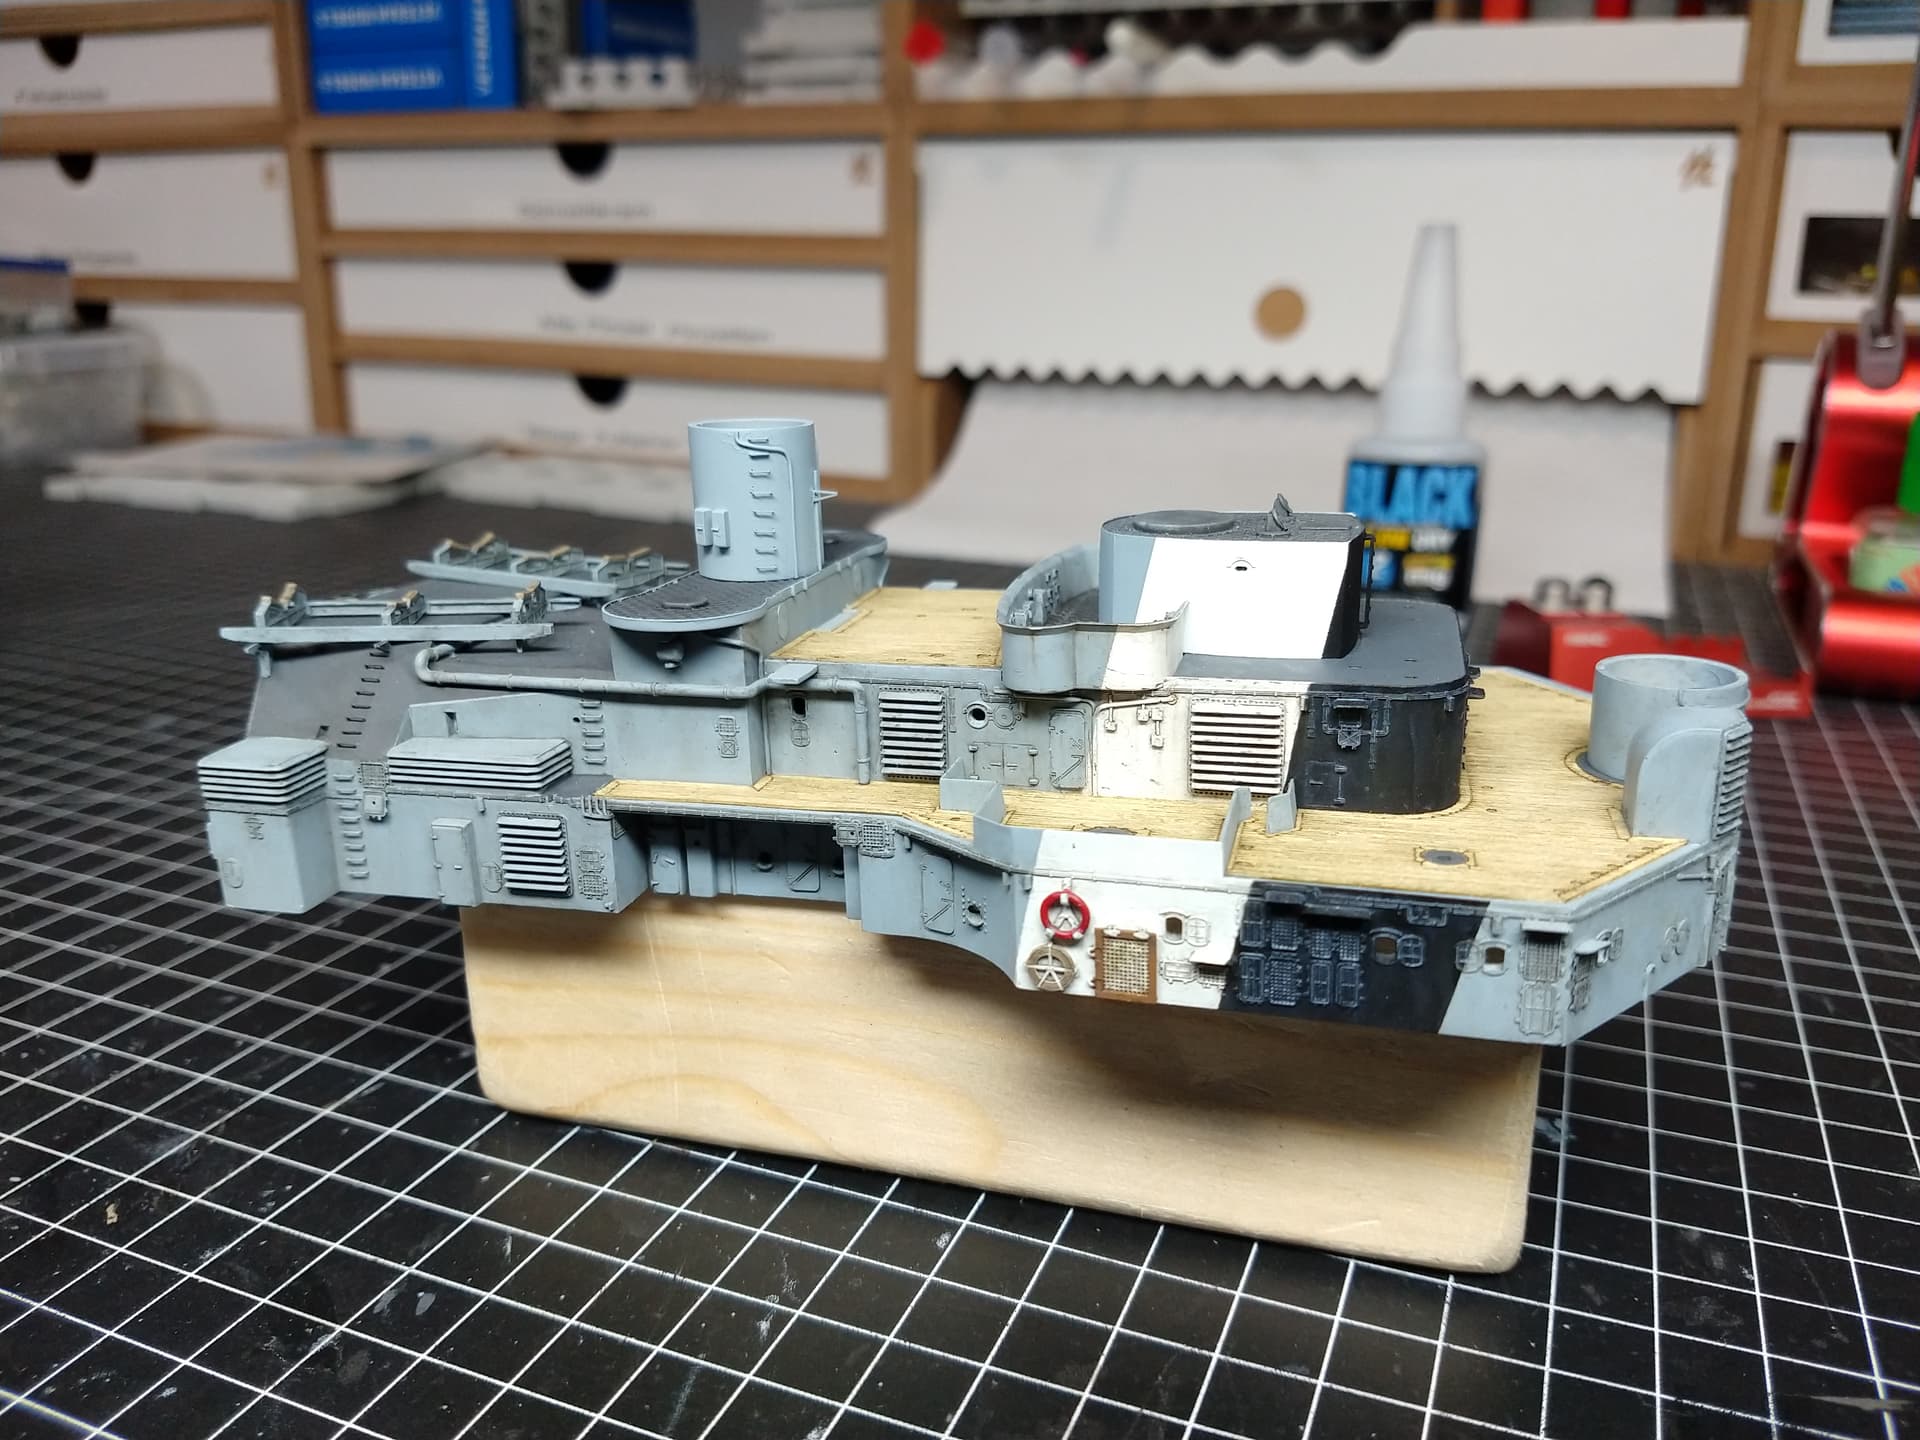
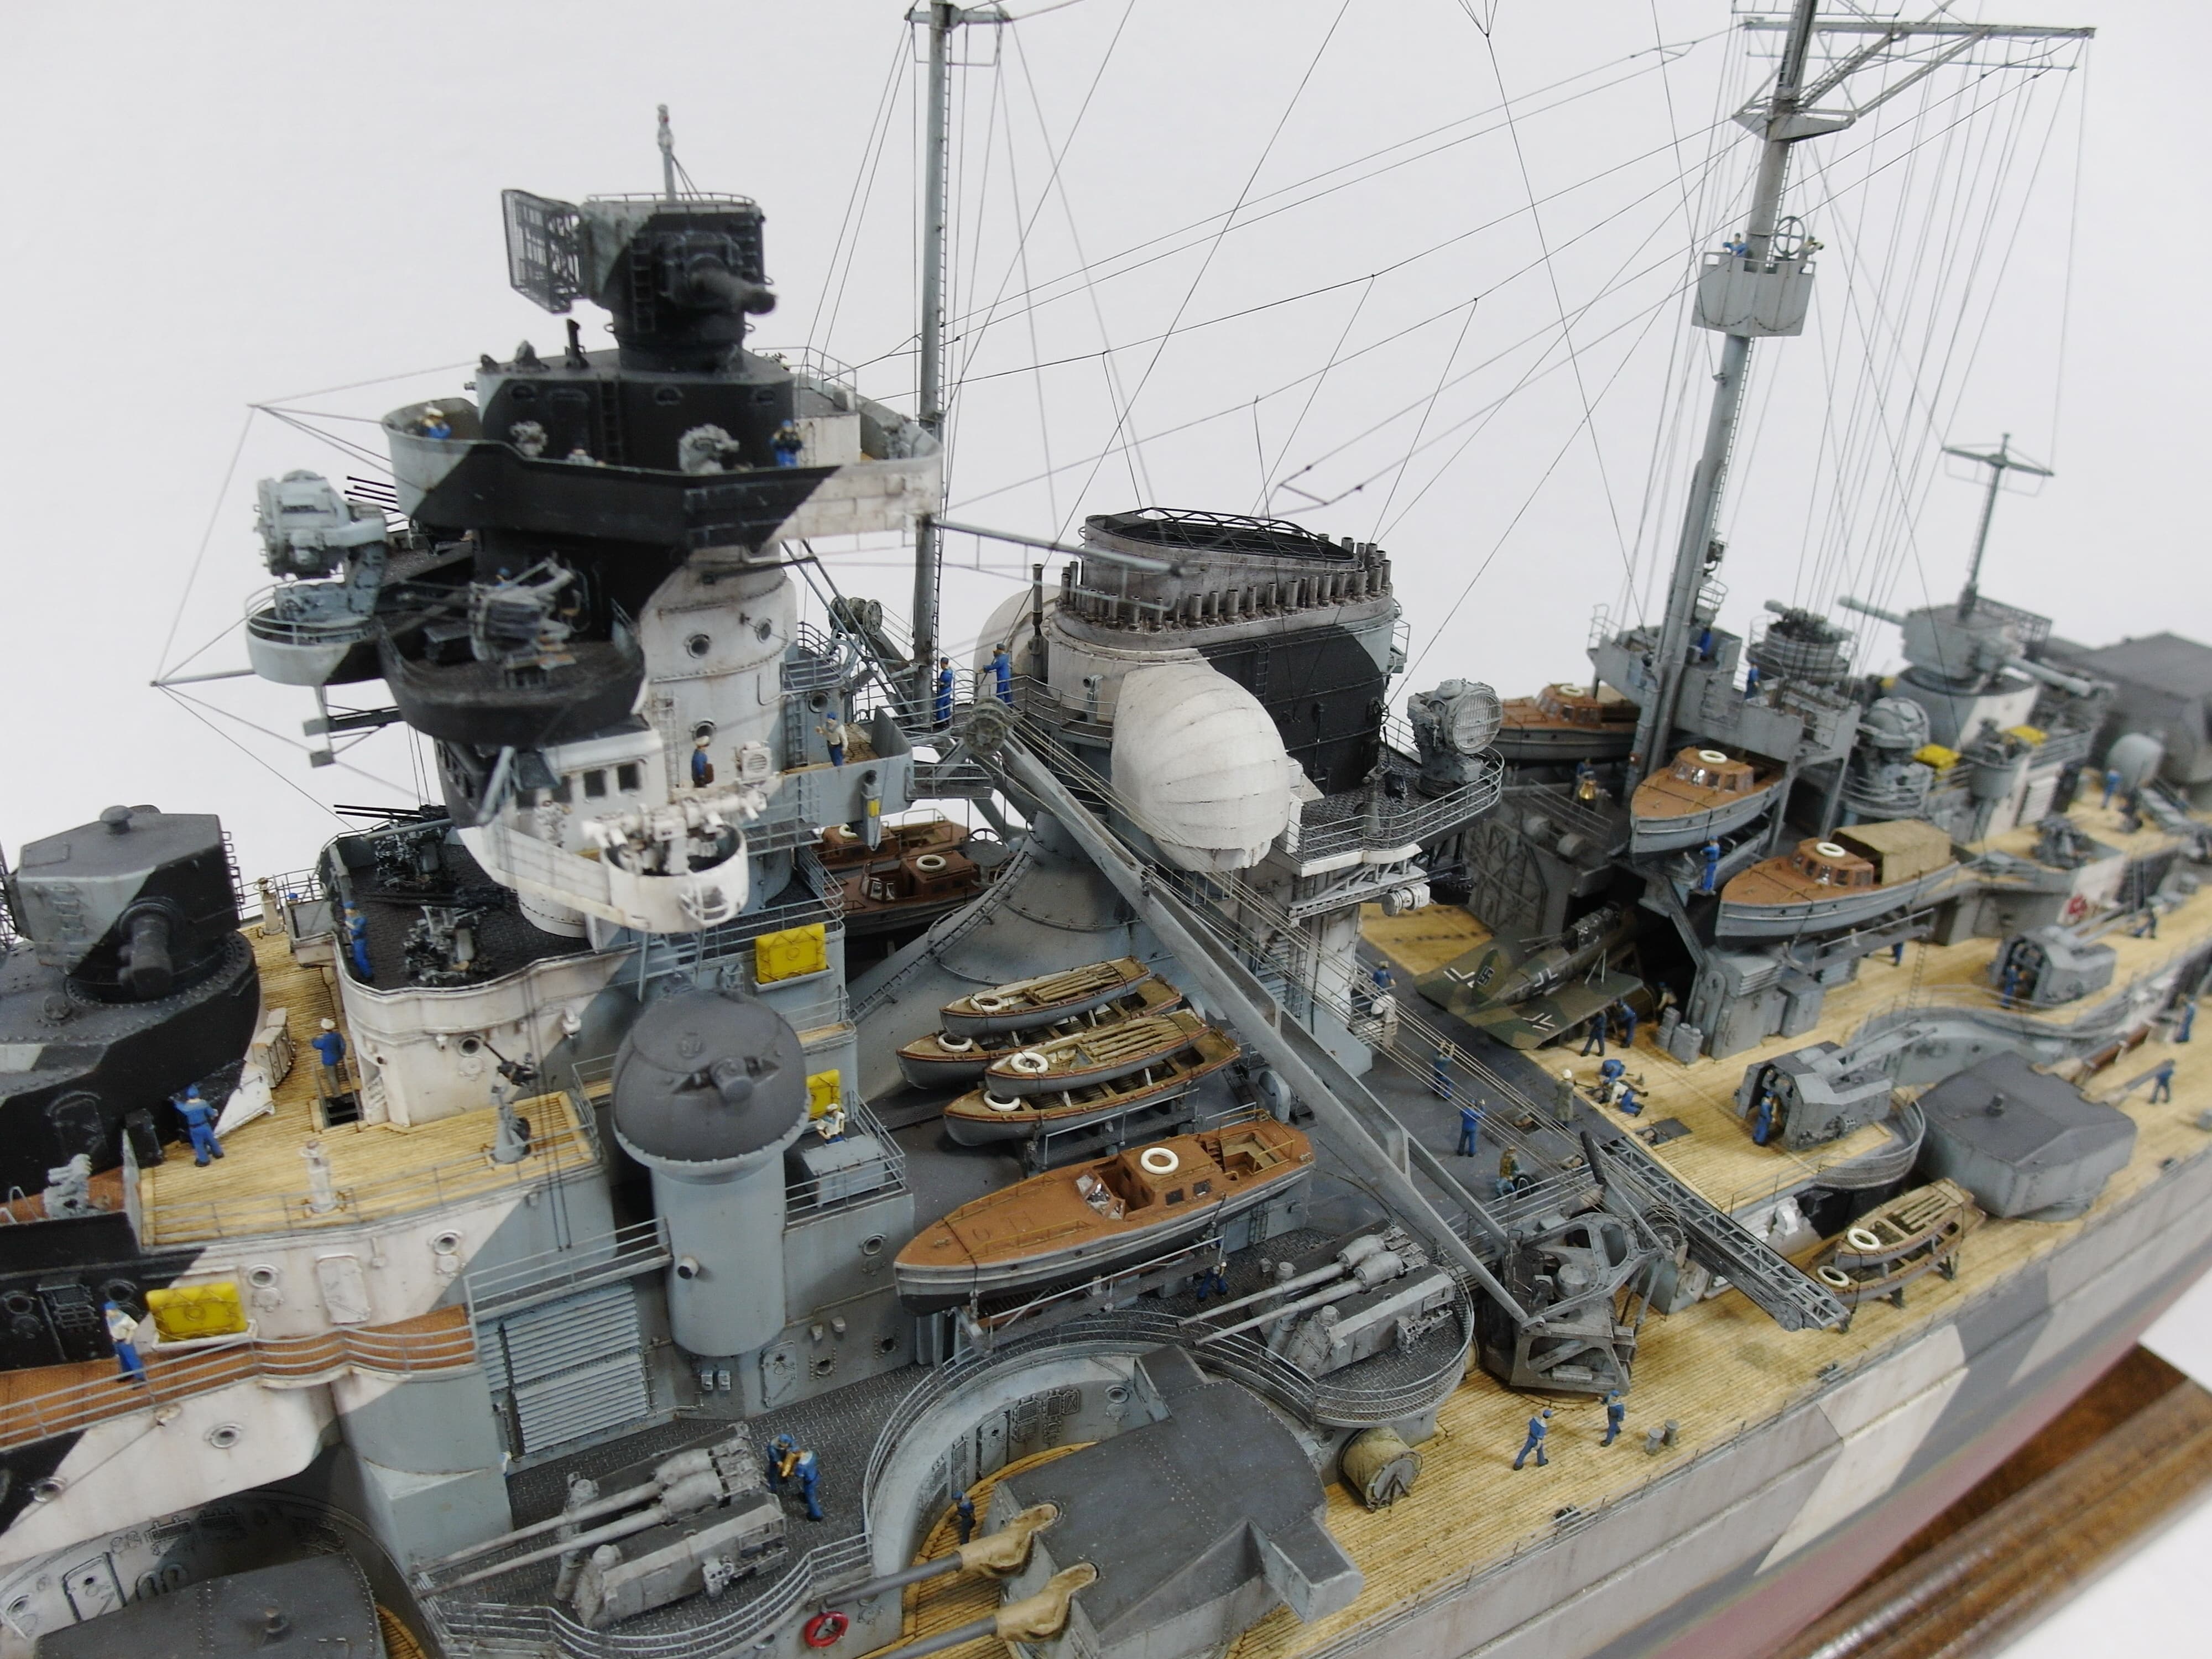
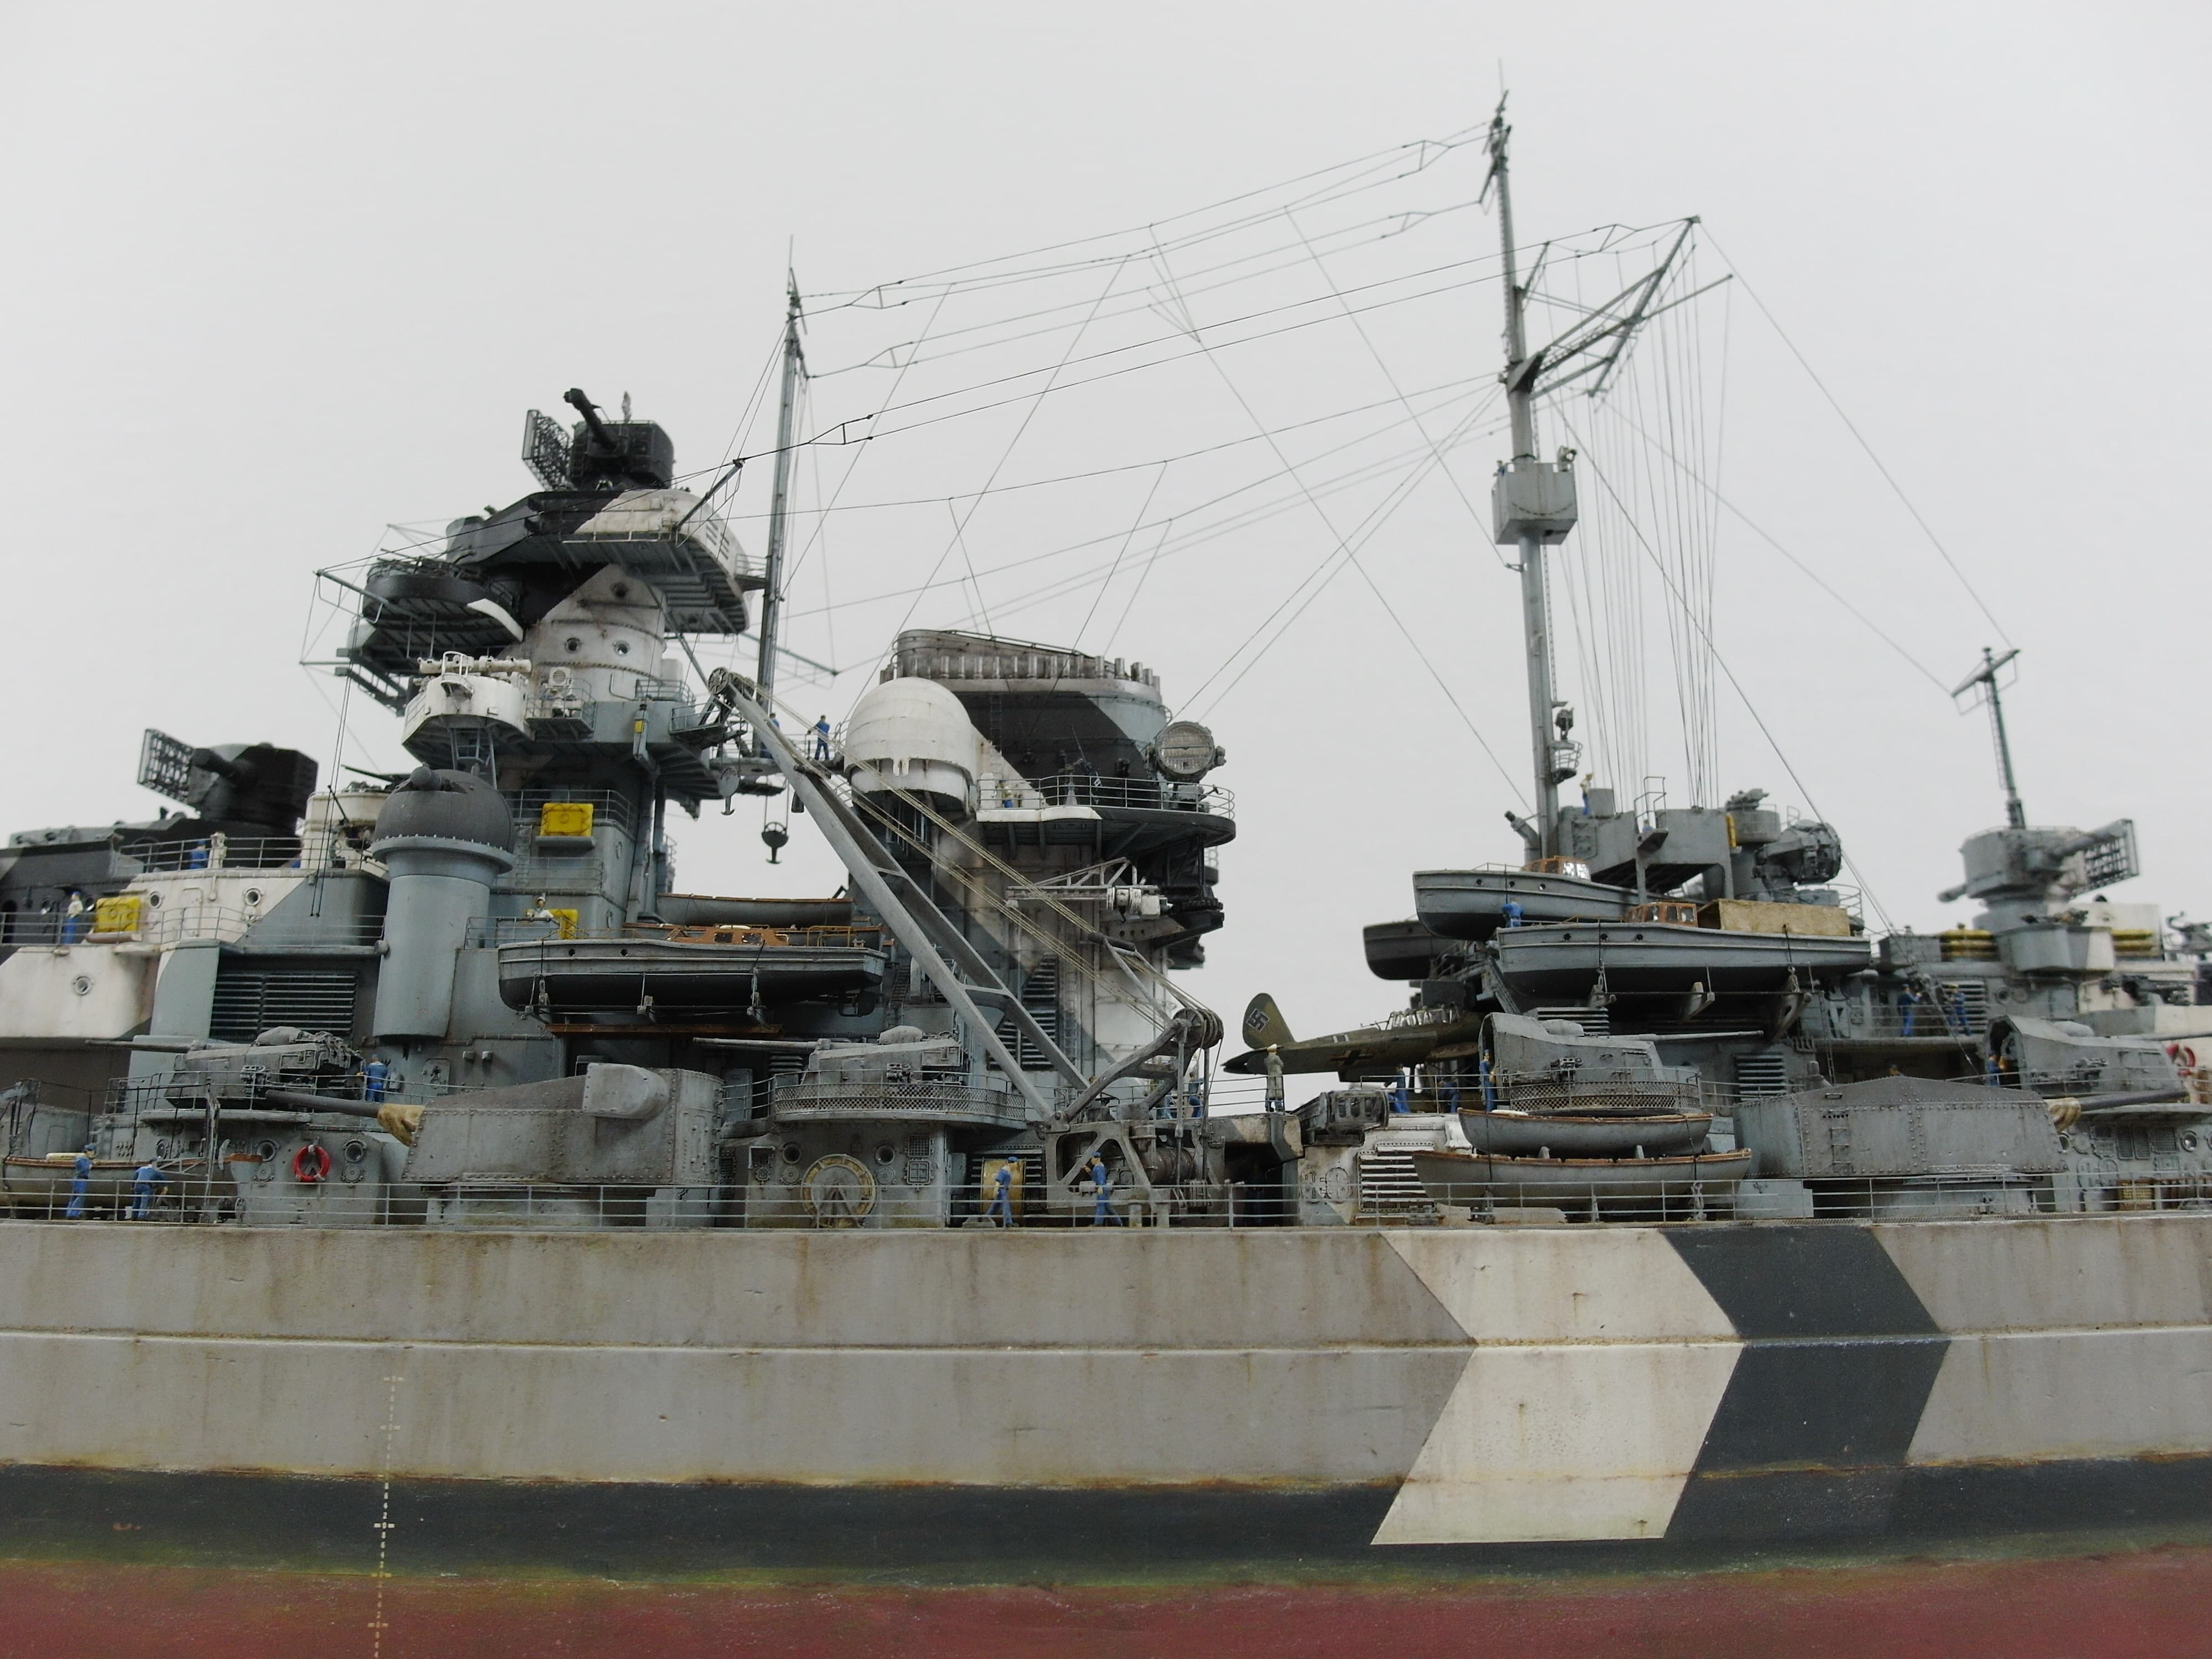
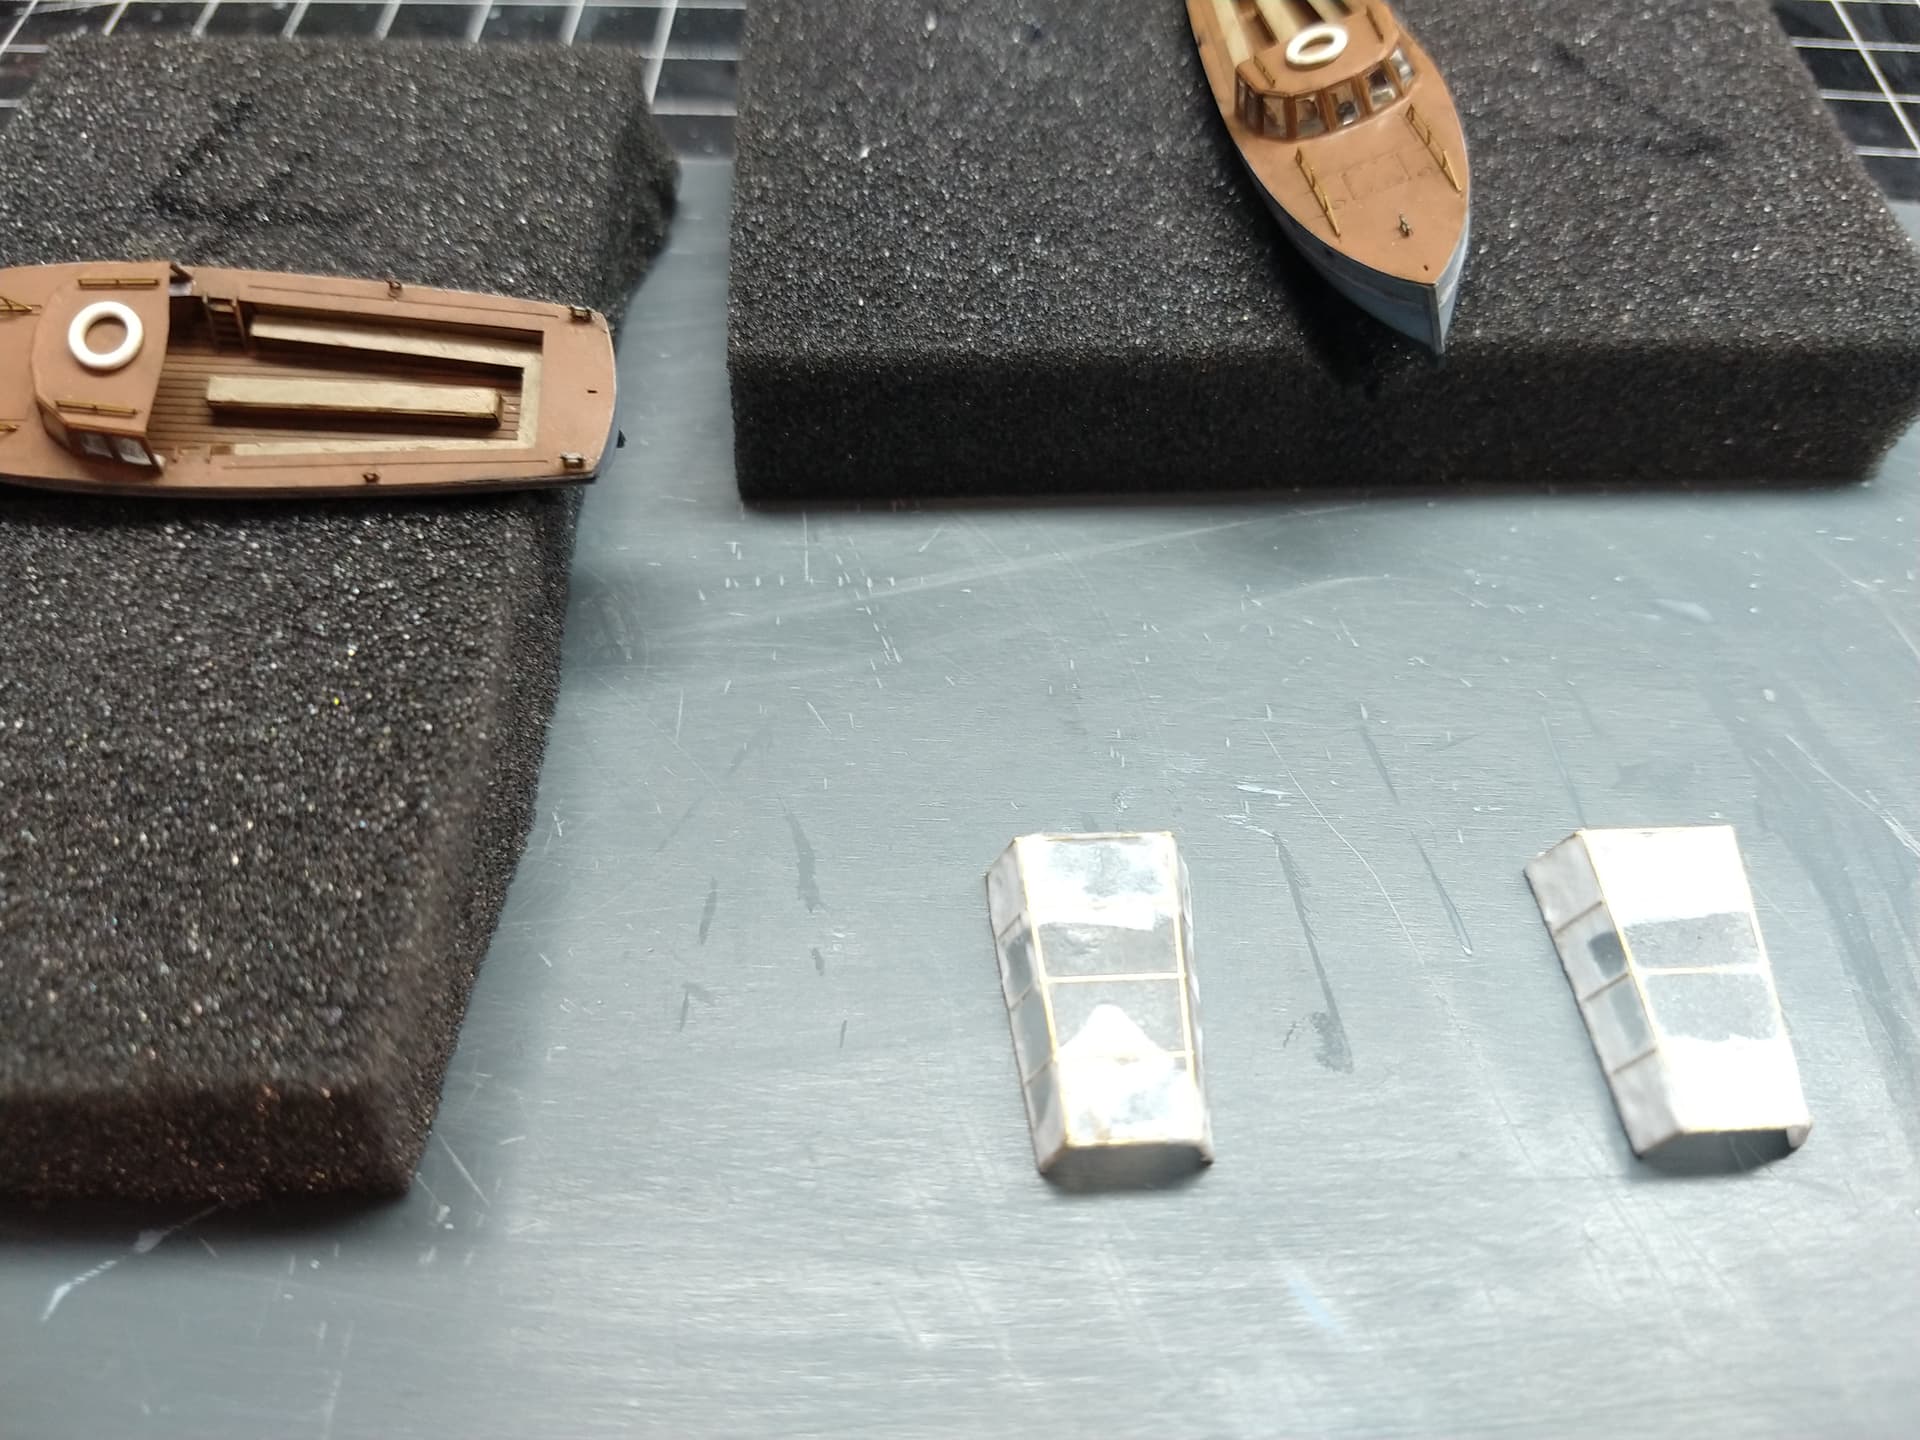
First the base of the main mast was set and the traffic boats in their mounts.
As you can see, I have shown the hangar open. A small scene should arise here.
Paper and wood glue are also used for the tarpaulins for the traffic boats.
Next we pimped the signal platform. Again with paper and styrene.
With this I imitate the covers of the signal flags.
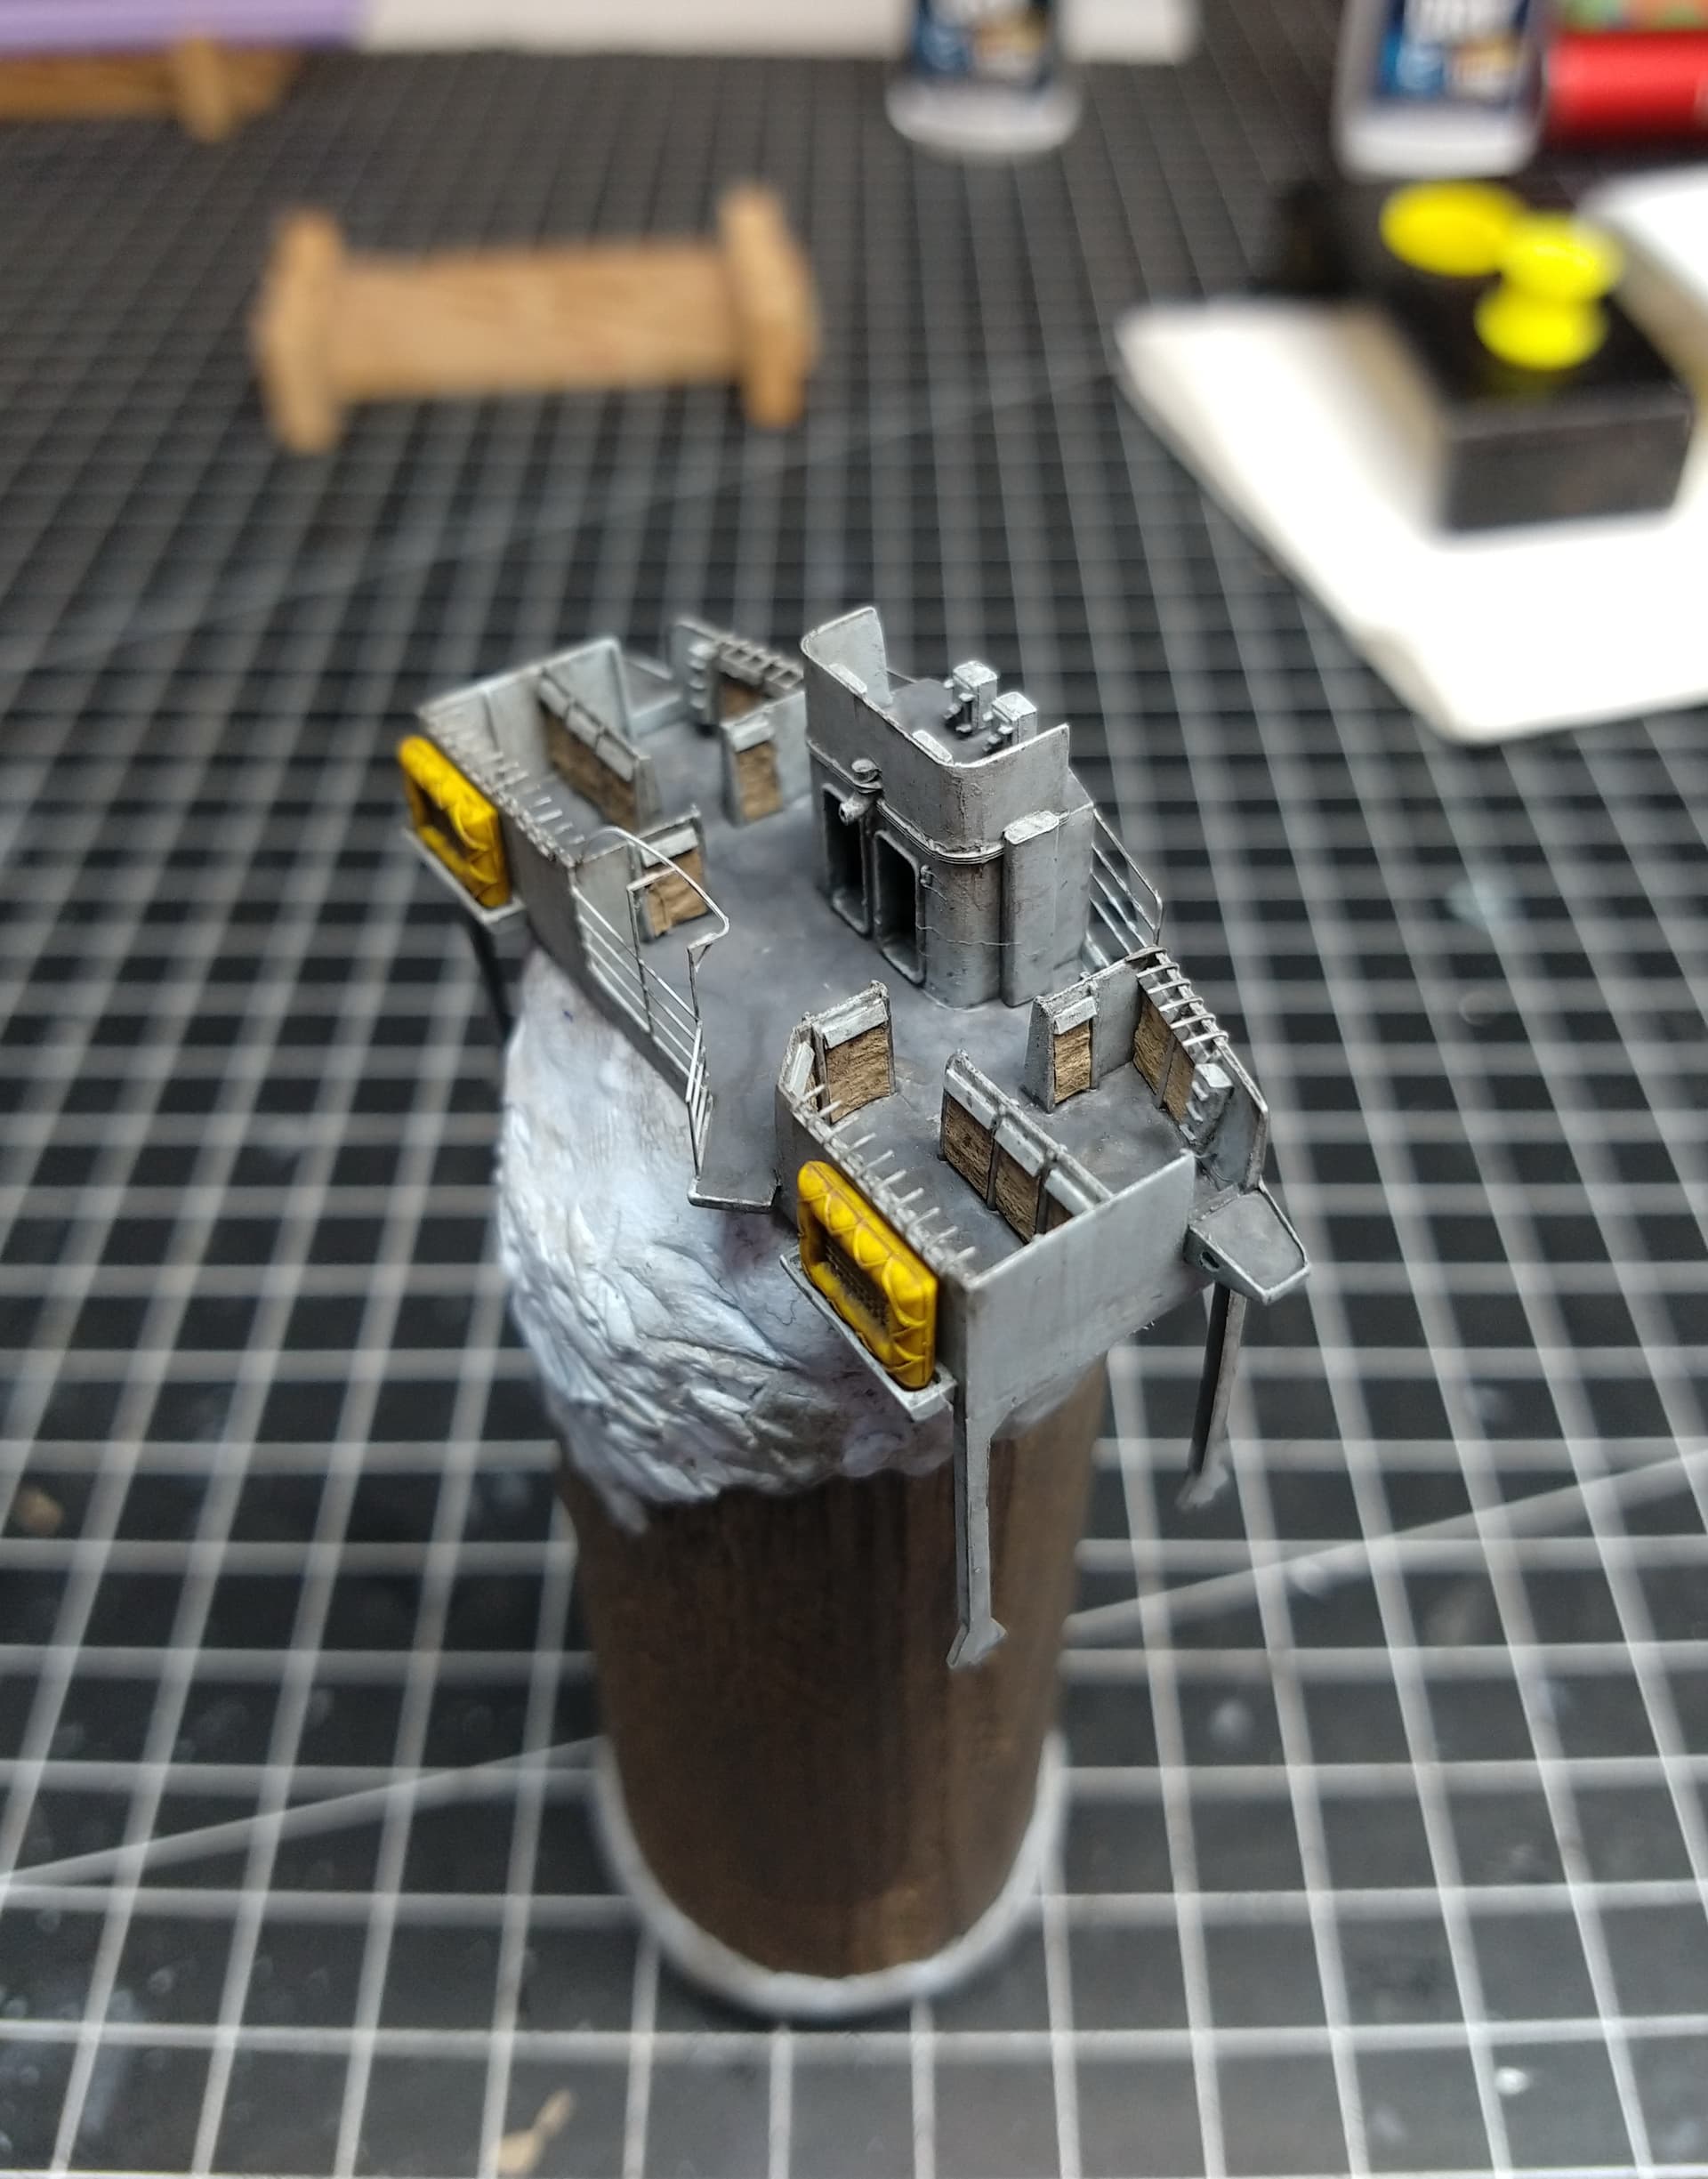
Still pulled the ropes for the flags.
Then all come togehter.
8 Likes
Holy smokes!
Those signal flag ropes….
Such detailing!
1 Like
I am very happy that you like my model so much.
Then I’ll continue to feed you. ![]()
1 Like
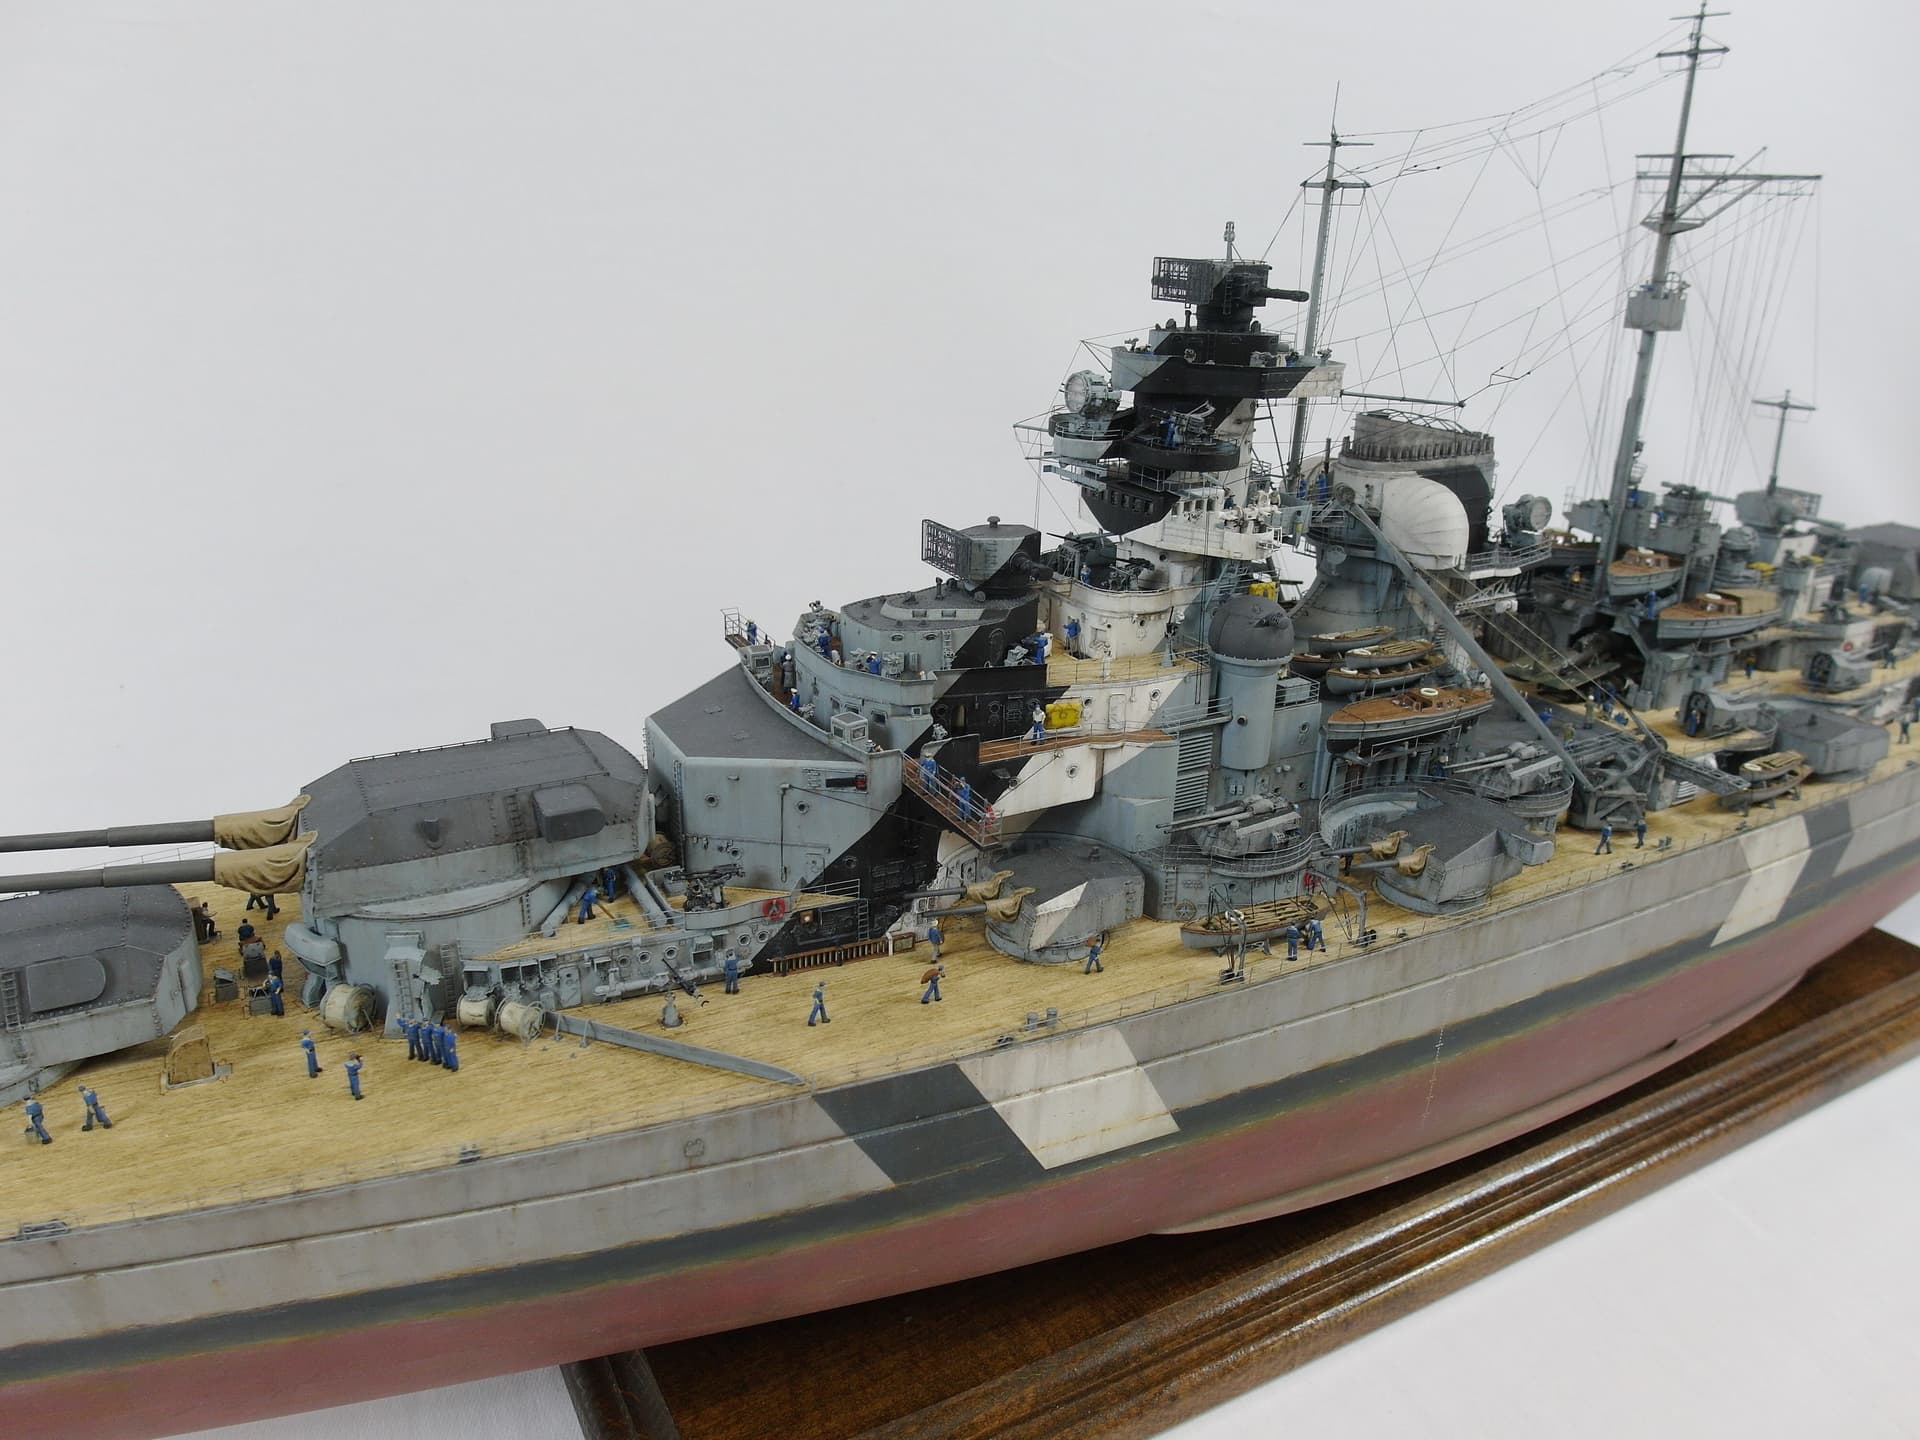
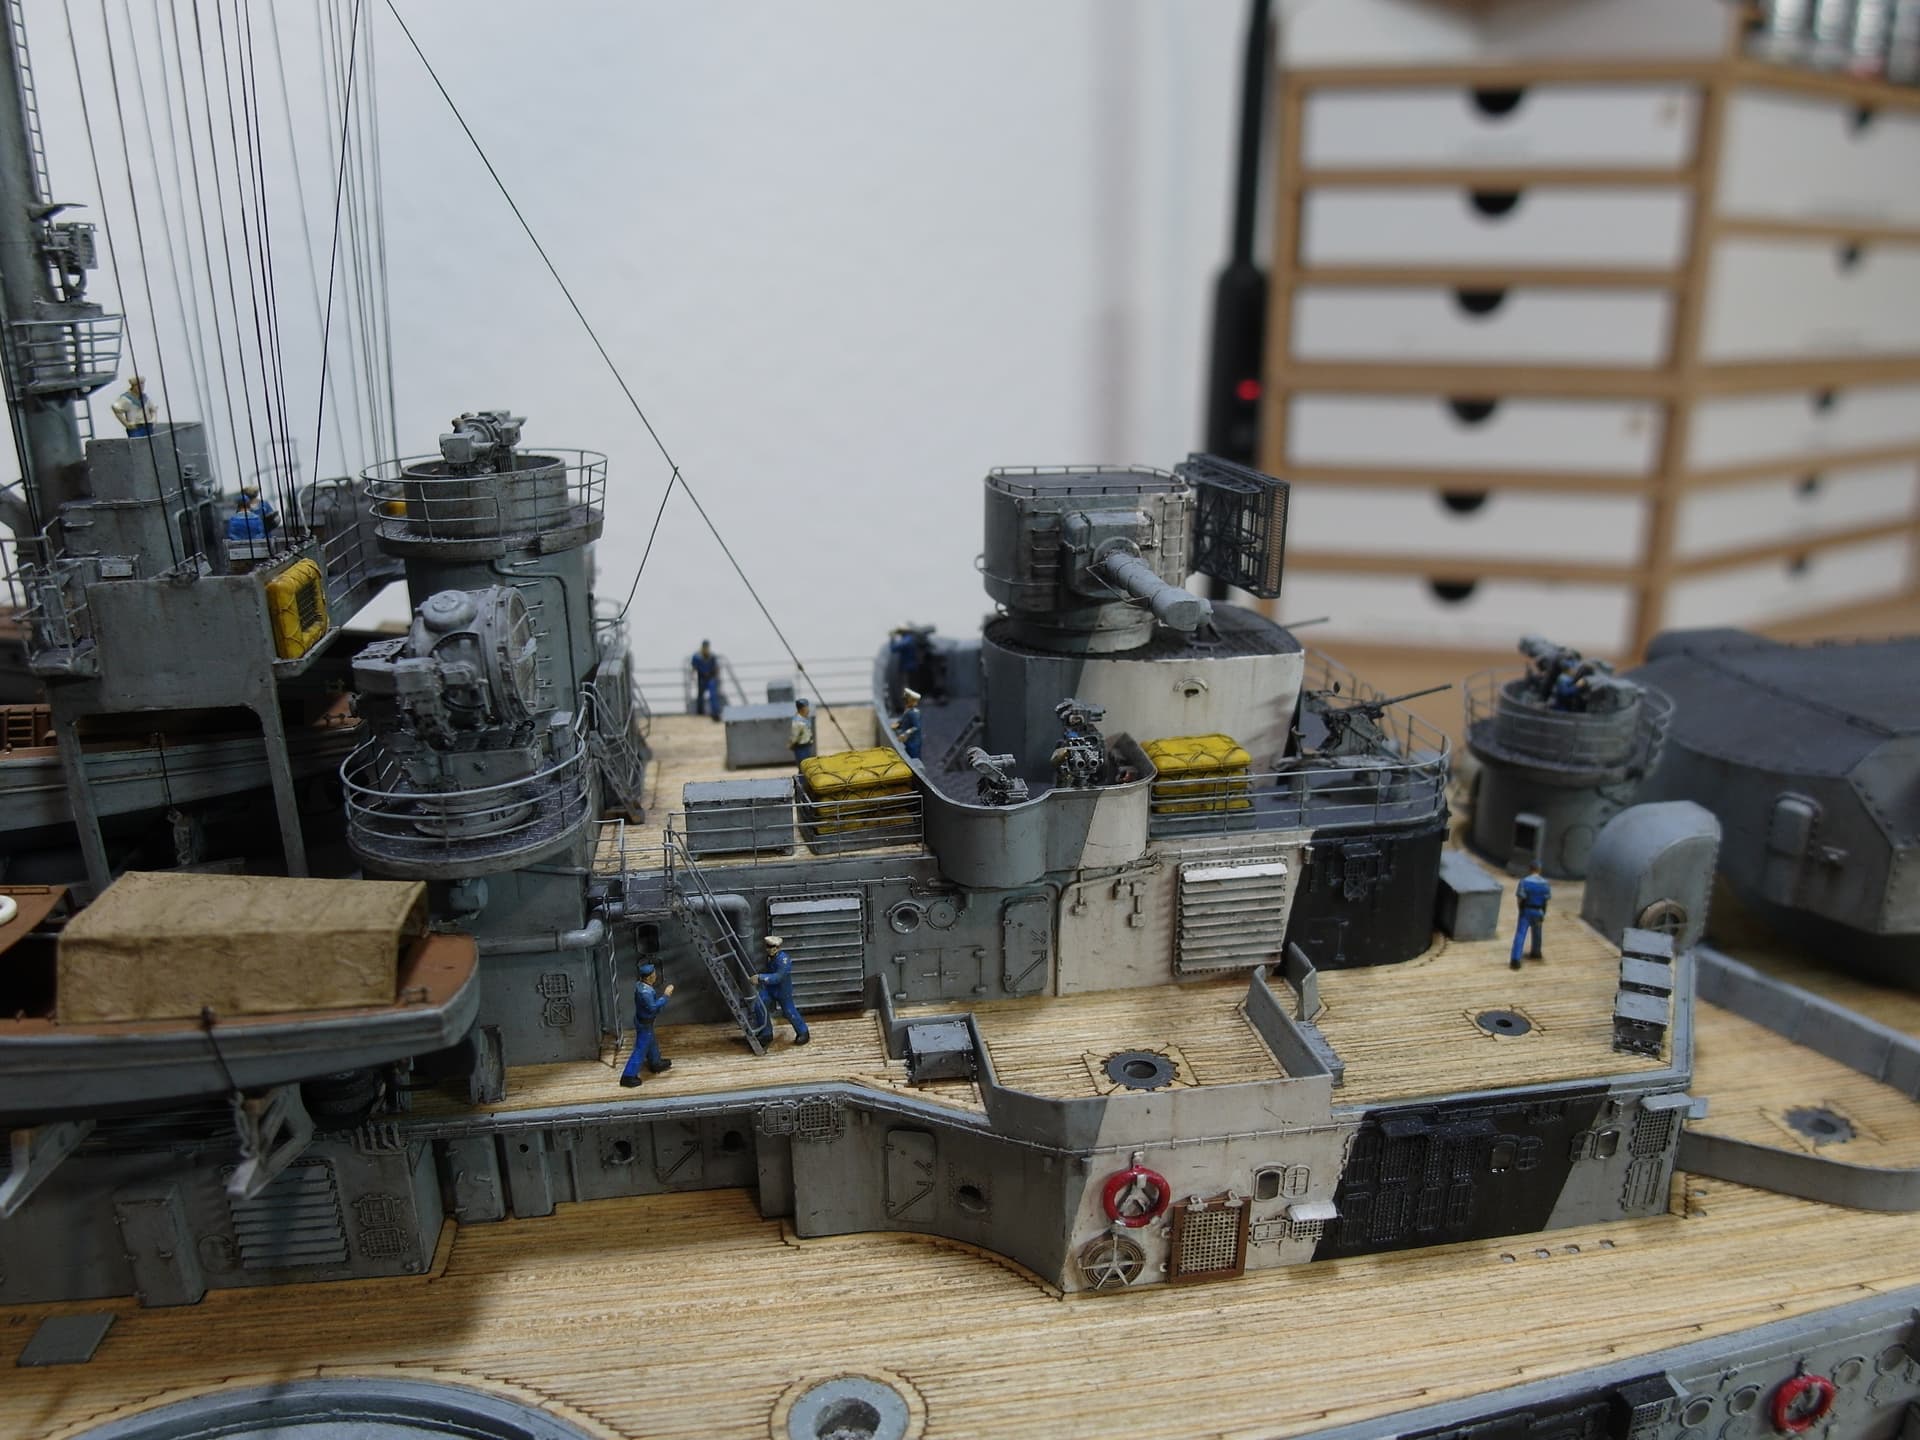
This allows the deckhouse to be installed and the main mast to be continued.

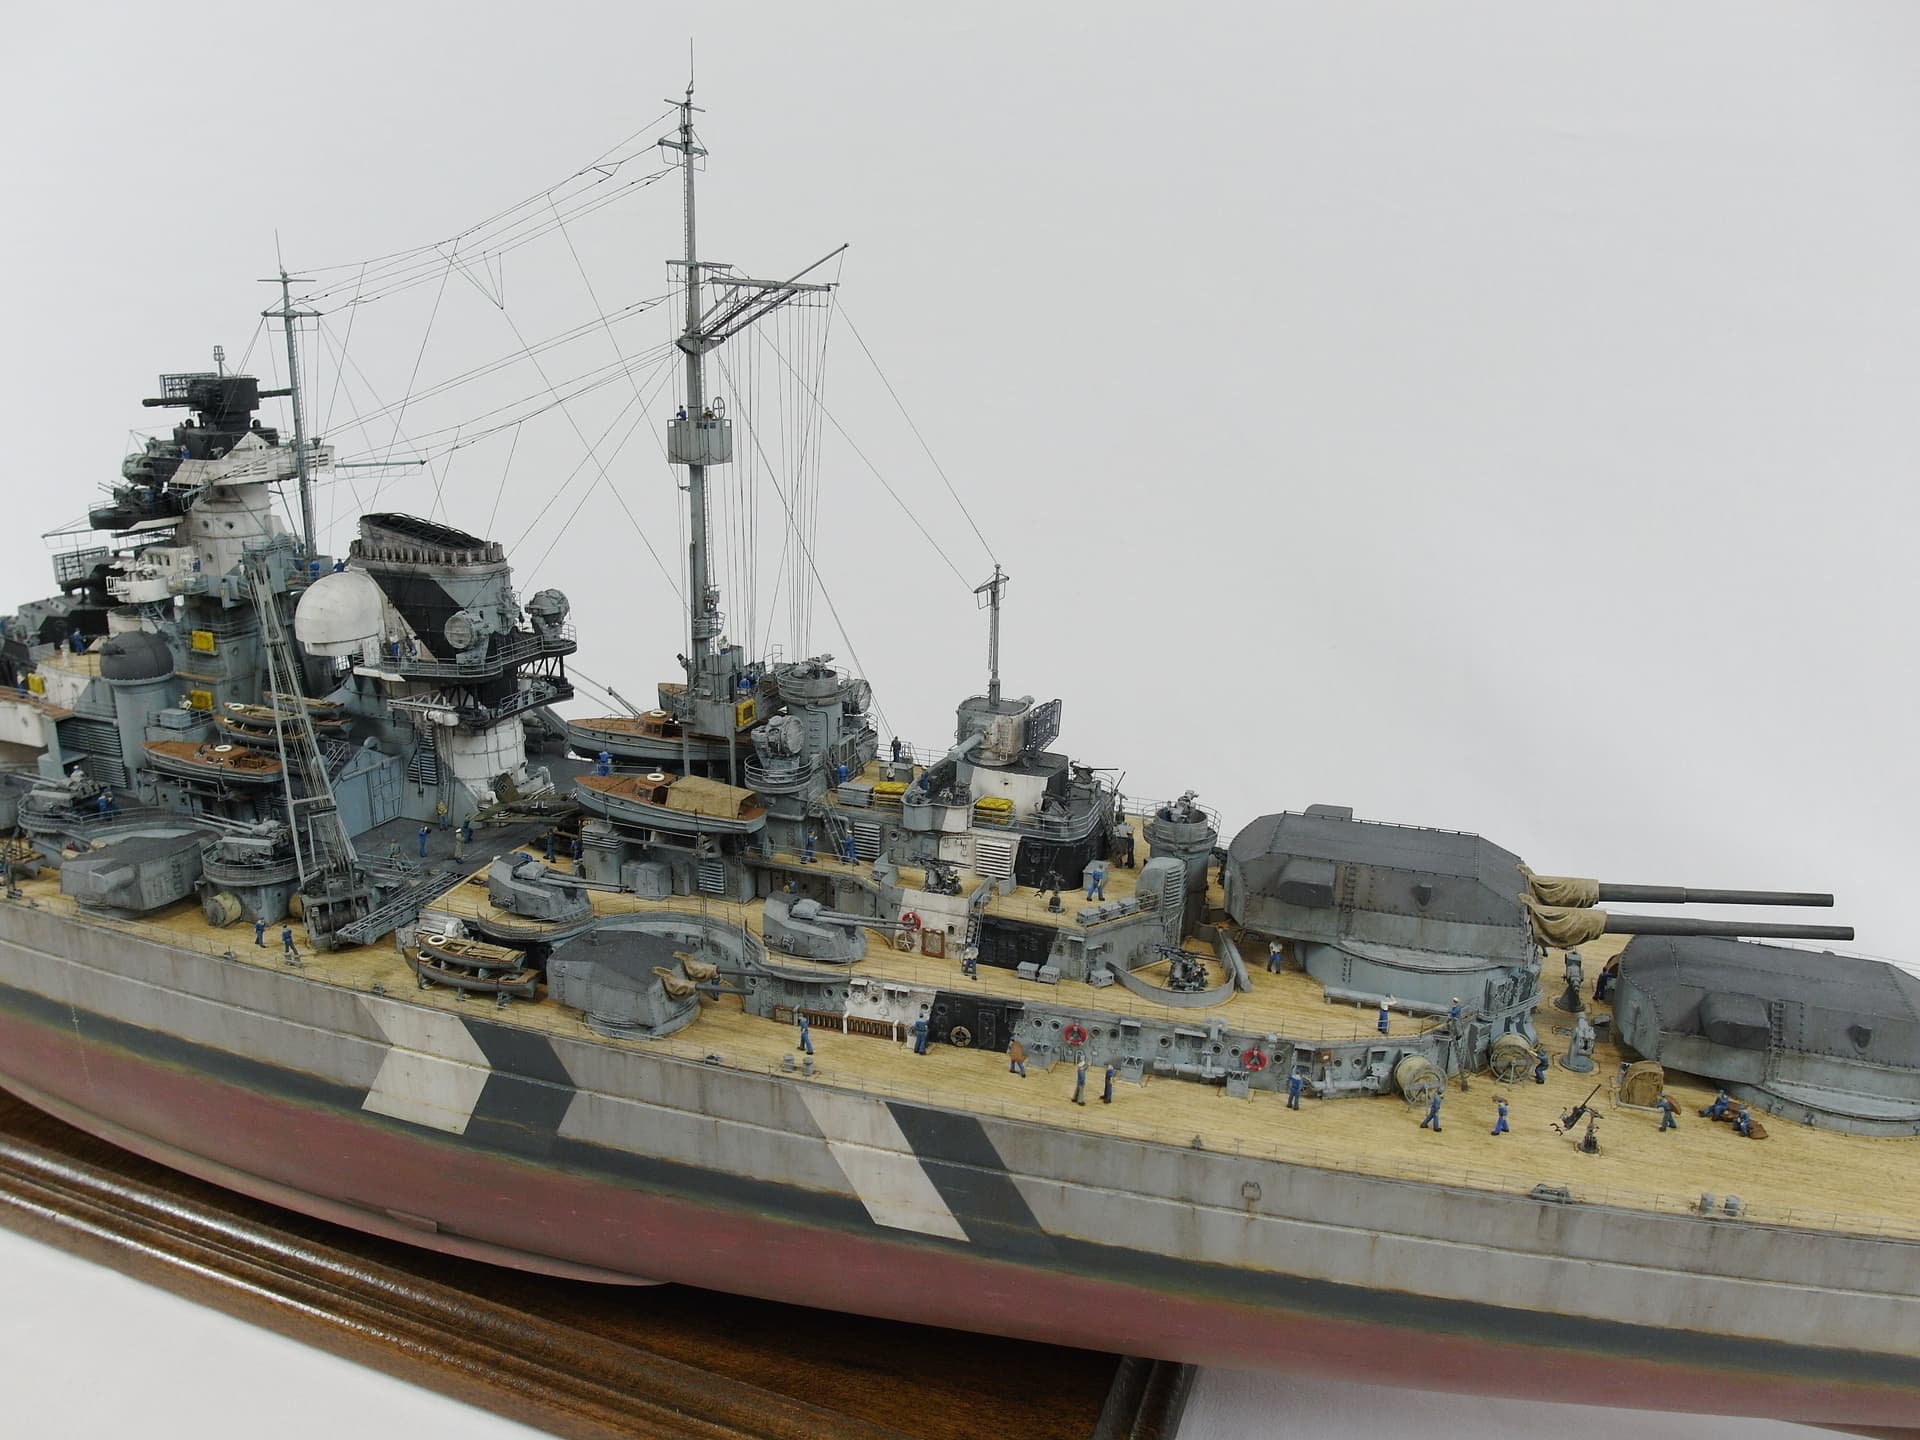
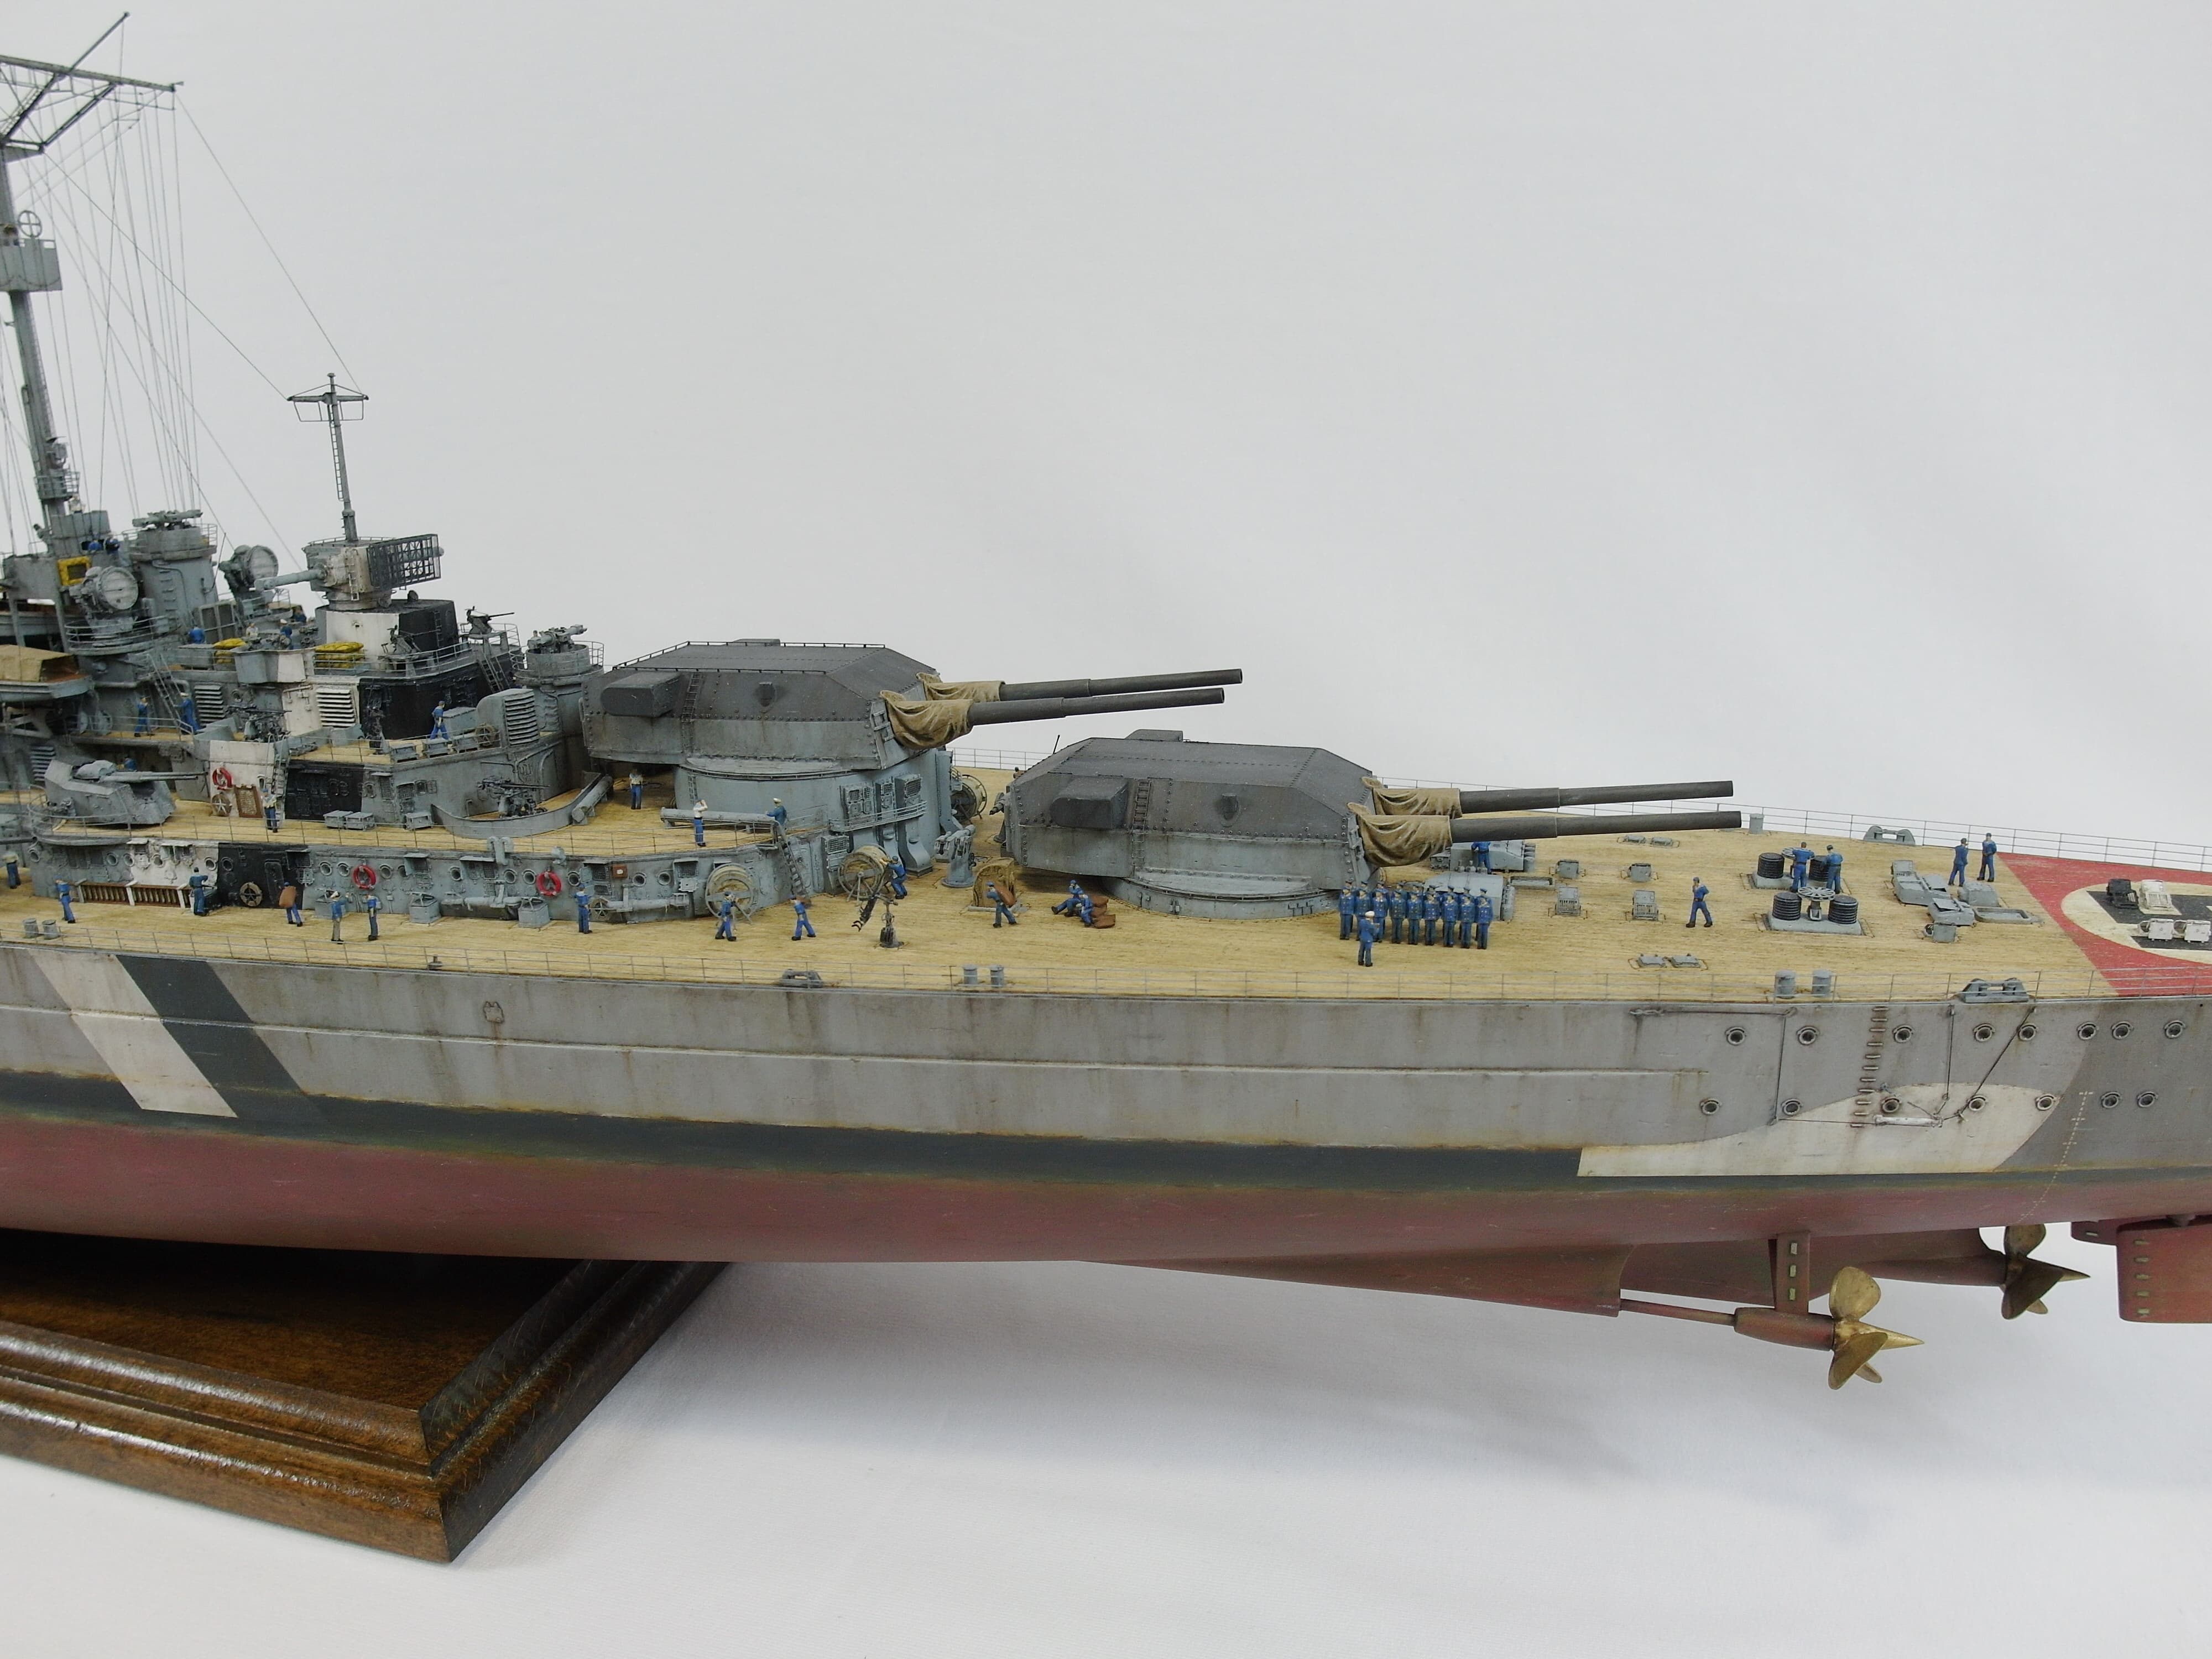
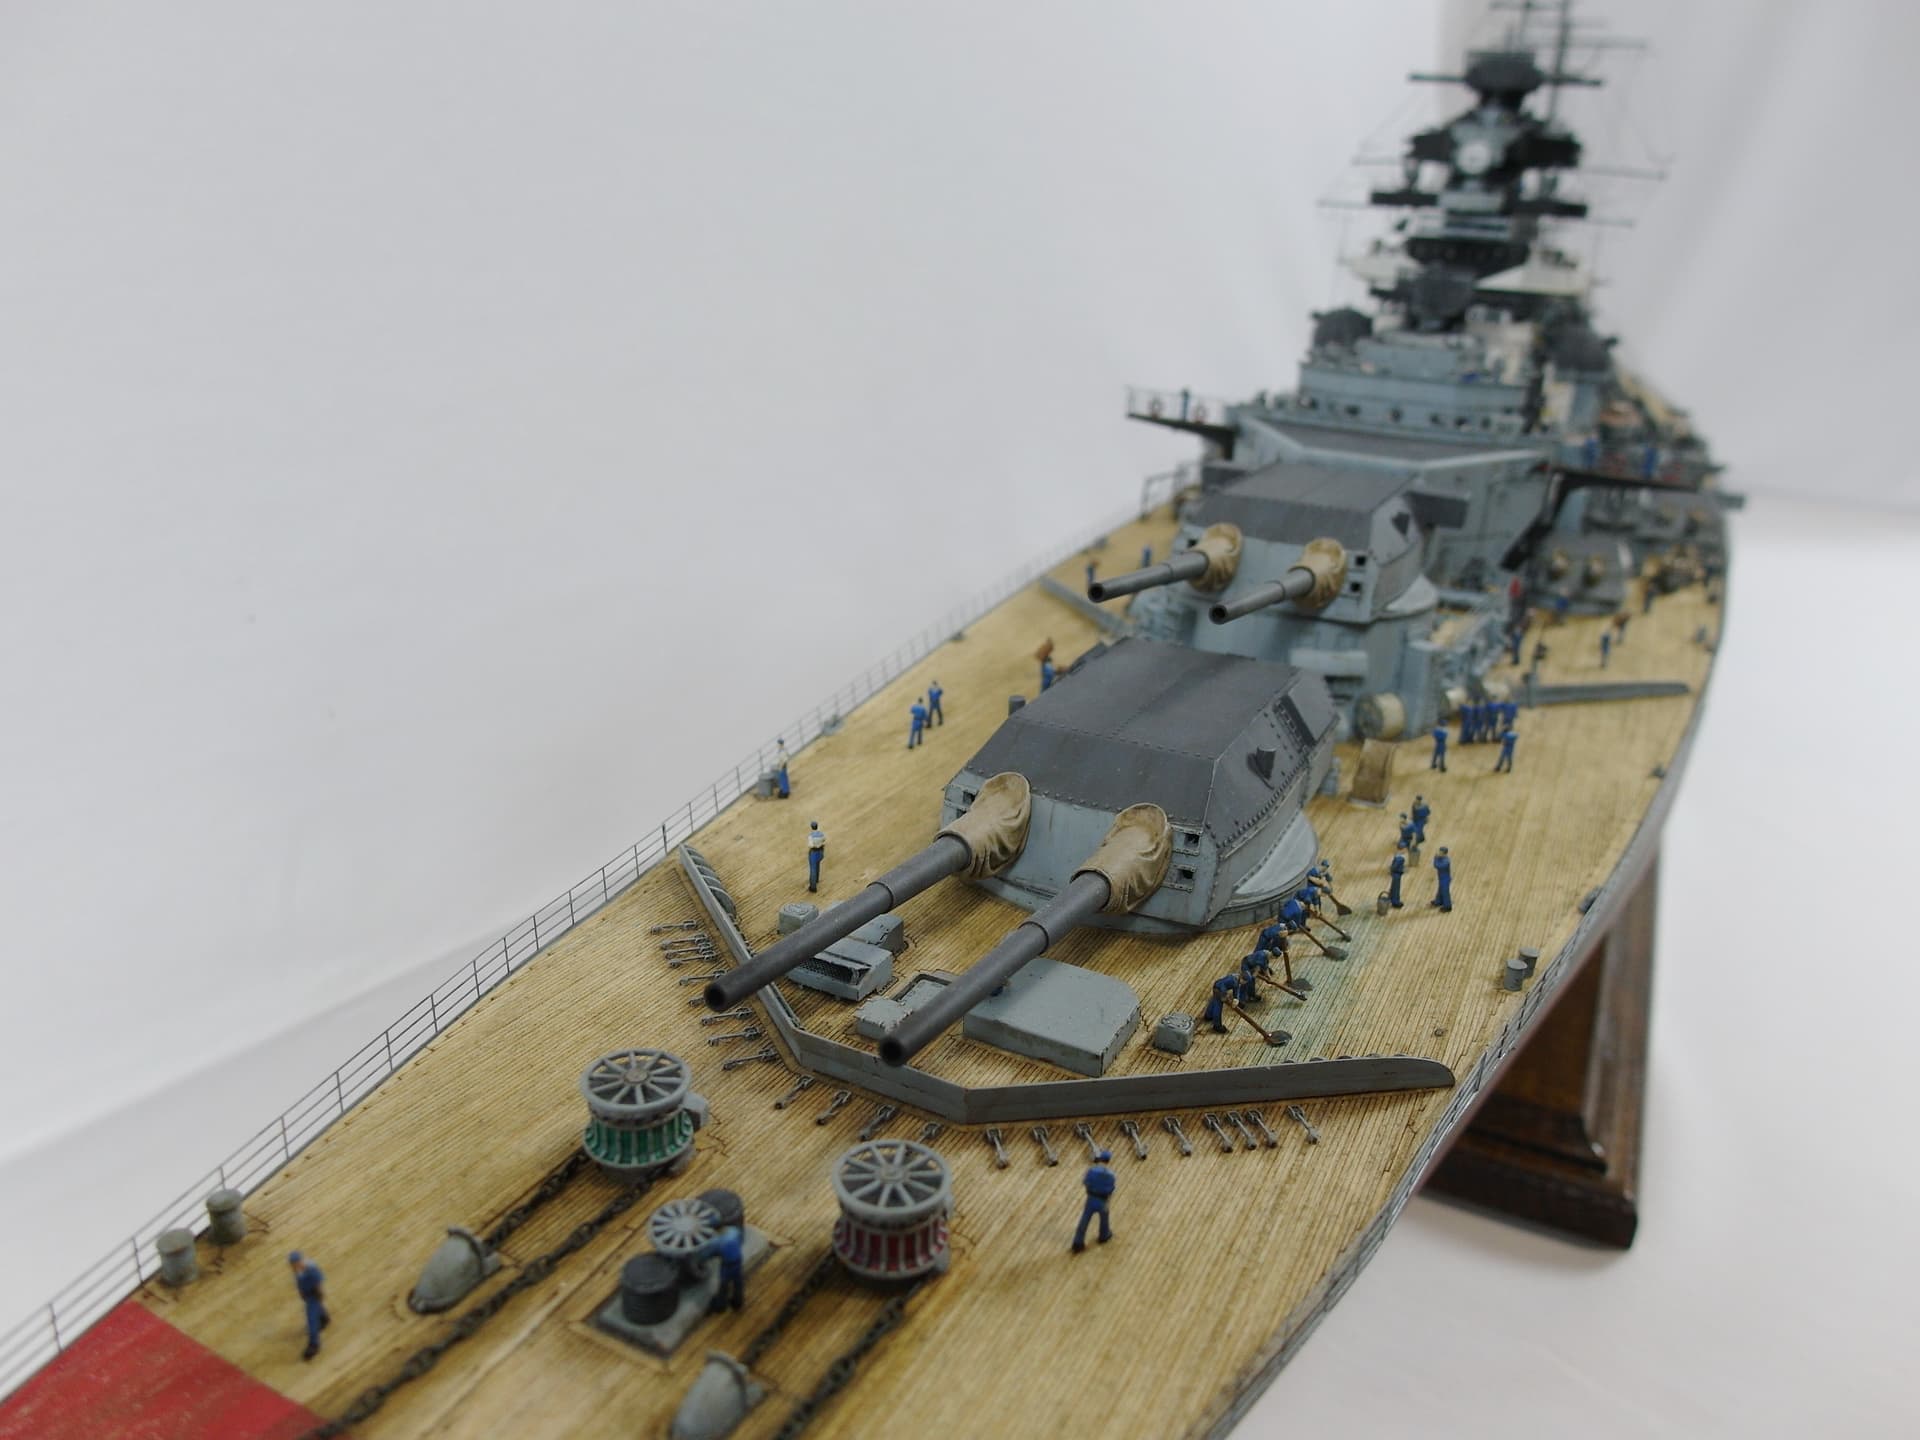
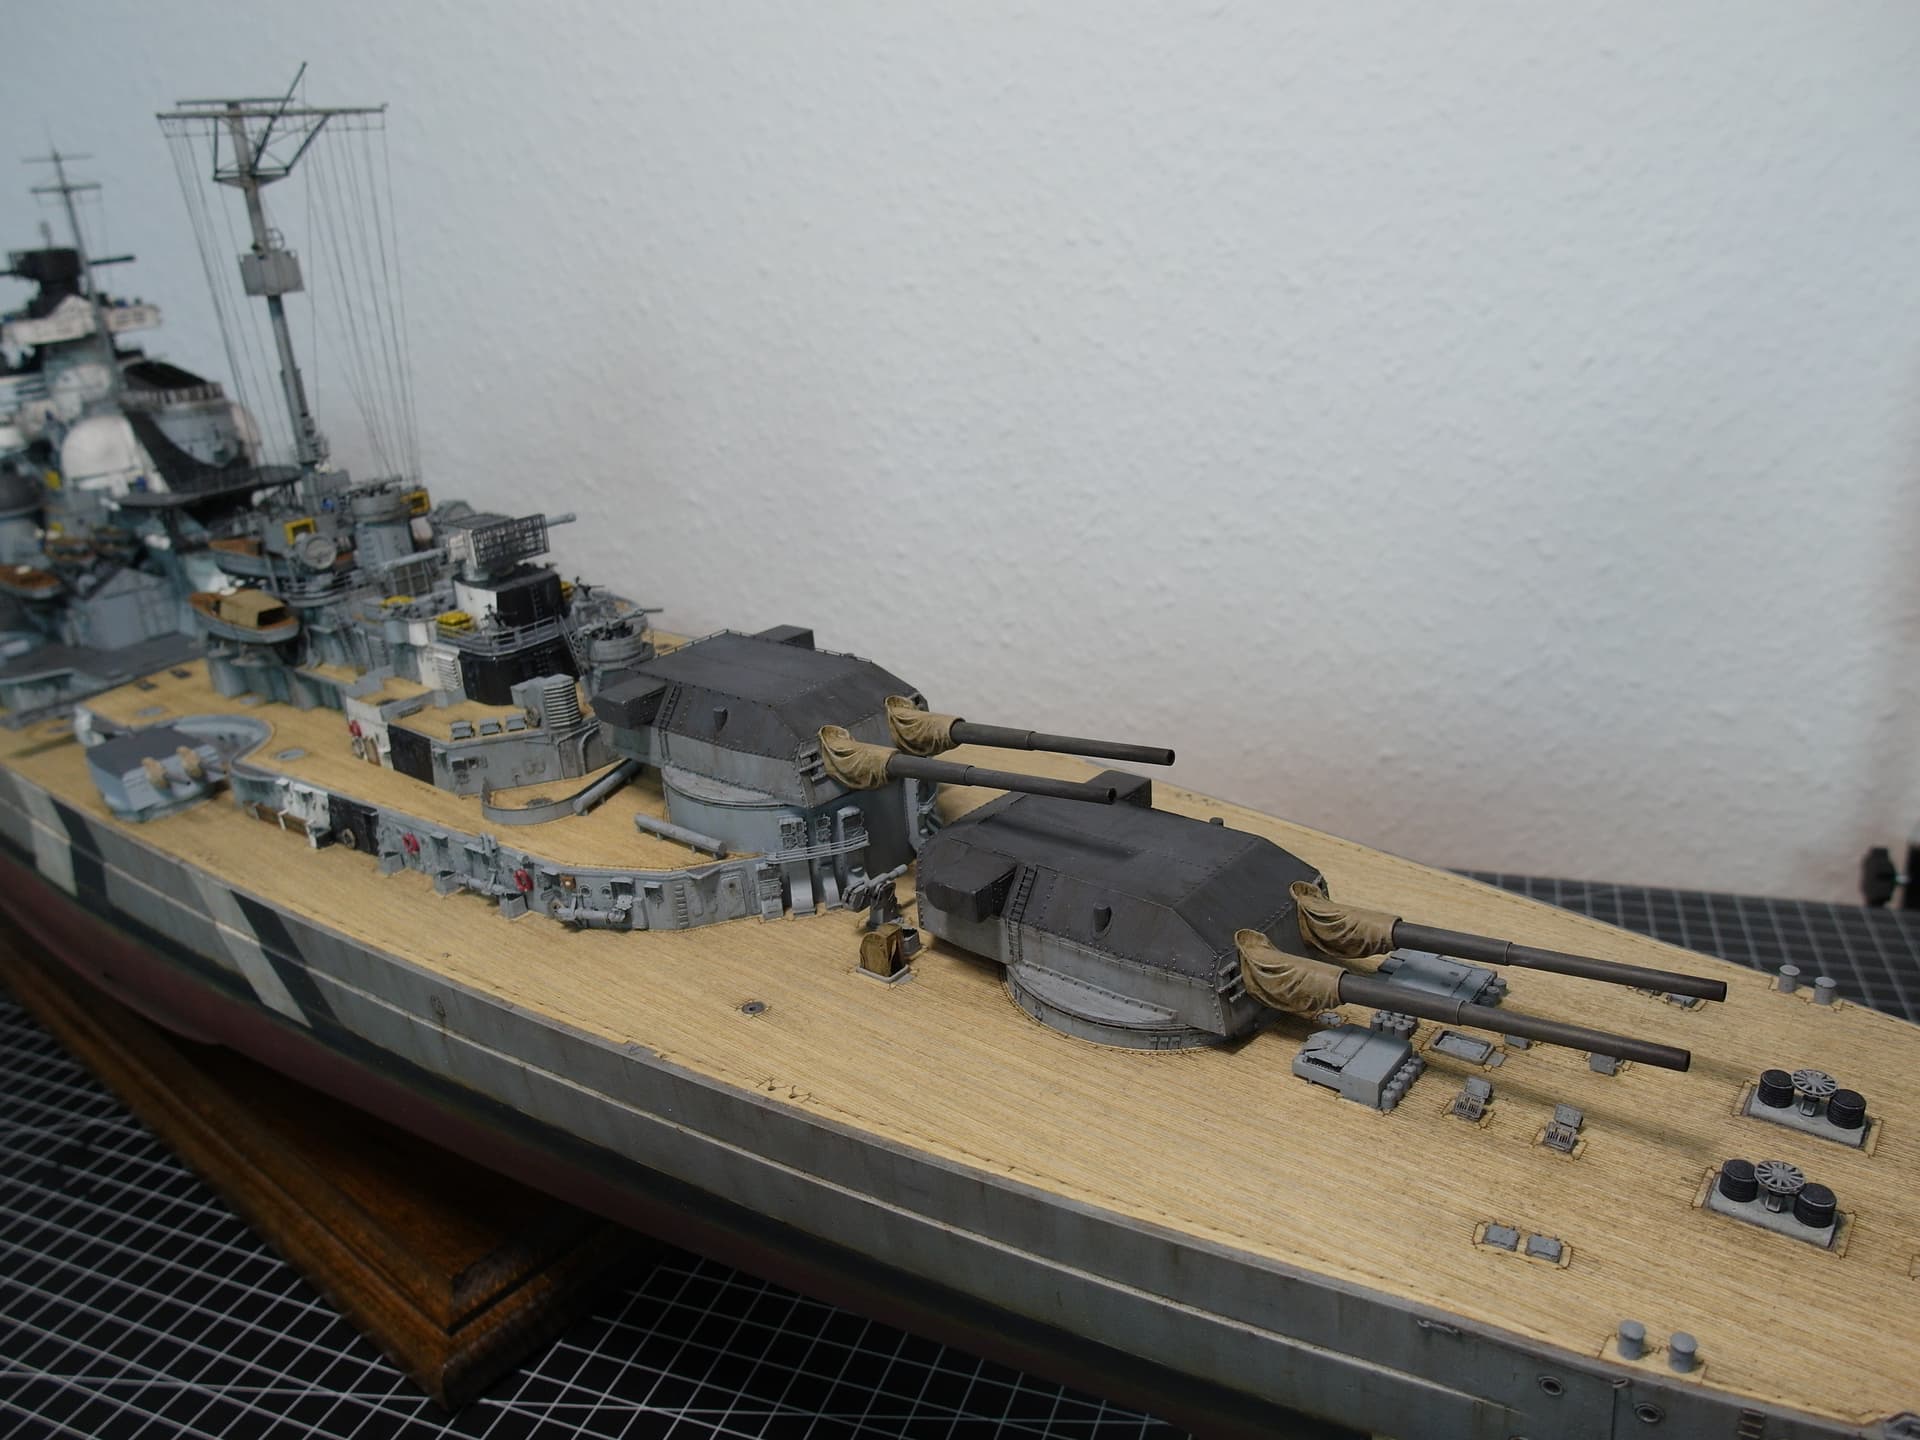
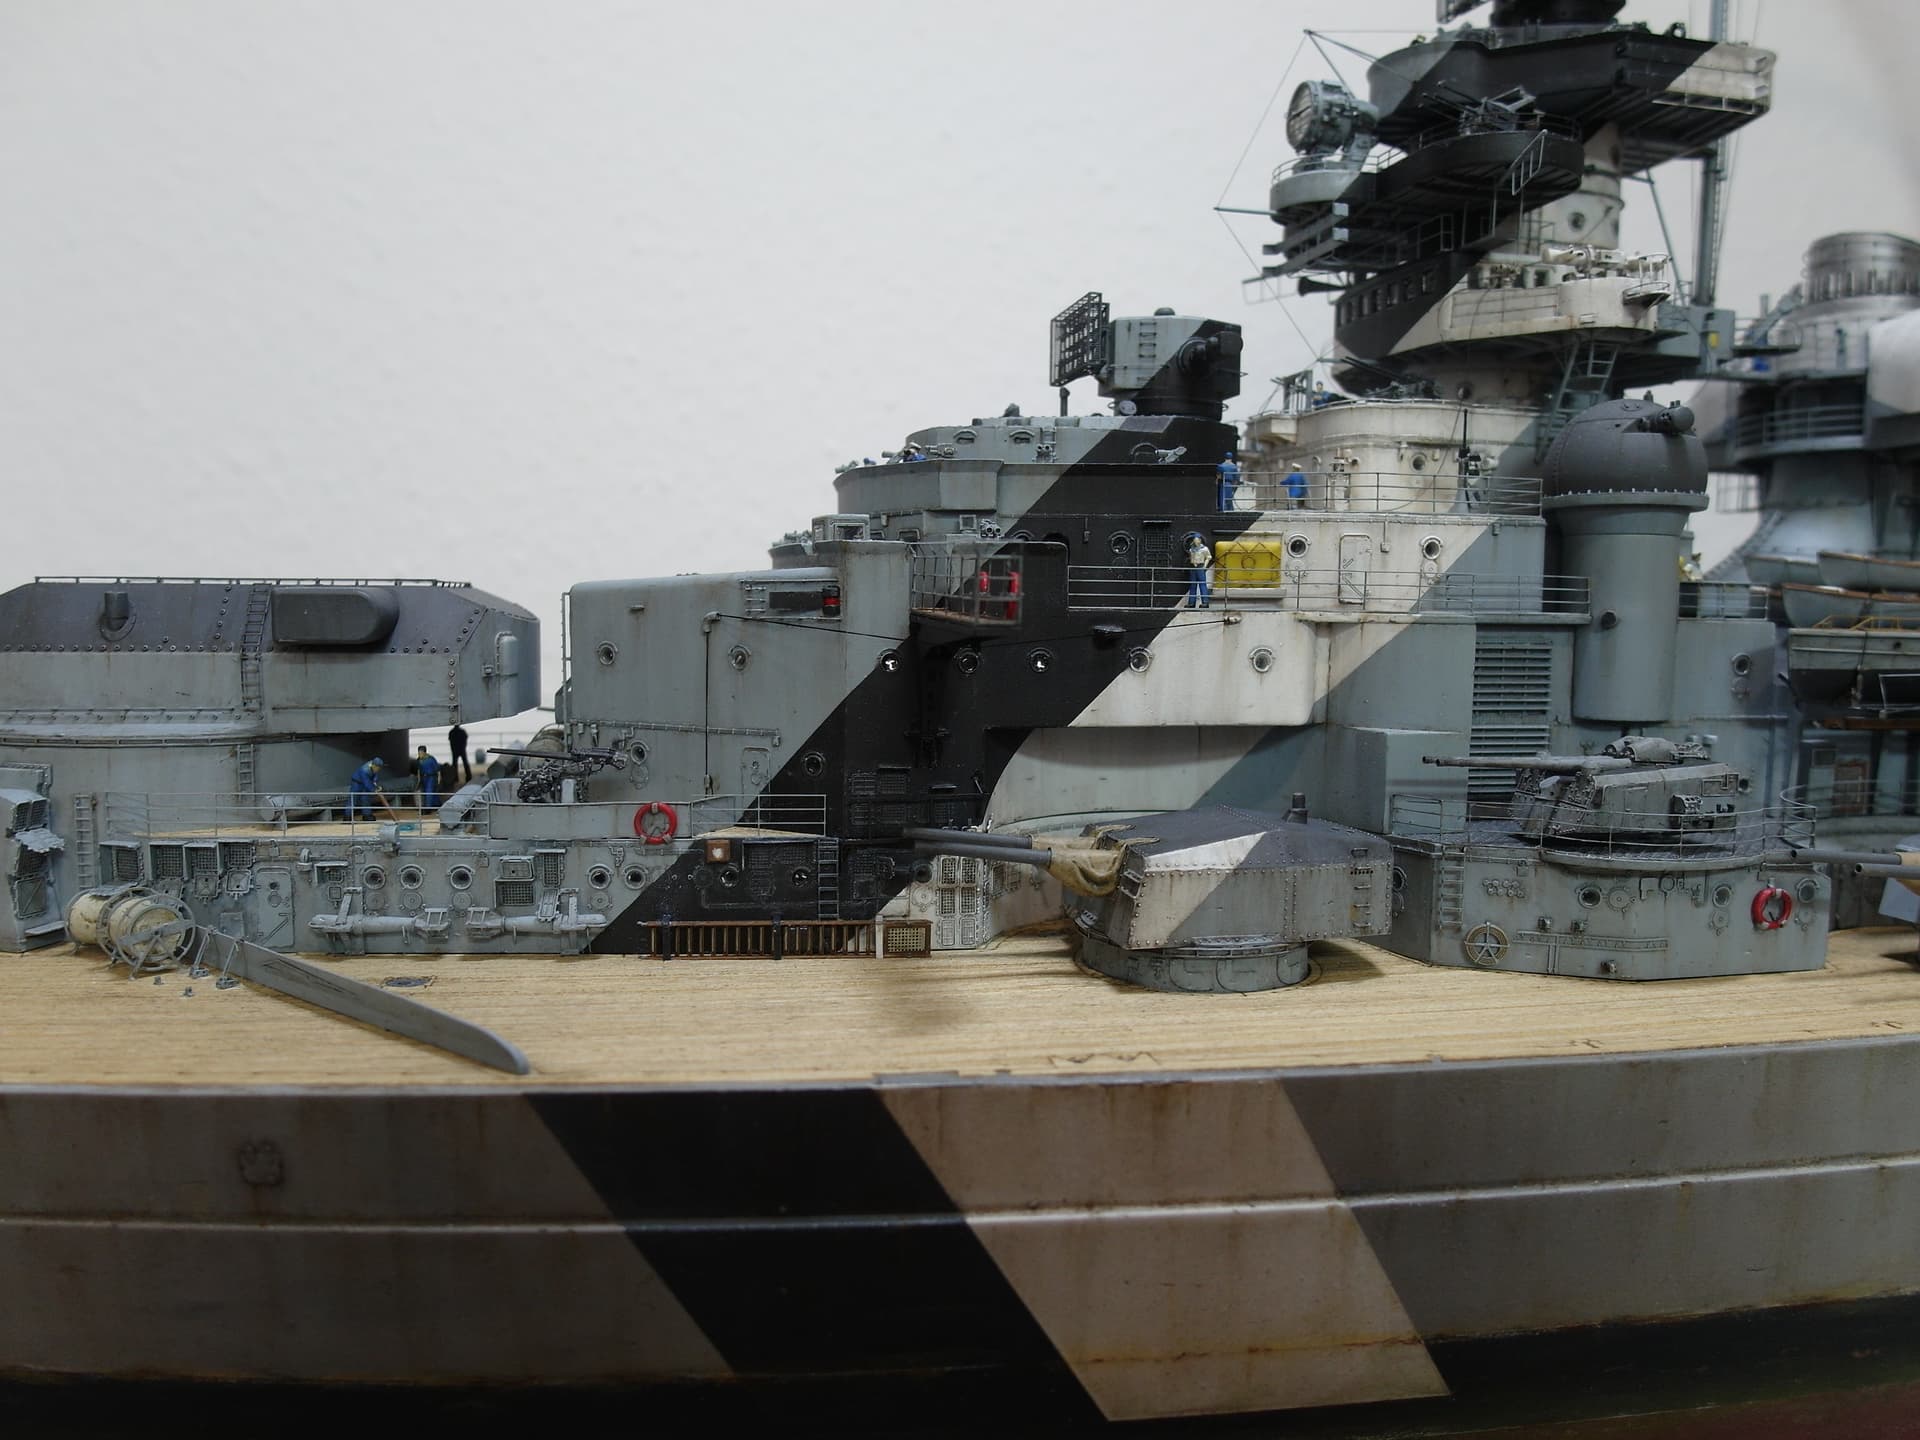
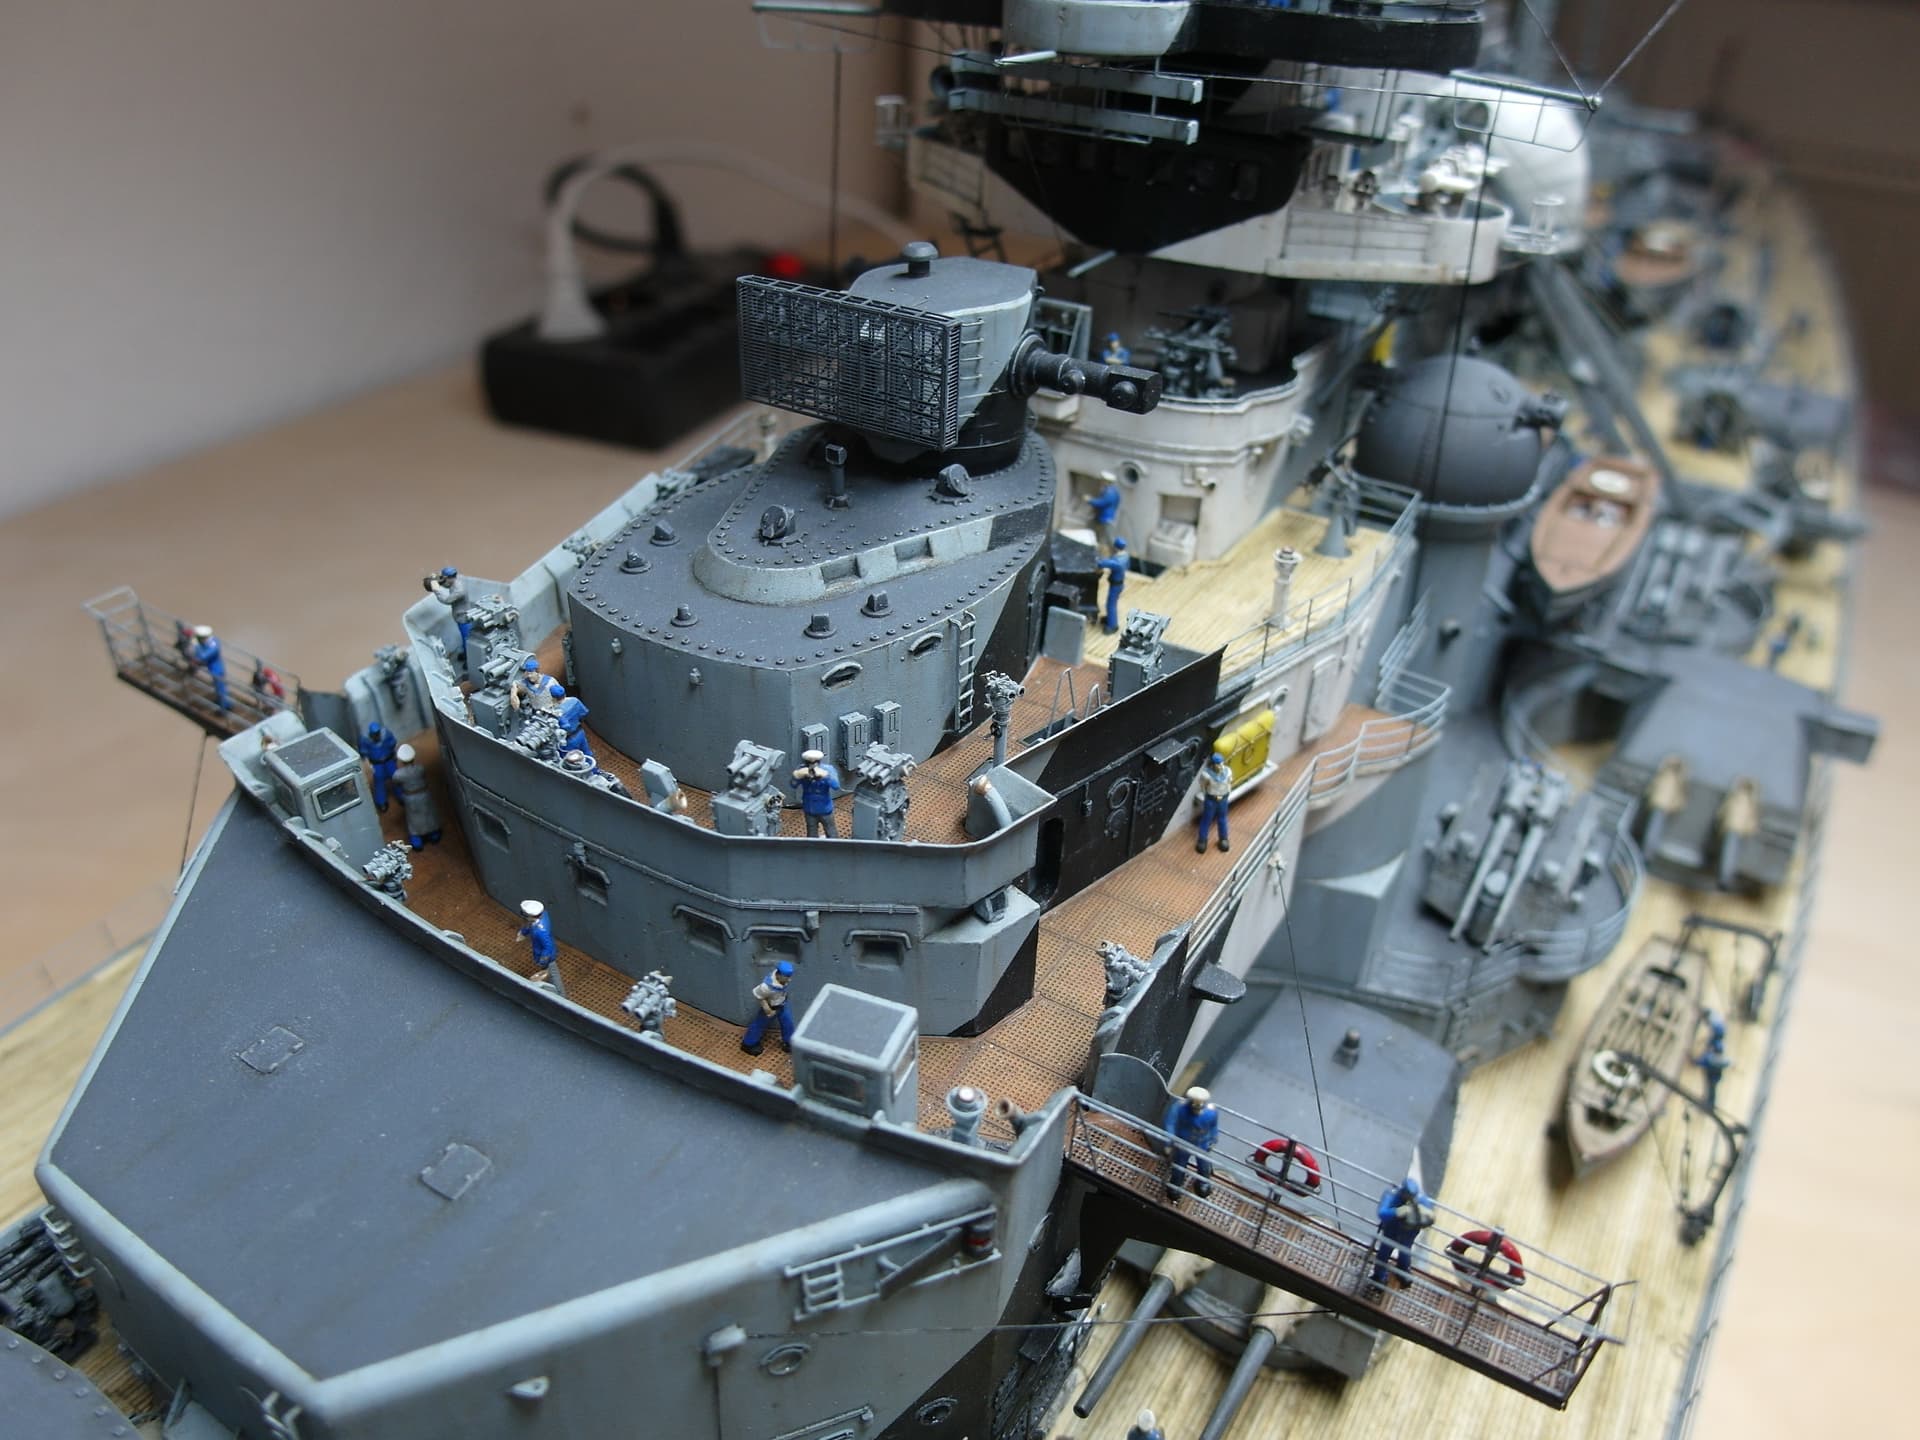
The heavy artillery gets its finish.
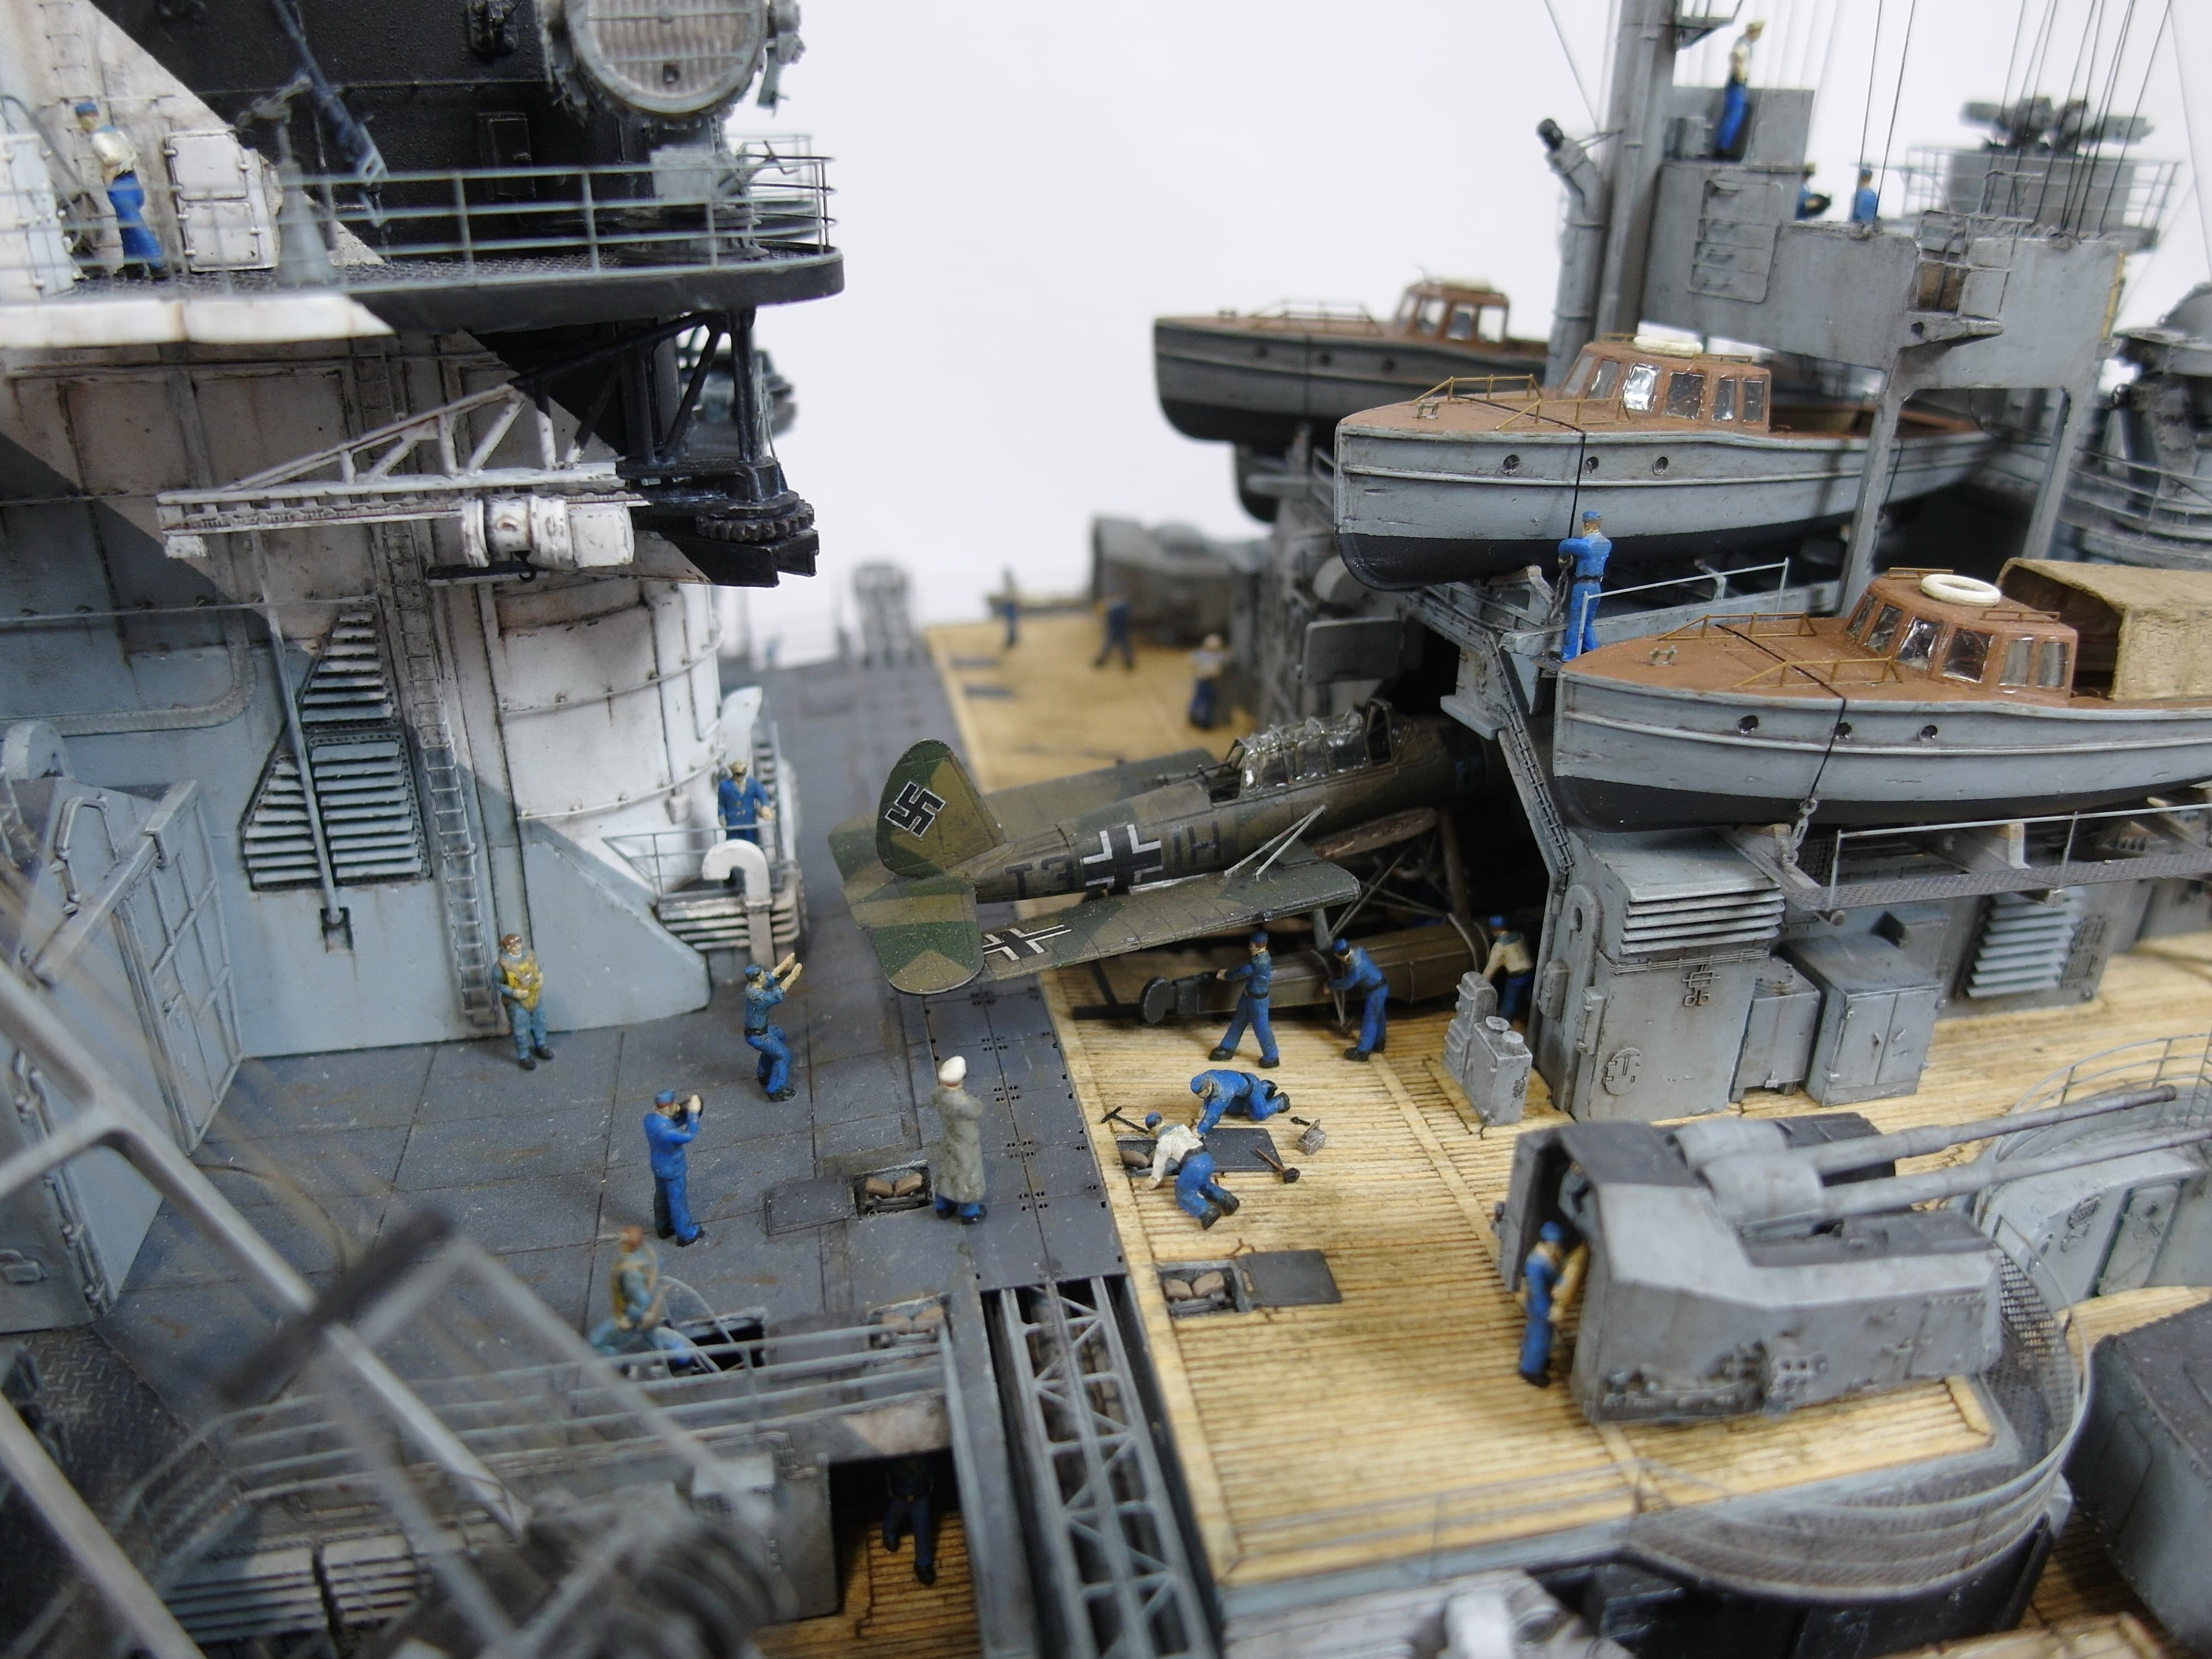
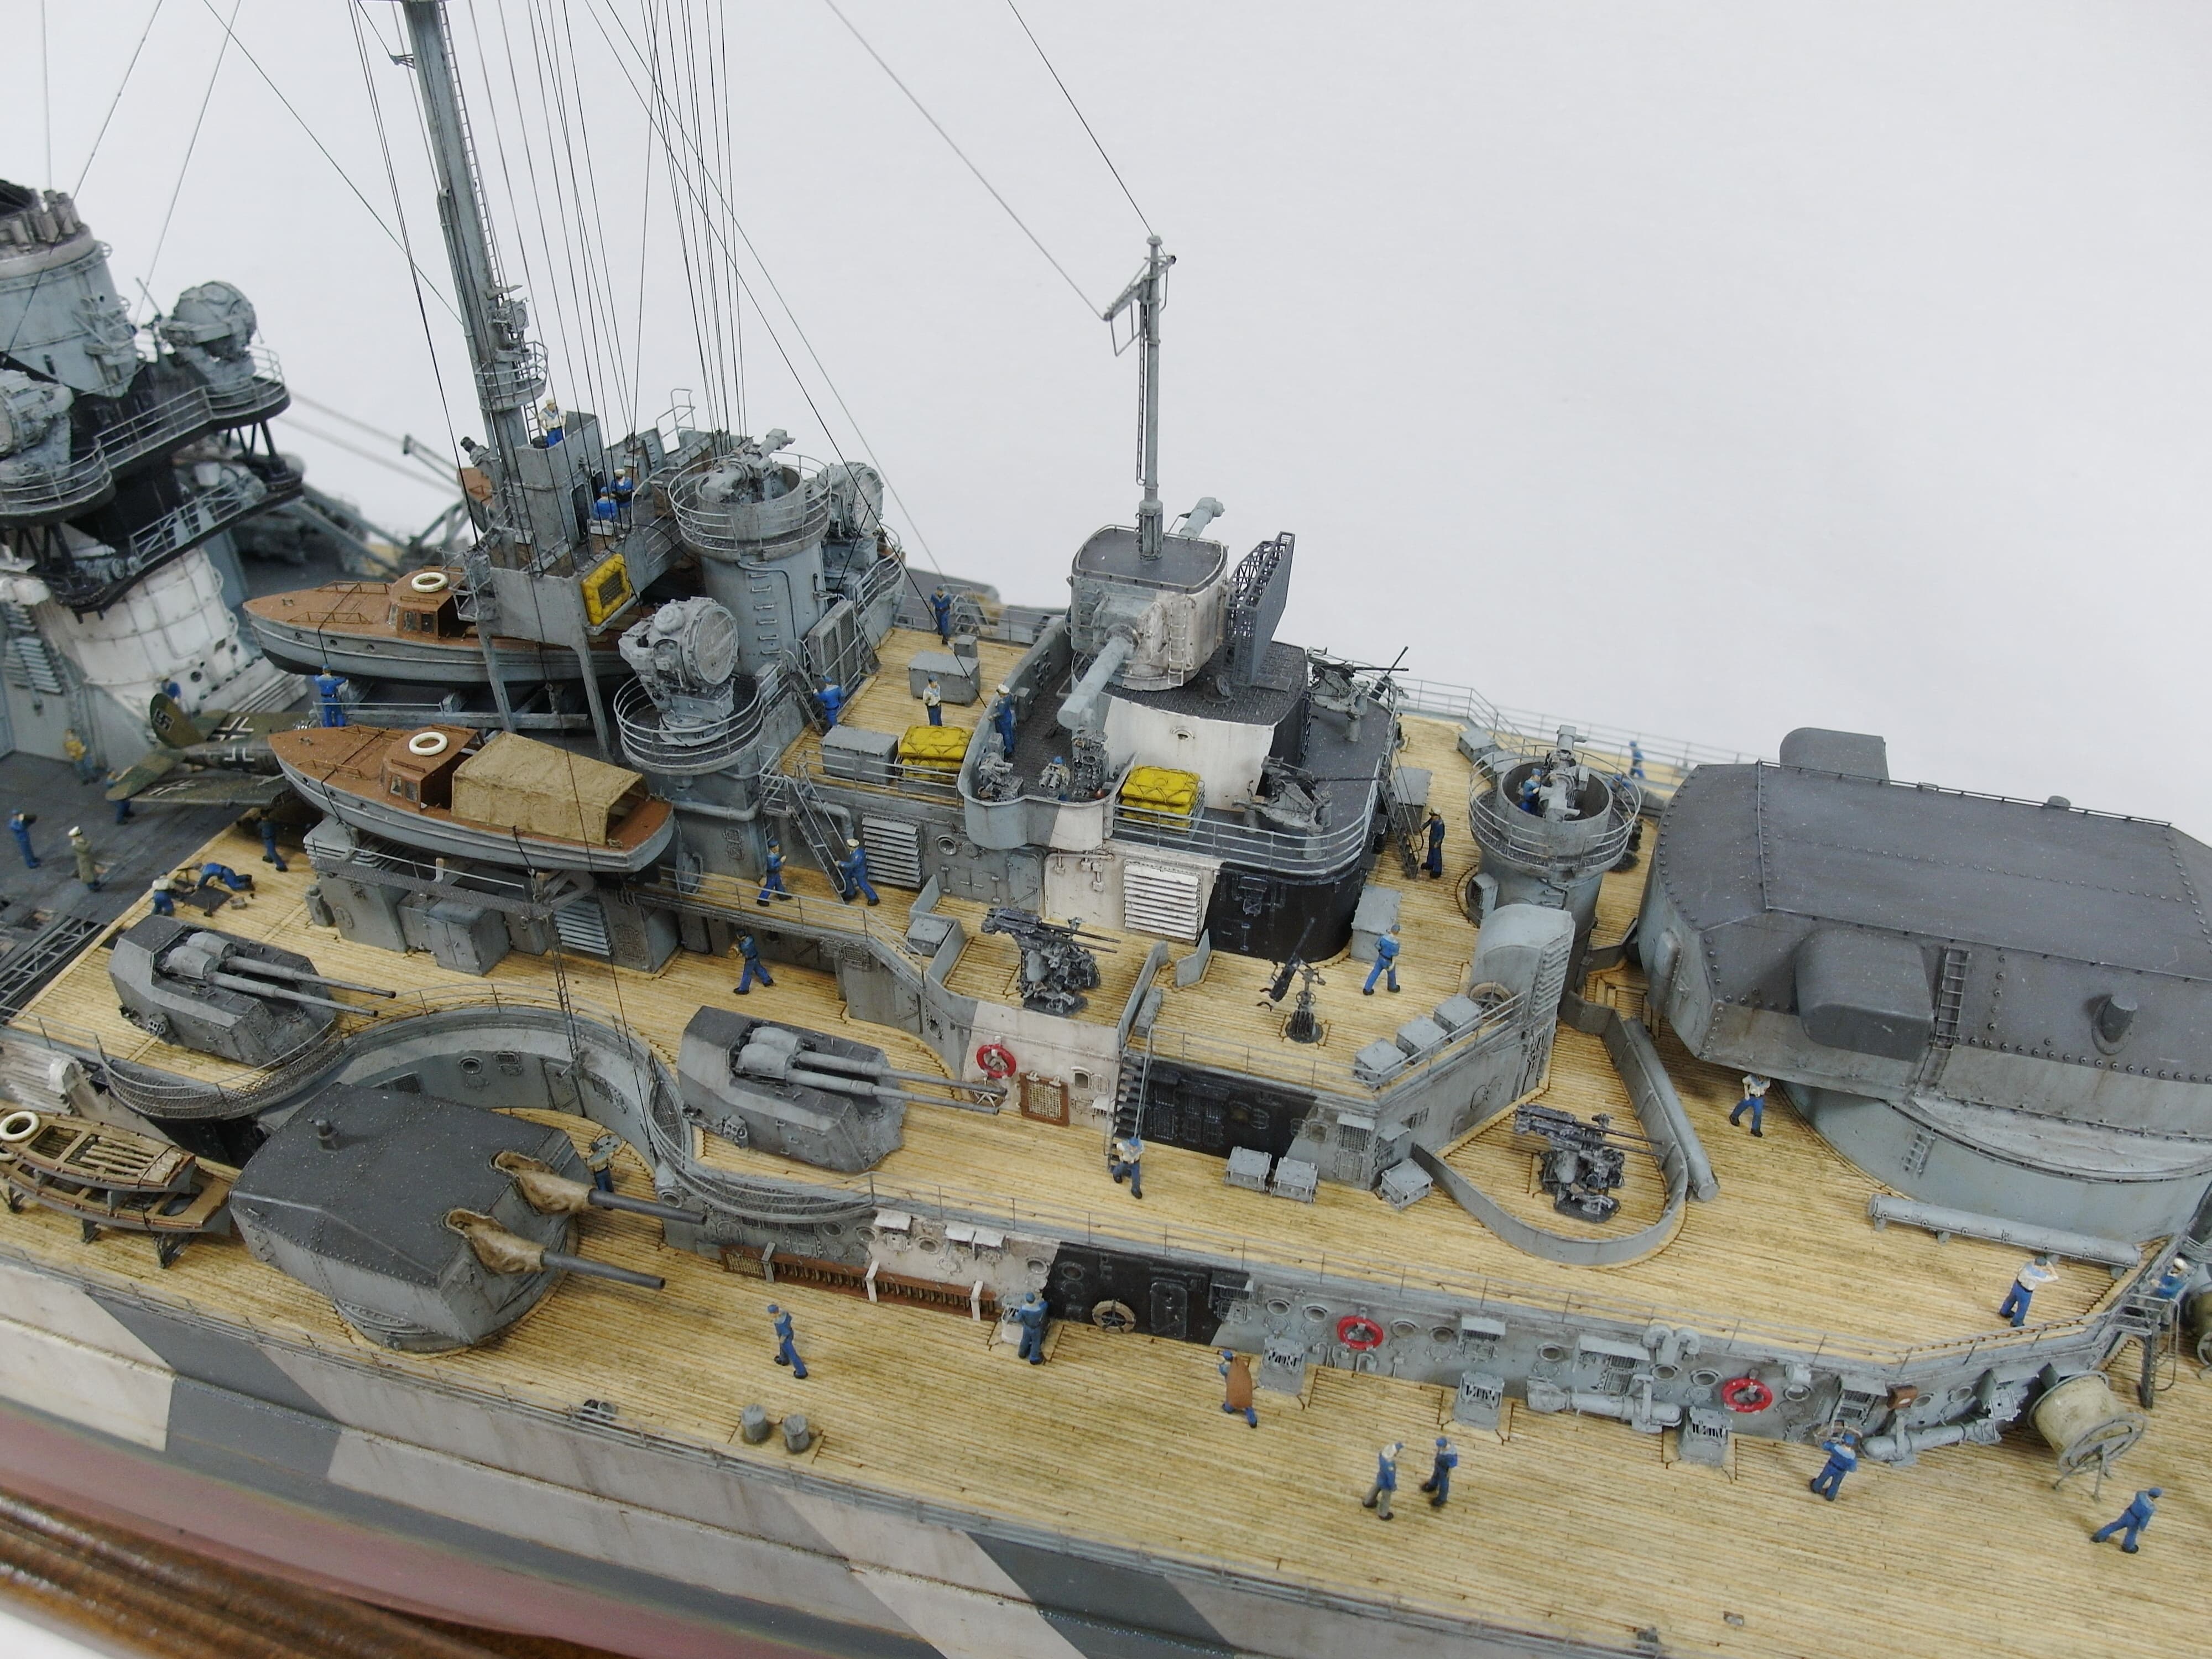
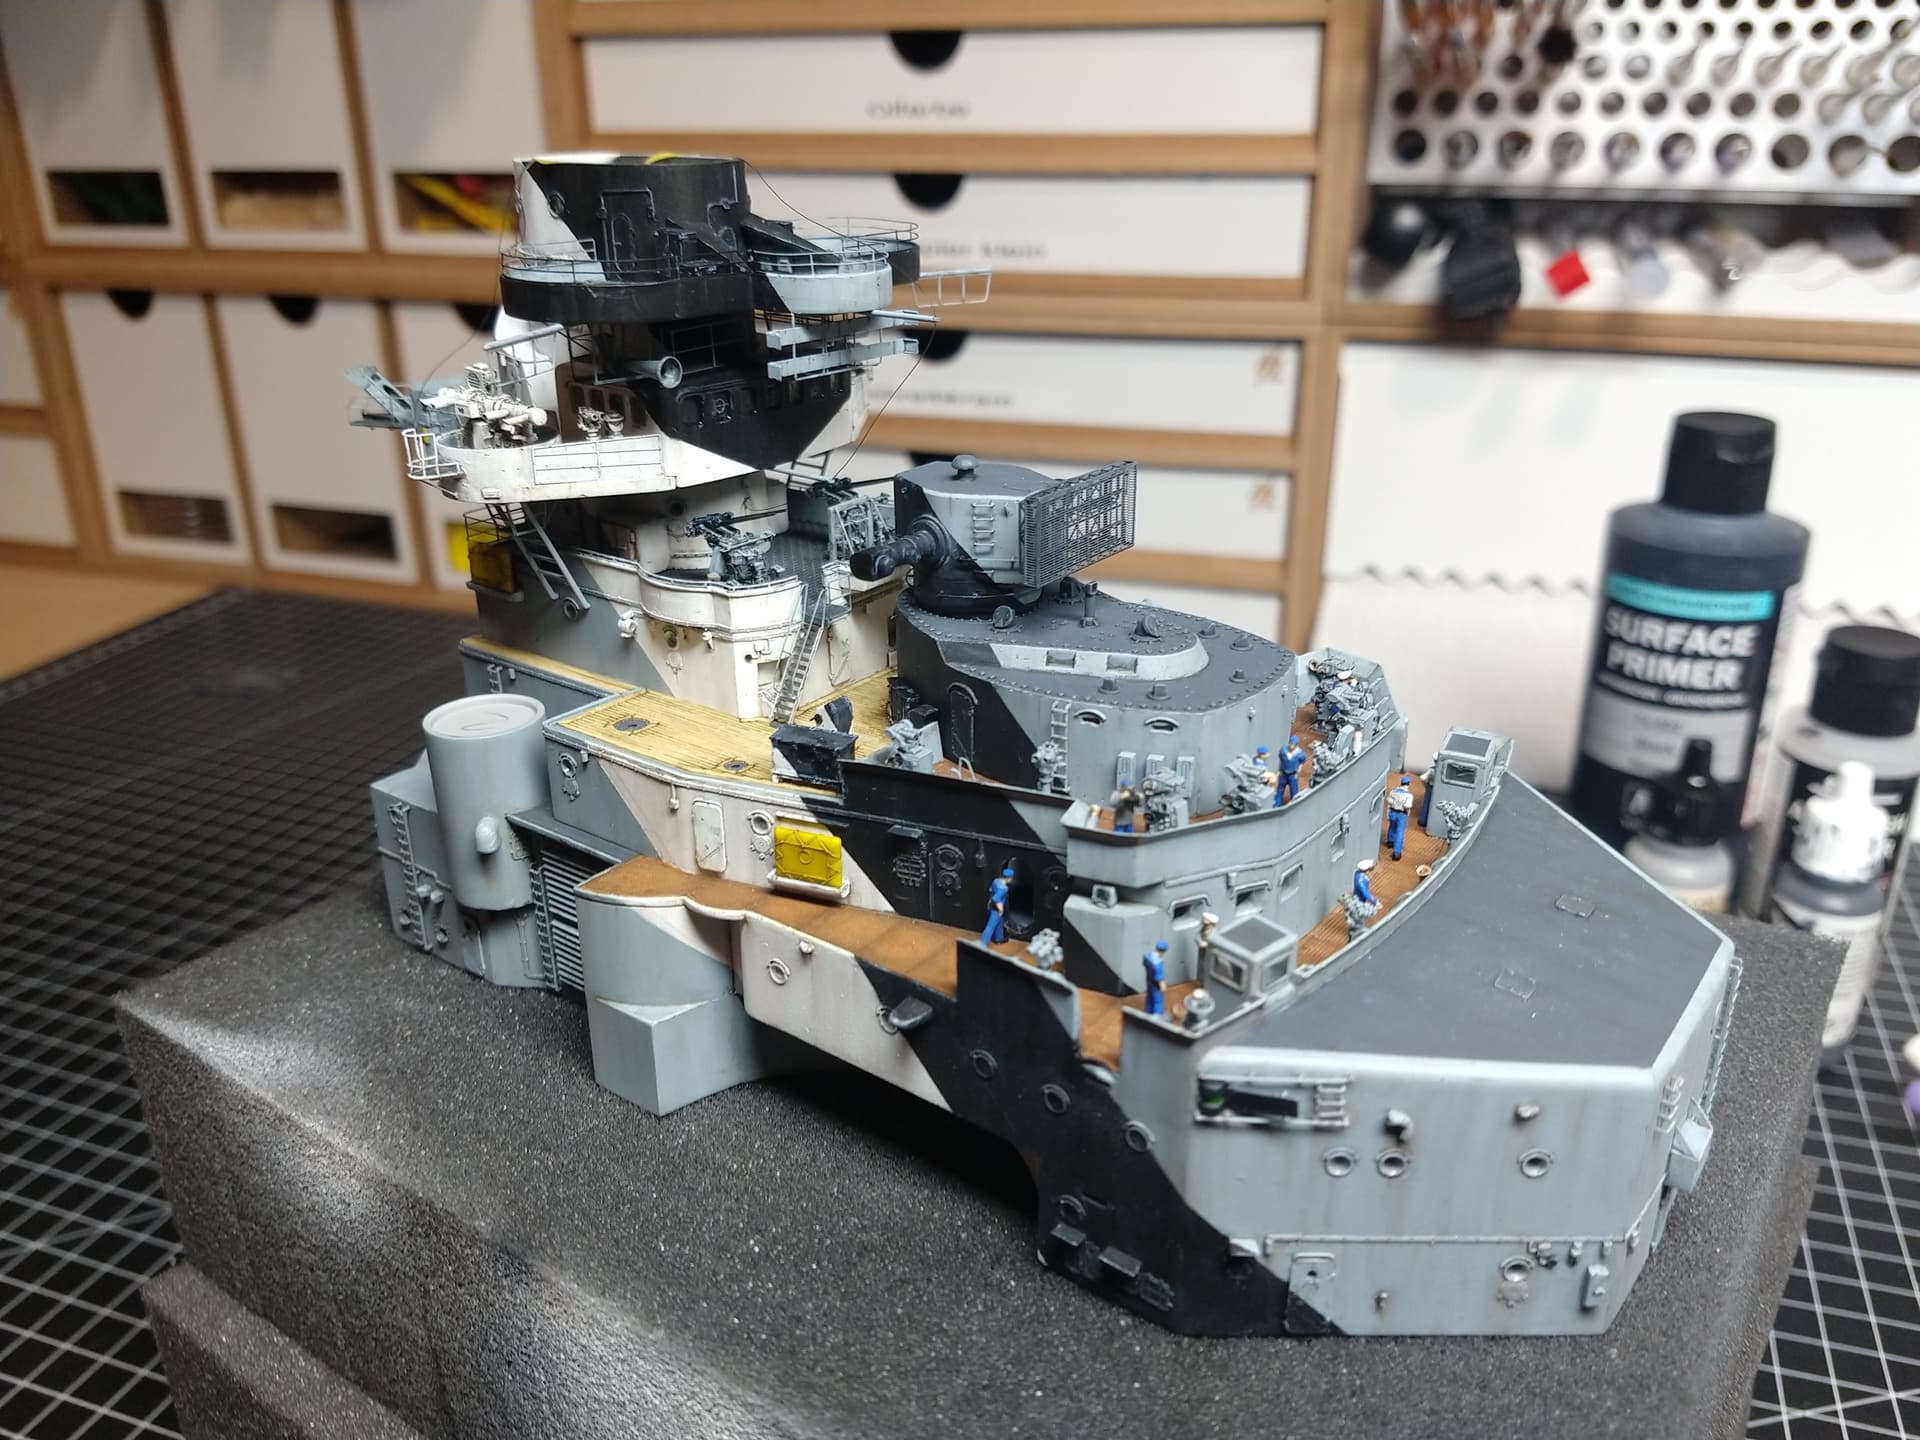
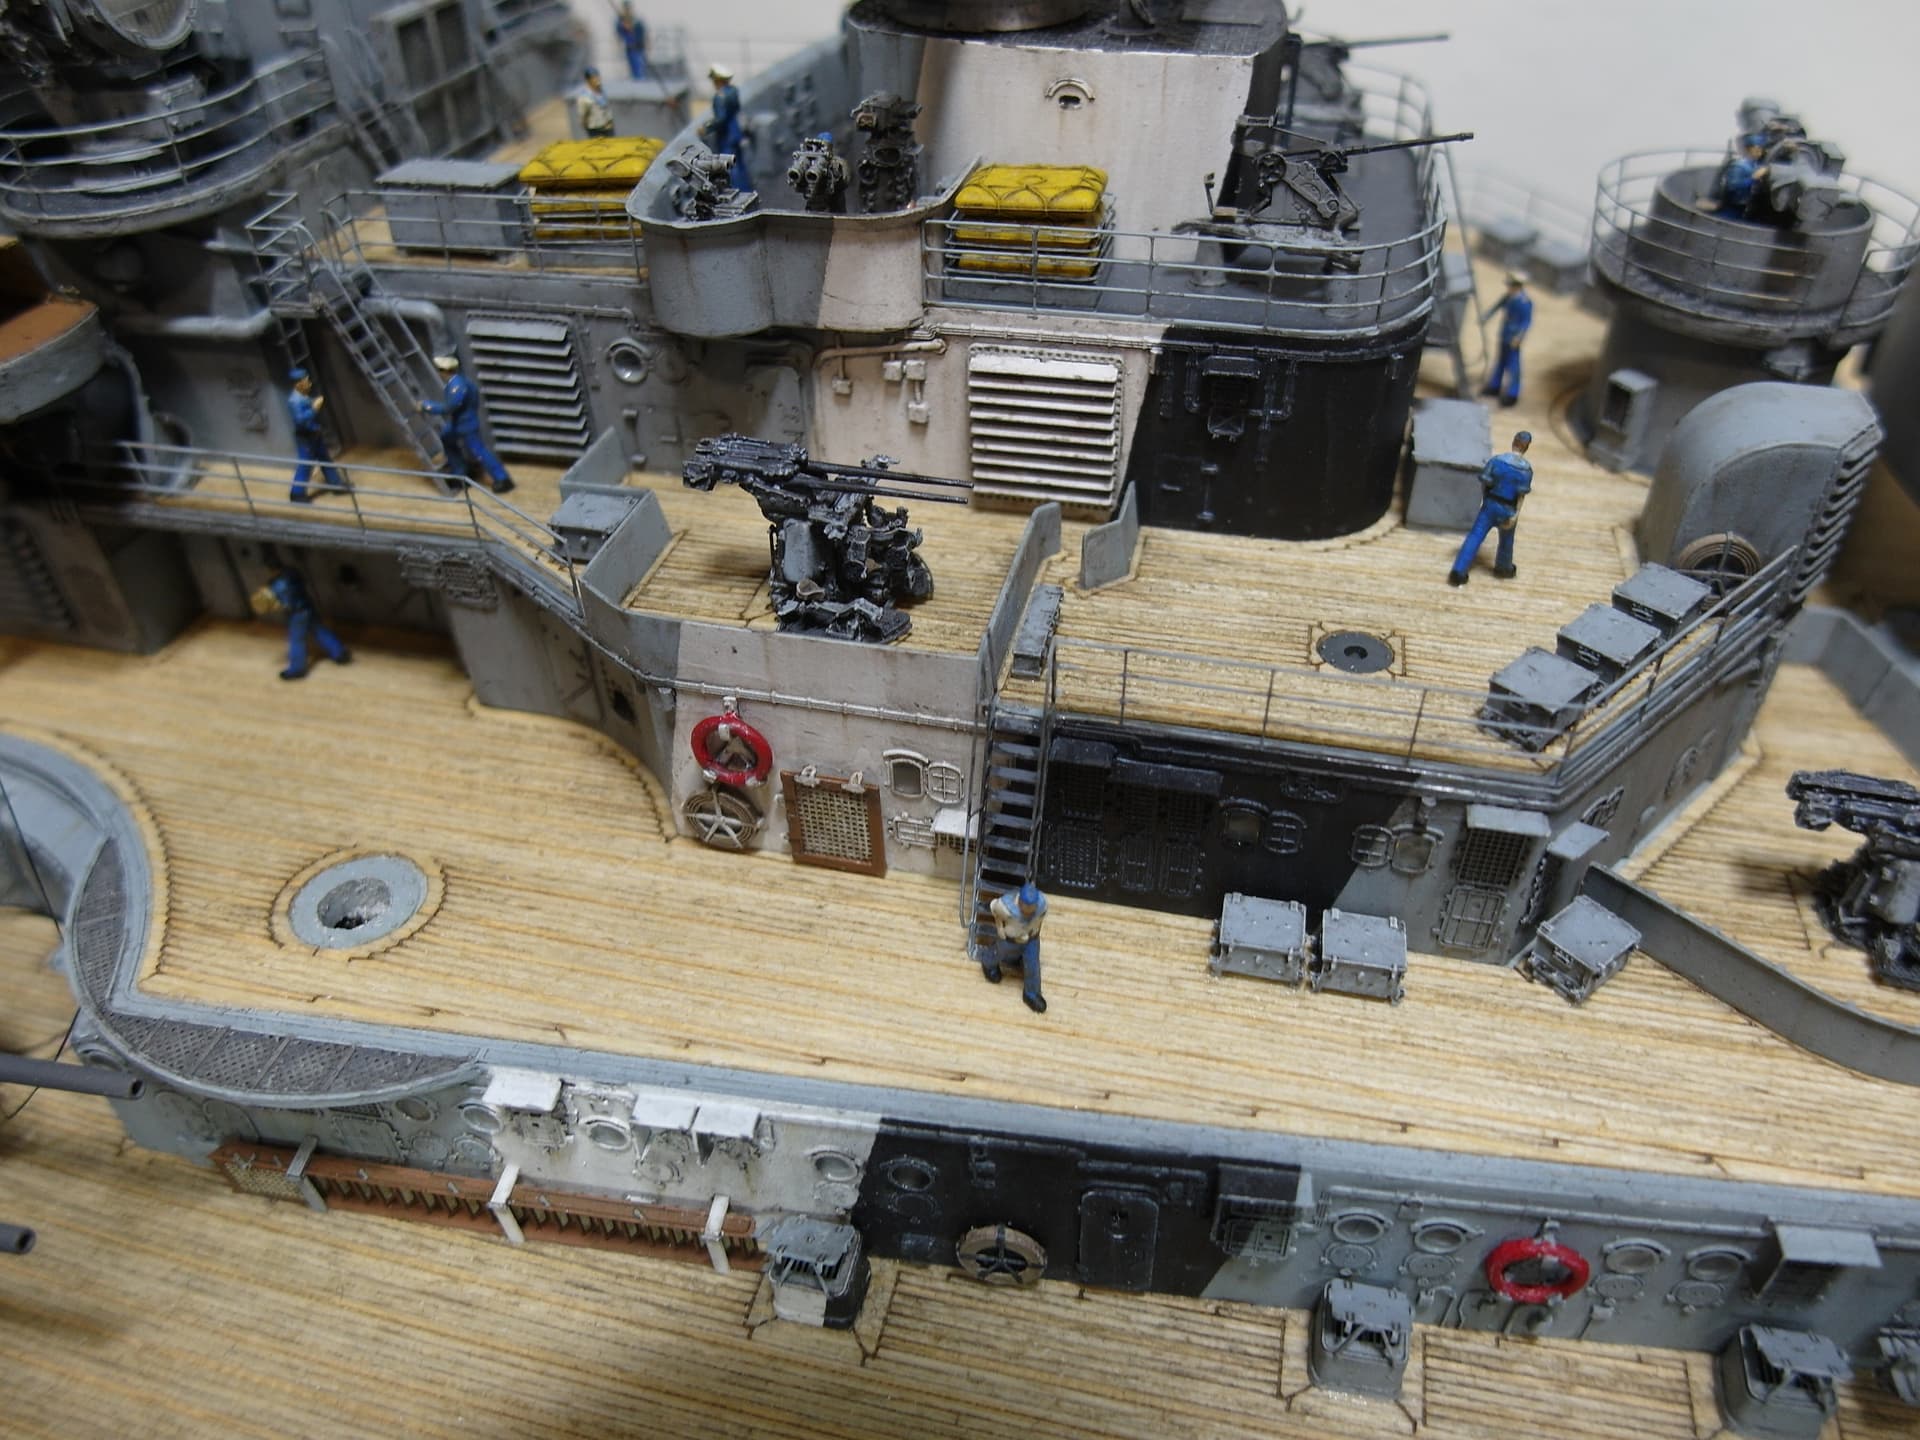
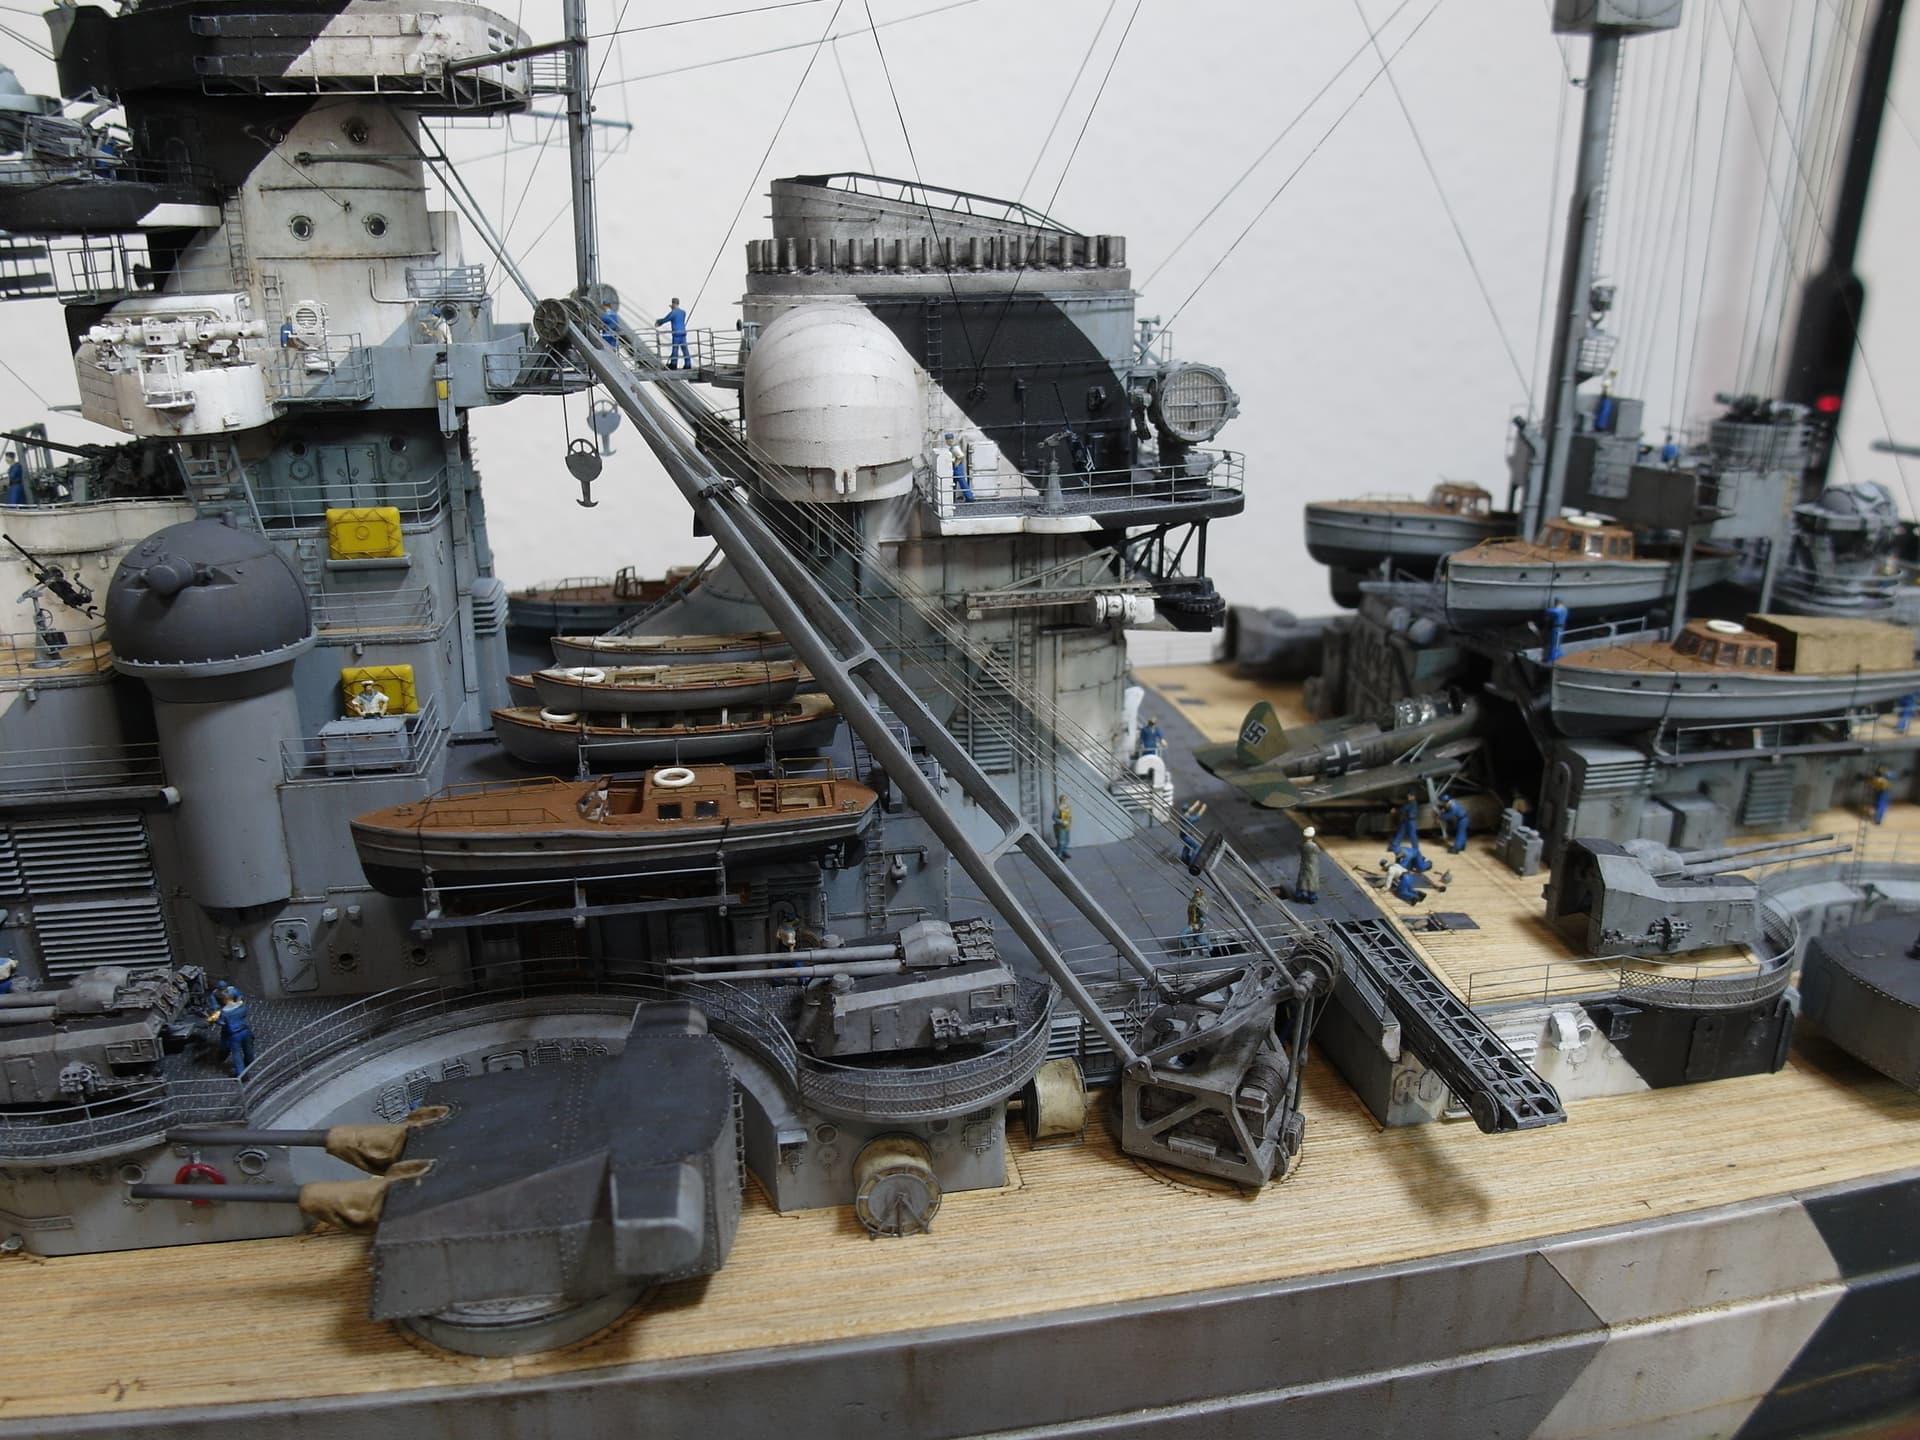
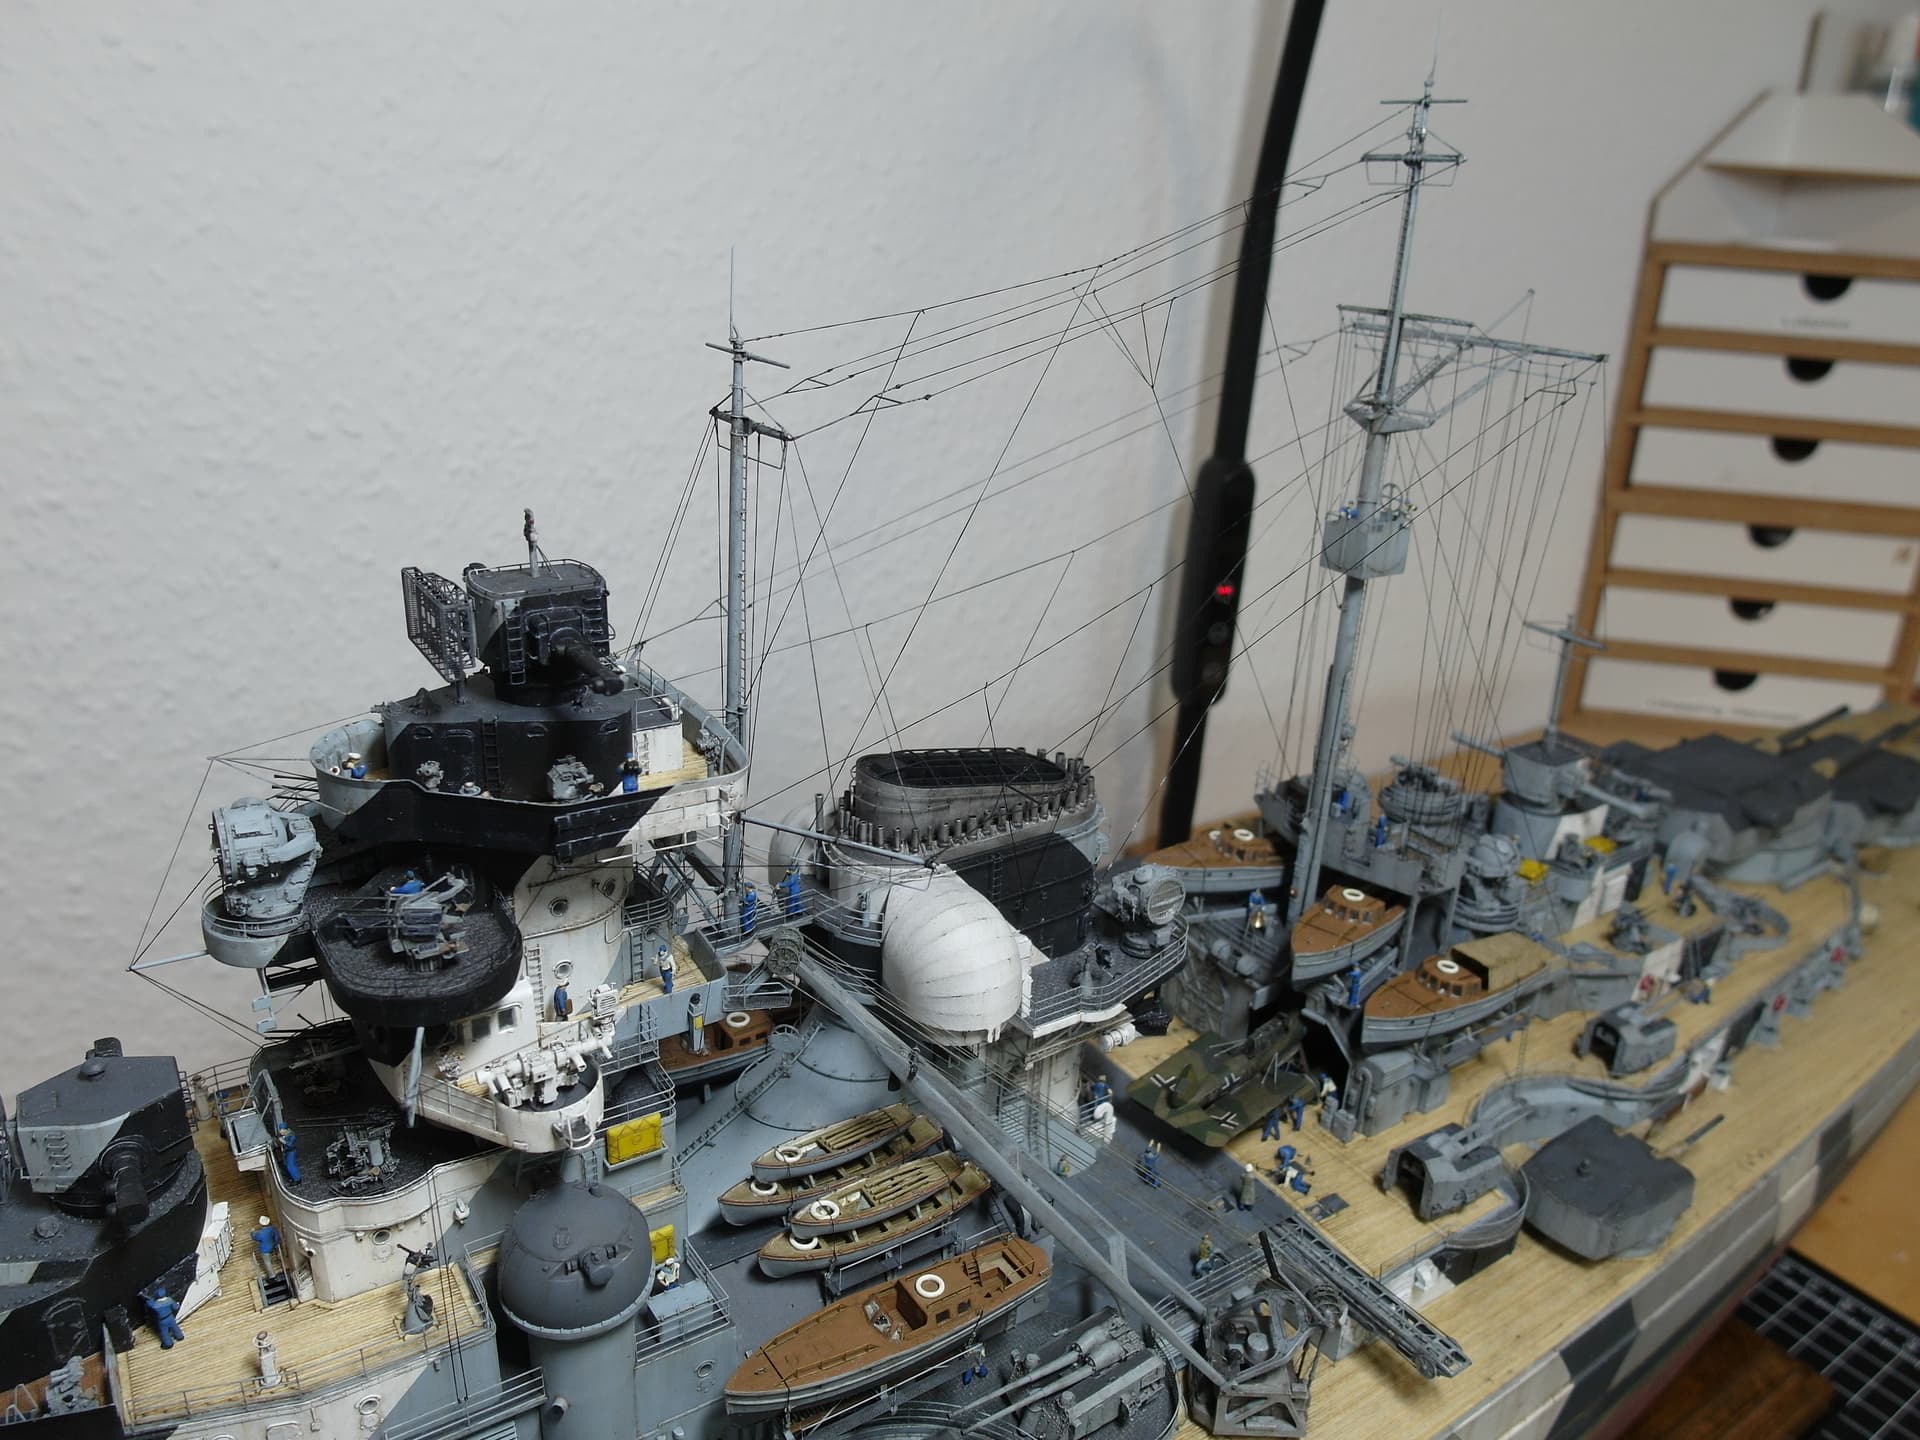
Let’s get to the protagonist for the small scene in front of the hangar.
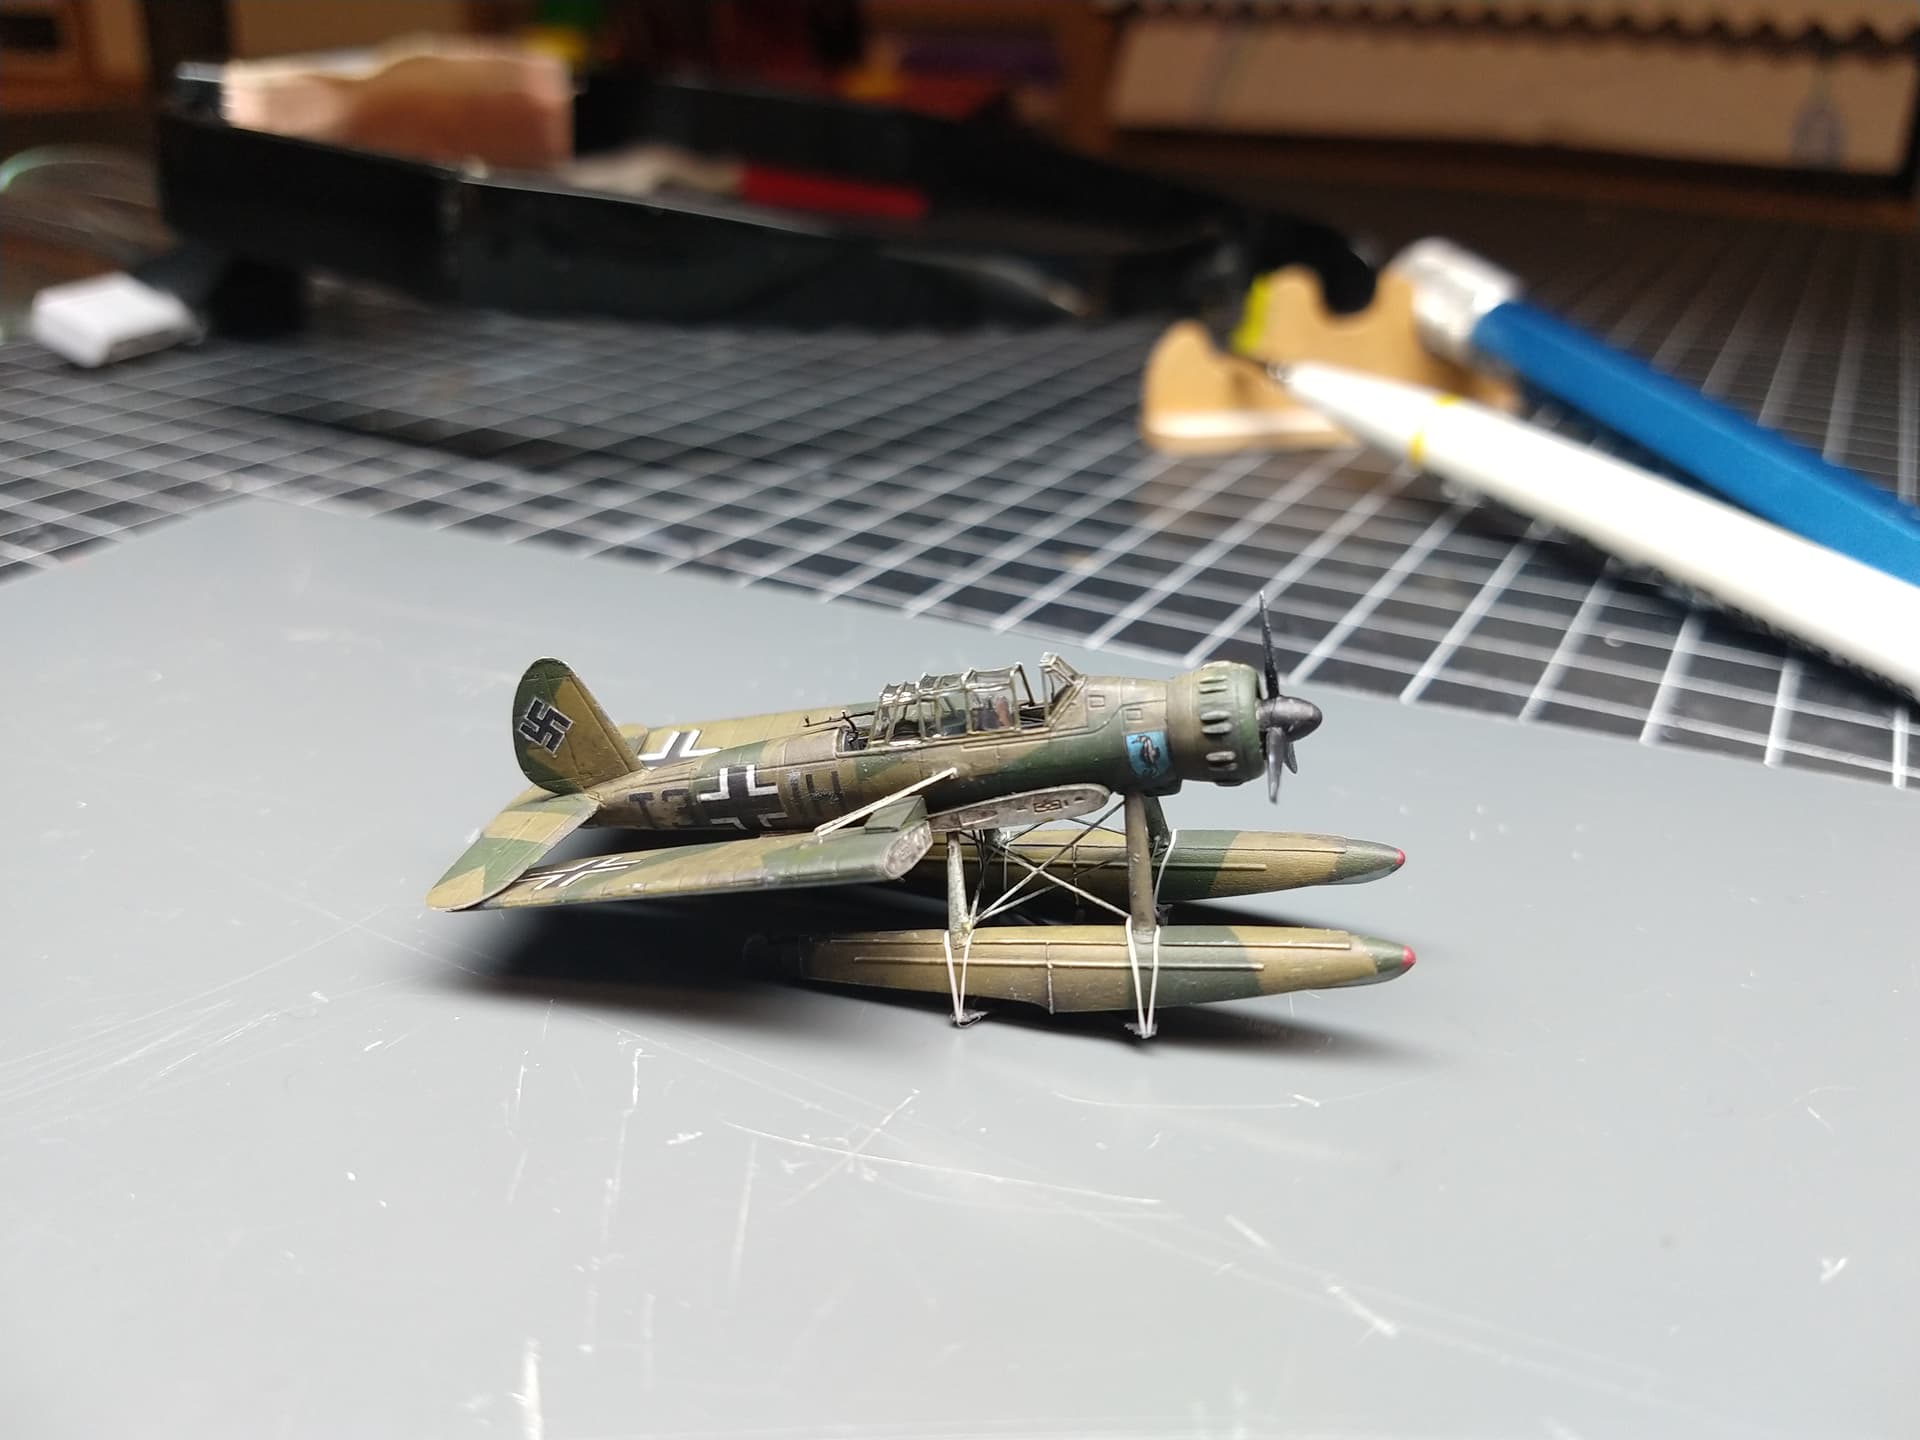
The team pushes the Arado out of the hanger on the rail system (which cannot be seen here). The hydraulic jacks are adjusted again with a hammer and crowbar.
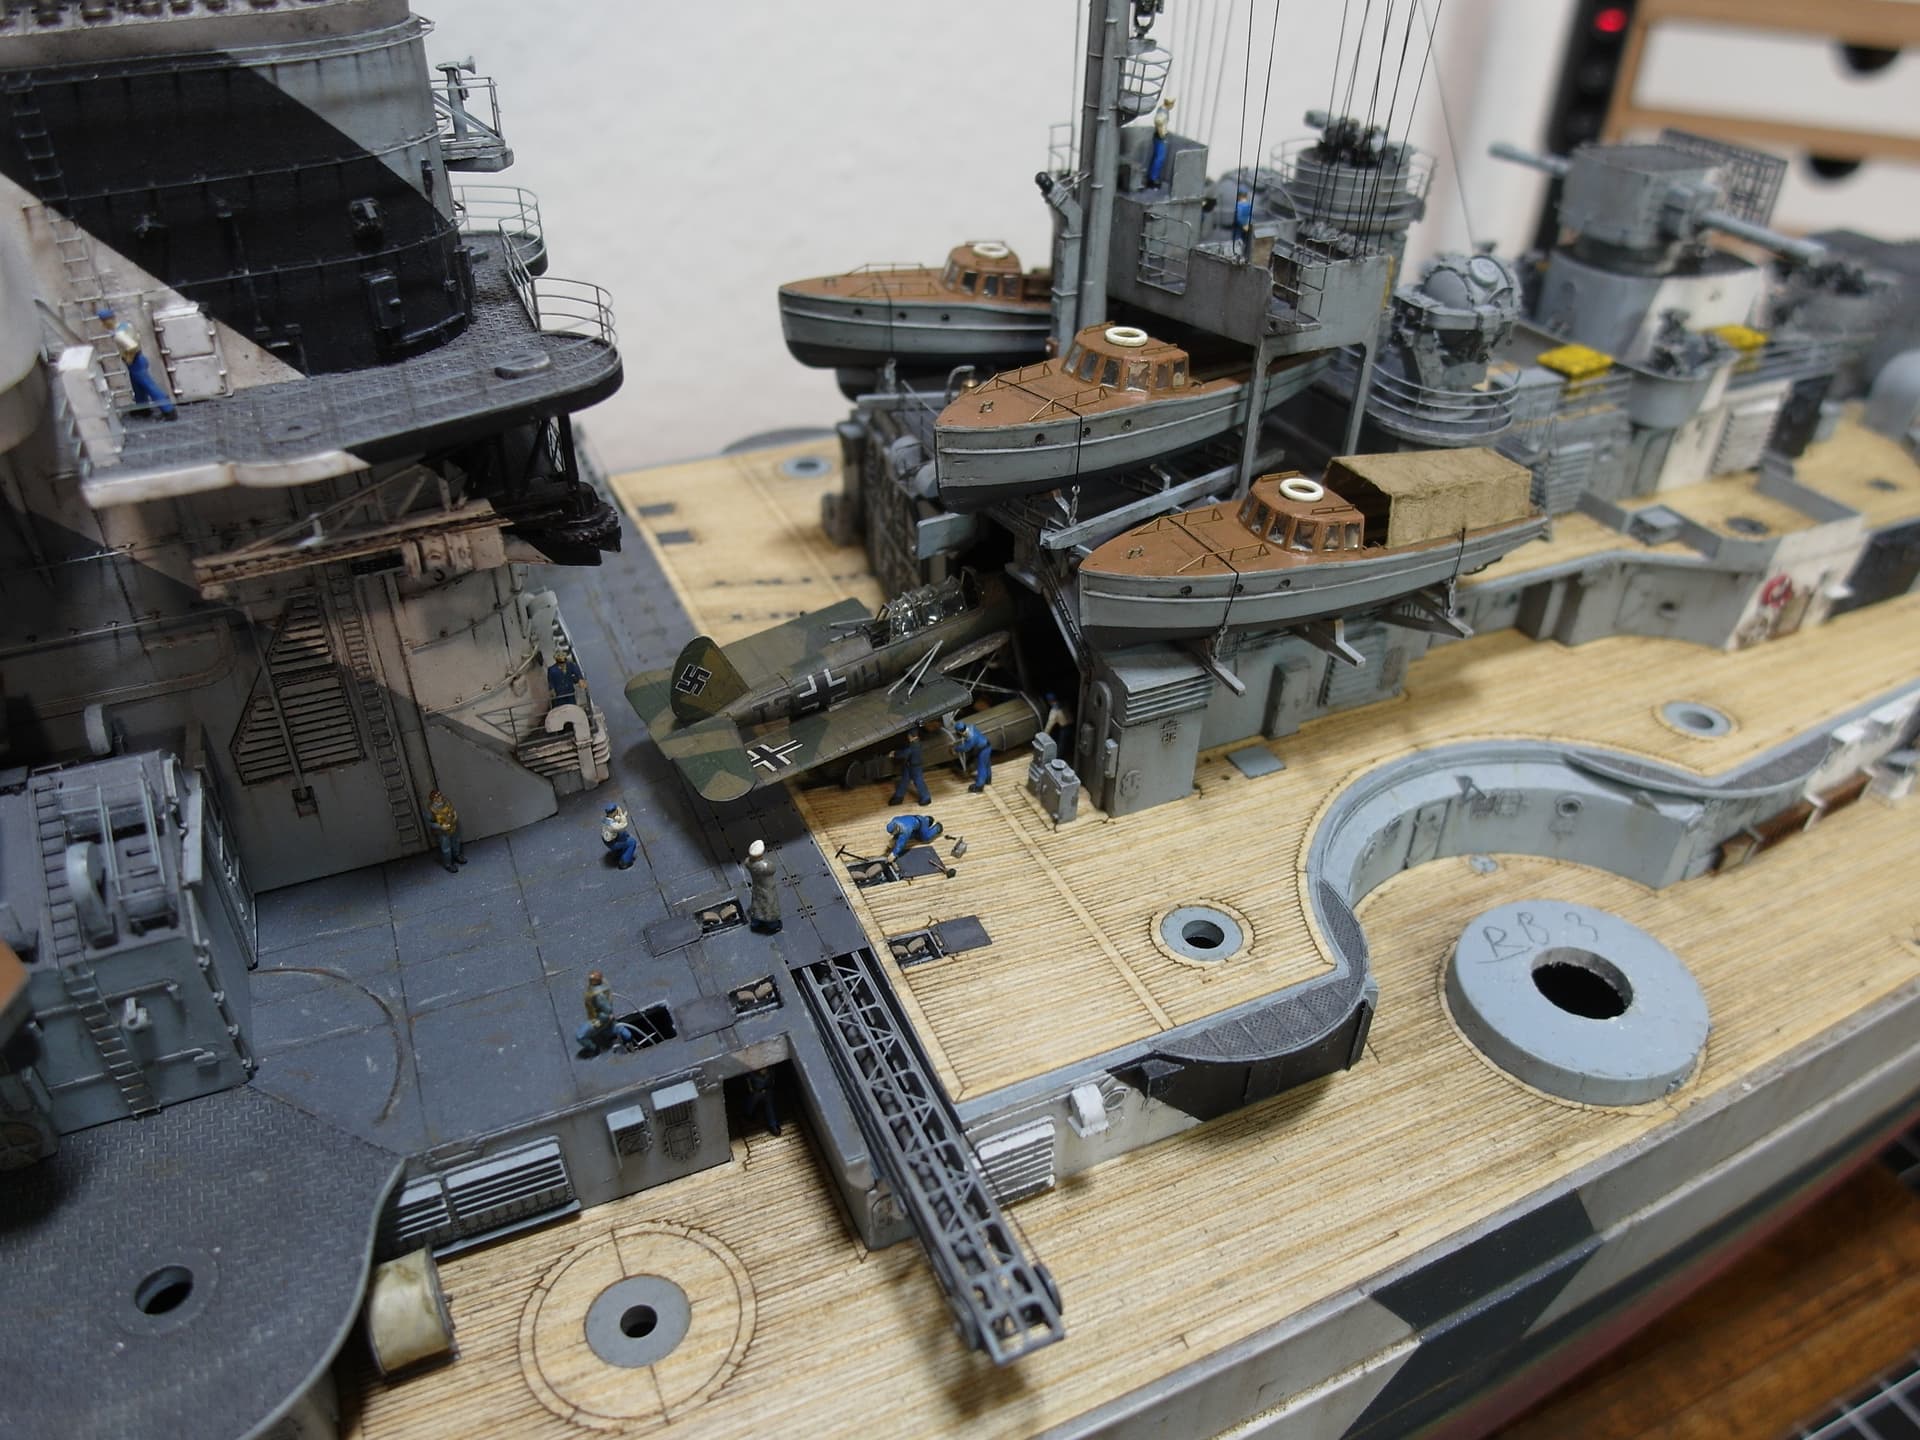
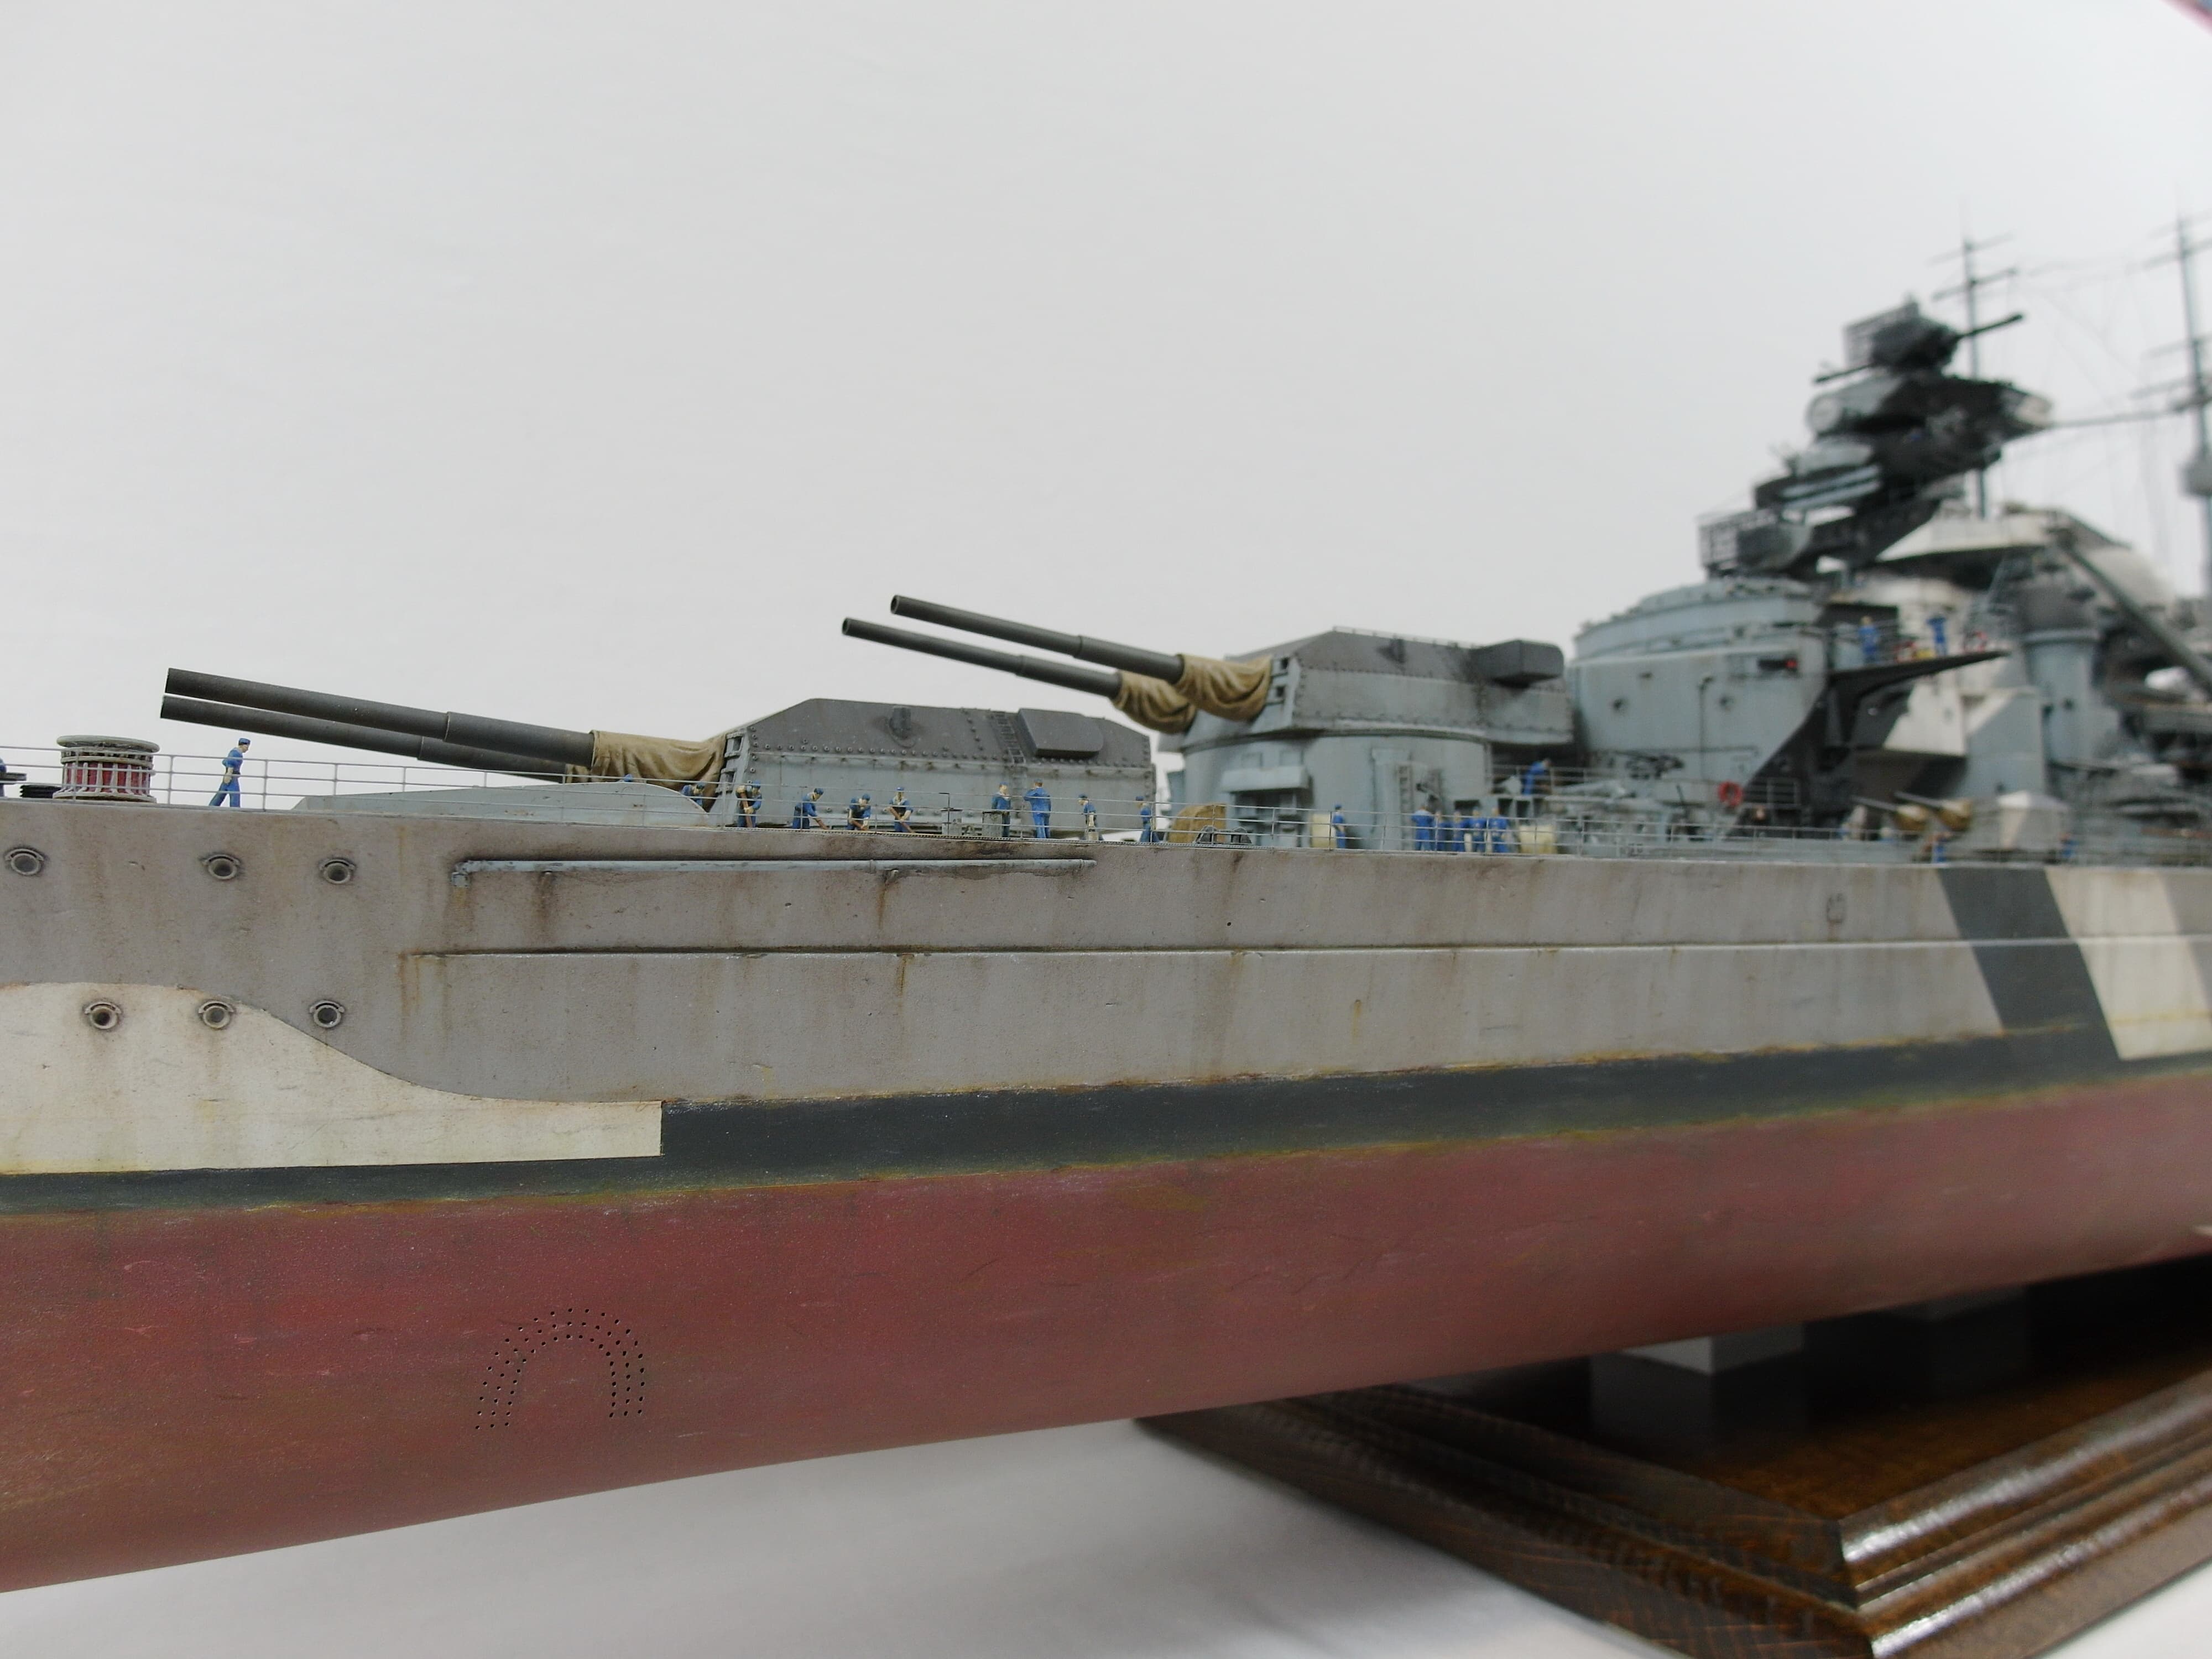
Still afloat the 10.5 installed.
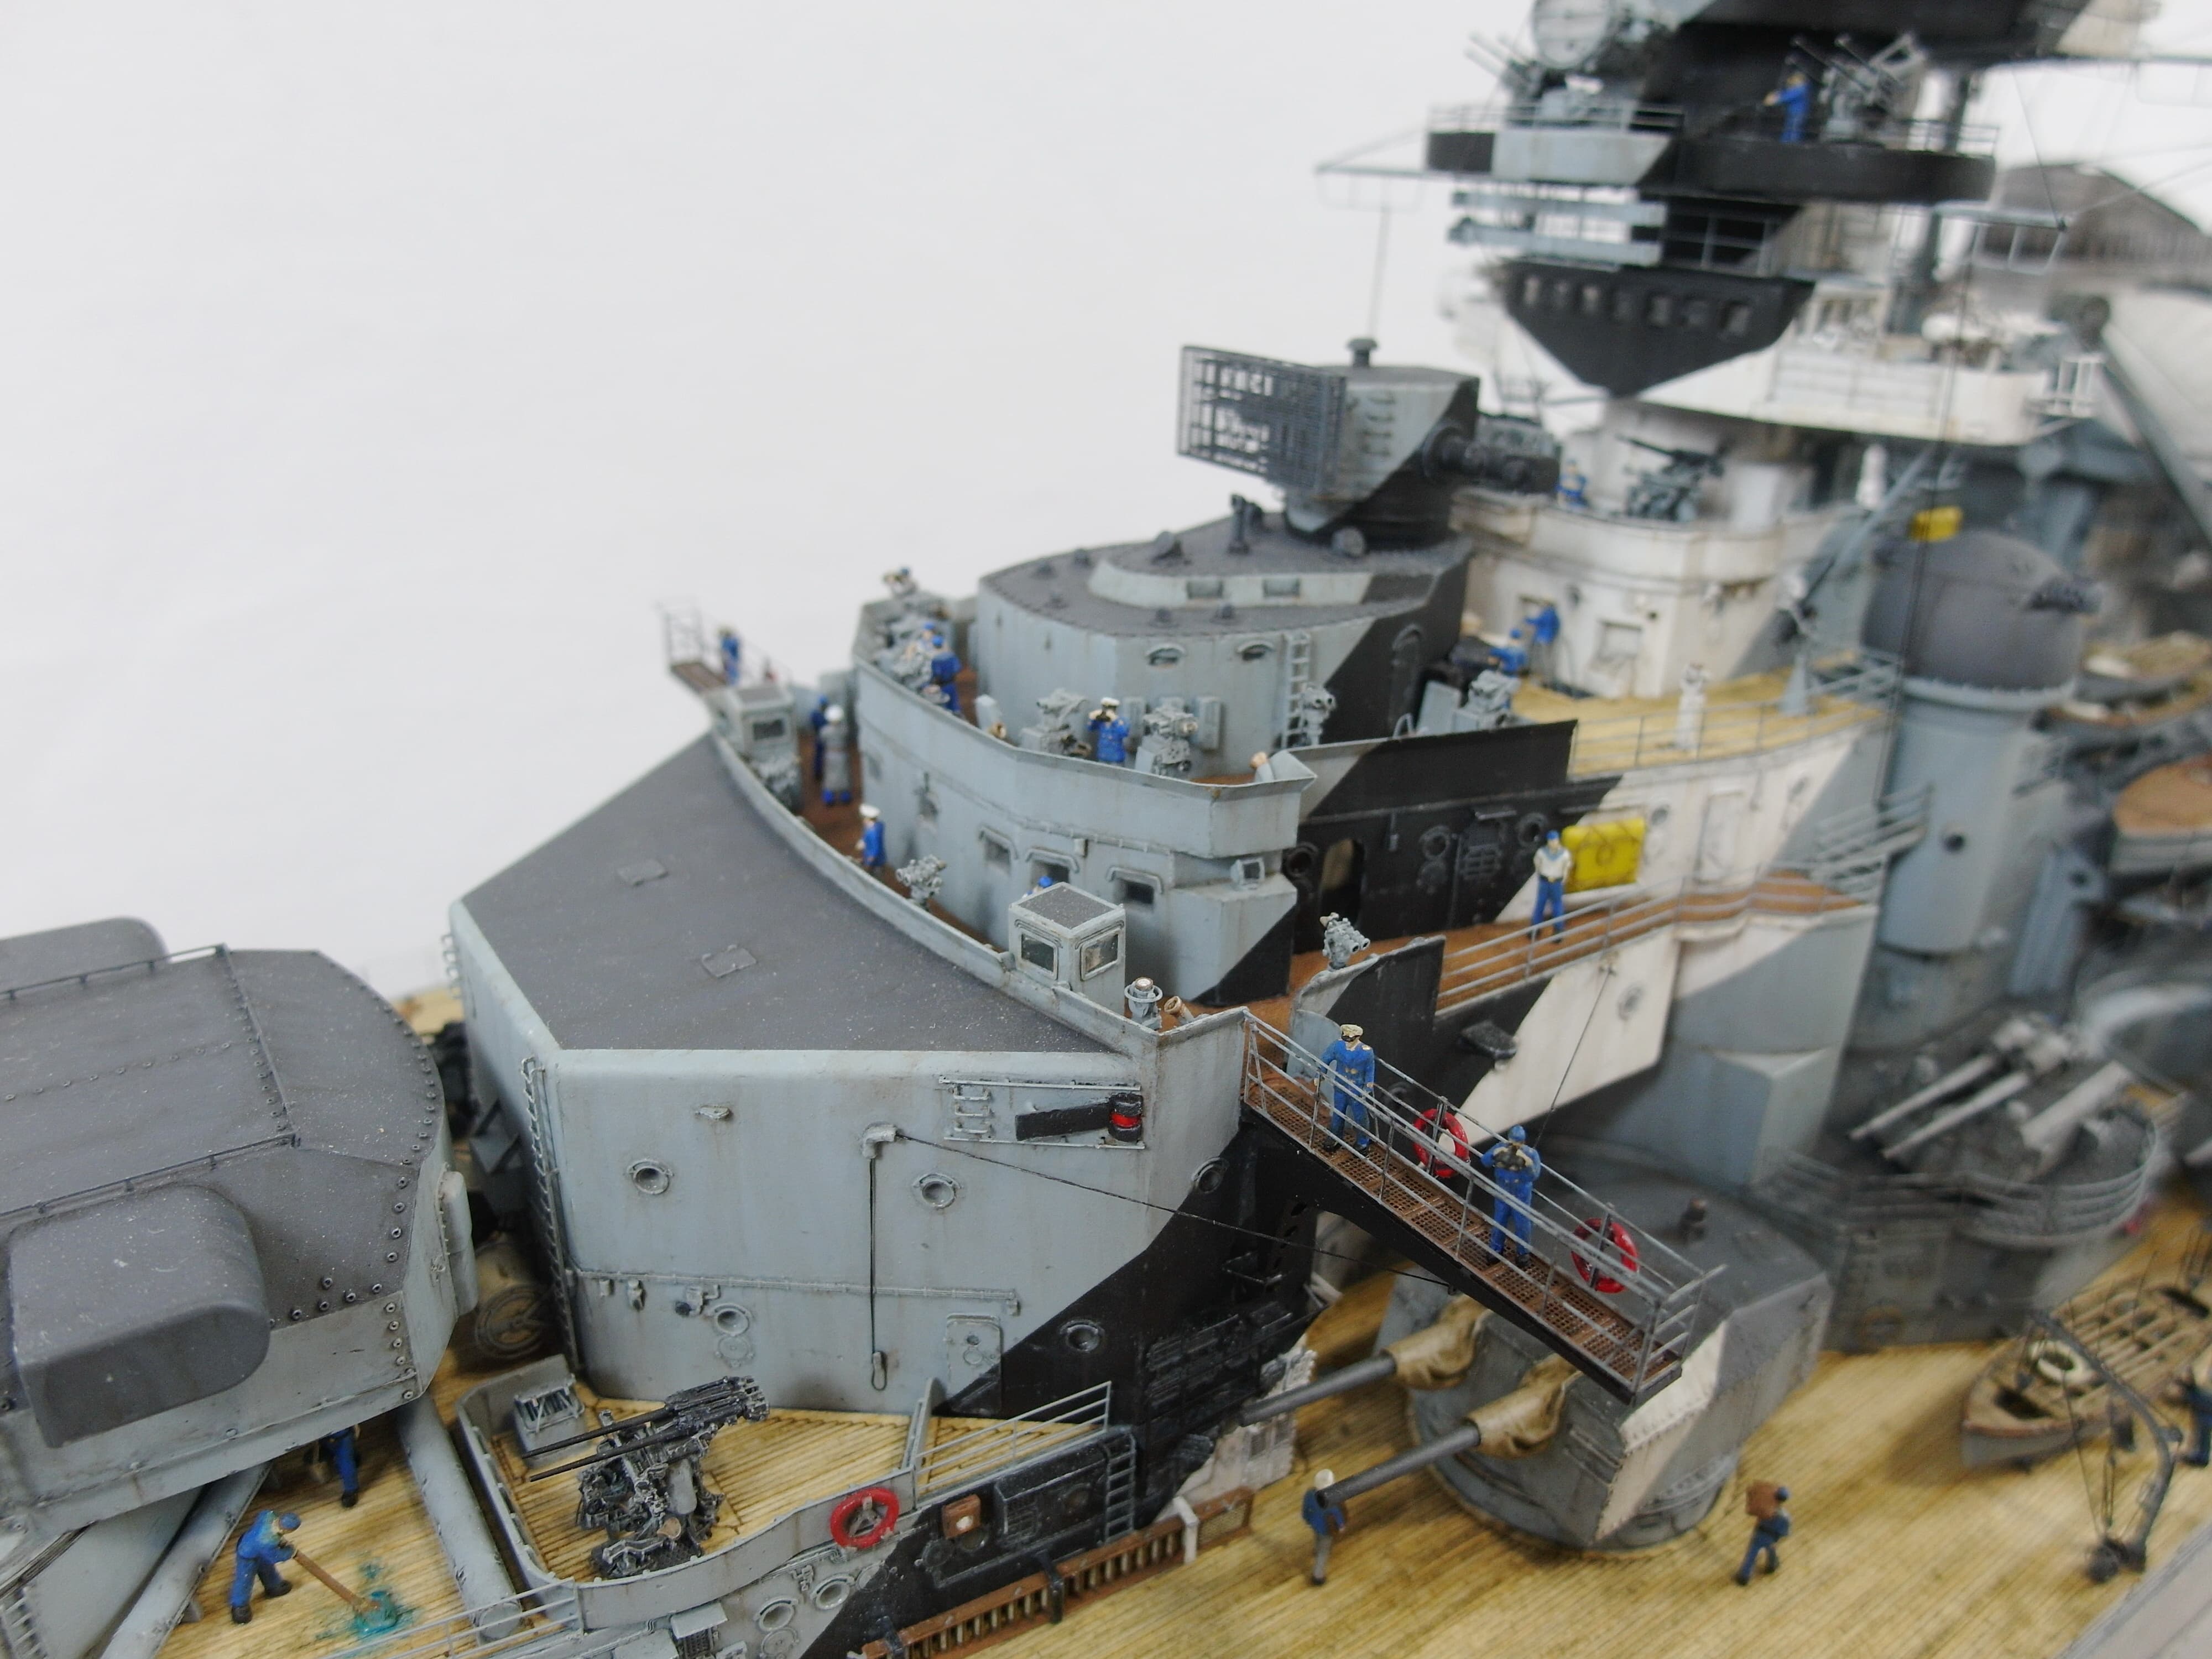
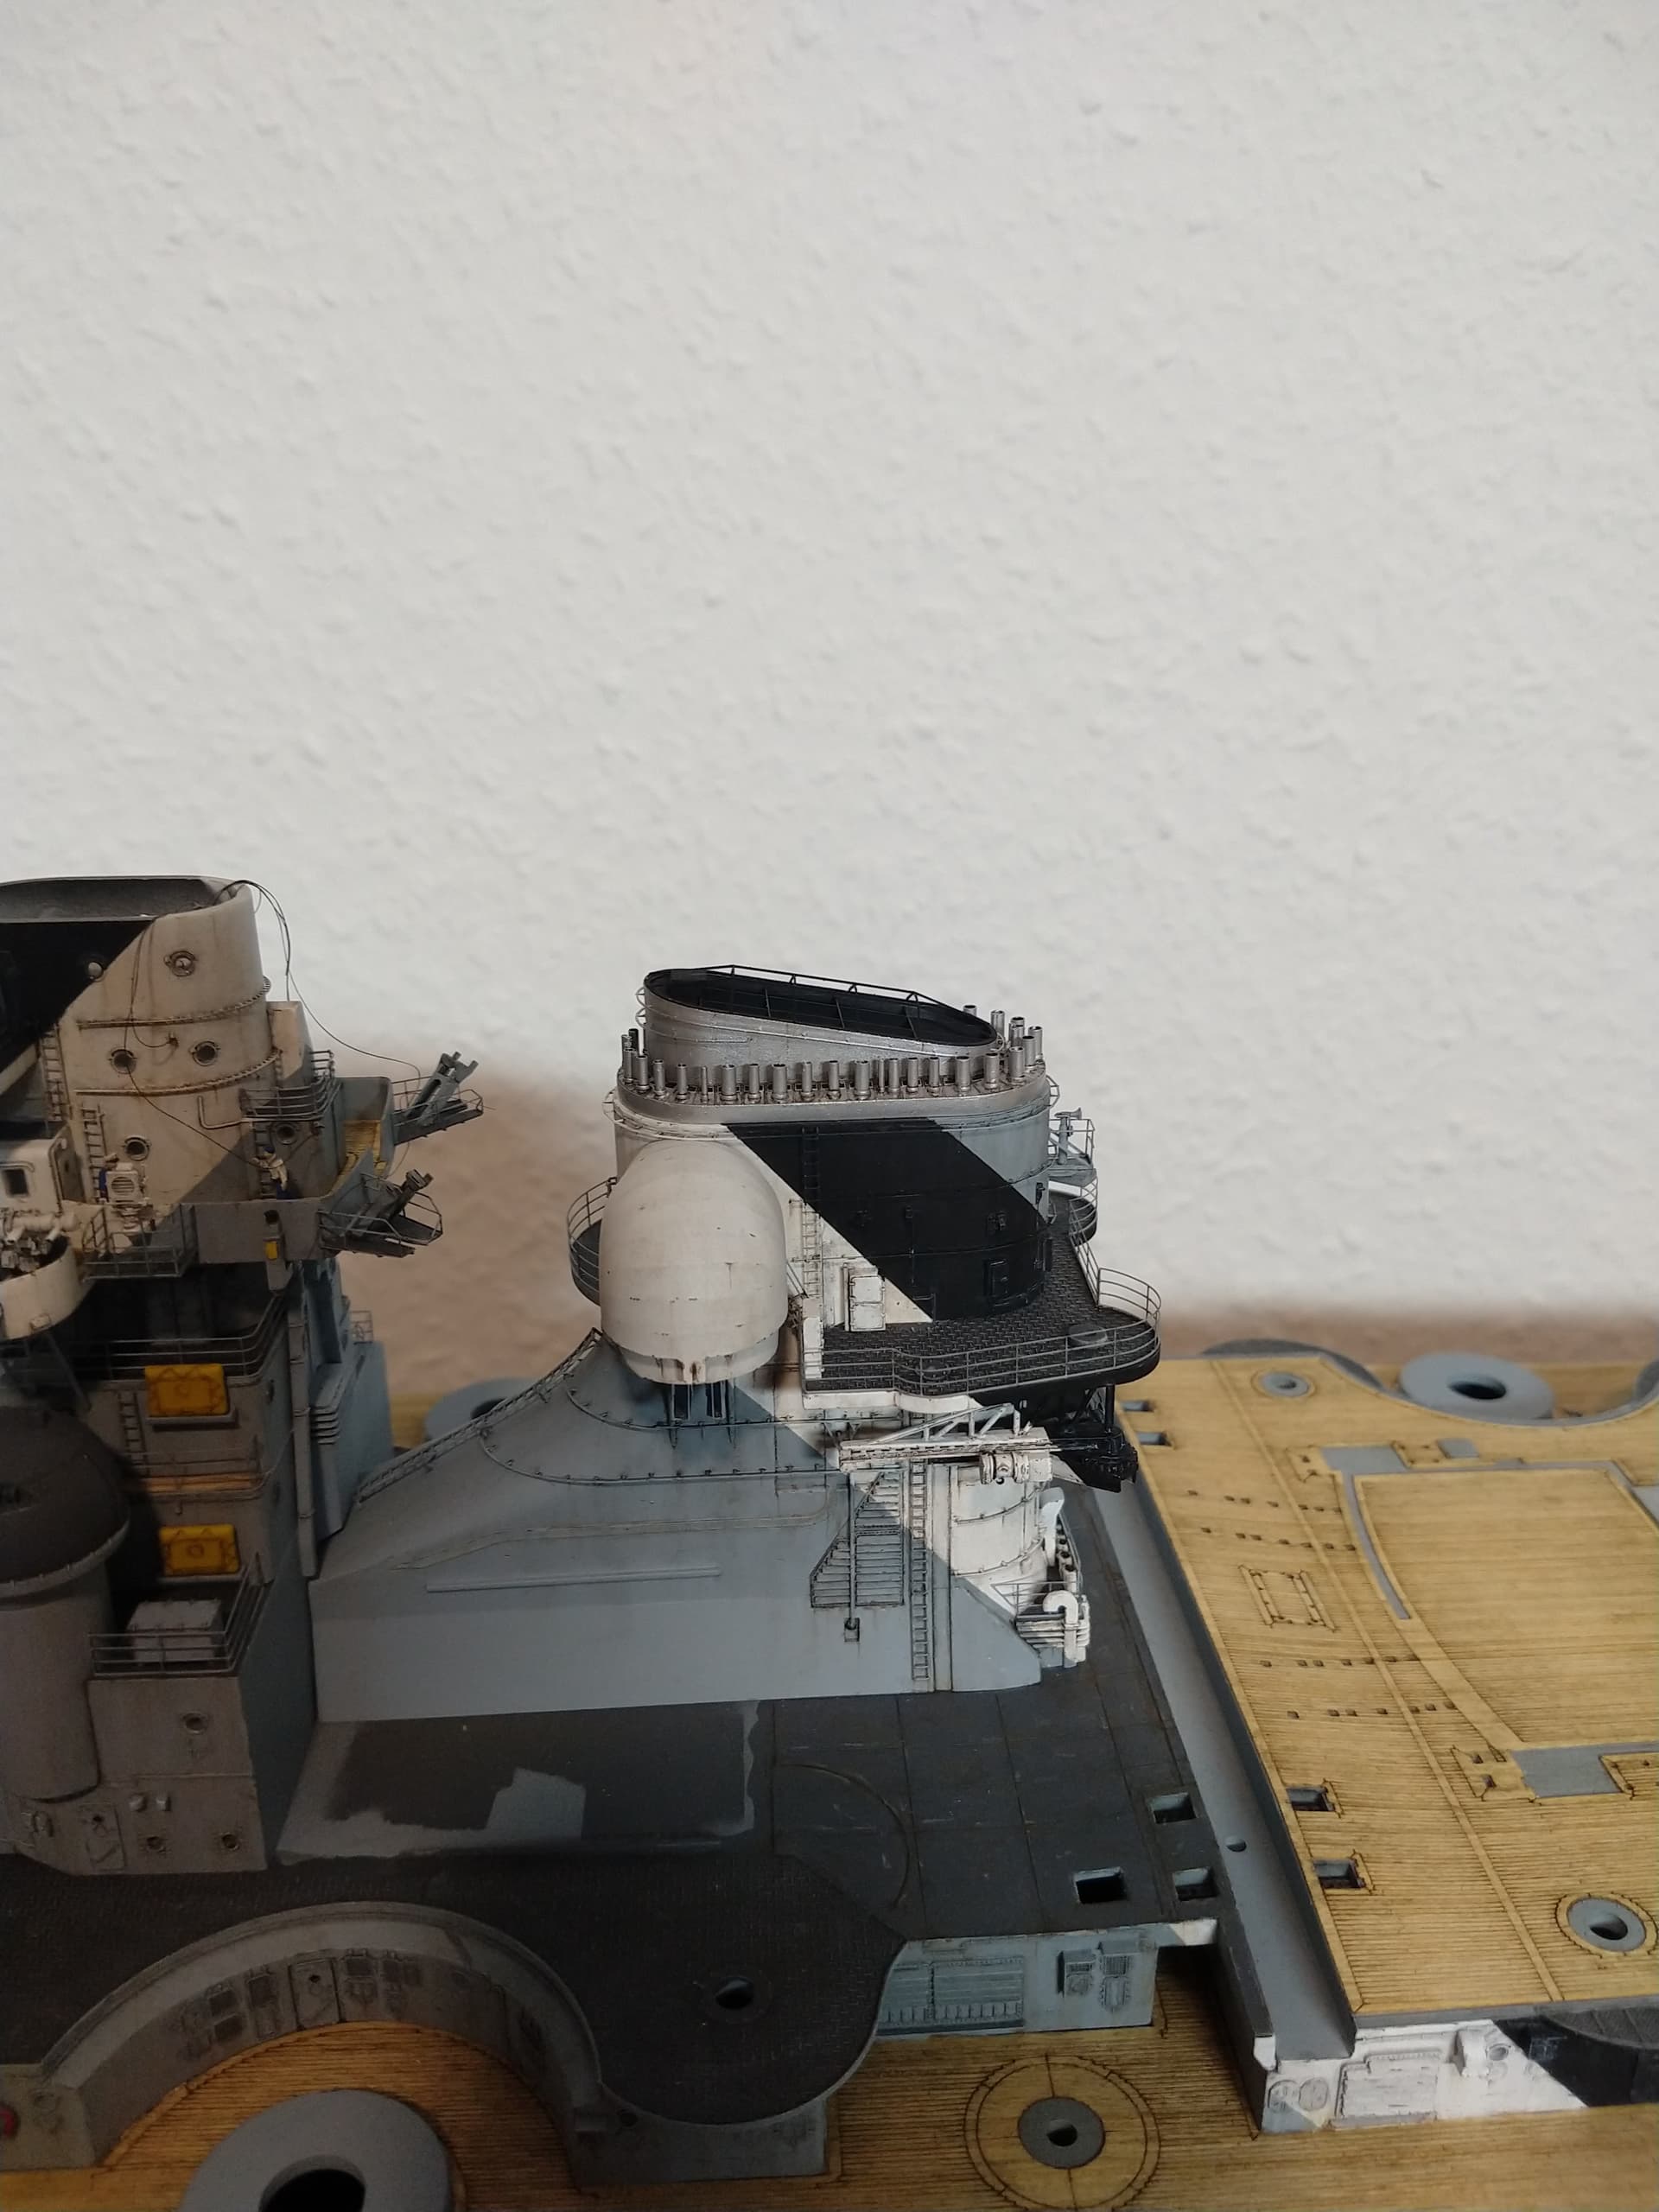
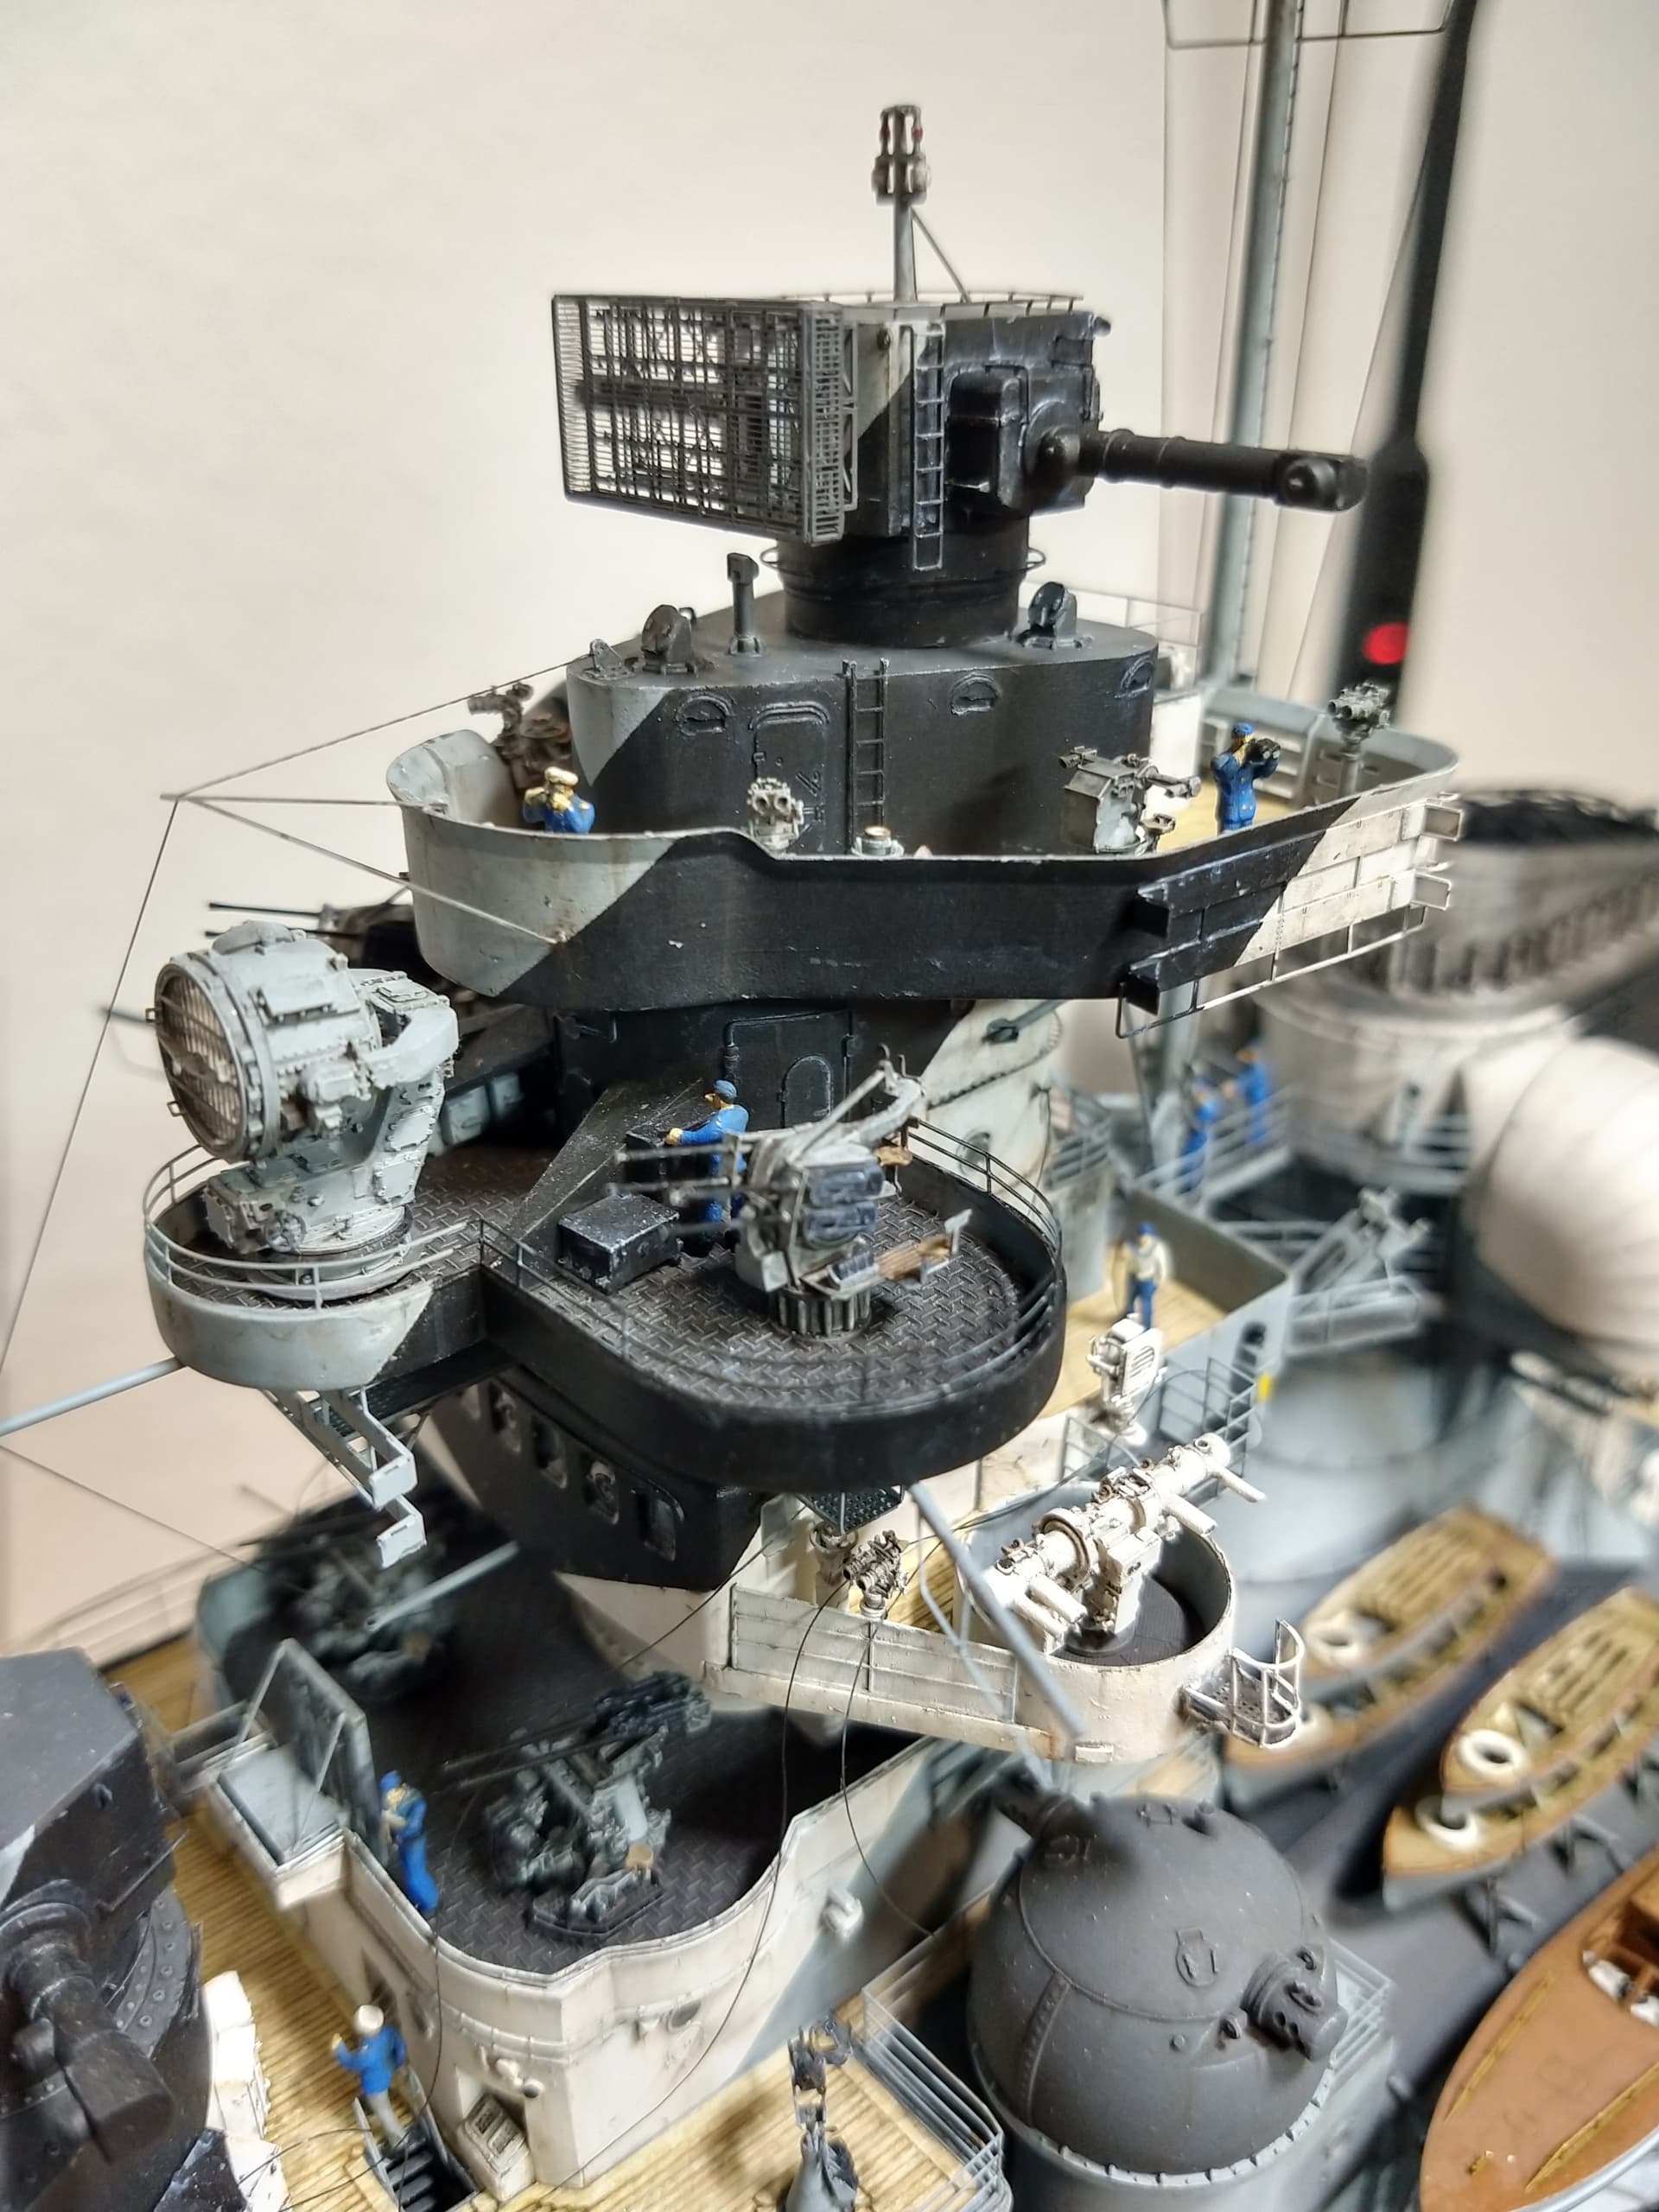
And off you go to the bridge nock.
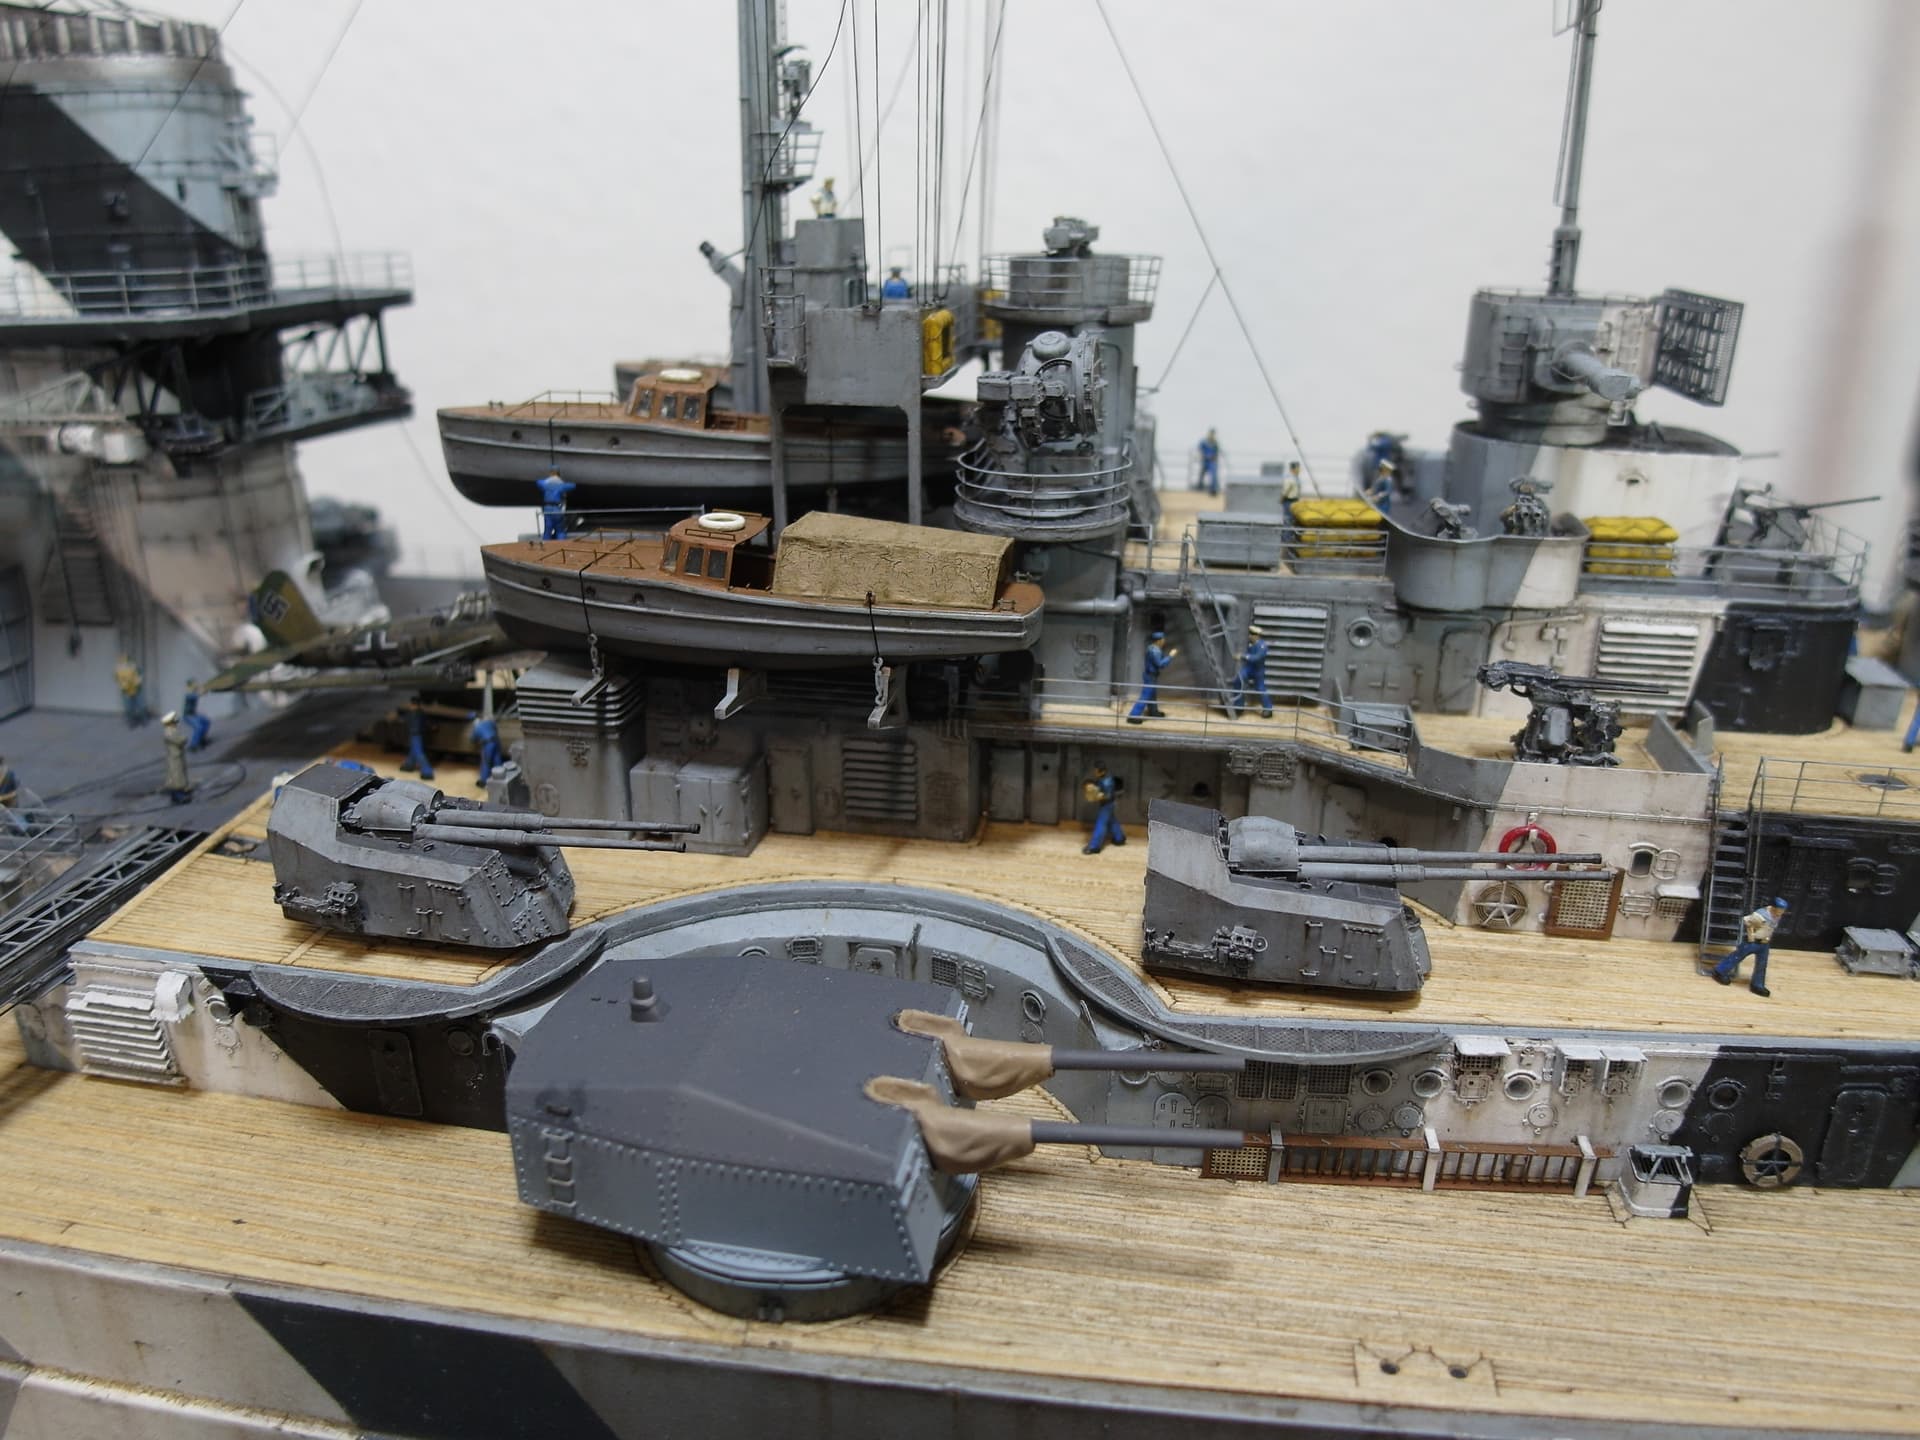
It’s amazing how many parts Pontos makes that out of. You can hardly get any closer to the original
When installing the bridge wing, I still had to make corrections because Pontos had forgotten something here. This sheet metal was used to close the created bridge wing.
And when it was extended, like here with me, it naturally prevented the sailors from falling off
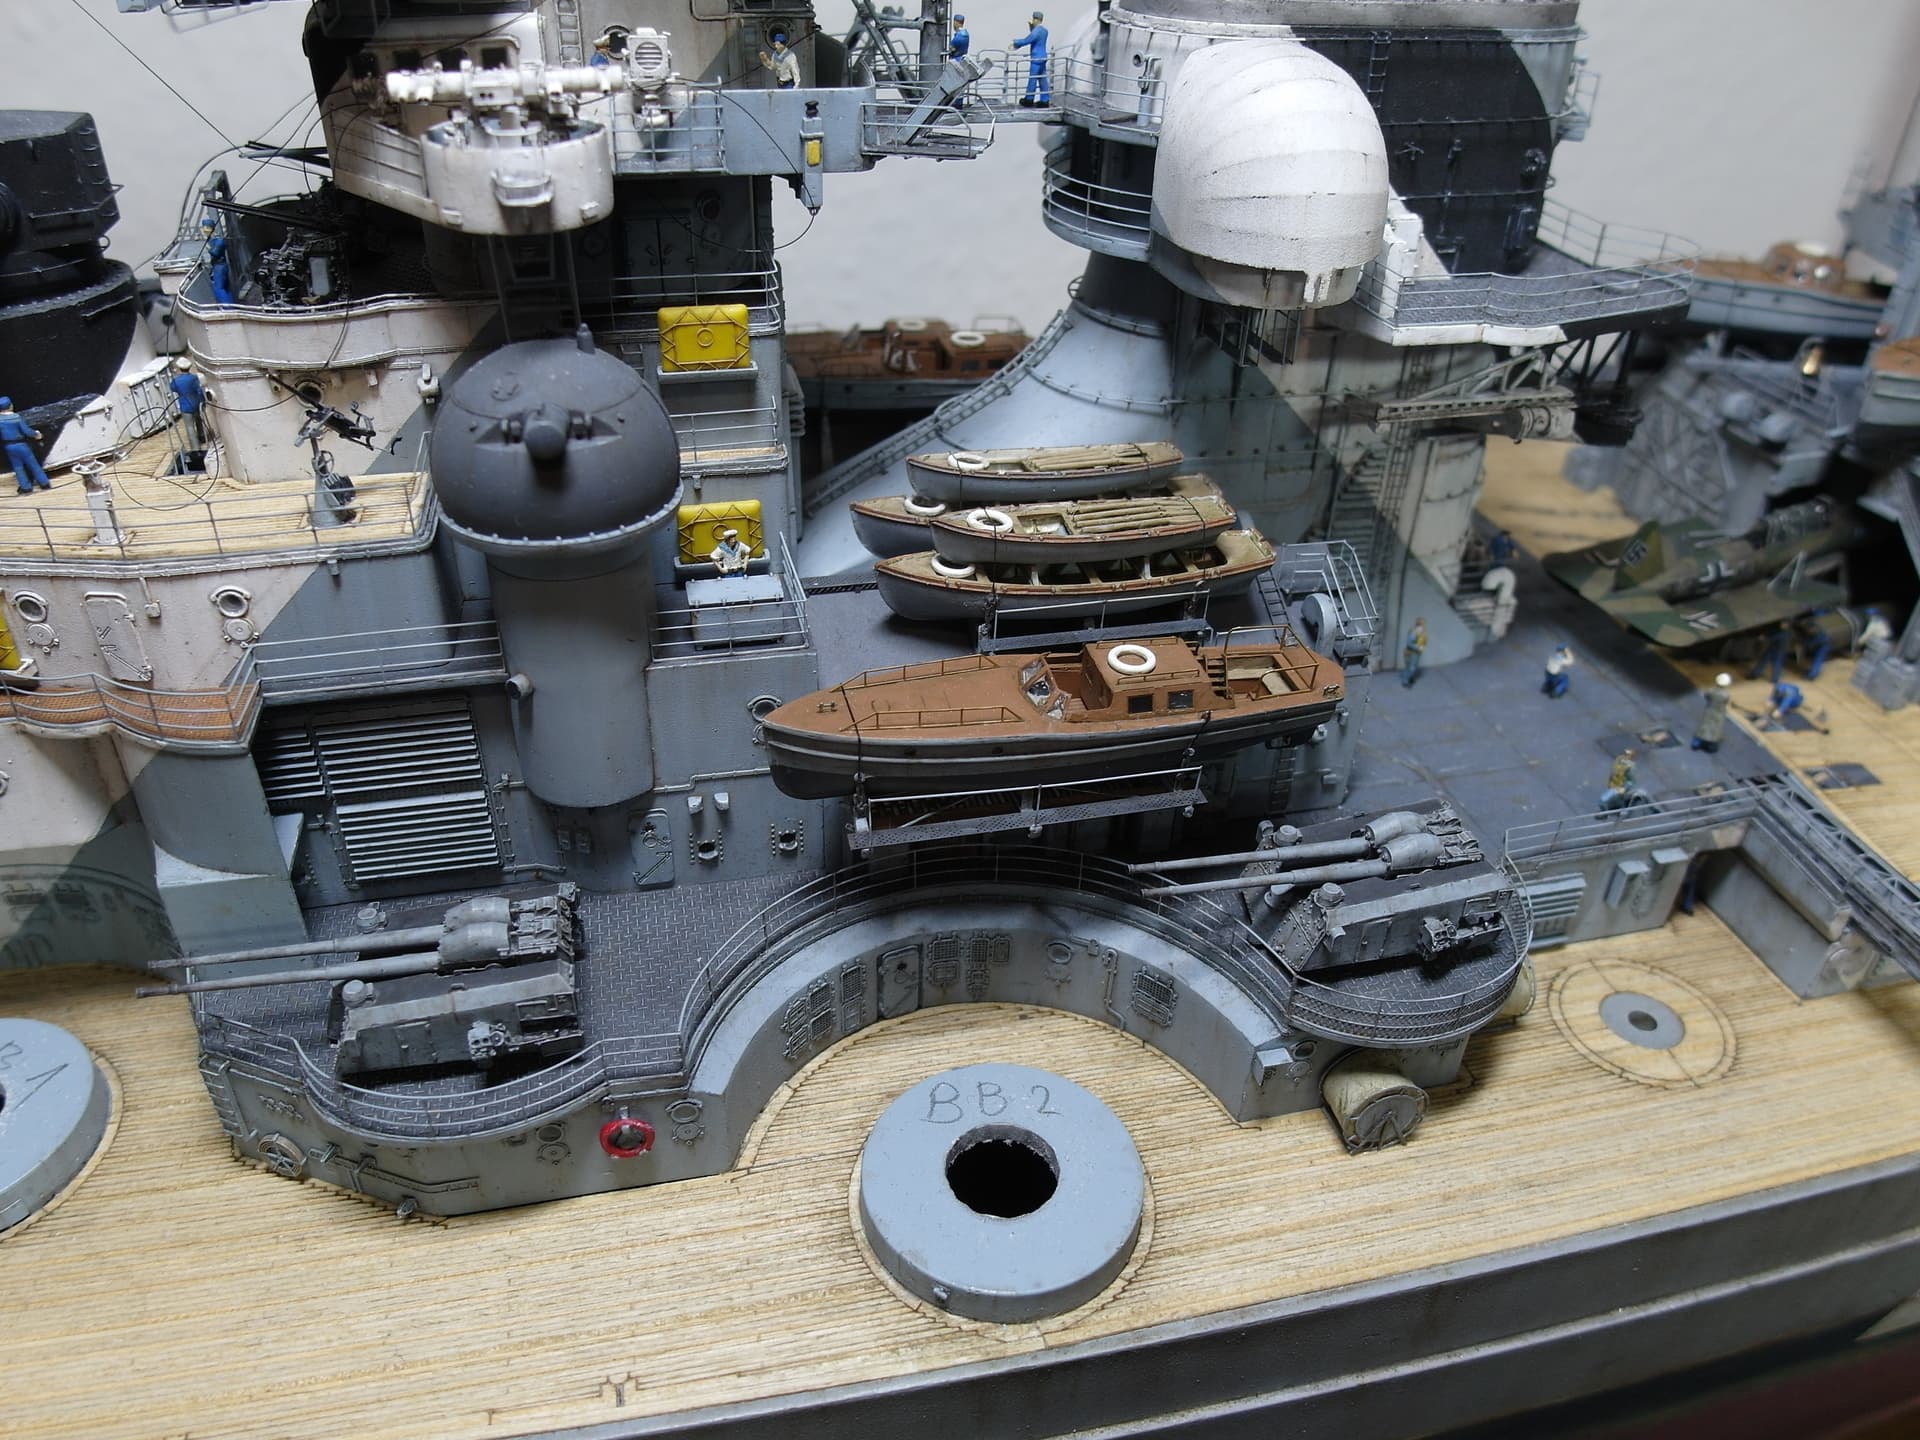
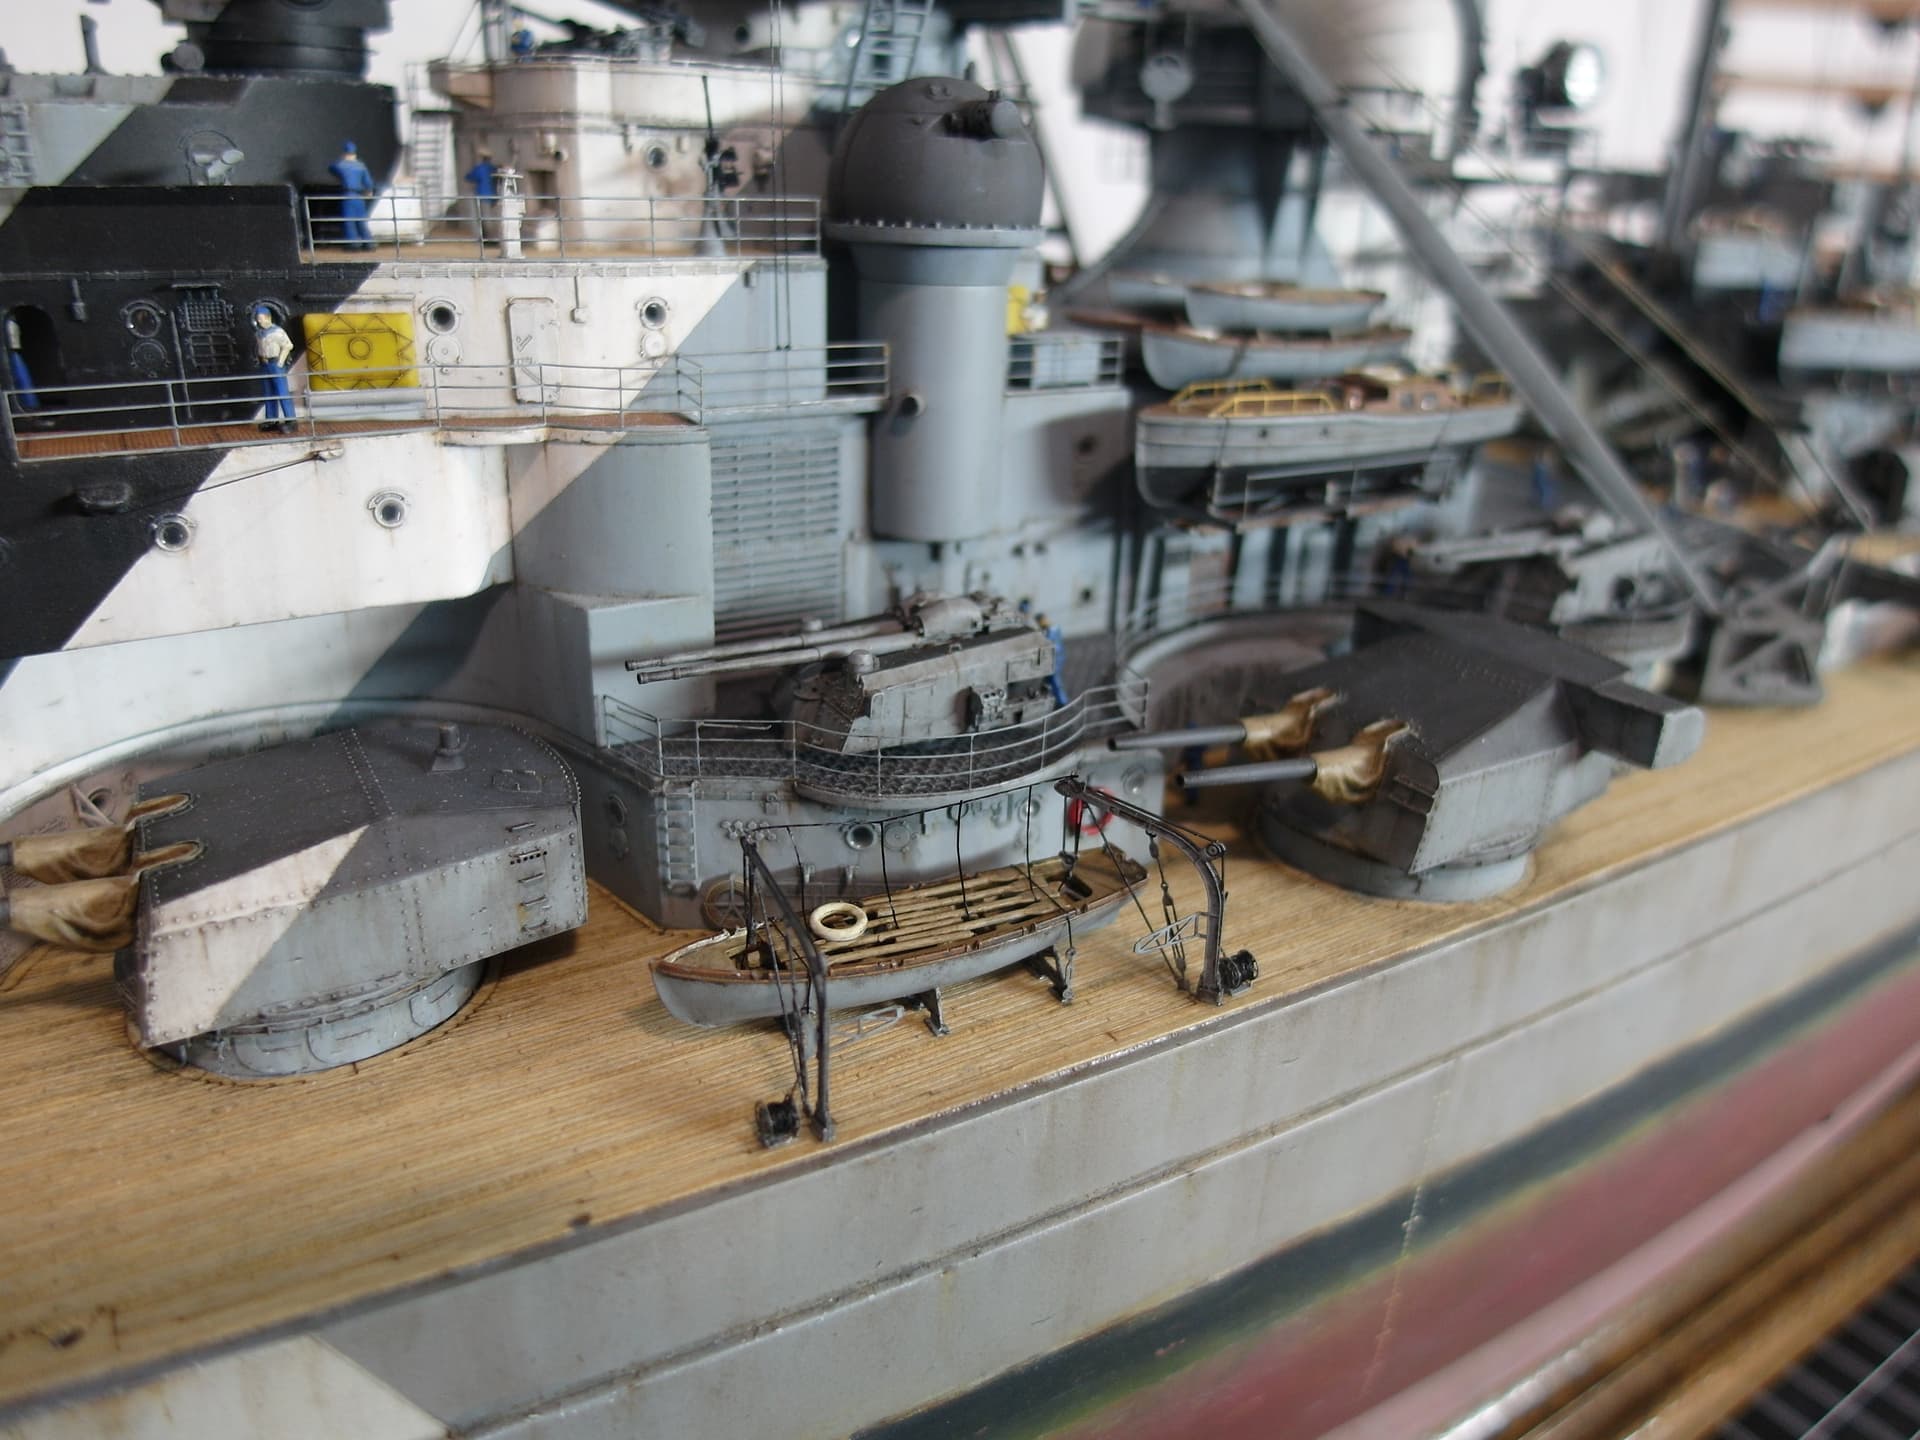
Of course, the middle artillery should not be missing either.
11 Likes
Brilliant !!!
1 Like
Certainly not a ship guy but this is crazy detailed and a large one as well. ![]()
![]()
1 Like
This is insanely detailed. I’m dumbfounded.
1 Like
Good morning and thank you for the comments.
A series of pictures goes before I have to go to work.
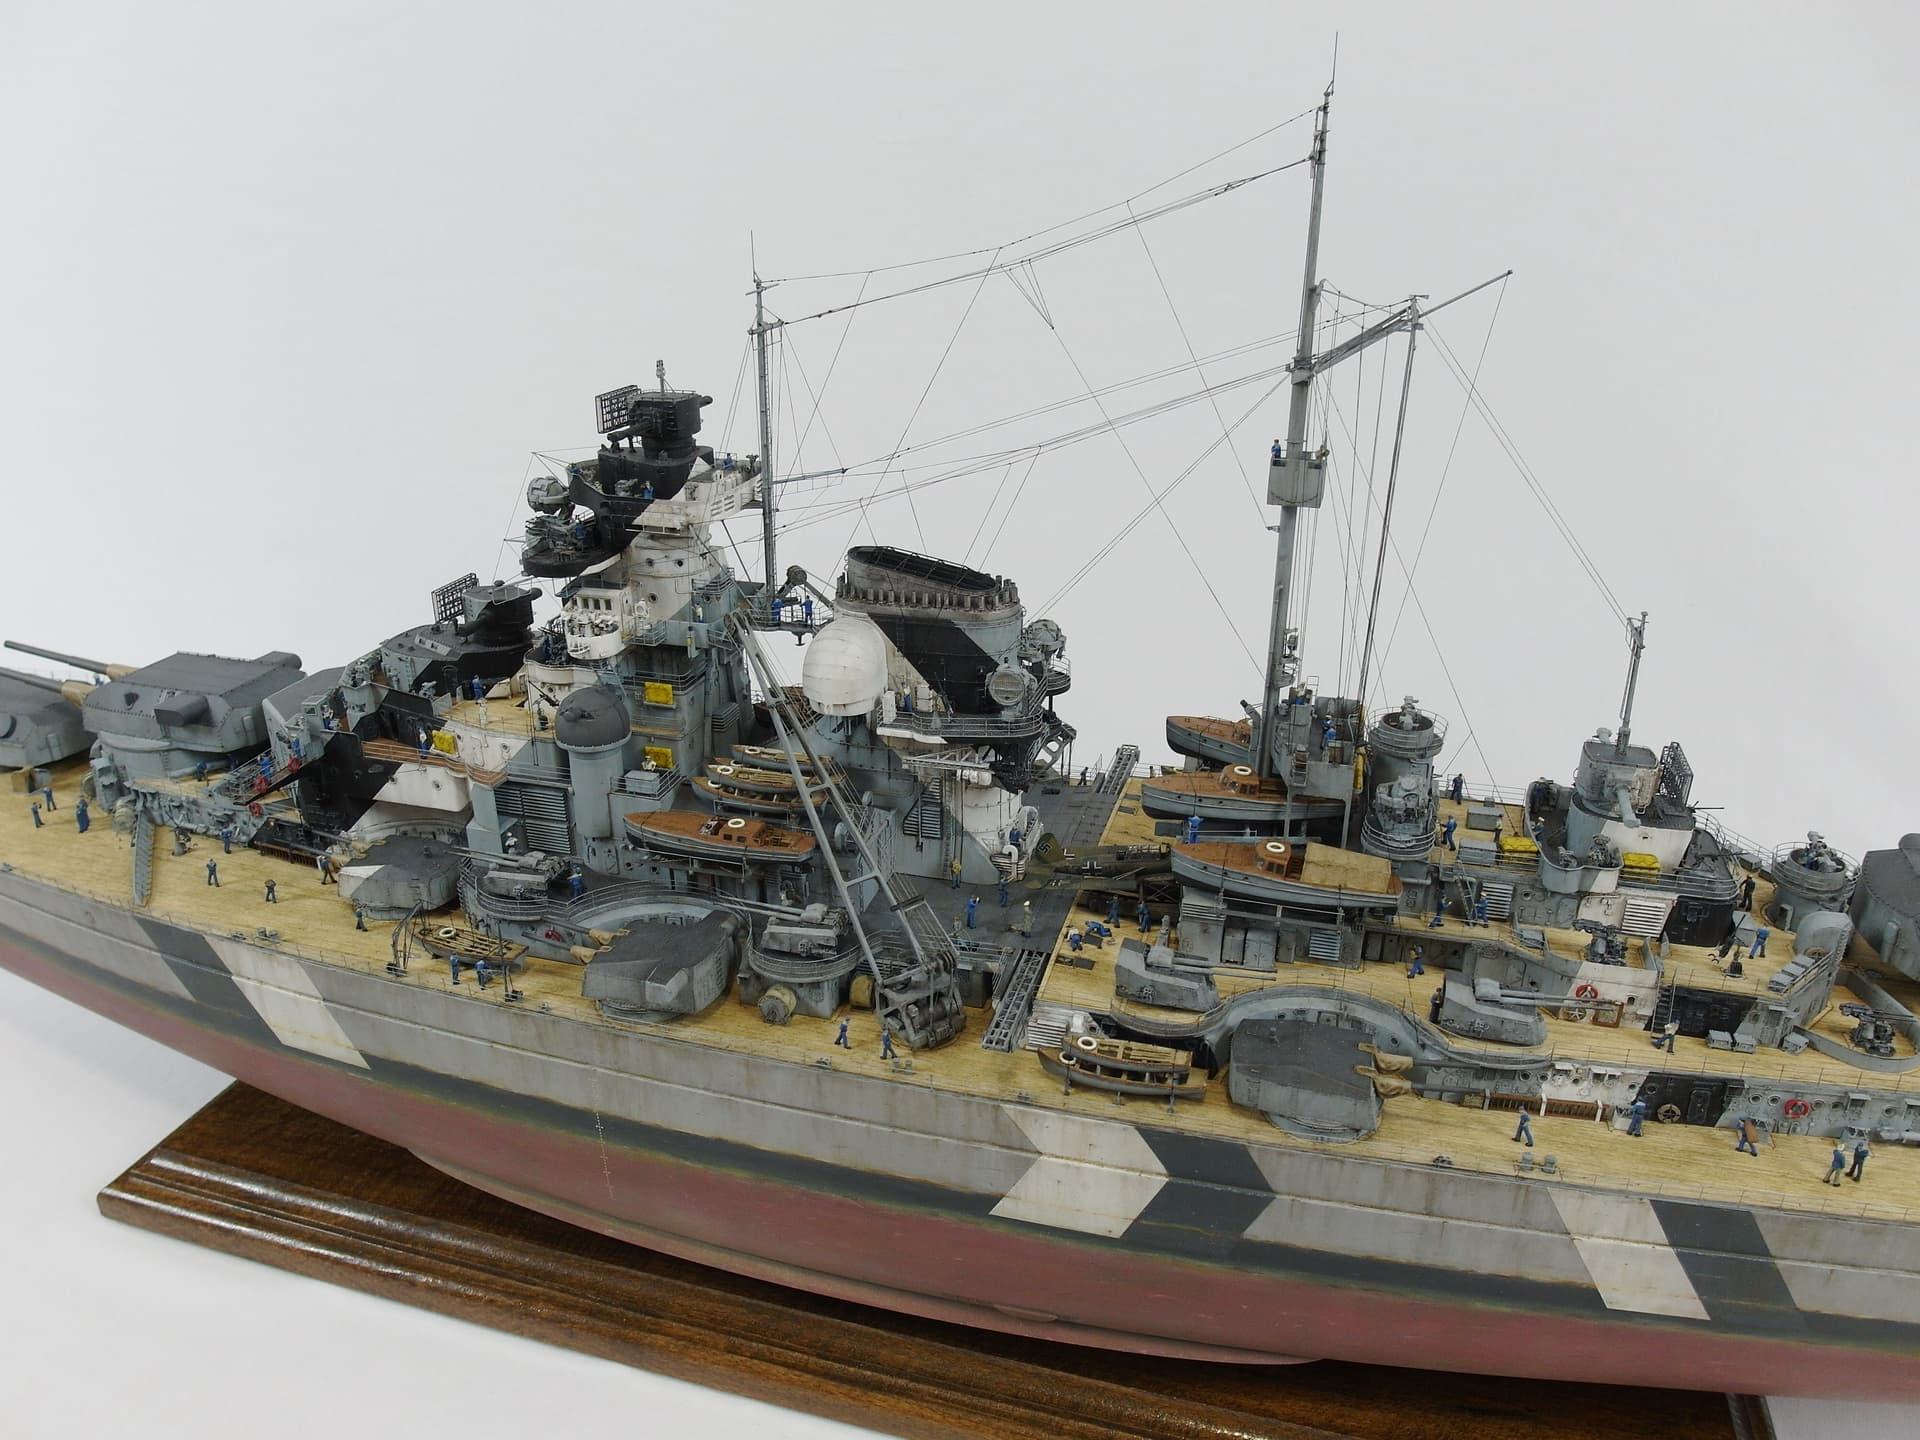
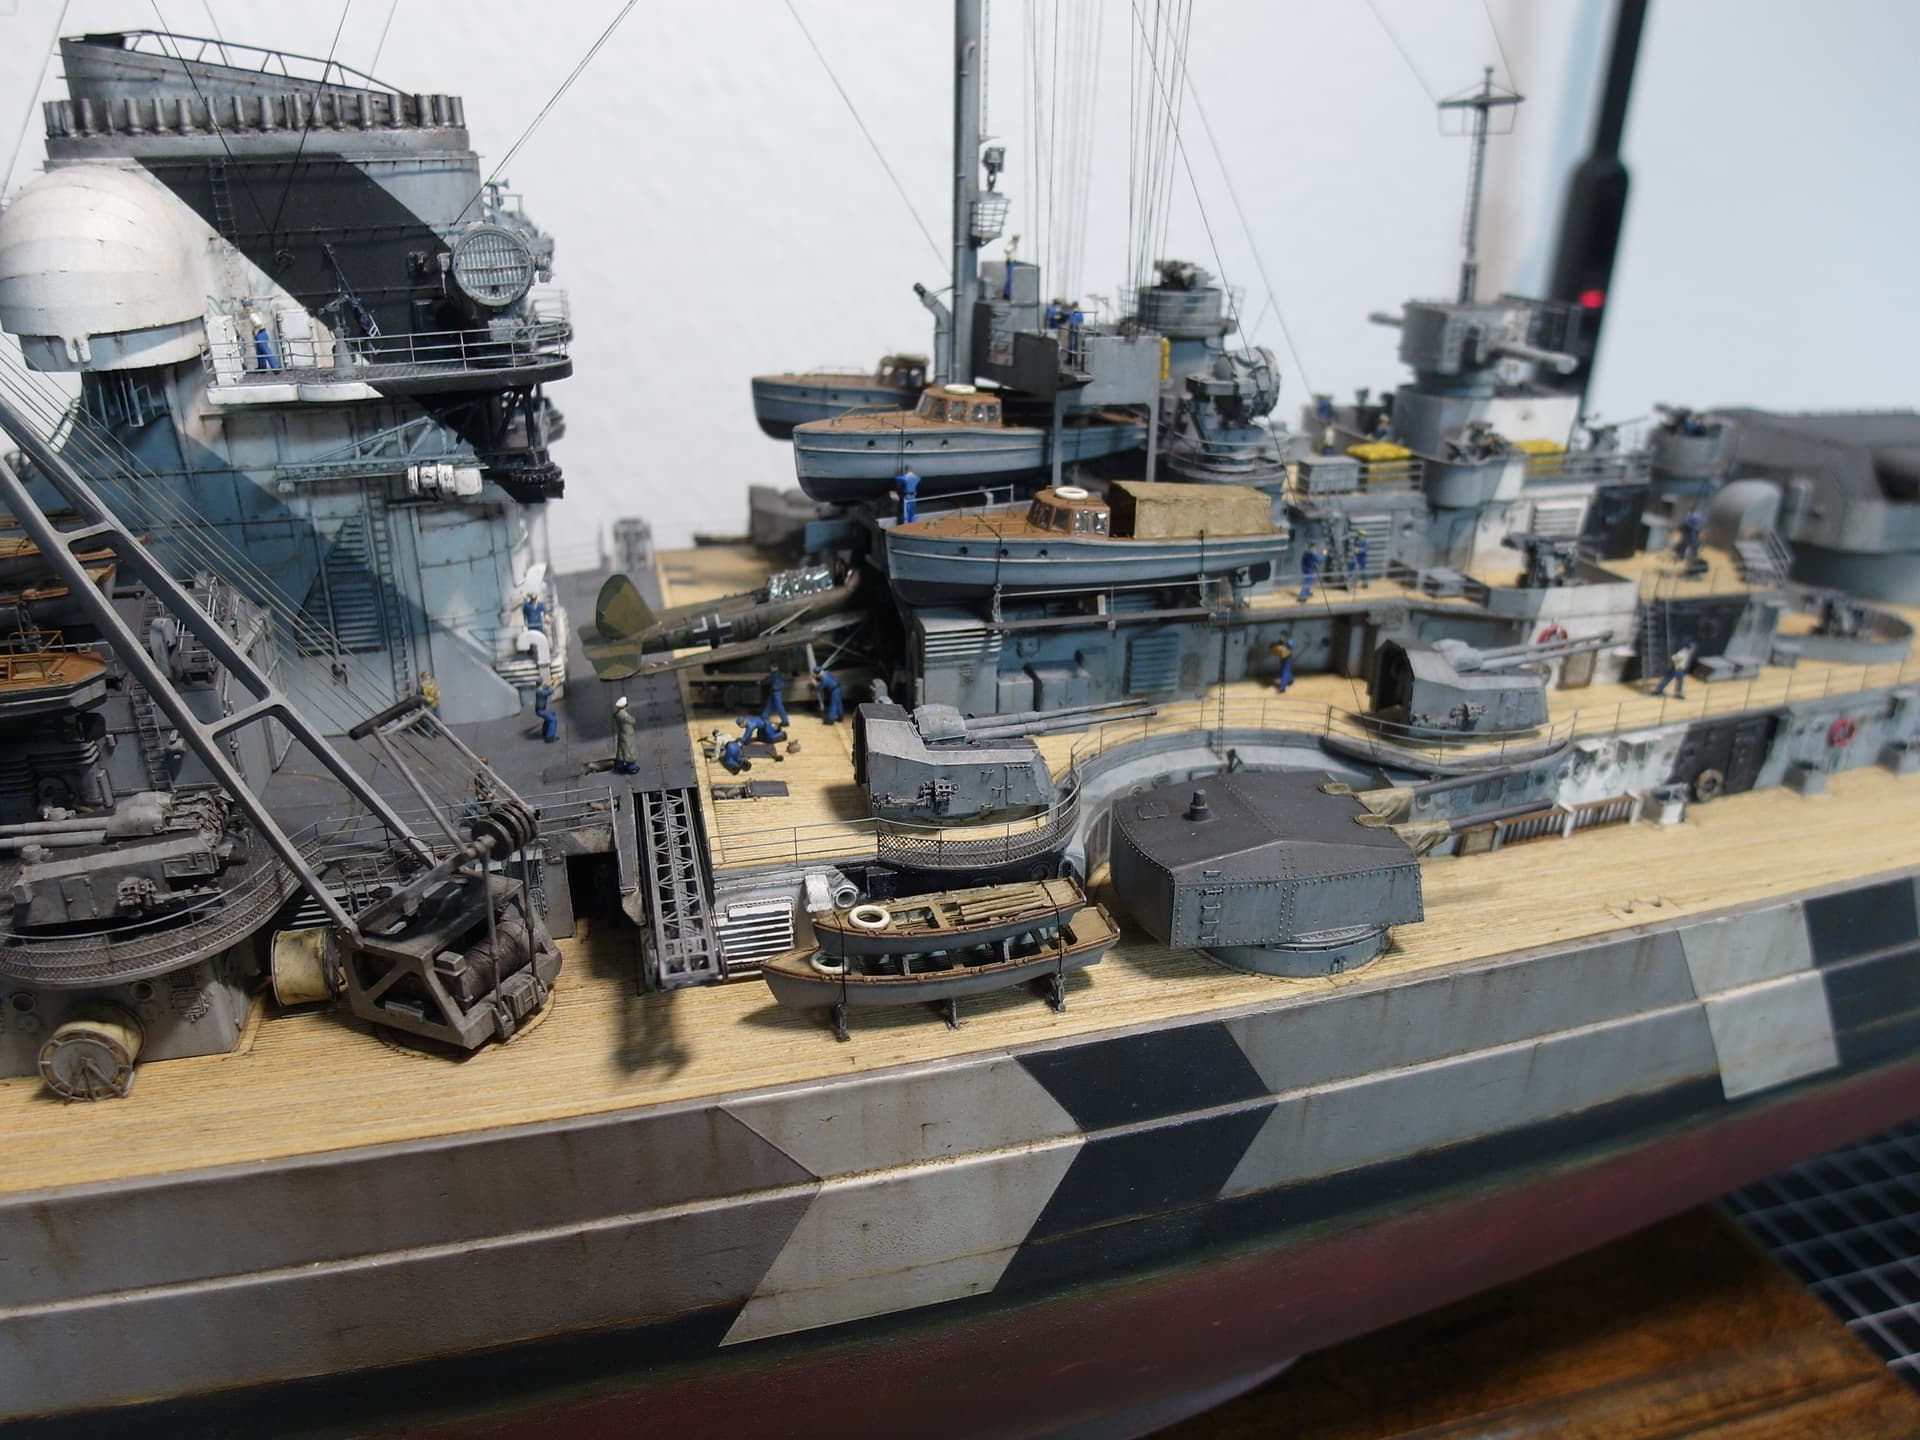
First fill it with life.
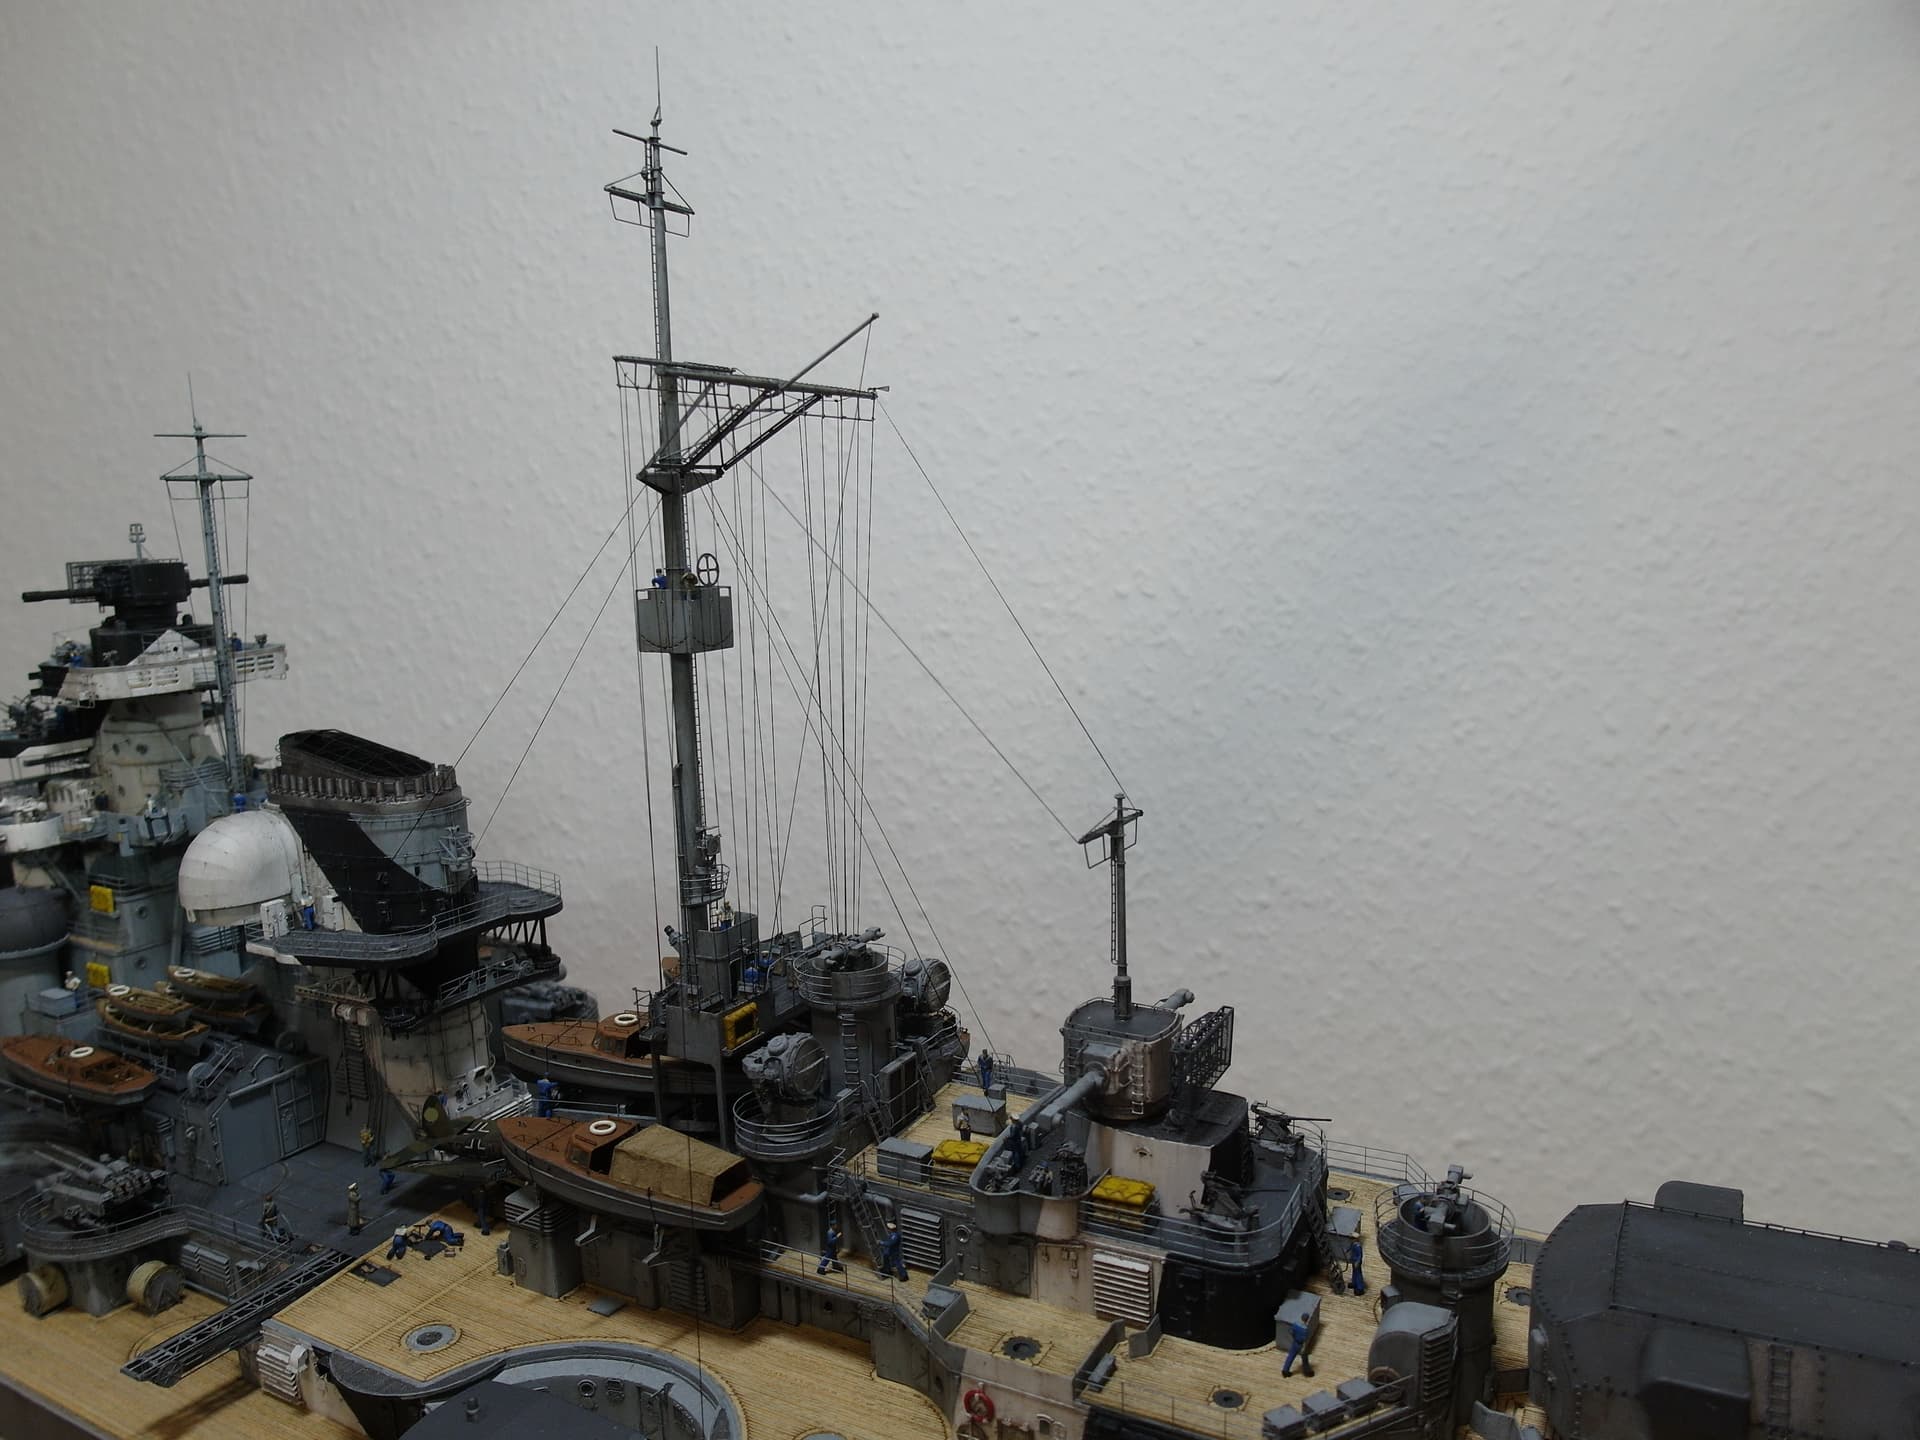
Then continue with the main mast and the mizzen mast.
Set and rigged.
When mounting the 37mm double flack, I noticed that the Pontos had once again made a mess with their research. The ladder to get to the rear deckhouse is missing.

Railing snipped and a ladder fumbled in.
The last 10.5 cm guns have also found their place.
So in the next post we go to the rigging, where I always have a little respect beforehand.
8 Likes
OMG… Dang!
1 Like
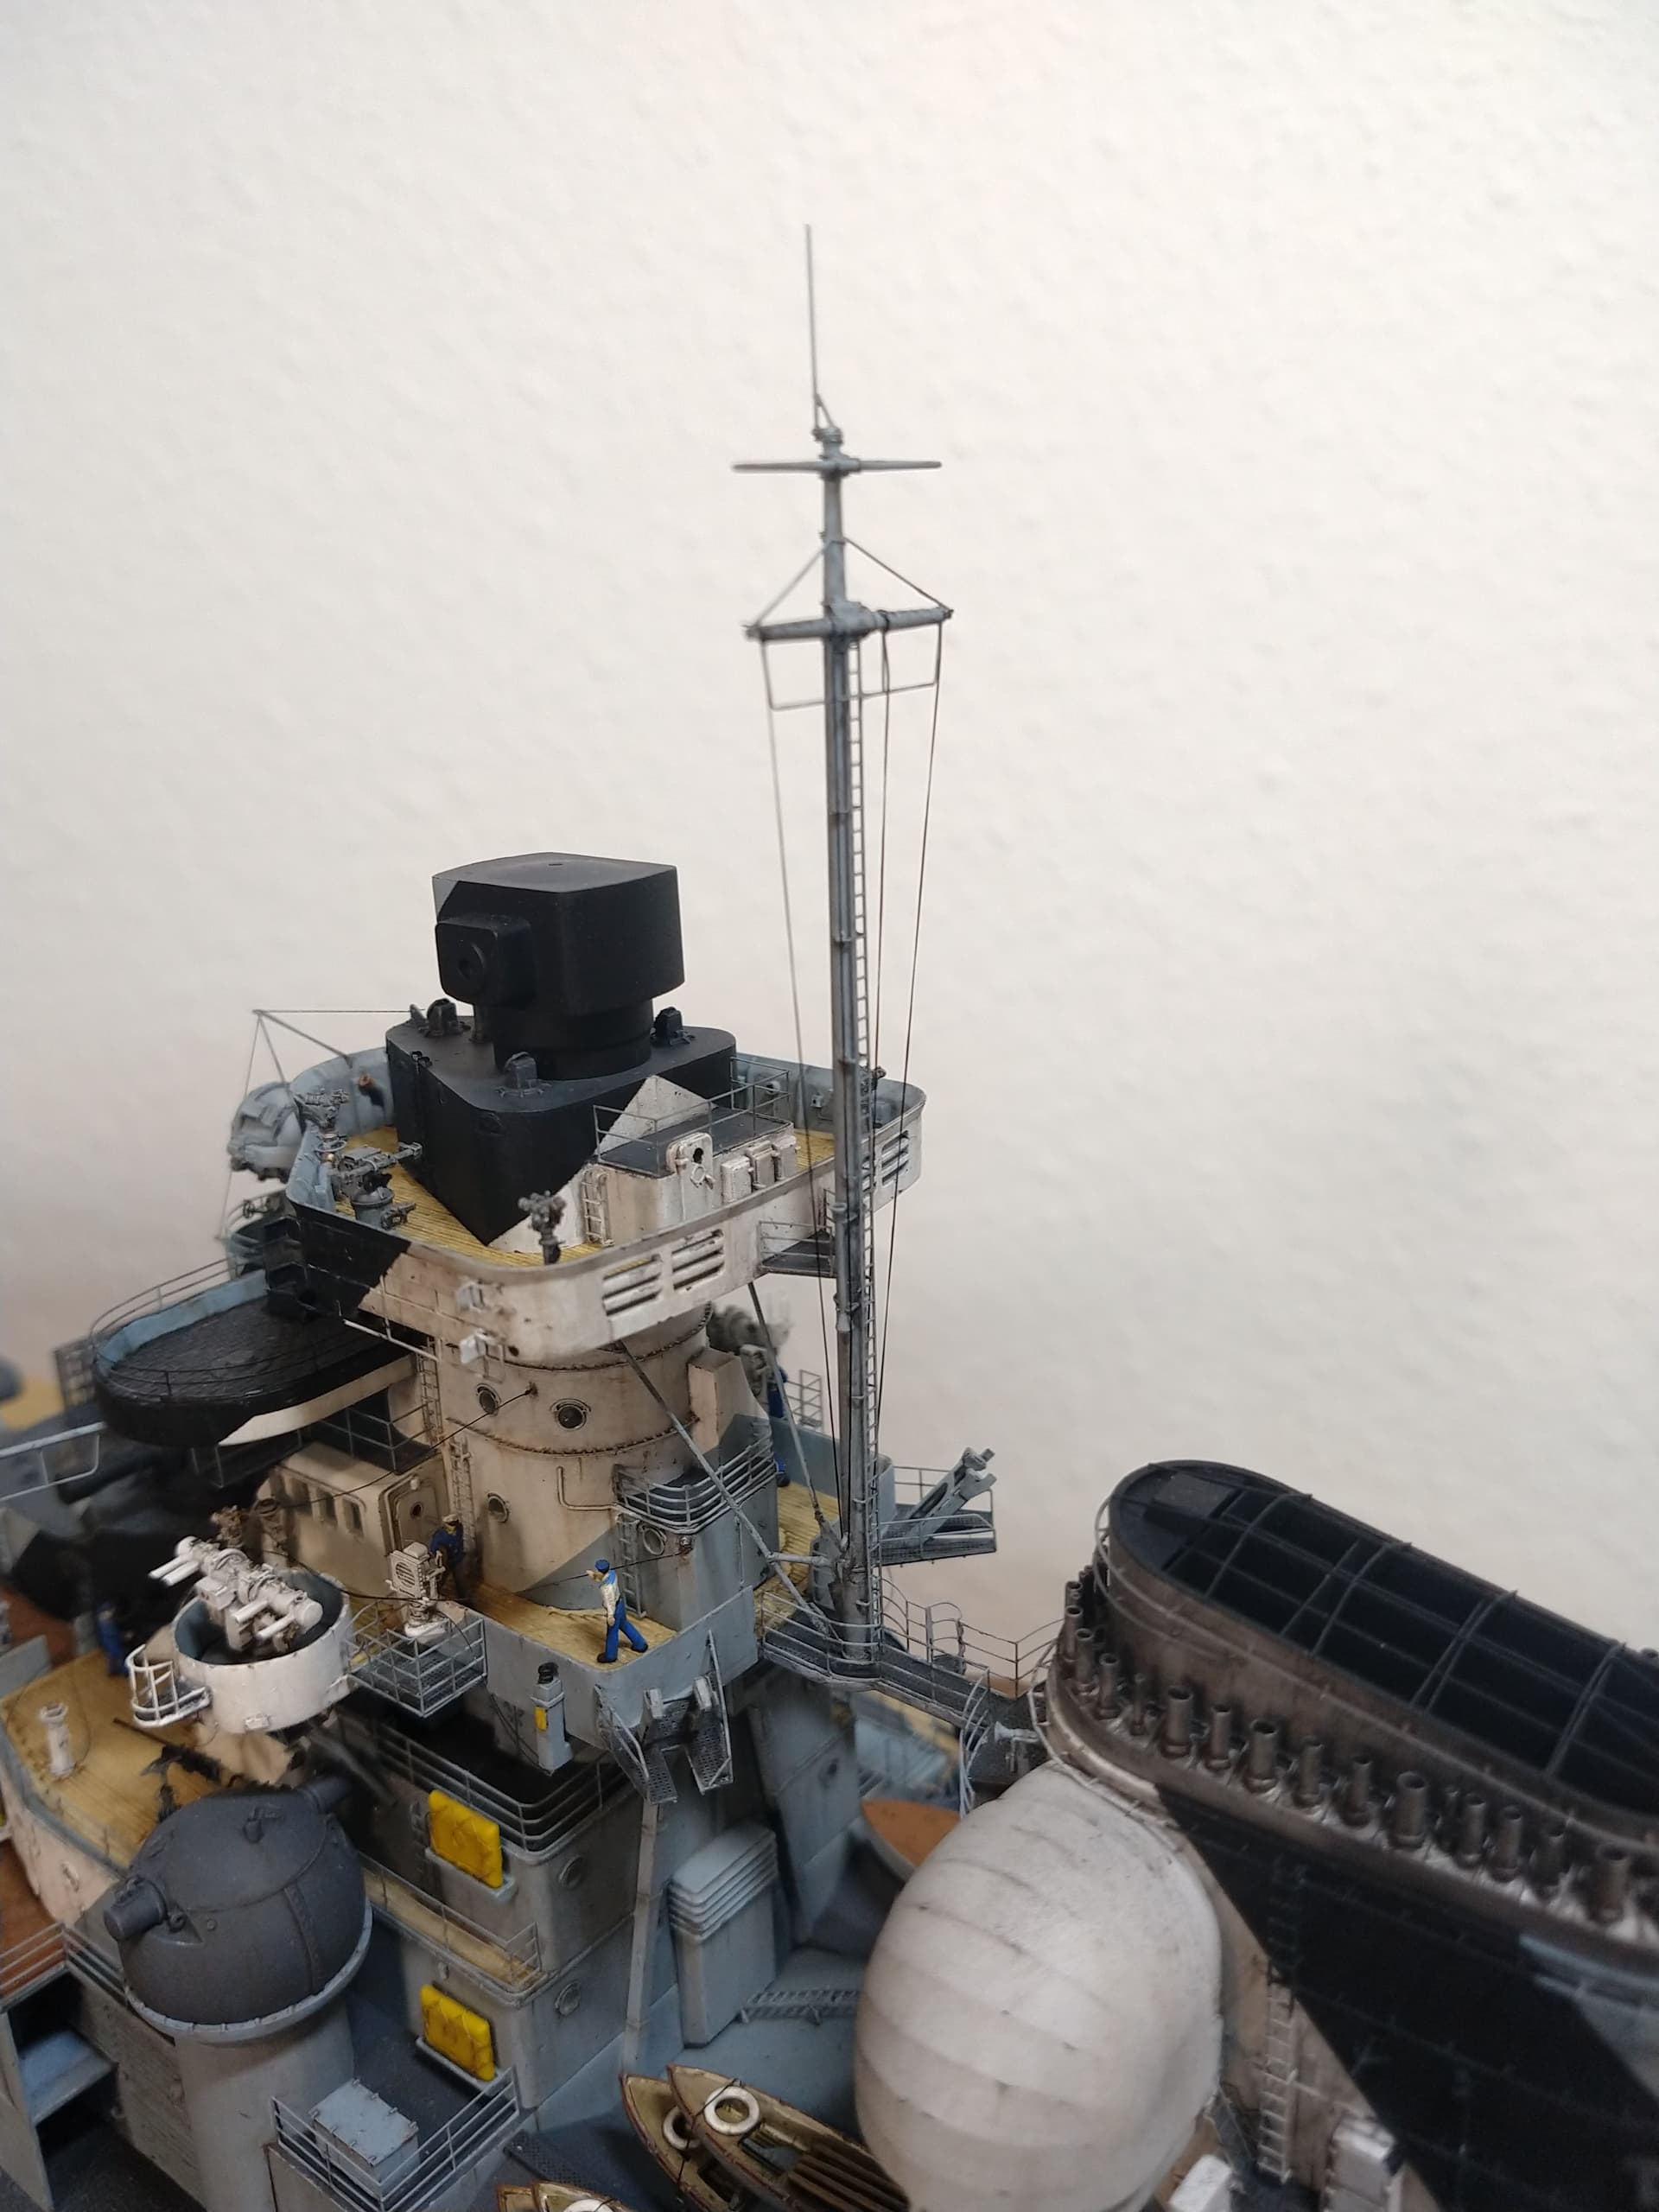
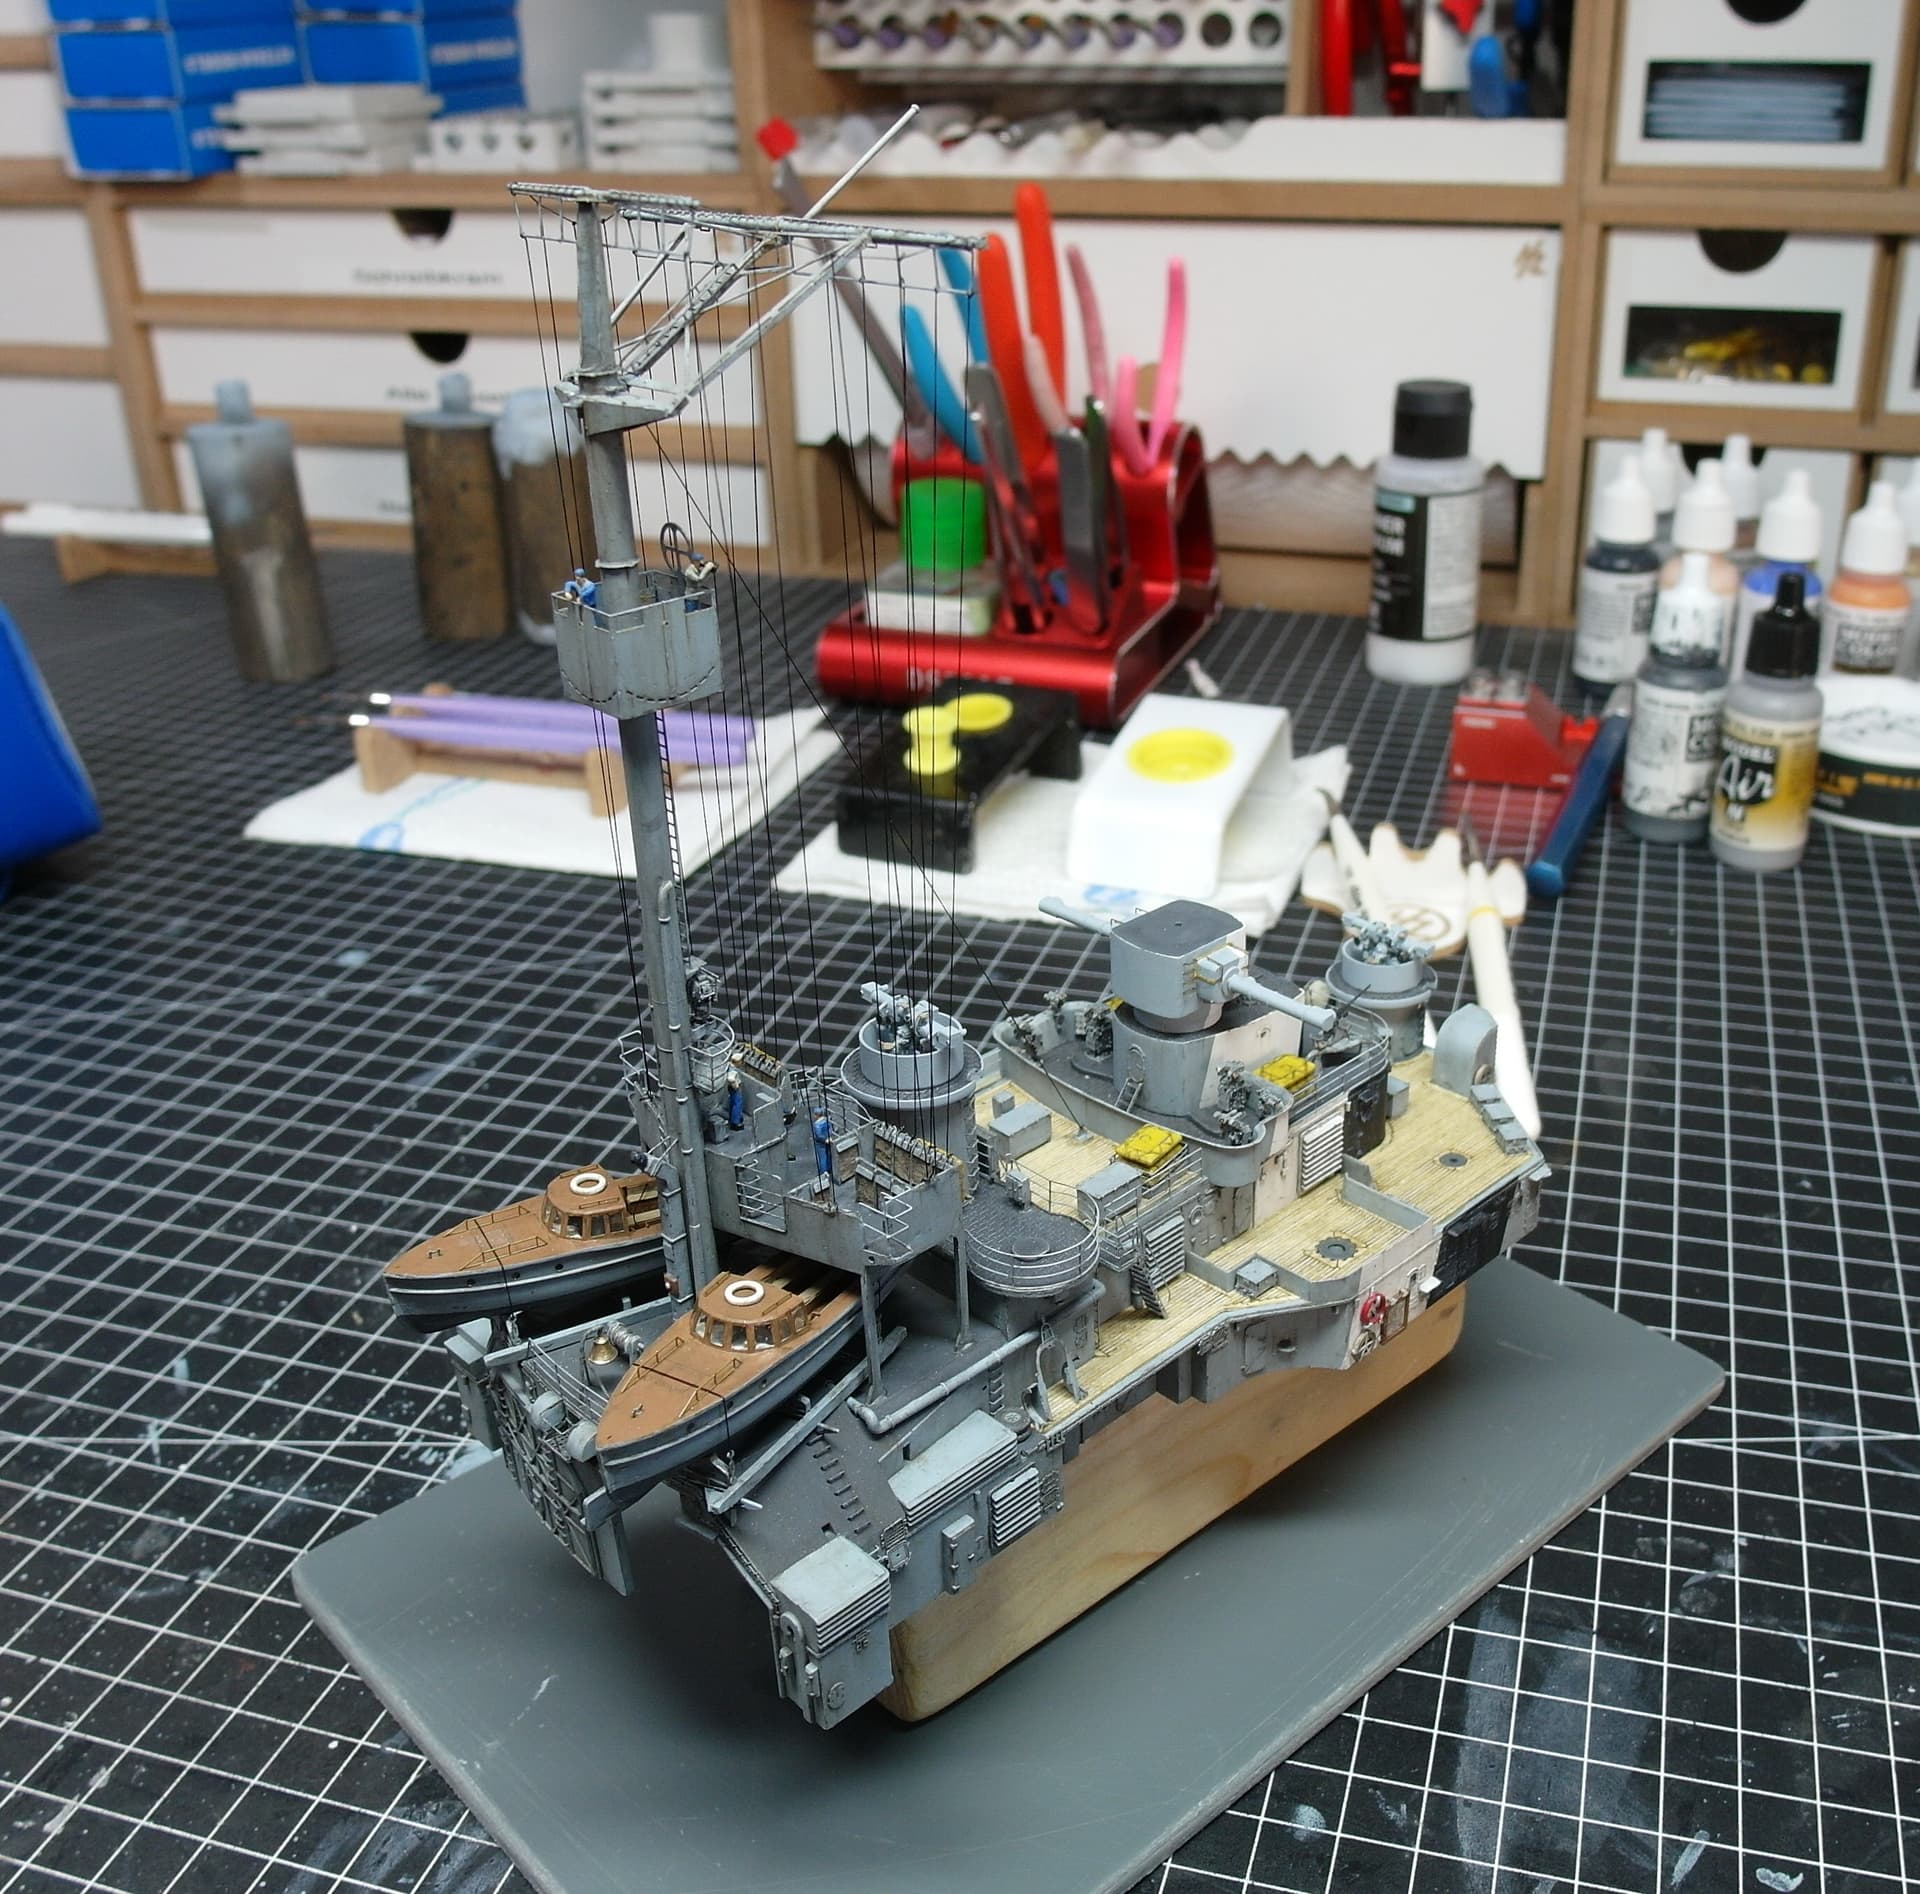
Let’s also come to the rigging.
First I built a device to run the longwave antennas parallel between the triangles.
This way you can get the same tension on both sides.
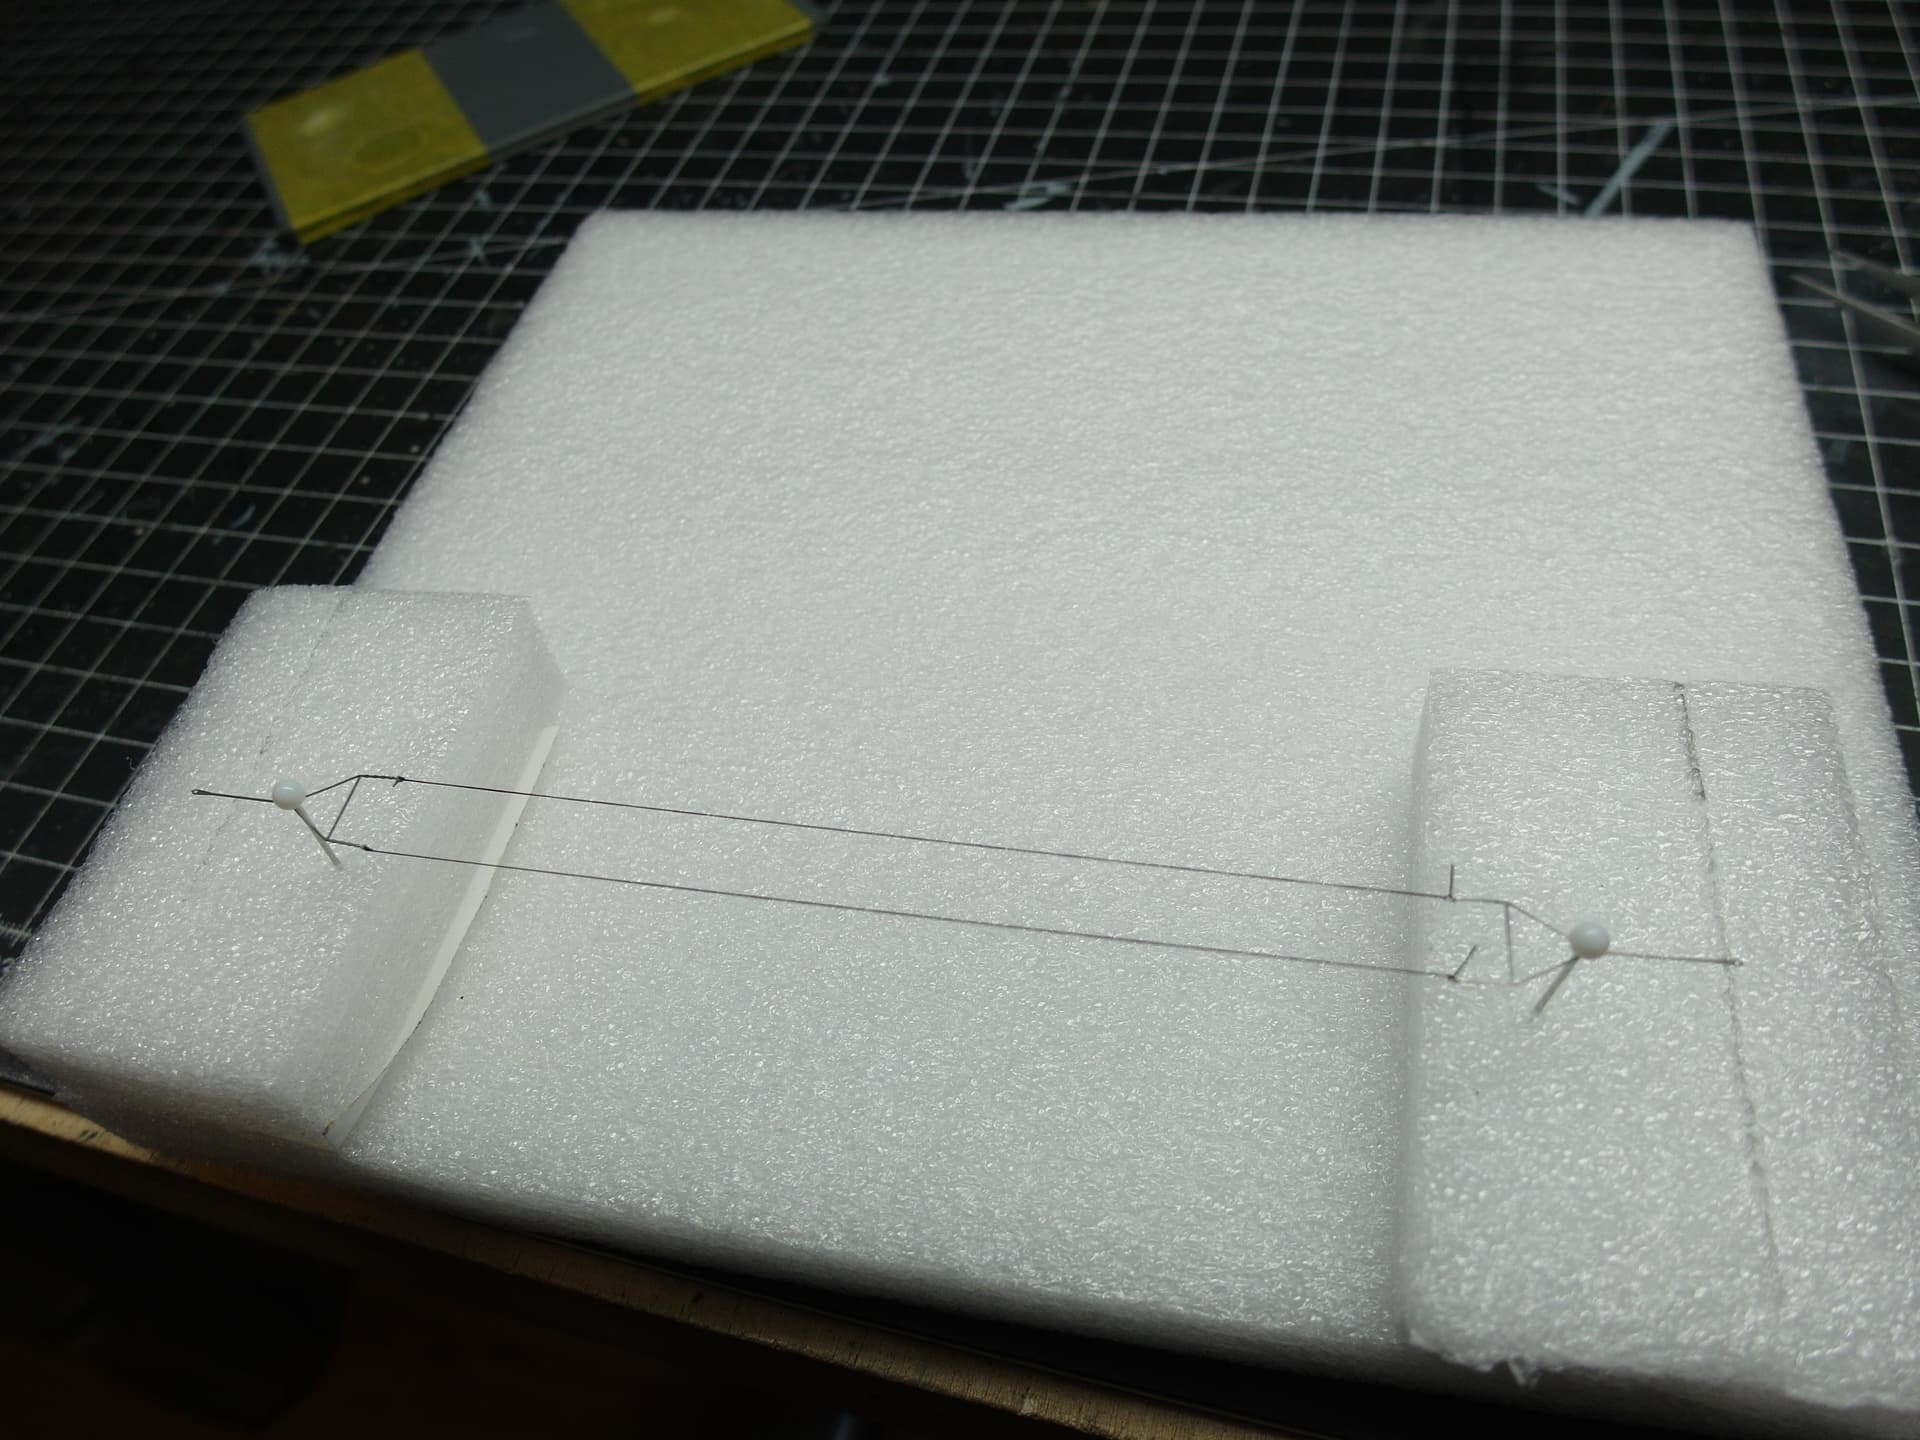
And the first threads are already hanging. Also to the funnel.
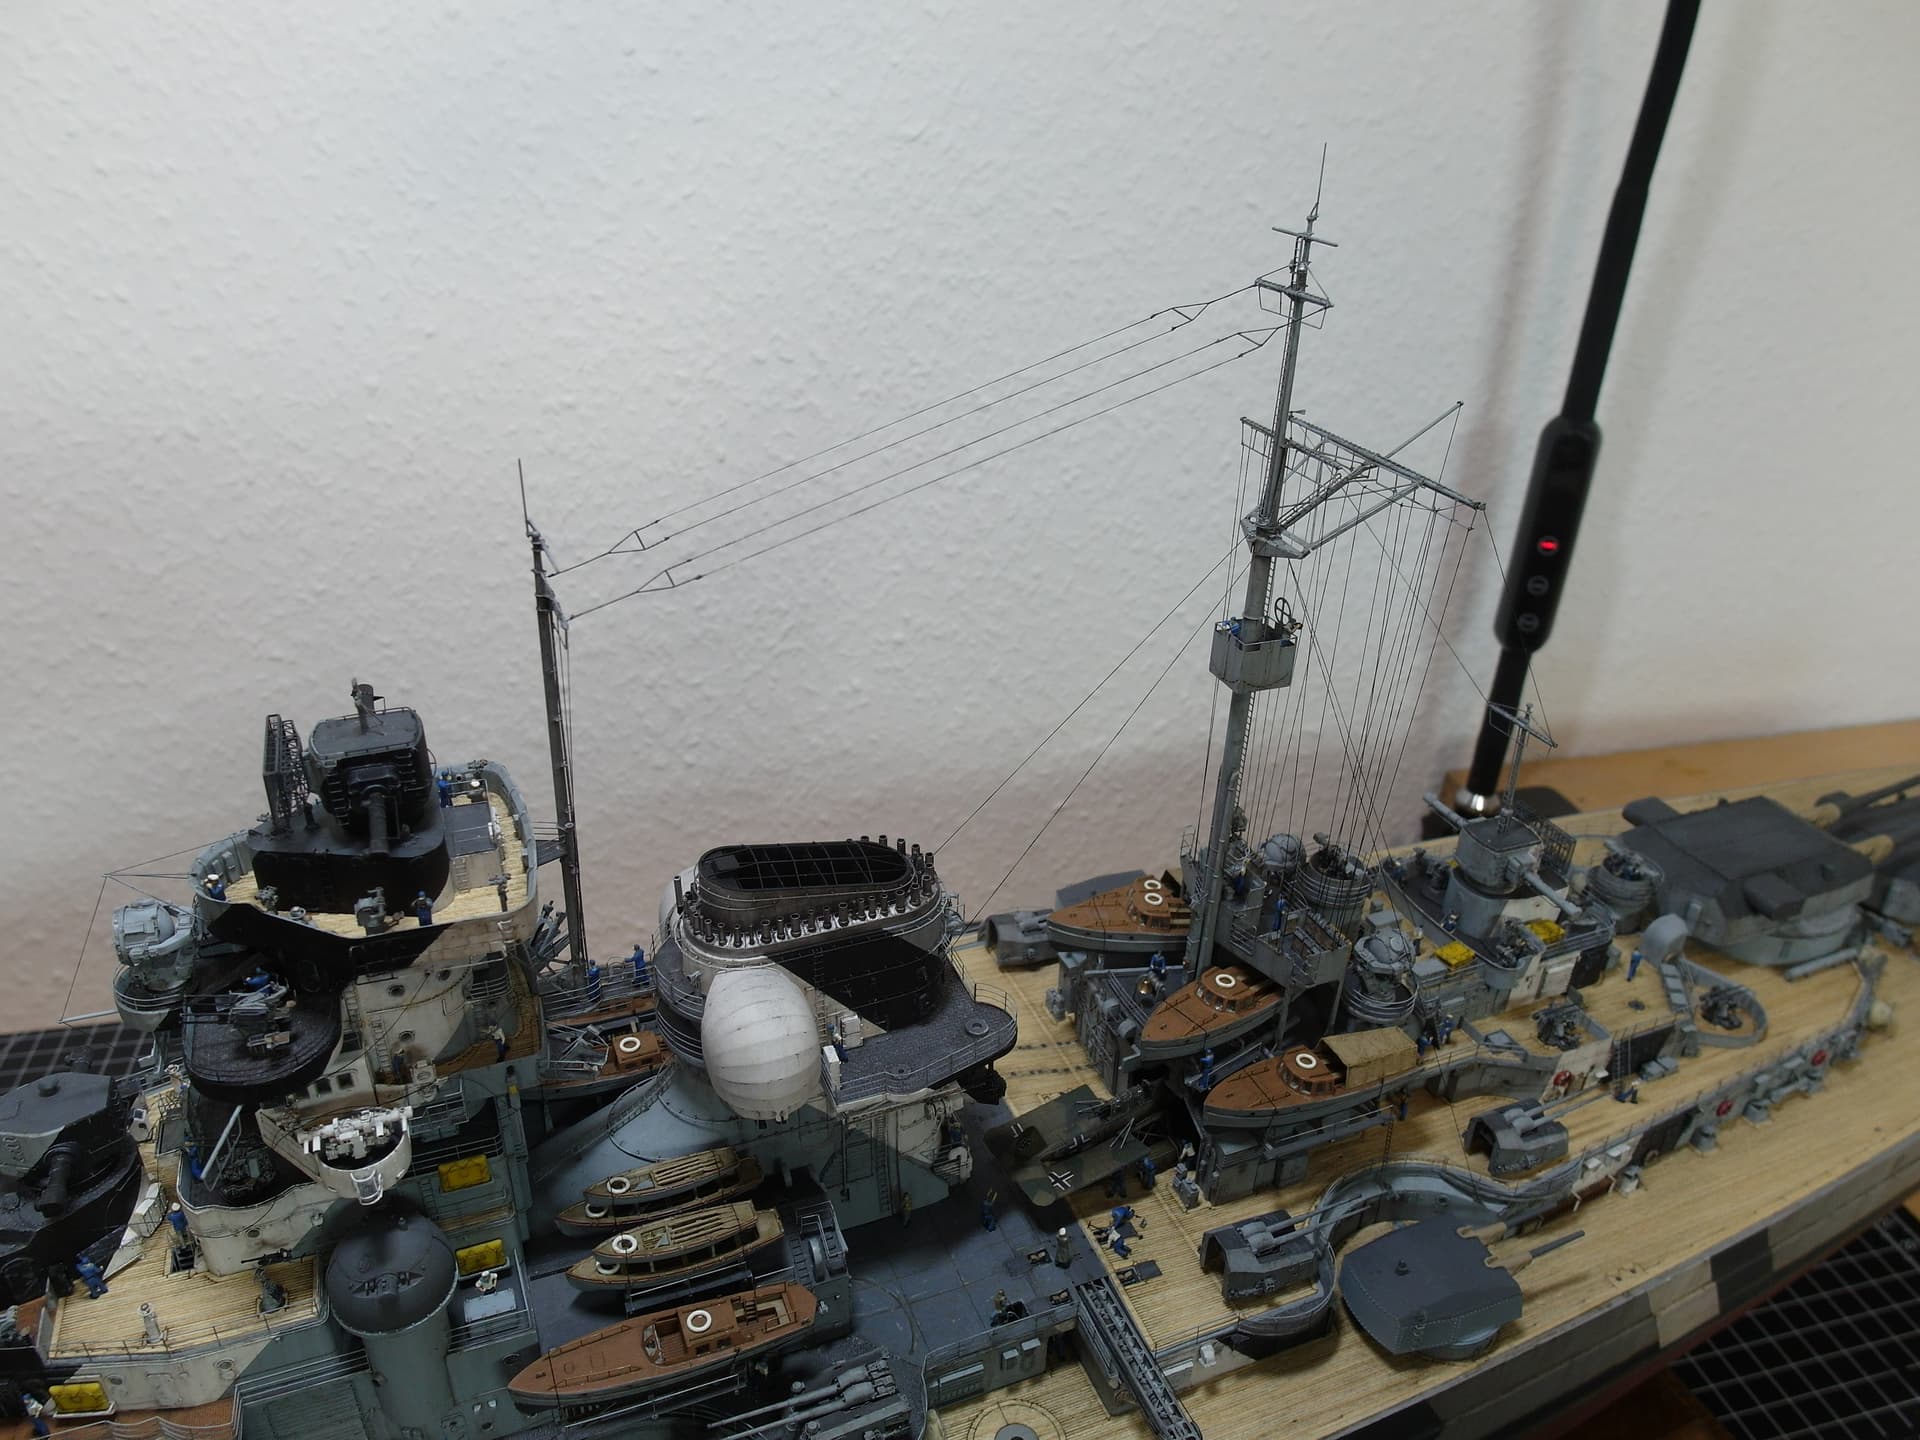
Now came a point that got on my nerves. Four cables each led from the two double-stranded long-wave antennas, which narrowed into one towards the mast.

Then the rest was easy. However, the rigging is not yet complete, as I still had to attach searchlights and anti-aircraft guns to the funnel. according to my motto, always work from the inside out.
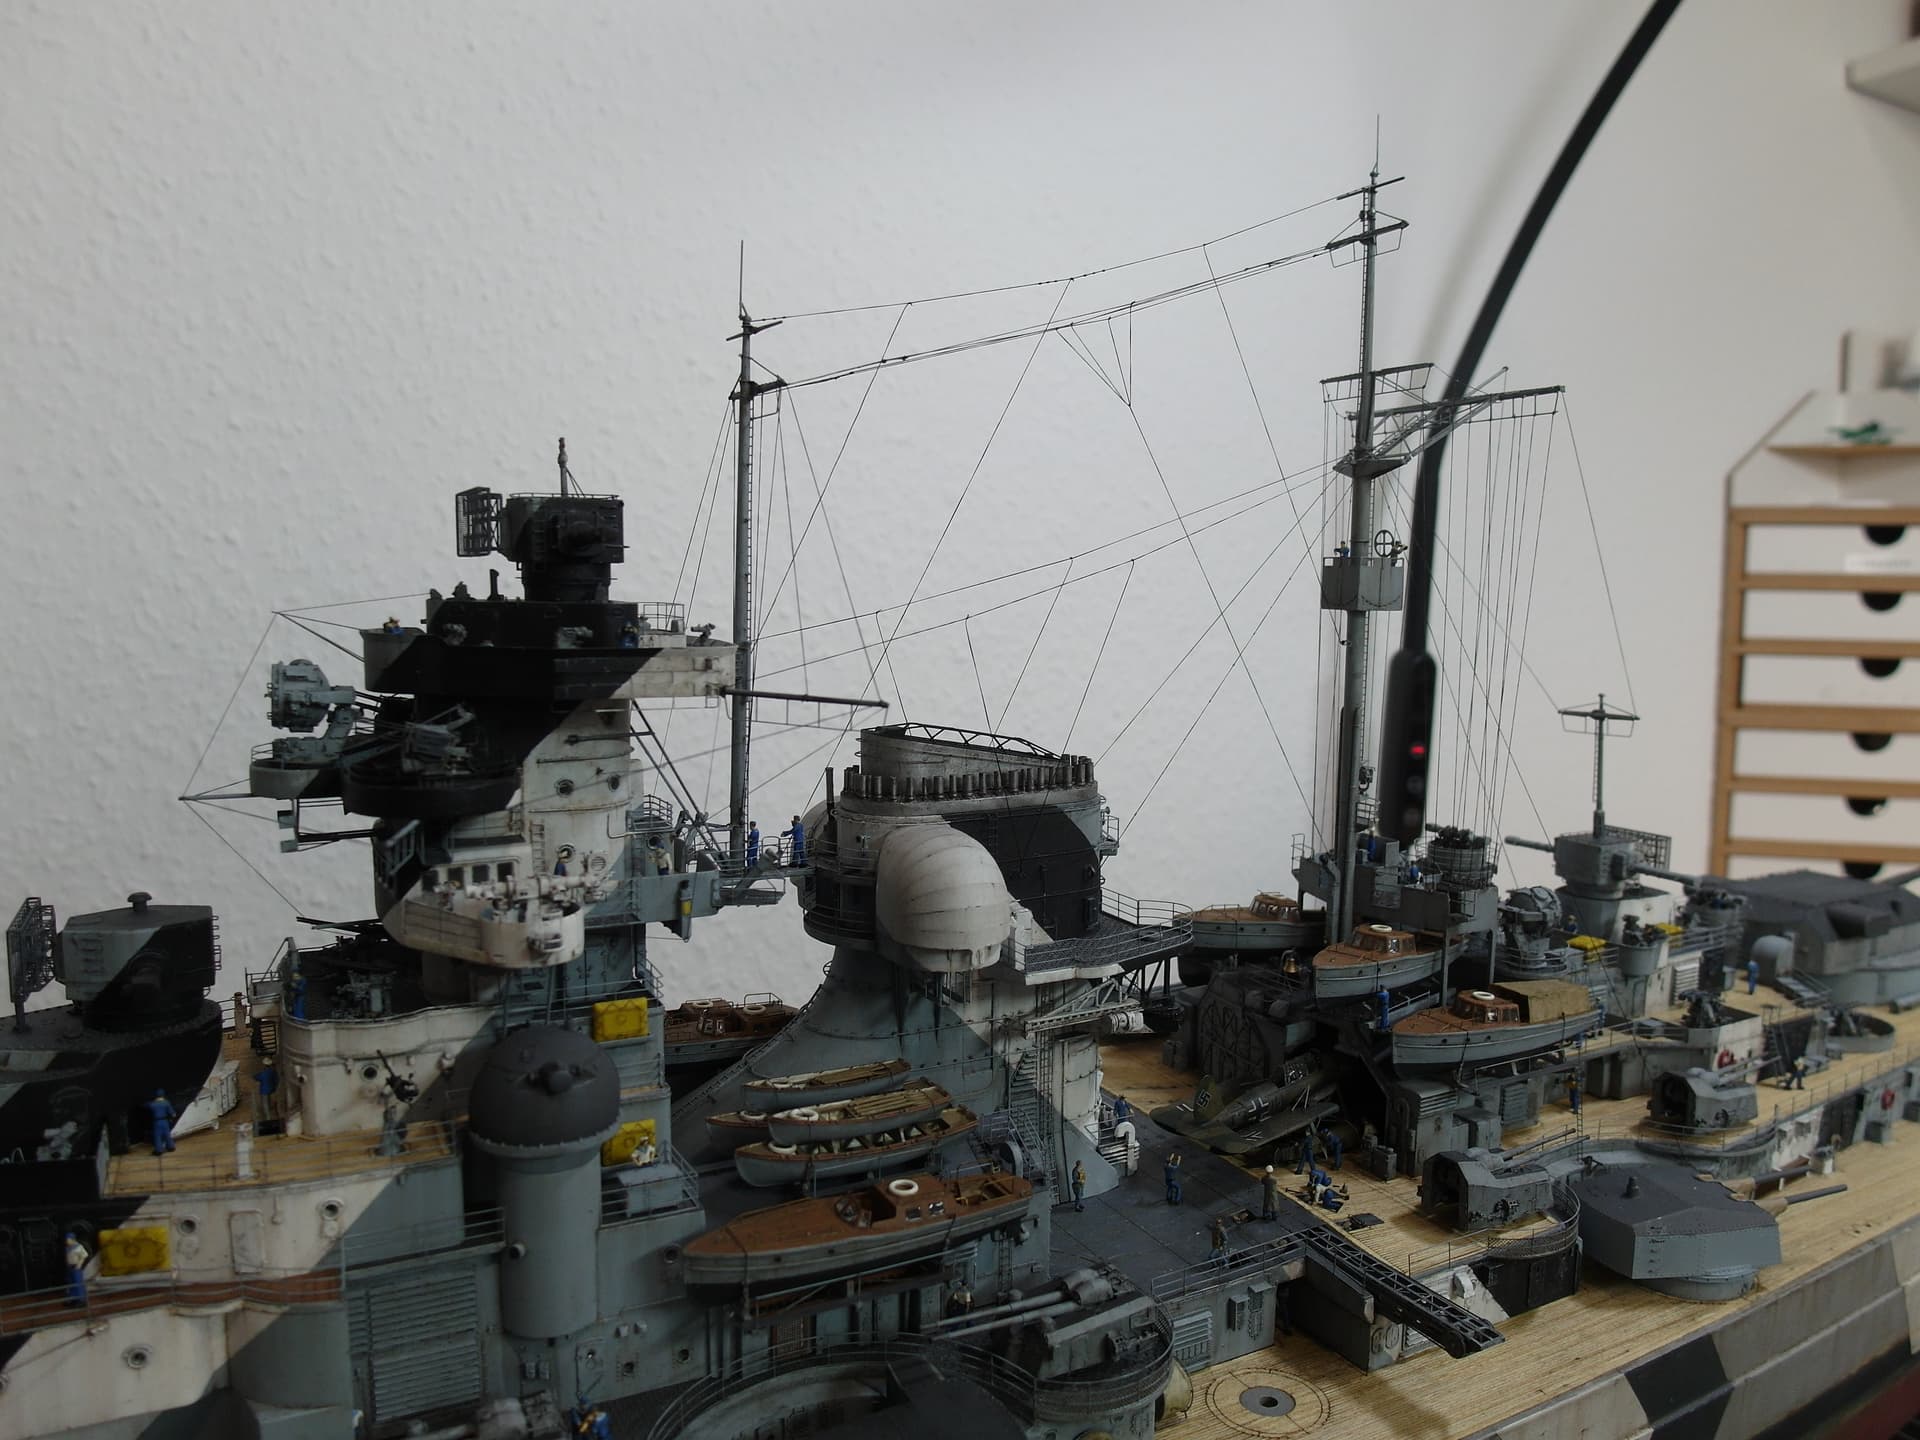
The last two searchlights are on the gallery. Madness of the detail richness of Veteran Models.
With that to the on-board crane. First scratched two rope drums. OOB only bare roll.
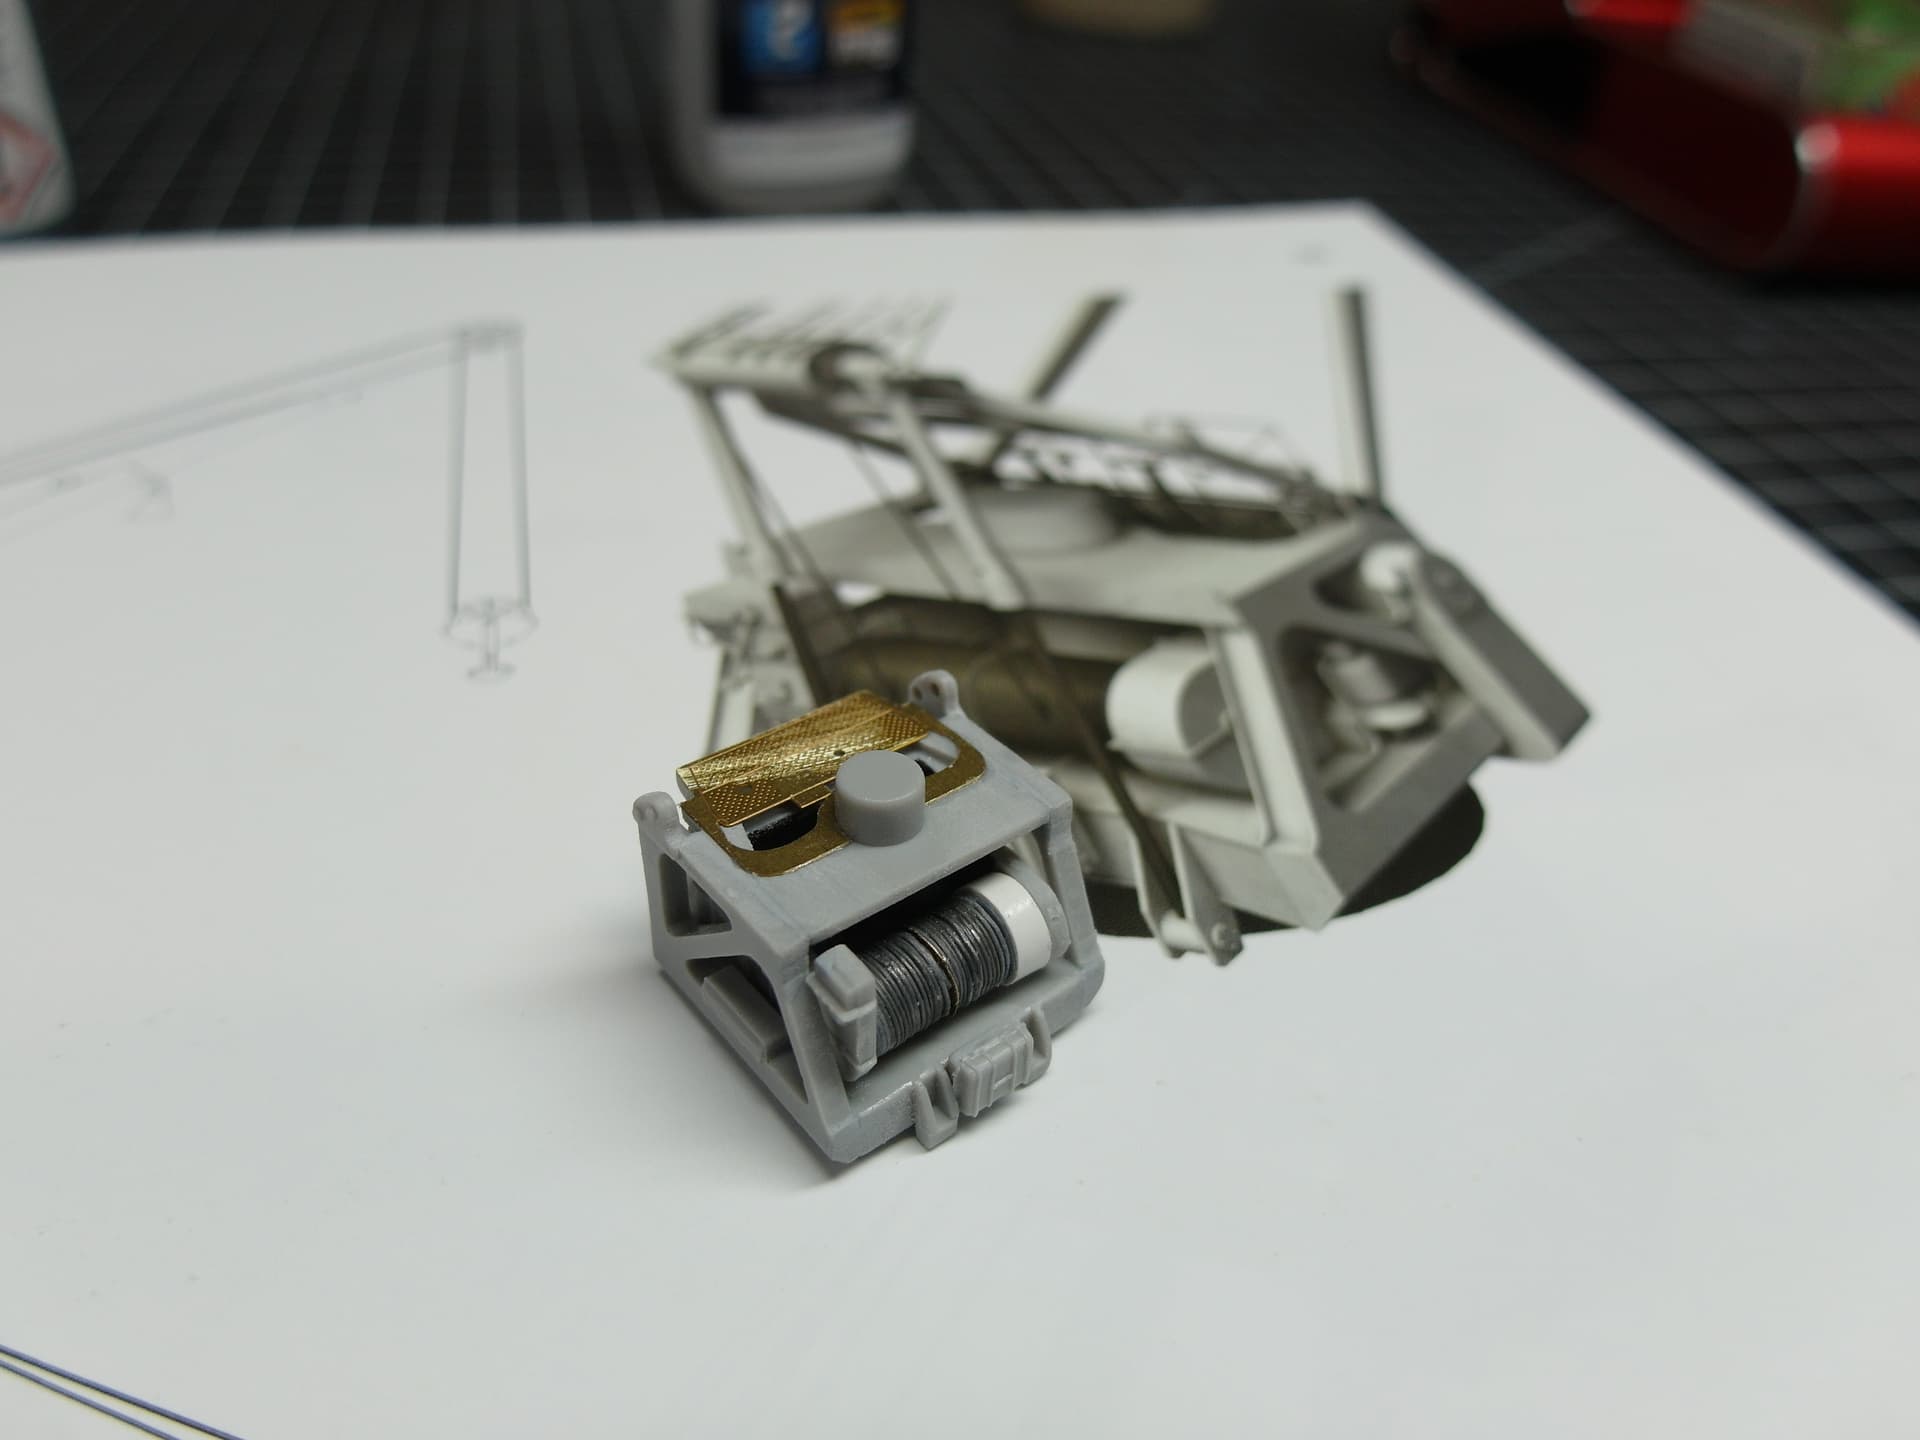
The crane body is already finished and there are still endless components.

But that also went together. A lamp scratched and he can get on the deck. Fits perfectly in the mount on the tower.
Now the rest of the rigging can follow.
6 Likes
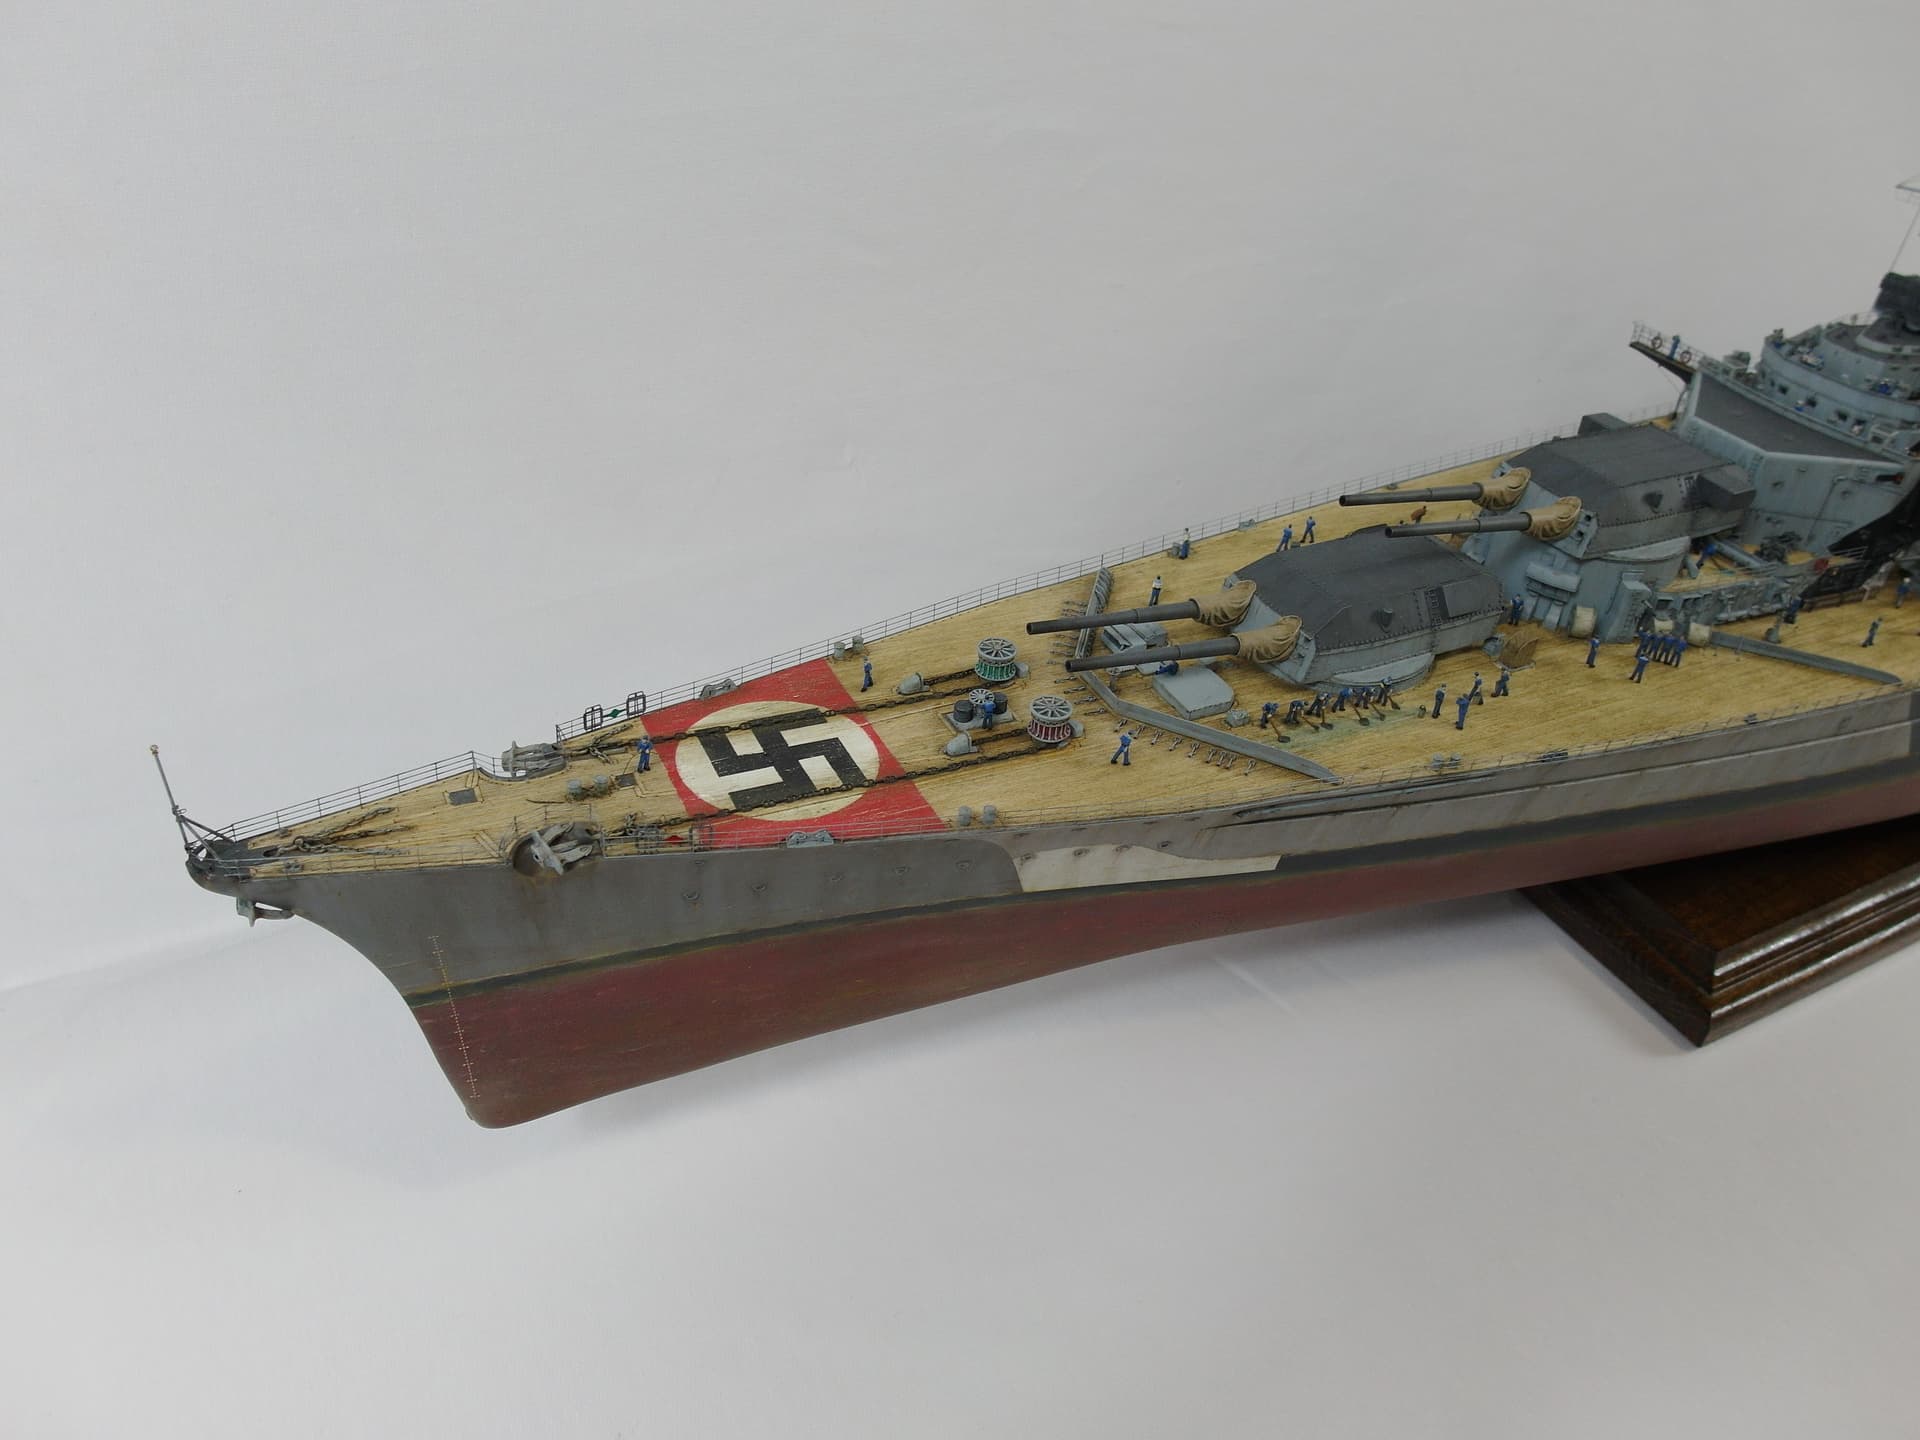
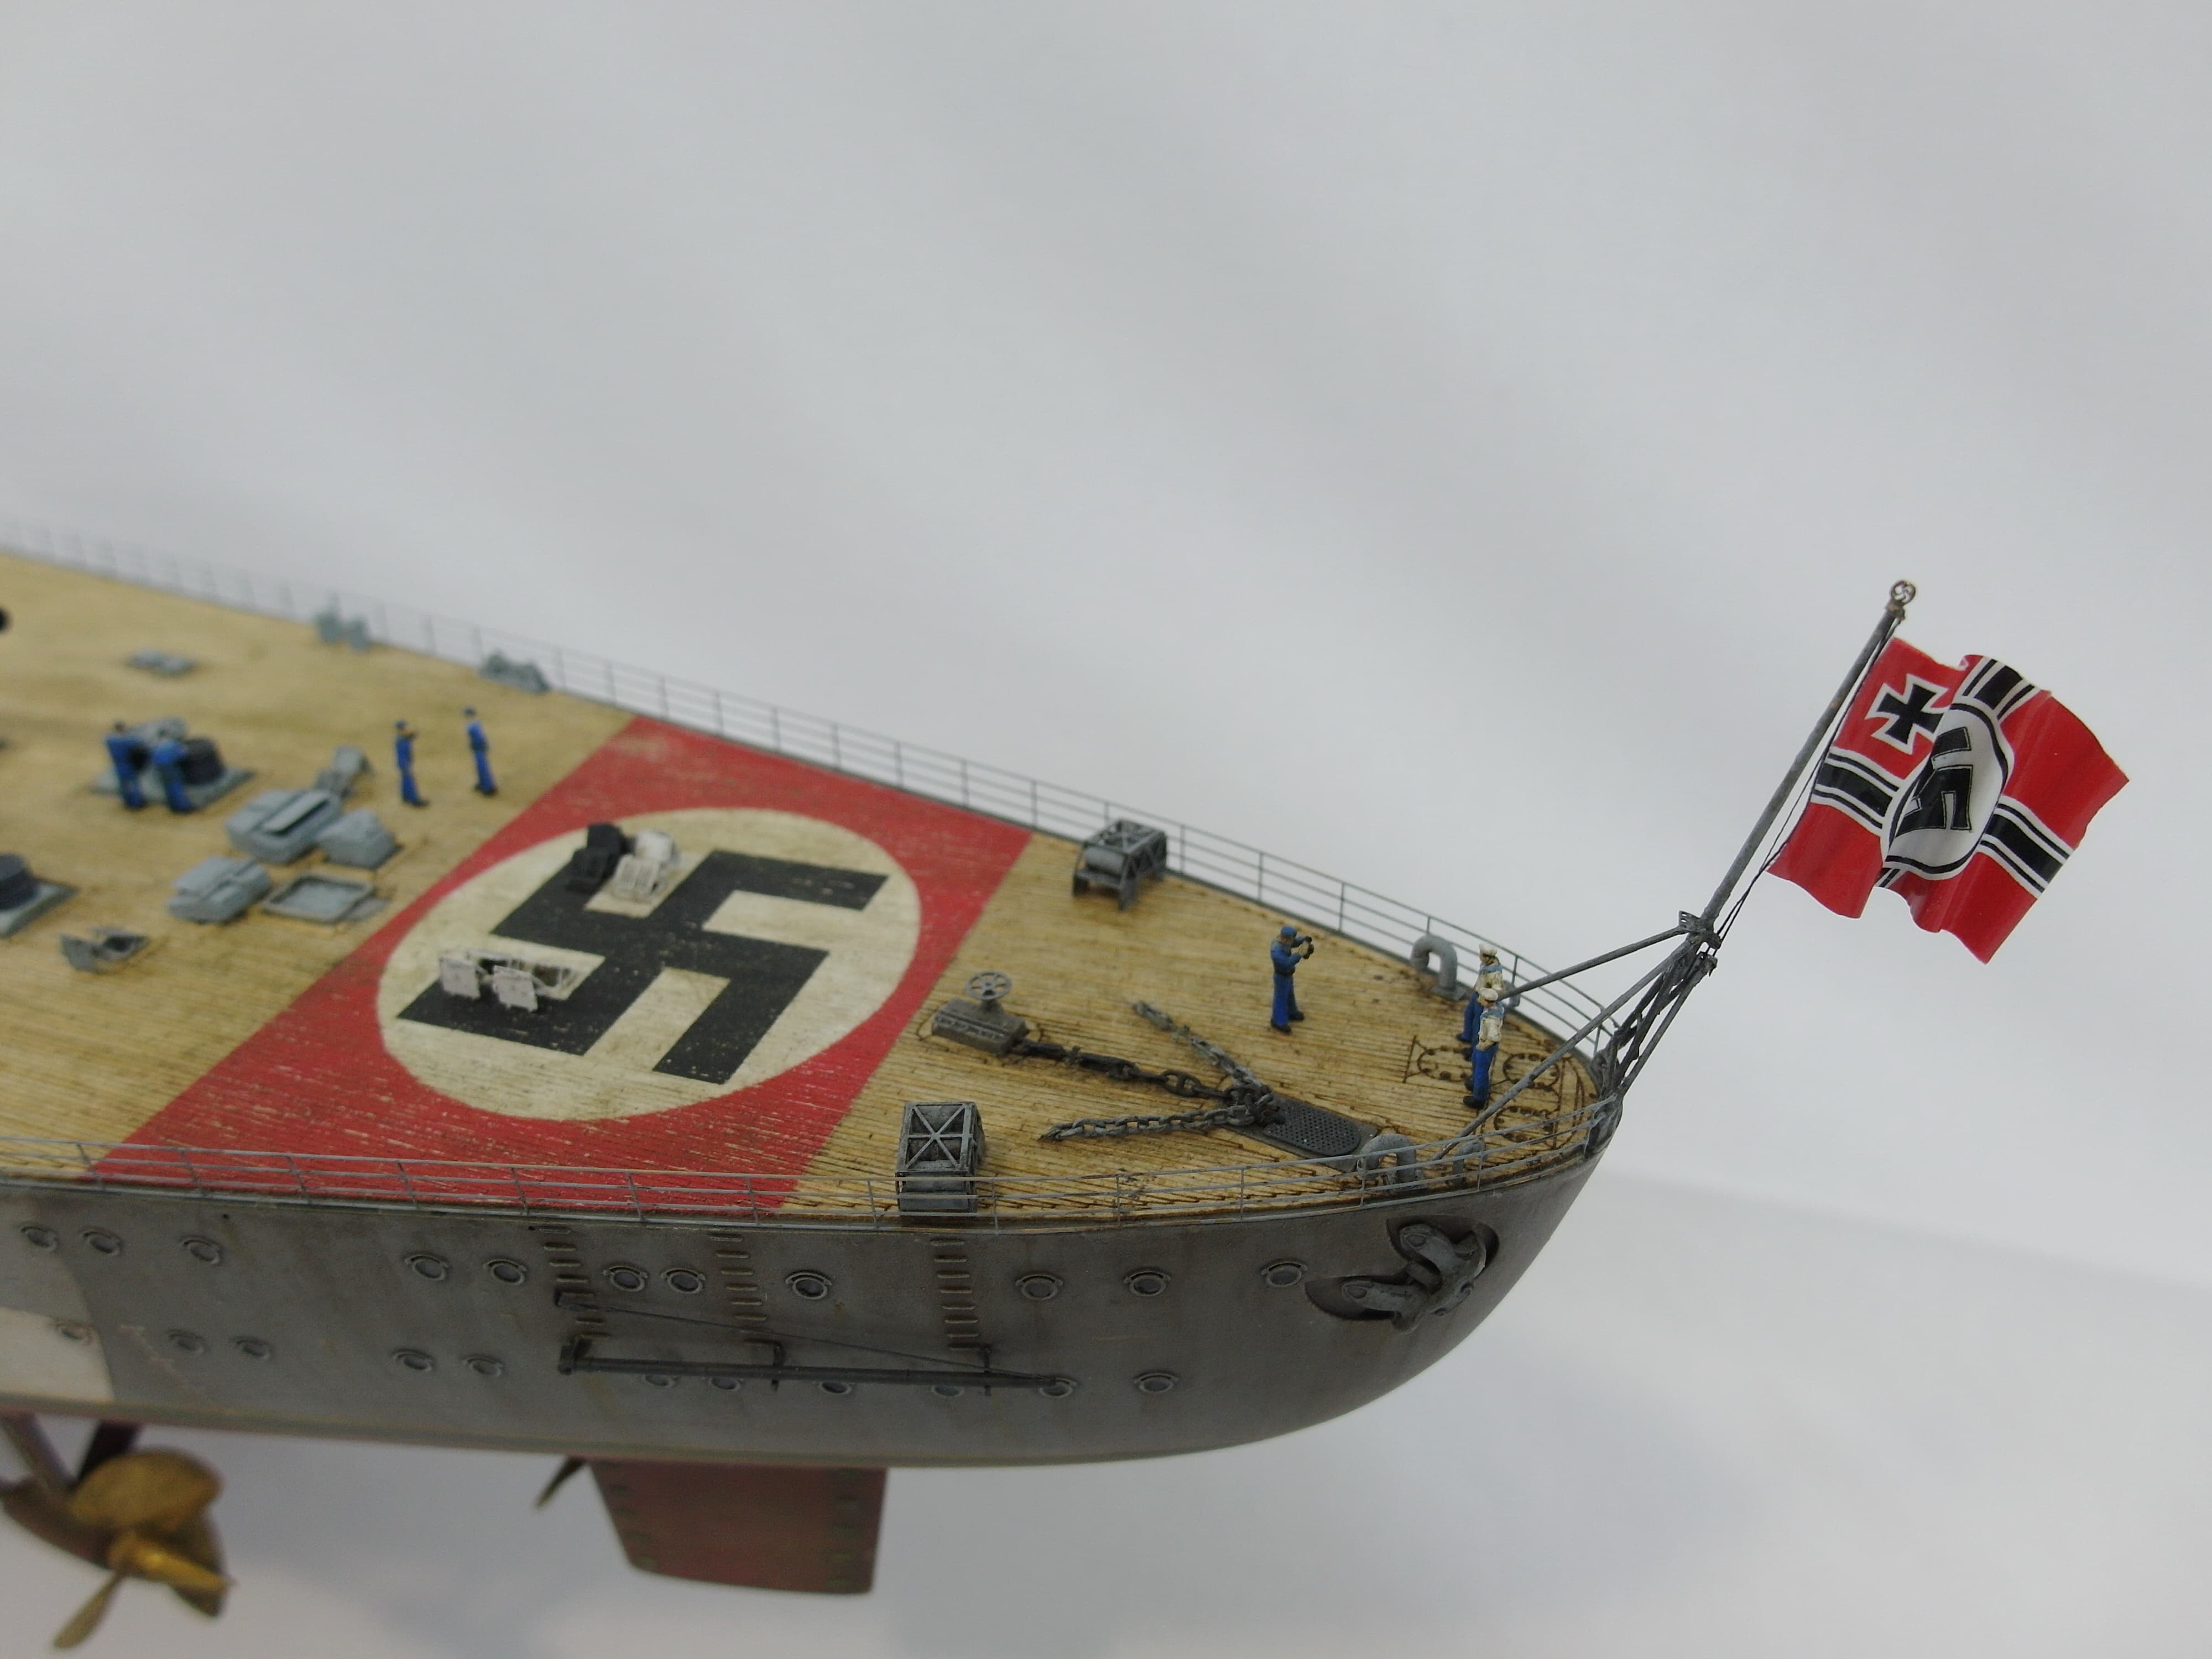
Since I am building the ship as it
was equipped in April 1941, there are still dinghies and row yawls on deck.
The last yawls in the davits have come on deck. A PE set of a destroyer in 1/350 had to be used for the rope drums.
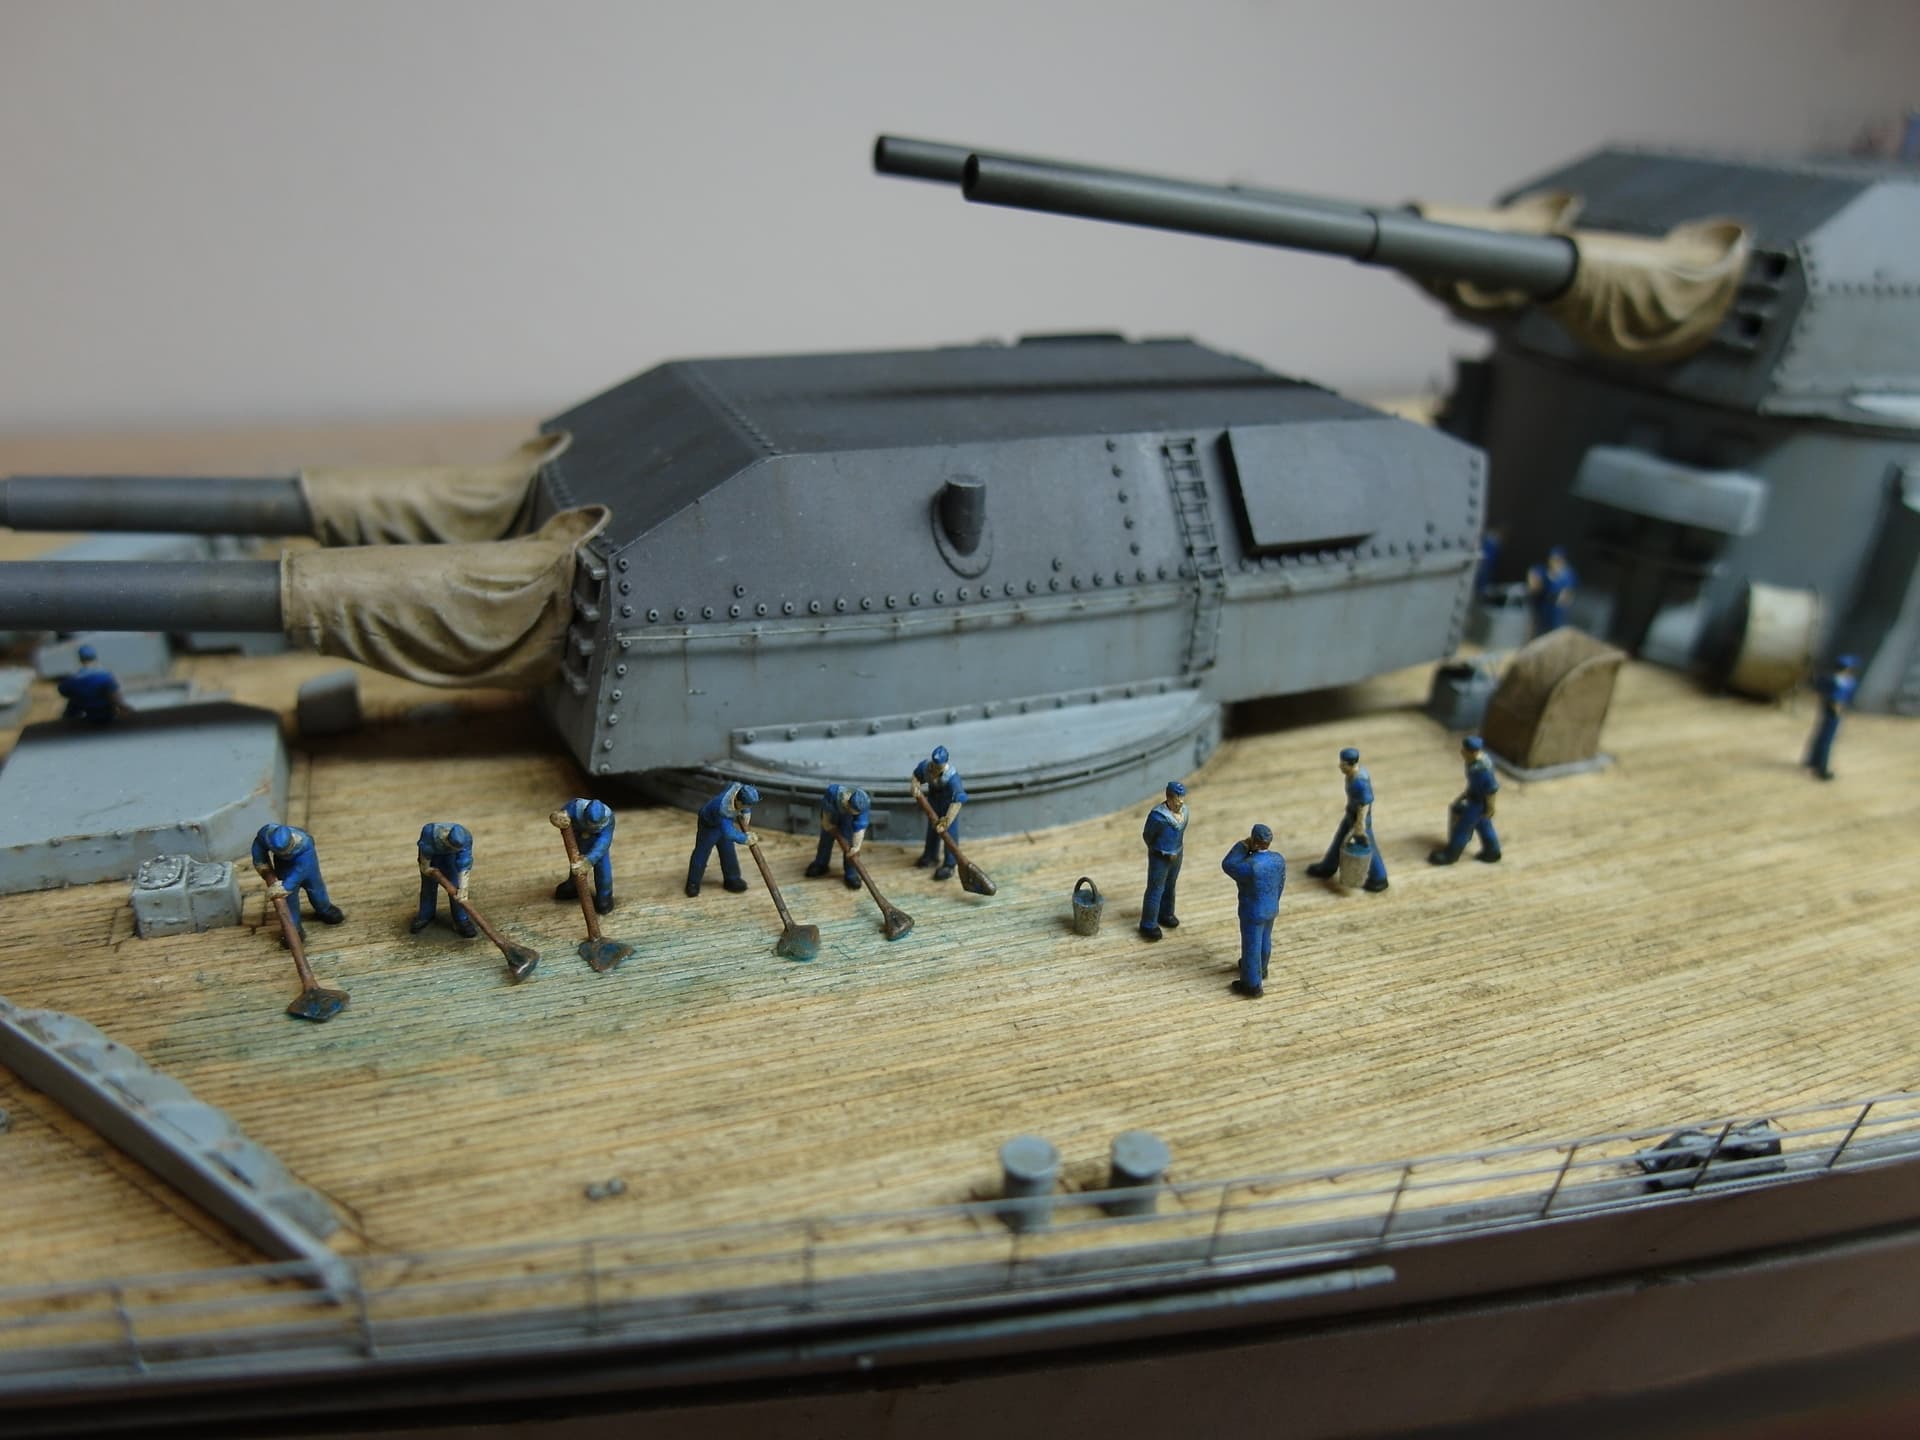
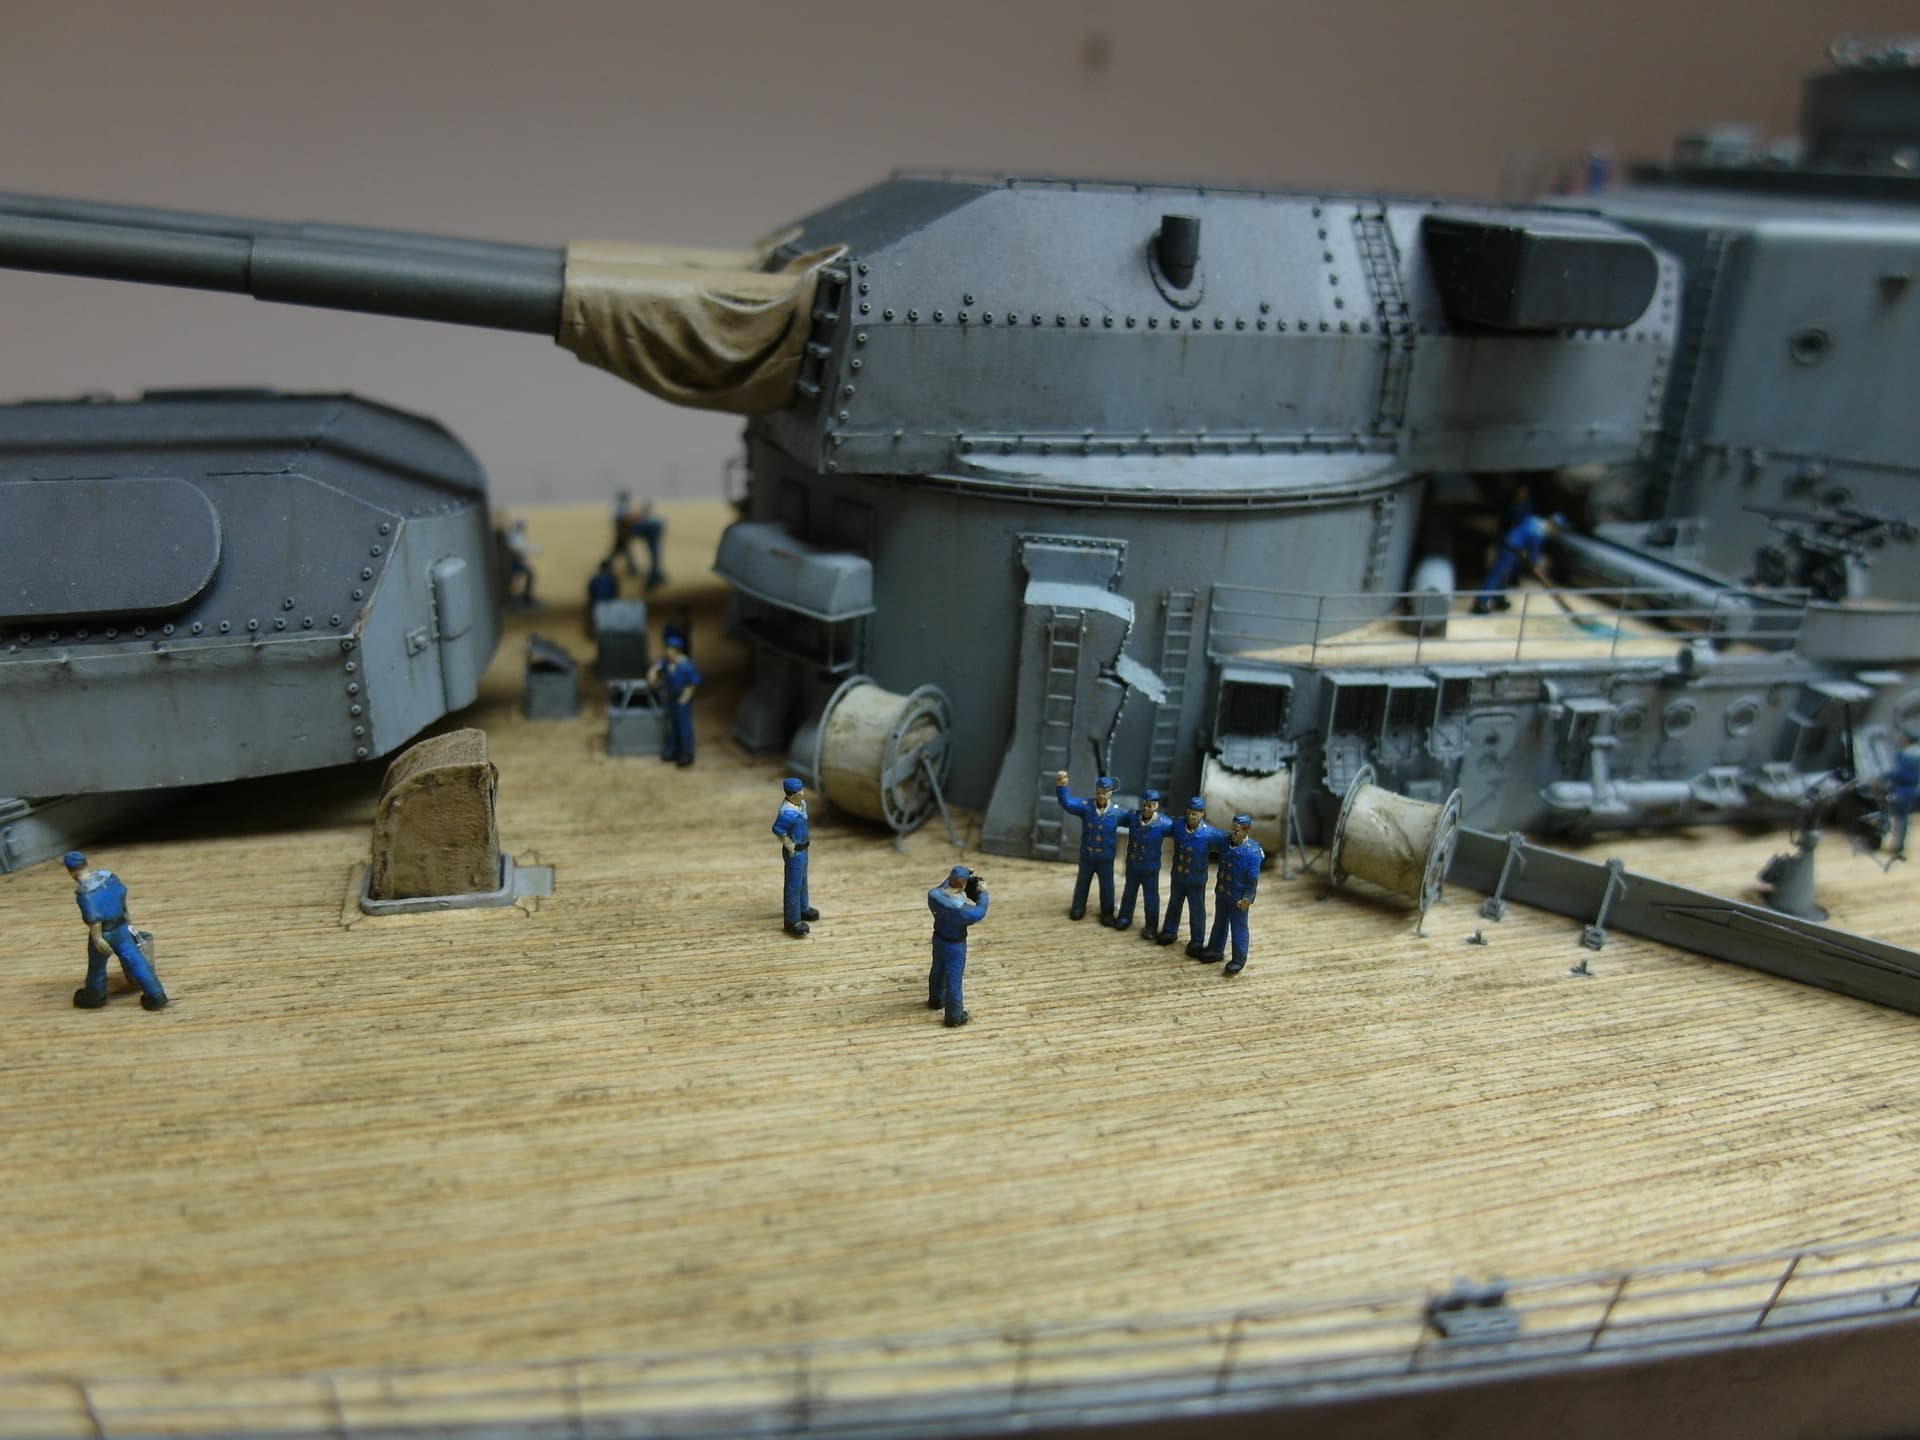
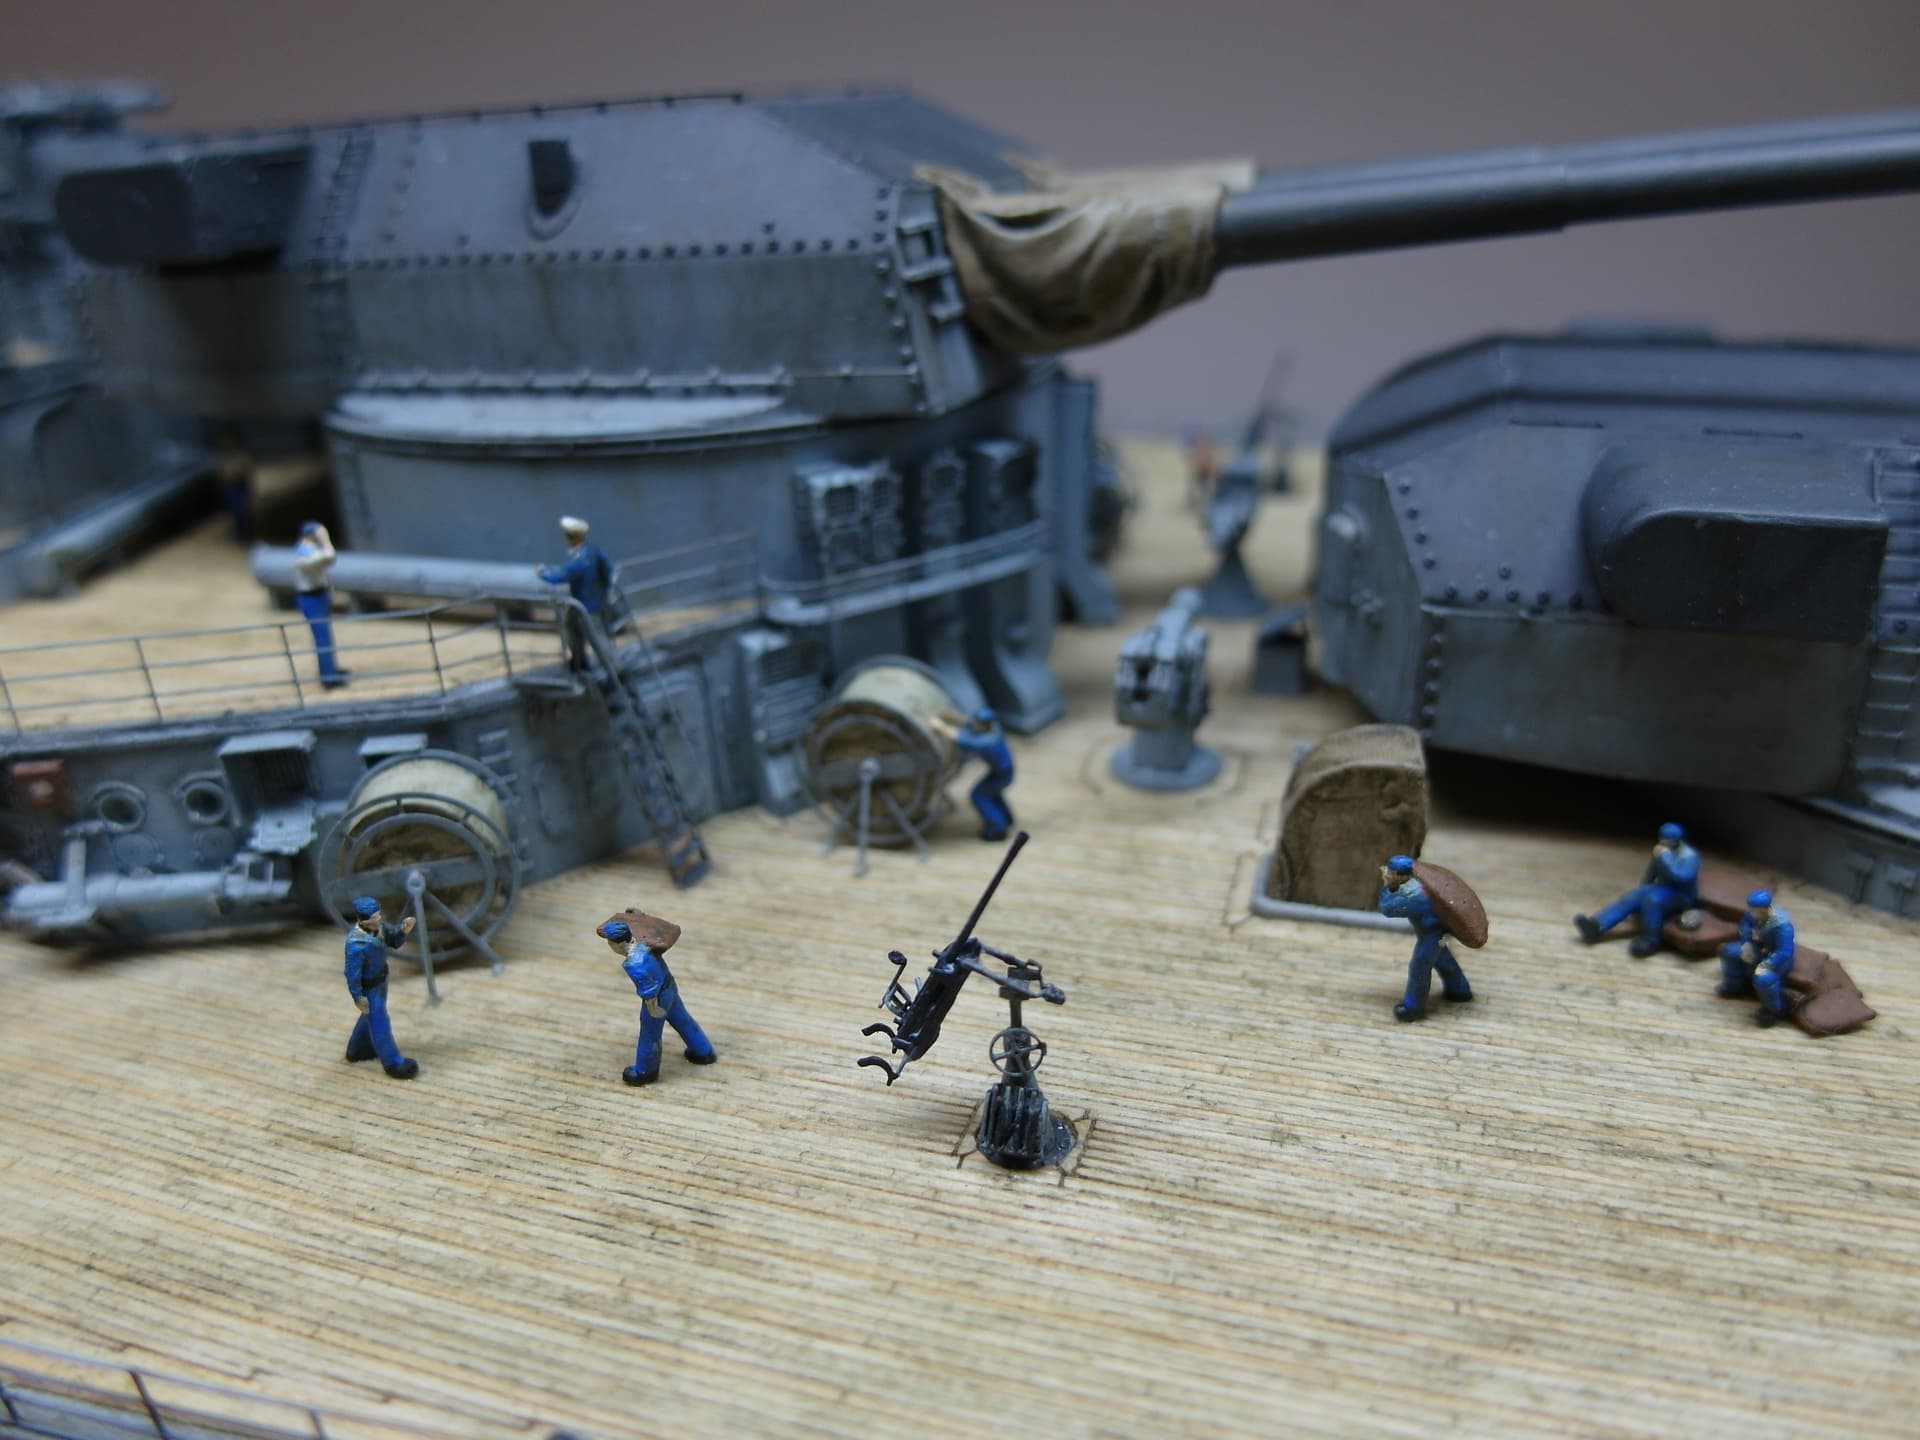
Let’s breathe life into the model.
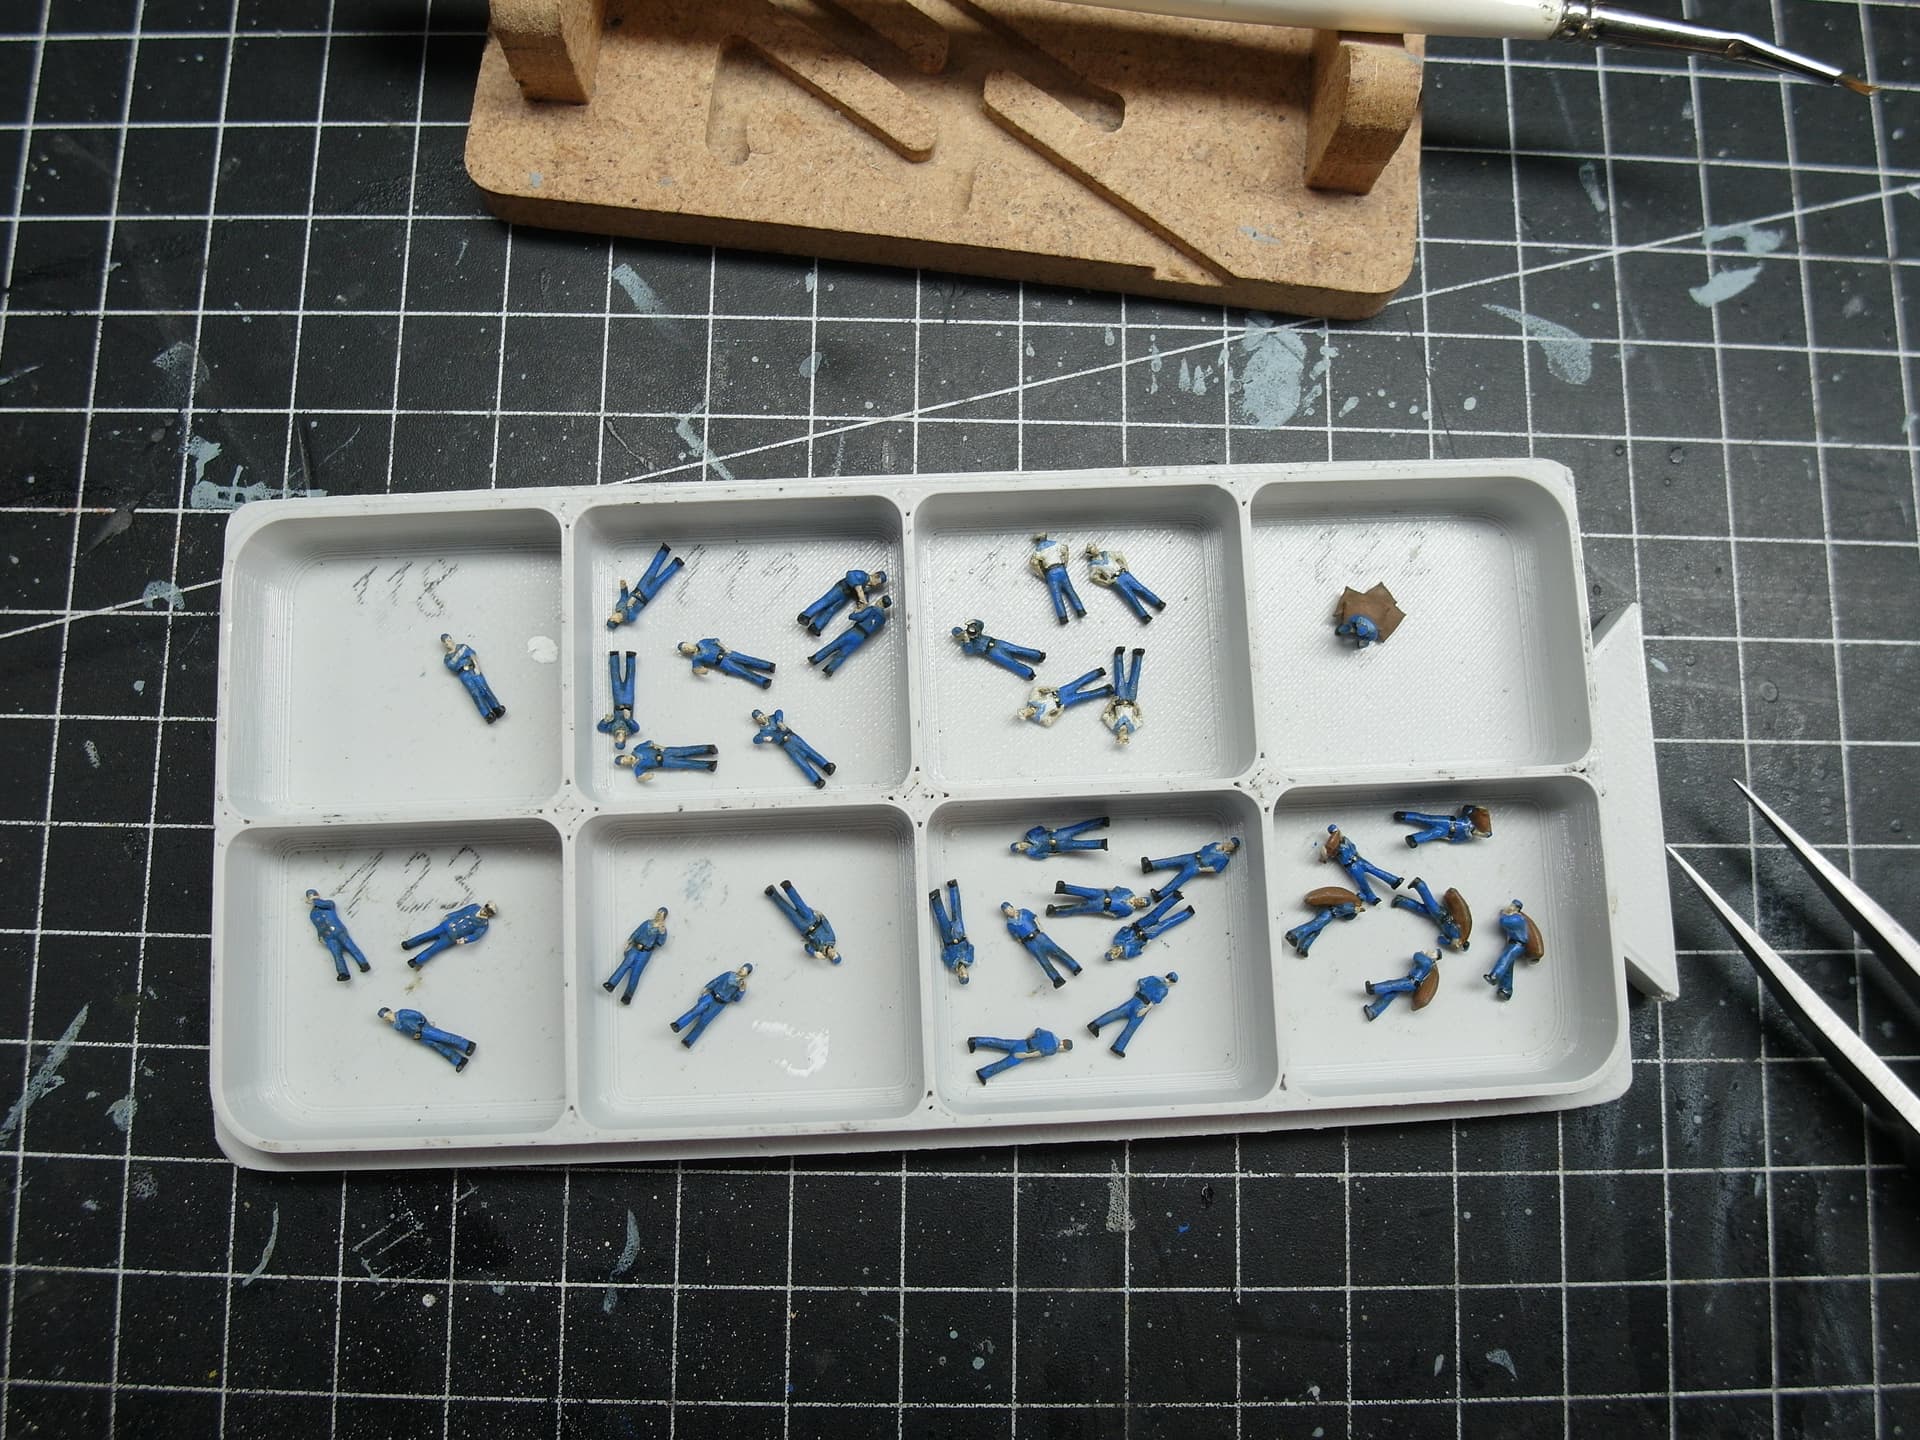
Northstar’s characters are fantastic. But it takes a lot of time to paint the 100 or so figures.


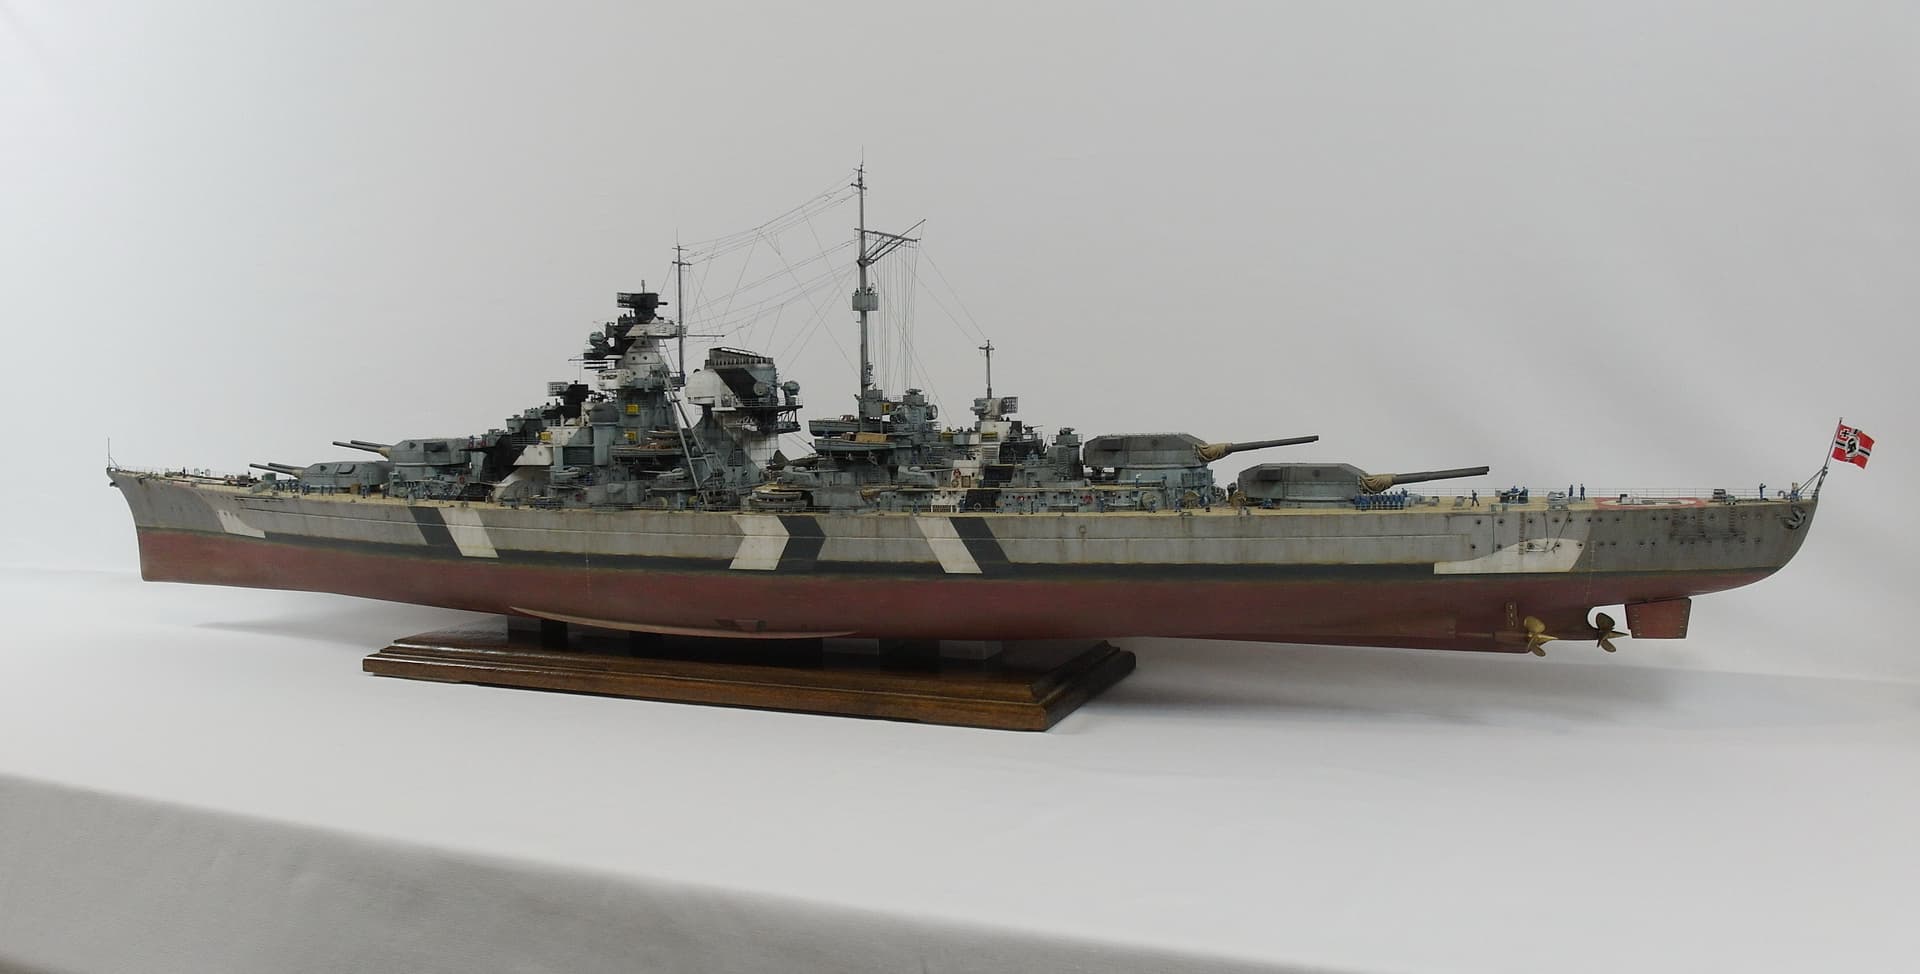
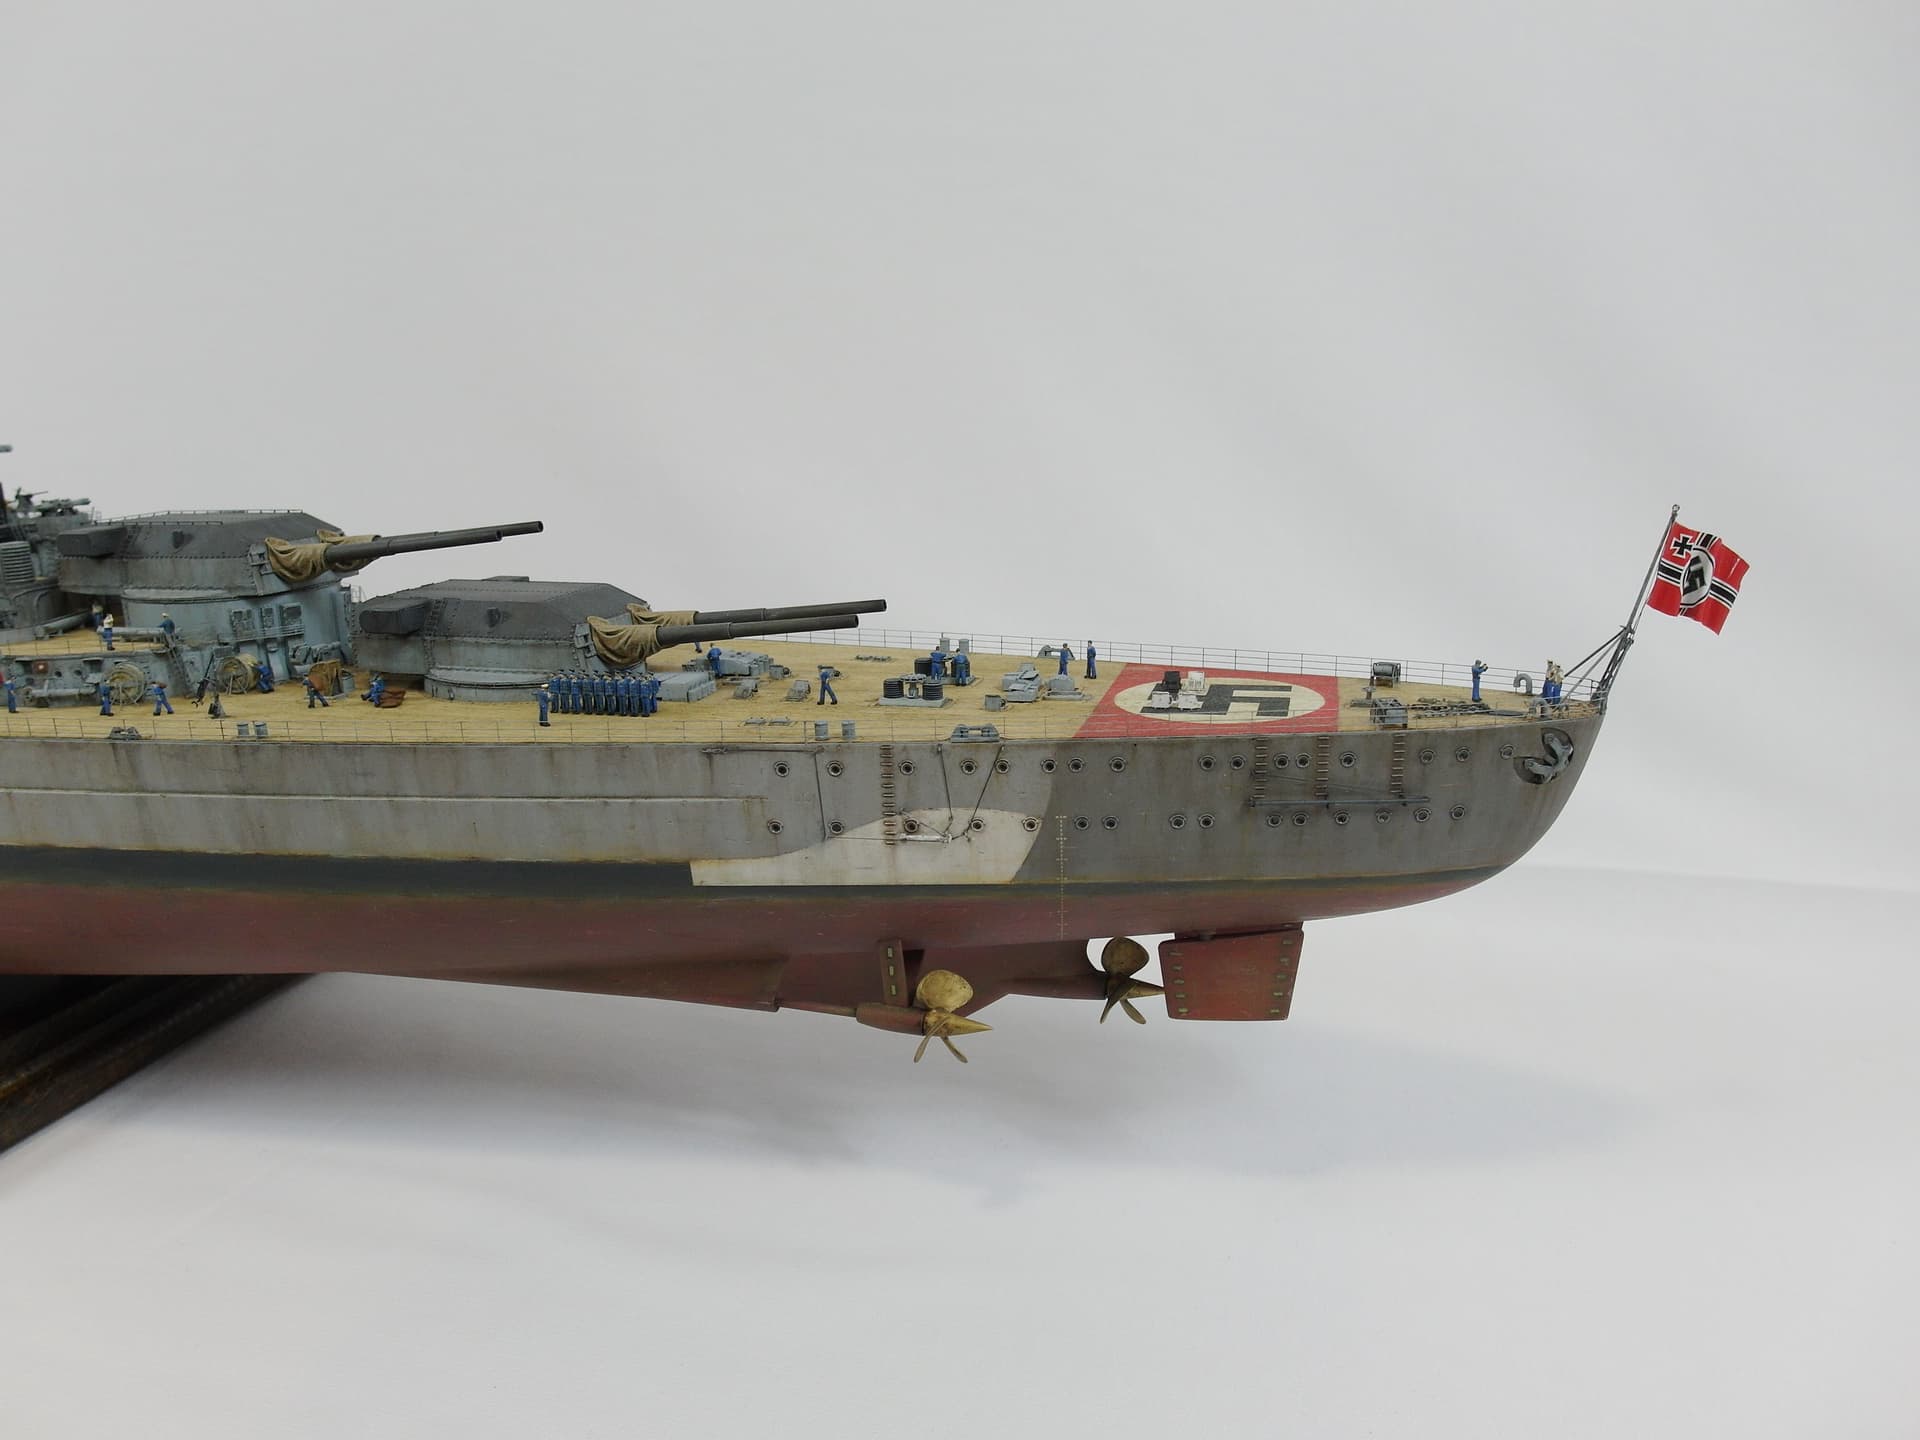
Now all that remains is to hoist the flag and attach the outer railing
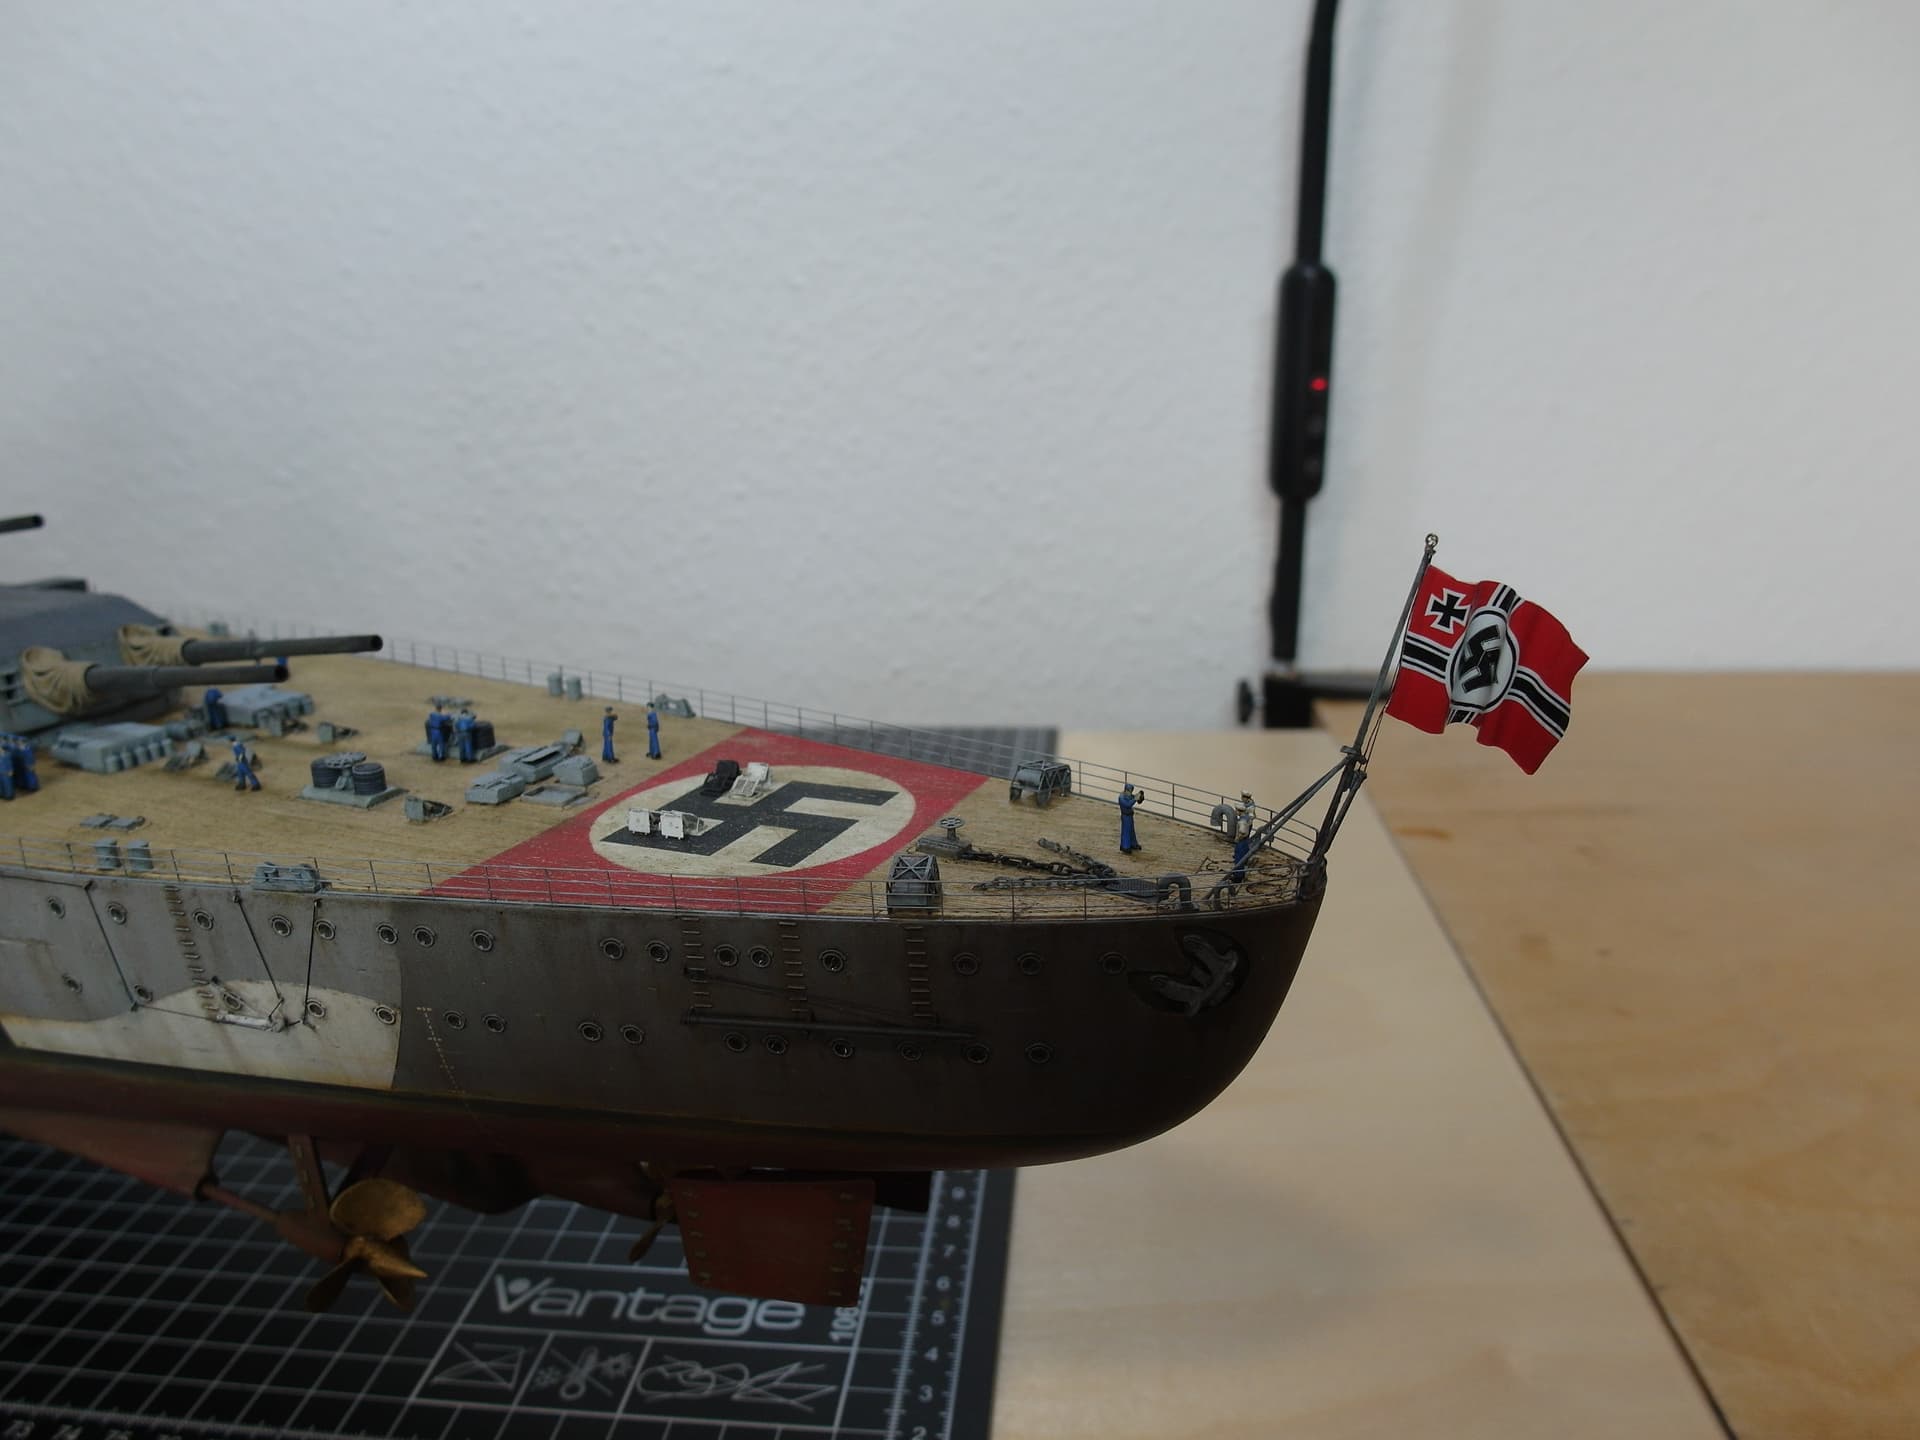
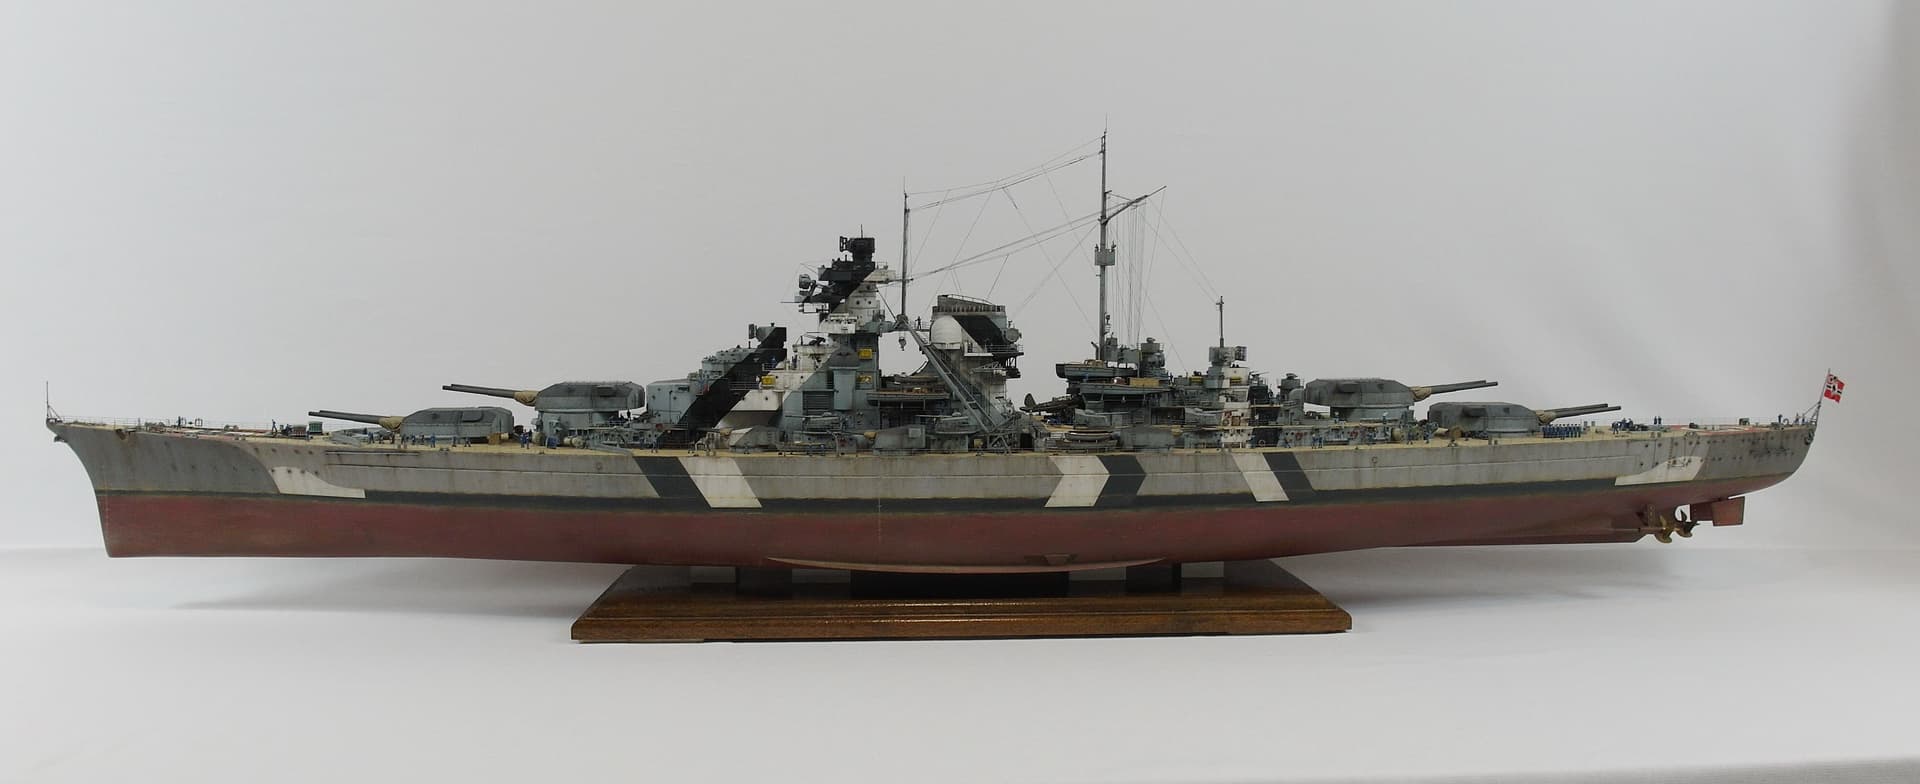
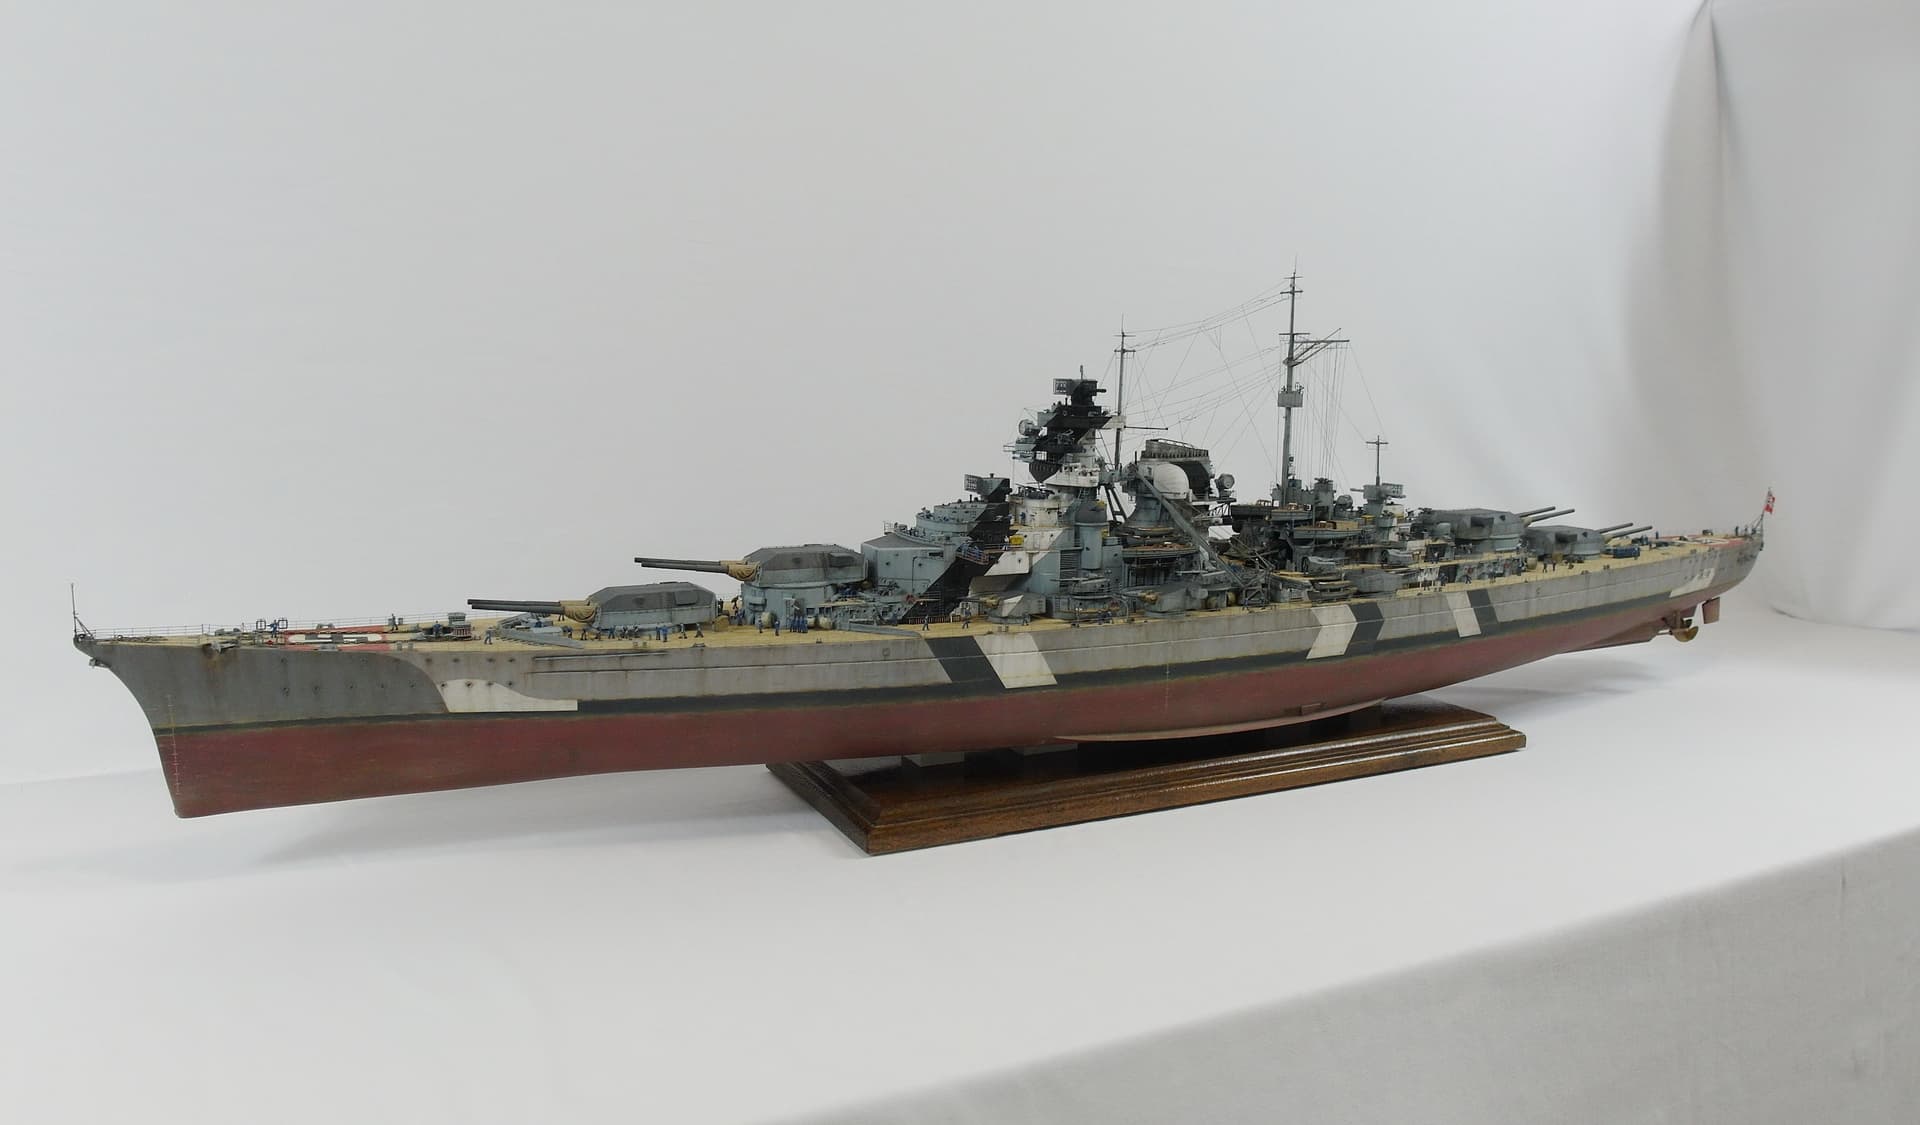
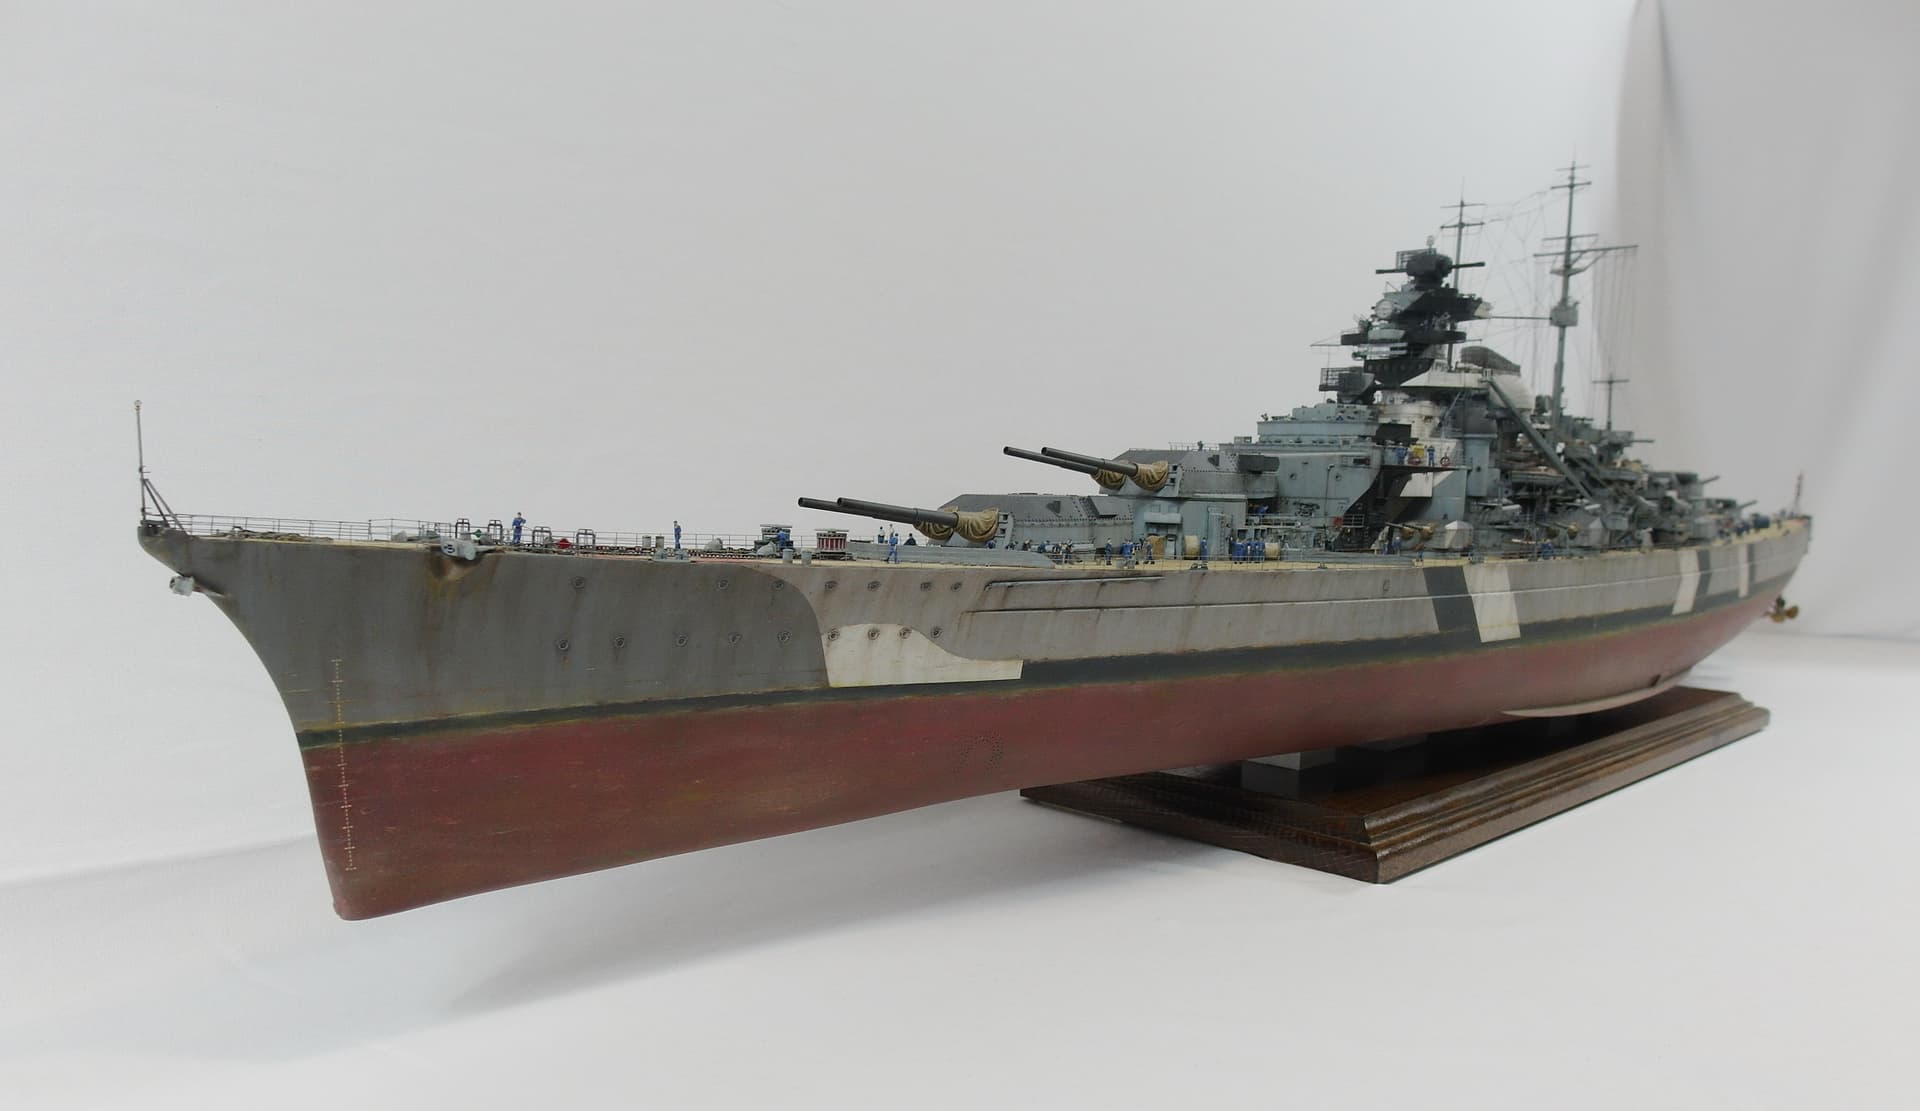
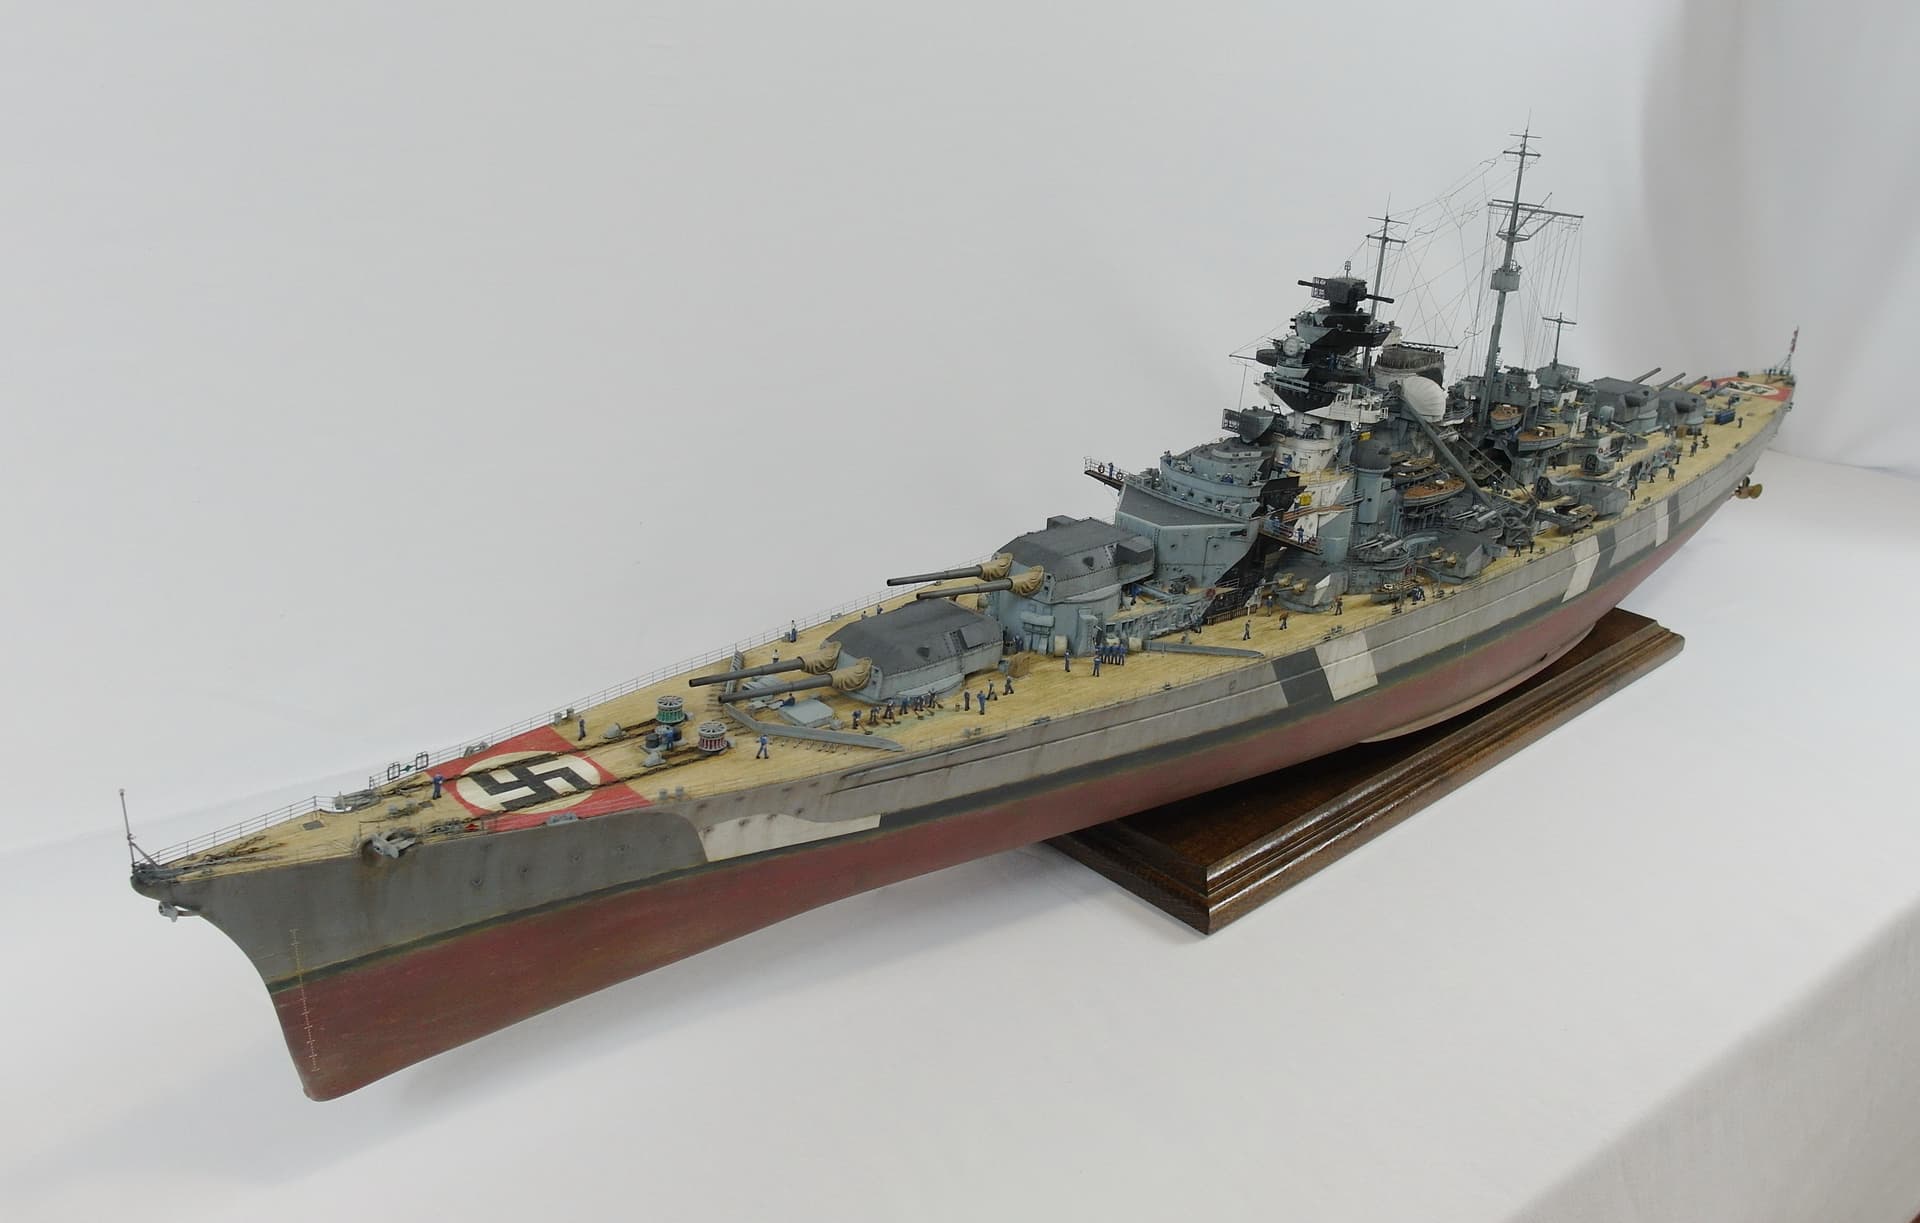
That’s it from construction. Now it only remains for me to present you the finished battleship Bismarck.
6 Likes