Very Nice. I scratch built some of these a few years ago for a Warrior I built. Based it on a pic I had where the warrior had two in the front stowage bin. Looking at your pic, I see I had underestimated how big they were… and how undersized Academy’s stowage bin was…
1 Like
Hi John,
regarding the oil can, which is indeed a feature on every Chieftain on exercise, and often fixed exactly like you did, it looks really large. Maybe it is an effect of perspective.
Here are 3 pictures from my collection showing this arrangement in real:
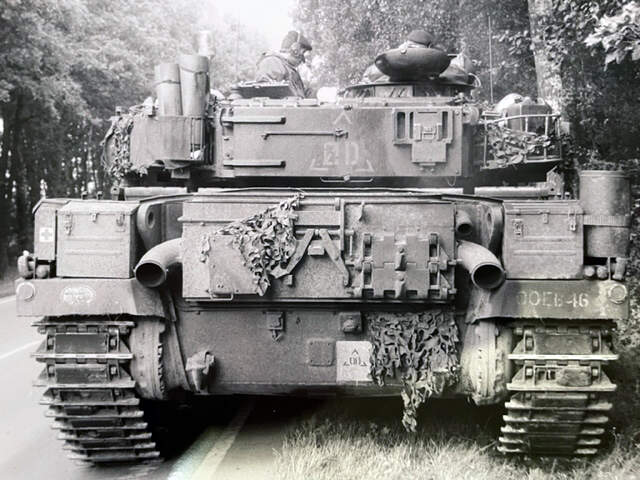

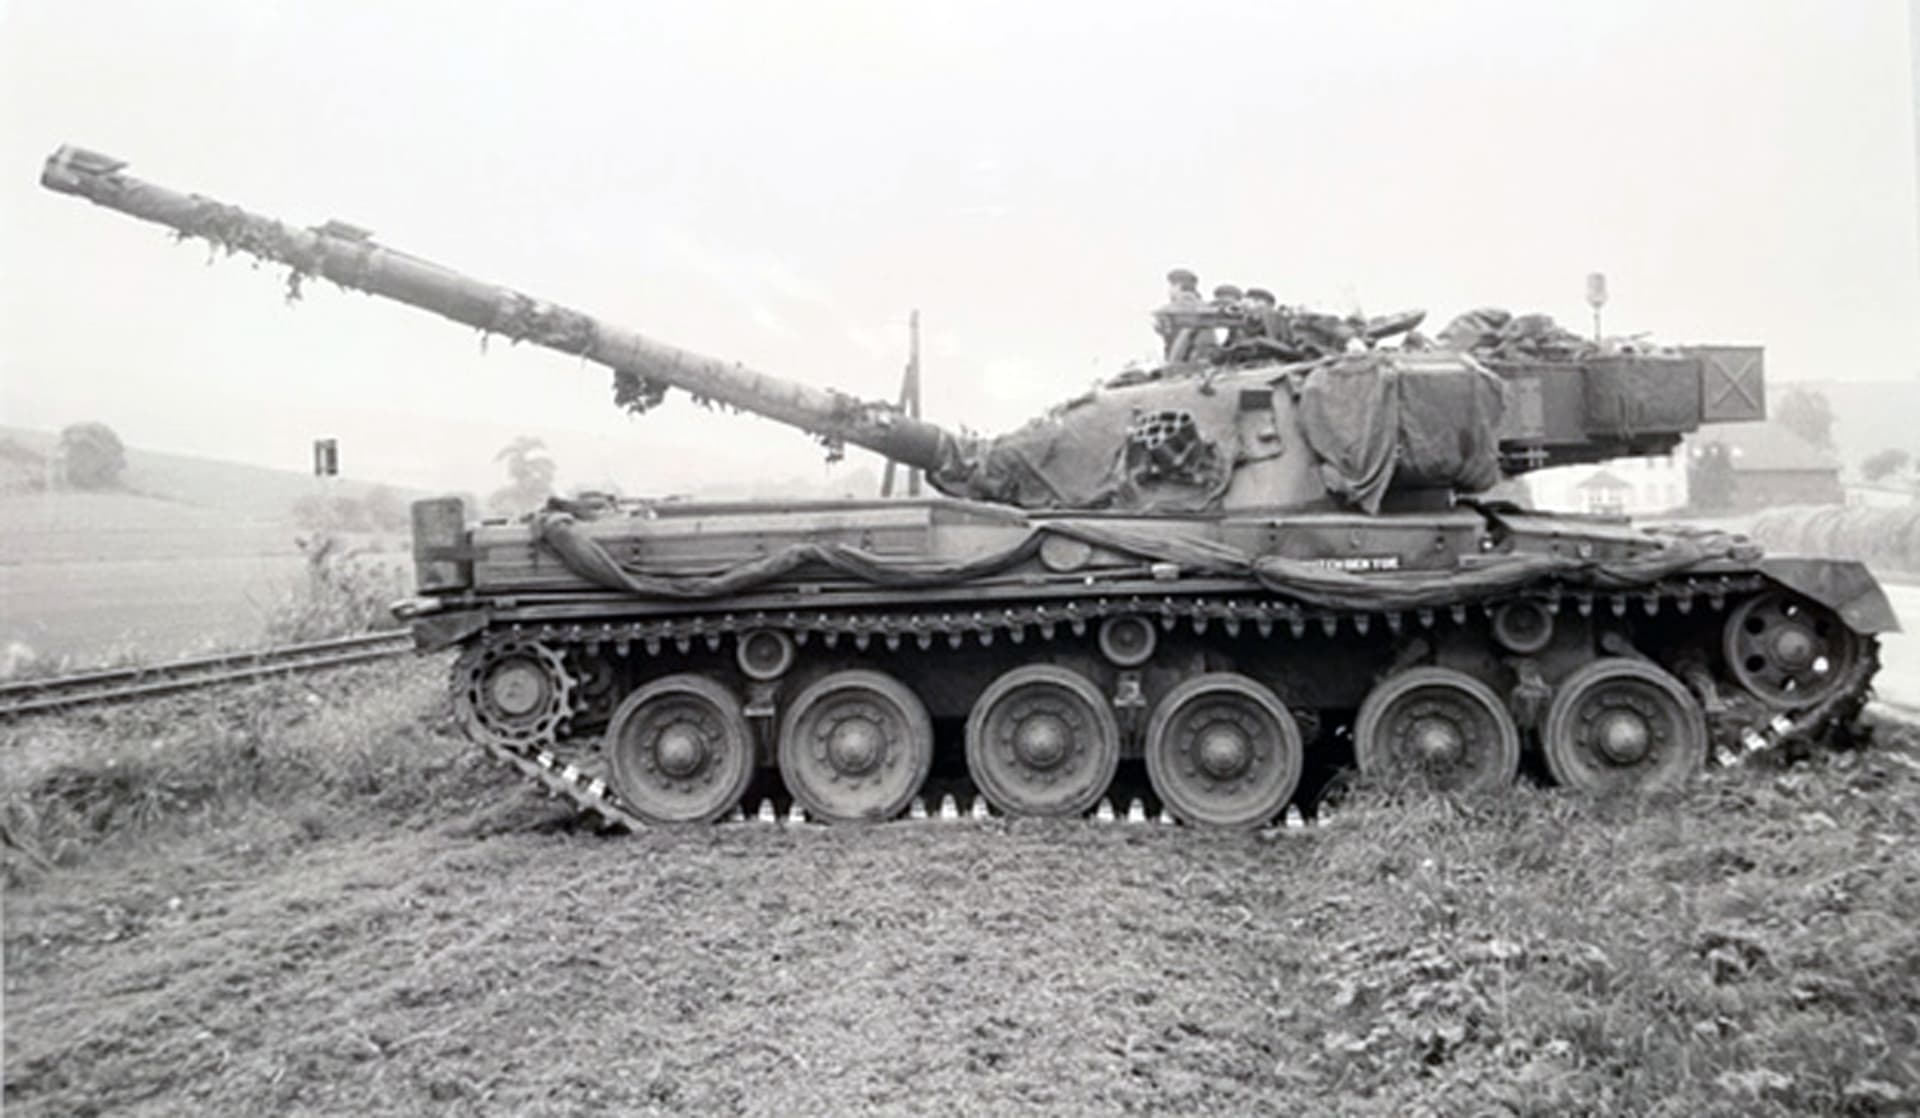
So, you might compare if the size of the oil can is correct. Or you may calculate if the amount of liters does match the size/hight of the oil can…
Otherwise, very well done as always!
Andreas
2 Likes
Hi Johnny
Those cans are something else I need to build, along with rebuilding the Tow rope thimbles, can you advise the dimensions of the 1/35 versions you have?
The padlocks are tricky, taking longer than I thought.
Mal
1 Like
No I think you are spot on Andreas. I was dubious last night when I put the can in, but didn’t bother to look for any reference pictures of it on real wagons. Now I’ve seen those you put up I am sure it’s to long.
I think it’s about 3ish mm to long, so I may do a bit of surgery on it later on 
Will do that for you shortly Mal
It’s surprising that AA made such a dimension mistake.
I have used those oil cans from Plus Model or CMK (I can’t remember the correct brand) and their size looked spot on.
Keep on the good work Johnny.
Olivier
1 Like
Thanks for bring this up and for the pics Andreas. My scratch built ones do not look so bad now.
I know Olivier, it does seem odd. But then there are a few areas on the Stillbrew that seem out of scale sightly. I didn’t know you could get those oil cans from another manufacturer, good to know.
I would actually like to measure this AA one against the TAKOM one, as I’m sure this one is slightly smaller … It just looks a bit off…
Anyhow… back to the Oil cans for @AfvAficionado
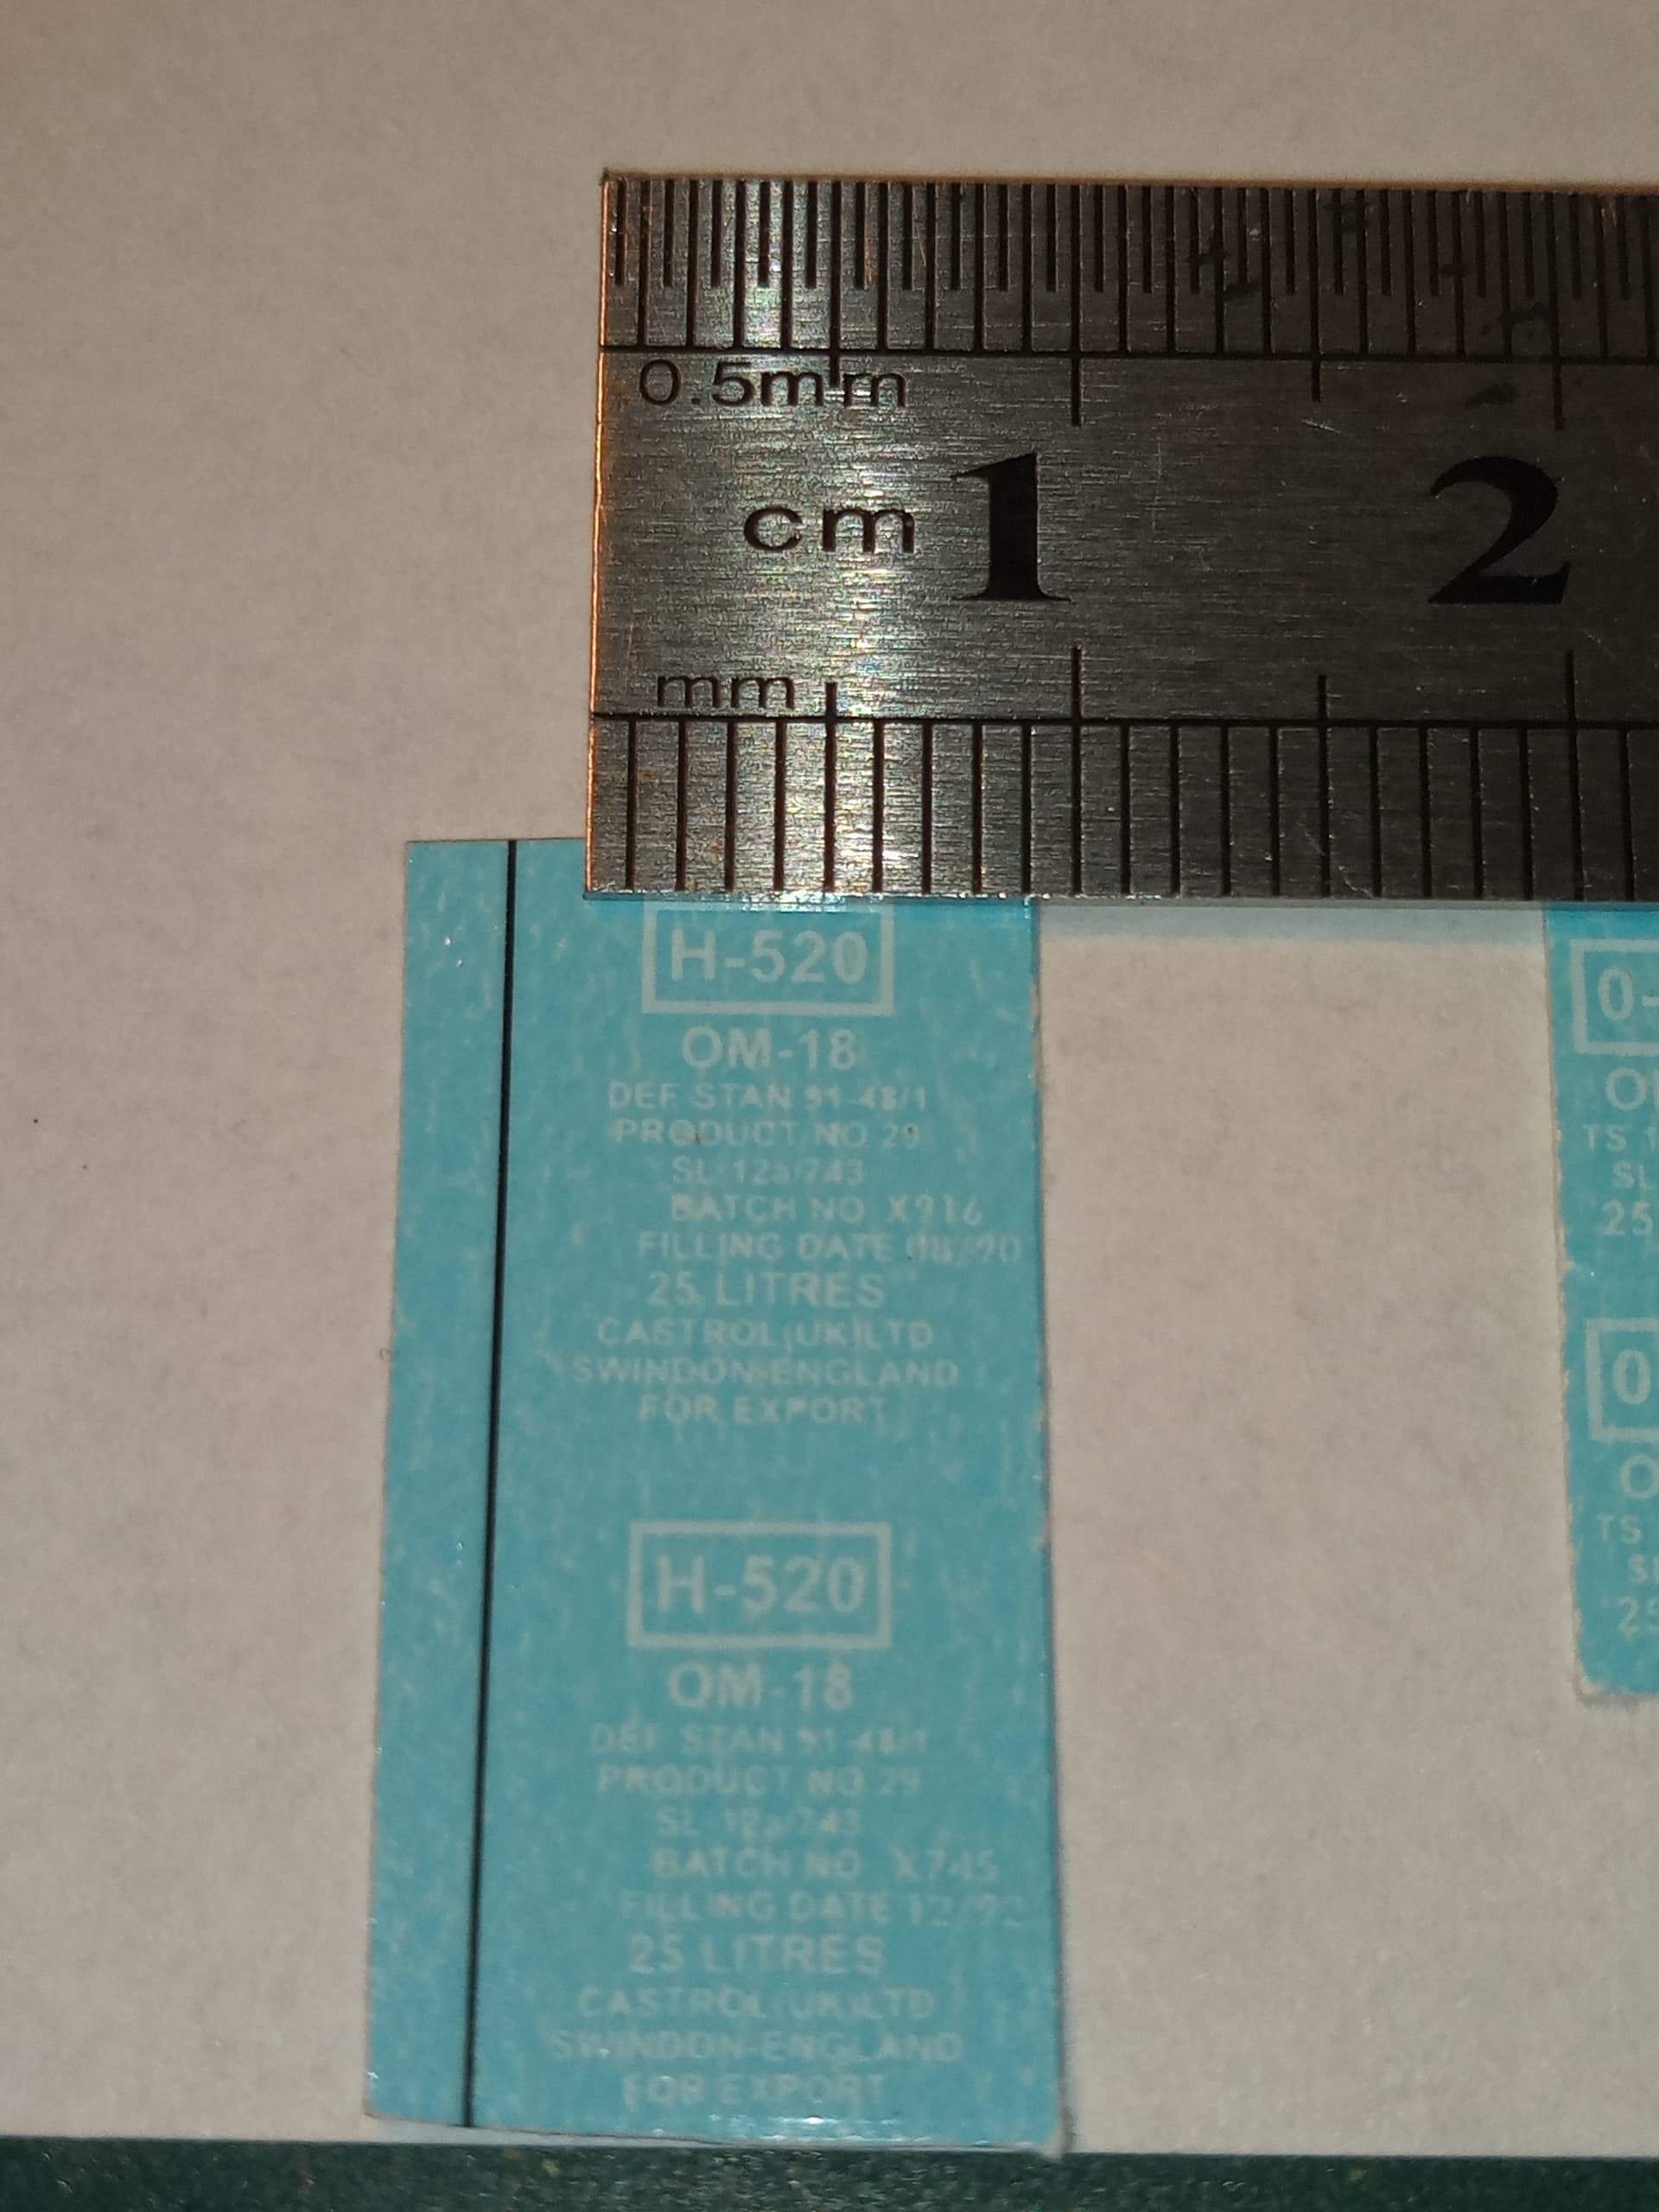
Now, this 1st pic is showing the new AA grey resin casts, the middle one is the one I’ve done awaiting shortening, and the RH 2 are the old AA sandy resin.
The new grey ones are very clean, well cast and no clean up issues nor air pockets/bubbles etc.
The old AA ones are very rough by comparison, lots of raised areas, air bubbles and some deep gouges on one side.
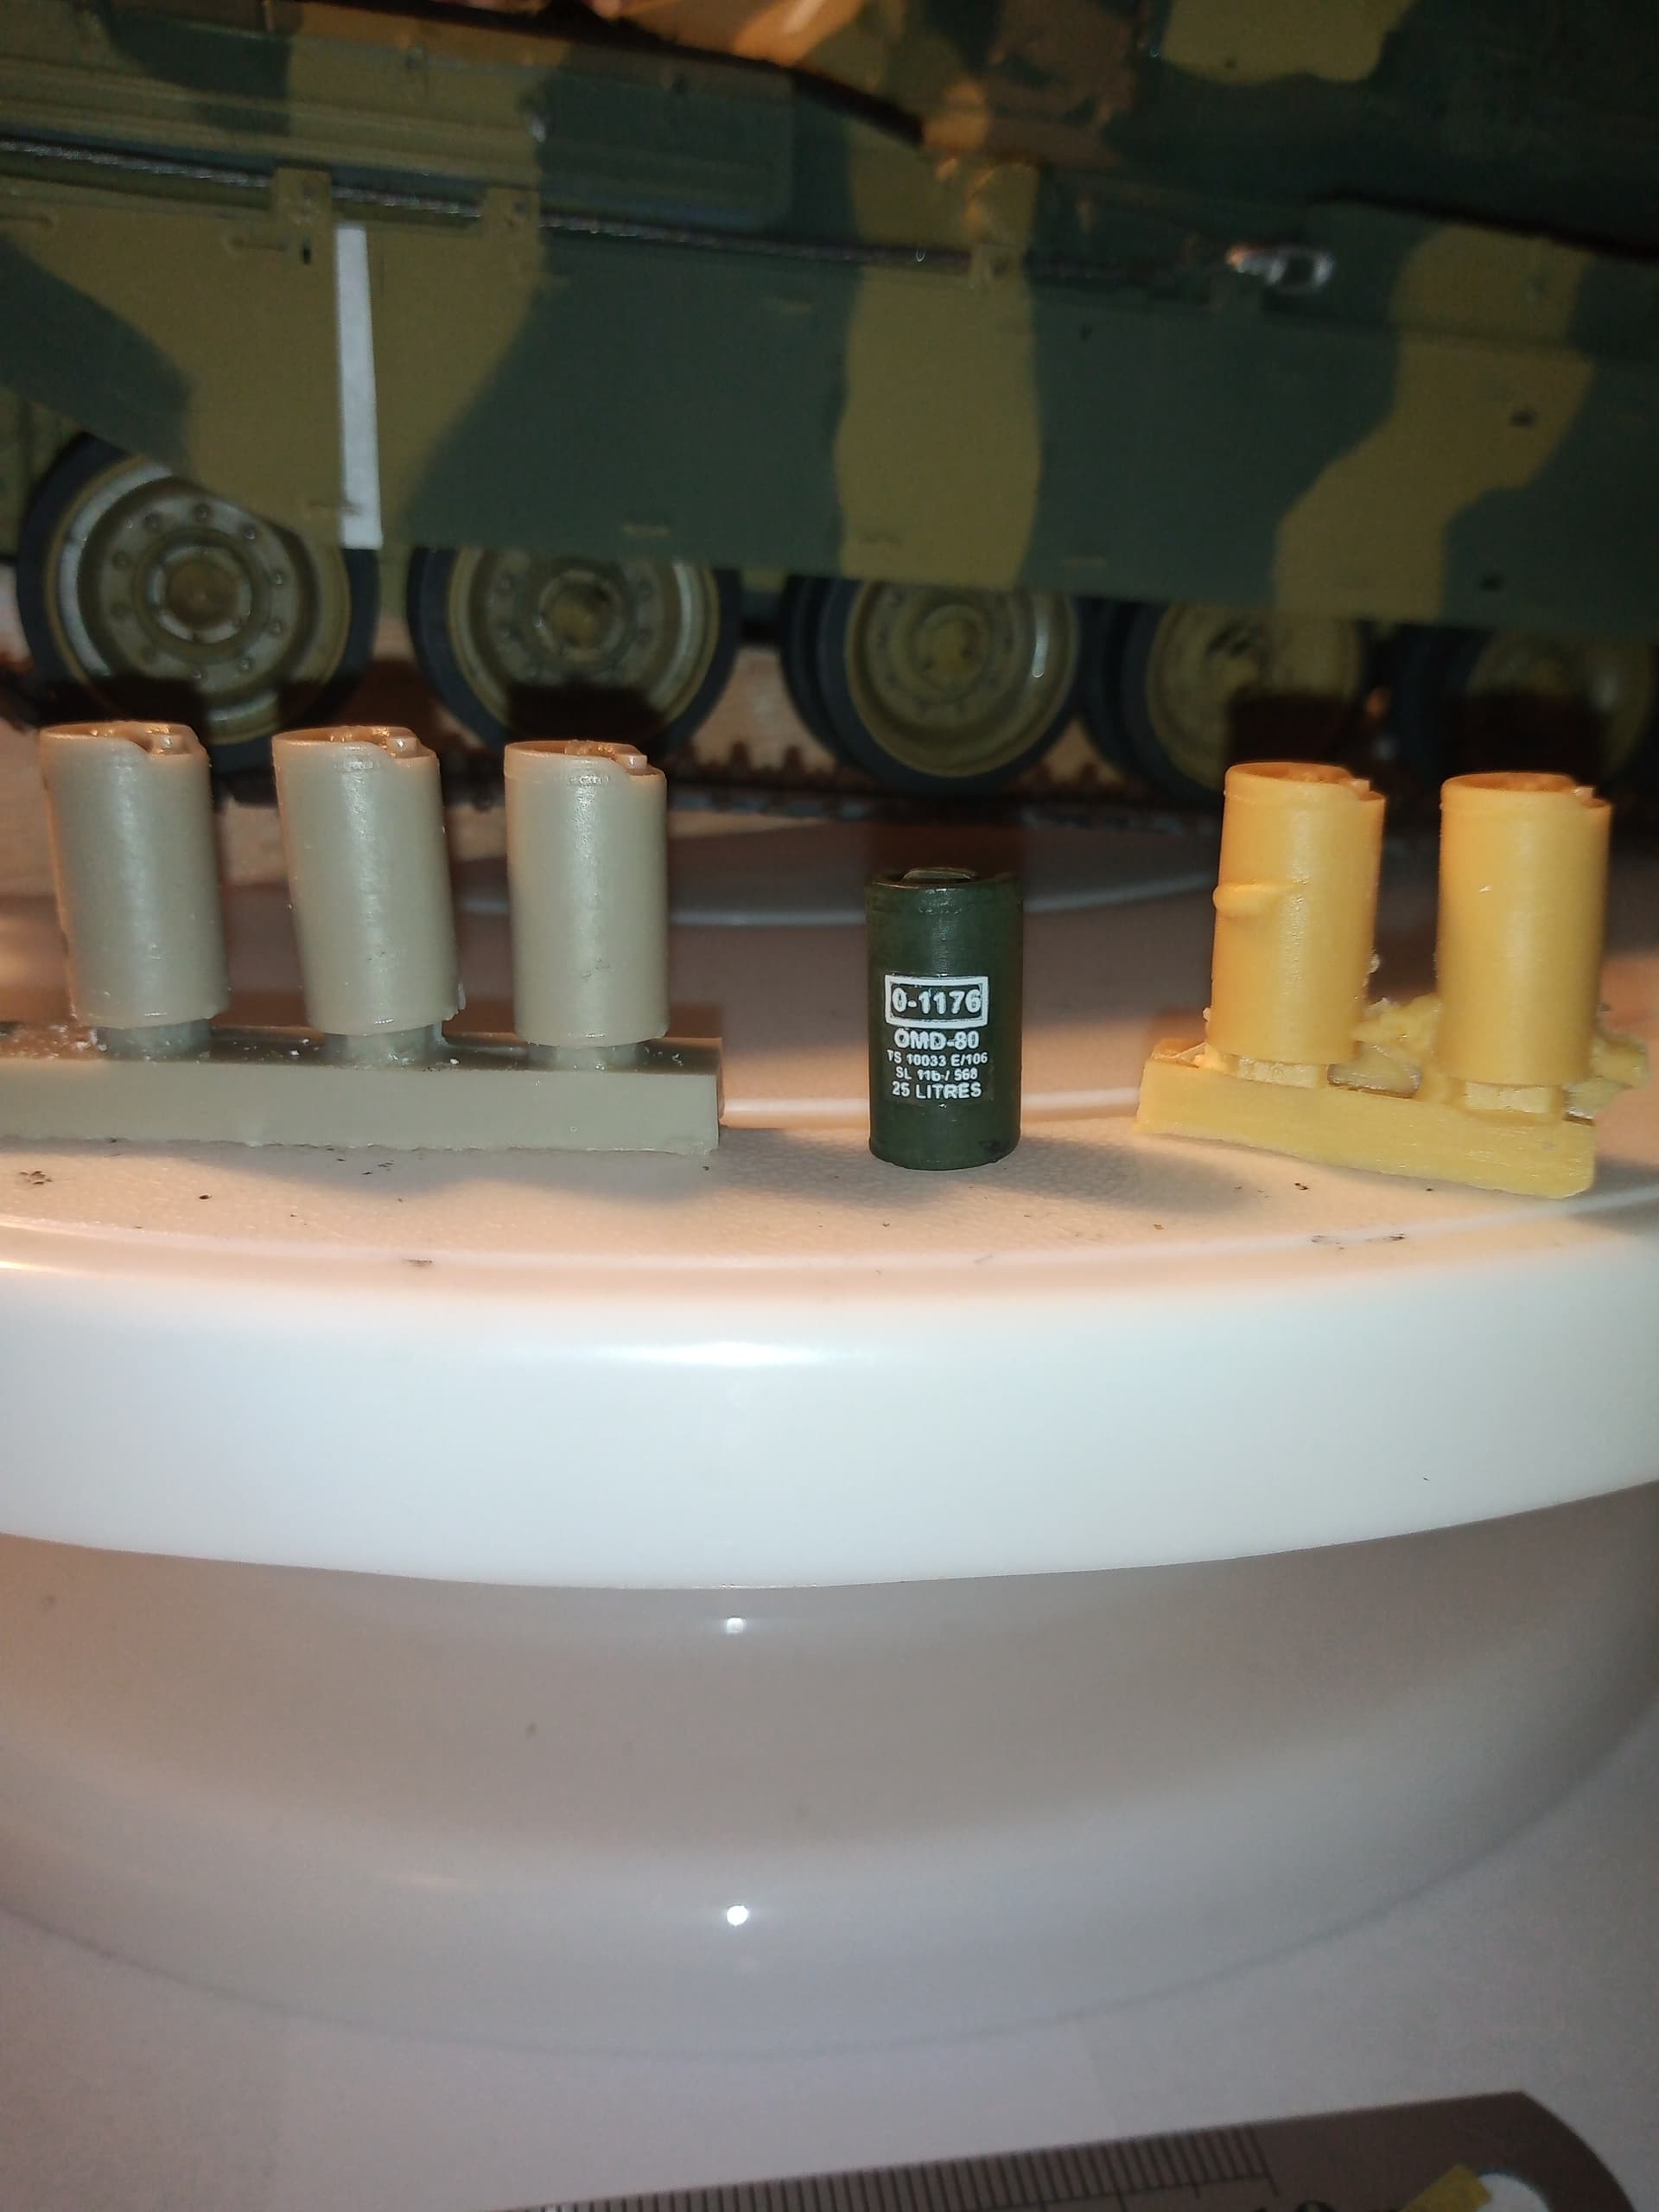
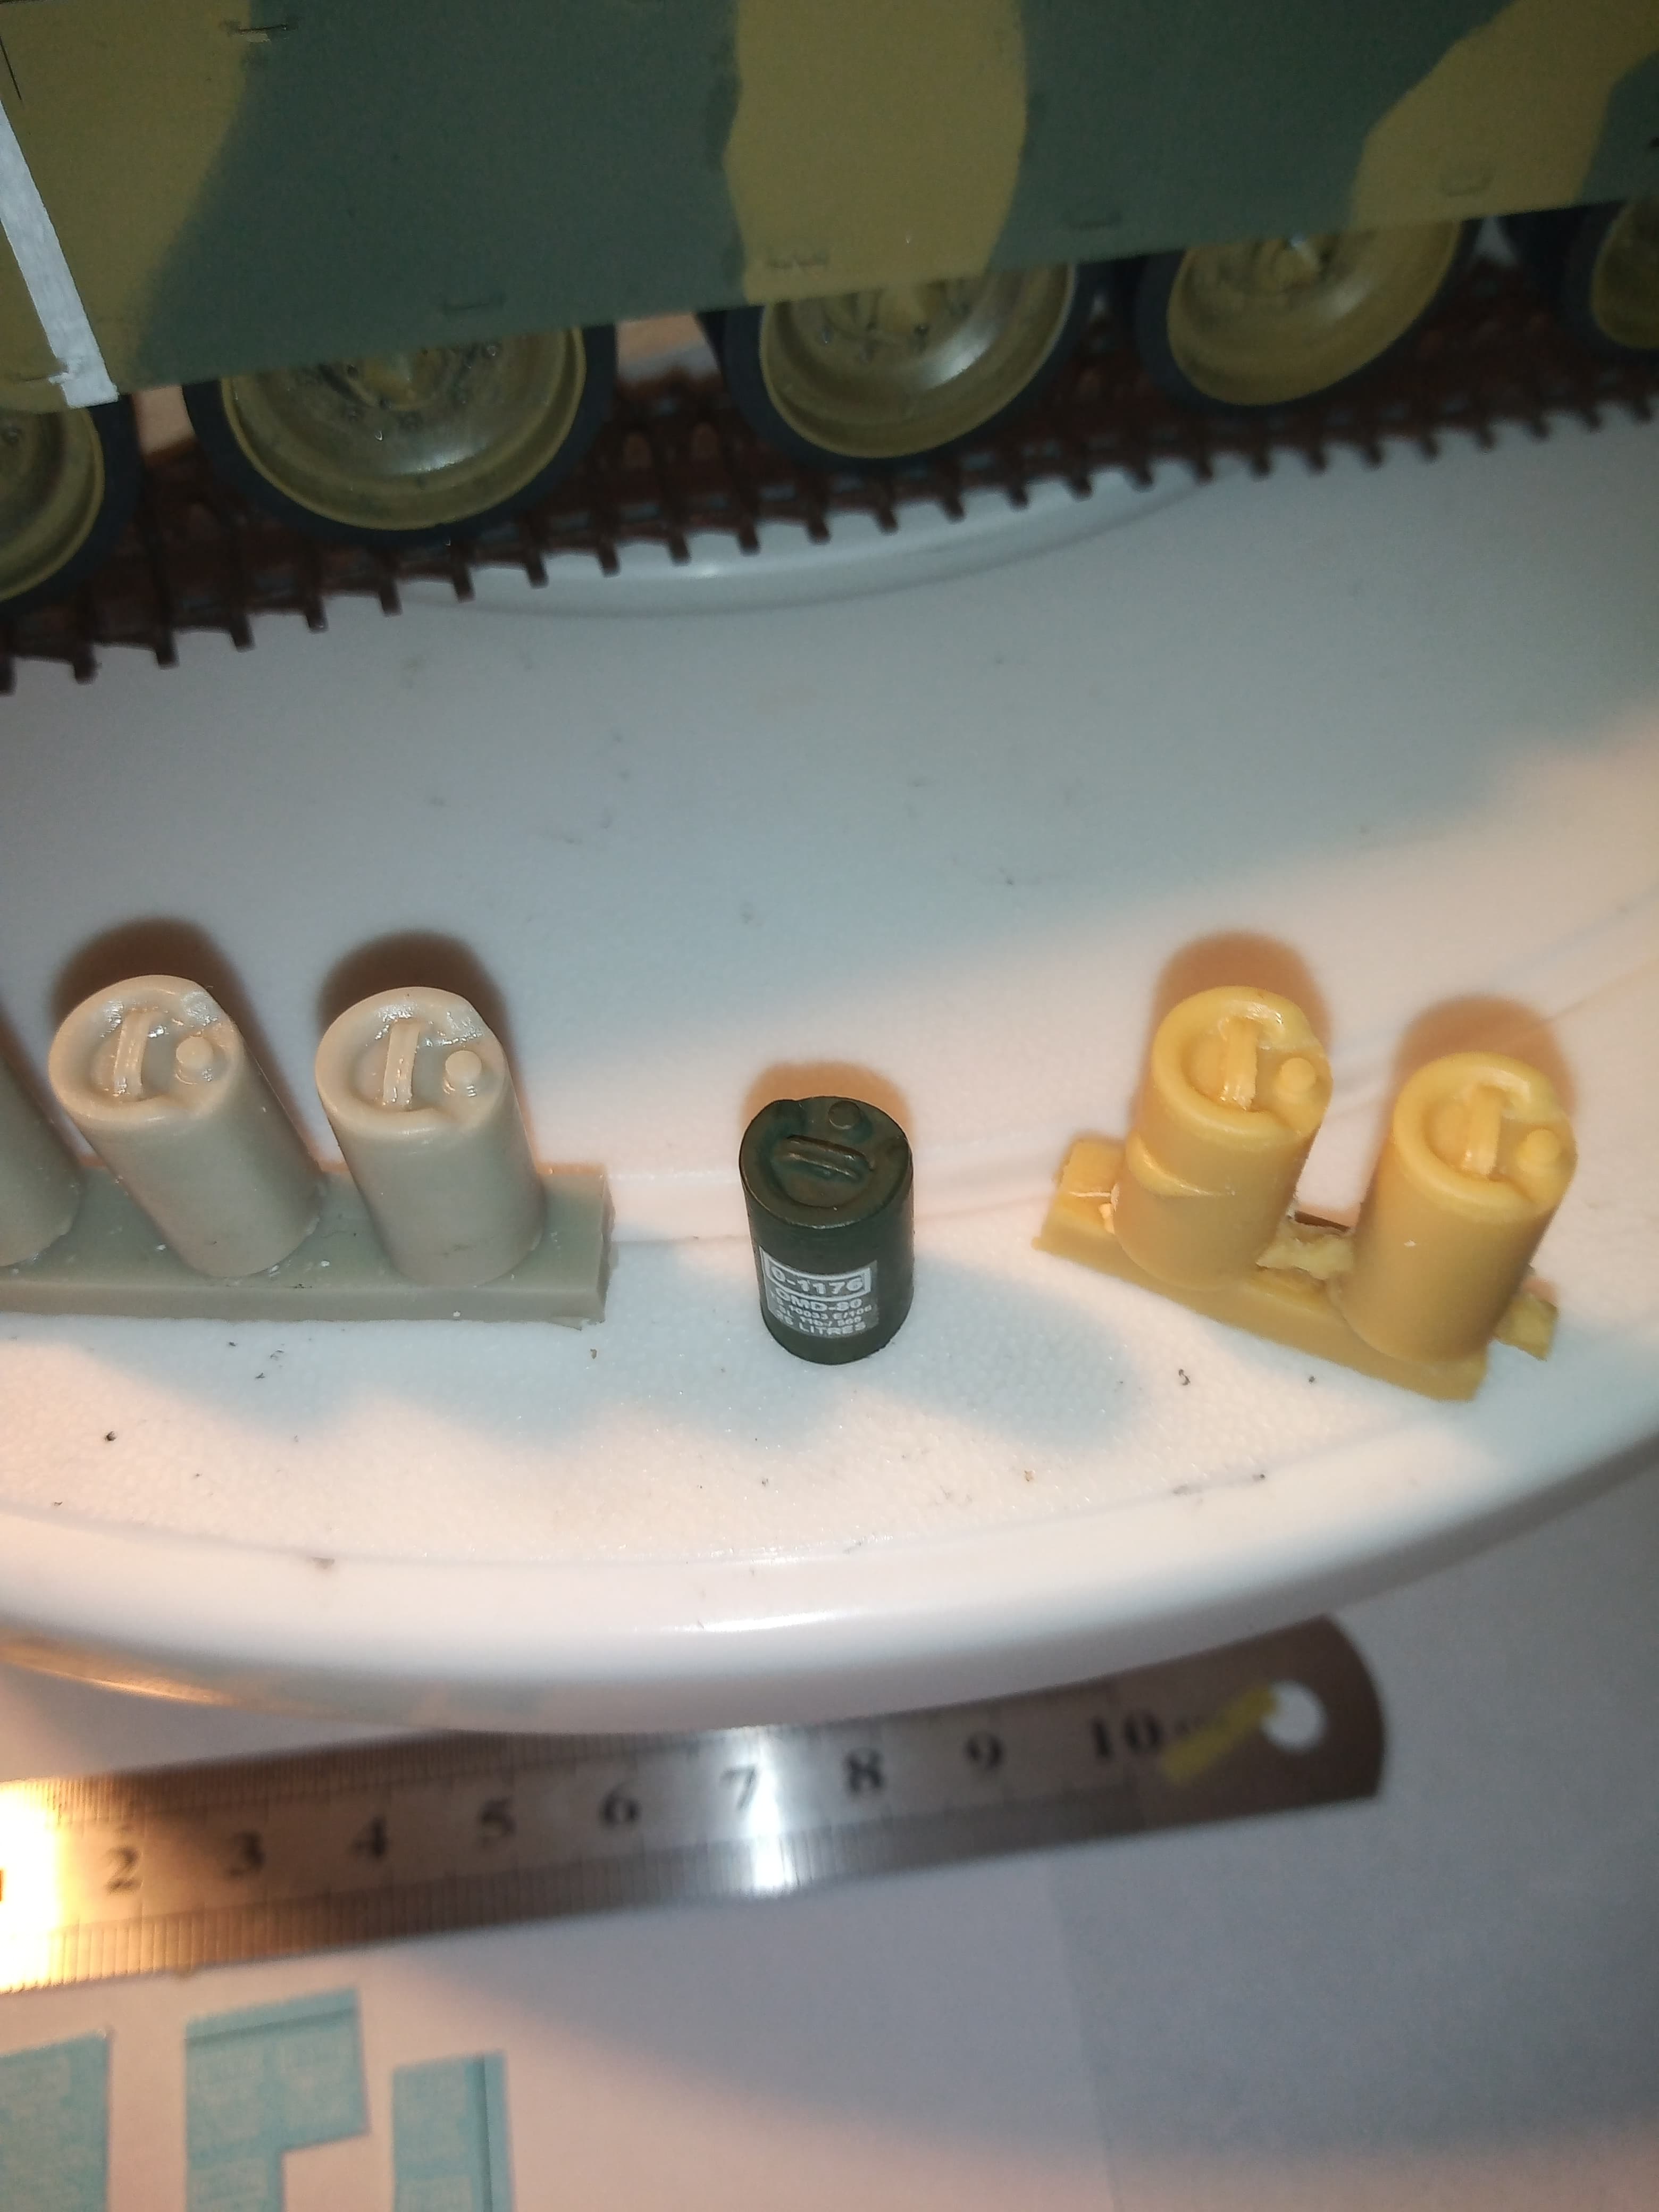
The dimensions for the cans as they are on the sprue are:
Height on the front (oil pourer)is 13.5mm
Height on the rear is 14.5mm
Diameter is 7.5mm
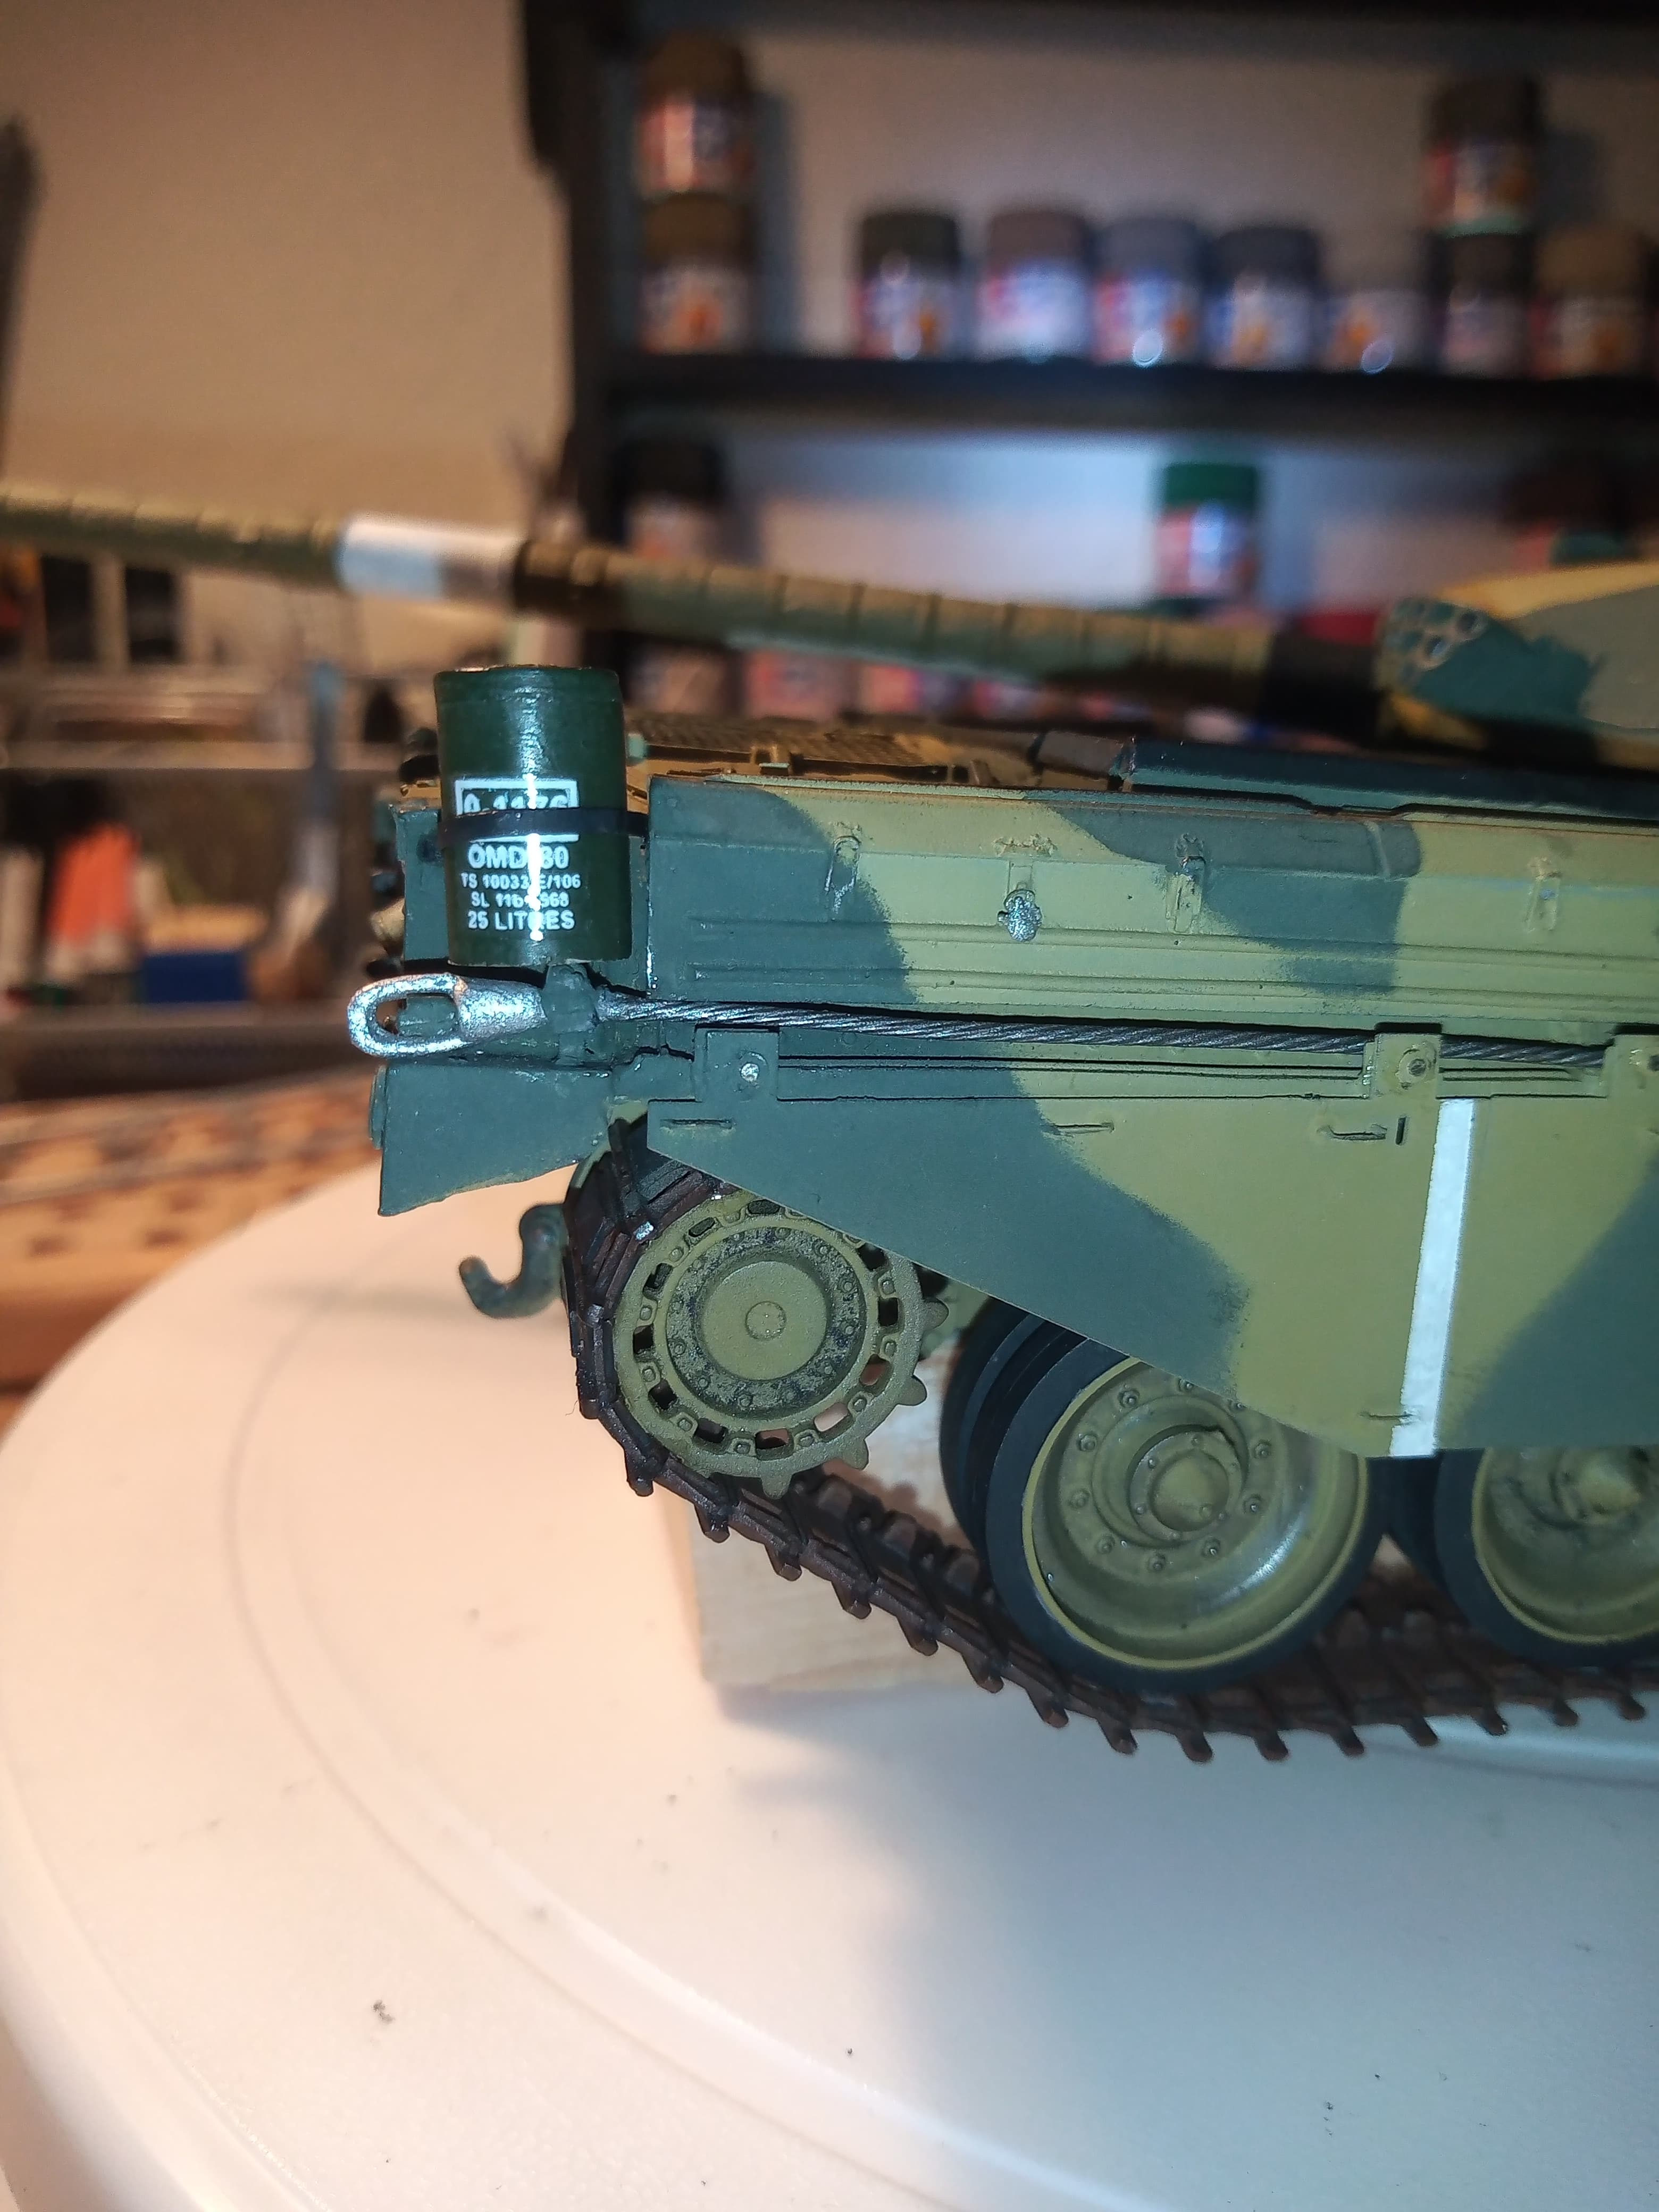
I made the cut from the bottom of the can and took off 2.5mm and once they have been cut the measurements for the height are front- 11mm and rear 12mm and now they look right as you see in the last pic.
The decals for the various types are as follows.
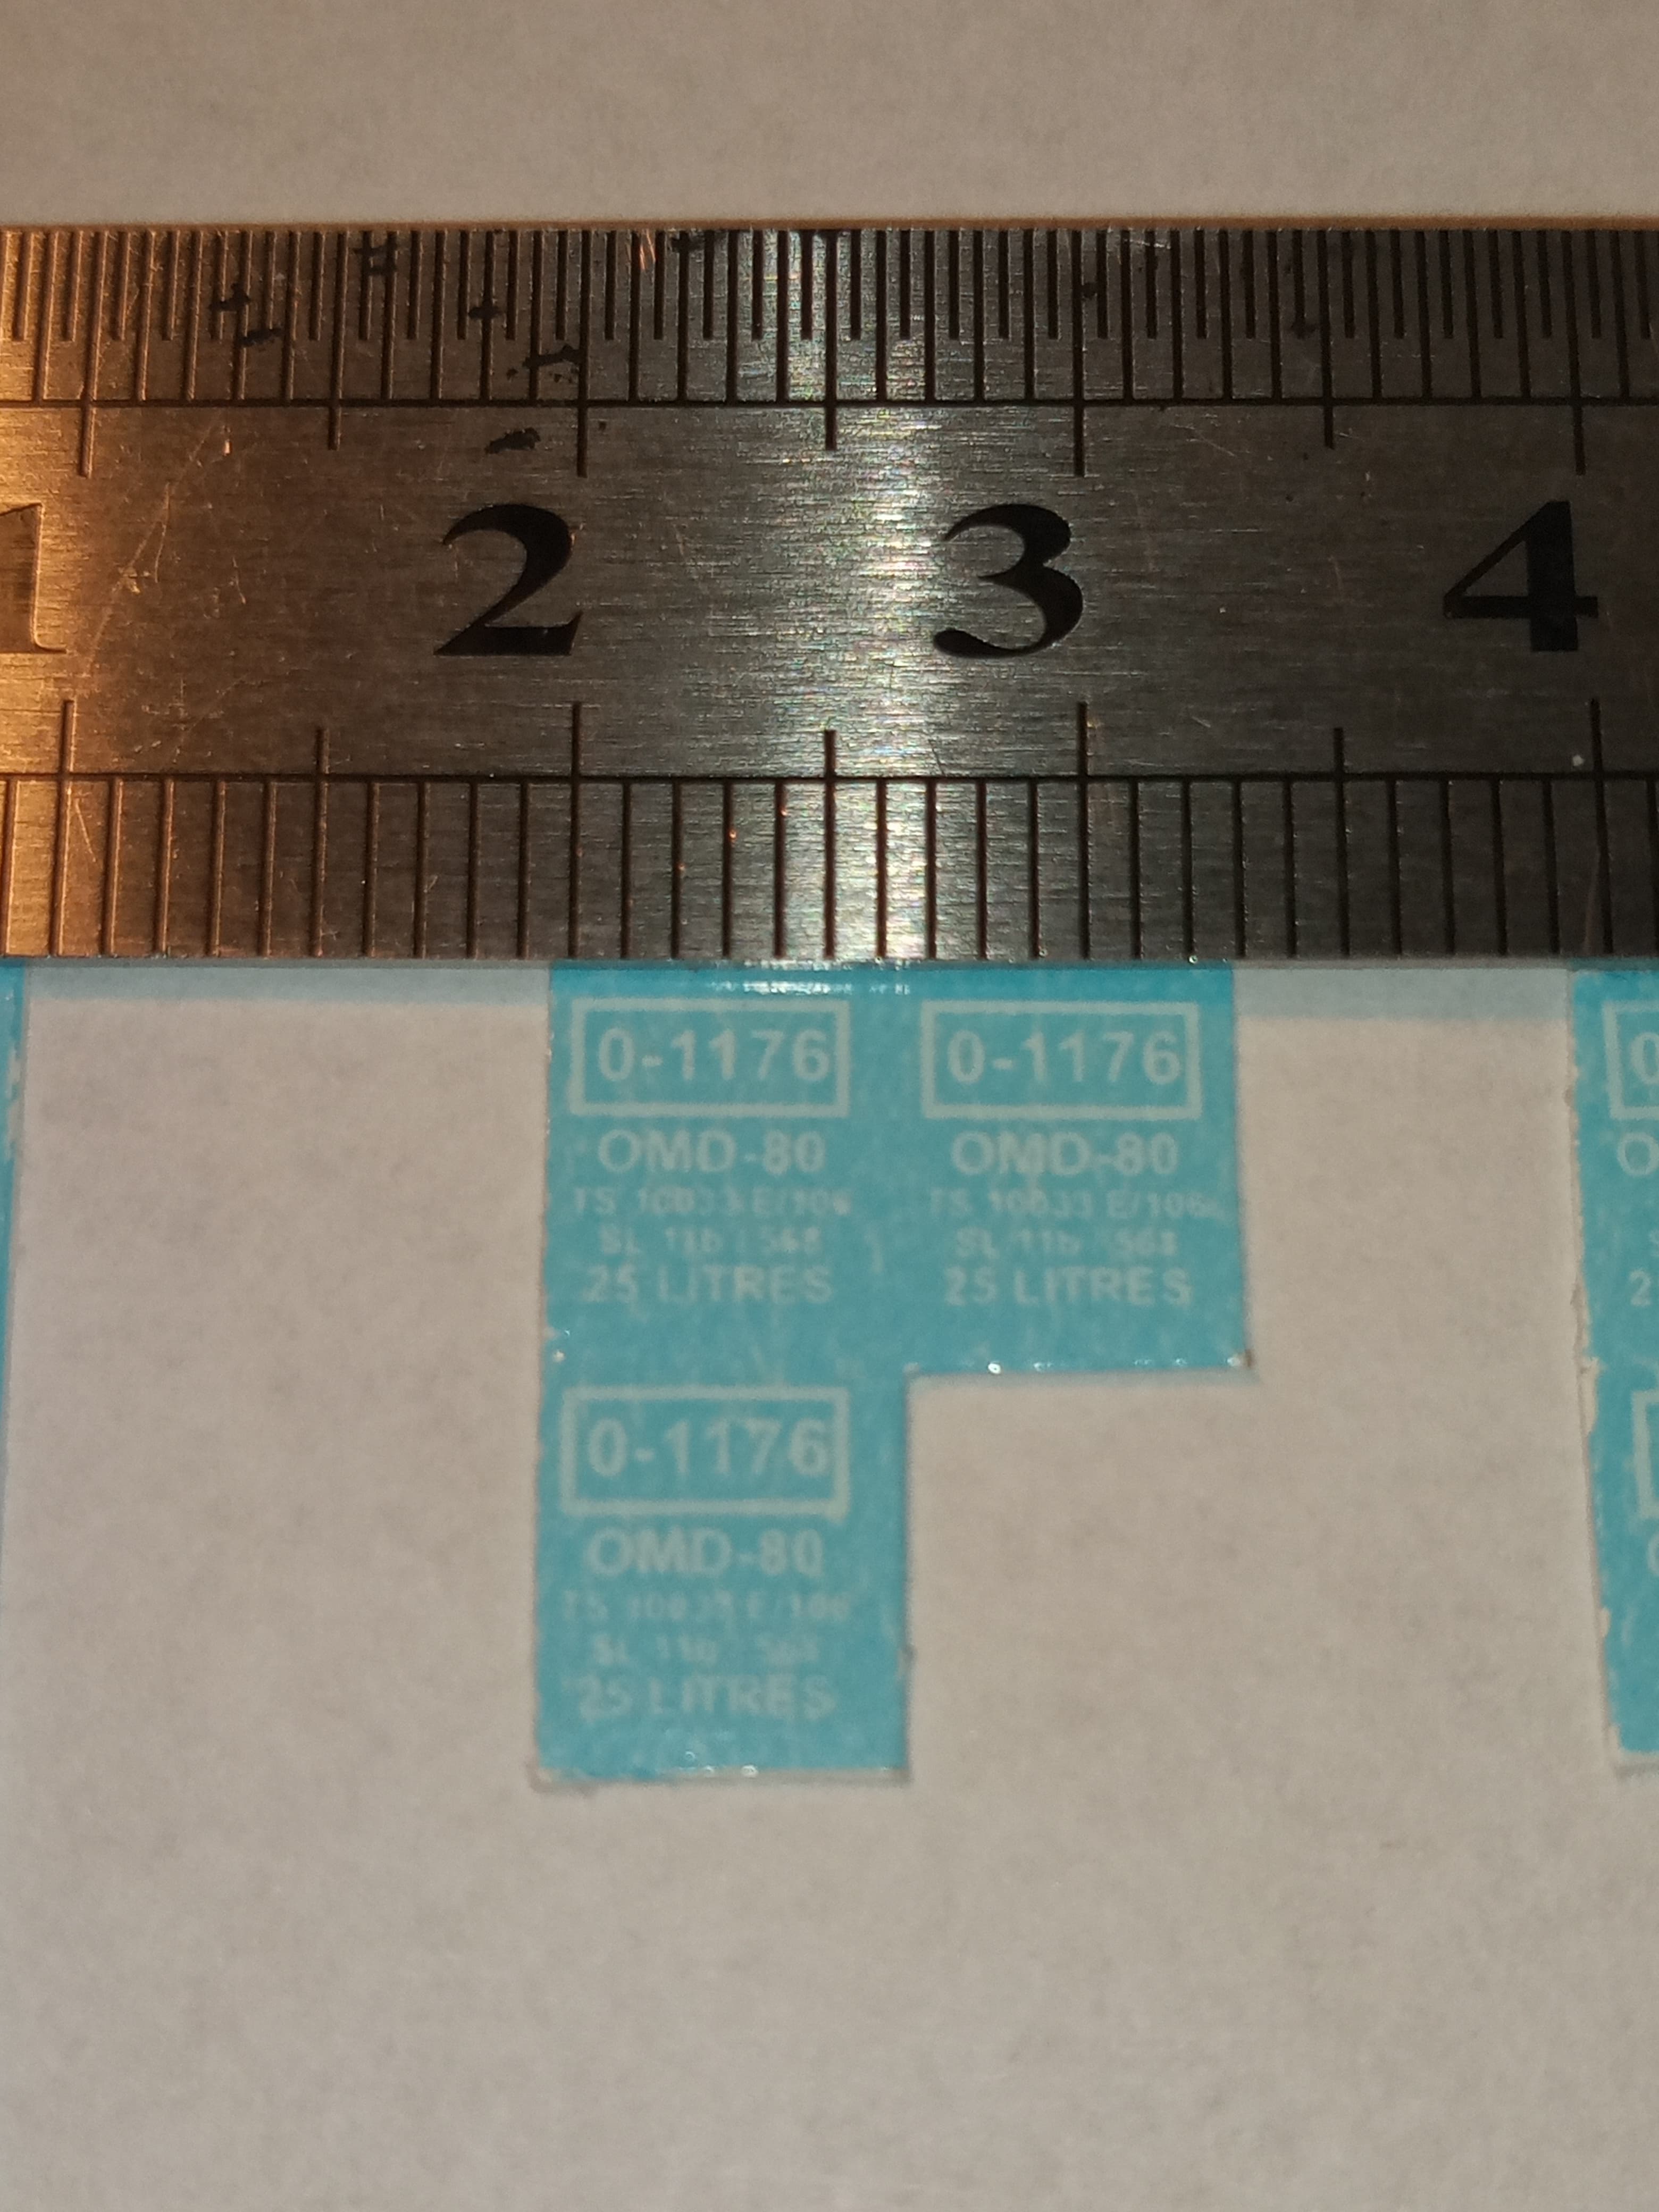
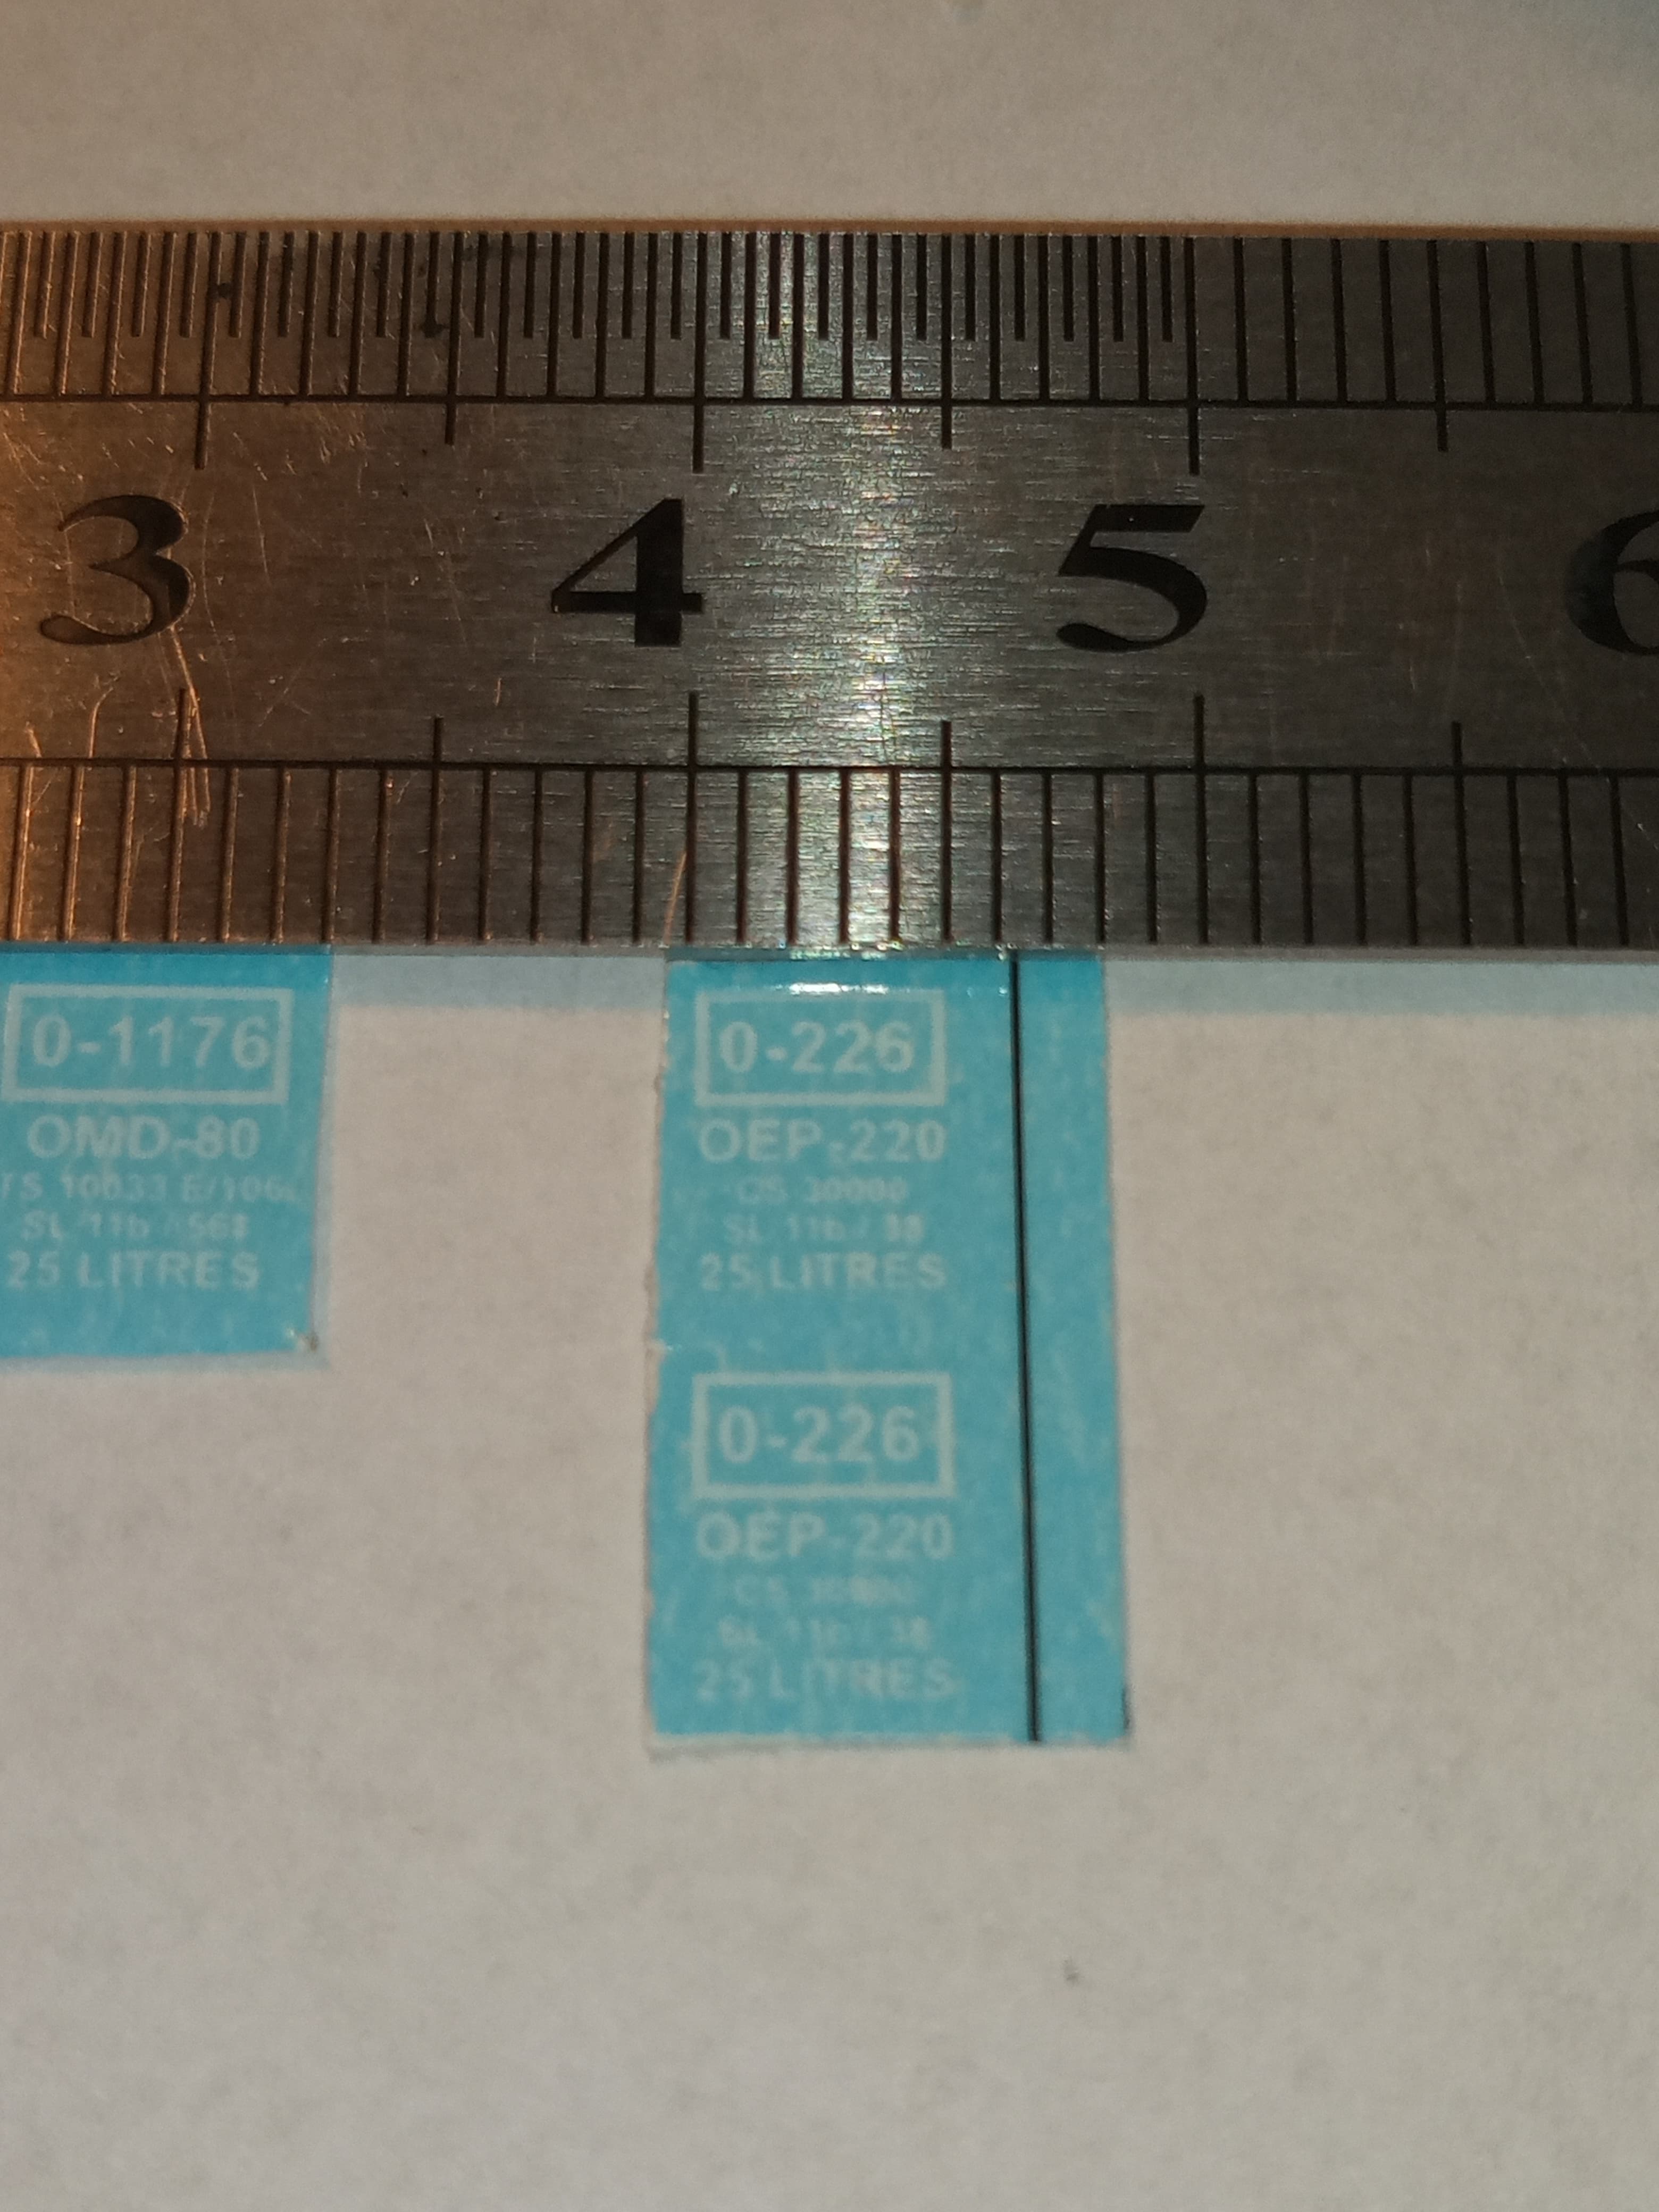
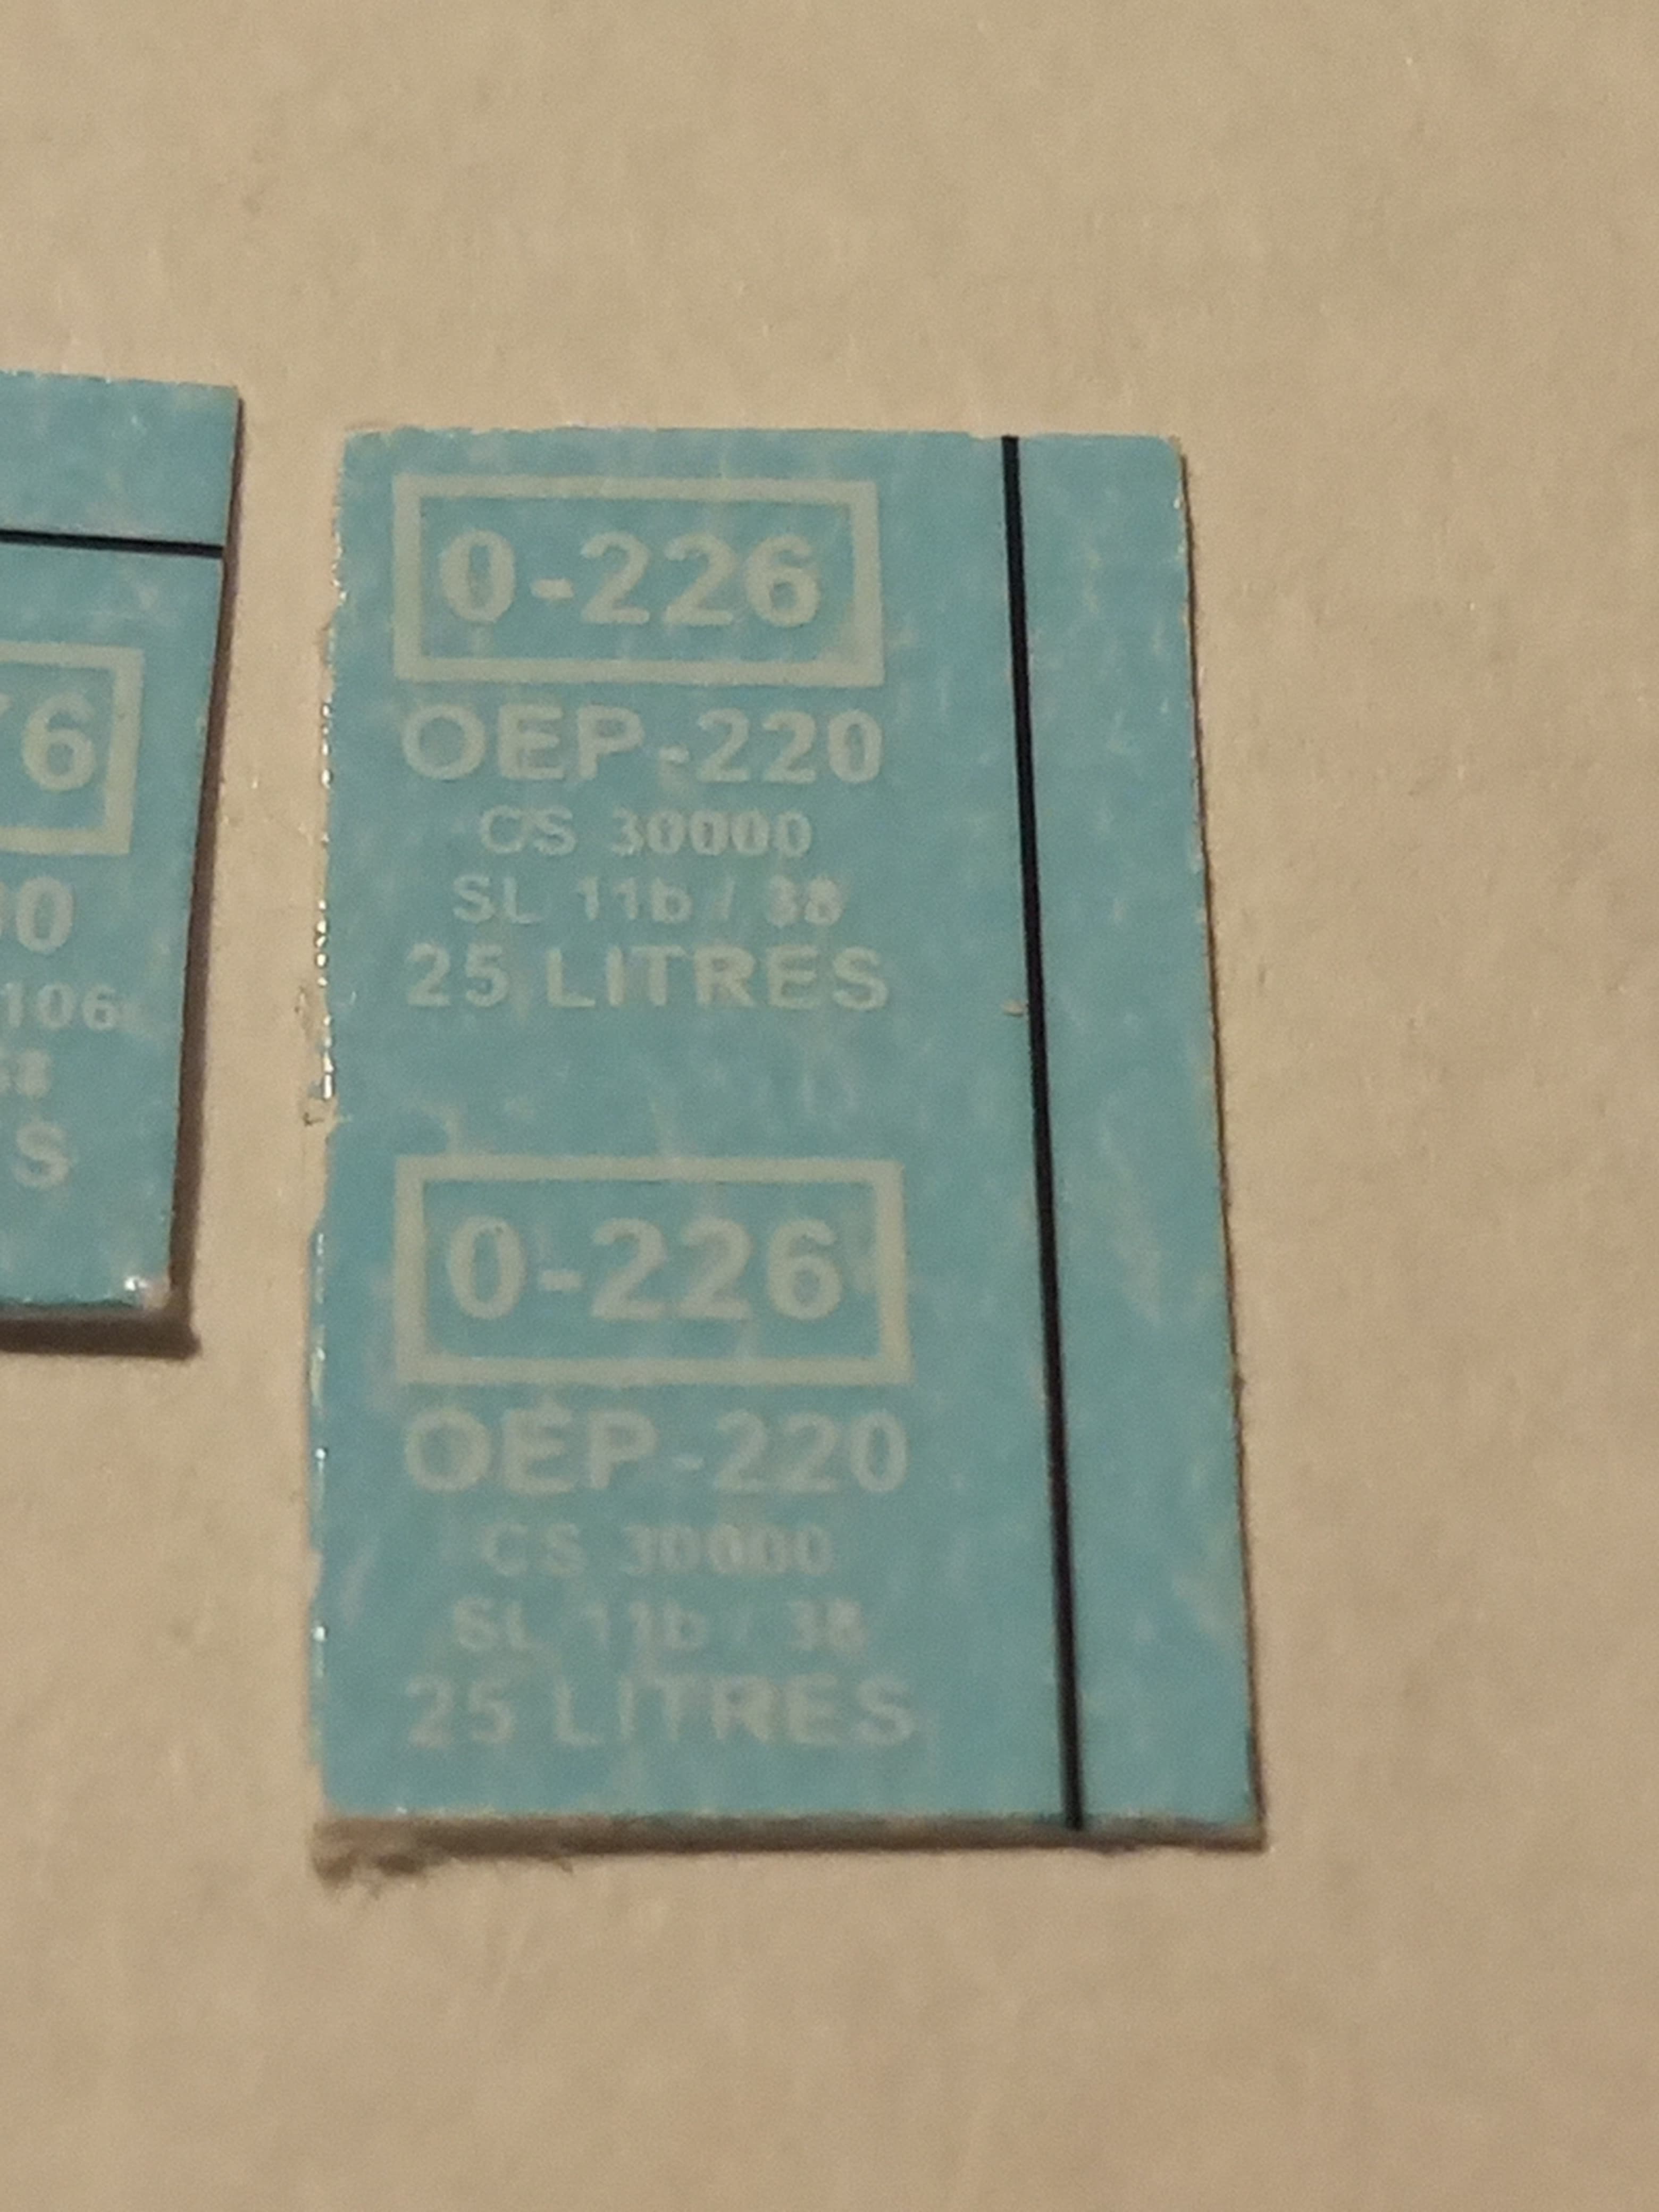
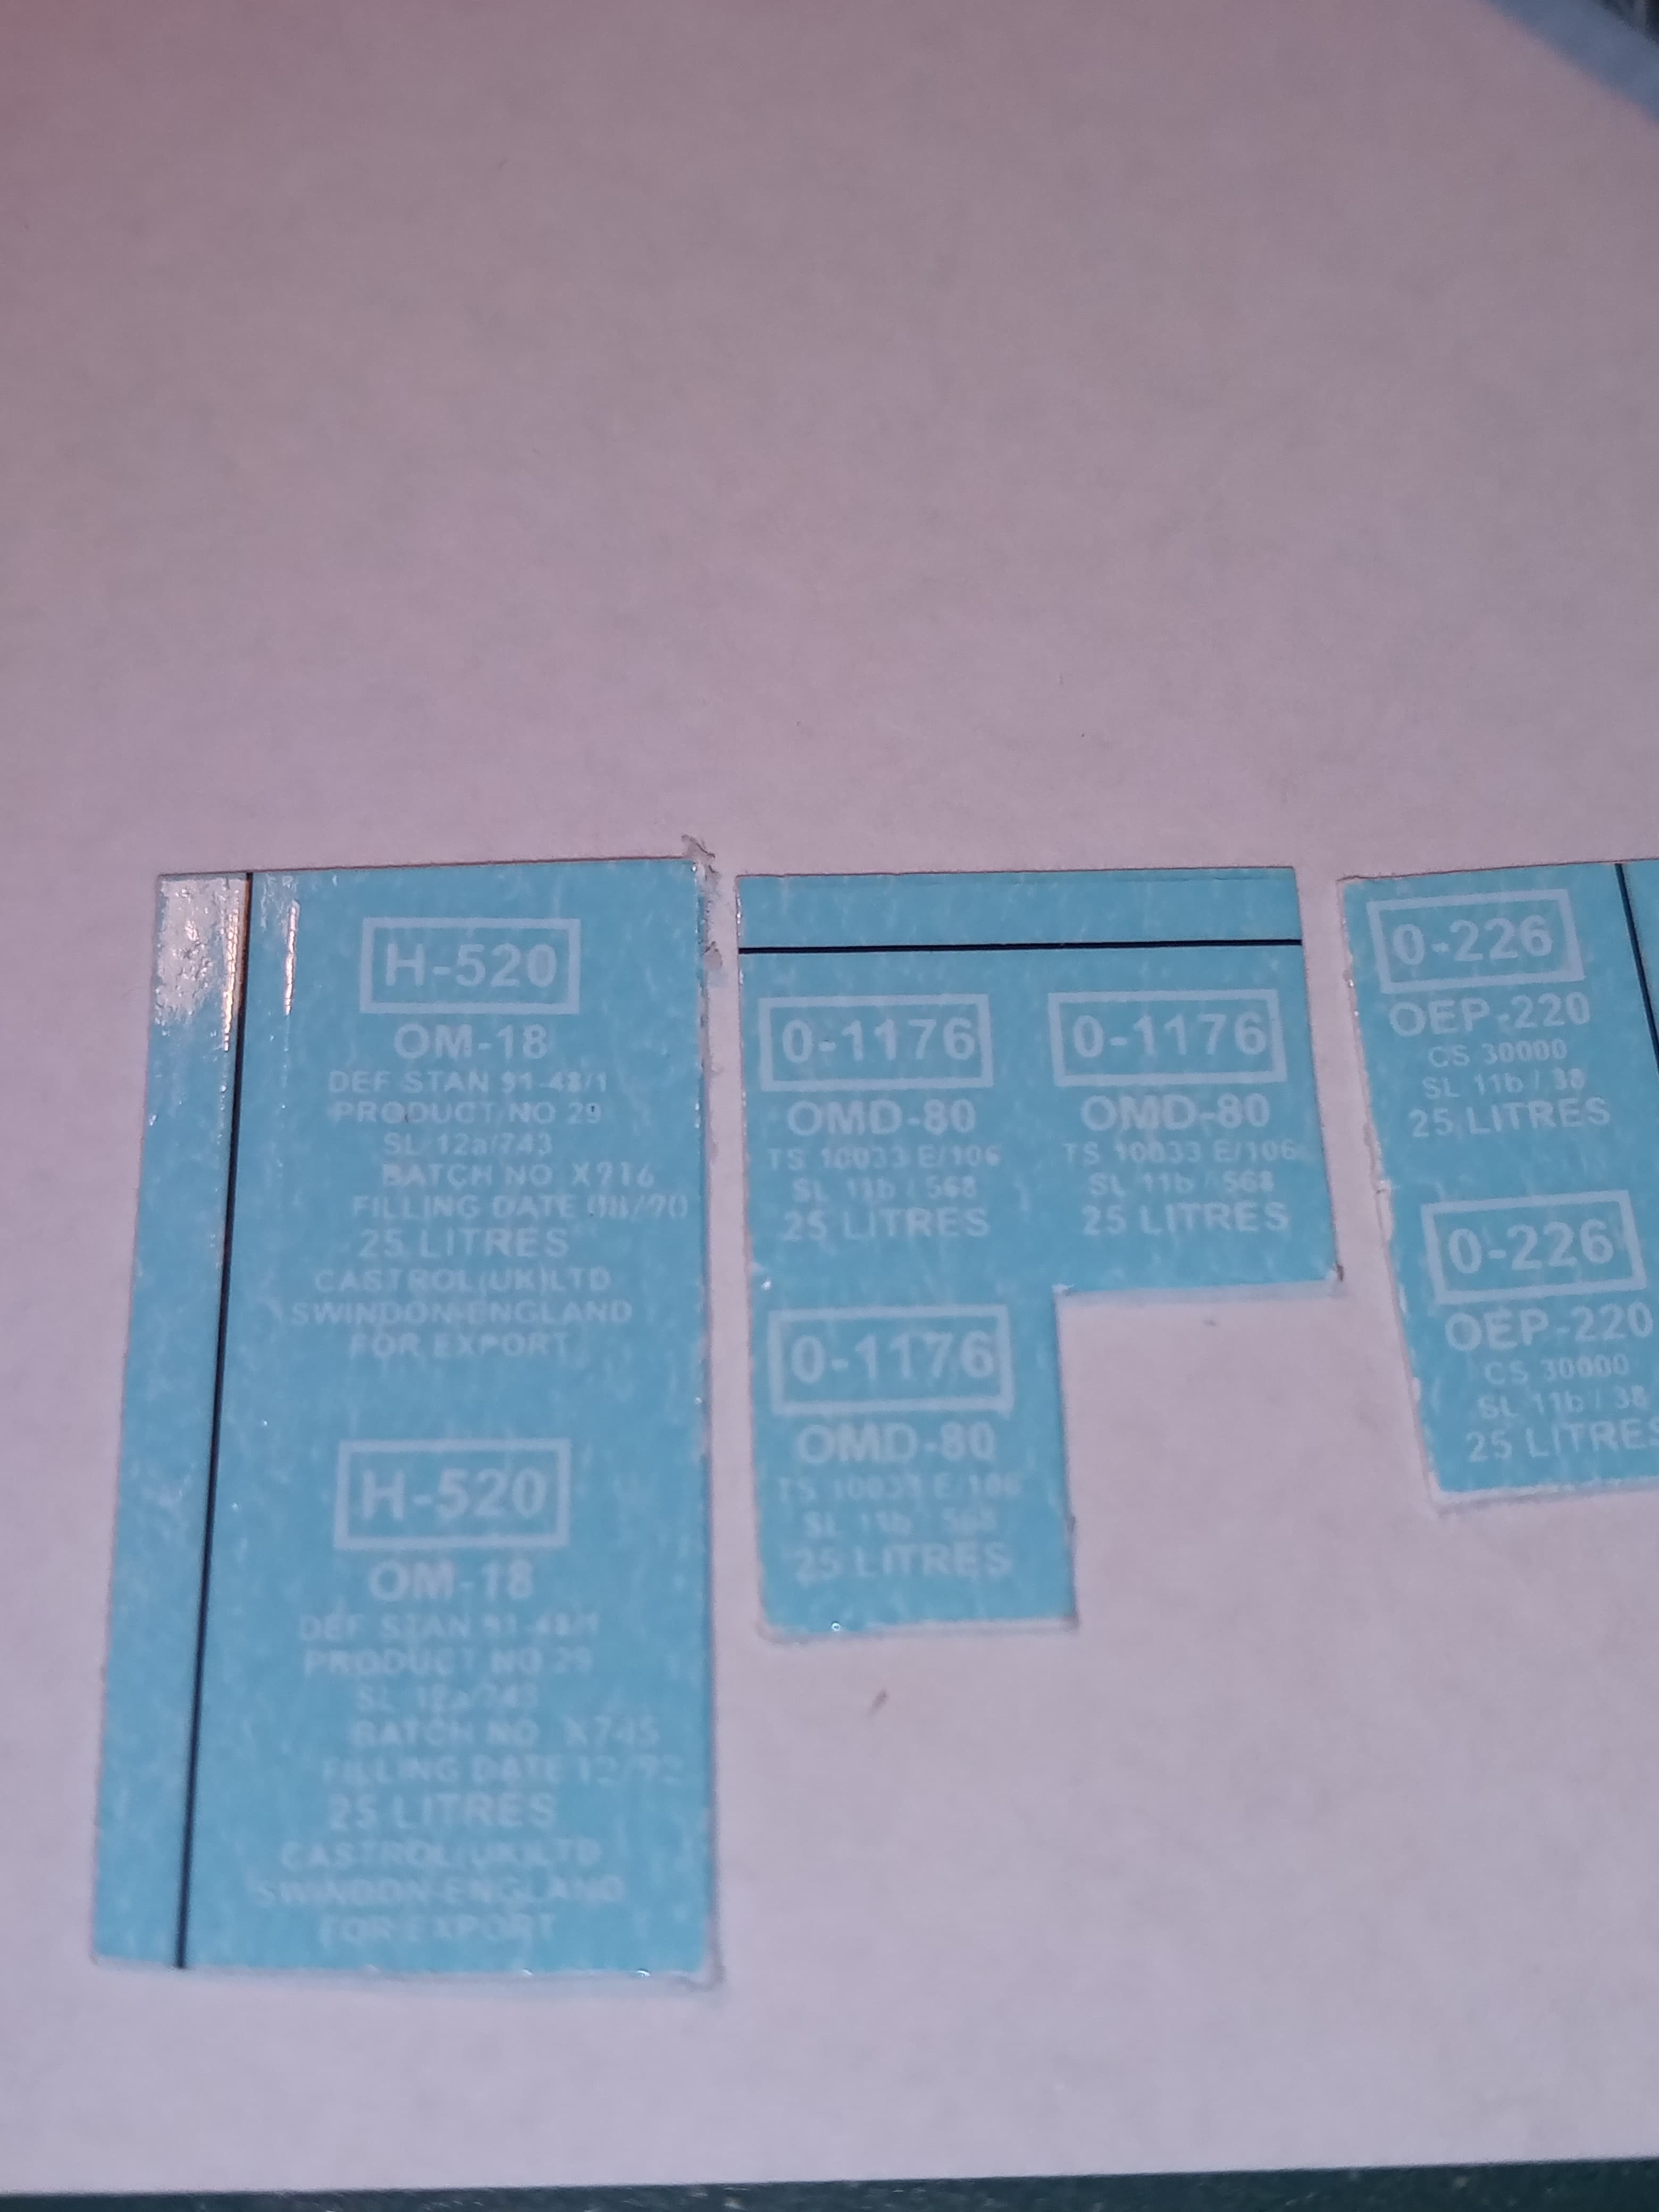
If they are unclear Mal, the wording is easily enough to find on Google. I couldn’t focus any closer, sorry.
And @AKirchhoff , Andreas, here is the cut down oil can refitted. It looks a lot better now and more to scale
4 Likes
Thanks Johnny
Works out to 16.4mm X 26.25mm for 1/16th, I have some Autoinjectors at 17mm that might fit the bill.
Mal
Got the decals on the beast.
First time with micro set & sol.
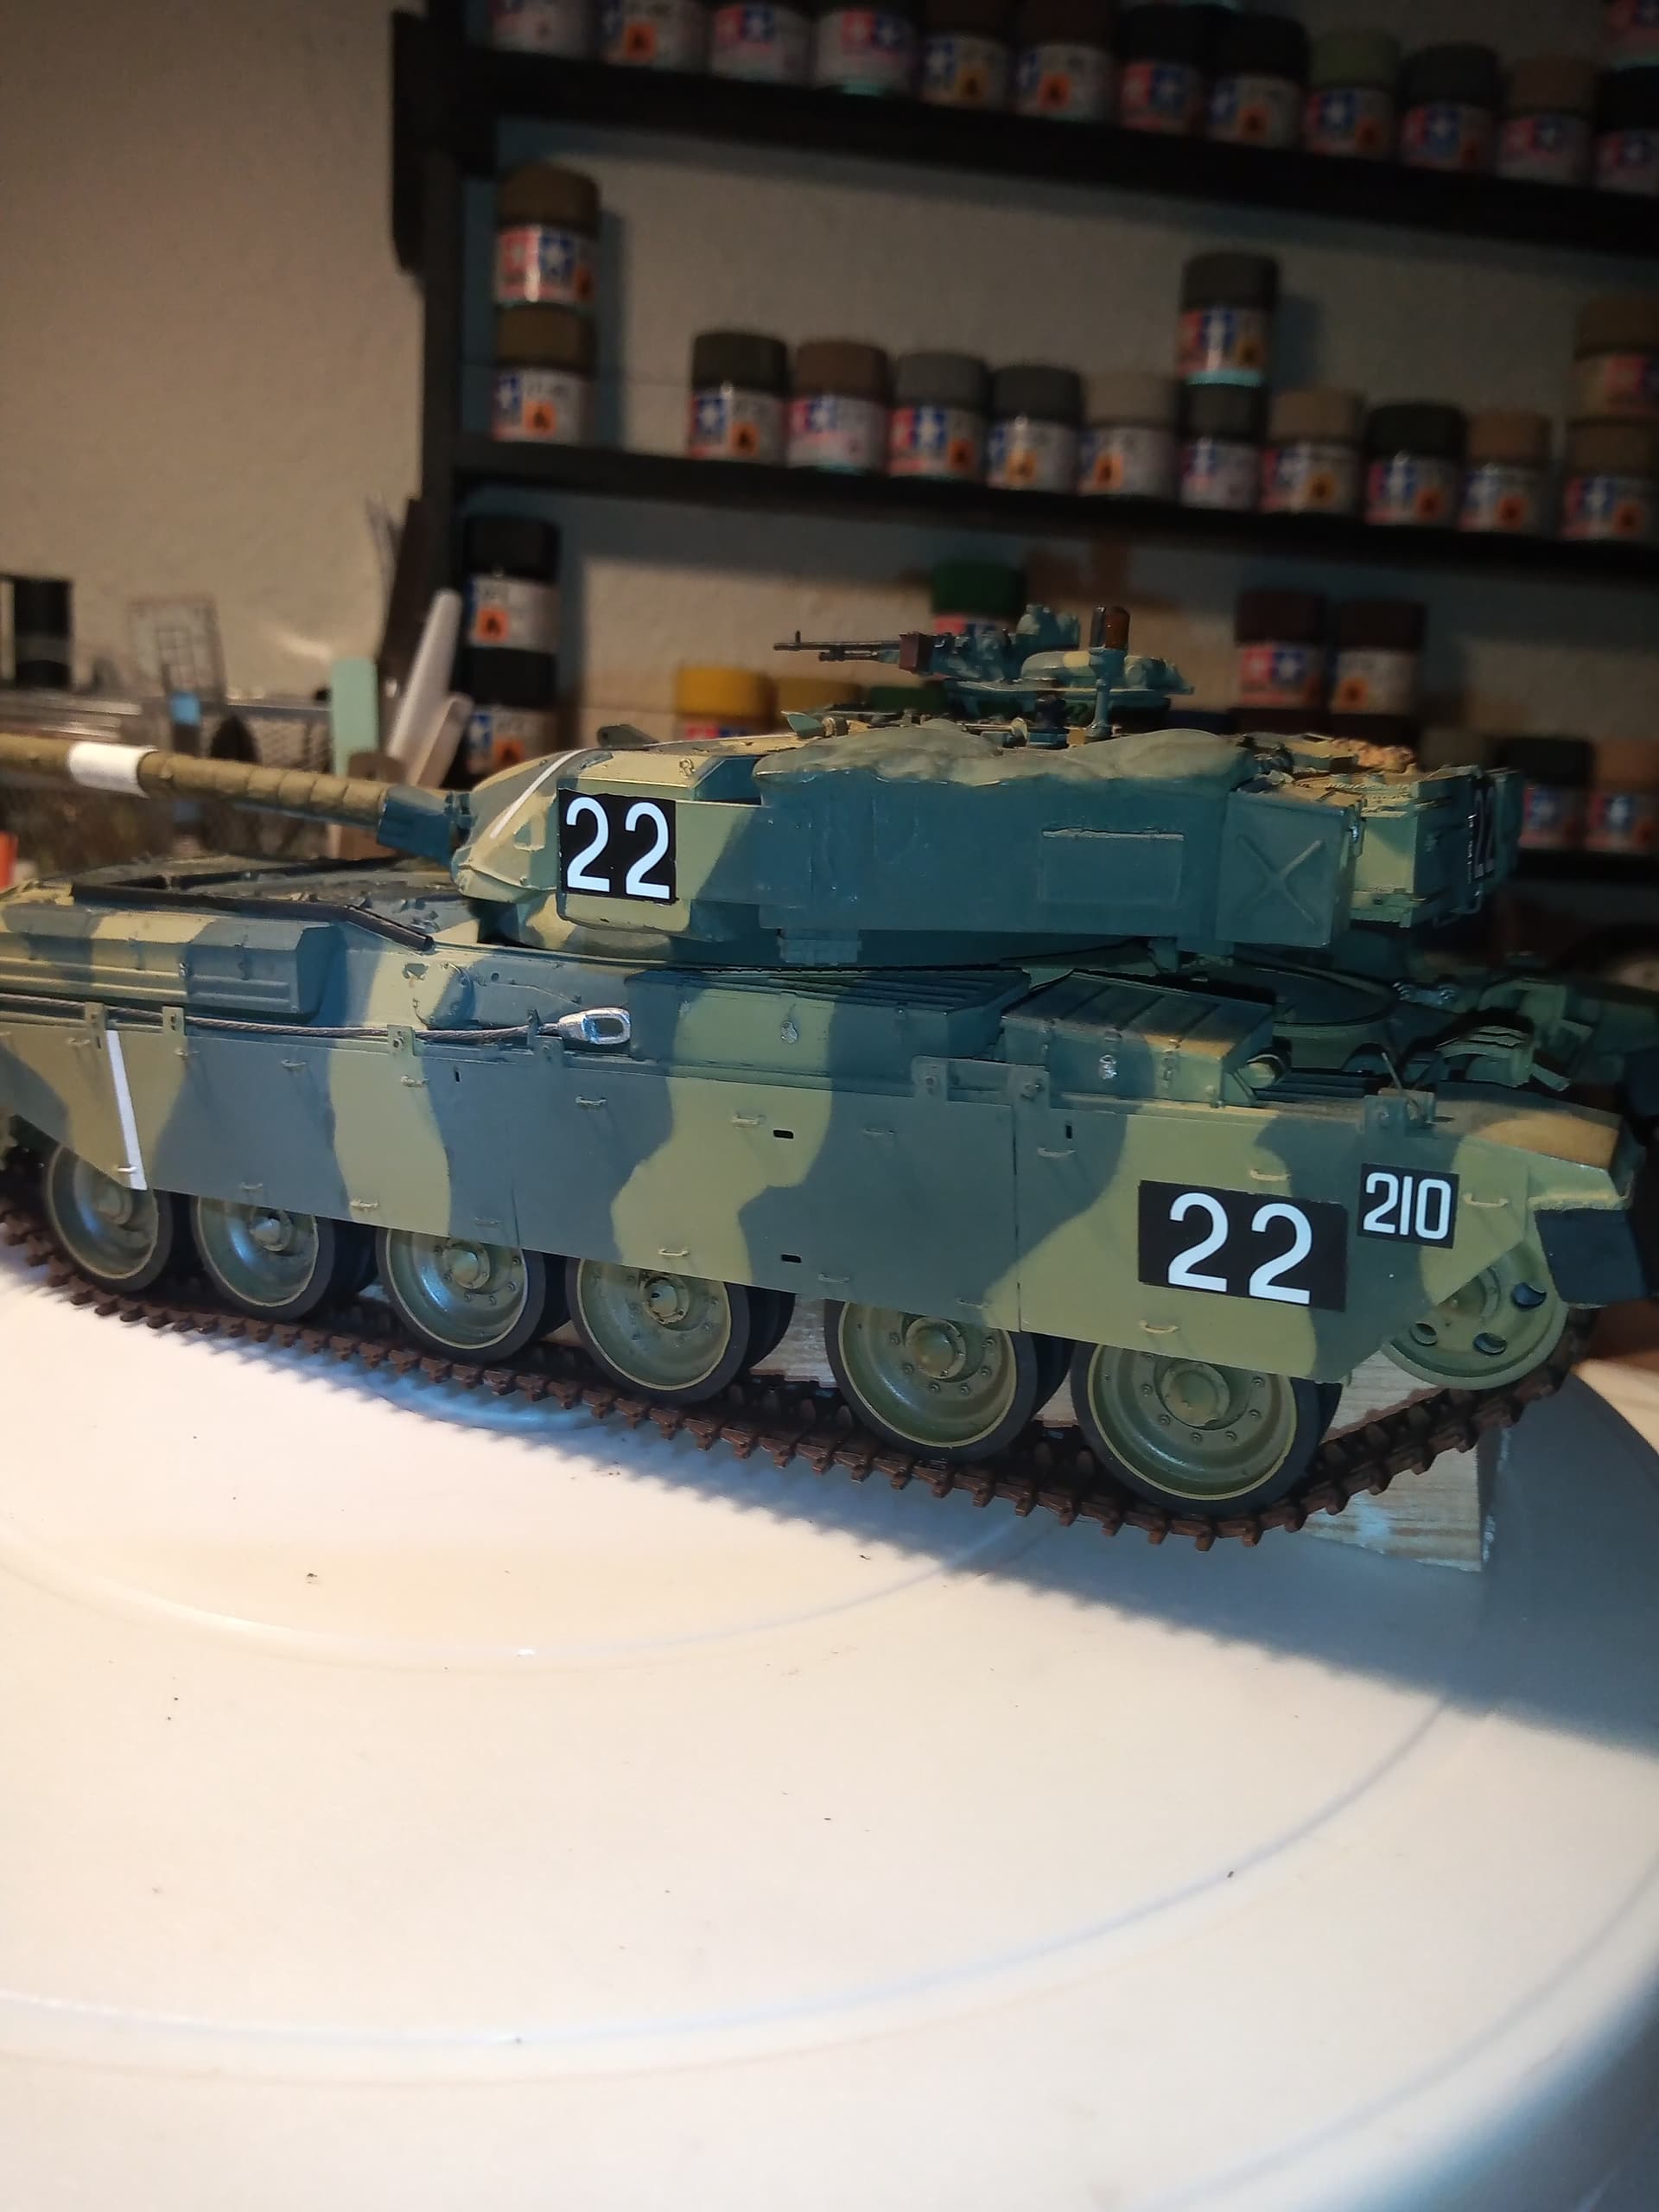

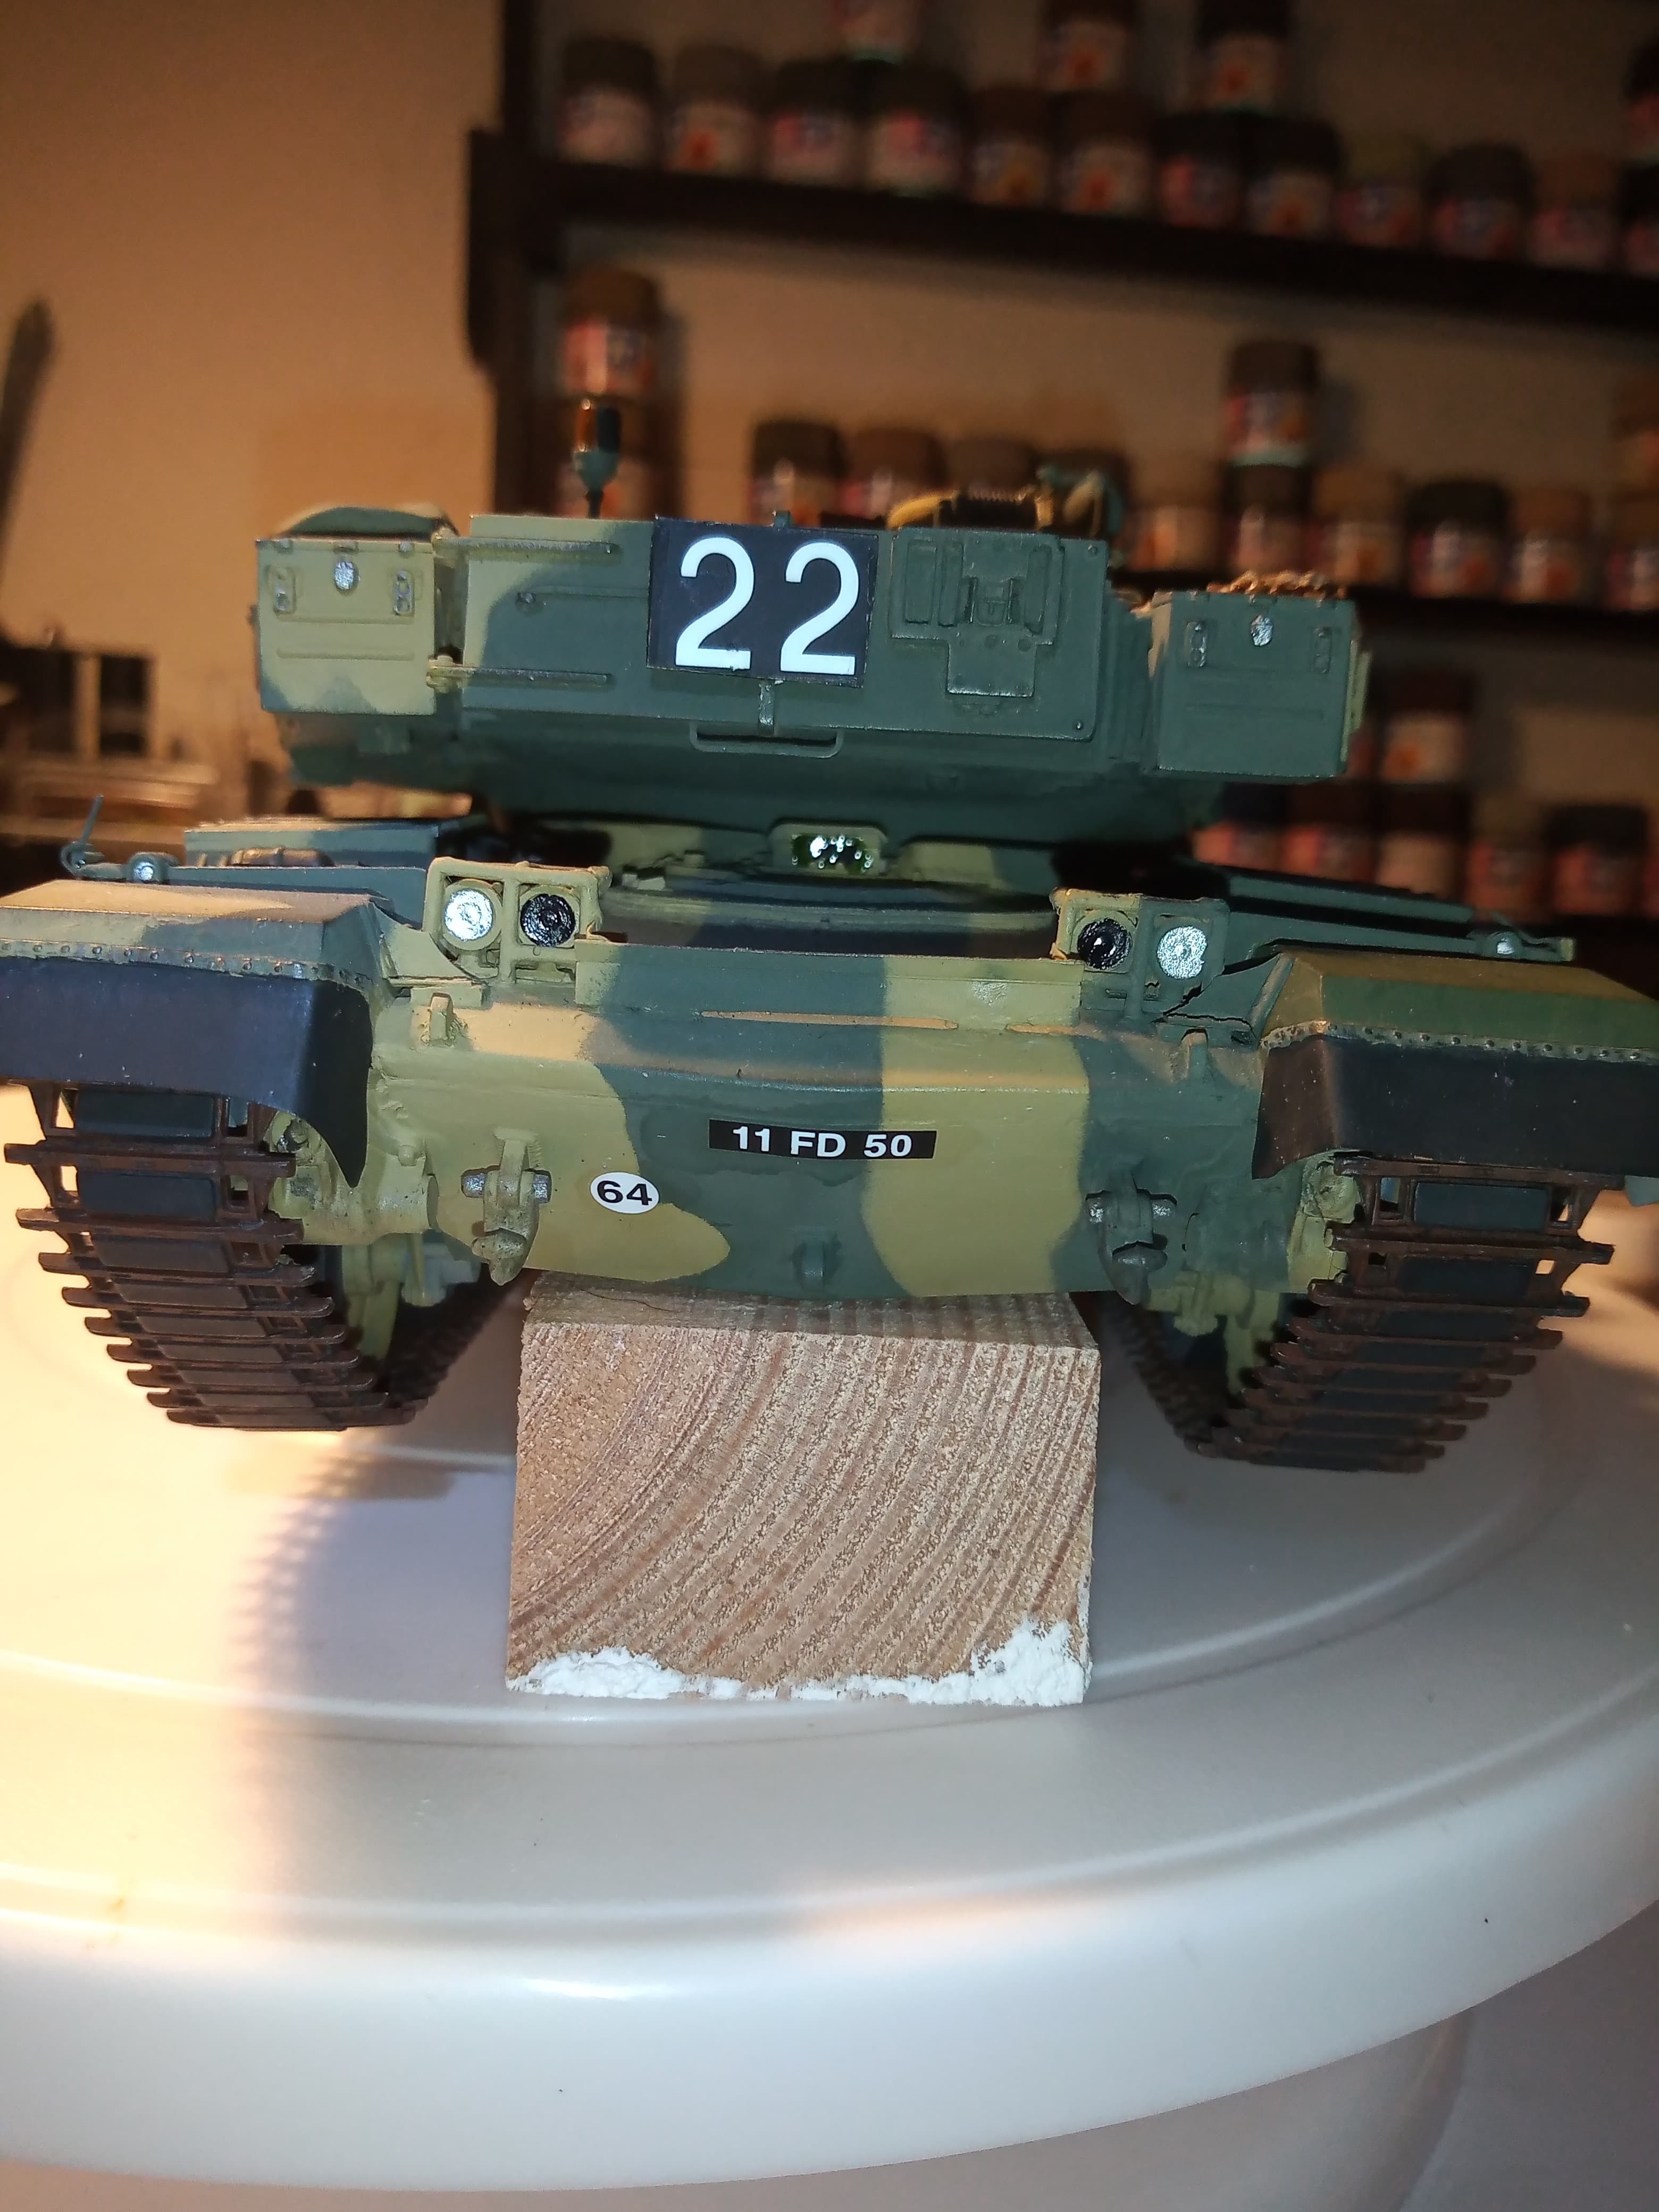
The Comds bin C/S needs to dry overnight and may need another coat of the microsol so it sets over the ridges.
I also cut part of the decal so it fits around the padlock and will need to touch up the cut away area with some black paint.
11 Likes
Looking the Dog’s John; love it.
1 Like
Looking better and better with every picture…
1 Like
Just to take over for a second,
found this on e bay, UK ,

He also has other stuff, british 1/35 related.
1 Like
Yeah I’ve seen that on there Frank. Granted it does look nice but if I’m honest, i just couldn’t justify spending that on a mine plough… I might see what other bits he has though next time I’m on evil bay …
He did have centurion conversions at one time on there, 7s, 8s and 9s, did one, a few years ago, IMG_20210331_214000|690x388


5 Likes
Outstanding work on your Chieftain John, I especially like all the ‘little’ touches you incorporate through your own intimate knowledge of the given vehicle, it adds that extra level of realism,  .
.
G 
2 Likes
Cheers G. The problem with that is I am forever remembering other little things that I should add or do and the damn process slows up again lol…as you will see below lol.
The curse of remembering little bits and pieces…
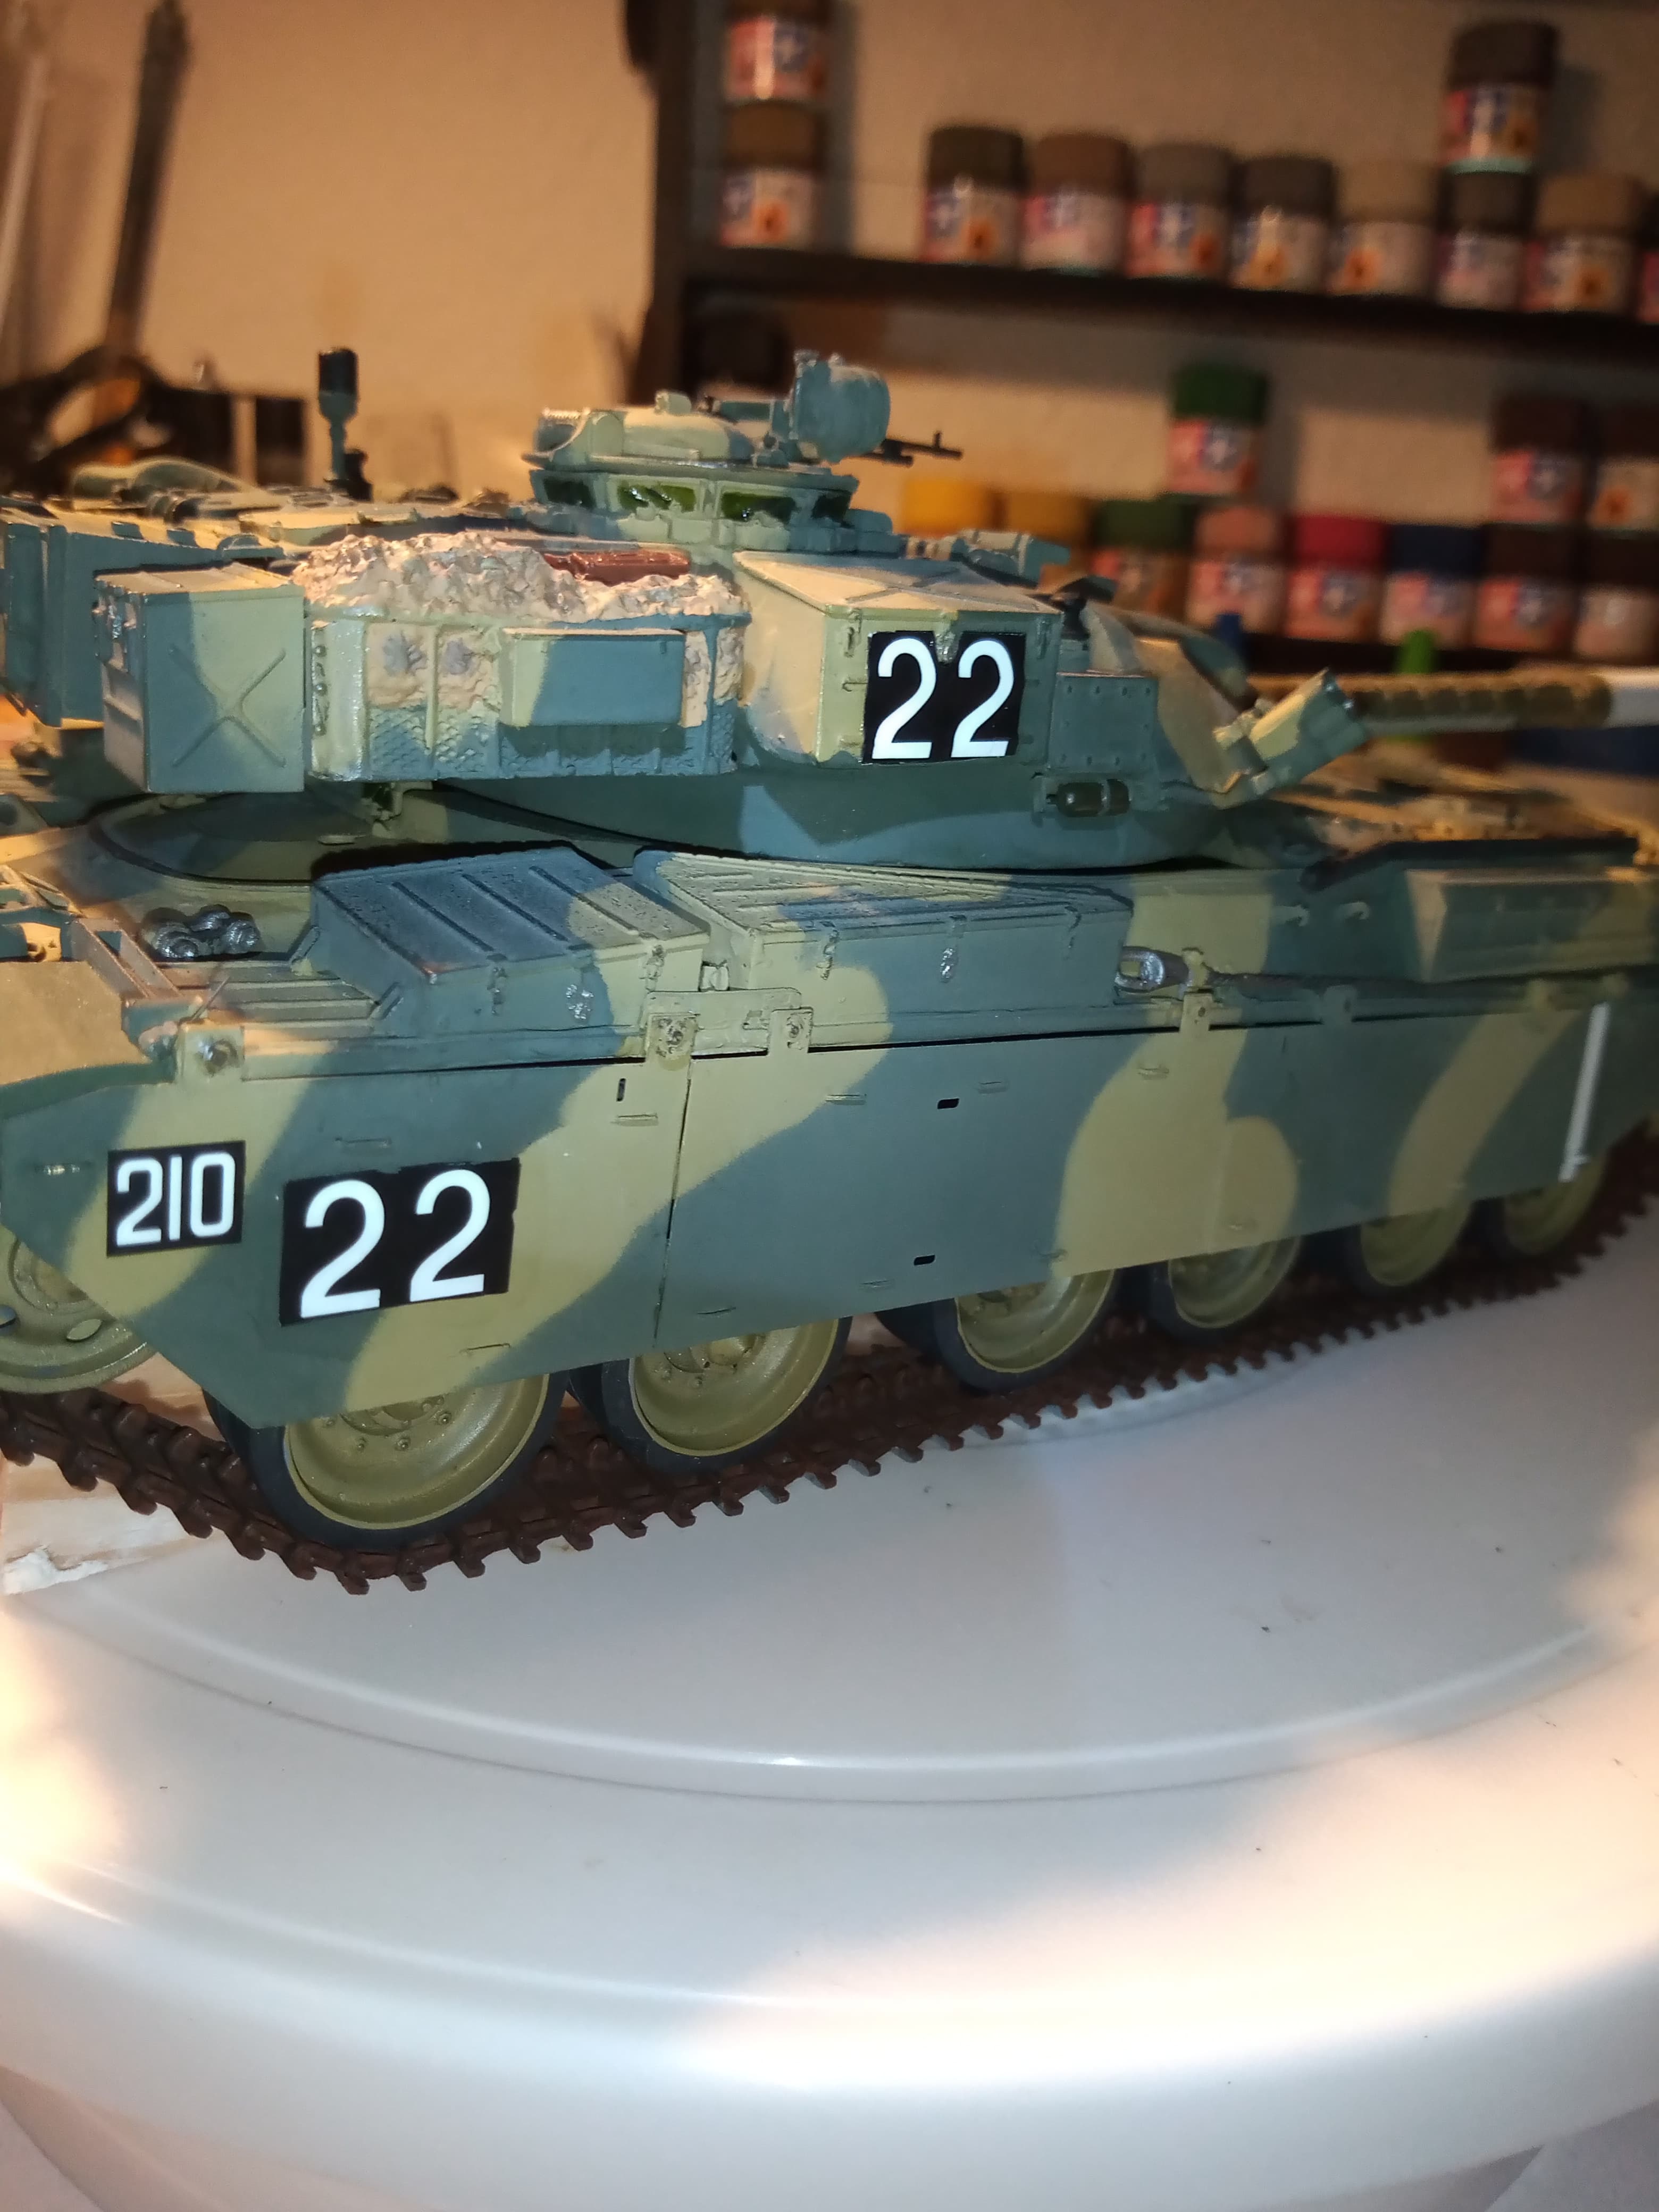
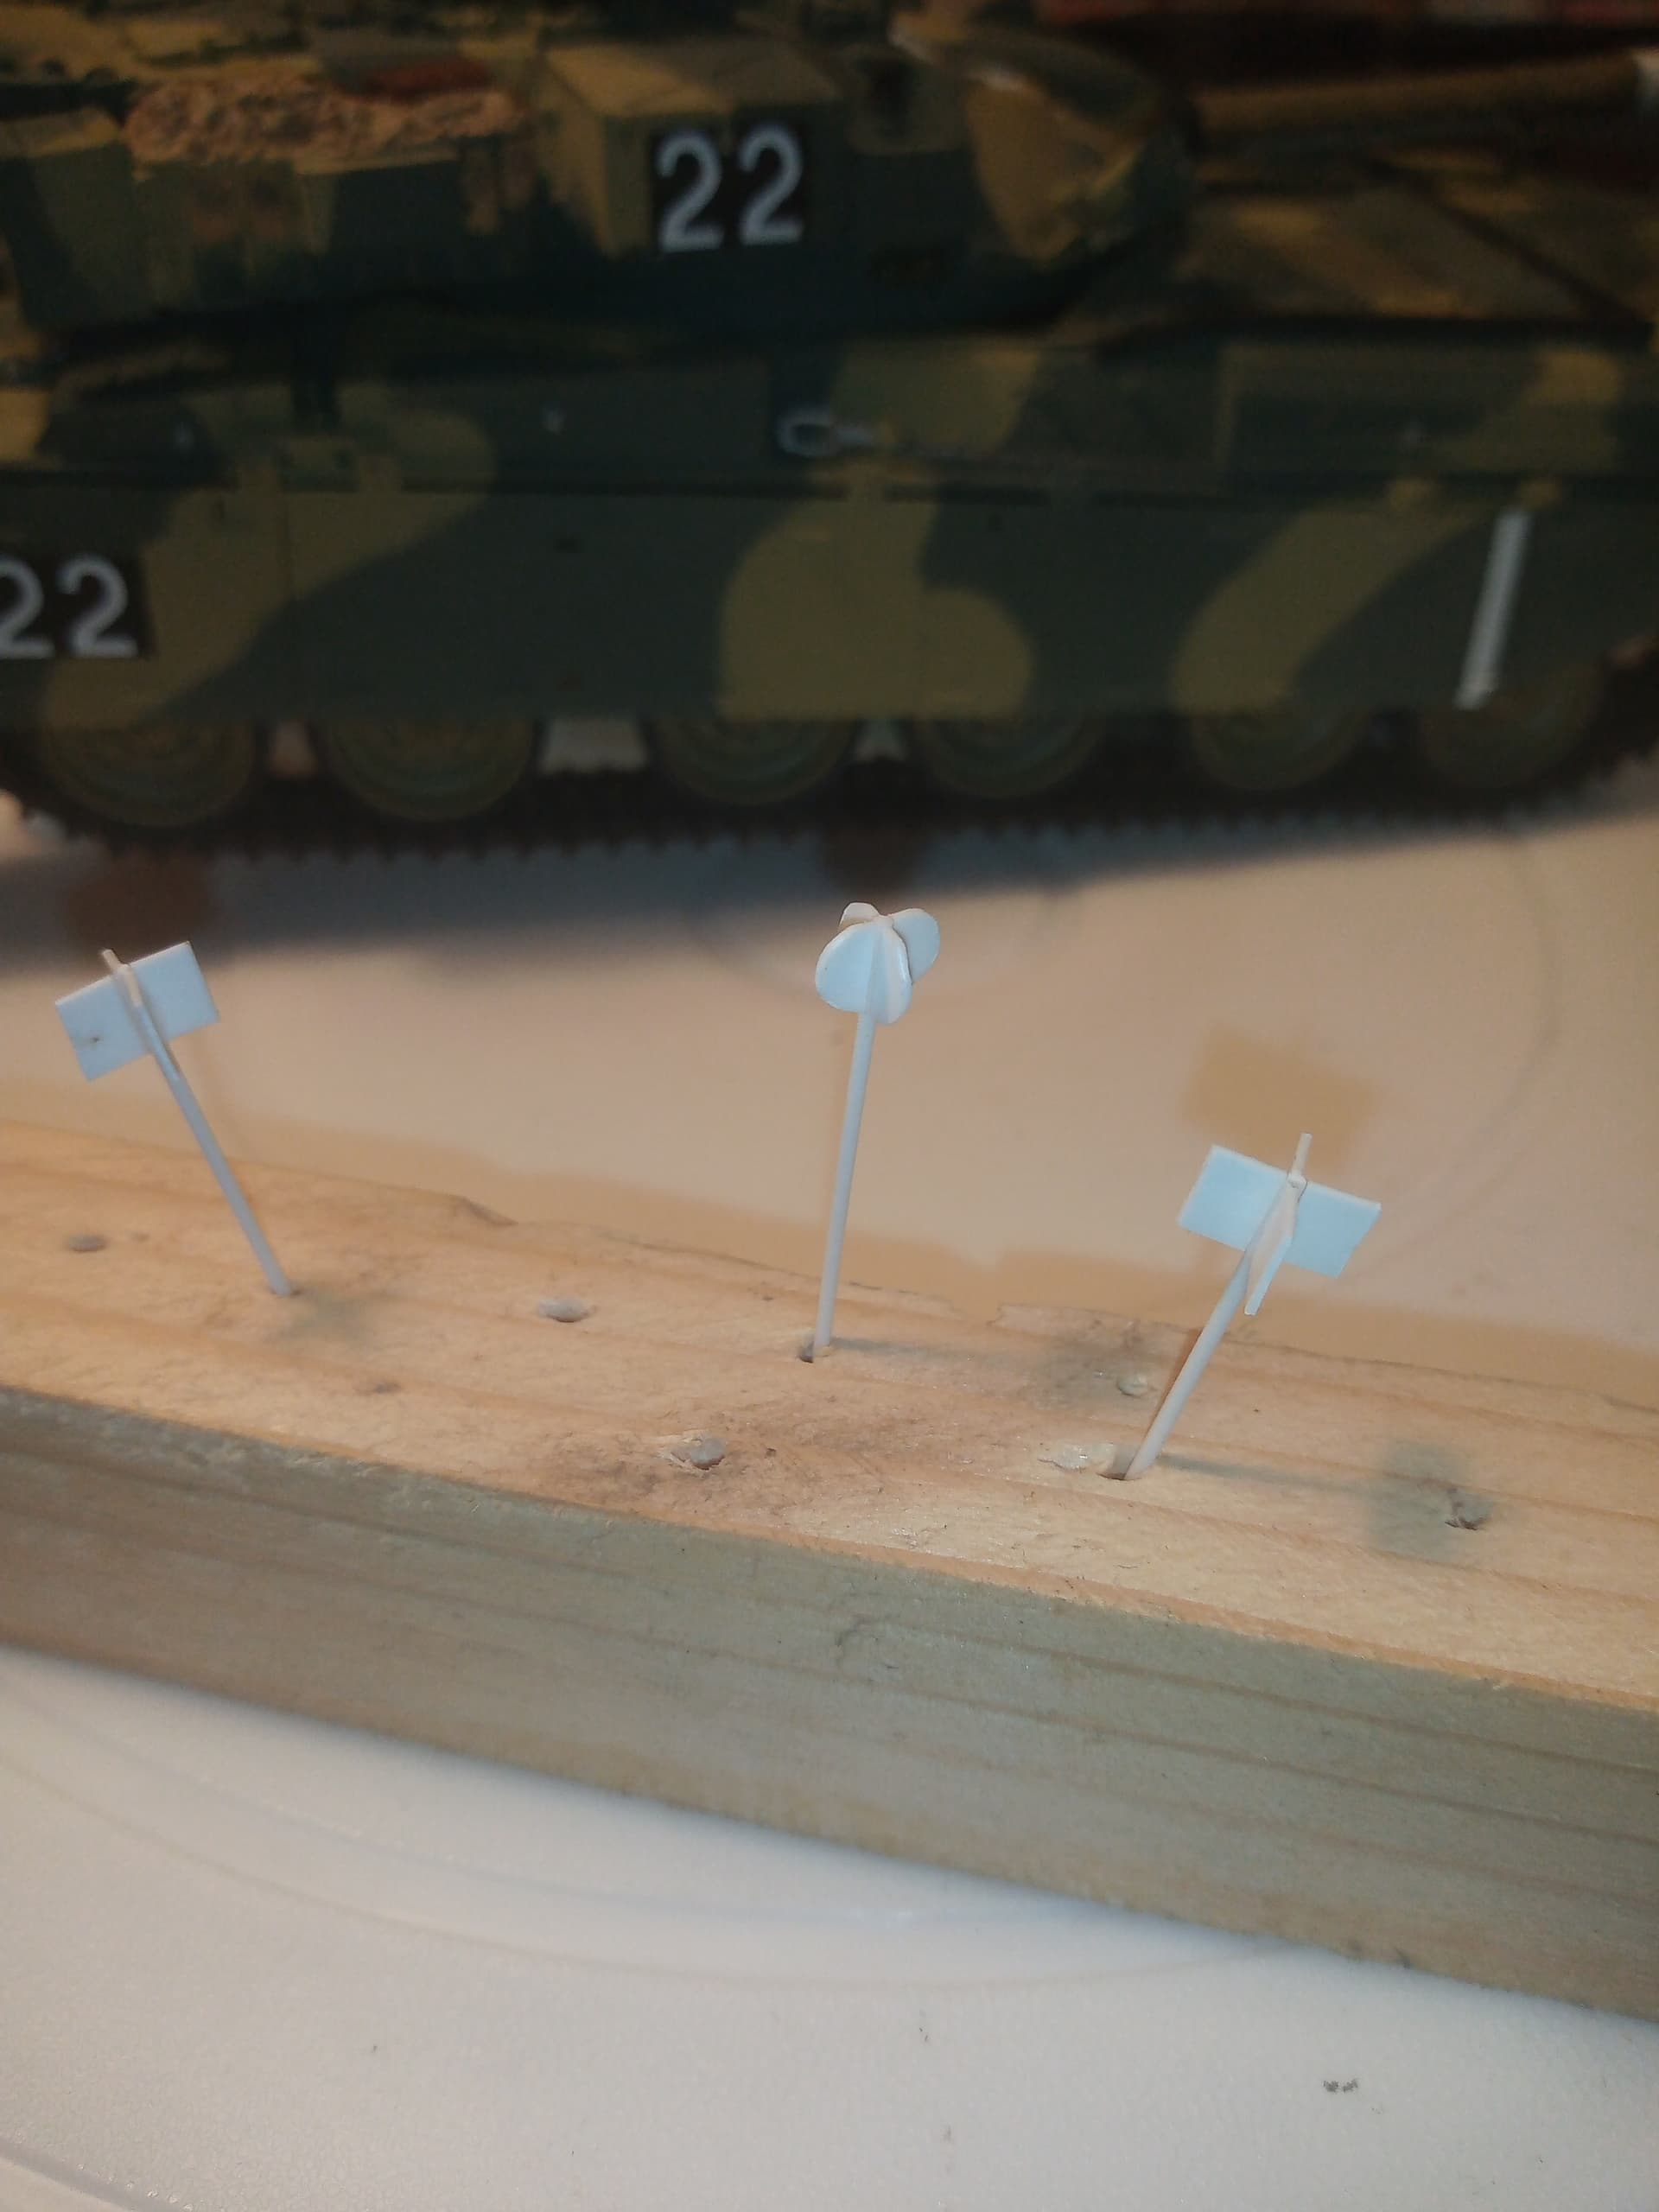
Here are the turret indicators to show what state the turret and gun were in.
The roundish one will end up white, the other 2 will be 1 red, and I’m sure the other was green… Once they are done I may have the green one upright somewhere on the cupola, and the others laying behind the cupola on the turret roof.
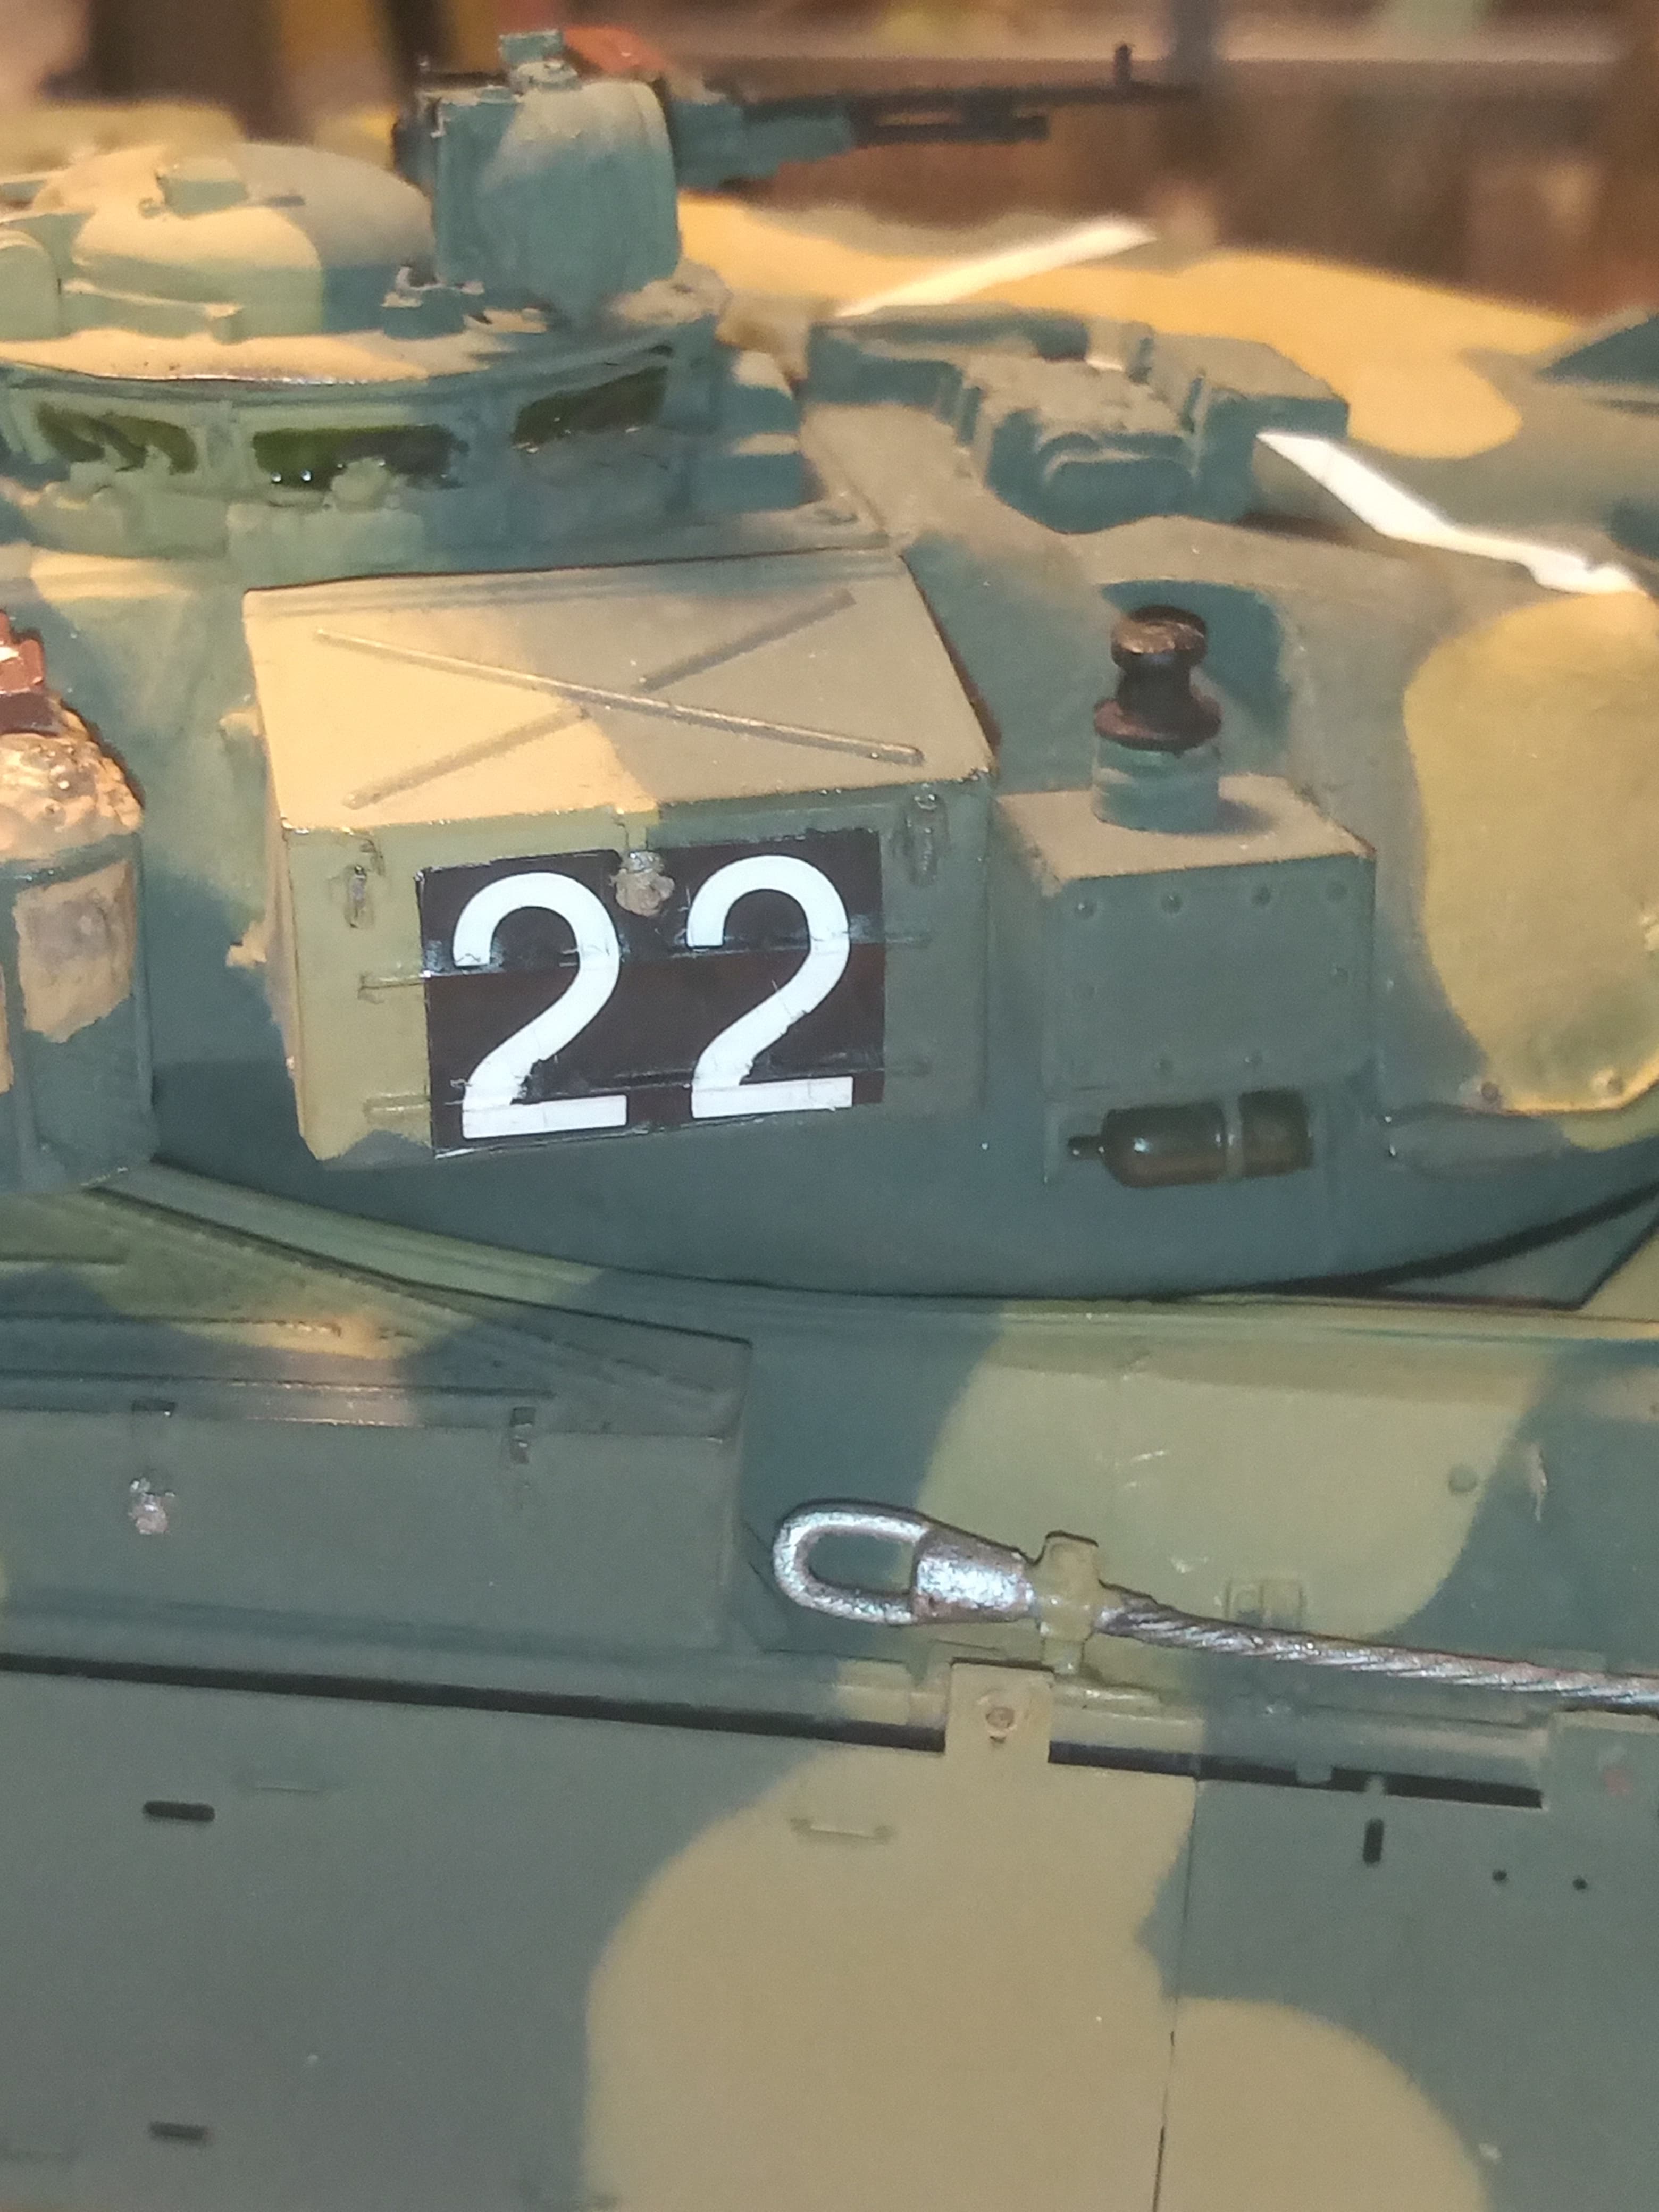
Also tidied up the black around the padlock where I had to cut the decal away to make it fit. Quite happy how the micro sol has pulled the decal around the bin raised areas.
Stay tuned 
8 Likes
Looking excellent John. Great job
1 Like
Thanks for the continued support Richard, much appreciated .
I only did a bit on this tonight, due to some fault rectifying on the Panther G.
I painted up the turret range markers - the green and red ones are square sections, the white one and rounded sections. I may drill down into the cam net and stow 2 of them there, and the third will be behind the cupola.
@Maximus8425 , Max I can’t remember but hopefully as you were the gunnery guru … Was there a yellow marker as well ? I’m sure we’d fly a red and yellow flag for 120 or 7.62 misfire/gun problem…??
5 Likes