Sorry Joel, yes, as Reg says, it is some kind of superior white PVA type glue. Much more forgiving to use than CA, allowing repositioning for a number of minutes, water clean up, transparent setting, and easily removable excess. So none of the horror stories I’ve had with CA over the years.
1 Like
Thanks guys. Gotta check it out as I’m using 3 different viscosities of CA glue and all have drawbacks to them.
joel
2 Likes
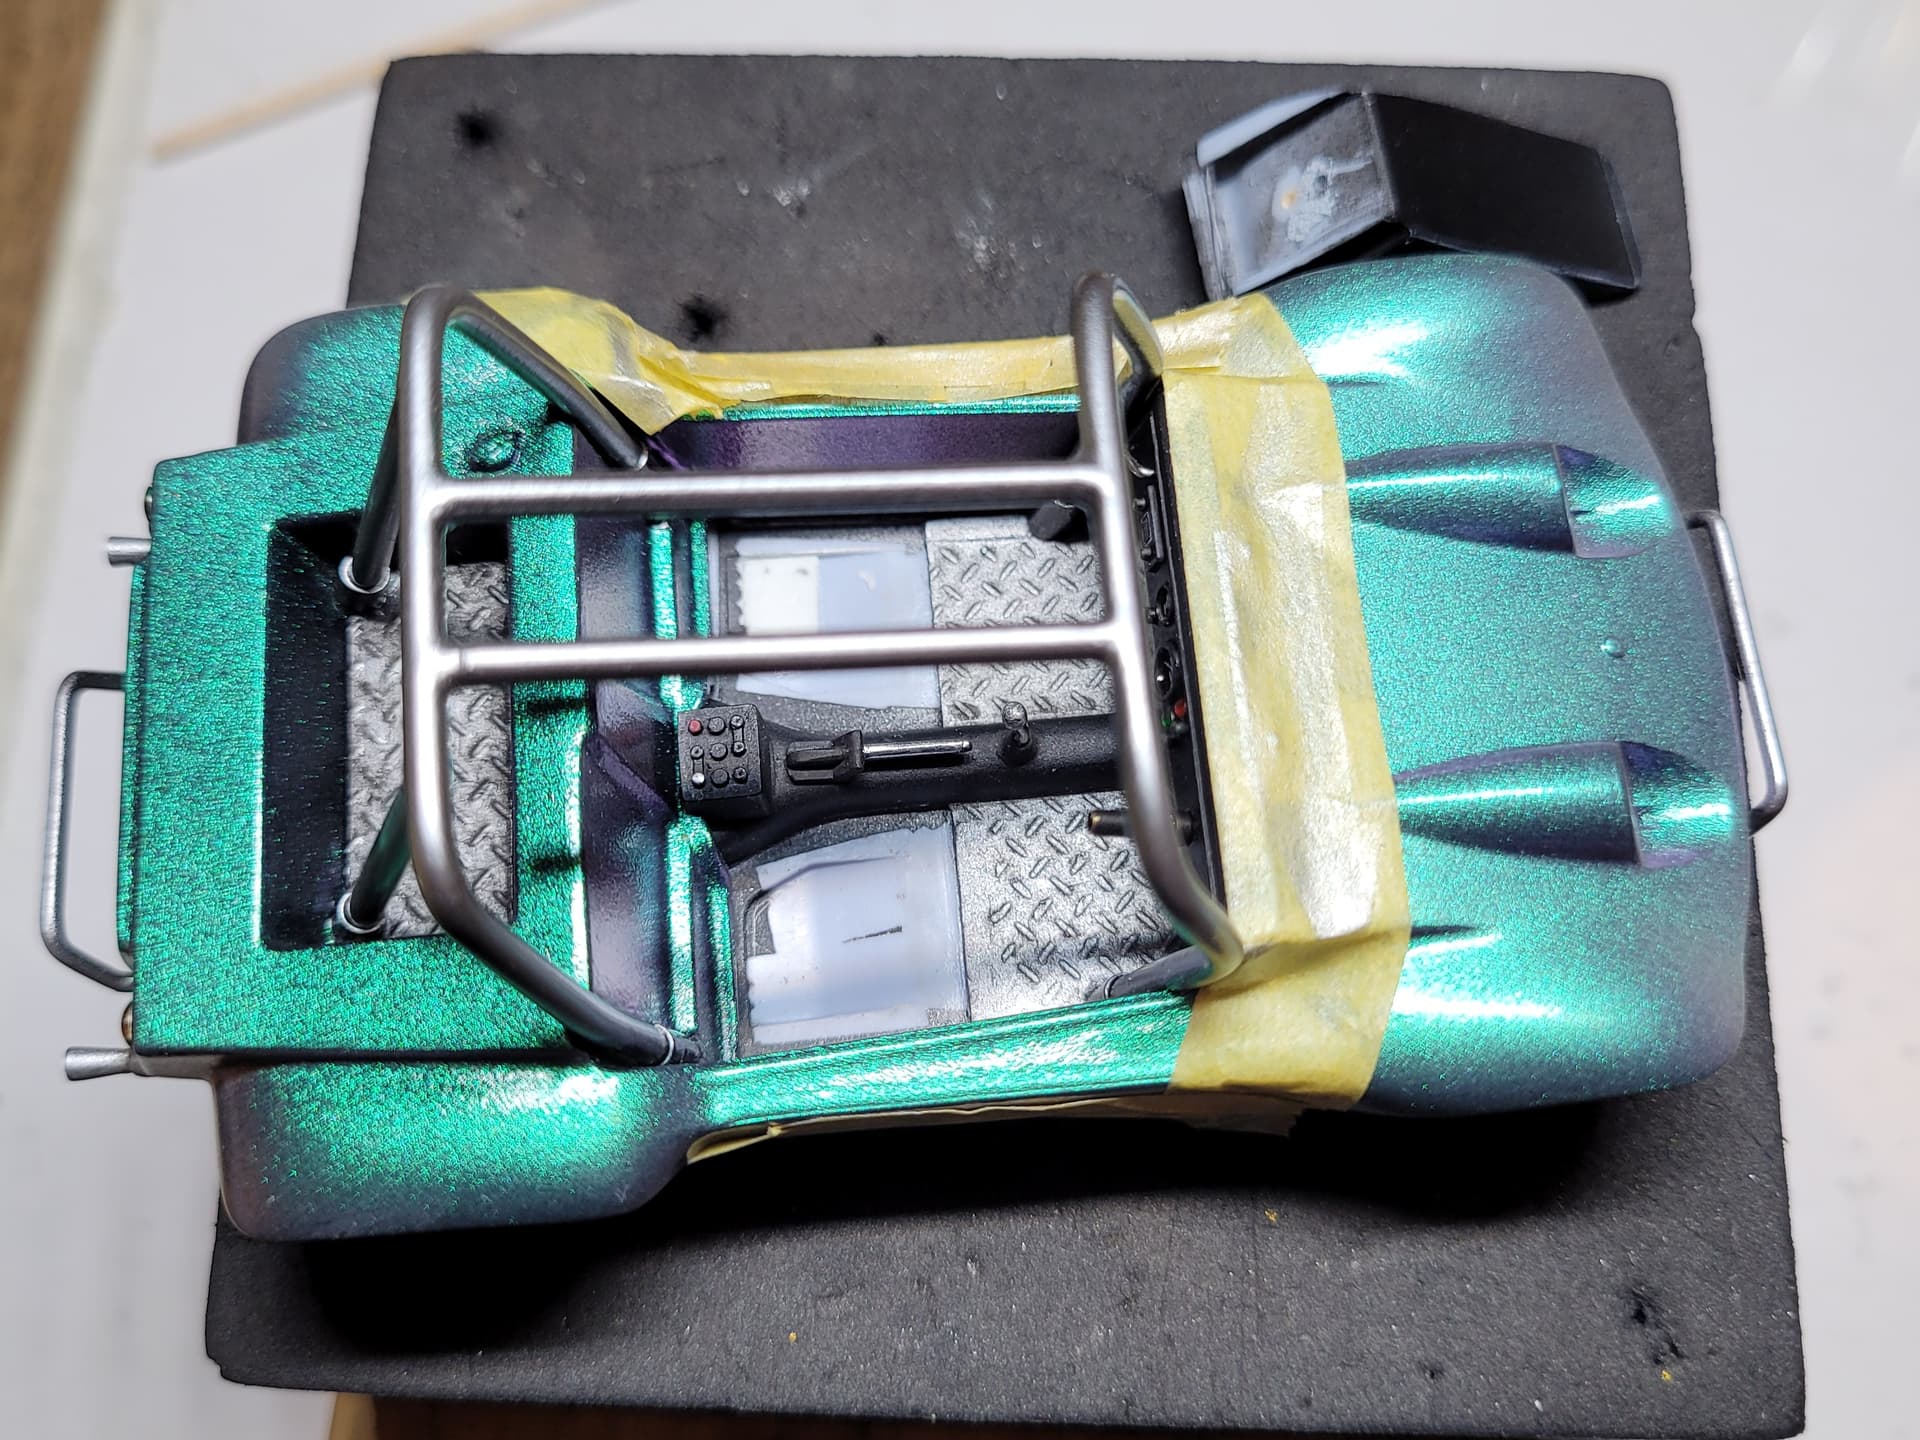
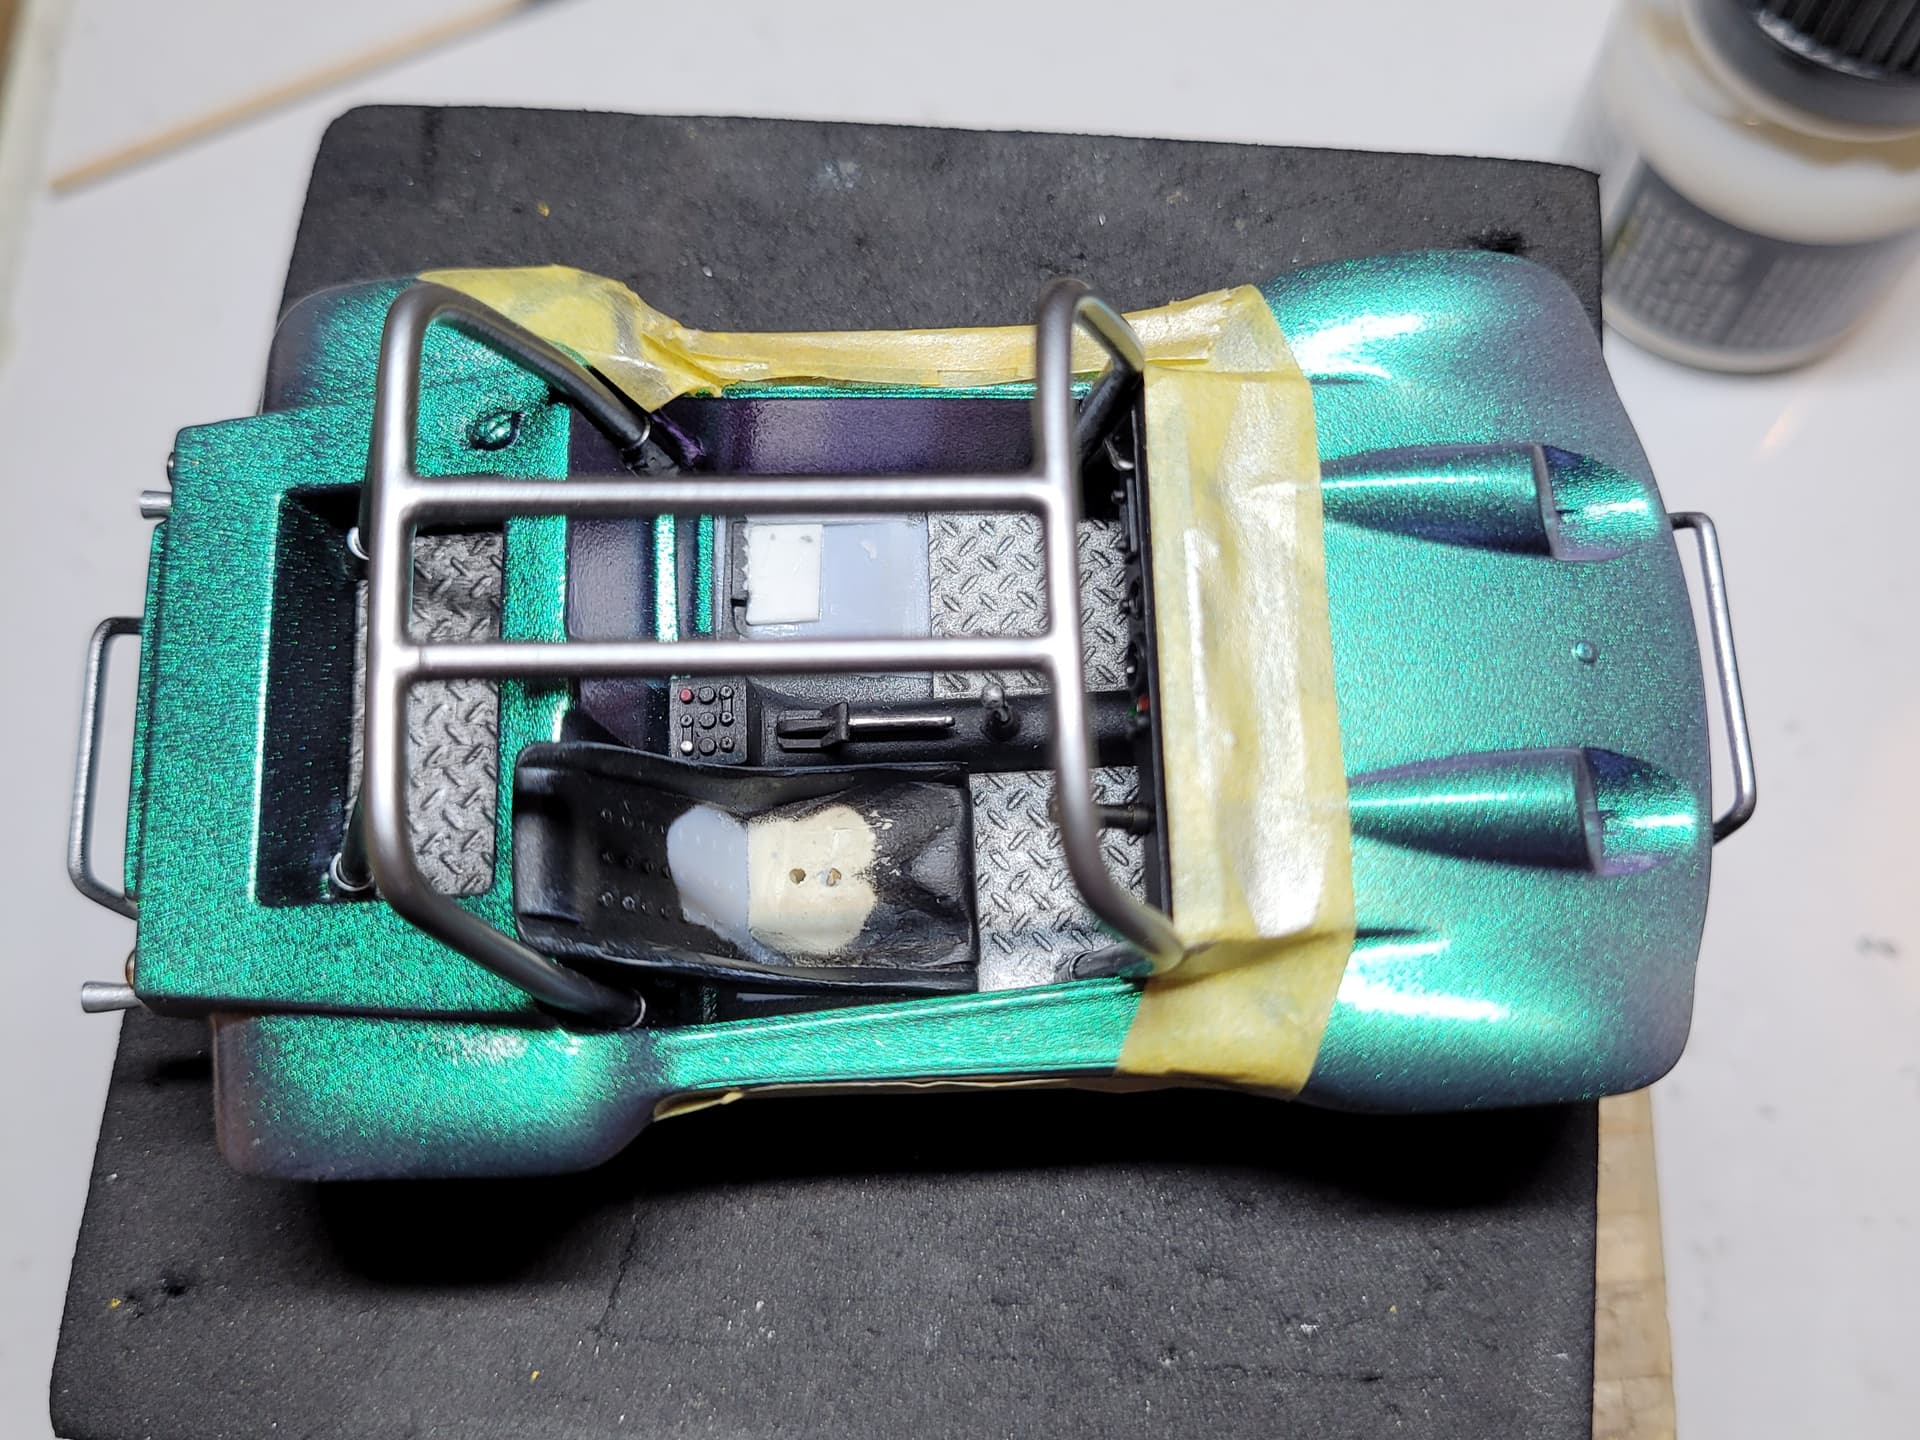
After the lengthy distraction of completing our new upstairs loo, I have got a few more bits done. At this 95% stage of builds there always seems to be lots of small tidy ups, and those bits that you have to redo a few times.
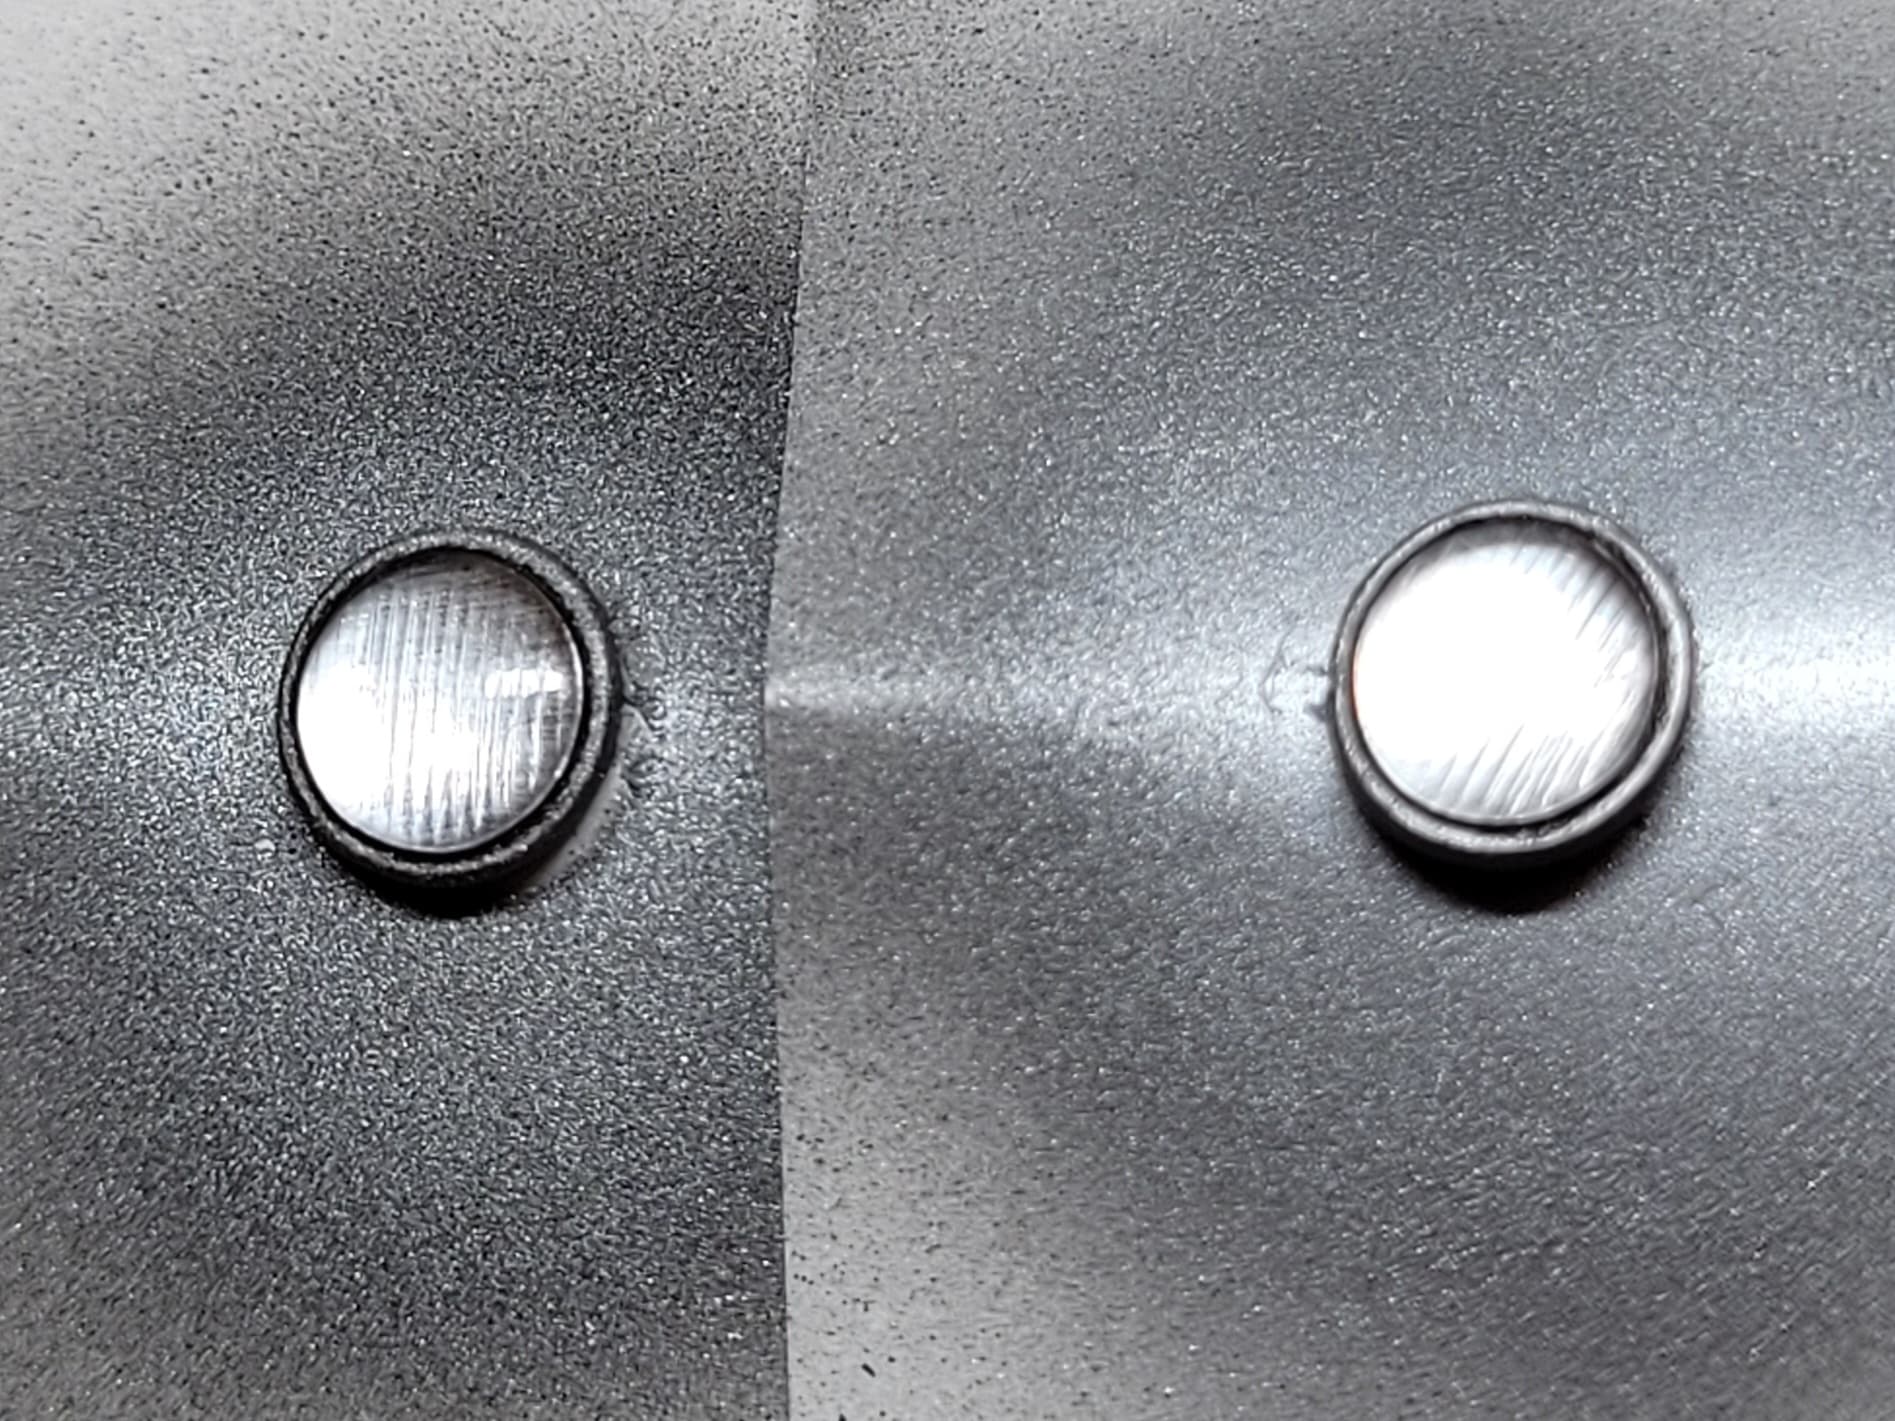
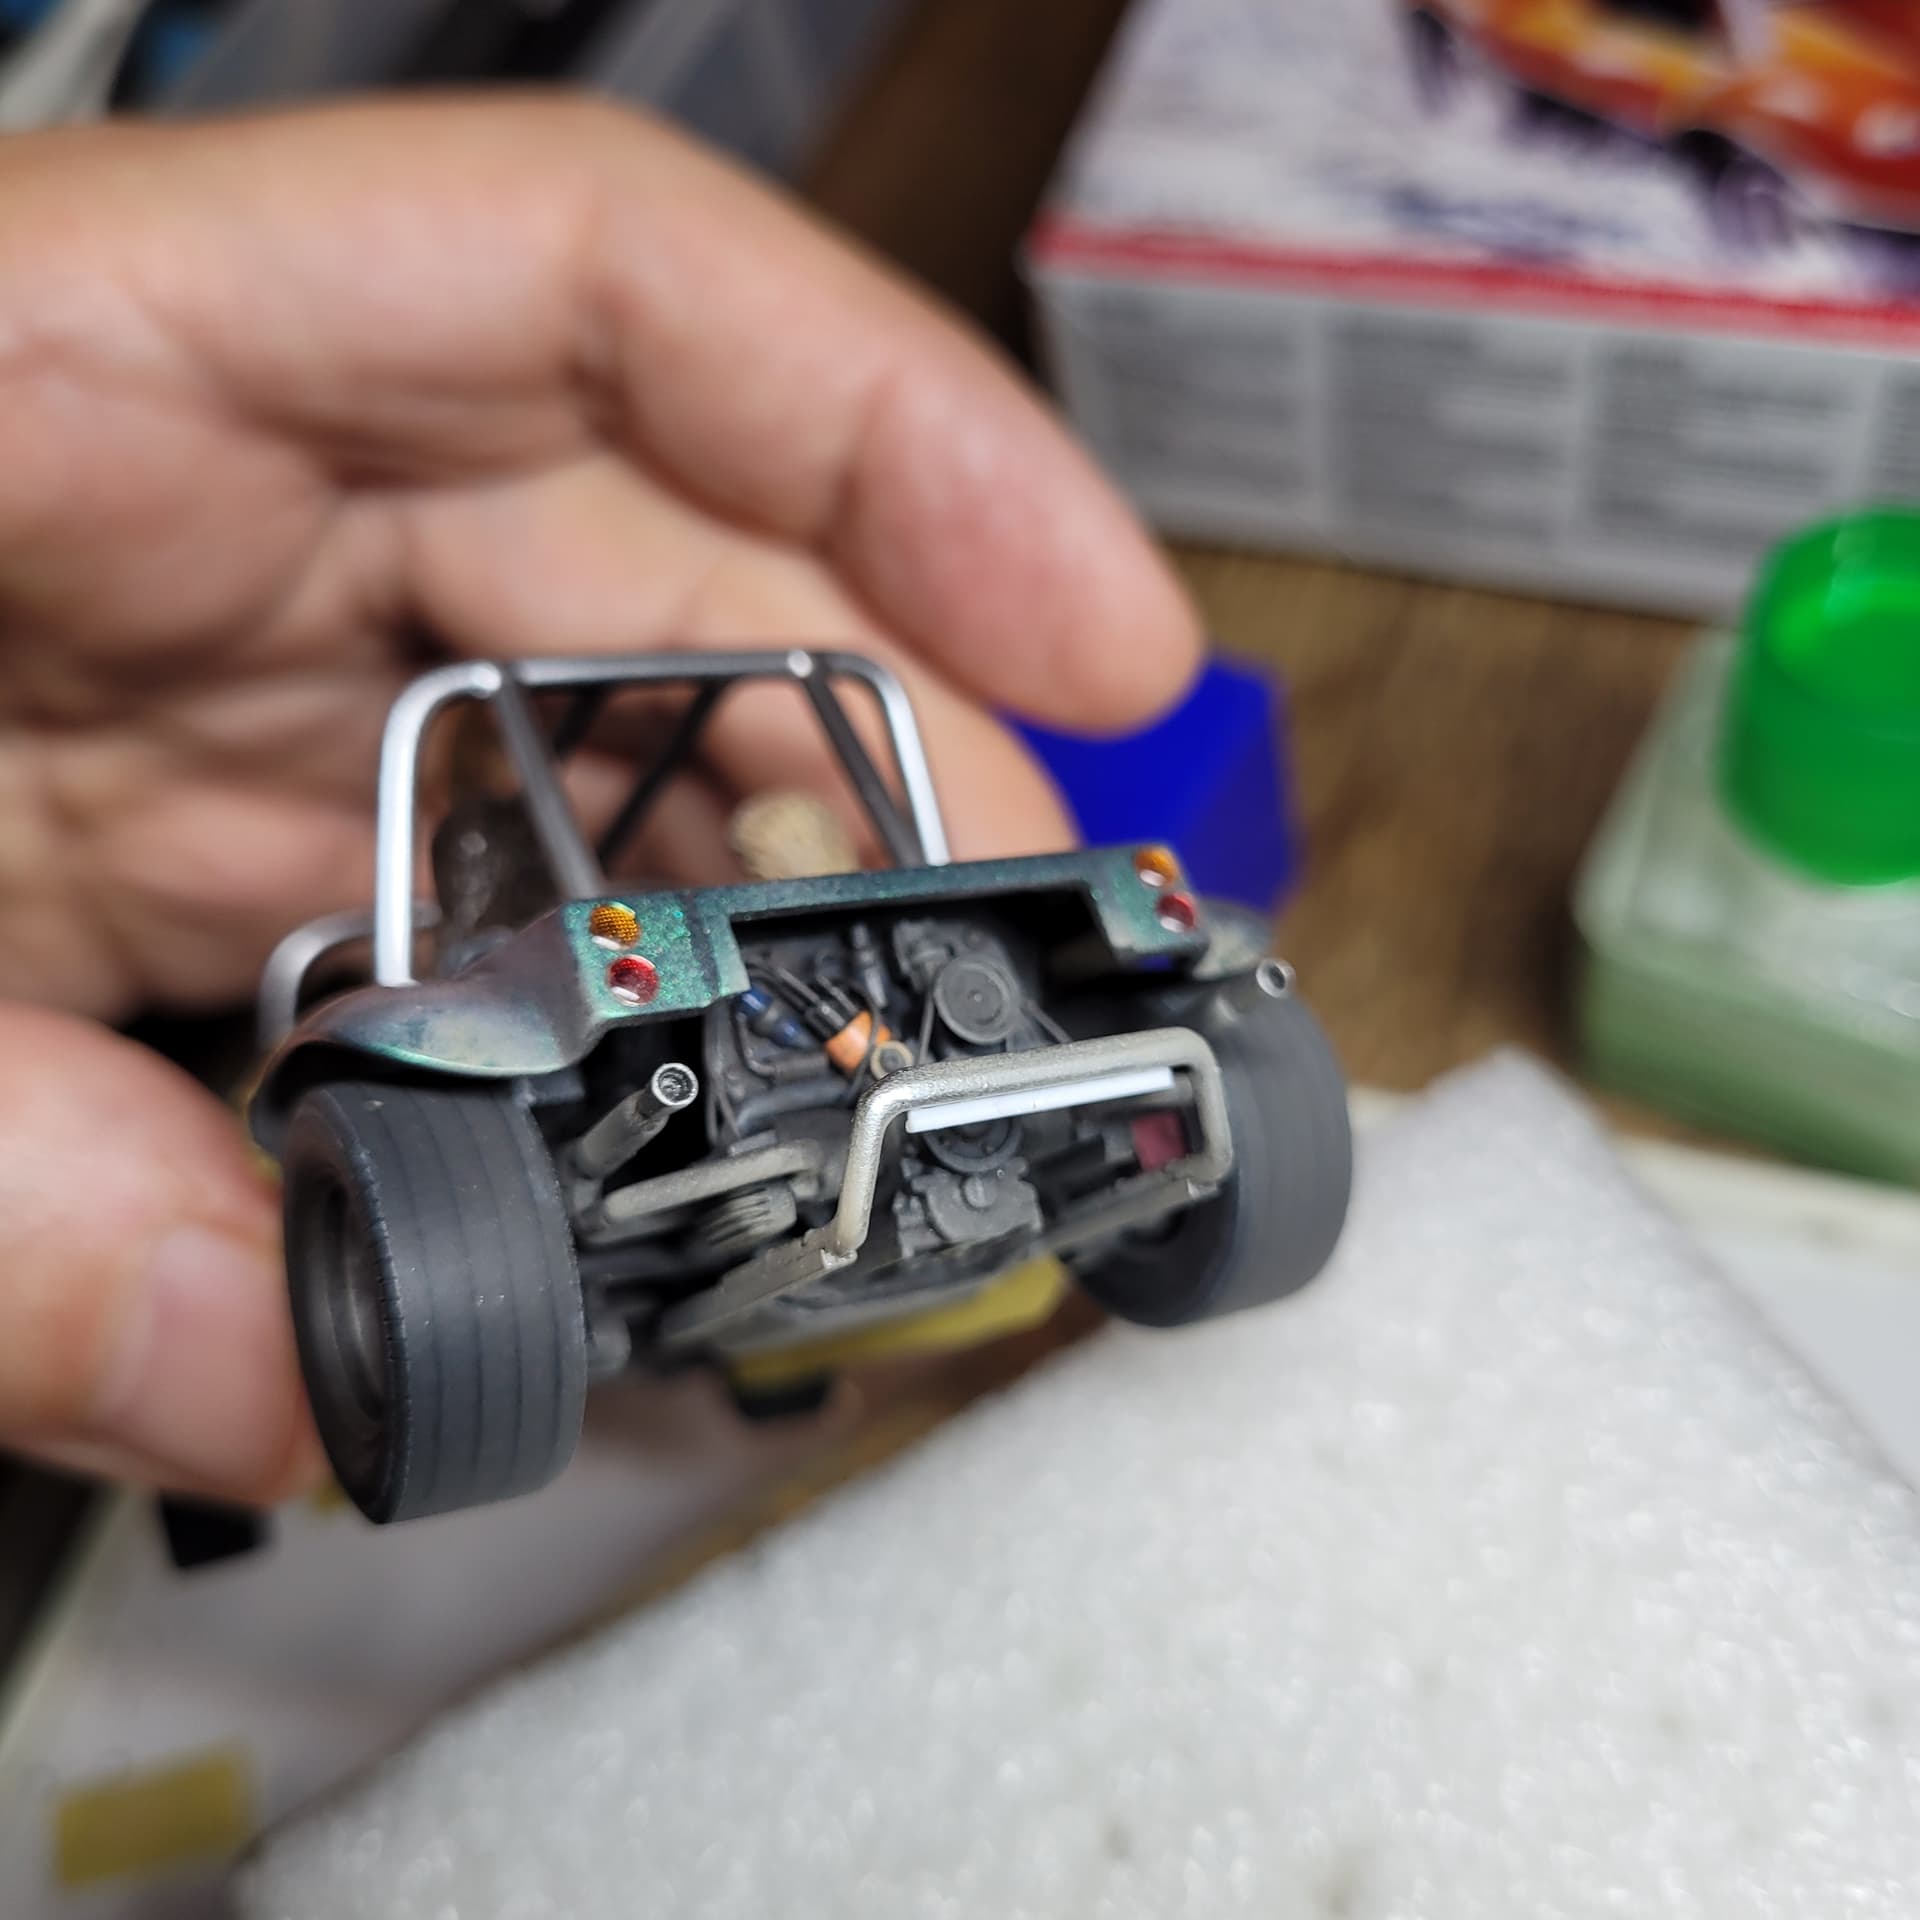
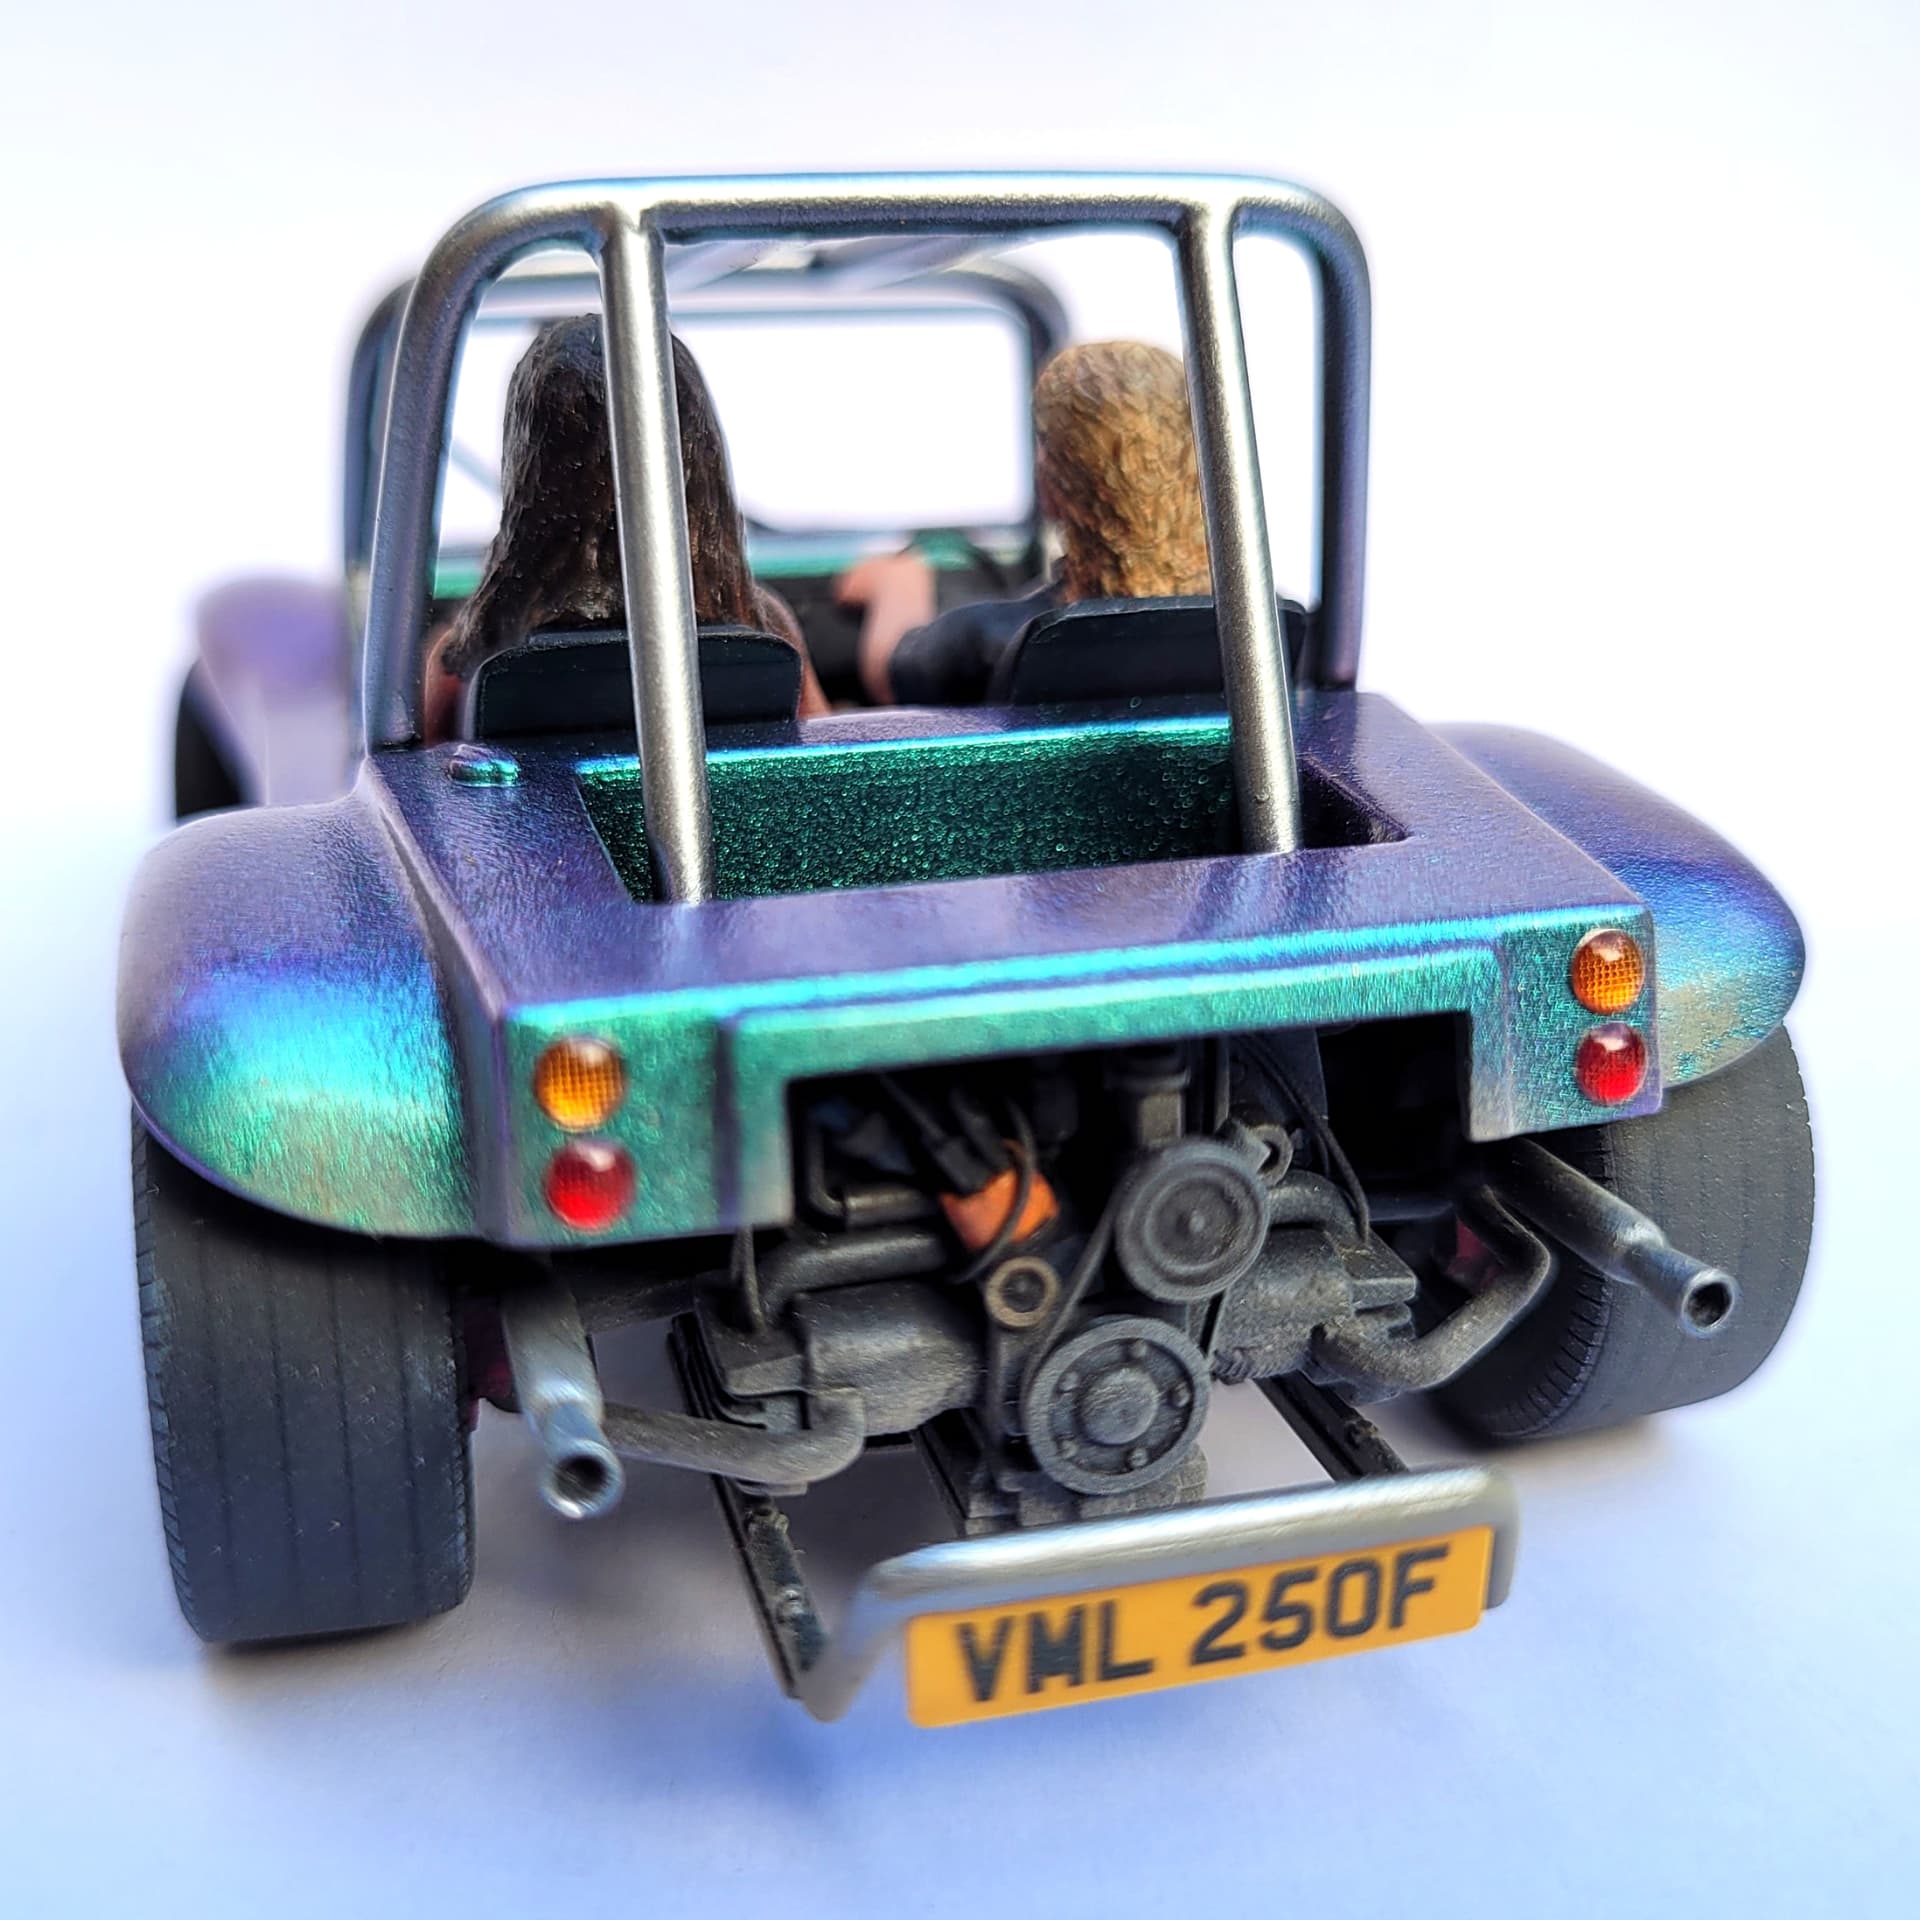
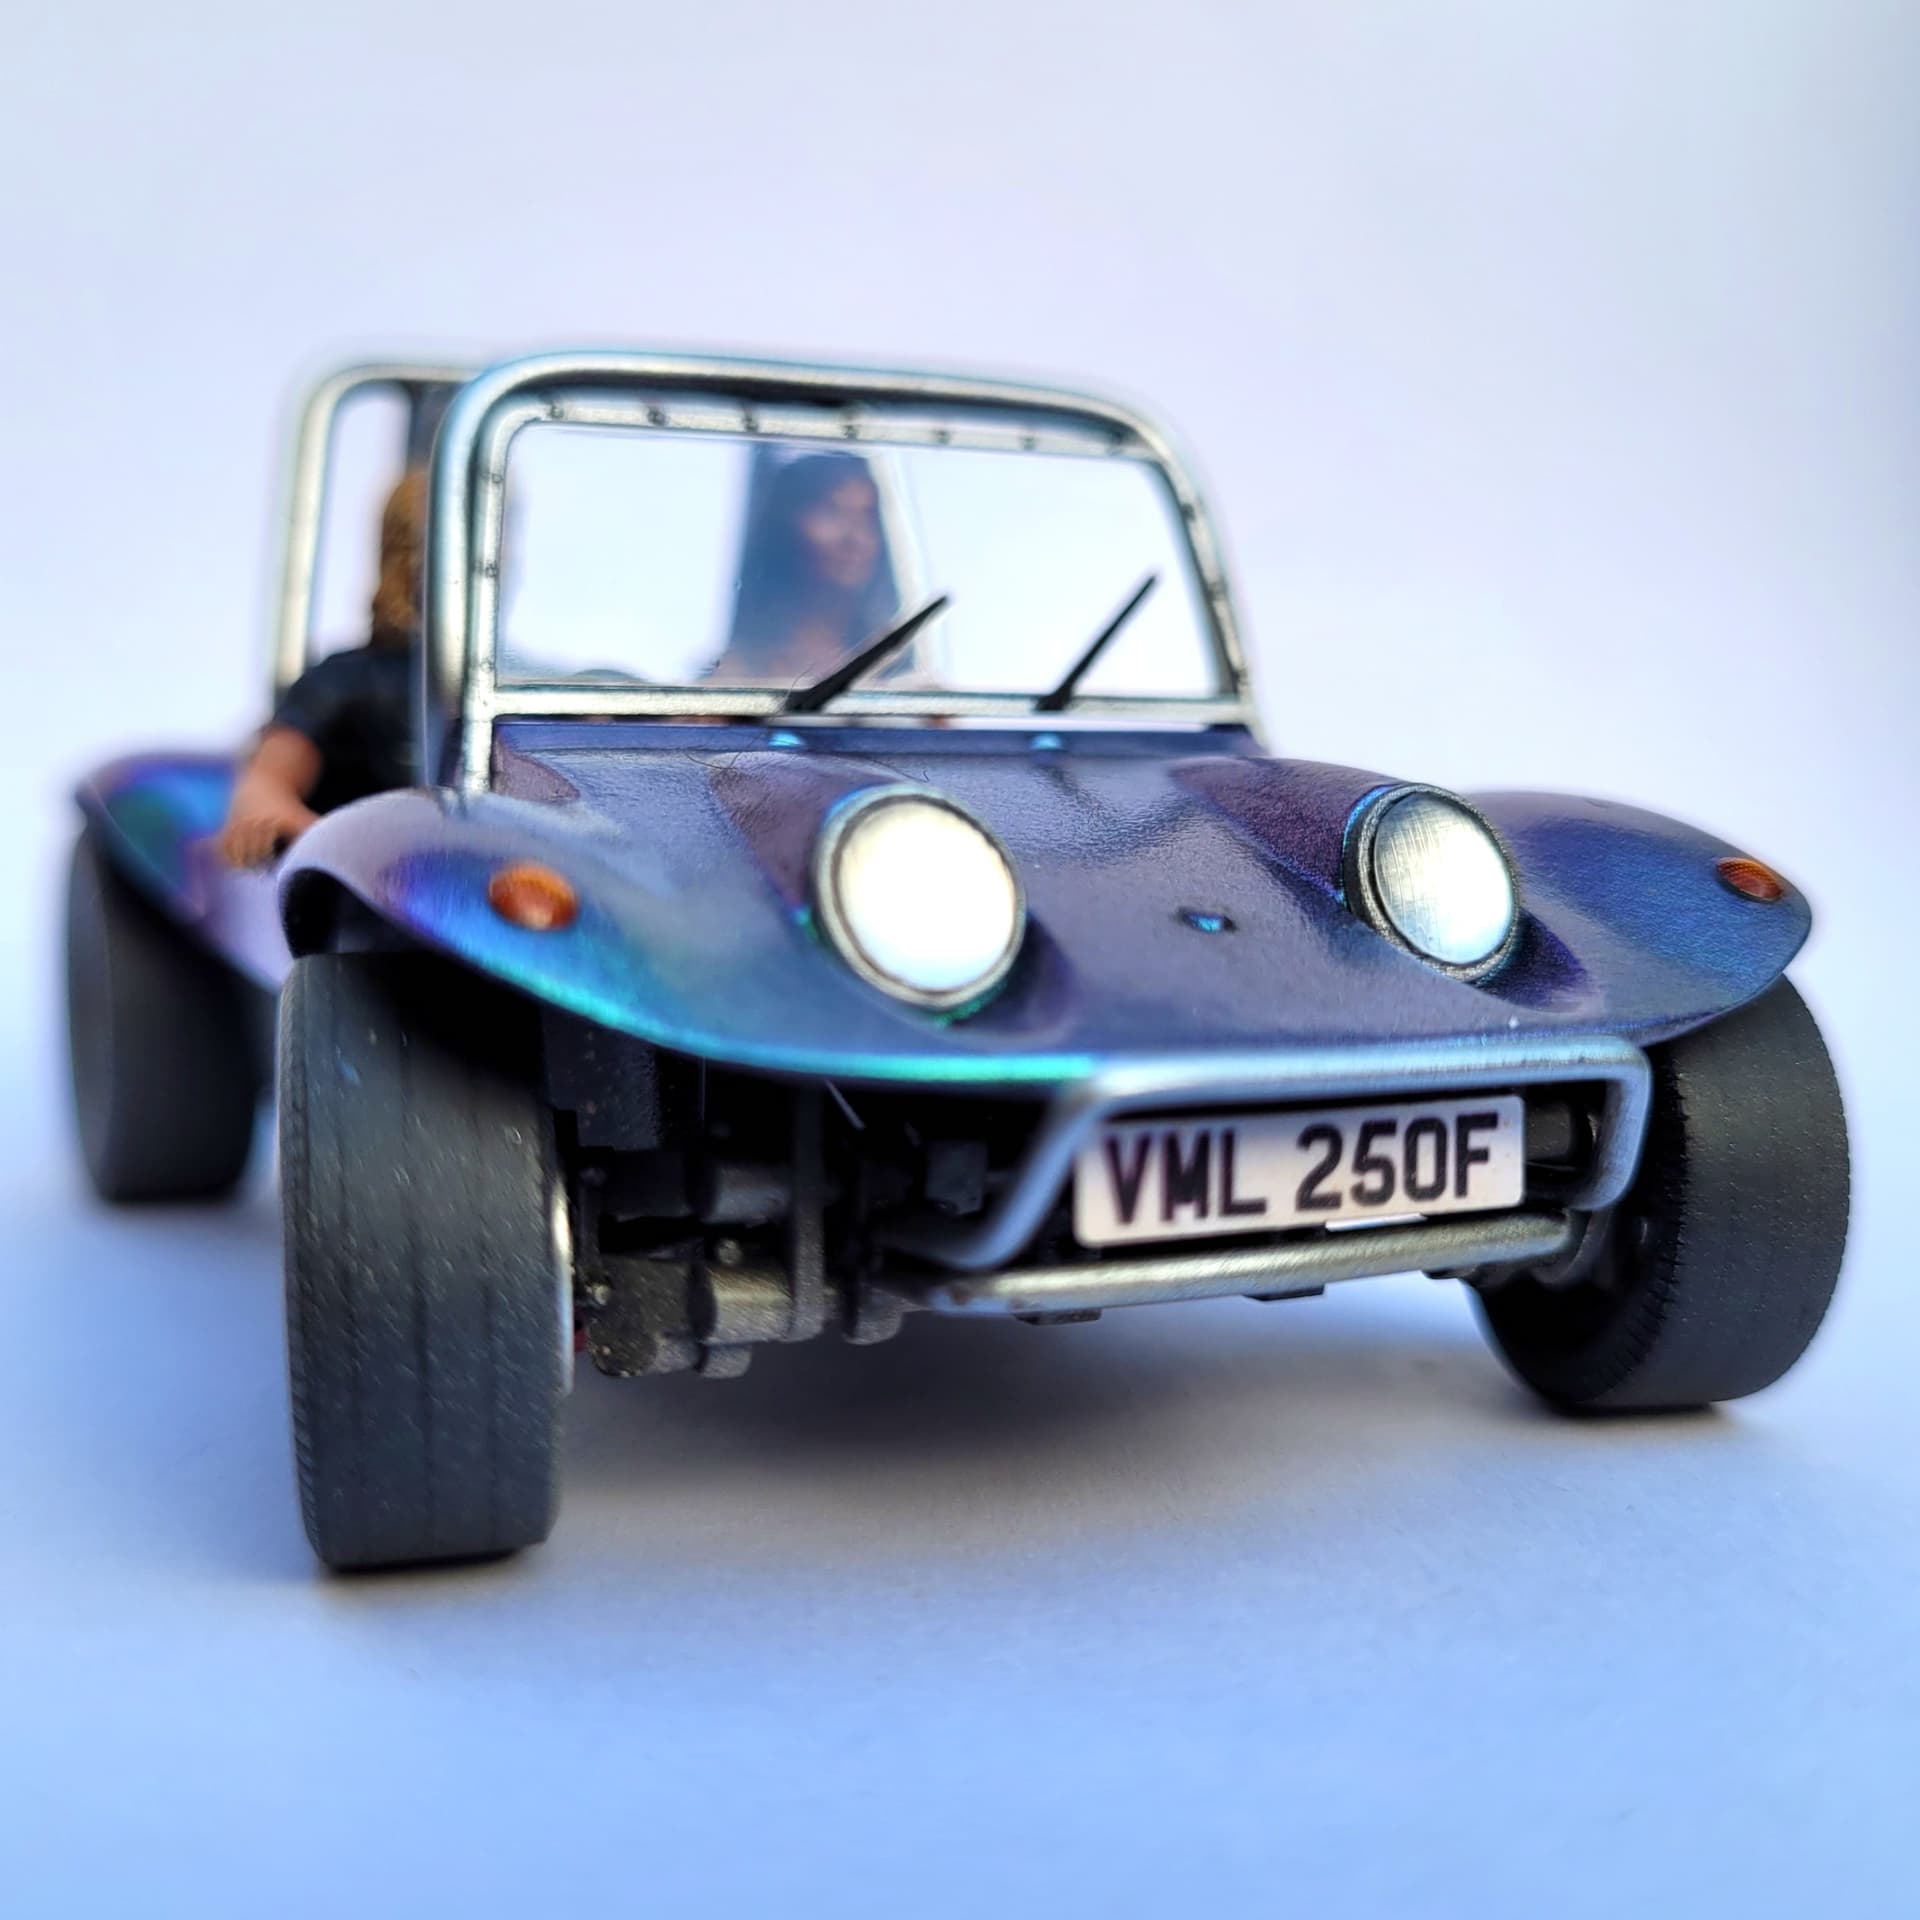
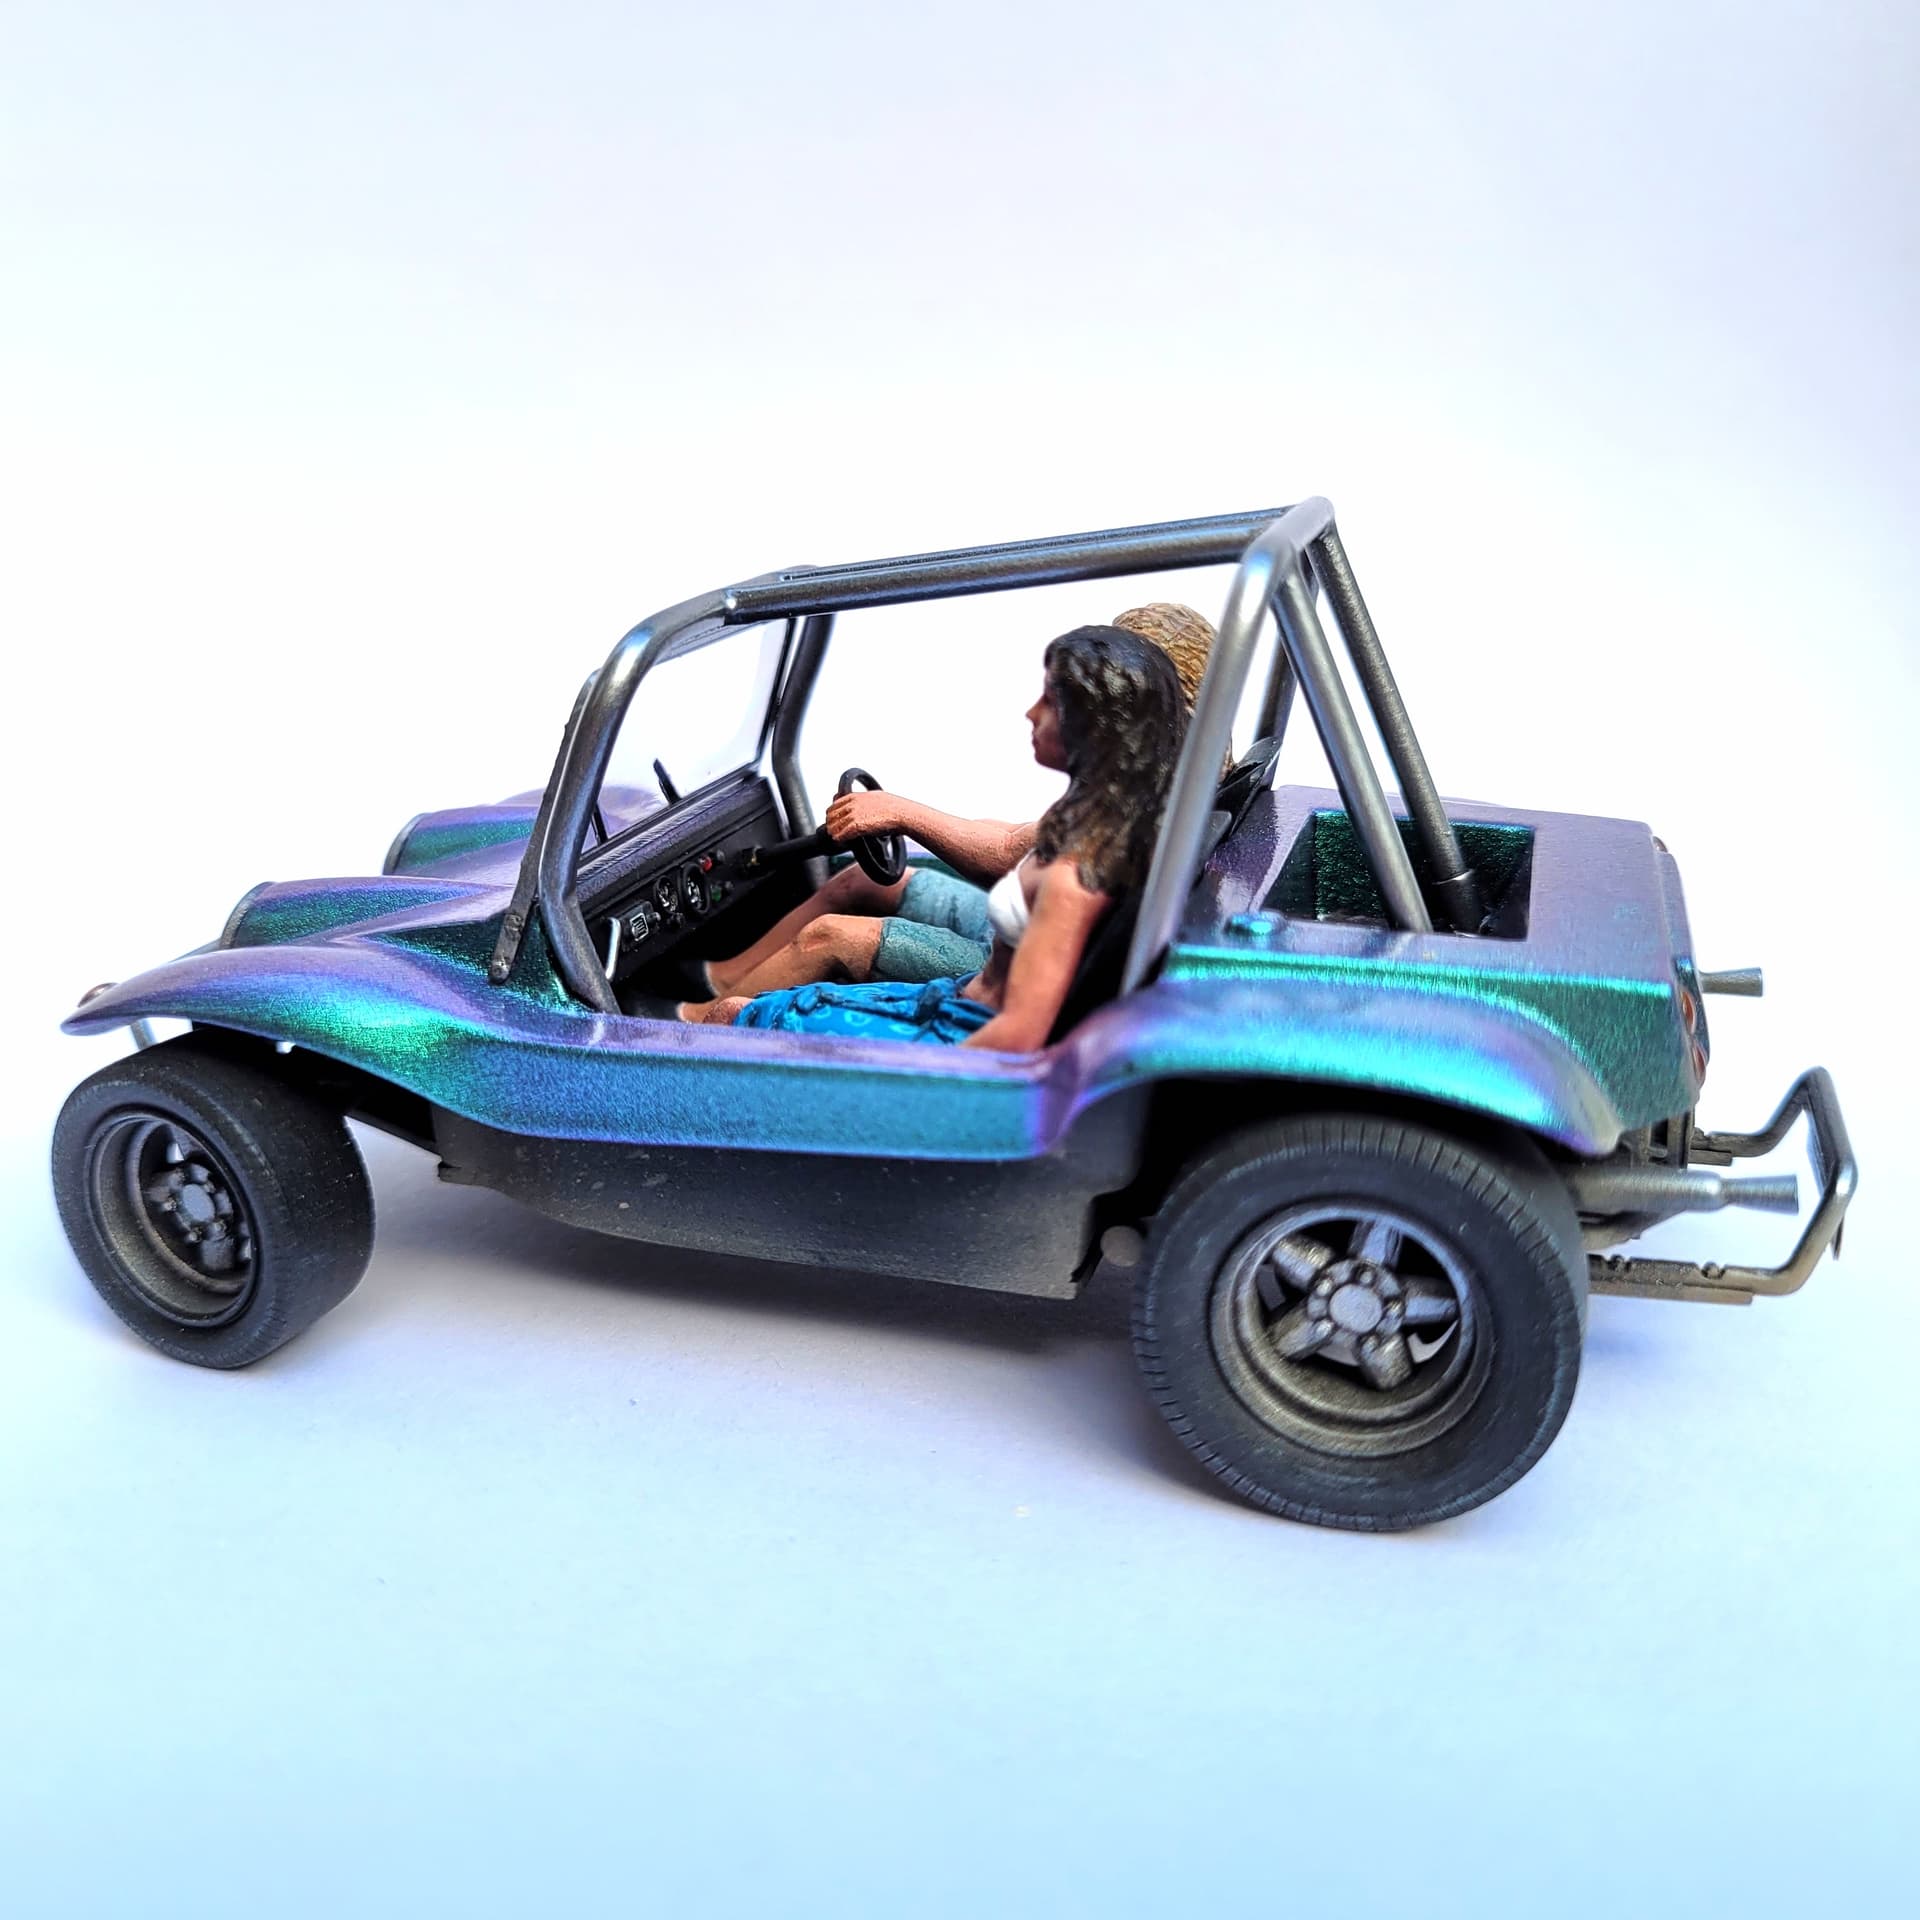
I first tried doing the headlight reflectors and rims with Molotow marker, but I think I have pretty much given up on those for modeling as the ink just doesn’t really set and stays soft. Fortunately it can be washed off completely with alcohol. Instead I used Klear to attach kitchen foil to the backs of the lenses, then masked the centres and sprayed the rims with Alclad aluminium. Then coated with Klear, and did a black pin wash around the edge. The foil gives a much better reflection than the chrome ink pen, and it looks a bit tidier.
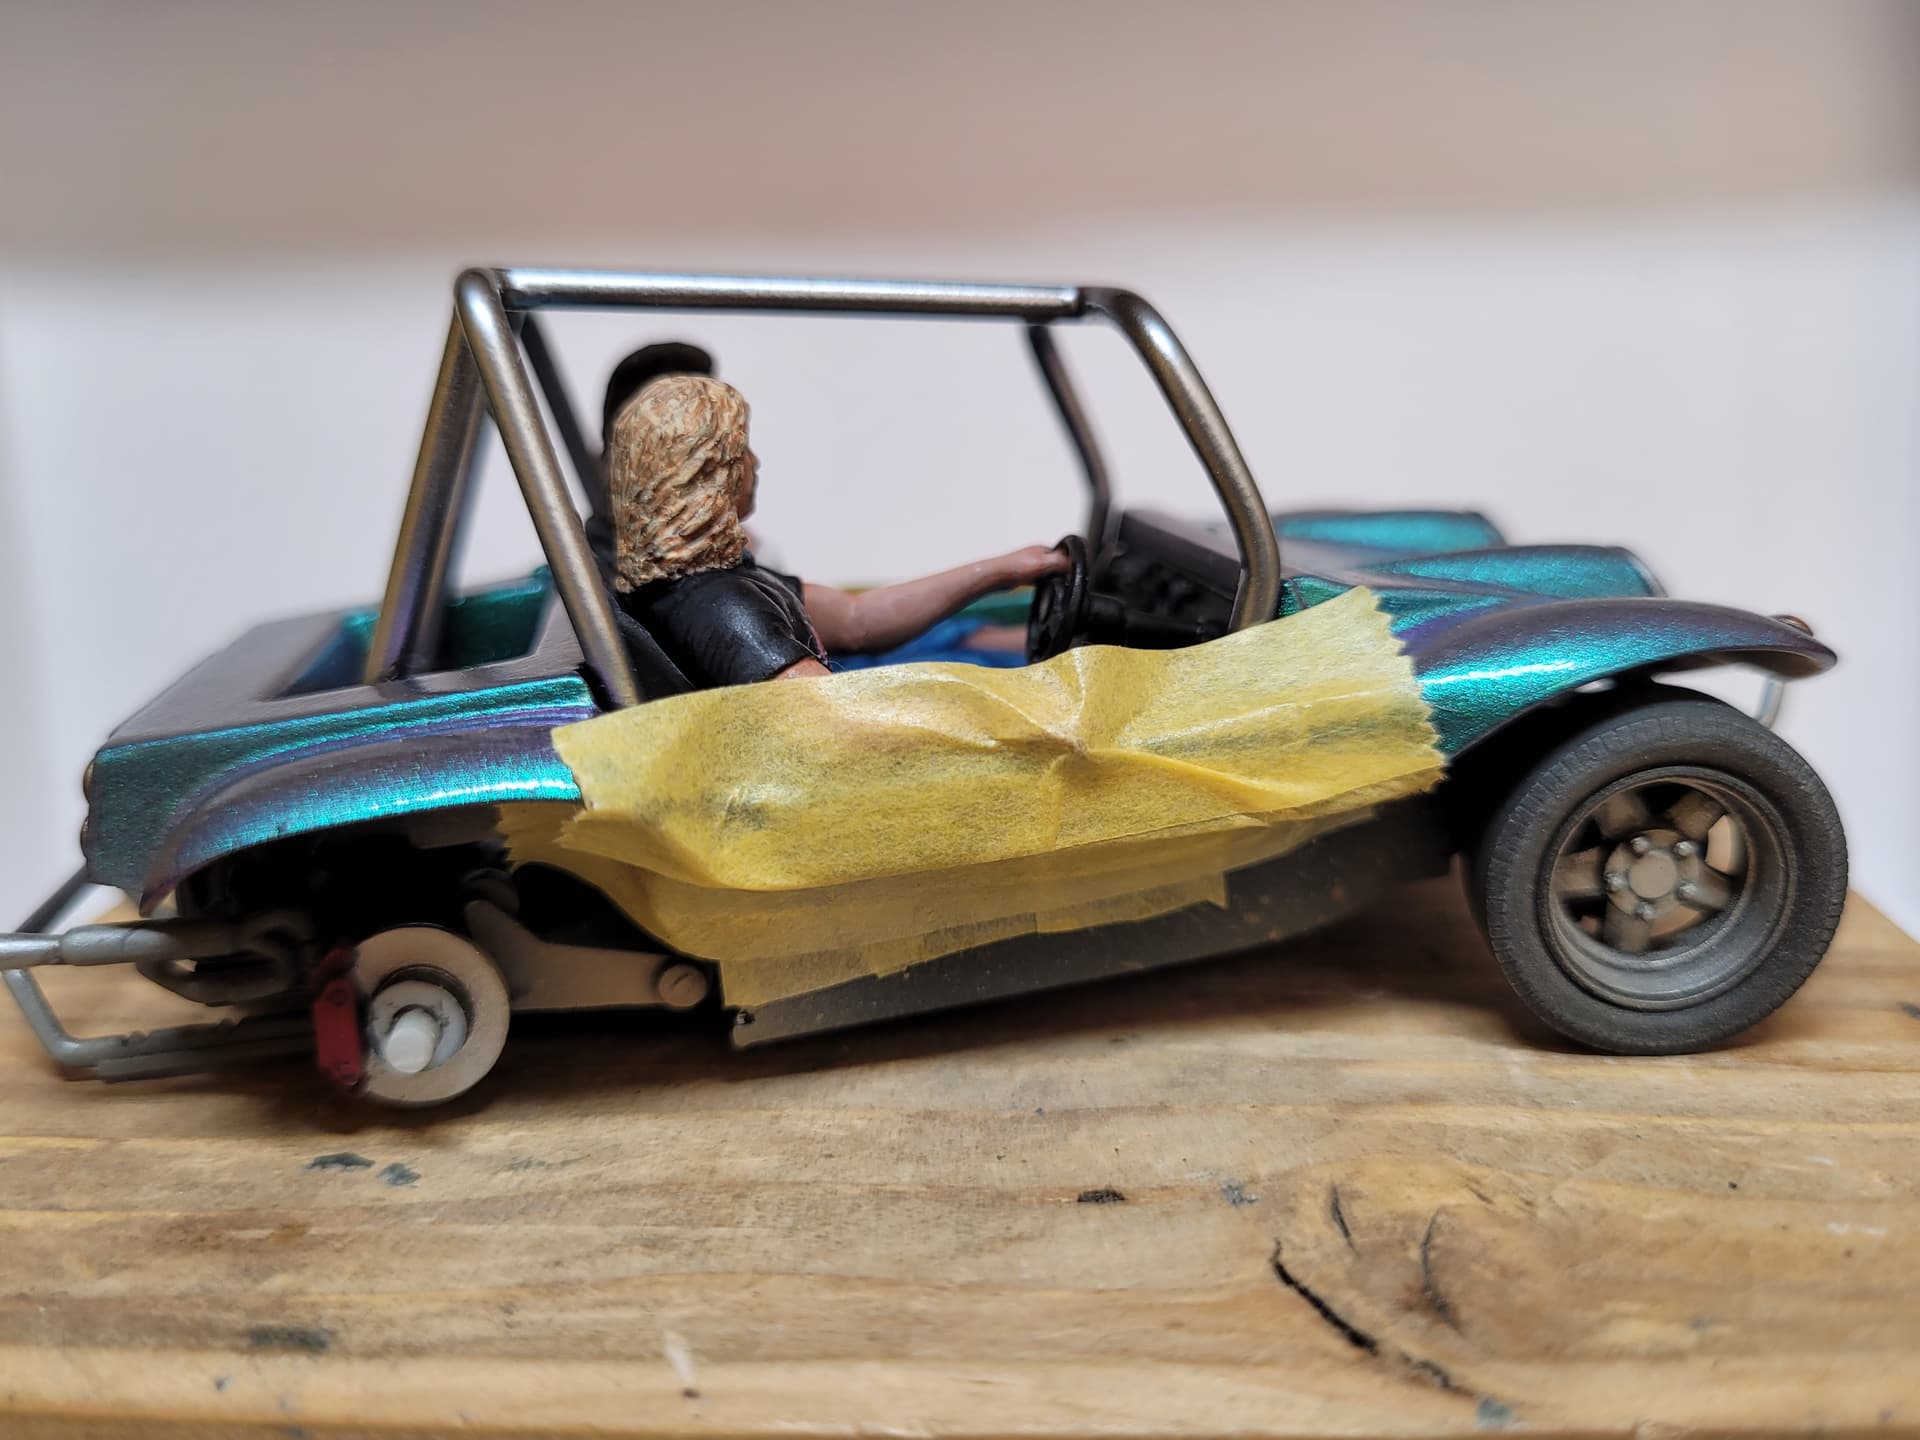
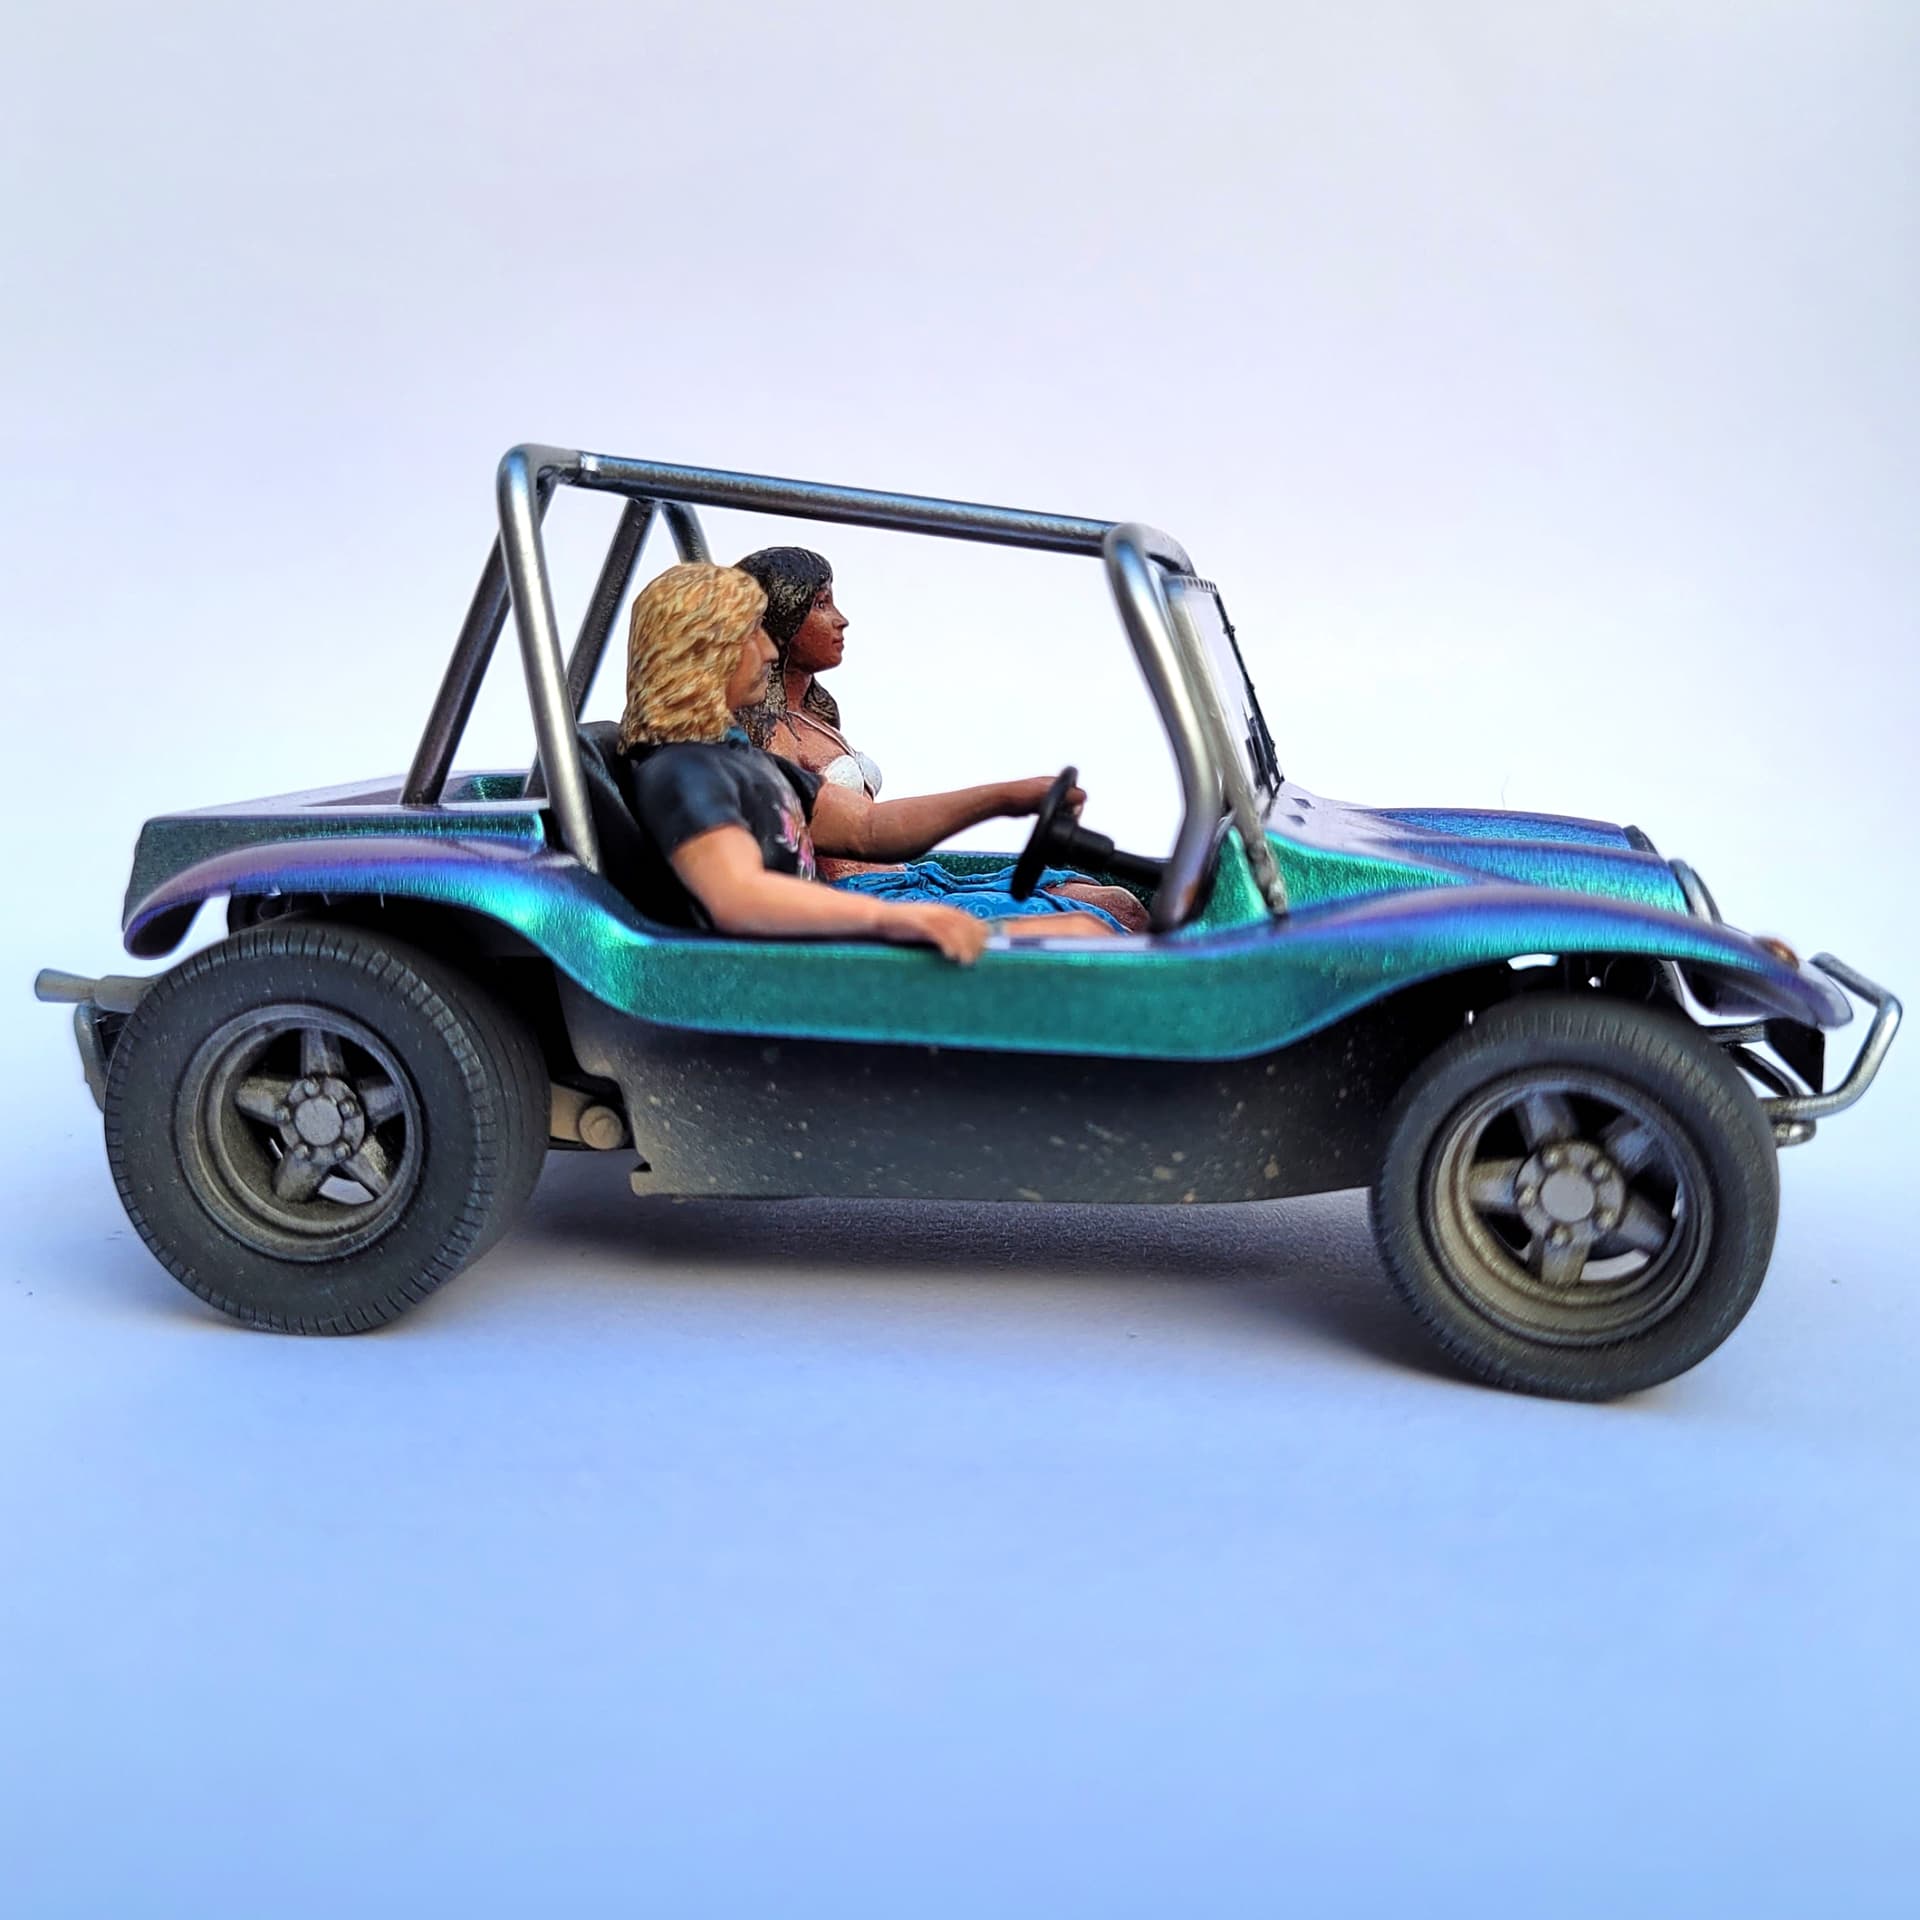
Our driver’s shoes were repainted from white to dark grey. As there’s no detail to speak of it seems better not to draw attention to them.
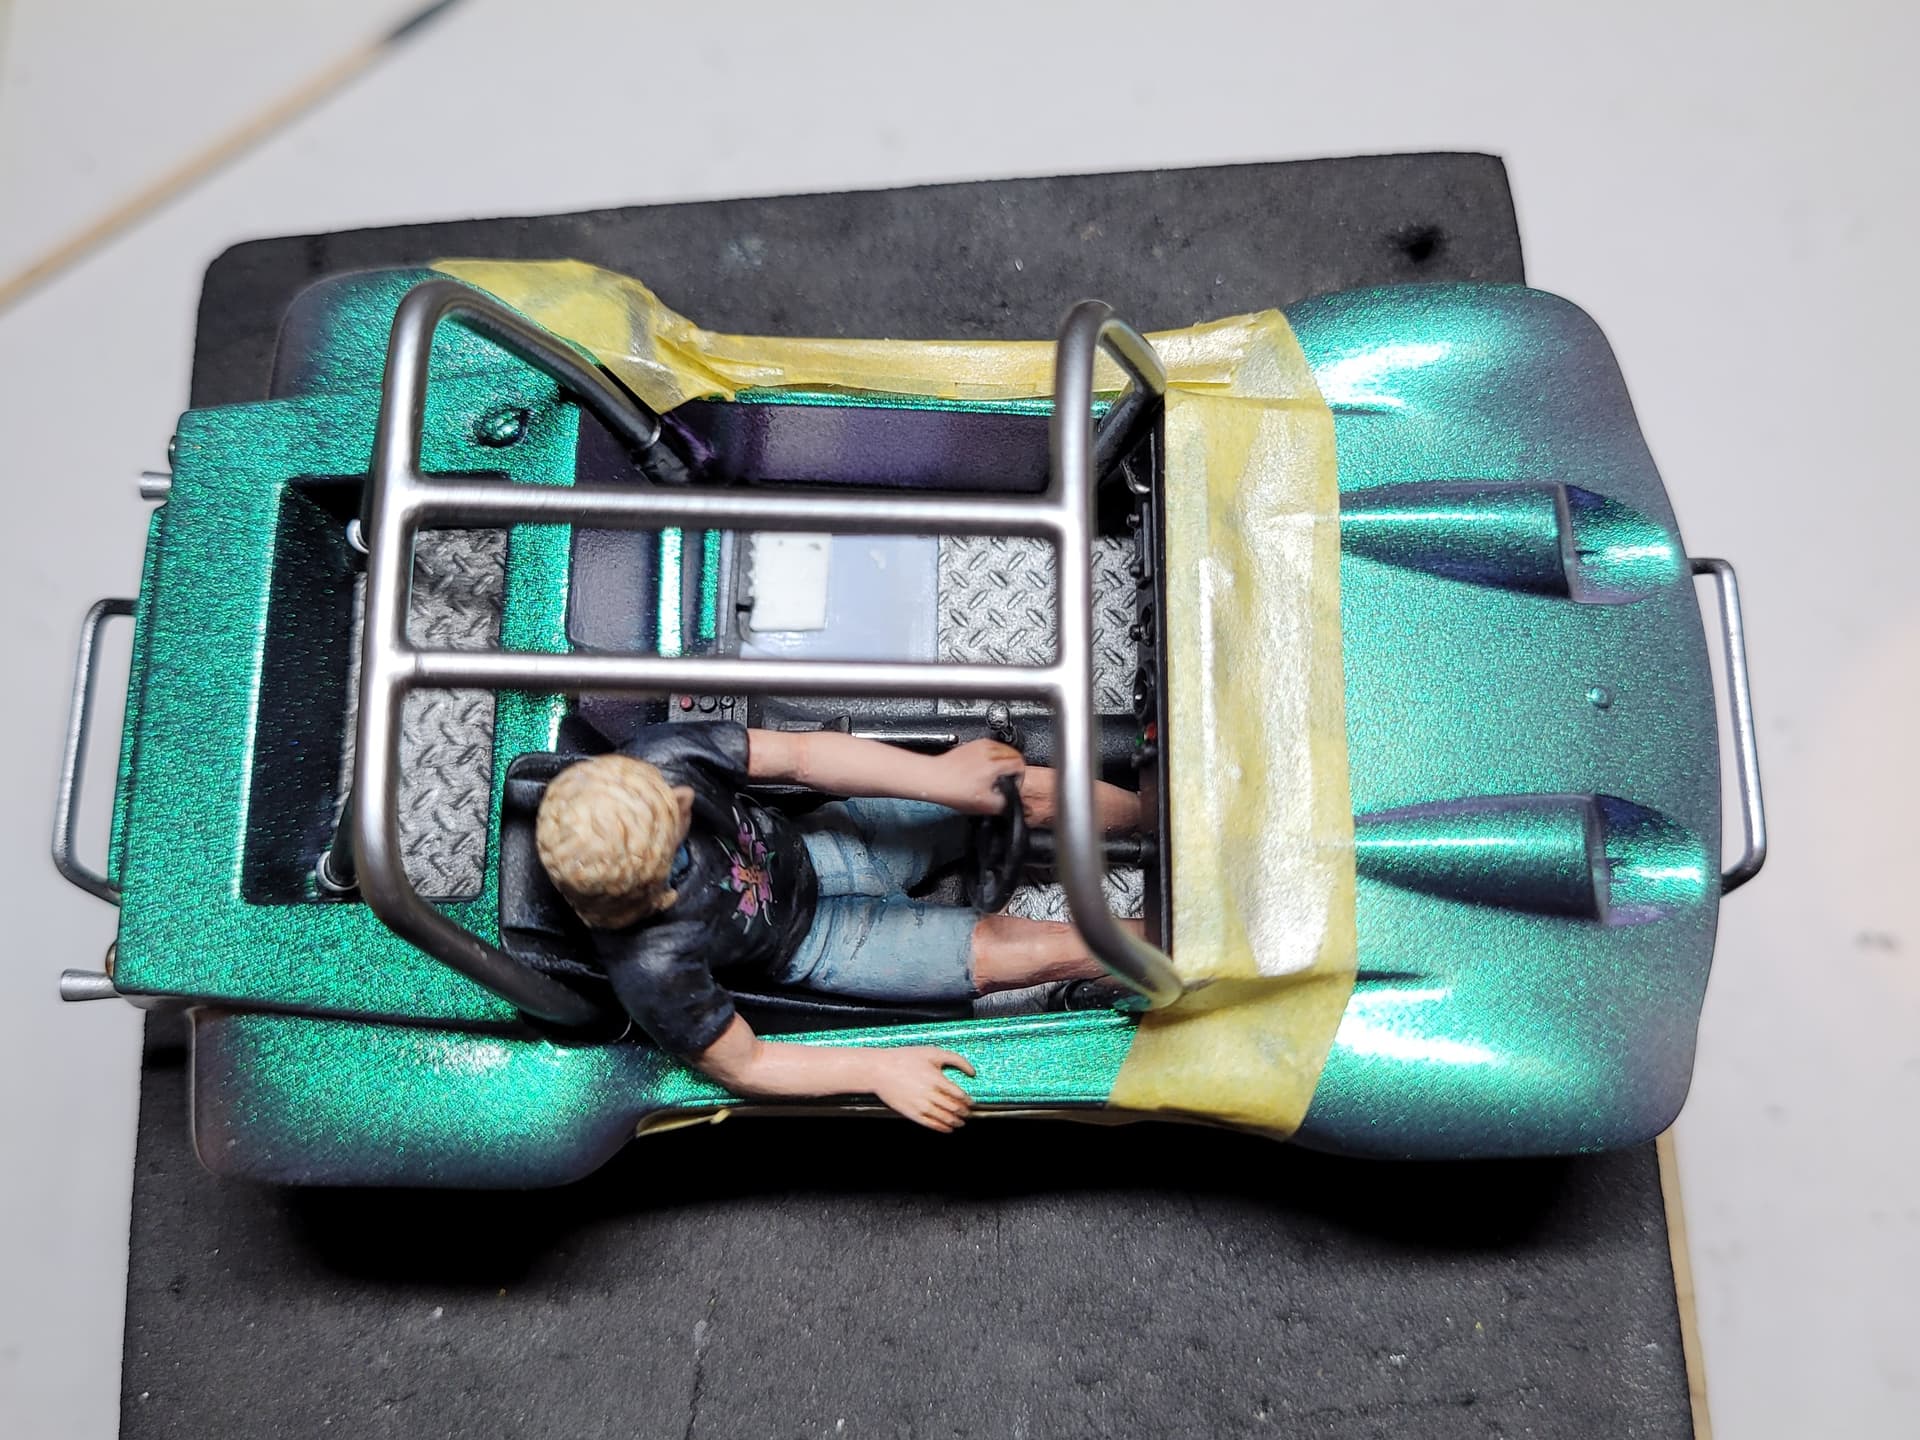
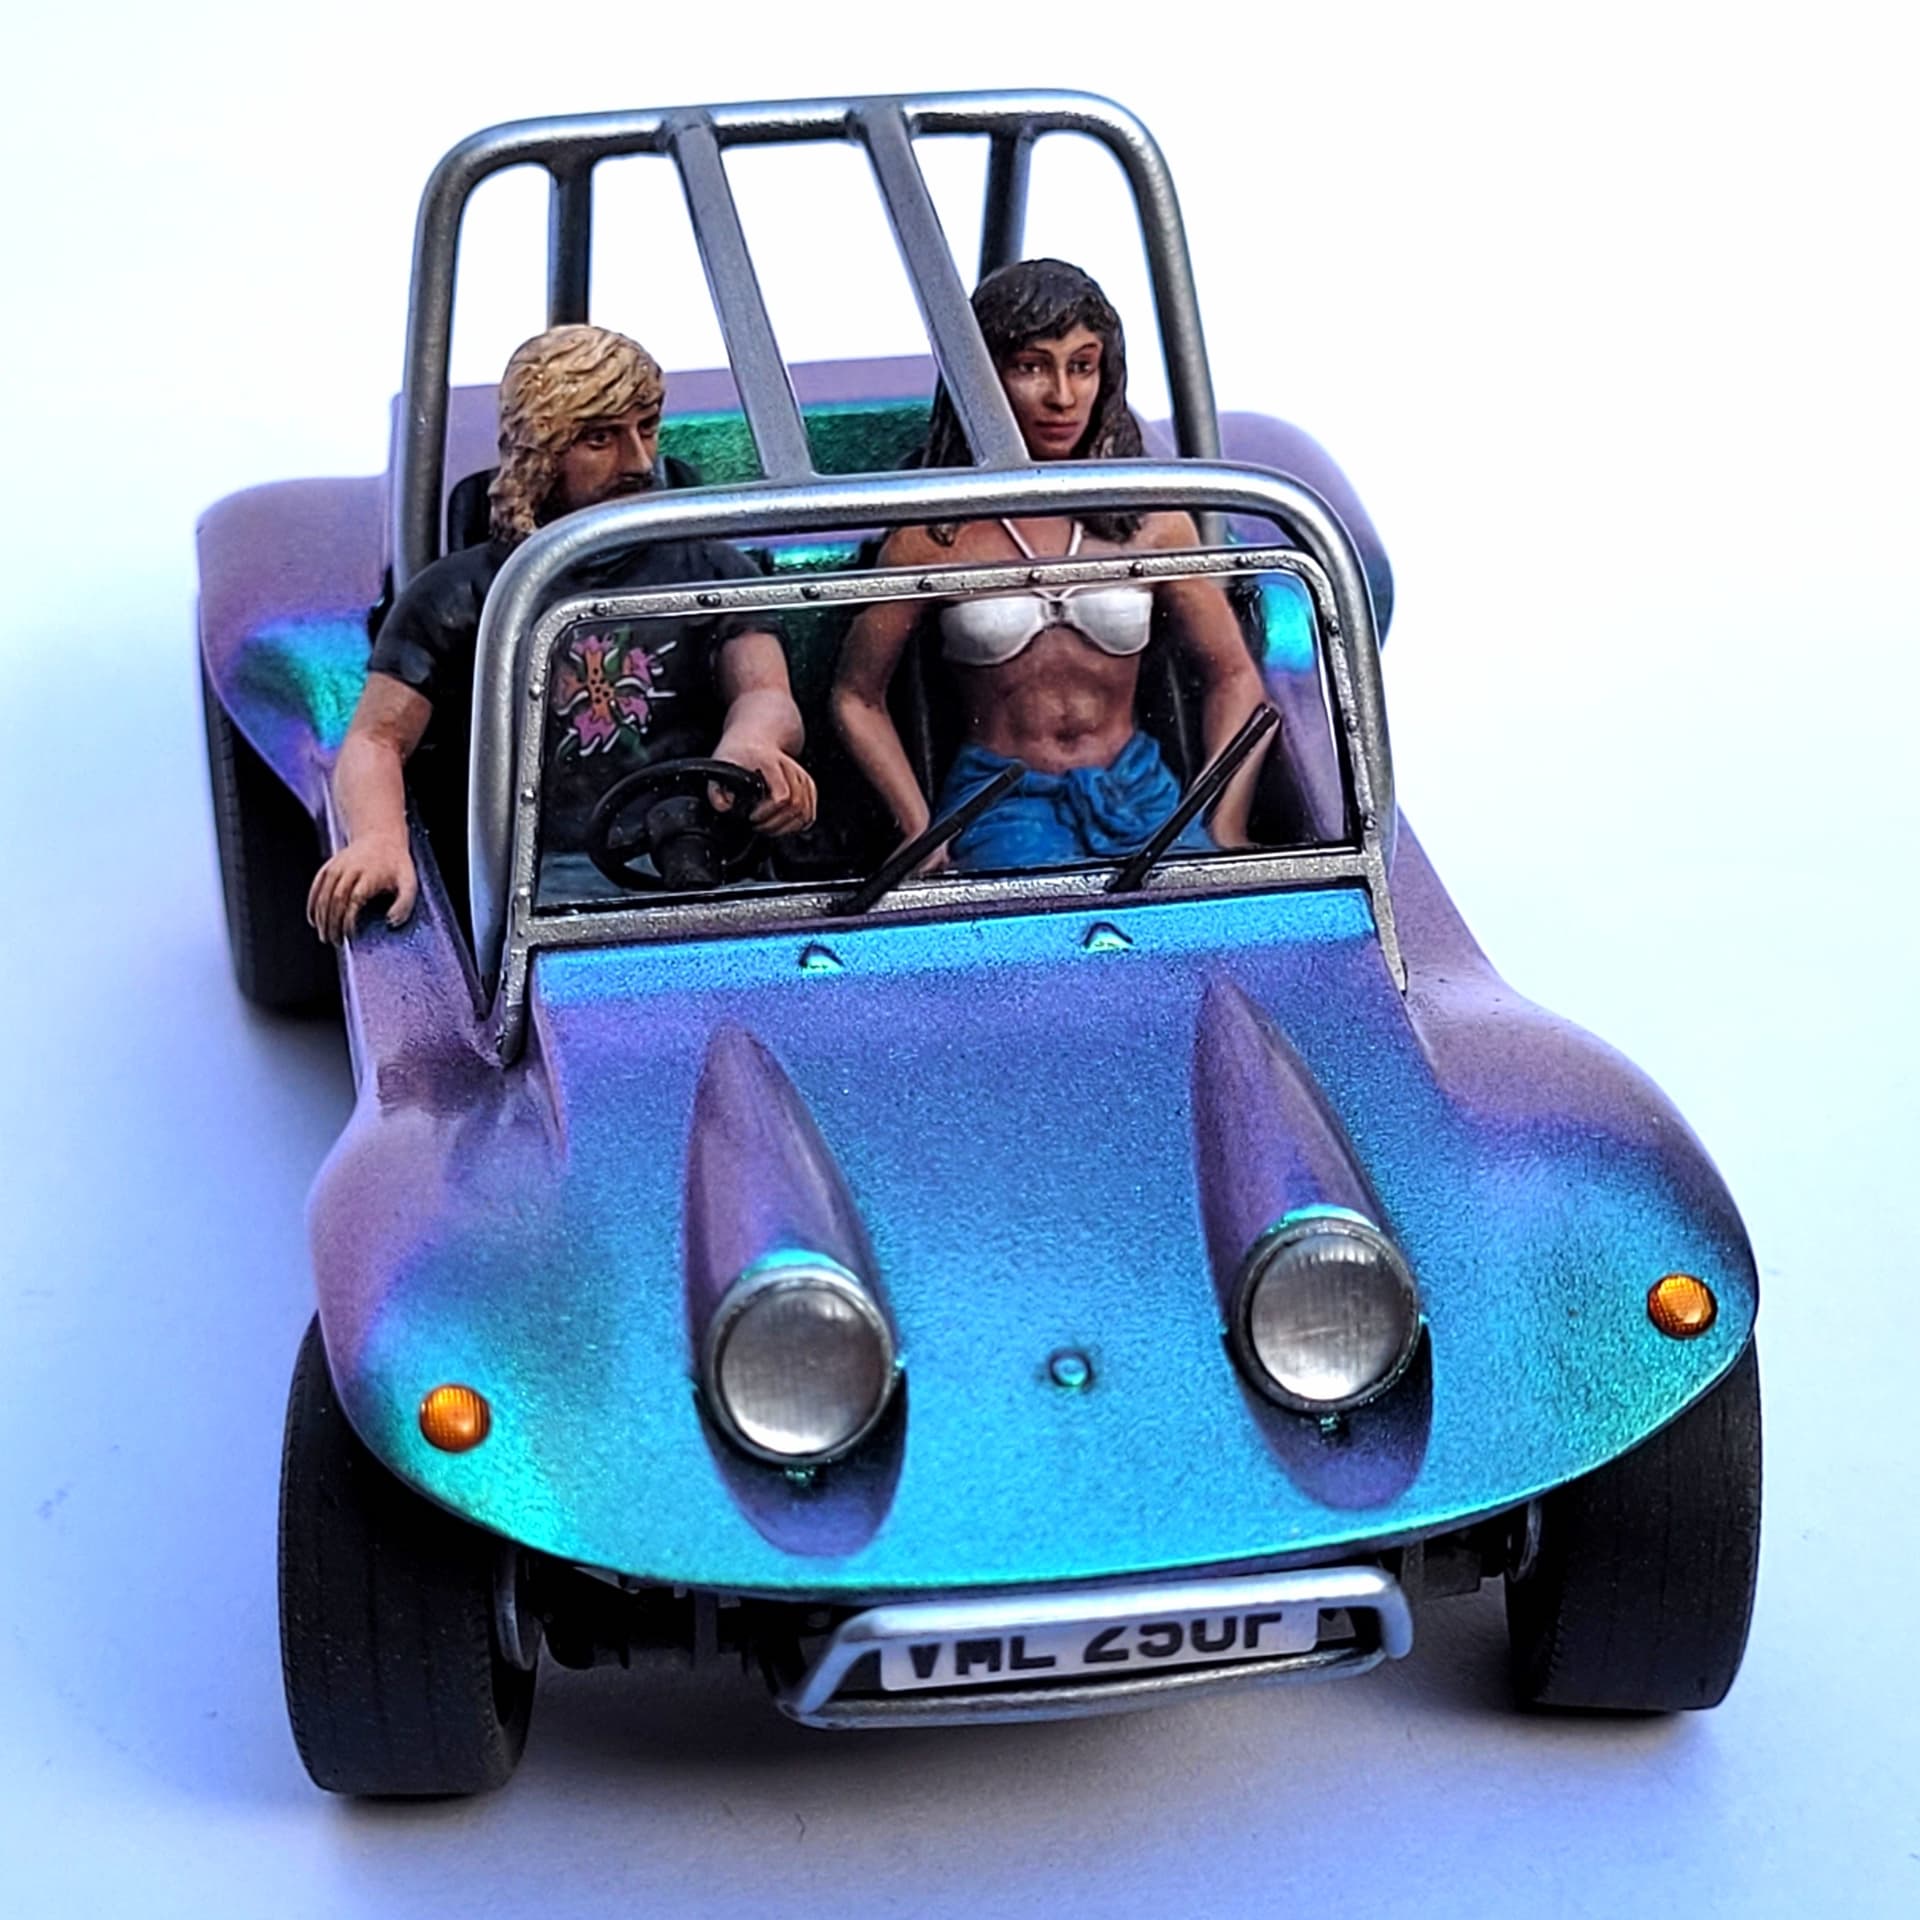
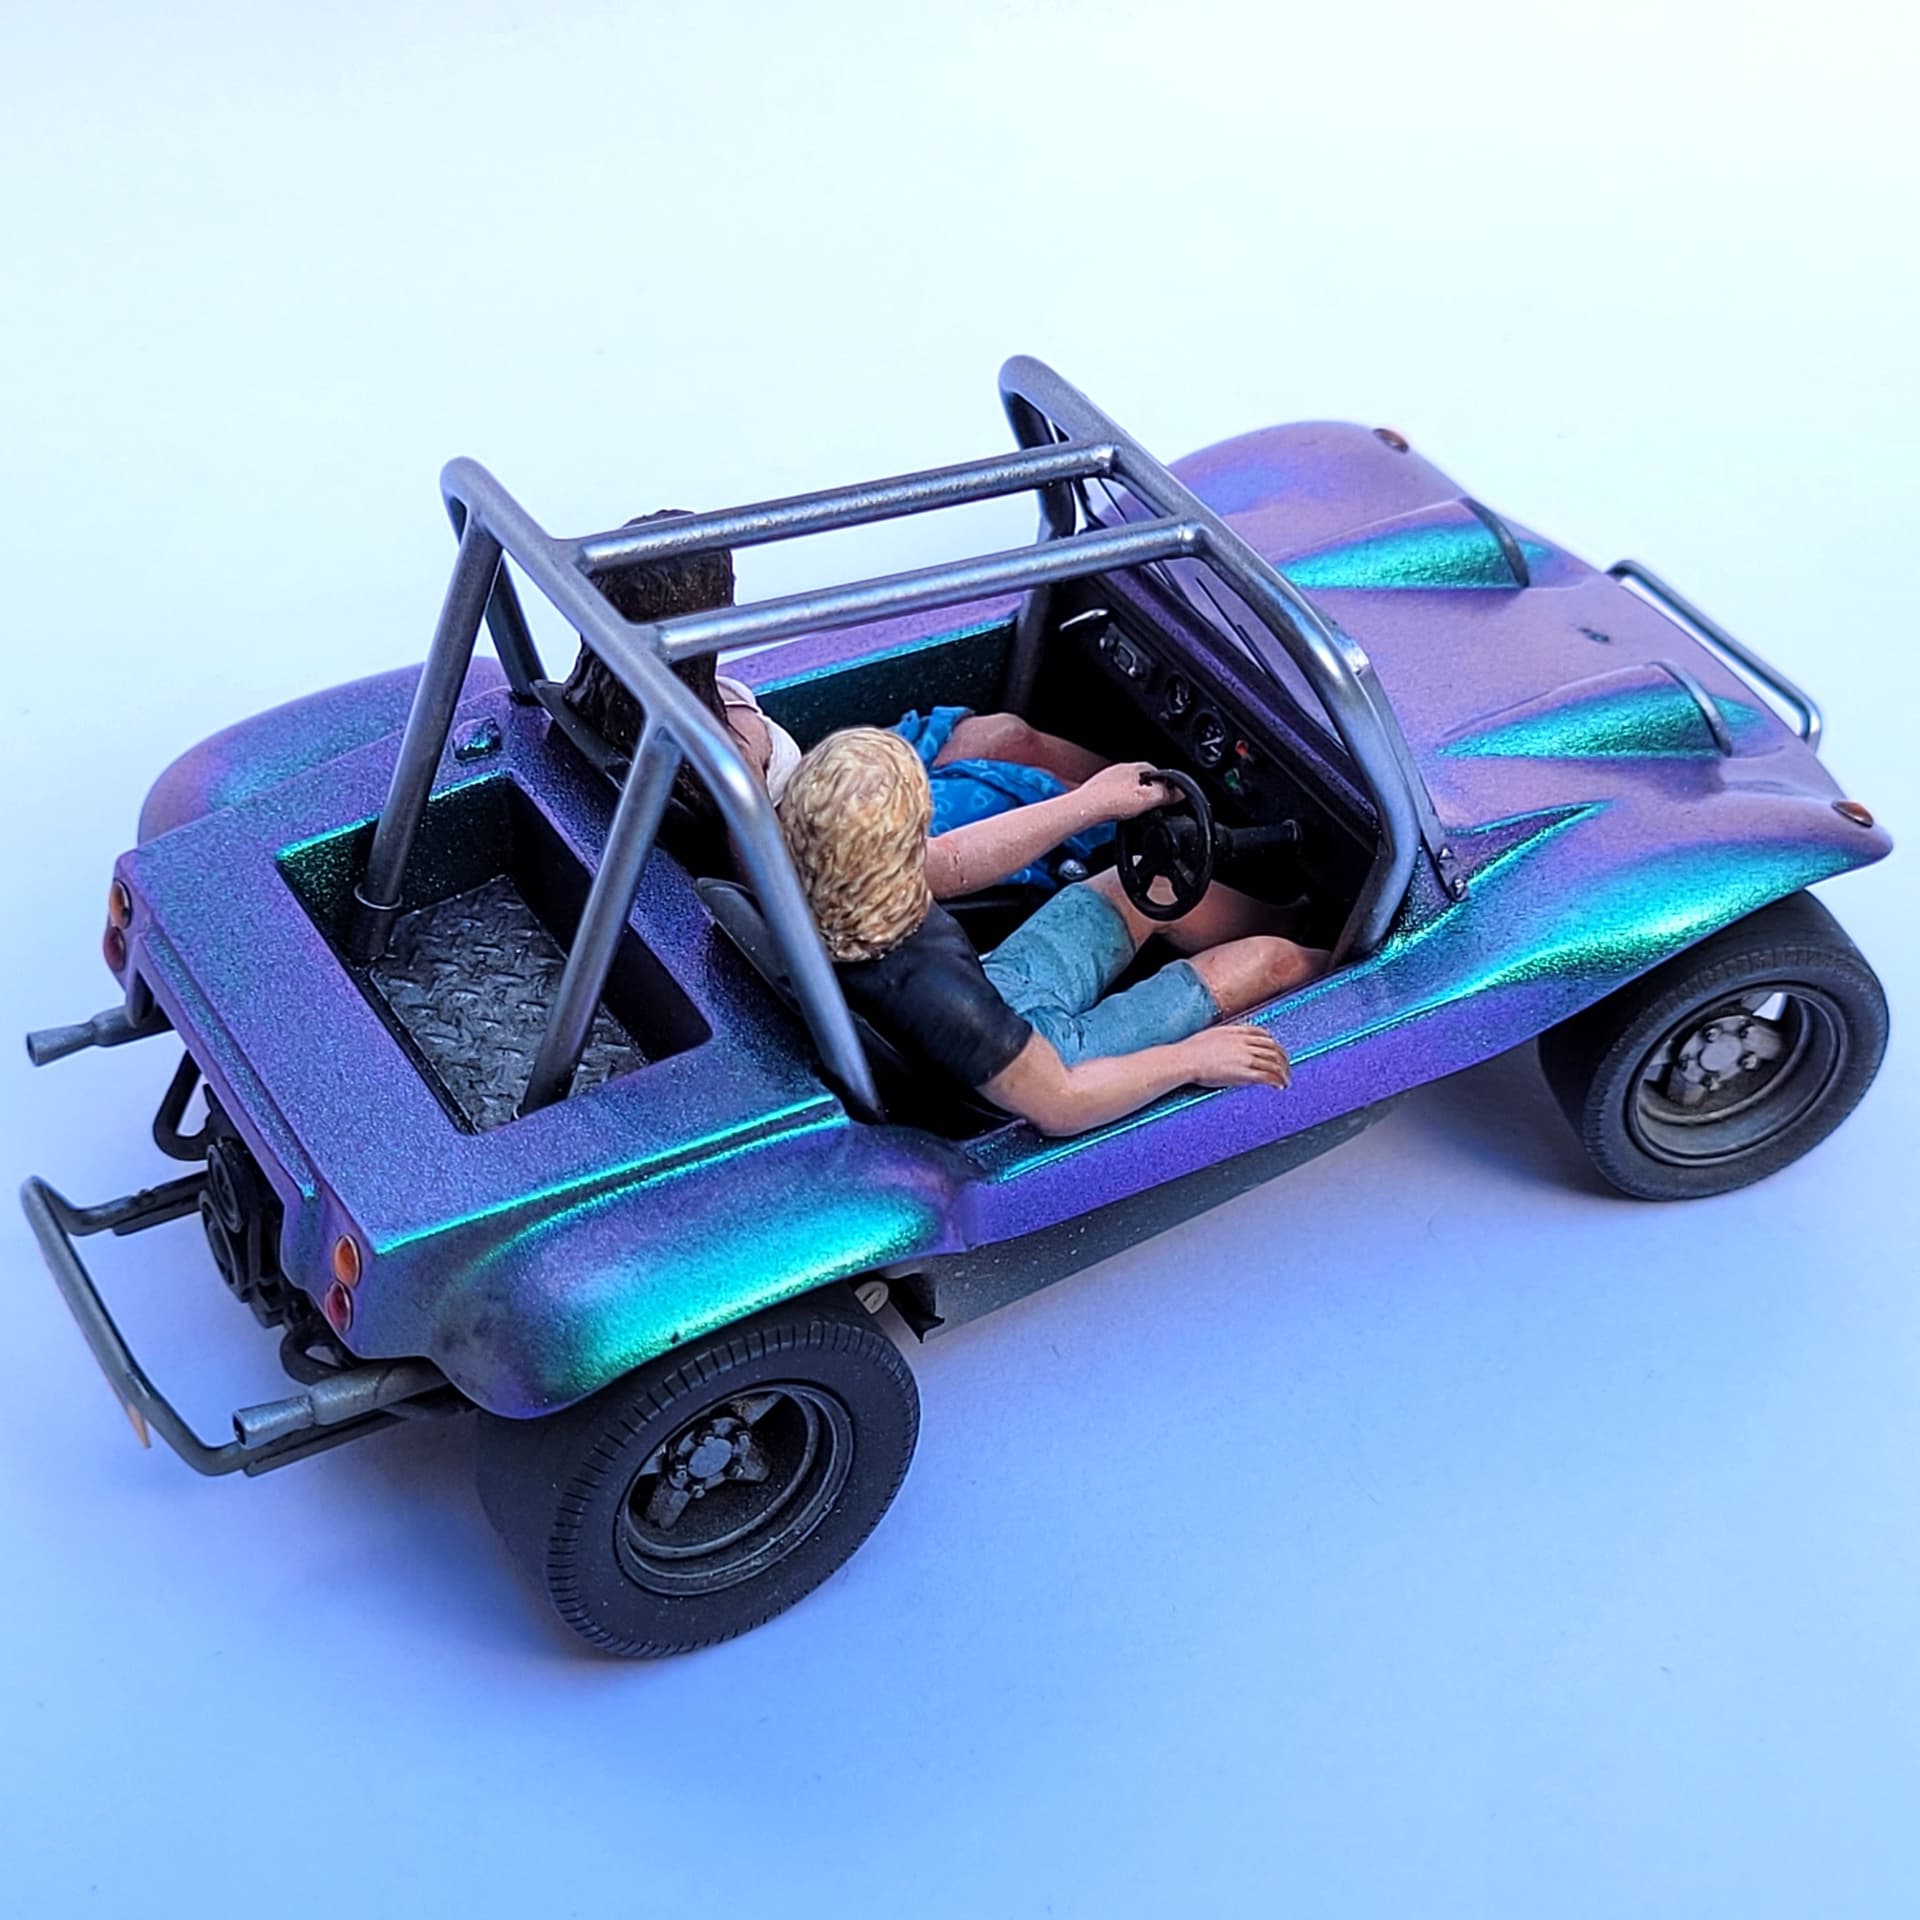
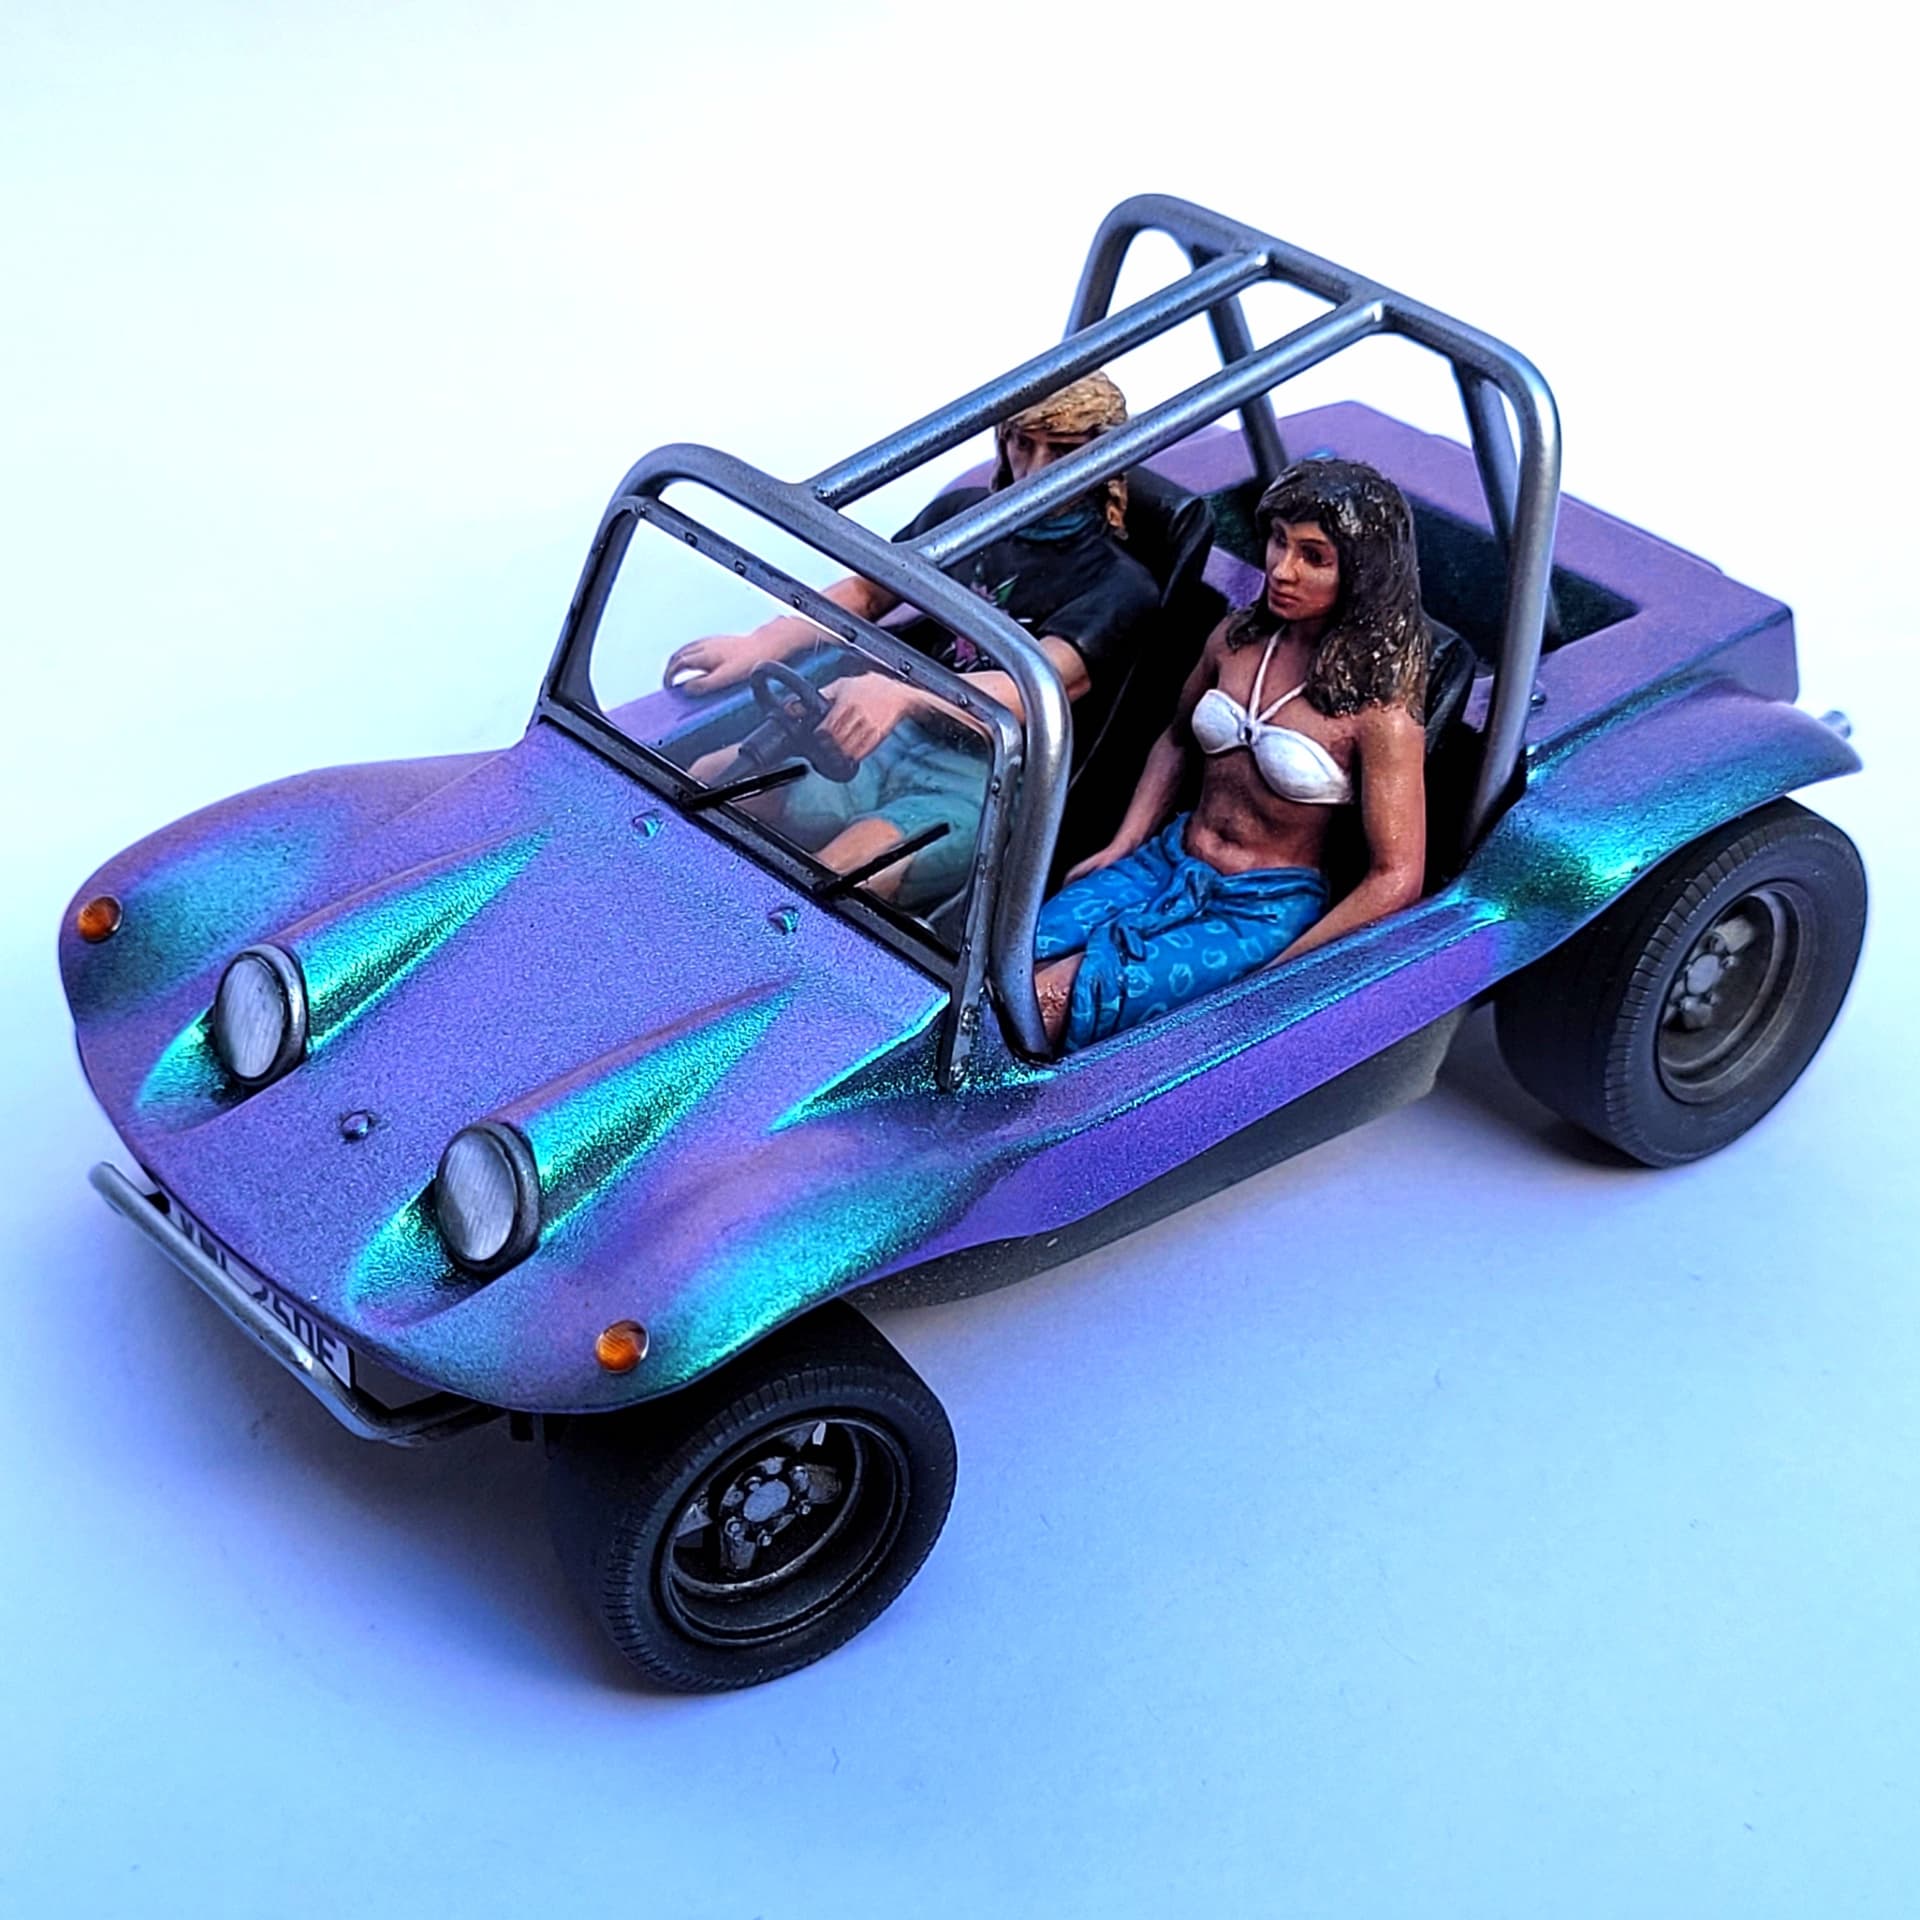
That, and with the steering column now painted black and Klear coated, cleared the way for the seat to go in, then the driver. After some fiddling I think I’ve managed to get his bum flat on the seat, his elbow resting on the side, and the steering wheel attached to the column. Just hoping there’s enough glue to keep it all there.
8 Likes
Very nice looking build. I like the bare metal finishes… They look spot on…
1 Like
Great little touches that all add to the final picture, really good stuff!
Cheers, D
1 Like
Mathew,
Very nice fix to the head lamps. I’ve tried a few Chrome/Silver Artist markers, and never much cared for them either.
The Driver really looks quite good seating behind the wheel, and actually looks the part with one hand on the sill and the other hand on the wheel.
joel
1 Like
Dude! I just saw this and I’m blown away. Great attention to detail, takes me back to the early seventies and my adolescent years! Love how the wheels came out, your efforts to make the figures seated oh so perfectly, and the young lady’s facial finish is spot on as well. I can just hear this thing blasting thru the neighborhood! The dash, engine, paint, and chassis work is excellent too. wow
Cheers ![]()
Dave ![]()
1 Like
A lot of tender loving care can really make an old kit into a gem. Really awesome work! ![]()
1 Like
More great detailing; love it.
1 Like
Thank you for the comments. Big break while I went away for a couple of weeks and other family things.
The passenger side proved more difficult despite all the prep I had done. When it came to test fitting, the seat sat up higher than the driver side, so filing on the seat base was needed, and also from the soles of her feet so that she wasn’t tipped back as the seat was lowered. I should have been braver with modifying her, tipping her head even more forward than I did, and straightening the legs more.


After a few days of filing, testing, filing, I fixed her in place, making sure to hold her until the glue set - those tight abs coming in handy. This seat assembly had a tendency to move around, but at the same time I’m being really careful not to damage paint work.

Quite exciting after all this time to get to fix the people and then the wheels. Front wheels first to get the angle and level right.
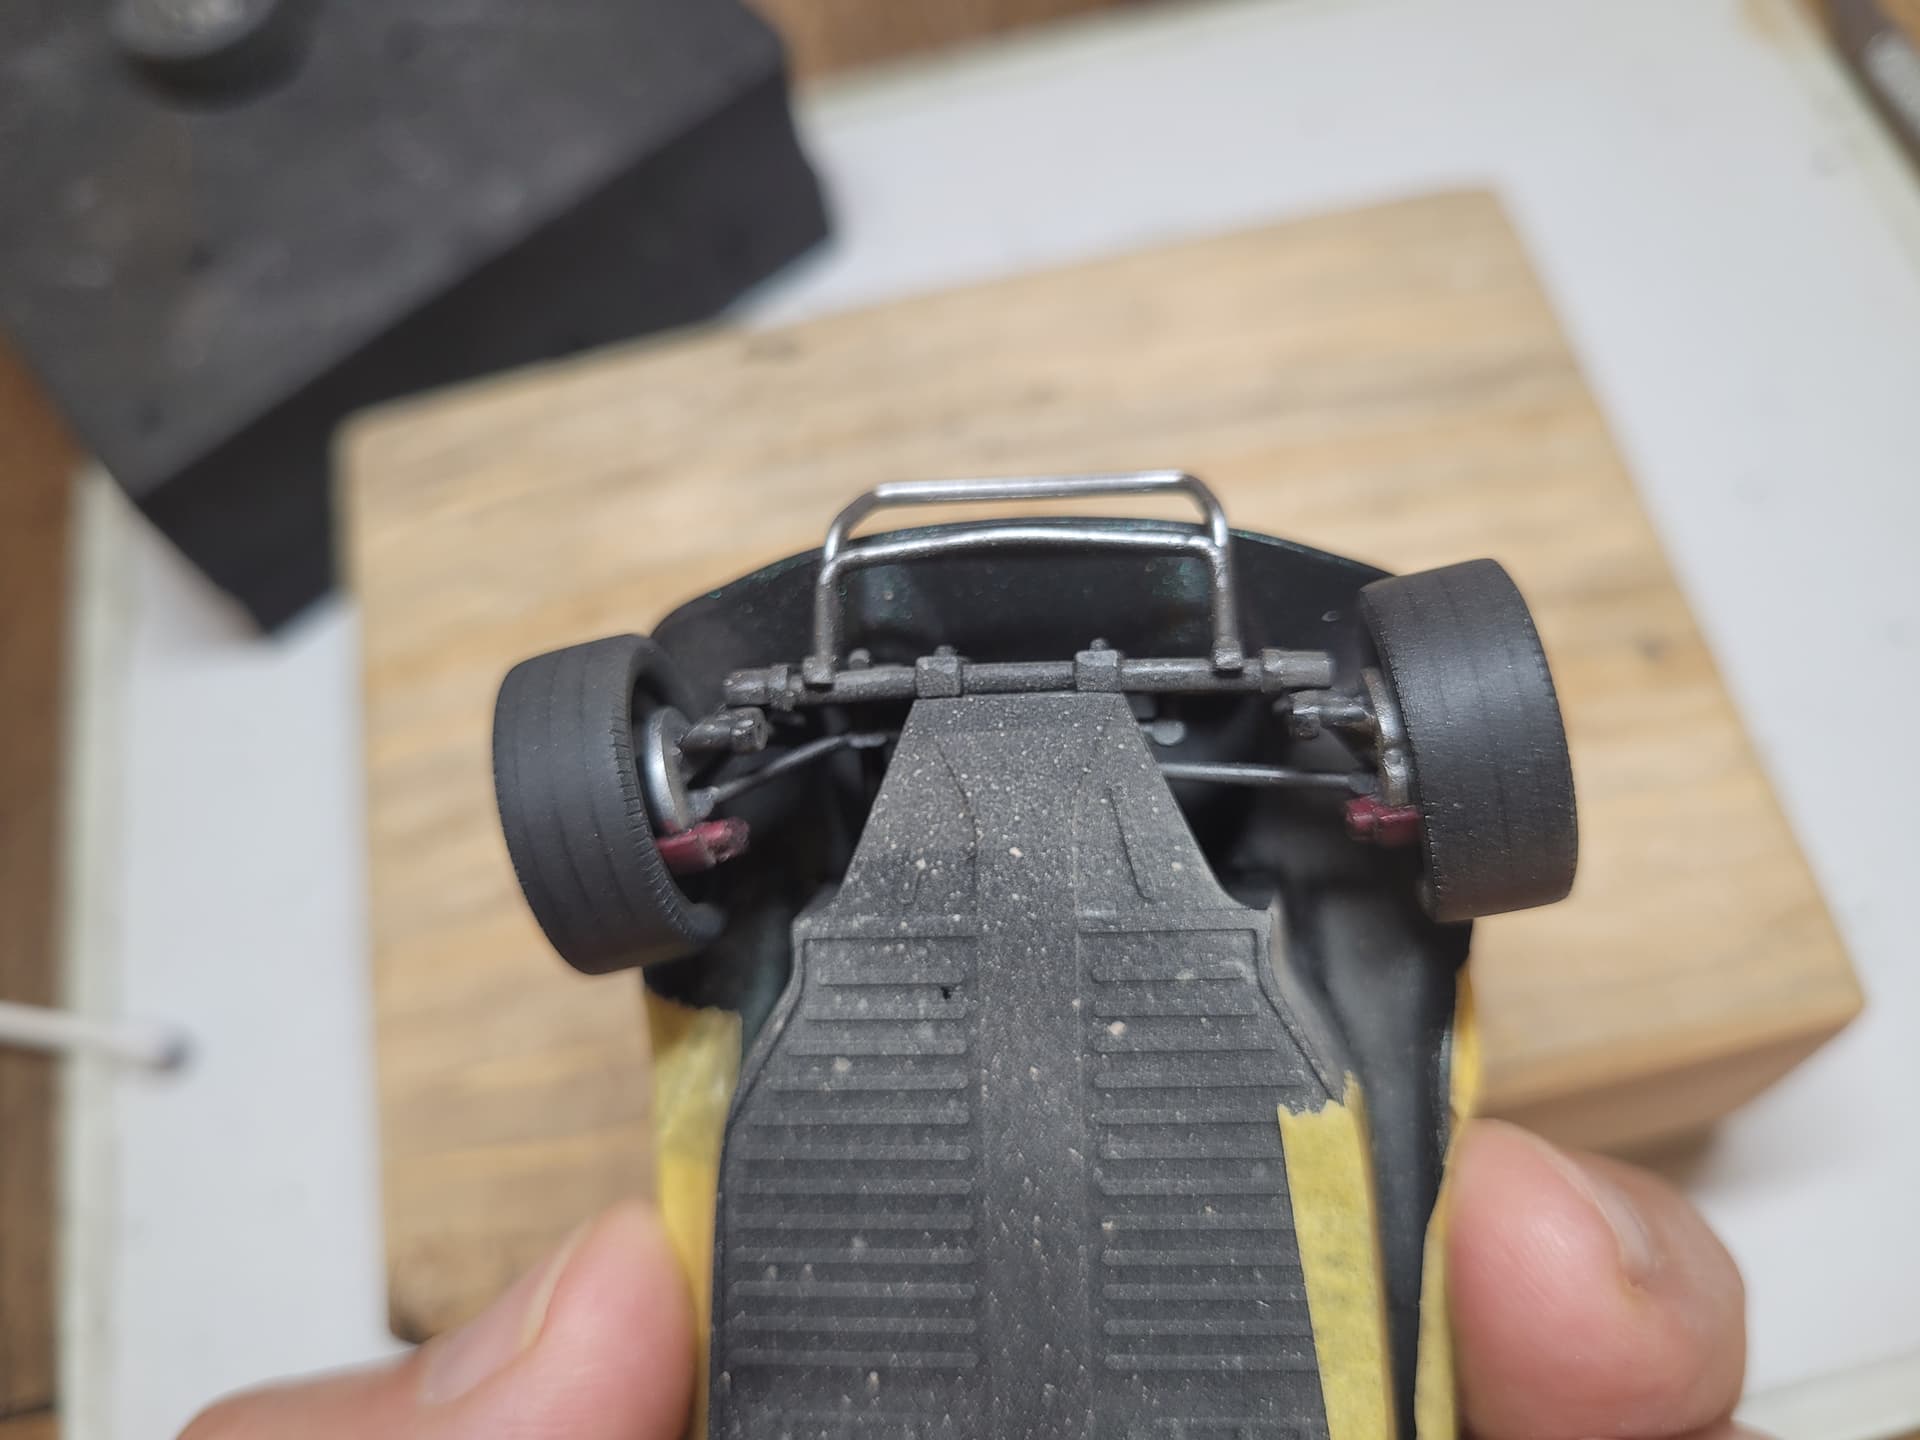
Added the head lights after more fiddling, adjusting the paint on the rims before coating with Klear. Quite surprised at how reflective they are with the foil inside.
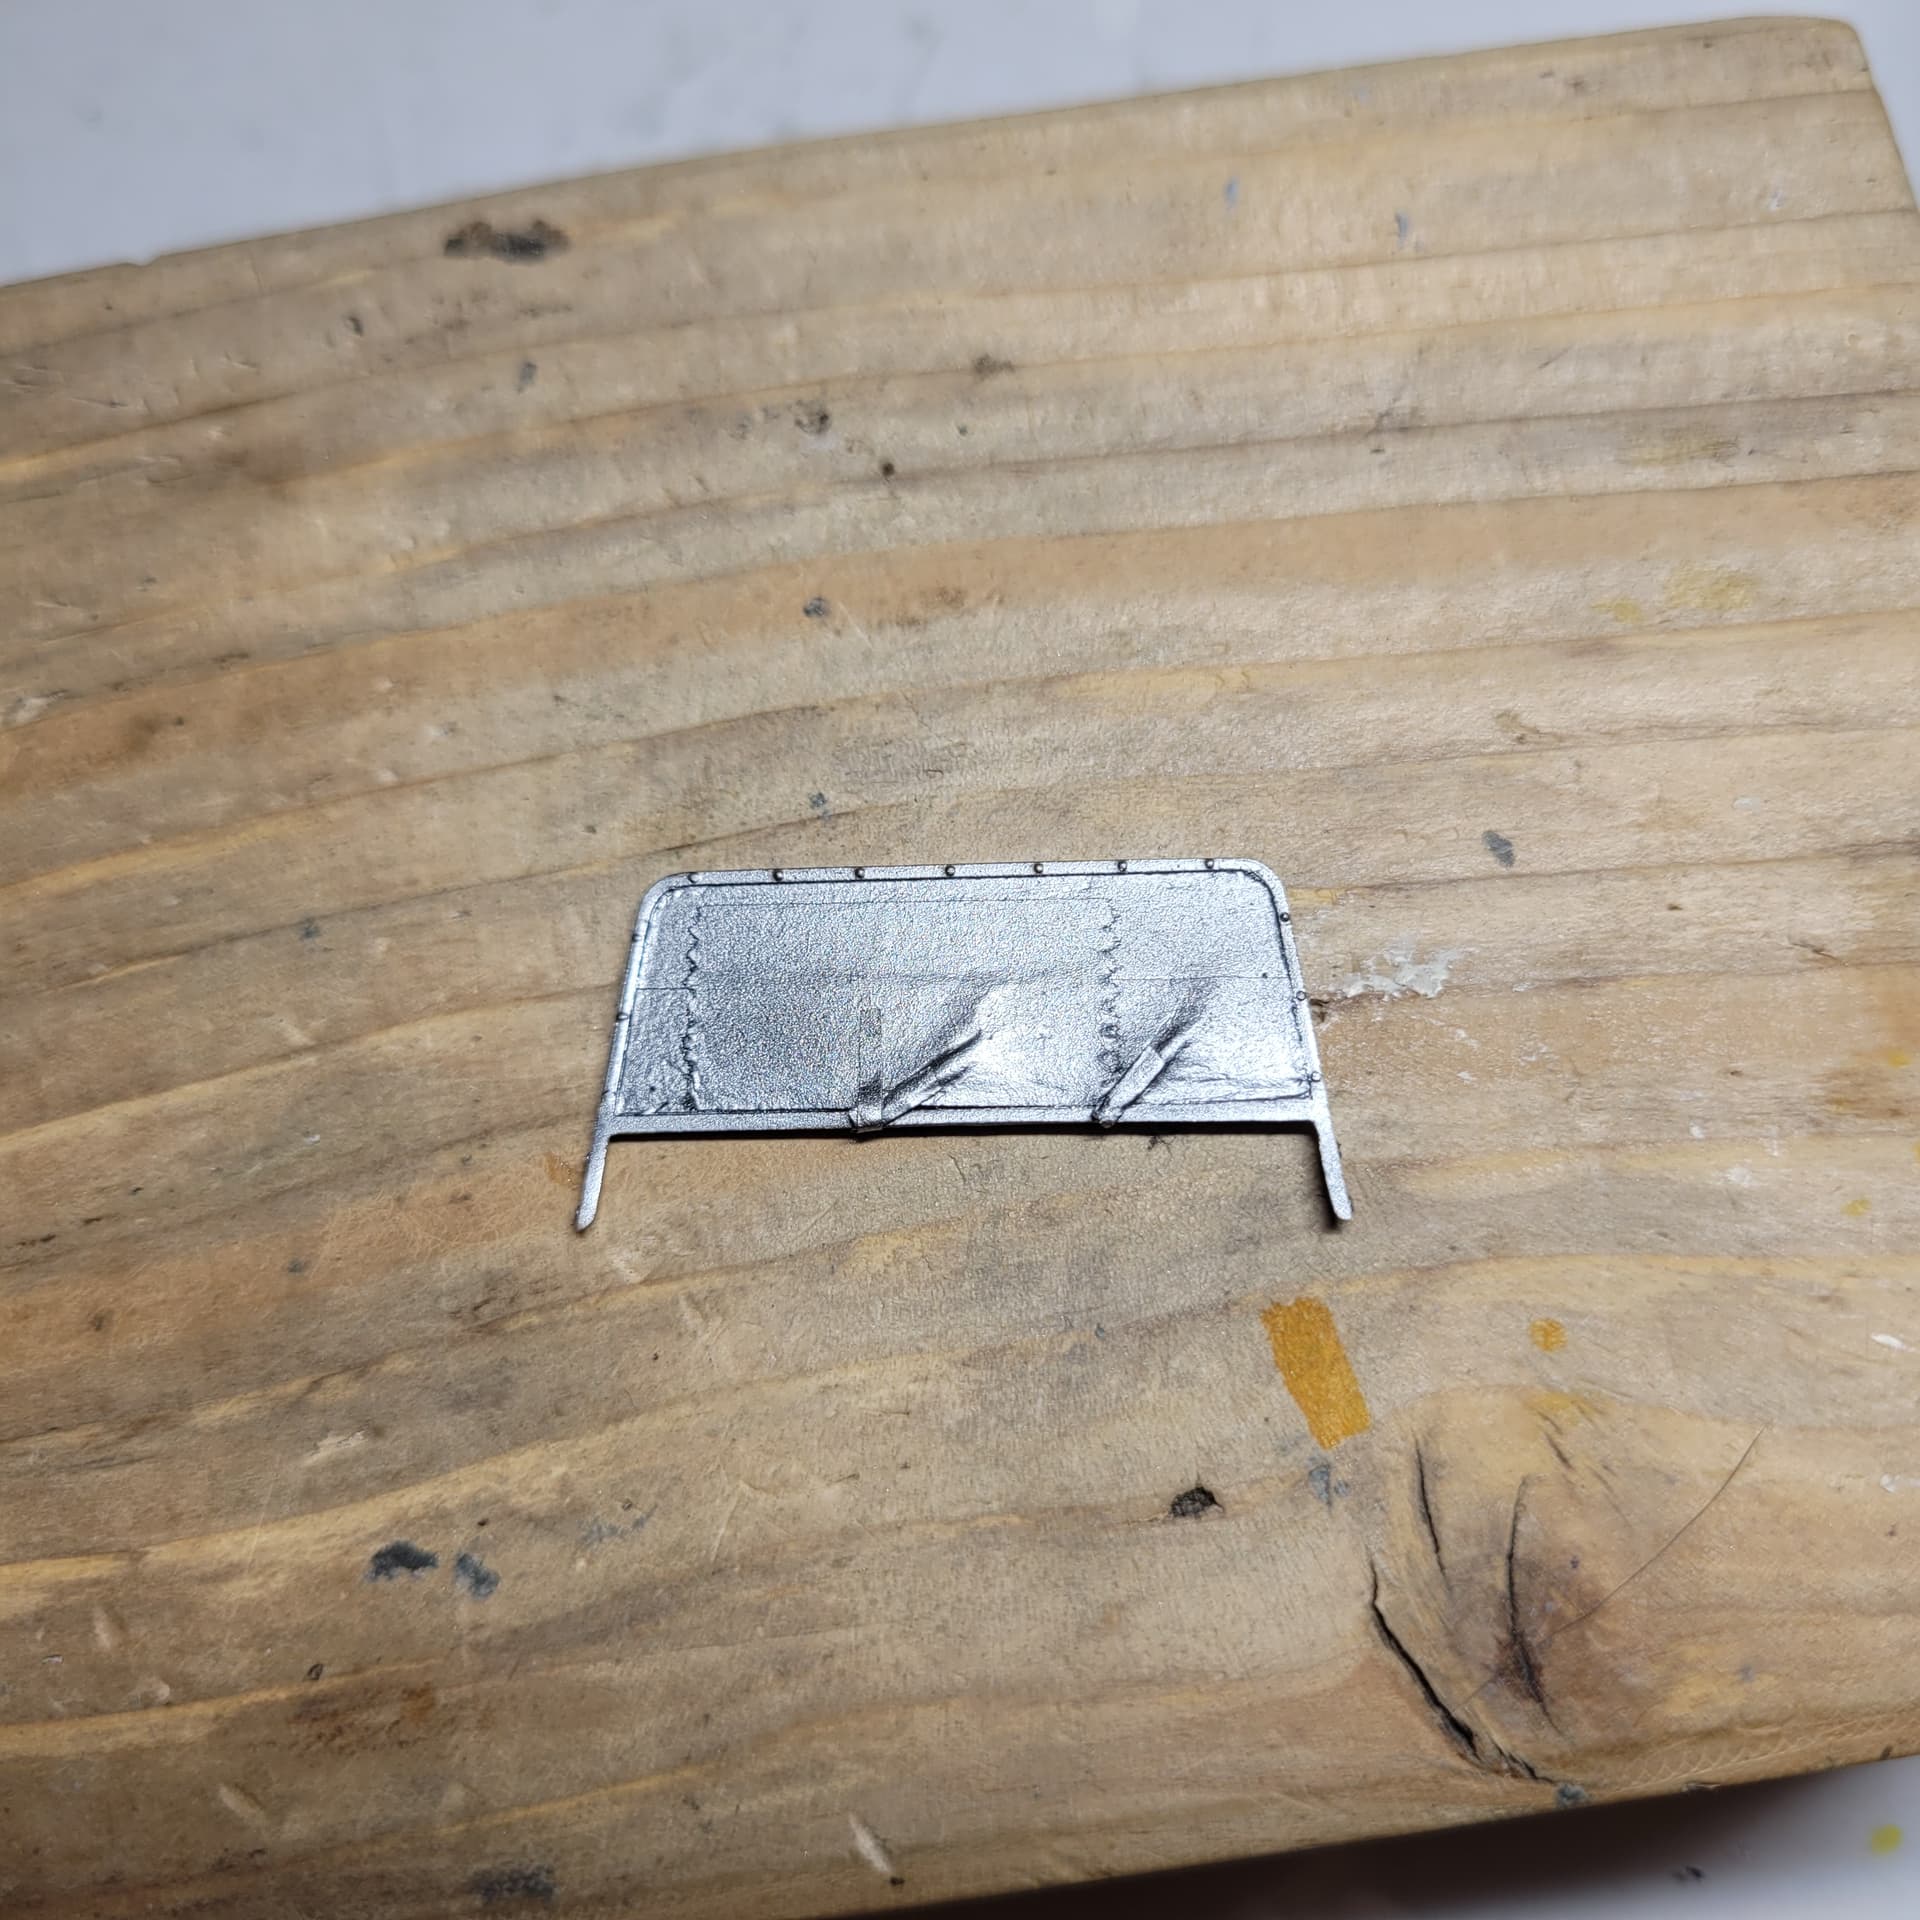
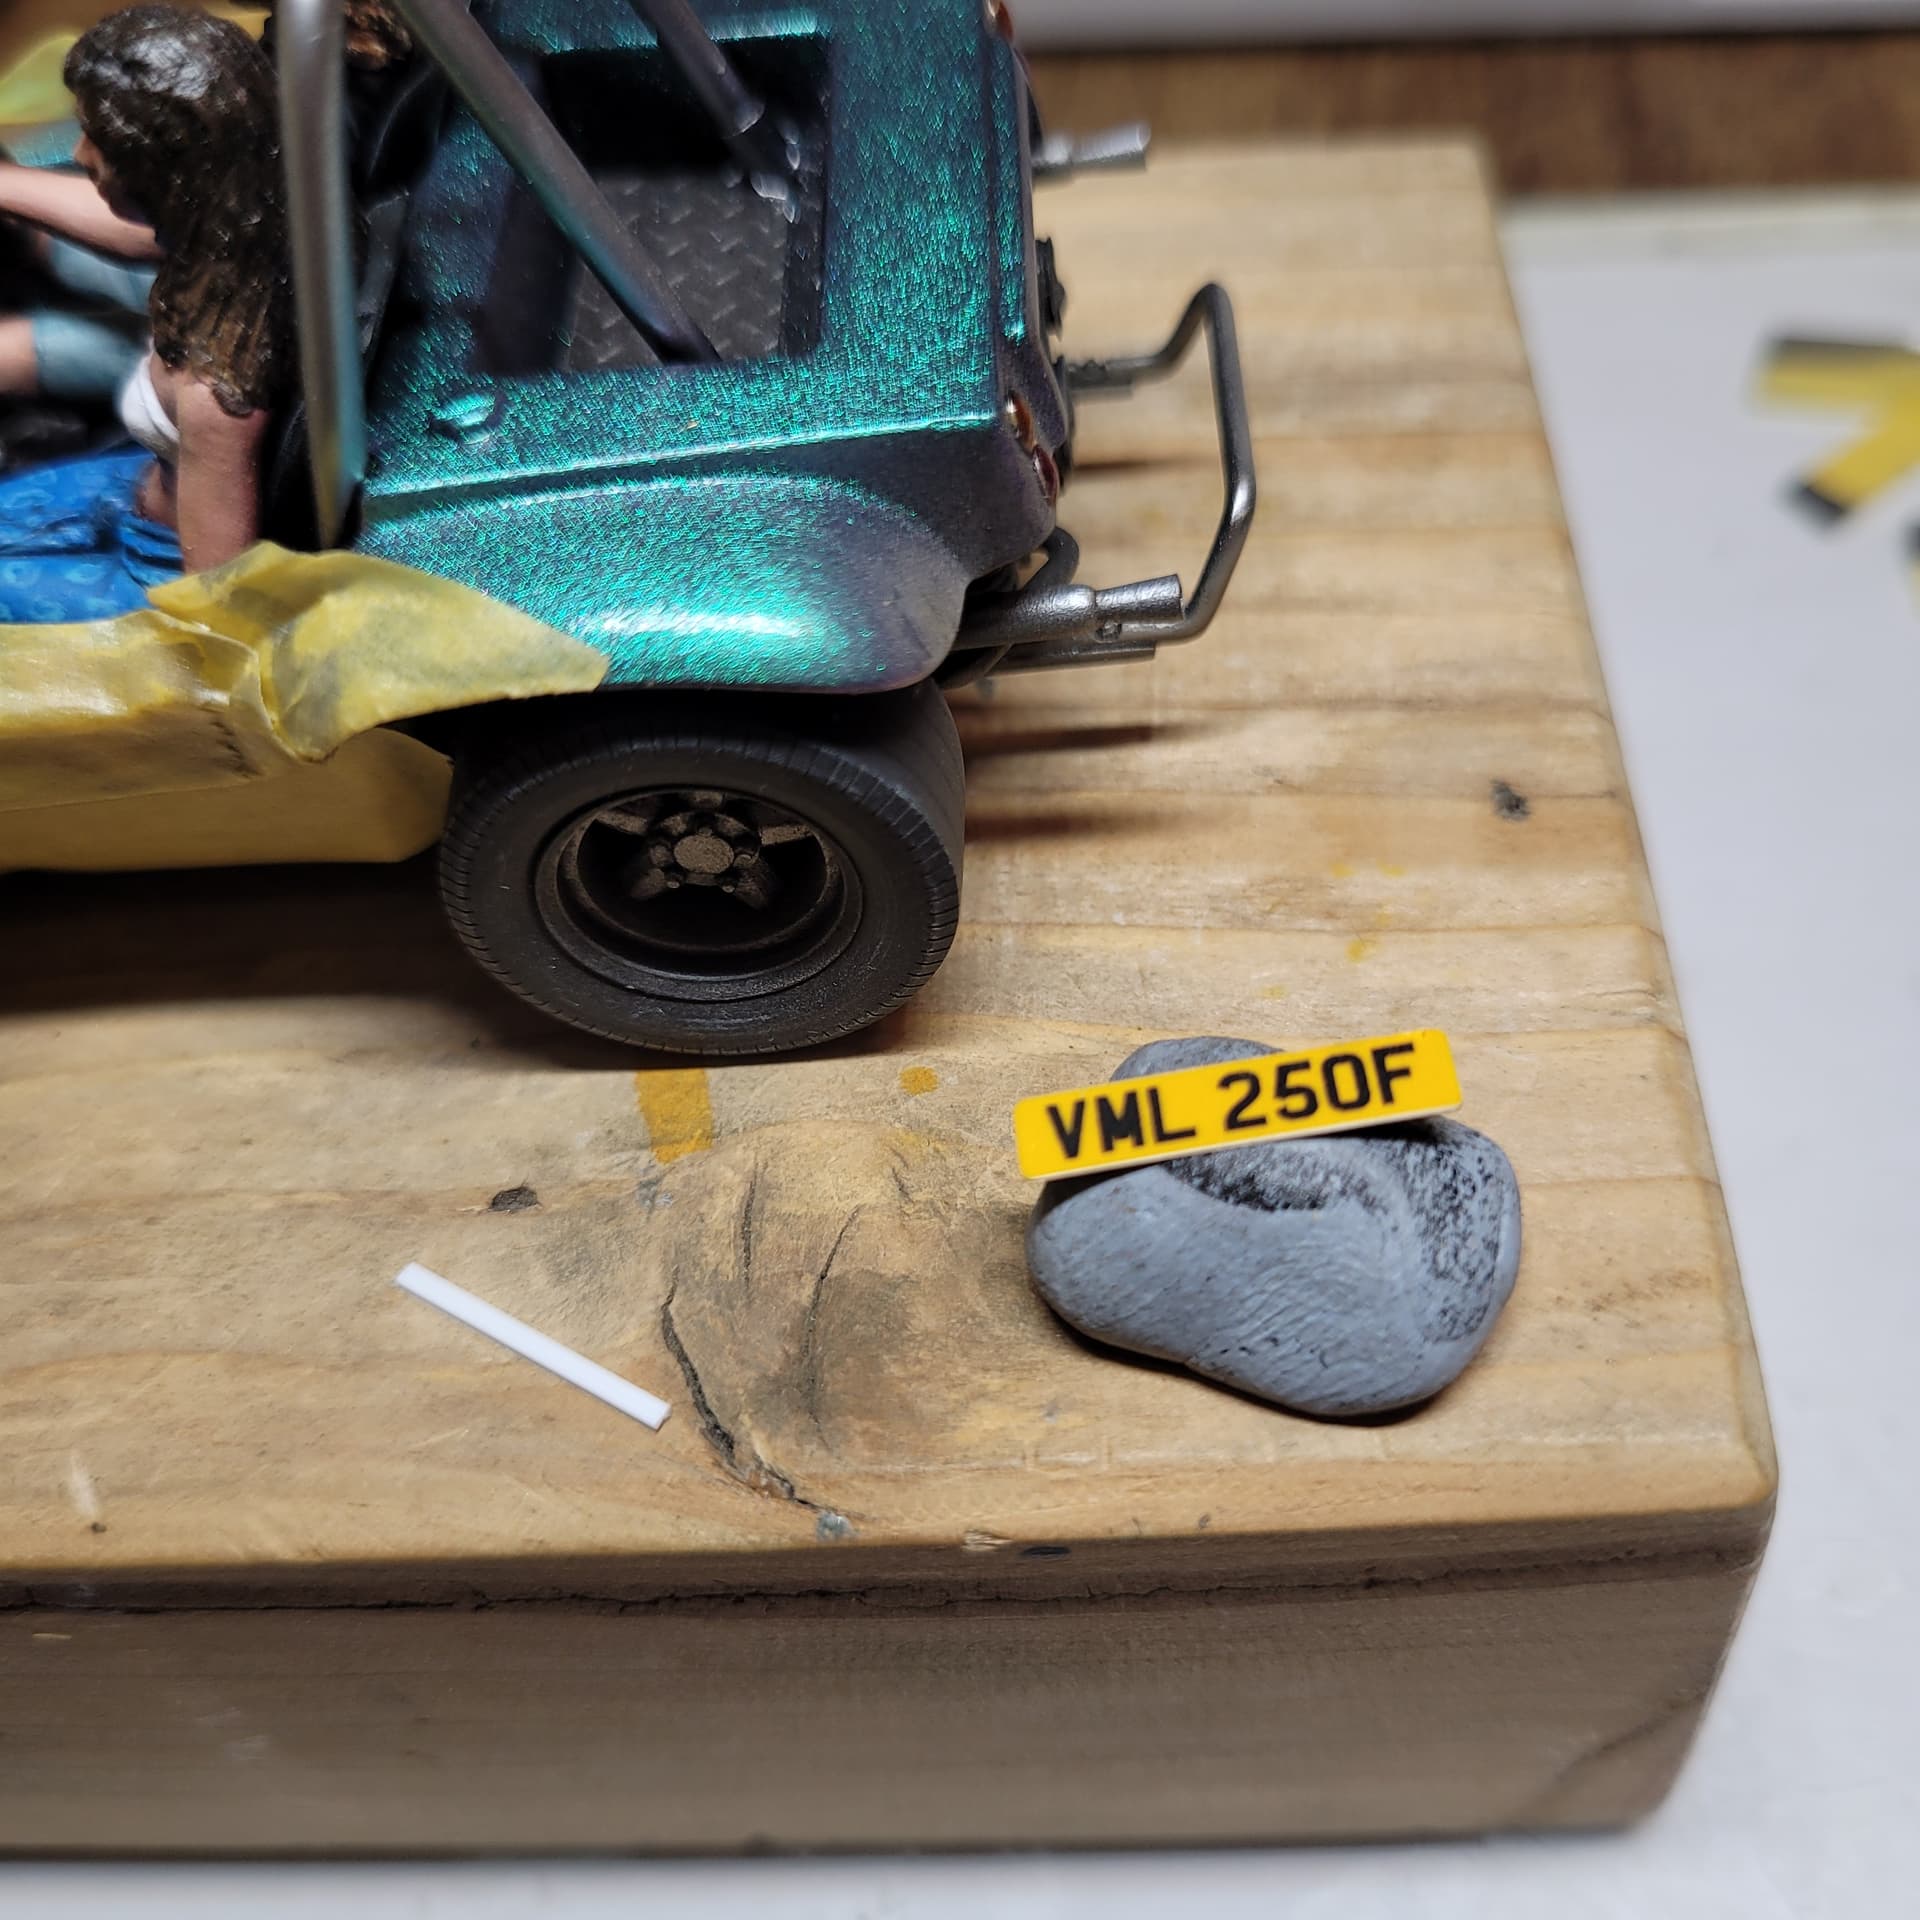
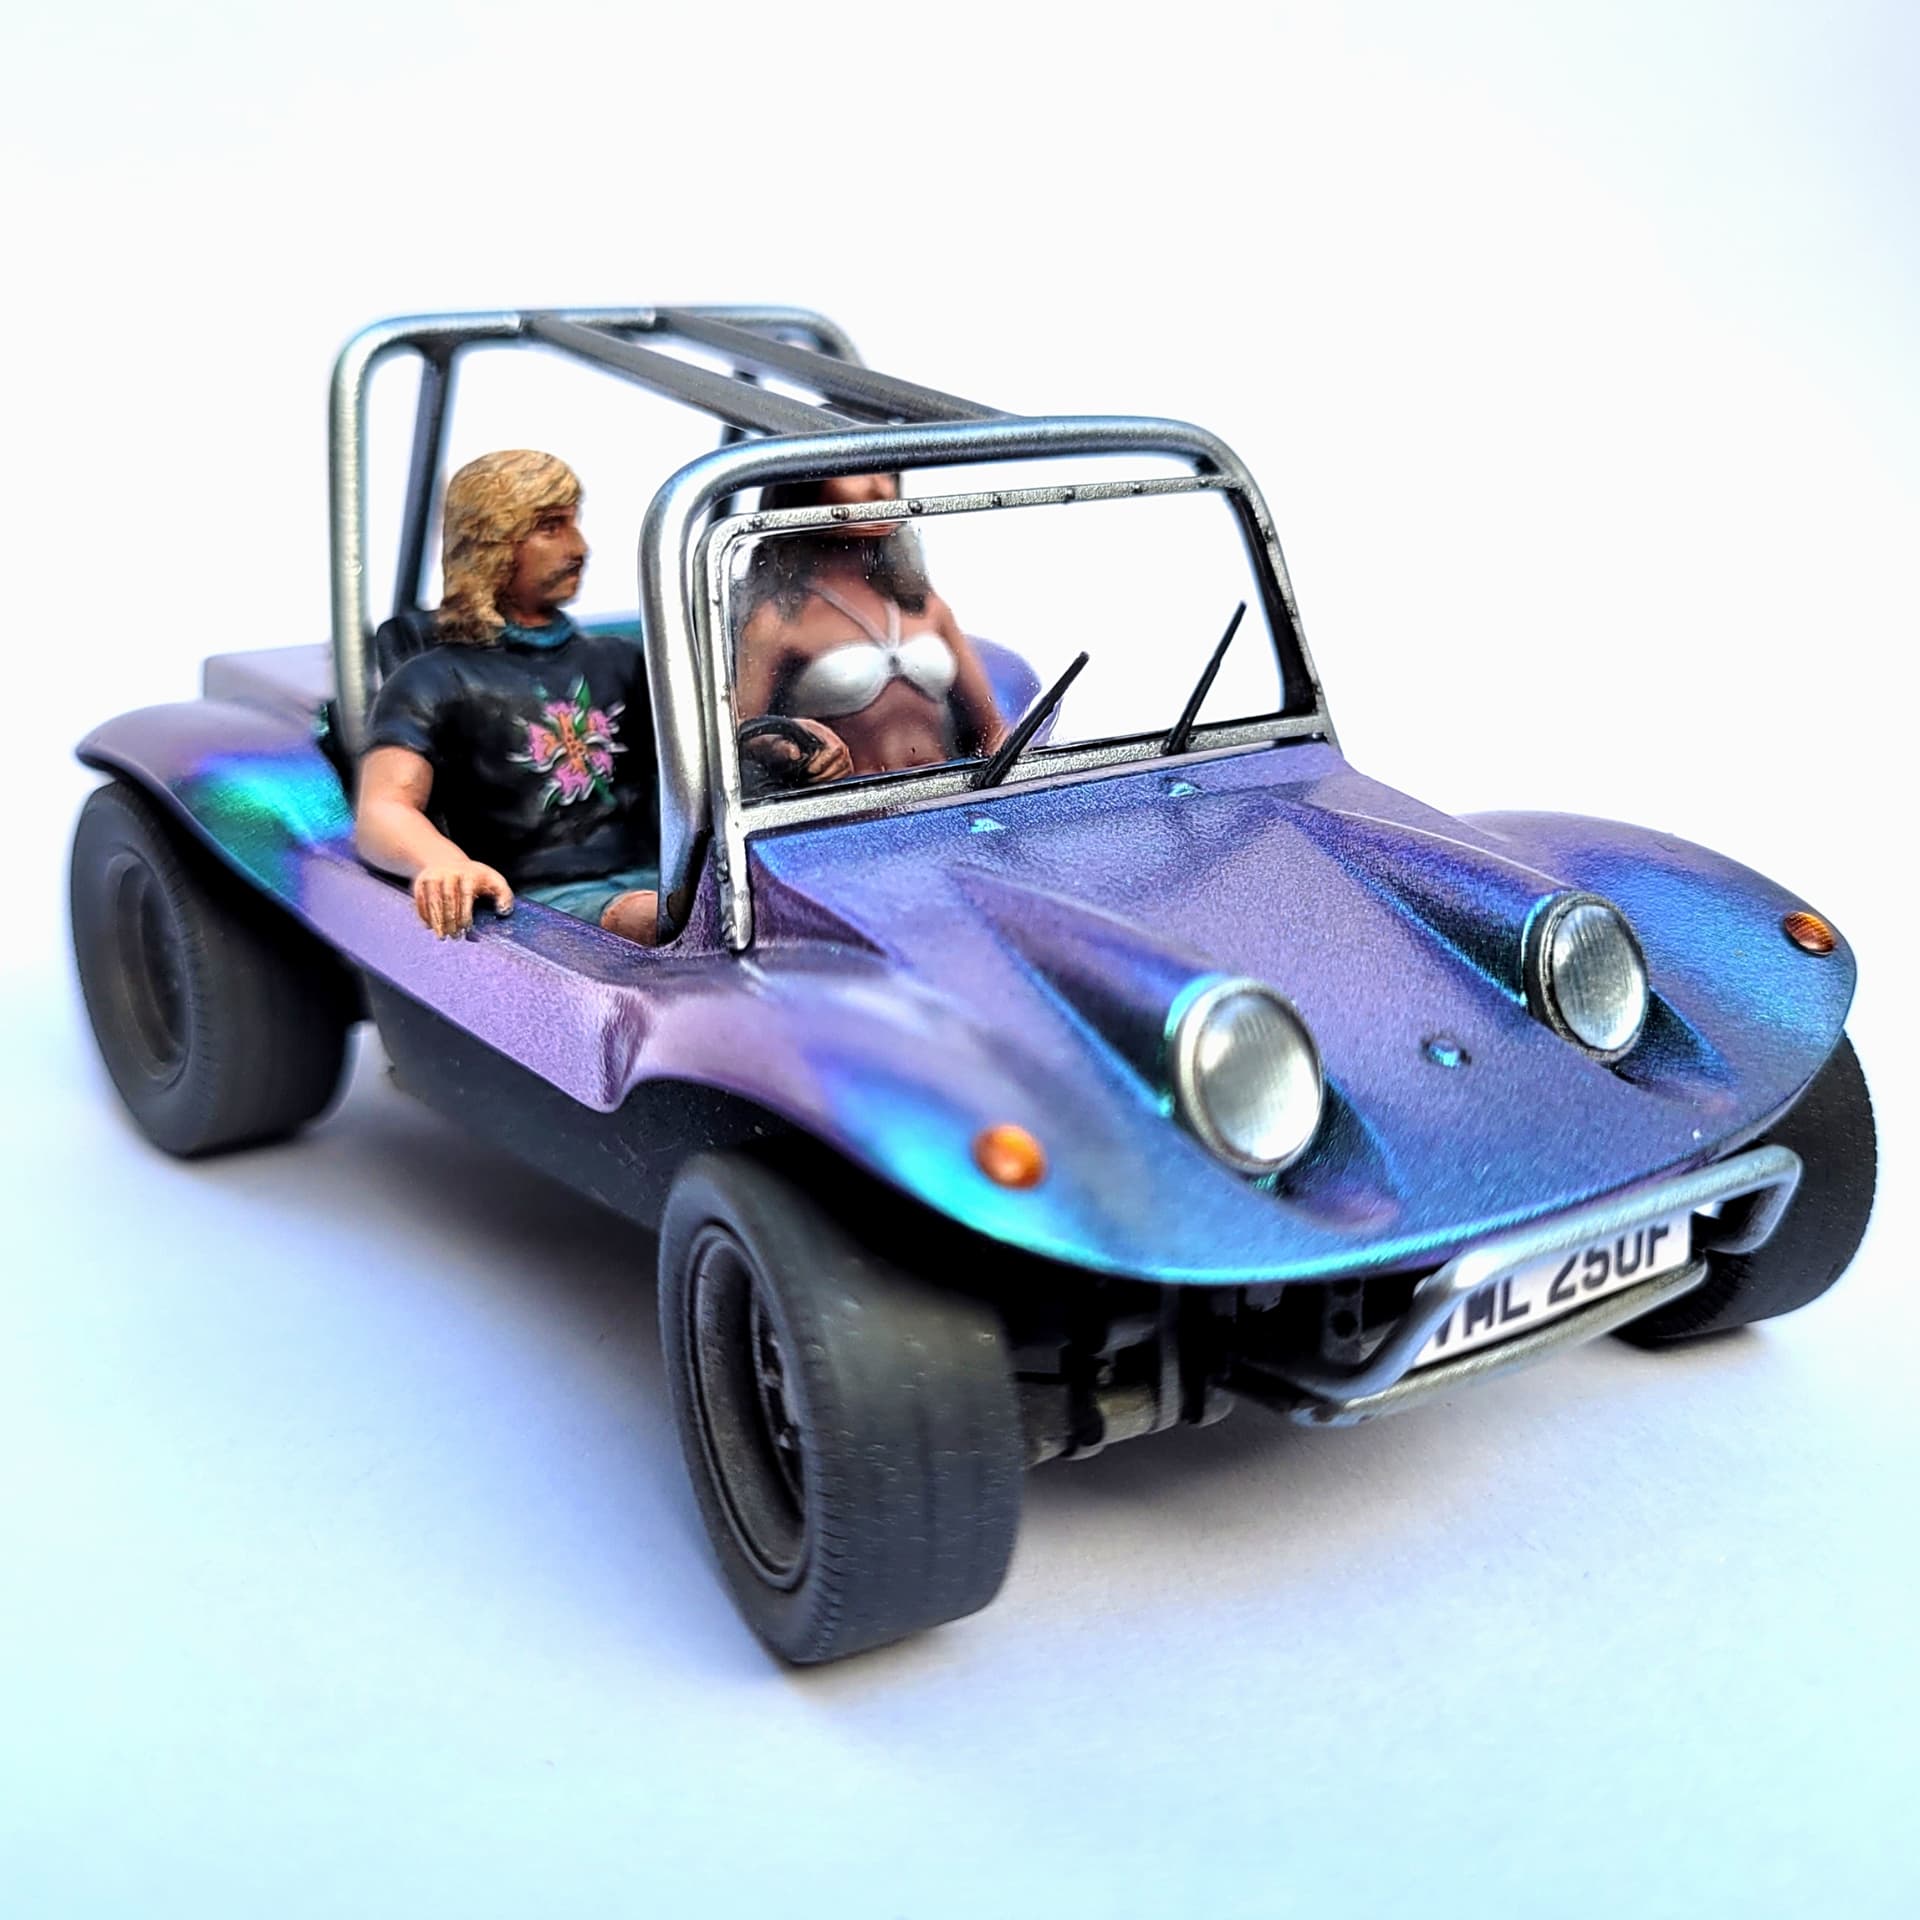
I bought some modern looking UK number plates from an ebay seller (“allscalediorama”). You specify the registration and choose a style and scale and he sends you three self adhesive vinyl prints of each, front and back. I went for the plain layout, with a 1960s number (F = 1967-68). I used a piece of scrap from an etched sheet for the plate, sealing it with Klear which protects the vinyl and gives a harder looking finish. I had already prepared a place under the bodywork so mounted it with a small strip of plastic, painted black.

Currently still working on two sticking points… the windscreen being one, so hard to get right. Had two goes at the Klear coat, but it seems there’s a flaw in the moulding resulting in a vertical line across the screen. While doing that I knocked one off the screws off the side and chipped the Alclad… Then I found the moulded wipers (pitiful as they are) were not painted quite long enough, so remasked those last night. Hopefully the tape doesn’t do any damage.
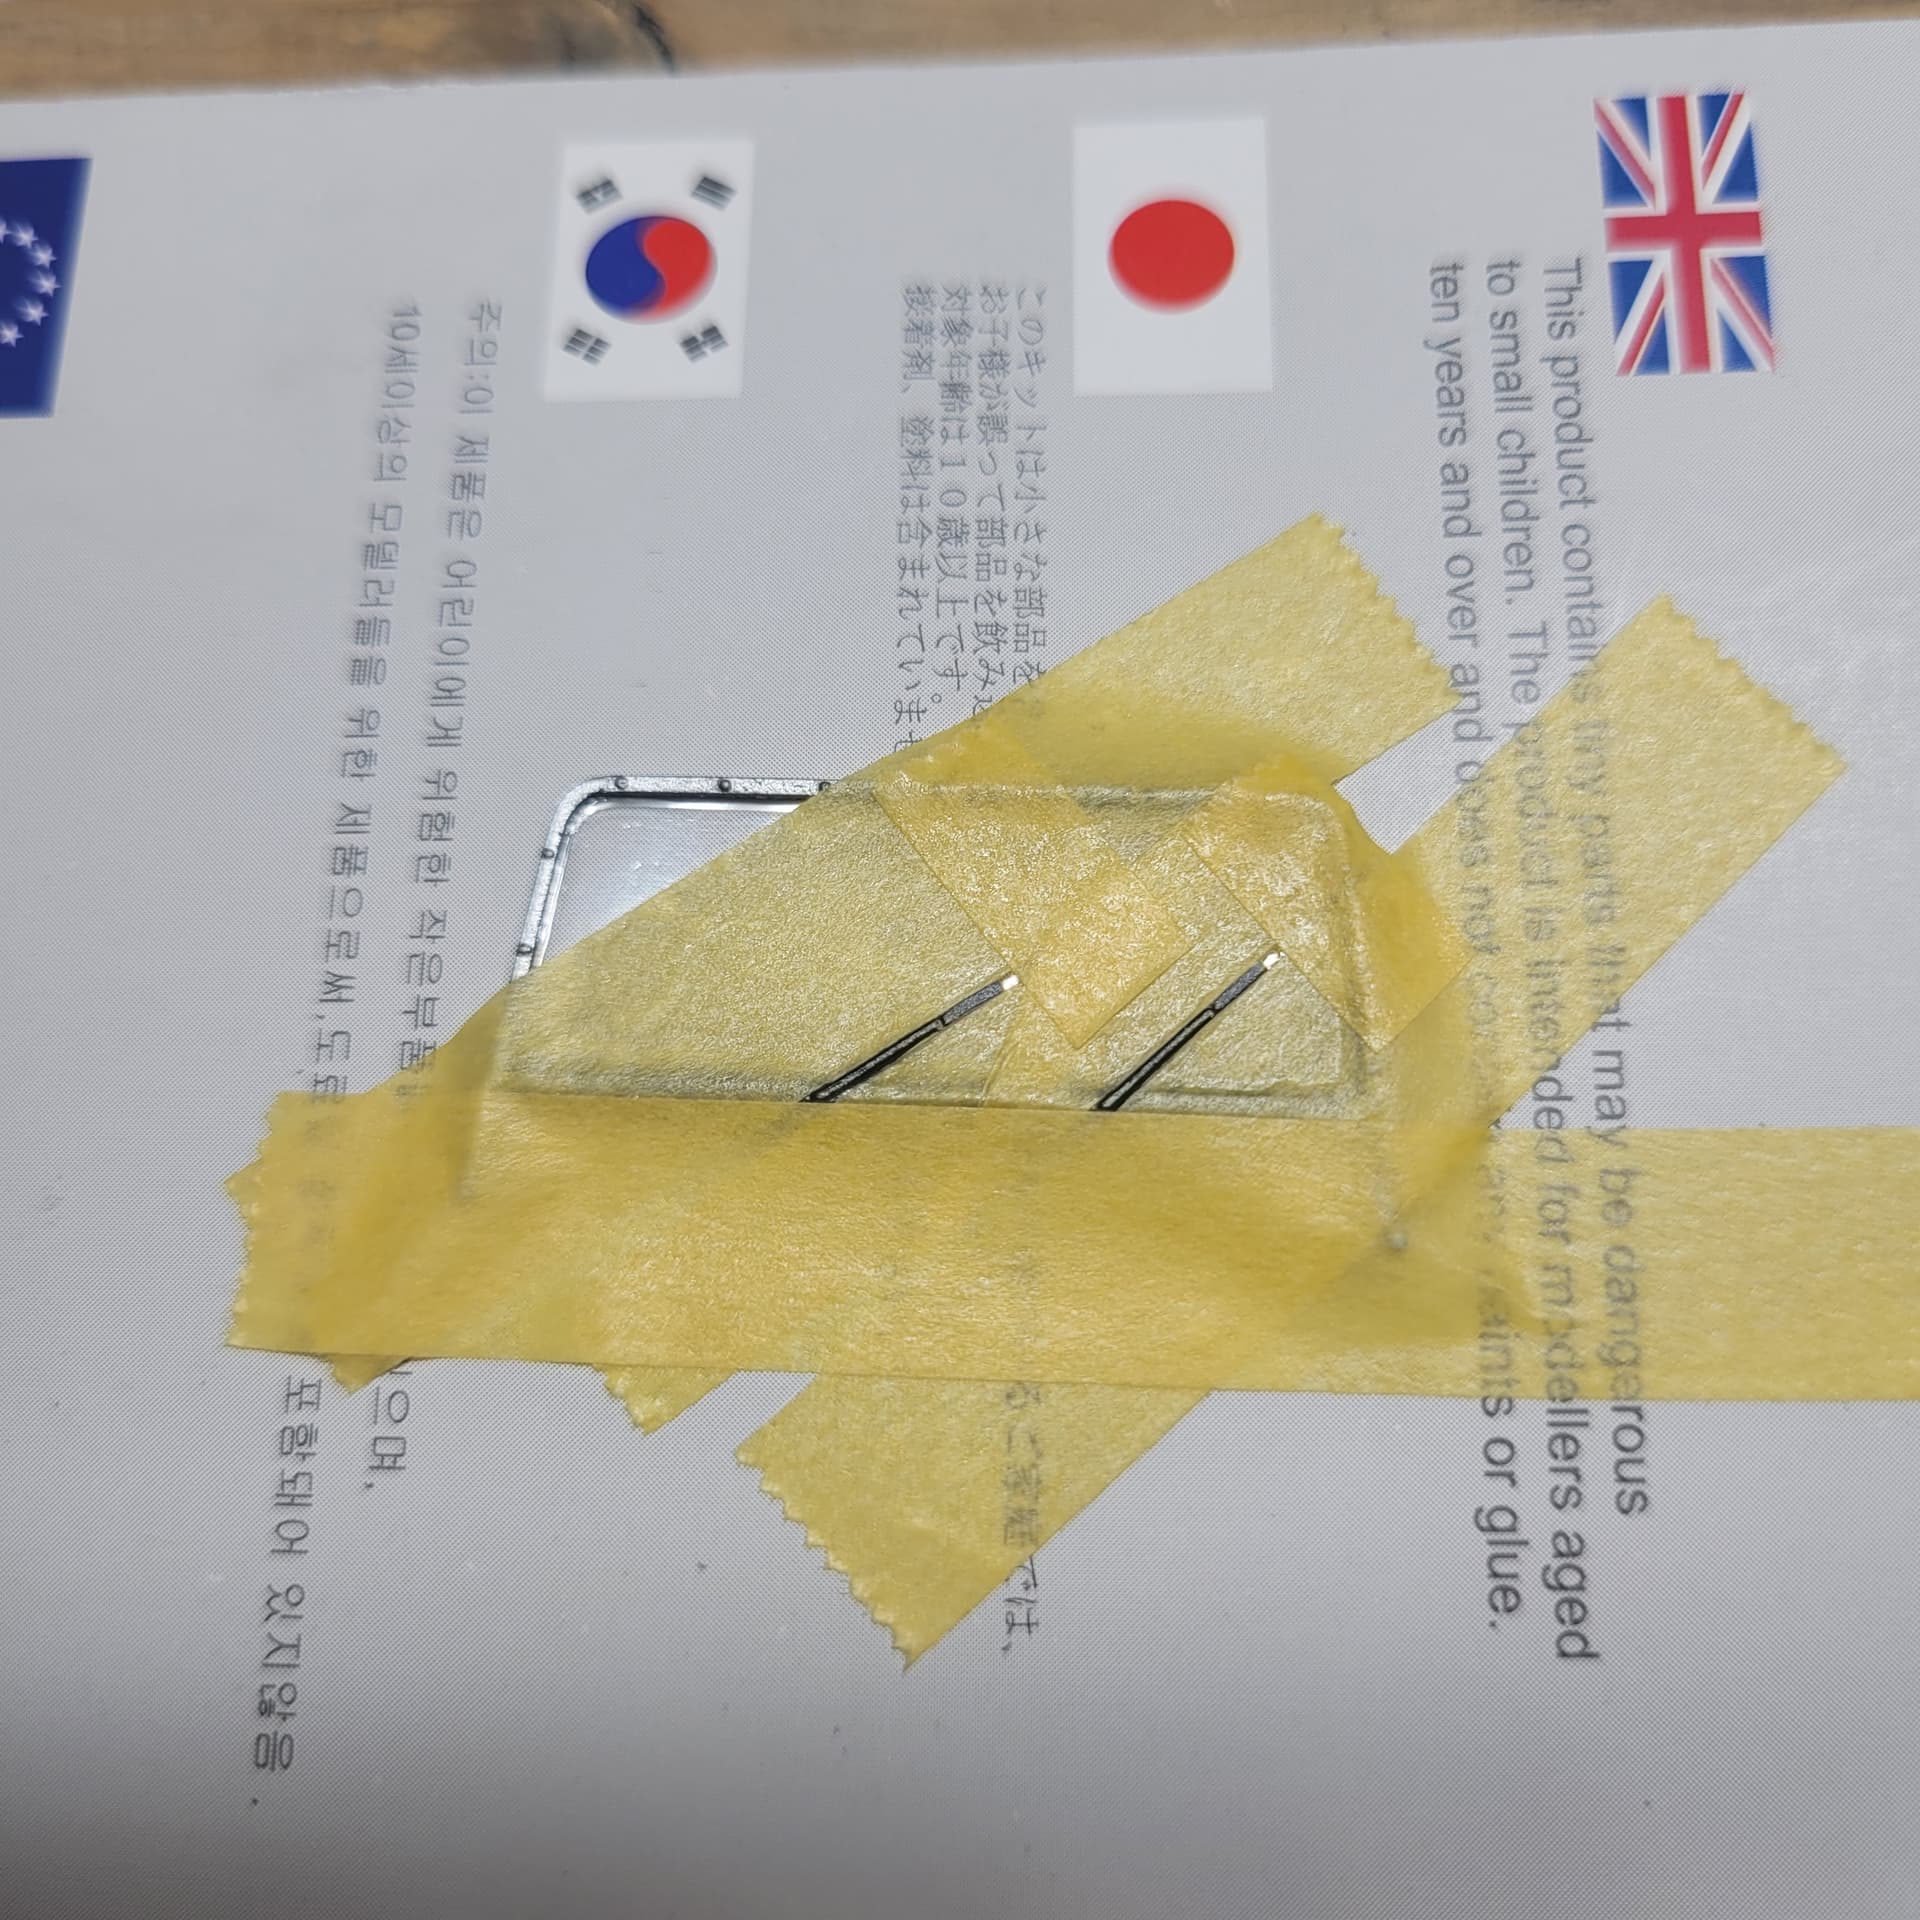
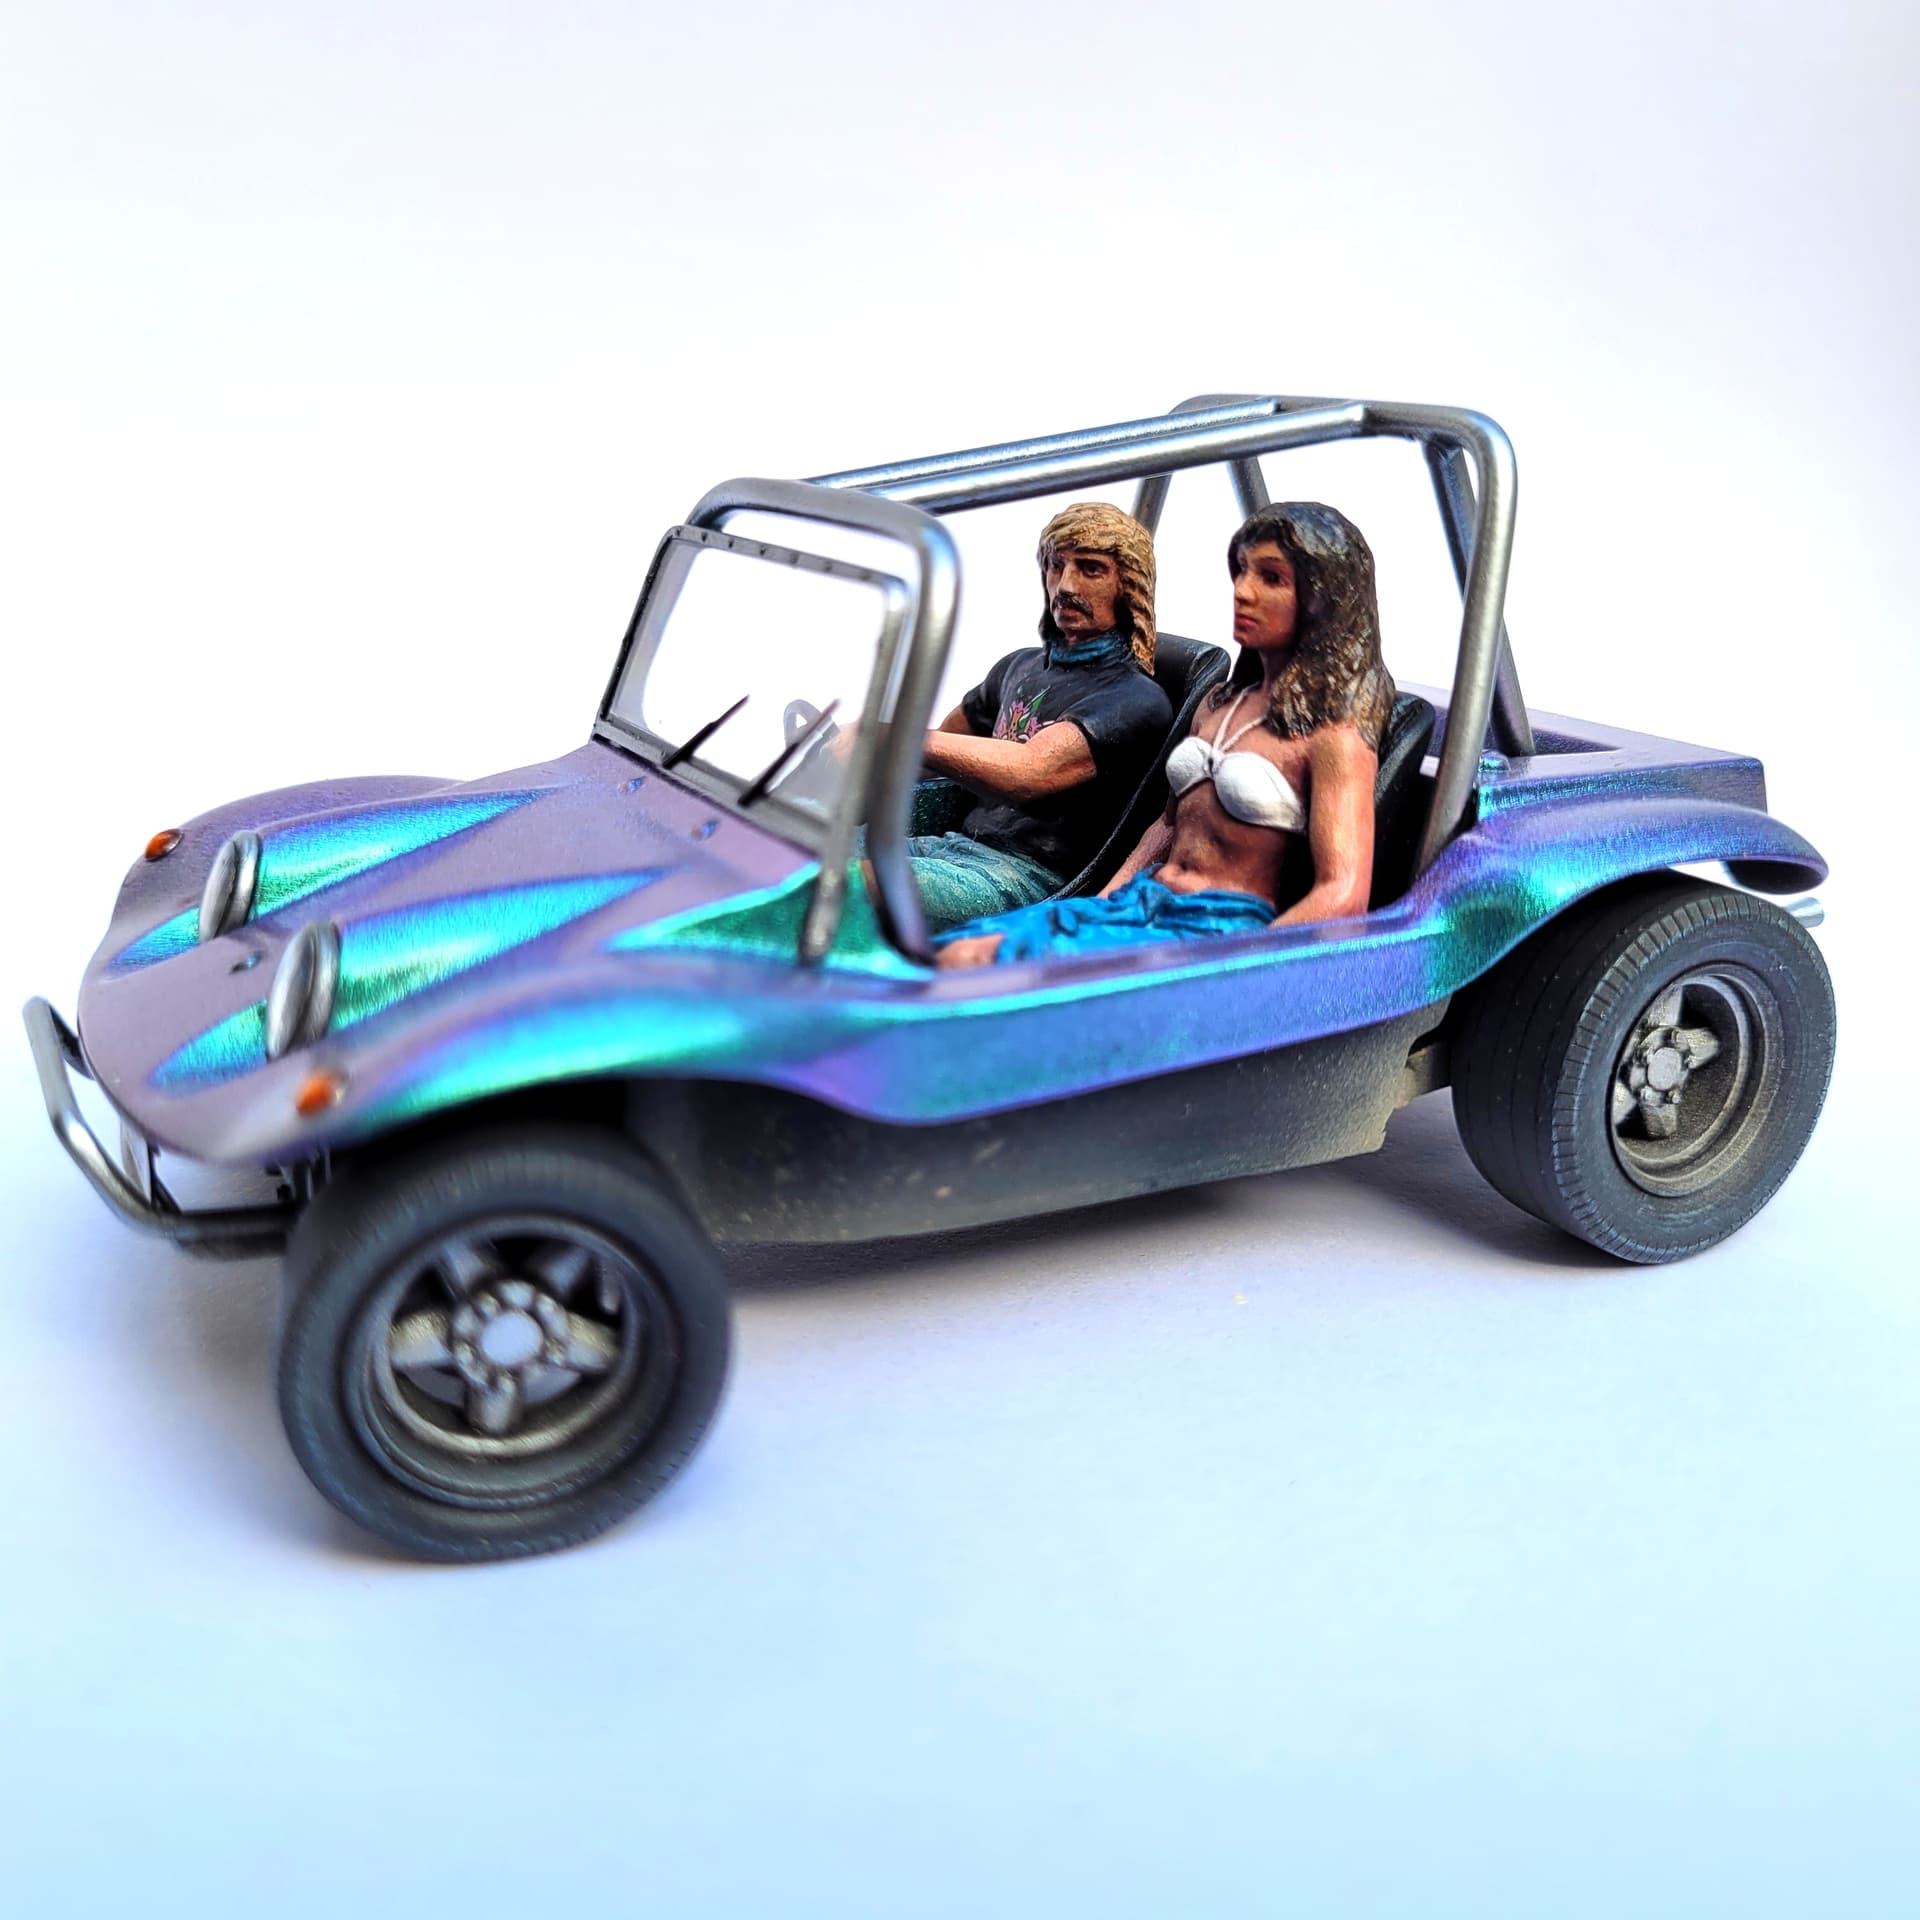
The other snag is the rear number plate, about which I changed my mind several times in terms of location. For some reason it has also taken about five attempts to make the plate, while the front was OK on the first go. I tried coating by dipping in Klear, but it made the yellow dye bleed to the centre. I also trimmed one too much, and damaged the surface of another.
Finally I have one that’s OK, and have added a strip under the crash bar on which to mount it. After studying photos of buggies, this position seems pretty common, and I think it looks a bit cooler than up on the rear bodywork over the engine. Hopefully no more hitches over this plate…
3 Likes
Mathew,
Nice progress. It’s always the little final things that seem to give us the most trouble with no warning what so ever. I guess it’s just the nature of the beast.
The Buggy is really looking quite good, with the finish line certainly in sight.
joel
1 Like
Thanks Joel, I keep telling myself it’s only a couple more sessions… trying very hard not to wear off any of the non over coated paint, mainly the tyres. Matt surfaces wear so easily.
Finally managed to get this over the line. Started working on a small sandy base, but time for some photos before it gets attached.

12 Likes
Looks pretty amazing. Will be great to see it on a base.
1 Like
Unfrickin’ believable!! That color is totally crazy and I love it. I really like the usage of kitchen foil on the back of the headlights and you adhered it using clear. GREAT idea.
I’ve found that if Molotow is airbrushed on in light coats that it works better. I shot it over a set of wheels for my 56 Ford F-100 a few years back and cleared with with Spaztix Ultimate Chrome Clear and it worked out great.
2 Likes
Mathew,
Congrats on crossing the finish line, it’s been one enjoyable journey to follow. The final results really are quite spectacular of an era gone bye.
Looking forward to seeing the Buggy on that Sandy base.
joel
1 Like
Thanks a lot guys. I am quite pleased with how it turned out, after having some awkward moments having to redo the head lights and the windscreen near the end.
The foil on the lights does work well, as if the lenses really do magnify the brightness of the foil.
I first took some photos indoors with the led lamp but then put it on the table outside just when the sun had gone over the trees, in the mini photo booth I normally use for 1/72 tanks, and it made this lovely purply glow. ![]()
![]()
1 Like
One of the best OOTB dune buggy kits I have ever seen with figures seated inside. Awesome job! ![]()
1 Like
Outstanding work! Well done Matthew.
Why do I now want to do one in MERDC camouflage as in US Army use with an M60 MG on top of that rail? As a sort of precursor to say, a Light Strike Vehicle.
1 Like
Yes, or as a halftrack… the thought had crossed my mind. ![]()