Paul, great build. My first thought was that it needed more dust and a flat coat, but I can read now you have a very realistic plan behind it. Super cool. Clean and shiny is probably more realistic in this case.
Congrats on finishing. ![]()
Paul, great build. My first thought was that it needed more dust and a flat coat, but I can read now you have a very realistic plan behind it. Super cool. Clean and shiny is probably more realistic in this case.
Congrats on finishing. ![]()
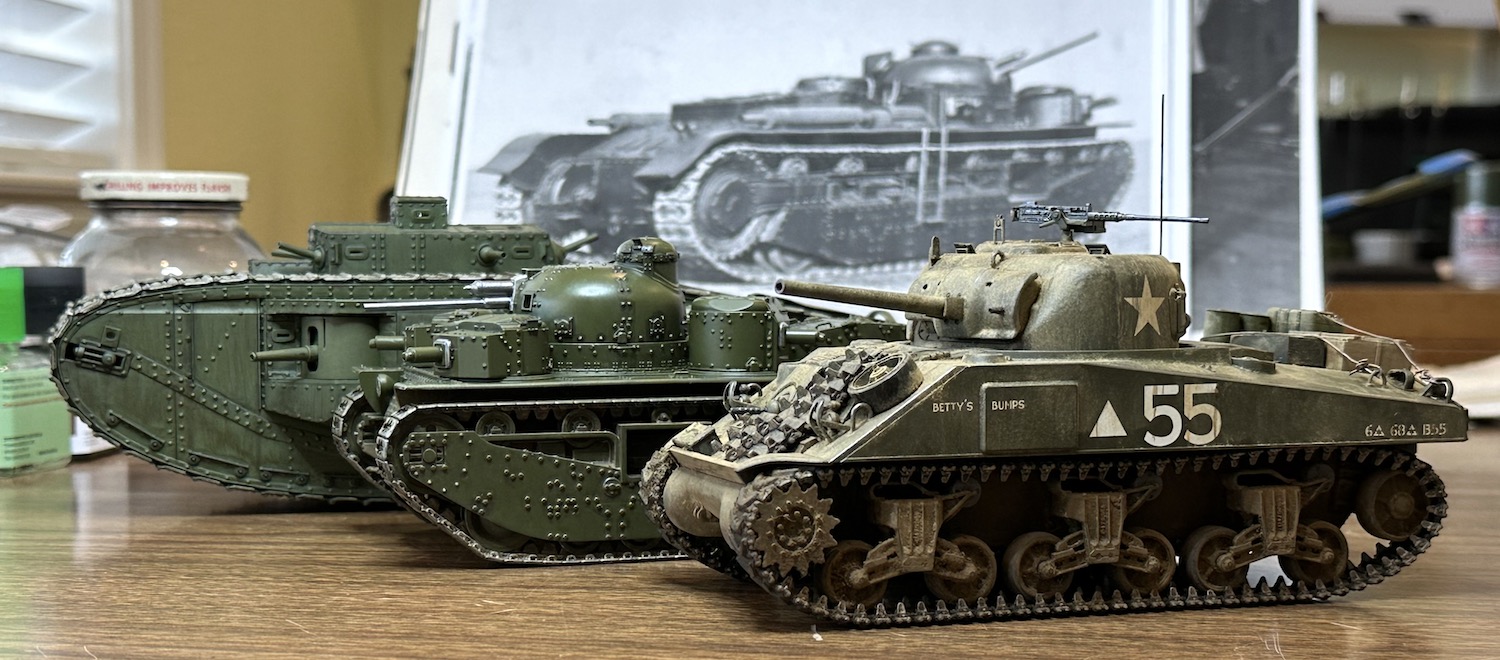
Thanks guys, I was really happy to have this kit and to try to replicate the photos. I shot a few more snaps to show the size of this beast. It looks like it ought to be huge but it wasn’t. Here it is with the MK VIII International that is still to be finished and a Sherman:
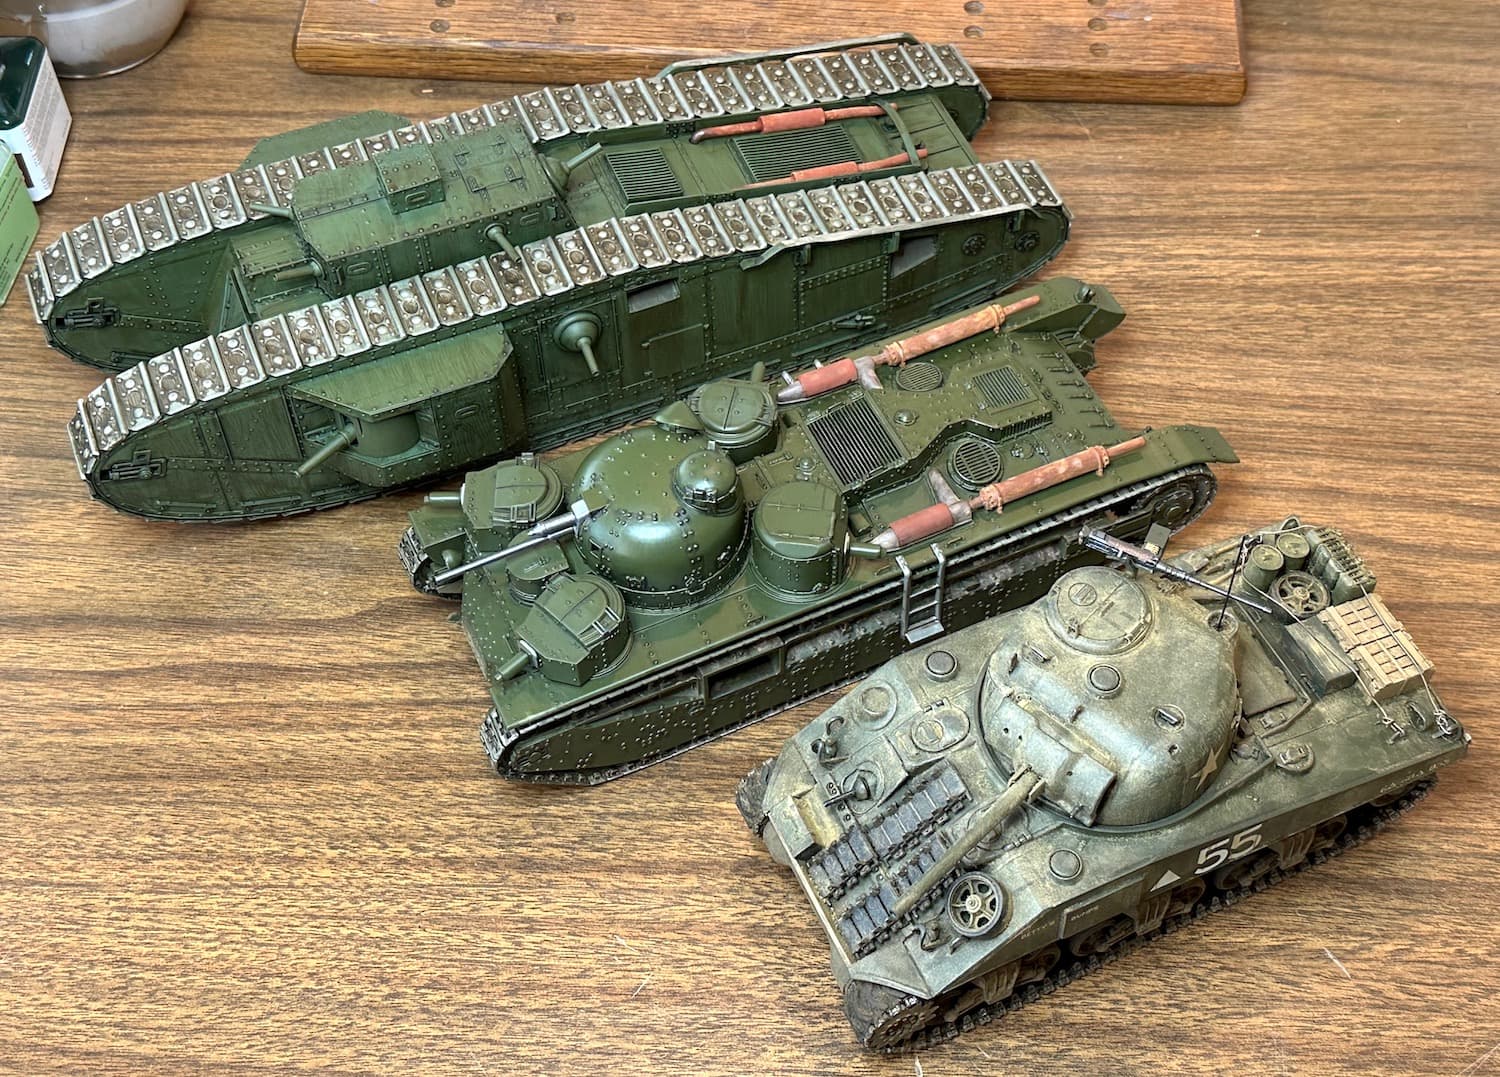
Here it is with the Soviet T-35 which had a similar layout but was much bigger:
Paul
That’s some very nice work there; well done. 'Love the International too. Comparison shots all very helpfull.
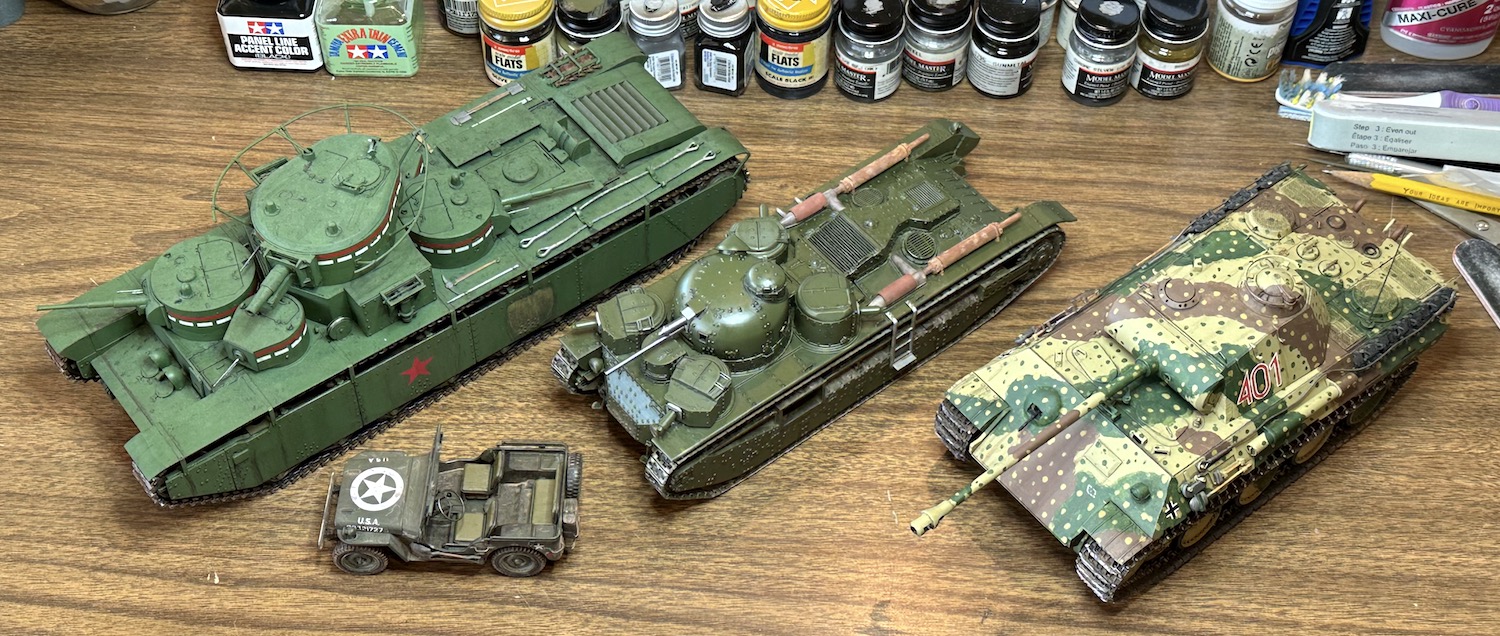
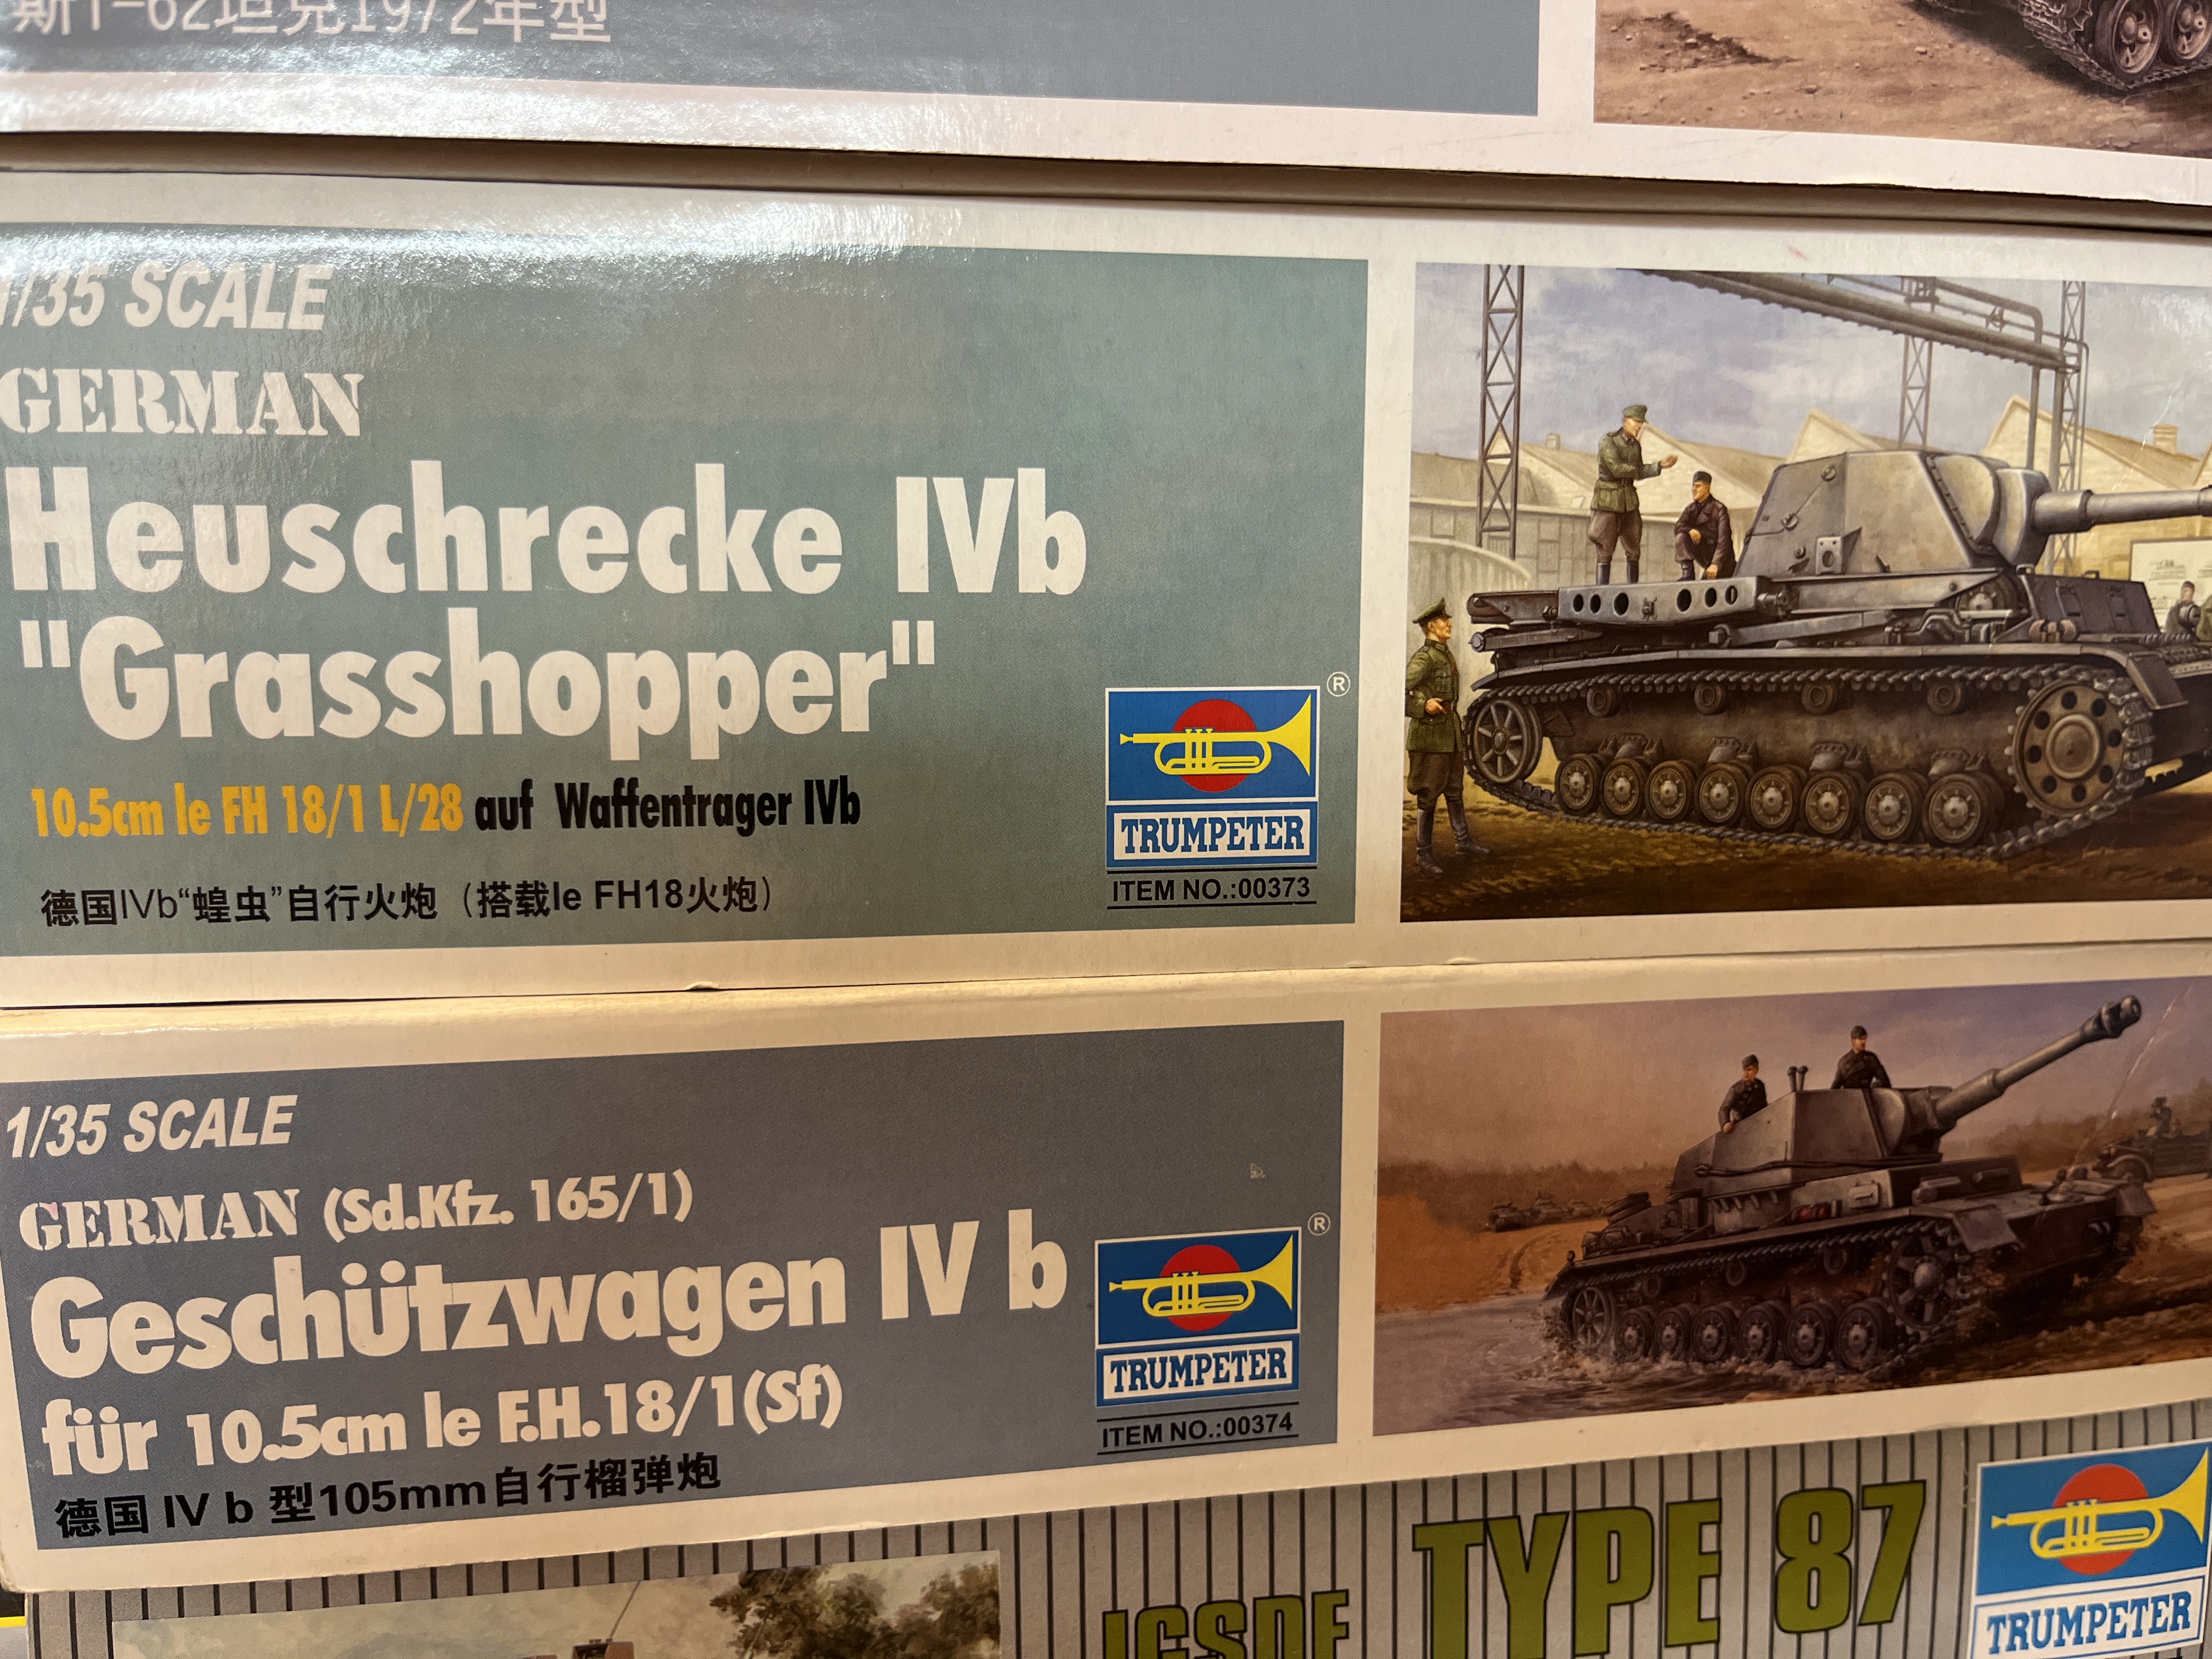
Trying to decide on an entry for this campaign. Obviously got an E-100 or Maus for this campaign. But that is what I build for the first one, so want to branch out a bit ![]()
Do any of the below kits qualify for this campaign?
I think less than 10 where constructed (?) So should work.
The backup if nothing else works ![]()
Hi Jesper. The rules state the vehicle needs to be something that was actually built in part and there is some evidence to prove it was. First two are well documented and fit this bill no problems.
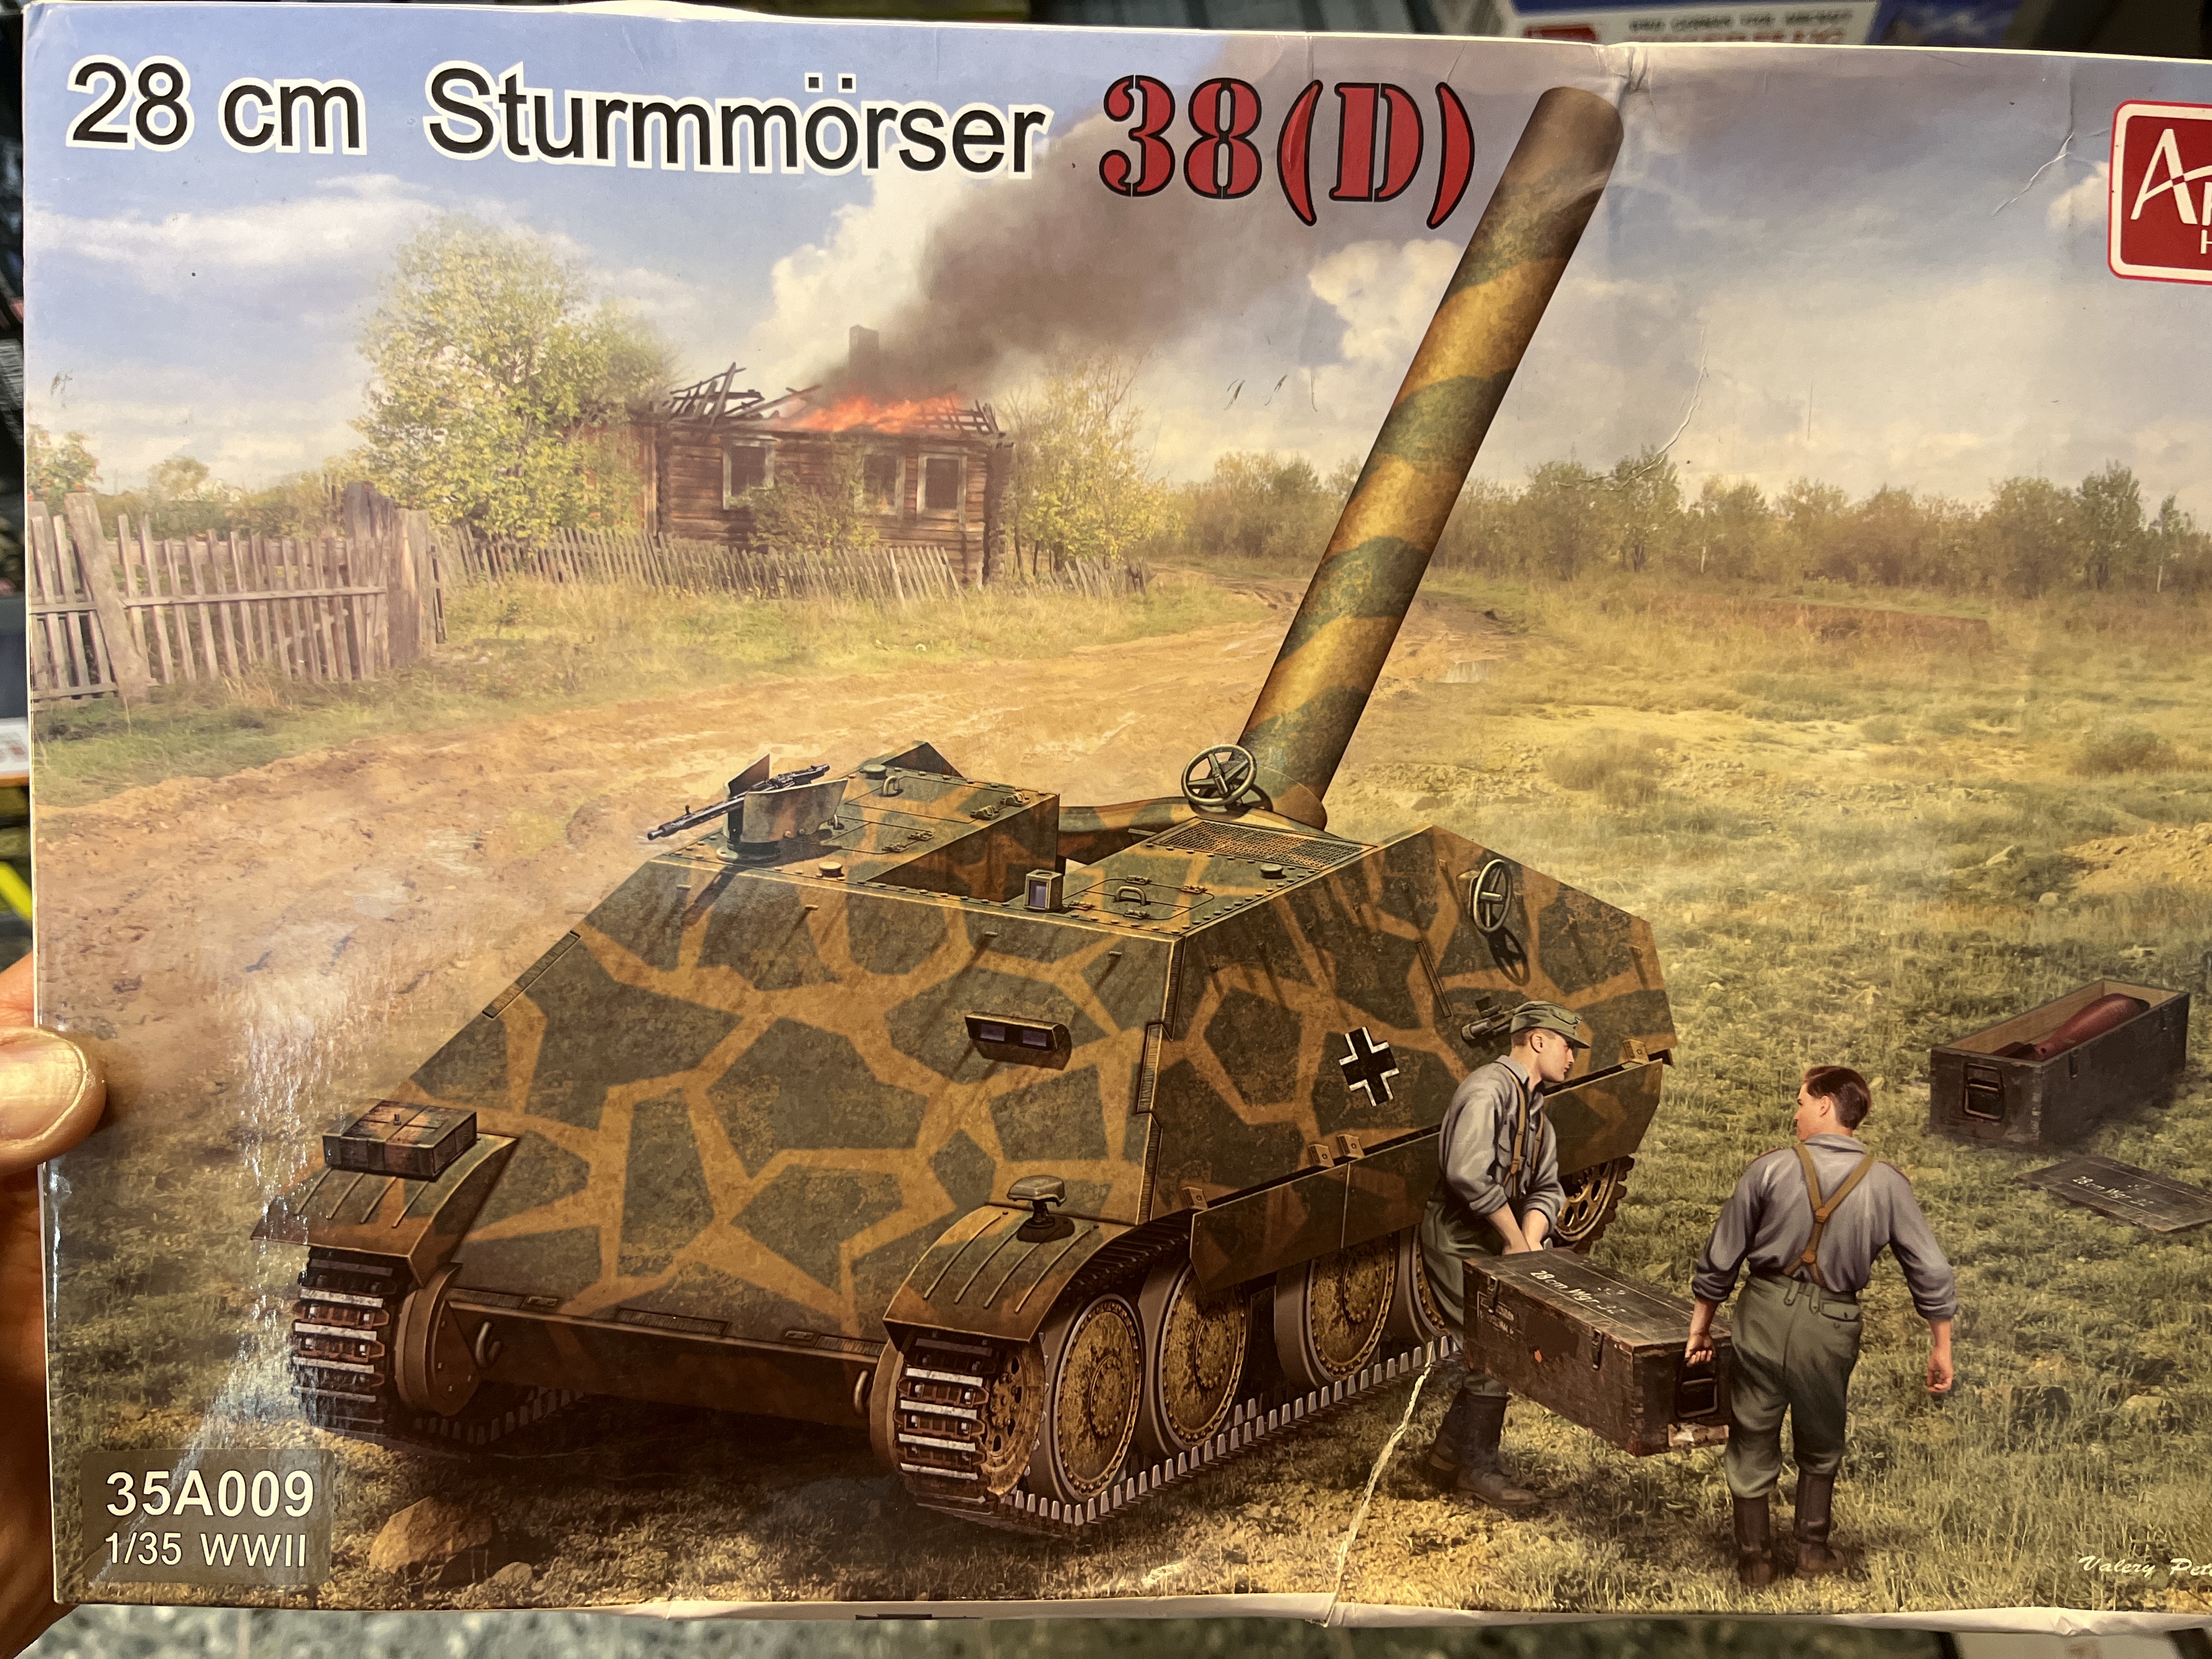
To the best of my knowledge, the Sturmmorser 38 (D) is pure fantasy. I don’t even think it was a genuine paper panzer. I would save that one for the next Sci-fi and Alternate History campaign (hint, hint). ![]()
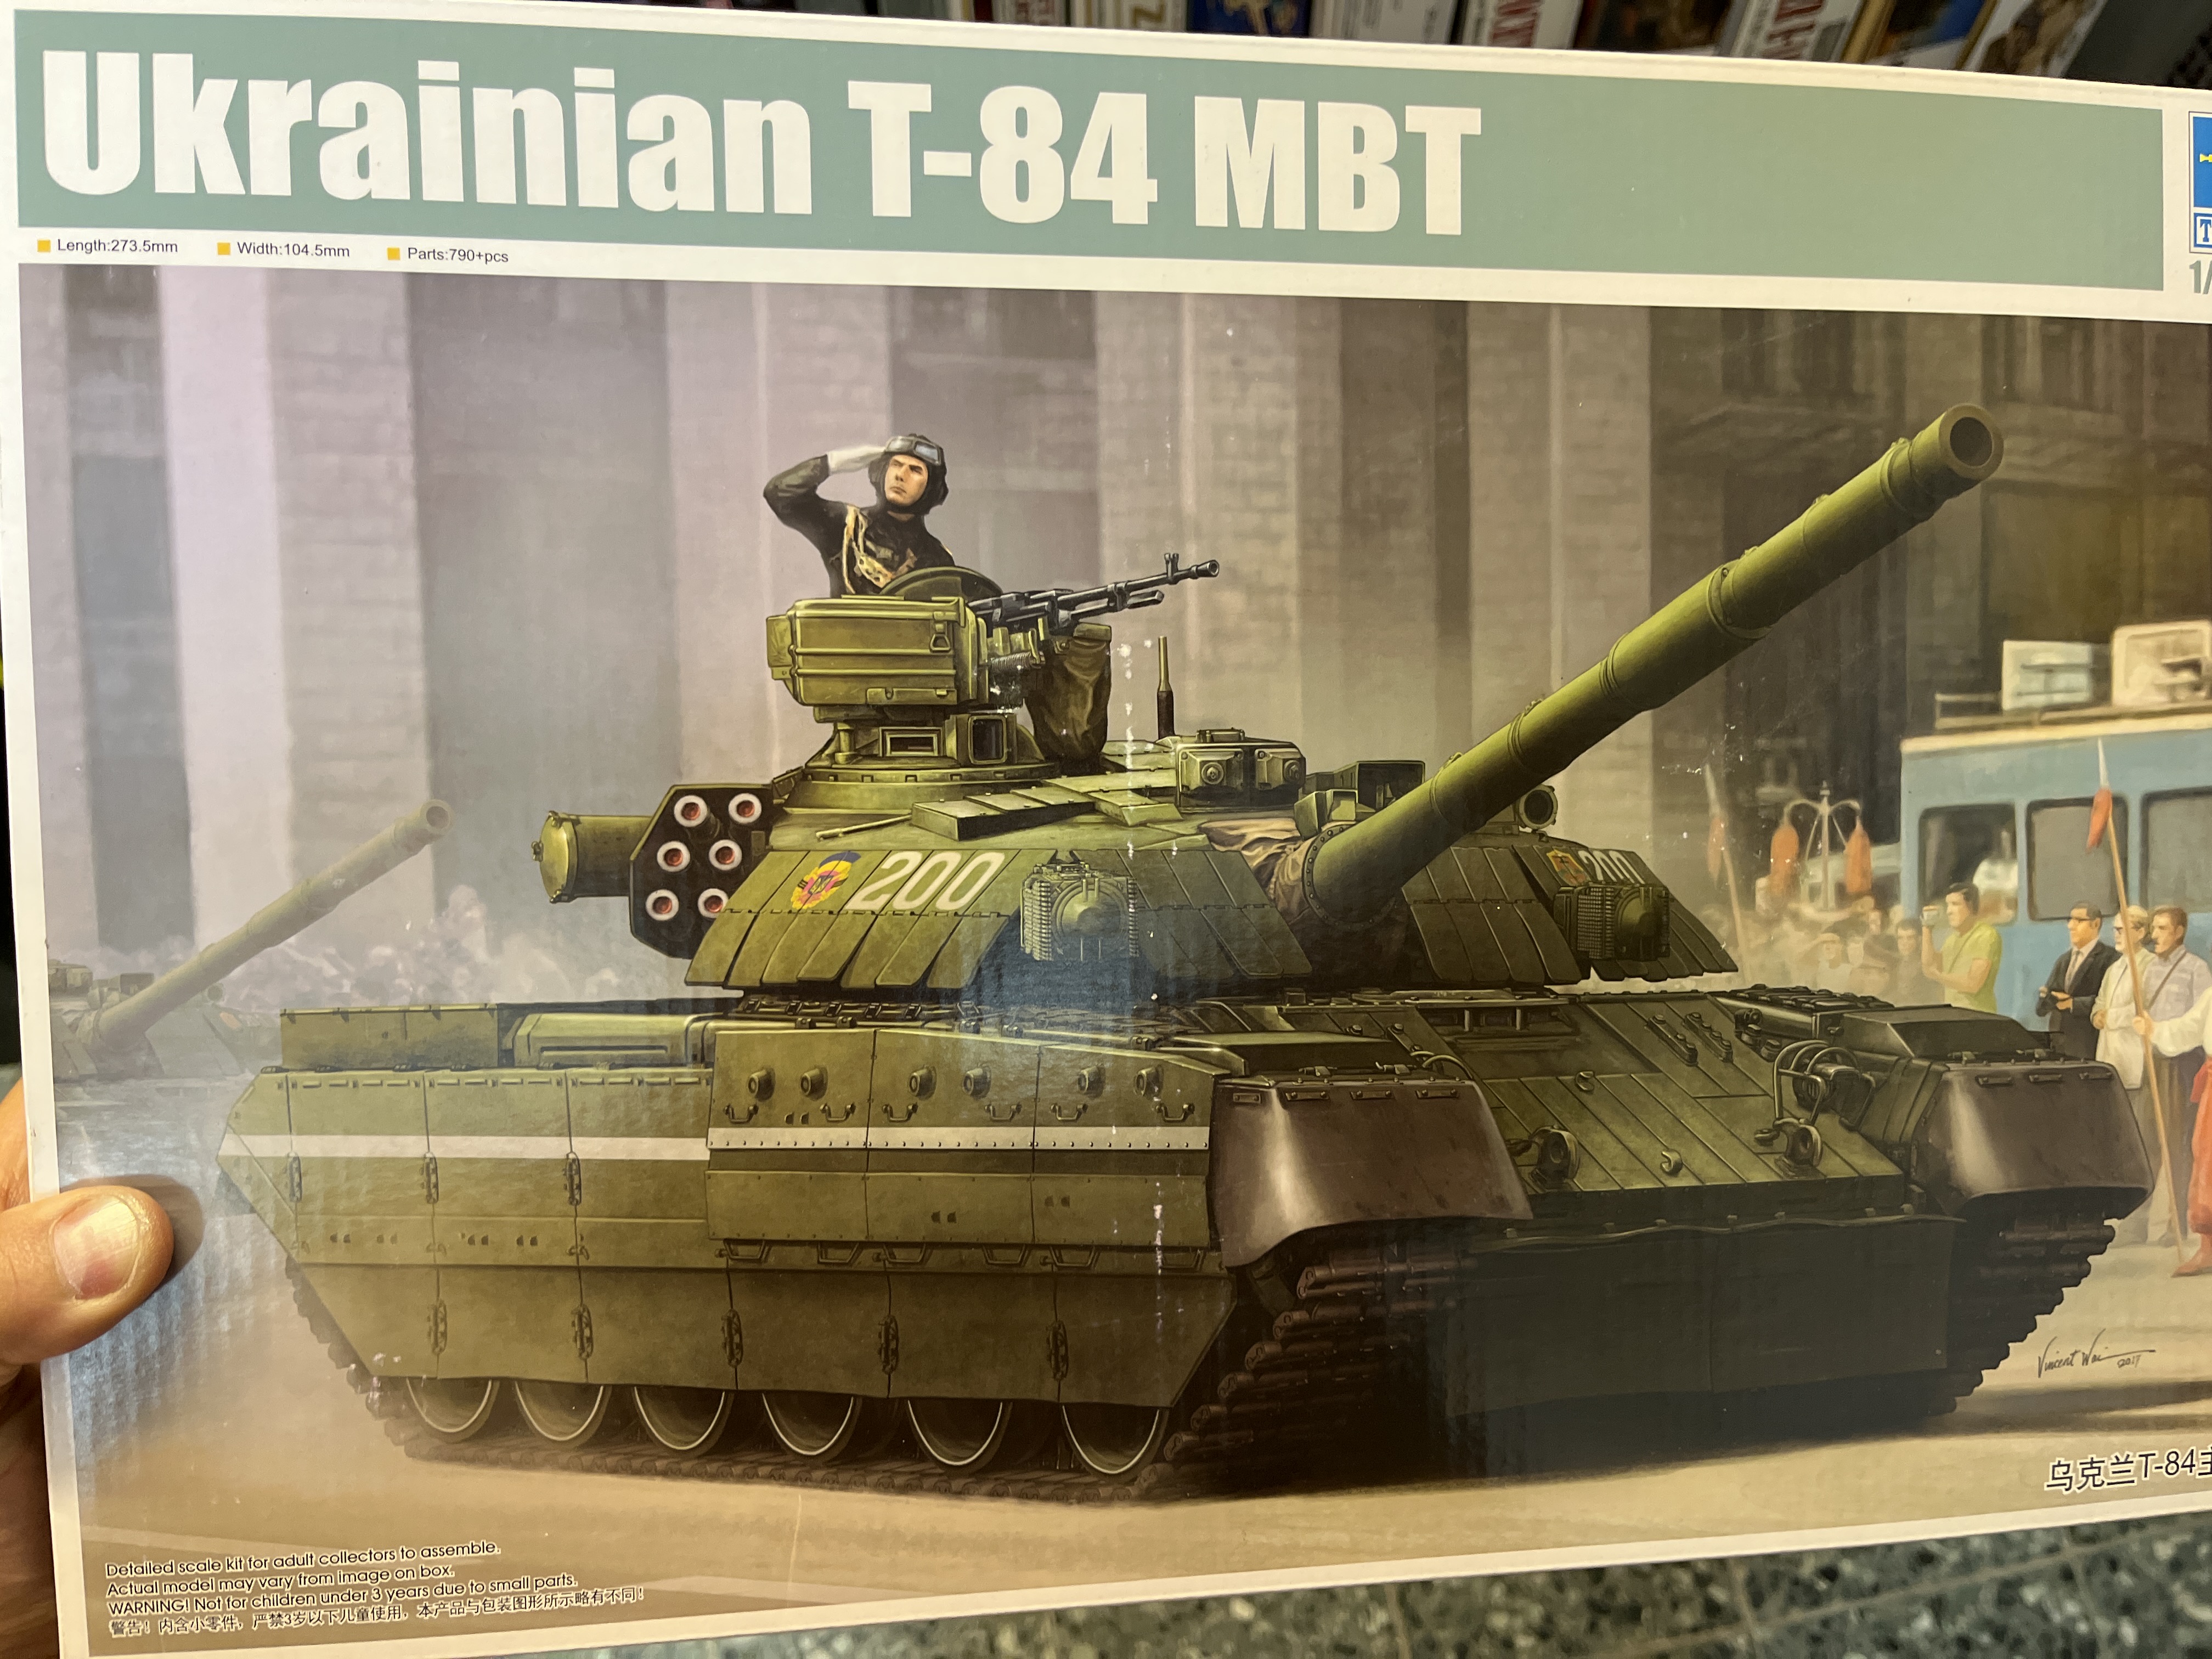
The T-84 was just an up armoured version of a widely manufactured vehicle but it may still fit in the “it could be a cancelled upgrade to an existing vehicle (such as the 120mm-gunned Leopard 1) rather than a whole-new platform” scenario. I’ll leave Tom to weigh in on that one.
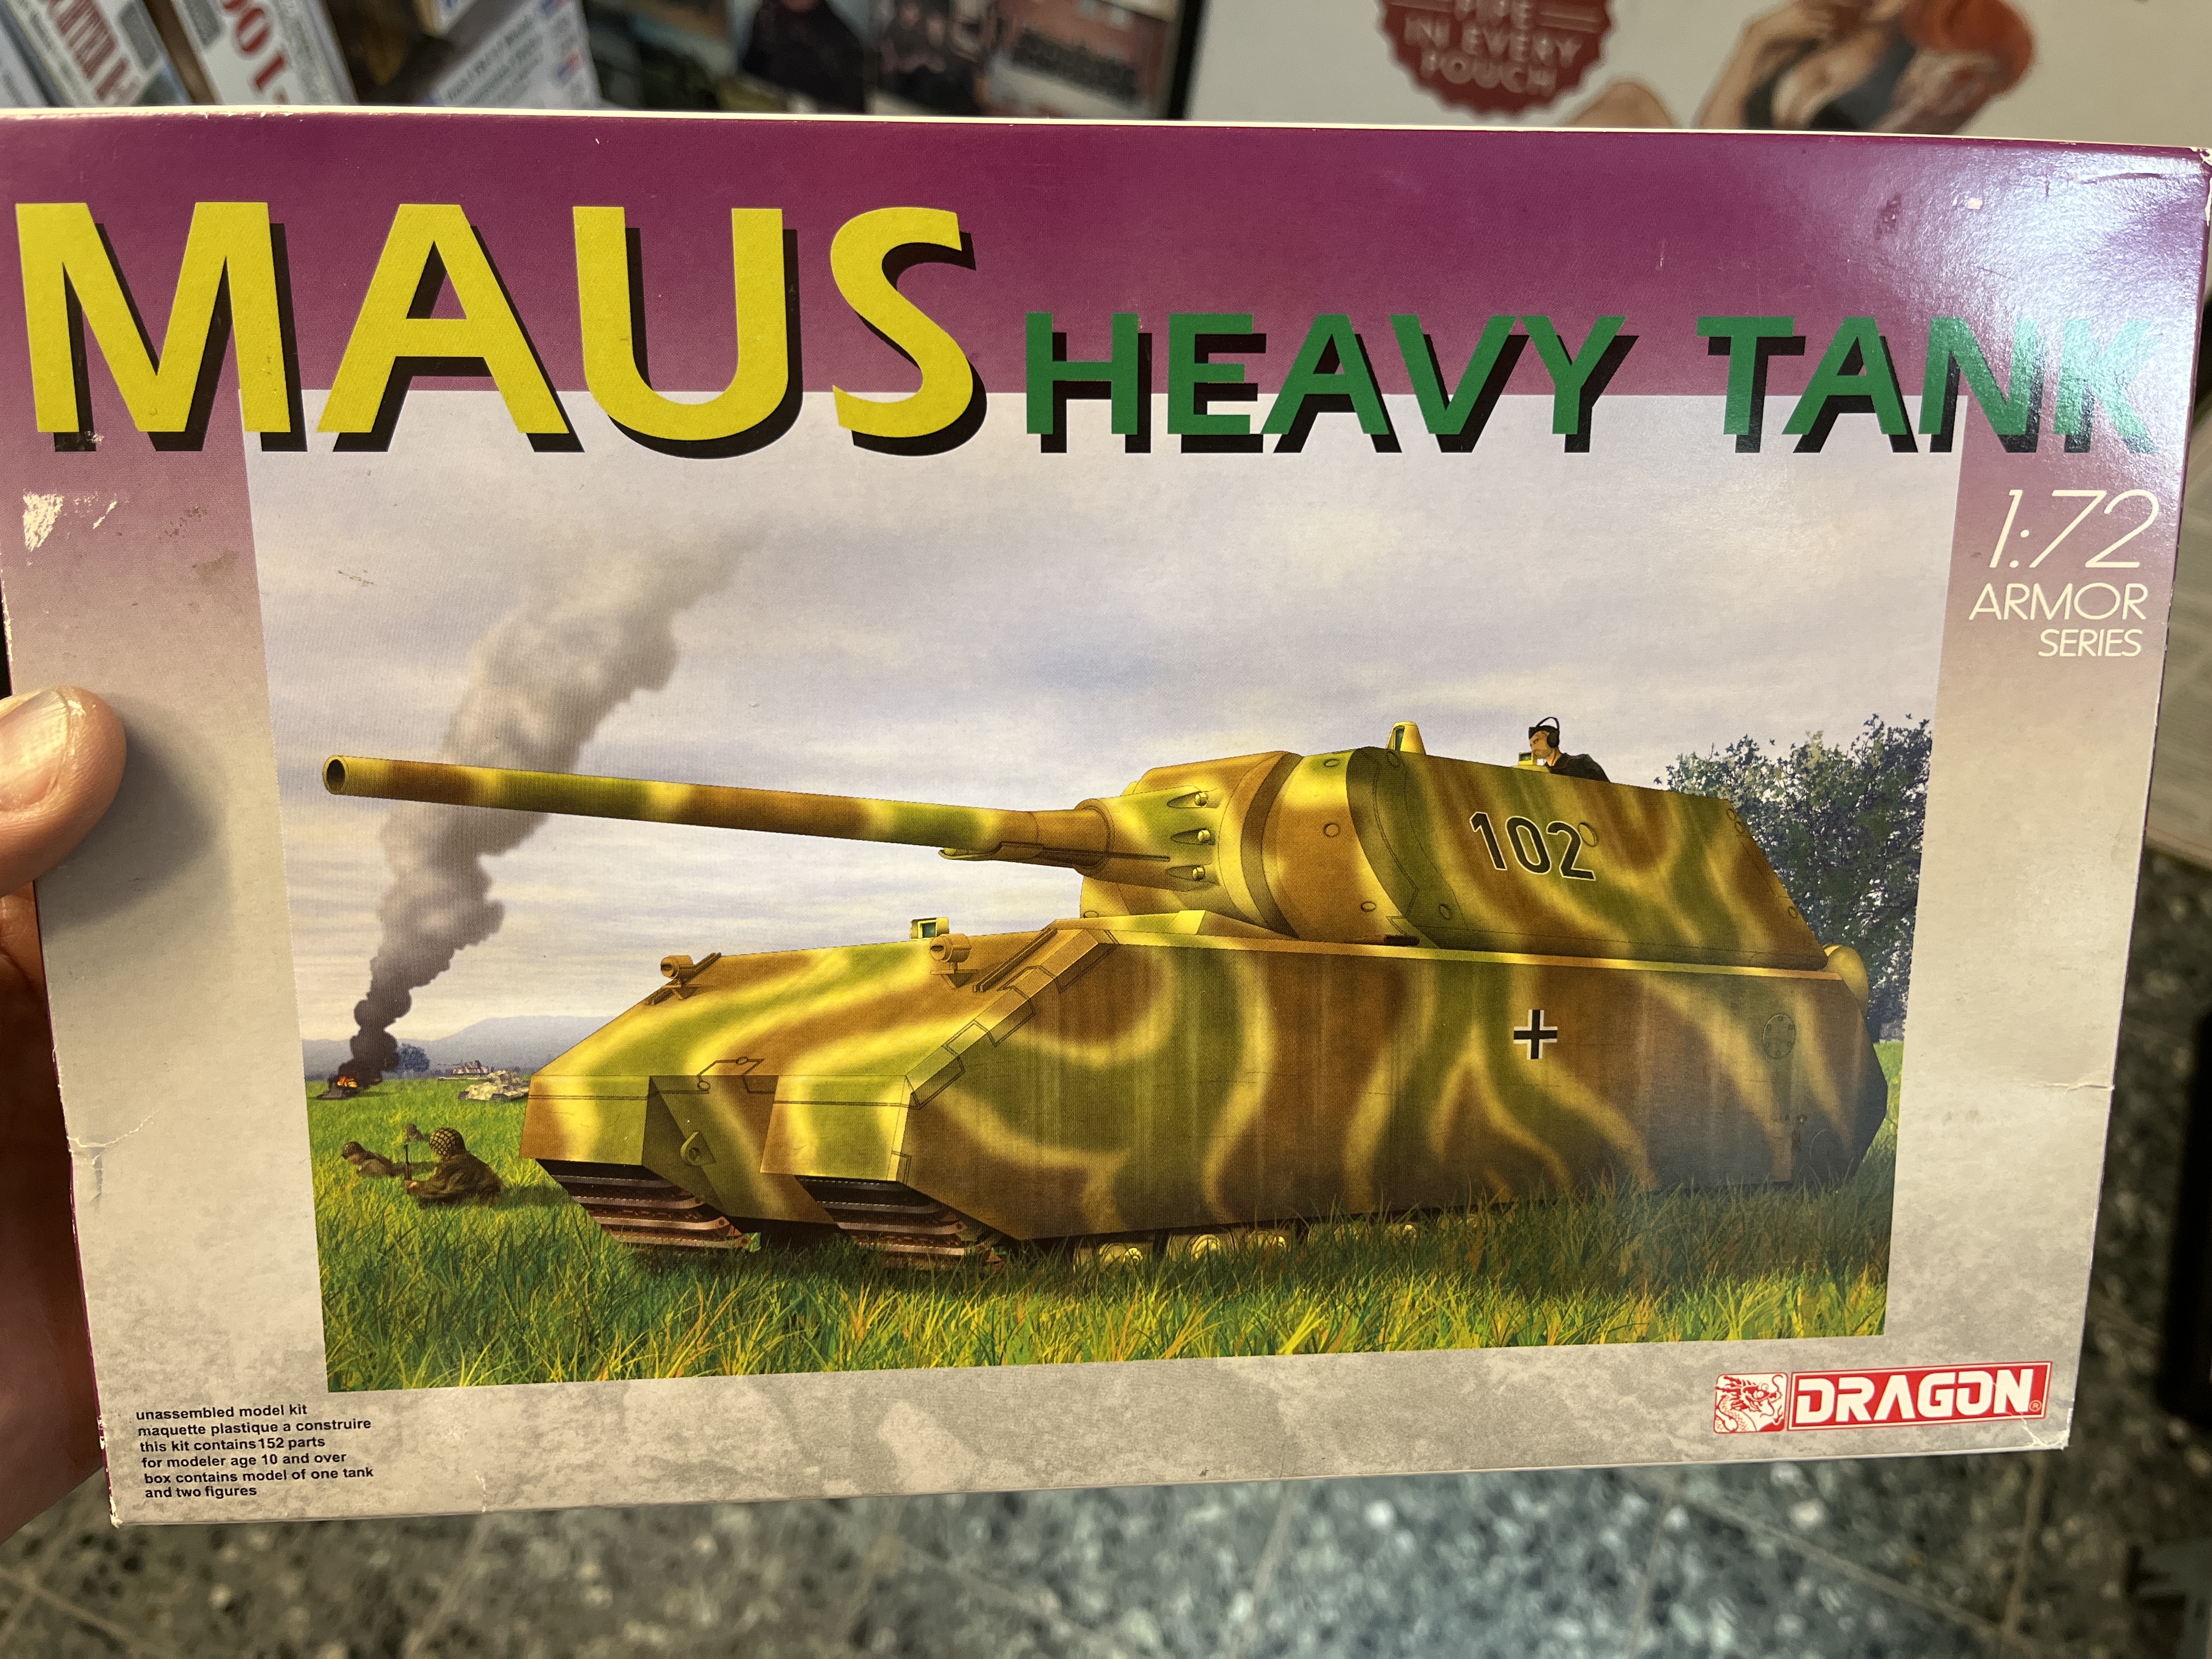
The Maus obviously also fits the bill, but watching you build 1/72nd scale will test my eyeballs. ![]()
Hi Jesper,
Like Pete says, the first two and the Maus are fine. Did the sturmmorser ever get beyond “napkin sketch for the Fuhrer” stage? If not I’m afraid it’s out. And I know nothing about Eastern armour - did the T84 get issued? If it got stuck at prototype stage that’s OK, but if that configuration made it to the troops then no. I’ll leave you to do the research and report back…
Tom and Peter, thanks for the quick feedback.
The T-84 is being used by the troops now, but I think it is simply “less than 10 prototypes” that were produced. Because of the invasion by Russia I believe they are being used. Guess it is a grey area, so I will leave it out.
The morser I have seen, but might actually just be a (postwar?) drawing in connection with all the planned waffentrager versions.
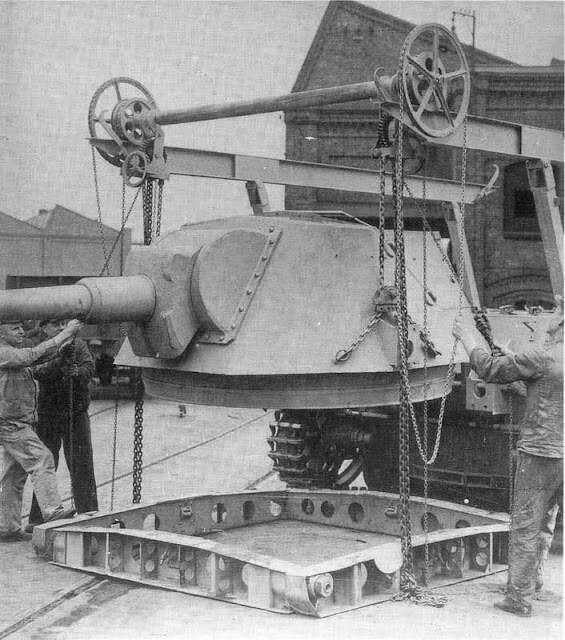
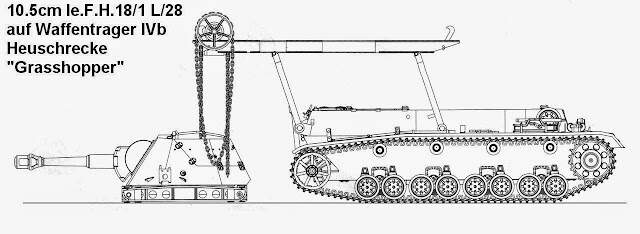
So in short I will go with one of the other waffentragers. ![]() I might even make a small diorama with the turret being tested on a bunker. We will see I have to research how the whole turret transfer crane rig worked.
I might even make a small diorama with the turret being tested on a bunker. We will see I have to research how the whole turret transfer crane rig worked.
Jesper, these may help:

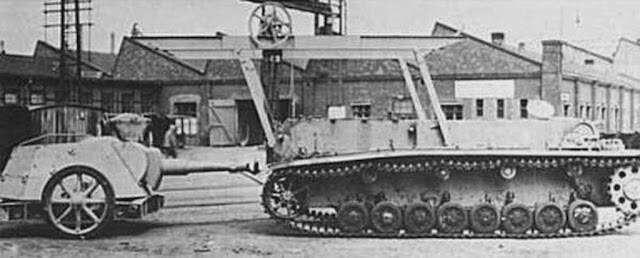
The Geschutwagen IV b did not have a turret meant to be removed. Also the left to right traverse was limited:
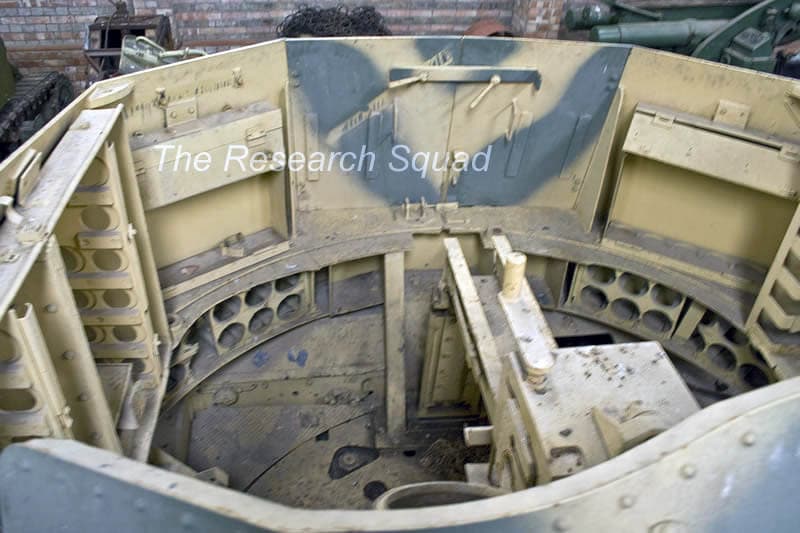
There a lots of pics of this one, including interiors, on the net.
Gotta say, I really like the Grasshopper! (Several decades ago I had a model (maybe 1:30 scale?) of it complete with the lifting arms and a cradle for the turret. Always thought it was so pointlessly cool…)
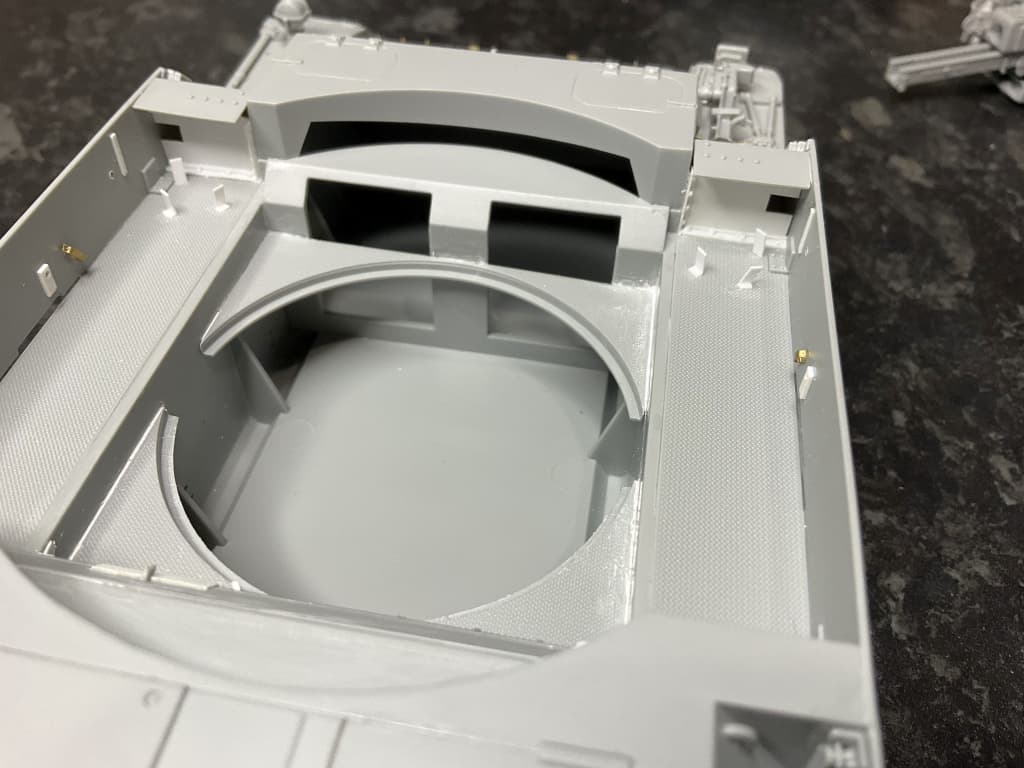
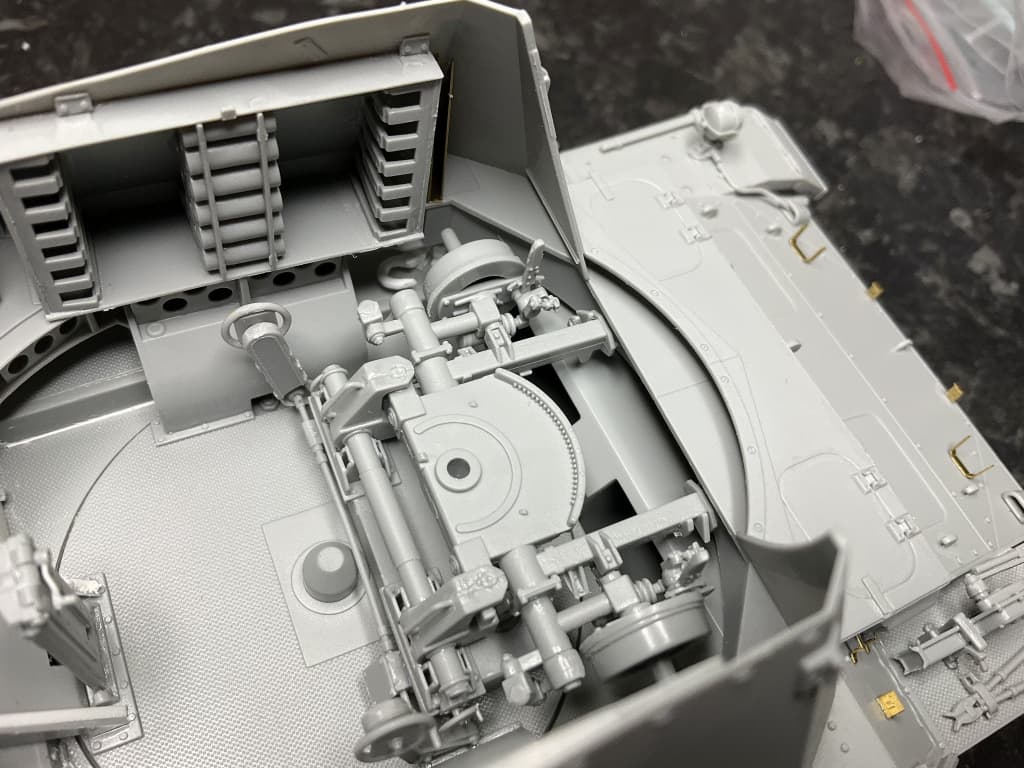
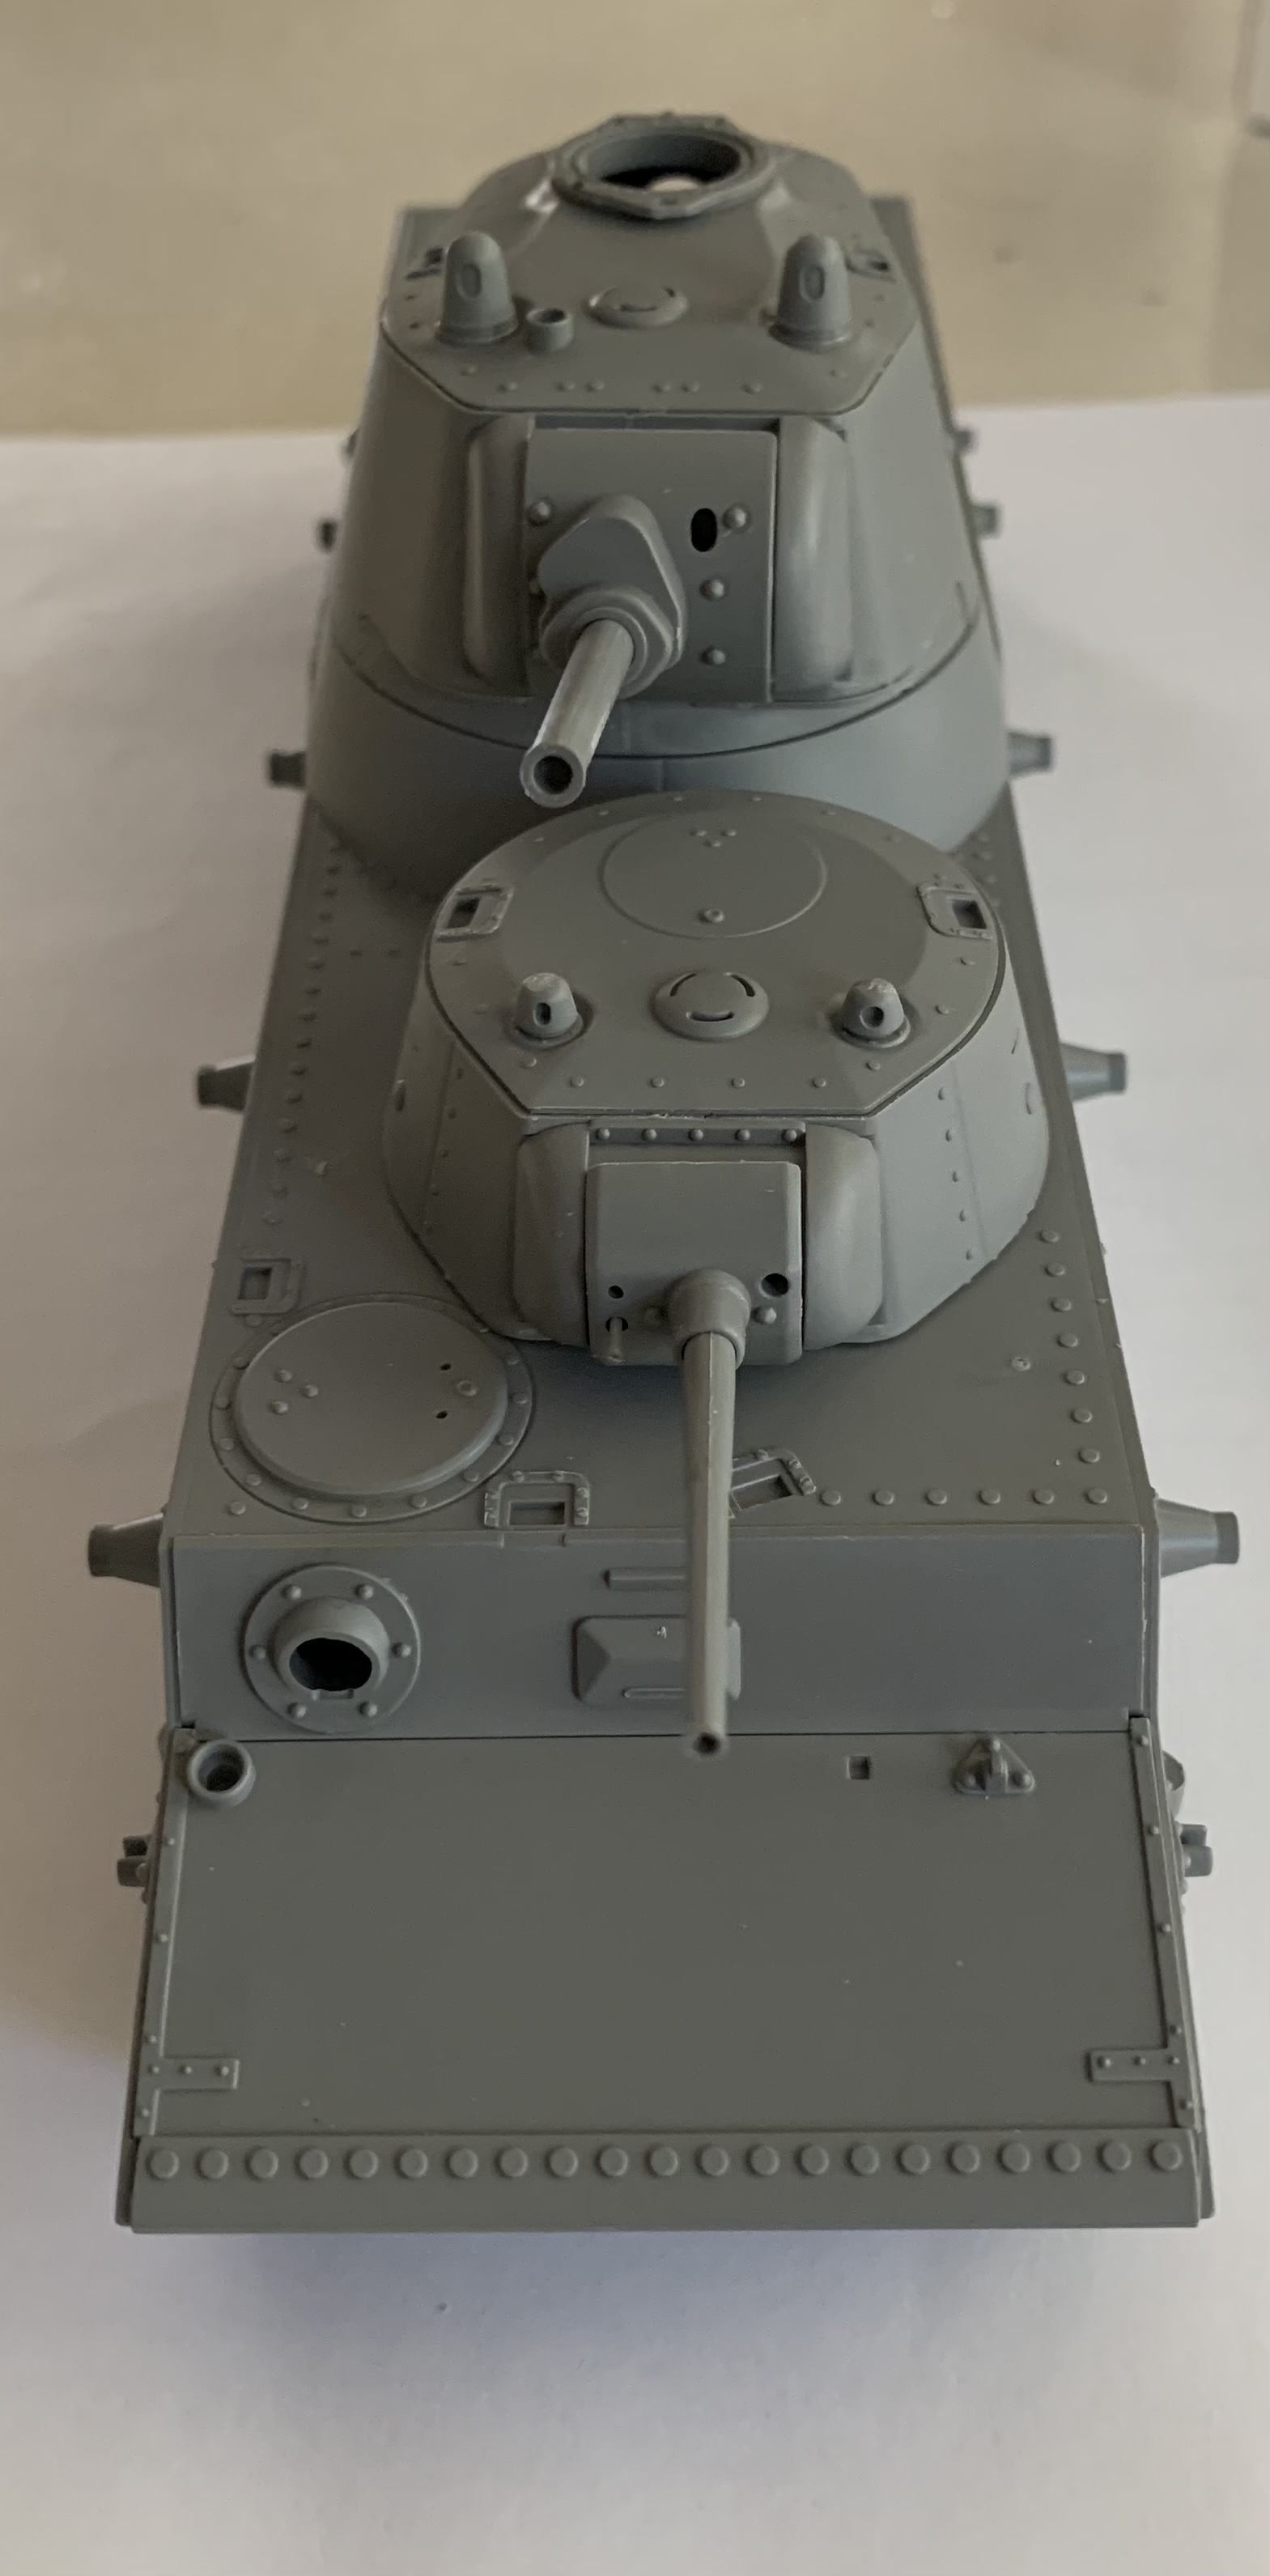
Okay managed to get some time to myself and did a little scratch building. The Dragon kit has a lot of missing detail and in places it is very incorrect. Firstly, the missing panels on the fenders. Dragon has these open all the way:
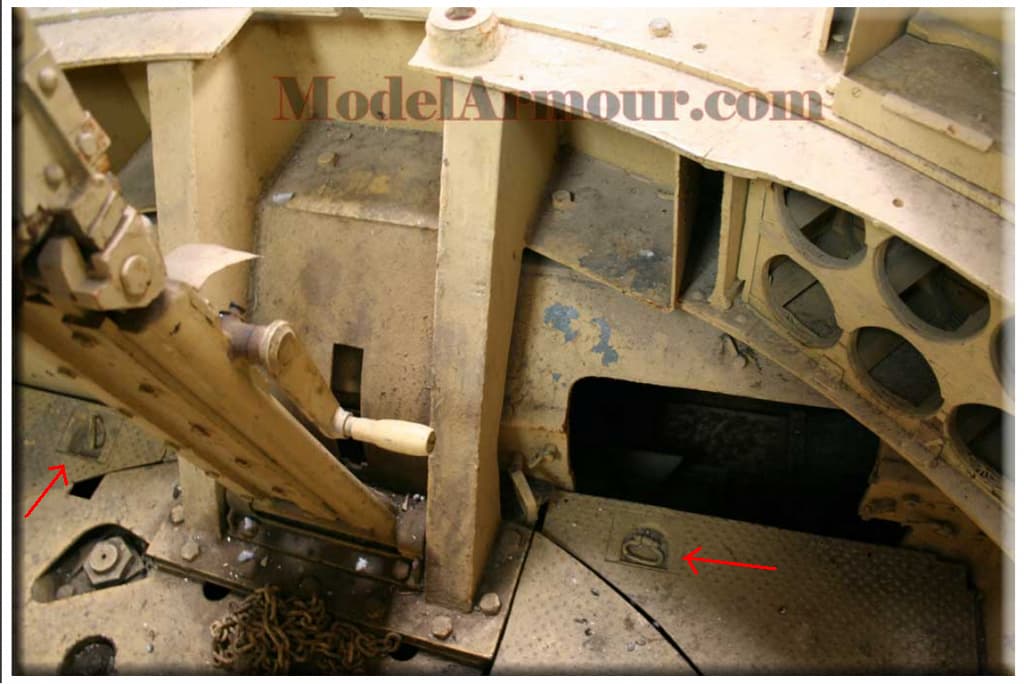
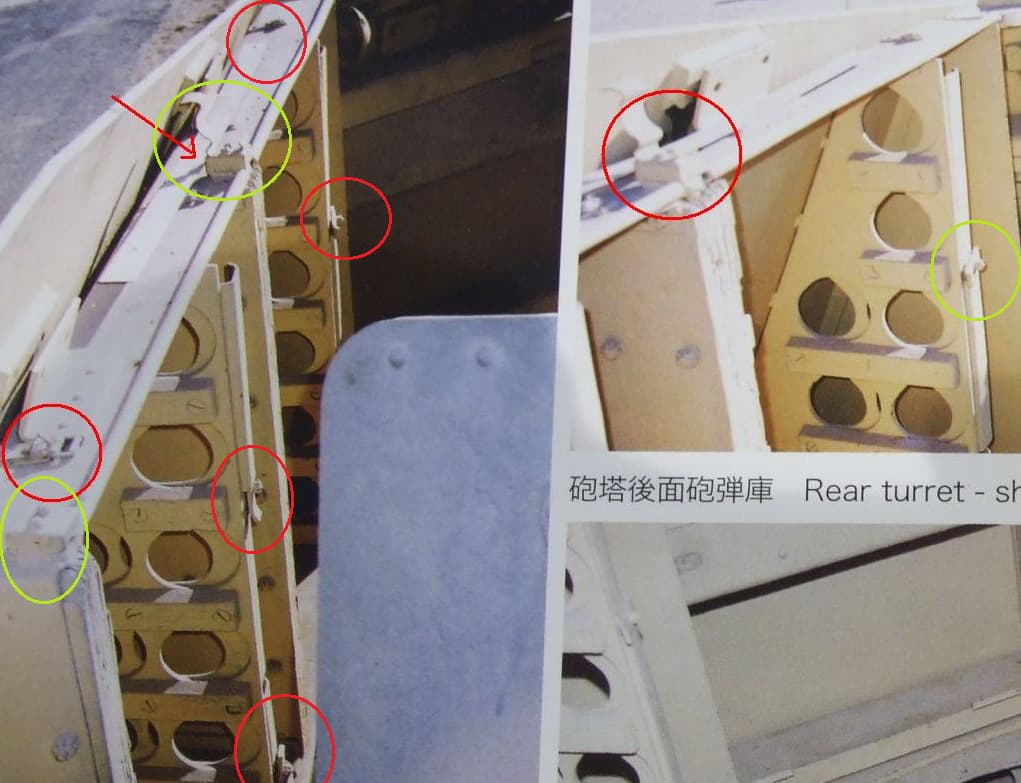
You will note the brackets on the fender behind these panels. These are also absent in the kit. It was where pulleys were located. The vehicle had pilzen mounts for a jib crane that was to be used to lift the gun and cradle up and out so the gun trails and wheels could be fitted. The pulleys were for the crane. I also added the missing detail in the side doors, including drilling the 2 holes needed:
The references to show this is actually how the vehicle was set up:
Yes, you can see the detail when the turret is on:
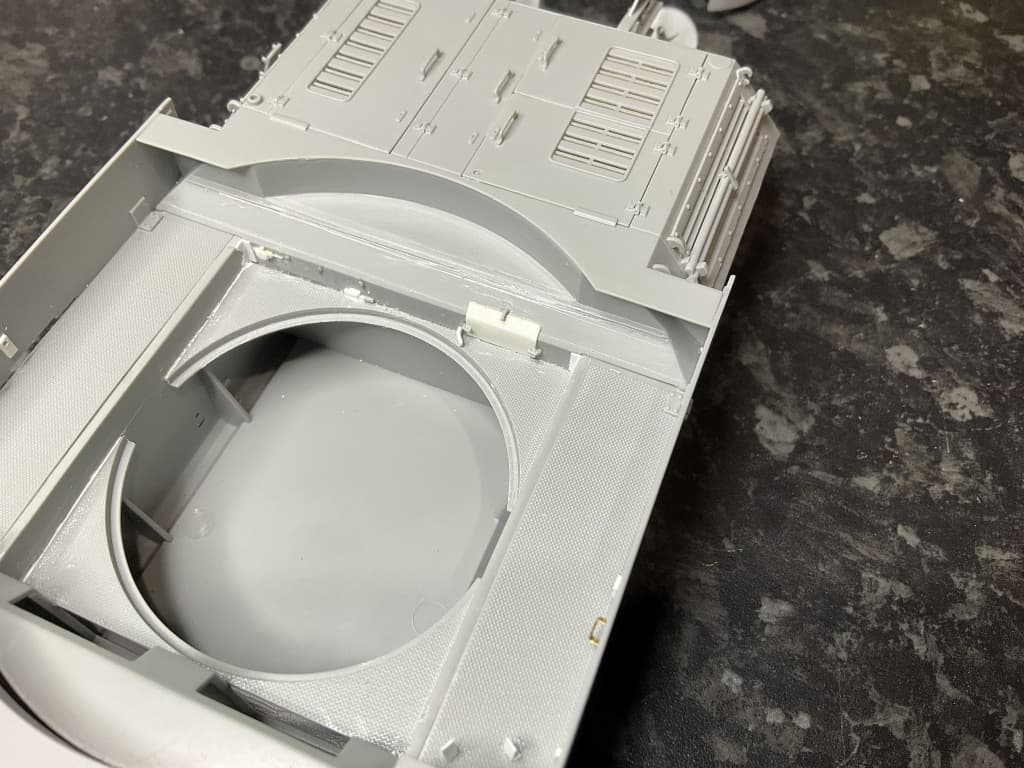
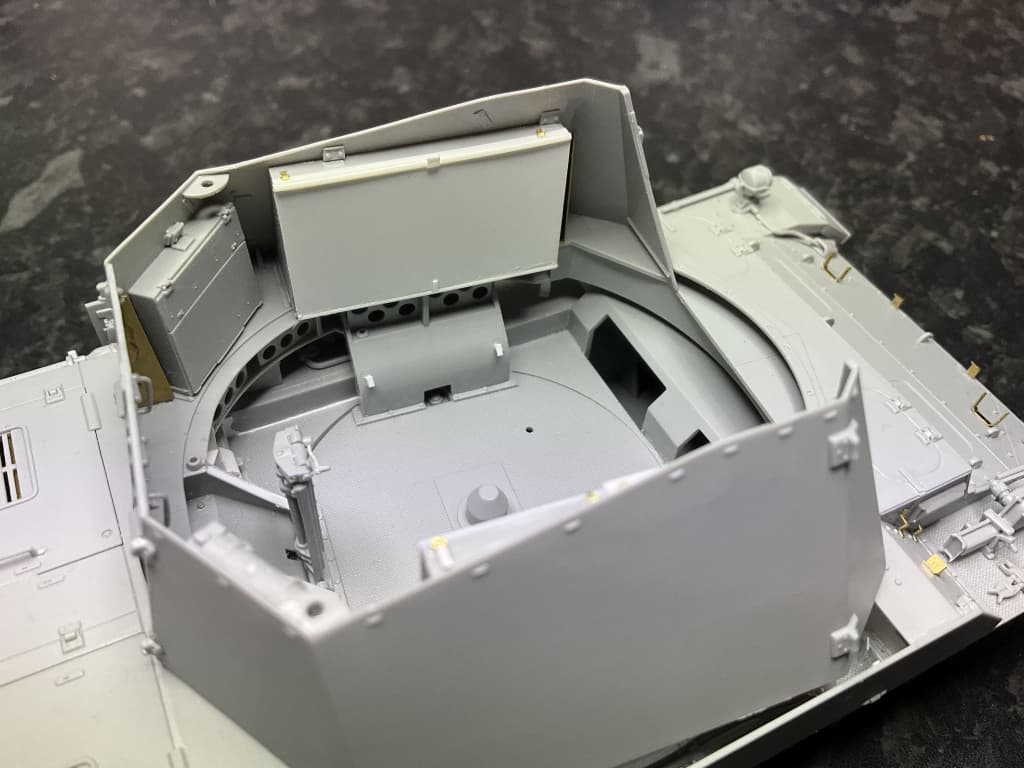
Some missing detail added to the rear of the compartment is next. Brackets in the corner, bolt heads, hydraulic lines and an access panel. This is all just flat plastic in the kit. All that white putty you see around the edge is because Dragon will have you fit the two bridge end like parts way too high. I had to remove them, cut off the top of the ribs you can see under them, then reposition the panels and fill the scaring. If you don’t do this the turret sits way too high. Then I scribed a panel line in the wrong place and had to fill that too…
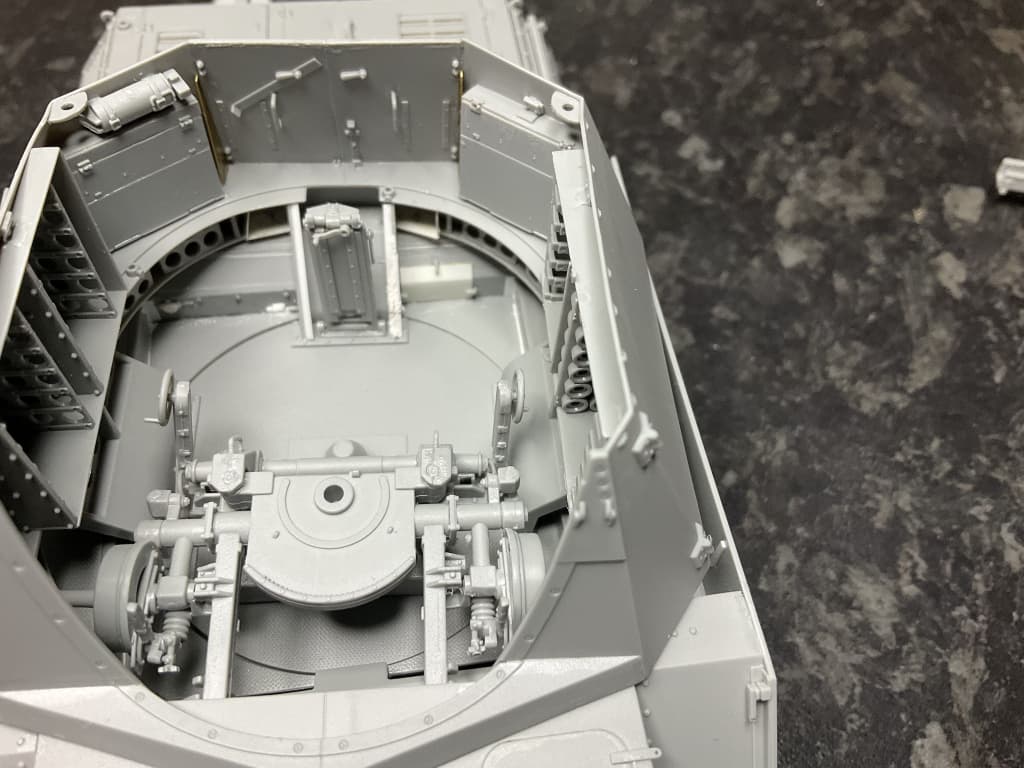
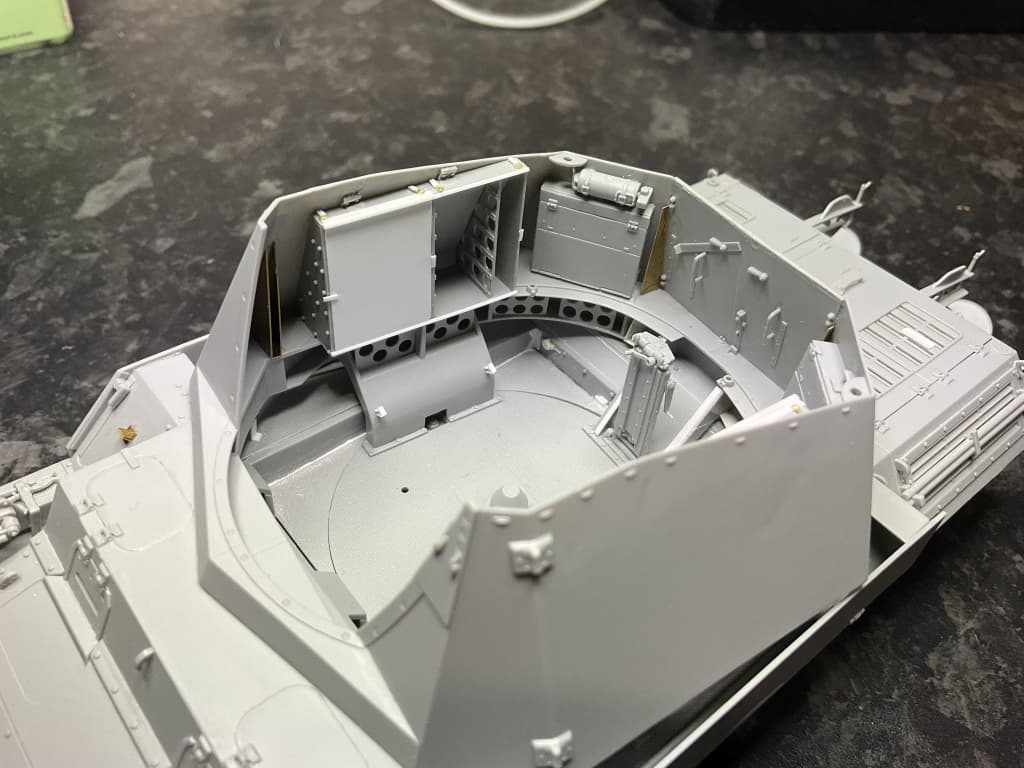
Test fit of the turret after this has been fixed. Note the moulded in, angled rectangle and the door of the turret… that is actually the brace for when the doors are closed and it is in the open position!
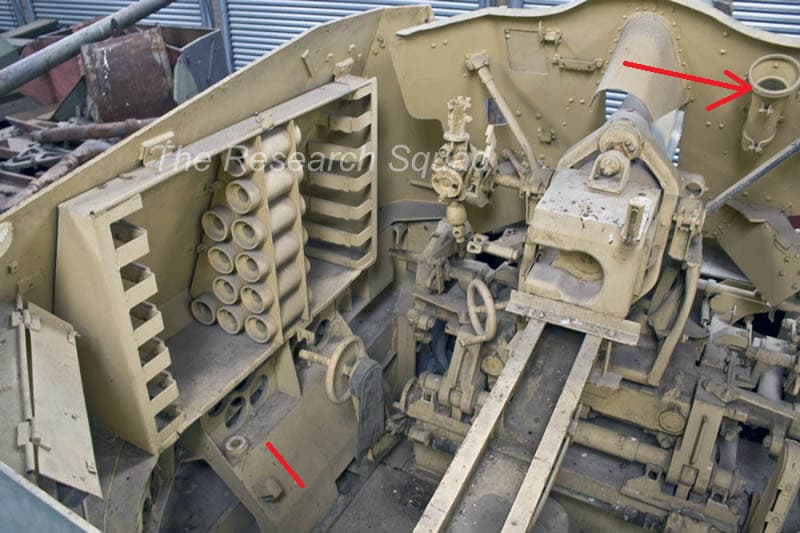
In the above pic, you can see the location of the fire Extinguisher which is not called out in the instructions at all. You can also see the two scratch built compartments on either side of the gun travel lock that stick out beside the charge case shell holders - missing in the kit. You can also see where I added a strip of styrene on the floor support braces beside the lock. Dragon just has the thin side panel, nothing on the front like this.
References:
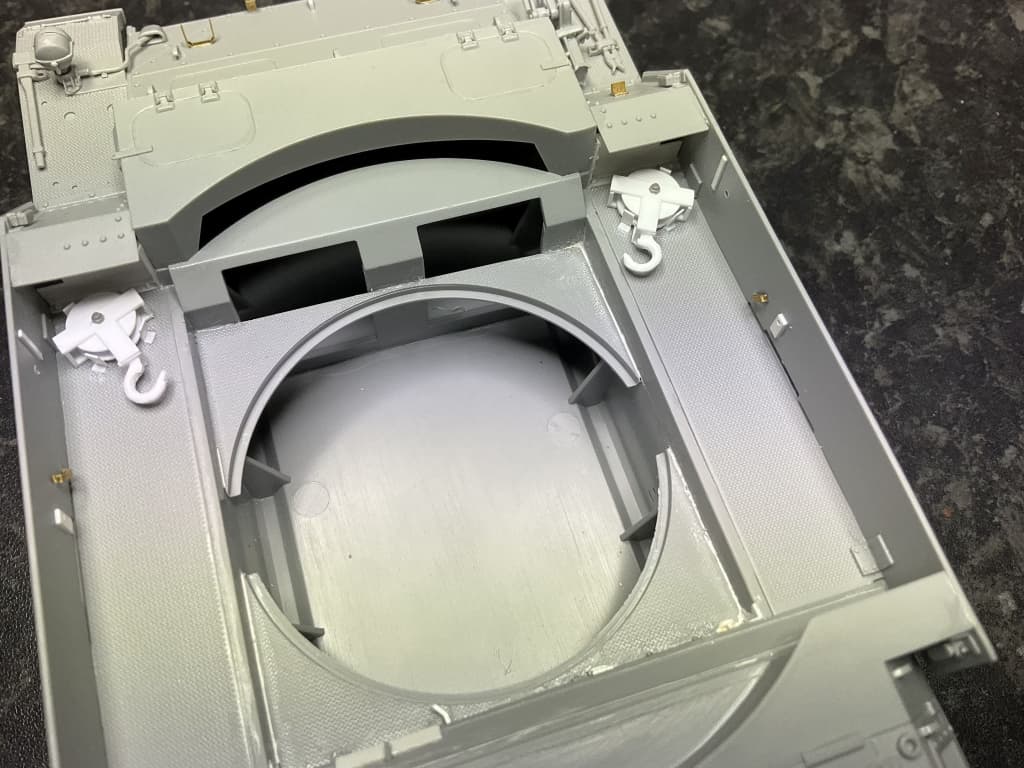
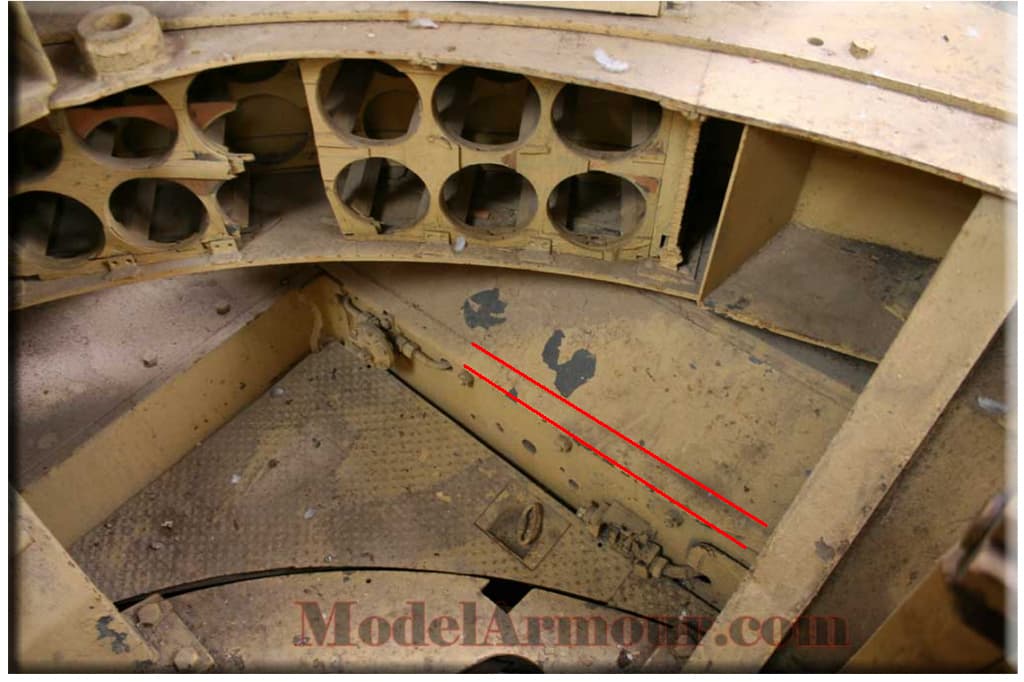
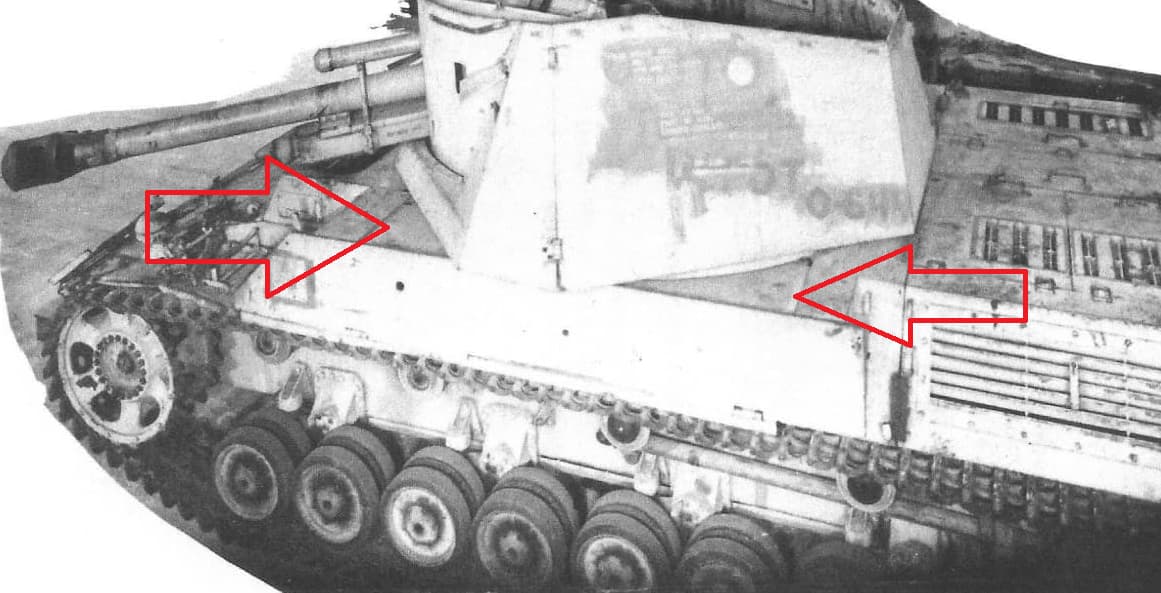
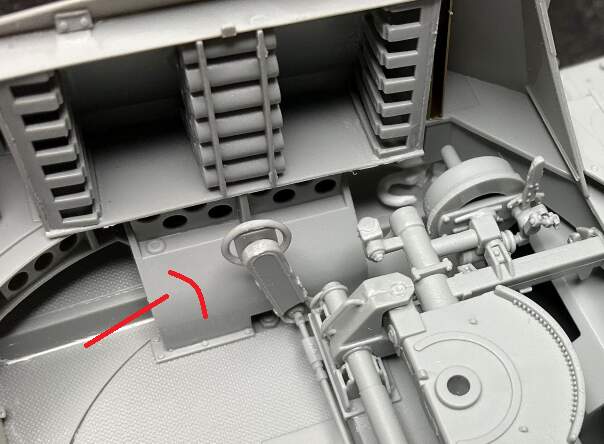
Note the piltzen mounts for the crane in the pics - the circular parts in the top of the pics. and near the left red line here:
That red line shows that the floor support bracket has a flat face but Dragon gives you a curved one with chunky thick sides. I decided to live with that, but will improve the pilzen mount and add the missing scope mount (red arrow)
Still debating on whether to try and add the floor lifting rings in the pics above… still a lot to do here anyway.
Peter, super helpful!
Maybe I just show the turret in progress of being moved, but still above the open hull.
Alternatively have the turret moved and the have a couple of crewmen pull a tarp over the empty hull.
Scratch building the interior is not an option for me - neither skills nor patience to pull it off ![]()
![]()
Another option is have the turret lifted slightly above the hull and have the crew removing the support frame part off the vehicle. Maybe have a couple already on the ground.
The wheels for the frame were quite heavy and I would think a smart crew would first use the crane and tackle to lift them off the vehicle and lower them so they can be moved aside. That could be another option to show the crane in use, without having to worry about having the turret lifted and a void interior.
Good idea, Peter. Once I start construction it is time to try out different solutions ![]()
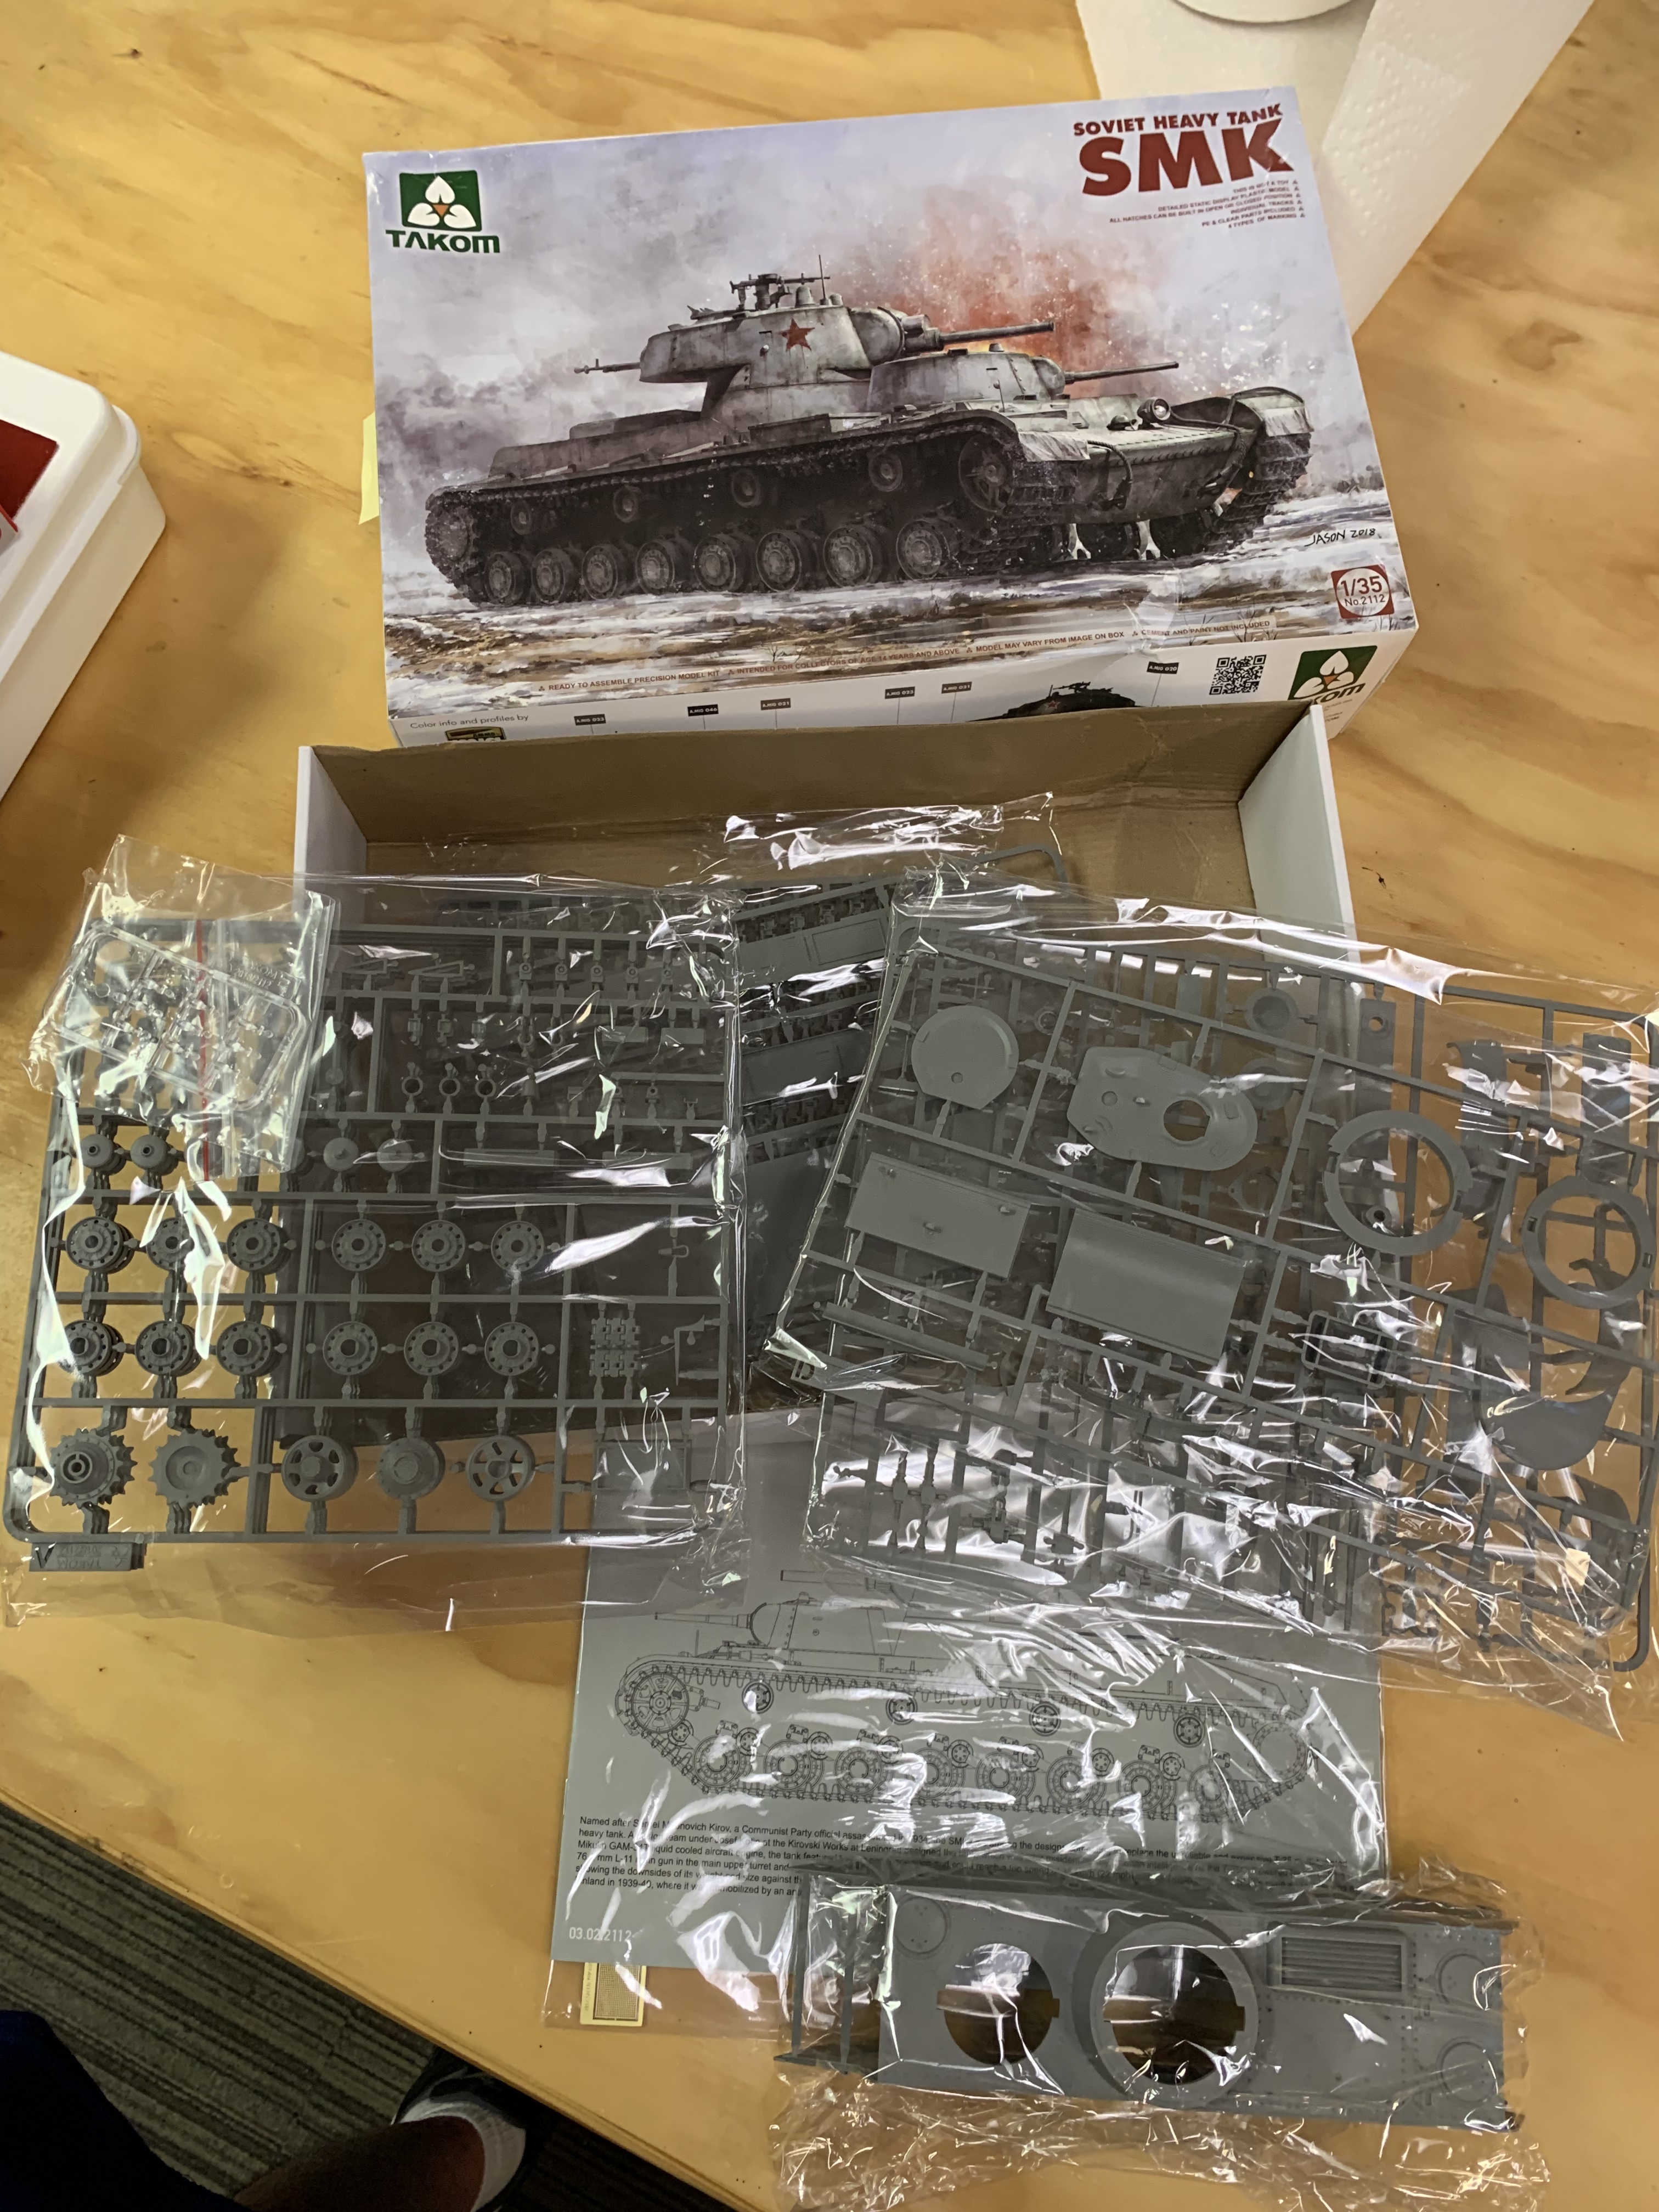
I was trying not to enter anymore campaigns for a bit and yet a Takom SMK fell into my online cart at checkout. ![]()
I hate it when that happens! ![]()
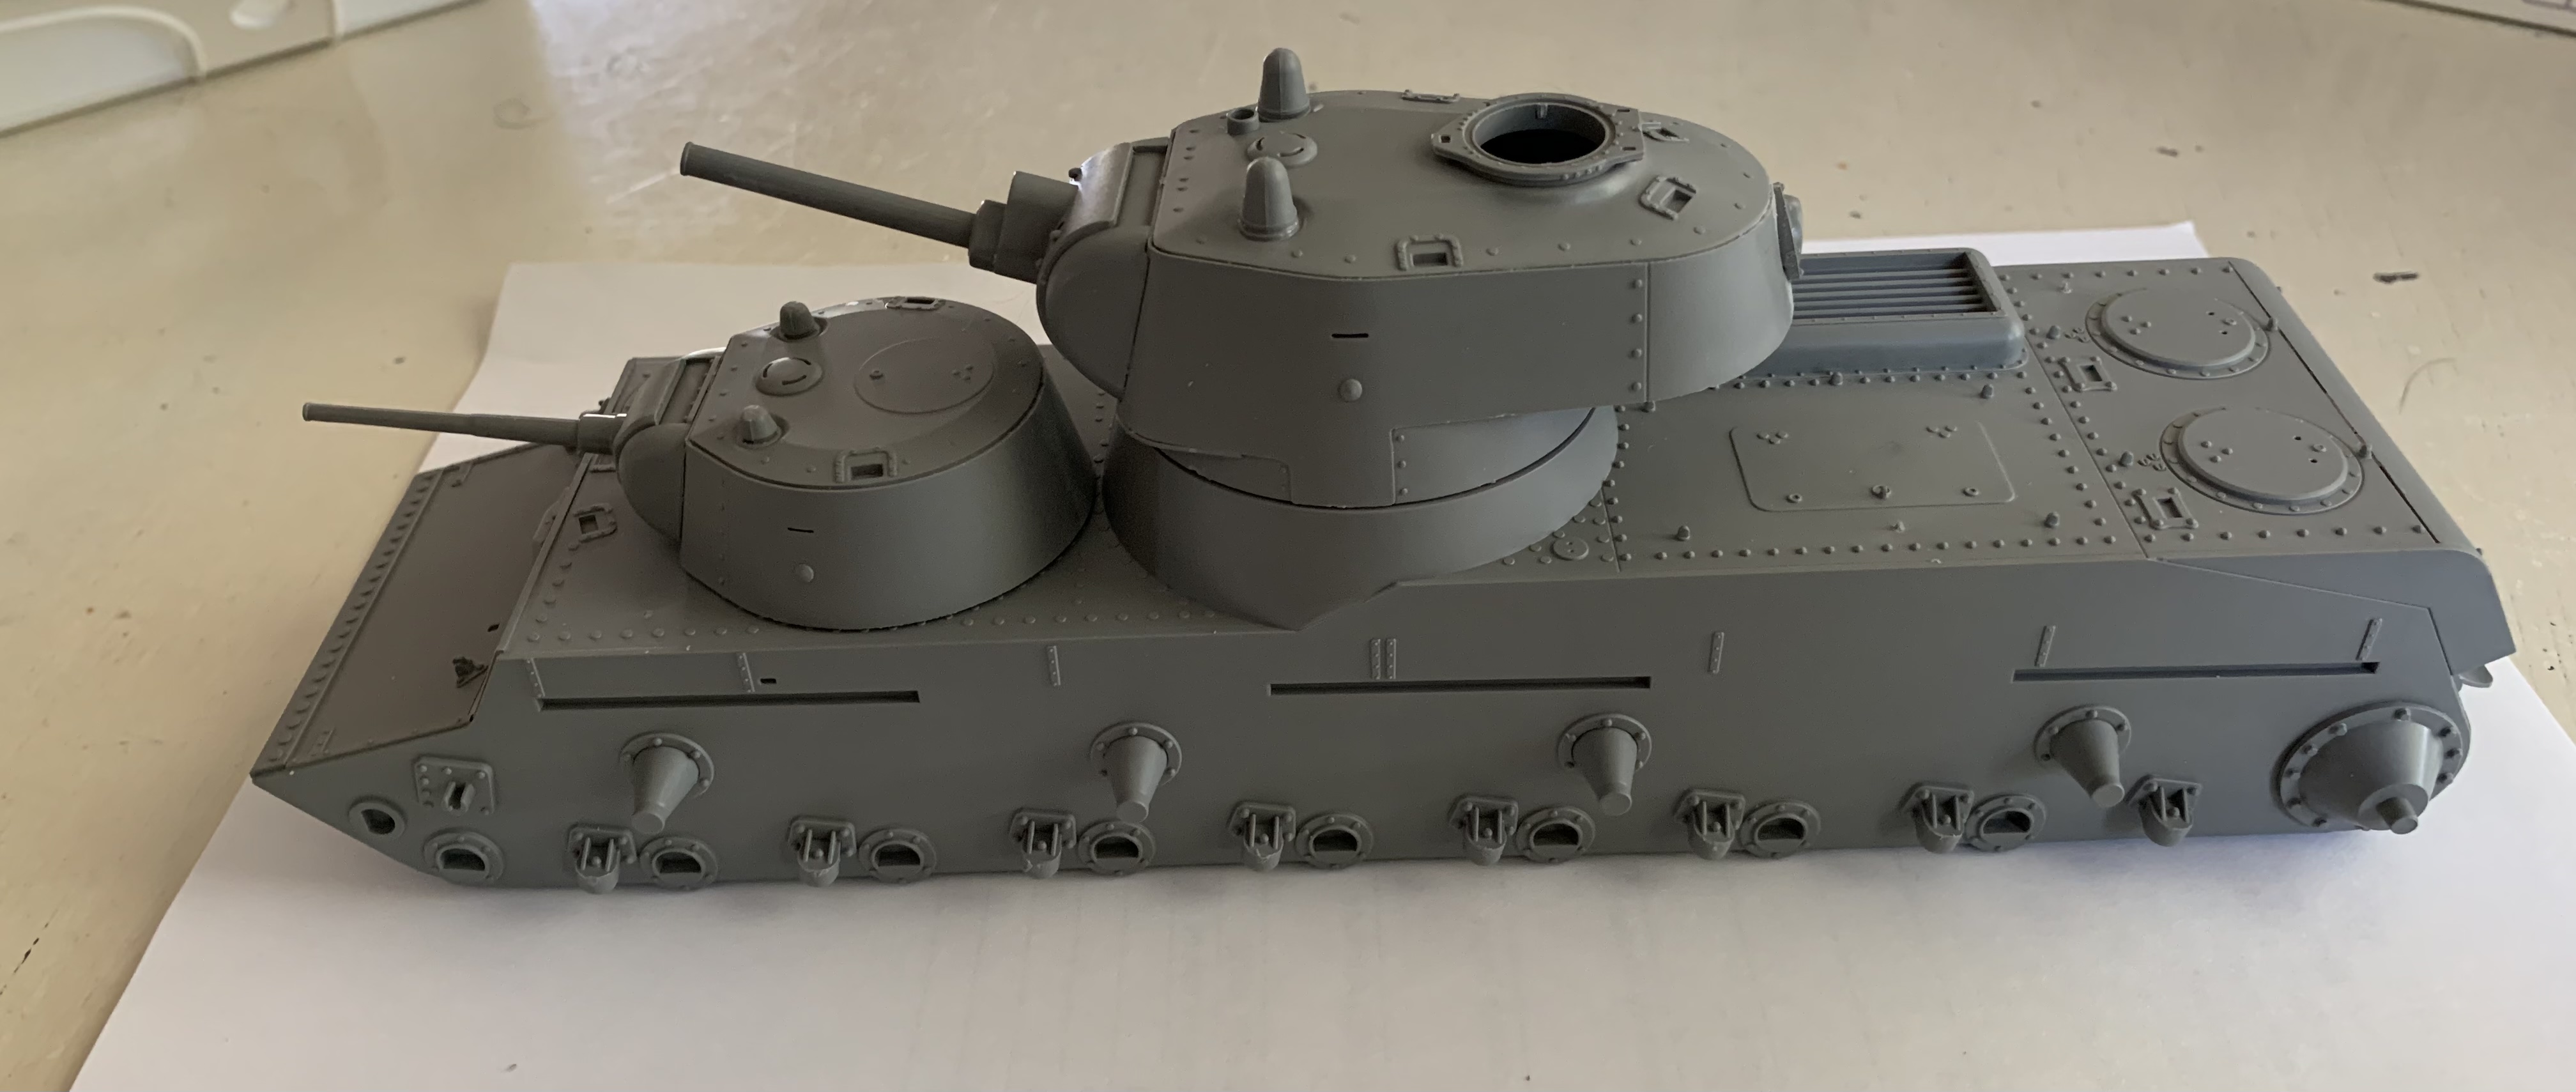
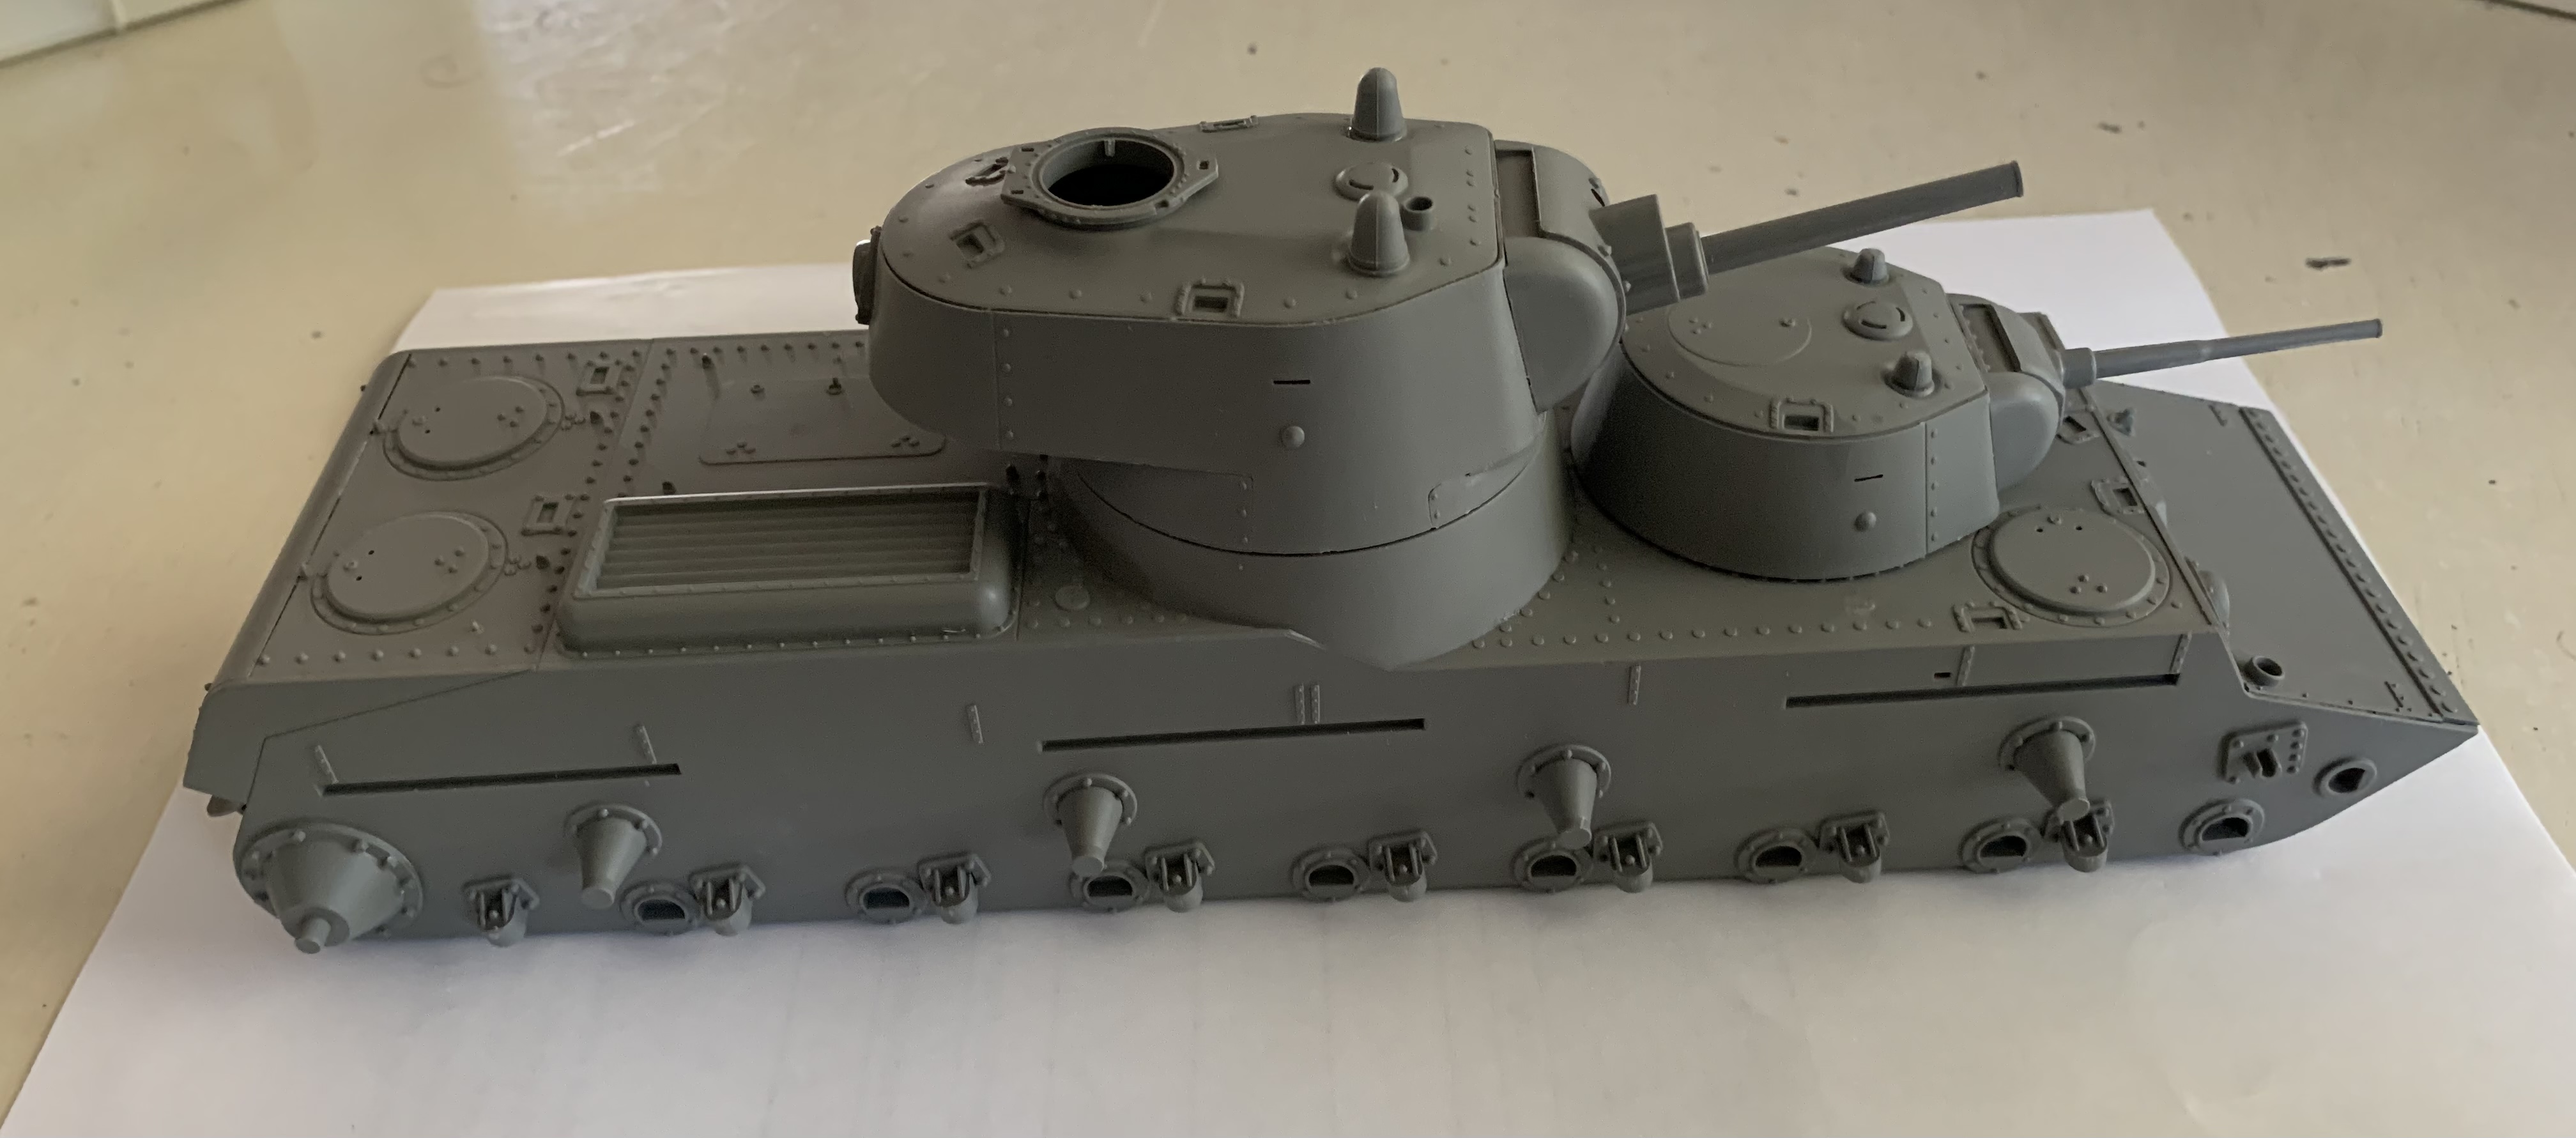
Looking forward to seeing a whole squadron of turrets sharing one hull…
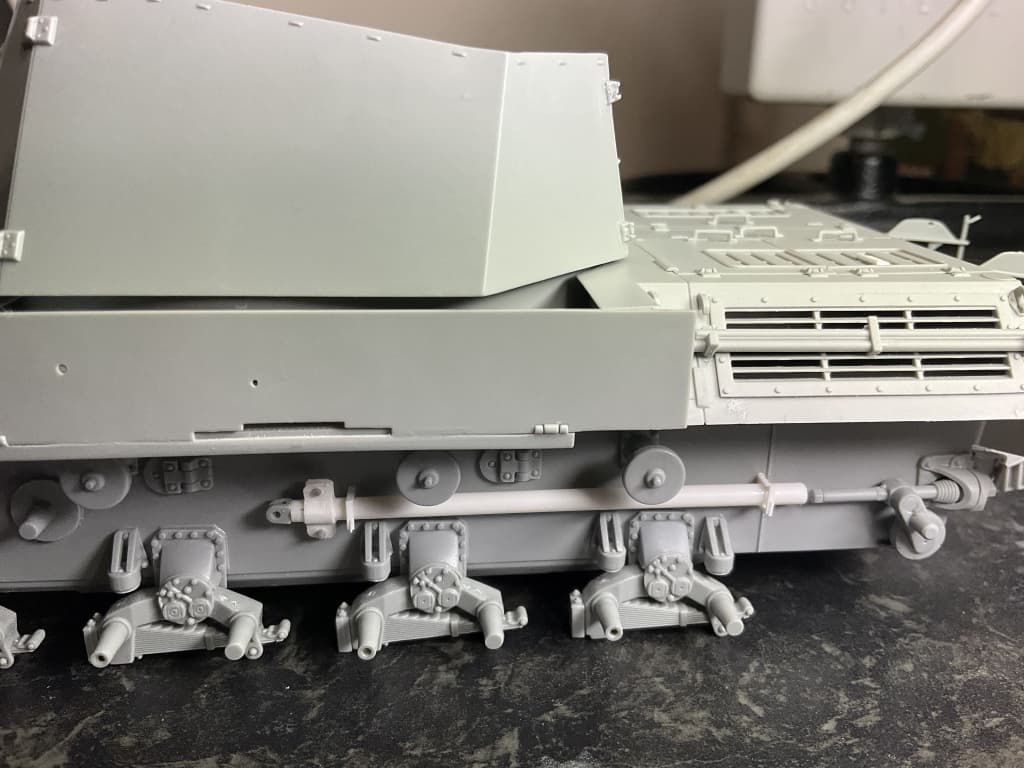
Okay, I’m calling it done for the build. I could keep going adding missing detail, but I have decided to draw the line. Dragon have a few shape and size issues in this kit, but to be honest, most people will never know.
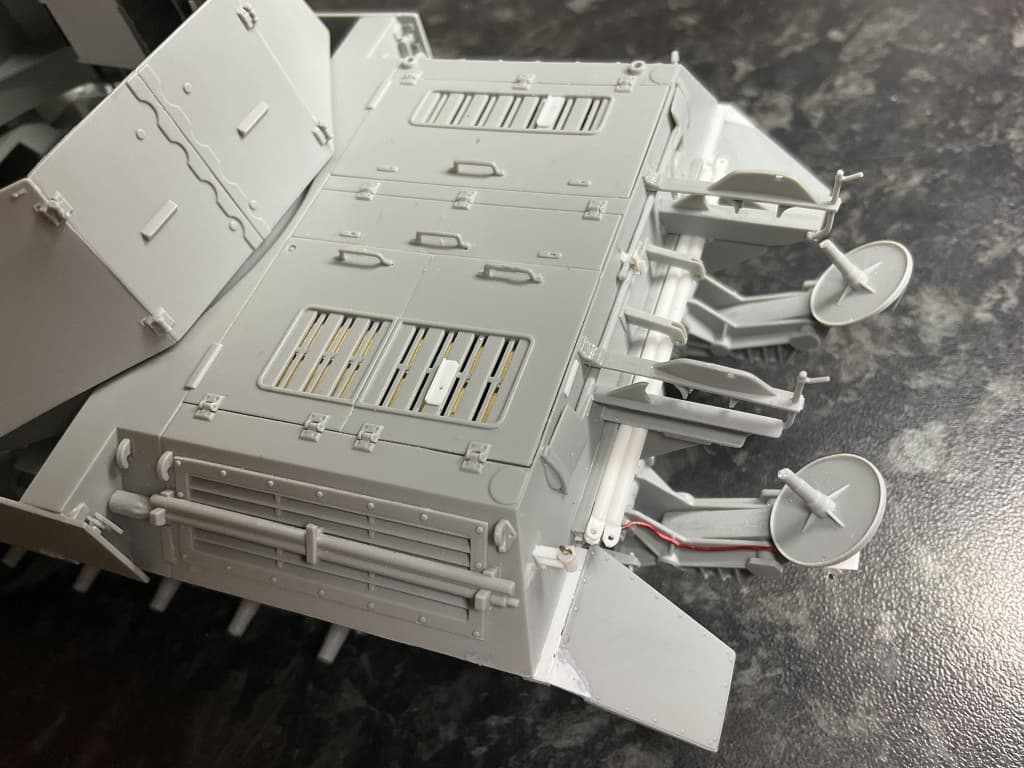
I have added a few more things most other people do not add, like the covers over the ammo bins and the retaining clasp and toggles for them. If you look at the Hummel, Wespe, Pz sfl IVb, etc, they all had covers on the racks. Same with Nashorn, etc.
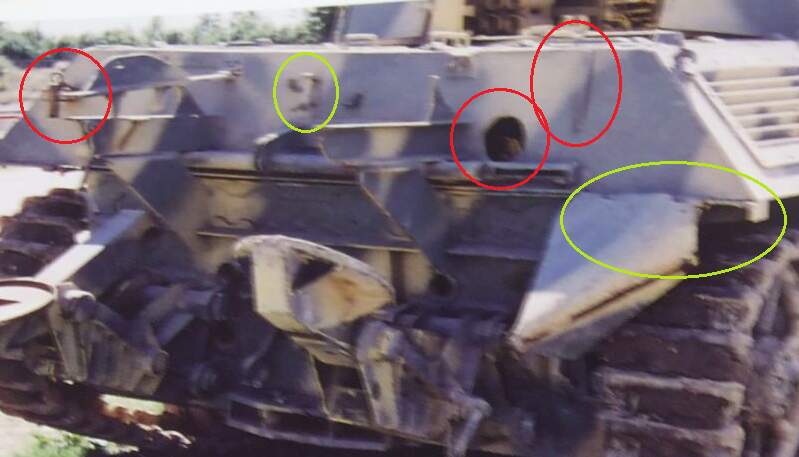
This pic shows the split cover side. One is removed and will be placed at the rear when painted. Note the toggles that are turned to hold them in place. You see these toggles and clasps in this pic of the real vehicle:
I presume the top of the cover is curved to slide over, and hang from, the rounded top face of the bins.
It also appears to have had an aerial storage tube on top of the rack too. The green circle shows the remnant of the front end mount and the centre mount which still has one side of the clip. I may still add that…
The other side has a bin that appears to have had a full one piece cover like the Hummel had - no toggles on this one to be seen, just the tab at the top of the bin and the swivel on the centre bottom (which I just noticed is broken on the model…).
The reference pic showing the remnants of the clasps on top and the tab and swivel:
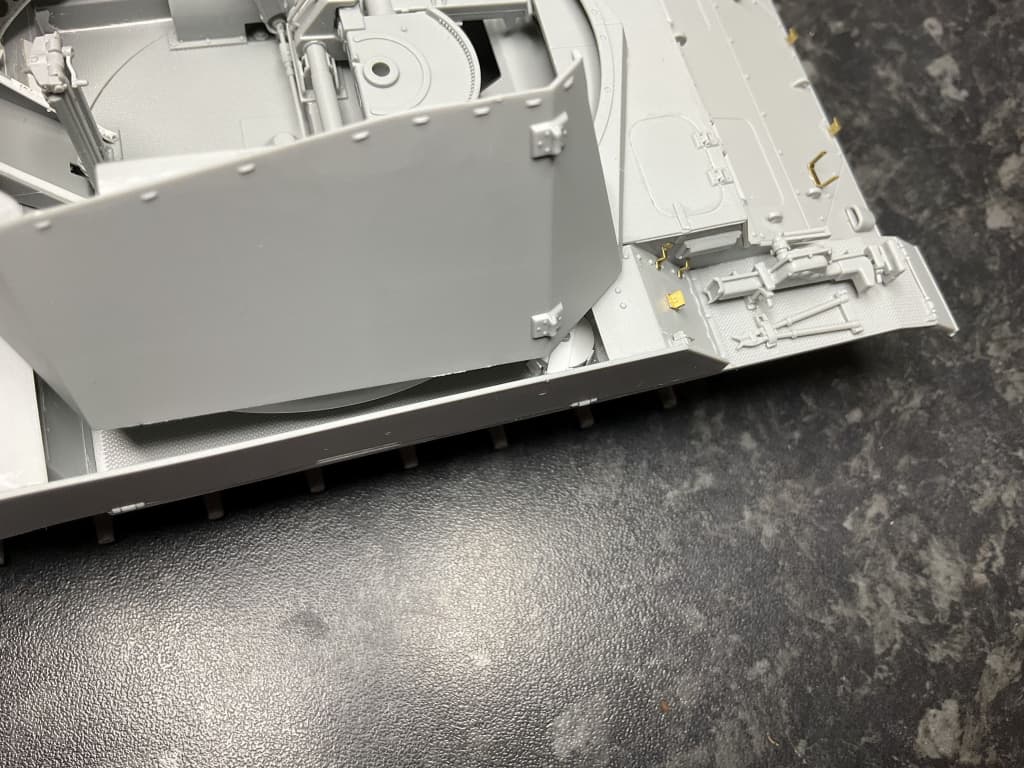
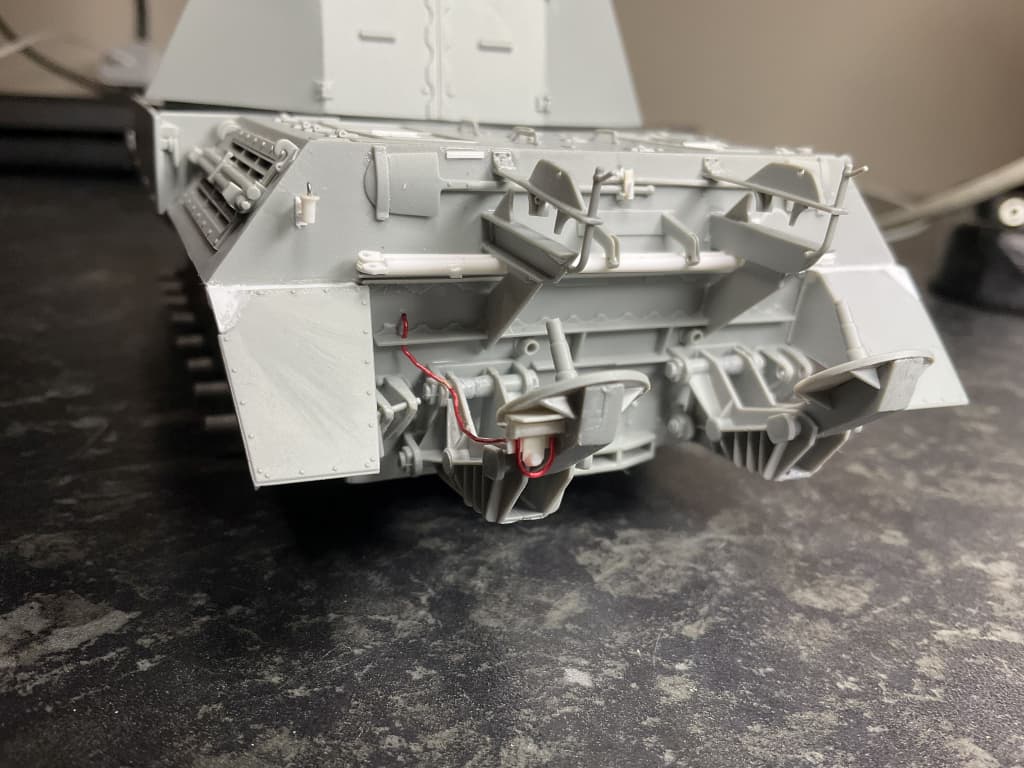
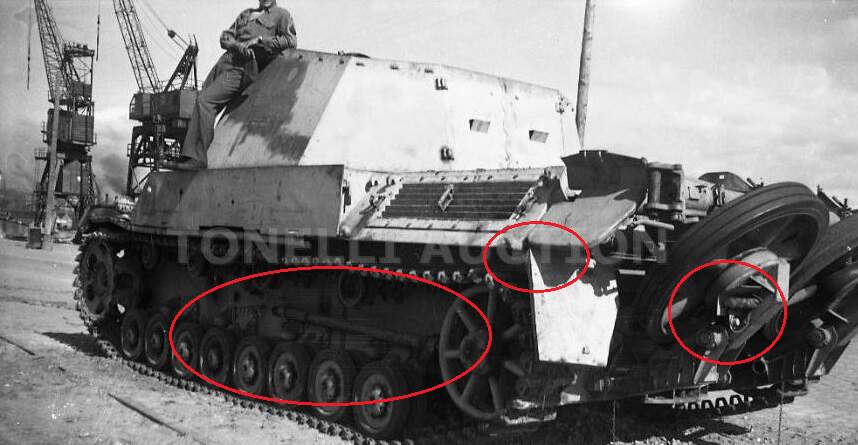
I have also added the crane support legs, rear light and cable, and the fitting on the top left corner - some sort of plug. I also repositioned the shovels where they should be, Dragon incorrectly has them fitted closer to the side of the hull, with the handles horizontal and butted end to end. I also added the cover on the rear near the trail mounts. Dragon has nothing there.
Reference pic showing the plug, shovel handle mount and position of the spade stowage strip… and the hole that has a cover on it normally.
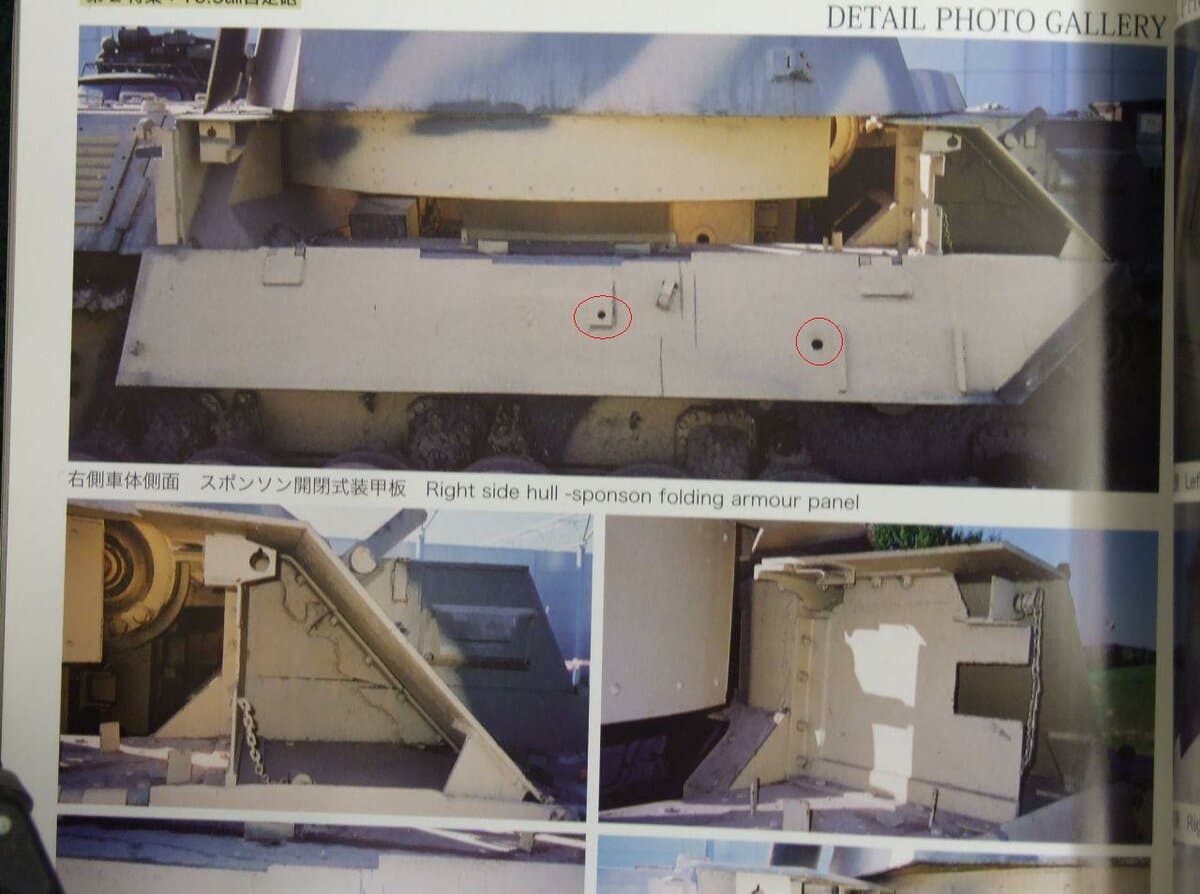
Not also the damaged mud guard. Dragon 's is this shape but they expect it to be fitted right up to the hull, not on the visible mount. What Dragon did not realise was the shape is because this one is damaged… the 'triangular top bit is missing.
The correct shape is seen in this pic, as is the rear convoy light - plus the crane post that Dragon does not give you:
I added that too, but added the boom link support for something a bit more interesting.
…which is more to what is seen in the Panzer Tracts book:
Looking good! Those toggles take some serious looking to find…
Yeah, it is a result of my ATDS in hyper mode… (Attention To Detail Stupidity).
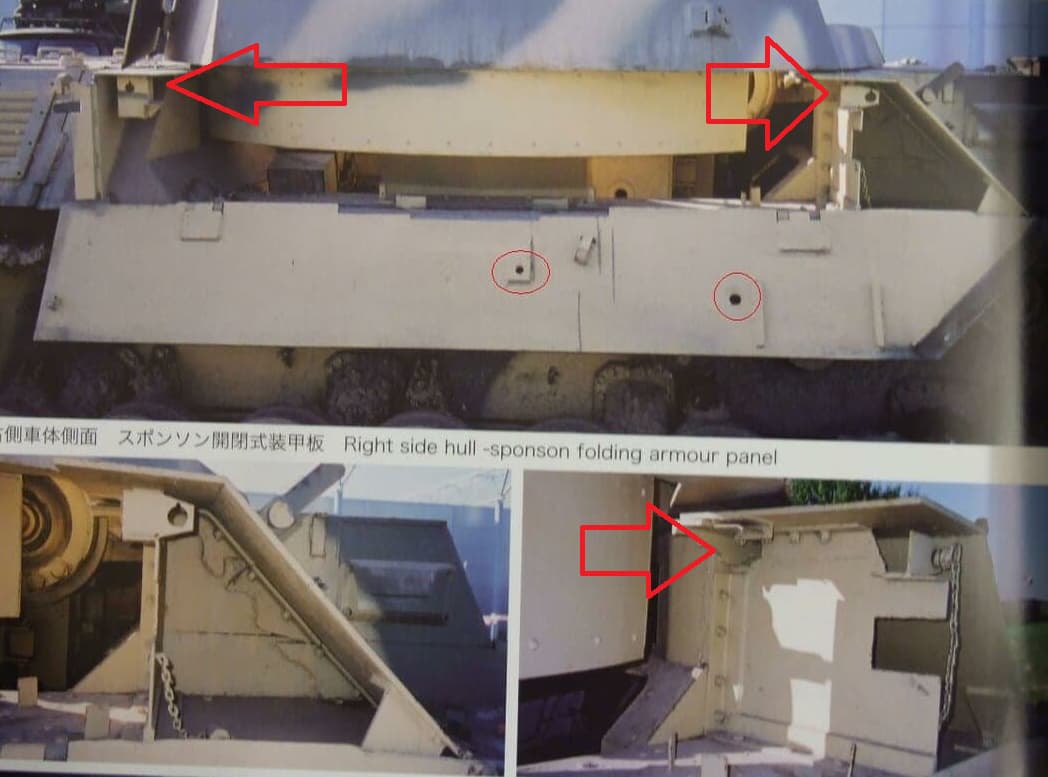
In fact, this has been eating at me for ages… the $64m question - did this vehicle actually have covers over the open area above the sponsons???
Are these fittings where a frame under the cover was fixed in place, but they are removable?
I am my own worst enemy…
Turrets and rivets - what’s not to like!