I’m just in it for the fumes… ![]()
3 Likes
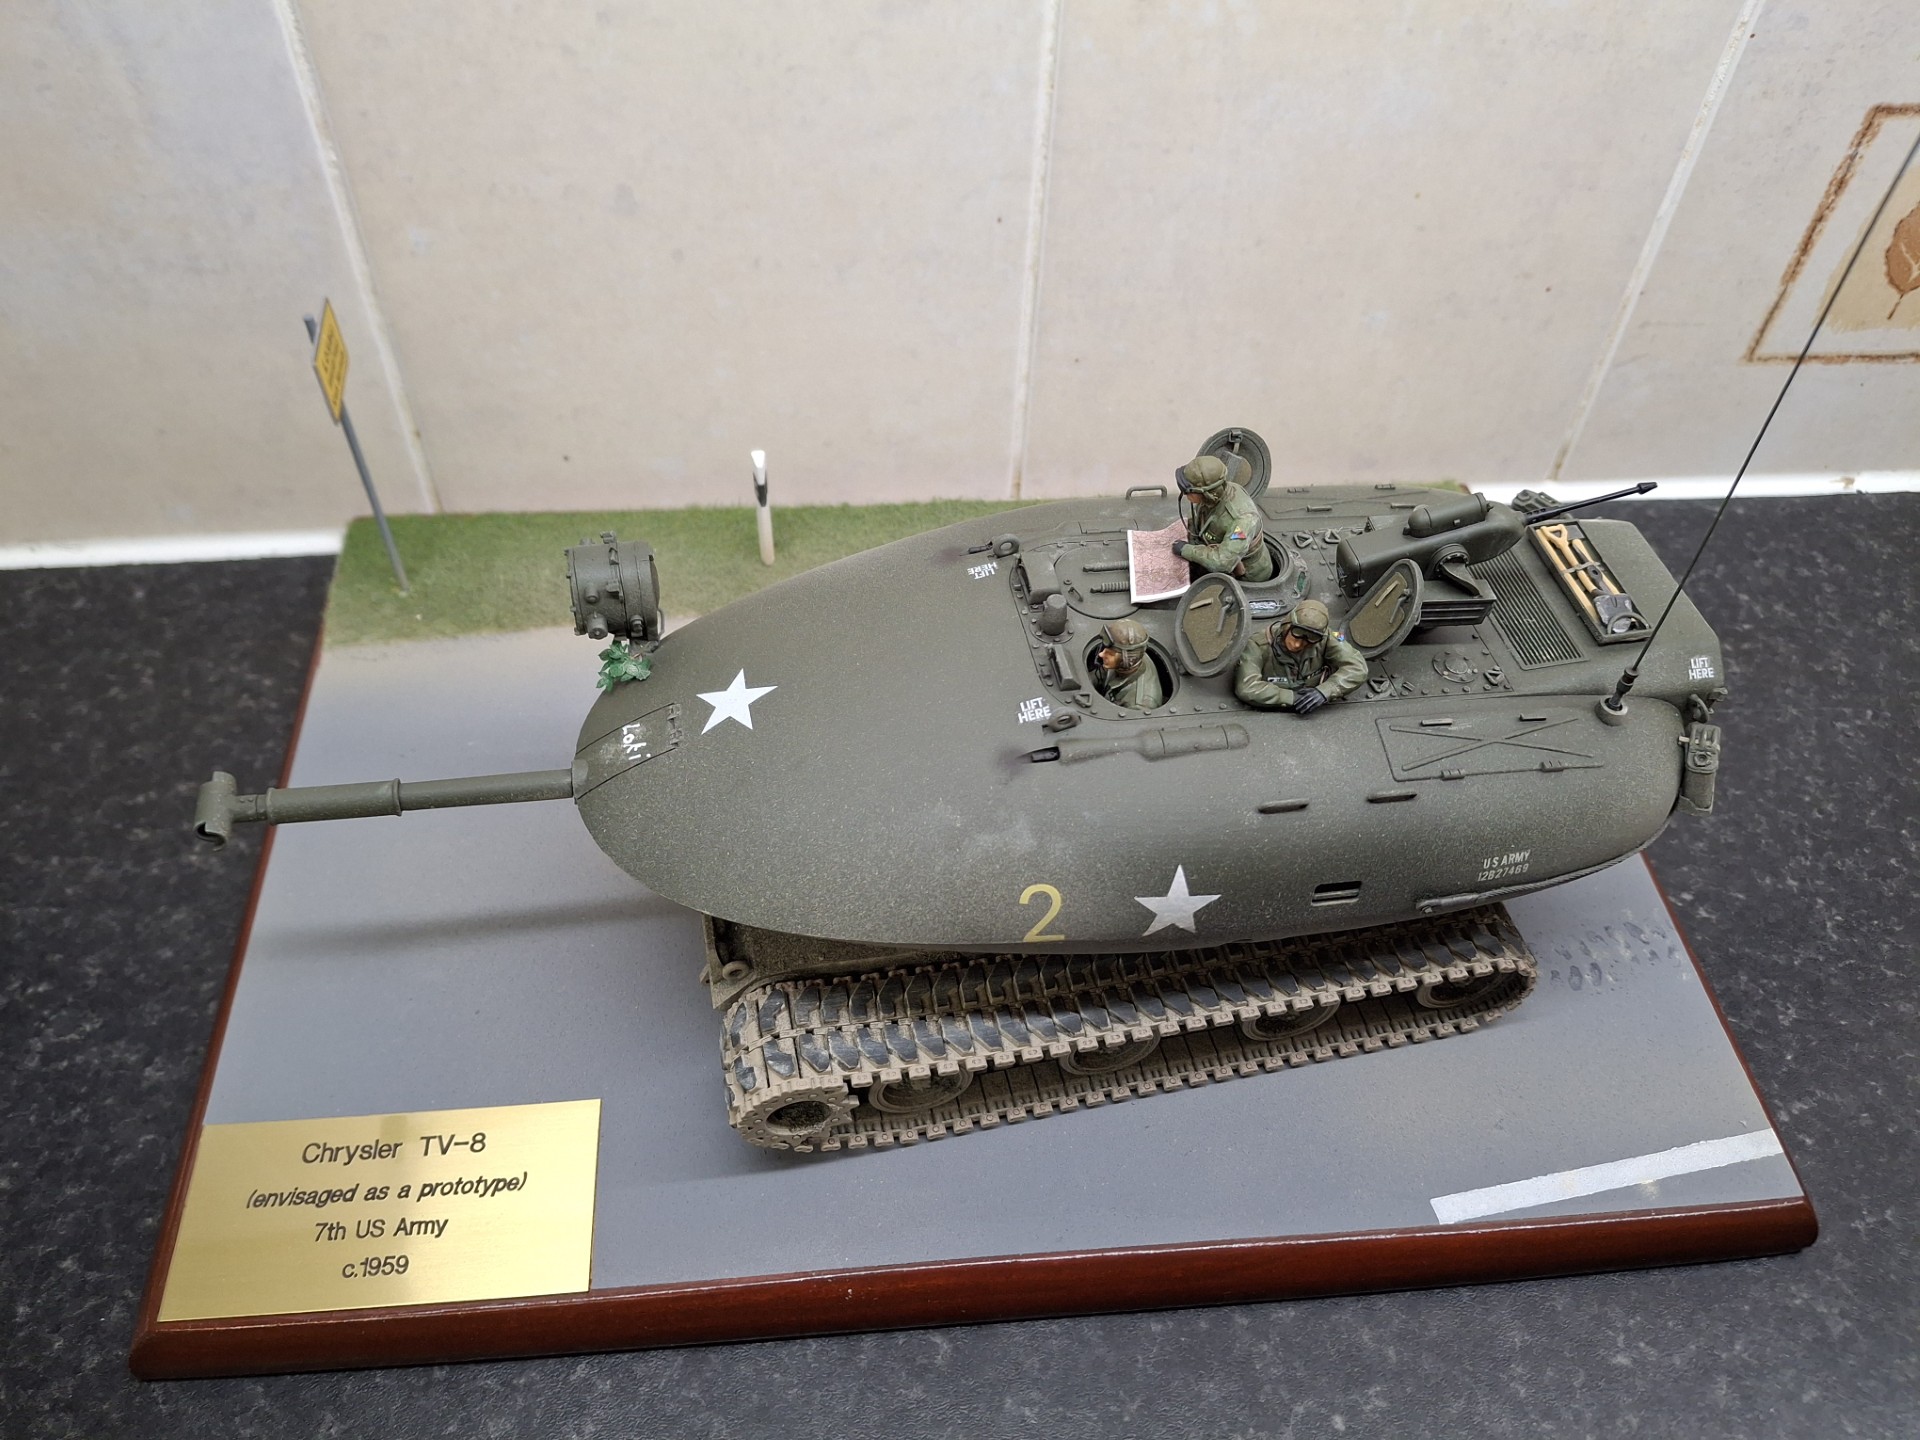
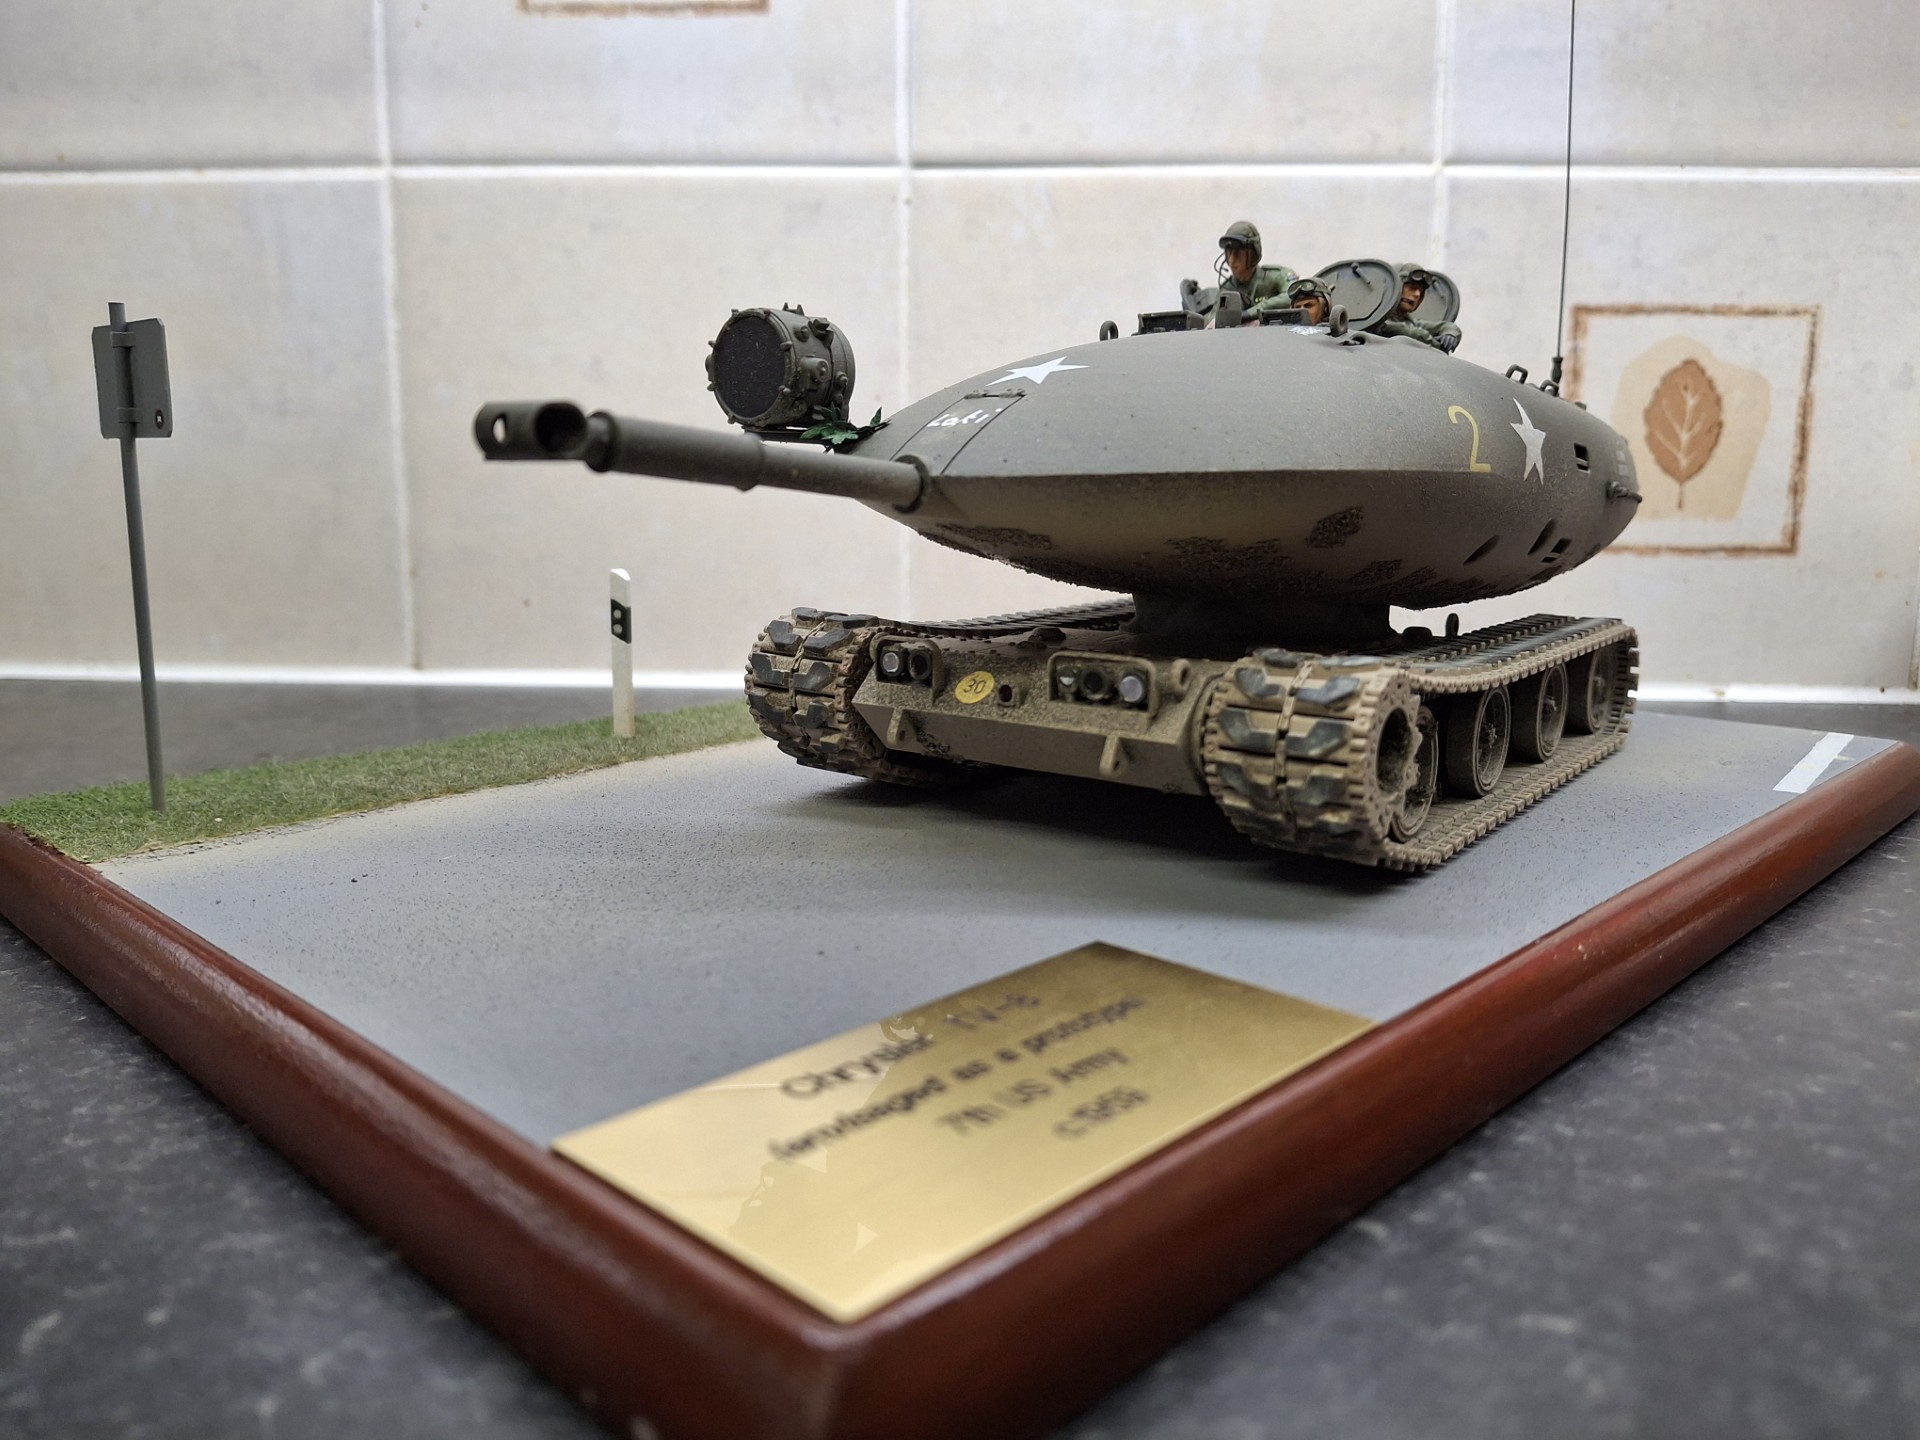
If I’m honest … now that the paint is on, it’s IMHO clear that the hull would have benefitted from sanding before painting. You can see a great many lines and facets resulting from the 3D-printing process, which I feel detract from the model ![]() But I suspect those were hard to spot without the slightly glossy paint on.
But I suspect those were hard to spot without the slightly glossy paint on.
1 Like
Yeah, it’s a bit weird; it didn’t show much at all when in primer and even the matt coat. An awful lot of work though to rectify and I’m not going to bother addressing it - it’s become far too protracted a build in any case. It was meant to be fun(!)
Perhaps it’ll revert a bit once a final coat of matt varnish is applied. We’ll see!
2 Likes
Its a experimental anti slip!
4 Likes
I like that idea! ![]()
2 Likes
I also hadn’t noticed it in your other photos, but suddenly in the semigloss OD, they’re very obvious. Let’s hope they do indeed go away again when the tank has a matt finish.
1 Like
Progress of sorts; the decals I’d ordered for the yellow numbers turned up but were very difficult to apply - extremely thin and fragile. There might have to be a bit more weathering on this model than I’d planned:
8 Likes


Very nice. It came out great. The striations pretty much disappear under the matt cote.
1 Like
Thanks Gino; it’s a bit weird isn’t it? There is still some indication there but I can live with that.
Next stop: Tamiya Buff and then some(!)
1 Like
Looks great! Scarily bulbous, but great… ![]()
2 Likes
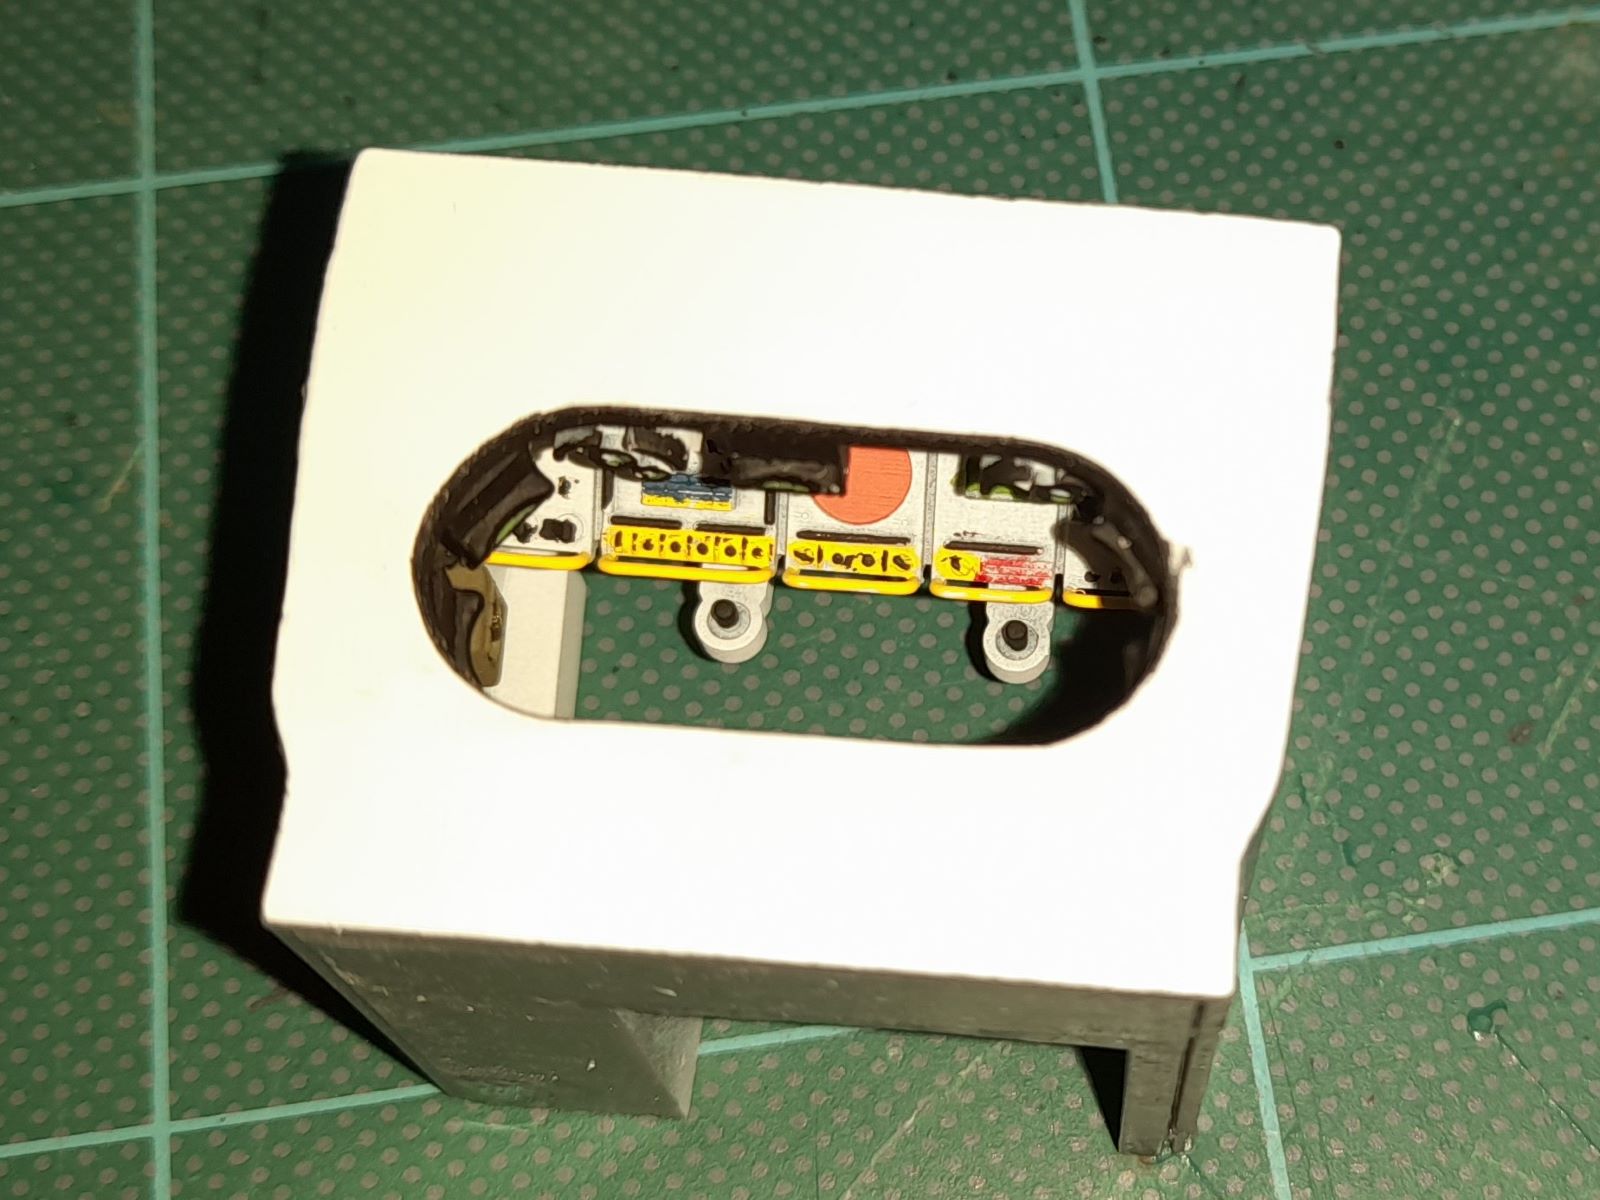
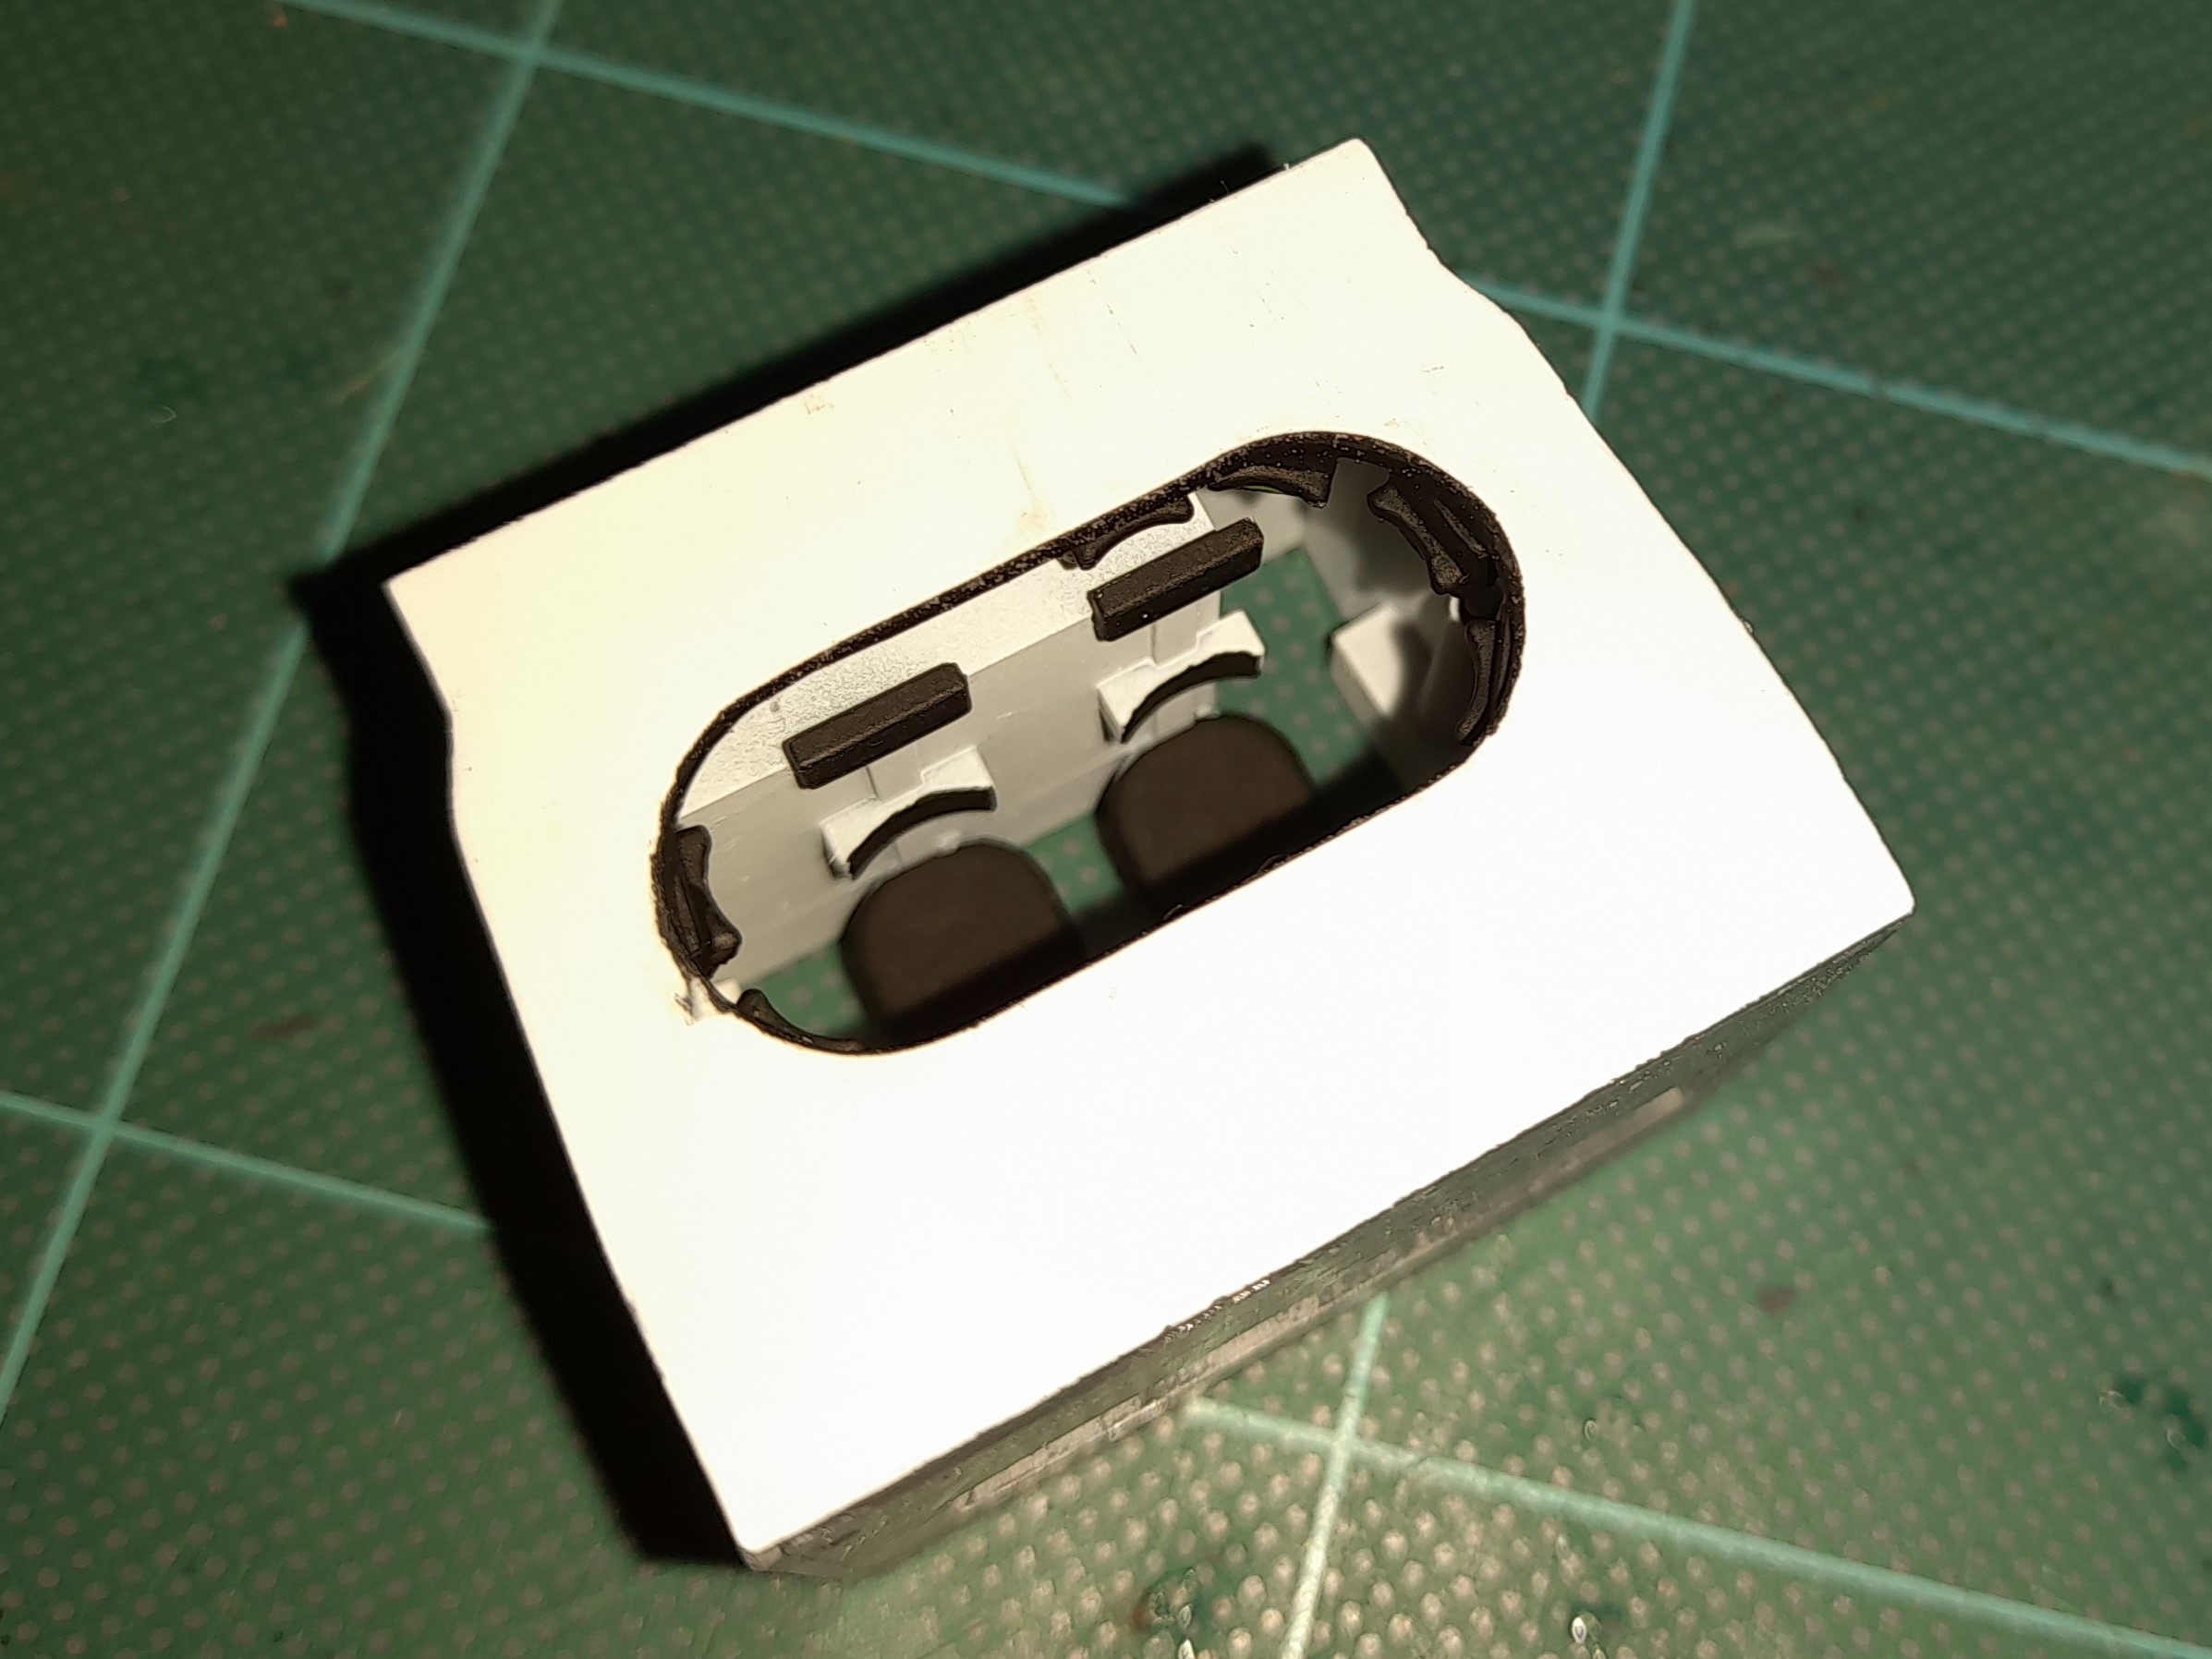
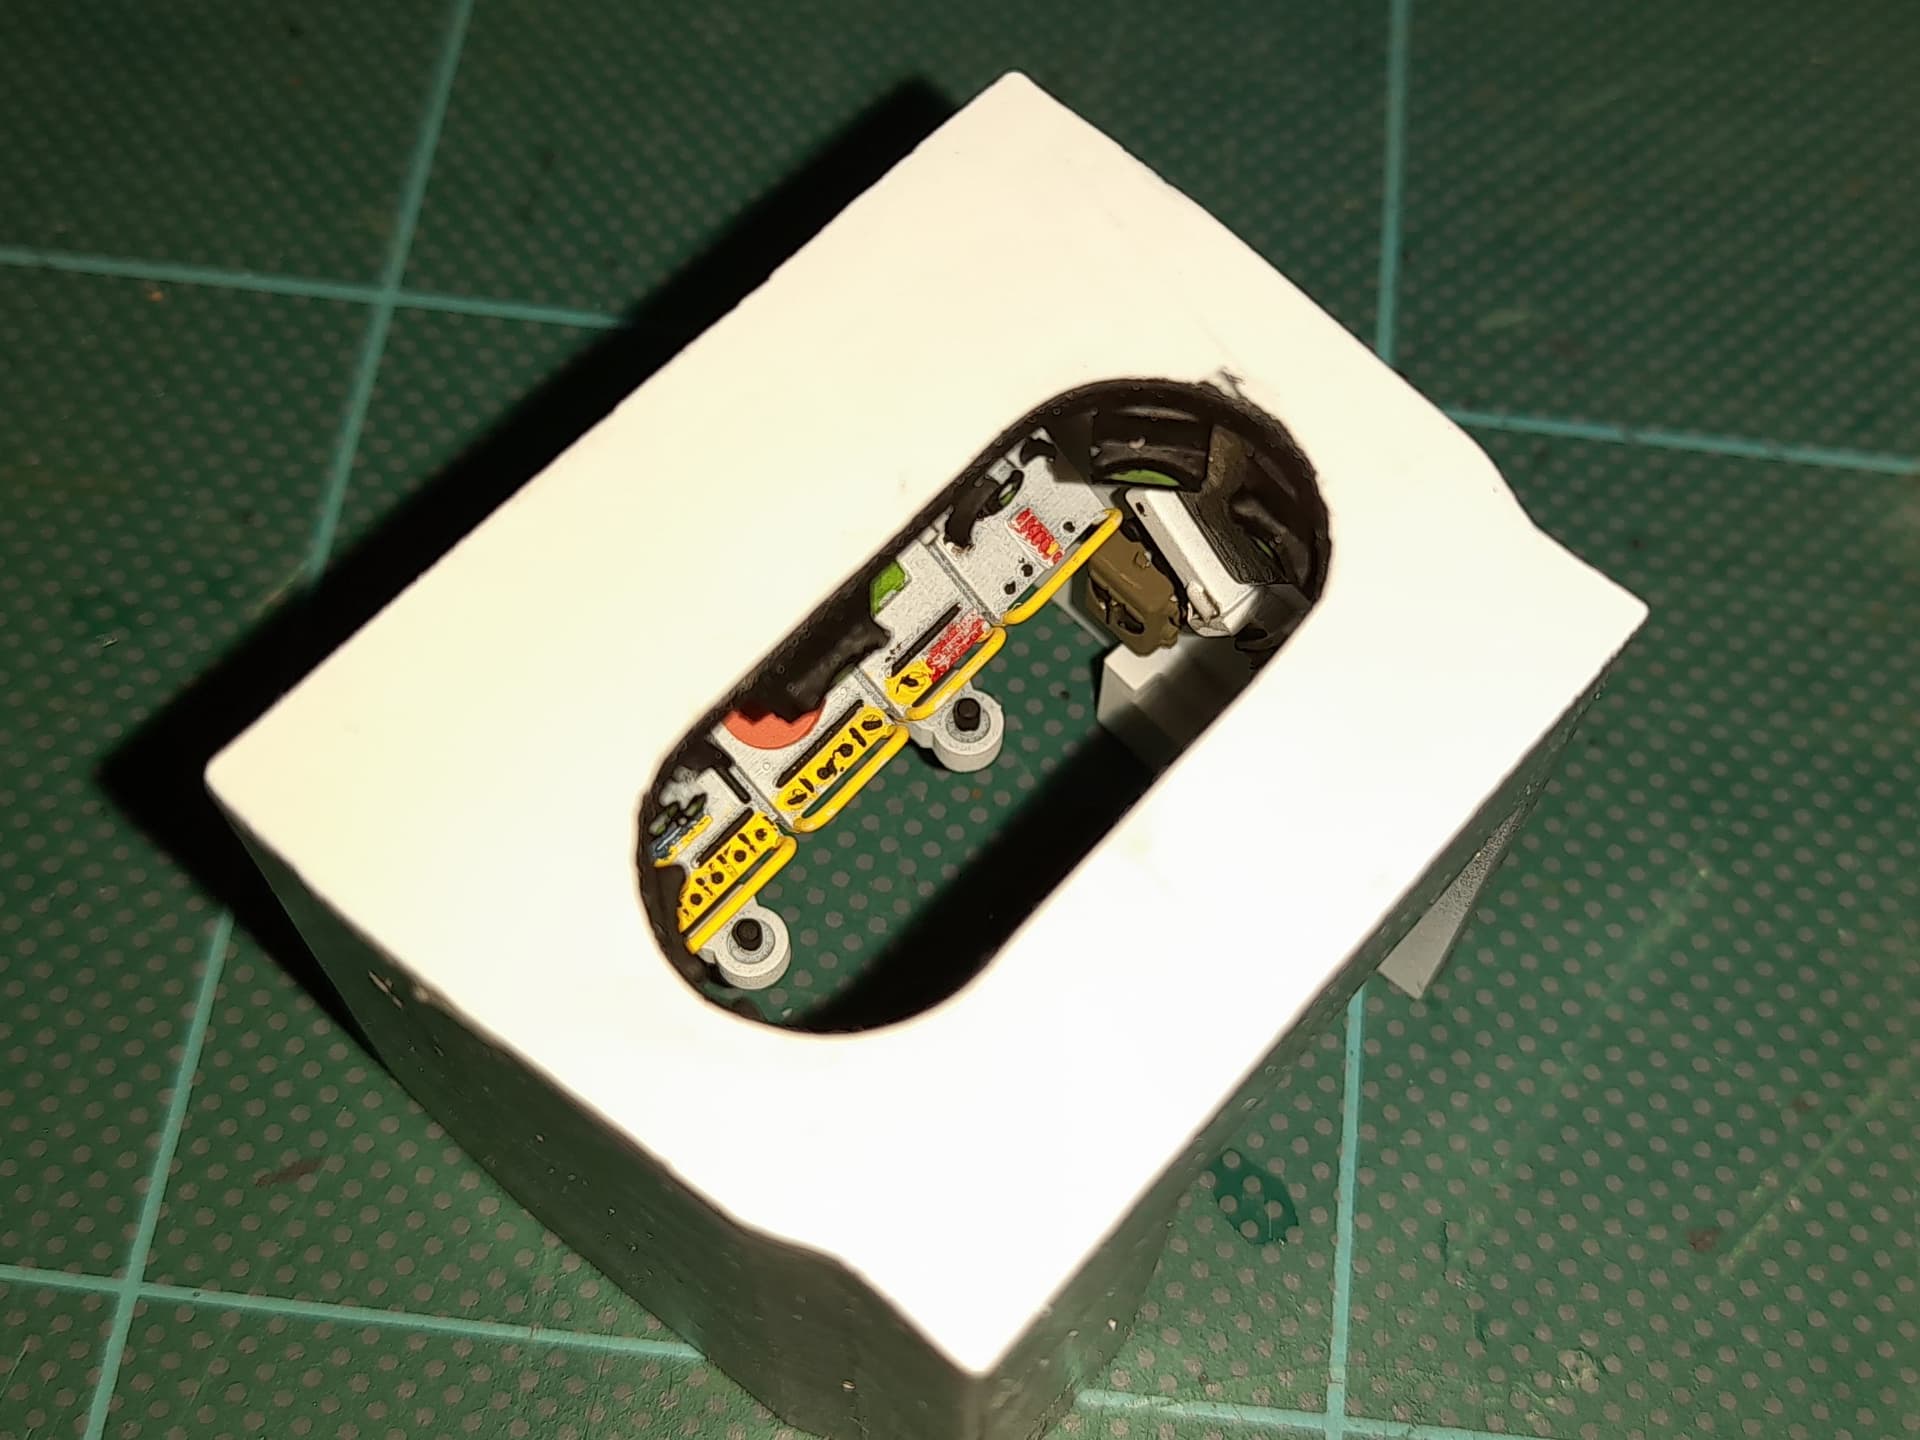
While my build sits in the paint shop, I designed up a little interior set to see through the open hatch! It’s four walls and a roof, and the finished “cube” can be glued into the turret. It should also work with the Takom and MENG Gepards, but I’d need to rework the control panels since the Dutch used different electronics to the Germans…
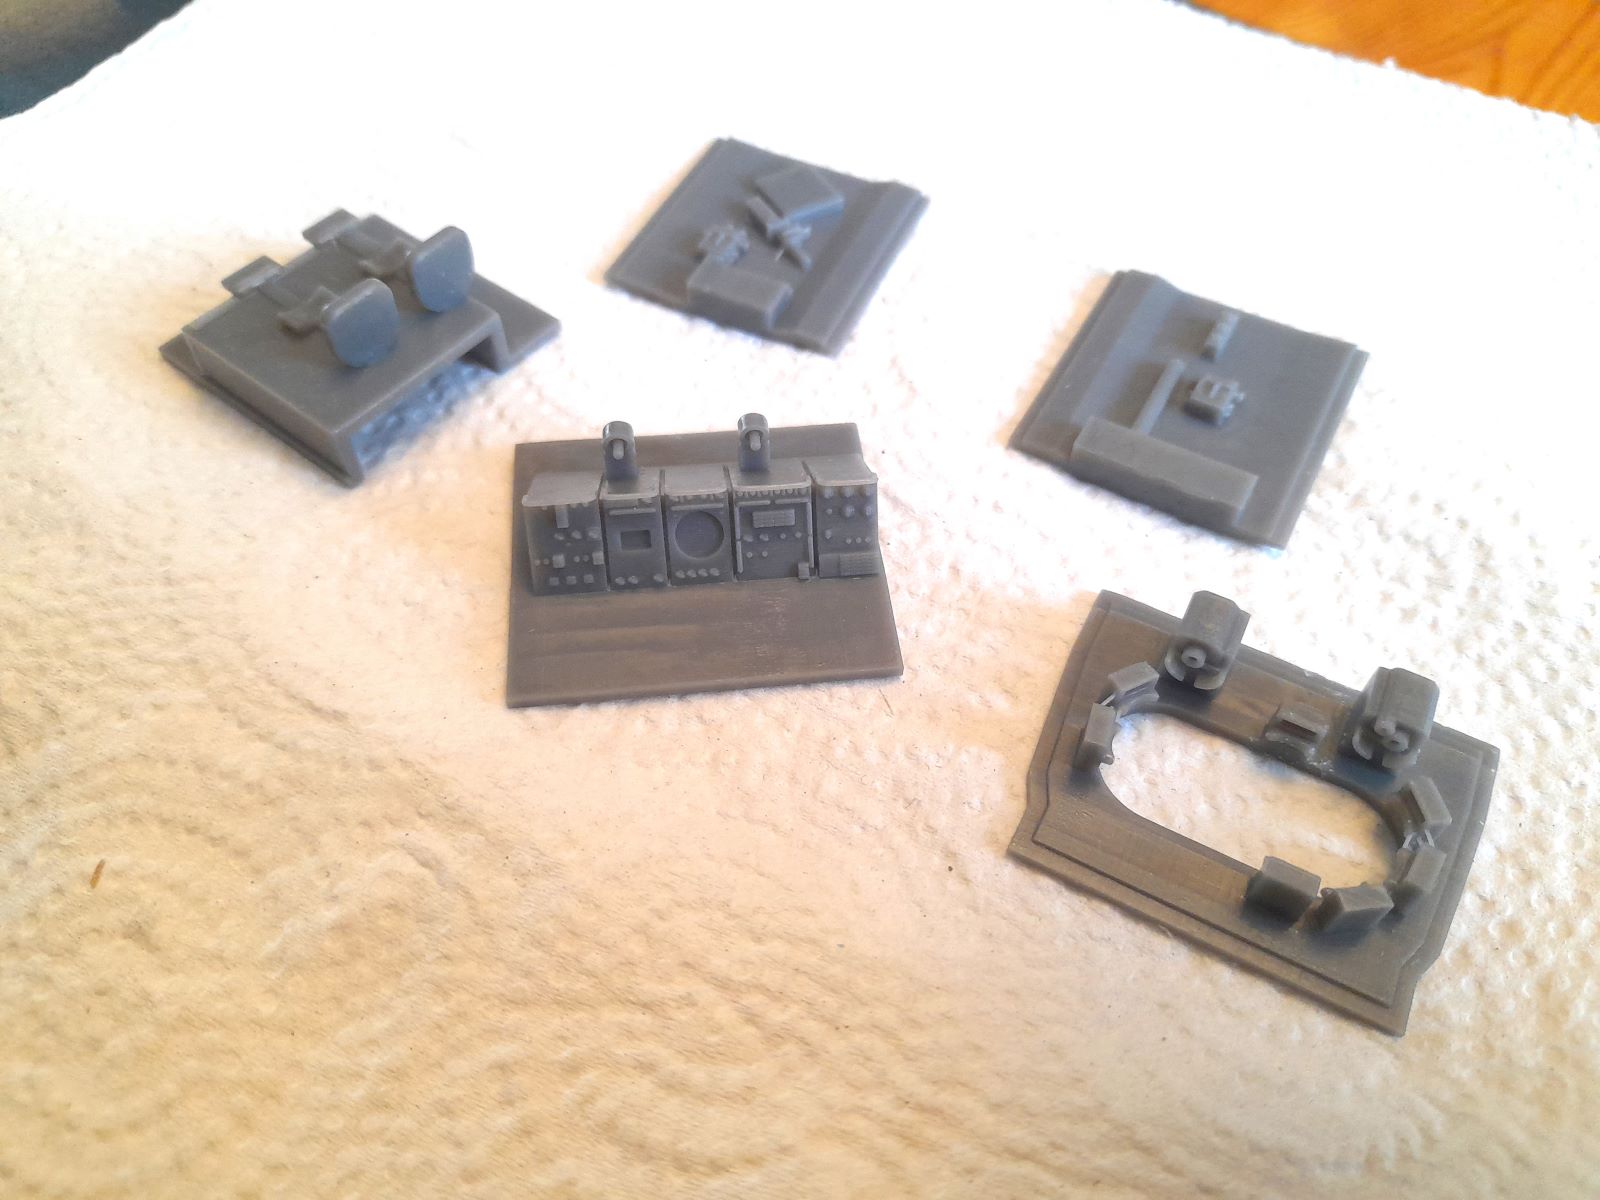
7 Likes
If you’re wondering where the TV-8 is, I’ve been held up; the crew figures need more work than I first thought. Here is where I am:

The Driver is currently drying - in primer.
7 Likes
They’re mostly 'armless! ![]()
Seriously good work on those uniforms - you have the patience of a saint.
3 Likes
It took another fair while, but I finally had some decals printed, which arrived last week. I put them on the model yesterday evening:
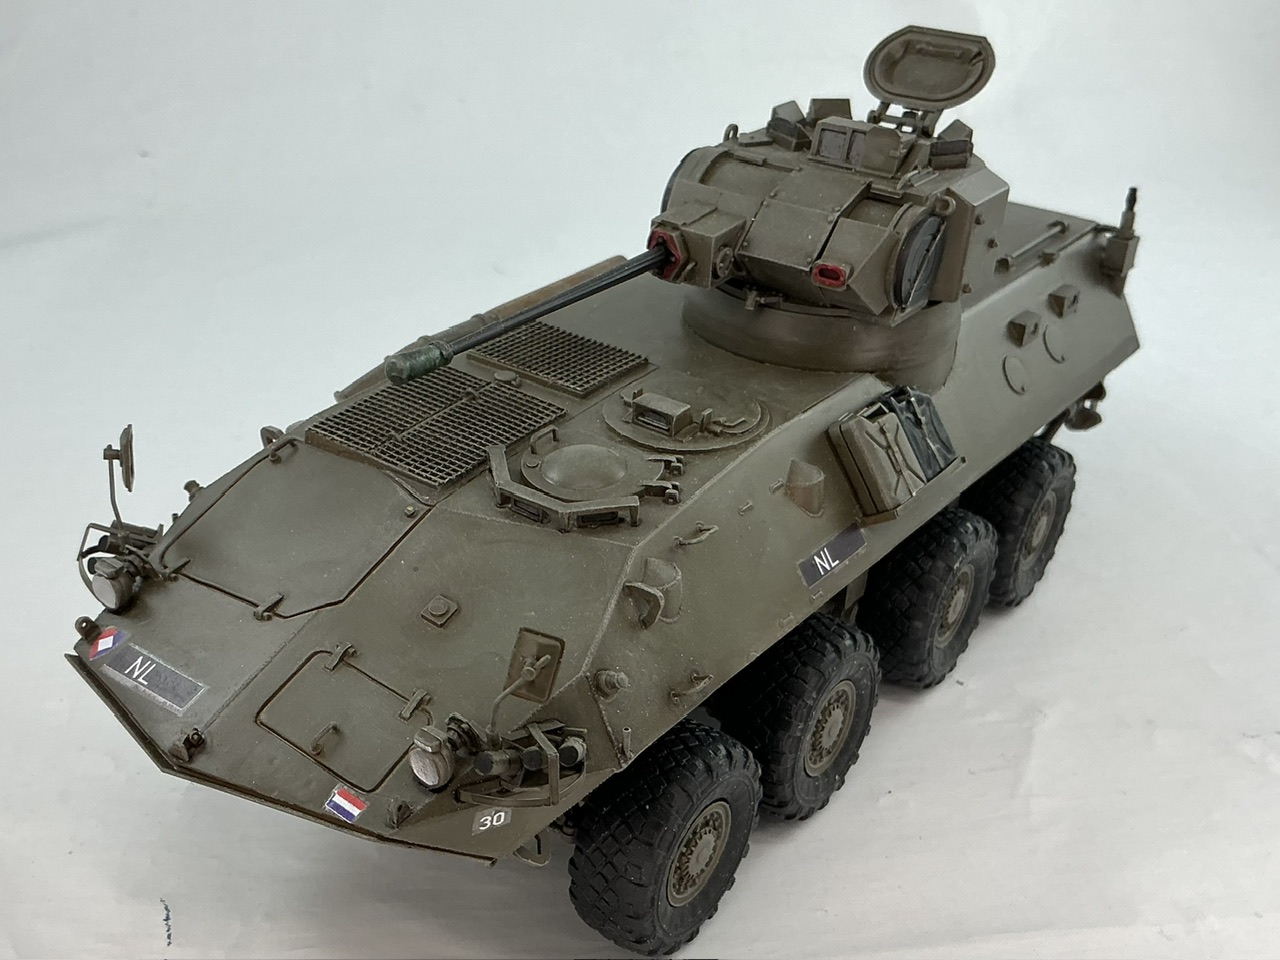
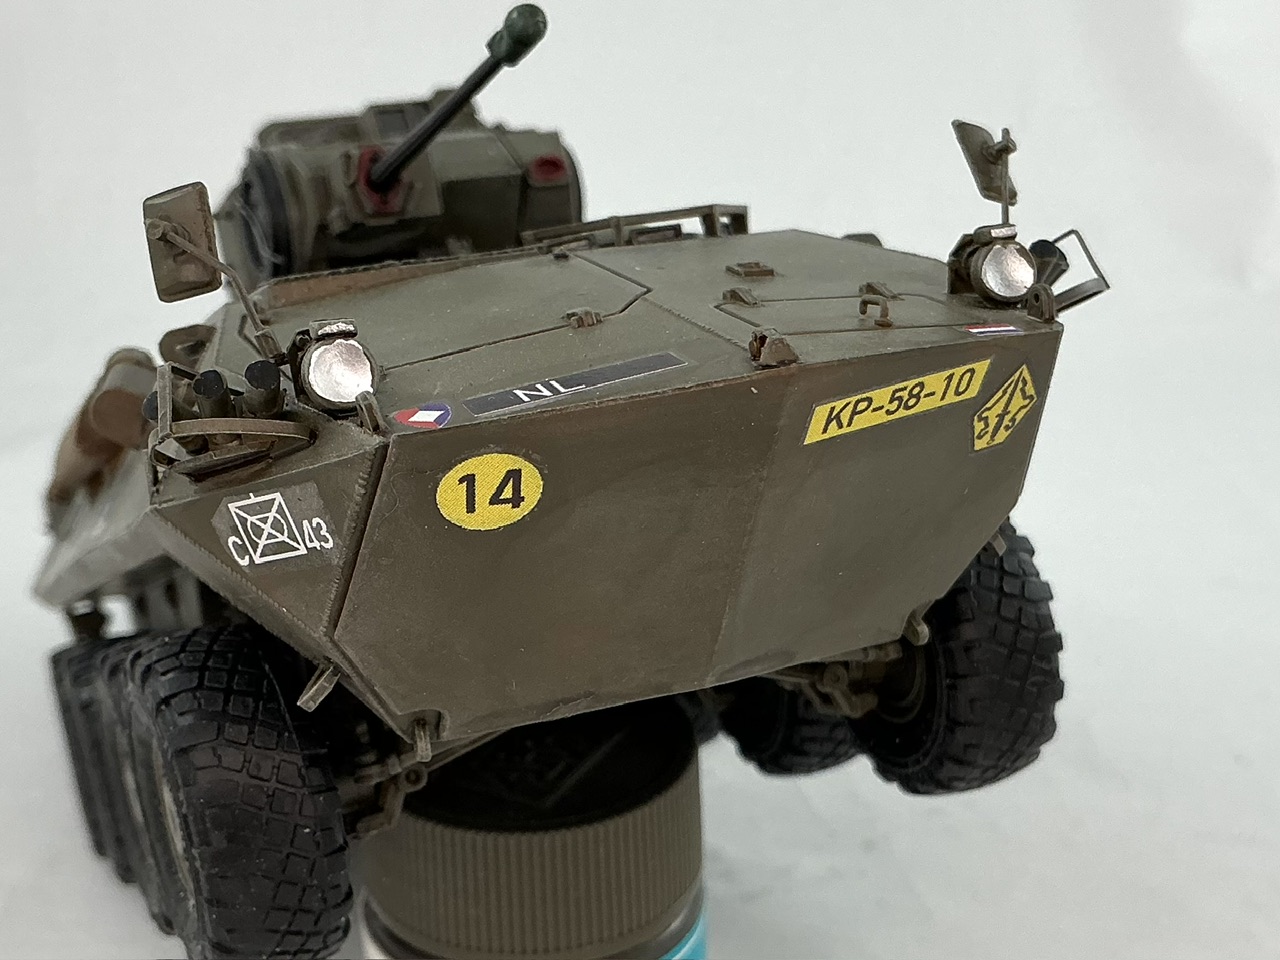
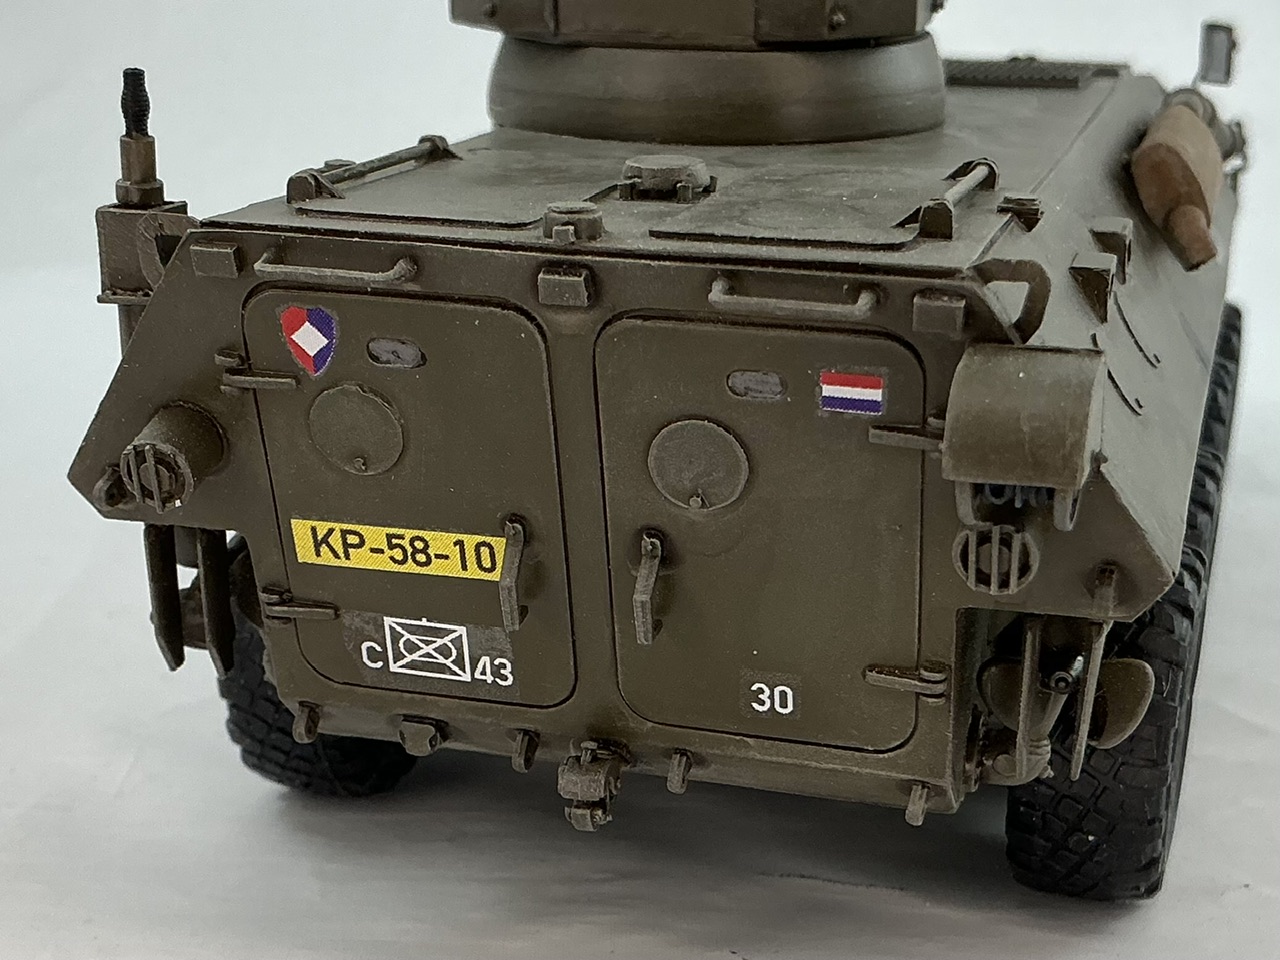
Vehicle No. 30 of C Company, 43 Armoured Infantry Battalion (43 pantserinfanteriebataljon, “43 painfbat” in Dutch Army jargon), “Chassé” infantry regiment. These markings are pretty much entirely fictitious, but taken from YP 408 APCs that this battalion was equipped with in the 1970s–80s. The registration, KP-58-10, is also entirely made up from whole cloth, as the KP series was never used, but it’s plausible seeing as how many YPR 765s were numbered in the KY series, so I figured KP might have been chosen for Piranhas.
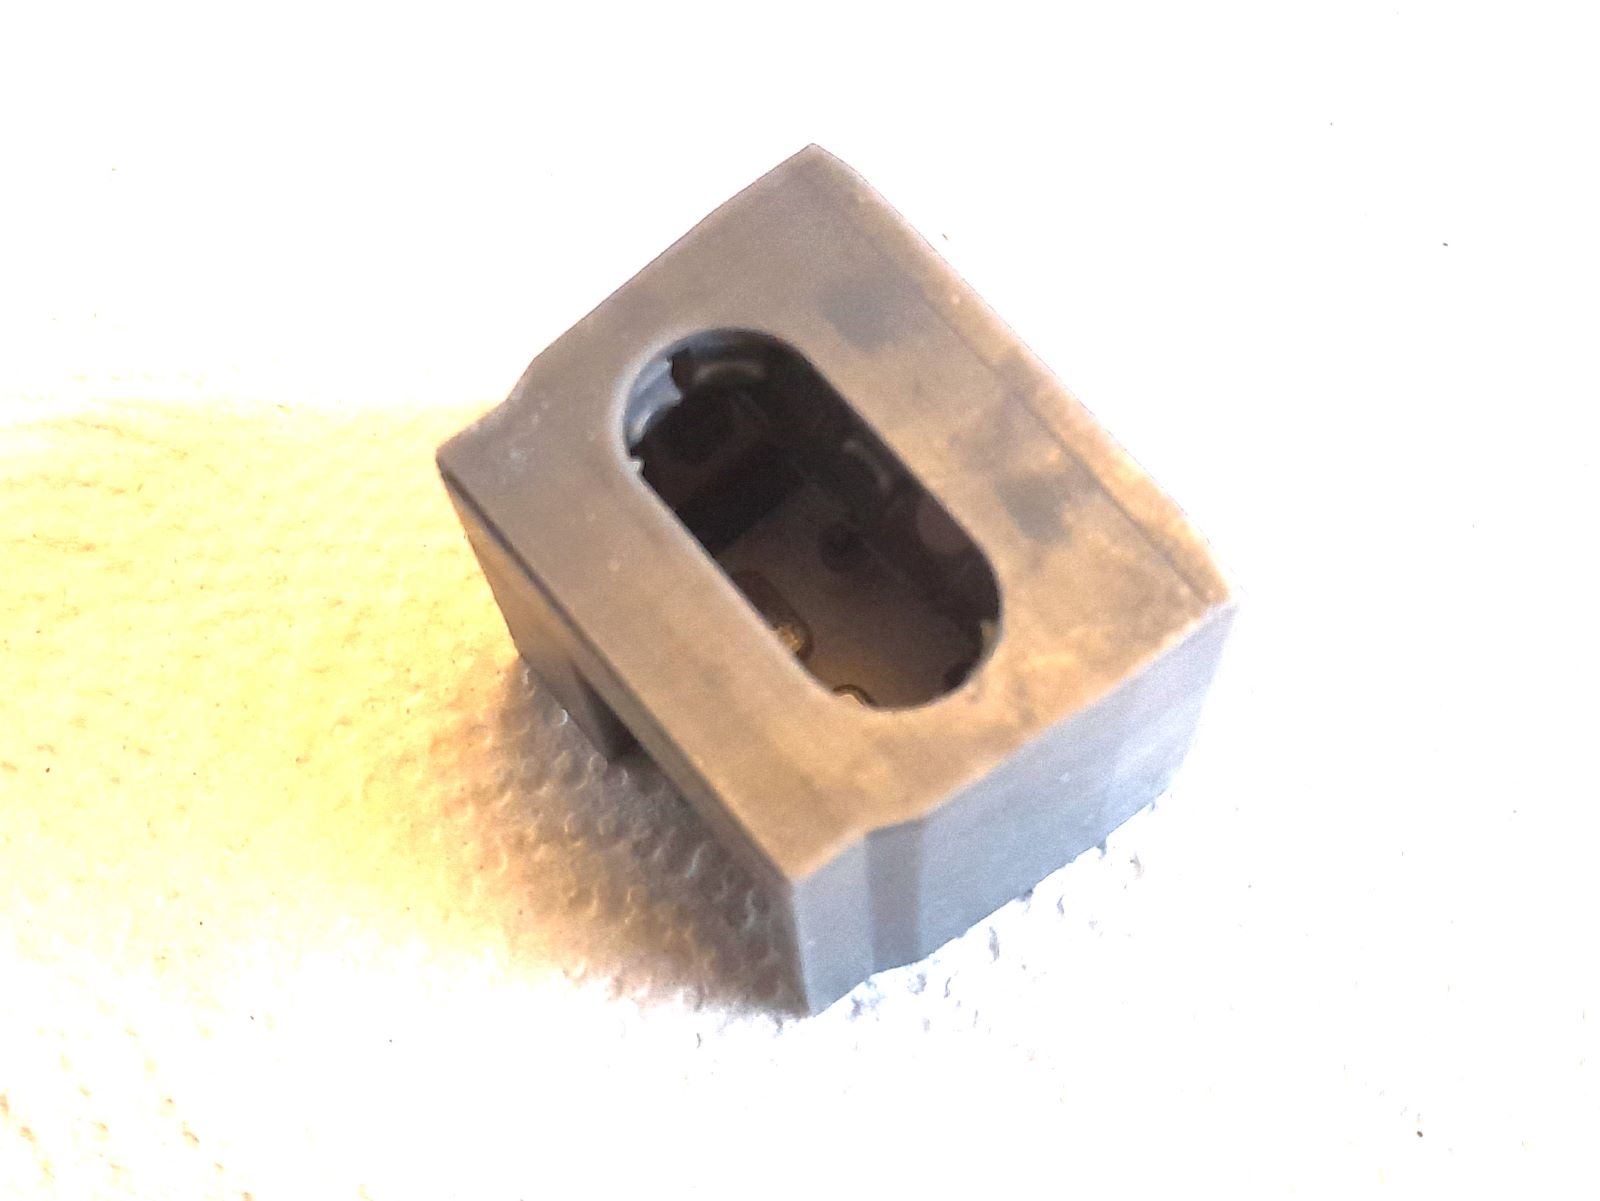
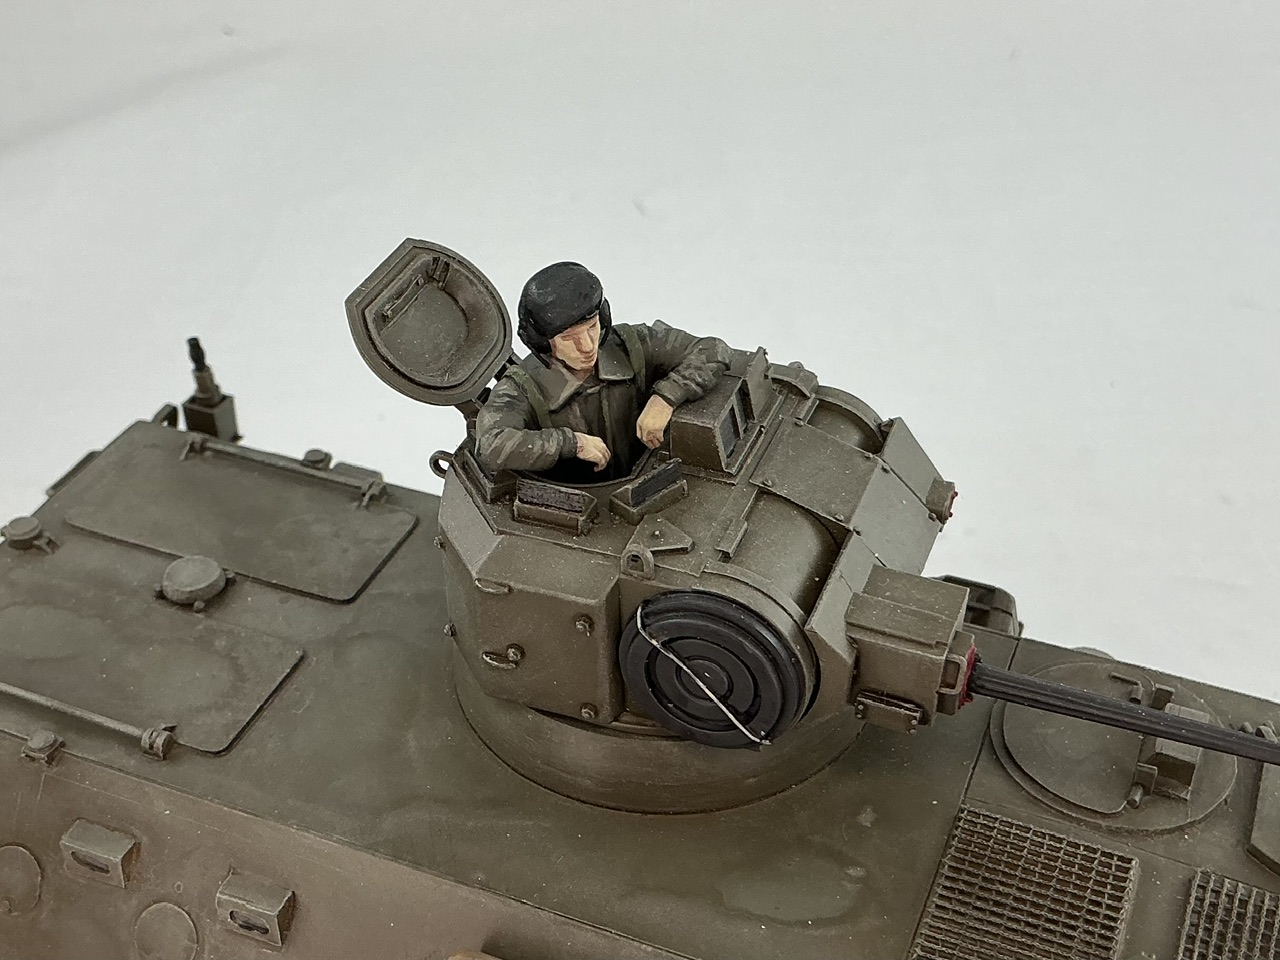
For in the turret hatch, I got a figure from Sylly’s Mini Models a few months back, though I had to saw off his legs to get him to fit in the hatch:
I think I will only add a small amount of dirt to represent a Piranha PWI on exercise somewhere in Germany in the late 80s.
5 Likes
Ah, the sacrifices soldiers make! ![]()
Those decals are great - I like the idea of the personal touch.
3 Likes
Quick update on my DIVAD - I’ve painted the interior and the rest is in the booth. (I laminated 0.005" sheet to the top so I can glue it in with liquid poly -that way I get a little wiggle time when I come to install it in the turret!)

6 Likes
The interior looks awesome. Great job on it.
1 Like
Seconded here, very good looking interior!
1 Like
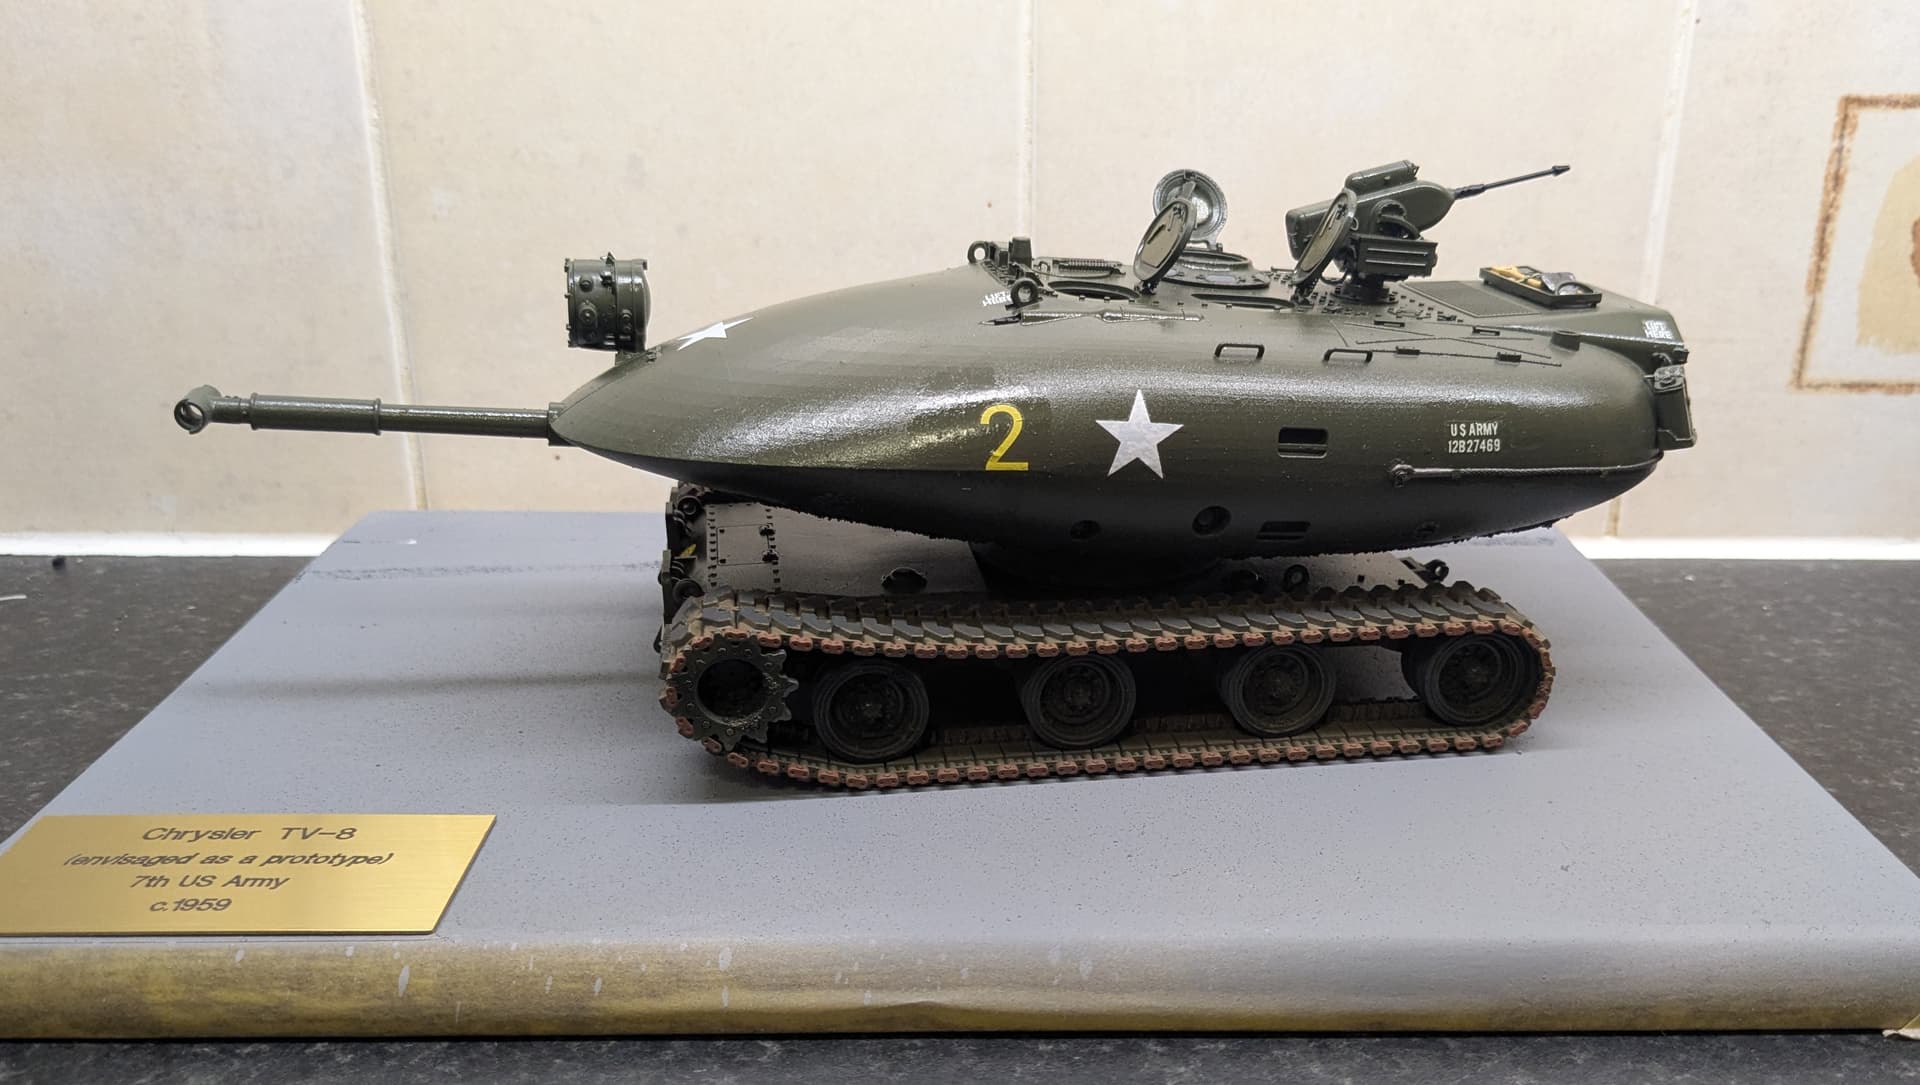
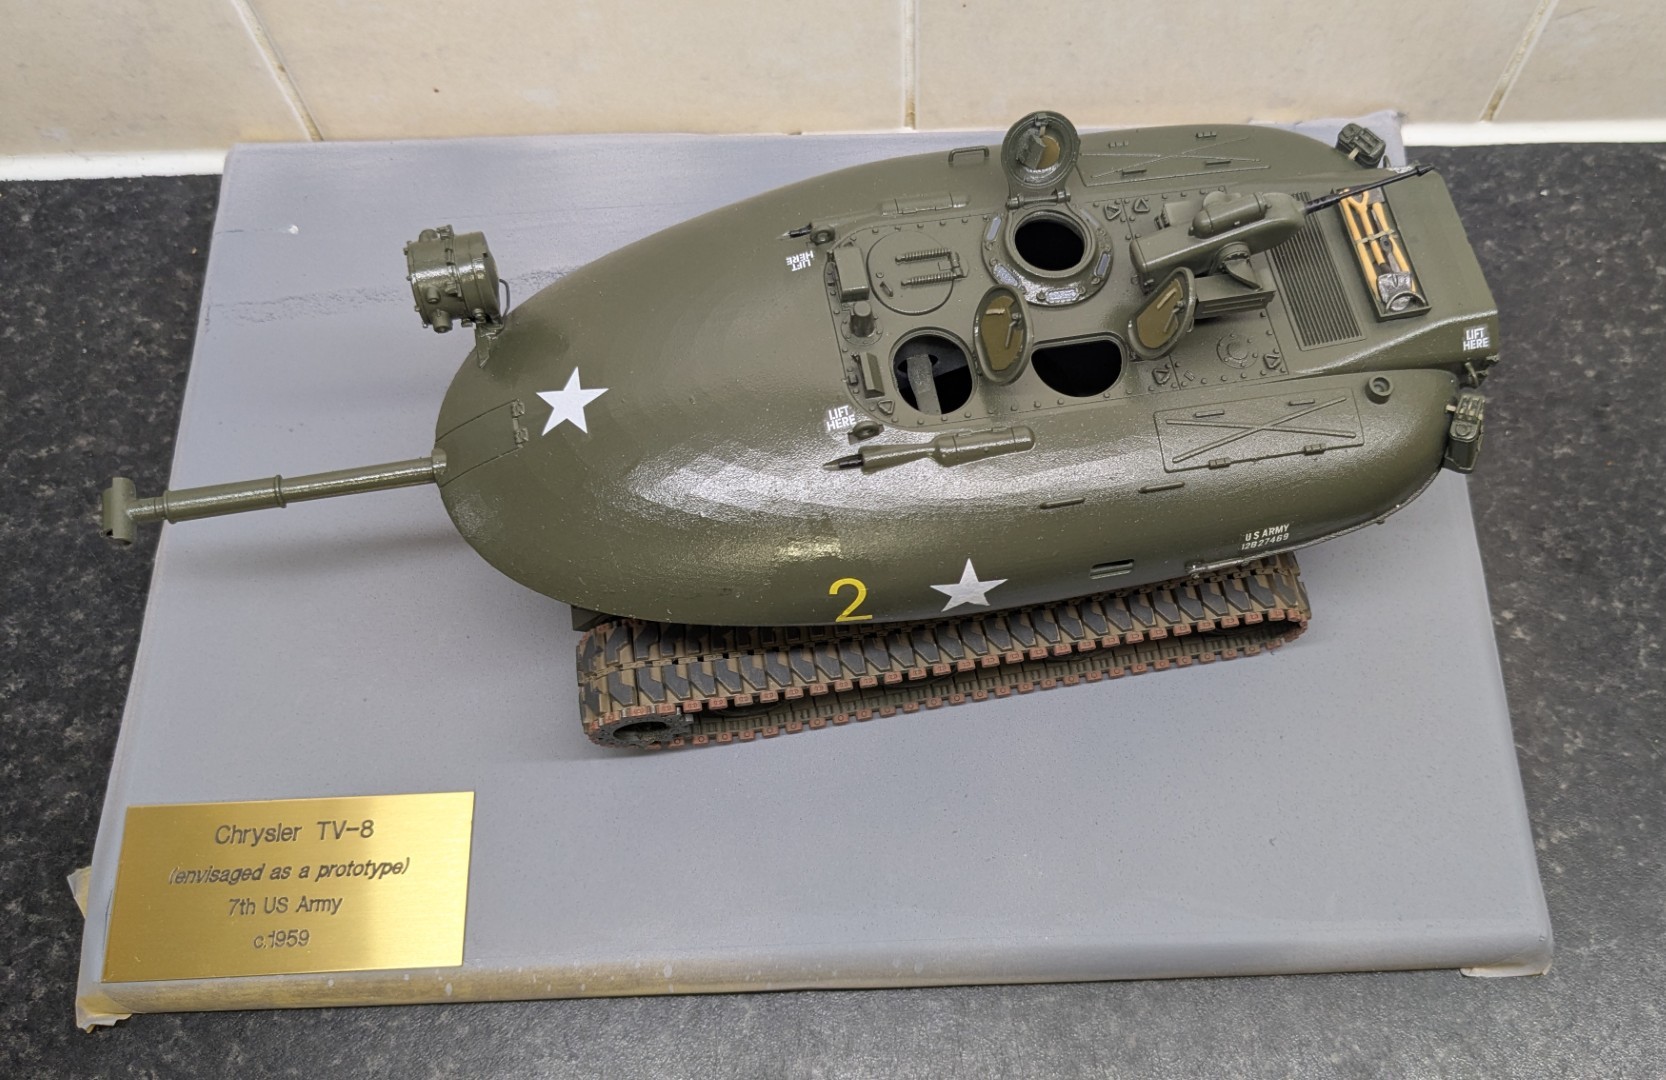
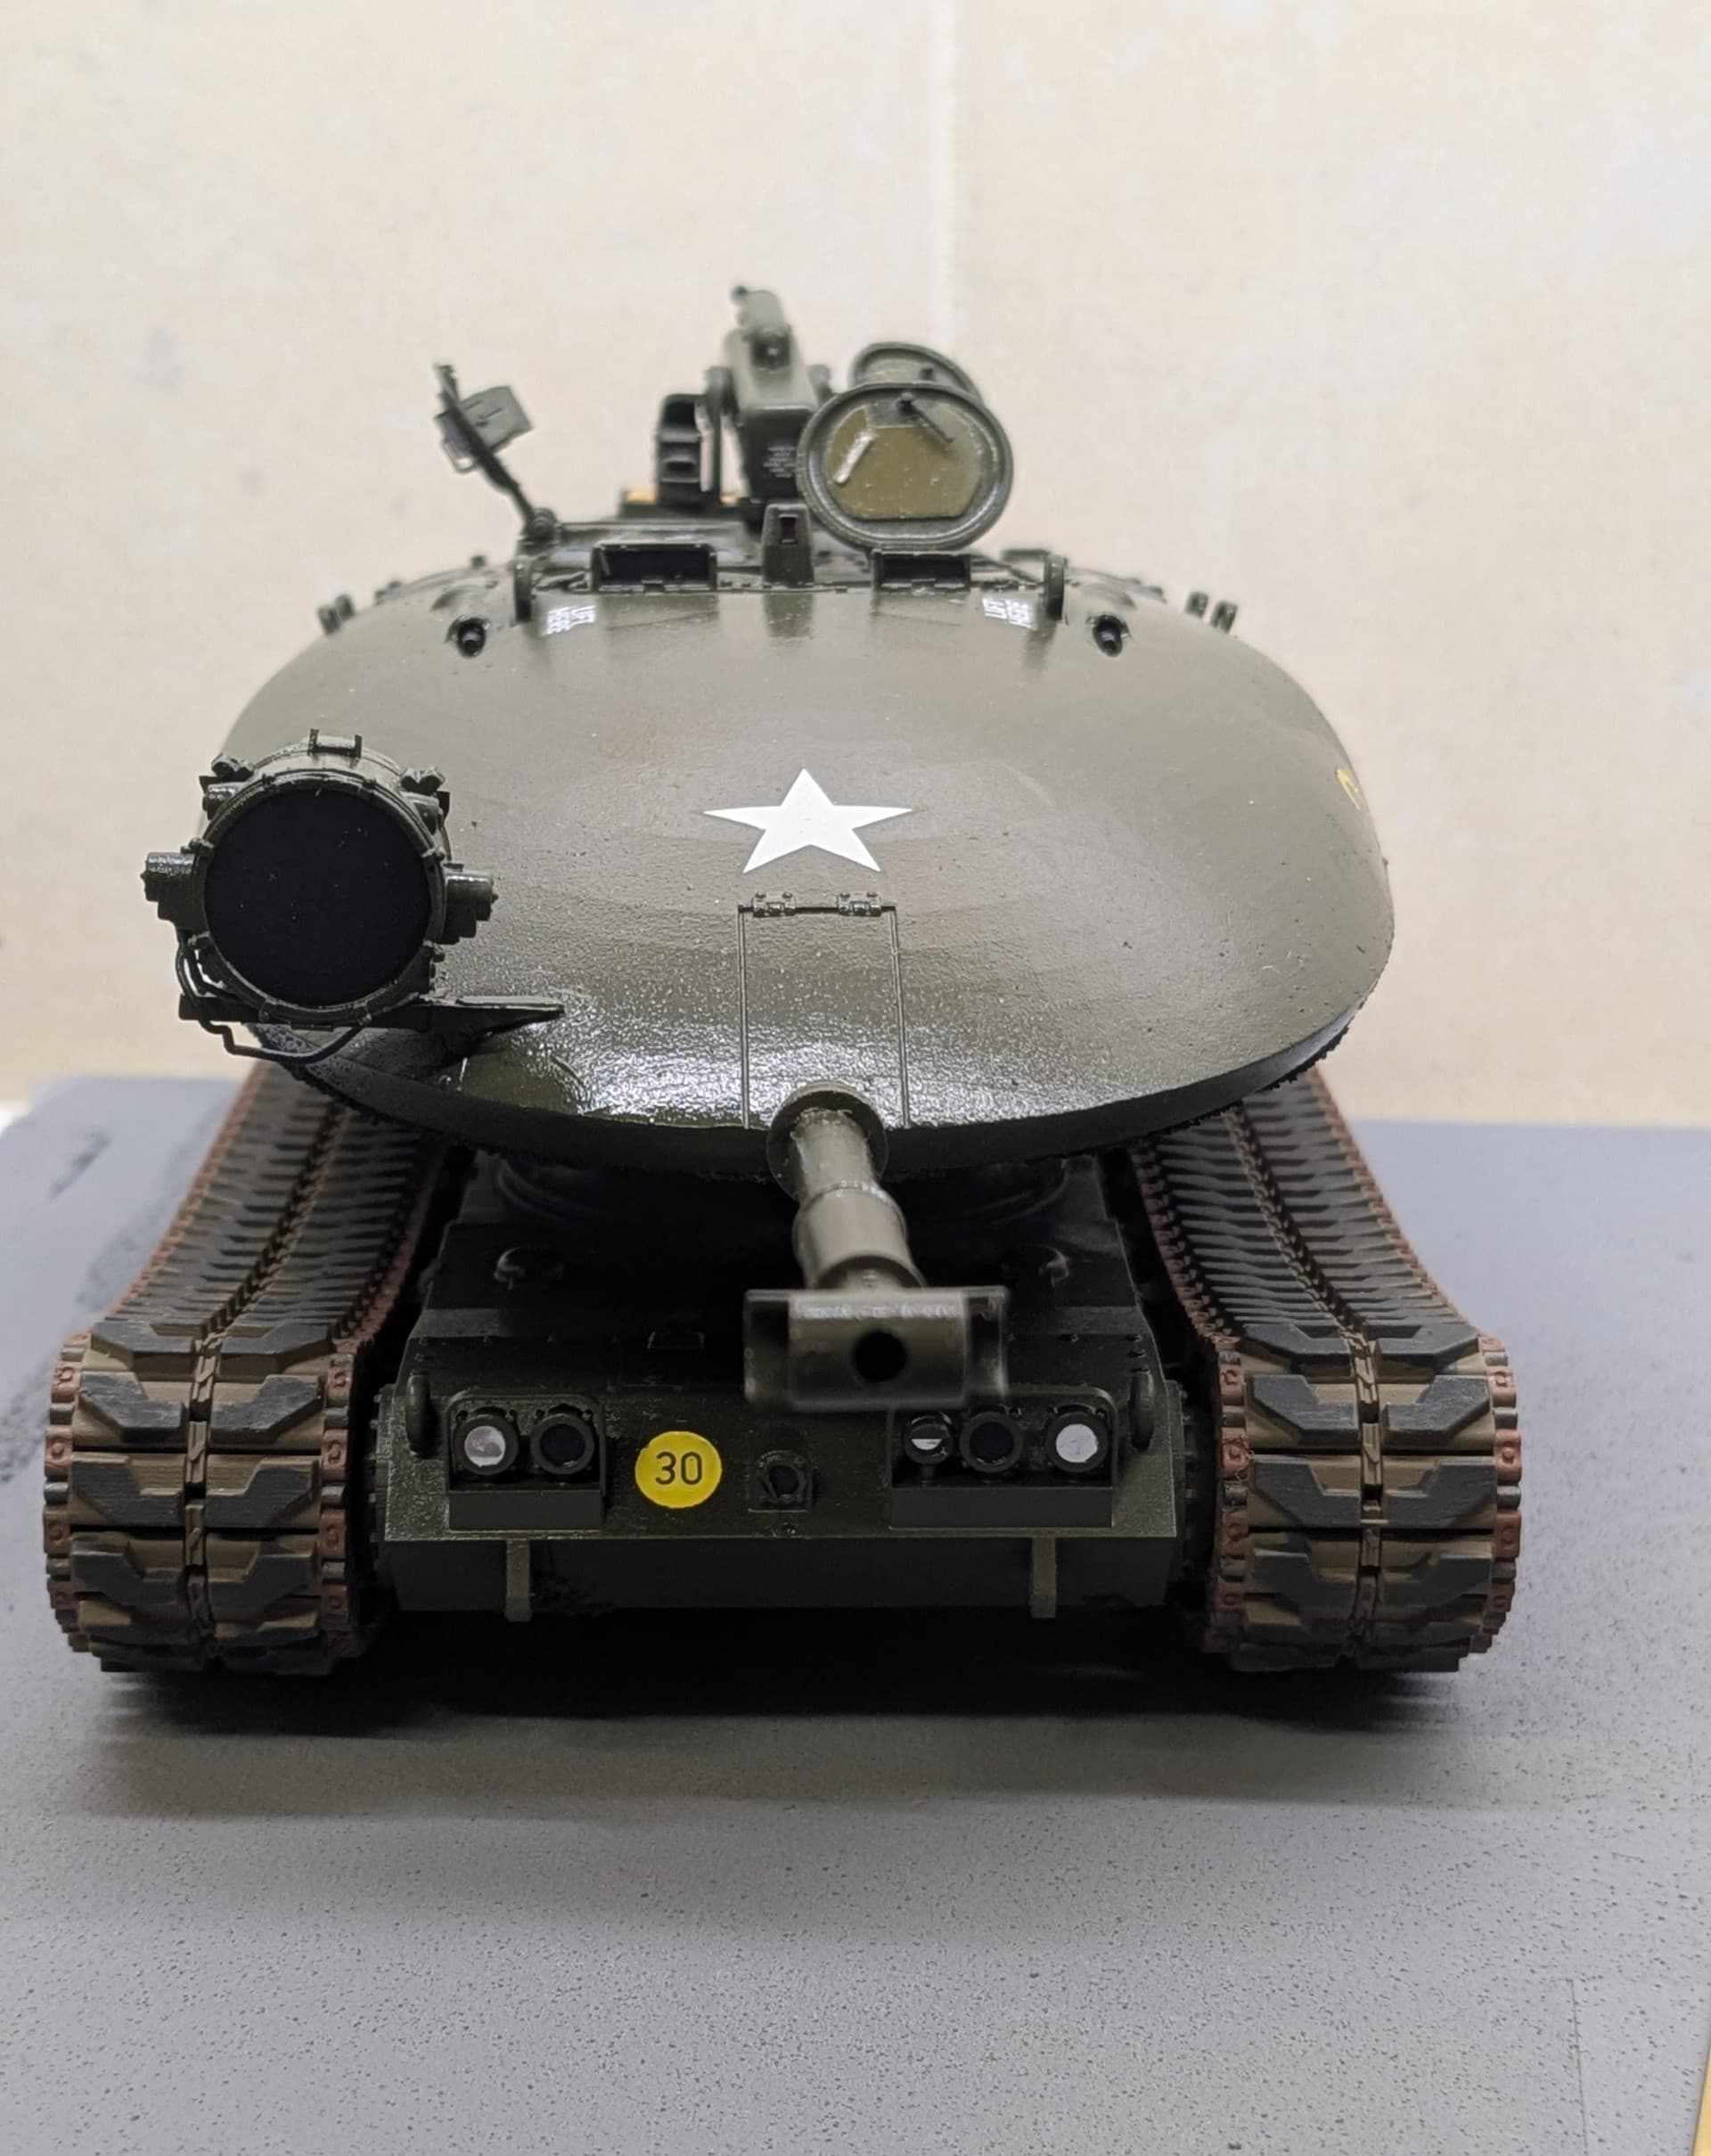
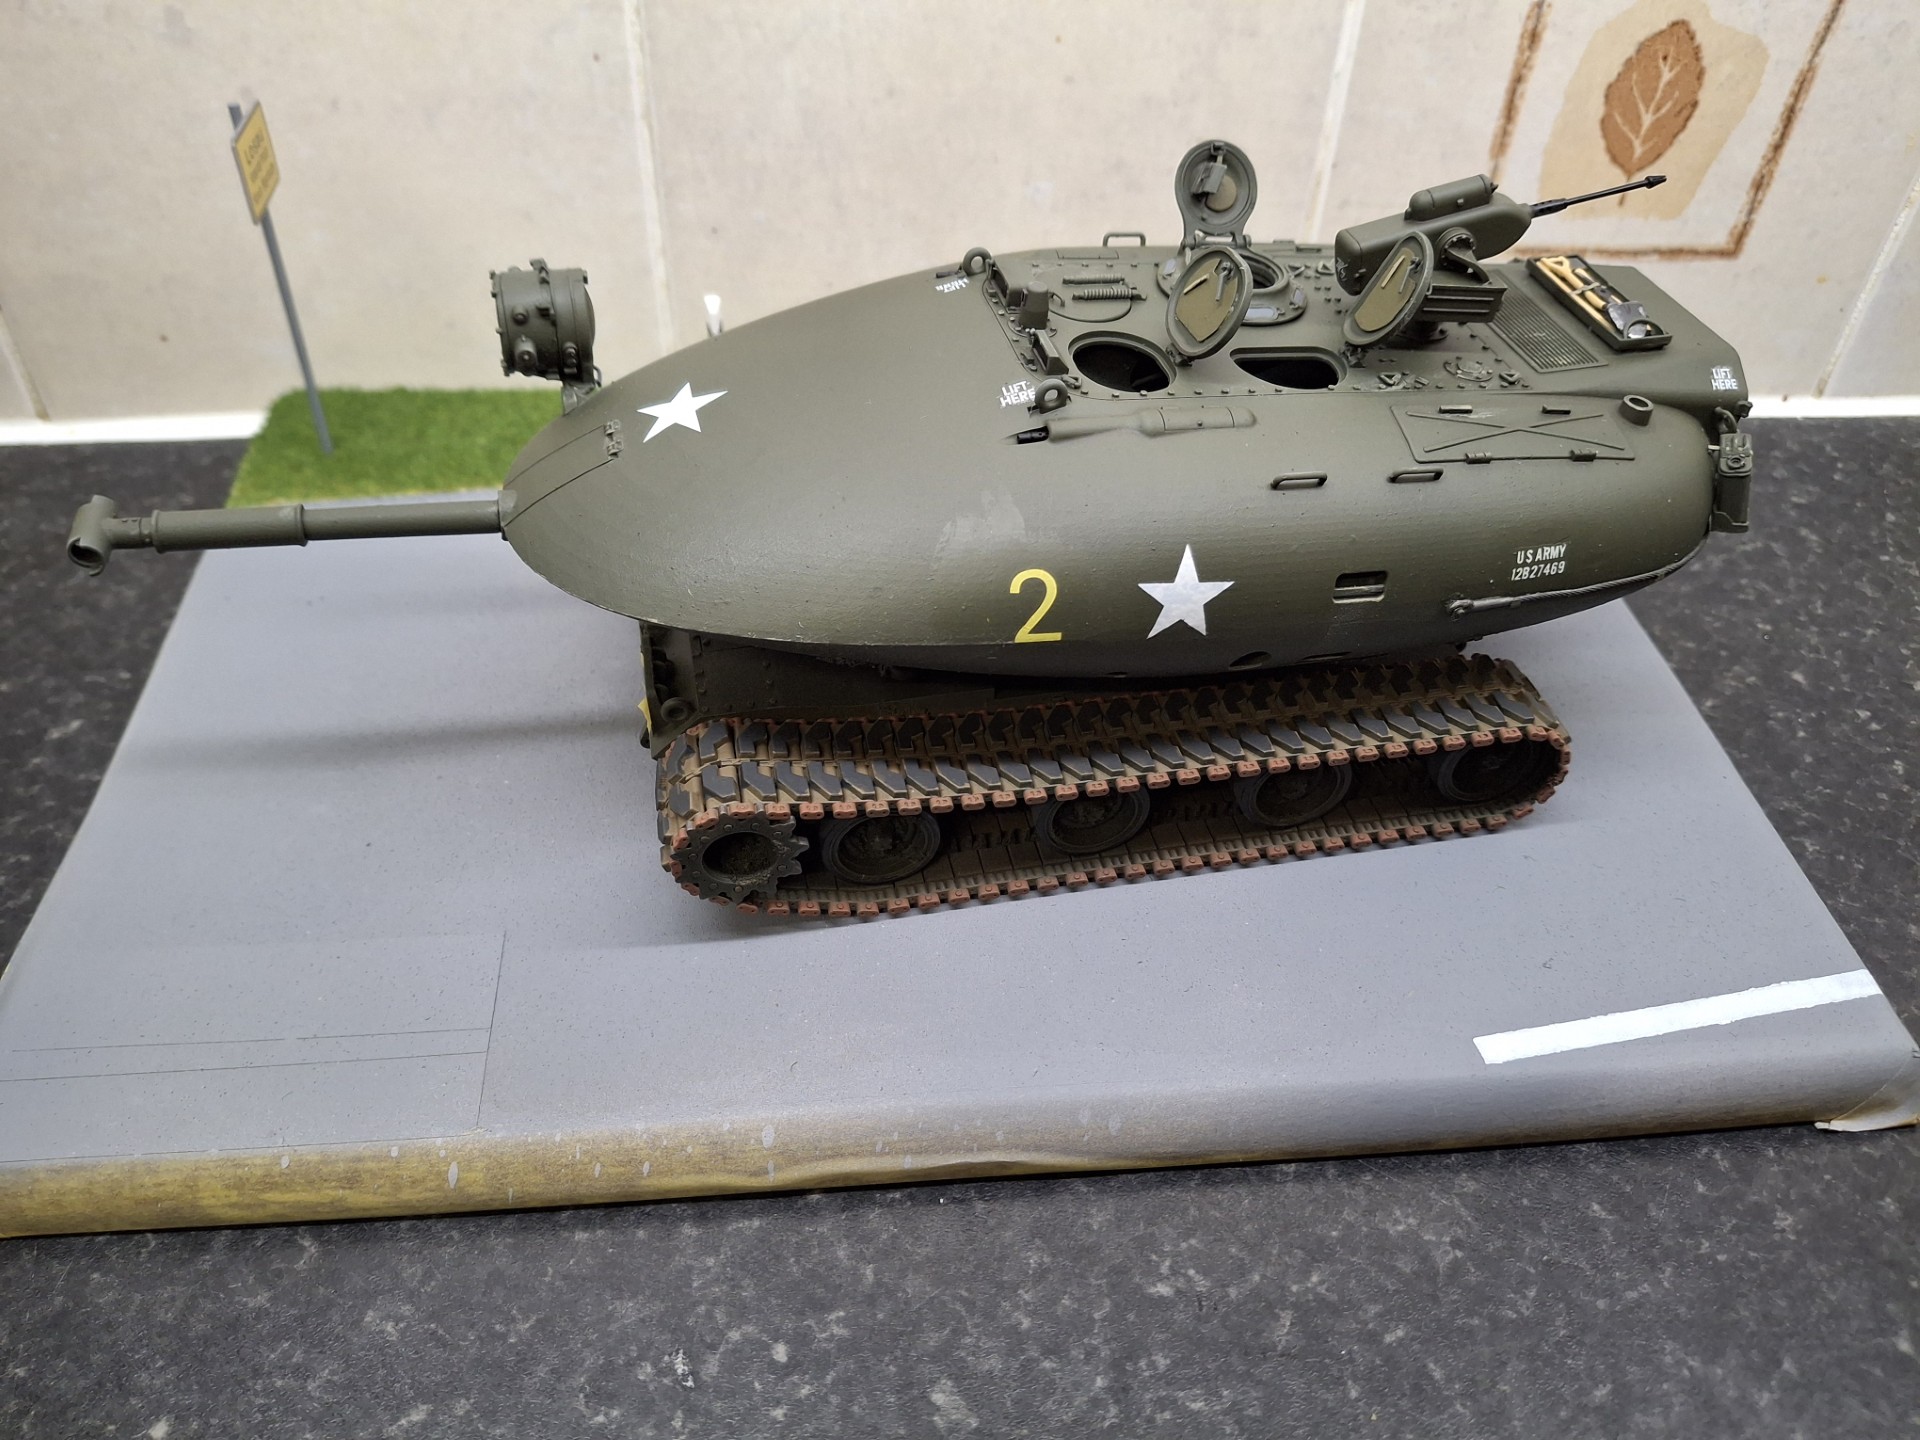
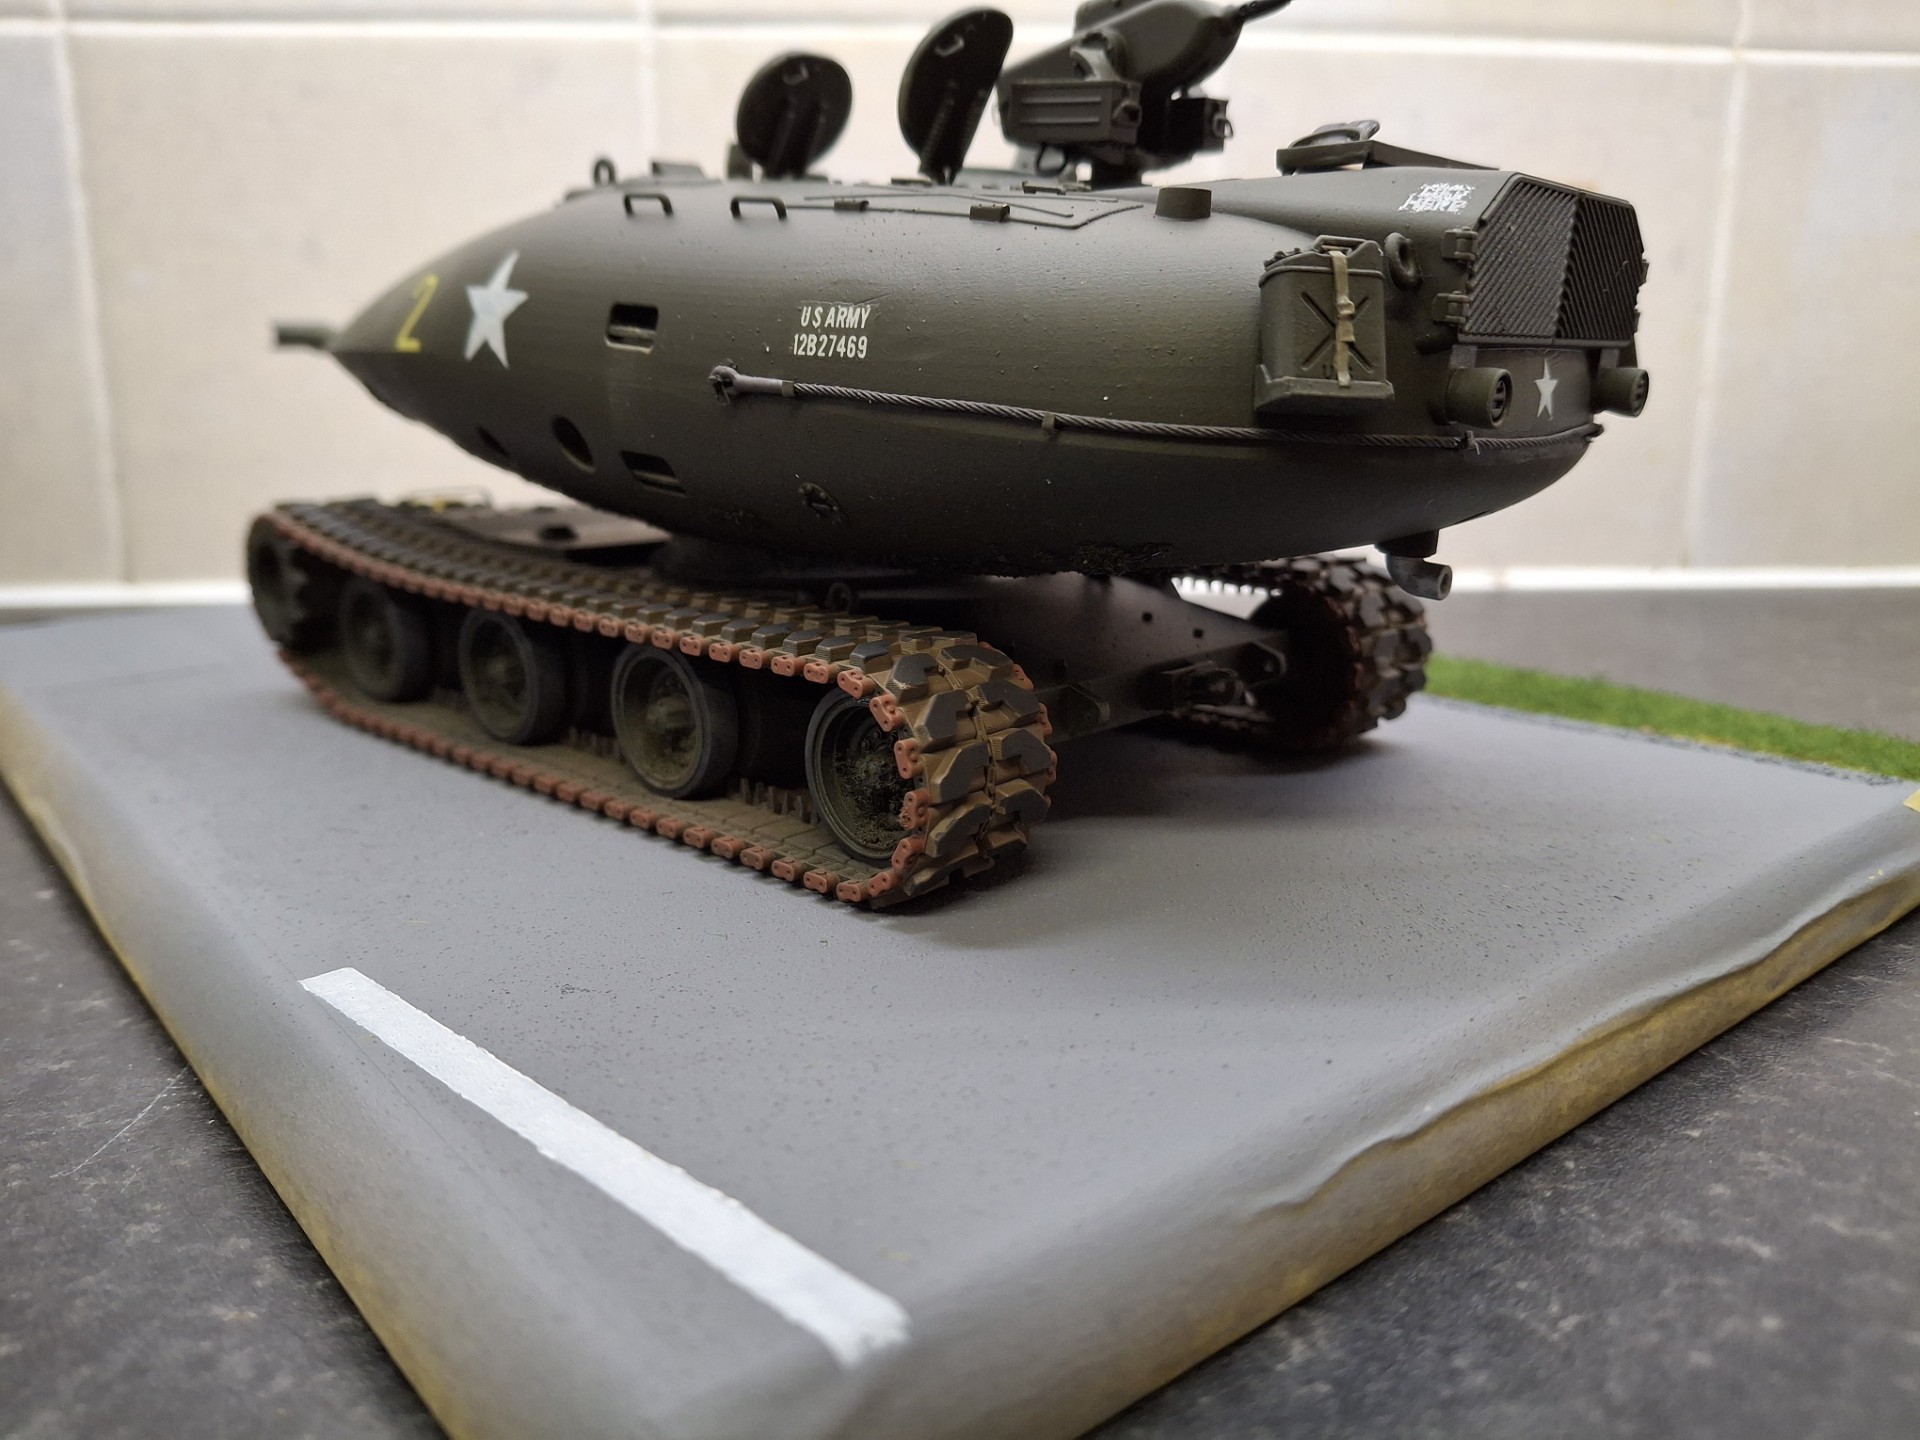
Long overdue, but here is the Chrysler TV-8 in all its glory - or rather - my efforts; I’ve given this a backstory but that’s within the parallel thread of “Chrysler TV-8” elsewhere (I’ve forgotten how to cross - refer to it I’m afraid); warning, I do bang on a fair bit. Anyway, a dozen or so pics:


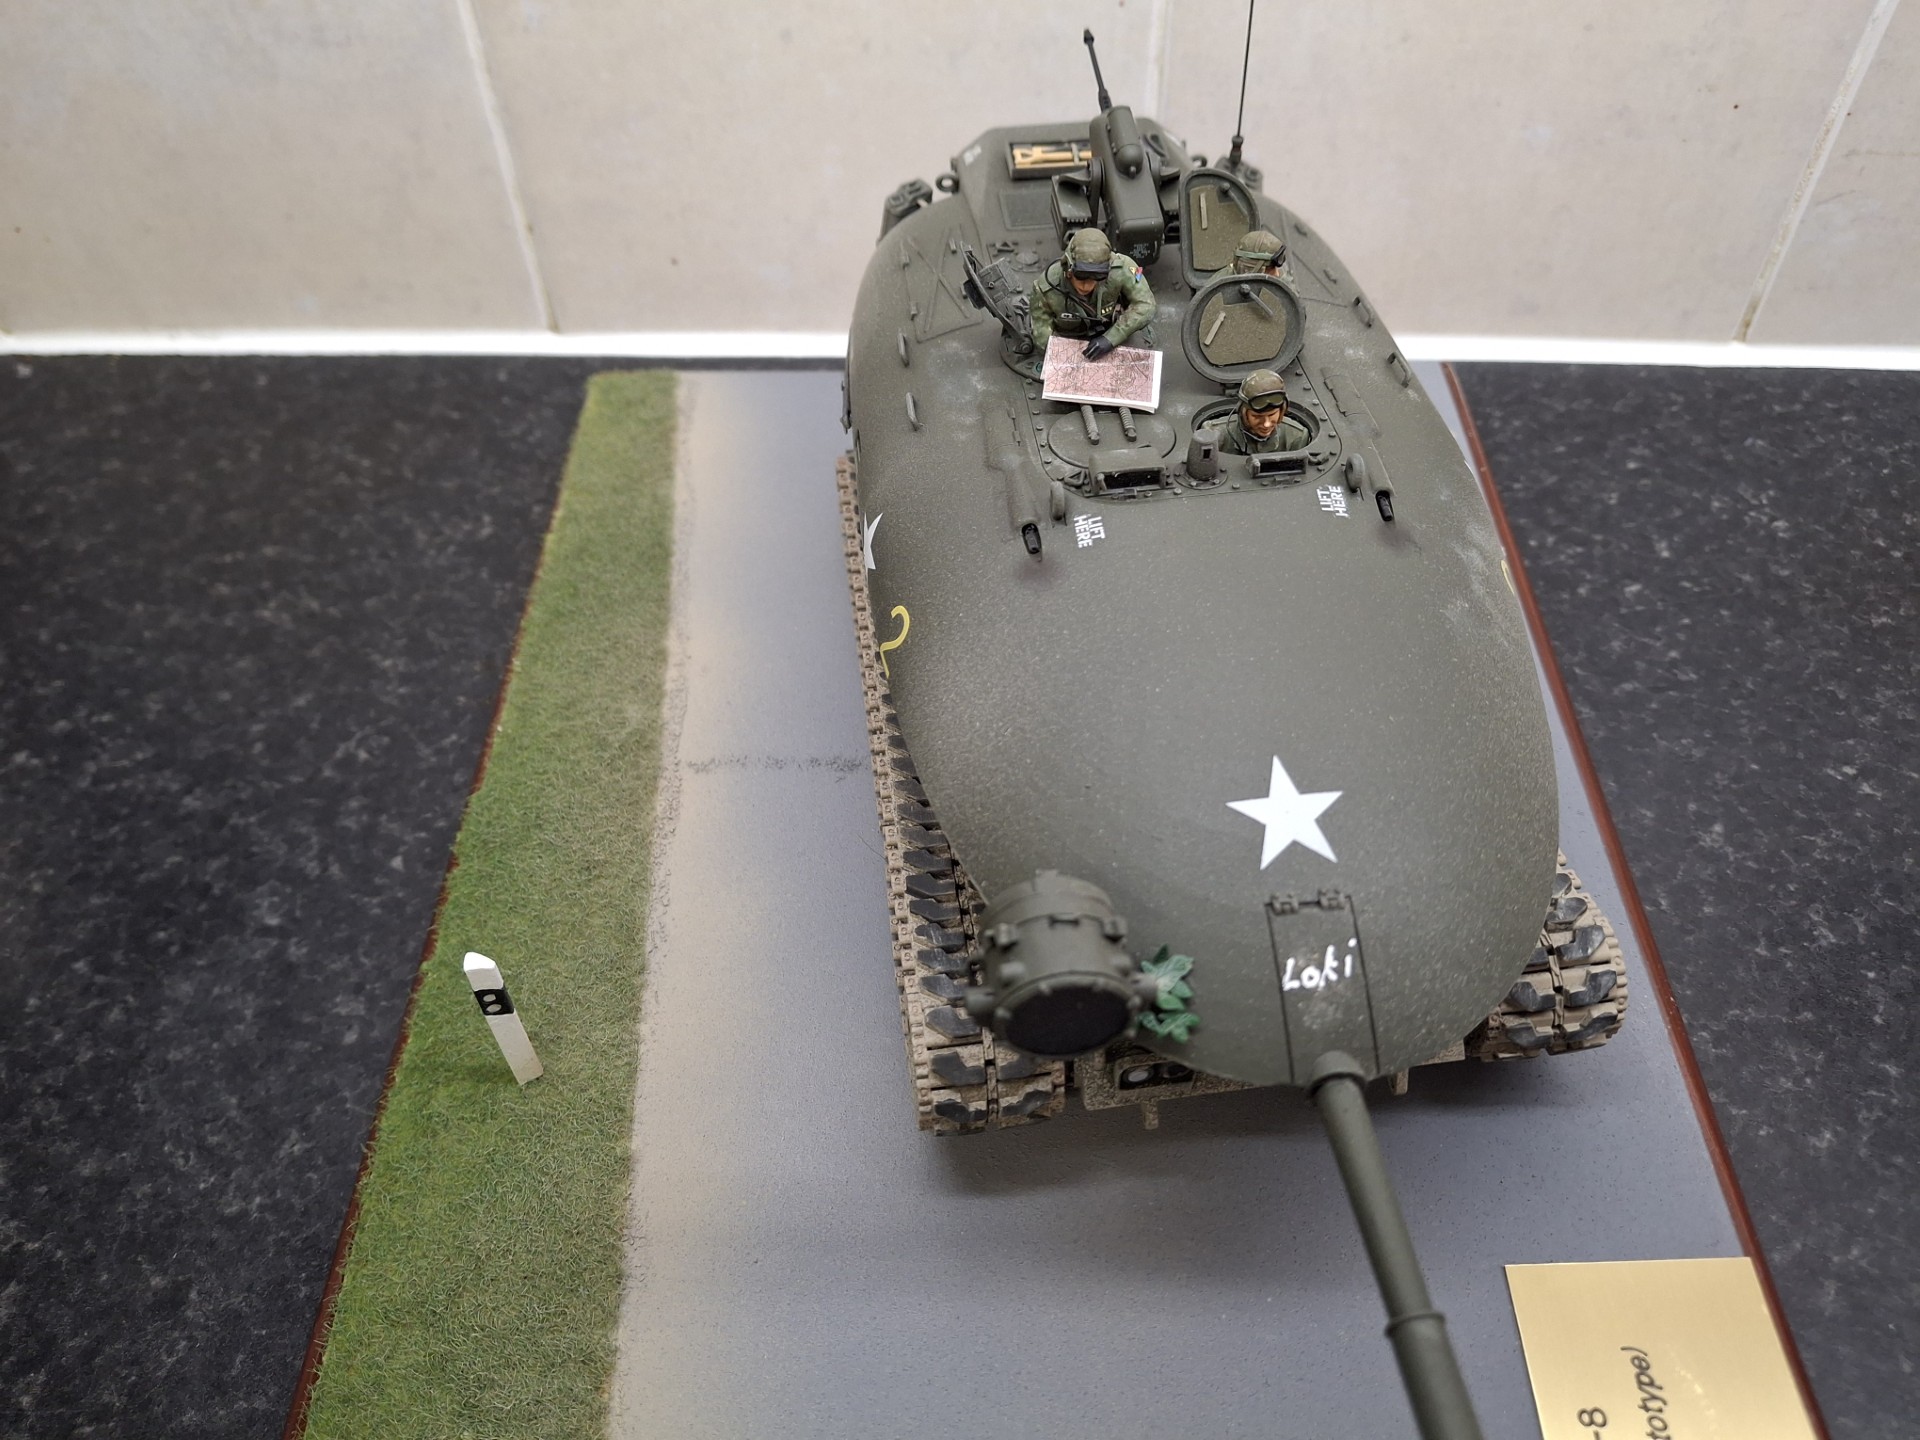
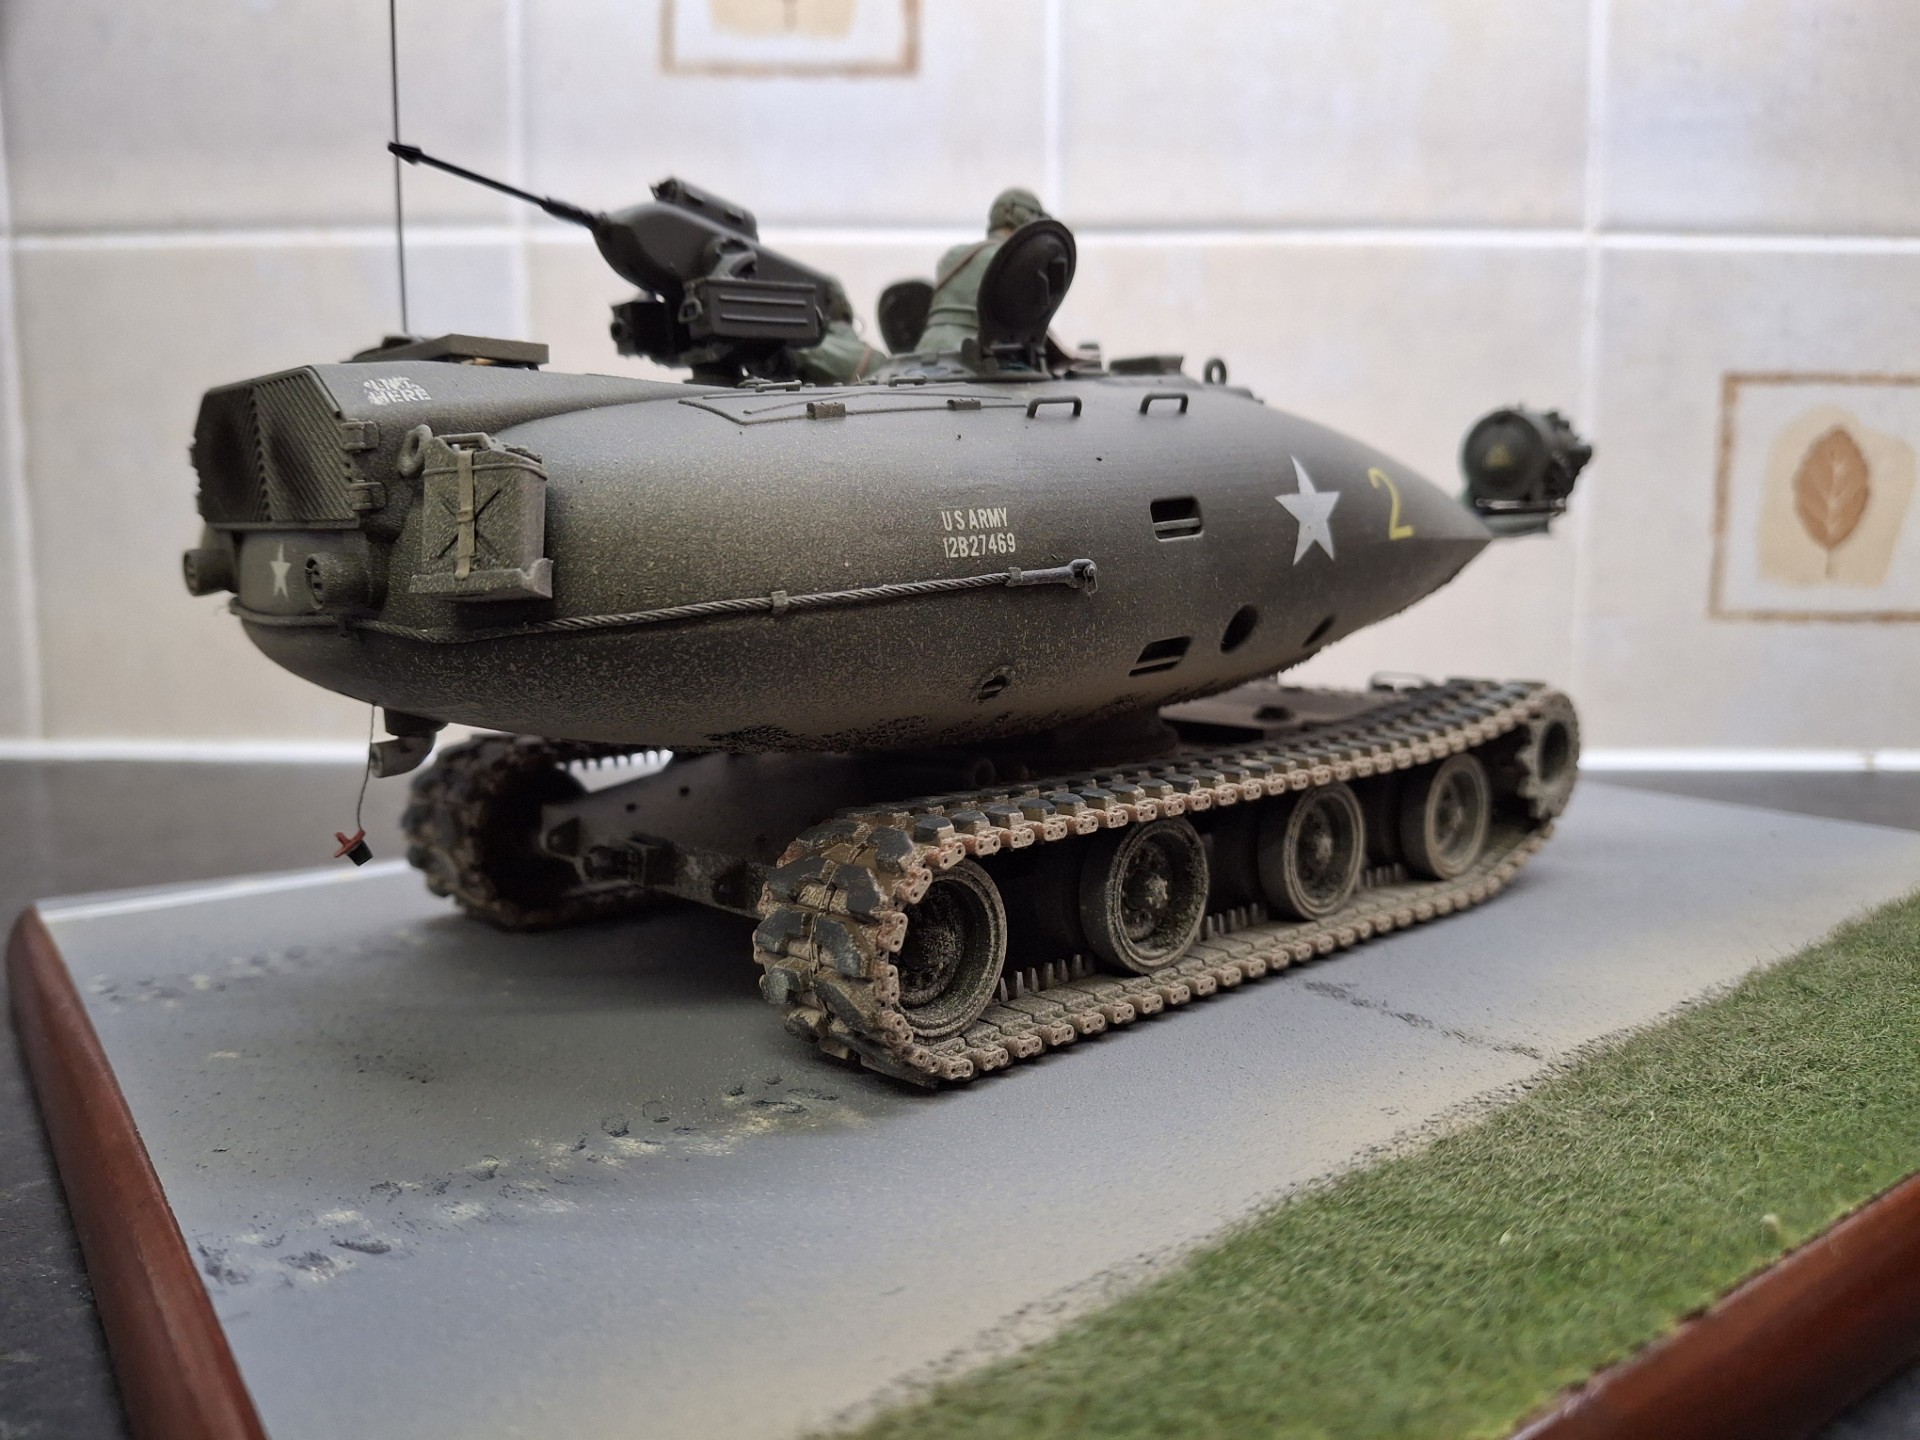
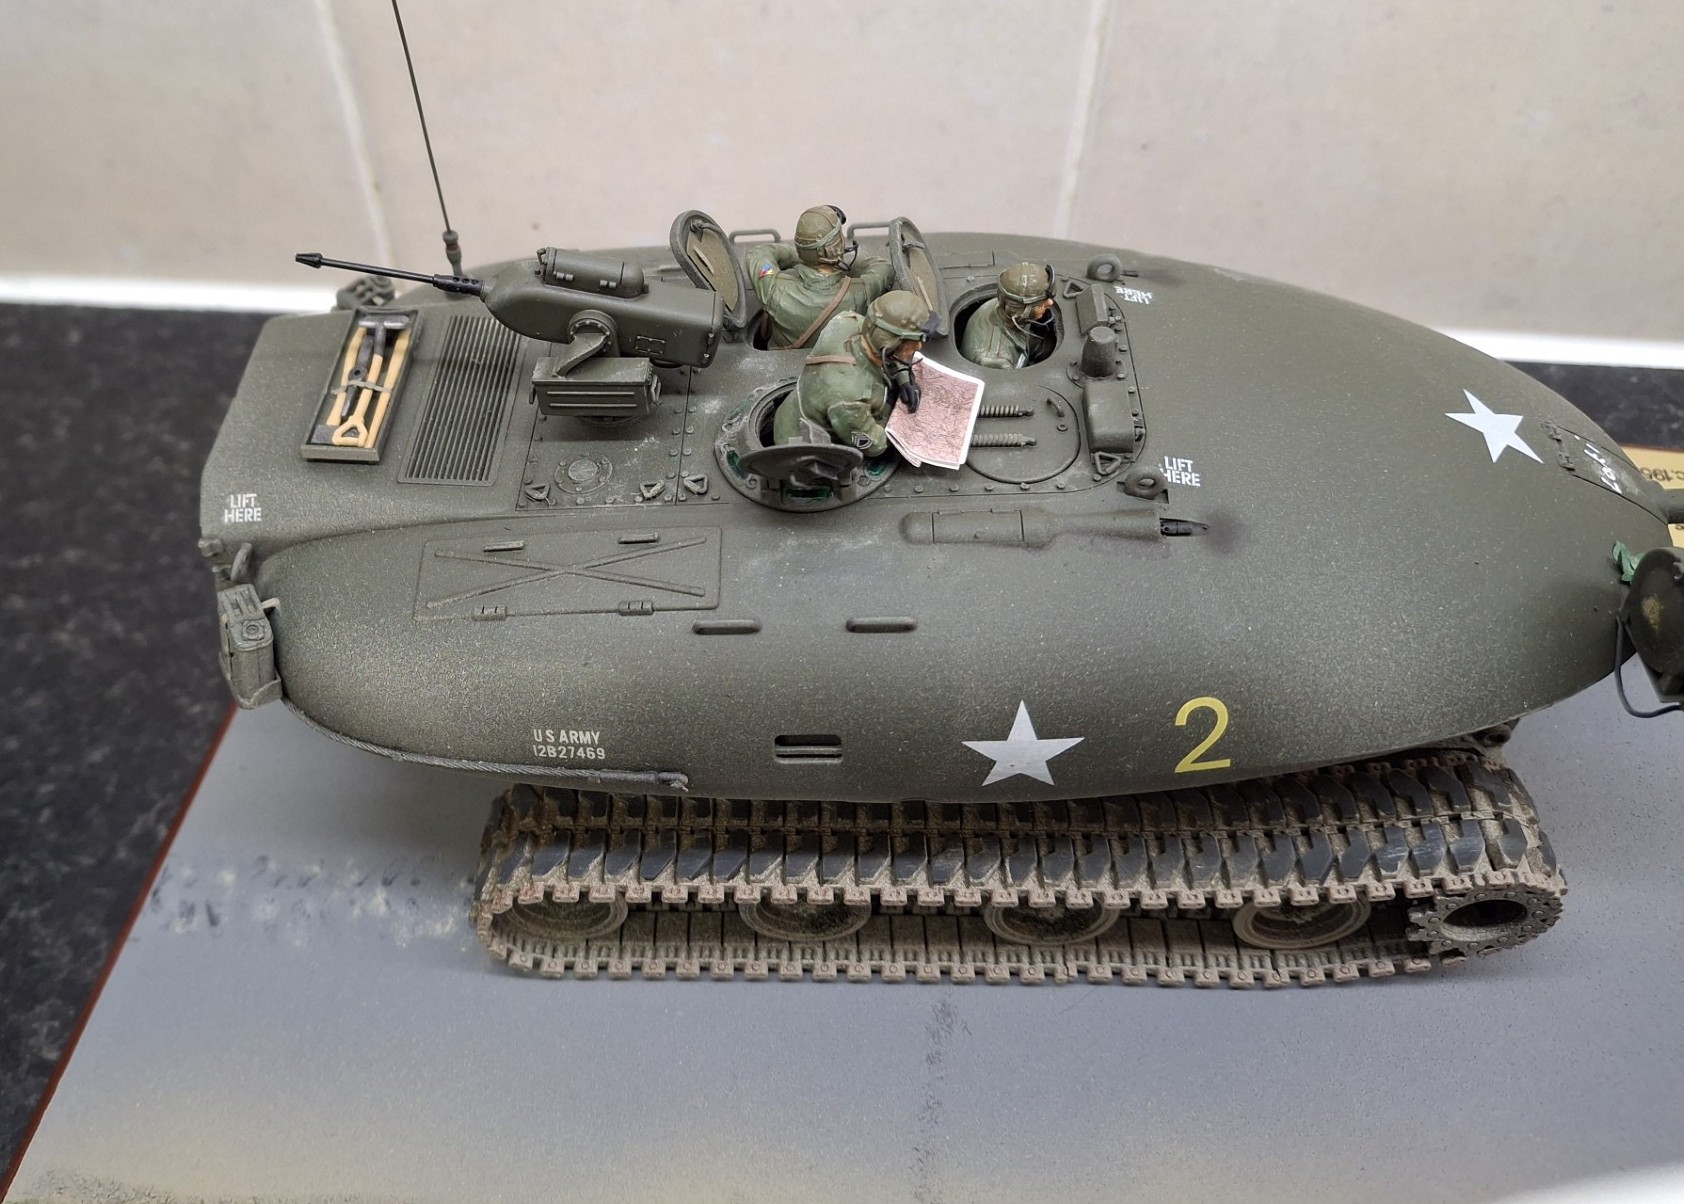
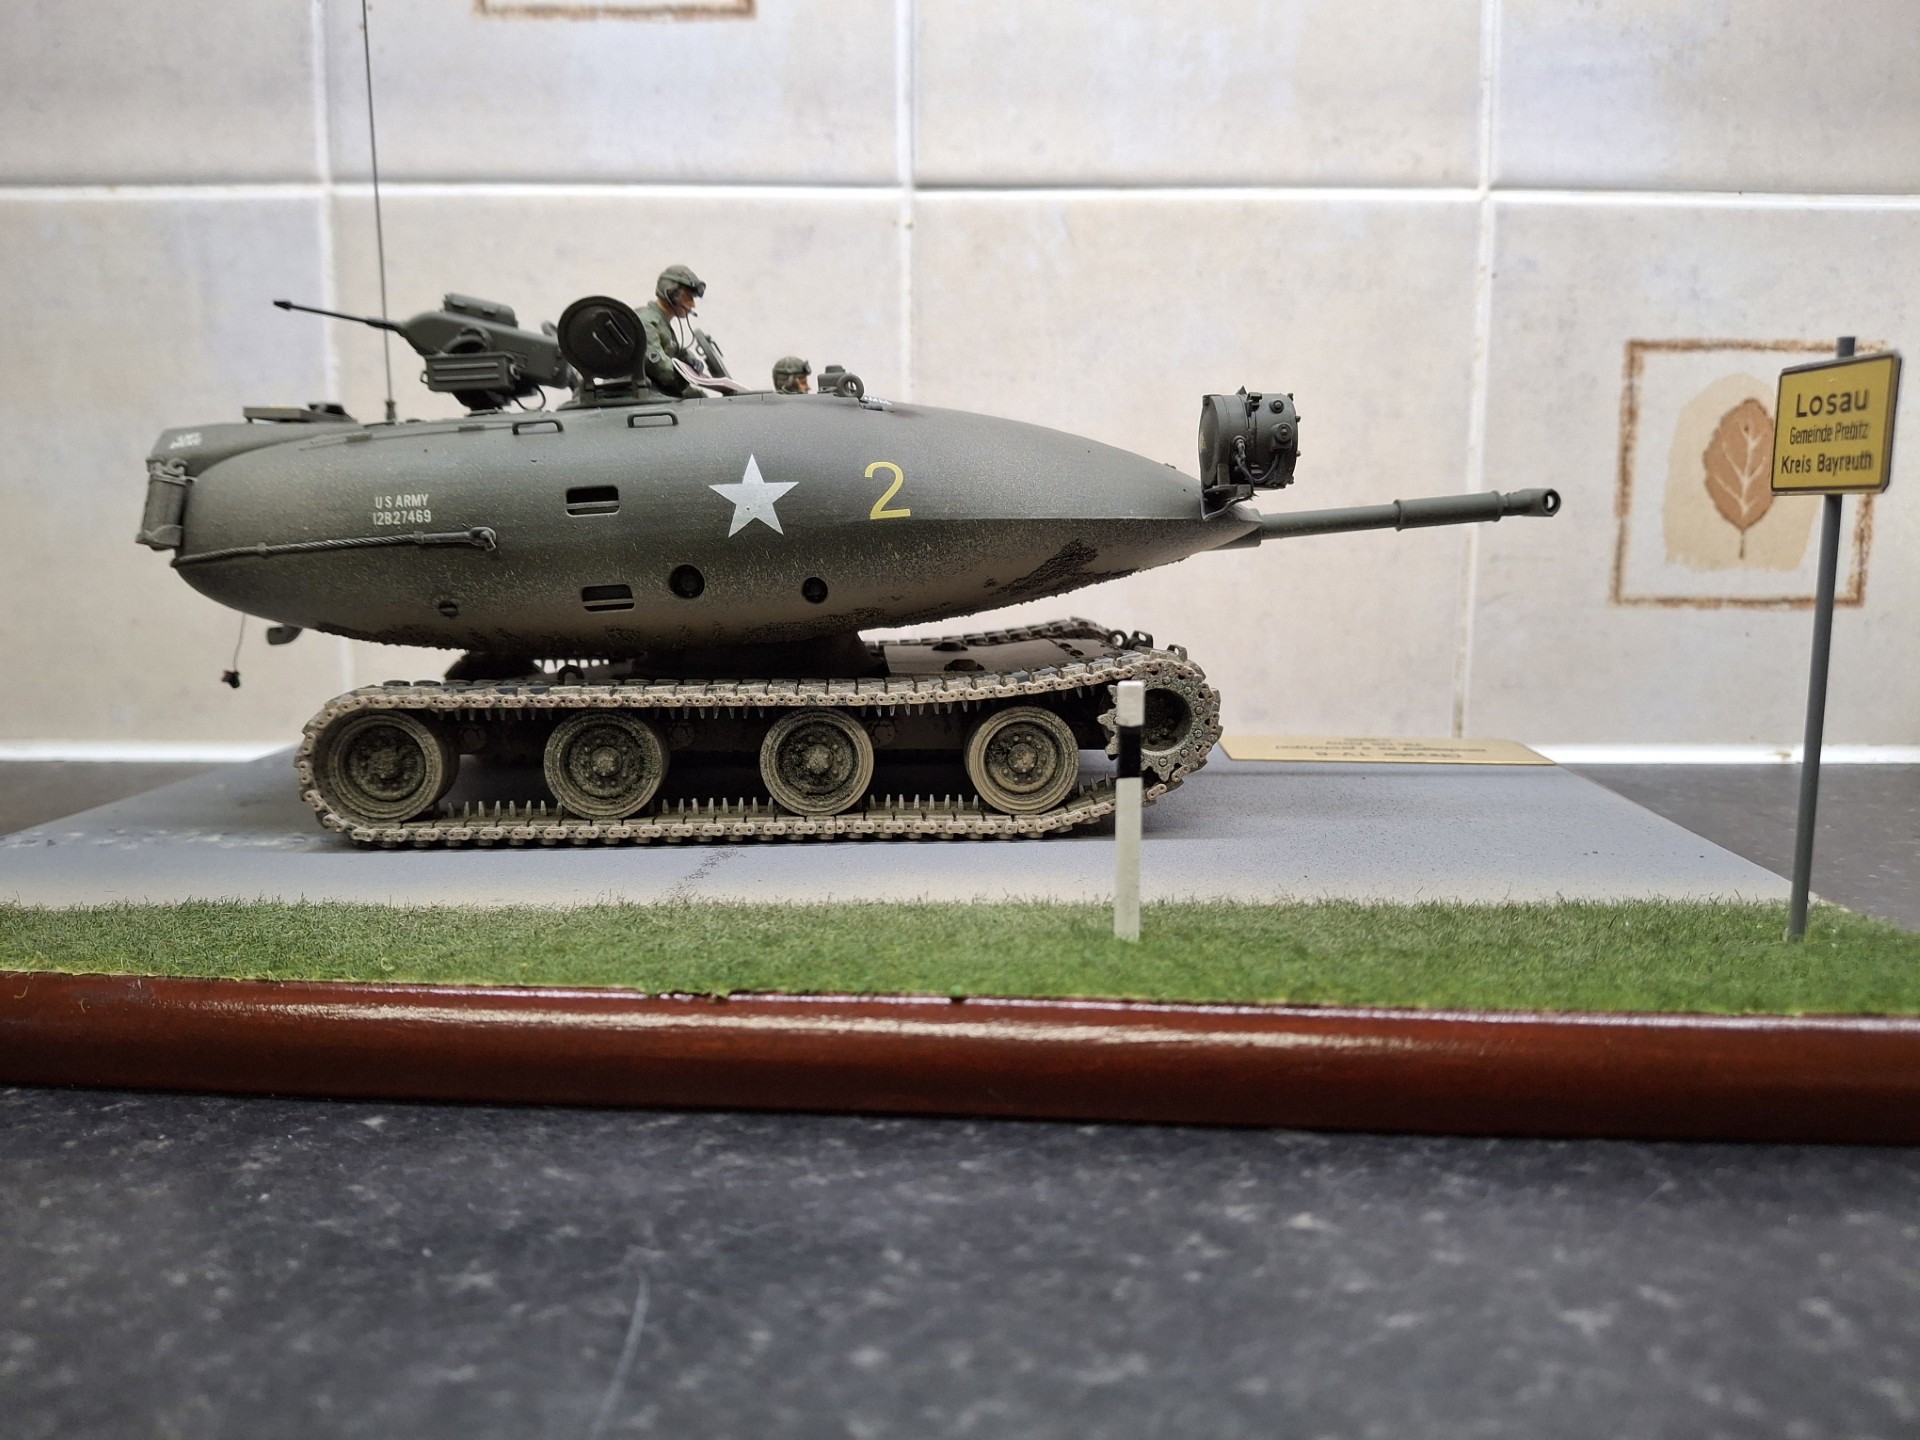
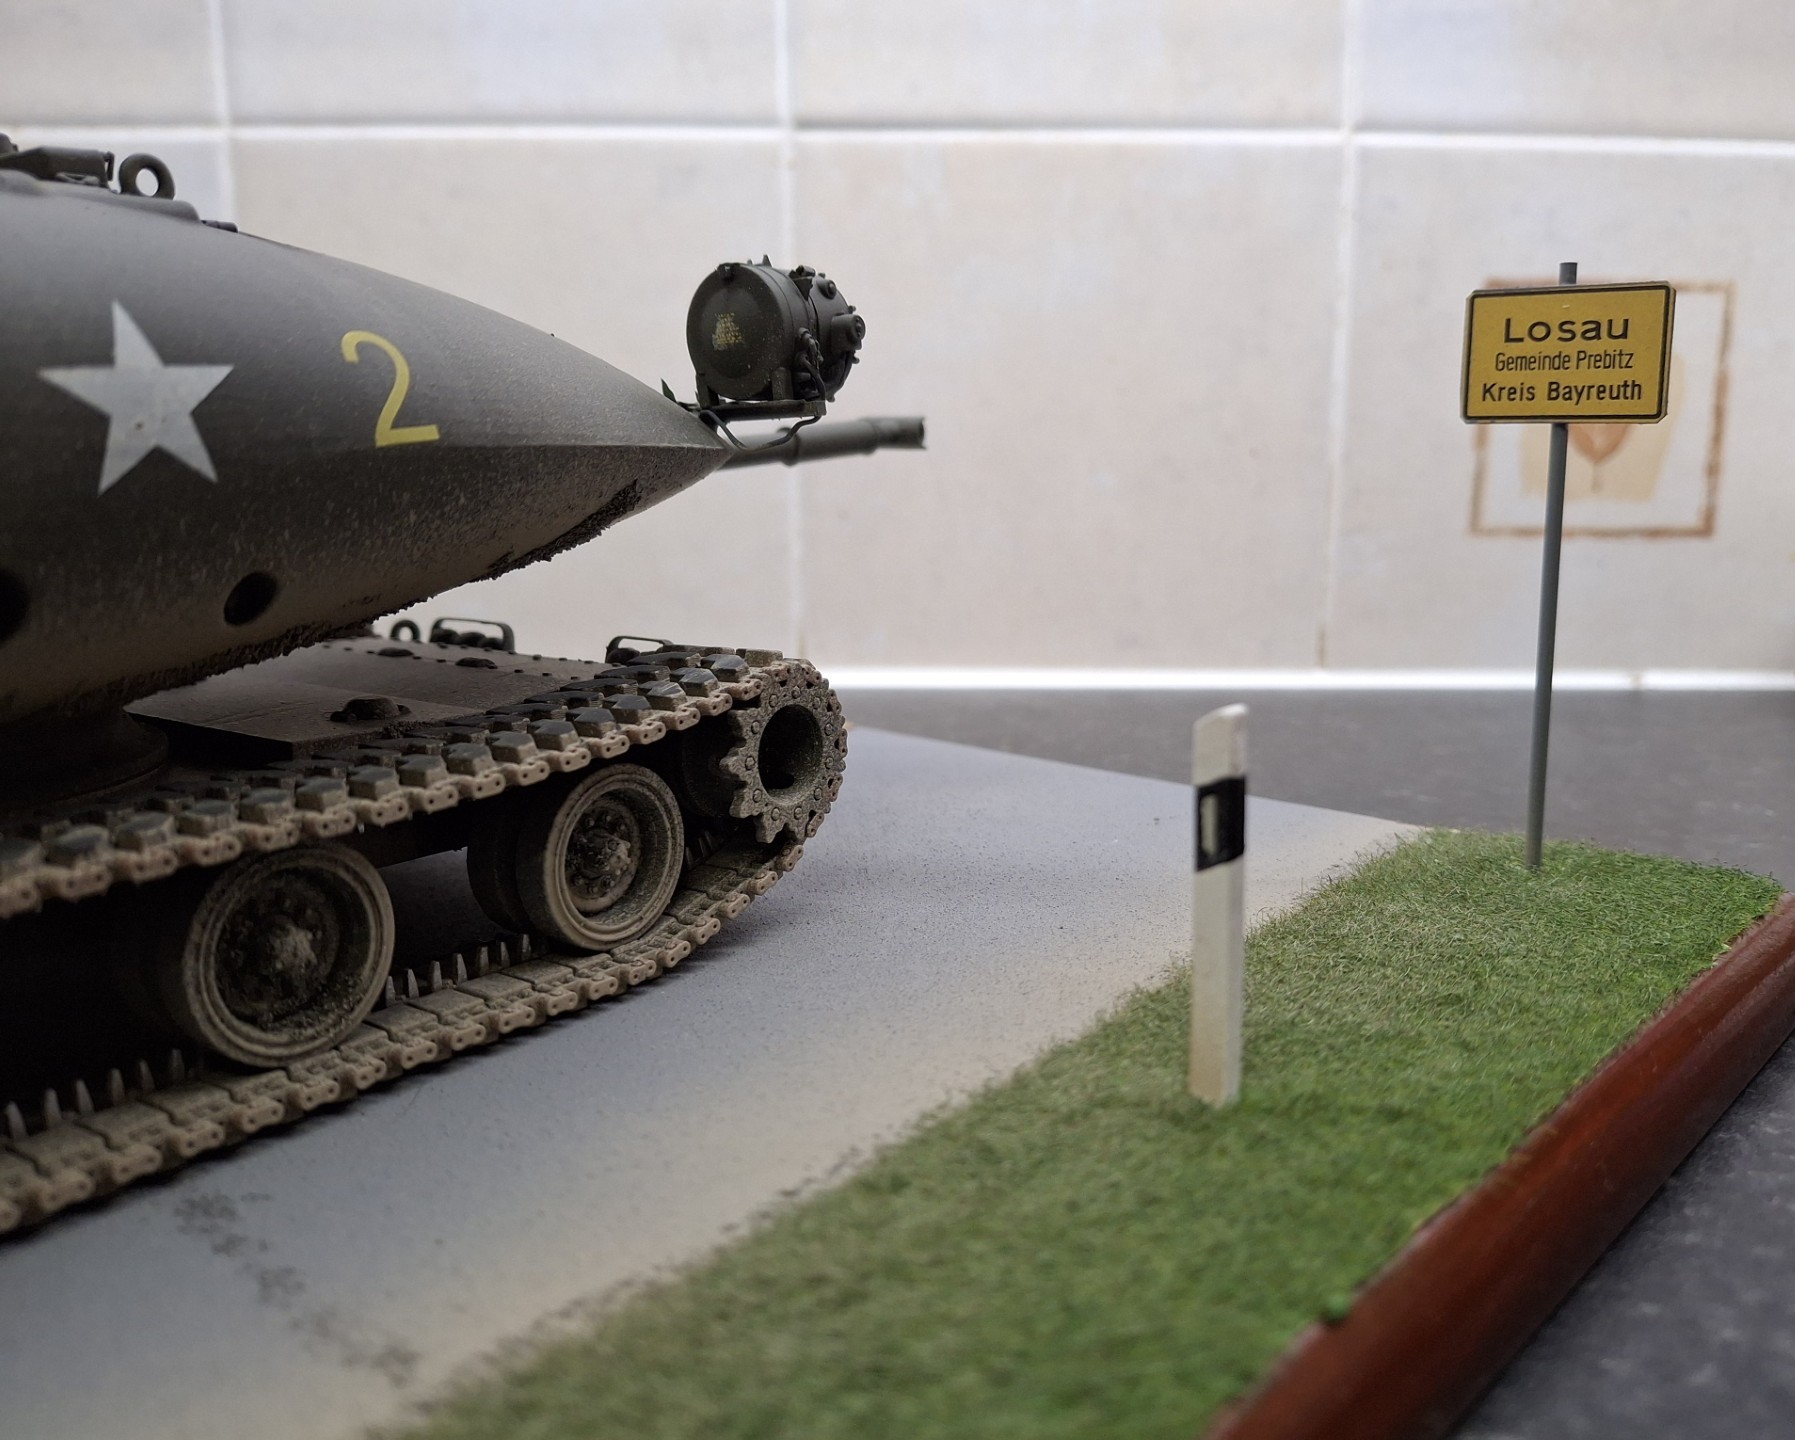

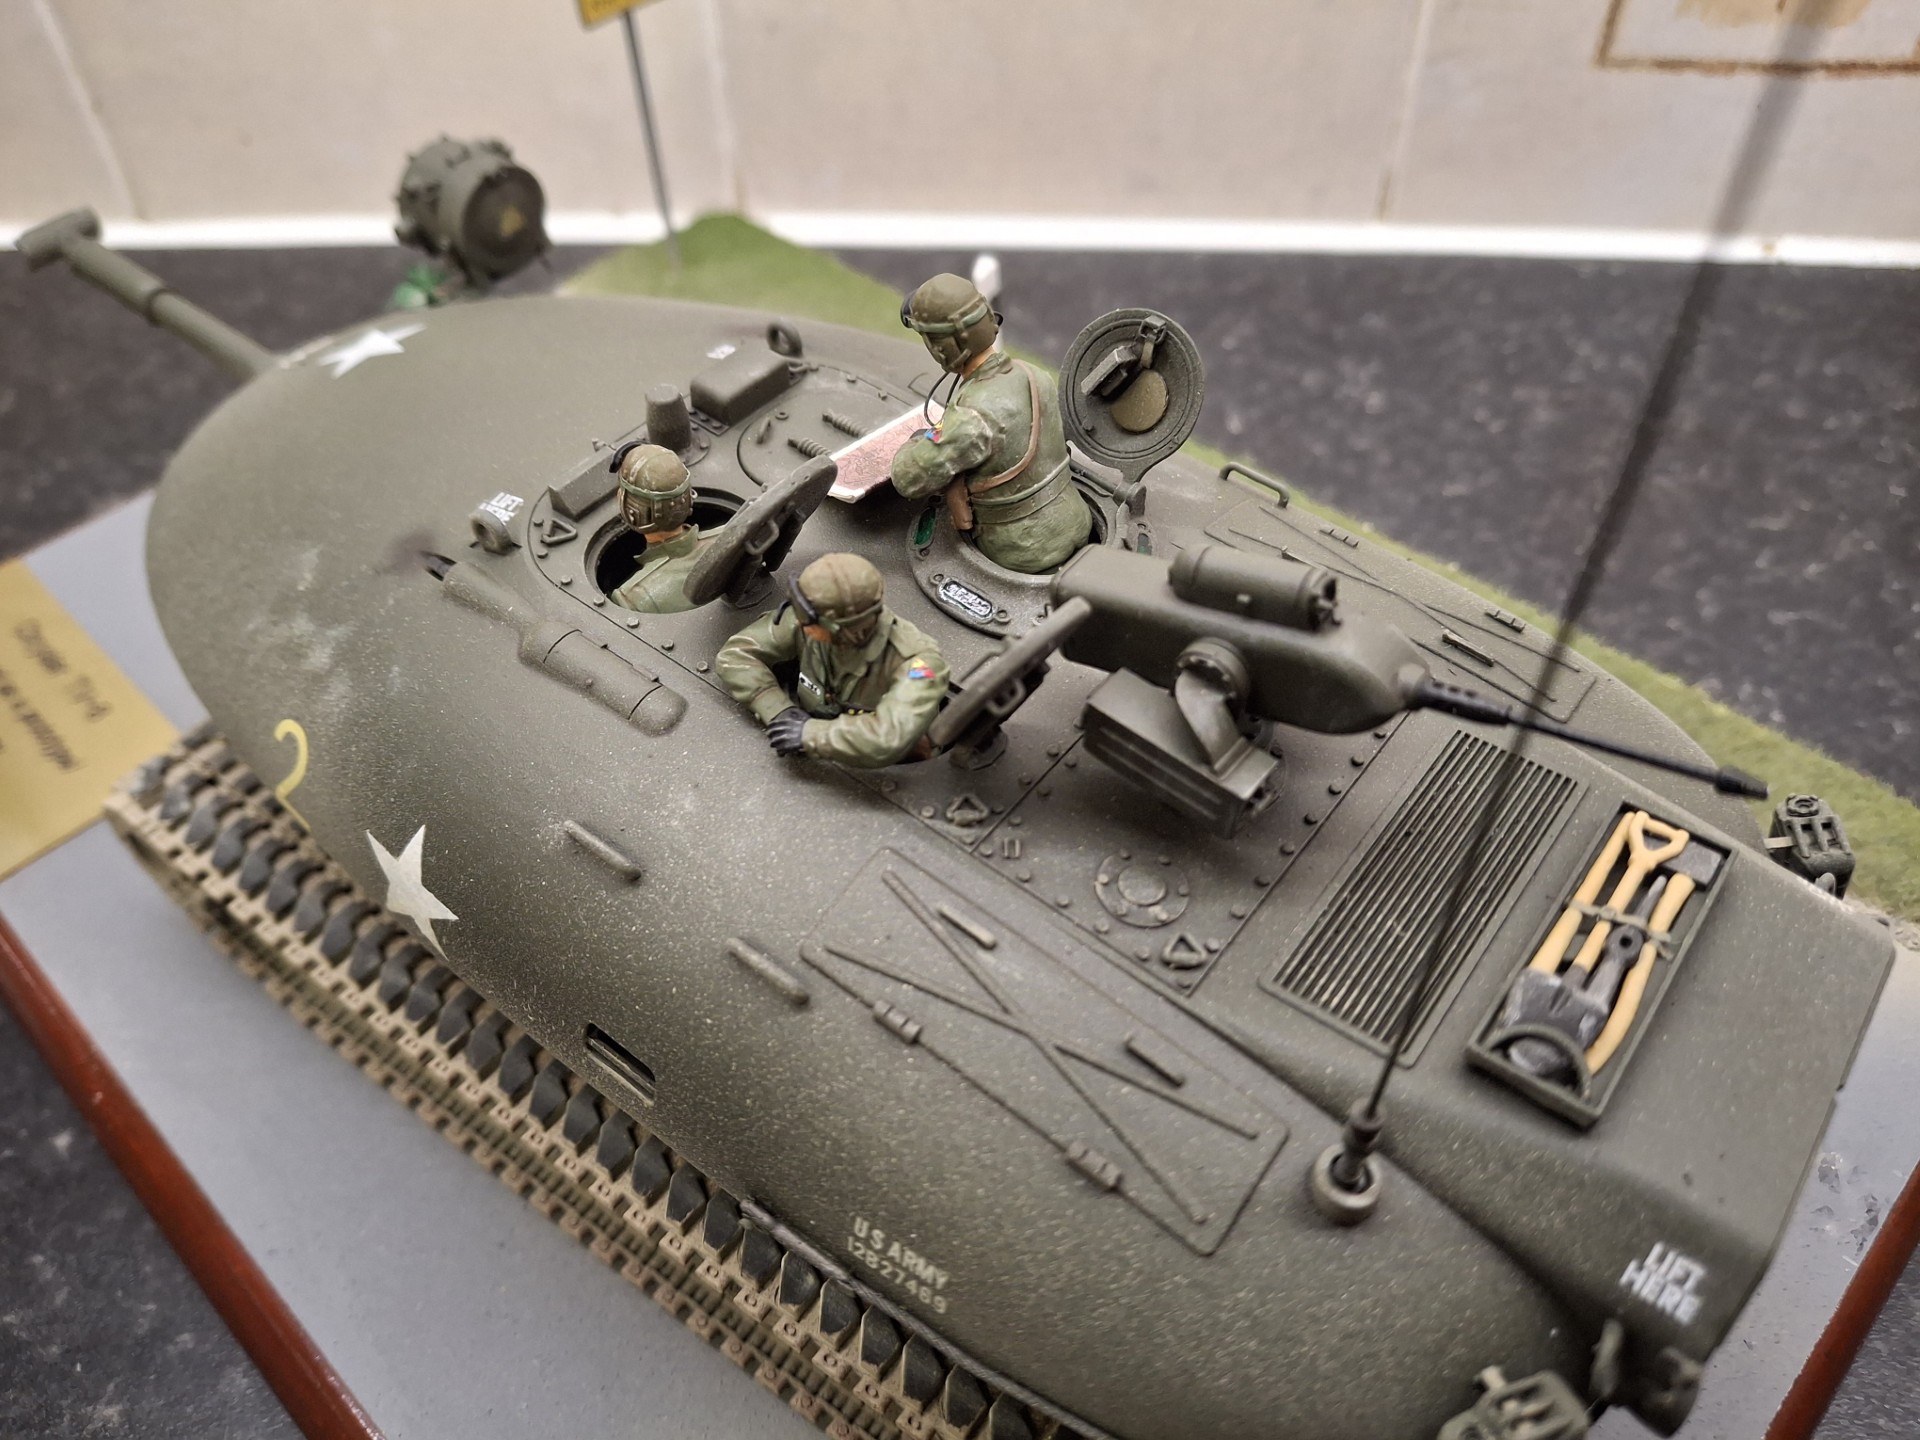

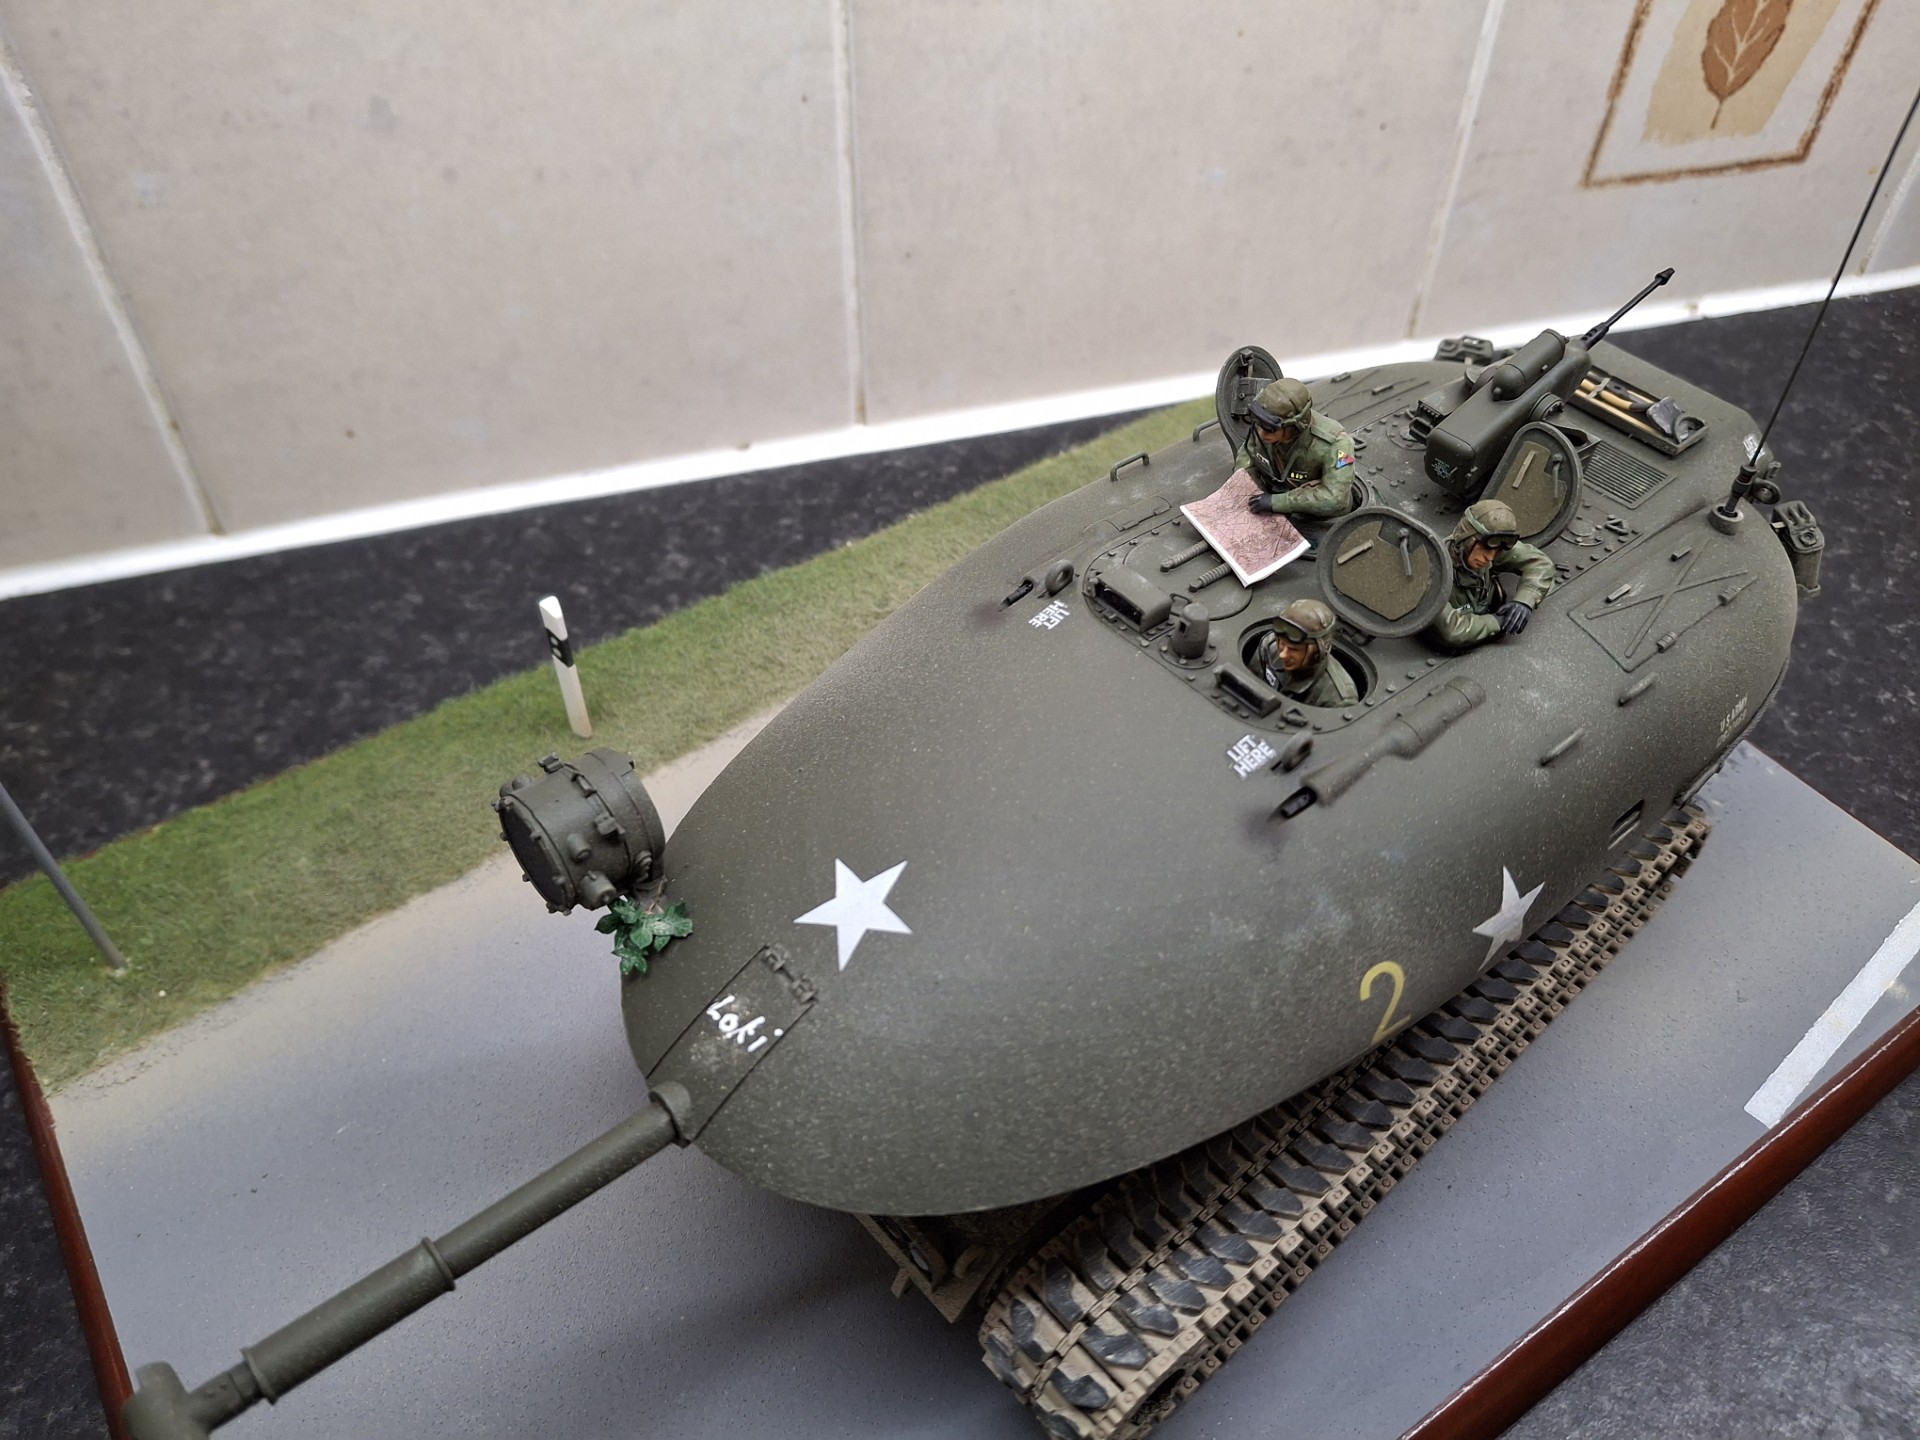
9 Likes