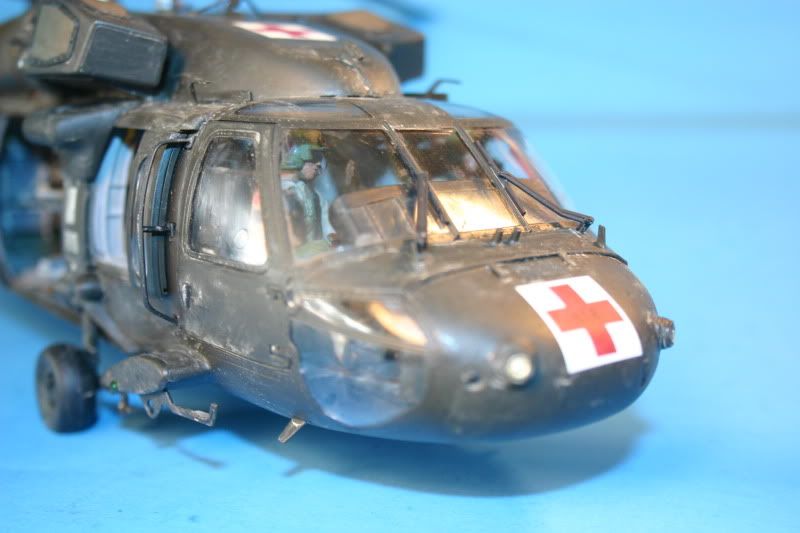
Has anybody converted the Kittyhawk kit to UH-60L? It does not seem impossible, but it seems it will take some work. The nose, the stabilator, and the missing towel rack antenna - all need fixed. Then I suppose there are plenty of minor items that need addressed.
I just can’t deal with the Academy kit. It is so bad in so many ways, Fit being the big one. But the detail is awful.
BTW, the Kittyhawk kit is pretty expensive. I don’t think I have ever spent this much on a kit before.
Hi Bob. Most of the work requires removing or leaving parts off to make it a standard UH-60L. I have plans to do just what you explain, sort of. I am planning to backdate their MH-60S (it has all the MH-60L parts and then some) to an early UH-60A from Grenada using the open exhausts from their SH-60F, then using the F fuselage with HIRSS exhausts to make an HH-60H. That is the great thing about how their kits are designed. They are all modular and you can mix and match parts to get other versions.
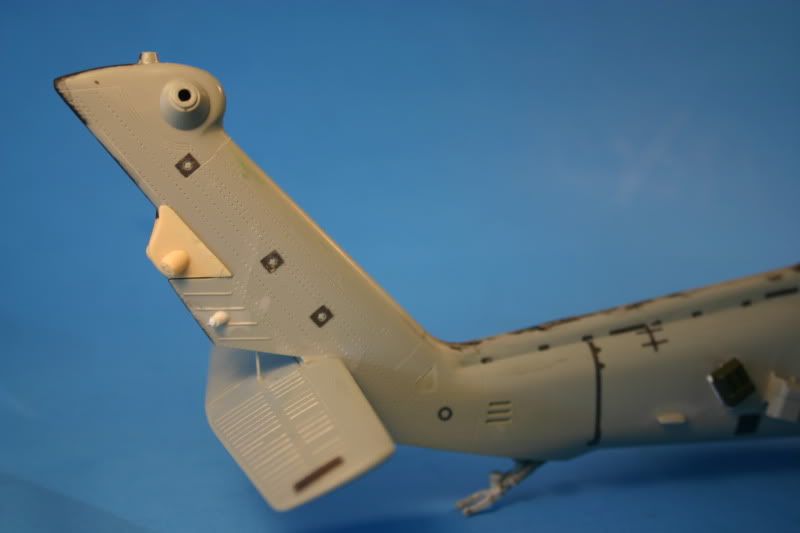
If you want a late model UH-60L, it is really easy. All you have to do is swap out the square, folding stabilator for a pointy one like on the Academy kits. You also need to backdate the instrument panel so it has analog gauges as opposed to multi-function display screens. Lastly, you have to remove the radar warning detectors on the vertical tail piece. Also, if you build it w/o the ESSS wings and just the covers, there are no lower connection point covers included in the kit. You could use ones from an Academy kit or make the bumps yourself for them.
All of these parts for the backdate are available from Werner’s Wings in a couple recent conversion sets. You can see them here. I used many of these parts as pre-production tests on my recent MH-60A Super 65, “Heavy Metal” build. All the parts are awesome and fit the Kitty Hawk kits perfectly.
As I siad above, I built the MH-60L as MH-60A “Super 65” from Op Gothic Serpent (Black Hawk Down) and the HH-60G as one from the Alaska Air Guard with Werner’s Wings skis on it. The kits are great and full of details. I highly recommend them. They are light years ahead of Academy’s H-60s.
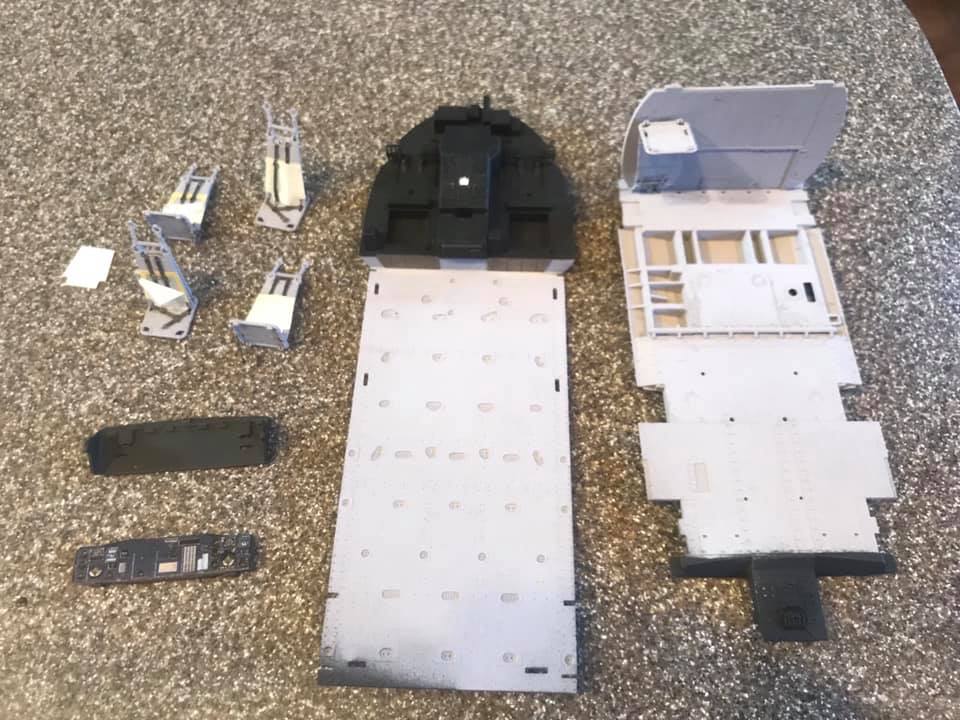
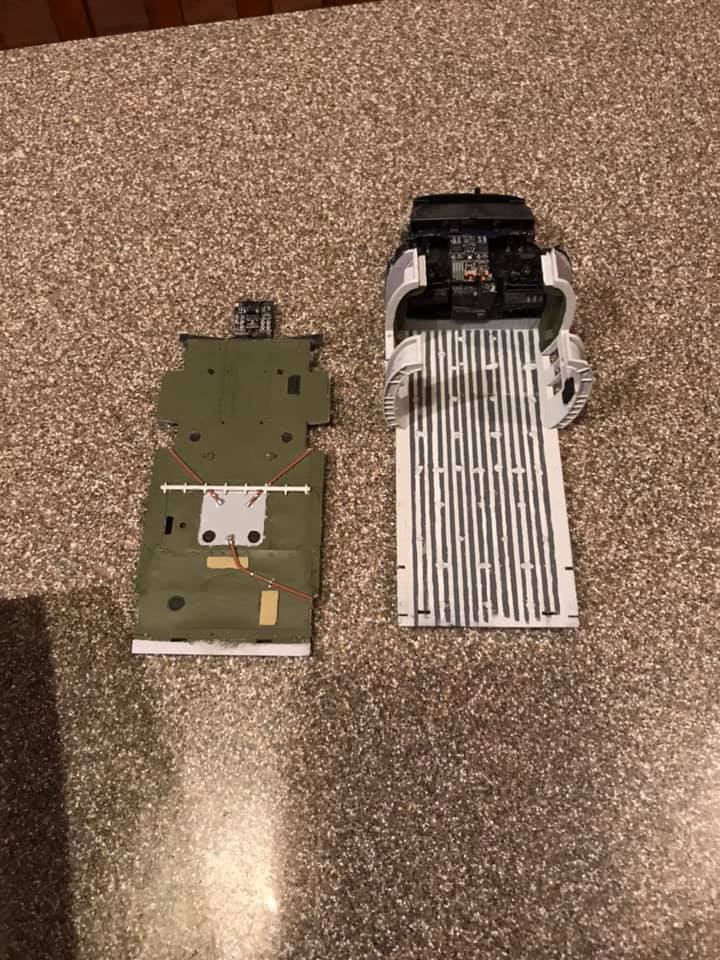
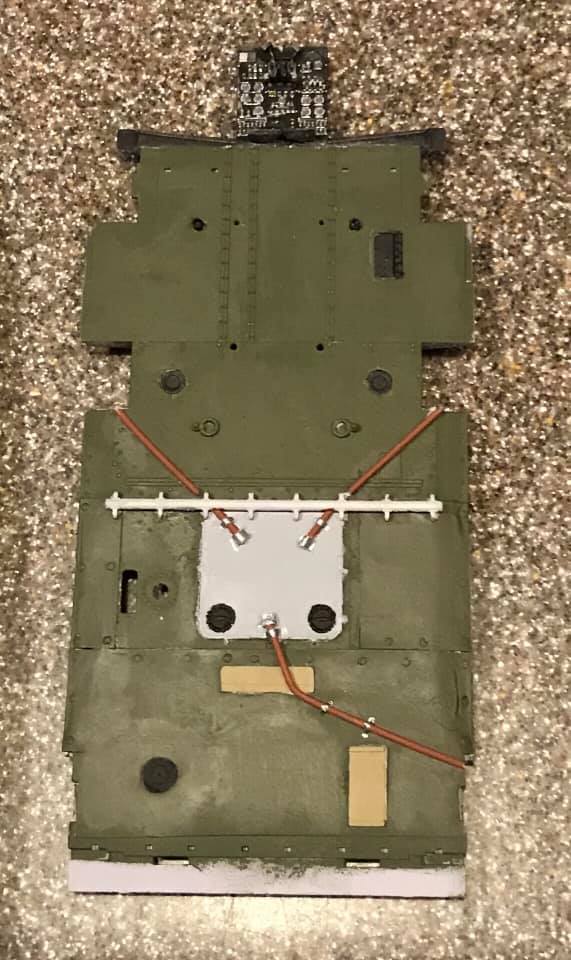
The only issue with them is that the internal cabin/cockpit parts are a little too wide to fit inside the fuselage w/o seams at the top and bottom. It isn’t big, but is there. Some have cut/sanded down the sides of the floor and roof to make them fit better. I tried leaving the side bulkheads loose and securing them to the fuselage sides like on the Academy kits. It works and reduces the gaps, but they still required filling. I will cut/sand down the floor and ceiling sides a bit on the next one and see how that works.
By the way, how much did you pay for it? You can get them directly from KH for a lot less than anywhere else.
1 Like
Very detailed response. Thanks Gino. I have the cockpit squared away I think. The old Eduard (Academy) stuff seems to fit pretty well so that instrument panel should look nice. The overhead circuit breakers too.
I’m not sure what you mean by the vertical tail piece though. It seems all late Limas I have been covering for the past several years have the same nose CMWS EOMS on the tail too - in staggered way. The kit ones are different looking. I may leave them. IDK…
I also need to scratch the towel rack antenna on the port side. I should be able to do it.
You got it. The kit one is specific to the 160th SOAR MH-60Ls. The UH-60Ls use one that looks the same as the USAF version that is in their HH-60G kit. Cobra Company made the USAF version and I have a few if you want one. PM me your address and I’ll send it to you.
Also, the front CMWS sensors are not as long as the MH and USAF ones, and lower on the nose.
I cut them down when I did my UH-60A MedEvac a few years ago, using Academy’s UH-60A/L kit. I also used the CC rear CMWS.
You are correct about the Eduard UH-60L sets. They fit just fine. The towel rack antenna isn’t hard either.
Sounds like you are on your way. Good luck on it.
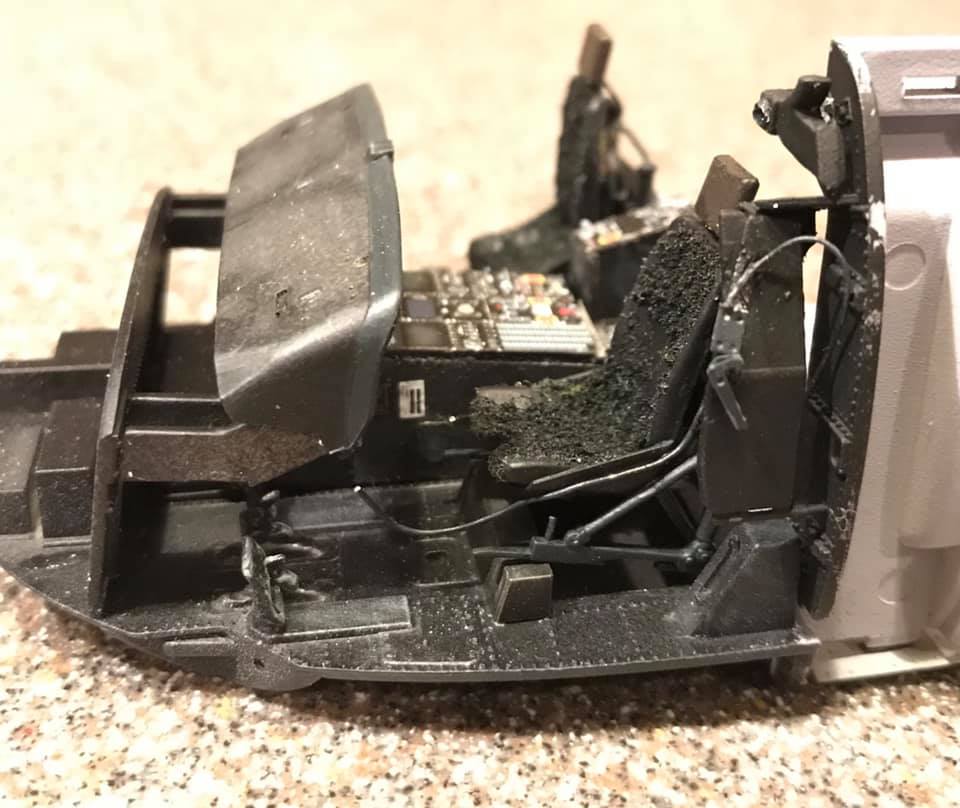
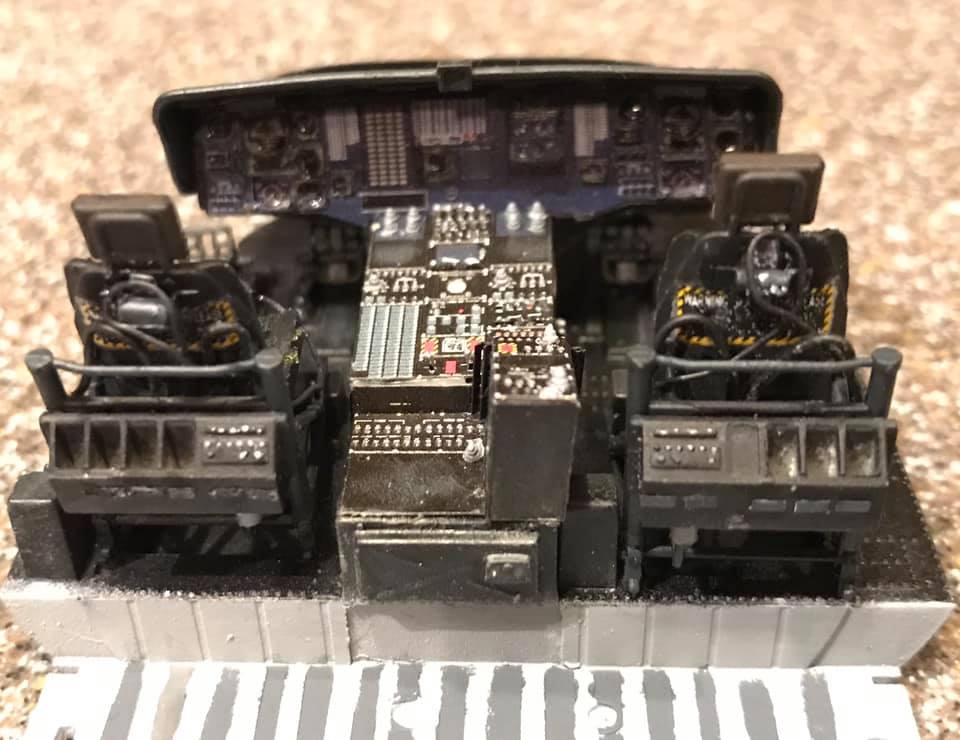
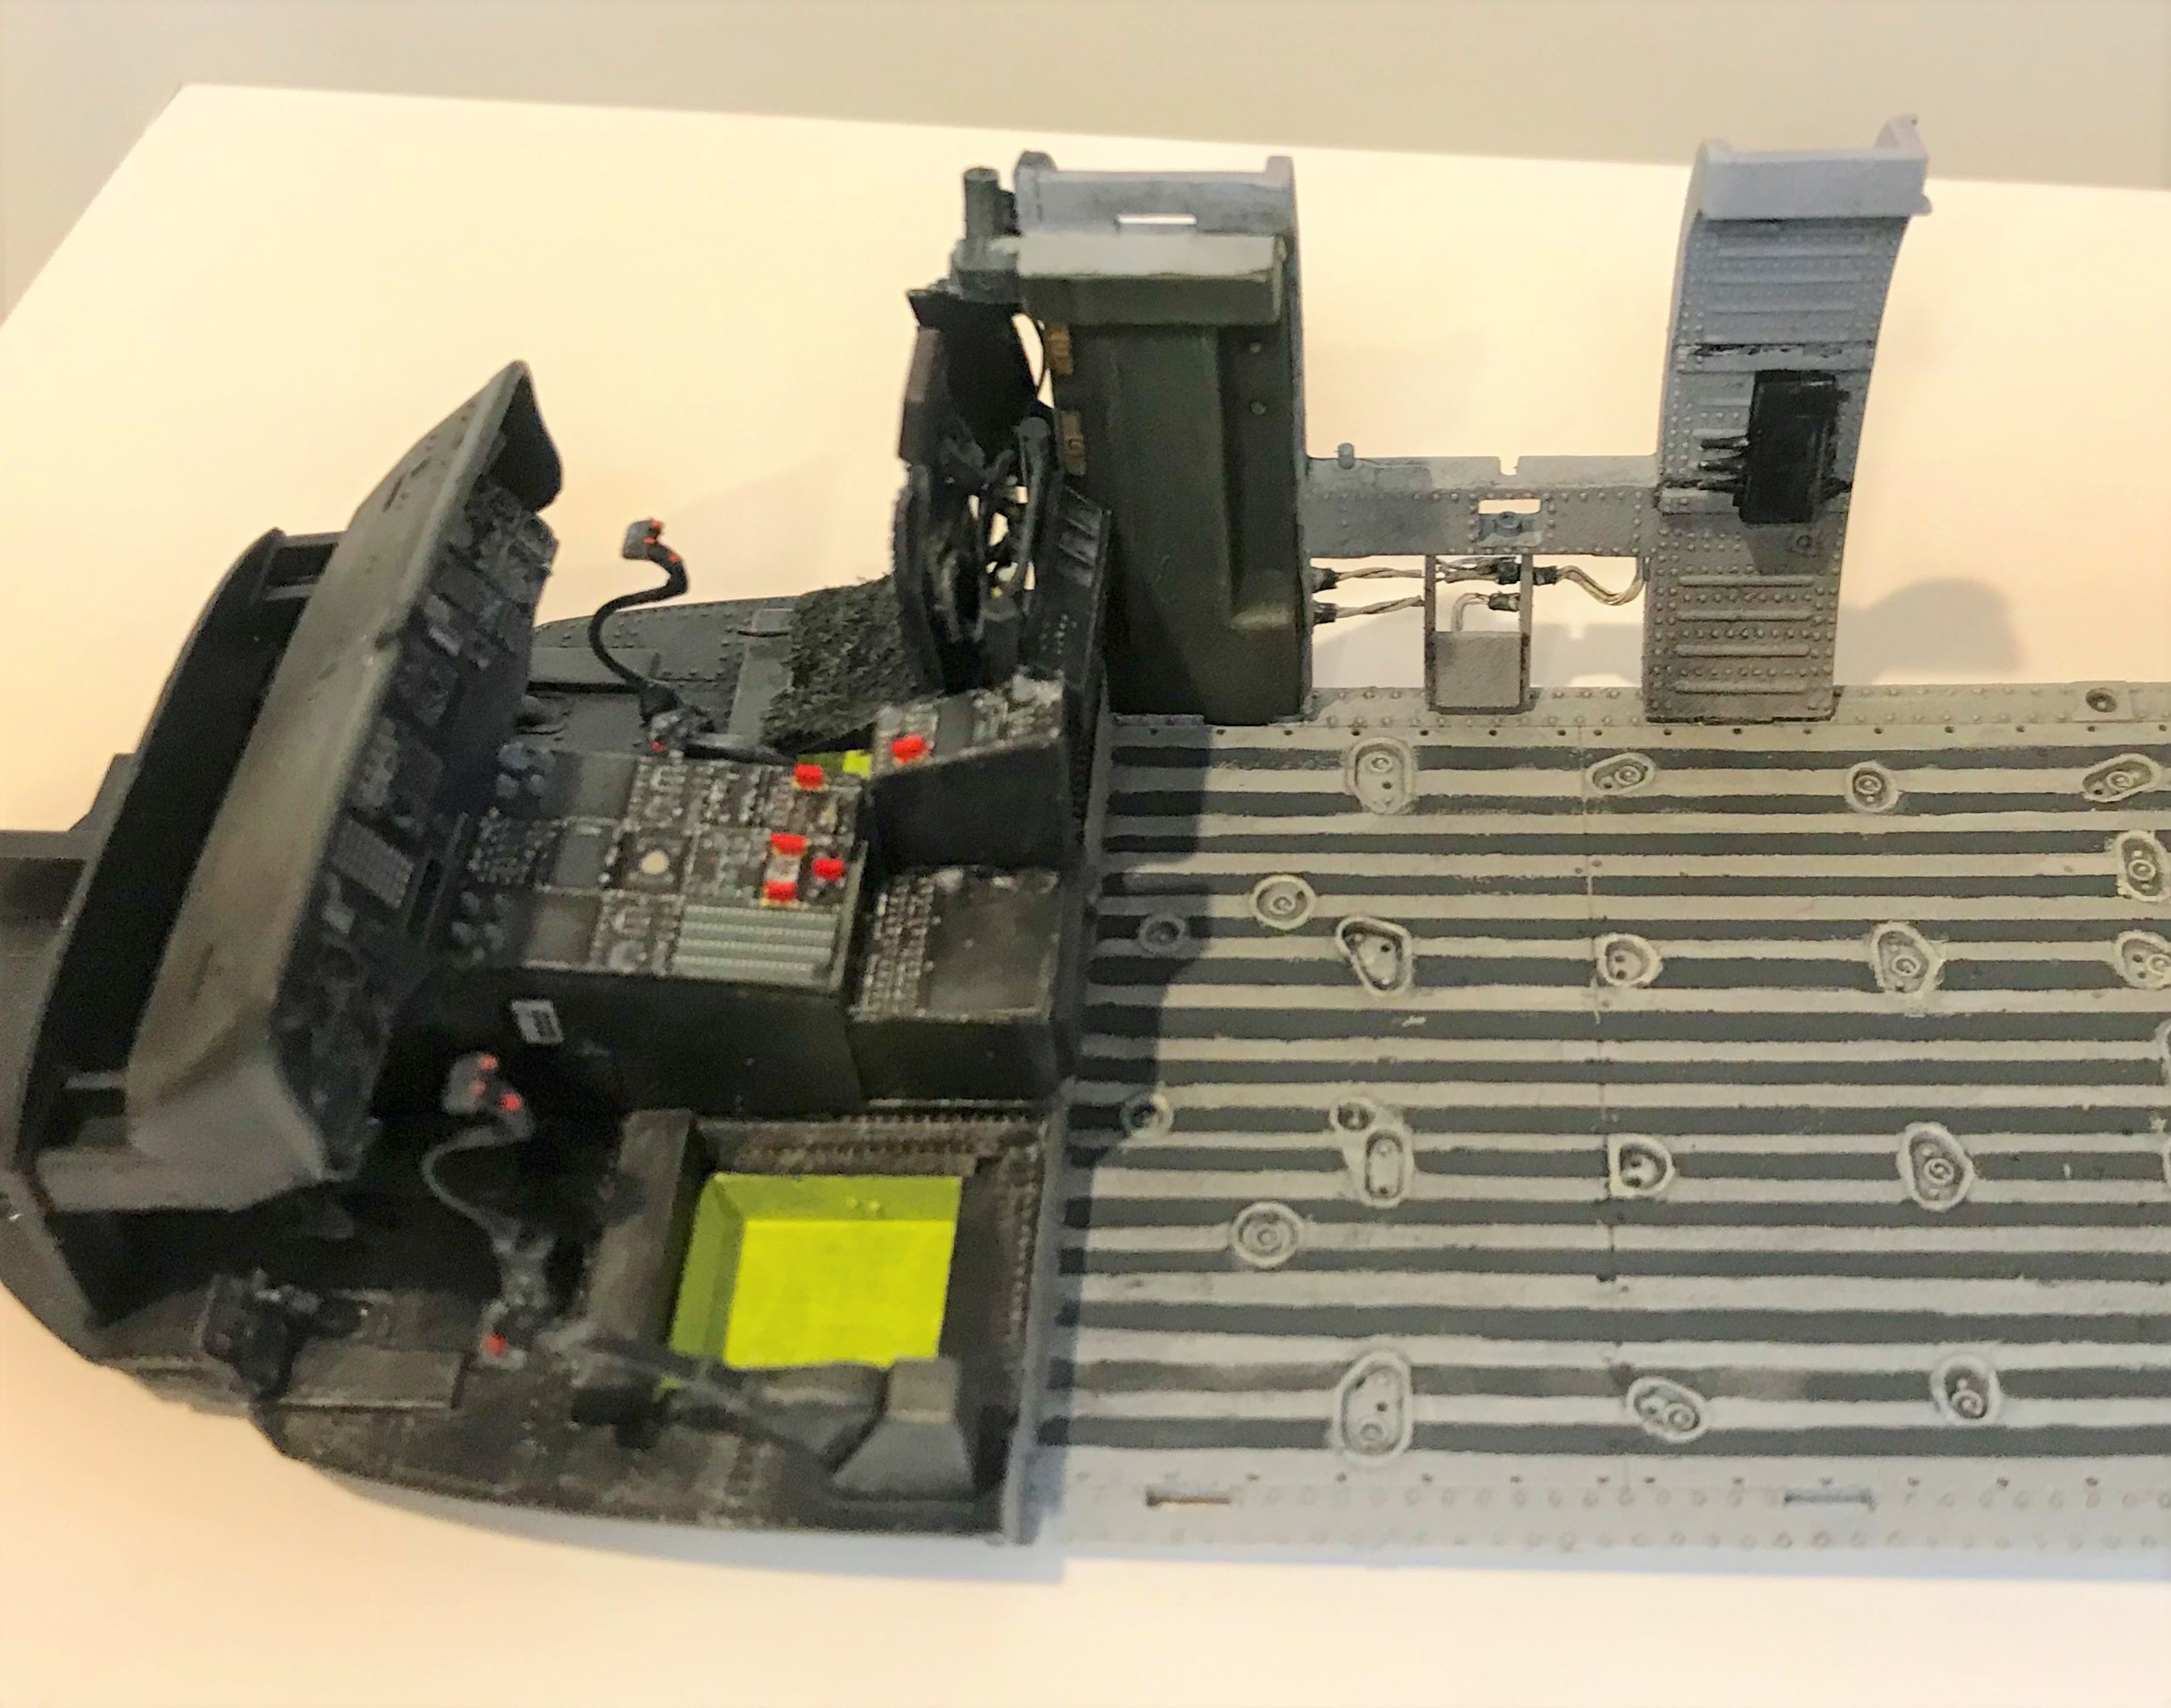
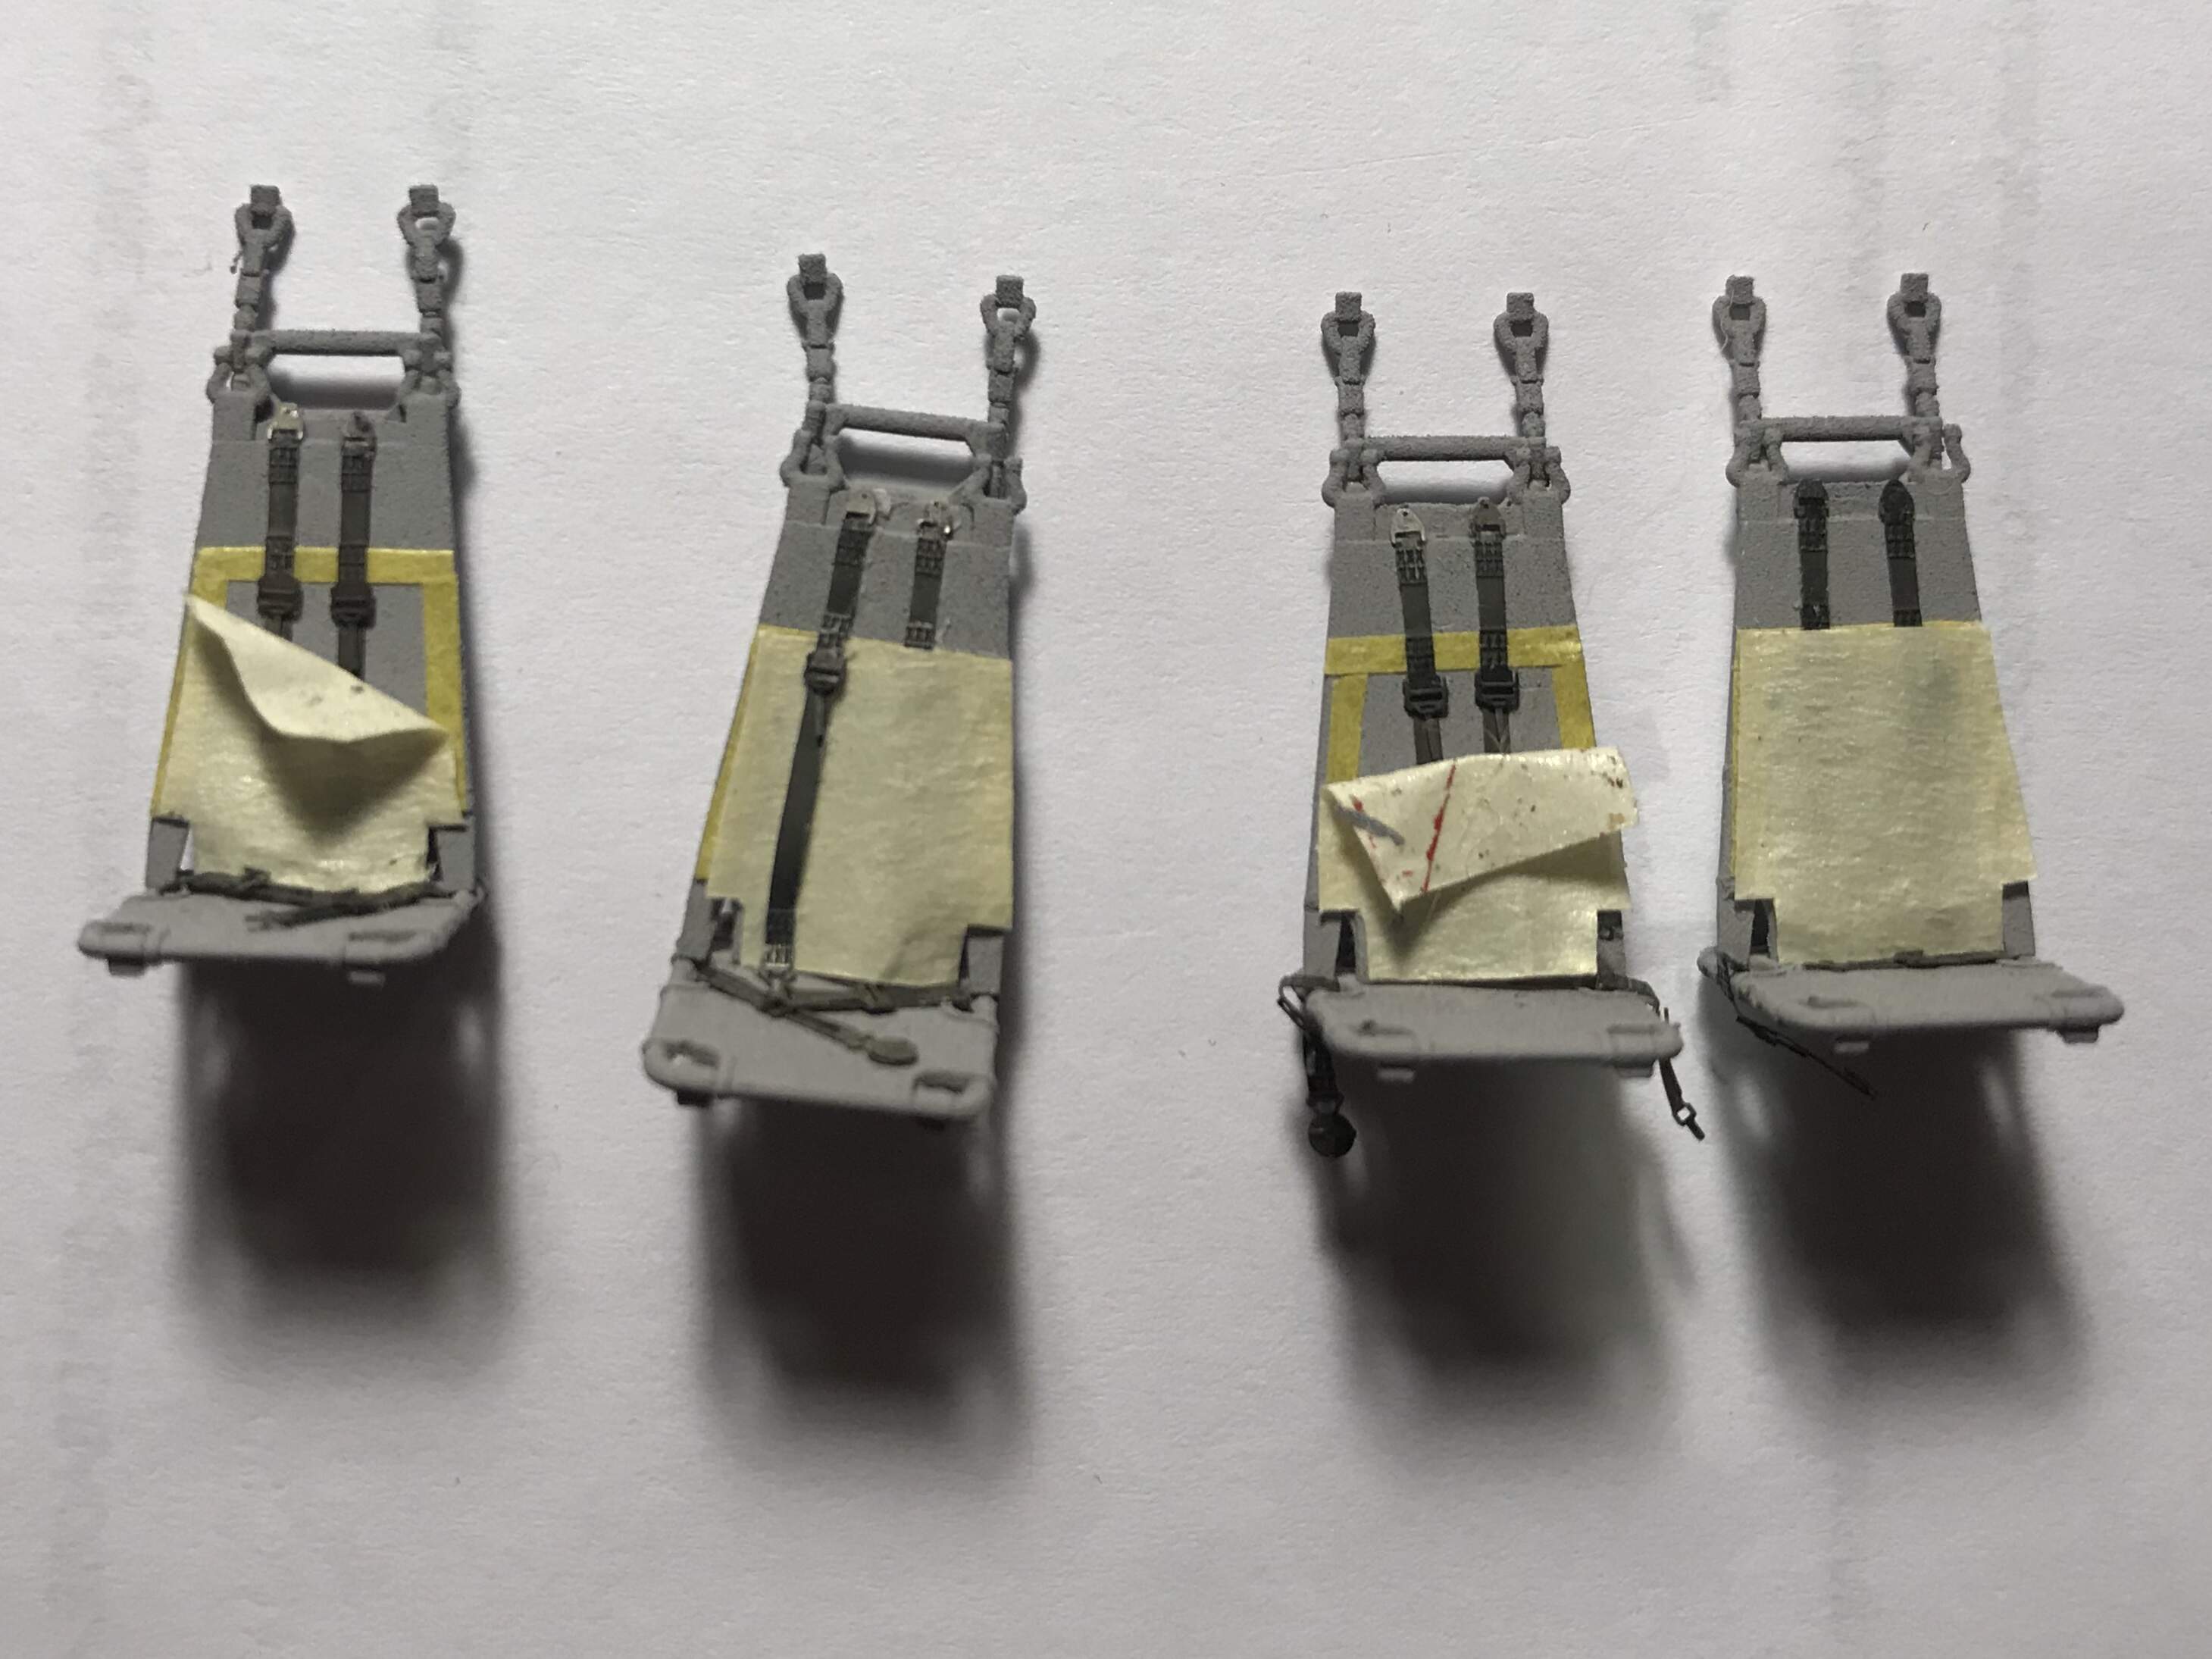
I’m going down this rabbit hole. I can’t pass up chances to detail things too, so that starts with the seats.
I want to show the seat belt covers pulled down in to reveal the seat belts in a few areas, so I started that with the rear wall seats. No need to create the baggy rear portion here, but I will do it on the other ones later, using putty. I’m using the old Eduard PE set, although the kit has some too. I created a pattern for the covers and I am using masking tape for the Velcro and for the seat belt covers (shaped like a keystone).
Missing is the H bar ceiling support for the crew chief seats. I will either have to scratch it or get it via Werner Wings.
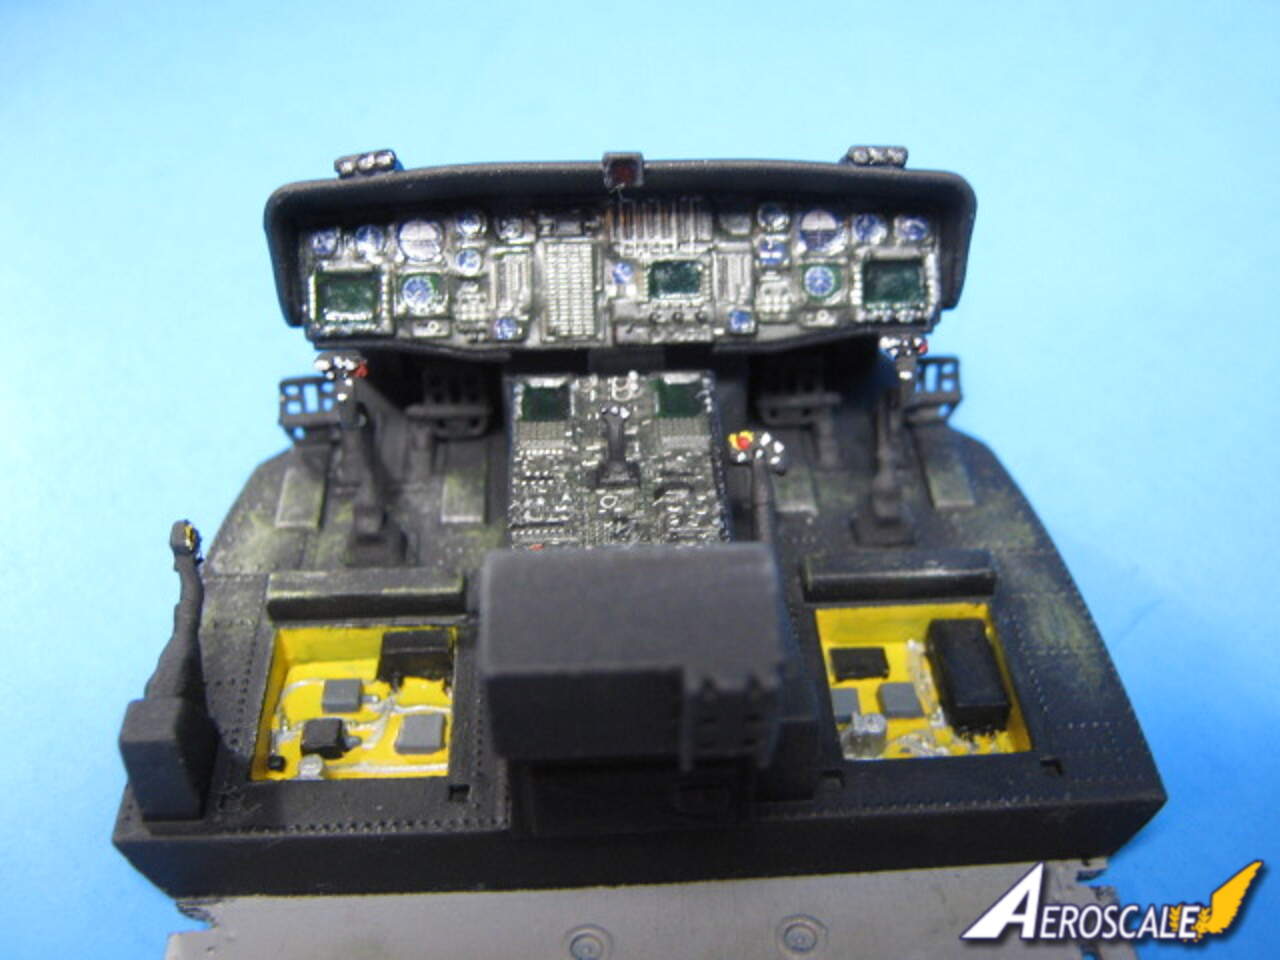
I’m halfway through the L instrument panel using the old Eduard set. It is nice. And fits. I added a few details on the underside of the instrument panel hood. With weathering, they should be noticeable. I’ll have a door open too.
I think my plan is to have the bird parked on the tarmac and either the helo being pre-flighted or someone like me taking photos of it. So I might show it with chains and the Remove Before Flight tags too.
Bob
2 Likes
Looking good so far Bob. This should be nice. By the way, the tail CMWS part is in the mail today.
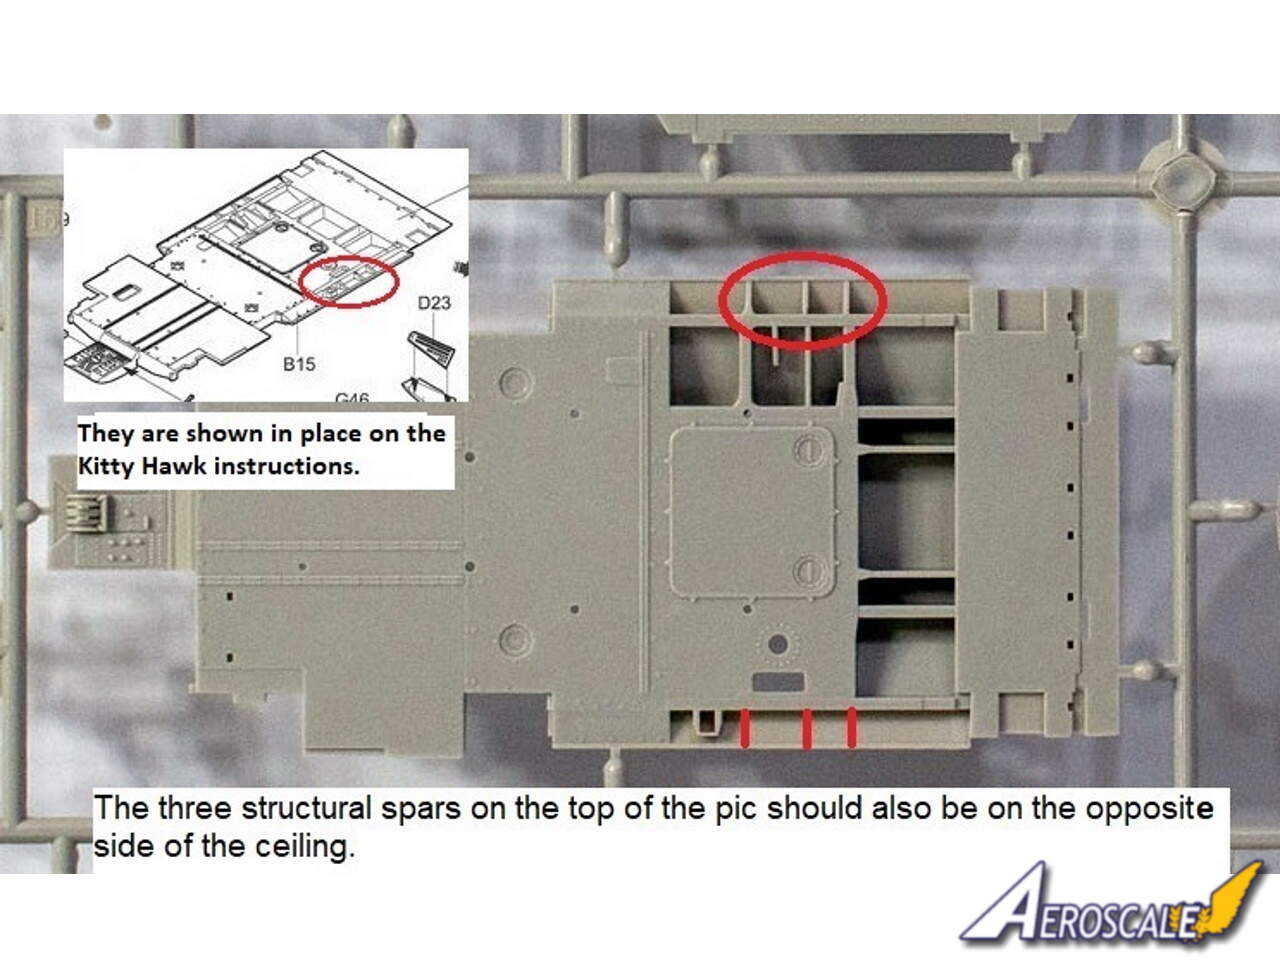
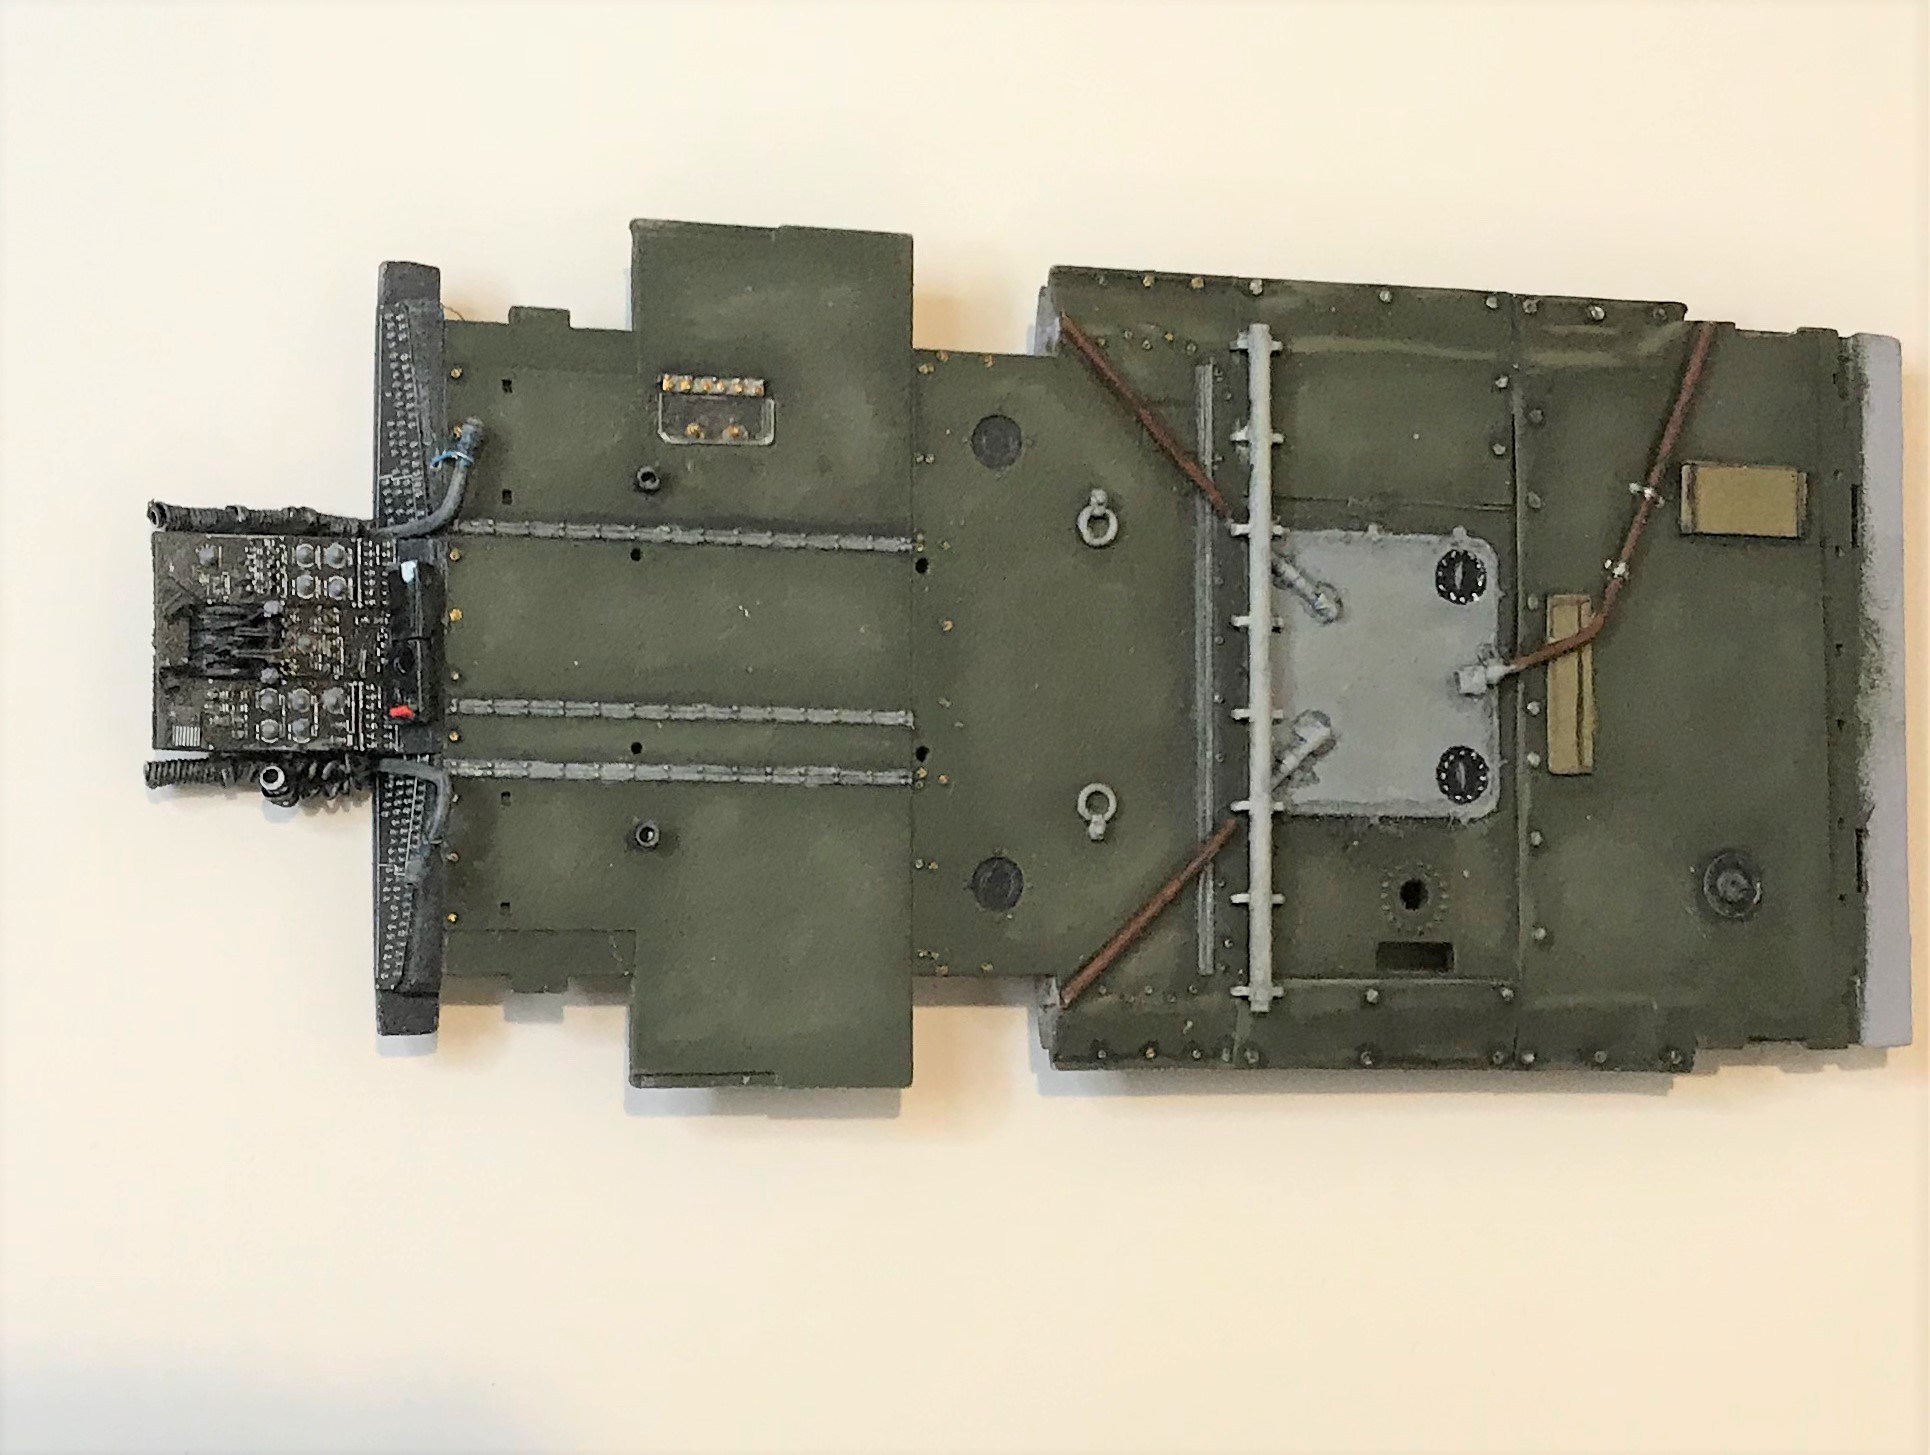
One quick fix, KH missed a few supports on the roof.
1 Like
Thanks for pointing that out. I will be sure to add it.
Bob
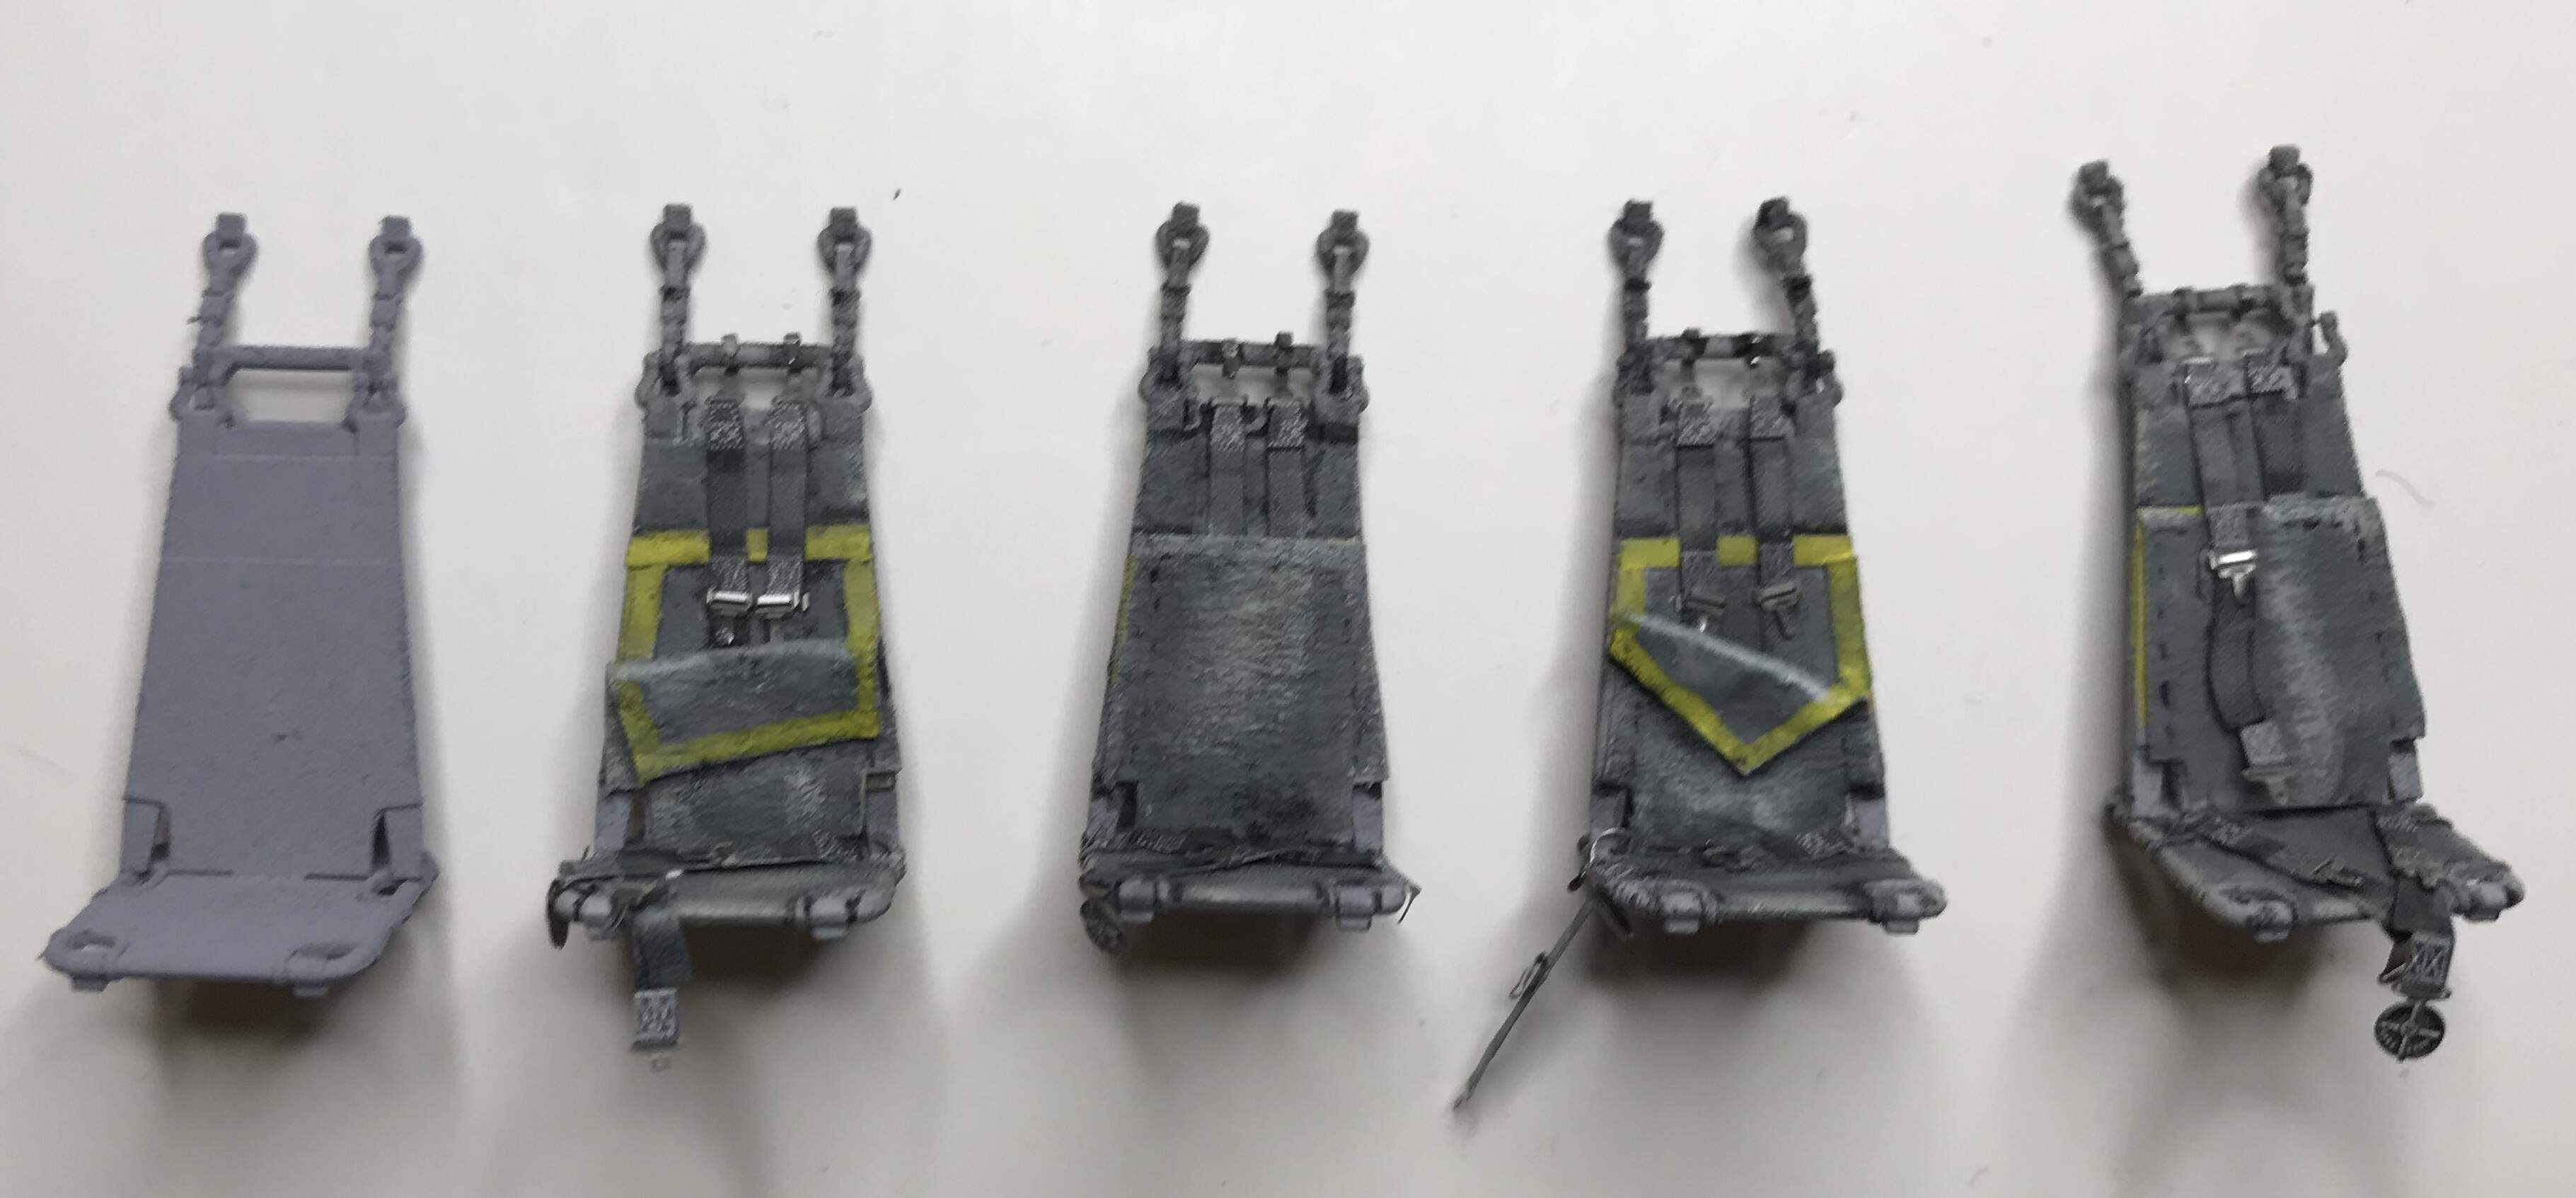
Some detailing done to the ceiling. Much of the rear portion of the ceiling was missing so I added it with thin plastic and the fastener bolts too. Added some extra panel covers, and the three drip pipes. A couple of air vents up front too.
I used the old Eduard set for the Academy on the instrument panel. Knobs added too.
I detailed the back of the pilot seats too with wires and cables. Once highlighted it and the other details should be easier to see.
Everything looks a bit crooked since nothing is glued yet.
I have to go back and clean up the anti slip striping. That was a big PIA to do. I’m not overly concerned with it since a lot of it will be covered by seats and other stuff.
3 Likes
It might have been a pain to do but the results speak for themselves, Bob! Looks great so far. Have you given any thought to a crew yet?
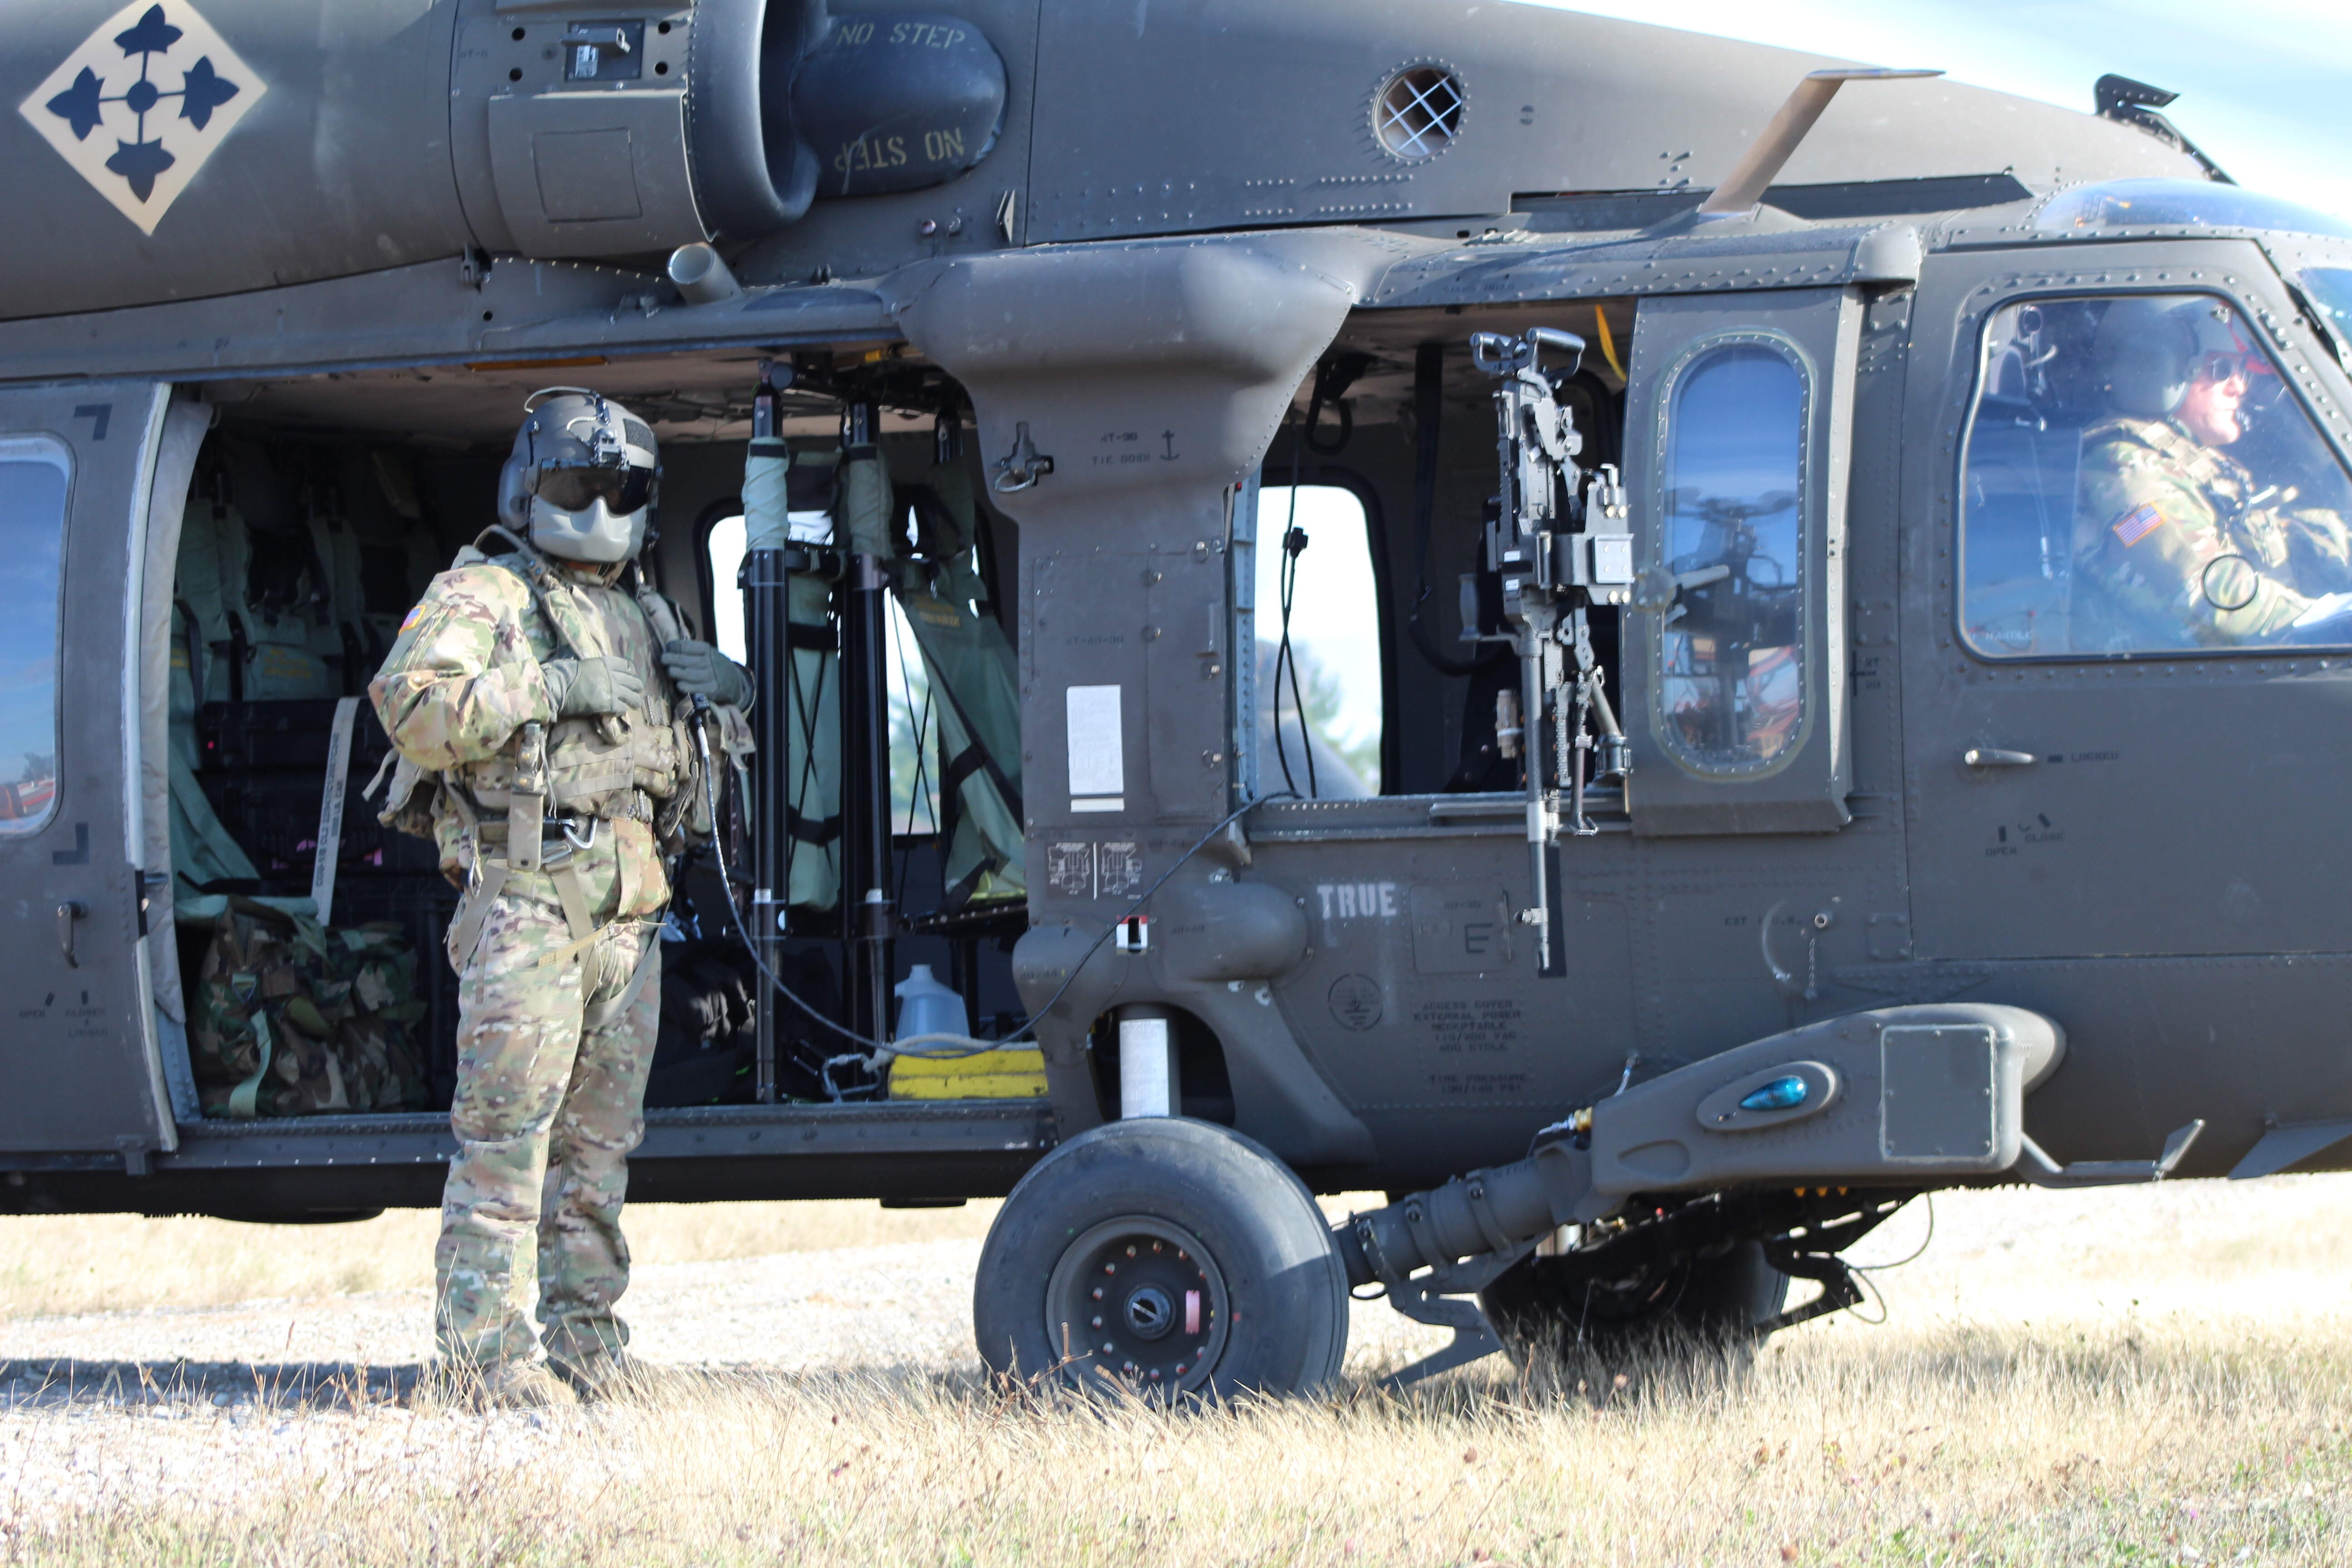
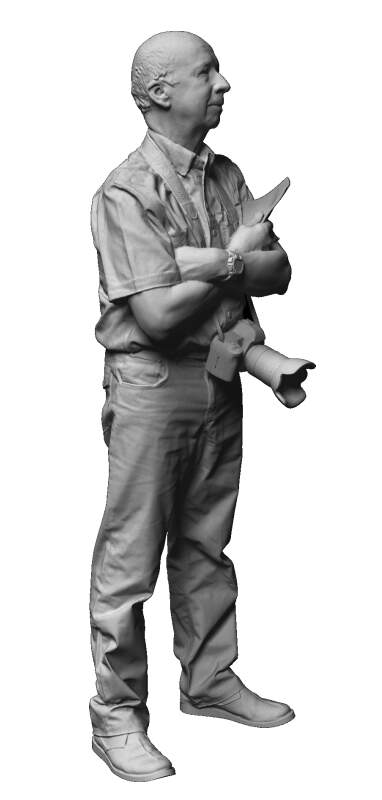
Yep, I have been thinking about a vignette and so a figure to go with it. I’d like to do something like this. I’ve been photographing the Black Hawk for 15 years and I am working on a book right now. That has inspired me to do this build. I want to show an tired looking Lima. Anyway, in photographing the Black Hawk so many photos I have show the crew chiefs outside the aircraft like this, so it is on my list. The other idea I have is to have the aircraft going through a pre-flight so the windows and doors can be open. And maybe have the aircraft chained down.
But in both ideas above I would have to find a standing figure, not inside sitting. Live Resin does nice current figures but they are sitting. Reedoak does different stuff, but it seems they are wearing the one piece Nome suit which went out in the mid 2000s.
Any ideas of figures??
1 Like
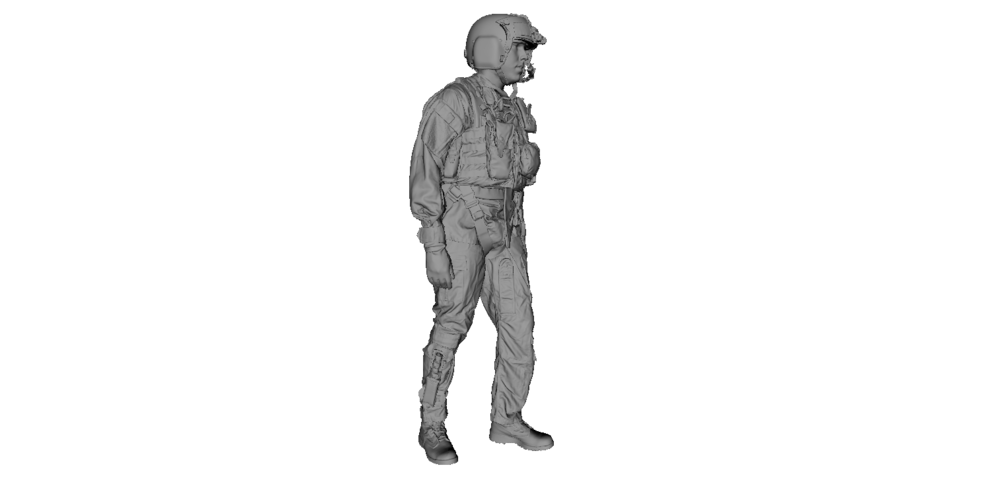
It is looking great Bob. I really like how the ceiling came out. I have some of the Reedoak figures and they are in the two-piece Nomex flight suits that can be in either UCP or OCP camo. He has a wide range and there are a couple crew chiefs standing outside the helo.
Hi Gino. I have been looking at their stuff but I don’t see the two piece A2CU.
I also sent you a PM on what we were discussing before.
Bob
I like the idea of this guy, but is that really the modern two piece A2CU? But he is not wearing a maxillofacial shield. And maybe putting me in there too - but I would have to change that head on the photographer. I’m not that old!. With Reedoak’s material is it difficult to do some modifications?
1 Like
Their materiel is like hard resin. It sand and fills well.
Progress. More detailing of the interior than I planned. I just can’t live without some things I see in my photos. The Kitty Hawk kit detail is pretty good, but lacking in wiring and such.
2 Likes
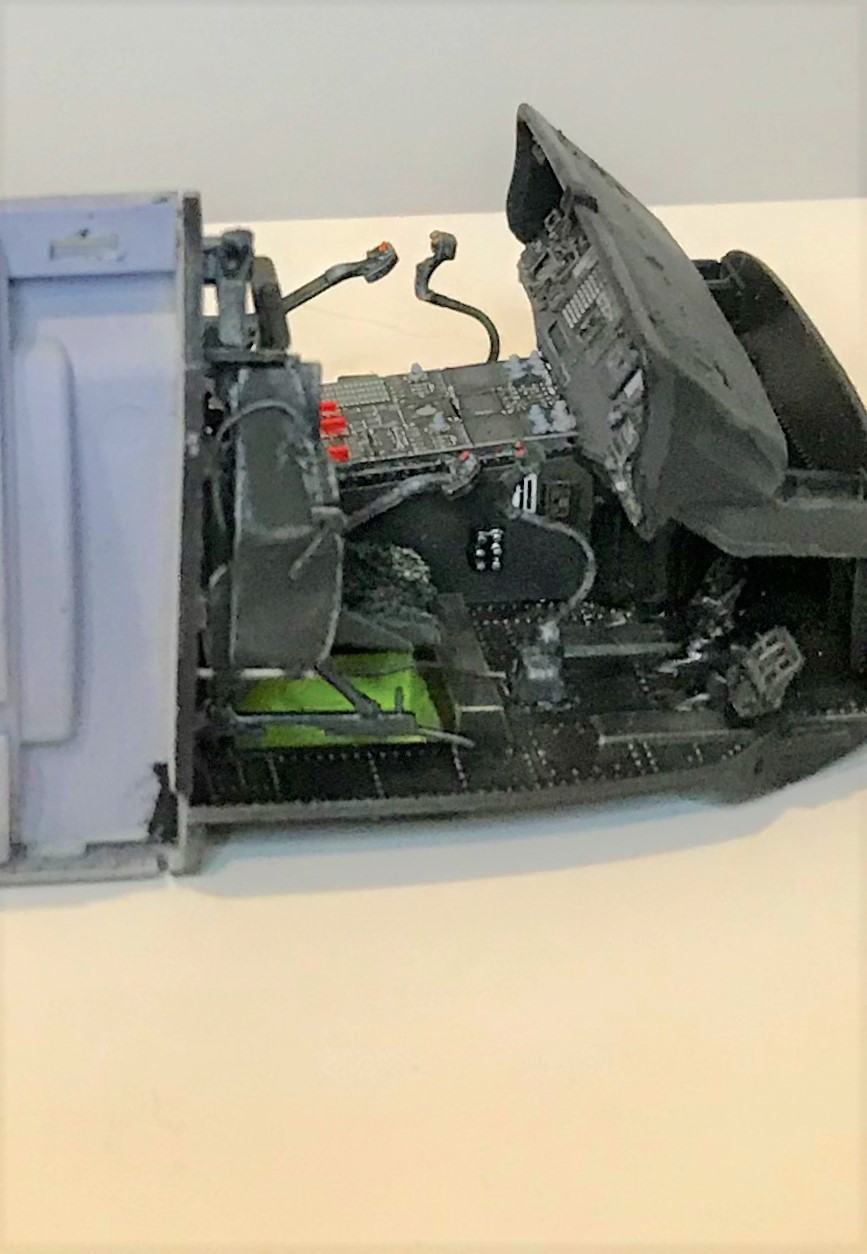
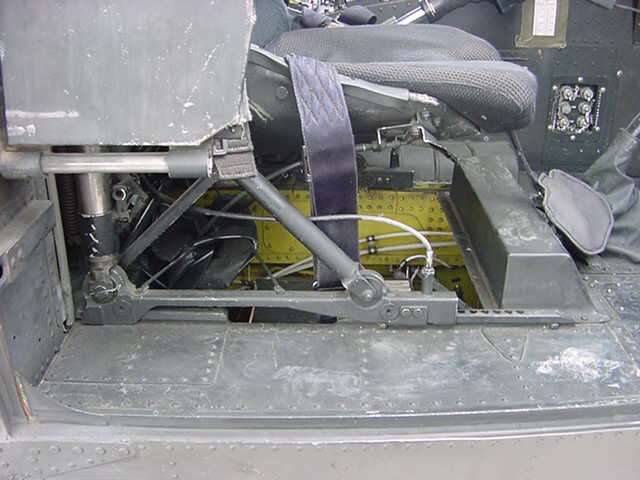
The interior is looking great. Very nice. One more area to detail if you want is the openings below the seats. There are various hoses and black boxes in them.
https://lh3.googleusercontent.com/proxy/2DzfdMkGTZ1Xjj0joMcBNWG7xMLOX-CSQiUg1GtV1v_gk1afBBxAgQoQMsg-gCCj_htIWlW6Pj1esnSEn0w17BVbjv-AXo8xq5x8Q54ak7ZnlFfDaLdNew
For mine, I cut up the black boxes that go inside the nose (B18 and forward part of cockpit floor) and place them in the seat wells. If the nose access panel is closed, they can’t be seen and are wasted parts.
1 Like
Hi Gino. I was thinking the very same thing. My seats are not in place while I considered my options. I have also been told by a prior, back in the day crew chief that if the vinyl covers were off the seat wells the aircraft would be grounded. All of my photos show them off, like here, but admittedly, my photos were taken in hangars during maintenance, so that could explain why there never were any covers. So before I commit, I am going to double check the deal with the seat well covers. My plan is to show mine out on the tarmac ready to fly.
I have seen them both ways (installed and not). Most 160th SOAR aircraft fly without the covers, but they are special. Not sure what the reg is for the rest of the Army. I like to leave them open for added interest and a bit of color.
In talking with crew and pilots they all agree the covers should be there for regular Army aircraft. Sometimes they get lost when they don’t fit so well anymore, but it is rare.
Rear seats pretty much ready to go. The legs and forward facing panel will get put on when everything gets done for the cabin. Next up is the pair of gunner seats but they need to be detailed with correct head rests. And correct seat belts.
1 Like