The troop seats are looking really nice. Good job on them.
What are the abbreviations in parenthesis on their web site after each figure? I sent the guy an email twice and no response.
Hmm, no idea. I hadn’t noticed them before. I have quite a few of his 1/35 helo crewmen and they all look great. I ordered them off his site and usually get them in about a week.
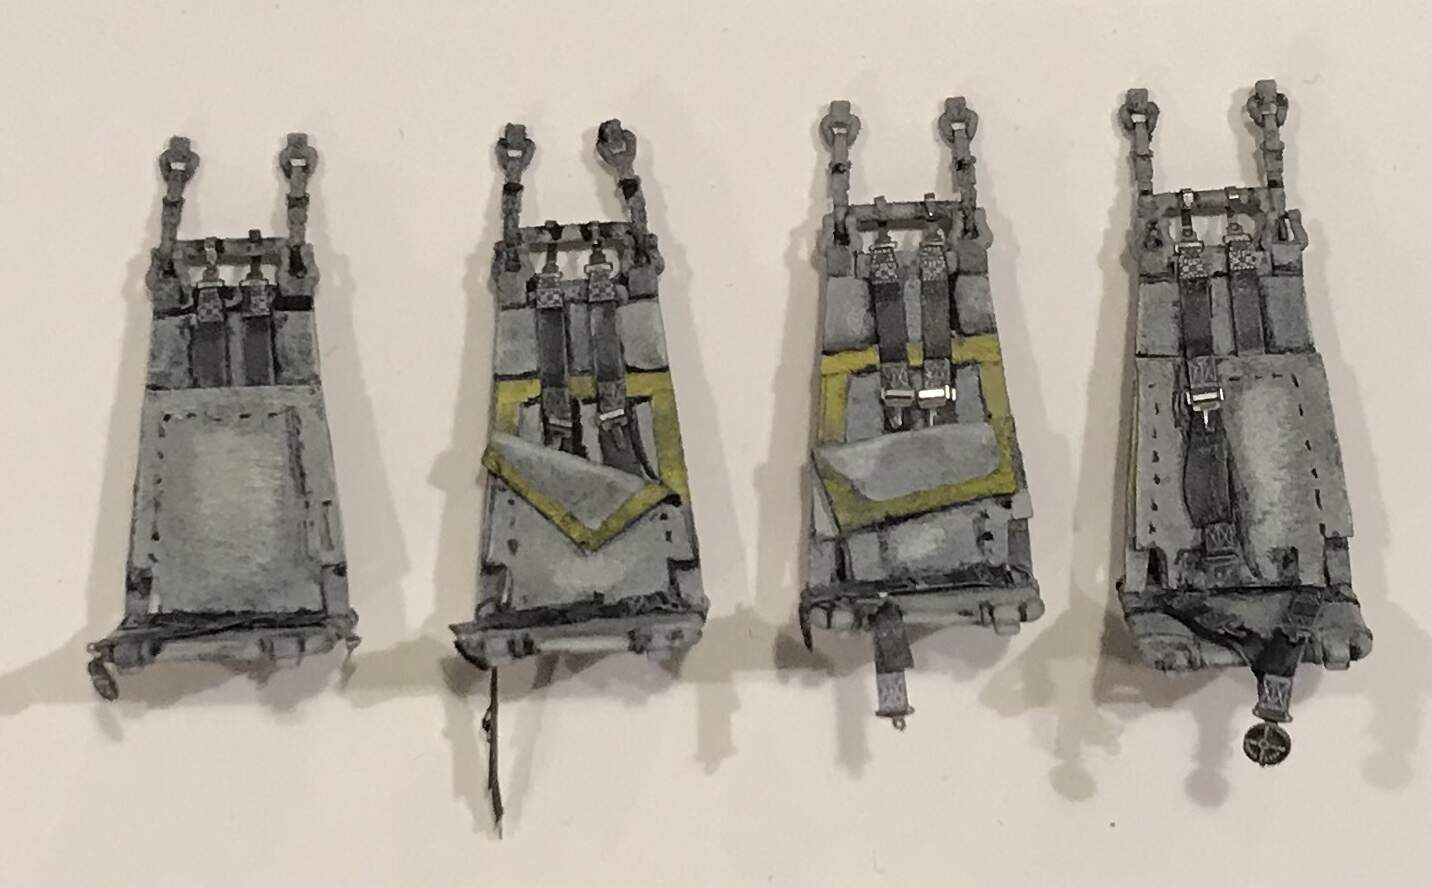
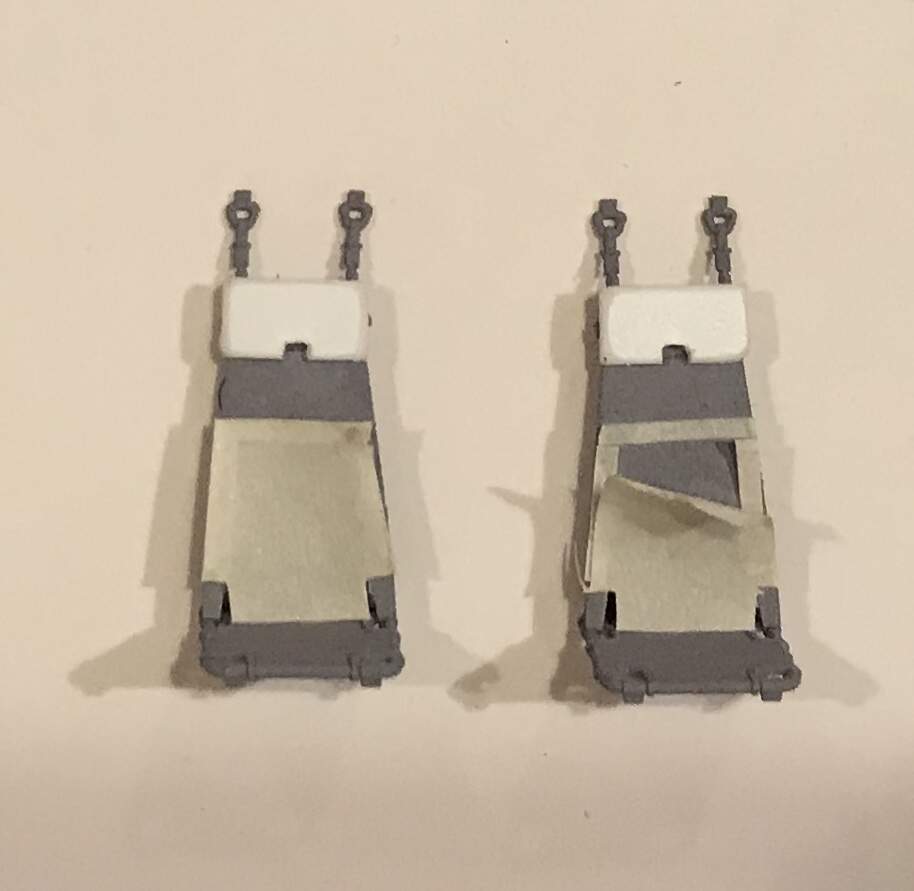
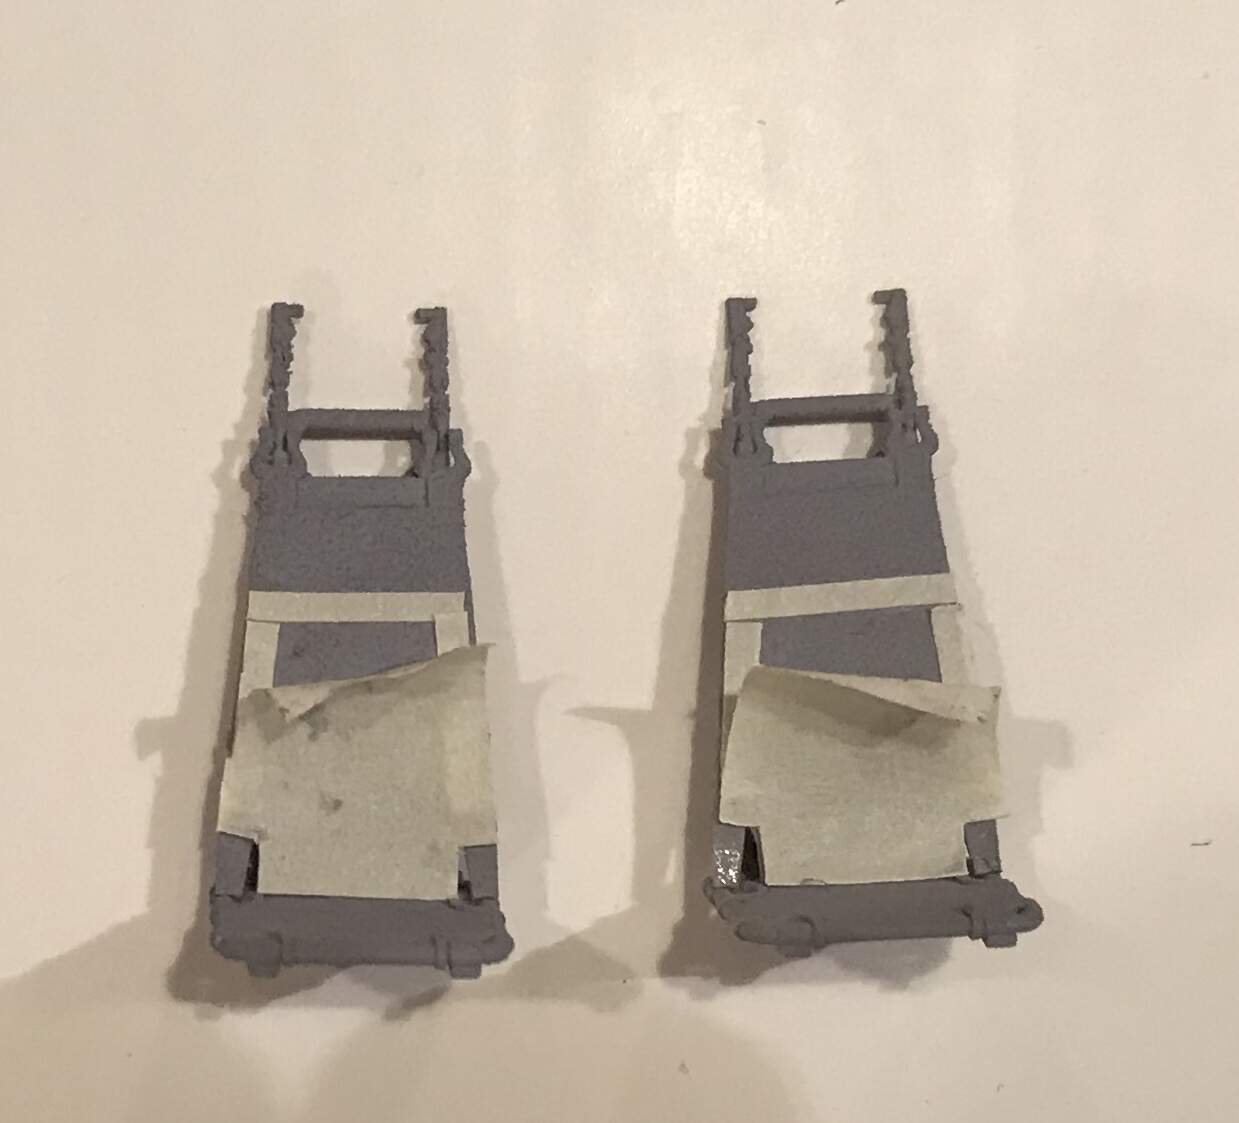
I had to repaint the seats. The were too dark. And I started the others. Gunner seats with head rests and different seat belts.
2 Likes
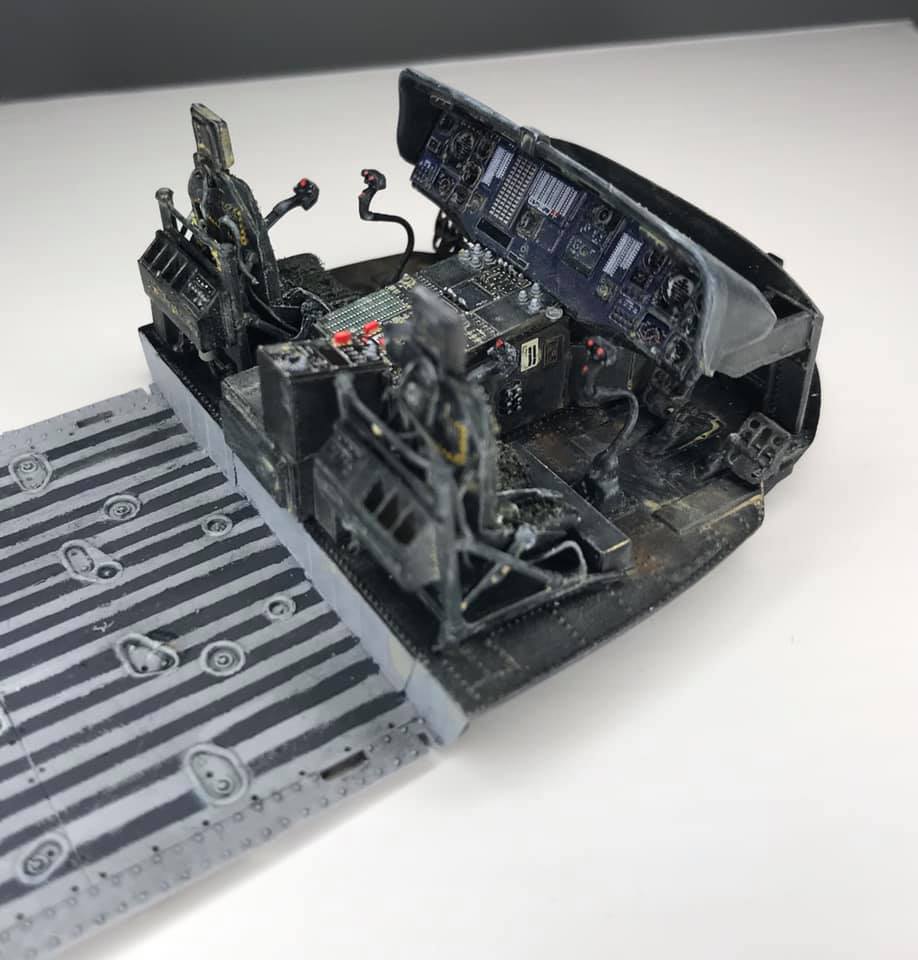
Lots of detail added here. I did not plan it, but it’s hard not to when looking at my photos.
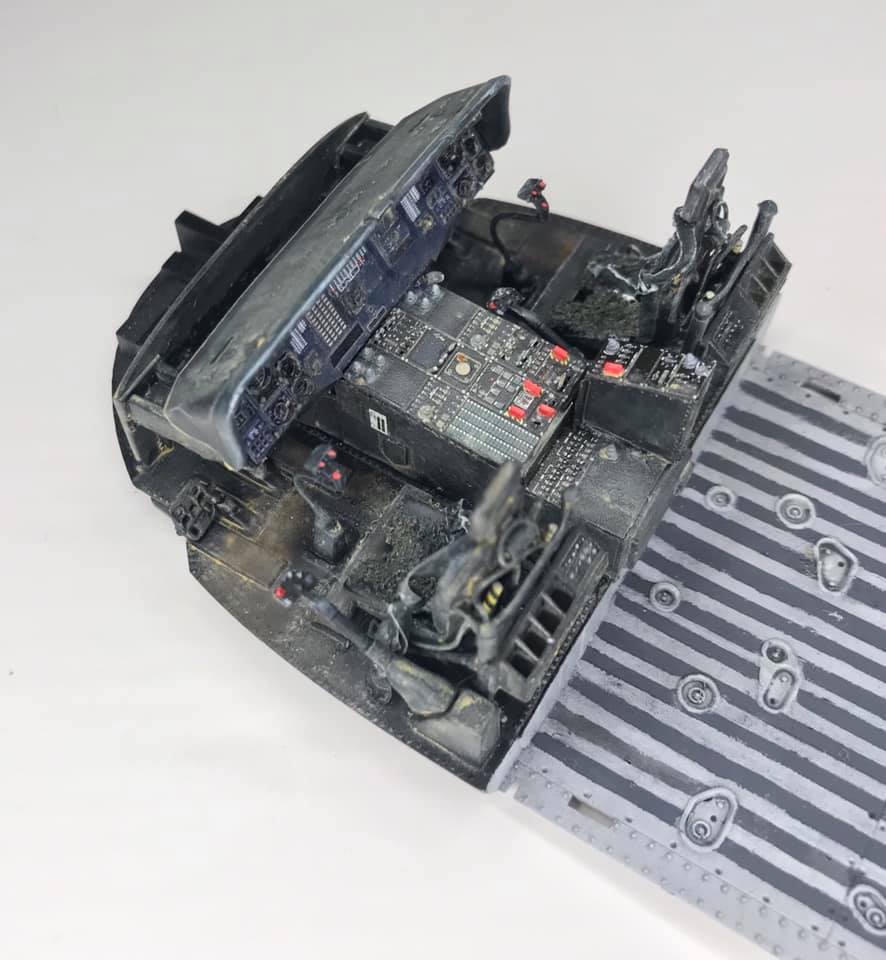
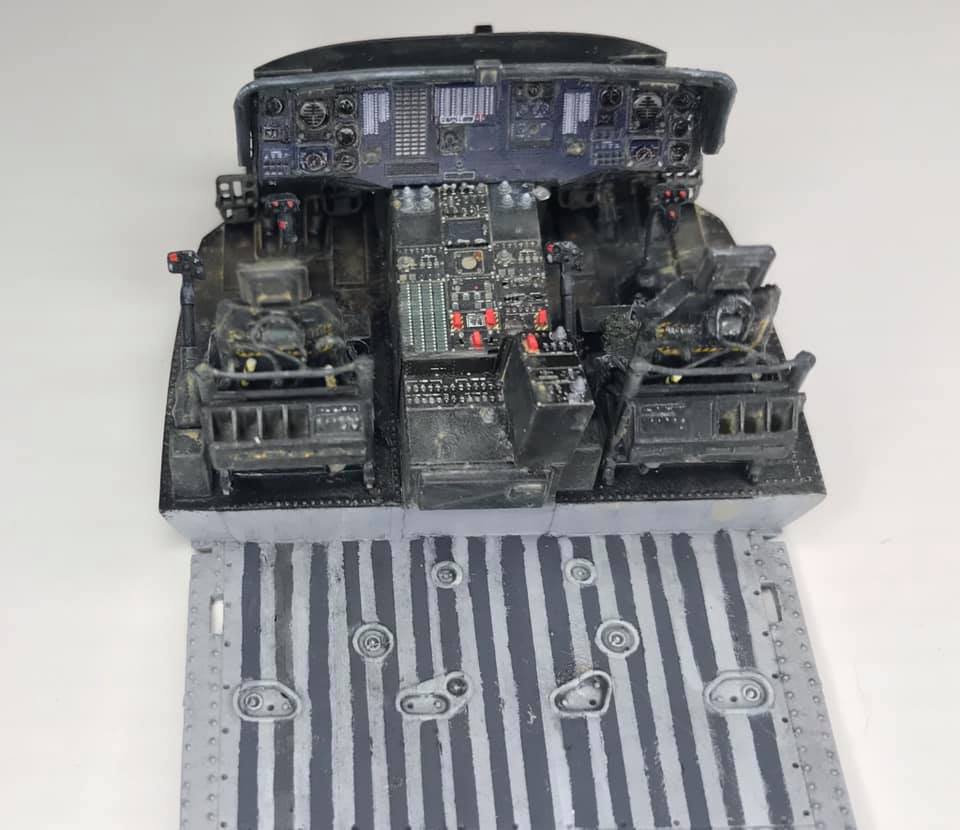
I detailed the rear of the pilot seats. There are a series of cables back there and release handles that collapse the seats backwards in case the pilot needs pulled out that way. I had to use gyzmology on the center console and tried to create some of the grey knobs seen there and on the top console too.
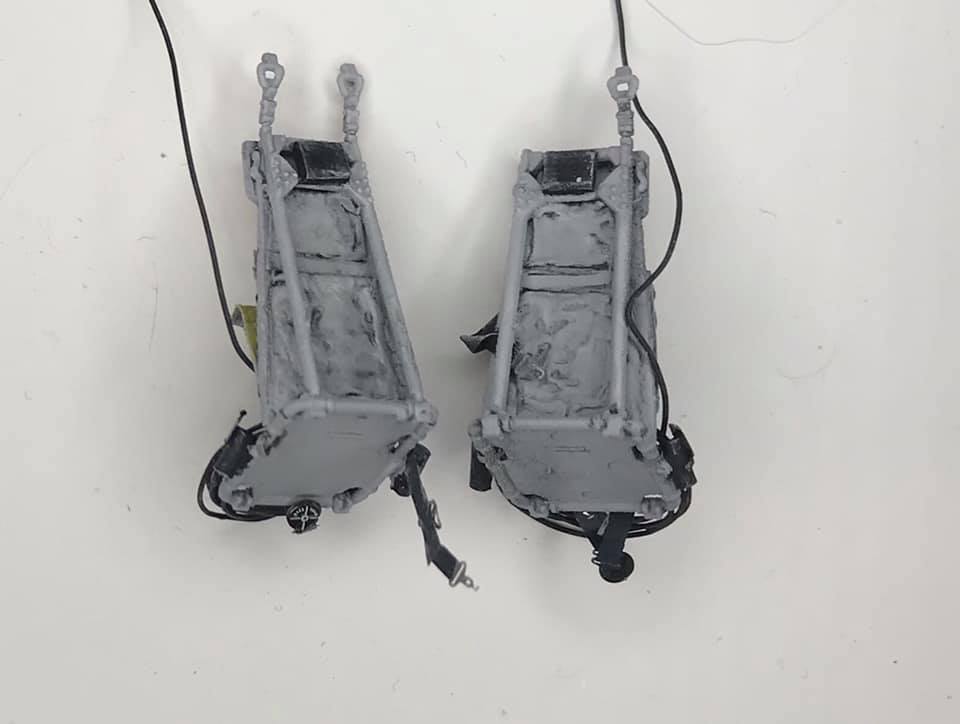
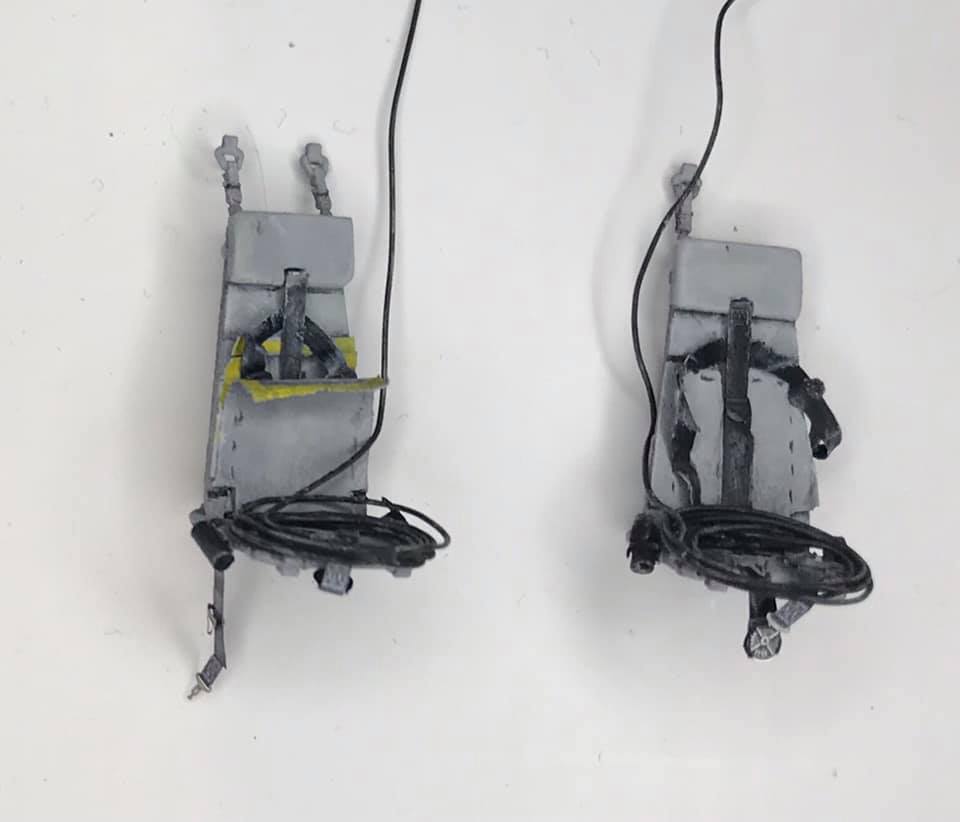
The CE seats have the inertia wheels on the sides and rear. Head rest added too. This will be parked so many CEs wrap up their comms wire in a spool like I have here. And I used putty to create the baggy look on the rear of all the seats - they are really pockets in case the soldier is wearing a pack. And I used Eduard harnesses since they are pre-colored and much easier to work with. The kit PE is a PIA to work with and needs painted.

4 Likes
The interior is coming along really nicely. Updated seats look great too.
My interior is in, but now I am VERY CONCERNED about marrying the halves together. Does anybody have pics of where the cabin should marry up to each half? When I do my dry fitting mine does not seem to get the pilots floor to meet the airframe where I expect, and maybe not the cabin floor either where I expect.
I see a slot inside the airframe half for the cabin ceiling to sit in. On the bottom is a tab instead of a slot. Should the cabin floor sit above that tab, abut that tab, or sit below that tab?
There are tabs on the sides of the cabin floor just behind the step up and at the rear. There are corresponding slots on the fuselage sides. This is where the floor is supposed to go. I found them to be too tight and the two fuselage sides don’t come completely together. I first tried to fix it by cutting the tabs off the ceiling and gluing the side bulkheads to the fuselage sides like the Academy kits. This helps, but the top and bottom seems are still a bit wide. On my next one, I plan to trim/sand the sides of the ceiling and floor down by about 1mm to give it some more room on the inside. Hope that helps.
1 Like
Any update on this one Bob? It is coming along great.
Eh. I’m dealing with the seat supports and putting the ceiling and floor and walls all together. Not fun. I’ve taken a break. Maybe back to it this weekend. My BH book is at the publisher though. That’s something!
Yes, the troop seats are a pain to install. This is the easiest way I have found. First, I attach the legs to the seats at about a 45 degree angle. Then attach (don’t glue, just snap) the seats into their bar on the ceiling. Now attach the ceiling to the back wall and floor. Next, glue each leg down to the floor where they attach. Lastly, hit the attachment points on the ceiling with bit of glue to lock them in place. Now add the whole interior to inside the fuselage and close it all up. After all that, go have a drink. 
Great news on the H-60 book too. I’m looking forward to seeing it.
I mashed the fuselage halves together and in the process knocked some seats loose. The fit really sucks here. I will be doing a lot of seam repairing and filling. Lessons learned for my next build, I want to convert this same kit to a medevac.

Looks like it turned out well in the end. As I said, the fit of the forward cabin isn’t the best.
Gino, did you do the UH-60L? I’m working on the nose now. I’d like to see how you handled the CMWS. I suppose I can use some of the kit mounting plate but I will need to scratch the round-ish mounting plate with the bolts. I need to choose carefully how much I am going to cut back on the kit part.
I built my KH MH-60L kit as an Op Gothic Serpent (Somalia '93, Black Hawk Down) MH-60A. It did not have the nose-mounted CMWS. I did use CMWS on my Academy UH-60A MedEvac a few years ago. I used the Cobra Company CMWS blisters at the time.
I would cut the KH kit CMWS down from the front side and keep the mounting plate as is. The back side of the clear part for the sensor can be filed smooth and then attached to the shortened CMWS part.
I think the part that mounts to the nose is a different shape - not as elongated. But I will study it more. Maybe it really is the same. I think what I need to do is use the outward part as is and shape the side that touches the nose to fit. Then i will need to scratch the oval shaped mounting plate.
Did you say there was a way to contact Kitty Hawk? The L seems to be out of stock and maybe out of production. I may SOL for doing my medevac Lima.
You can order direct from Kitty Hawk. Contact Sofia in costumer service at the following email: sophialynm@gmail.com
Does it come from China or a distributor in the US?
From China, but at what I consider a reasonable price ($120), shipping via FEDEX Express (3-4 days to US) included. They have great service.
There are a bunch on eBay as well, from Asian and US suppliers.
1 Like