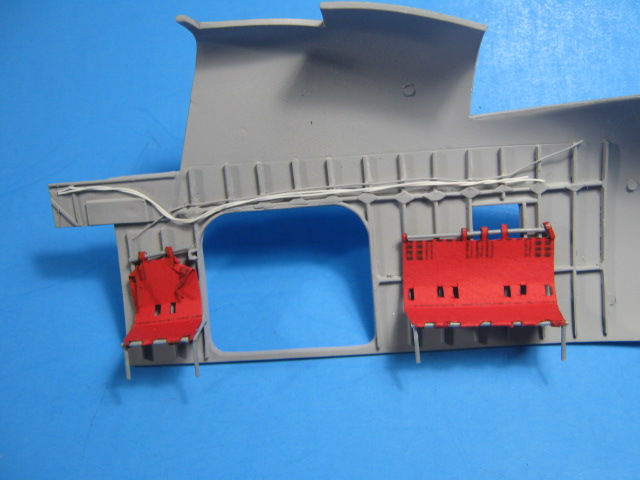
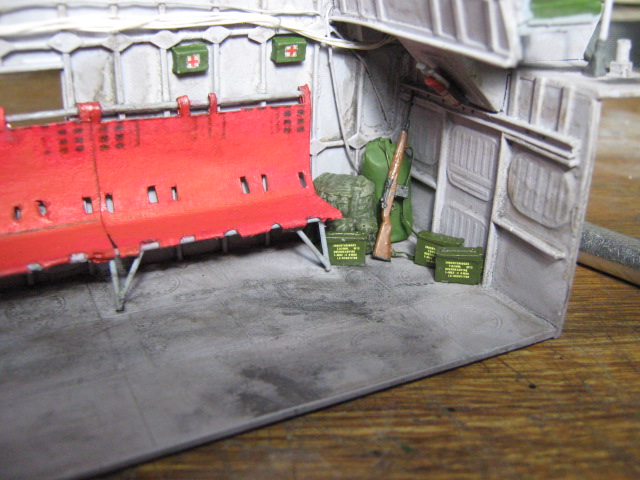
I’m slowly making progress on this one. I have been working on the cabin recently. I installed wiring and the troop seats so far. I made the seats out of the kit provided frames and fabric made from red card stock paper with the seat pattern printed on it.
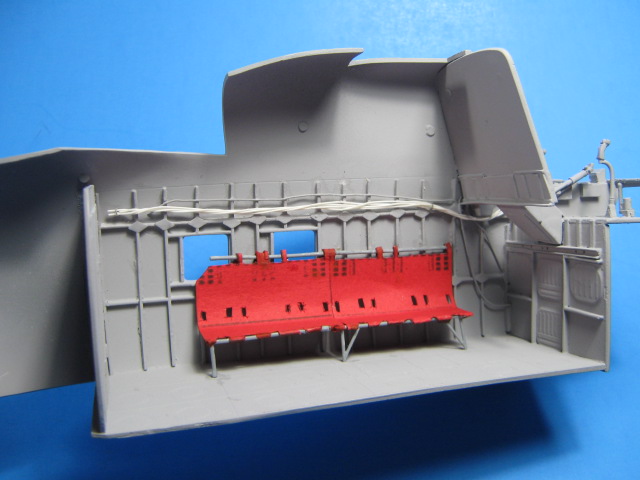
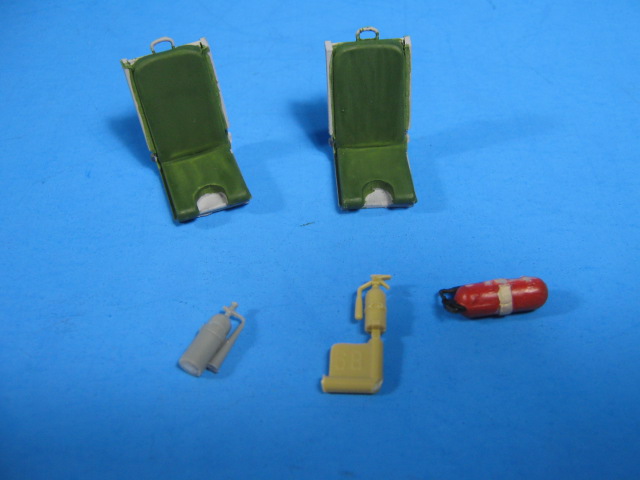
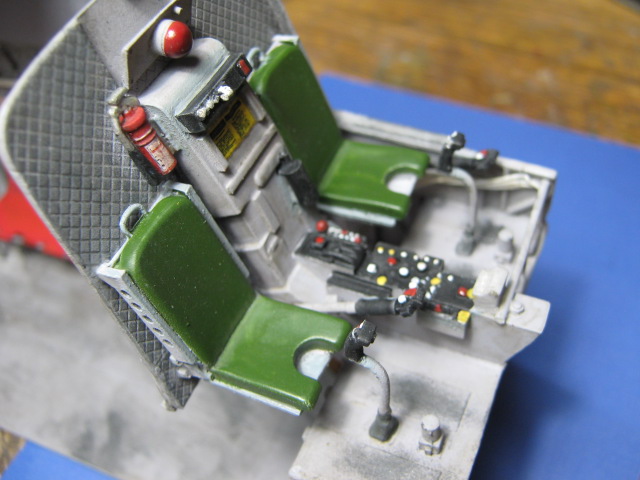
I also have some of the detail pieces started. These are the pilots’ seats and fire extinguishers that will be in the cabin and cockpit. There will also be various bags, ammo cans, and a couple M14s in the back.
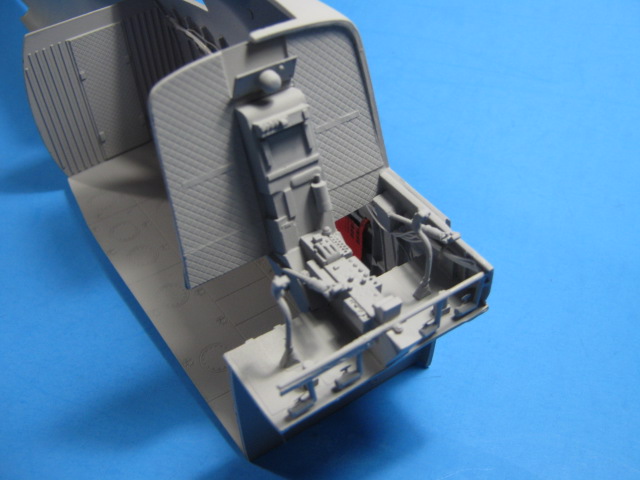
Next up is to start detailing the cockpit.
7 Likes
Looking really good Gino, your attention to detail is exemplary. Will be following closely 
this is coming along nicely, please post more soon.
Thanks gents. Slowly working on it. I’ll post more pics as I get more done.
definitely starting to take shape.
Thanks kornbeef. I like how it is turning out.
I have gotten quite a bit of work done it it the last couple of weeks.
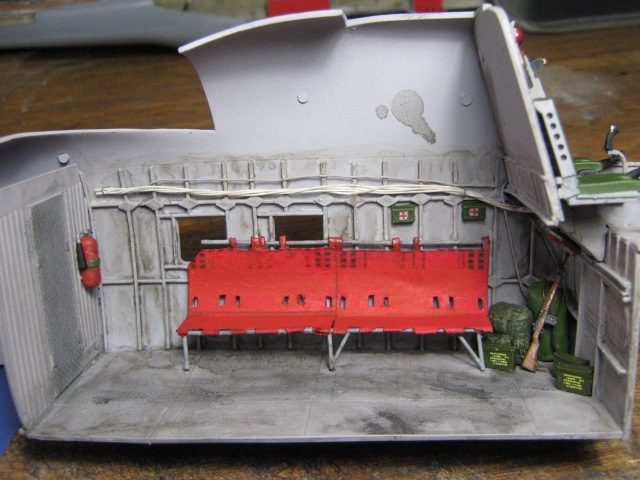
I completed the rear cabin by adding a couple first aid bags, fire extinguishers, a rucksack, a duffle bag, an M14, and a few 7.62mm ammo cans for the M60A door gun. I also washed it with a dirty grey-brown to make it looks a little lived in. Lastly, I added some bare metal on the floor as well.
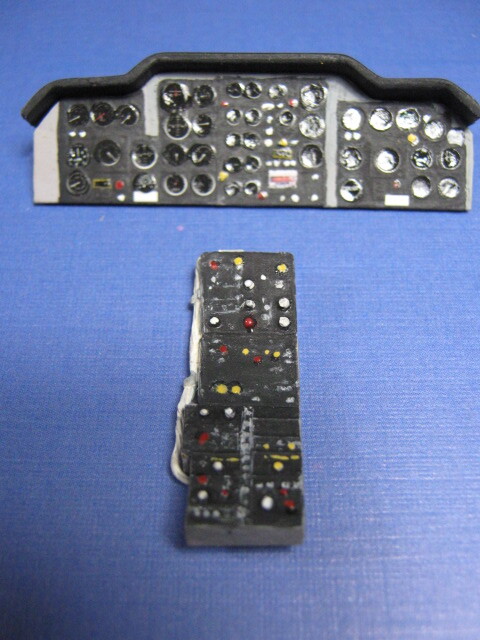
Here is the IP and overhead console. They are painted by hand and I used the kit instrument decals on them, and a few from the spares bin.
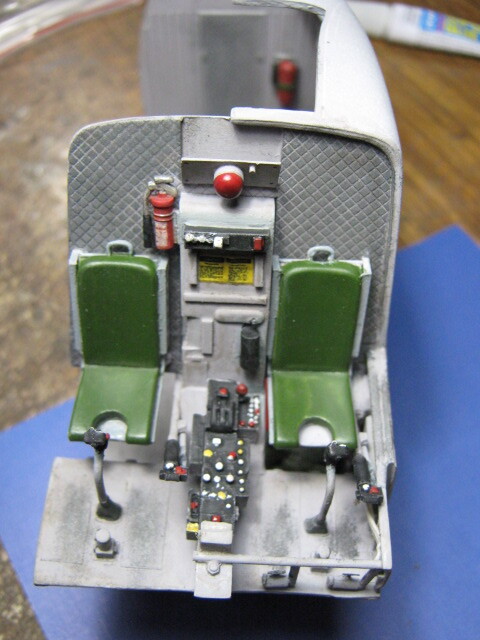
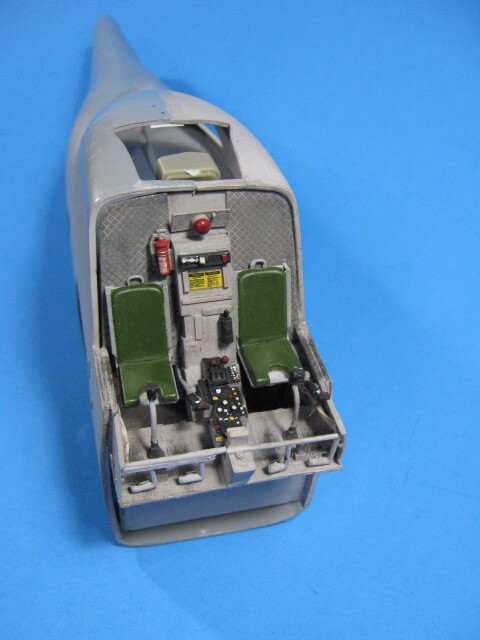
The rest of the cockpit. I added the fire extinguisher, placards and other details. I haven’t added the seatbelts as I think I will put a couple pilots in it.
I have sealed up the fuselage as well. I didn’t really have any issues with the fuselage going together. I did sand a couple spots that were sticking out and binding, but after that, there were no other issues. It will require a bit of filler where the bottom meets the sides, but it isn’t too bad.
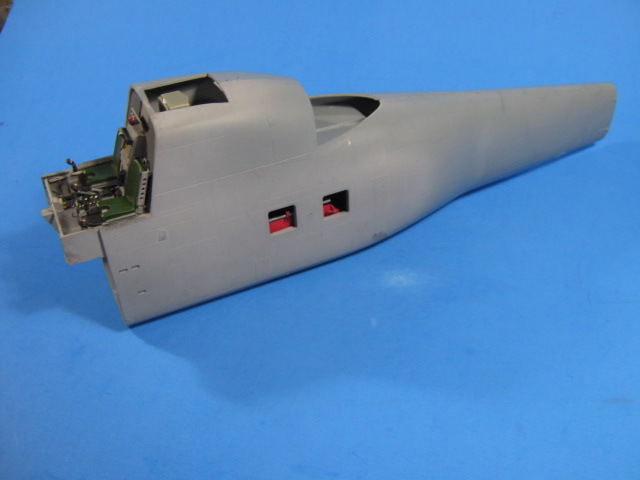
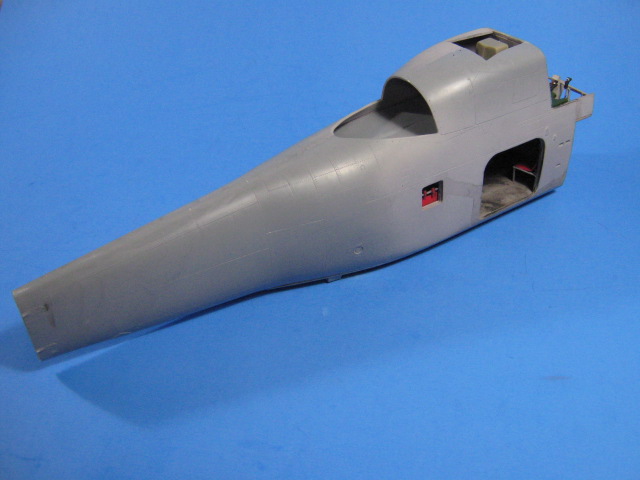
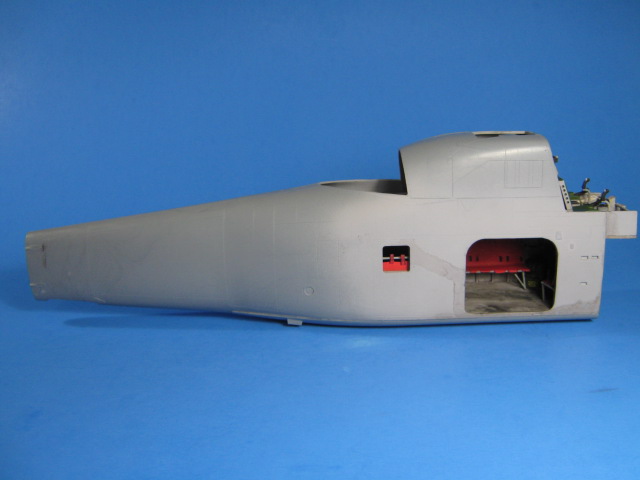
It is finally starting to look like an UH-34D. I am very pleased with it so far. Next up is painting the inside of the nose, building the intake vents on the underside front, and installing the nose.
10 Likes
Taking shape and coming along nicely.
Keith
Thanks. Yup, finally getting there.
Not sure how this one slipped under the net, but congrats for your daughter and her graduation and commission, you should be rightly proud.
And great build. The extra detailing is taking this up so many levels it looks superb so far.
I have found memories of falling out of a Wessex from about 15ft with a GPMG close behind lol…
Looking forward to more of this build.
Also Gino, did that Stinger launch bin ever arrive ?
Thanks John. I am very proud of both my daughters.
No package yet, but I did receive a missed package slip from the P.O. yesterday. I will swing by and pick it up today. It may be the Stinger parts. I’ll let you know.
1 Like
More progress this last week.
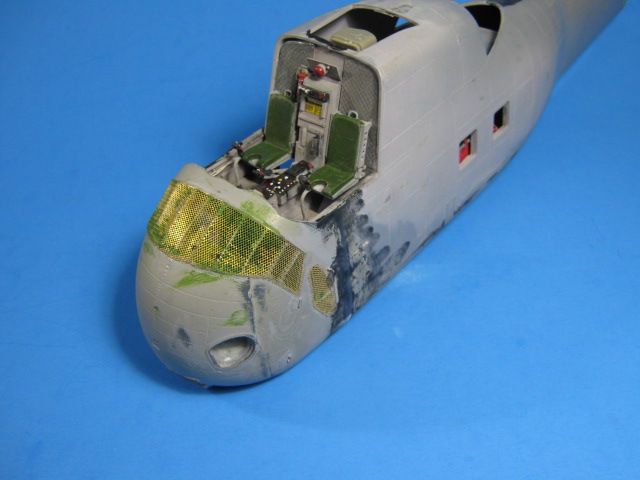
I painted the rear side of the engine fan and drive shaft. I also added a couple hydraulic lines. Most of this will not be seen once it is all together.
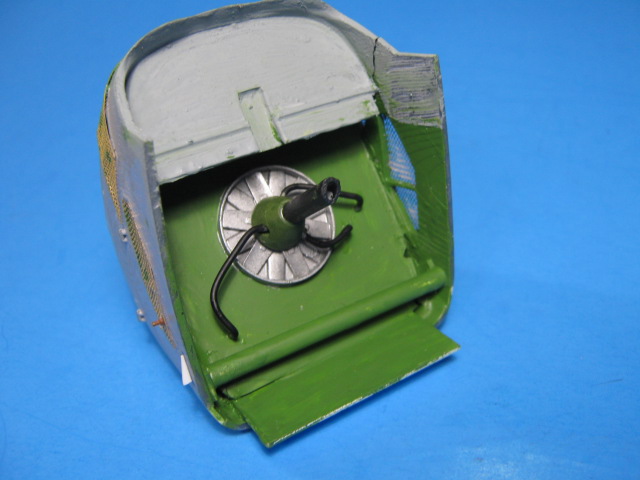
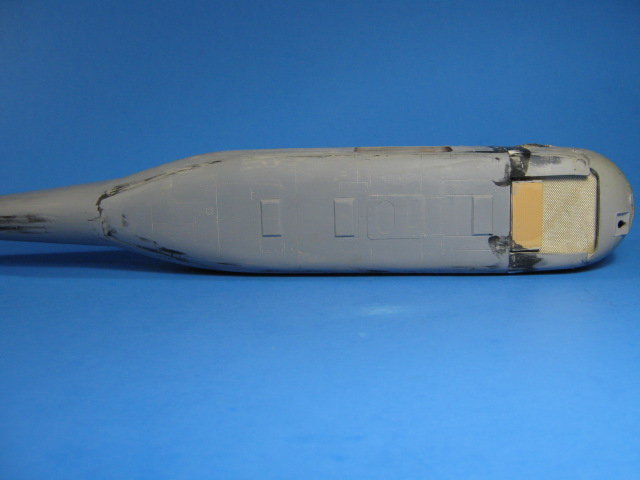
I also added the screen and oil cooler on the underside.
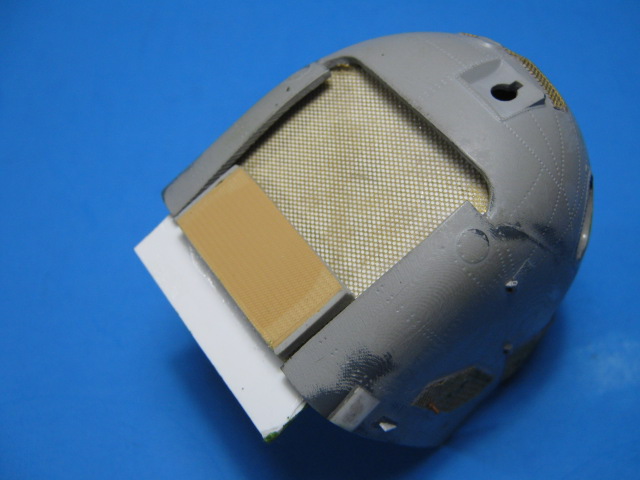
Once all that was done, I added the nose to the fuselage. I had no real issues with it, just a little bit of filling and sanding needed to blend it all together.

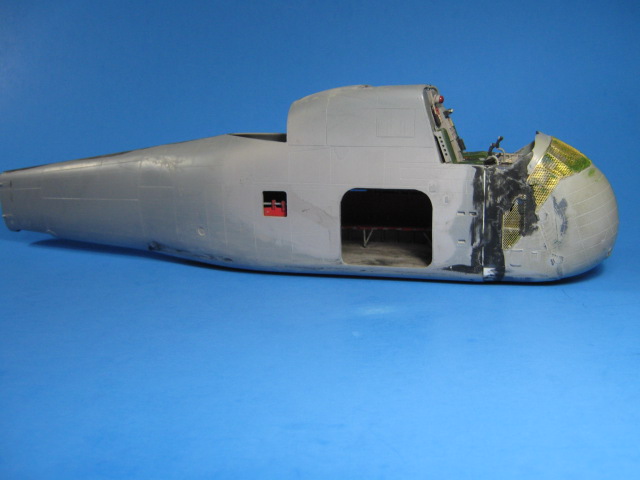
The underside.
Next is adding all the exterior details, tail, rotors, glass, etc…
10 Likes
it’s coming along nicely, well done mate.
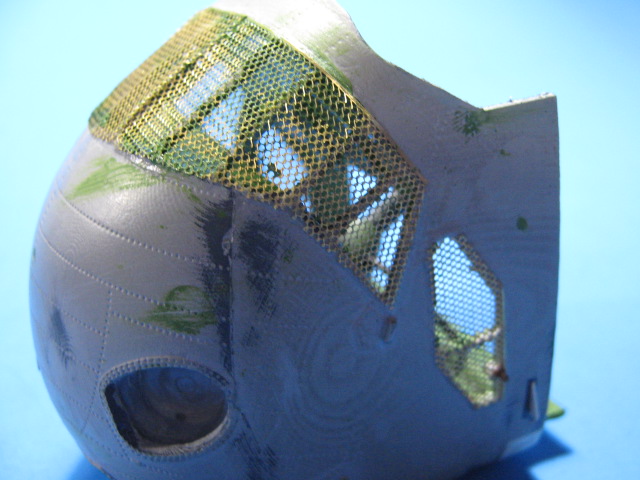
@HeavyArty Gino how are you going to paint the photo etch engine grill without the paint bleeding through the mesh and into the interior of the engine bay?
I’m actually not going to worry about it. For one, you can’t really see much through the mesh once the nose was installed. Second, I don’t think it would have been blanked off during painting on the full sized helo and whatever goes through, goes though.
2 Likes
Its certainly taking shape. I think you are probably right about the mesh too
Thanks kornbeef. More progress this weekend…hopefully.
Wow!!! You’re really pulling out all the stops with the details on this thing. Beautifully done so far.
Thanks Mustang. That is the way I like to build them.
2 Likes