Great job.
Thanks Frogman.
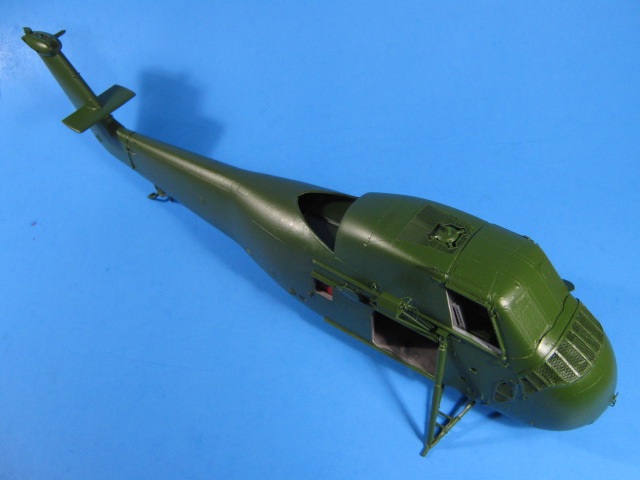
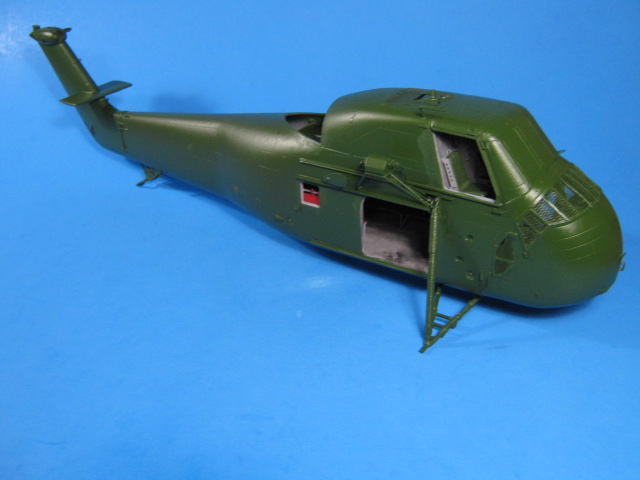
I have basically finished construction on the fuselage and the main parts of the helo.
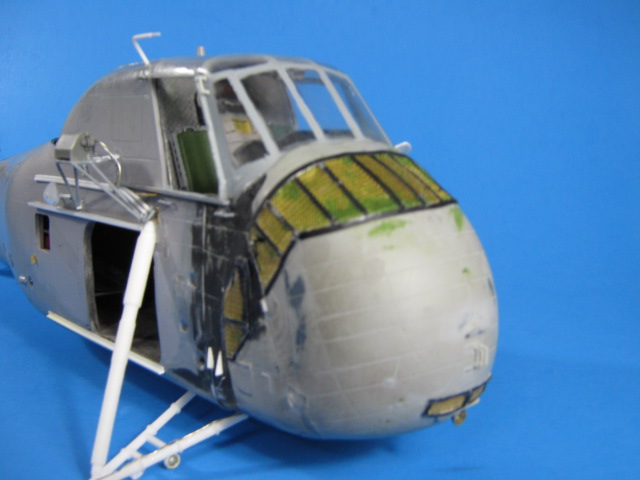
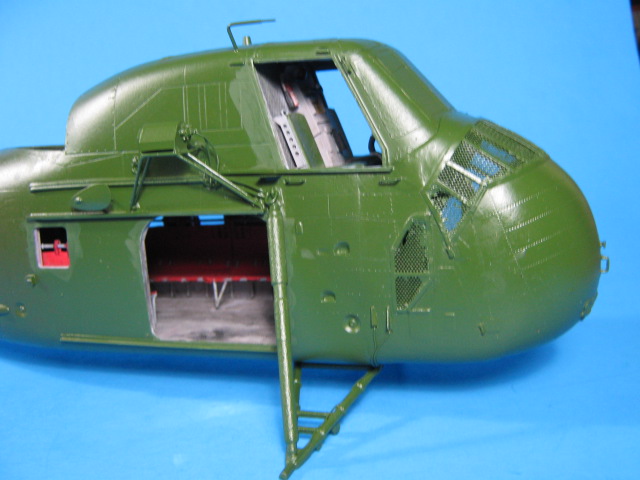
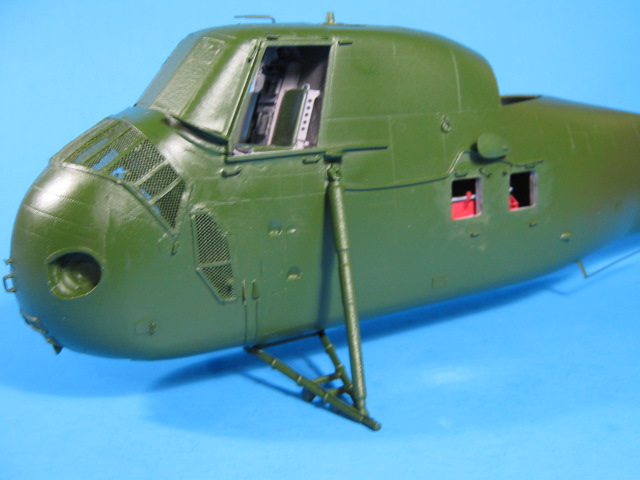
I added piping and some other details found on H-34s (white styrene). I also added the teardrop-shaped antennas on both sides with small marker lights left over from another helo. The exhaust deflector below the port side front canopy is styrene as well.

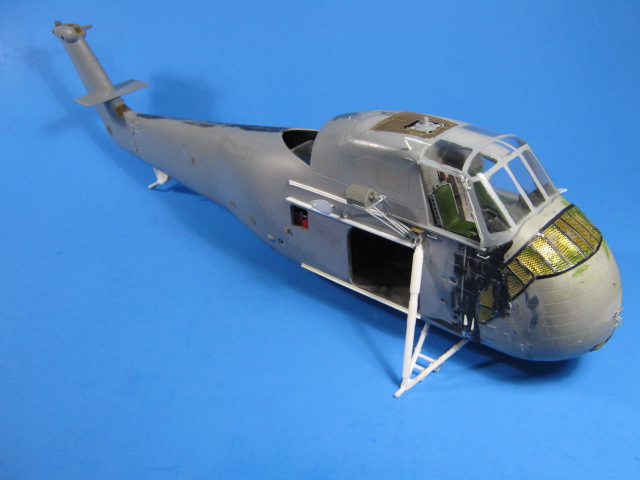
The struts and tail wheel gear are 3D printed parts from Heli-Scale Quality out of Germany. I will also be using their decals later on as well.
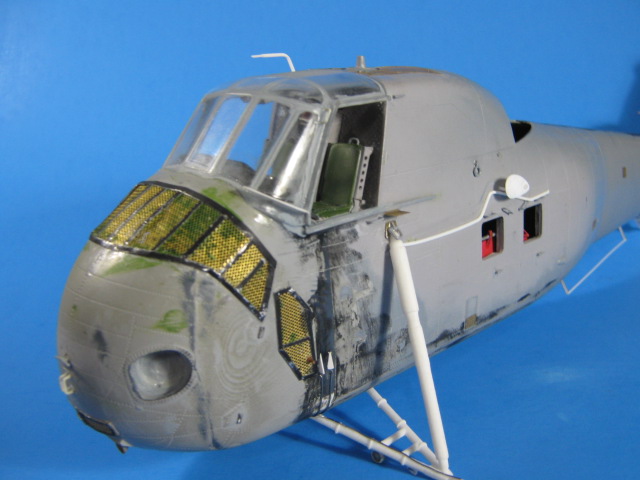
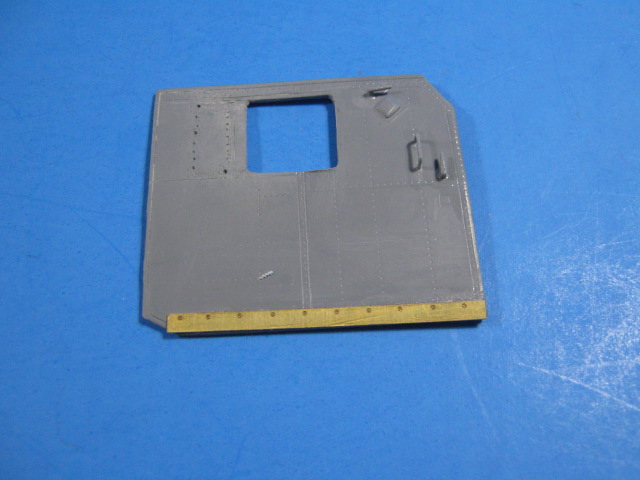
I added “C” channel (upper) and 45 degree angle (lower) styrene for the side door guides. The kit came with PE for this, but it was really small and almost impossible to fold and keep from kinking. I added the frames on the screens using thin wine bottle foil. I simply cut thin strips and glued them into place.
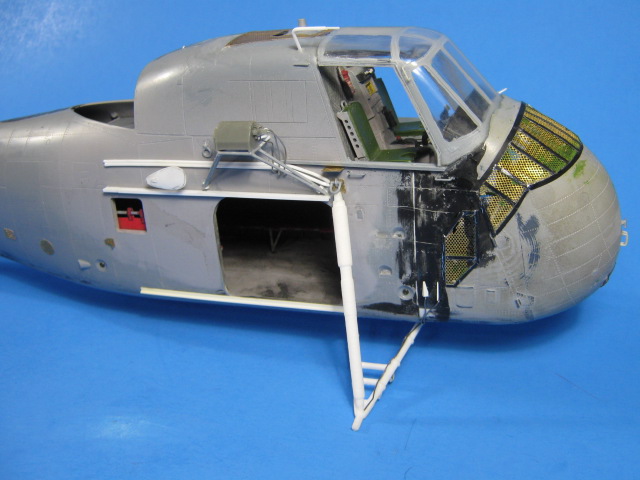
I also plumbed the brake lines and rescue hoist. I cut half circle steps in each side and two new fuel filler points on the starboard side.
I also had to modify the sliding door. On US H-34s, the window was centered on the side door. On the British Wessex, the window was further aft. I cut a piece out forward of the window opening, then inverted it and placed it in the aft section of the opening and filled/filed it smooth. Door window successfully moved forward/centered.
Painting is up next. I also have to build the main and tail rotors, which are kits in themselves with lots of resin, PE, and plastic parts.
9 Likes
That’s looking great Gino. The extra detailing is going to lift it up from the standard build … It’s very intricate and skillfully done… You get to see some nice cockpit detail as through the side windows… 
I am told they were called “elephant ears” and designed to shield the navigation lights from the pilots.
Great work on the details.
1 Like
She has come on leaps and bounds. Some very nice detailing work I must say.
Keith
Thanks guys. I am really liking how it is coming out. Interesting tidbit about the “elephant ears”.
I don’t know either til ask over at Popasmoke and the 1:1 guys told me.
Super nice man!!!
Thanks HG. I hope to get some paint on it soon.
1 Like
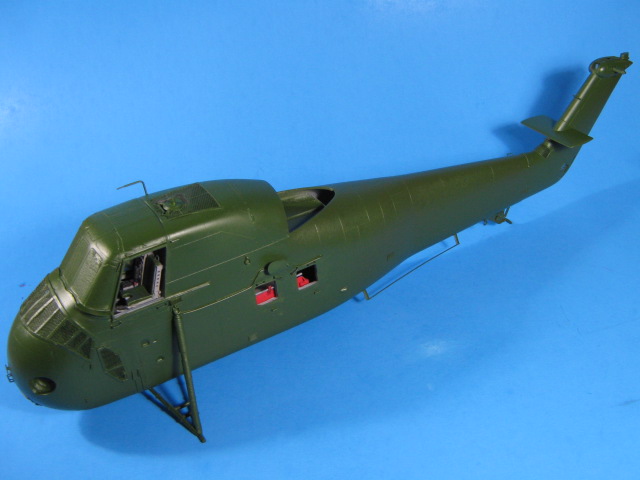
I was able to get the initial base coat of Medium Green on it. The USMC did not use Olive Drab as the Army did at the time. The 3D printed parts (landing gear and nose) look to have really blended together seamlessly with the plastic kit parts. I am very happy with how it is turning out.
Next up is detail painting and the decals. They will be in a couple weeks though as I will be out of town for the rest of this week and next.
7 Likes
This has all been very useful and interesting; I’m thinking of having a go with some 1:35 helicopters myself; I have the Revell Bell H-13H (hopefully to masquerade as a British Army Sioux), and at the other end of the scale the huge Heller 1:35 Super Frelon. This build has been very encouraging!
Very cool build!
Looking forward to see more 
Thanks gents.
Boots - I highly recommend you build a 1/35 helo or two. They can be very fun.
1 Like
I must admit Gino, it’s got me thinking of a couple of scenarios; 'never been too sure about aircraft before - one can’t really hide any errors with cam nets and mud(!)
That’s not 100% accurate, you just cannot go to the same extreme armor builders do but lots of aircraft spend time under cover and you have exhaust, fuselage patching for weathering plus if operated from a grass or no concrete/asphalt runway it can have mud and grass on the underside.
Exactly. That is why I like helos. To me they are an extension of armor/ground vehicles. Most are operated by Armies as well. Most of the same techniques I use on armor models are also used on helos.
I was also including fixed wing aircraft, though they are more constrained by in large.
Good points. Hmmm. I may well now sabotage my planned builds (like they’re that organized?) and push a certain project up the list(!)
Go for it.