Tamas my first contact with Soljanka was in 1990 or 91 when I was a young employee sent over to an eastern german city to work in a shop for some weeks as the owner was sick in hospital. There I tried it first and never lost my love for this soup 

Hello Jan,
you are absolutely right - they should be Yokohama fenders! And they are all four in easy reach for both of the aft cranes. Mystery solved thanks to you - always useful to have an experienced captain of the Marine aboard 

1 Like
Hey Tony, 120 $ is really a bit high. I bought mine from a hobby shop from estonia for about 55 € inclusive shipping. That was the cheapest offer I found. The big upgrade set was obtained directly from MICRODISAIGN from Moscow which costed me about 80 € inclusive shipping.
Glad we have you with us at the control panels here 
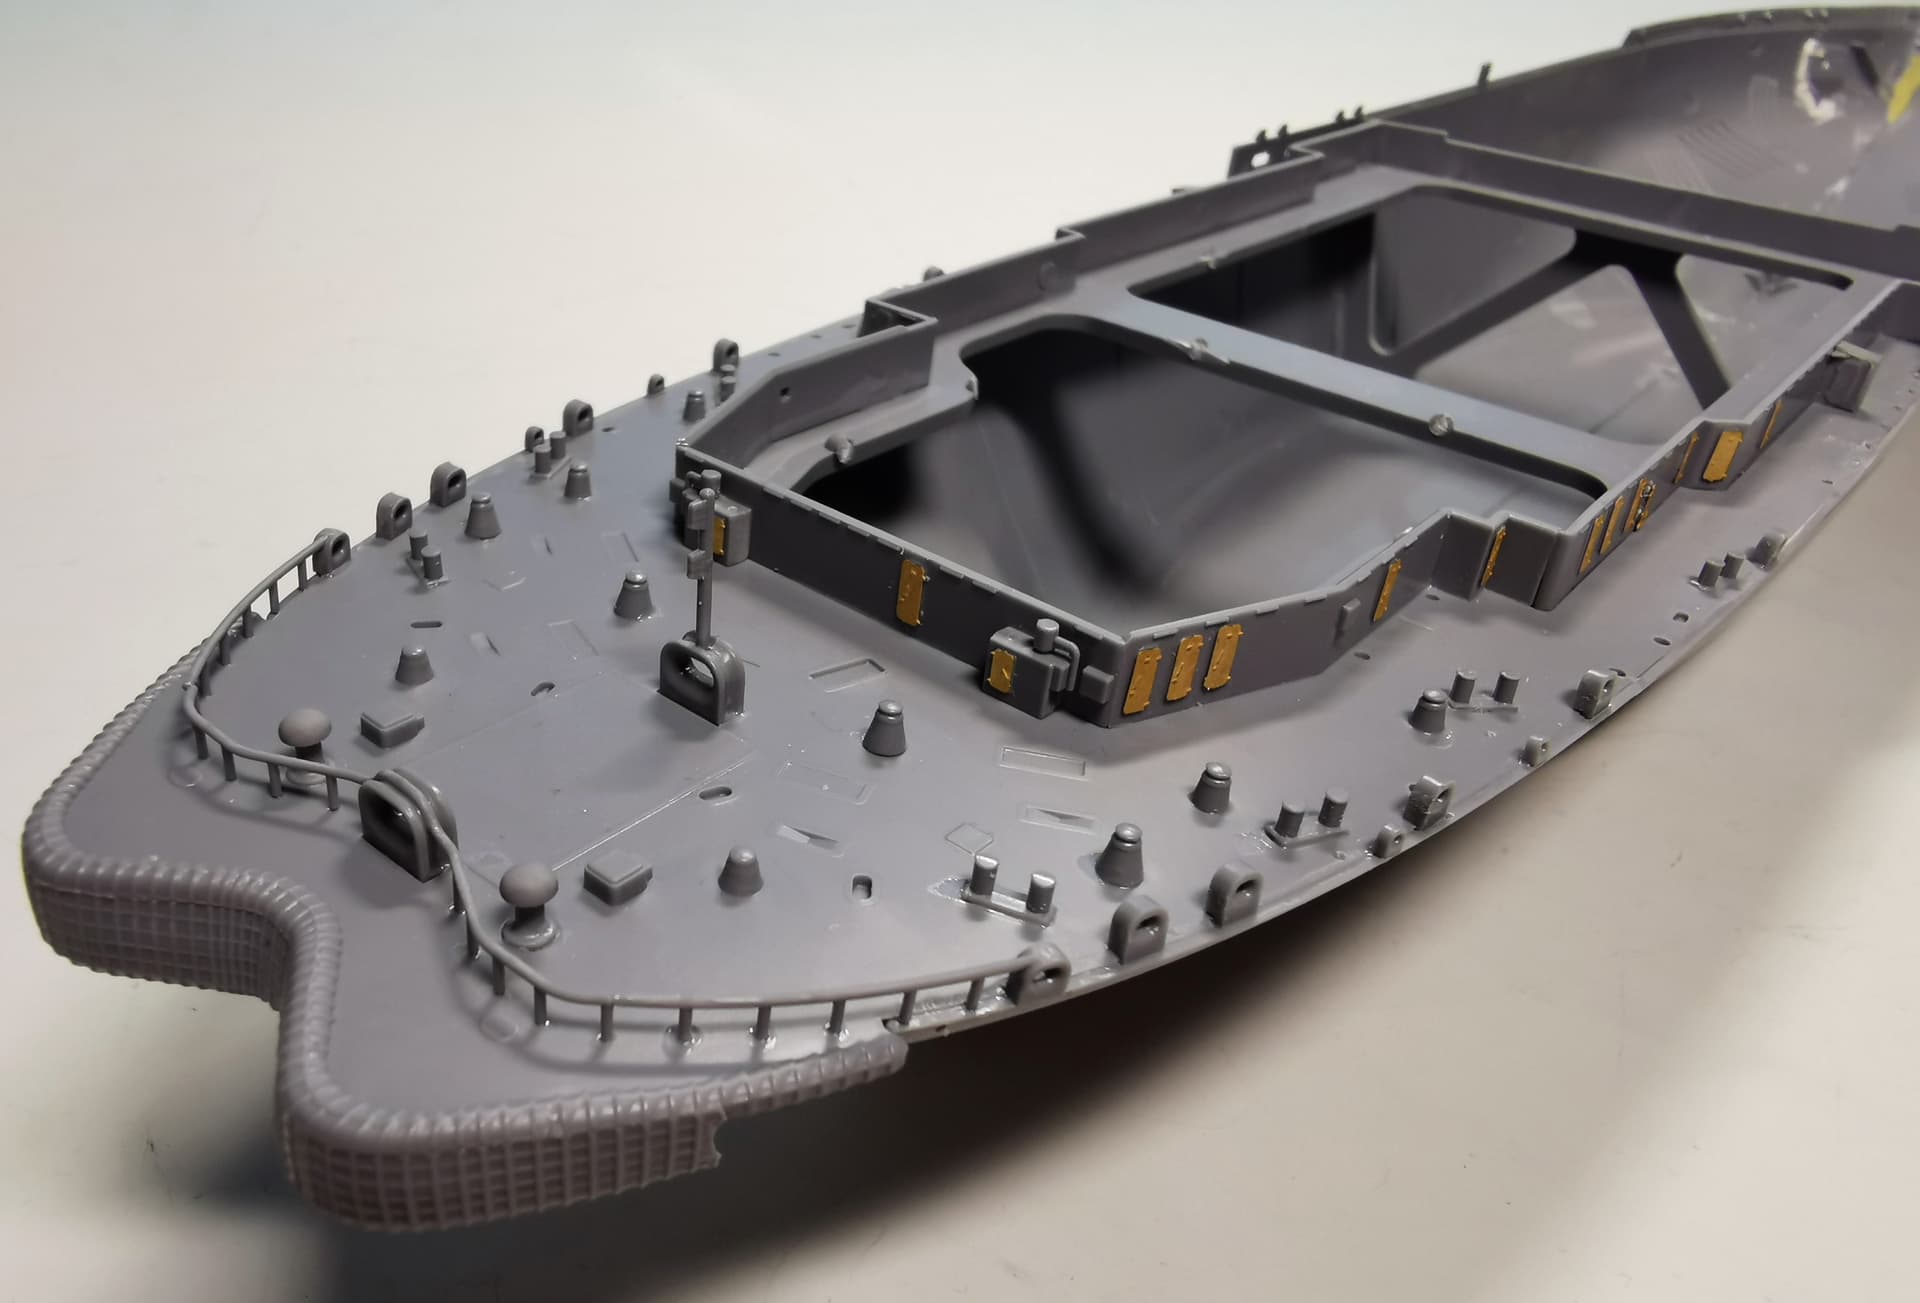
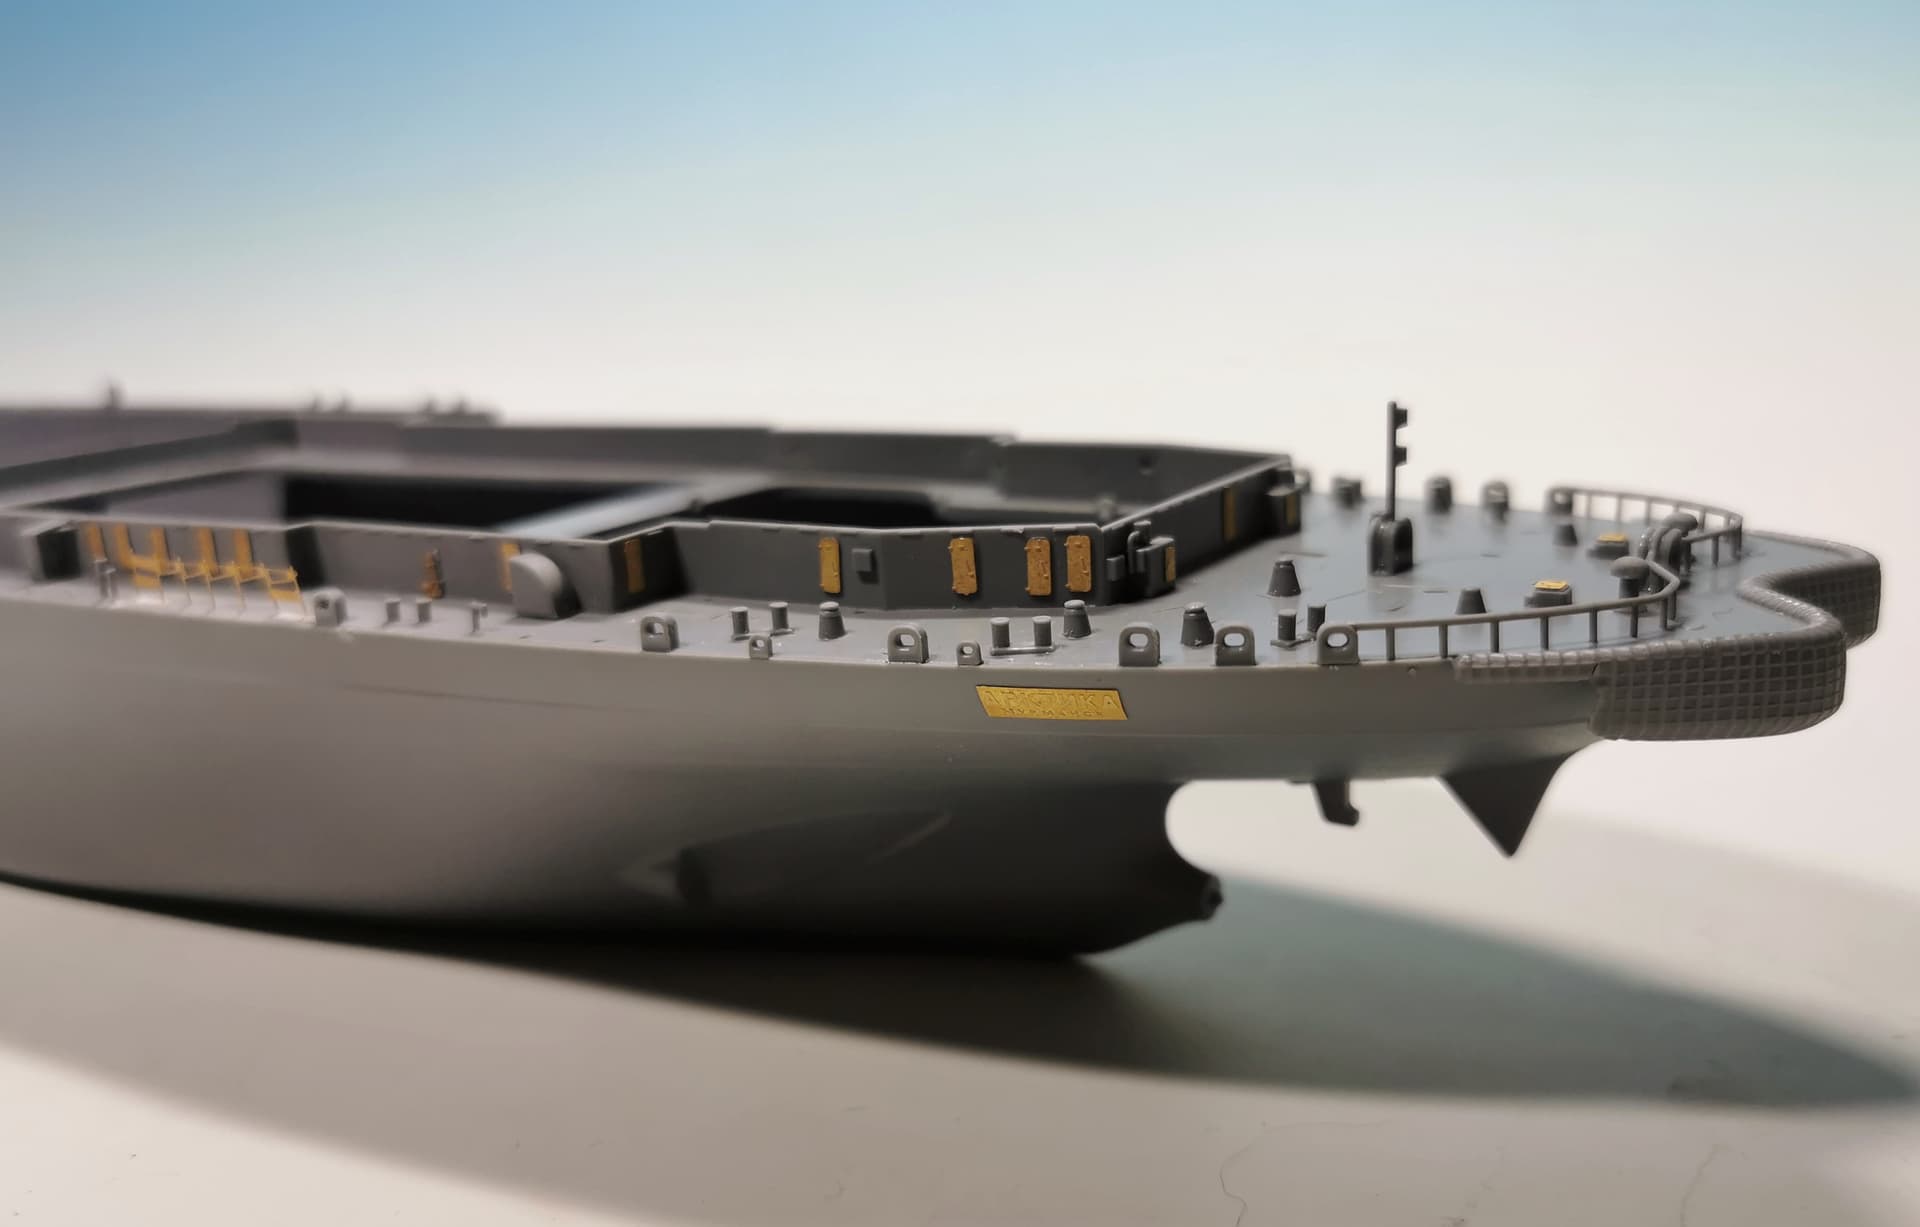
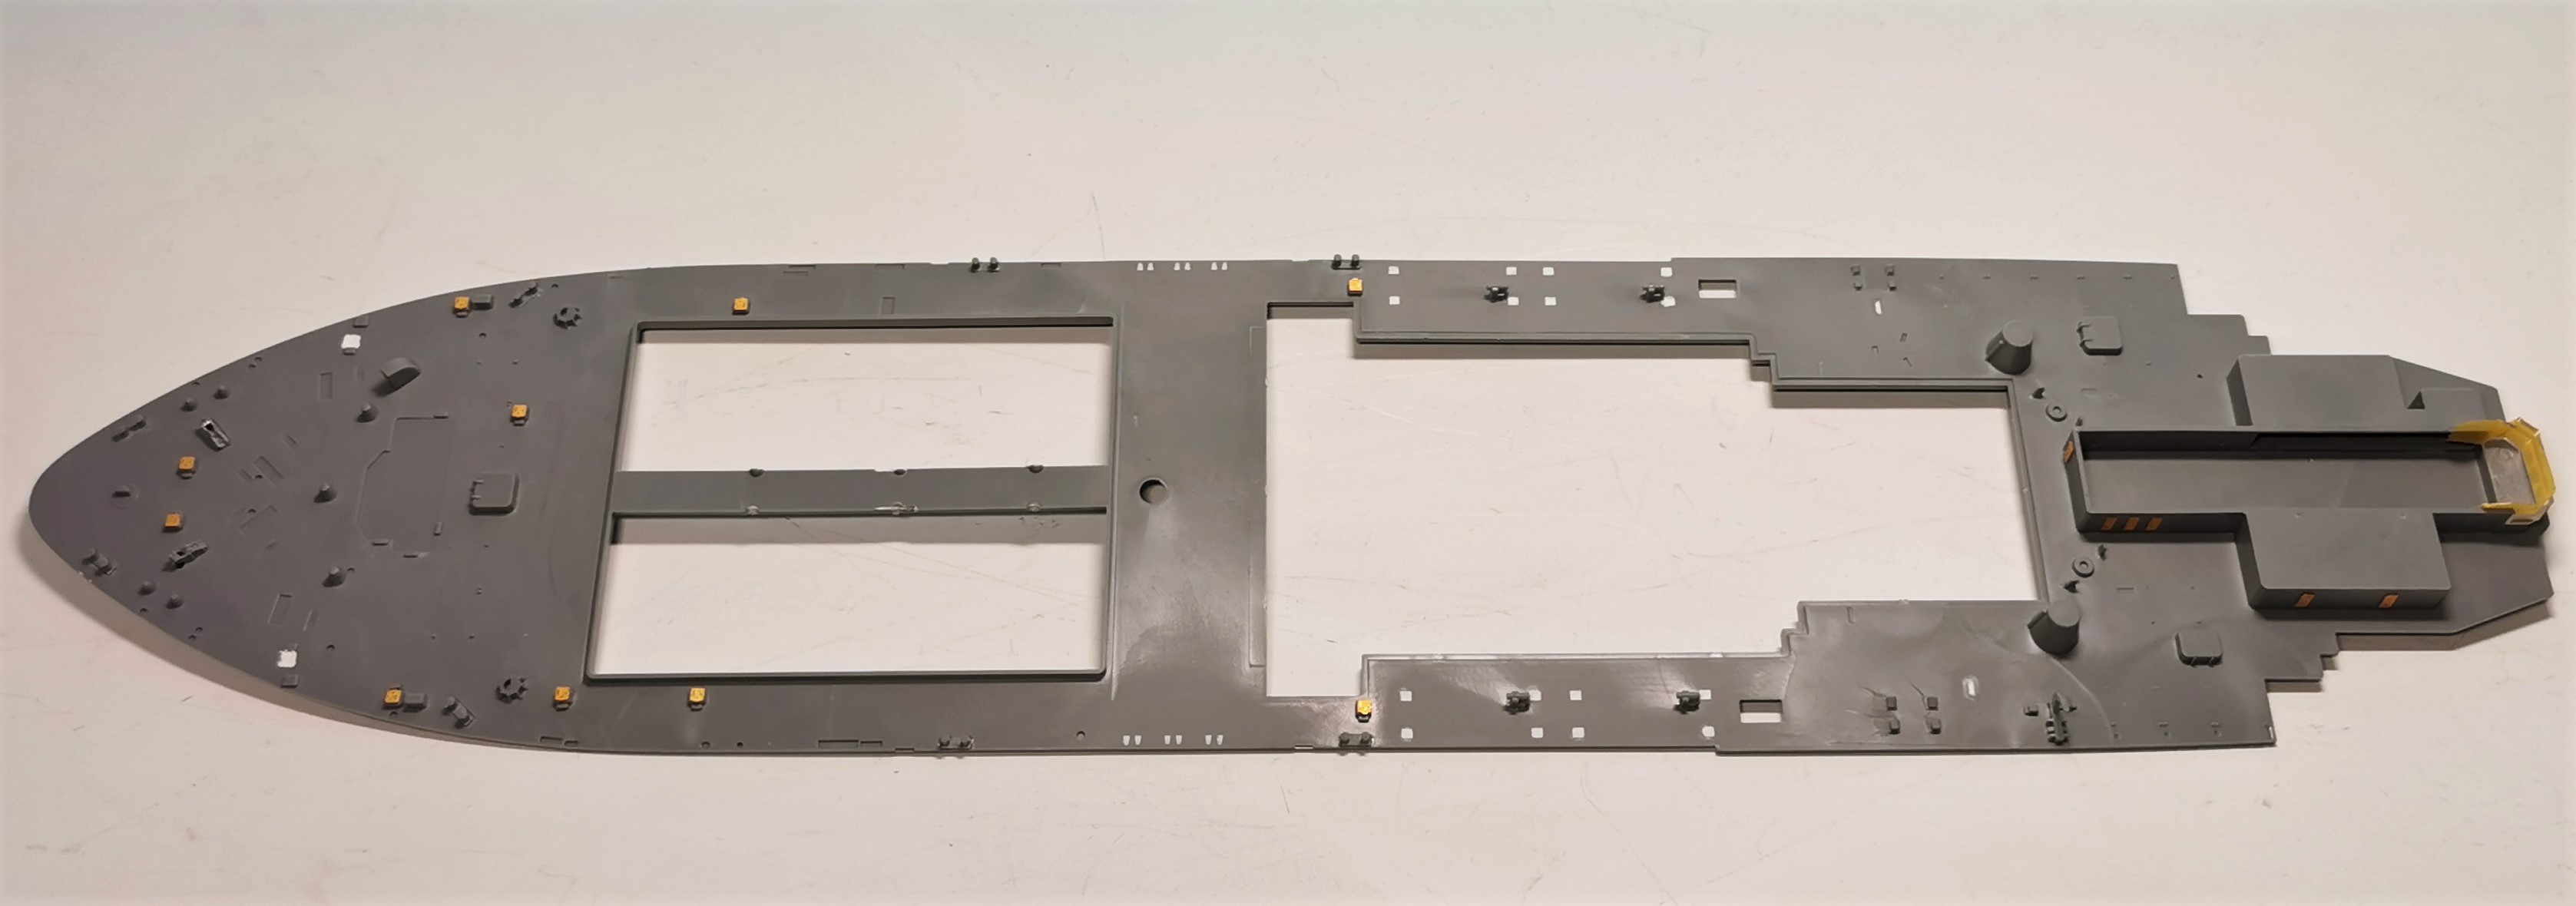
We were very busy today with glueing in sidewalls, etched doors and most of small plastic parts for the ships stern deck. The big winches and ladders will be painted separately after the main parts were painted. This is the actual situation at the fitting-out quay
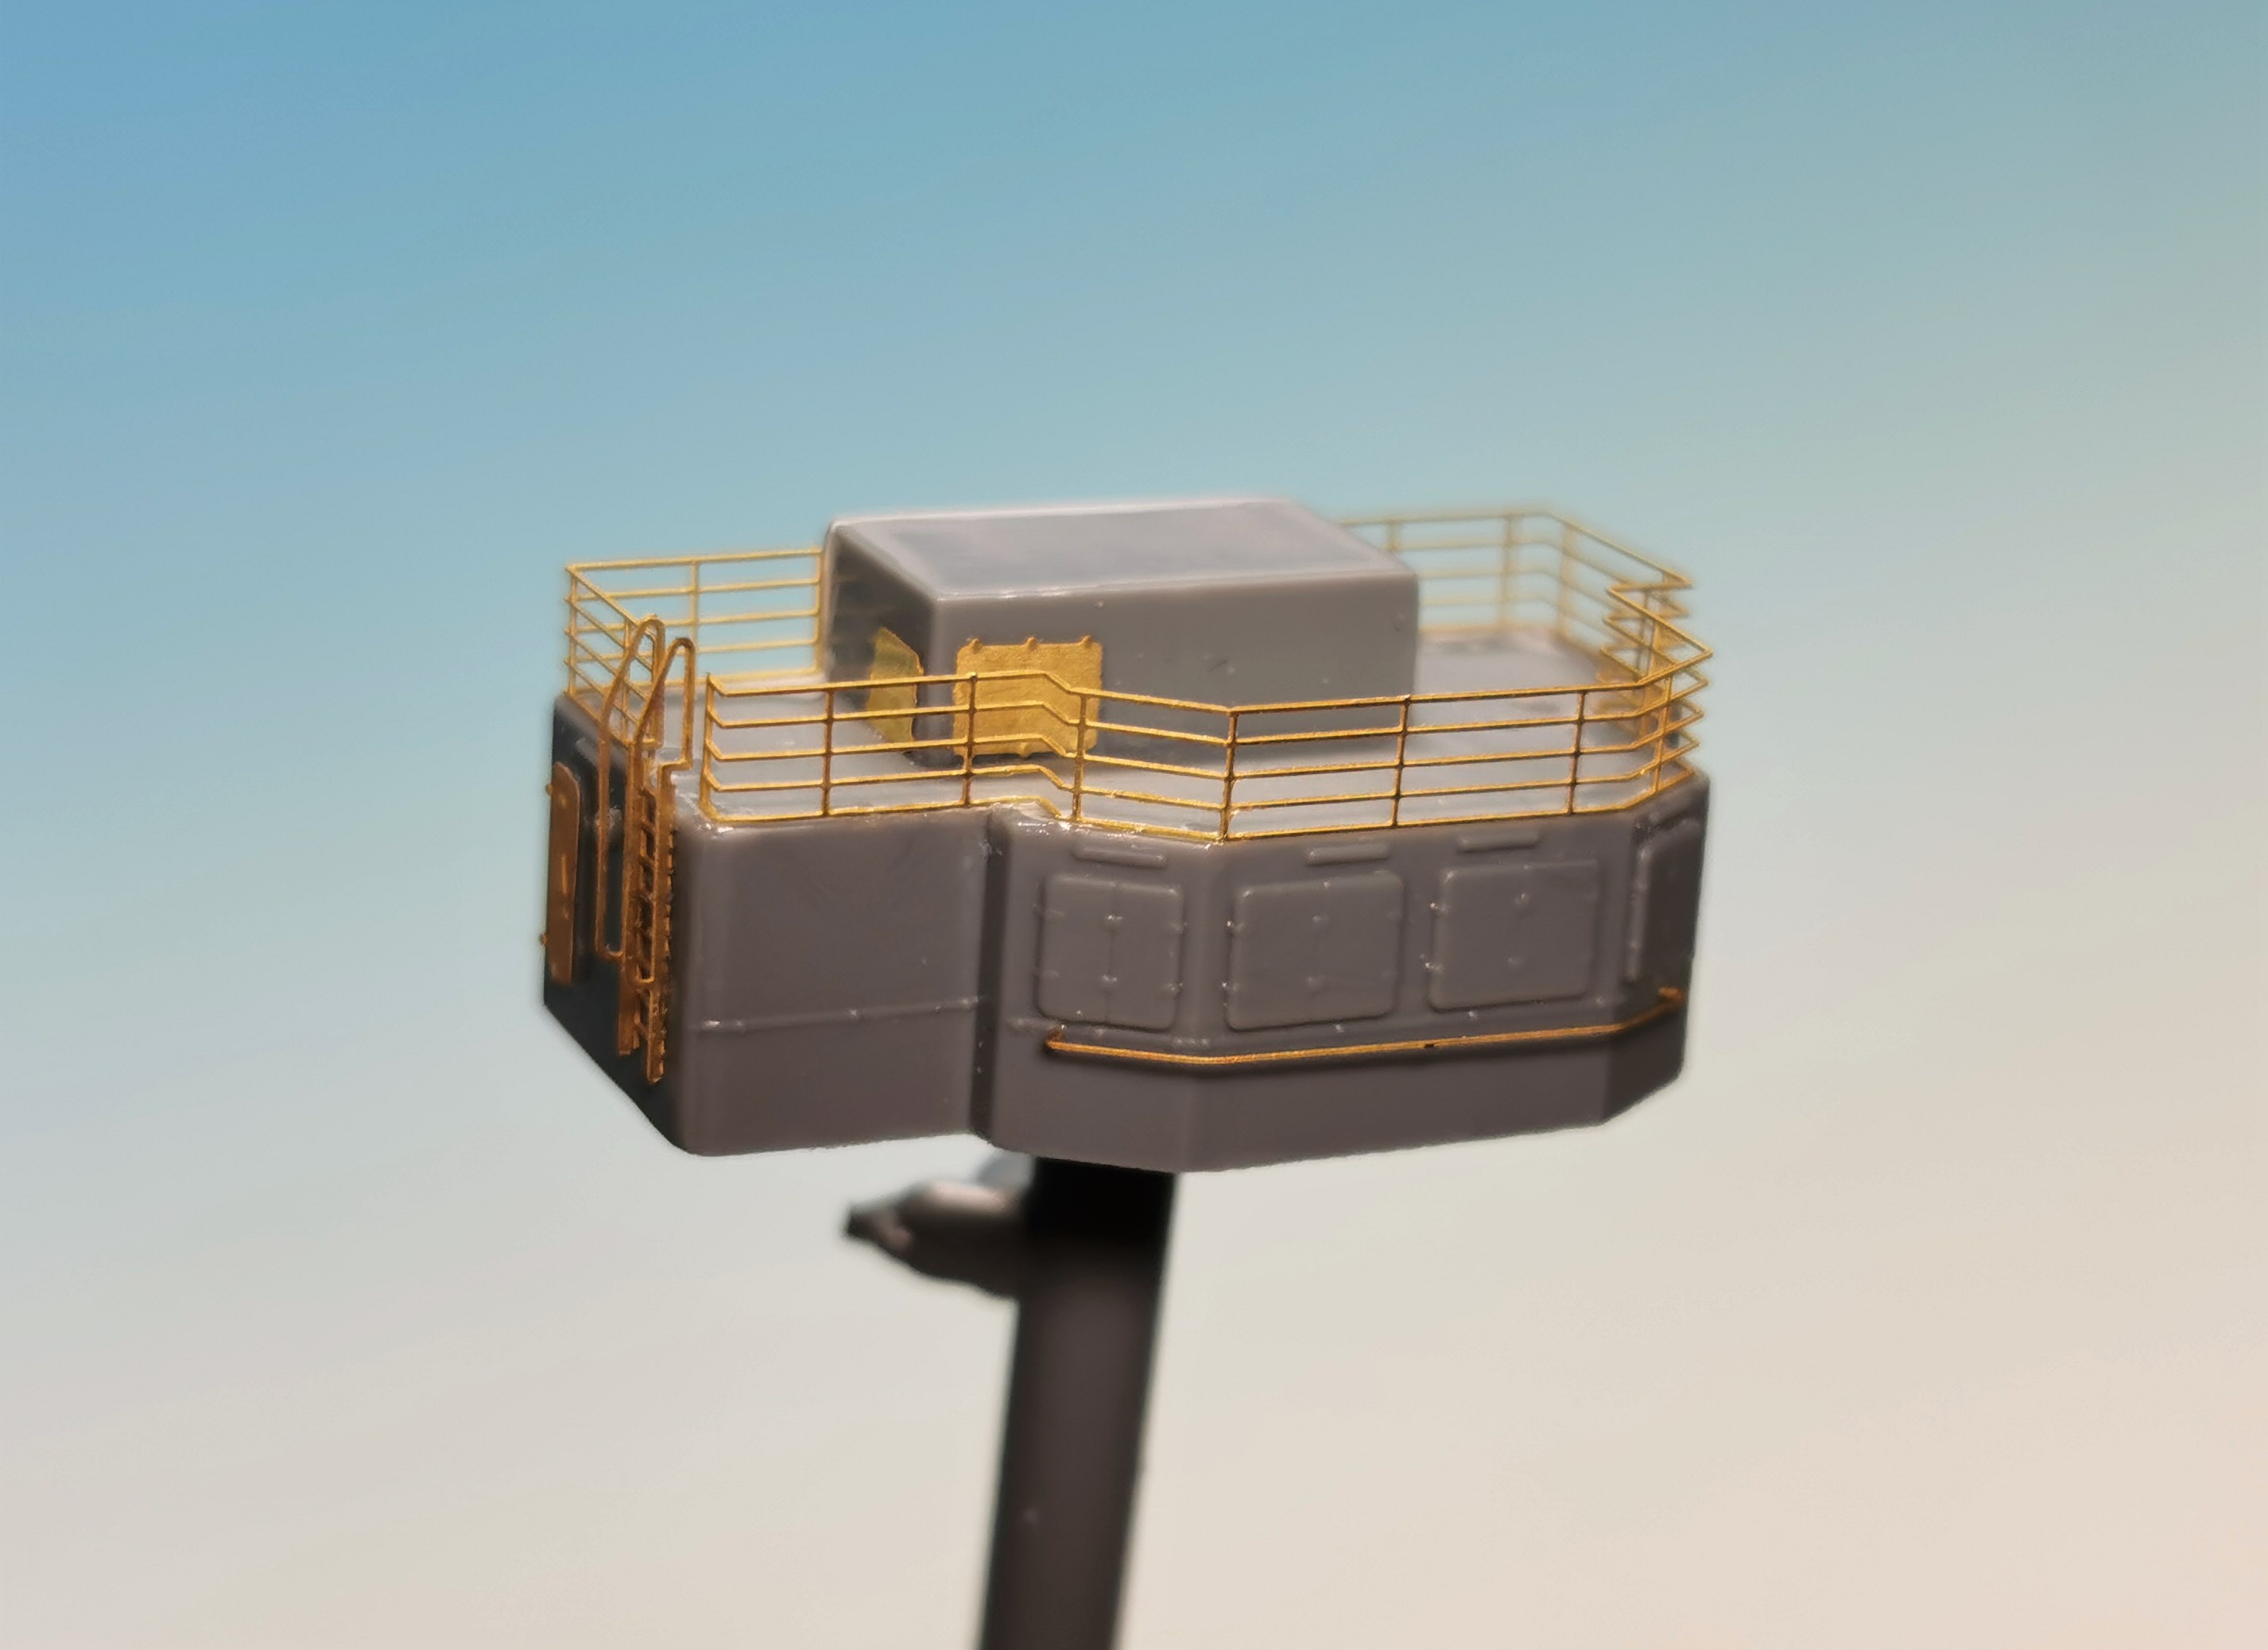
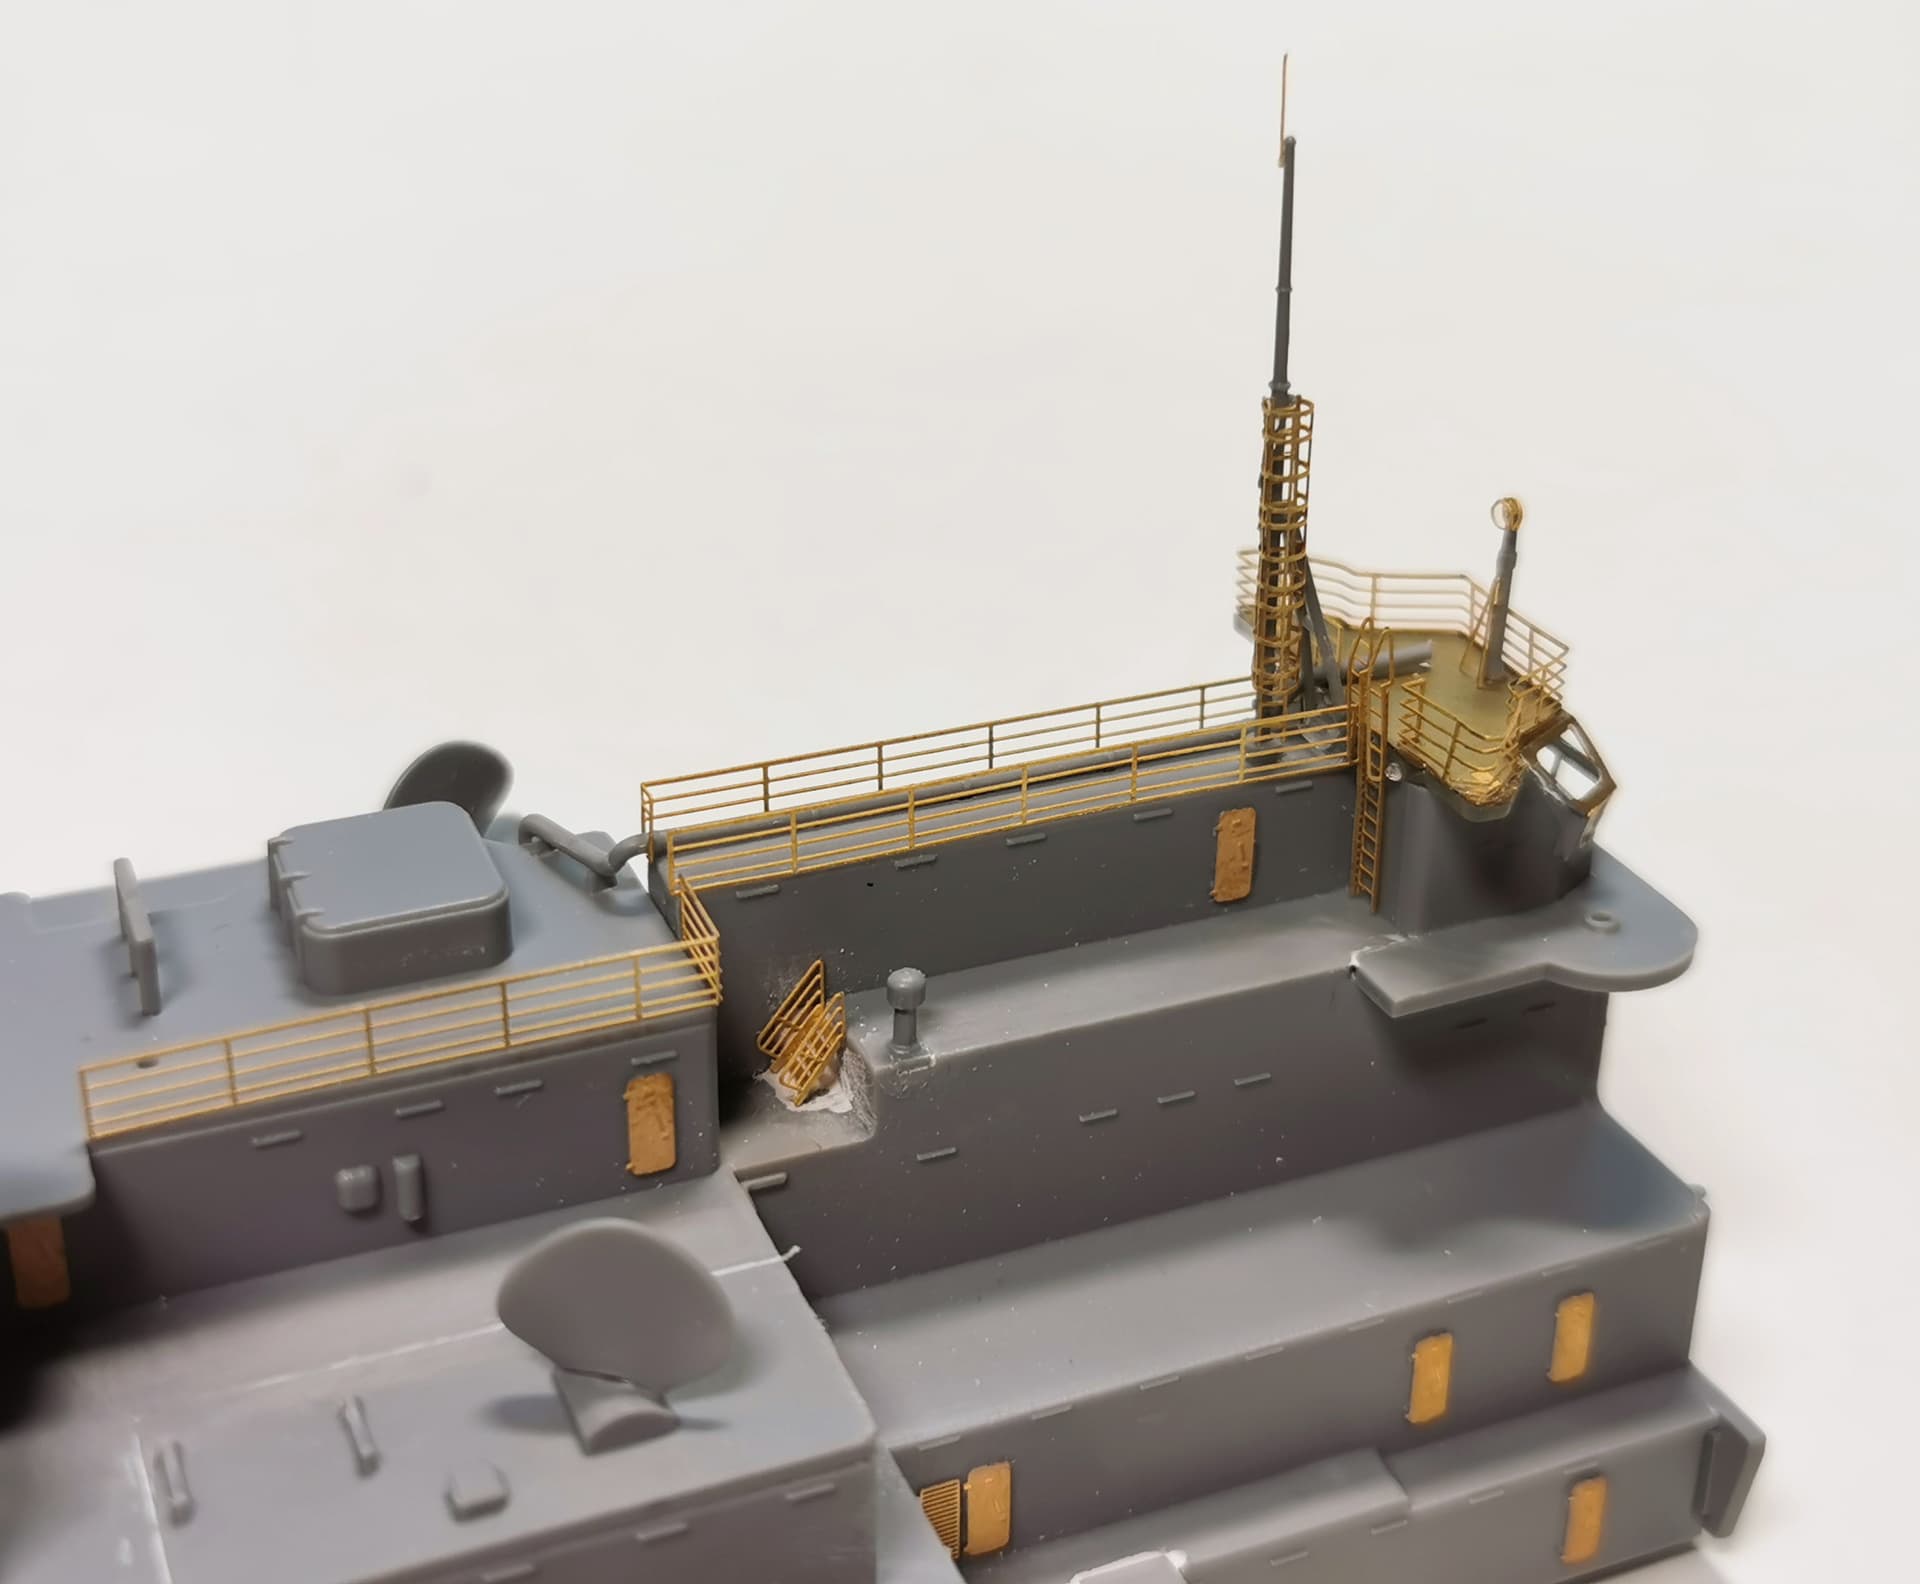
Couldn´t resist and tried to handle some first railings with the furthermost small superstructure at the ships bow. The edged part numbers 7 and 8 here were mistakenly interchanged in the manual but you don´t confuse an old shellback modeller like me so easily, eh? The fit was good and the parts bend nicely
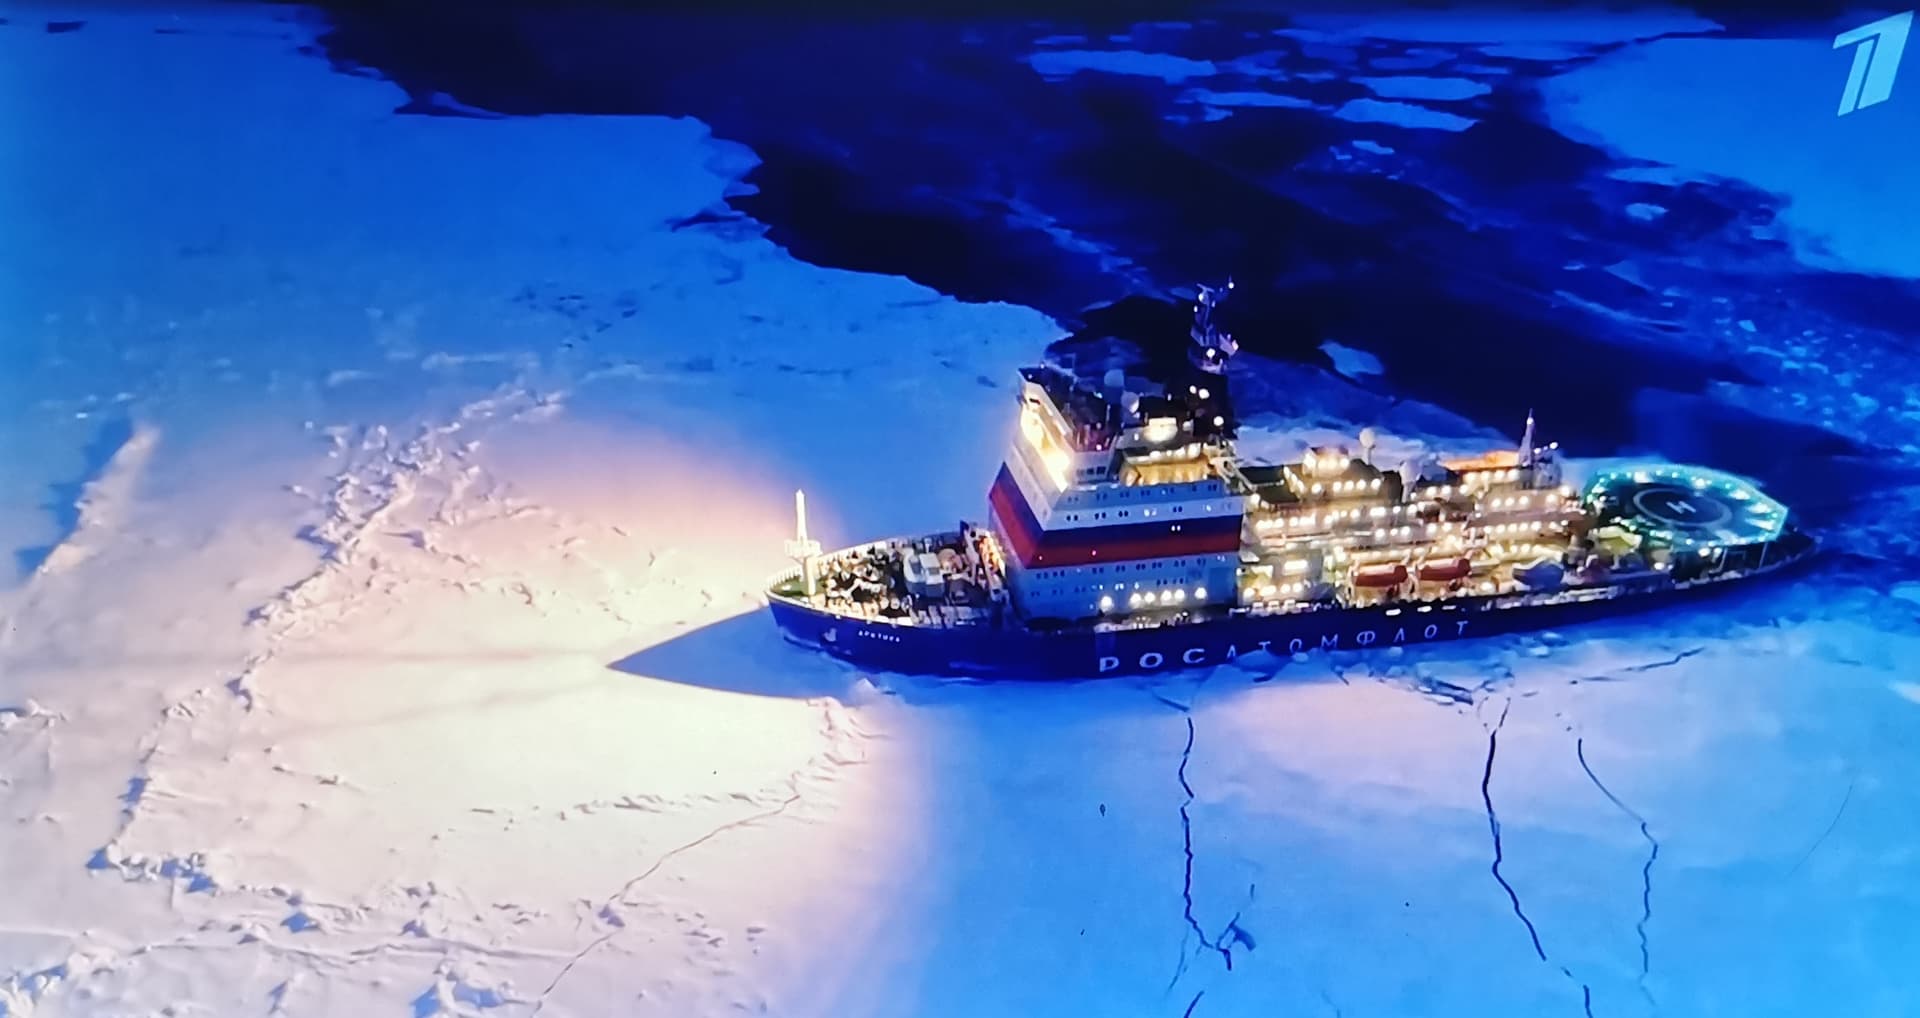
Before we leave the quay I would like to share an athmospheric picture of ARKTIKA sailing through the dark frozen sea with all its lights on. I found it during my search for usable pictures of the life ship
Doswidanje 
12 Likes
You are doing very well Thomas and nice job on the PE parts, too!
Ditto!
Mark 
Happy and healthy new year to all of you 
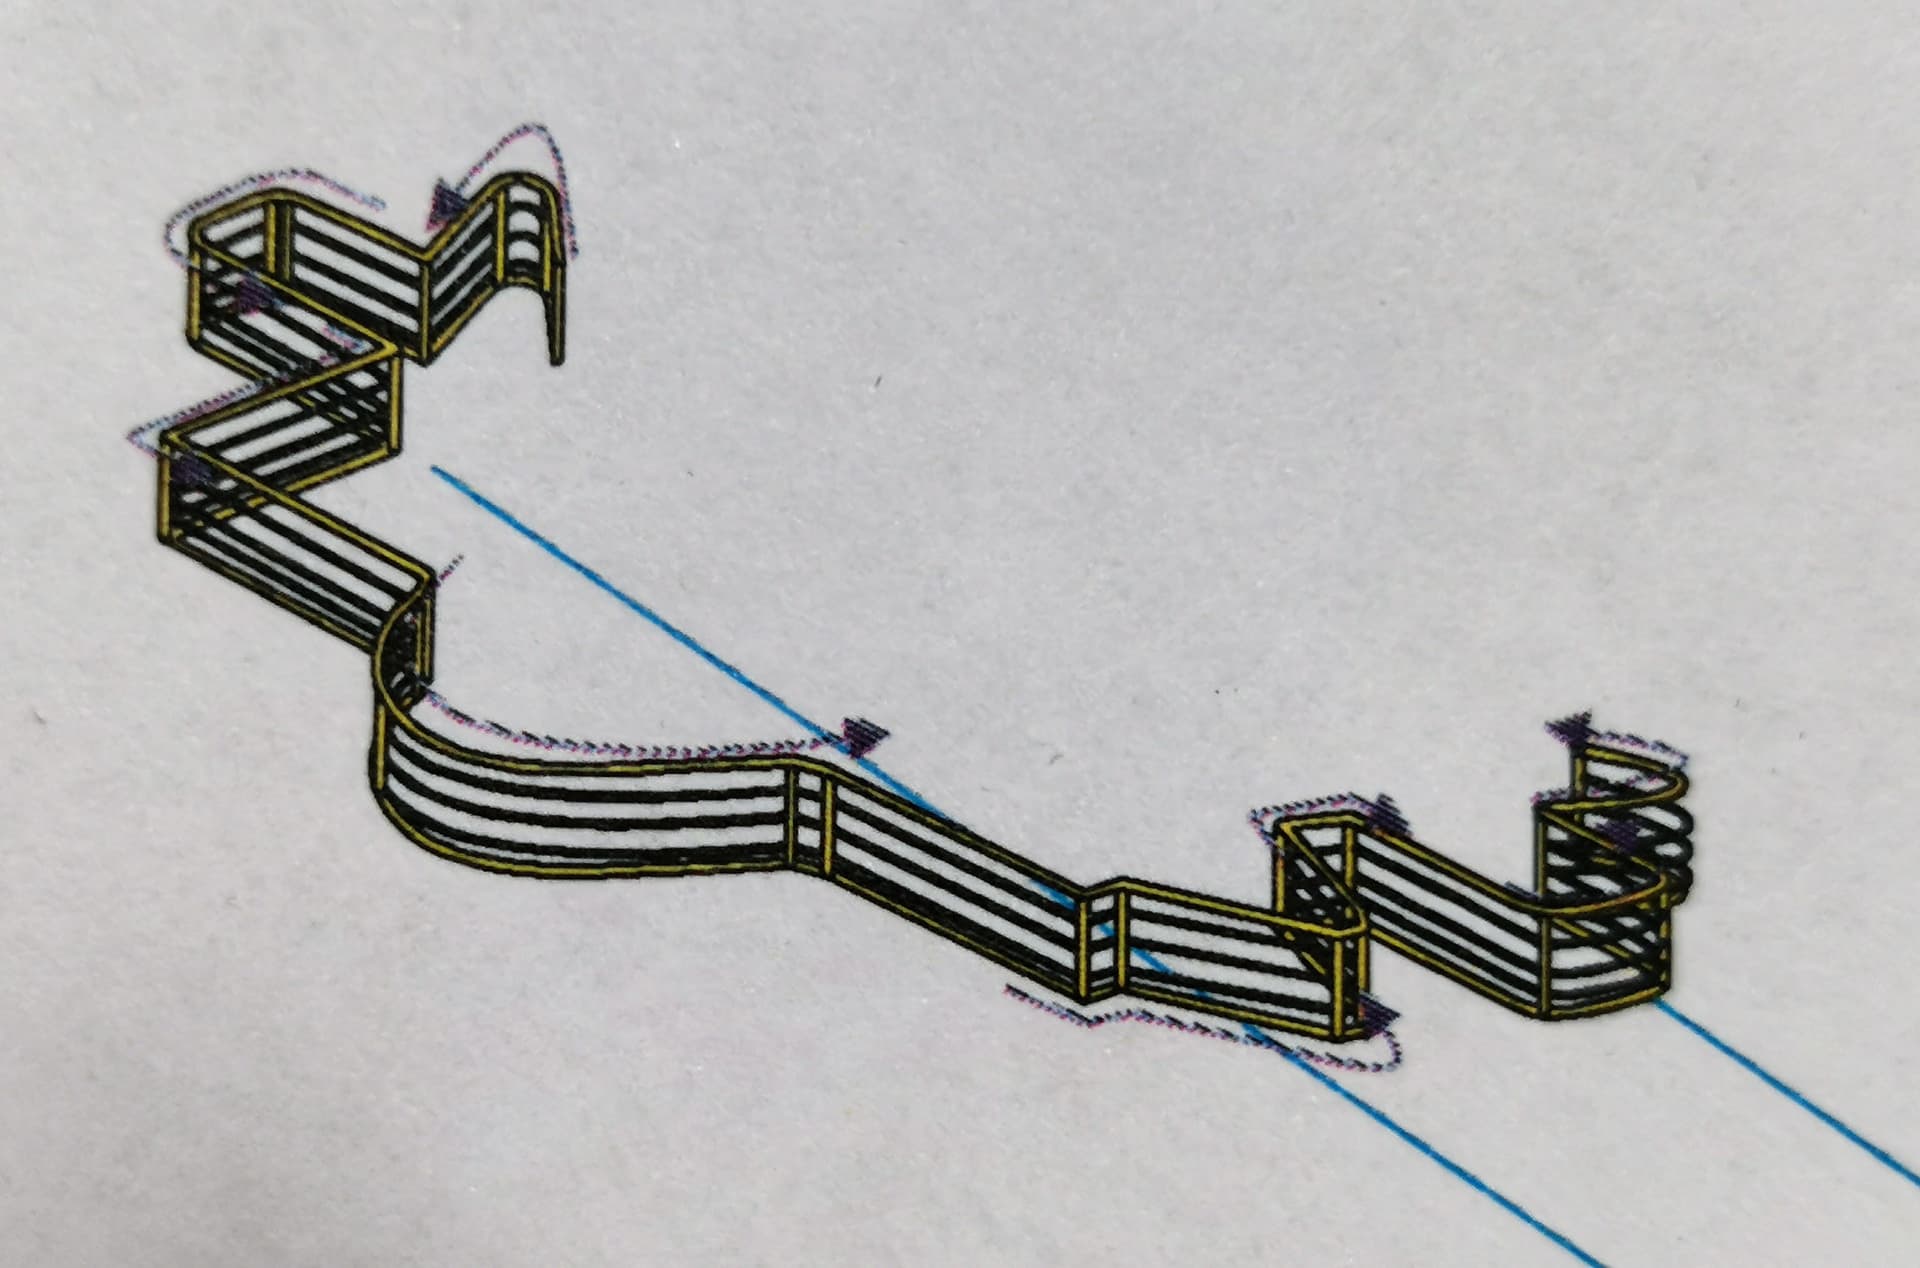
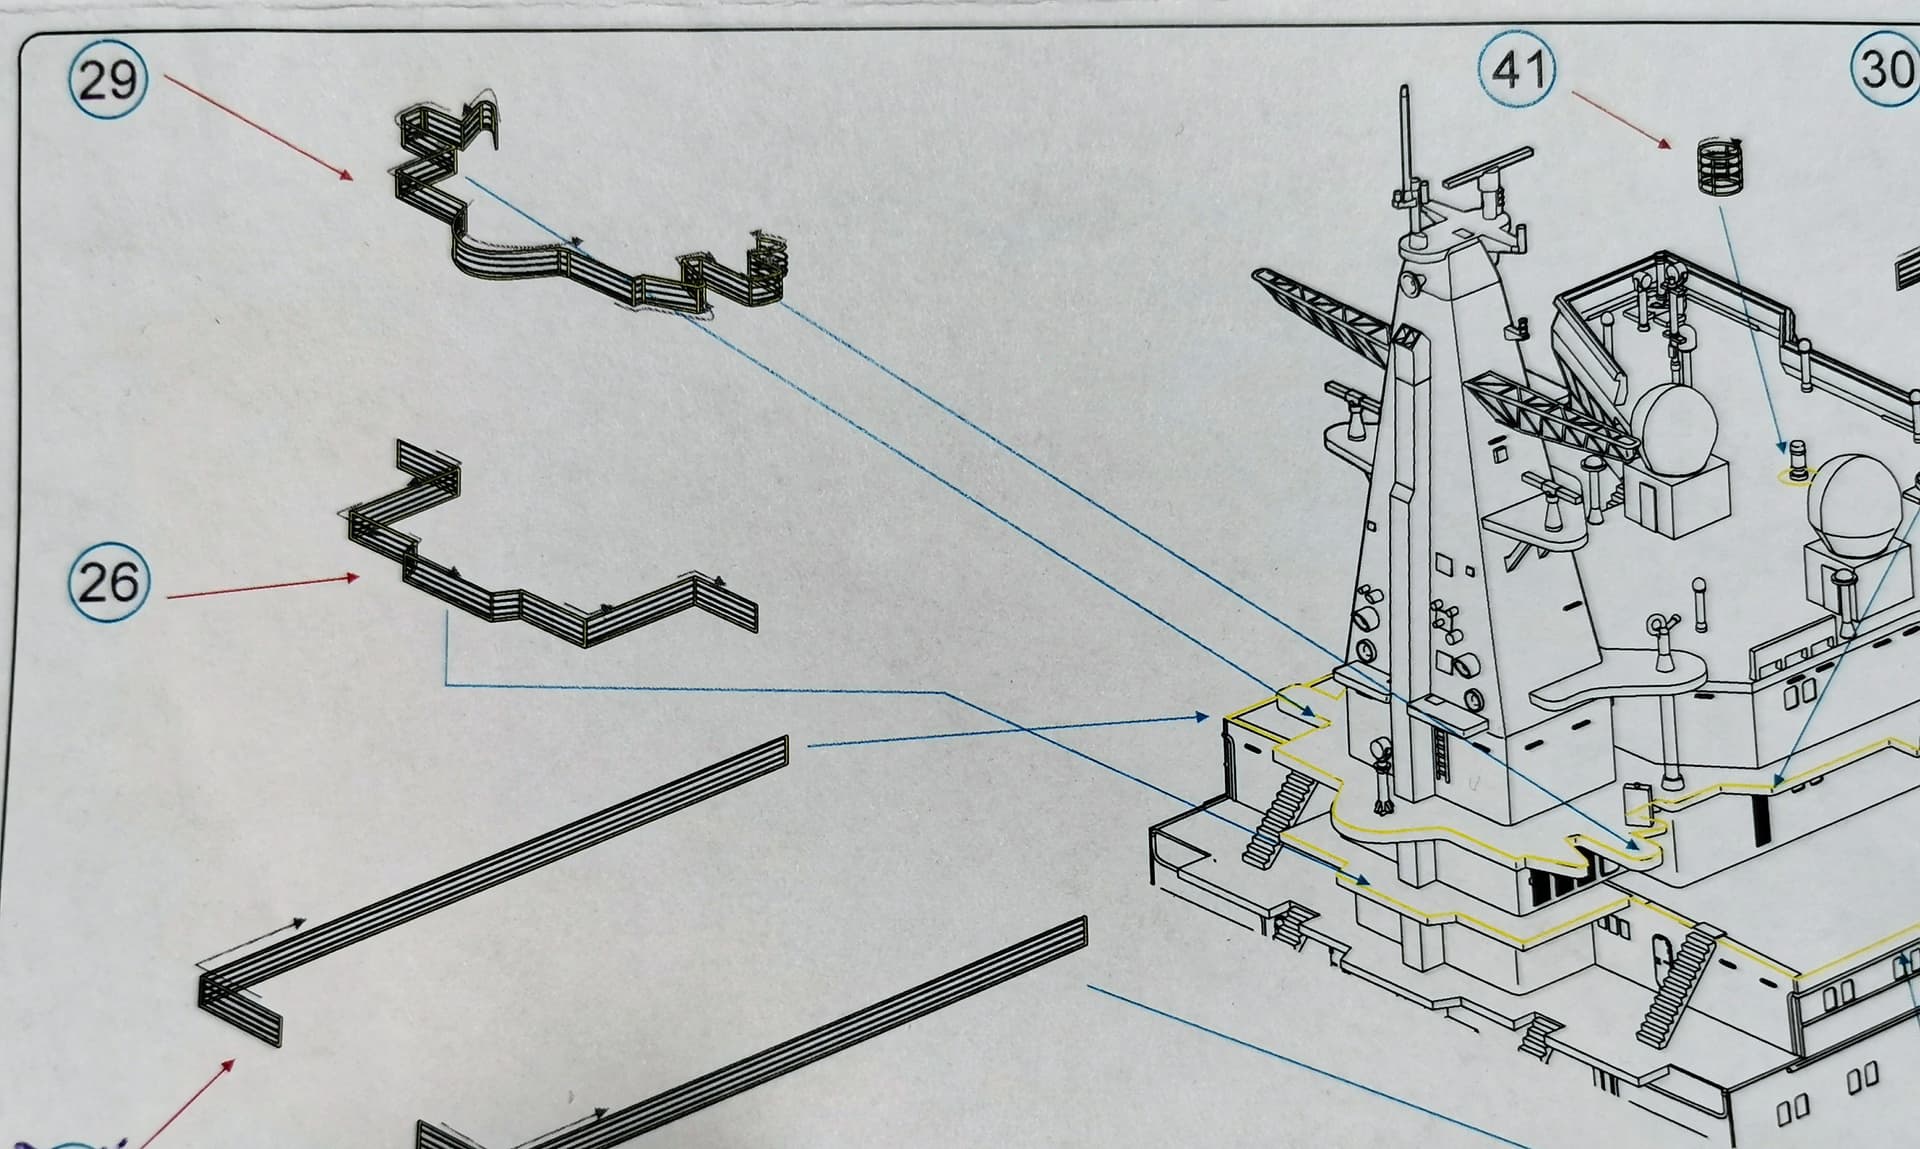
As most tasks for the plastic welders are done now its getting more and more work coming for the railing builders. The ship constructeurs made some deck shapes led the real railing builders surely to sweat. Look at the part 29 for example. If I can tackle this without it doesn´t look irregularly bended you may call me the bend-wizard 
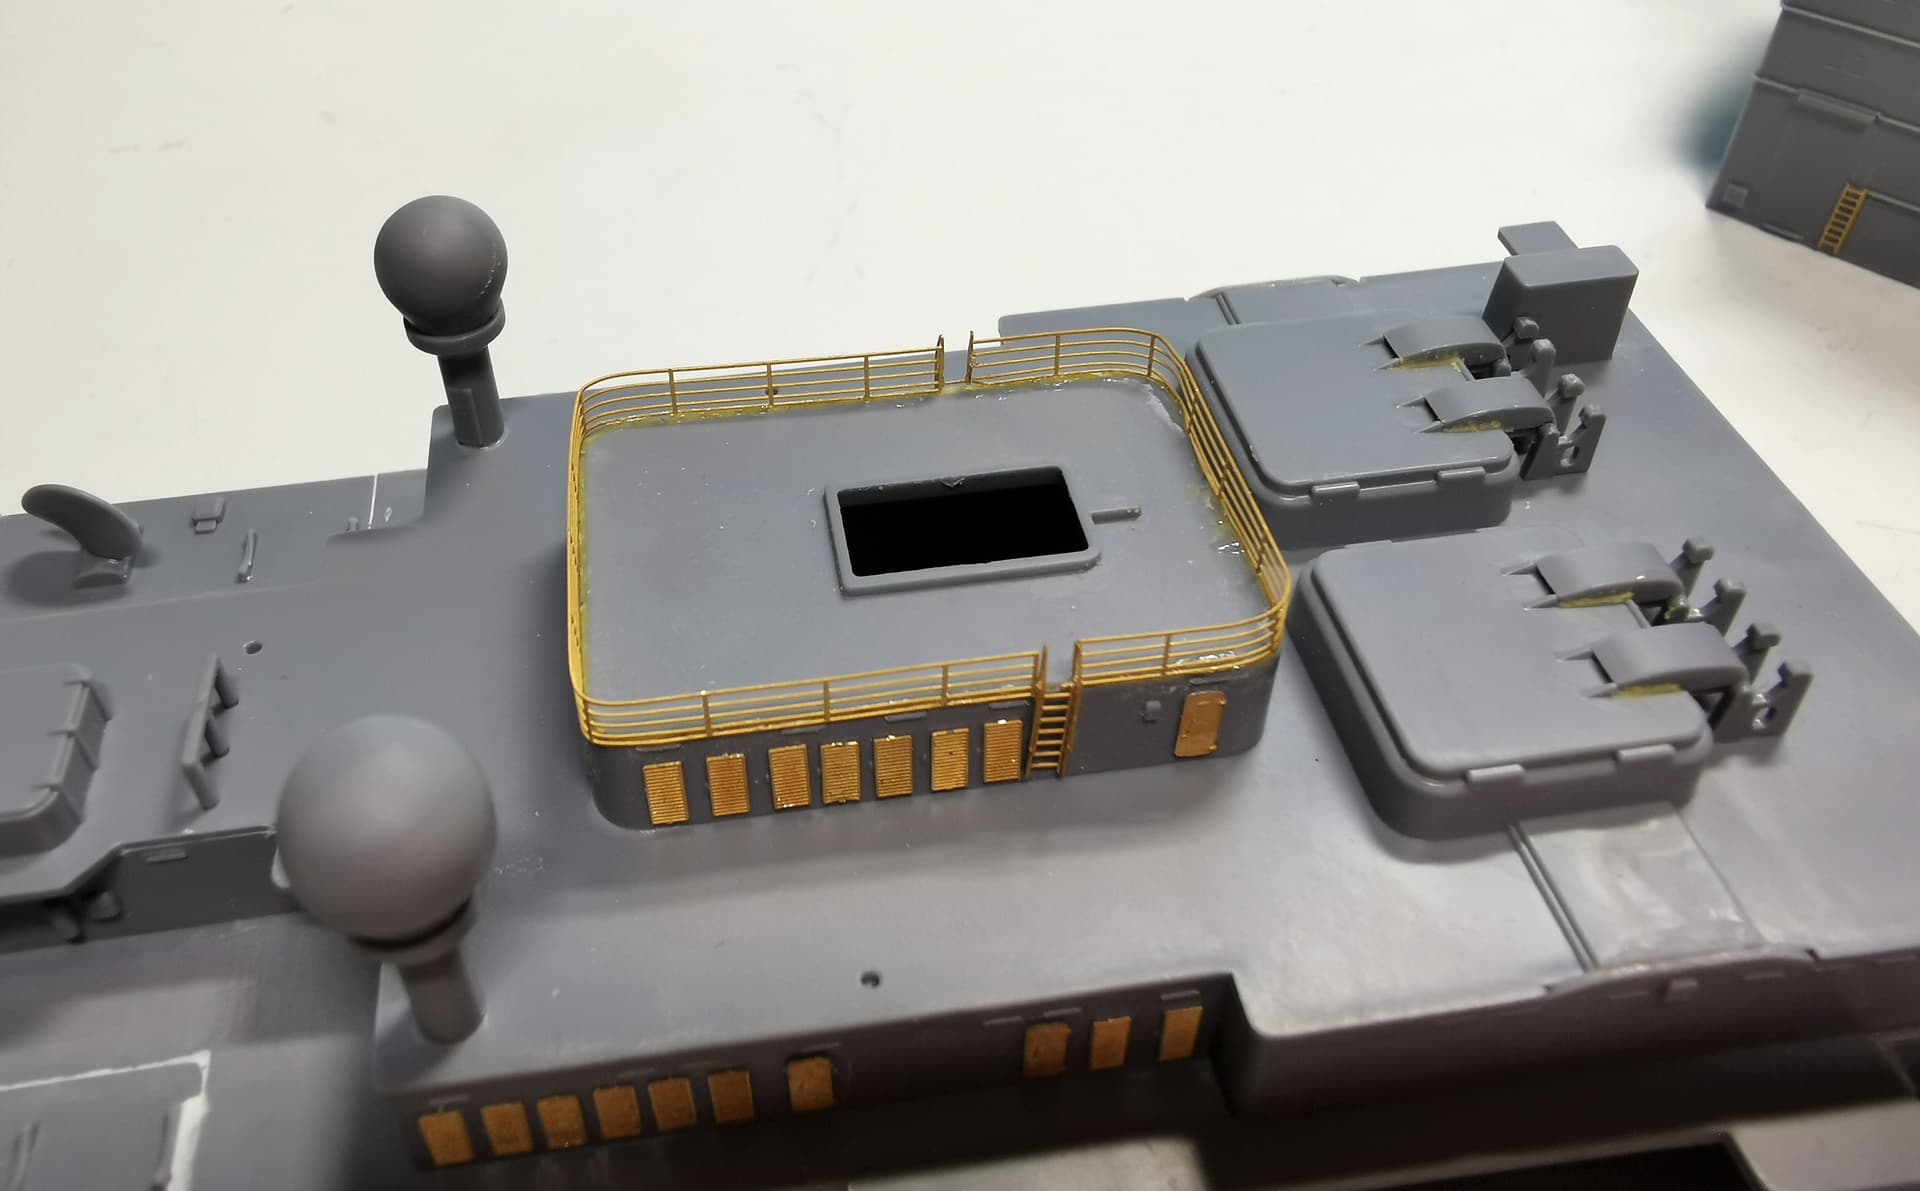
Started with some easy railings around the funnel deck
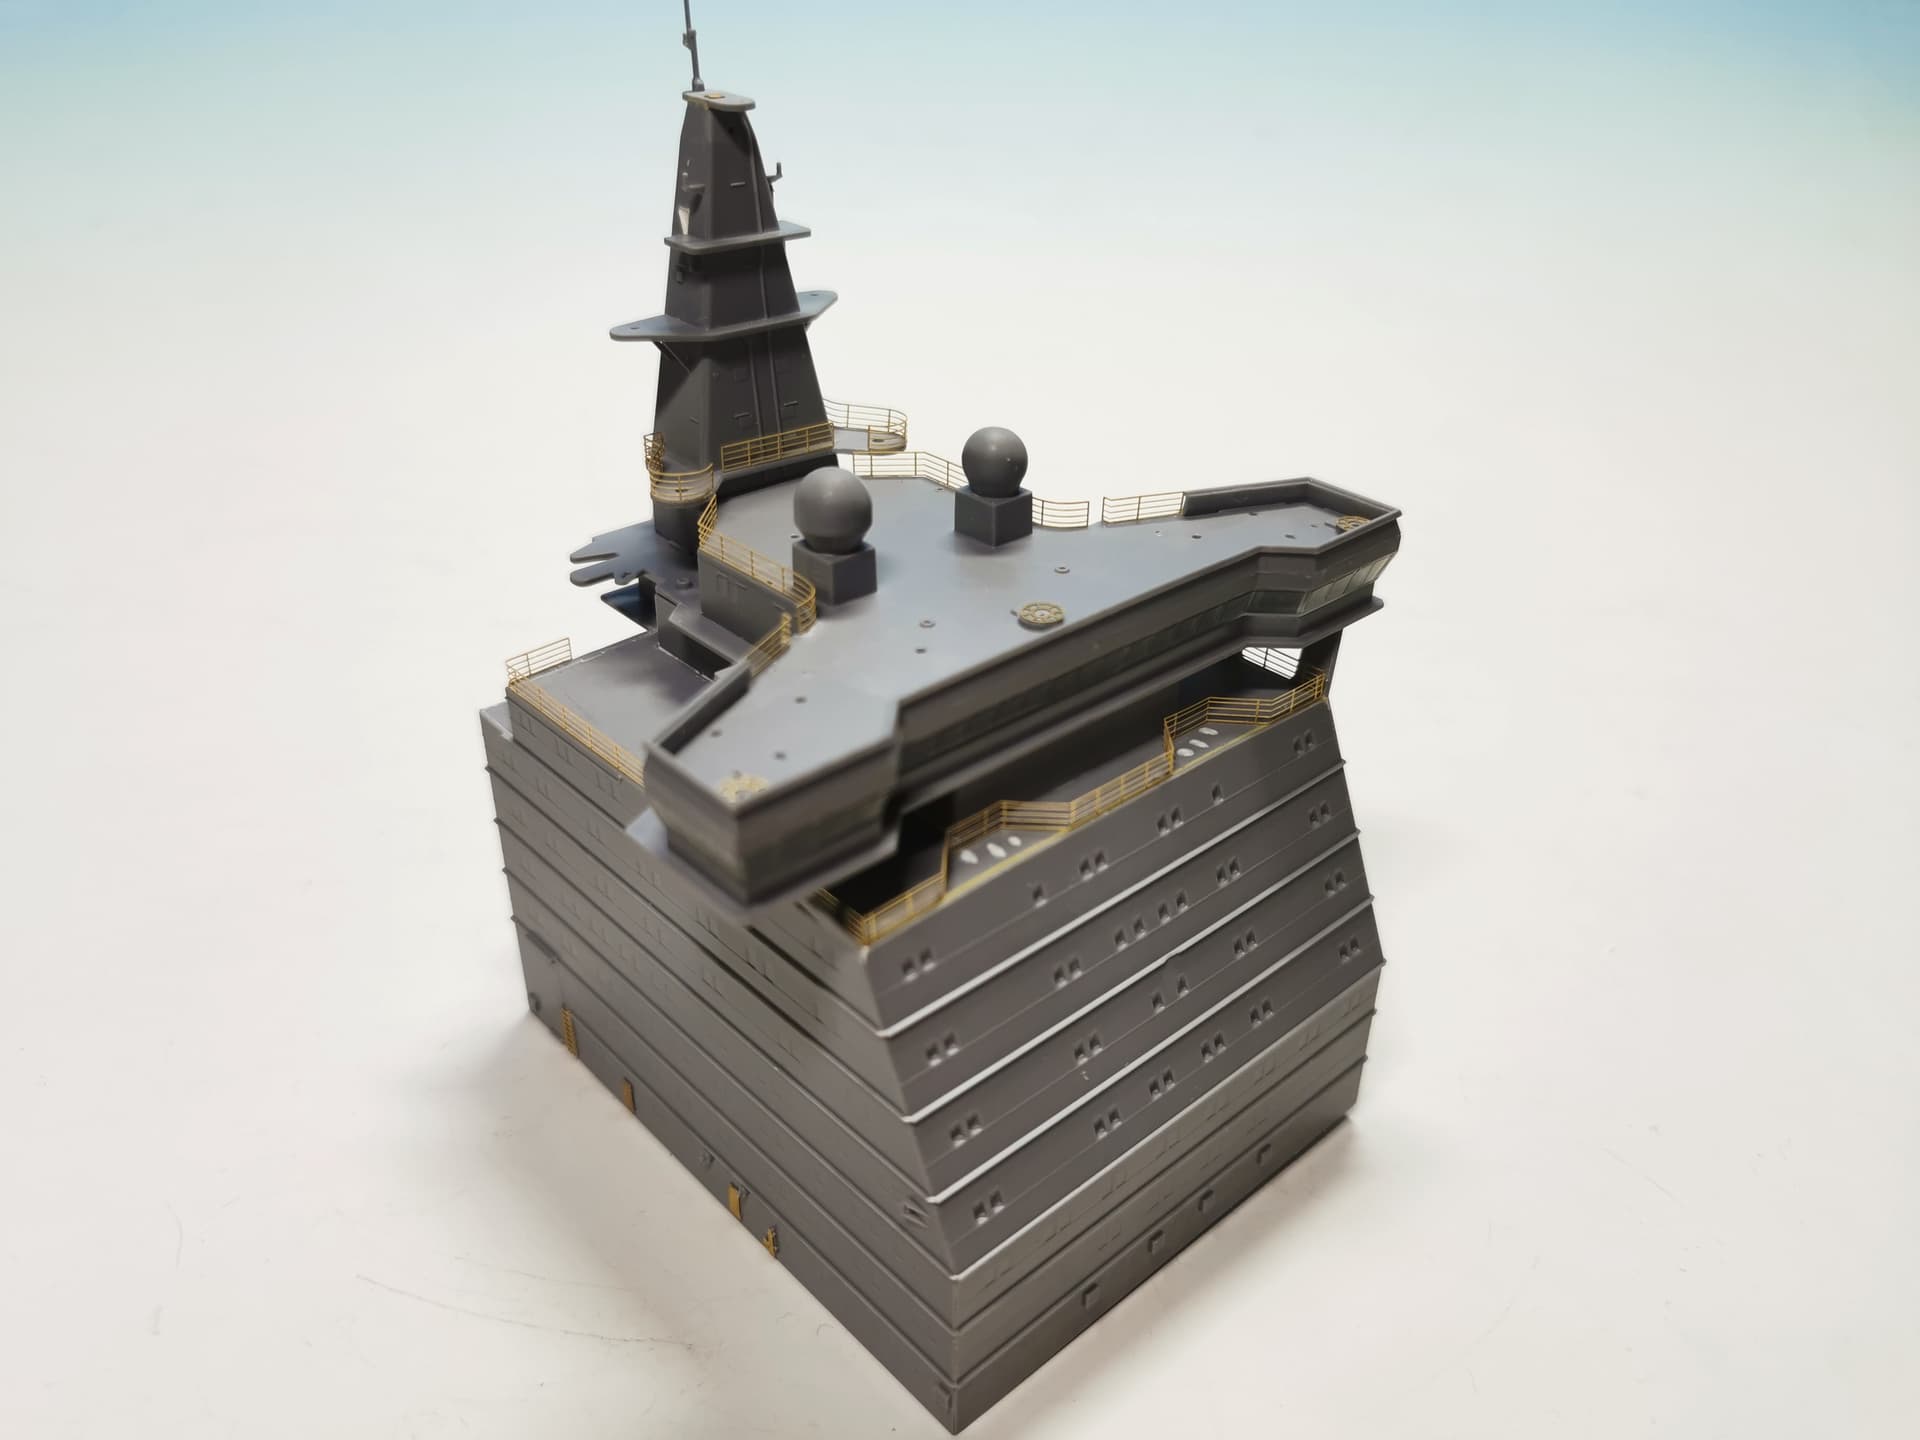
Then I made some first railings at the main superstructure and the funnel mast
Some small parts were added at the winches
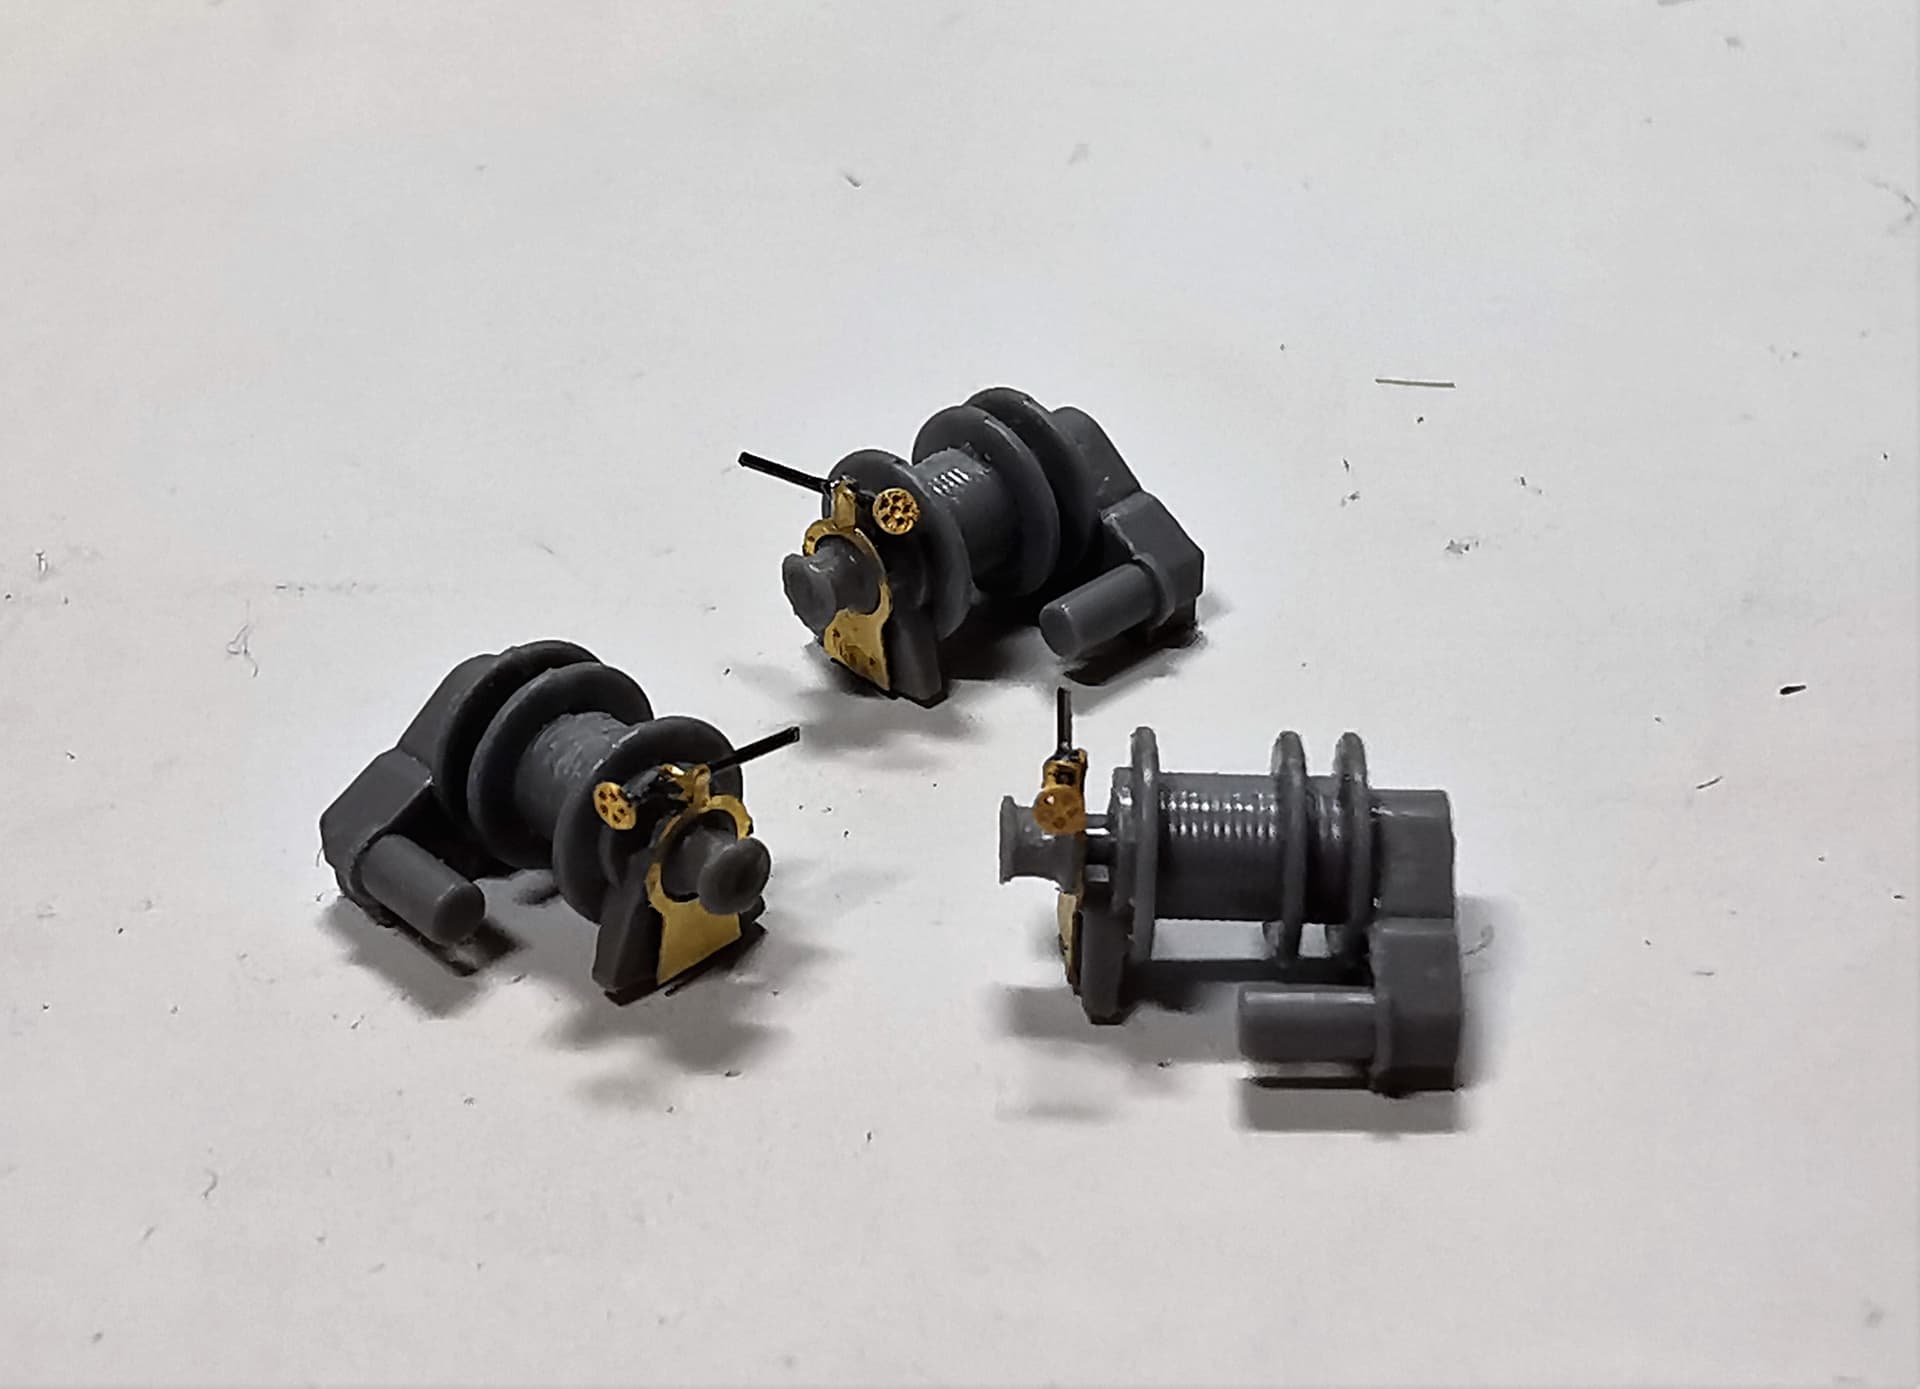
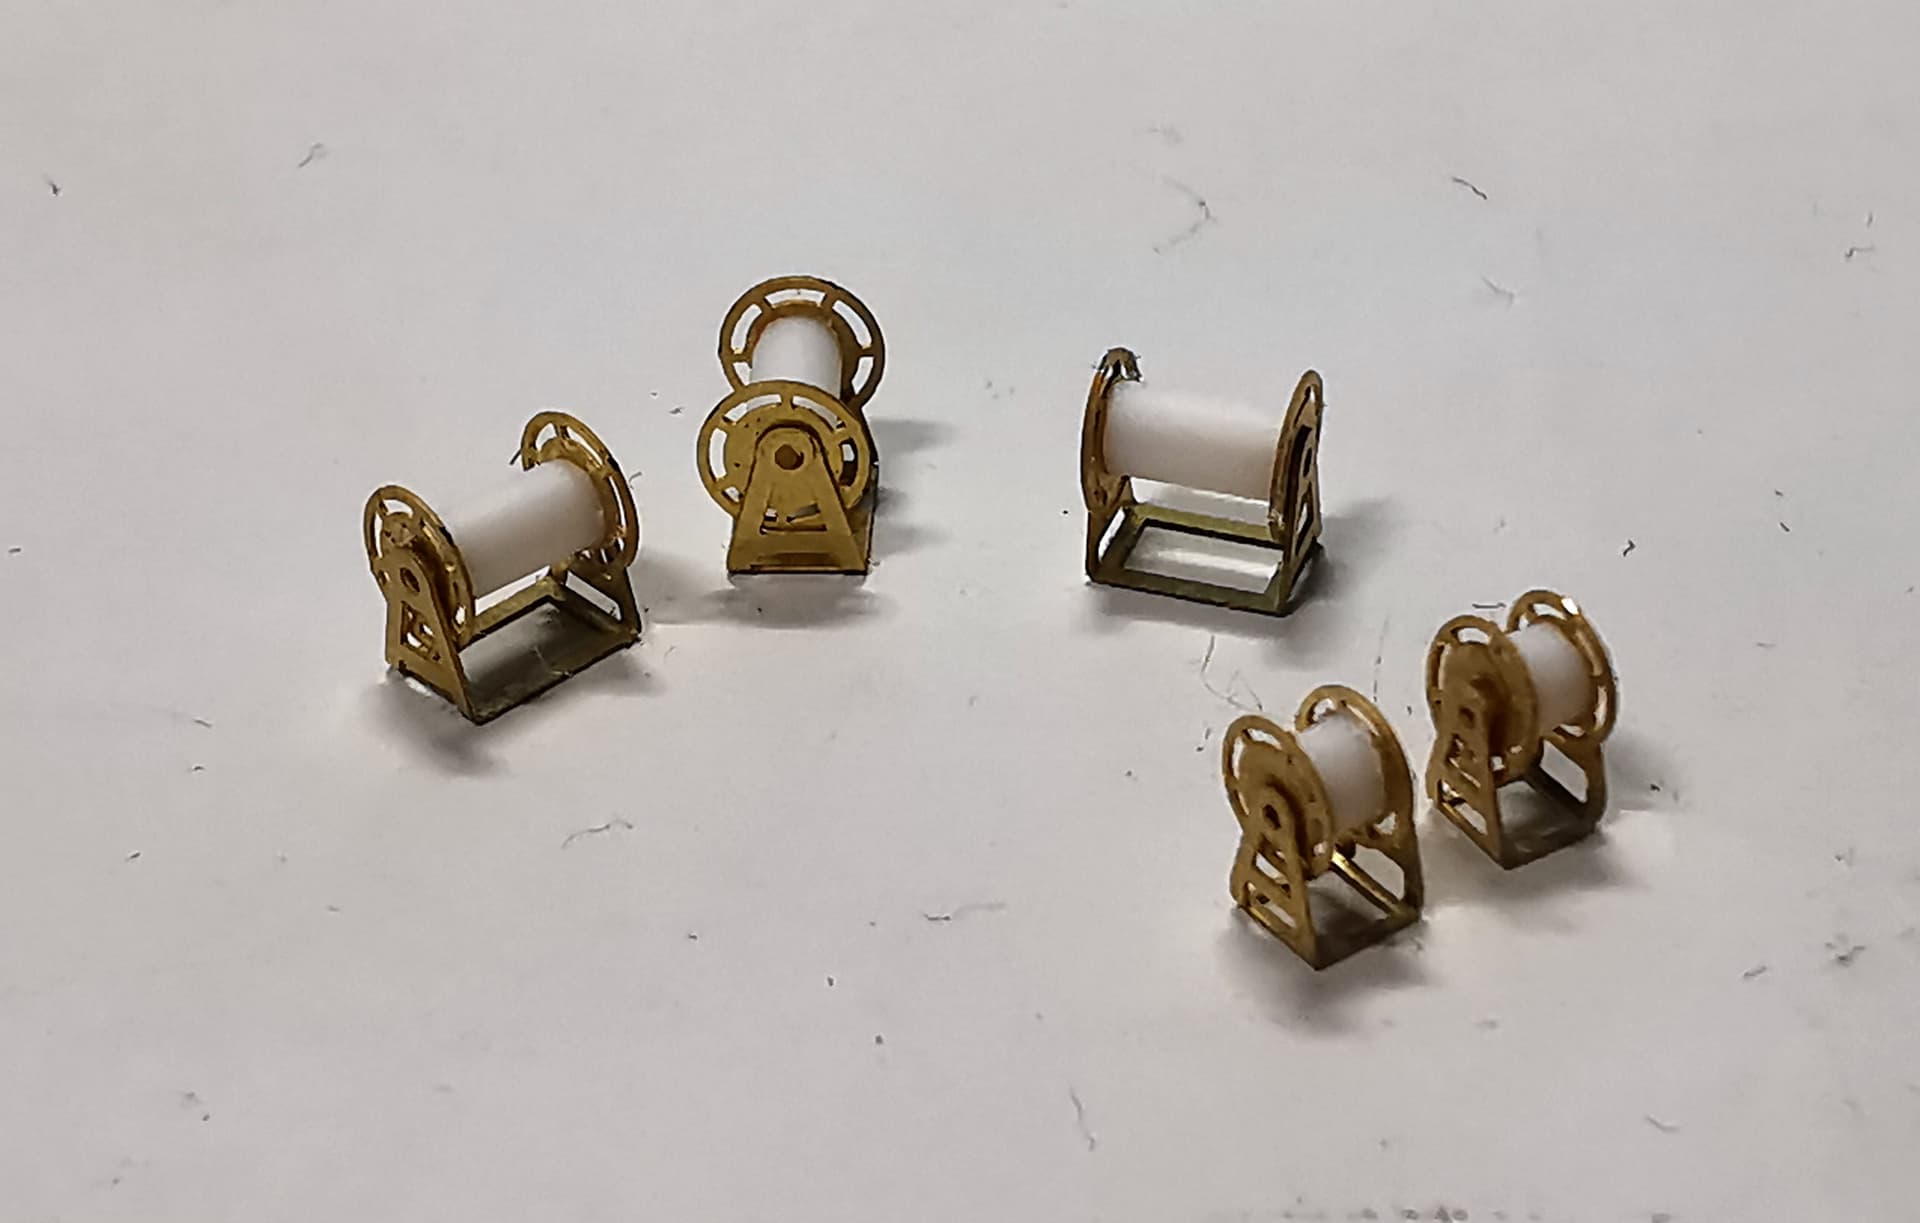
Etched cable reels were build instead of the plastic ones
Some more small details were added at the rear deck and the main deck before painting will start
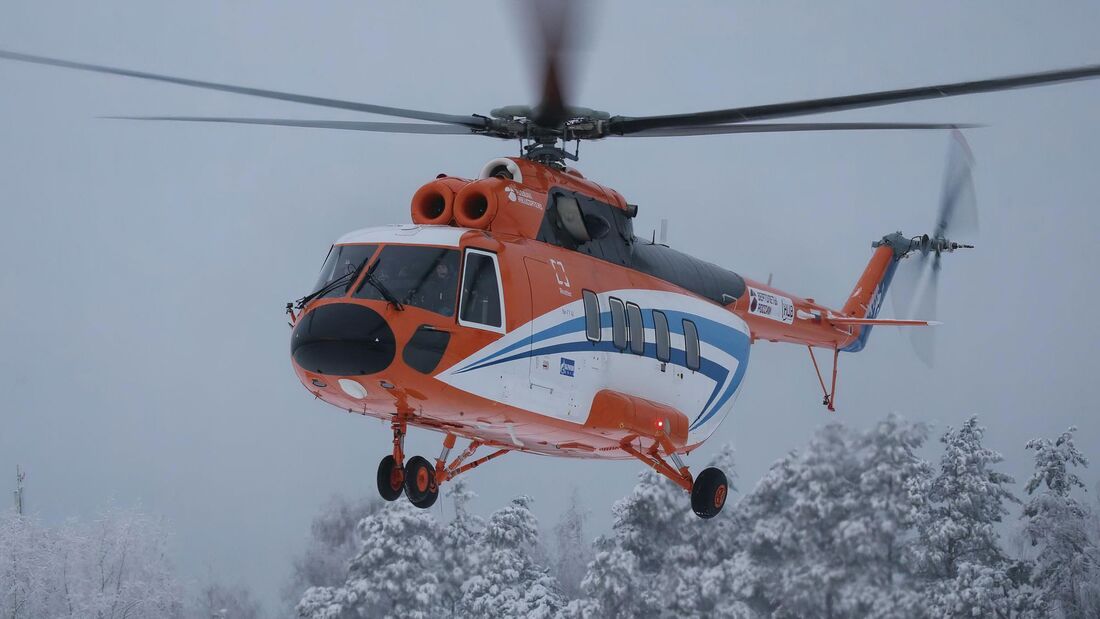
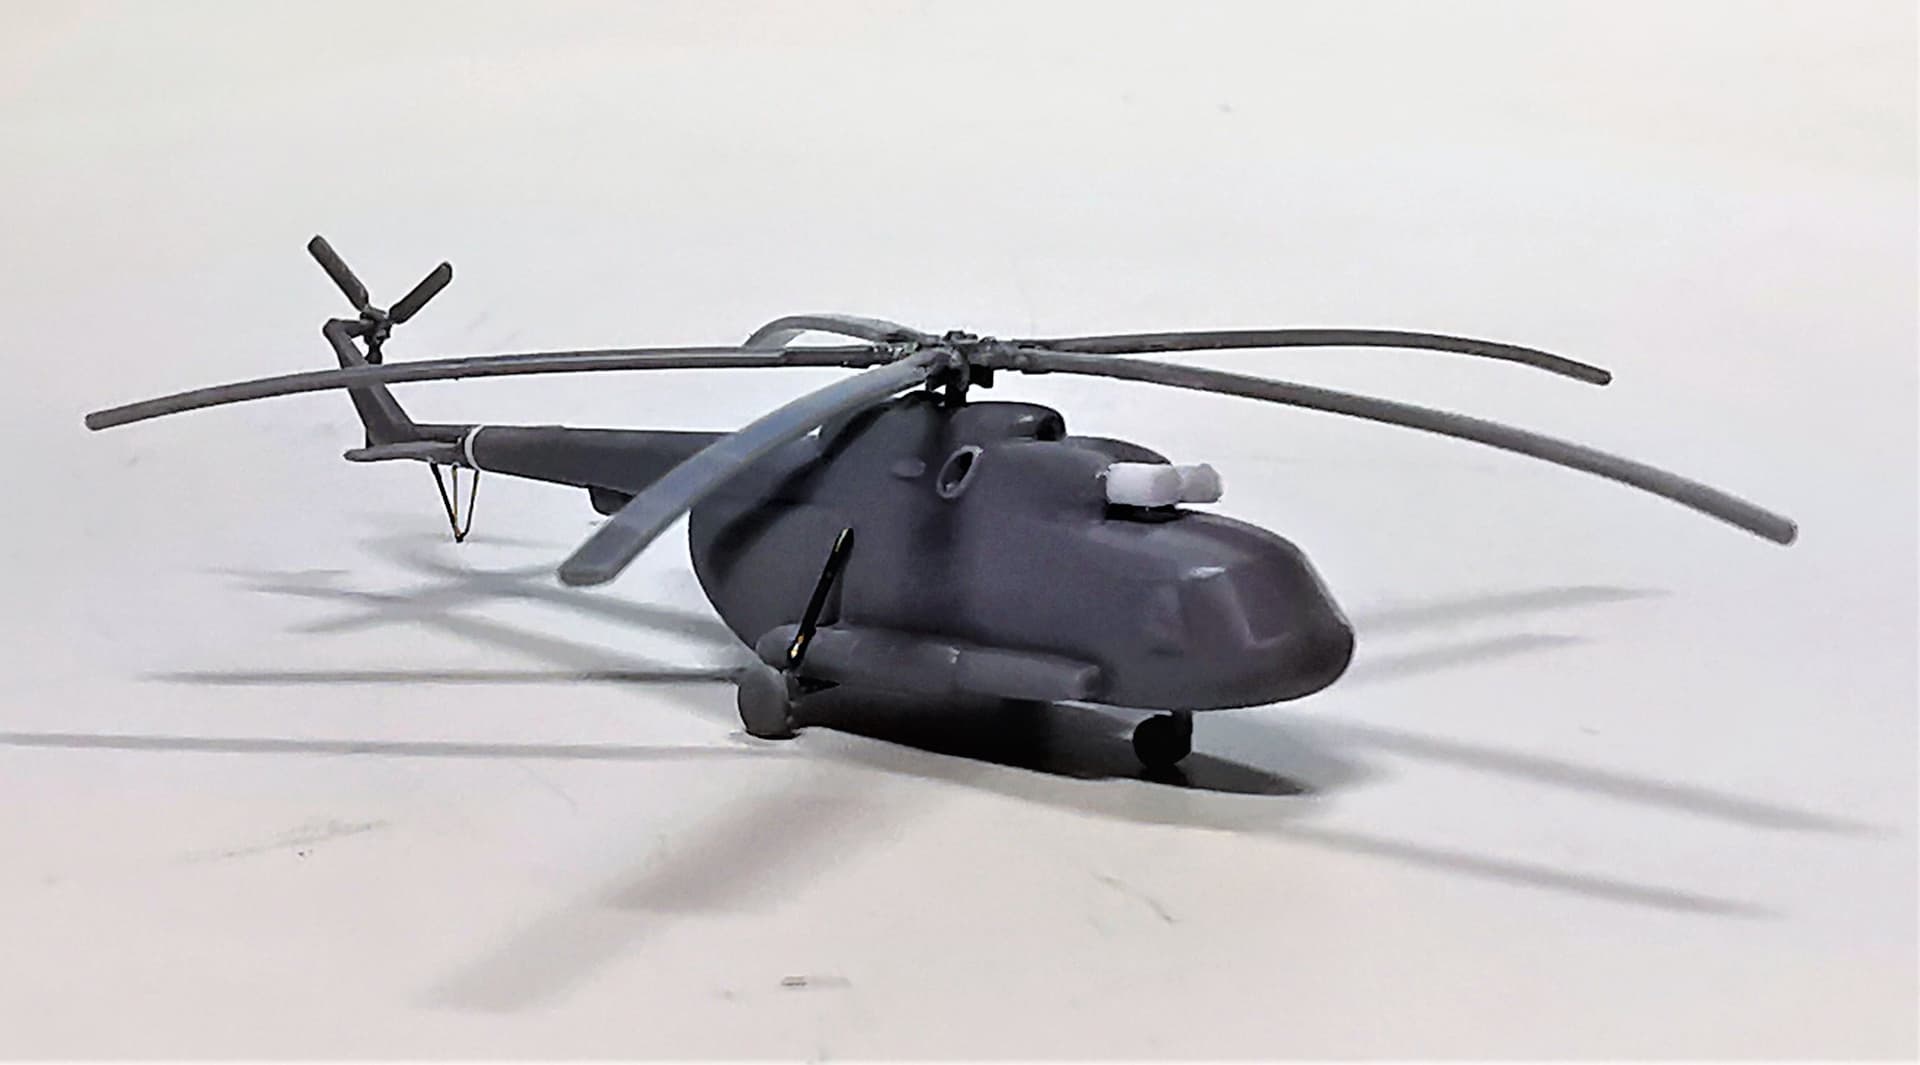
And I found a first picture of the recently accepted new Mil-Mi 171A3 helicopter. These helicopters are especially intended for the use in arctic climate areas; one of these will be stationed aboard the ARKTIKA.
Cheers 
13 Likes
Today I managed to tackle all the etched railings, ladders and steps I will attach before painting. Meticulous work was necessary here because of the fragile parts and the different bending angles. But I think it looks nice:
Now the painting stage can start soon 

14 Likes
Top class work there Thomas- judging by the size I’m sure all that metal was not an easy job! It was certainly worth it though- it looks awesome.
That’s looking fantastic Thomas, and super neat everywhere. Great work
Thomas, excellent work on the PE installation.
Mark
Some more railings done. I have to say it is not as easy as expected as MICRODISIGN´s construction leavlet don´t adress all parts. Some are double, triple as much as needed inside, many are not mentioned at all (for example all the hatches 27 x 101, 2 x 152, a lot doors 100L and 100R, 27 x handwheels 103) Some parts are mentioned in the instructions but no informations where to place (for example 4 x support grates, each one consisting of parts 4 x 10⁴ and 1 x 126; two racks part 160, The railing for the forward mast at the ship´s bow isn´t mentioned at all, I will use up all other railings first before I will able to find out whats left to use for this one), some parts shown with wrong placement in the instructions (2 x Antennas 196 shown looking sidewards but in reality they should look forward; this error is already glued in and I don´t want to rip them off again). Some railings have notches at the needed places where to be bended but not all and, to make matters worse, some notches are at areas where you don´t need a bend and some railings don´t have notches at all. This is especially difficult where you would need it seriously as with railing Part 29 which is very long and contains really some very complicated bends. Here I would have wished to split up the railings and give the modellers proper notches (snort!). This specific part is one who let normal modellers lean back with dis-encouragement to continue the build…
Luckily I found a photo documentary of the installed etched parts on the kit at MICRODISIGN´s homepage. They made 123 pictures which are more or less useful in looking at how and where some of the questionable parts should be installed.
Enough critics, I am happy I successfully tackled railing Part 29 which should be the most difficult one of the whole etched set. Glueing down at the kit should not represent a big problem

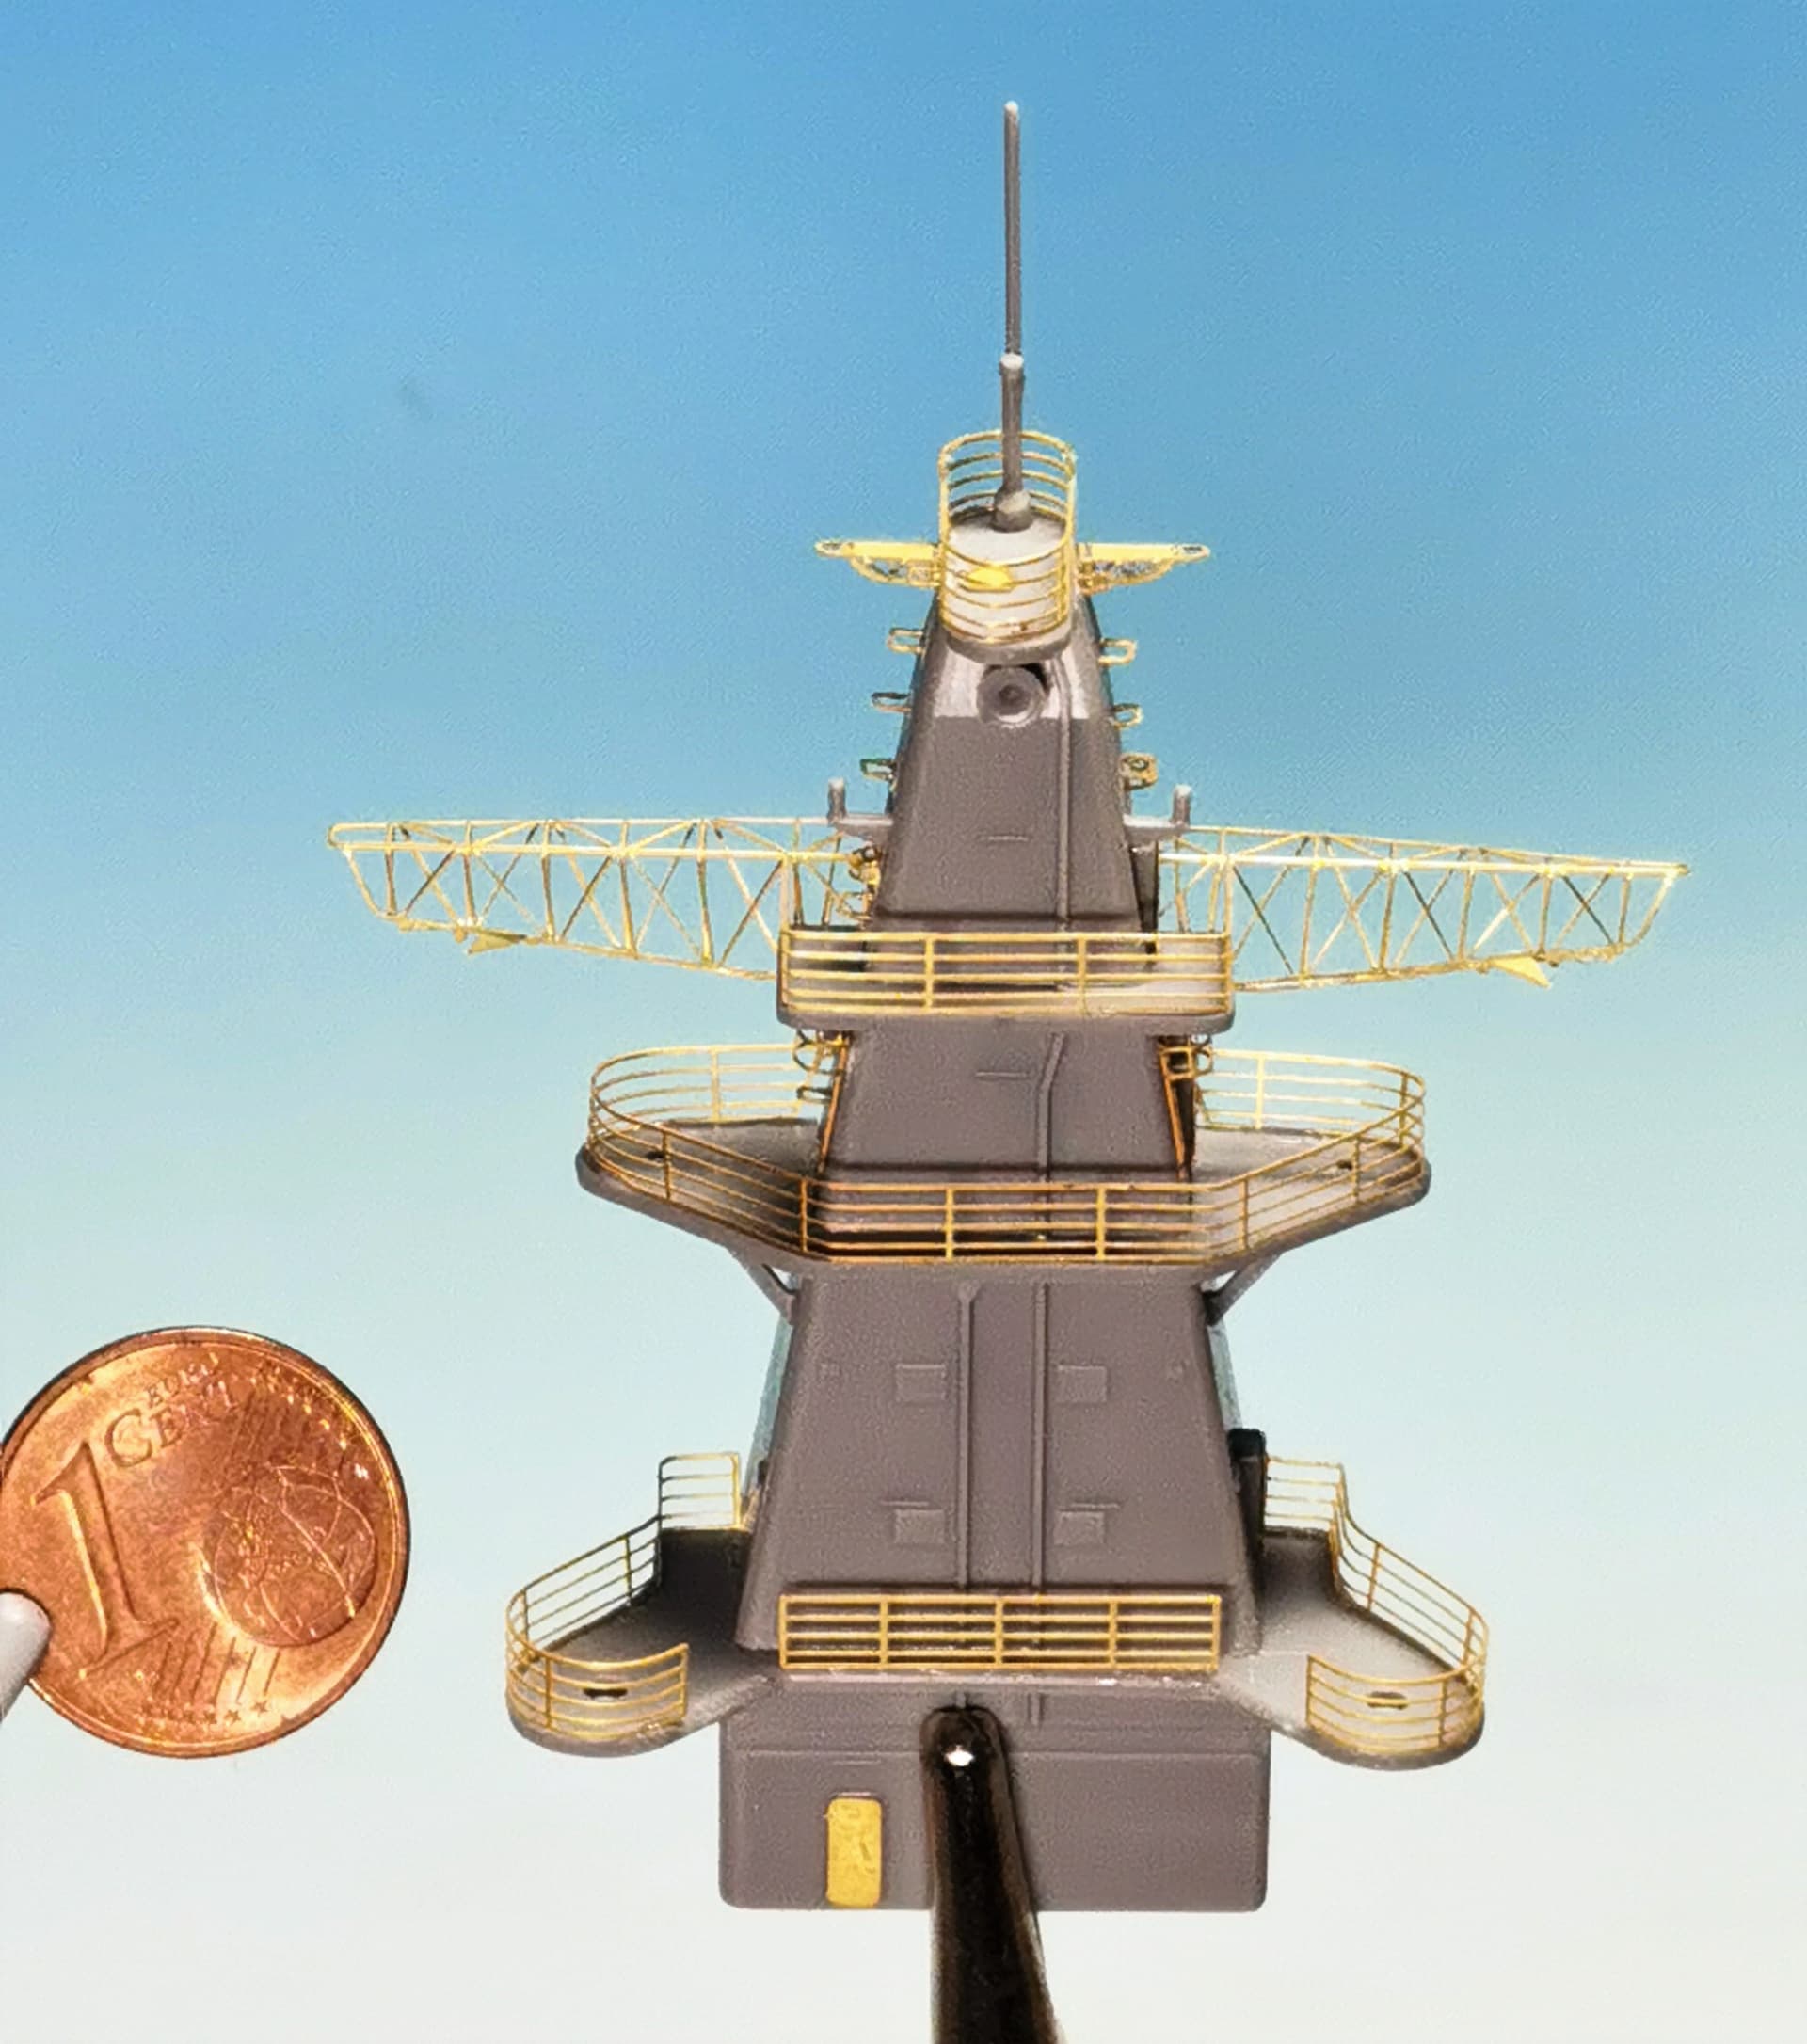
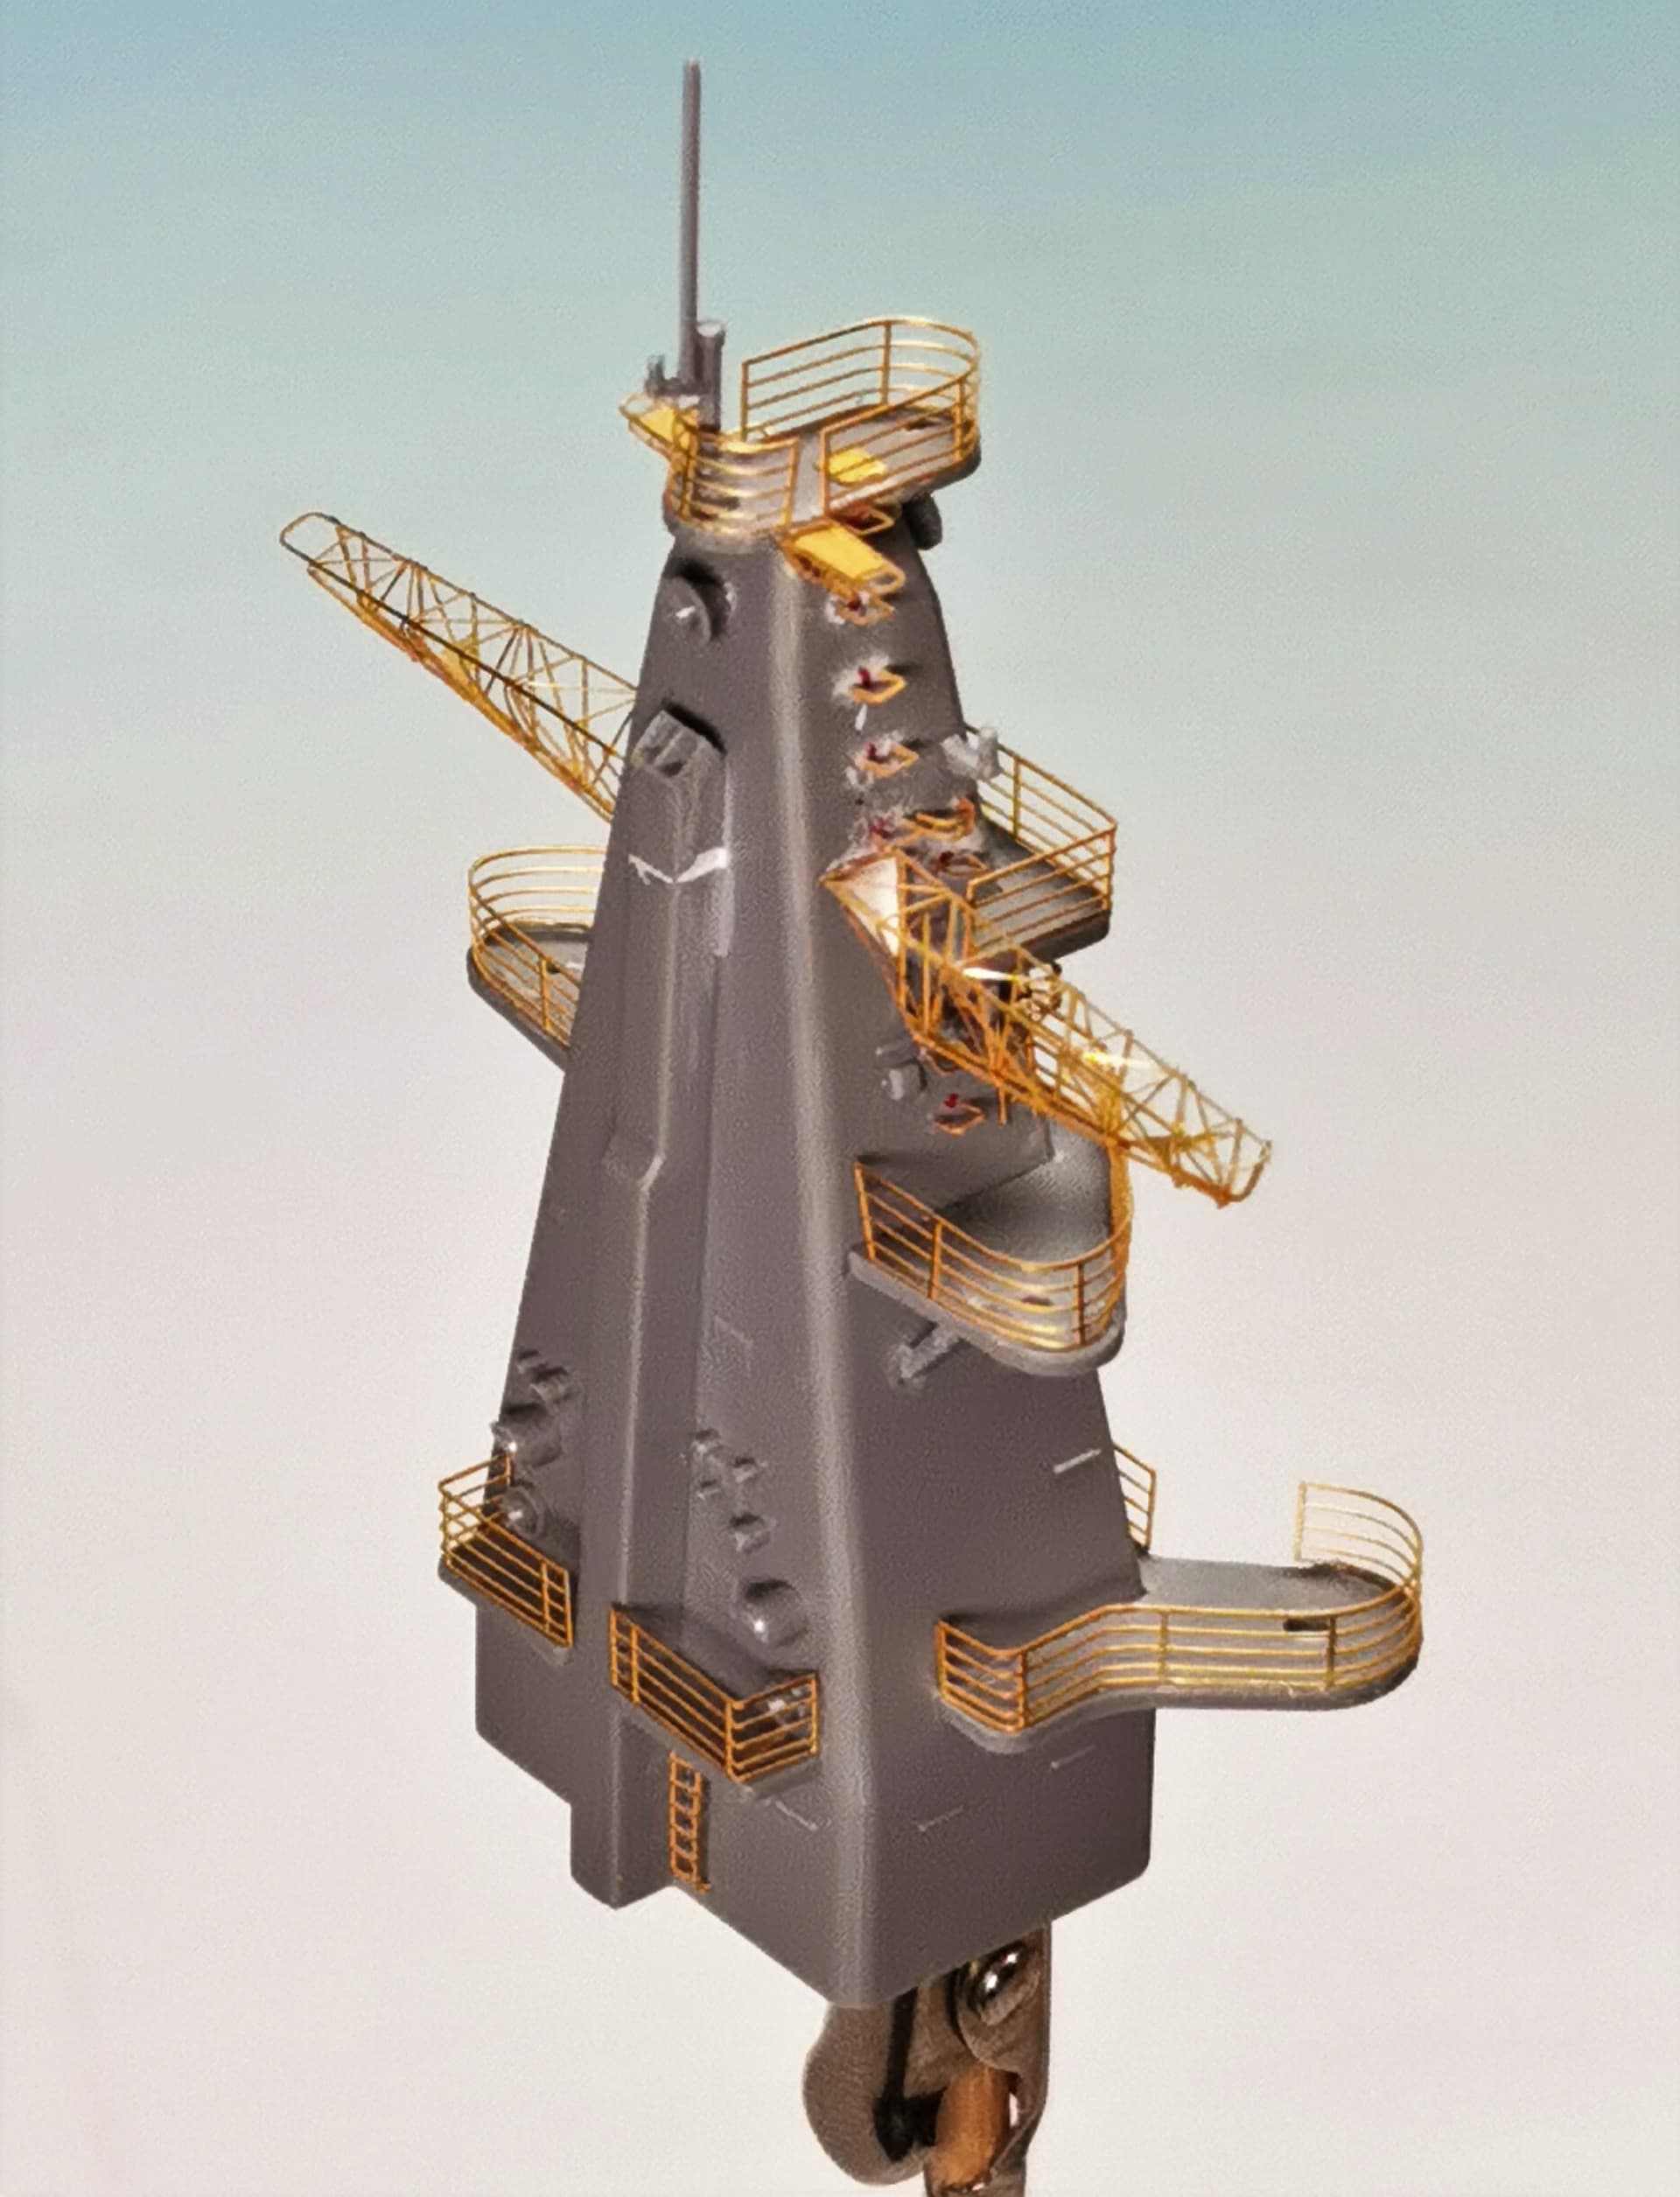
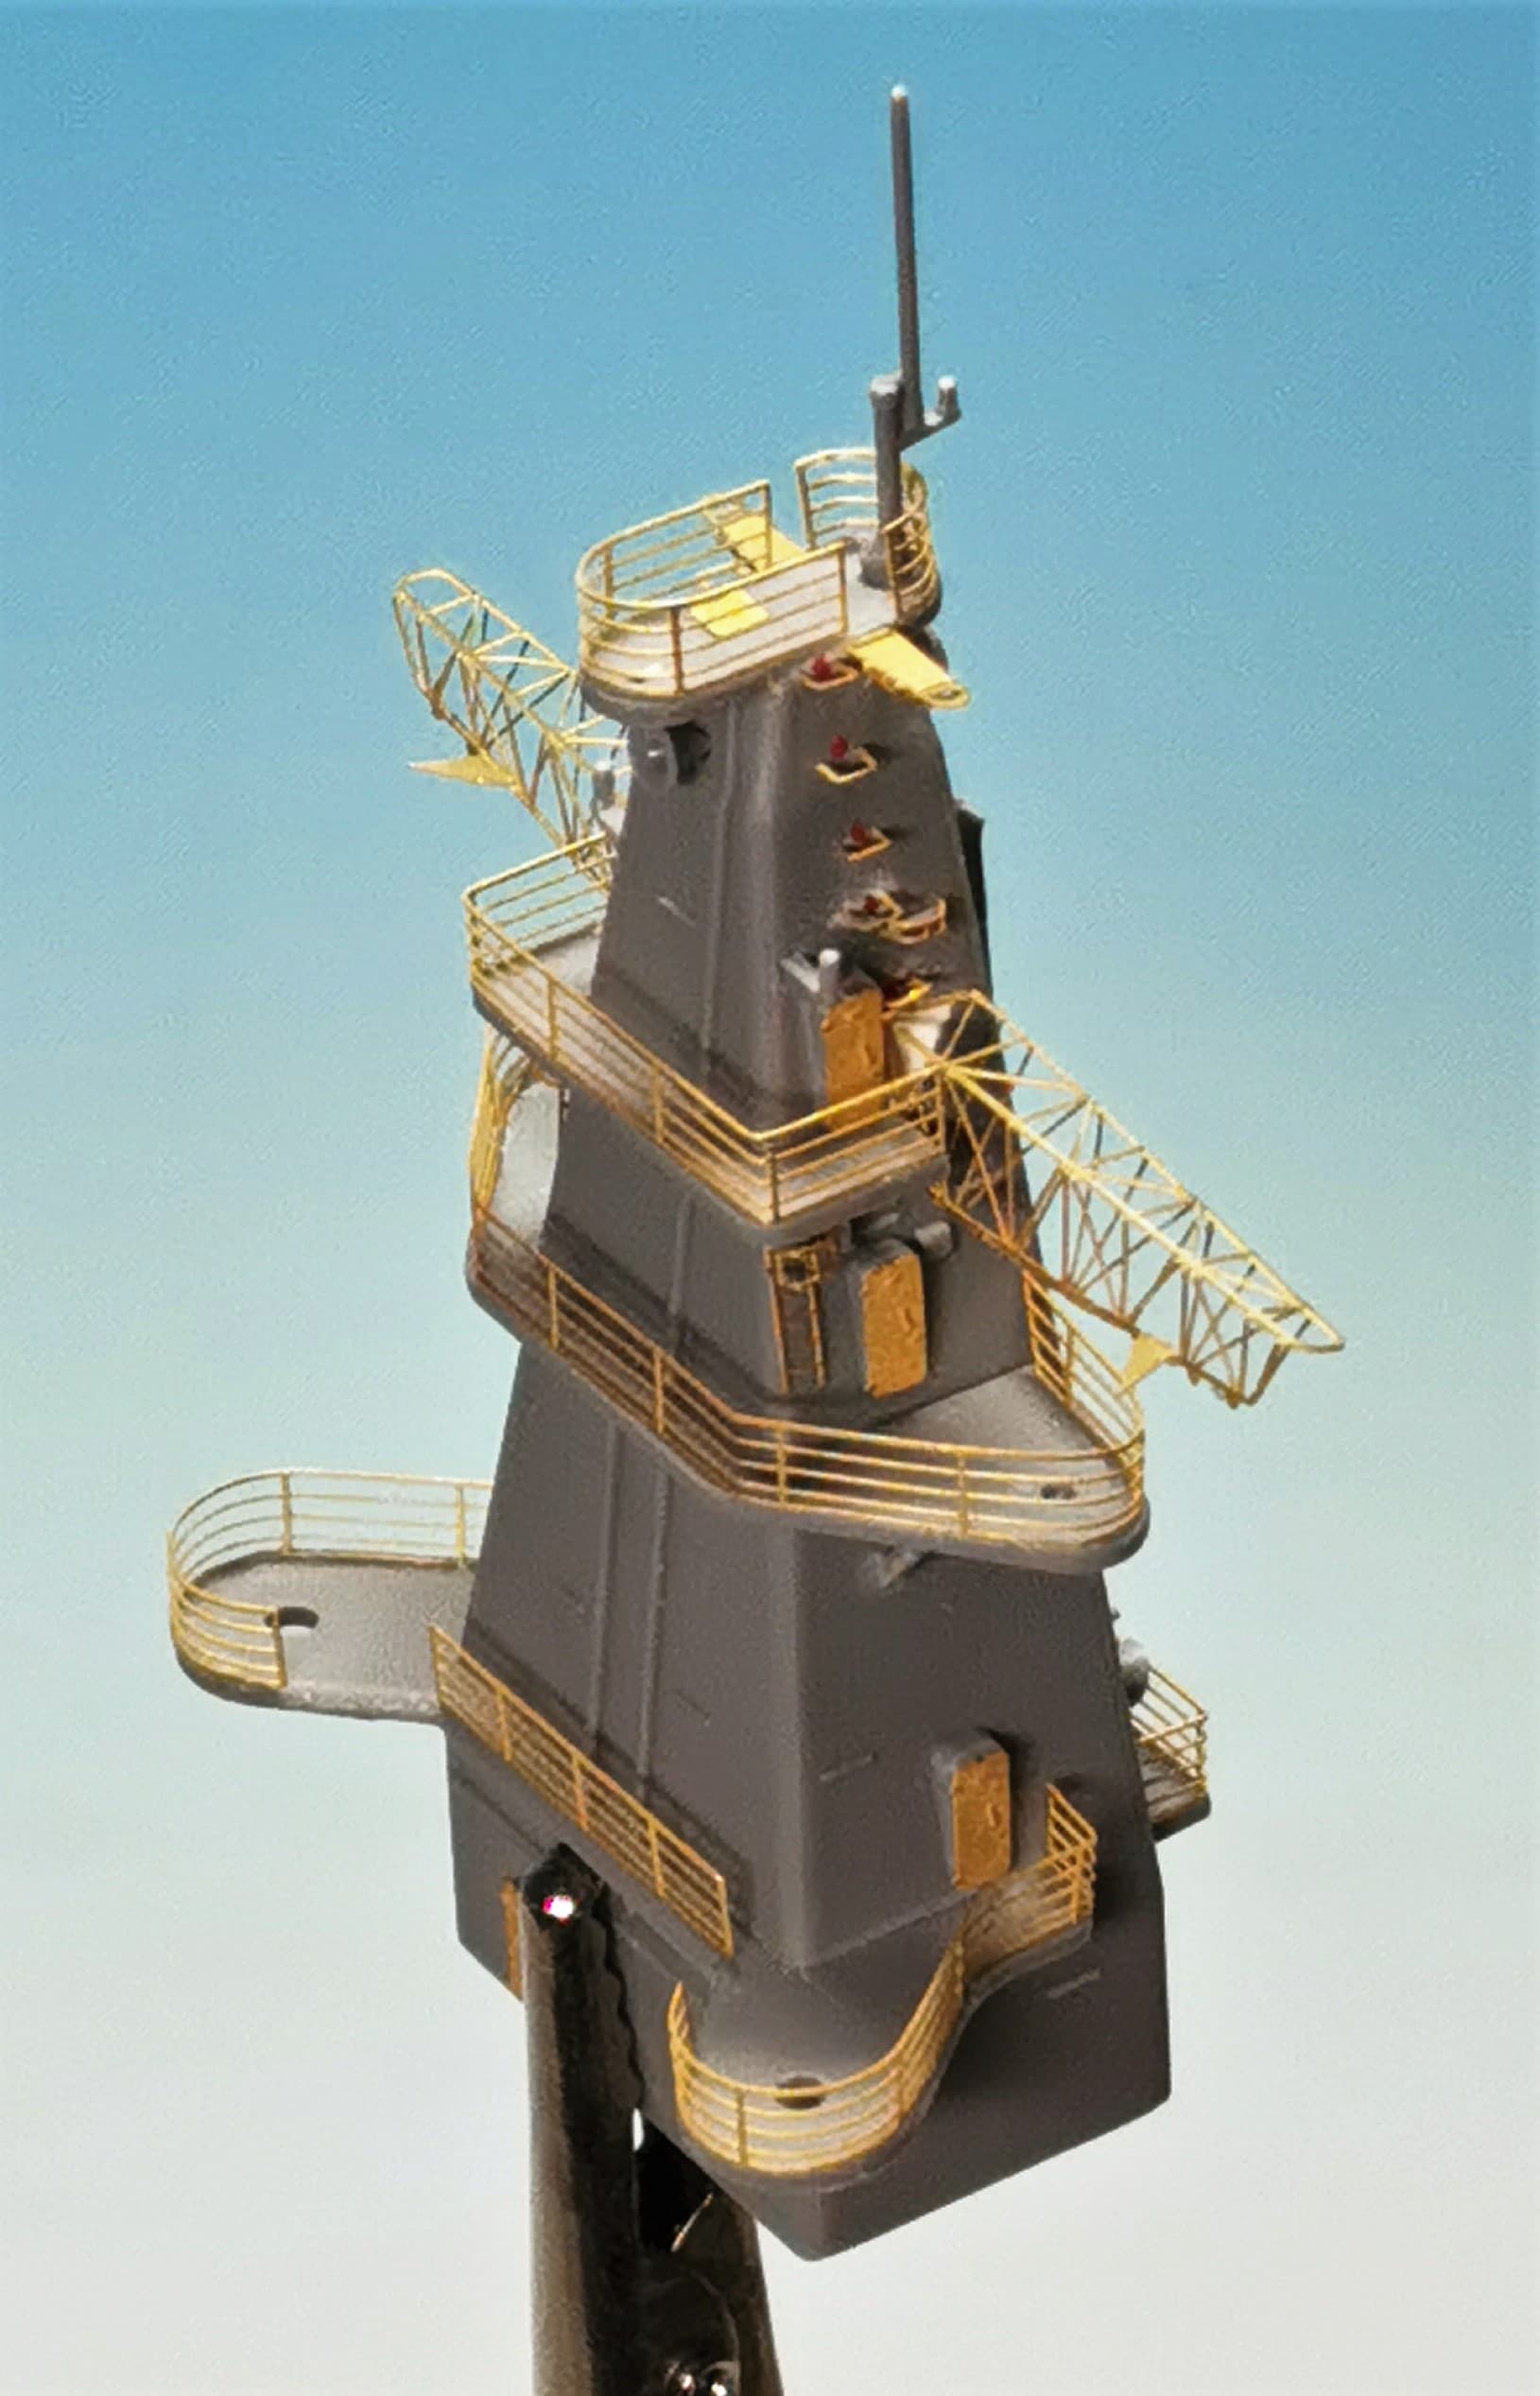
Some further etching was done at the helicopter control tower
As you can see this one is a hard nut to crack but I am one that never gives up 

Continueing with the cranes now 
13 Likes
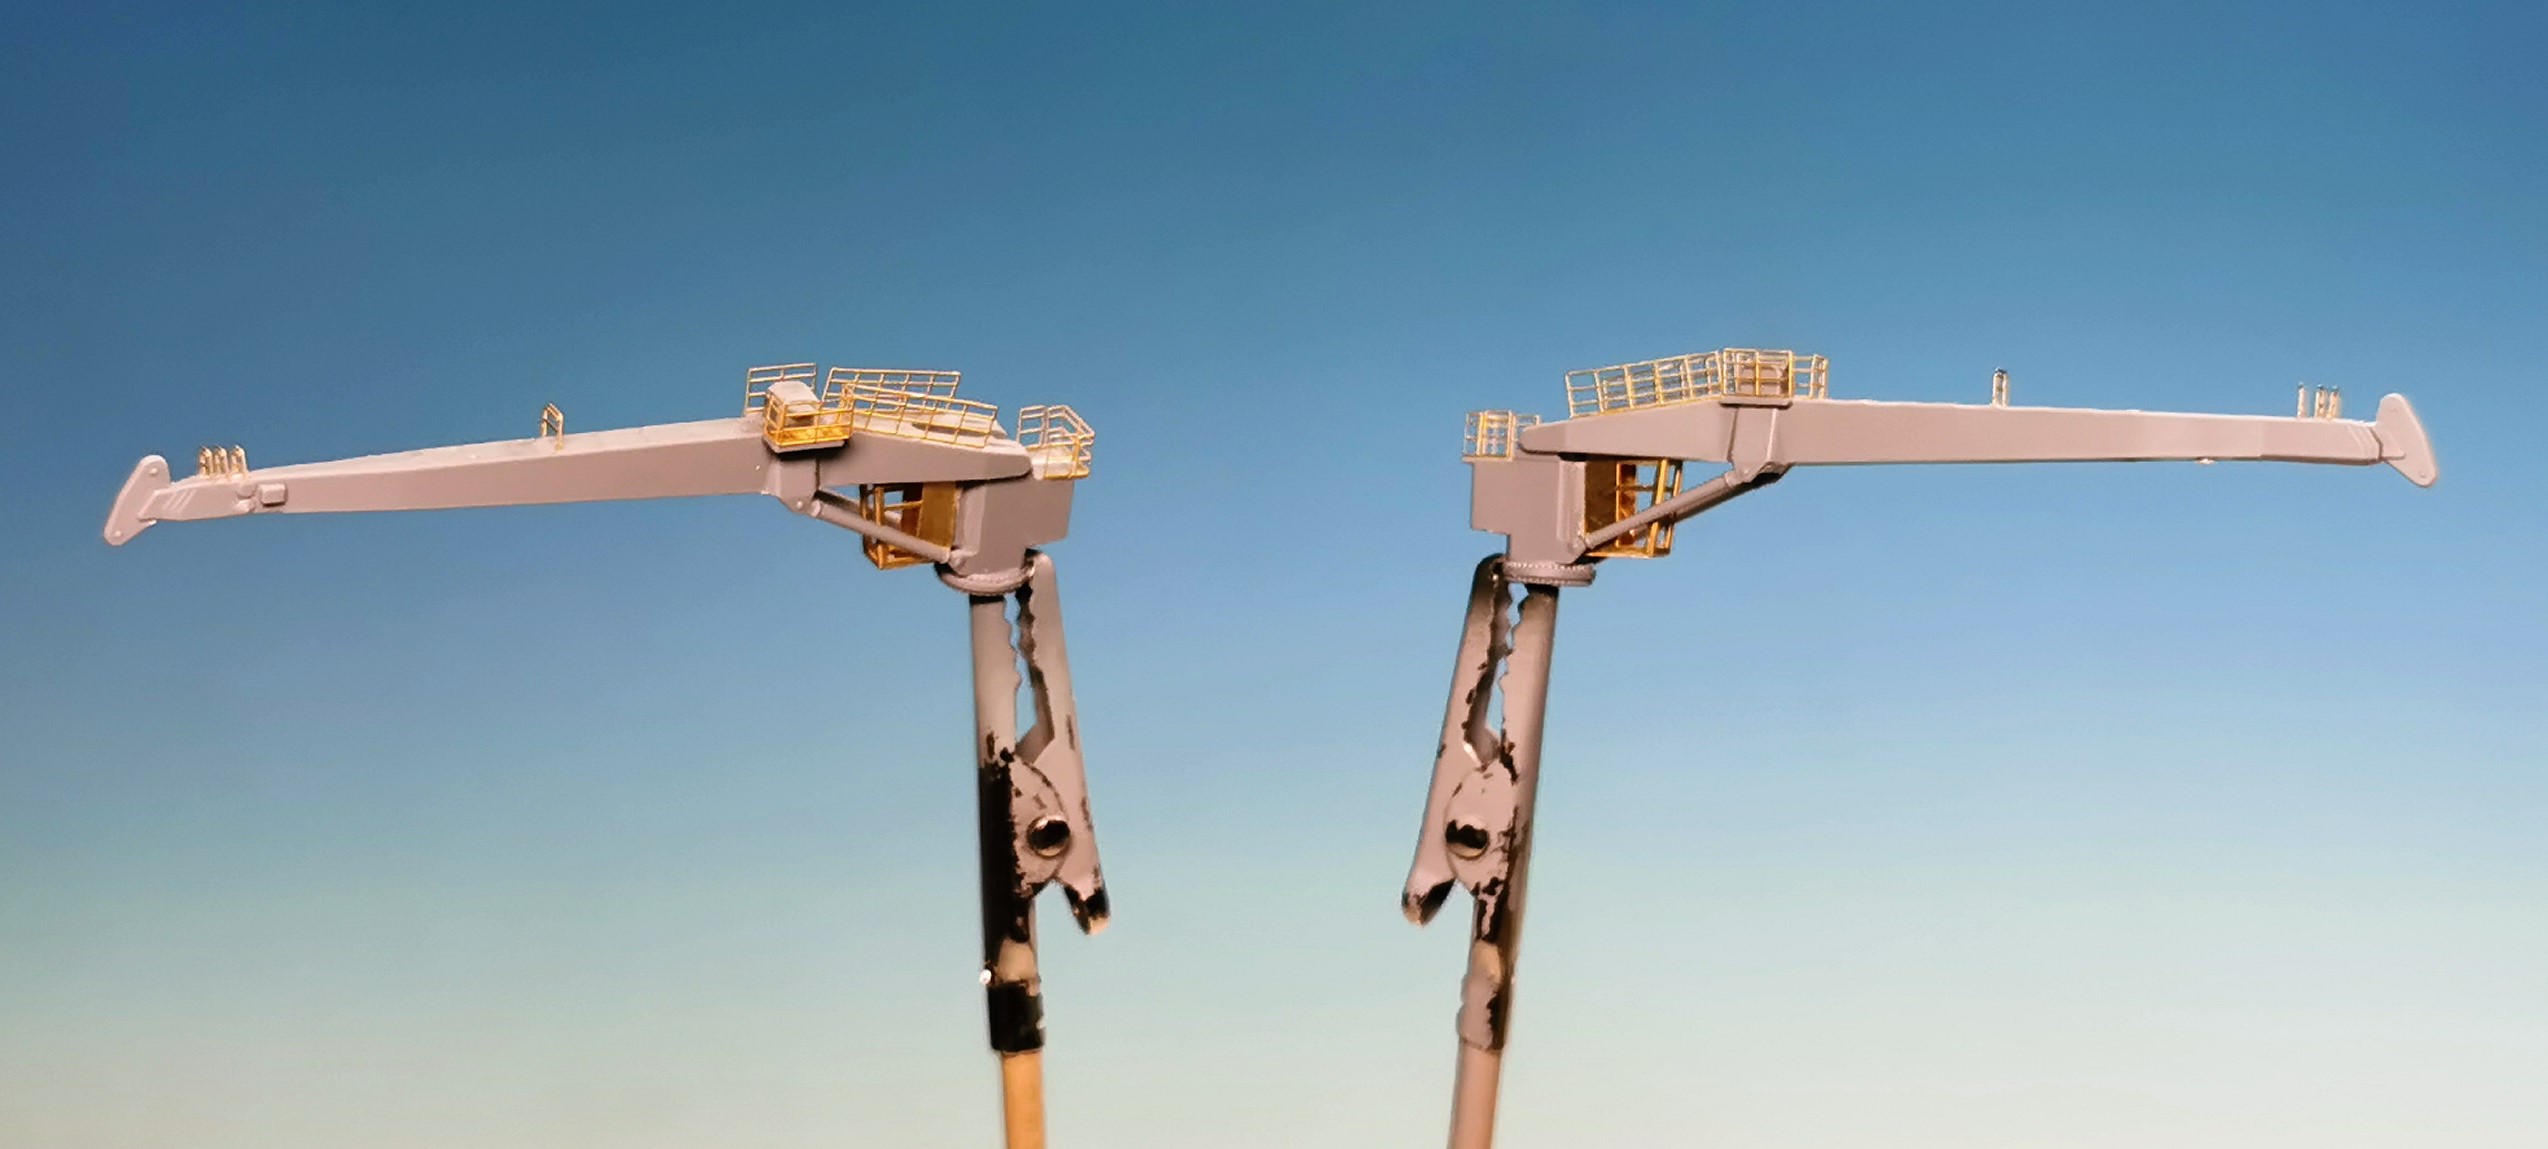
All four cranes are finished; luckily these went without any problems
smaller bow cranes
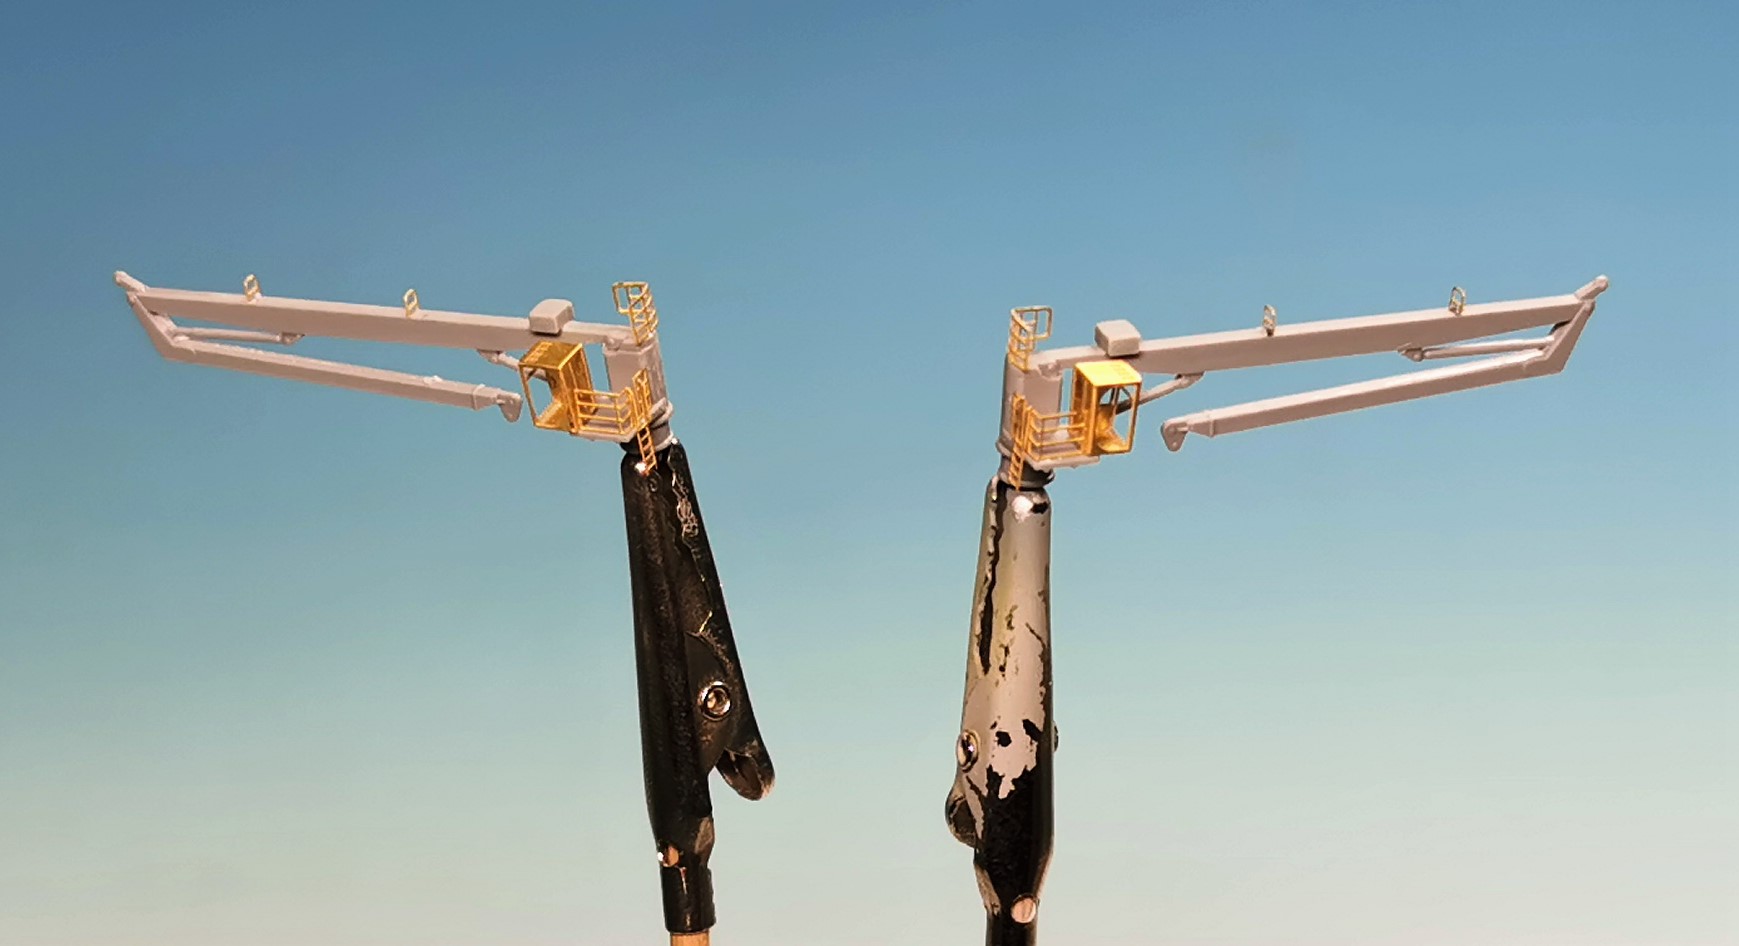
bigger stern cranes
now on for the last three small launches
11 Likes
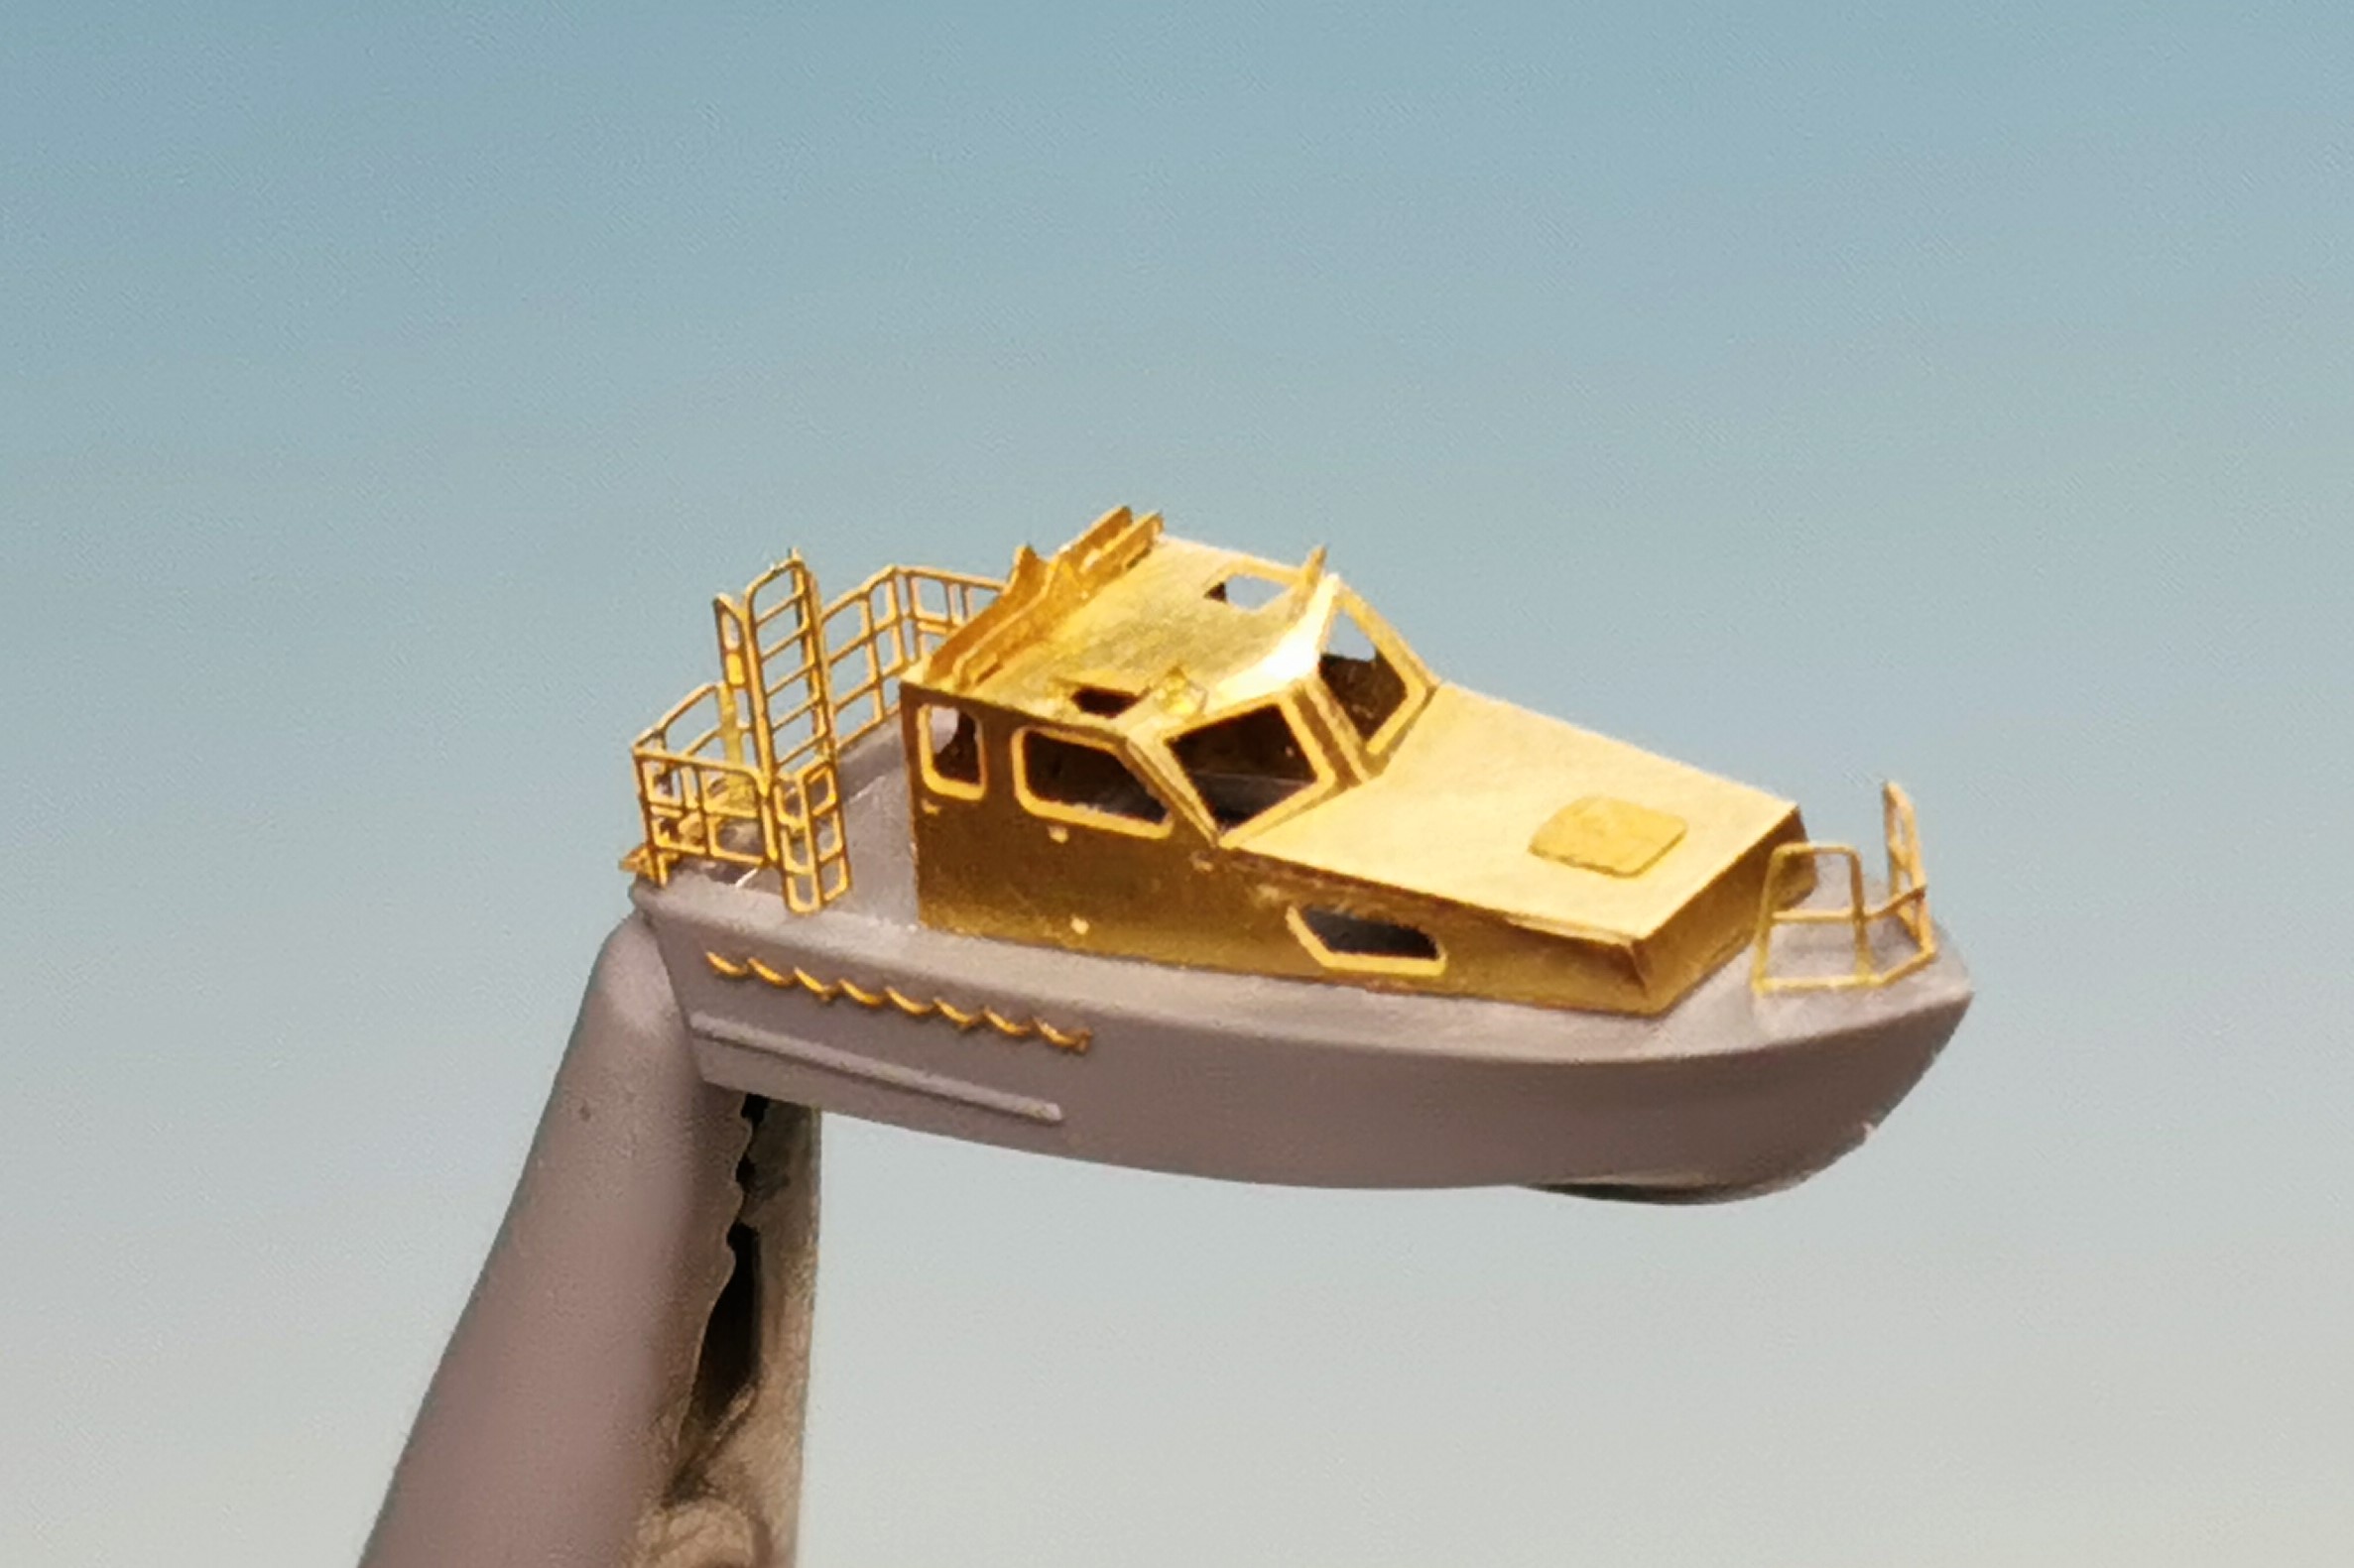
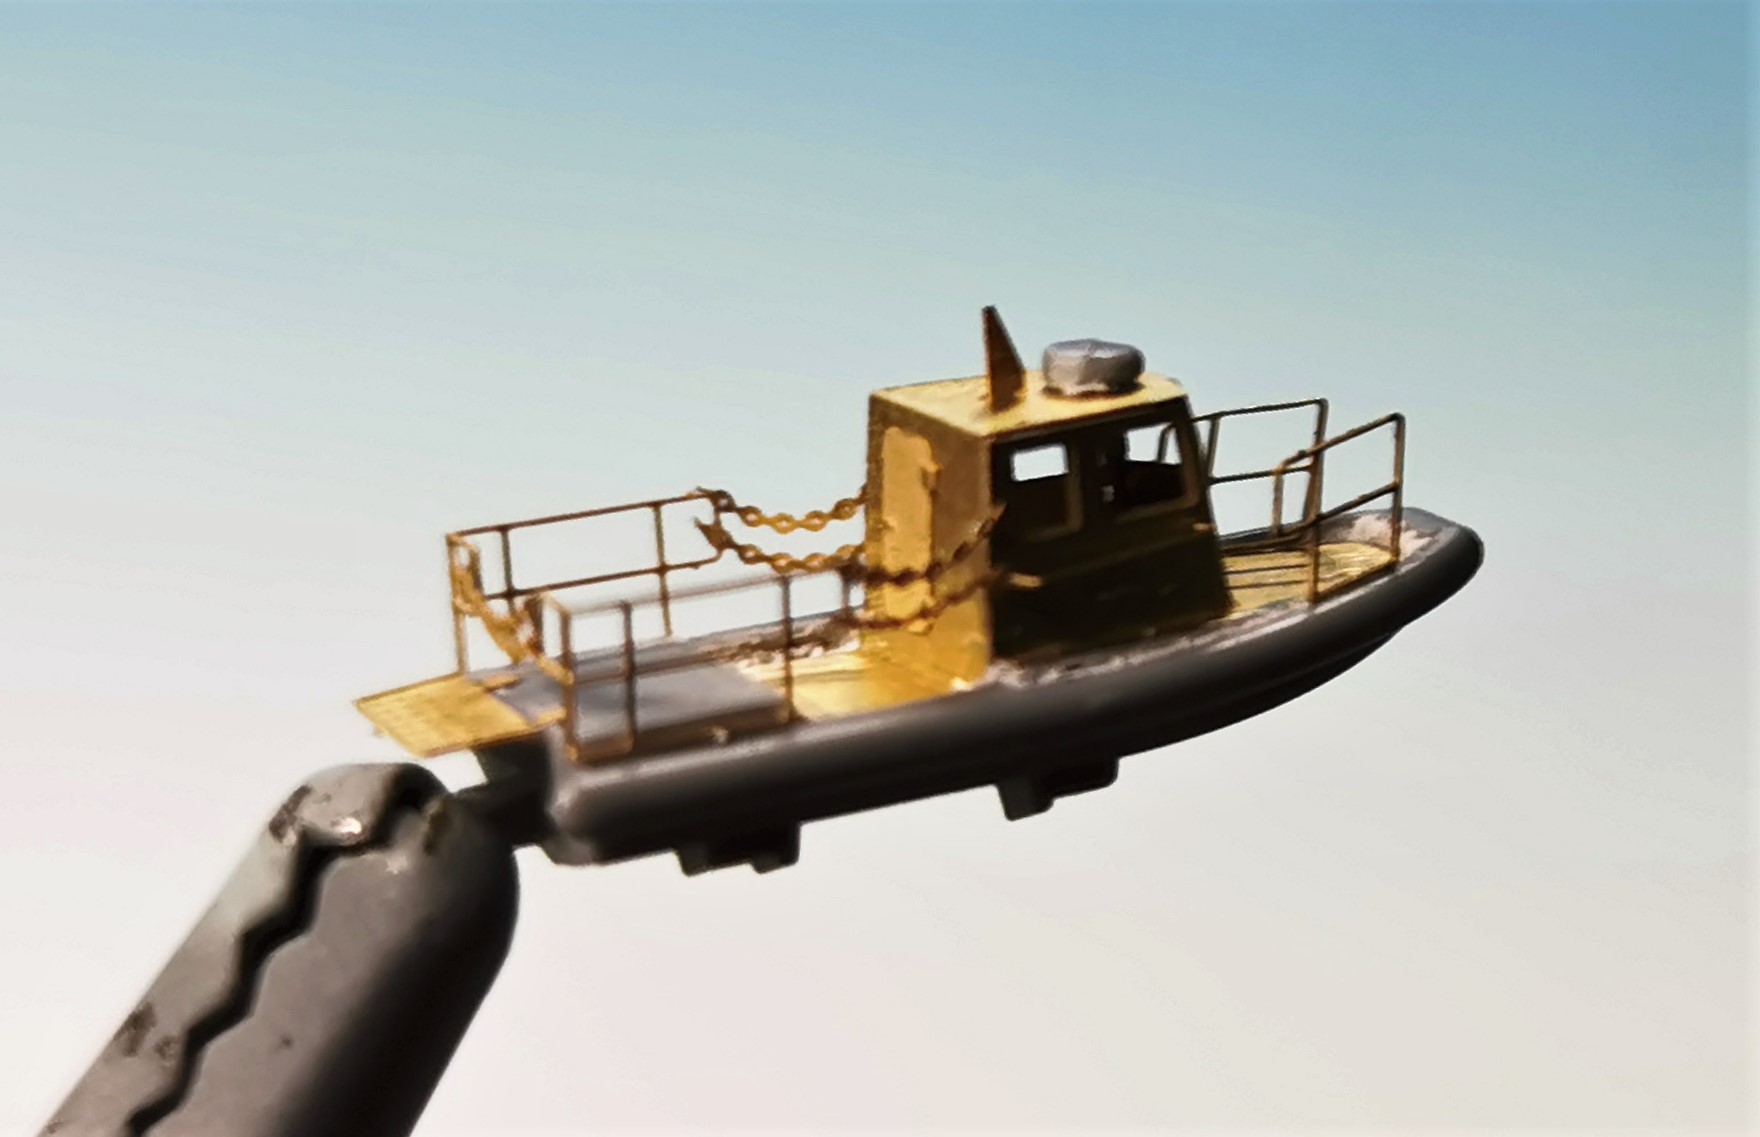
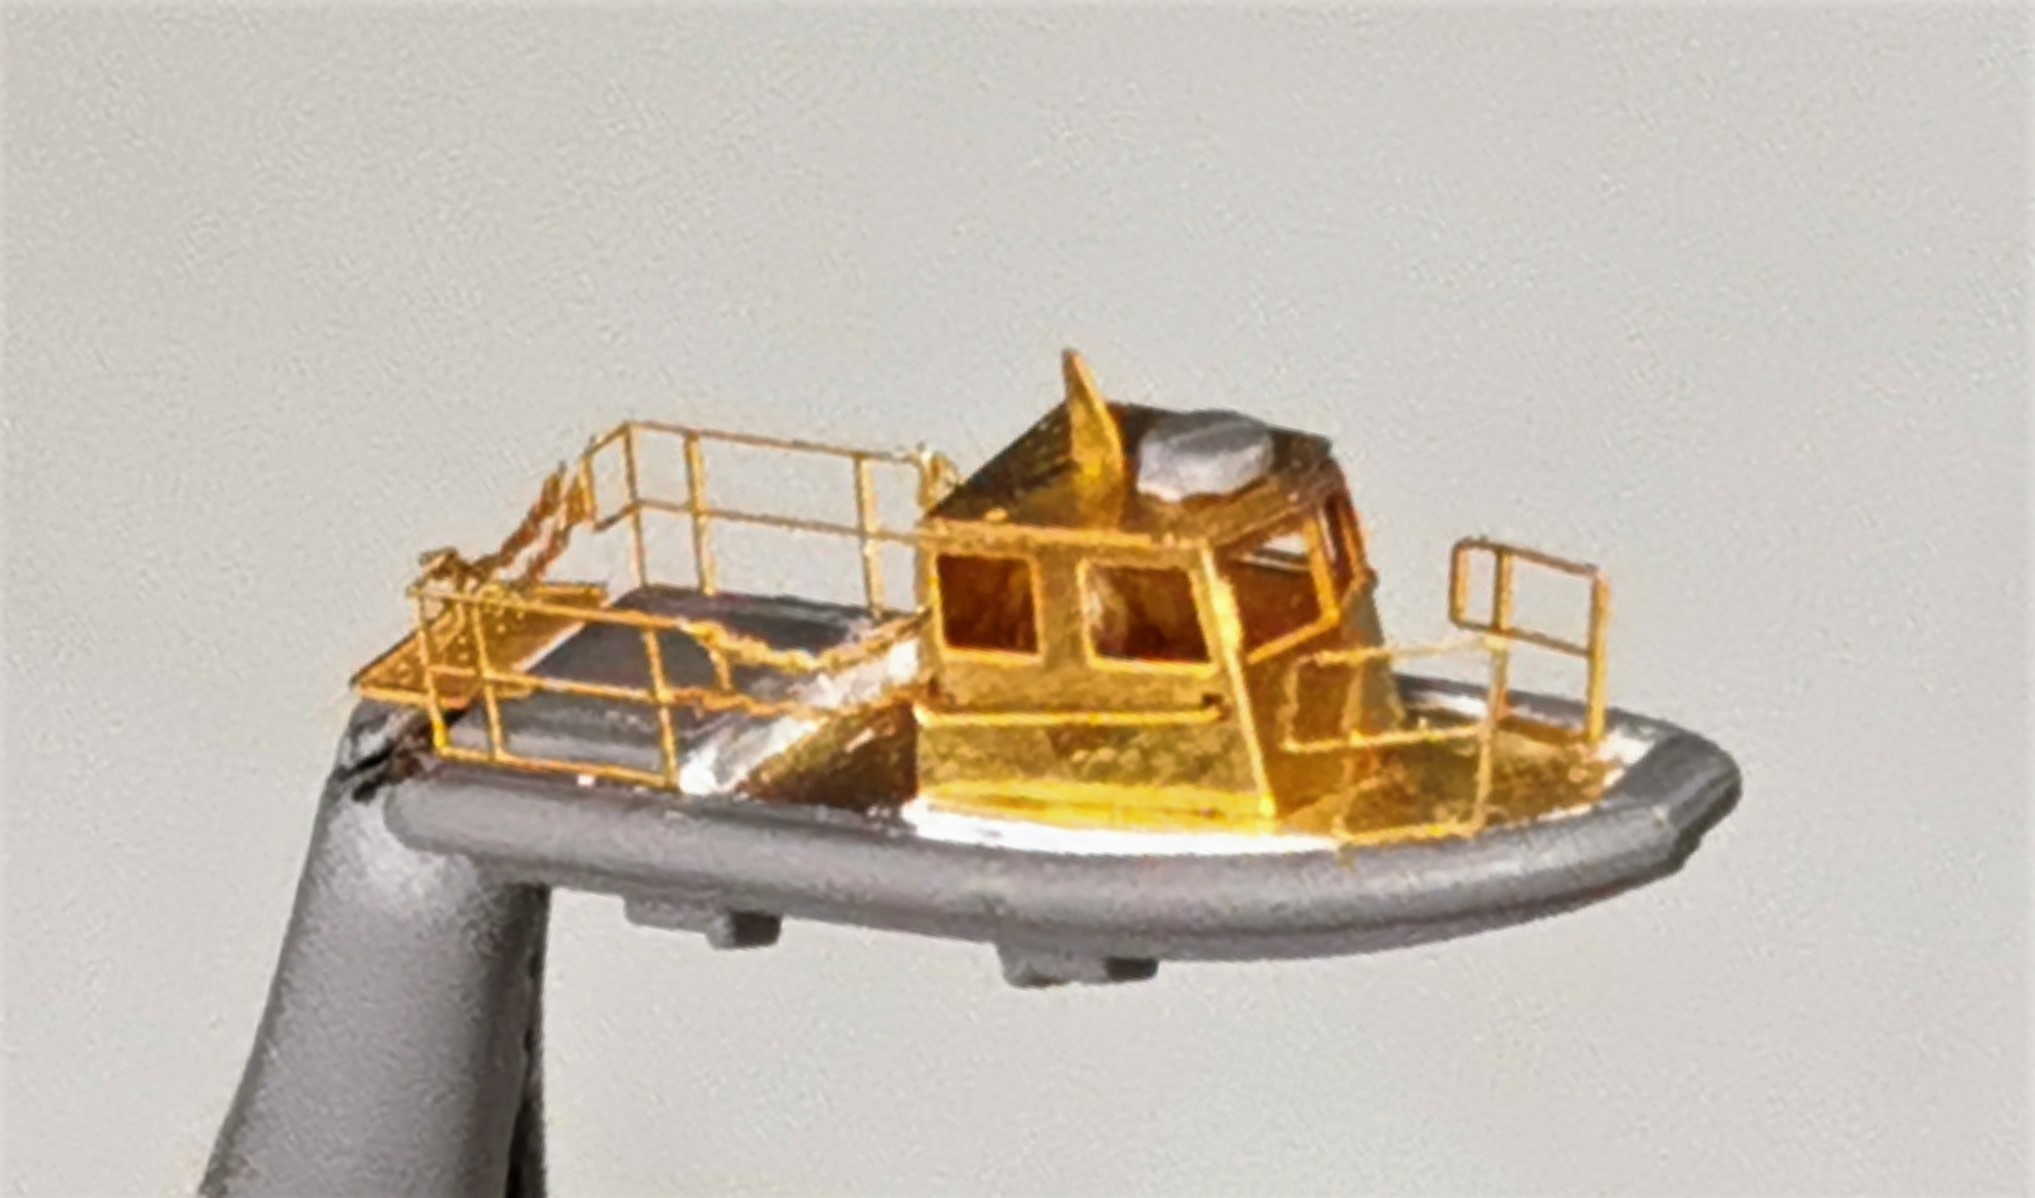
punctually for the end of my christmas holiday I was able to finish all three launches. These were very tiny but got quite some PE treatment, too
This is the bigger one
and that´s the smaller one, excuse the blurry picture but its the best I can do in maximum zoom
The smallest lifeboat is only seen wrapped up in canvas so I tried to replicate this with Putty

Thats it for the weekend, thank you for watching
15 Likes
That PE on those launches looks fantastic, that is super detailing and a miniscule level as well … I would not of had the patience for that. Really well done with that Thomas.
1 Like
@Johnnych01: John thank you very much. The etching work on these tiny boats were at the border of my abilities. MICRODISIGN ask you to make three chains on each side of the smaller boat but even with a microtweezer and sharpened toothpics with superglue this isn´t possible (at least for my modest skills)
Cheers
1 Like
Man does this bring back memories of being on big ships and cracking threw the ice. WOW. Great work on the PE!!! She will be stunning.
2 Likes
The PE work on this is first rate, inspiring stuff.
1 Like
The last missing single plastic part of the ship is finished: The board helicopter Mil-Mi 171A3 is finished. I filled a small gap and carved off the rear wheel´s plastic dampers and replaced them with 0,3 mm wire and made a small anti-ditching wire attachement for the rear rotor out of 0,15 mm wire. As the real helicopter shows engine intake protection grids I replicate these with plastic evergreen rods.
Now there are no more excuses for not to start painting
11 Likes
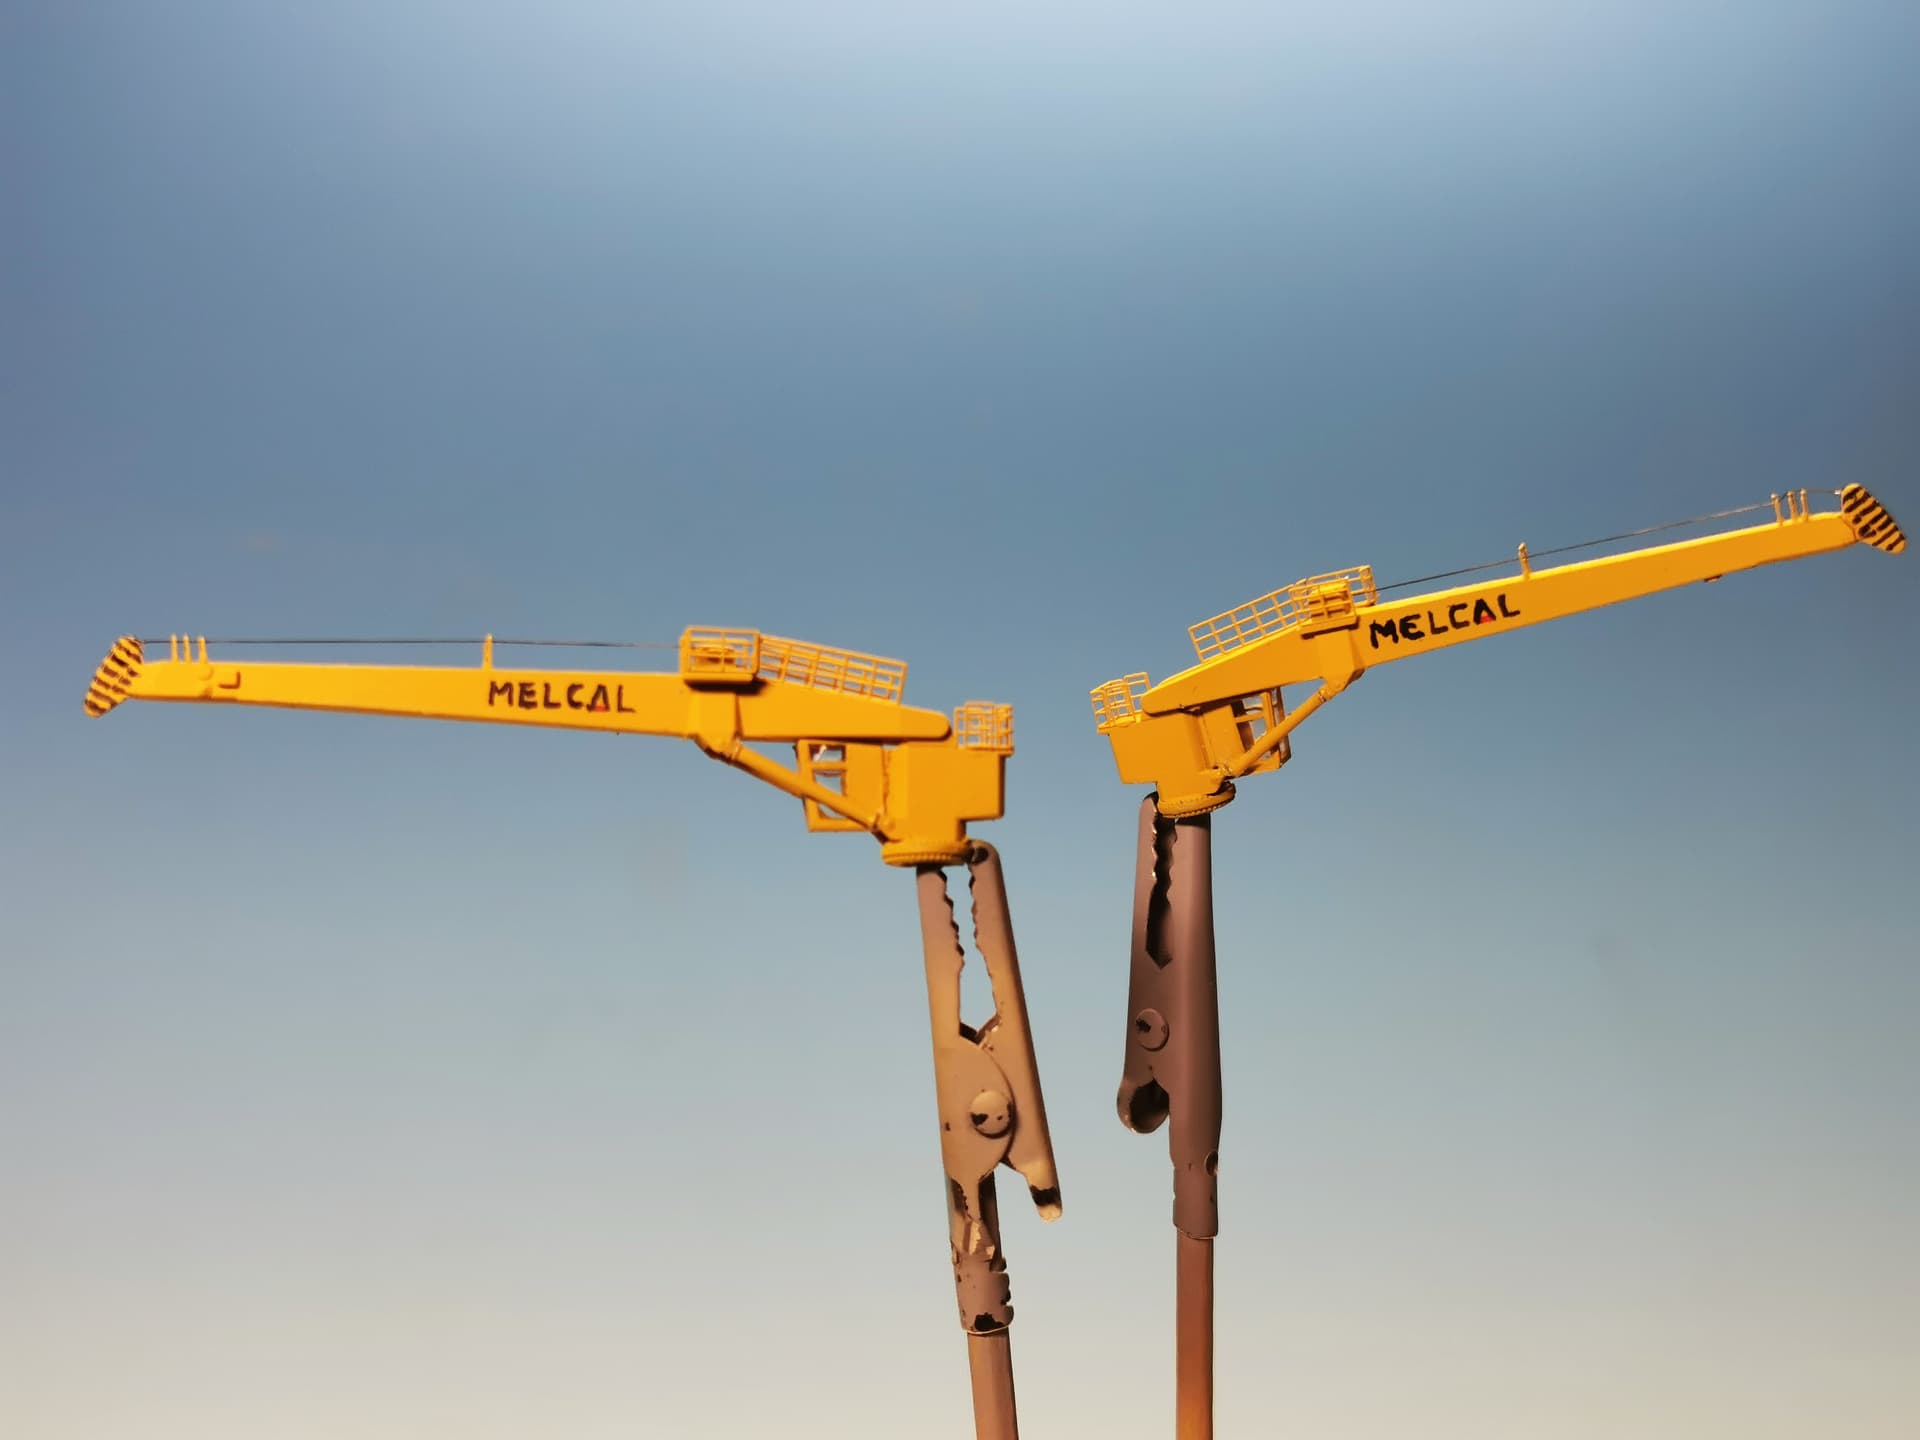
Finally entered the painting stage  I did started with the two aft big yellow cranes. In some video stills you can clearly see the name of the crane producer´s name in black and red written at the crane boom.
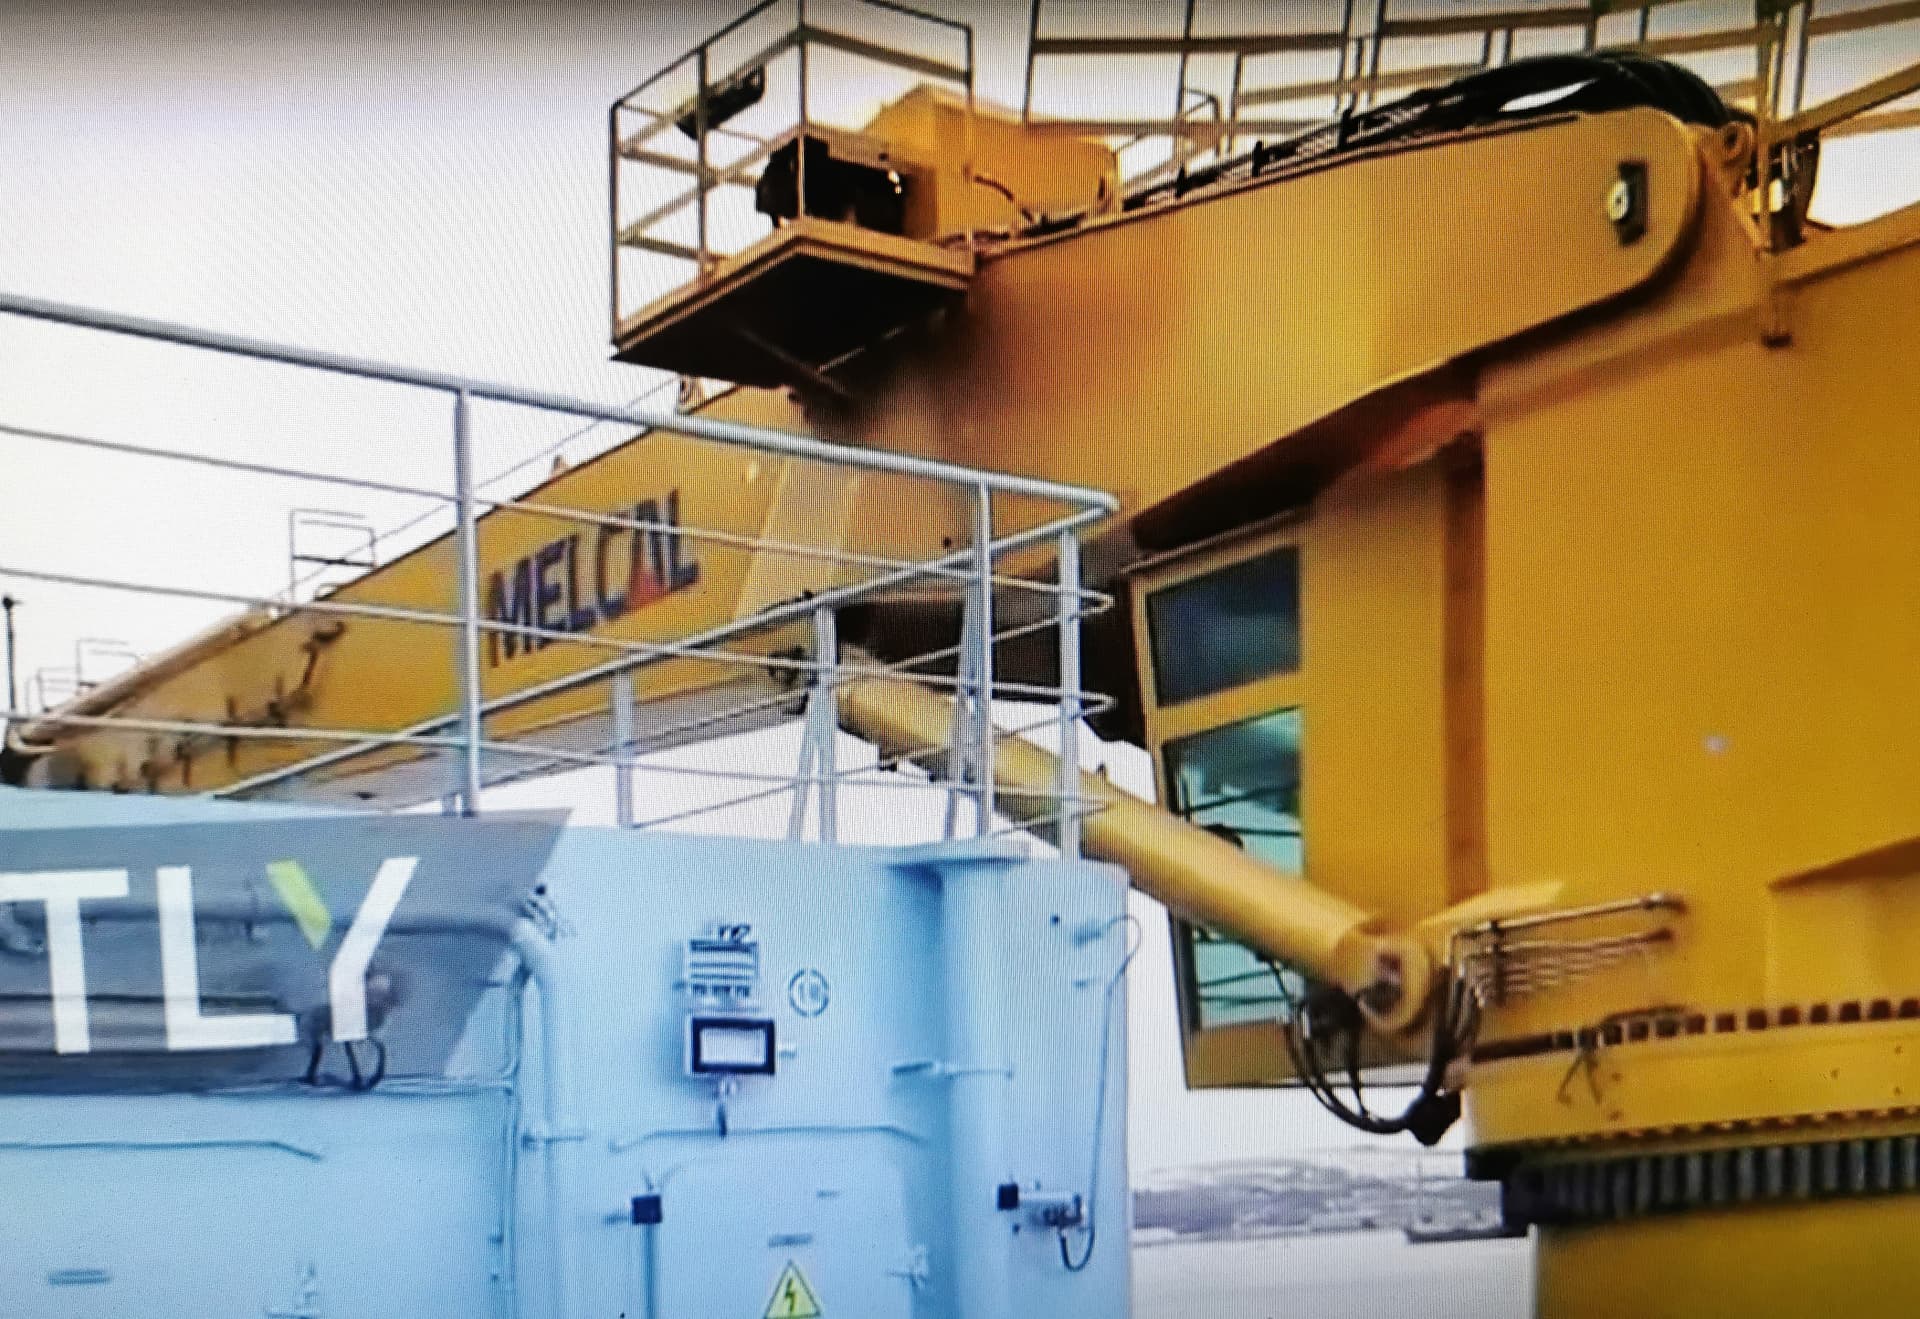
Also at the front of the crane boom you can see black yellow striping for better visual visibility and security.
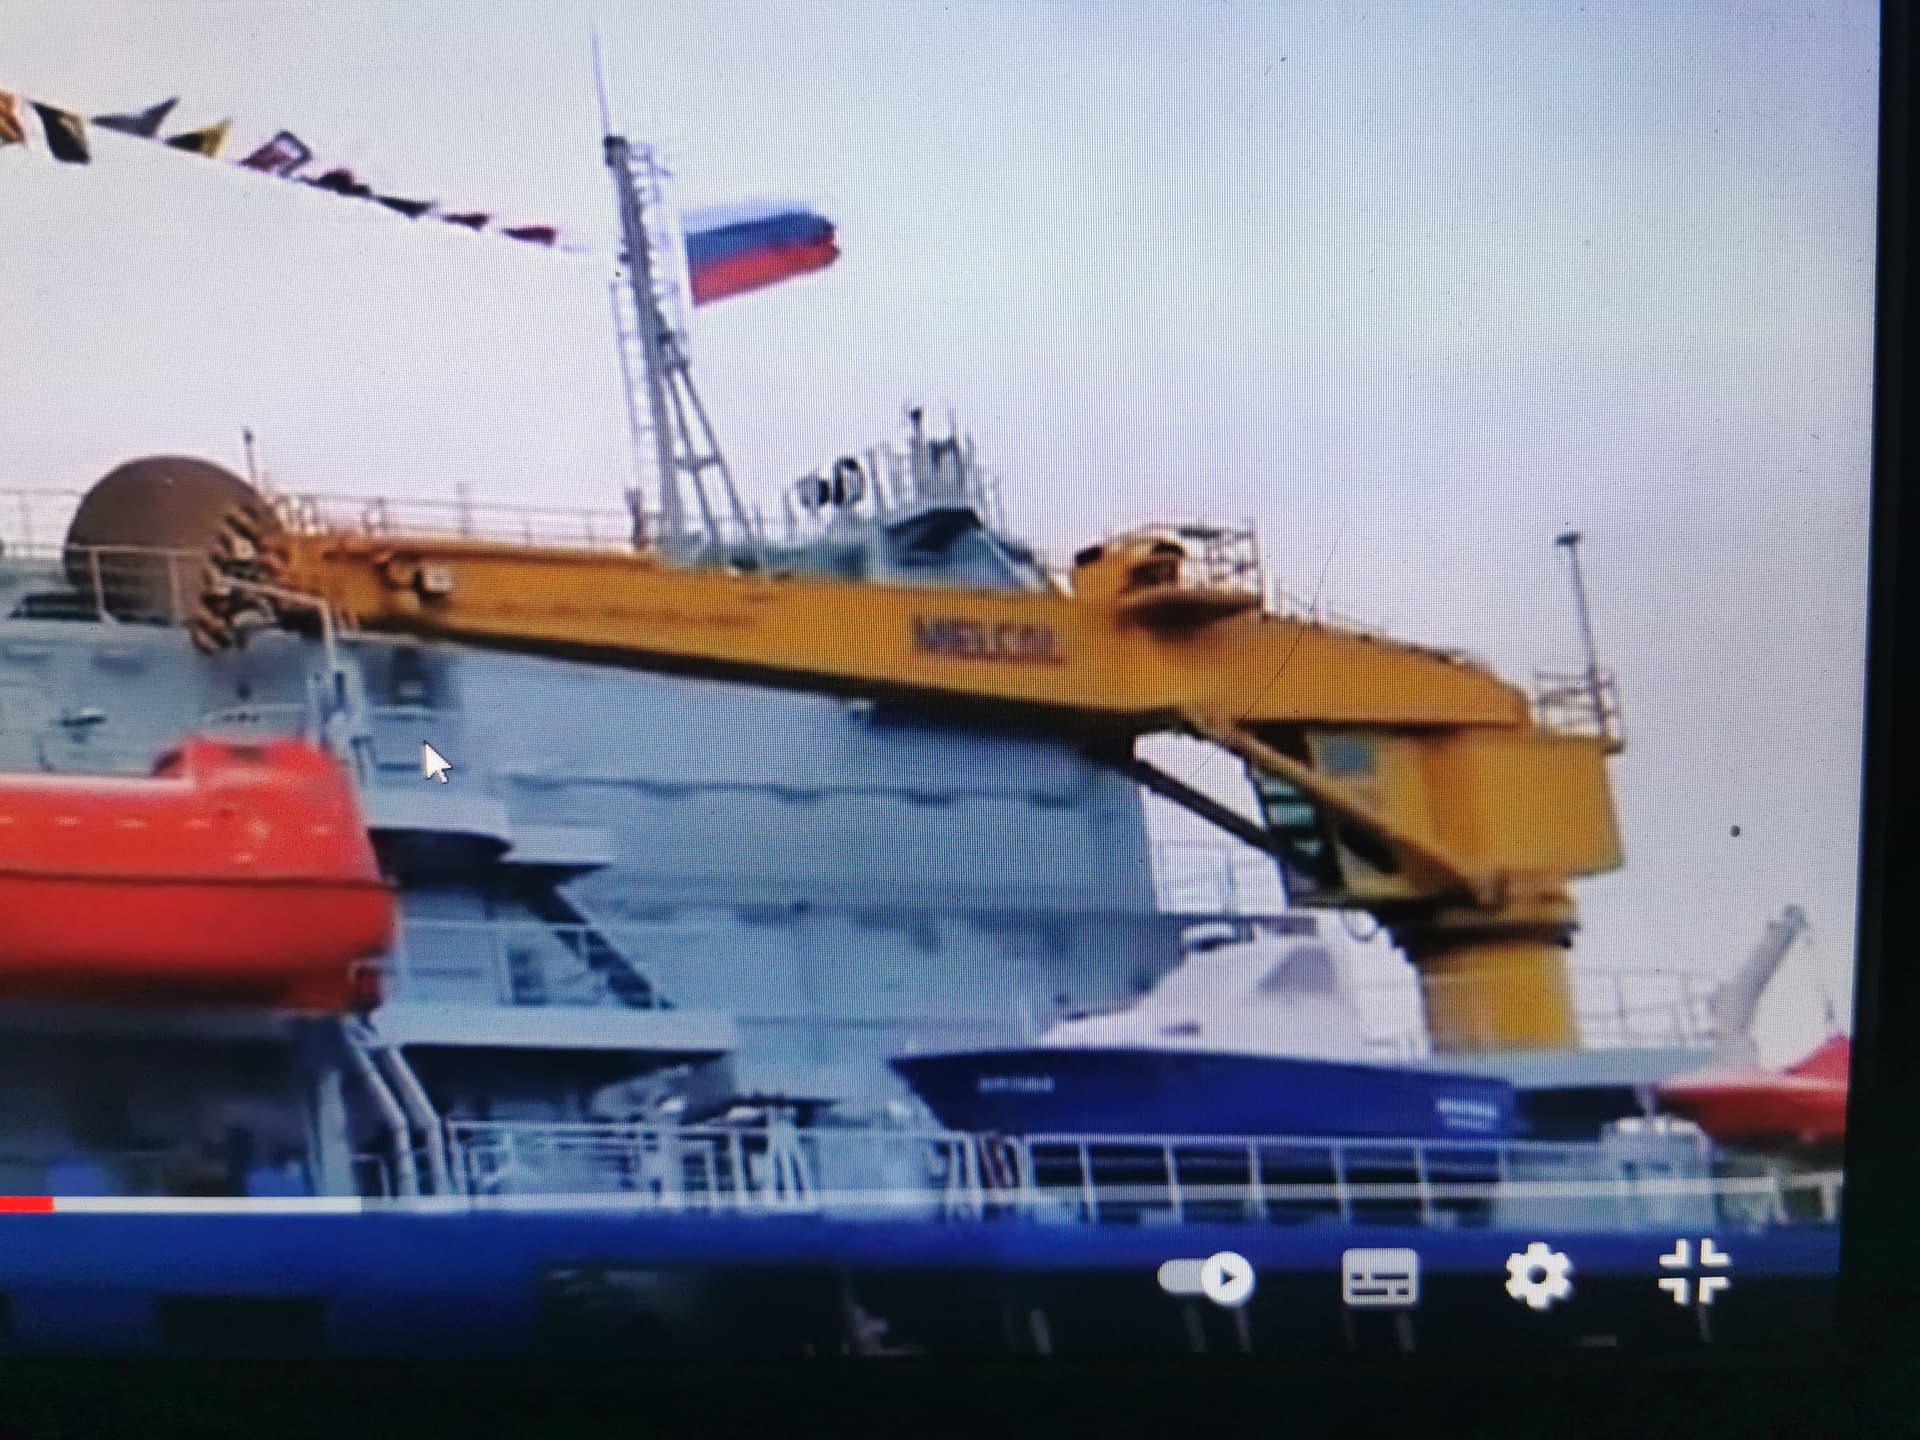
Regrettably neither are printed within ZVESDA´s decal sheet. As I want to depict the ship´s details as much realistic as I can do I opted to represent the writing with a 0.2 mm Fineliner pen. The red beam of the letter A was done with a 0.2 mm Fineliner pen. The black striping at the boom front was also done with the black Fineliner. Everything went on without any problems.
The crane cable was done out of 0.03 mm rigging wire and the windows with the old trustable Kristal Klear

Continueing with the two smaller bow cranes…
11 Likes