So, i started this kit for the Bronco campaign earlier this year. Due to going back to work, i didn’t progress much and i did not finish the campaign.
I usually stop by Armorama everyday and check out everyone’s work and to use said work to get me motivated. And because of that, i started working on the kit again over the past week.
As i have mainly built Tamiya and dragon kits in the past 25 odd years, i have started to build manufacturers other then those two. I built my first Academy kit this year and my second Trumpeter kit also this year. Now it’s Bronco’s turn.
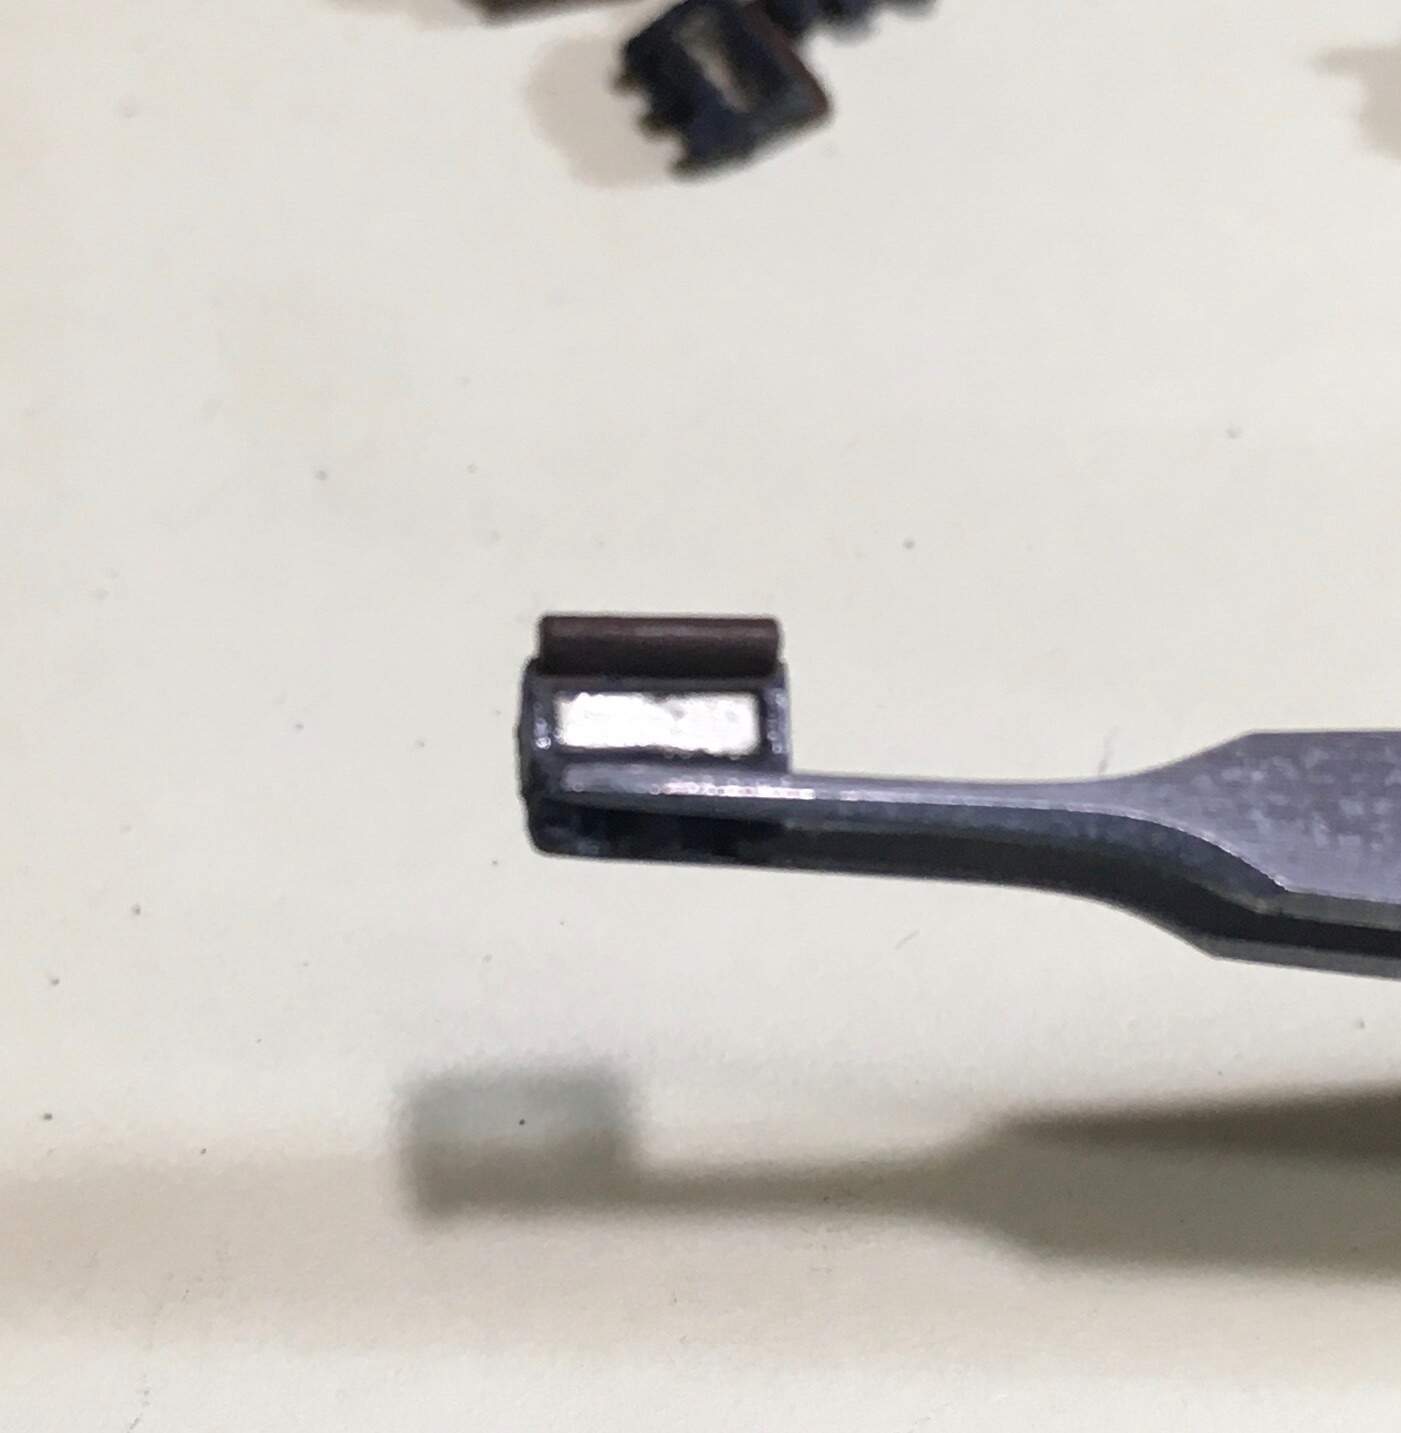
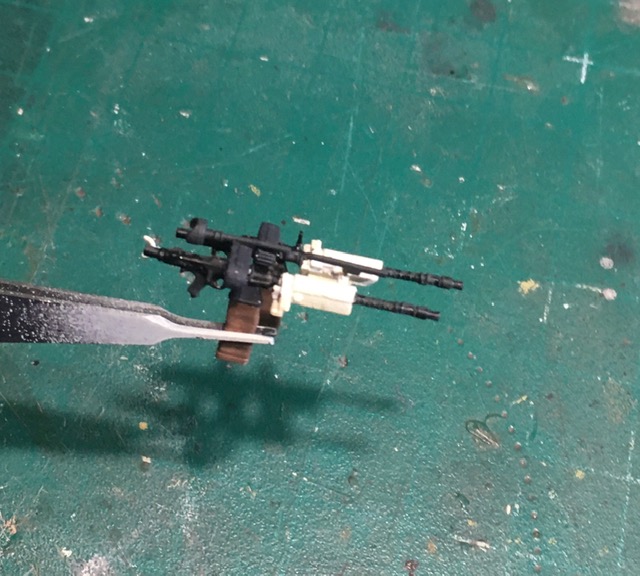
I have always heard Bronco had some tiny and fragile parts, and this kit does have it’s share. The hull and suspension wasn’t too bad, but the mg34 in the front plate had me cussing big time ( sorry for crap photo)
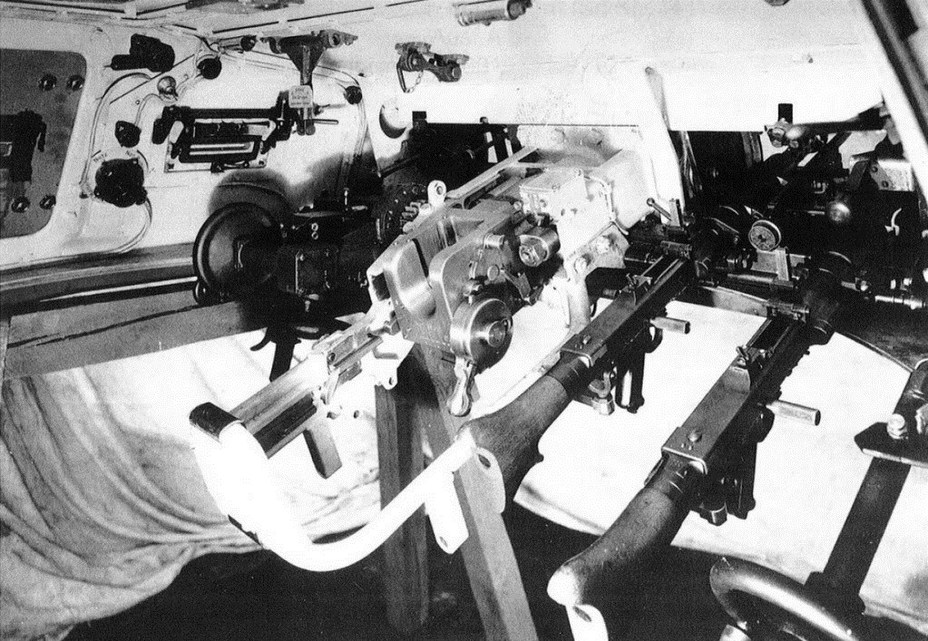
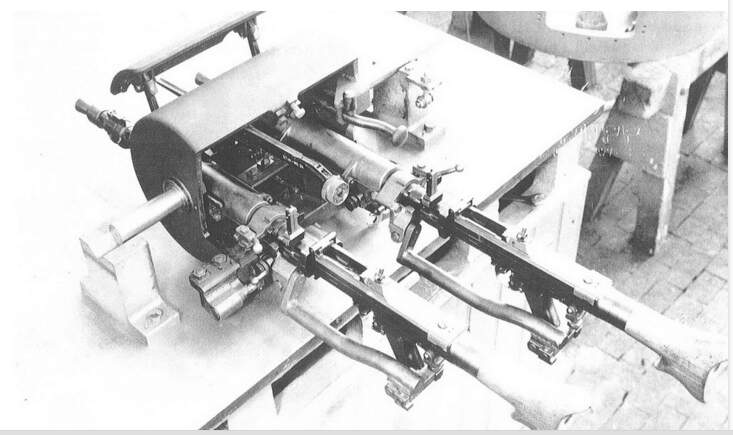
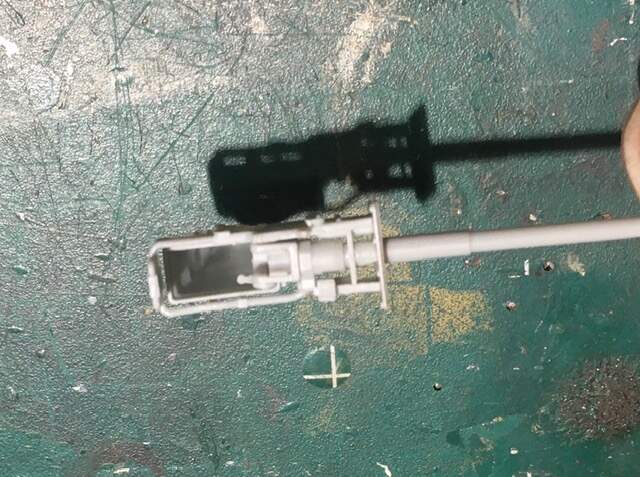
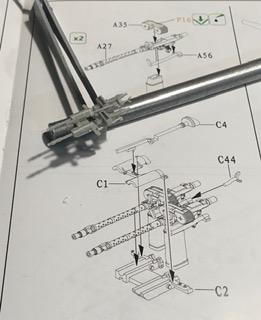
The main gun also is a multi part assembly with some parts with barely any room for the glue, though the MG-34 is worse. And to add to the nightmare, i need to build 2 more MG-34s for the coaxial mount. I am not looking forward to it.
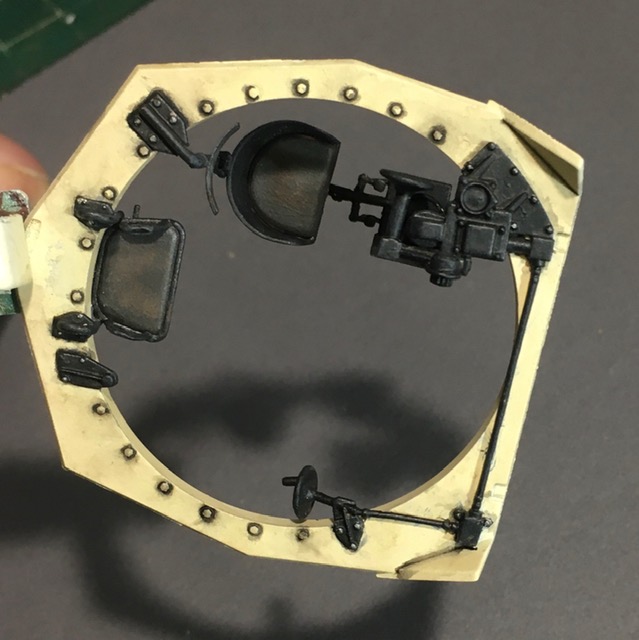
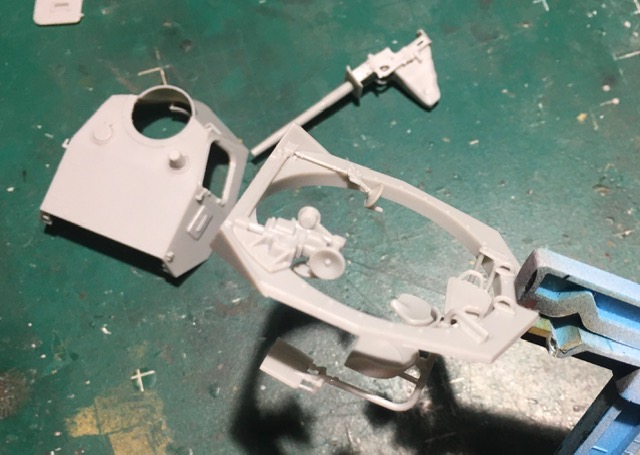
The seating in the turret, again a multipart affair with horrible attachment points with little room for glue. I considered skipping alot of the turret interior detail, but i was able to convince myself to go forward. I had to glue one piece and wait An hour before adding more to that piece. It didn’t matter if i used extra thin Tamiya, Orange cap Tamiya or solvaset. This plastic takes awhile to bond to itself.
Let’s see what tomorrow brings .
Todays update.
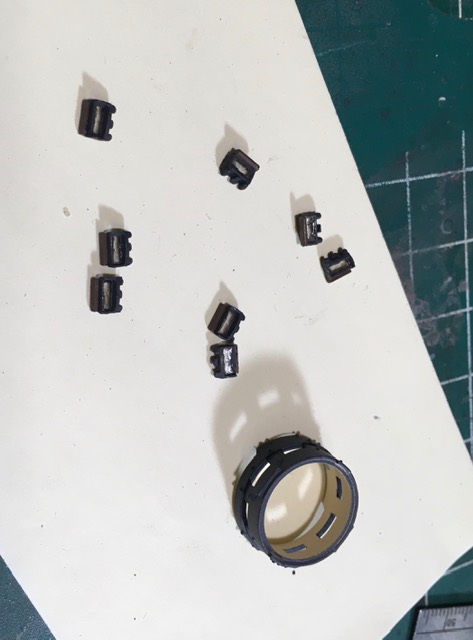
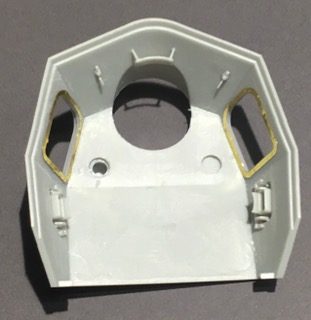
Picture one shows turret top interior. 5 pieces each for the vision devices. I did not add the clear parts yet.
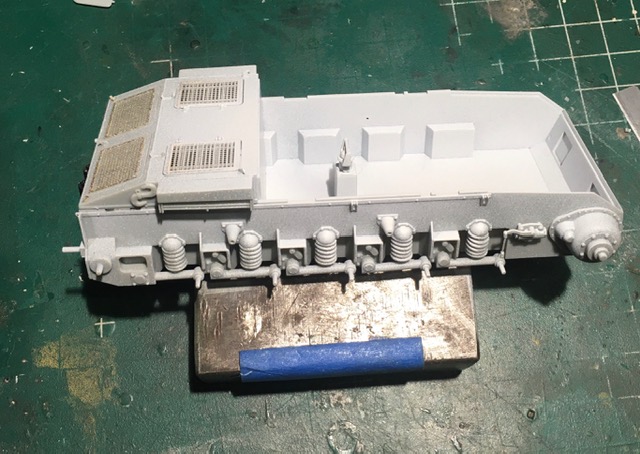
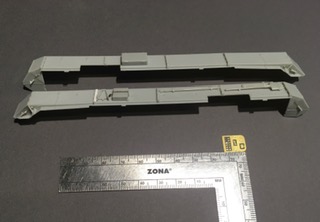
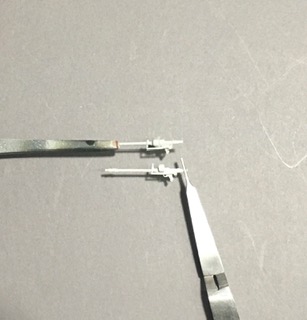
The fenders i have had built for a few month. There are some crazy small parts for the fender hold downs. I lost some of the pieces and did what i could to complete the task. The small etch fret has some of the rivets that would hold the turret lifting hooks. I cut two off and and decided to not drive myself mad by fiddling with theses things. I was sure to lose at least 1.
Picture 3 shows the kit turret lifting hooks mounted and 1 Dragon lifting hook. Definitely a different size, but i lost the two hooks for the other side. So i built up 4 of the Dragon ones and replaced them all.
I wanted picture 5 next, but i am still not used to the new forum. This is the order they uploaded.
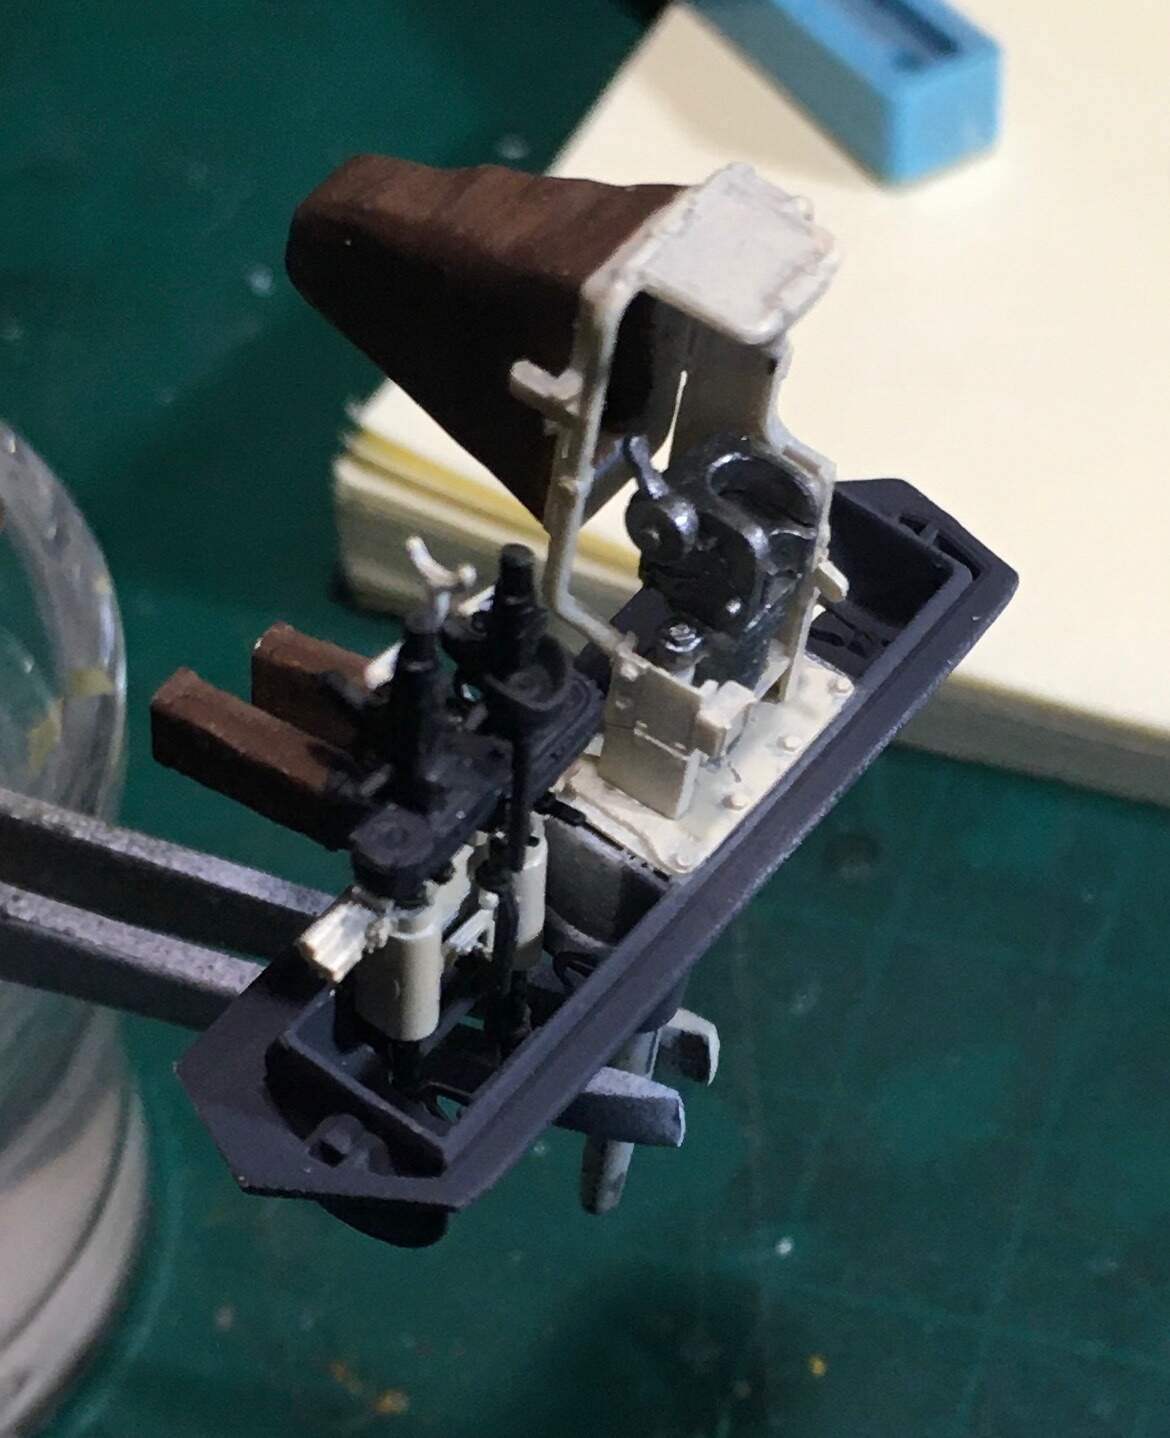
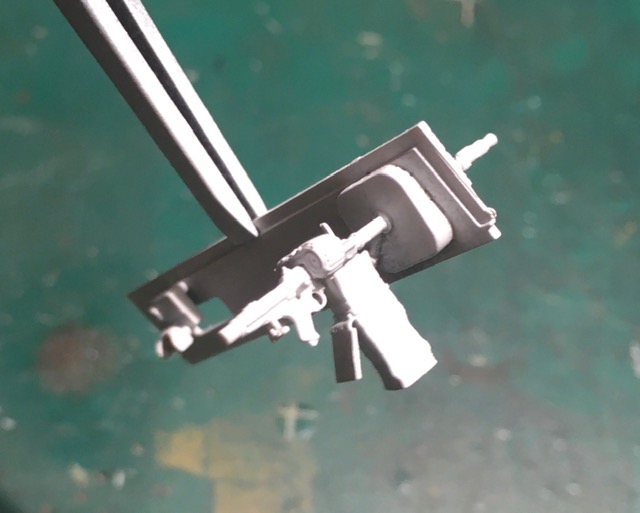
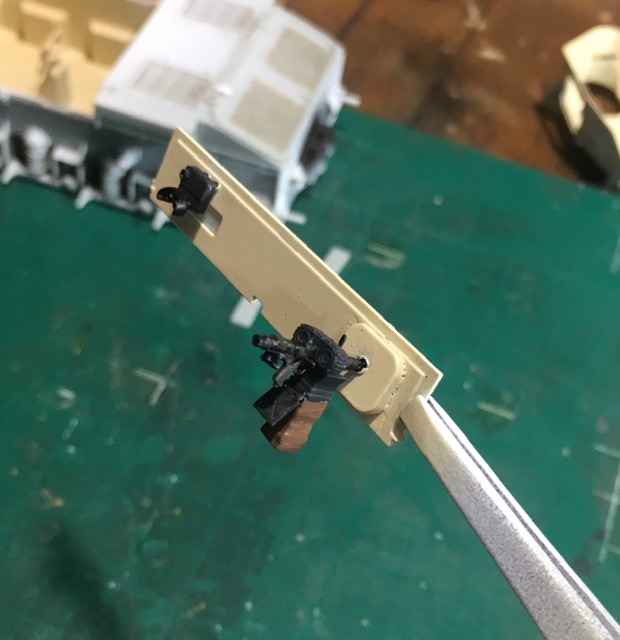
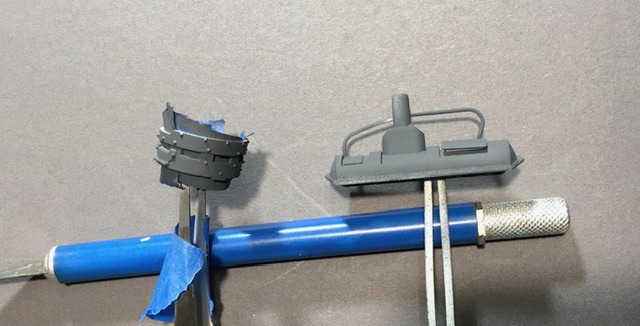
The small brackets on the underside of each MG-34. When i built the MG for the front plate, these pieces drove me insane. There is very little contact area for the glue. These two were not too bad.
Picture four shows the complete coaxial mount. The gunners optic has 1 point of contact and it is very small. I will be surprised if it makes through painting. I’ll be lucky if it stays on went i try to mount it with the main gun into the mantlet.
Maybe more tomorrow.
EDIT, i went with smaller pictures today, but they are now too small.
Time for an update.
The past few weeks have been pretty crappy for me. And i’m surprised i was able to continue with this build with my state of mind at the time. This is a difficult kit and being stressed out does not help things.
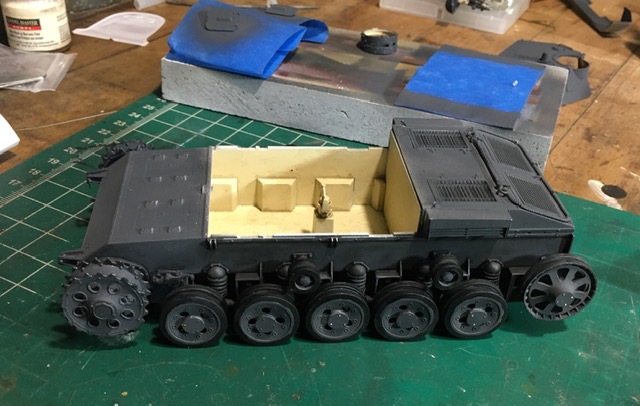
I primed and painted most of the interior parts.
Model Master Panzer interior buff. I wish i had added white to it.
It is looking a more yellowish and dark then what i remember.
Optic devices and headrest painted.
Could use some minor touch up.
Coaxial set up.
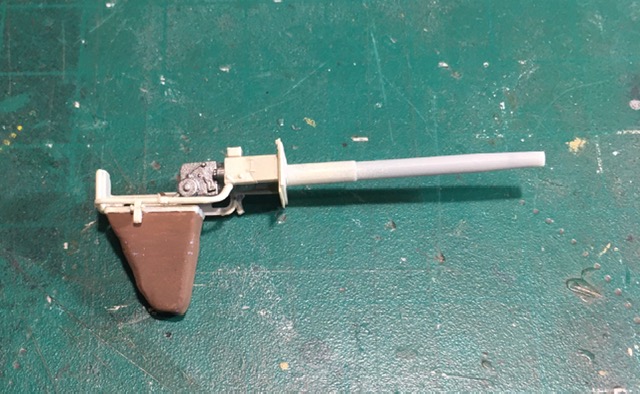
Main gun. Not as straight as i would like.
It Shouldn’t have been difficult. I blame myself.
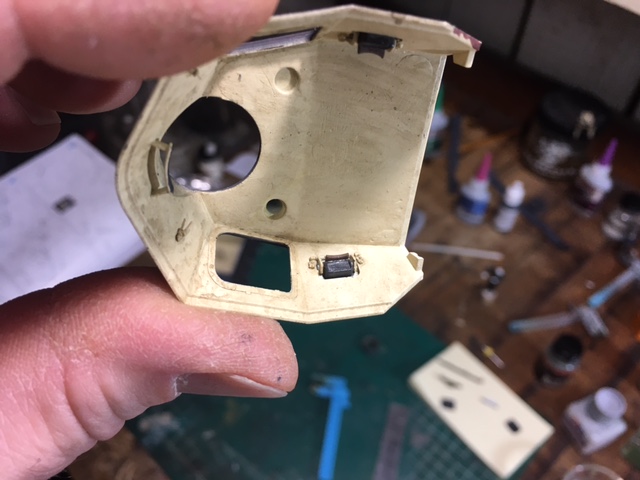
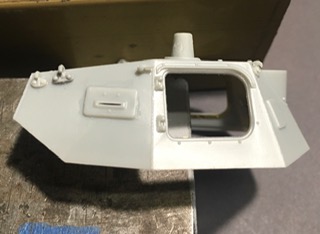
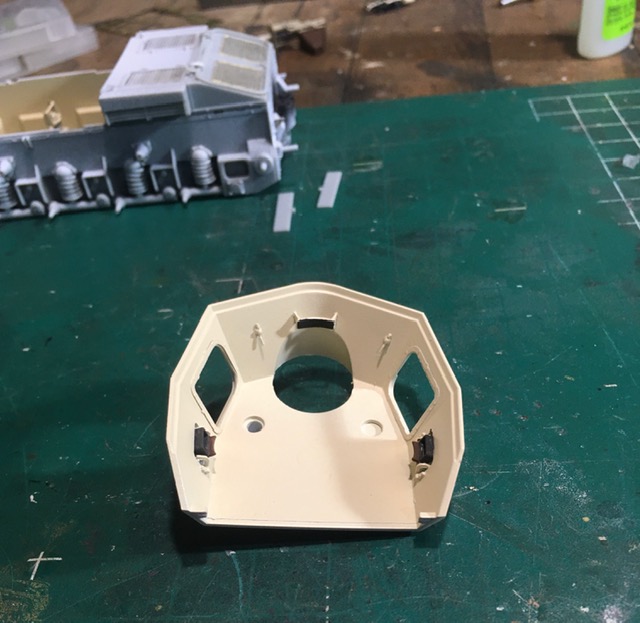
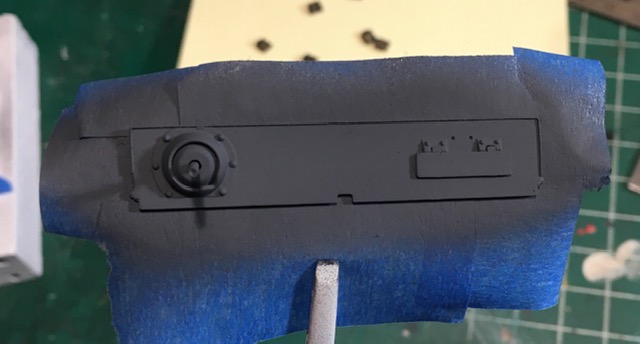
Turret face/mantlet primed. I positioned the coaxial MG port open.
I tried to keep the gunner port open, but I ended up losing an etched arm due to tweezer fling.
There are two brass-etched arms that hold the visors in place.
It is very difficult to line up.
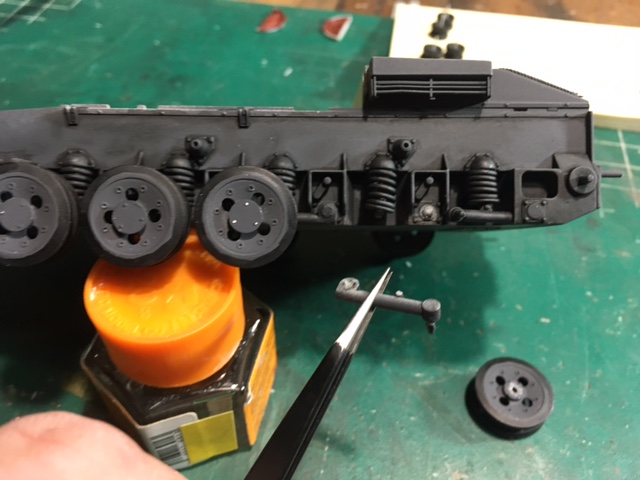
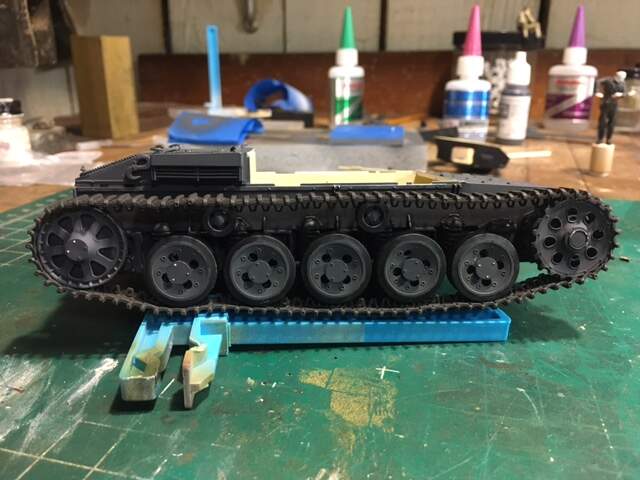
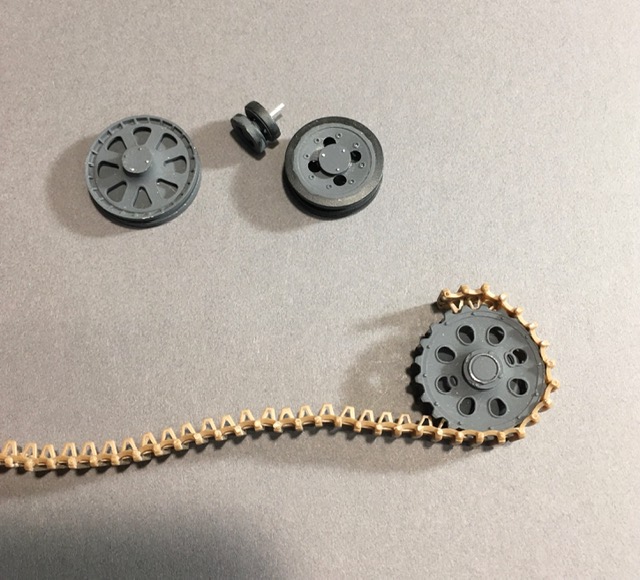
The wheels have been painted since April or May. I must have
Used Vallejo paints, as it is wearing of some of the areas.
There is a step in the rubber tires. Alot of reviews mention them
And most people fill in the step. It isn’t worth it to me. Just building
OOB.
The tracks have also been assembled since april or may.
They have the small pins to keep them workable.
I like them.
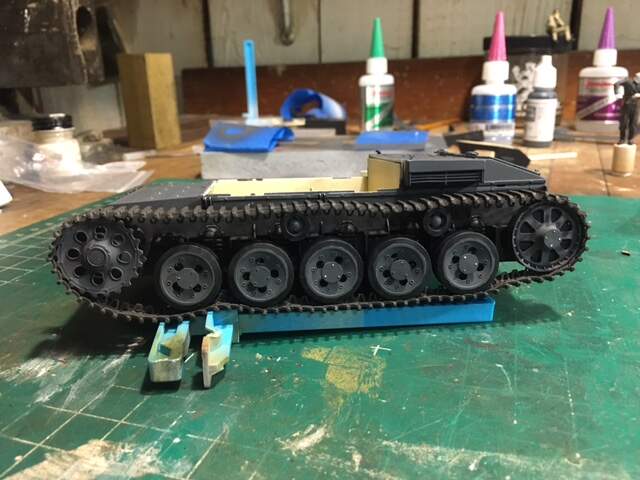
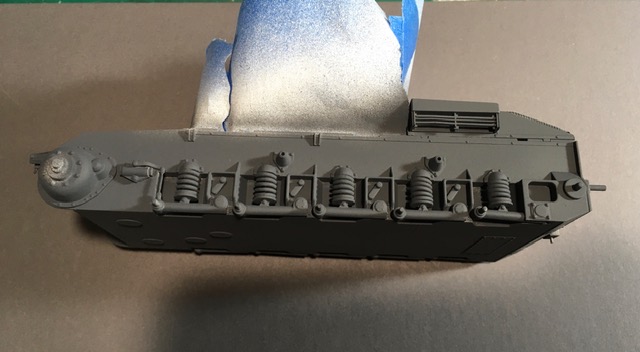
I had to get the basecoat on the substructure. My build has been
stagnate due some tough things killing my Mojo.
I want to get the wheels and tracks mounted.
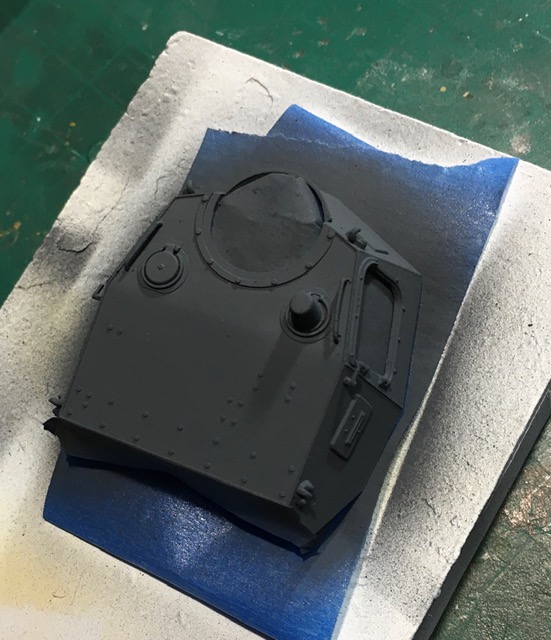
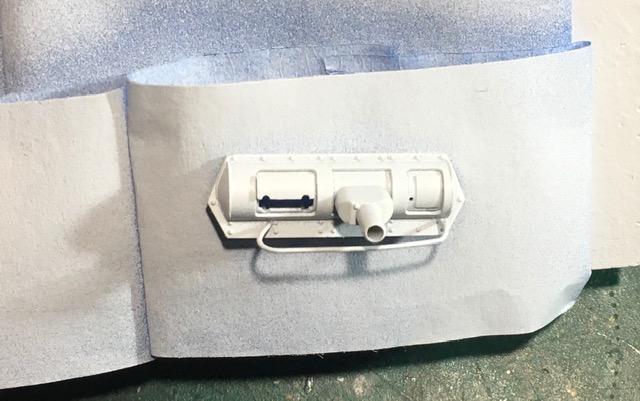
The cupola has both base coats on it. I needed the exterior sprayed before i mount the vision devices.
I also did the mantlet.
It is a nice kit. All the reviews talk about the great details and I agree. I’m sure you would do it justice after watching you work.
If I kept at it back in May, I am sure it would have been a lot easier for me.
Thank you, Marc that’s kind of you to say. Mini-Art’s high part counts make me nervous. I do enjoy being a spectator and watching a sweet build like yours.
Coming back to a model is hard for me as well… Even marking parts and making notes, its easy to forget exactly what one was thinking about a build that’s more than a month old.
Looks great to me and happy to see updates:) Hope the next stage goes well
I sprayed a satin clear on the interior parts. I wanted it sealed before i stated putting masking tape all over, especially the turret interior where there is etch. Vallejo Satin of course was breaking them off on me. Always gives me problems. Needed the dark gray on both interior and exterior of the hatches. The decals need to go on these and i am not looking forward to it. sprayed the front plate.
Did some interior washes today and installed vision devices in the cupola. Took around an hour to do them. I hope they stay in.
I used satin clear for adhesive.
Did some more washes and some acrylic dry brushing.
I started going slow again. I really need to close up the interior, but my OCD is kicking in.
Trying to be a little neater, though i don’t know how much interior will be seen if i leave the hatches open. And that damn loaders seat fell off again!
I started with Vallejo washes, but moved onto Tamiya panel liner. Much easier to clean up tide marks.
I broke a suspension arm off yesterday. I couldn’t believe it.
The wheel wasn’t even on long when i went to remove and broke it off.
It is not easy to keep the wheels and suspension straight and true. There is a lot of play in all the pieces.
i see alot of people using Tamiya dark iron for tracks these days,
So i went out and bought some. One side of the tracks seem to have more slack then the other. I think i have 96 links on each side.
I think most reviews talk about 96 on one side and 95 on the other.
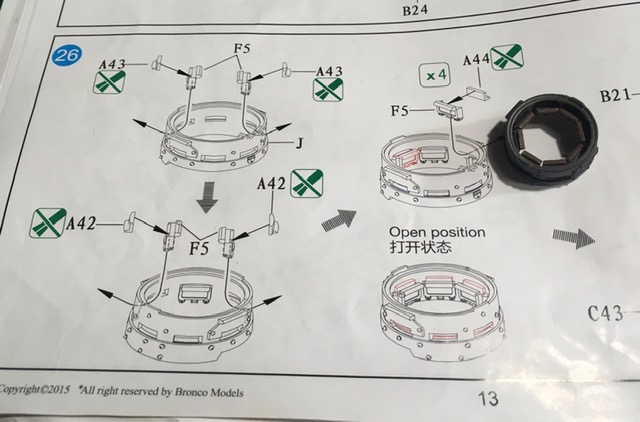
I misread the instructions when i installed the vison blocks in the cupola.
I thought I would be able to slide the armor covers in after. It was actually easier to assemble the shields and vision blocks at once.
Installed armored glass in optical device.
The tracks are still workable, but 1 or 2 pins did work themselves out.
Hope for a better update in a couple days.


 sprayed the front plate.