Build A Photo 2 Campaign

Looking great John. If you are being accurate to your photo, you will need figures, or with just one you are taking artistic licence.

Speaking of artistic licence, after the disaster test runs for doing water, I may have my licence to build revoked…

1 Like

Thanks @SSGToms @Armournovice @G-man69 @Tanksami & @petbat … This is actually becoming more complex as it goes on, but not in a bad way. There will be lots of little details in the groundwork that need to be added and sourced. I’m also going to try and make use of some dried moss for some of the undergrowth.
And Peter and Mike, you both gave me the shove I needed regarding the figures…if I’m doing a build a photo campaign then I seriously cannot corners, so I will be doing (or attempting is probably a better phrase) the 3 figures that are on the mantlet and stood/sat on the nose of the hull.
I had a look at figures I have unmade, and I believe I have 3 that can be made/adjusted to pretty closely resemble those 3 in the photo. I will probably try and start on these tomorrow.

All I did really tonight other than look at the figures was to add the road walls on each end of the bridge.
I used balsa wood and will lay a coat of pre made household filler over those to replicate the concrete, then pain and blend them into the rest.

Keep smiling :grin:

4 Likes

Mate, modification is not really that hard as long as your start parts are reasonable. Don’t try and do everything at once, build up the basic structure and and roughout reshaping first and let any putty set. Do the finer detail, pleats, pockets, buttons, etc after the base sections are rough shaped and firmly set. Take your time, do it in stages, just like you do your scratch building and you will be fine I am sure…

1 Like

Have given the woody bits a dark wash and letting those dry overnight.

Also got the balsa wood wall sections covered with the filler, and once that’s dry I can start painting that the concrete tones.


Didn’t get a chance to begin the figures, that will get started over the next few days now.

7 Likes

The road walls are now base coated with Grey, will add a lighter wash to that to blend it in tomorrow.

Have done a couple of pics with the G and the various broken beams and roadway planks dry fitted.
This one is from the opposite side so it looks a little more cluttered. The various beams that are at angles will be held with small beads of cyno gel and some will be held by the AK puddle effect once it sets.

This one shows it from the correct side and you can see alot of the beams/planks remain hidden. There is also a fair bit foliage/large bushes that will go on the RH bank that goes up the side of the bridge end. Also some rocks to go in strategic positions…

Stay tuned :+1:

9 Likes

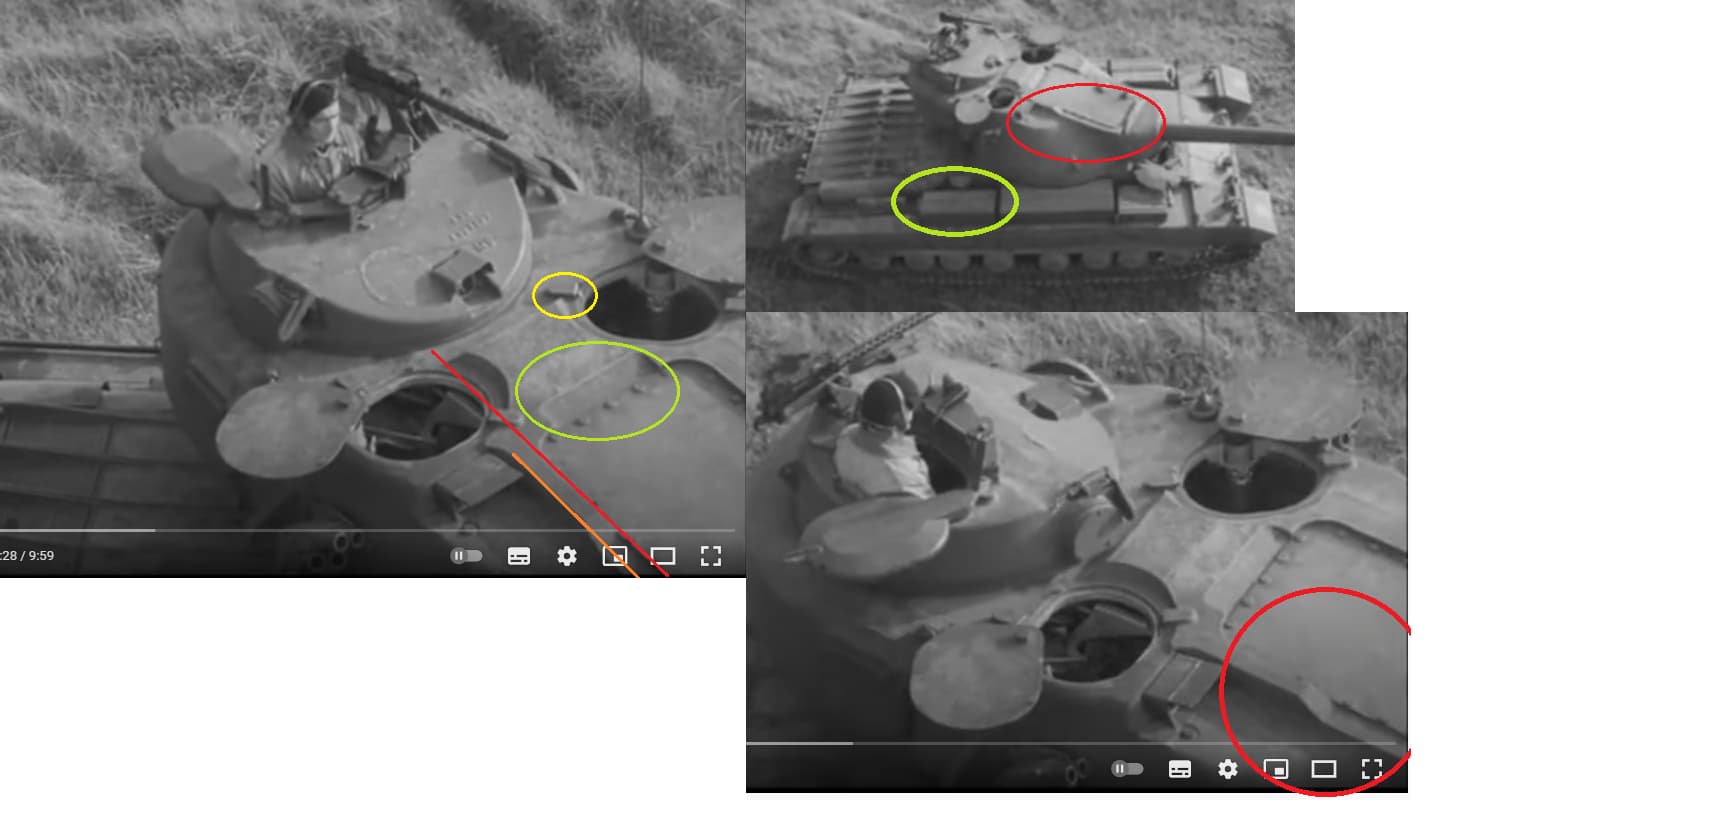
Had to do a bit of scratch building for another model, so did some work on this at the same time. The Amusing Hobby kit has later model stowage bins provided. I am assuming they researched the ex-Littlefield, now at Bovington one. That was refurbished and the bins are not correct for a mark 1.
image

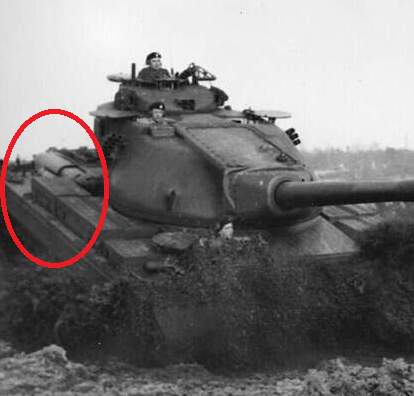
The issue is the corner is cut off on later versions, but the mark 1’s are perfect rectangles. Not a big issue to fix, just a matter off cutting into the bend on the side piece so you can straighten it, trim off the slightly longer end that results, then fill the gap. Of course I realised this after I had used a complete new piece of styrene to replace the kit part first time around!

I chose to remove the whole rib on the lid, rather than graft a piece at the end.

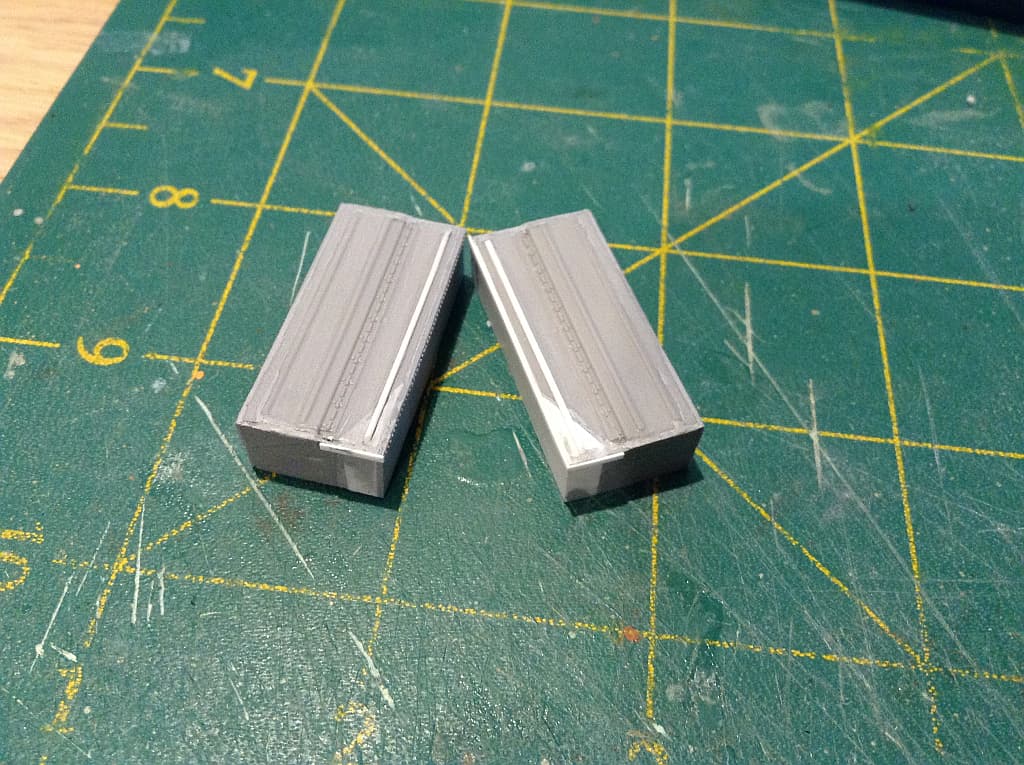
Just a bit of sanding to do on the lid edge.

Found a video clip that shows them quite well, although the turret on this one seems to have some unusual features. This is a declassified training film showing the very first batch. There is a lot of talk about the turret not being right in areas, yet comparing the original pics I posted to the video, and then looking at other pics, seems to show some differences from vehicle to vehicle.

4 Likes

Don’t worry, we will :grinning:

Looking really good with those beams… found the broken ones… :+1:

1 Like

Thanks Bert, its all coming together … I will probably rearrange the beams and planks a little to make the broken ones more obvious when I get around to setting them in their final positions.

Interesting images @petbat , I wonder if the parts on the loaders/gunner hatches are possibly locating guides and or locking clasps parts ?

Looks awesome John!

Fyi to everyone, I will be withdrawing from the campaign as my Pzh. 2000 is getting a different camo scheme as in the original pic. So I no longer meet the criteria.
I will be making a thread for it tho.

1 Like

another one for the ‘this would make a great dio’ book:

Lifestyles of the rich an famous - dining car

2 Likes

No probs Ezra, look forward to seeing the new thread :+1:

Yes, they are parts of the hatch locking system. The interesting part is they are located differently to the kit but overall this pic has a lot of differences to the kit, but also many differences to actual period vehicle pics.

Compare the aspects of the cut out/raised area on the side of the bolted plate and the notch at the rear of the plate in the video capture to this pic.


Note also a prominent bolt on the gun mantlet not visible as a bump under the canvas cover in the video still. Then compare that pic to the kit:

Looking at the open hatch pic, it suggests the Amusing hobby hatch is too wide, and a commonly cited kit issue. However, look at the periscope cover on the left of the hatch-less pic, and its relation to the bolt (green circle) in front of it, plus the apparent width of the triangular segment to the scope cover’s left. Then look at how the section of turret on the right of the hatch tapers slightly at the front. Compare to the pic of the kit turret. Then compare the centreline on the raised section on the right close to the back end of the turret to the area in the kit (Yellow arrow) I think it is because the sections on the kit turret beside the hatch are too narrow, not that the kit hatch is too wide at all. Also the mantlet in the kit seems narrower than the one in the pic, which means if it was widened to fit a widened area on the hull beside the hatch, the rest would be in proportion!

Yes this is all based on one pic and perspective might play its part, but to my eye, I believe I’m on the right path (as opposed to confusing muddy water for bushes ( :disappointed: )

1 Like

image

Fixed your problem Ezra

5 Likes

I think your chosen path is possibly the enlightened way Peter :+1:

I think you’re right. Is that riveted (?) cover plate around the prominent bolt missing from the kit? Its side pieces (if there are any) would give you that bit of extra width to be in line with the widened red-line area…don’t envy you sculpting the latter though! Looks like the lifting lug holes need drilling out but at least you’ve got decent bases on them to tease down into weld seams :tumbler_glass:

1 Like

Yes, there is an etch strip for that. You have to place a canvas cover around the mantlet and the etch pieces go over that. You need to make the canvas cover, which is no big issue. As the cover hides everything, filling out the mantlet is the easy part - it is hidden!

Yes, the basics for the weld beads is good, needs trimming and sculpting with a sharp blade. I usually do them after they have set on the kit.

1 Like

A couple of annoying and self induced setbacks on the Panther…
Was starting the damage on the barrel cleaning rod tube, and over heated the small screwdriver which then burnt through the tube …:rage::angry:

So out with the filler and made good on that, and did some paint touch up. Will give a very light rust on the edges.

Then while looking at the ref photo I realised the LH tow rope connector wasn’t actually fitted to the vehicle tool rack, so because the paint had set on the etch securing pins, as I pulled the connector, that in turn pulled the tool rack off the hull…:angry::rage:
So that needed reglueing then some more paint touch up.

And on this last shot ignore the 3 coloured markers, they are for the Stillbrew build.
On the turret to the rear you can obviously see the 5 is in black… I didn’t want to buy a Star decal sheet just for 415 in white, so I used the numbers from 2 old sets and put them together as they were a perfect size match. The 5 will be hand painted white tomorrow night after work.

5 Likes

Hand painting numbers? You’re a better man than I John.

1 Like

Well, in my defence I’m using the black 5 as a base template so even I should be able to follow the lines … I hope :grin:

1 Like

Famous last words. :joy::joy:

Best of luck.

1 Like