Well Here I go again, I wasn’t going to do this anymore, But I just can’t resist it.
This may take a while, as I have gotten very slow.


Regards
Donald
Well Here I go again, I wasn’t going to do this anymore, But I just can’t resist it.
This may take a while, as I have gotten very slow.
Good to see you back at it Donald. It’s a great kit but needs some attention while building. I’ll be interested to see which version you decide on.
Mines about 85% done so if theres anything I can help you with just shout.
Keith
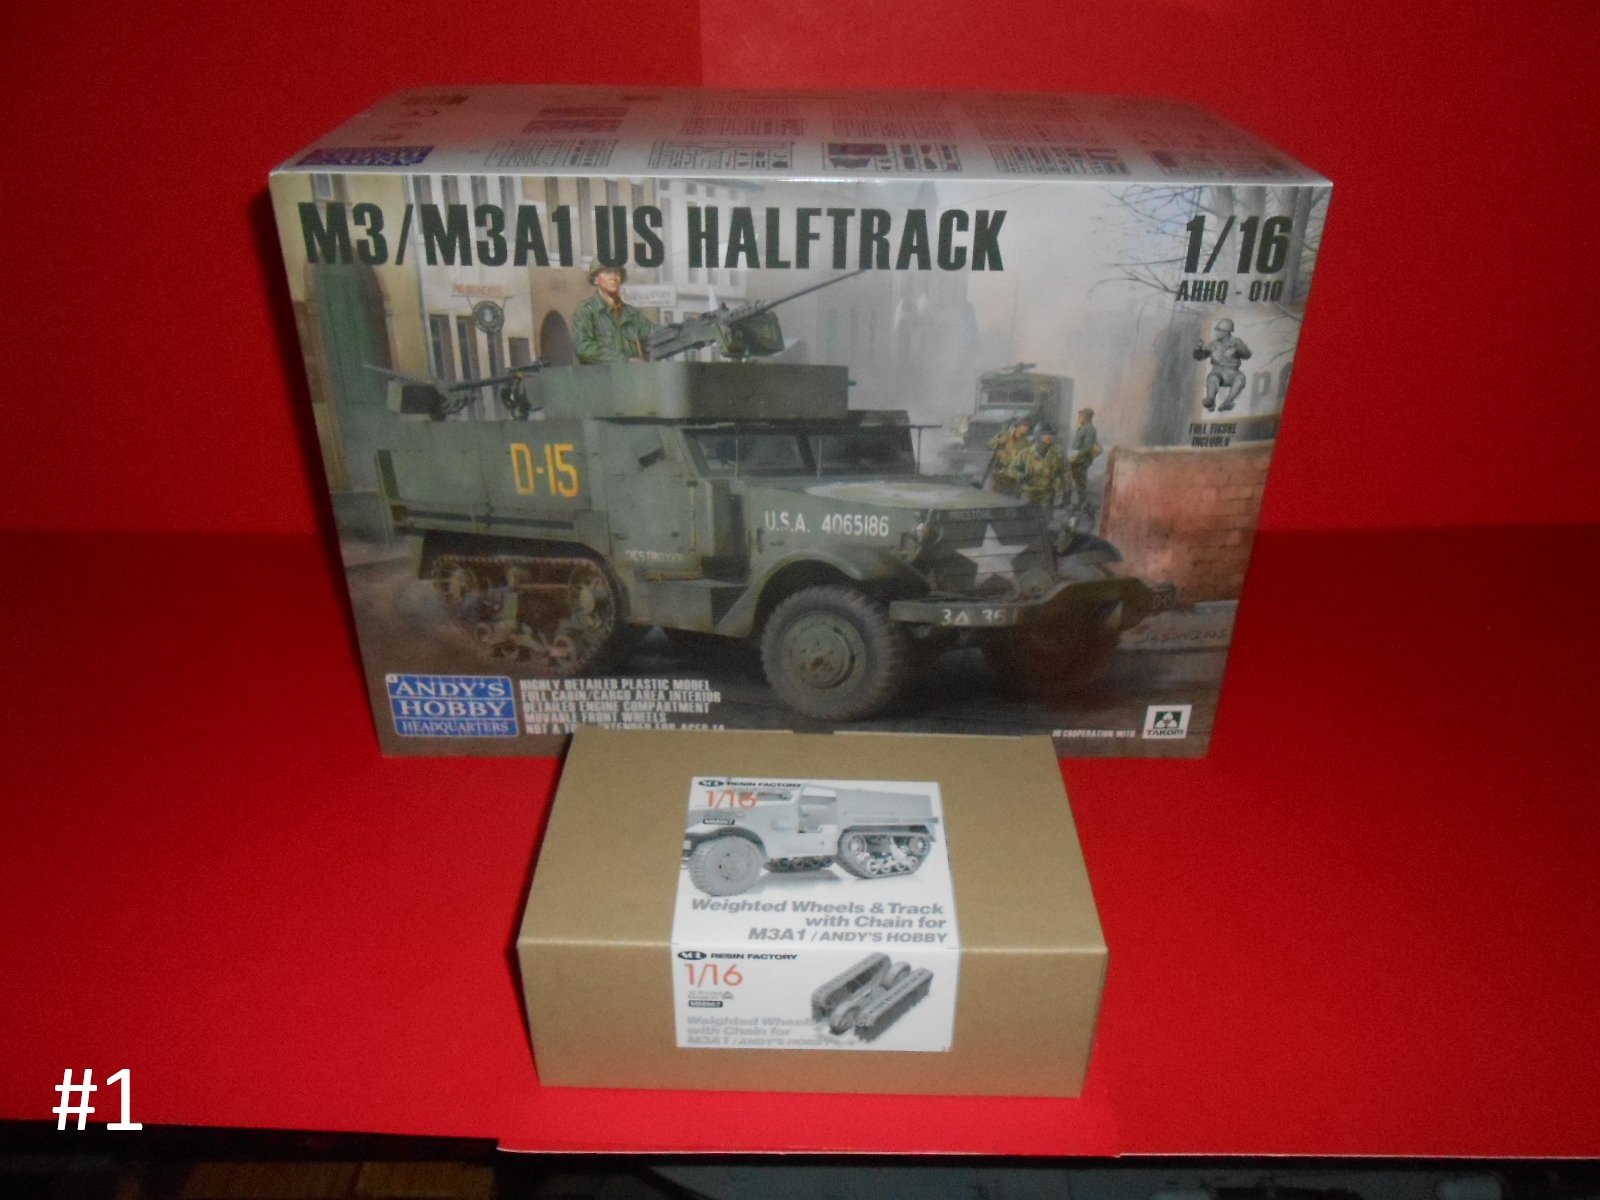
I have 2 of them to build eventually. This one is to be the A1 version, I am looking for some Early Wheels to do the Regular M3 Version.
It should be interesting.
Regards
Donald
Screaming toad do the early hubs and tyres and they are really nice. Other than that I think FC trend may but I tend to avoid their stuff.
I kind of feel like an echo chamber, but could you please edit the thread title to include the word “halftrack”? Just “M3A1” tells us almost nothing.
Fixed
Thanks ![]()
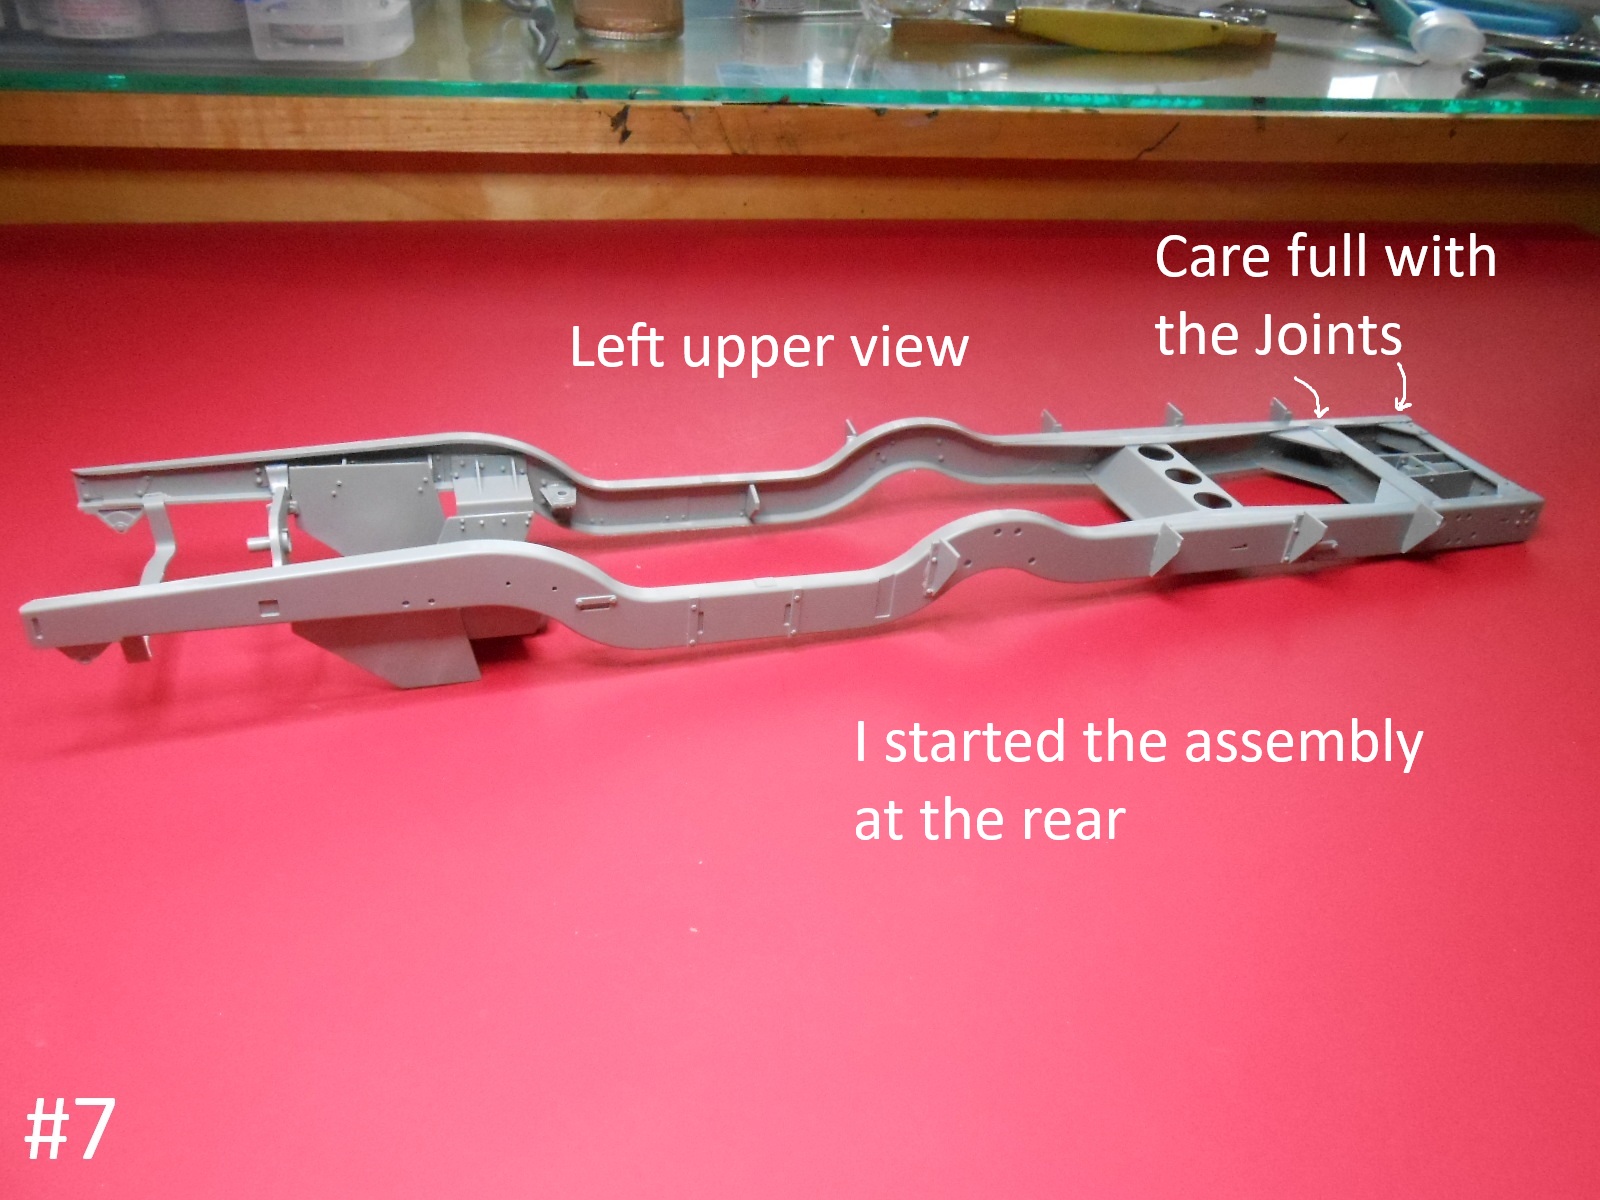
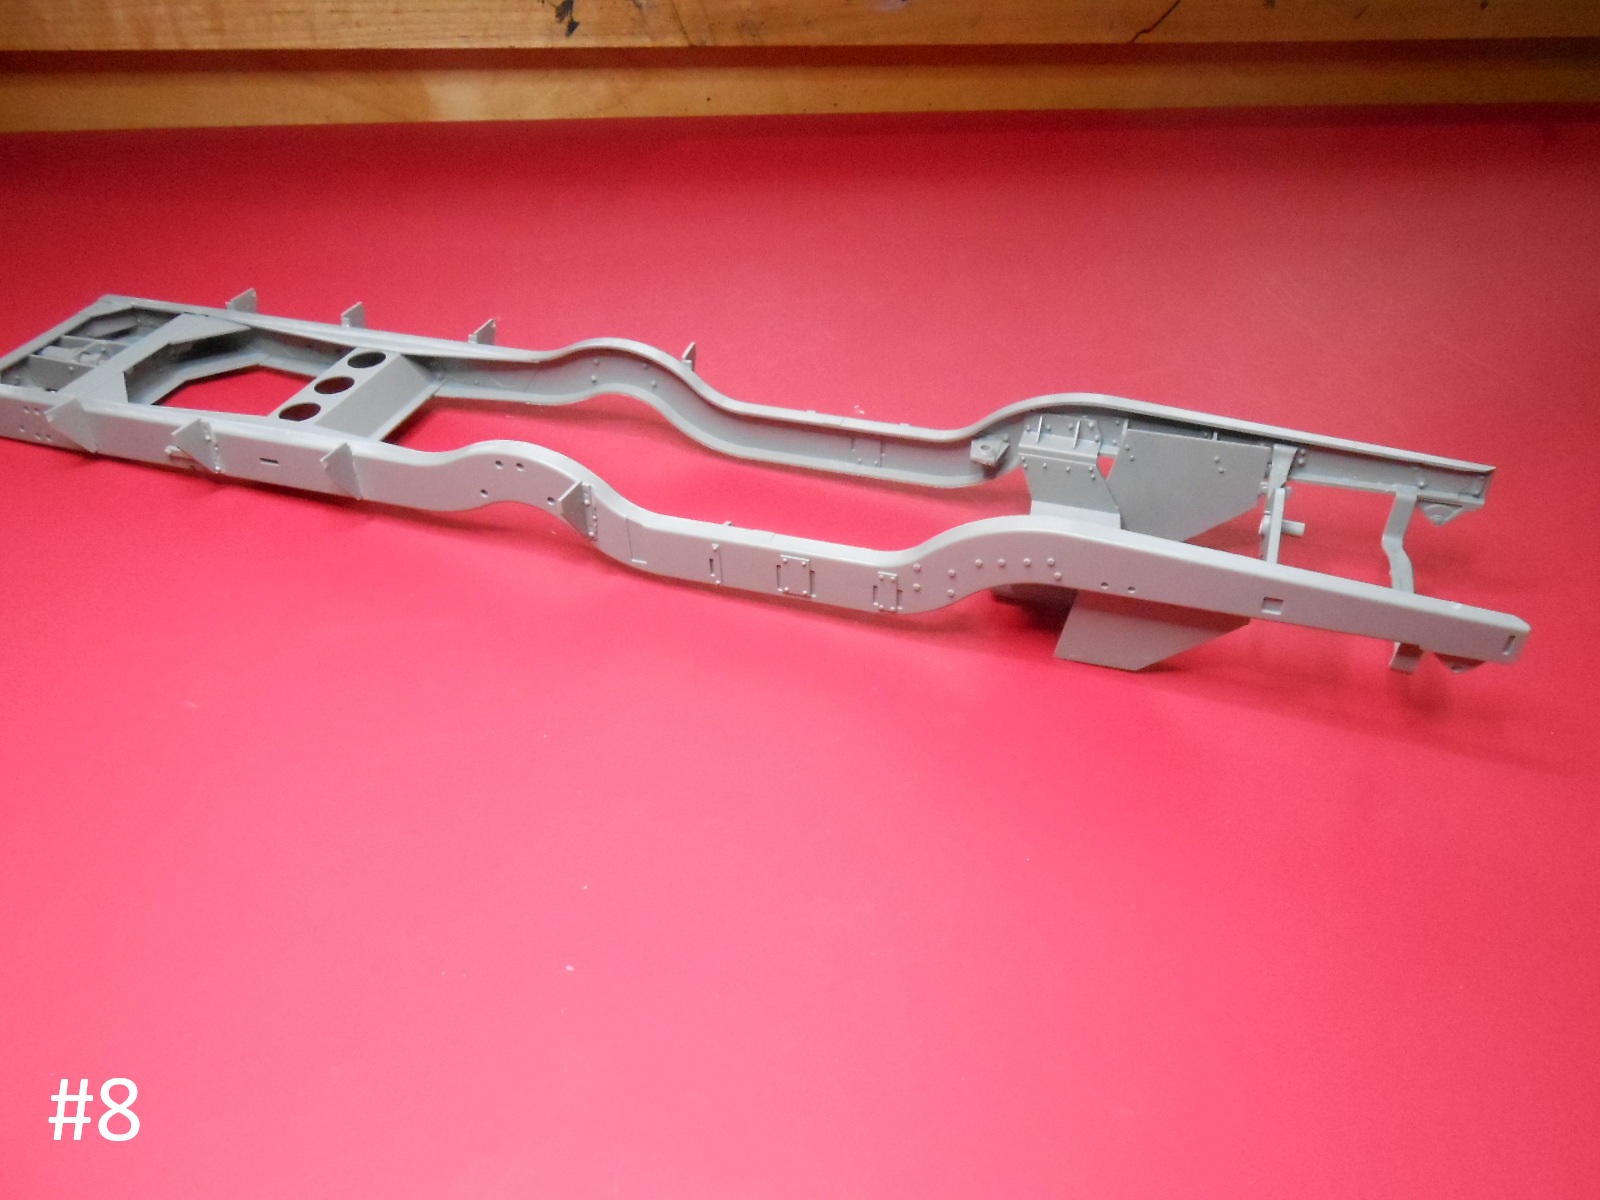
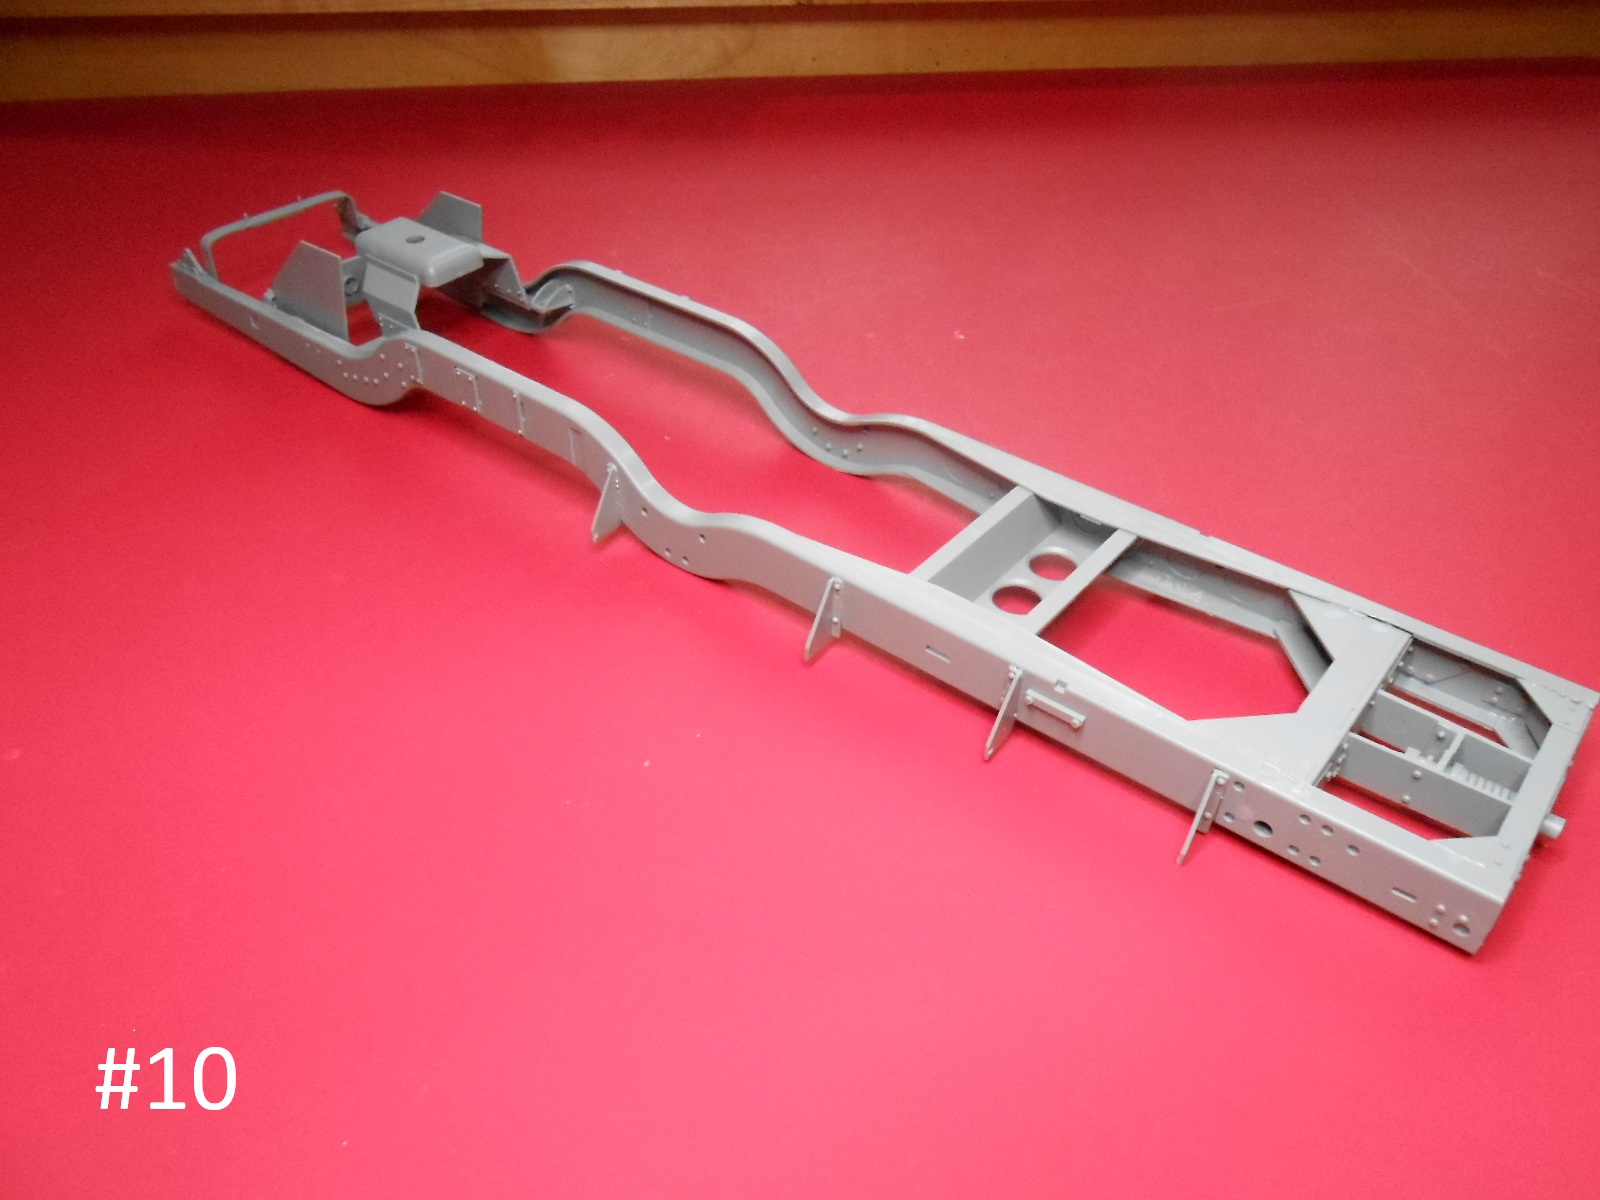
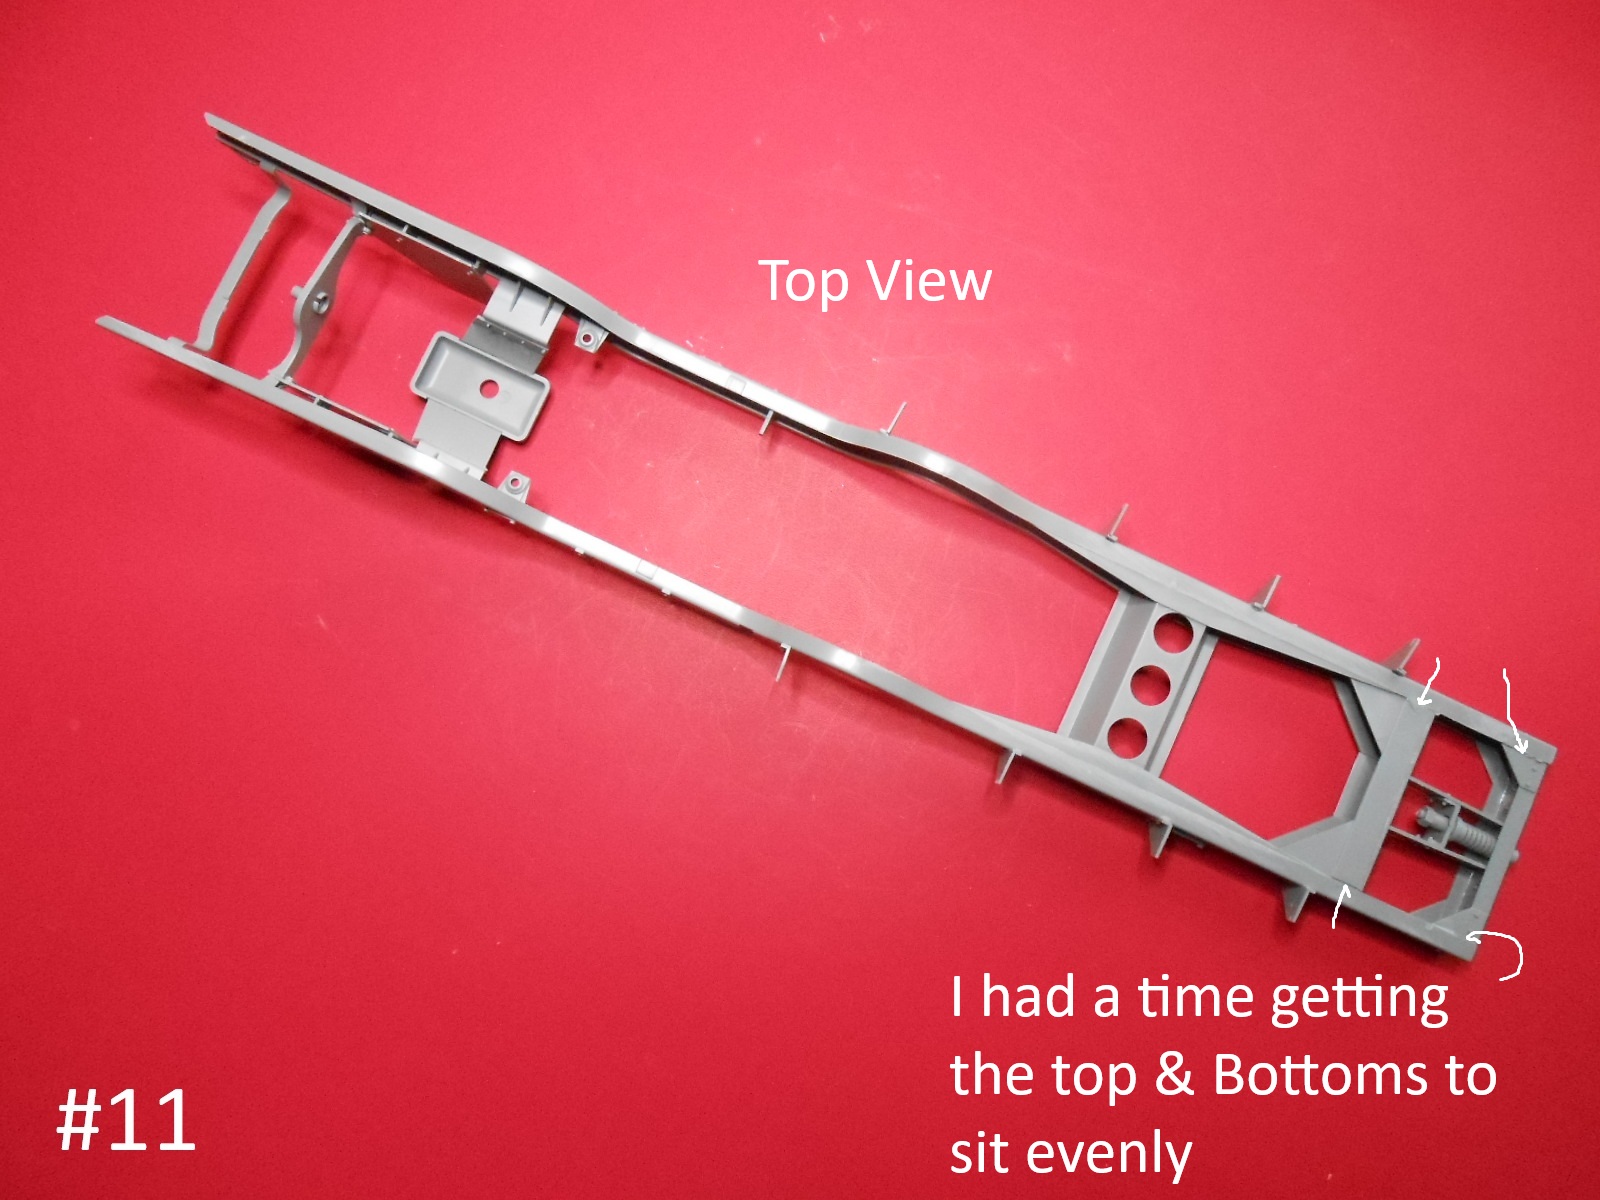
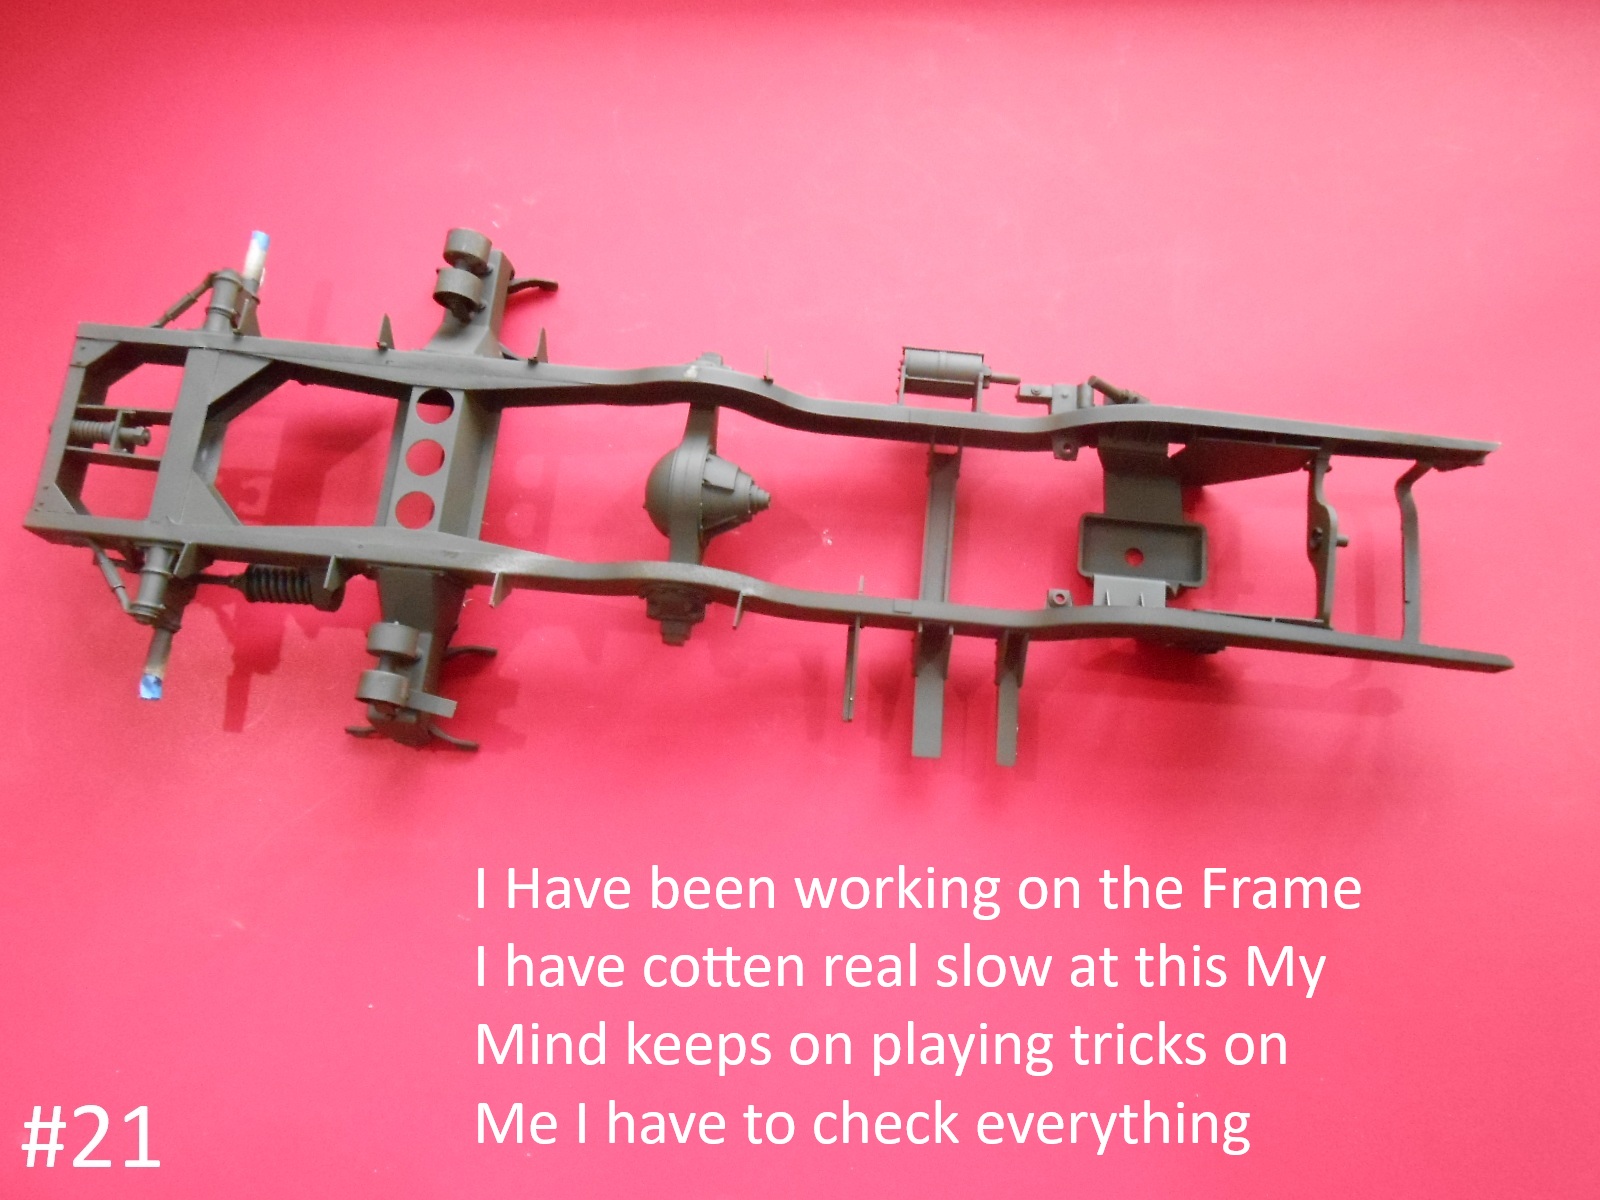
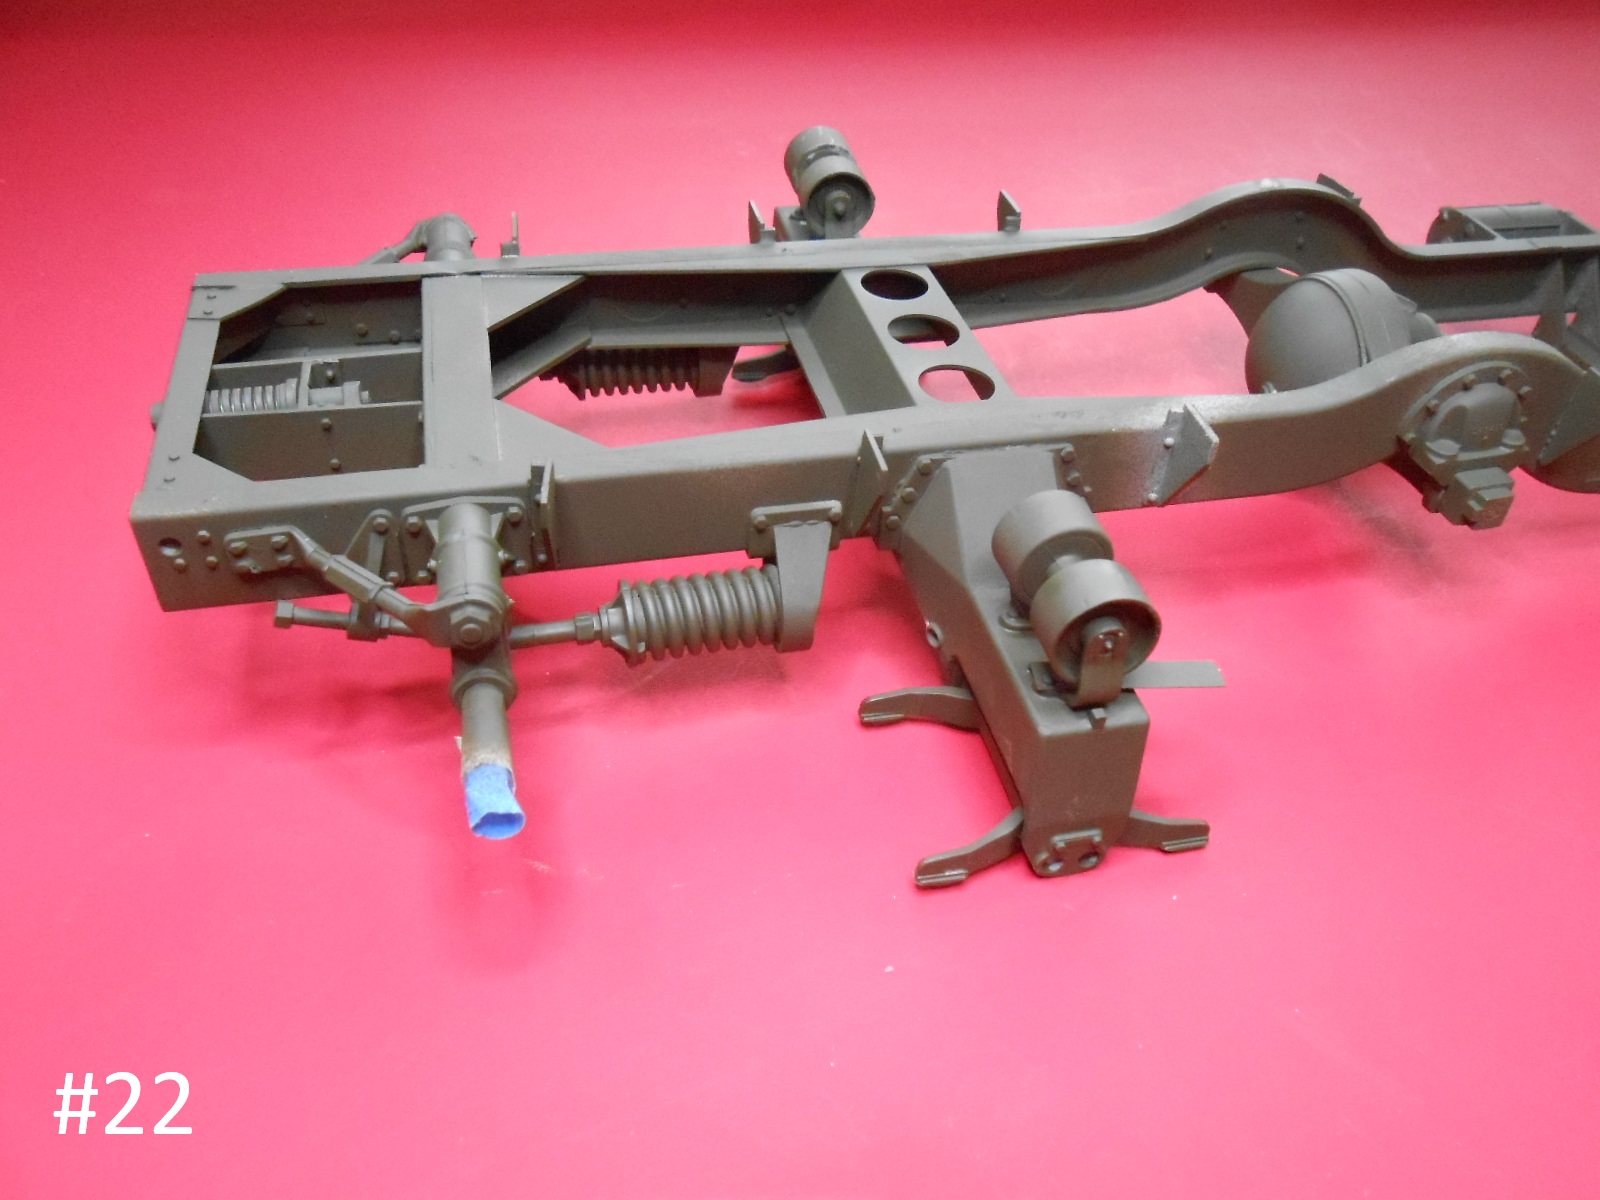
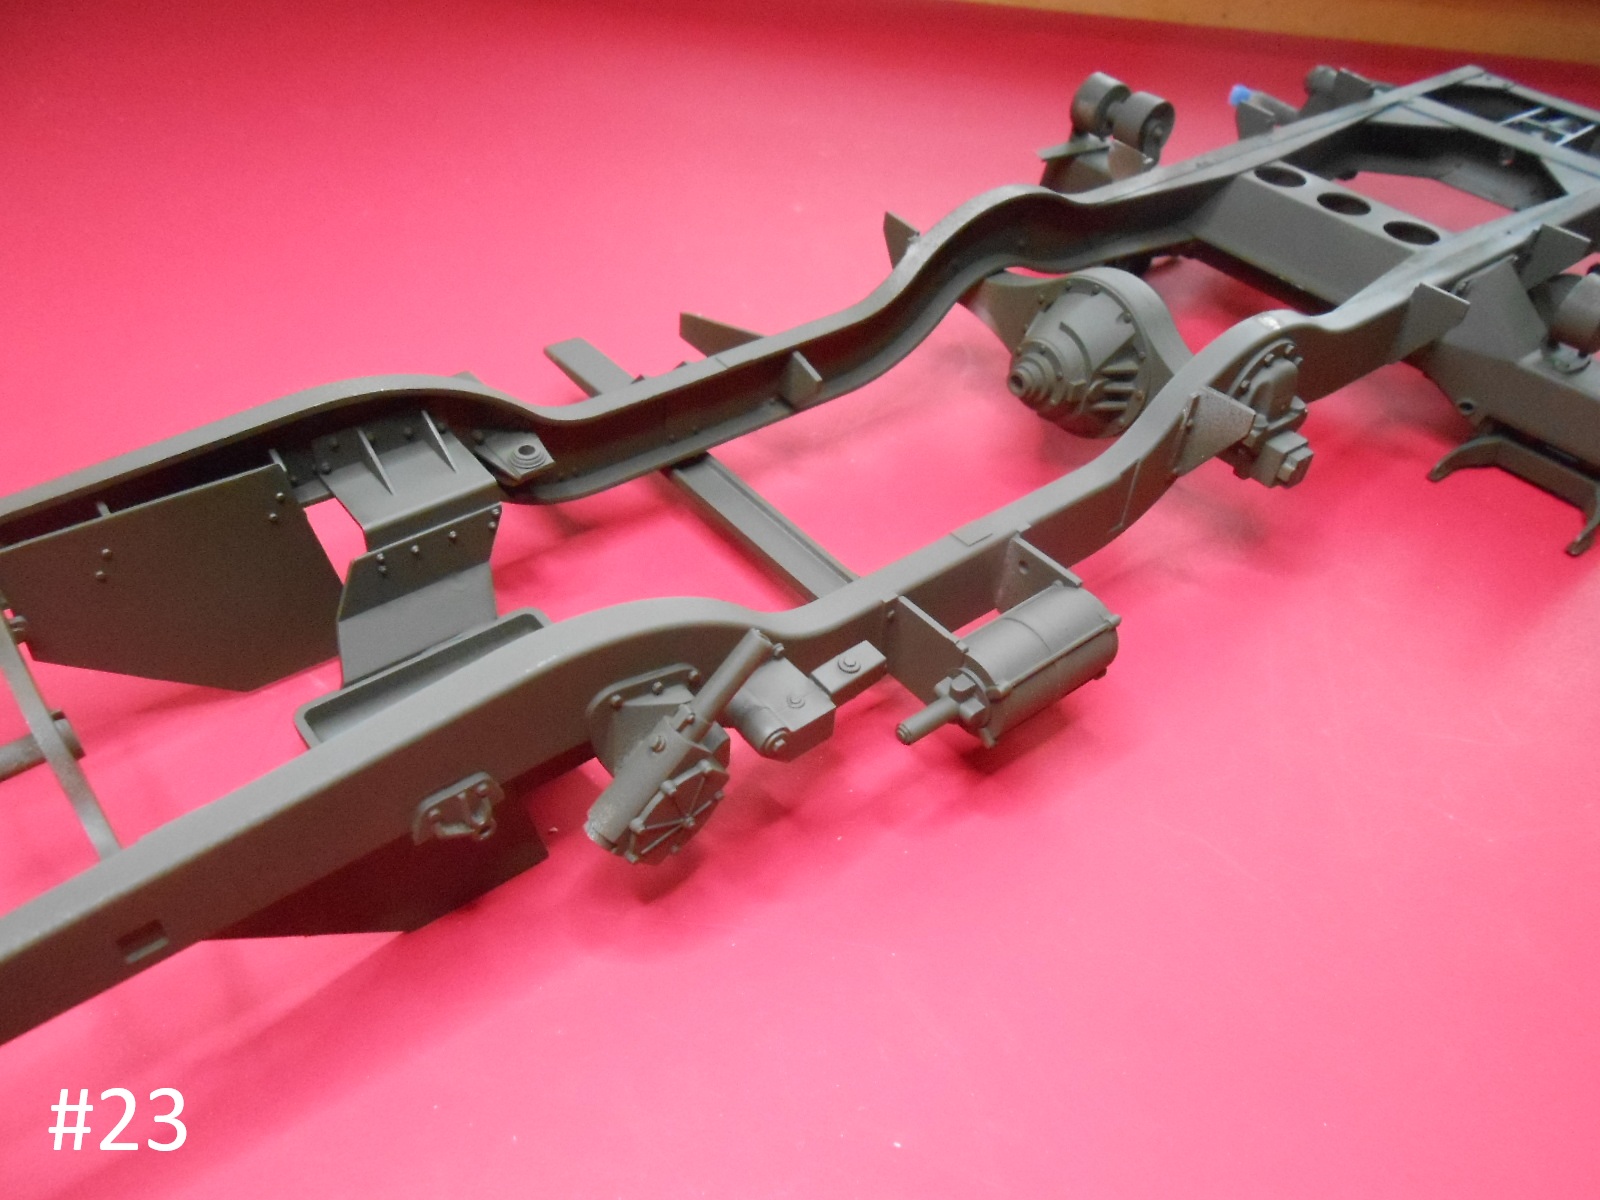
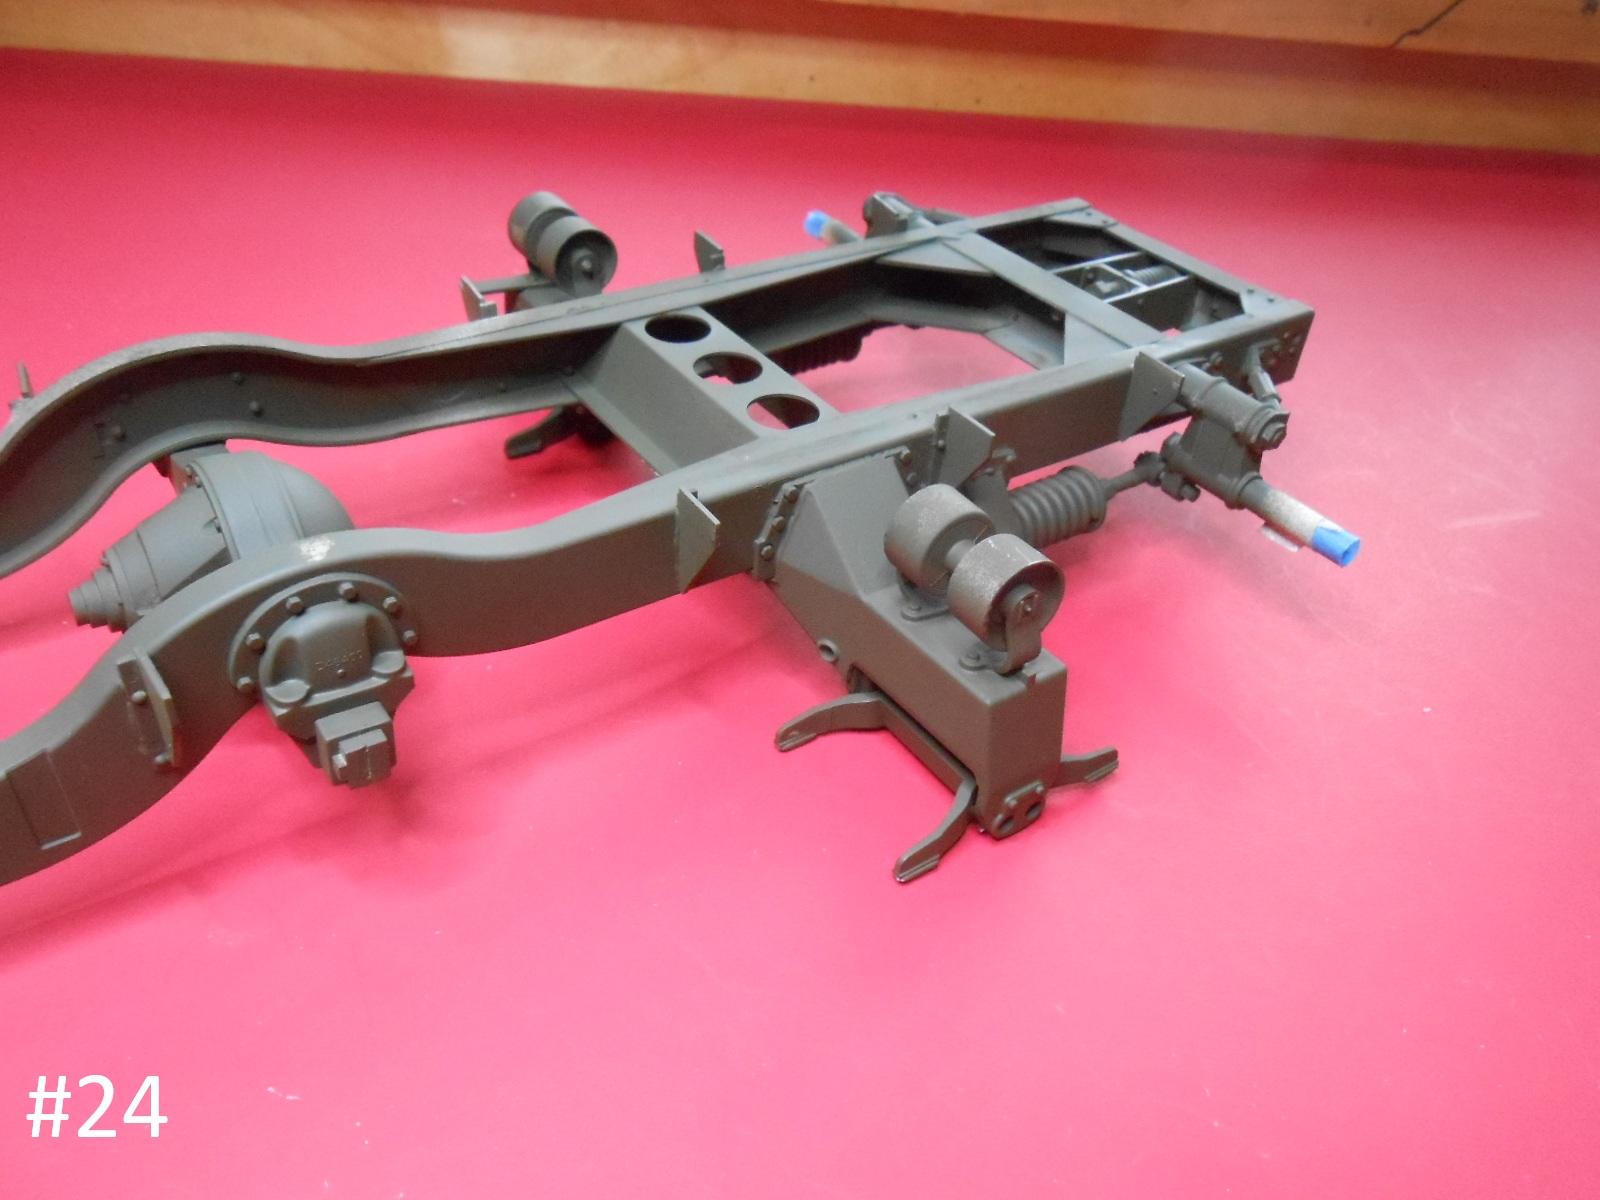
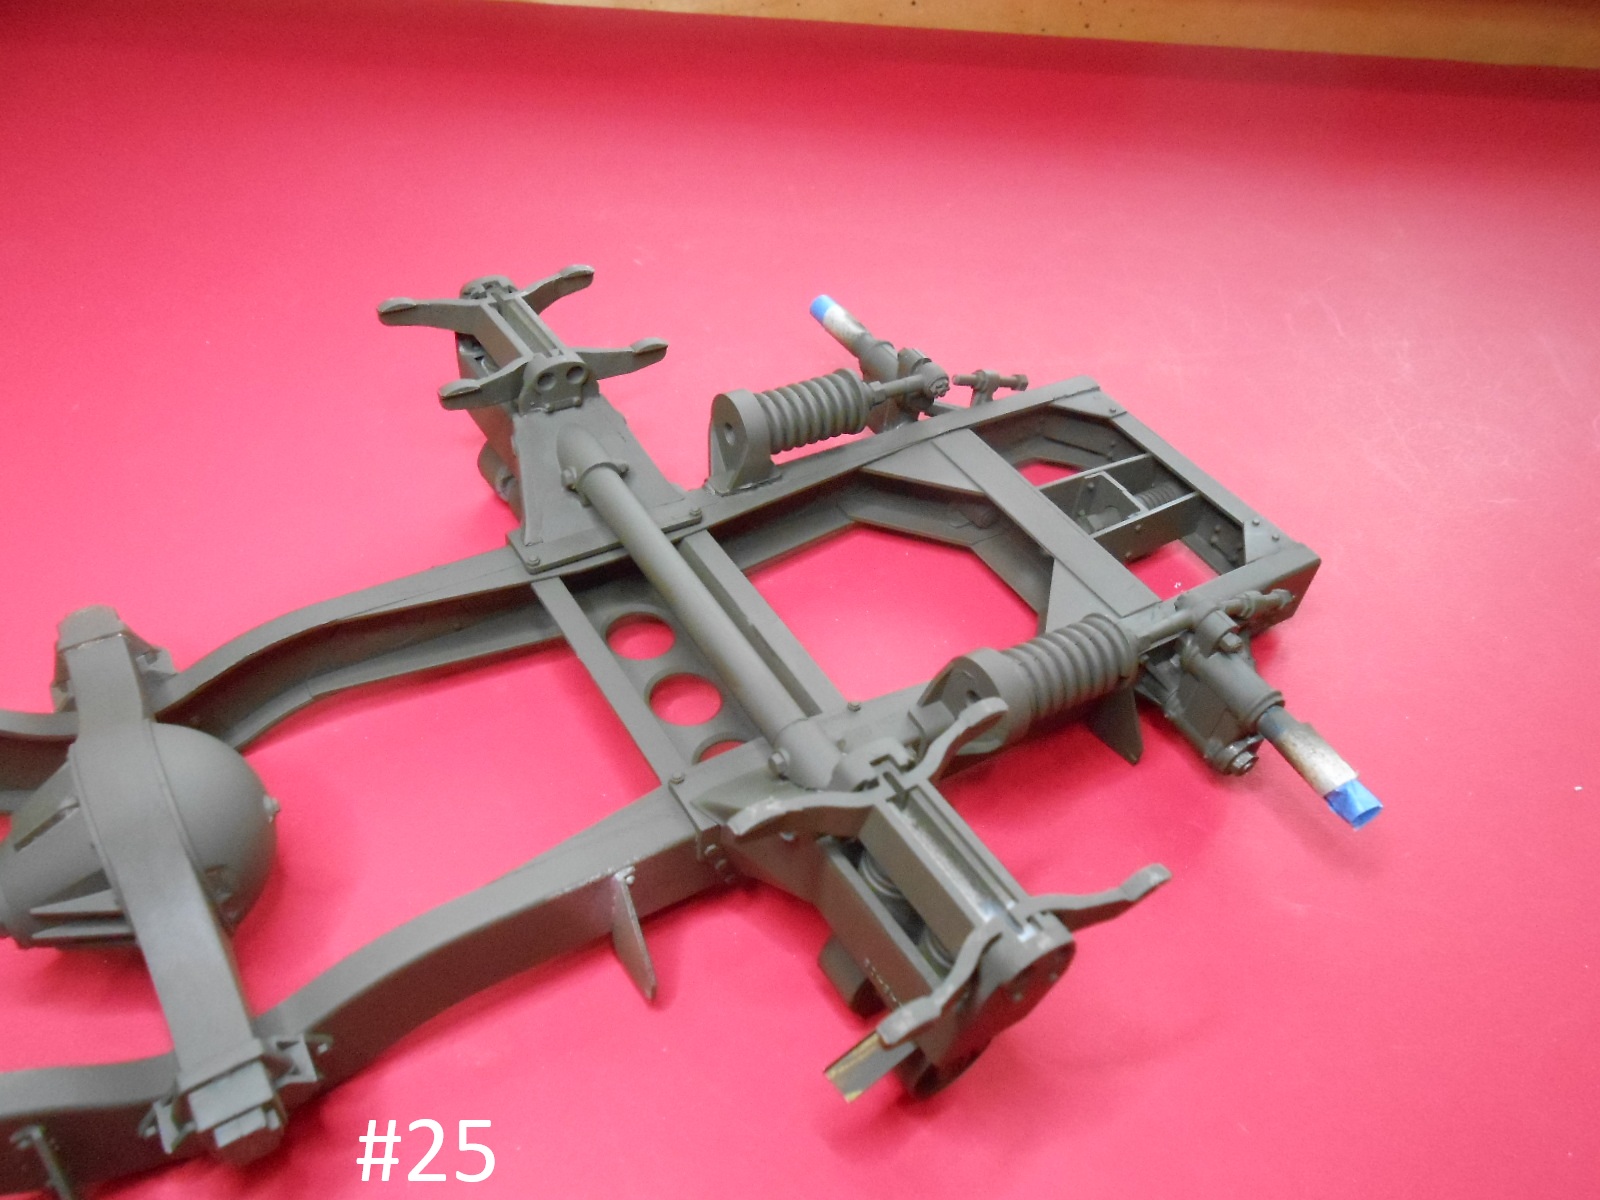
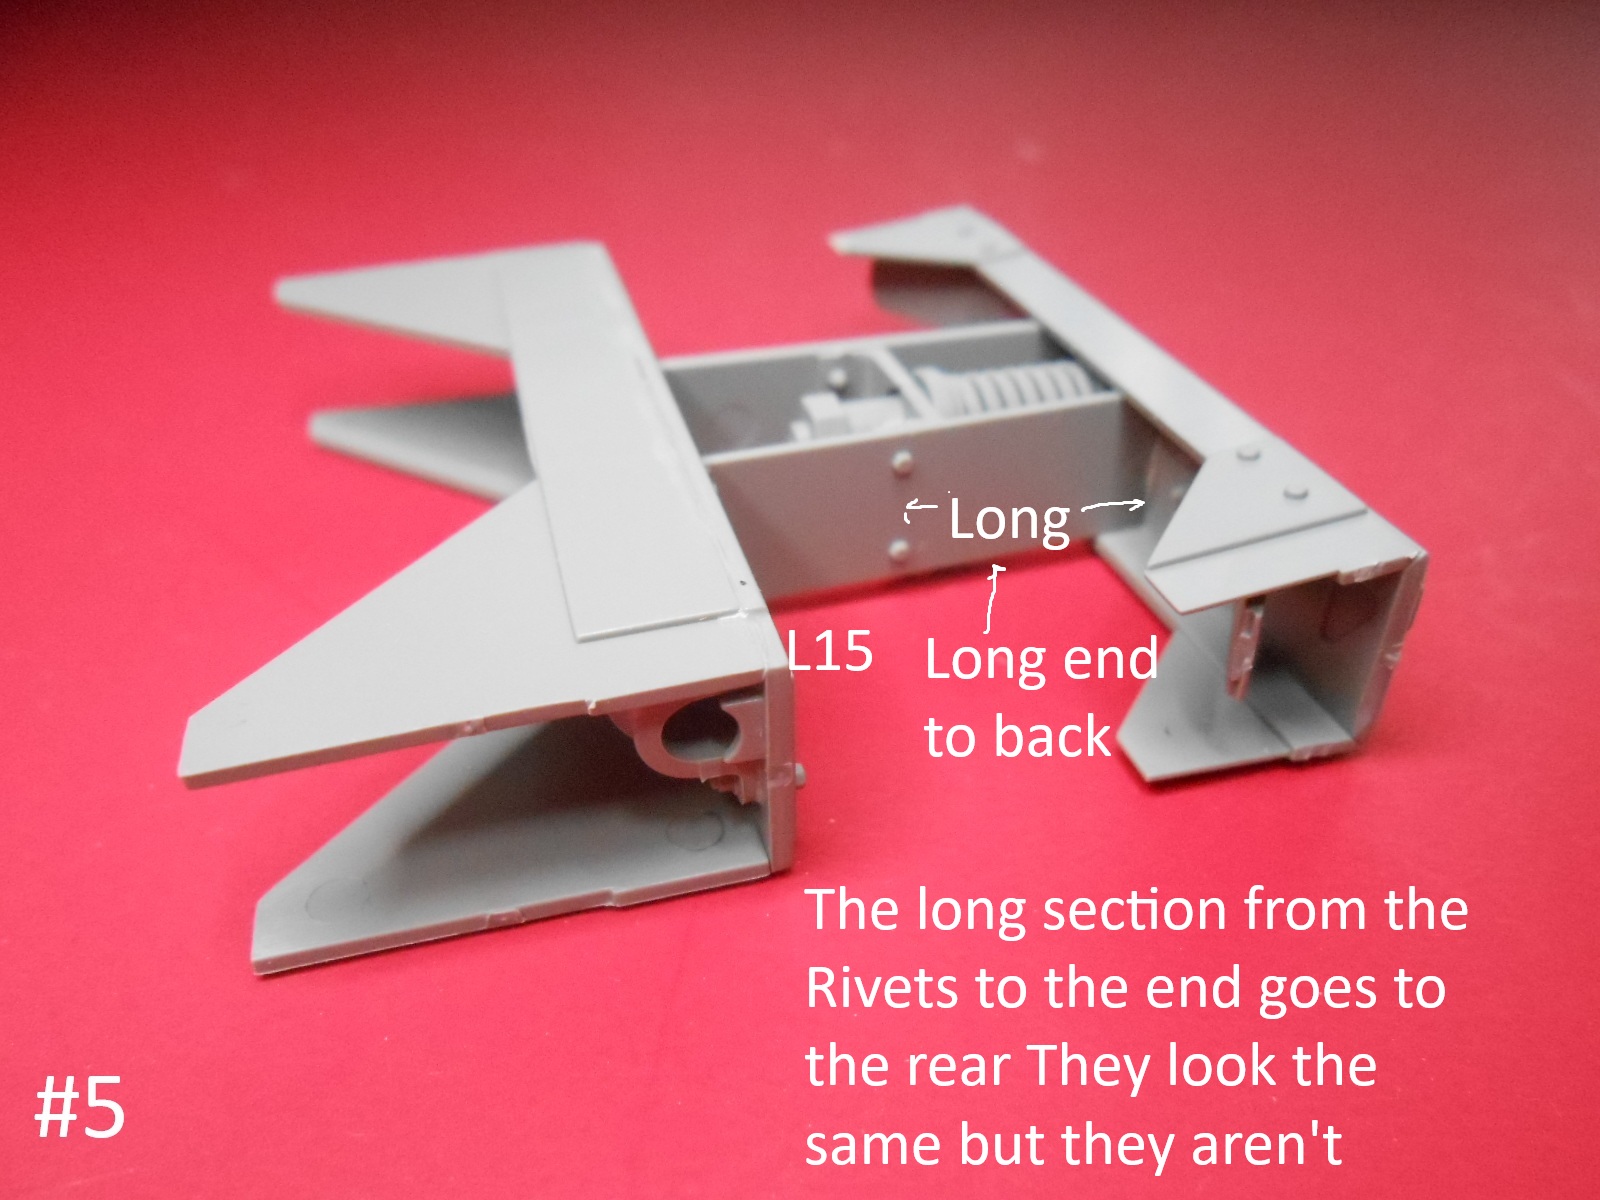
Today I assembled the main part of the Frame, I started at the rear and worked my way forward. The last 2 cross pieces were a little tricky to get them to fit evenly.
Well I’m tired and I need a nap
Donald
Nice going Donald. Just so you know. You can build the body and chassis/engine/drivetrain separate if you wish to instead of the way AHHQ have you do it.
Keith
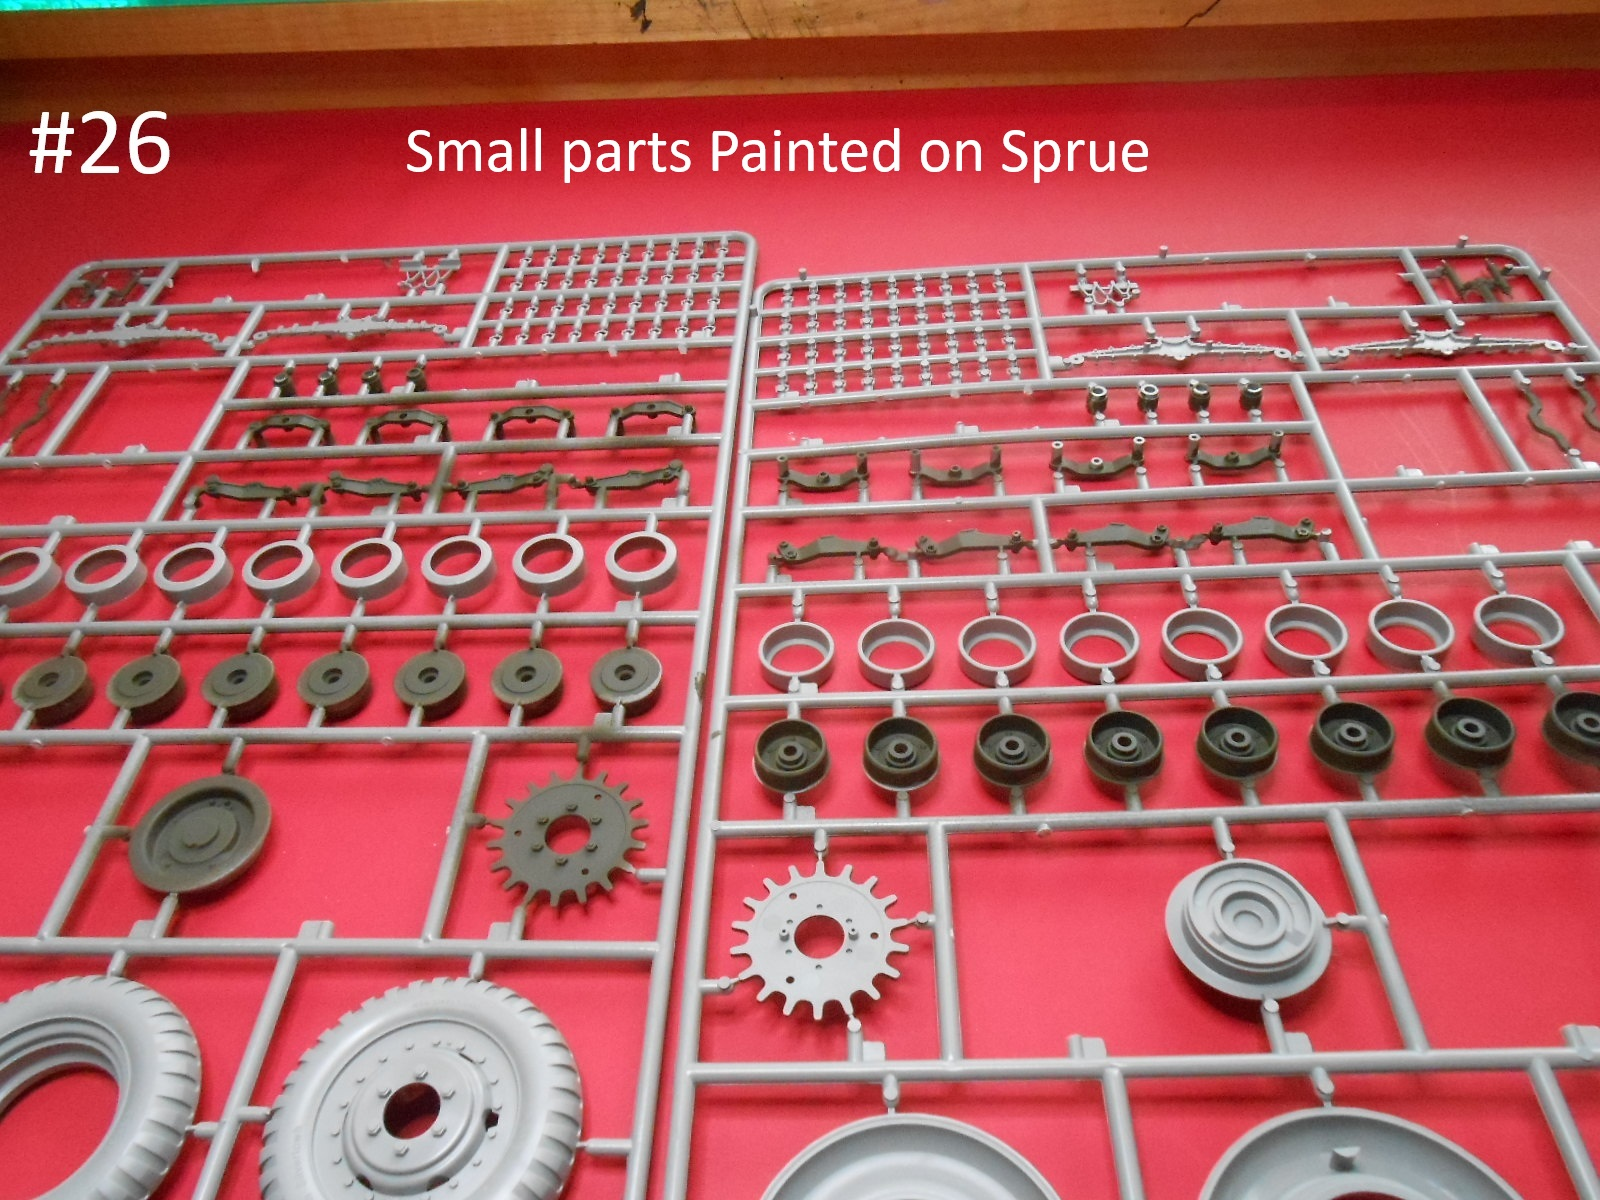
It makes it easier to paint that way too. I plan on assembling most of the Frame, then painting it and installing the Wheels and track. This should work I hope.
Donald
If anyone is interested, here are some builder’s notes I compiled during the construction phase of my AHHQ M3A1:
Step 2: knockout marks on triangular fillets will be visible. Fill with putty. Parts K7 and K8 also have visible knockout marks
Step 6: knockout marks on triangular fillets will be visible. Fill with putty..
Step 11: Bogie housings. were a single casting. Fill seams where M4, M6, M7, M35 and M20 meet.
Step 12: sprue attachment points to road wheel parts M14 and M15 need complete removal or fitting problems will result
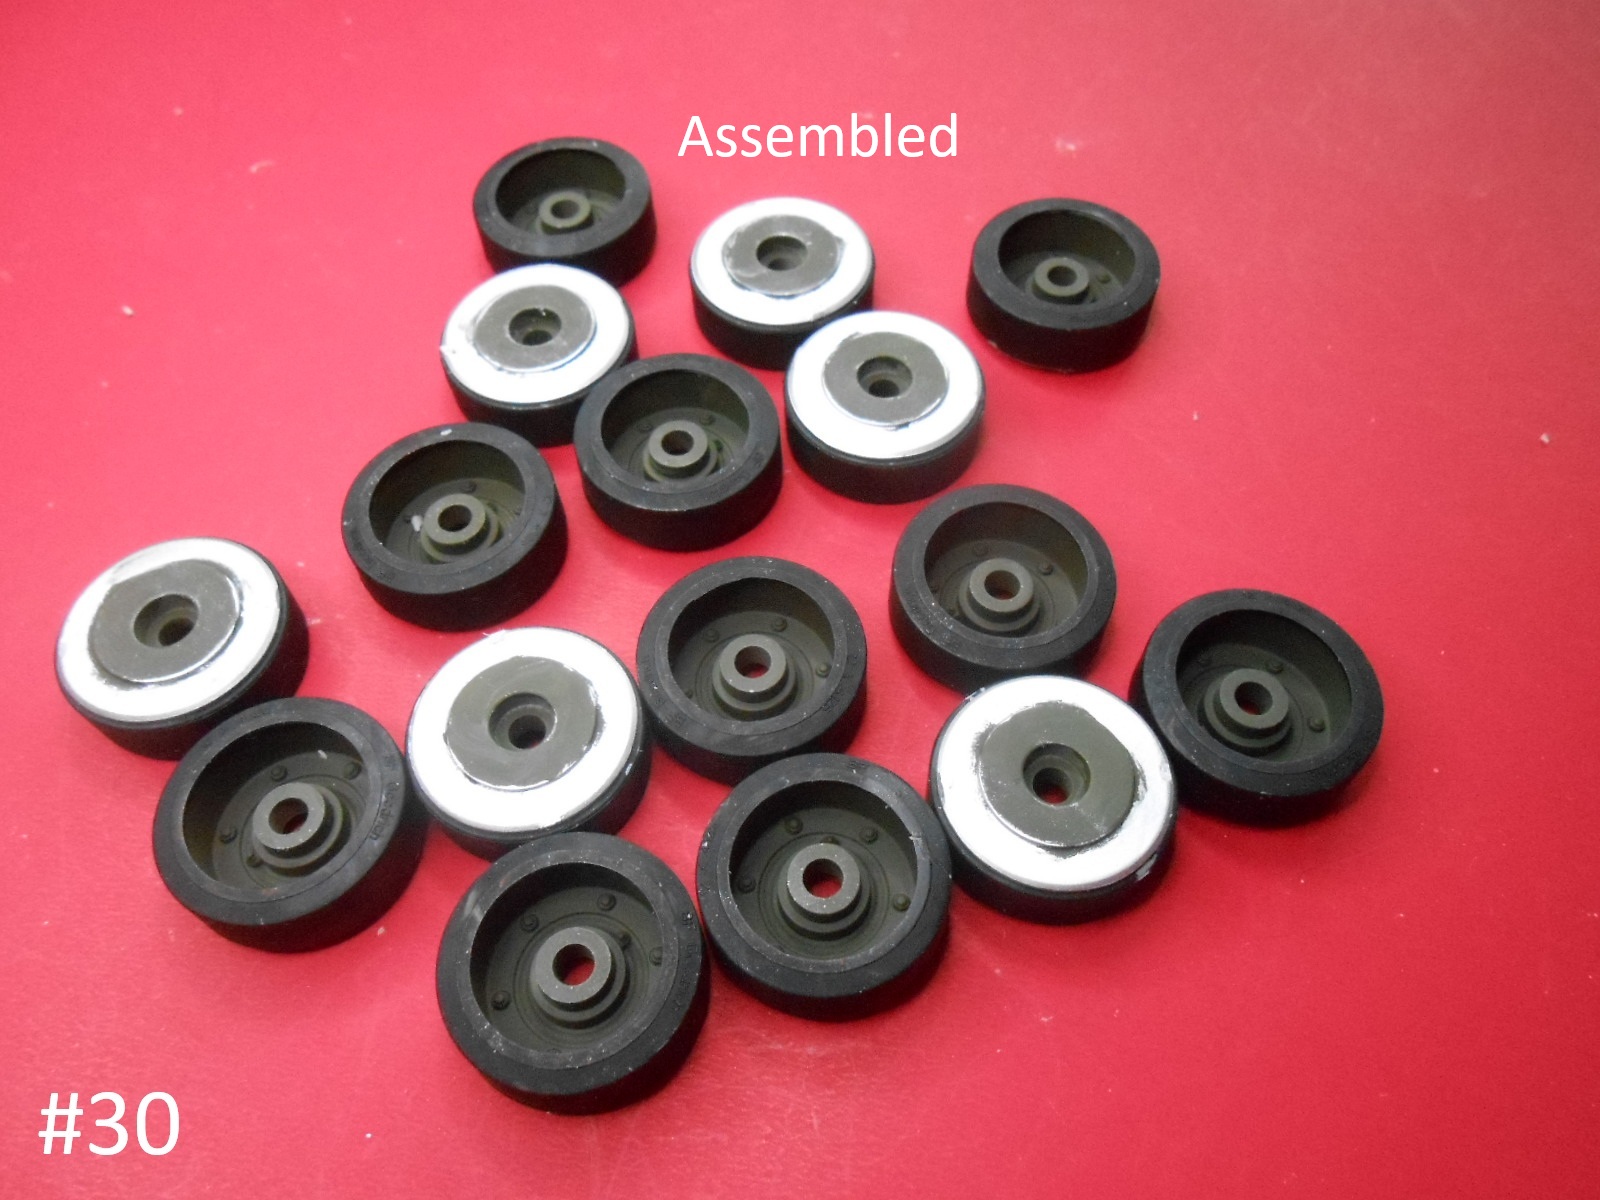
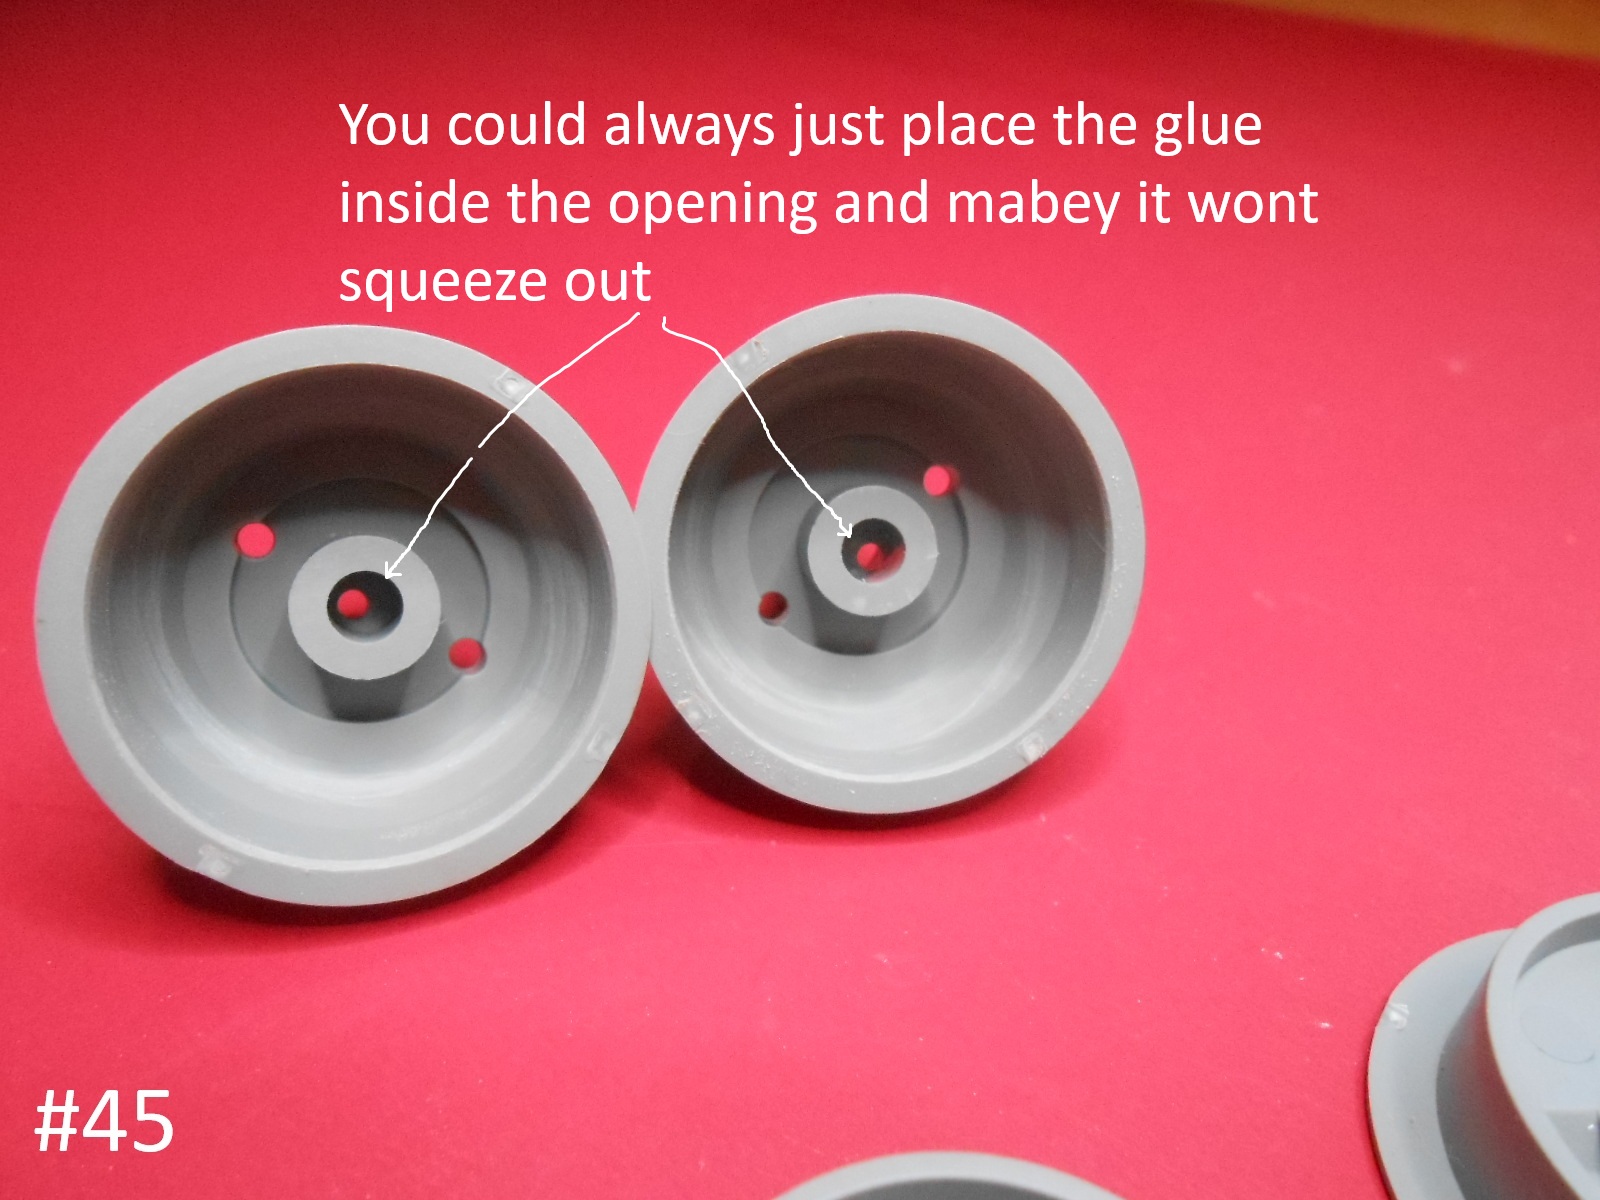
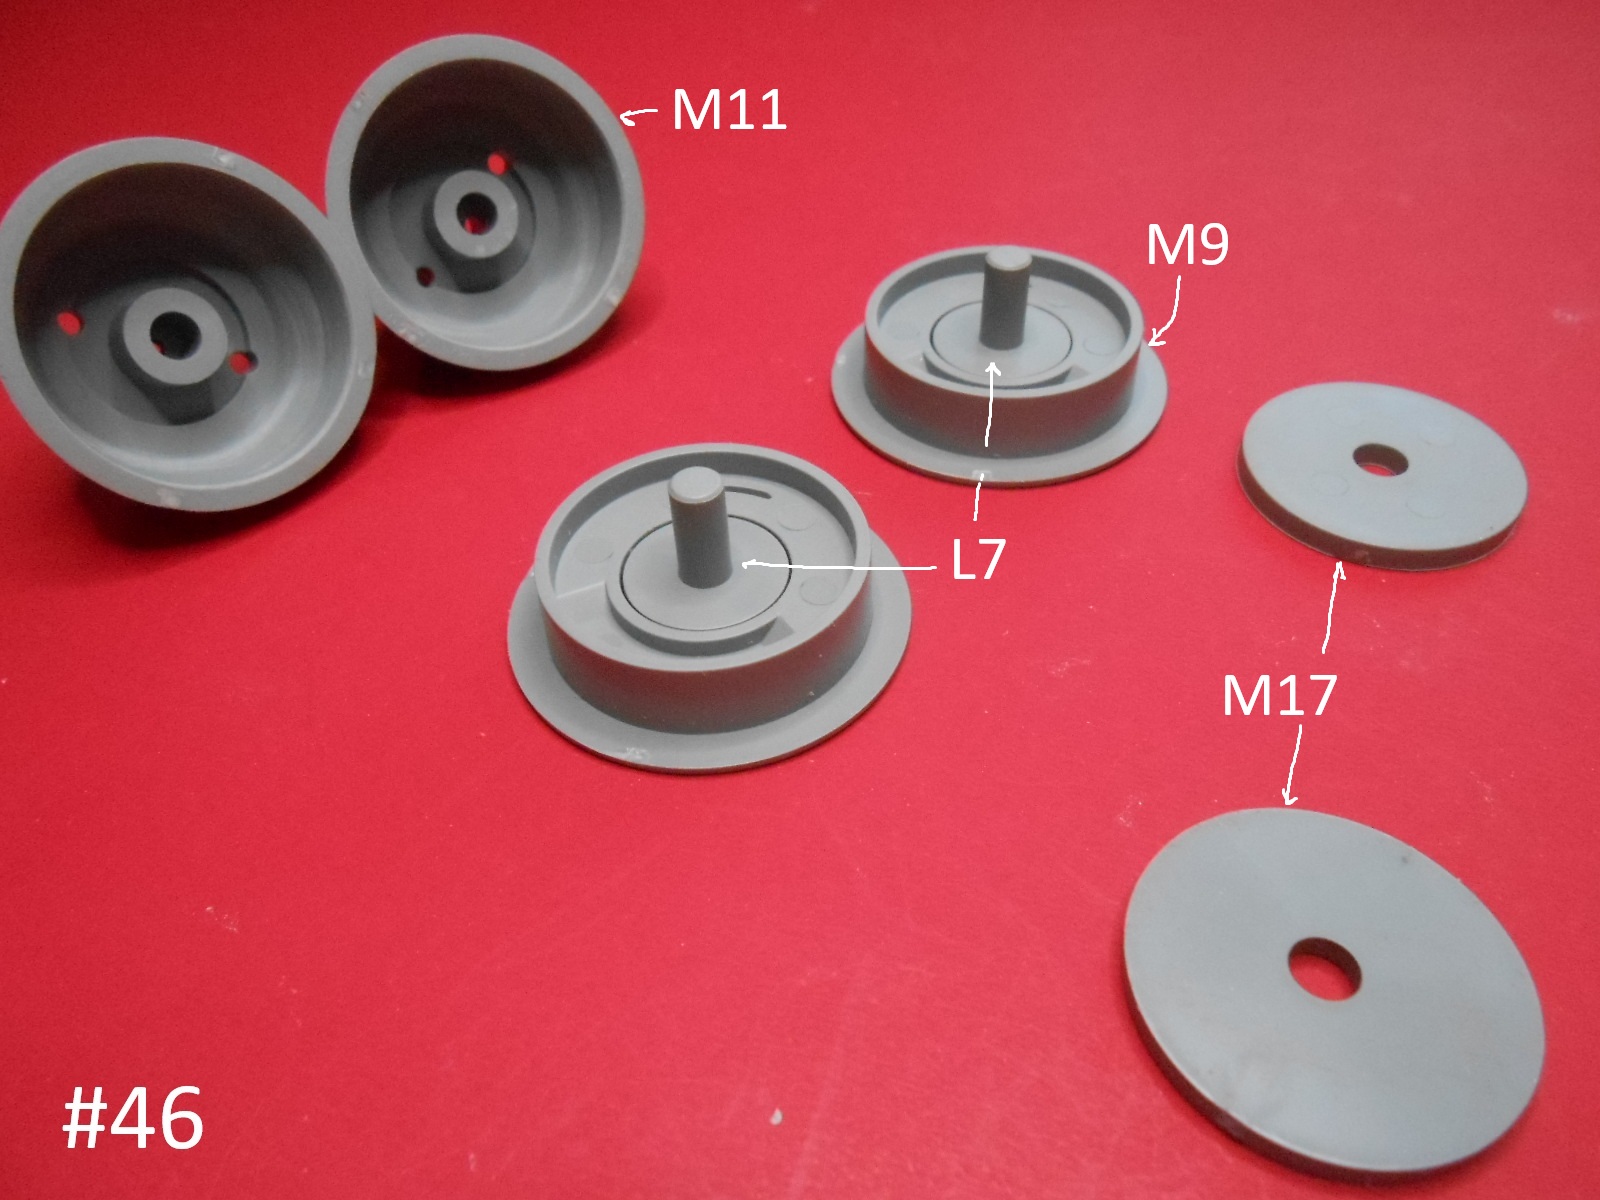
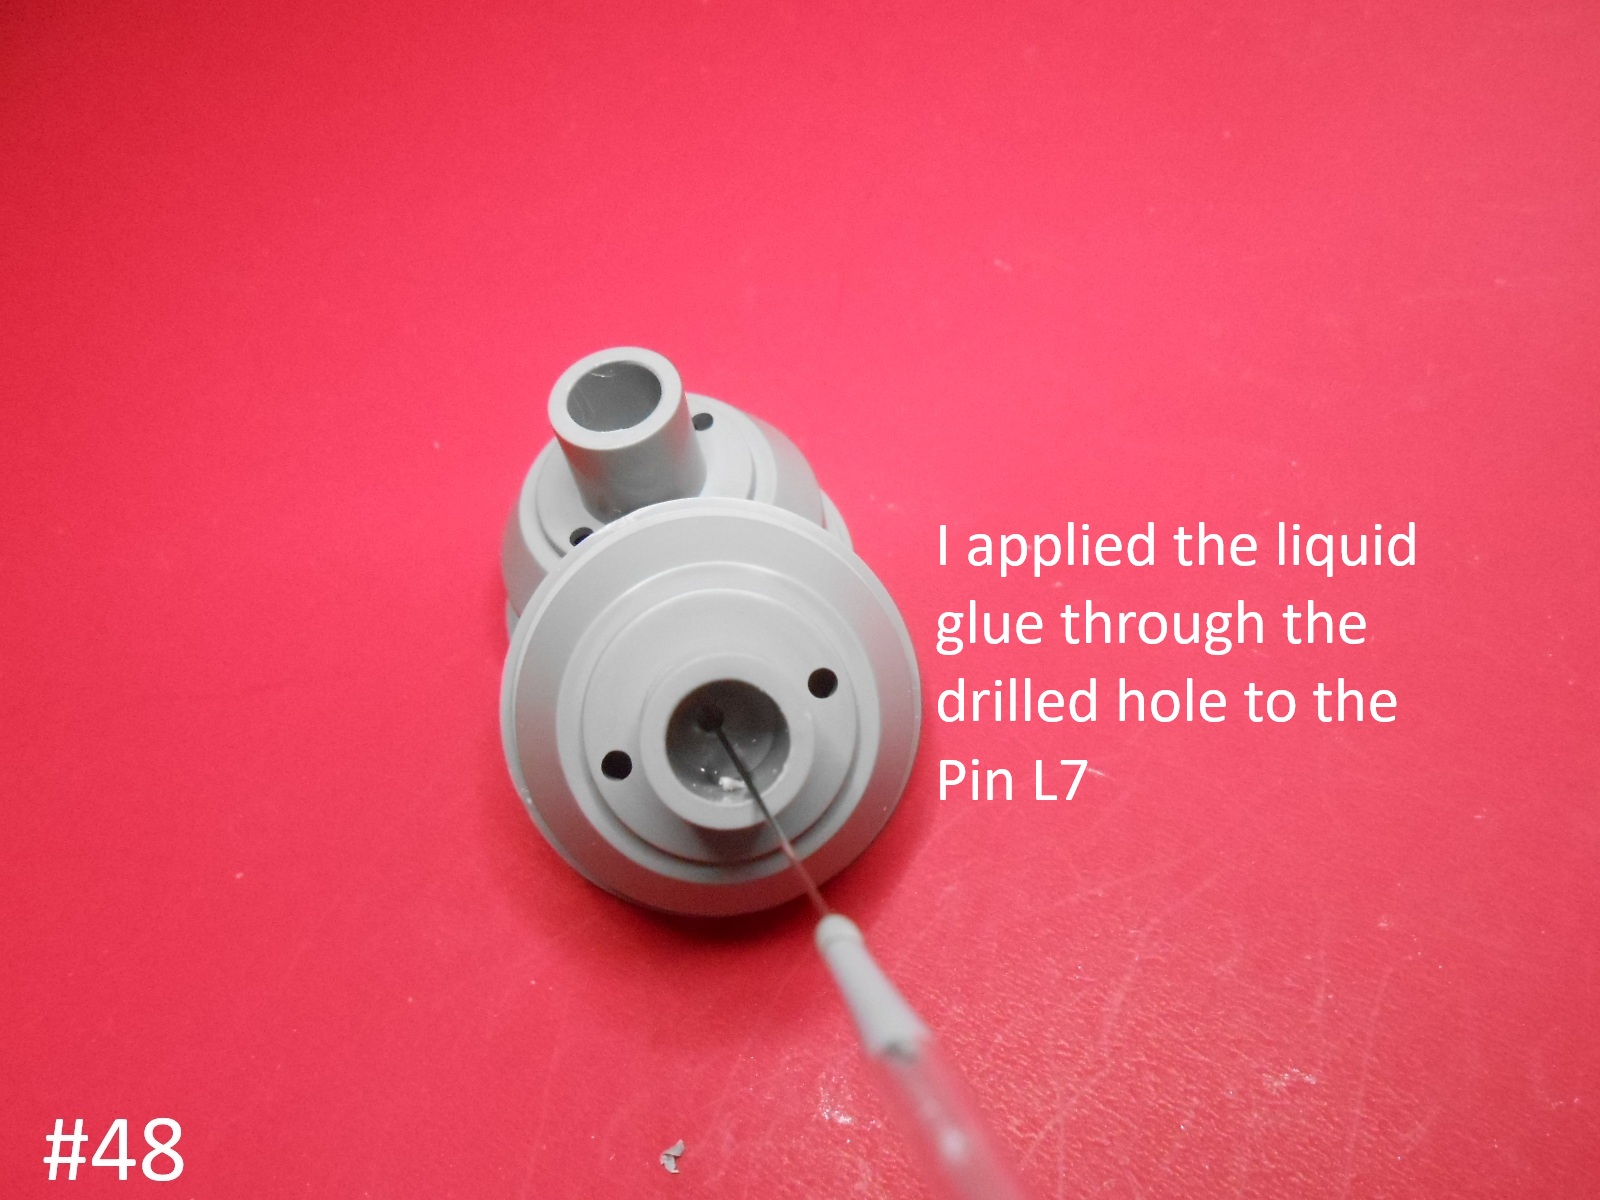
Step 13: I put a small drop of super glue into hole of M11 to accept L7. Then I put super glue into inner rim of M9 to attach to M17.
Step 16: a) leaf spring halves M31 and M32 require lots of seam clean up. Work the underside with files. On the upper side, rather than putty, I removed all the cross bolts and placed strips of thin 0.005" styrene to complete hide the upwards facing surface and seam of the leaf spring halves. Then I replaced the cross bolts with 0.025" styrene rod.
b) spring leaf parts M31 and M32 ends have different diameter holes. Ensure the right ones are facing forward or you’ll have problems later in step 18.
c) Connector bars L16 (x4) that go into J66 and JH67 are a tight fit. Enlarge the holes in J66 and J77.
Step 49: Upper windshield support frame E13 fits behind and below the top edge of windscreen part E17 (sometimes modelers think E13 fits on TOP of E17 – that’s incorrect). When viewed from the side, parts F8, S10 or F1 should be horizontal.
Step 50-1: a) for accuracy, drill out the top of support pole R37. It was a hollow pipe with thin walls, in reality. b) not ever M3A1 had support rod R9 fitted. Look at your photo references.
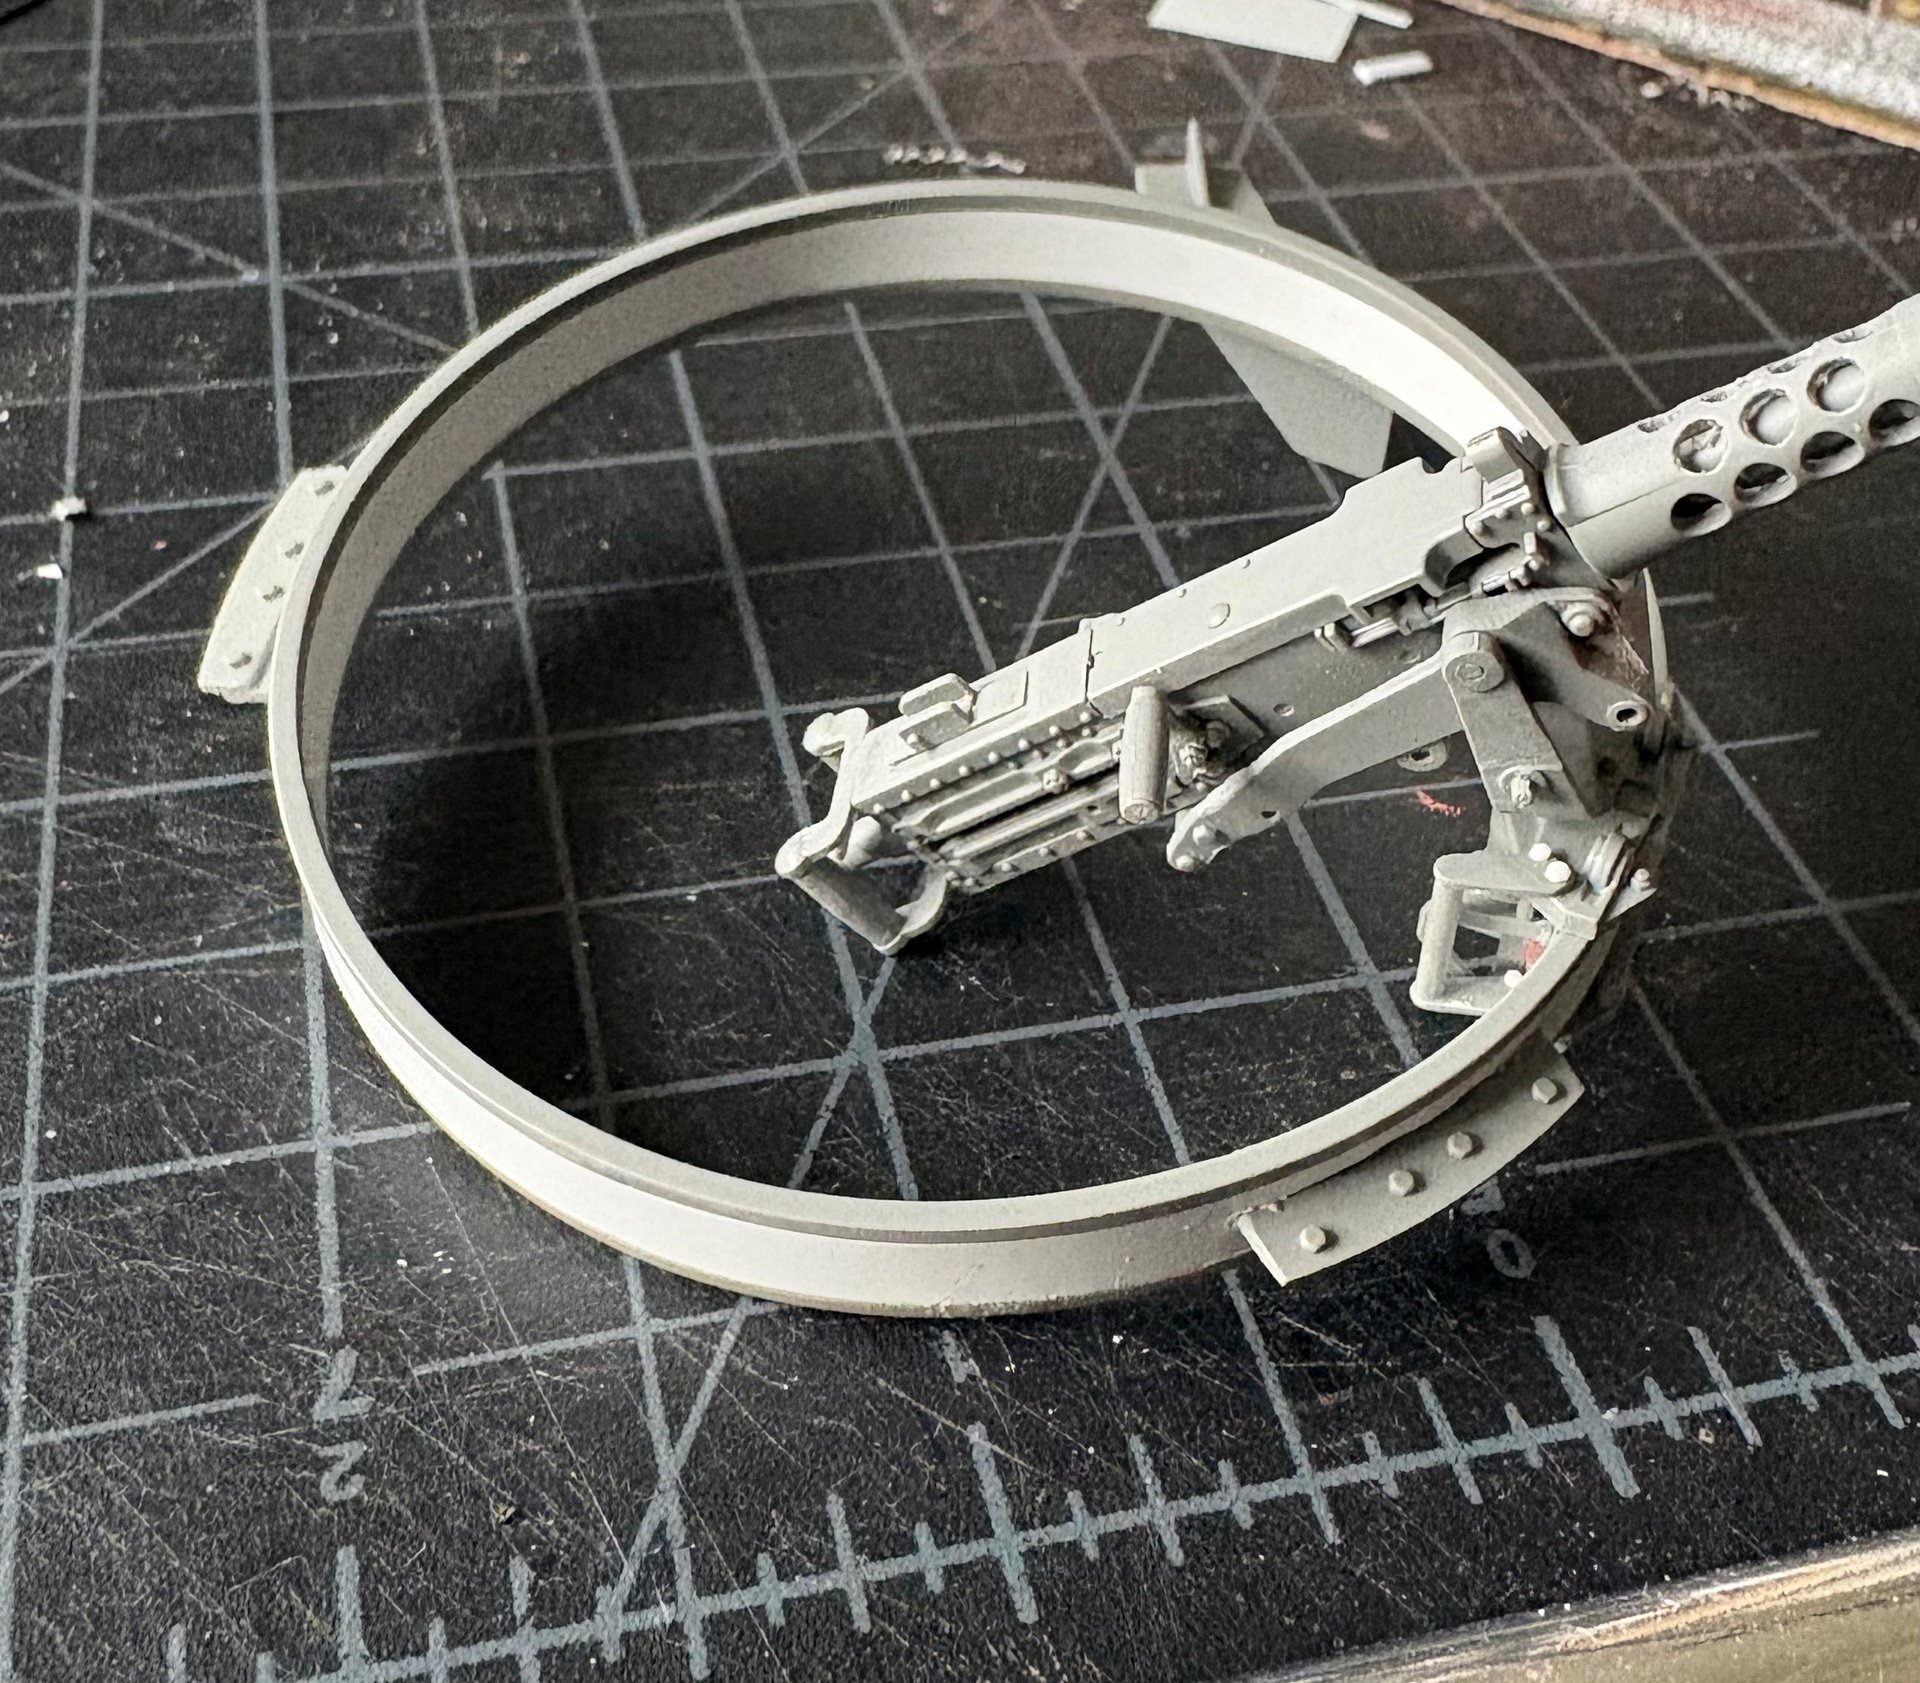
Step 51-1: a) be careful fitting R35, R34 and R16. The three slots from MG ring R1 and R2 are not symmetrical. Test fit with the MG ring armor assembly from step 50 to place the right parts with the right slots. b) MG ring parts R1 and R2 leave a nasty, hard to fill seam. I ended up wrapping both the inside and outside of that section with 0.005" styrene to hide the seam. See picture
Oh man, this will be a cool kit once finished. Cannot wait to see the steps when those resin goodies go on.
I think that you will like it, but this may take quite a while as I am very old and slow I have to check and check and then do it again. Please have patience with me.
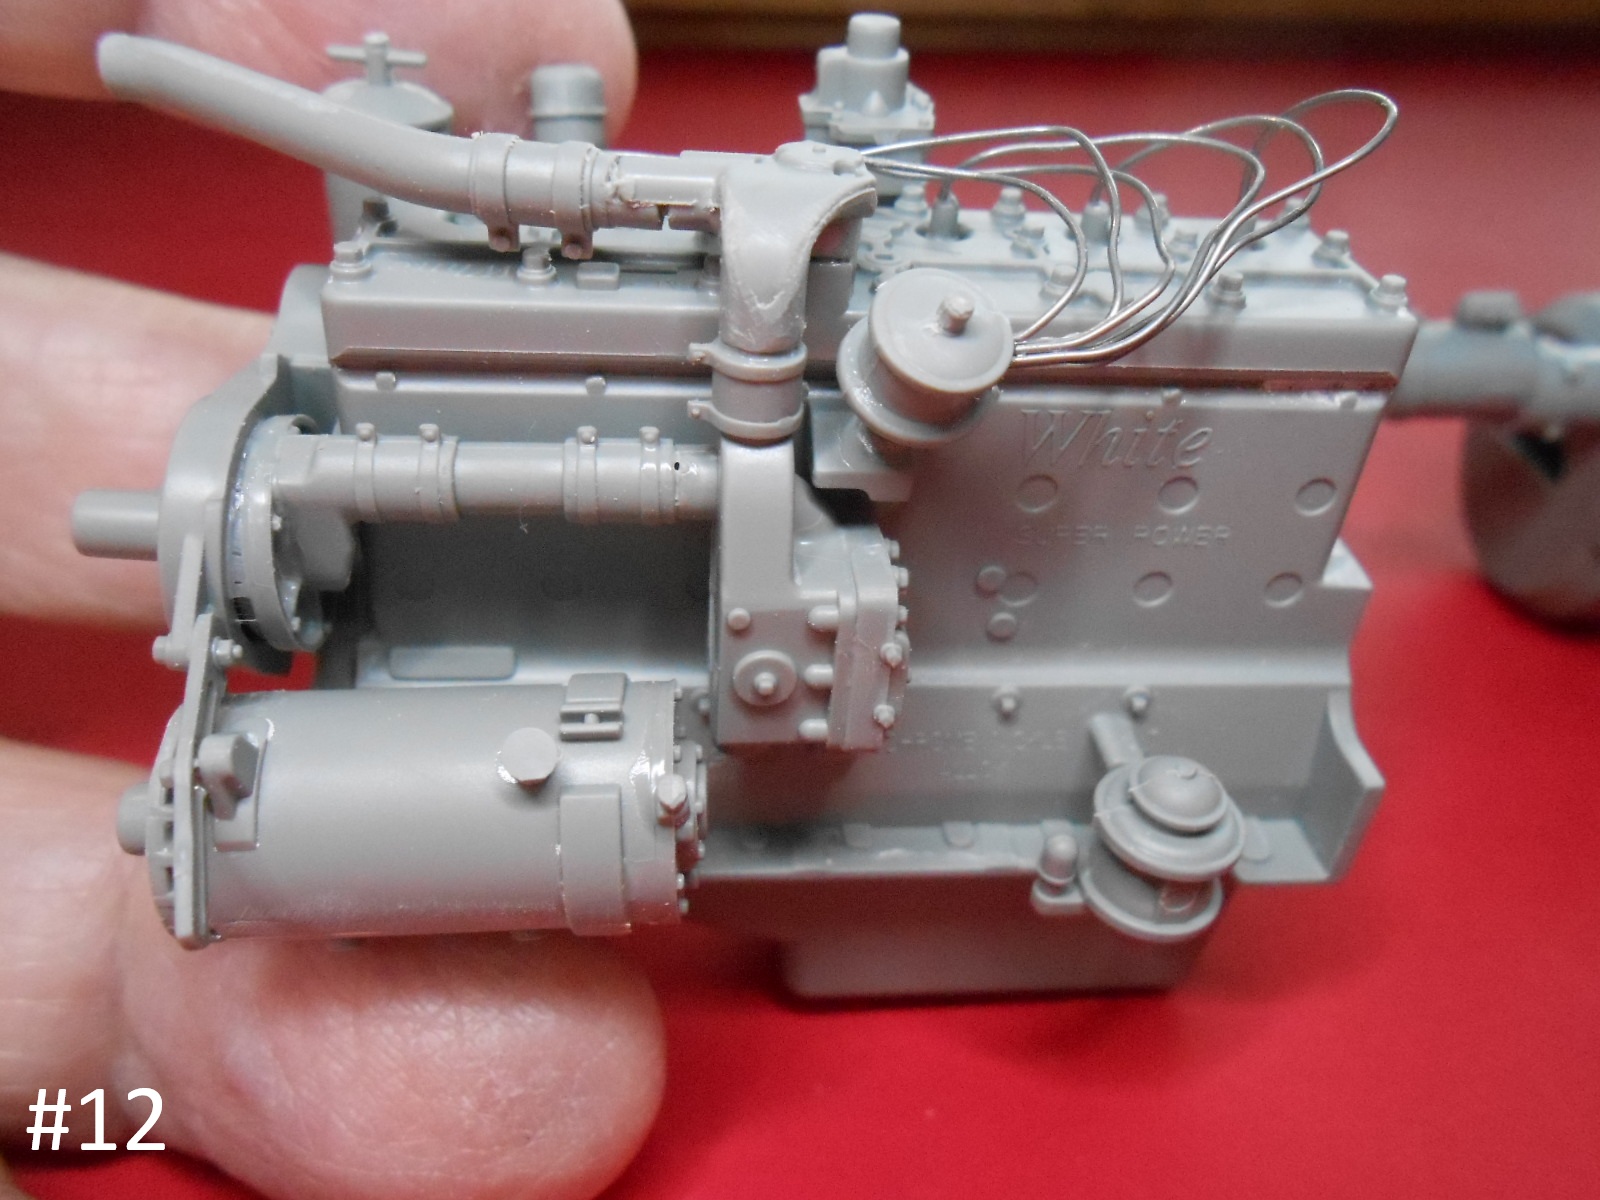
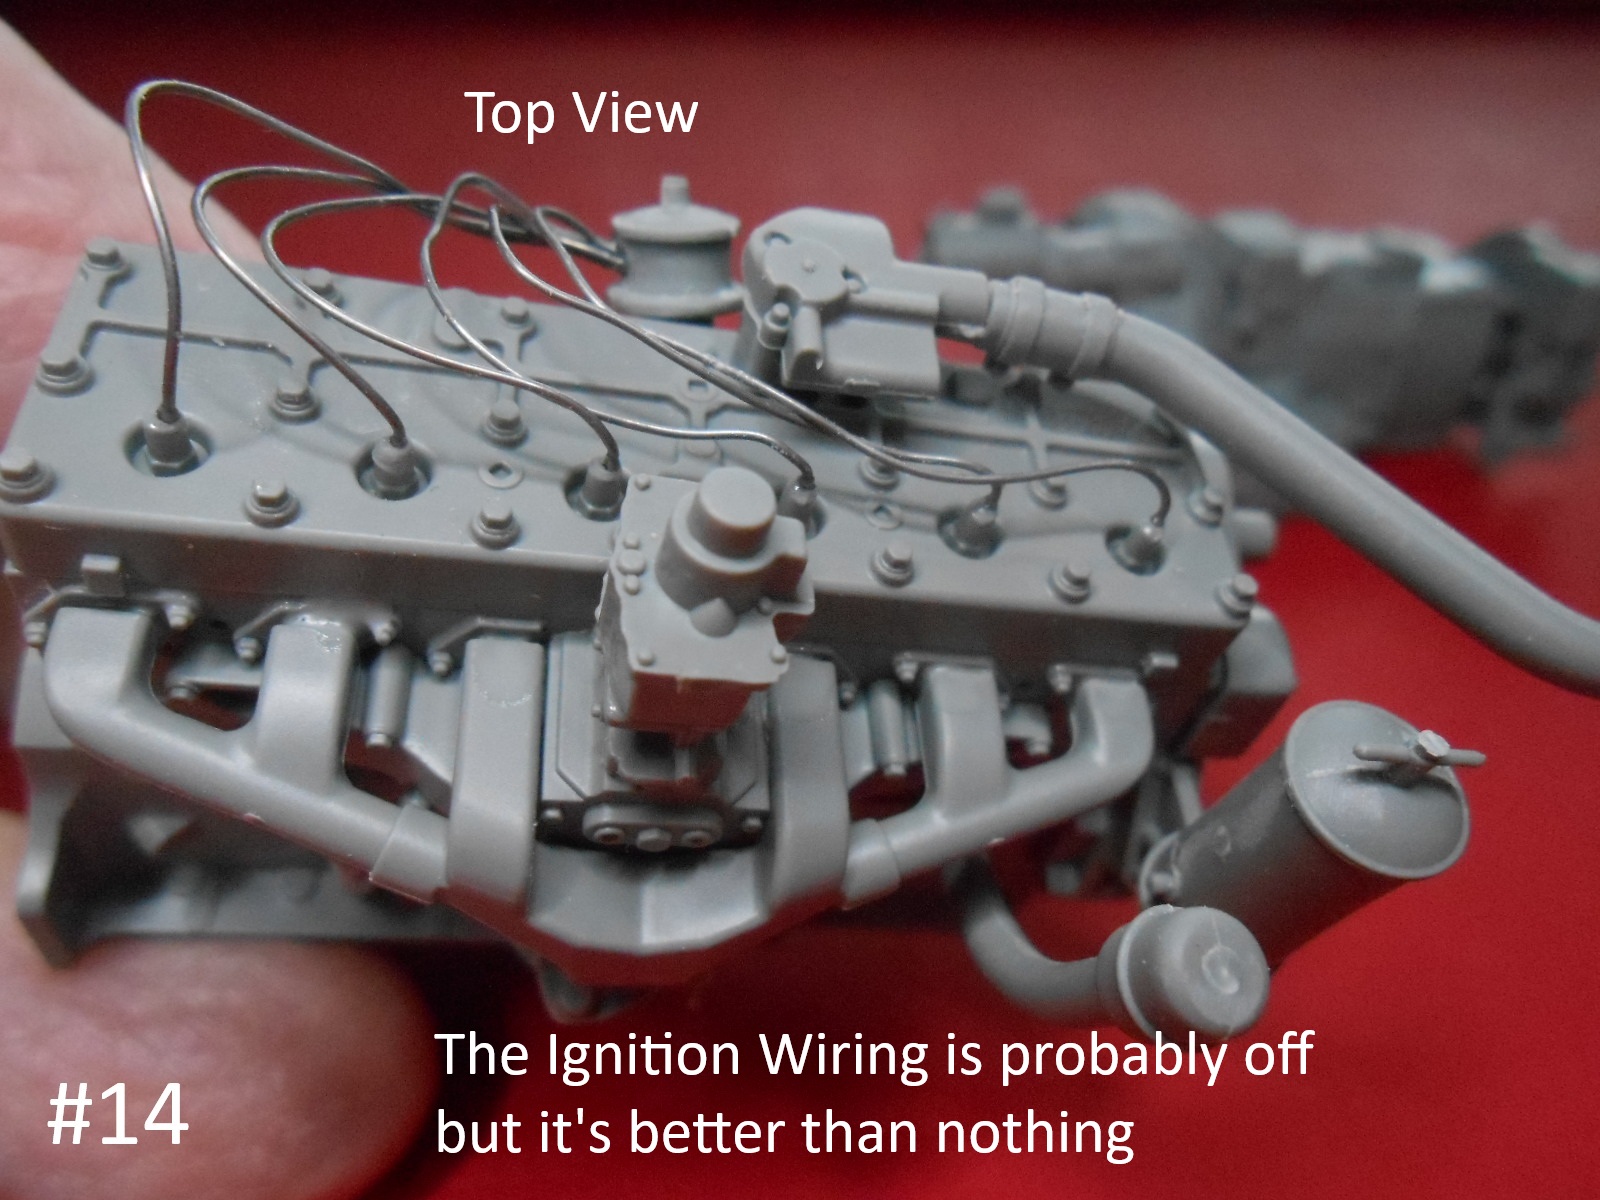
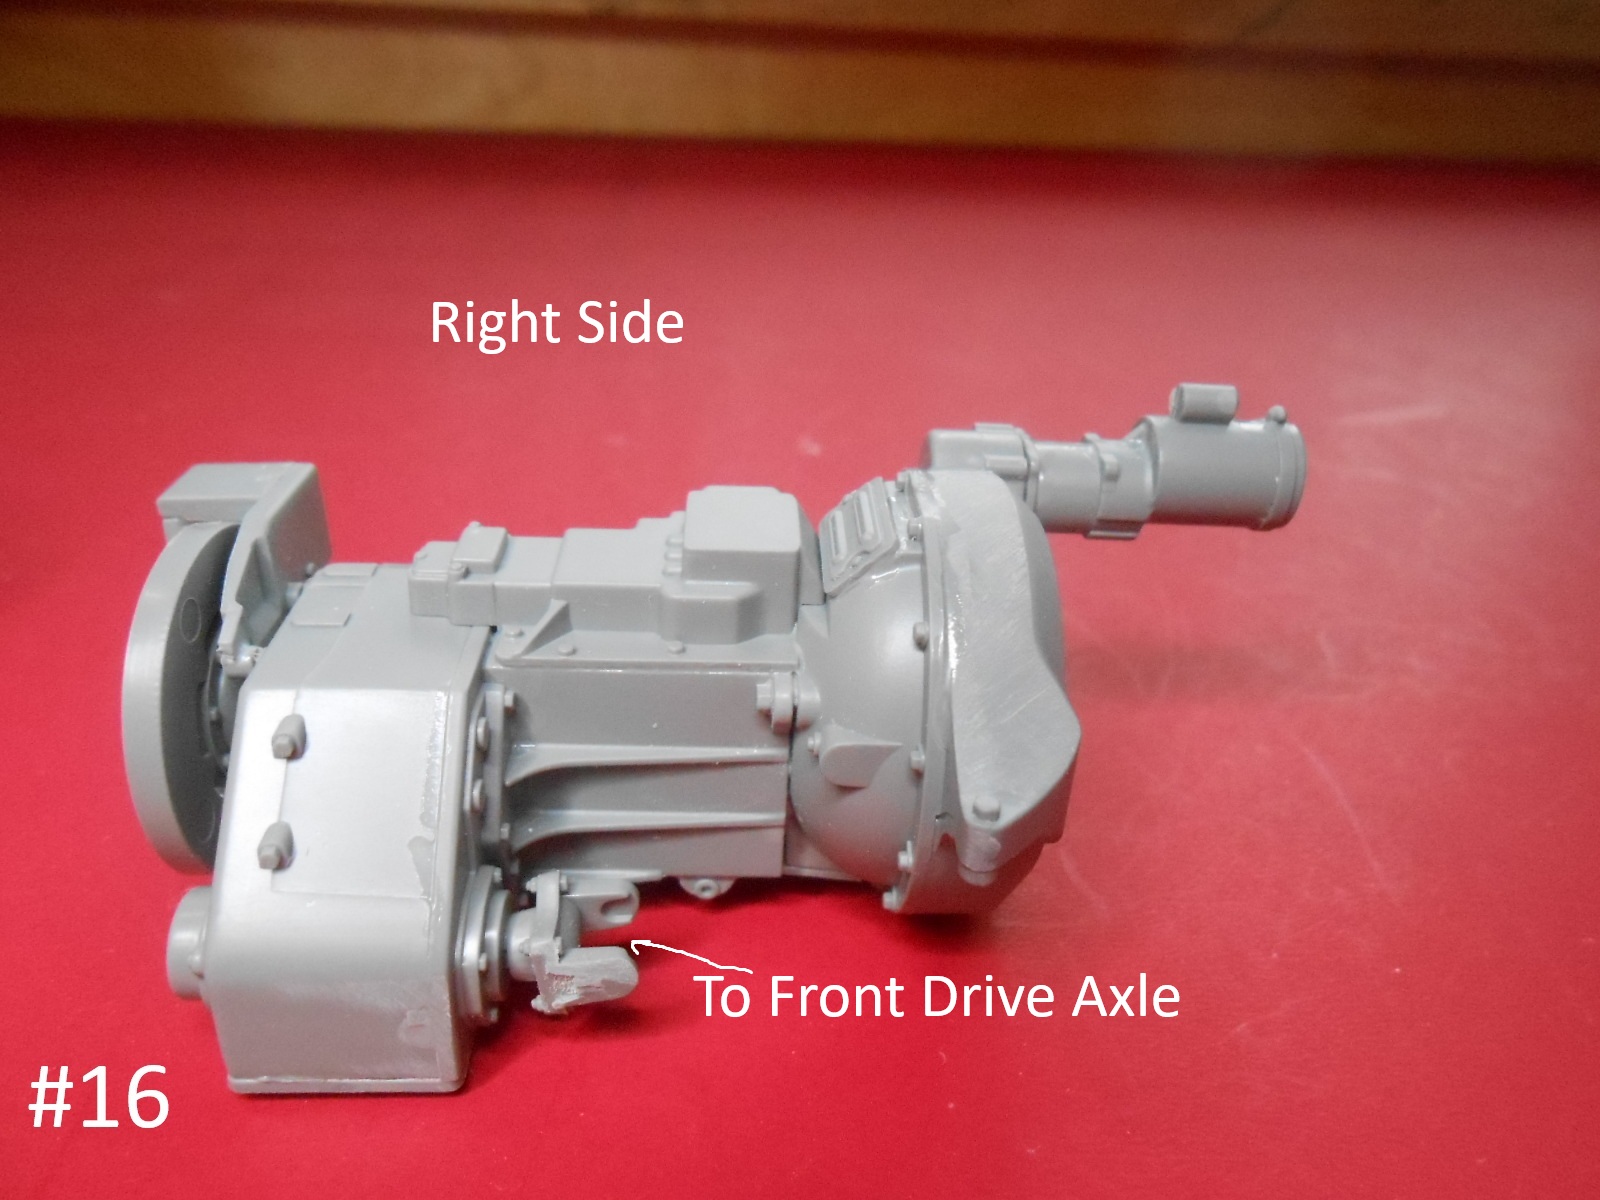
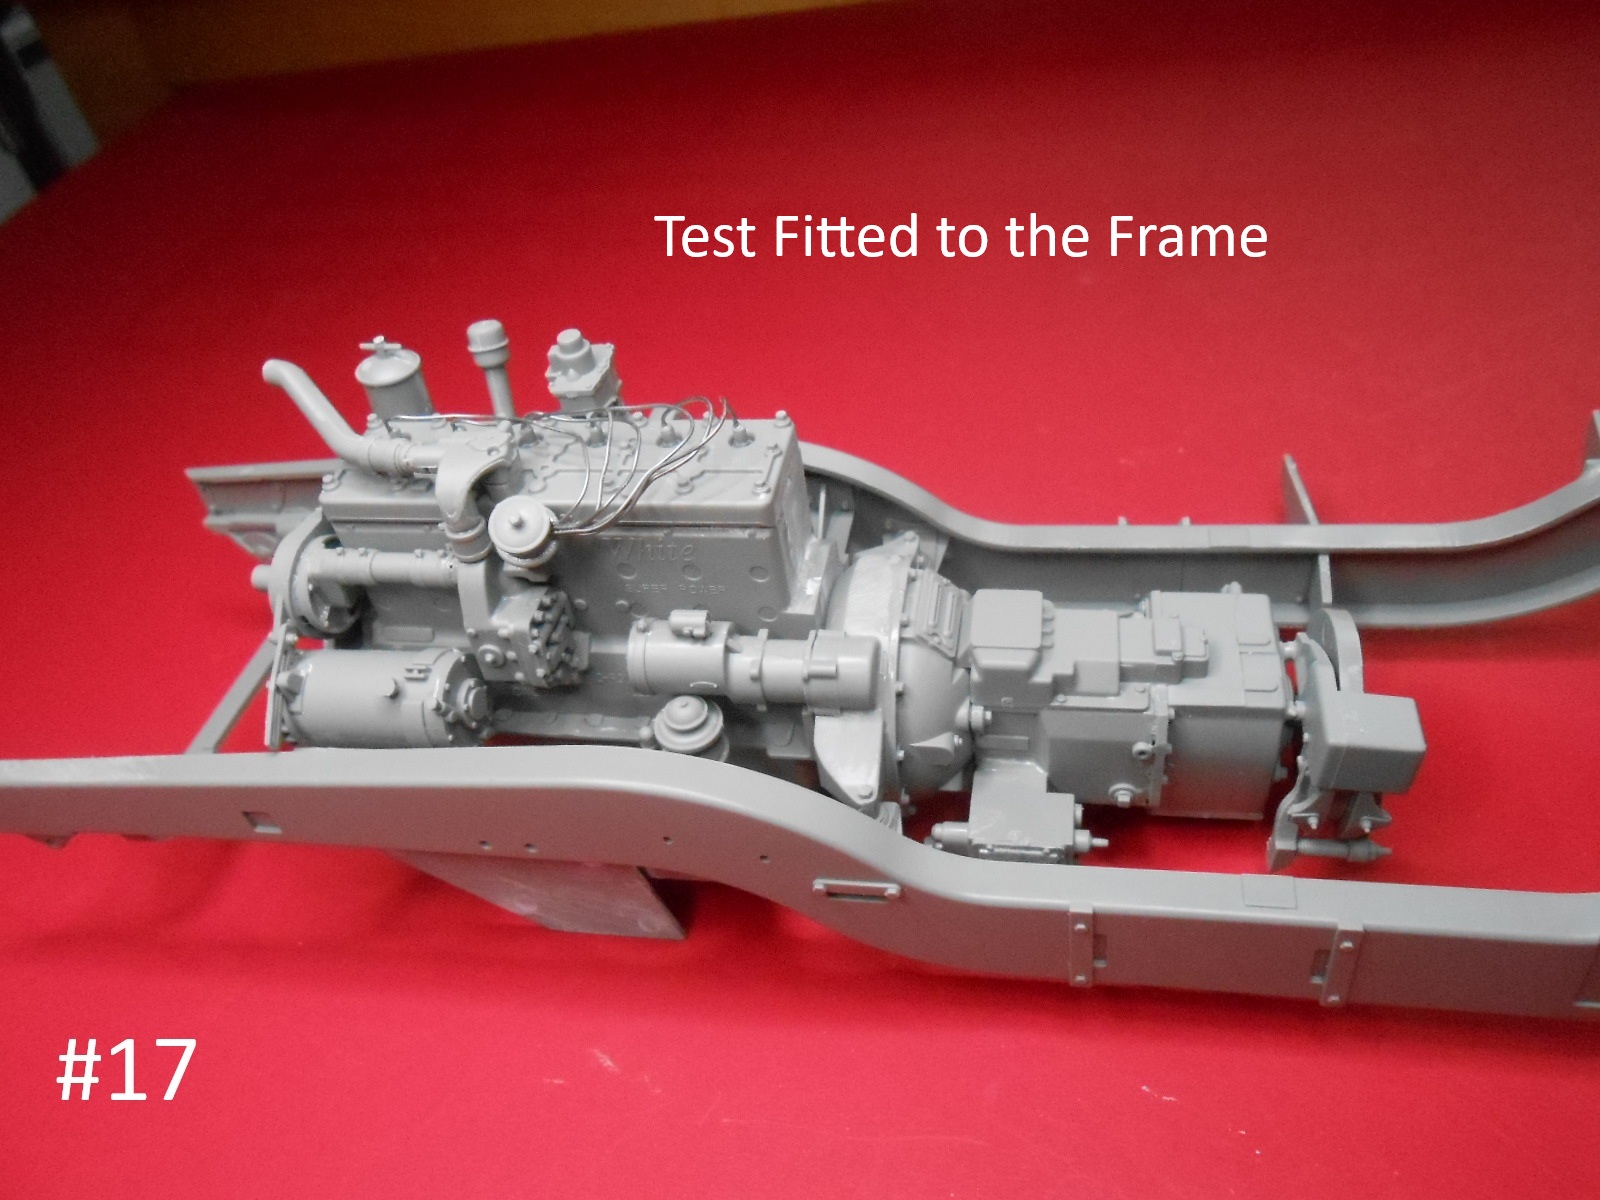
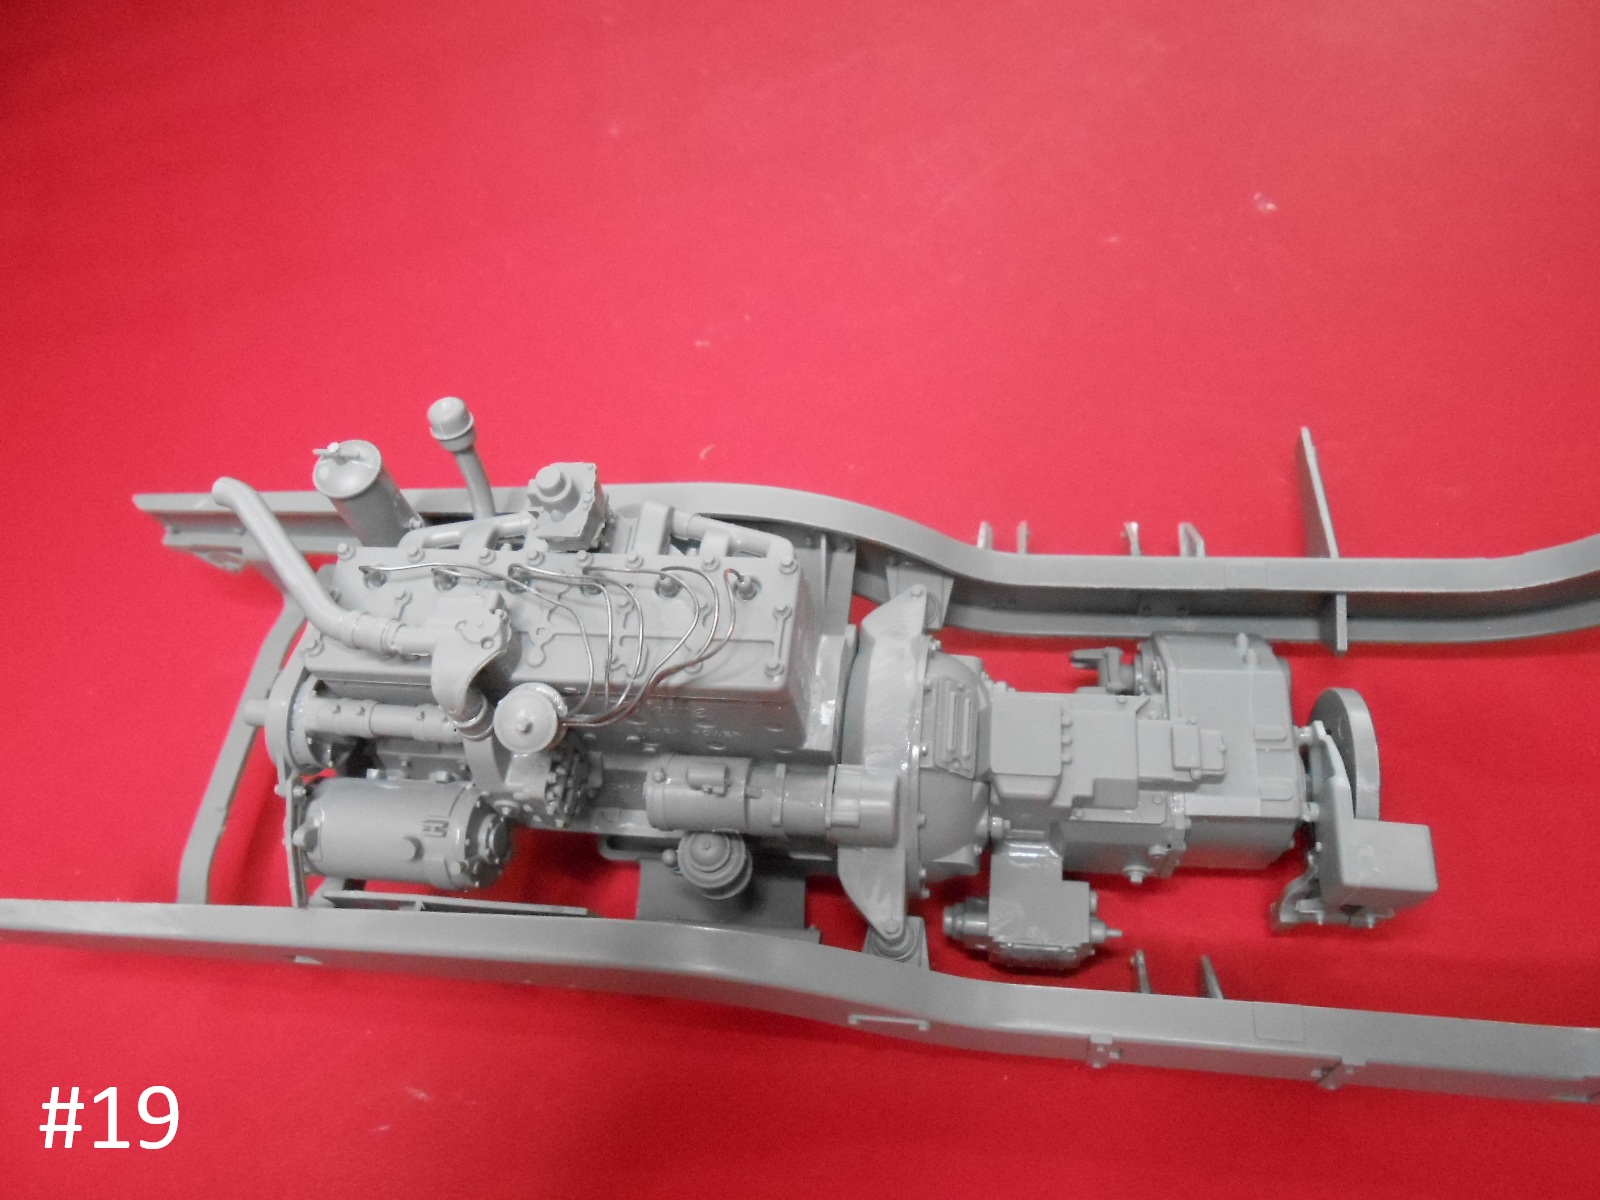
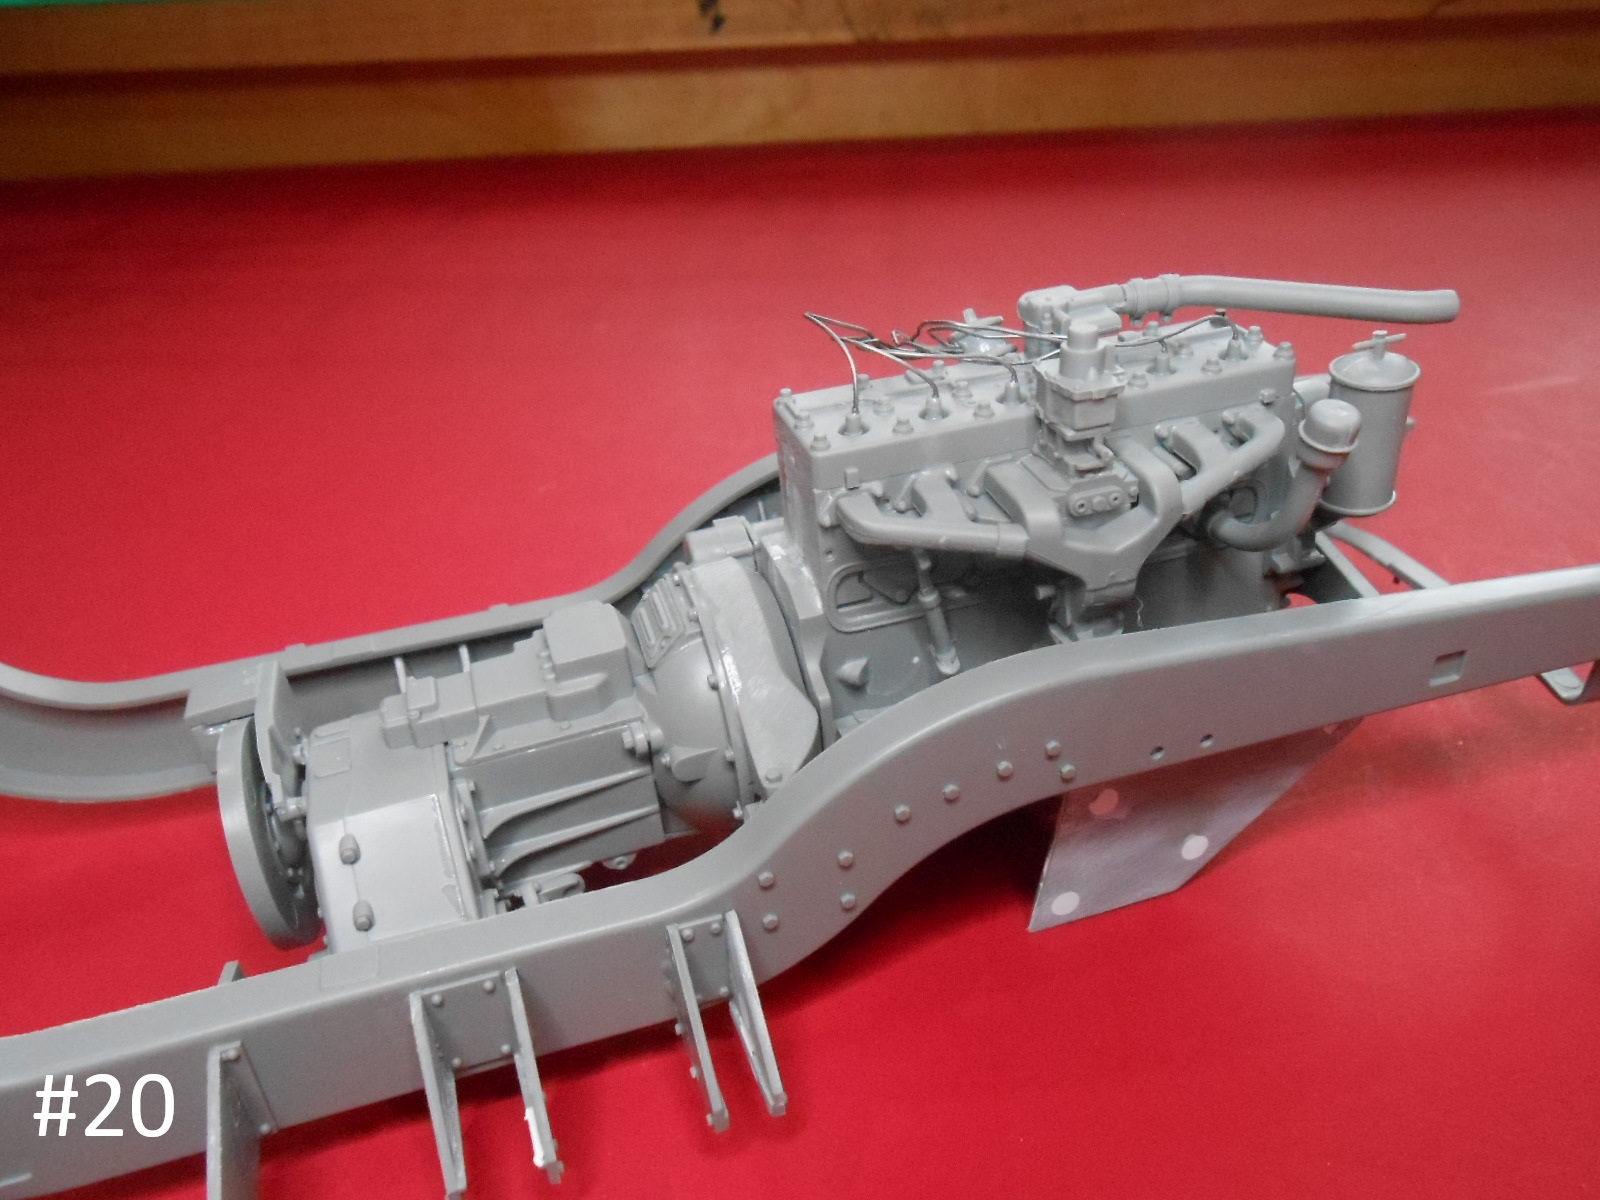
OK Now the engine, I even did the Ignition Wiring. How correct ?
OK Finished for a while
Donald
Its more correct than the kit gives you. The kit is kind of missing those few details it really could have done with around the engine but still looks impressive built anyway. I can understand the cost restraints as why it is as to spend more time adding things would push the kit price up and less customers might buy it. So hitting a happy medium is where AHHQ set their sights and did well.
Donald, are you going hood open 1 side, both open or closed up?
I must get my own M3A1 finished its so close but then something new came in and stole my attention….. as usual ![]()
Keep soldiering on, my wife has PD so I understand the difficulties and honestly admire your determination to keep at it.
Keith
I’m not shure yet, At least one side otherwise it would be a waste of time.
I’m planning on doing the M3A later after Iget some Early Front Wheels and Tires.
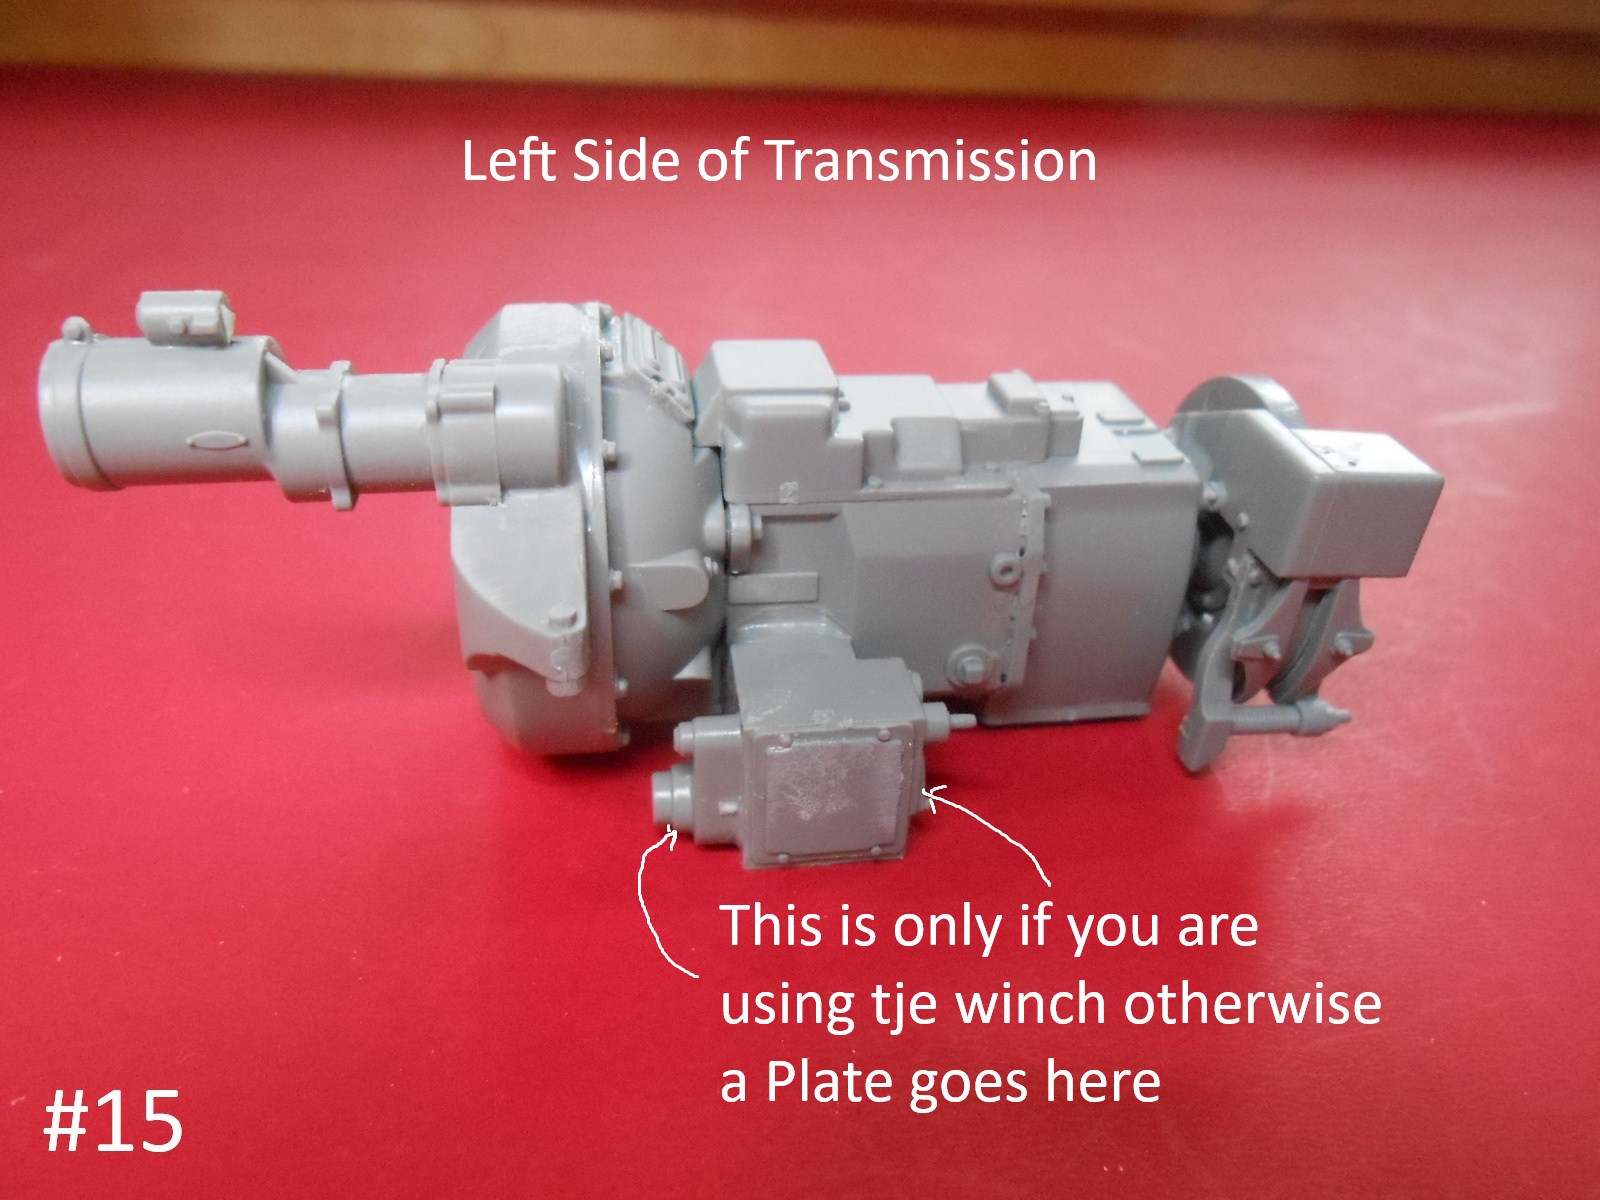
On that one I think that I will do the Engine and Transmission as a stand alone Build.
Regards
Donald
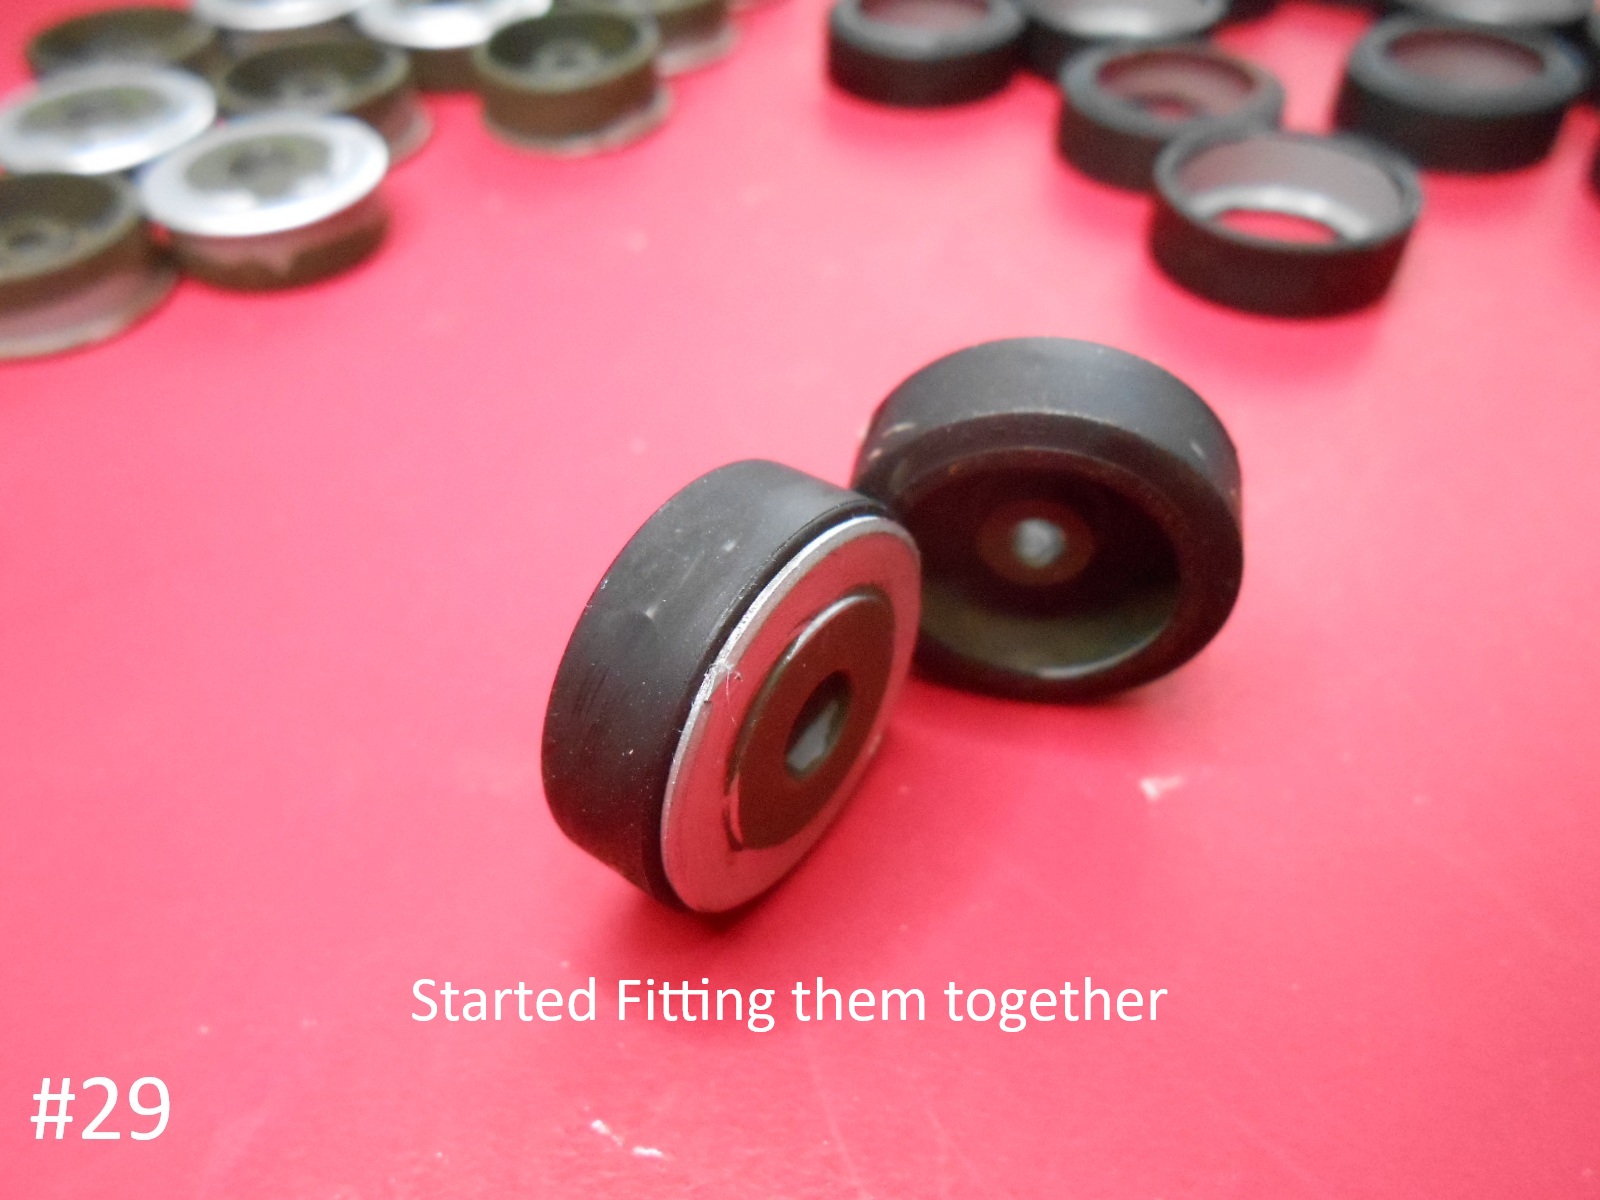
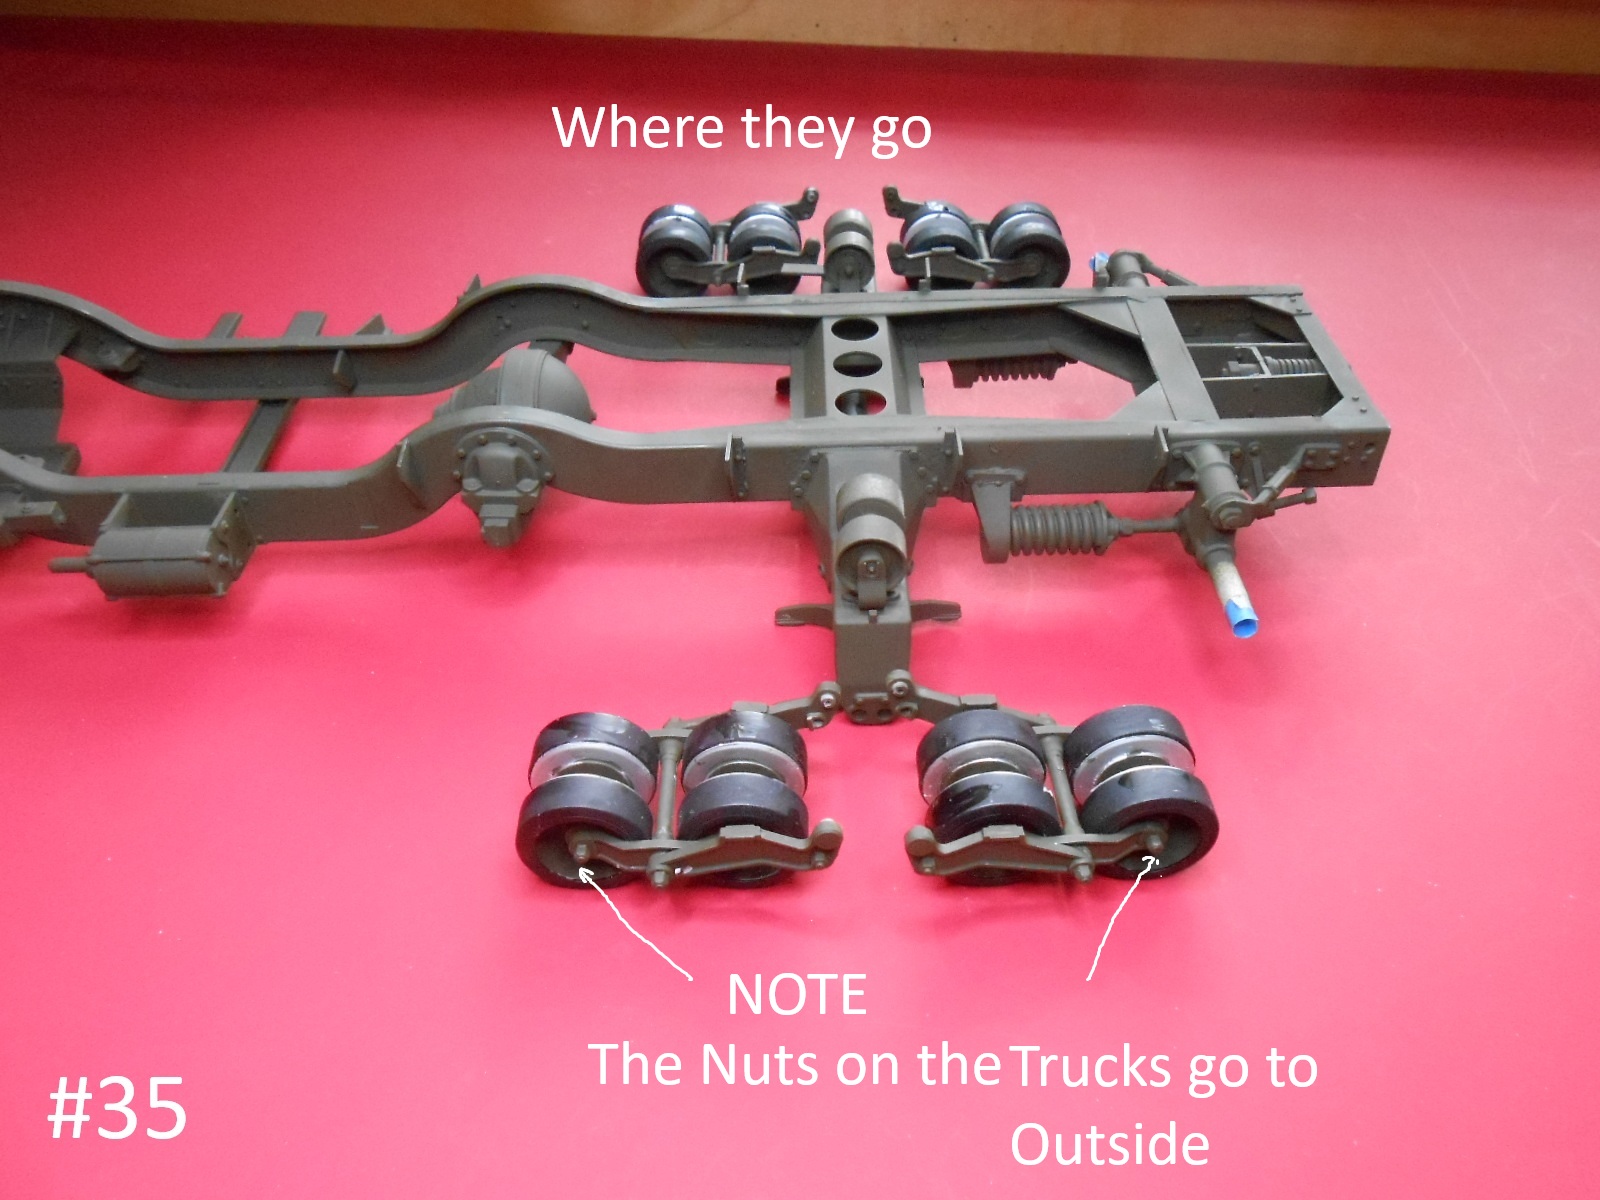
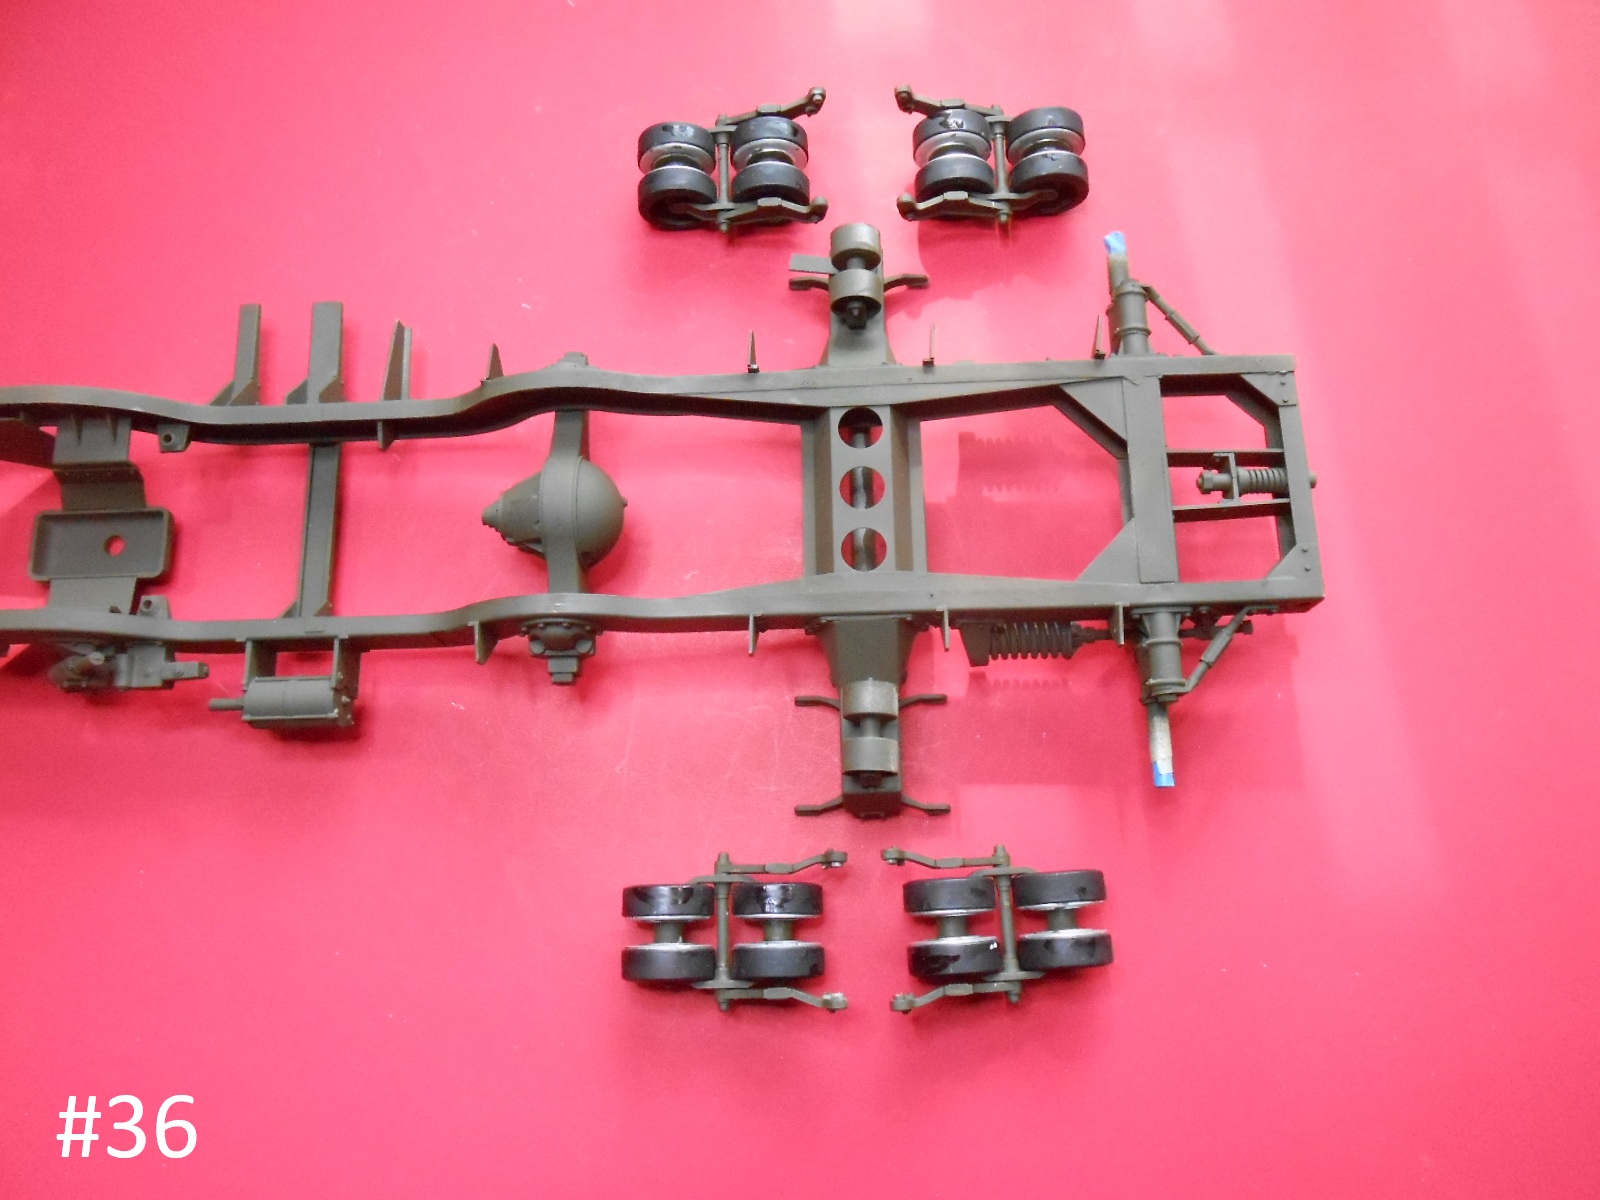
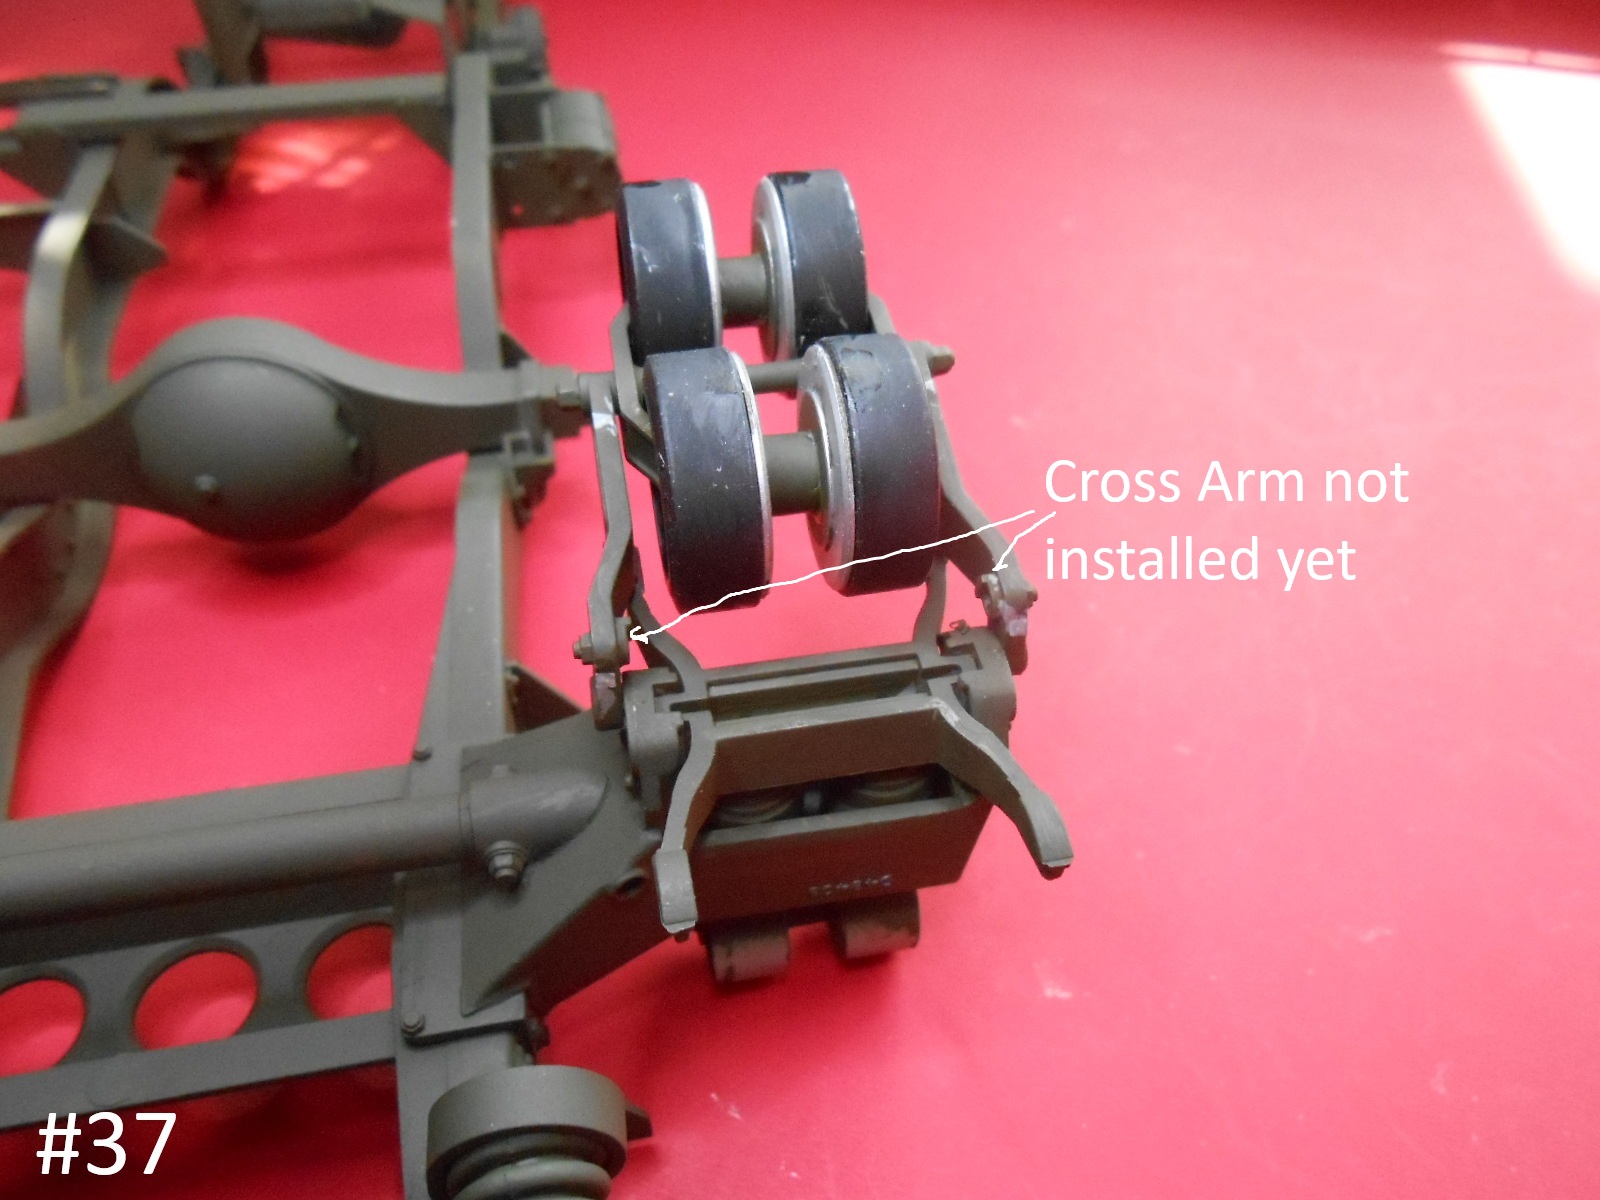
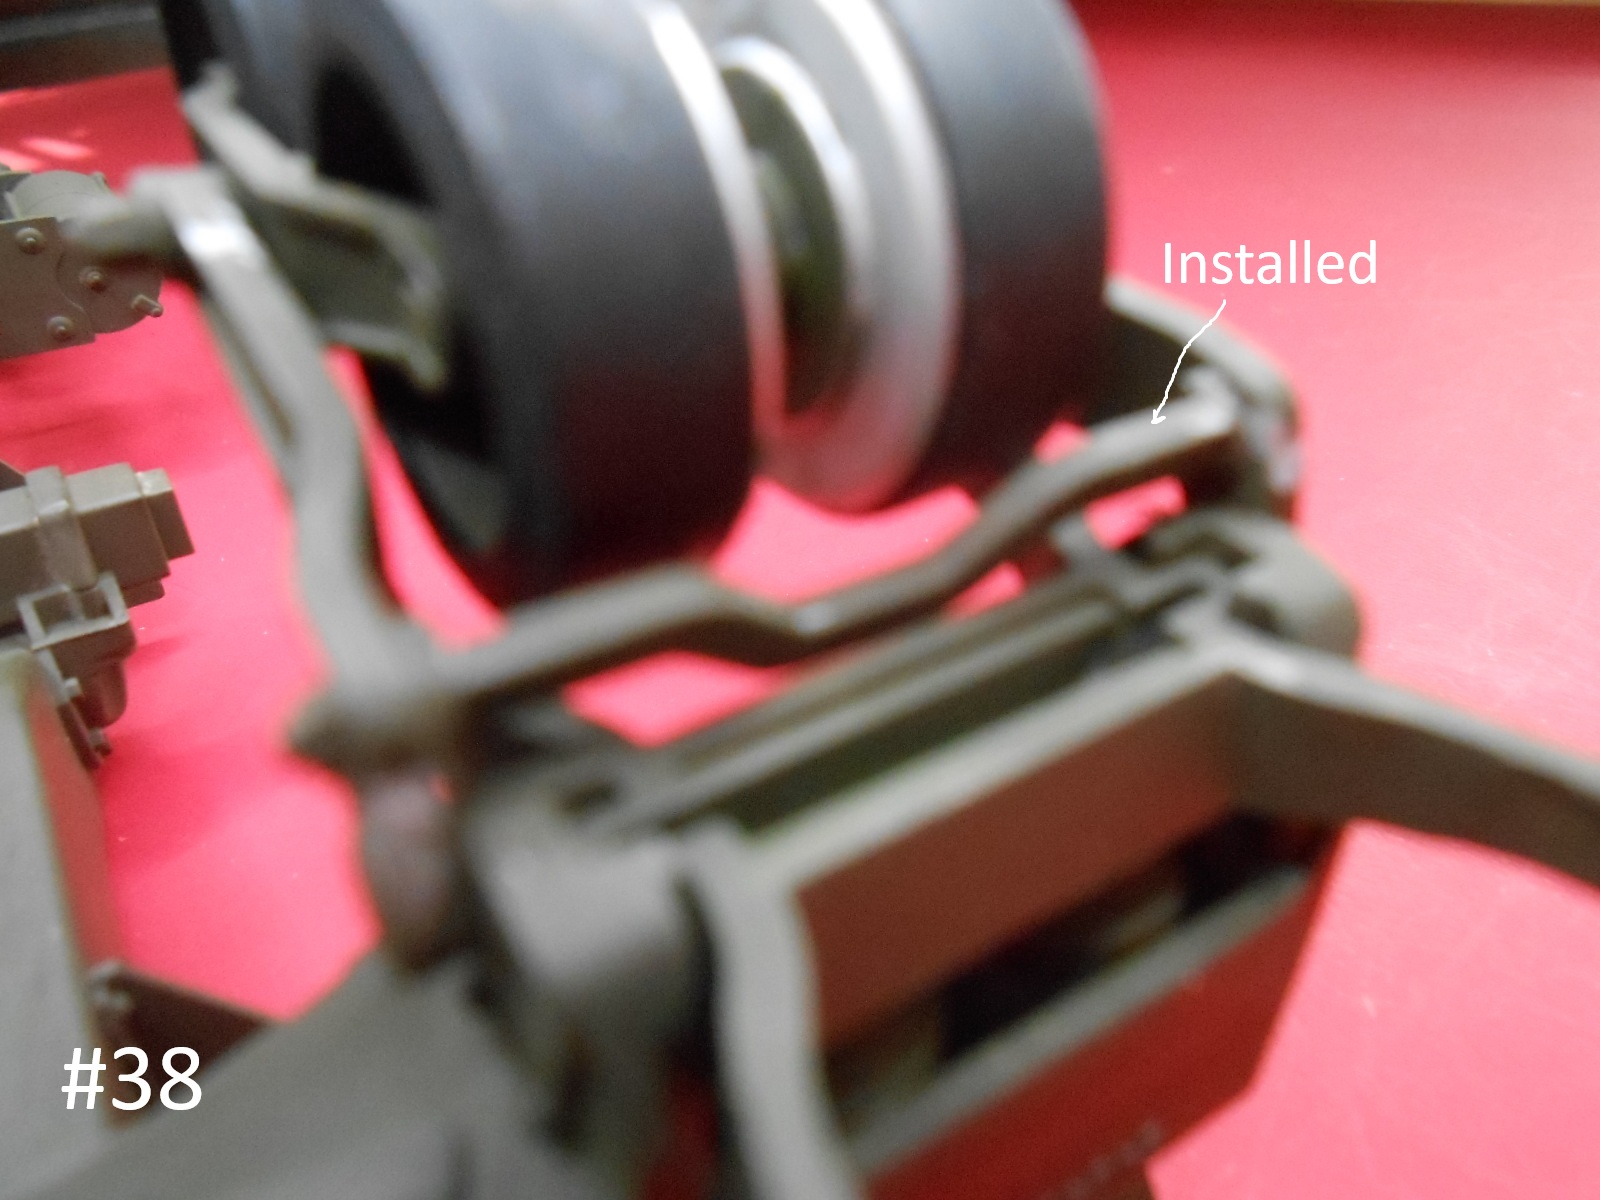
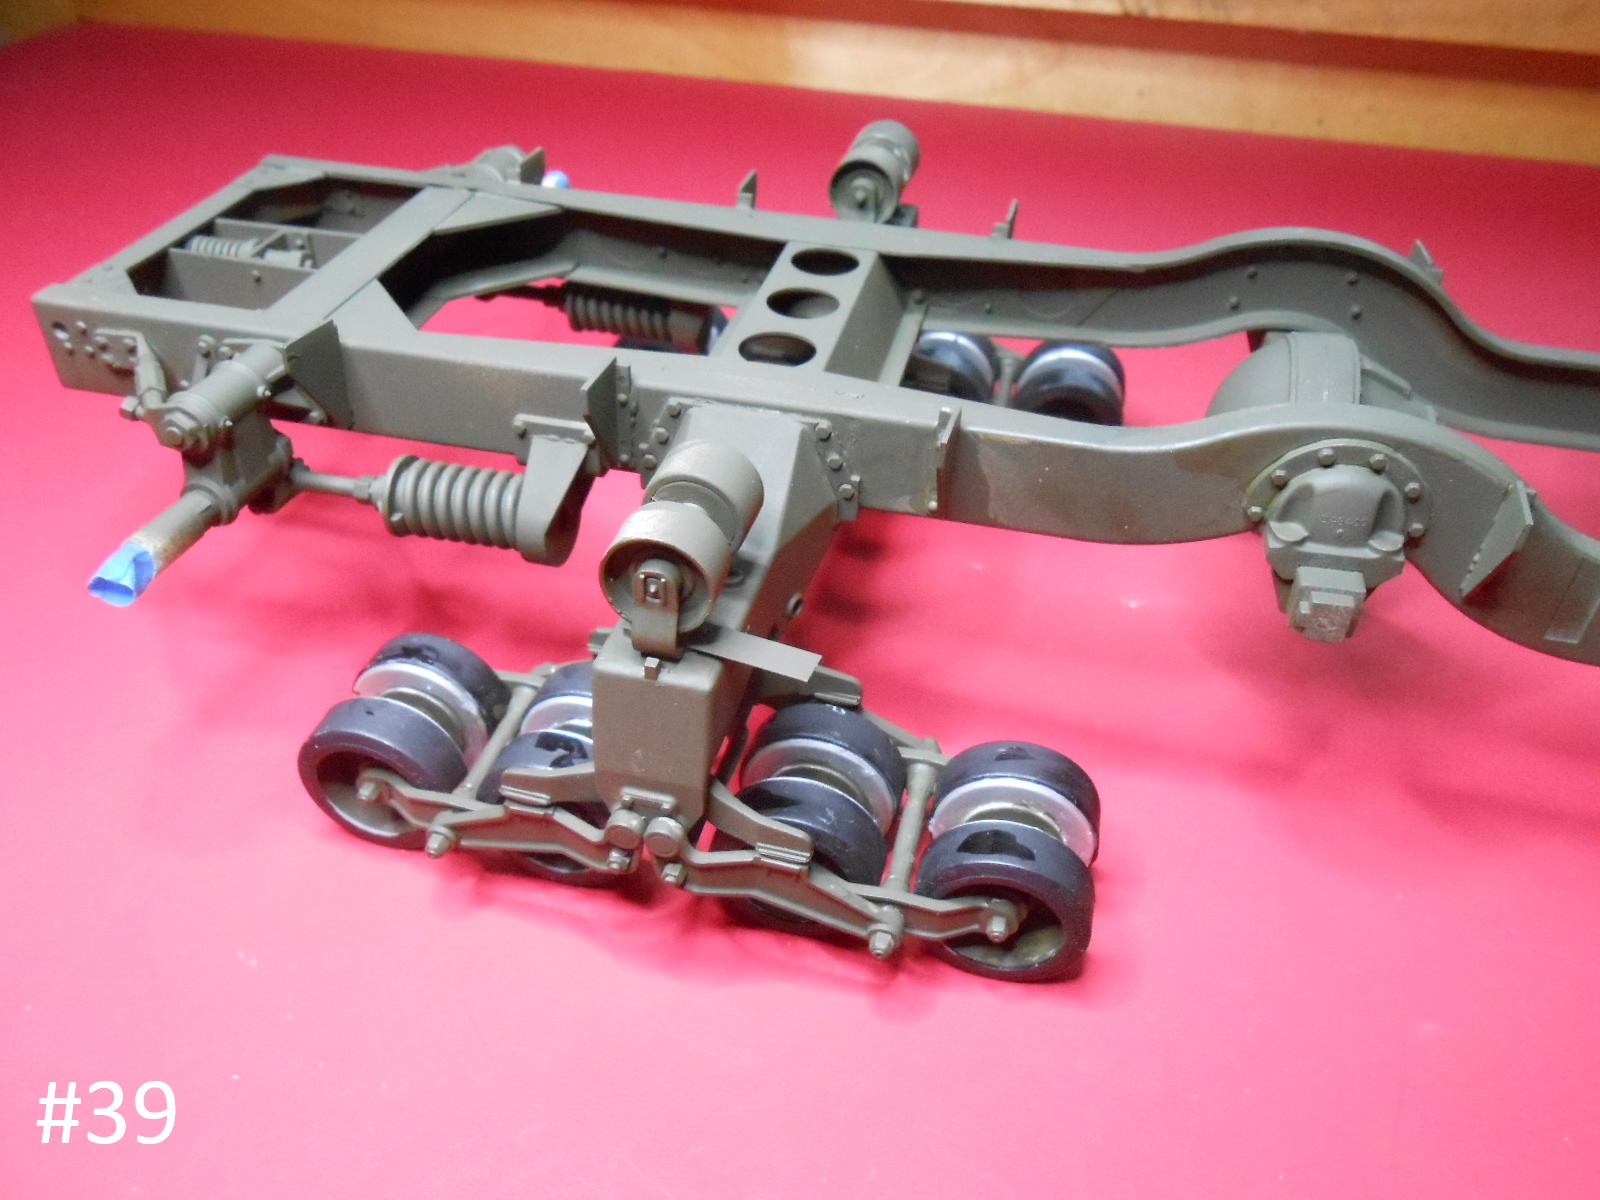
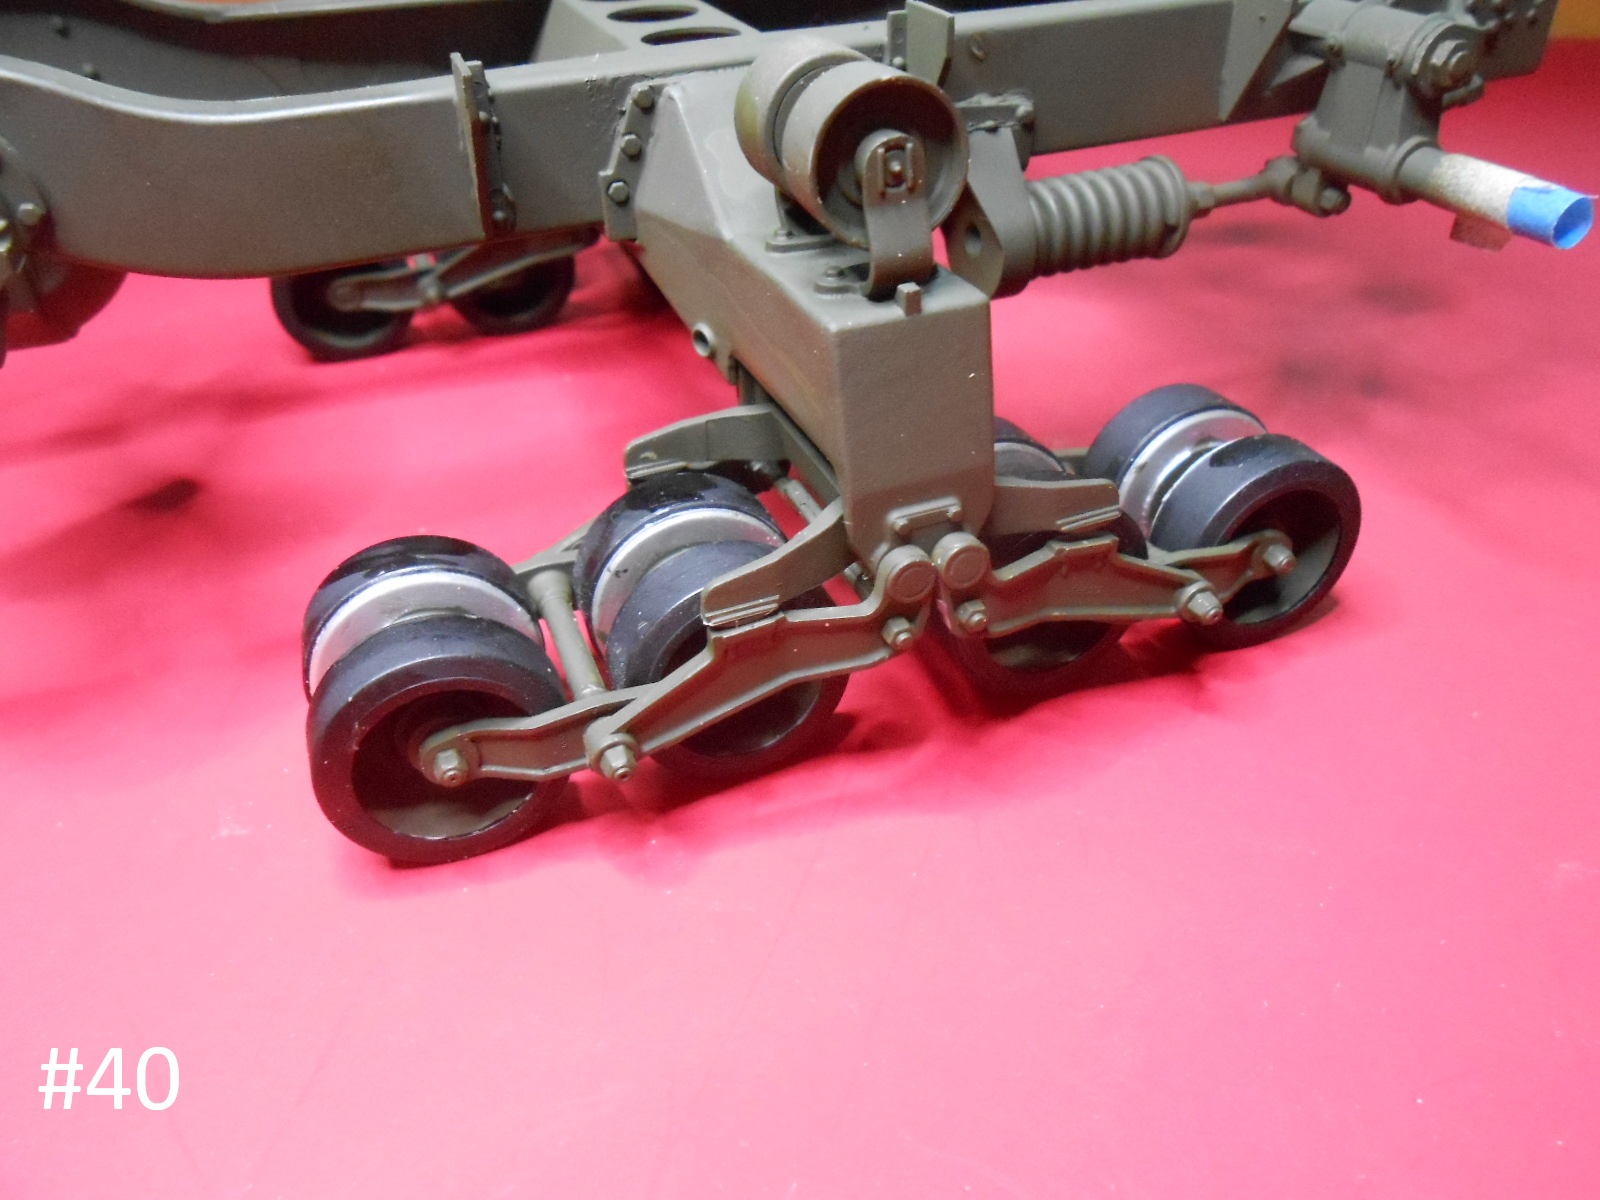
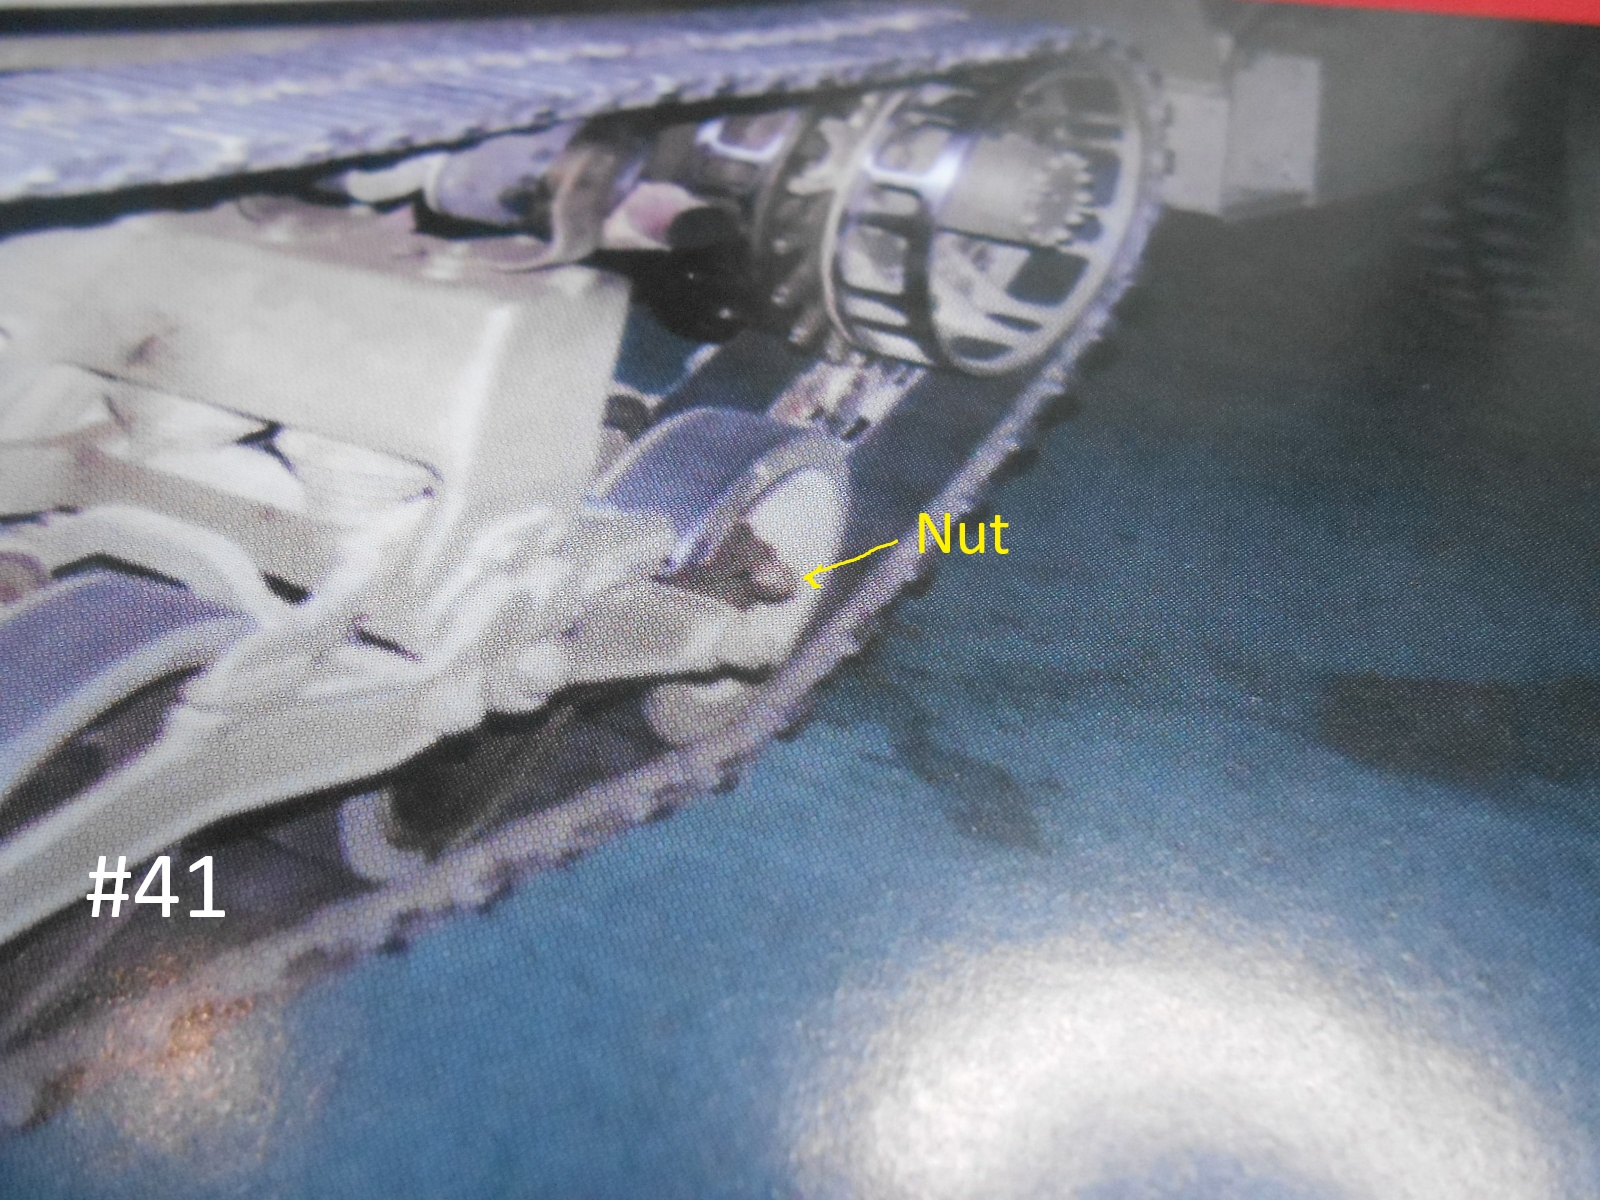
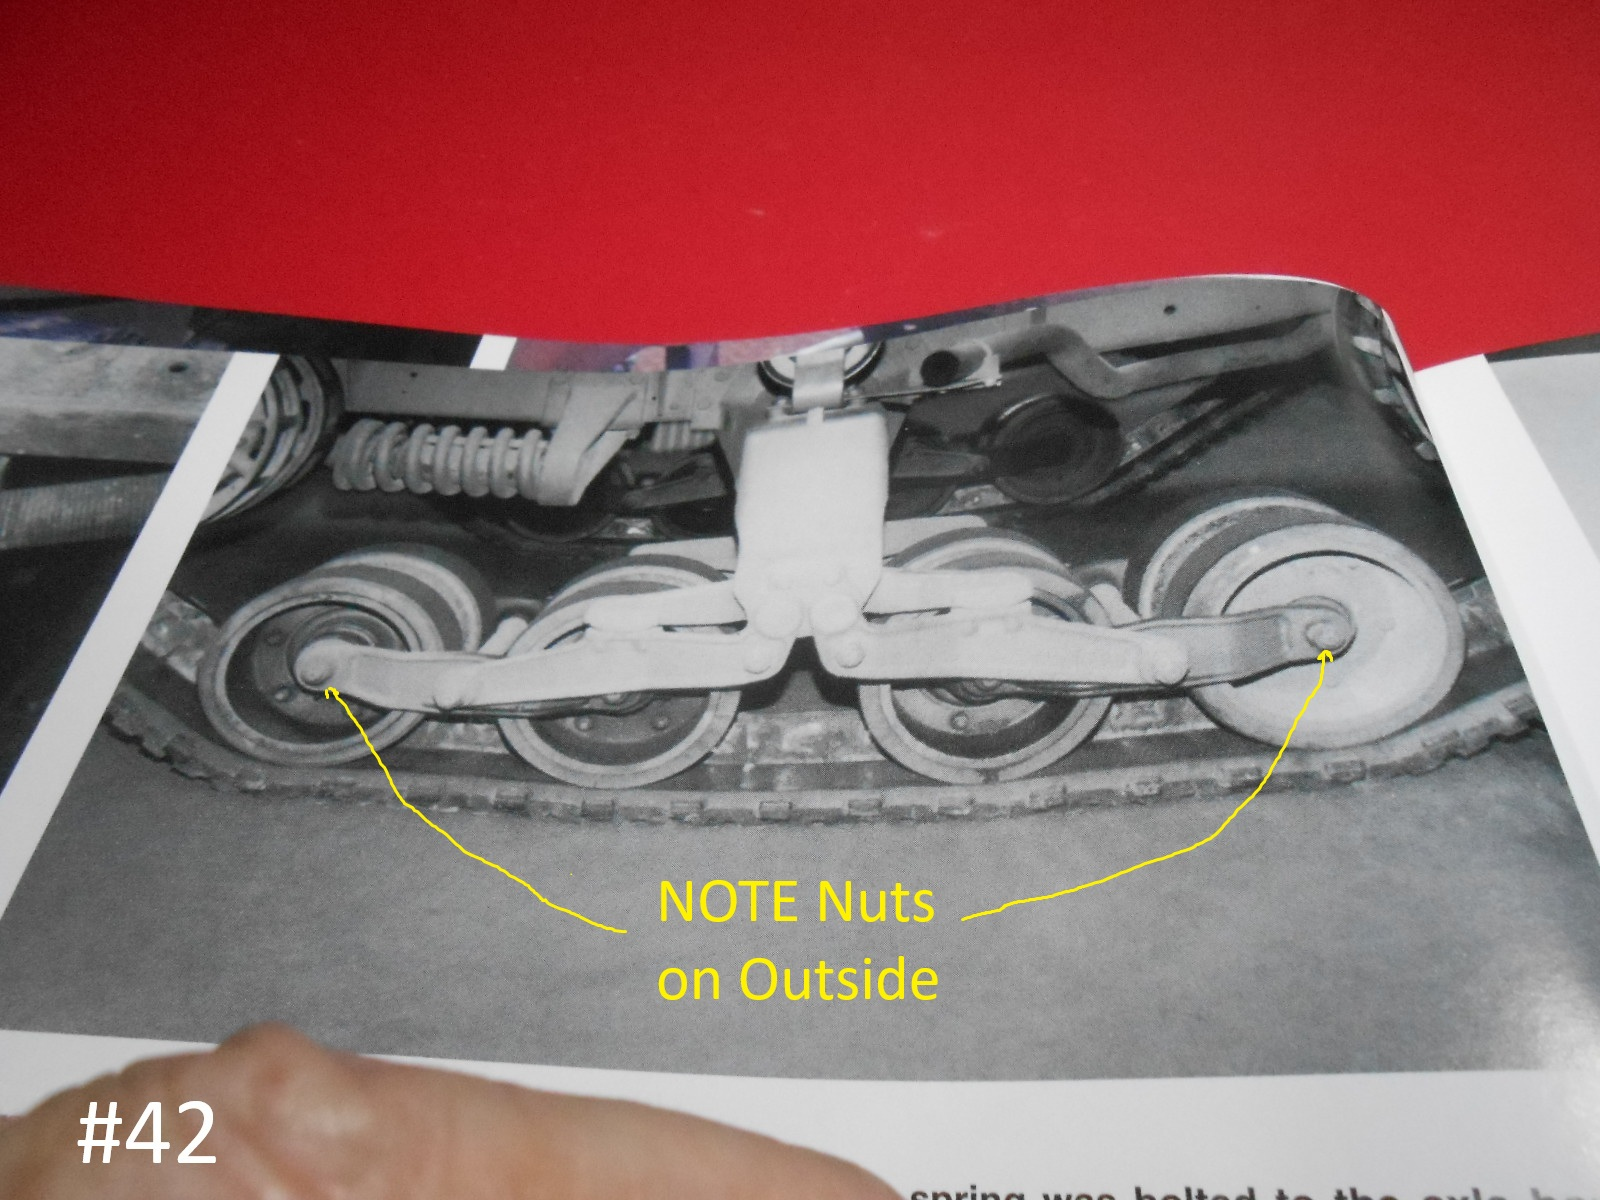
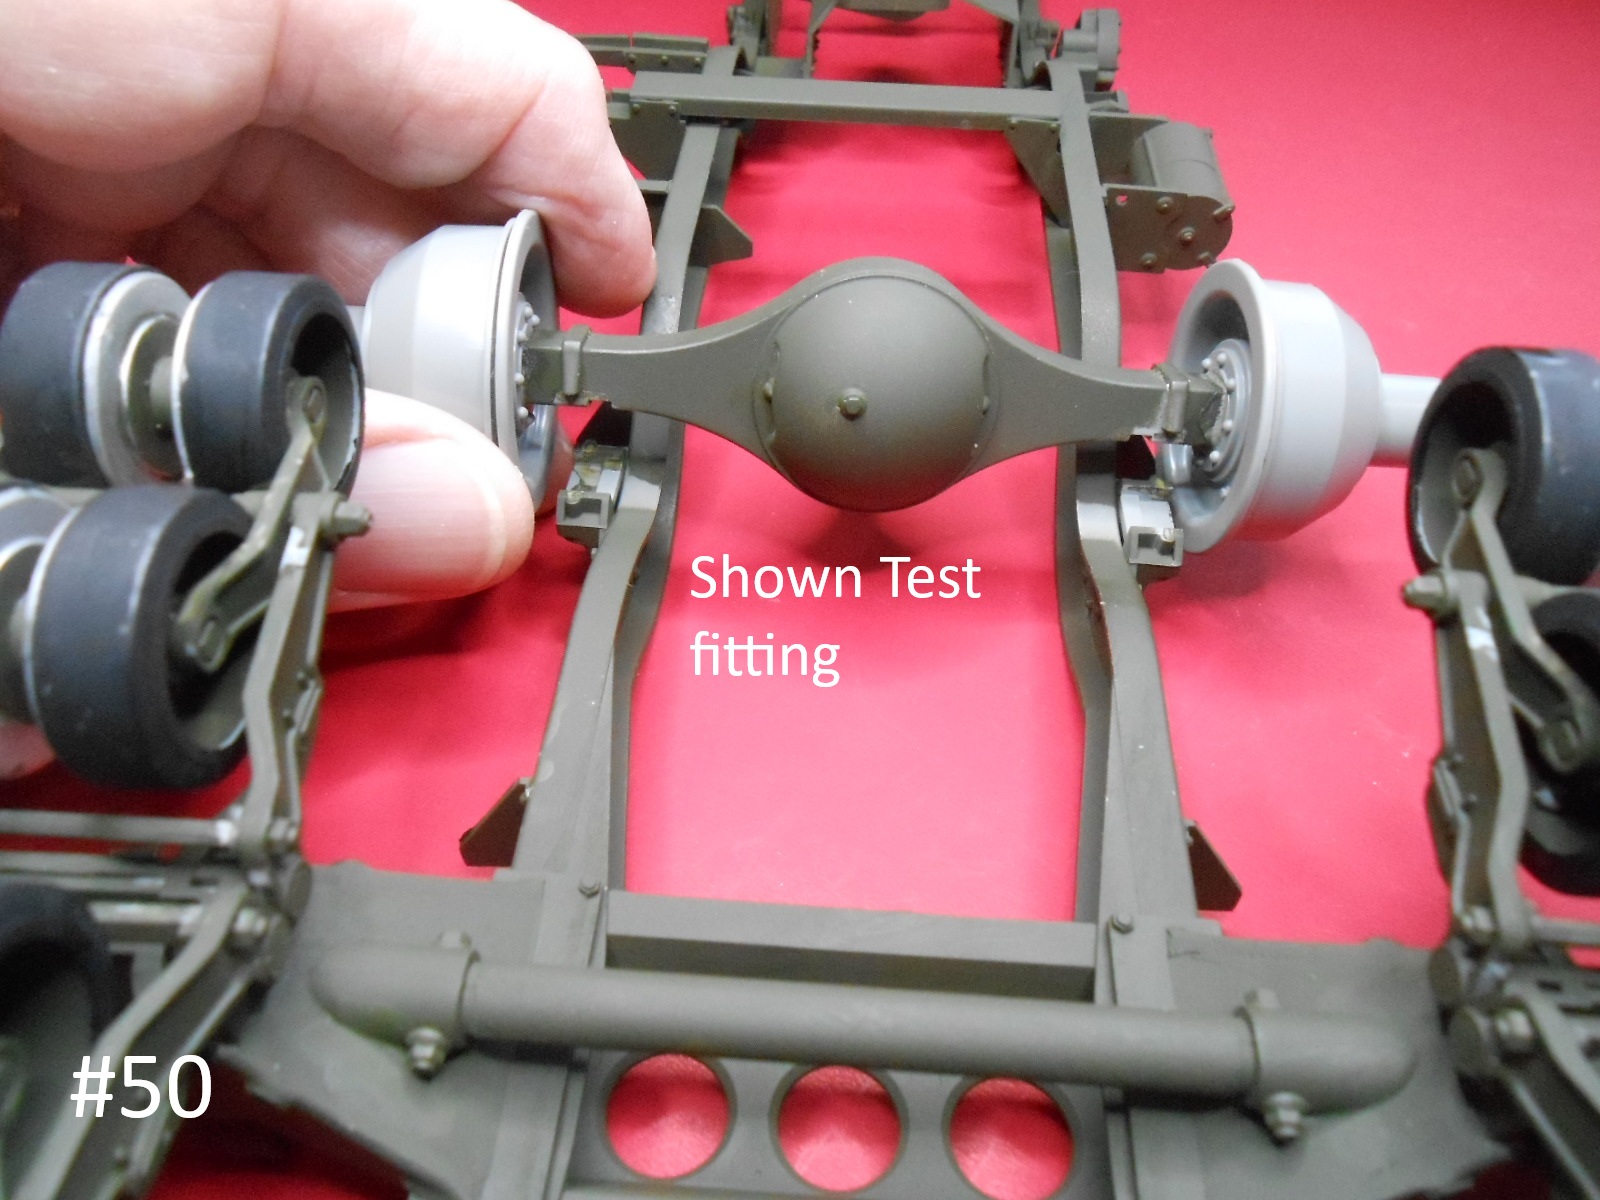
I have the Trucks Assembled, Painted and Installed.
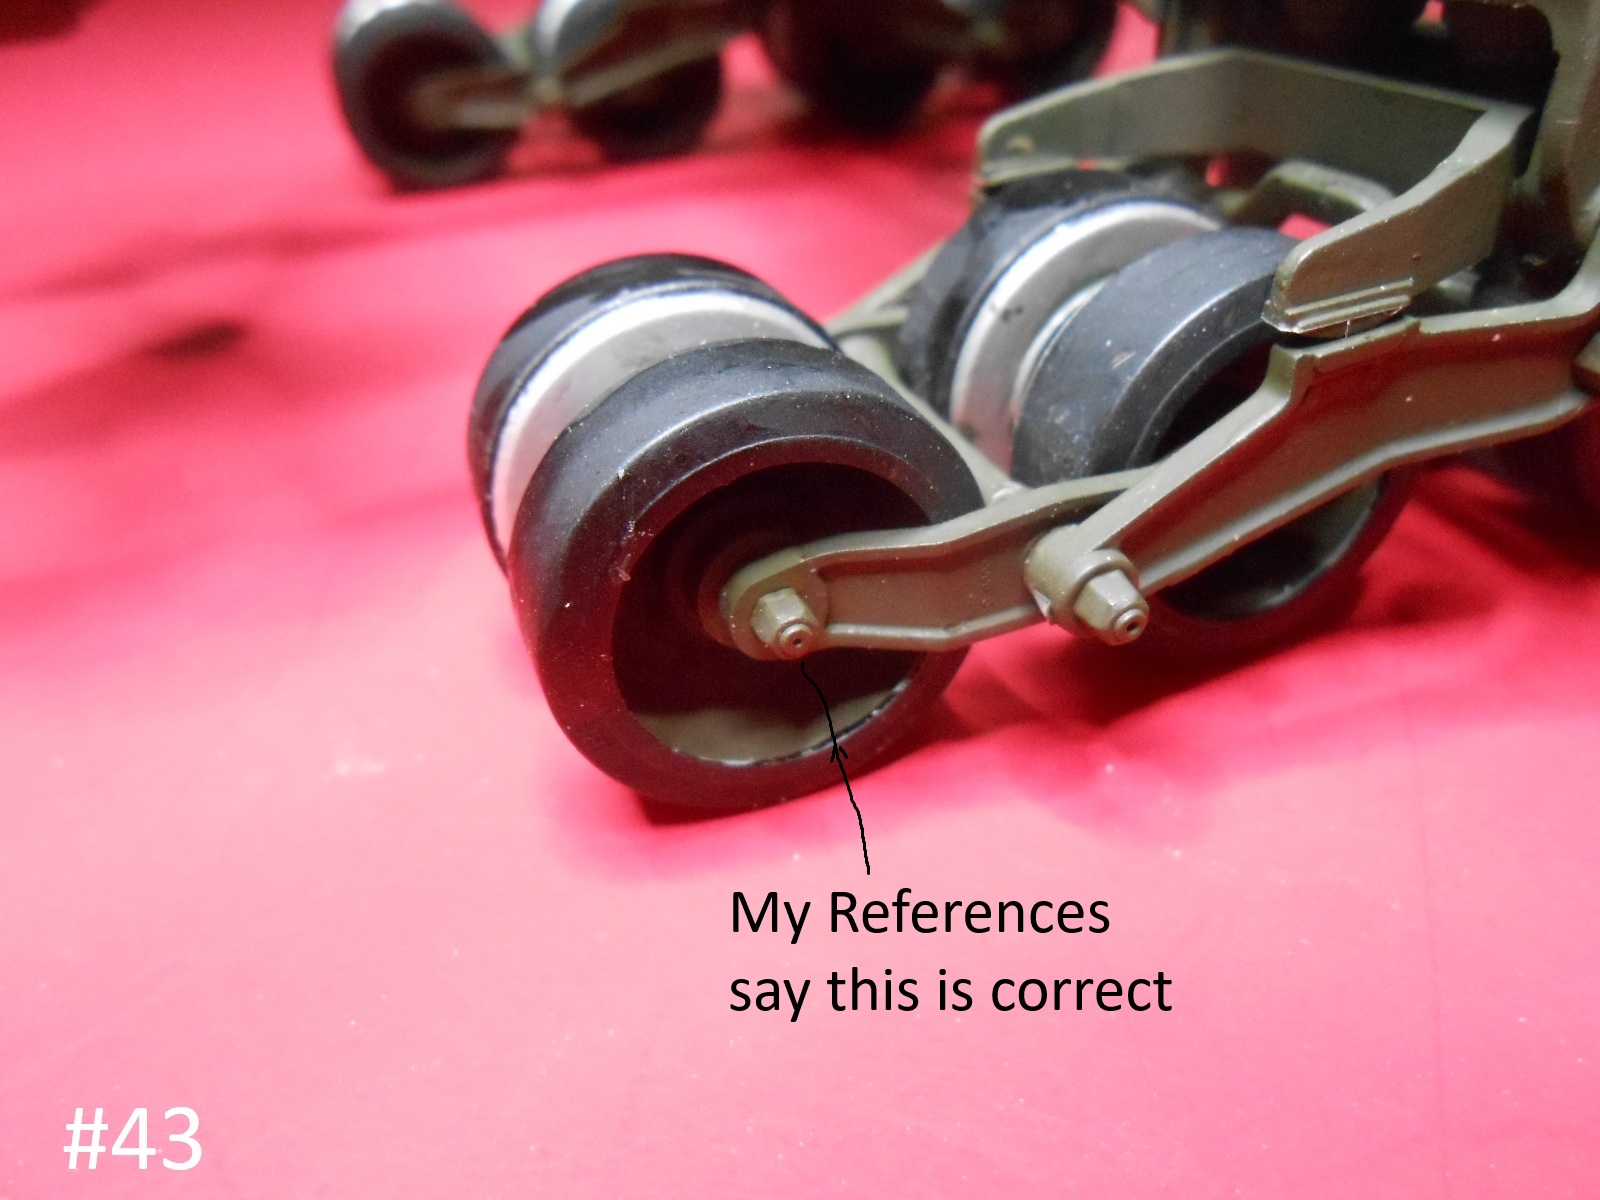
This was very Tricky for me, The Instructions have the Nuts on the wheel axles on the inside, that is unless I have been reversing everything again.
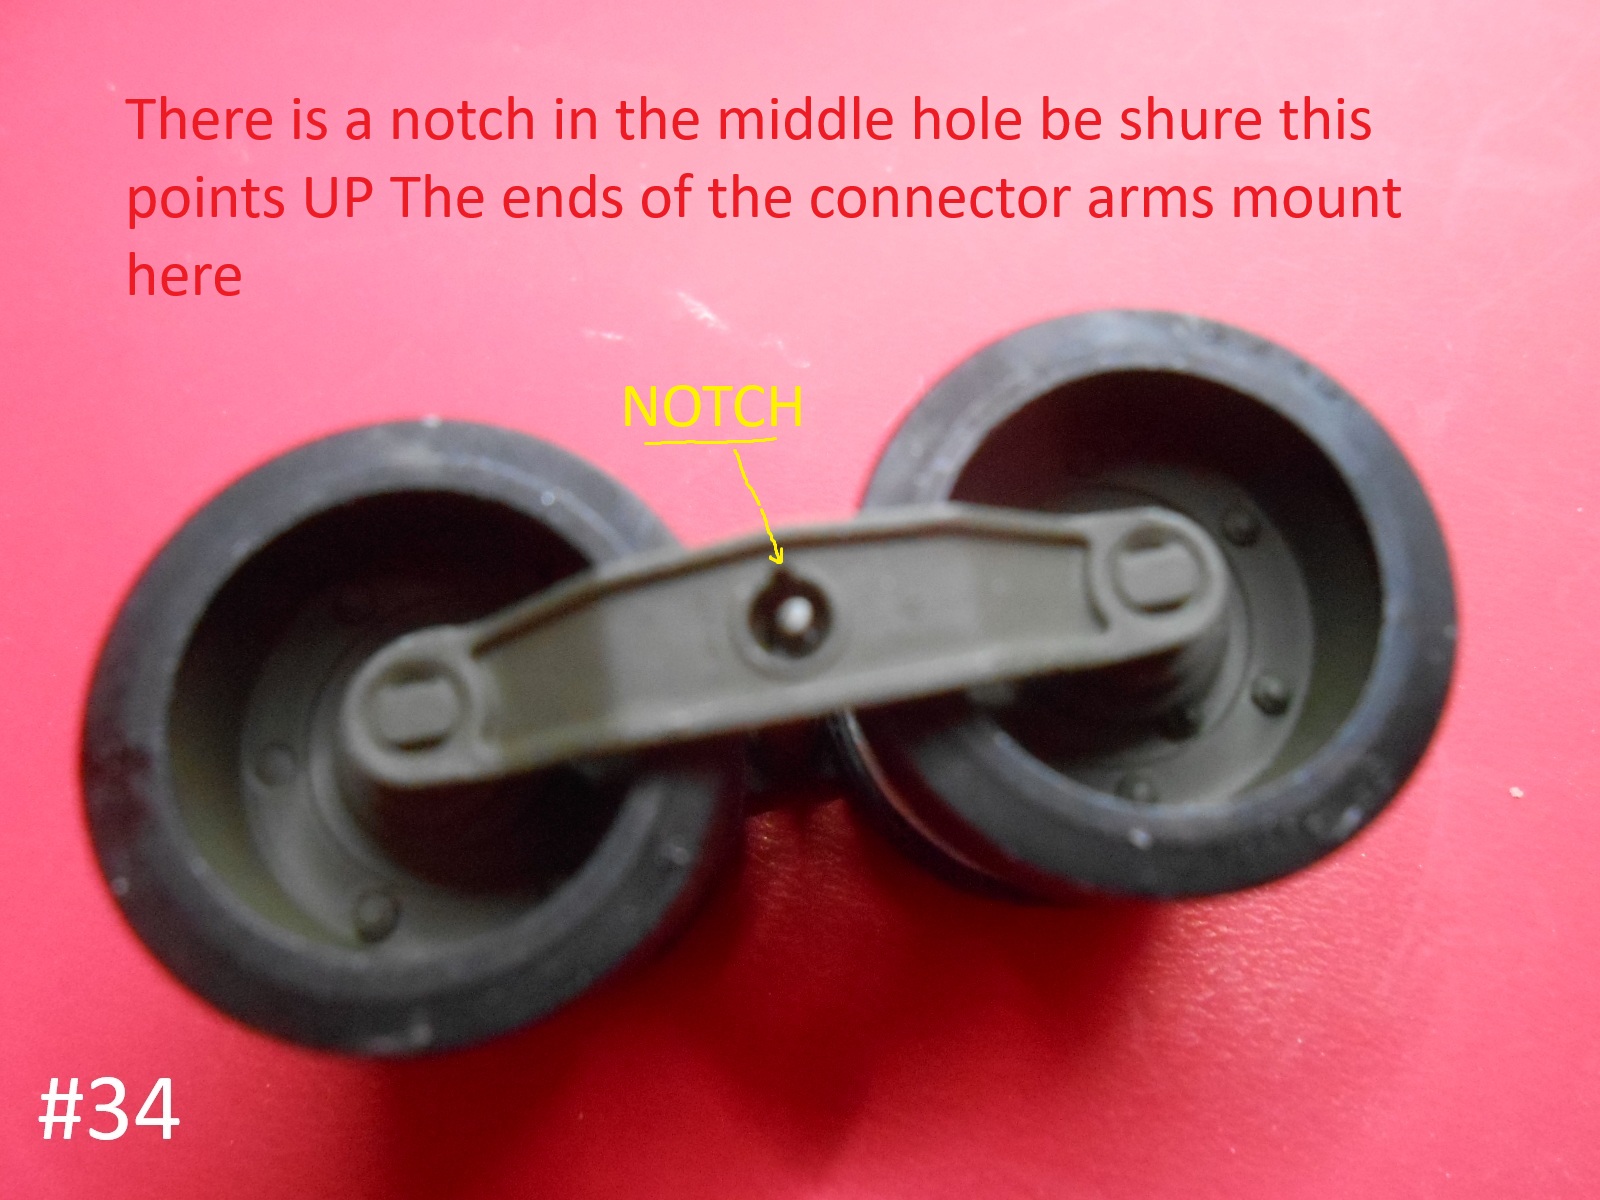
Oh well the most important thing is to be shure the notches in the middle hole of the trucks point ip.
Regards
Confused Donald
Yes confusing as hell. I did mine diligently and carefully and still managed to get some wrong. I’d recommend setting everything solid once you are happy with them. I dont know if the tracks come with any fitting instructions but the Screaming toad ones tell you to fit the drive wheel and idler wheel to the track then guide the assembly over the bogies and finally over the return roller seating the drive sprocket and idler into their position as you go.
Keith
They don’t give you any info. on how to install them.
I figure on installing the Sprockets to the track then installing it all at omce.
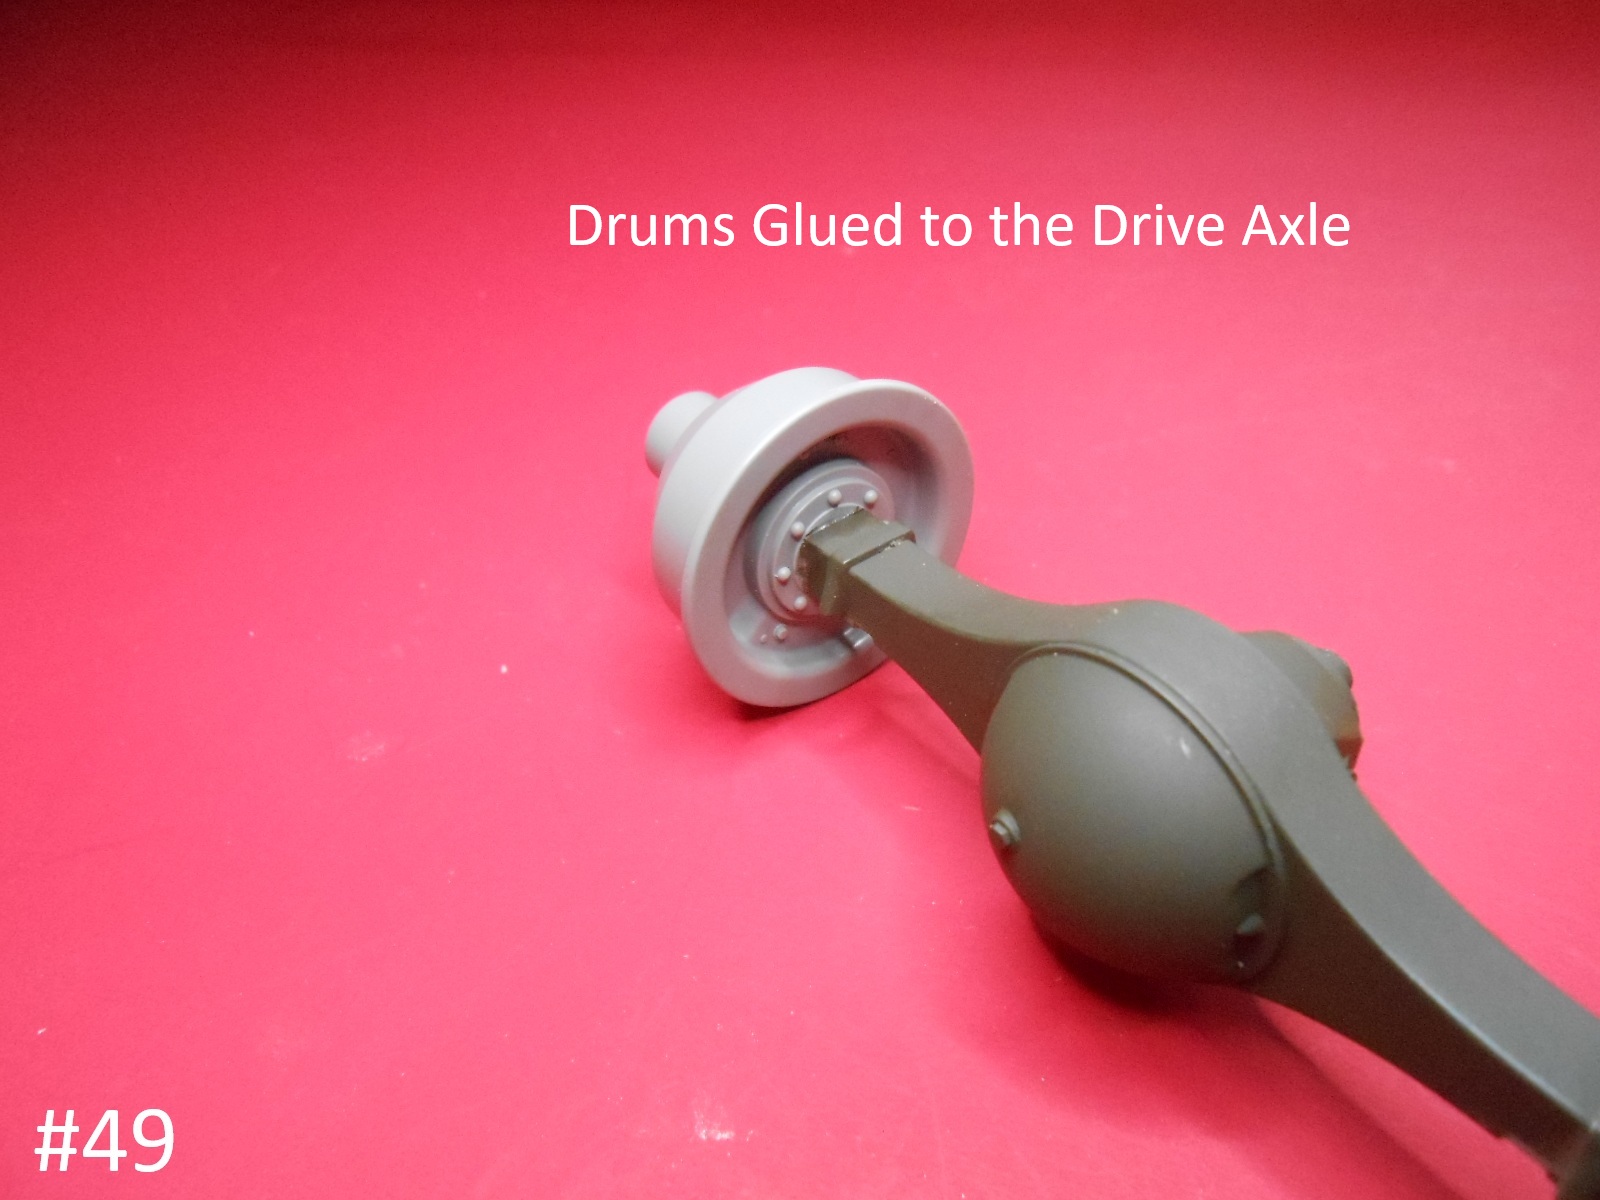
I left the Main Drive axle loose so adjustments can be made.
Donald