Hey guys i haven’t seen this built here yet.
Hope you all like it.
Donald

This looks like a very interesting Kit
Regards
Dona
Hey guys i haven’t seen this built here yet.
Hope you all like it.
Donald
This looks like a very interesting Kit
Regards
Dona
That’s a big boy!
Got my popcorn, my comfy chair and ready to enjoy this one. ![]()
![]()
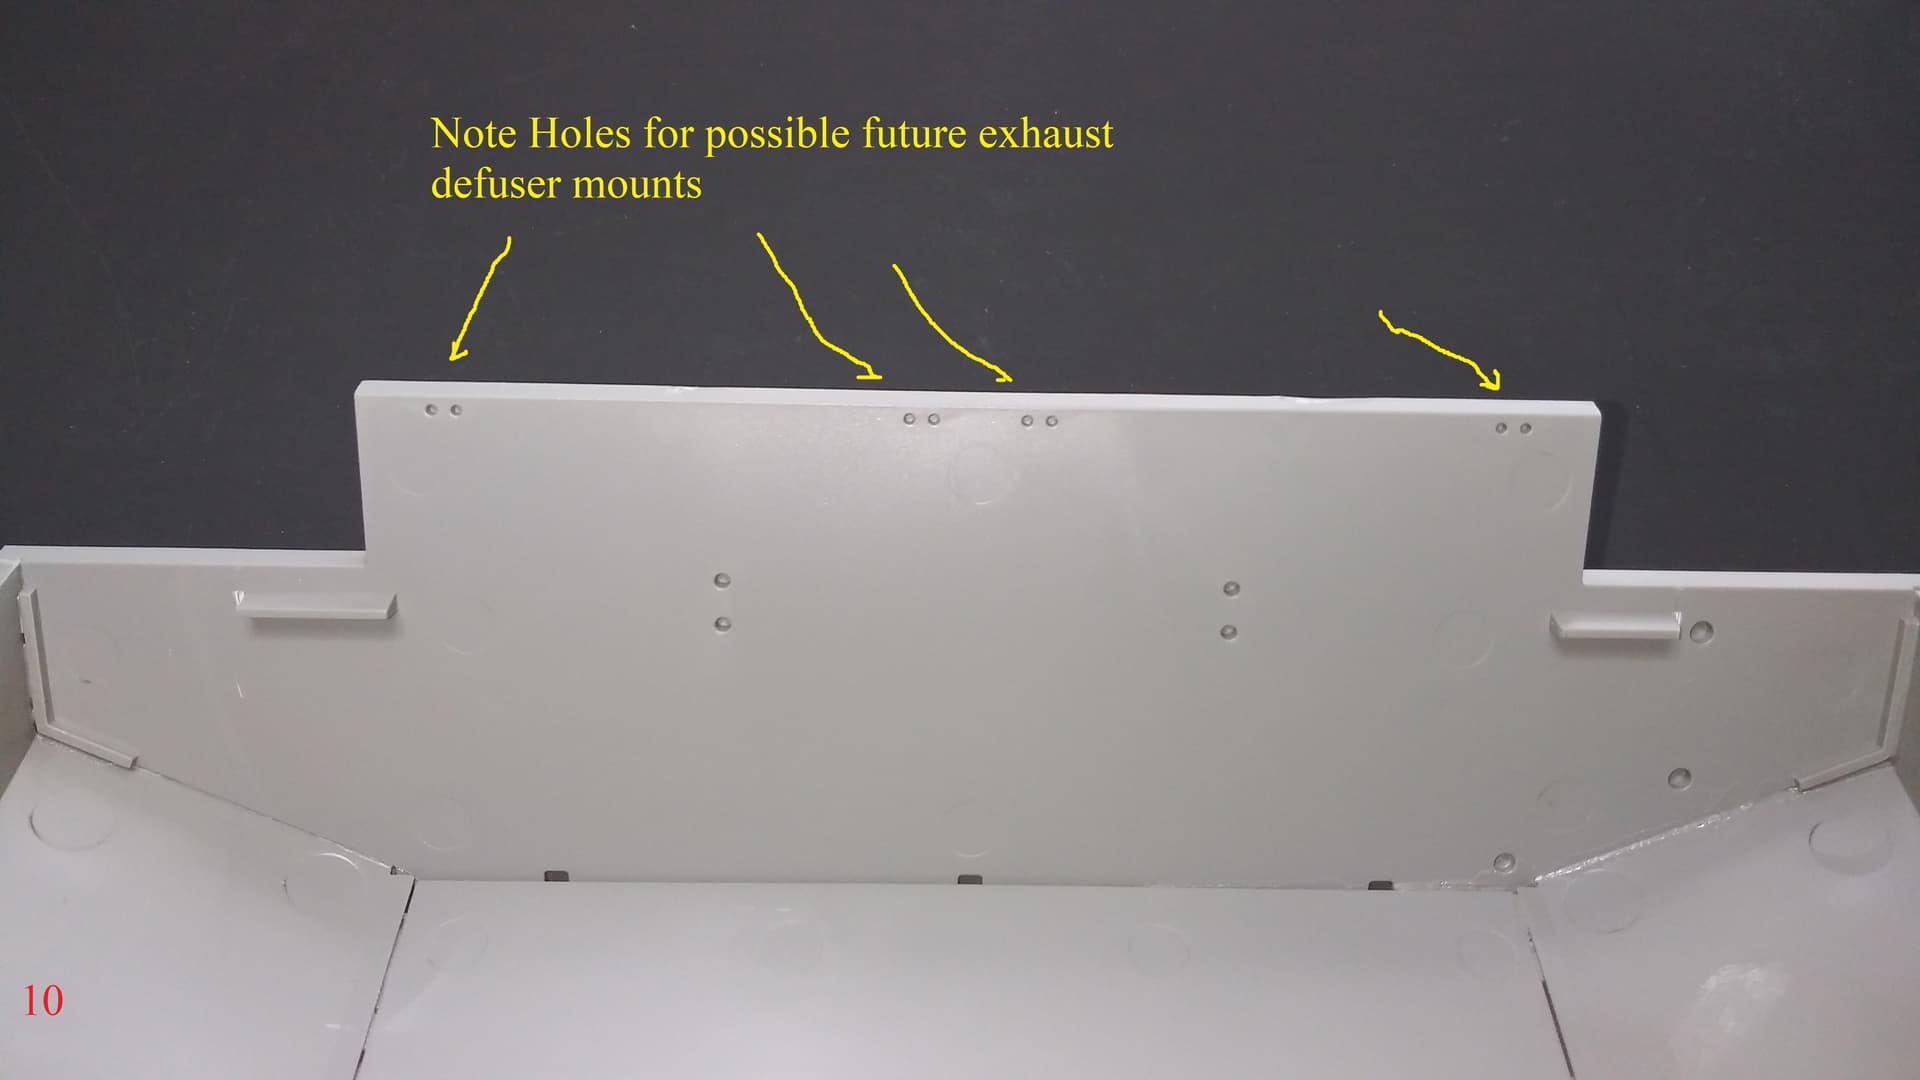
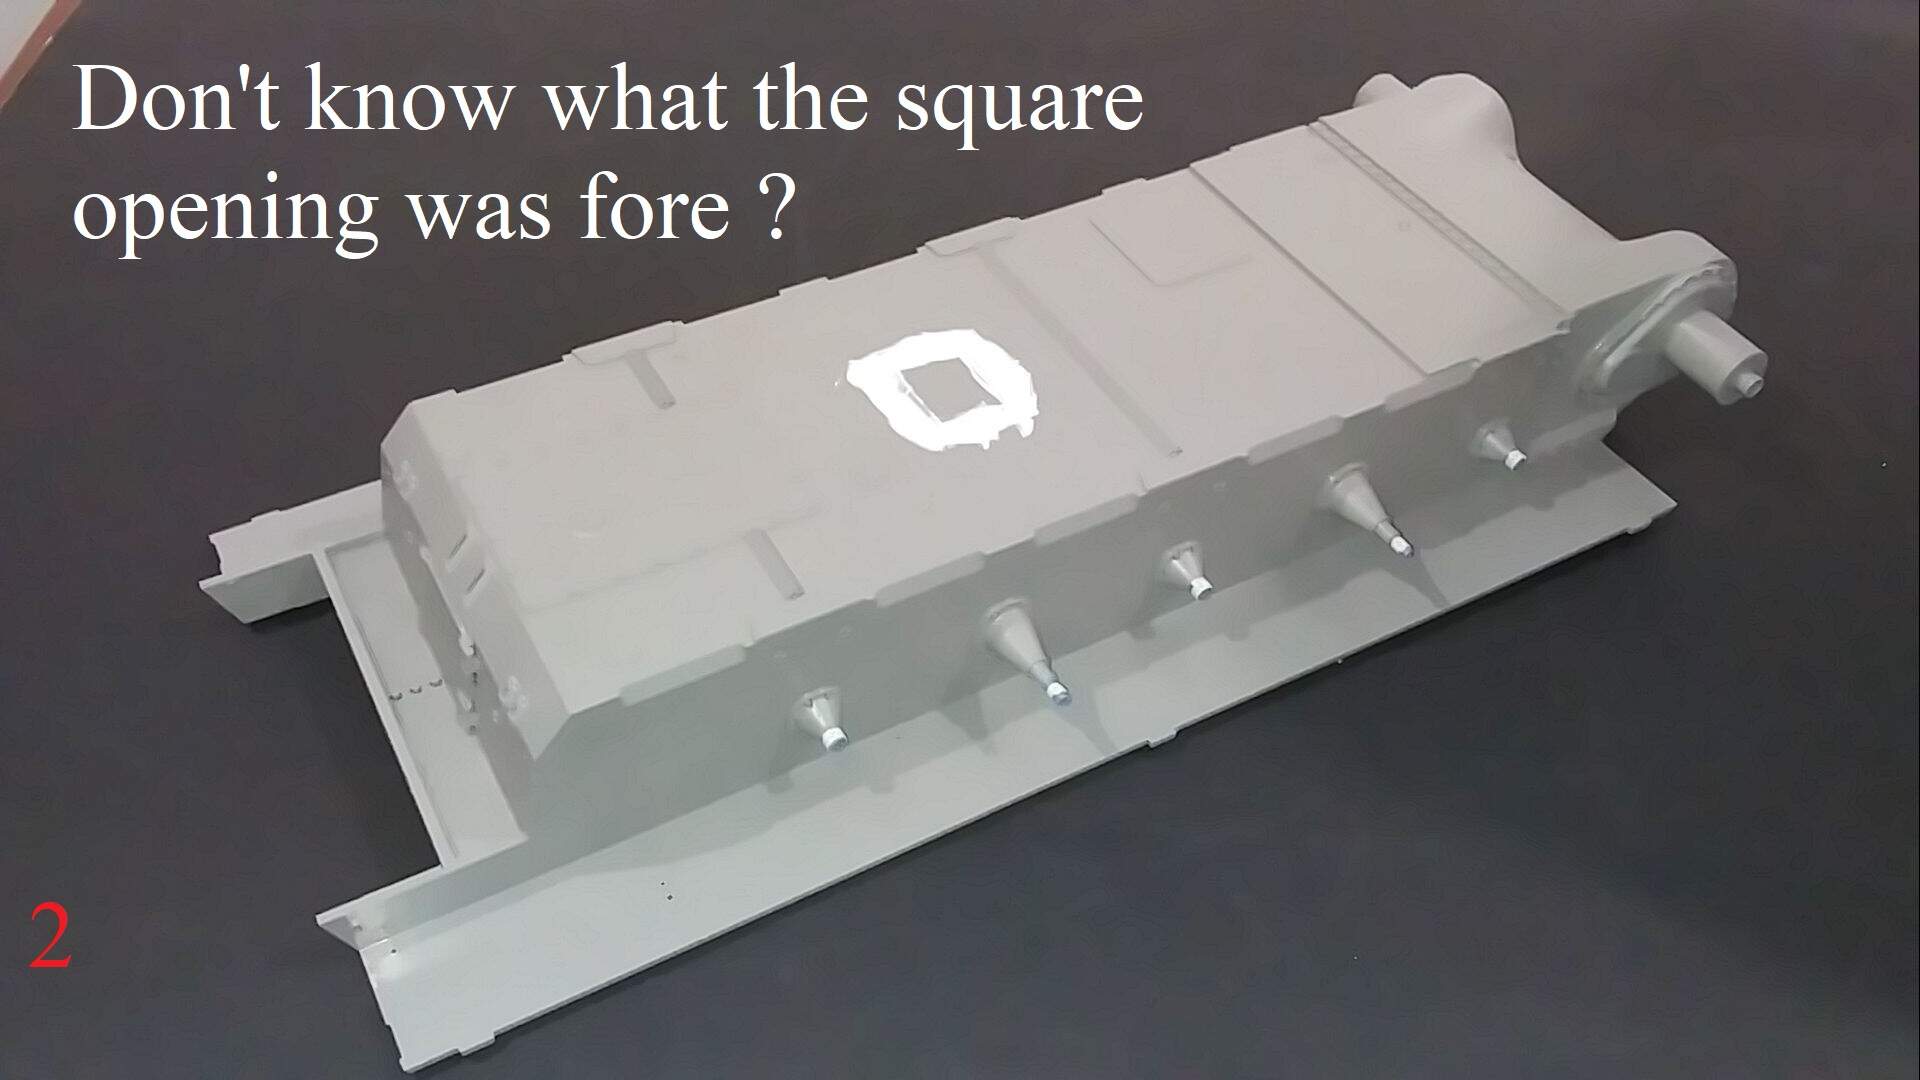
Maybe the square opening was for an on/off switch on a motorized version?
This is Andys / Takom new Sherman
Regards
Donald
Hey Moderator / web guy , I think I screwed up here,
this should be in the Allied AFV section.
Can you help ?
Then somebody screwed the pooch.
Fixed.
Thank You, I’m not really good with computers.
I sometimes get the keys mixed up
Donald
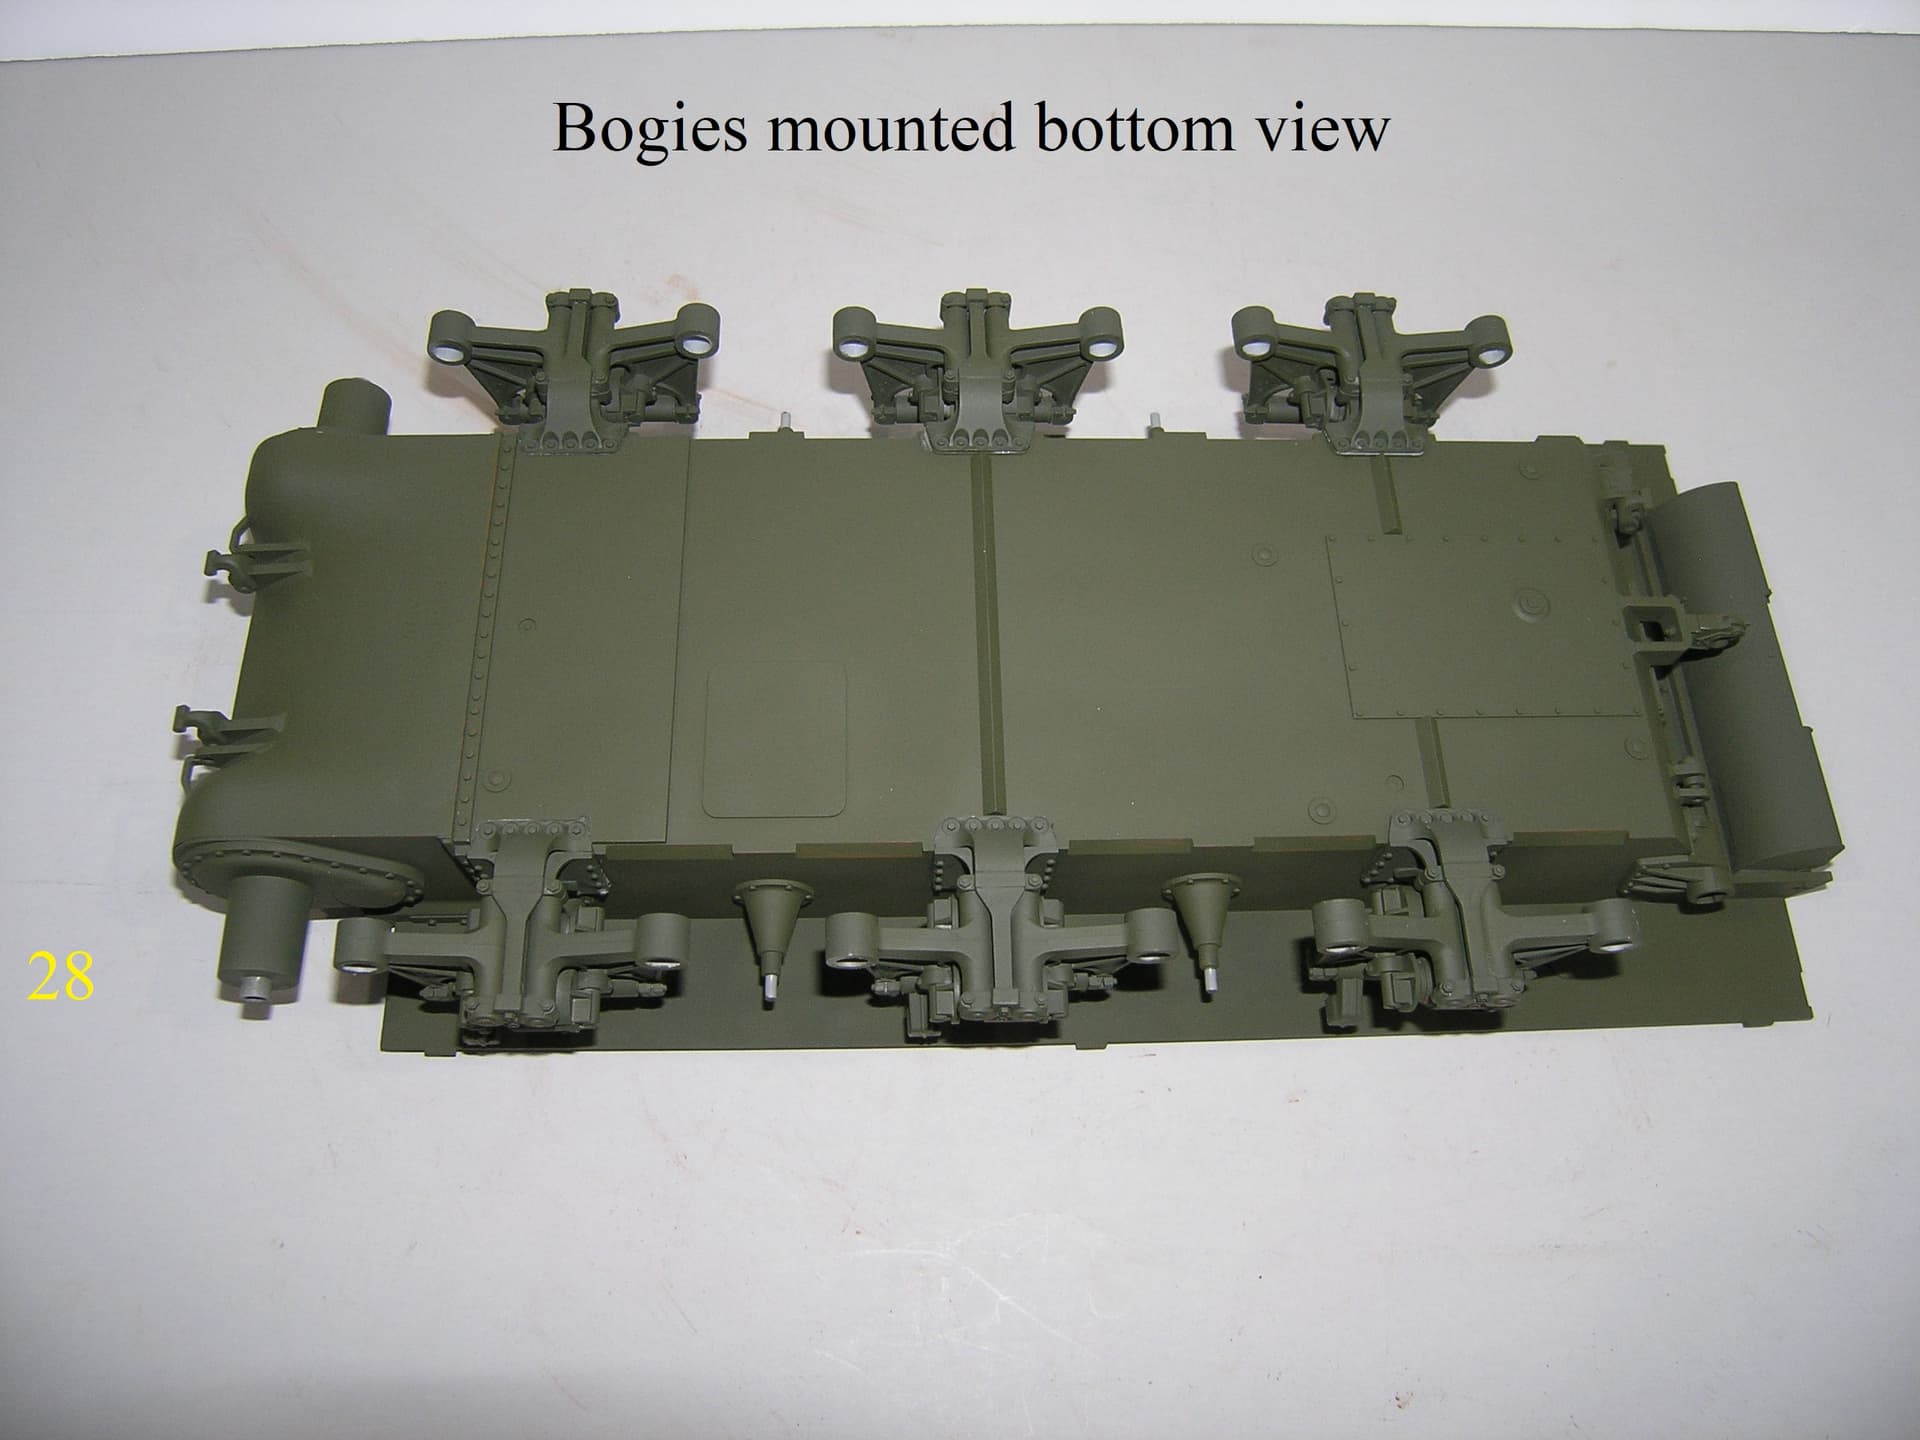
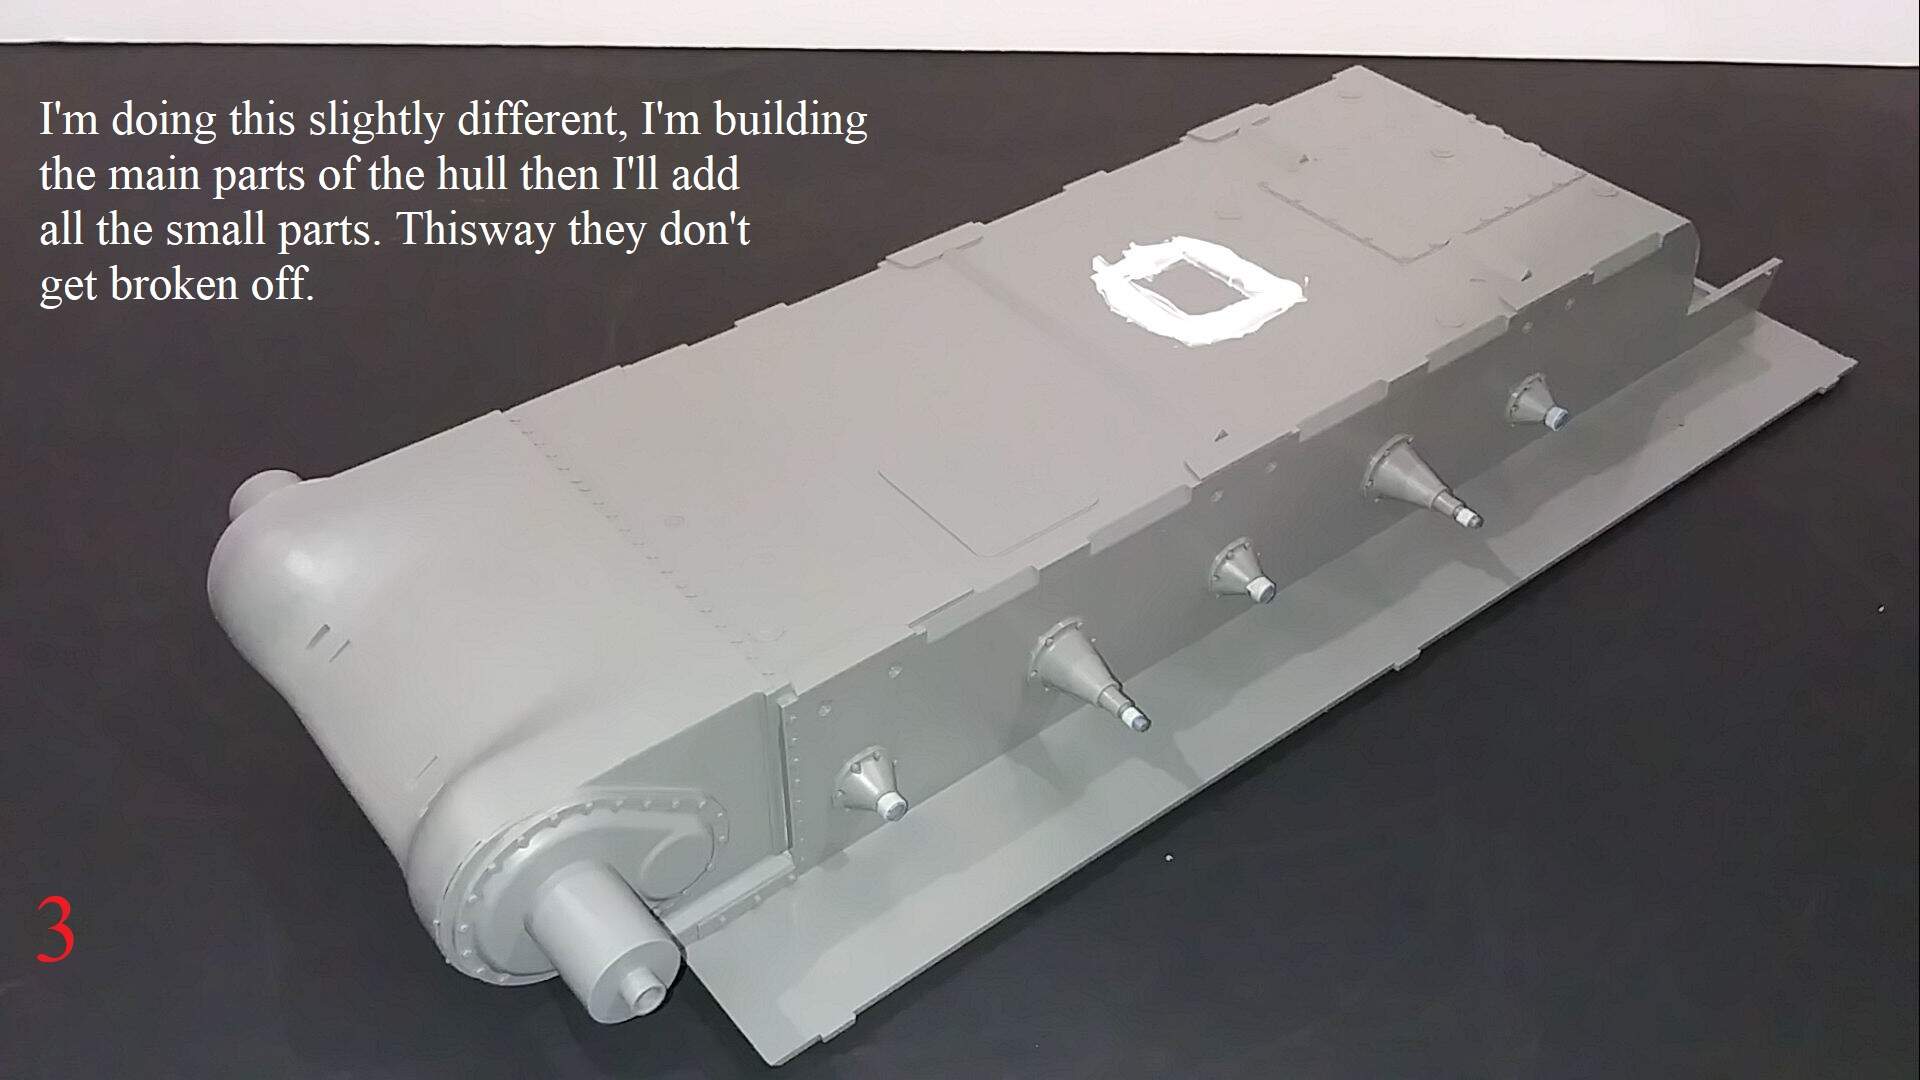
Finished for now , Some may wonder why I build this way.
This is easier for me as I don’t have to worry about breaking off the small parts.
The upper and lower Hulls aren’t glued together yet , that will come after every thing is added and painted.
Regards
Donald
Will follow with interest !!!
This is also the way I build Takom kits. Sometimes you have to make sure there is not a part that fits from inside or is easier to assemble before putting larger parts together. Also sometimes you need clamps or bands to hold parts together while gluing. Very difficult to do with small parts in the way. I have this kit as well, so I’ll watch you cut the path for me. Your on point soldier.
even though I’m not interested in American tanks at 1:16, I’ll still watch with pleasure. Any improvements or additions planned?
A little more finished , I’ll be building this mostly out of the box with a few improvements possible.
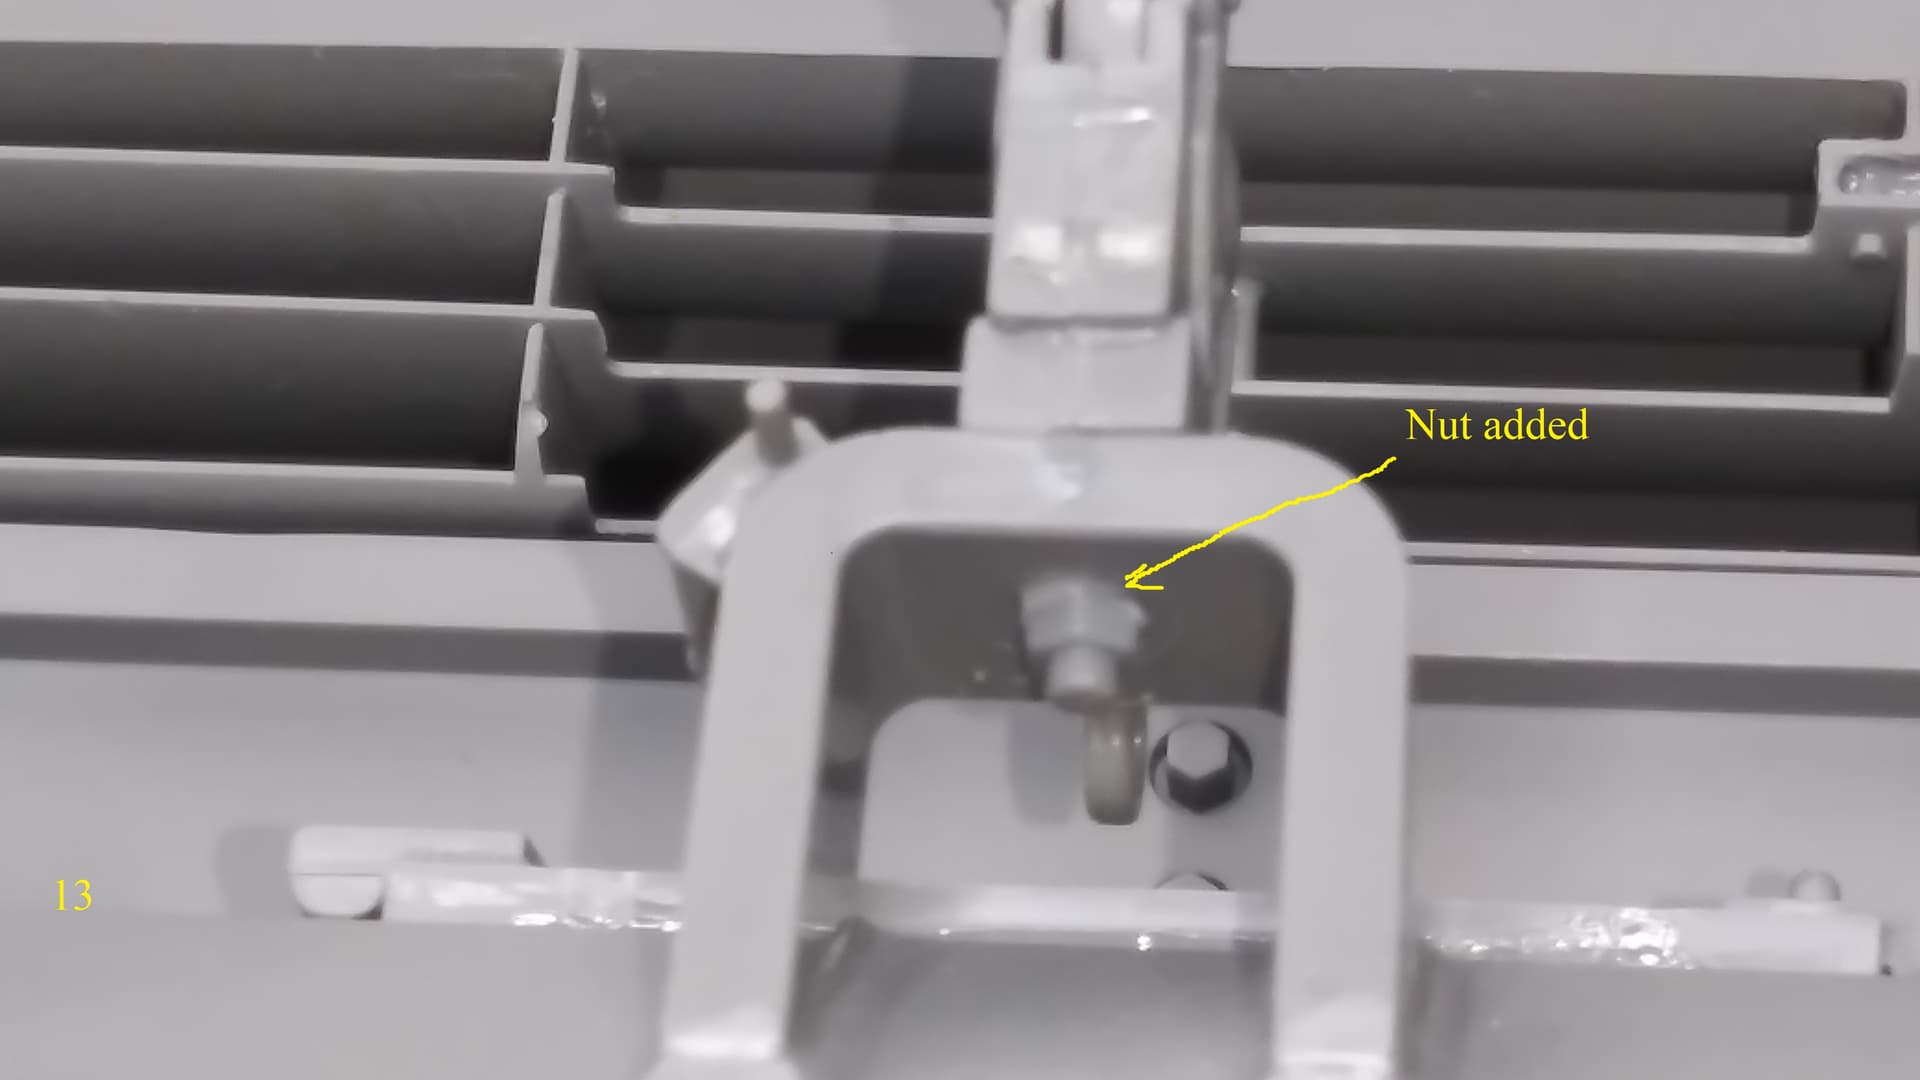
It looks like you’ve added the nut and stud securing the tow pintle, correct? If so you’re right, the only “improvement” would be to make it a castle nut with a locking clip, sometimes referred to as a J clip or even a “Jesus” clip.
Watching with interest, thanks for taking the time to document this!
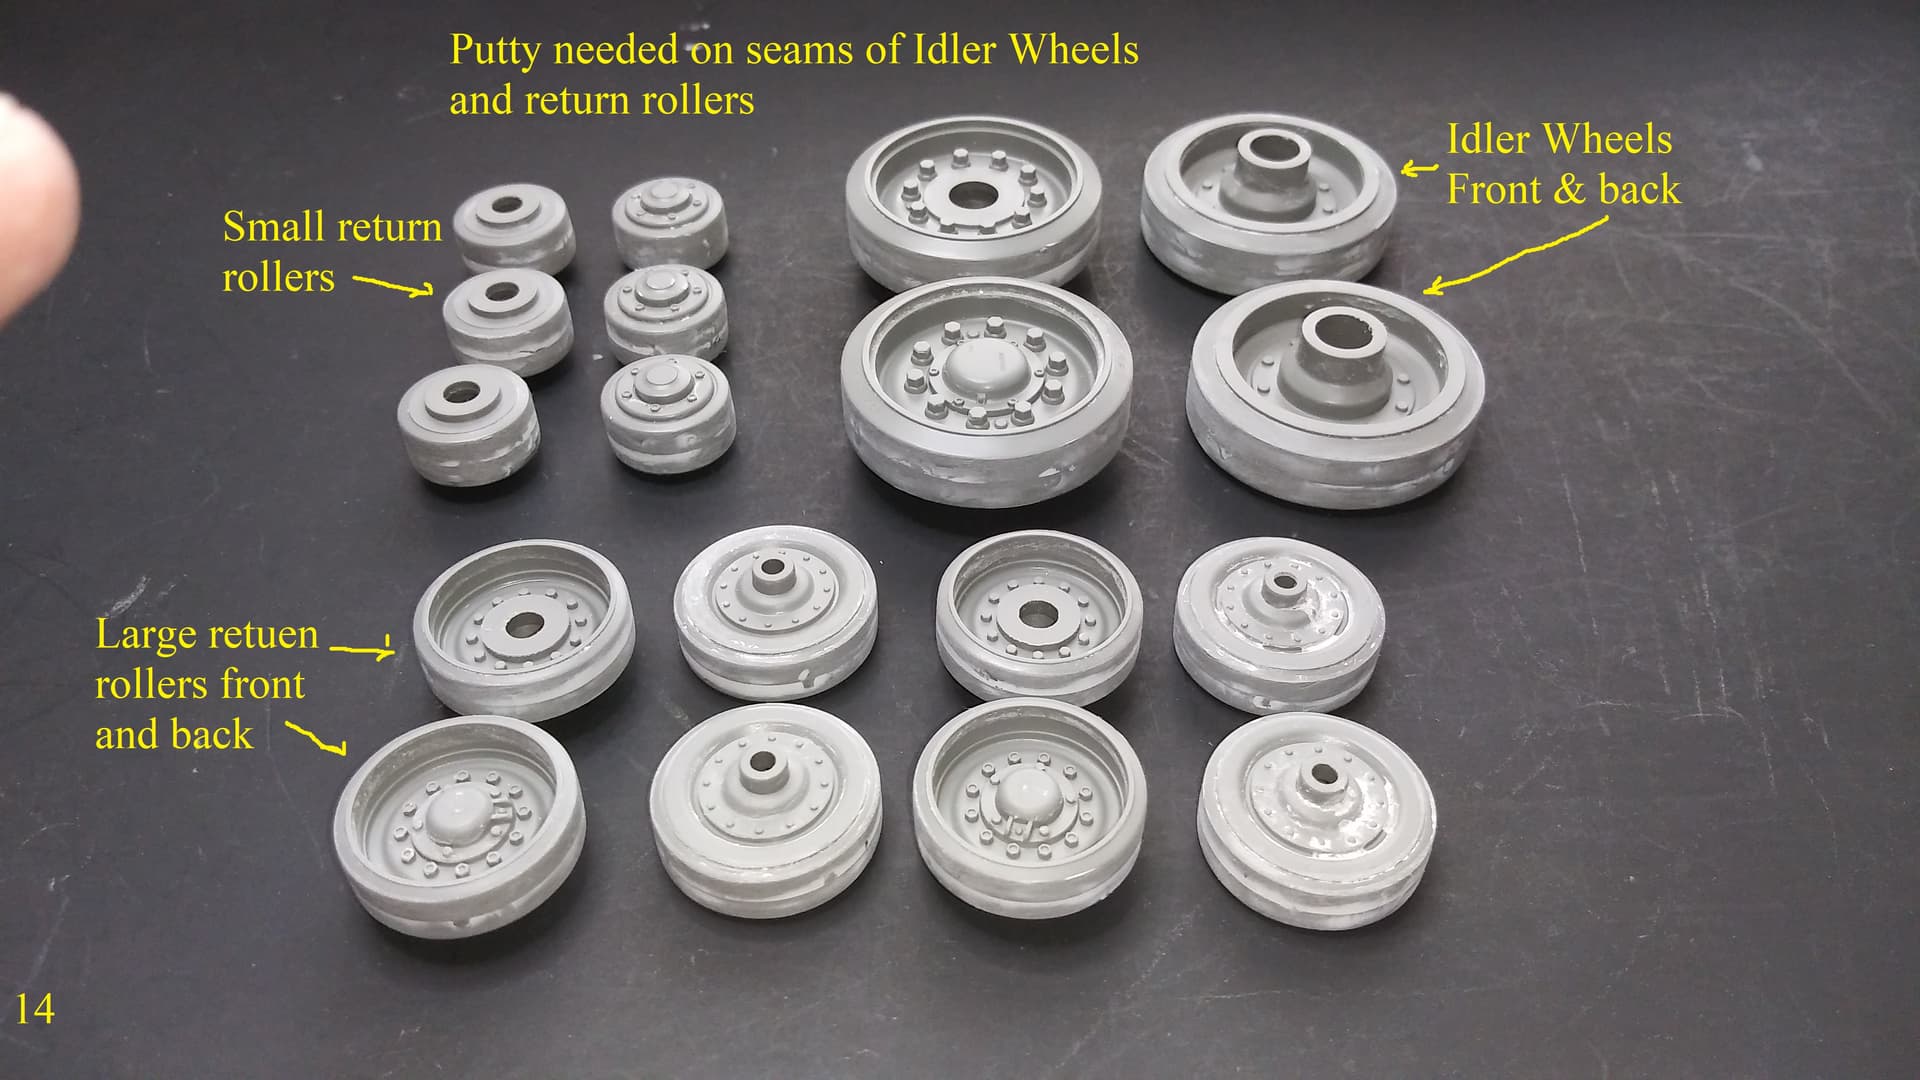
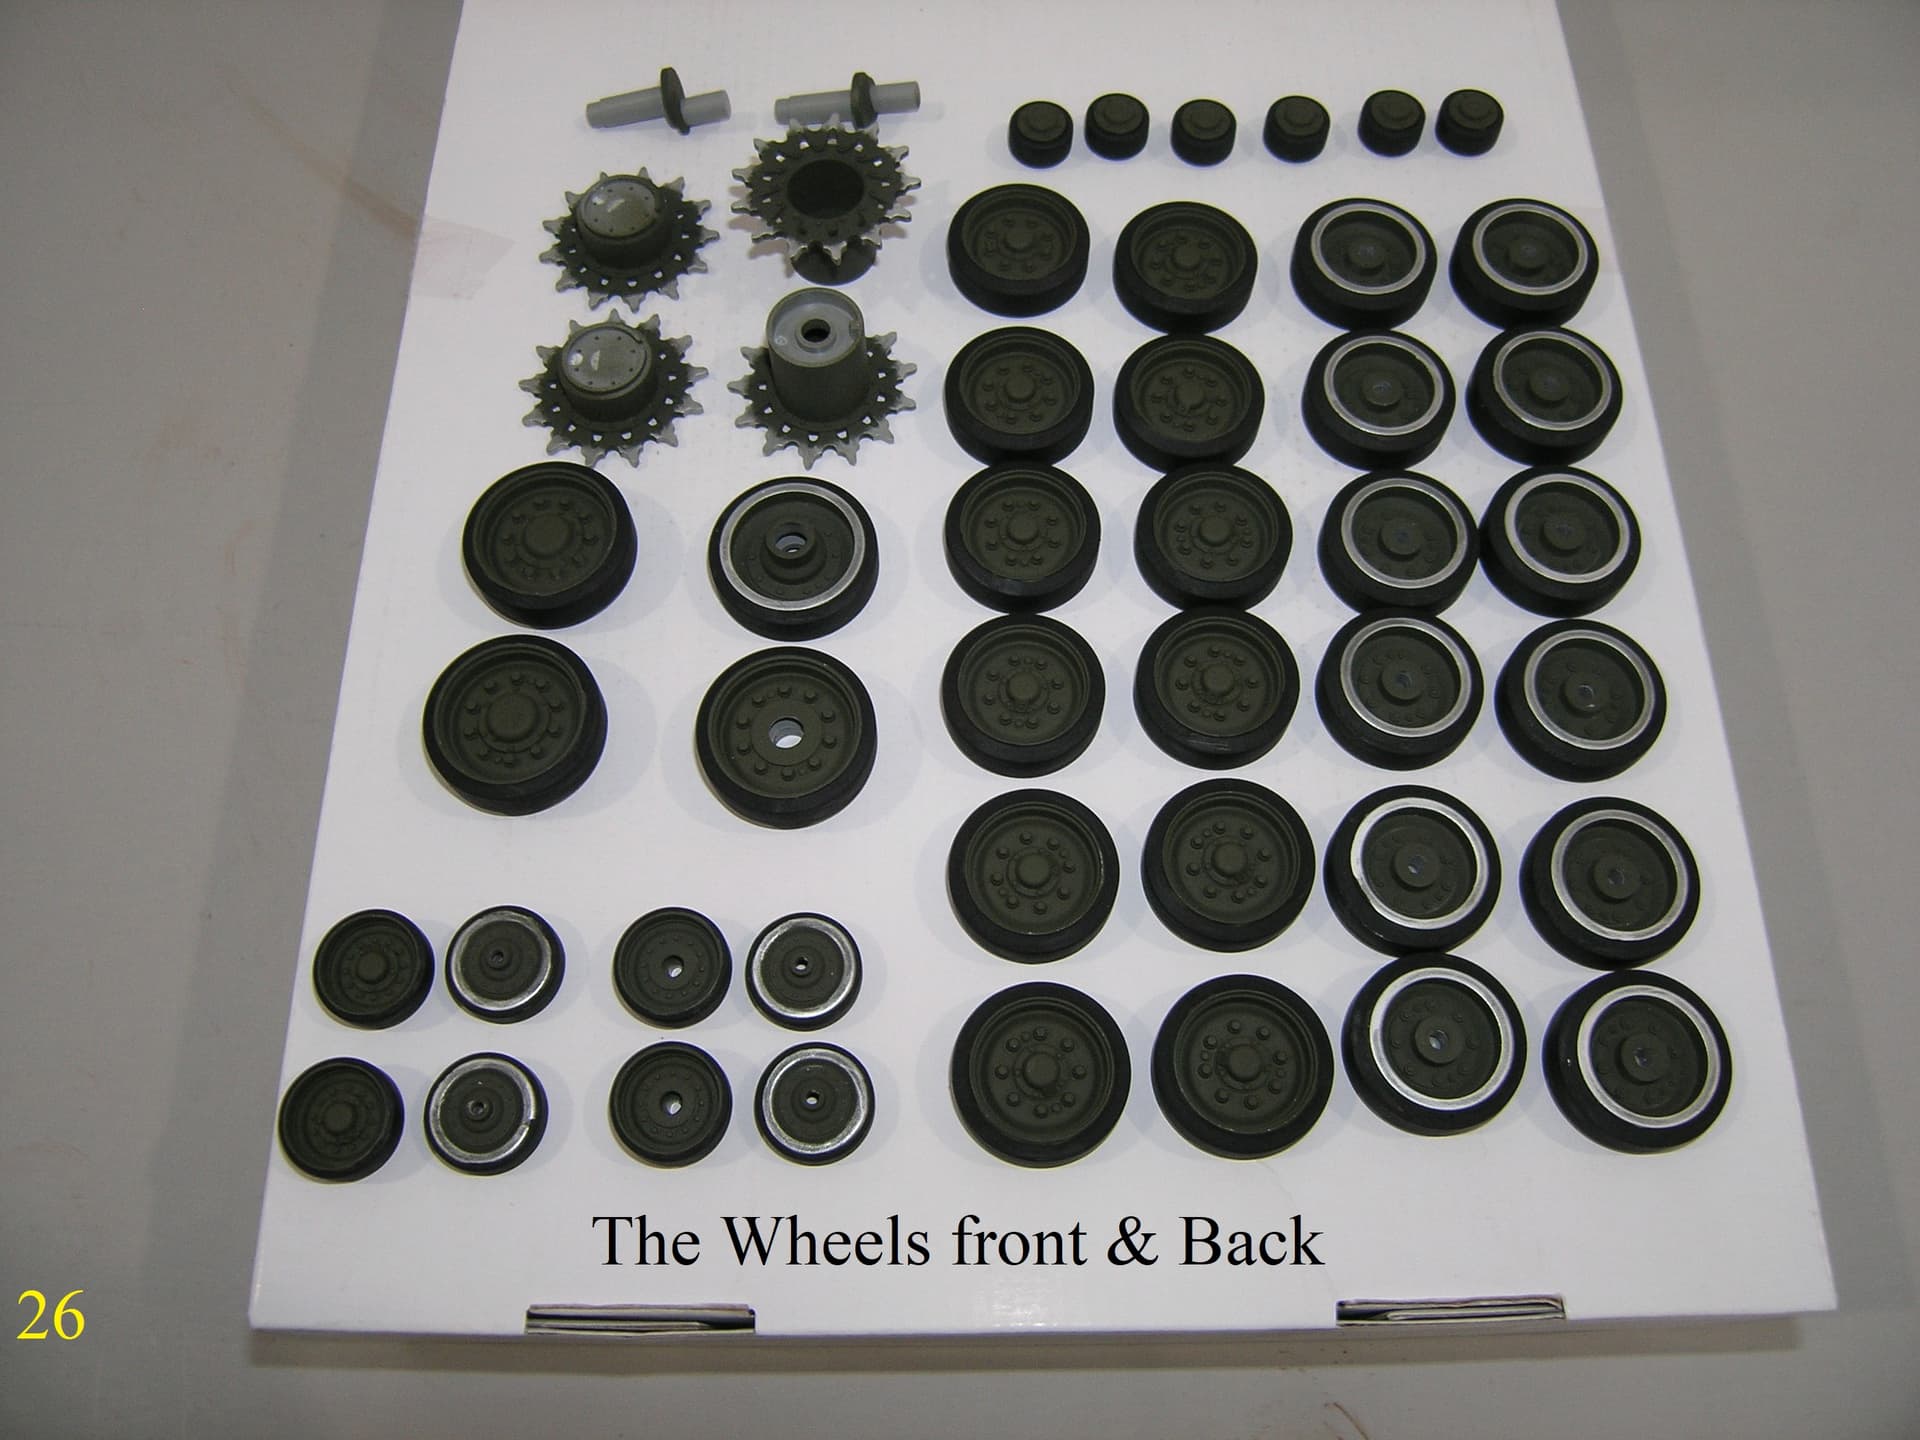
Here is some very important information for those of you who are building or going to start this kit .
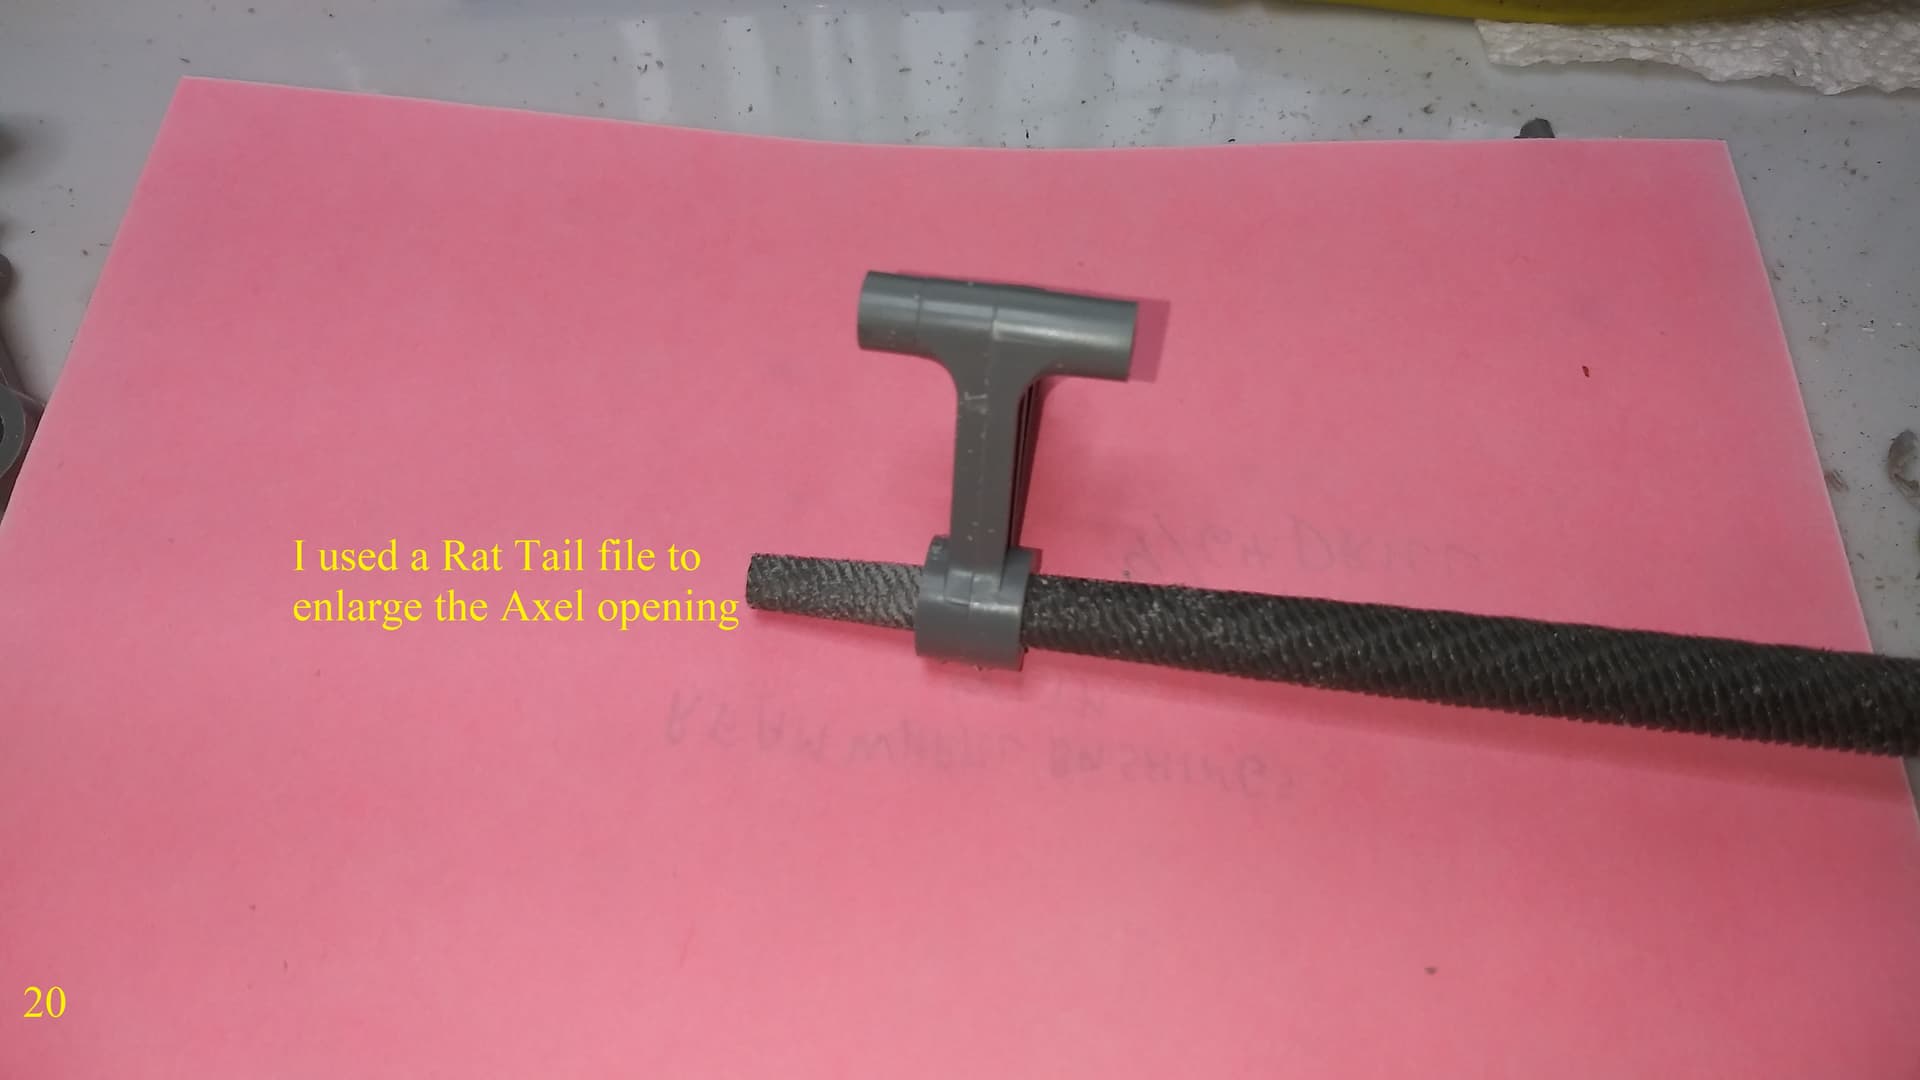
I don’t know how Andy did it but on my kit I have found that the Axle part # L13 would not fit into the Wheel Bushing Part #A2. You could possibly force it but you might break the Wheel Bushing.
Regards
Donald
Weld beads around the bracket would be seen easily at this scale.
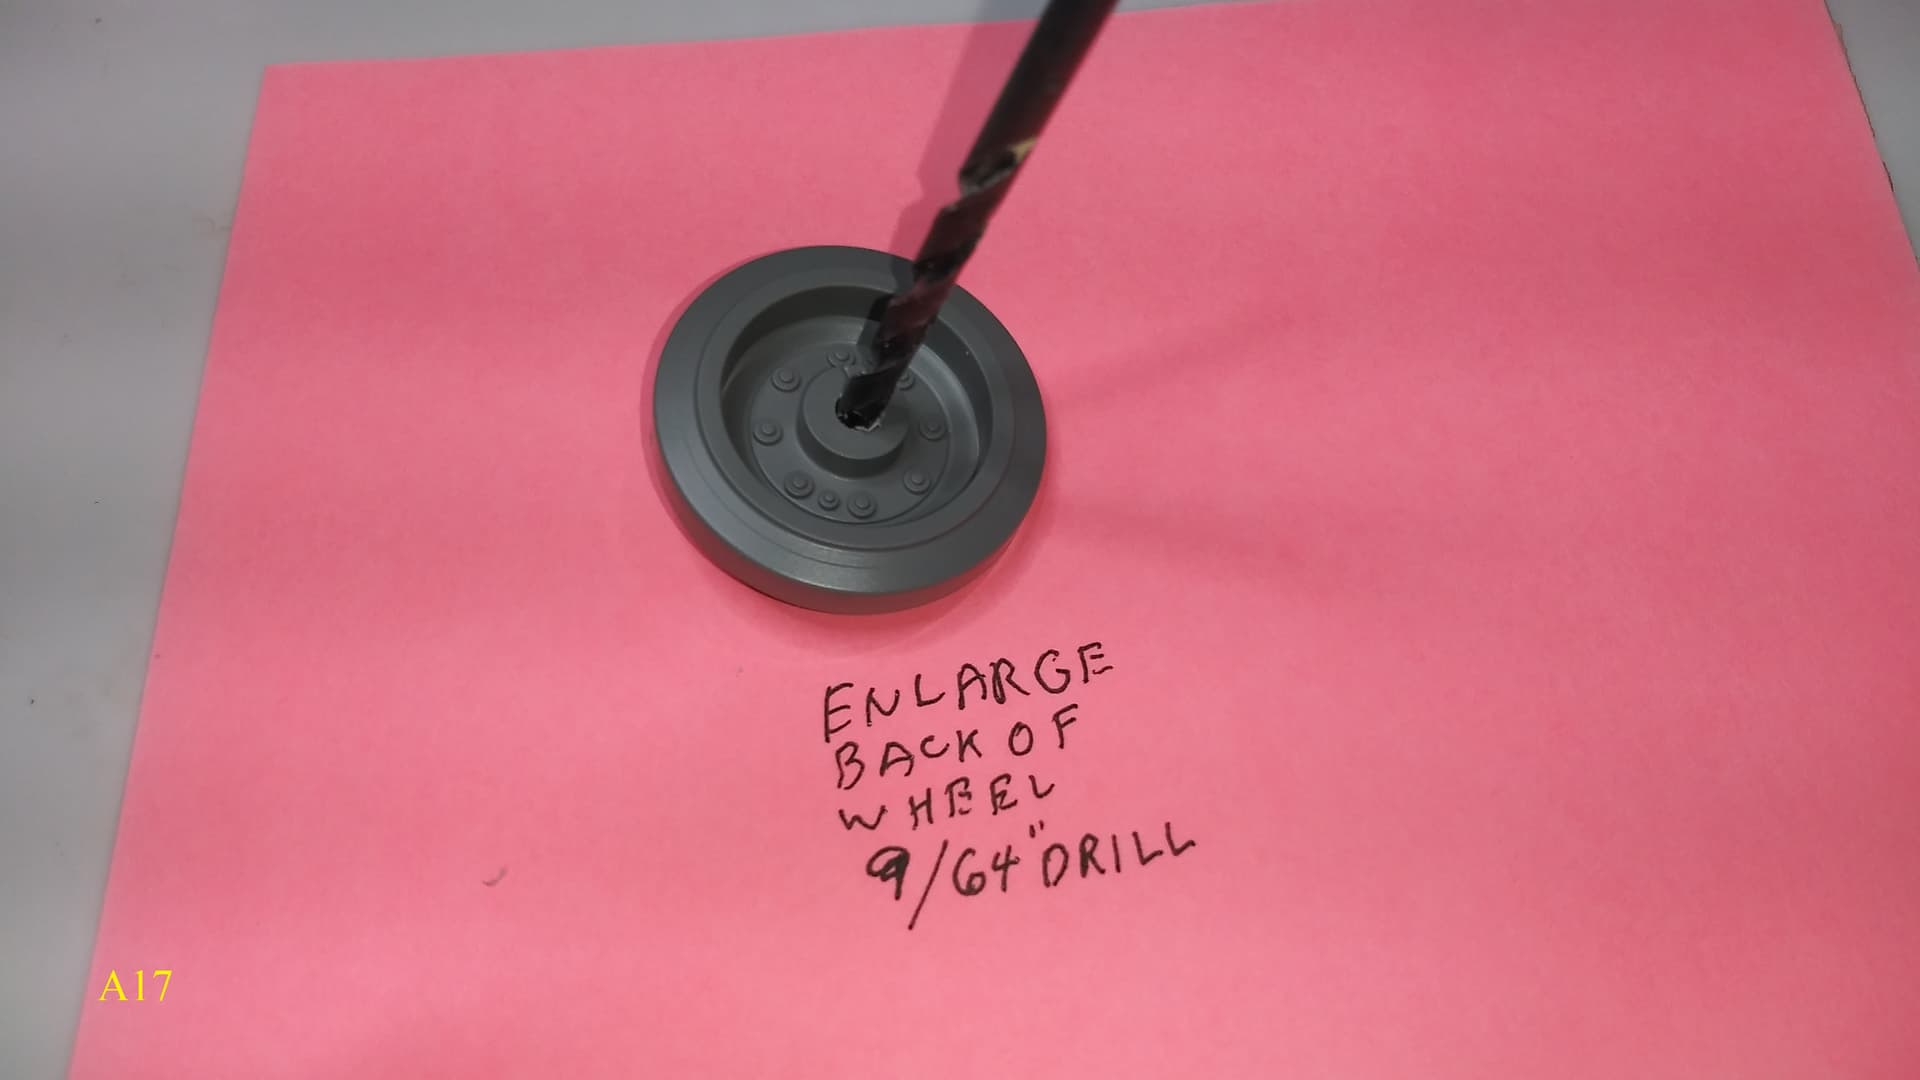
I have the Road Wheels assembled , I recomend shortening the inside bushing slightly. It tends to keep the sides separated slightly. You could clamp the sides together, but shortening the Bushing would allow easier rotation of the Wheels.
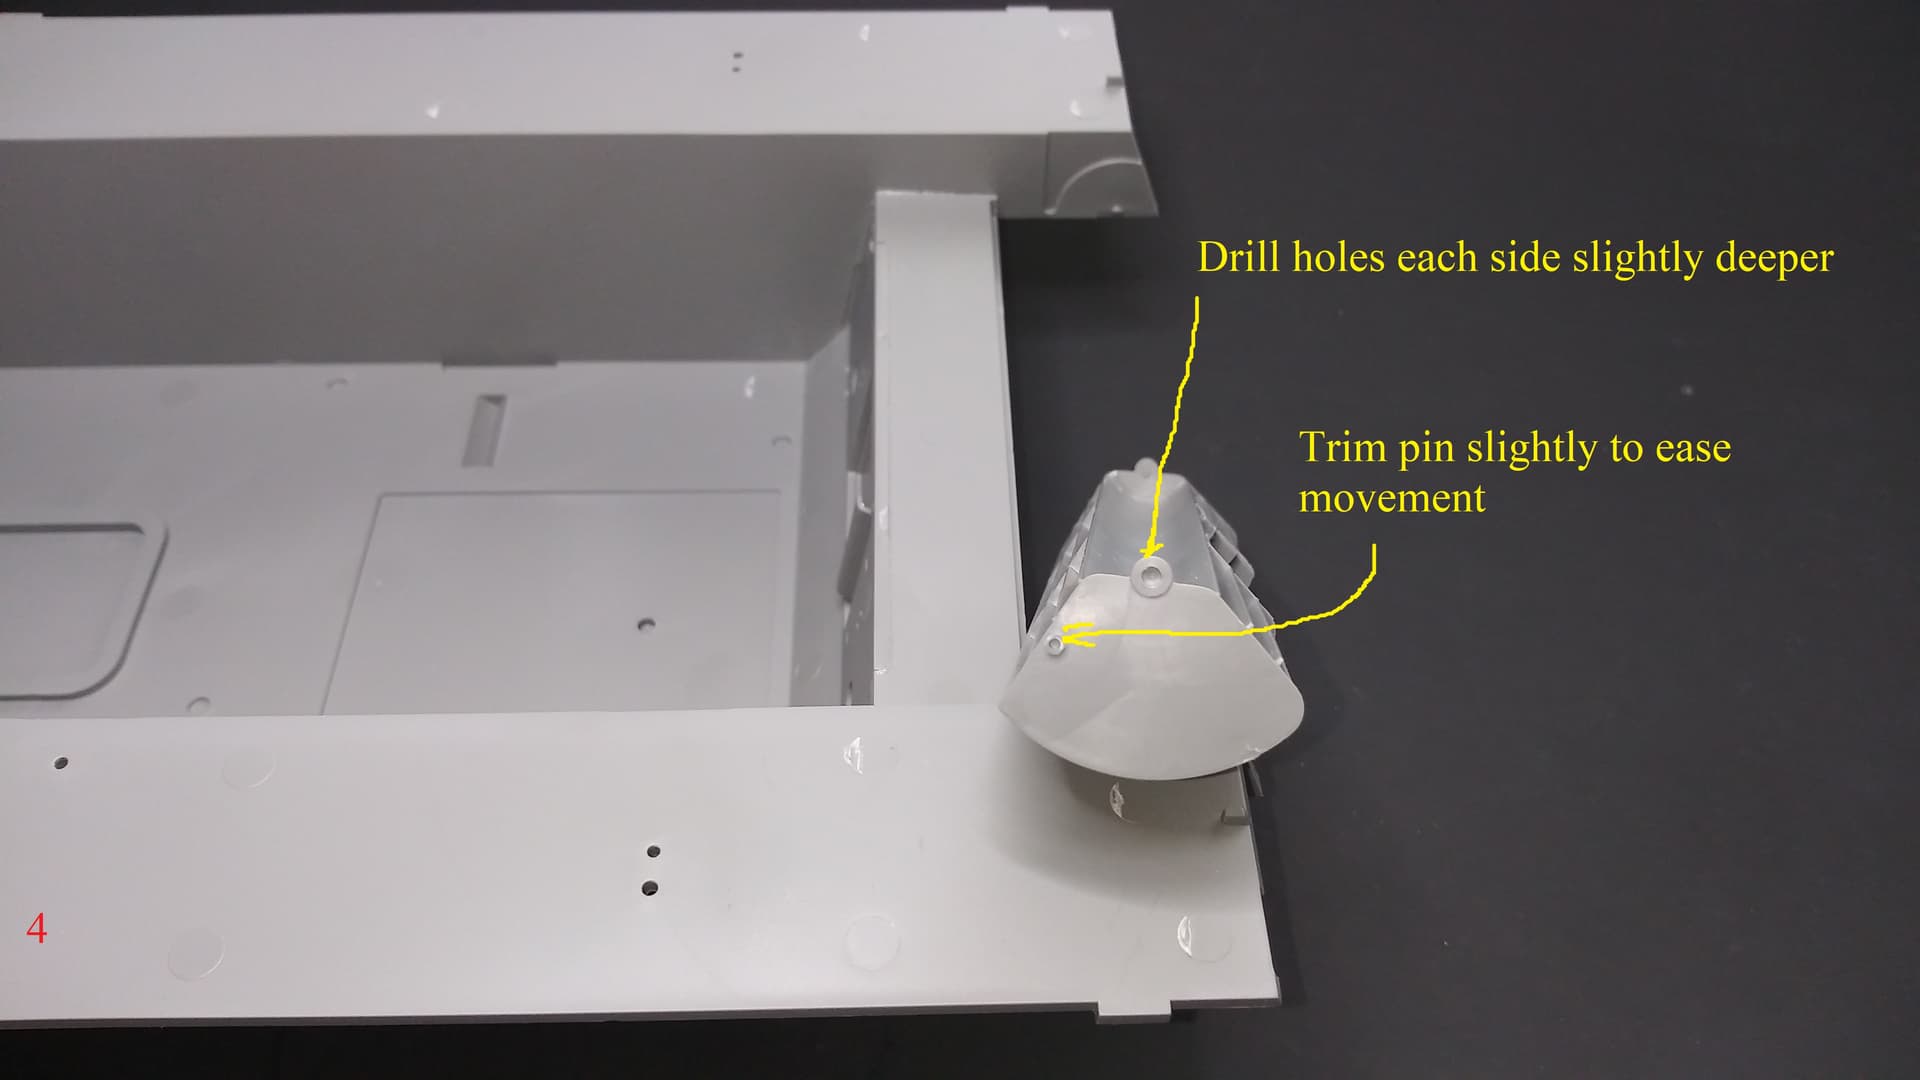
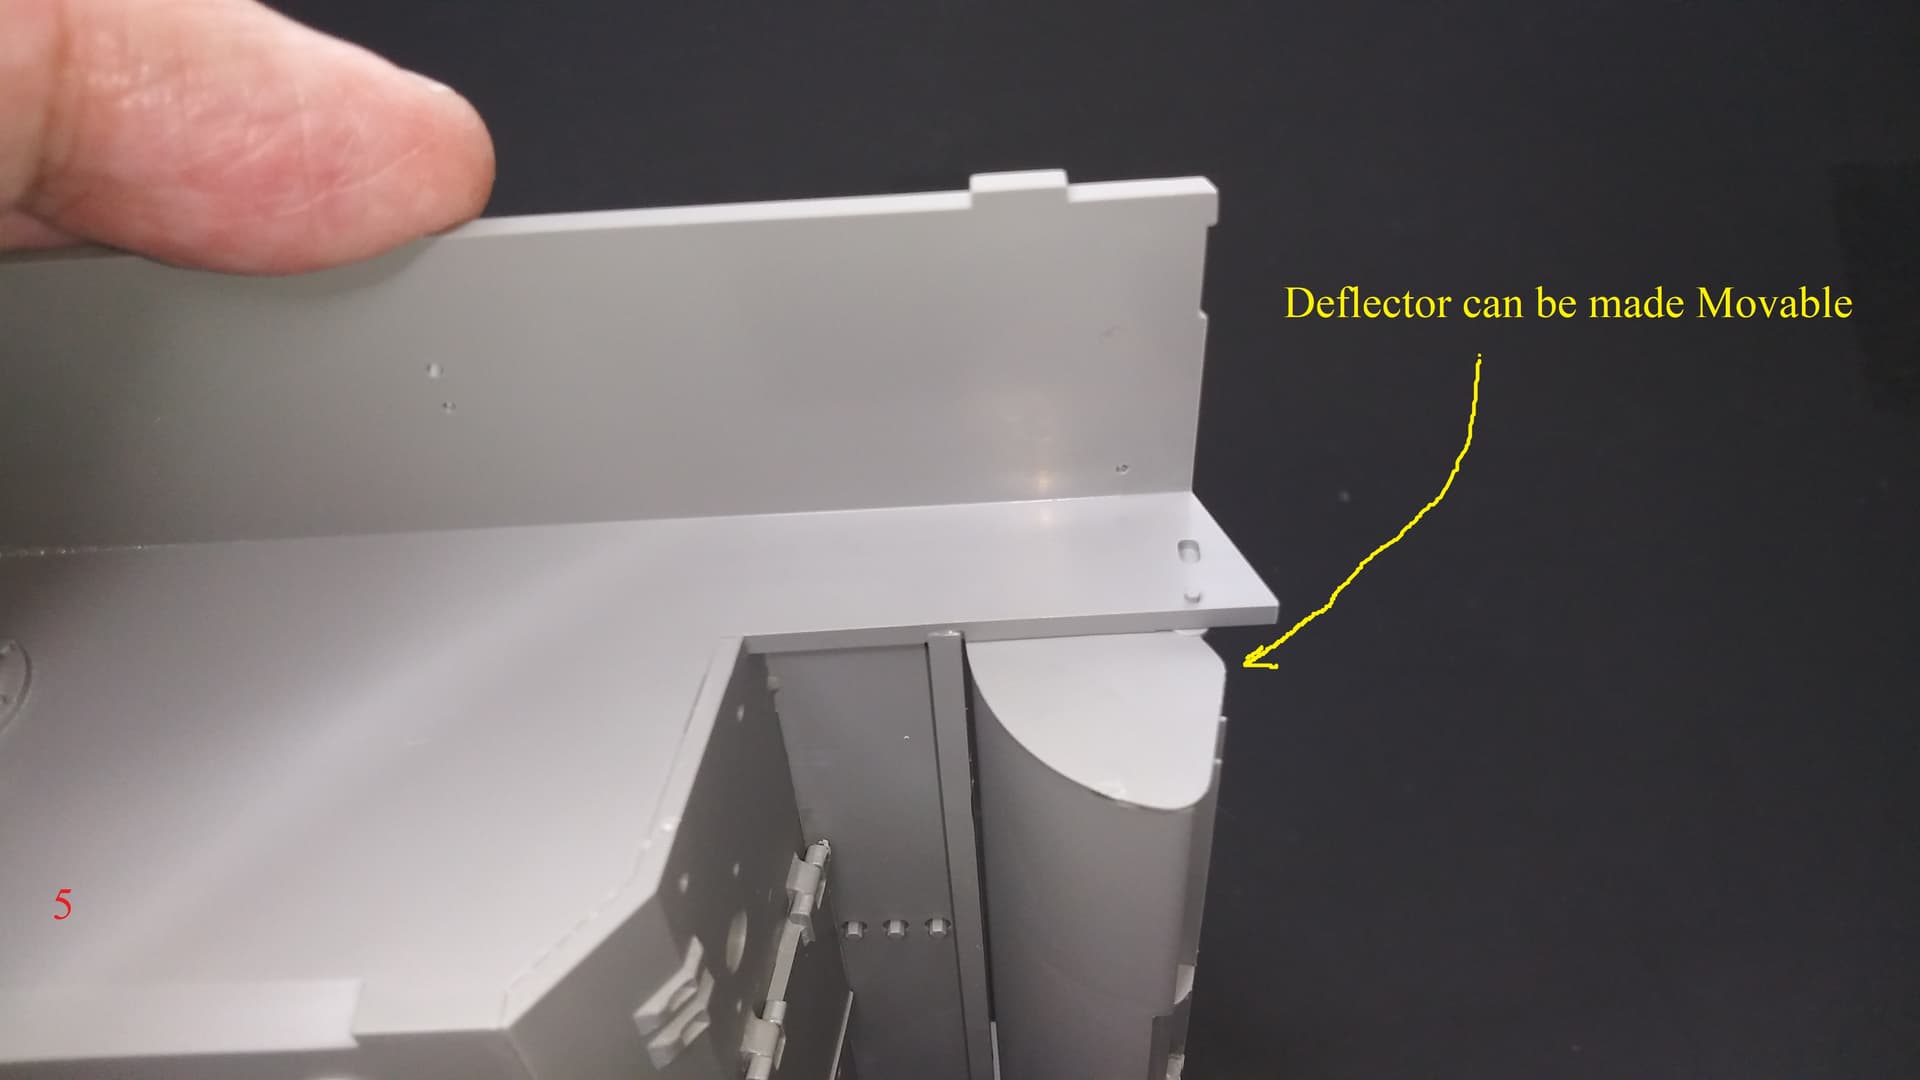
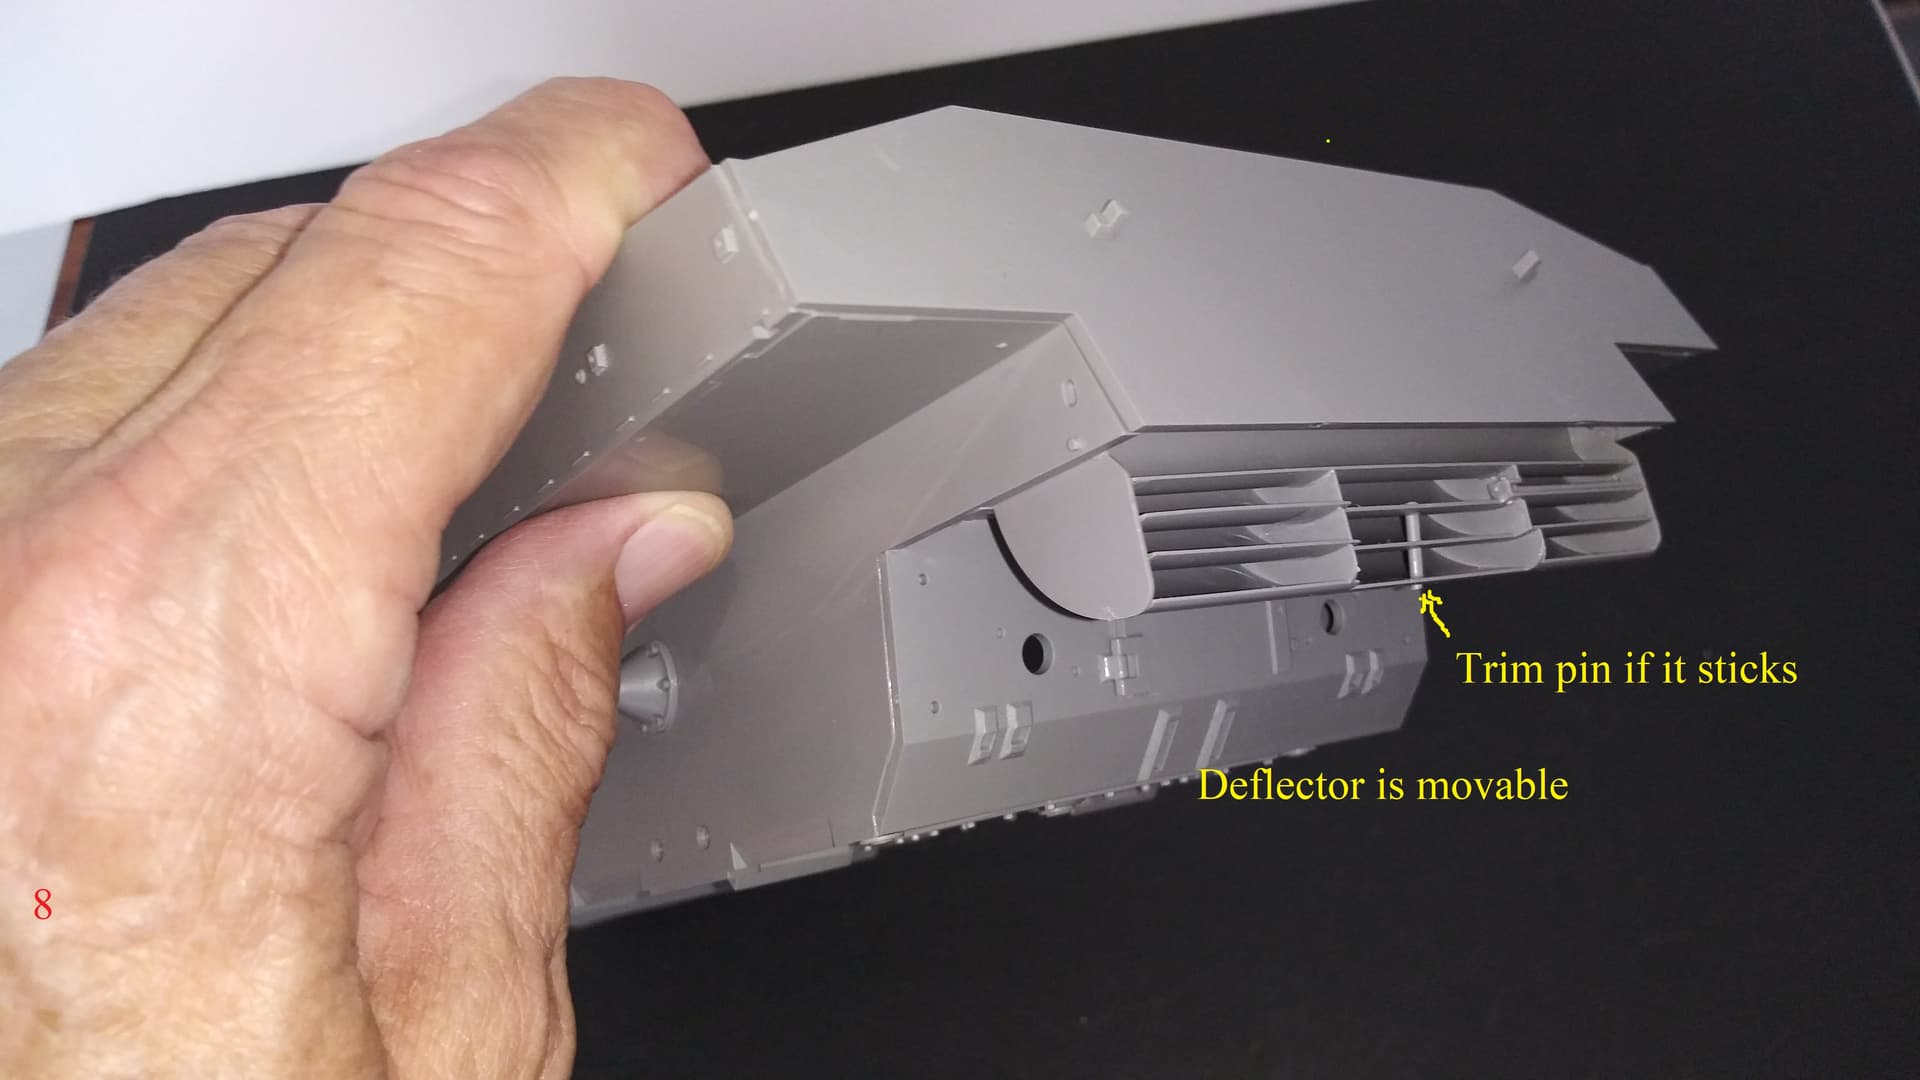
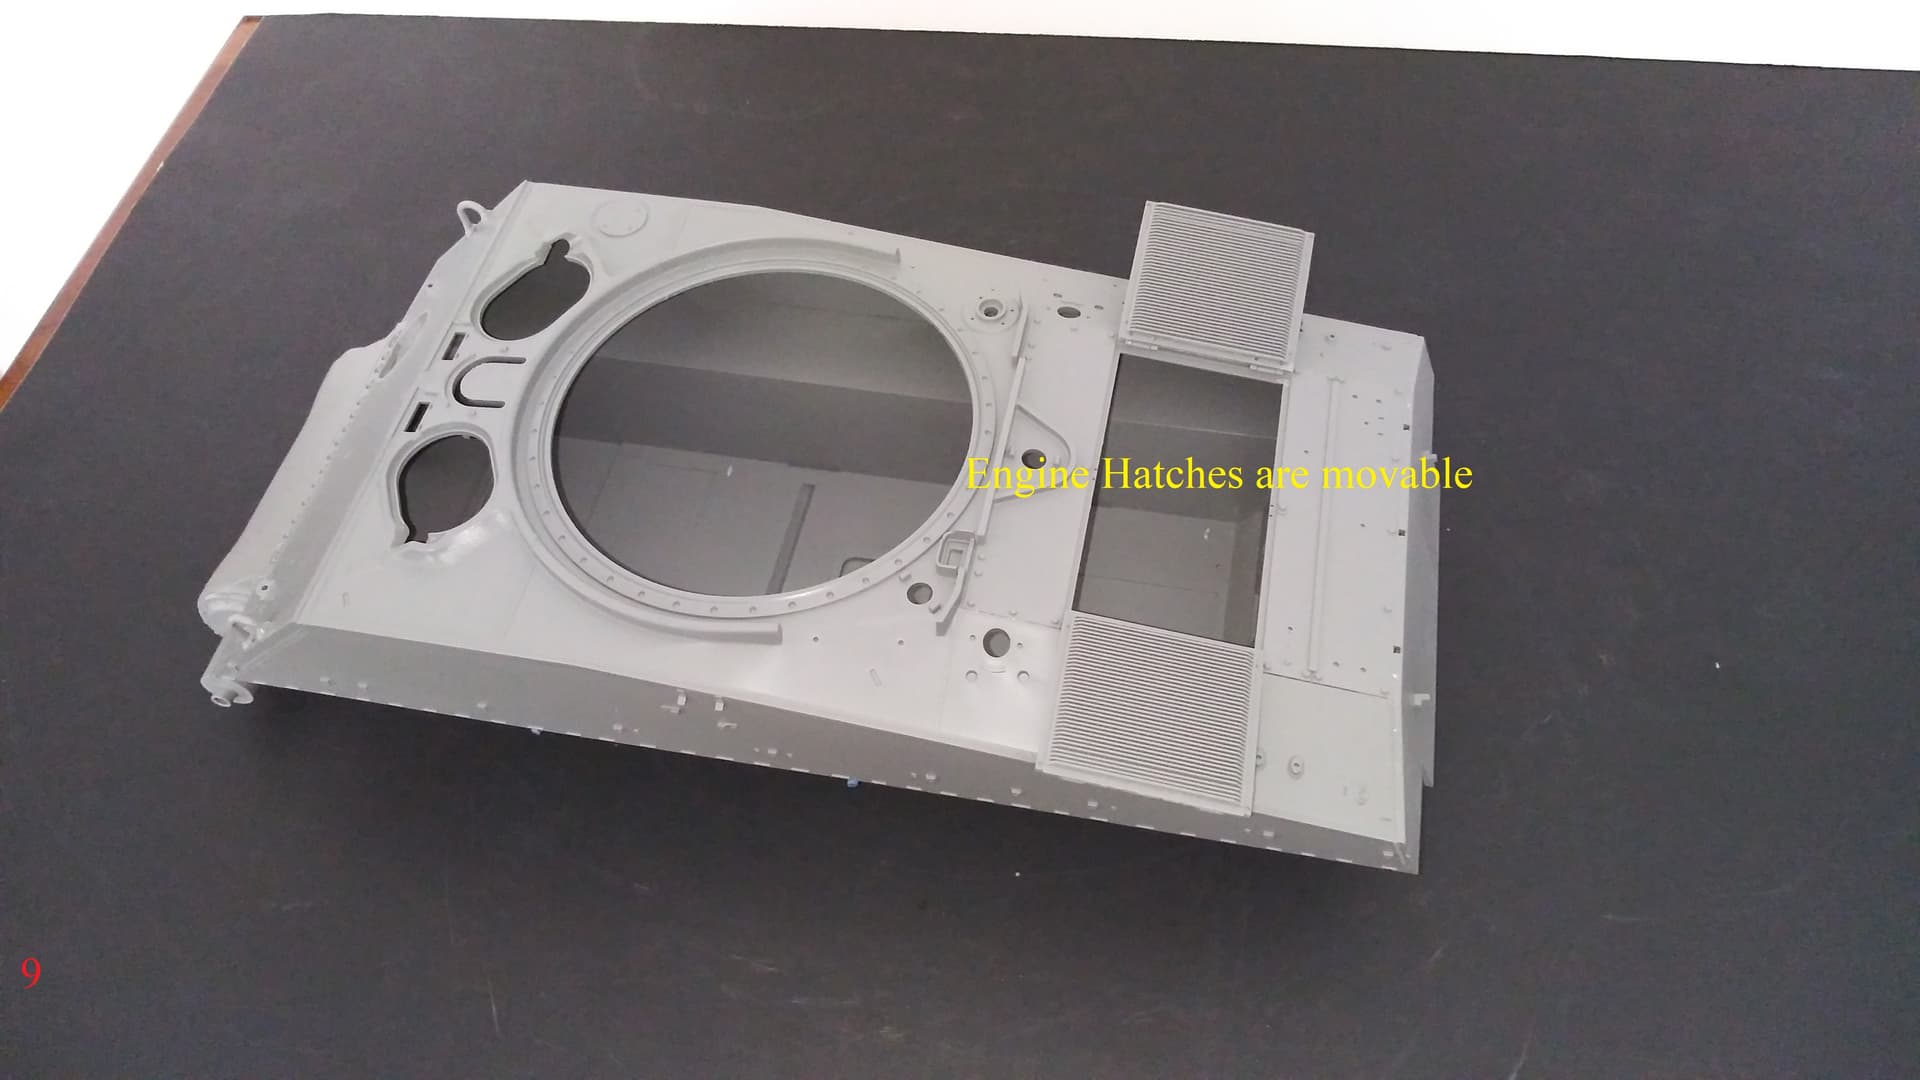
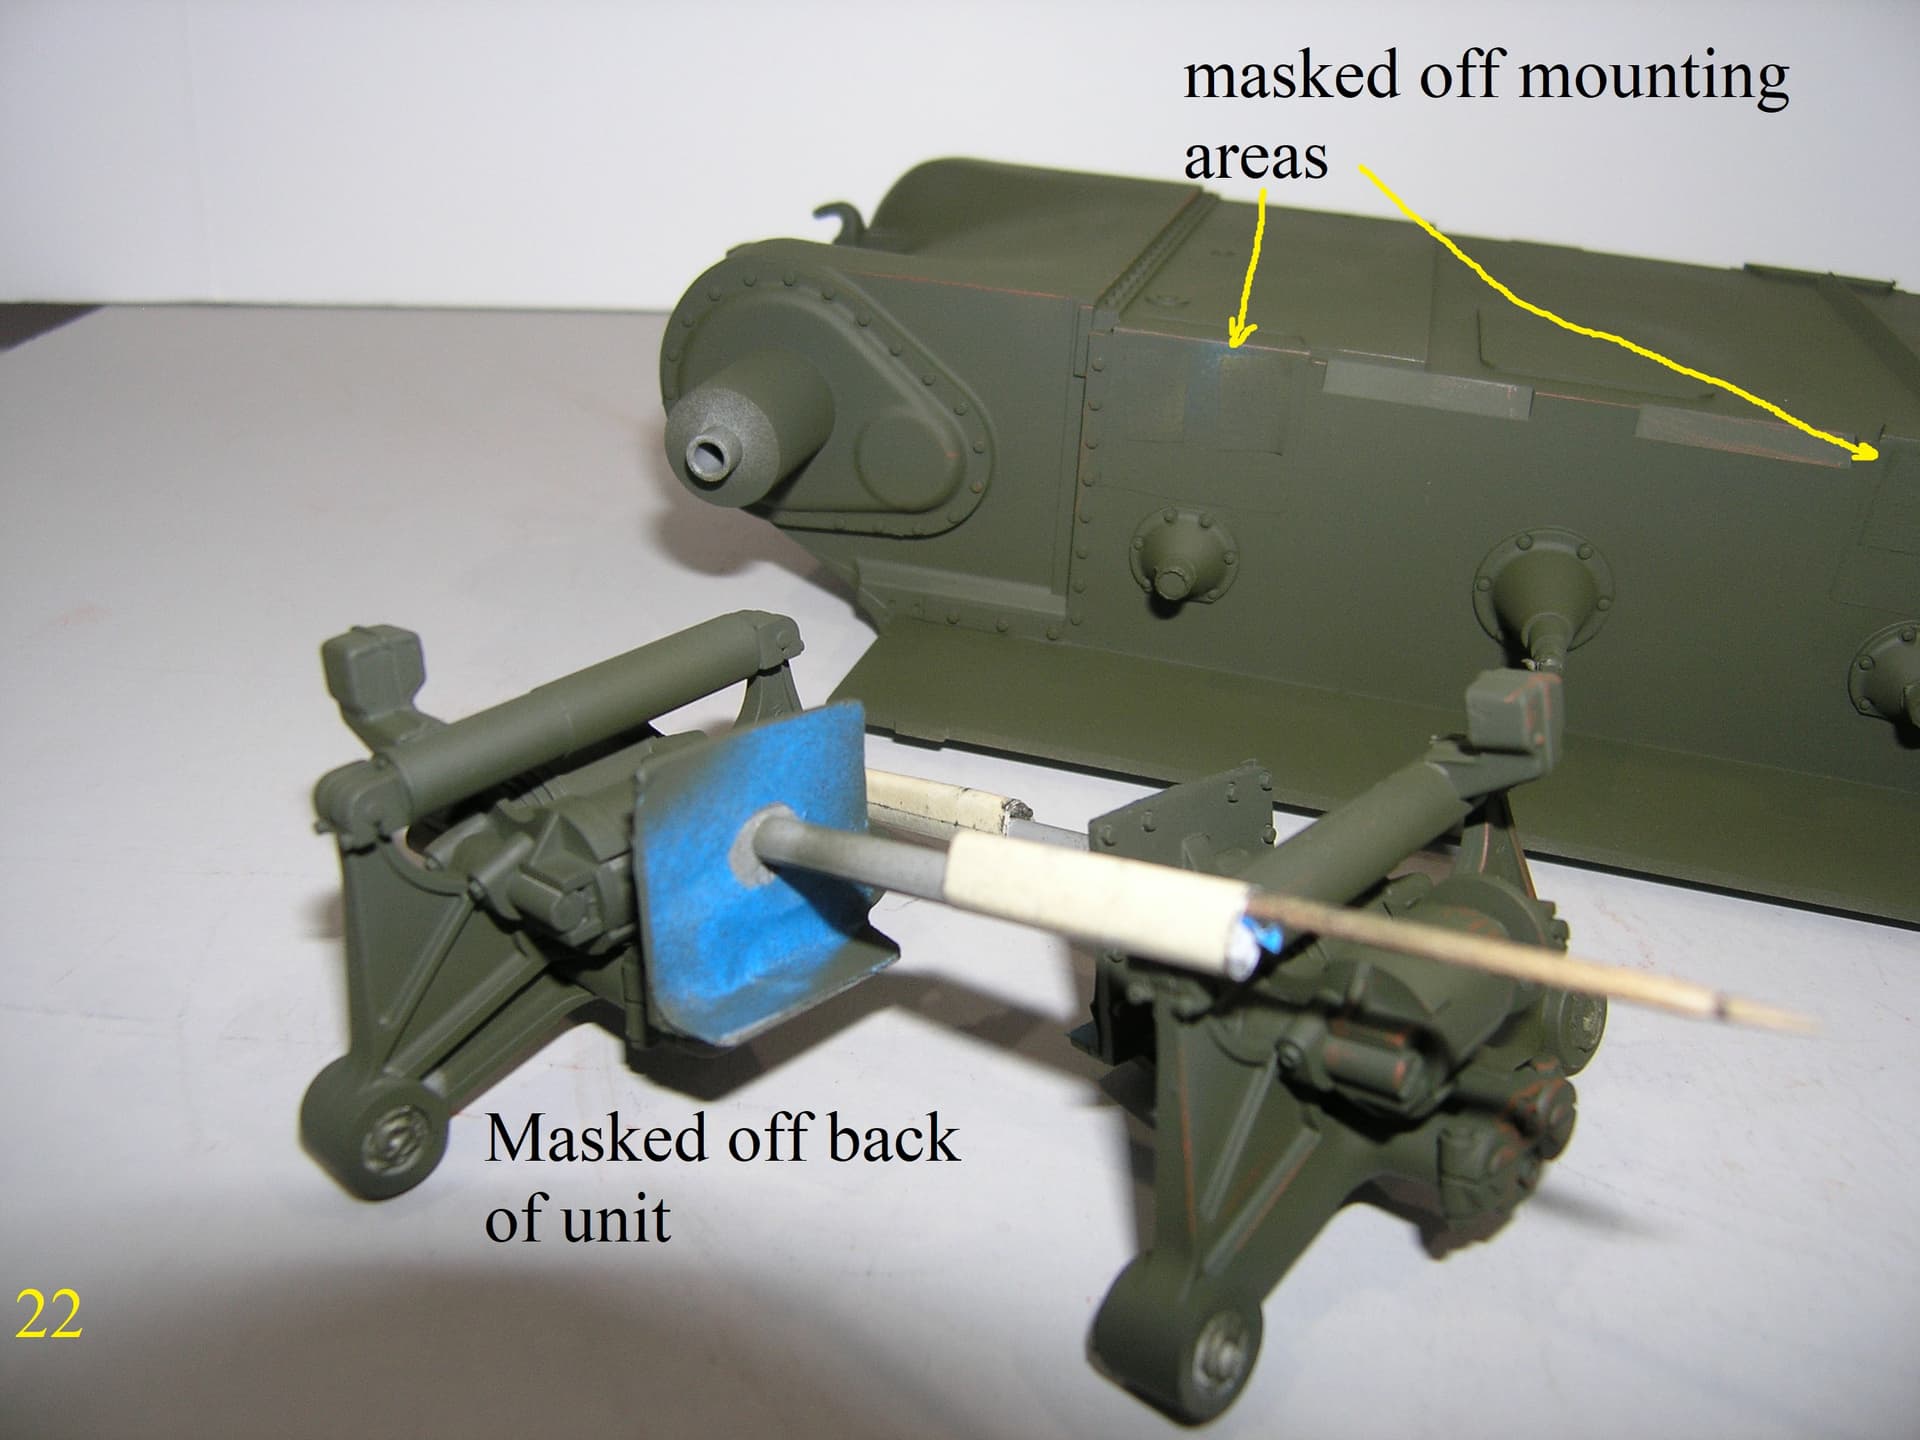
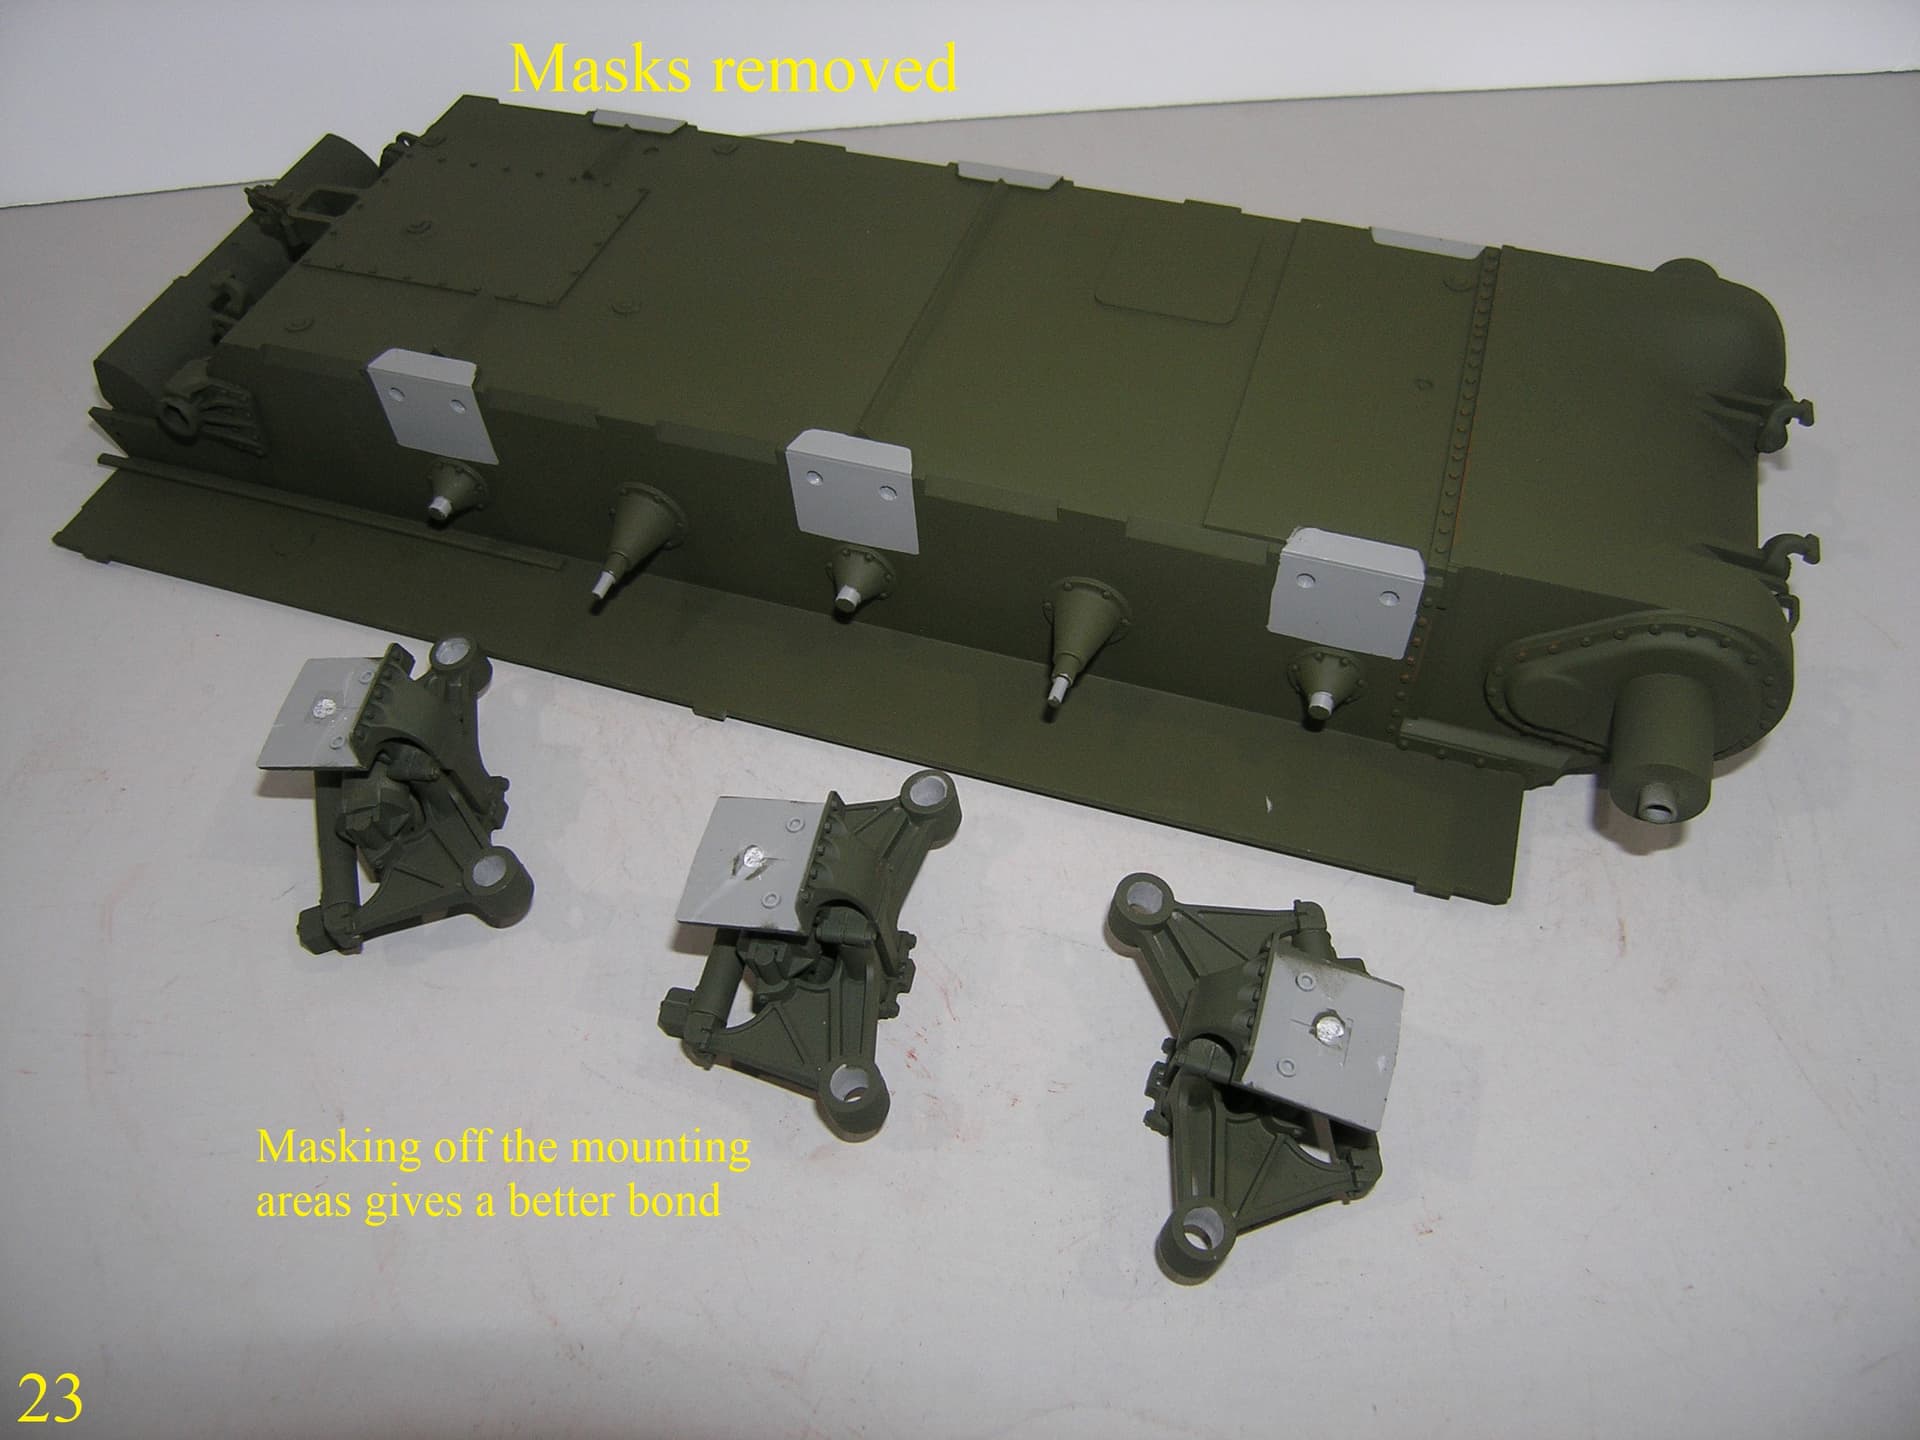
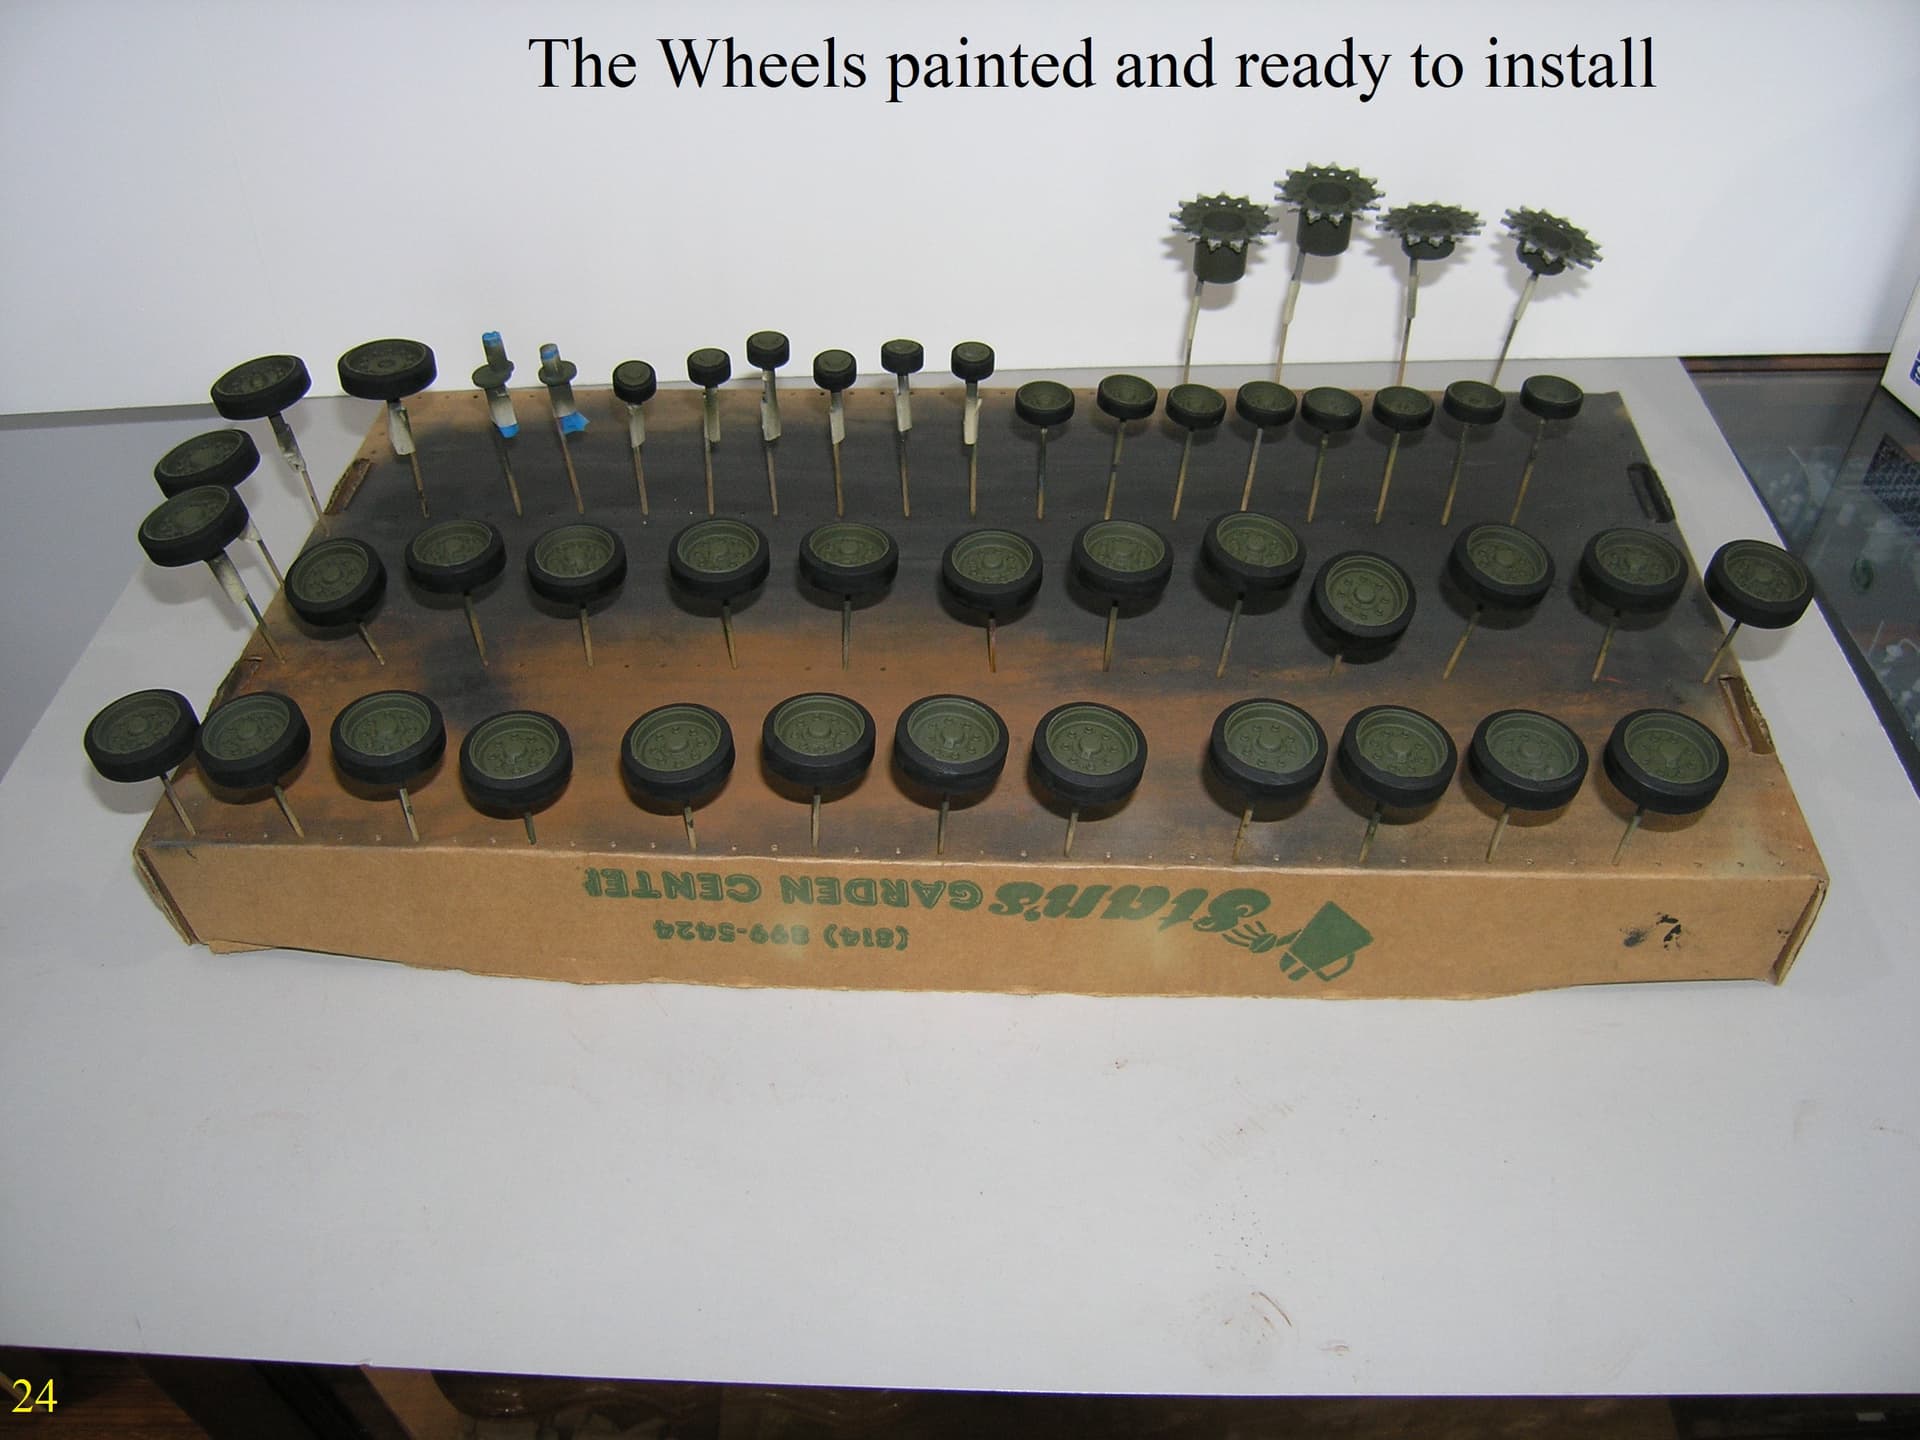
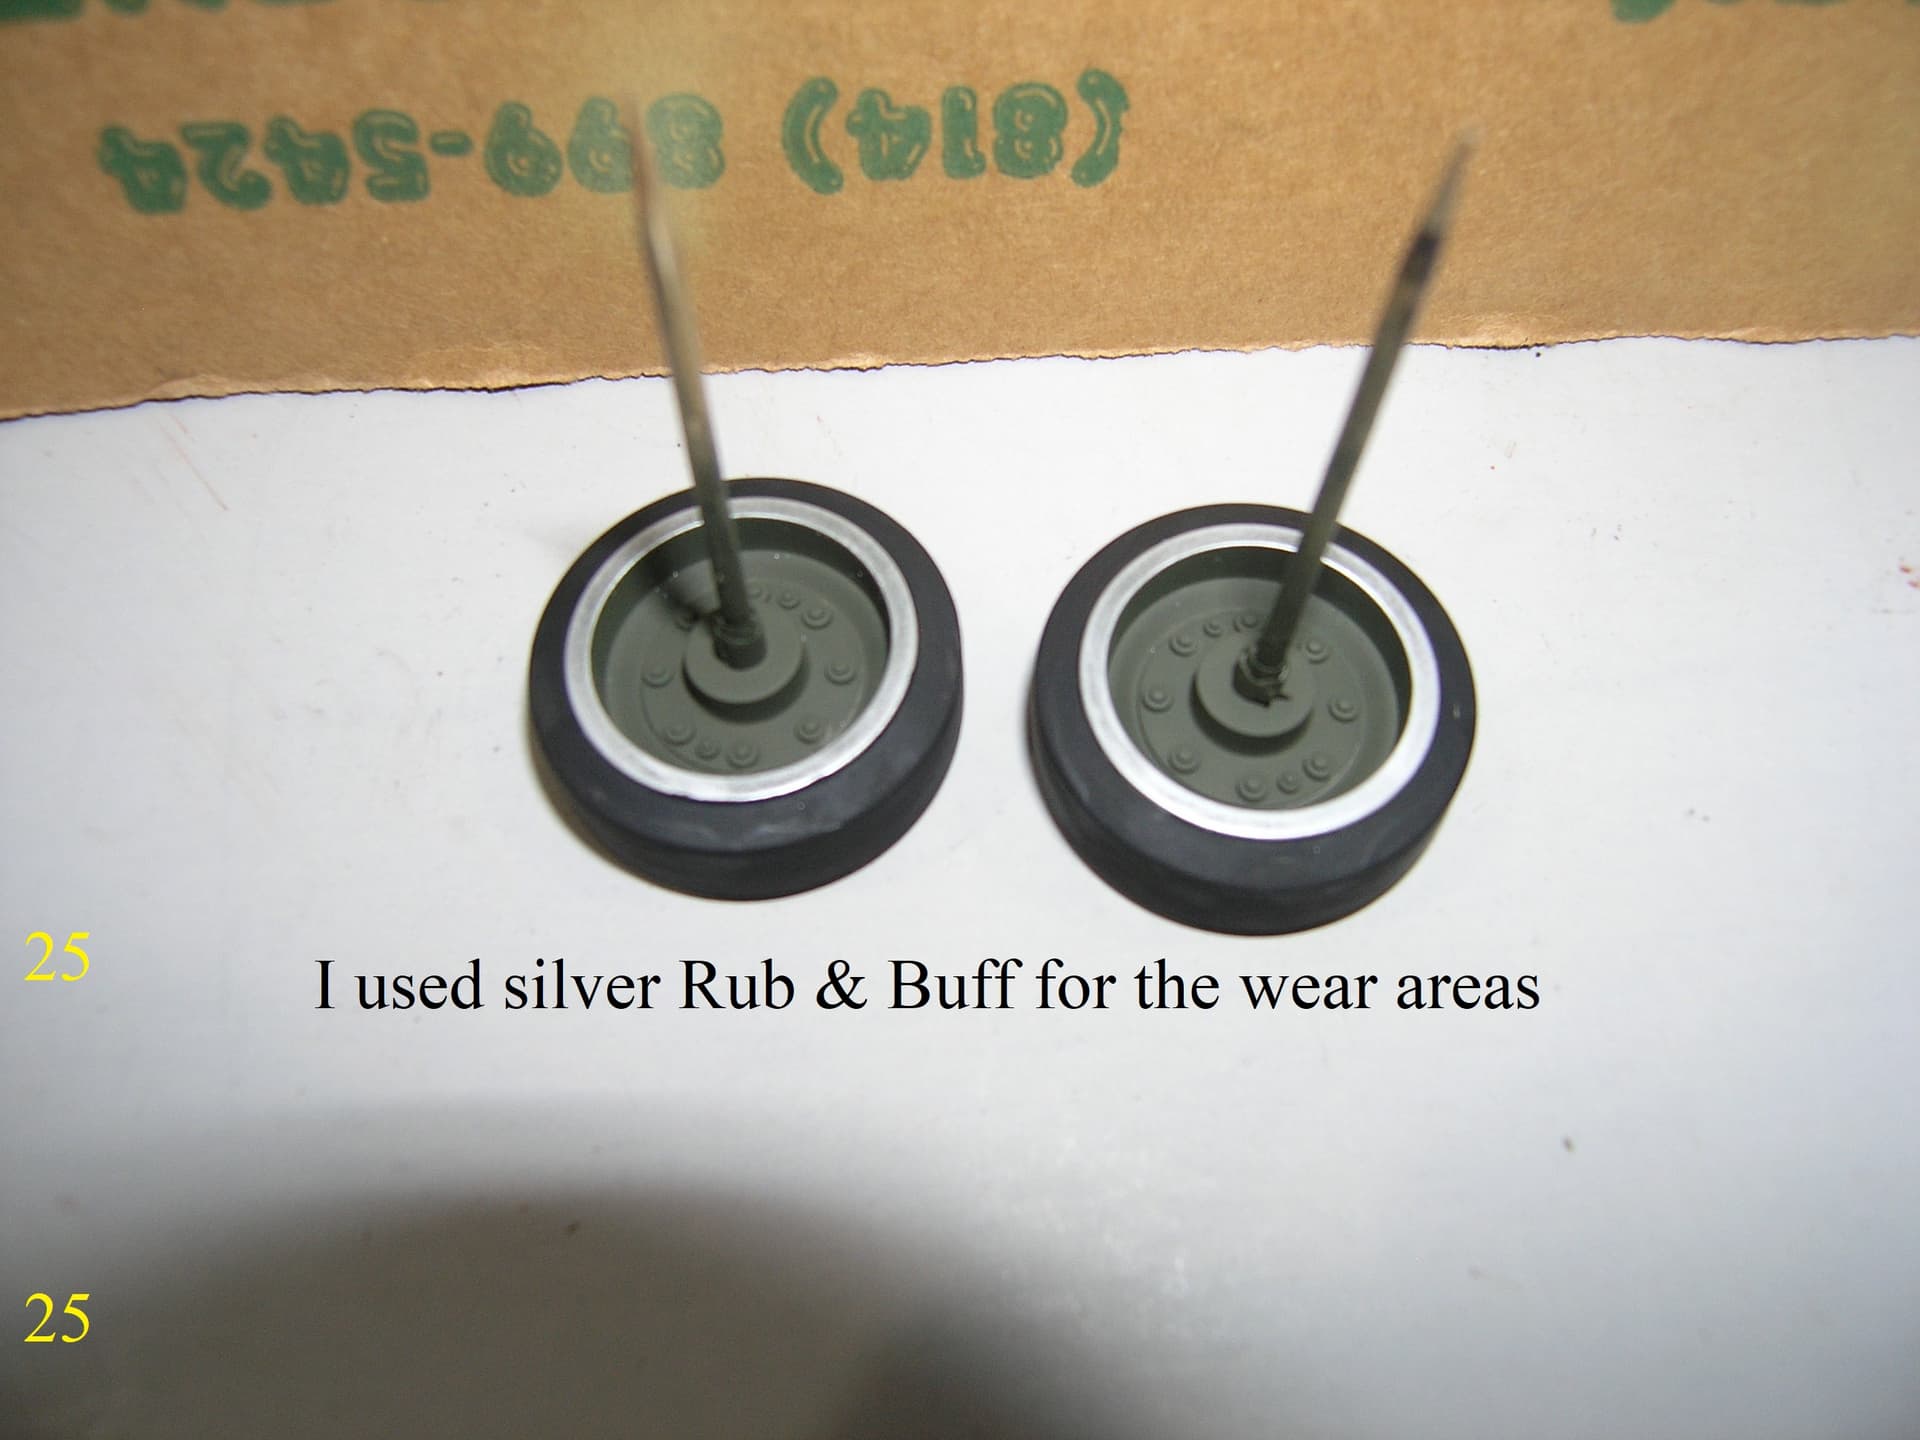
I have more finished.
The captions on the Pics. should cover it.
The Pics. should be of better quality now, I finally found adaptor for the chip in my good camers so I don’t have to use my cheap cell phone camera anymore
Regards
Donald
Excellent build so far. I almost ordered this beast, but I value sleeping in the house. I already owe the dogs back rent and their house is a bit small, HA!