Building the 1/16th. M4A3E8 Sherman Late WW2 / Korea

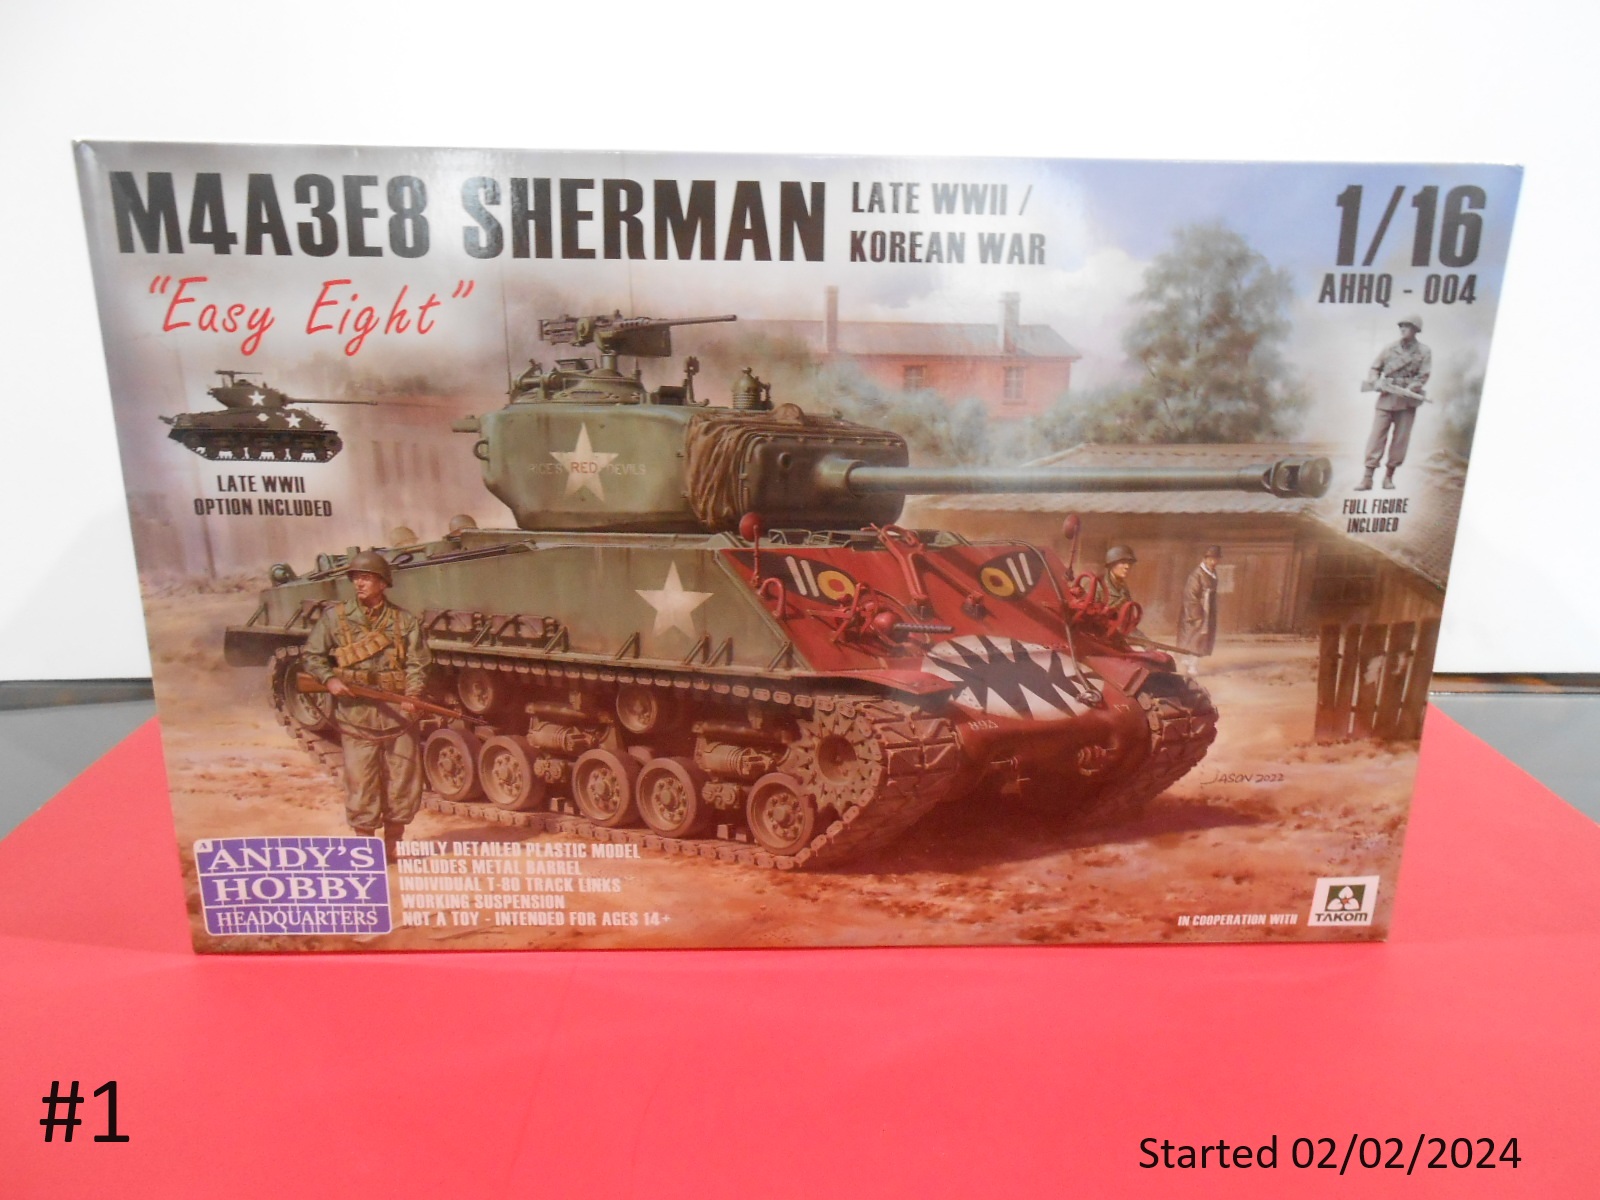
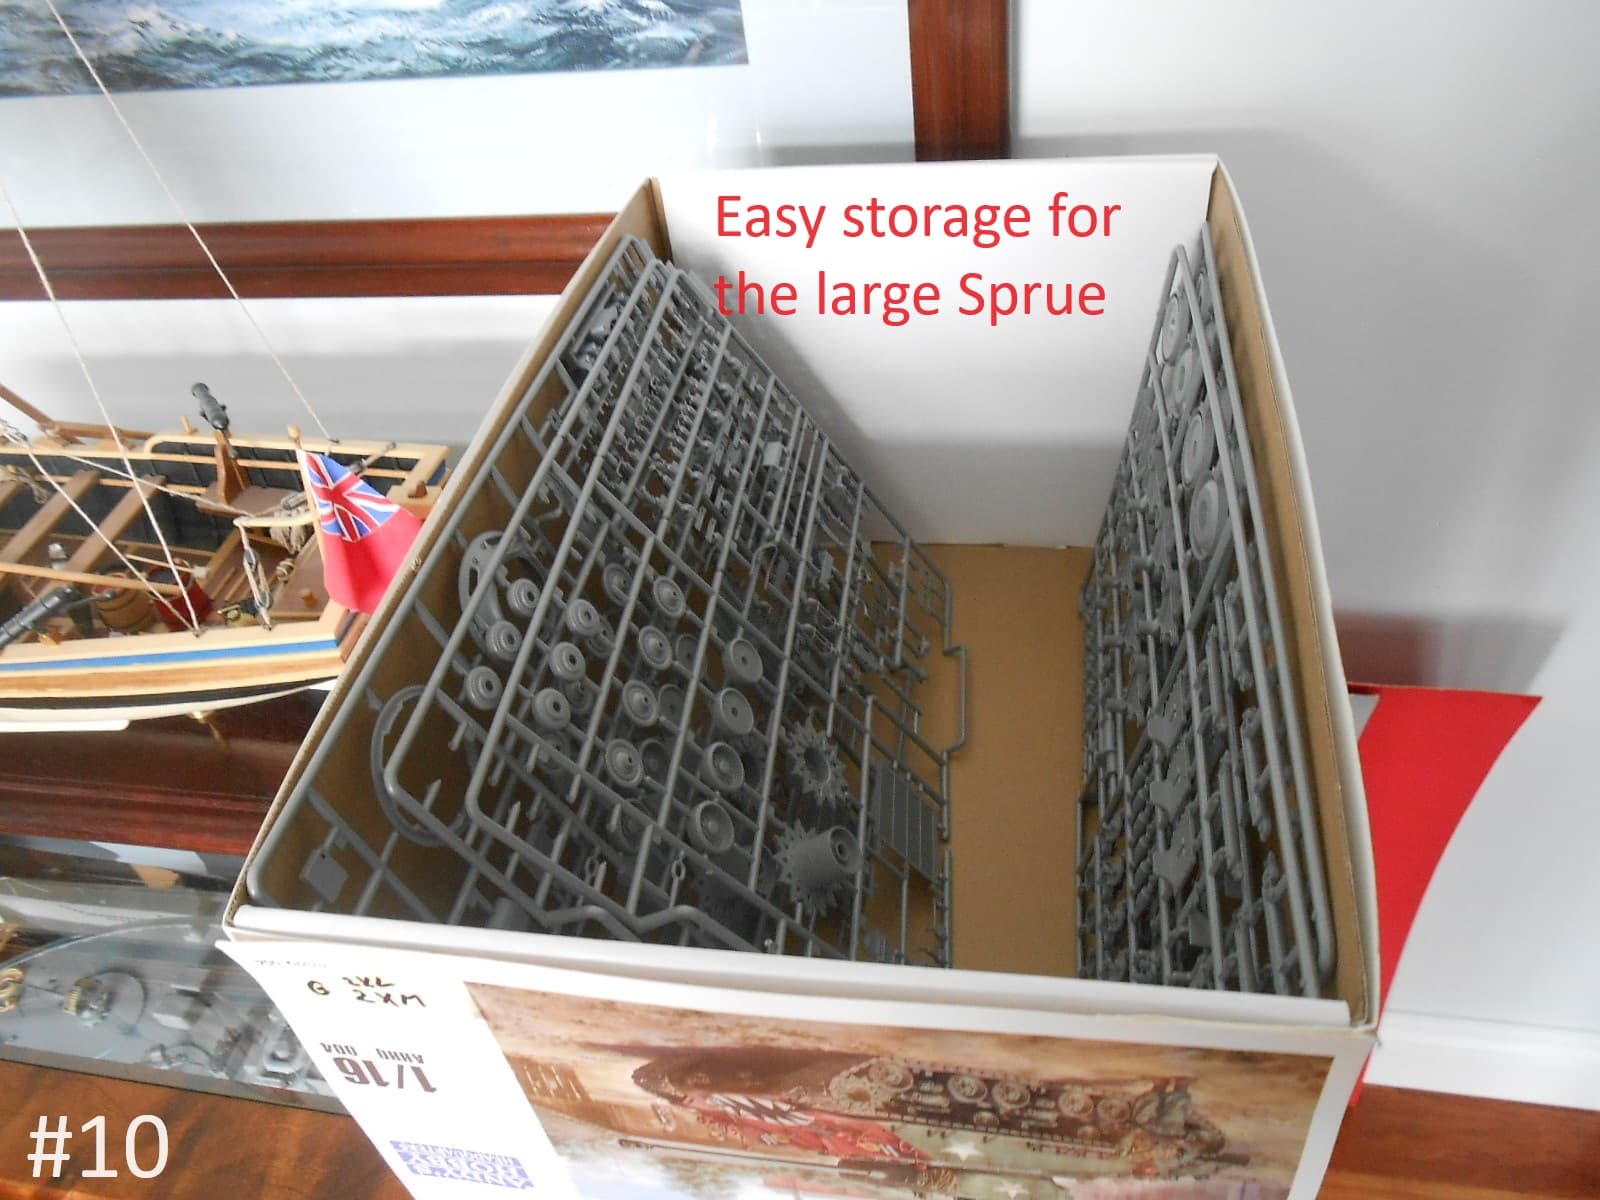
I just can’t stay away from these big ones. Well here I’ll build the late WW2 / Korean war
1/16th. Sherman from Andy.
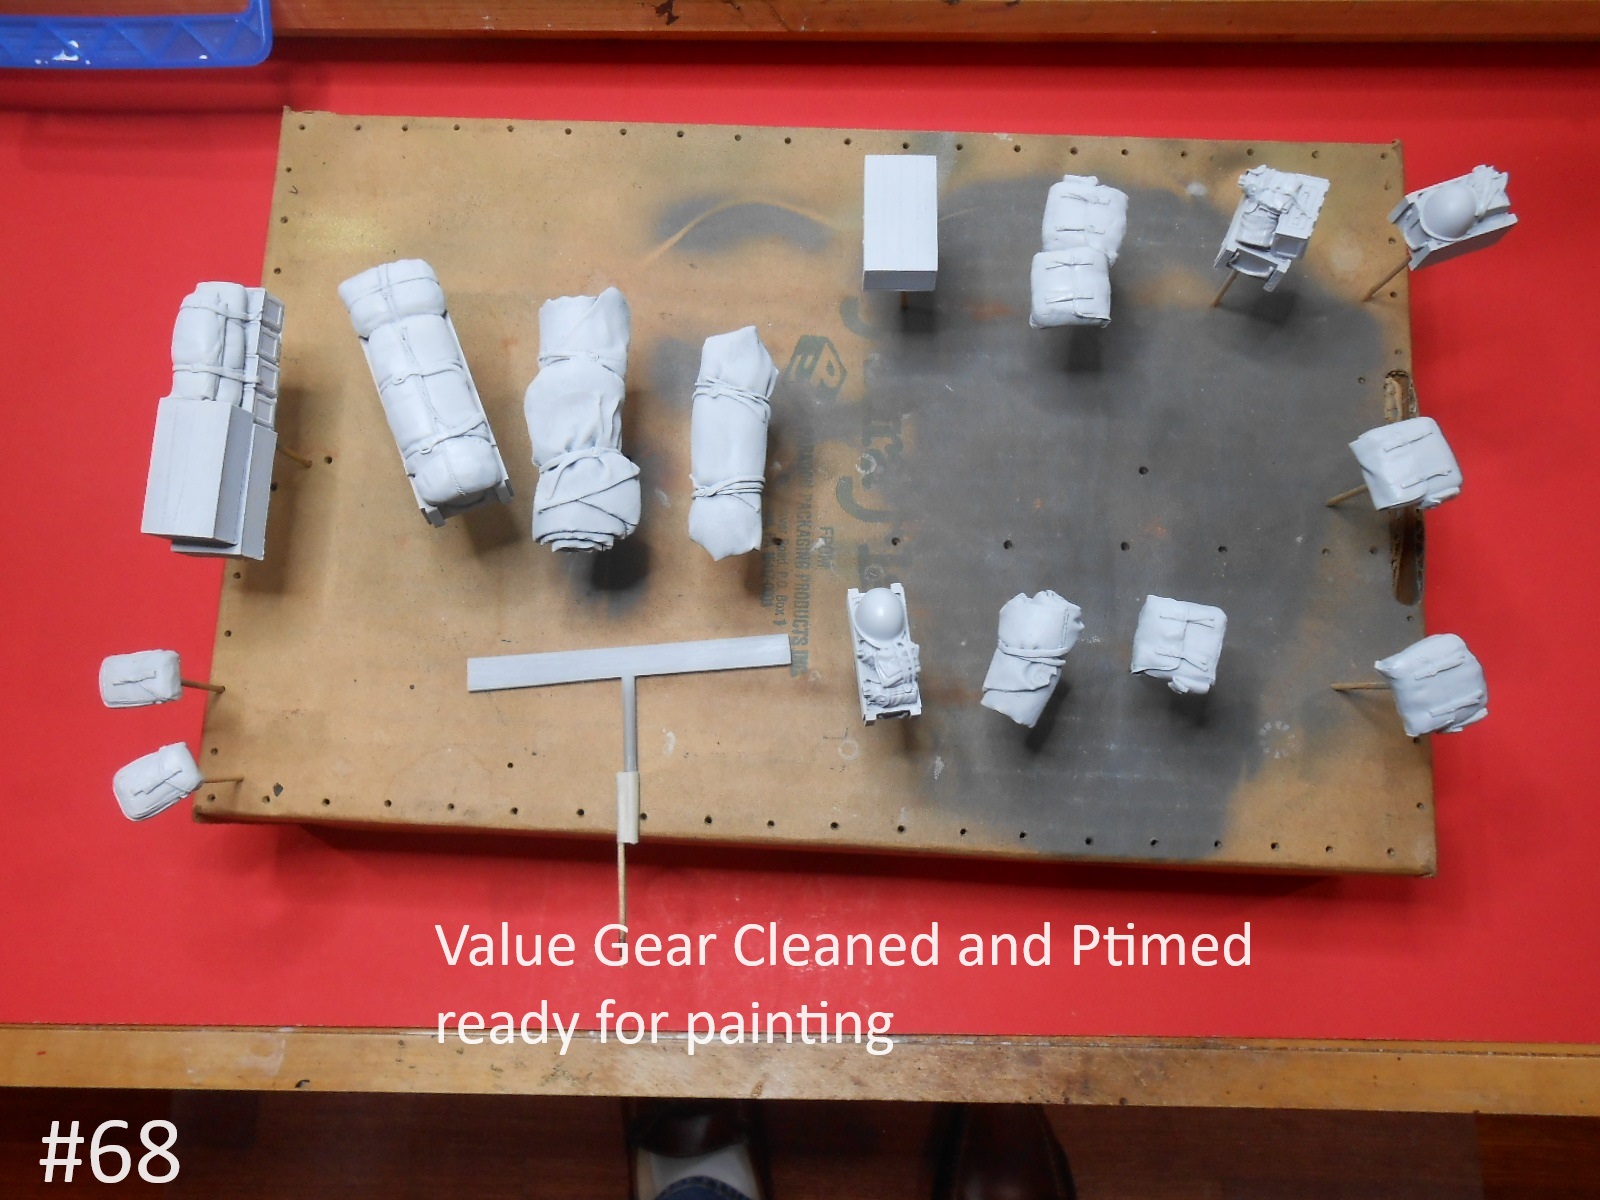
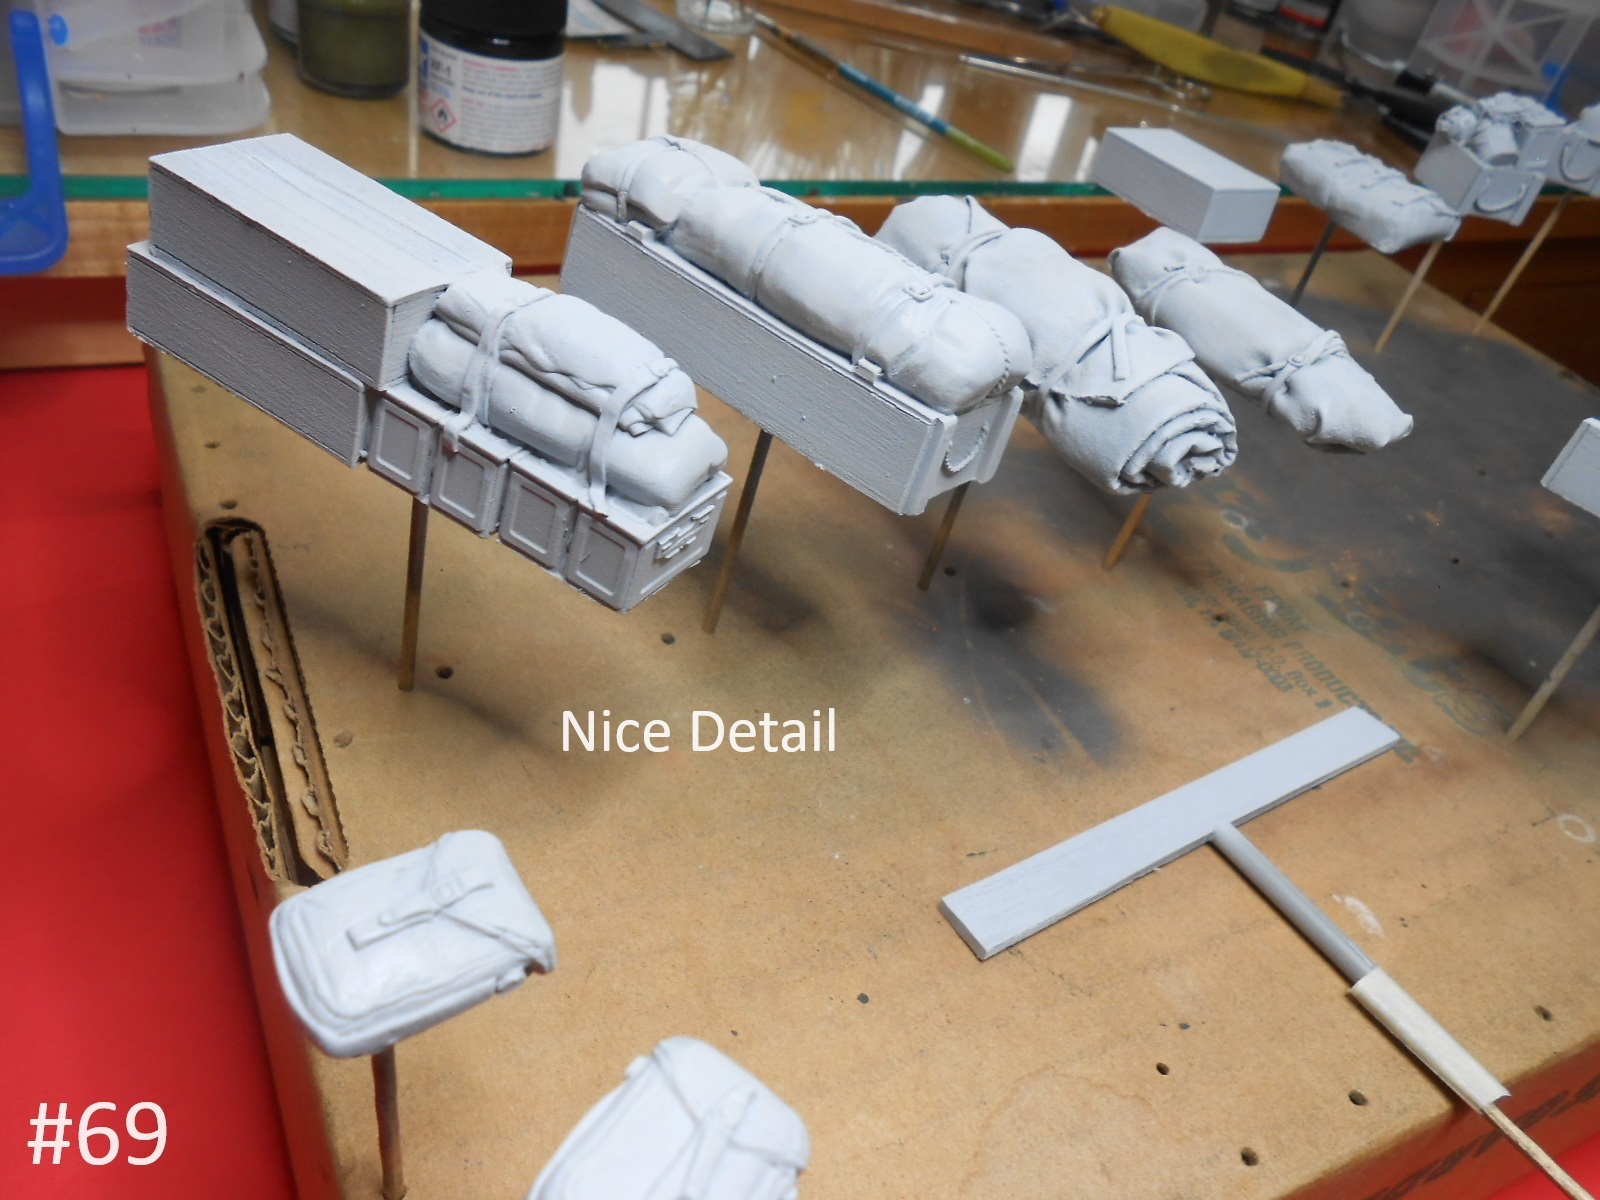
A lot of the parts are the same , but there’s a lot different and this time I’ll be adding some of the Value Gear to it. I’m still not quite Shure if I should go Late WW2 or switch to Korea.
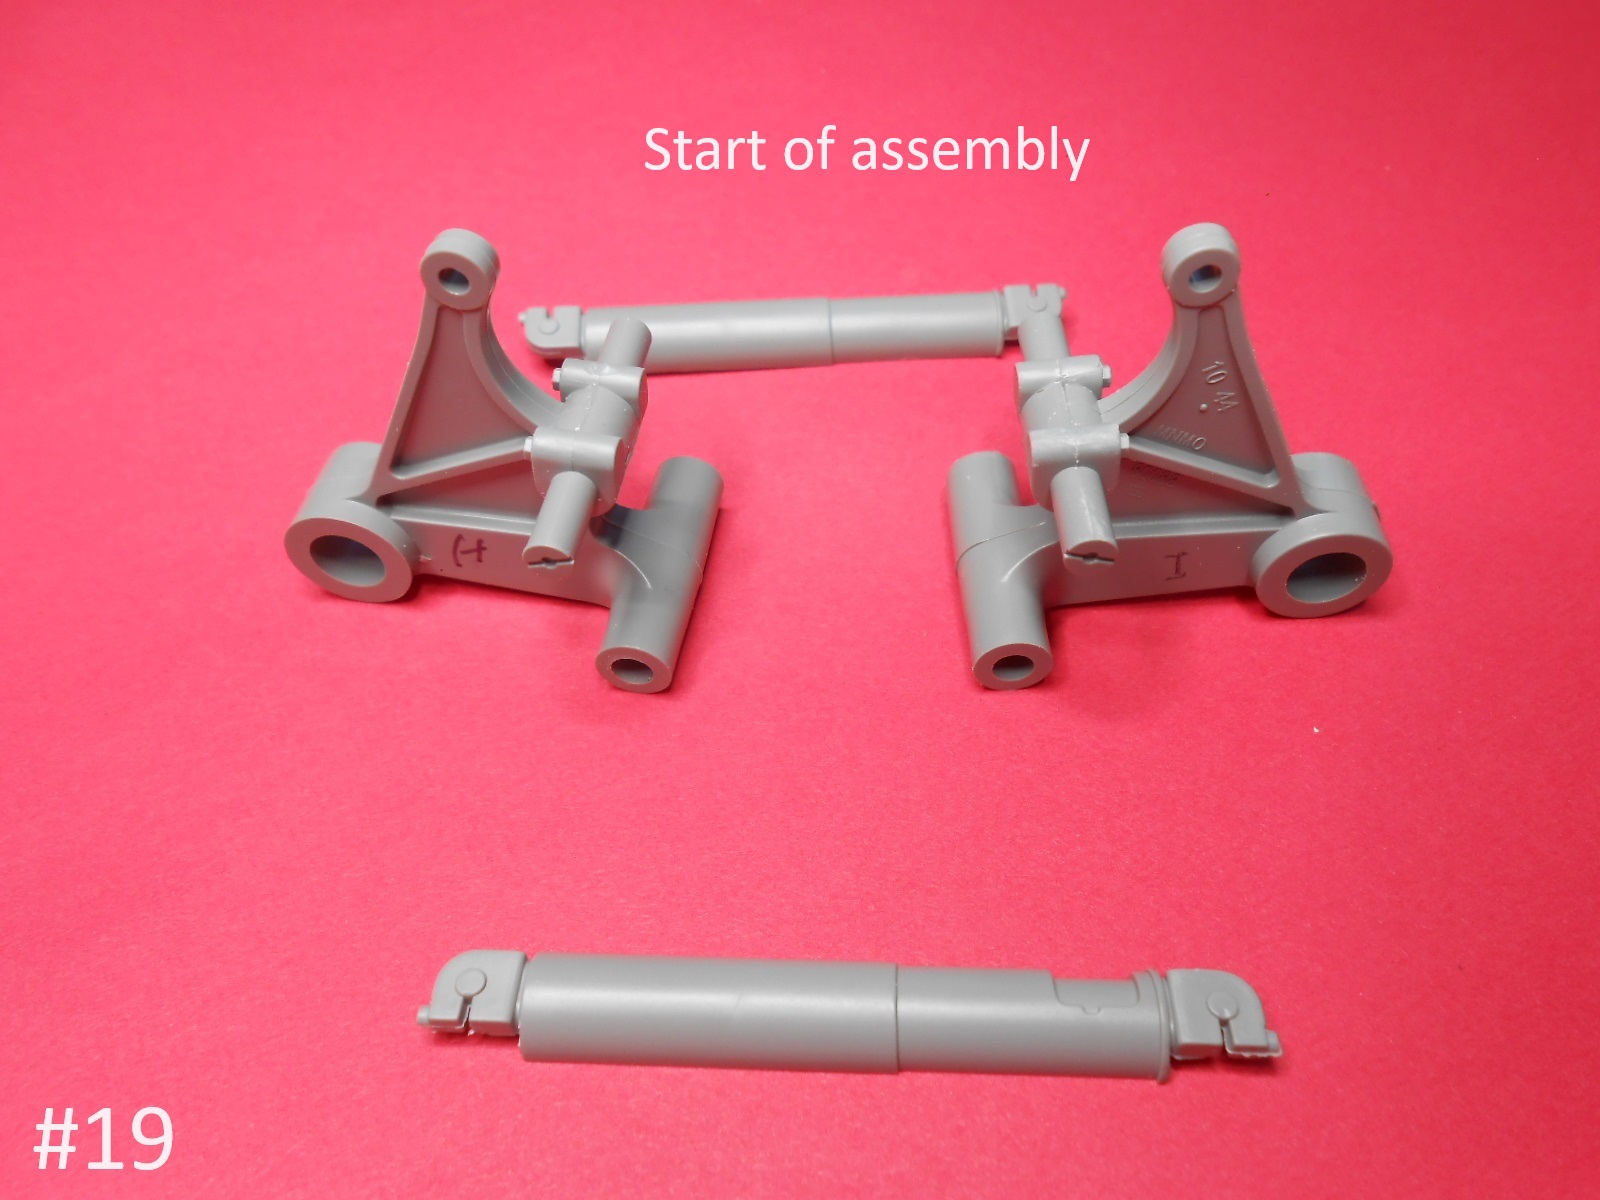
Oh well here’s the start.


Well that’s a start , more coming when I get them. I’ll be taking it more easy on this one because I tire easily.
Regards
Donald

9 Likes

I’m watching for fun, but dang, that thing’s big. I would have to completely reorganize my whole work area to have room to manipulate that kit.

1 Like

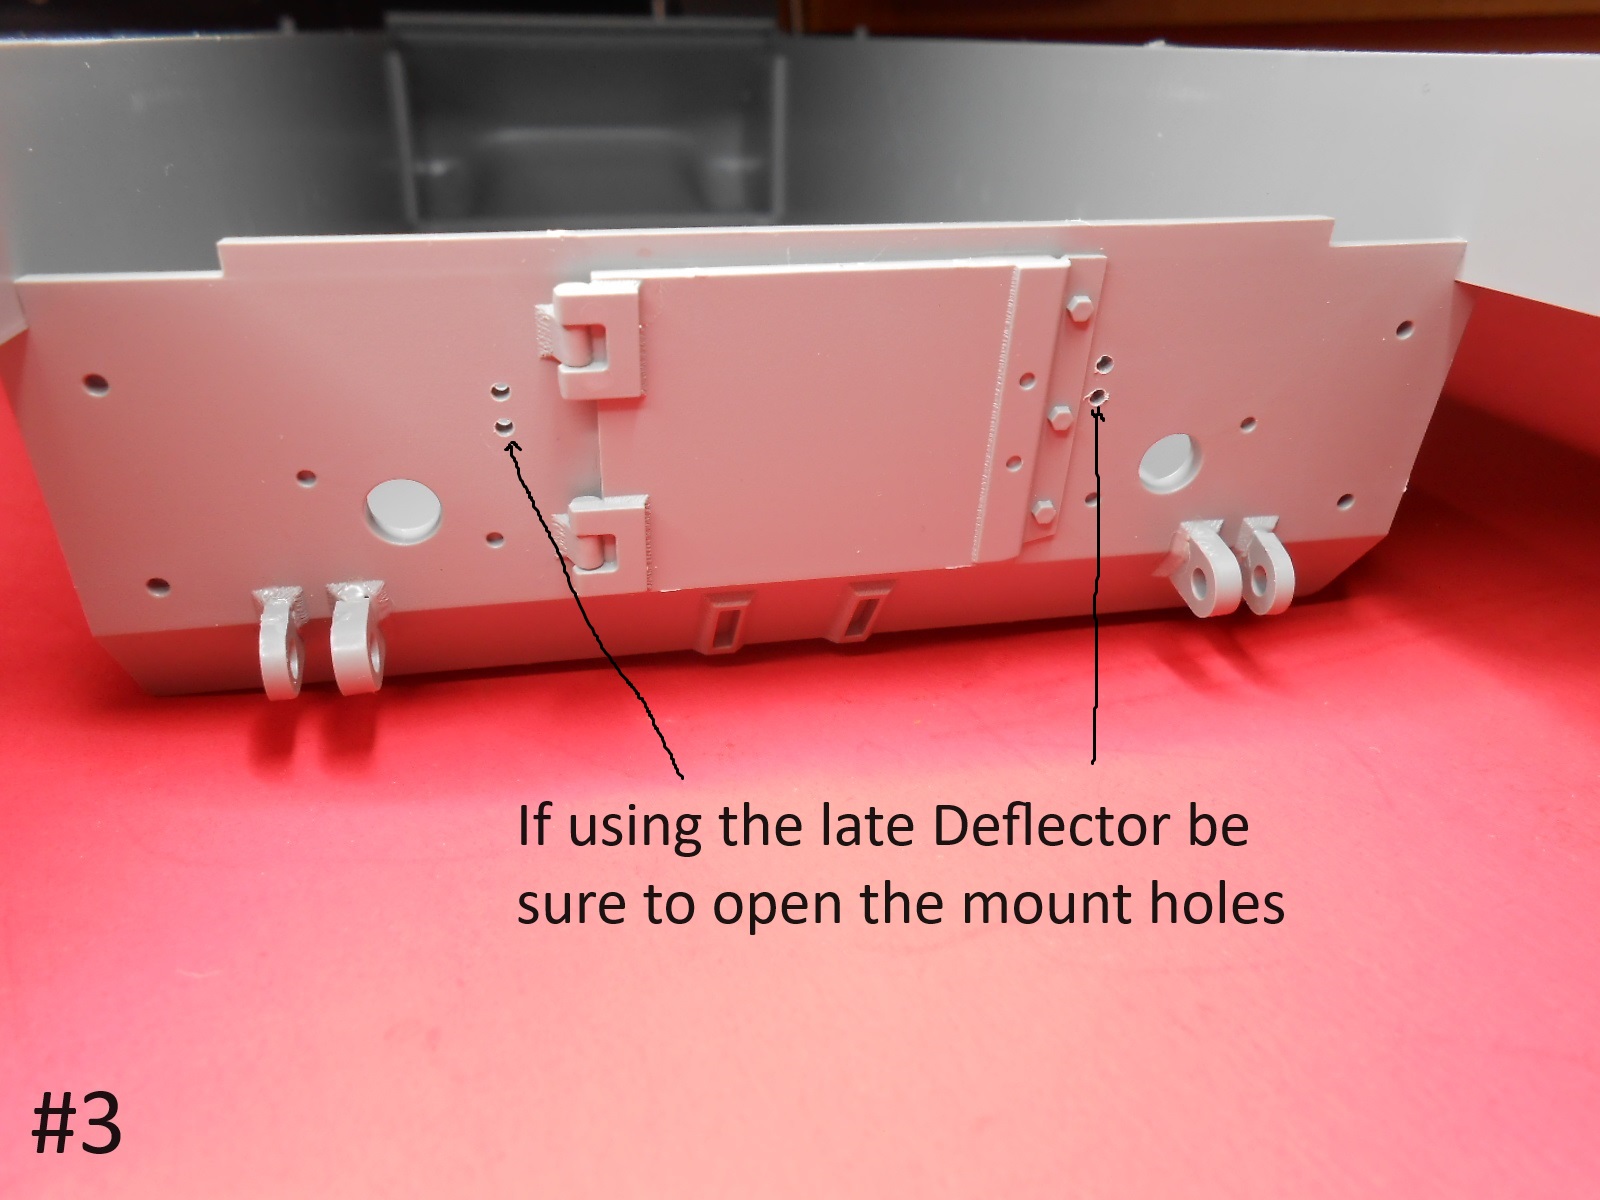
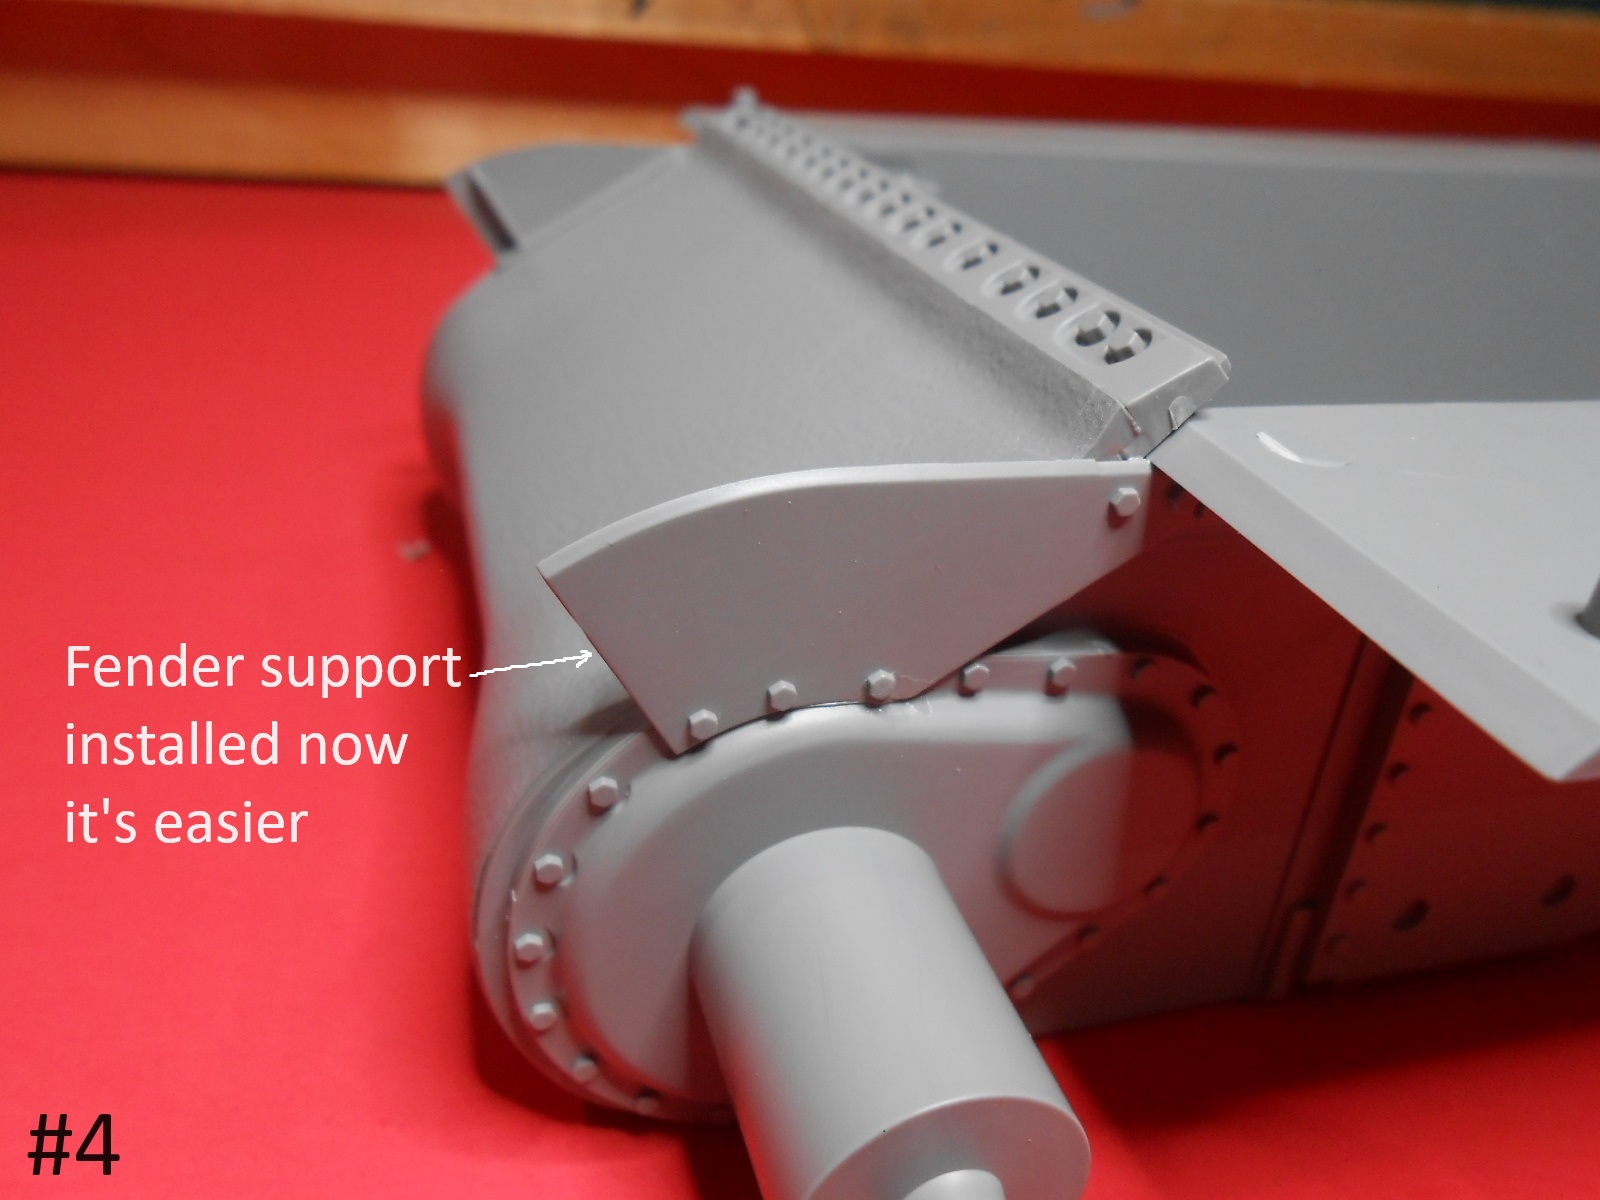
Now I continue on. I am trying to put as much of the relevant info on each picture so those of you if any , save them you will have what you need to know.
Now continuing .


The next Pic. has nothing to do with the assembly , just how I store the Sprue while Building.


I’m going to work on the Trucks next.
Regards
Donald

4 Likes

Some parts of the Trucks assembled.


Working on the Wheels next.
Regards
Donald

6 Likes

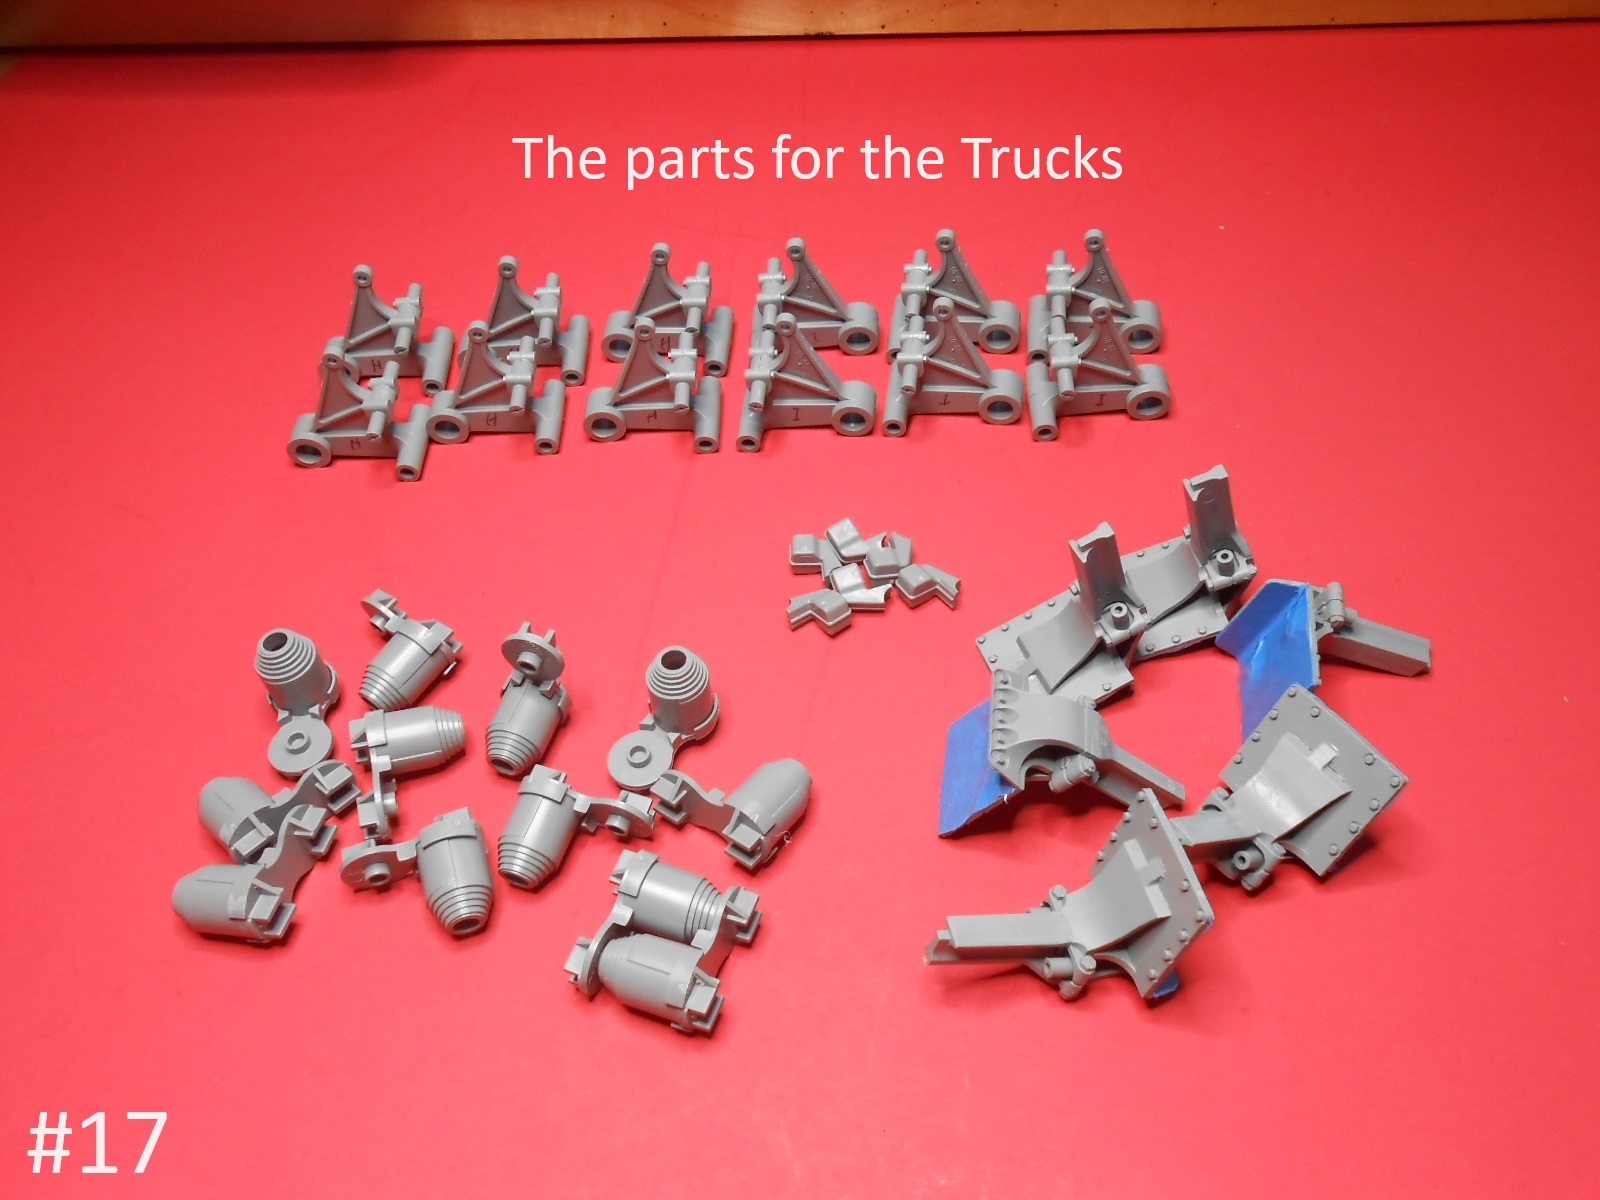
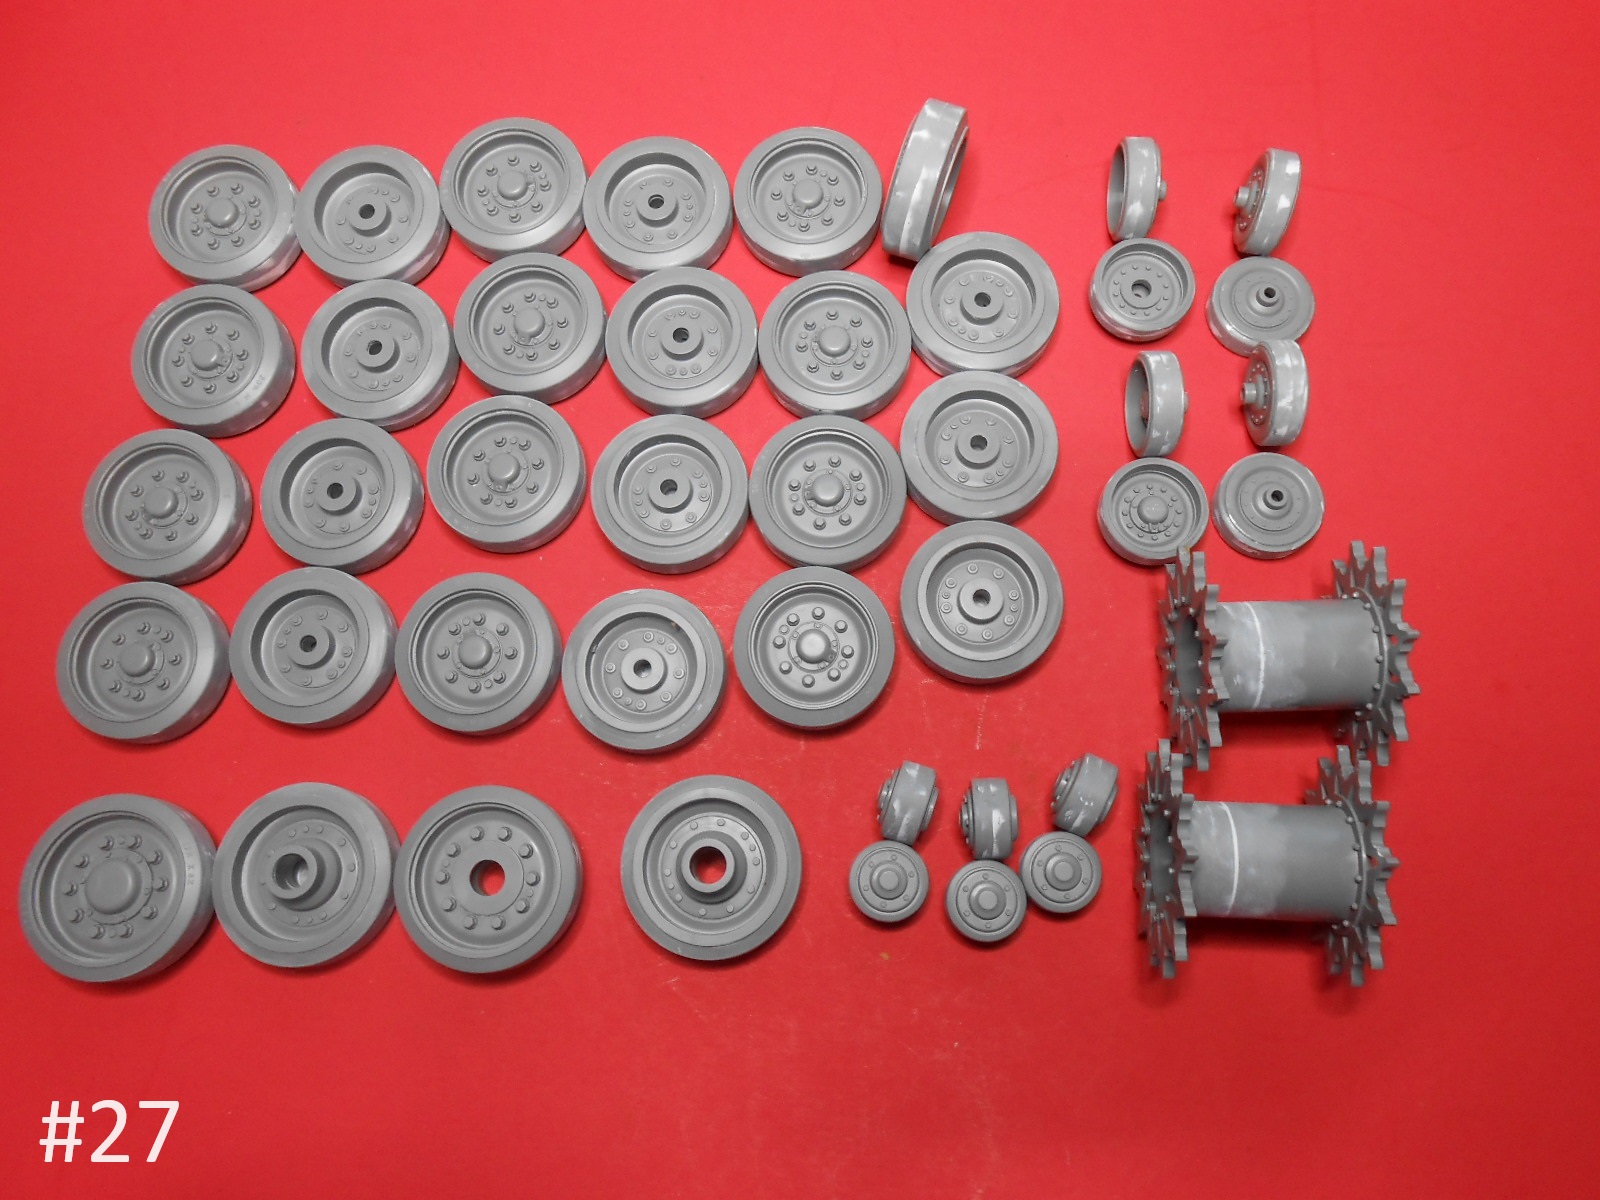
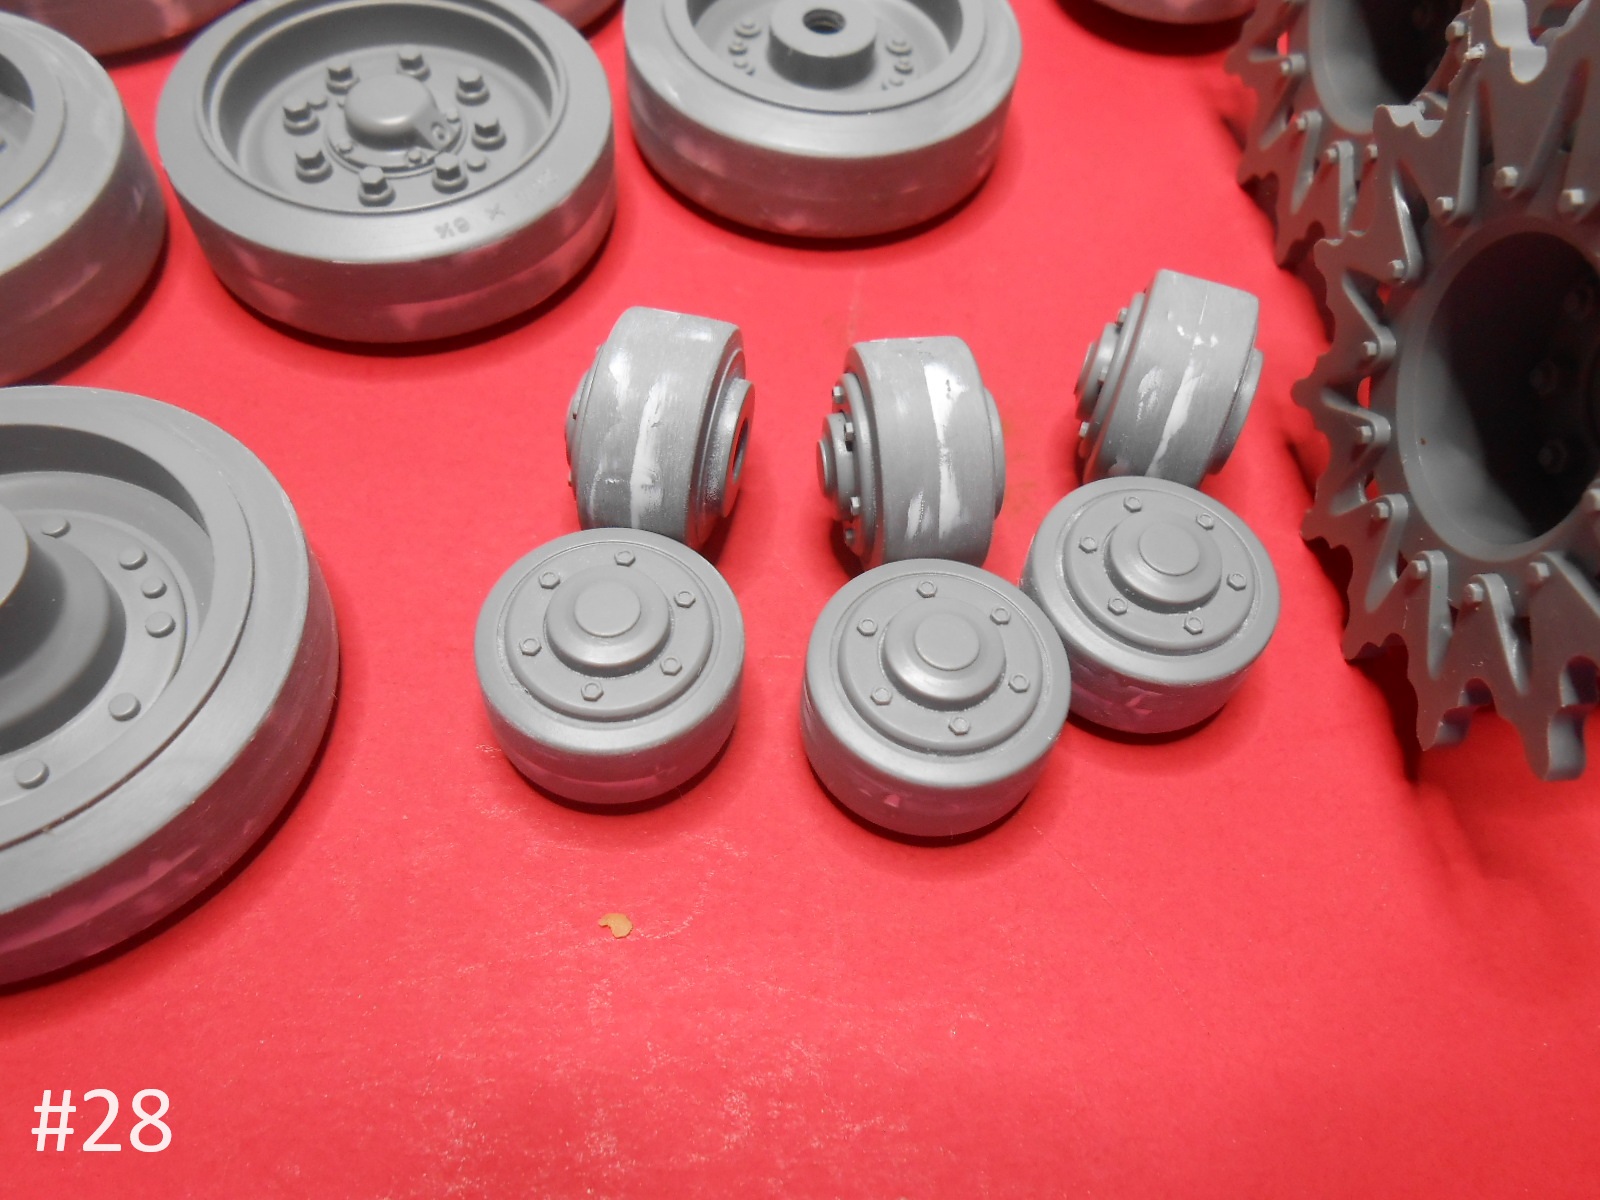
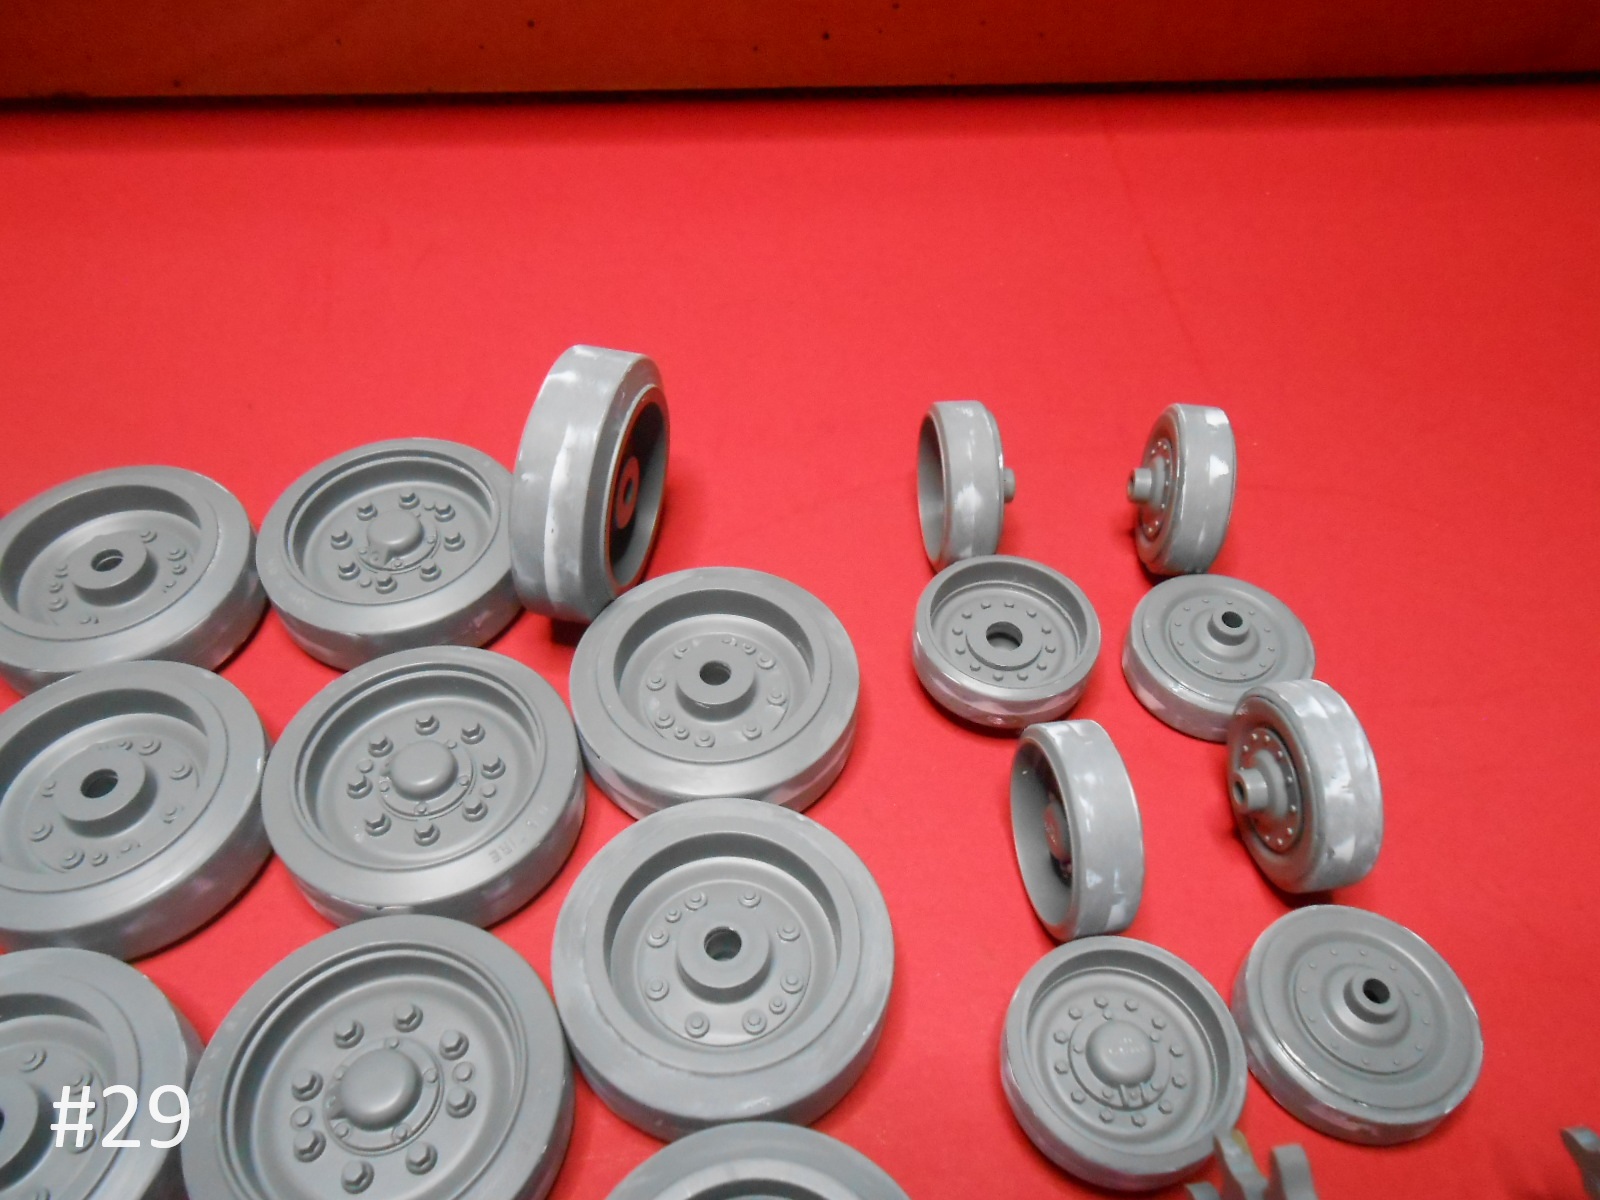
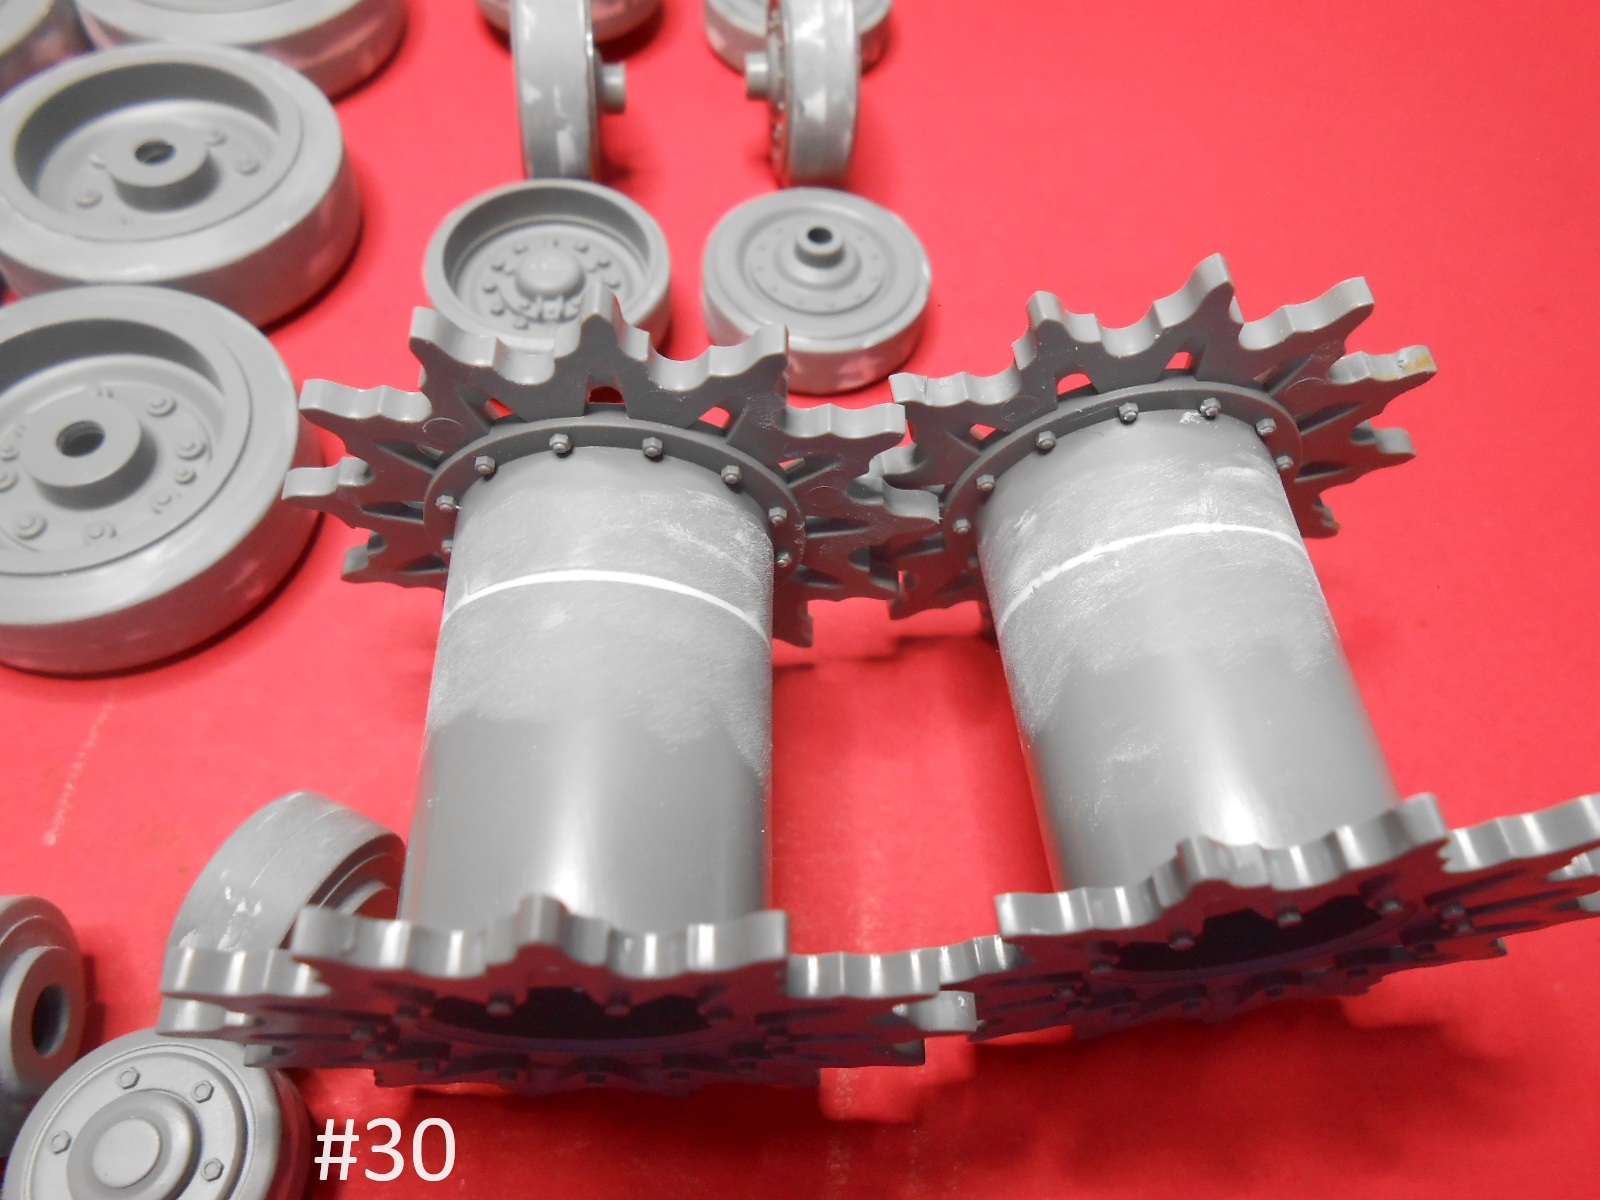
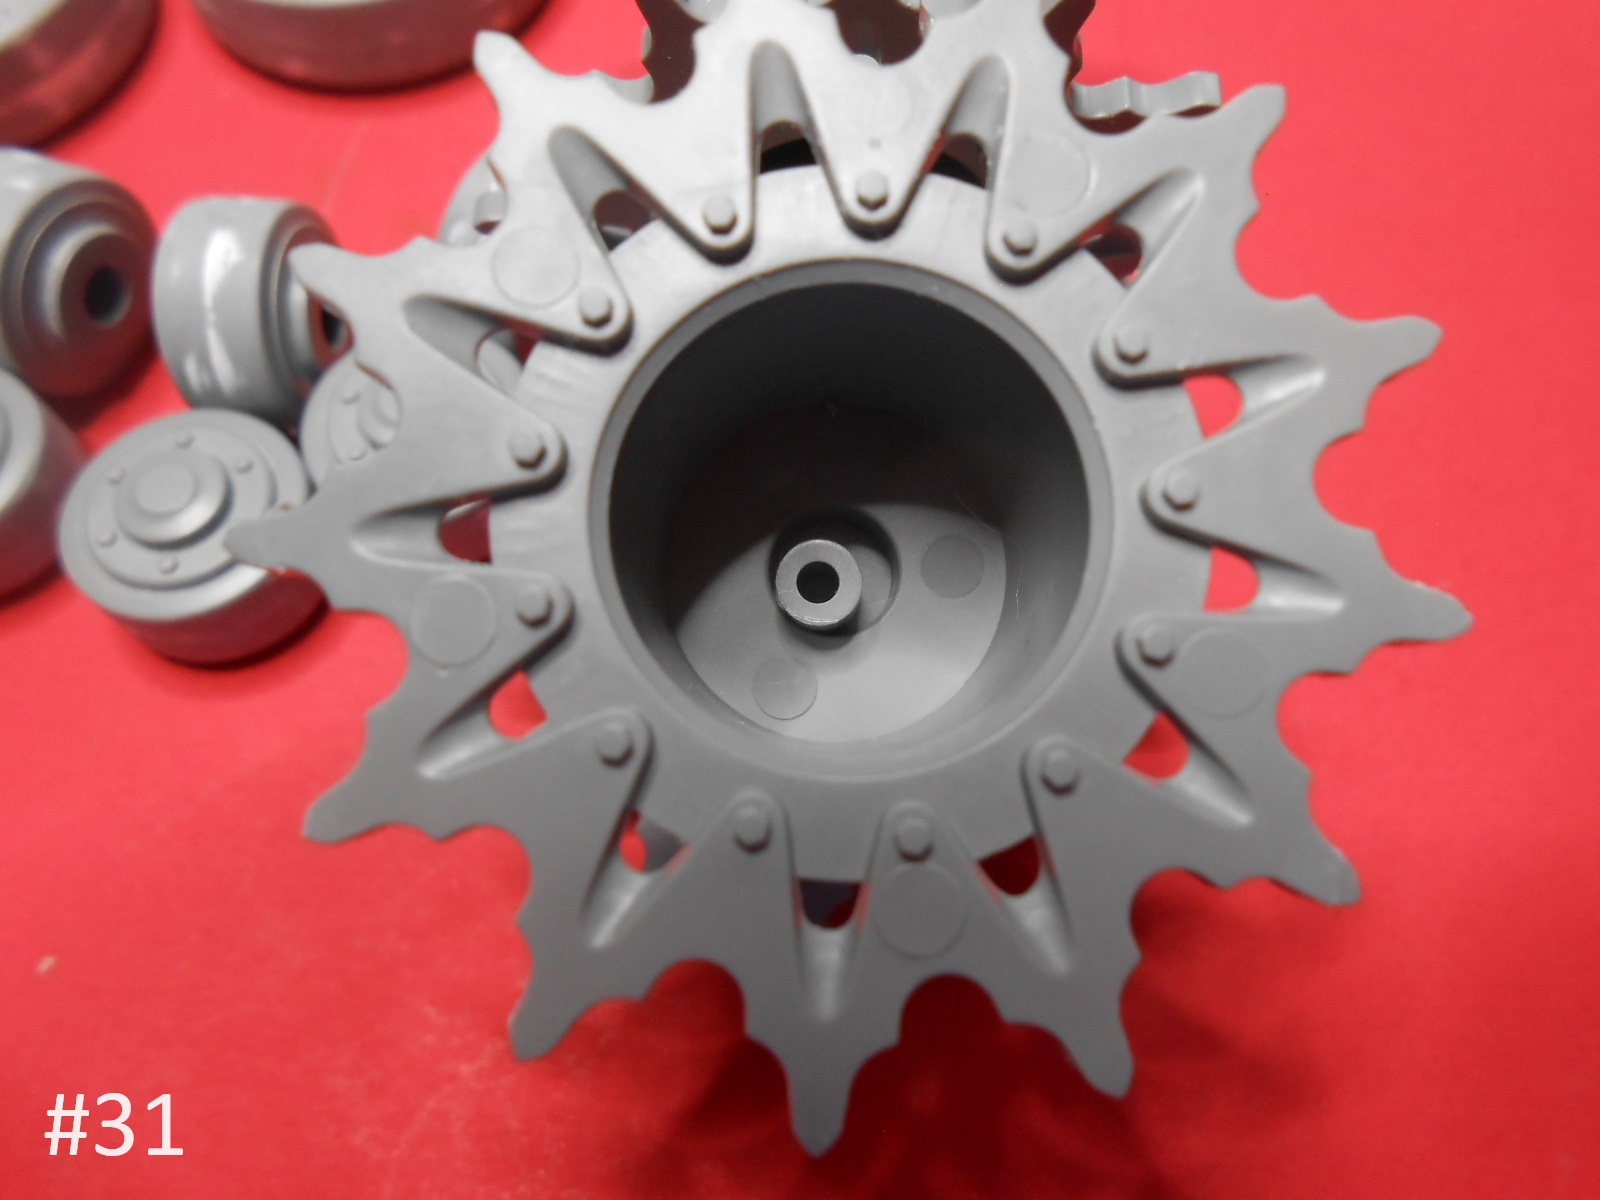
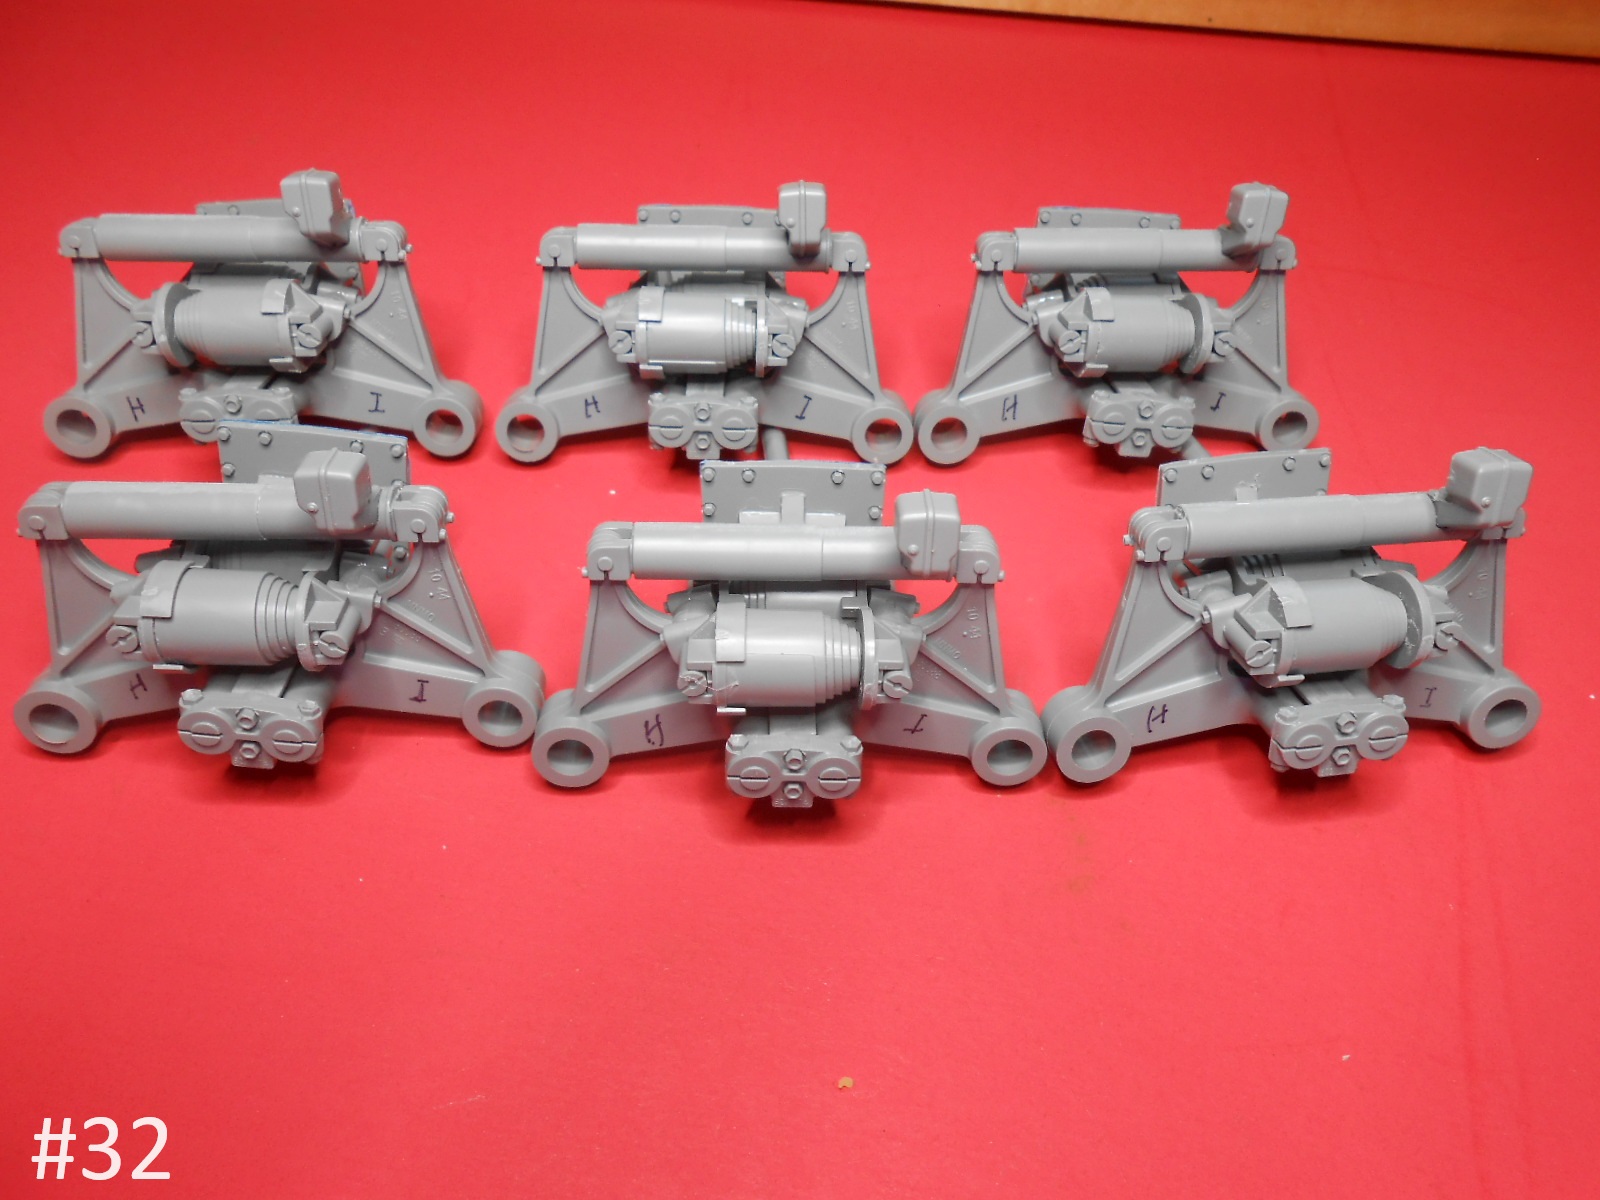
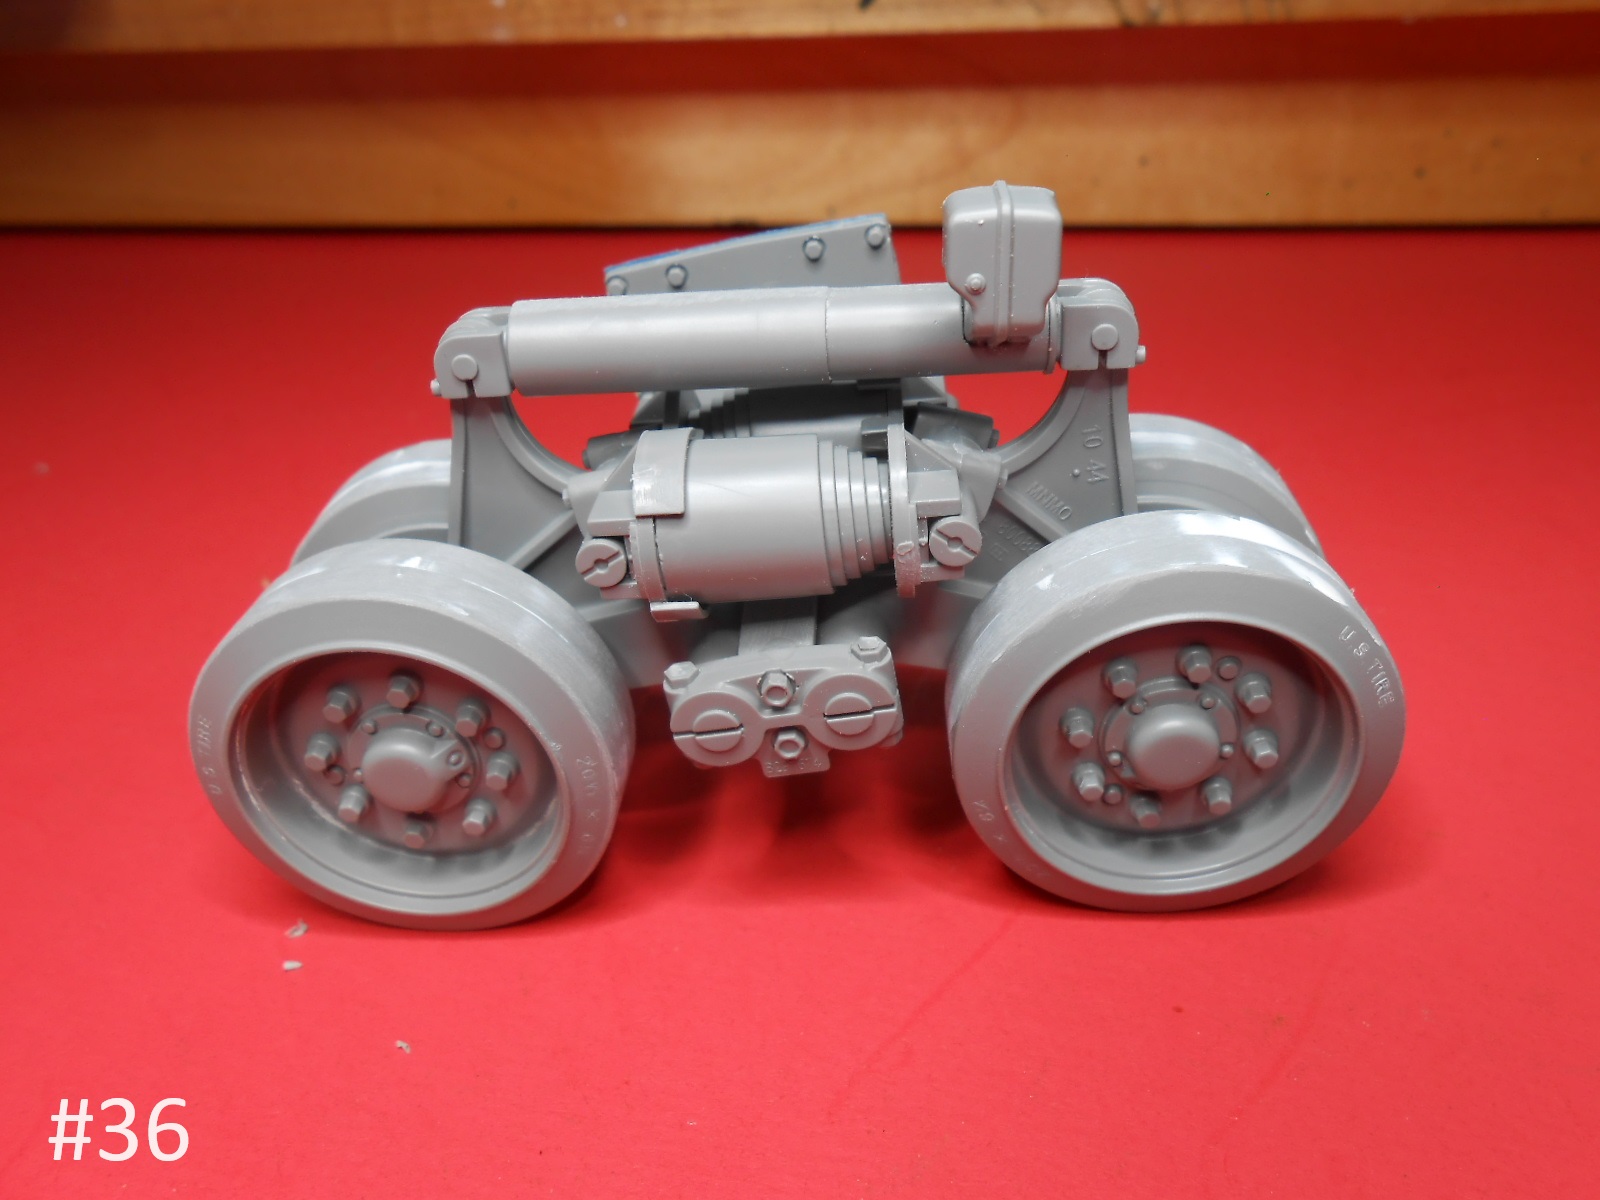
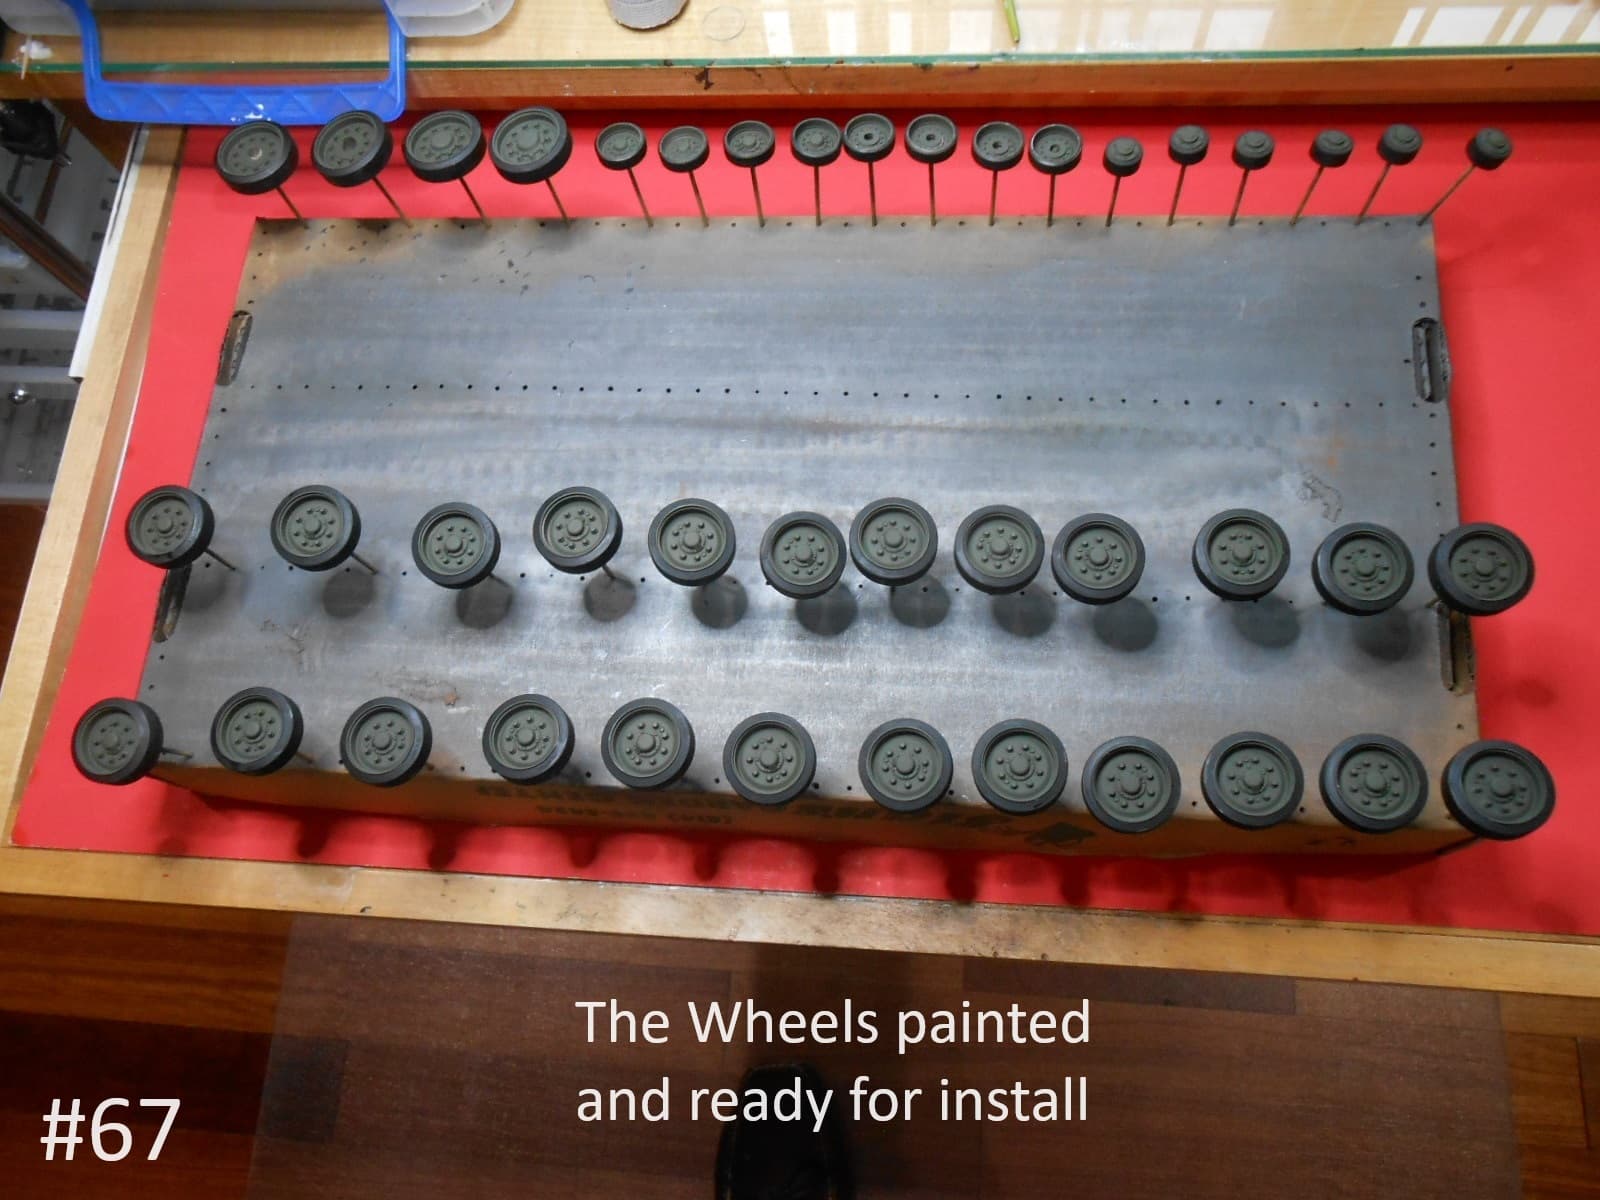
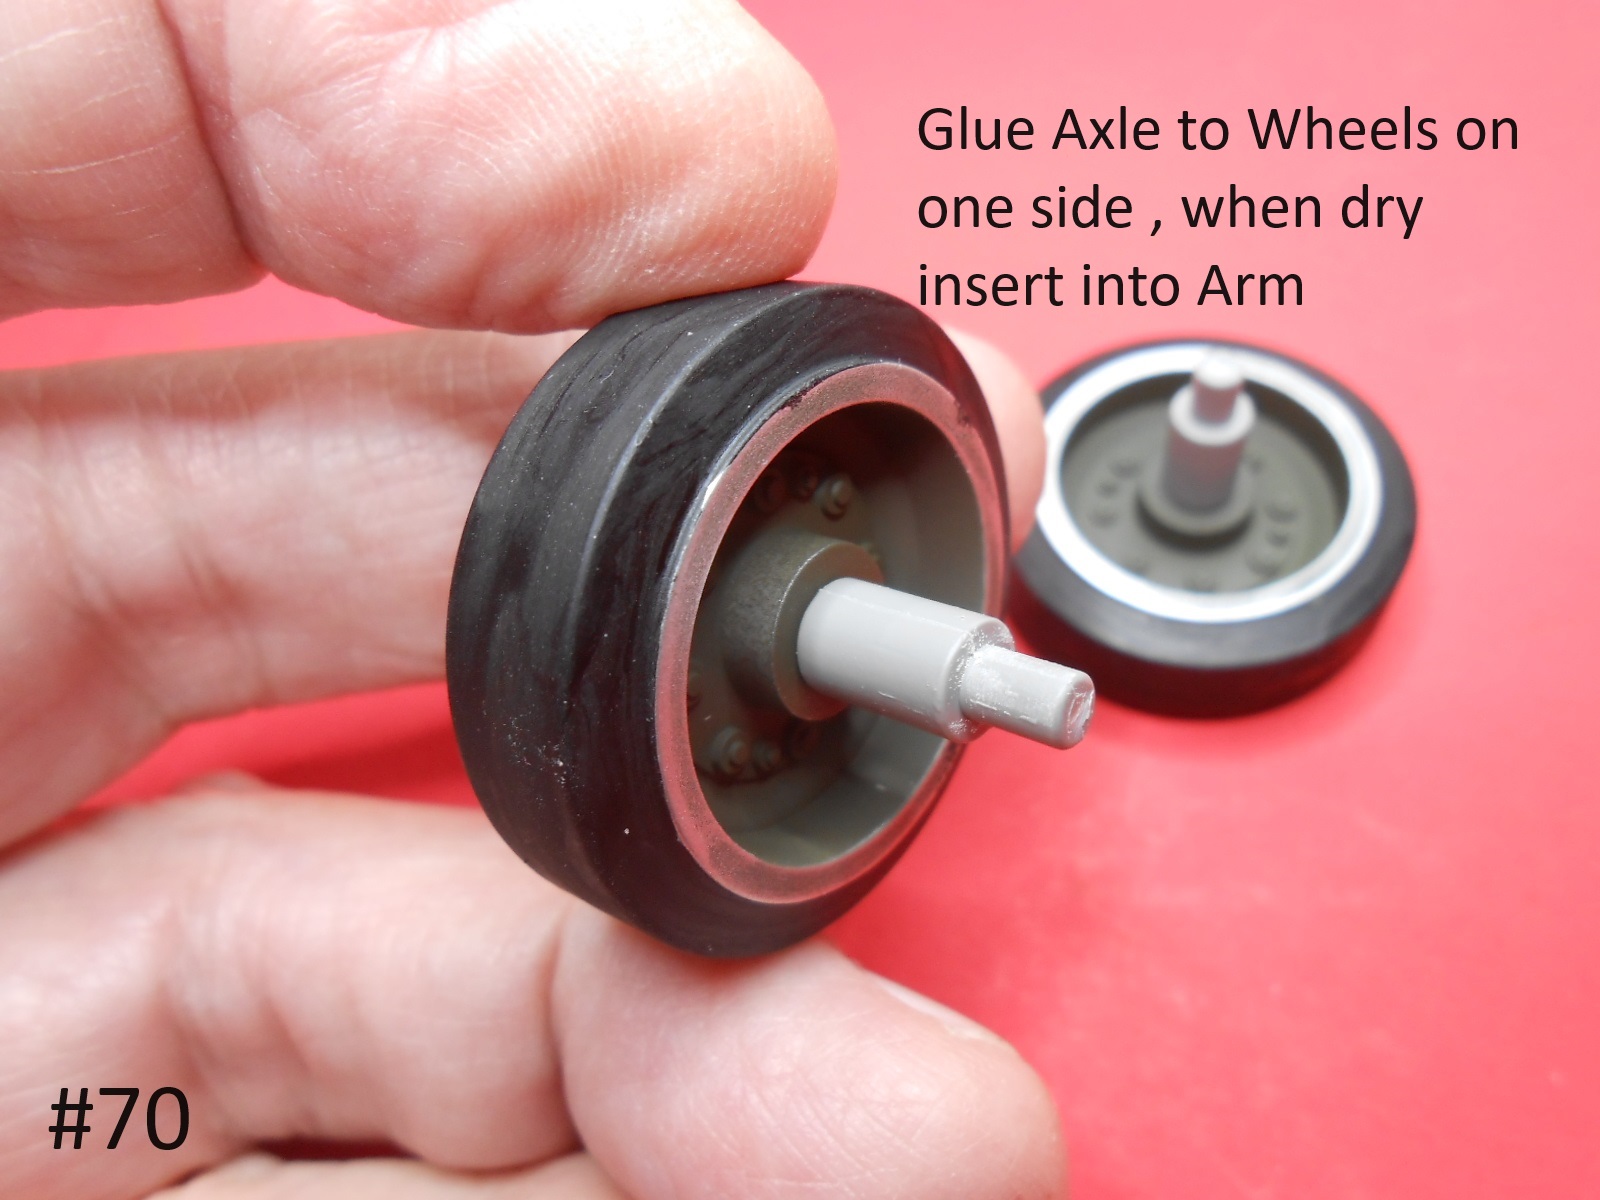
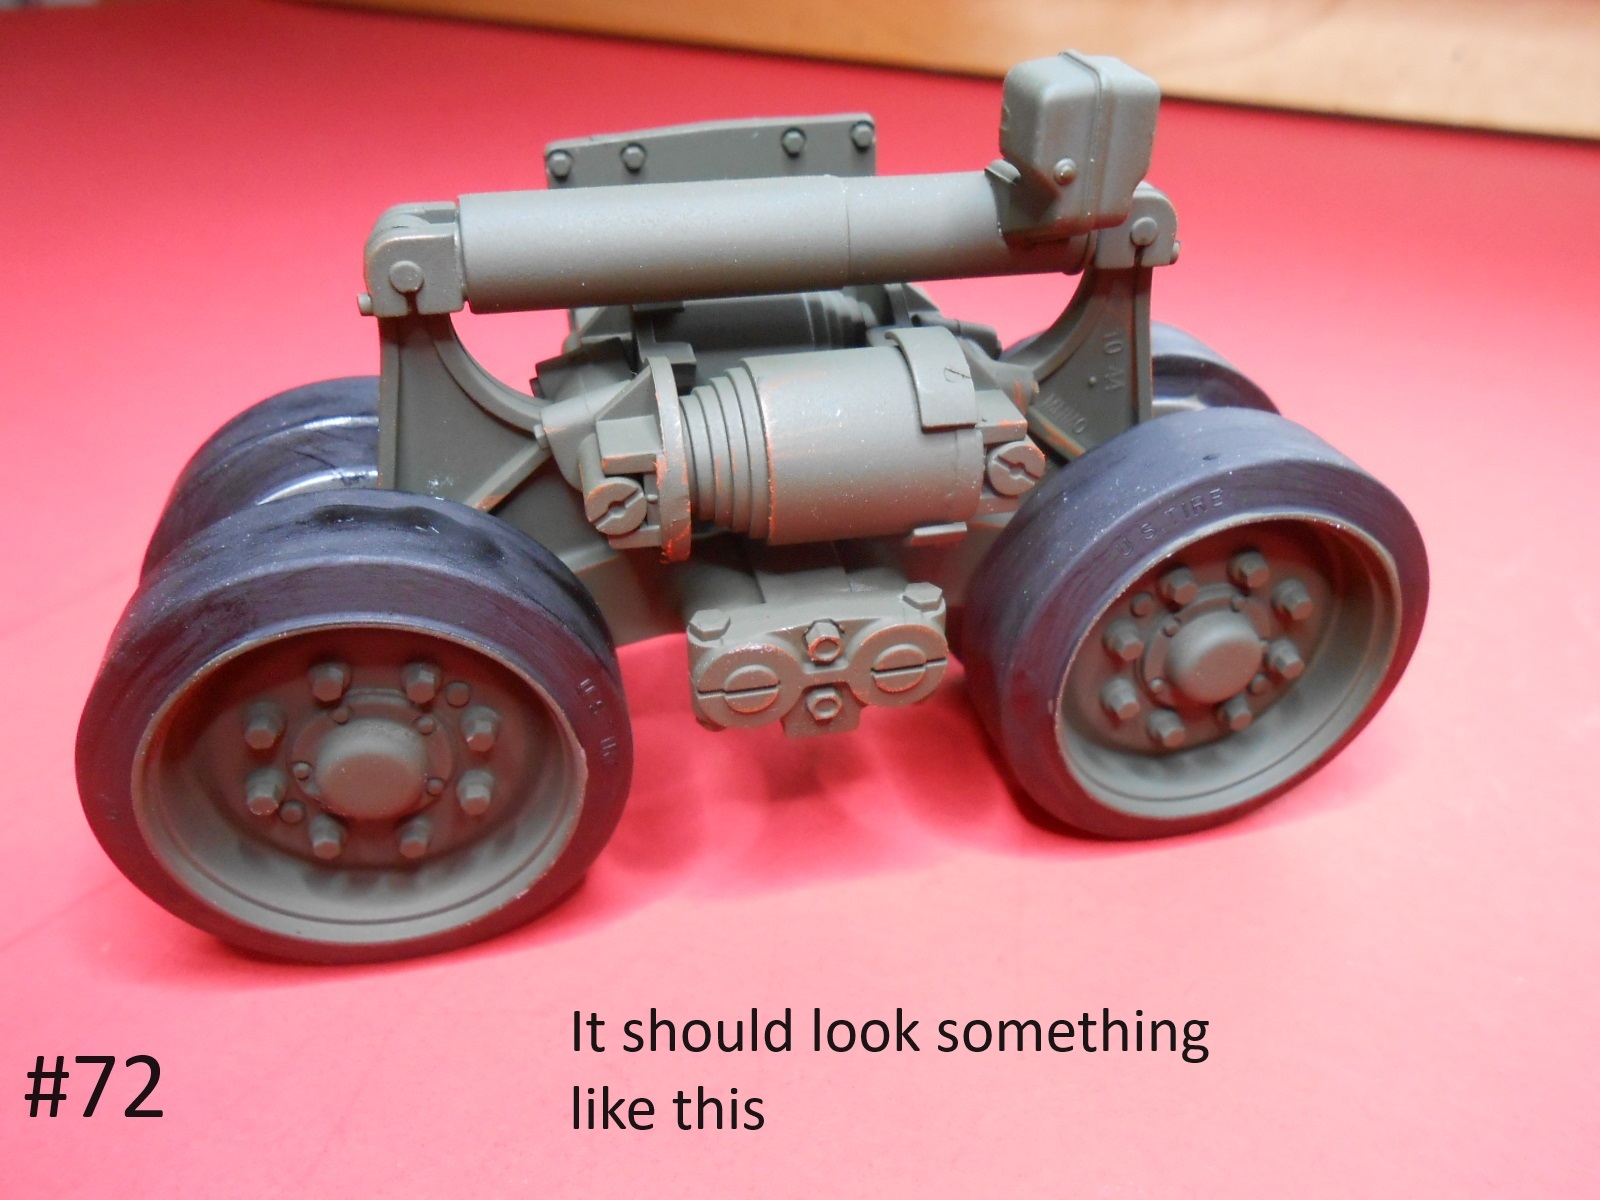
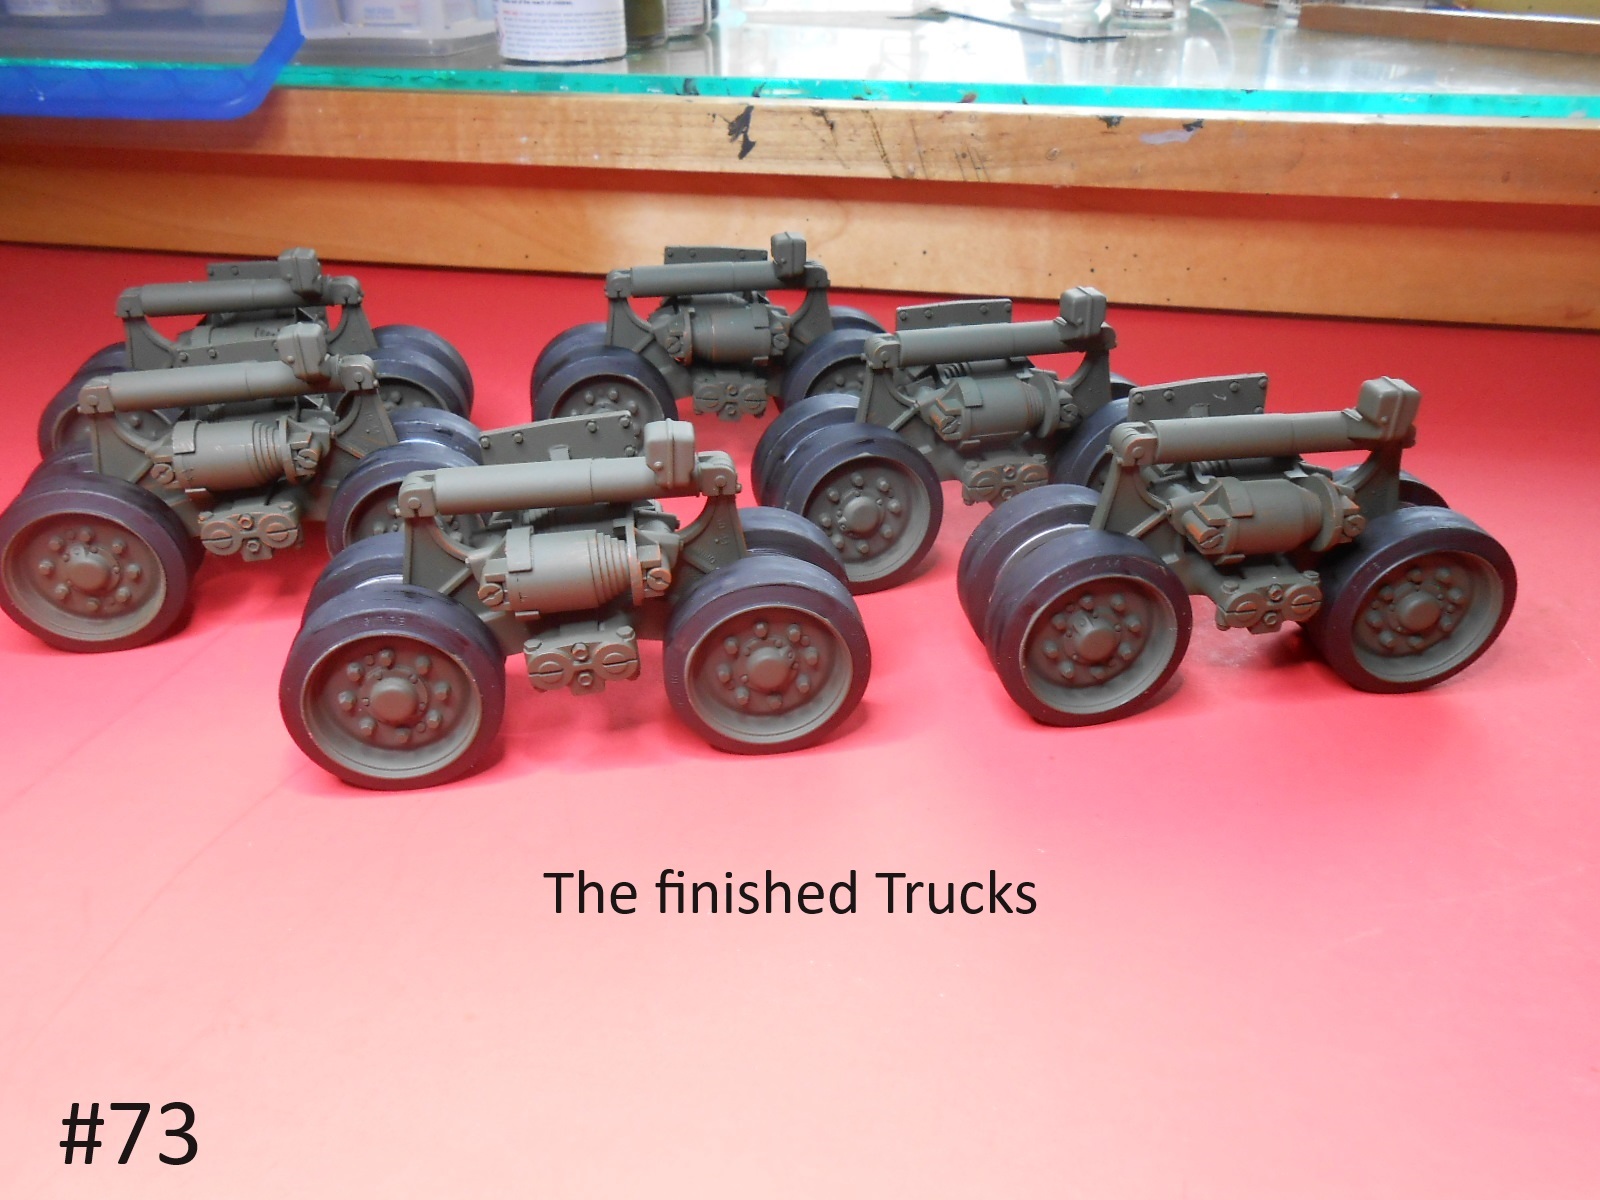
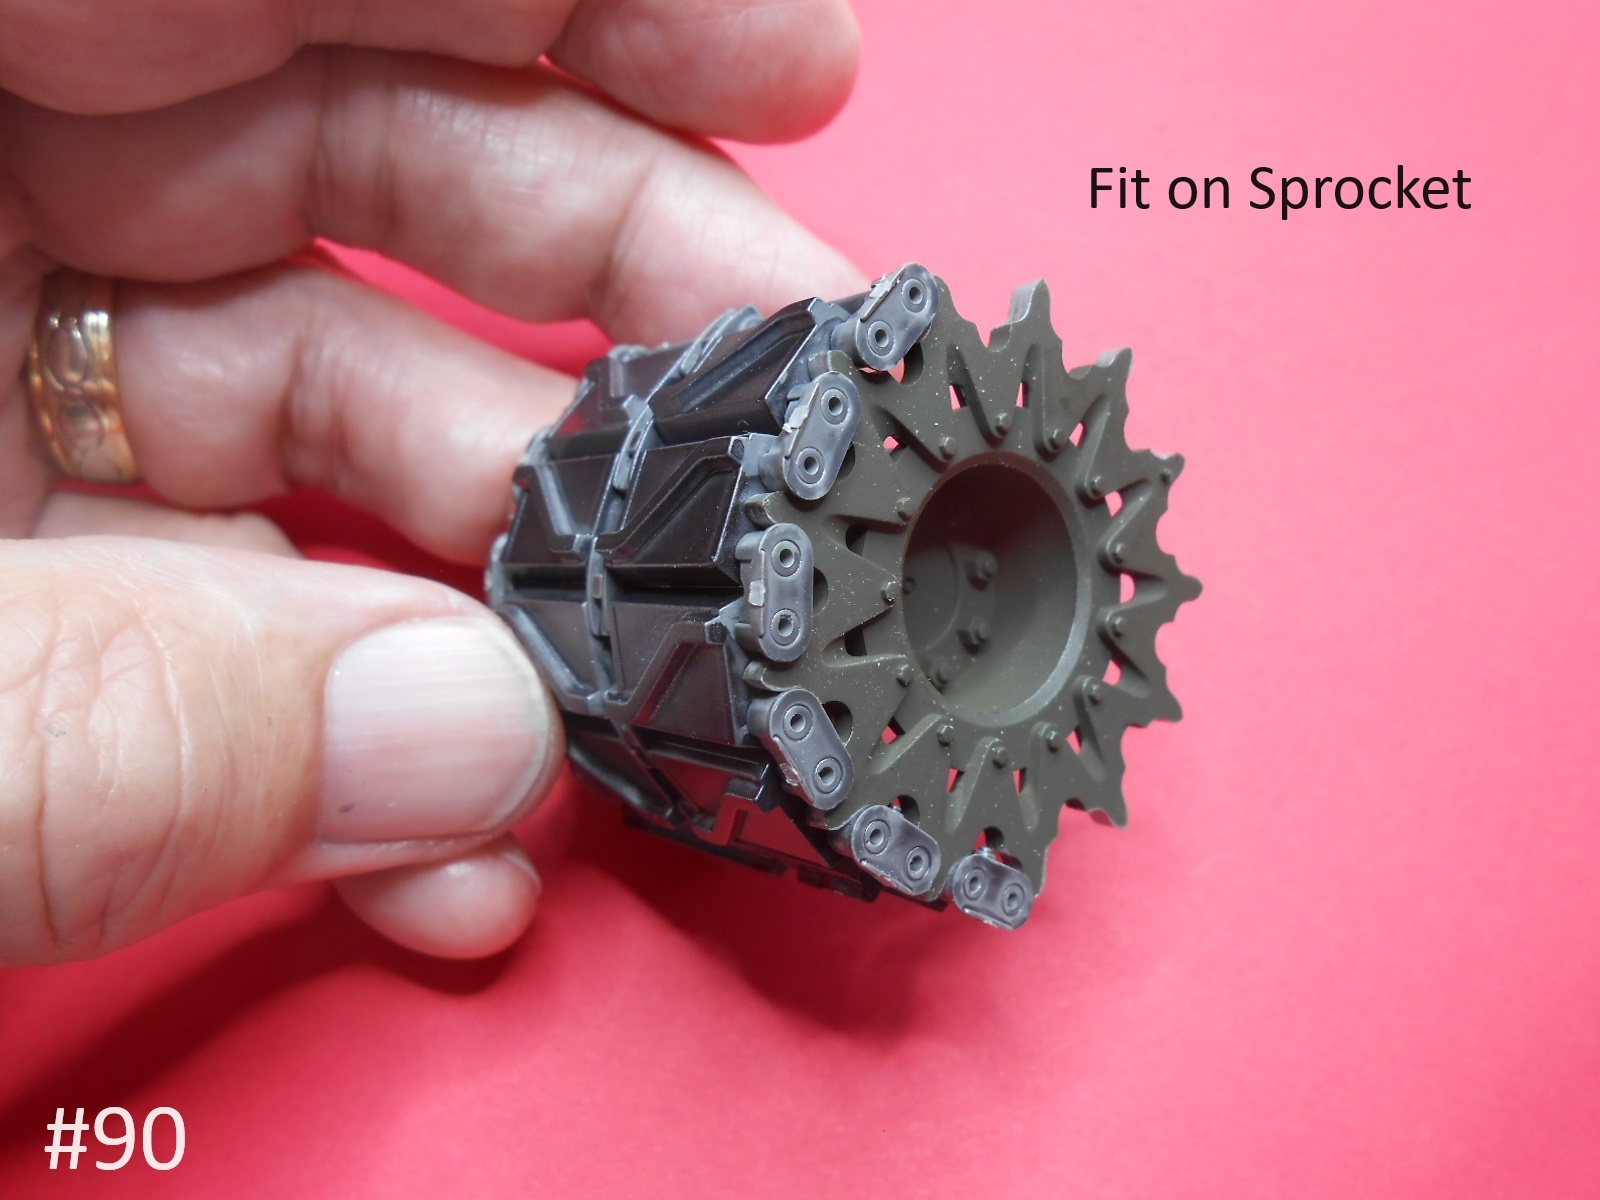
I have the Trucks , Wheels and Sprockets assembled.
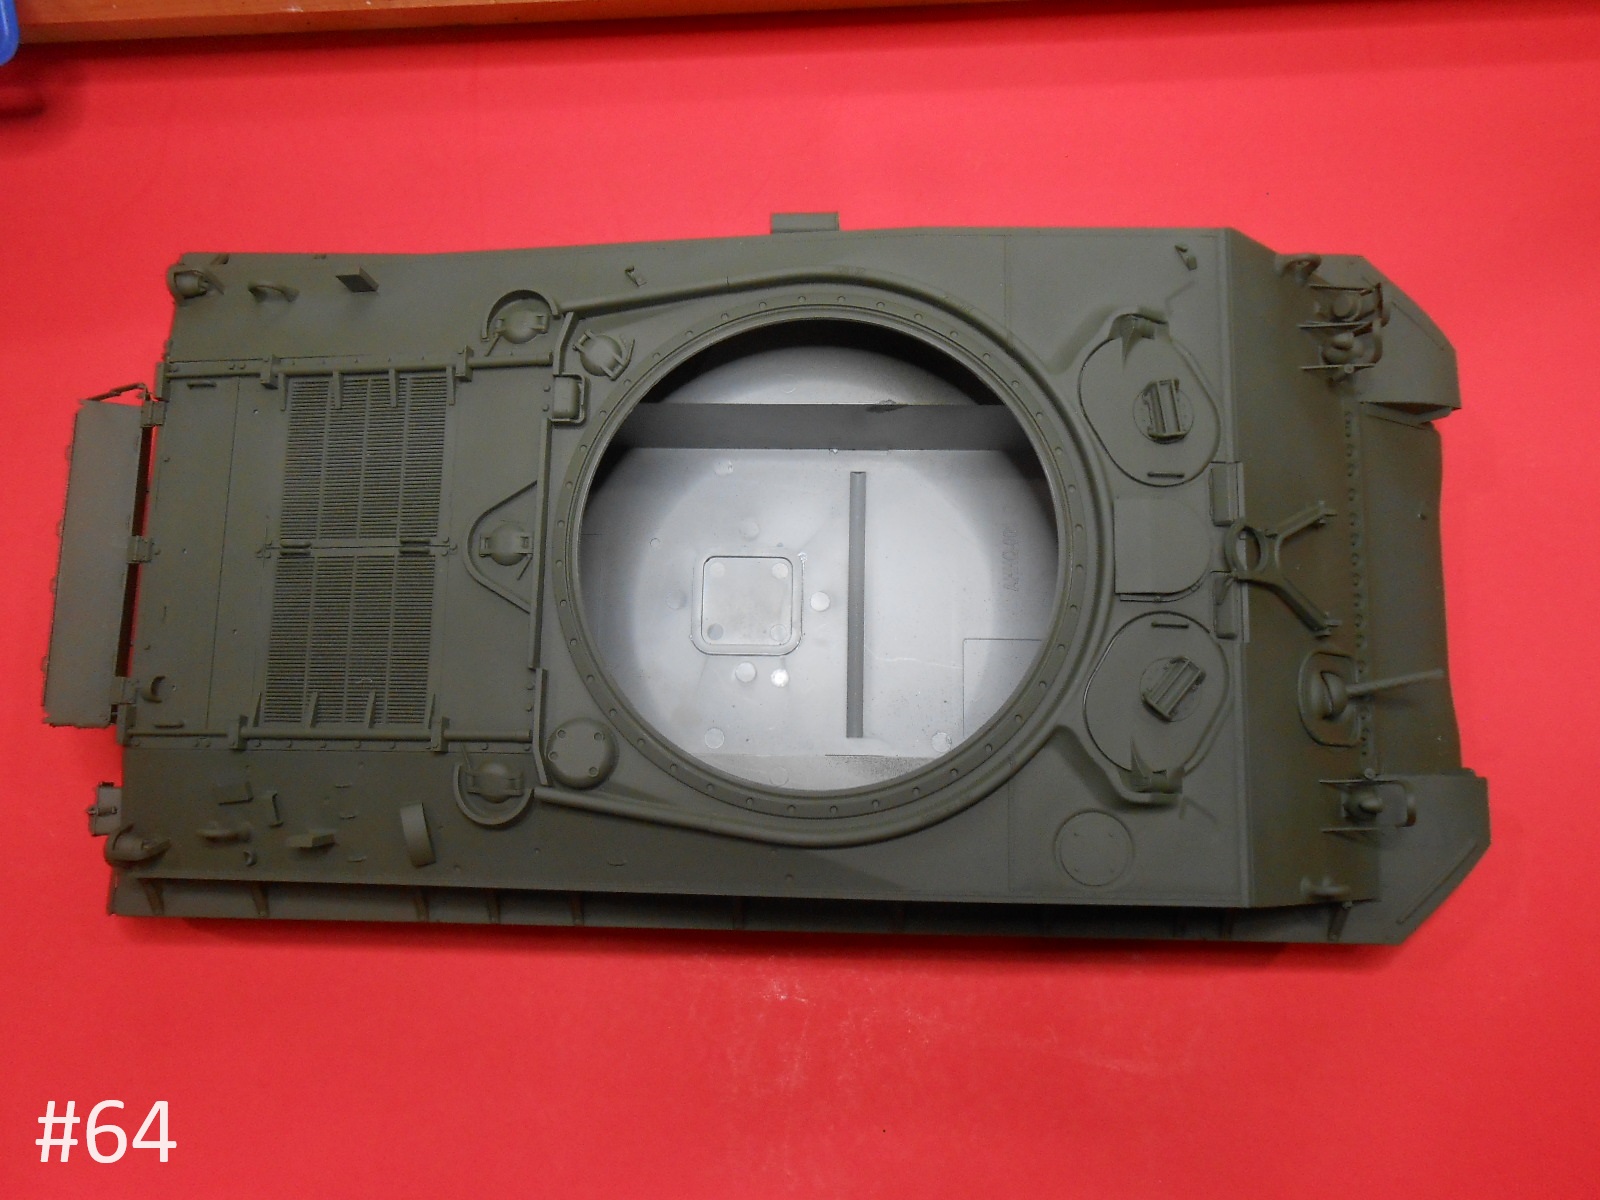
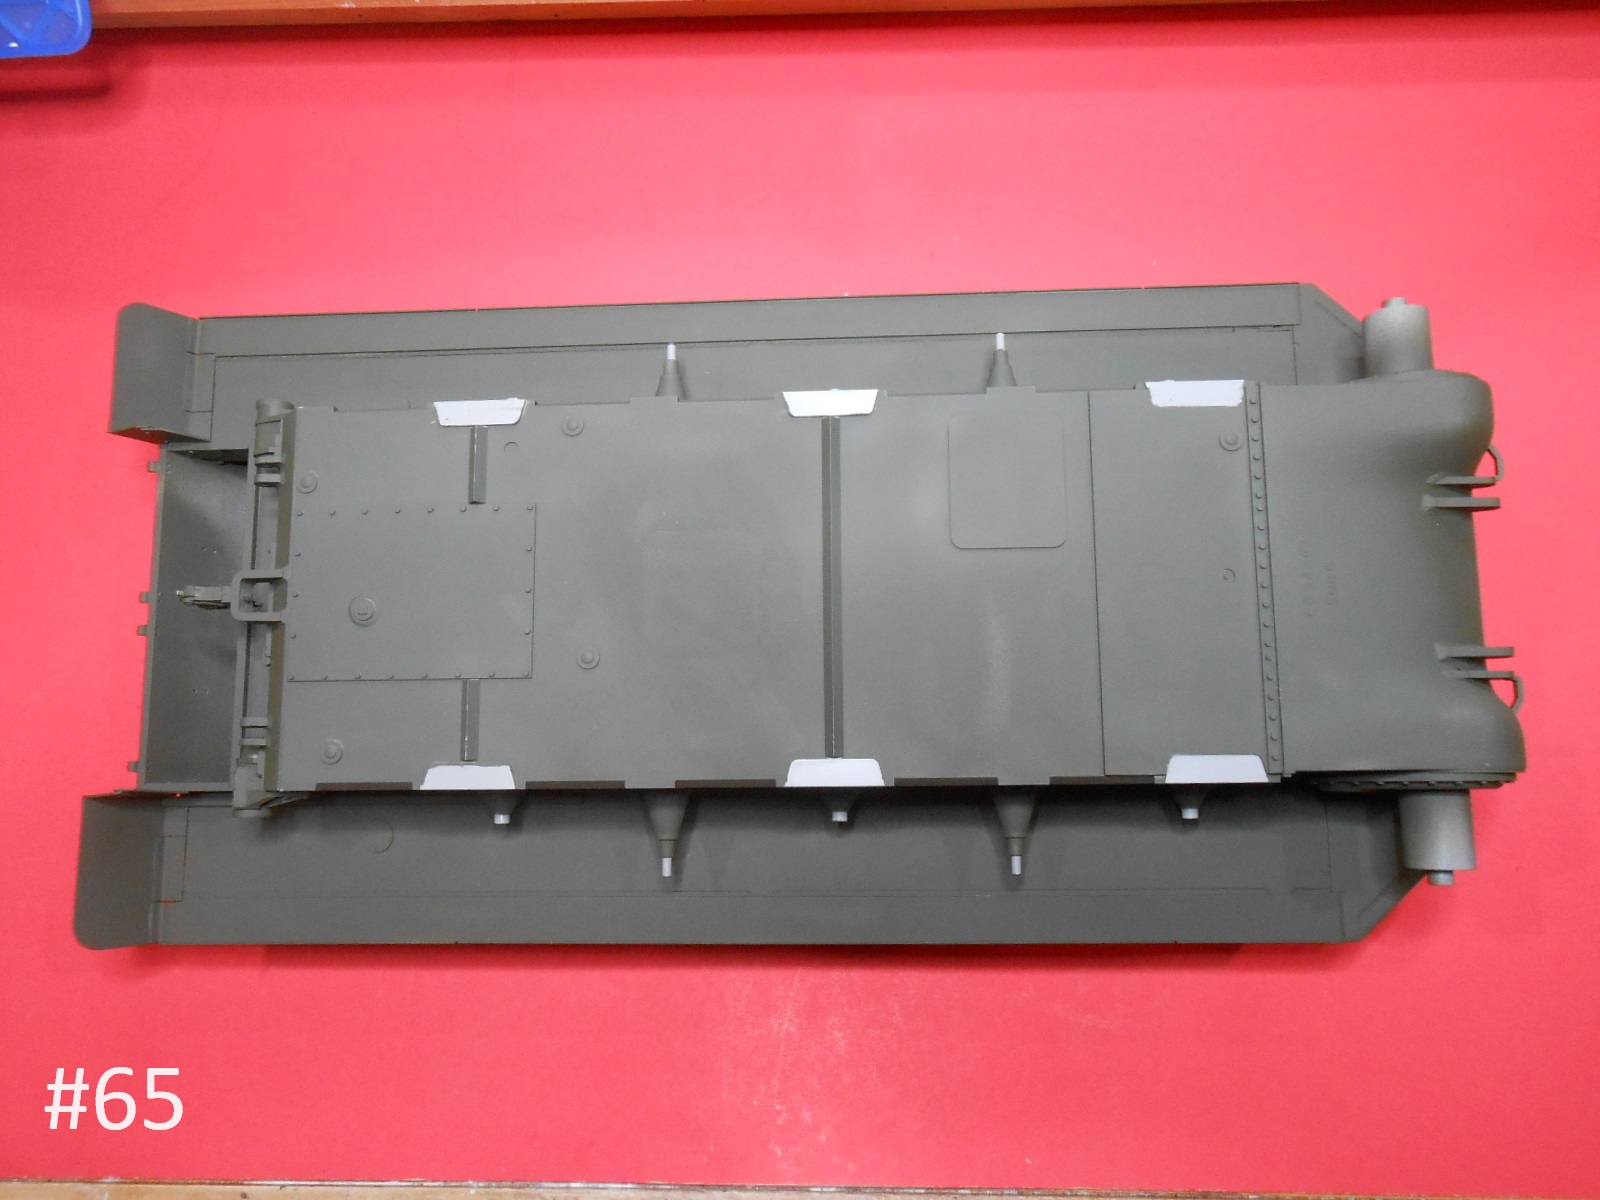
But first here are some pics from the first Andys Sherman that I built here.
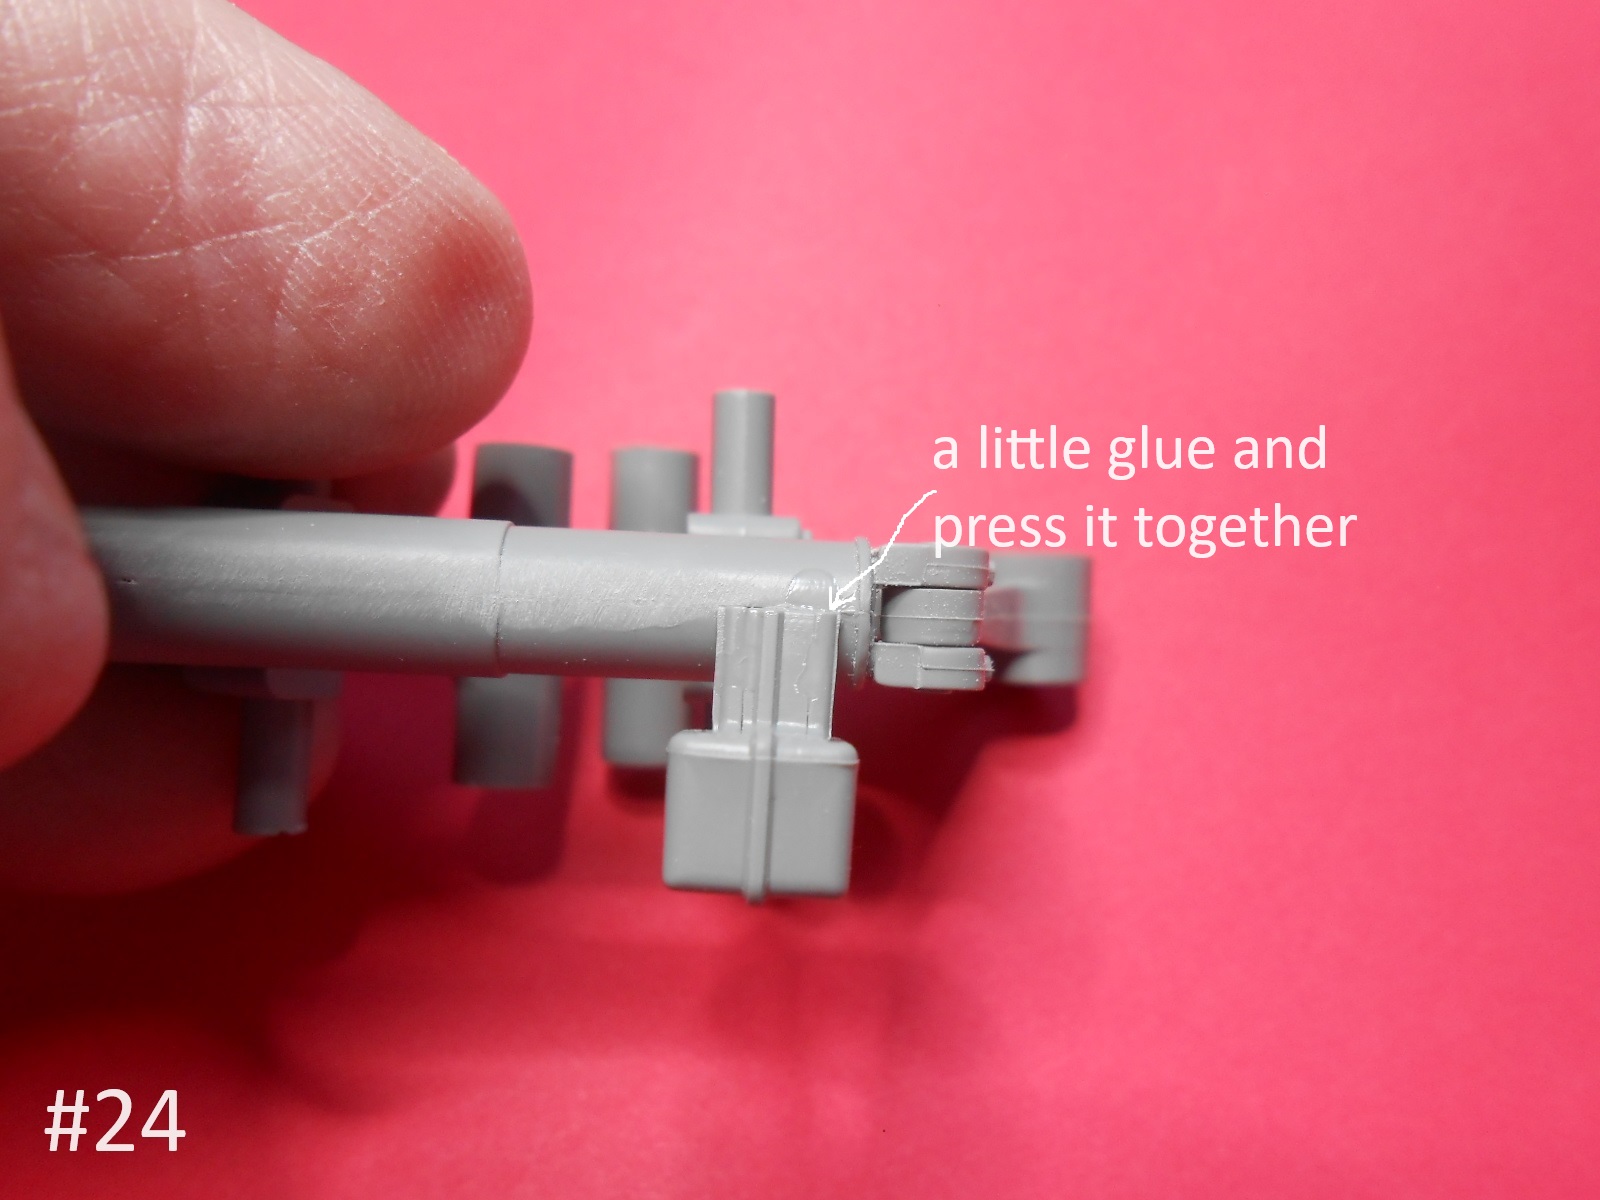
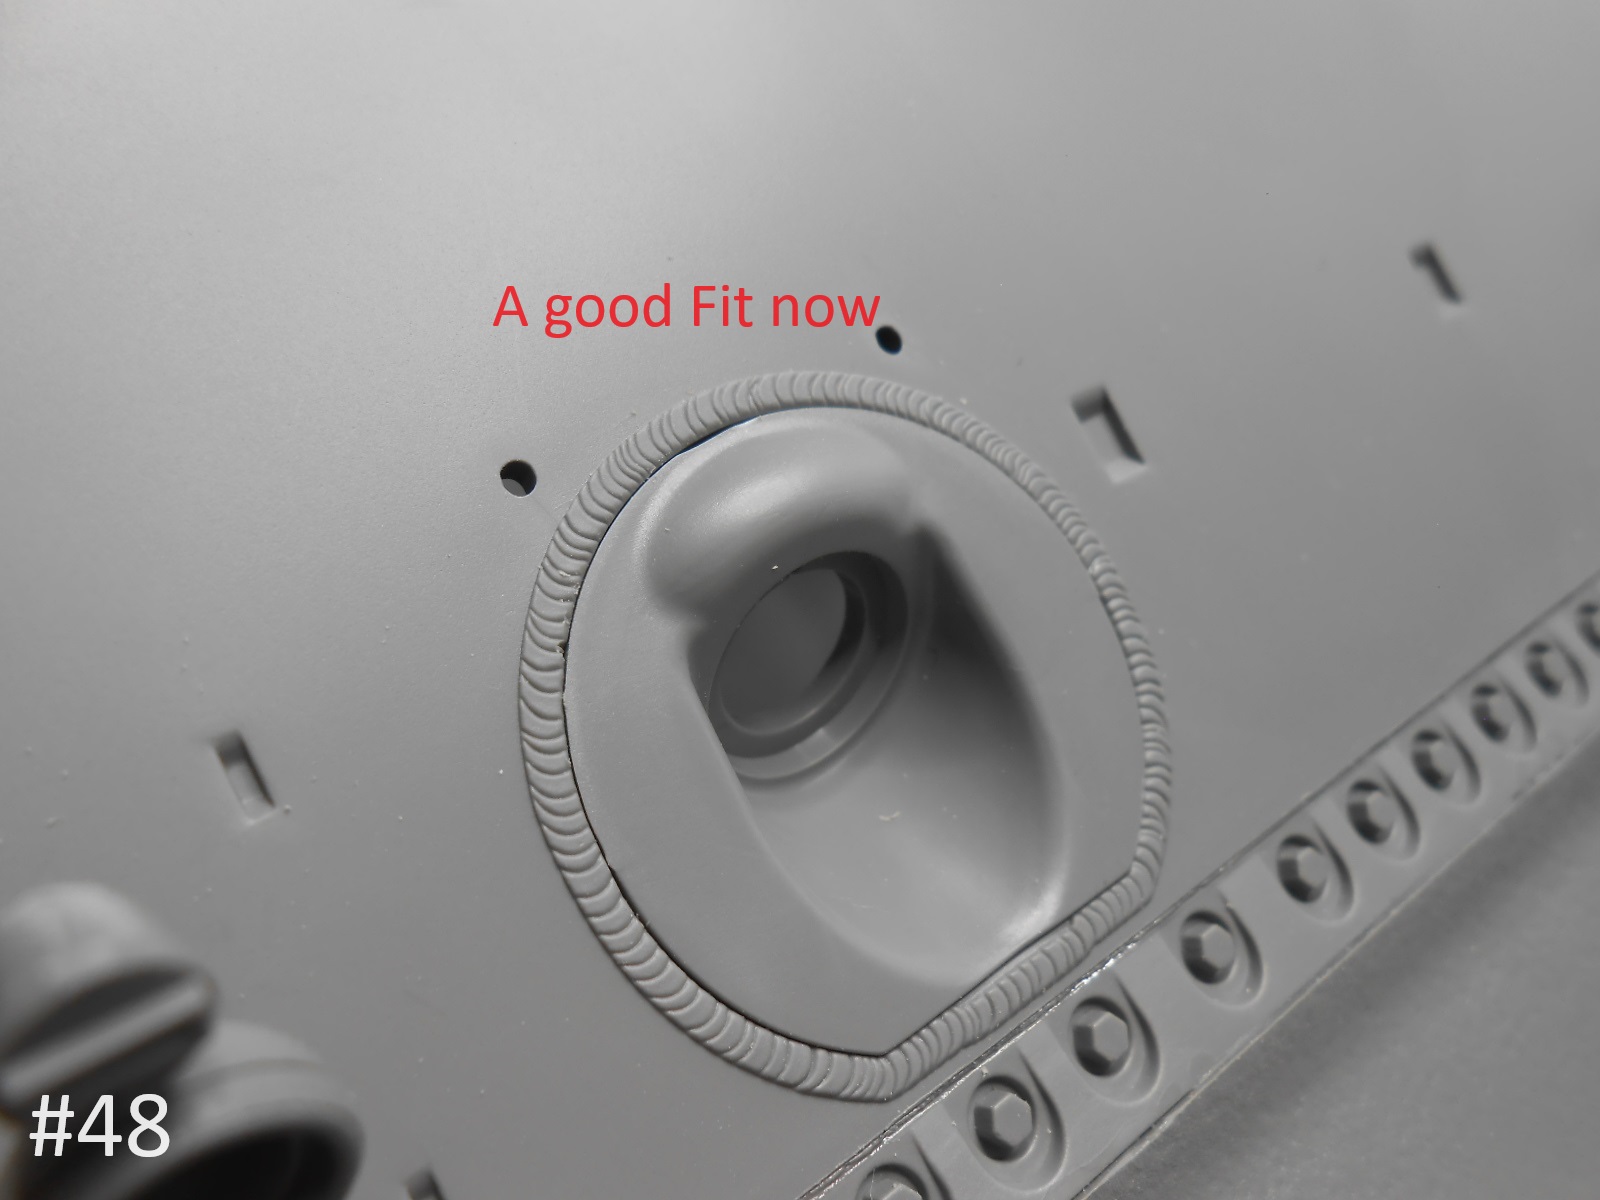
They must have done some work on the Molds for the Truck parts , Wheels and axles as the newer kit has a lot better fit.
OK
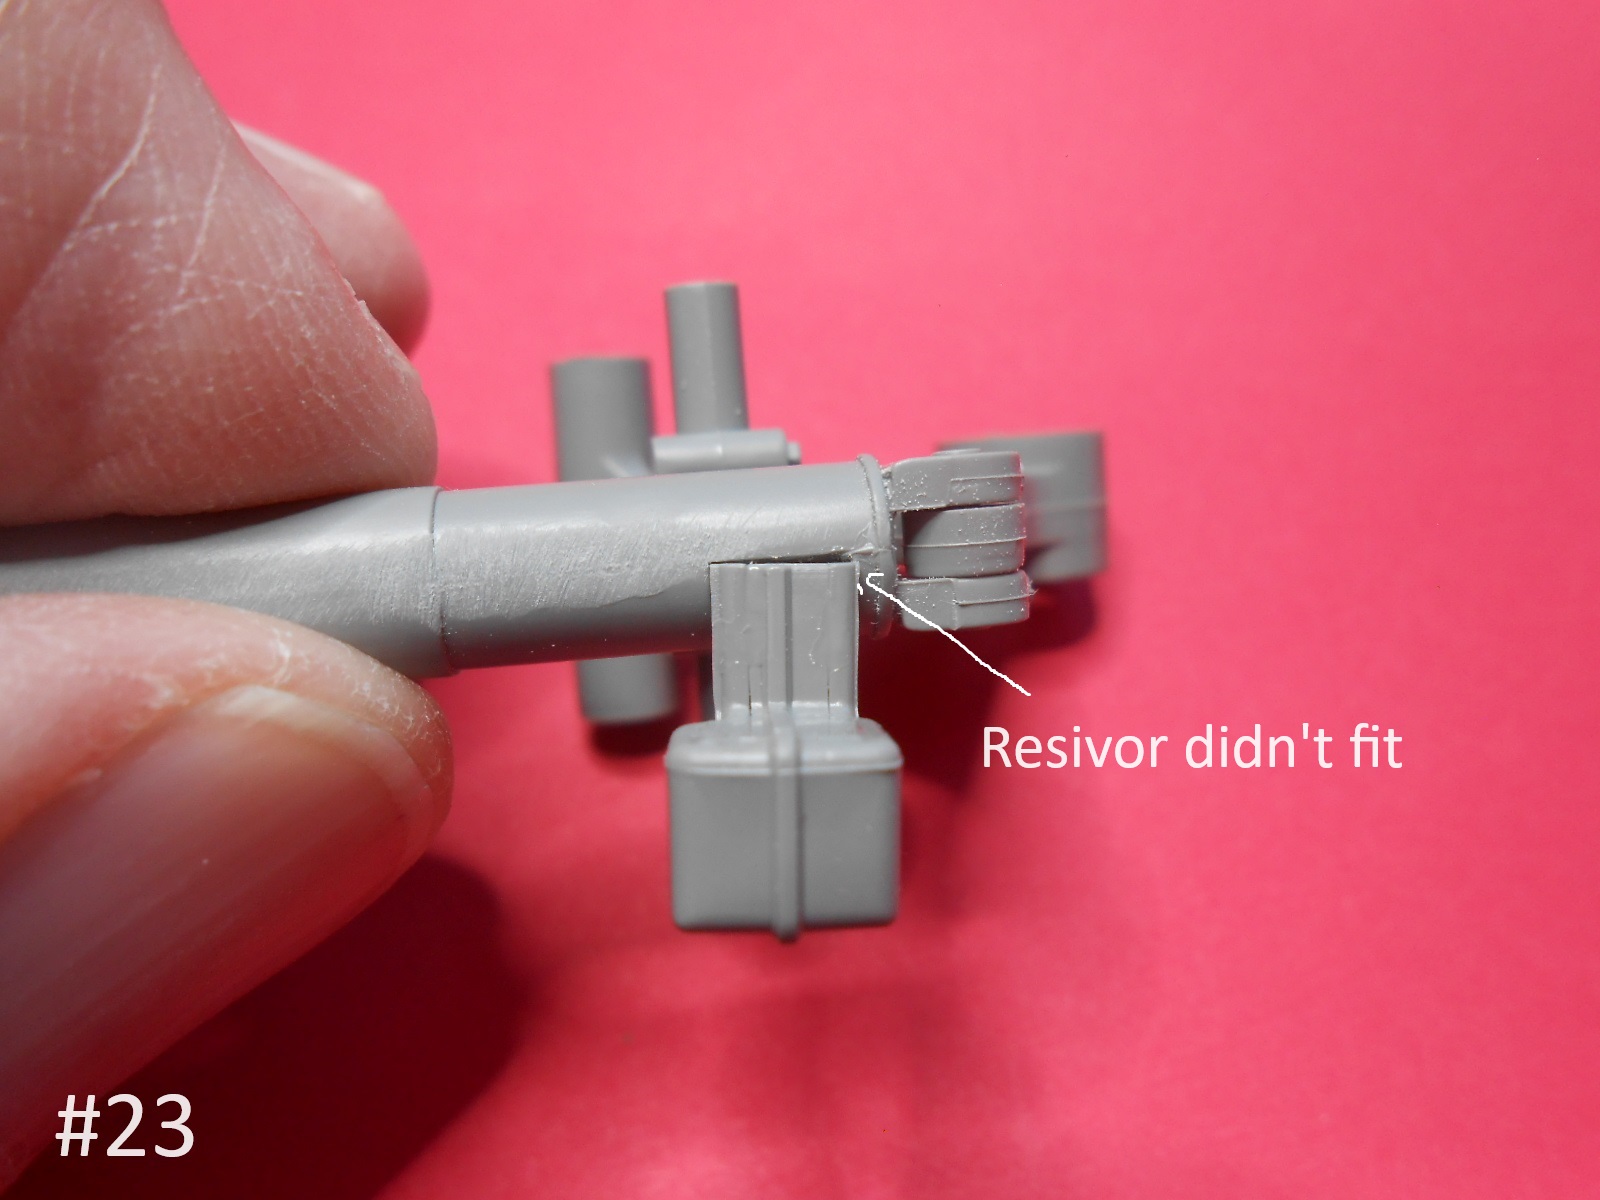
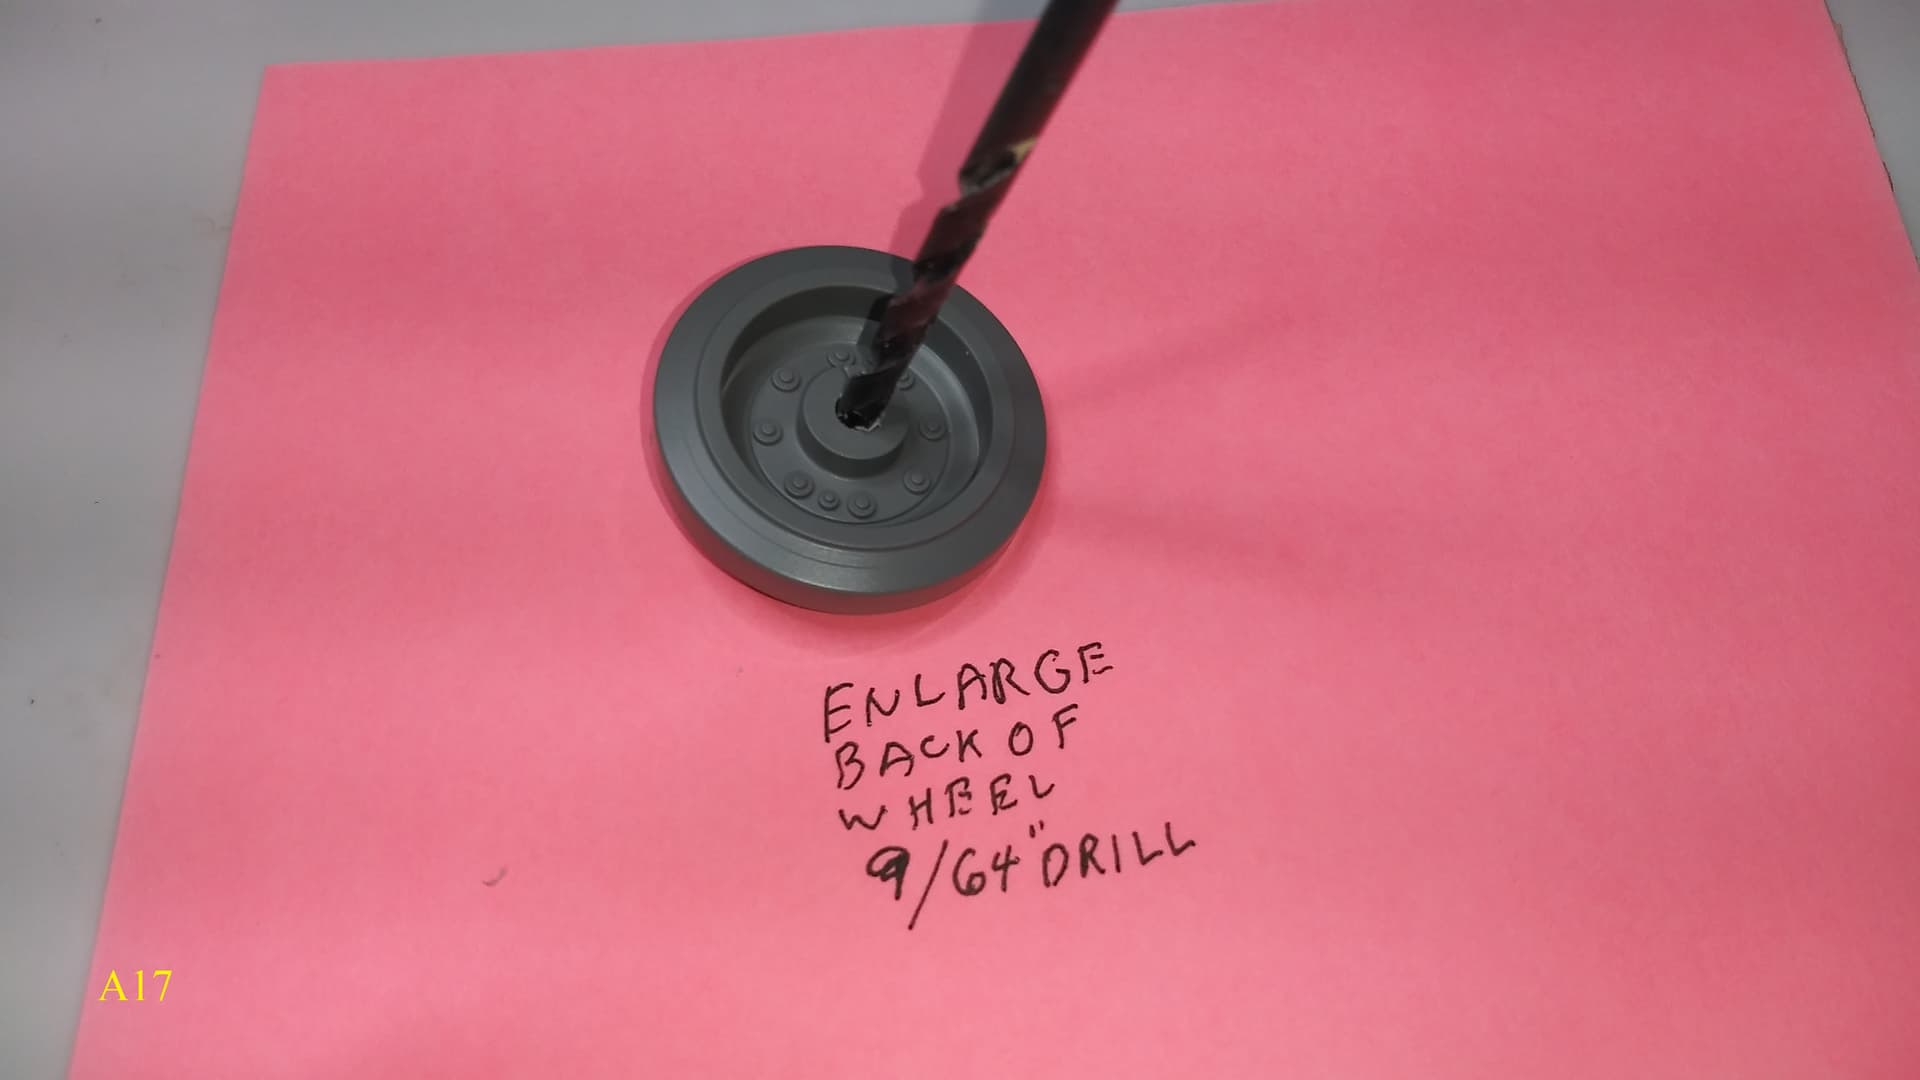
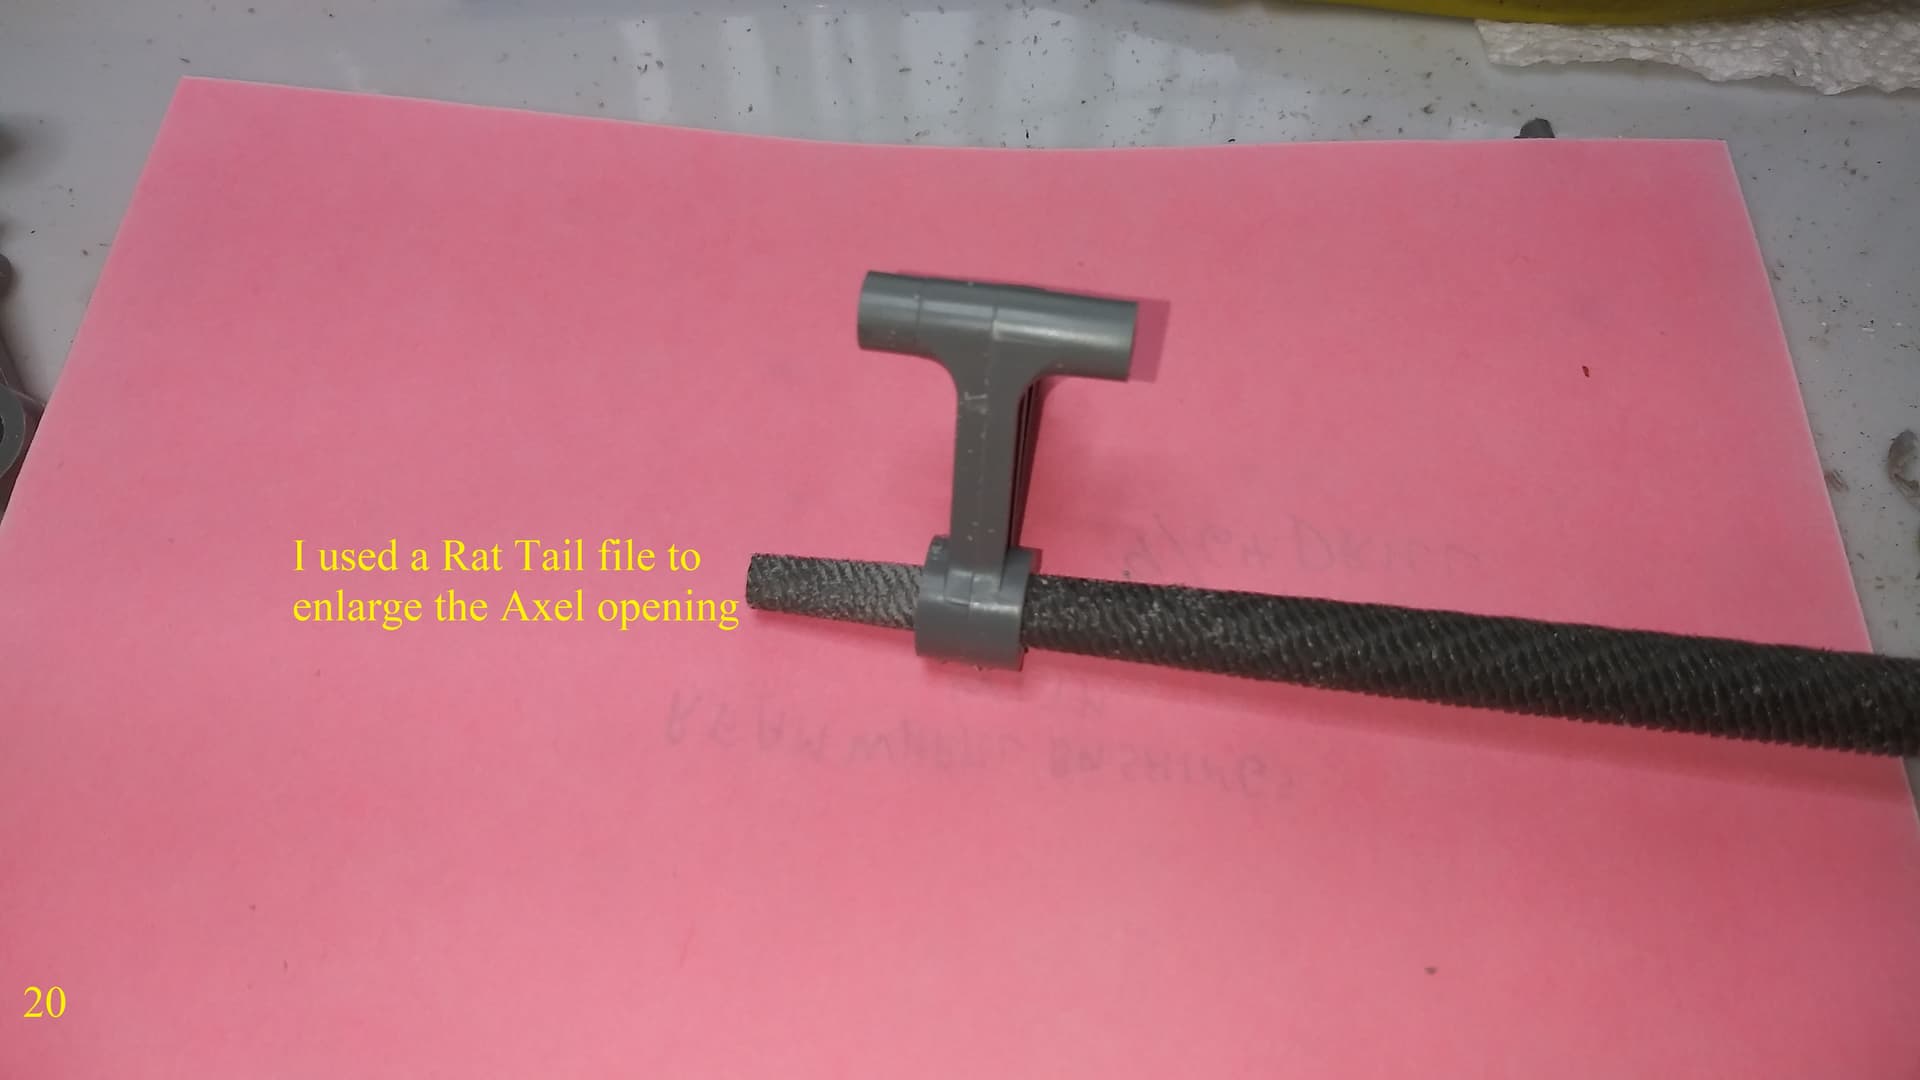
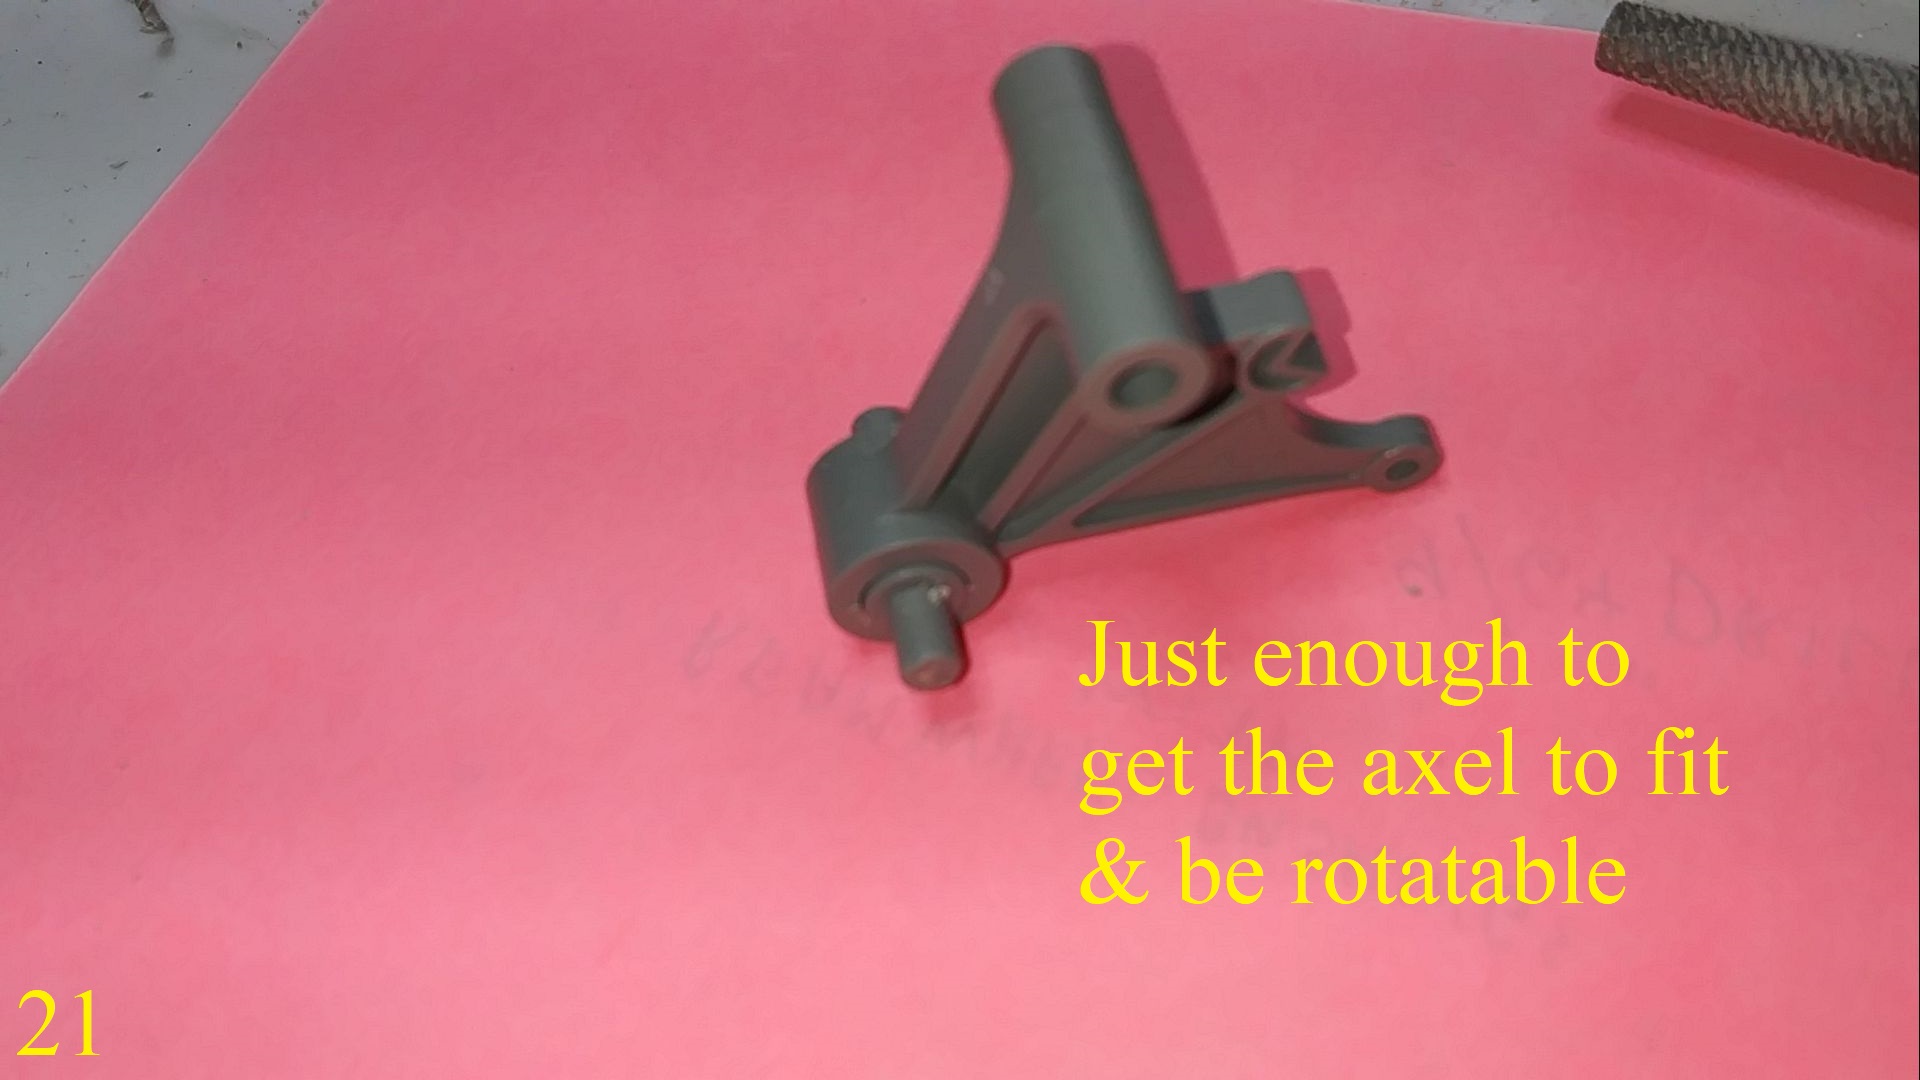
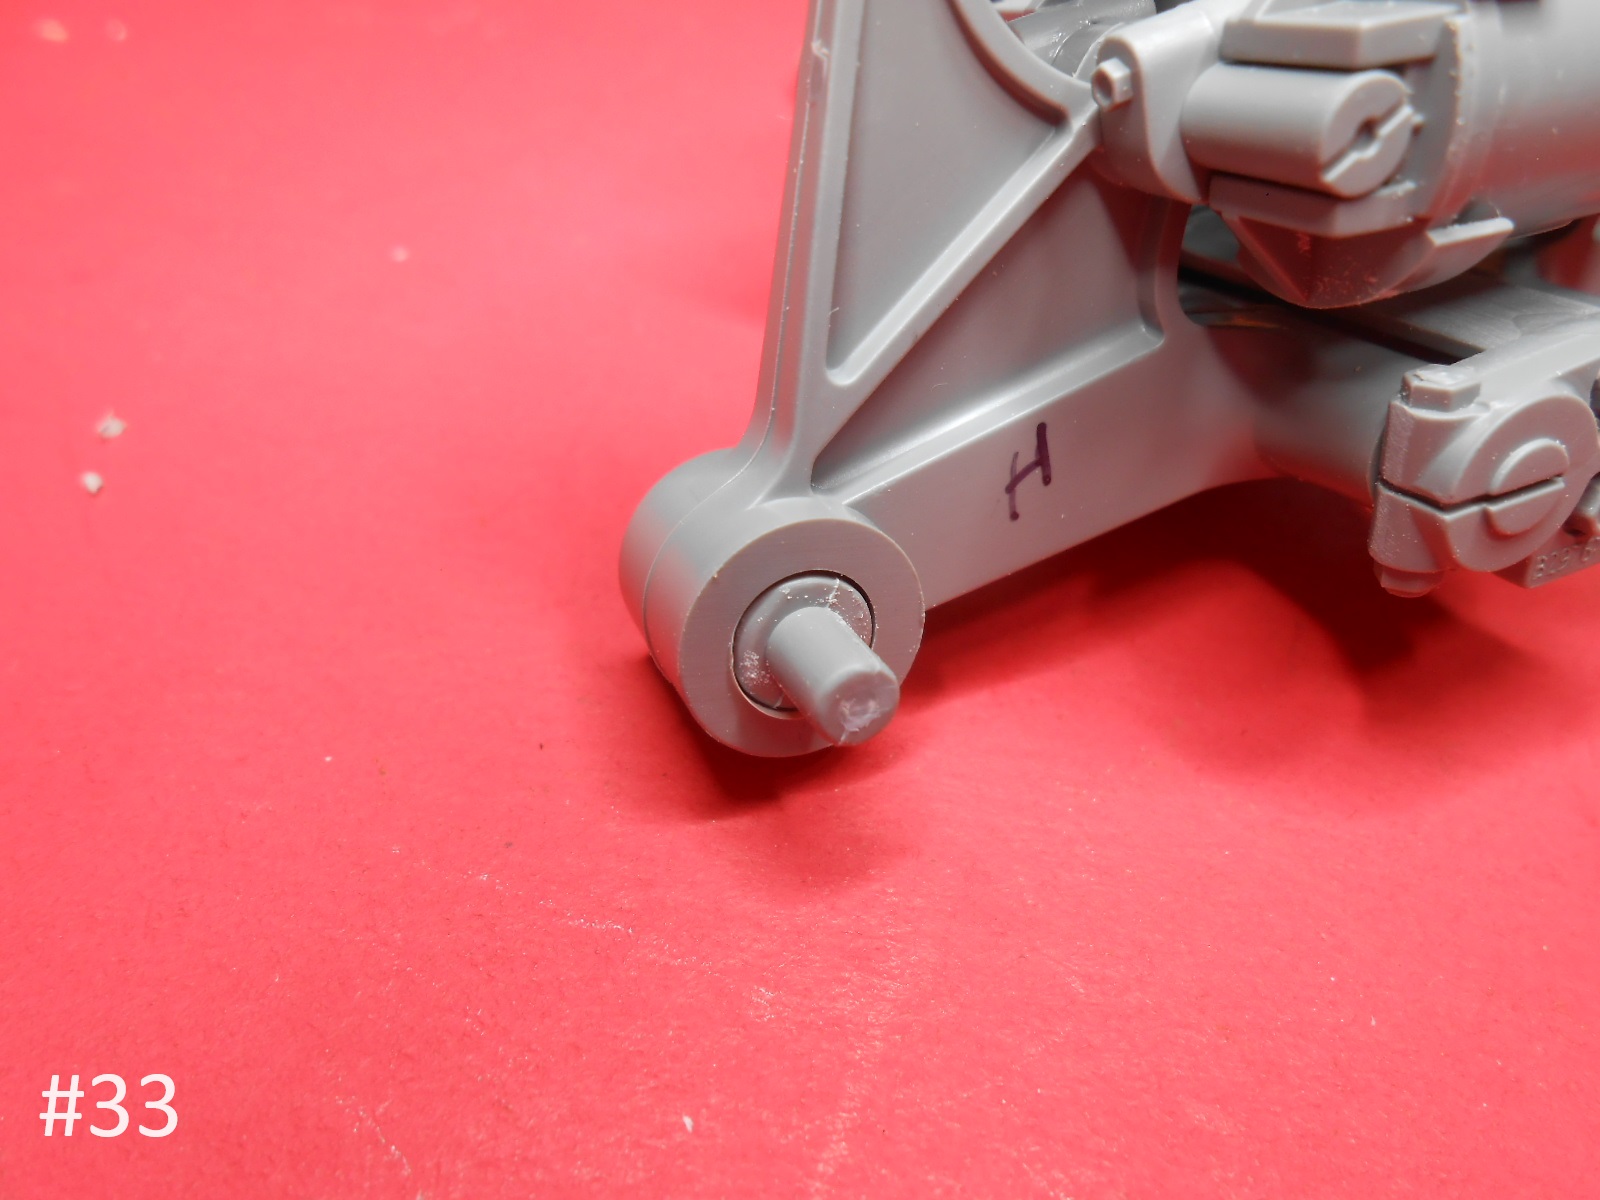
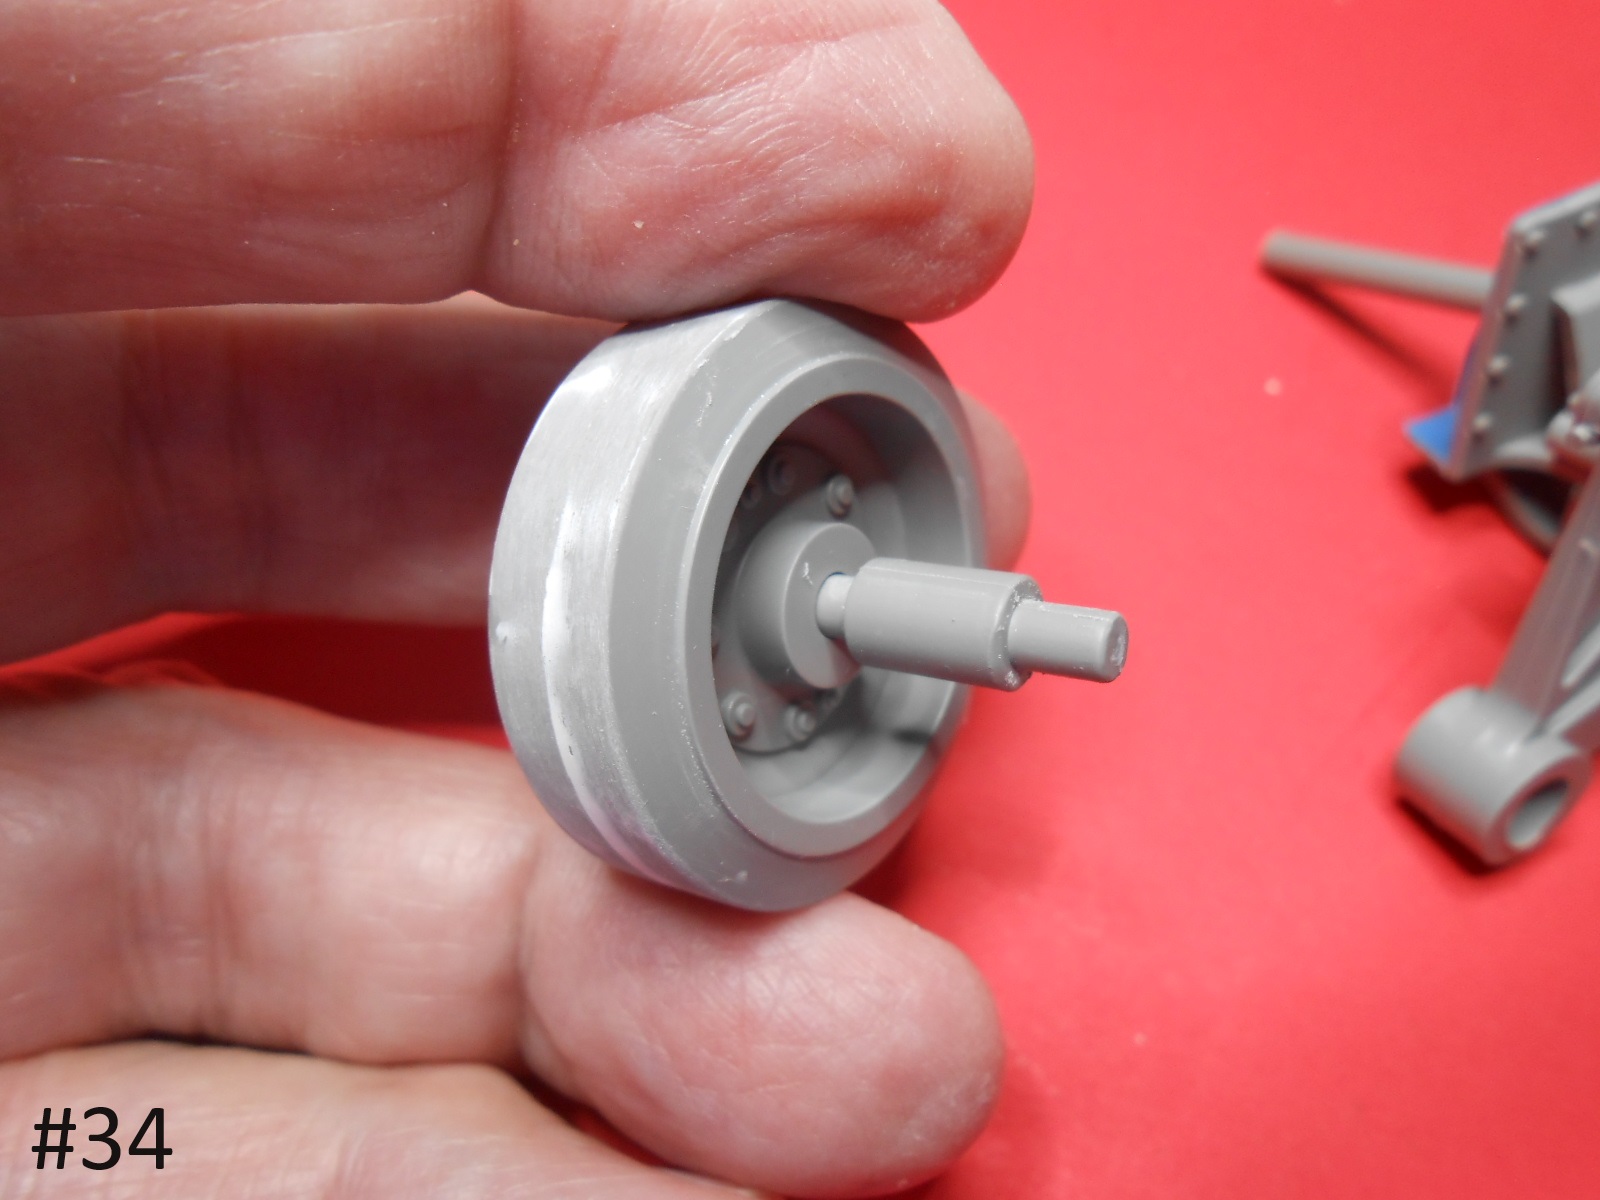
First in the older kit the Axles wouldn’t fit the Wheel Bushings or Wheels.


I had to drill out the Bushings and Wheels.


I also had to ream out the openings for the Axles in the Arms.

Now for the newer kit.
I filled and sanded all the wheels Do or don’t that’s up to you.


Since the Sprocket Drum is suppose to be one piece I filled and sanded the seam.

The retainer pin I left loose inside , when Sprocket is installed it’ll go right where it’s supposed to ,

I tried it and it works.
Here are the assembled Trucks minus the wheels.


The Axles fit fine on the newer kit .


The Wheels test fitted on the Trucks , no problem here.

These parts will be waiting for the paint , I’m going to finish the upper and lower assembly before painting anything.
Inside Front

Fixed Periscopes masked and installed.

I’m finished for a while.
Regards
Donald

5 Likes

You are steaming along. Nice work and great tips for those considering buying this . Keep on keeping on Donald.

Keith

2 Likes

Today I joined the upper and lower hulls together except for one spot I got an excellent fit.


Now to start adding all the little parts.
Regards
Donald

4 Likes

I have the little parts installed.
Some of them are a little tricky.


Next stop the Paint Shop
Regards
Donald

7 Likes

Great build coverage. If I ever find room to store finished 1/16 kits (as in, I move my car out of the garage), I’ll tackle that model.

2 Likes

I have some painting done.


Finished for today
Donald

5 Likes

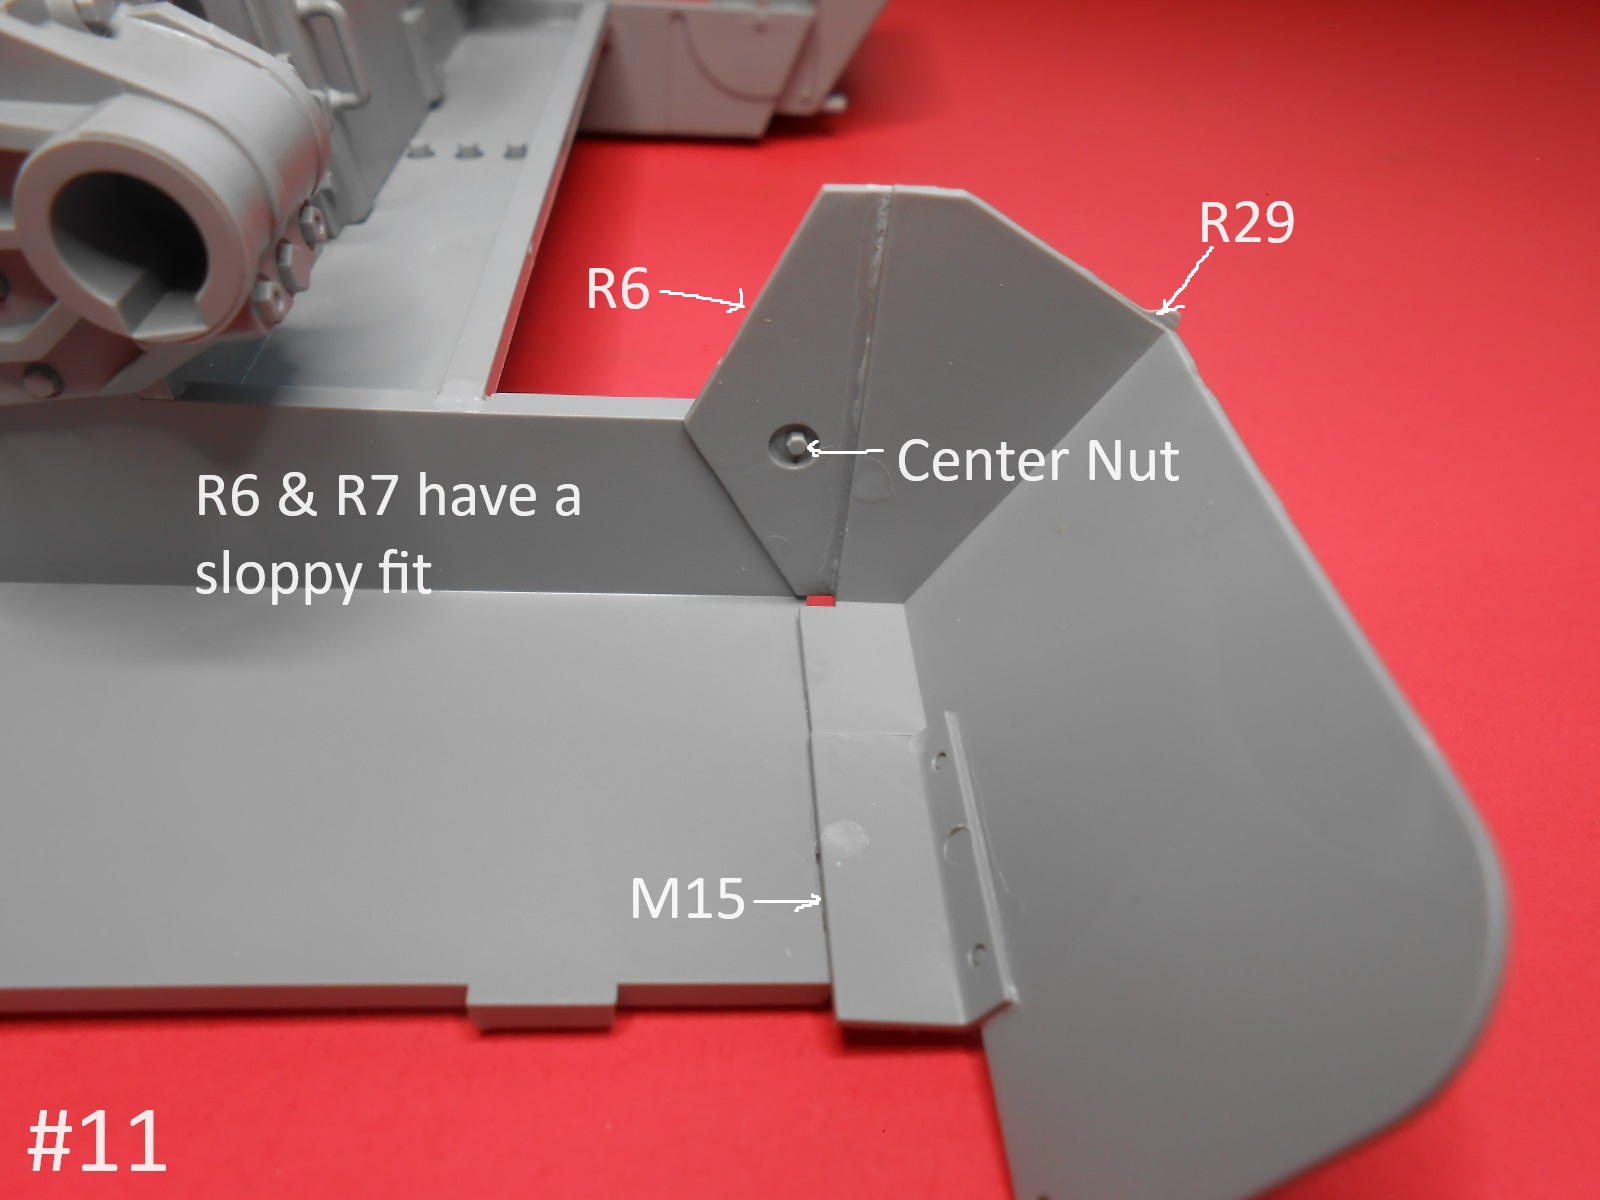
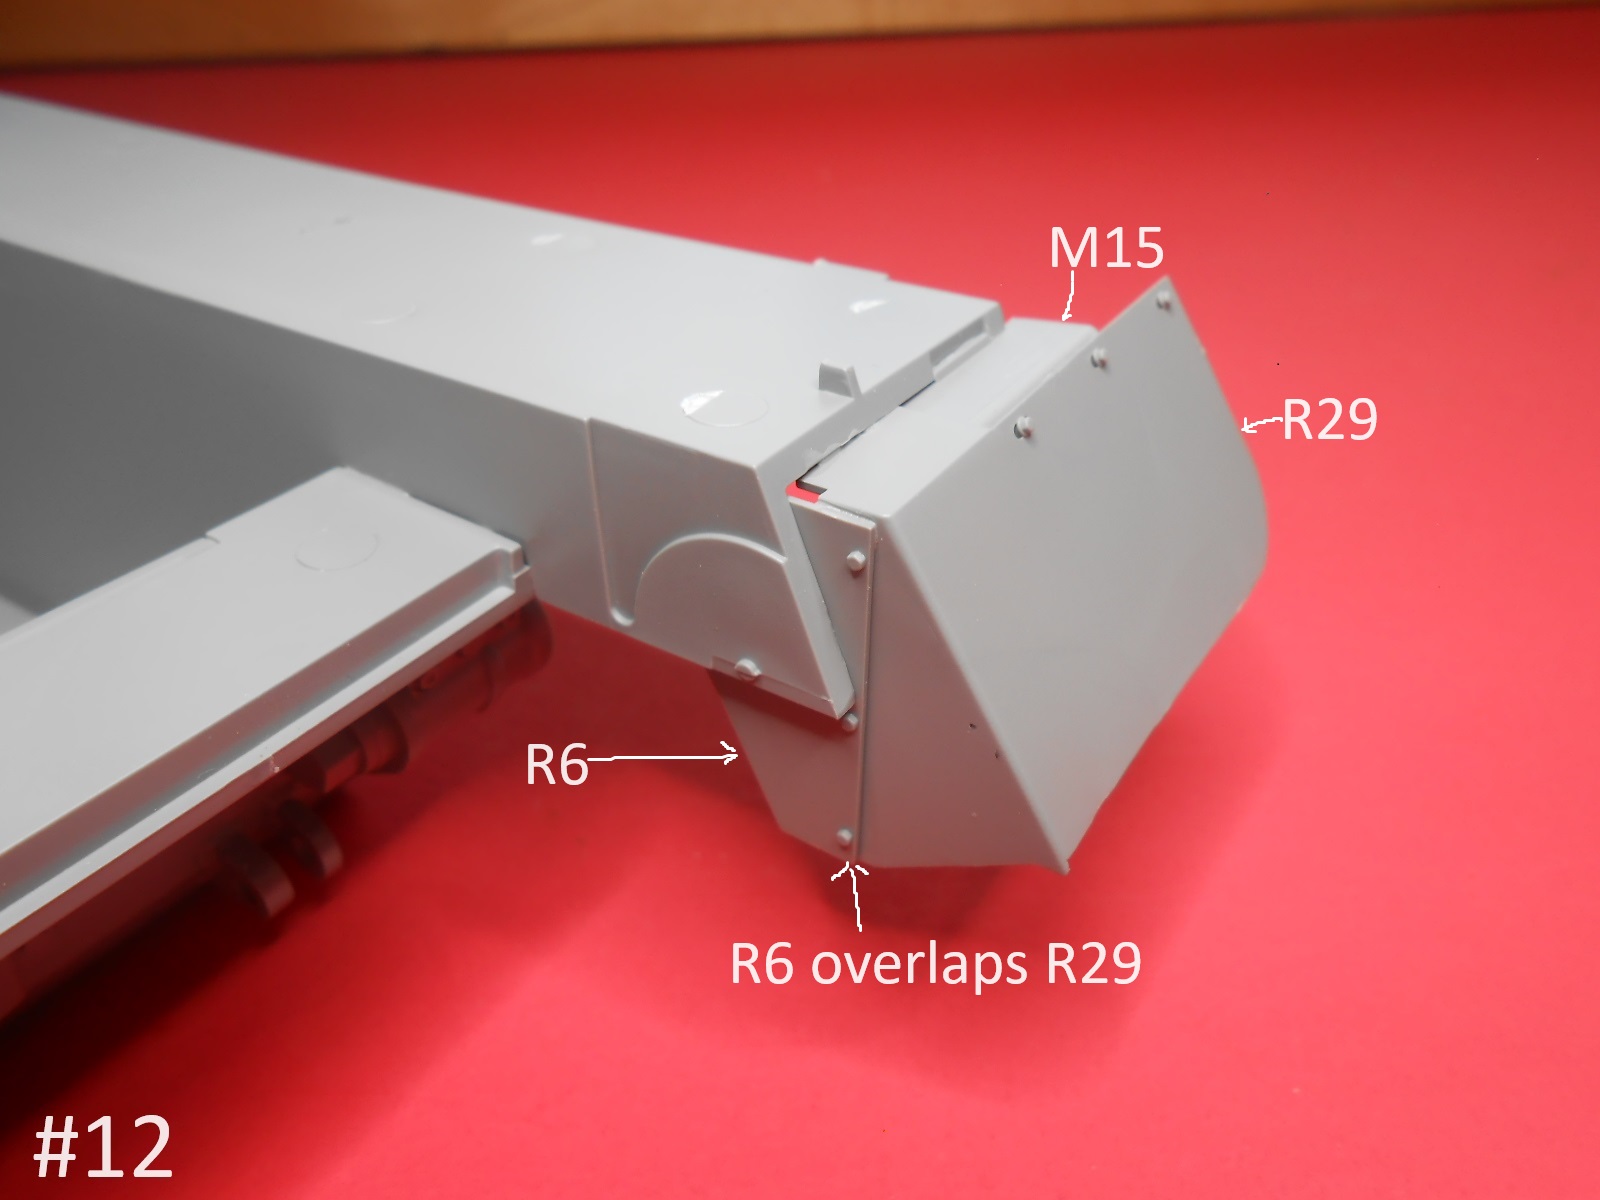
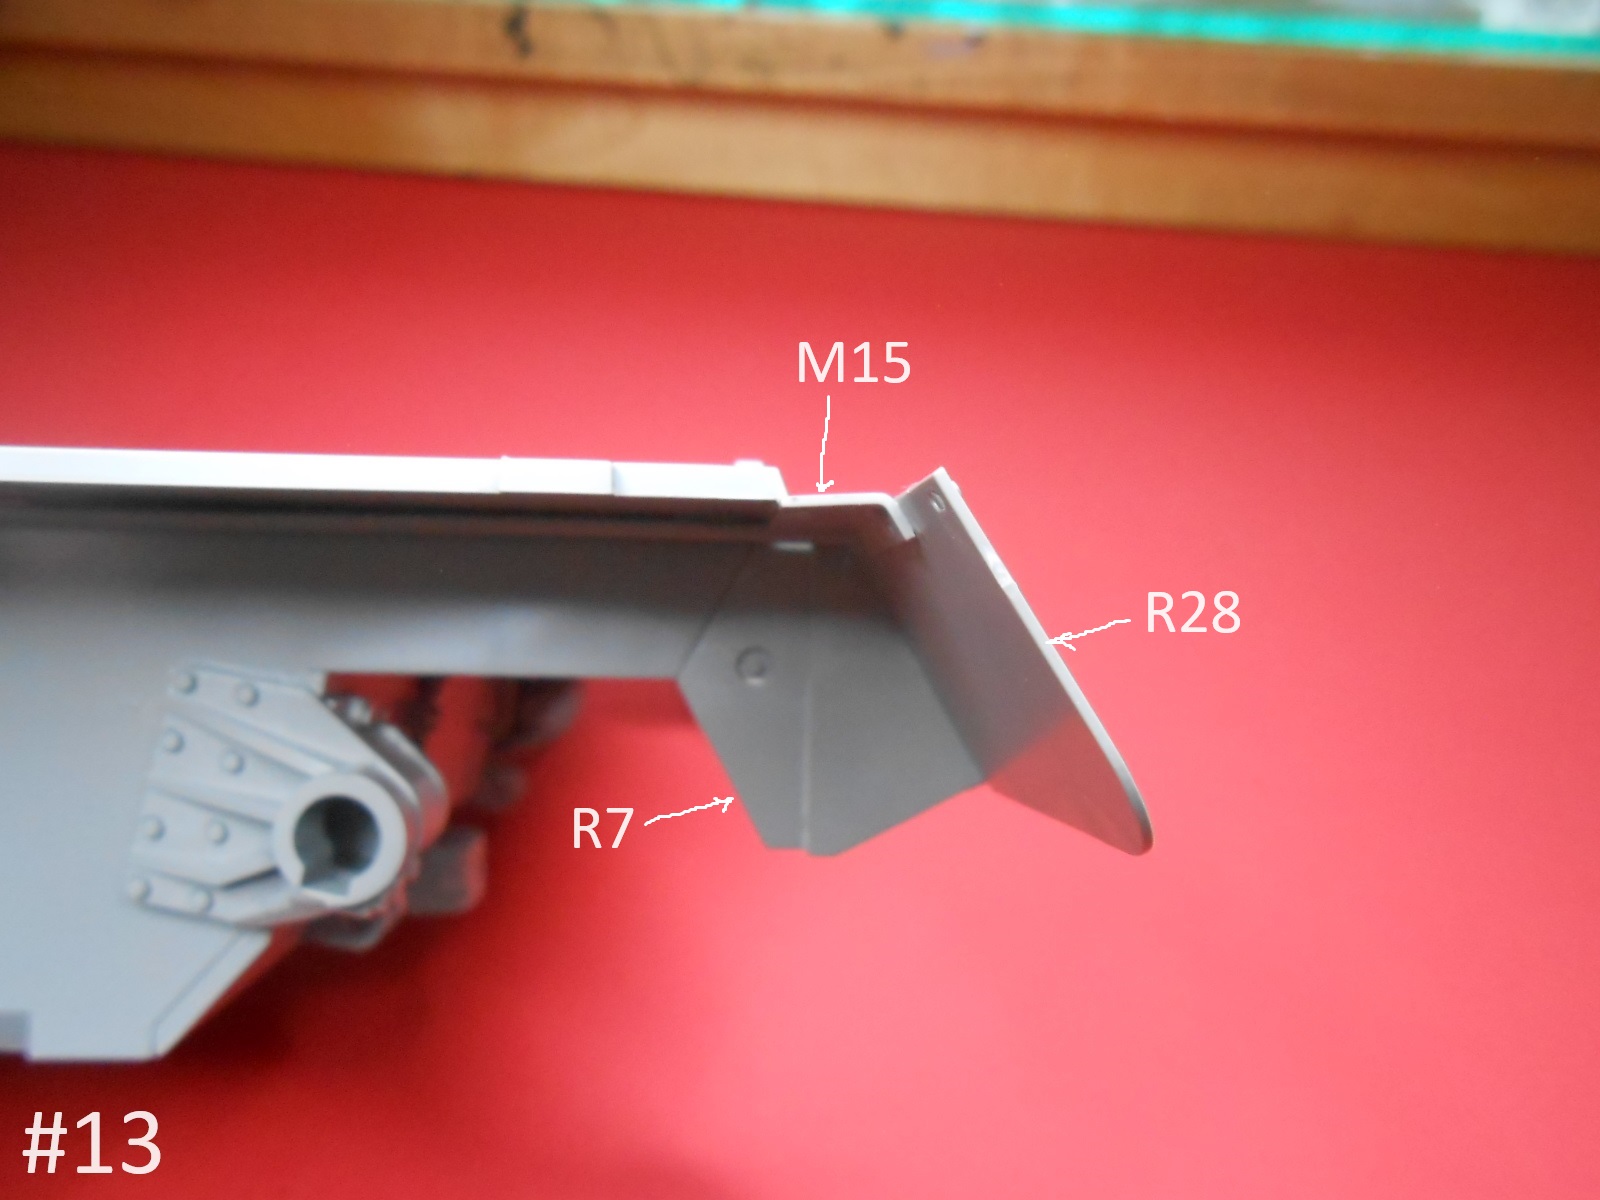
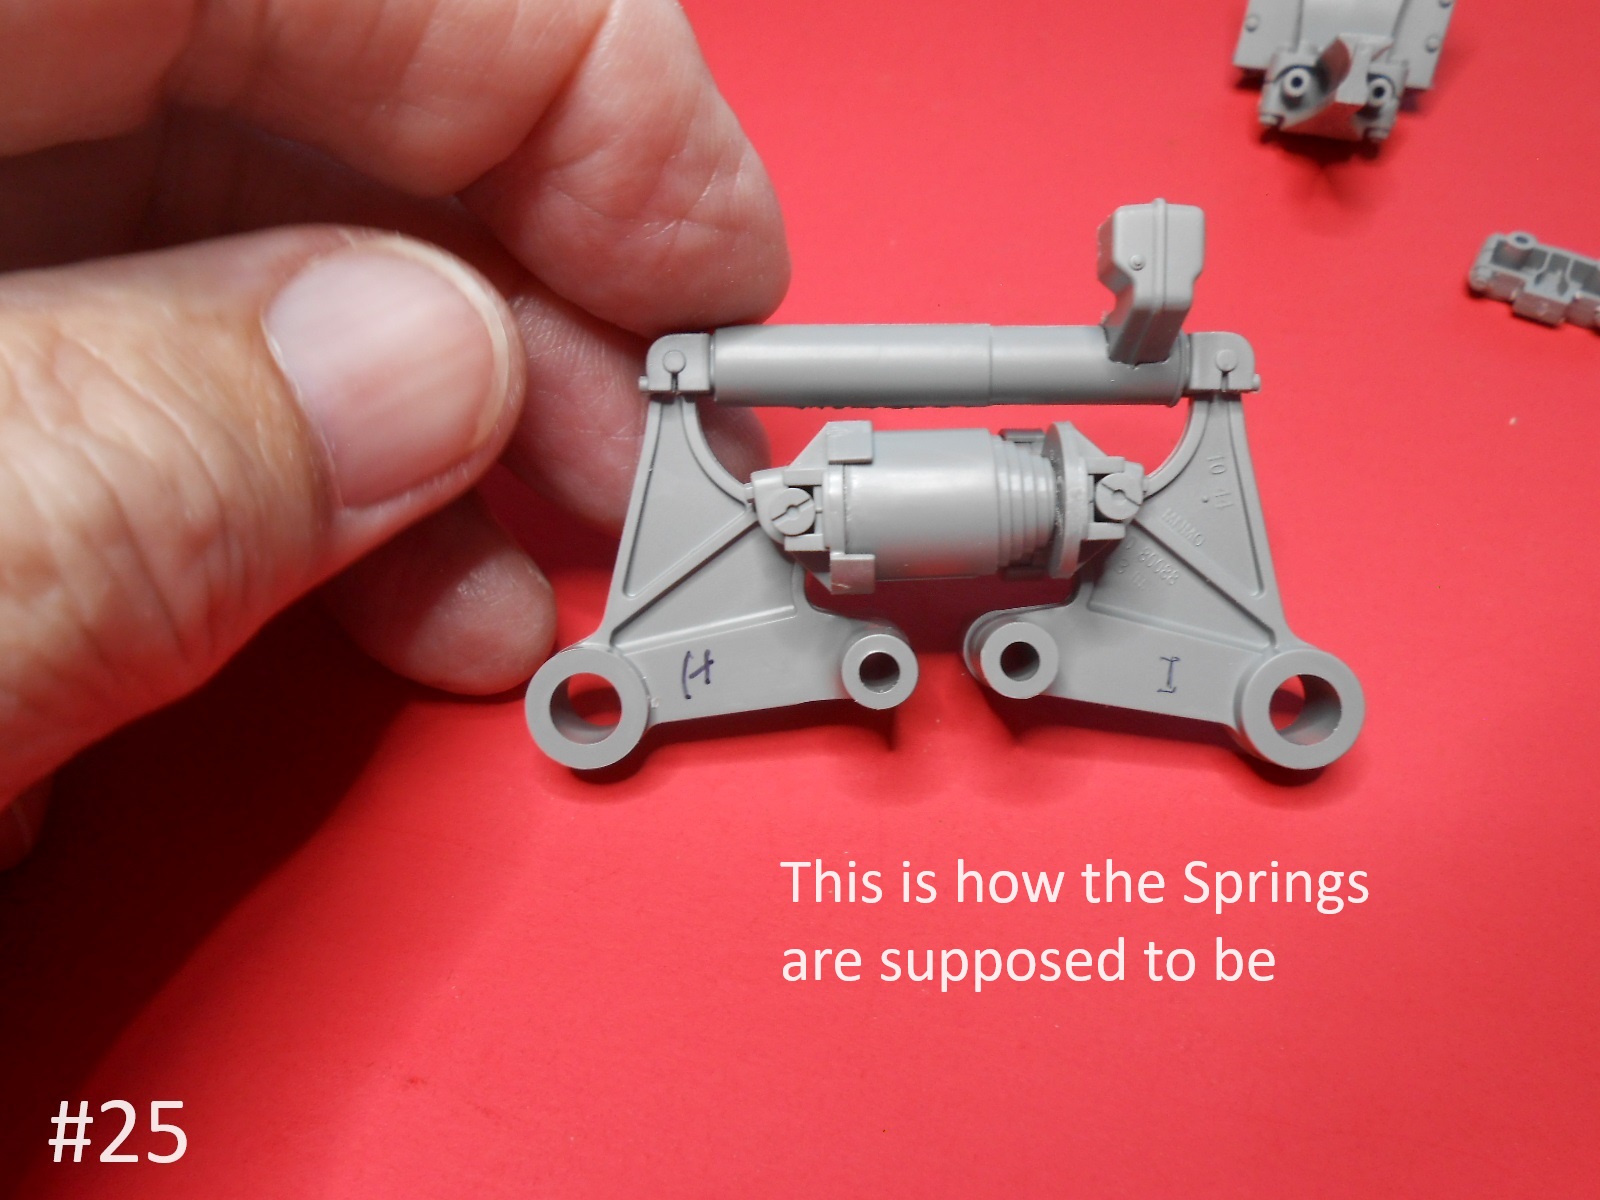
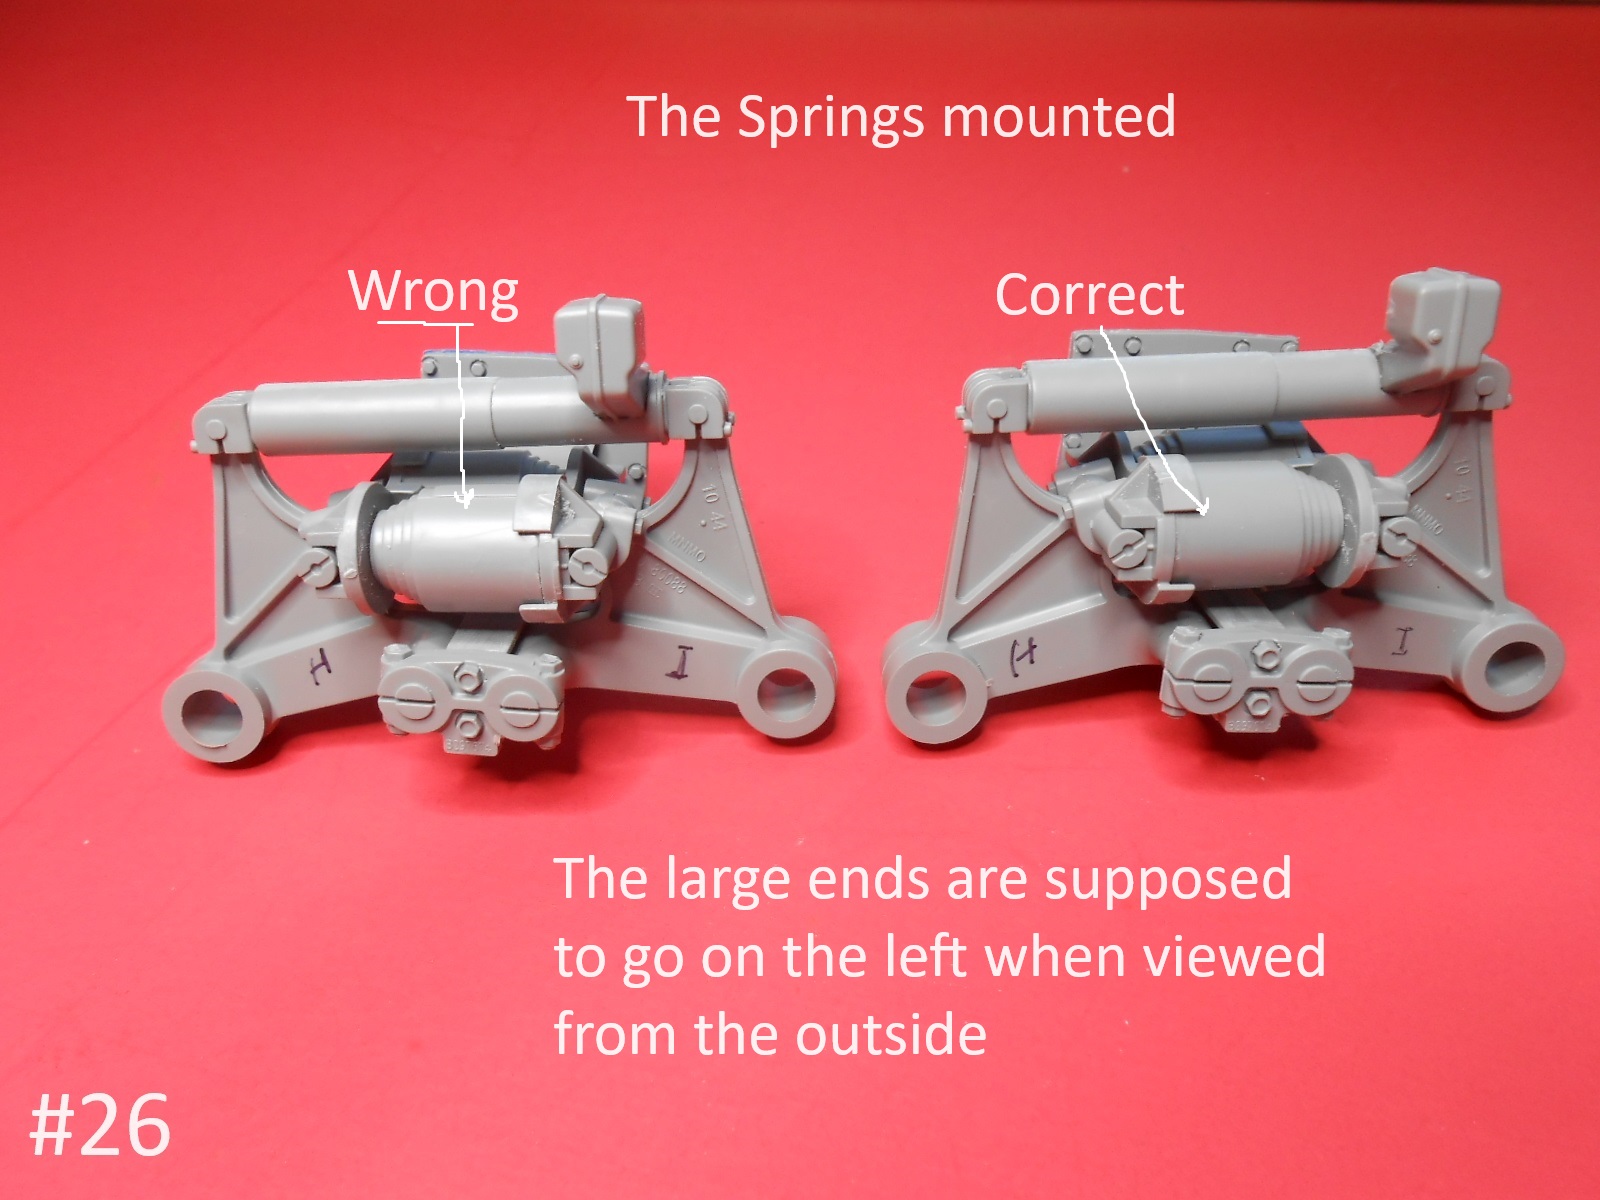
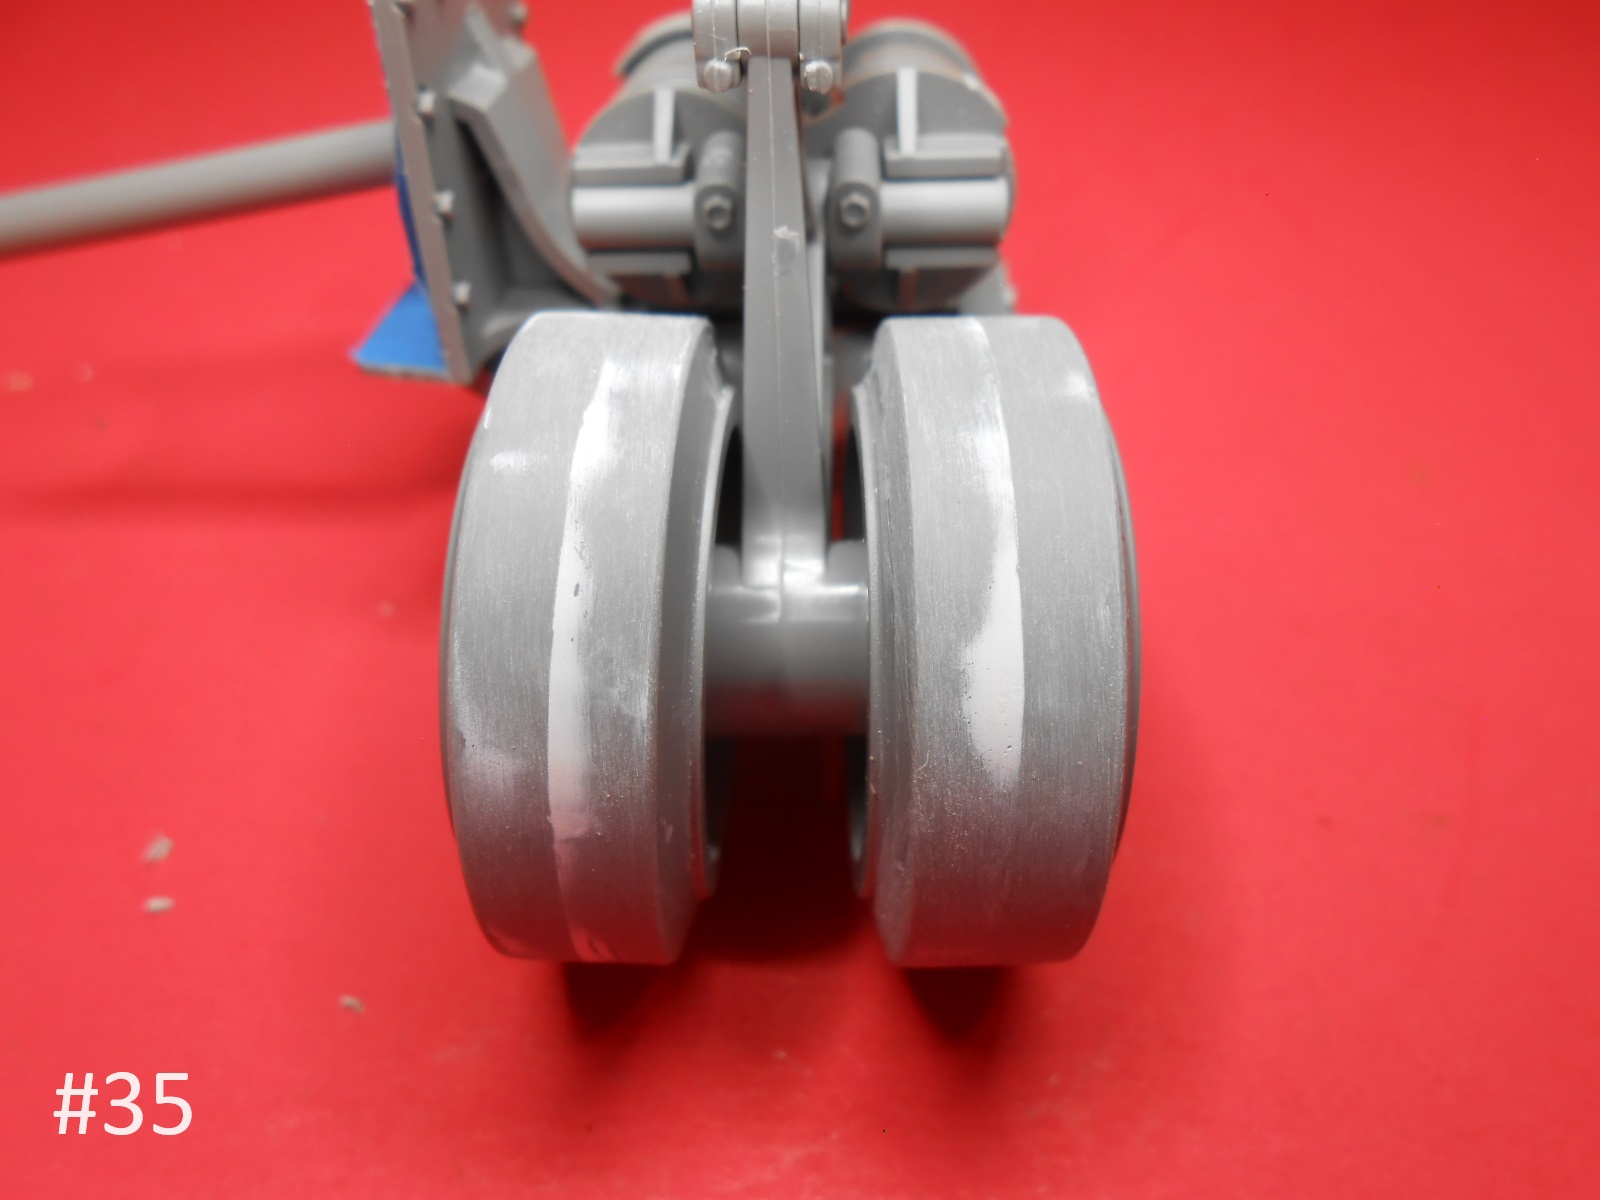
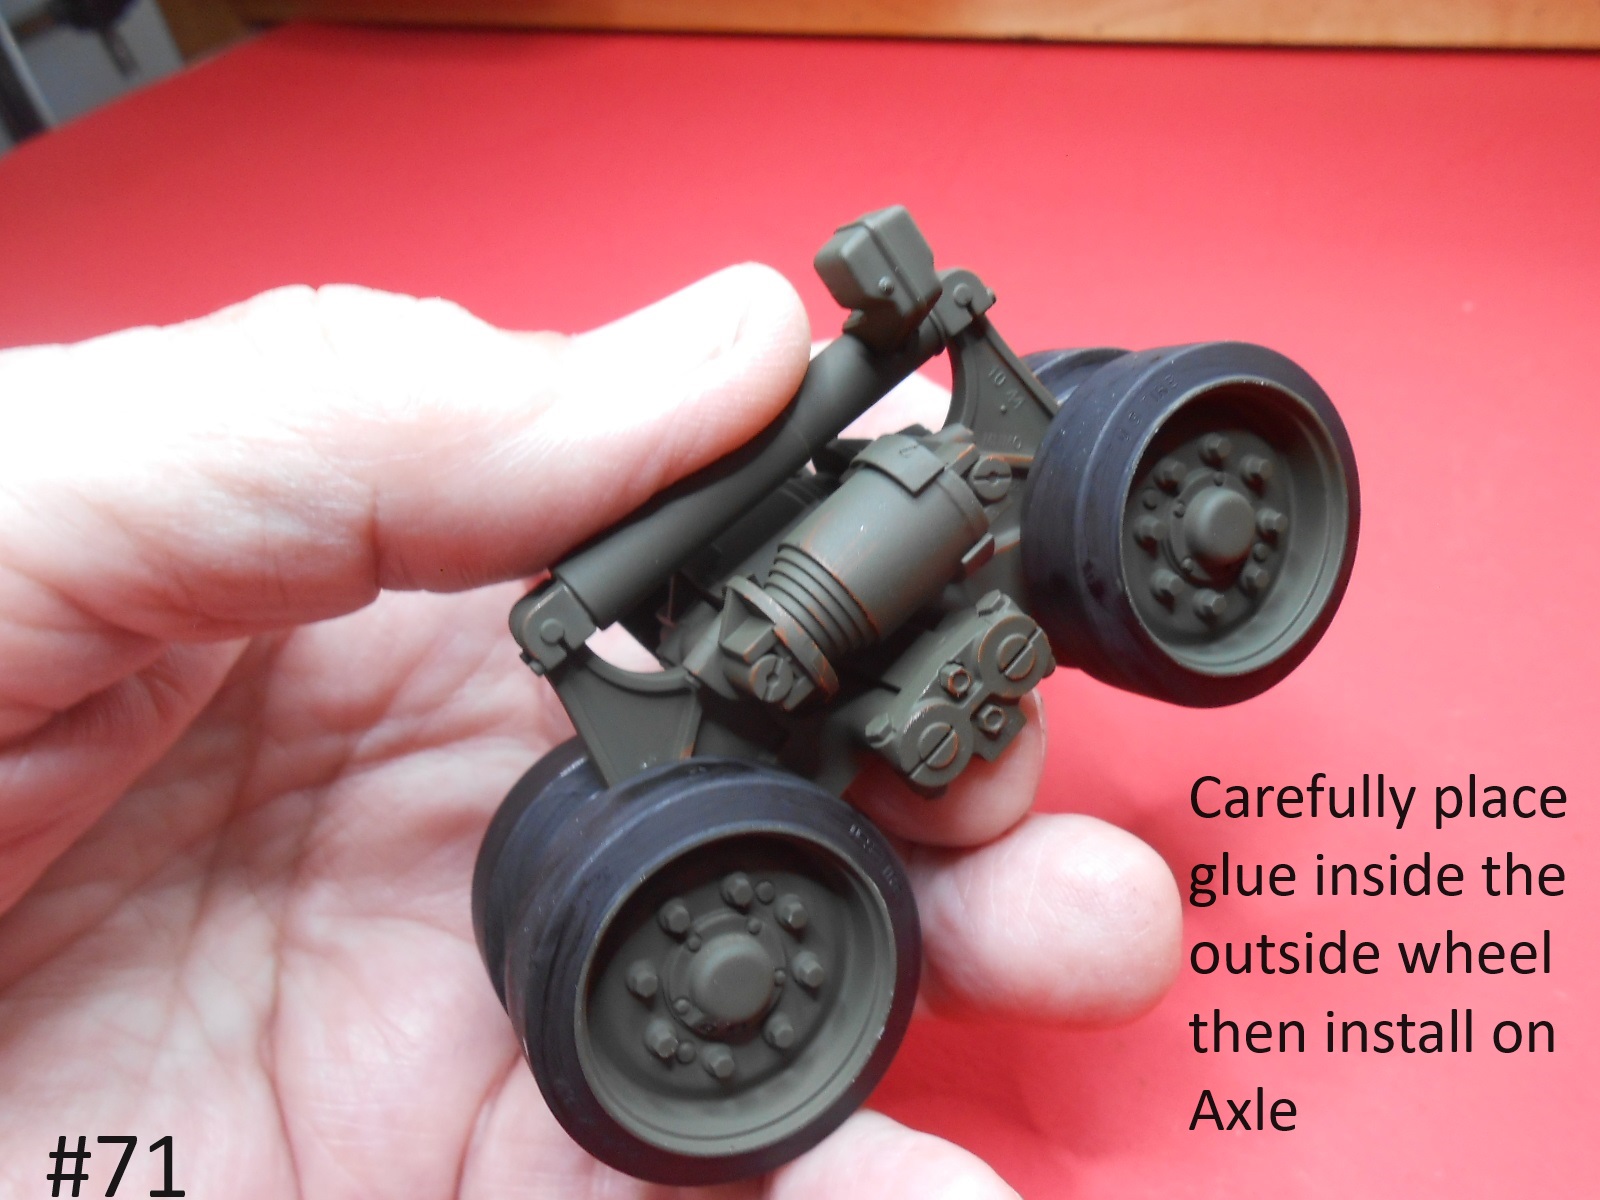
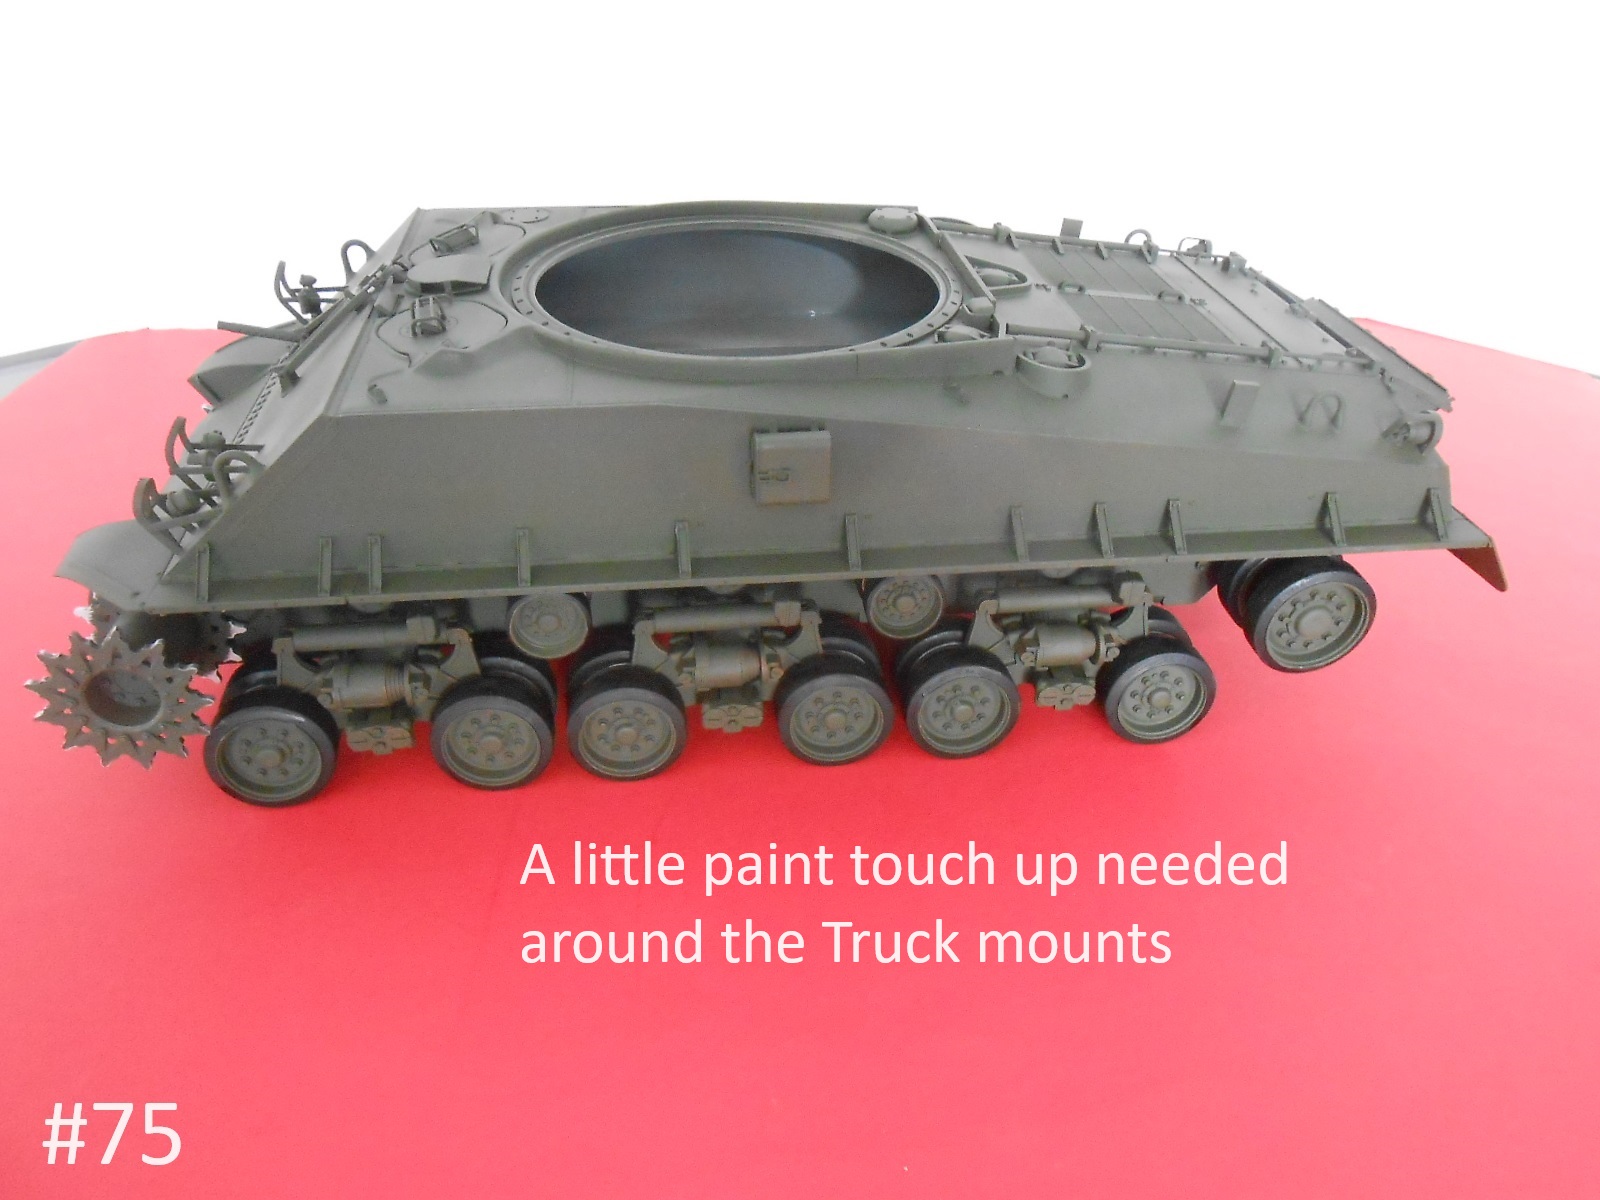
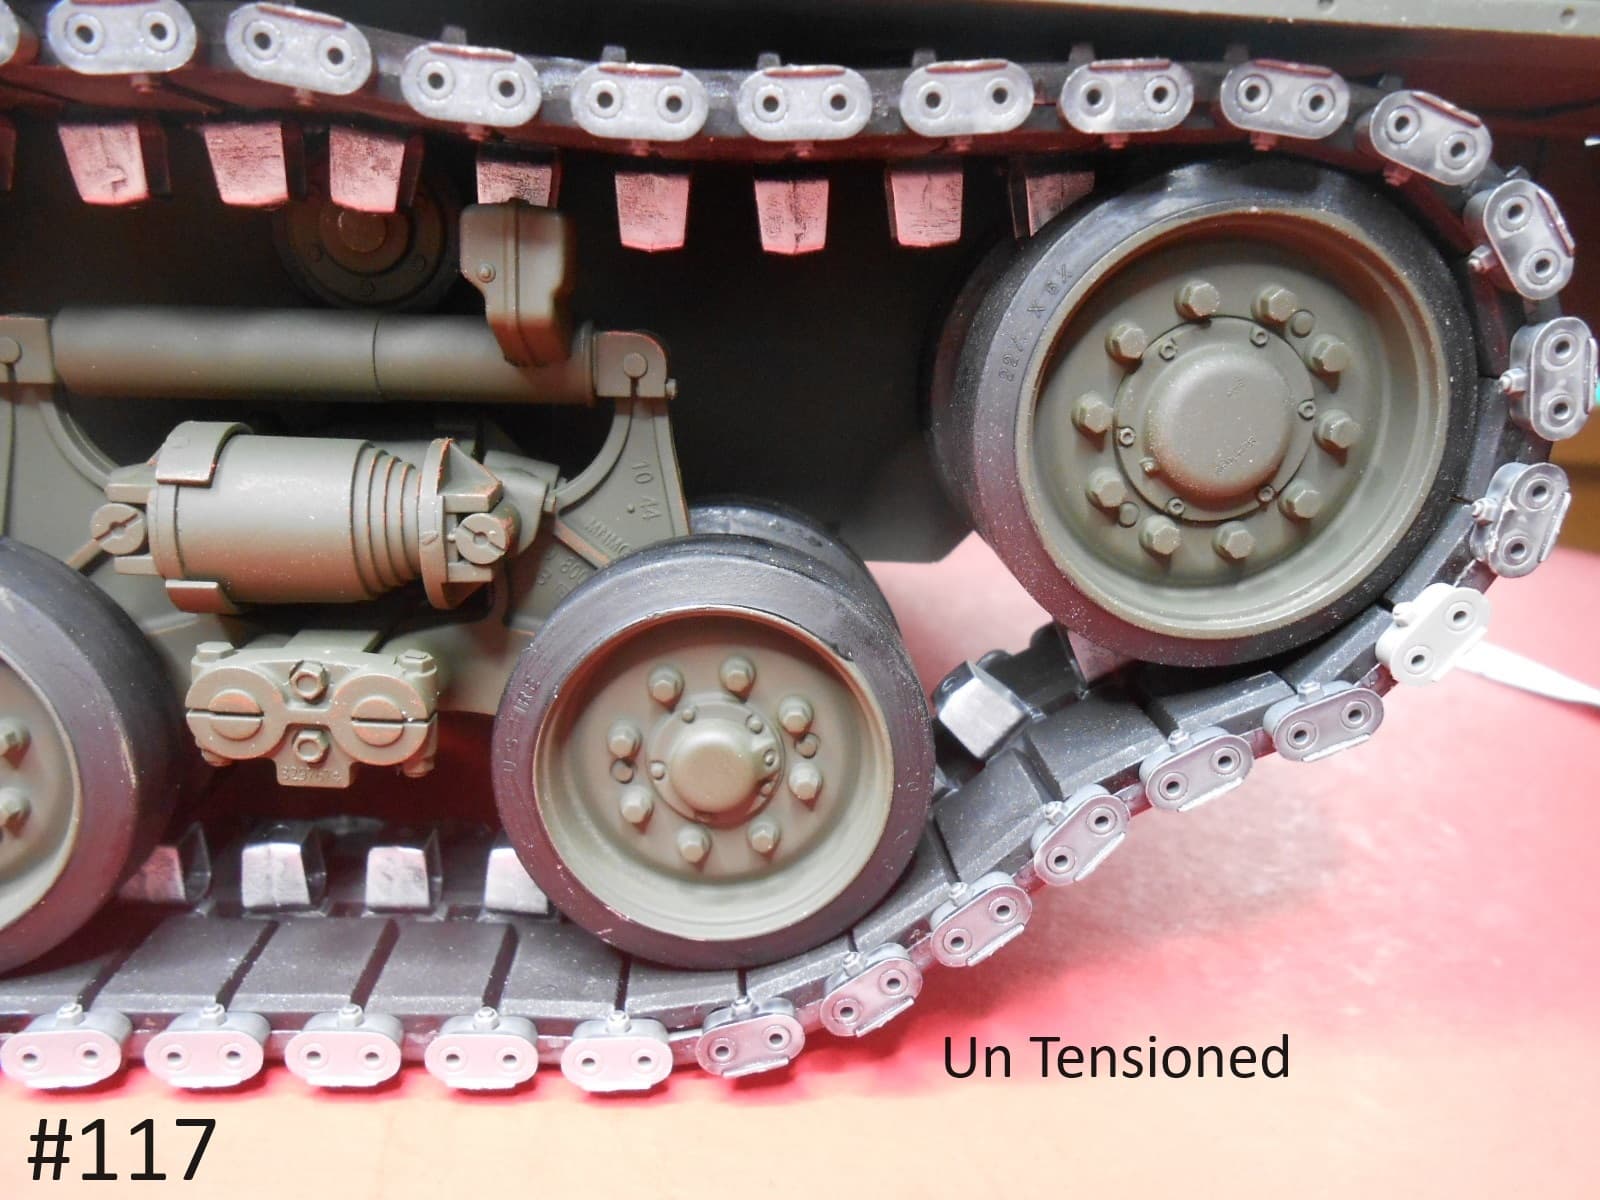
Installing the Wheels and Trucks.
First off the Korea version has been improved over the first early issue of this kit.
The Wheels and axles actually fit over having to drill out the Wheels , wheel bushings and Frame that the axles go through.


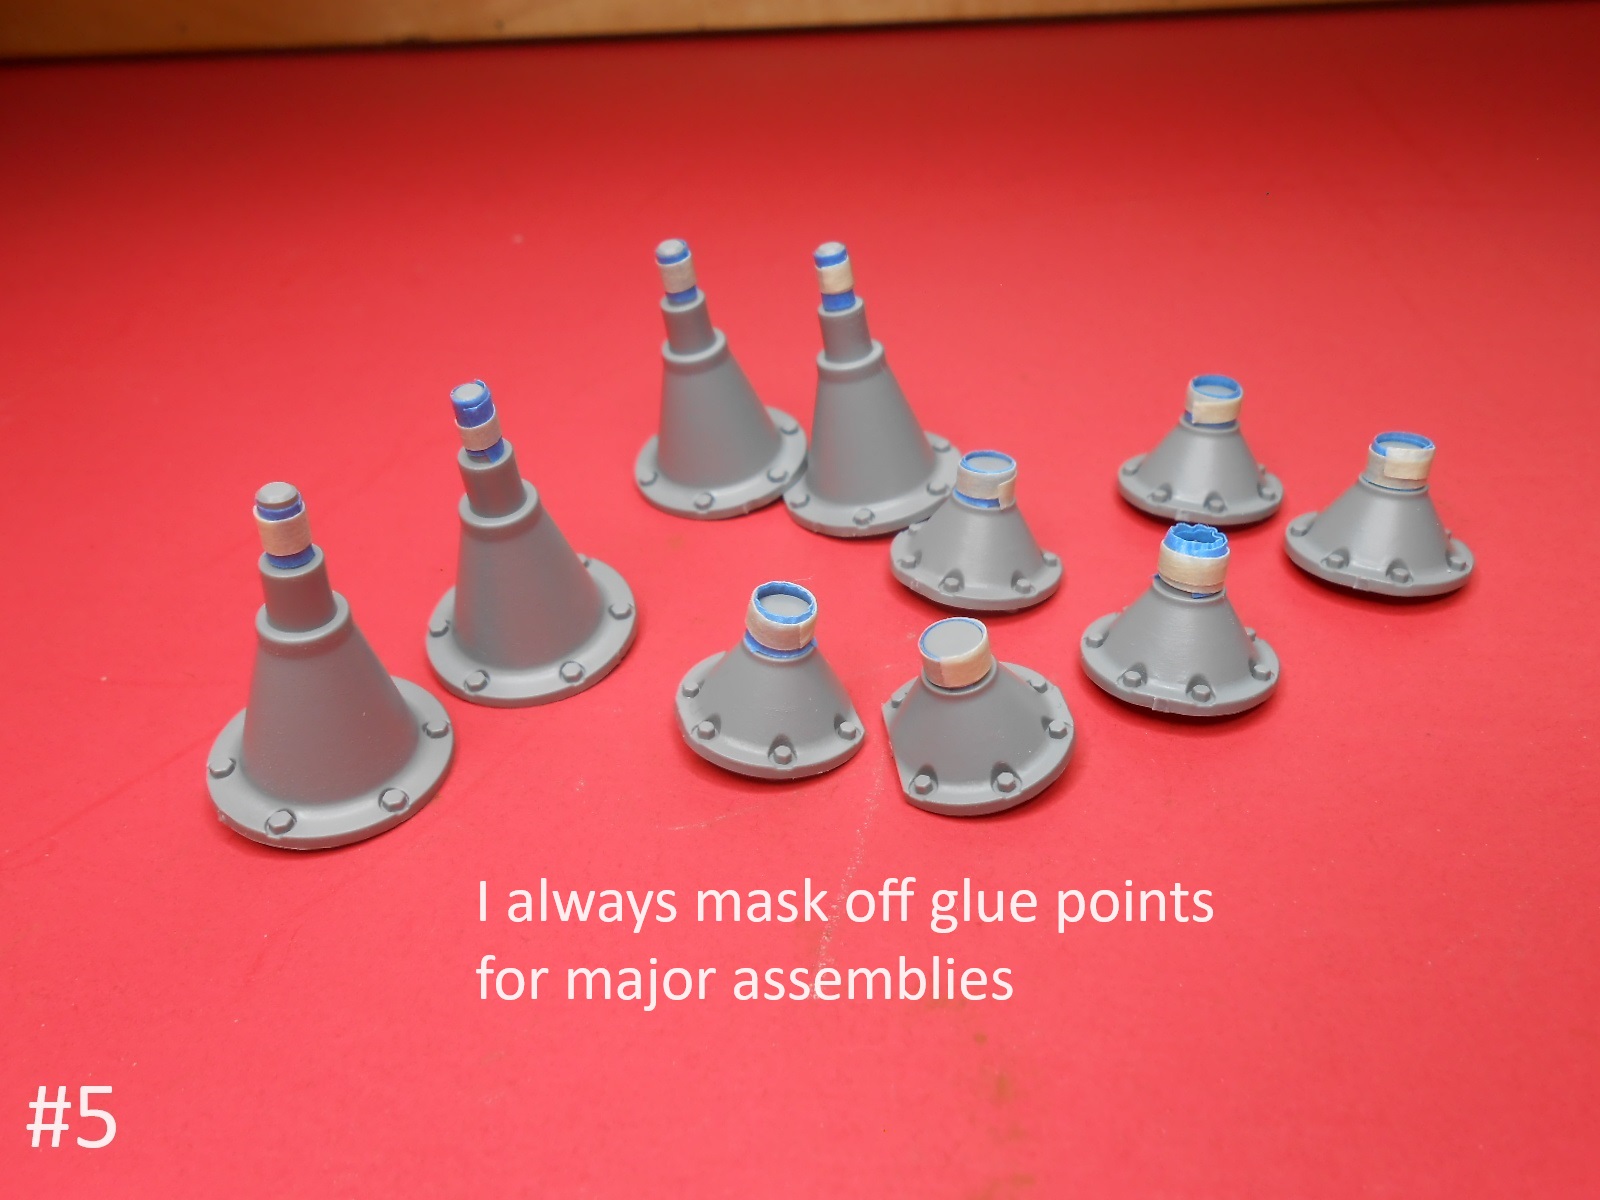
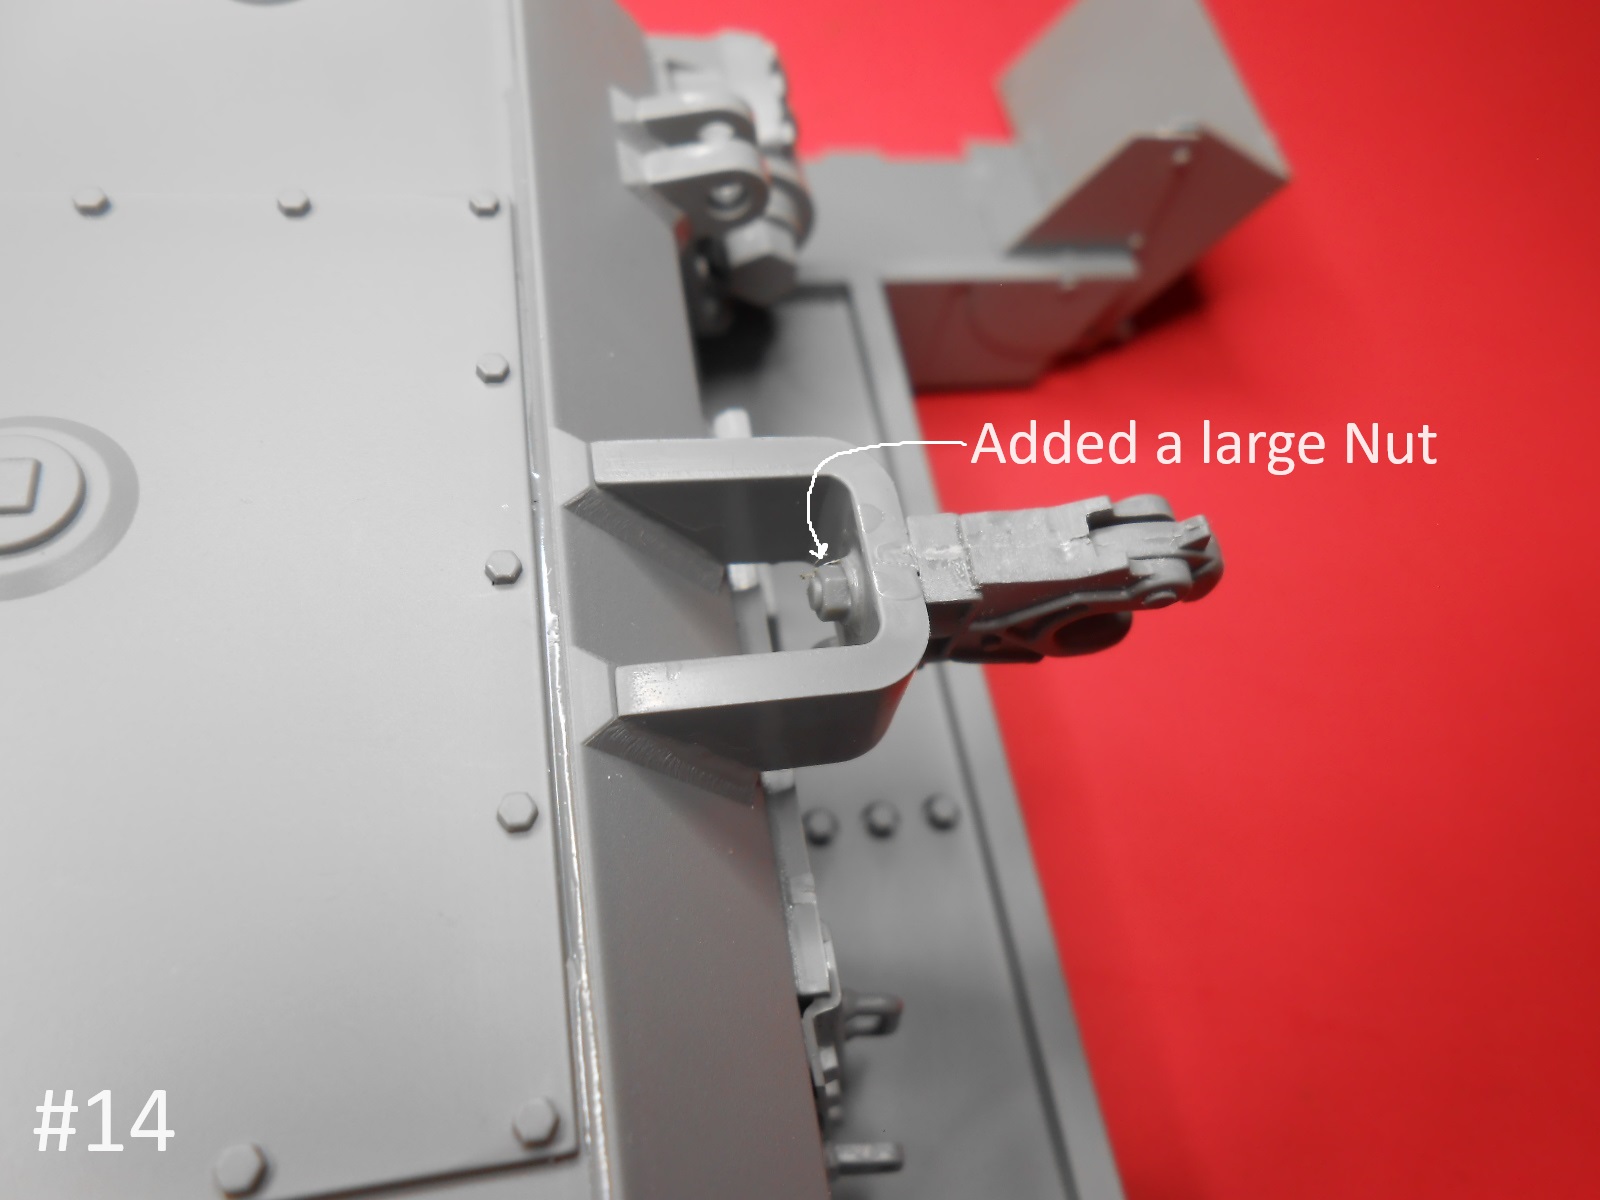
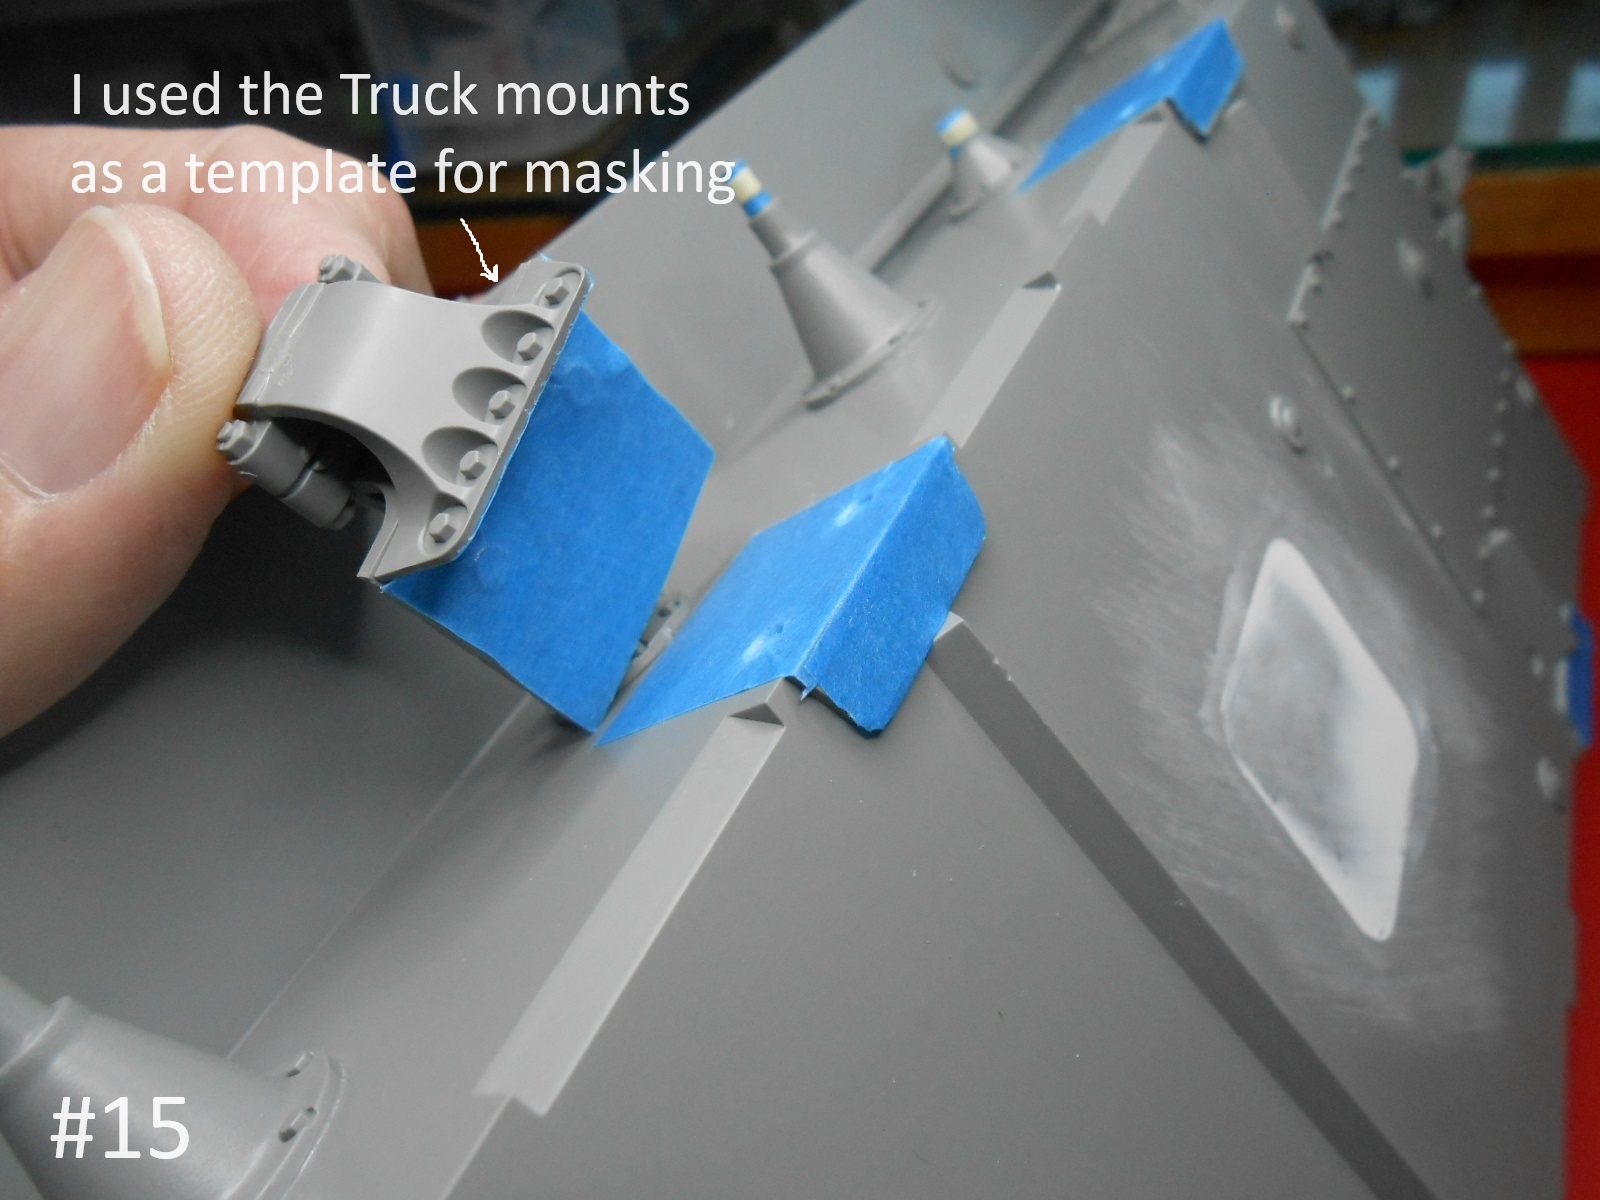
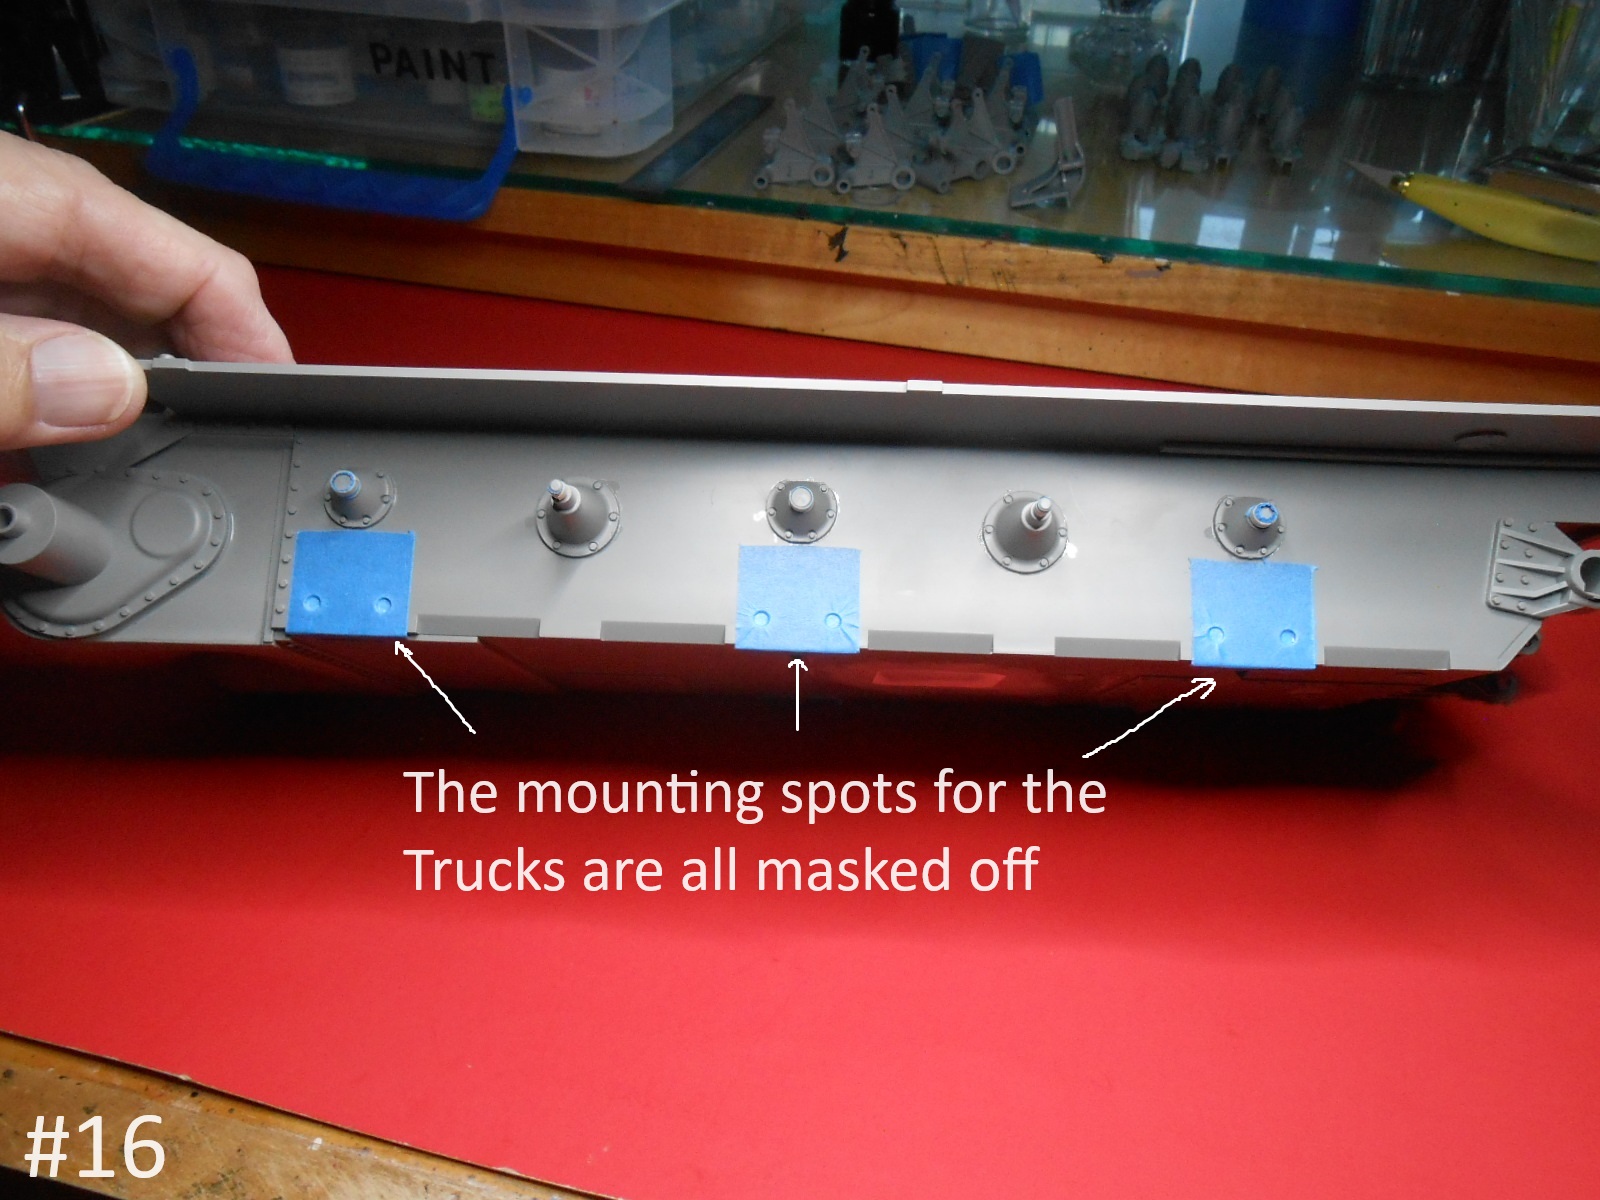
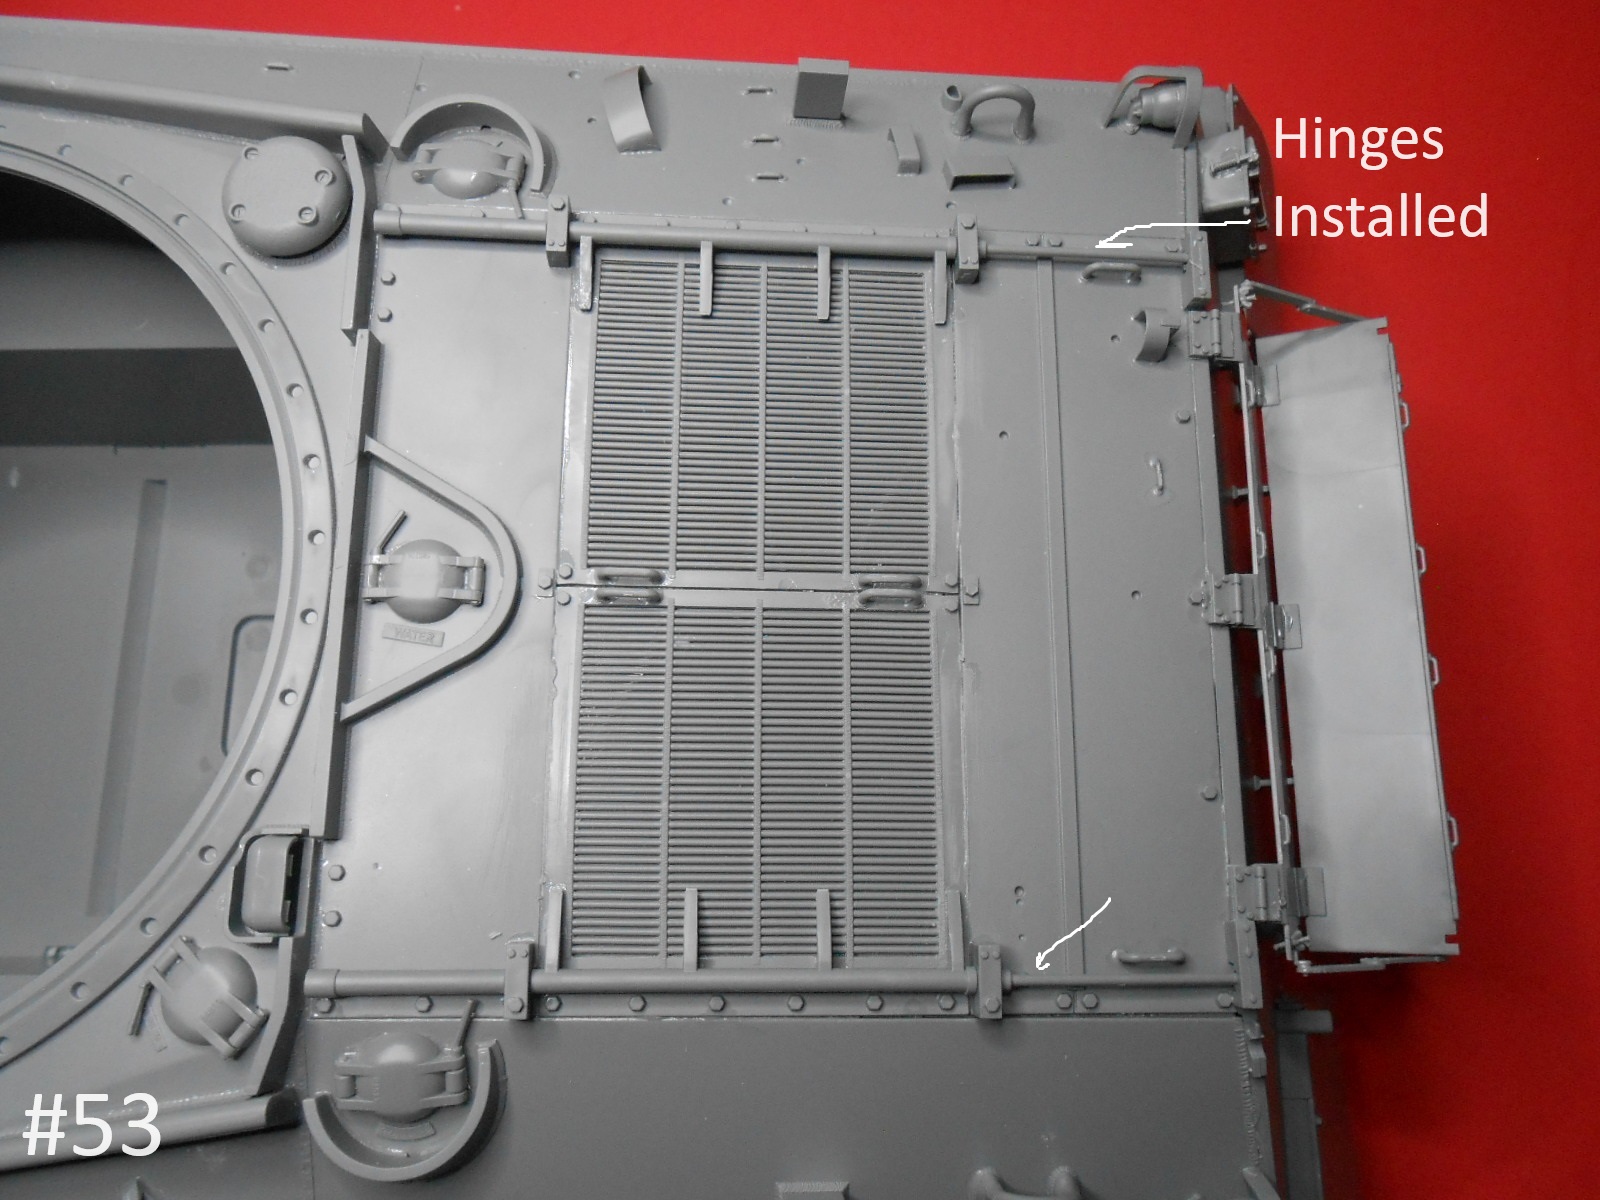
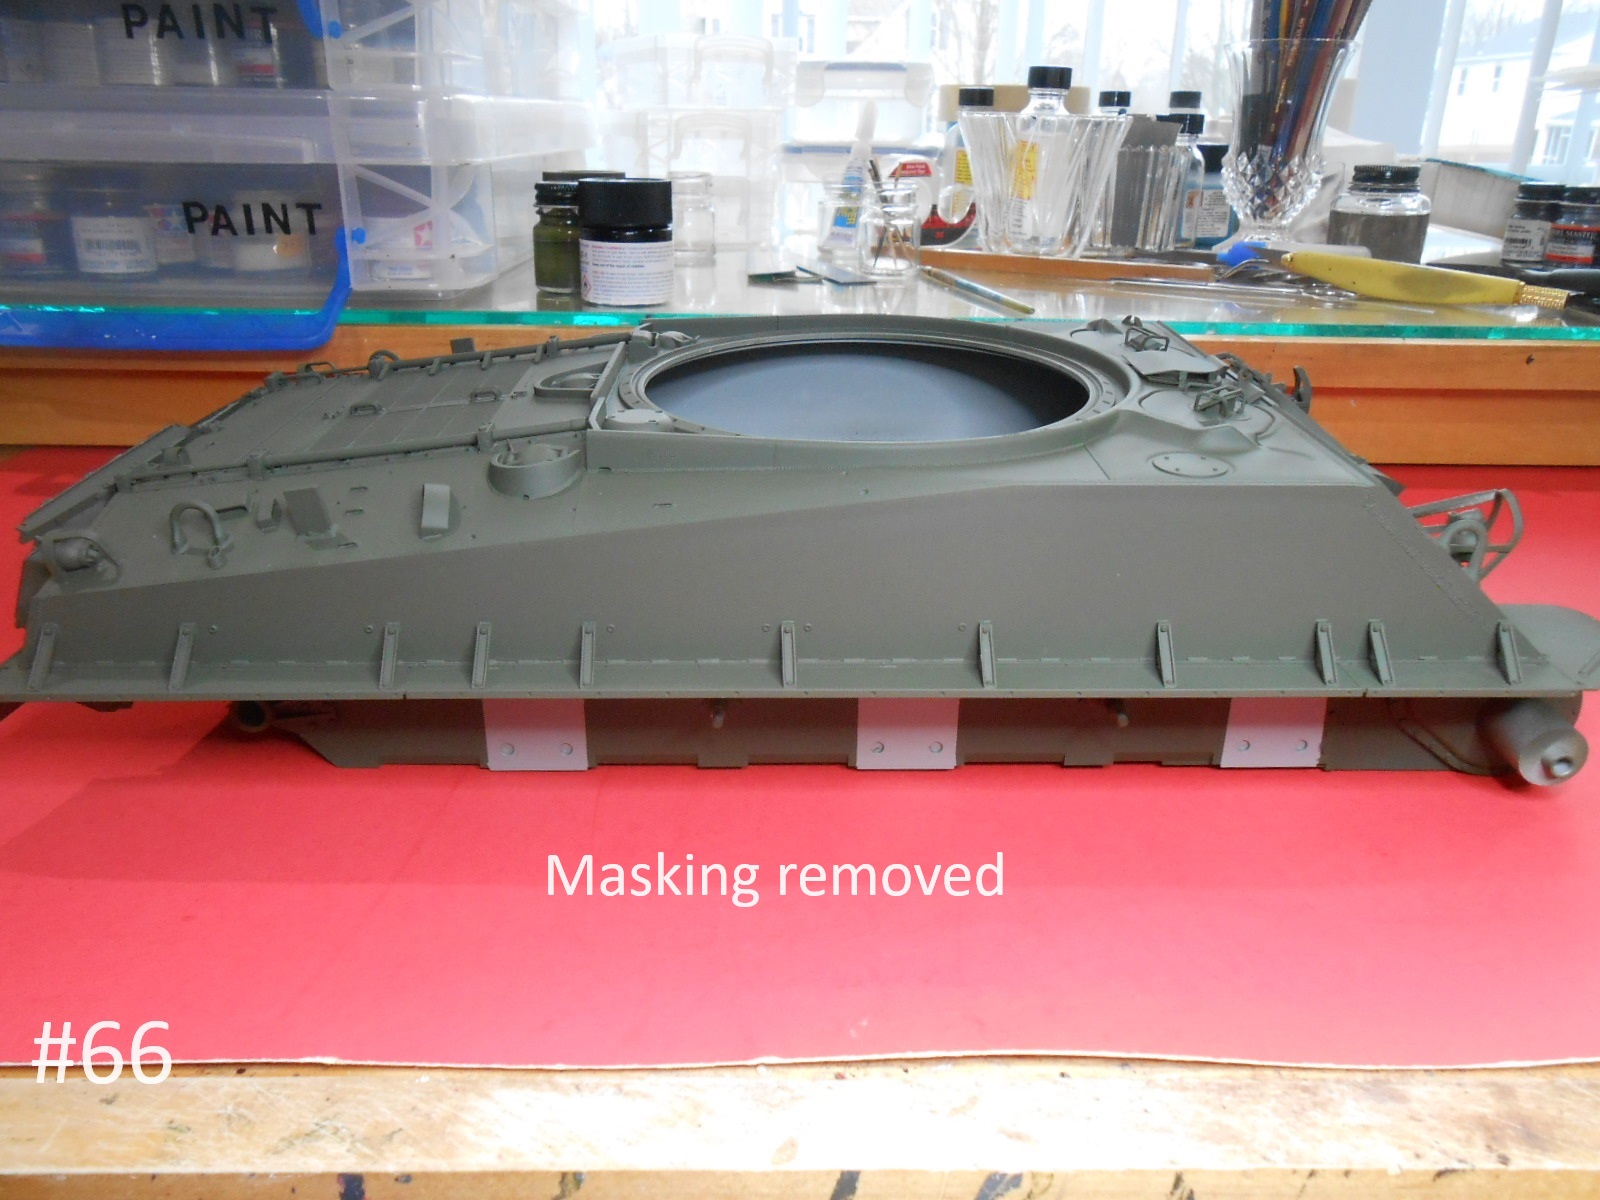
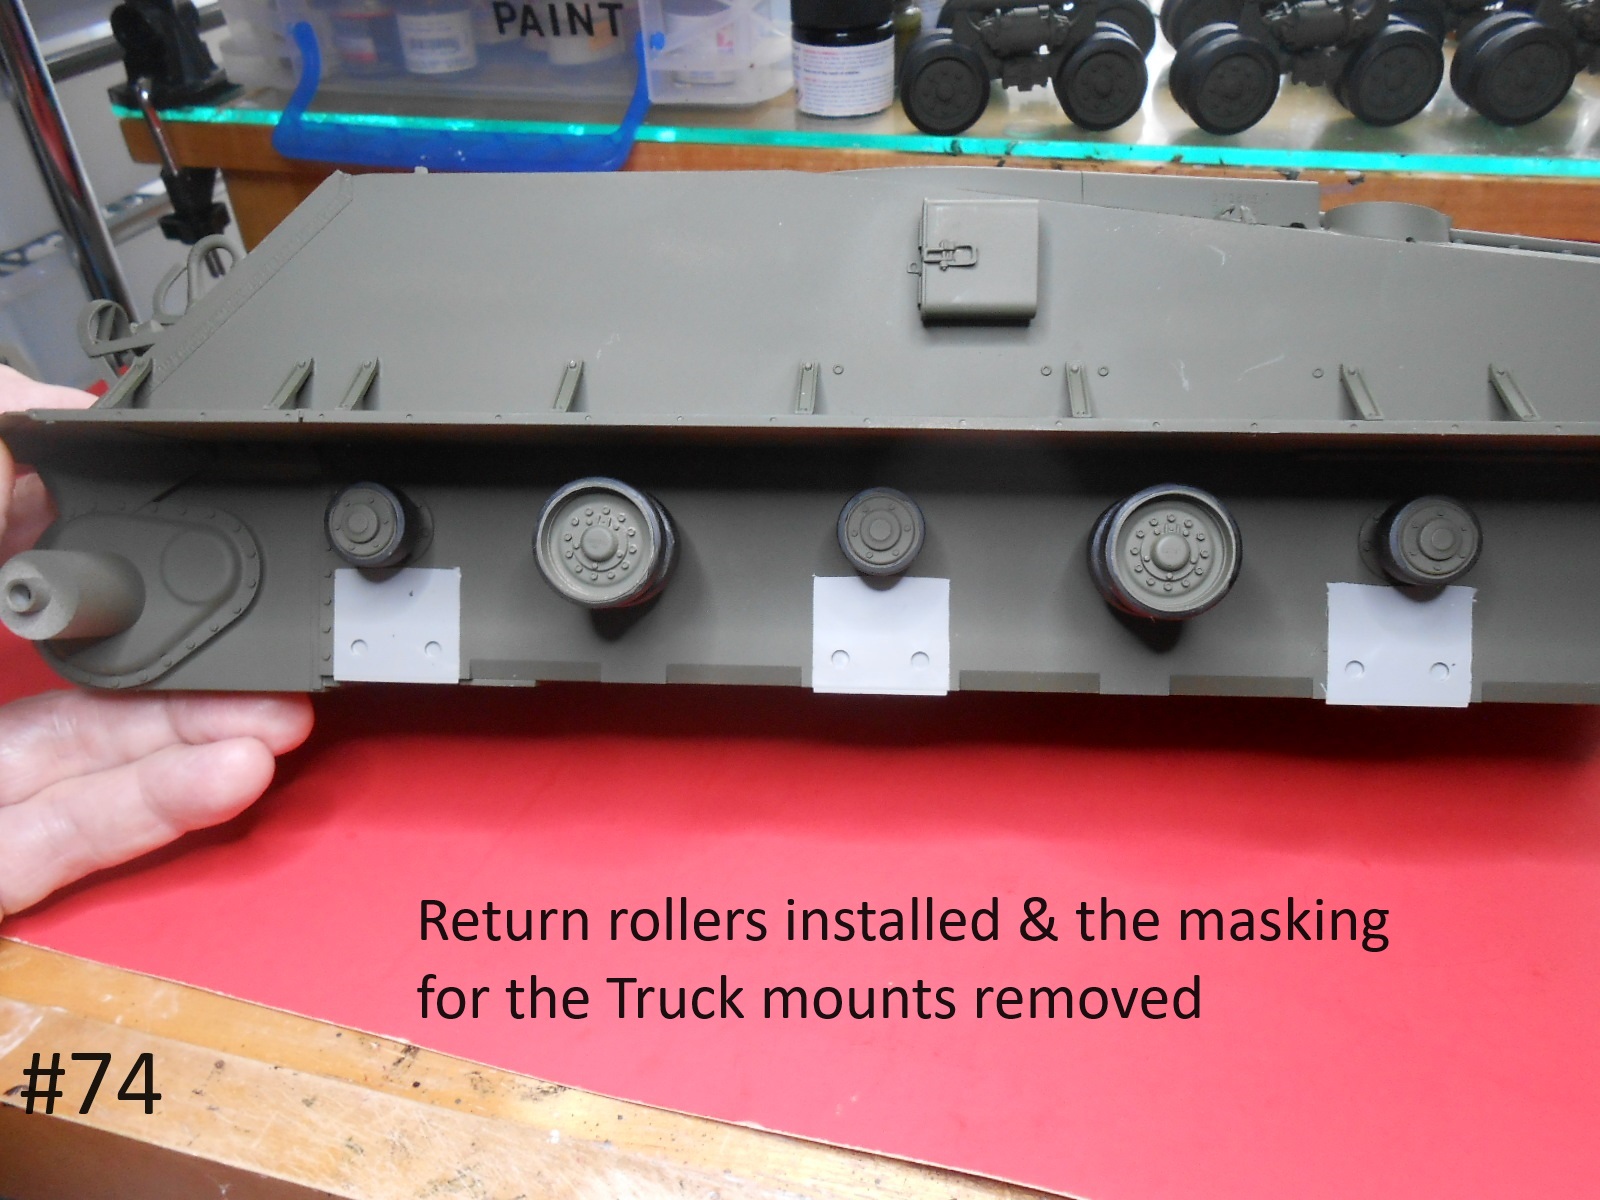
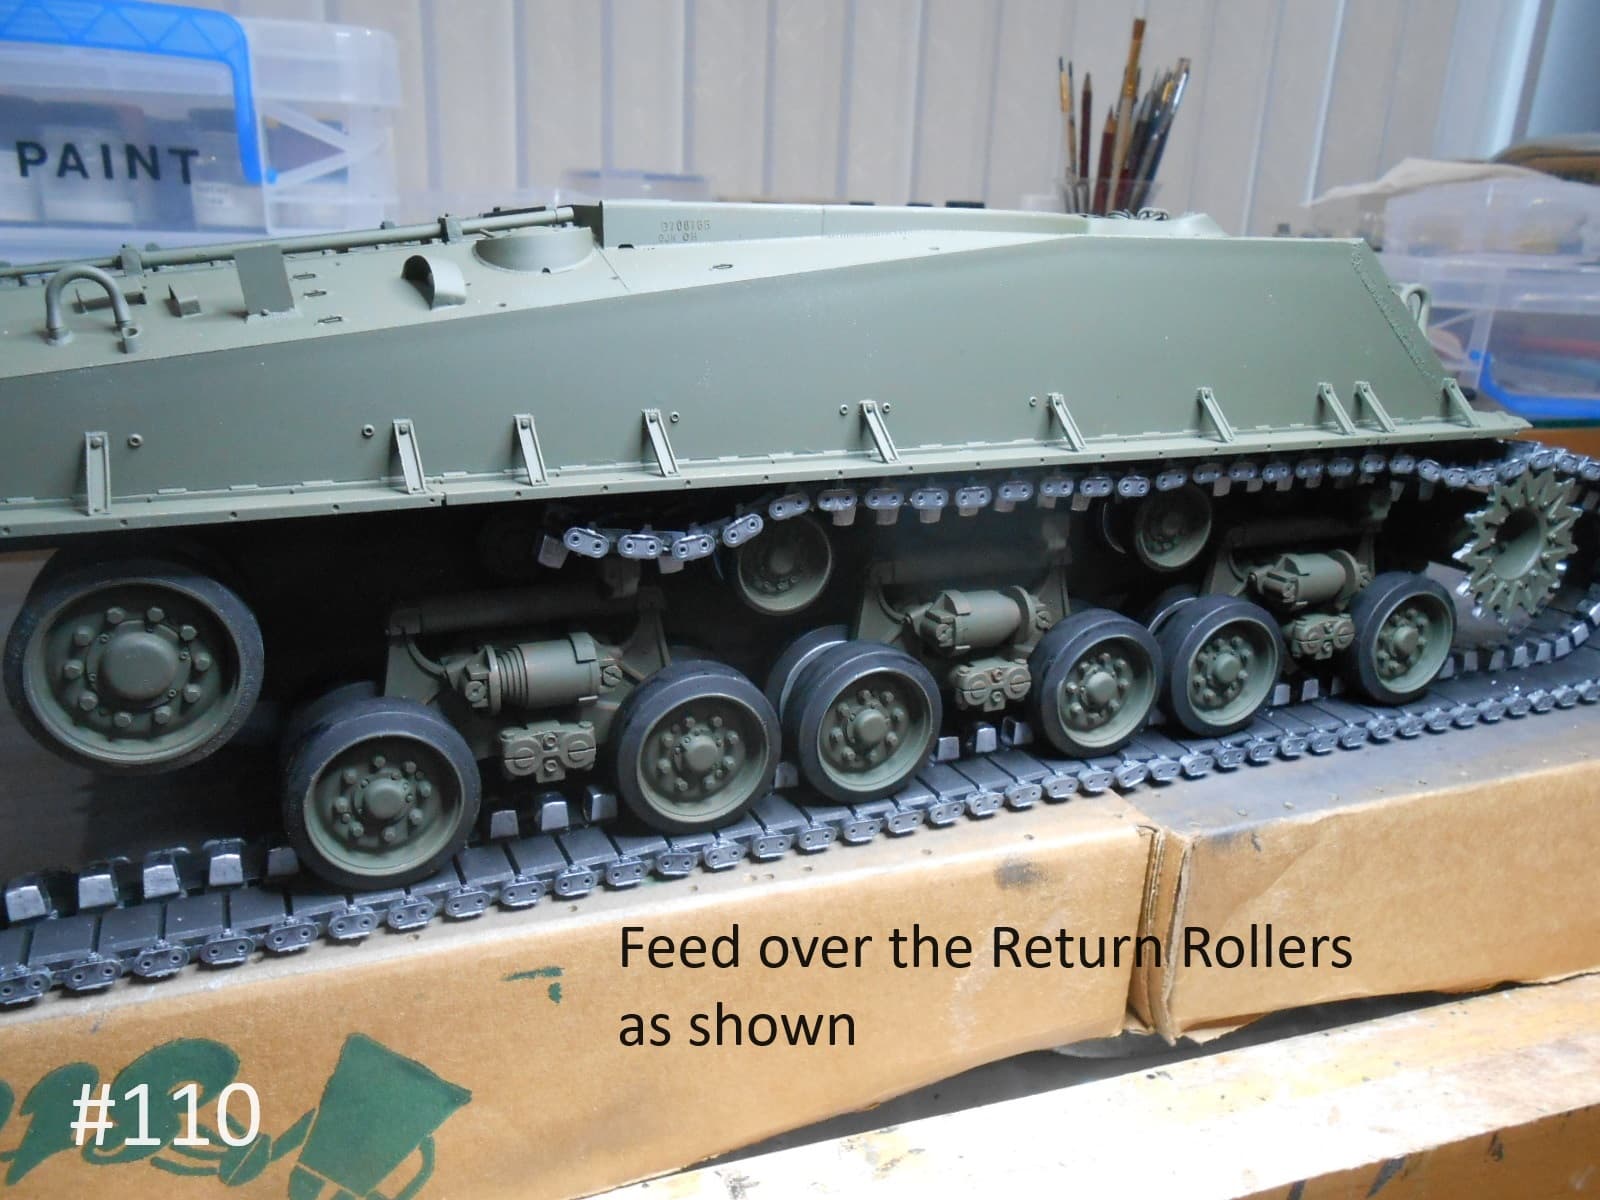
Here I installed the Return Rollers and removed the masking where the Trucks mount.
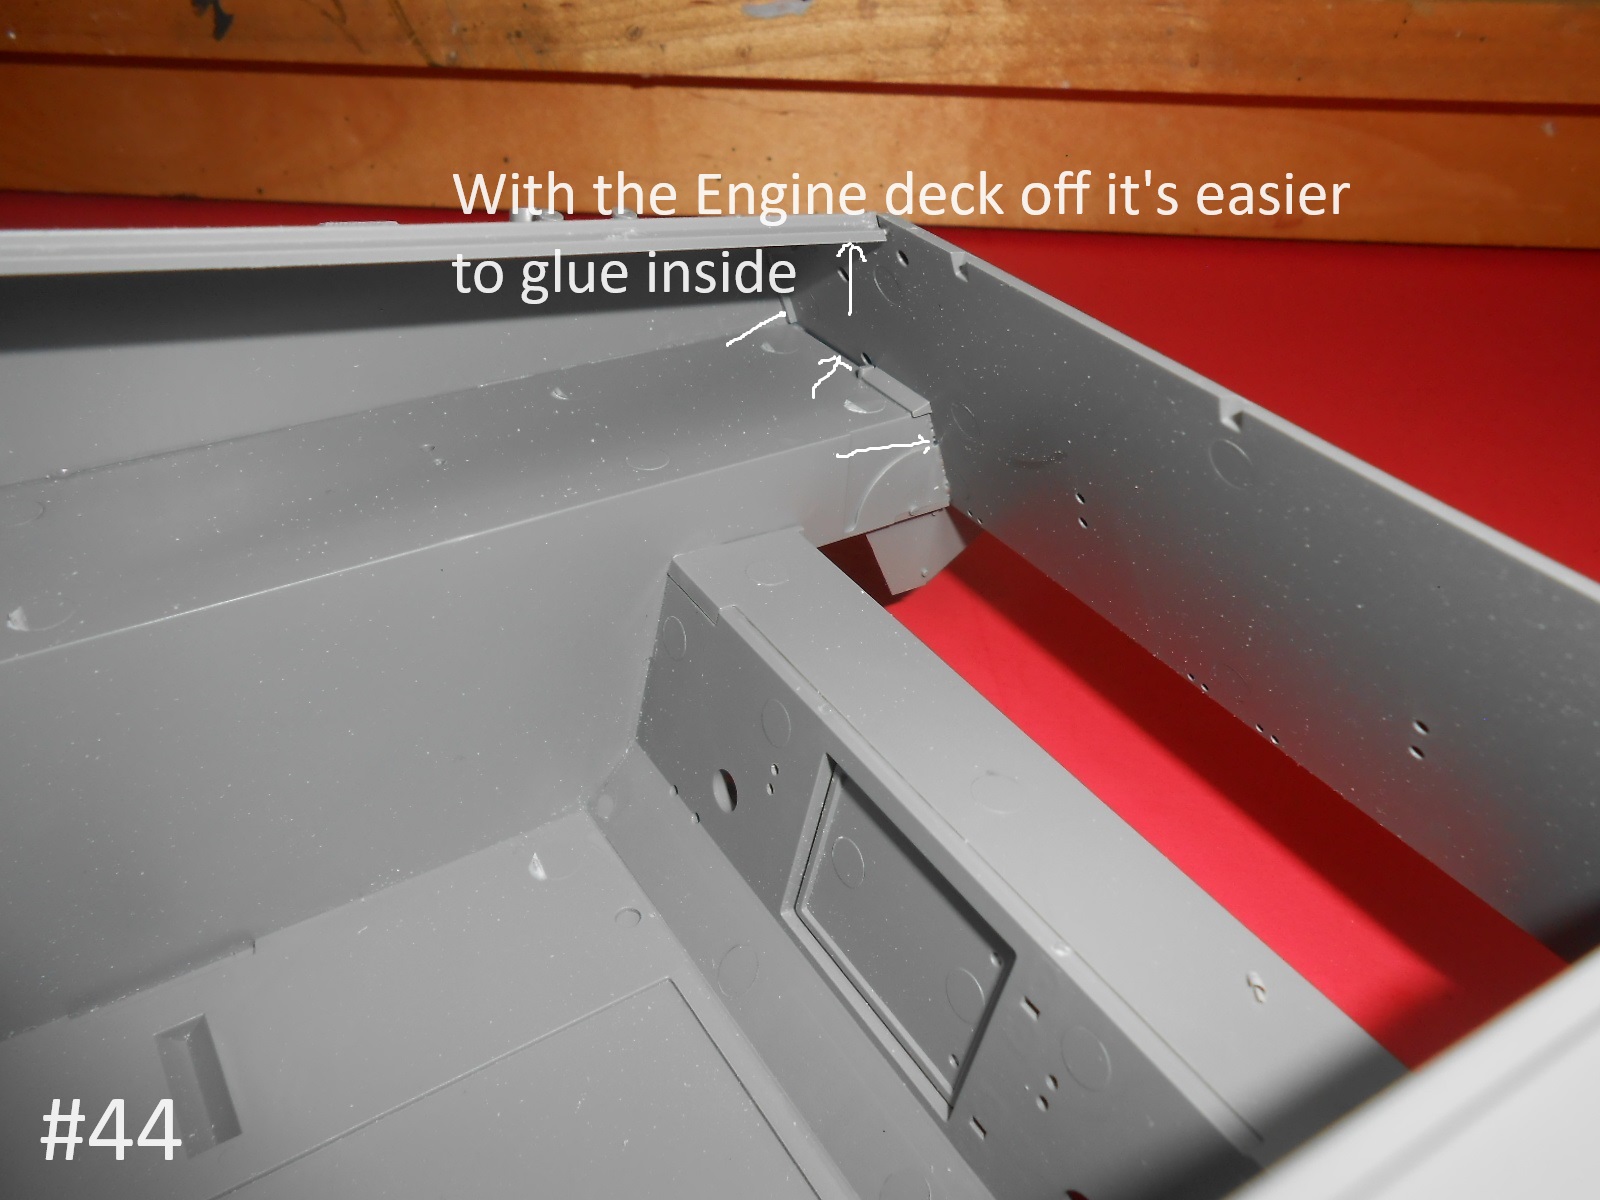
Gluing is a lot easier when you don’t have a layer of paint between the parts you want to join.


Just a little touch up paint around the edges where needed.

I’ll be working on the Track next , this might take a while as there is a lot of parts involved.
Regards
Donald

4 Likes

I’m working on the Track parts , this is what I have so-far.


There are 5 Sprue of these.
I removed the Sprue parts from around the Guide Horns , it’s easier to clean them up this way.


Painted now to separate them.


Well back to work.
Regards
Donald

3 Likes

All those track parts and sanding makes me want to cry :joy:

2 Likes

At least it’s a larger scale , easier on the Eyes & Fingers.
Regards
Donald

4 Likes

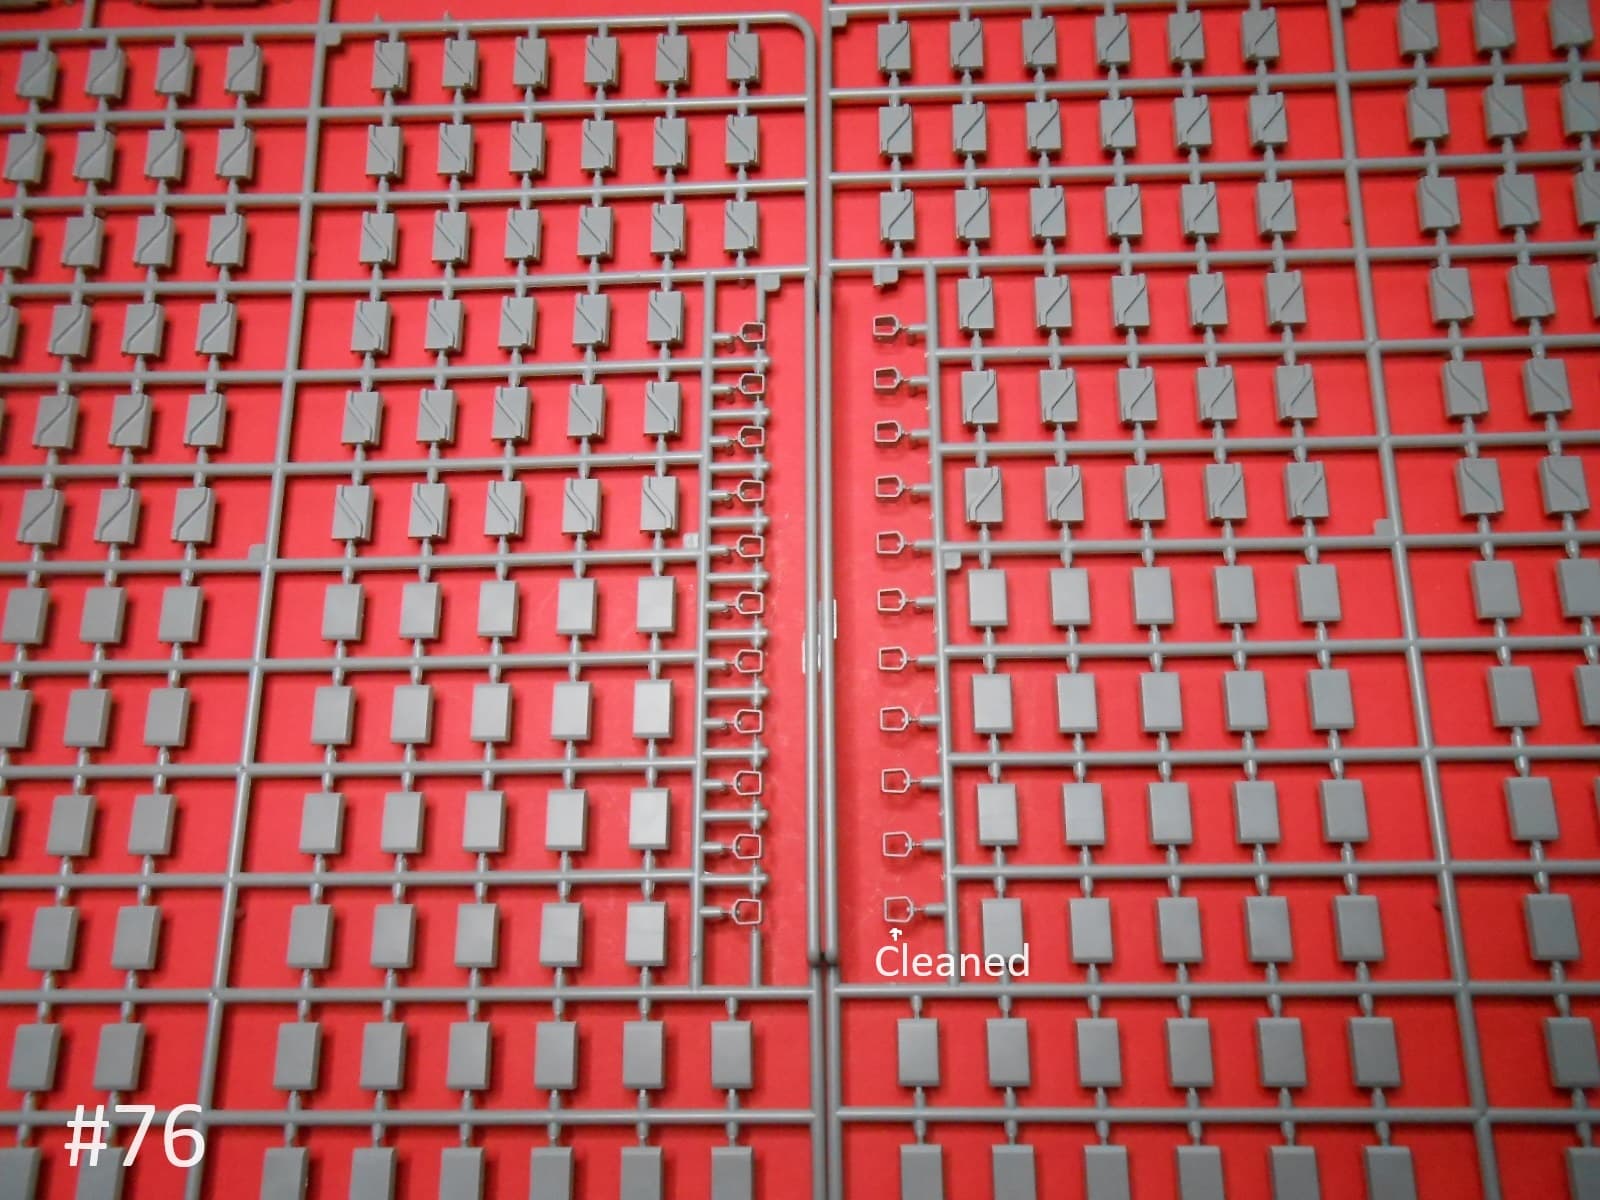
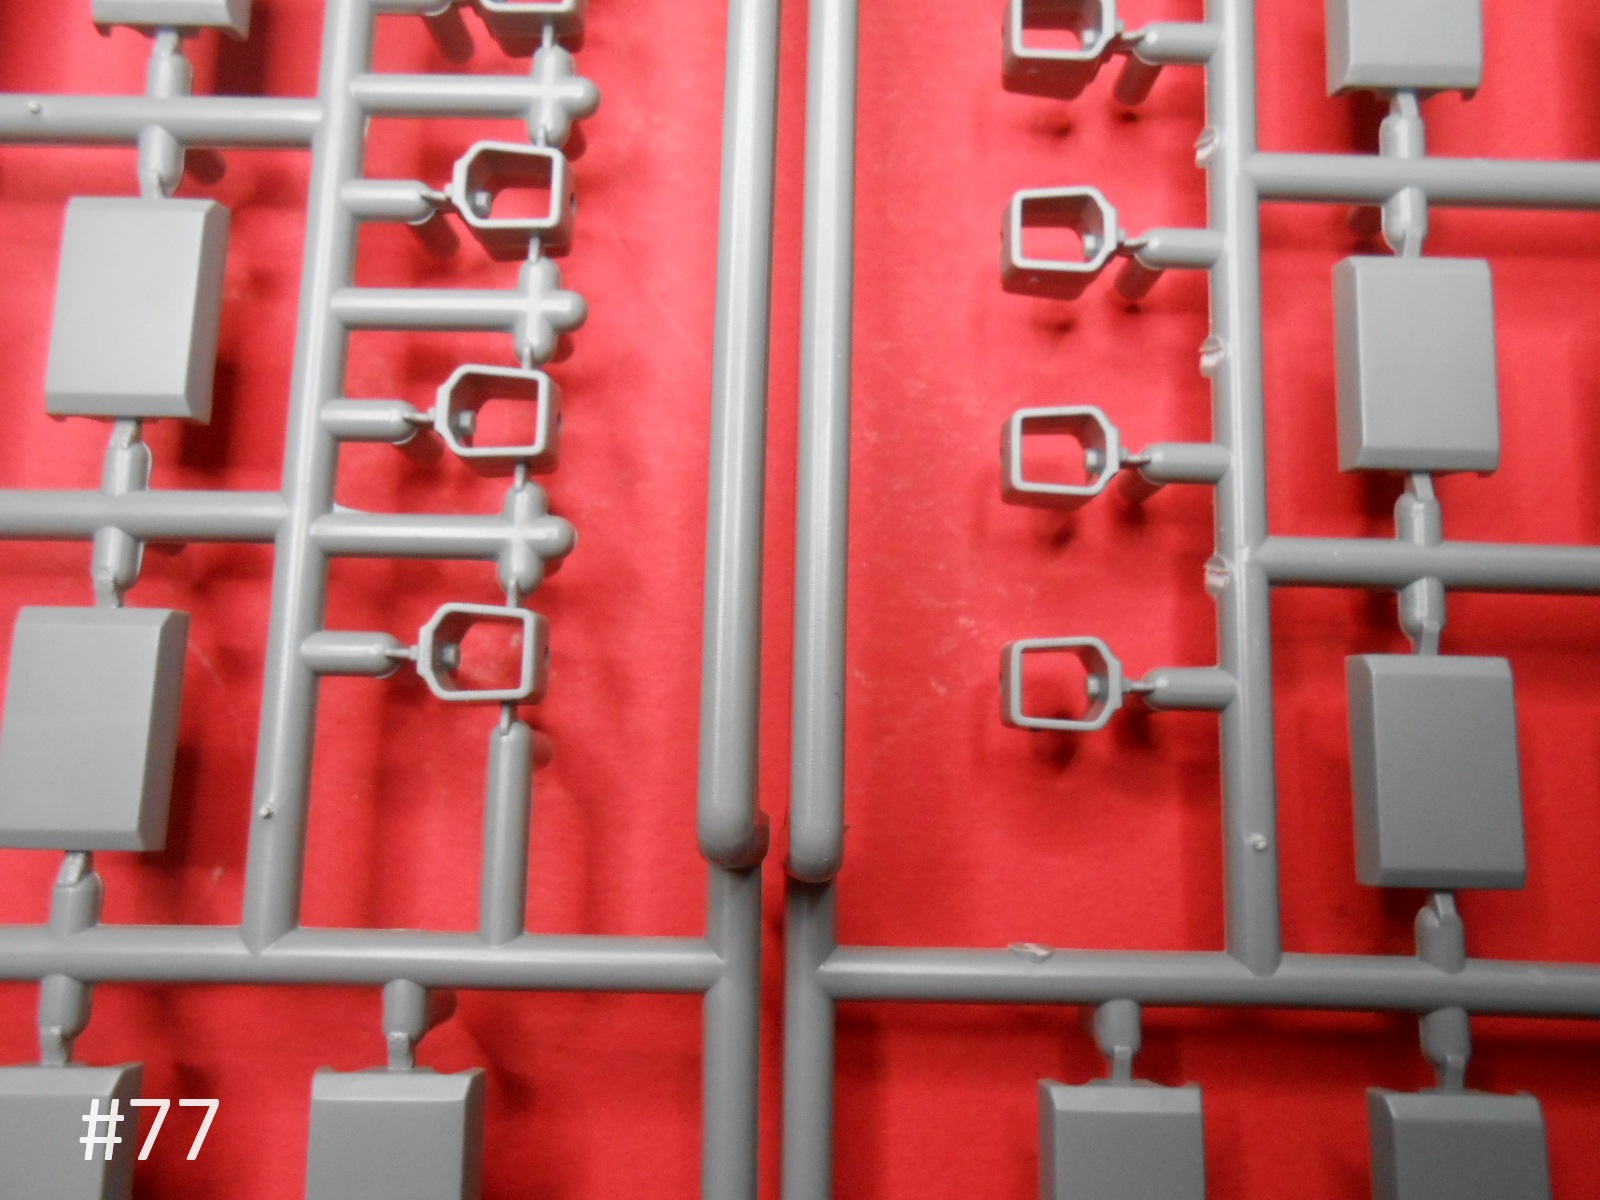
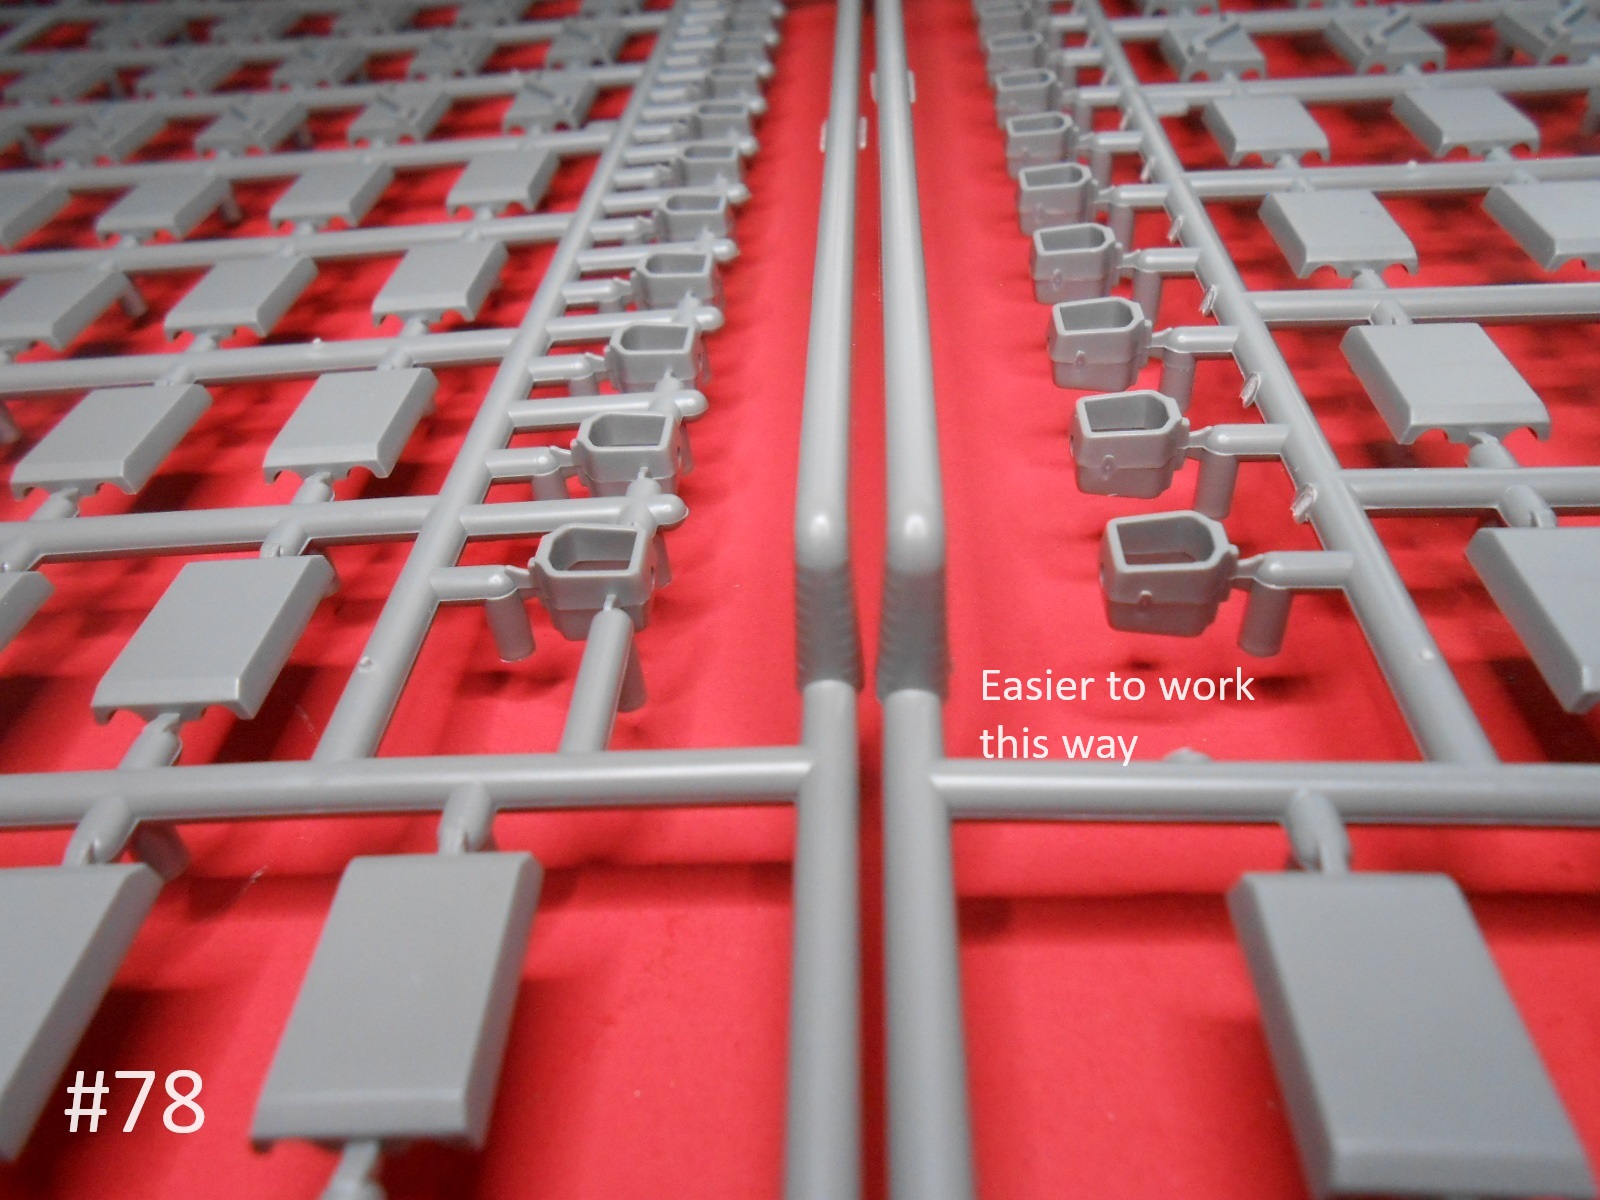
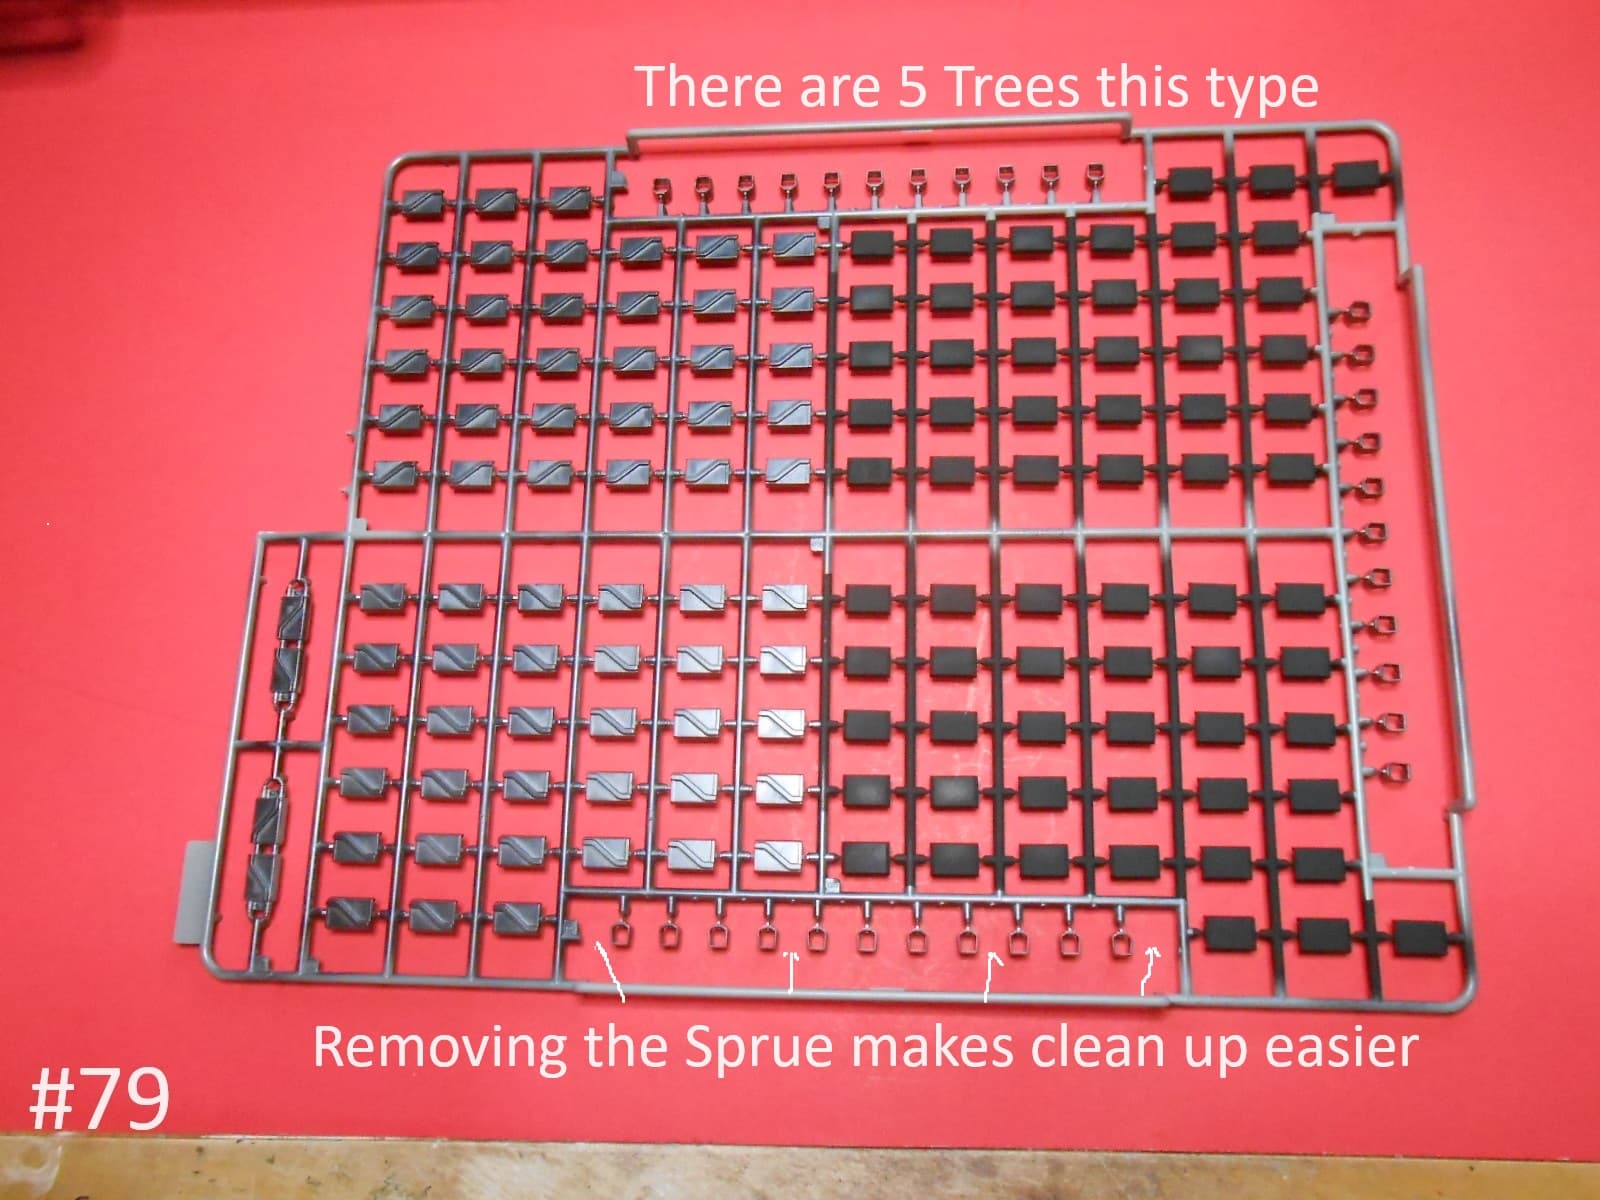
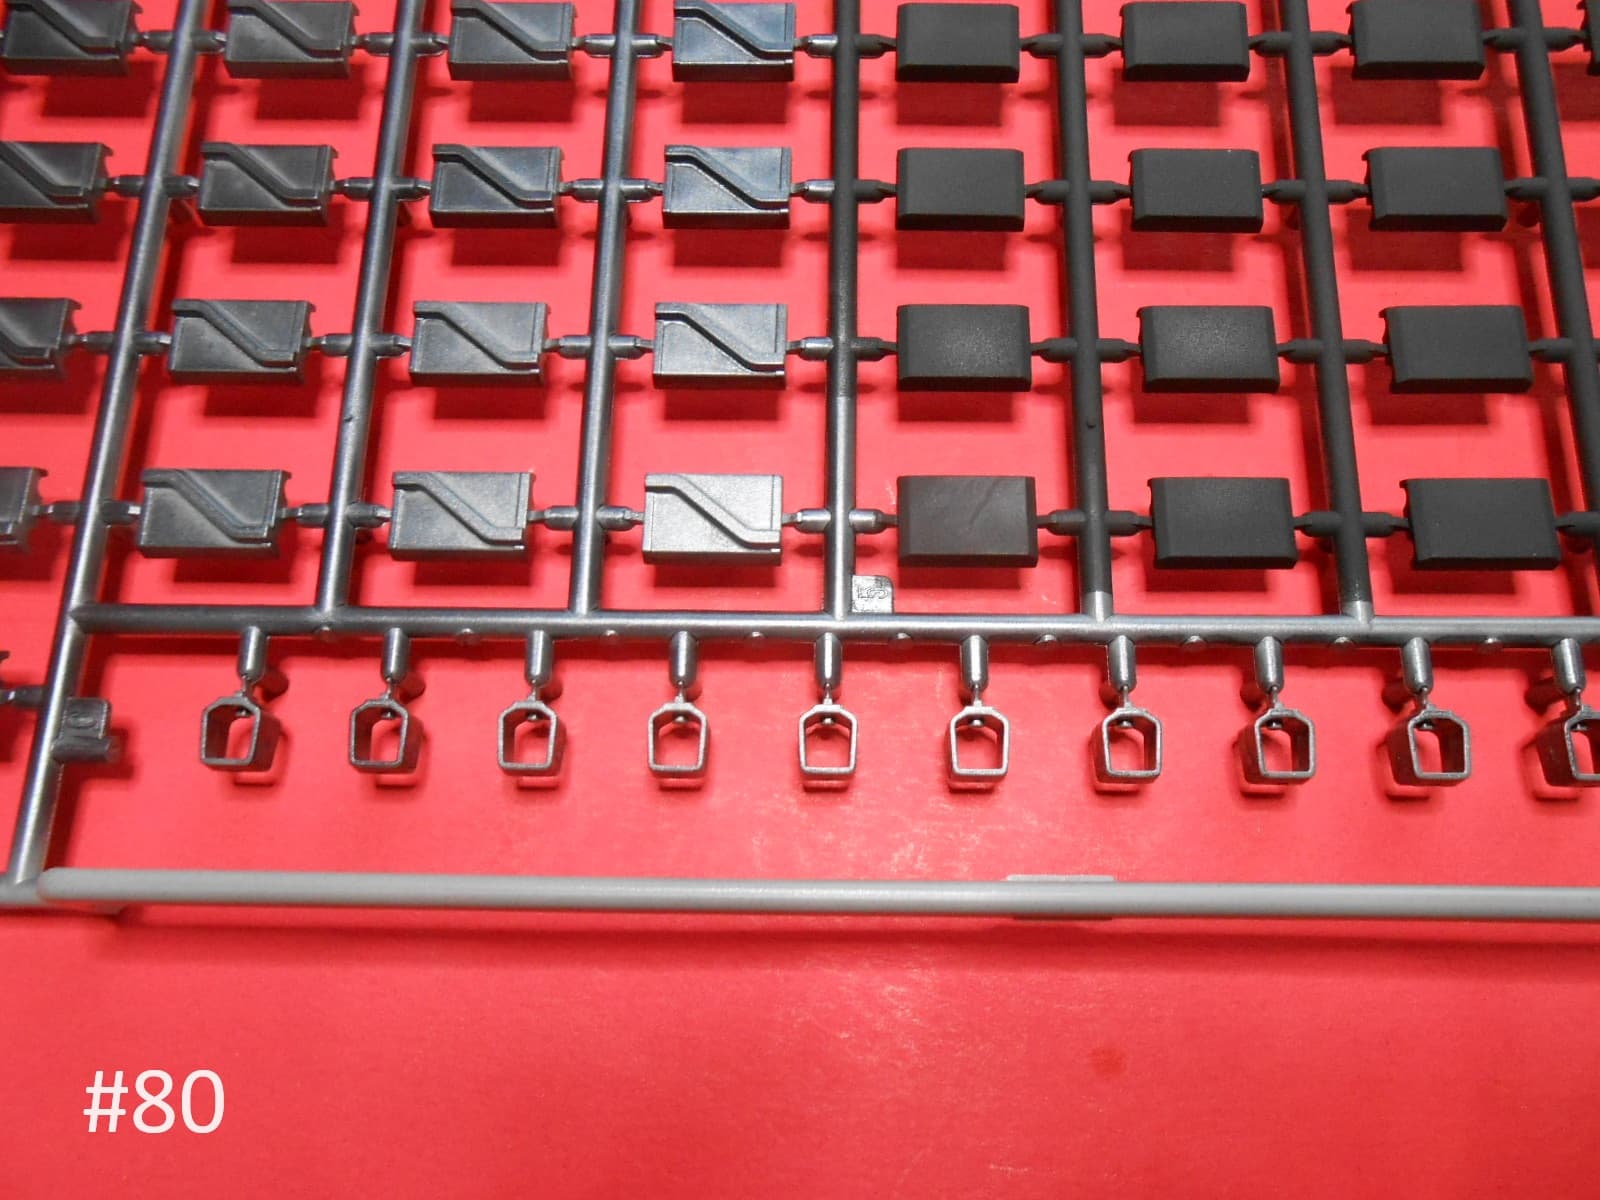
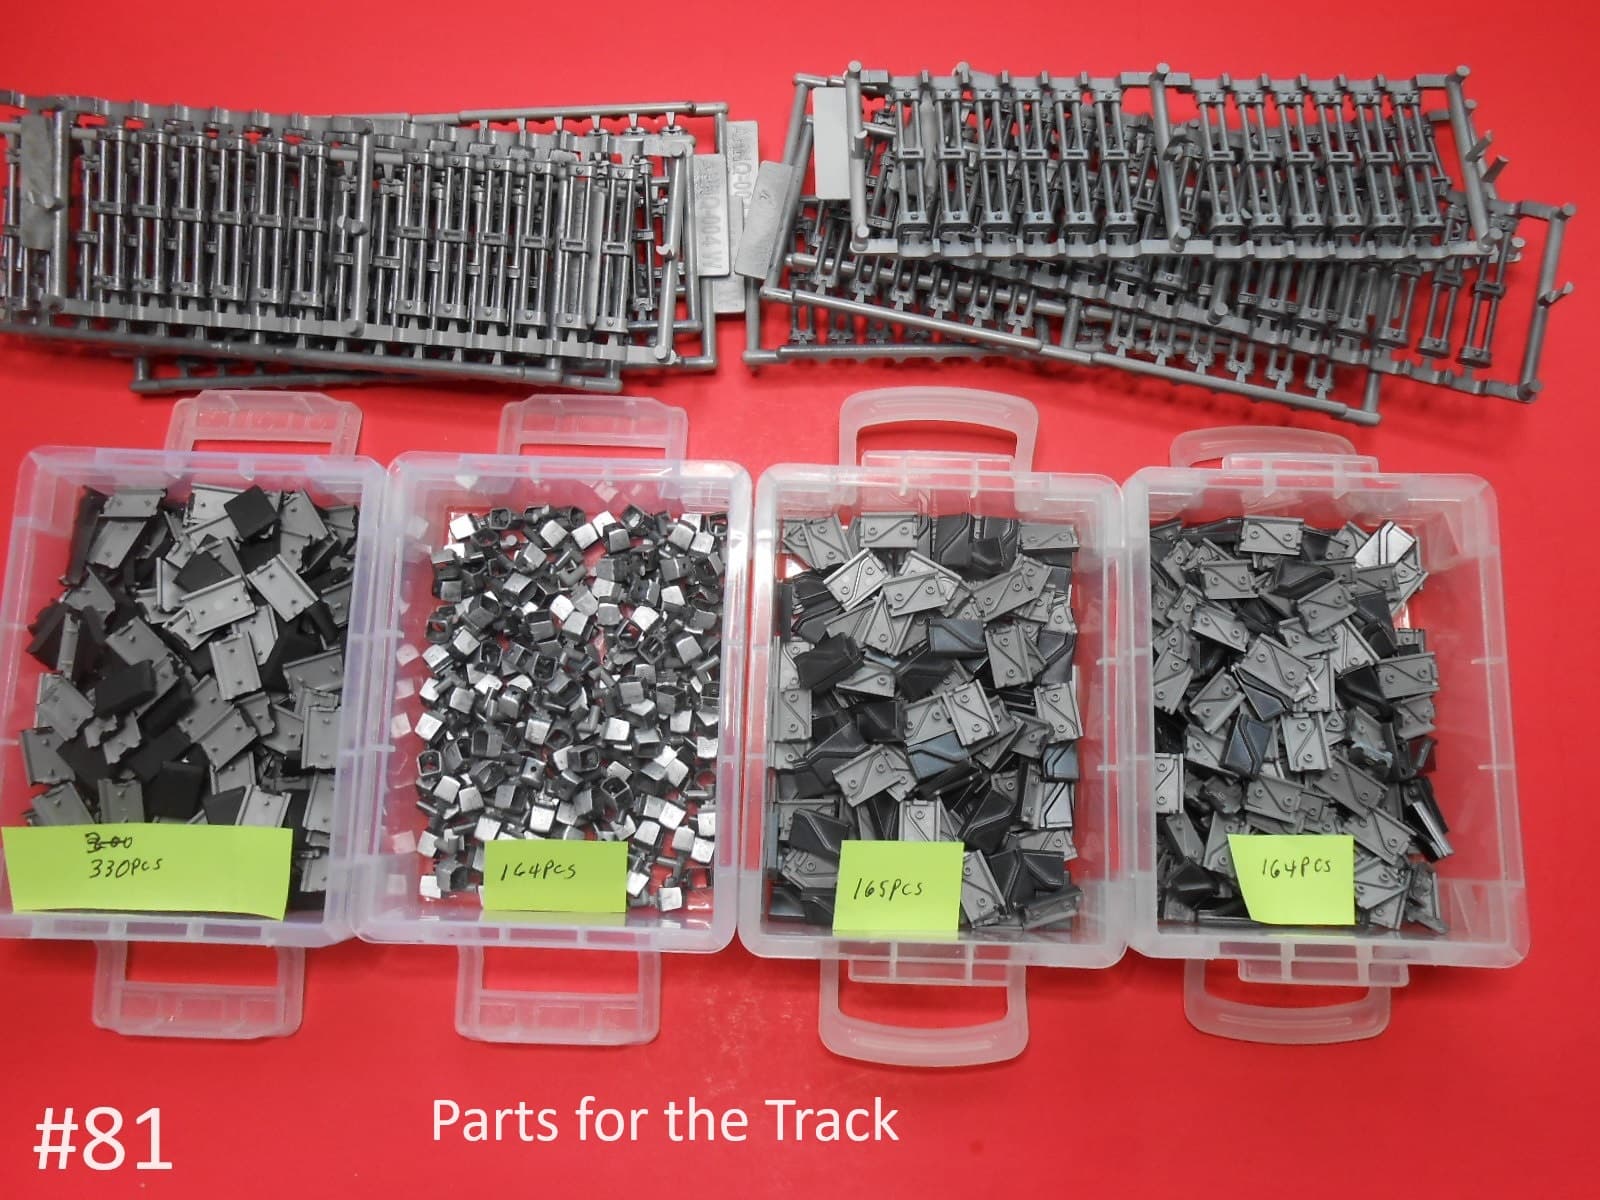
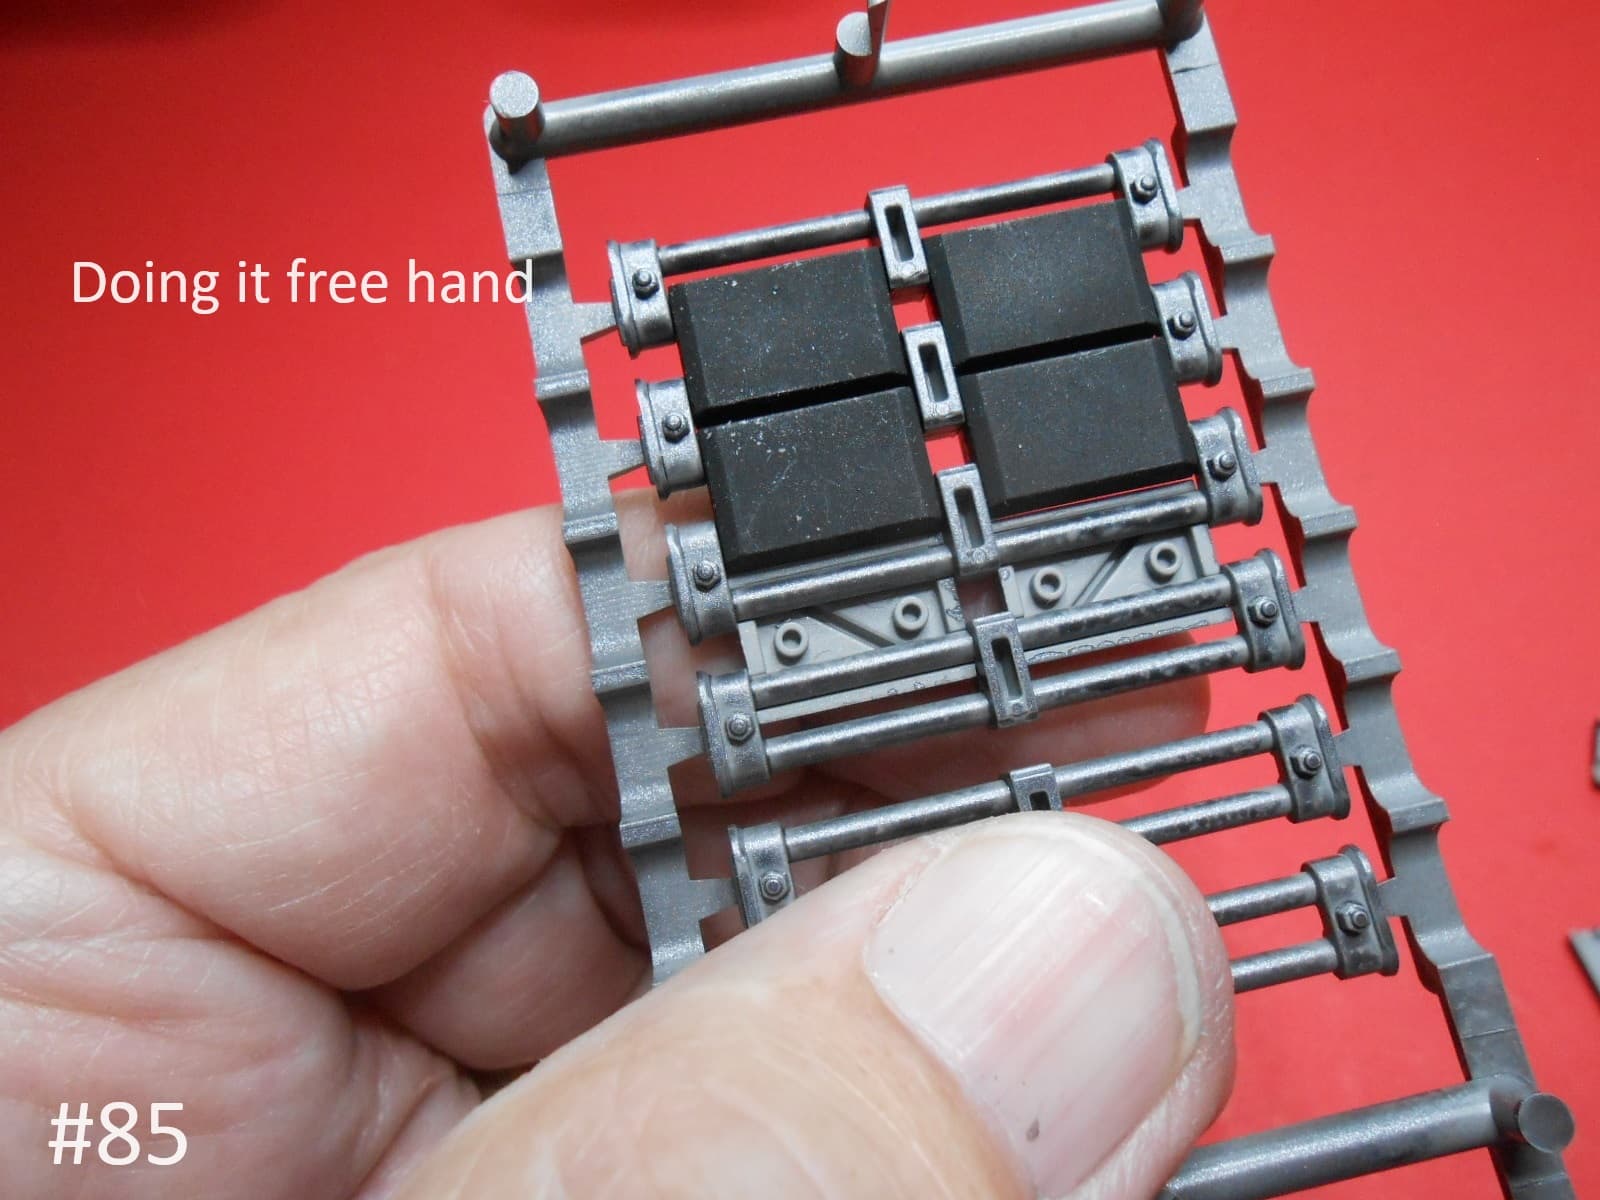
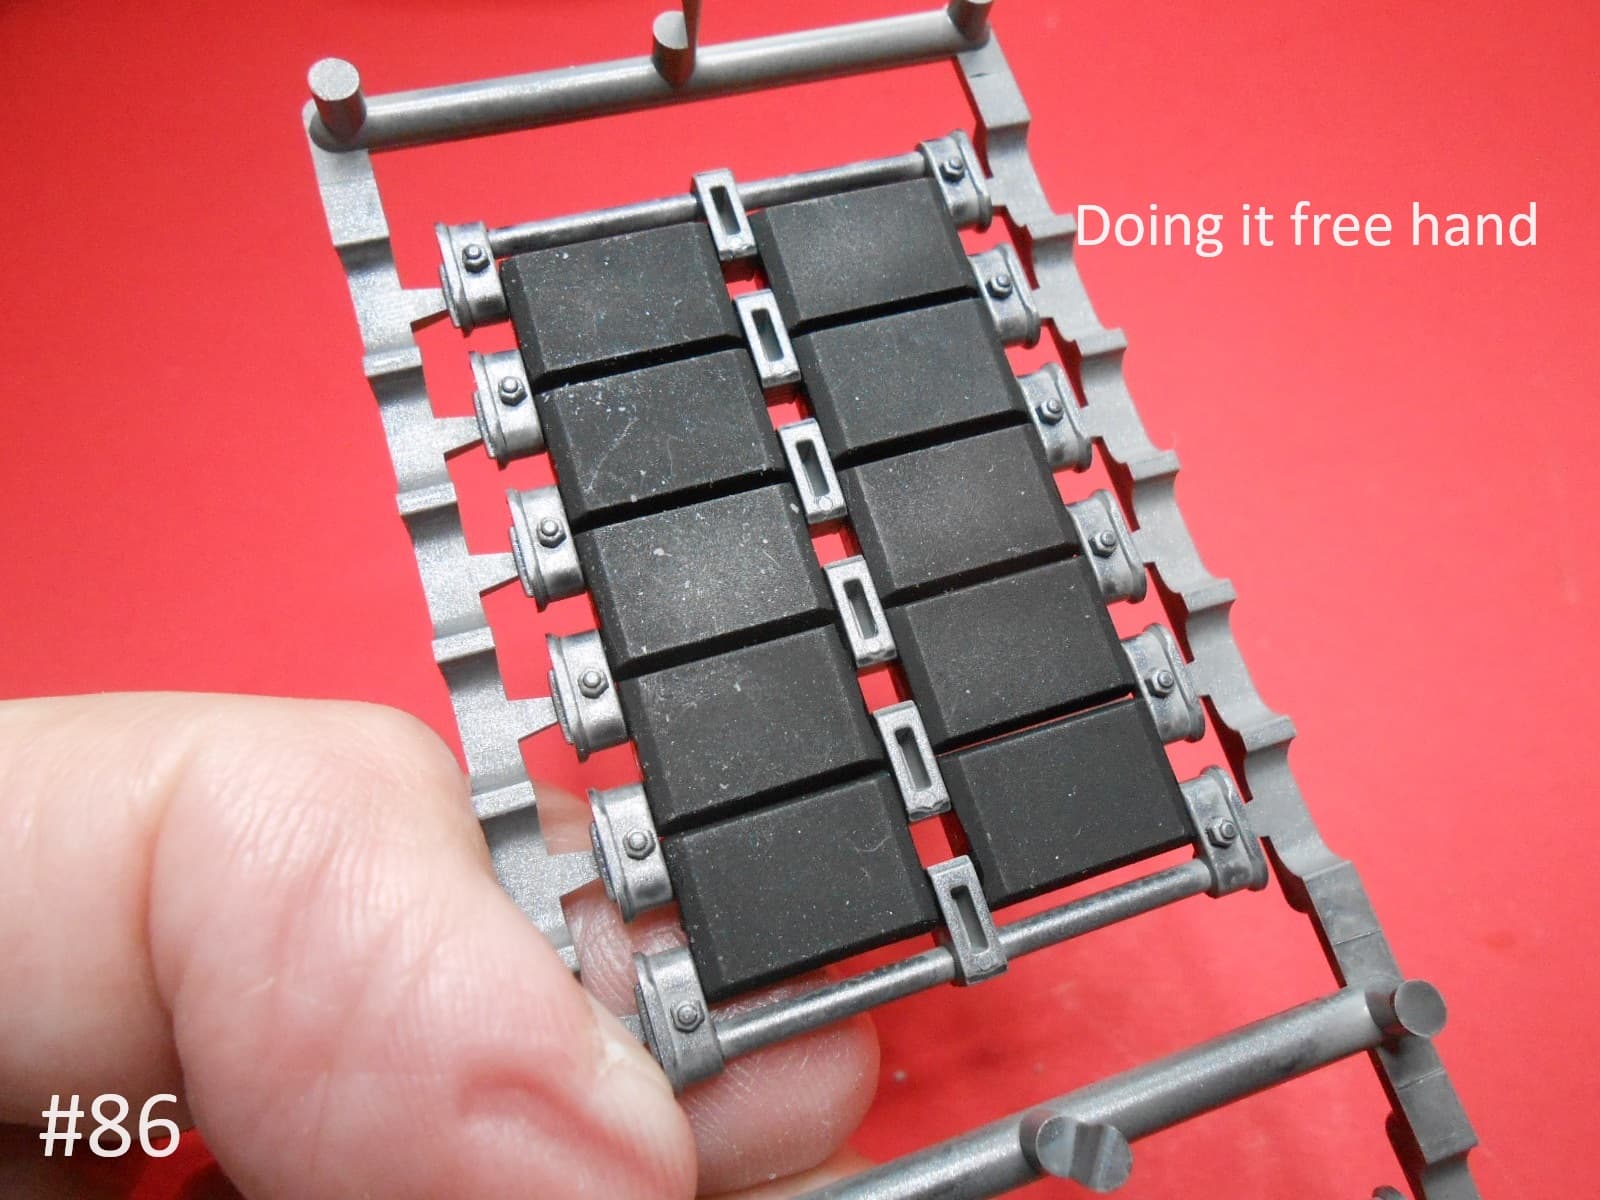
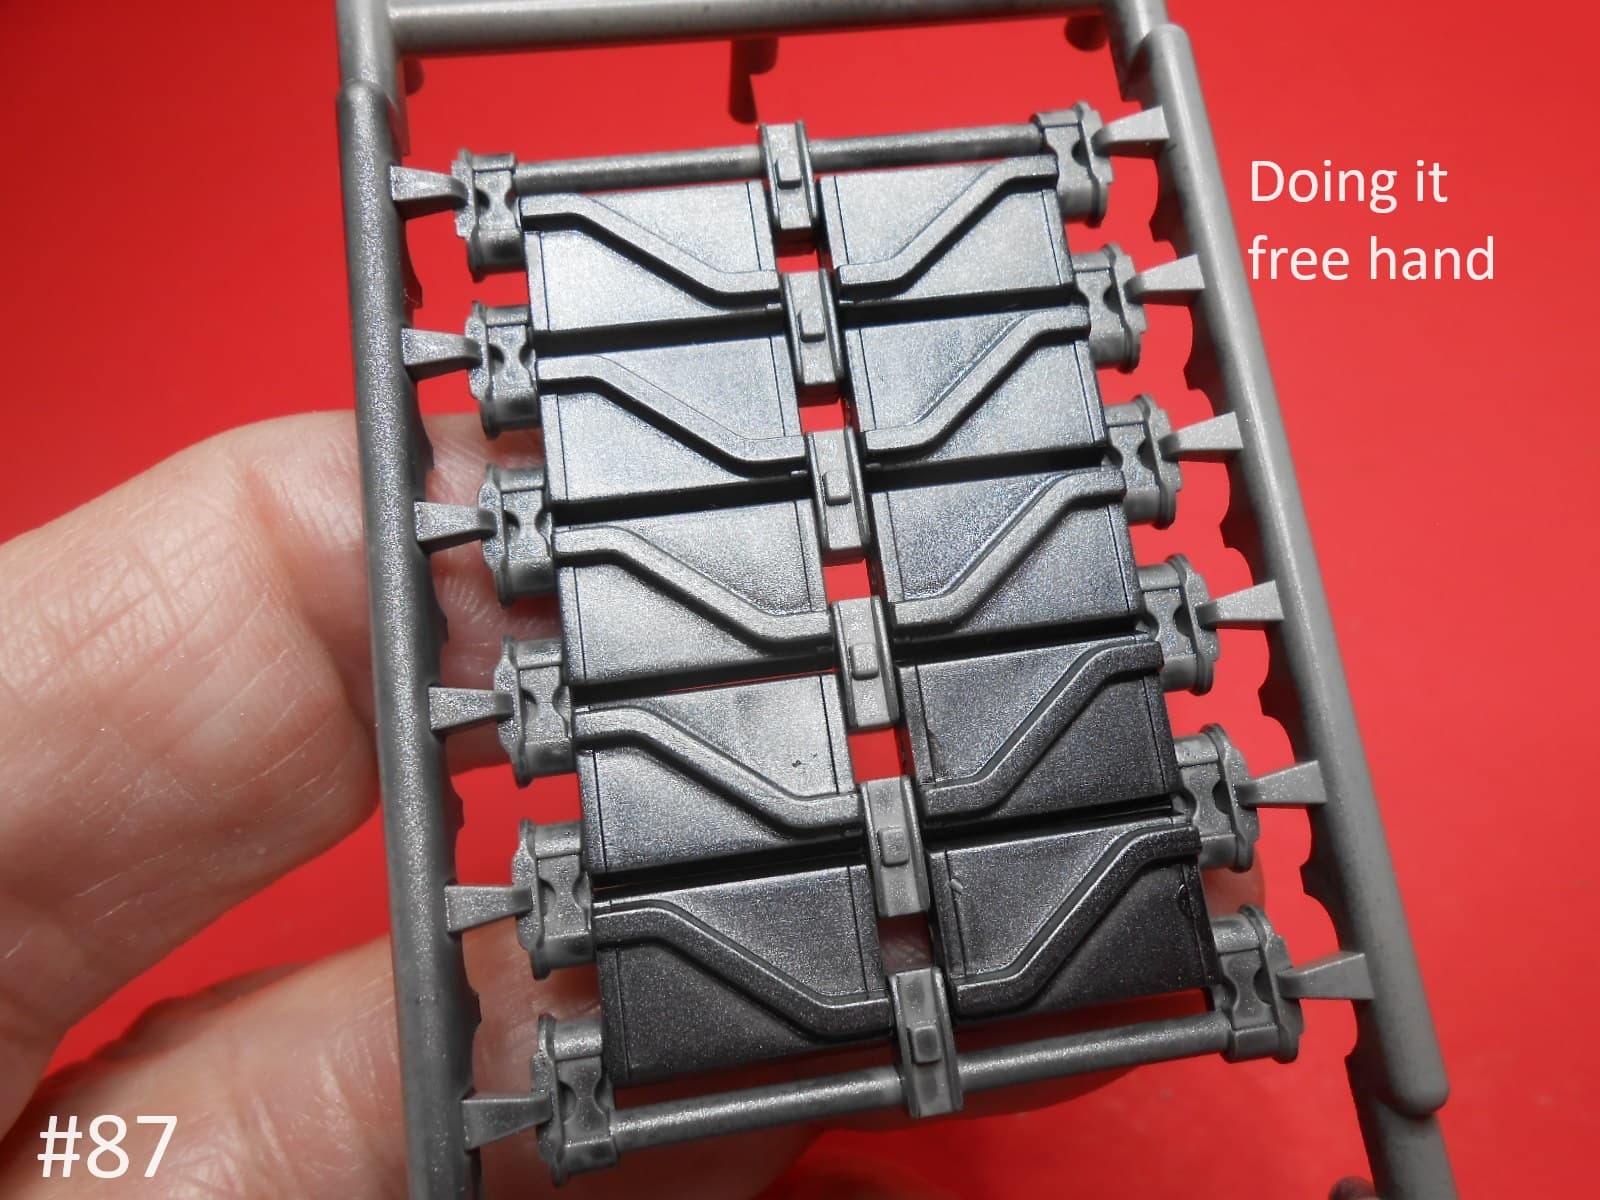
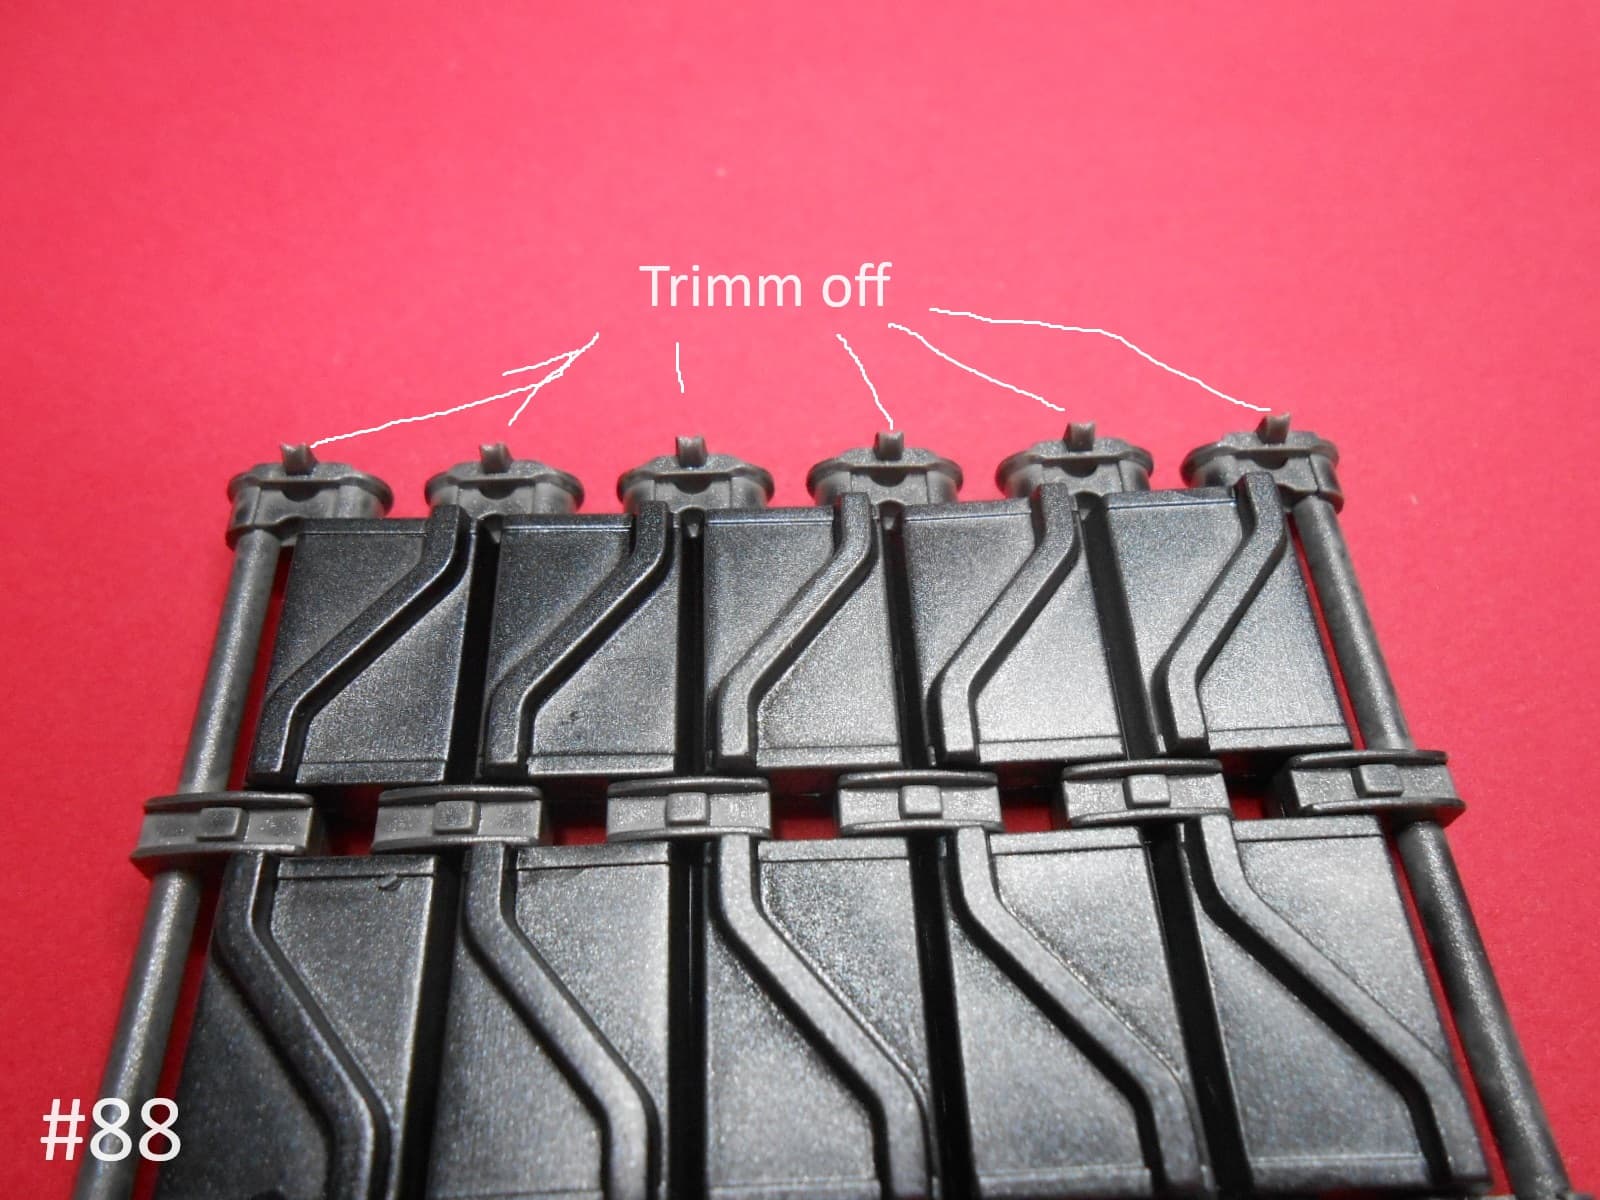
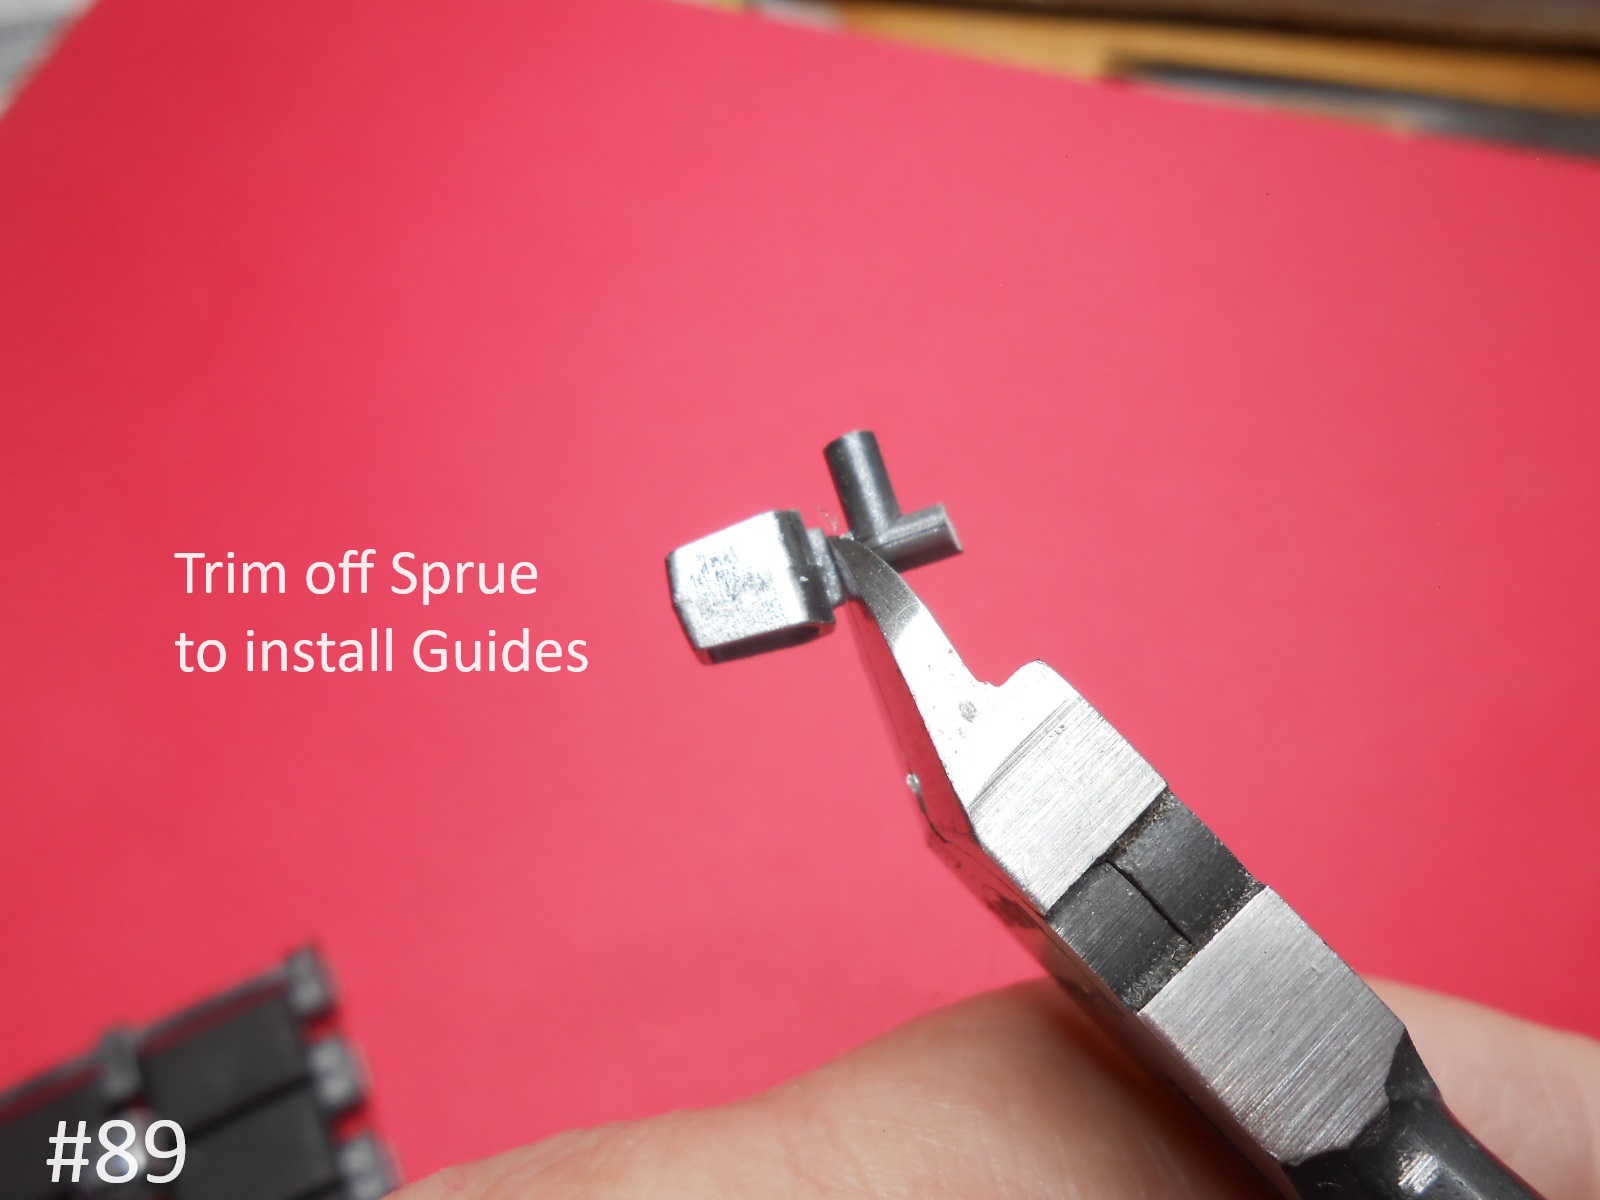
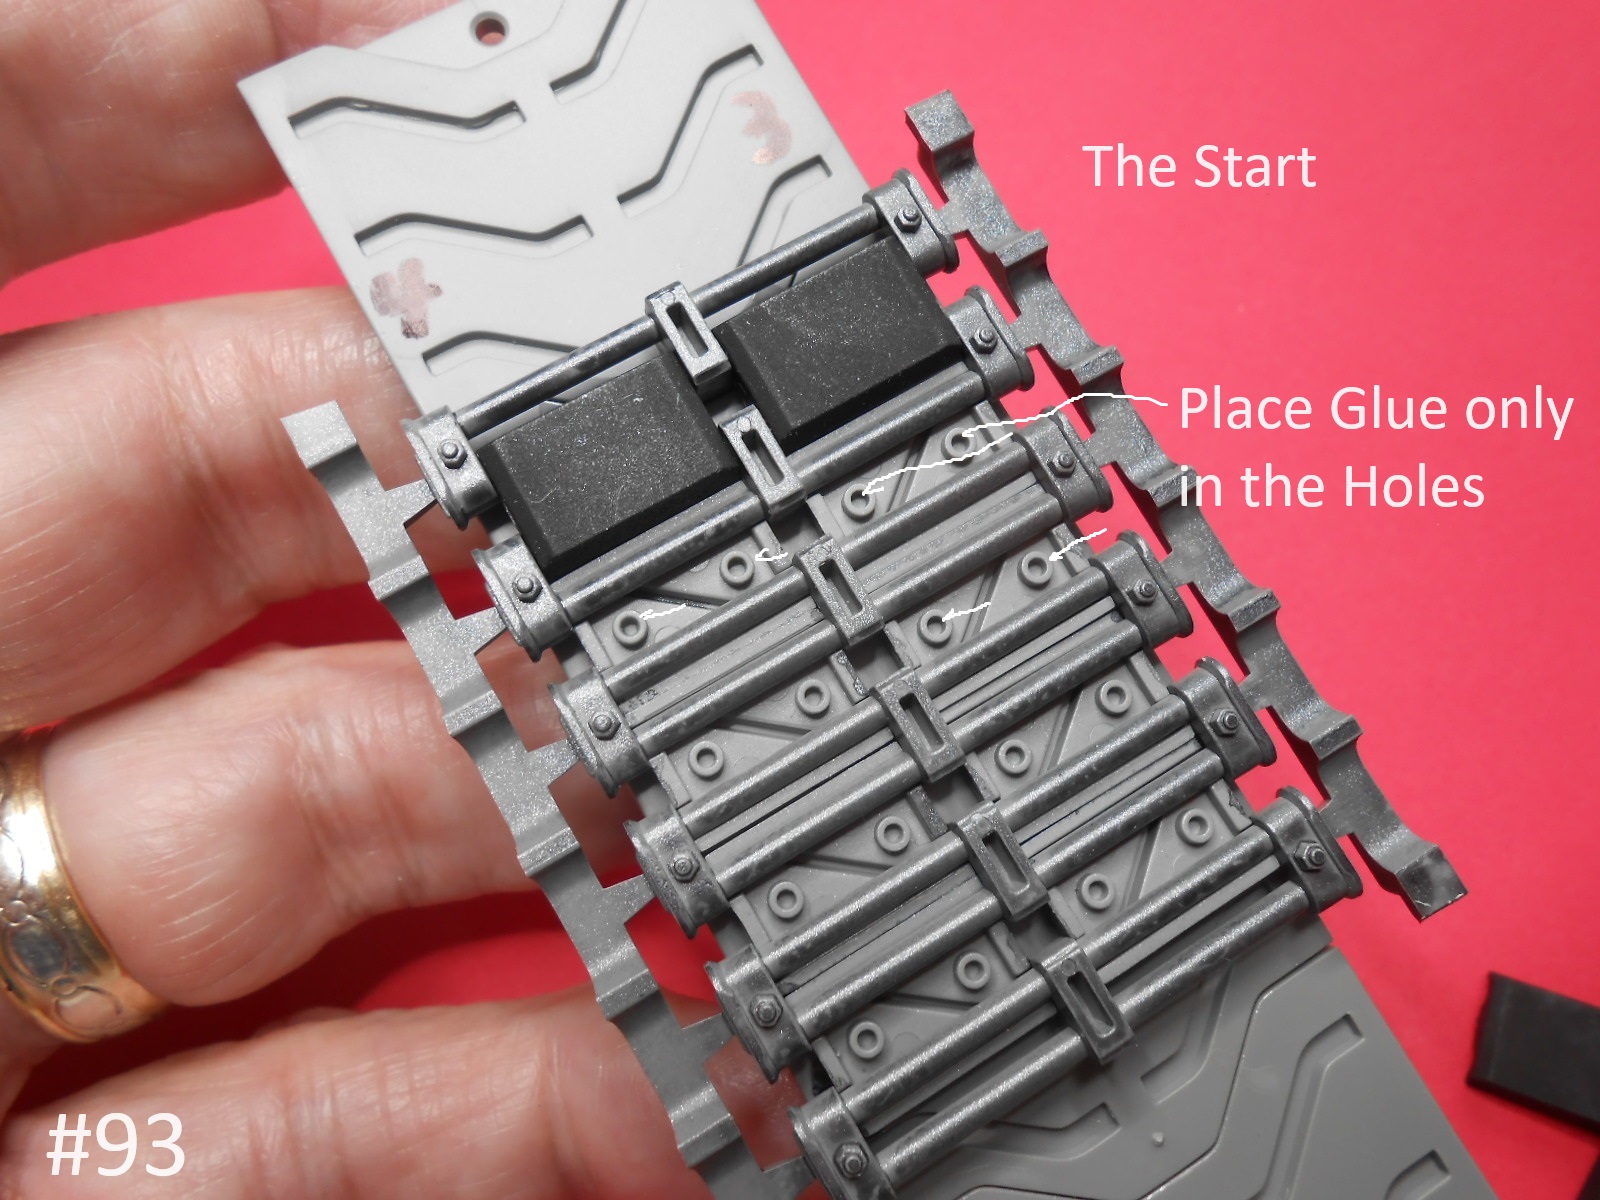
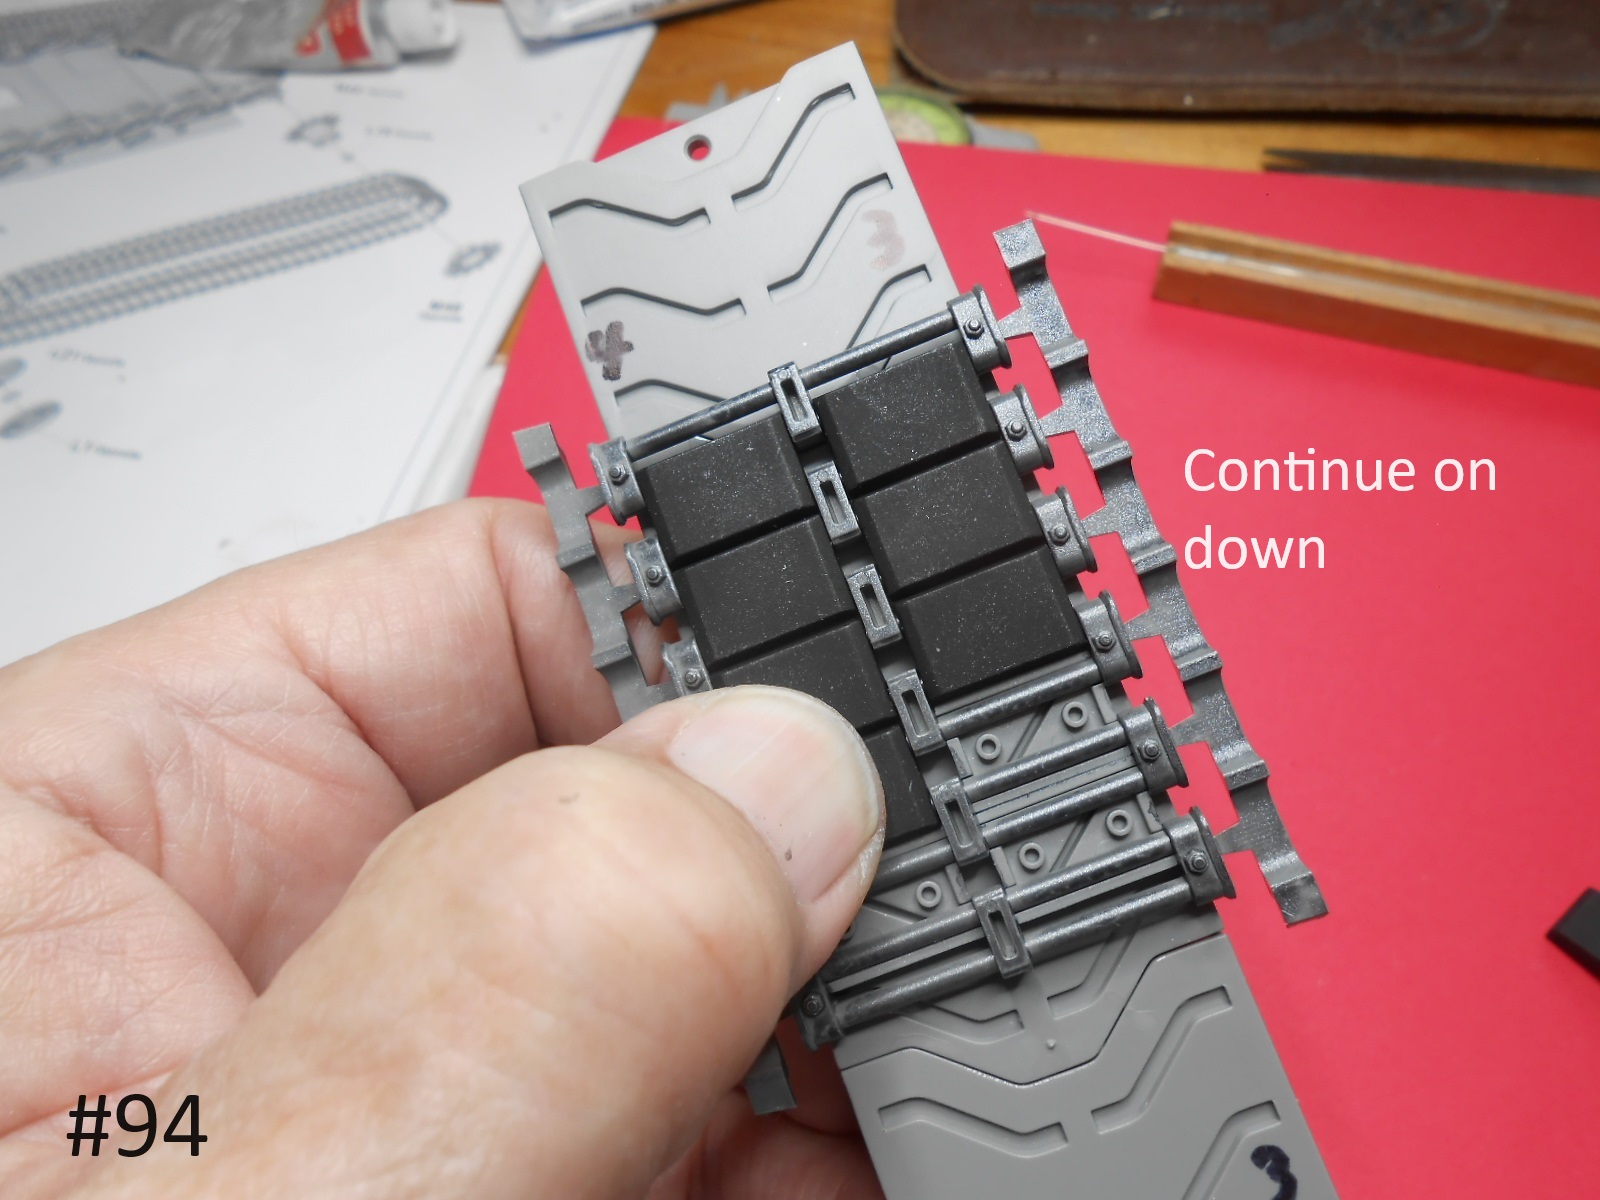
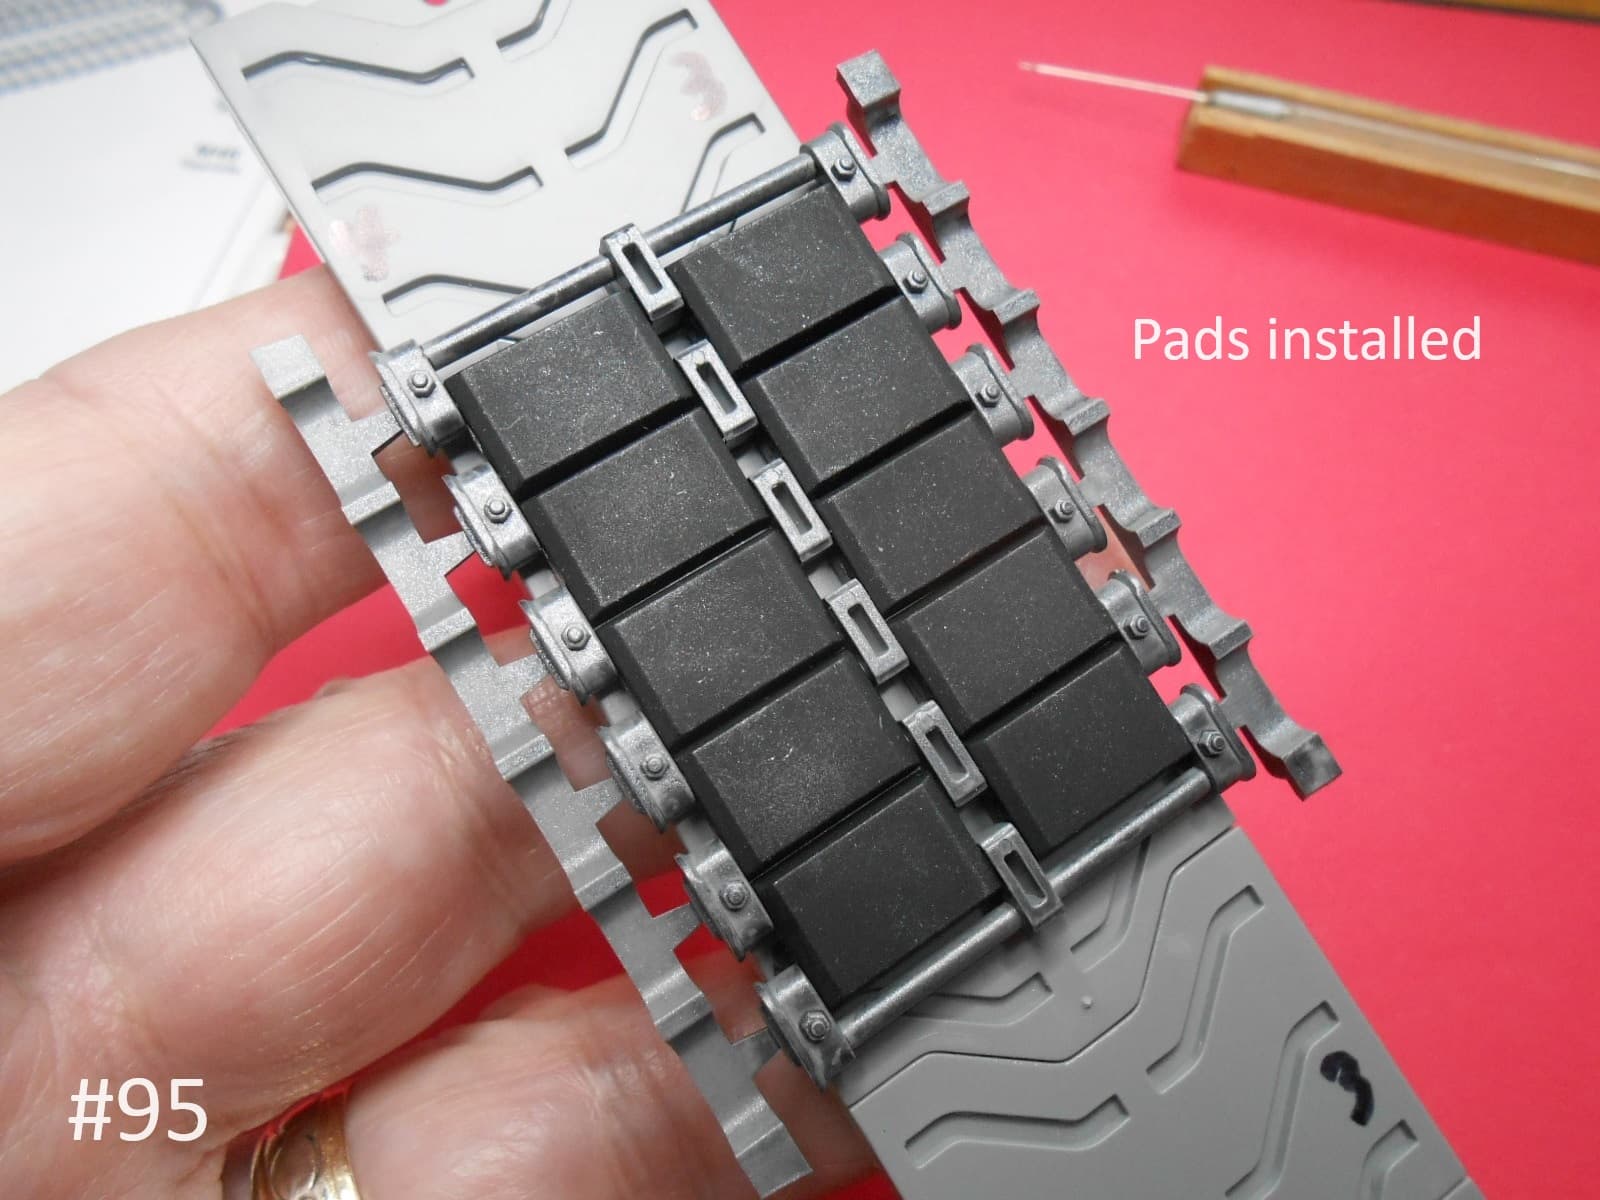
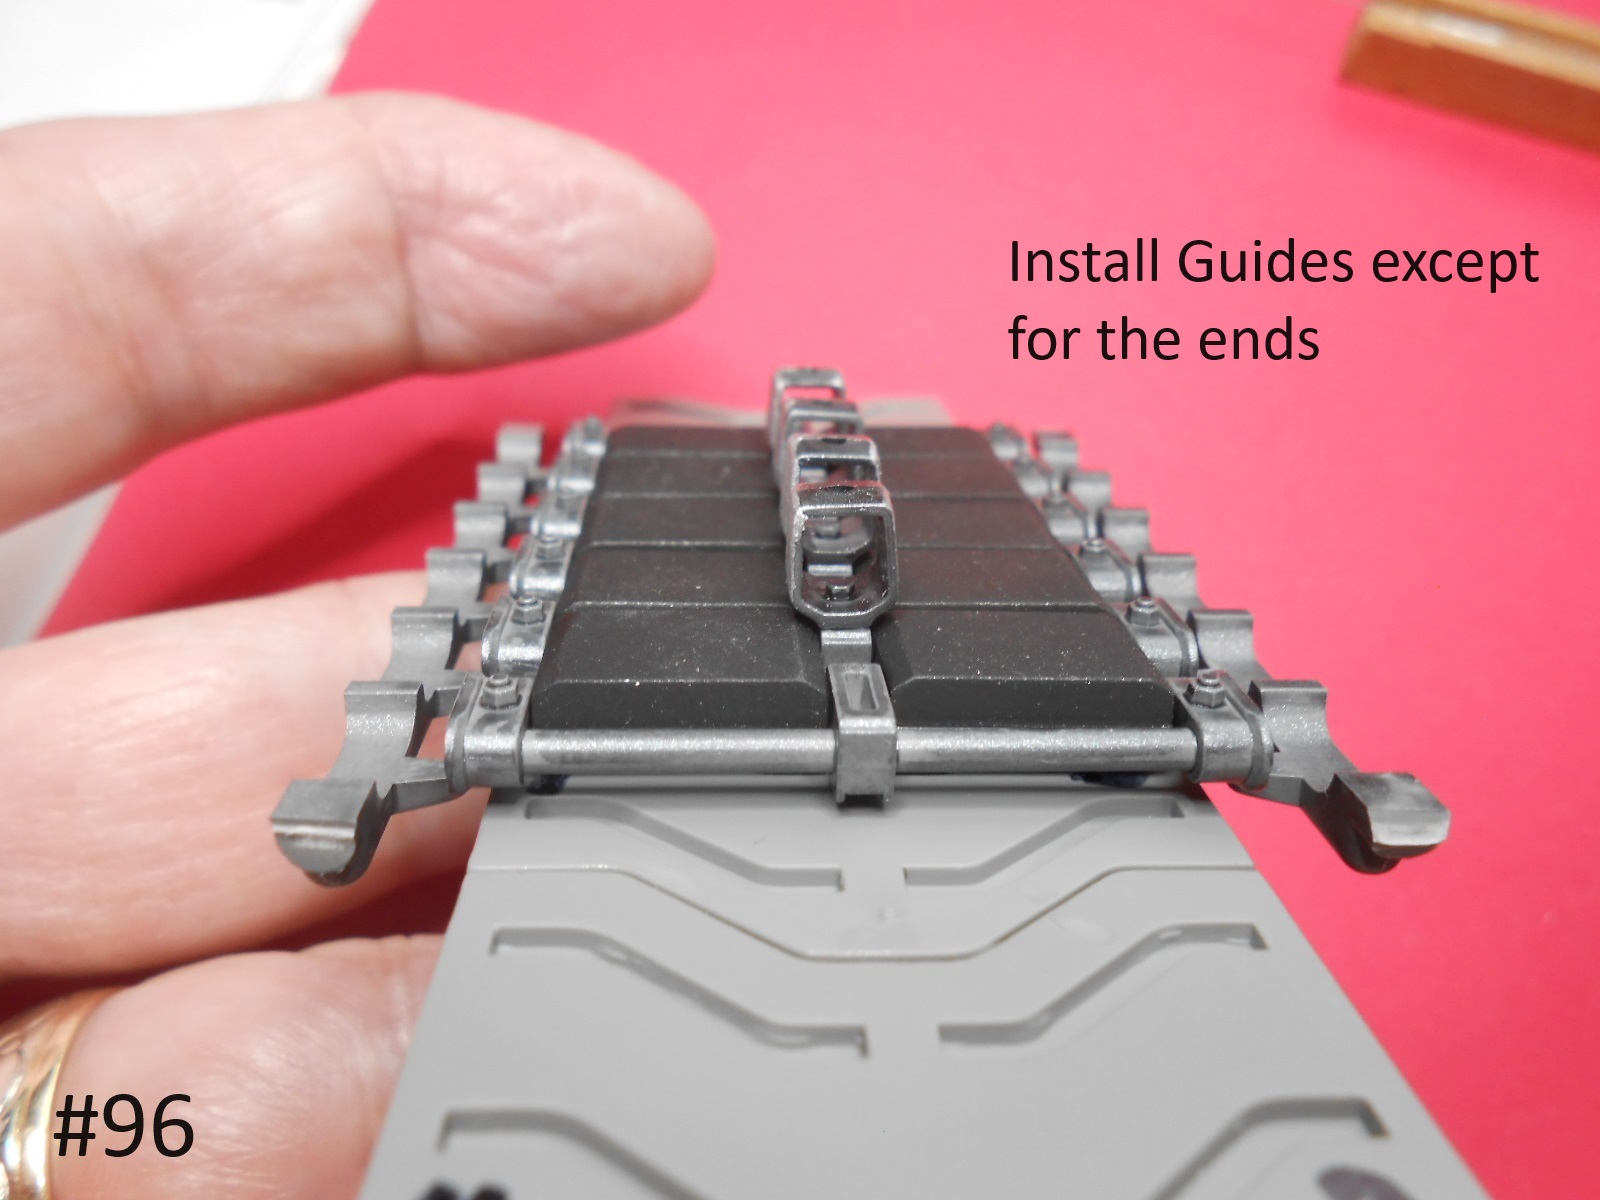
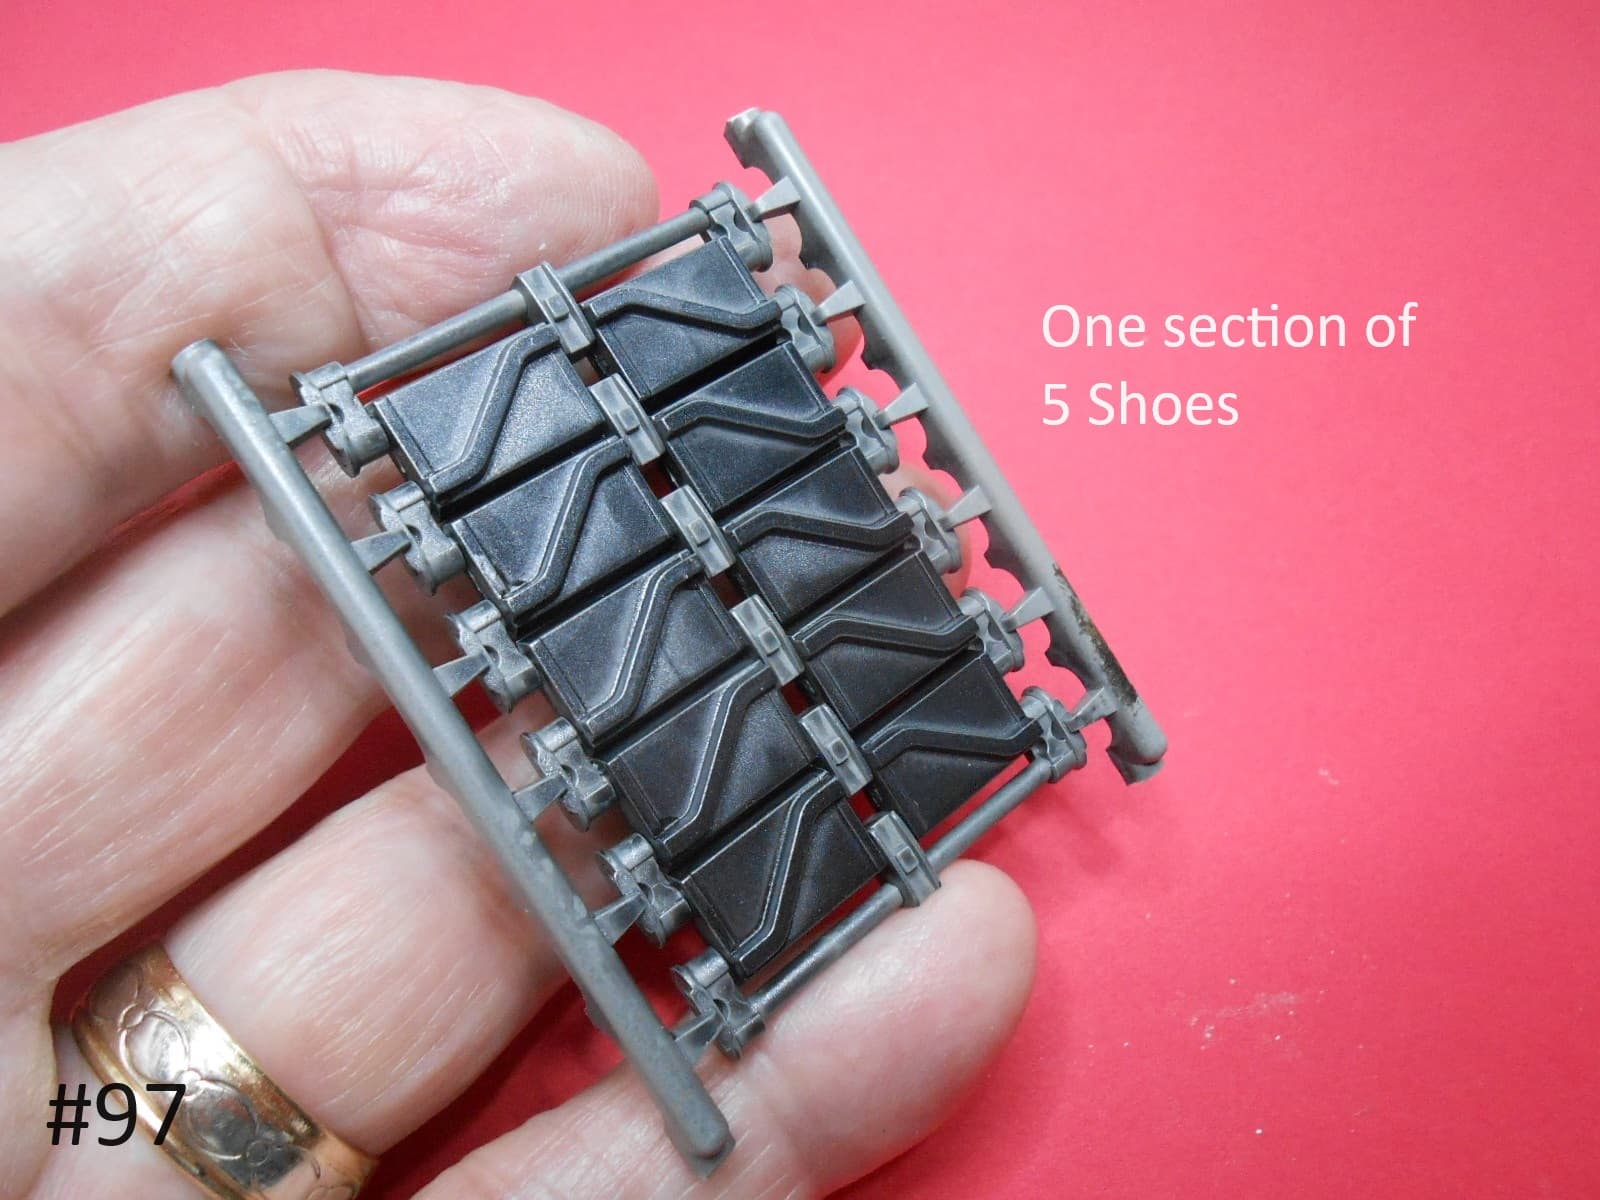
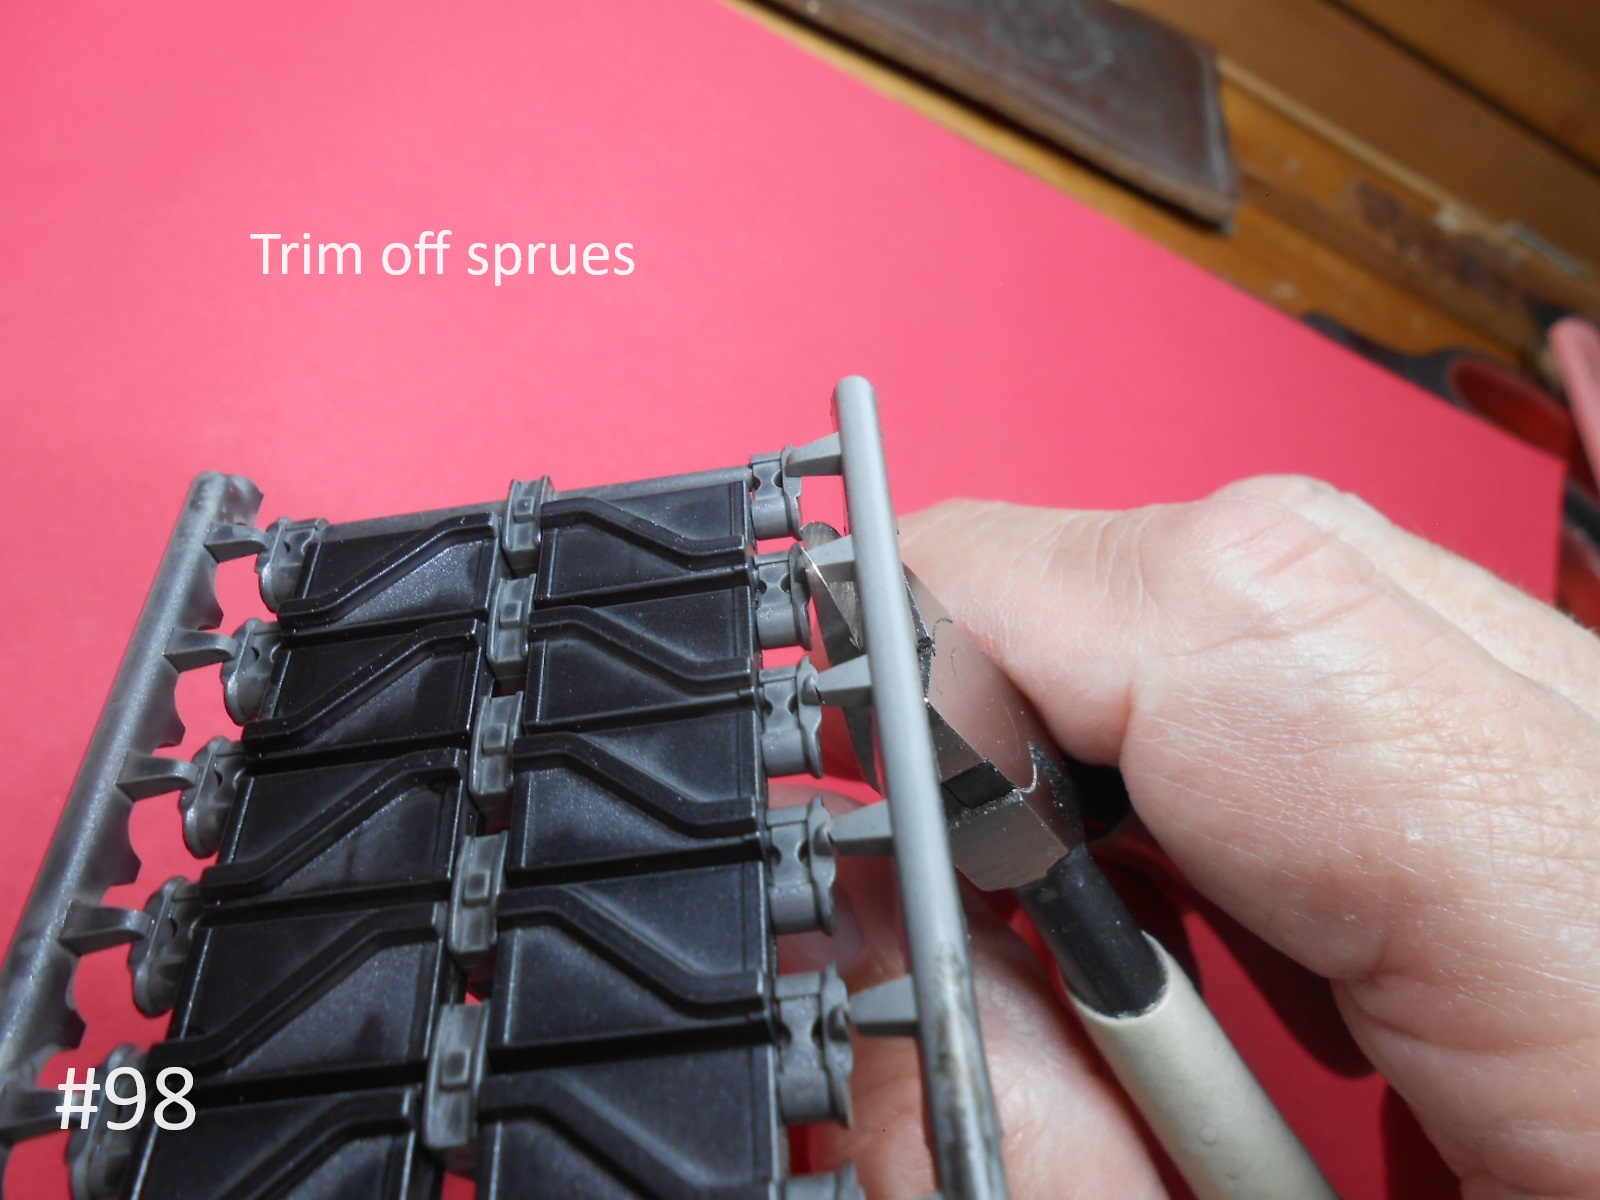
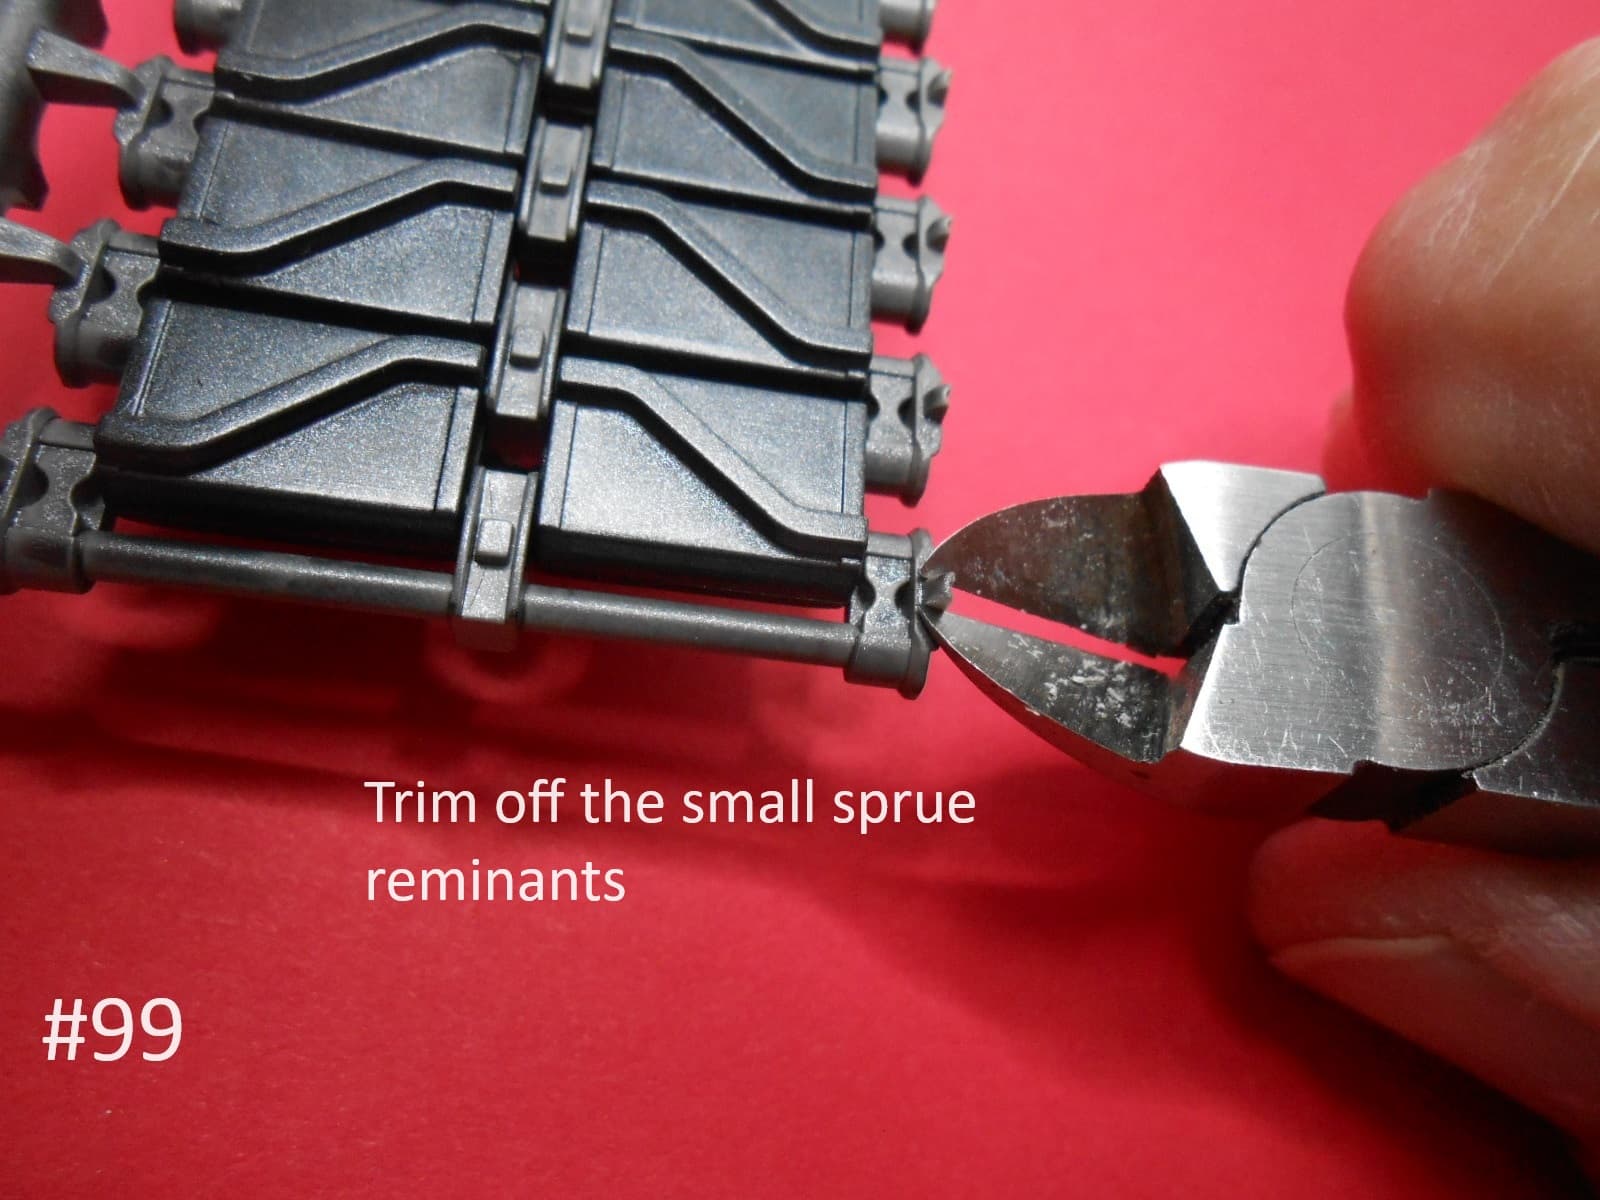
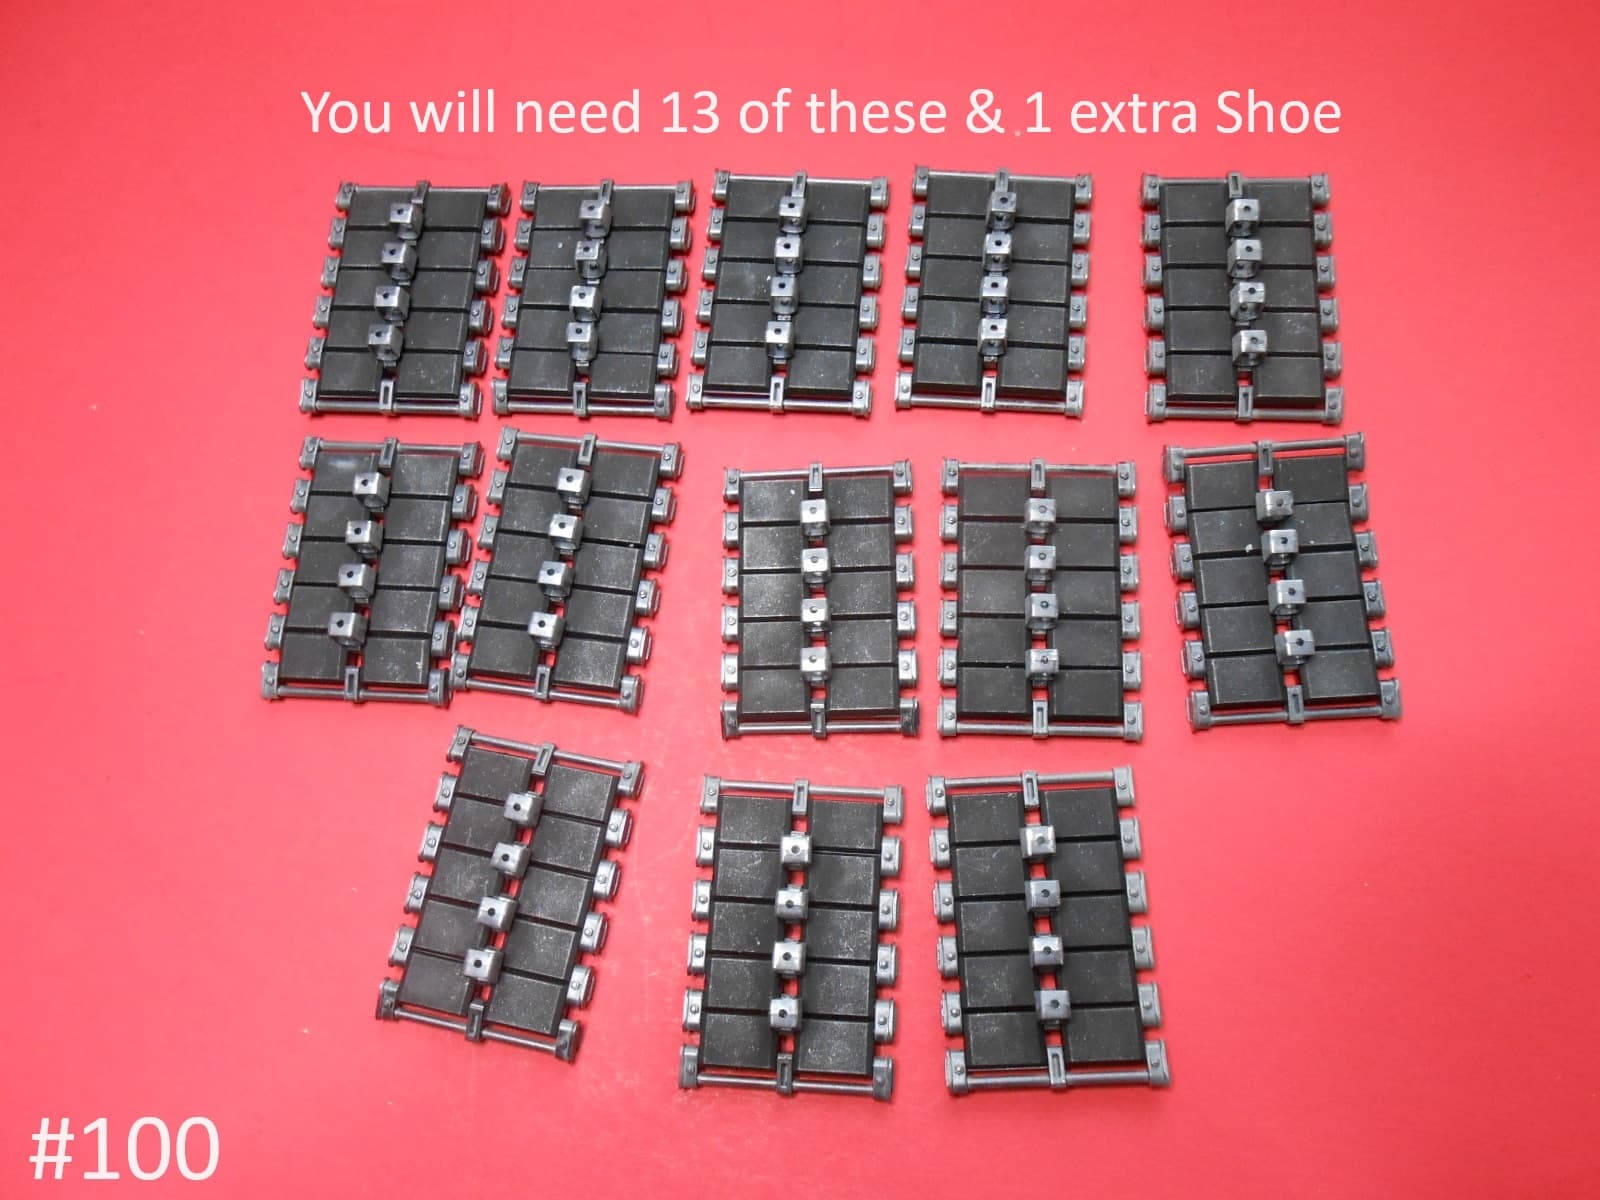
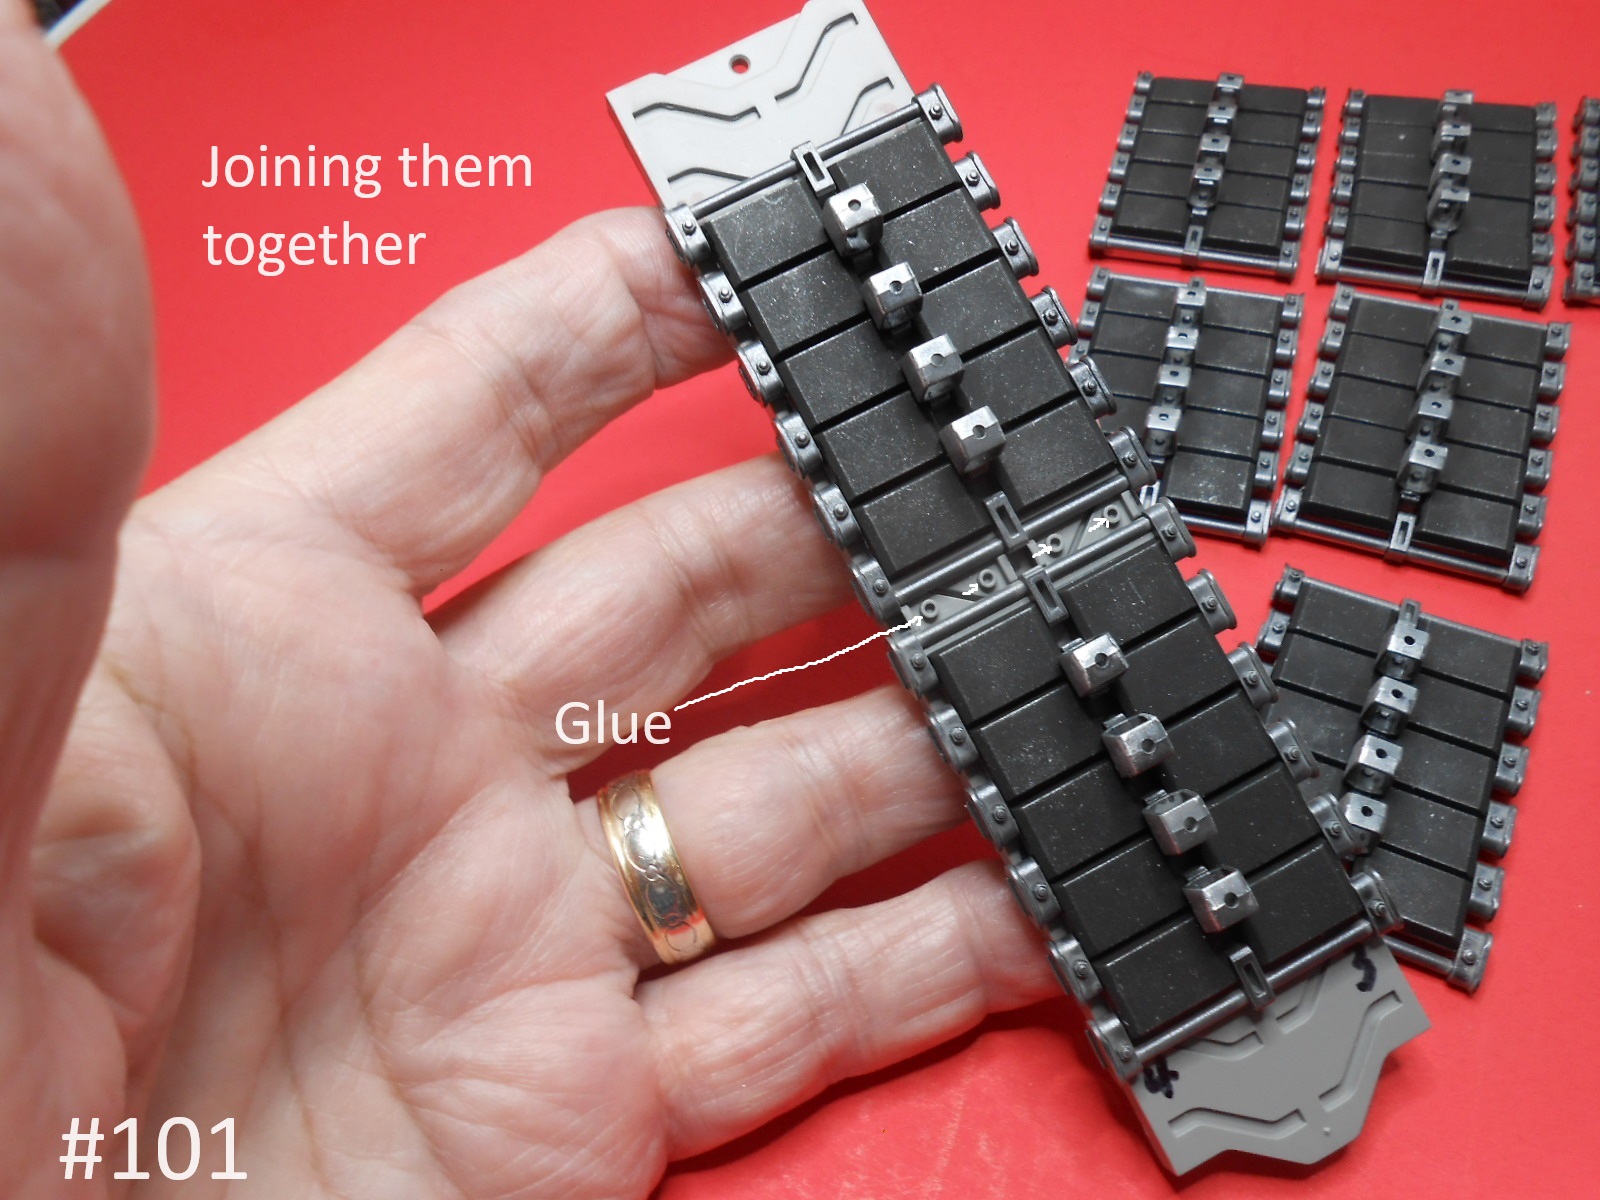
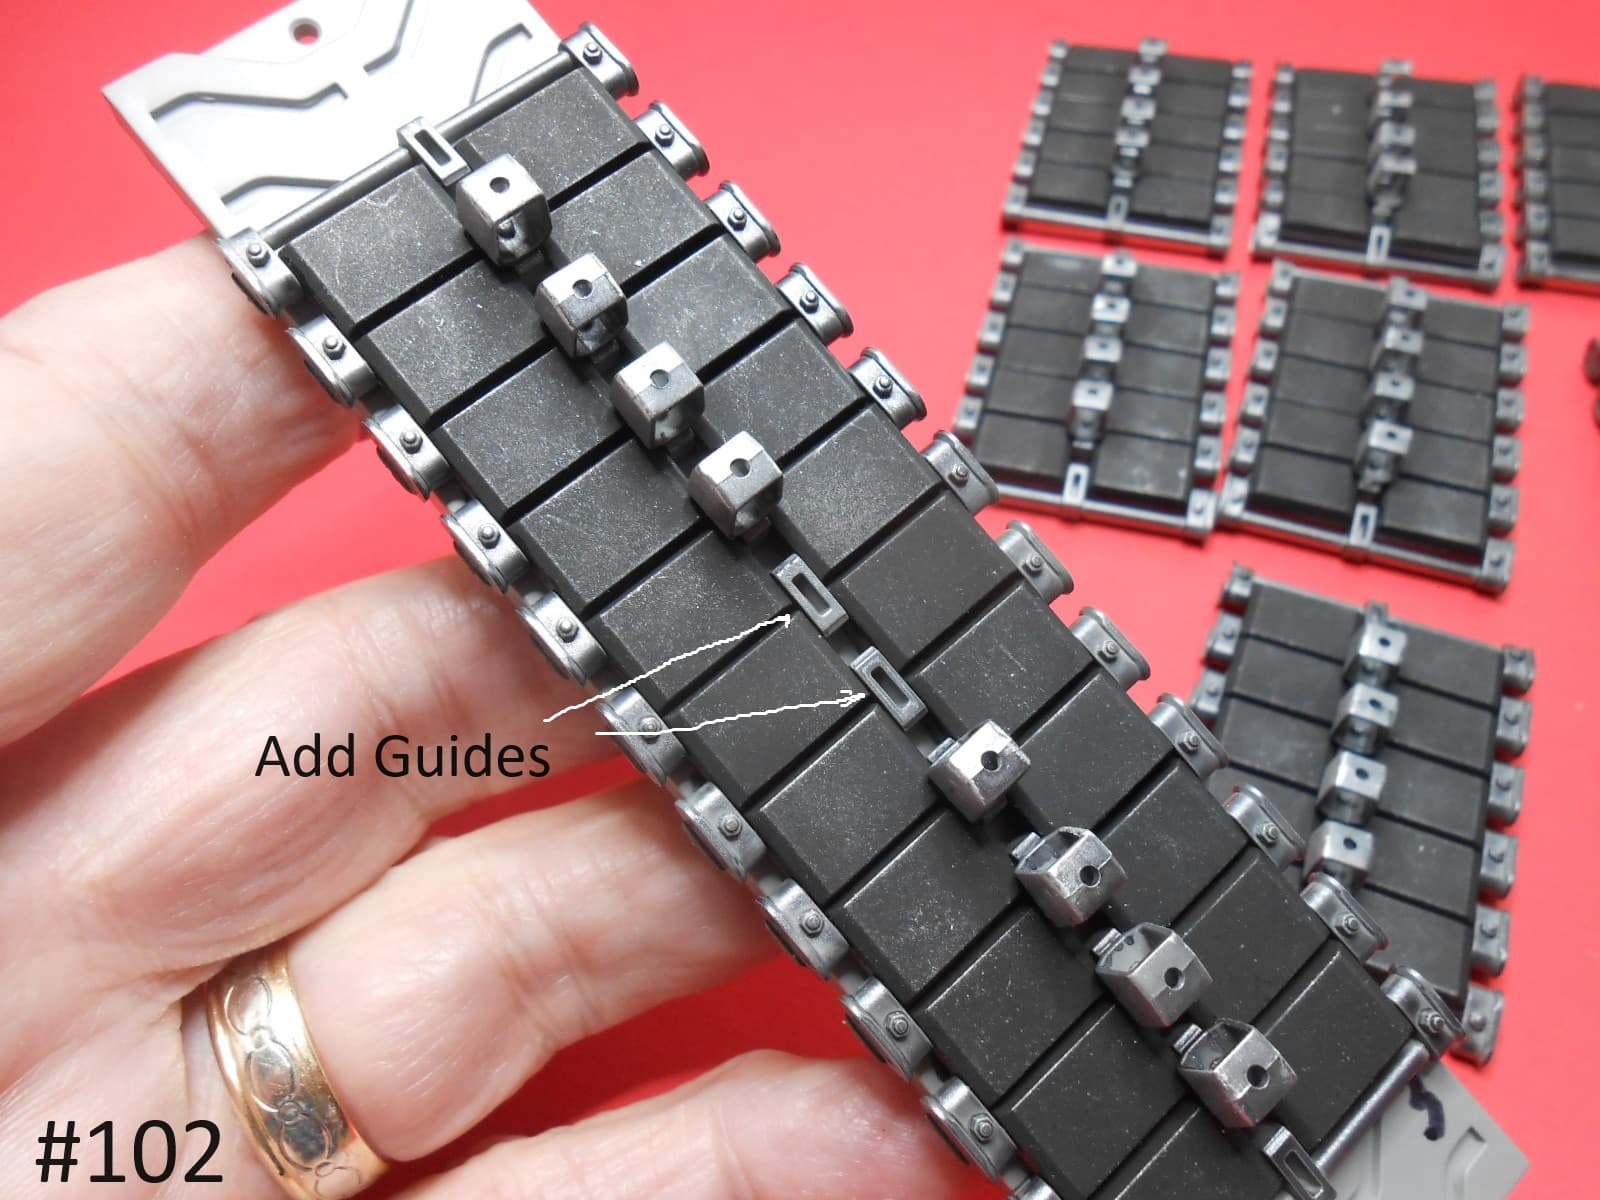
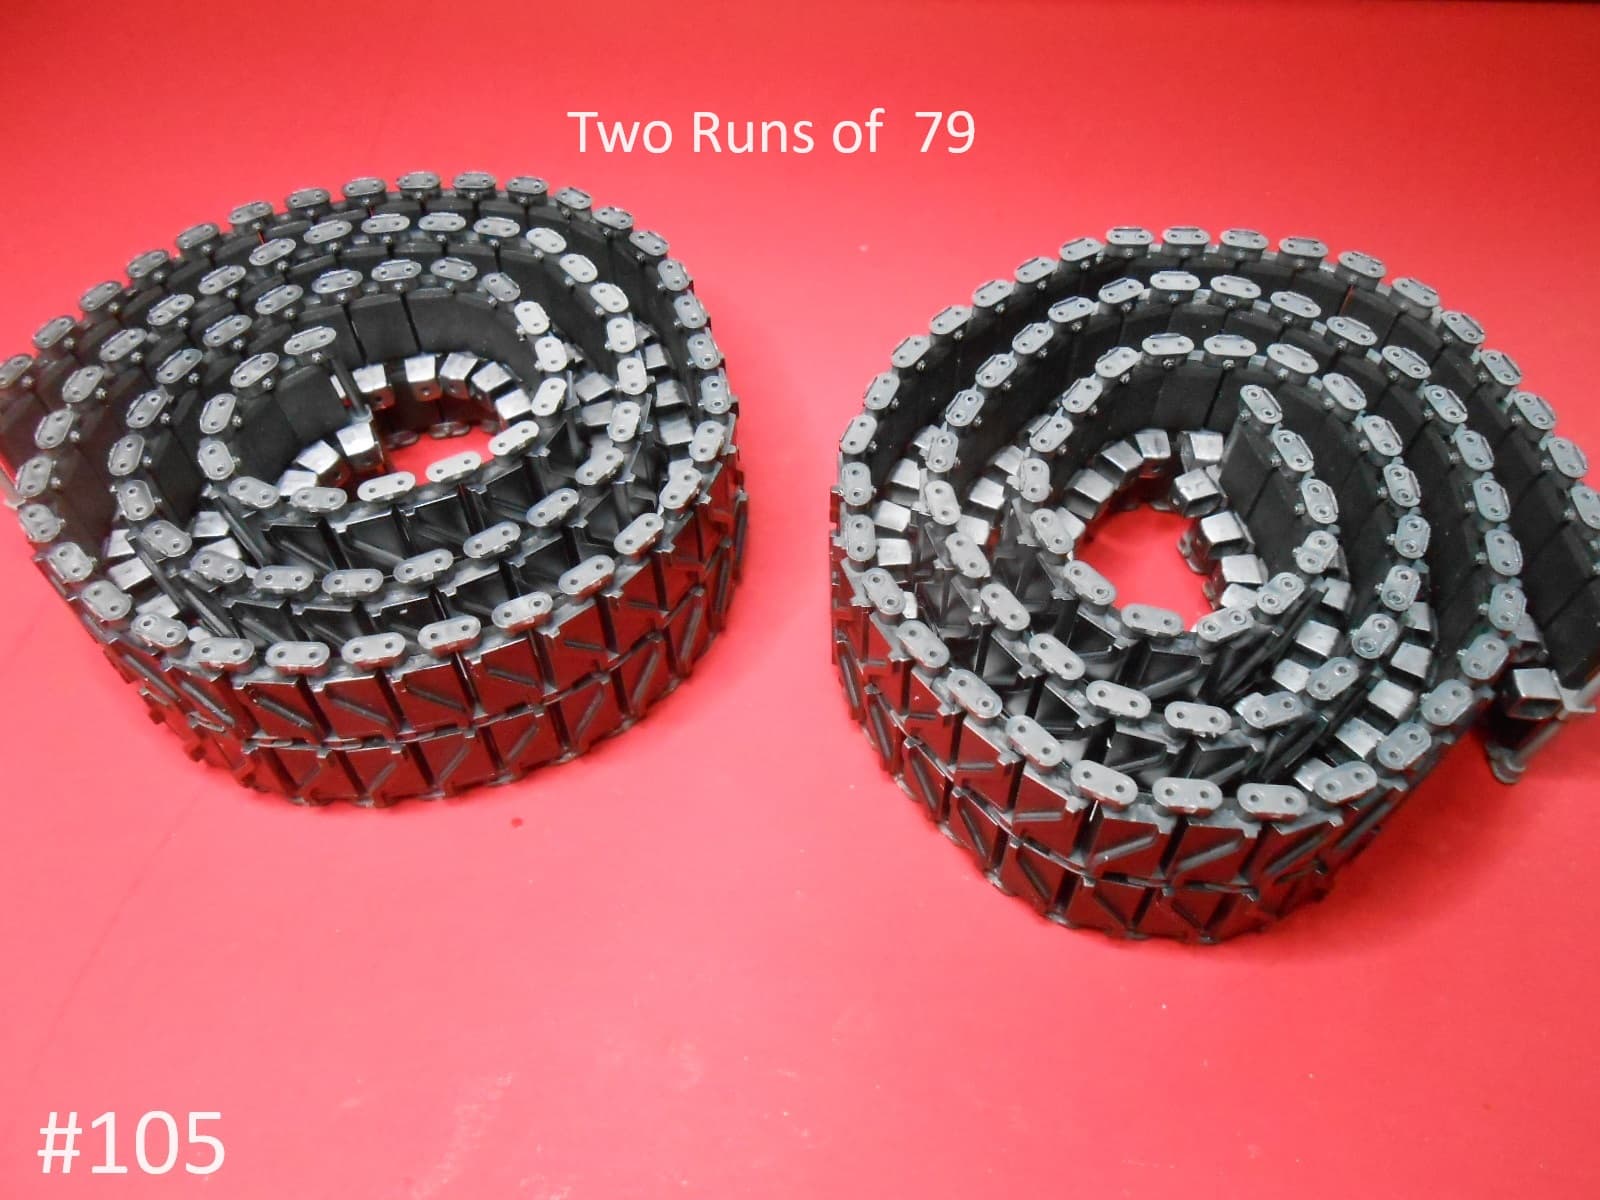
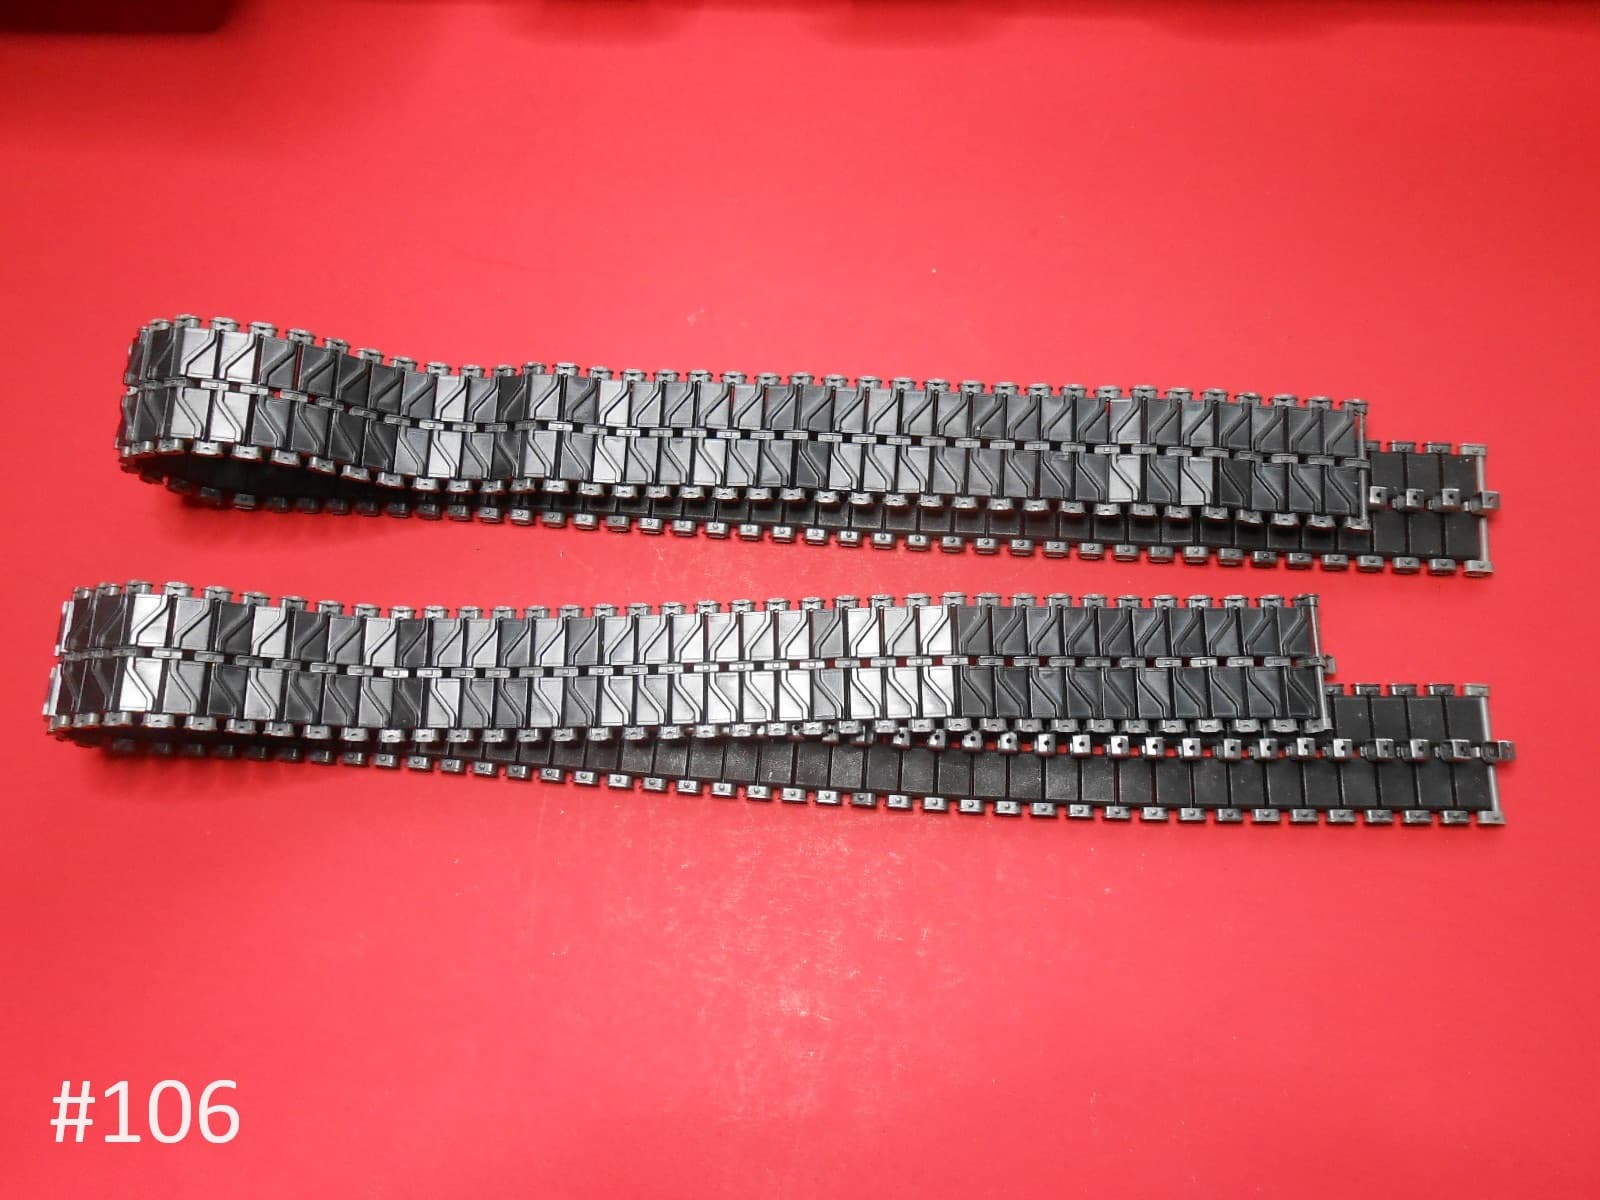
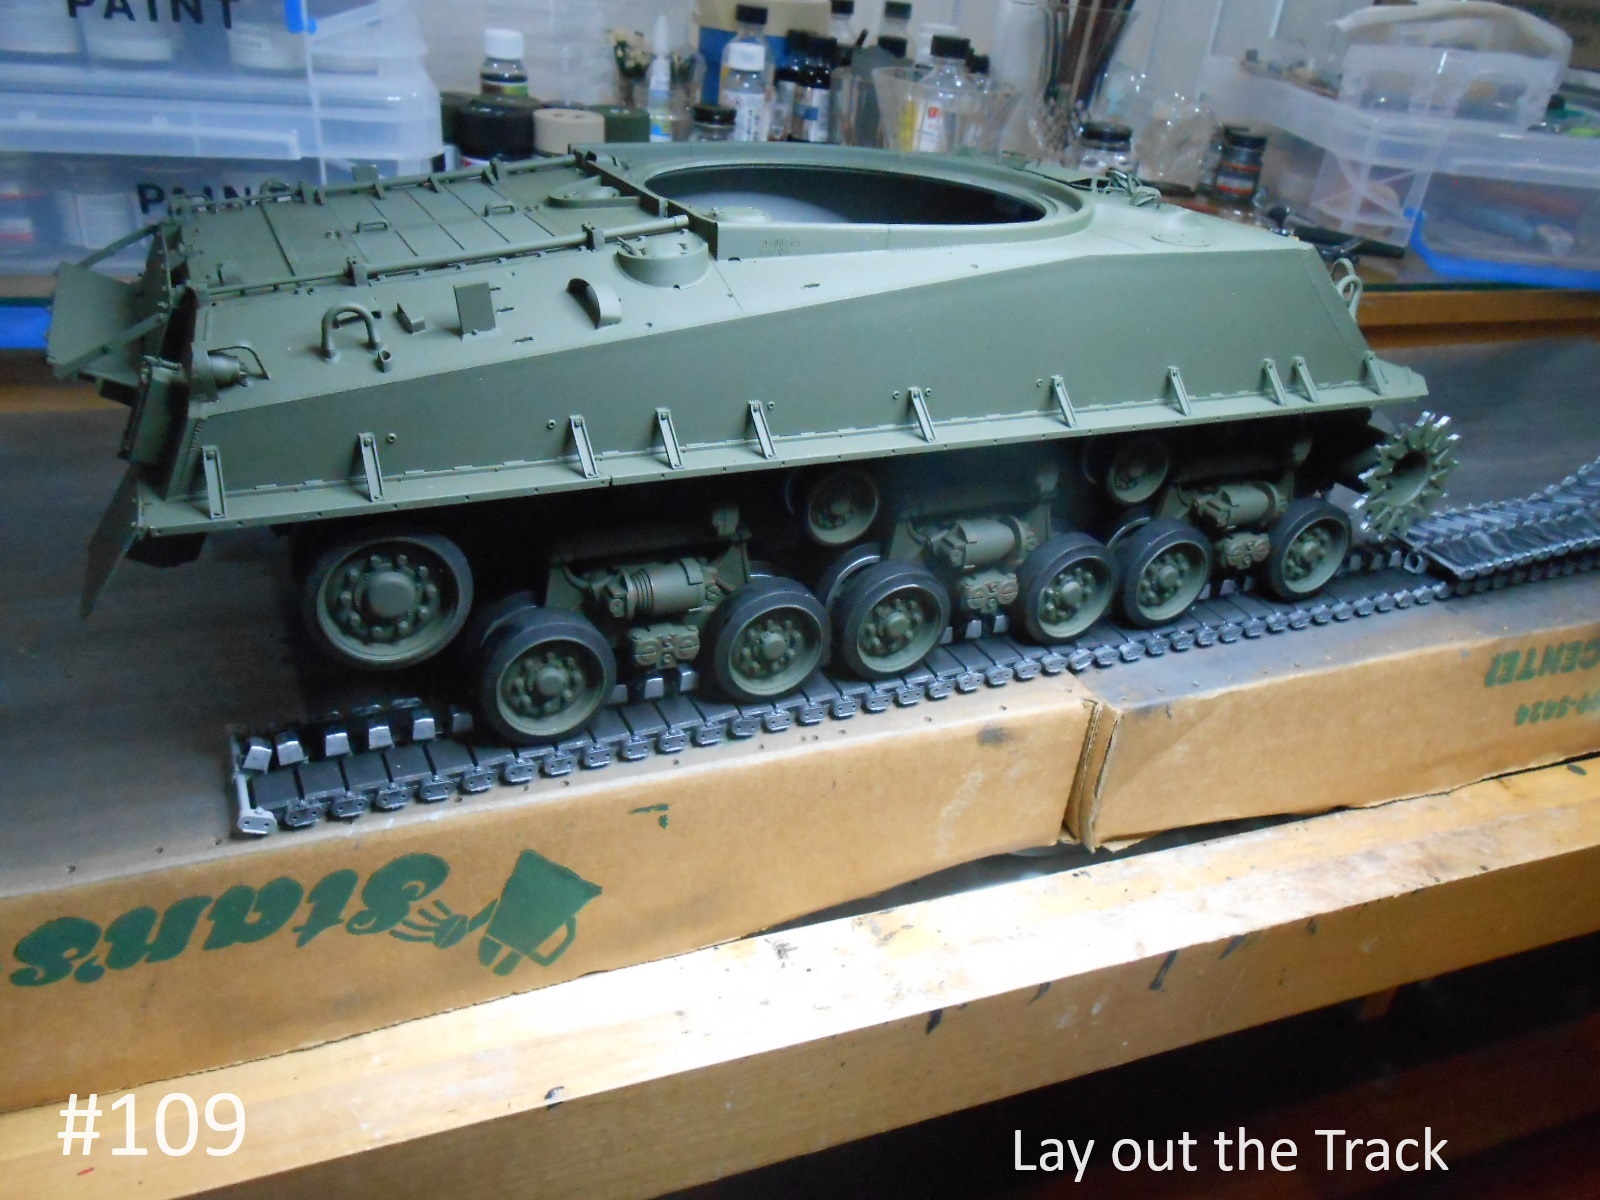
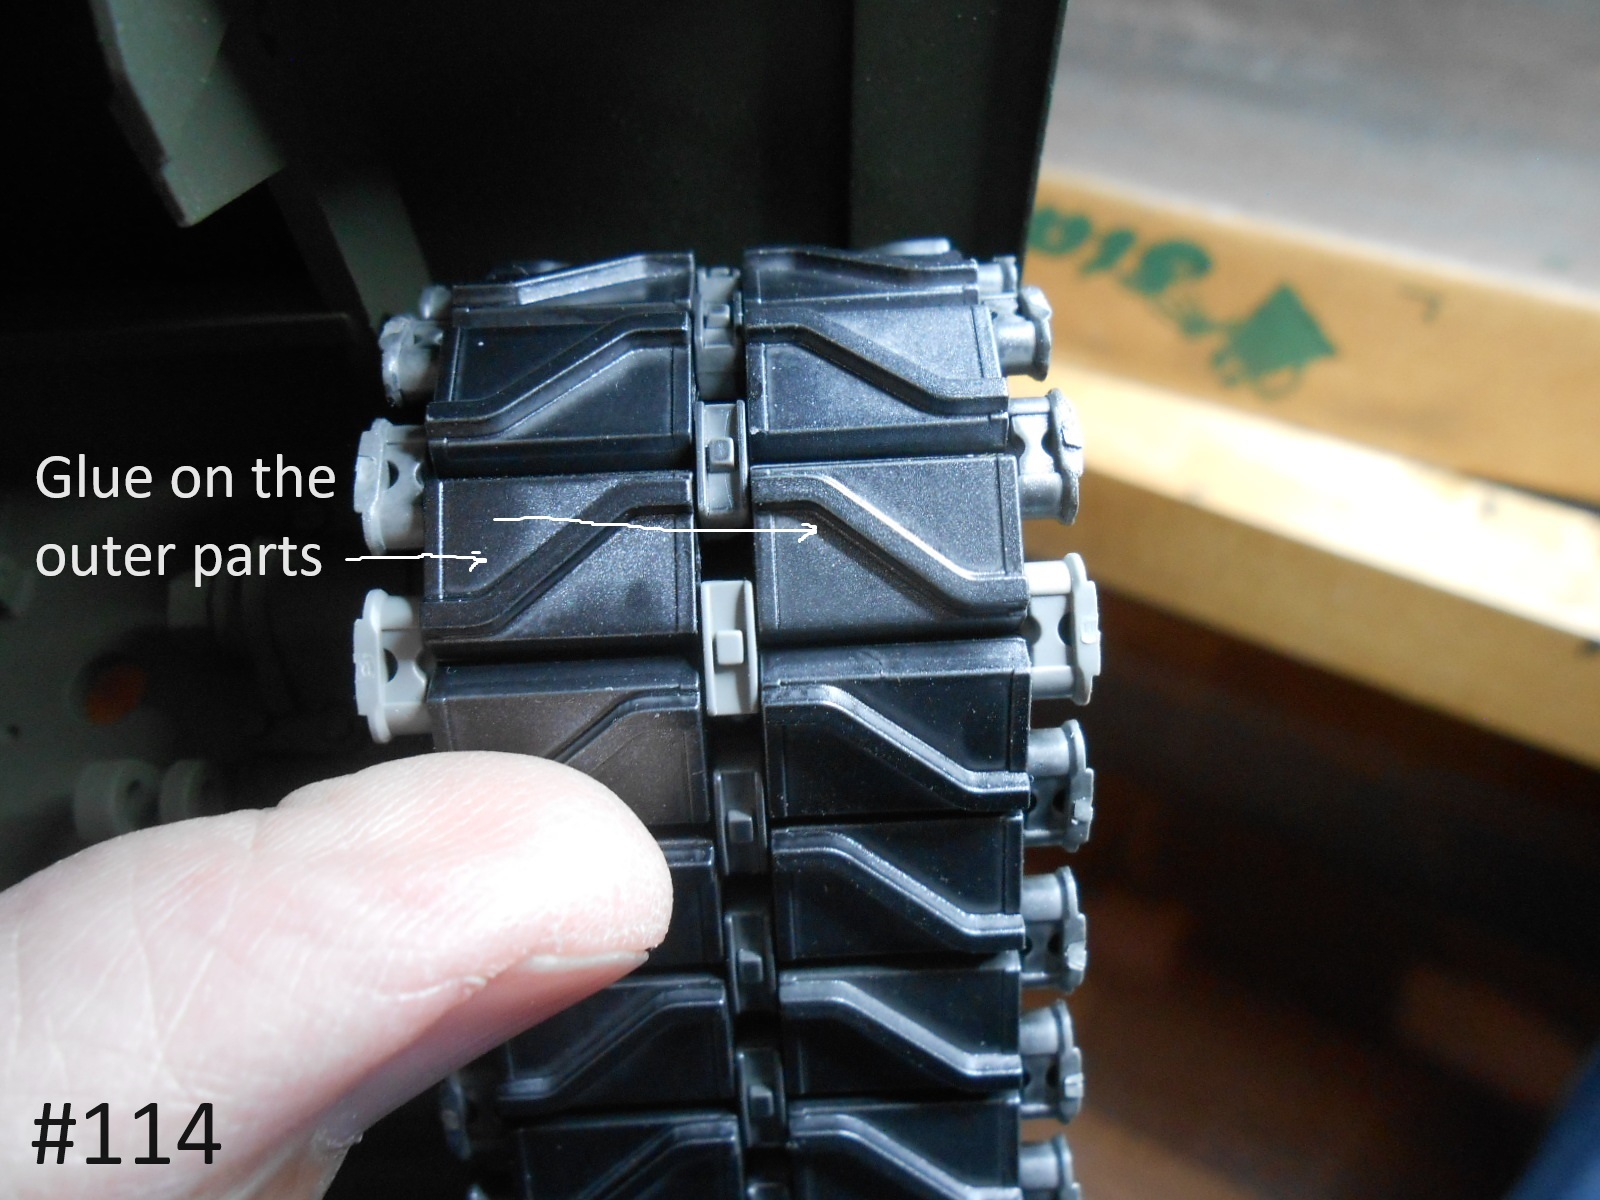
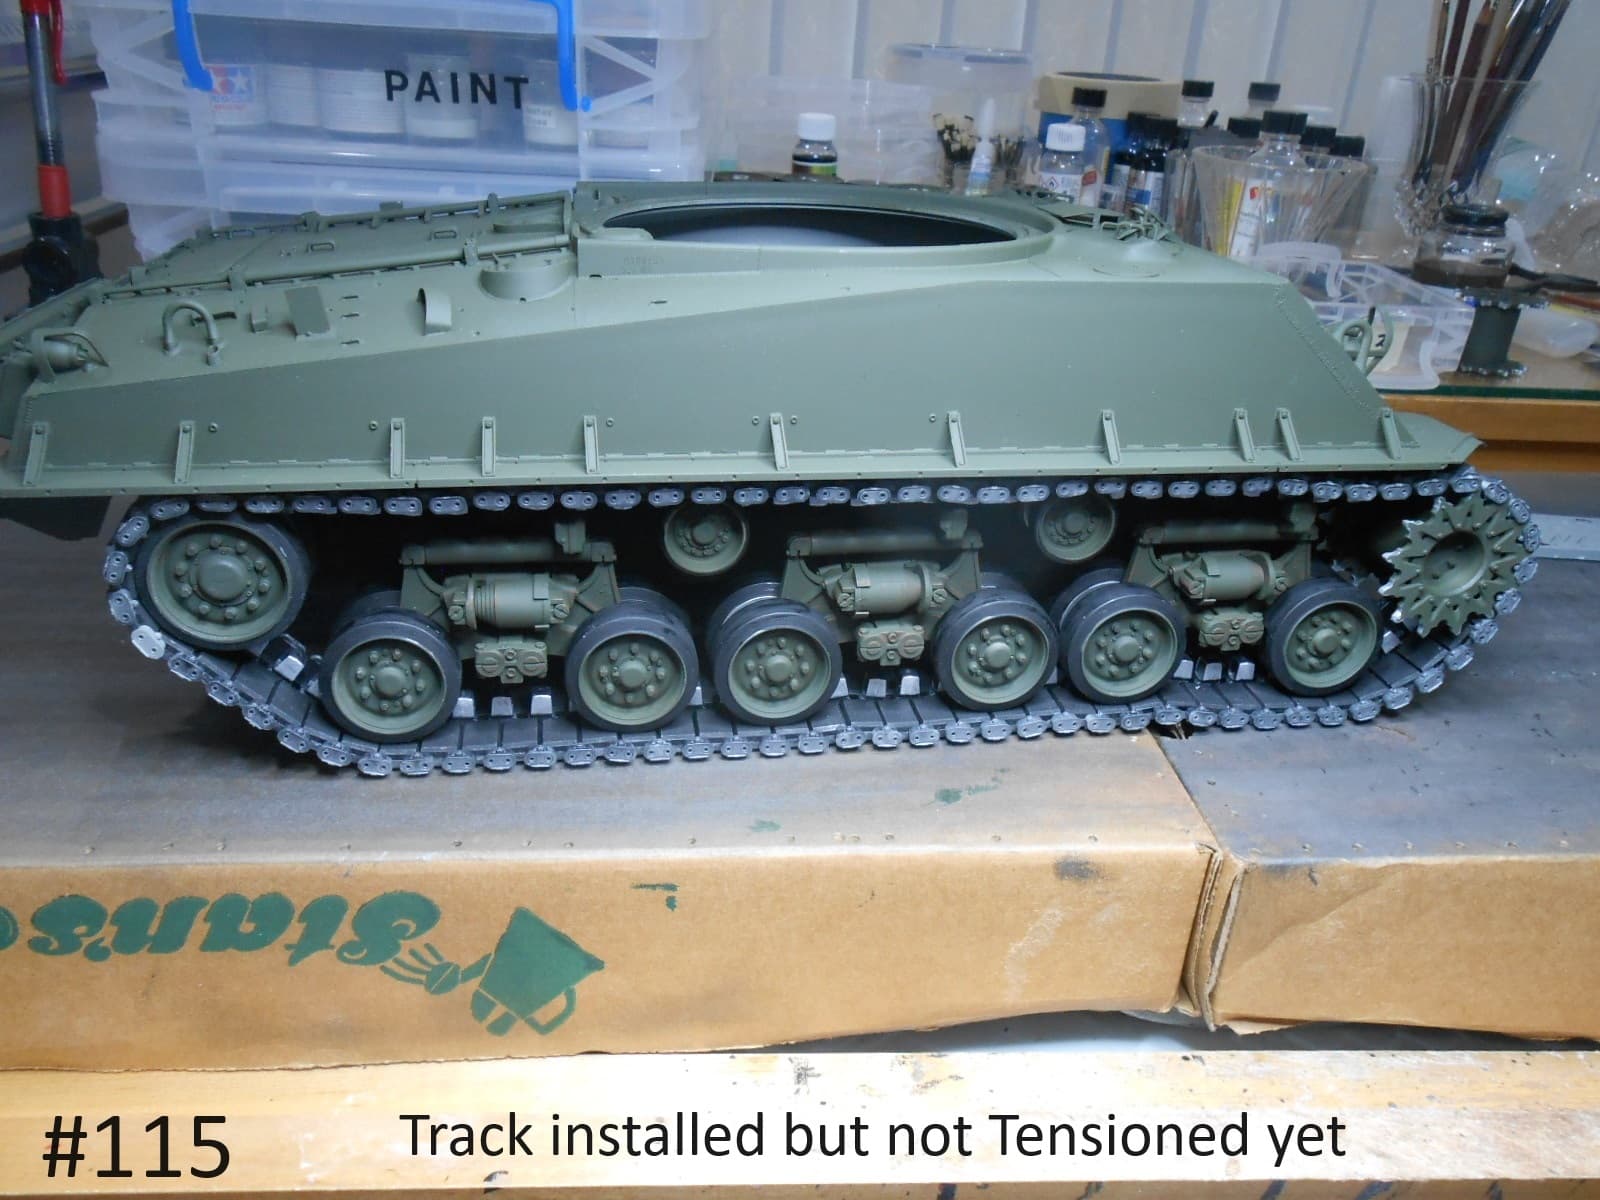
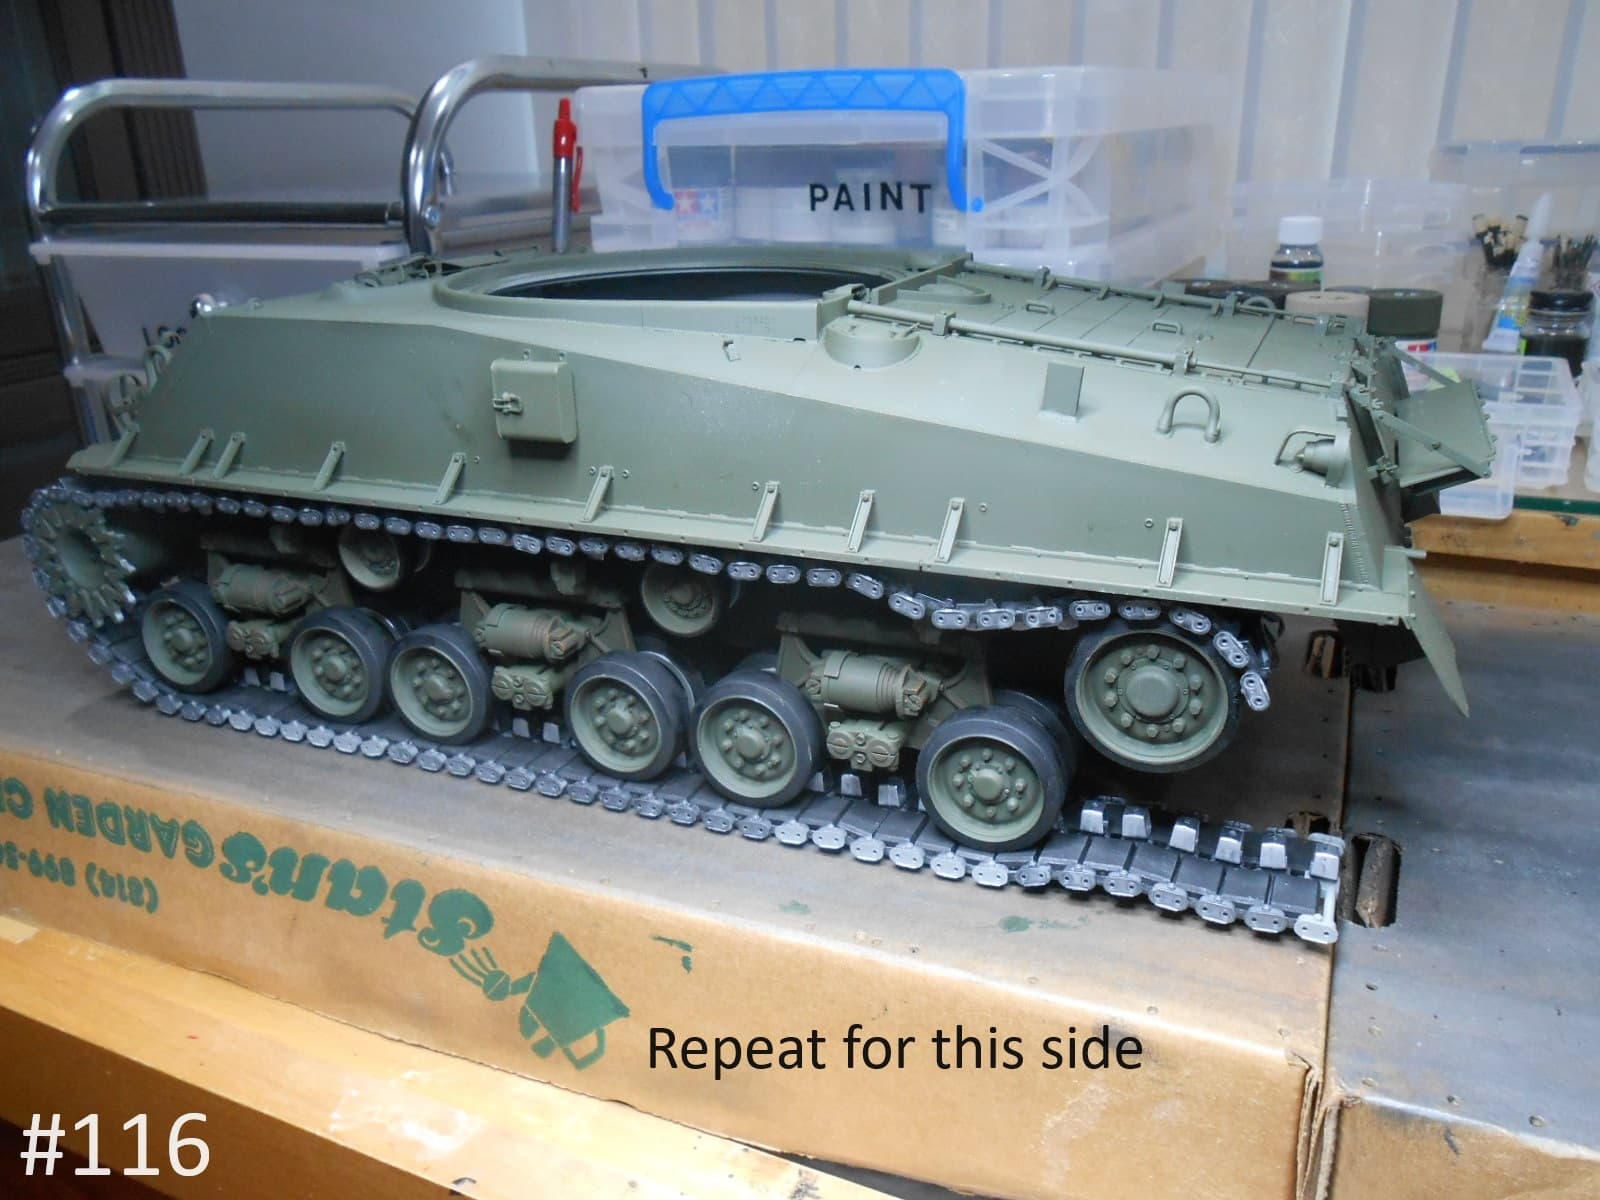
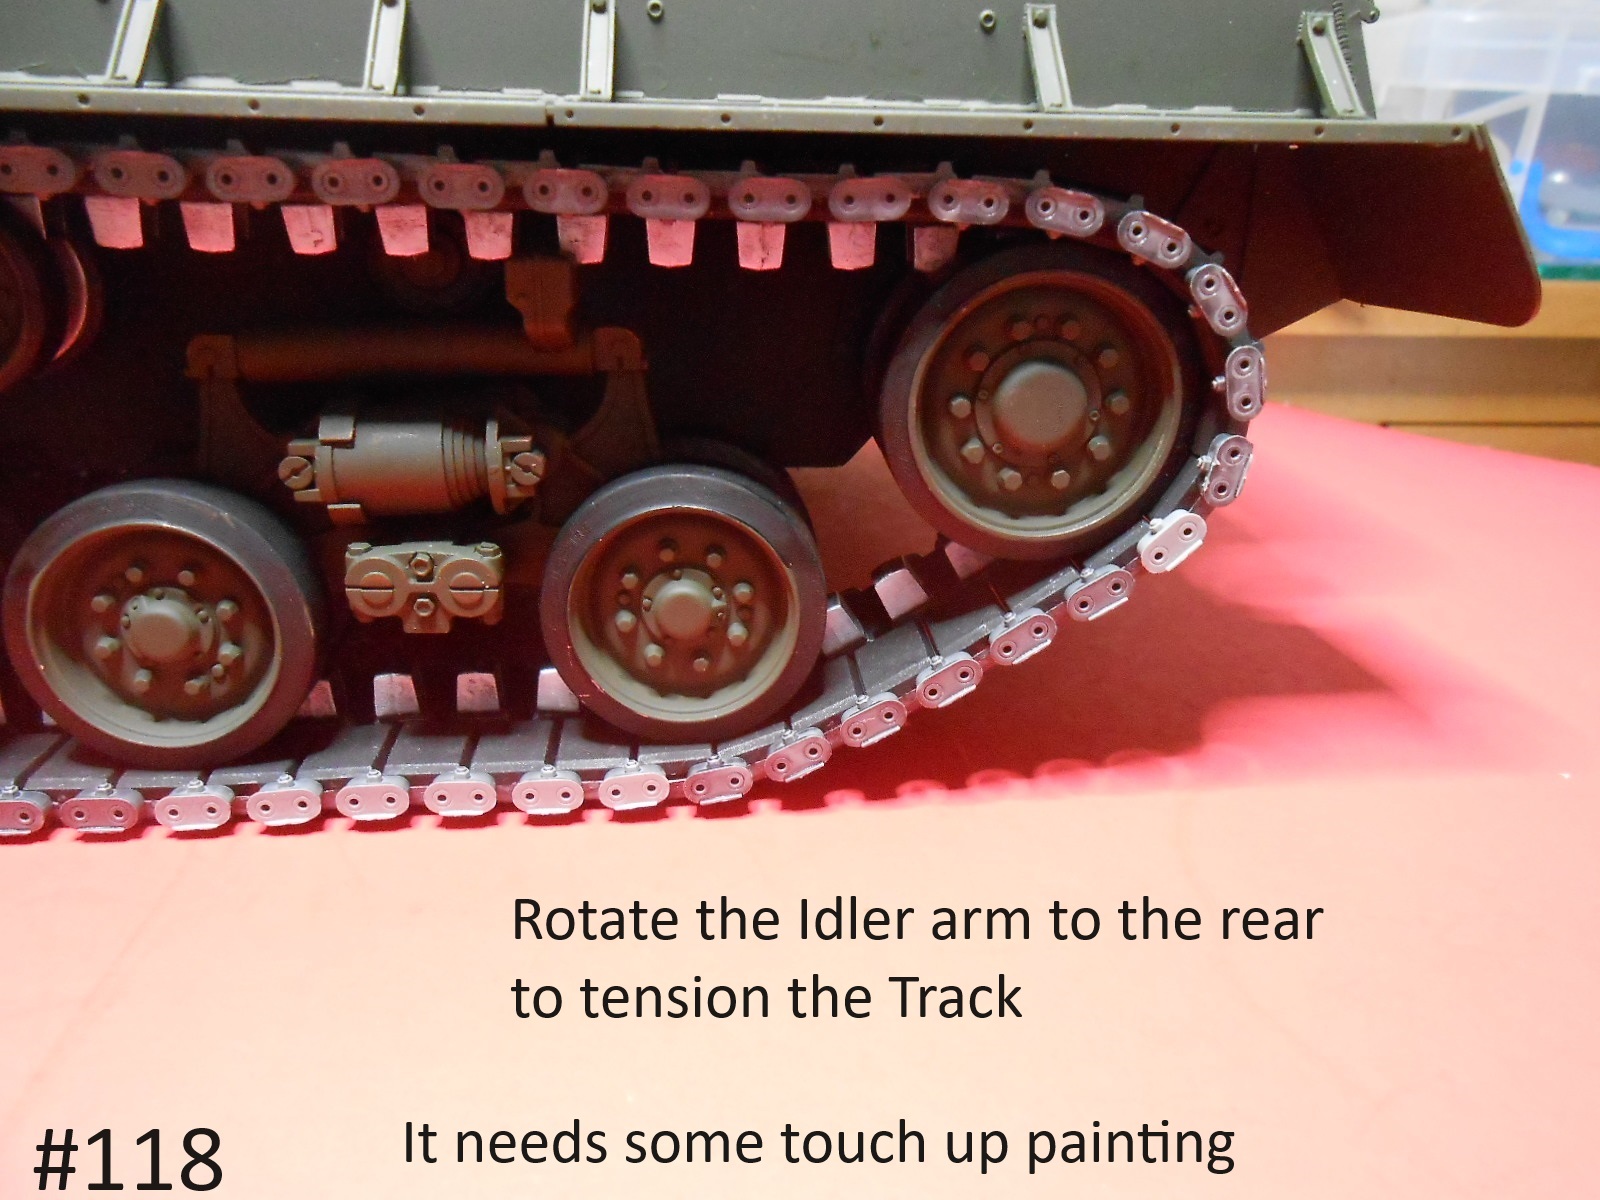
Well after a three day struggle I finally have the Track assembled and installed.
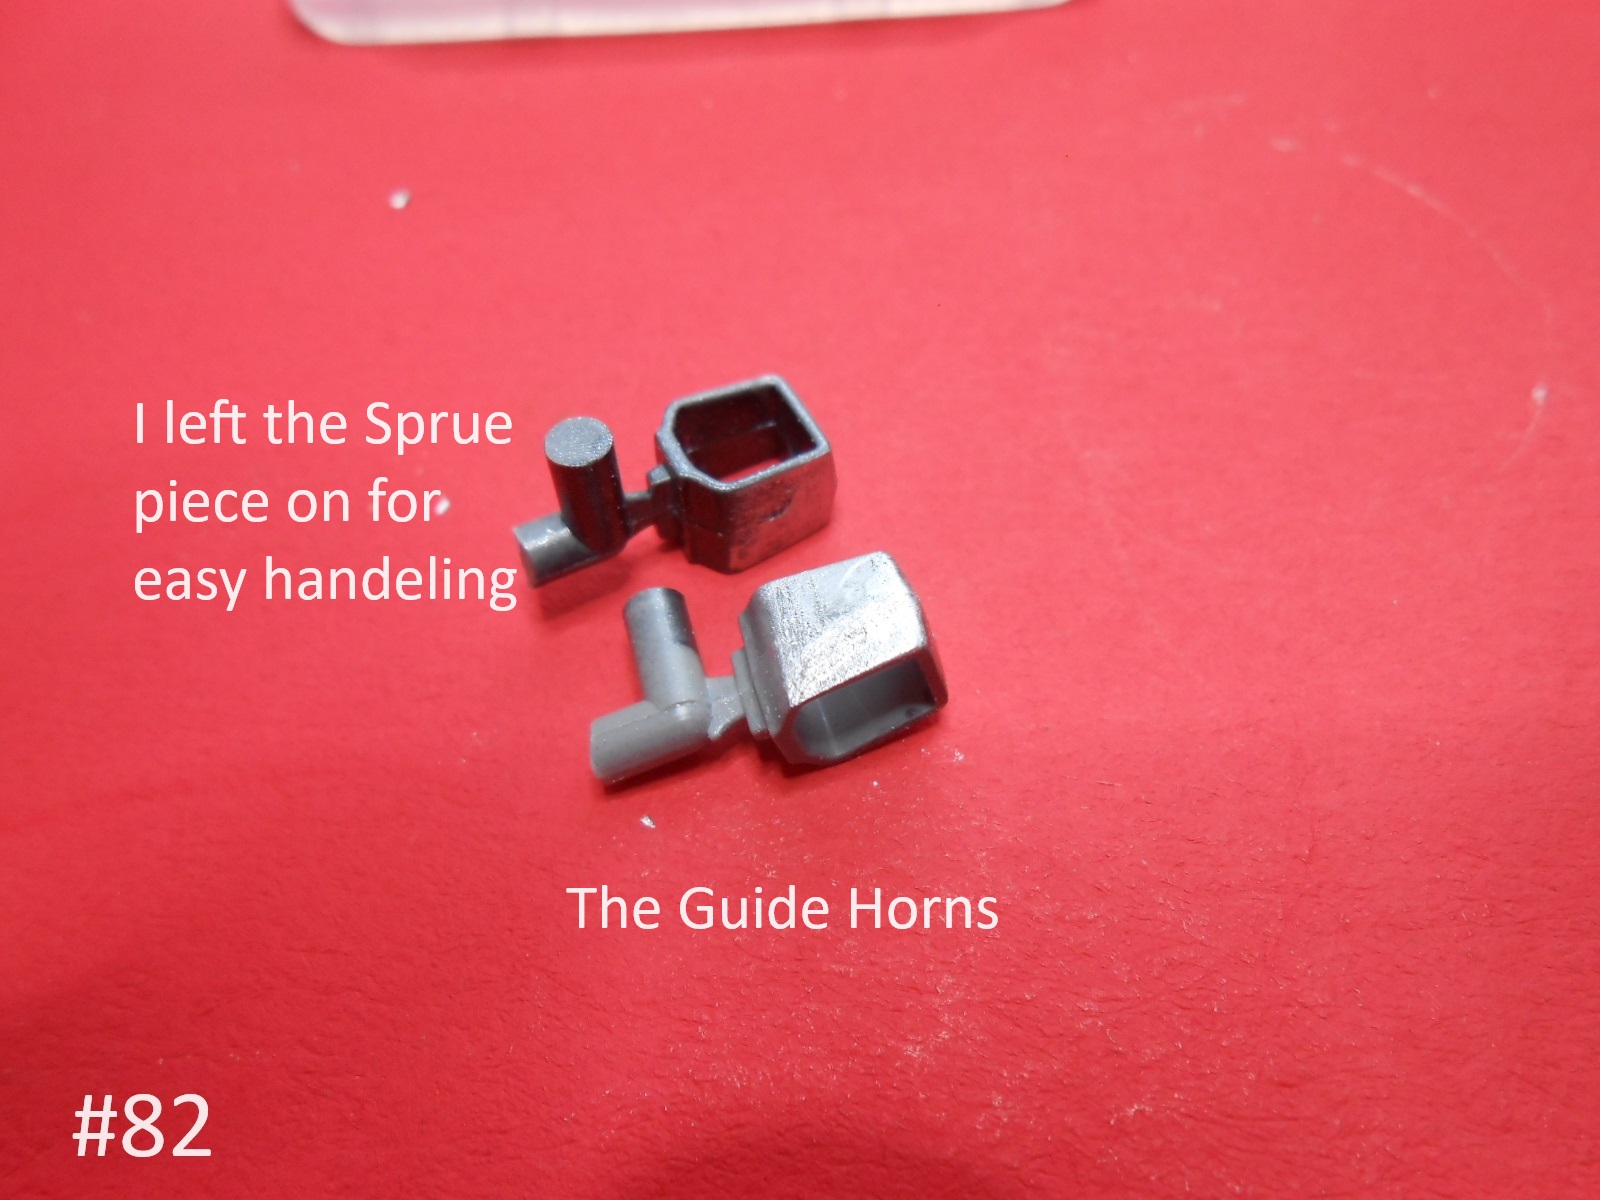
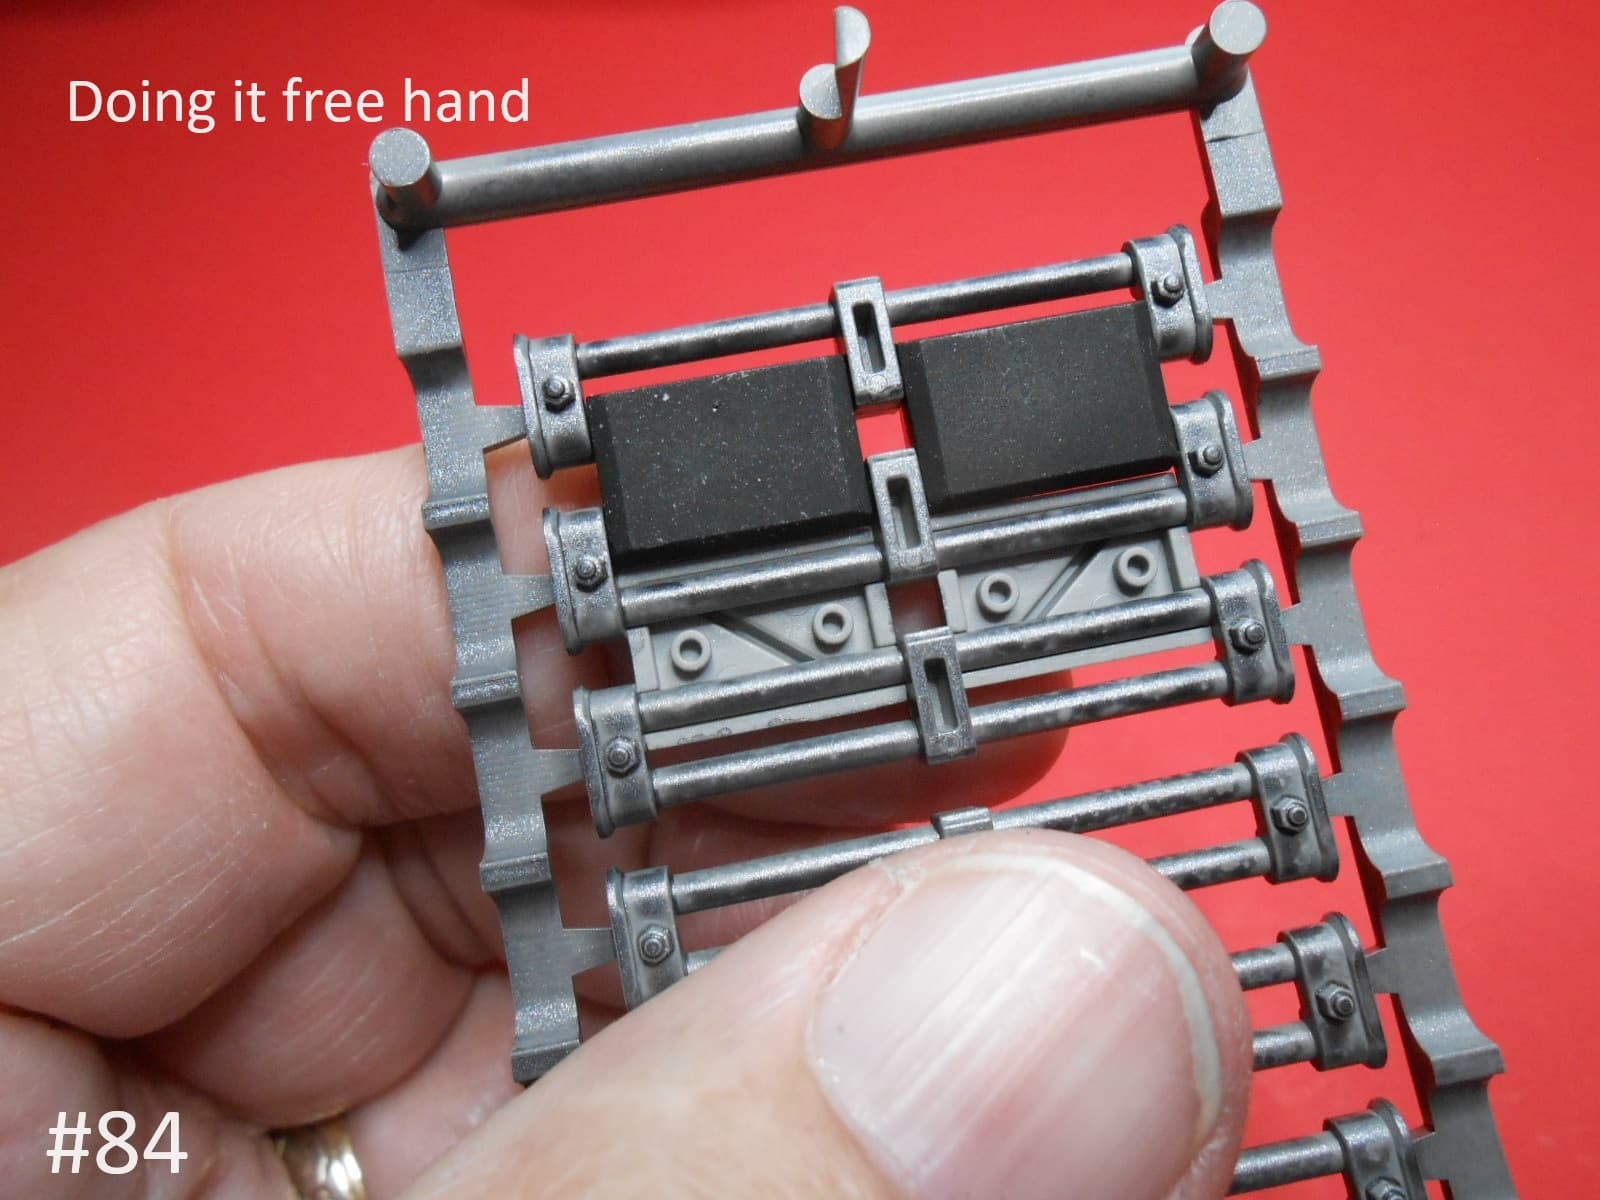
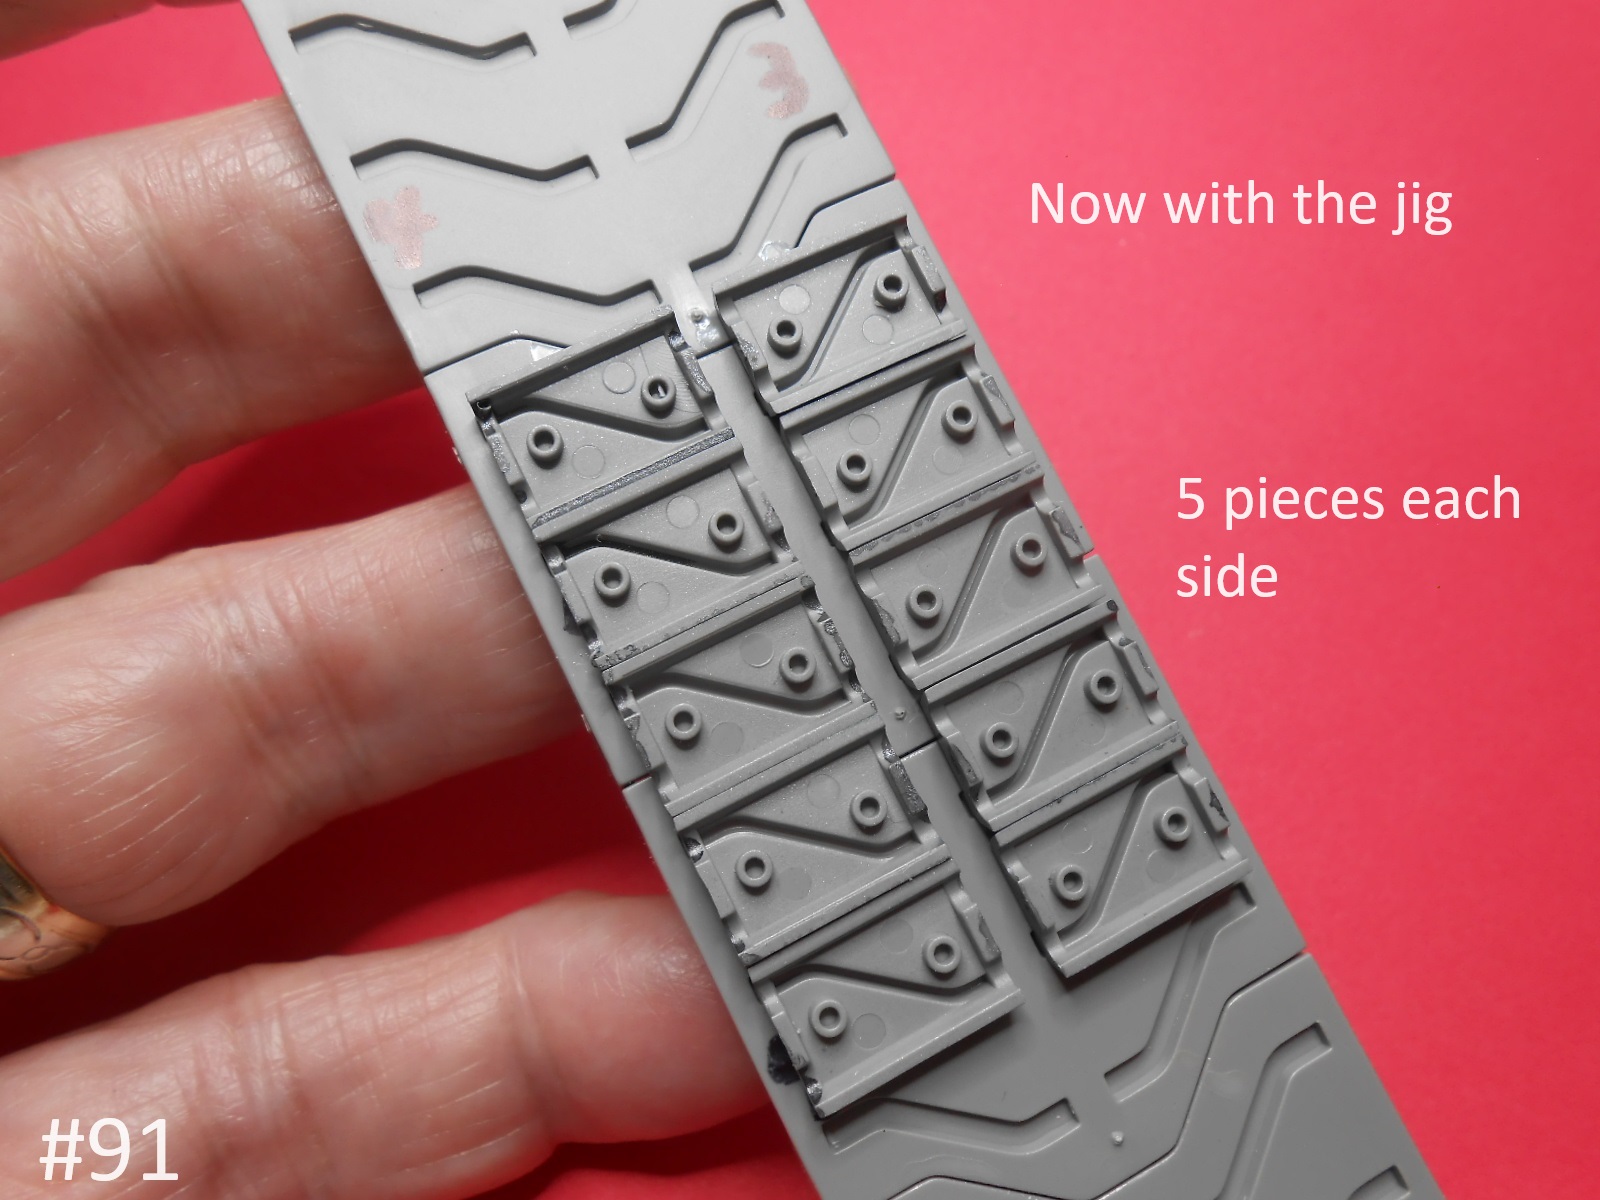
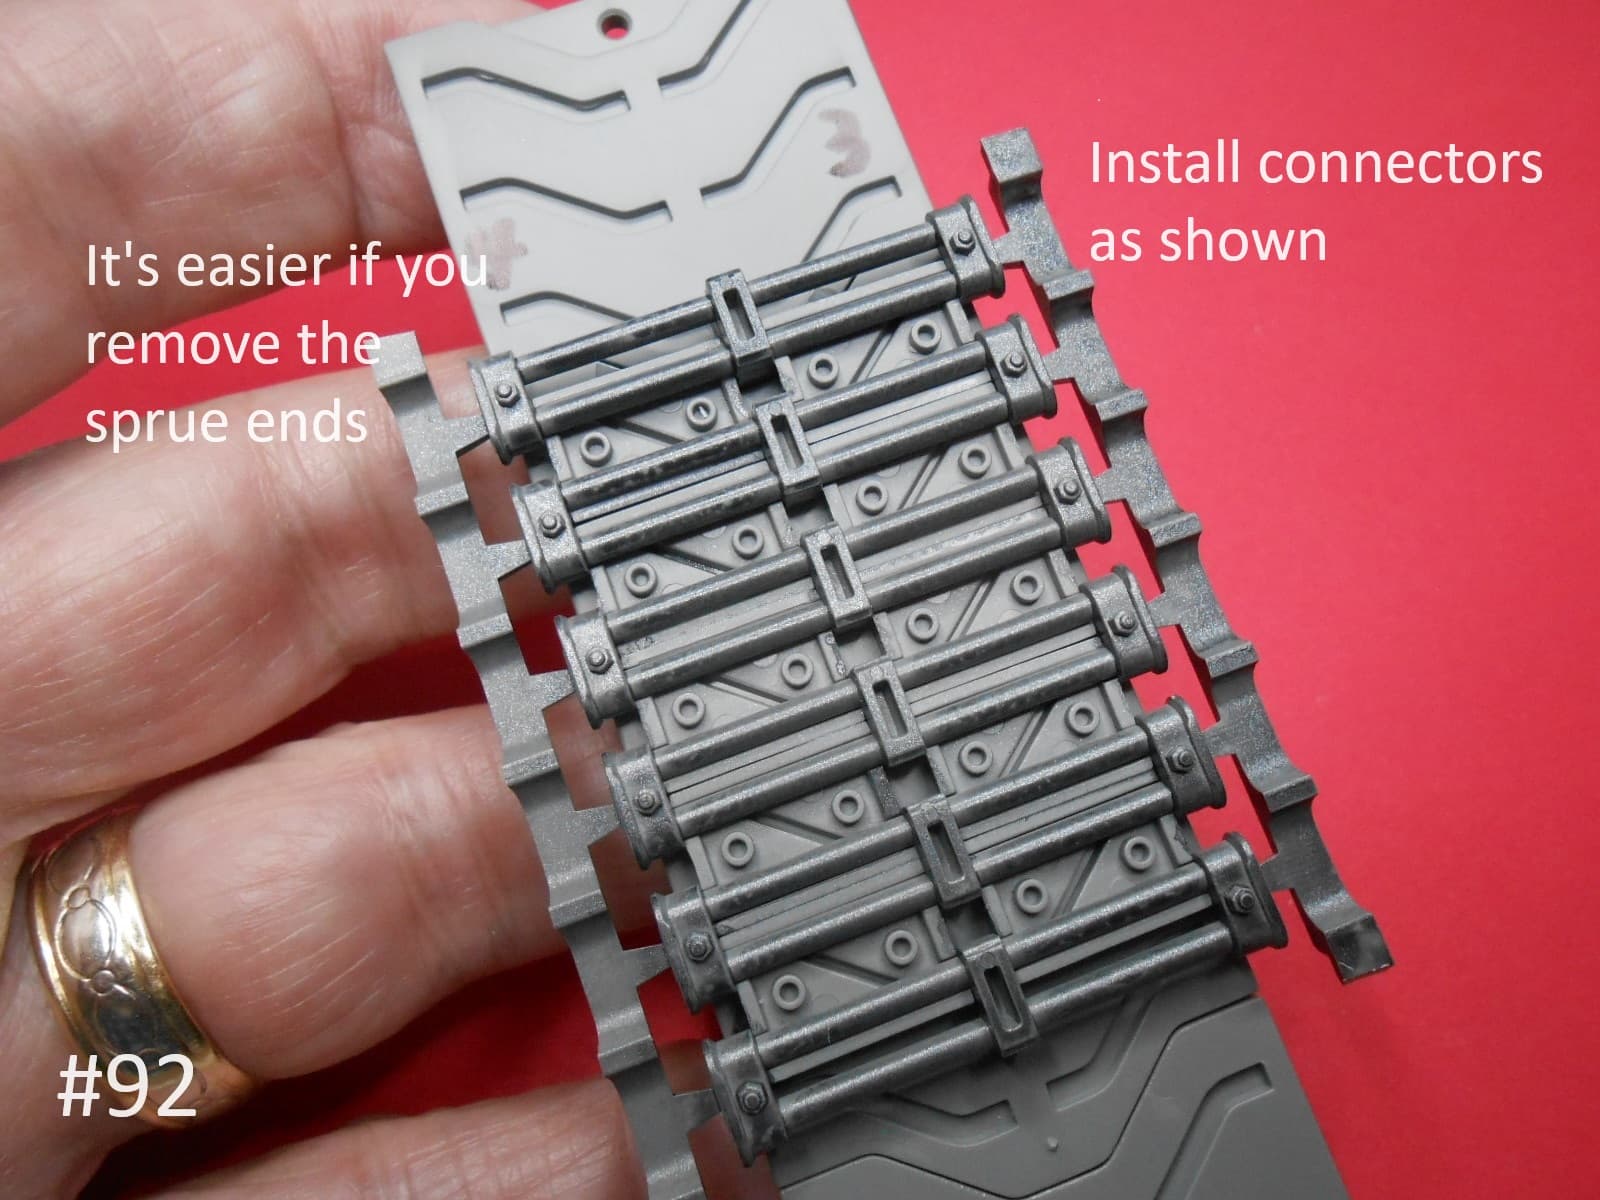
I’ll be showing 2 ways of assembling the Track. You choose what works for you.

First the Free-hand method without the supplied jig,


Now using the supplied Jig which is the method I preferred


.


Now the installation.


Now for some touch-up painting.
If there’s any question just aske , I’ll help if I can

Regards
Donald

3 Likes

The Exhaust Pipes and Deflectors are installed.


I’m working on the Turret and Gun next.
Regards
Donald

3 Likes

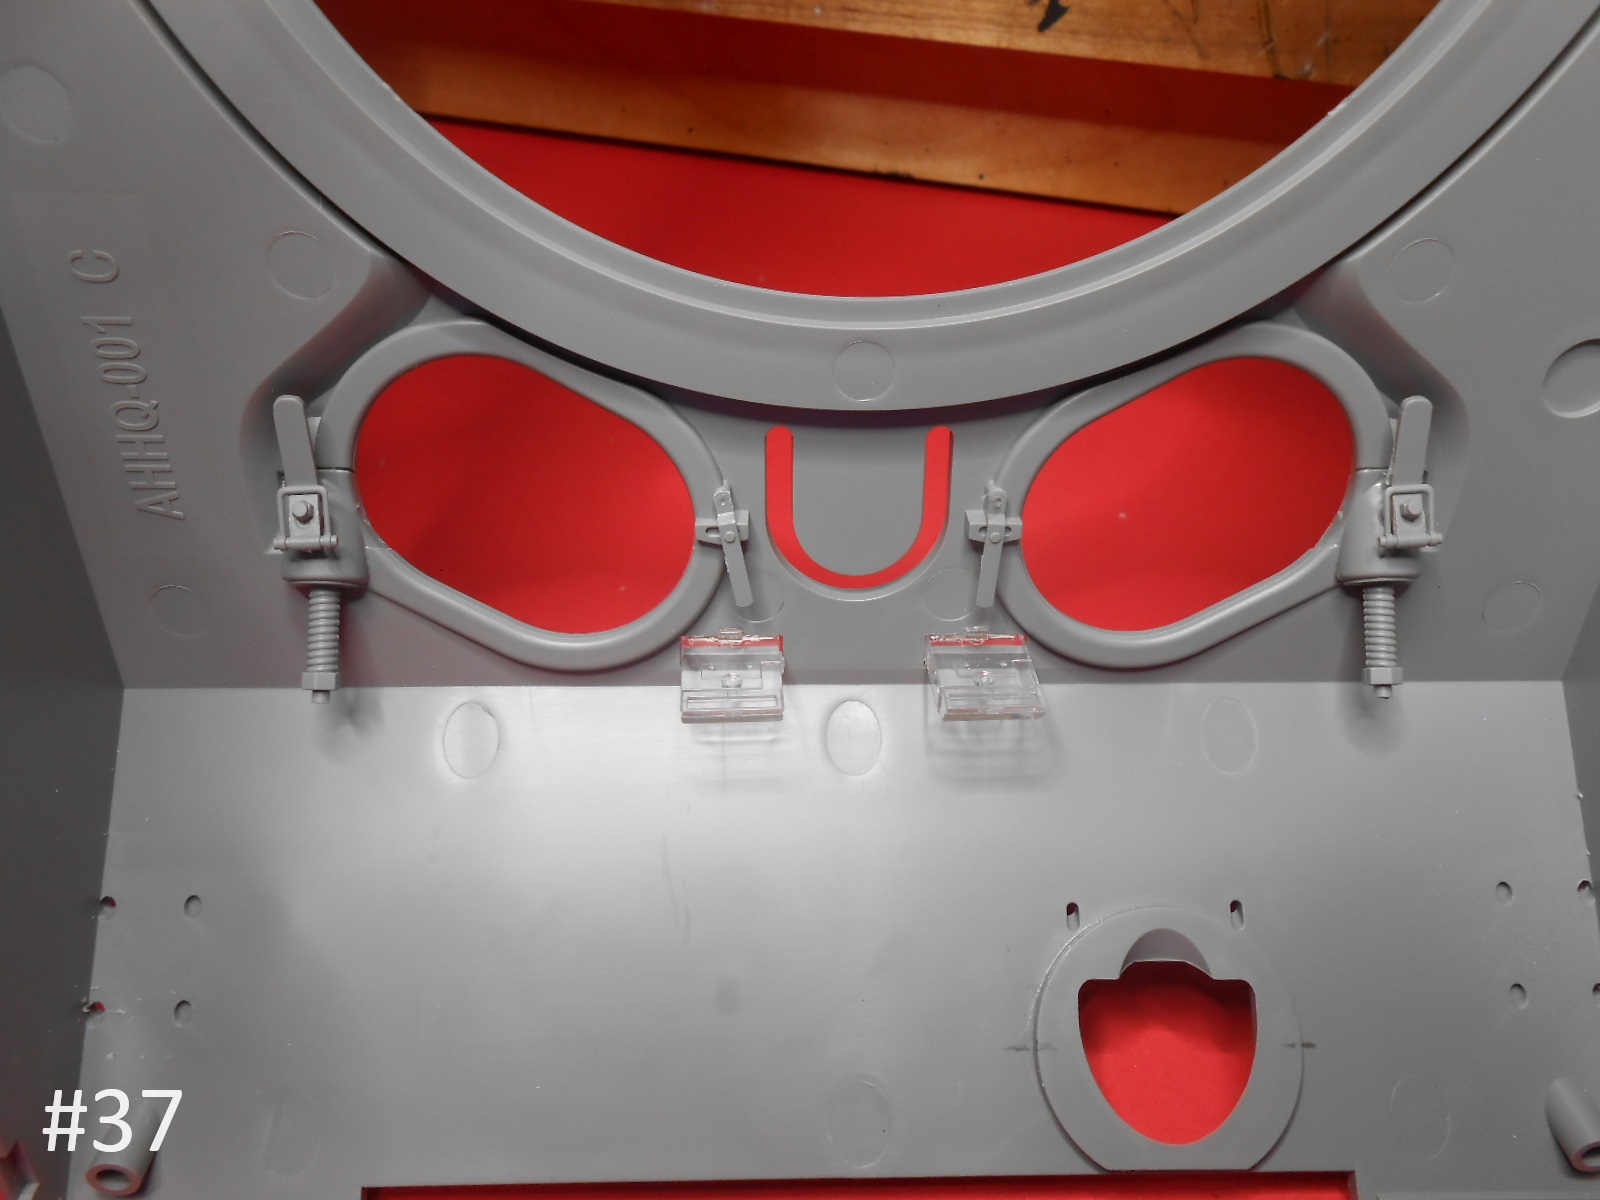
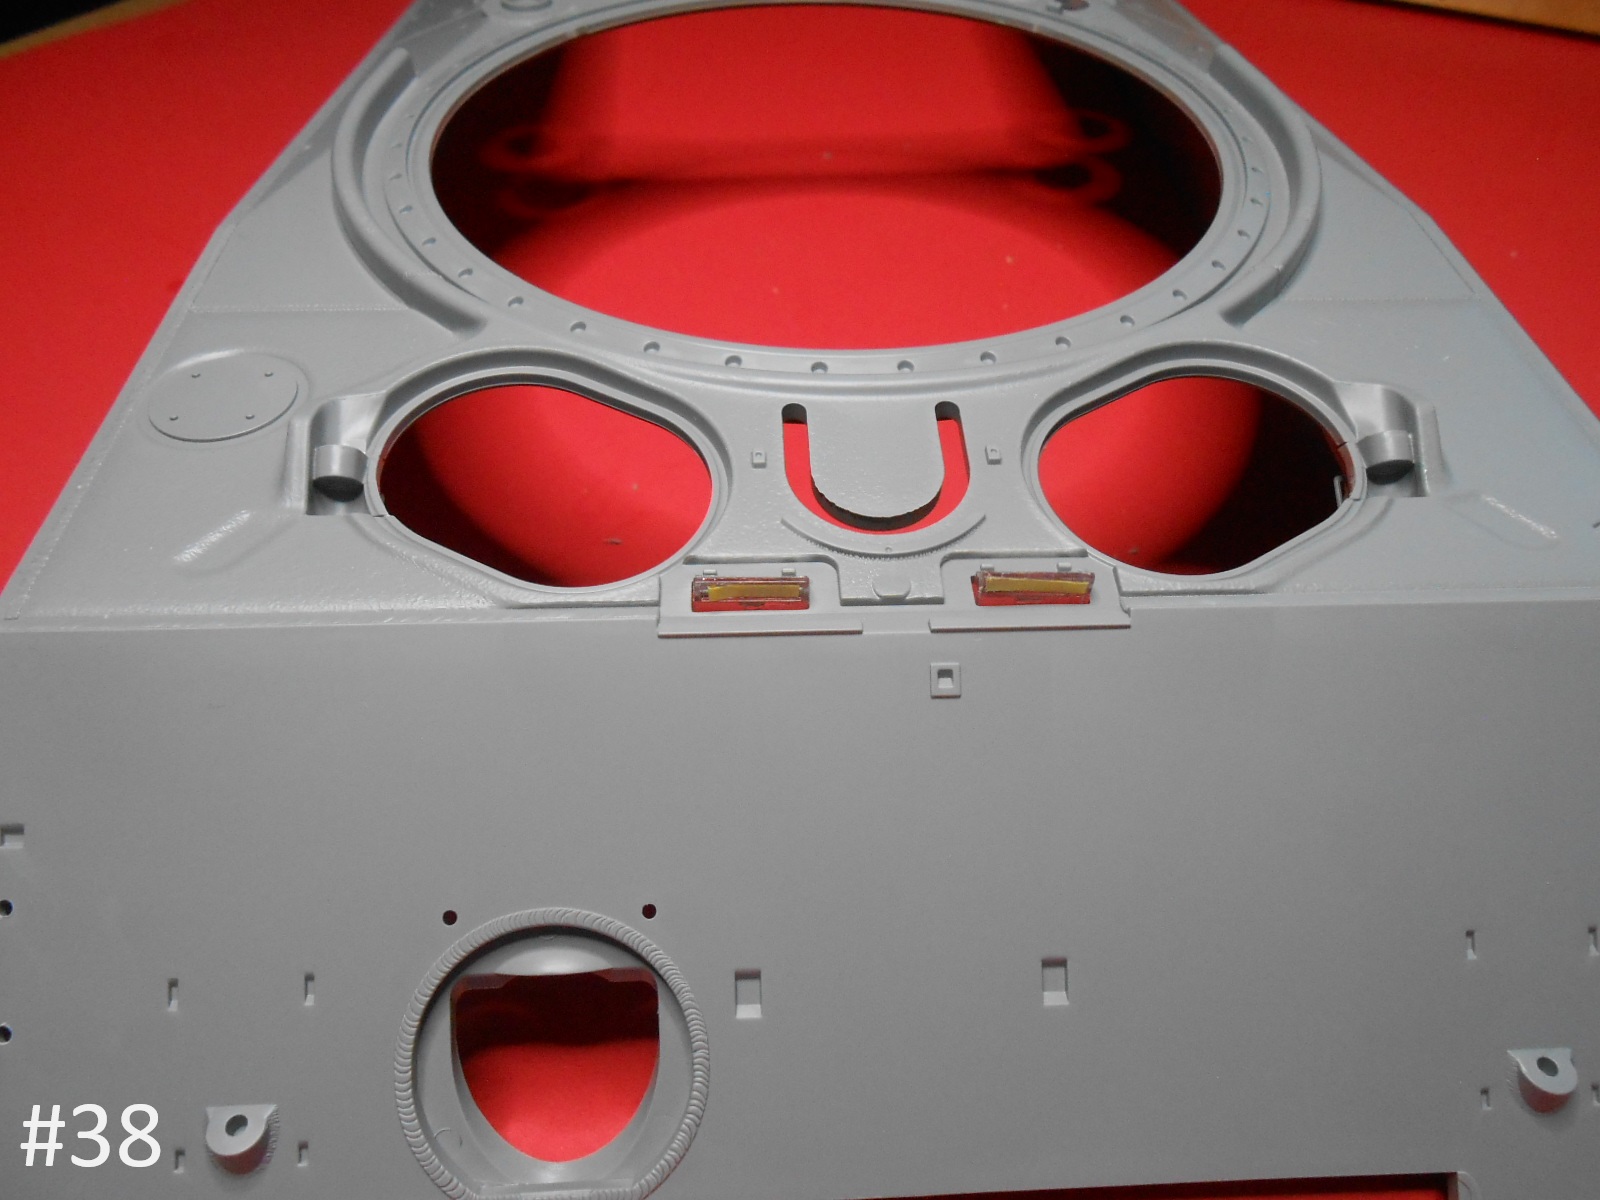
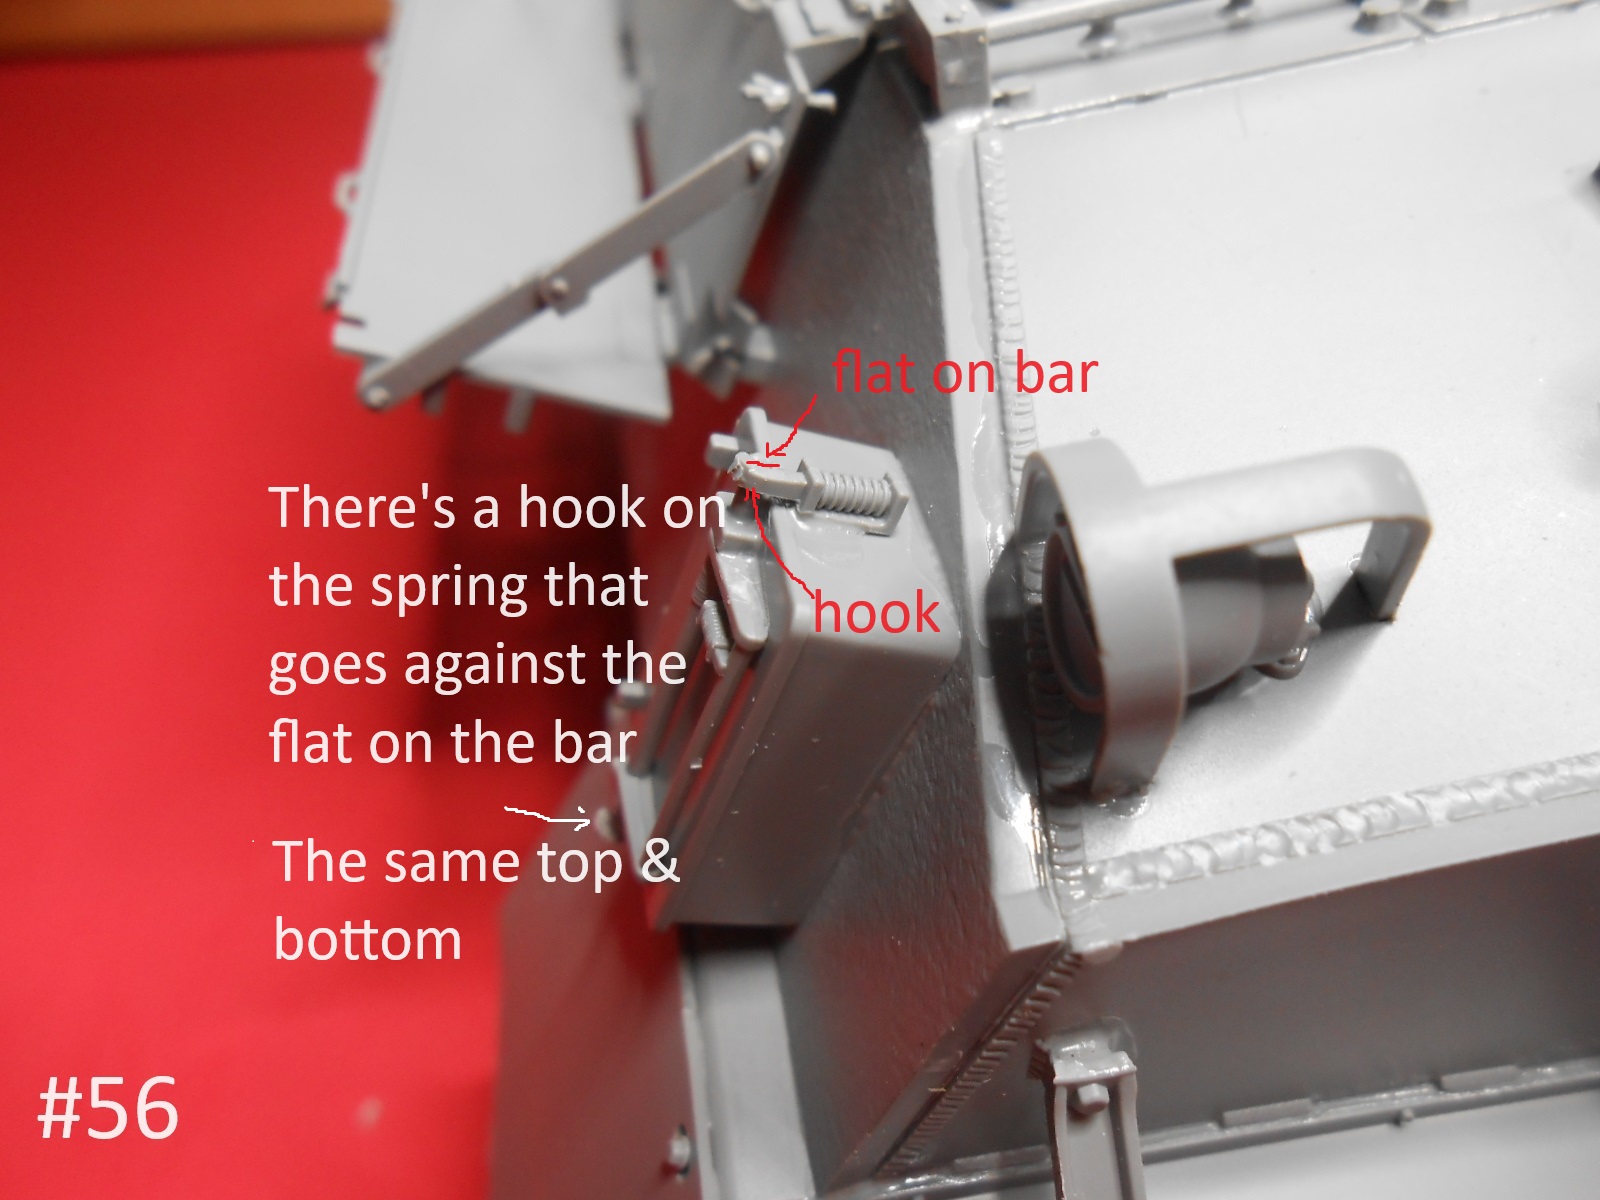
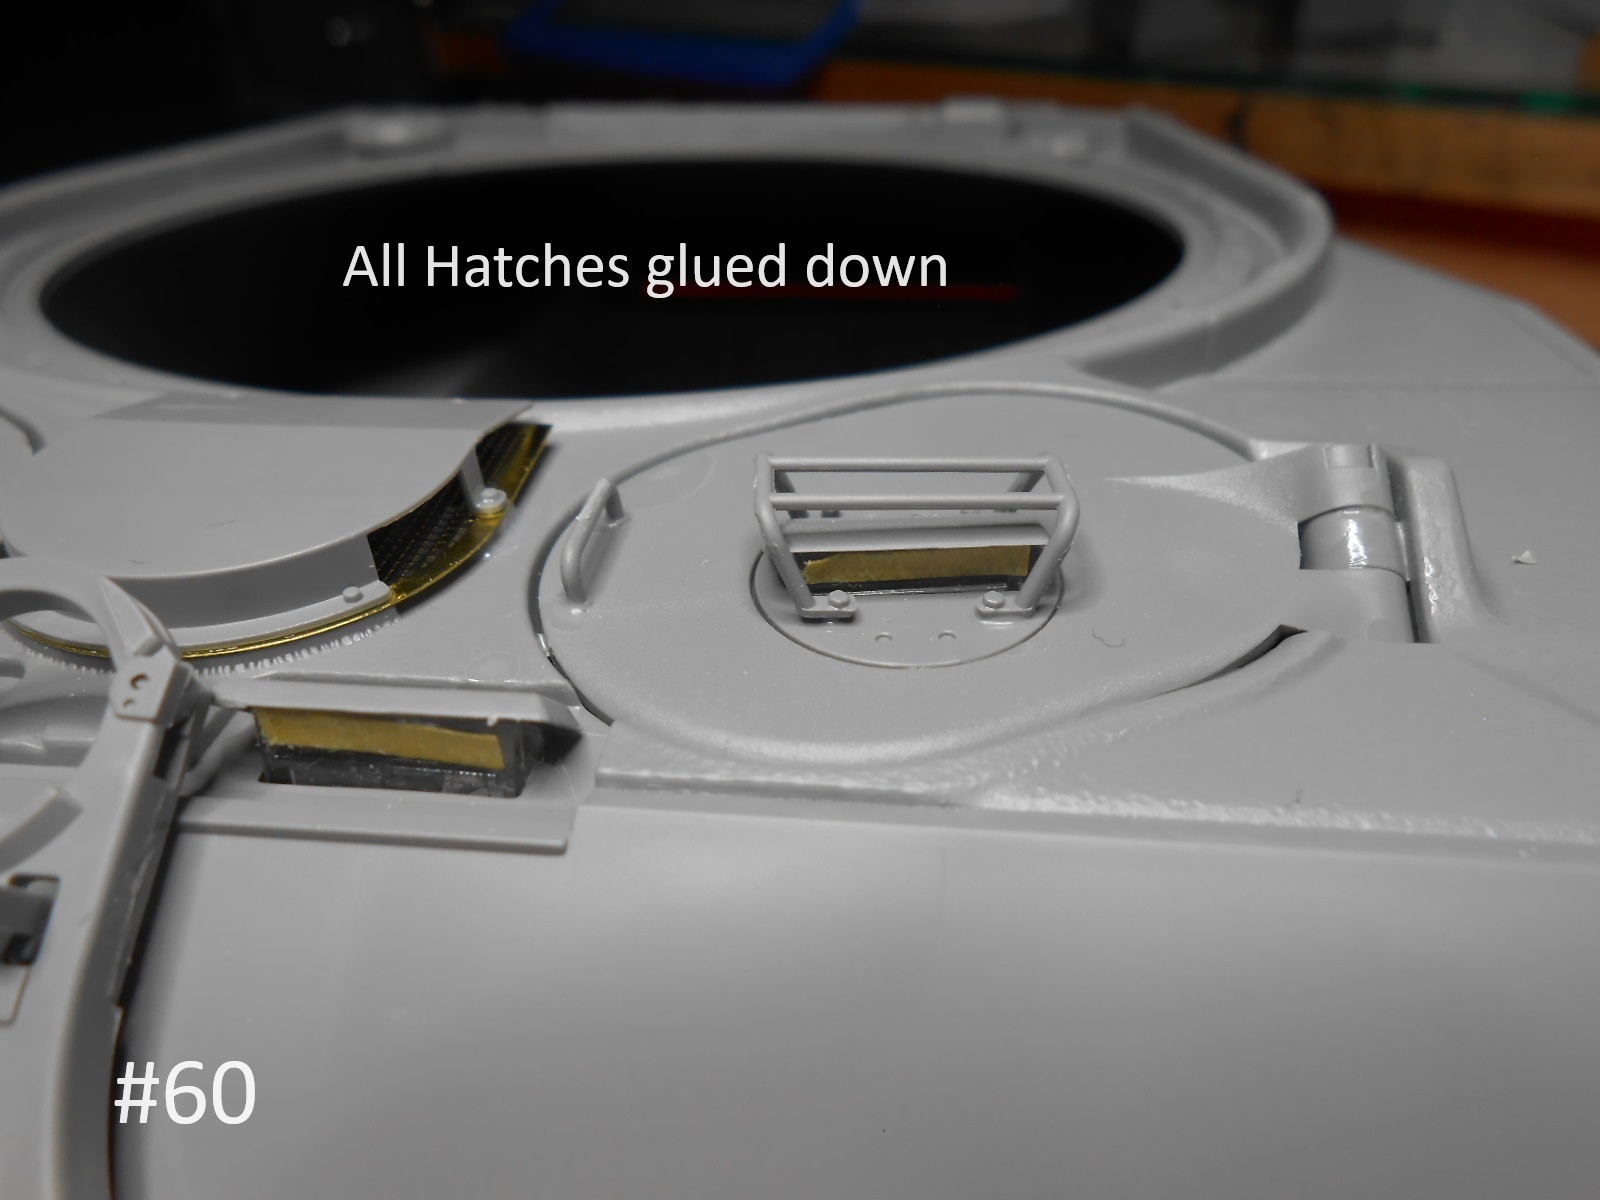
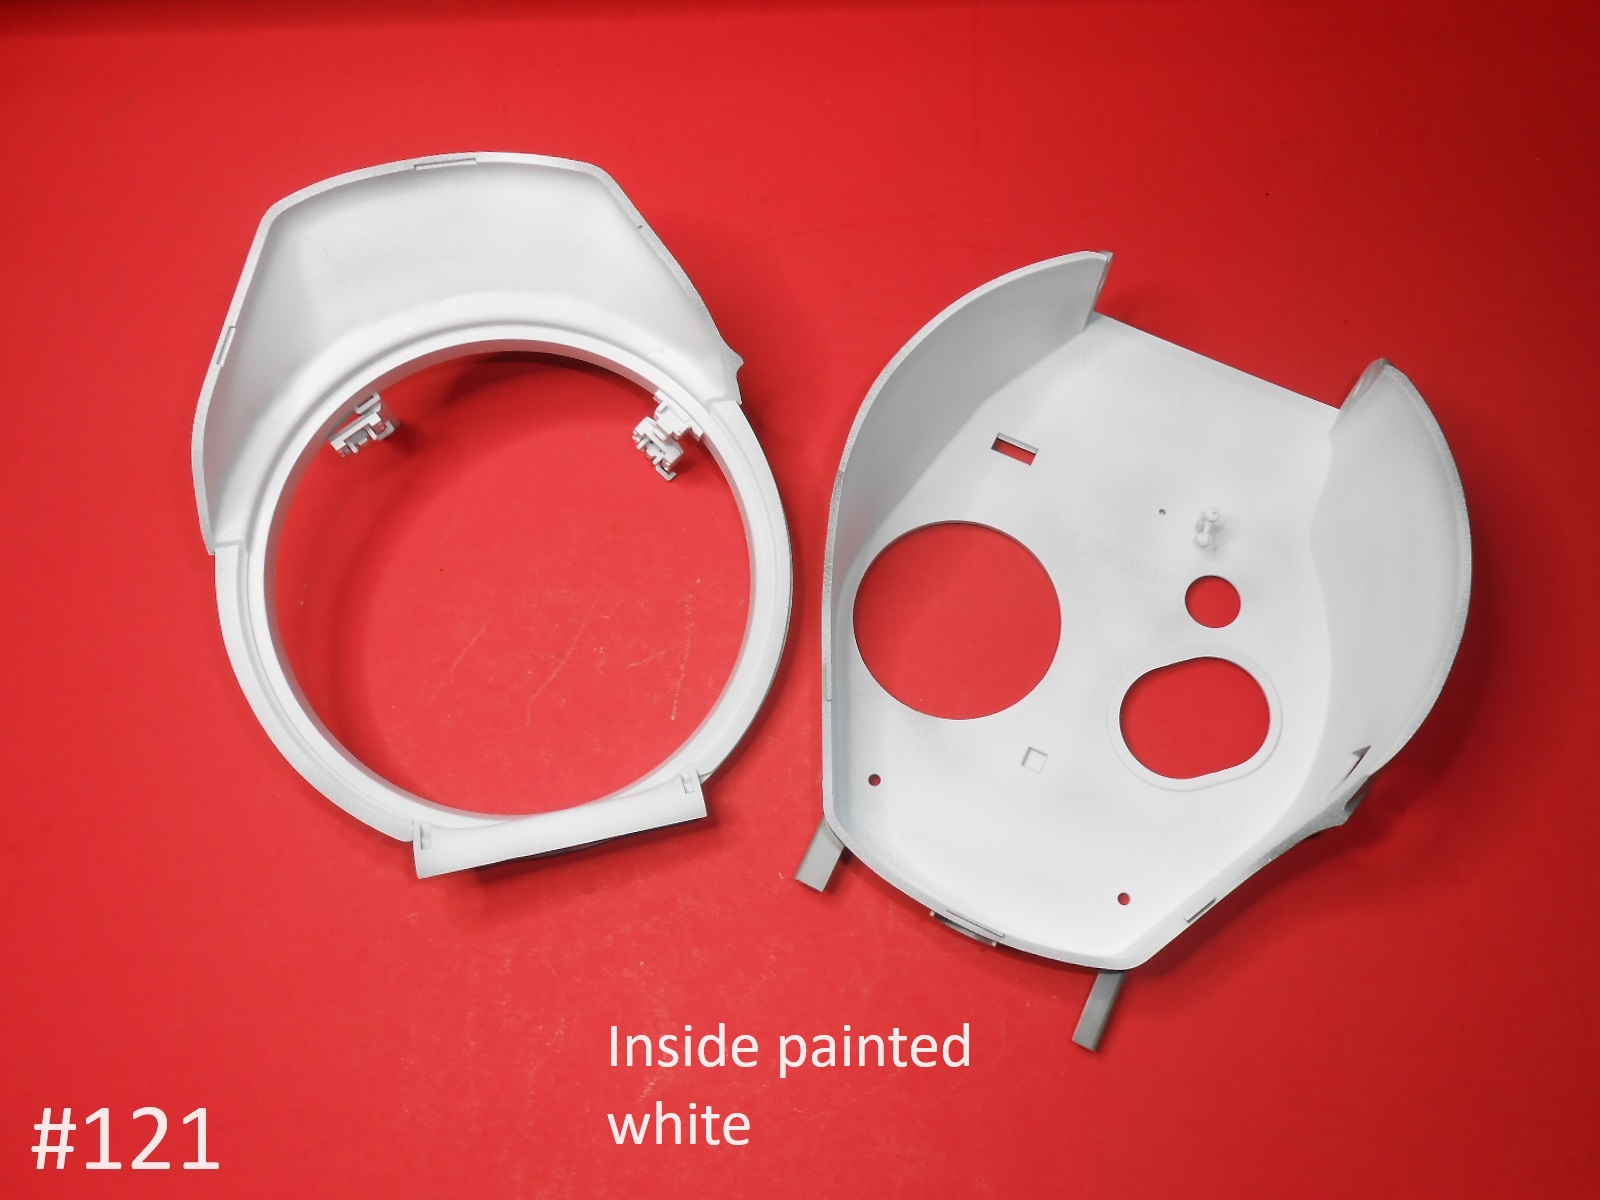
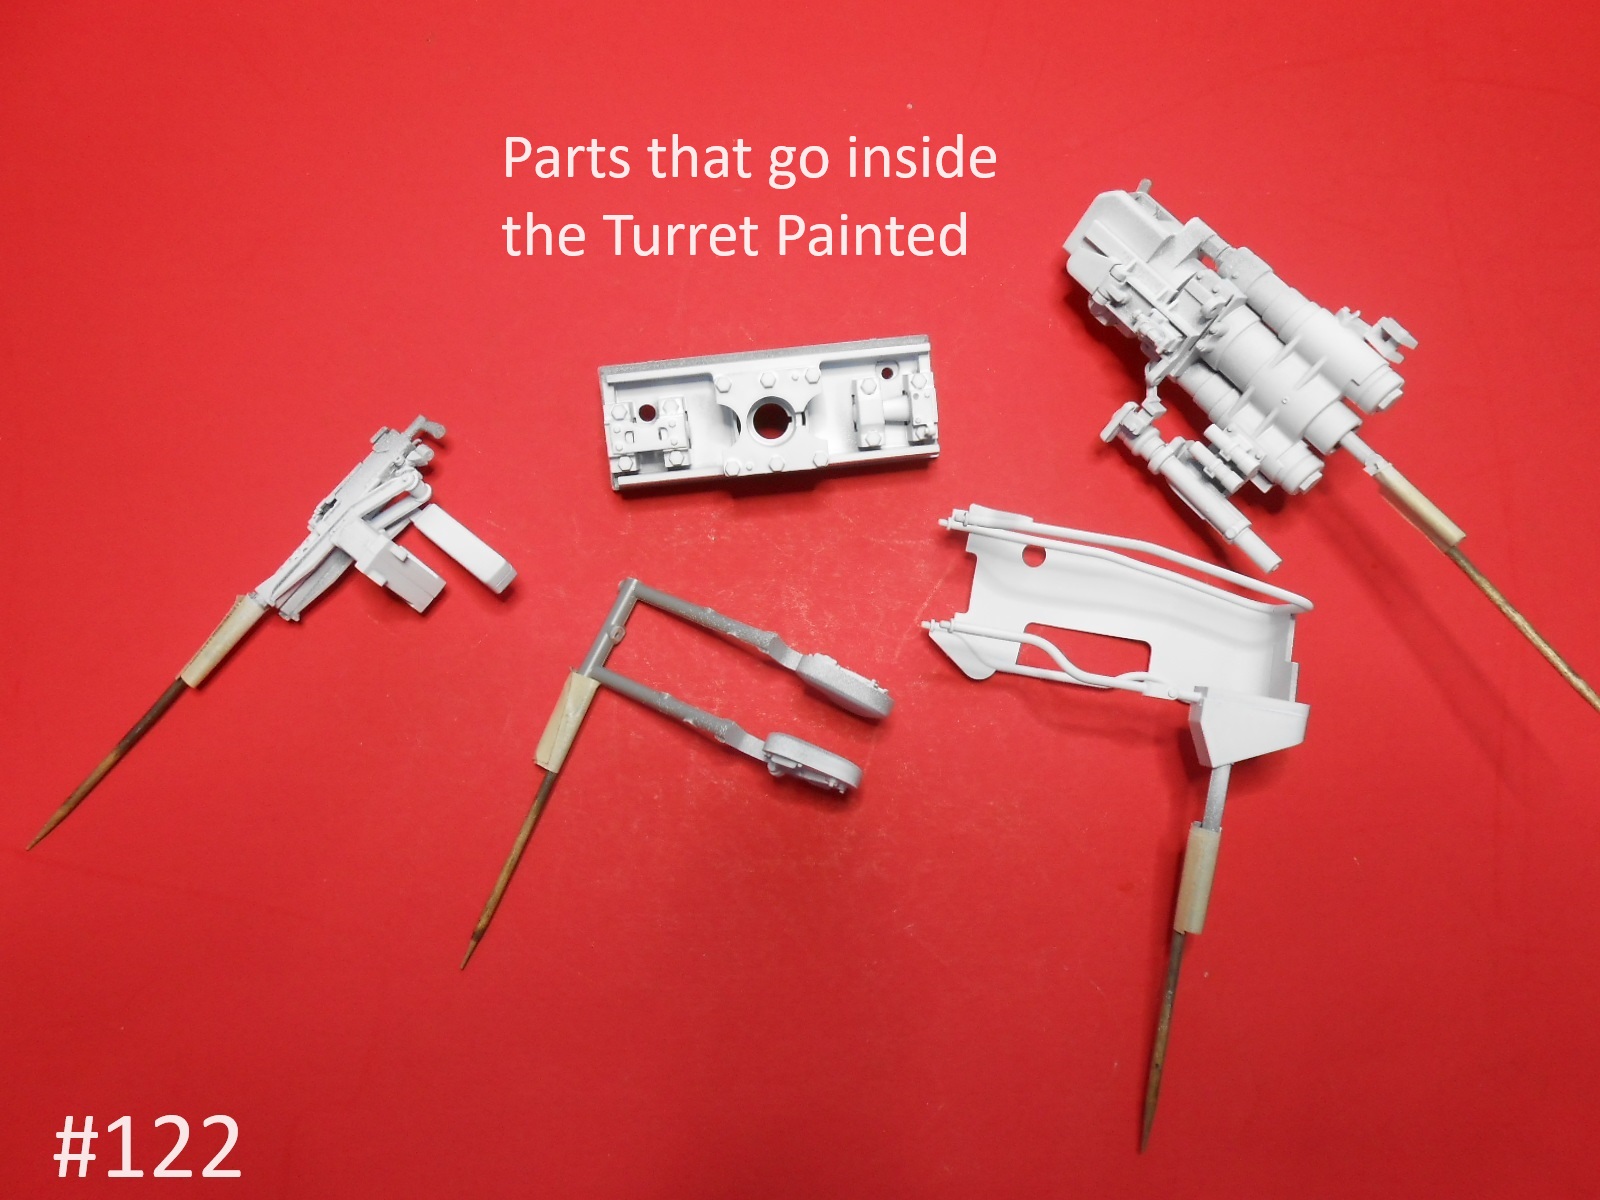
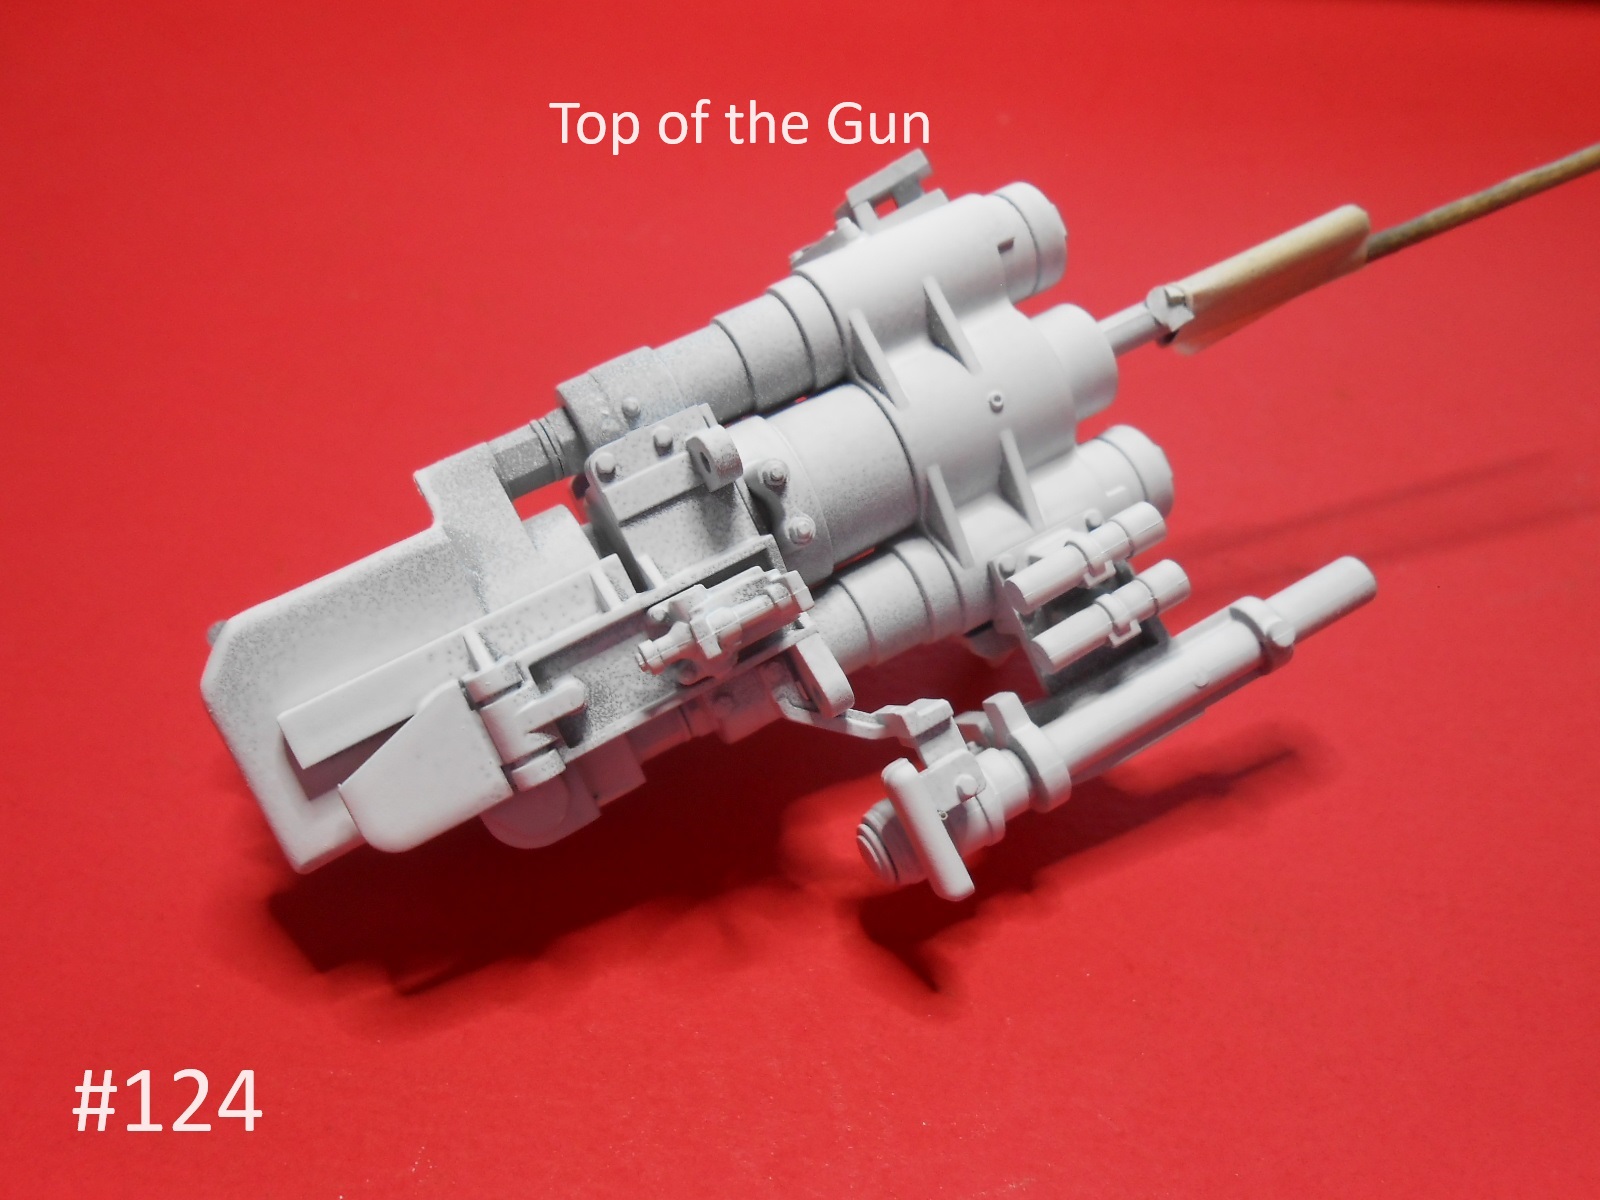
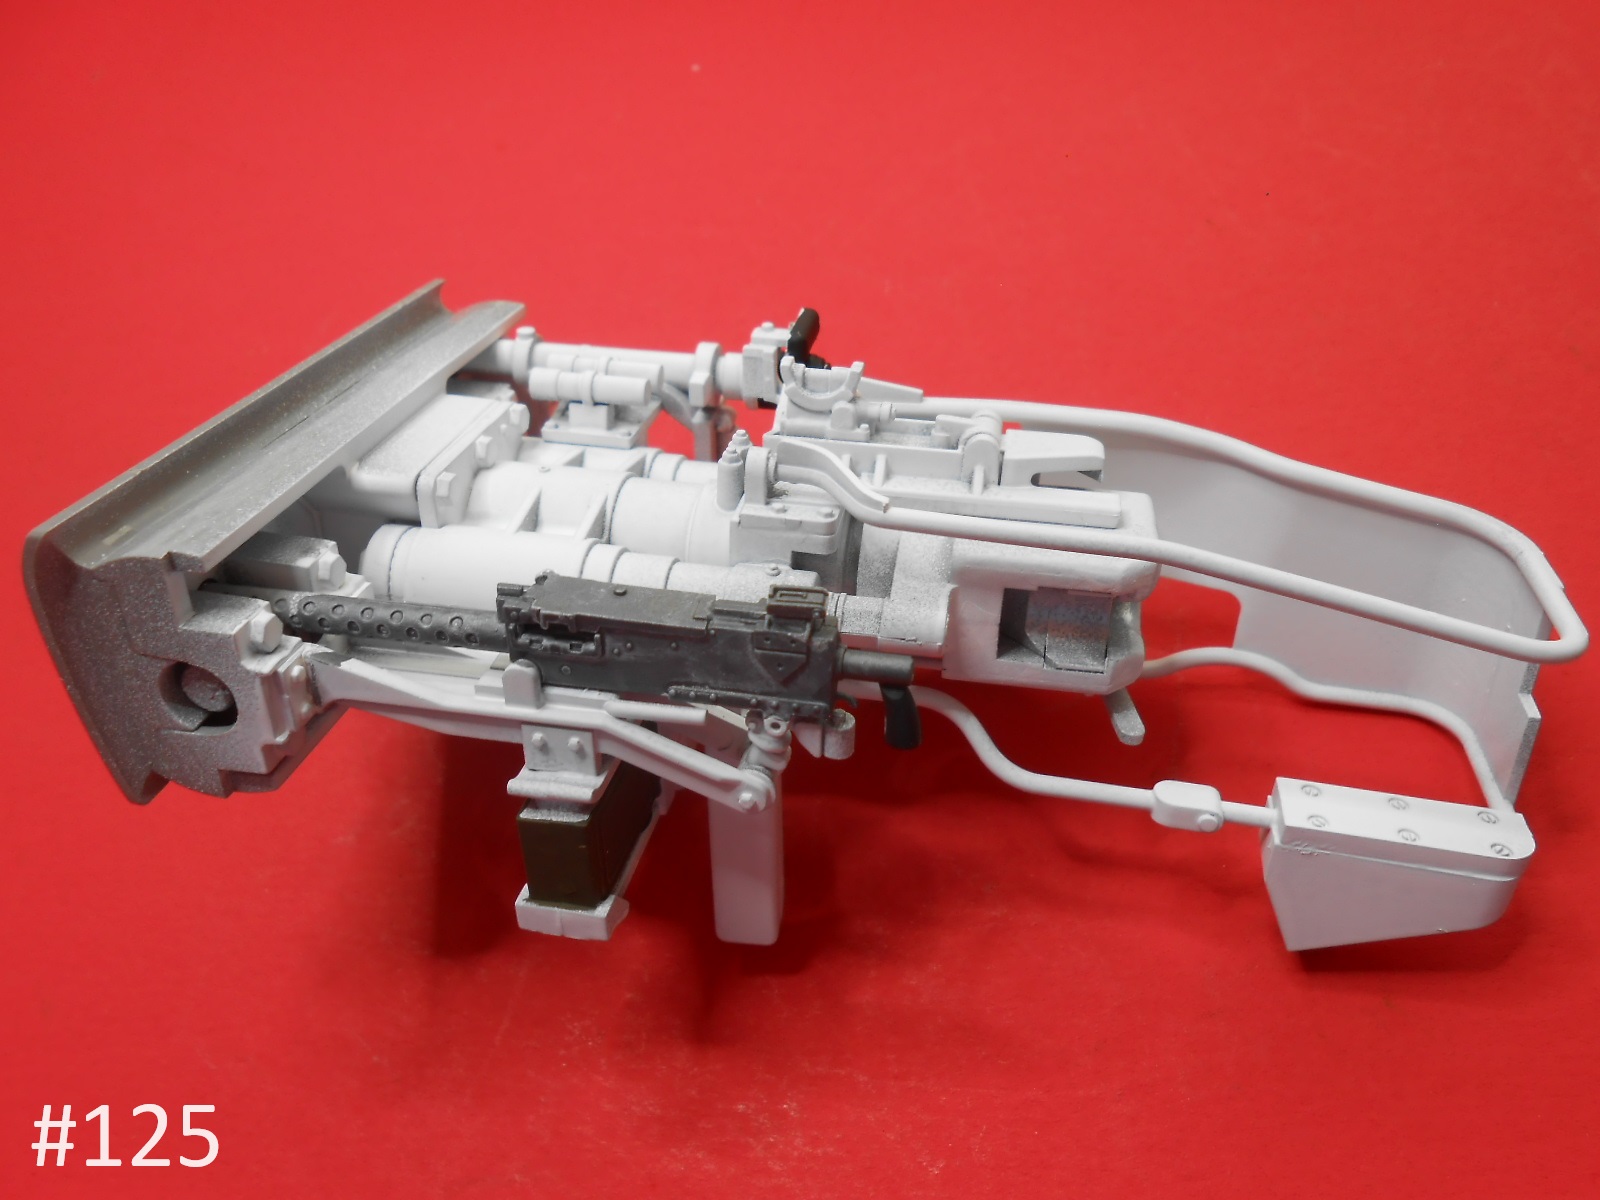
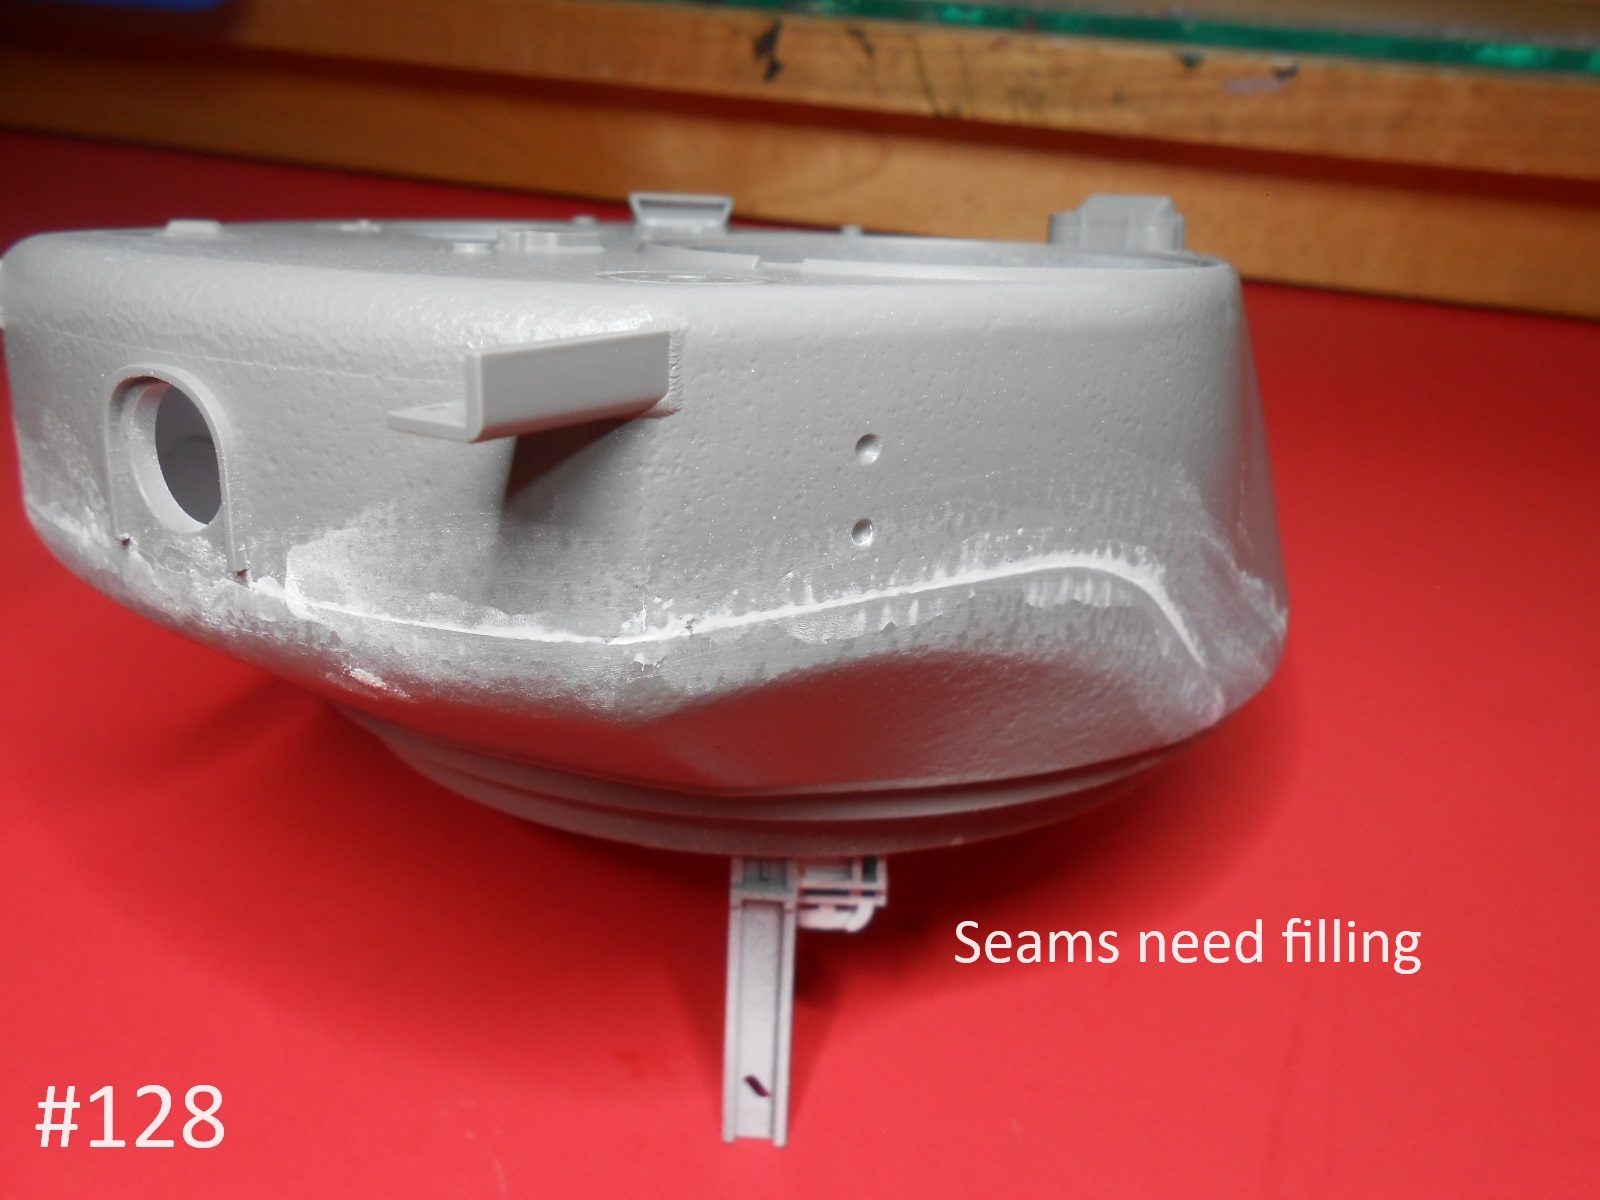
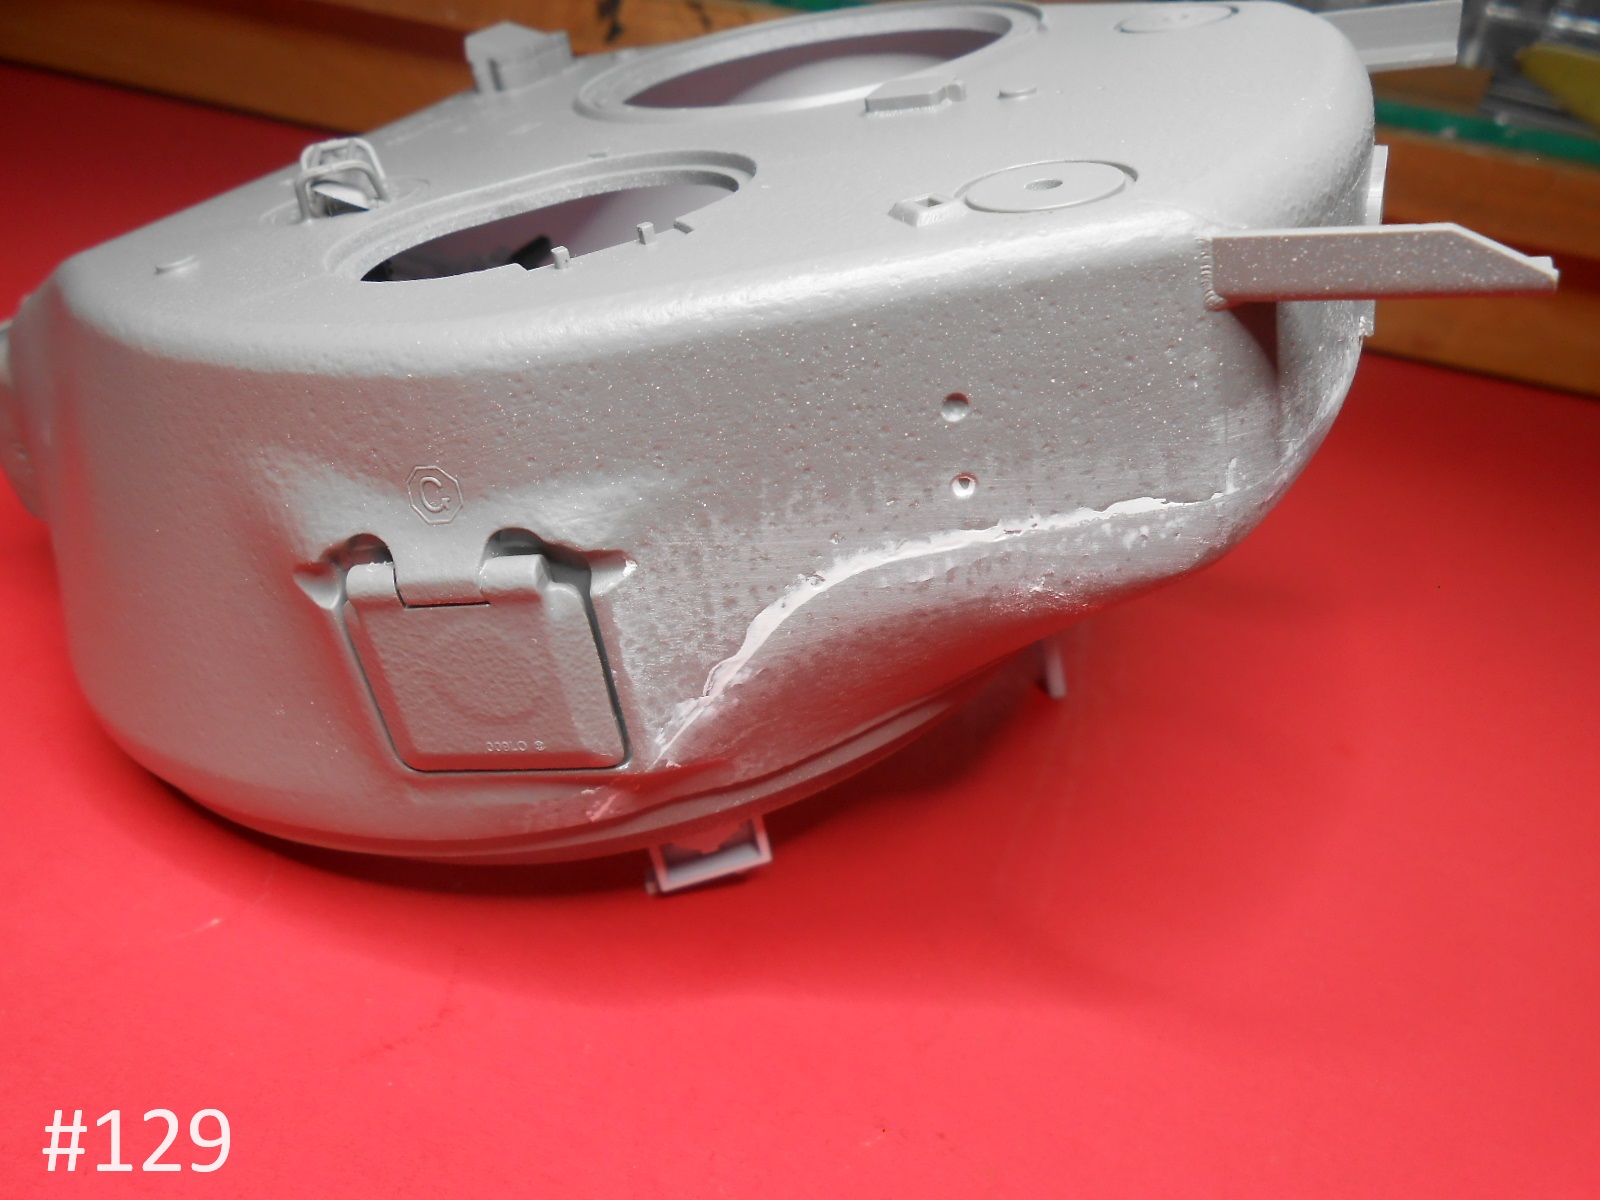
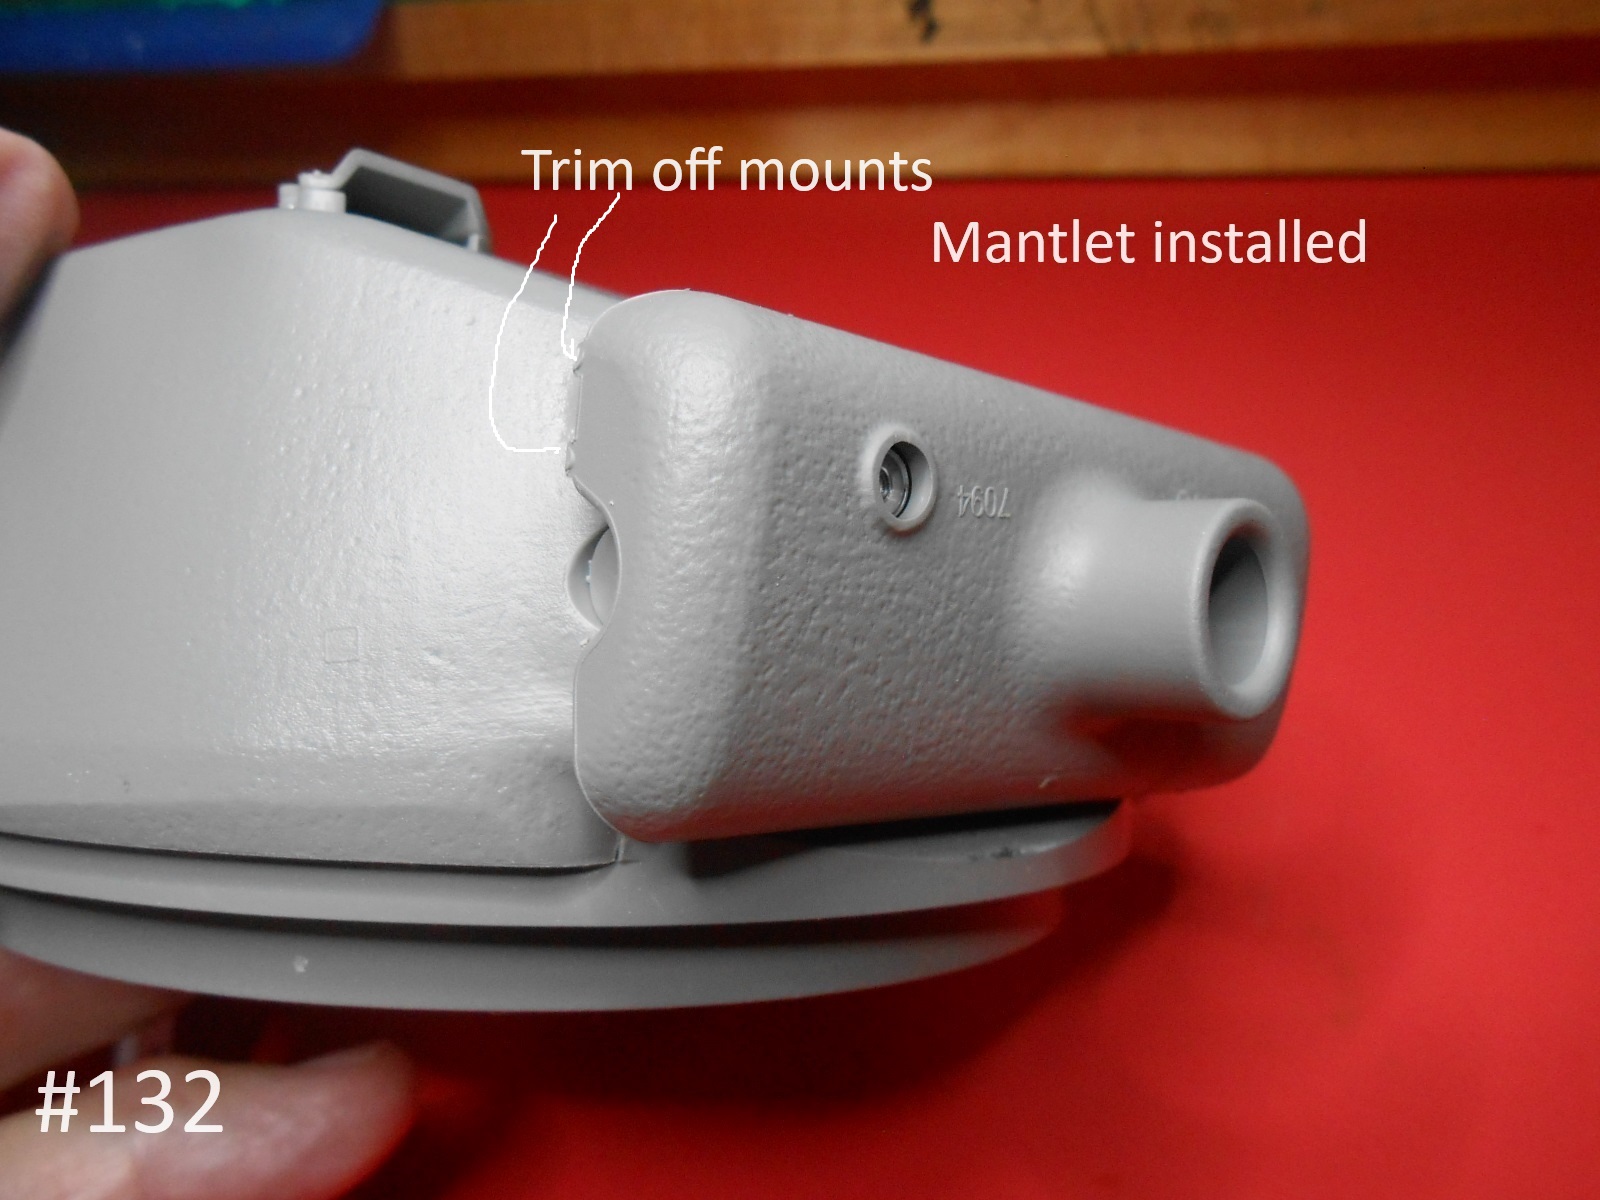
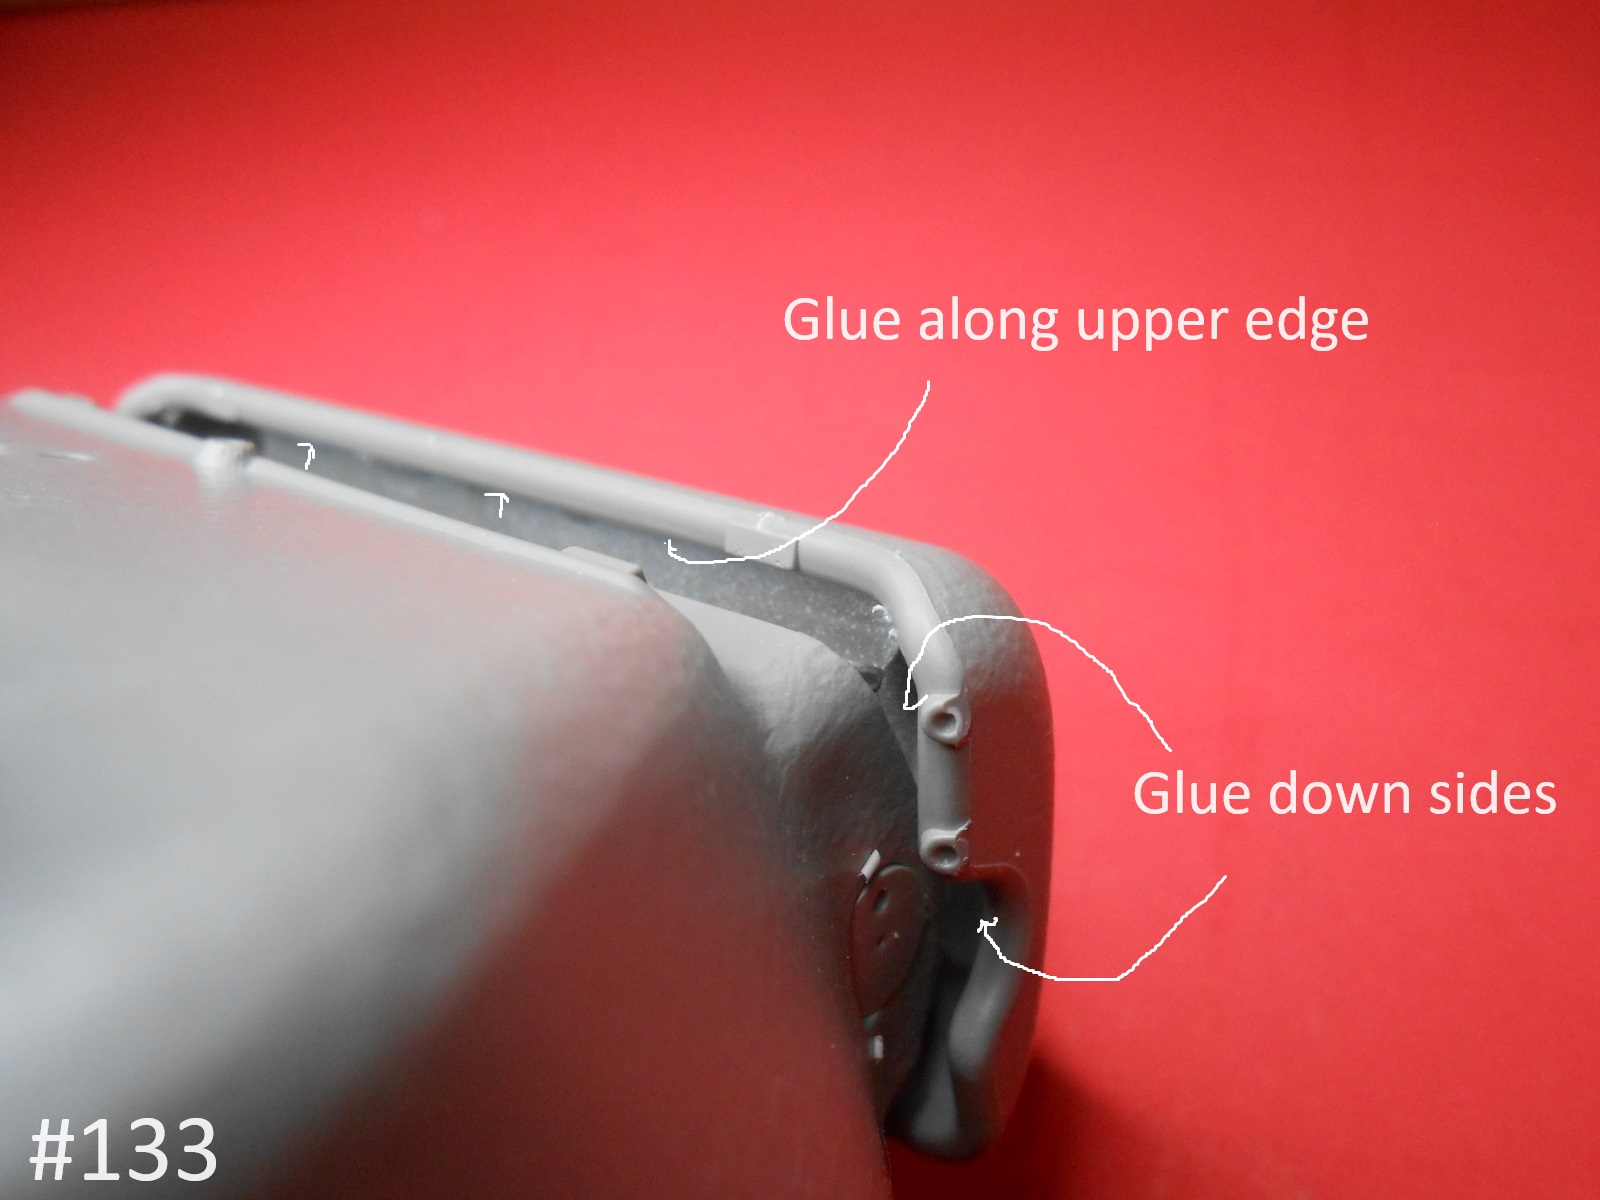
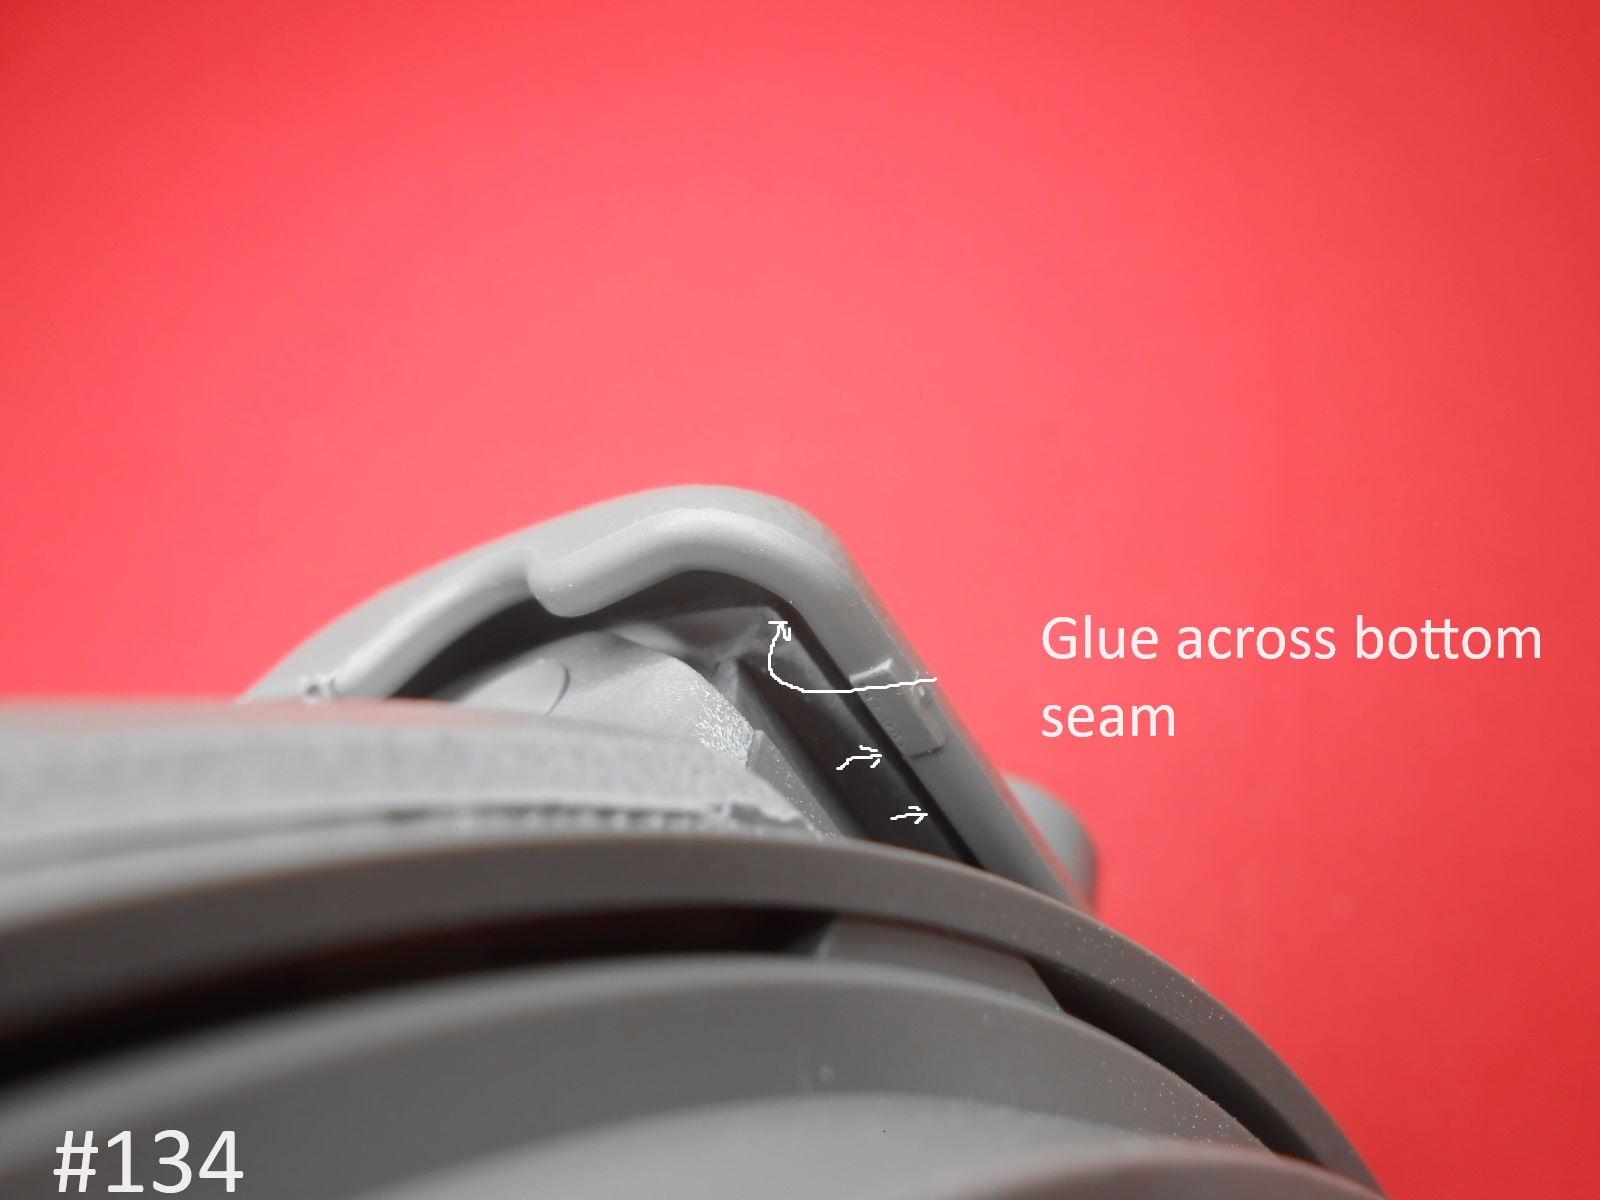
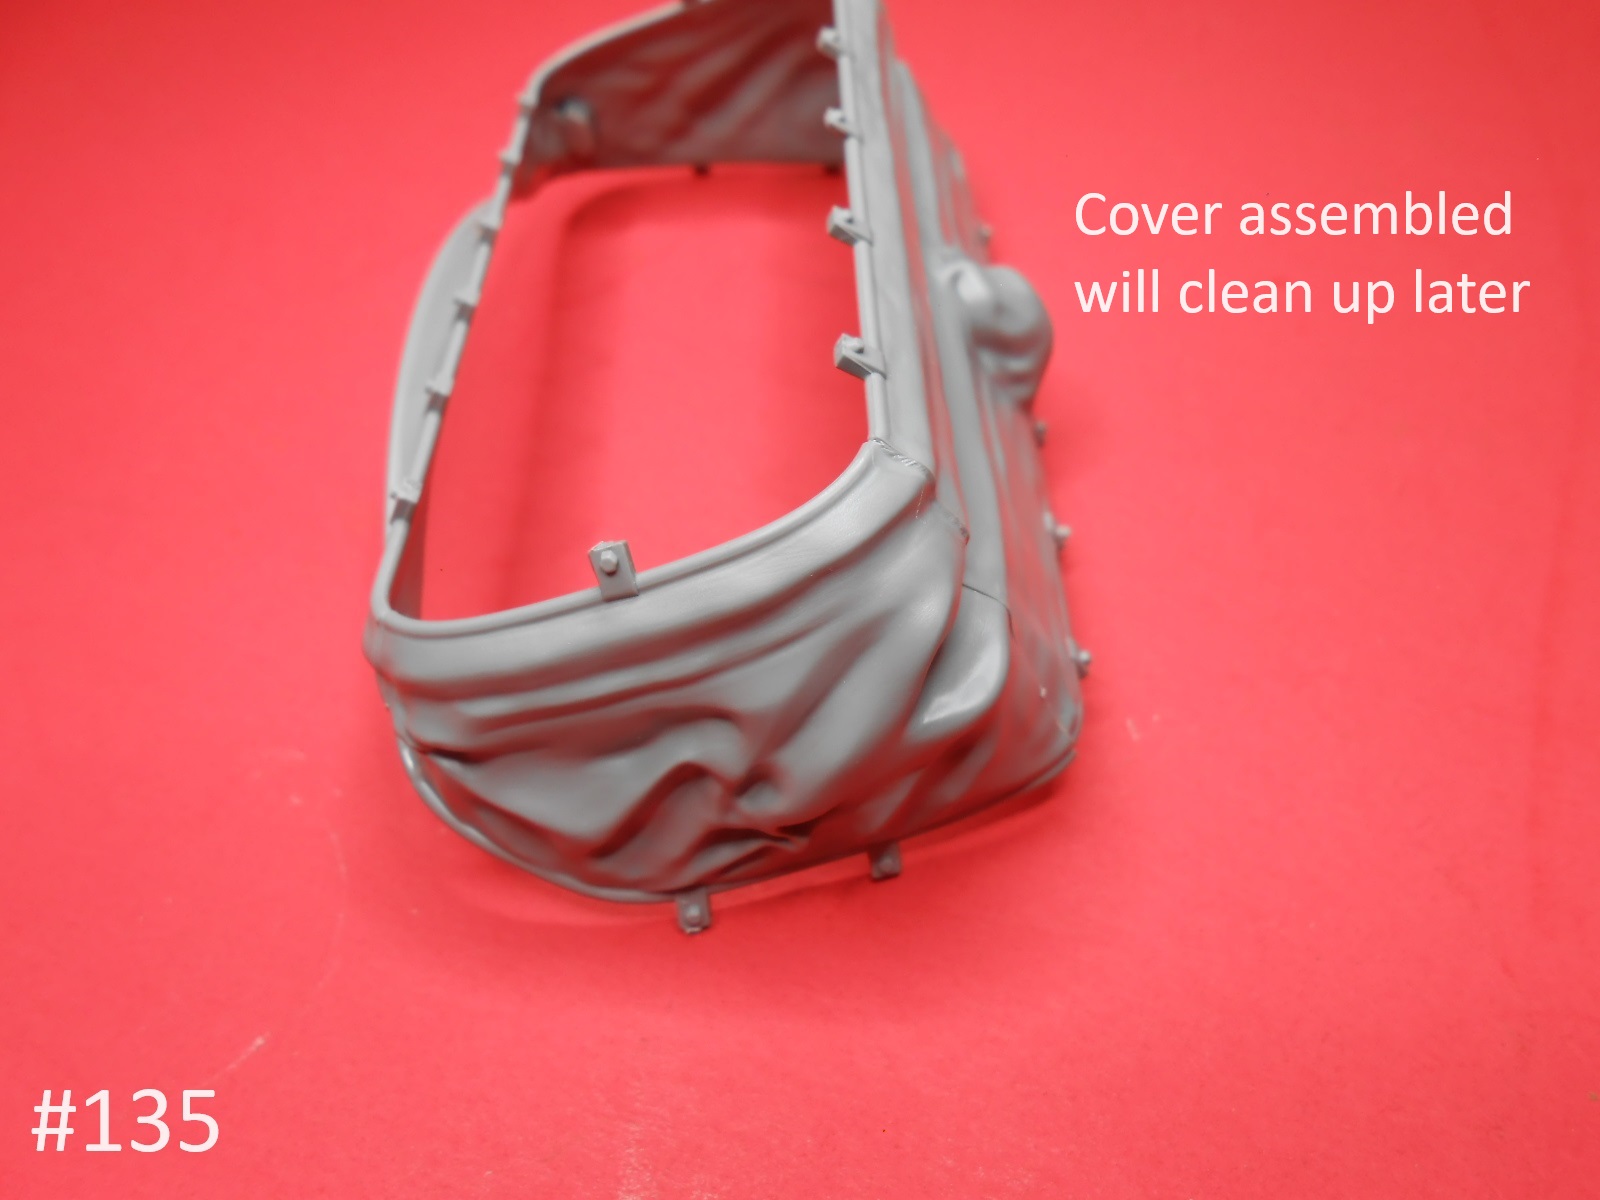
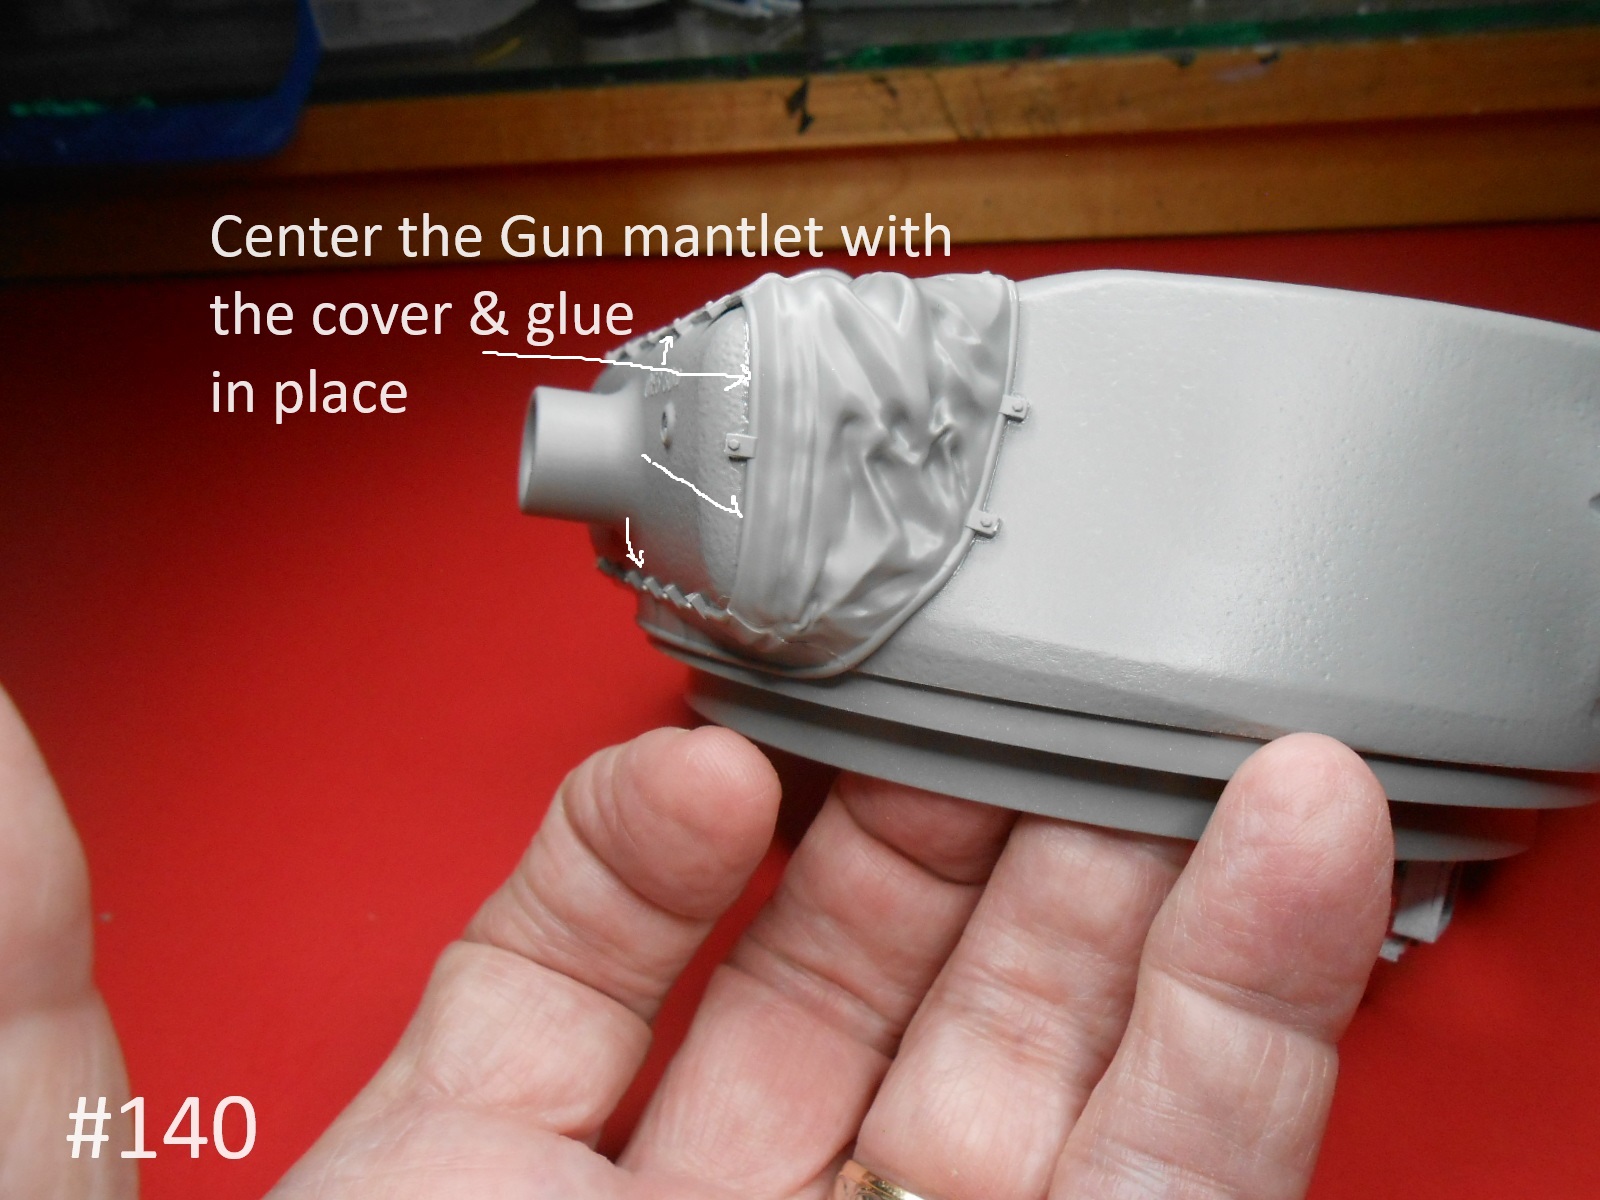
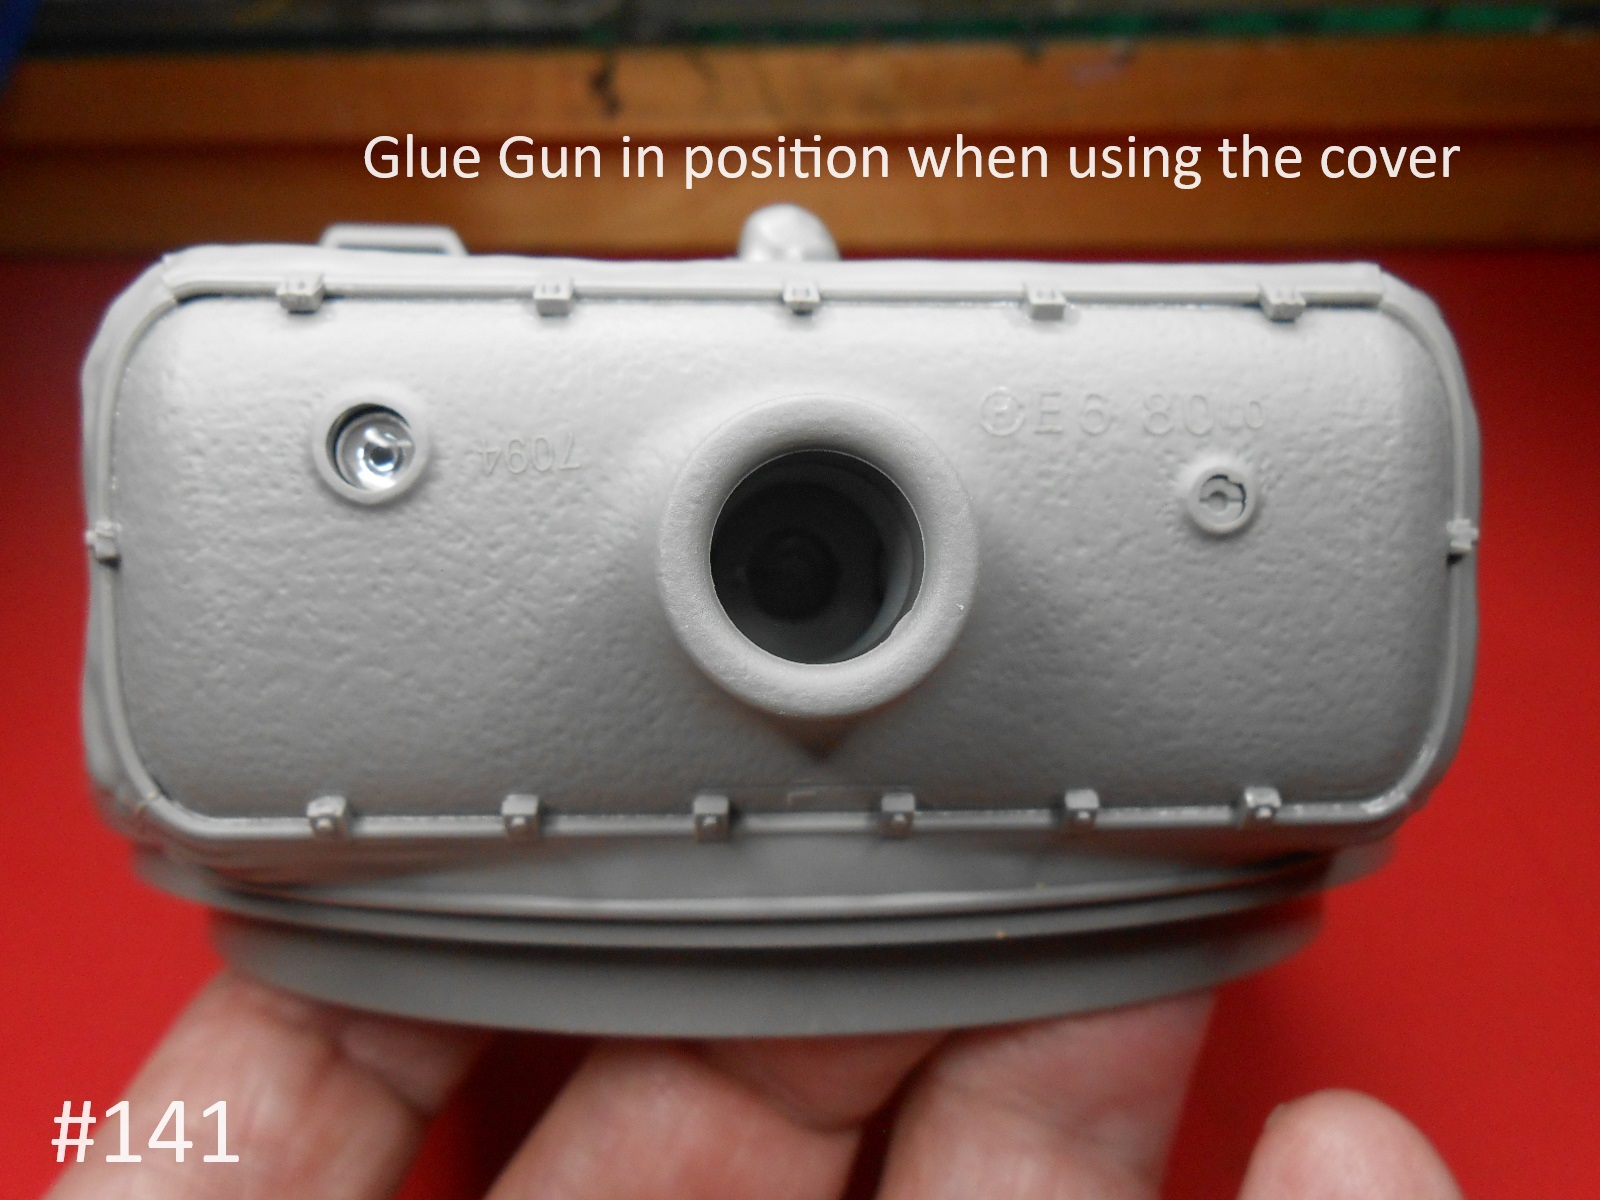
I have some of the Turret inside & Gun finished.
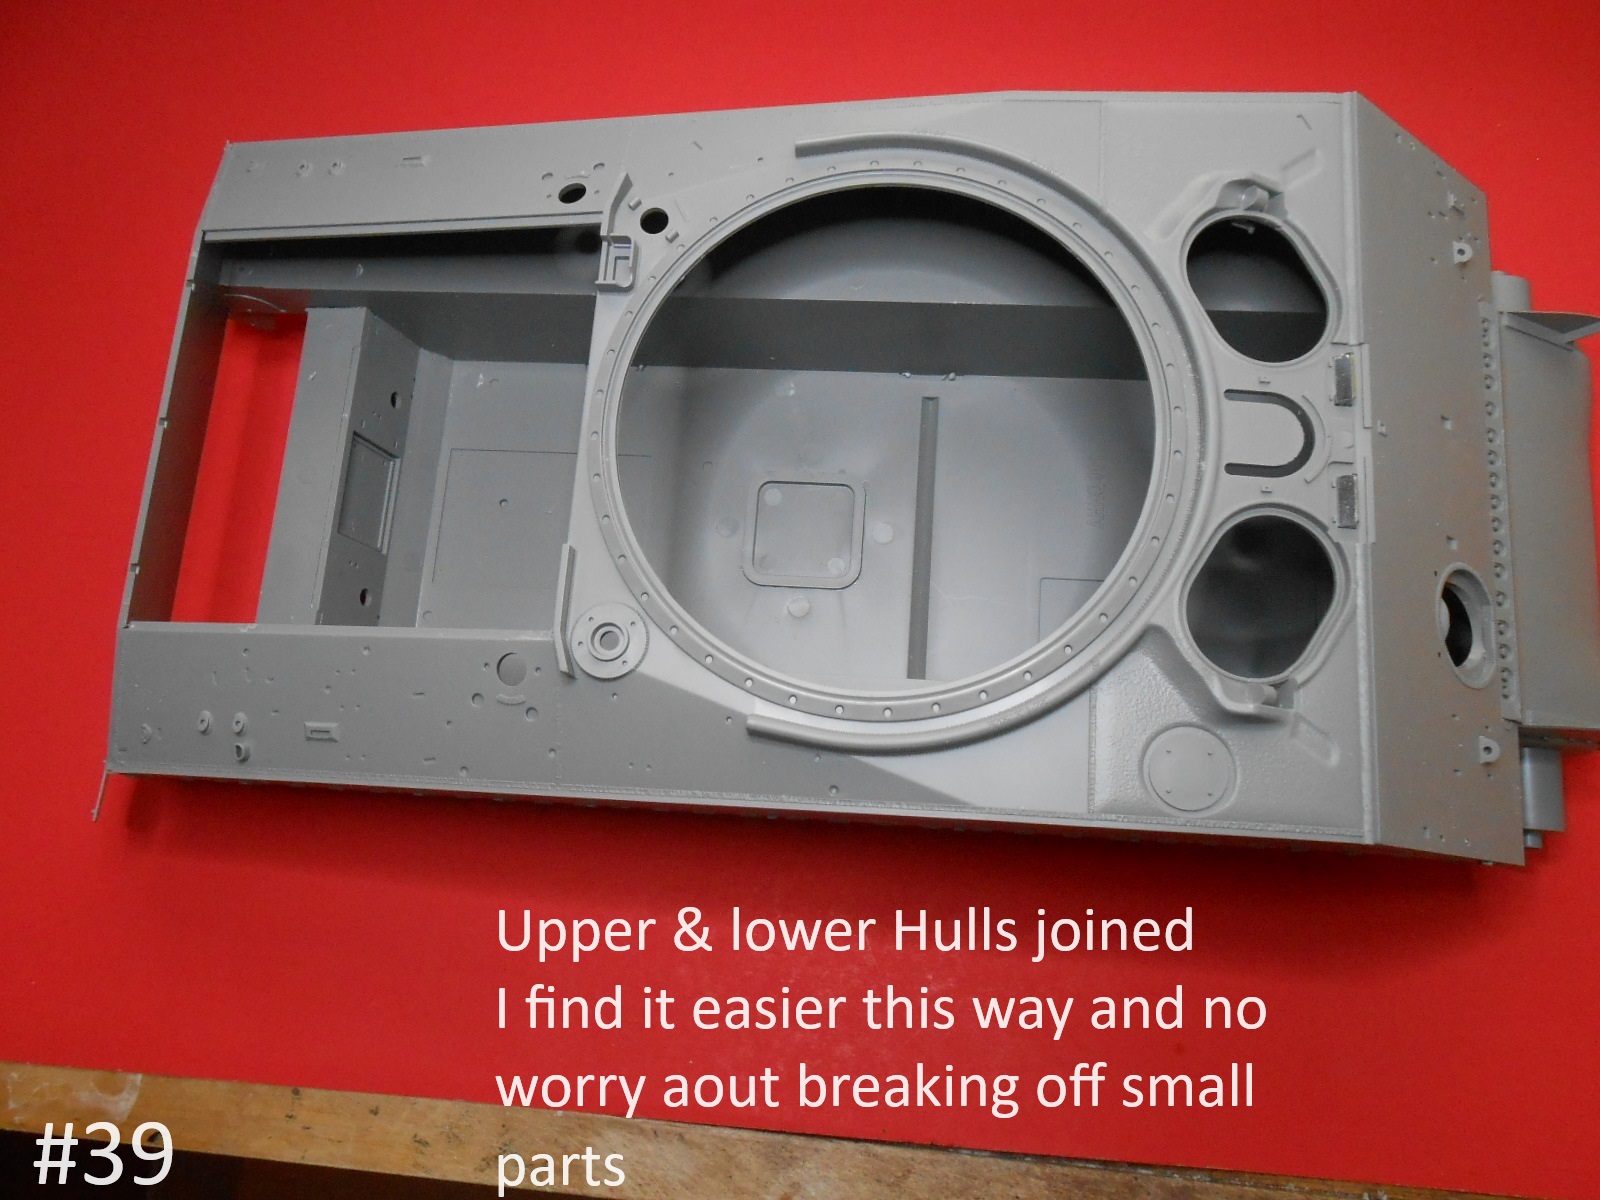
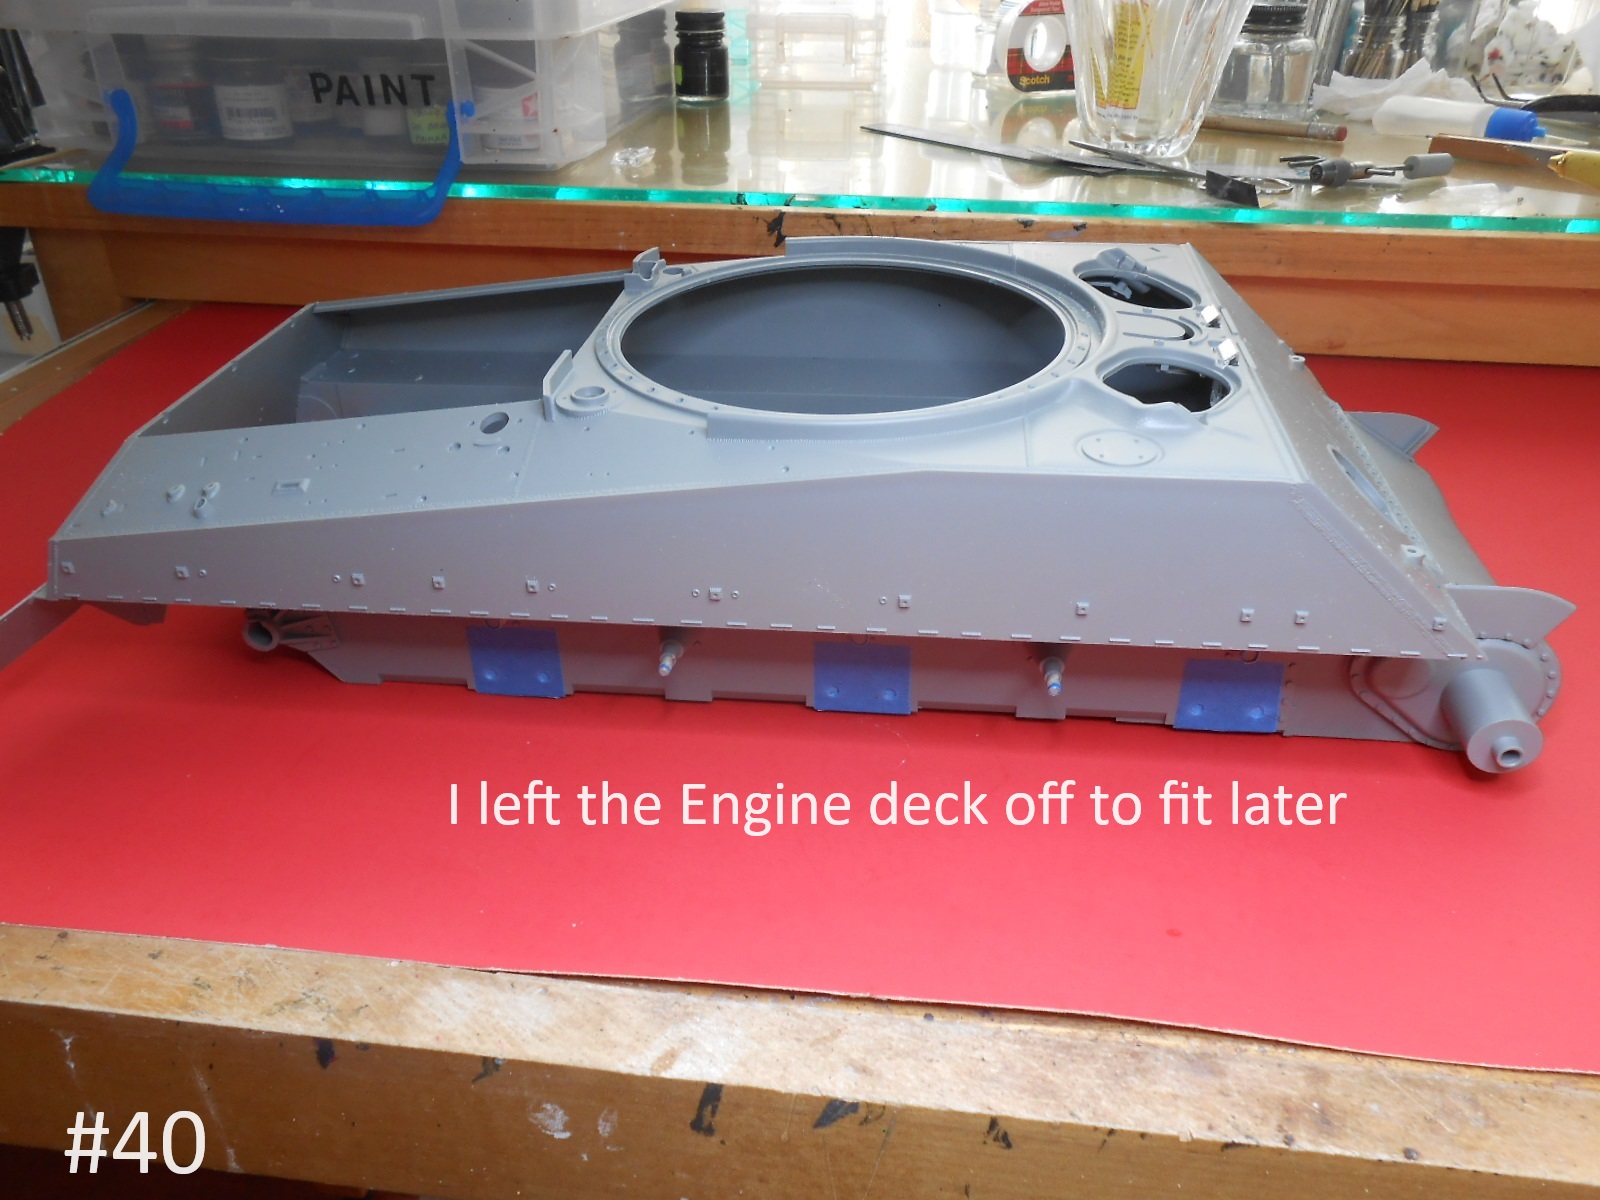
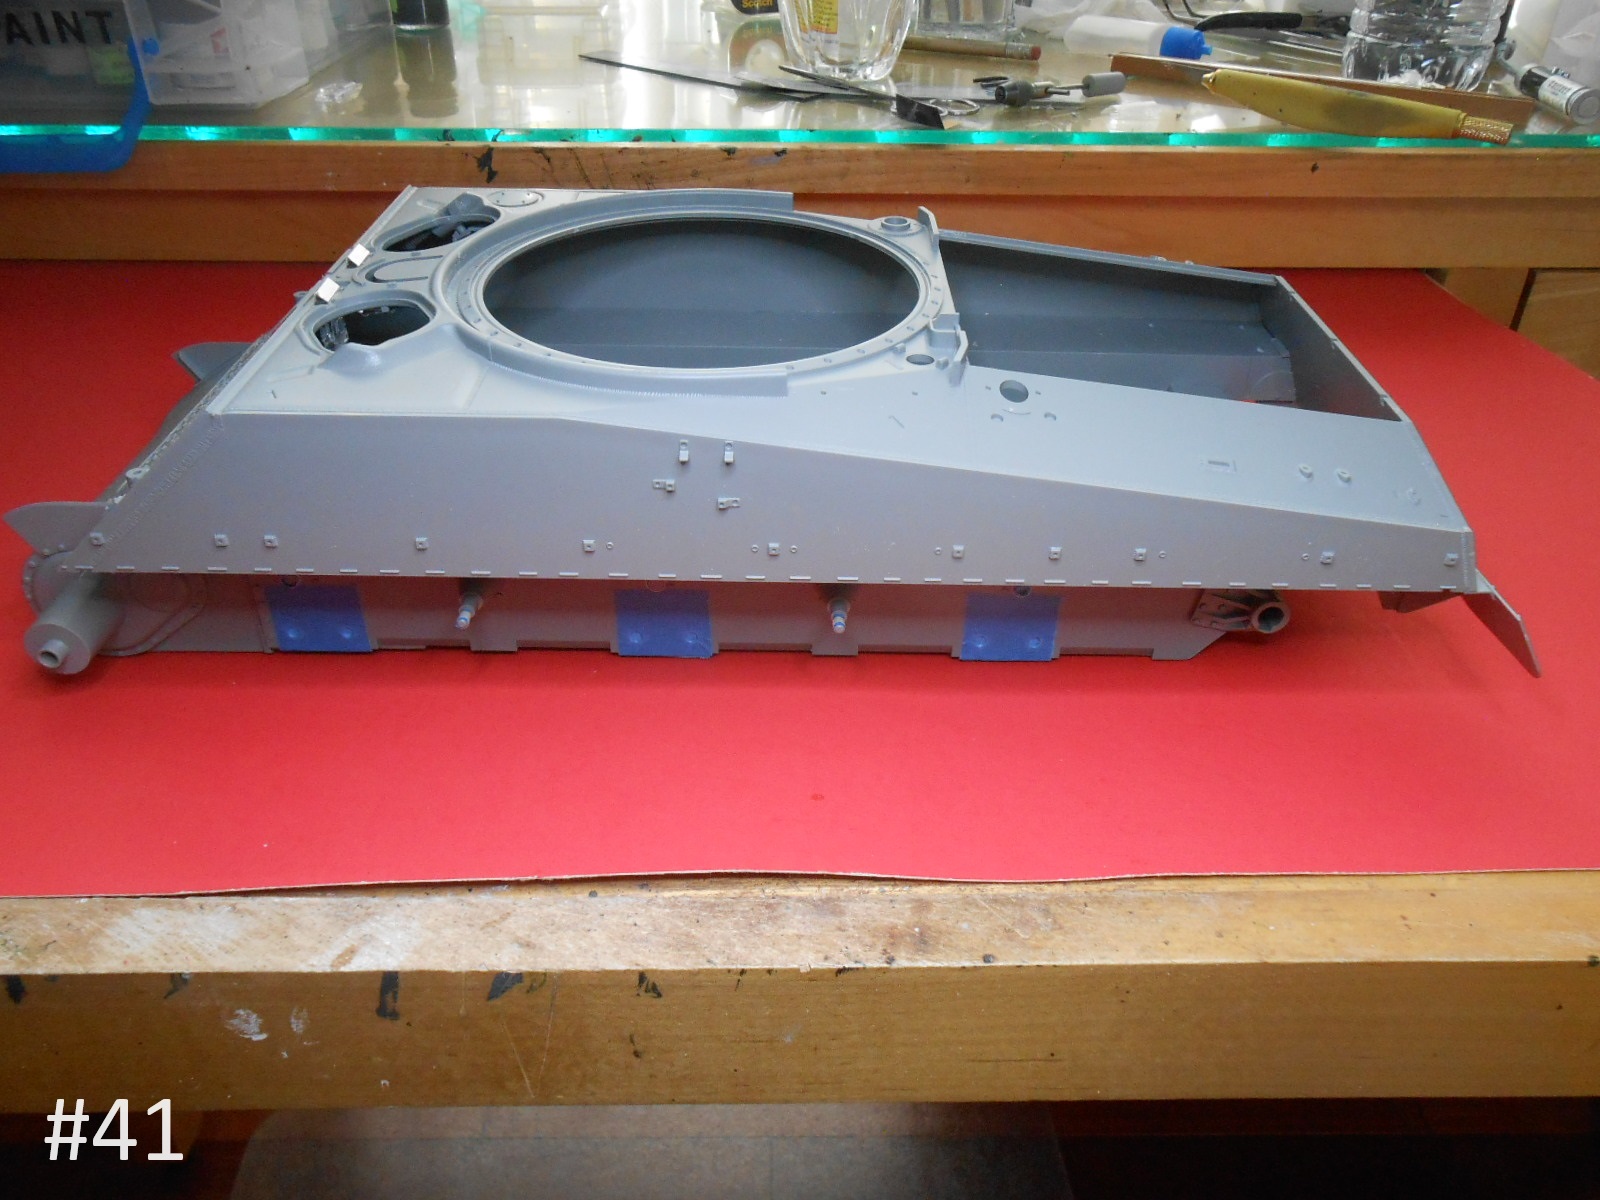
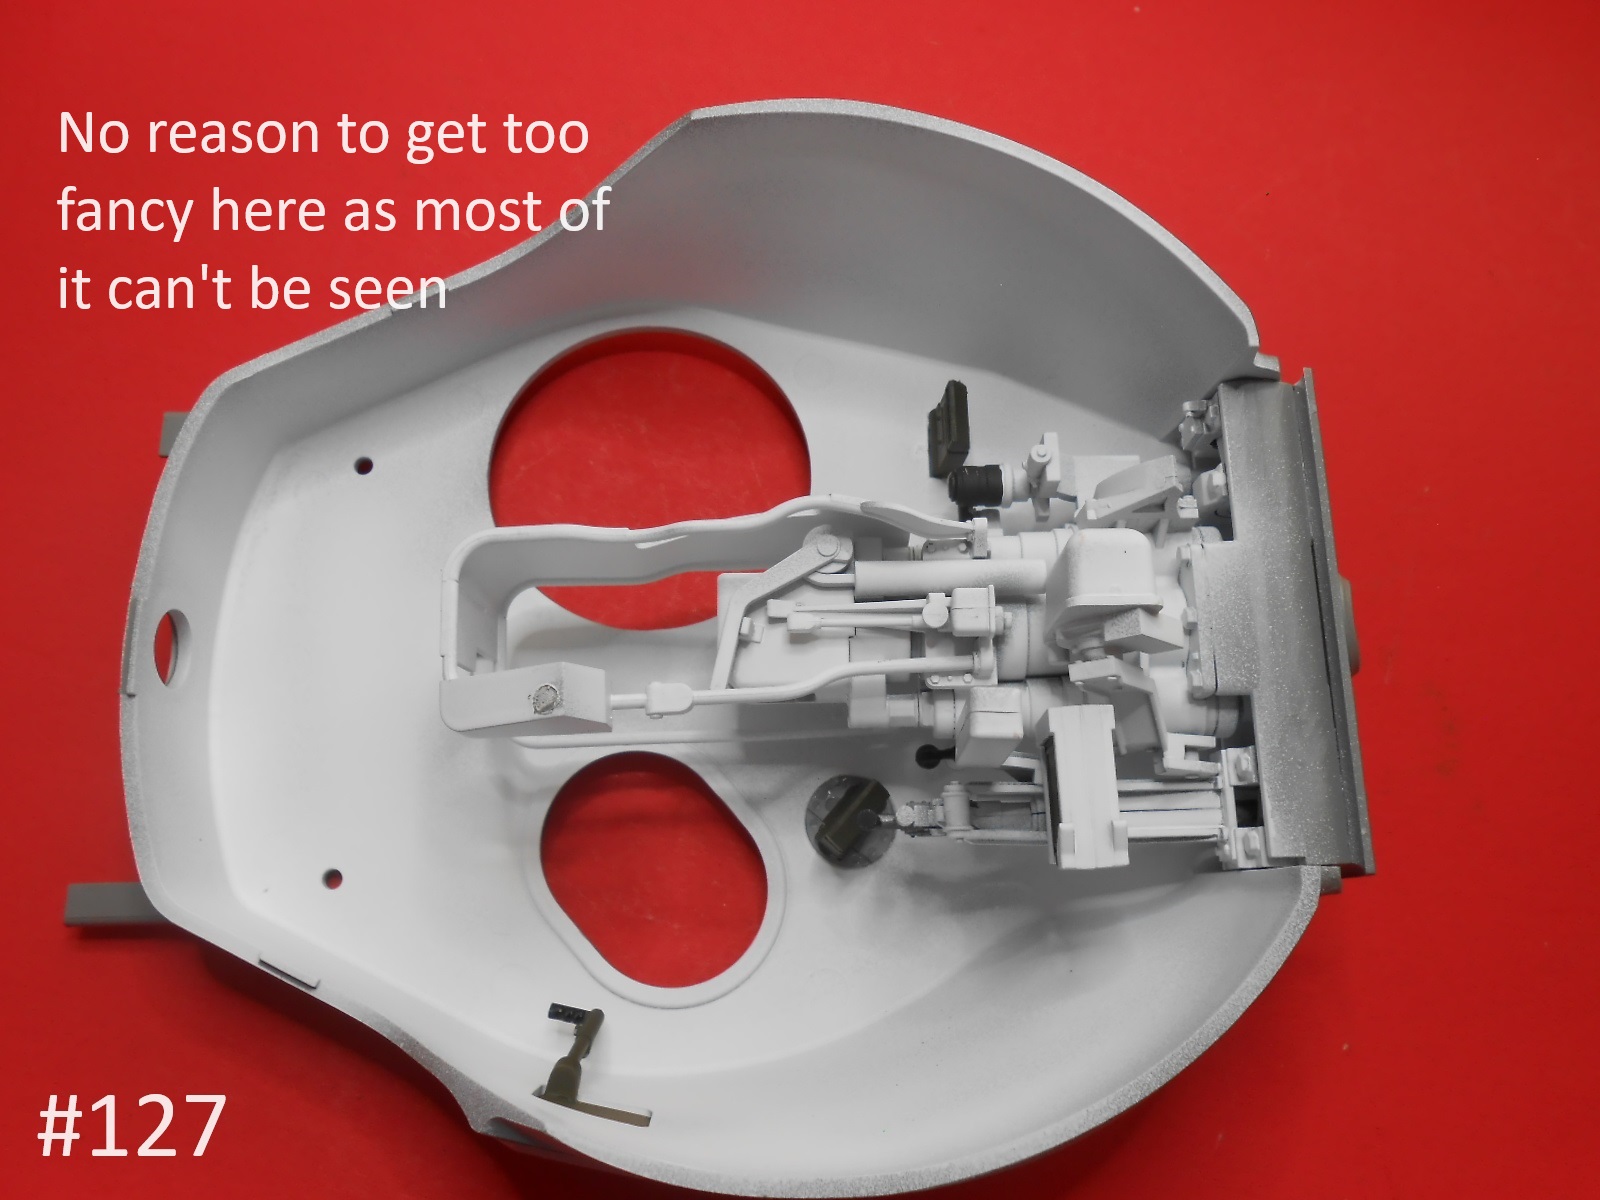
There’s no reason to get too fancy here as most of it can’t be seen once the Upper & Lower halves are joined together.


Finished for today.
Donald

3 Likes

Assembling the tracks in 1/16 scale looks tedious, but very doable because of the larger size. In 1/35? Ugh! Not so much; tracks like that scare me. :rofl:

2 Likes

The assembly wasn’t bad it’s the part clean=up which sucks
Regards
donald

2 Likes

Some more Turret work finished.


Now a lot of small parts to add.
Regards
Donald

5 Likes