The carpet monster (but I work over a tile floor) or my cat seem to have absconded with the Chevy dash board???
I could pull one from an Italeri water truck kit but would really rather not on such a nice build as this one. Spent last evening on my knees with a flashlight - but so far no luck!
I have a still unfinished HobbyBoss CCKW SWB. - With the acception of the cab, the model is all beautifully done. Also the HB cab is incorrect front to back but width wise it is perfect. So any of the dashboards should work. I was replacing the HB cab with a Italeri water truck cab so there just may be BOTH dashboards in that box.
Bear Boy doesn’t eat small items he just bops them around and uses them as toys. I am still expecting to find it in another part of the house. He has never bothered any of my models before so i really dont suspect him. (Not yet)
Matt, I saw those on Shapeways - however they don’t seem to include the “A” frames to support the reels and are those just general pipe fittings there in the middle or some other type of fire apparatus I might not be familiar with? Any valves in there with all those pipe fittings?
When I did the set, I did it as requested. Whomever it was only wanted the reels, fittings and valves (without handles, as Shapeways says they were way to thin) I believe it was for the one where the reels were under the truck.
Still the missing dashboard has not turned up. I guess I will be moving on to either using the HobbyBoss or the Italer dash. Hopefully the gauge decals with still fit.
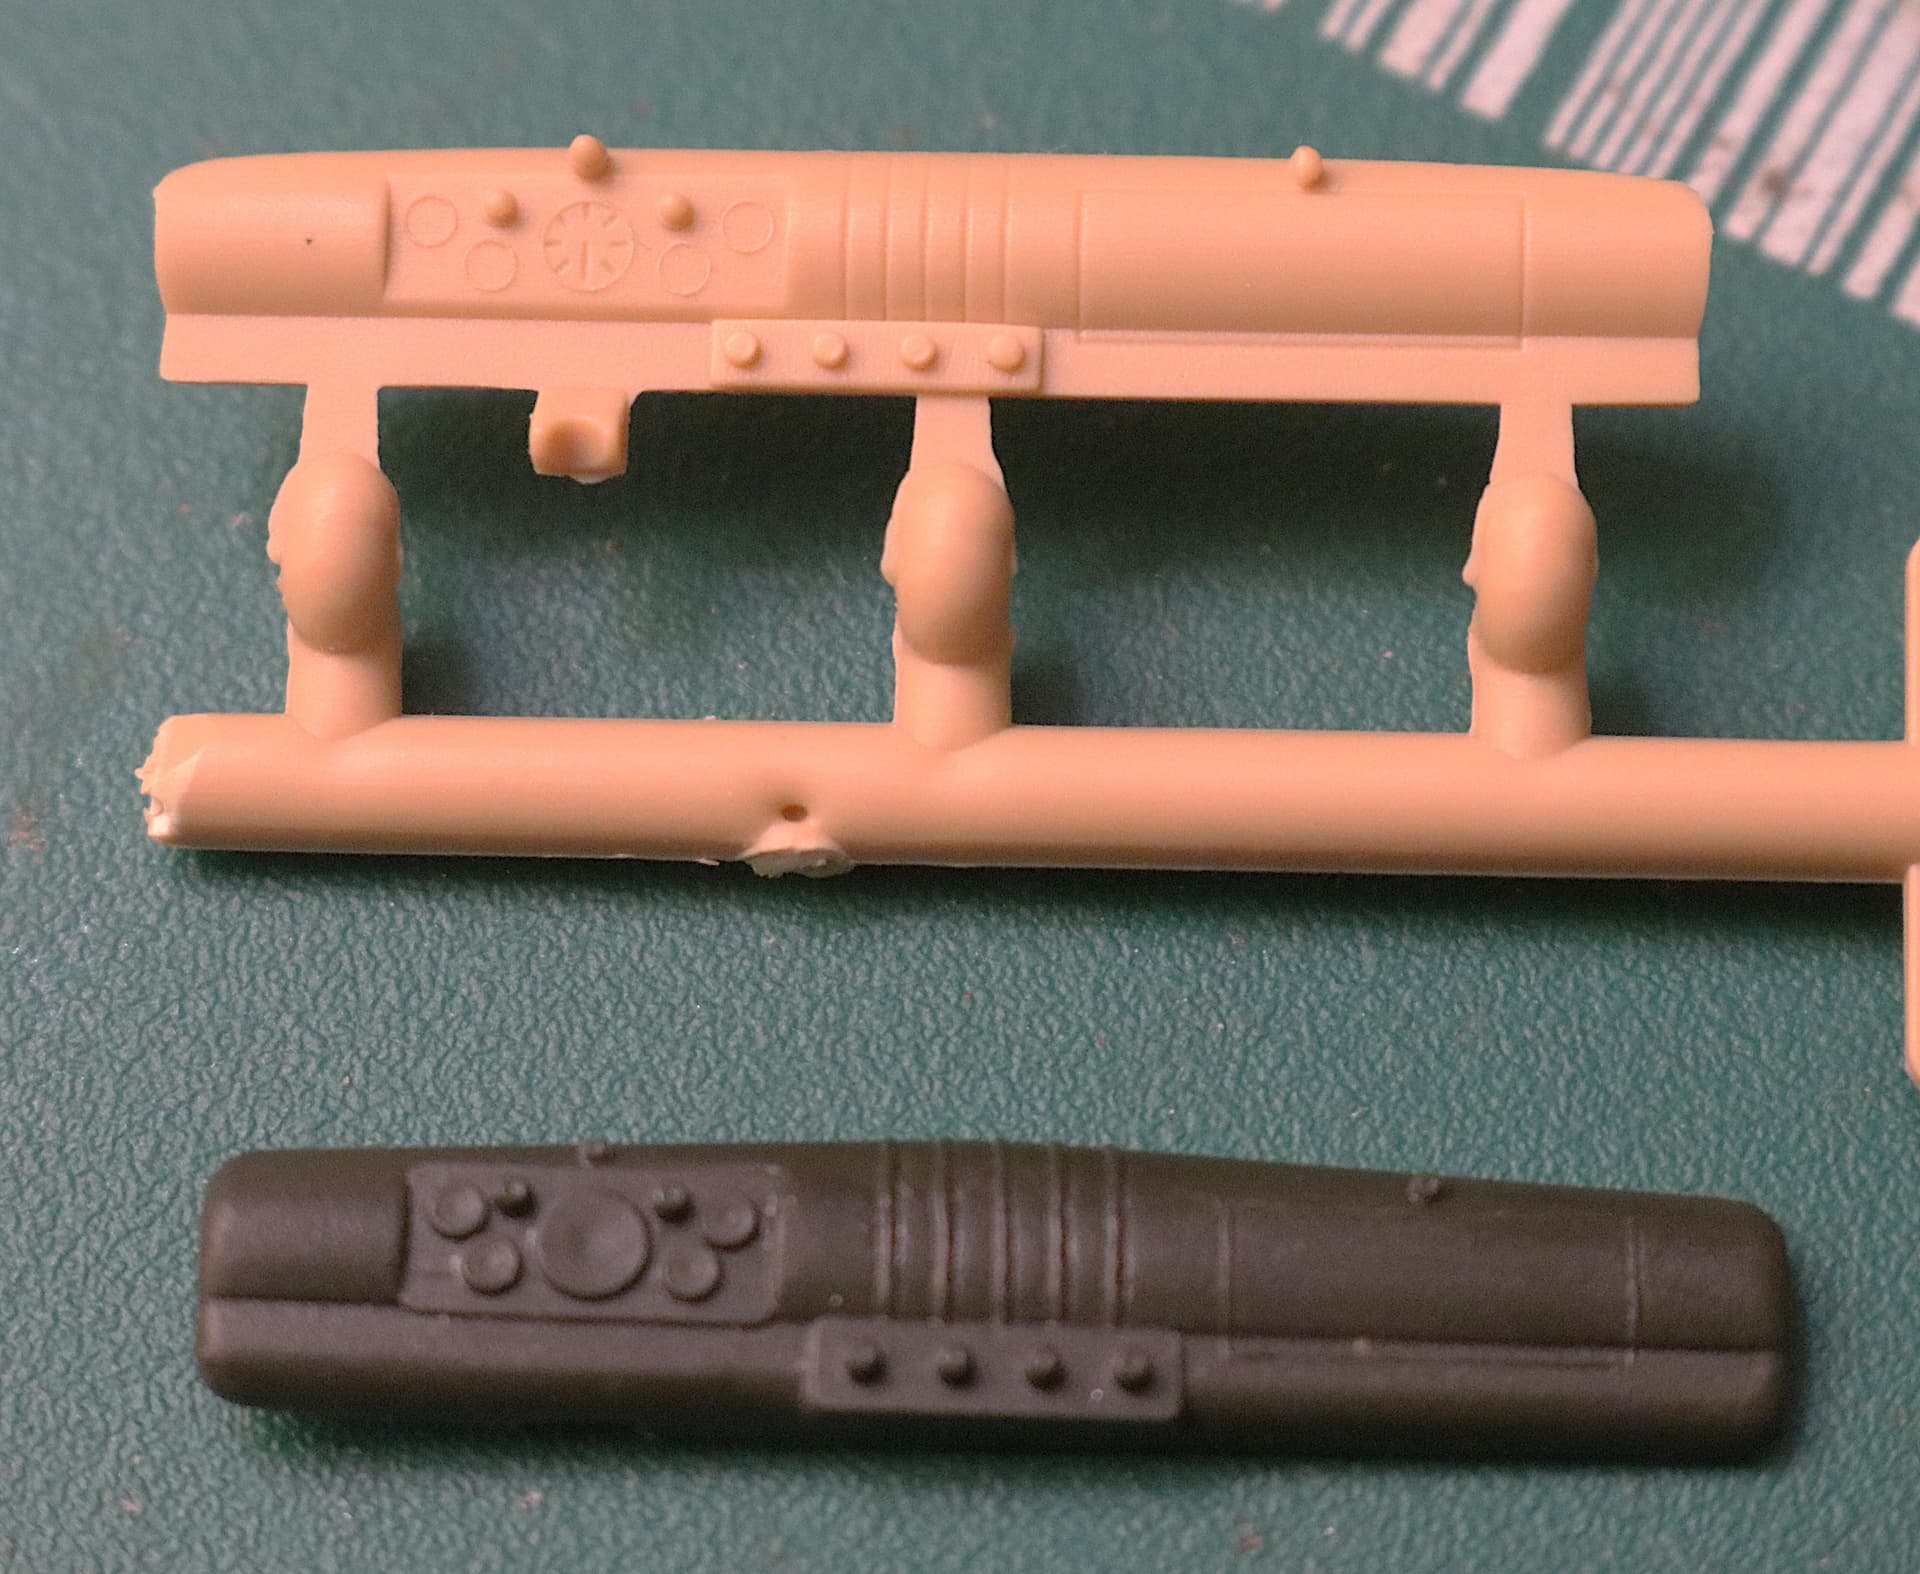
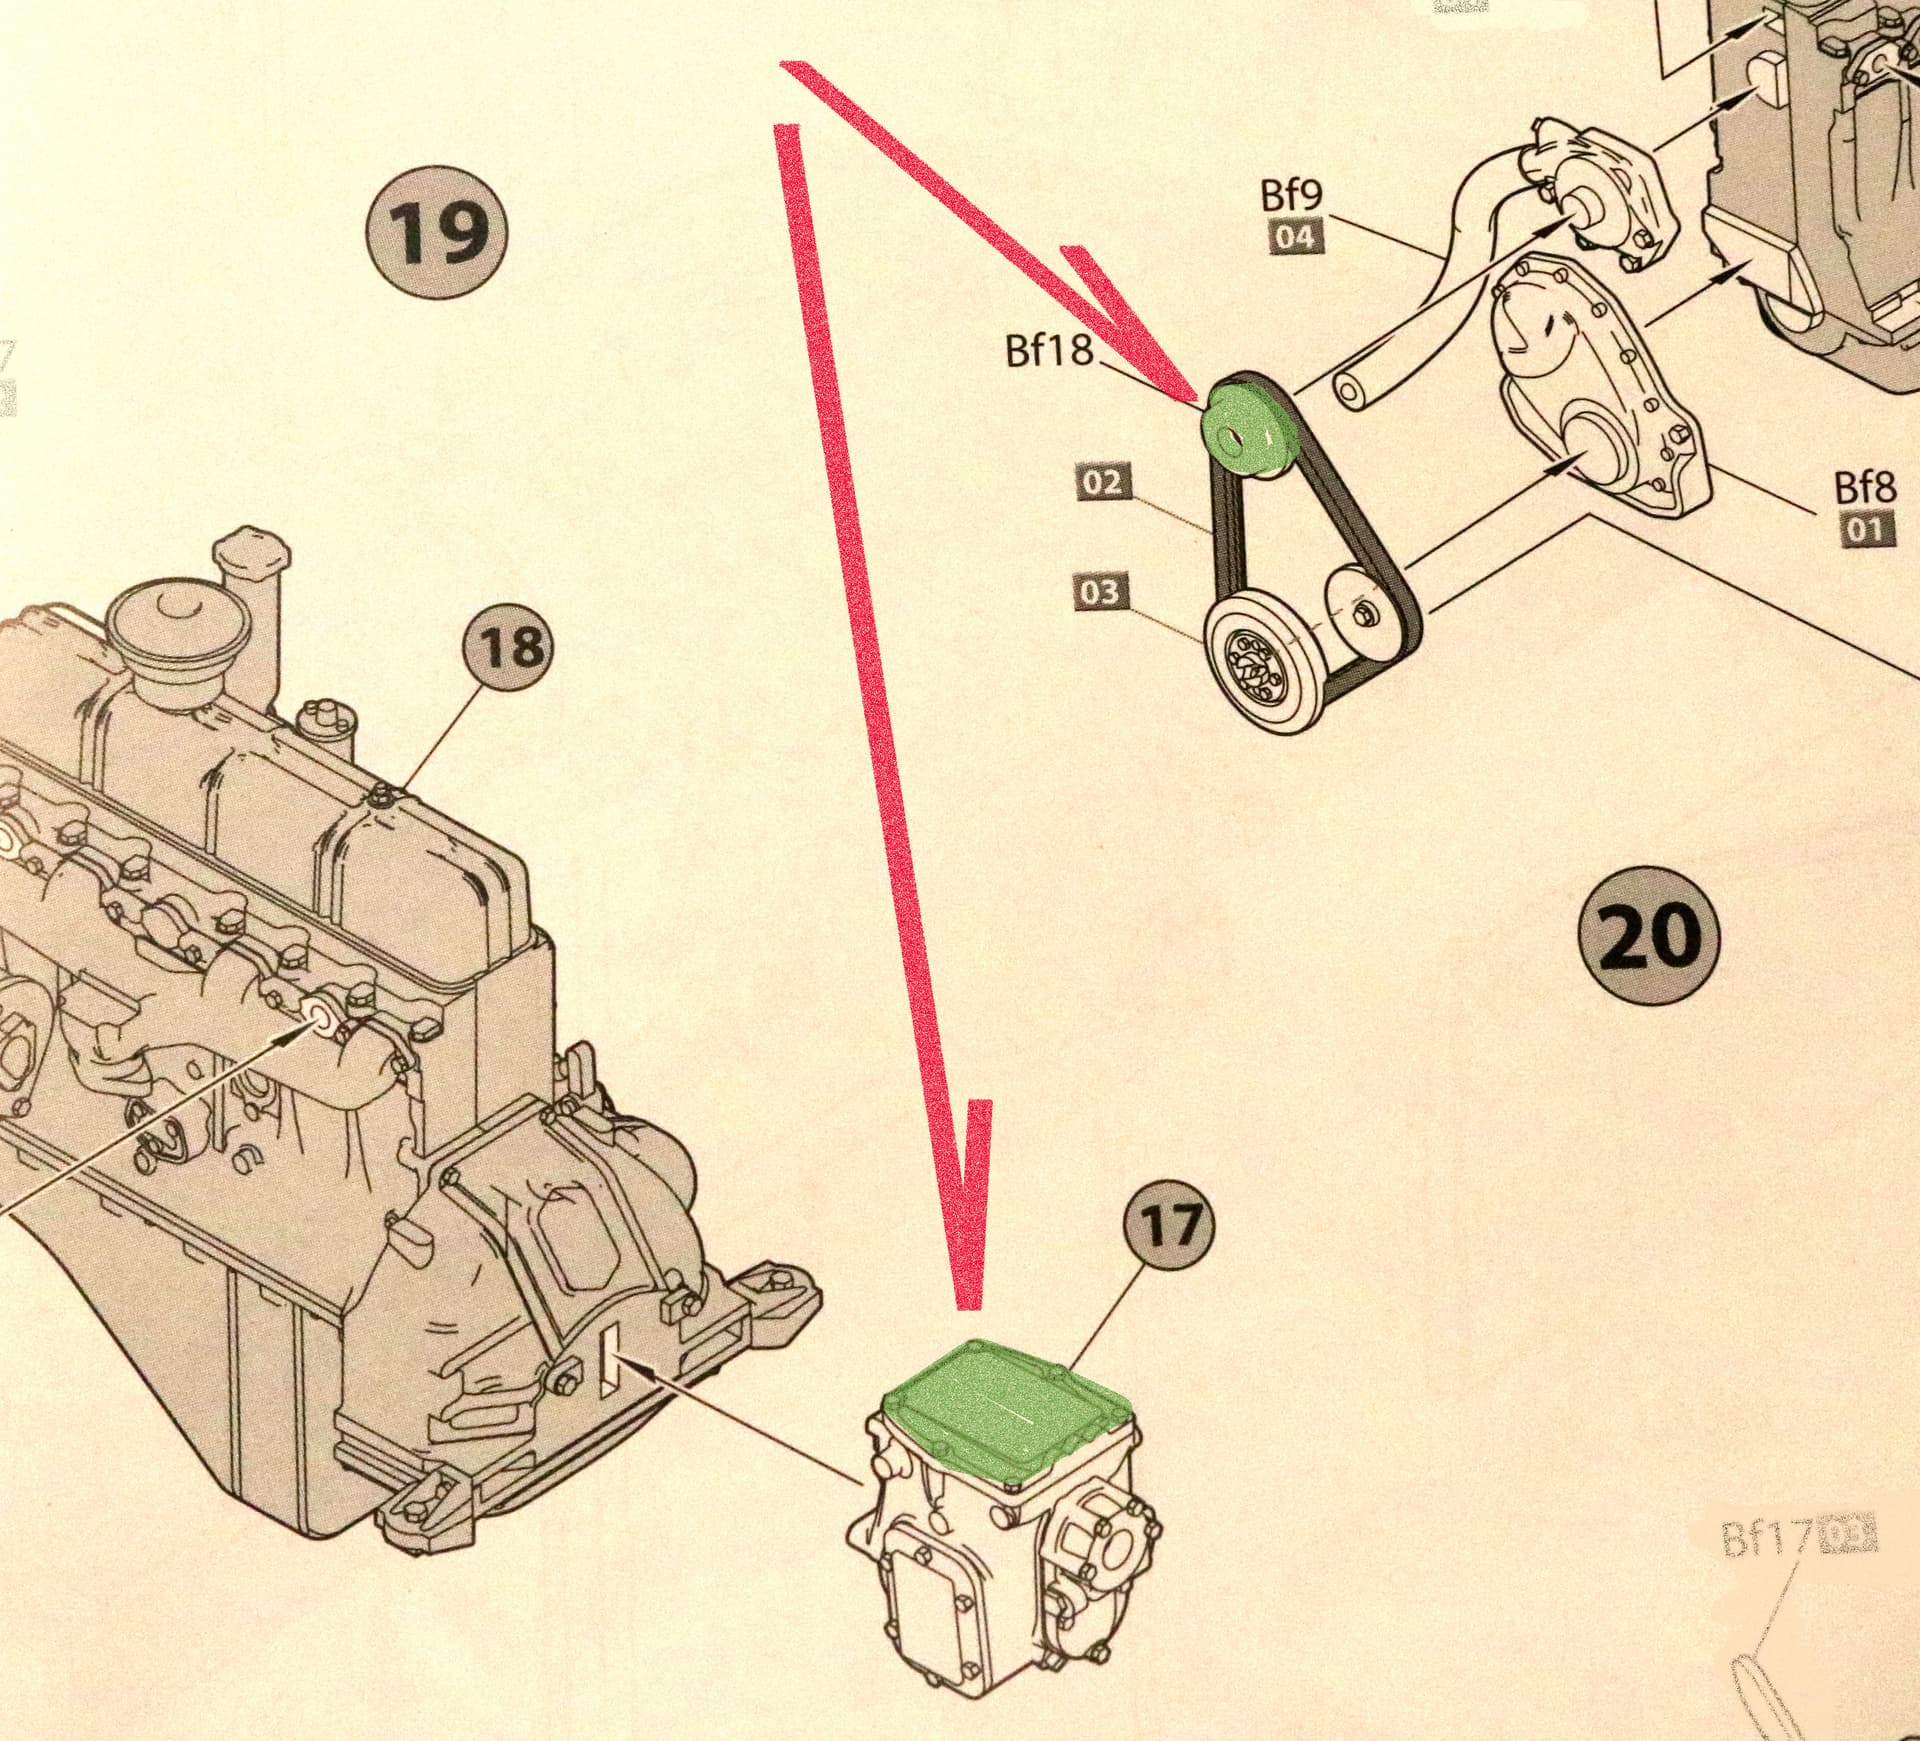
The HobbyBoss Dash (Top) versus the Italeri Dash (Bottom)
I think I like the Italeri Dash just a bit better but the HobbyBoss offering comes with gauge decals. Perhaps the MiniArt decals will fit the Italeri dash??? We will see.
Modeling Tip:
Place the gauge decal first, allow to dry and then put just a drop of Future on each gauge and again allow to dry to a high gloss finish that will represent the glass.
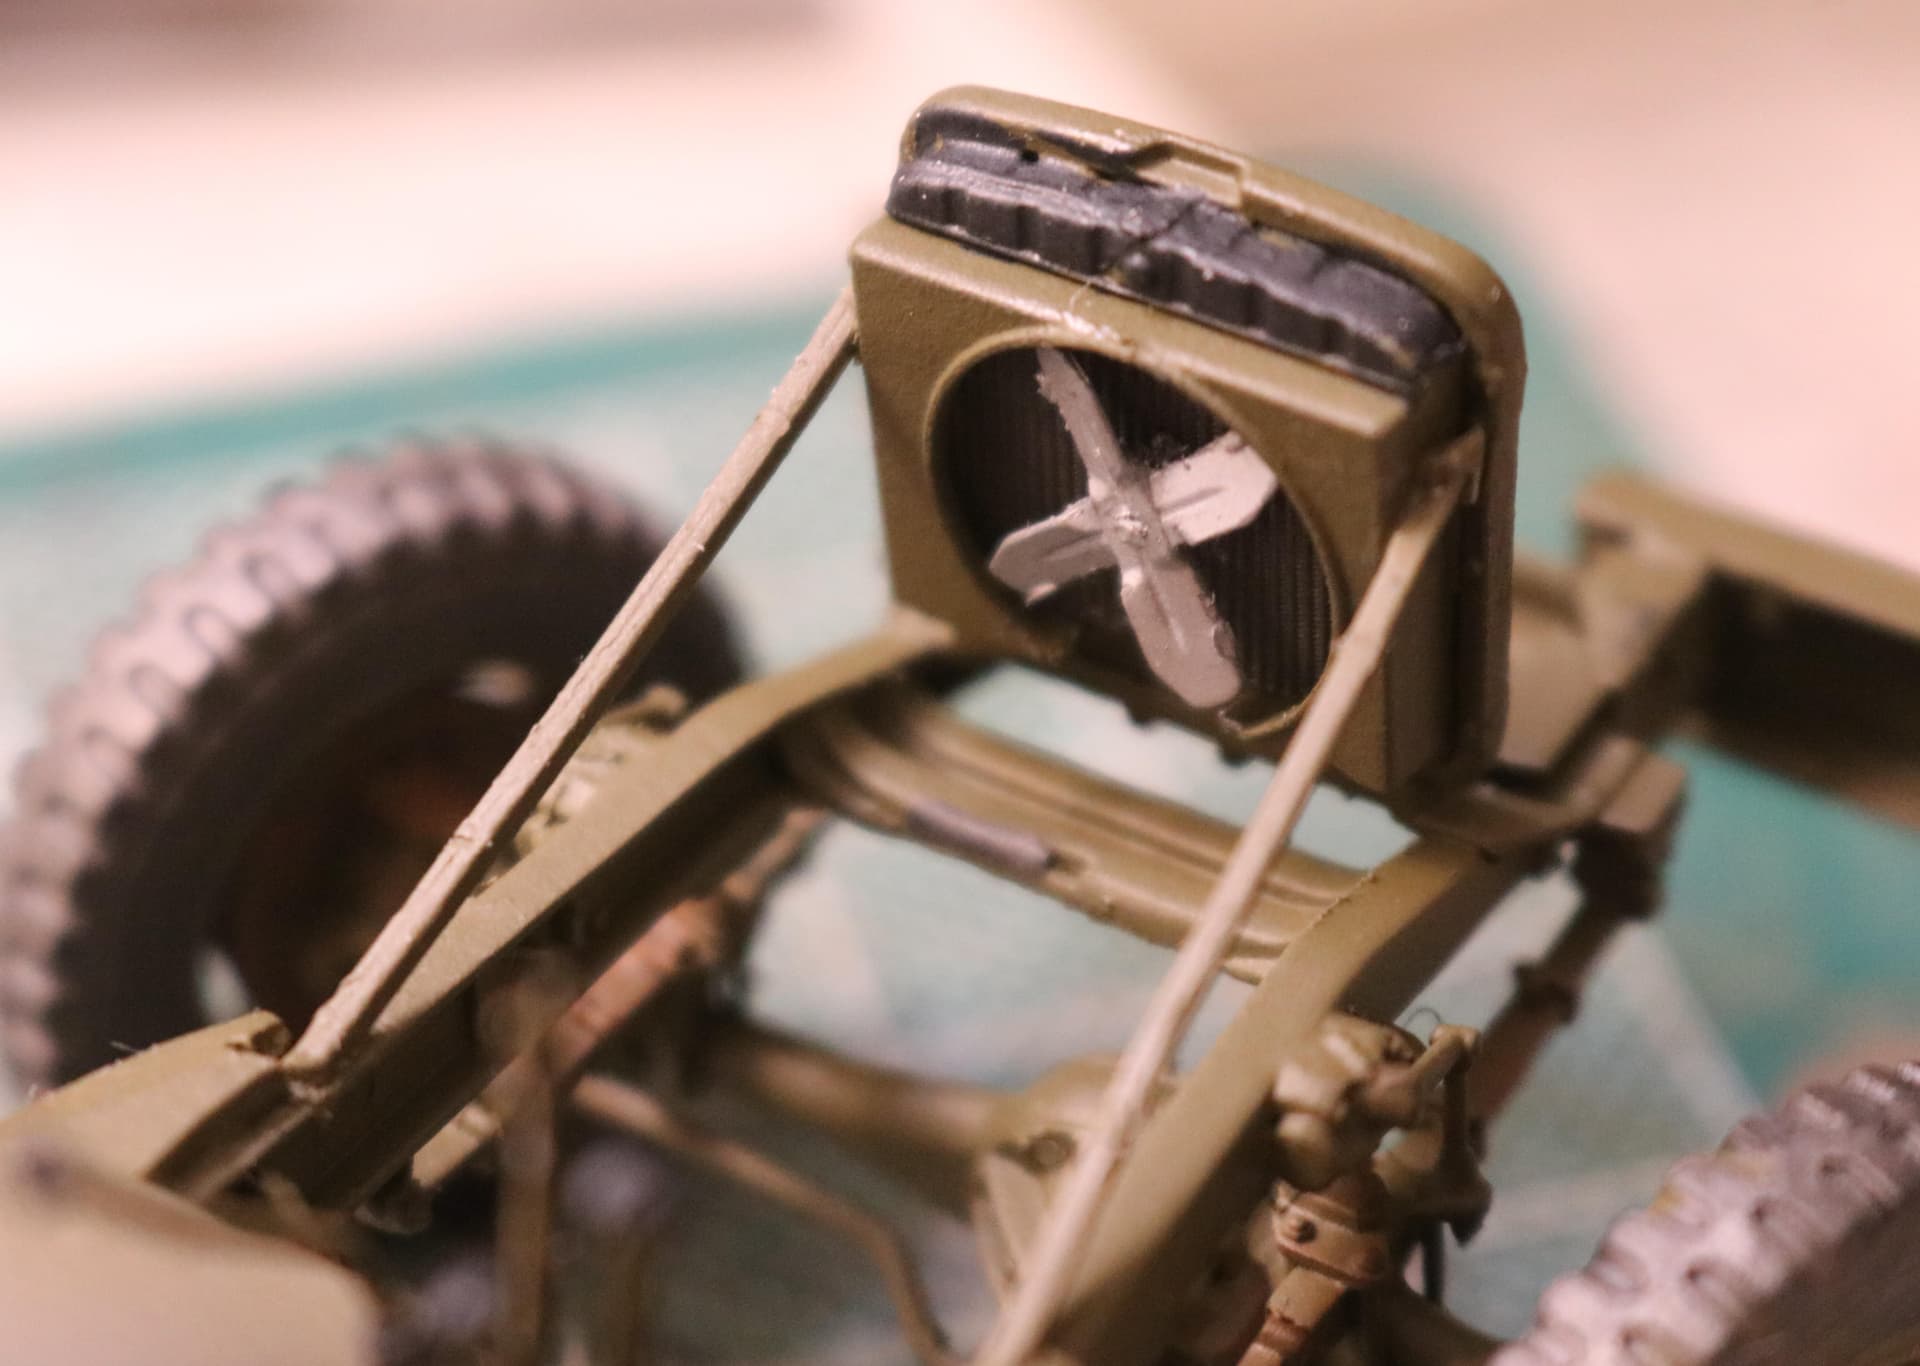
We are dealing with really to-scale spacing and tolerances here. As with most engine change-outs you have to pull the fan and sometimes the entire front pulley assembly to accomplish the change. (Either that or take out the radiator.)
So again I would recommend you glue a short spacer (a piece of round sprue) to the front of the fan and then glue this assembly to the radiator before even attempting to install the engine. Also sand down the front of the engine pulley where the fan WOULD have mounted so as to create even MORE clearance in this area. (I shortened the lower radiator hose just slightly to also help out in the area.)
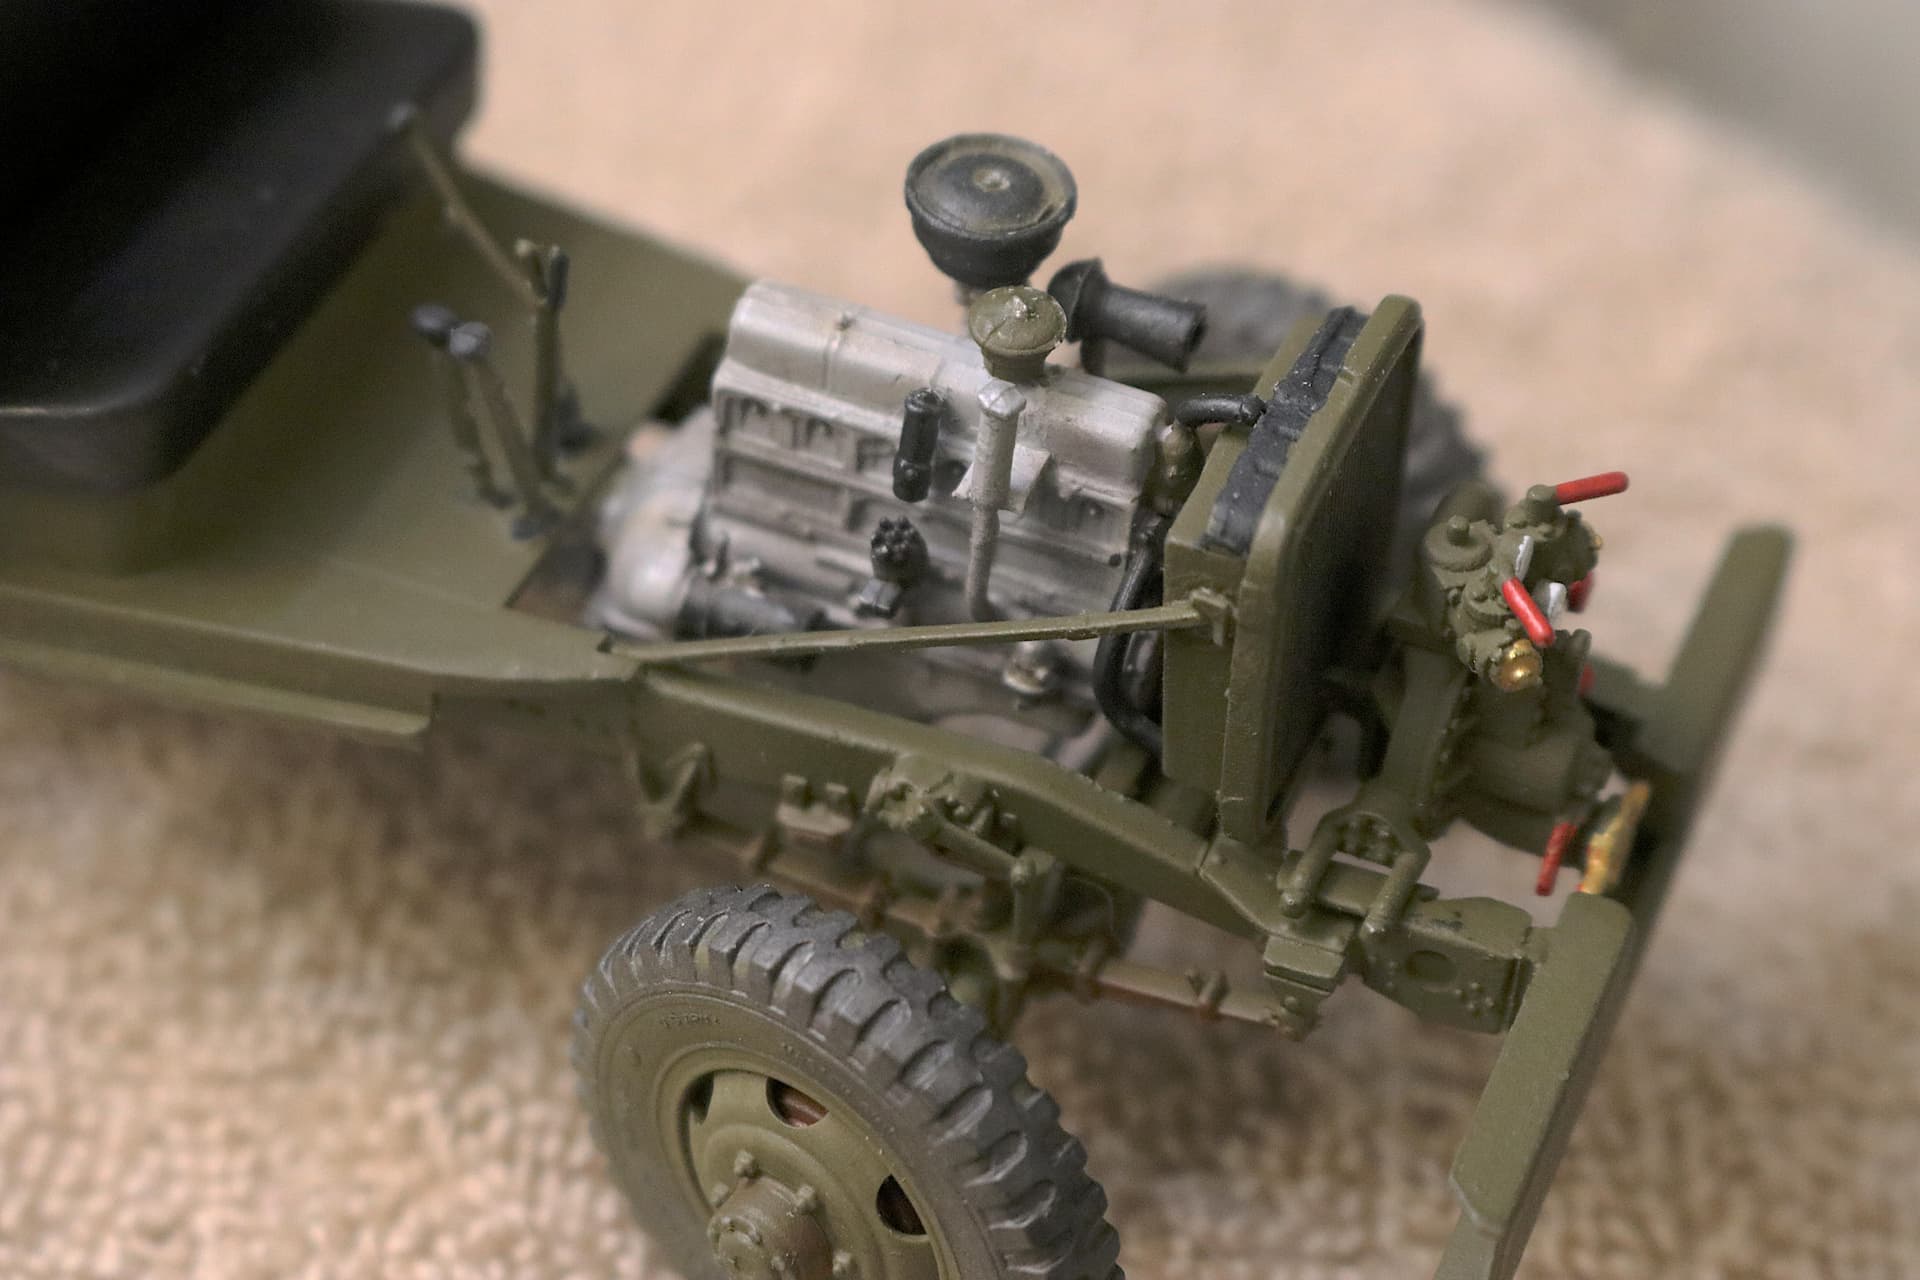
You are going to have to also sand down the top of the transmission box (not the bell housing) quite a lot to get it to fit under that floorboard. (The plastic floorboard being a lot thicker than its’ real 1 : 1 scale, sheet metal counterpart.*)
I think MiniArt’s, “Auto Conflict/Interference” routine in their CAD software let them down in this one particular instance. You are really NOT going to get that floorboard to sit properly if you don’t reduce the height of that transmission box ~ Either that or you will break the rear engine mounts when you try to force the install of the floorboard.
Besides all that nice detail on the top of the tranny will NEVER be seen again once the floorboard is in anyway!
[Edit:] For a time I considered just cutting out the floor board and mounting the stick shift directly to the top of the transmission, just as it is in real life. but later thought better of it.
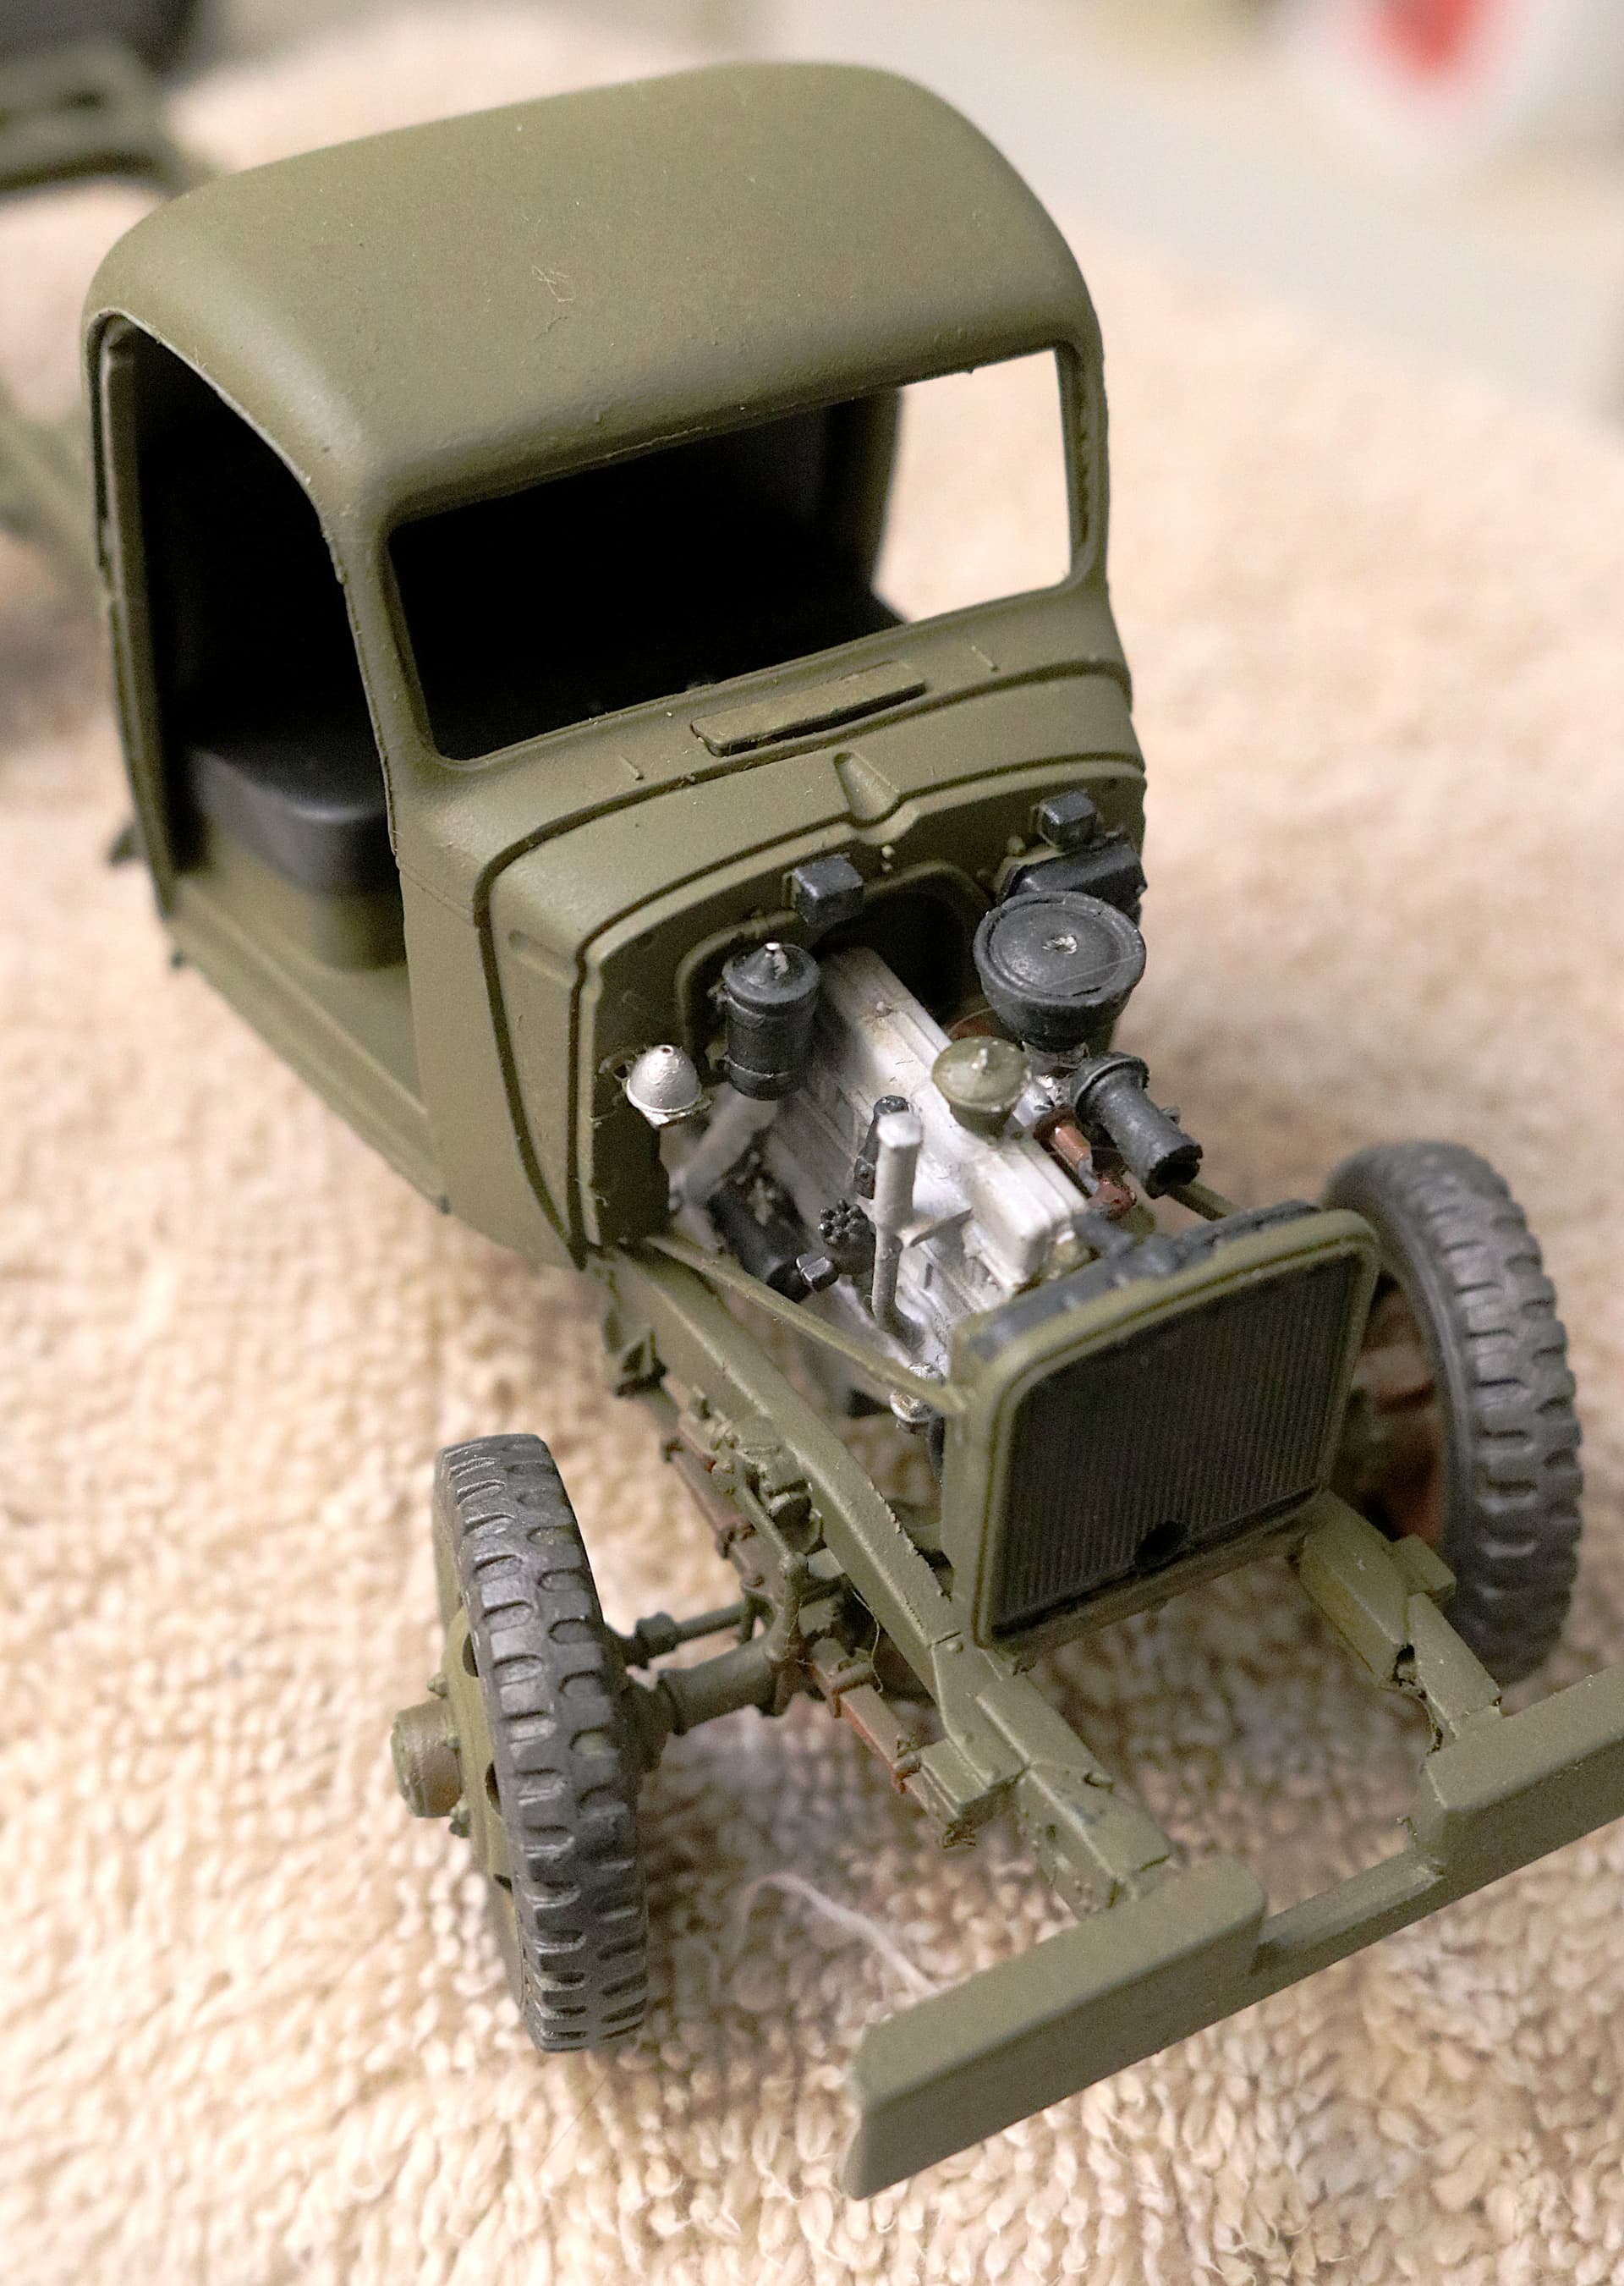
MiniArt gives you the choice of showing that cowl air vent as closed, partly open or full open. I chose partly open. Full open the vent stood much taller than that.
If I had it to do again, I would move that entire seat assembly forward on its’ base just a little.
The Chevy seat had fore/aft adjustment and here it is seen as moved fully to the rear. (Only tall guys need apply for this job!)
The seat back really should stand off from the back cab wall just a bit and not be leaning against it. But alas who will ever know?
In any case my order of booster springs for the Chevy has now arrived from Shapeways so hopefully I will be posting photos of progress in the next few hours.
There is a right hand and a left hand to the booster springs so note should be taken here of the differences:
Note how the booster spring forward contact pad mounts higher up on the frame member than the rear. Tom @barkingdigger has wisely taken this into account in designing his AM spring set.