What size hole does a typical rifle-caliber (.303 or 7.62 mm) bullet make in thin sheet metal such as a soft-skin vehicle? I know what the damage looks like, but is the penetration hole the same diameter as the round, or does the round punch a hole larger than the projectile itself?


1 Like

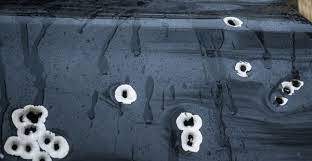
AK bullet (7.62 × 39 mm) holes on 1 mm sheet metal :
H.P.
7 Likes
Thanks. It also occurred to me that I need to make visible exit holes. I want to model a shot-up Kubelwagen, where there will be several entry holes in the body, but also many entry and visible exit holes in the doors, and side panels. As shown in the photo’s, an exit hole is surrounded by a small “eruption” of metal - any suggestions on how to simulate that on a plastic part?
1 Like
You have to thin the plastic as much as you can from the back side with a steel cutter. At the right speed, it will remove plastic without melting it. Some people then punch through with a knifve blade, but if oyu want the "eruptions"and a round hole, punch straight tbrough with the approprite sized drill bit.
If a bullt passes through a second piece of sheet metal the hole may not be round as bullet can yaw, creating an elongated hole.
7 Likes
That sounds like Dremeling out the reverse side to thin it and punch holes through. I’ve used that technique for making rust holes, and shrapnel punctures, but that only works well when you can’t see the reverse side as the thinning process is very evident, and ruins the surface, and surface detail. I want to have entry and exit holes on the same part (the doors and side panels) and visible from both sides. I’m considering scratch-building new panels, and doors (as a last resort), from paper-thin sheet plastic, and punching a hole right through with a suitable sized needle. Any other suggestions?
1 Like
That would have been my first suggestion - scratchbuilding by making panels with scale thickess.
Or - Depending on how much detail is on the inside of the doors, you might try removing the detail, sanding the doors as thin as possble (circular motion on 120 grit paper) and then replace the details. You might have to add some strips along the top to bring back the thickness.
Edit:
Based on this photo I think it’s entirely possible to sand the door super thin and replace the perimeter frame with what looks like might be .020 x .020 Evergreen strip.
1 Like
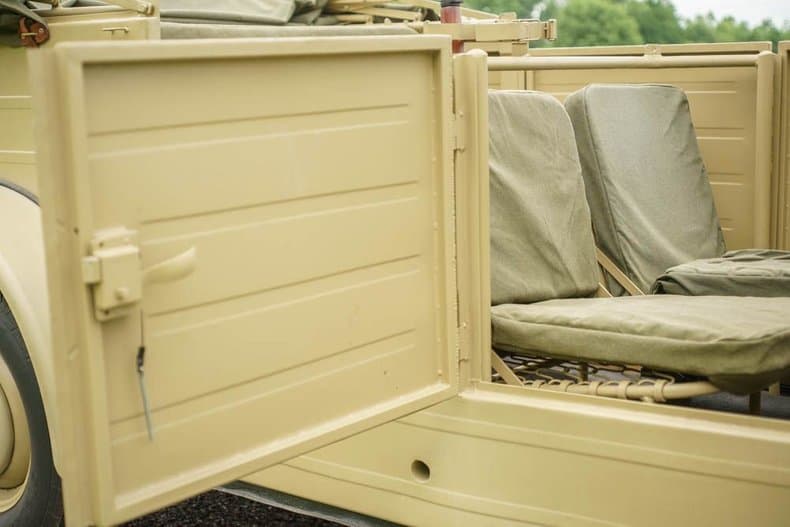
Seeing as the door panel construction is pretty simple and linear, I think it would be a lot easier to make new doors. I’m only going to do damage to one side of the vehicle…so, only two doors to replace.
1 Like
I have had success using aluminum foil and needle before.
1 Like
That was another consideration, but I’d rather use styrene, and styrene glue throughout the construction. Just my preference.
1 Like
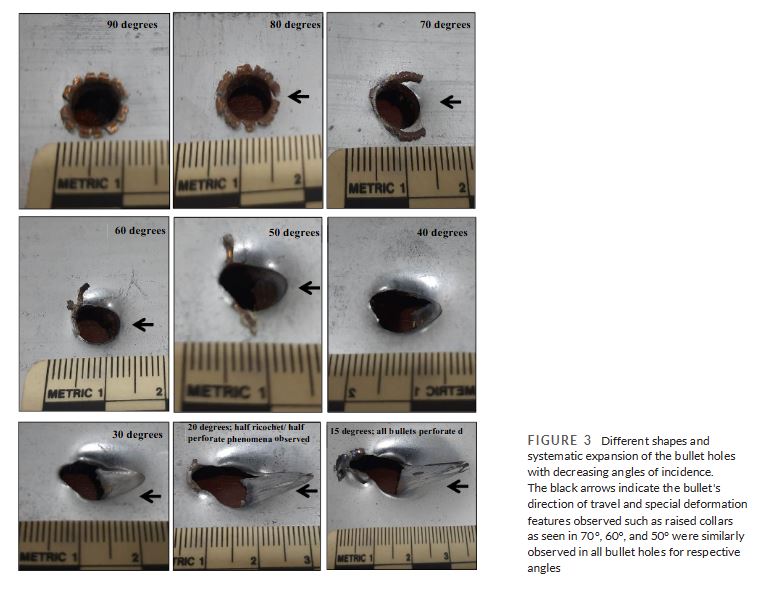
are we to use the pix of muzzles to determine scale? Are the pix 1 to 1 or real size and we scale from there. I love the table and want to save it, but need to know how to apply it. Thanks
1 Like
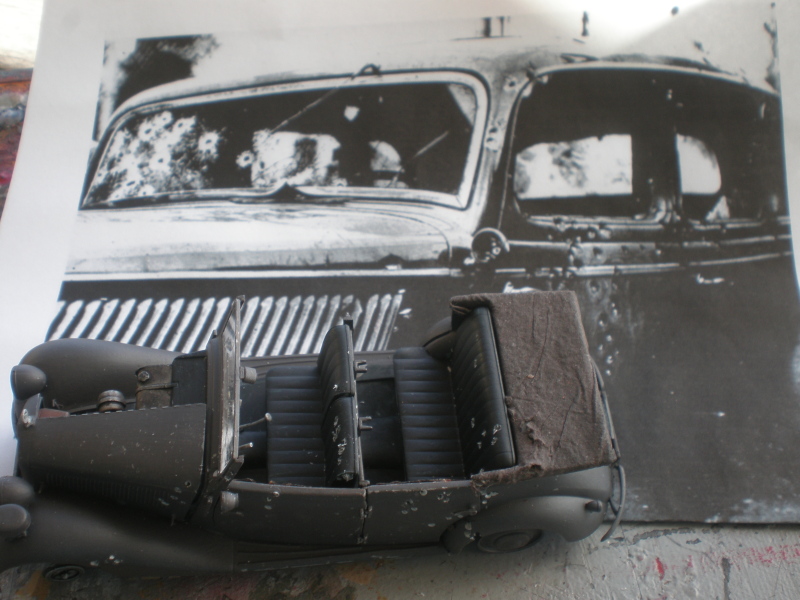
When pondering the same issues way back, I looked at various FBI photos of shot-up gangster cars in the 1930’s - I assume mainly Chicago typewriter .45 slugs. That was also handy to check how they went through ‘30’s glass too….
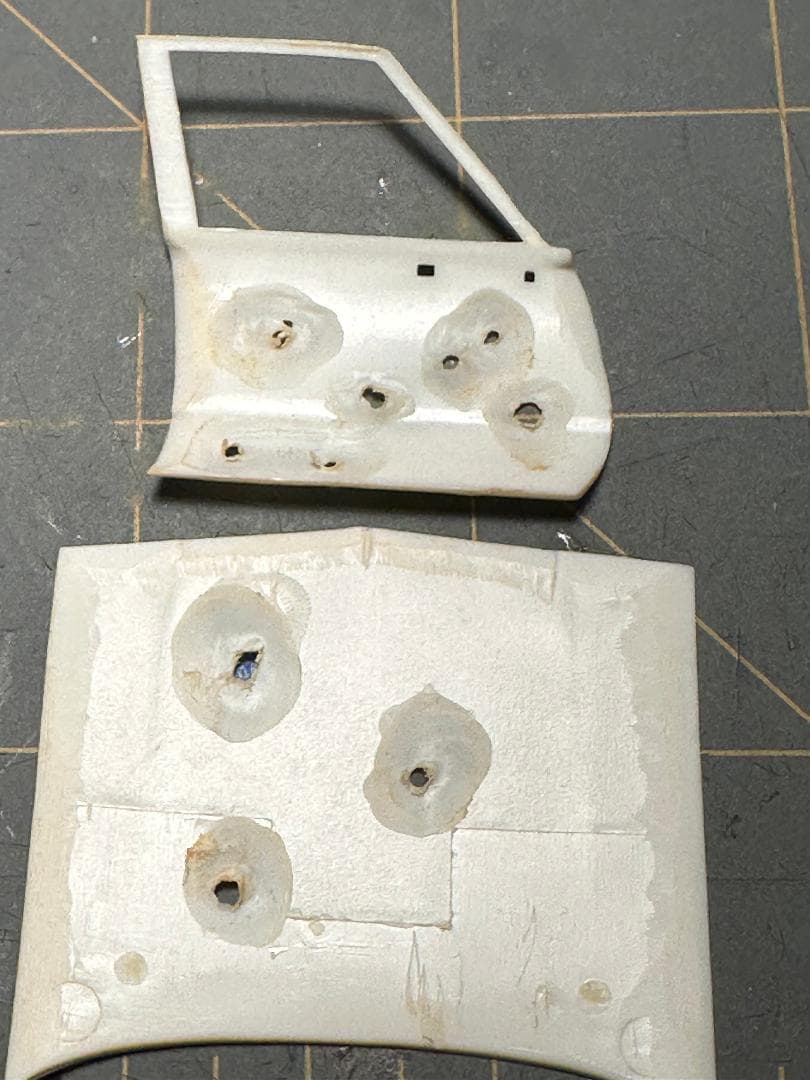
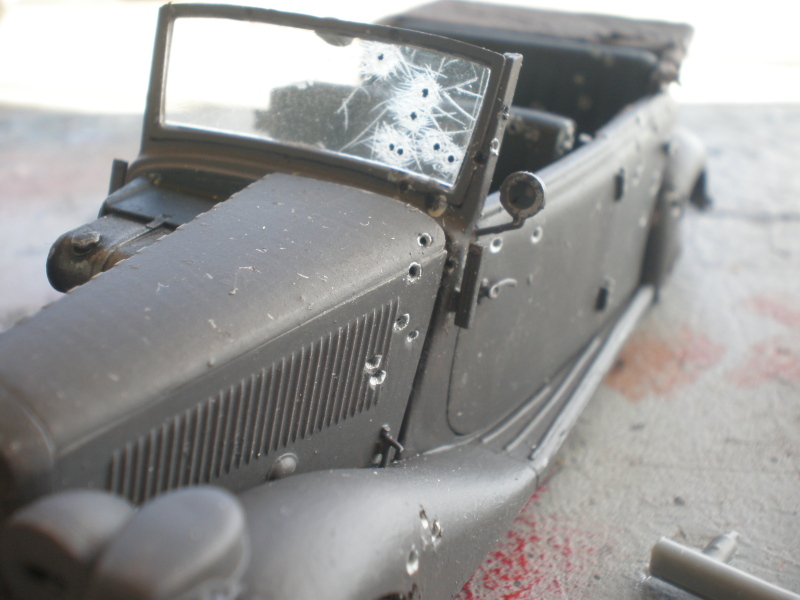
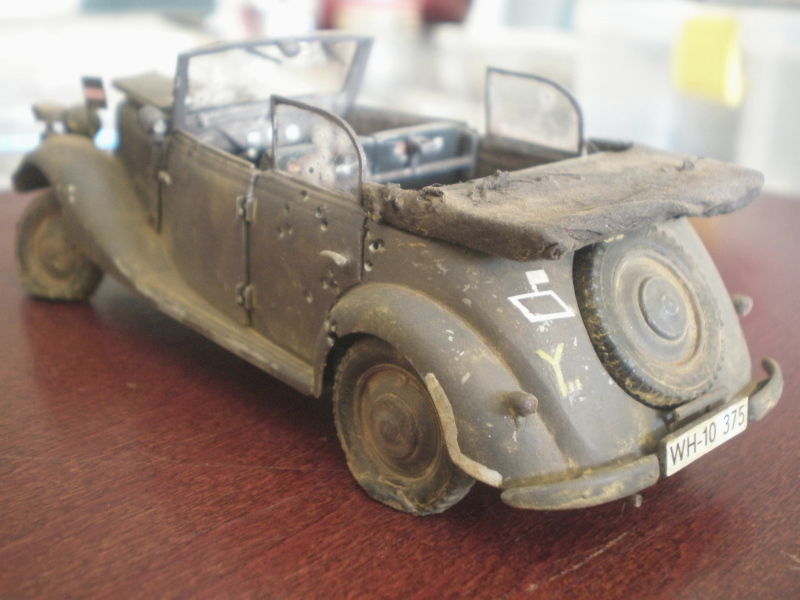
To make the panel holes I just used a standard scalpel blade where the point had previously snapped off (about 0.5mm gone) and very slowly “screwed” it into the panel to make the indented flared hole. If you go real slow, you should find exit holes will leave some eruptive edges but I’d immediately fix them with CA or other glue to prevent them dropping off.
After painting the car, I used a toothpick with a tiny droplet of metal paint on the tip to work into the hole. For the glass (substituted the kit’s ice-blocks with thin flexible PVC like that used in packaging) I used a fresh blade & after making the hole using the fine point to scratch round the edges & also make random cracks.
I covered the seats & tilt with a thickish layer of tissue paper to simulate leather or fabric, and then used the fresh blade to make tufts round entry/exit holes. Not saying my attempt is perfect, it was mostly an expression of my frustration with such a crappy (MBox) kit so I really enjoyed riddling it.
6 Likes
Unfortunately I haven’t found any explaination for the first chart…Here’s another one that may be more useful :
H.P.
1 Like
That’s pretty much what I’m doing with a Tamiya Kubelwagen, but with the doors opened displaying both entry, and exit bullet holes. Had to scratch new doors for scale thickness so I could punch holes right through with a needle. A lot easier than I thought…so far; so good.
2 Likes