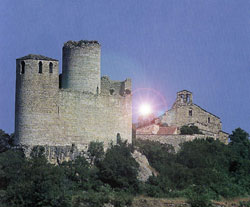
Castell de Mur in 1:72
One of my next projects will be a Spanish motif. The Castell de Mur in the foothills of the Pyrenees in northeastern Spain.
I came across this relatively small castle, which dates back to 969, on Pinterest. The castle is relatively simple but very interesting. It’s also a completely different construction style.
The castle is approximately 31 meters long. Perfect for a model in this scale.
I also wanted to build the castle and its monastery in 1:160 on a 188 cm base. However, I may not do that, even though I had already printed the monastery.
You need a lot of references for this, don´t you. Almost an archeological work. Over Pfingsten, I will visit the Burgenmuseum on Veste Heldburg in Thuringia. I hope they have some models there.
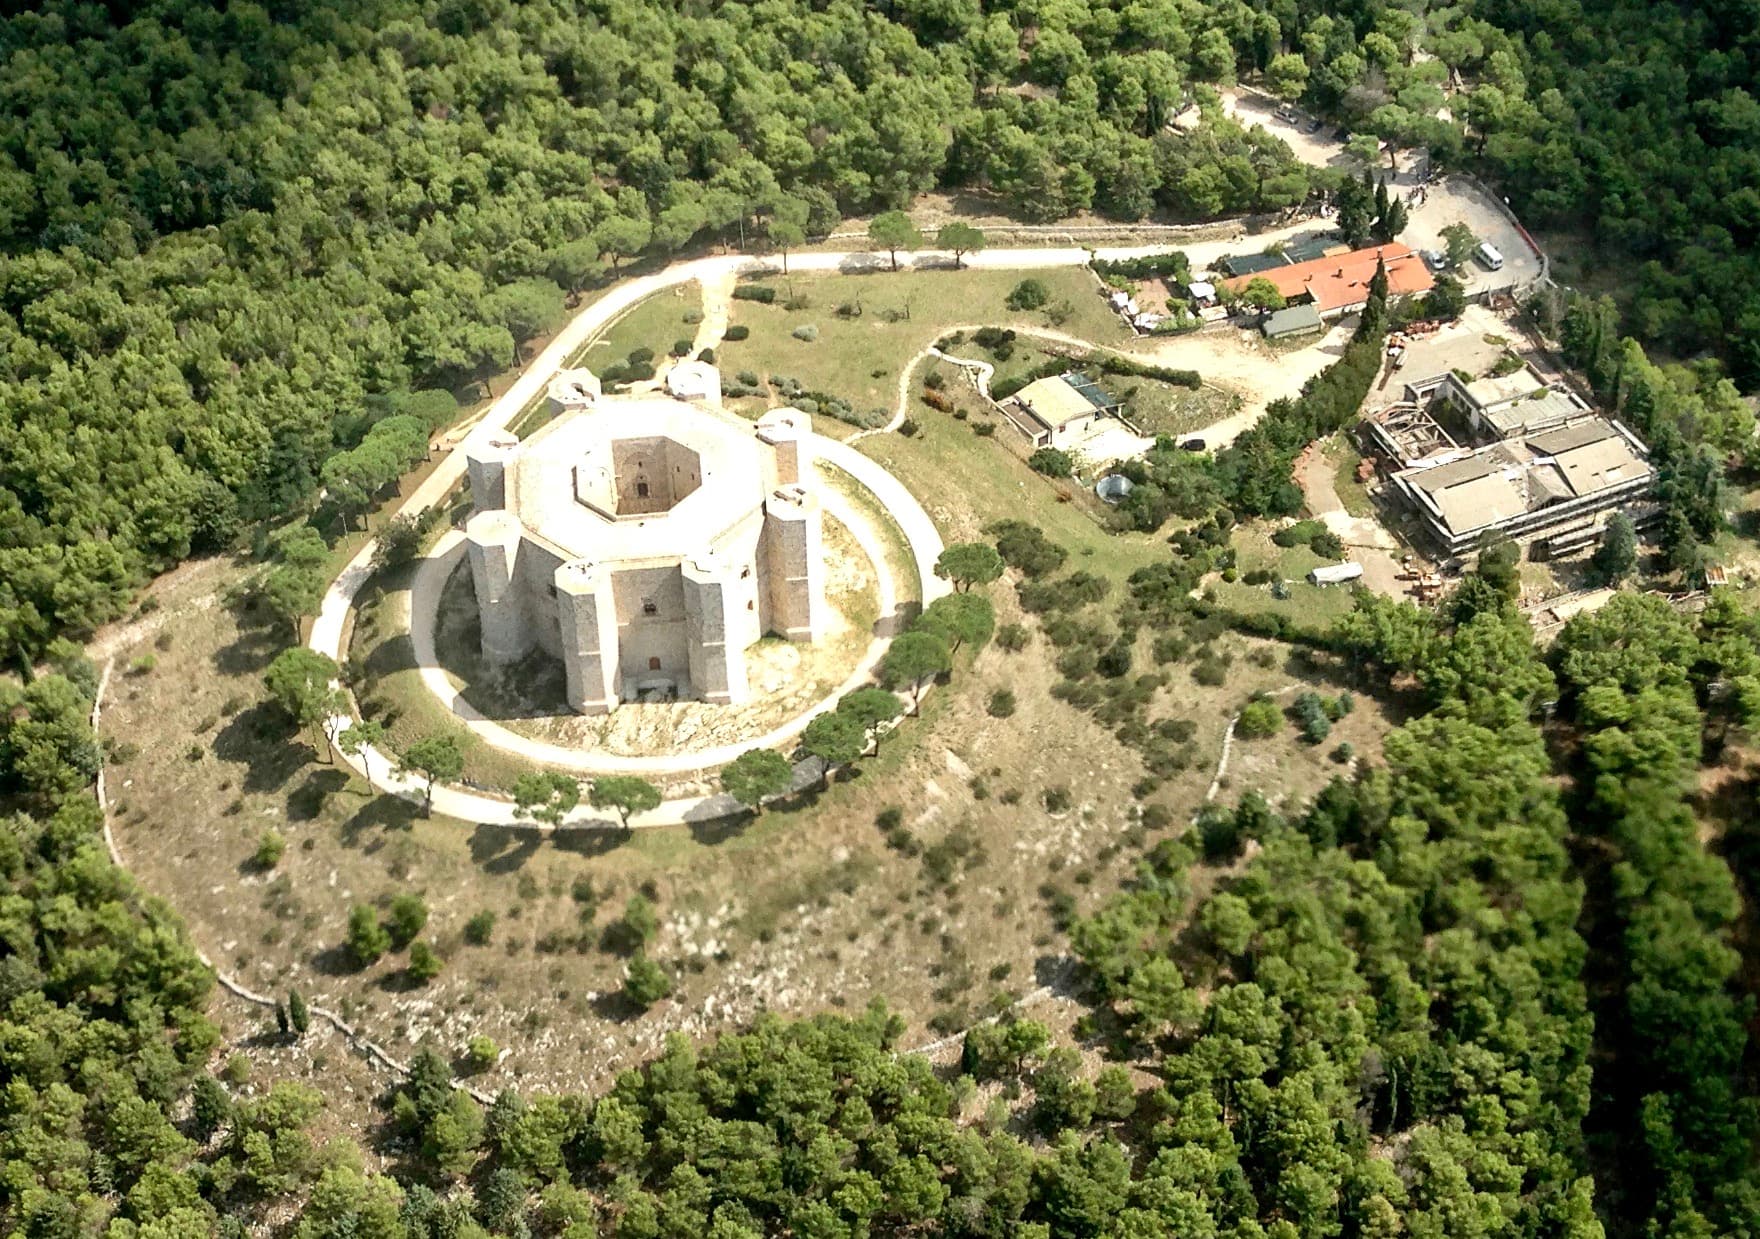
Castel del Monte in Italy looks like an “easy” job.
I’m sorry, but neither castle is for me. I only build small castles, which would take up a maximum of 1.50 x 0.8 meters. That’s the absolute maximum…unless someone would pay me the rent for a hall.
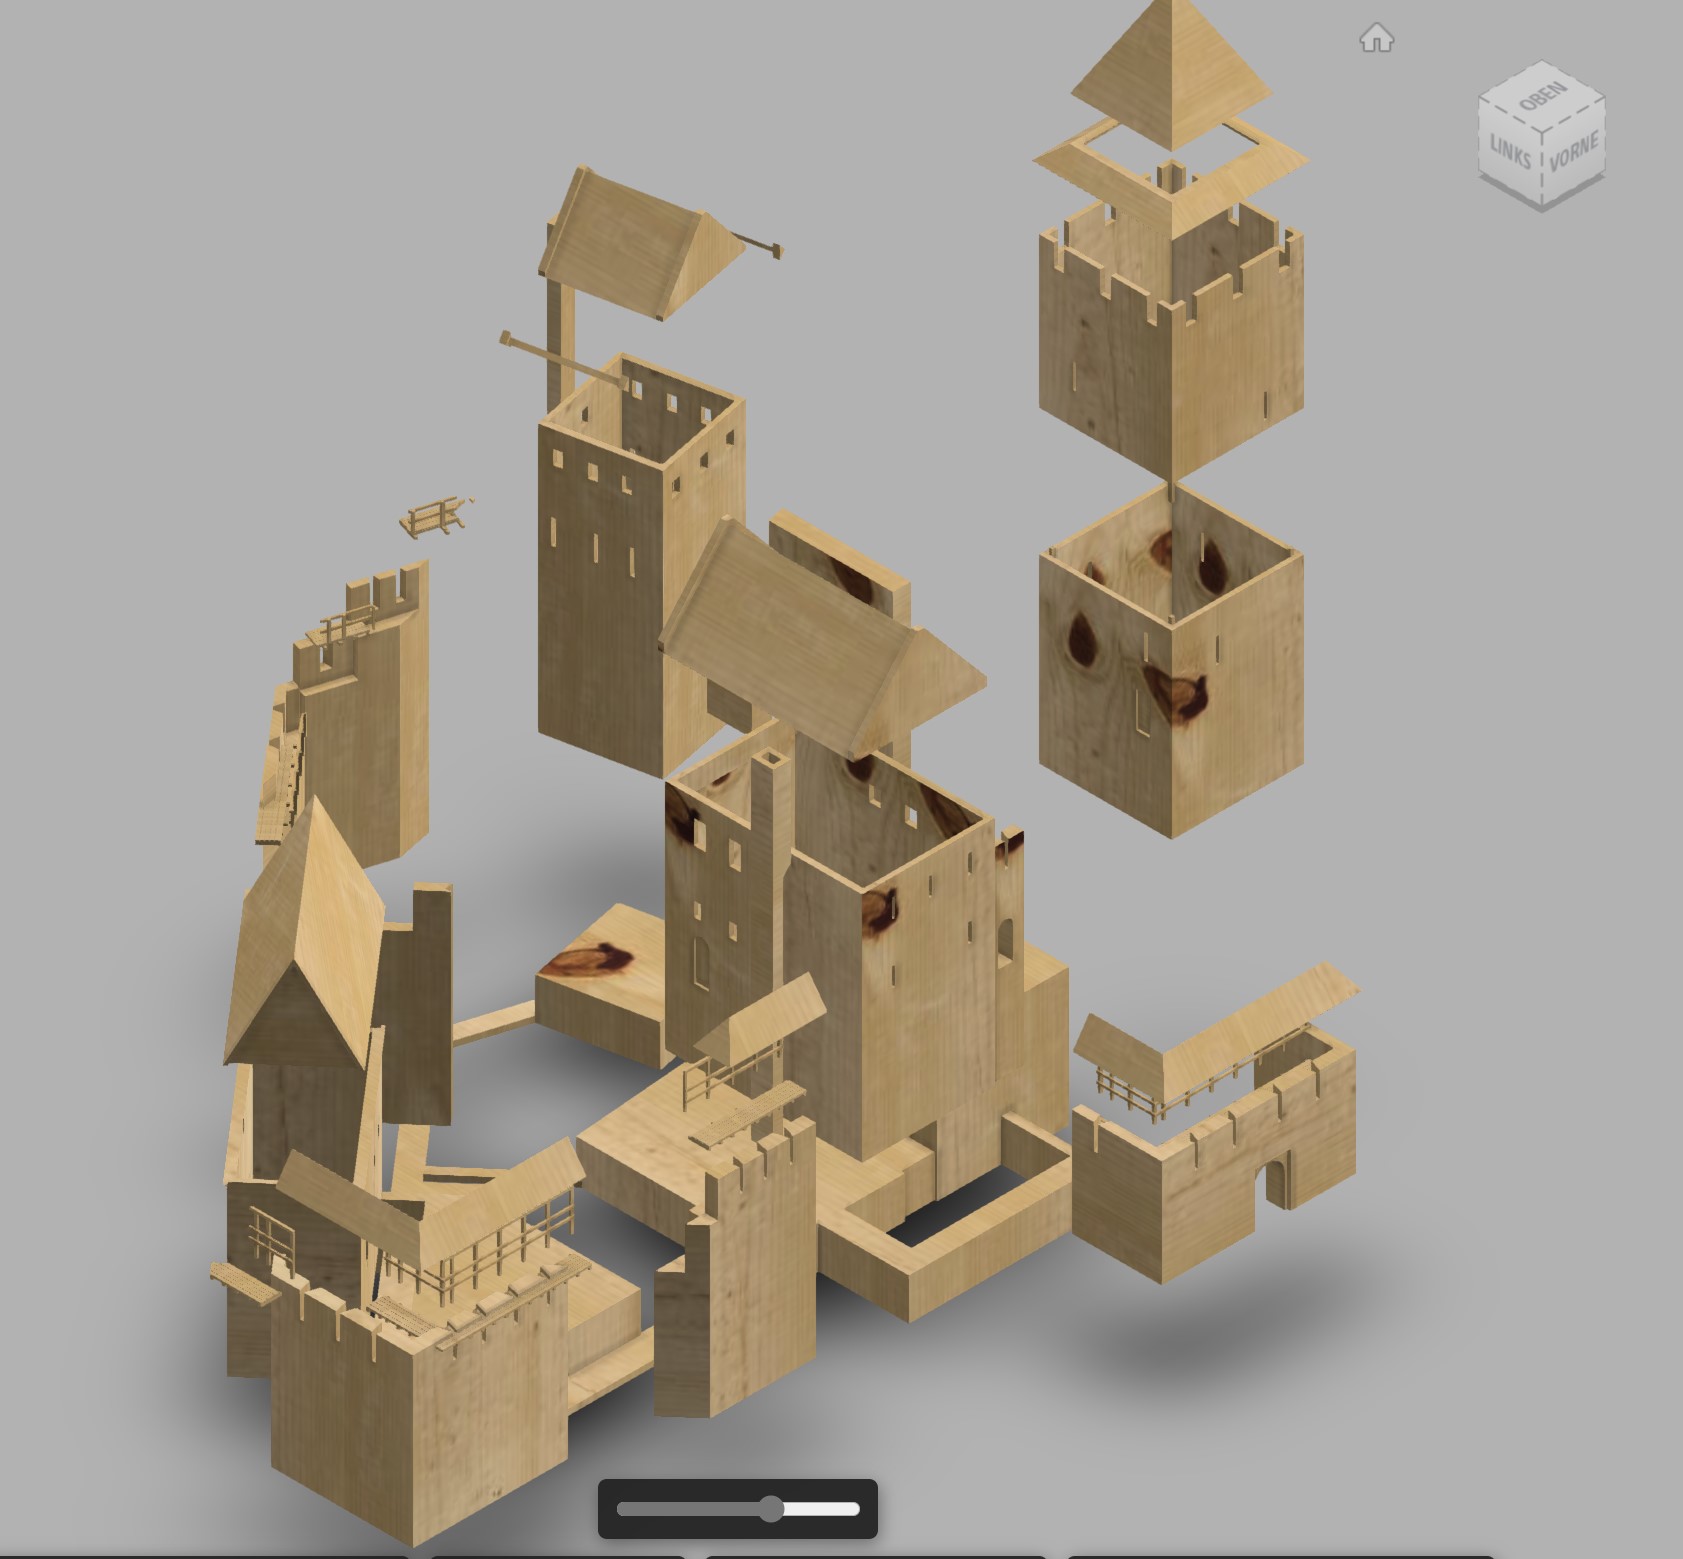
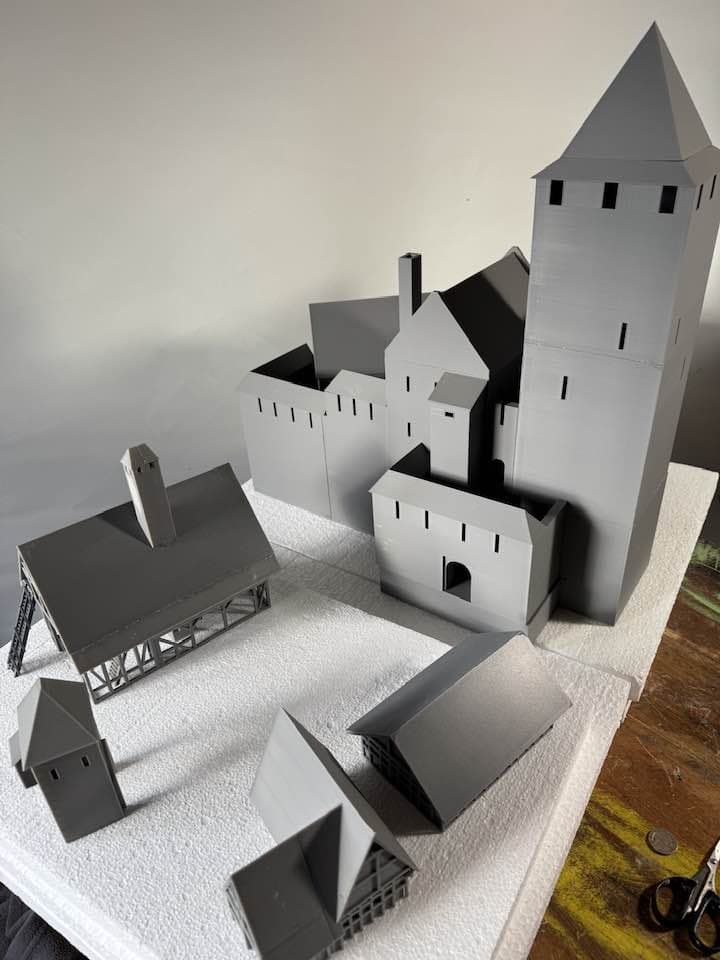
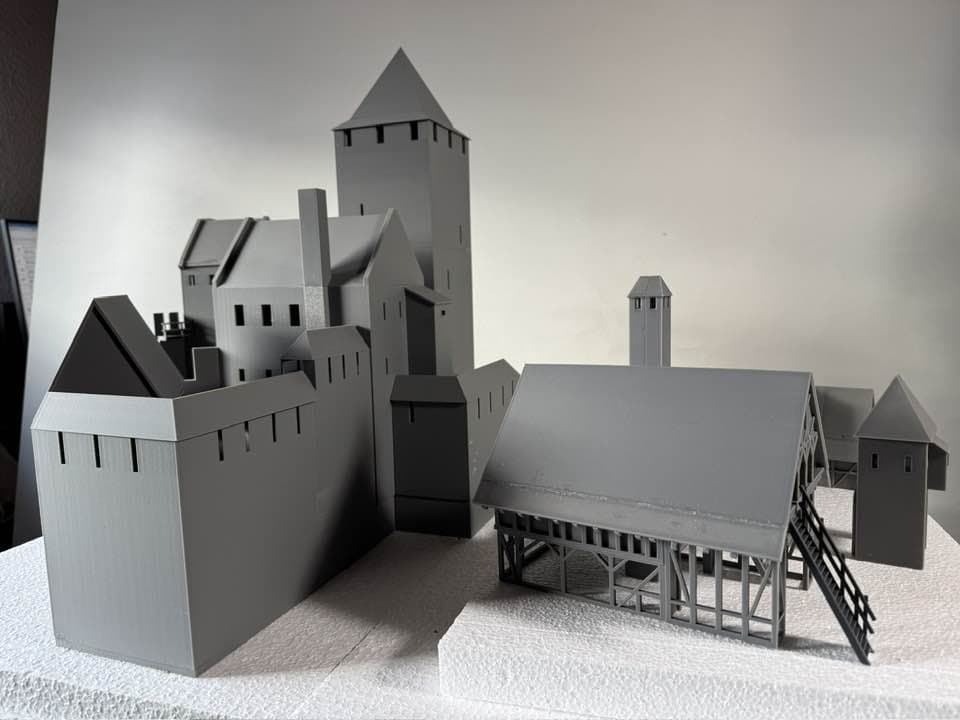
My next castle will be Reichenstein Castle in 1:72 scale.
But not next month… I’d say in the next few months.
I think I’ll use a stone wall instead of a palisade for the outer bailey.
How about Carcassonne (the whole city as well as citadel) in 1/35 scale? AliExpress has some very nice 3D printed mounted, and foot knights, in battle in 1/35 scale (also 38 mm).
Back to Castell de Mur in 1:72
After this little excursion, which strayed from the original topic, I’d now like to return to the topic of Castell de Mur.
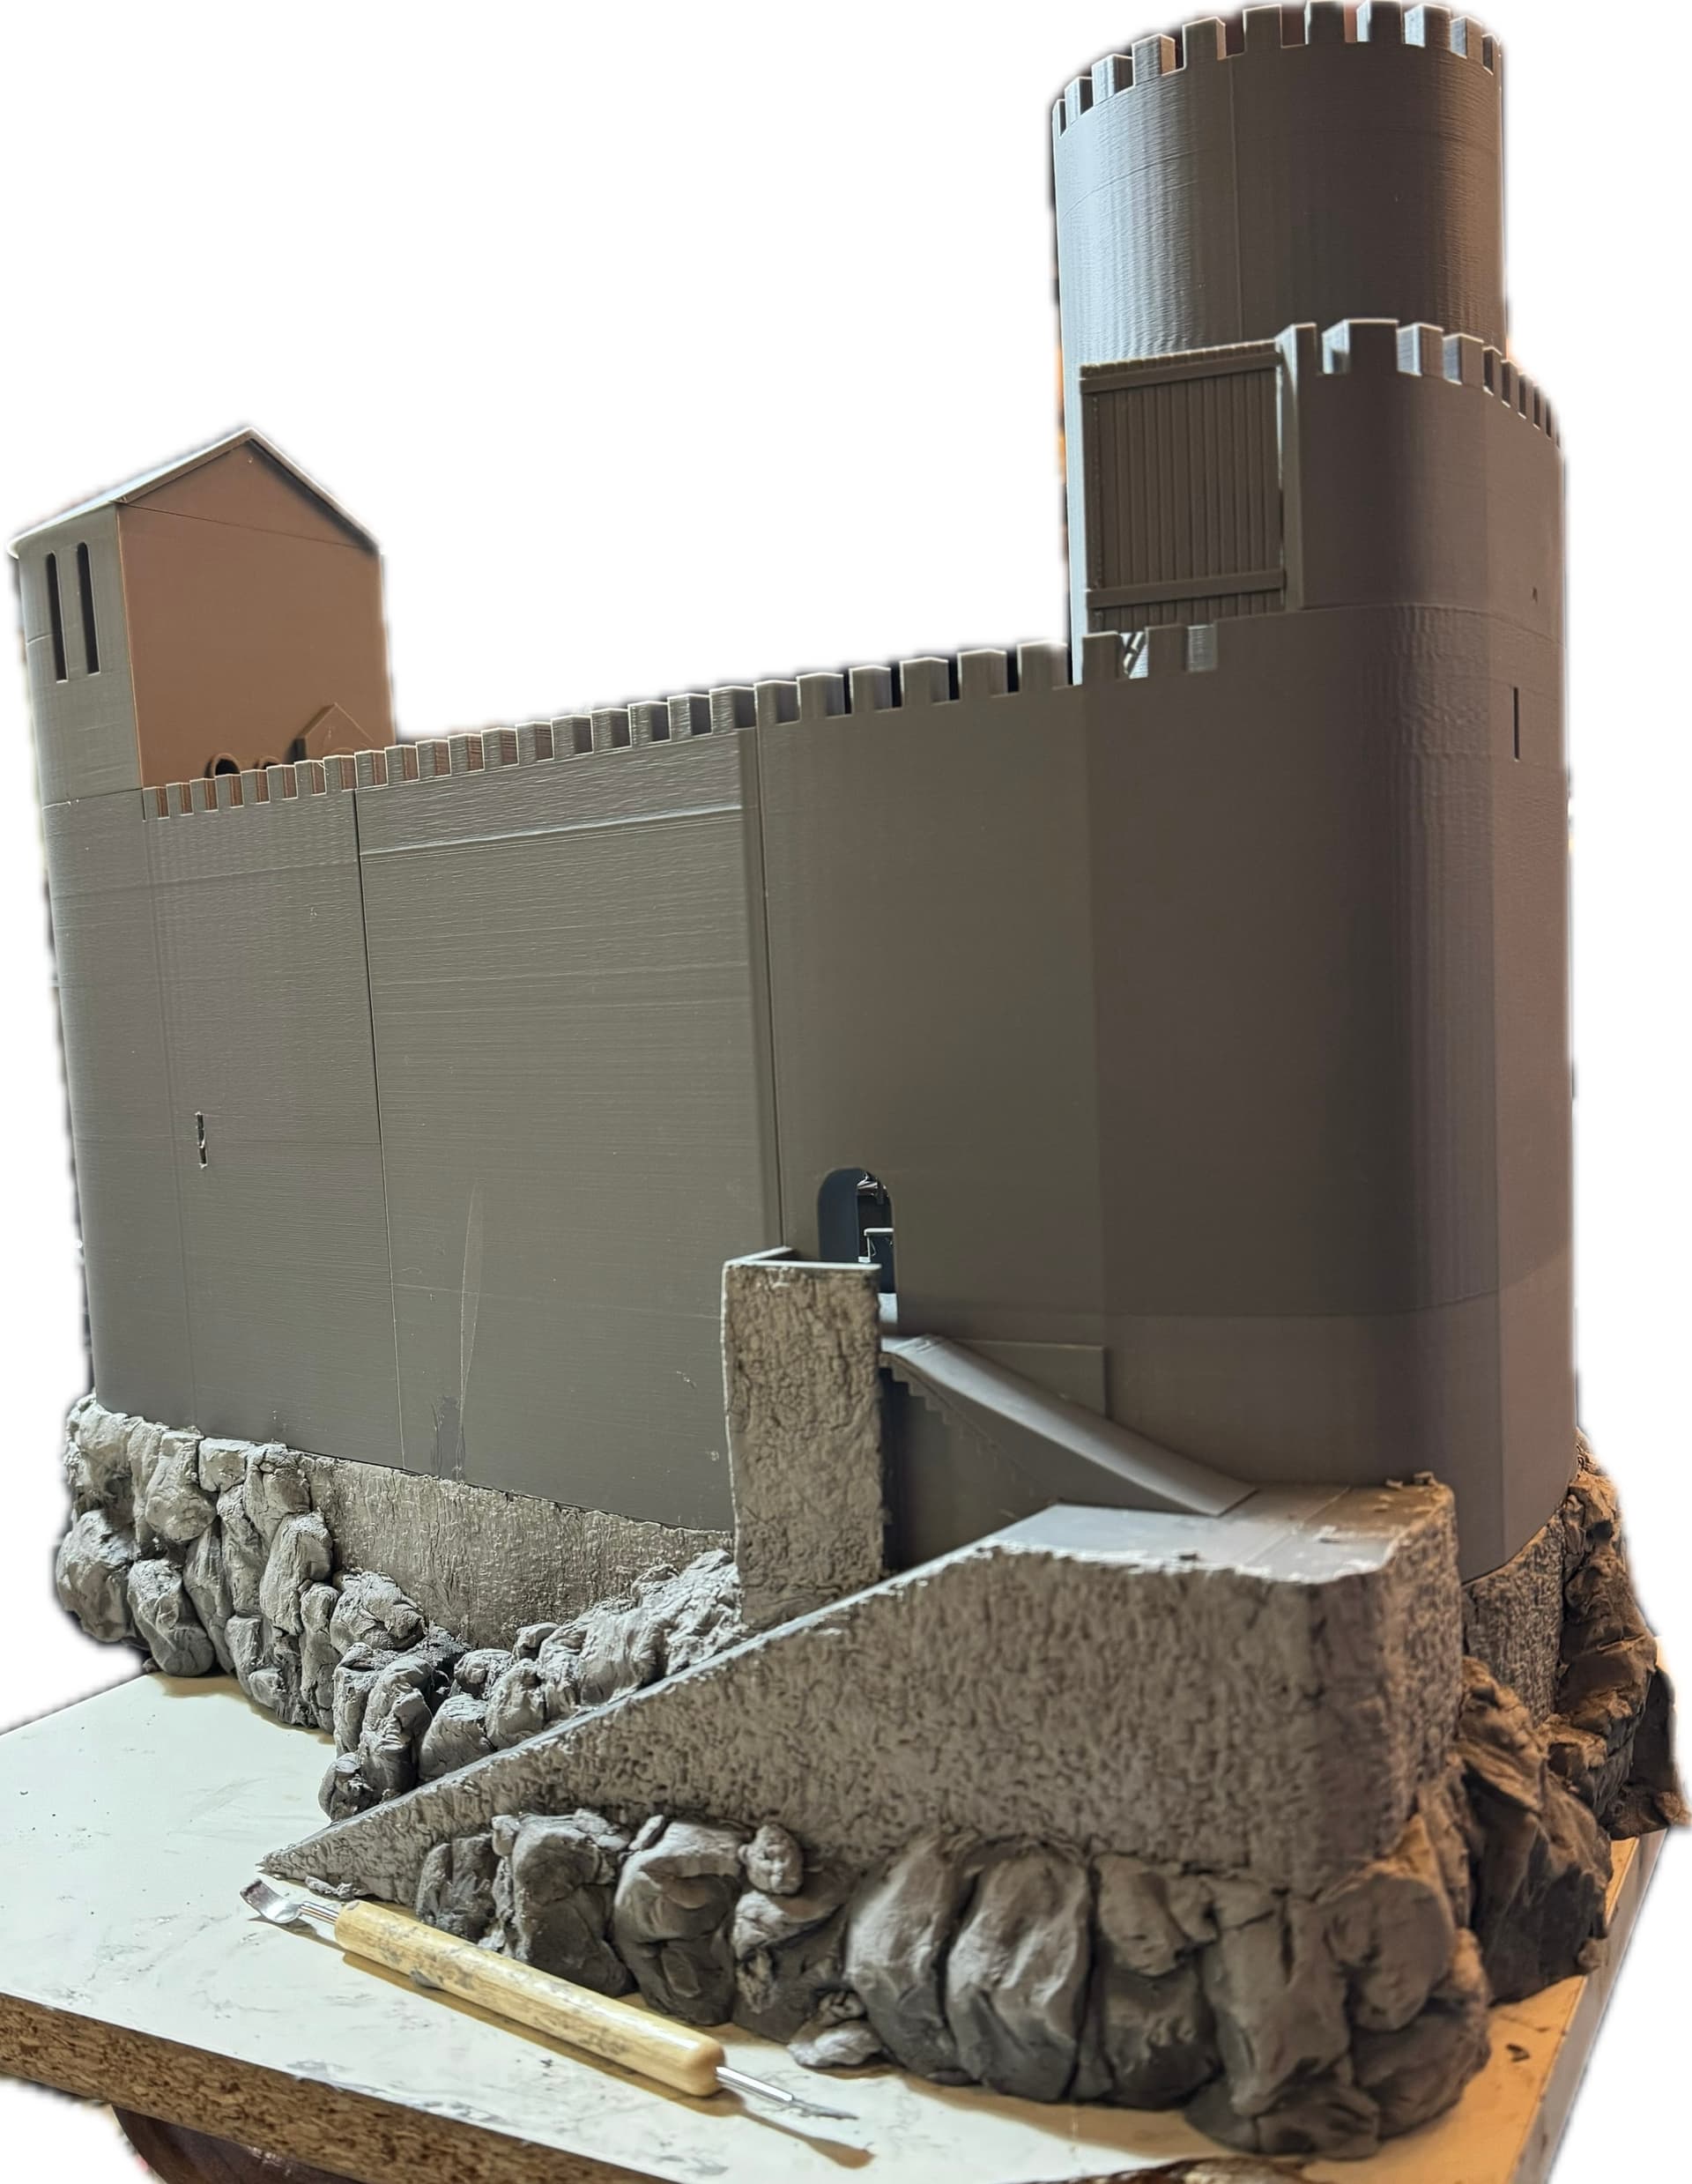
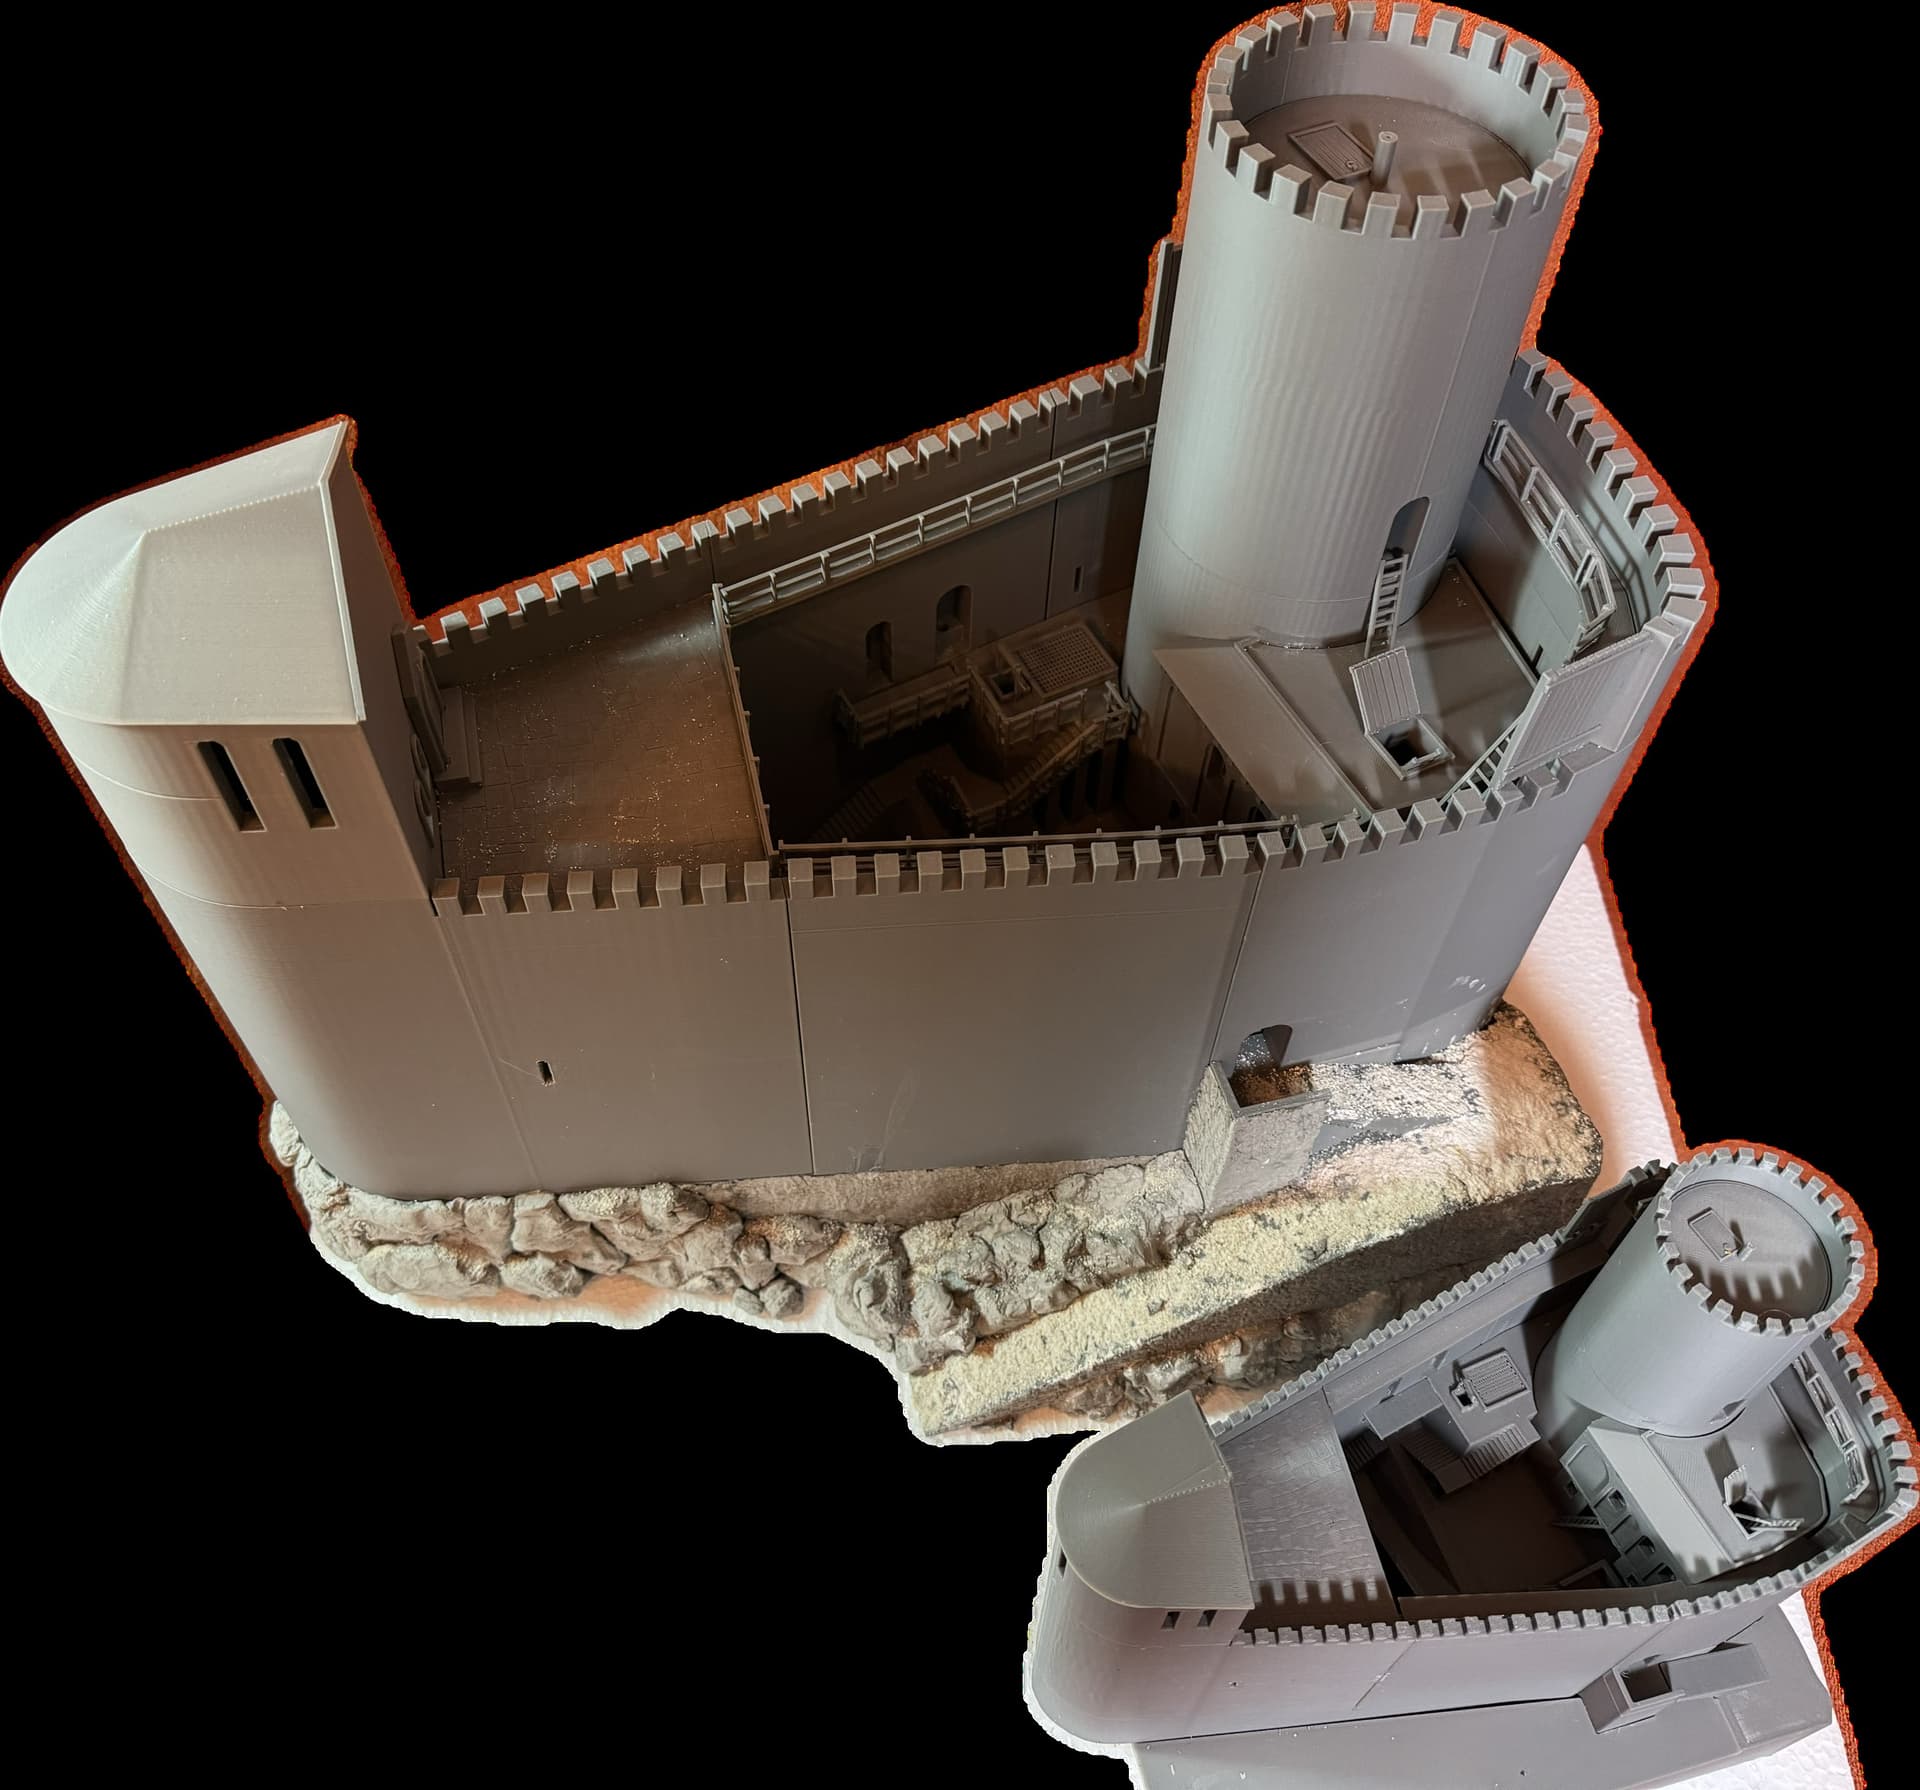
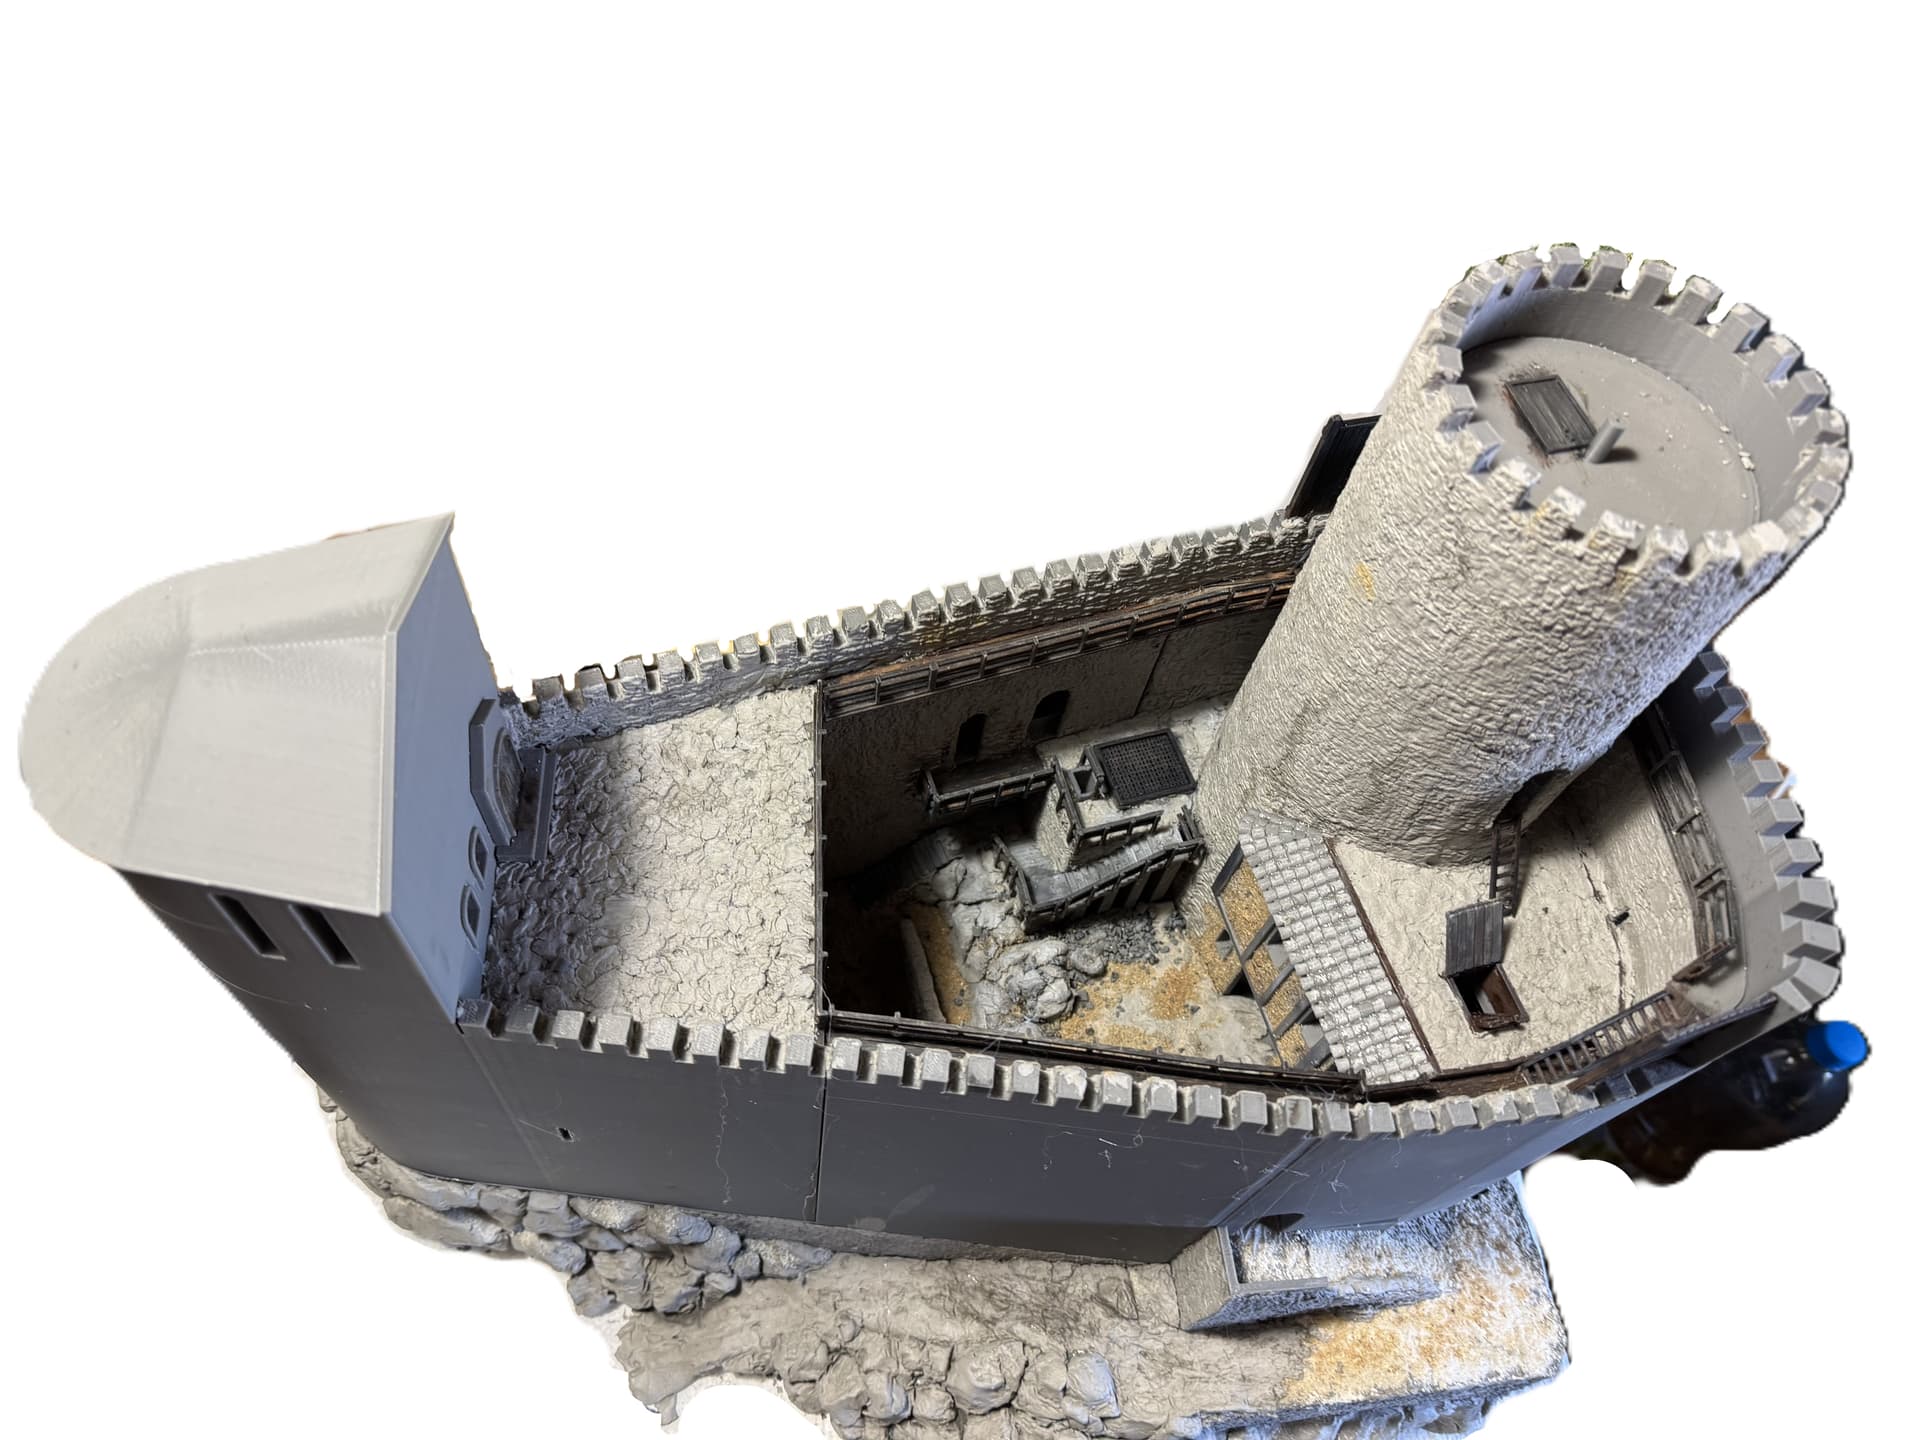
I’ve also been able to make further progress here.
This has been waiting for some time. So, part of the courtyard was modeled over the last few days.
Again, following the familiar procedure:
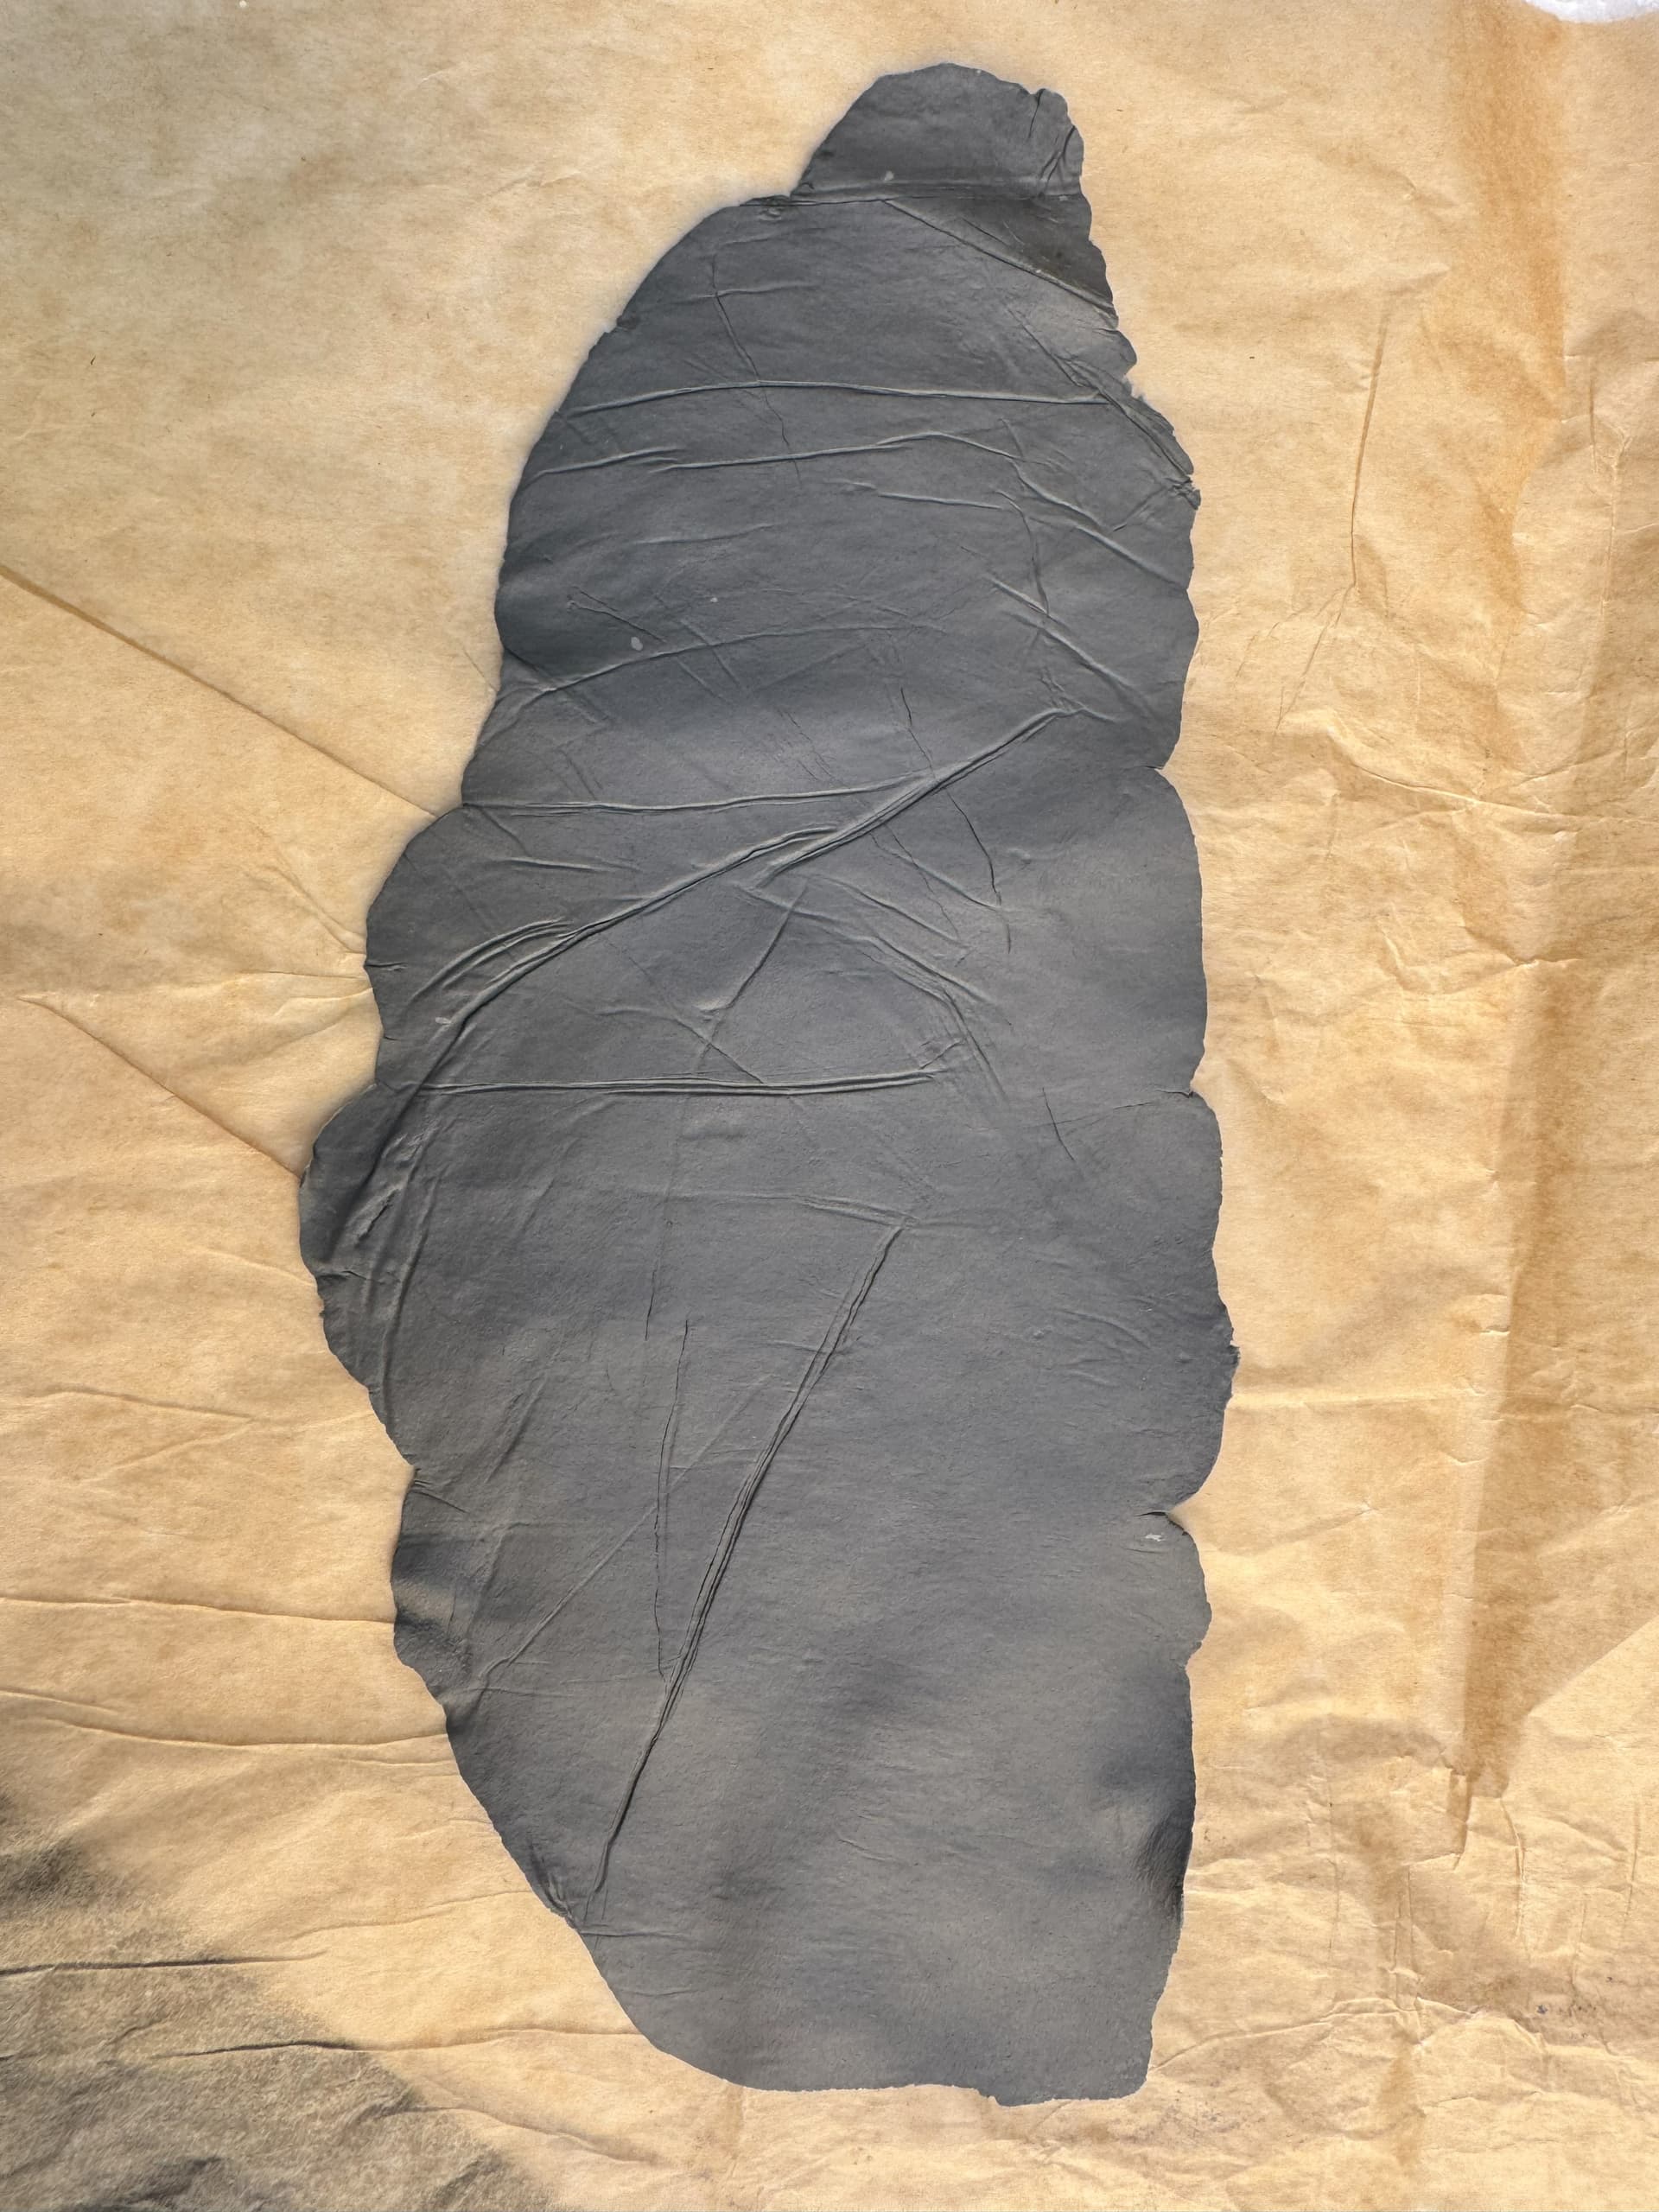
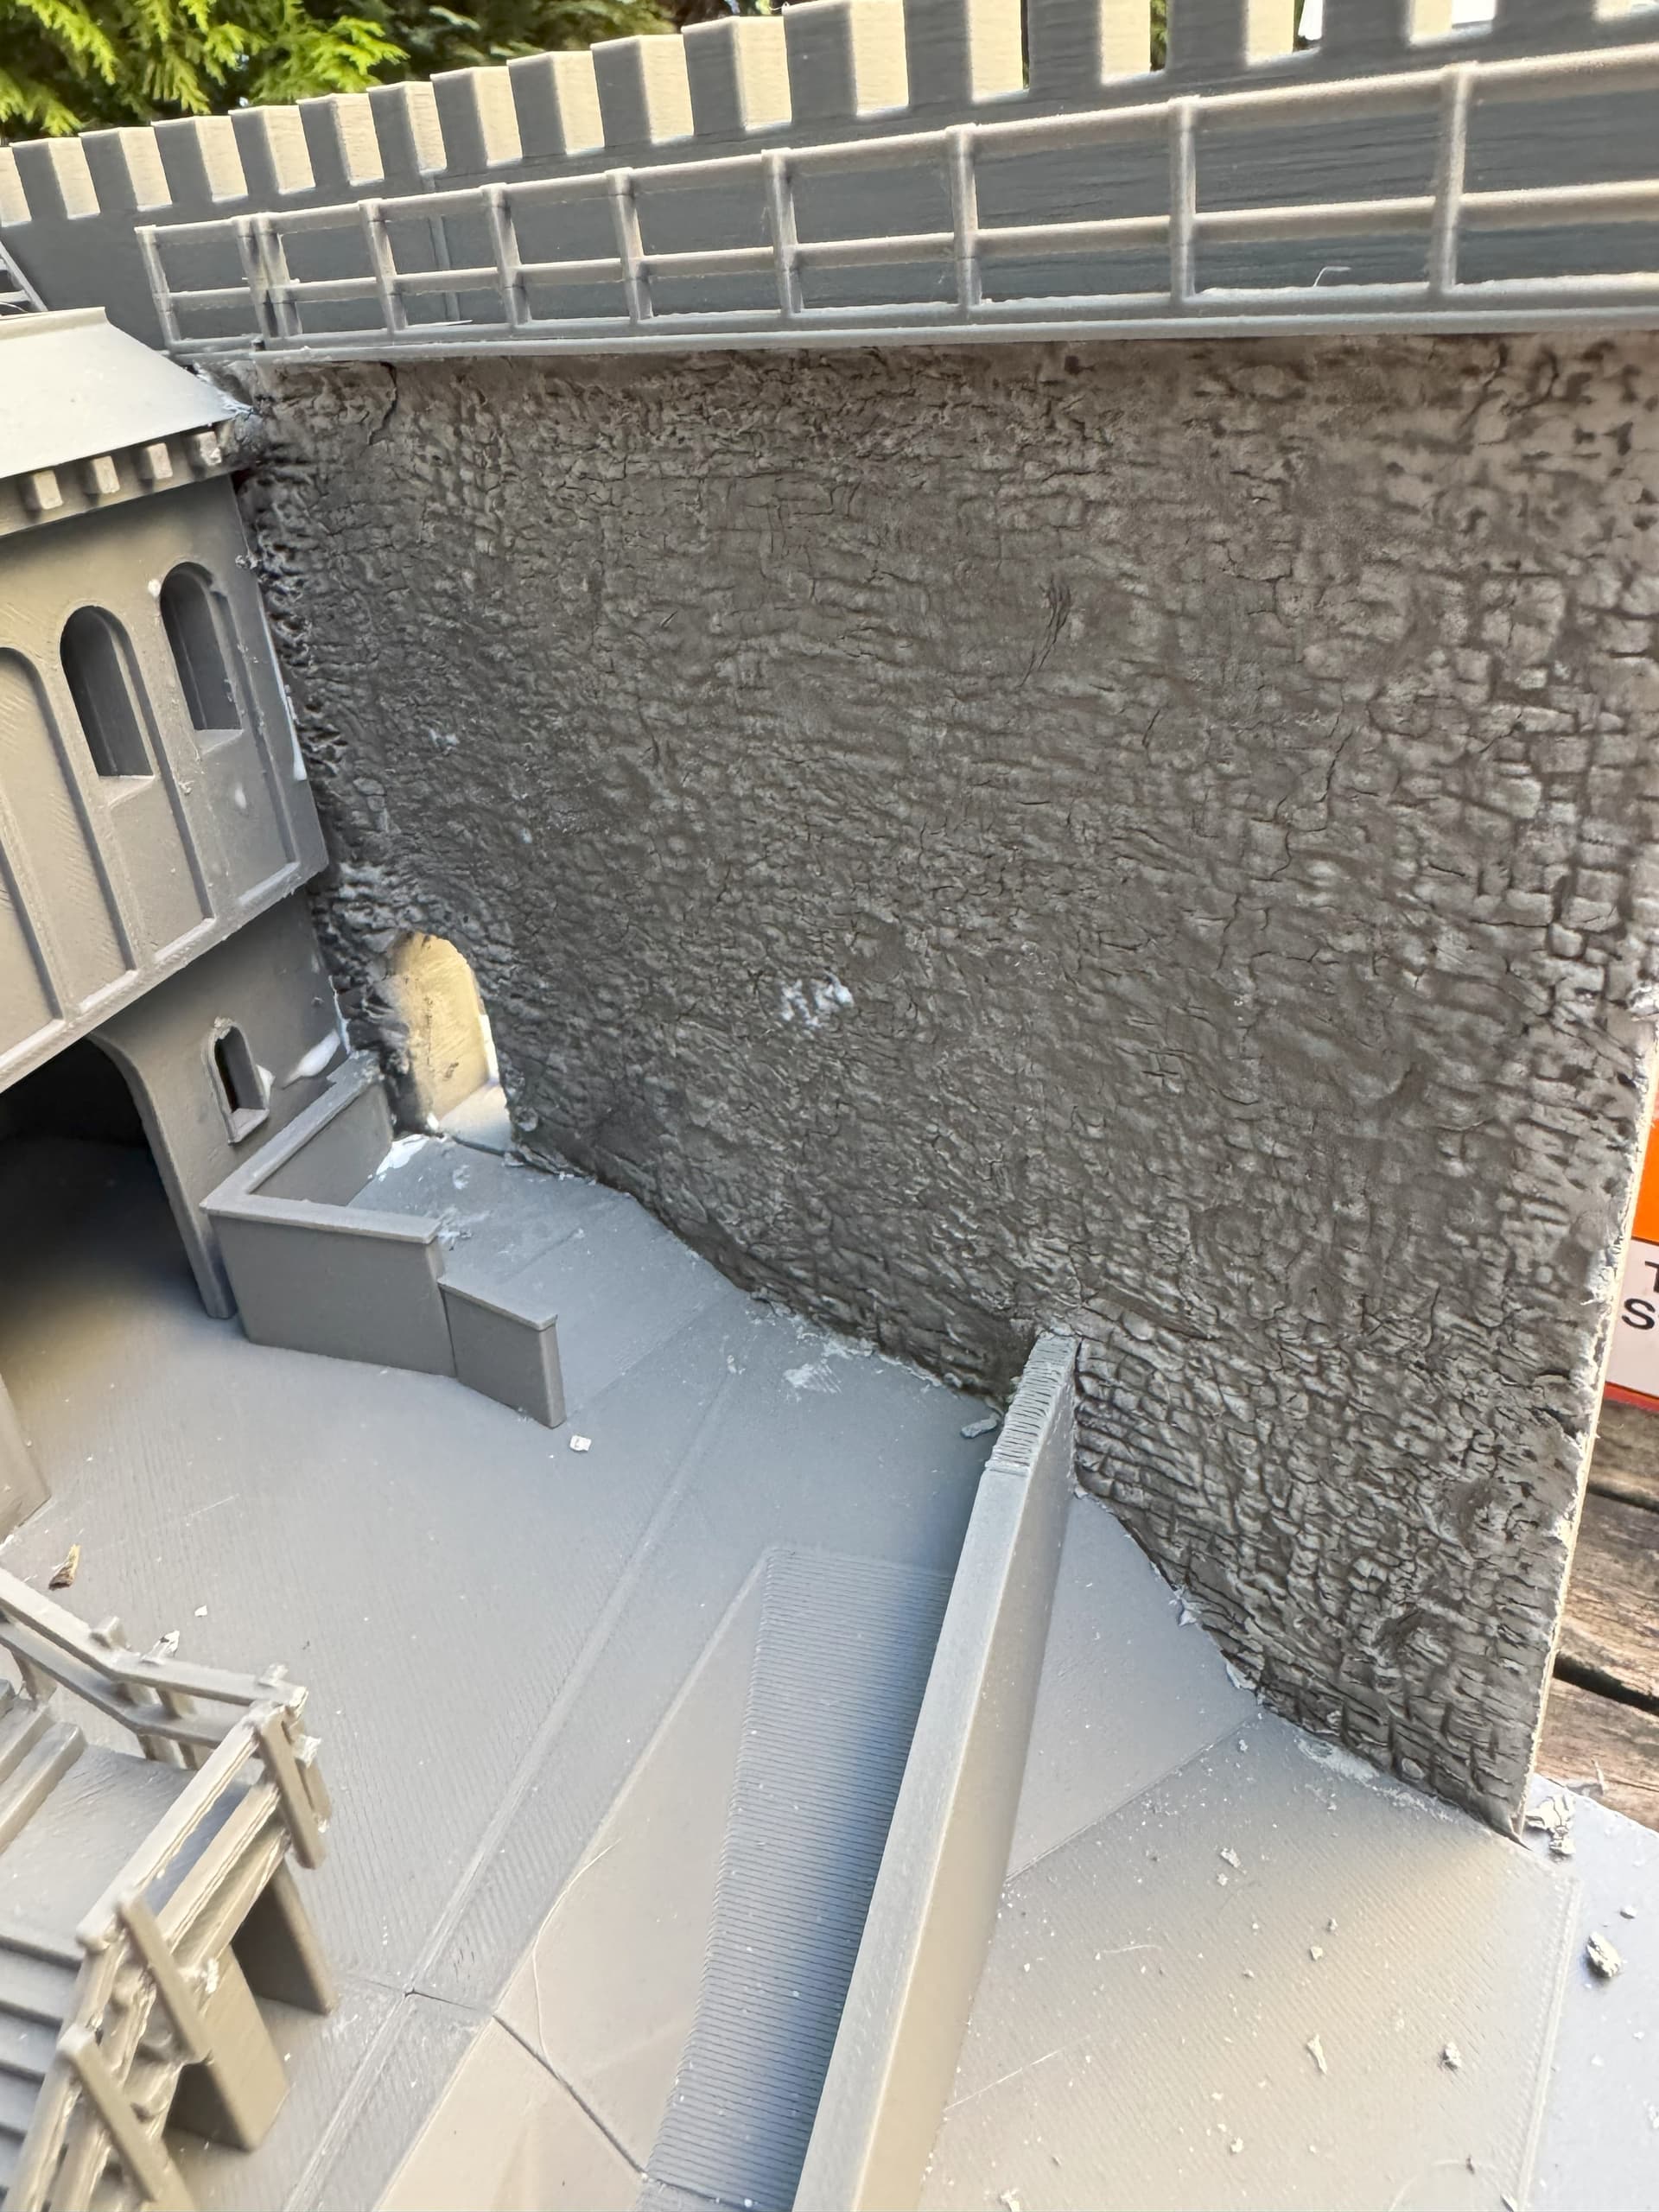
Self-hardening modeling clay (DAS Stone from Amazon) was rolled with a rolling pin to a thickness of approximately 2 mm, the intended area was coated with white glue, and the modeling clay was pressed down. Openings were cut out. Then textured with a texture roller. The areas that were inaccessible to the texture roller were textured with a modeling spatula. Everything was carefully pressed down to smooth out any raised areas. The openings were reworked.
The work continues:
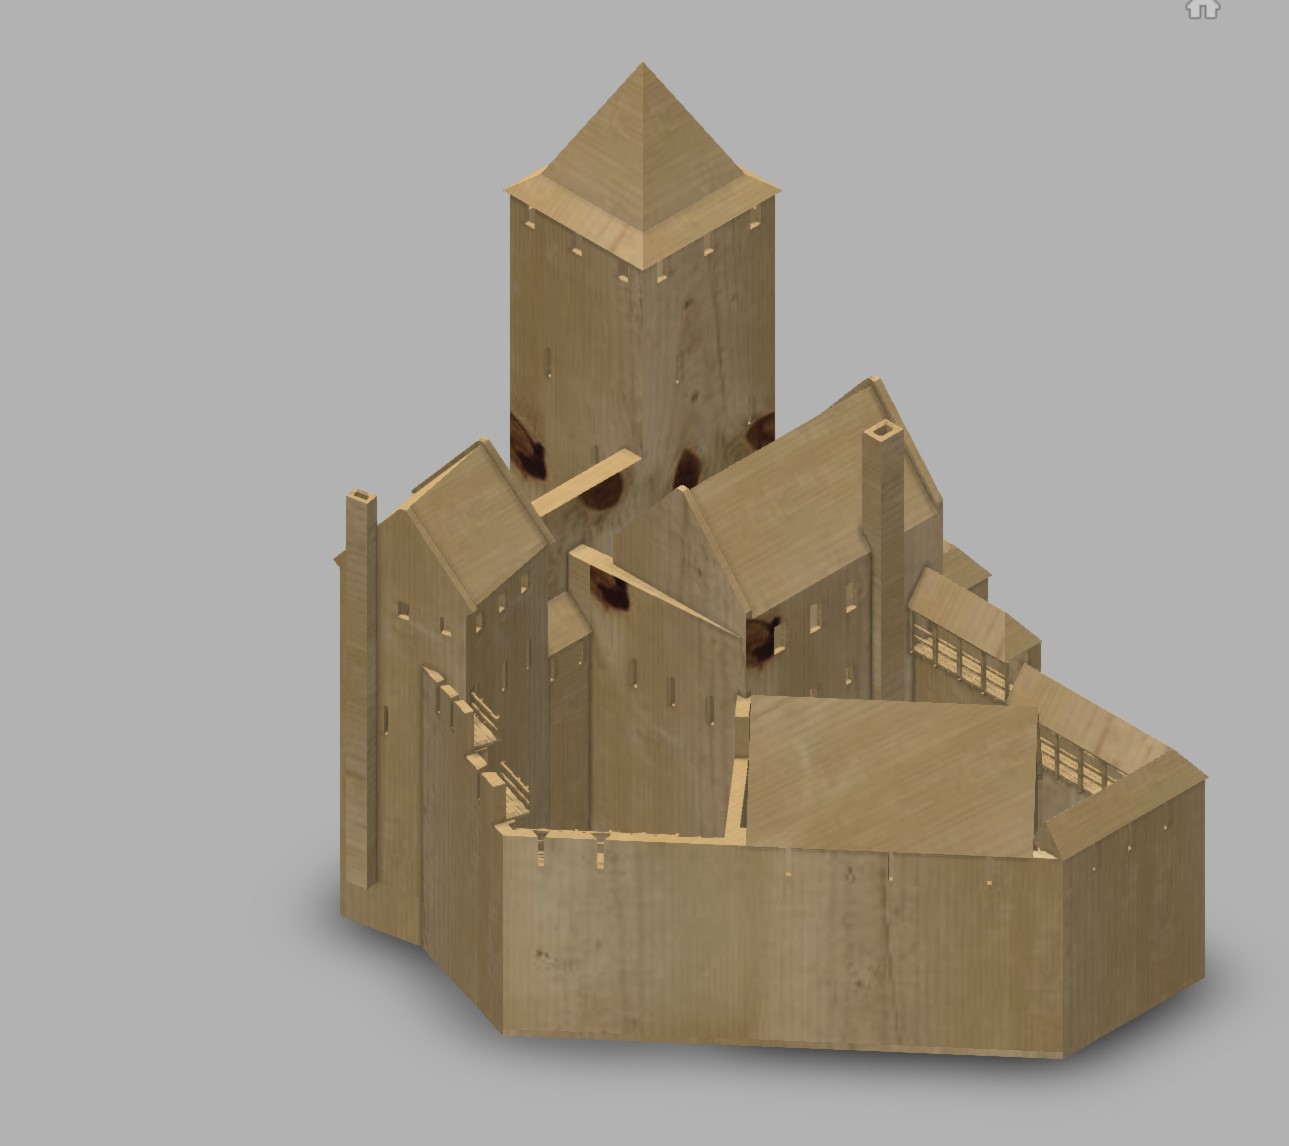
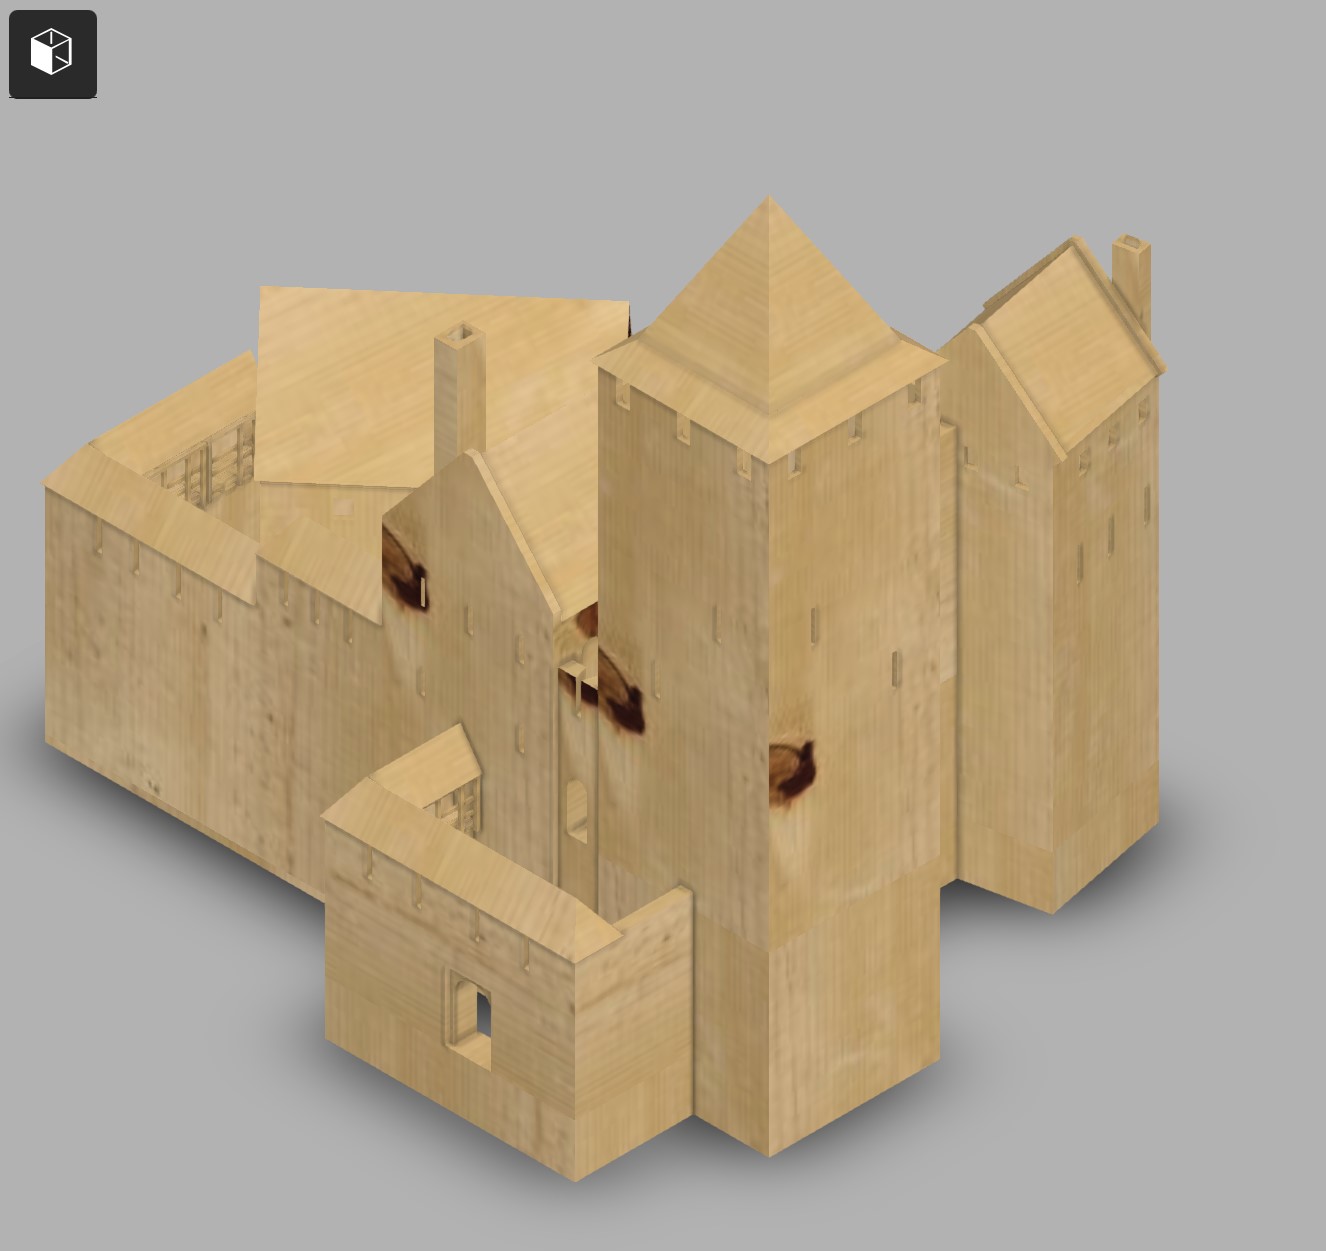
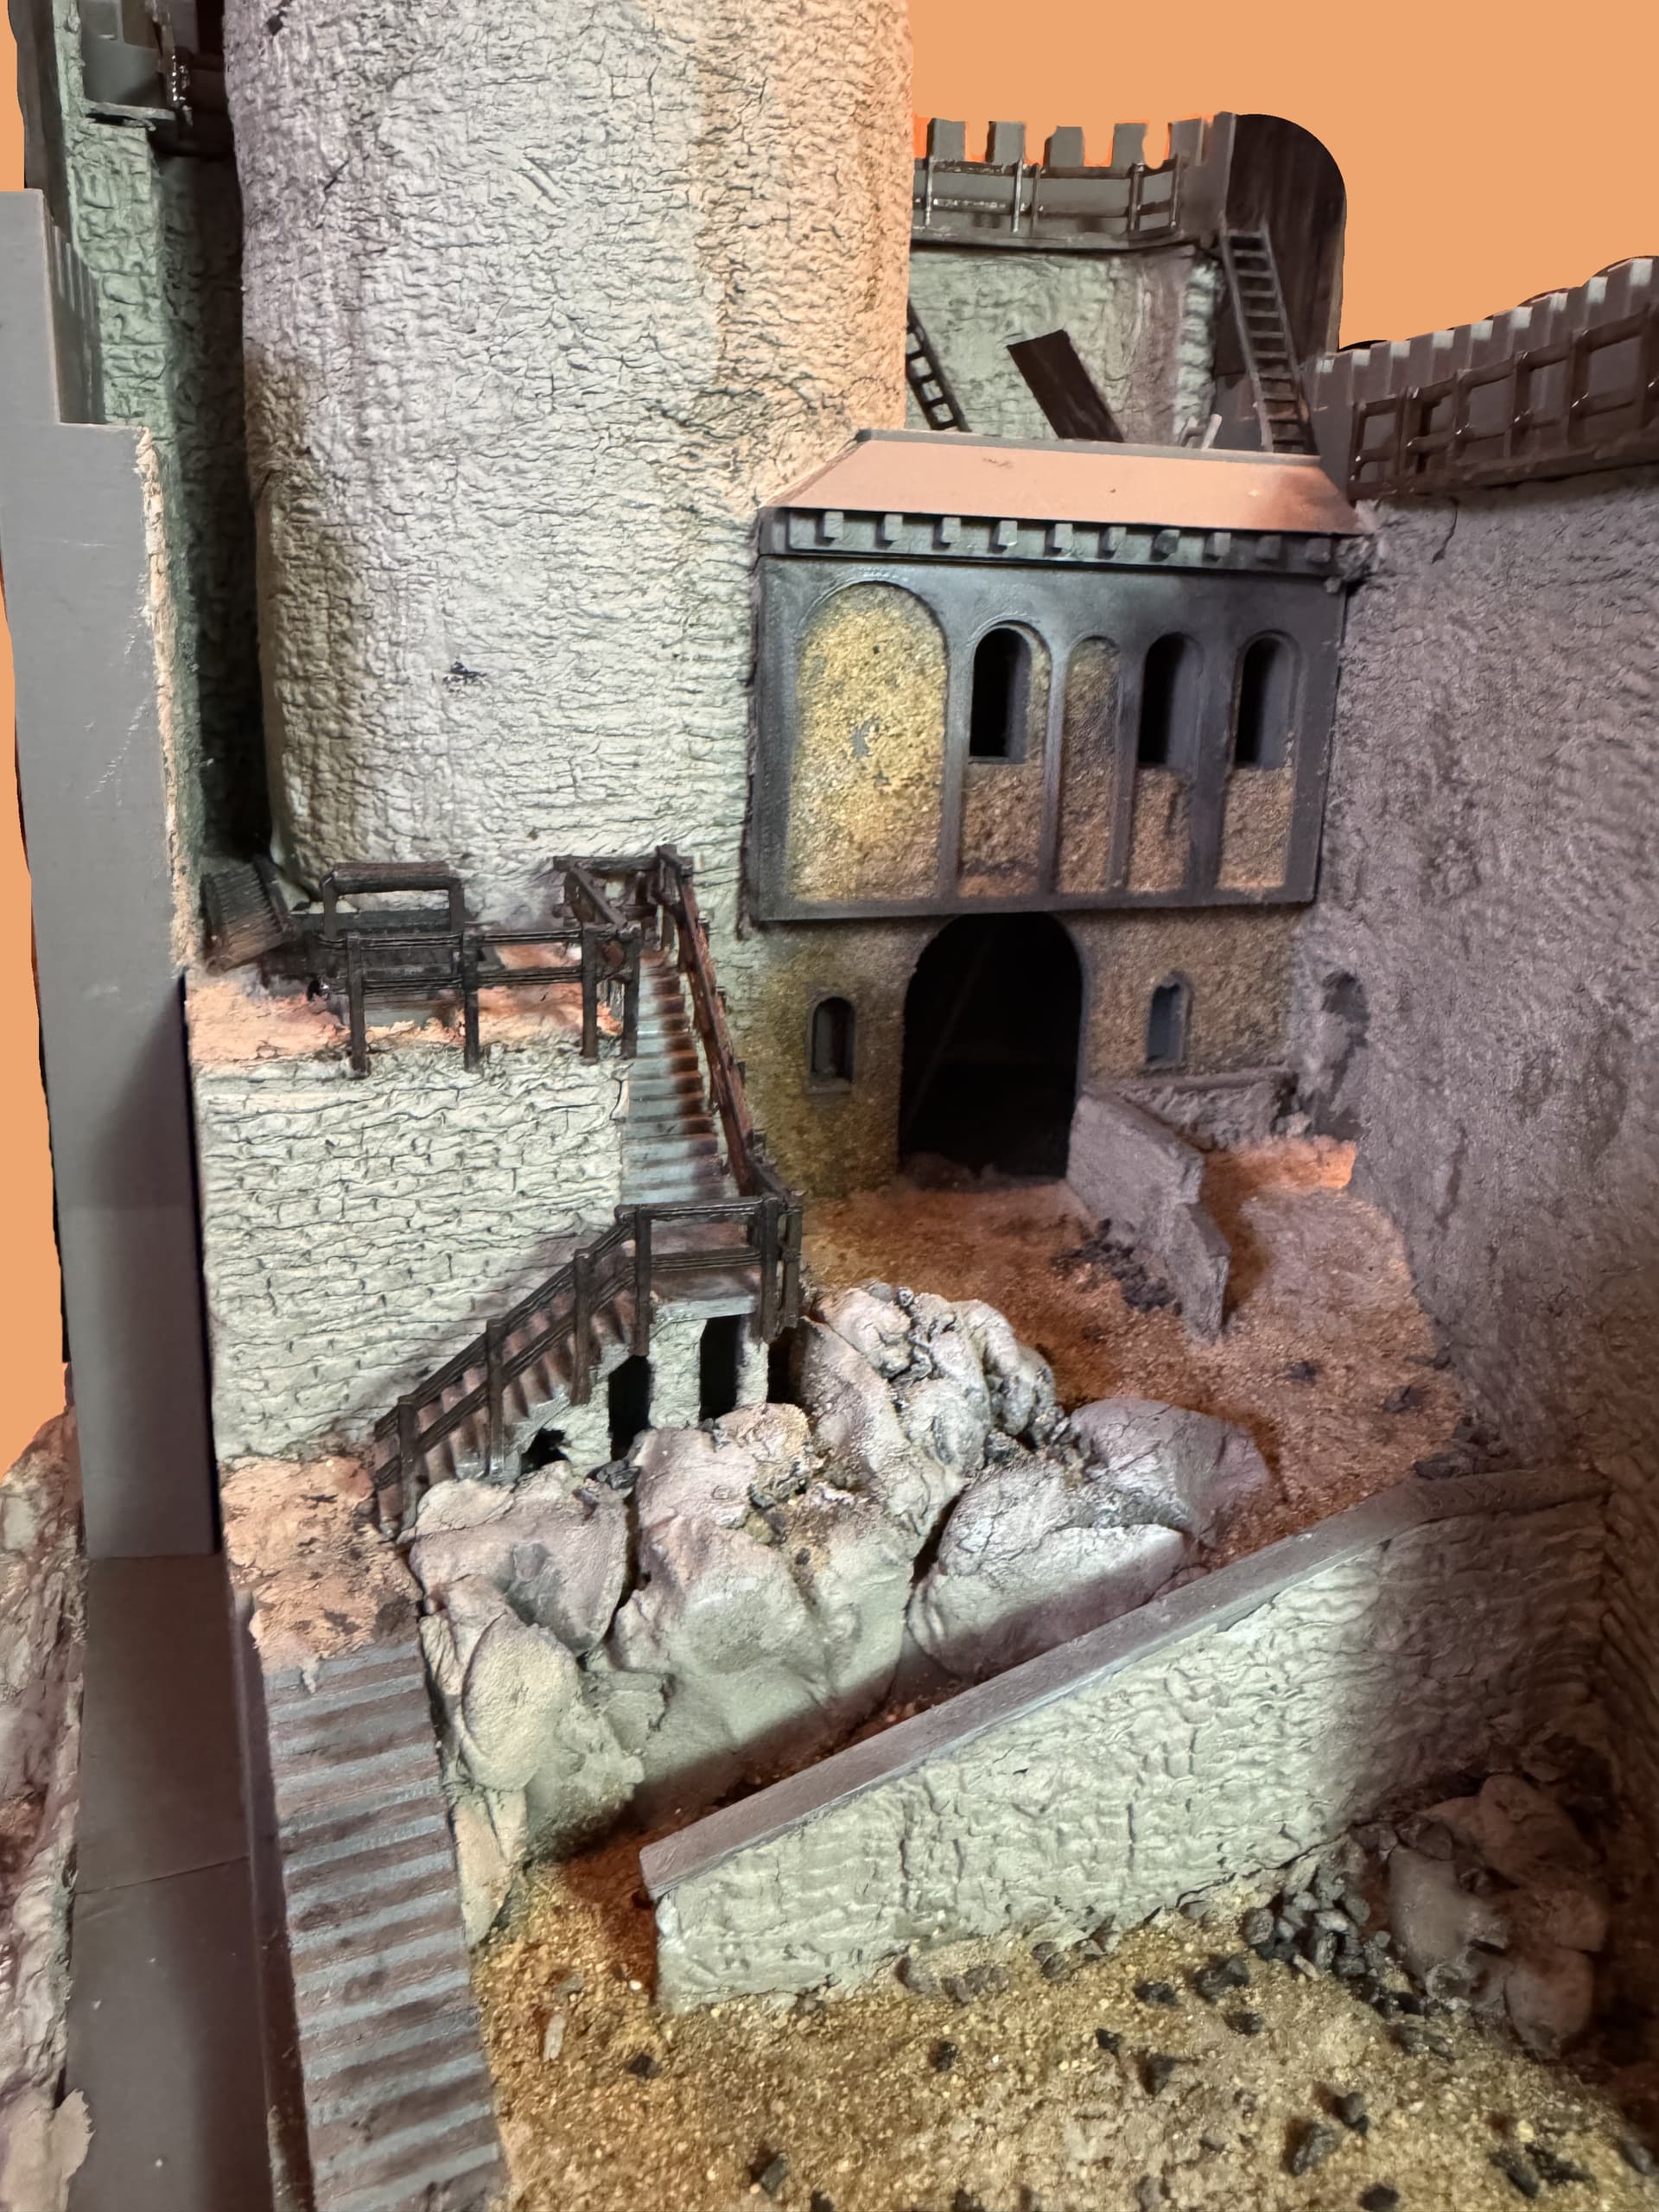
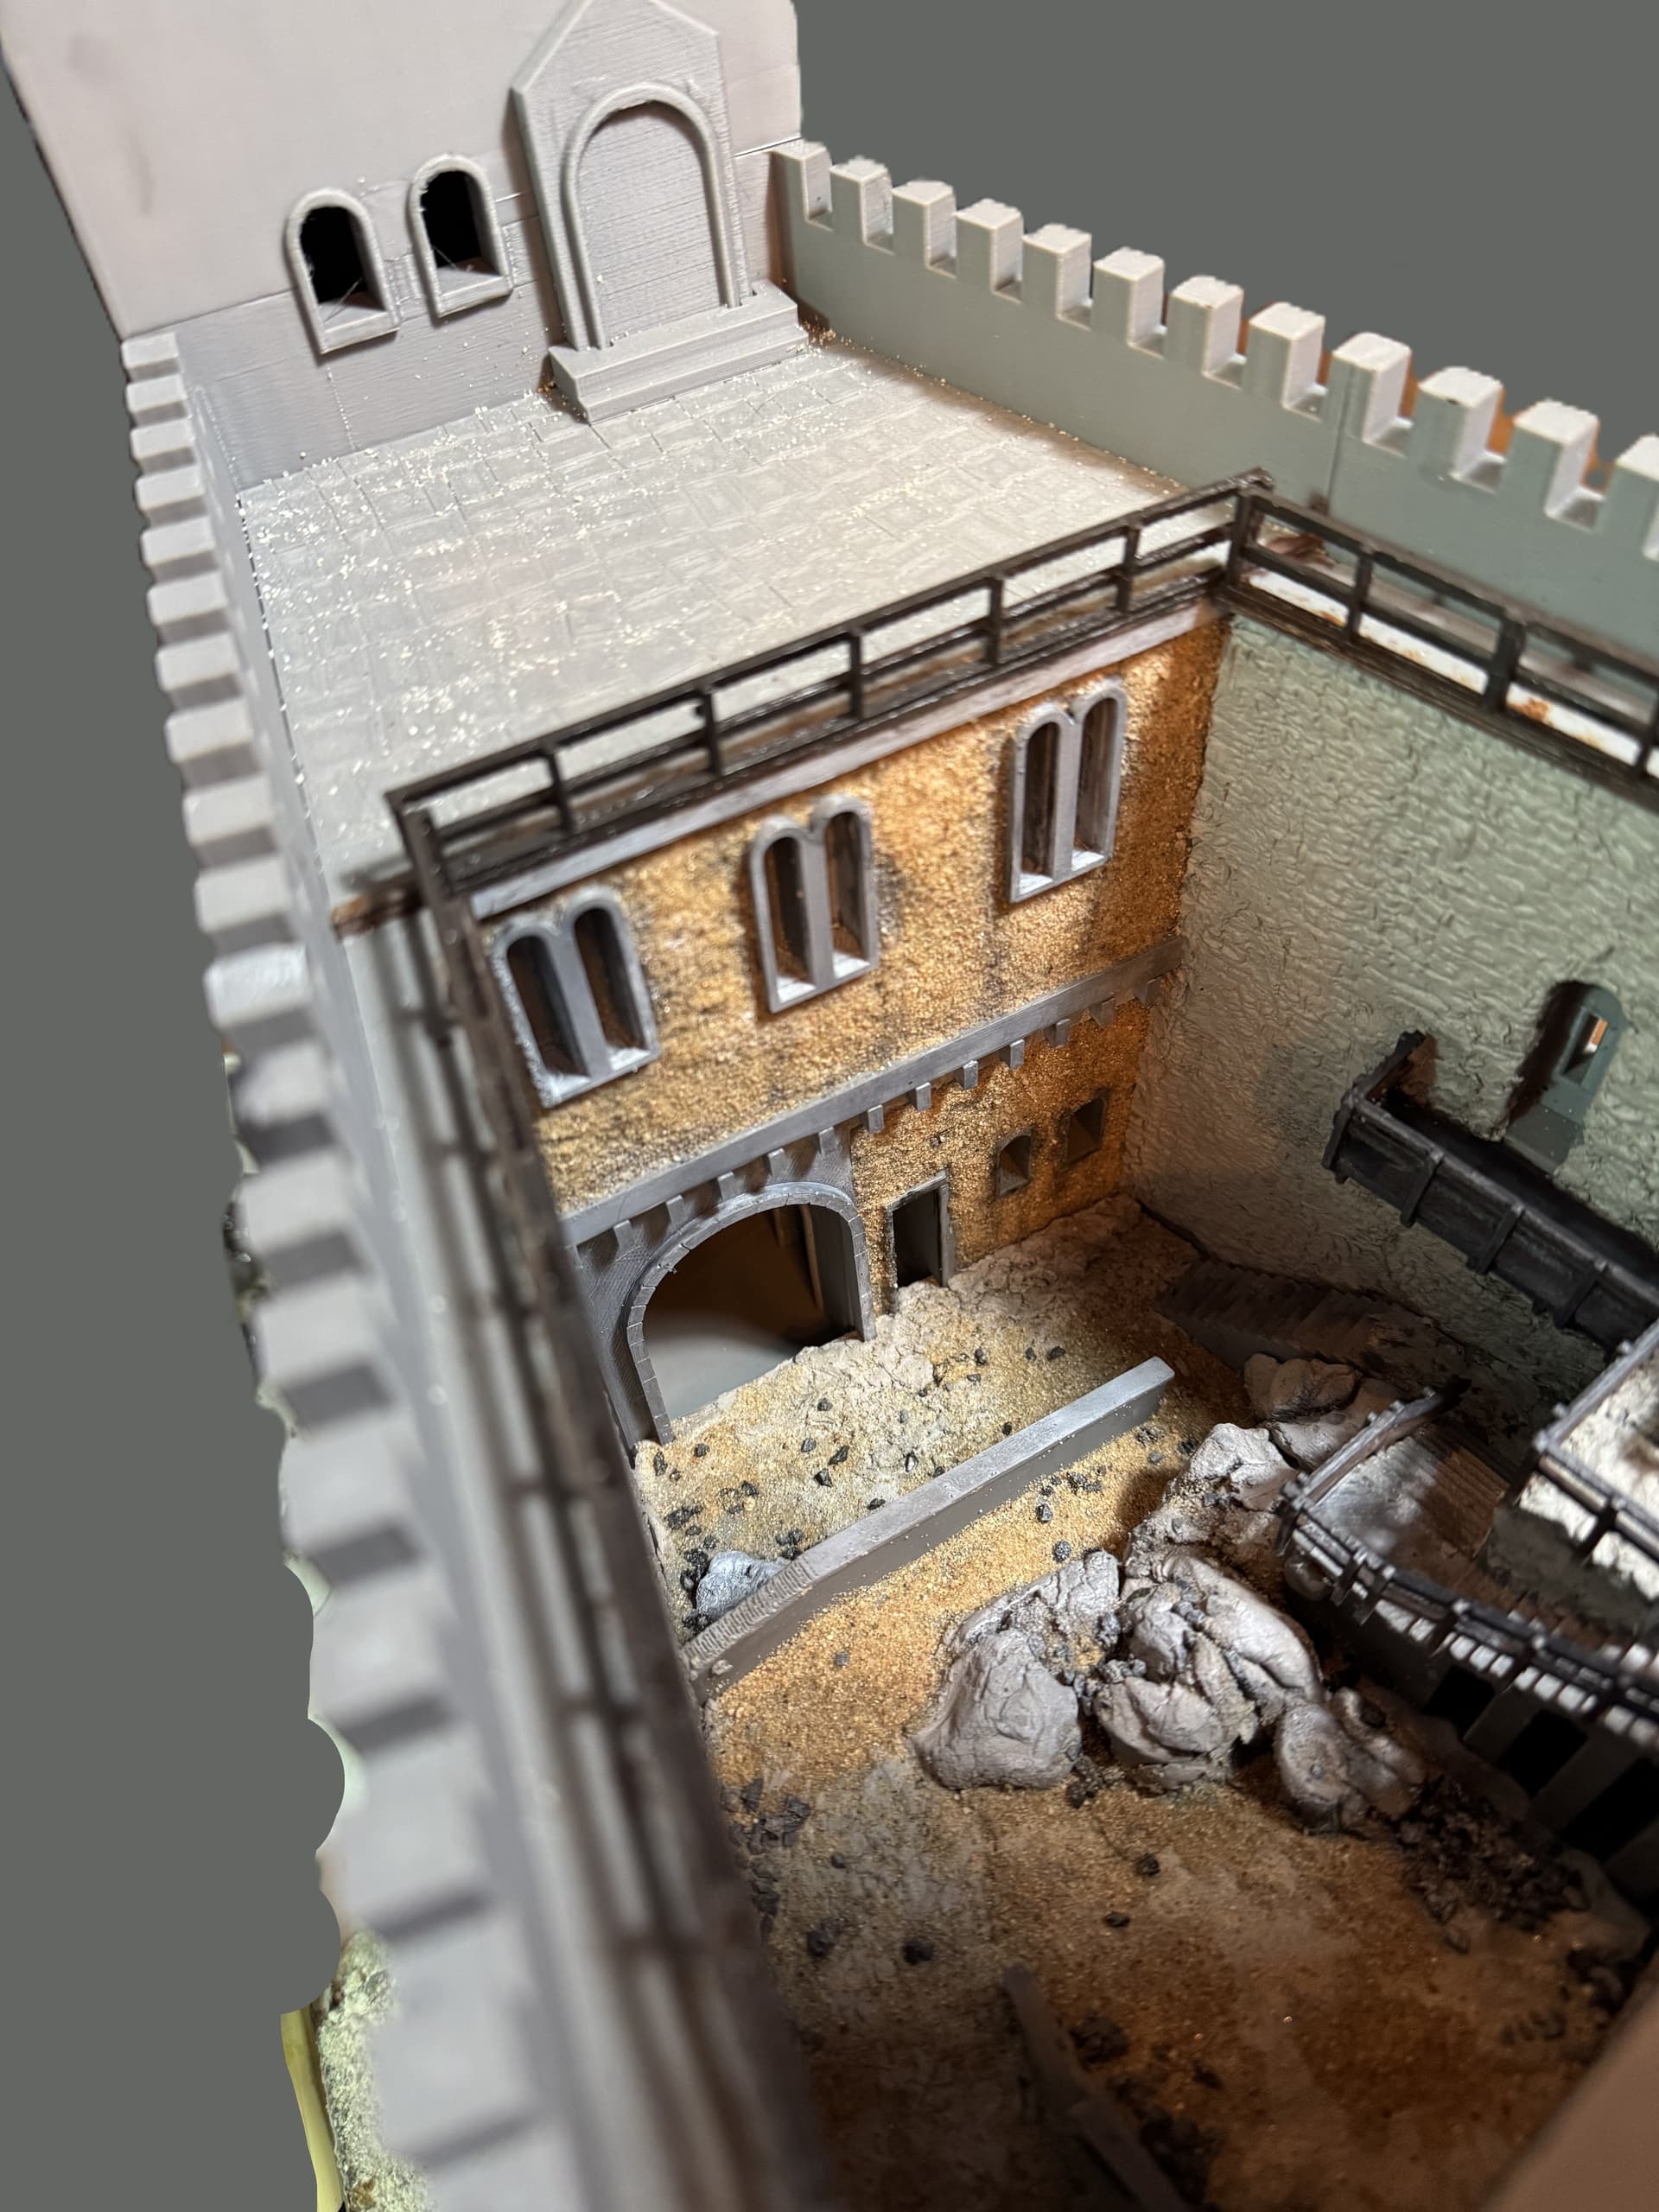
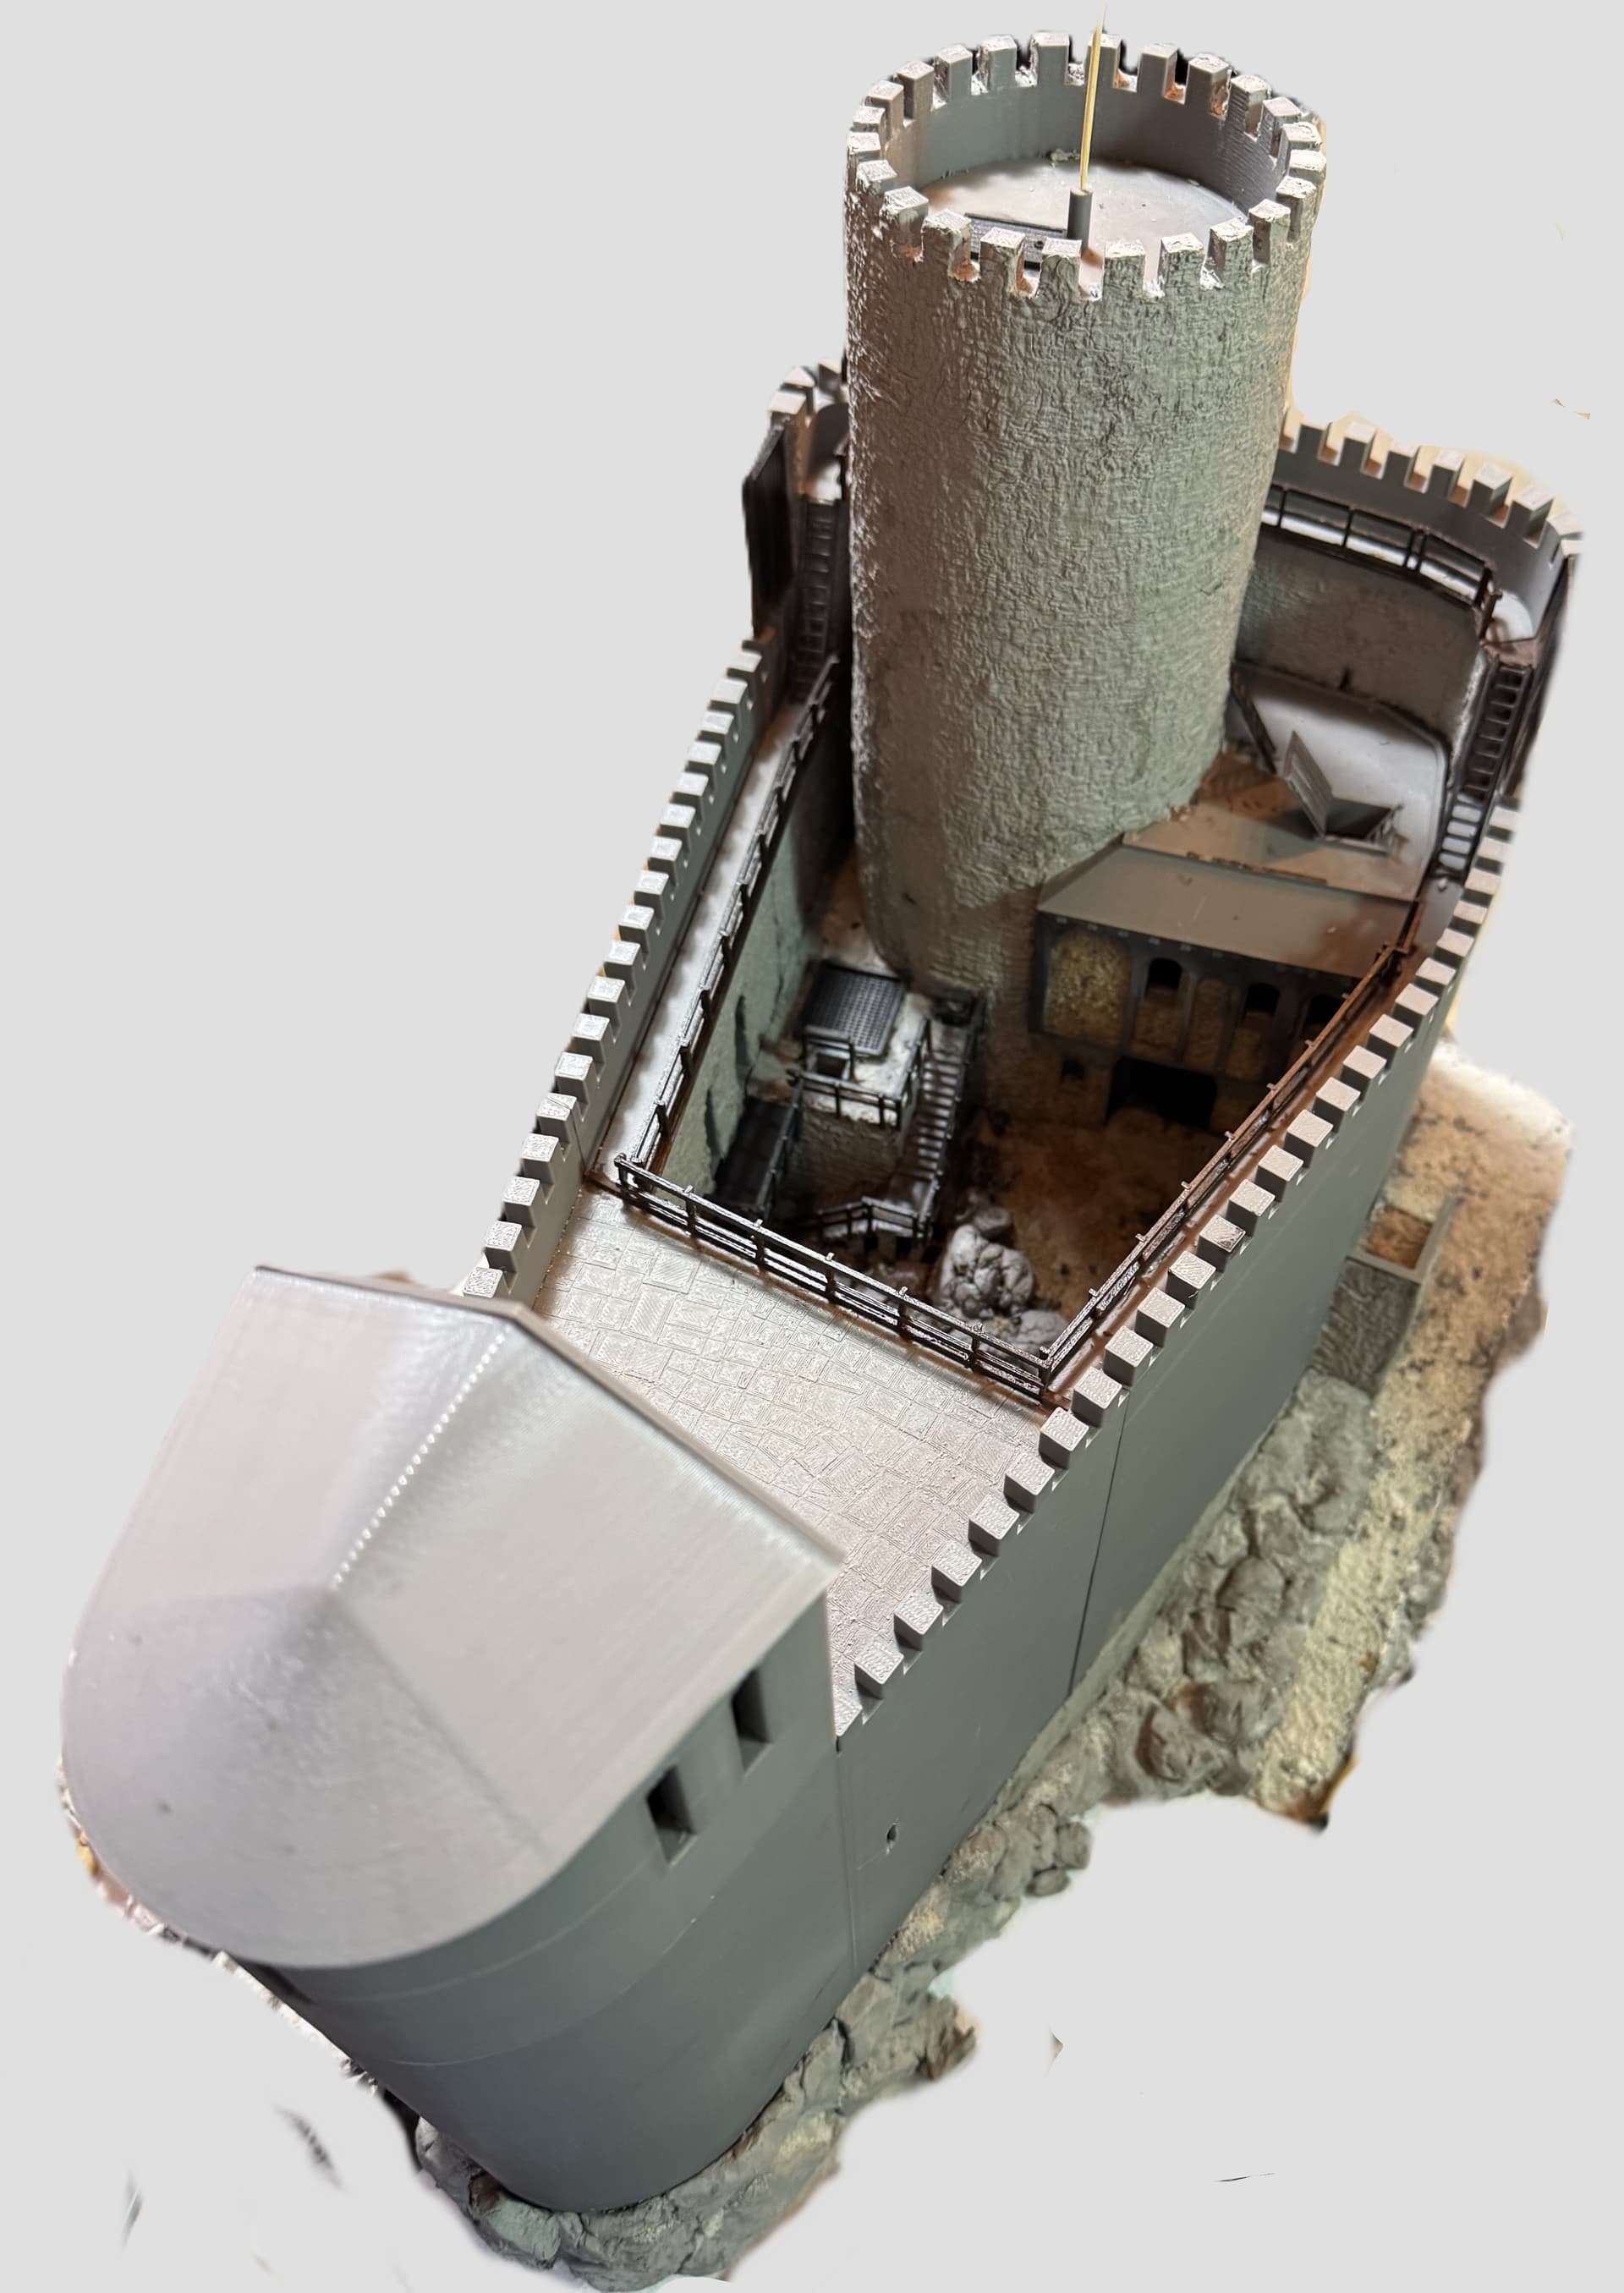
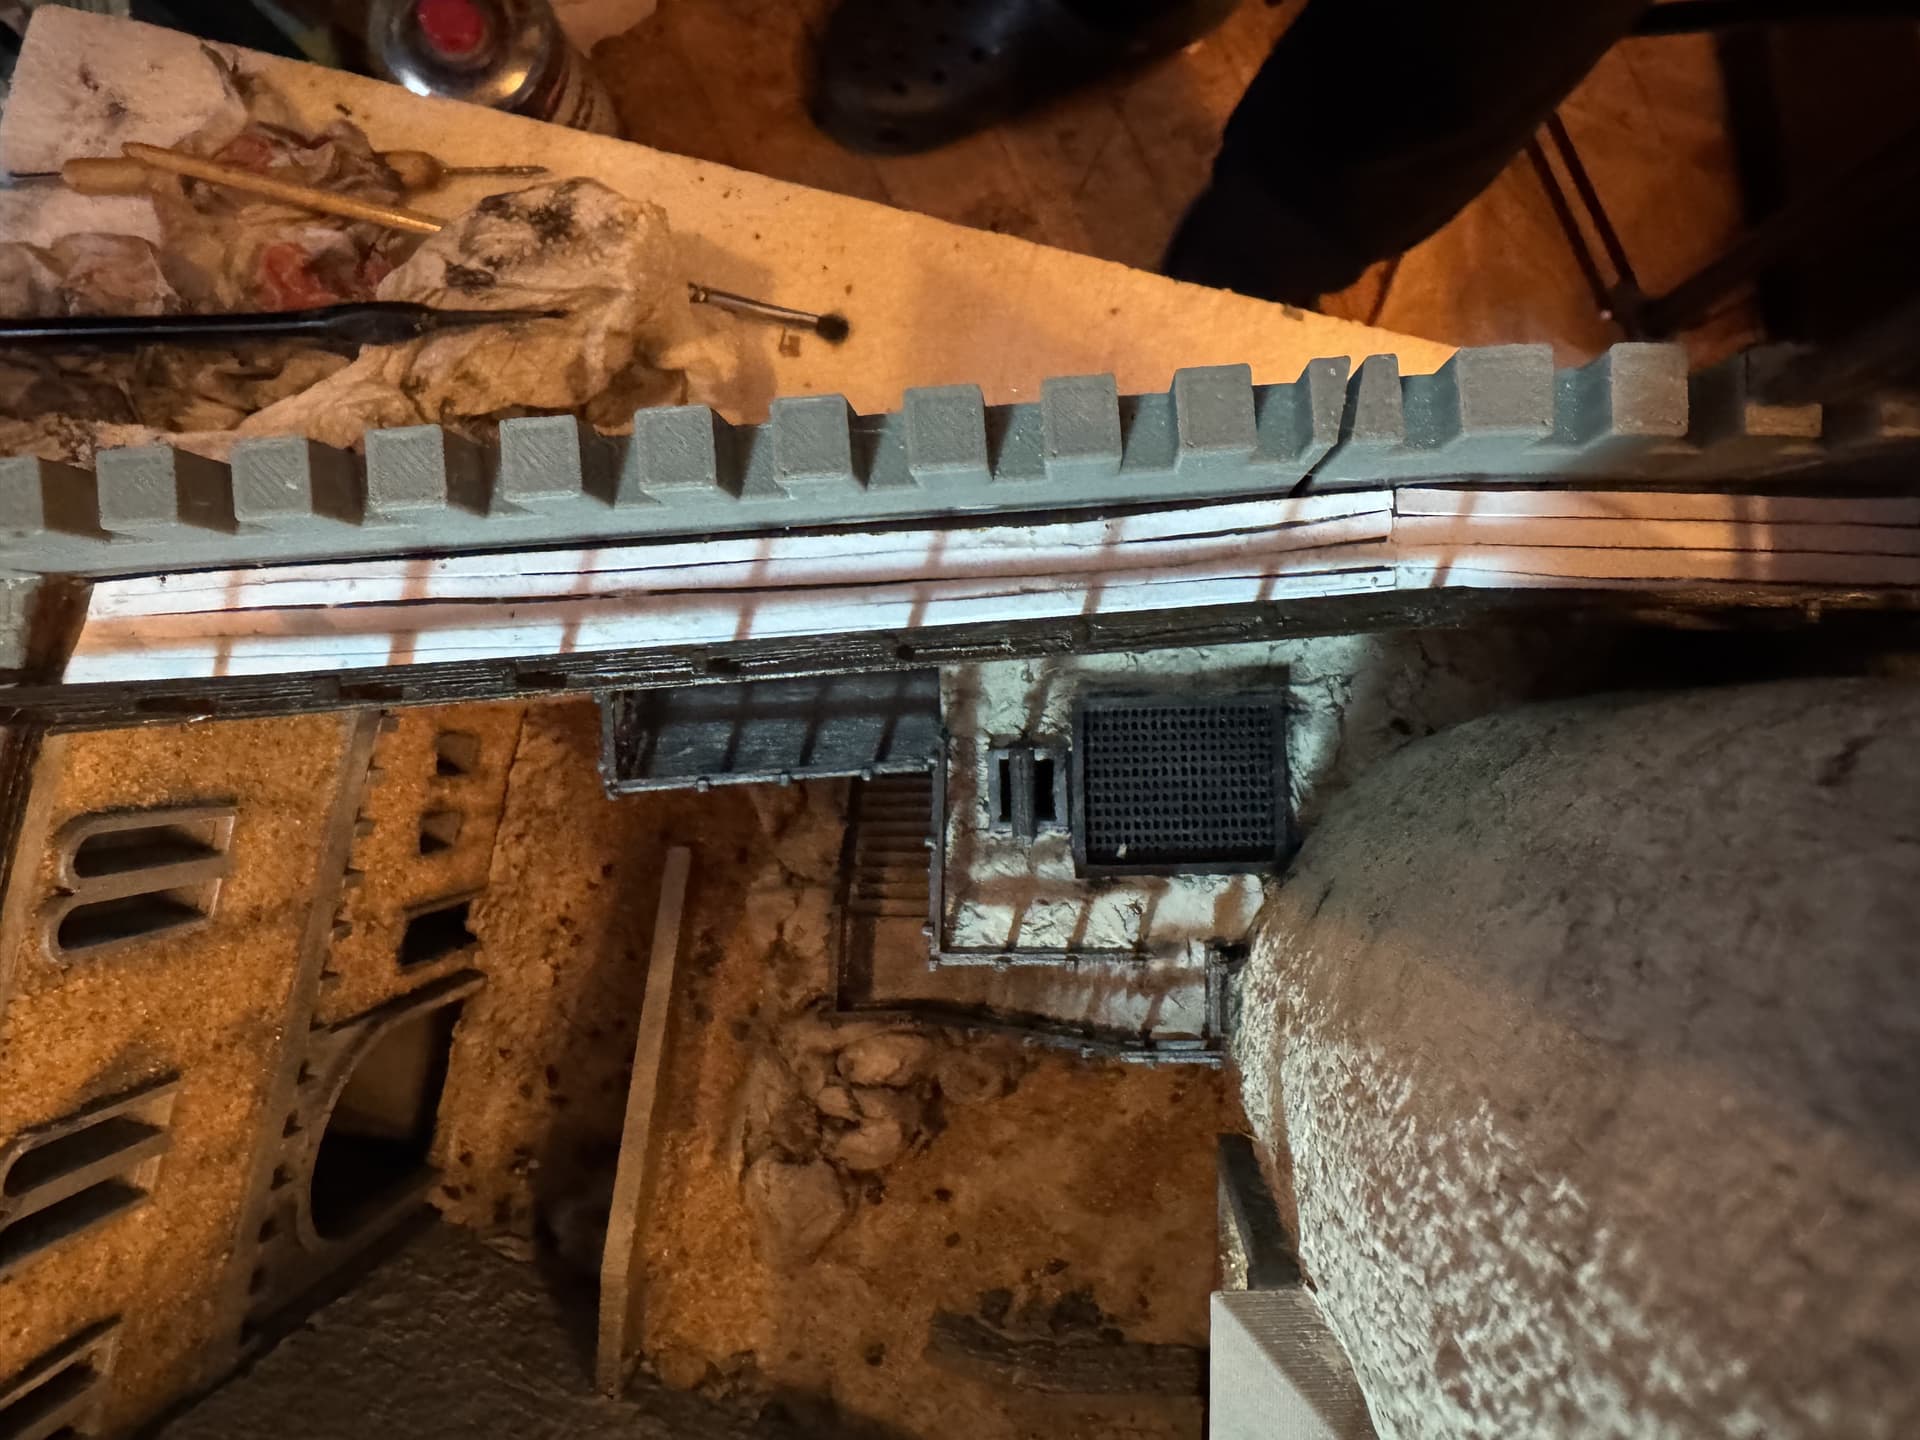
The keep received its “masonry.” The courtyard was modeled and given its first color. The facade of the Pallas and the servants’ quarters/stable were treated with jointing sand.
A photo of the interior of the courtyard and the process for the walkway of the curtain wall. “Wood planking” was made of artist’s cardboard and painted. First with medium brown acrylic paint, then with black and burnt umber oil paints. After a short drying time, it was carefully rubbed down with a bristle brush – applying very light pressure.
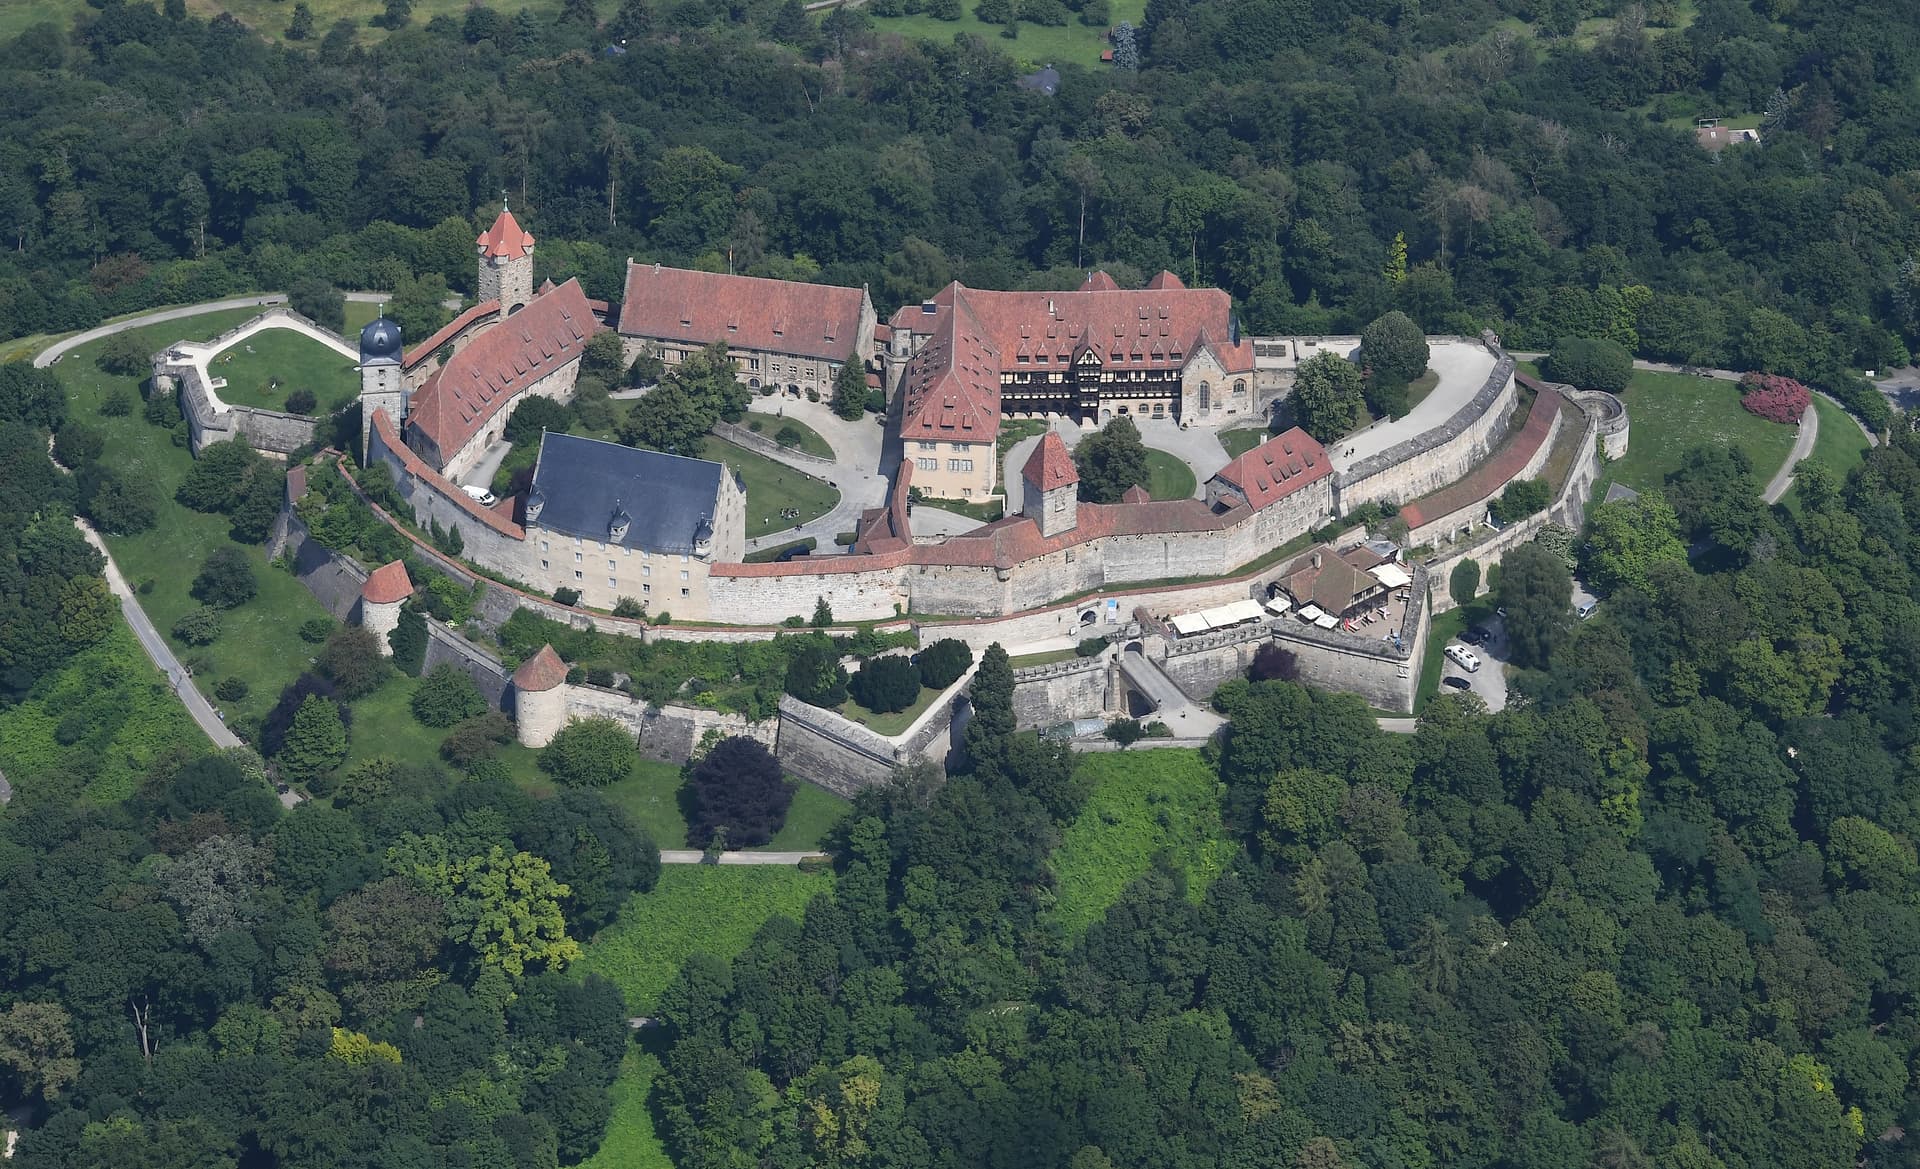
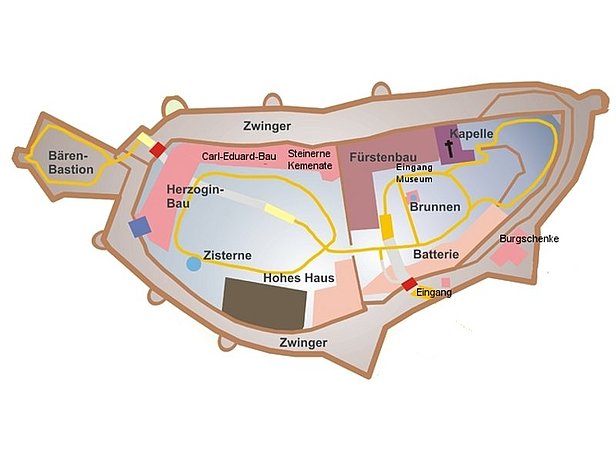
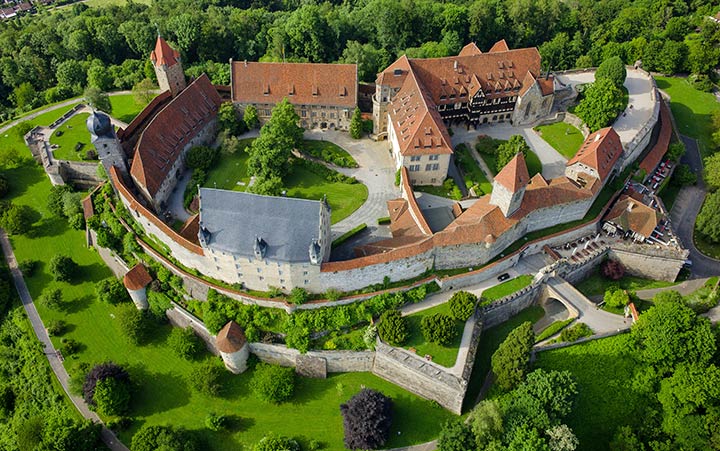
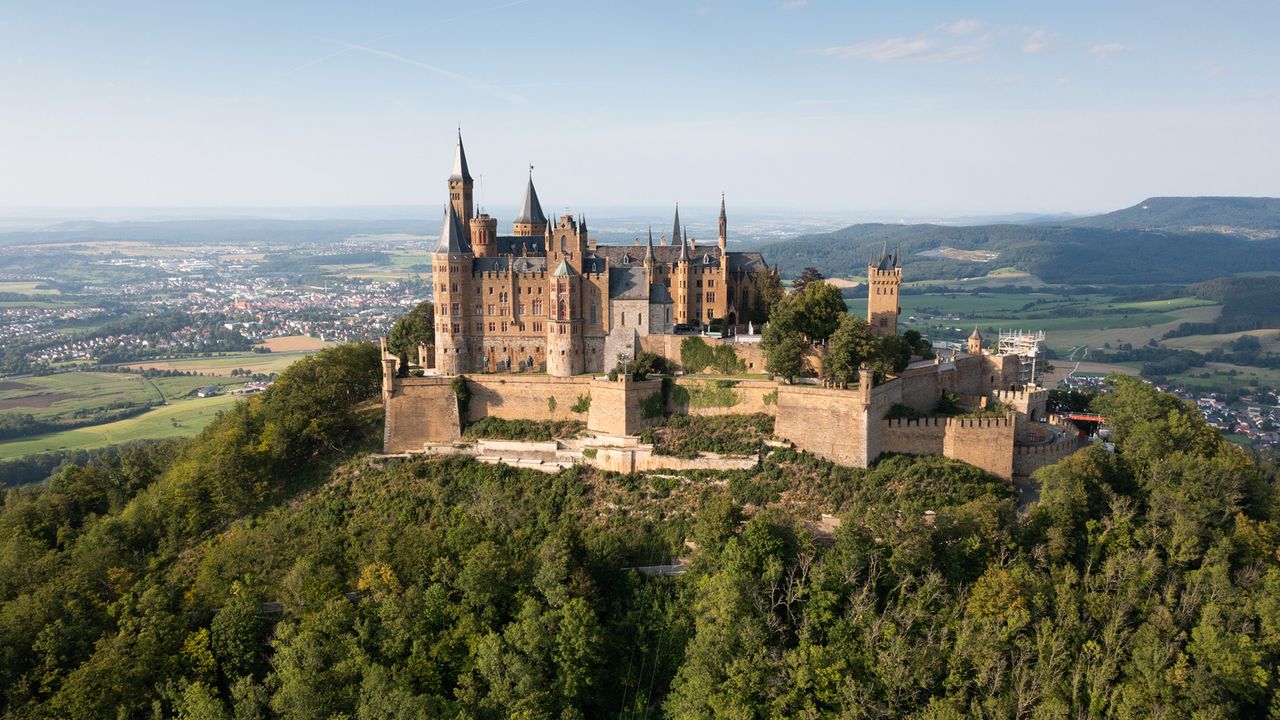
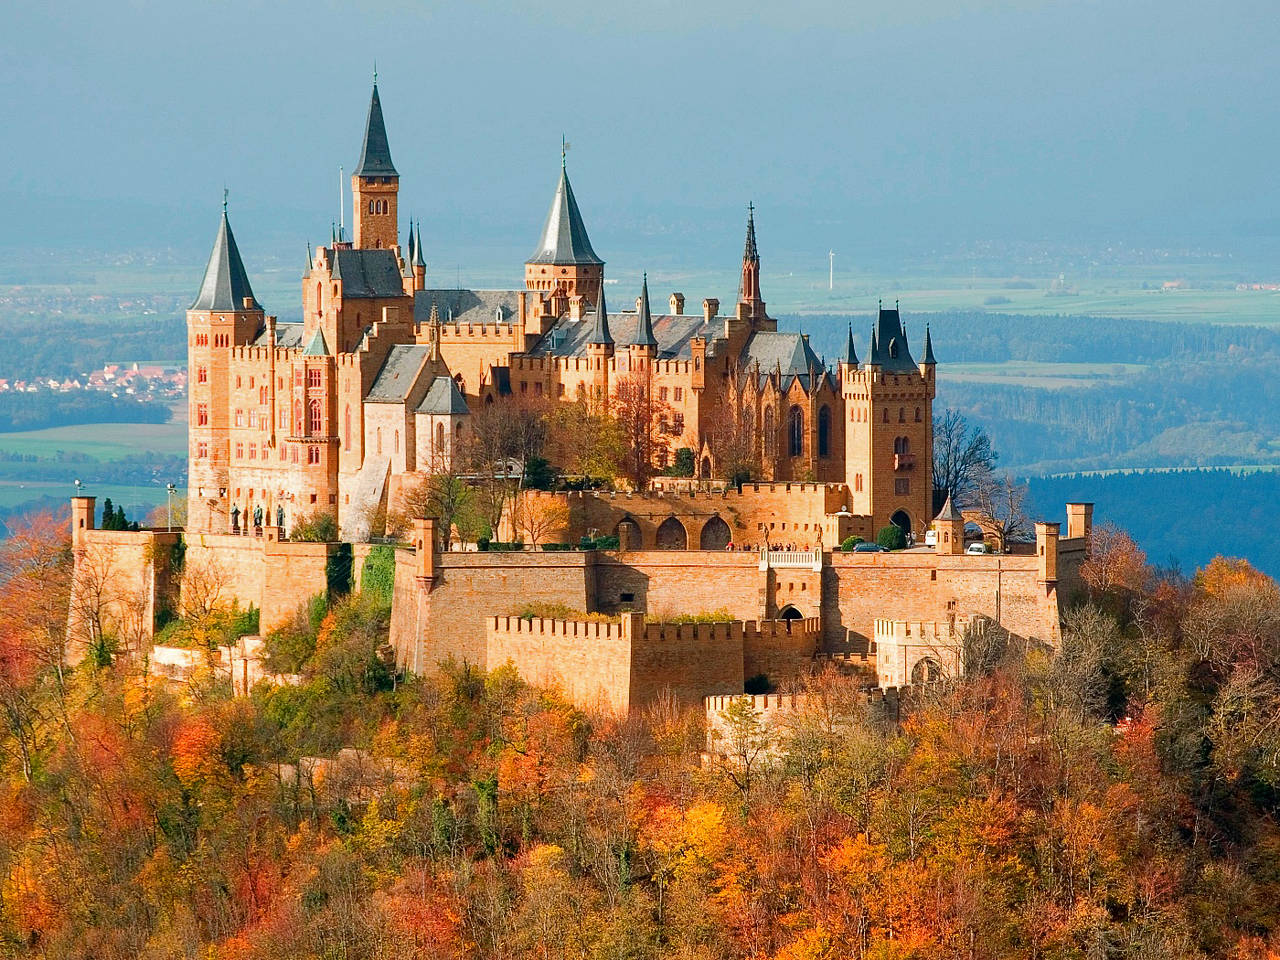
I seem to recall that this castle provided inspiration for the Tannenberg Memorial. Anyway, both are very impressive in their own right(!) I don’t think I’ve seen anything quite a symmetrical as this castle.
Oh no…that’s not symmetrical. Look at the floor plan of the original in the very first post. Pictures of the original are also shown there.
The whole report is a bit convoluted because all sorts of pictures of other castles have been posted by various users. This led me to show Reichenstein Castle instead of linking to it. As a result, everything is a bit jumbled up. Tannenfels Castle is a different topic. It’s a residential tower with a small courtyard and some outbuildings located a little lower down.
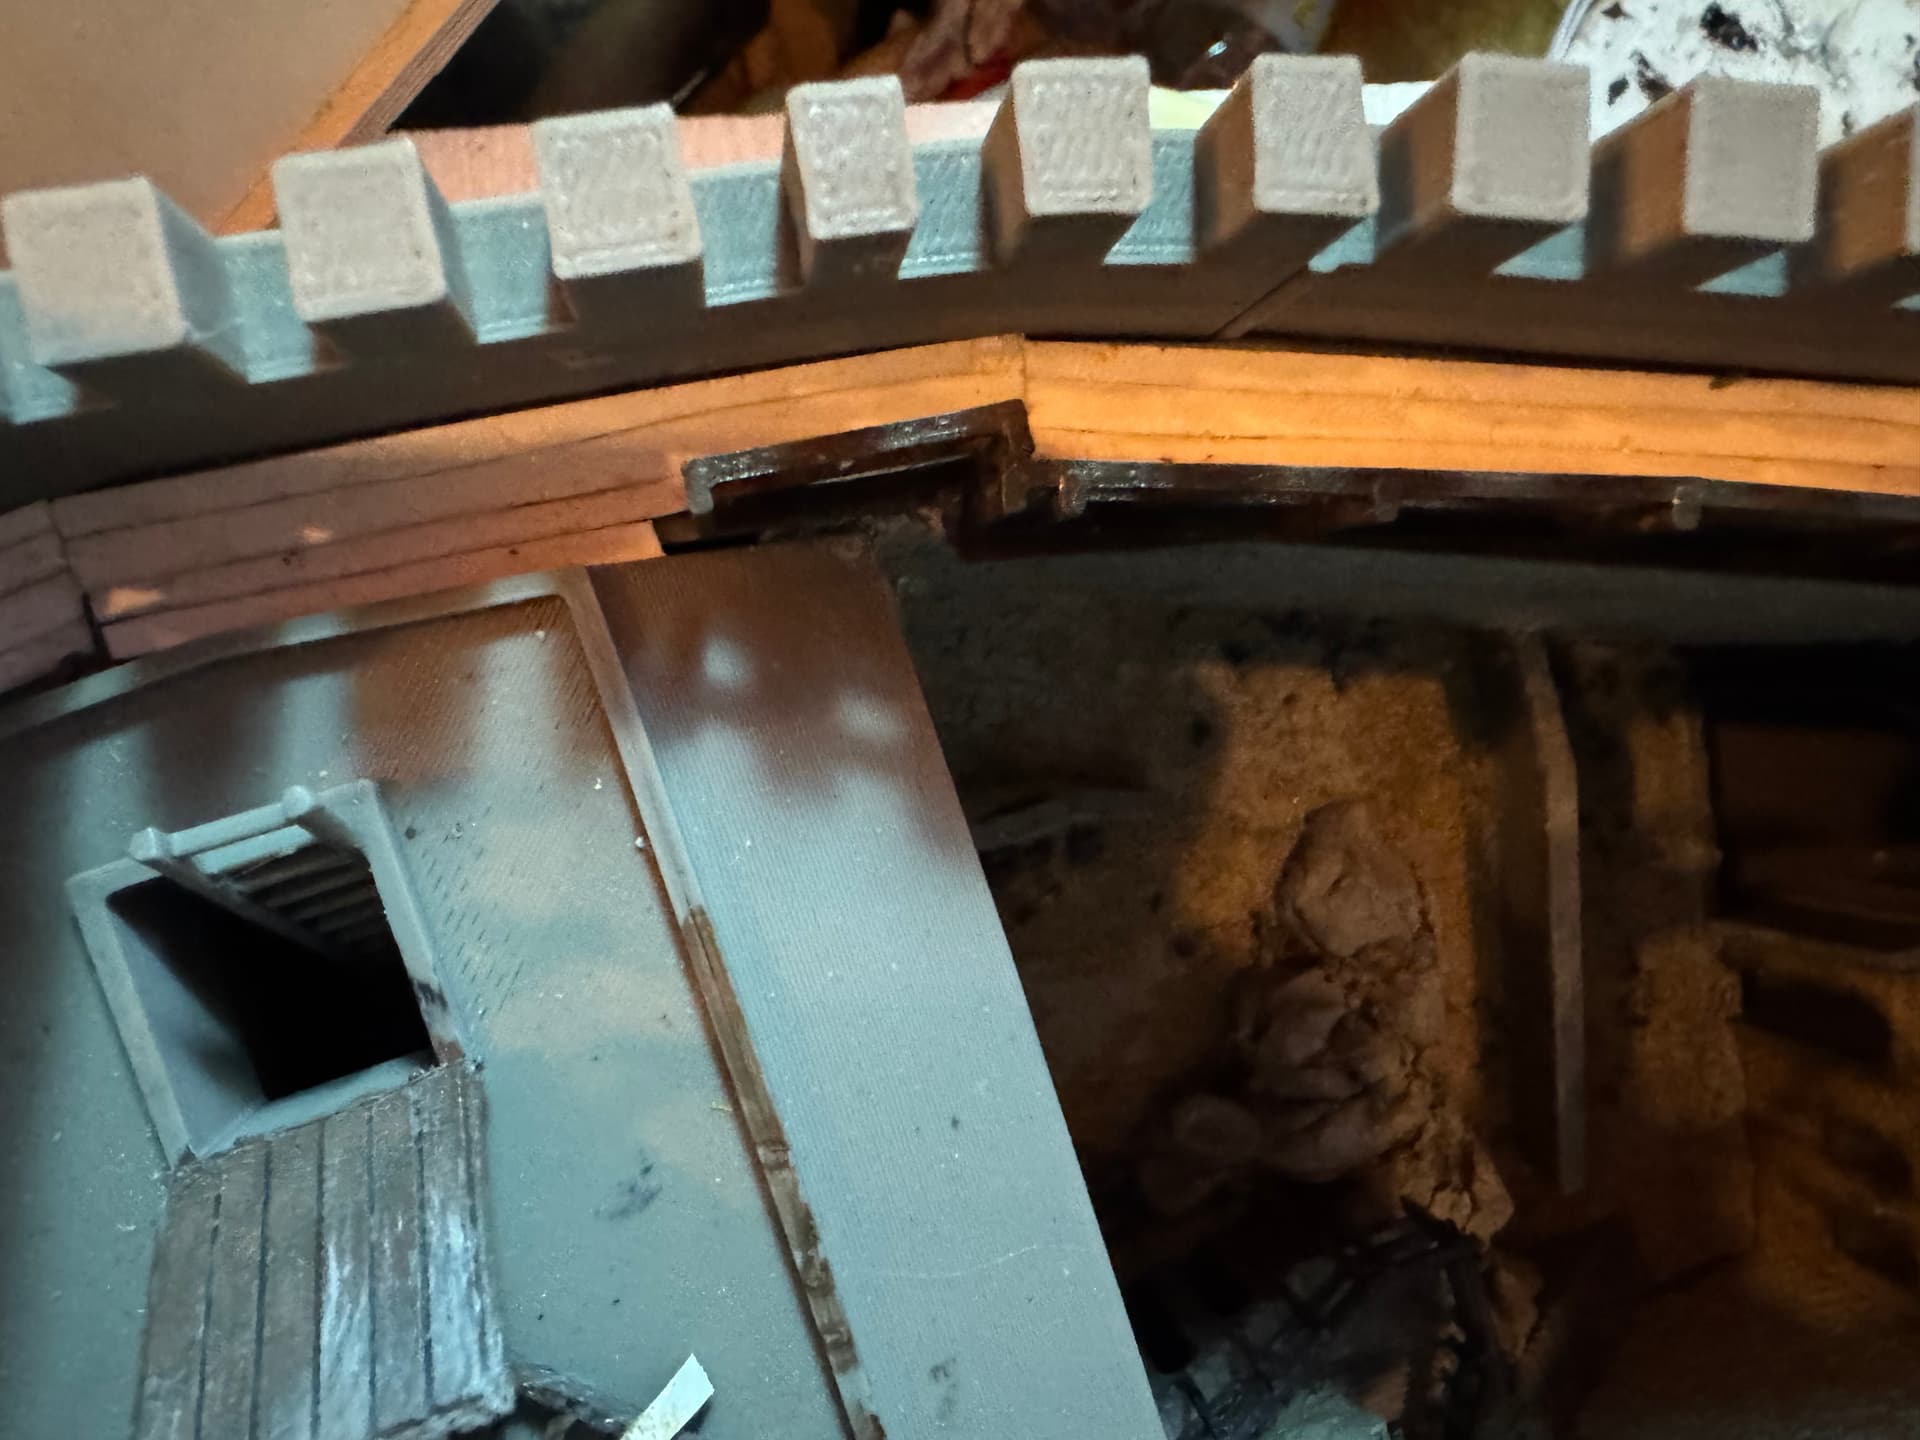
The roofs of the Pallas and the servants’ quarters were covered with stone slabs. The “wall stones” on the battlements were modeled. The wooden parts received an additional drybrushing with Sahara tint. The passage from the cistern to the loophole was given a wooden surface made of artist’s cardboard and was colored. The door to the small tower (accessible from the roof of the Pallas) also received a textured surface made of artist’s cardboard. The walls in the courtyard received a modeled cornice. Various parts were slightly repainted.
Unfortunately, I made a mistake during the construction. The entrance gate was placed a little too high in the wall. As a result, I had to relocate the access to the castle and redesign the courtyard. I’m actually happy with the courtyard design, but I didn’t like the ramp leading to the gate. As a result, I redesigned them, not properly, but more interestingly than before.
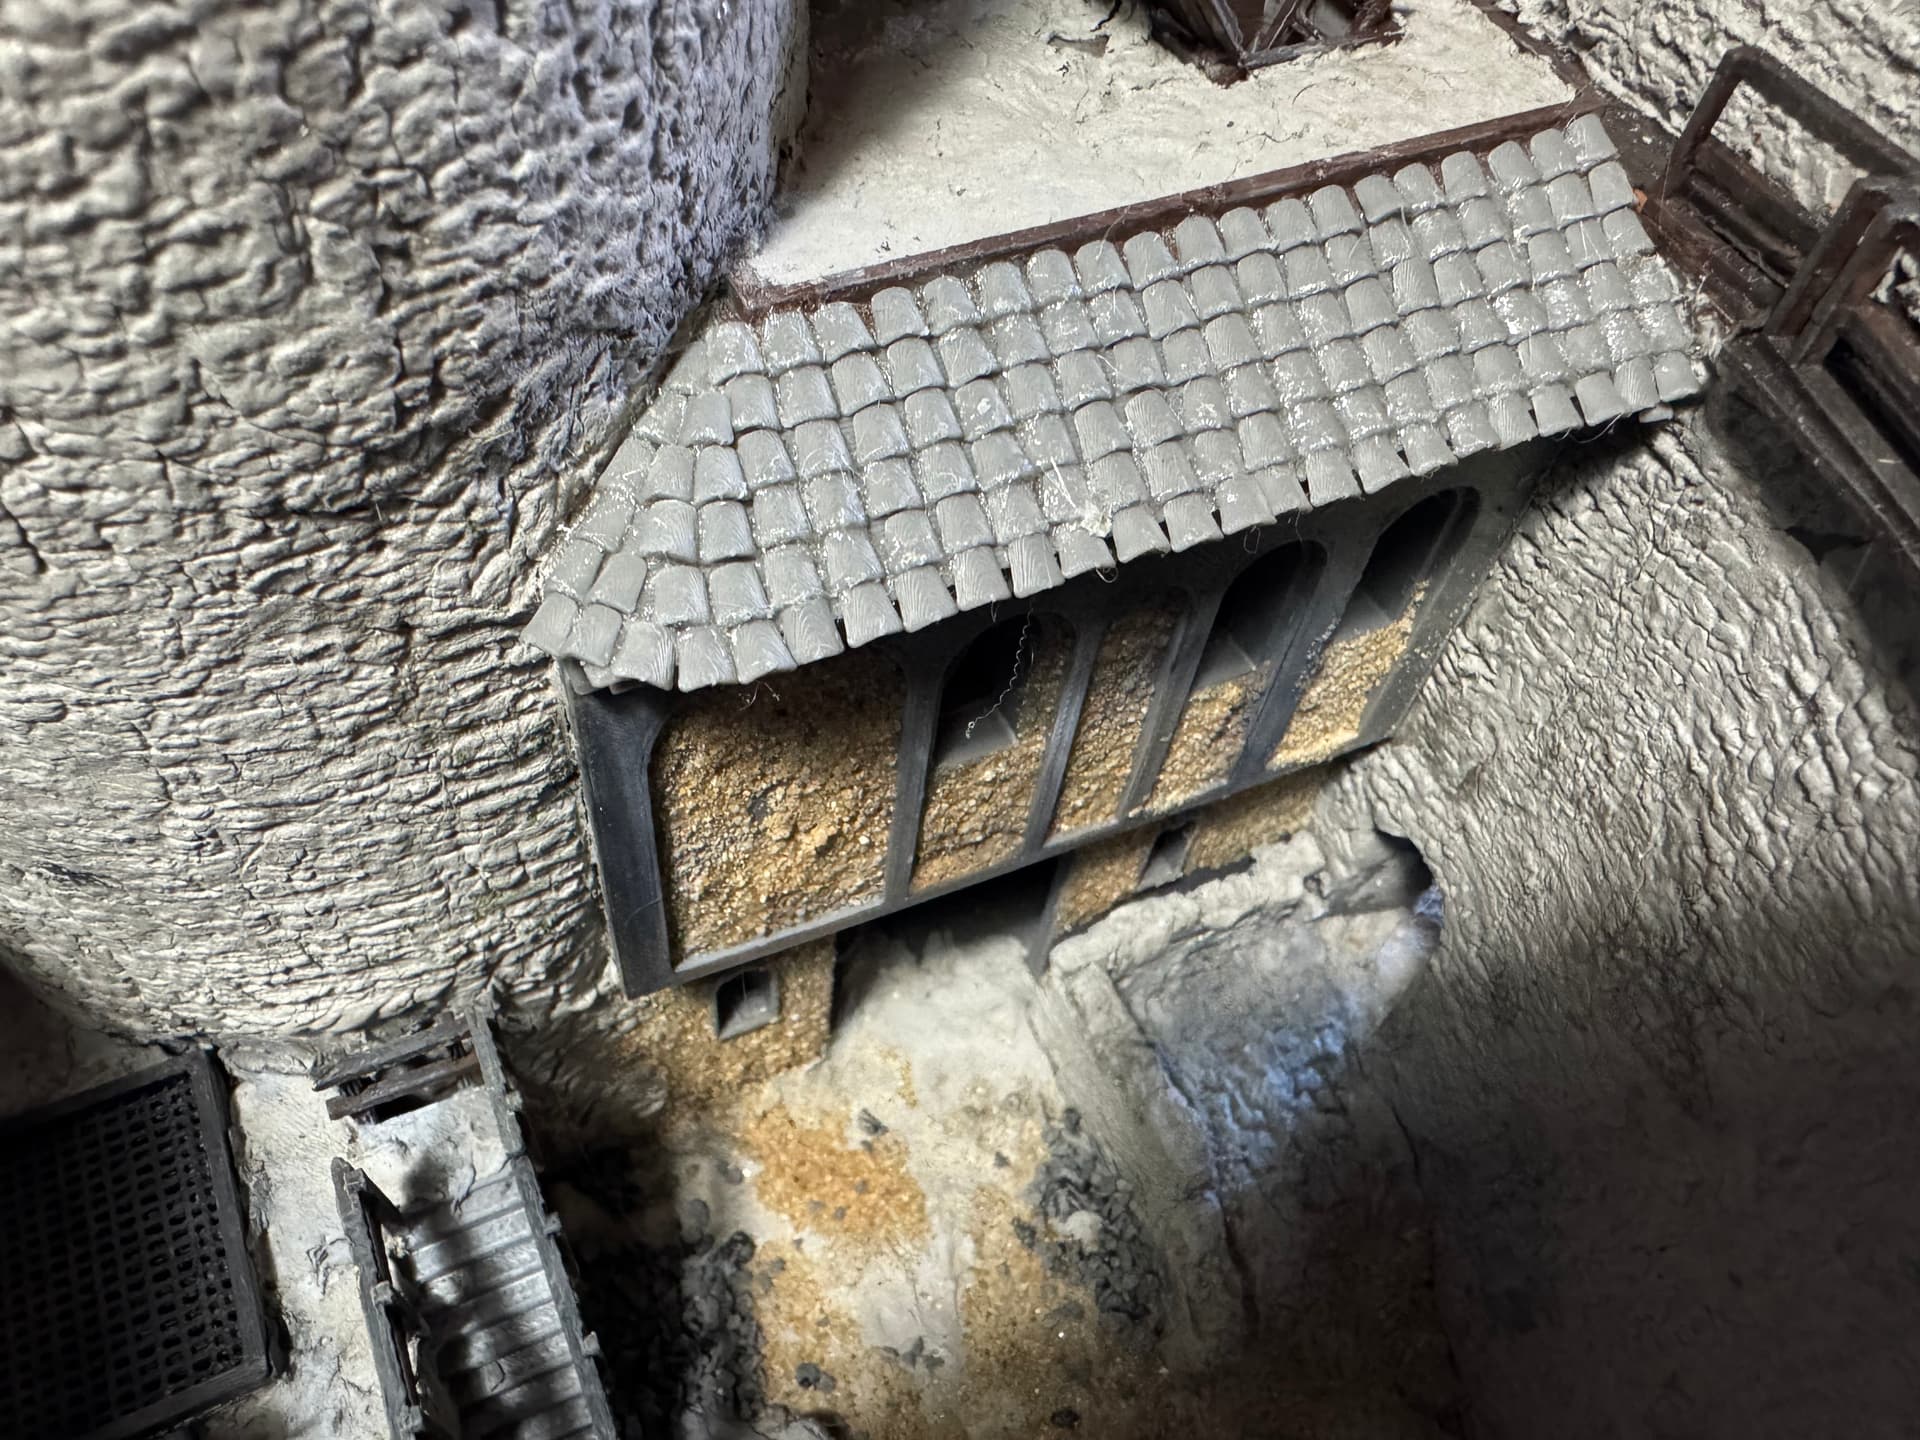
The roof of the servants’ quarters was “tiled.” For this, the roof tiles were glued individually, as Mediterranean roofs were not covered with plain tiles, but with hollow tiles (?). The construction was again carried out using Fusion 360. First, a trapezoidal surface measuring 4.5 mm long, 3.5 mm wide at the front, and 2.5 mm wide at the back was created. This was extruded to a height of 2.5 mm. Then, the upper, side edges were rounded so that they met at the wide side. This creates a semi-conical shape that slopes downwards. This shape was then cut into the front by approximately 0.2 mm. First, the top row of tiles was glued to the top edge of the roof with the narrow side facing up. The tiles of the row below were glued with the narrow side into the notch of the tile above. This continued row by row until the roof was tiled. This is a very complicated explanation…but I hope it is still understandable.
I think so too, but I believe that between (and underneath) each pair of vertical rows there was another row, upside down; this would only be seen along the lower edge of the roof. Essentially, it’s a simplification of the Roman Imbrex-and-Tegula system, using only much-enlarged variants of the latter.