That’s great thanks. Interesting to see all those Vallejo products in use. Really looking forward to seeing the upper hull done, and to see what you do with the cockpit! Very inspiring indeed, in fact I had to open up my 1/72nd Finemolds Falcon box and have a contemplation about finally starting it!
Thanks again Jörg!
2 Likes
You’re welcome.
I am indeed pleased that you have opened the Finemolds box and are thinking about building the model, go ahead.
1 Like
And here are pictures of the completed chipping.
Think it can be seen, but judge for yourself.
Now it goes to the Fading.
19 Likes
You have nailed the subtle chipping. It is looking brilliant… I really like the blaster scaring the rear left quadrant… Whole build is outstanding 
3 Likes
Excellent, looks fantastic, keep them coming!
1 Like
I’m also a bit further with my aging attempts.
In the meantime, I have completely dispensed with enamel products, and not just with the normal colors.
For a long time I thought that the acrylic counterparts could not keep up in the weathering area, but far from it.
These excellent products from Vallejo have fully convinced me.
I don’t miss the smell of turpentine and nitro at all.
I did this very subtle fading with it. Think it’s perfectly adequate. It’s often easy to do too much.
Now that has to go on the rest of the saucer.
10 Likes
I know Bandai Plastic doesnt fare well with enamels. But what you did there looks ace. I may have to invest in some of those myself.
Keith
1 Like
Thanks Keith.
Yes, I don’t want to go back to enamel colors.
Although I have my own model building room in my apartment, they smell very strong.
With acrylic I can airbrush, age and everything else and my family isn’t annoyed. Quite apart from the health aspect.
3 Likes
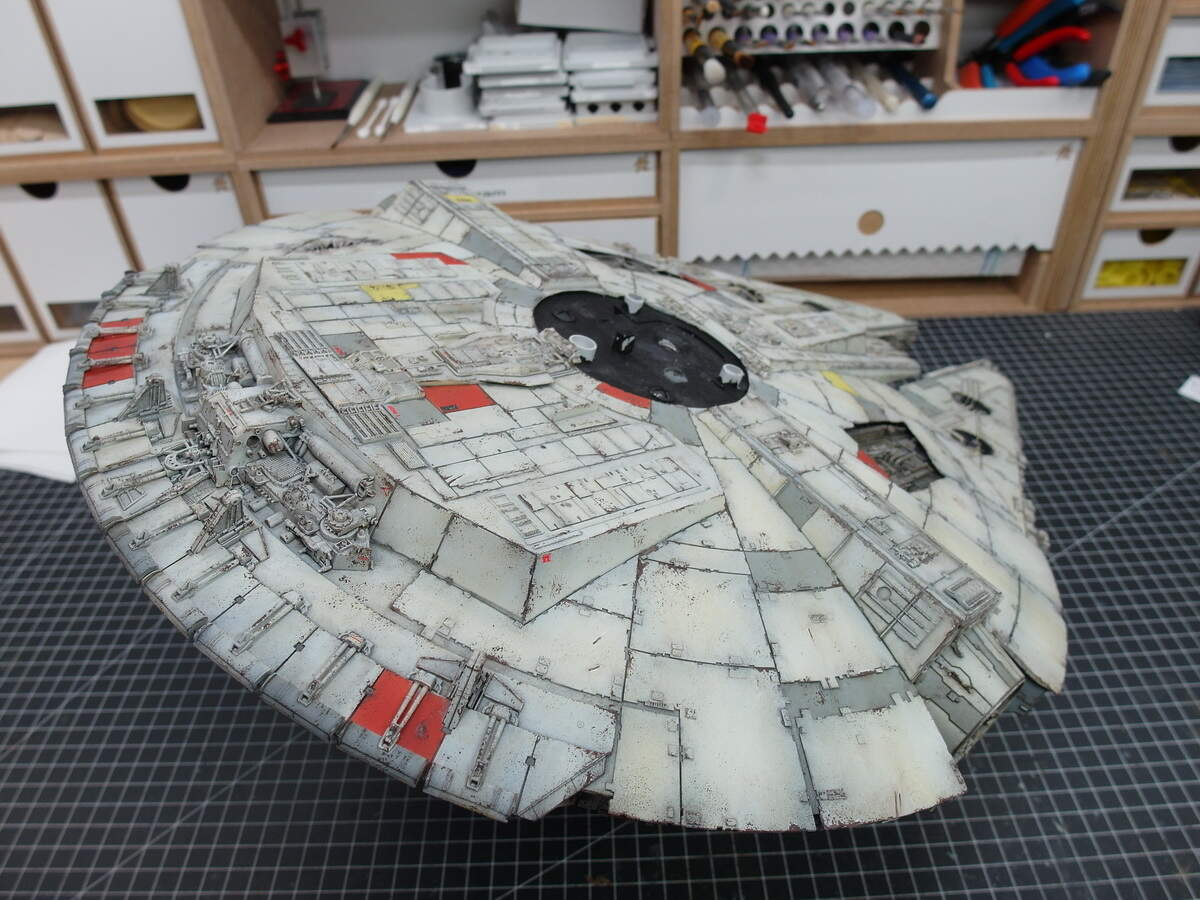
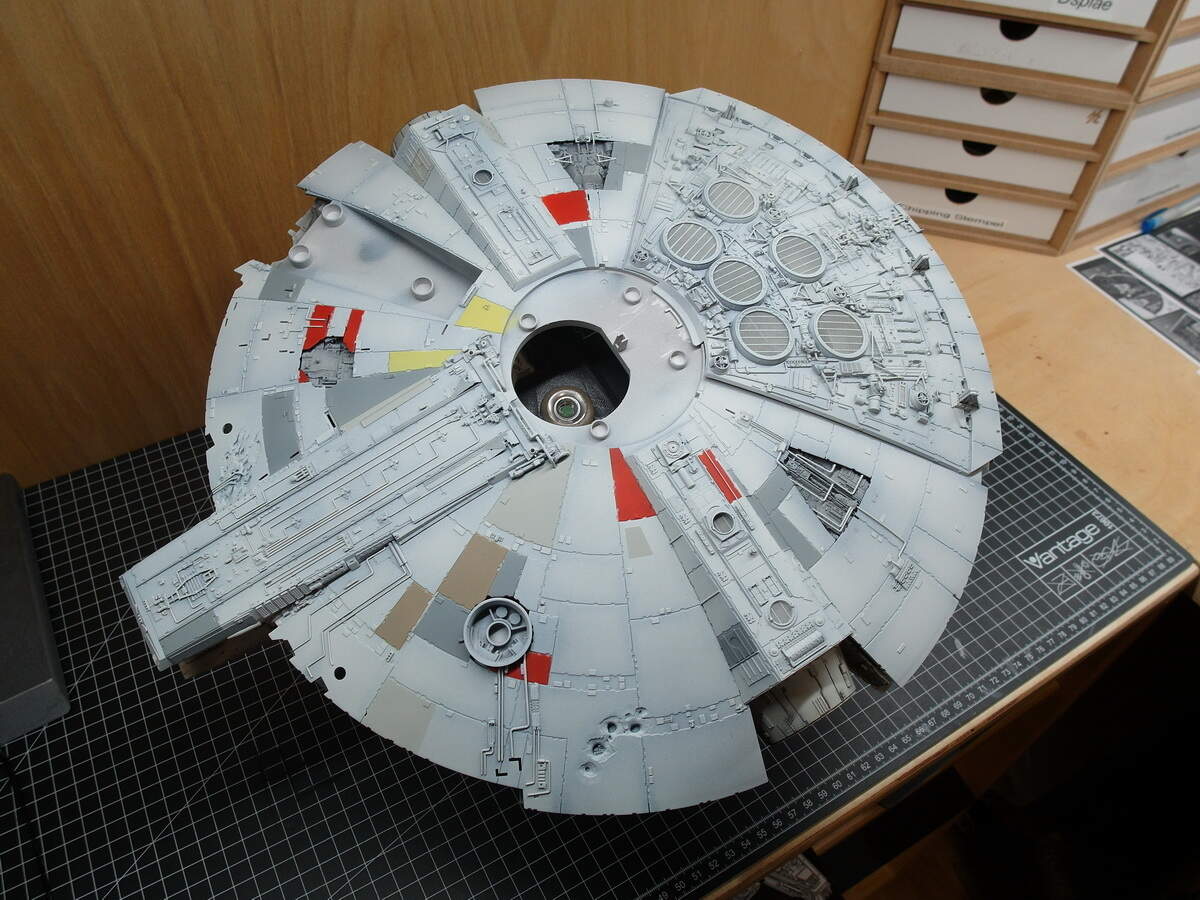
Let’s finish the subpage.
The last streaks of dirt were still missing and I refined the chipping a little.
In some places white highlights were added.
Next, I’ll focus on the top.
The base coat with the colored plates is on, now the lengthy process of aging starts again.
11 Likes
Time consuming… But the effort and the effects are outstanding
1 Like
Thanks Johnny.
Yes, with the falcon model building clearly takes a back seat. Unlike my ships, that was done quickly. Not like aging. On this large scale you have to chip much more precisely.
1 Like
I’m actually starting to think you’re doing a better job of the Falcon than ILM did with the original. I just don’t feel they put in this much care and effort.
1 Like
Thank you, too much credit. 
But you should also consider at what time ILM built the model. I think I read that George Lukas gave the order not to make the spaceships look new. They invented the aging of models with it and of course no experience yet.
2 Likes
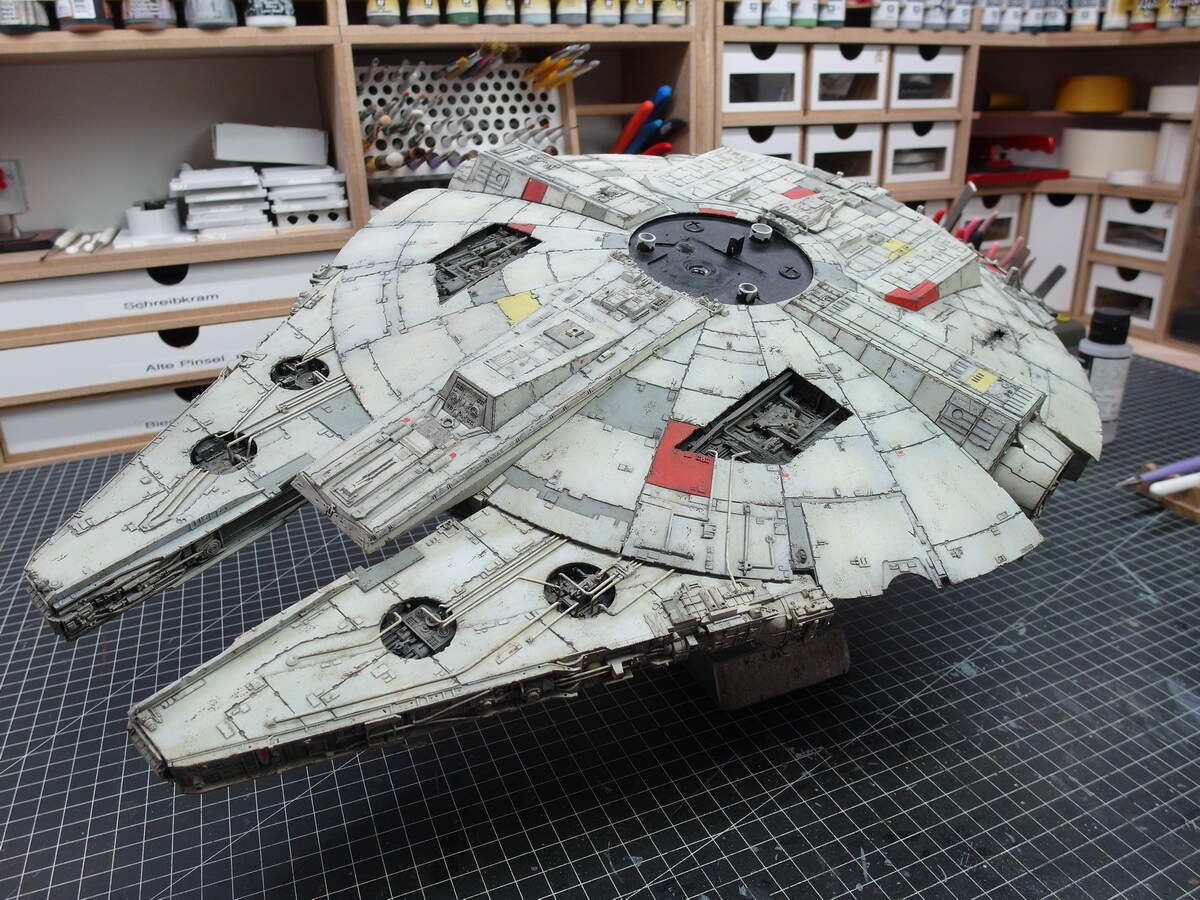
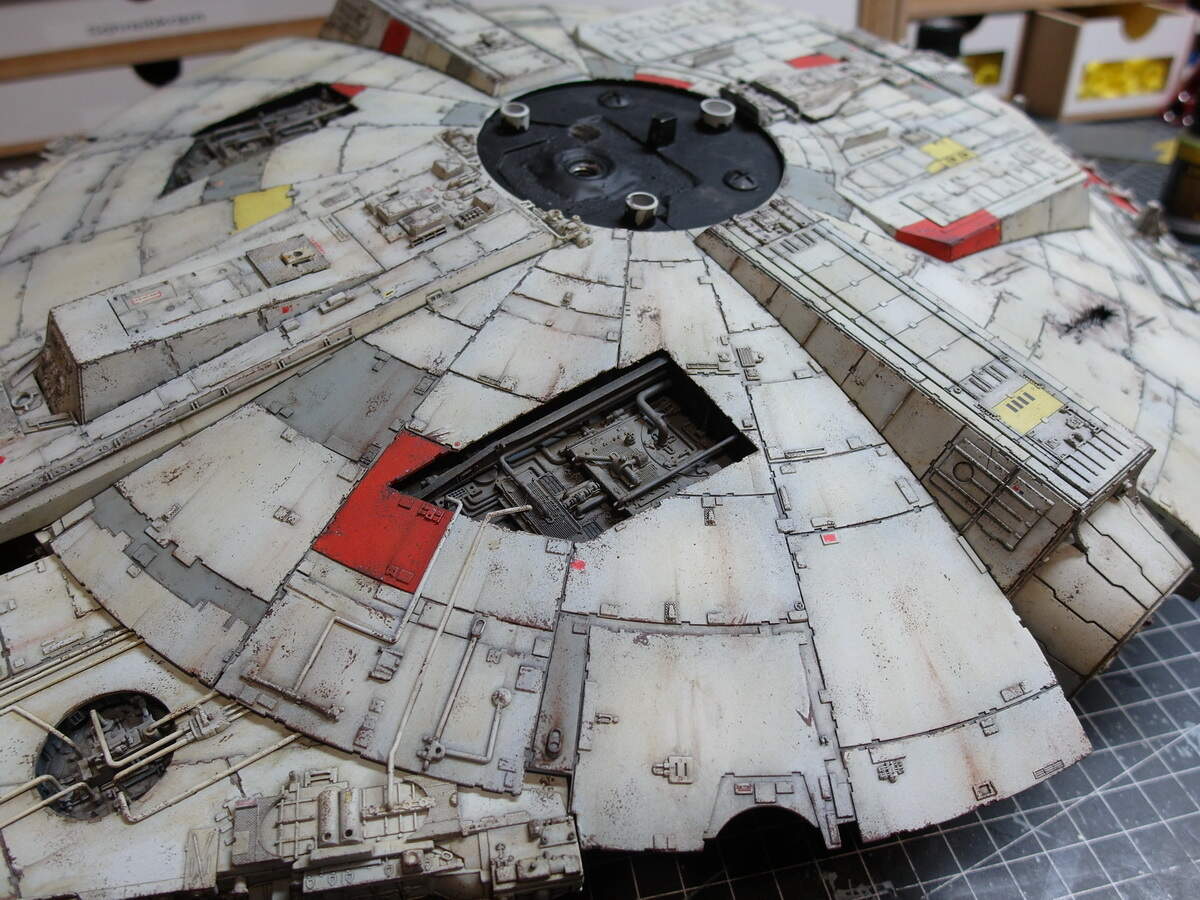
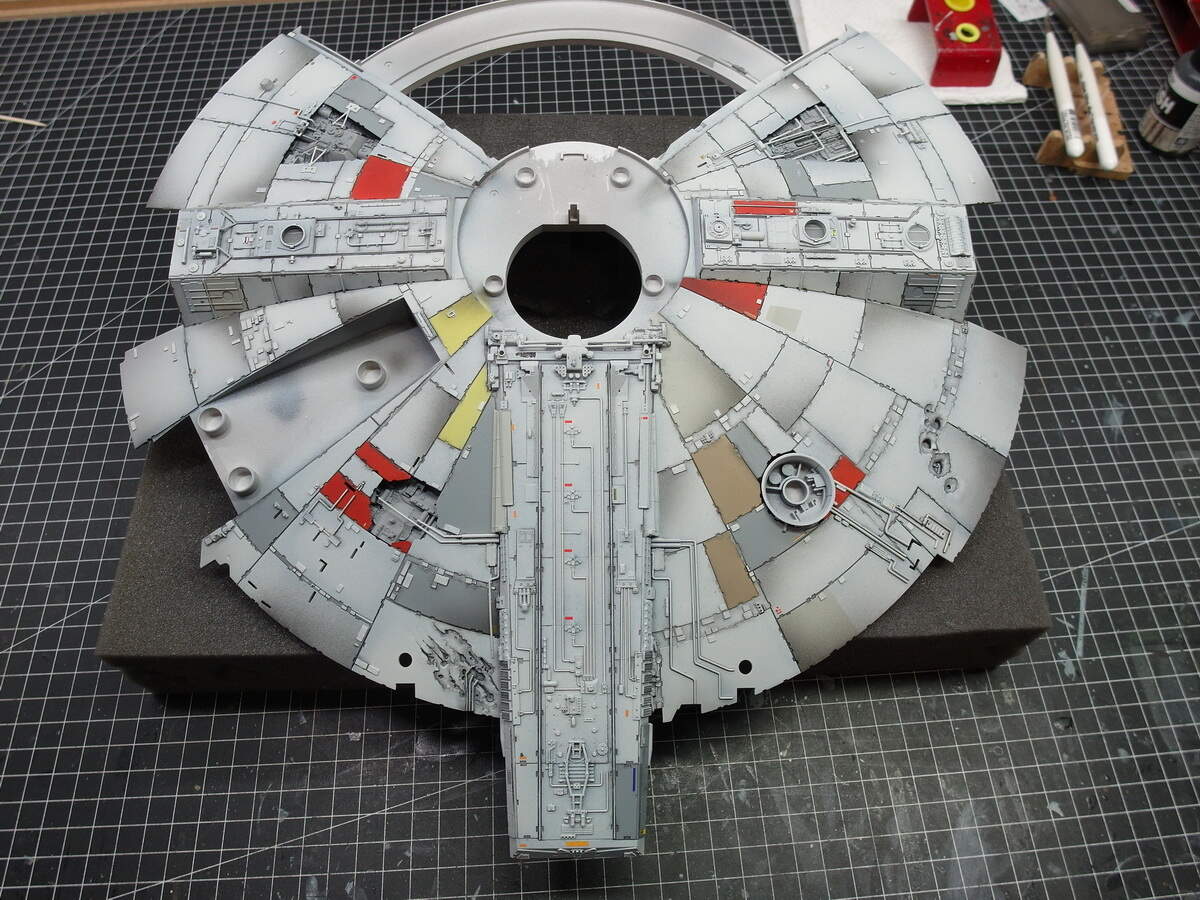
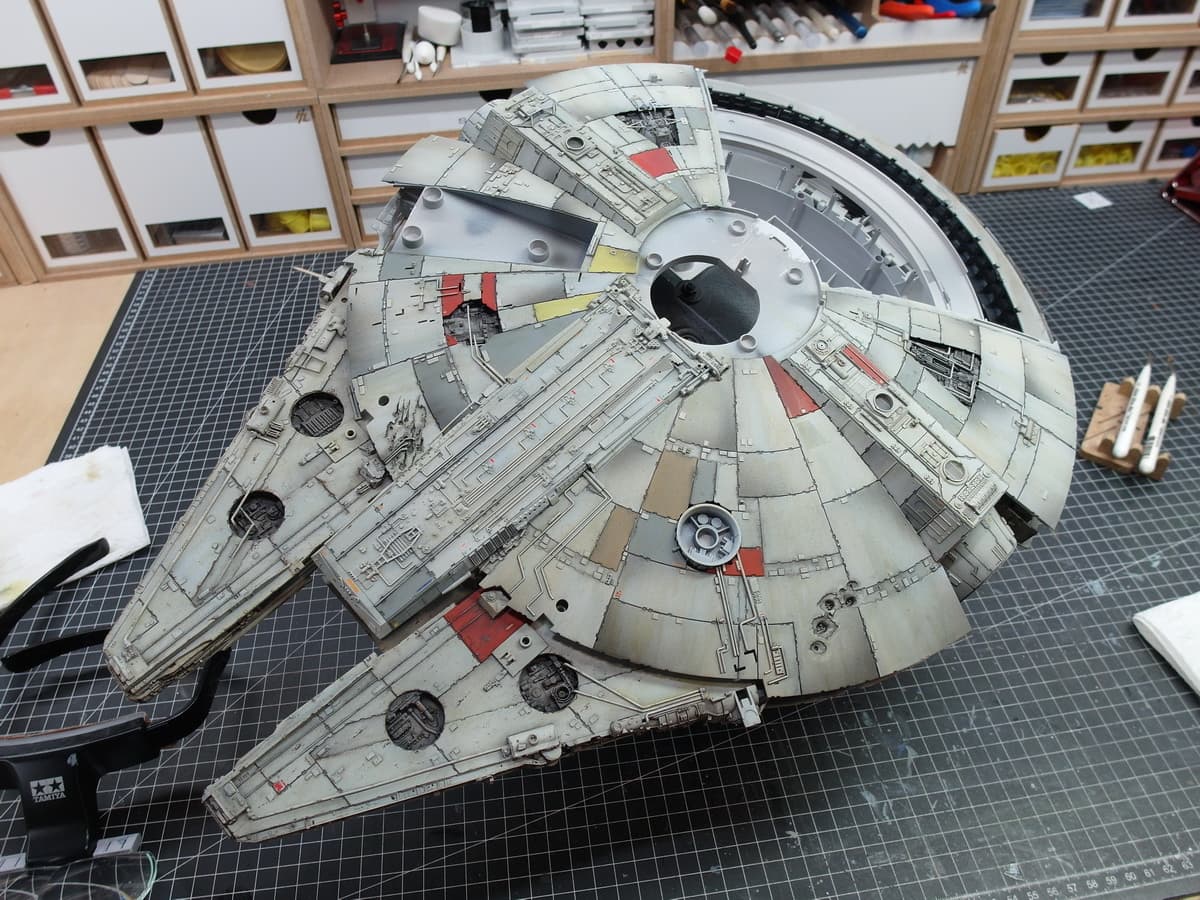
It’s really a lengthy process, but worth it. I even extended it a little at the top.
The art of these surfaces, which consist of many individual panels, is to emphasize them differently. This creates a sense of depth.
I found the underside a bit too homogeneous, but it was only my practice object.
Therefore, after the panel lining, I did a panel lightning. In other words, individual plates were masked again and a black shadow was cast in one corner.
And I also emphasized the small squares on the panels with the base color.
Now clear coat on it and then I can filter tomorrow.
I’m curious how that works.
9 Likes
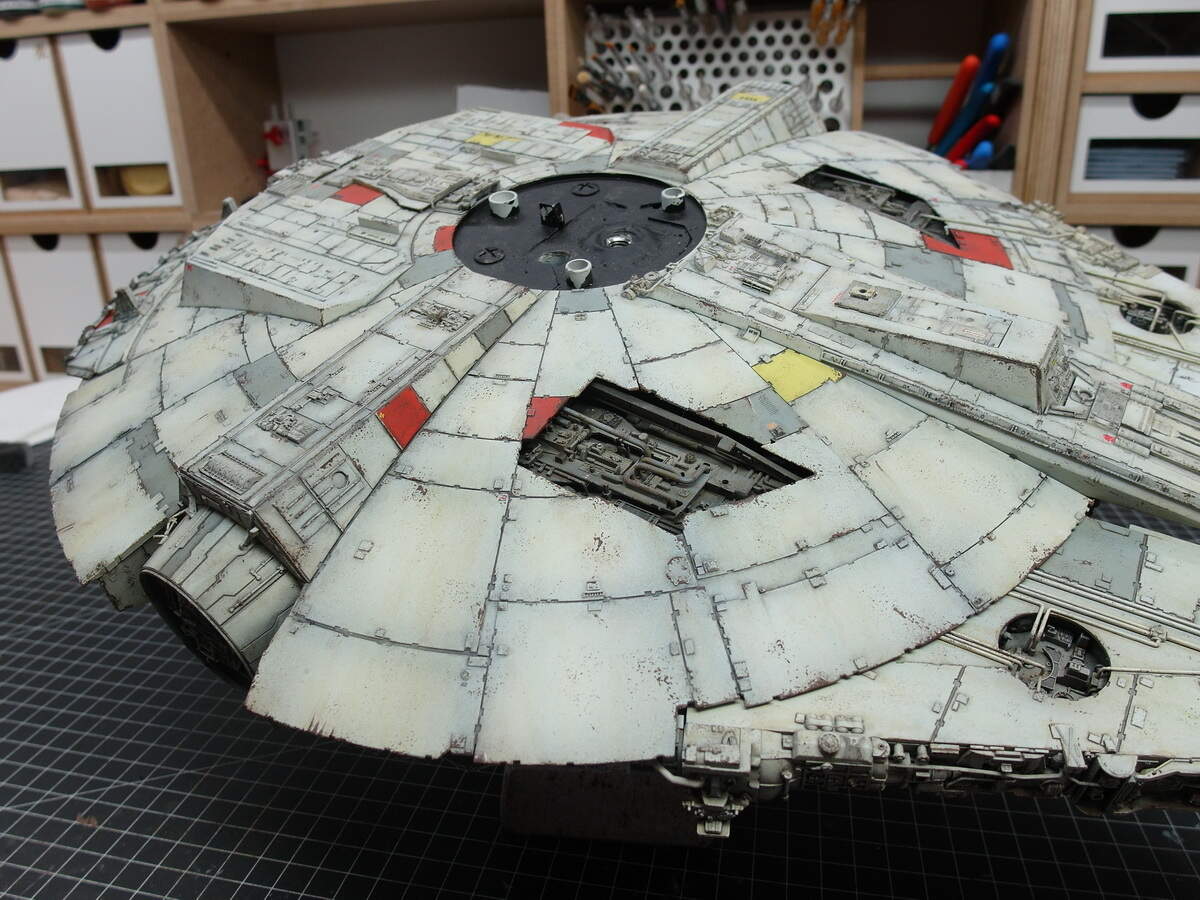
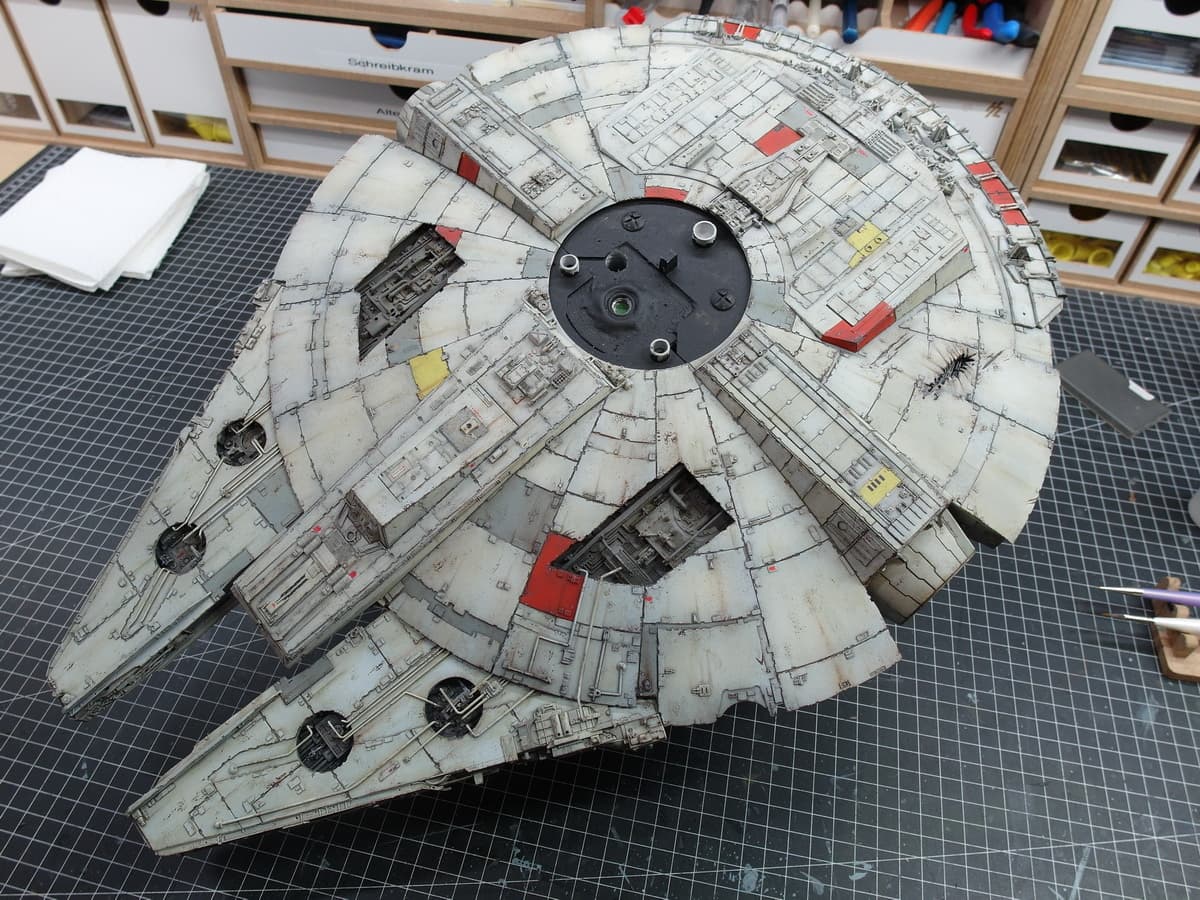
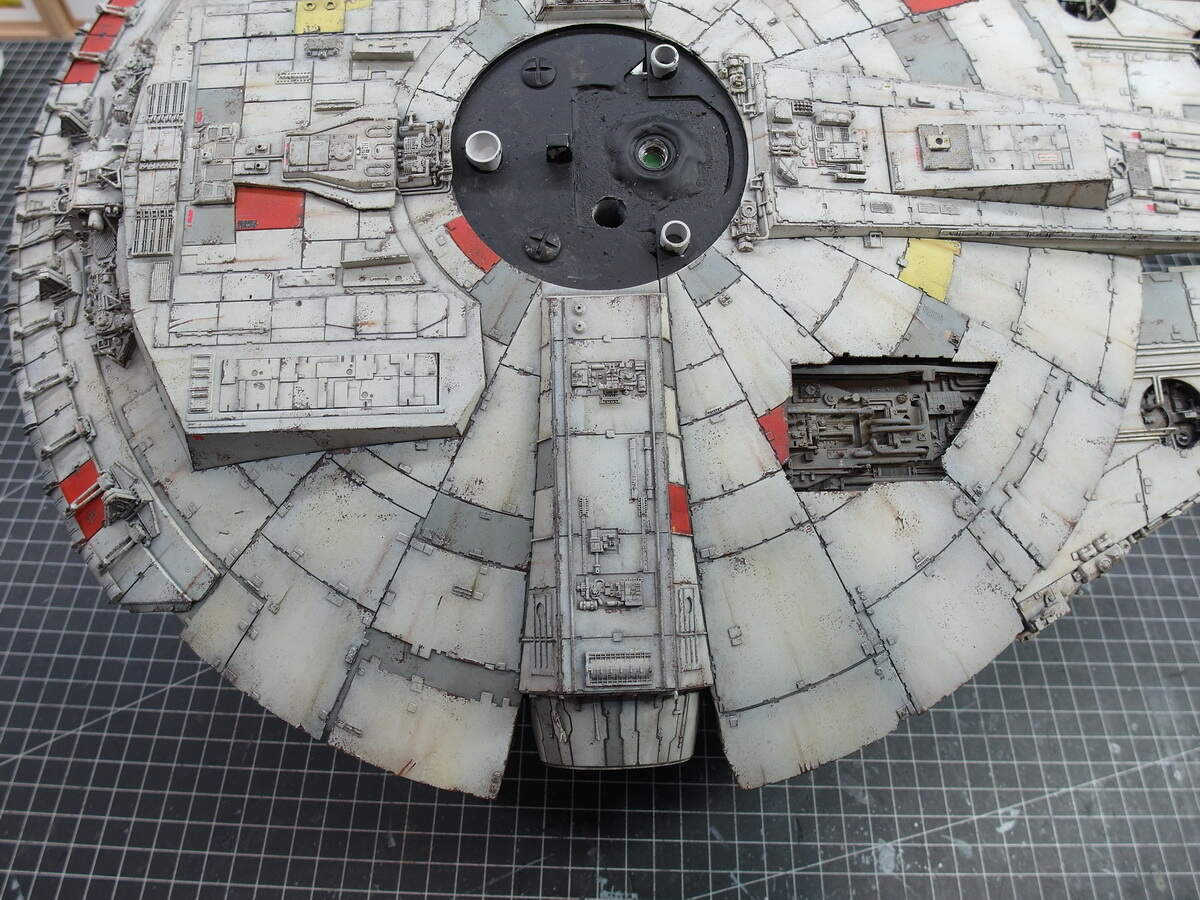
Another small update.
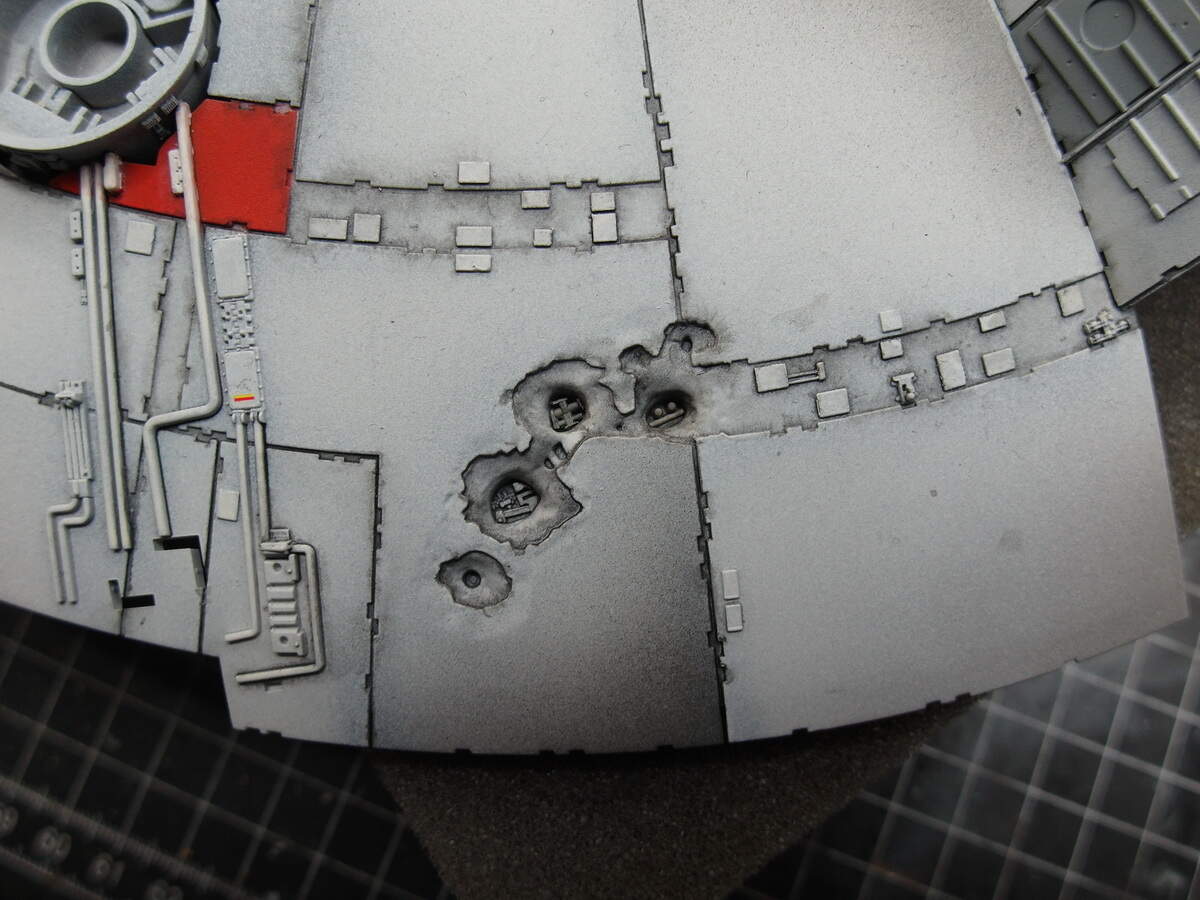
Think the 3D blaster damage is really great.
But that’s why I didn’t understand why parts of the inner ship can only be seen in one of the larger holes and I filled the other holes with leftovers from the rummage box and styrene.
Only the left hole was filled.
11 Likes
Love the way this is being weathered and finished … looks superb
1 Like
Thanks Johnny.
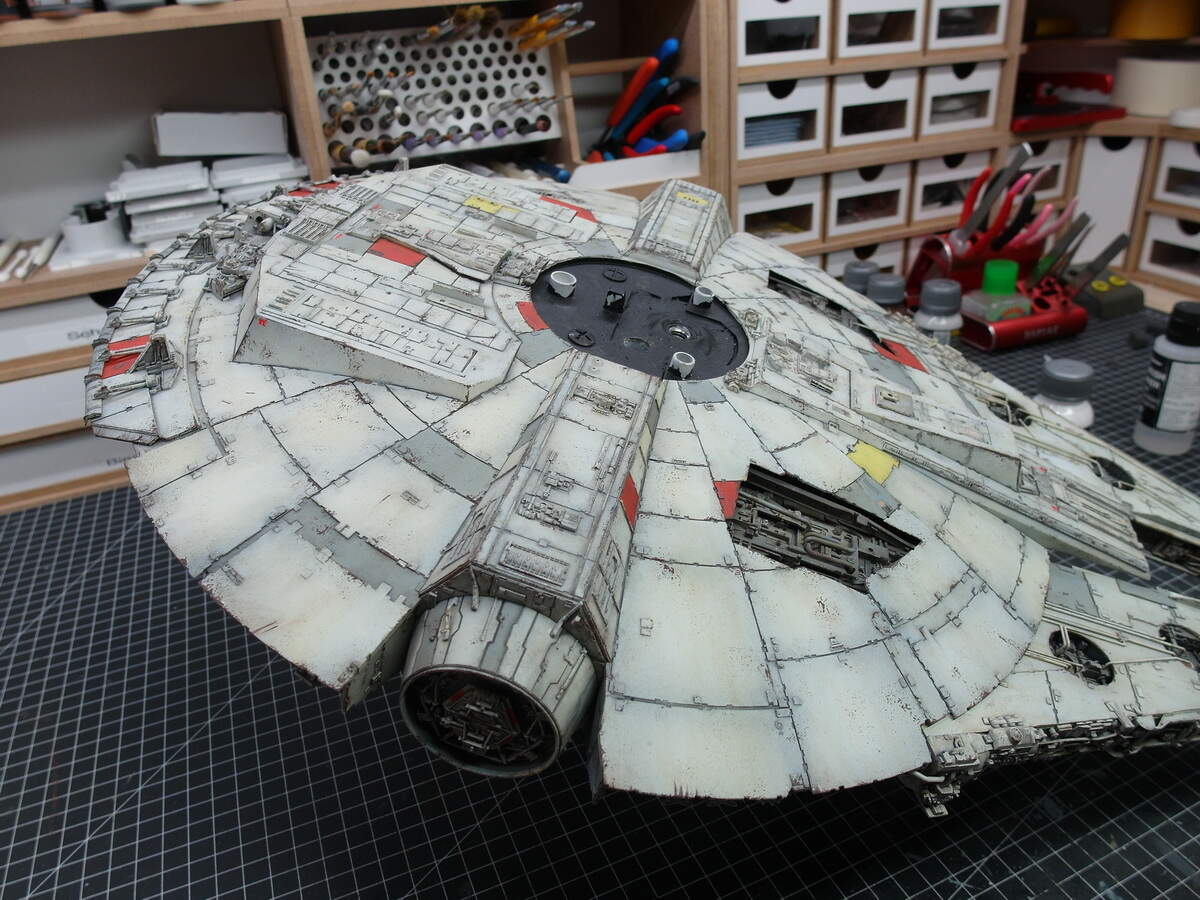
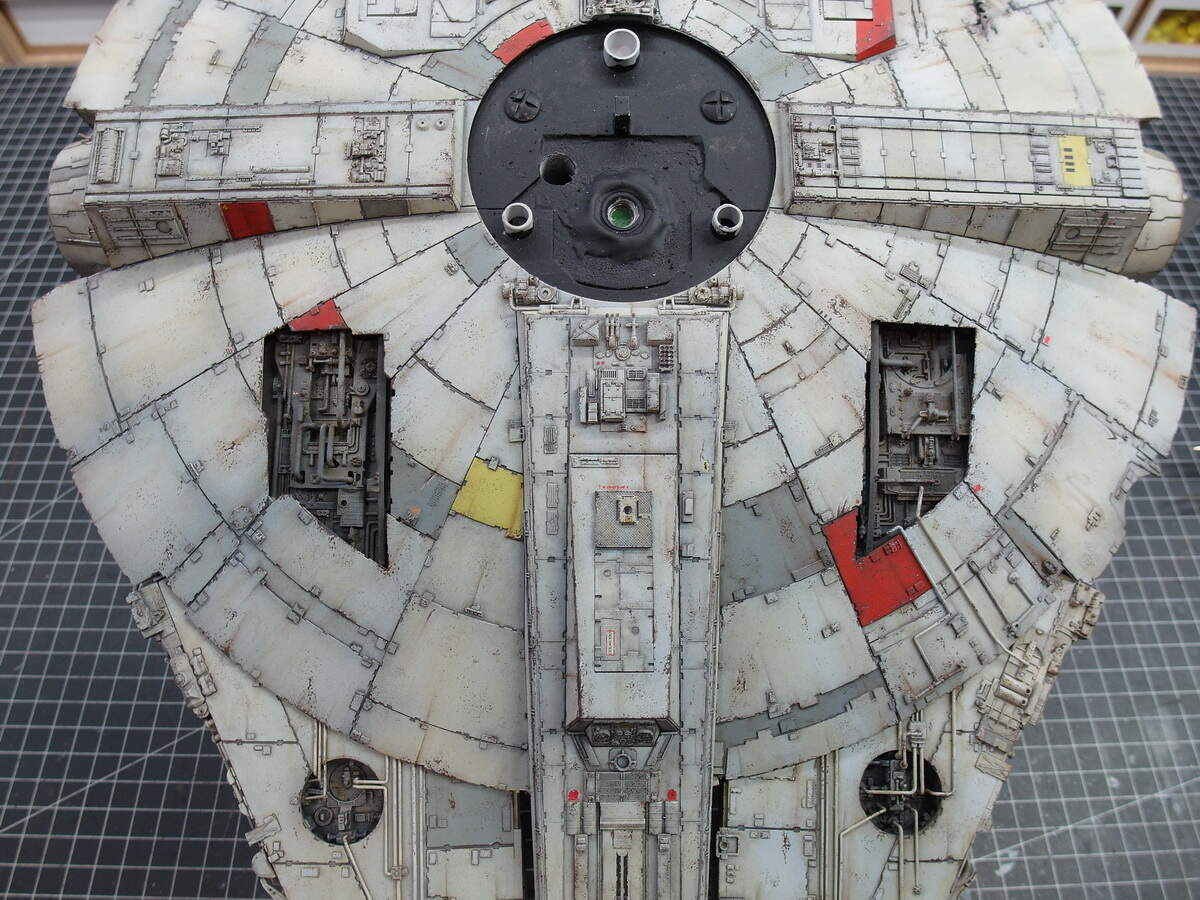
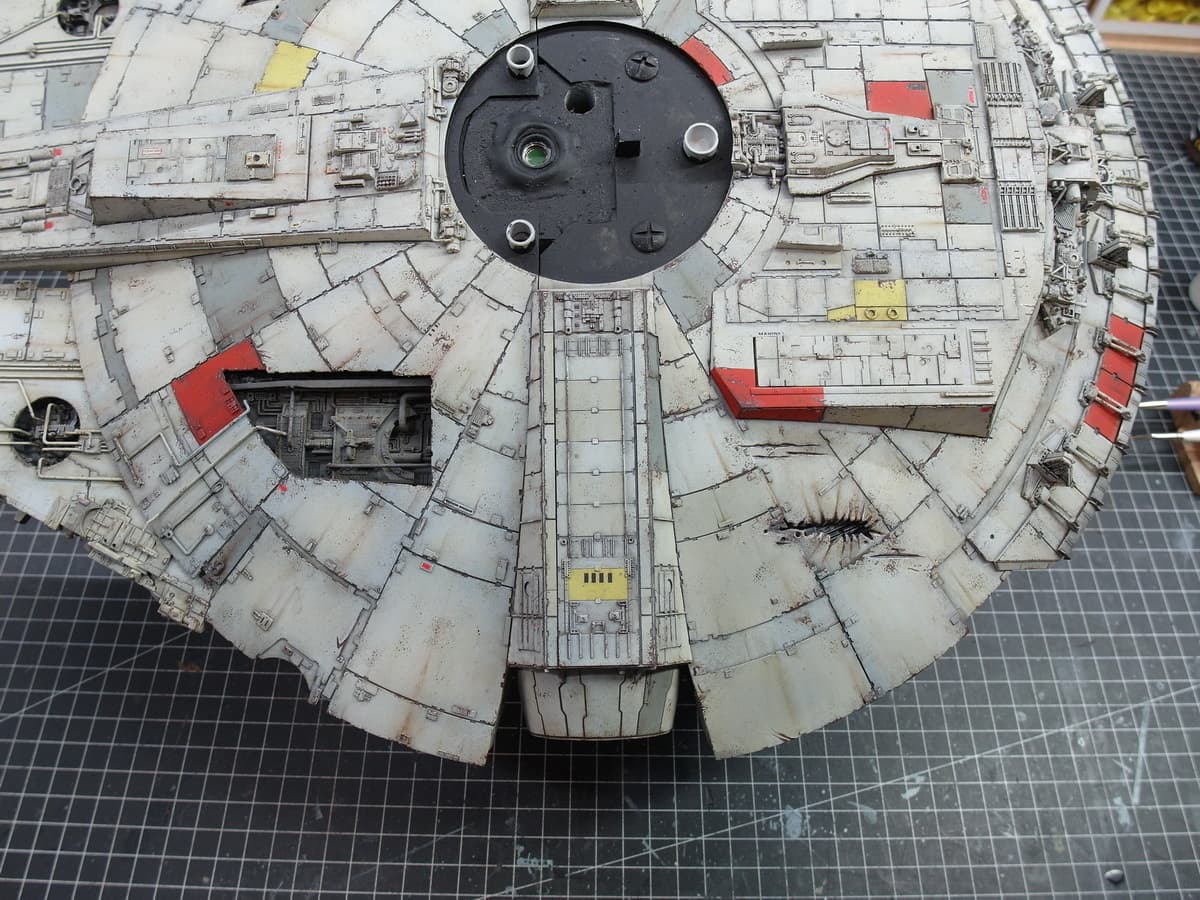
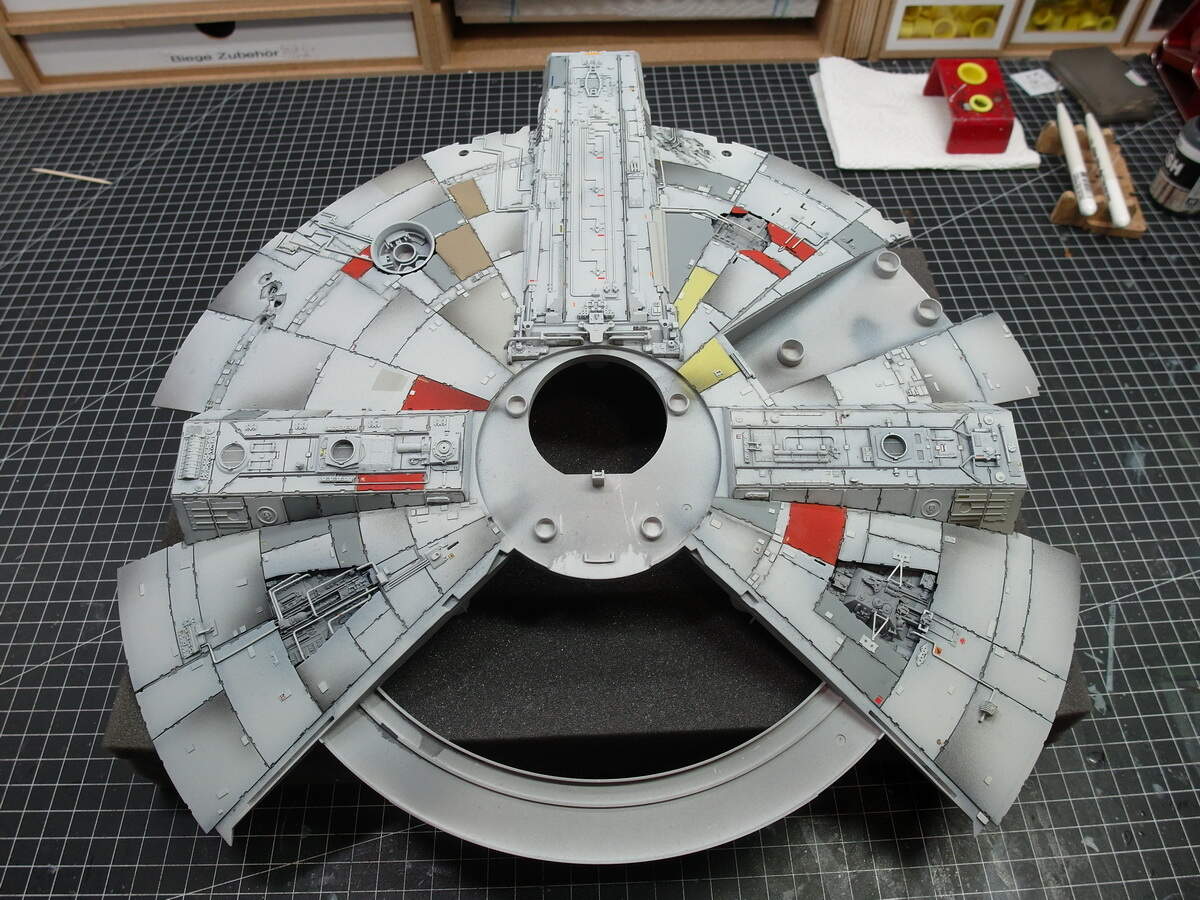
And now, the filter is on it too.
The lid is only put on to see if the mandibles and the upper side match the sound.
7 Likes