Small update.
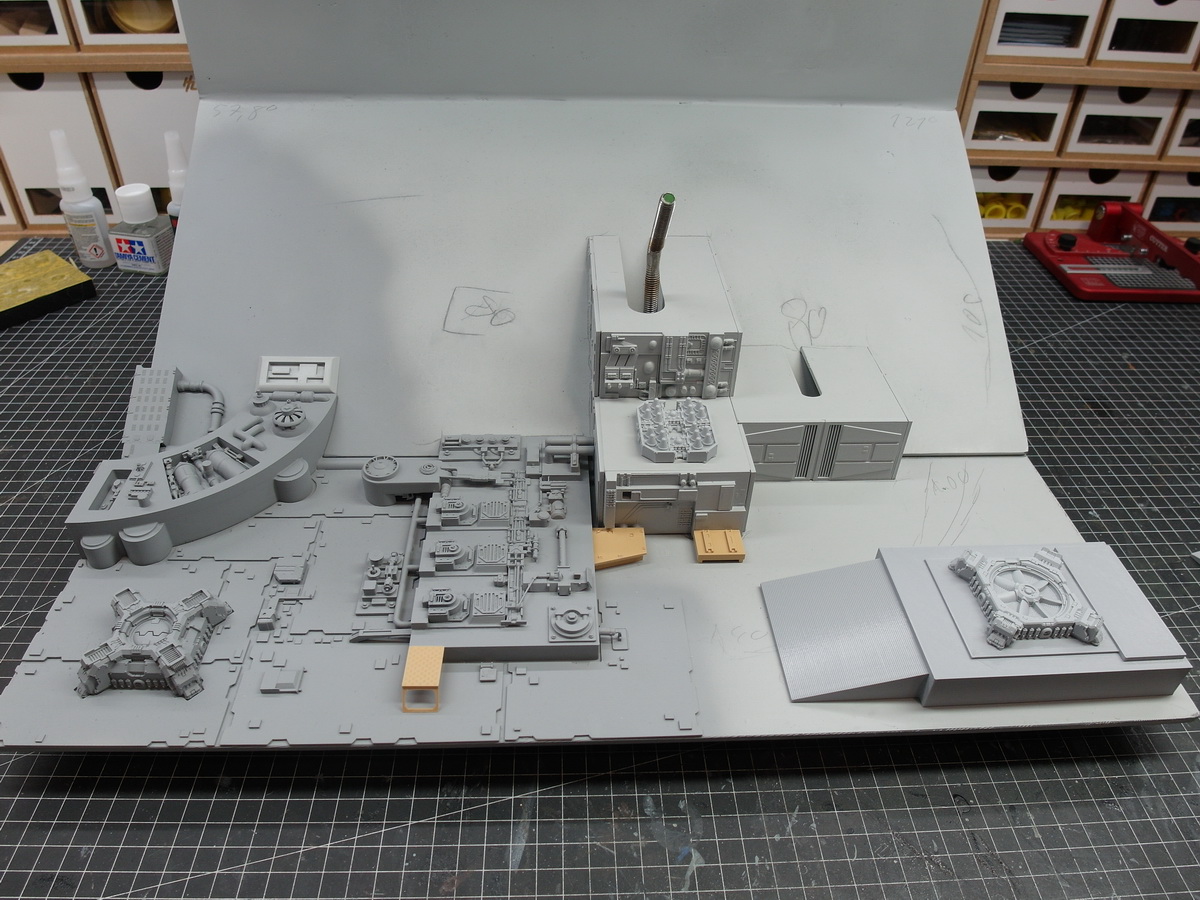
Print straight panels to dress the dormer that conceals the falcon mount and adjust.

Since they are quite simply detailed, filament plates work quite well. Foundation follows.
Small update.
Print straight panels to dress the dormer that conceals the falcon mount and adjust.
Since they are quite simply detailed, filament plates work quite well. Foundation follows.
Very nice … And this is just a thought from me that I think would be cool… On the death star panels … If a few random kit parts from the spares box got added like a road wheel with pipes coming out of it, or an engine grill from a Panther or a tiger… Like they did when they made the original film models … A homage to that sort of thing …
That’s the way it should be Johnny. ![]()
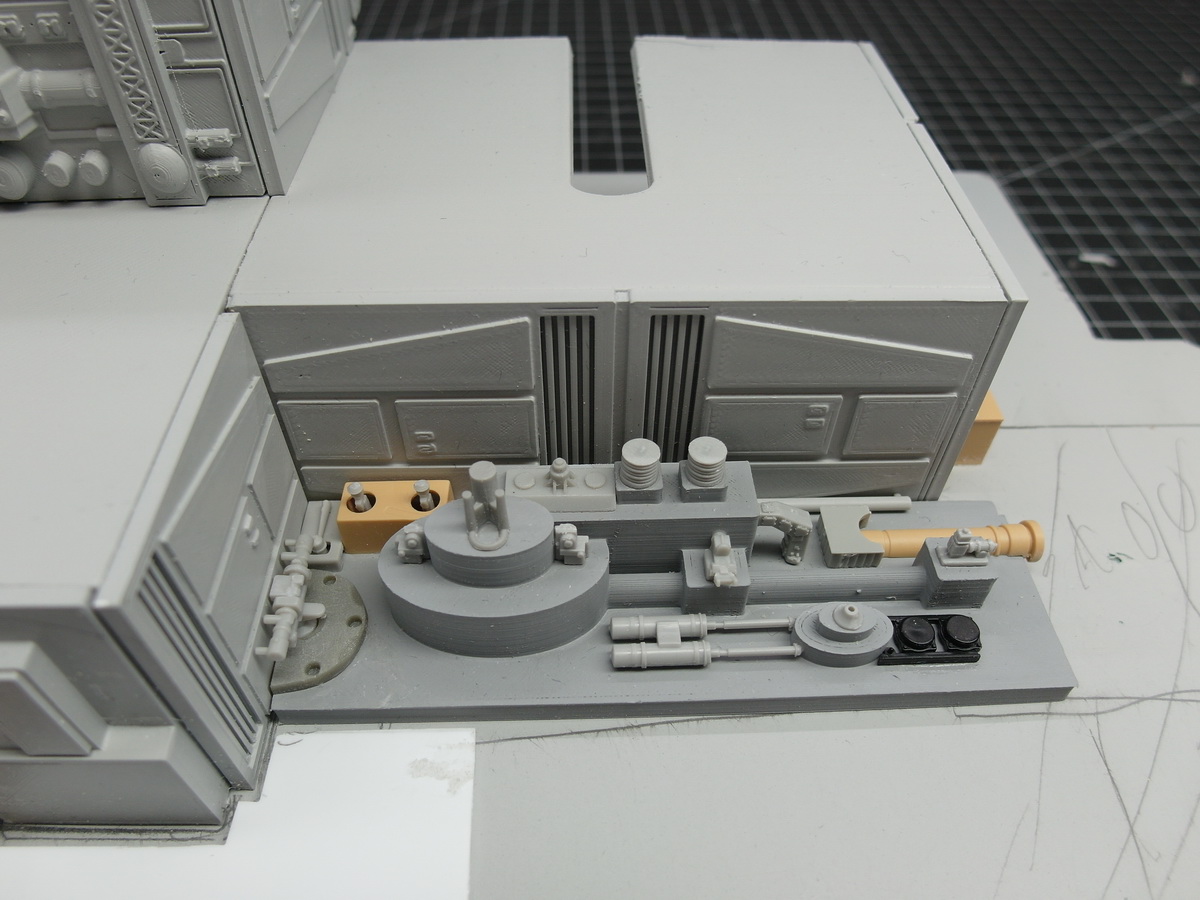
A tank wheel is on it, top right in the left of the picture. But for me, the things for kitbashing are more of a maritime nature. Since I’m a ship builder.
And that´s it.
It goes on.
Excellent ![]()
Lovely work! An epic undertaking, but the results so far are superb.
Oh and your build led to me hinting to the family so much that they got me a Bandai Falcon for a significant recent birthday. Huge discount online didn’t hurt though!
Thank you.
Cool thing Jim. I am happy if my contribution has helped you to a great model. Apart from the discount. ![]()
Next time the whole time in plain gray primed.
Seems completely different.
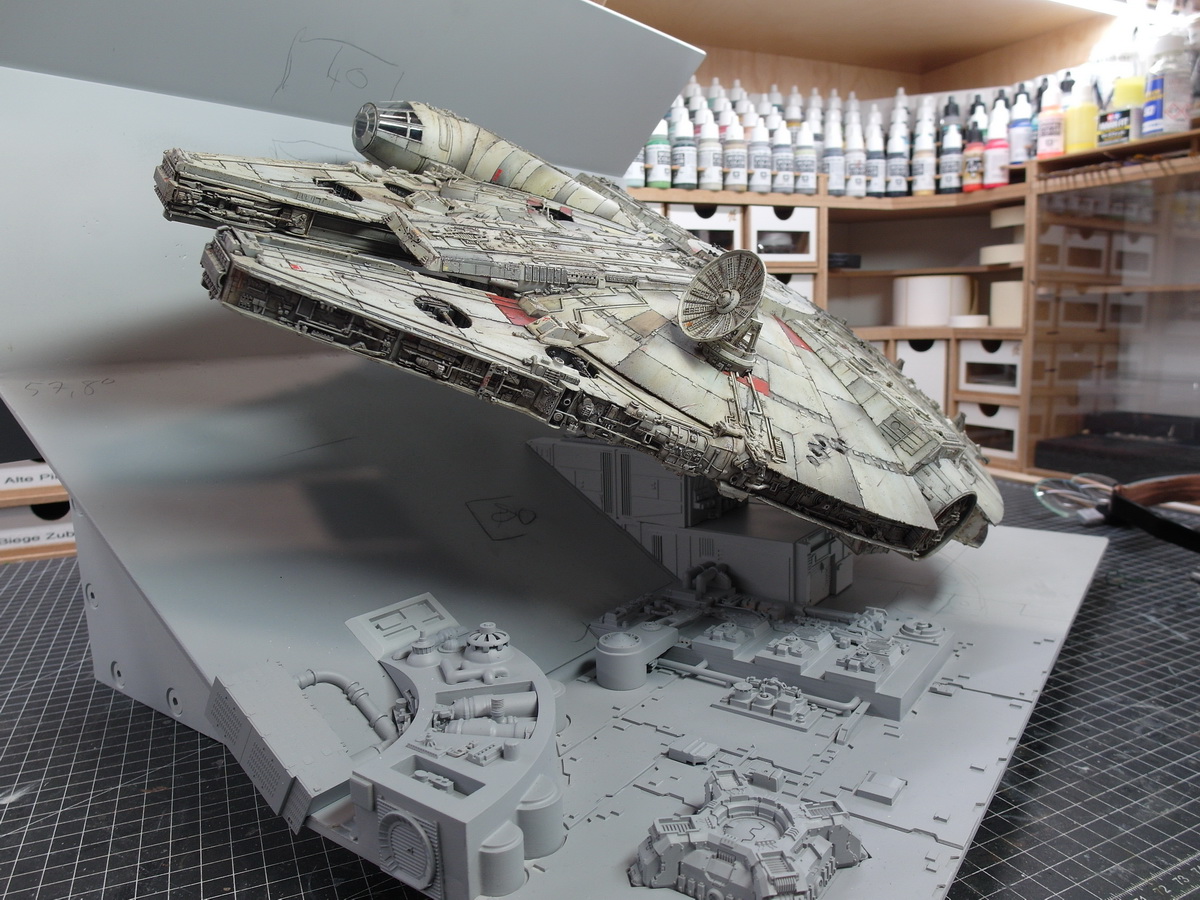
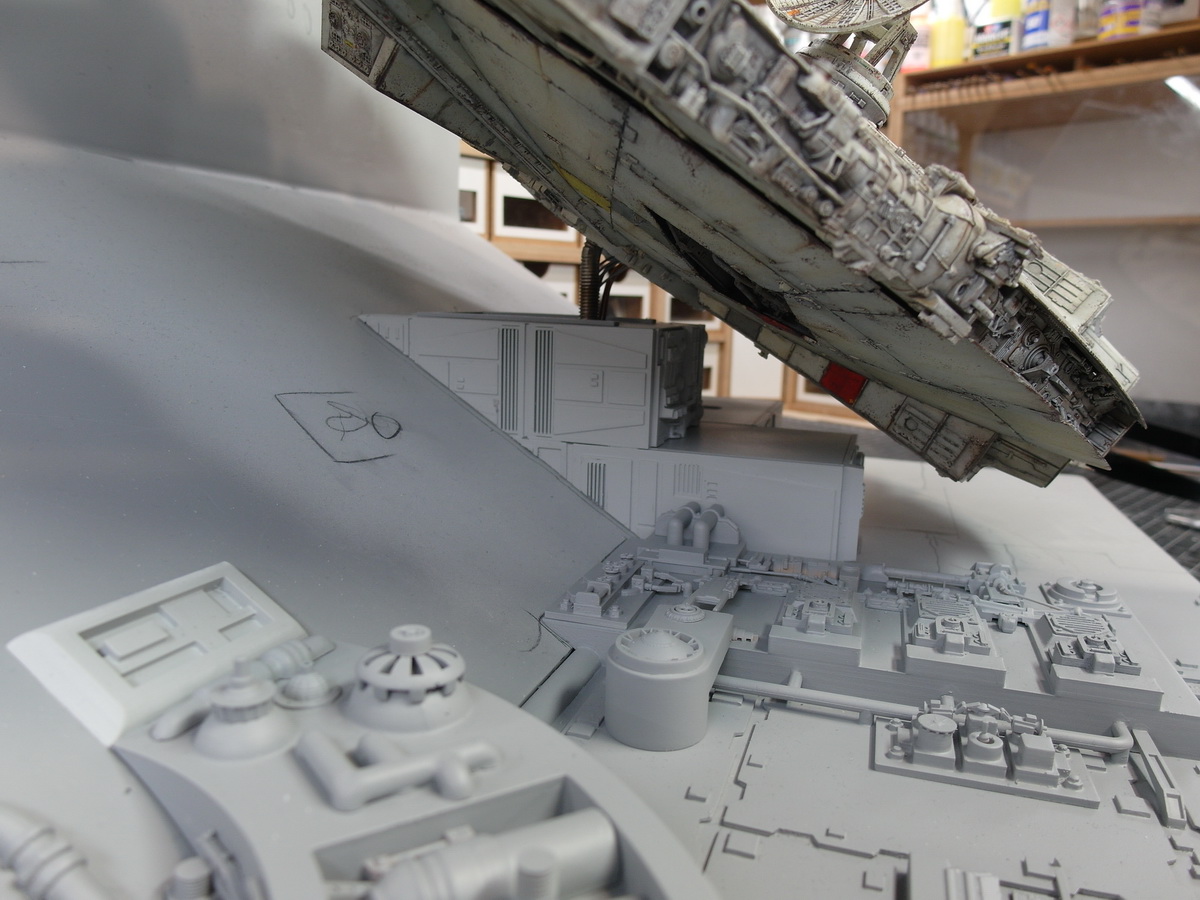
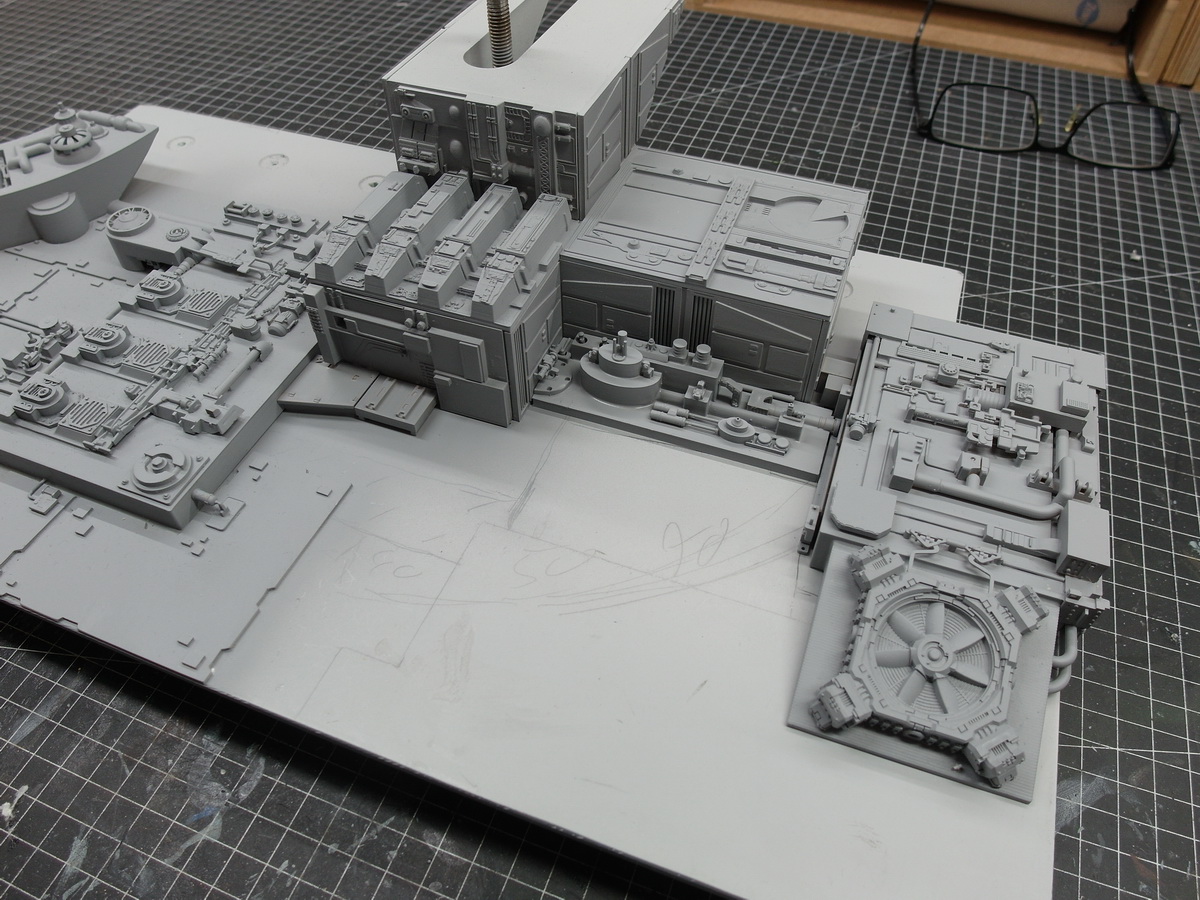
So we come pretty close to a Death Star surface I think.
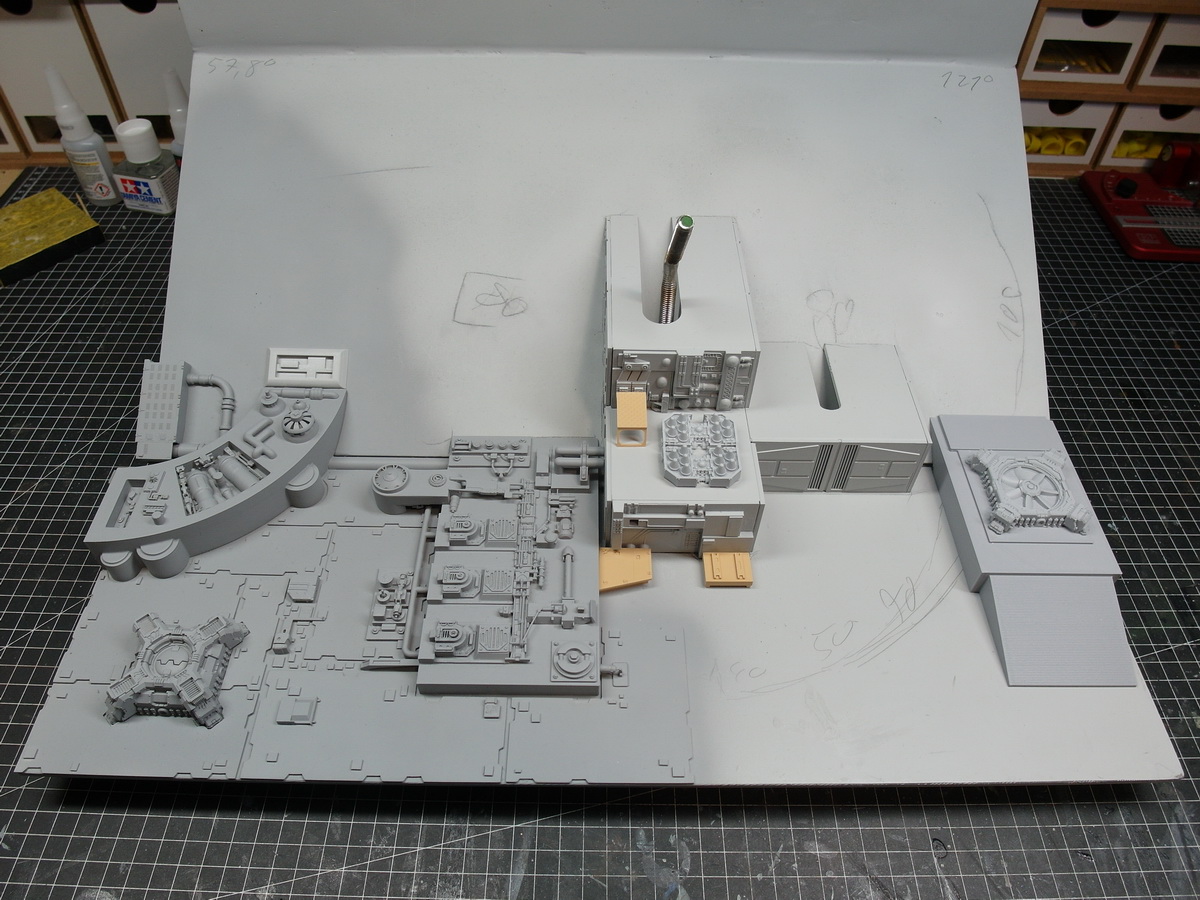
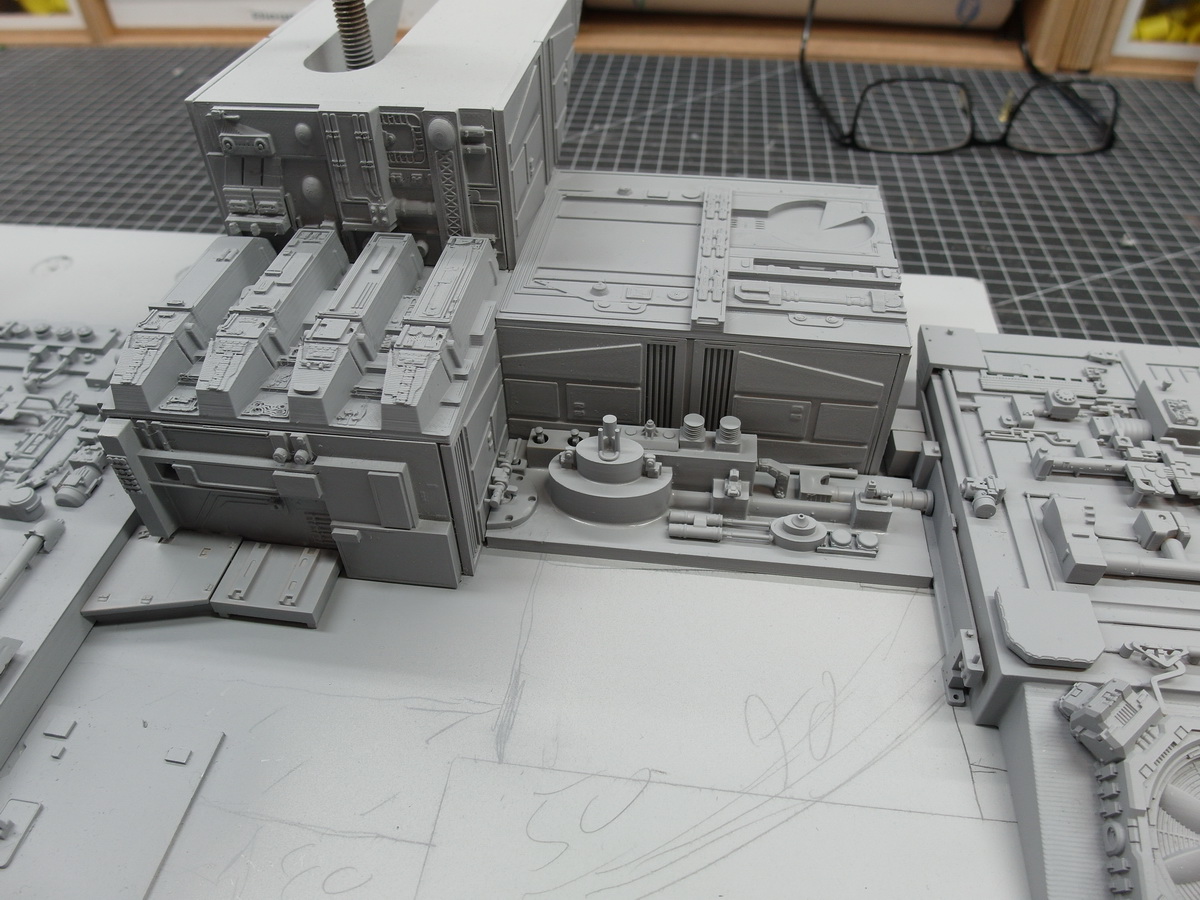
Now a look at how it could go on.
I’m not sure what position the next block will be in.
There is definitely still enough material for kitbashing. ![]()
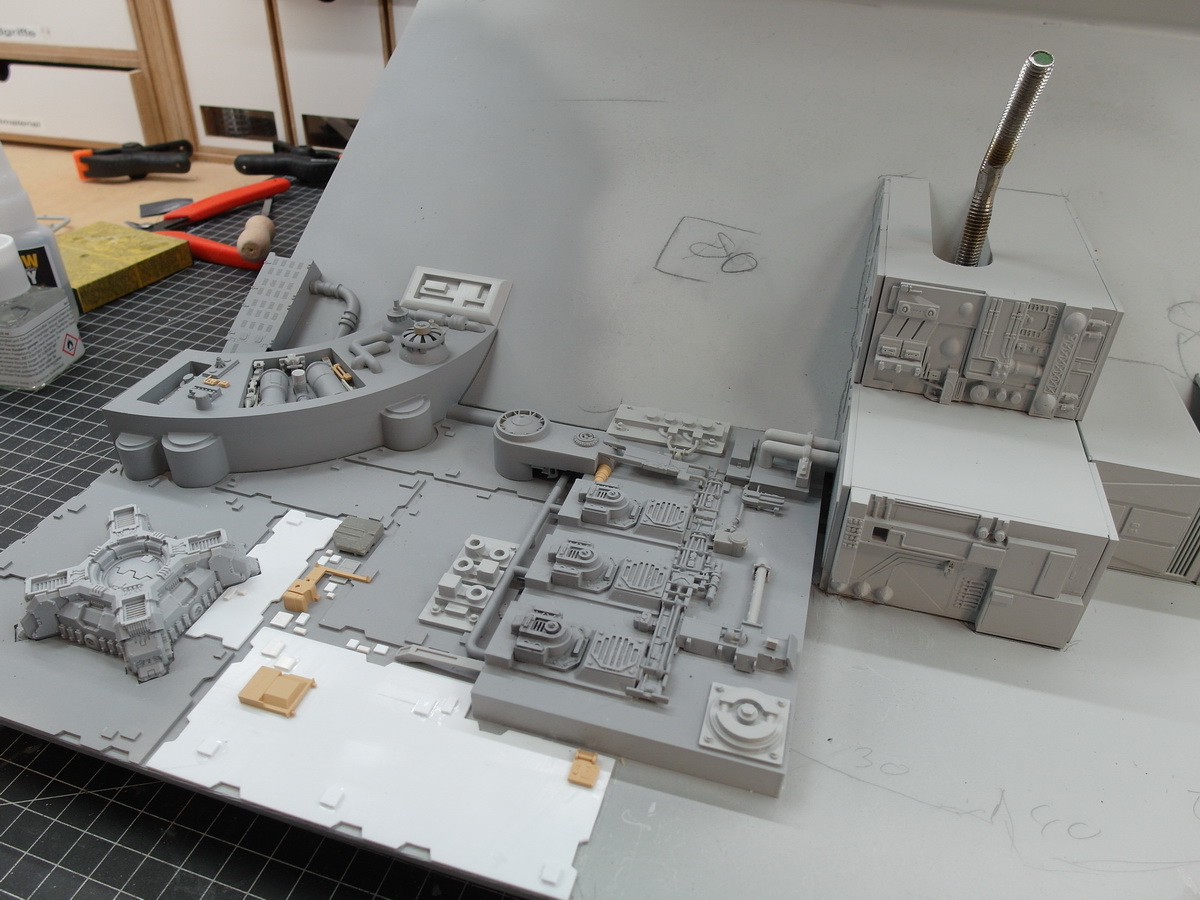
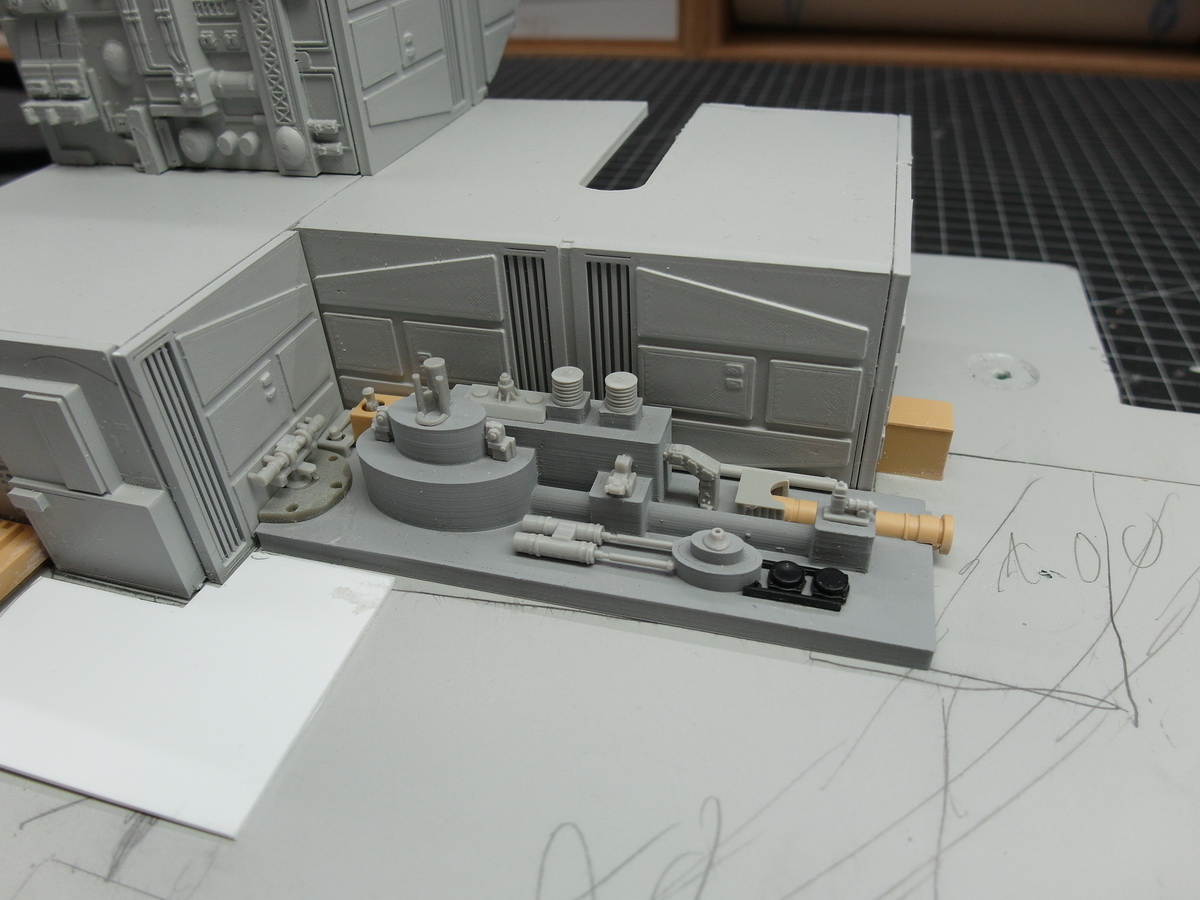
After I pushed the cover for the model holder quite far forward, a setting test had to be done today.
As you can see, tight but sufficient.
The cables also thread well into the compartment intended for the electronics.
I like it.
Looks fantastic… And with Han flying it … If could get tighter than that ![]()
Year, great Pilot that Han. ![]()
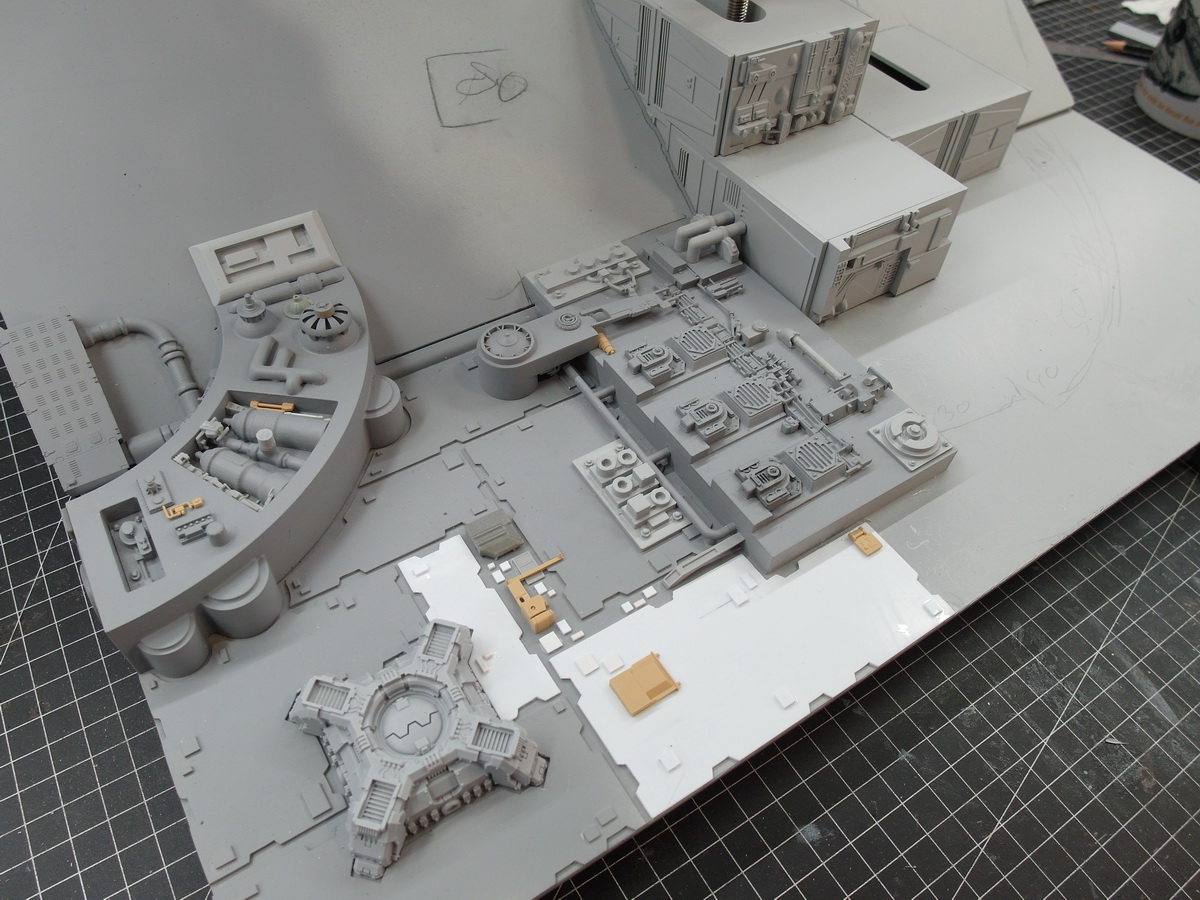
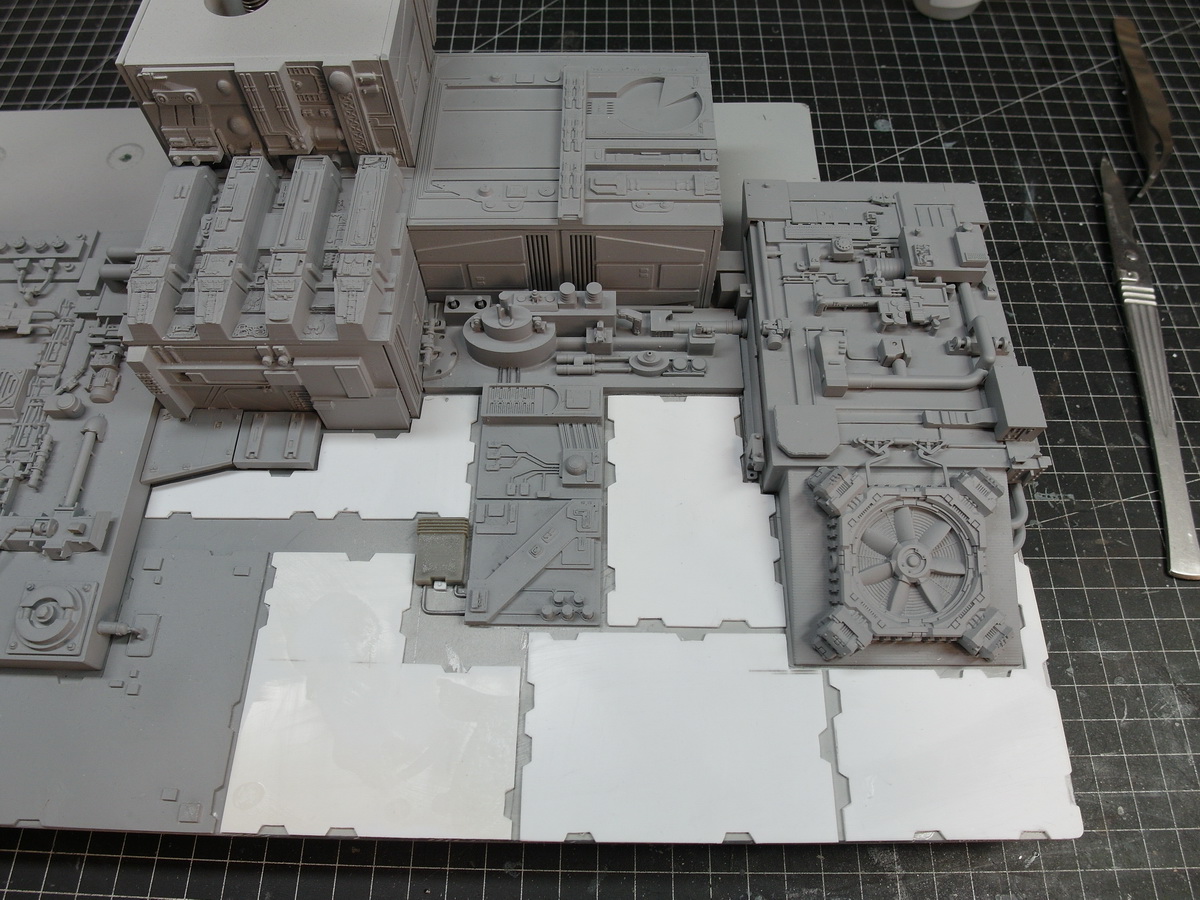
Again just a small mini update. Kitbashing is really very time consuming.
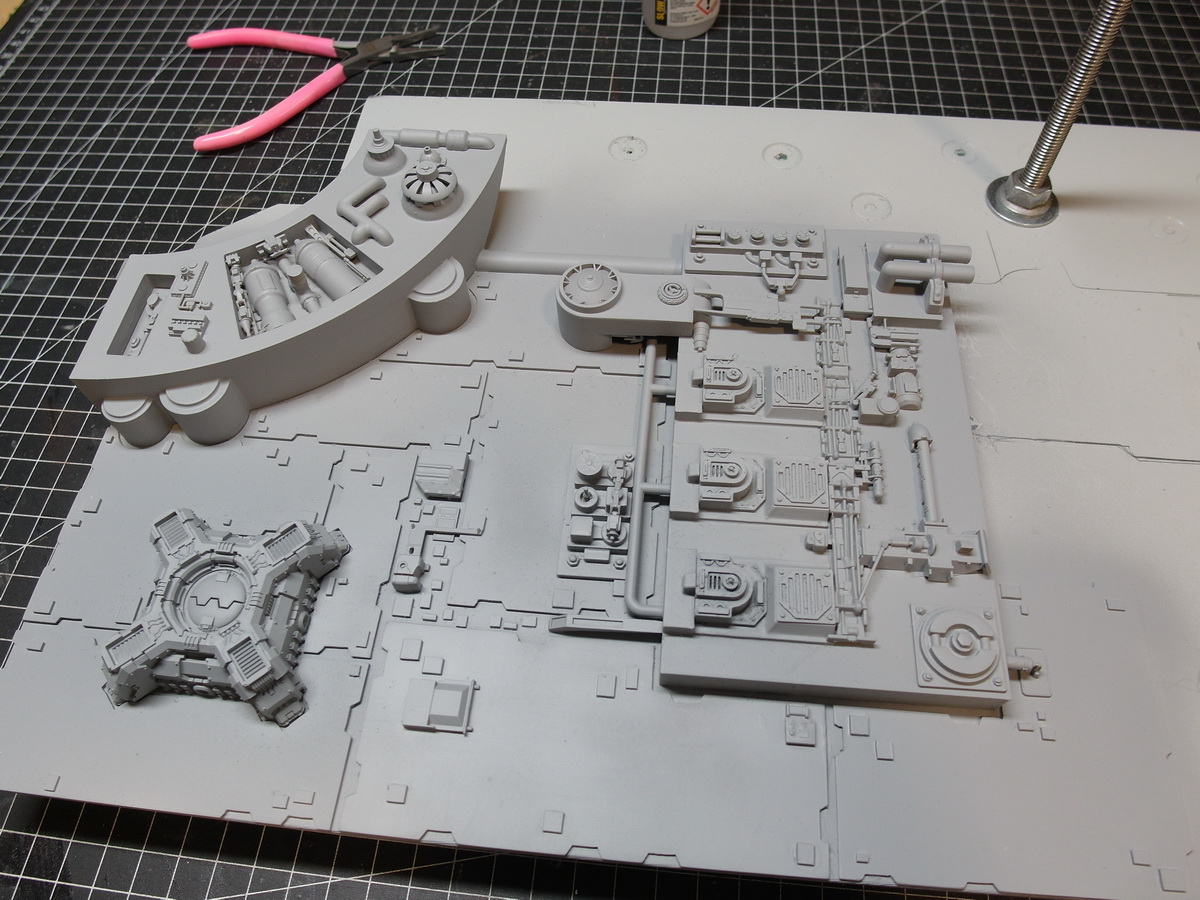
Right side cover.
Here, too, the slot of the two-part diorama must be concealed.
I think a little is still possible.
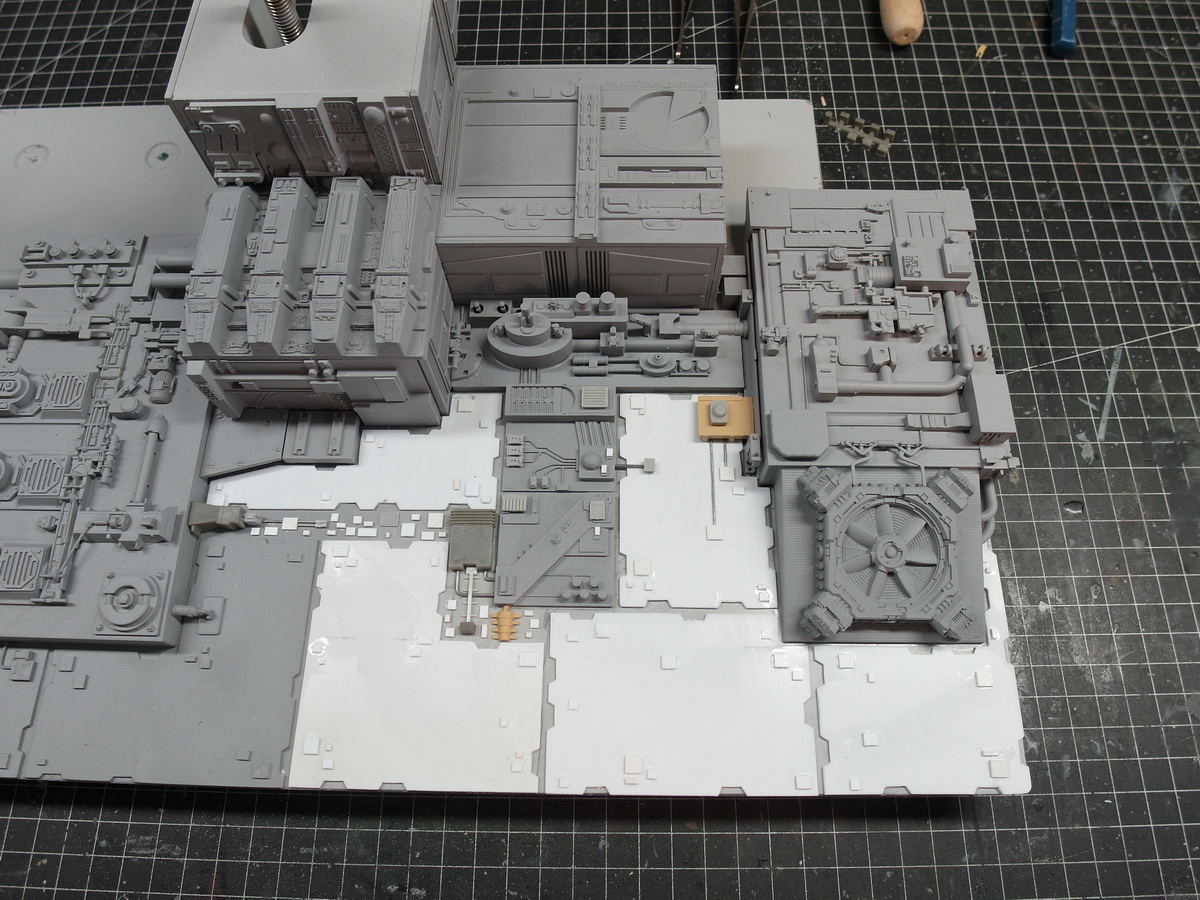
And now fresh from the airbrush cabin… still a little damp…
I think the big effort in kitbashing was worth it.
![]() worth it
worth it ![]() looks super.
looks super.
Thanks Johnny.
Continue with the star.
I’m afraid that there will only be small updates in the near future.
It’s extremely time consuming. First the creation on the computer, then the printing, the bold priming and the subsequent kitbashing.
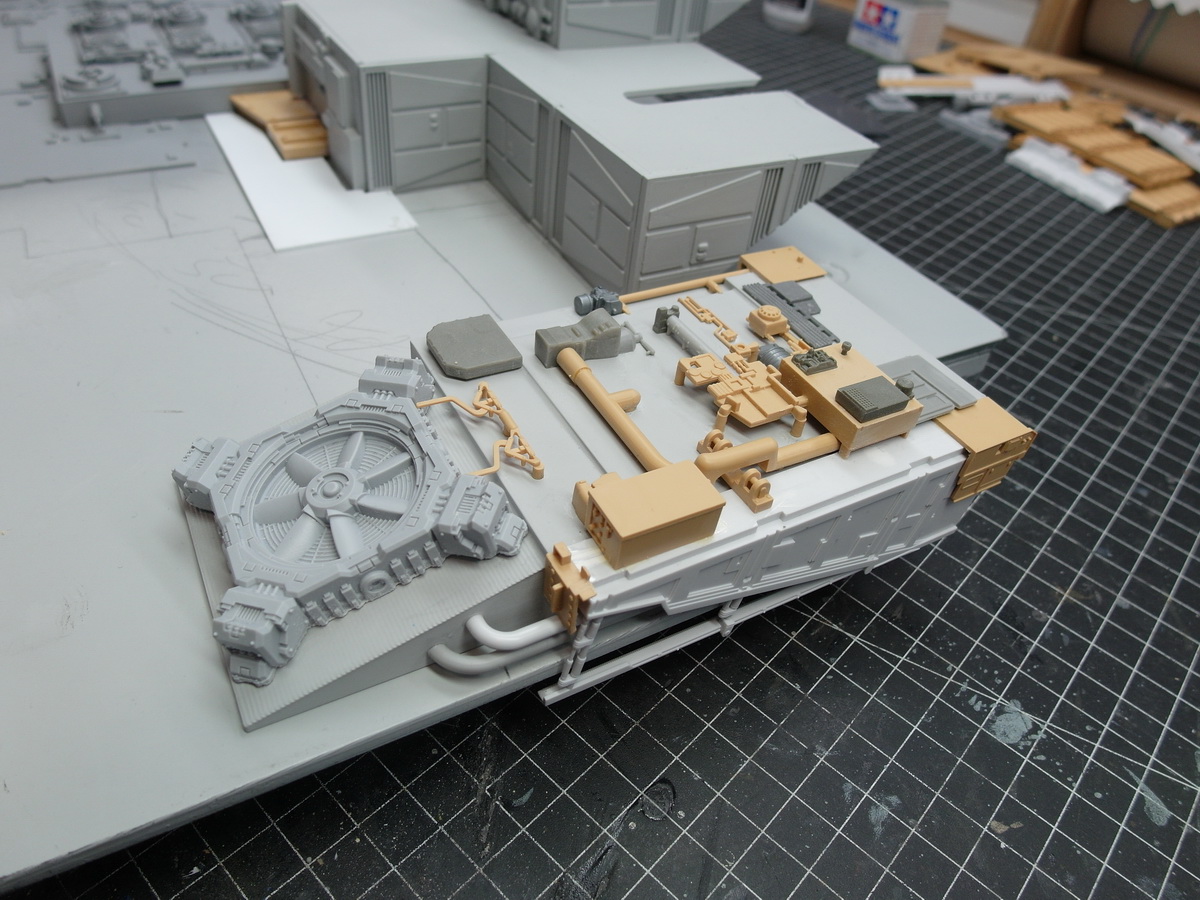
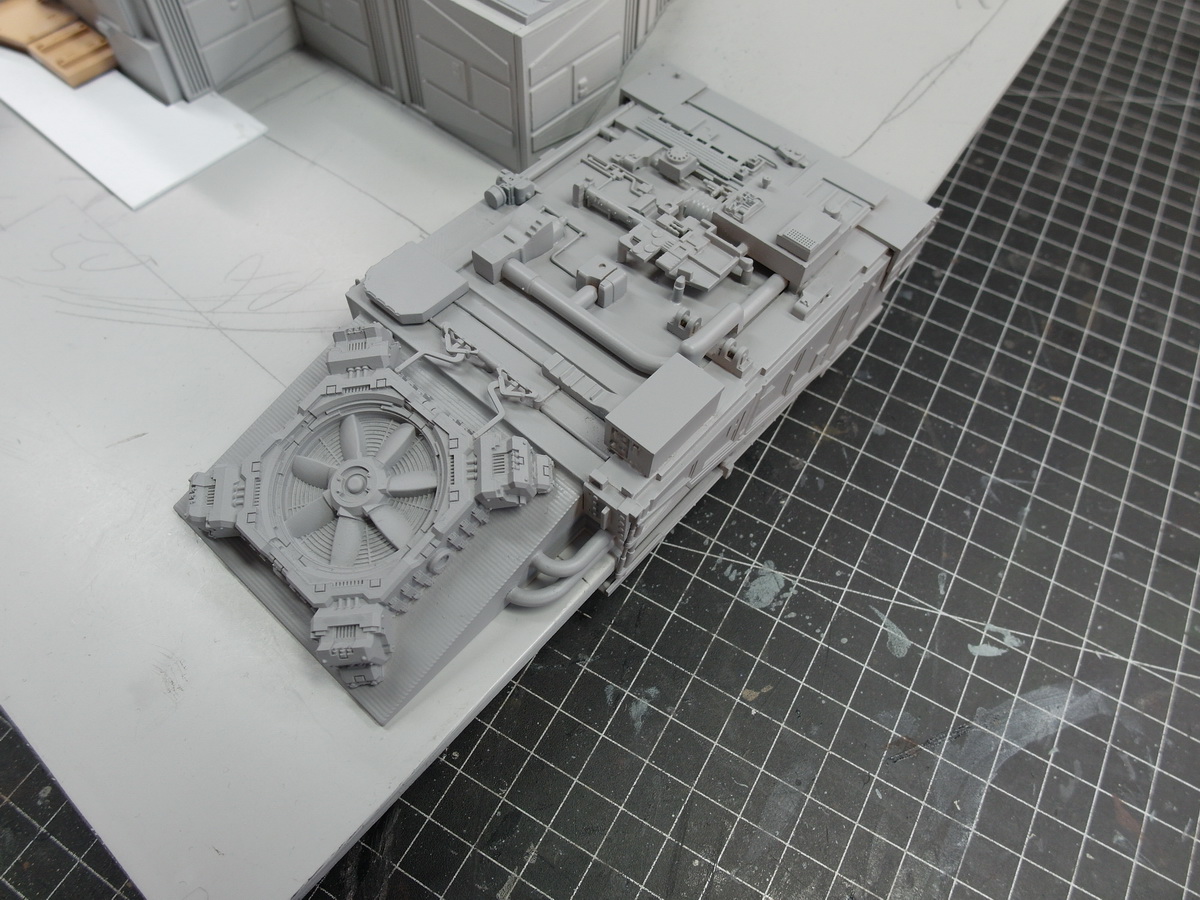
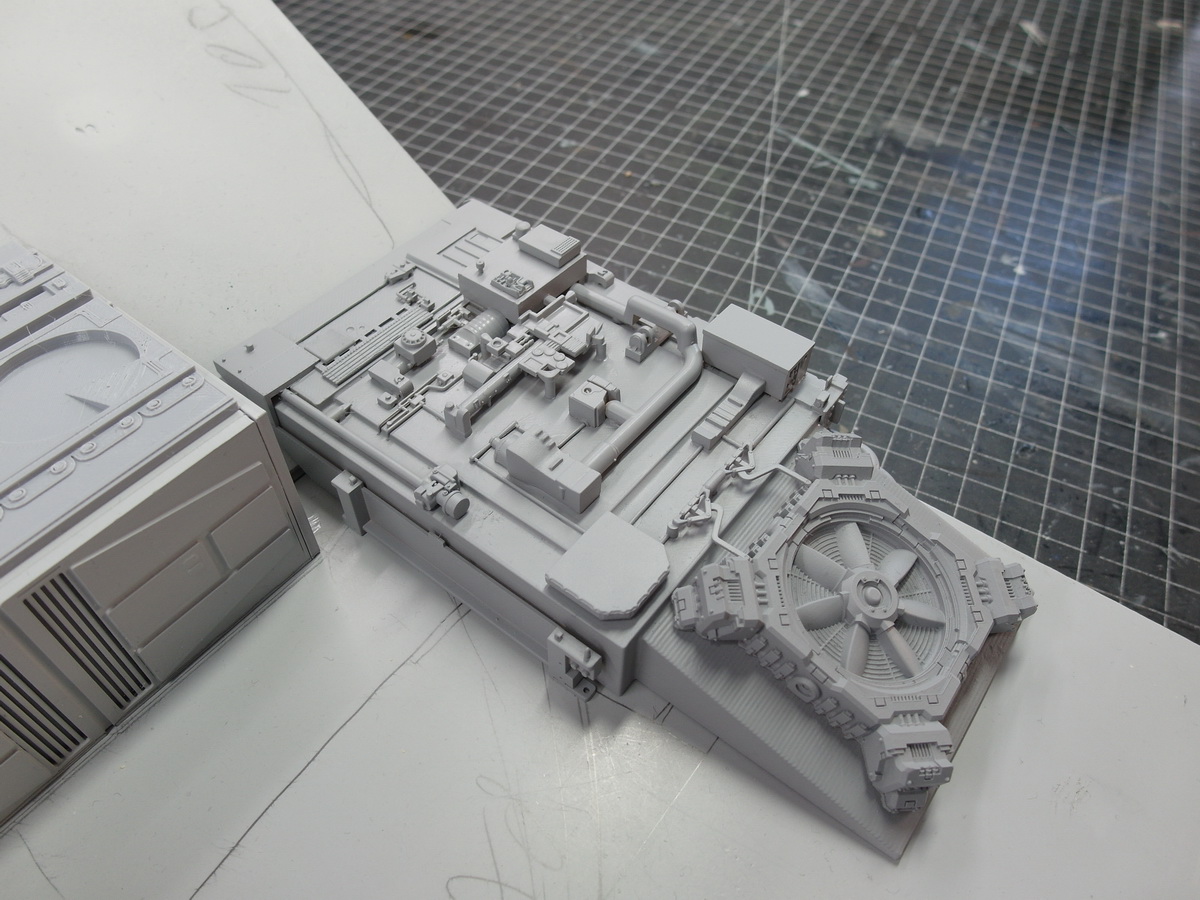
Here you can see the very simple, printed structure with the subsequent refinement using old components from the leftovers box.
I hope that the spare box will also be enough to create the complete diorama.
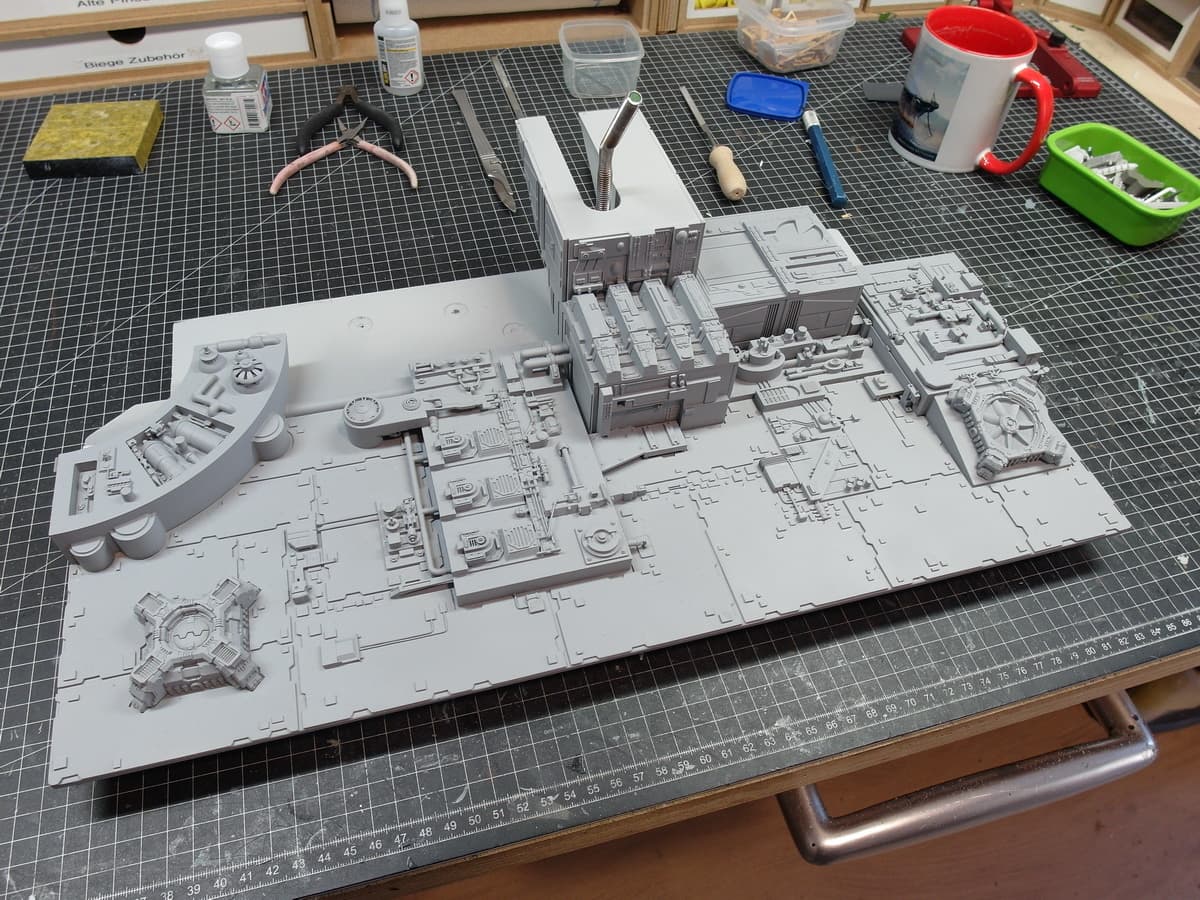
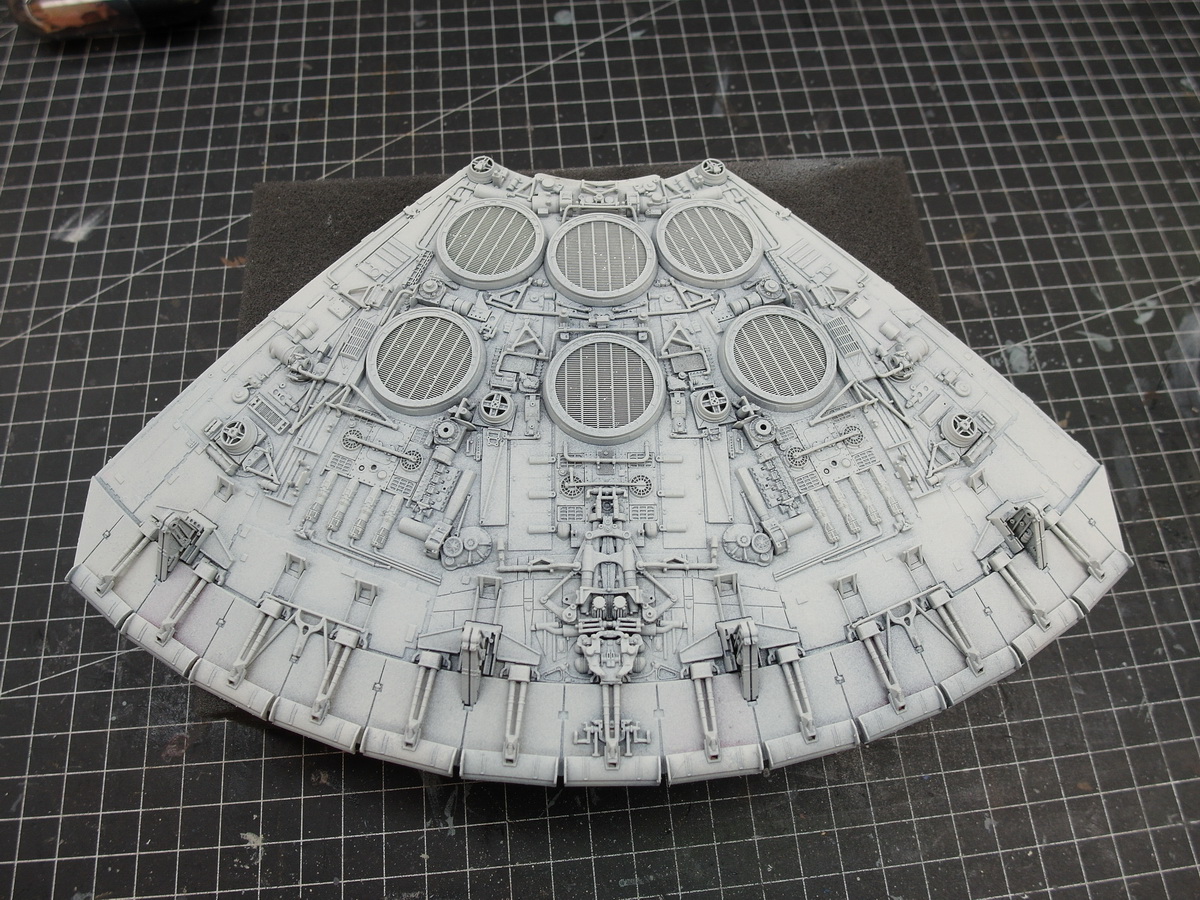
Primer.
And it comes together.
This part isn’t quite as elaborate as the one on the right, as you won’t see much of this area once the falcon is in position.
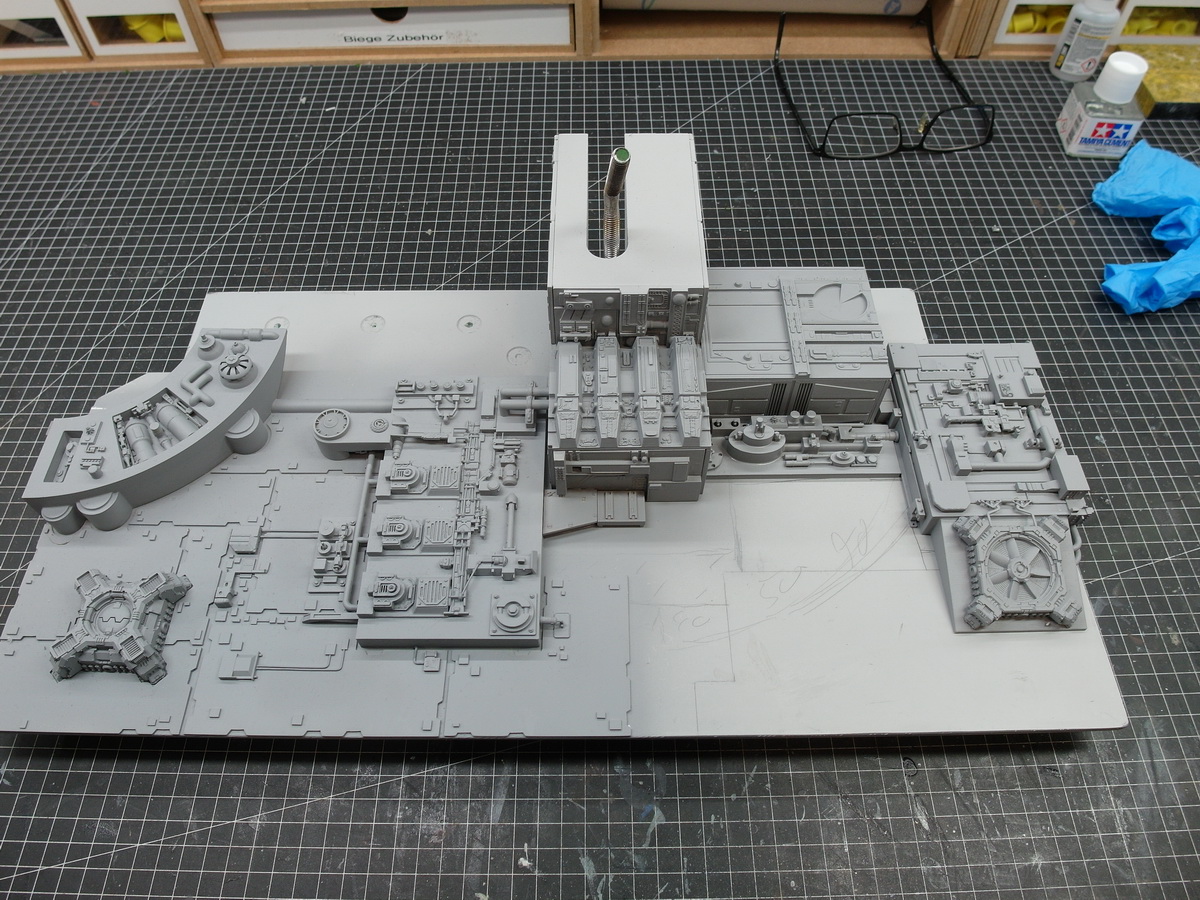
This is the current status.
Brilliant build up and use of spares ![]()
And again, thanks Johnny.
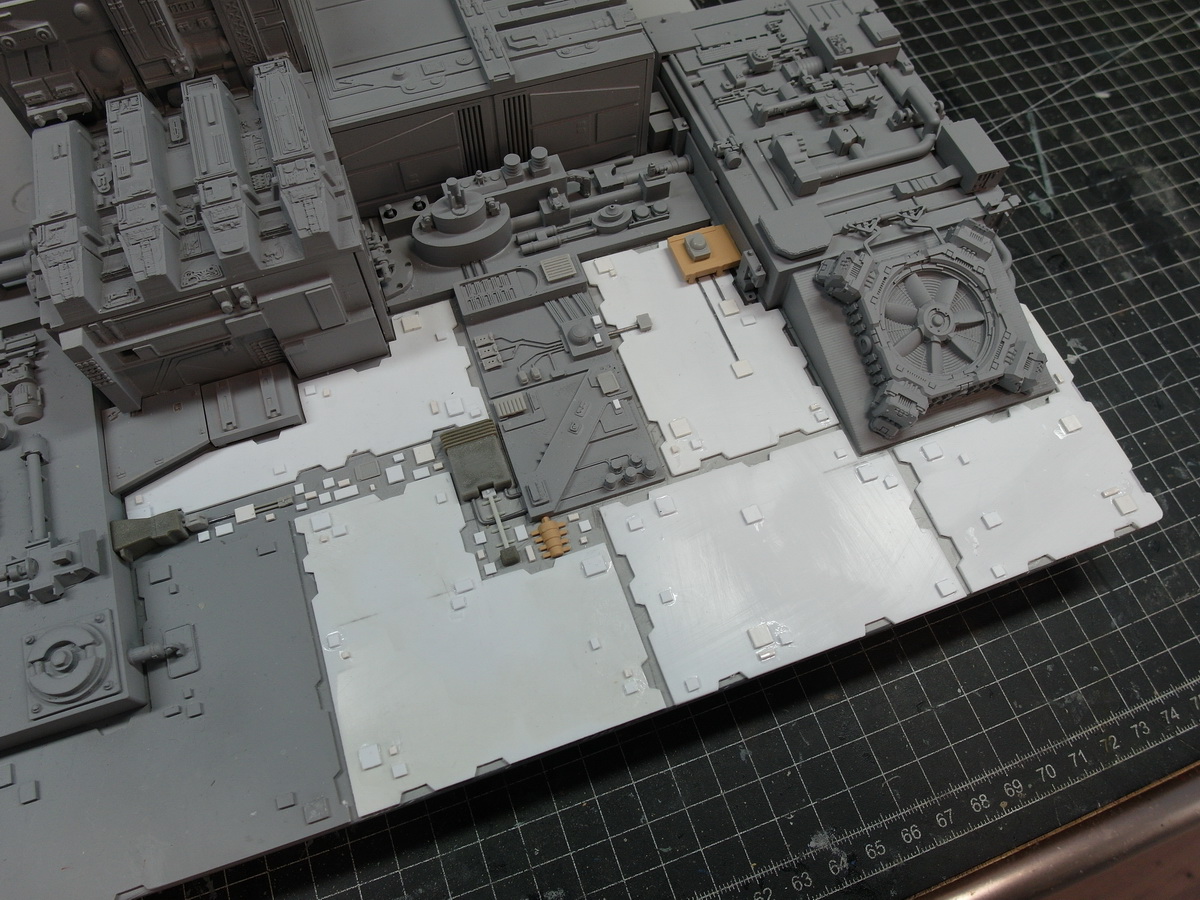
Laid the armor plates.
I love Styrene so awesome and easy to work with.
And details laid out.
Ready for the primer.
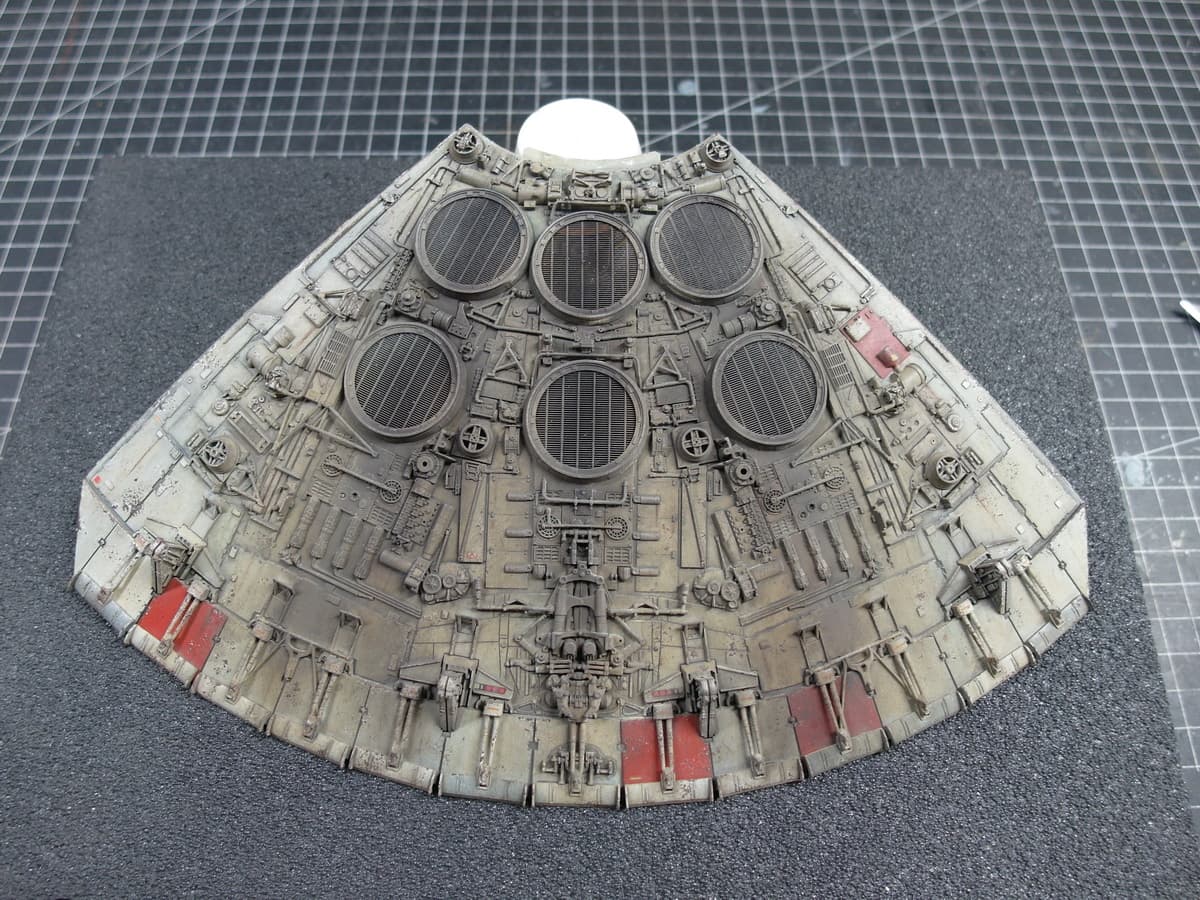
Fresh out of the paint booth again.
This roughly finishes the surface of the lower panel. But i’m sure I can remember one or two details.
Just keeps getting better and better. ![]()
![]()
I’ve been L & L (Lurking & Liking) this whole time and this entire project is just phenomenal. Mind-blowingly, exceptionally good.
Thats a model in its own right !! Brilliant scratch work
Wow! Such a talented eye for greeblies! ![]()
![]()
—mike
Thanks guys, your comments make me proud,
But there is a small setback.
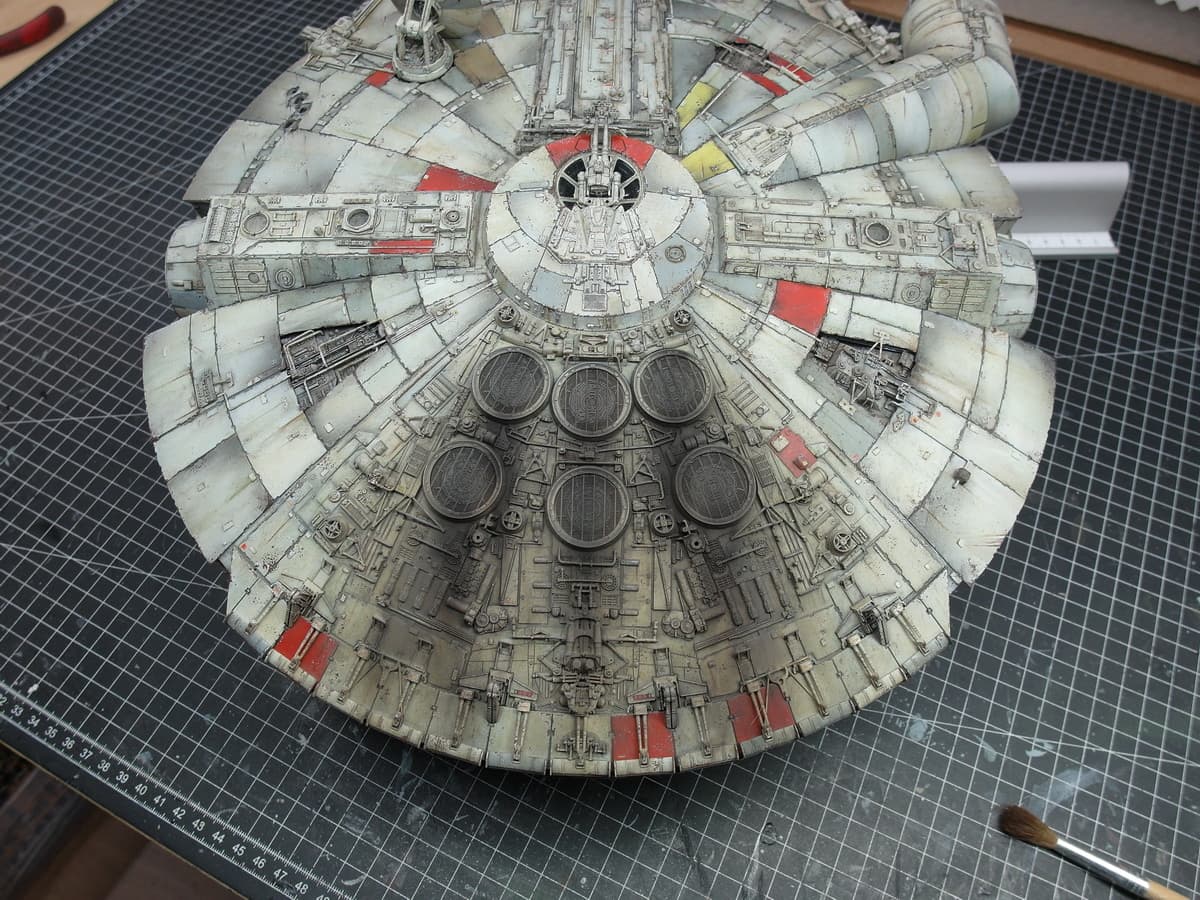
I just wasn’t happy with the engine cover. Firstly, the exhaust fumes were going in the wrong direction and it was too heavily pigmented. Even though it was like that in the film, it bothered me immensely.
So I changed the direction of the exhaust gases and made things even worse. ![]()
I tried to wash off the pigments again, but as you can see, it’s just a muddy color.
So what else was there for me to do than completely repaint the lid?!
But it’s going well.
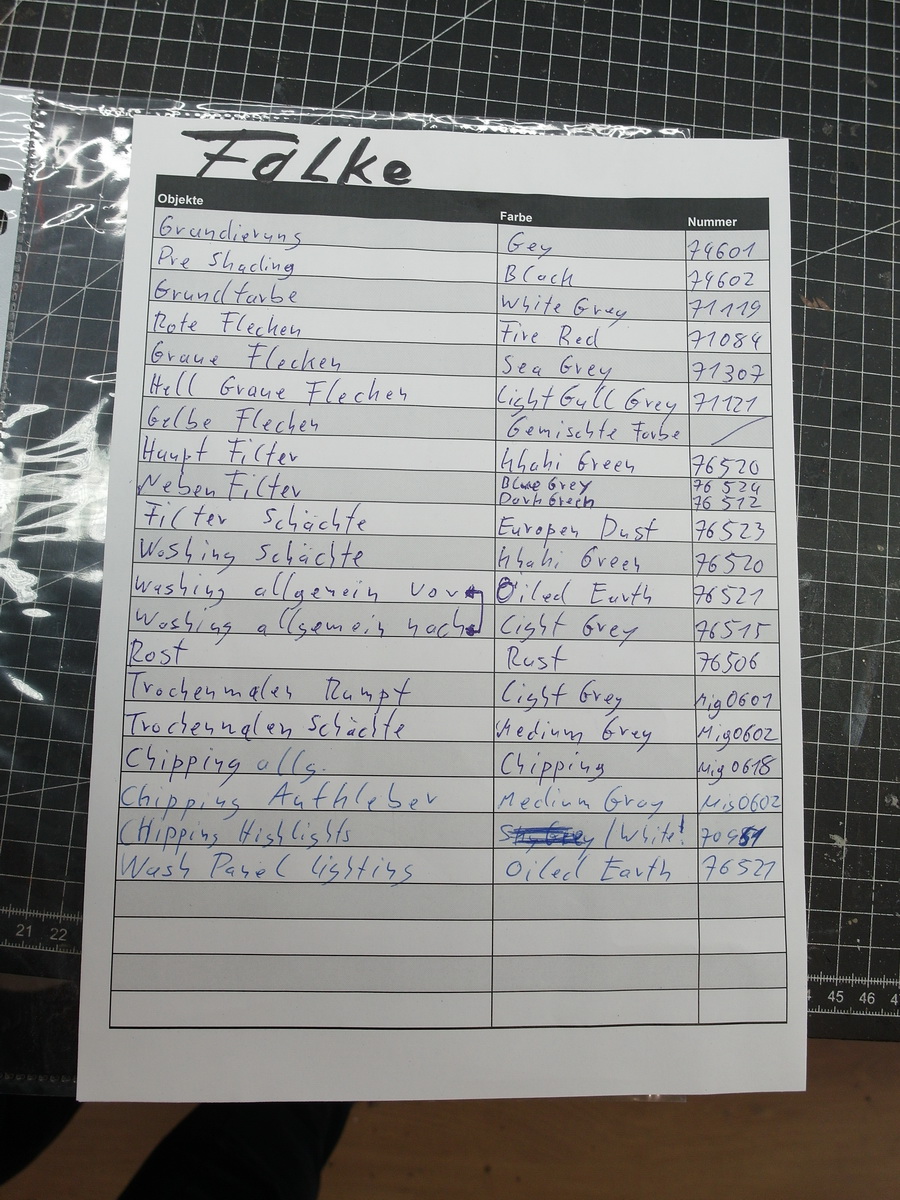
The plates are painted in three different colors.
Good that I always make a color legend for each of my models.
Otherwise I would get my problems with “50 shades of gray”. ![]()
So the battle was lost, but not the war. ![]()
Excellent recovery on the repaint … I would of cried like a baby lol …