Yeah, something just drew me to the Merkava shape …
1 Like
I’d definitely be interested in following your build. This is a kit I have in the stash, along with the Meng Mk3D LIC that Johnny mentioned. I’ve a thing of IDF kit, I’ve done the Academy Mk2D and although it’s quite old it still builds up to a respectable model.
1 Like
How big were the links on the real thing?
Two inches? A tad big isn’t it?
One inch? Could be about right for holding on to locking pins et.c.
Two inches = 51 mm, divide by 35 and arrive at 1.4 mm
One inch = 25.4 mm, divide by 35 and get 0.7 mm
Getting awfully small …
2 Likes
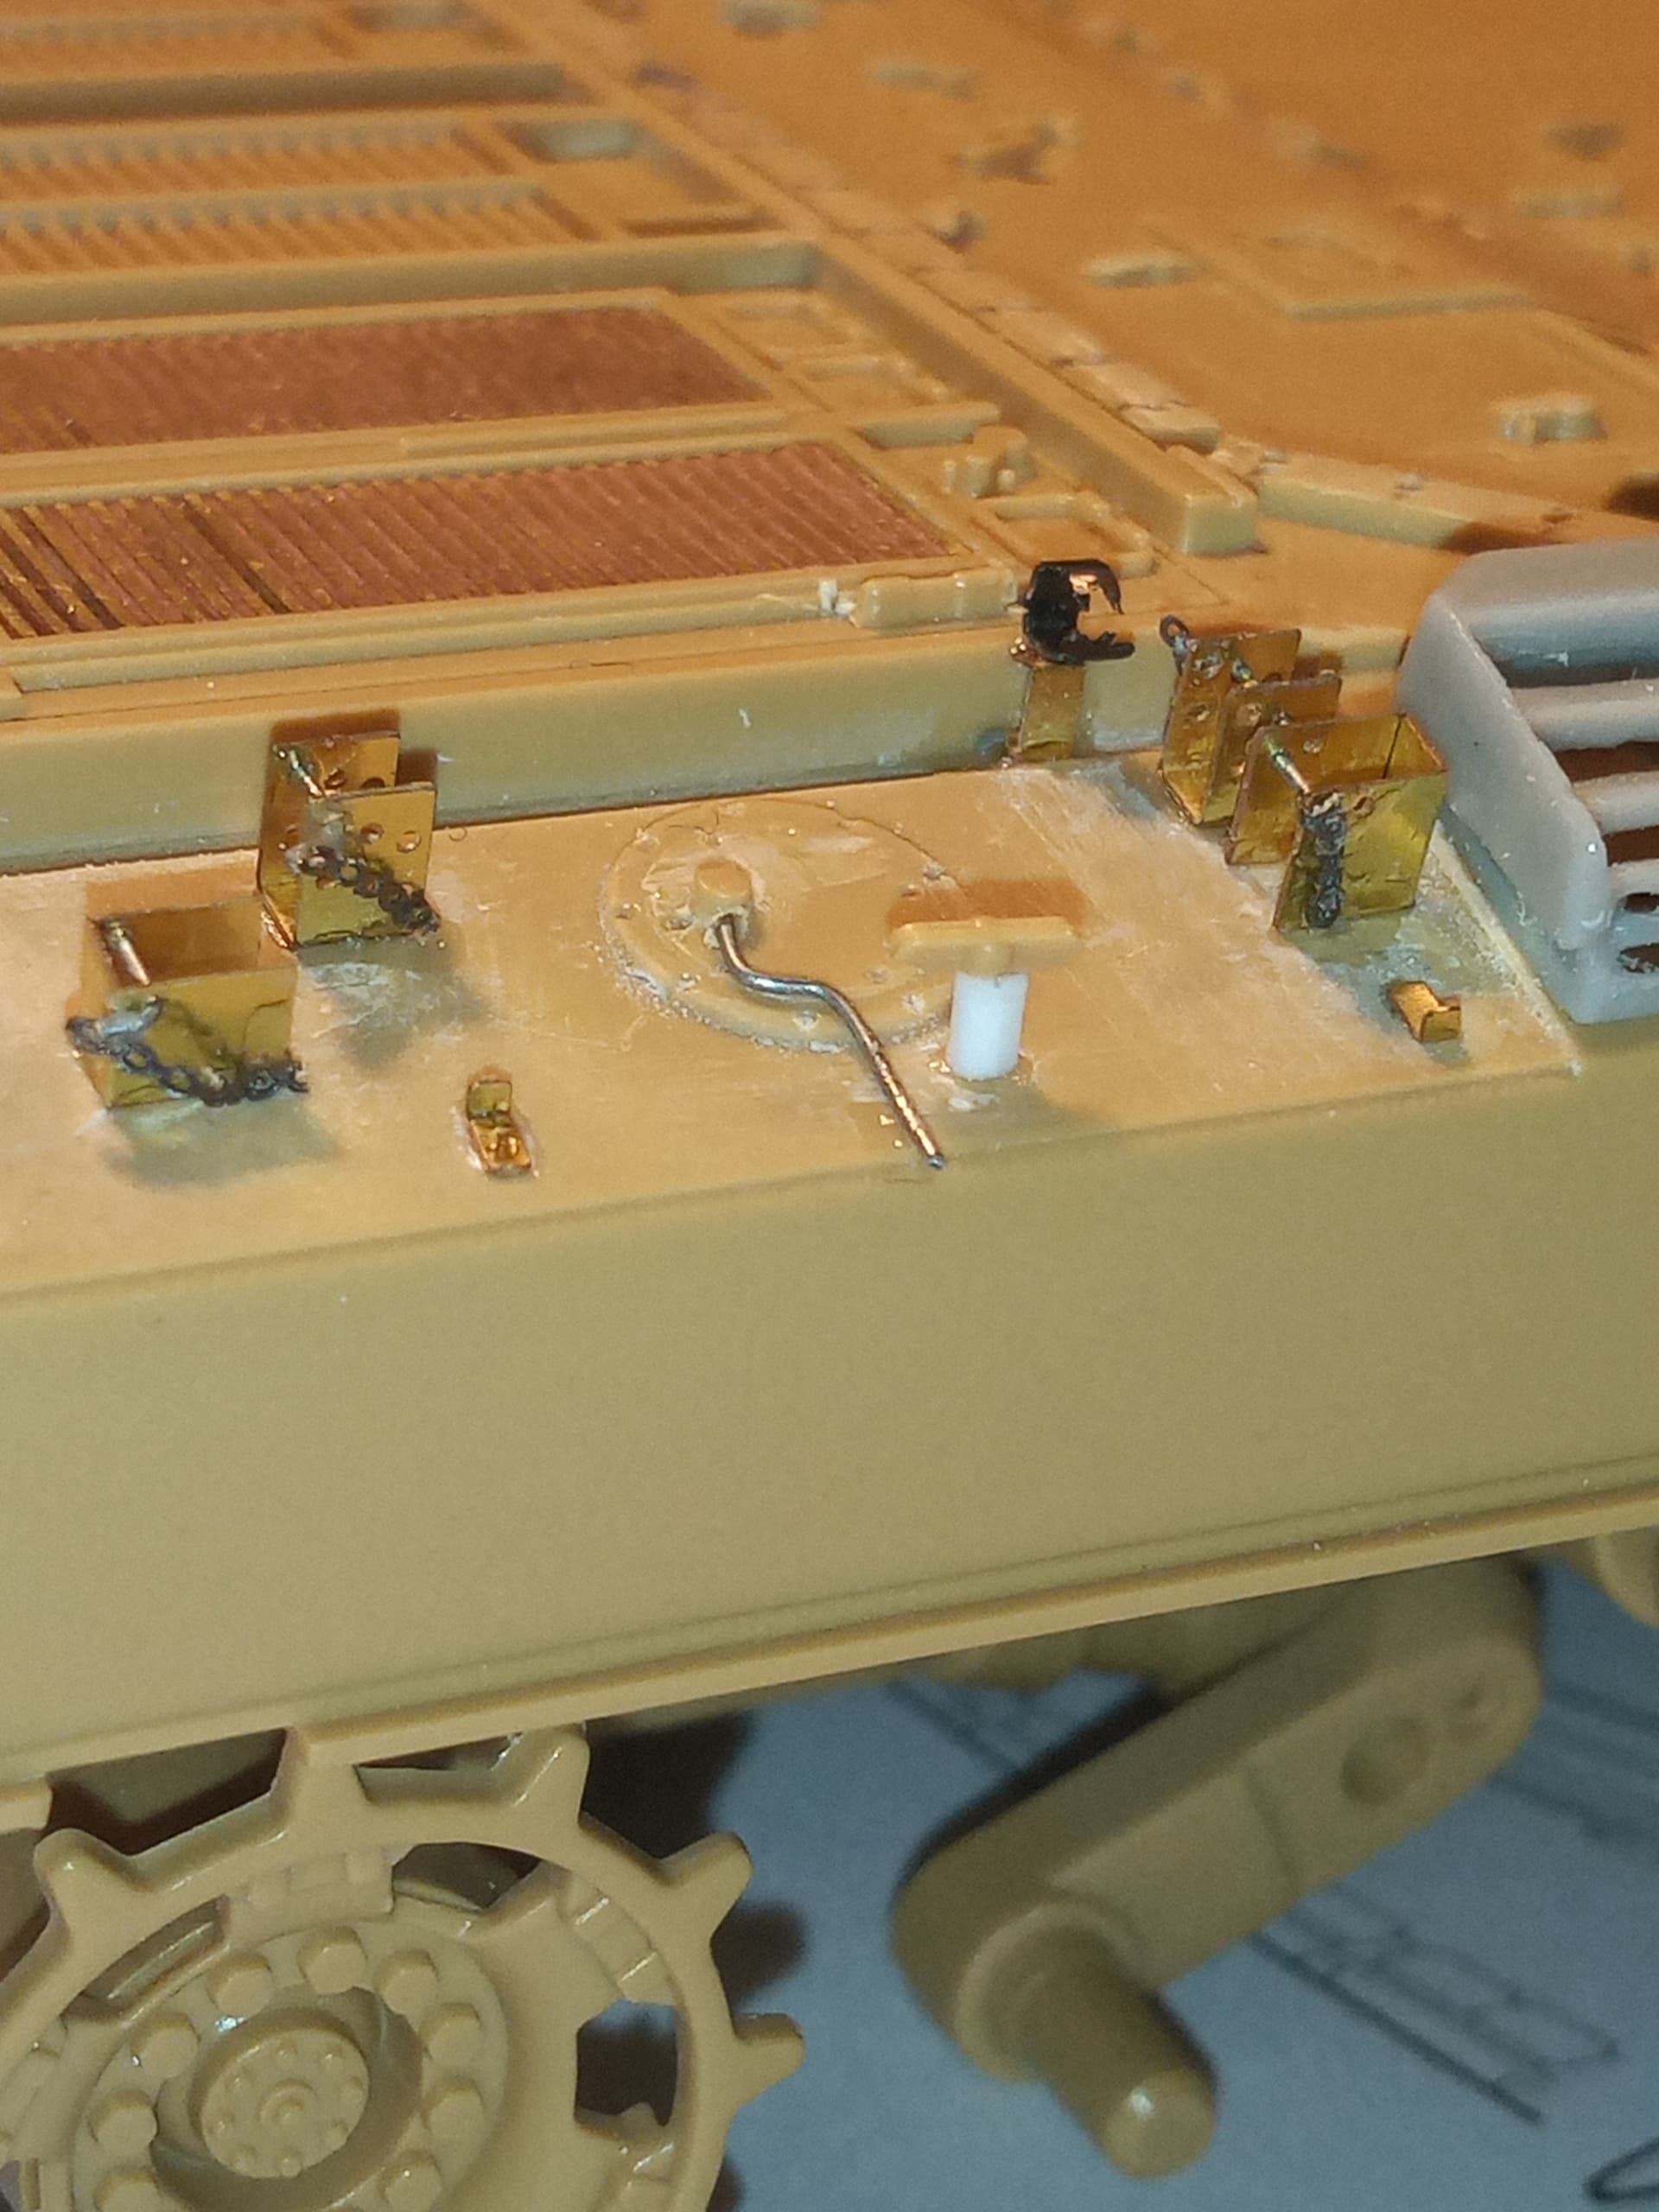
They are small, and the PE ones are pretty close to it. I cant really remember the actual link length but this gives you an idea in the images below. The real pins are not L shaped either like I have done on mine, but the quick release pull type.

Probably around the inch mark or there abouts … the PE ones just about cut it
3 Likes
Also if you give the PE chains a twist or two it imparts a 3D look to them.
2 Likes
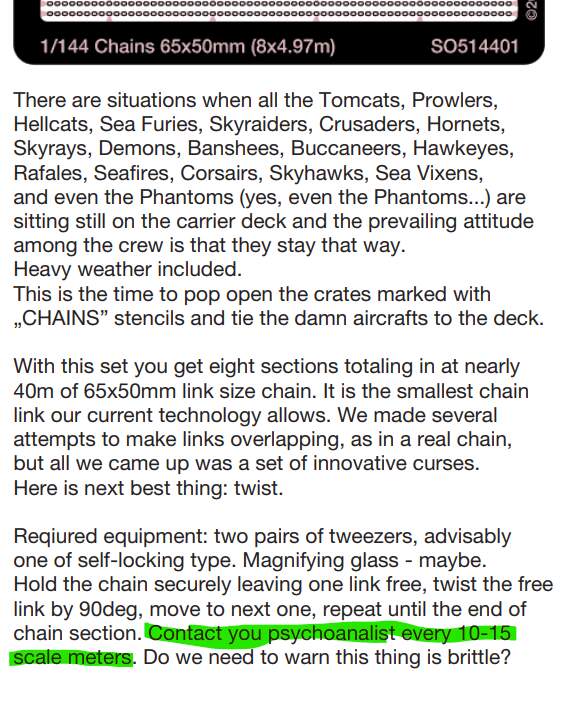
Having just used loose-link micro chains to hang “plywood” skirts on my Ersatz-Panzer M41 I can attest to the psycho-analyst requirement!
4 Likes
A pic would be good Tom if you can to see how they hang and look etc ?
2 Likes
Here ya go - from the Movie Star campaign thread.
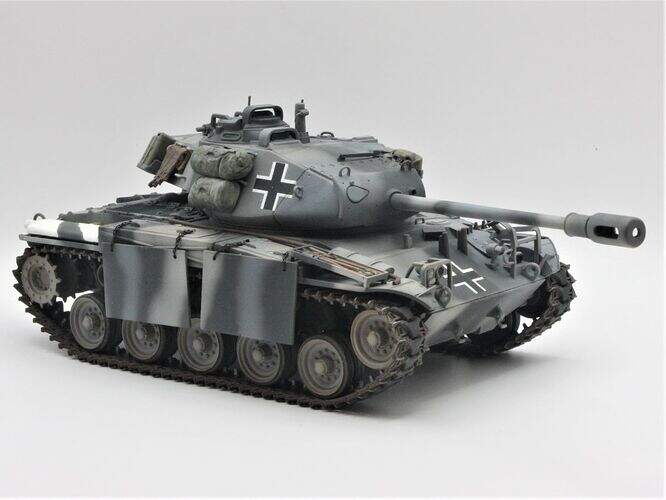
3 Likes
very nice as well … chains look good … Great finish you have on that ![]()
2 Likes
D’you know what? That is really rather nice.
Well done Tom!
1 Like
All it took for six chains was three hours and a ton of swearing! ![]()
2 Likes
I feel your pain - whenever for instance I tackle Bundeswehr vehicles - those damned smoke dischargers.
1 Like
Hi!
It´s not only small details. I do have a link of both in my garage…Memories of good old BAOR time. CR1 one has a width of 650mm, Chieftain width is 600mm. Layout is, as Johnny said, quite different as well.
Andreas
2 Likes
Cheers Andreas, and as I thought, that answers the question about the width and not fitting on the sprockets … God, thinking about track bashing has brought me out in a cold sweat lol …
1 Like
Hi Johnny,
from me who did not crew these wagons like you did: The tracks look so different, I can´t ever recommend to use one for theother. I will do a picture of both together at the weekend and show it here, since it was frequently asked in forums if these are interchangeable. CR1 track link is more massive both in its look and its actual weight.
Andreas
2 Likes
It’s been so long since I even held a Chally or chiefy track link … I knew you can’t interchange on the real wagons … I wasn’t sure about the kits though.
What I do remember is 2 or 4 of us humping round lengths of 6 links and it being back breaking … Everyone always dreaded having to drop a link as you knew as they got less and less … The track change was coming… Along with a sprocket ring change or at least reversing them …
2 Likes
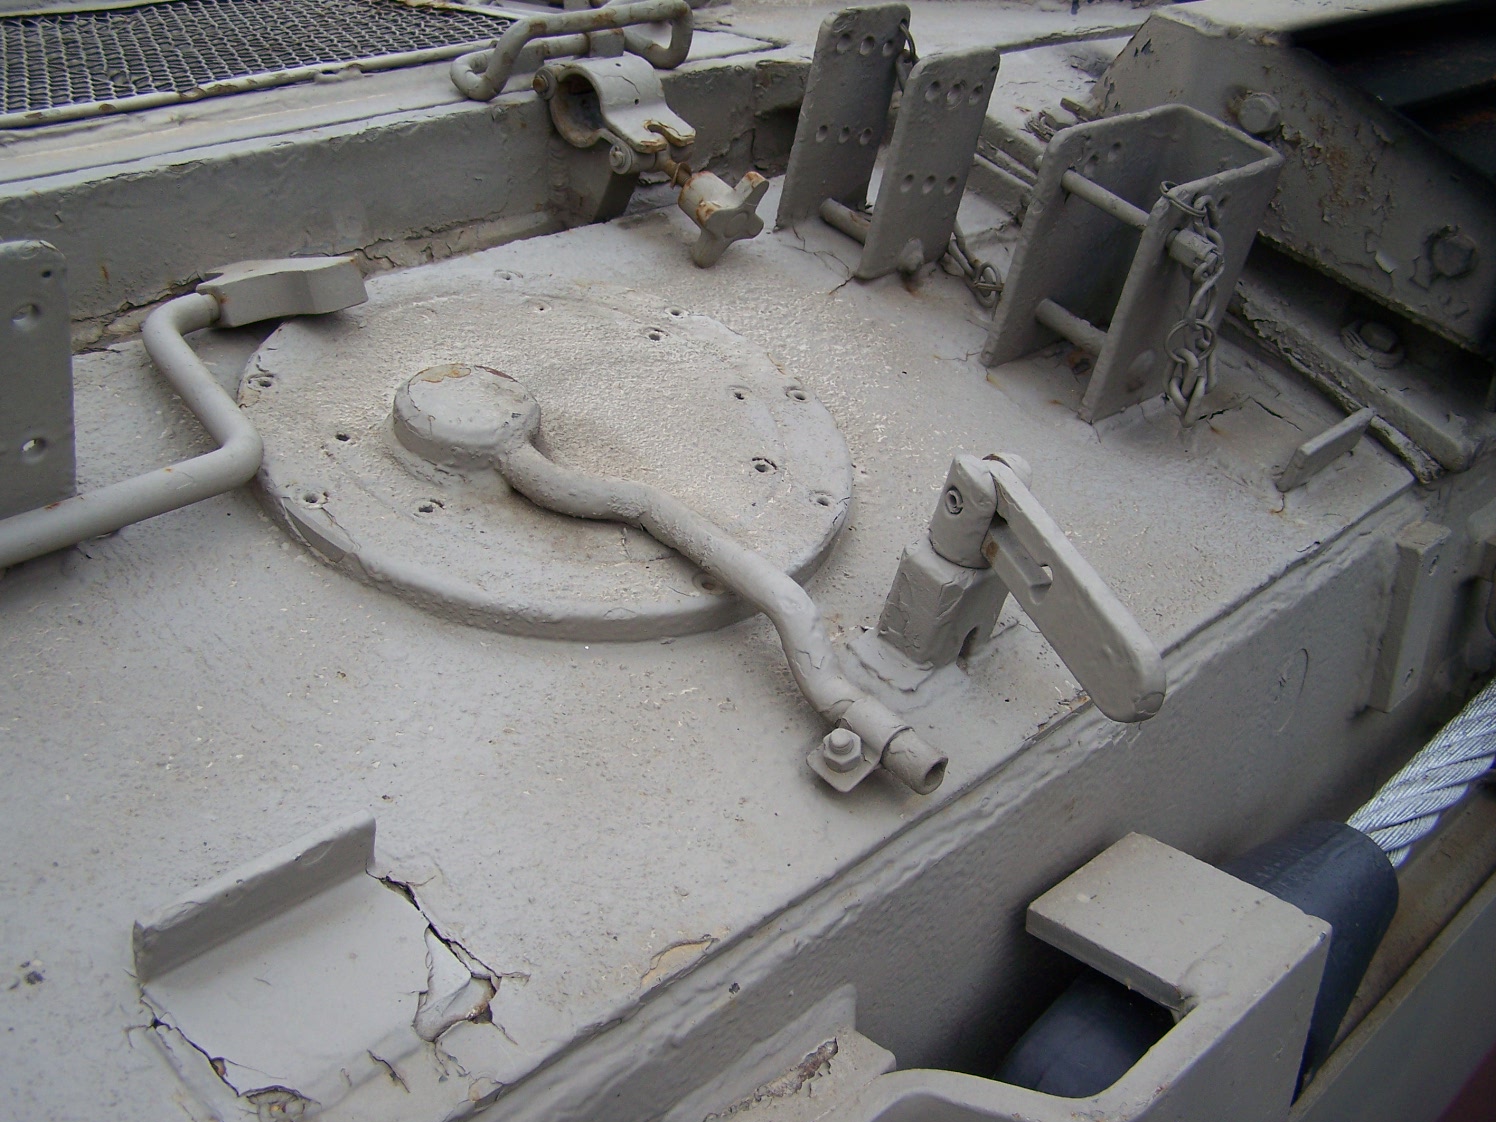
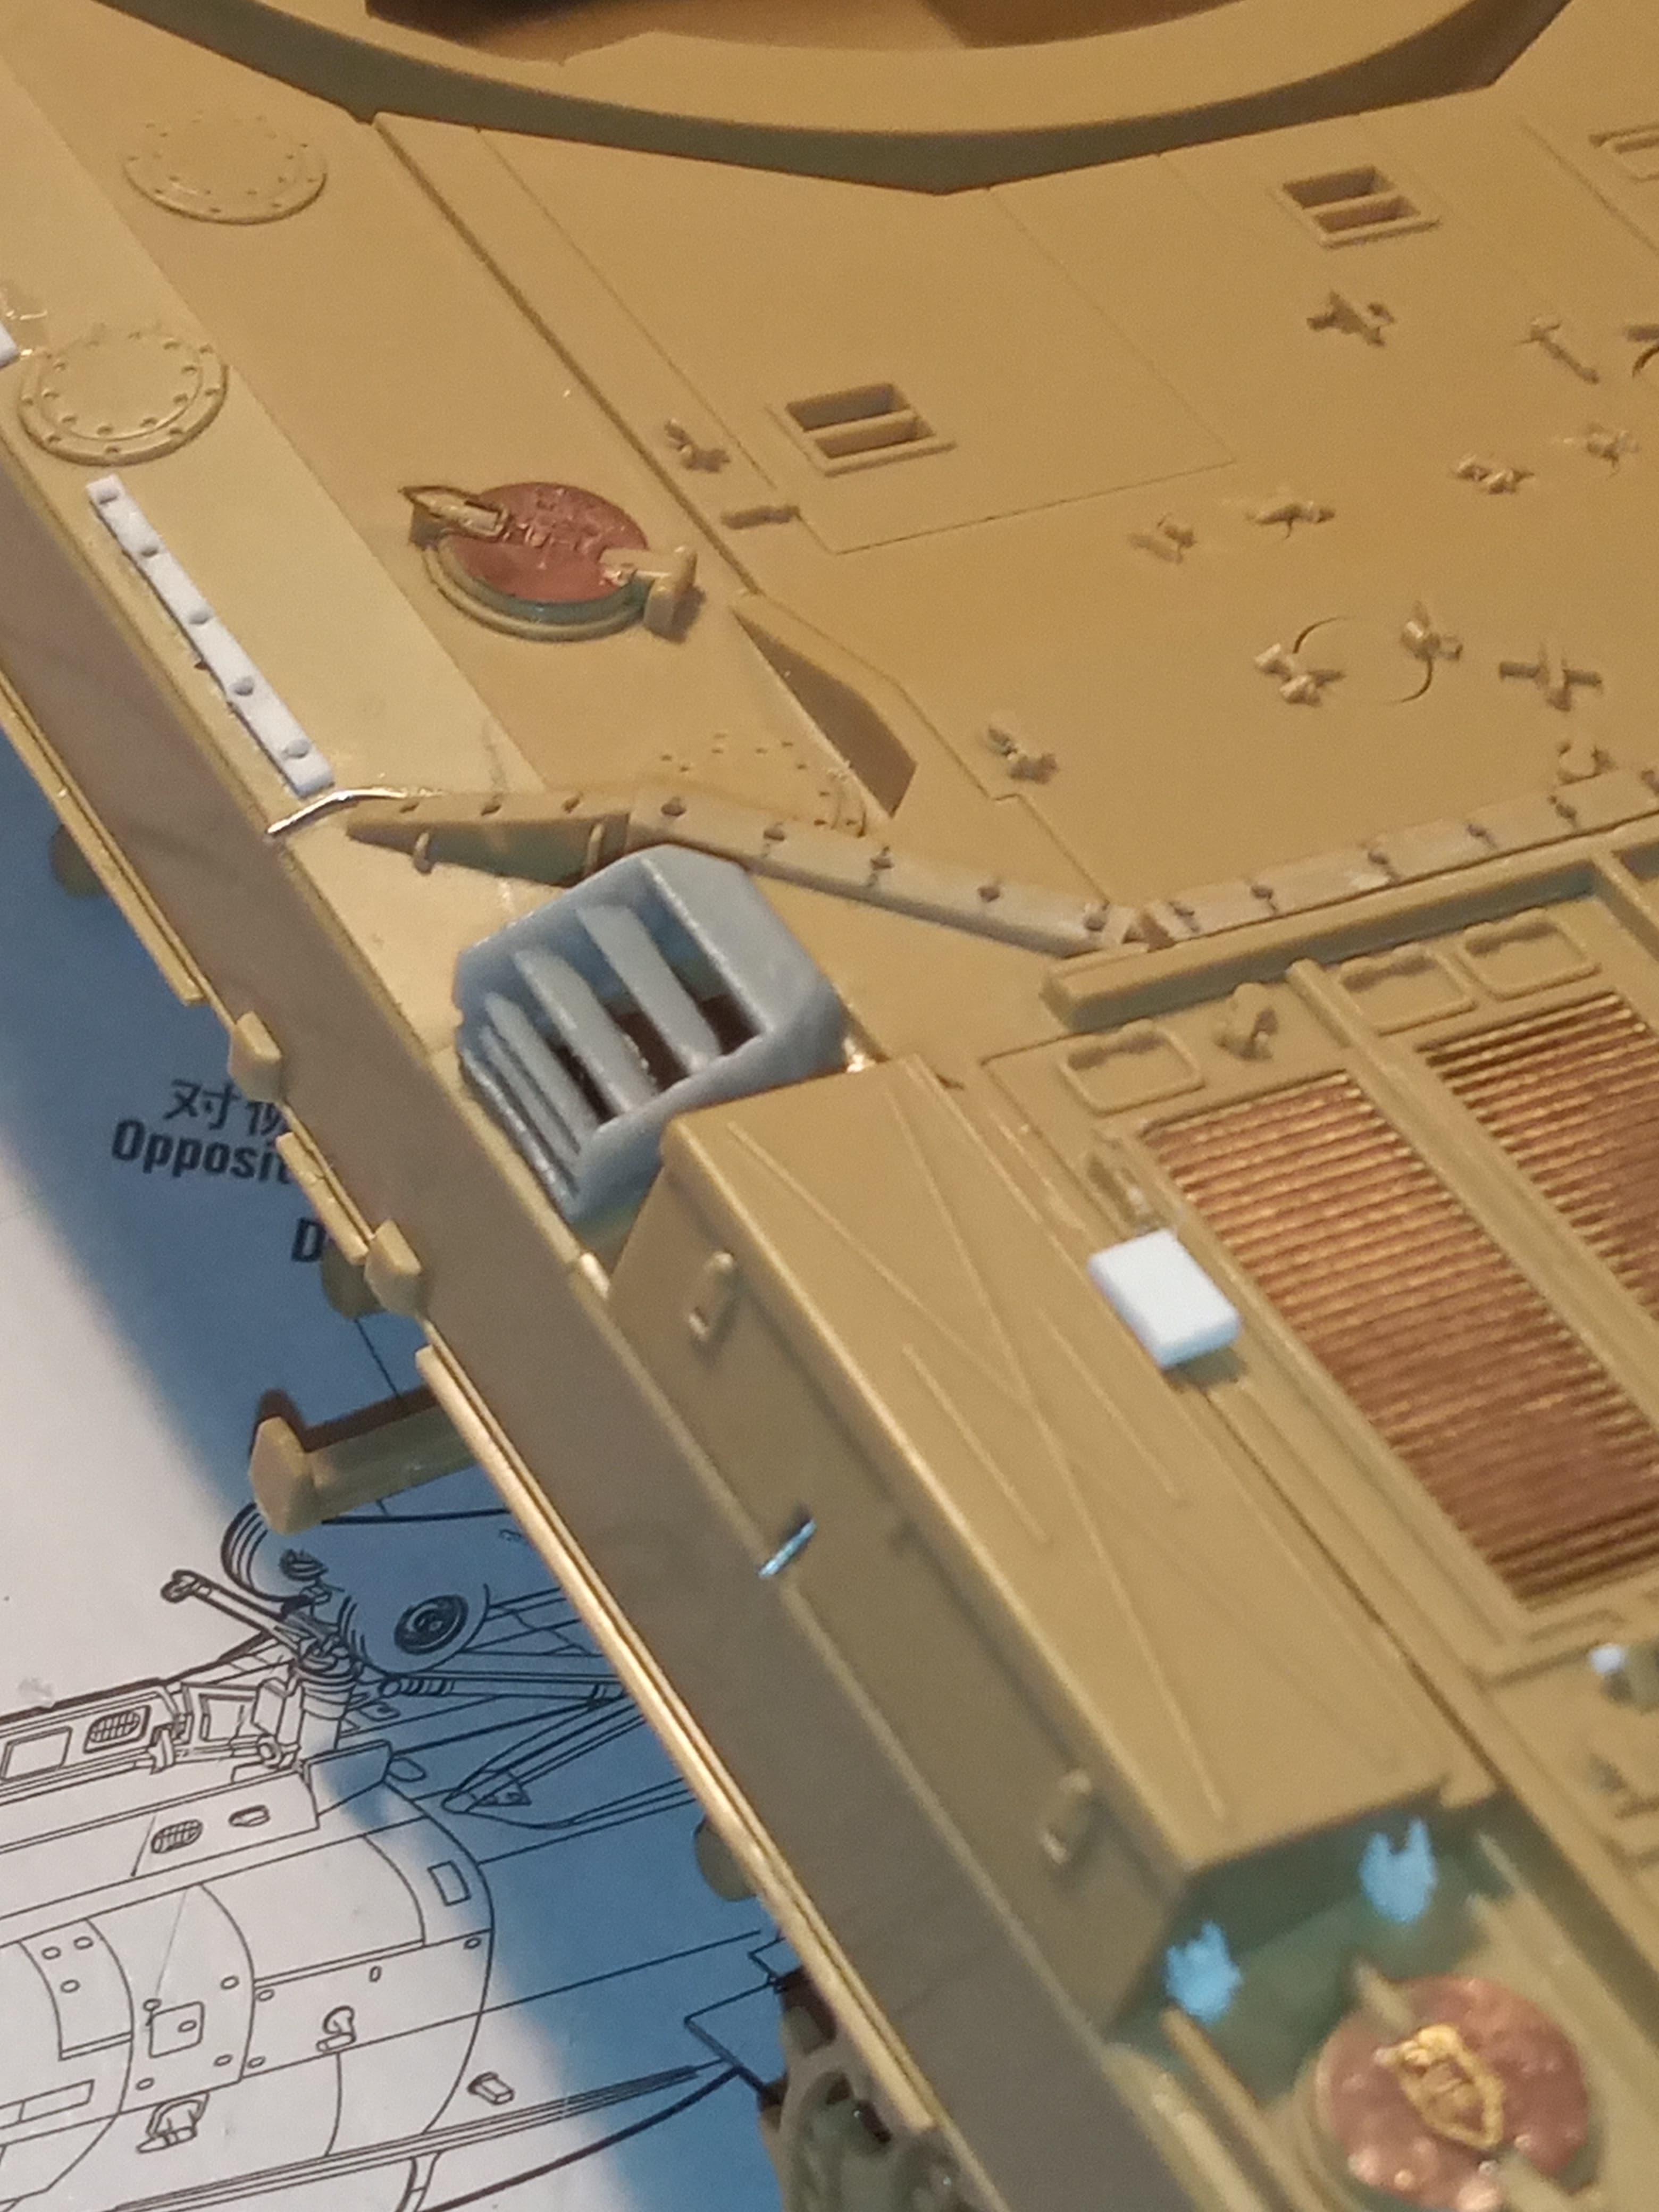
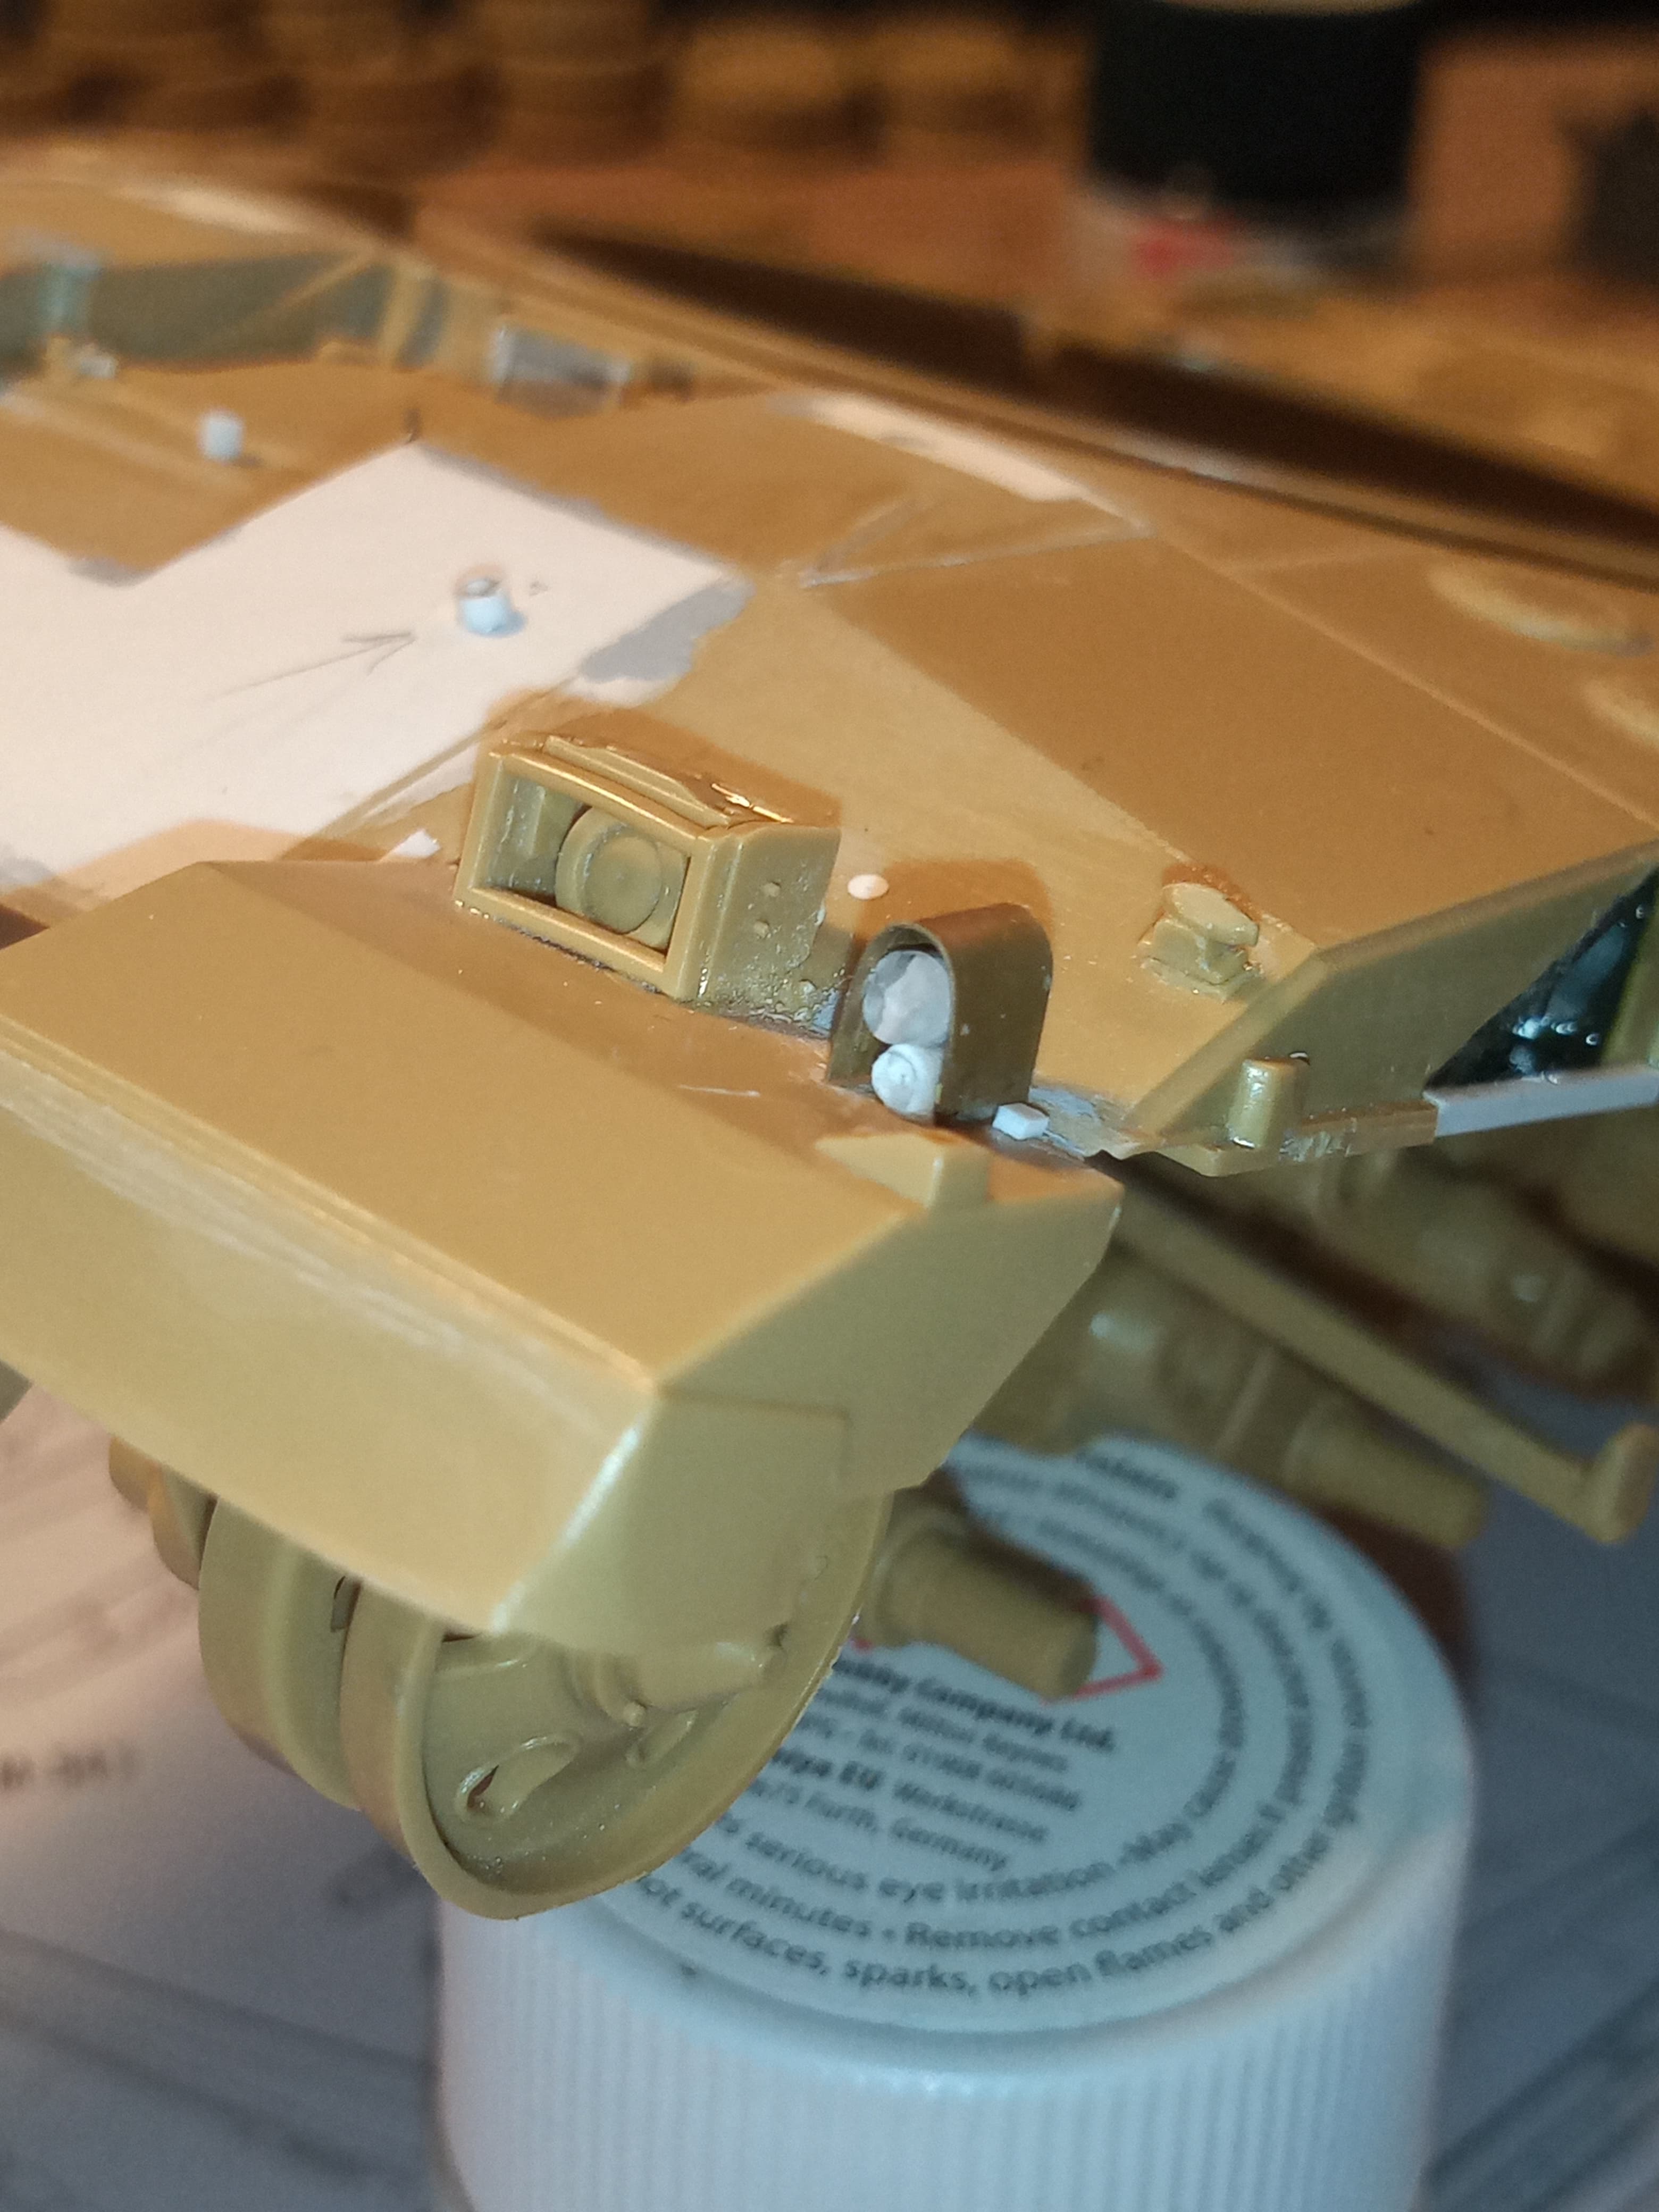
More detailing …
Added the securing chains to the pins.
And also added the crow bar clamps

And the opening pull handles for the fuel caps
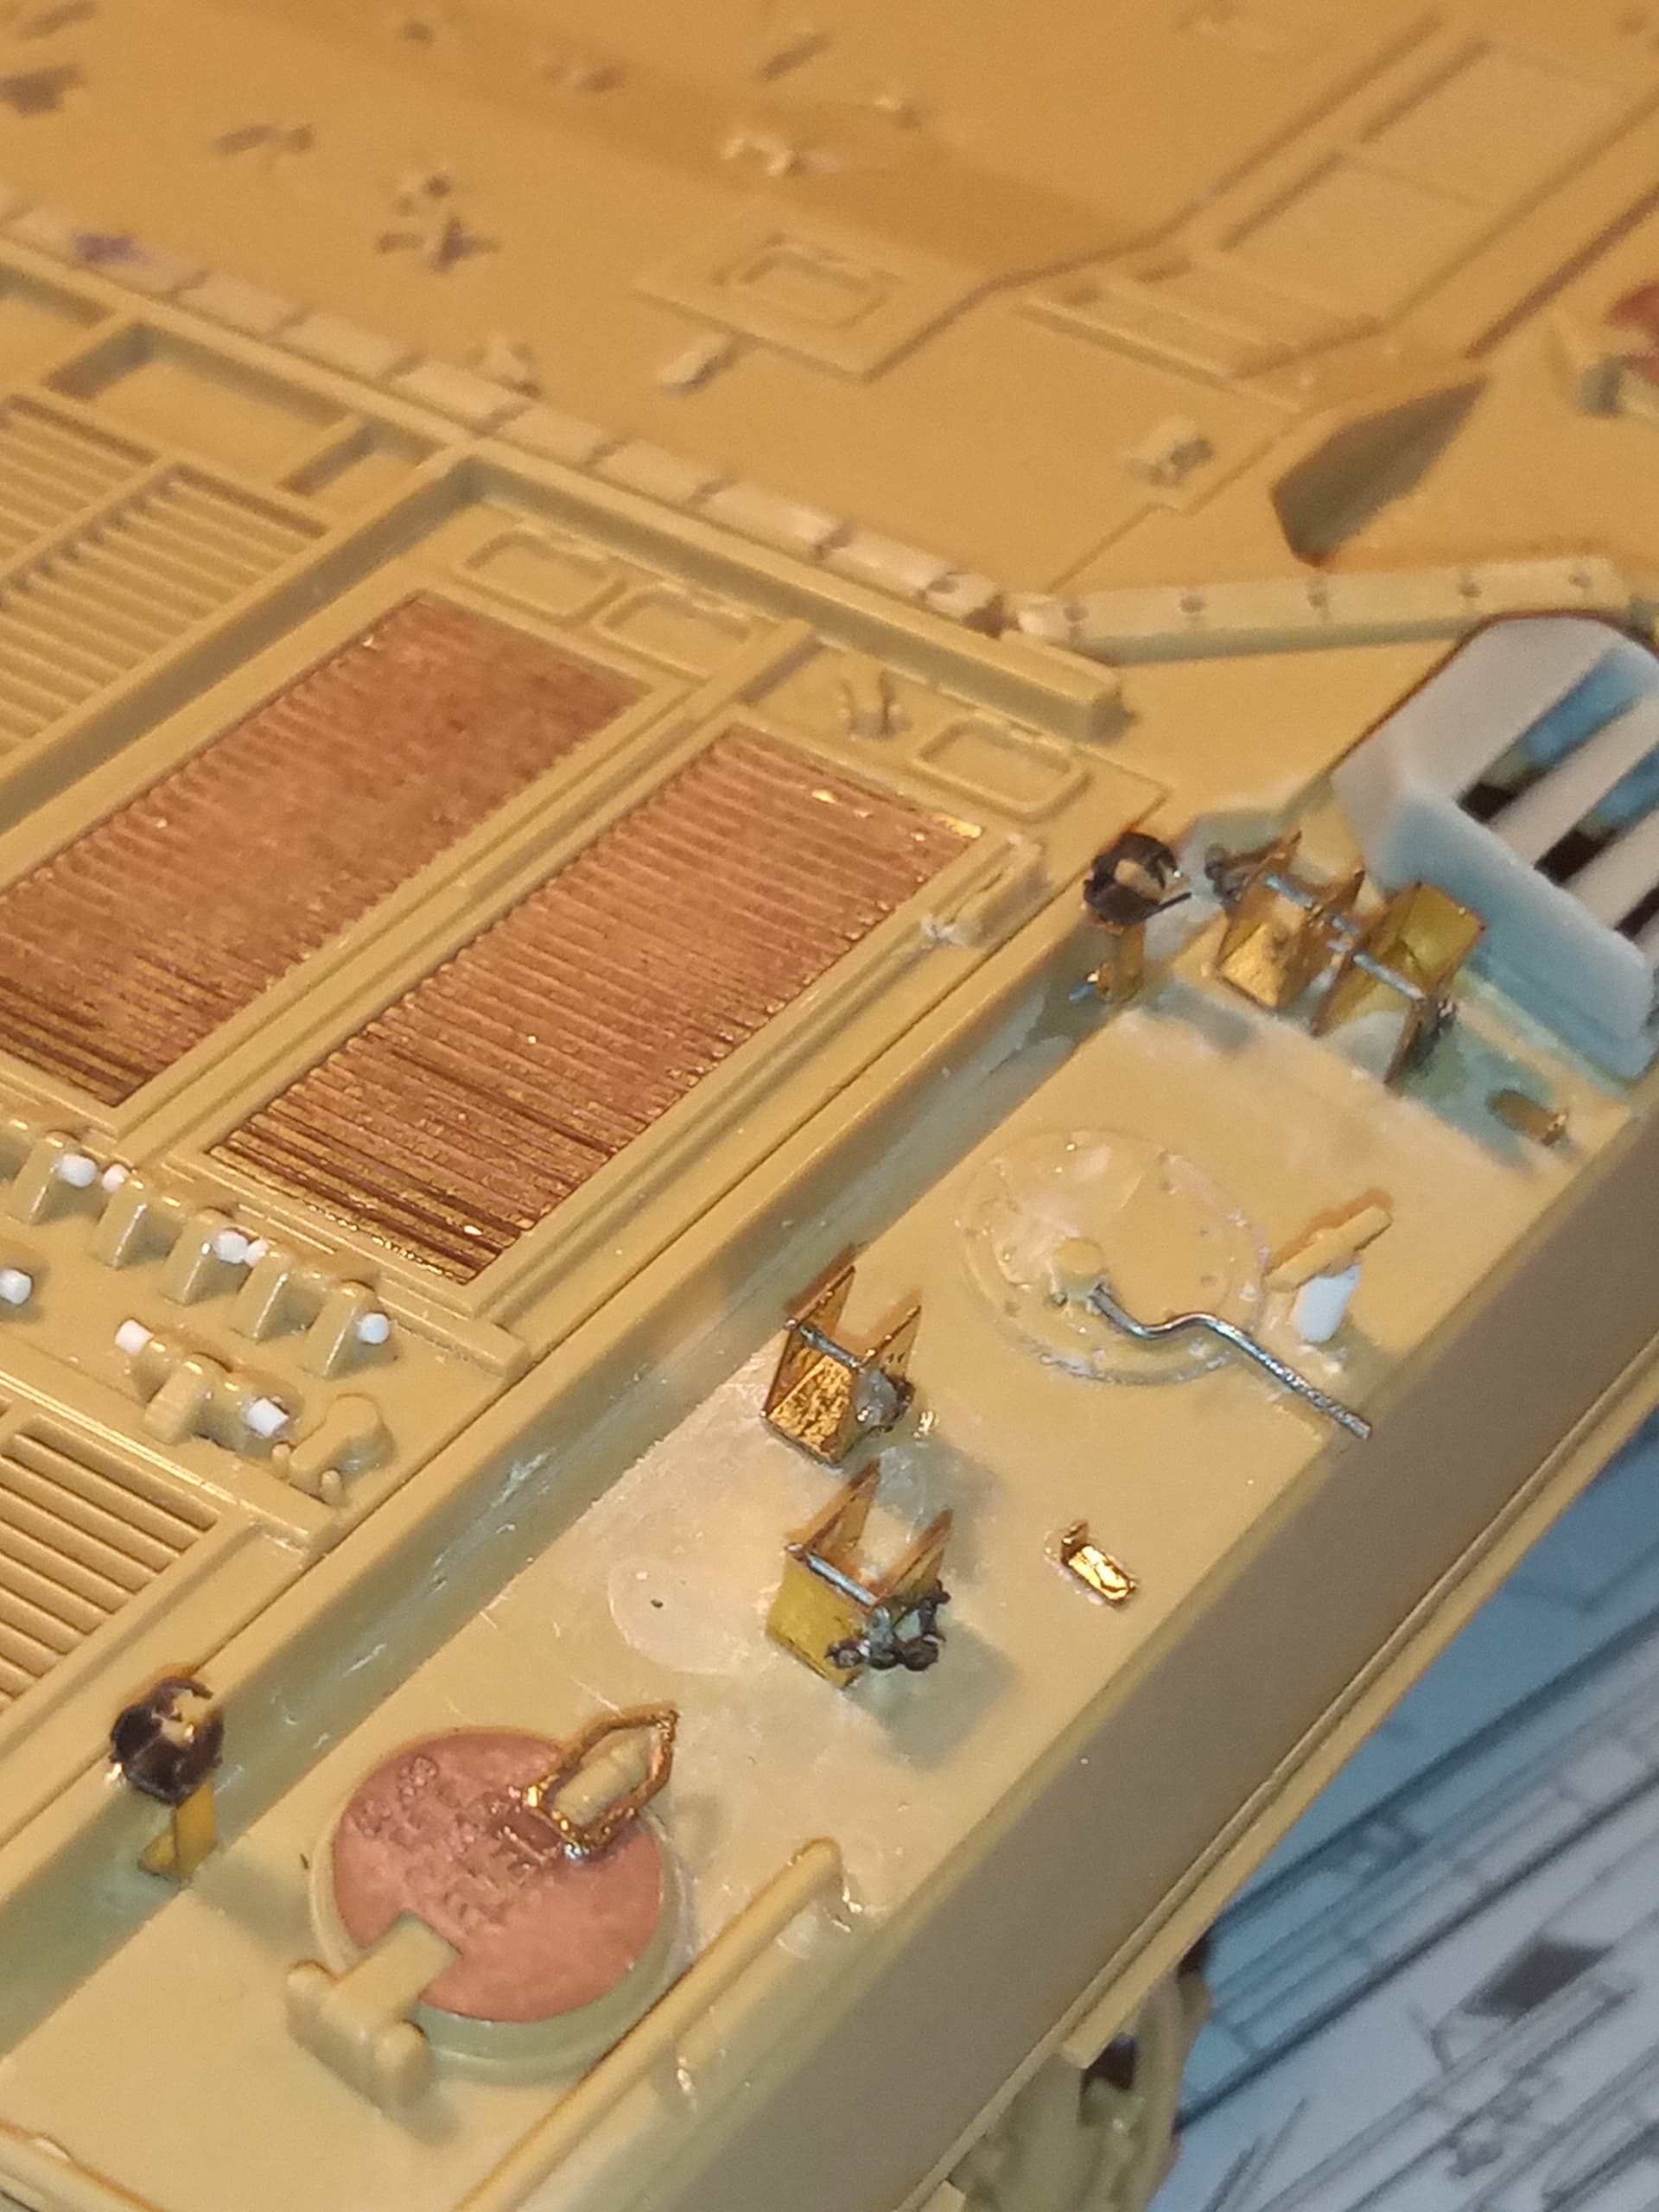
Have also done all the fuel cell breather pipes.
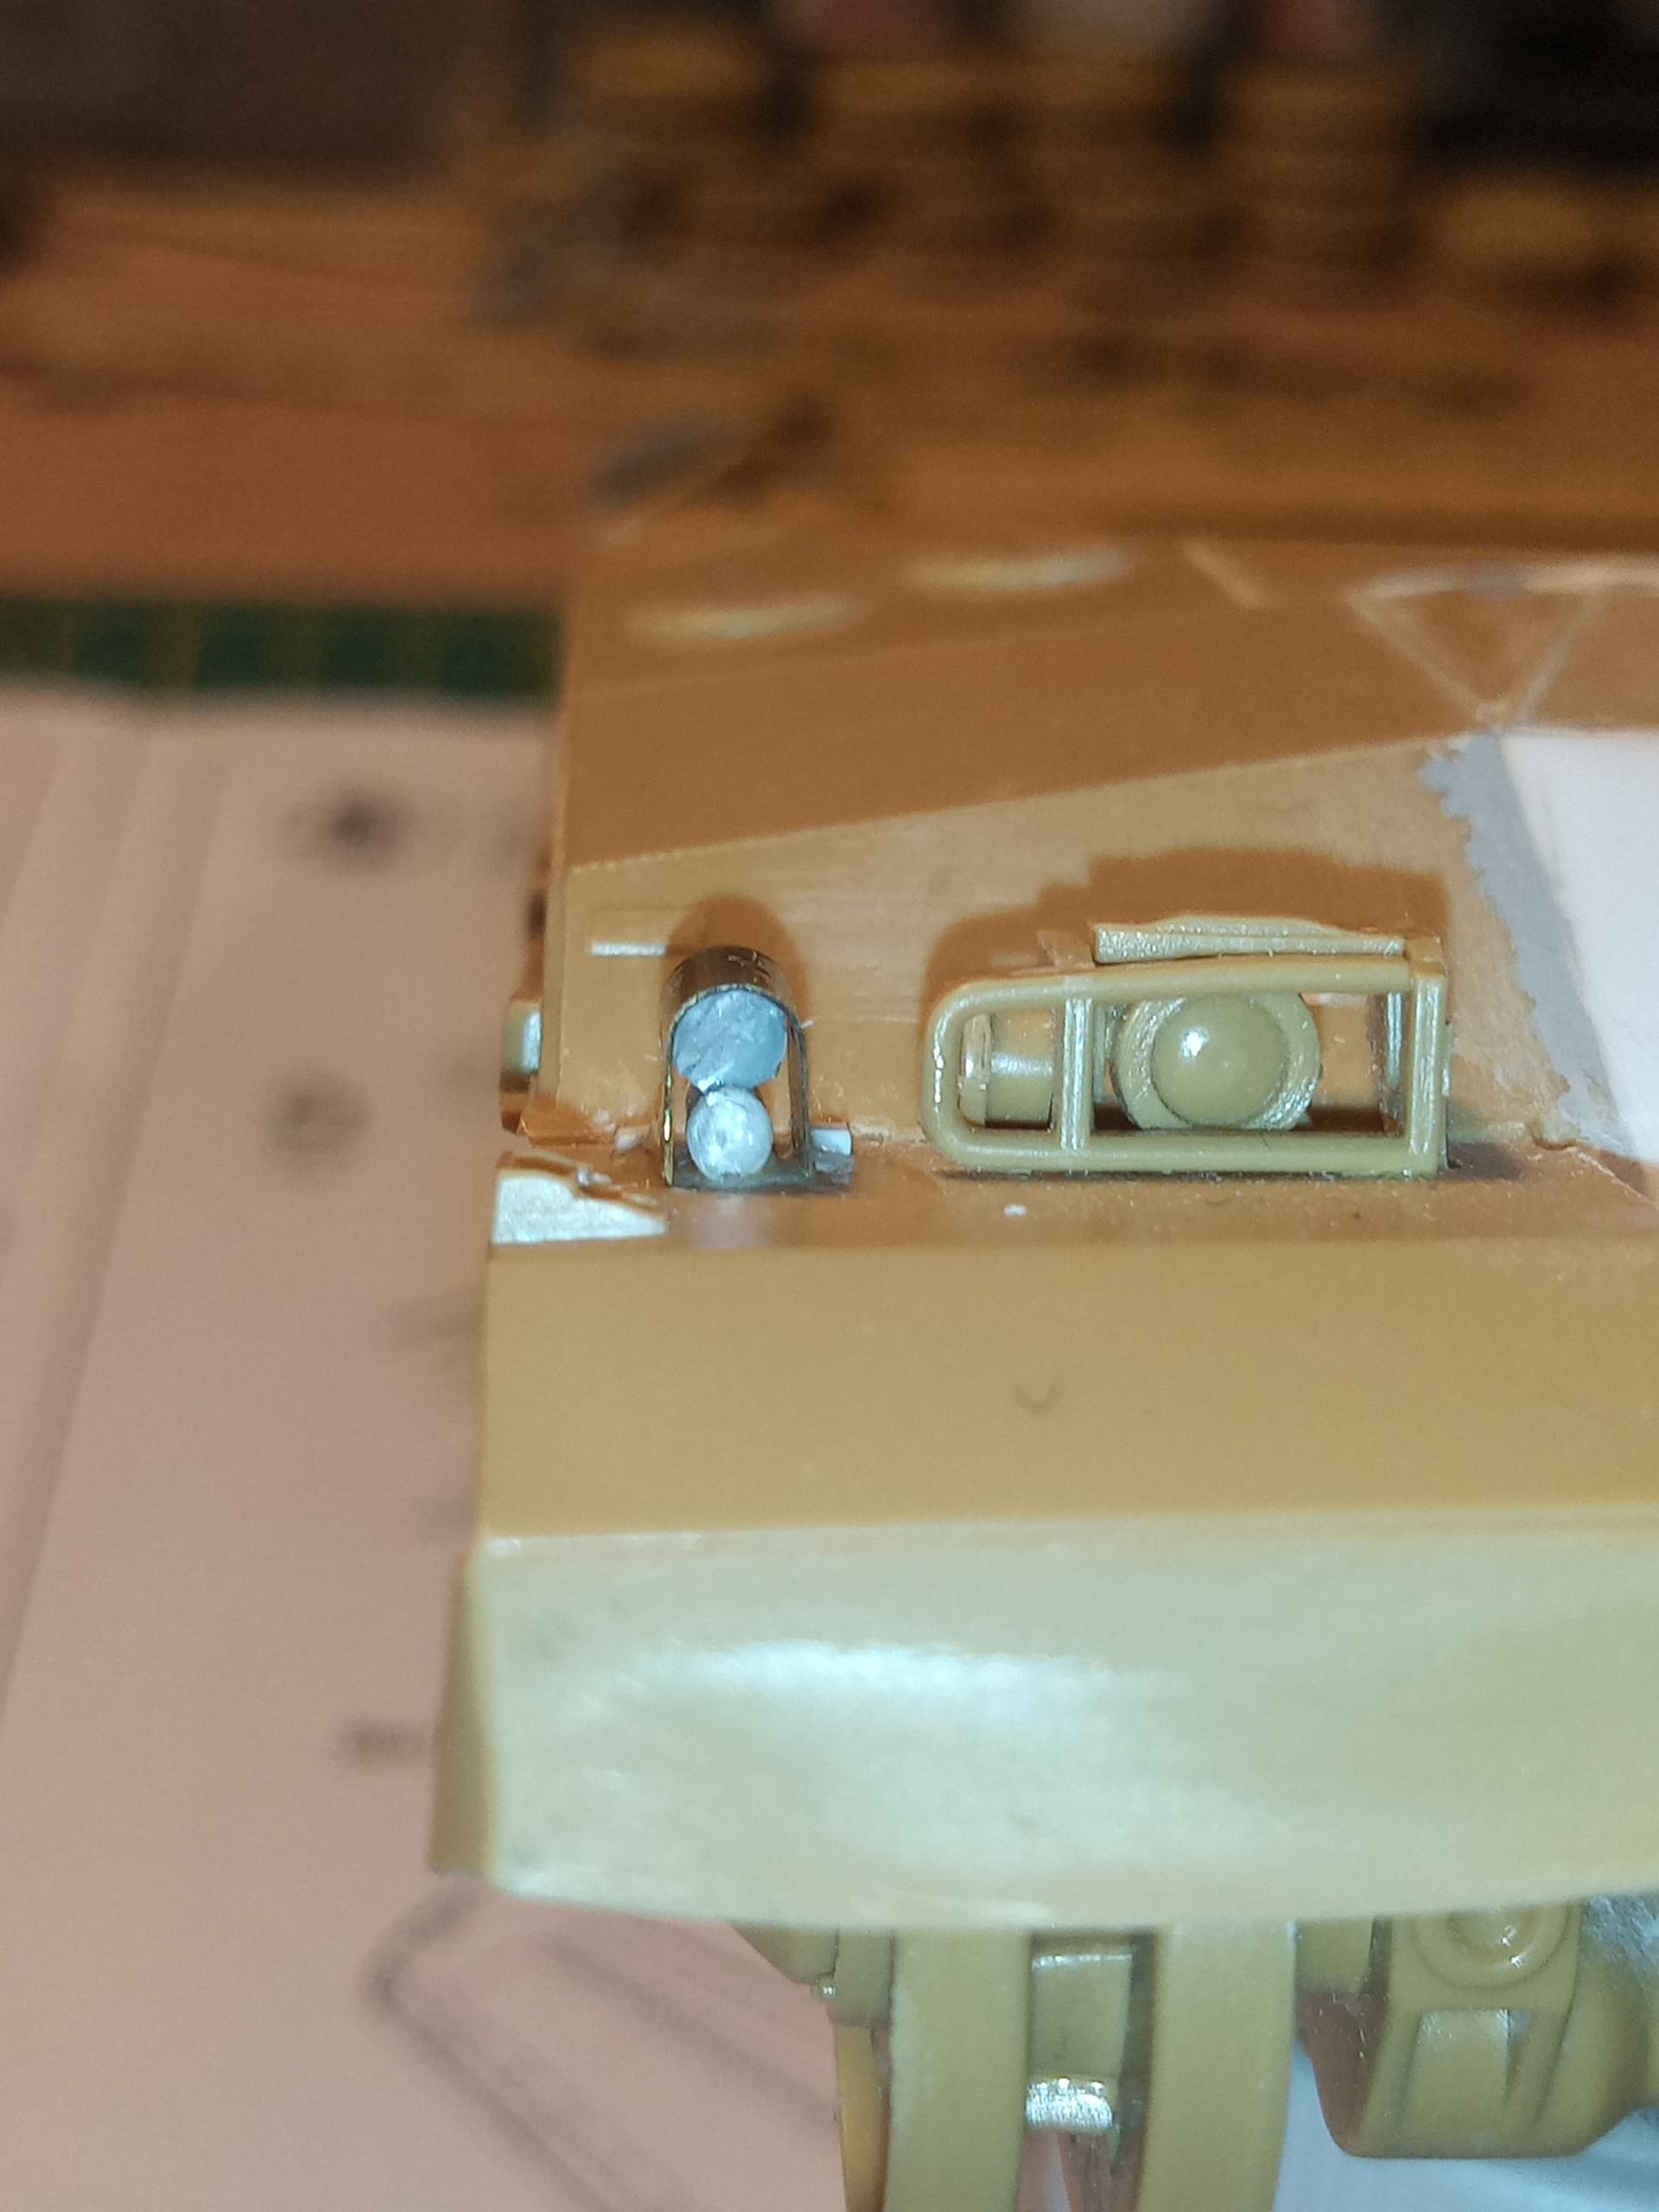
And side lights. White rod, about 3mm and the lens is stretched clear sprue.
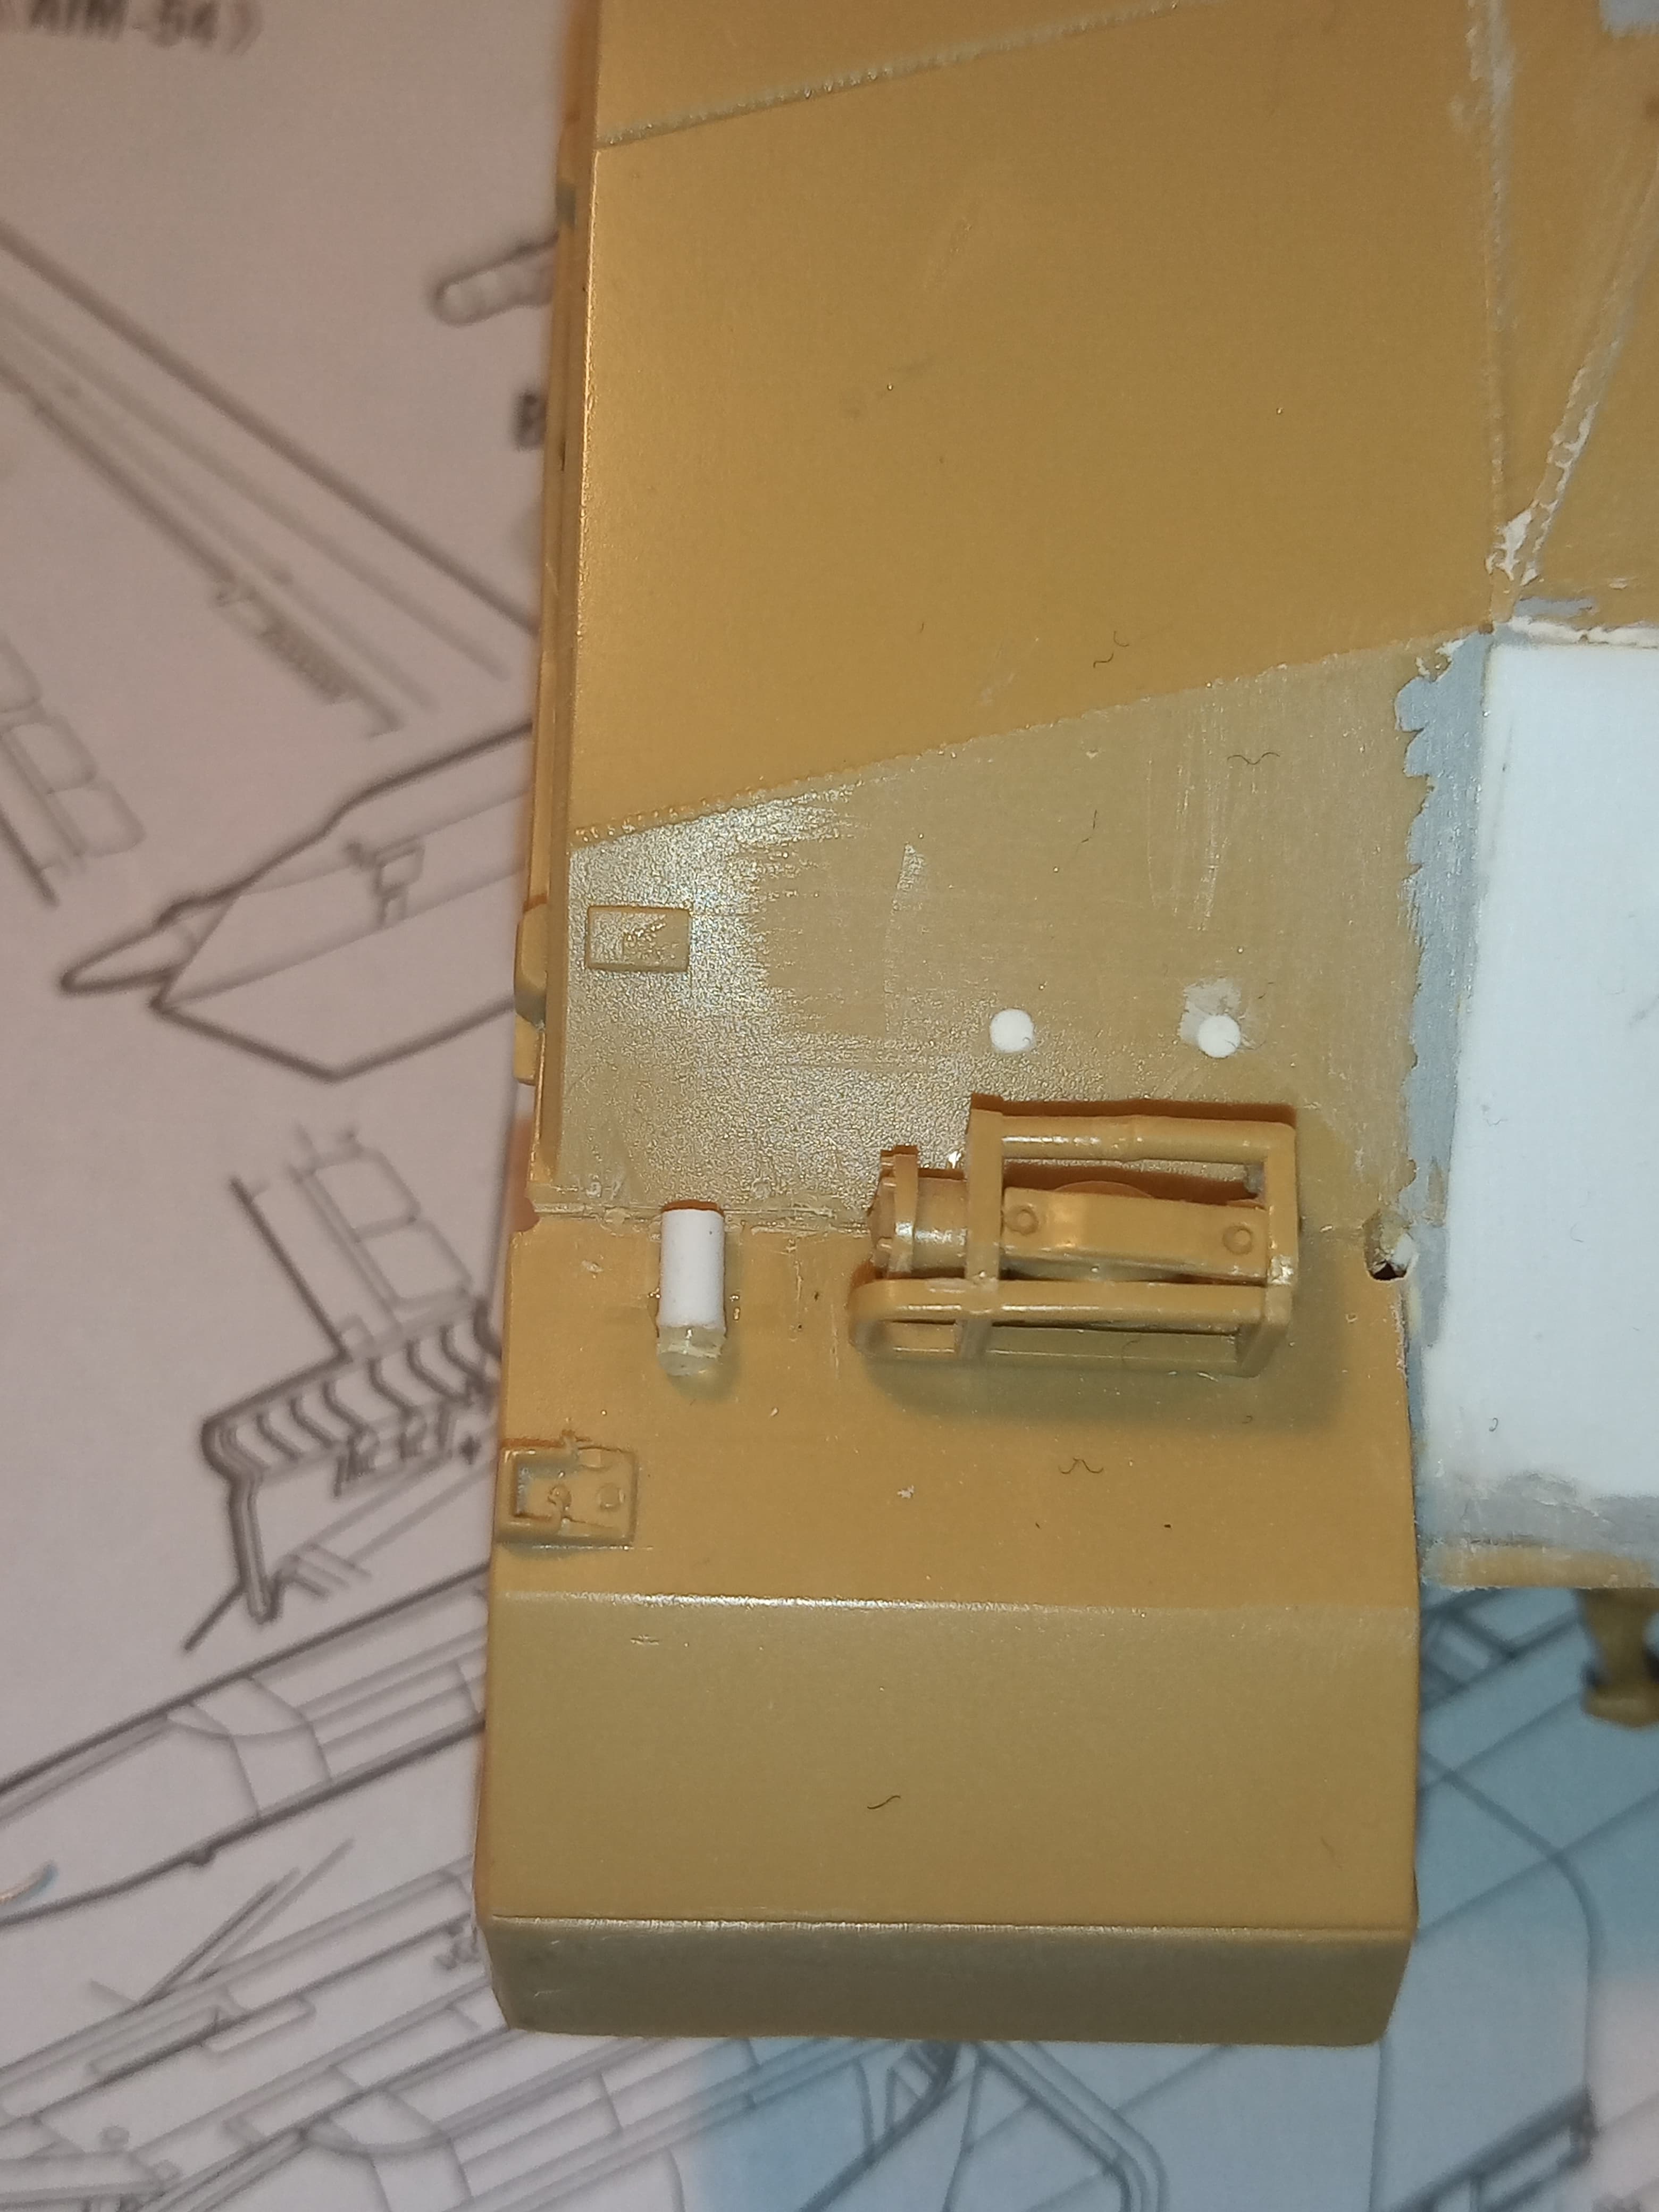
Next up where the indicators. They were cut to the same length as side lights and glued onto the top of side lights, the indicator lenses are clear sprue again, stretched and thinly sliced.
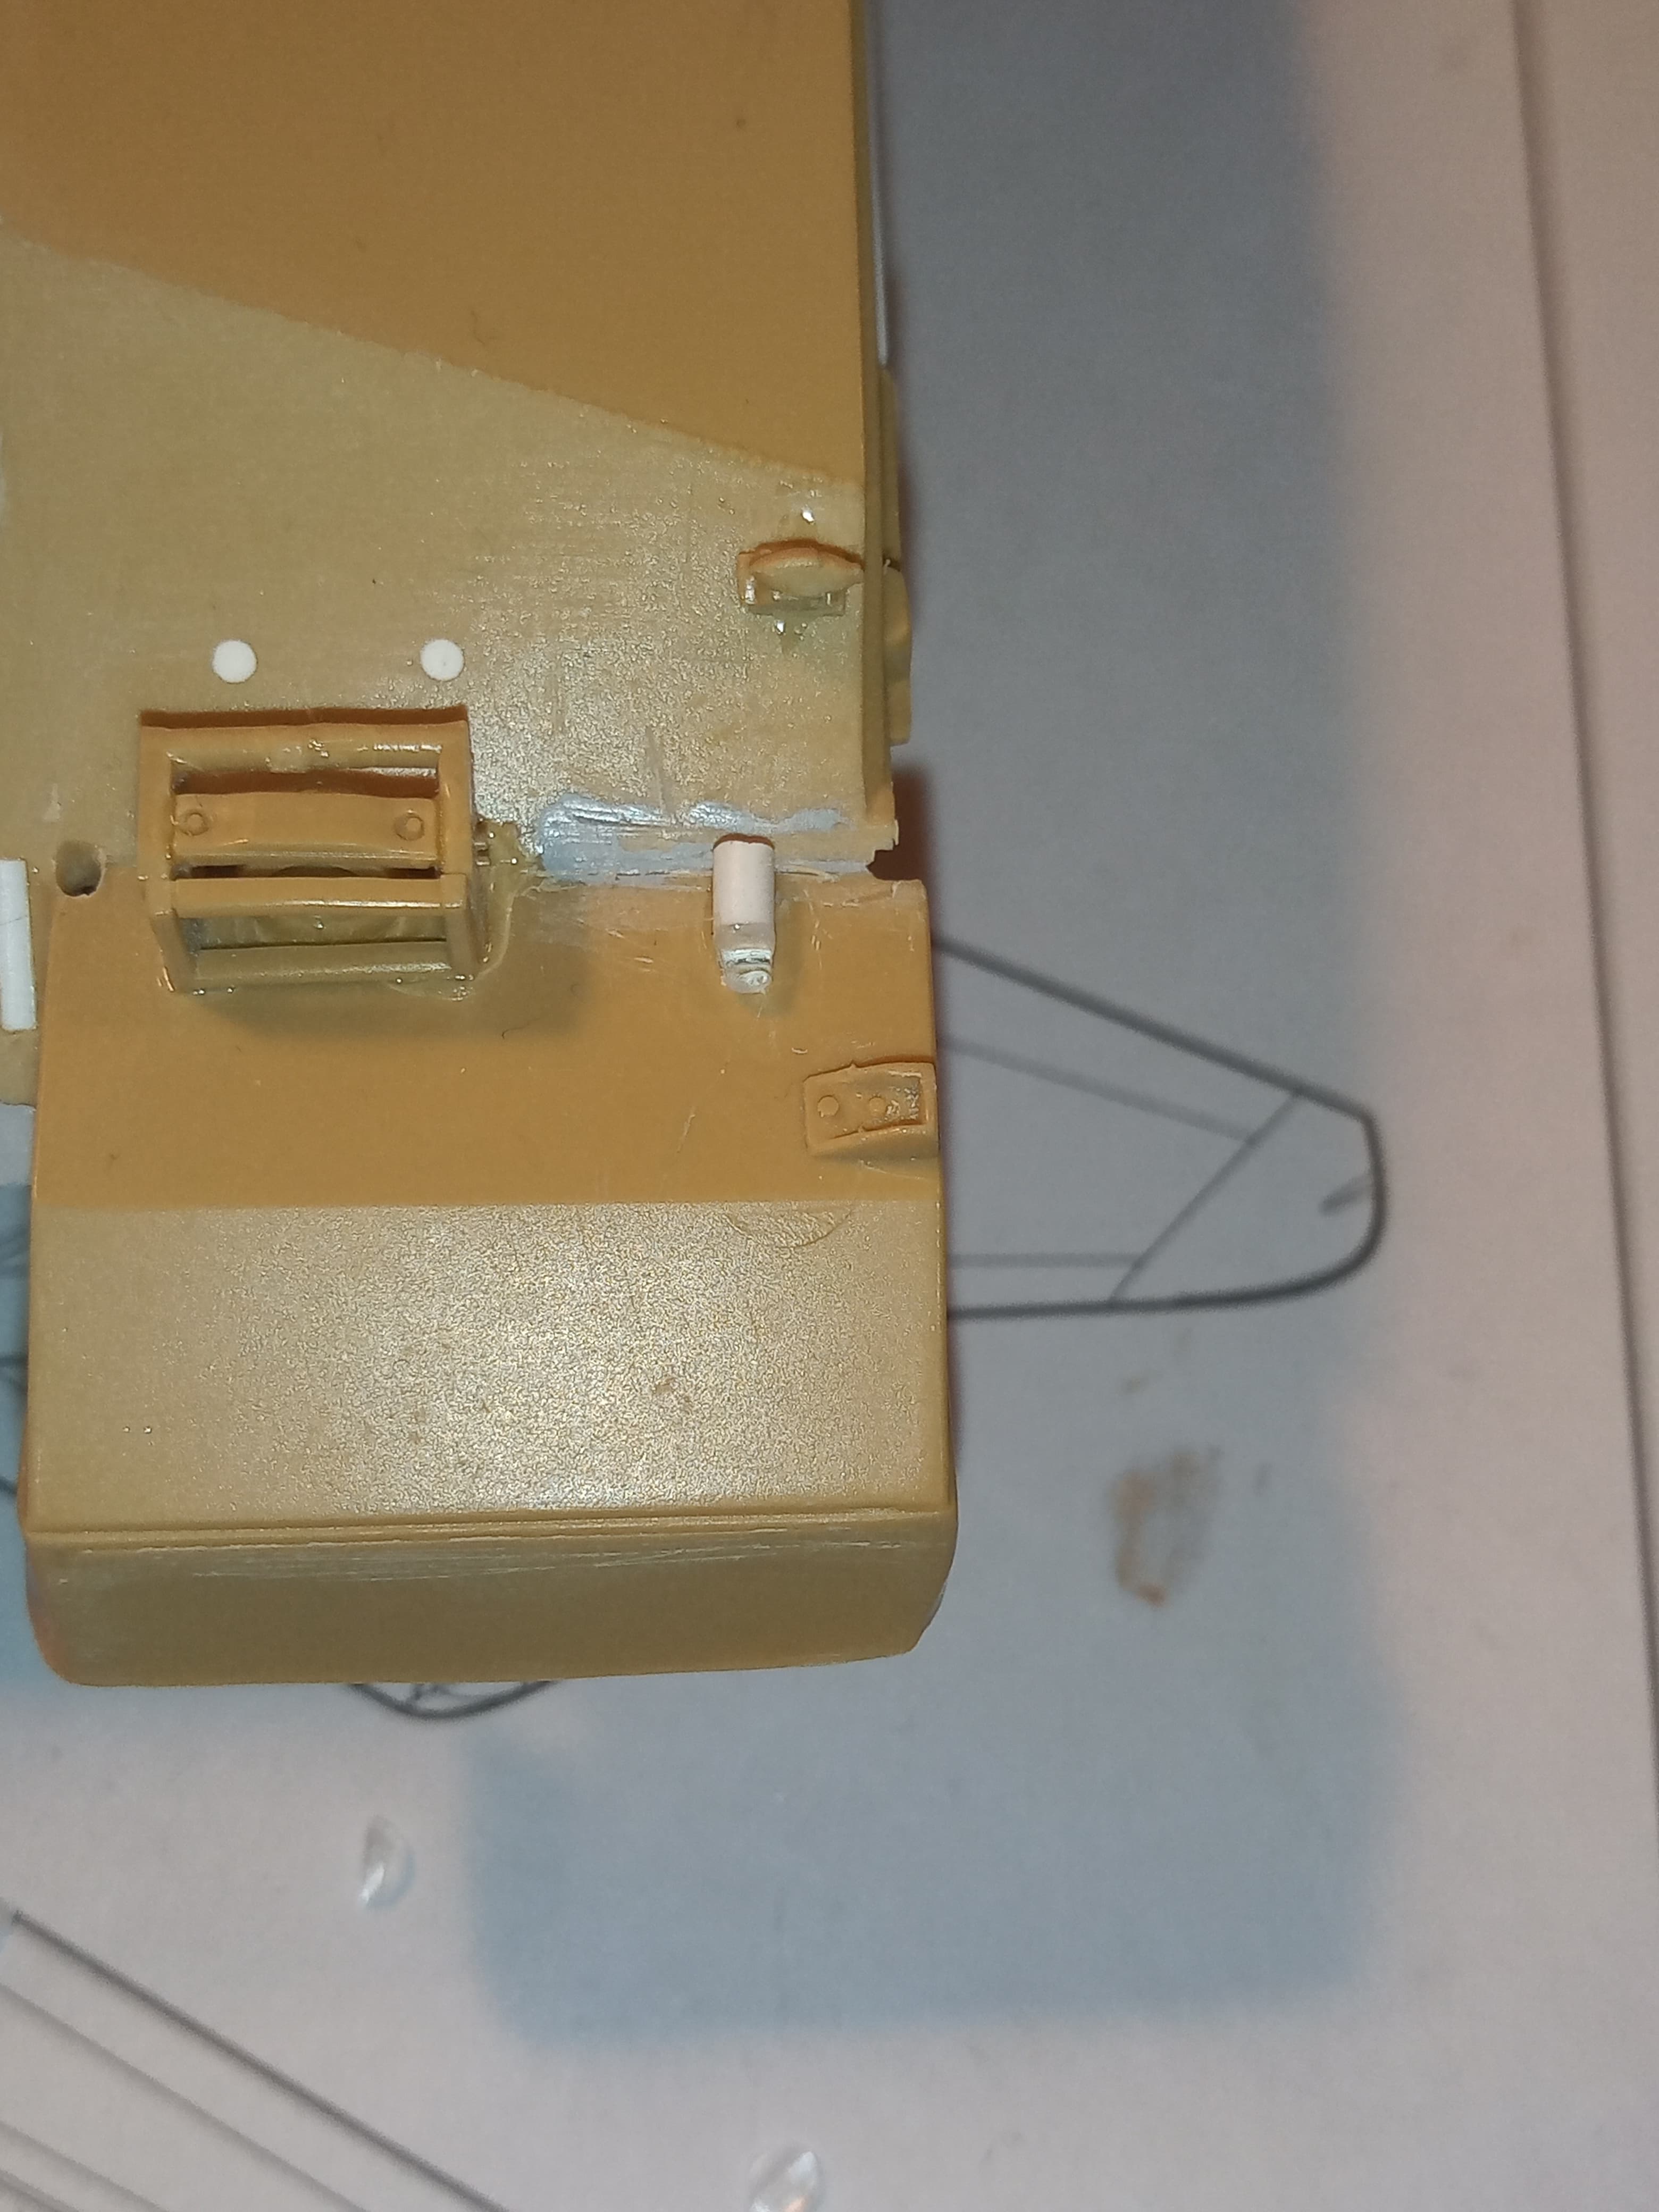
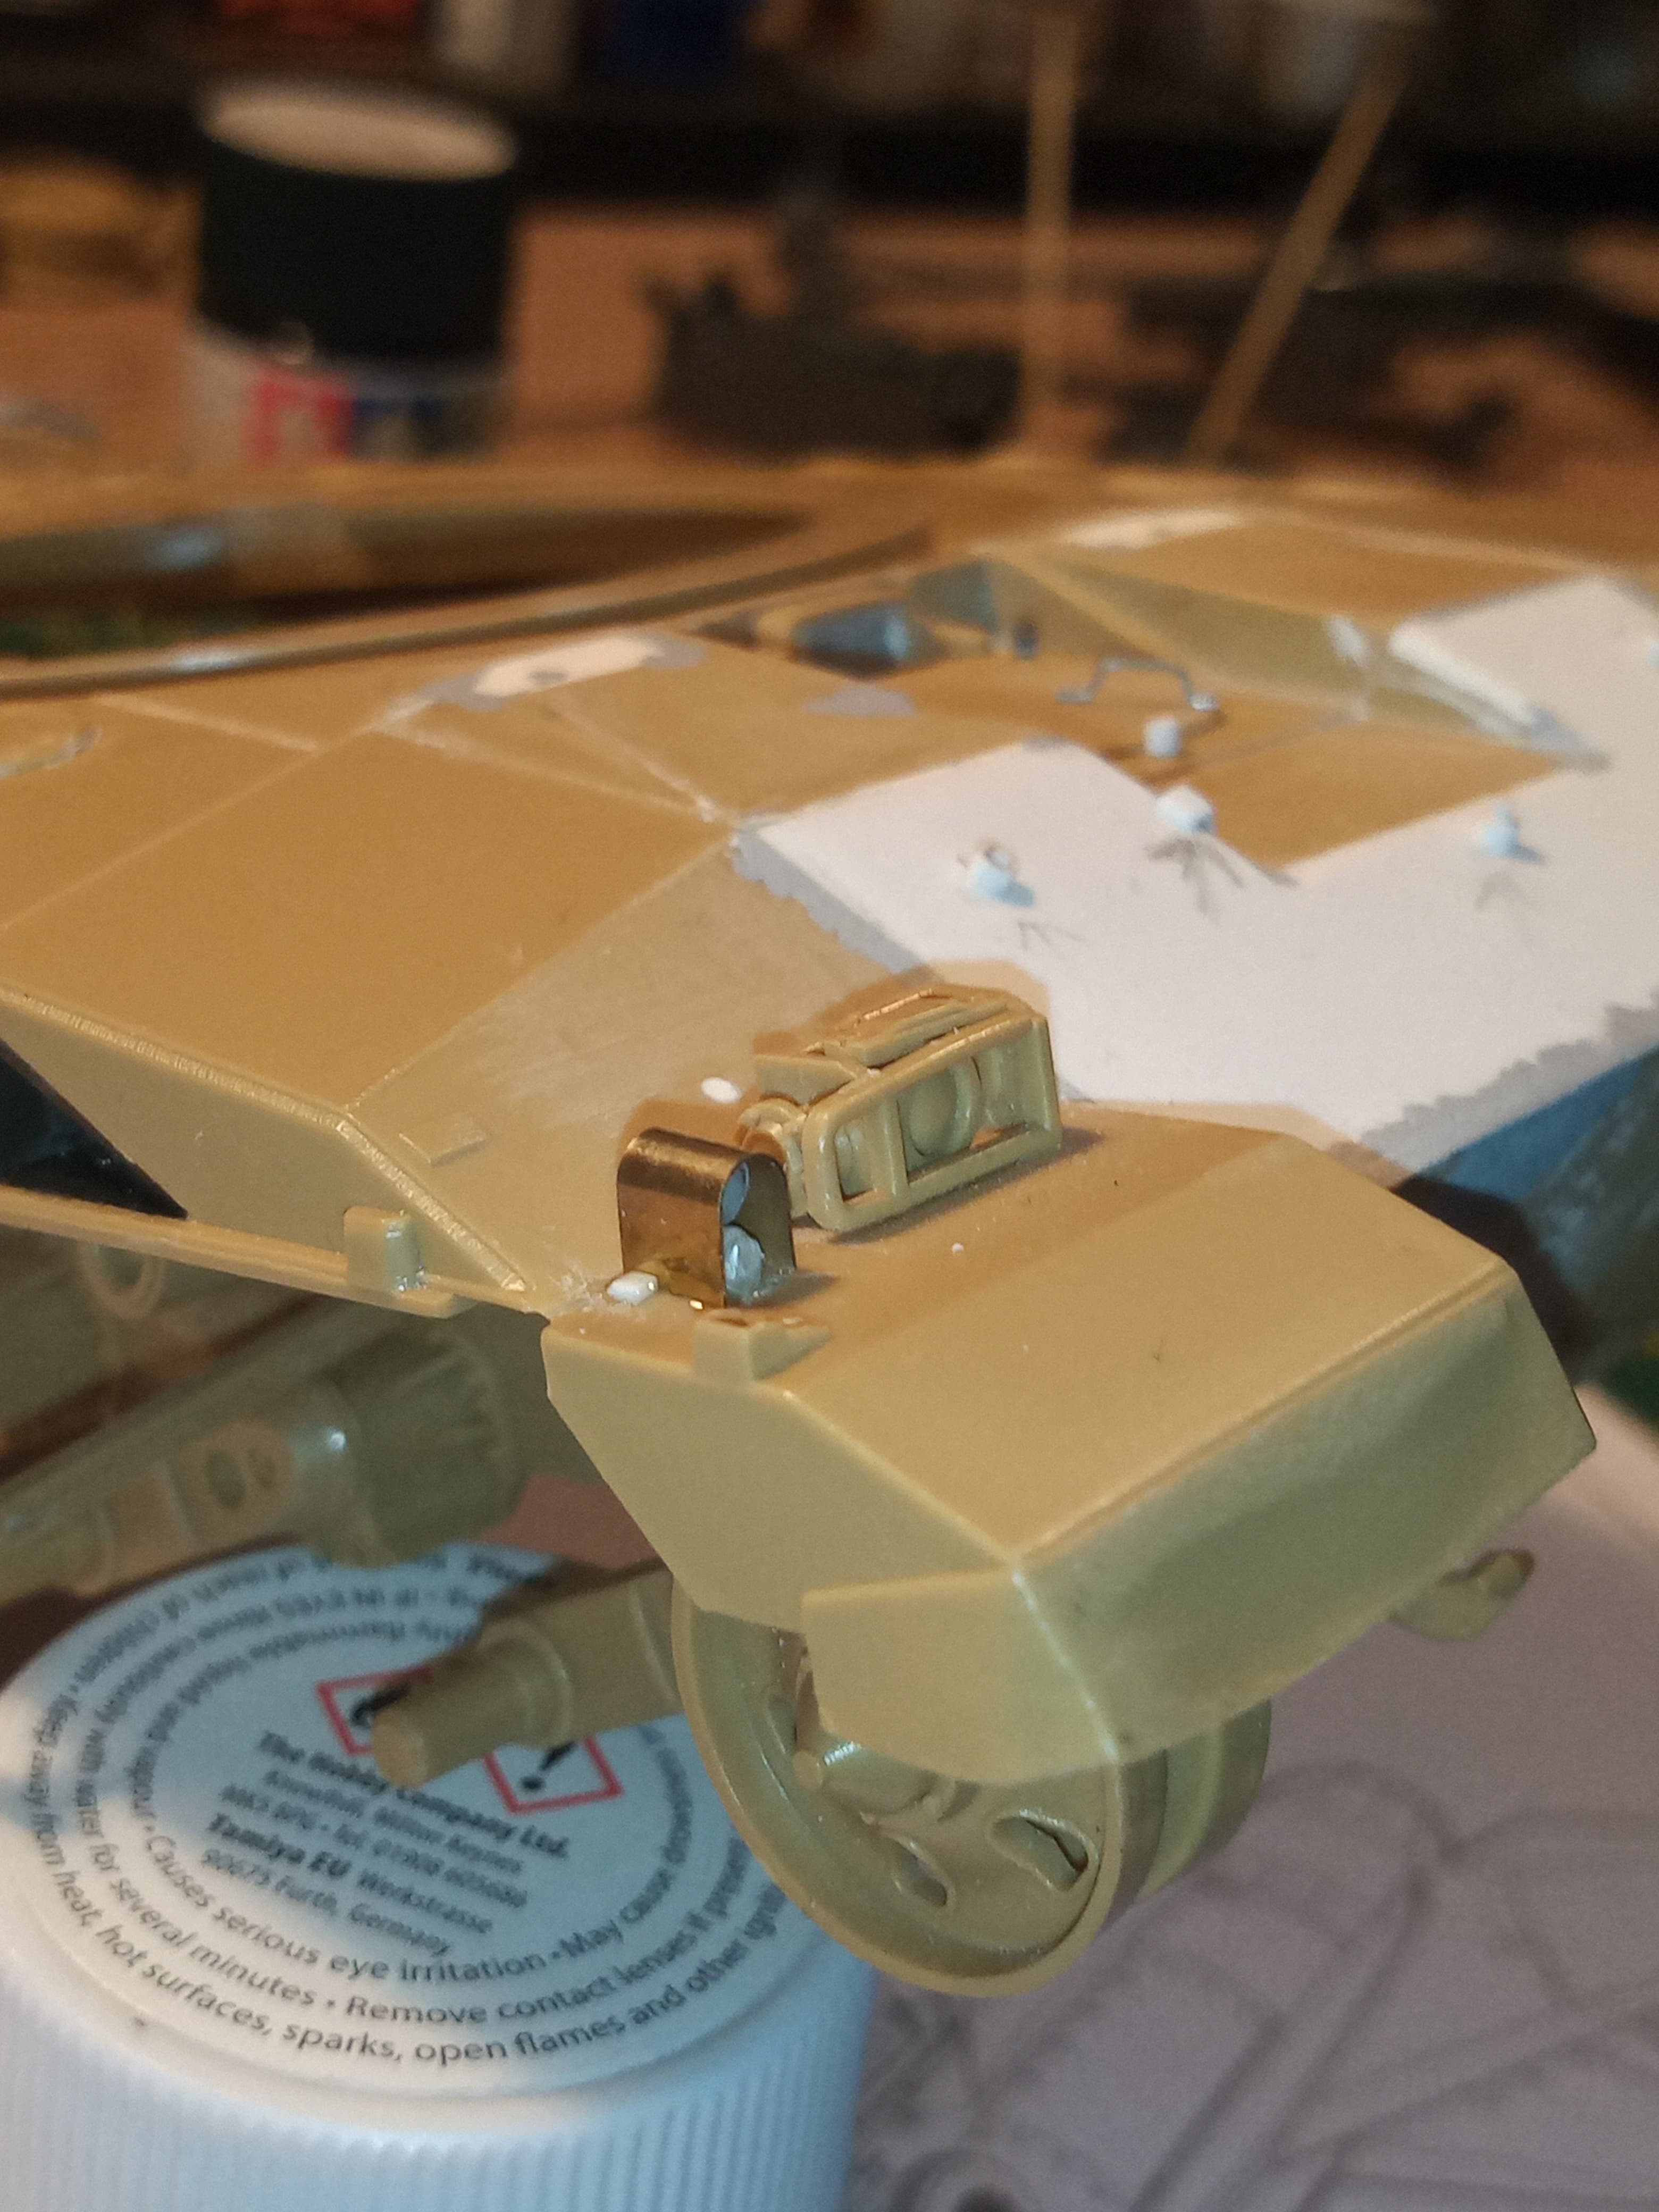
Once they were on, I carefully fitted the enlarged sidelight/ indicator housing

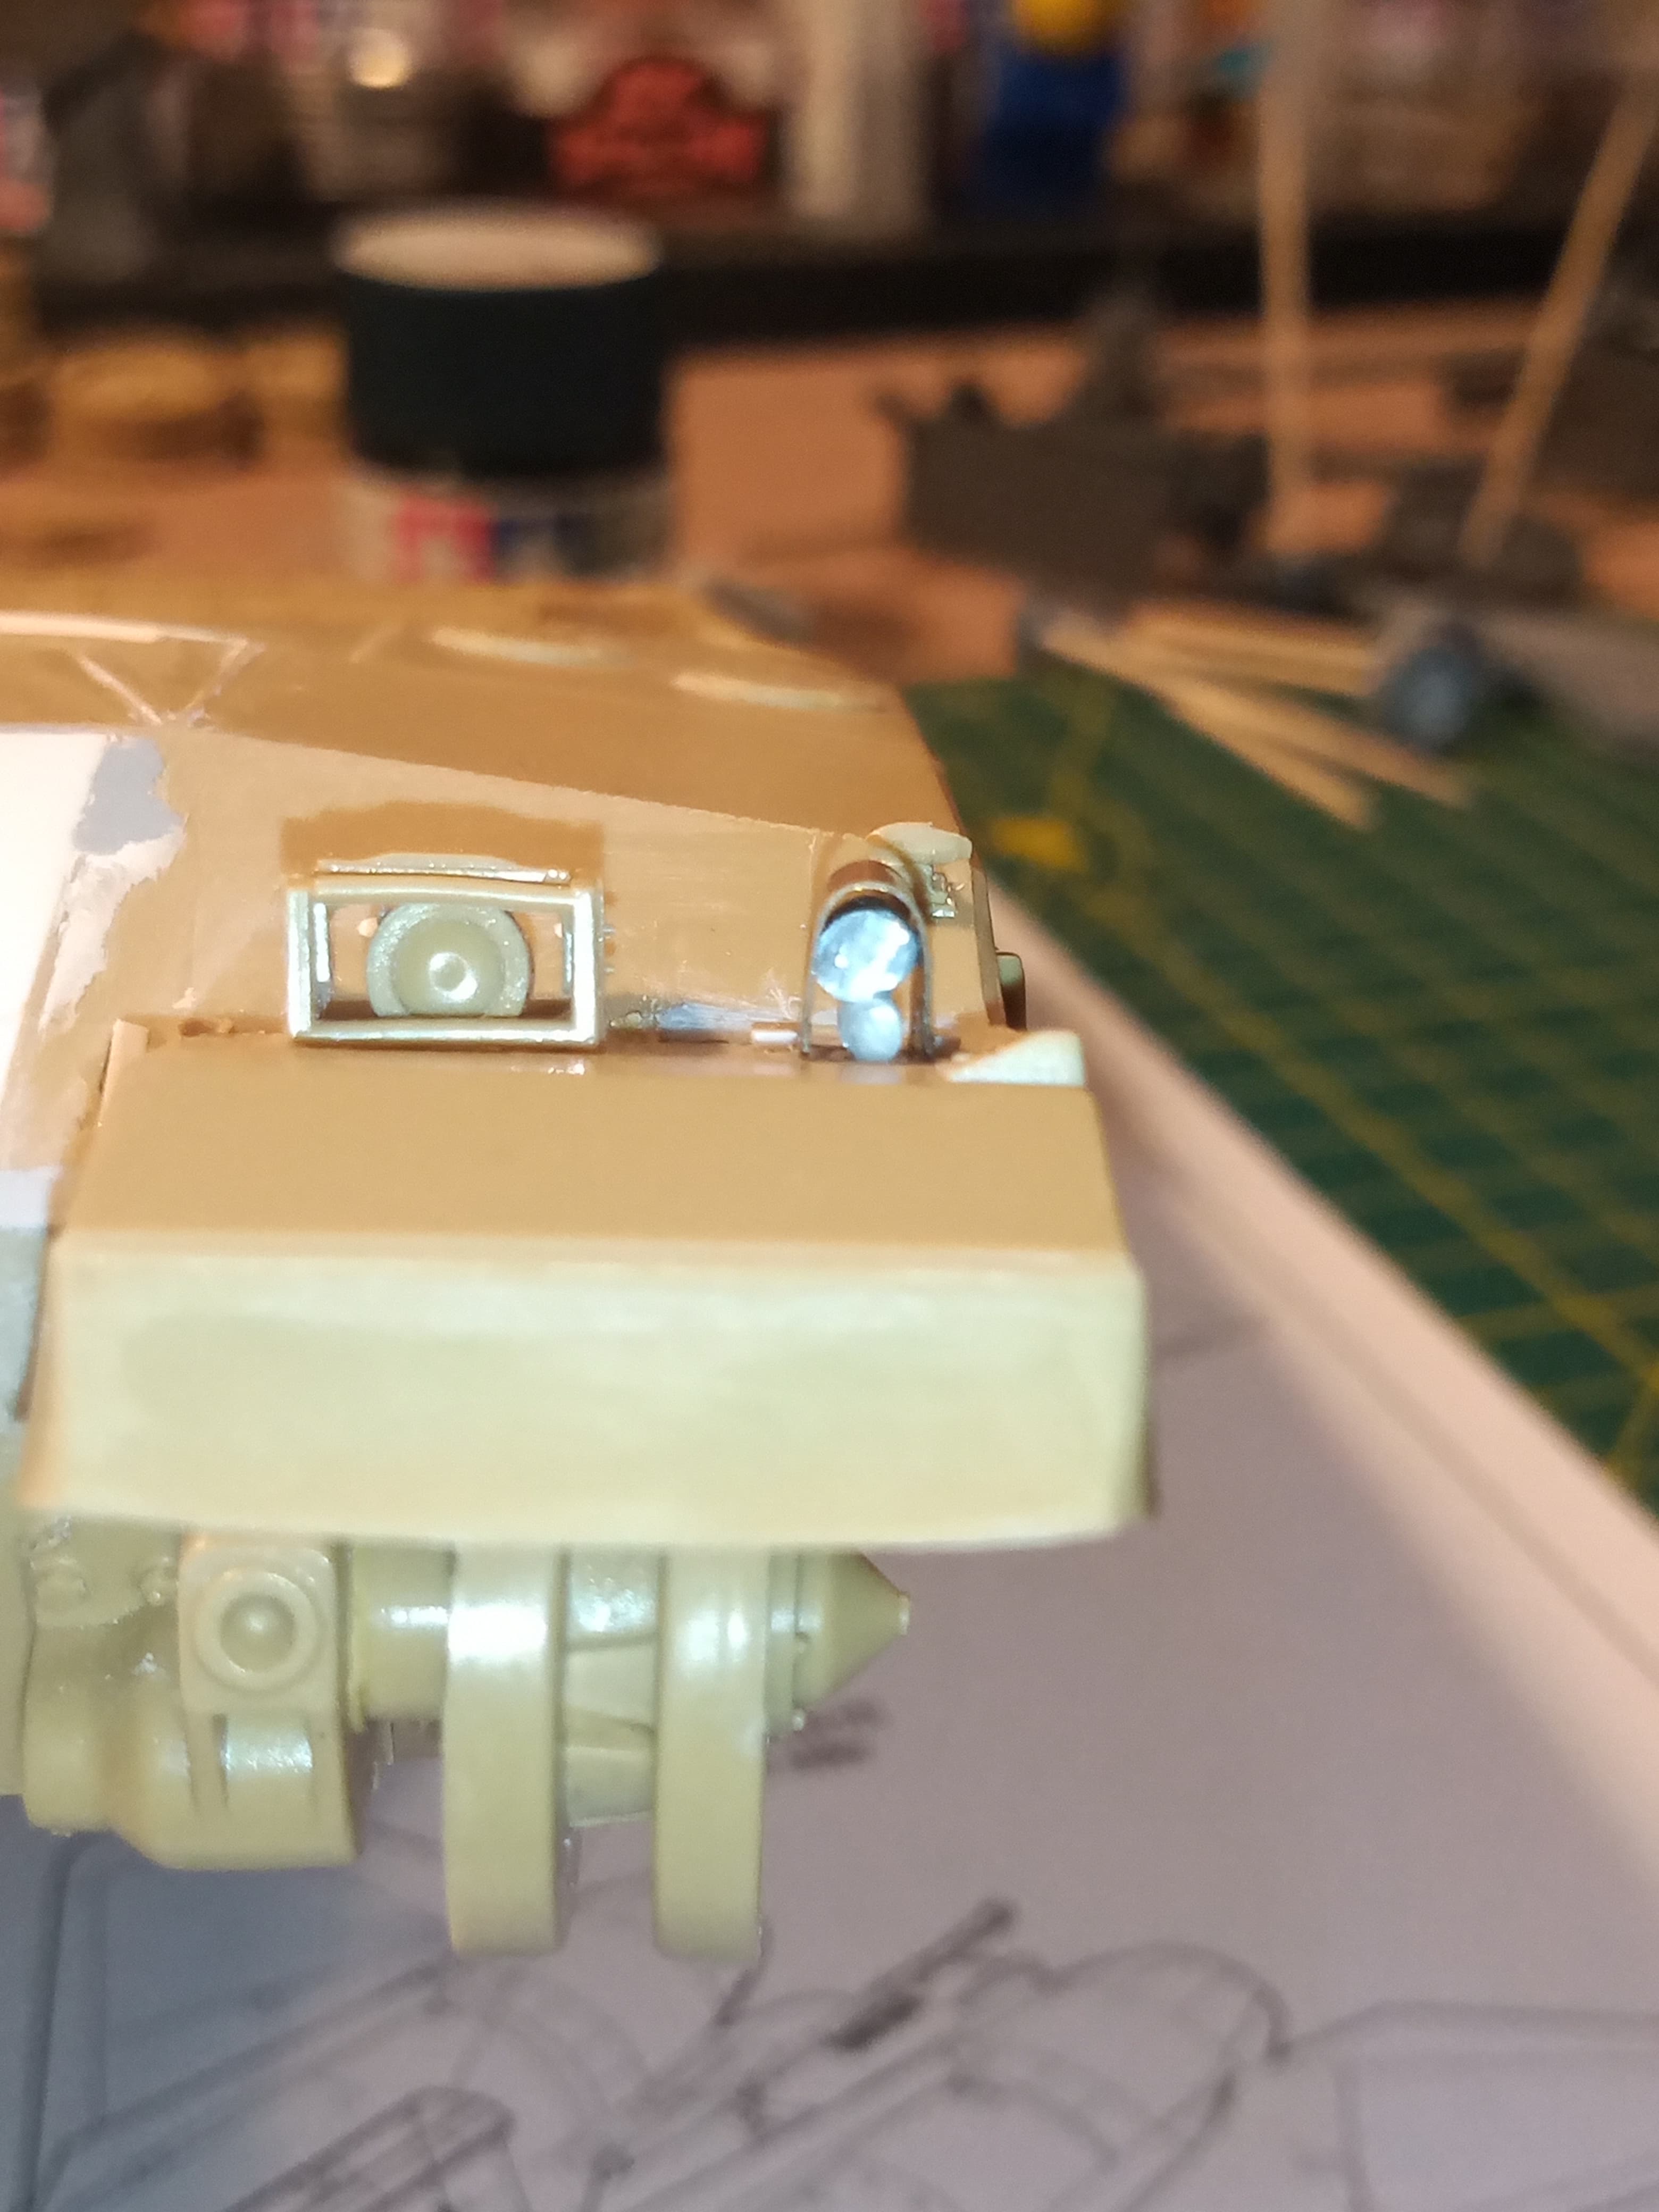
And once they were fitted I then added small cut squares to each side at the rear
Will start on the headlight / sidelight/ indicator and horn wiring tomorrow ![]()
9 Likes
I wish I could give this more “likes”. I’m really liking all of this but especially the fuel caps. I’m weird like this.
3 Likes
Thanks Al, glad you are enjoying it all ![]()
3 Likes