Problem is when I started saving ref pics , I never catagorized anything so when I want to find a ref pic I know I have , I have to scroll through aaaaaaaaall of them .
Thanks again H.P., that Krupp version build by Michel Verschuere (on imodeler in 2018) is also handy research for the interior - which won’t look much different from (my) Henschel version when trashed
So, safe to say you flunked the Basic Librarianship course back in 1969 too eh? But thanks again for the trawling, what’s a couple of Russkie sets between friends?
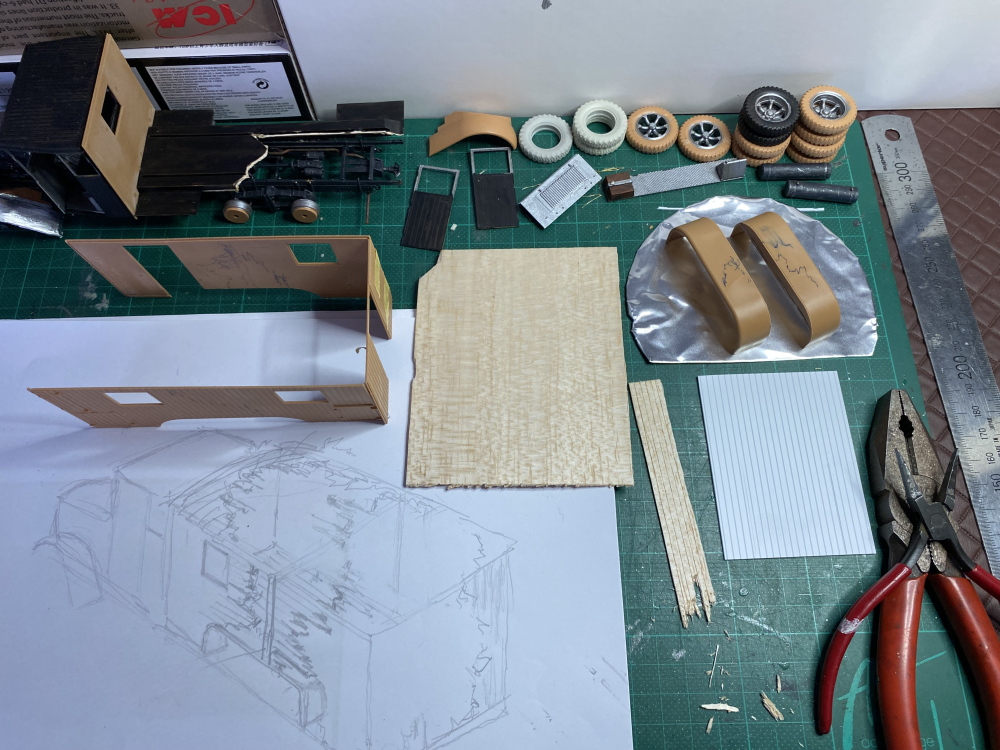
Clockwise from top left: ripped off a large section of flooring/ignore the tyres & bits/ rear mudguards likely to be replaced by tortured metal foil/ two pliers having a private moment/ Evergreen planking probably only to be used sparingly for support - the thin balsa will be way easier to shatter & char/ my sketch, the entire rear quarters and back wall with associated flooring & roofing will be blasted off/ original plastic cabin walls as a guide.
Begs the question of how I’ll bond shattered balsa to plastic. PVA will probably suffice provided there’s some support beneath/behind.
Aaaah , the Timinator is back in form , if you scratch the factory finish up on the plastic parts PVA should work , but what I know works is Testors model cement , tube type . Try the PVA method on scrap and spare bits .
Thanks Glenn I was going to experiment using just PVA – isn’t Testors just another plastic glue or am I missing something? If neither works I guess Araldite might be an option (?), I’m fairly sure cyano isn’t.
Cyano would soak into the wood and leave little to adhere to the plastic , although if you gob it on good enough and use cyano on the wood , let dry , then use the cyano on the new wood/cyano created surface , that should work . Have you thought about using Evergreen/Plastruct in lieu of the balsa ?
I think the balsa would give a very realistic splintered wood look in line with the Timinator’s planned destruction of the wooden parts of the truck. Can Evergreen give a similar splintered look?
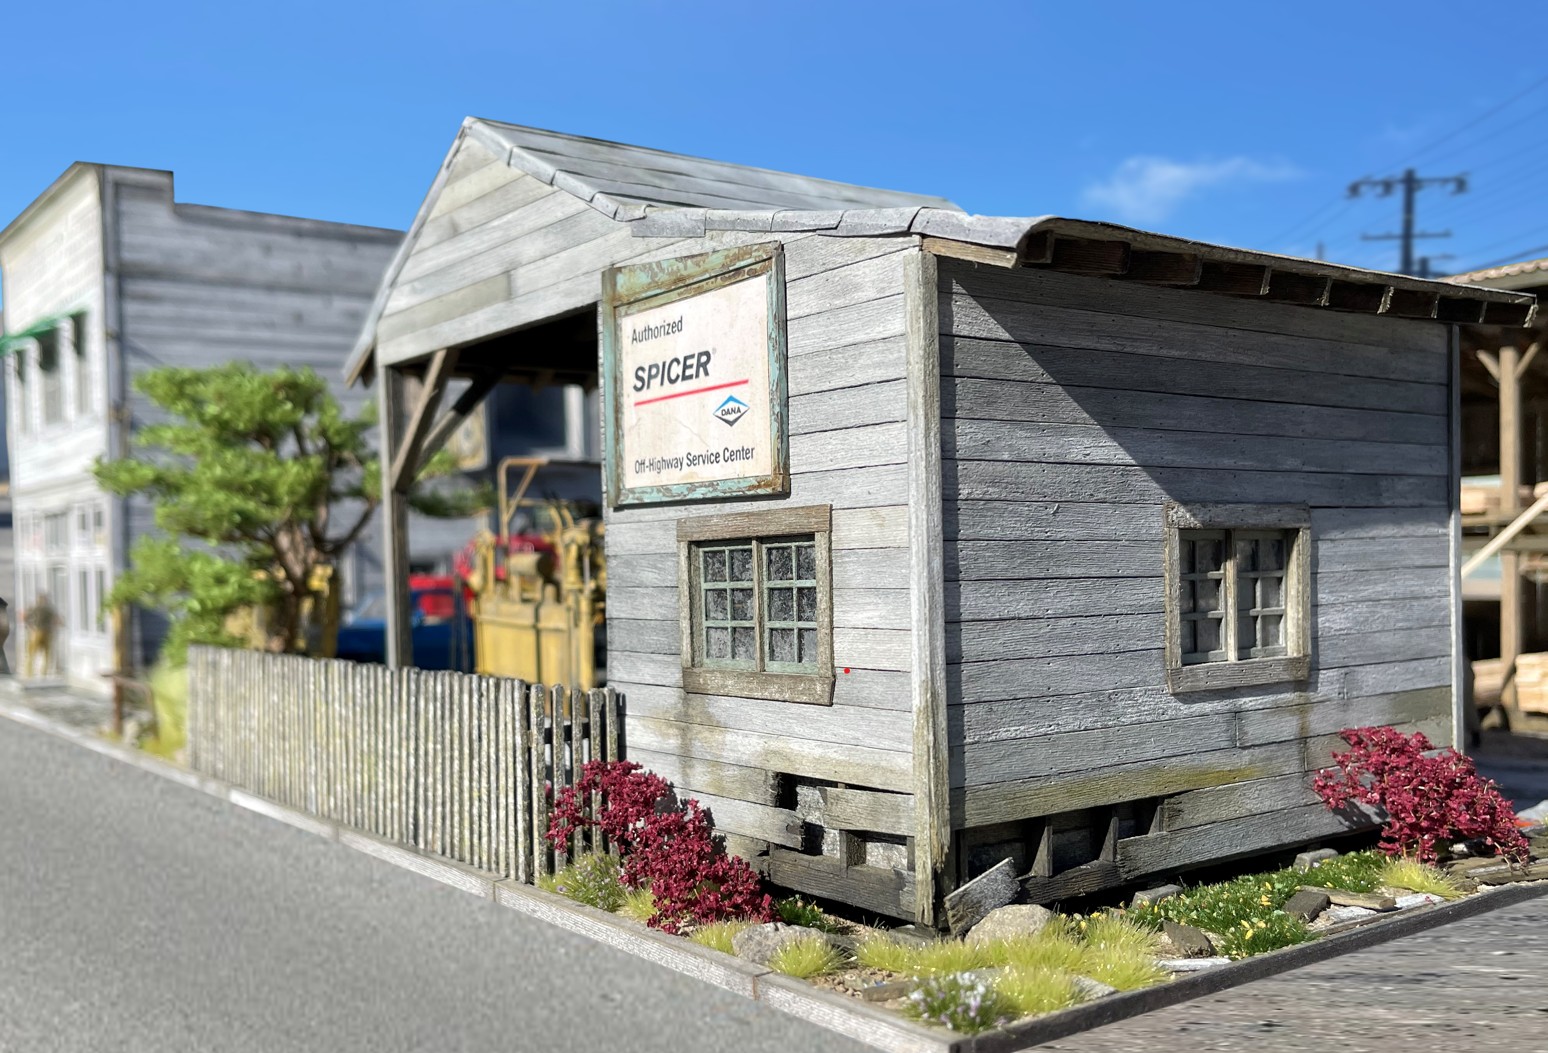
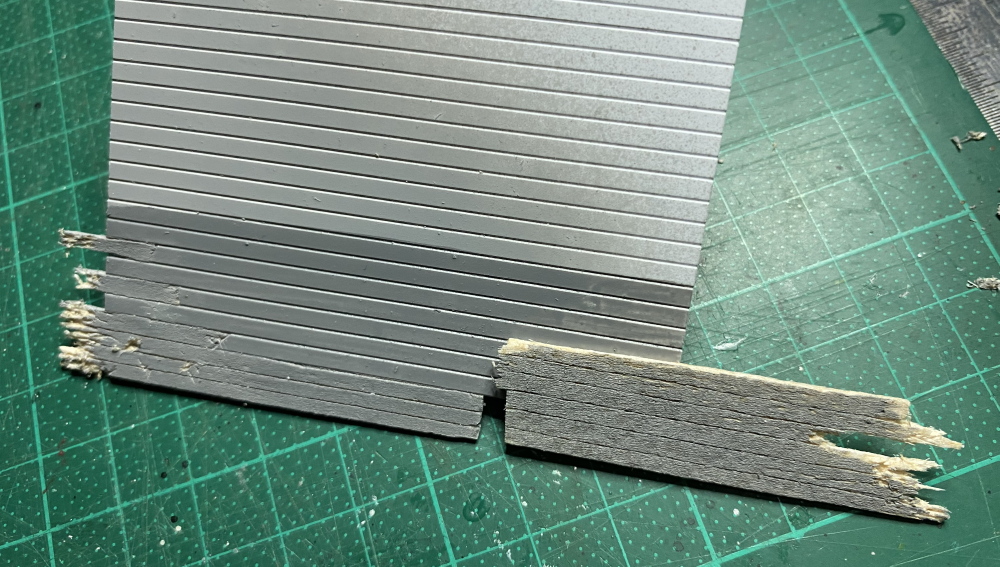
FWIW, I’ll weigh in with Glenn. I use Basswood pretty often and have had very good results. I pre-weather it in bulk (rough it up with a razor saw, and stain), then cut it up/paint it as needed, glue it all together, and in this case, go back and break it up. Doing this, you can glue it all together and it’s hard to see the glue, then once you smash it up/break/burn parts, you can go back and weather the freshly exposed areas. And, it’s easy to CA together and to most other surfaces. I used this process as shown below - all the material was weathered and painted before I built the building, then for the rotted out corner, picked each board - imagined where I wanted it, cut, re weathered, installed and then…re weathered!
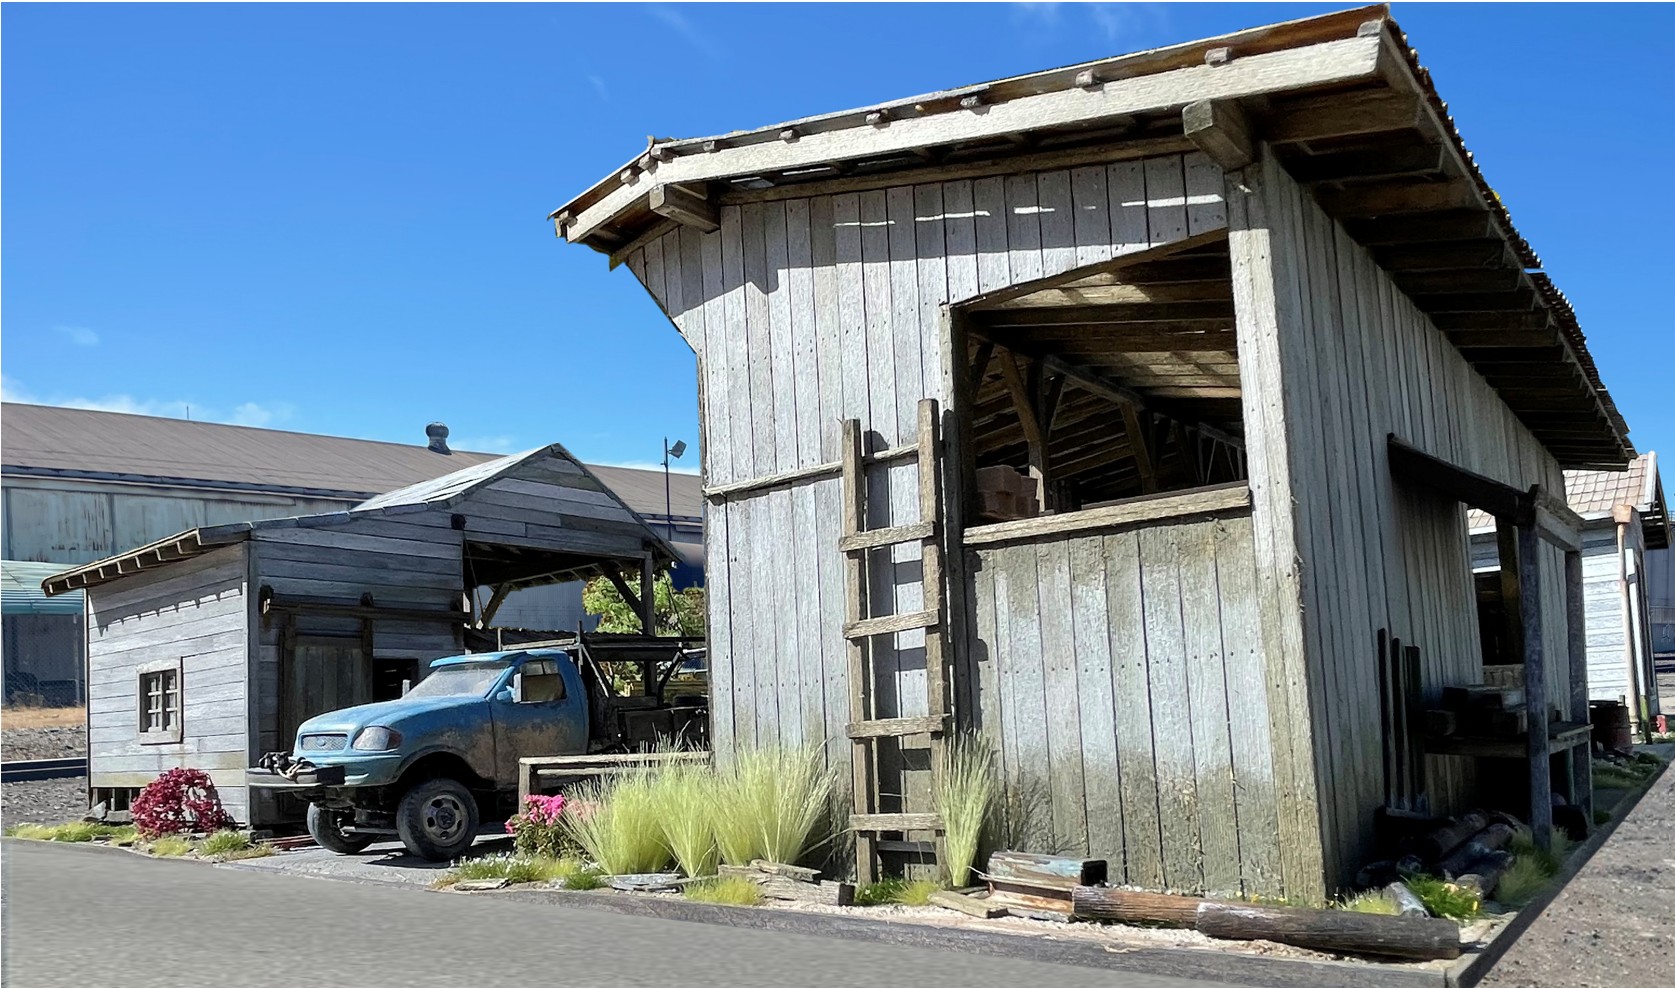
The two pics above are the same building, the top one is showing it done, the bottom during the build. While this is only showing a tired out/rotting building, you can see some wood grain and shredded edges. I realize this is only a small portion of the building, but I have broken up larger building sections - but have no idea where pictures of this might be! To get the frayed edges, I cut out the back side of the board, maybe half way through, then carefully snapped it, trying to keep the wood strands on the visible side.
This is all basswood plank, not painted, but weathered and washed with several layers of India-ink based stains. It was intentionally diluted to look faded but it could have been painted (I use vallejo model air acrylics) to look newer, which you could then weather/demolish etc and touch up with yes, more washes!
OK, hope this might be of some use! TIM: Keep the MOJO!!
Glenn - yep pre-sealing the edges should work if using CA on a wood/plastic bond, and I’ve got the (correct plank-width) Evergreen ready just in case…plus the original kit cabin walls (the sections that have been destroyed) can serve too, slightly thinner than the Evergreen.
Sam – yep I’d like to prove (or not) that I can splinter balsa better/more easily than basswood. The killer might be (as Glenn mentioned) if the porosity of balsa screws up the paintjob, given some sections will be plastic and others balsa. (See experiment below)
Nick – yeah nice try with those 1:1 photos, but now show us something you’ve actually built
But seriously, (a) yep I was planning on pre-painting/weathering panels in bulk before construction (b) surprised you used CA rather than PVA – to avoid glossy PVA bleeding? Would’ve thought PVA gave a stronger bond…? (c) India ink staining, I’d never have thought of that but jeez how it sings! I’m hoping to replicate that effect with my famous el cheapo artists’ acrylics, I have some game. But sparingly, getting the same effects across plastic & balsa may defeat me.
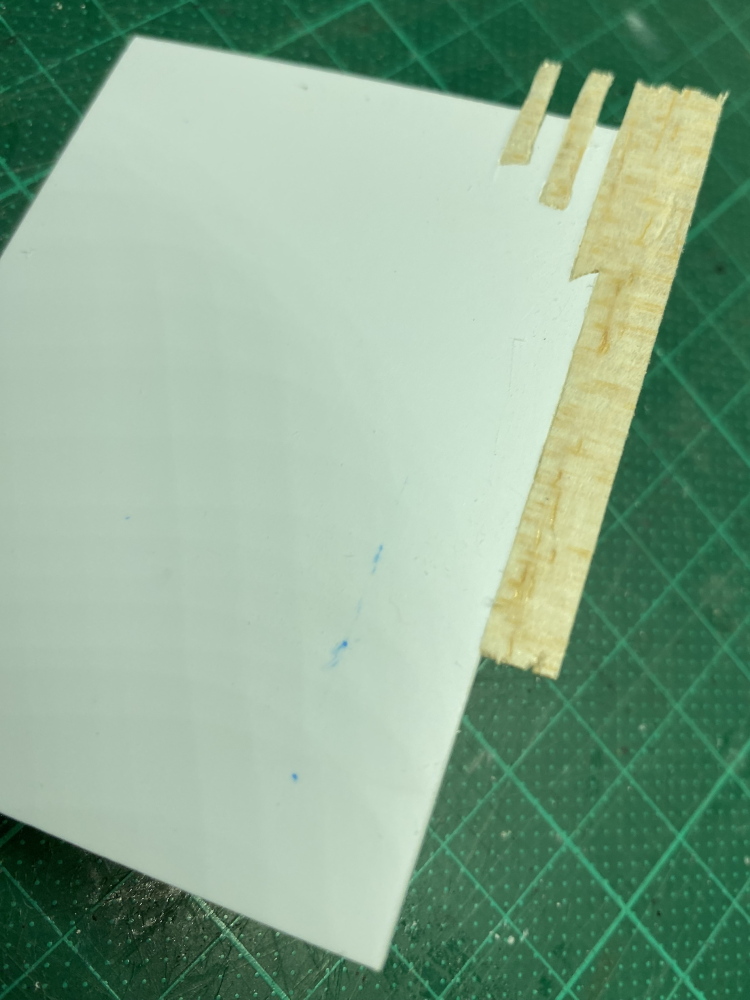
Exhibit A: plastic & balsa bonded with PVA and sanded…
…and with minor distressing on the balsa edges. From this we can see (a) confirmation I need to prime the balsa parts as well as the plastic to give a more uniform paint coverage – the unprimed balsa section looks a different shade altogether, and too rough in texture (b) I need to scuff up the plastic parts to give a more uniform texture with the (primed) balsa.
I haven’t tested the PVA bond in terms of trying to break it – it’s likely fairly fragile but was certainly strong enough to be painted, and should withstand construction/destruction.
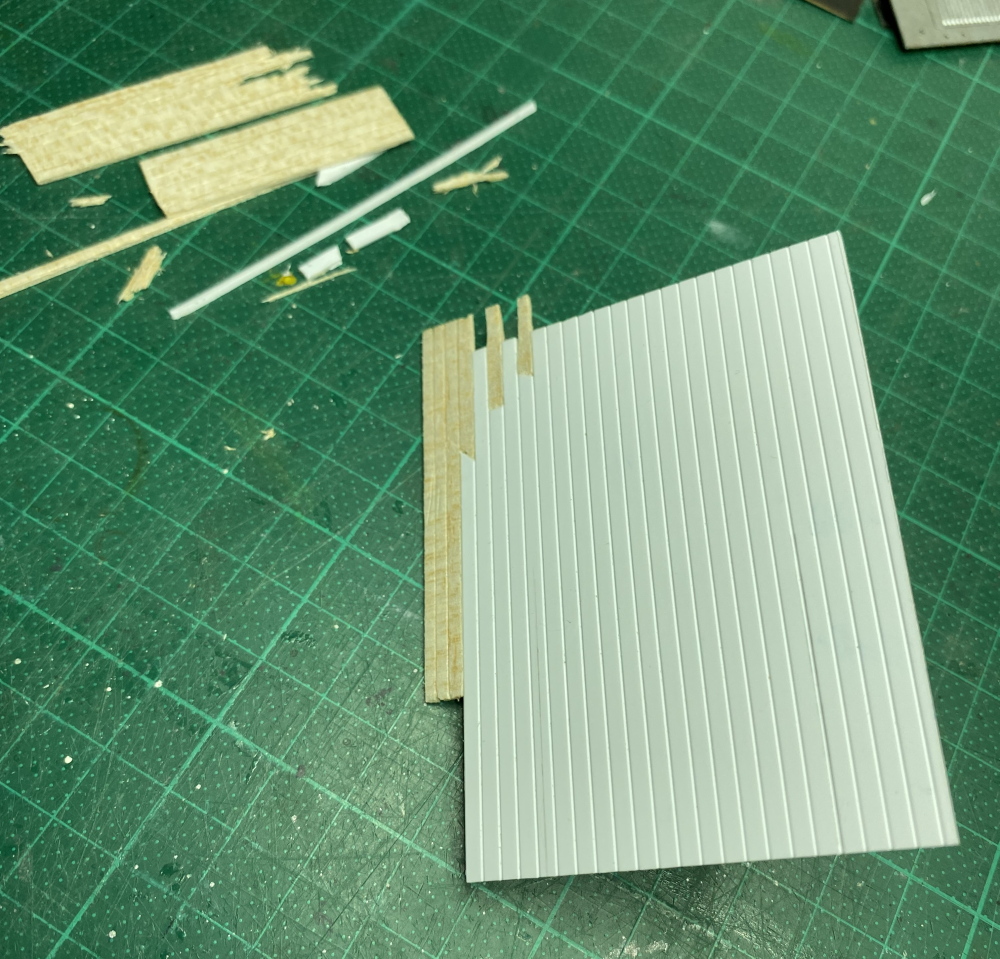
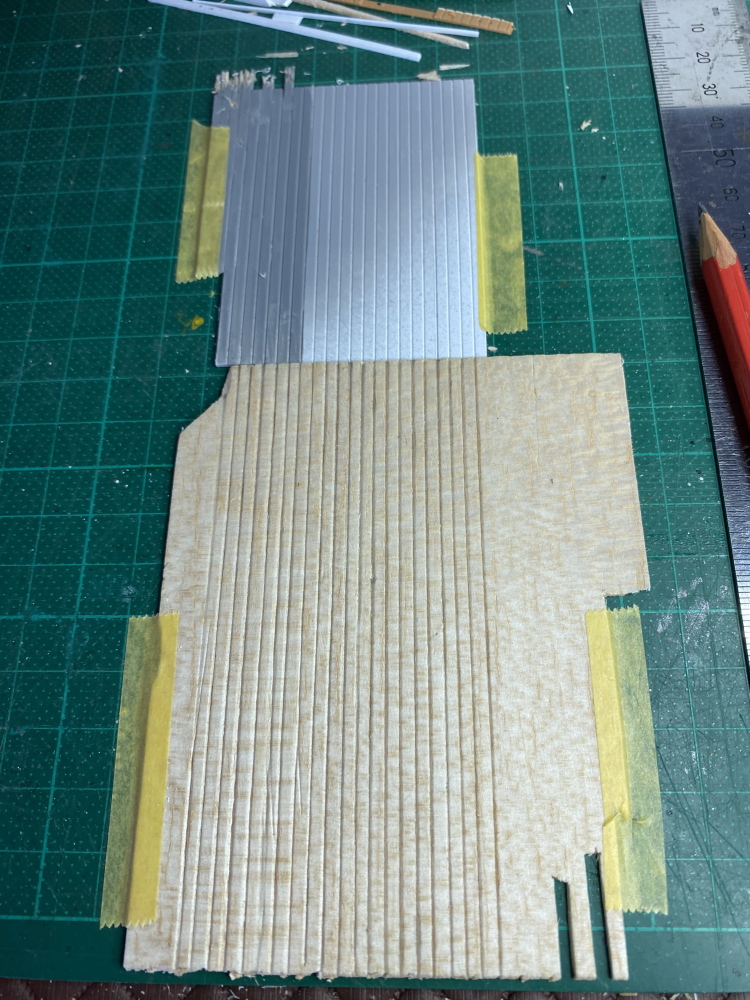
Hopefully this’ll work, using Evergreen as a template and a sharp pencil on balsa. Over the next 12-24 hours the indents should shallow out to look more like the plastic, which is when I’ll prime it…
Hi Nice Glenn - thickness claims to be 0.75mm but measures nearer 1mm, maybe 'cos it’s getting chilly/damp here heading into winter. I’ve noticed some of our interior doors are slightly “wedging” now. Standard Tamiya Surface Primer.
Do me a favor and try this on a scrap piece of balsa . When you prime the balsa , thin it a lot . The primer will absorb at different depths of color leaving some deep color and some parts of the balsa still looking like wood according to the grain , like a stain or ink . When you put your top coat on , do the same , You may have to do multiple coats . Your top coat will absorb the same as the primer , the trick is to have some original wood showing . Hopefully it will look like worn painted wood . You also might want to try paintng it without primer and just your topcoat [ thinned ] . Basically this is like using a stain or ink .
Or don’t … Like I used to tell my son , son when you slice bread you have to cut it against the grain like a piece of wood , … my son would say , Dad there’s no grain in bread …
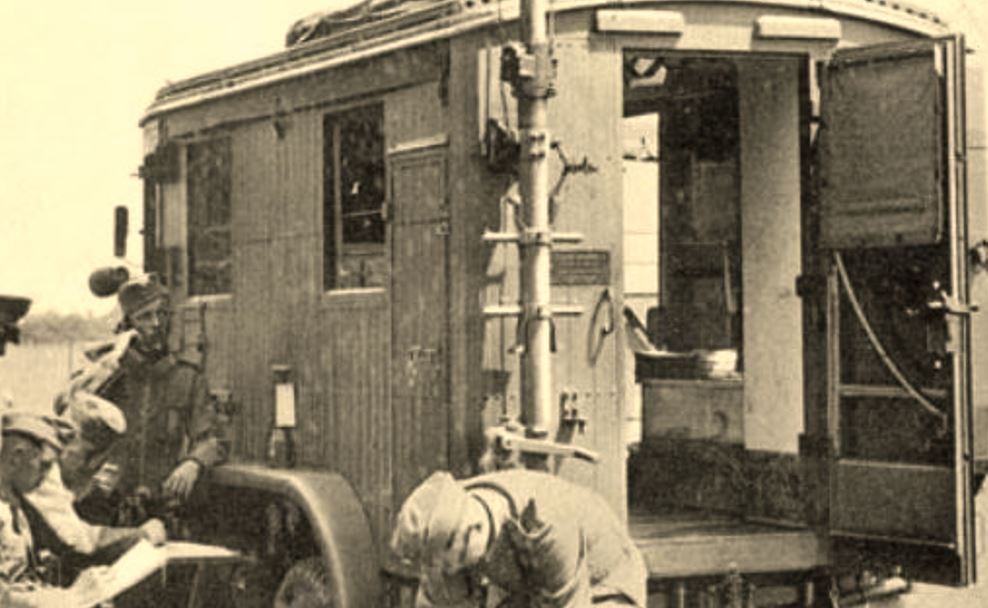
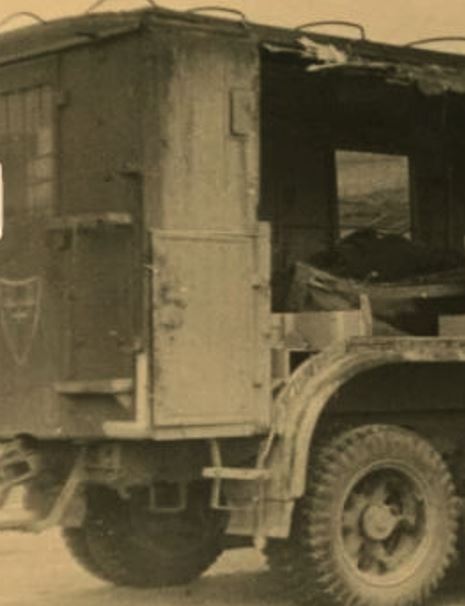
Thanks Glenn that’s kinda like Nick’s technique he mentioned above – ideal for weathered buildings etc, but this is a Cherman-painted truck only a couple of years old. Looking at some refs…
Not great blow-ups admittedly but I’m fairly sure the plank surfaces would’ve been smooth gr*y paint. That said there’s clearly surface weathering going on, I’m just not convinced that’s due to the paint wearing thin though - more likely rain/mud/dings(?)
And unless there’s another way, I need to use full-strength primer to smooth out the balsa texture to match closer to the adjoining plastic sections…which in any case couldn’t be stained etc as if it was wood. Or if it could, I dunno how. If that makes sense (?), sometimes I can’t tell