(Completed) Tamiya M-3 Stuart

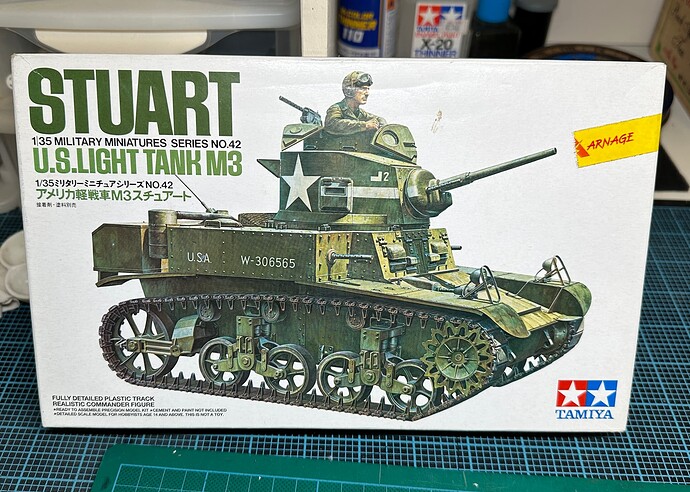
Going to challenge my ability to walk and chew gum at the same time by trying to simultaneously complete a build and build log of Tamiya’s 1/35 M3 Stuart.

I’ve started build logs before, but never seemed to get to the far end for one reason or another. But this should be a nice, straightforward build so fingers crossed (Are you sure about that? More on this later).

If you are interested in some of the background for this build, read on. Otherwise, just skip down to the photos where the good stuff begins.

One of the first armor builds I can remember from my youth was this same kit I got from my parents as a Christmas or birthday present, and recently I had been feeling somewhat nostalgic about it. As it happened, not long ago I was in second-hand model store I just discovered in a back alley in Tokyo and I found this kit. To my surprise and delight, they also had a set of Modelkasten workable tracks. Yea, me! The irony is that the box for the tracks is nearly as big as the box for the kit–that should have been a warning.

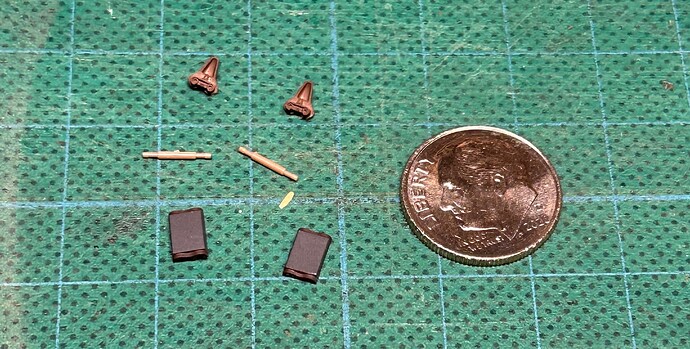
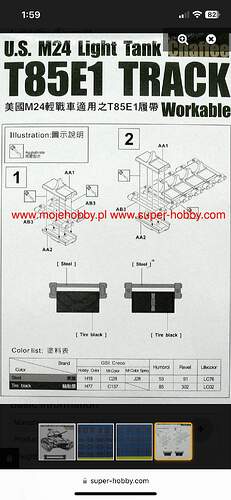
The part count for the kit appears to be around 150–typical Tamiya simplicity–whereas the tracks require 134 links (both sides) with six microscopic parts per link for a whopping 804 pieces! What have I gotten myself into?


I started the process of painting the tracks while I was still working on my AS42 Sahariana. track pads and guide horns were primed and airbrushed, then the metal ends of the pads finished with a hairy stick.

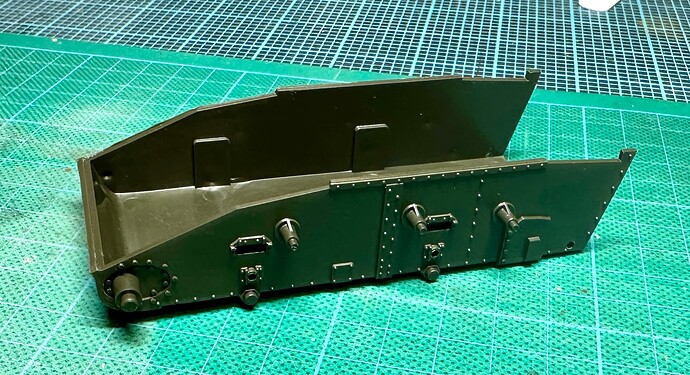
The Sahariana finished, it’s time to begin work in earnest. The hull tub has the drive sprocket axles and track support roller stanchions molded on.

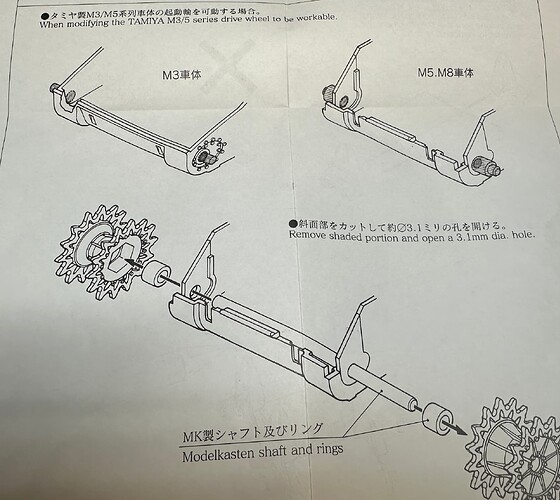
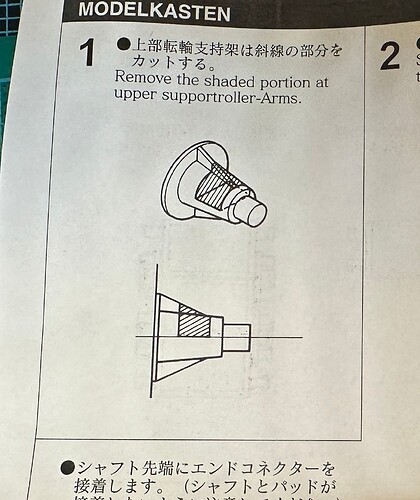
Unfortunately, Modelkasten doesn’t like those so some surgery is required.


My first consideration is whether I want to open up the holes for the sprocket axle slightly along the horizontal access so I can allow some play in the action. That way I can get the tension on the tracks right. Still thinking through how to spring load the axle. Don’t want to use rubber bands that will eventually harden and crumble. Stay tuned to see what solution I come up with.

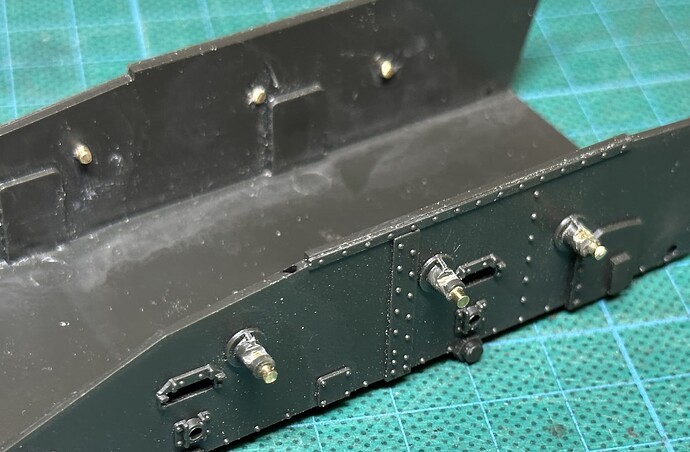
My next concern is that removing that much material from the stanchions is going to leave them weak and prone to breakage. My plan is to first drill them out and insert brass rod to replace the roller axle. Have yet to figure out yet how to get the necessary precision since I had to leave both my drill presses in Rhode Island when we moved. I have some ideas, but experimentation will be required before I do anything irreversible.

To the bat-bench!

:beer:

11 Likes

So AFV Club did a plastic set that is more reasonable than Modelkrasten and might be better suited for the older Tamiya kit. Not that there is anything wrong with building that kit.

Miniarts release even has simpler tracks that might work.

Either way still here for the ride. :+1:

2 Likes

Thanks, Ryan. Modelkasten got the nod in this case because the set just happened to be on the shelf and second-hand priced. :wink:

:beer:

2 Likes

The AFV Club T-16 tracks are a bit of a pain. There are sink marks on many links. The return roller support is not mentioned but still needed (to get the teeth into).

1 Like

Sorry, but … isn’t putting those tracks onto this particular kit, lipstick on a pig?

2 Likes

@Jakko You’re not wrong, but I hate vinyl single-piece tracks. I will go to all kinds of extremes to keep vinyl off my builds.

:beer:

3 Likes

I have discovered over time that detailed track can hide some poor molding issues. If I have a highly detailed kit and use 25 year old rubber band track, it gives the viewer the impression the kit is less detailed than it really is. The kits wow factor will always be limited.
Using highly detailed track gives the viewer the impression that the entire kit is more detailed than it really is. On a Stewart, the suspension and track are a big piece of what you see and remember. It will look great when you are done.

6 Likes

I remember buying that Modelkasten Stuart track set and being very excited to finally have accurate tracks for my blinged out Stuart kit. I was filled with wonder and hope as I opened the box. The anticipation turned to concern as I looked at the parts. That concern morphed into horror when I studied the instructions and saw the 6 parts per link. Shaking my head vehemently, I returned everything to the box quickly and closed it tightly, as if it belonged to Pandora. At my next club meeting, I promptly gave the tracks away to a club member who was silly enough to take them, with a stern warning of their construction, and a no-givsies-backsies clause.
I then went about the relatively easy task of filling and sanding the AFV Club track’s sink marks and ejector pin marks, which was a comparative delight compared to Modelkasten.
By the way, I assemble all my Stuart/Sherman tracks unpainted and in one run. Then I airbrush them rubber black and then pick out the end connectors in oily steel.

5 Likes

Then why not build the modern Tamiya kit and put these tracks on it? You would have a far more refined model — one without an undersized turret, for starters.

1 Like

That is pretty much my feeling with regards to AFV Club Sherman tracks vs. Bronco ones … I much rather file off the ejector pin mark on the former, than to clean up the parts for the latter, let alone assemble them.

Same, except I paint them the other way around: airbrush the steel colour for the end connectors, then brush-paint the rubber blocks. Less effort than painting the end connectors individually :slight_smile:

2 Likes

Probably not as bad , but I used AFV Clubs M24 Chaffee tracks ( workable) for my French AMX-13/M24 kit but there was only 4 parts per link. I thought that was tedious.

IMG_1024
They were definitely delicate but it came out nice in the end. I would look for something easier next time.

2 Likes

I very much dislike that current style of tracks, with pins you need to trap between two block halves. I much prefer blocks with pins on the ends, that connectors slide onto — except the AFV Club T80 and T84 sets, those are atrocious. Do not attempt to build if you value your sanity.

3 Likes

I think you are too late. I know I lost my sanity years ago :crazy_face:!
Ken

3 Likes

@Jakko I see your point, and it’s quite valid; however,I prefer to paw through the shelves of the second-hand stores to see what I can find. It’s like a scavenger hunt and playing slots all in one. I’m less about getting the latest high-end (and expensive!?) kits available online, than I am about digging up a diamond in the rough and seeing what I can make of it.

:beer:

5 Likes

Surgery on the track support roller arms is done. I used one of the rollers as a jig and microfile with masking tape on one face to avoid damaging the roller.


Not perfect, but should give adequate clearance for the track guide teeth and it’s all going to be pretty well hidden. Next I have to remove the drive sprocket axles. Still undecided about whether to tension the tracks from the sprocket axle or via another means, possibly the idler arms.

:beer:

3 Likes

That’s why I’m trying to warn others before they are that far gone too :wink:

2 Likes

Concur. I am still buying some of the latest, greatest ubermodels, but I’m also gravitating back to the kits of my youth. They don’t have the detail on have the flaws, but for buildability, they are bringing me more joy and satisfaction than some of the latest - greatest.

3 Likes

Did I say there were 6 parts per link? I forgot about the salt grain-sized bolts that go on the guide horns. That makes 8 parts per link—1072 parts in total. Luckily, that part is behind me. Assuming I’m not to sloppy with the glue, the rest of the assembly should be pretty straightforward. (Famous last words?)

:beer:

2 Likes

If you are unconcerned about workability (and with US live tracks that shouldn’t be much of a concern) you can cut a bit out of the middle of the pins and insert the ends into assembled blocks.

KL

1 Like

I do like my tracks workable, though :slight_smile: Even for ones that will be taut around the wheels, because it makes putting them on after painting much easier. I’ve tried assembling lengths to fit the wheels, then removing them before painting, but it’s not a method that really works for me. Workable track and an adjustable idler does, though.

2 Likes