Well, imagine my surprise that this new layout has gone live already! I’ve been reading the previous posts on this matter, but I don’t recall seeing an actual go-live date. I hope I can find the way to link back to the old blog, and that it’s not lost forever!
One thing though, that I like about this new format, is that we’re supposed to be able to paste photos directly to our post - I’m hoping it works for this post!
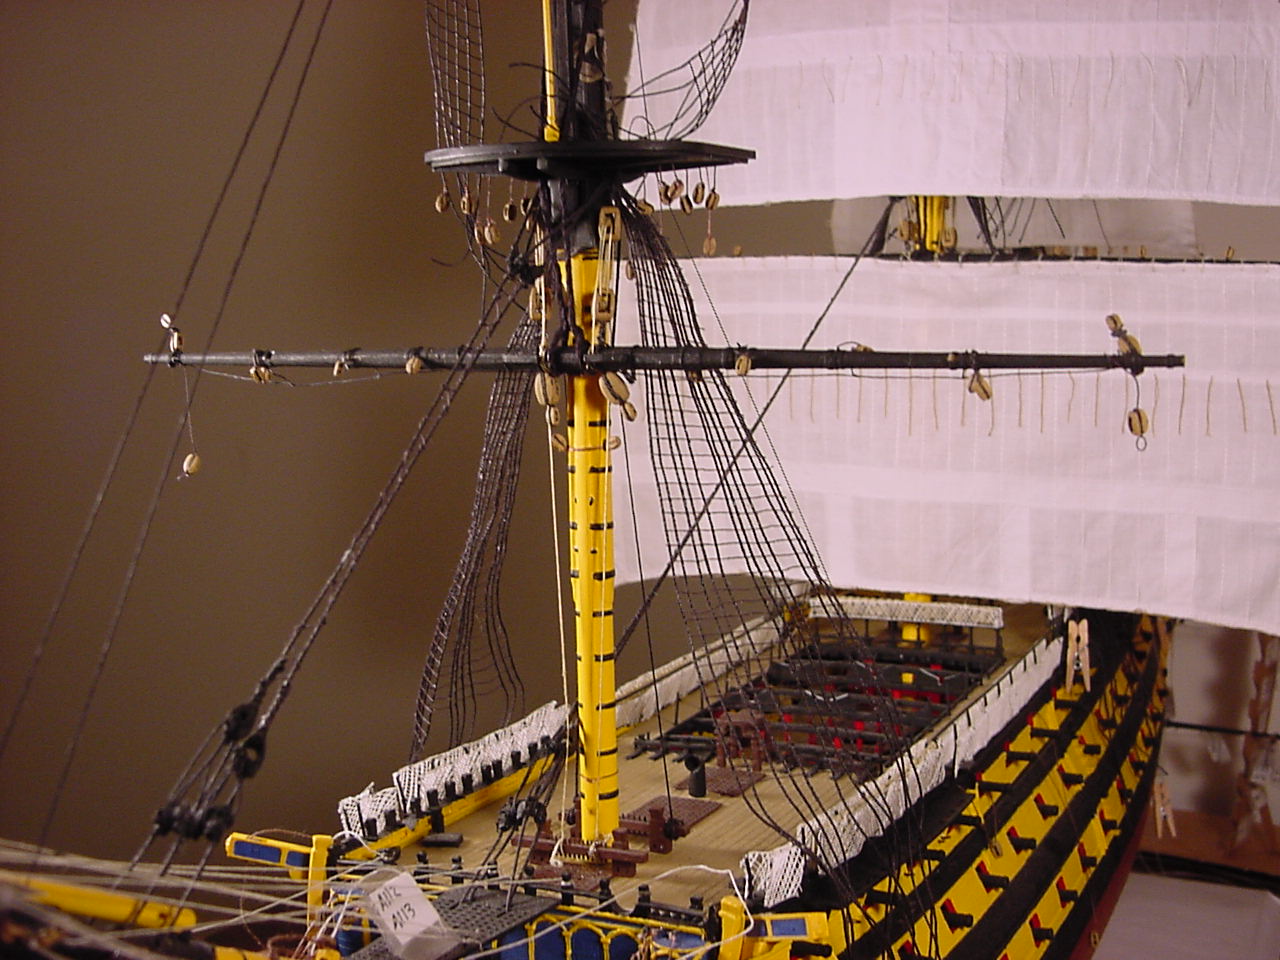
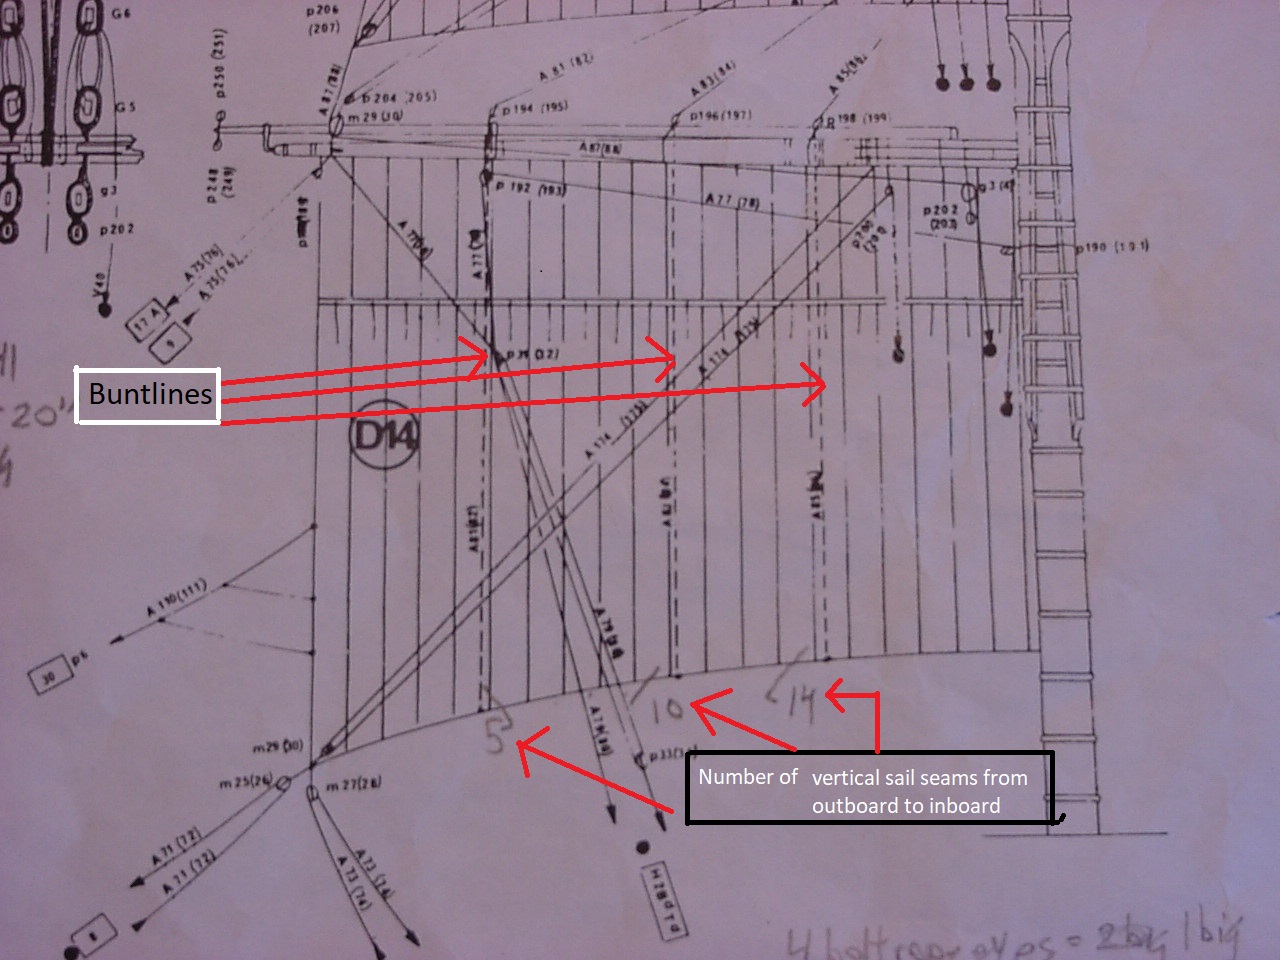
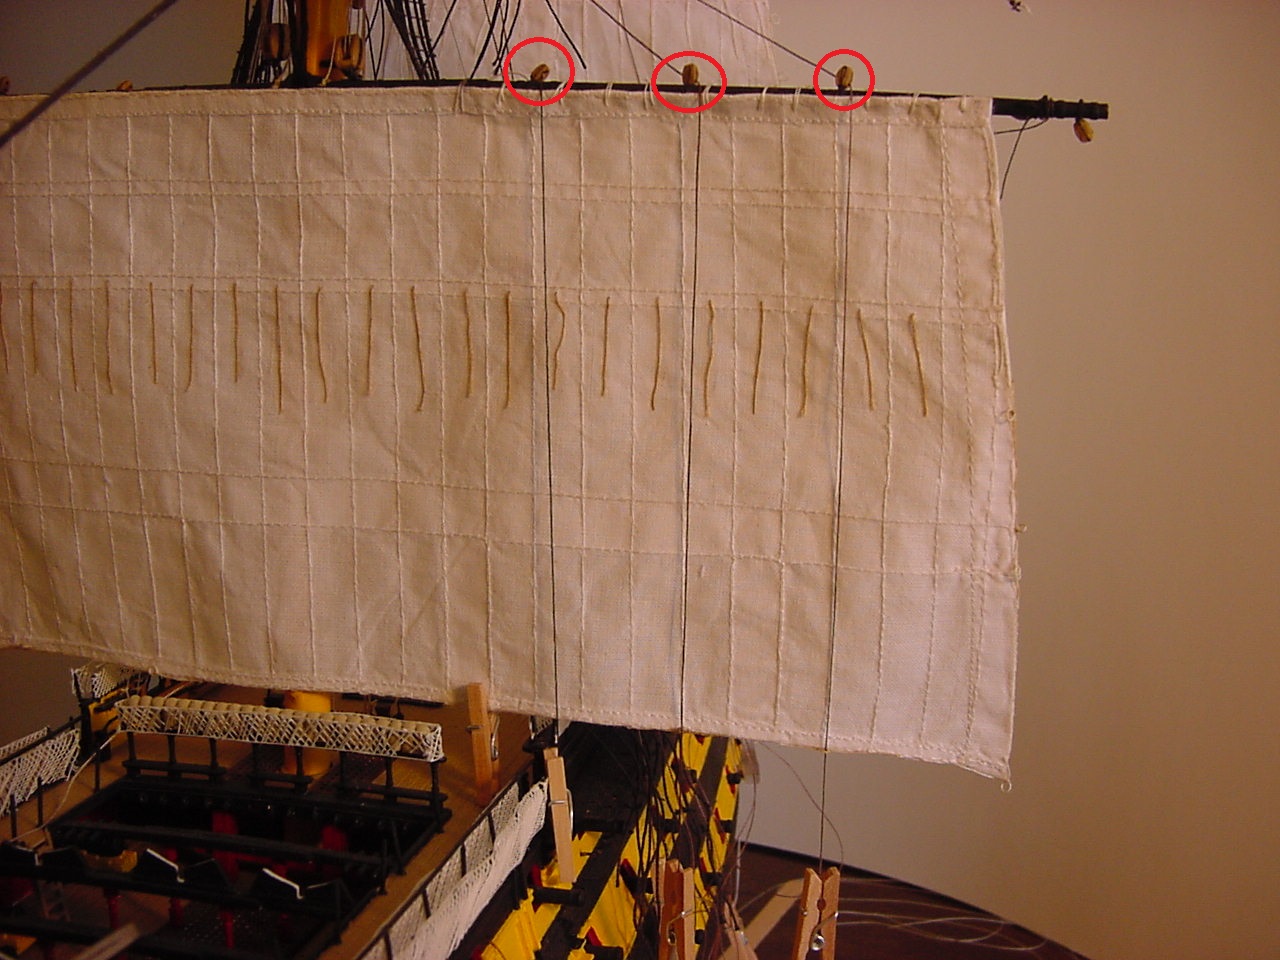
So, in today’s installment, I want to point out a little something about where to glue the cringles to the bottom of the mainsail. When I was preparing the mainsail with its cringles, I found myself more or less guessing as to where the cringles went. So, in looking at the instruction sheet, I was counting over the vertical seams in the sail, to see where the cringles should be installed. All fine and dandy, right? Not quite! It wasn’t until I got the mainsail partially attached, that I looked at my model, and thought to myself, those 3 blocks on the top of the mainyard - what exactly do they do? That’s when I went back and looked at the instruction sheet, and saw that the buntlines went through those blocks. Here’s a picture of the instruction sheet, and the buntline blocks:
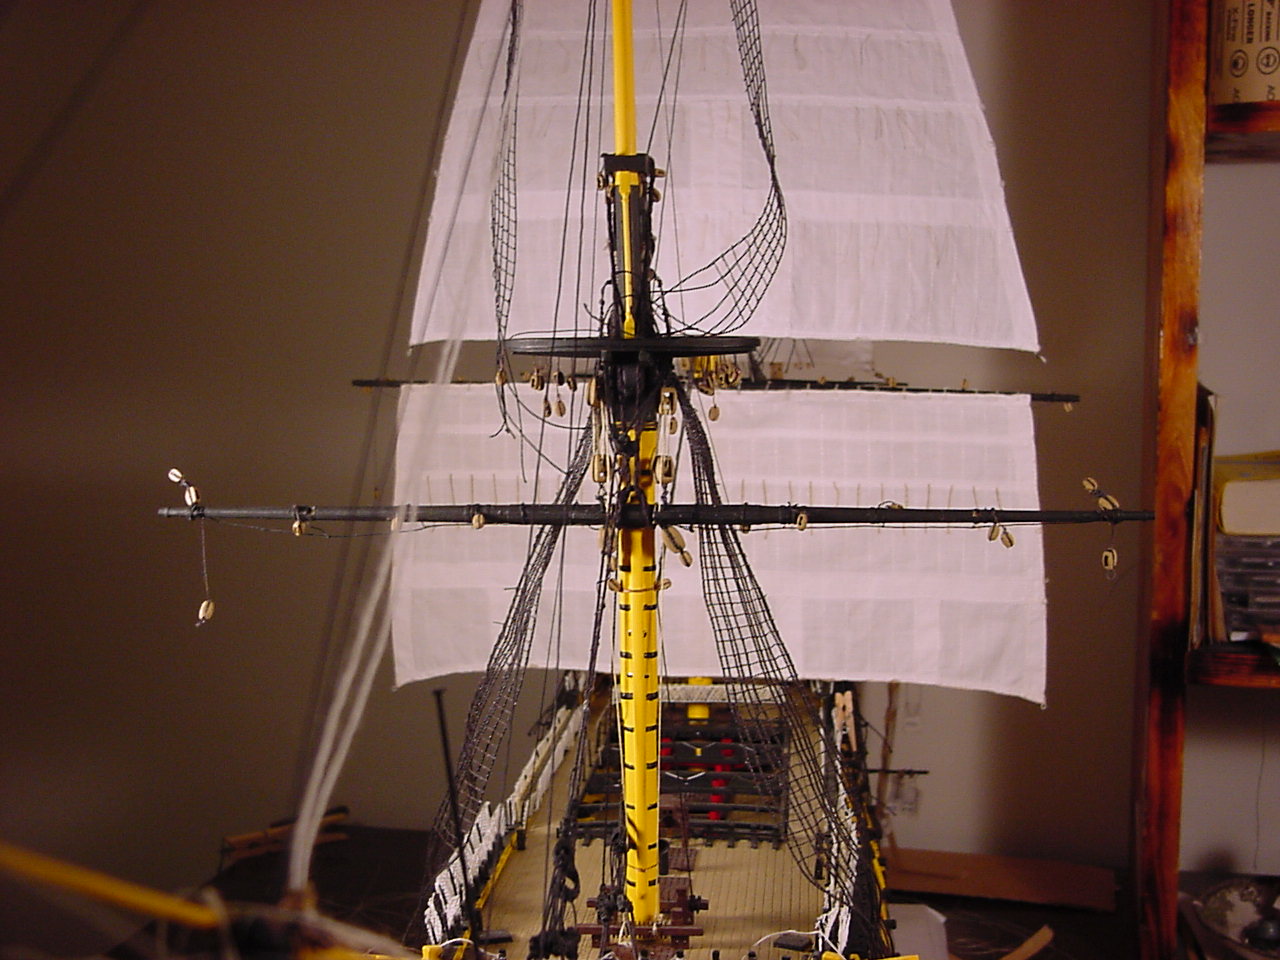
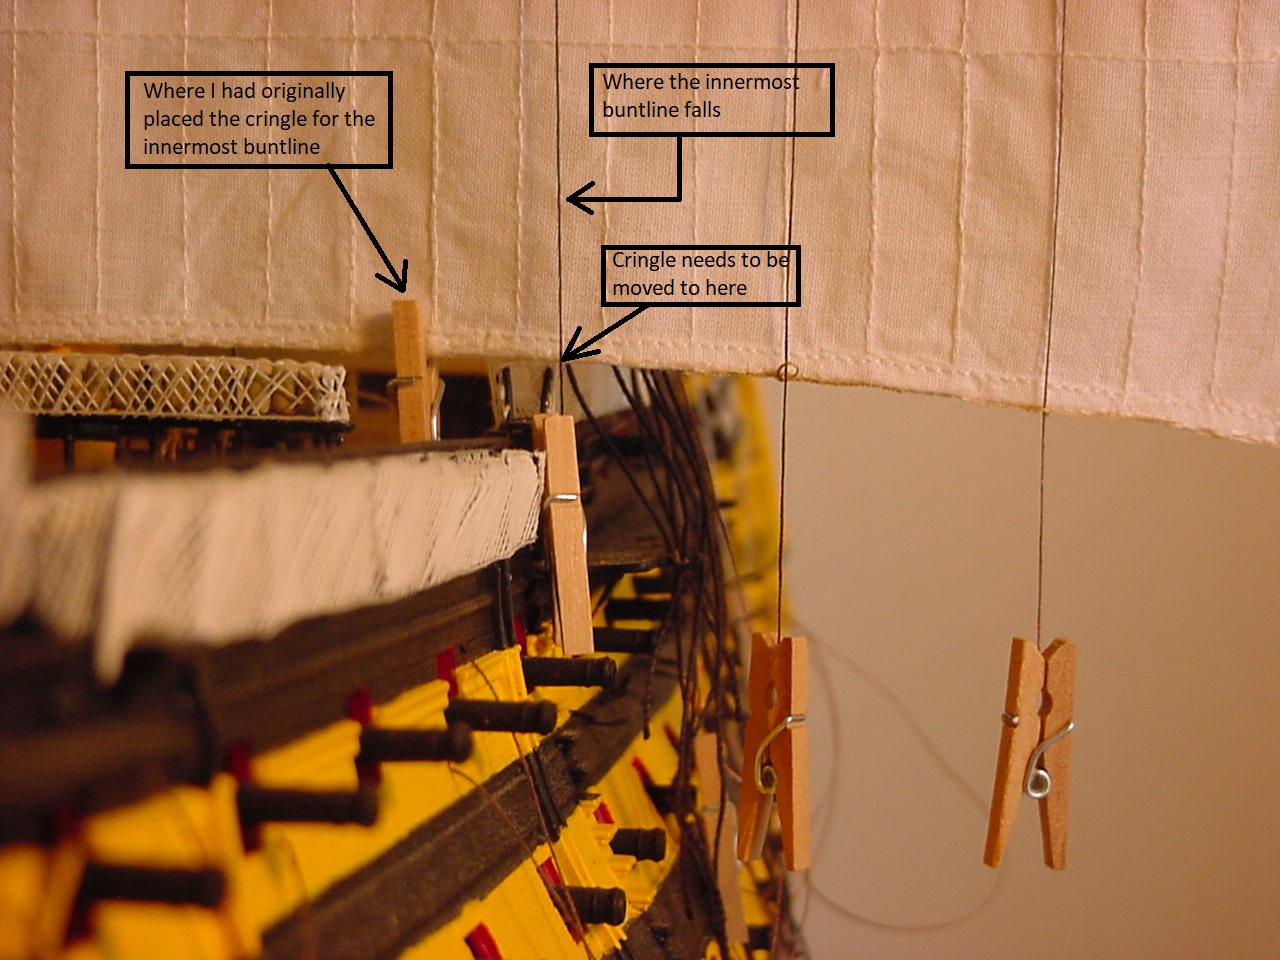
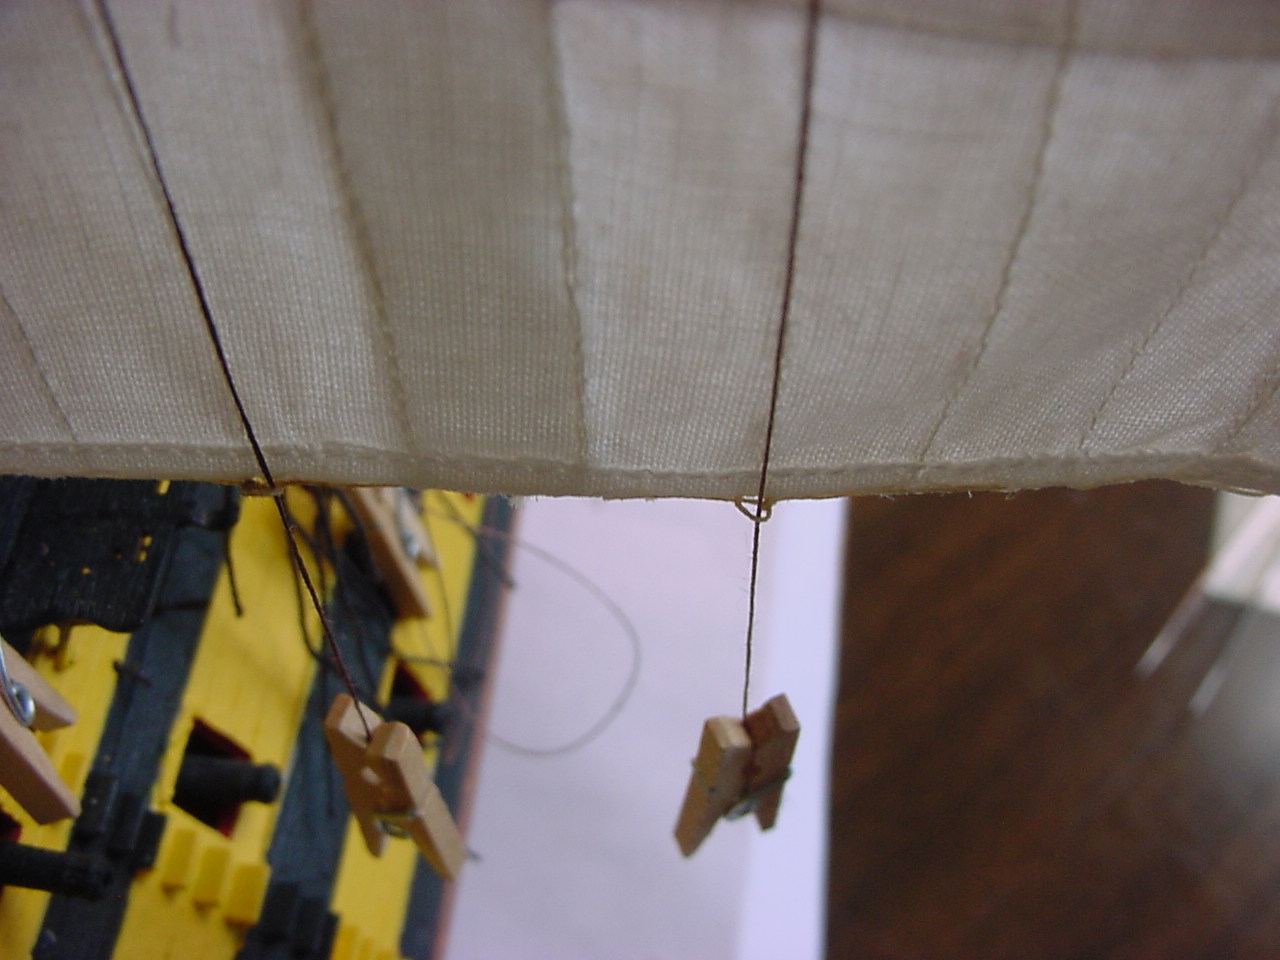
So lastly, here’s a pic of the mainsail, with the the buntlines semi-installed. As you can see in the image, the clothespin on the left marks where I had originally placed the cringle, and the black thread shows where the innermost buntline will lay. So, not that big of a deal, just have to re-install that particular cringle about an inch or so to the right, and things should be good. Have to do the same thing on the other side of the sail.
Hi Tim,
I must admit to a little trickery on my part. The site (and forums) are still in beta, but the URL (modelshipwrights.com) needed to be pointed at the new content site for all the future links to forum topics to work properly. If you had bookmarked the kitmaker.net location for MSW (https://modelshipwrights.kitmaker.net) the site is still there and as it was. But… that all said it’s not long for this work as a postable interactive site. It will soon be just a flat HTML museum piece in dry dock soon. Weeks away I would say. Maybe sooner.
Thanks. It was a surprise that when I went to modelshipwrights.com, it led me directly here to the new forums. I really like the fact that we can directly post images to our posts with the new forums, as opposed to having to find a 3rd party site to host the pictures, then bring them over to here.
Thanks for your post. Admittedly, when I first read your post, the way it showed up here in the new forum was a bit confusing to me (the content, however, was not).
Since the old forum will soon be in “dry dock”, what would be the best way to put a post here in this blog, that refers back to the old blog? And what would the URL be?
As I’ve written in some other posts, one thing I really like about the new format, is being able to post pictures directly our entries, as opposed to having to use a 3rd party host.
Linking to the old site is going to be challenging once I flatten it to plain old HTML. There may be a way I hopefully can get many of the old links to work via using a process called mod_rewrite, but that process may not work on every single URL for the old site. I will likely try to make sure it works for forum posts, features, news, and reviews for sure though.
For now I would just link to the old site and if needed we can always update any important links to the archive version of the site once that has been created and published.
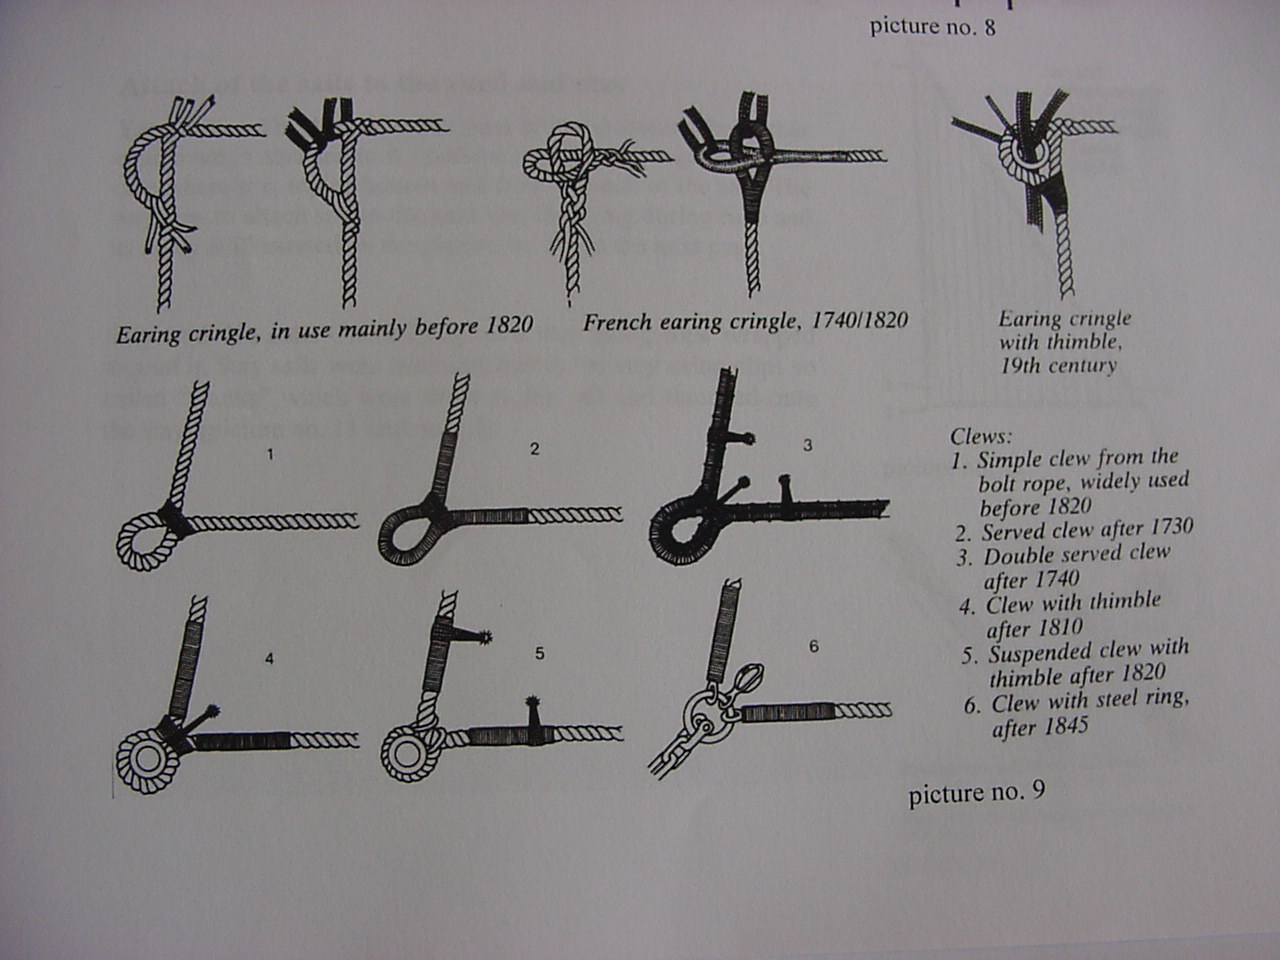
So here’s what Longridge says about cringles (on page 237 of his book): “The buntlines…make fast to the “cringles” or rope loops at the foot of the sail”. So with that being said, here’s some examples from some instructions I got from HisModel.com:
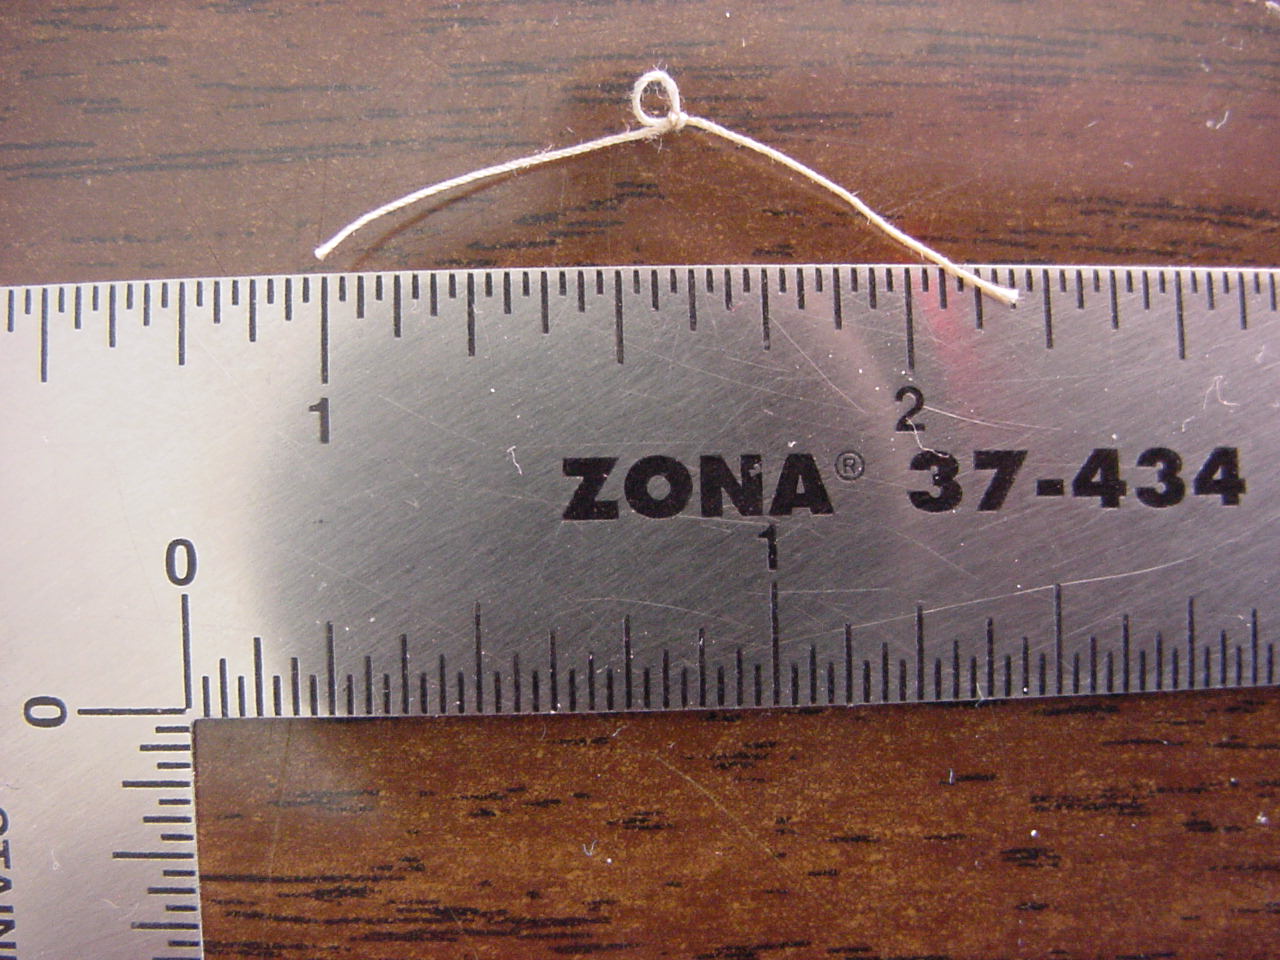
And now, here’s one of my cringles (it’s not the same one I already pulled off the sail - for some reason, I can’t find it right now). The scale is in inches.
Hope this helps! These cringles are also on the bottom corner of each sail - it’s where the clew line and sheet line are attached, and the cringles are also on the sides of the sail, and the bowlines will be attached at those points.
So what do you think of the new layout of the site, Mark? I sort of miss the old site, but then, it’s probably just because I’m very used to it. Change happens!
Take care, and I hope you’re not in the path of this next hurricane that’s coming (Delta, I think?)
Thanks for the explanation on Cringles, I didn’t know I was looking right at them…LOL.
Will have to get used to this new layout. Not to happy with these separate forums. I will have to scan each one for new content. Like it better when the content was in one forum.
Mark, glad to hear you’re out of the way of the hurricane. I’m sorta with you on the forums look, some things I like, some things I don’t. I guess this is the way it’s gonna be!
@TimReynaga thanks! I want to make my blog educational, as well as entertaining! I haven’t looked, but how’s IJN Hatzuzuki (sp) coming along?
great to see your impressive build and log continued here!! ( I didn’t see it earlier due to the separation into different ‘main topics’, but once understood and getting used to, it seems a good system) Your dedication to all those little details and how you go about with your rigging and the sails just continues to amaze me!!
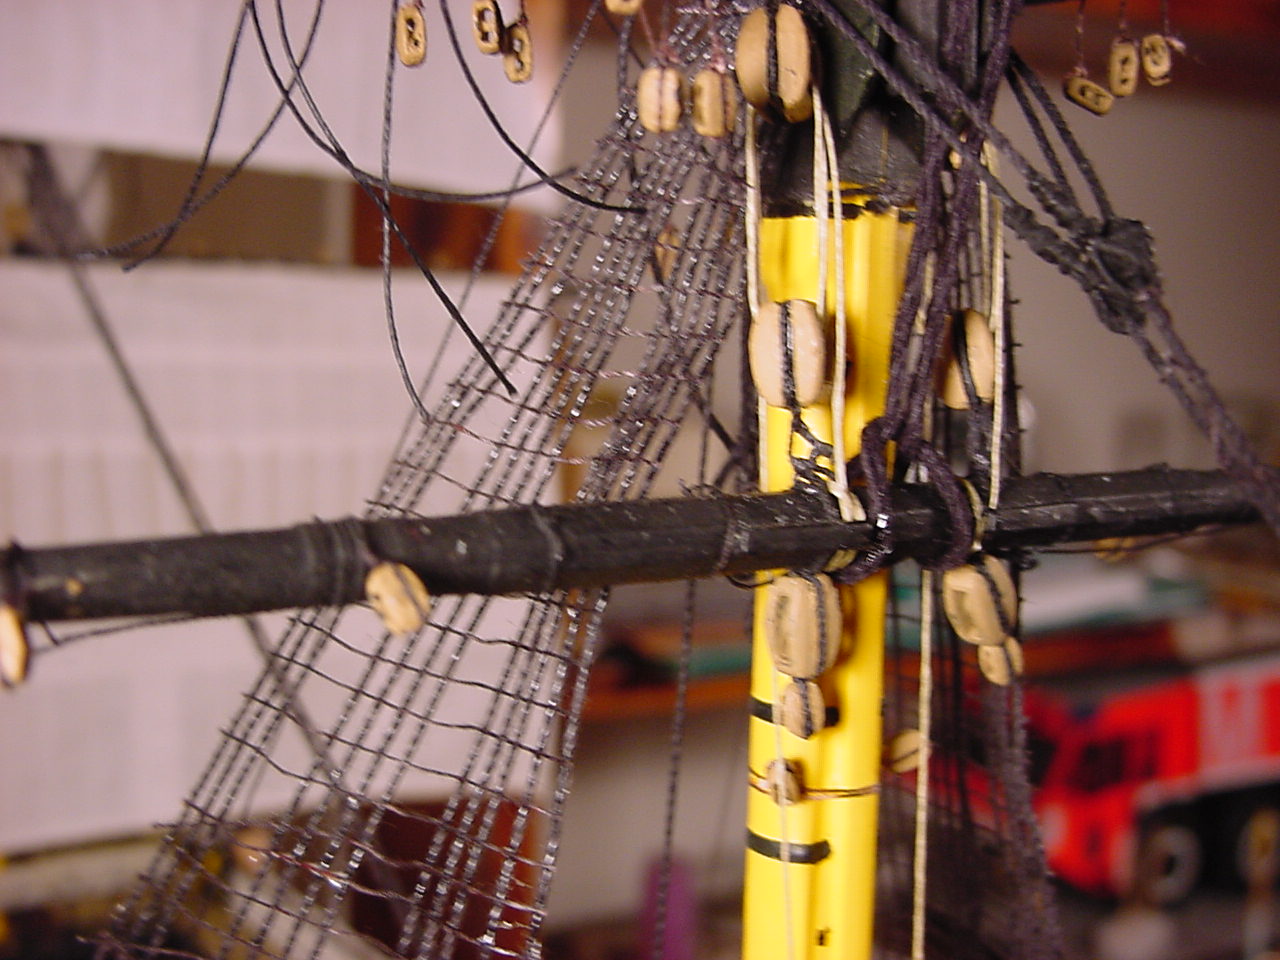
Talk about little details! Yesterday, I put the final two ropes in, on the mainsail. It was very crowded, as these 2 ropes were located right where the yardarm & mast come together. What with the yardarms lifts, the sling, and some previously installed rigging, I about gave up on it - my threads, as I was trying to loop them over the yard, kept getting entangled with some of the other lines, so it was back the thread out, try to loop it over the yard again, but then, getting the thread caught in a different line! No wonder I’ve been working on this thing for years!
Next steps: put that last cringle on the mainsail, hopefully I can get that done tonight, then attach the yardarms on the foremast and get the sails attached.
Yes, the new forums seem to be laid out in sort of a logical fashion. Sorting through it all will take some time, but soon enough, I’m sure it will be second nature to us!
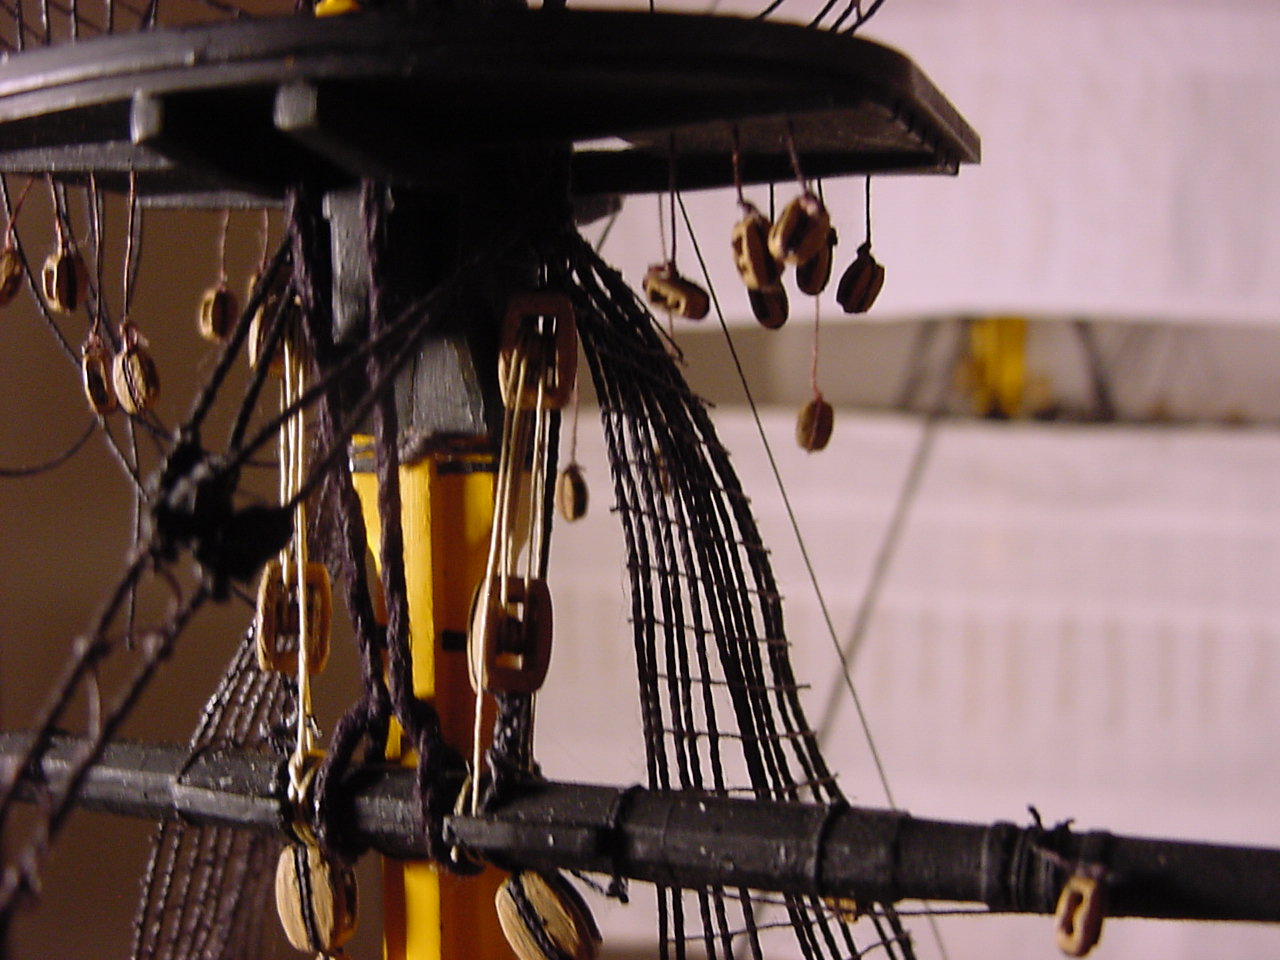
Not much news, but I did get the fore yardarm installed yesterday. Also did some checking of threads V6 & V7, along with…A33 and A34? Those lines (V6, V7, A33, A34) go through the blocks that hang underneath the foretop (those 6 blocks under the foretop are also used for the foresail buntlines). I had to go back to instruction 19 to figure out where those lines start & stop.
Ah, so, back to it, after a while. Been dealing with a pinched nerve in my shoulder, and it’s pretty much put a stop to any recreational activities. However, things are a little bit better, so I though I’d work on Victory a bit today, and I managed to install the foreyard lift lines.
This first picture is underneath the foretop, on the port side:
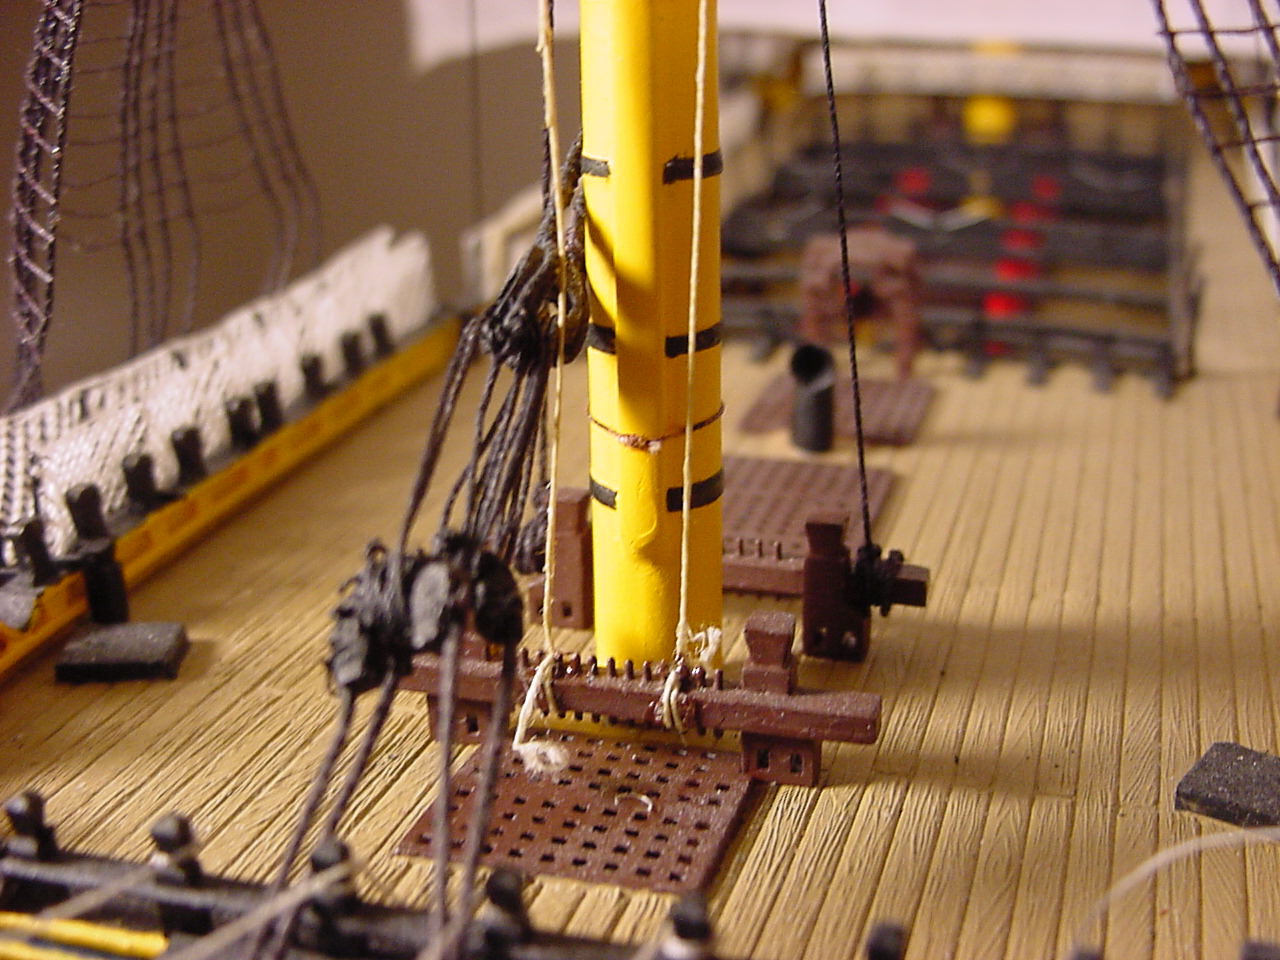
This is the foremast forward fife rail, where the lift lines belay to. When I was roving the starboard lift, I made a note to myself to be sure the line was on the inside of the mainstays.
So next step: soak the foresail in my coffee solution, and get it attached to the yard. Seeing as how Ohio State isn’t playing this weekend, I might be able to get some real work done!


 )
)