Looking good Tim! Hope your shoulder is on the mend and not getting in the way of moving forward on your brilliant build 

Looking good Tim! Hope your shoulder is on the mend and not getting in the way of moving forward on your brilliant build.
Ditto!
Mark 
As a tall ship sailor, nothing warms my heart more than a correctly rigged model. Having rigged a real ship more than once, someday I’ll try a model.
@d6mst0, thanks Mark. The shoulder is getting a little better, but still needs work!
@Danie Always good to get critiqued from an experienced hand! Thanks!
Tim,
looking really good! Nice to see the whole foreyard as it stands right now.
Sorry to hear about your shoulder but good that it is getting better. A pinched nerve really isn’t helpful…
Looking forward to see her grow!!
Cheers
Jan
Hi Jan,
Thanks for checking in. Yes, the shoulder is getting better, slowly. At least it’s not as painful as it was before.
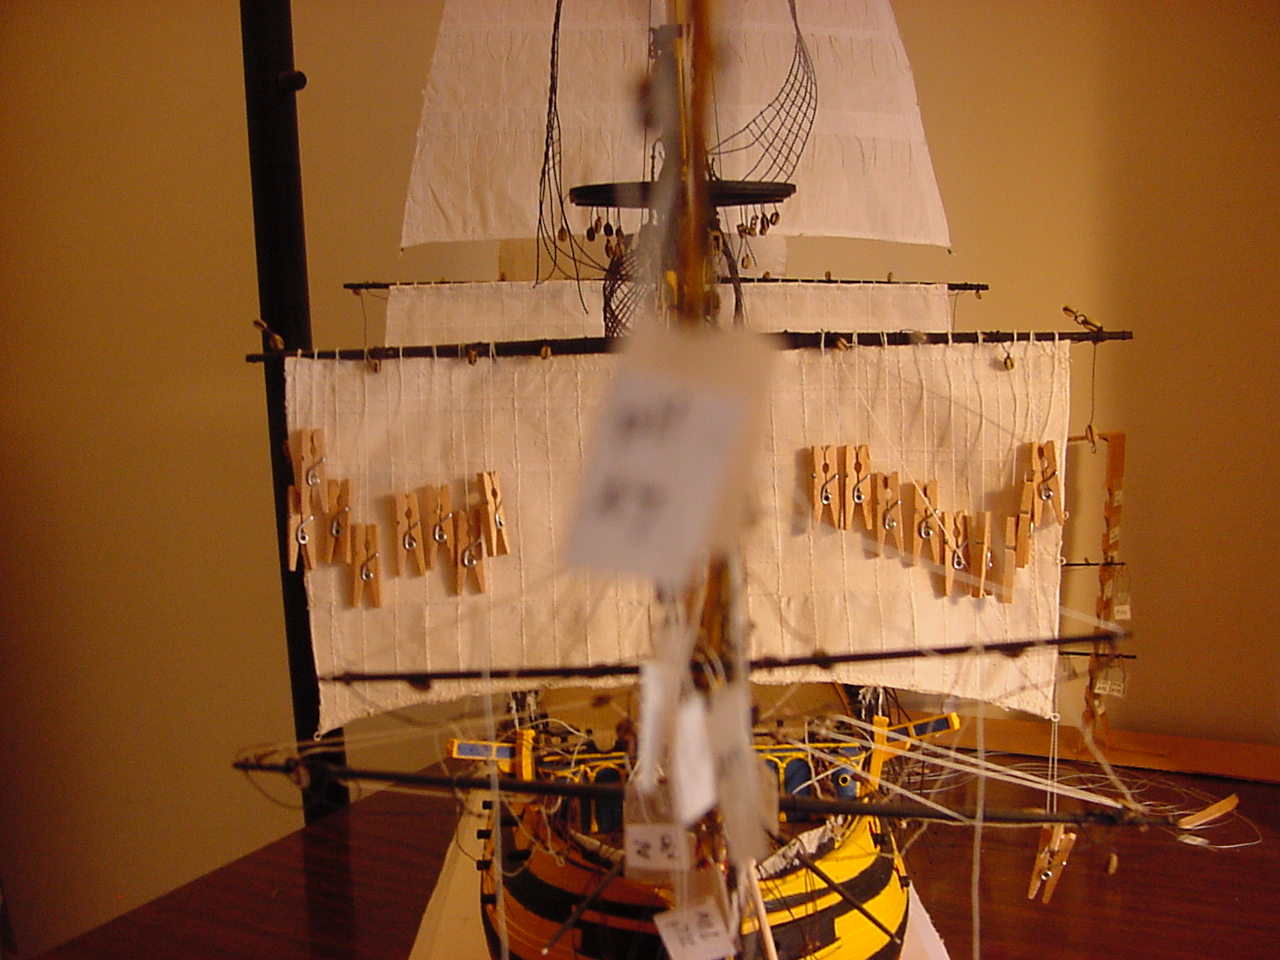
I’ve just about got the foresail attached to its yard…I call this picture, “Never charge into battle without your clothespins!”:
Hope to have more updates soon!
Thanks for looking!!
Tim
4 Likes
 hi Tim!
That brings new meaning to the term, "crossing the (clothes) line 
 Yes, it certainly does, Russ!
I finished bending the foresail to the foreyard today; the next step will be to get the foretop yard installed, and prepare the next 2 sails.
1 Like
Some progress! I got the fore topgallant yardarm installed today:
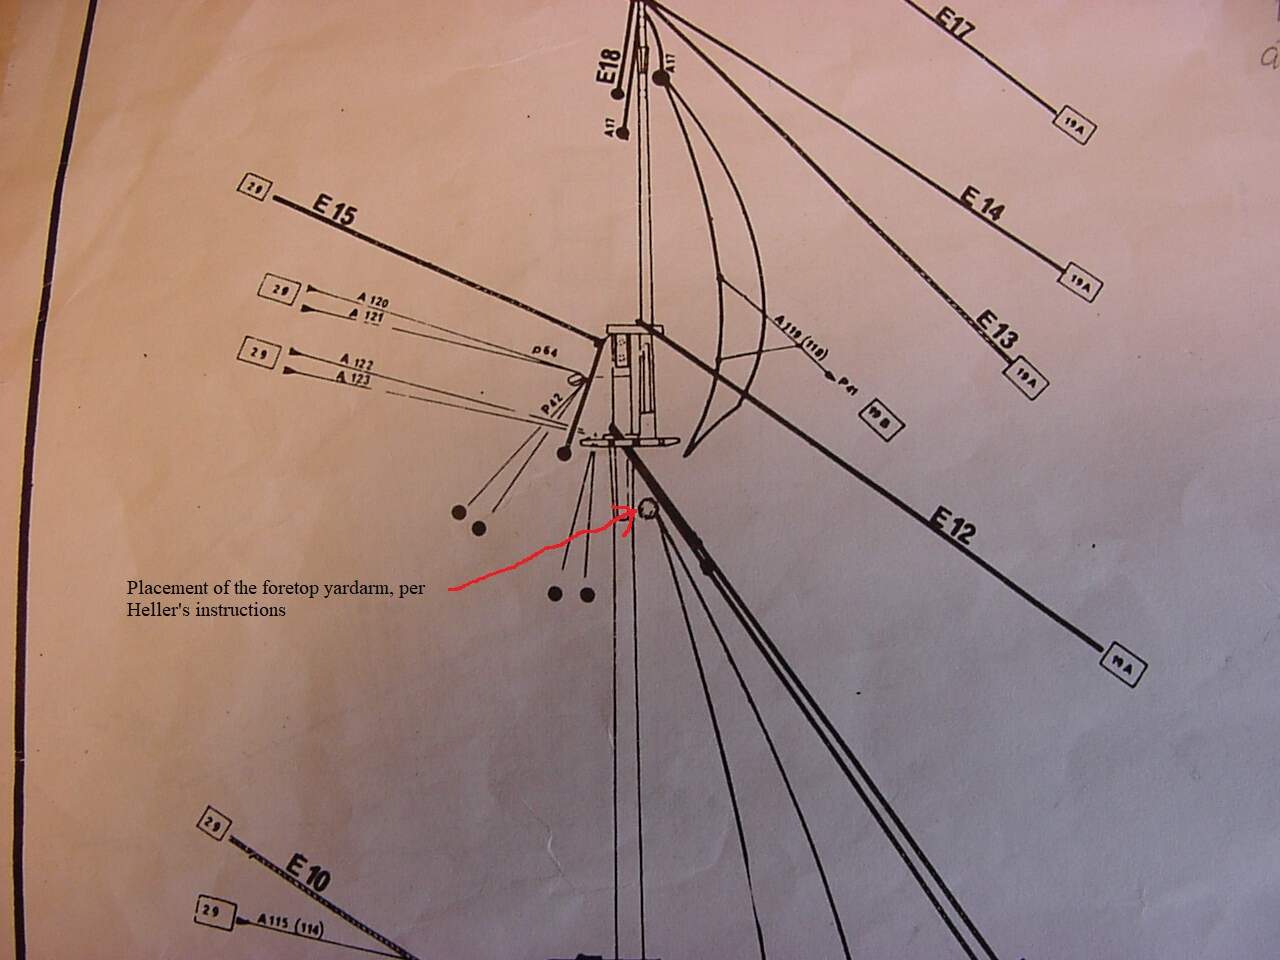
First off, was deciding exactly where the yardarm was to placed onto the mast. In Heller’s instructions, there is a chart showing the distance between the yards, and the chart’s numbers are relative to the foreyard’s placement. So I made myself a little “measuring stick”, but its markings are relative to the foretop, which allowed me to just place the stick on the foretop, and see where the markings lined up:
And my measuring stick pretty much lines-up with what is in the instructions:
And while I’m at it, the same holds true for the topgallant yardarm:
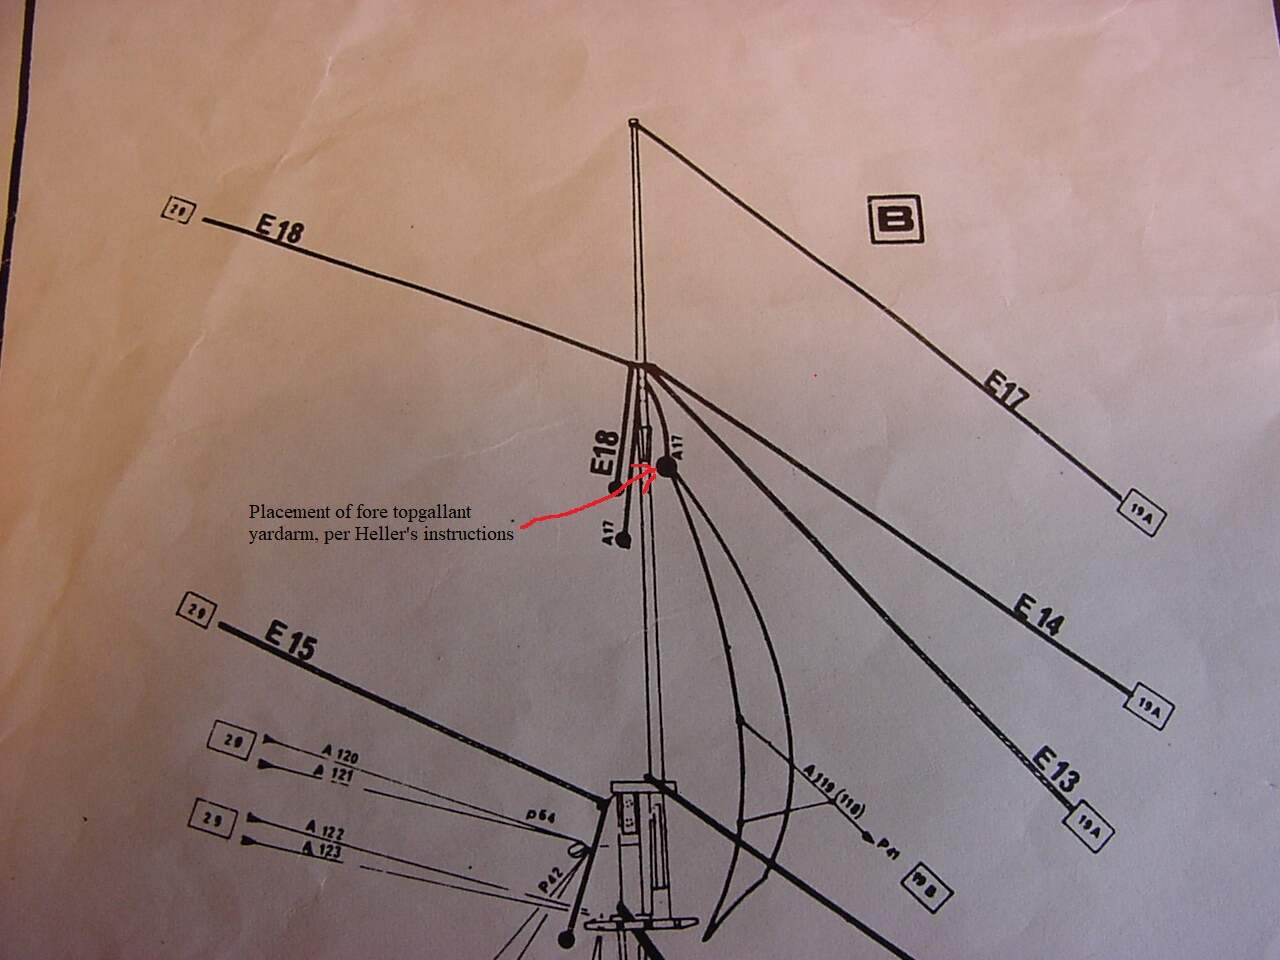
And here’s my measuring stick placement for the same yard:
Just now, in looking at the photos, it looks like I have a little bit of wiggle room on the topgallant yard.
Oh, and here’s a pic of how I placed the measuring stick:
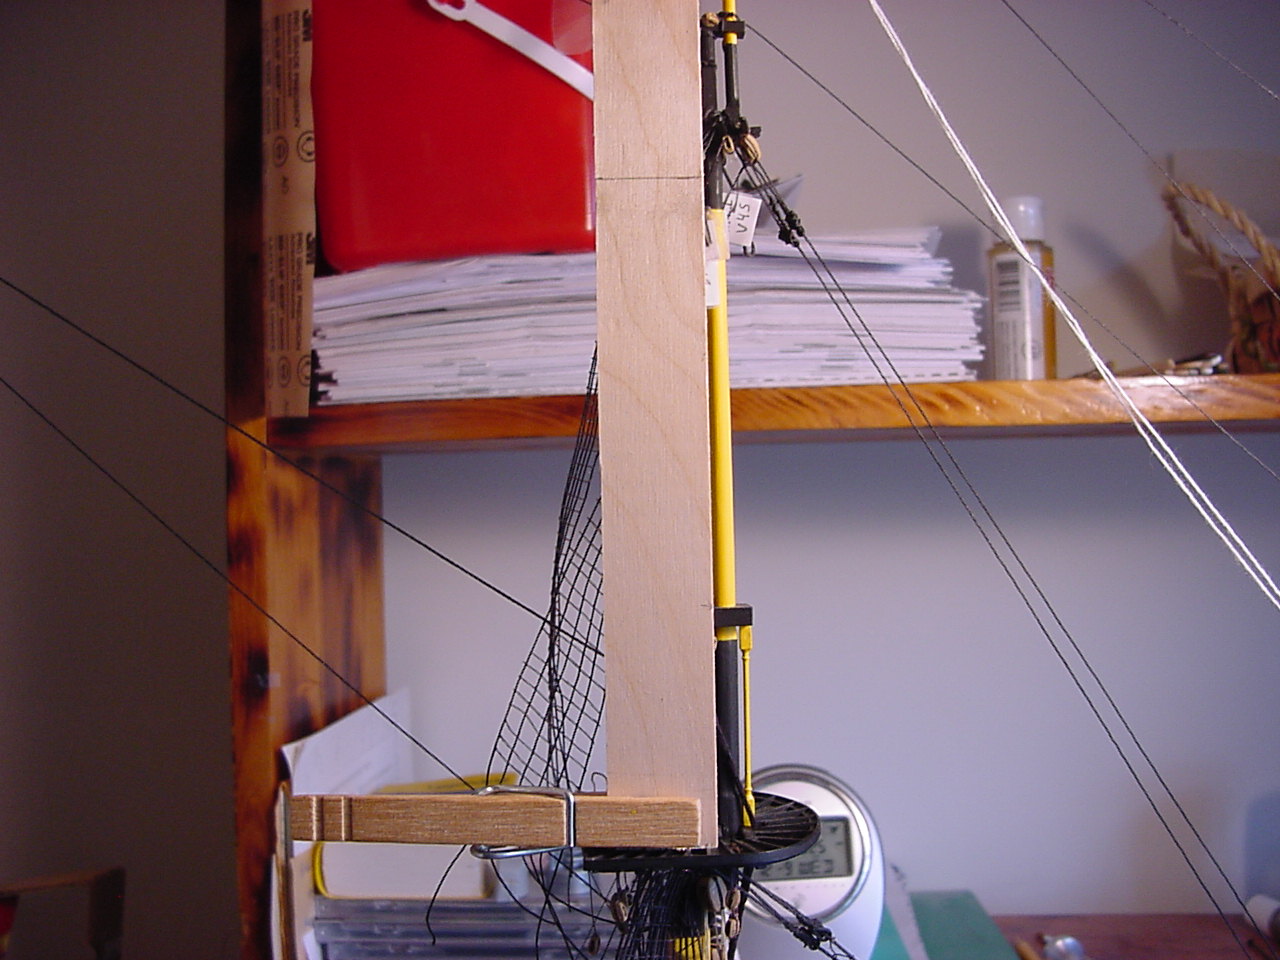
And so, the foretop yard is installed: (woo-hoo!)

It looks like the yard got installed fairly straight, considering I was trying to line it up without being able to see the far end.
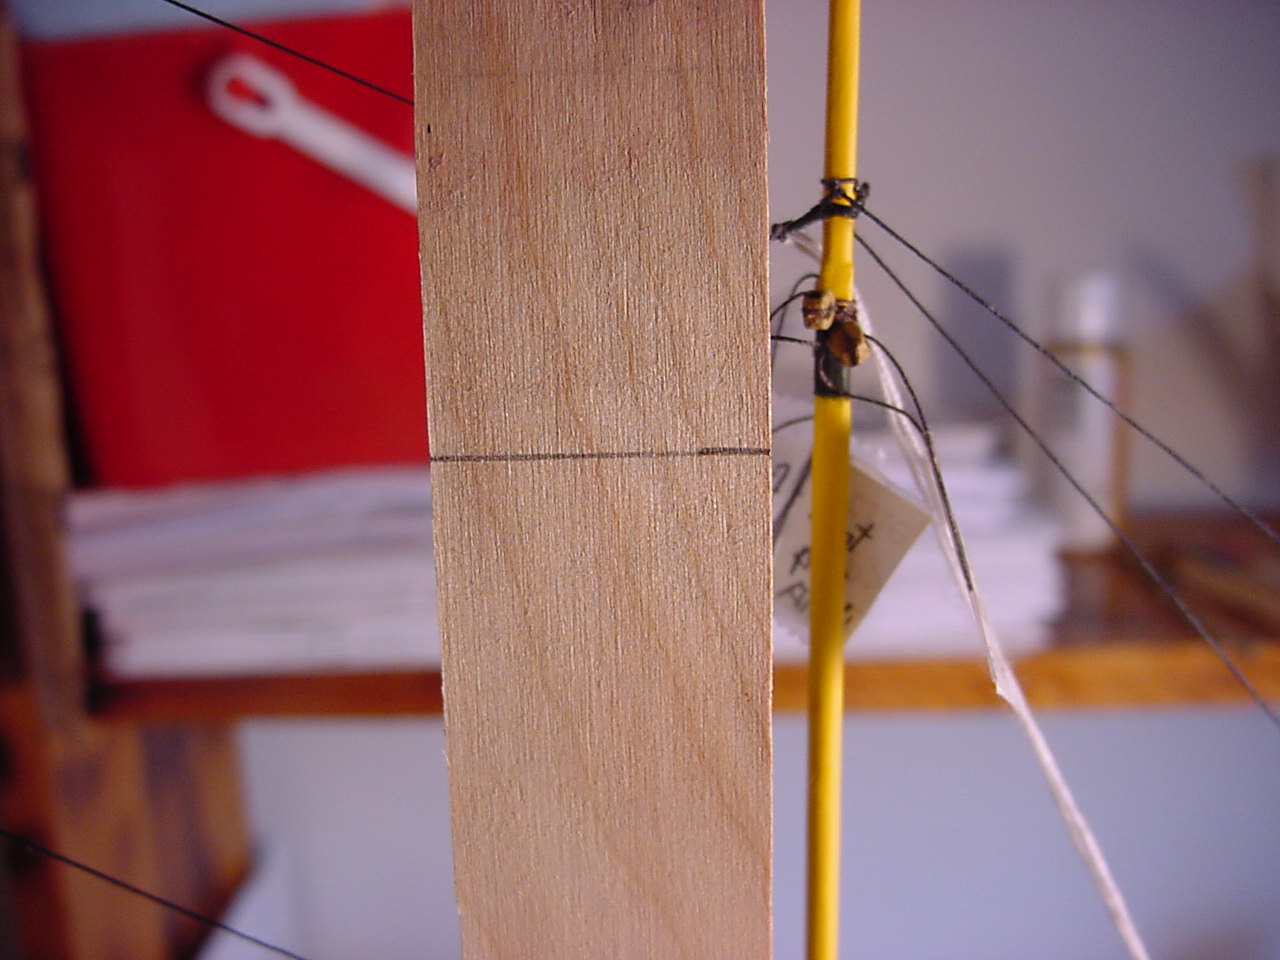
So about getting this yardarm in place: I had to be careful, when filing the notch in the yard, not to go too deep, because I didn’t want to tear into the thread that holds the tye line block in place (I drilled through the yard to install that thread). But before I started filing, I took some measurements of the mast, and found the mast to be about 4 mm in diameter, so I didn’t want to go deeper than 2 mm on the notch. In the end, I’m not sure how deep the notch is, but the little circle template I have, shows the closest hole size to be 1.984 mm or 5/64", or 0.781". So I drew a circle on some paper with that circle size, and just eyeballed the depth, then did some fitting of the yard to the mast, to fine tune things.
I was going to try and make a stupid joke about how these measurements are metric, and therefore must involve higher math, but it didn’t work out. 
So thanks for taking a look, and if there’s any questions or anything, please feel free to ask!
Cheers,
Tim
5 Likes
Looking good, Tim! When I installed the yards on my little USS Constellation I actually made notches in the mast rather than the yards, but it can be done either way! I had a concern that these notches wouldn’t look right as, strictly speaking, they are not authentic… but as it turns out, they aren’t even visible and the method makes for a shipshape look and more secure fit.
Anyway, your yard looks perfectly fitted to the mast, and that is what counts.
Great work as usual!

Thanks, Tim. Yes, I’ve thought about trying to notch the mast, but given the rigging and stuff already installed, and the shape of the yards, it would have been impractical. I wish I would have taken a picture of this foretop yard, to show the shape of it, as the yards are not perfectly round (Heller, I think, did a good job of molding the yards in a true-to-life fashion). Of course, the most important thing is, is that the yard stays in place!!
Thanks again.
Tim
1 Like
Agreed: notching either the yard or mast prior to adhesion makes for a much more robust join 
Tim,
again, very nice work!! Now she’s really coming together, I’d be scared to work in the middle of all that rigging you have already in place…
Cheers
Jan
Jan, yes, you’re right, it can be a real terror trying to get some new rigging installed, without getting previously installed rigging caught up in the new stuff, or worse, get accidentally cut! It makes for slow progress! And the rigging is only about 1/3 done.
Just to further the discussion re: notching the yard or the mast for attachment of the yard, for this particular yardarm, it really would have been impractical to get a good notching of the mast, as the yardarm is not merely circular. Here’s 2 close-ups of the foretop yard, which I’ve tried to show the sculpting of it (unfortunately, they’re blurry, but maybe you can get the idea):
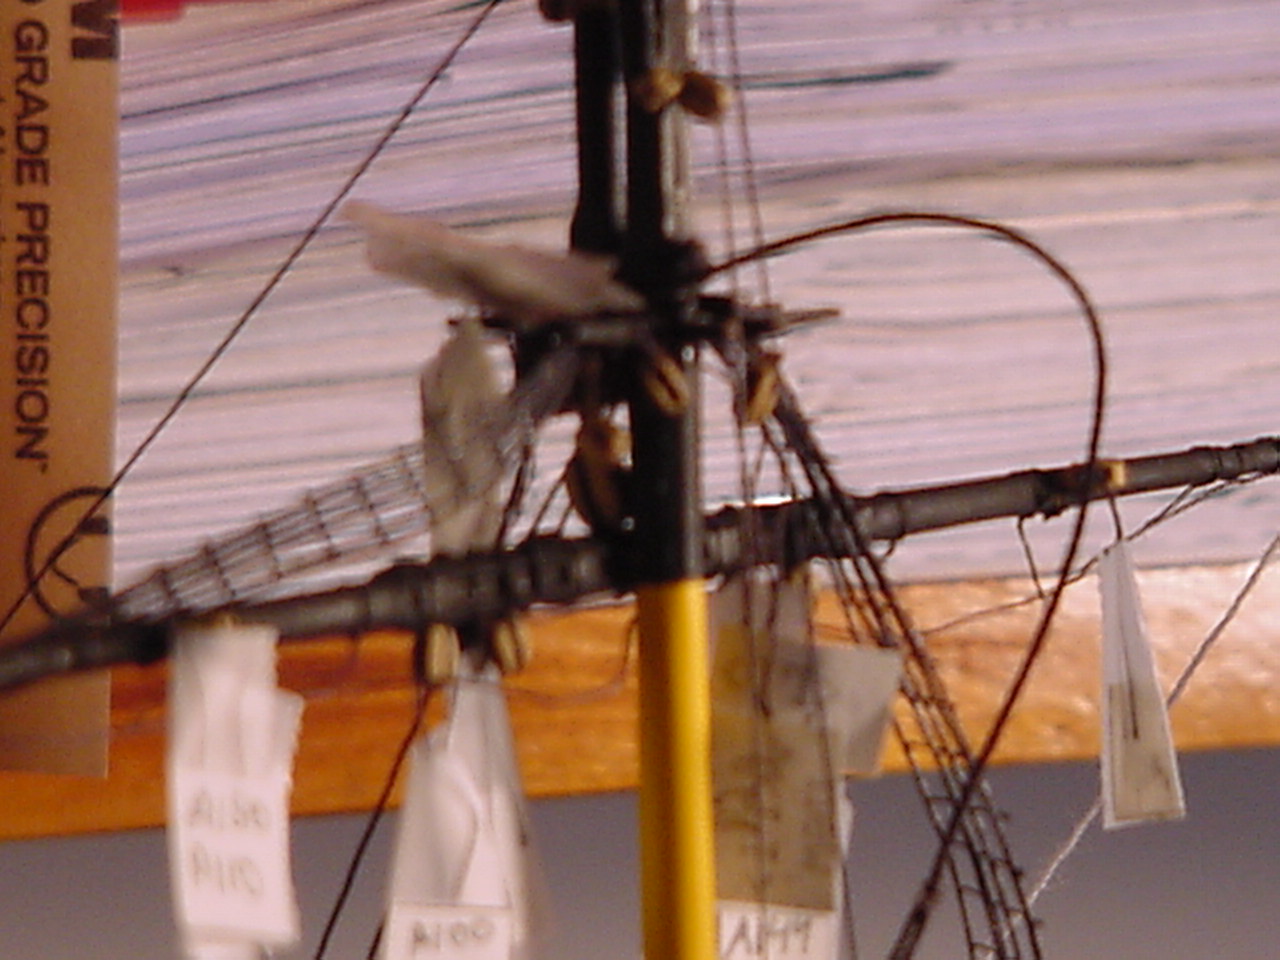
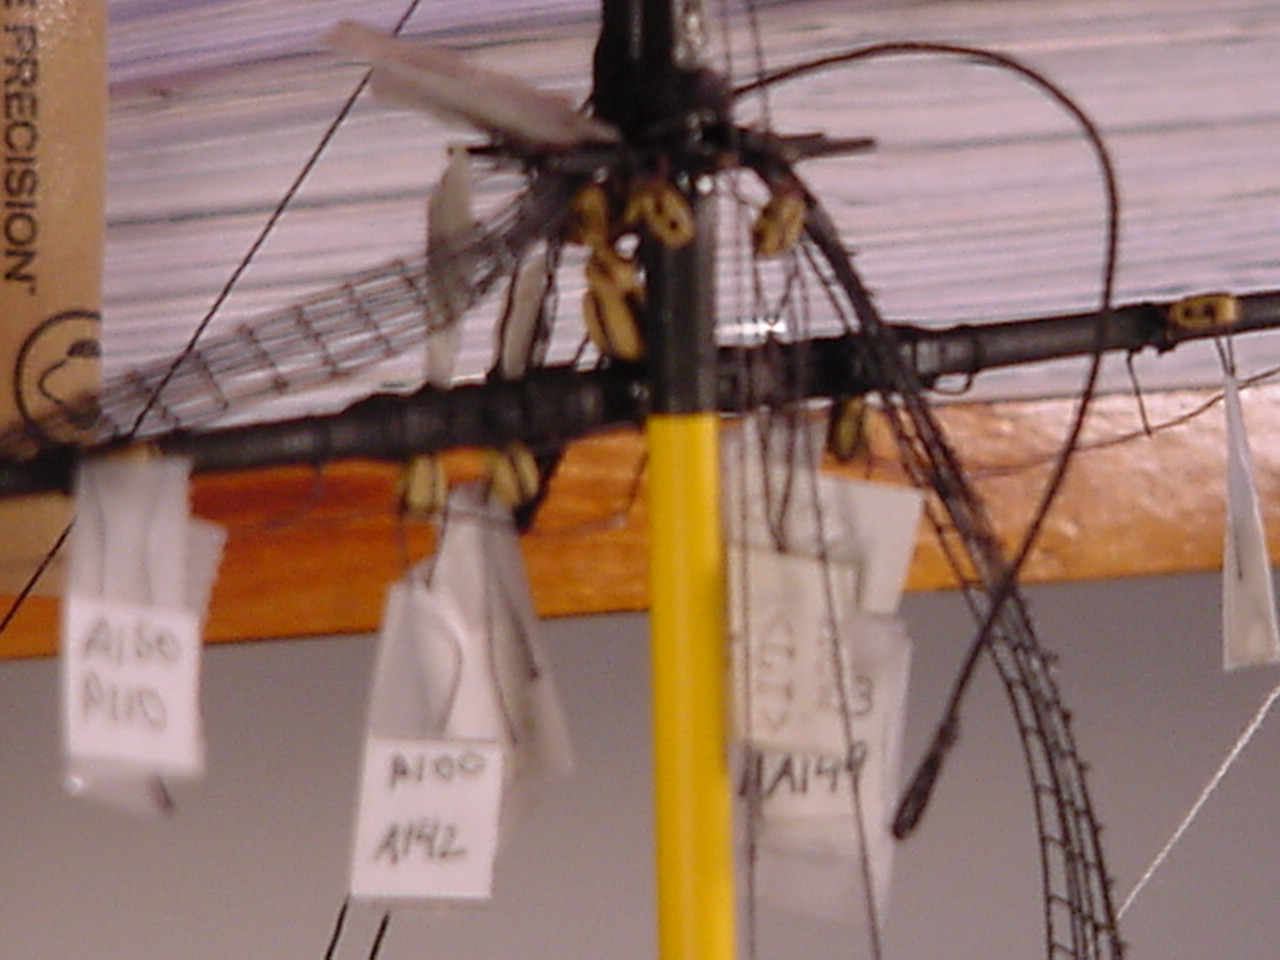
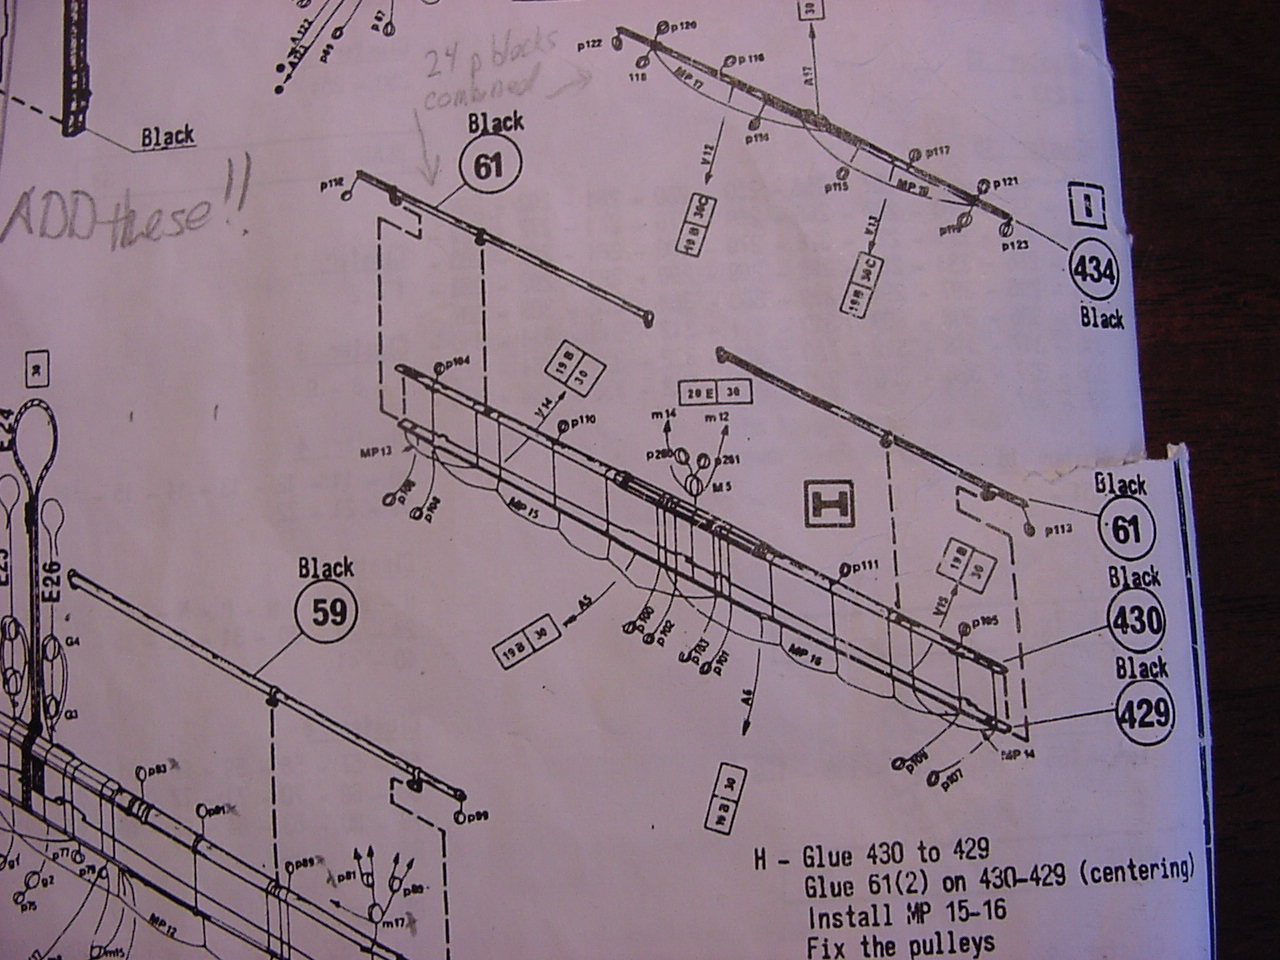
And here’s a pic of Heller’s instructions. It’s not the clearest thing on the drawing, but maybe you’ll get the idea (the foretop sail is “H” in the drawing):
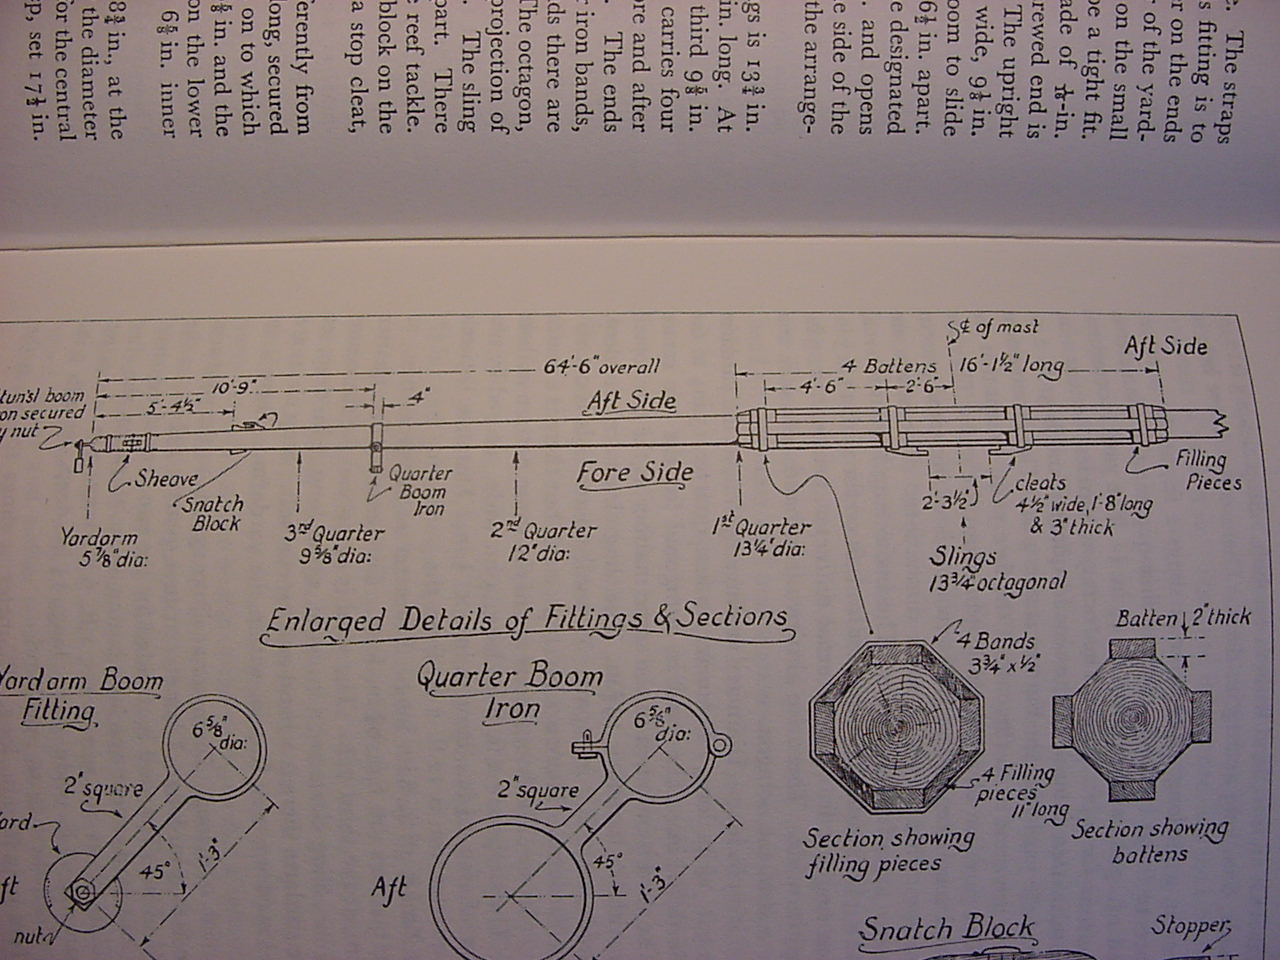
And finally, here’s an image from Longridge’s book. In this image, imagine you’re standing above the yardarm, looking down. The cleats are facing forward, and the centerline of both mast & yard are between the cleats.
I realized today that I should be Summa Cum Laude in stupidity - in counting up how much thread I would need for the reef lines, I multiplied the total number of reef lines by 20, instead of 40. Why 20, and not 40? Because the reef lines hang 20 mm on each side of the sail, so I needed a total of 40 mm for each reef line; but because I had the 20 mm dimension in my mind, I multiplied by that, instead of the required 40. Oh well.
And one last thing: I saw in Tim R’s blog about his USS Constellation, he made mention that the lift lines were used to help take the weight of the ends of the yardarms. It’s been my understanding that the lift lines were used to actually raise and lower the yardarm against the mast. In days of old, when sailing ships were in port and had furled their sails, they would also lower the yardarm(s) to (I guess) lessen the amount of…stuff…that could catch the wind and move the ship around. But again, that’s just my understanding!
So hope everyone is healthy and whole, and as Gov. Larry Hogan (MD) says, “wear the damn mask!”
Cheers,
Tim
3 Likes
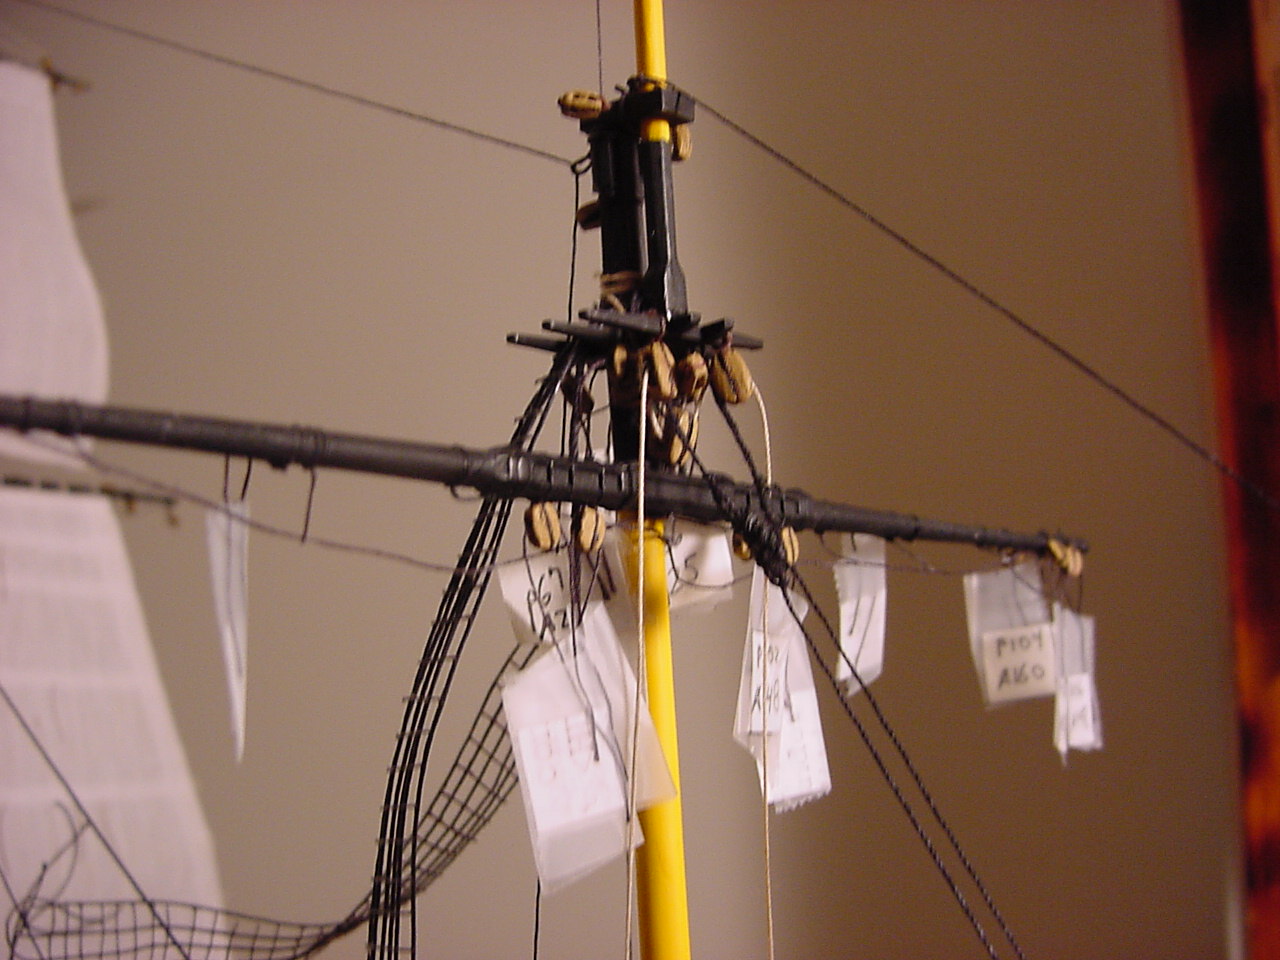
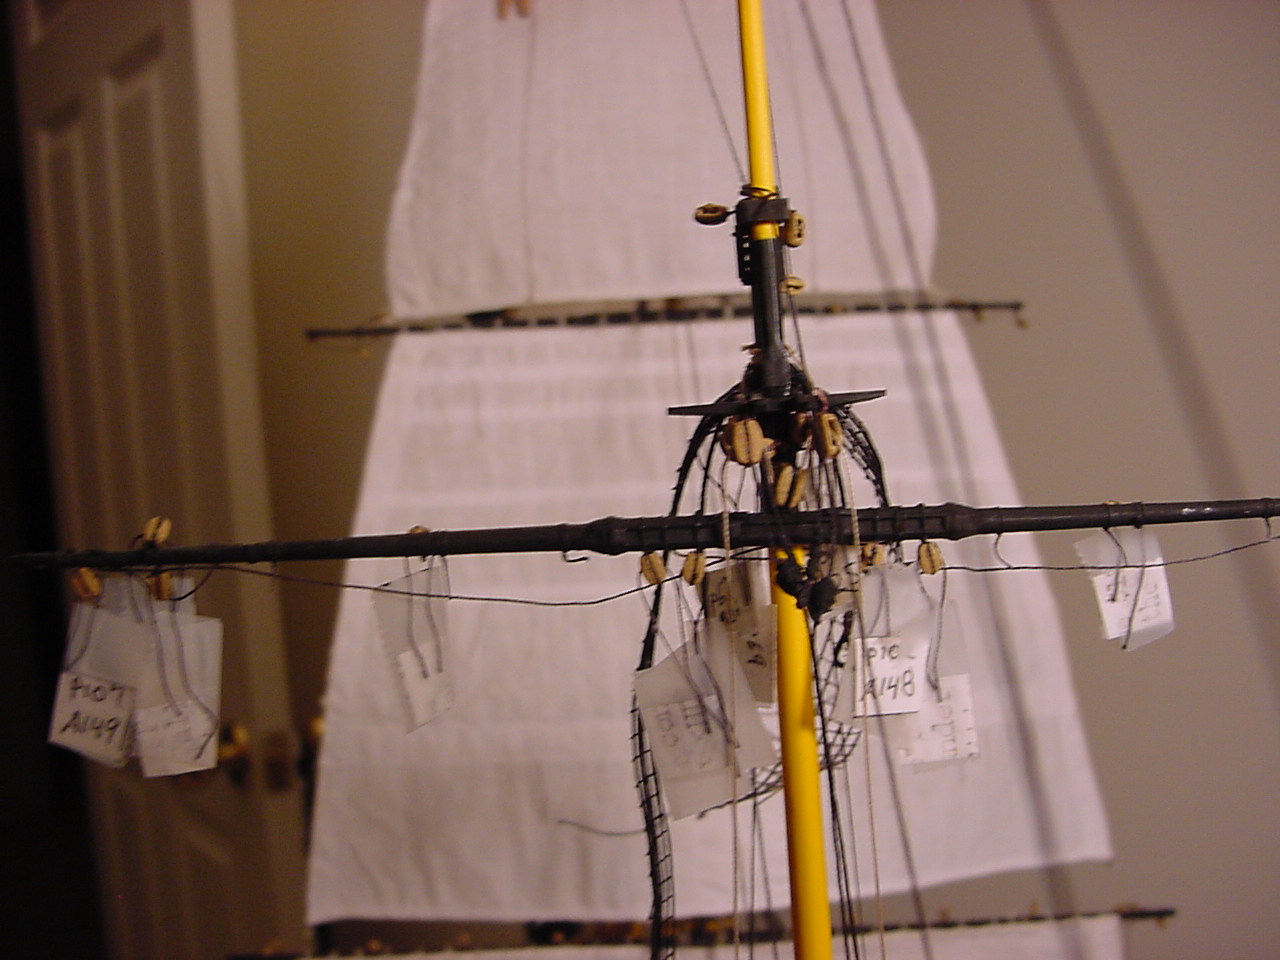
So, just a couple of pictures of the foretop yardarm tye lines installed:
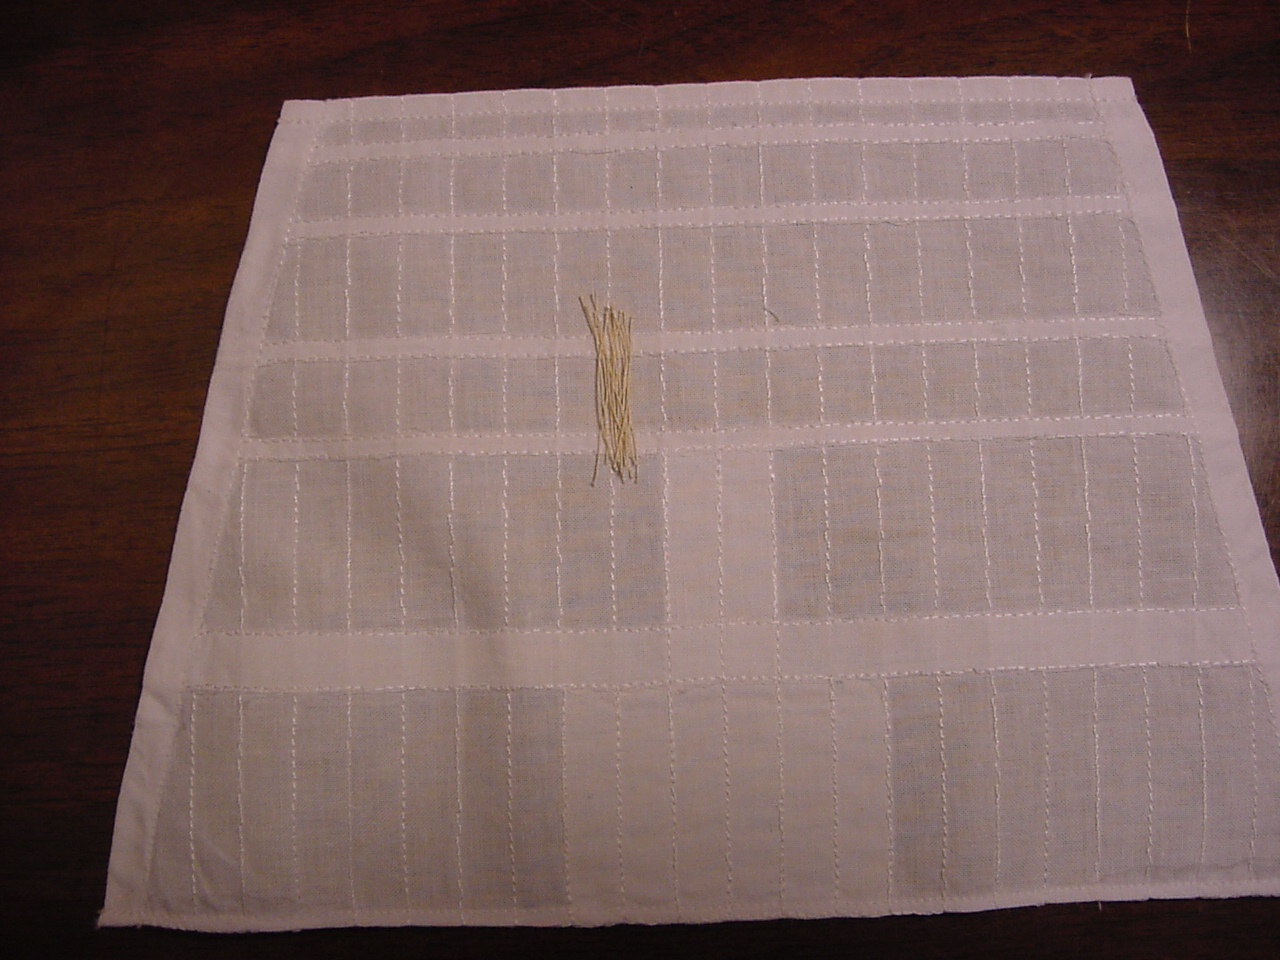
I tried something new to color the thread I’m using for the reef lines: I figure out how much length of thread I need for the reef lines, cut that length, then soak it in my coffee solution for 24 hours. Pulling it out of the coffee solution, it looked pretty good, and after cutting everything to length, when they’re all piled up, they look pretty good. Here’s a pic of a bundle of the reef lines, sitting atop the foresail:
And here’s the same bundle, but spread out on the sail, in their approximate position:
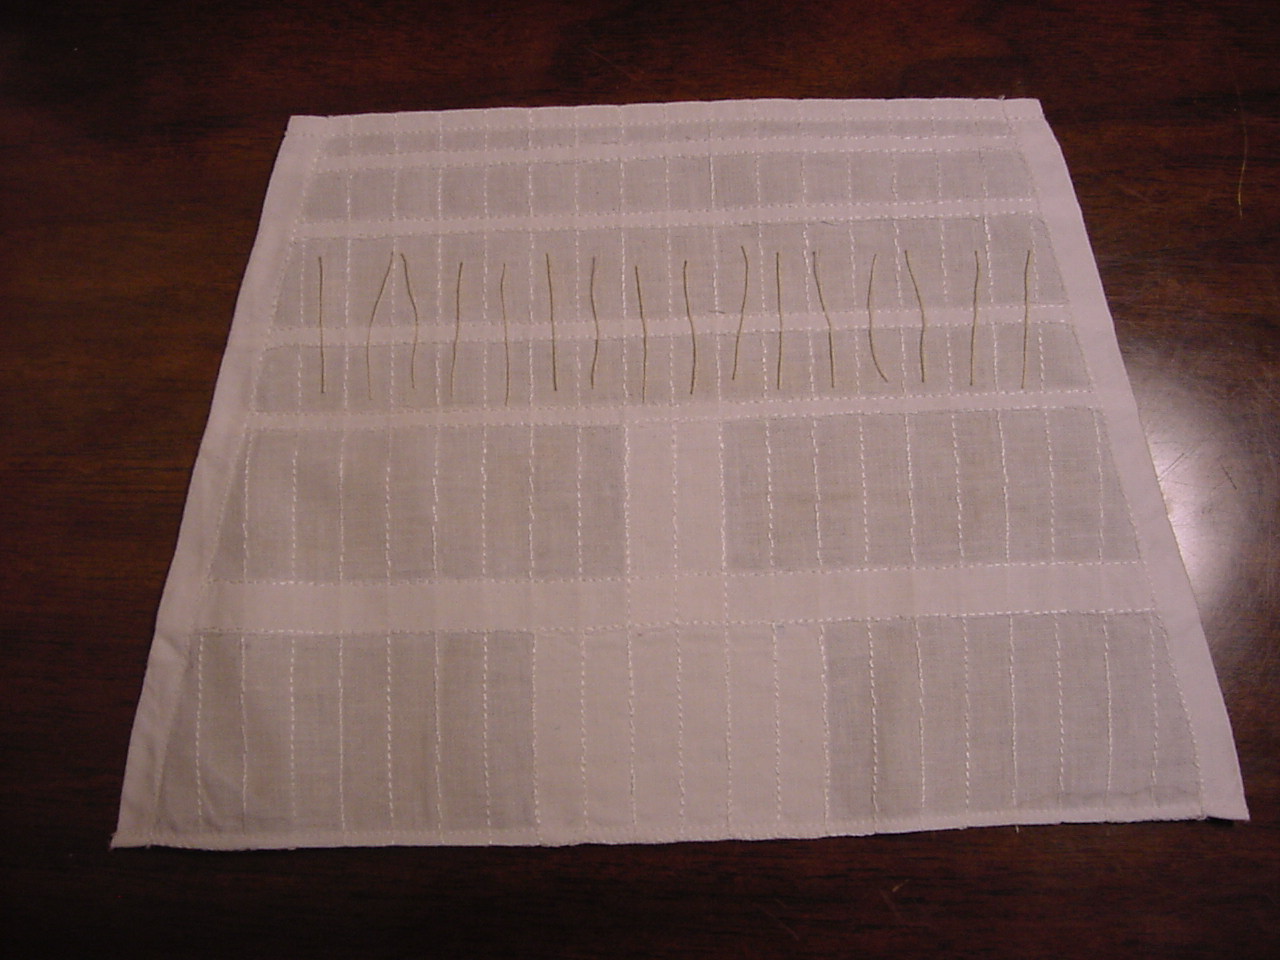
They look darker when bundled together, but separated out, they look ok. I forgot to add in a piece of unadulterated thread for comparison, but against the backdrop of the sail, the original color of the thread pretty much blends in with the color of the sail, and you can’t really see the reef lines.
I was thinking tonight, after taking these pictures, that I could probably start installing the foretop and topgallant sails, and maybe get the sails installed before the end of the year. But then I realized I have to install the reef lines and the cringles on the foretop sail, then install the topgallant yardarm, and only then could I get the topgallant sail put up. So it’s a big maybe on getting both sails installed, but I’m pretty sure the foretop could get done by the end of the week.
So if I don’t make another post soon, I want to wish everyone a Merry Christmas, and may Santa enhance your kit stash tenfold!
Oh yeah, in the previous discussion about notching the mast v. notching the yardarm, I think in the second picture, it shows (somewhat) the detail of the foretop yard, and why it was easier to notch the yardarm instead of the mast.
OK, I’m done for now.
Cheers!
Tim
p.s. I just LOVE the direct posting of pictures to the forums!!!
5 Likes
Tim,
Nice progress I sure getting those reef lines stained and installed took some time to get right. Enjoy watching your progress on the build.
Mark
Thanks Mark. I got the foretop sail mostly installed, but I got confused as to which direction one of the blocks should be pointing - in looking at the instructions, I got the feeling that the block should be facing forward, but in reality, it should be facing aft. So now, the decision is to try and squeeze the block between the yardarm and the sail, to get it pointed correctly, or just cut the thing off from the yardarm, and re-attach it so it’s facing aft. I have a feeling that the latter choice will be done.
Cheers!
Tim 
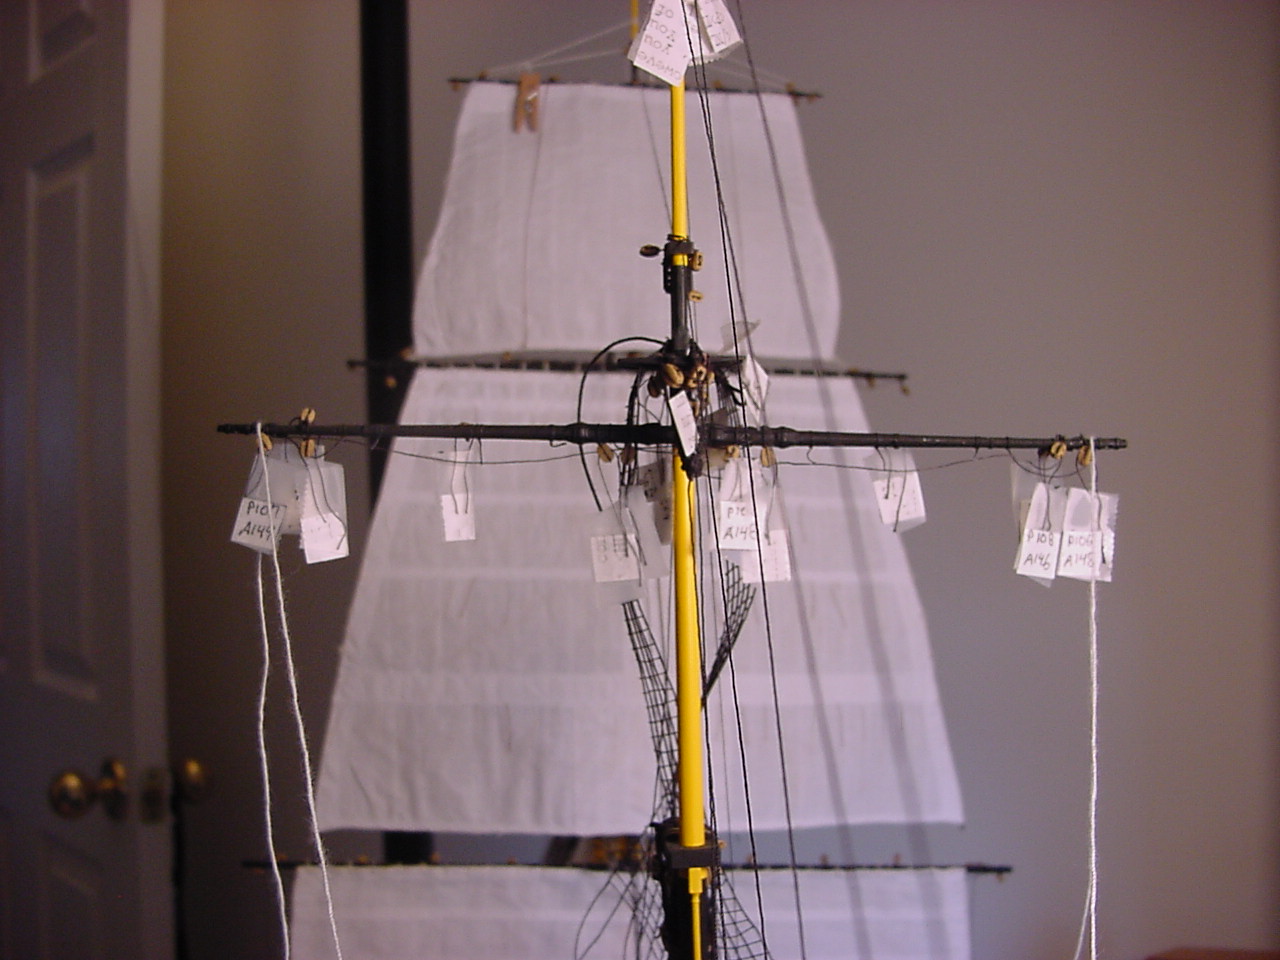
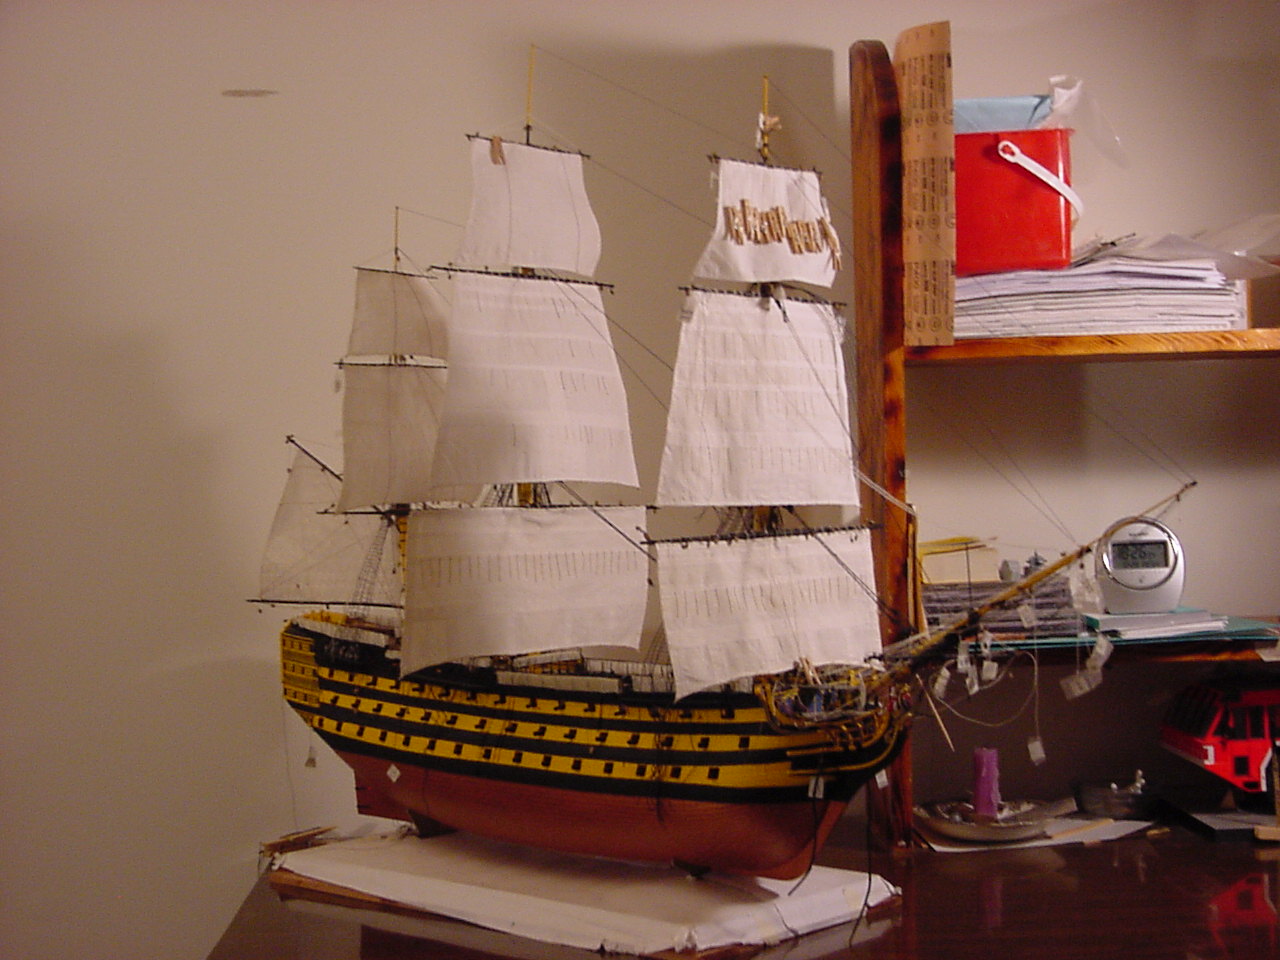
Success! I got all of the square sails mounted today - and before the end of the year! Yippee!
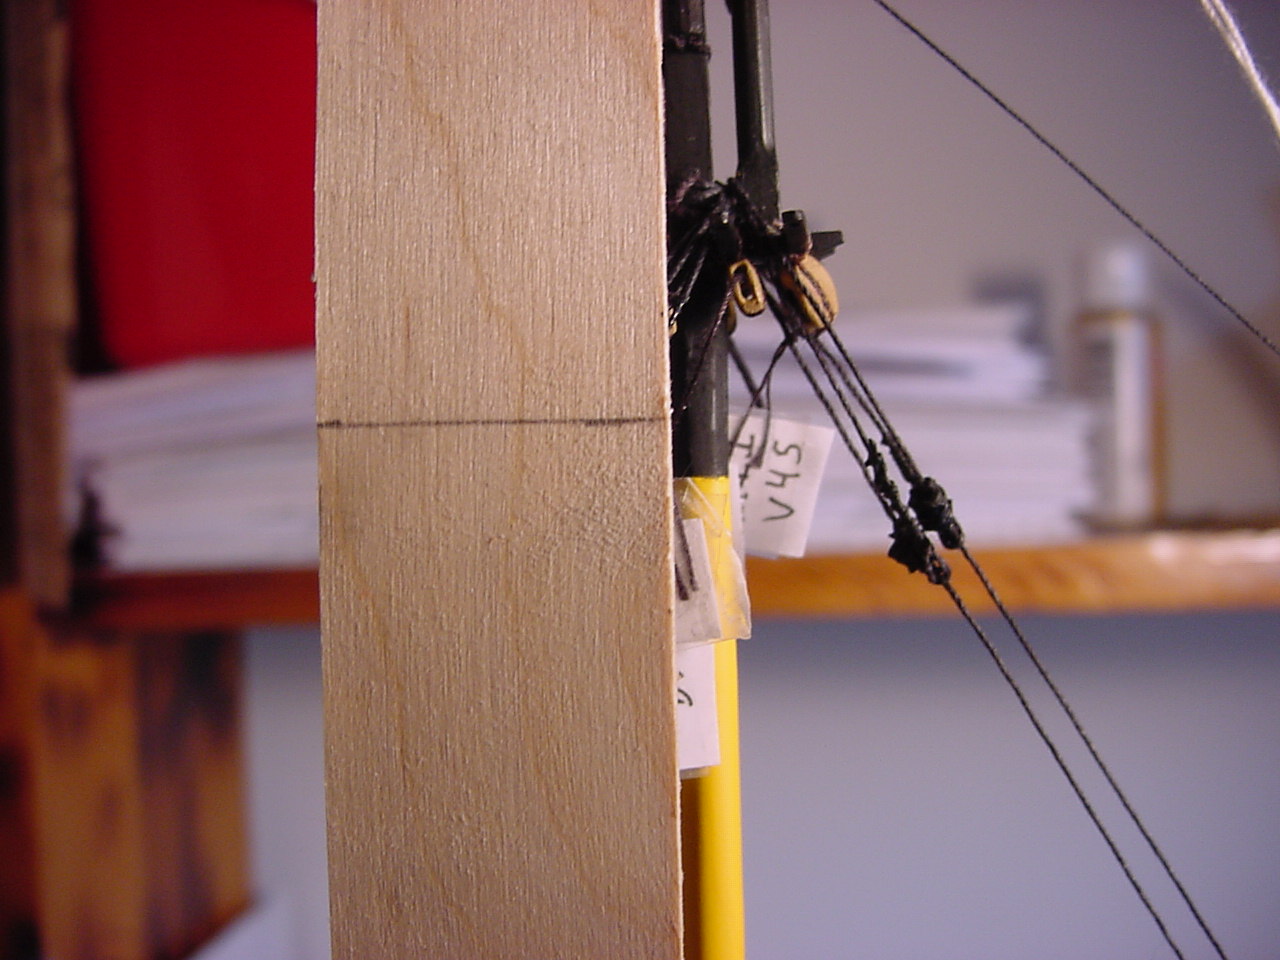
One of the first things I needed to do, was to install the fore topgallant yardarm tye. I think the second picture explains why the hole in the mast needs to go fore and aft:


And here’s a couple of pics with all the square sails completed:
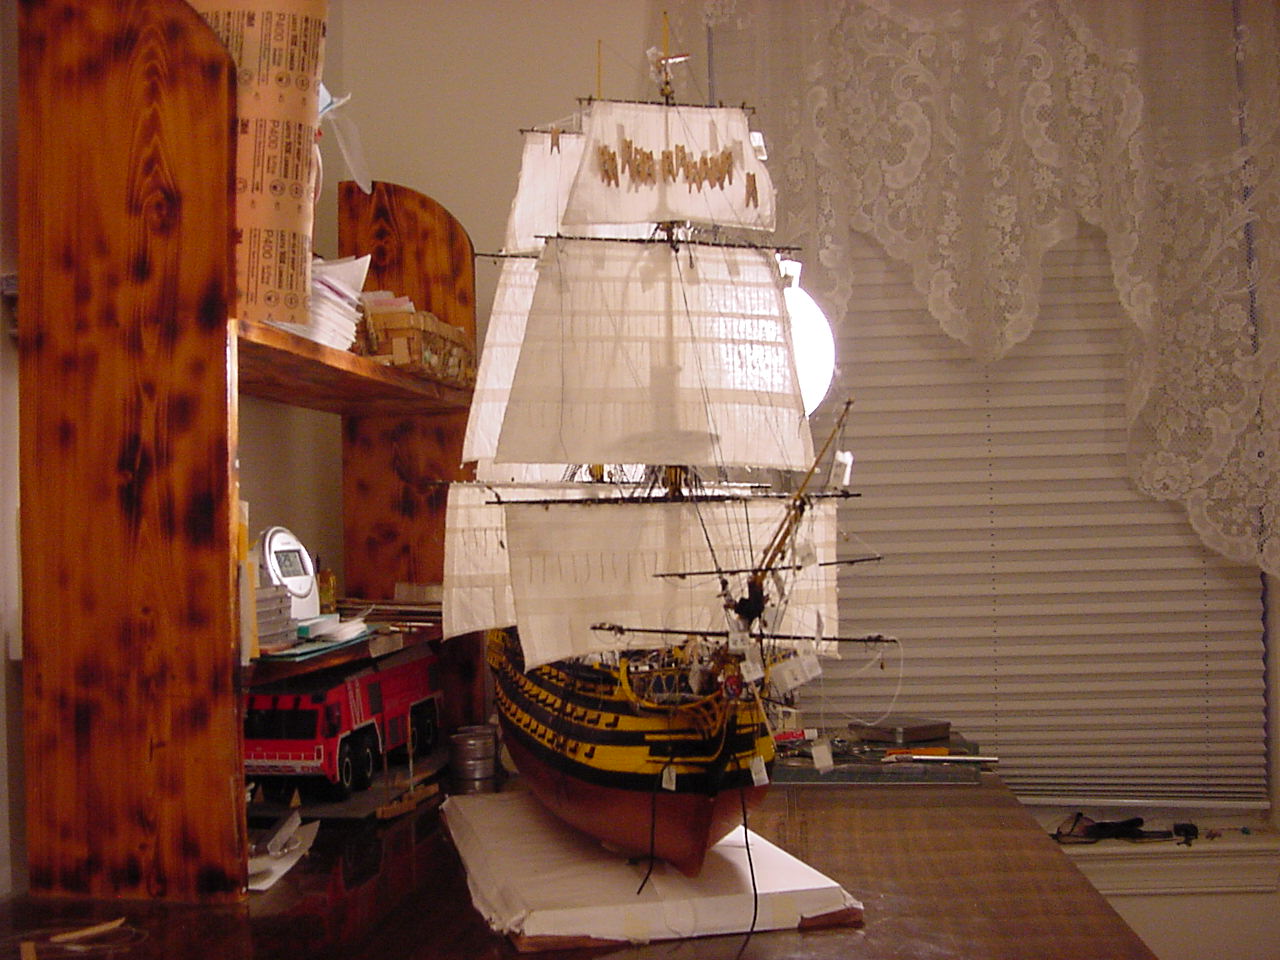
So now, I can really make some progress on completing a good amount of the rigging. Can’t wait!
Thanks for stopping by!
Tim
8 Likes
Wow Tim,
now that’s really impressive! Congratulations on installing all the main sails, that’s a big and important step for sure, but just to look at her now, she’s looking great!
Cheers
Jan
Ditto!
Mark