Wow, Tim! Those full length shots really show Victory in all her majesty!
All these years of hard work are paying off! 
Wow, Tim! Those full length shots really show Victory in all her majesty!
All these years of hard work are paying off!
Jan, Mark, & Russell,
Thank you for your compliments! Still a lot more to do!
Tim
I was always watching your build on the old forums, and wow! This is one truly amazing build! Cant wait to see it finished.
Thanks, Panzer_Modeler. I can’t wait to see it finished, too! 
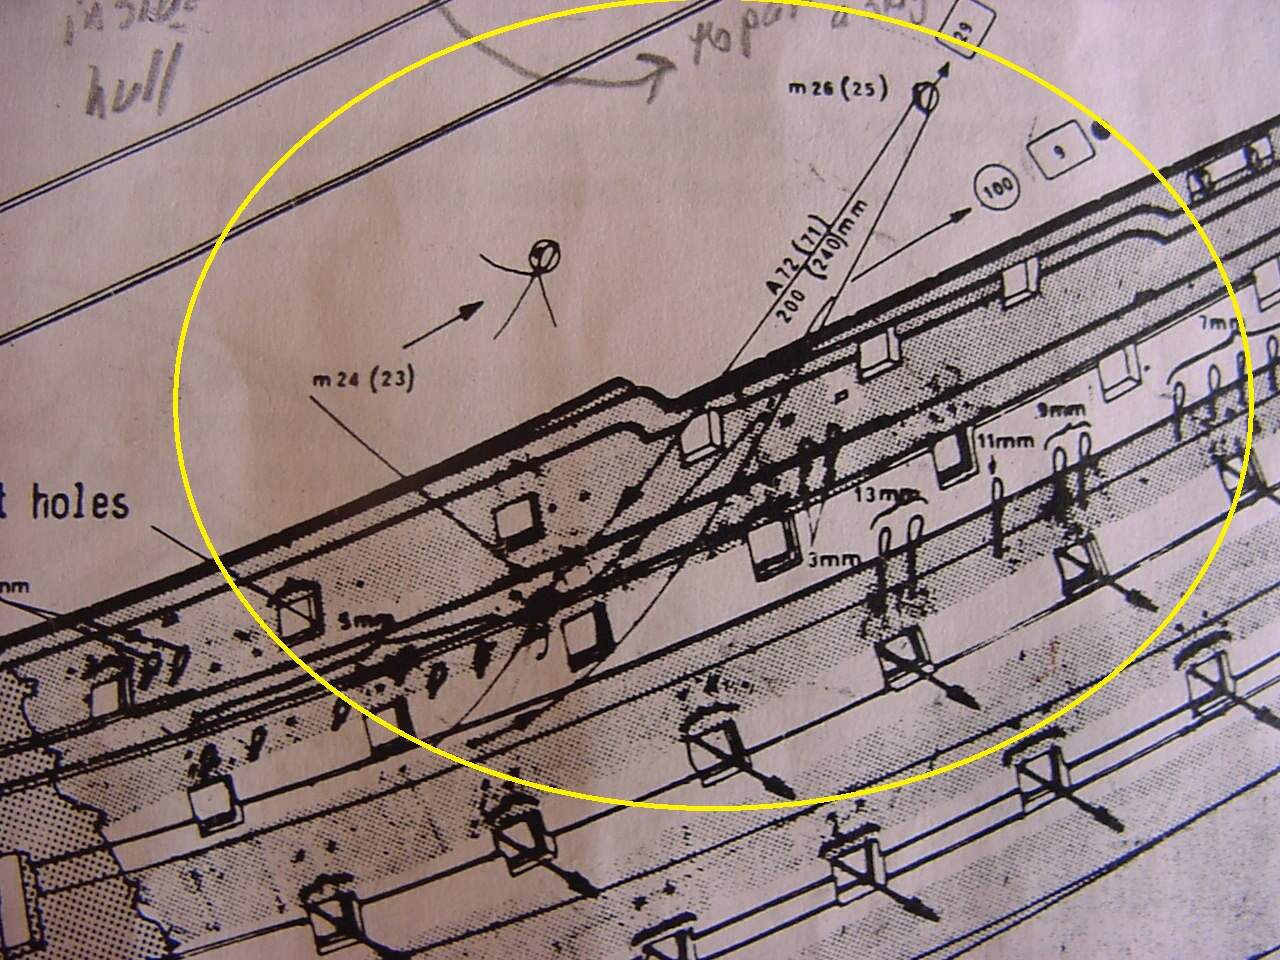
So, since the last post, I pre-installed the buntlines and got as much of them rigged-up as possible. At this point, I decided to go back a few steps, and properly emplace some blocks that I initially put in, back in step 8. But because Heller’s instructions were unclear, and some of those blocks needed the sails to be installed, they weren’t in the correct position.
So this first picture is of Heller’s instruction sheet, and you can see just how clear everything is (I say that in jest!):
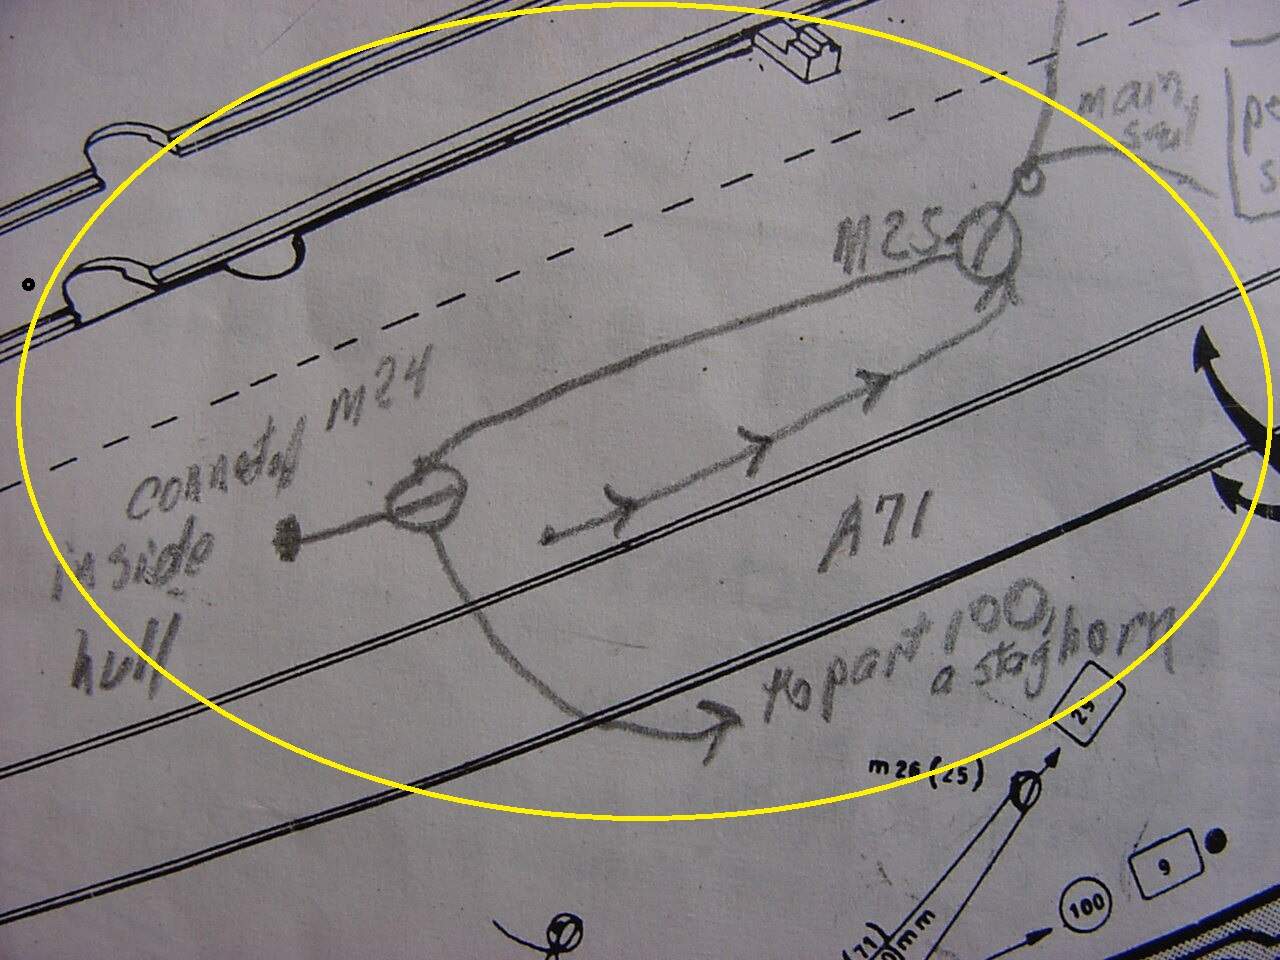
In this next picture, this is my penciled-in concept of how everything should be:
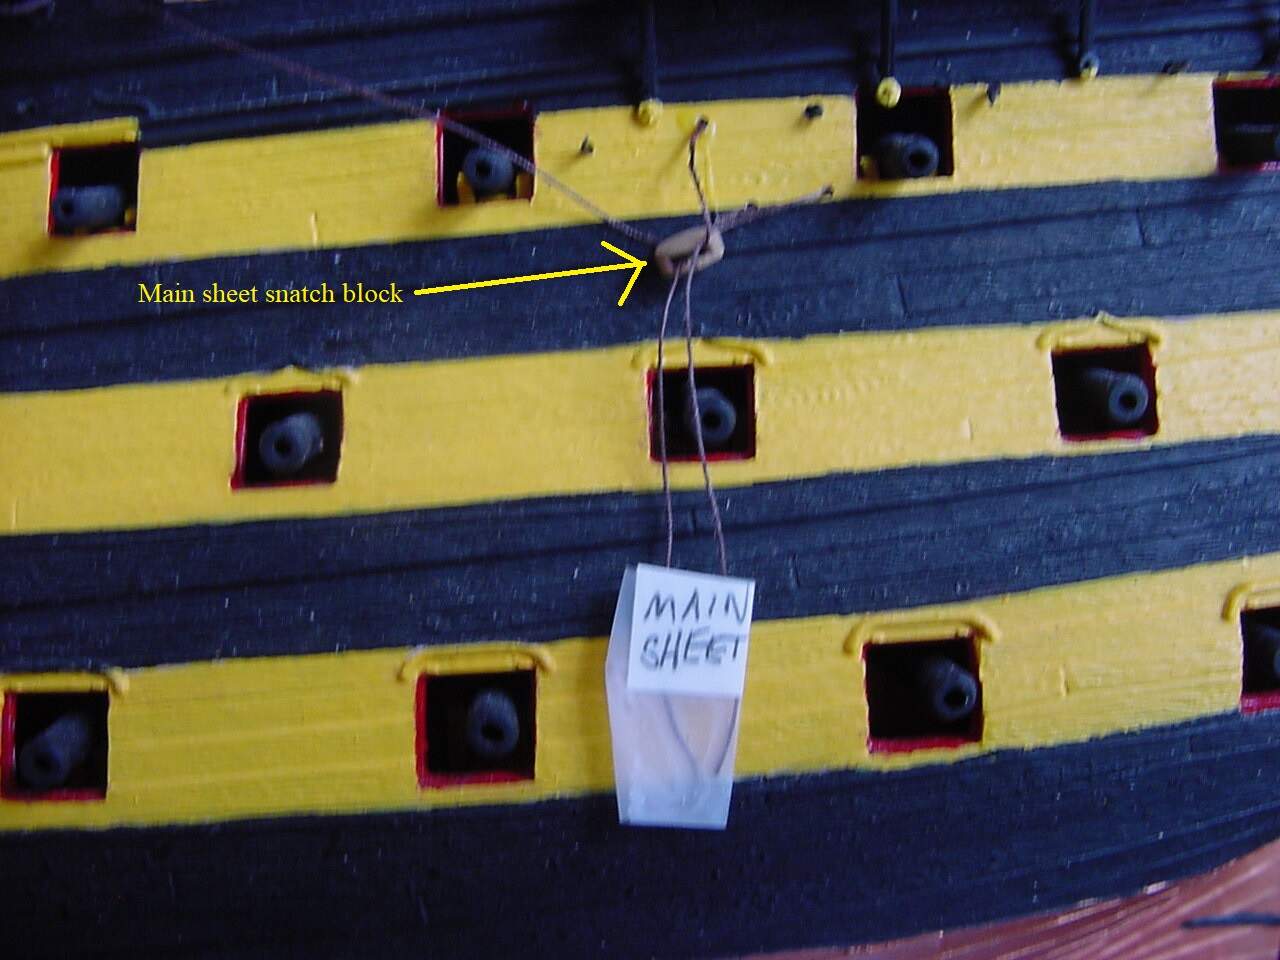
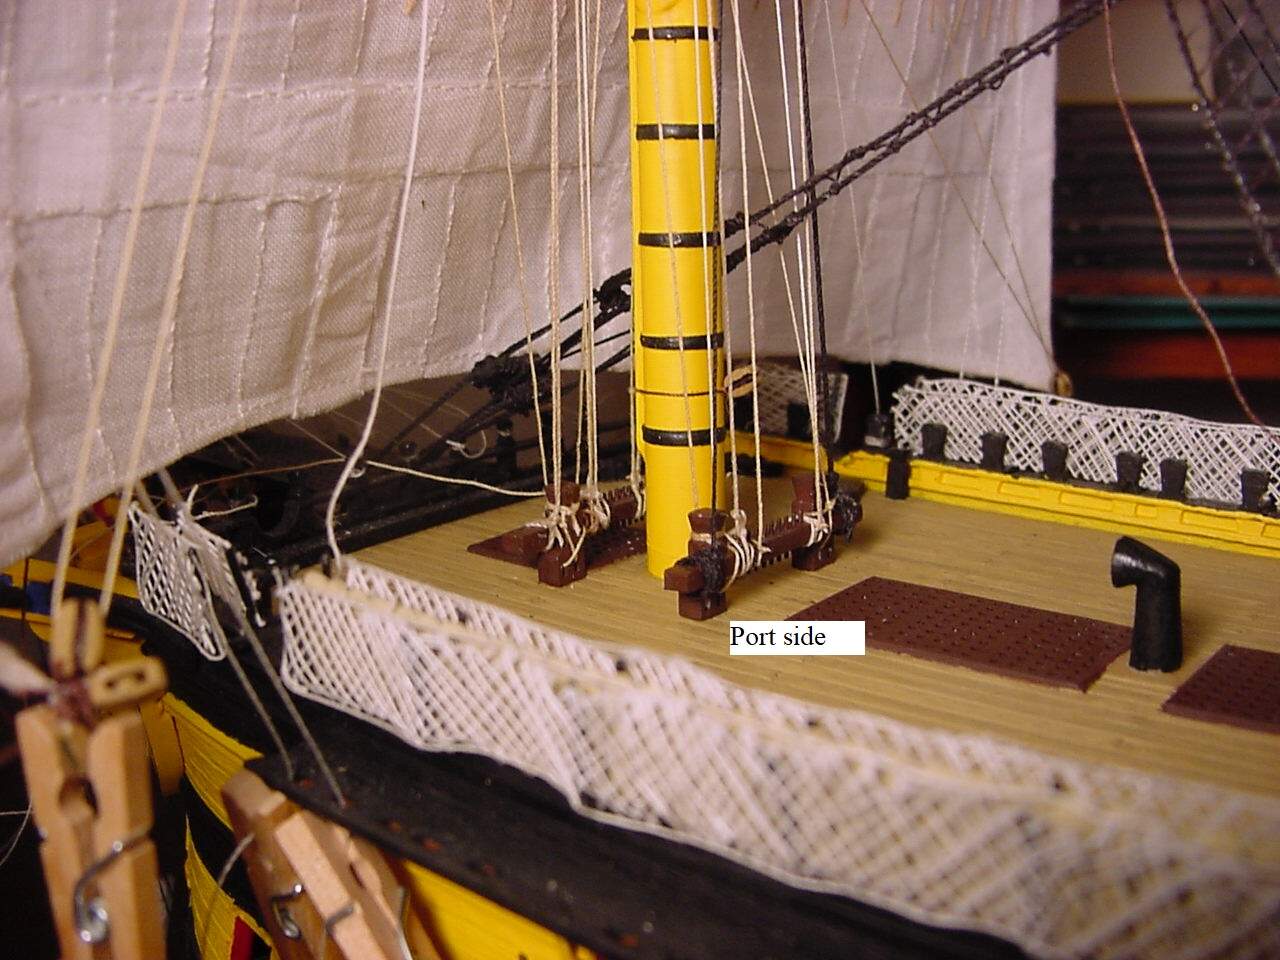
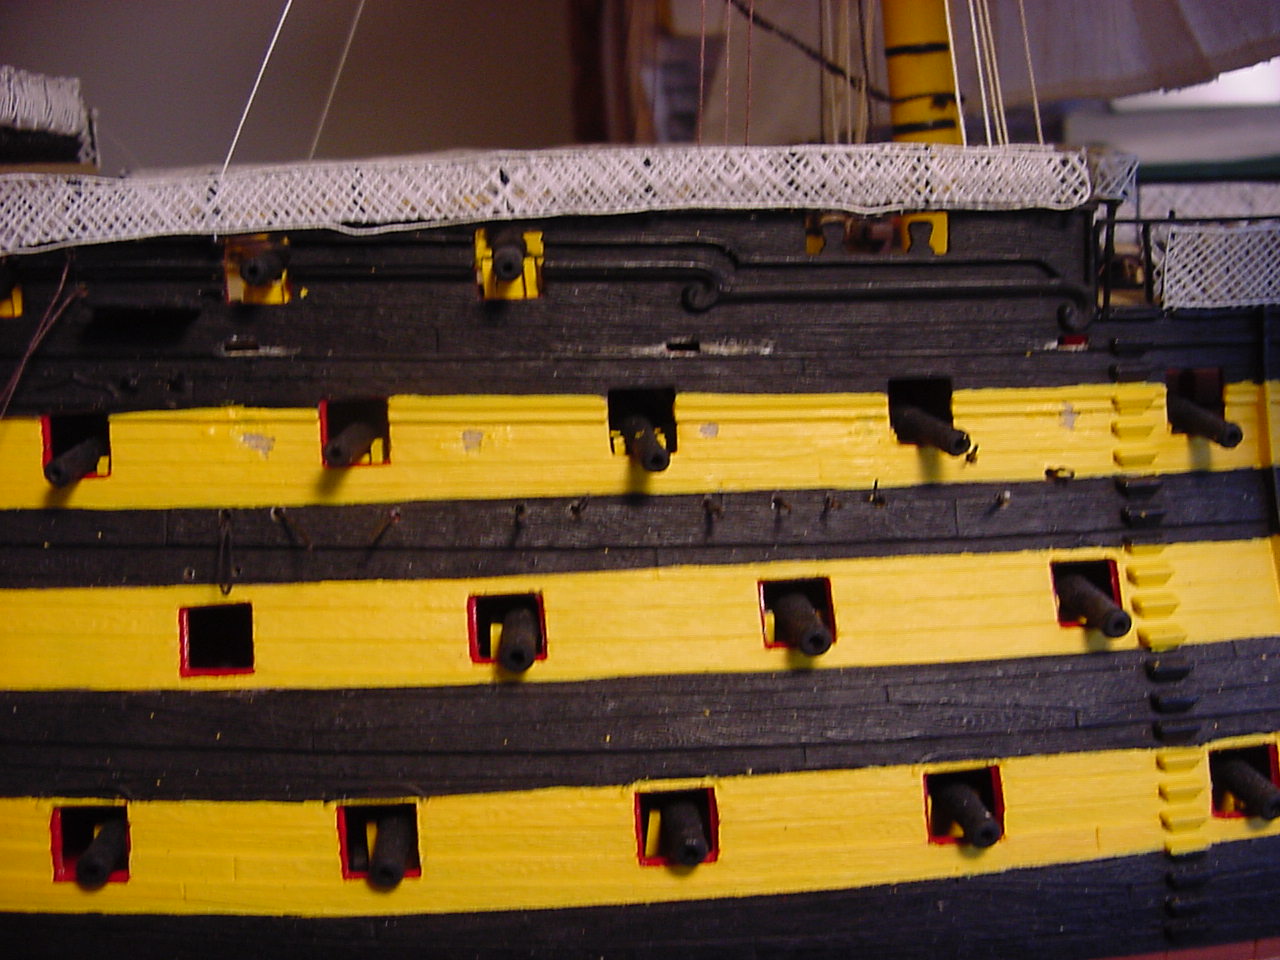
Here is the port side of the ship, showing block M23, and the way I initially installed it:
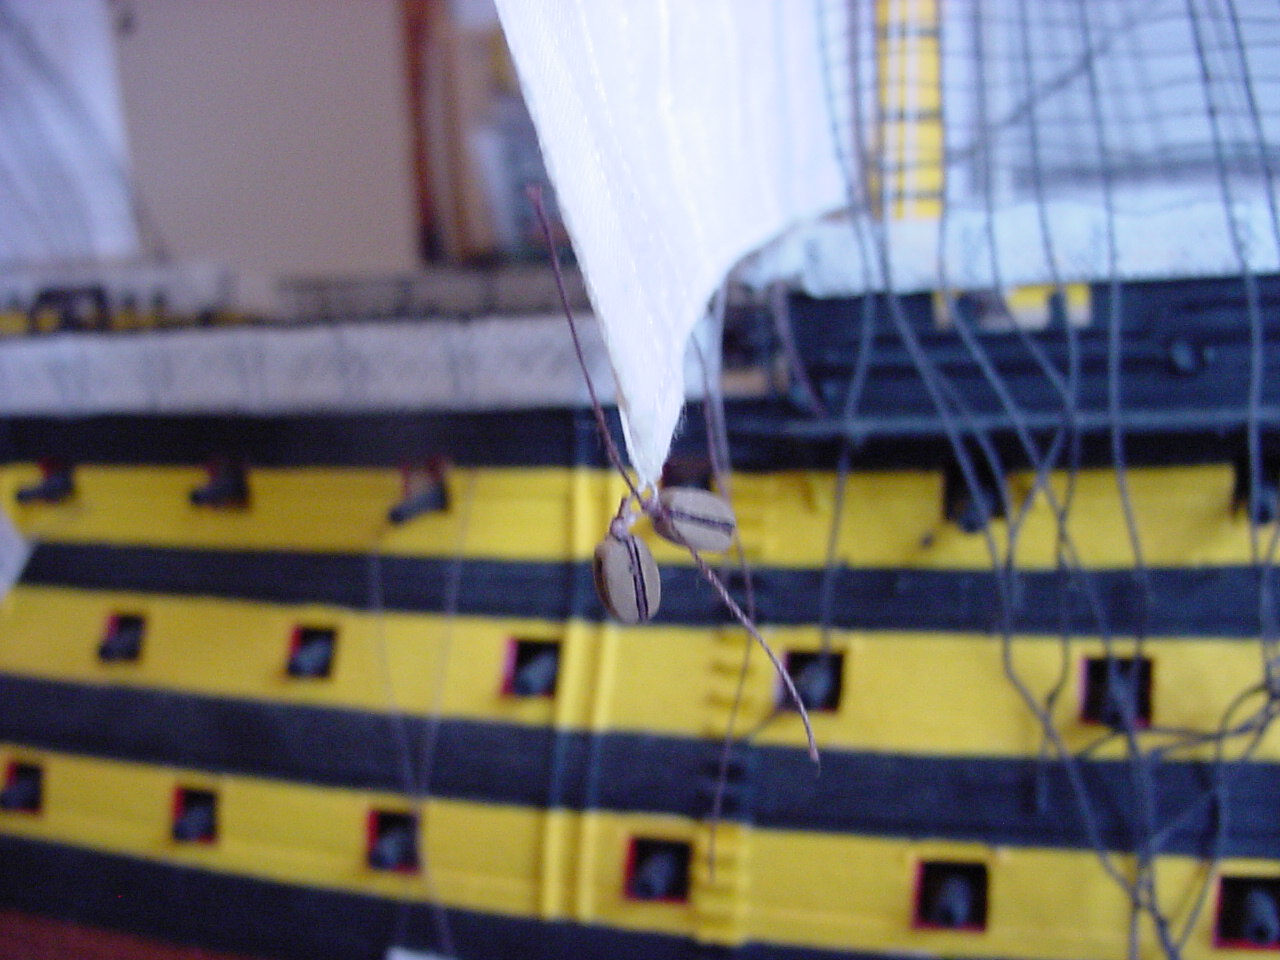
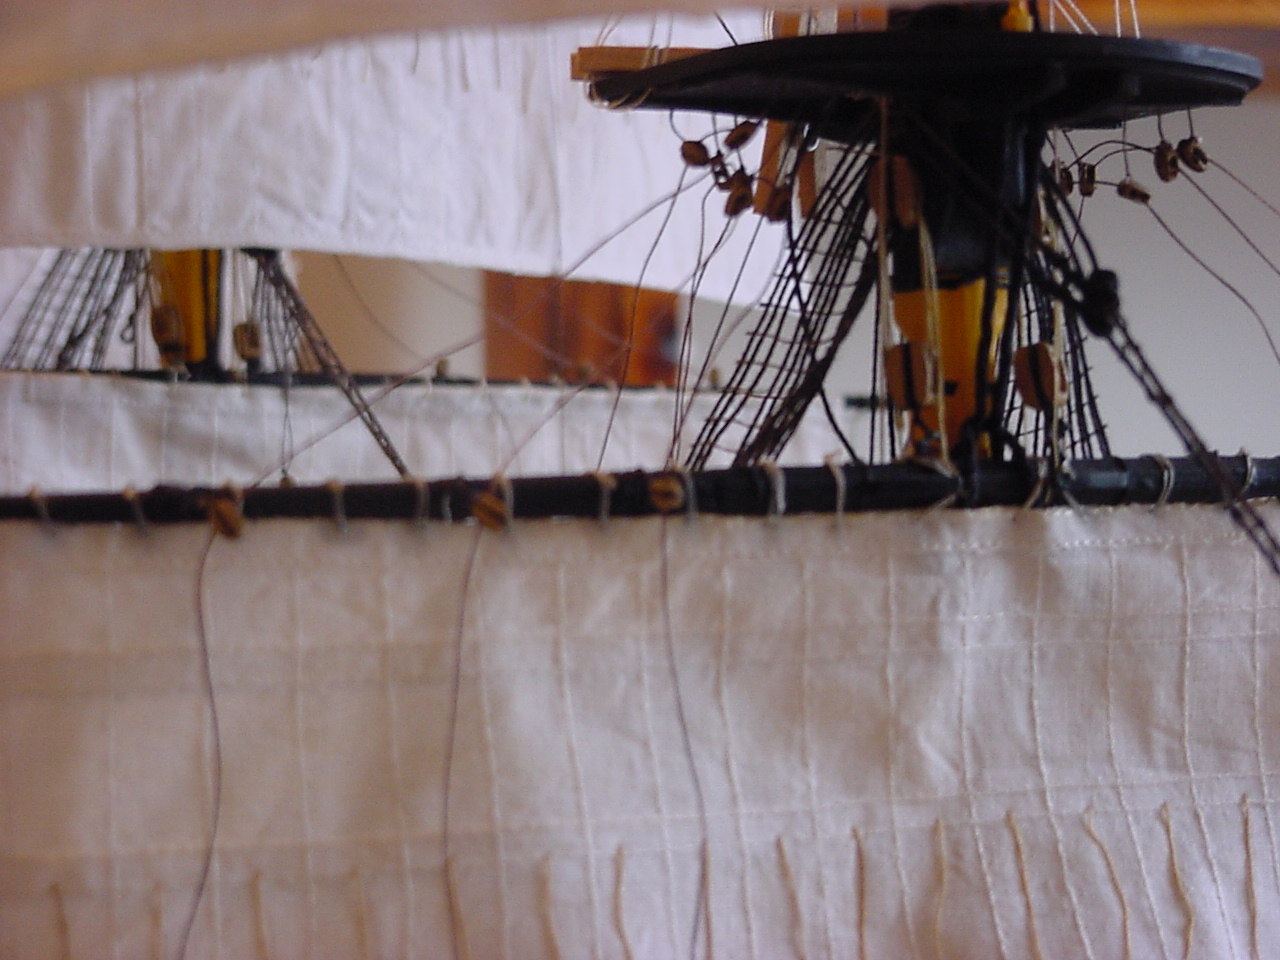
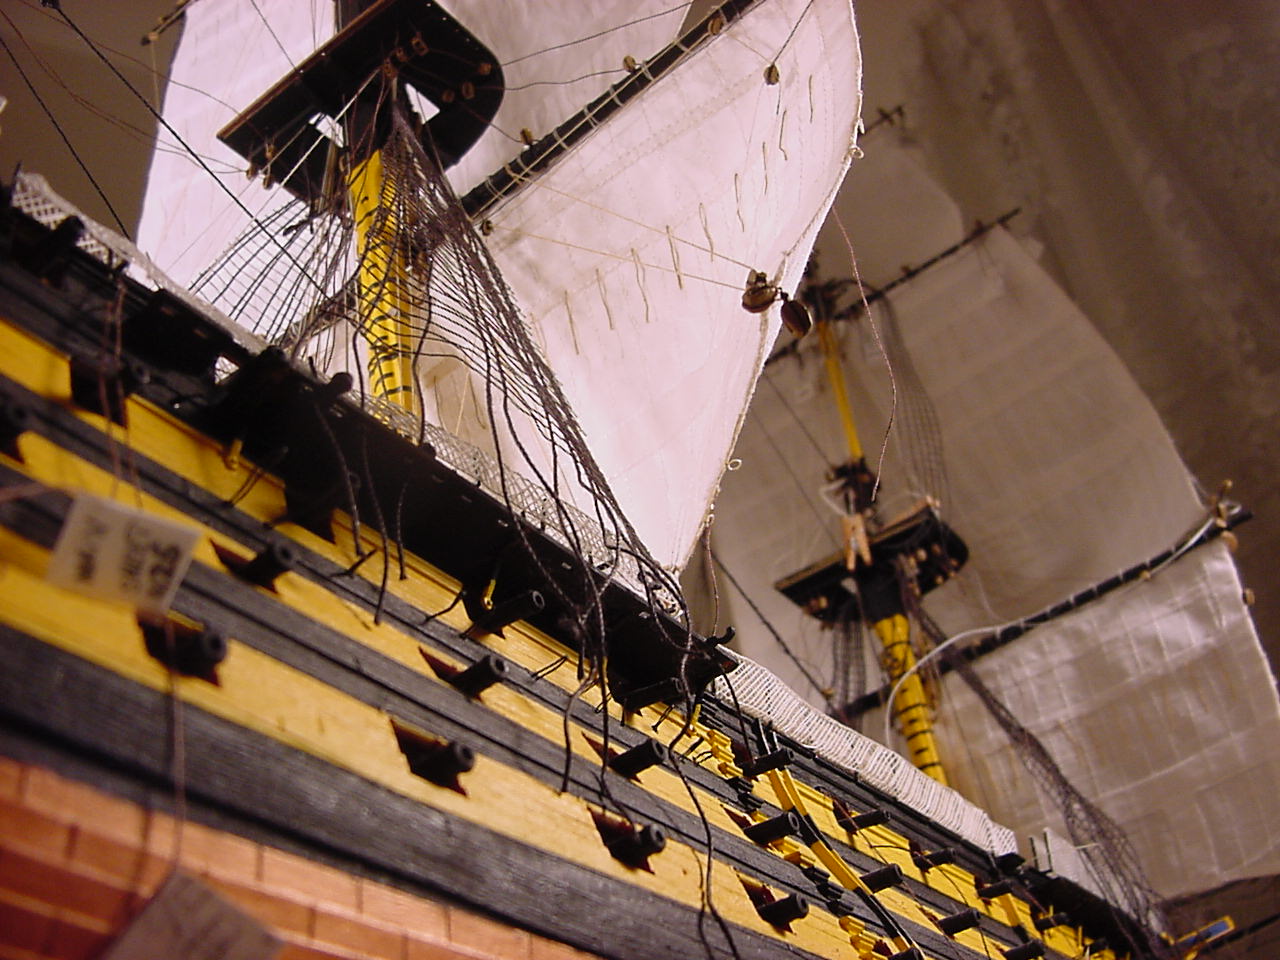
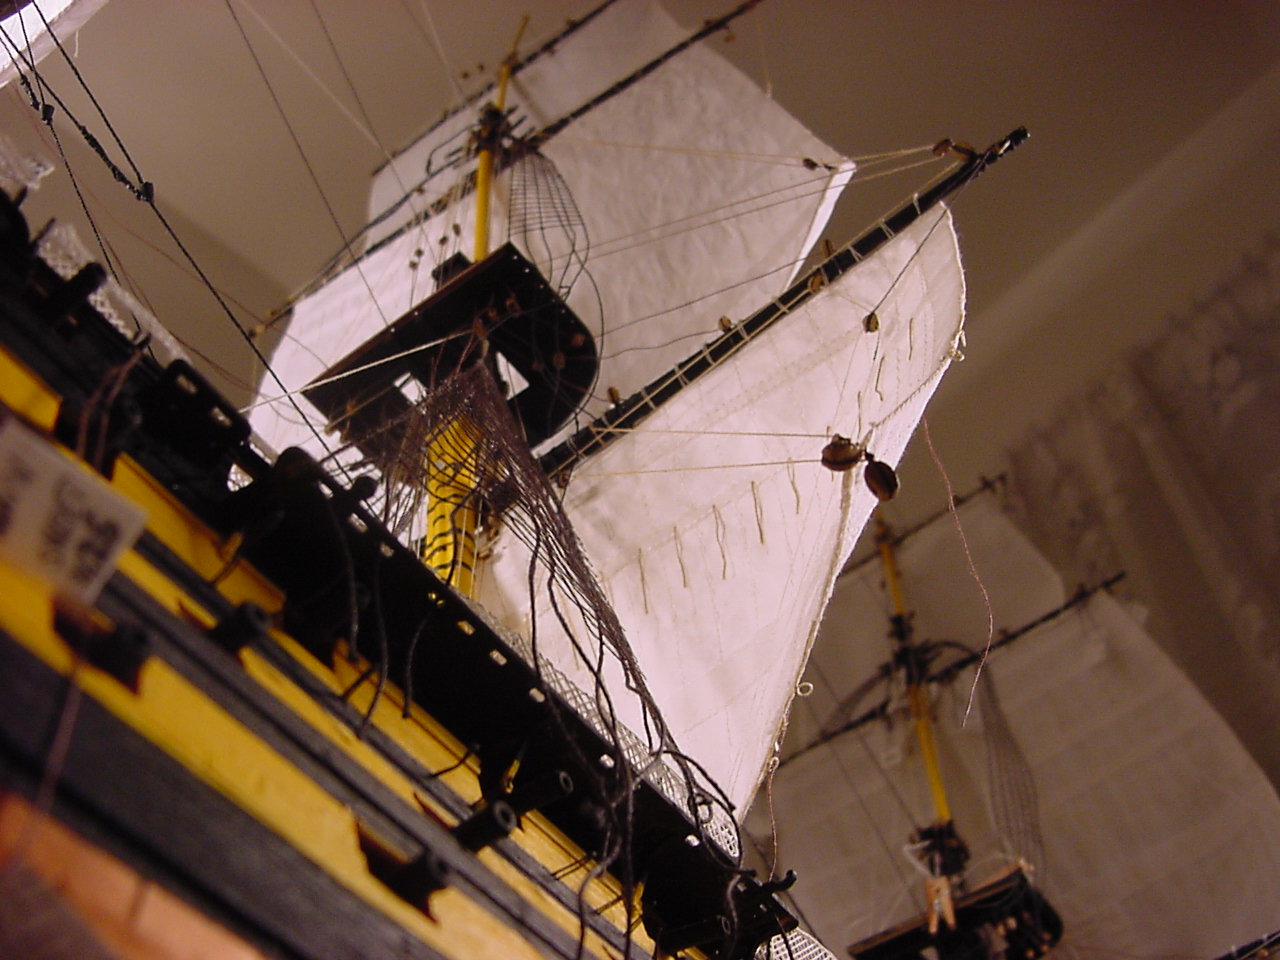
So I need to cut the thread holding the block in place, prepare the block so I can wrap some thread around it, then re-install it to one of the threads coming out of the hull. Since the sails are now installed, I was able to properly put the sheet & tack blocks on the corner of the sail - this image is of the tack & sheet blocks on the portside main sail.
And lastly, a picture of the foresail buntlines on the starboard side, and the port side (they’re the three lines from some blocks on the yard, up to other blocks under the top). While installed, these lines are not yet belayed, because if they were, they’d be in the way when I try and belay the lifts, clews, and sheet lines of the upper sails to the fife rail.
So, as Porky Pig would say, “Th-th-th-th-th-th-that’s all, folks!” Thanks for tuning in, and I’ll see you next time!!
Tim, your attention to detail is incredible!
Thanks, Russell. You know, on our hobby, details are what makes the difference!
Well, some more progress. I have the majority of the rigging done on the main mast sails; right now, I’m soaking some sewing thread in a coffee solution, to try and darken the thread (this thread will be for the foremast sails). After soaking for about 24 hours, the thread doesn’t darken too much; in fact, it almost has an orange tint to it.
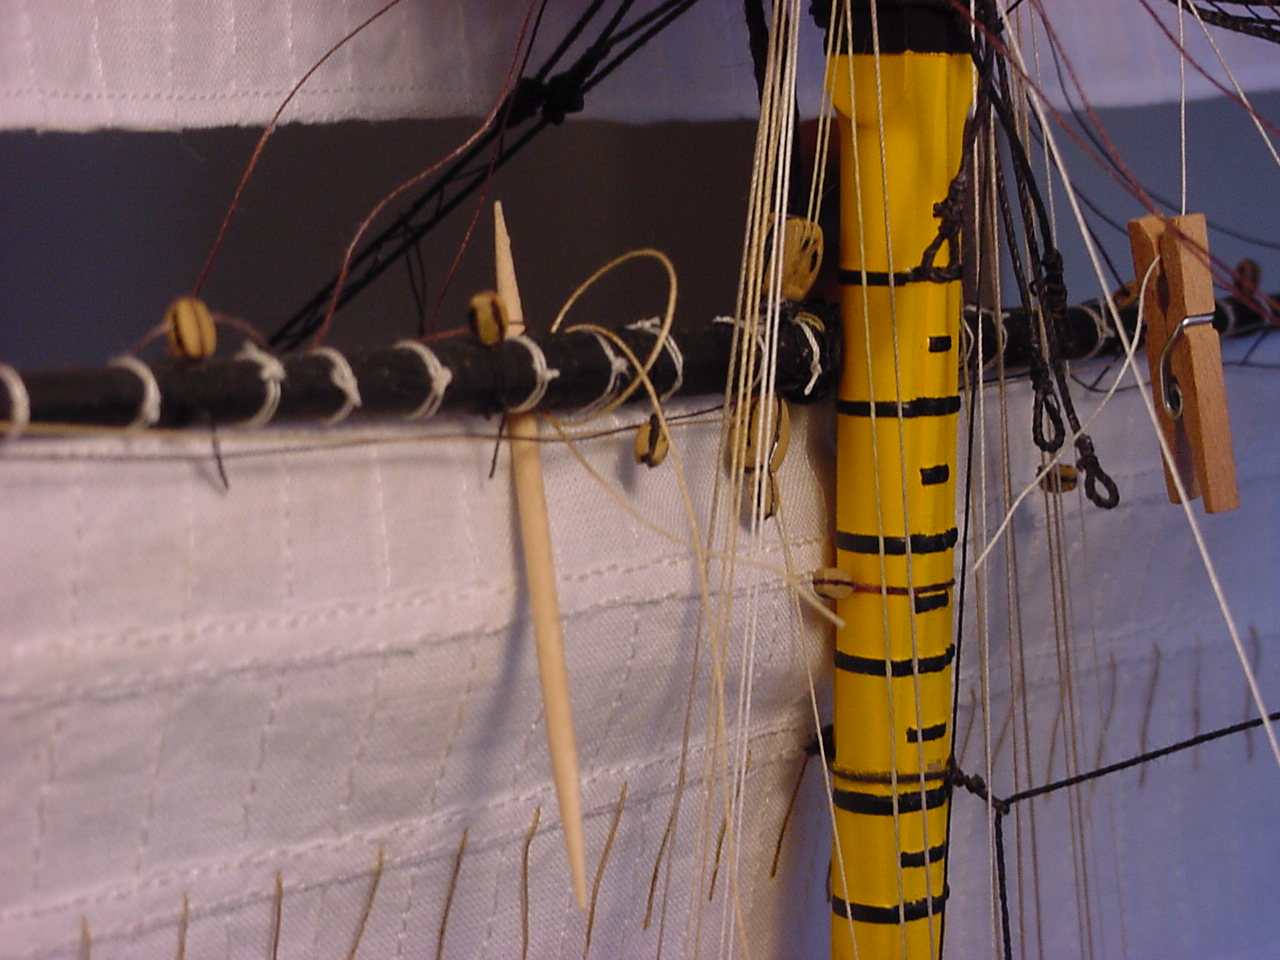
Here’s a construction tip: wait until after the rigging is installed to glue into place parts 35 (18 of them, they’re the stanchions around the opening on the main deck); same with installing parts 27 & 28 (which are the hammock brackets). By waiting until after the rigging gets done, you’ll have more room to fiddle with the threads of the rigging, and you won’t be knocking stuff off, which will have to be re-glued later. Also, and I mentioned this in the “old” blog, after installing the pin rails on the inside of the hull (parts 74 and 79), drill a small hole in the rail, behind the fife pins. I use the hole to insert the thread, then tie it off around the pin rail. I did this, because the length and fragility of the pins is such, it’s danged near impossible to wrap the thread around the actual fife pin. Besides, once the thread is tied off, it’s really hard to tell that the thread is not wrapped around the pin.
Another little trick I’m using, is to put a small dab of white glue (I’m using Elmer’s) on your fingertip, then run both ends of the threads through the glue, to make them a bit stiffer. Nothing worse than having a thread get started into a block, only to find out the thread is getting caught inside the block, and all the pushing you do to get the thread through, only causes it to bunch up. Stiffening the ends with some glue helps keep the thread straight as it’s being inserted.
So the past couple of days has been spent doing the mainmast rigging. I made a little chart to help figure out what line goes where:
And here’s a pic of what’s been accomplished; hard to see what’s been done, though:
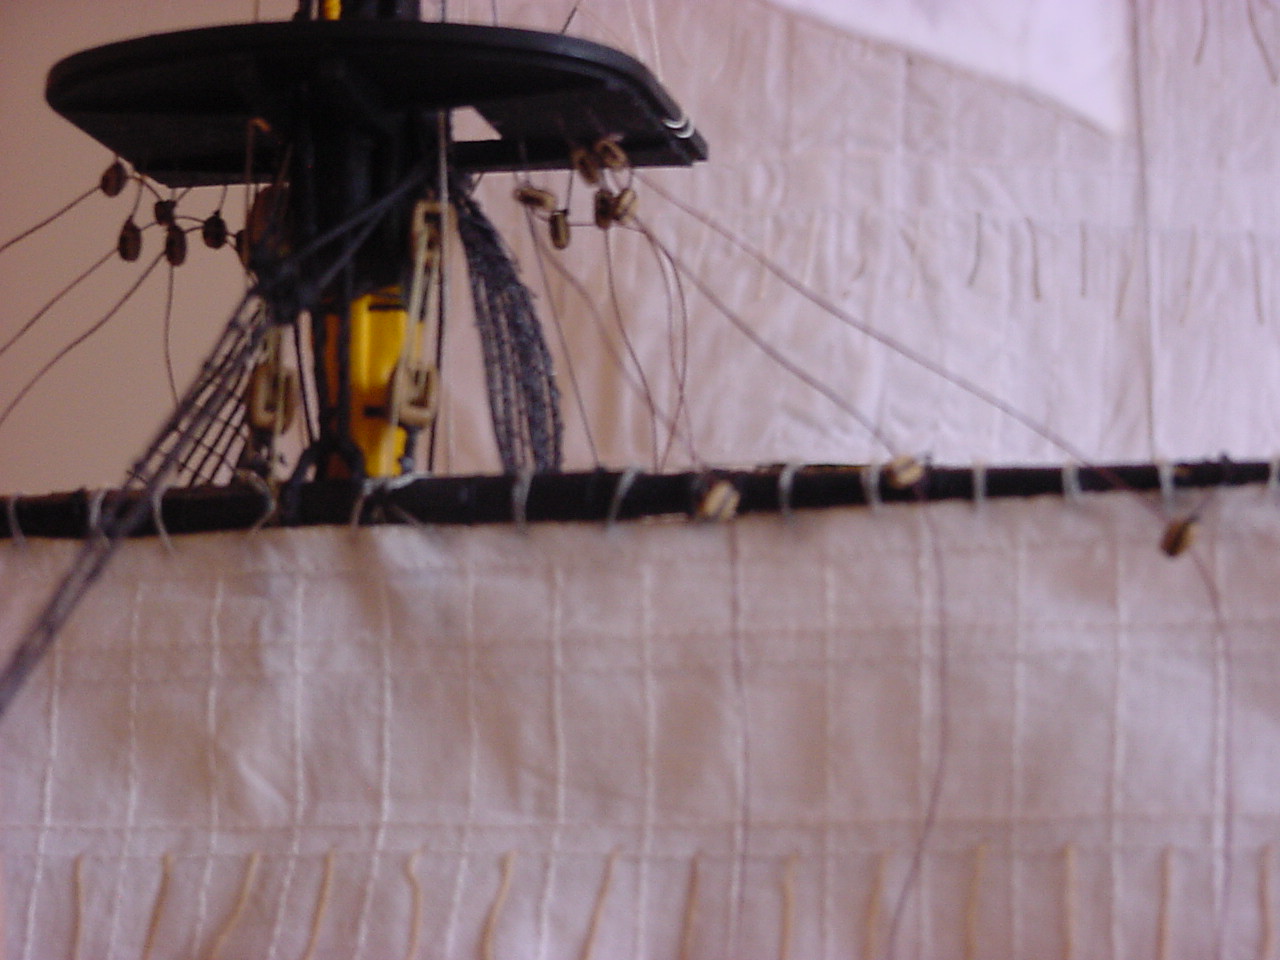
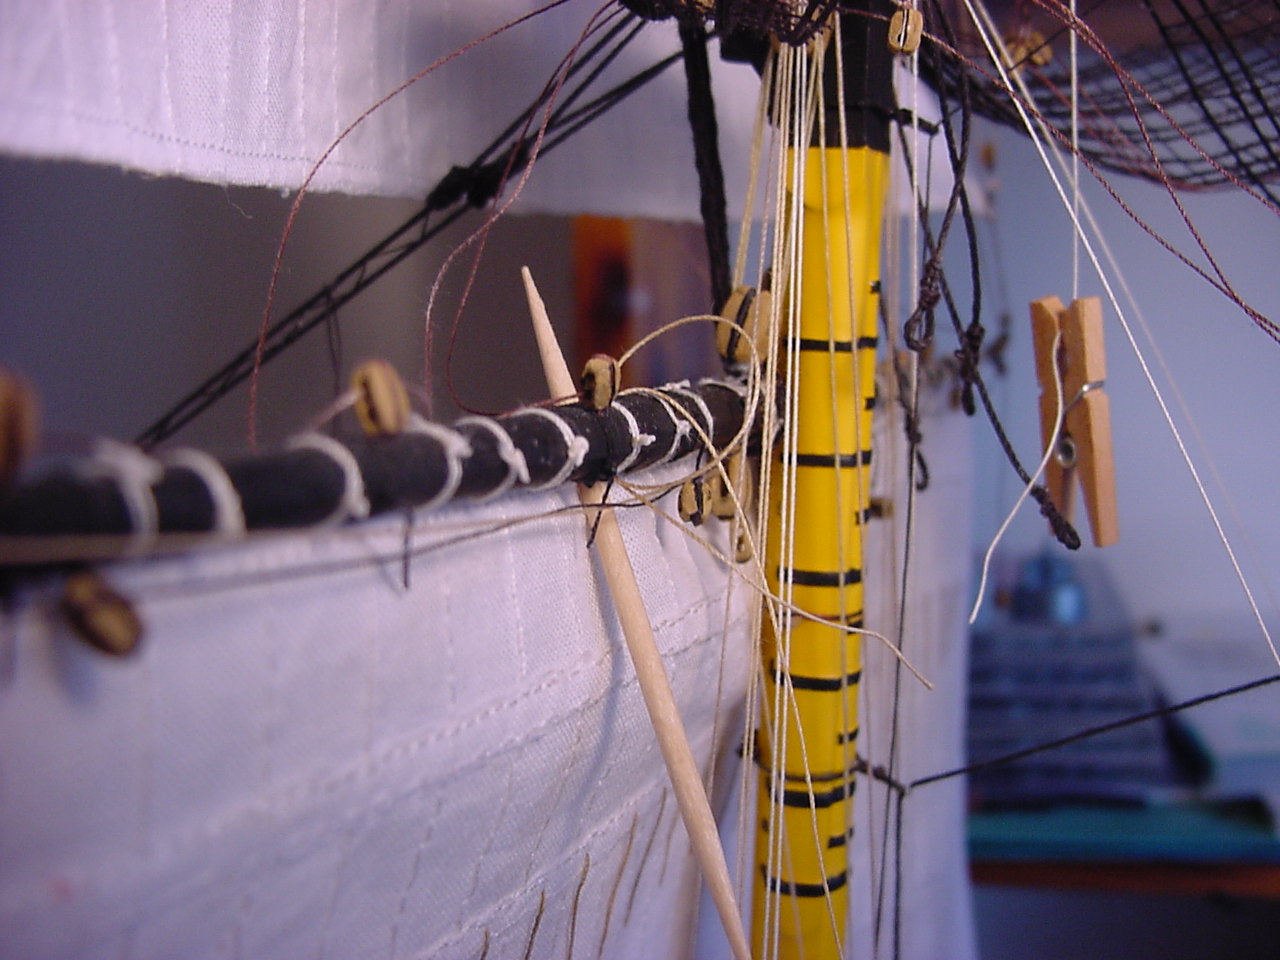
Here’s some close-ups of the precision engineering tool I used to make a gap between the sail and the yardarm, so that I could install the clew lines (same technique on the main topsail and mainsail). In both pictures, the loop of thread (this is some of the coffee-soaked thread) is the clew line; I used a clove hitch (I think it’s called a clove hitch) to secure it to the yard. These pictures are of the main yardarm.
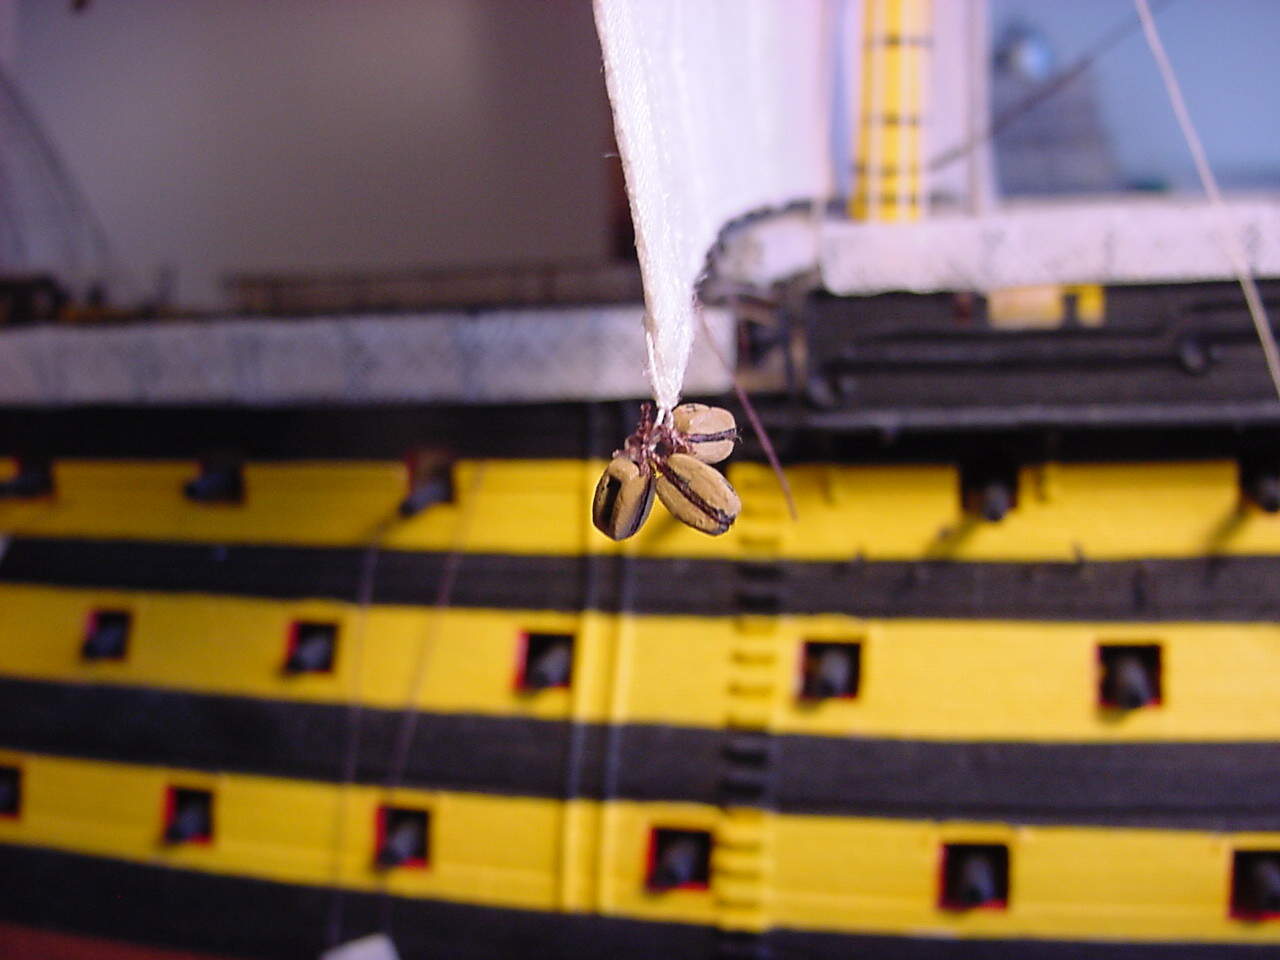
This next picture is of the corner of the mainsail. The block in the horizontal position is for the clew line; the block on the bottom left is for the tack line, and the bottom right is for the main sheet line. After installing the clew line, that block is in more of an upright position.
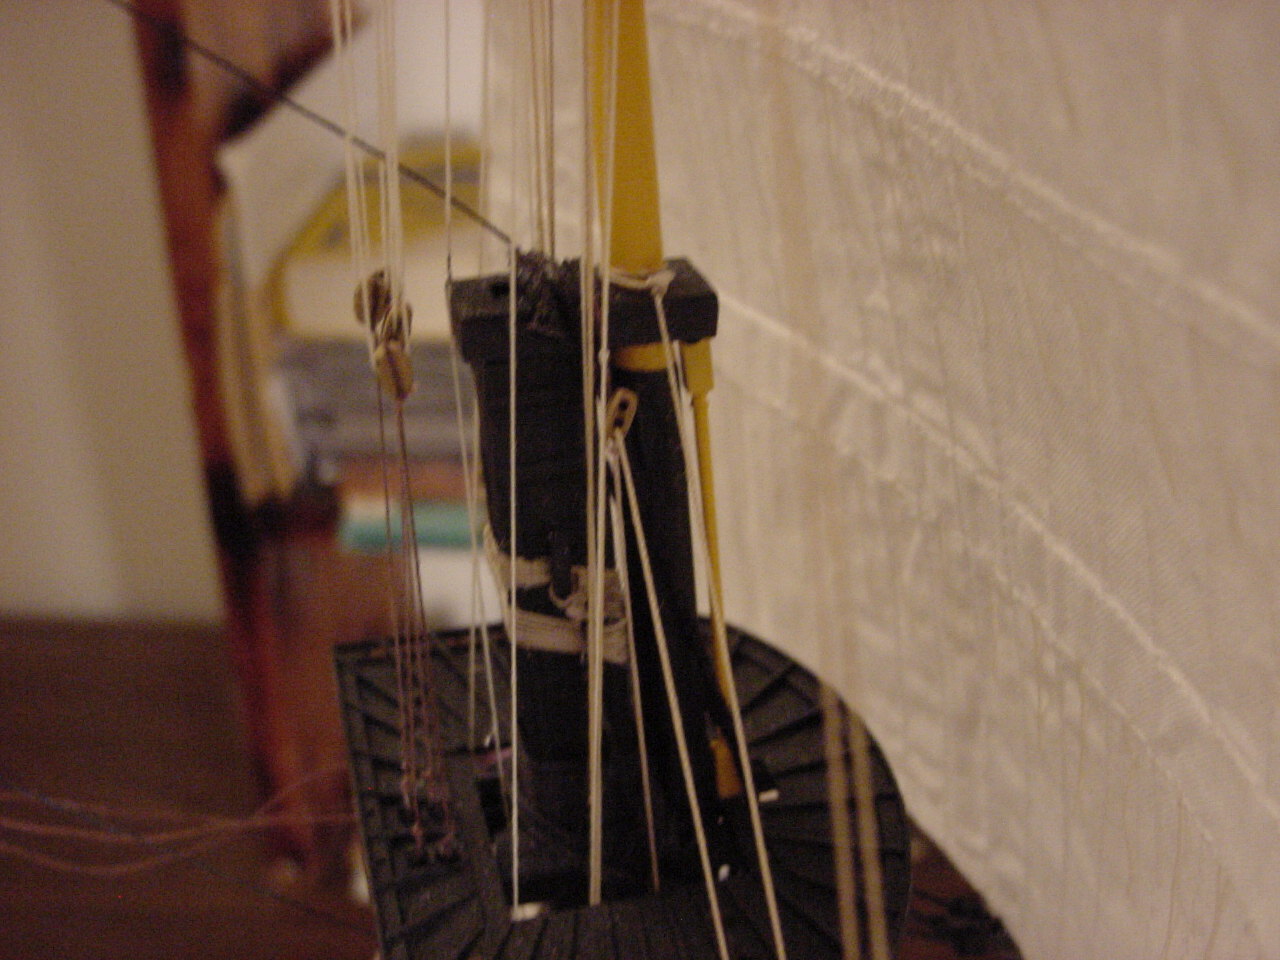
This picture shows a rather glaring error: the lift line is going through the bottom hole of this block, not the top hole. That would the rope is not going over the pulley (or sheave).
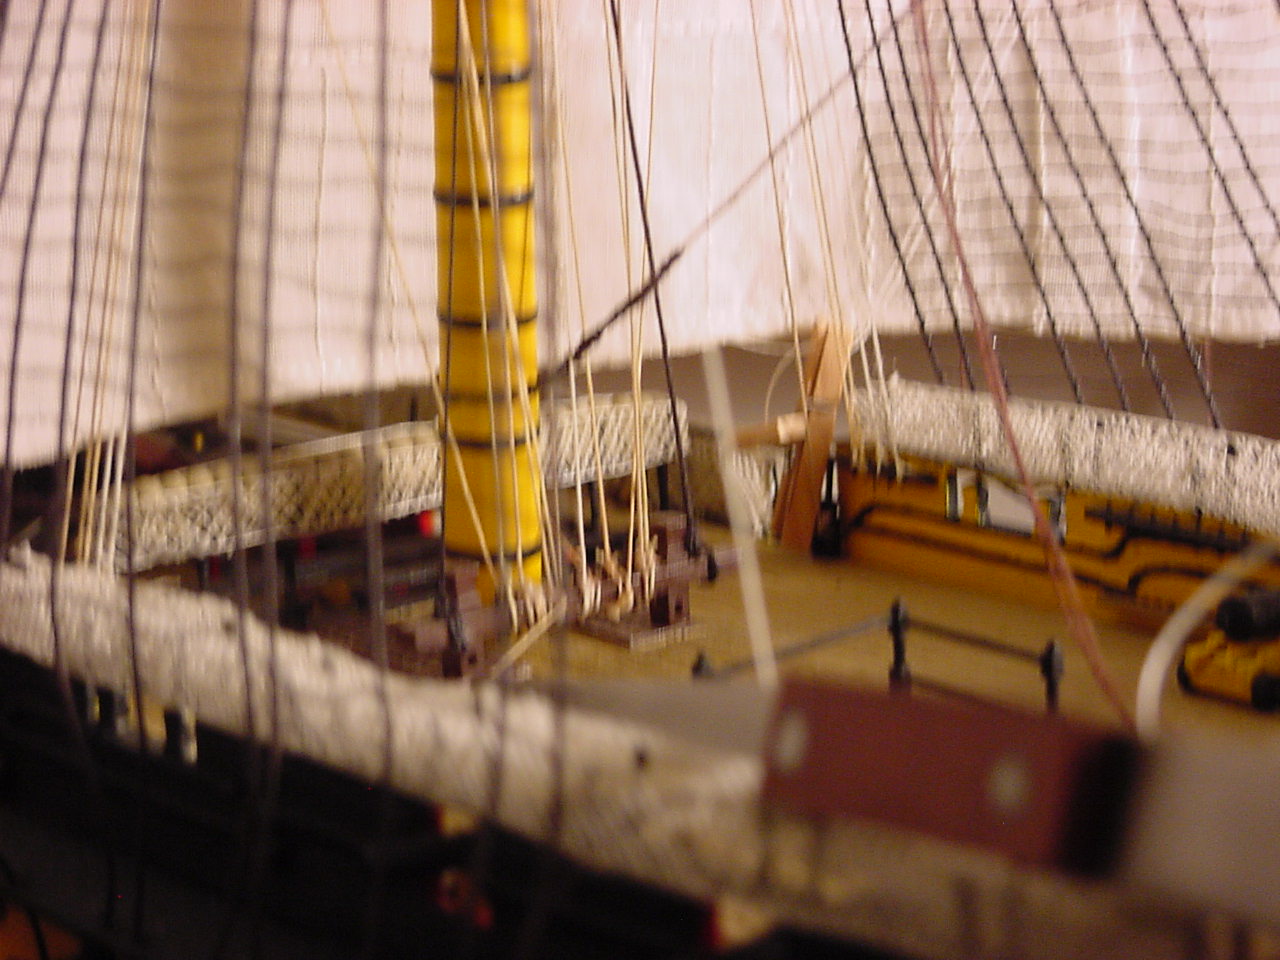
This pic is of the fife rail located directly behind the main mast, and where most of the rigging belays to. Off to the left side of the picture, between the second and third shroud, is where other lines get belayed to. (Sorry it’s blurry, I was having a hard time trying to get the camera to stay focused.).
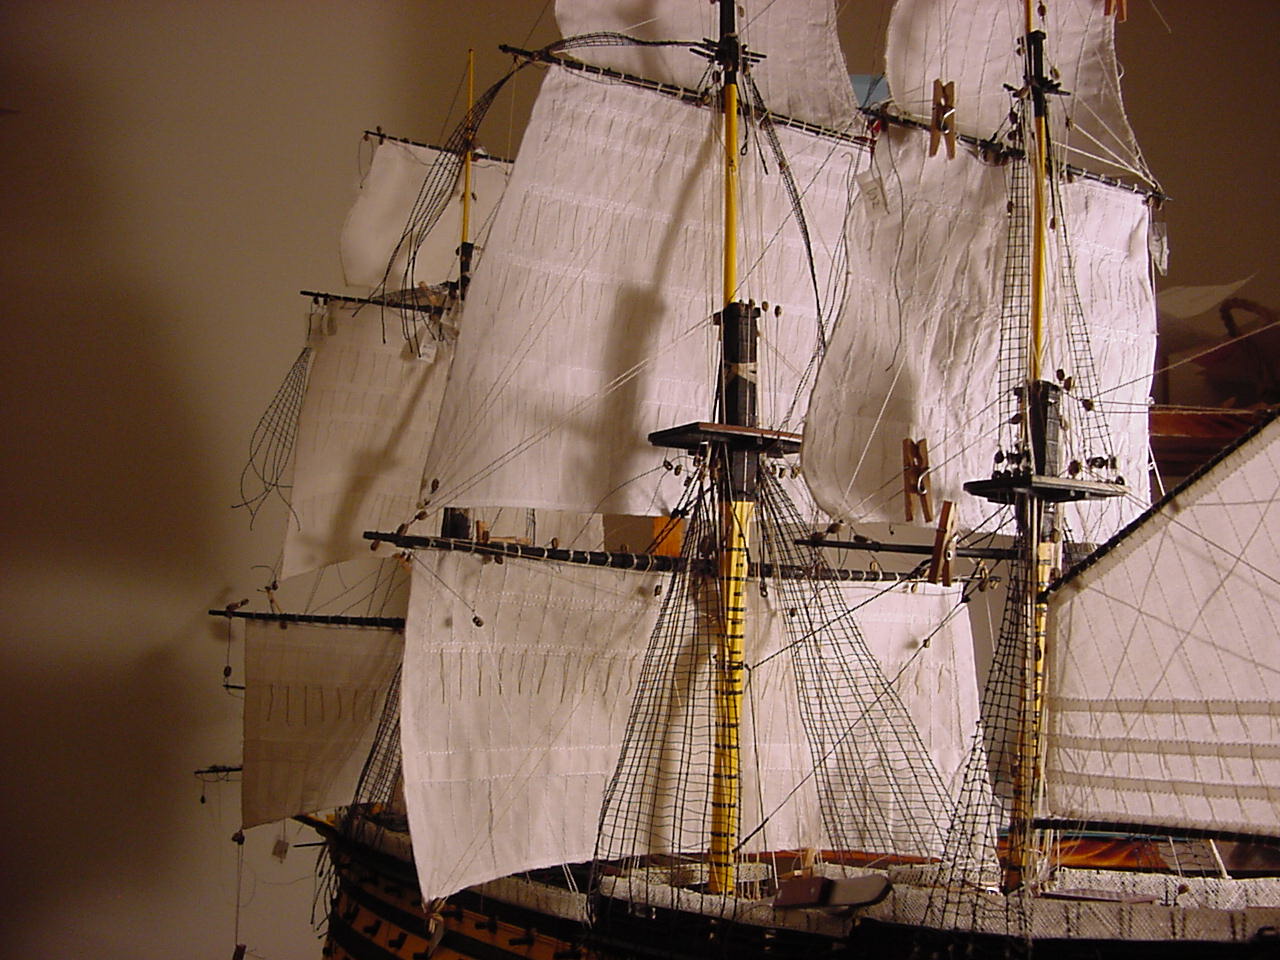
And lastly, a couple “imagination” photos - imagine you’re in a longboat, coming alongside Victory, and you look upwards at her main mast:
Next: tackling the foremast rigging!
Hope everyone is whole and healthy!
Tim 
BTW, we WON’T be discussing Alabama’s dismantling of Ohio State.
Tim,
great, but certainly tedious work! Just the number of lines you’re dealing with is amazing!
I particularly like your imagination shots - give a very cool impression not only of her complexity, but even more her majesty and how big she was when approached by a long boat.
Cheers
Jan
Hello Jan,
Yes, you’re right, it’s very tedious work! It seems to take about an hour to get a single line of rigging installed.
I’m glad you like those imagination shots - I wanted to show how impressive Victory was - after all, she ain’t no tugboat!
Hopefully, tomorrow I can get the last of the foremast rigging done - it’s a total of 5 lines, but 2 of them are really easy, and another 2 (the fore topsail sheet lines) are almost as easy.
Cheers,
Tim
Ahhhhhh, relief! Got the last of the rigging on the foremast sails done (except for the fore sheet line, some more of the tricing line, and the tack line).
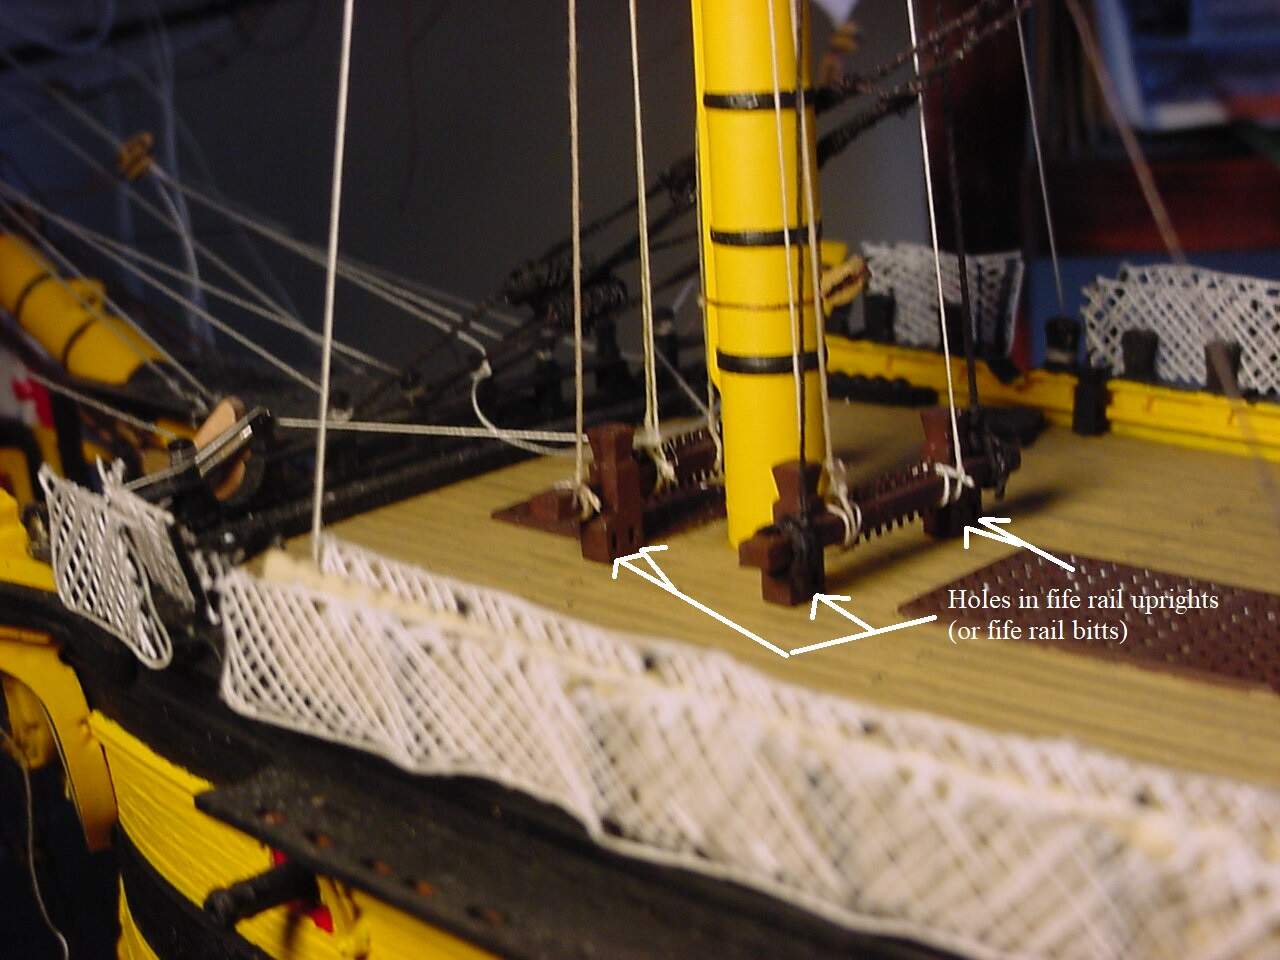
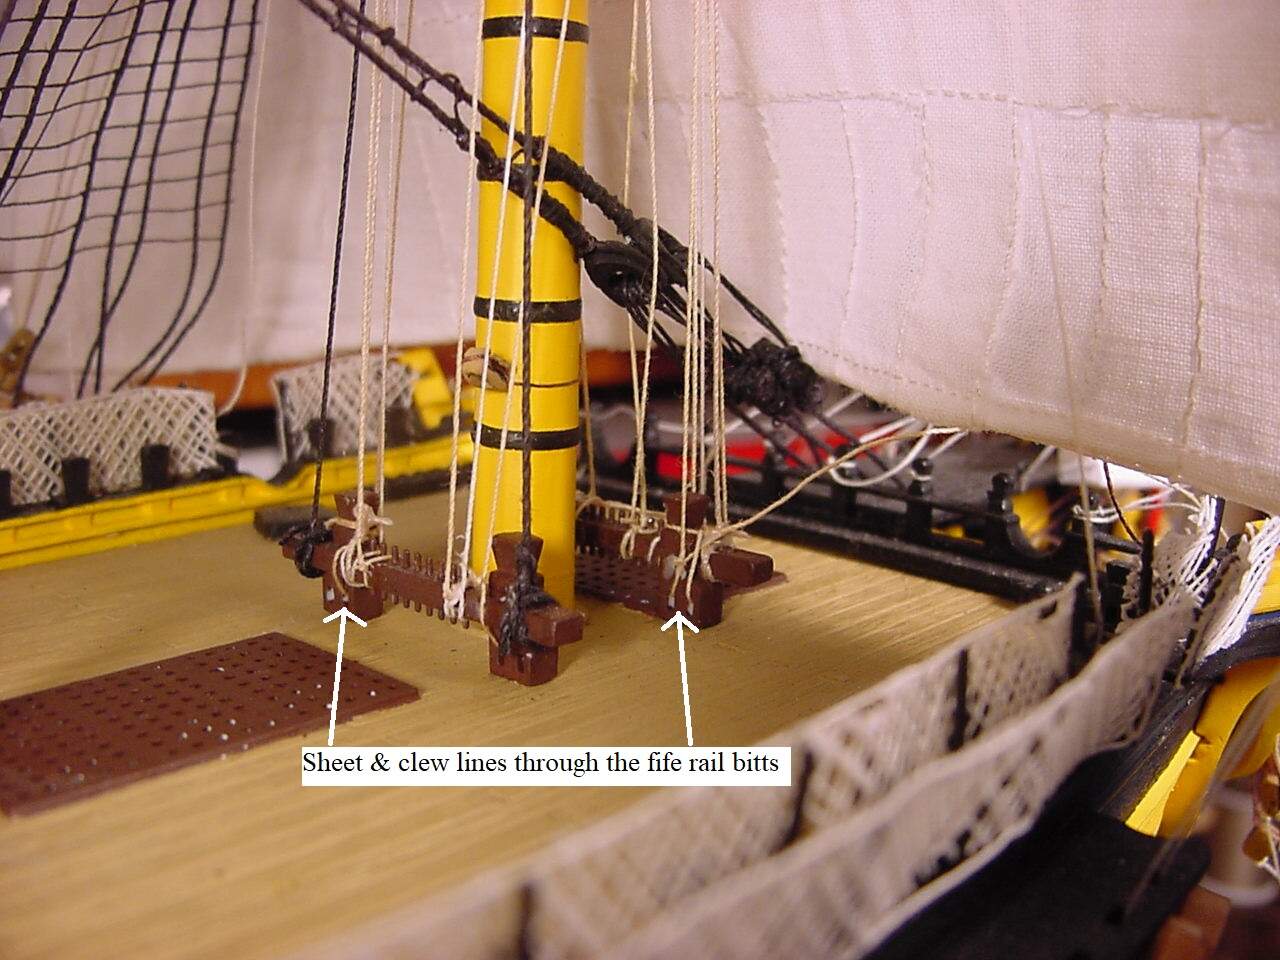
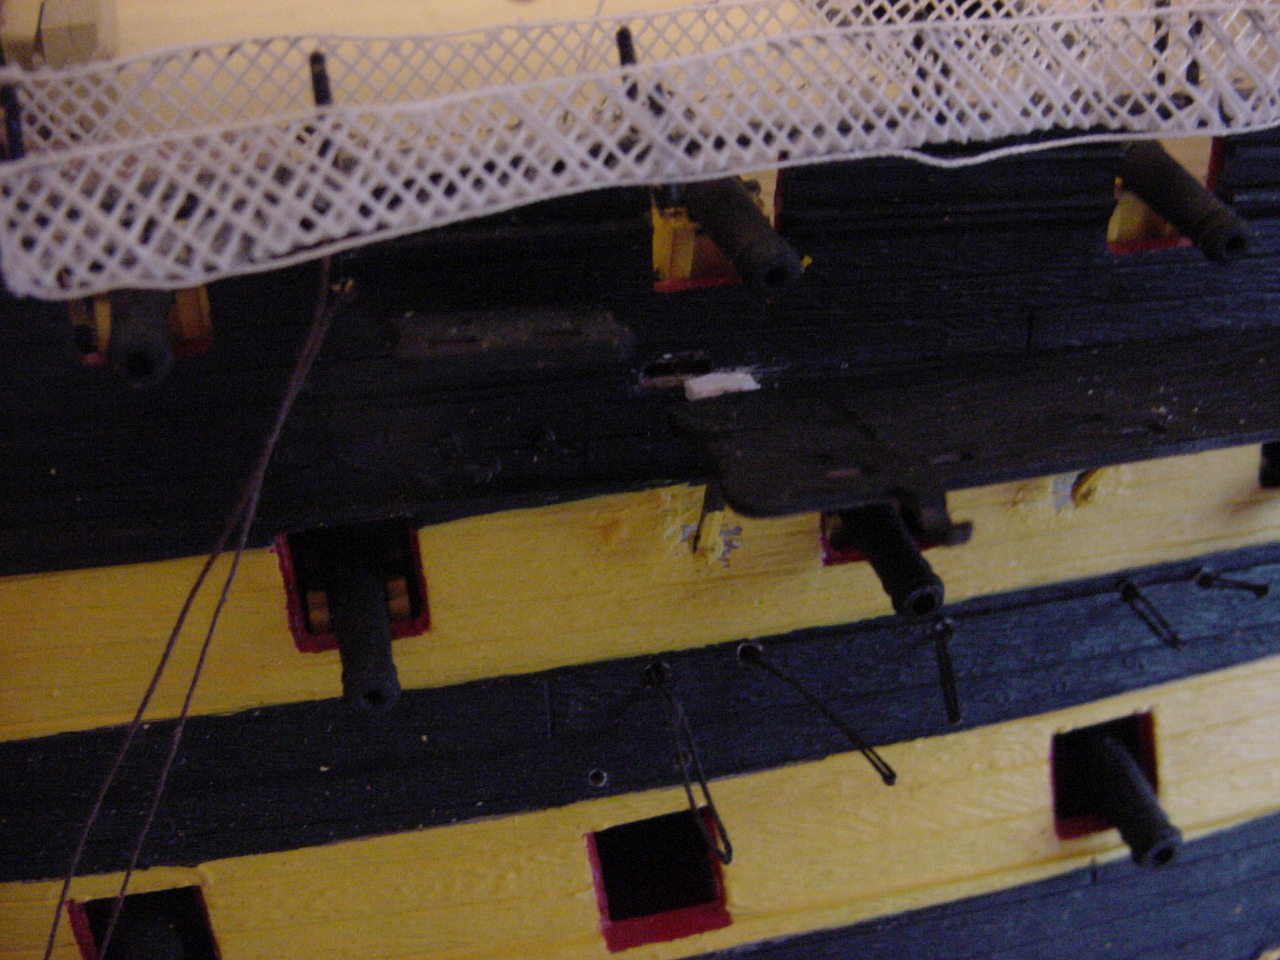
I wanted to bring attention to any and all, that in the belaying diagram, it shows several lines all going to the one of the fife rail uprights (I think Longridge calls them the fife rail bitts). Actually, there are some holes in the bottom of the uprights, in which certain lines are roved through, then secured to the bitts. In particular, it’s the clew & sheet lines for either the fore topsail or the foresail itself (I don’t have Longridge’s book handy to verify). Naturally, I took some pictures:
So a next big step is to add block P43, which attaches to the mainstay, underneath the main top. This will be a bear to install, as the main topsail overhangs the mainstay, and doesn’t leave much room to get tools in there to get the block tied up. As a recommendation, you should probably add the block to the mainstay after the stays are installed (step 15), but before the sails get attached.
Once I complete the above item, I’m not sure what to tackle next. It would be nice to get the shrouds and their deadeyes completed, but that would take a lot of time, and besides, it would limit my ability to get to any belaying point that’s one the main deck. But not doing the shrouds, it leaves all the buntlines for the topgallant and top sails hanging around and getting in the way, as these lines are secured to the upper shrouds.
At any rate, get block P43 installed, and the I’ll figure out what to do next. BTW, does anyone know of a technique to create coils of rope, so that I can throw the coils over the fife rails, as if the excess line is bundled up and ready to go? Besides, it’ll hide the ugly knots I tied of the various lines on the fife rails.
Enjoy!
Nice progress Tim
You must be over the halfway line? 
Hello Russell!
Yep, things are moving forward. Getting the square sails attached & rigged was a huge step!
Yes, I’m definitely over the halfway line, but I’ll just say there’s still about 49.8% left to go!! 
Thanks for taking a look!
Tim
Lookin very nice indeed, as Russ says. And it’s really good to see steady and constant progress and that you’re not being stalled by the huge amount of rigging lines…I feel I would…
She’s coming along awesome Tim, looking forward to more!
Cheers
Jan
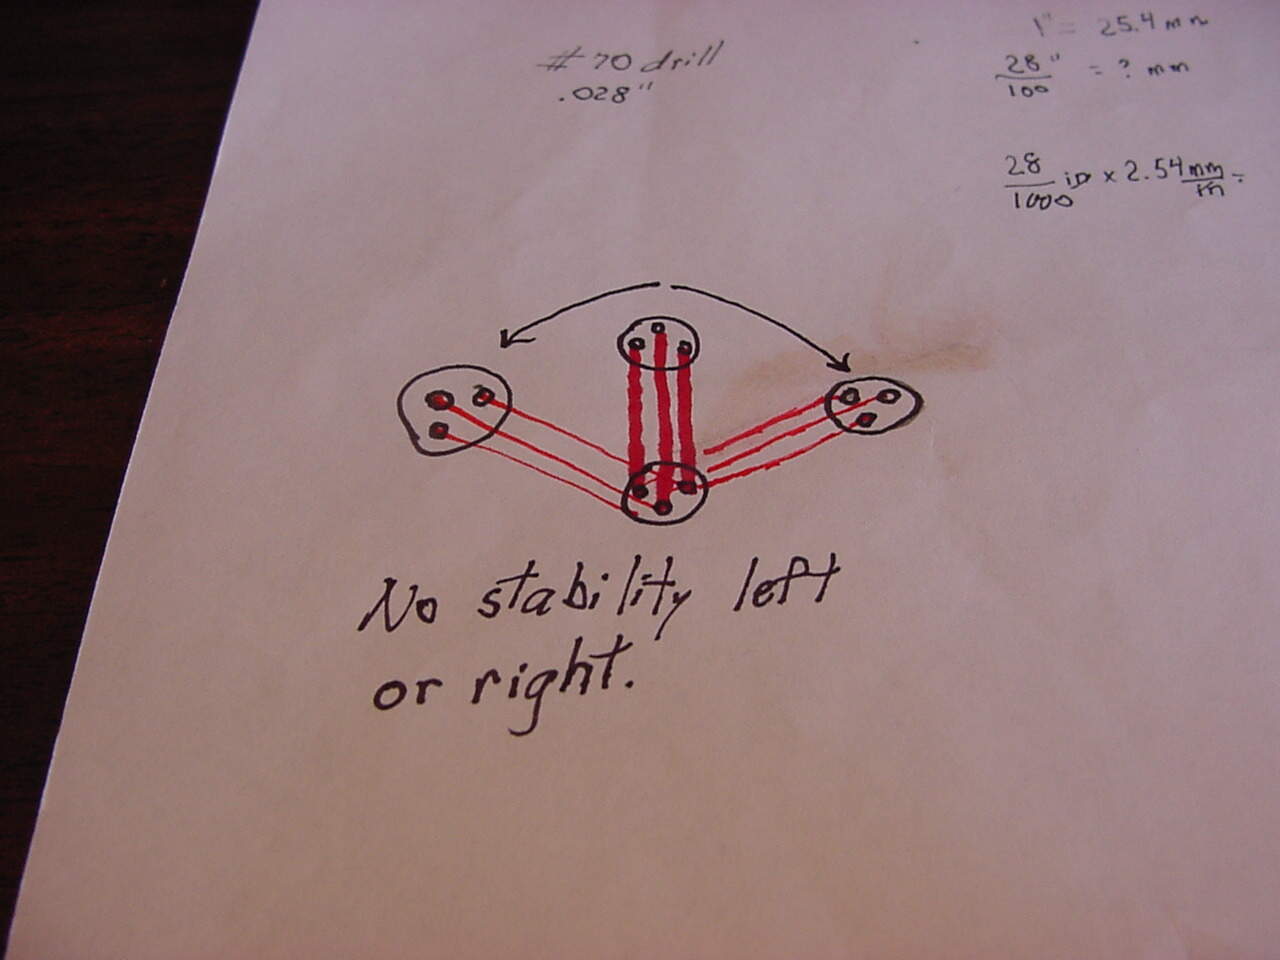
Thank you, Jan. Actually, getting the rigging done was sort of motivational for me. The next step: getting the deadeyes accurately set, so I can secure the upper shrouds to the deadeyes, then I can finish the buntlines on the topgallant and top sails. Earlier tonight, I attempted to make a jig that would keep the distance between each upper and lower deadeye consistent. The jig consists of 2 vertical pieces of florist’s wire, with a single horizontal piece of wire, and the whole lot is super-glued together. The superglue instructions say to wait 24 hours for a full cure, so now, I’m just waiting for the 24 hours. I tried a similar thing on the mizzen mast stays, but the problem there was, I didn’t have anything to keep the vertical pieces from rotating left and right, so I’m hoping this works better. If the current idea doesn’t work out, I think I’ll try to make a different jig out of plastic, assuming I can get some very thin plastic rod to fit the holes in the deadeyes (I cleaned out the holes with a .070 inch diameter drill, so I’ll need to find some very slender rod).
I’ll try to get some pictures posted as to what I’m talking about. And along the same lines, I was reading Longridge’s book, about where some of the rigging gets belayed to. Gee whiz, Heller really missed the boat on their instructions. I’ll discuss this topic in a later post, as well as put some pics up.
Well, again, Jan, thank you for your post, and I hope to see you back here real soon!! 
Whoops! A little correction to my previous post: it’s a #70 drill bit, which is 0.028 inches in diameter, or 0.7112 mm.
Here’s a pic of the problem I had, when I didn’t have any lateral support on the vertical pieces of wire:
And here’s 2 pics of the jig, inserted into a pair of deadeyes:
So for now, I put a light coat of flat black paint on the deadeyes. Not sure what my next step is going to be, there are so many small things that need to be done, but I don’t want to do one thing, only to find out it makes another thing harder to do. I guess I’ll go watch TV.
The snow has stopped, the sun is shining, I hope you all enjoy the day!
Tim
often the solution presents itself when we’re not even thinking about it
You’re right Russ, it’s the ol’ Eureka! moment.
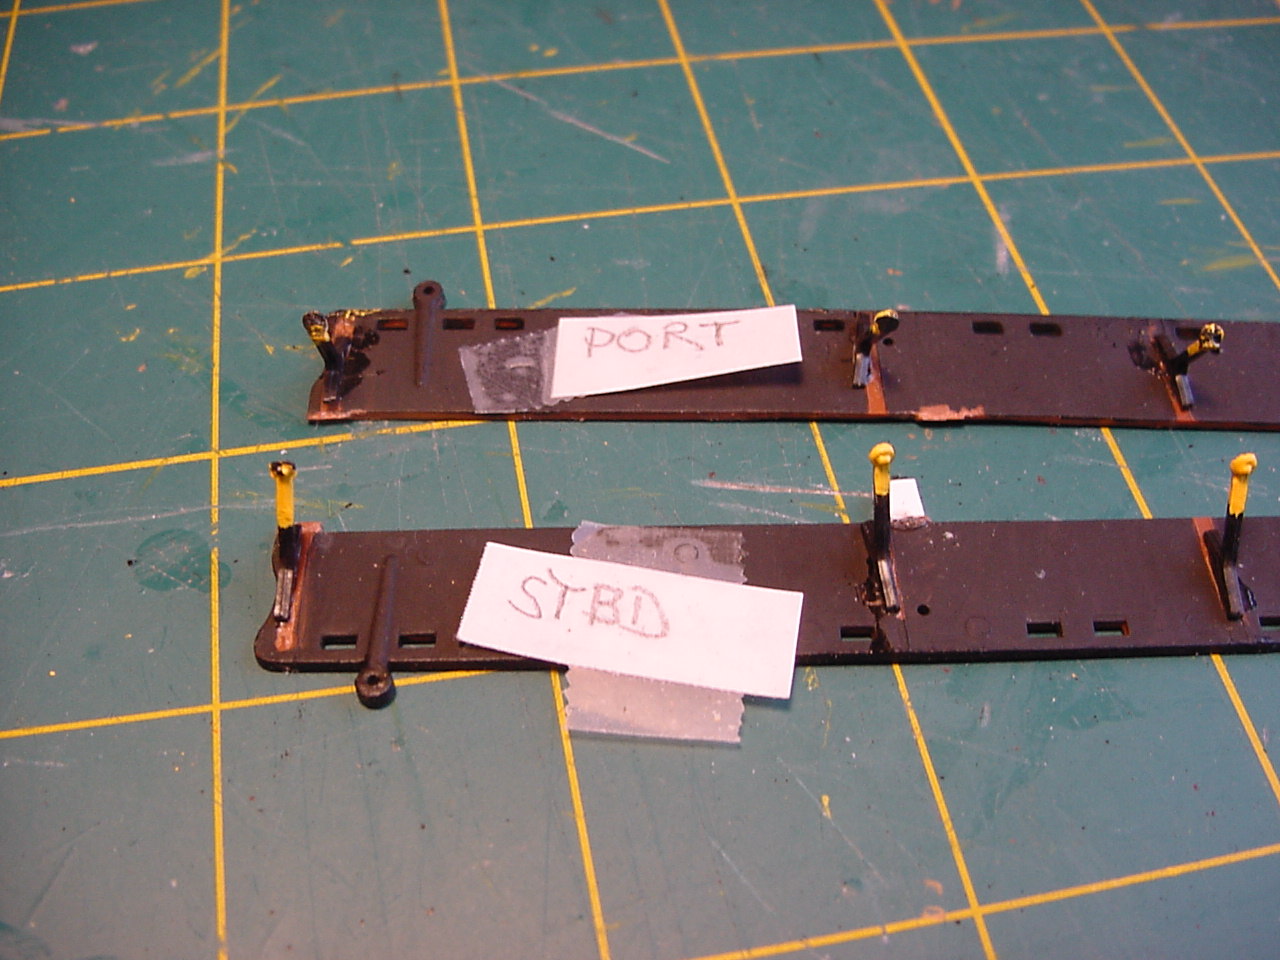
So in trying to figure out what to do next, I made a list of the various belaying points for all the staysail lines (and in true Heller fashion, some of them just go in a circle). But after doing that, I realized I should probably get the buntlines for the mainsail and the foresail tied down, because if the staysails were in place, I wouldn’t have any room to maneuver around for the mainsail buntlines, which are belayed to fife rails on the hull bulwark. And, for those buntlines, I had to figure out (by trial and error) at what point the buntlines go through the shrouds, so that the buntlines look nice and tidy. However, in pulling the end of each individual shroud through the its respective slot on the deadeye channel, I found that the shrouds weren’t lining up with the slots. So my first thought was, maybe a couple of the shrouds don’t actually have a deadeye pair associated with them. But a closer inspection of the instructions, and comparing that to the ship, I found that I glued the port deadeye channel onto the starboard side, and the starboard channel is glued to the port side. So all forward progress is stopped, and the next adventure is to remove the deadeye channels and get them properly installed. I’ll let you all know how much damage I cause in the next post!!
It’s almost time to watch this neat series on NOVA, about chemical elements and how they work in the bigger world - last week was about the difference between concrete and cement, and how cement is made, and how plants need nitrogen, and even though the atmosphere is about 80% nitrogen, it’s not the kind plants can use, so the process of making usable nitrogen was discussed. It’s cool stuff!!
Until next time! 
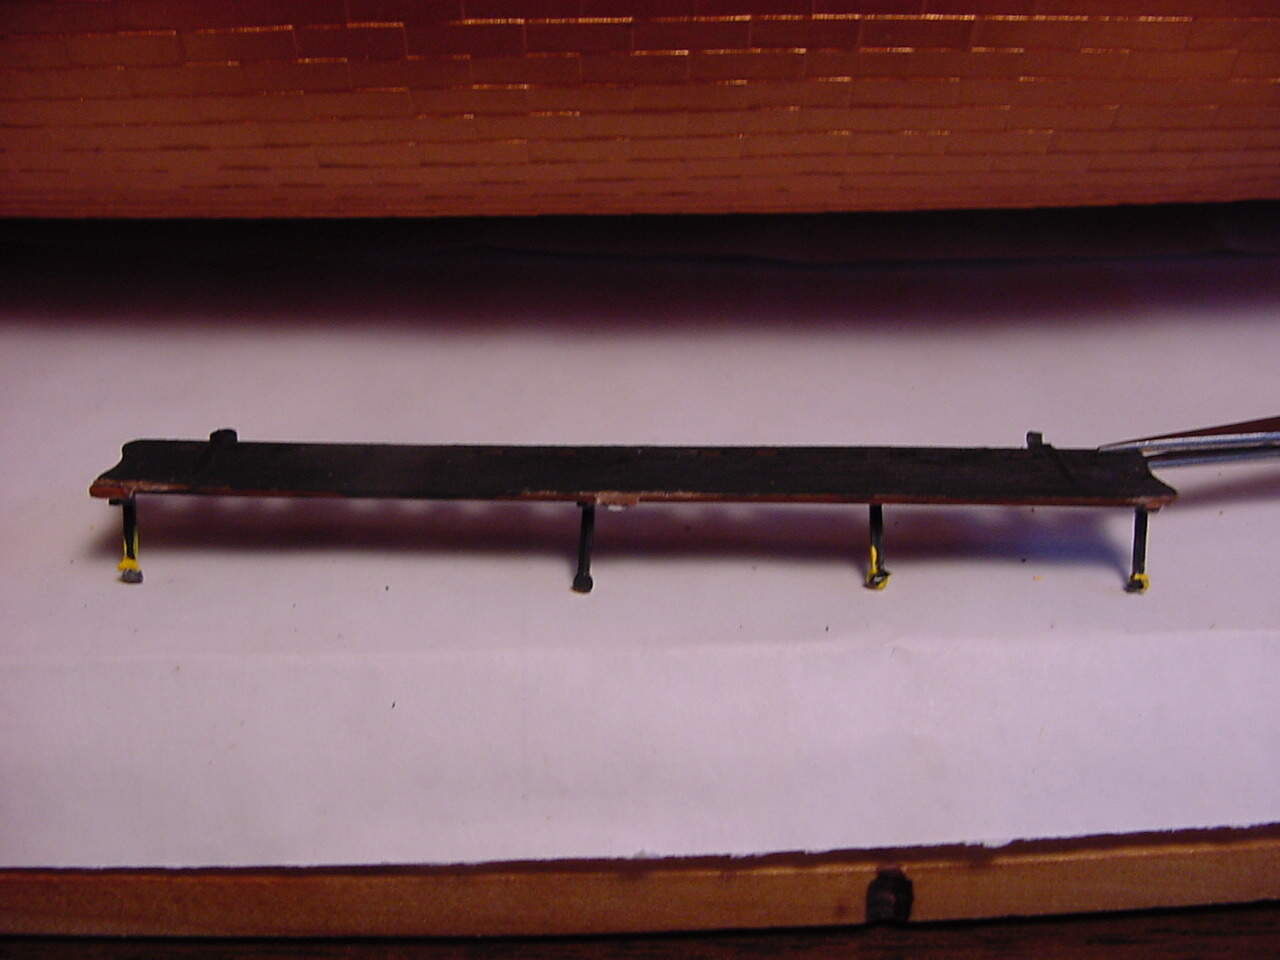
So I worked on the deadeye channels today, and remarkably, got about 98% completed - I just have to glue the channels to the hull (a little more work is needed). The channels came off fairly easily, even though it was pretty tight trying to get my knife blade into position. So, here’s my first pic, which shows the port side channel, and how one of the support struts wound up next to a cannon barrel:
The next pic is just showing the channel, before I started working on its removal:
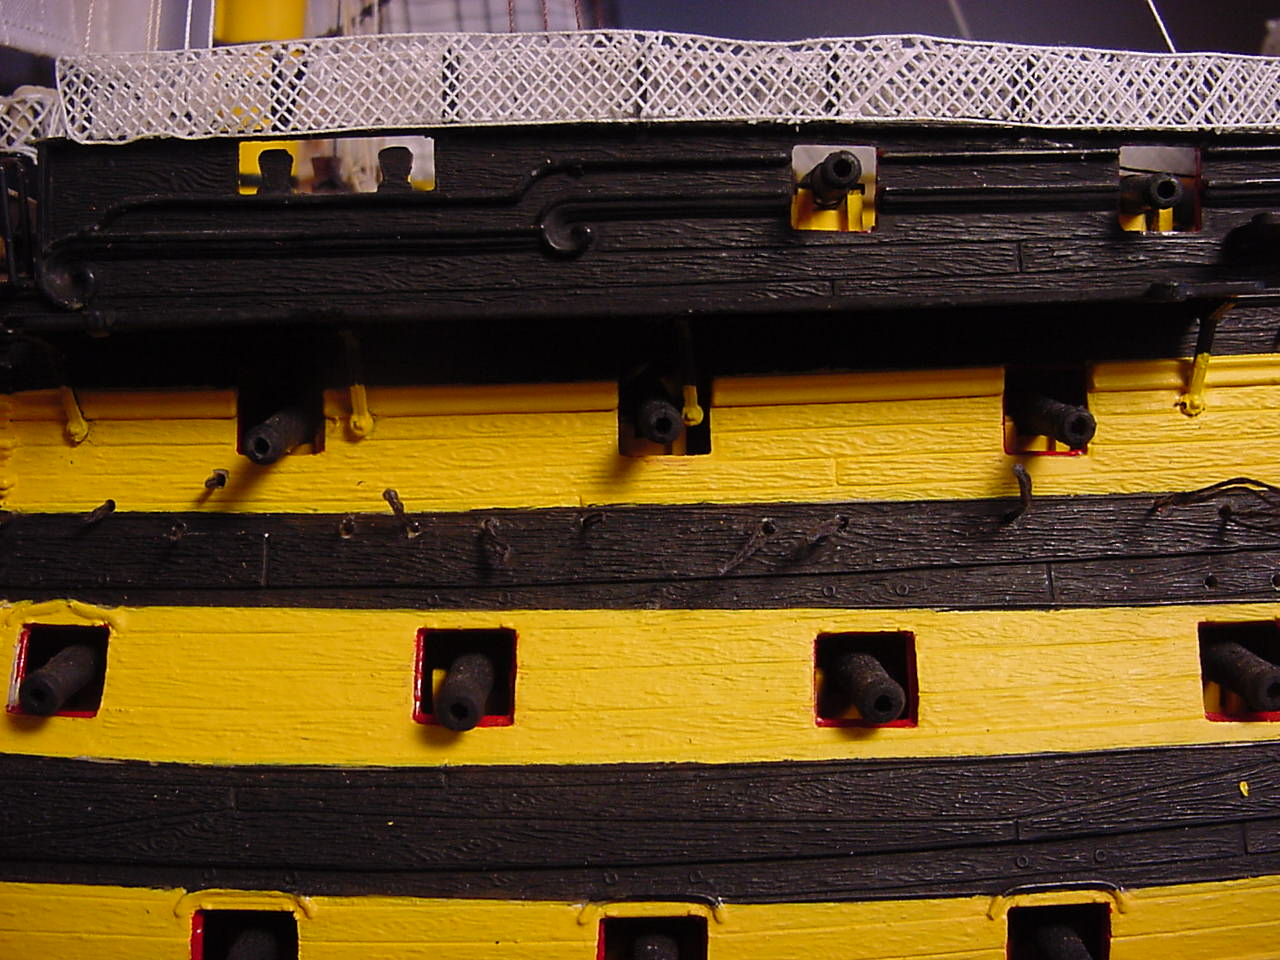
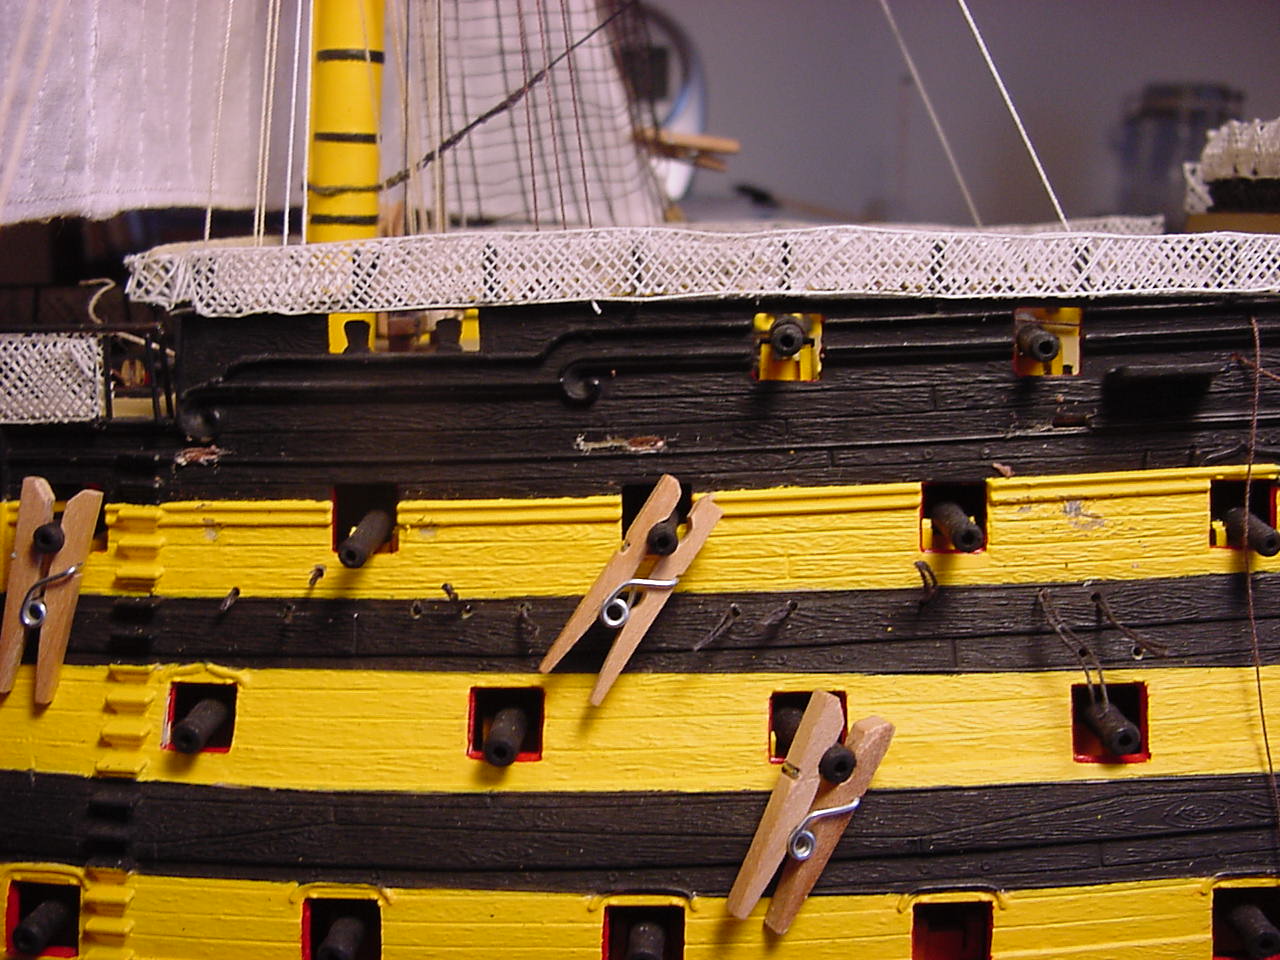
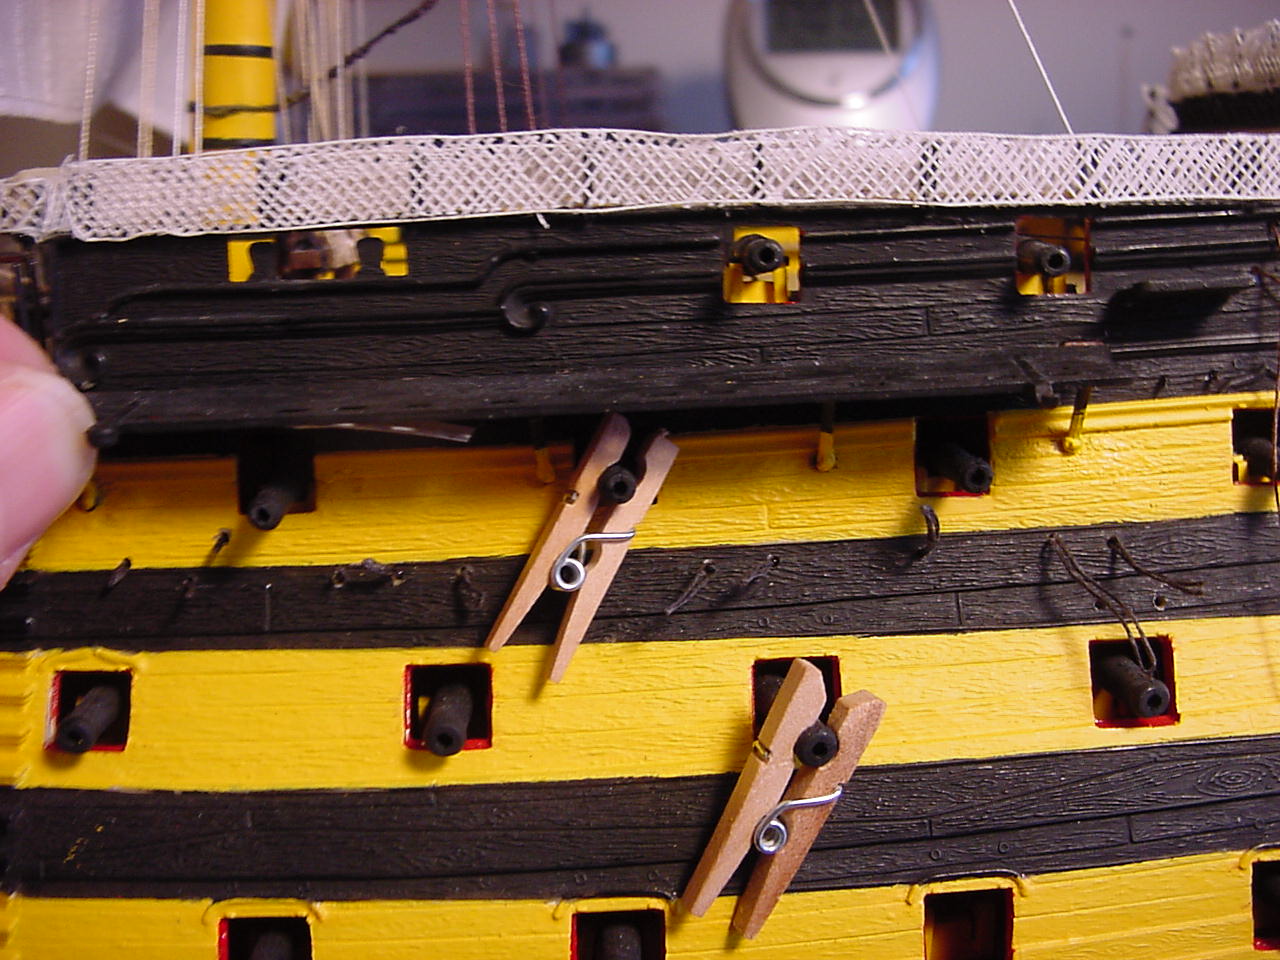
The port hull, with the channel removed, and the damage done to some of the cannons (the clothespins are used to prevent the cannon from disappearing into the lower deck):
The channel removed:
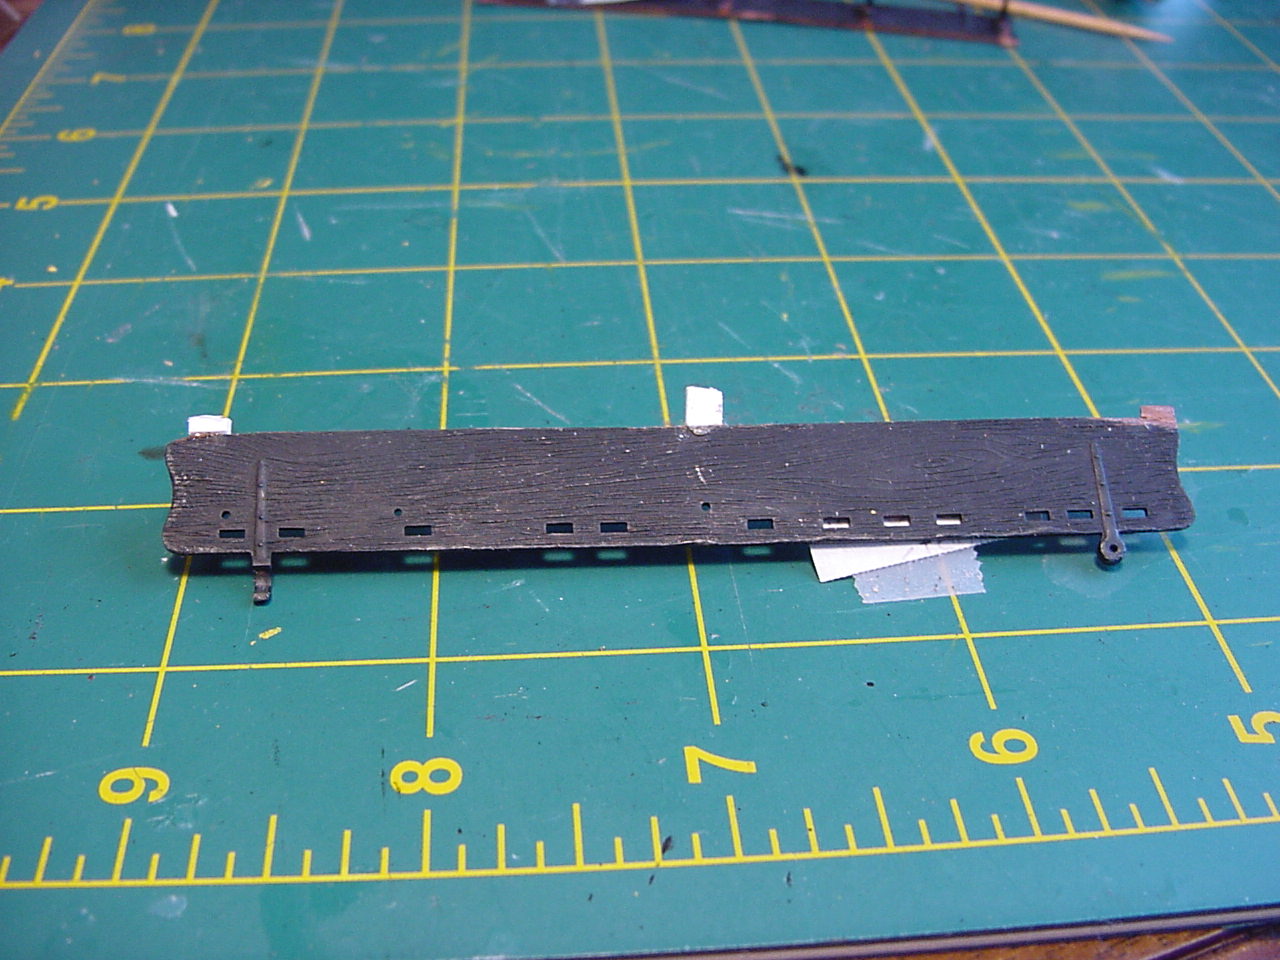
The starboard channel, with the support tabs I attached (from 1 mm thick styrene sheet):
I got smart, and labelled the parts correctly:
This is after the starboard hull, after the channel was removed:
Hopefully, you can see in this picture, that the one support tab I added needs to be notched to fit into the slot in the hull:
And lastly, now that the parts are correctly oriented, we see that the support strut under the channel is not lined-up over a cannon barrel!
So tomorrow, notch that support tab, and get these babies glued into place! Woo-hoo!
Nice recovery Tim.
It’s easy I know to mix up parts such as these and later on down the line it affects something else…
Having said that, I always get really nervous trying to remedy my mistakes for fear of causing too much damage, but you’ve carried out a precision repair and no collateral damage was incurred