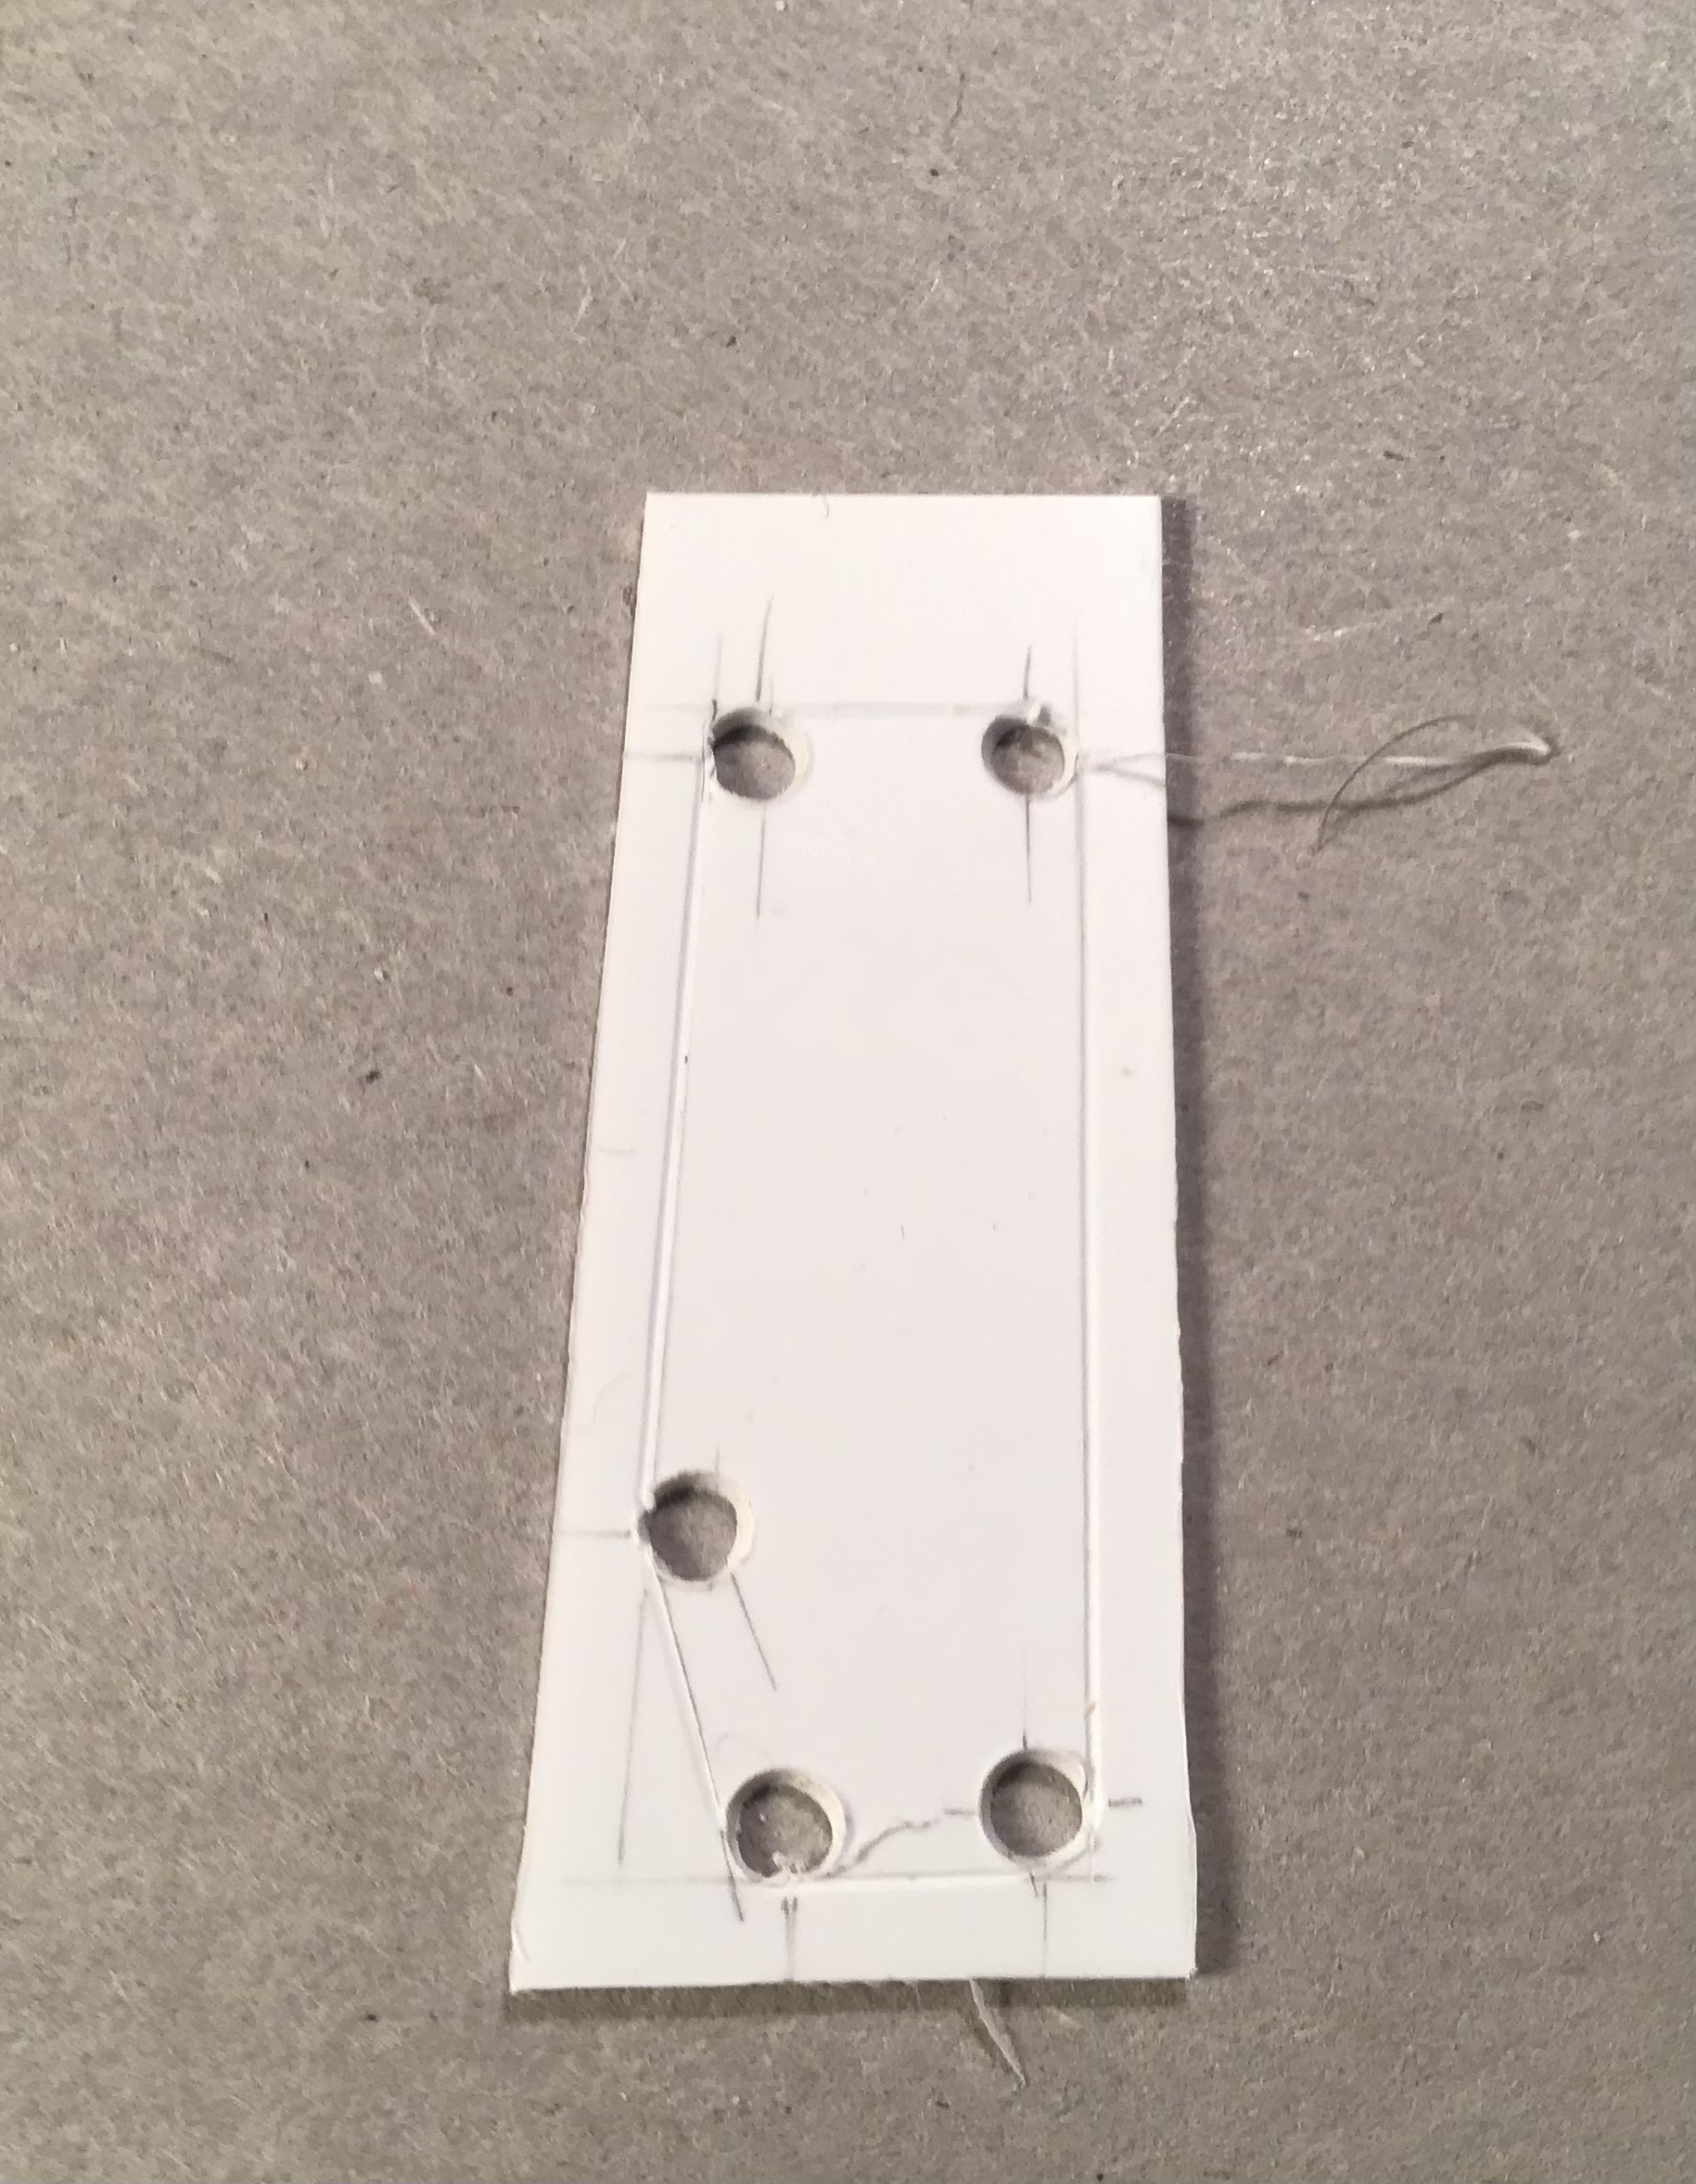
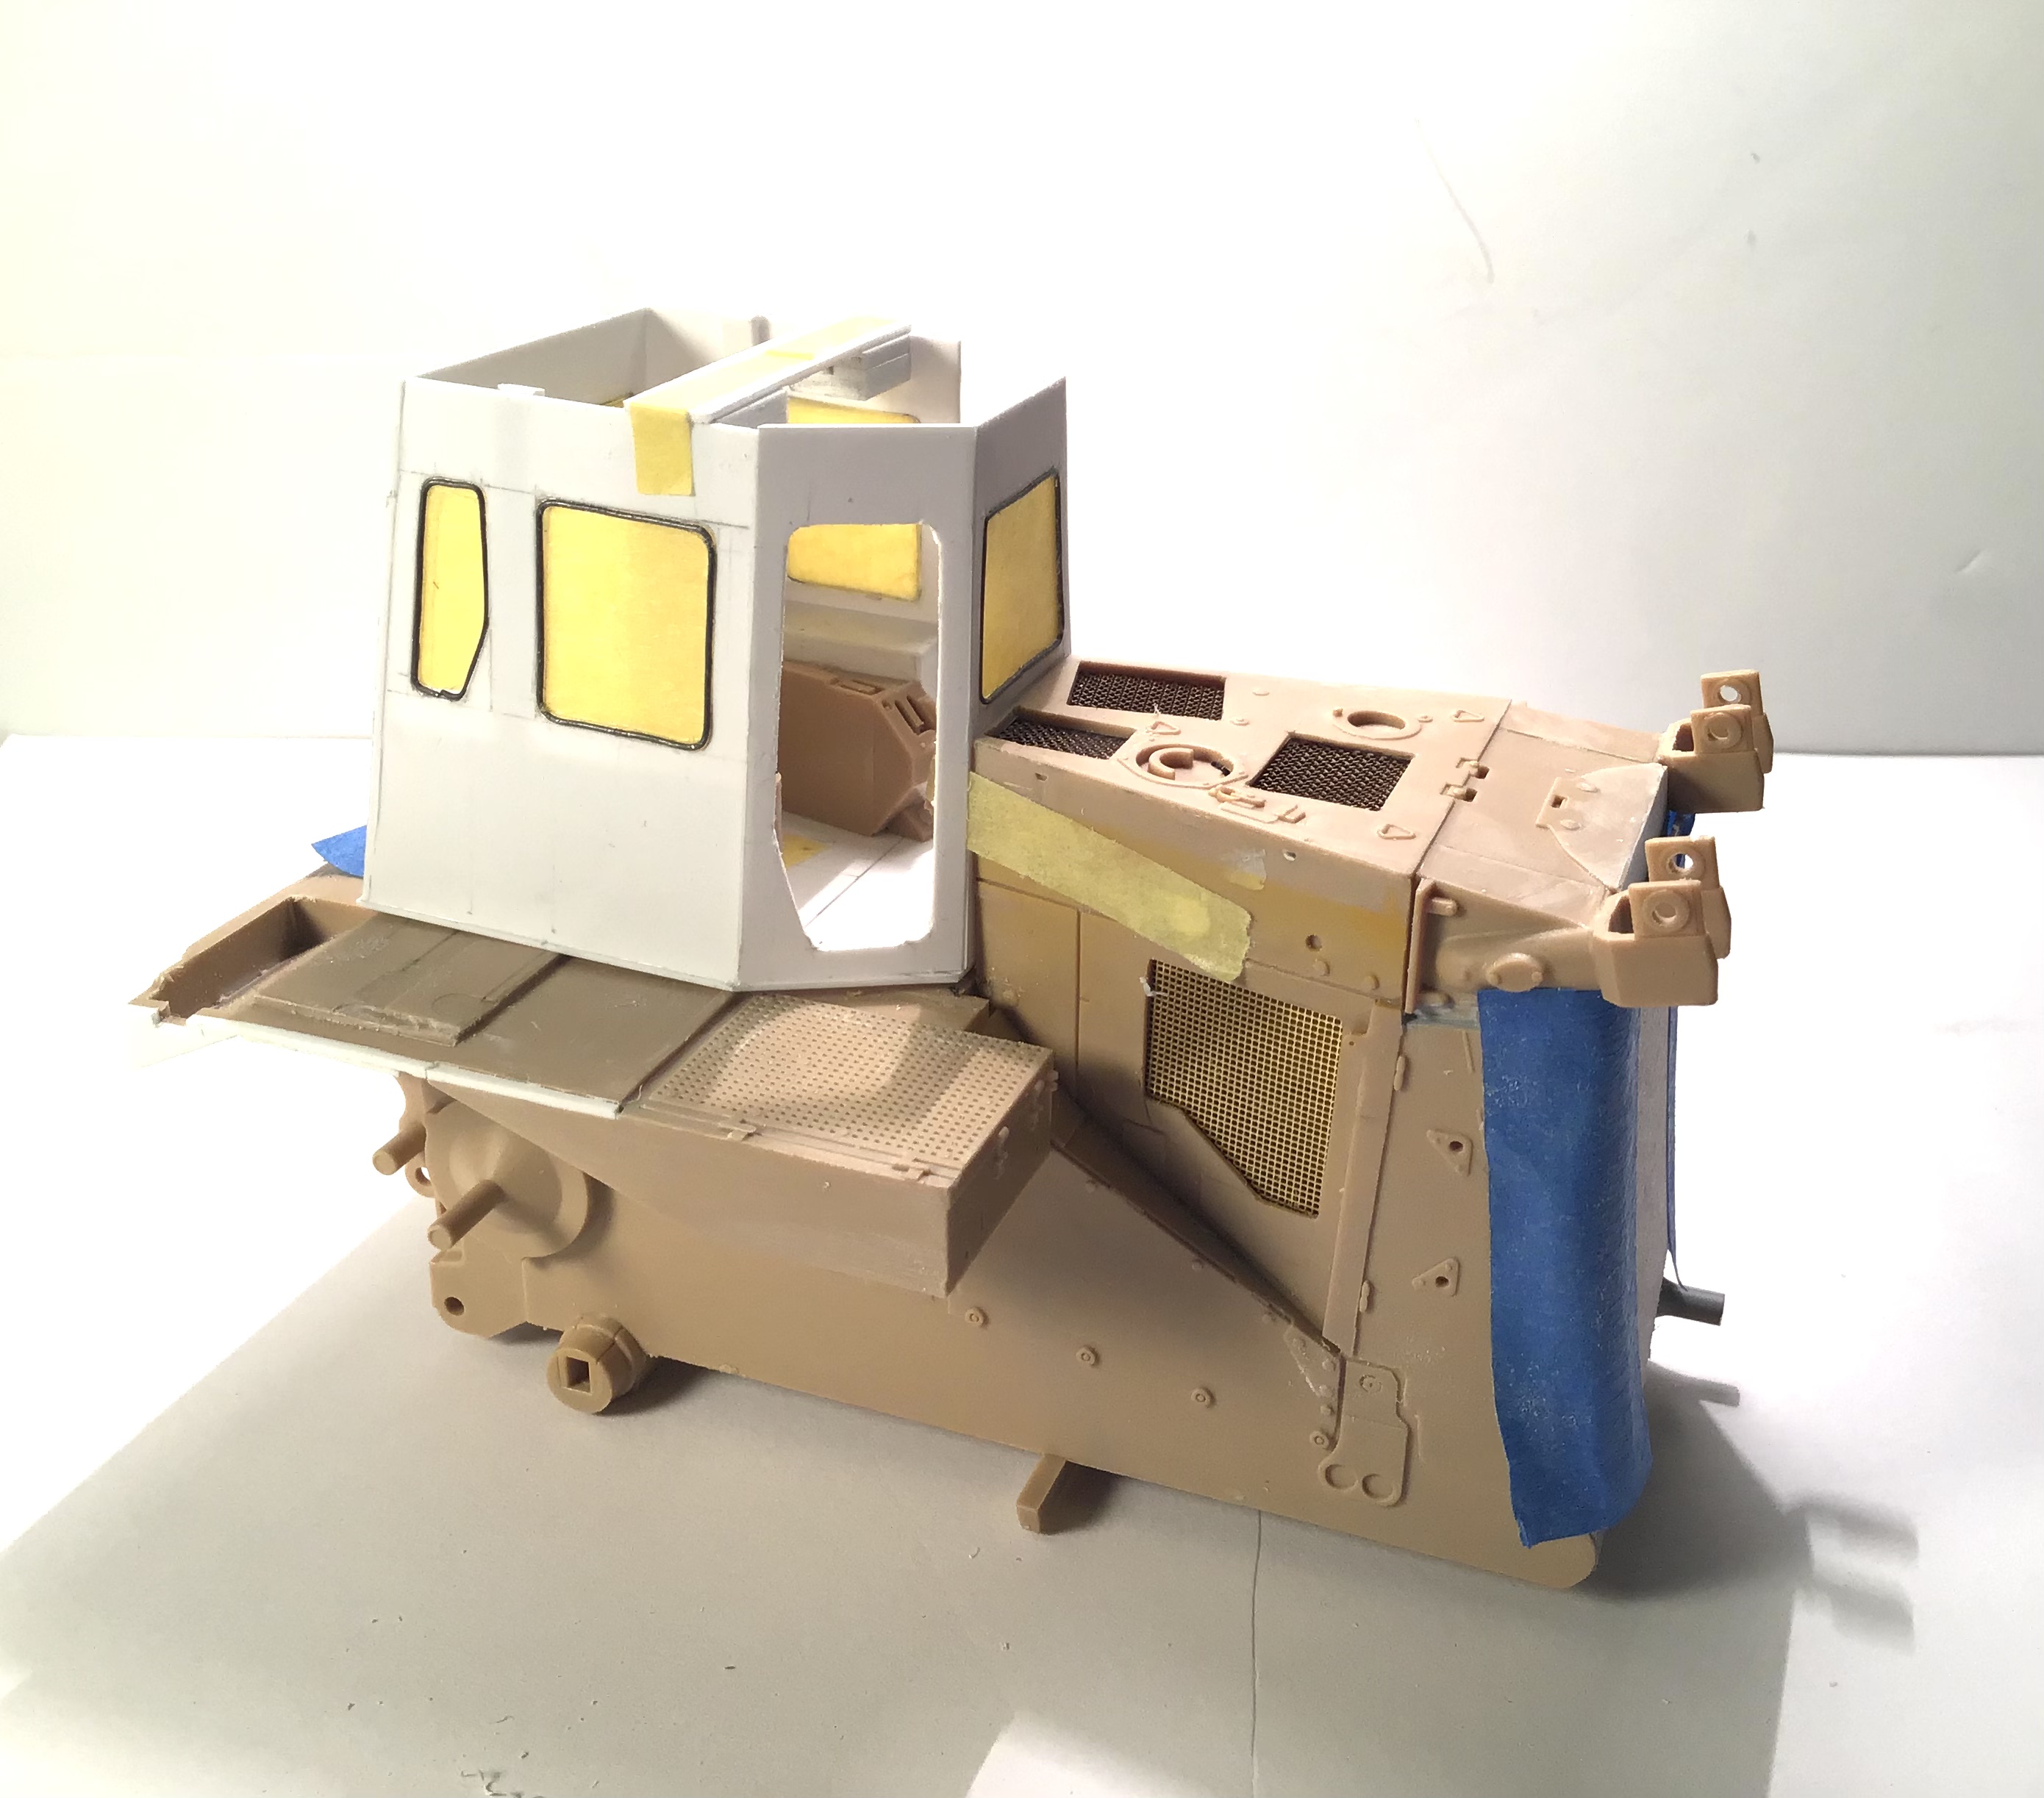
Progressing with the cab . Cab itself cut from .030 “ styrene sheet . I made a new floor from .030 “ styrene as well and used the seat surround from the kit . The windows were laid out and holes drilled in the corners with a 1/8” center drill .
Using a straight edge and scriber the outline of the windows was chased around tangent to the holes to provide a path for the razor saw . Windows then cut out with saw .
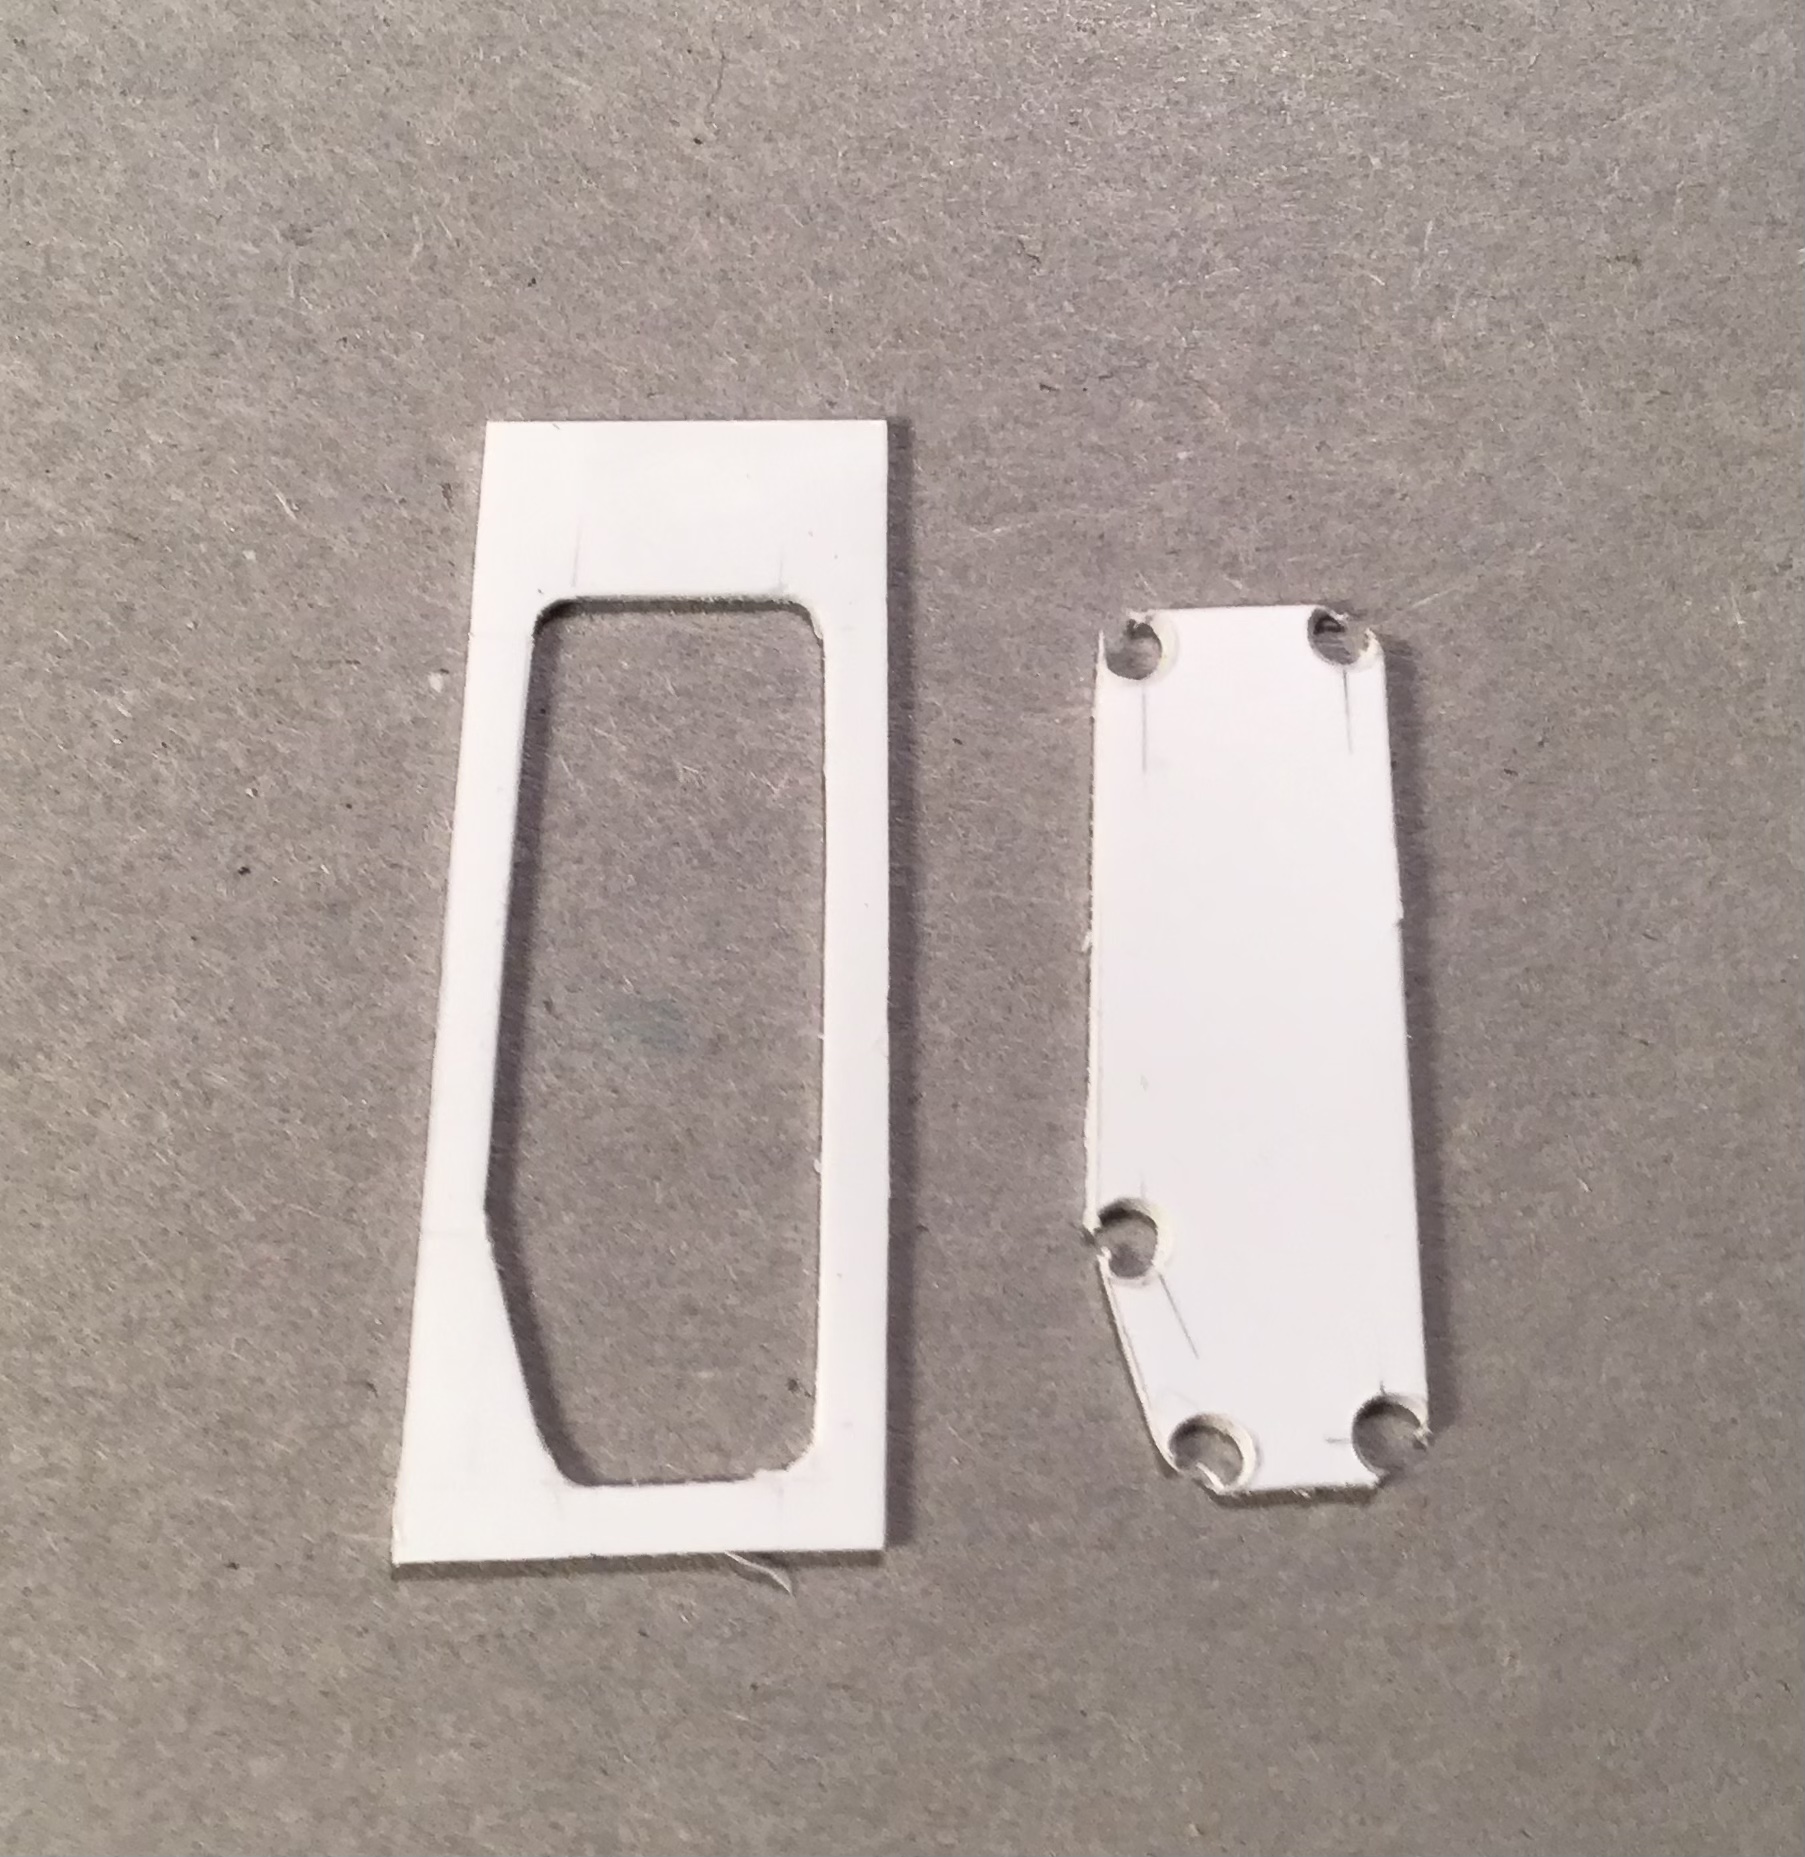
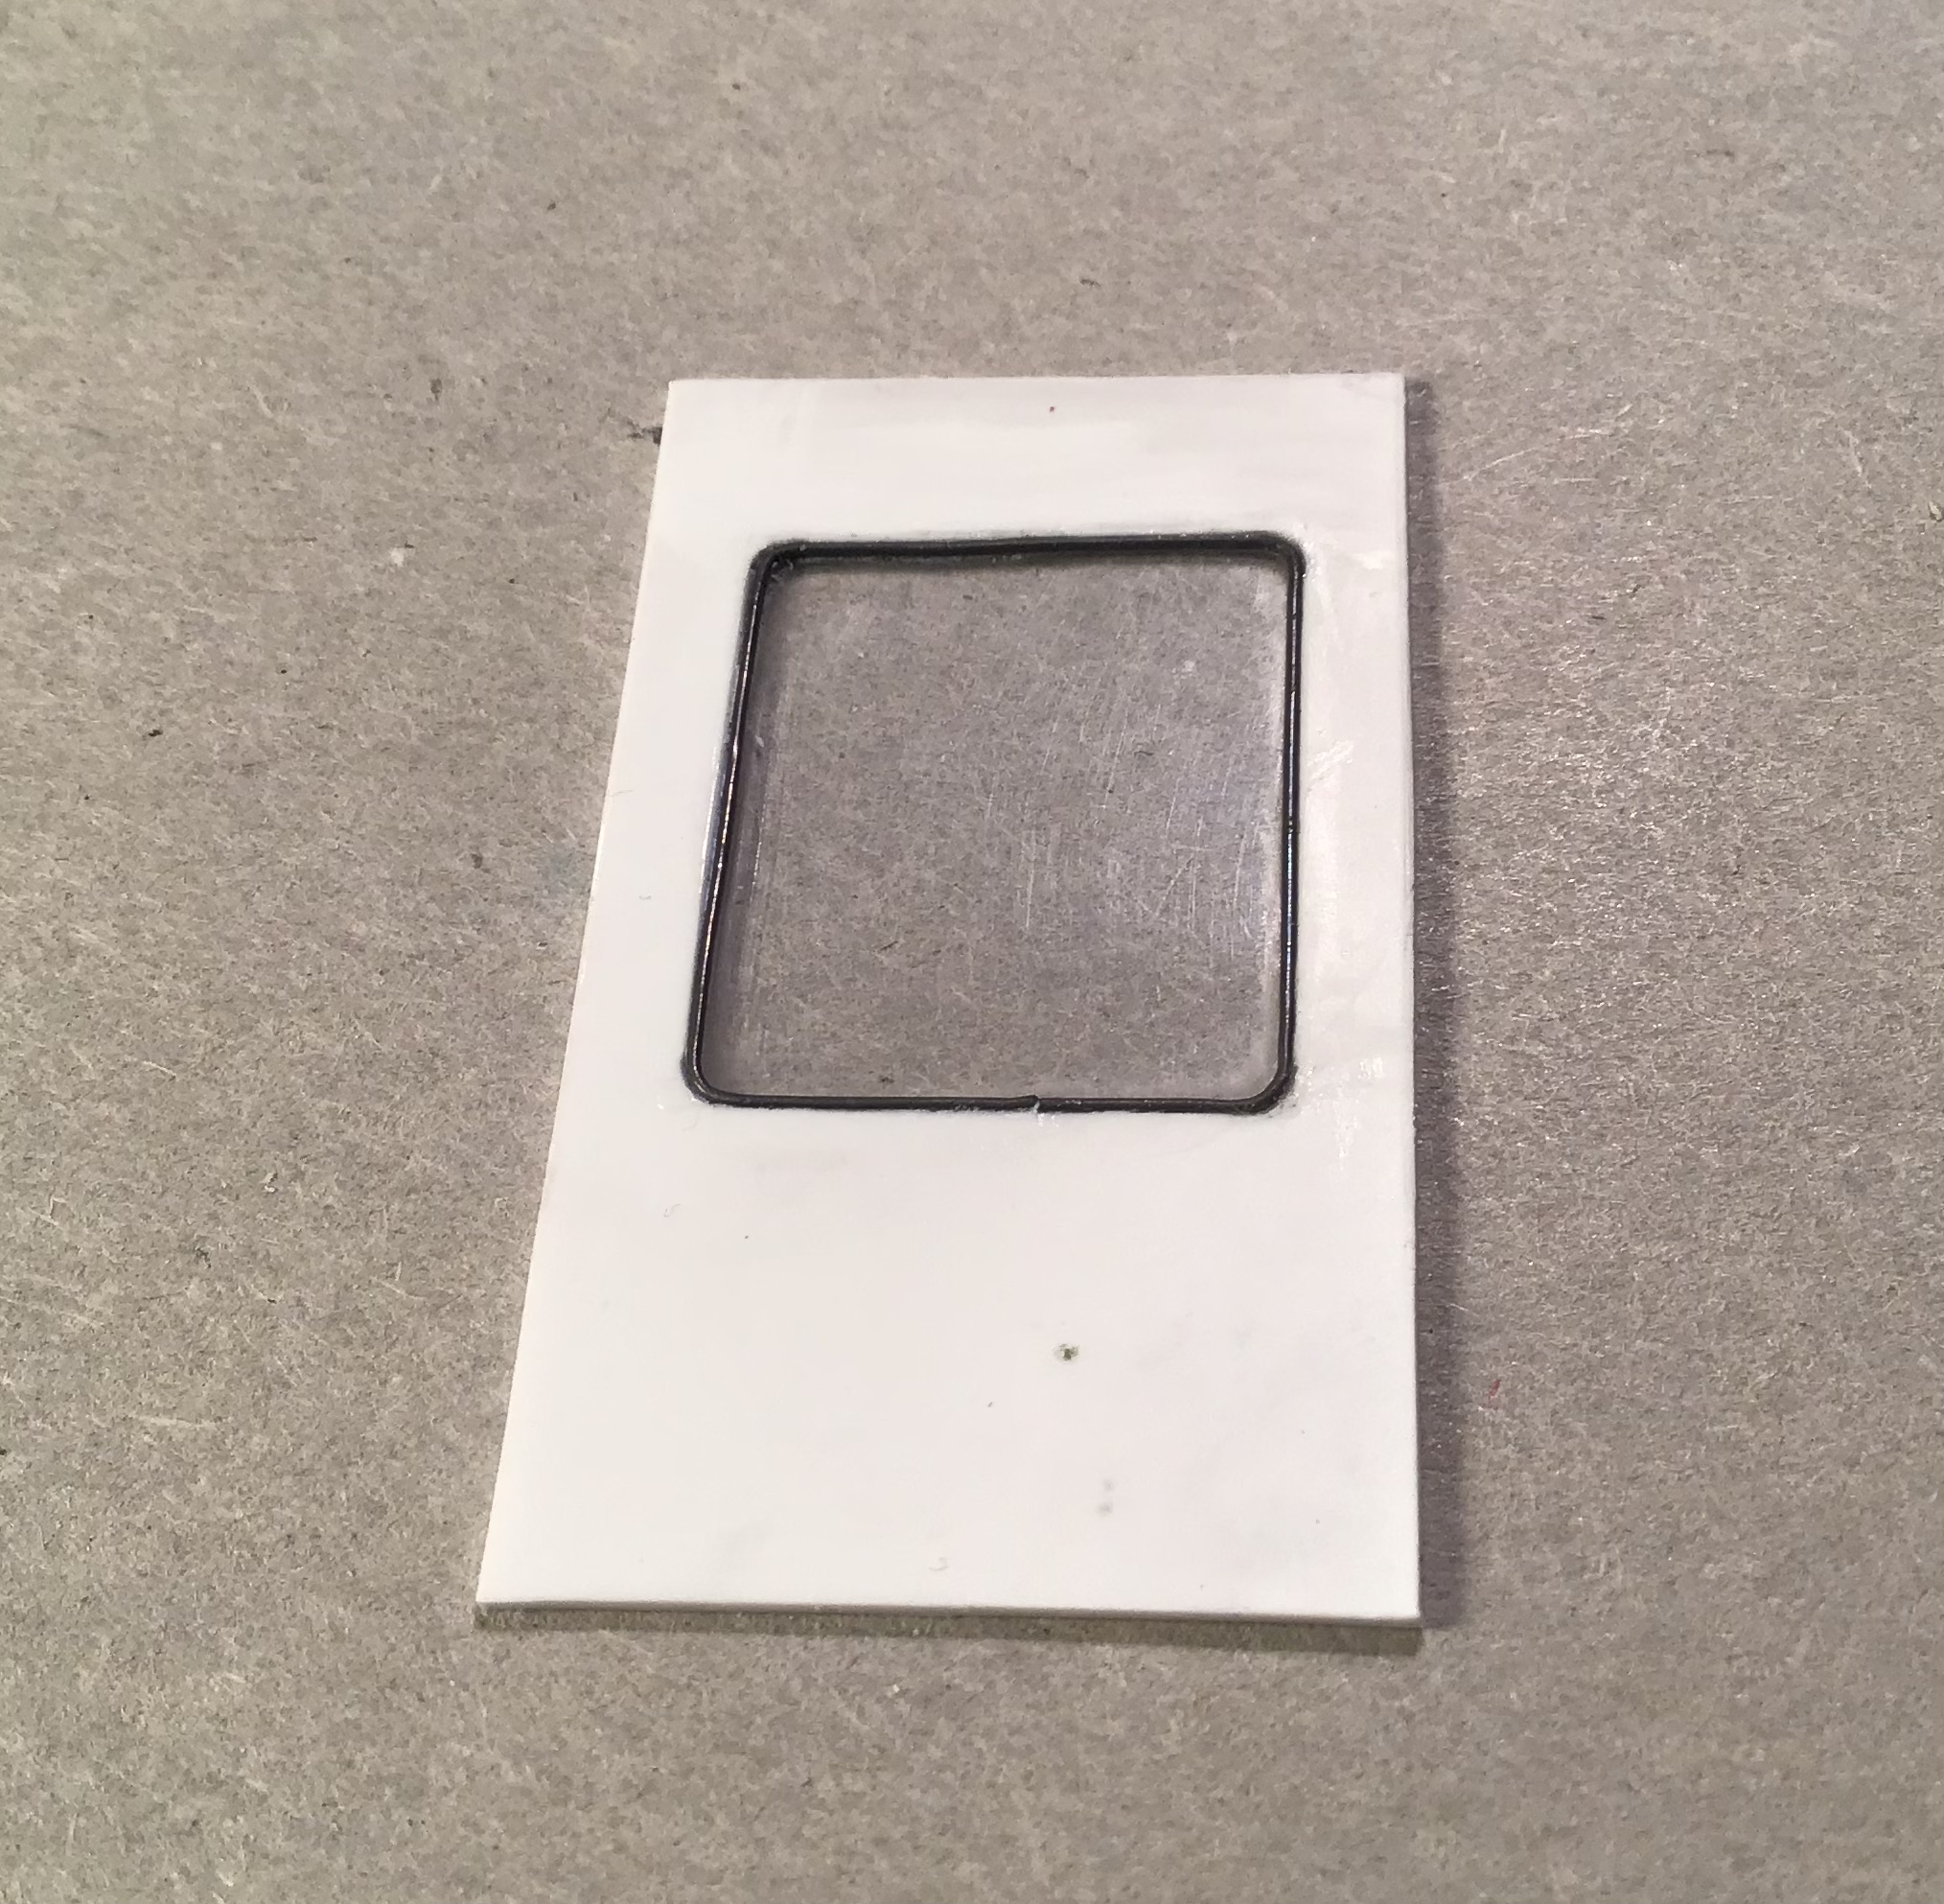
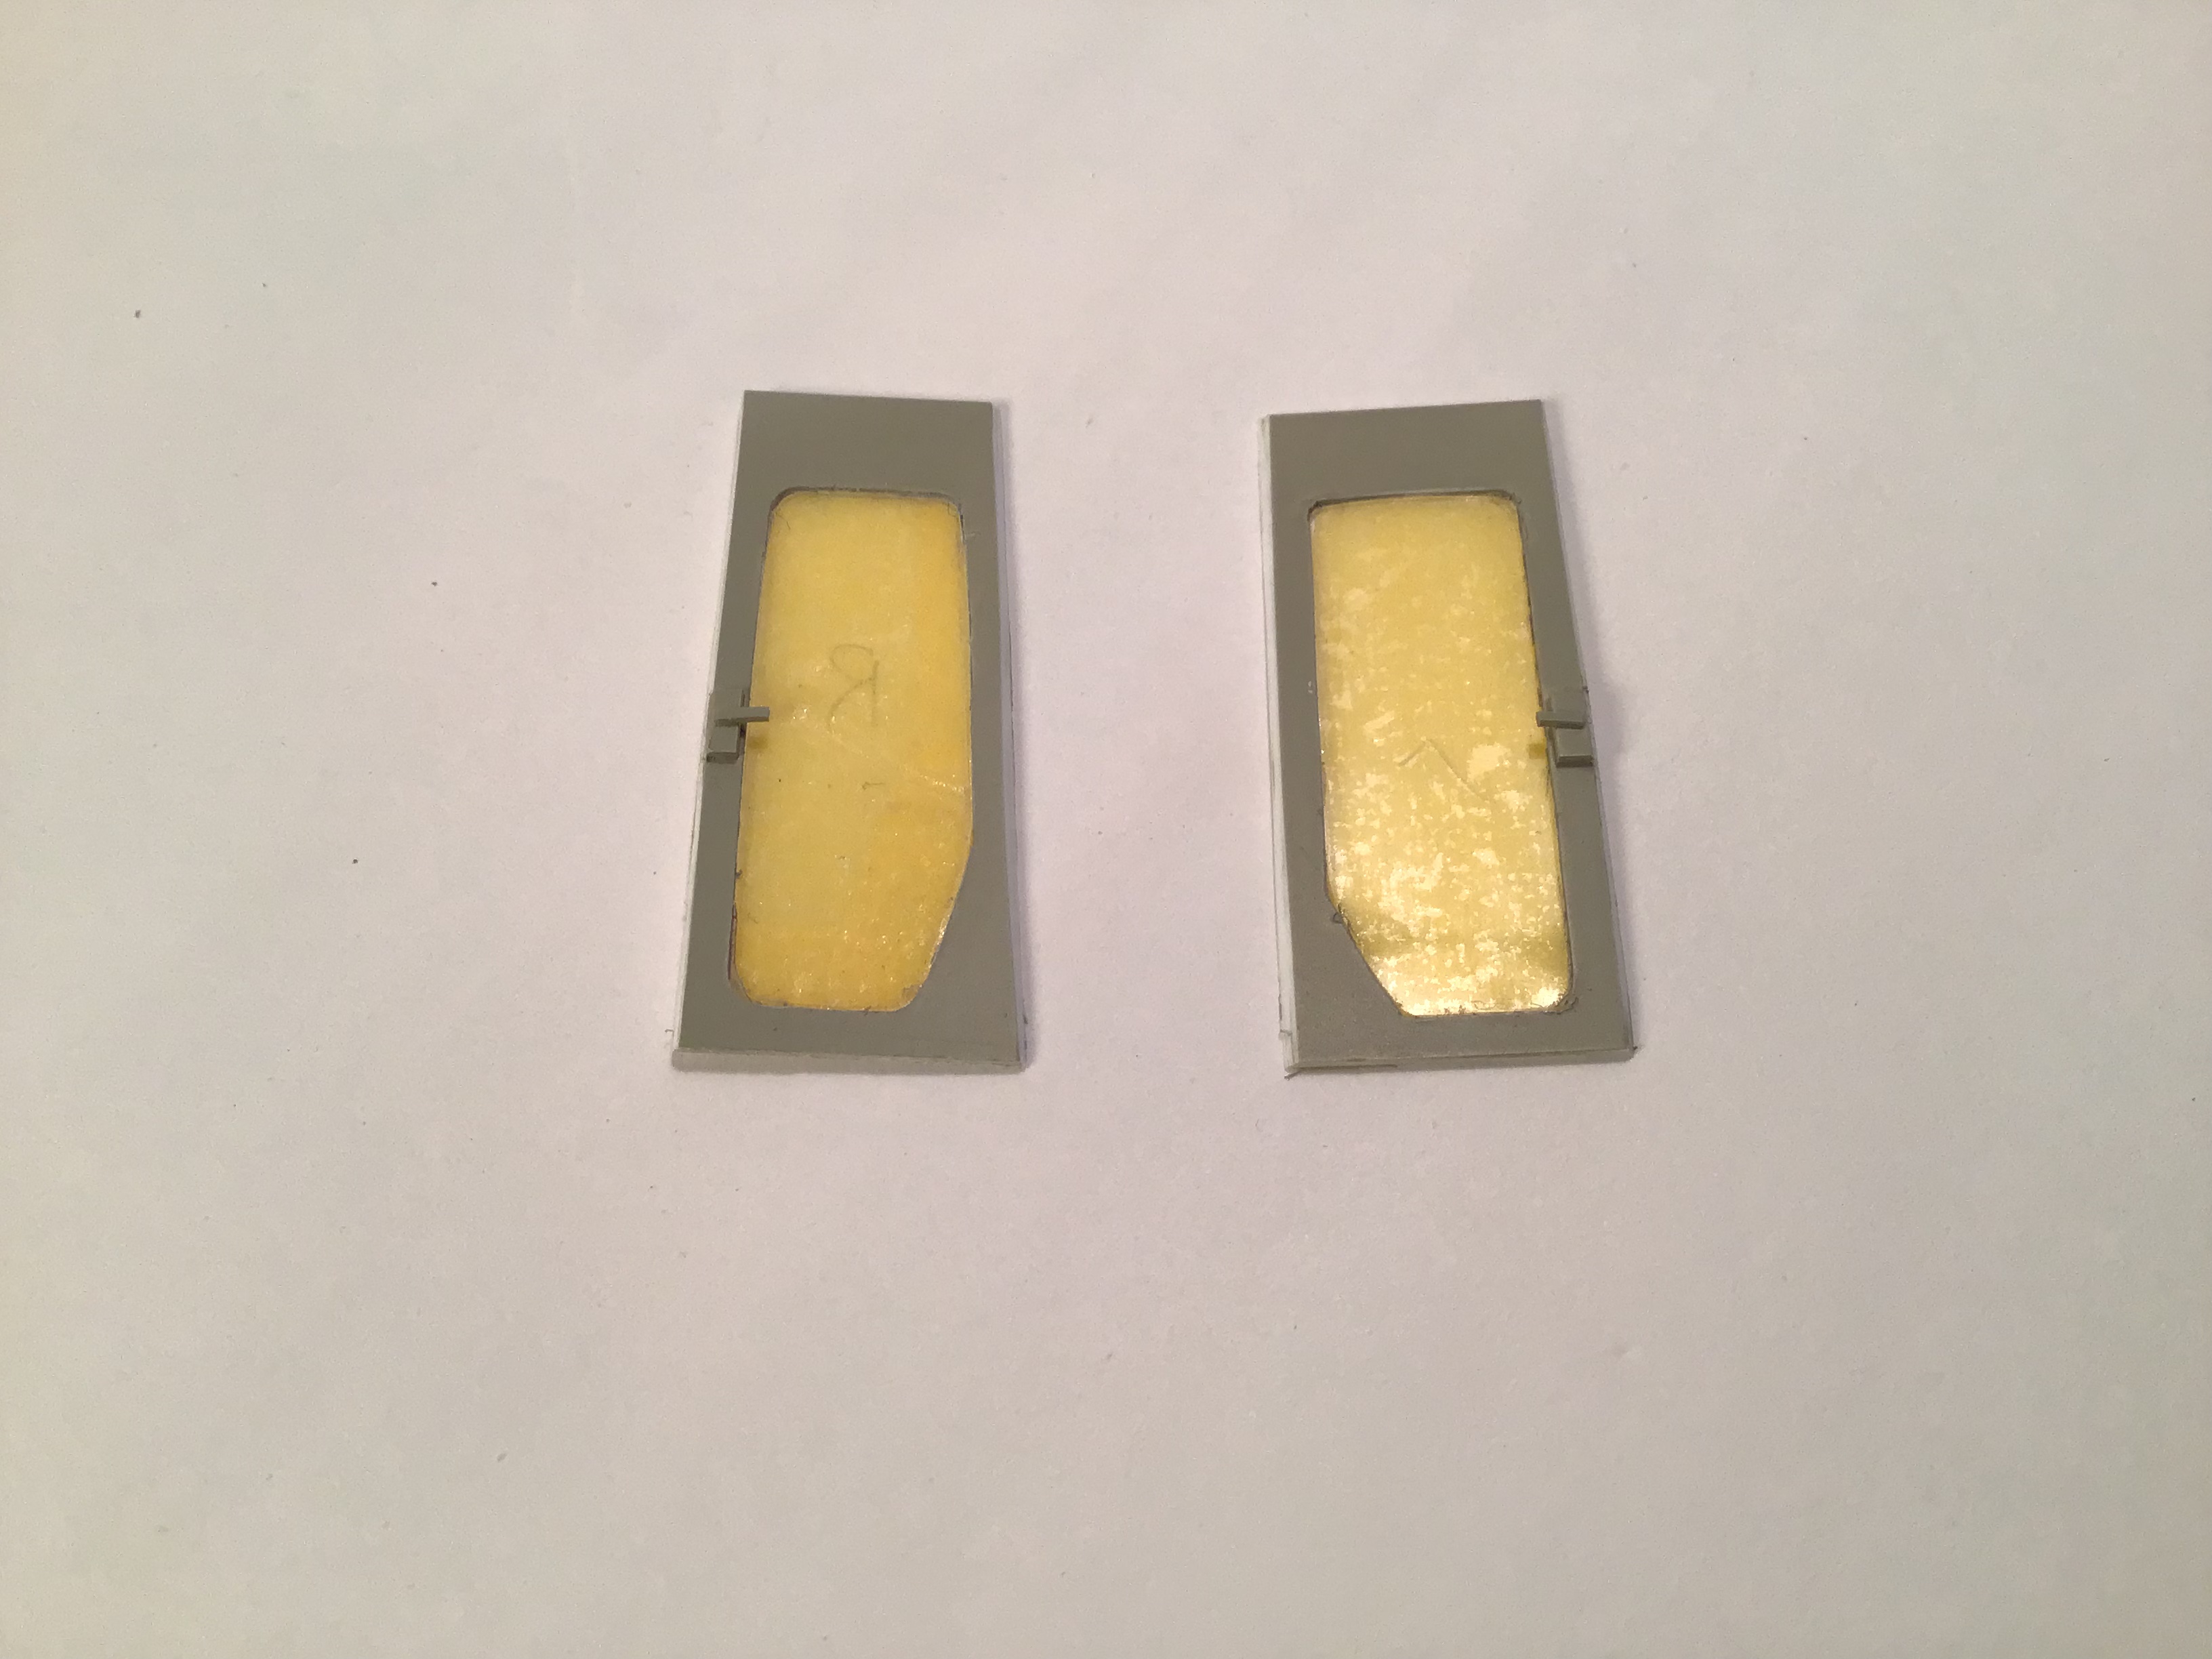
After cleaning up the cut edges with files the openings were traced in pencil on masking tape to provide paint masks . Openings then traced on .015” clear styrene with a needle and then cut out with scissors. After careful fitting clear parts cemented in flush with interior using Tamiya Extra Thin Quick Setting cement.
.020 “ lead wire chased around exterior of windows to represent gasket . Held in place against clear with PVA then cemented to white styrene with thin CA .
This is an initial sample made up to test process.
And the results so far …
Glass yet to be installed in doors then painting of cab interior.
Thanks for looking!
Cheers - RT
6 Likes
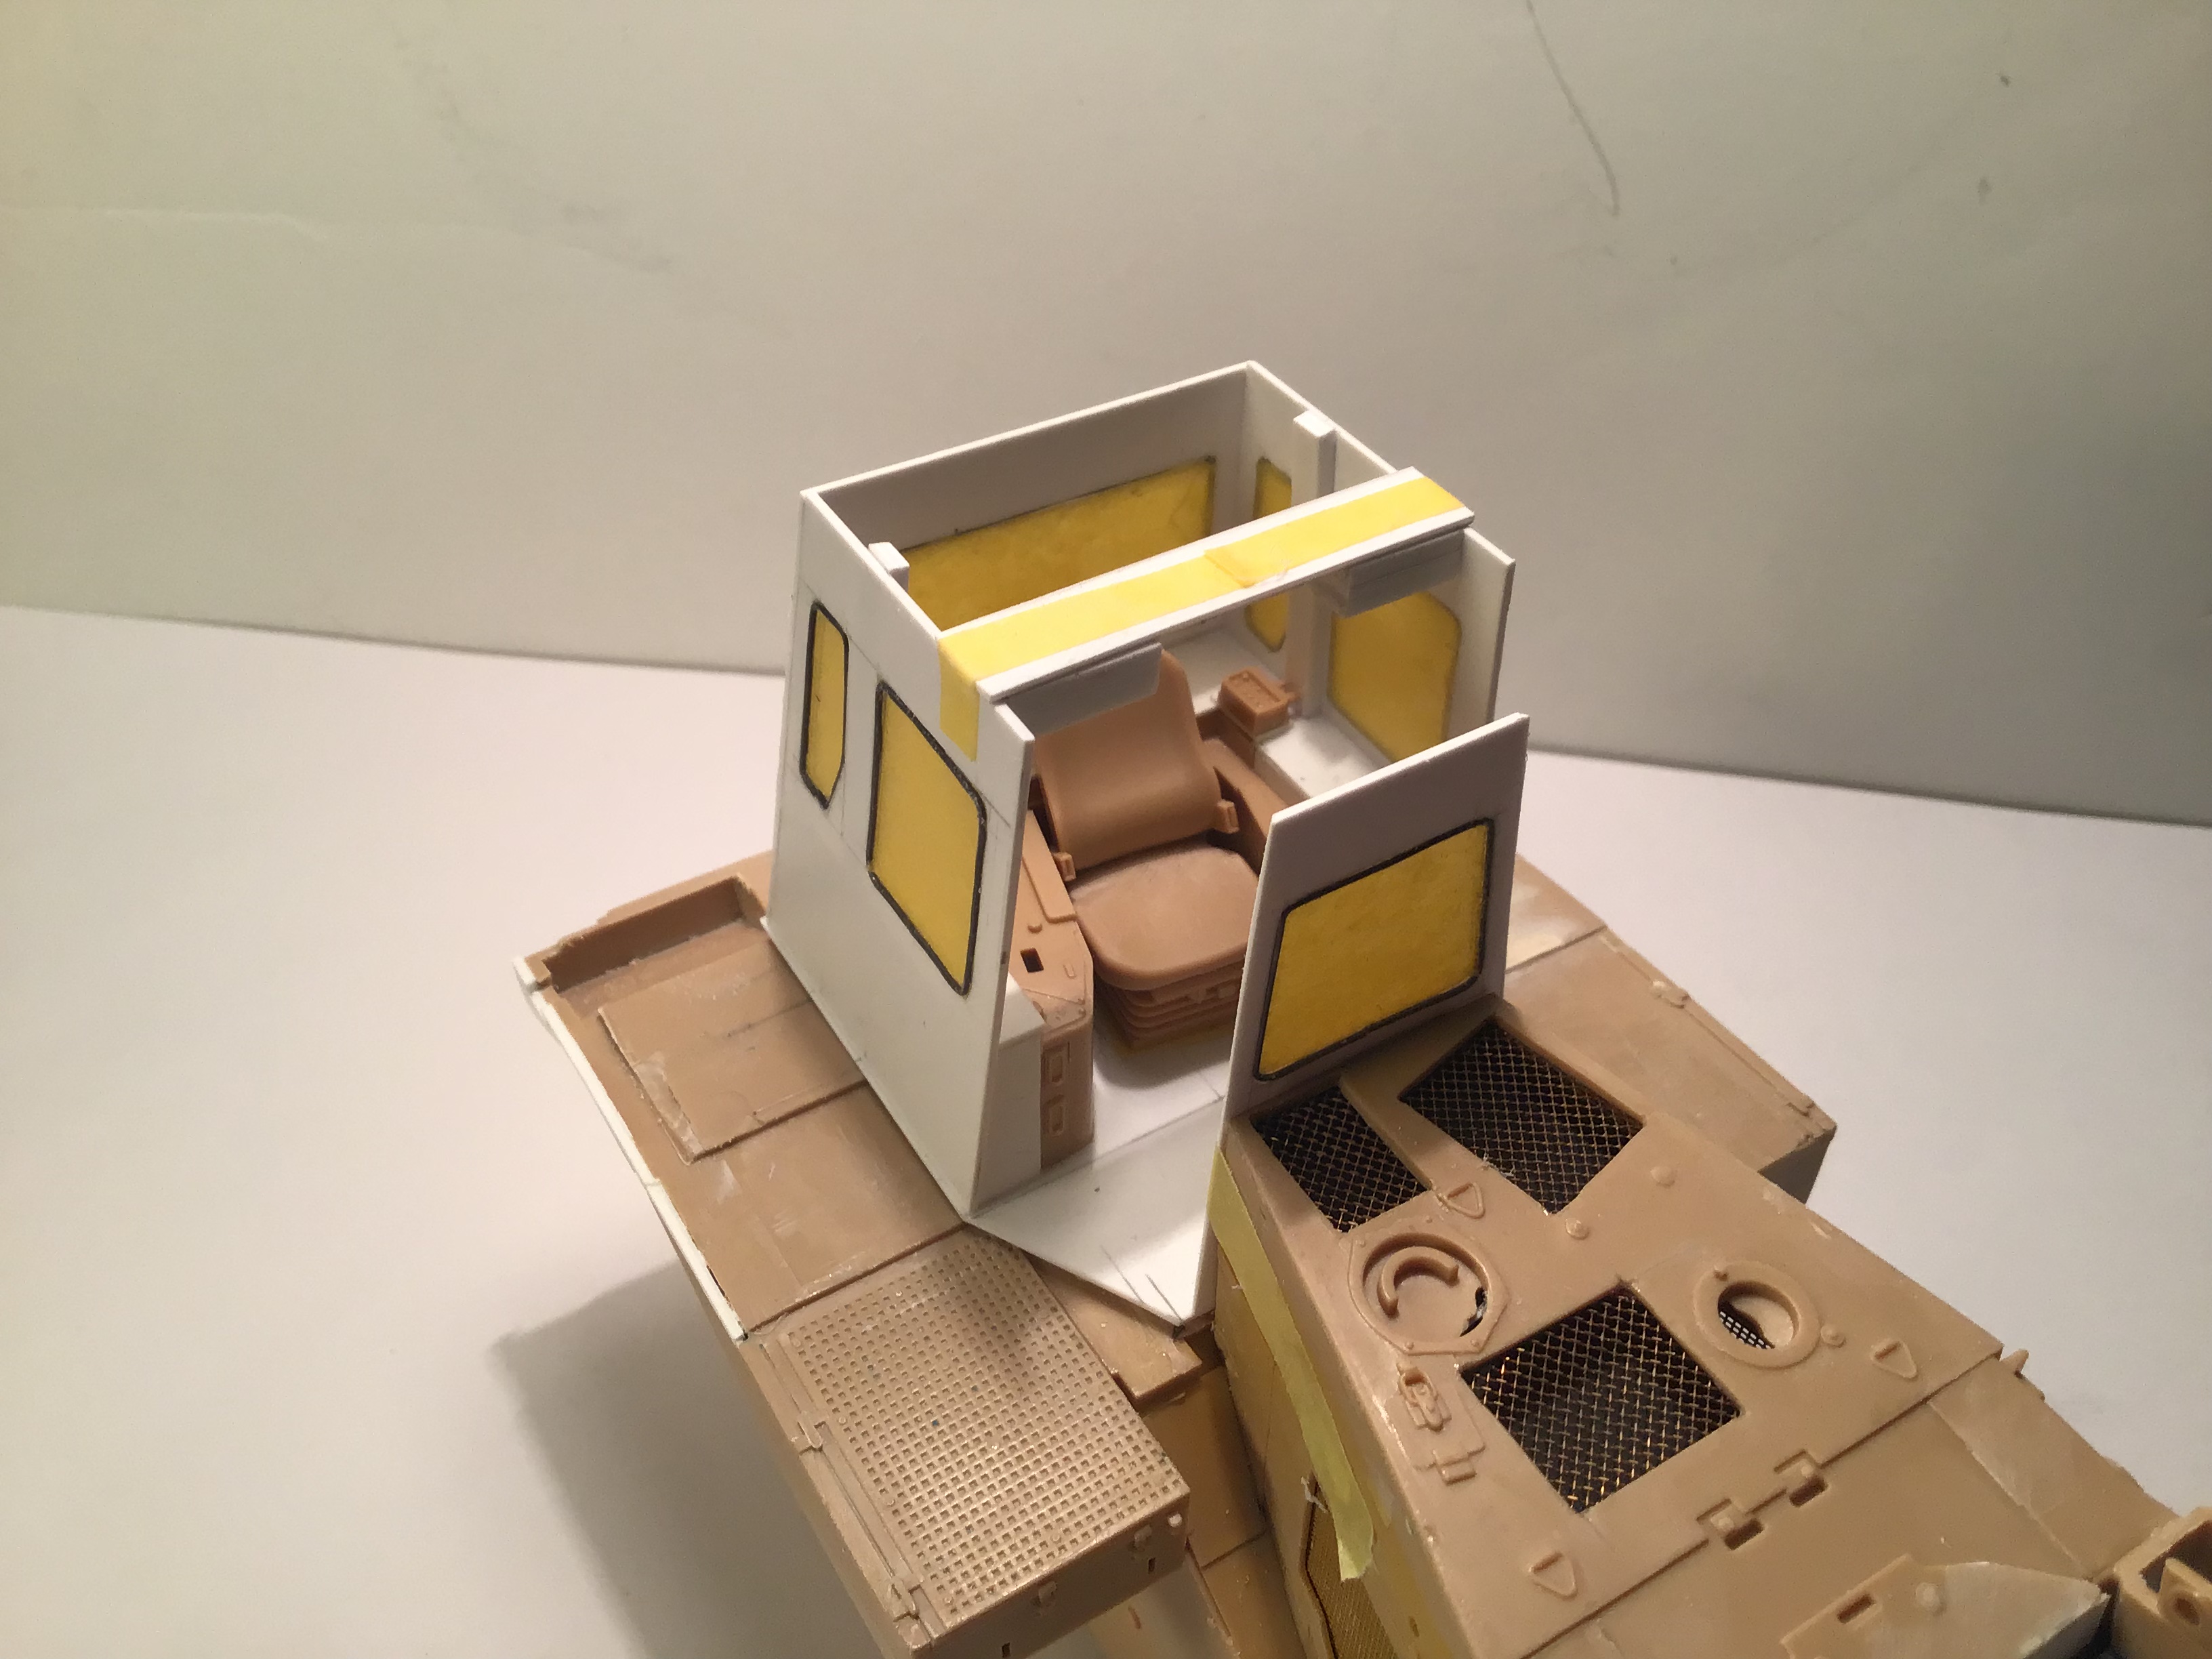
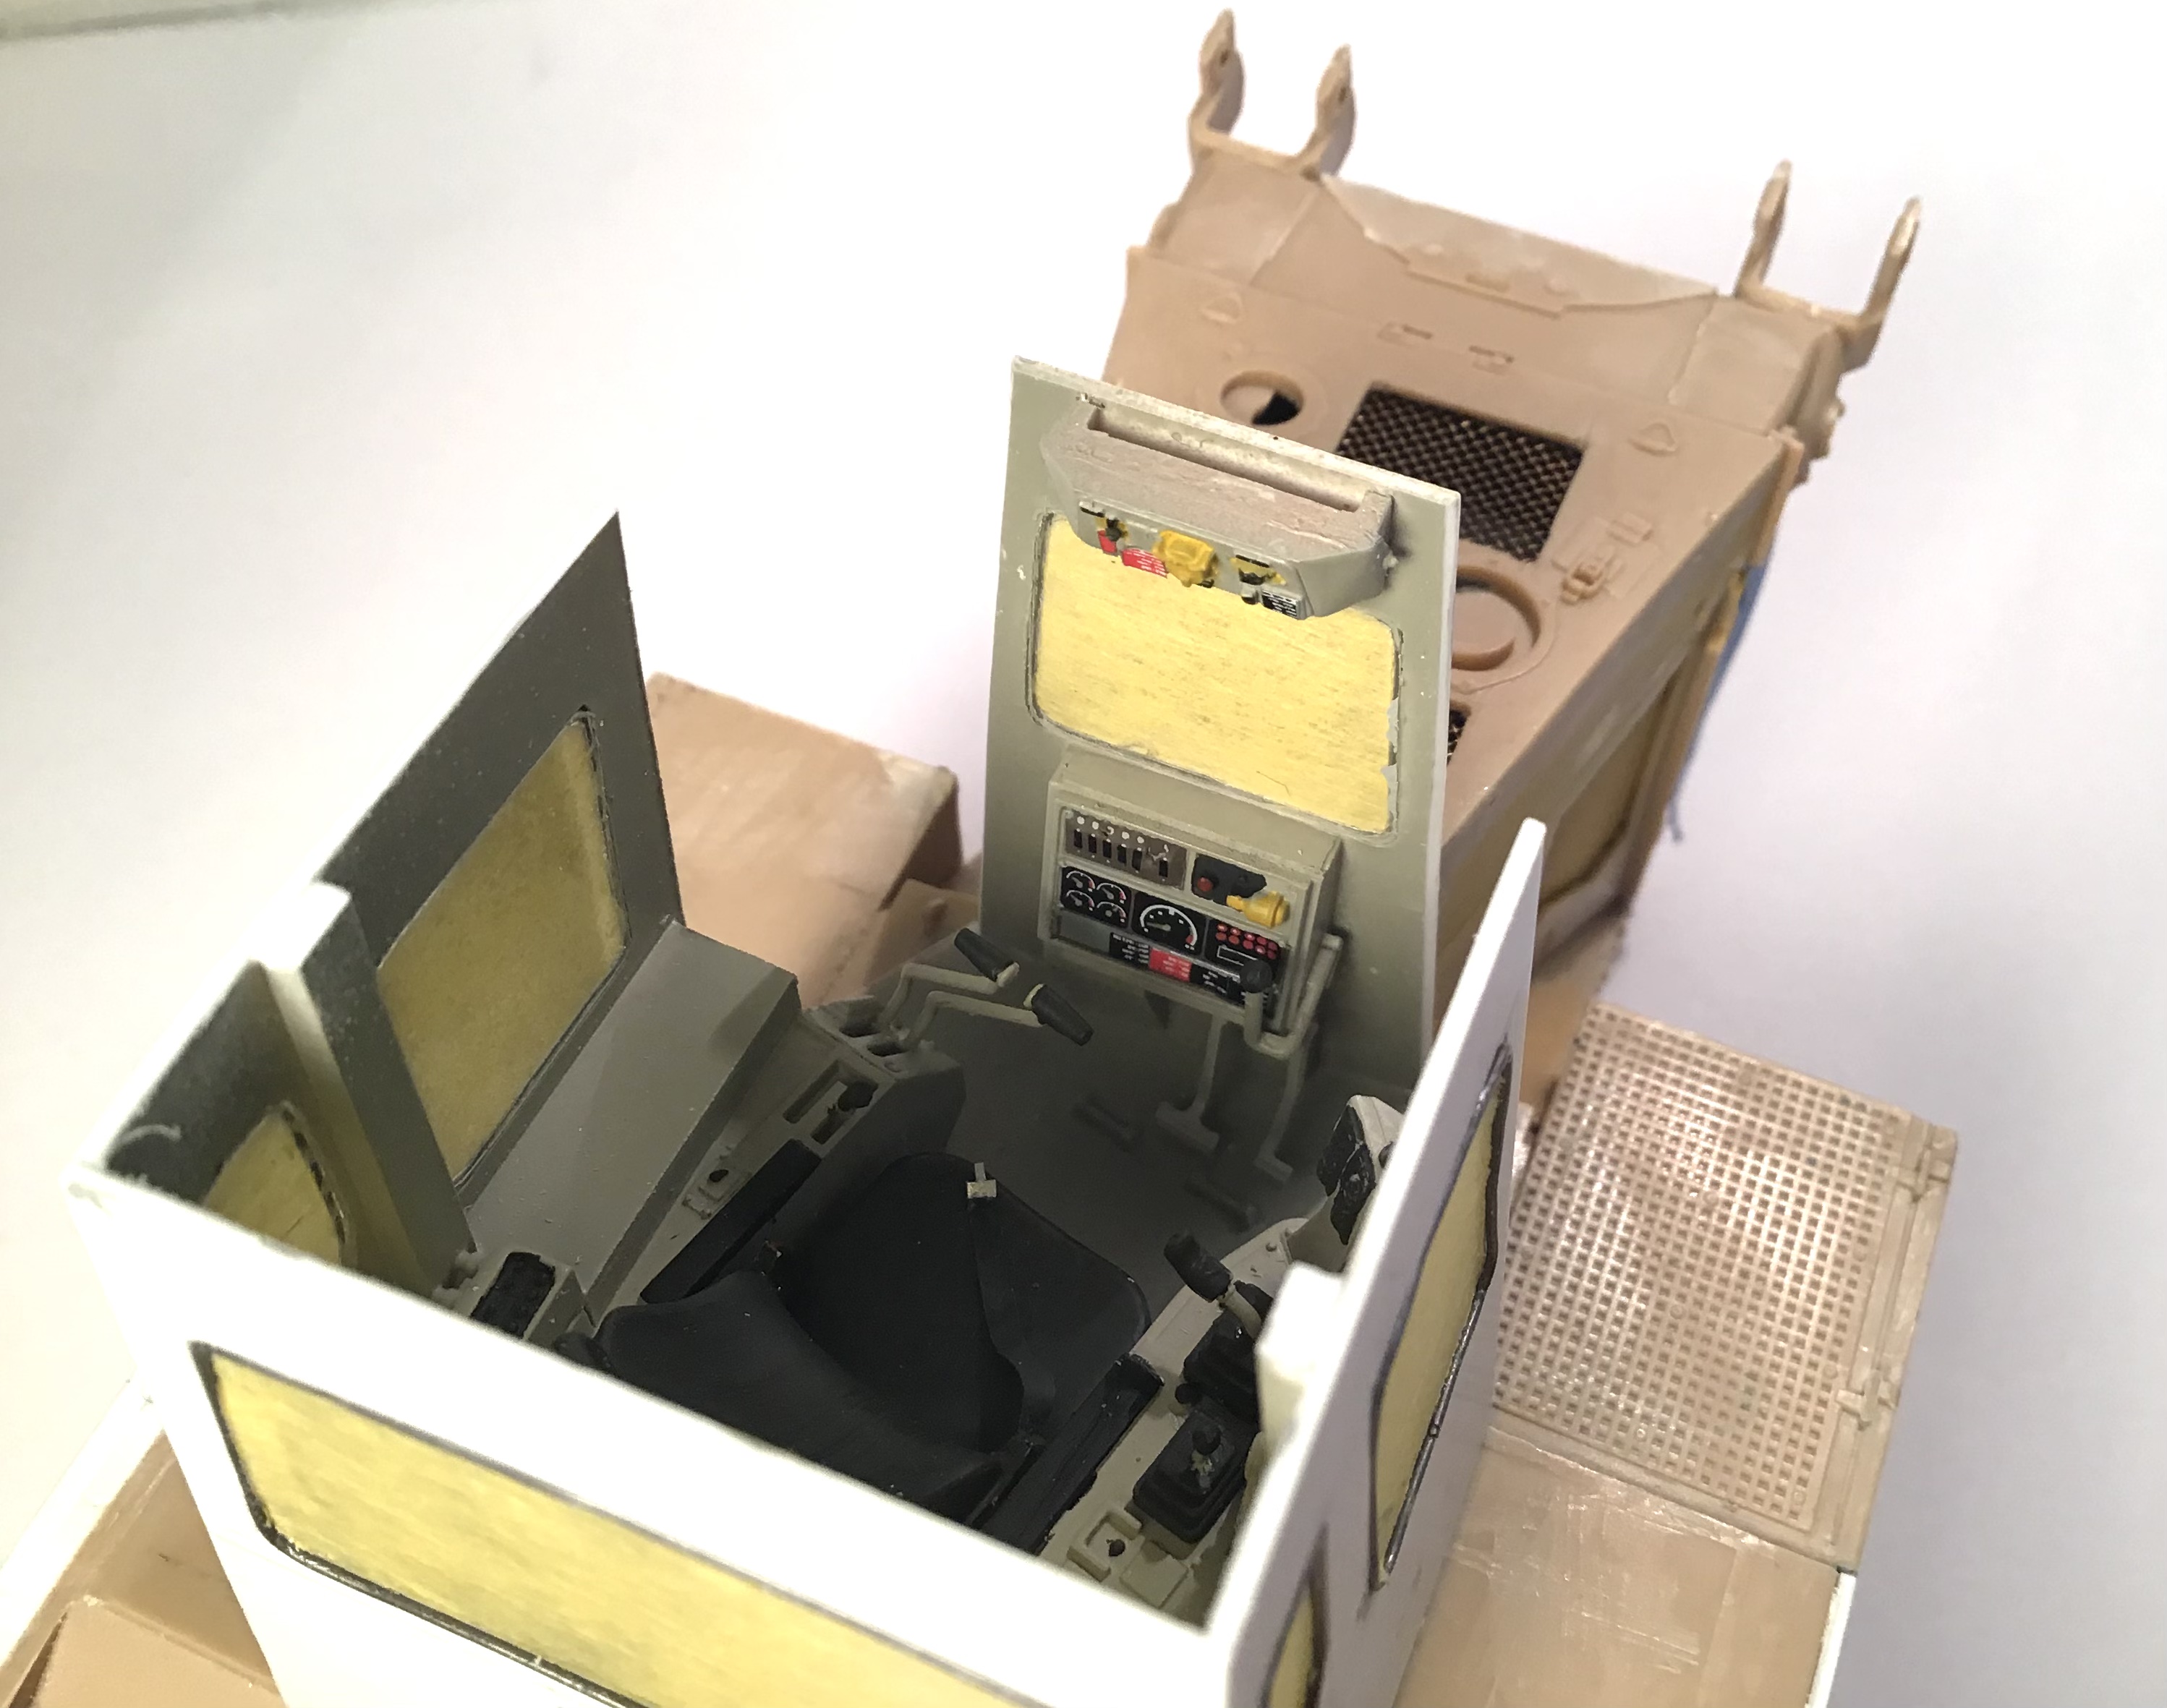
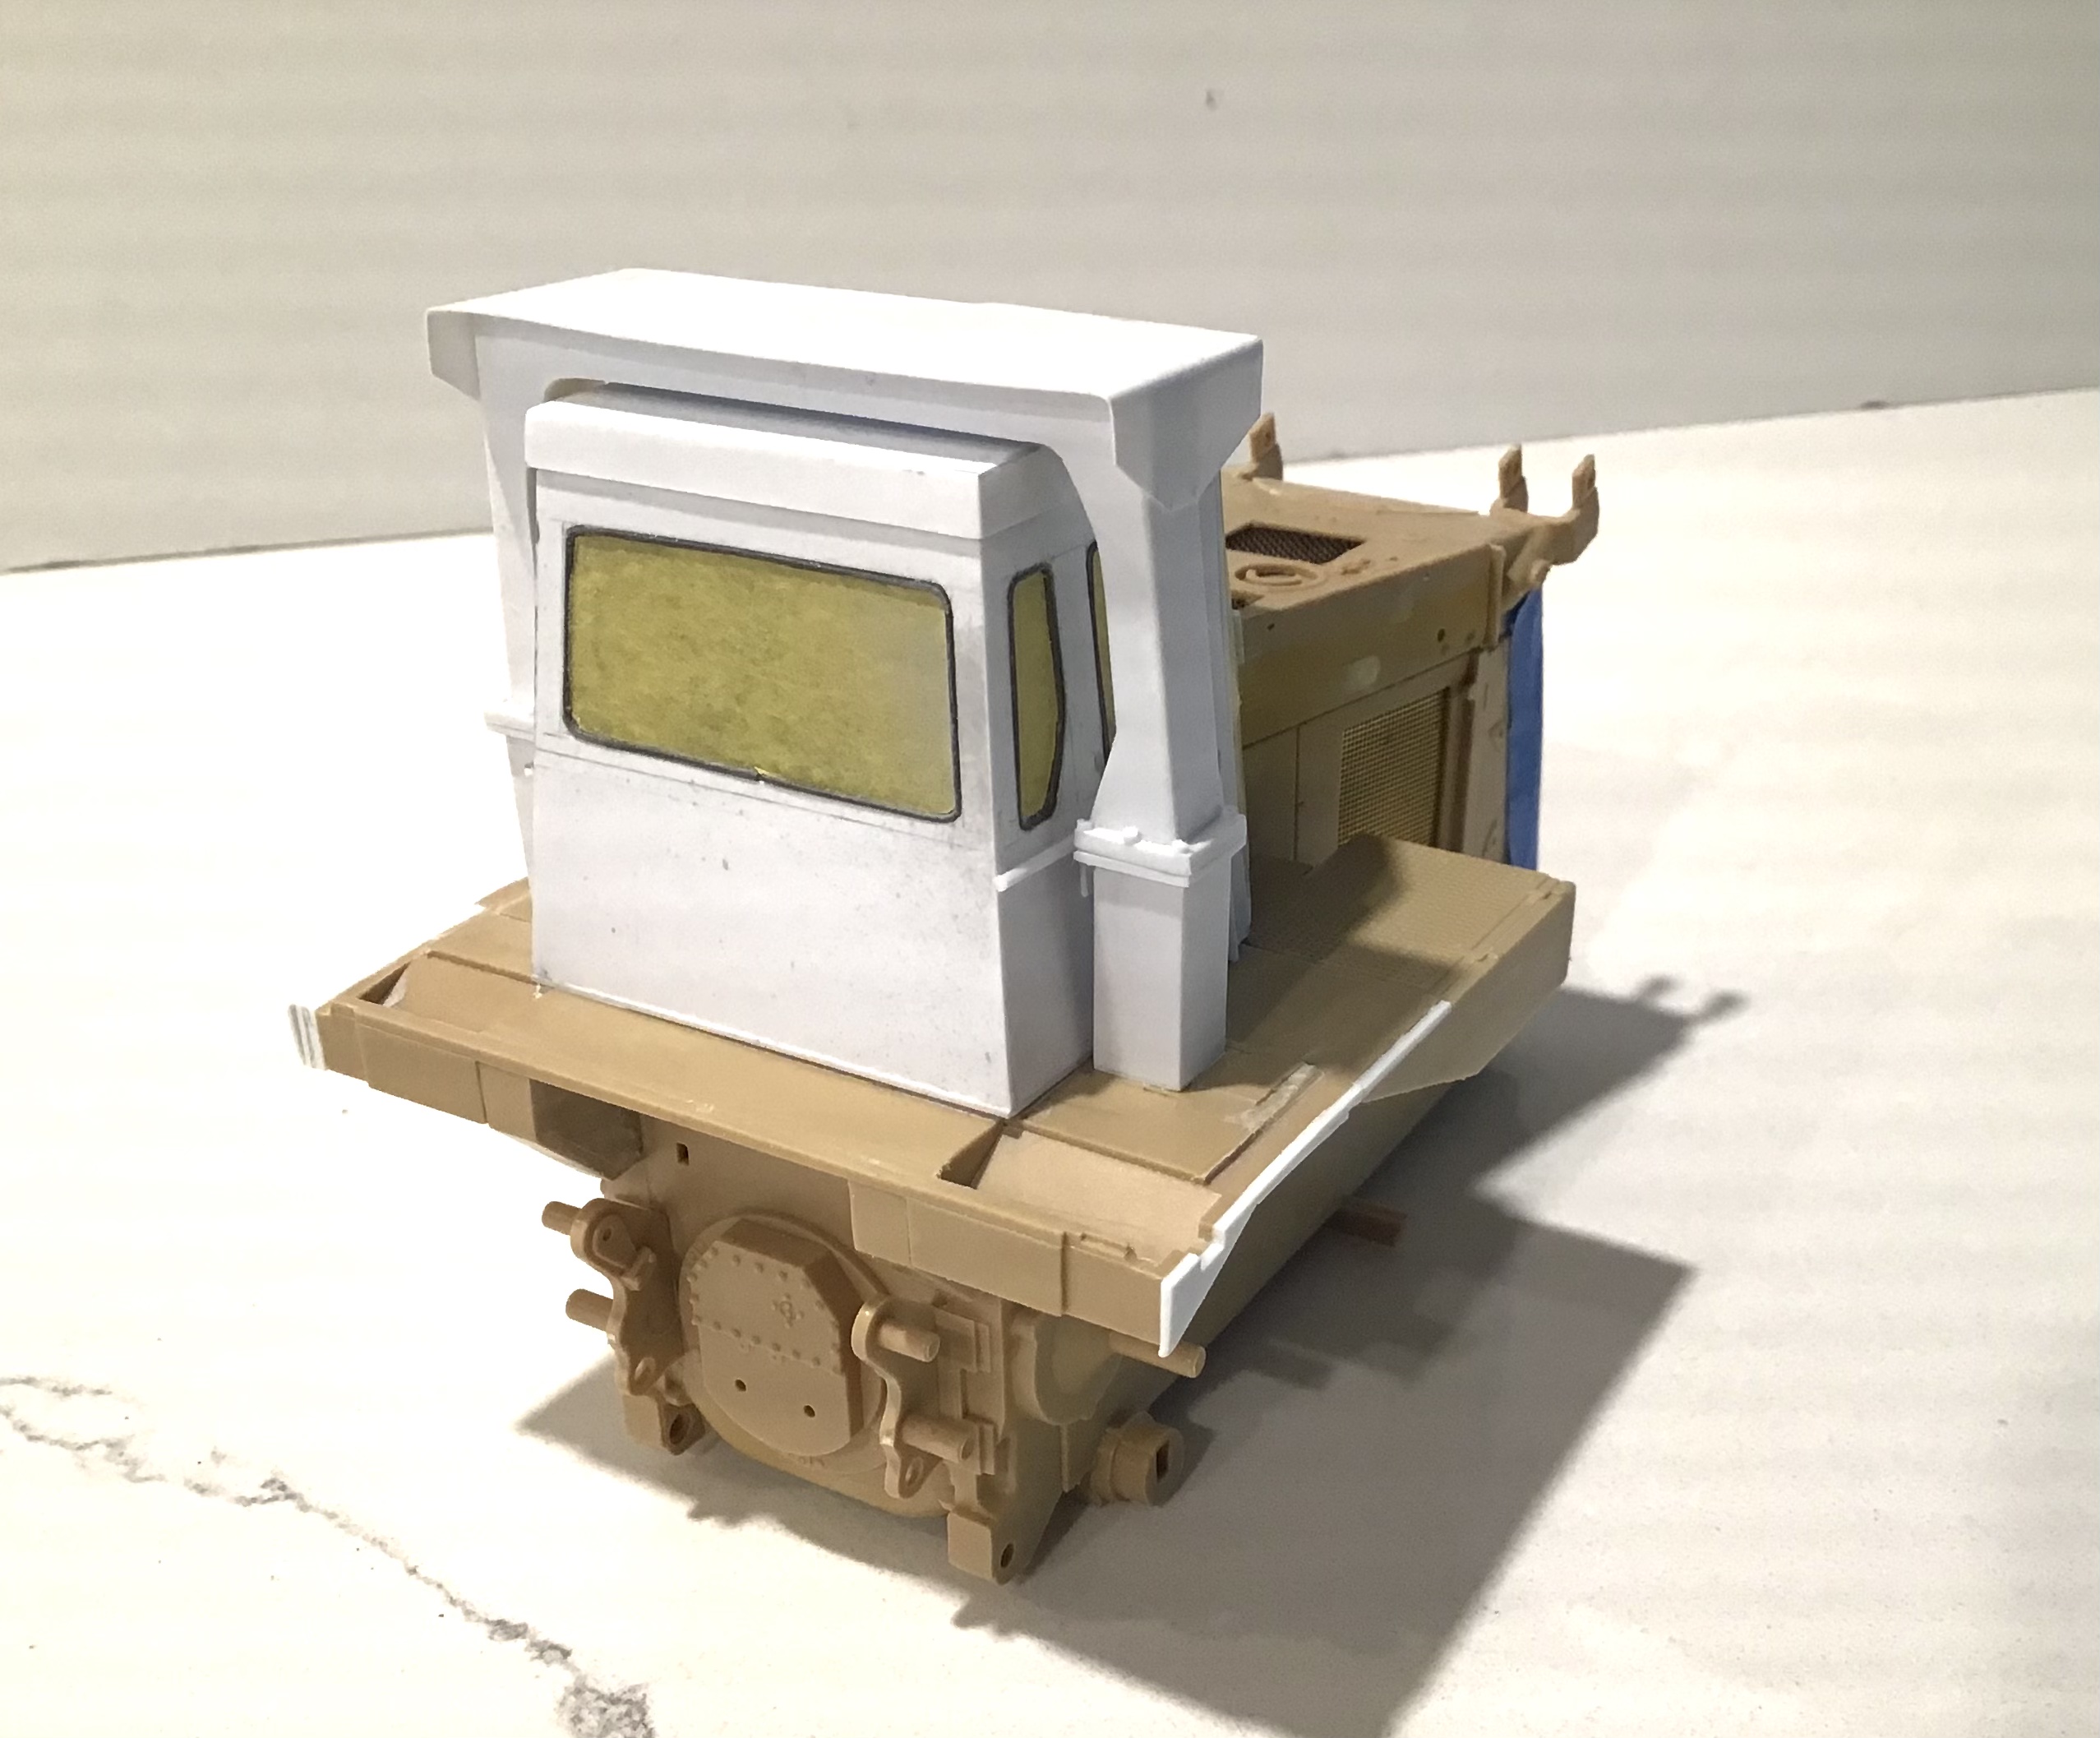
Cab progressing with the completion of the interior-
Combination of the kit parts and scratch building -
I used the kit instrument and placard decals .
Not impressed with my first experience with Meng decals - they make Tamiya decals seem thin .
I don’t know if it is a function of their extreme thickness but they are unresponsive to Microsol which is the strongest solvent I have . Fortunately all will be difficult to see when cab is buttoned up.
Doors ready for install -
And doors installed -
Cab roof next then begin building the ROPS .
Thanks for looking
RT
3 Likes
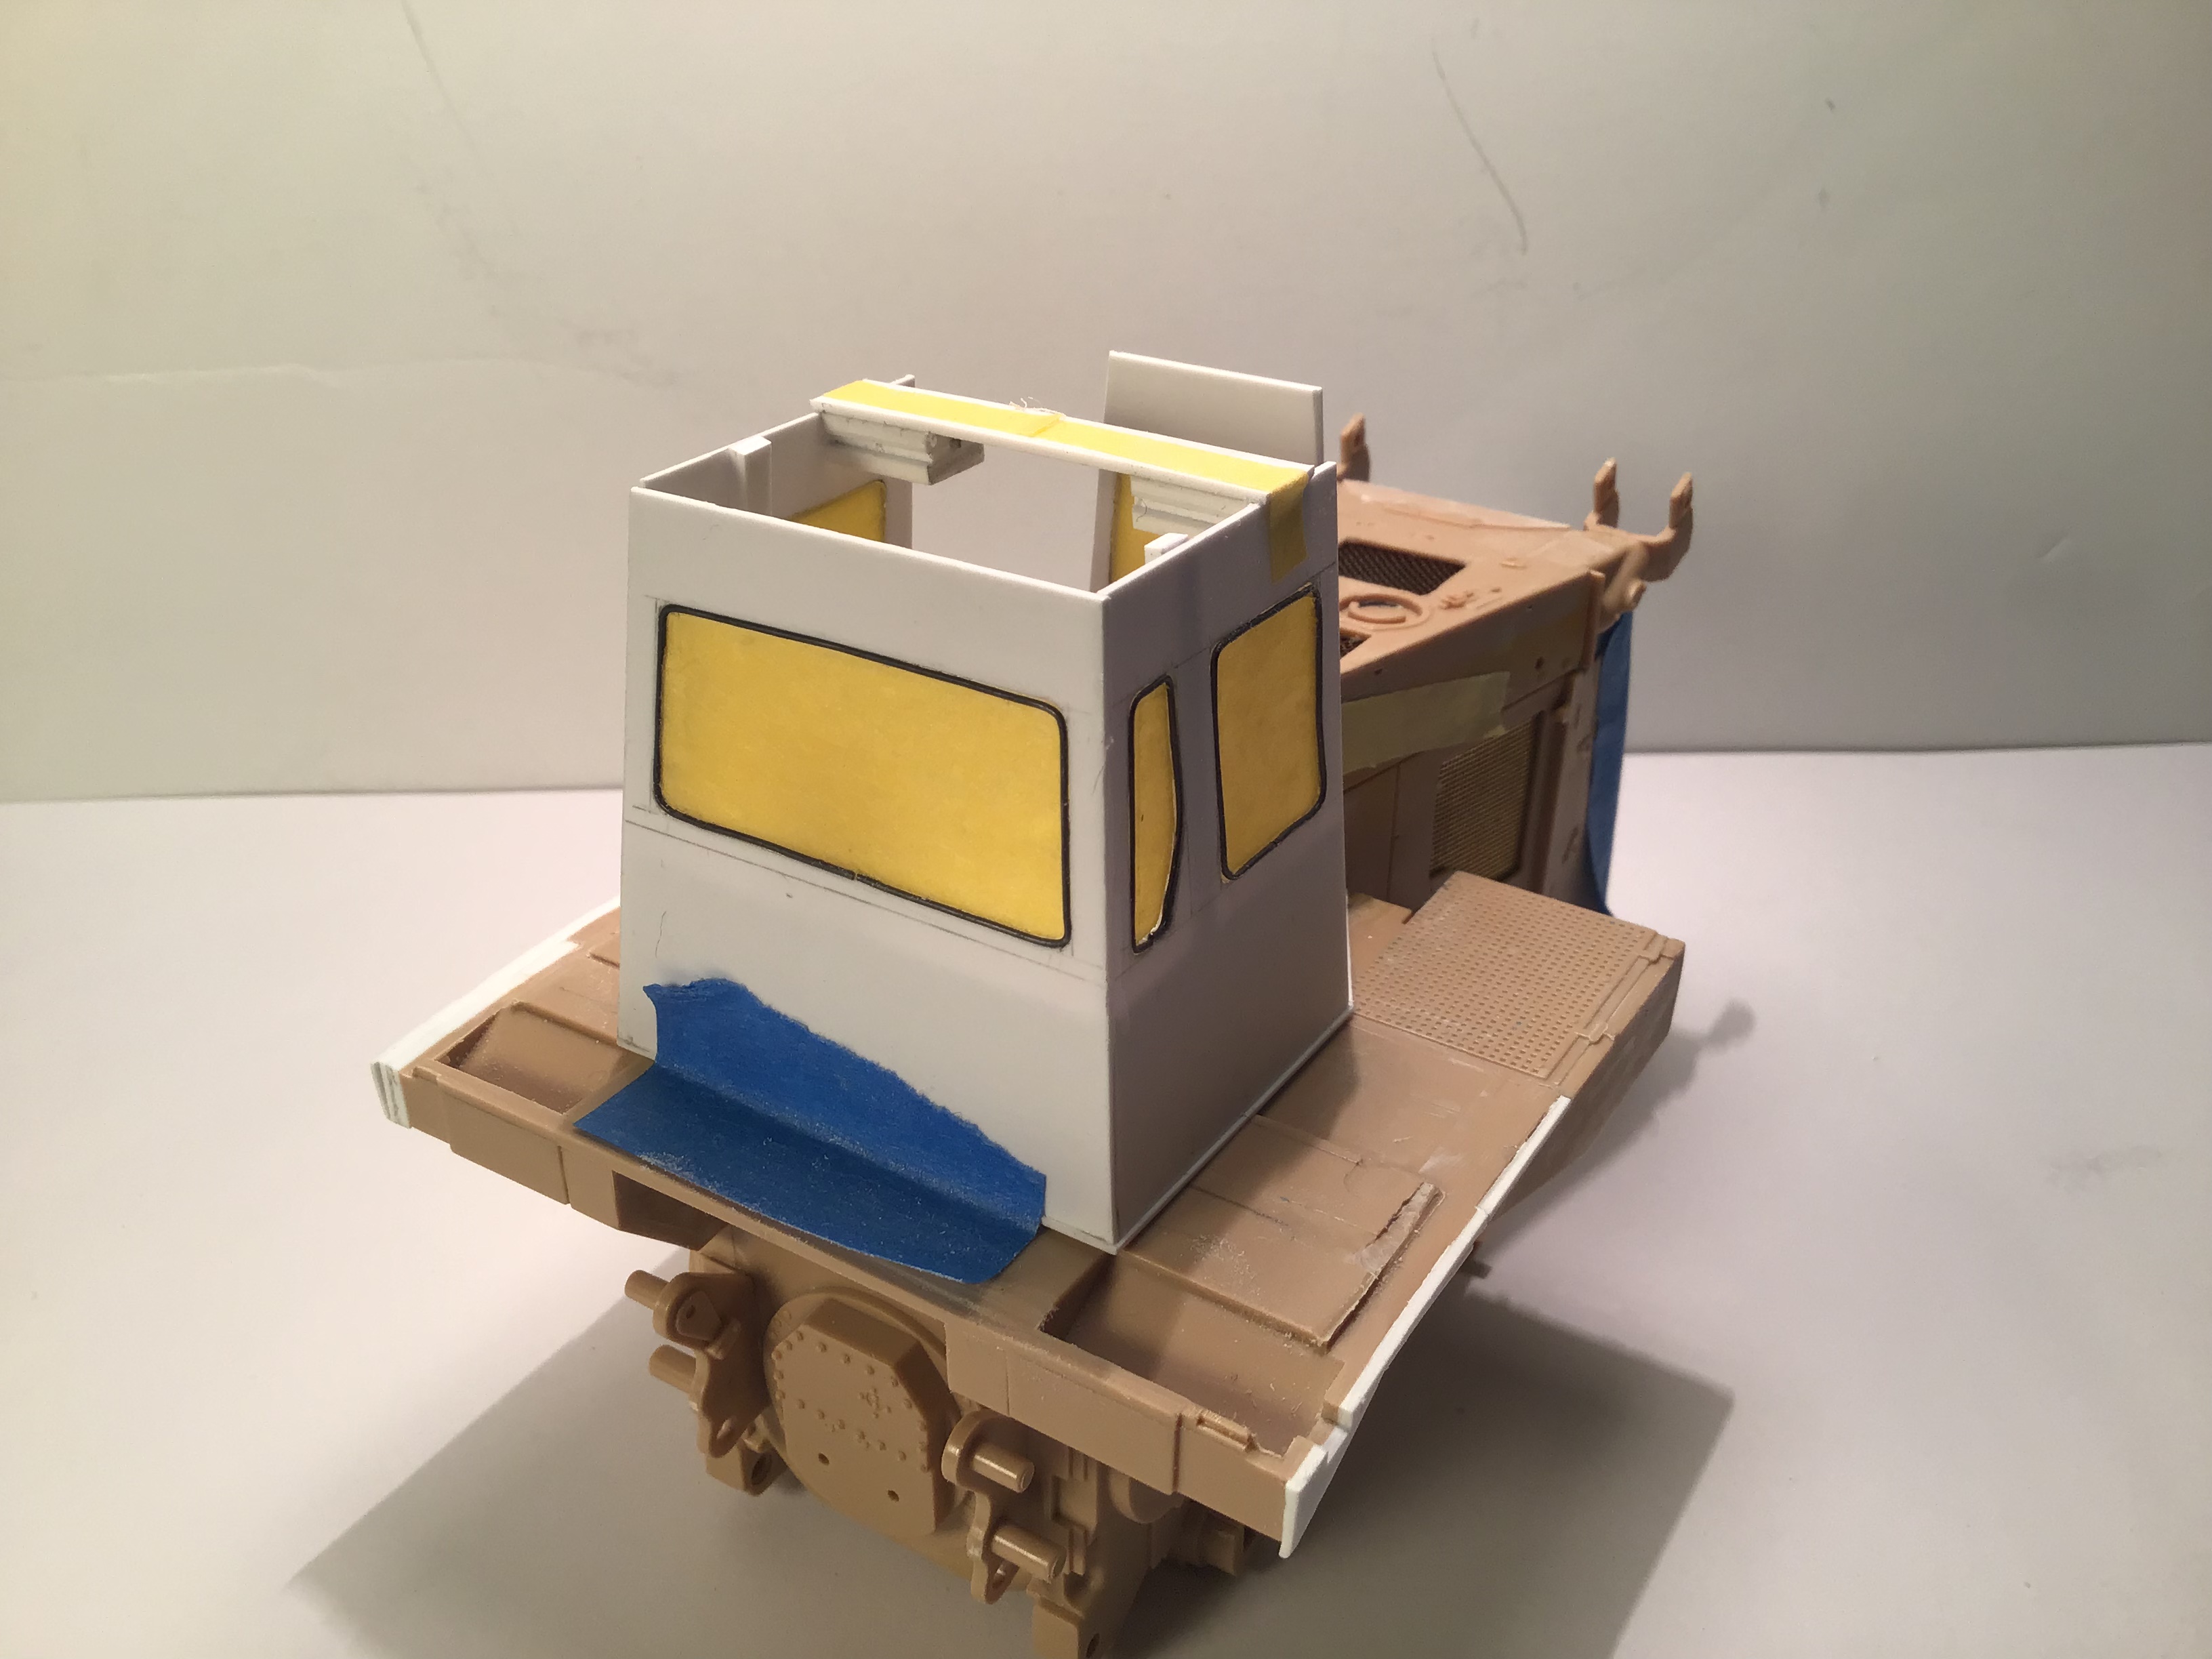
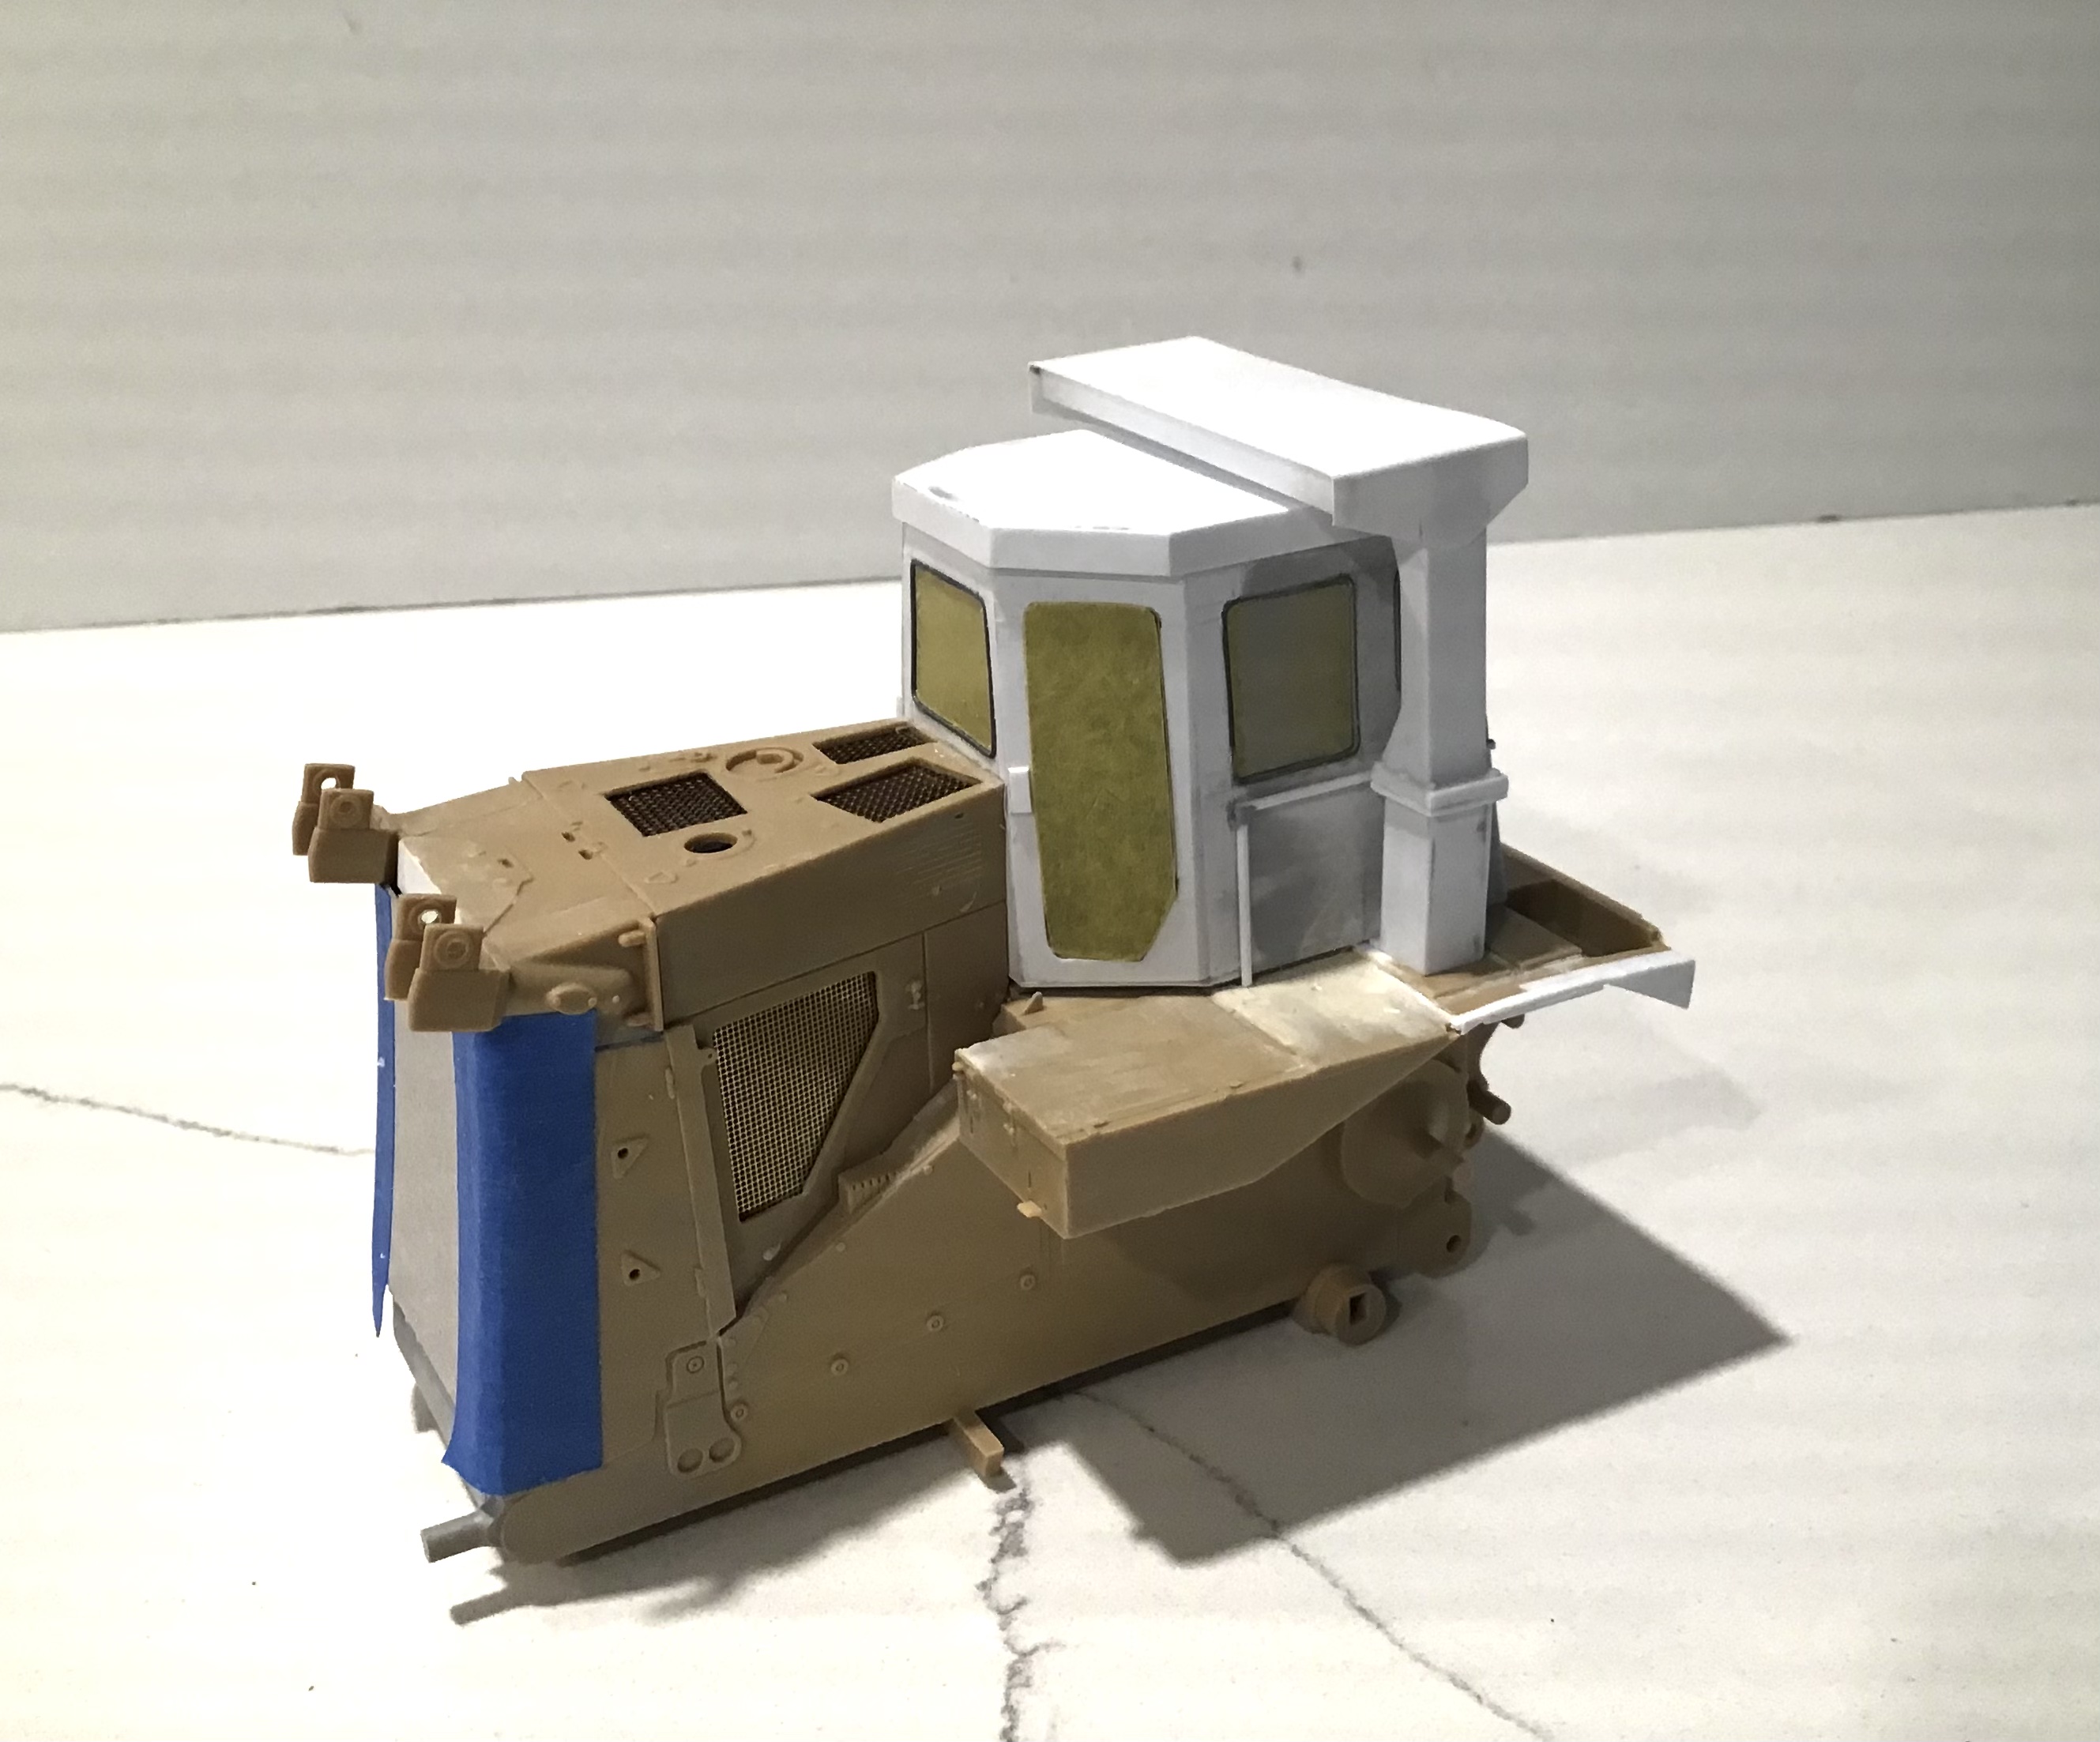
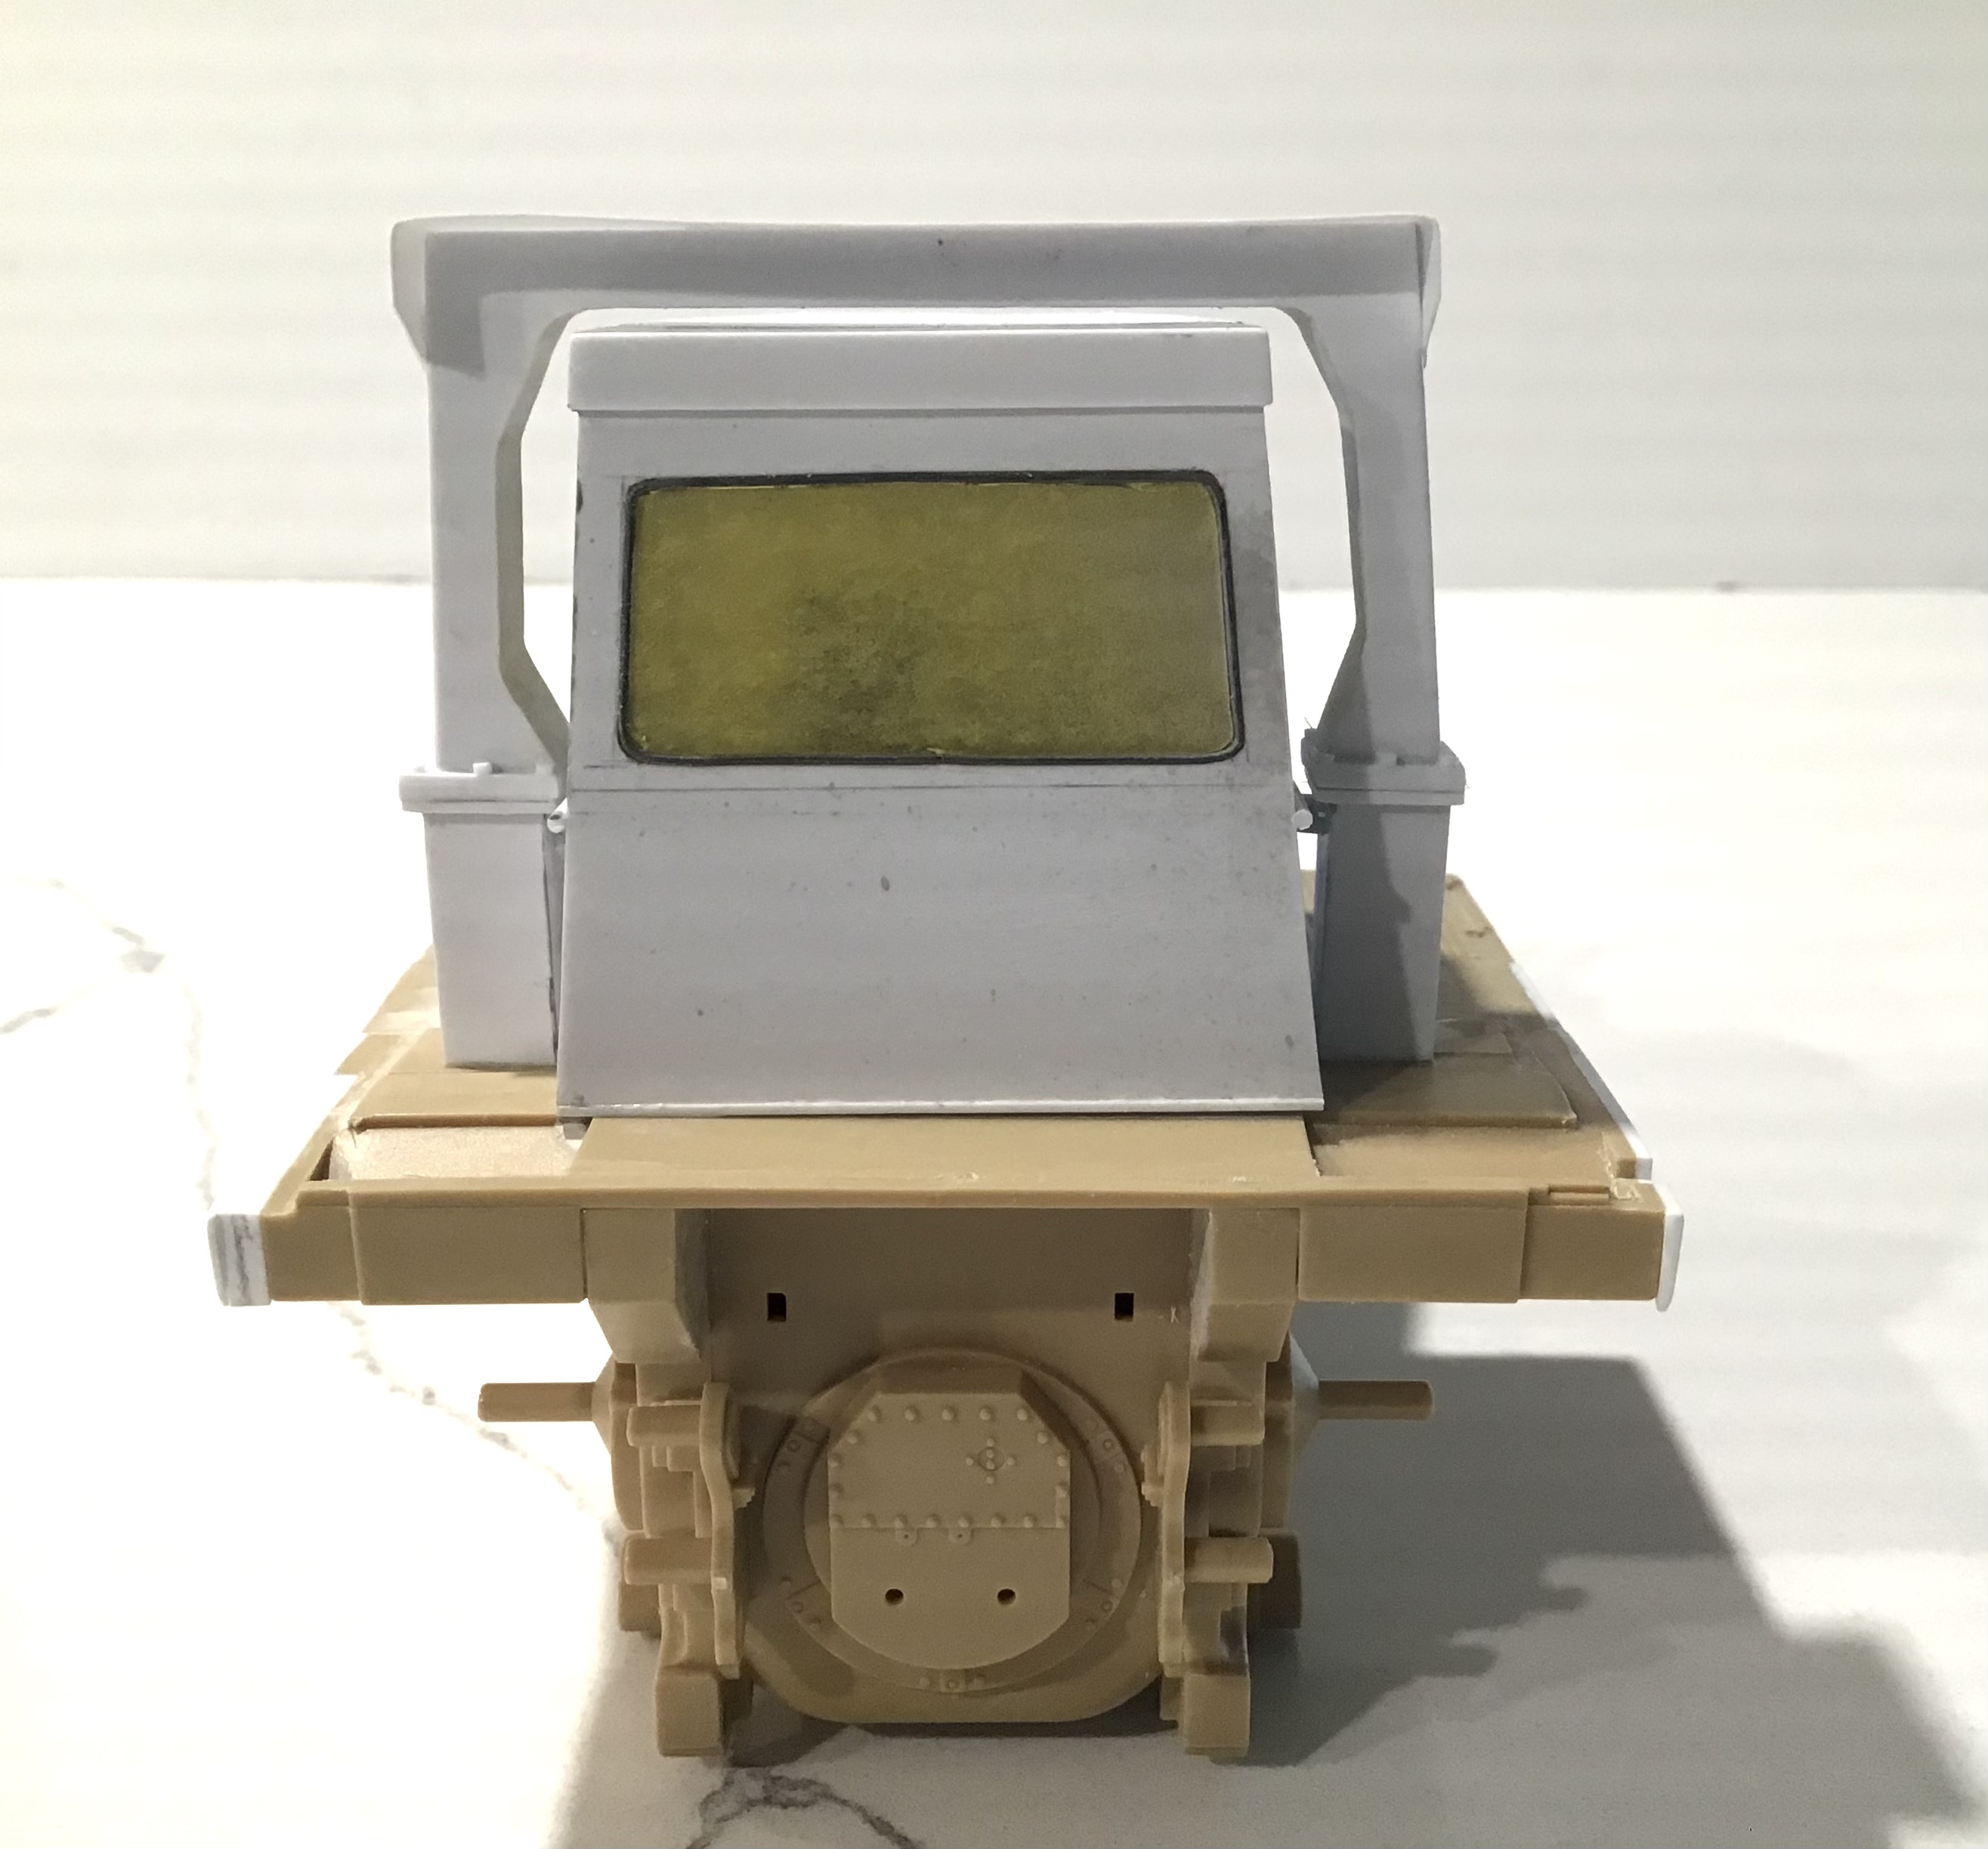
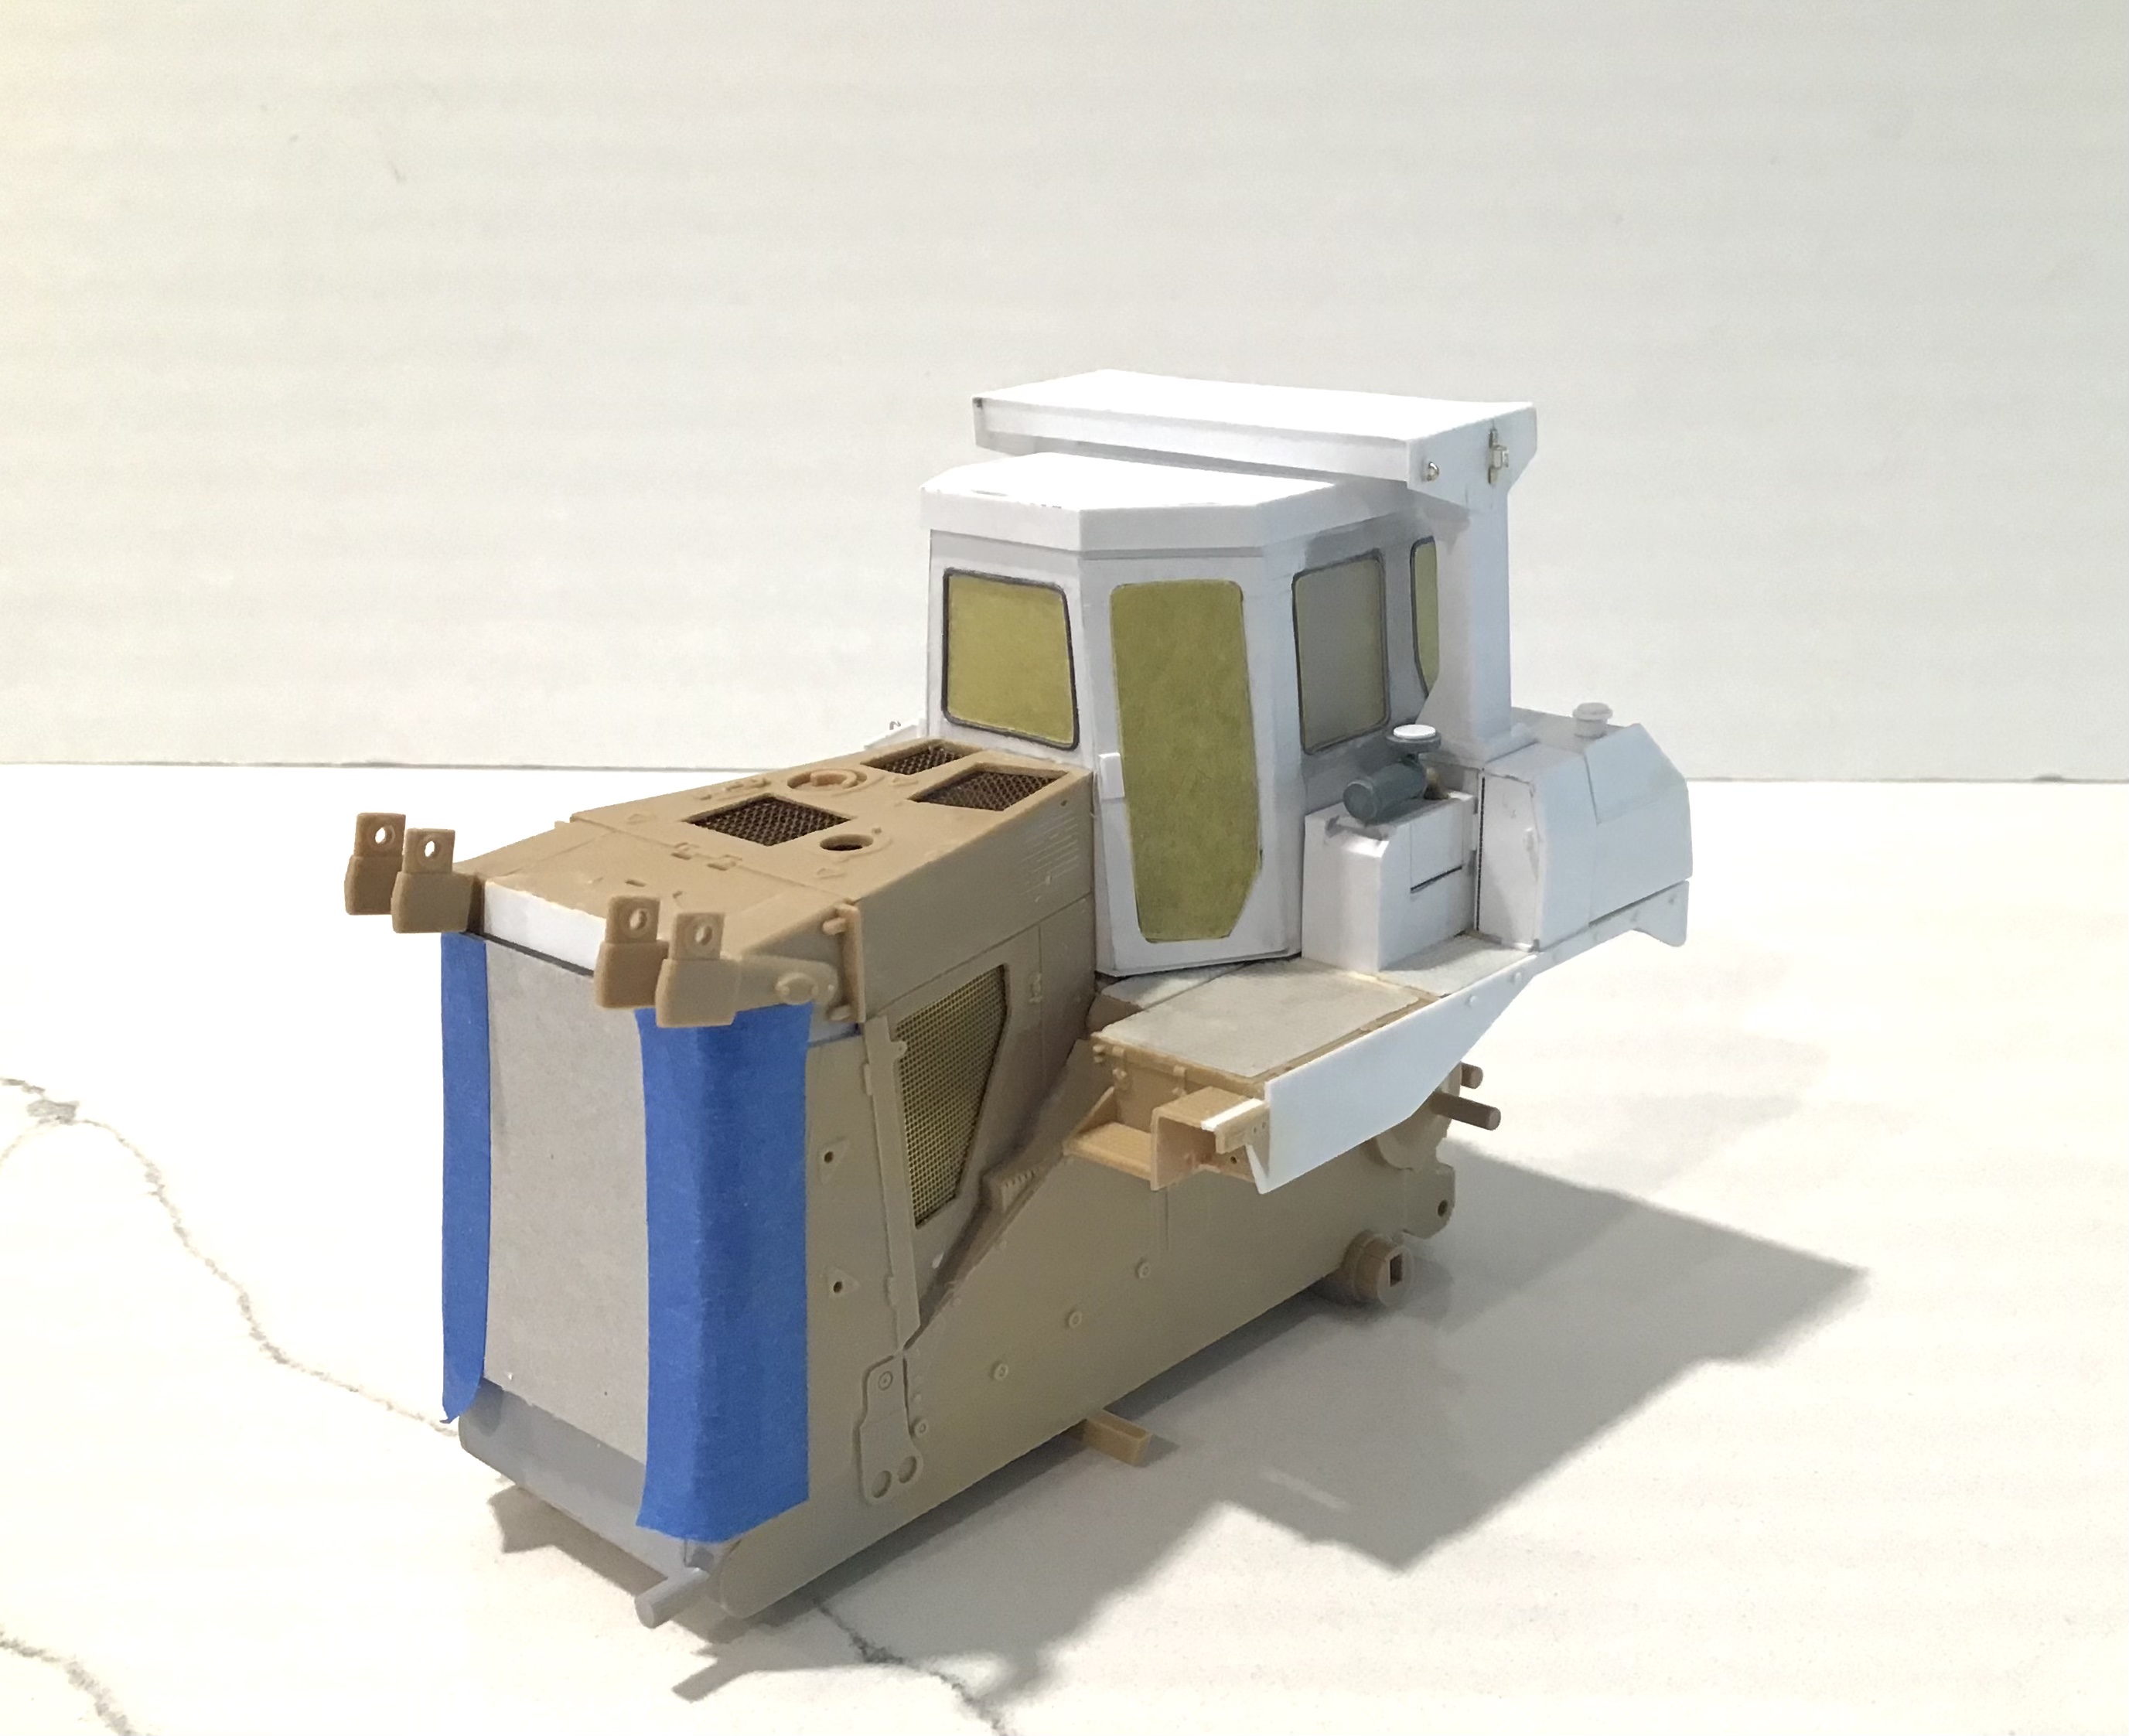
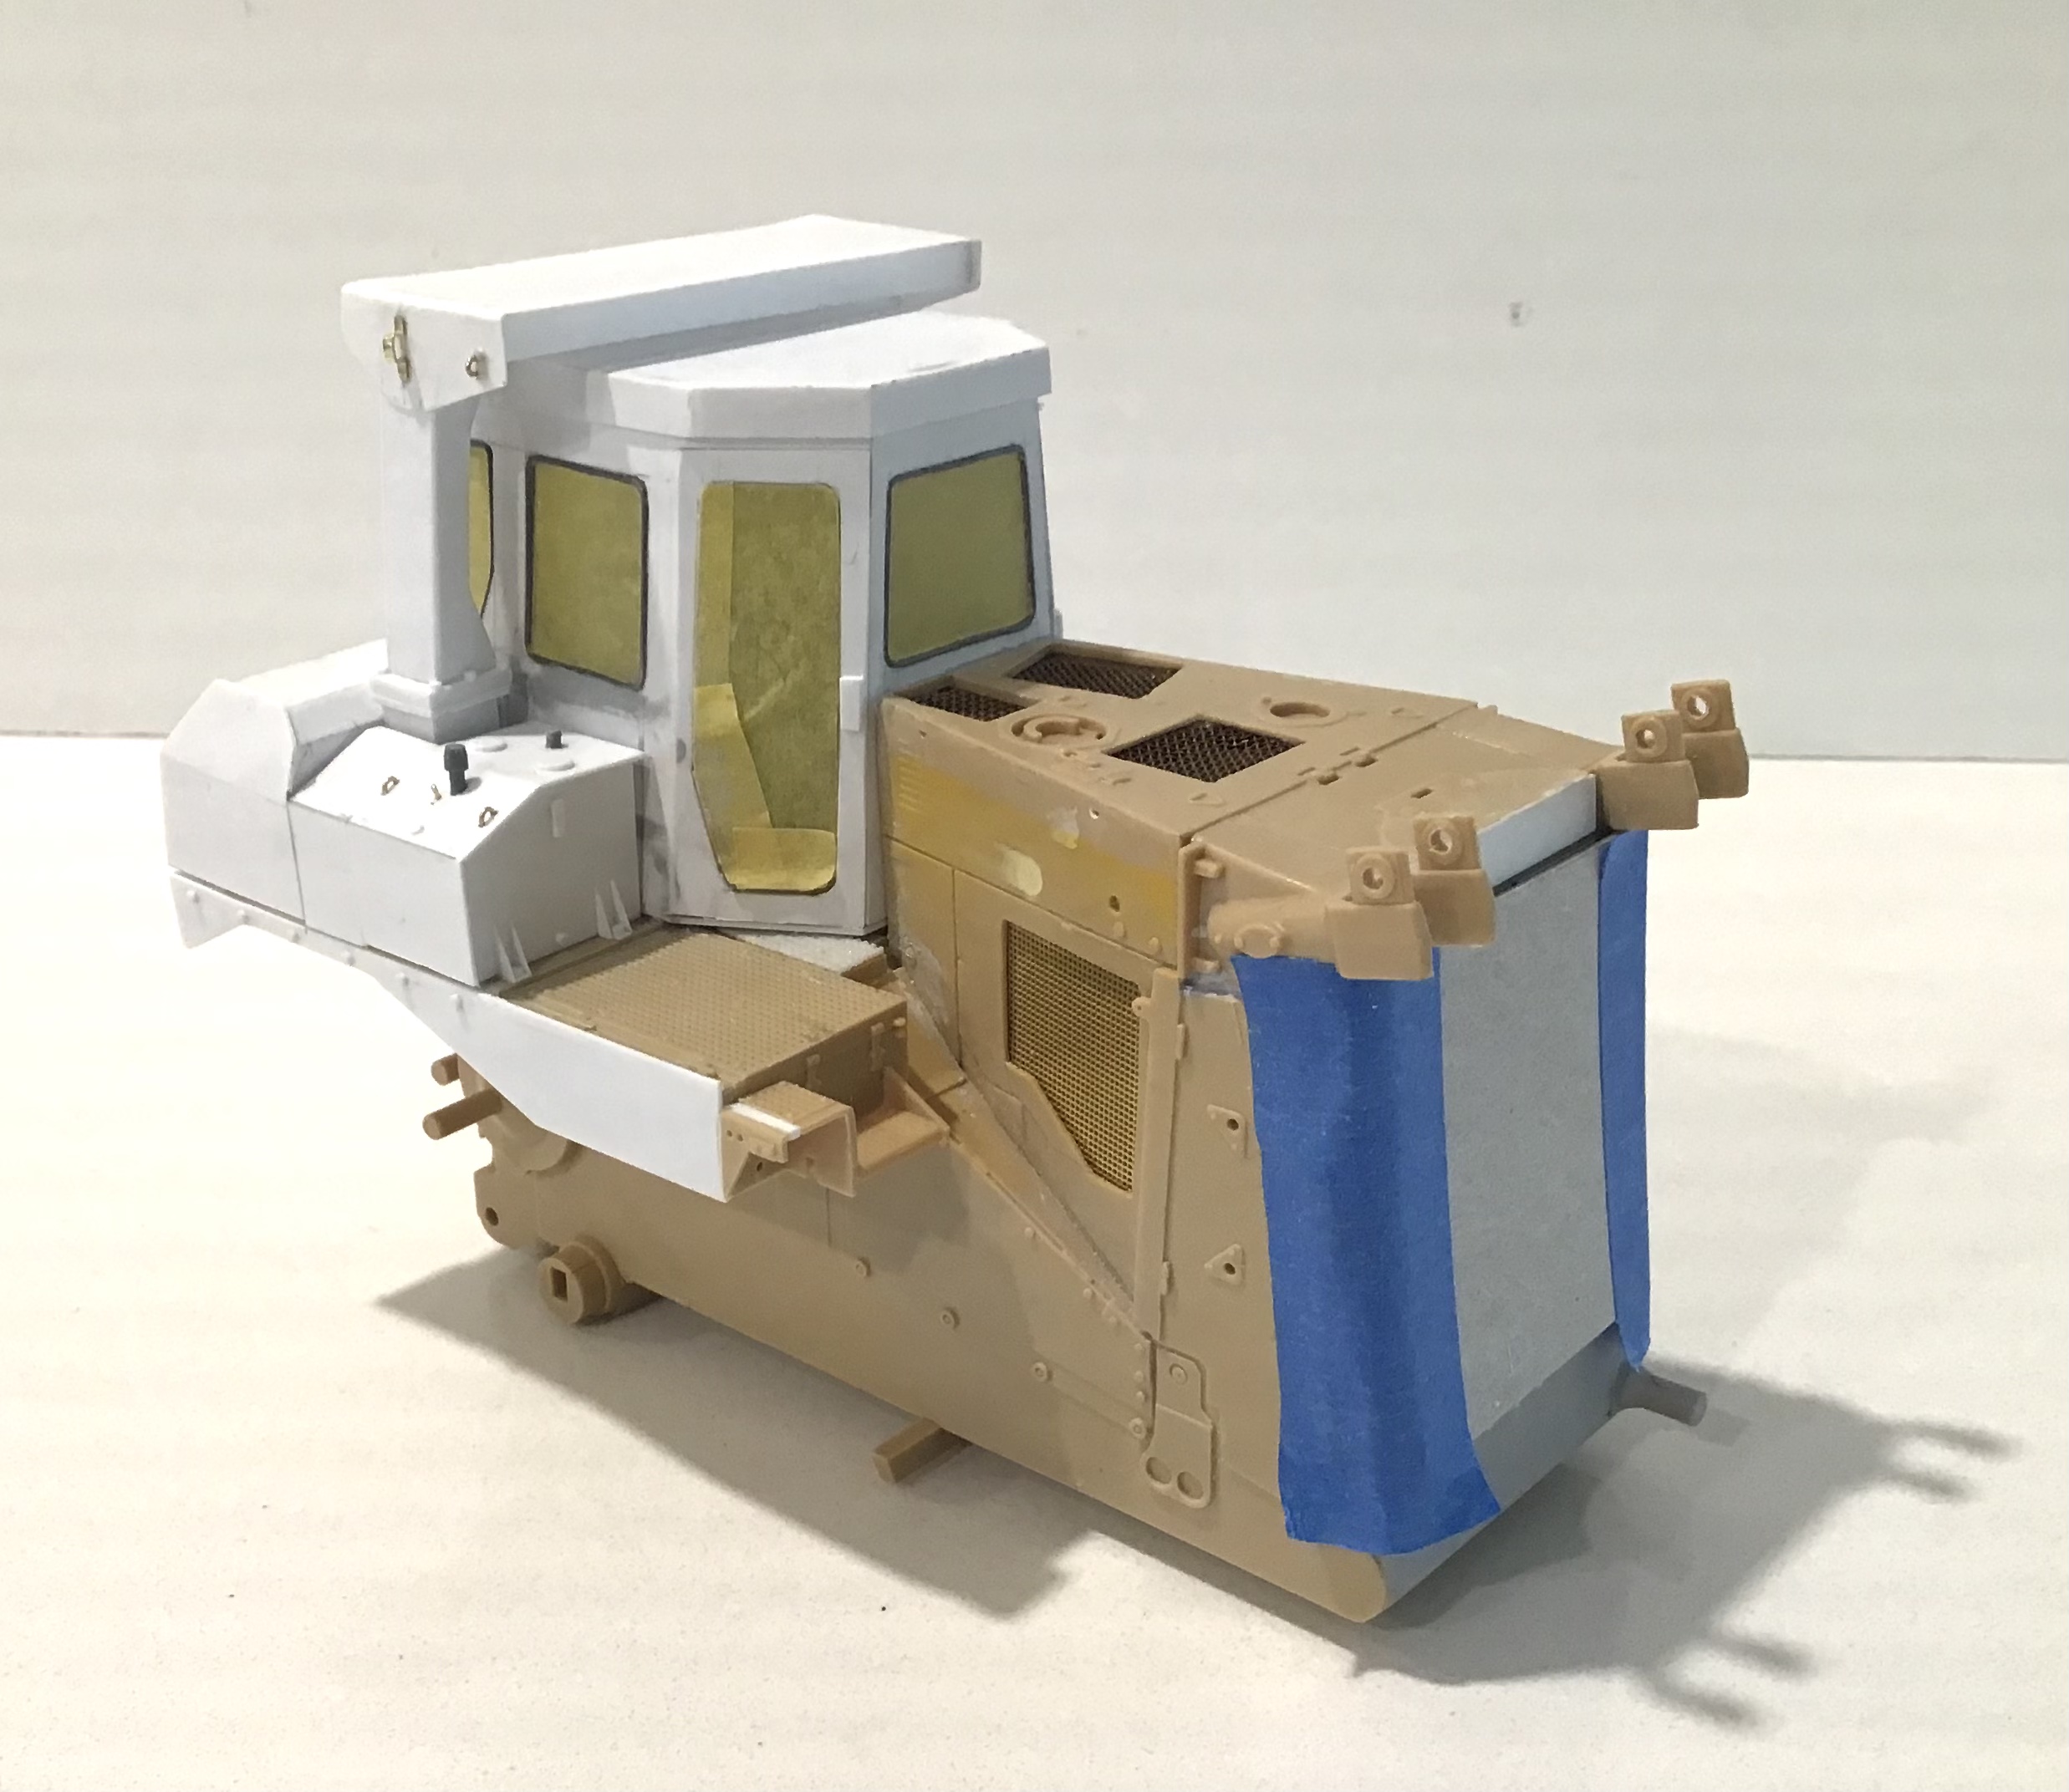
Cab largely done- just some small fragile details to add before painting. Roof on and ROPS built up . Again , some fragile details to add to ROPS .
Now on to the fuel and hydraulic tanks.
7 Likes
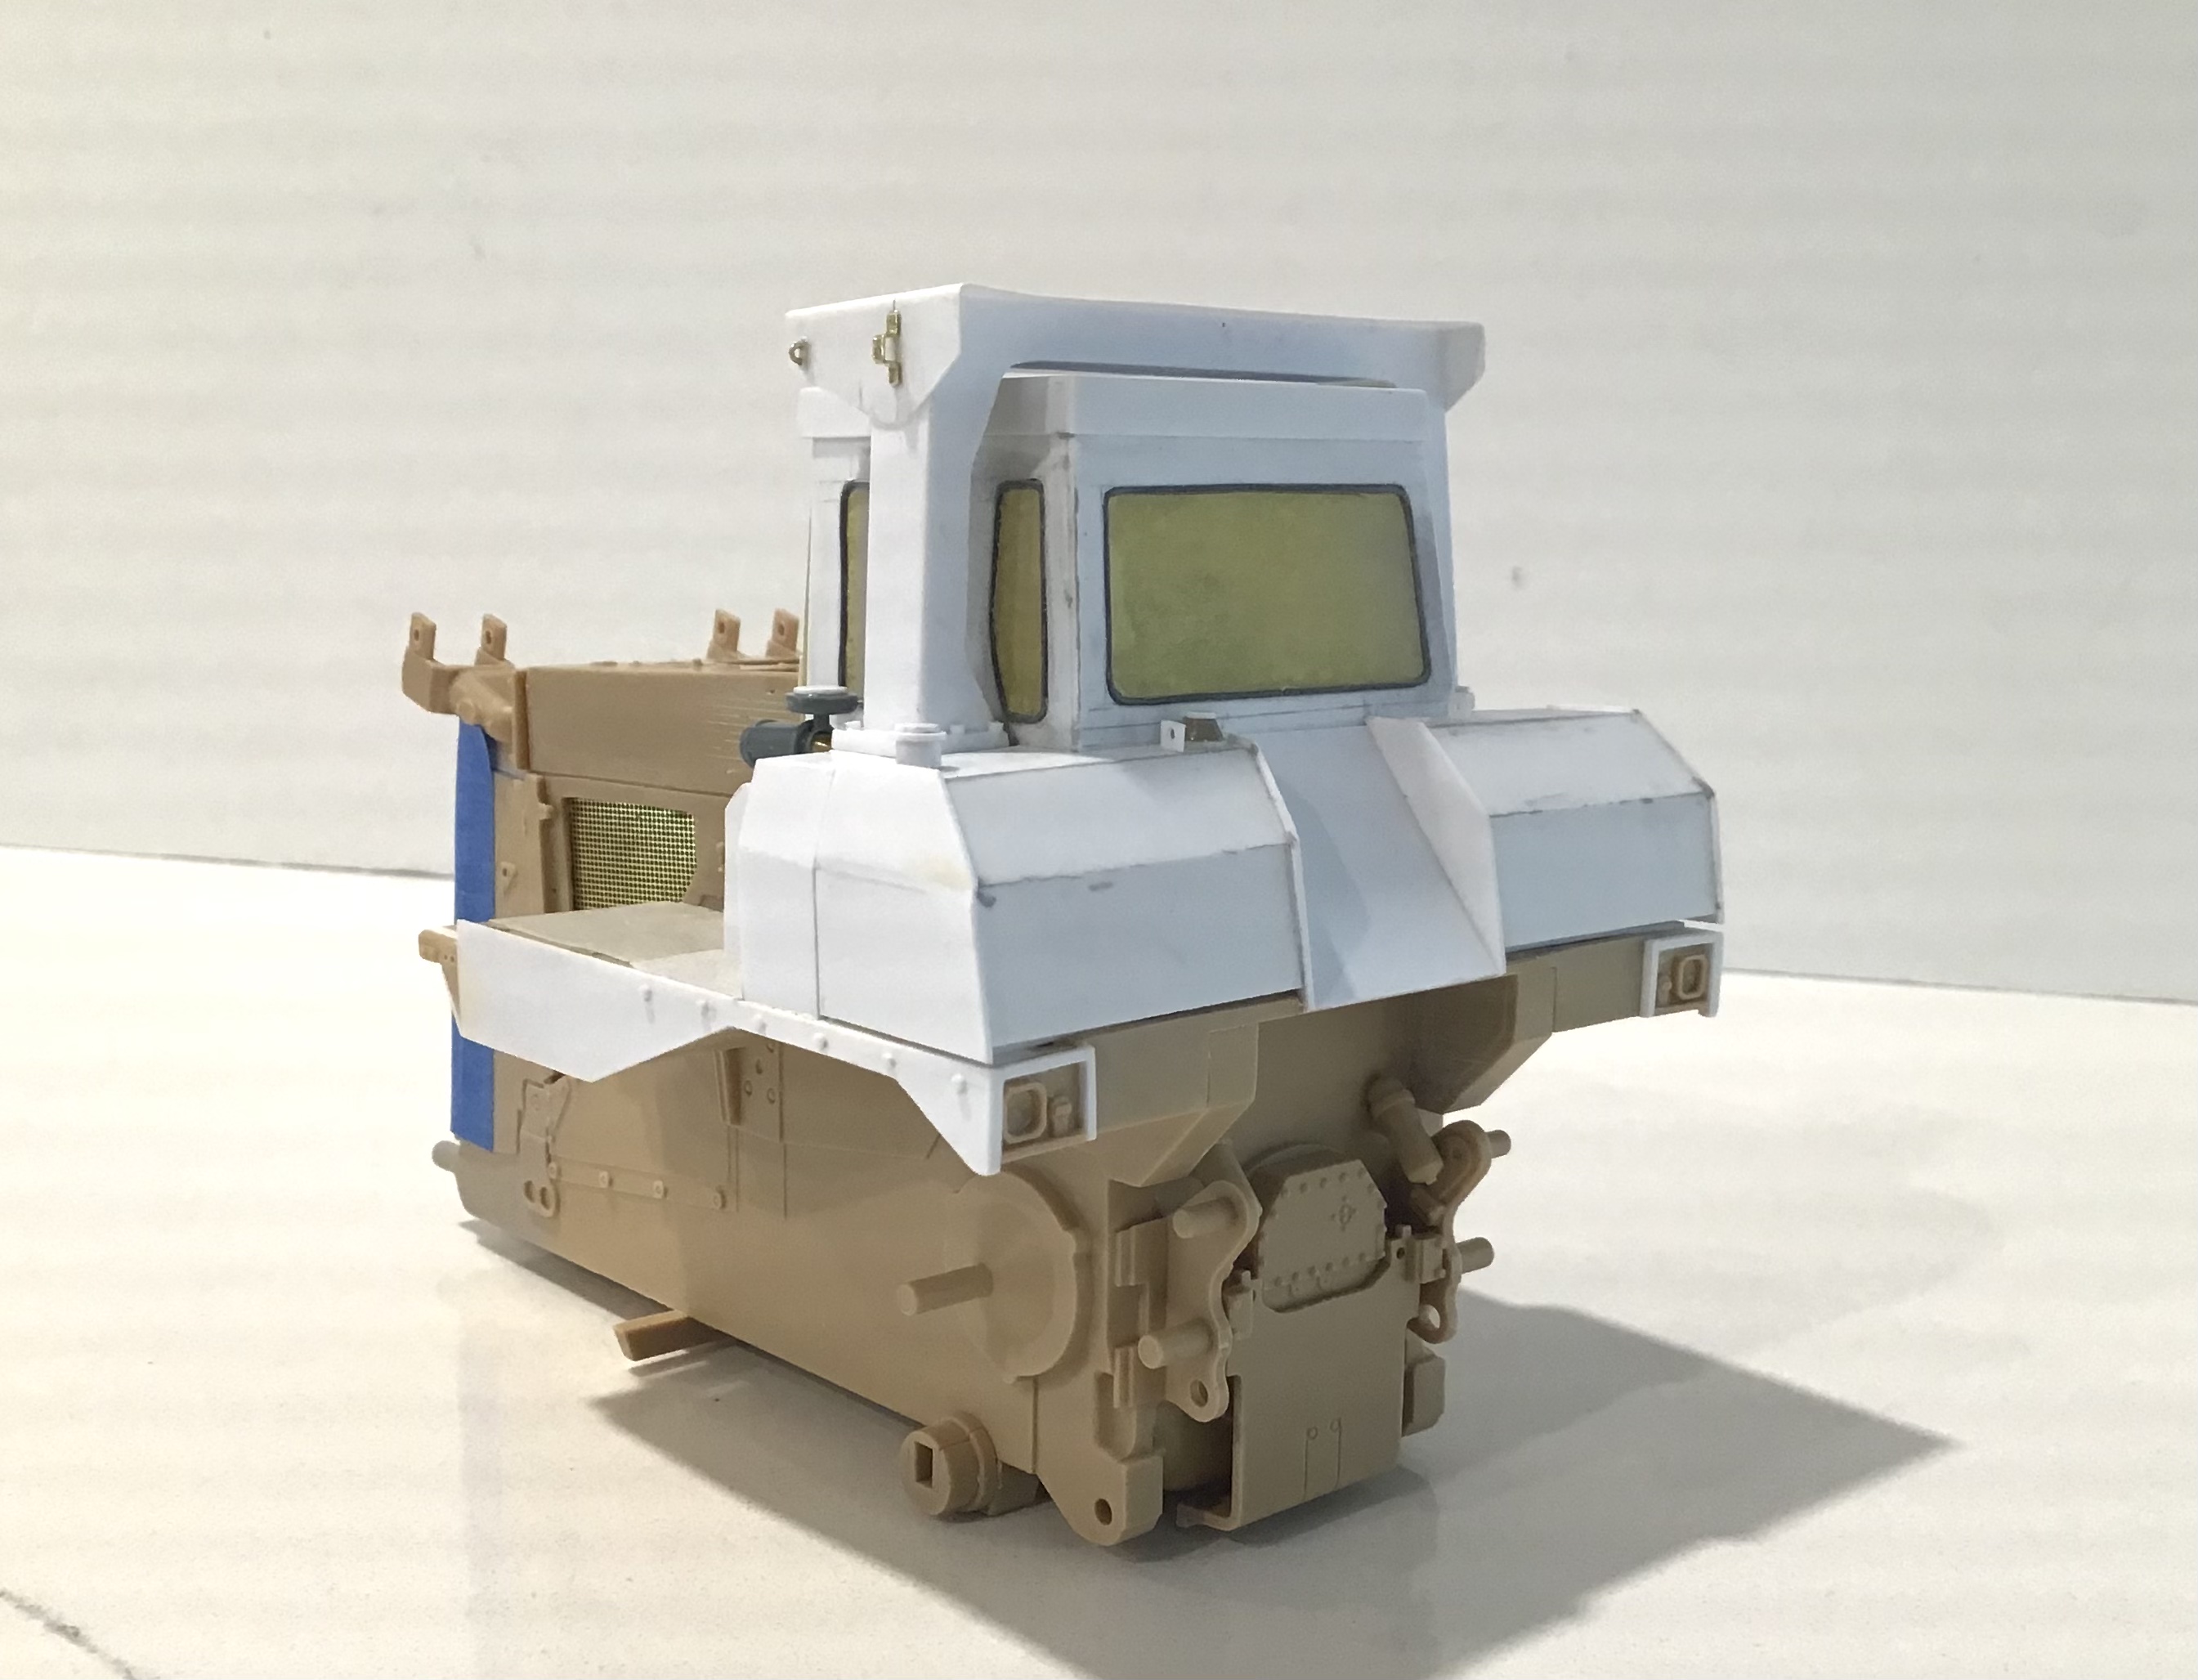
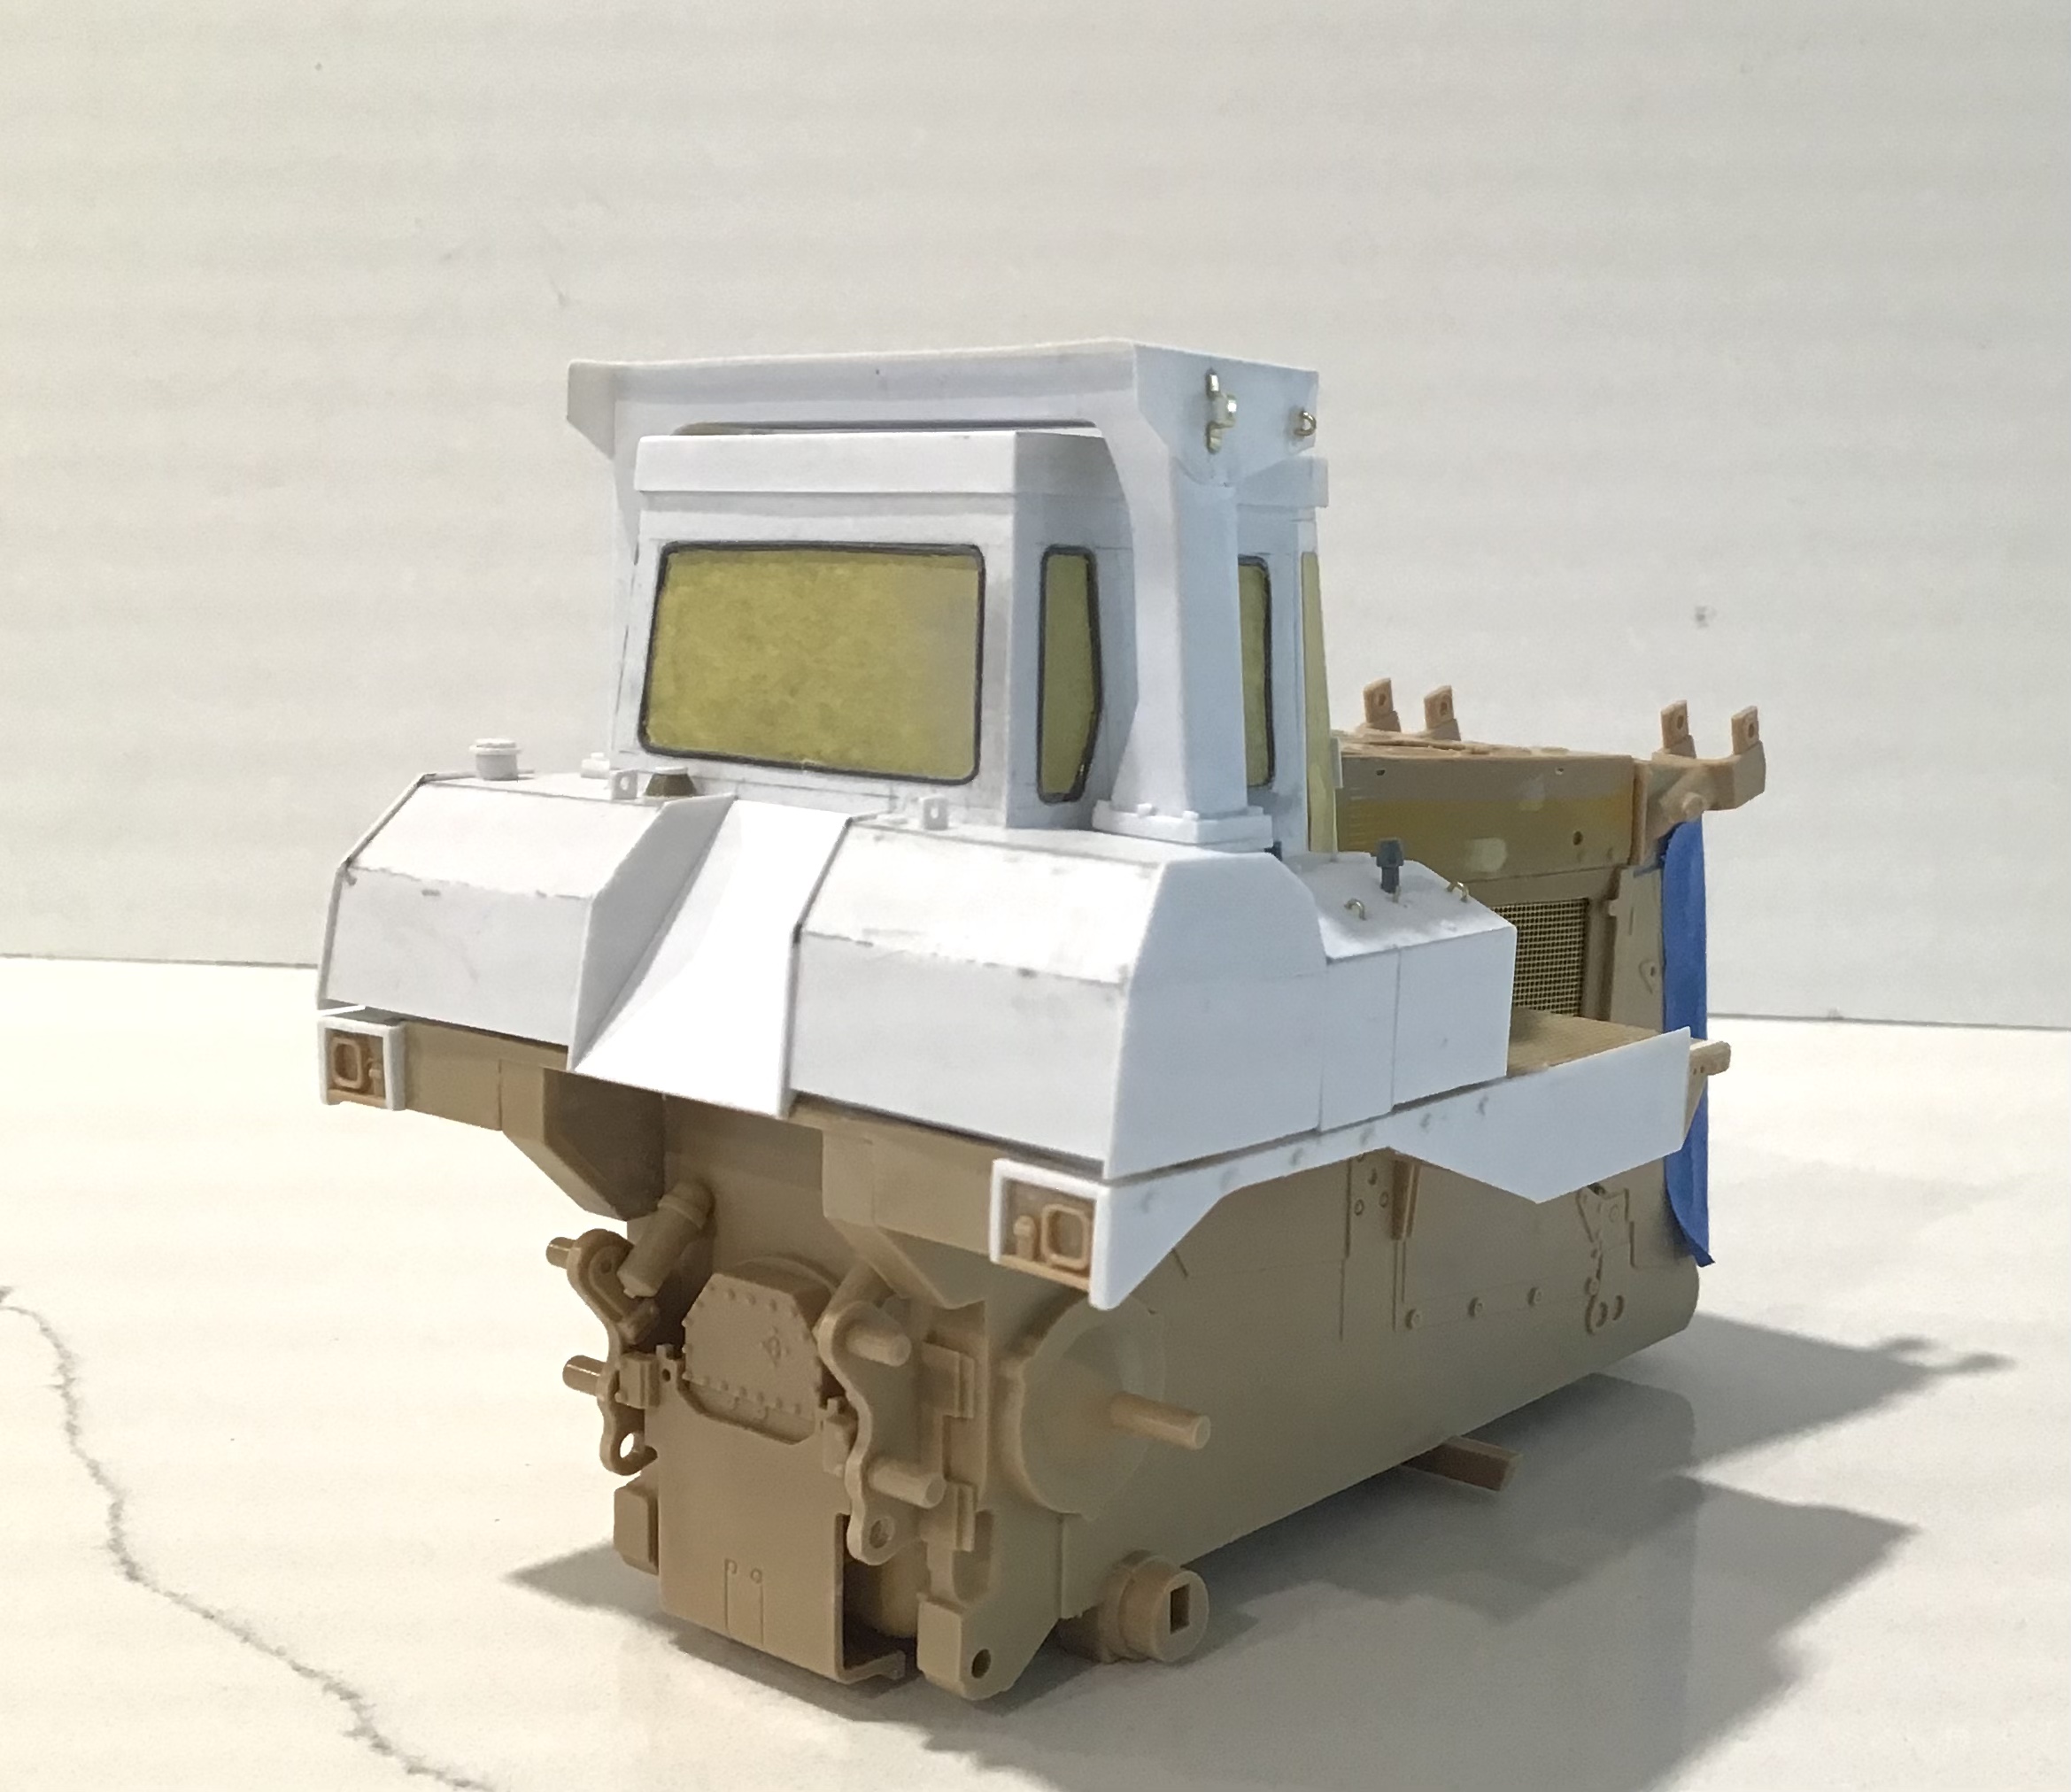
Fuel and hydraulic tanks done - mostly sheet styrene. A few details in brass and some bits from the spares box. Hinges on storage bins done with Archer surface details piano hinge . Boltheads on valance around cab base done withe styrene hex rod. Perforated decking done with resin castings made in silicone mold cast from existing decking.
The ROPS unit is just set in place - permanent attachment after paint .
Next up will be making various grab rails in brass -
then the painting can begin.
Thanks for looking!
Cheers- RT
9 Likes
Out of likes for the day but I have been really enjoying this build. Looking forward to the next update.
2 Likes
Outstanding scratchbuilding Richard everything looks just the part. Your detail and accuracy are miraculous.
1 Like
Thank you Matthew - not so sure about the accuracy bit . As stated previously this is a sort of hybrid as not all images show all the needed views for a given year and there were numerous changes here and there over the years .
One example is the gasket around the doors - it seems the later versions had it on the inside of the doors ( which I followed) while older ones had it on the exterior. I now wish I had done the older way but too late for that .
Cheers- Richard
2 Likes
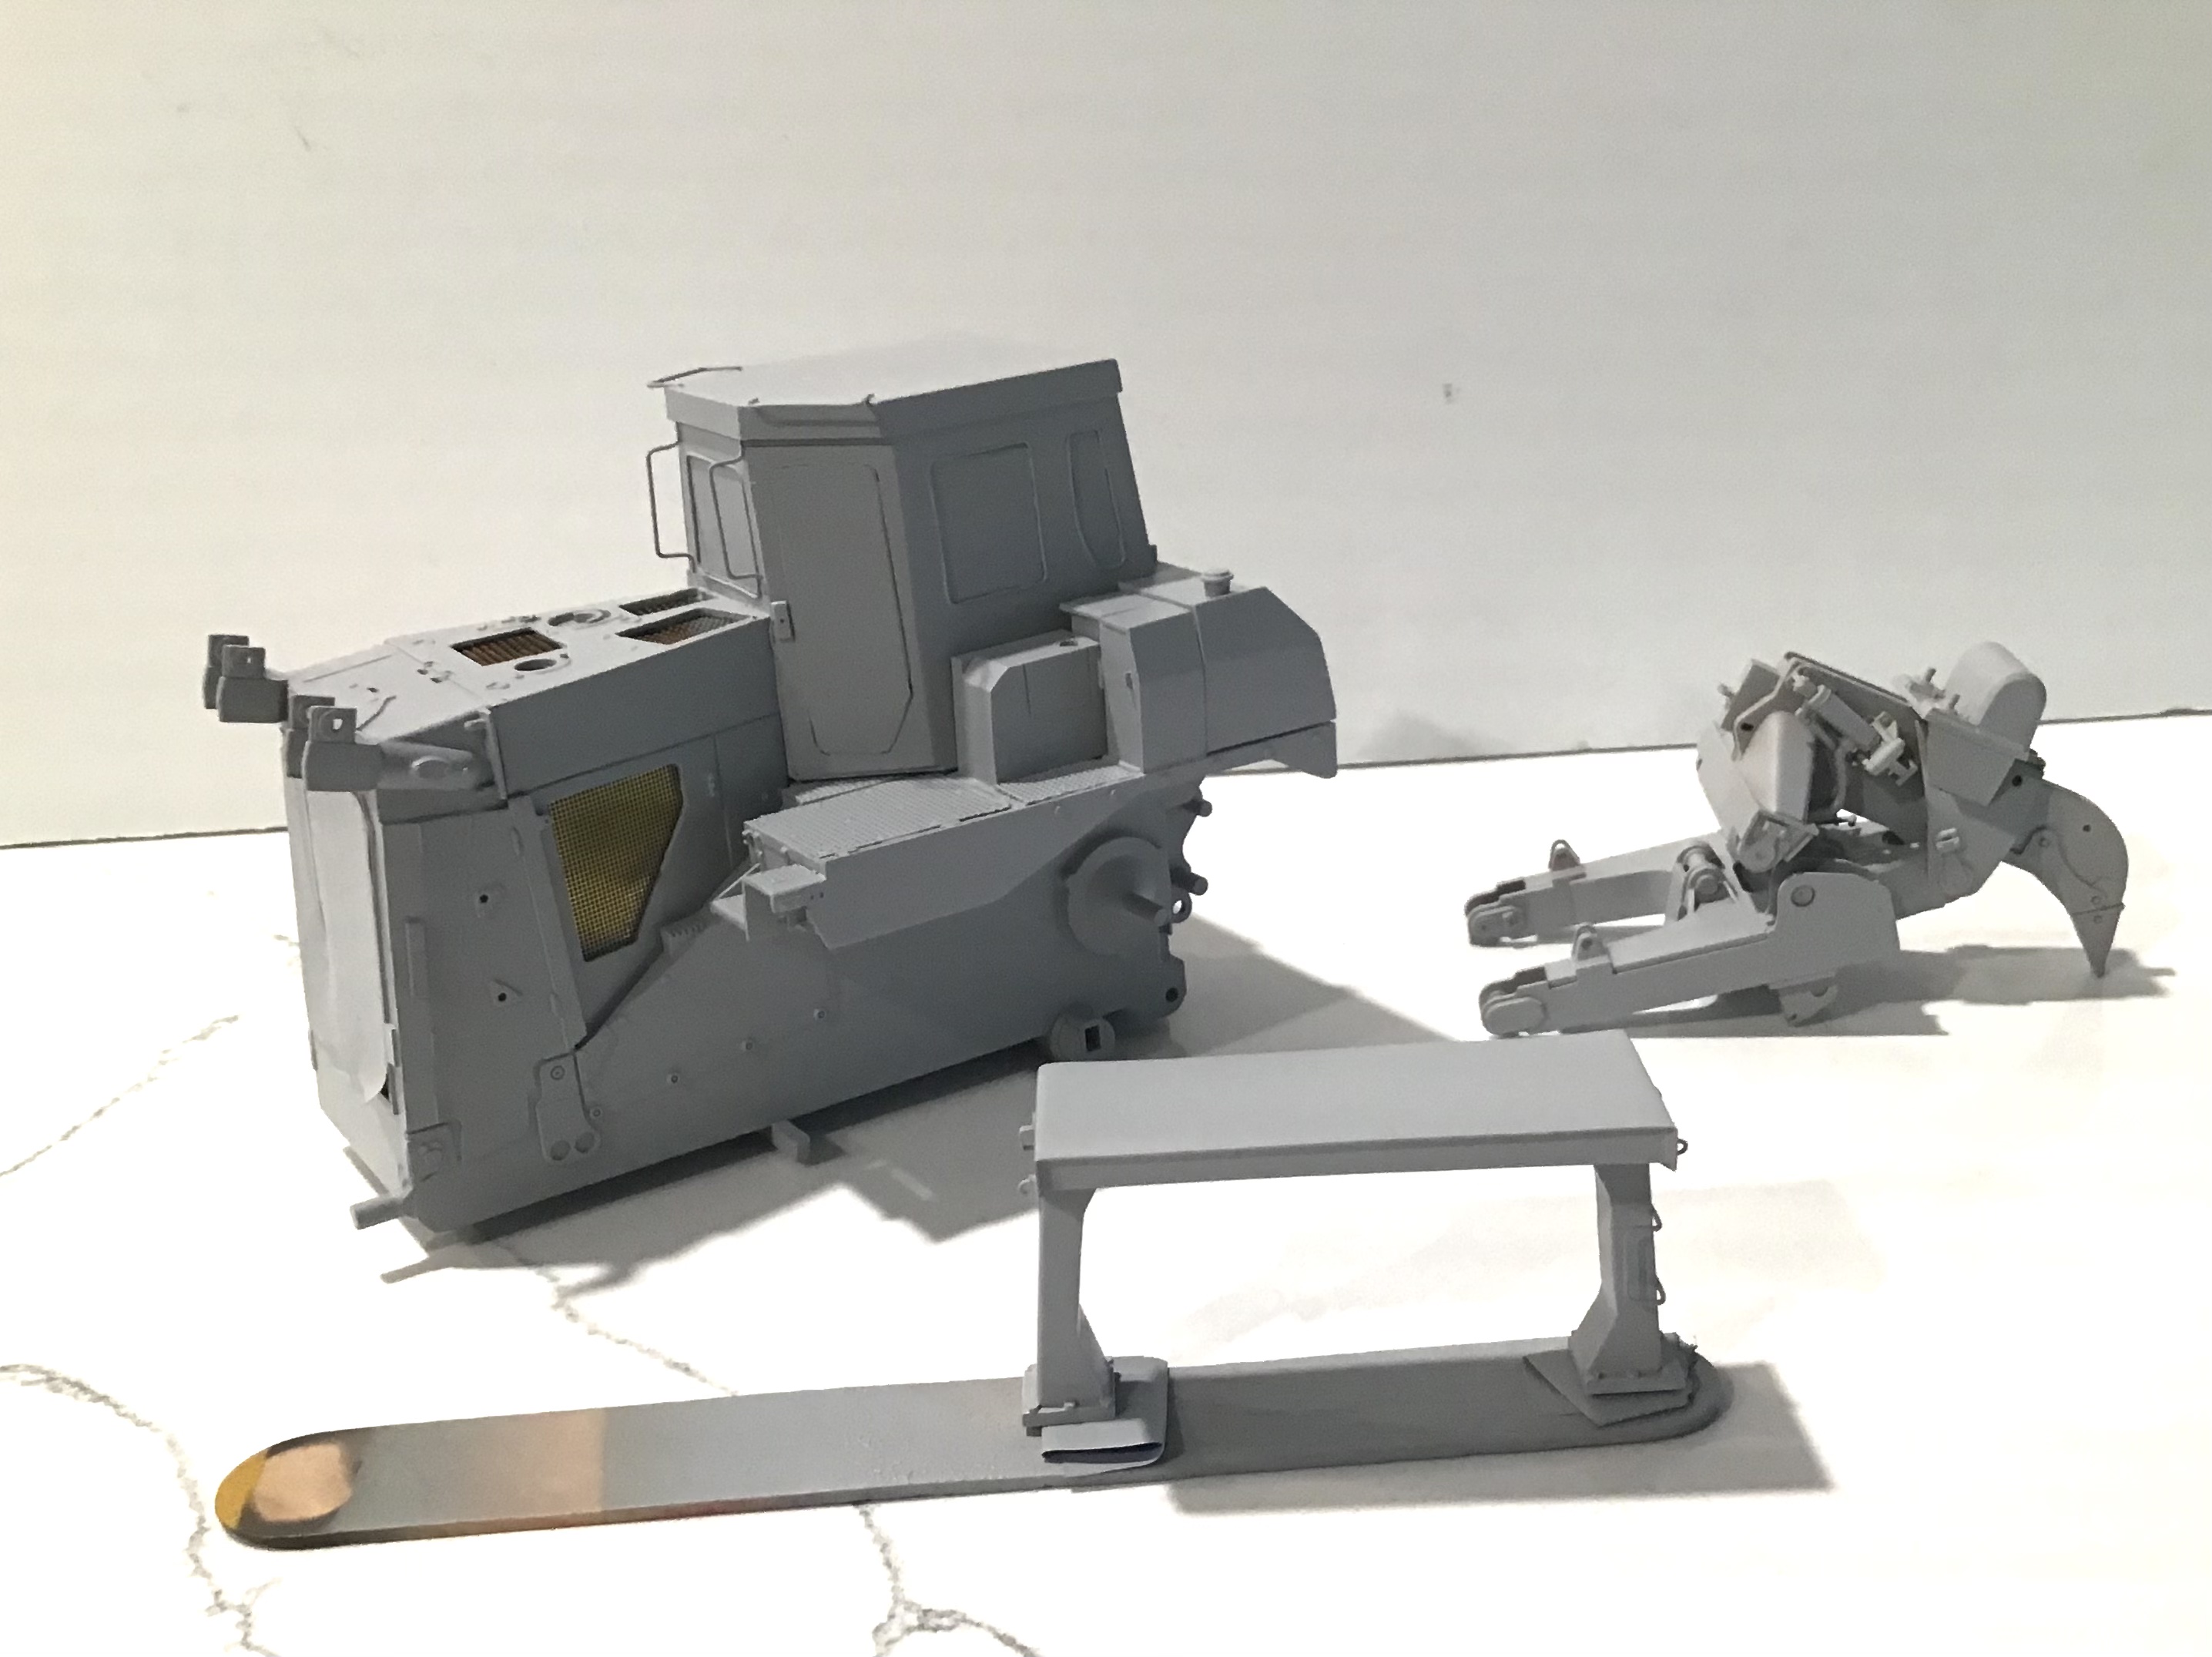
Brief update - grab irons made and
installed .
machine and ripper in primer.
Shooting yellow next .
Thanks for looking!
RT
6 Likes
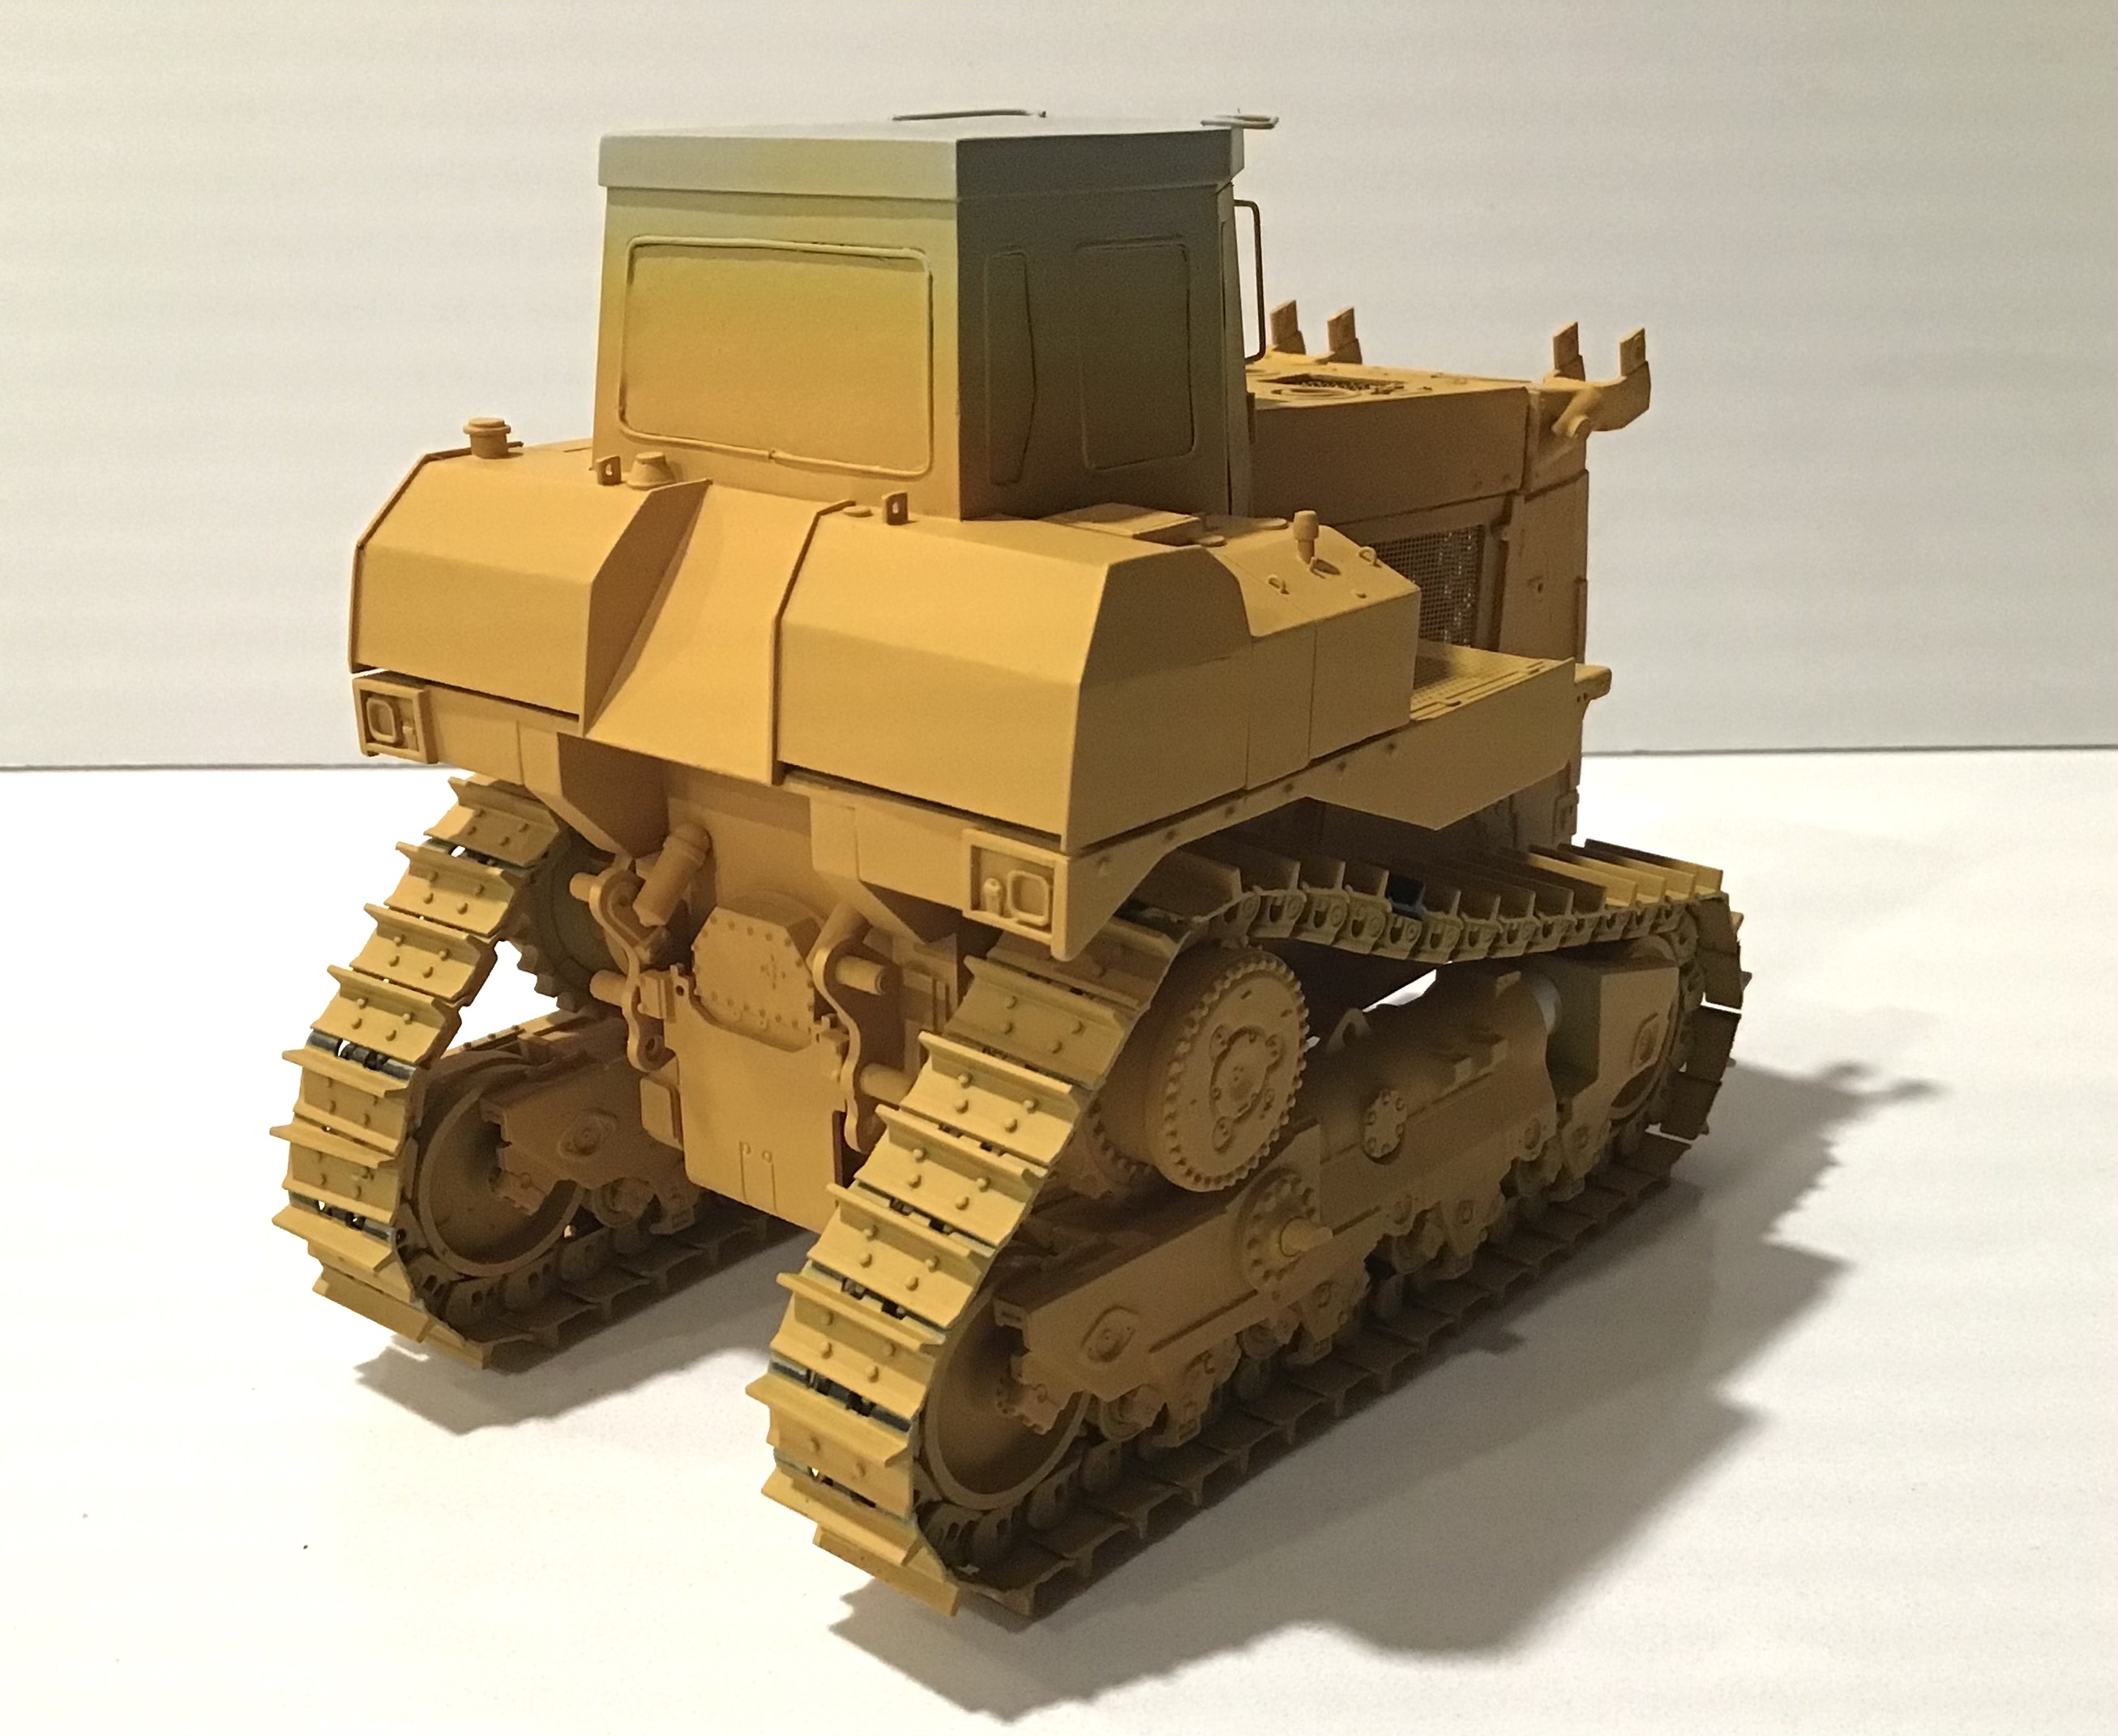
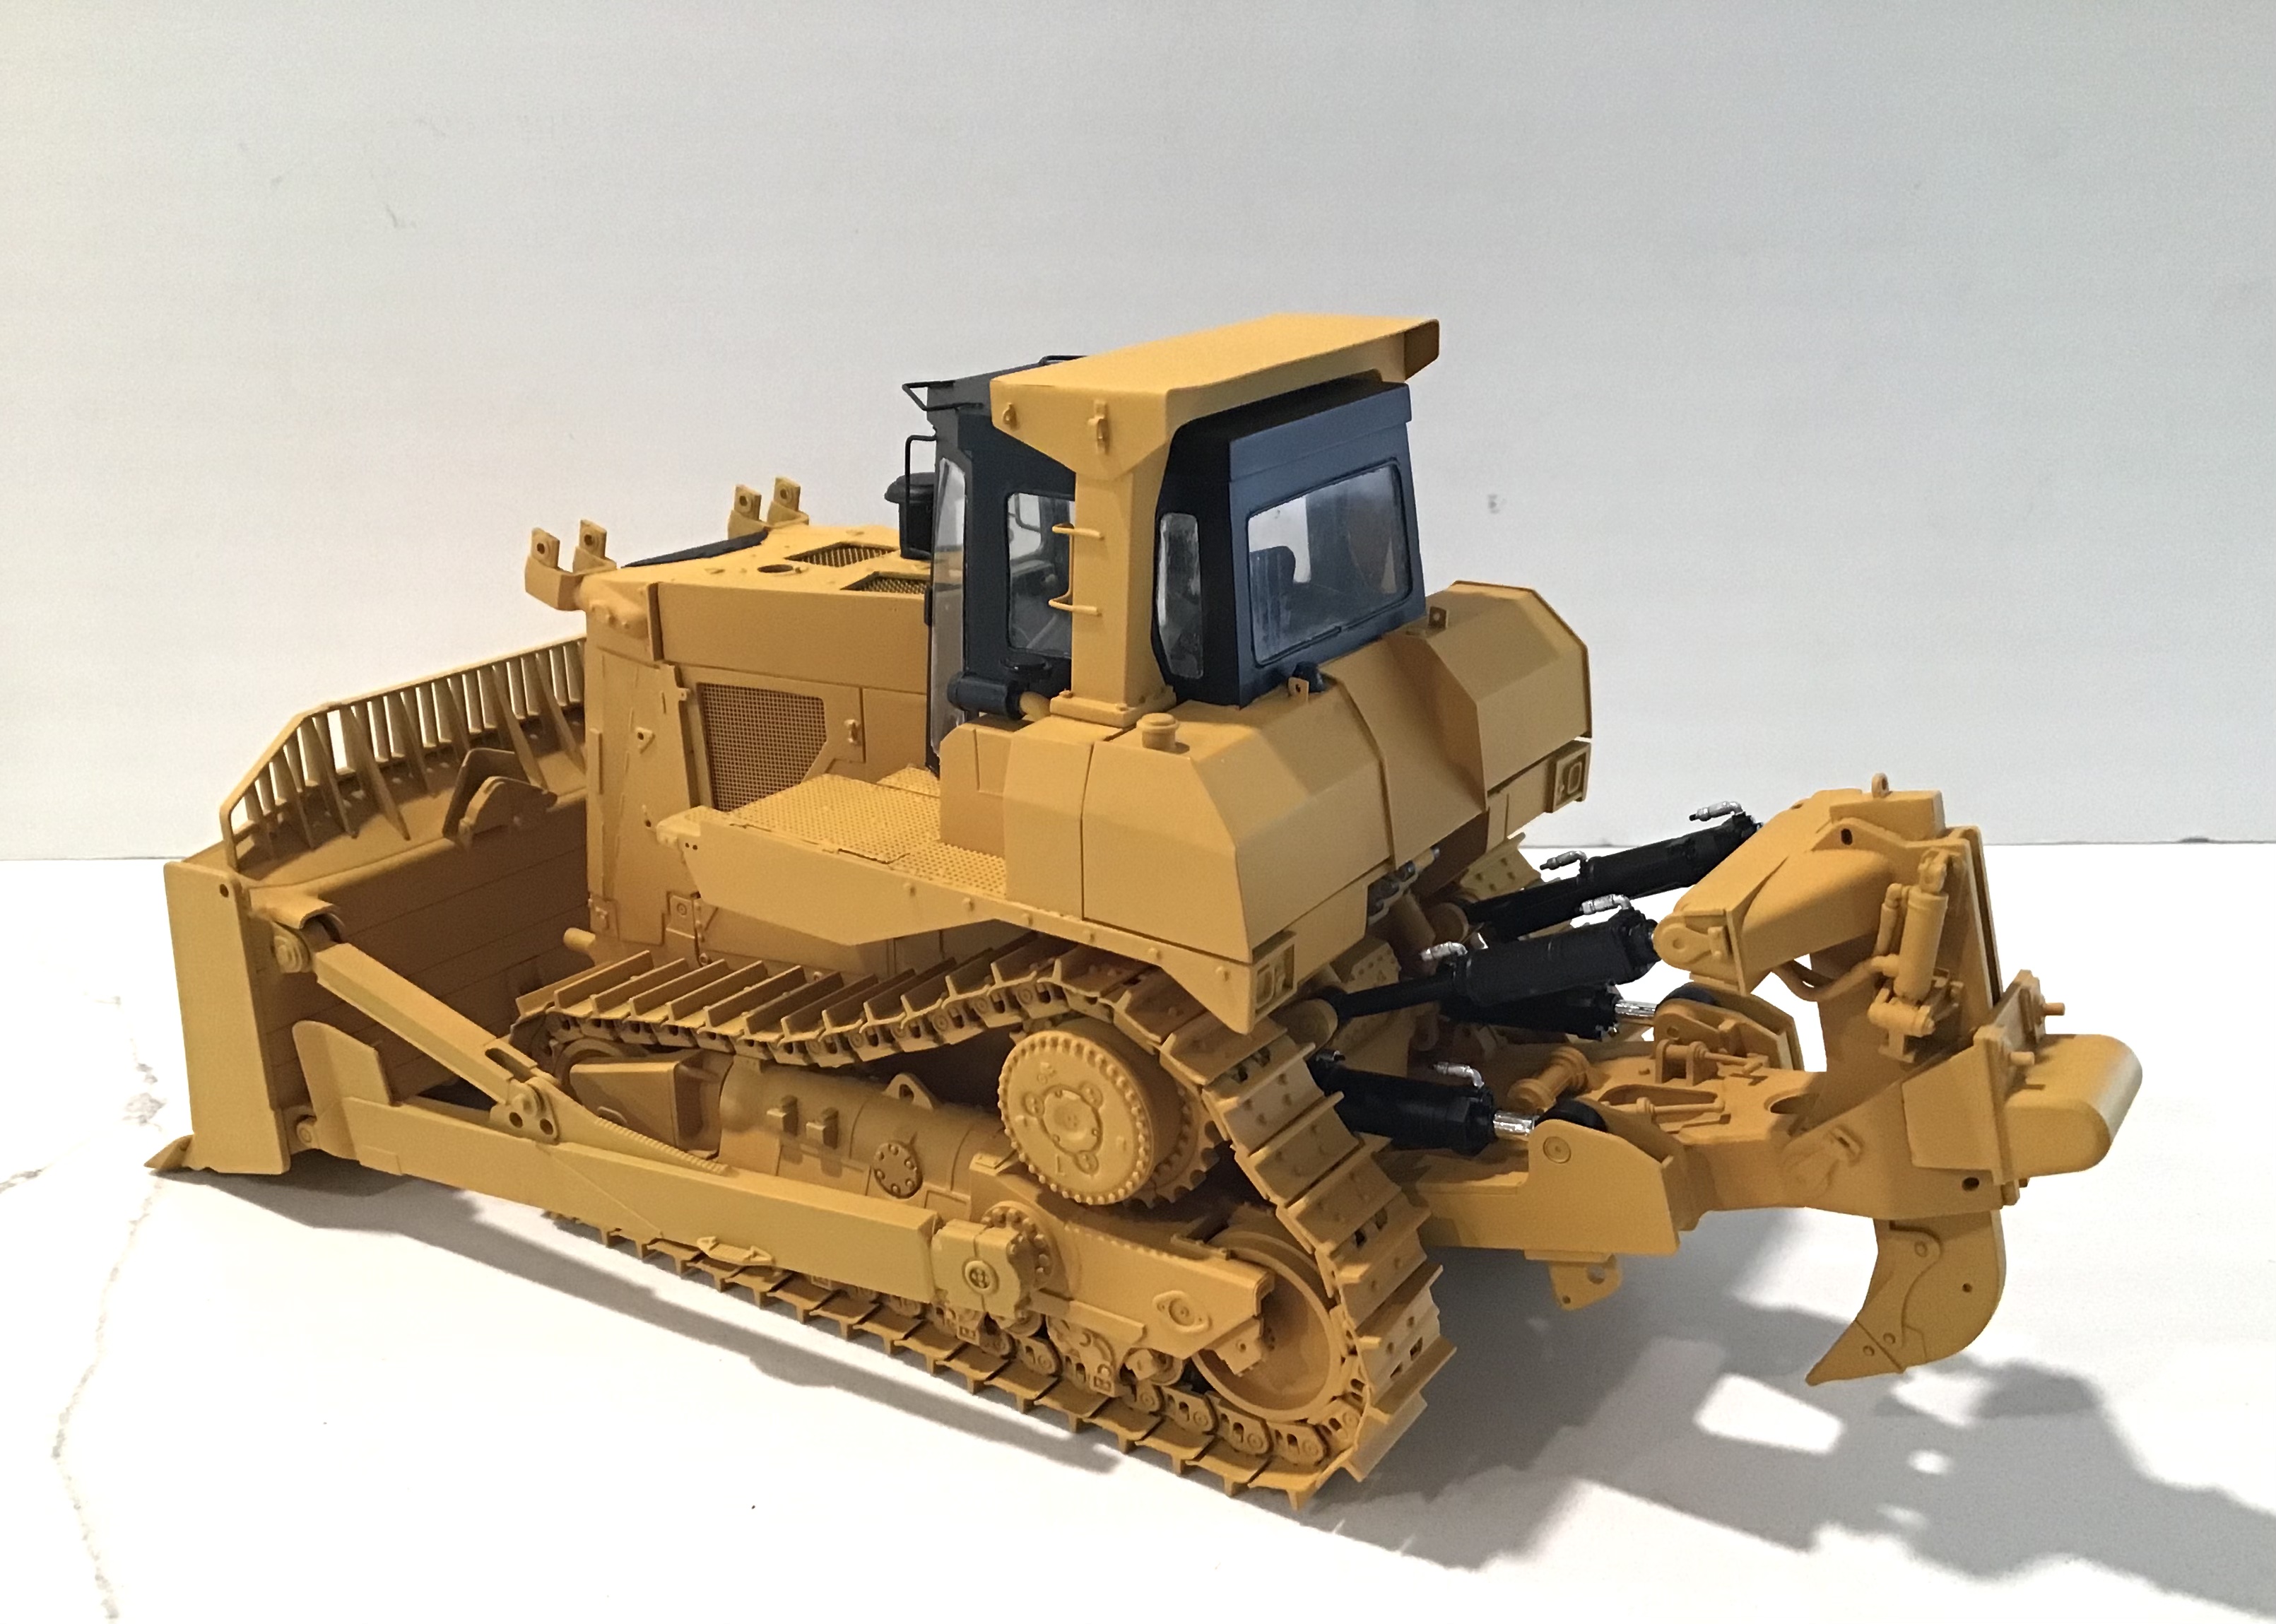
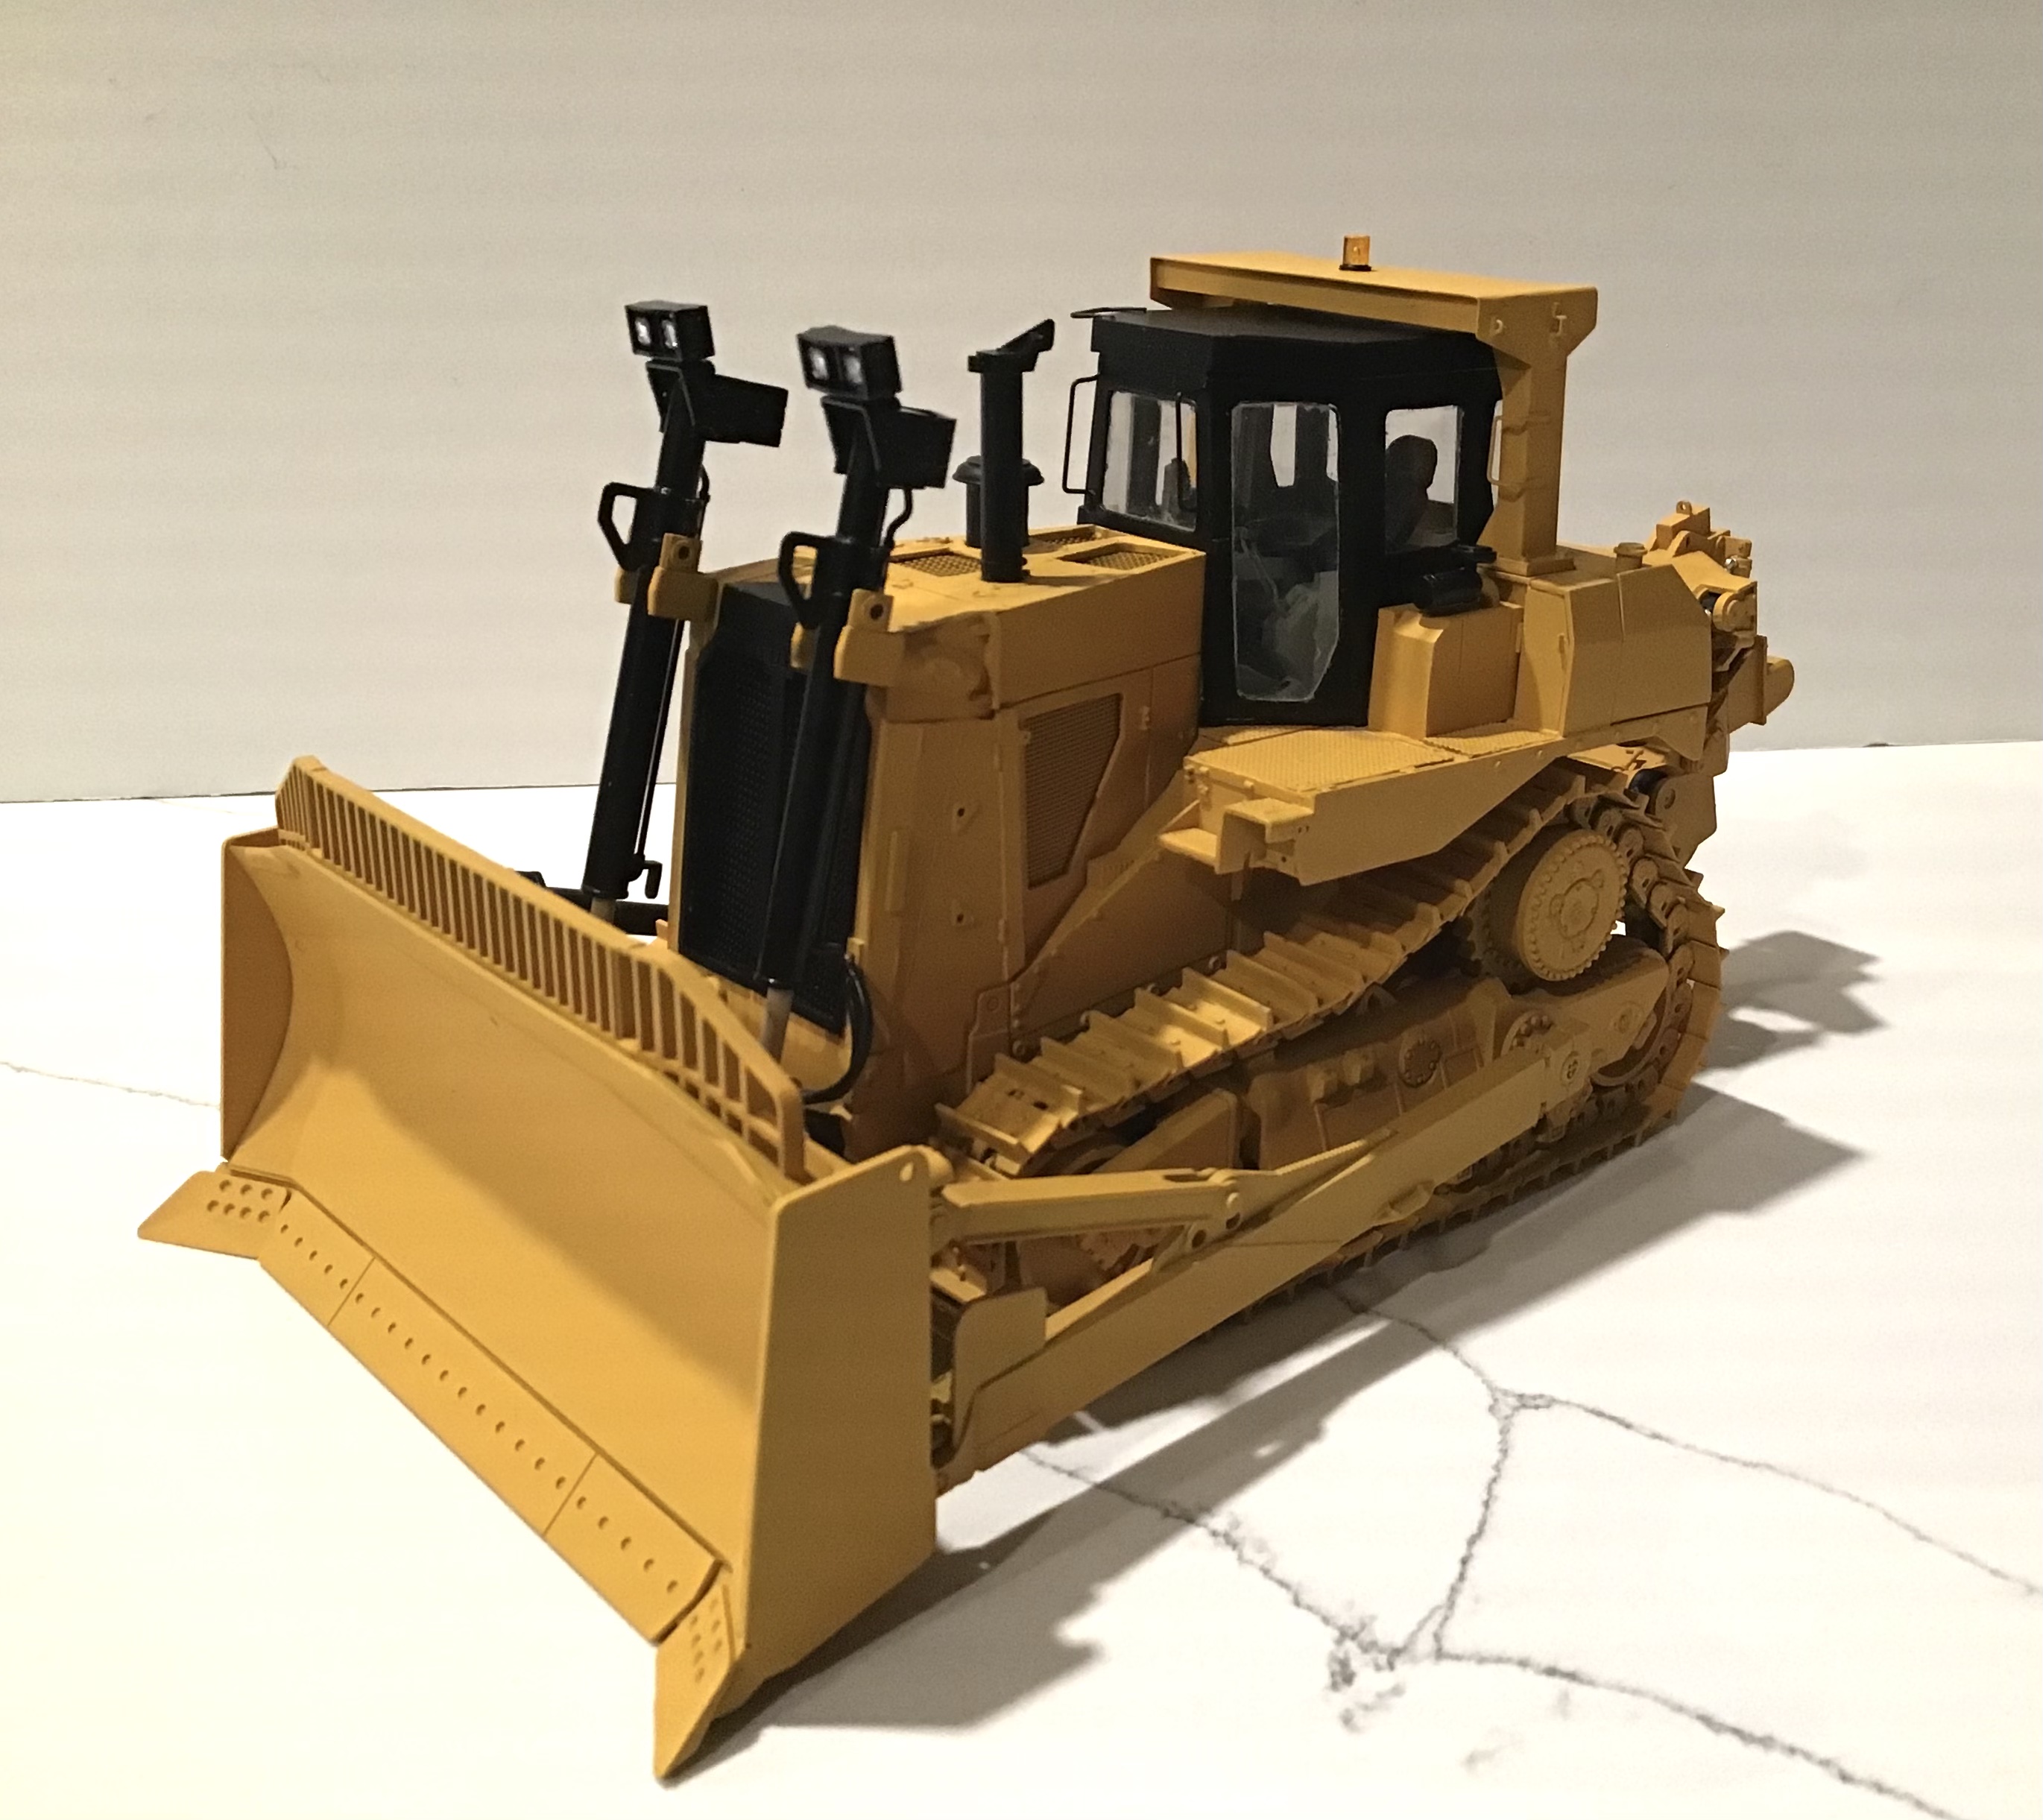
Yellow paint going on - undercarriage and tracks dry fitted . Tracks will need another shot of paint after tweaking.
Tracks / undercarriage will be removed as units and sprayed again . Next will be masking for black cab/grille and then painting . Ripper will need to be assembled to tractor before undercarriage/tracks can be permanently installed.
8 Likes
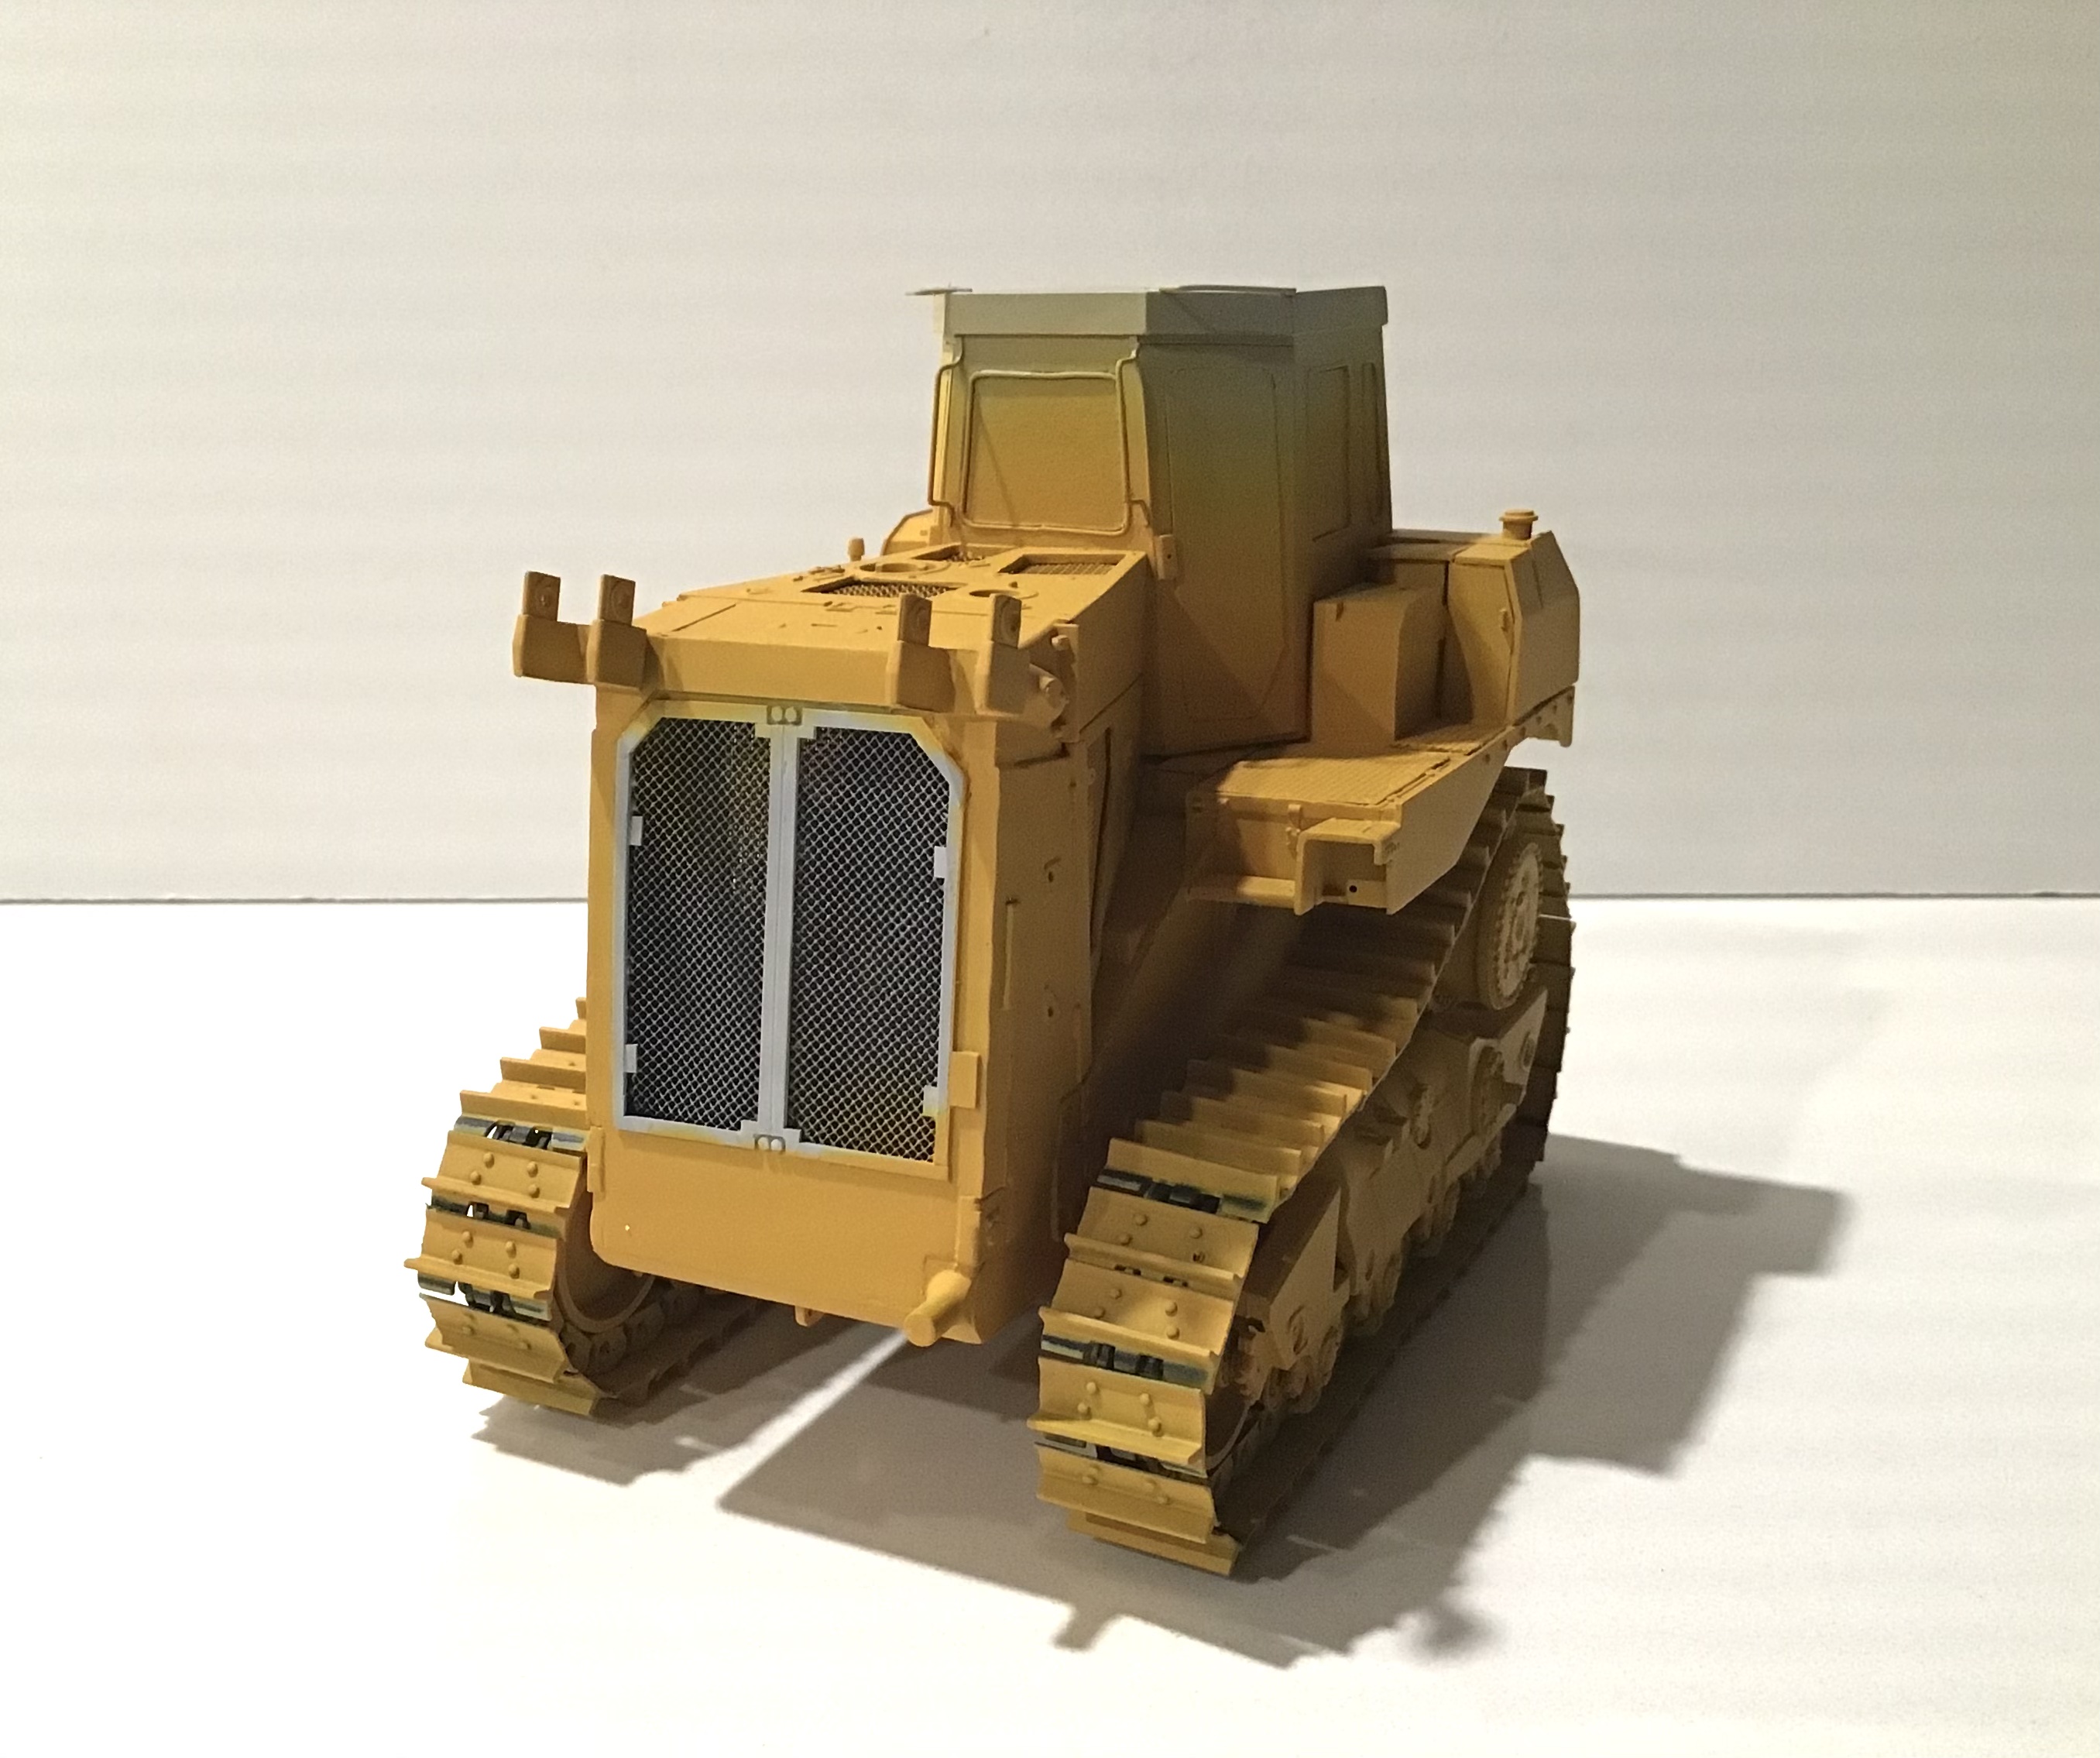
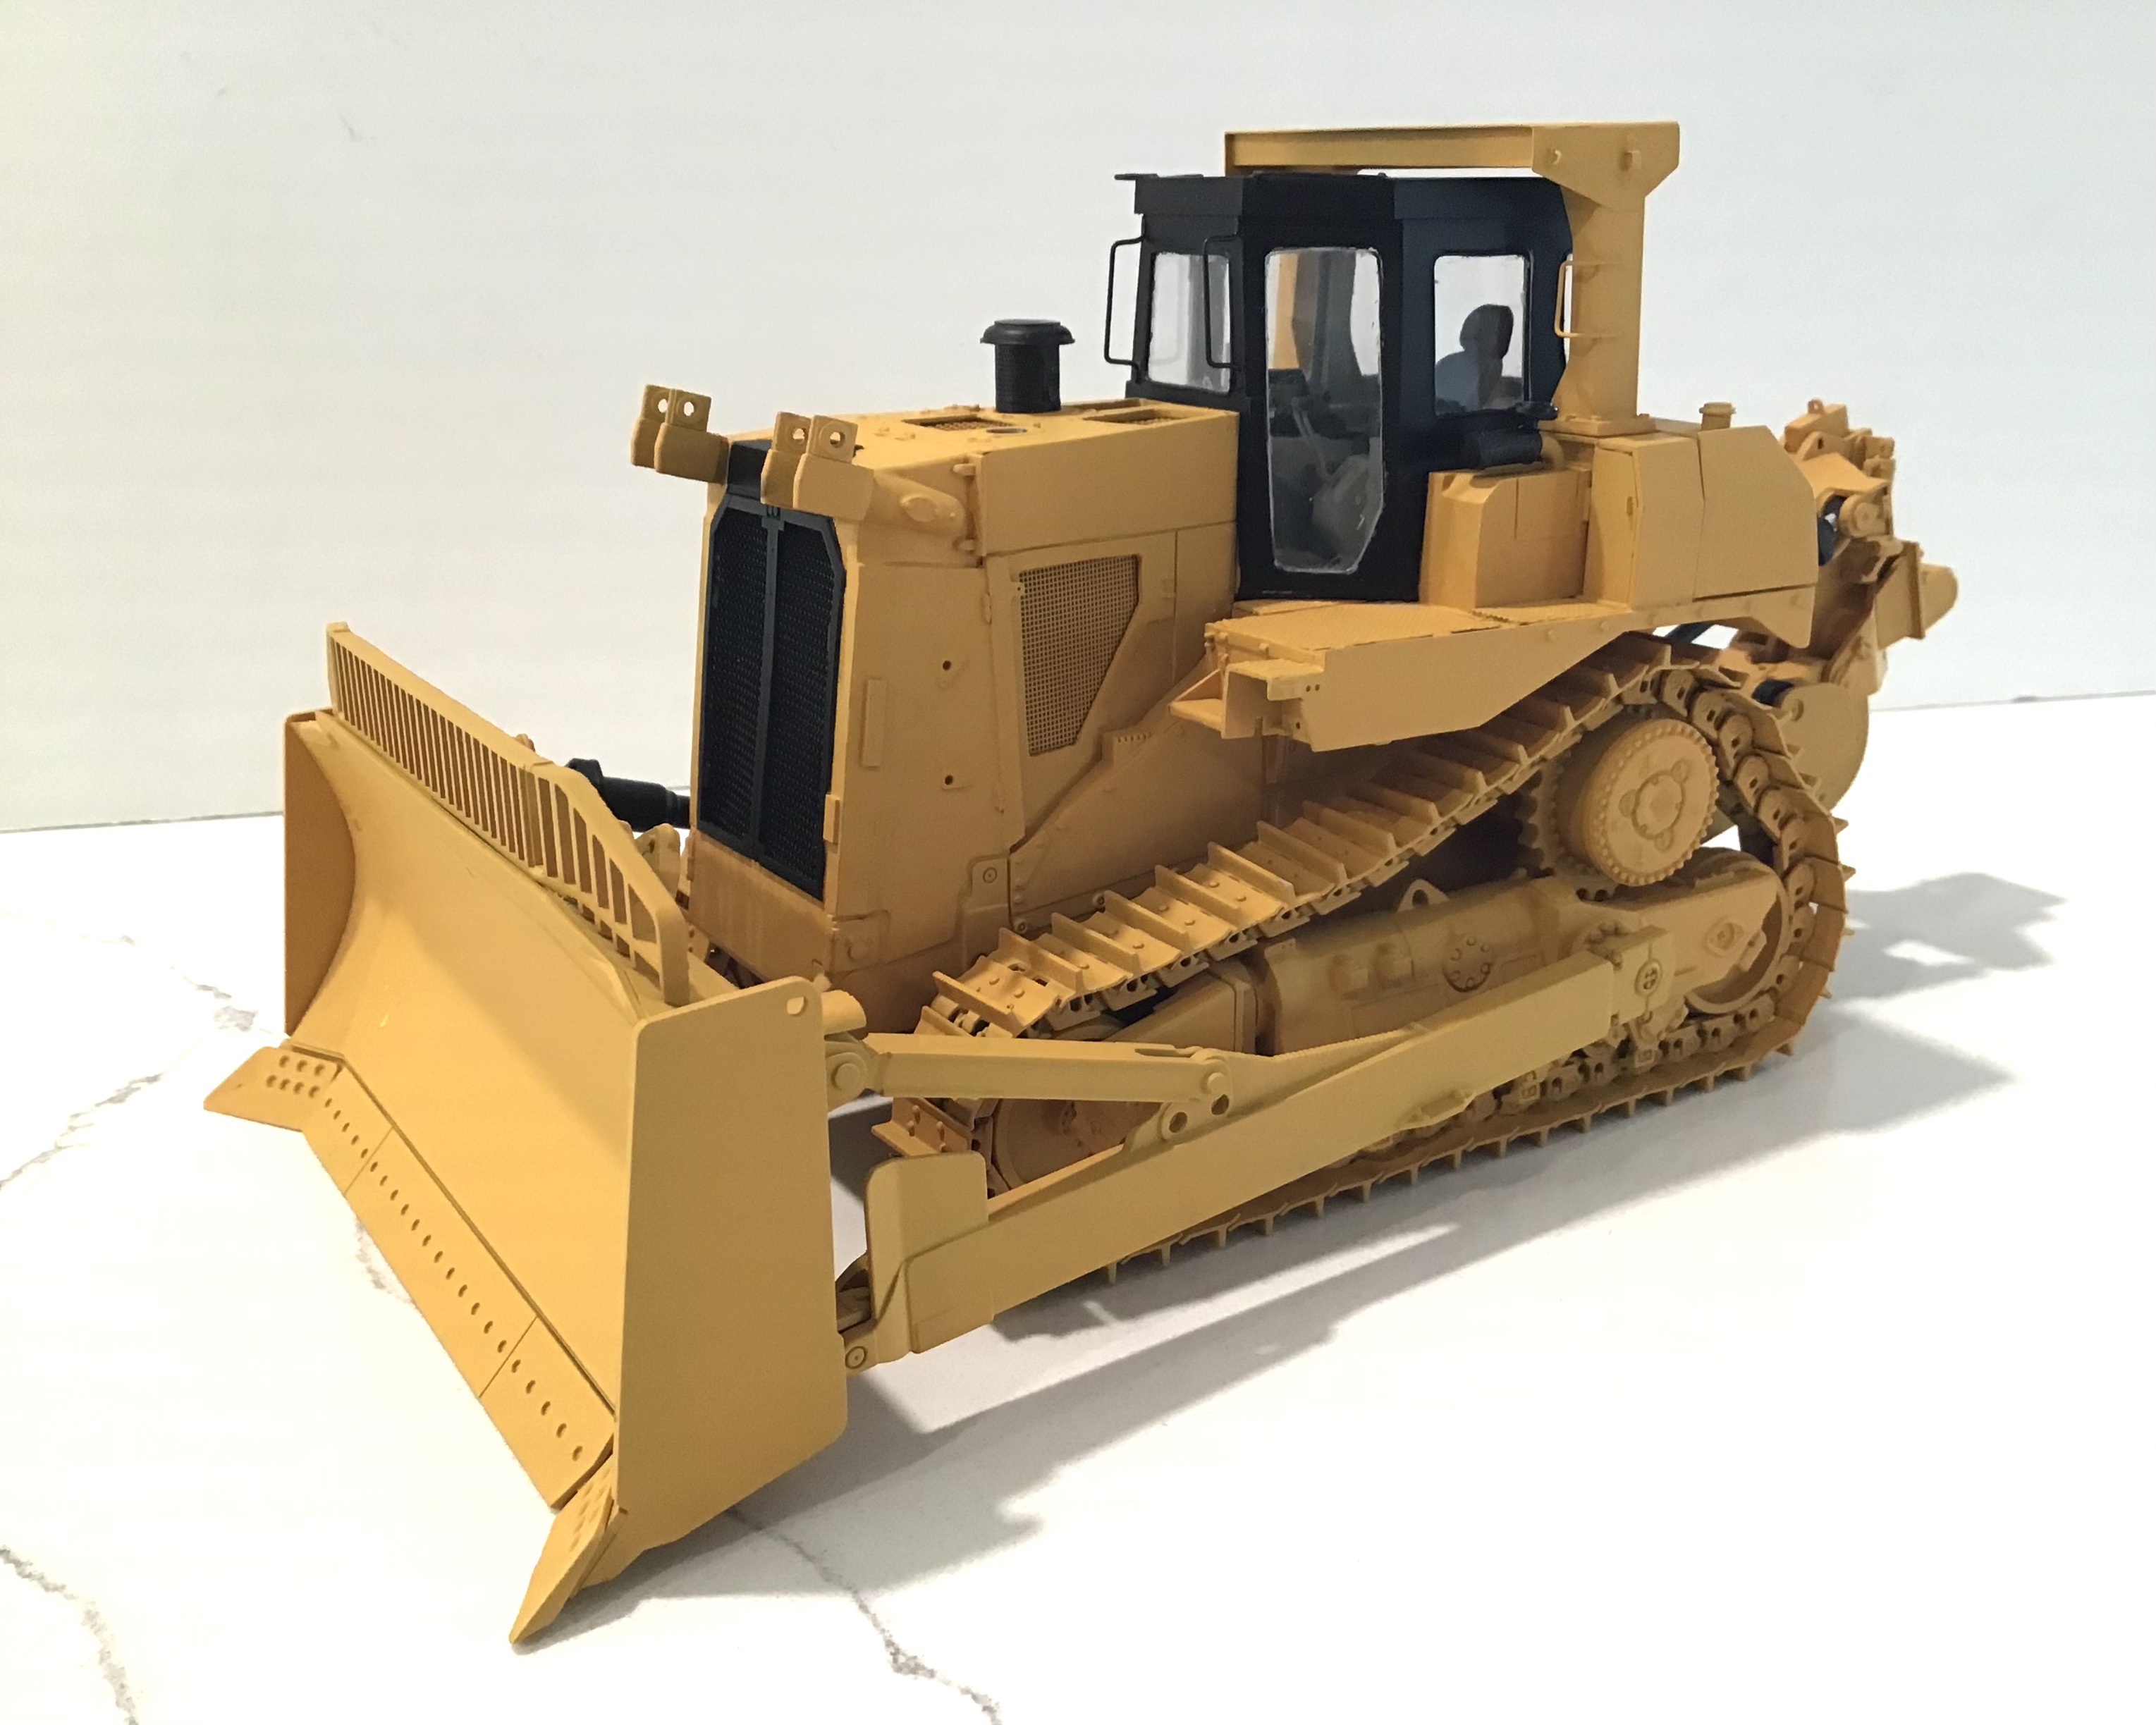
Paint mostly done - blade lift hydraulic cylinders and lights yet to do . Also exhaust and hydraulic hoses on ripper remain to be installed.
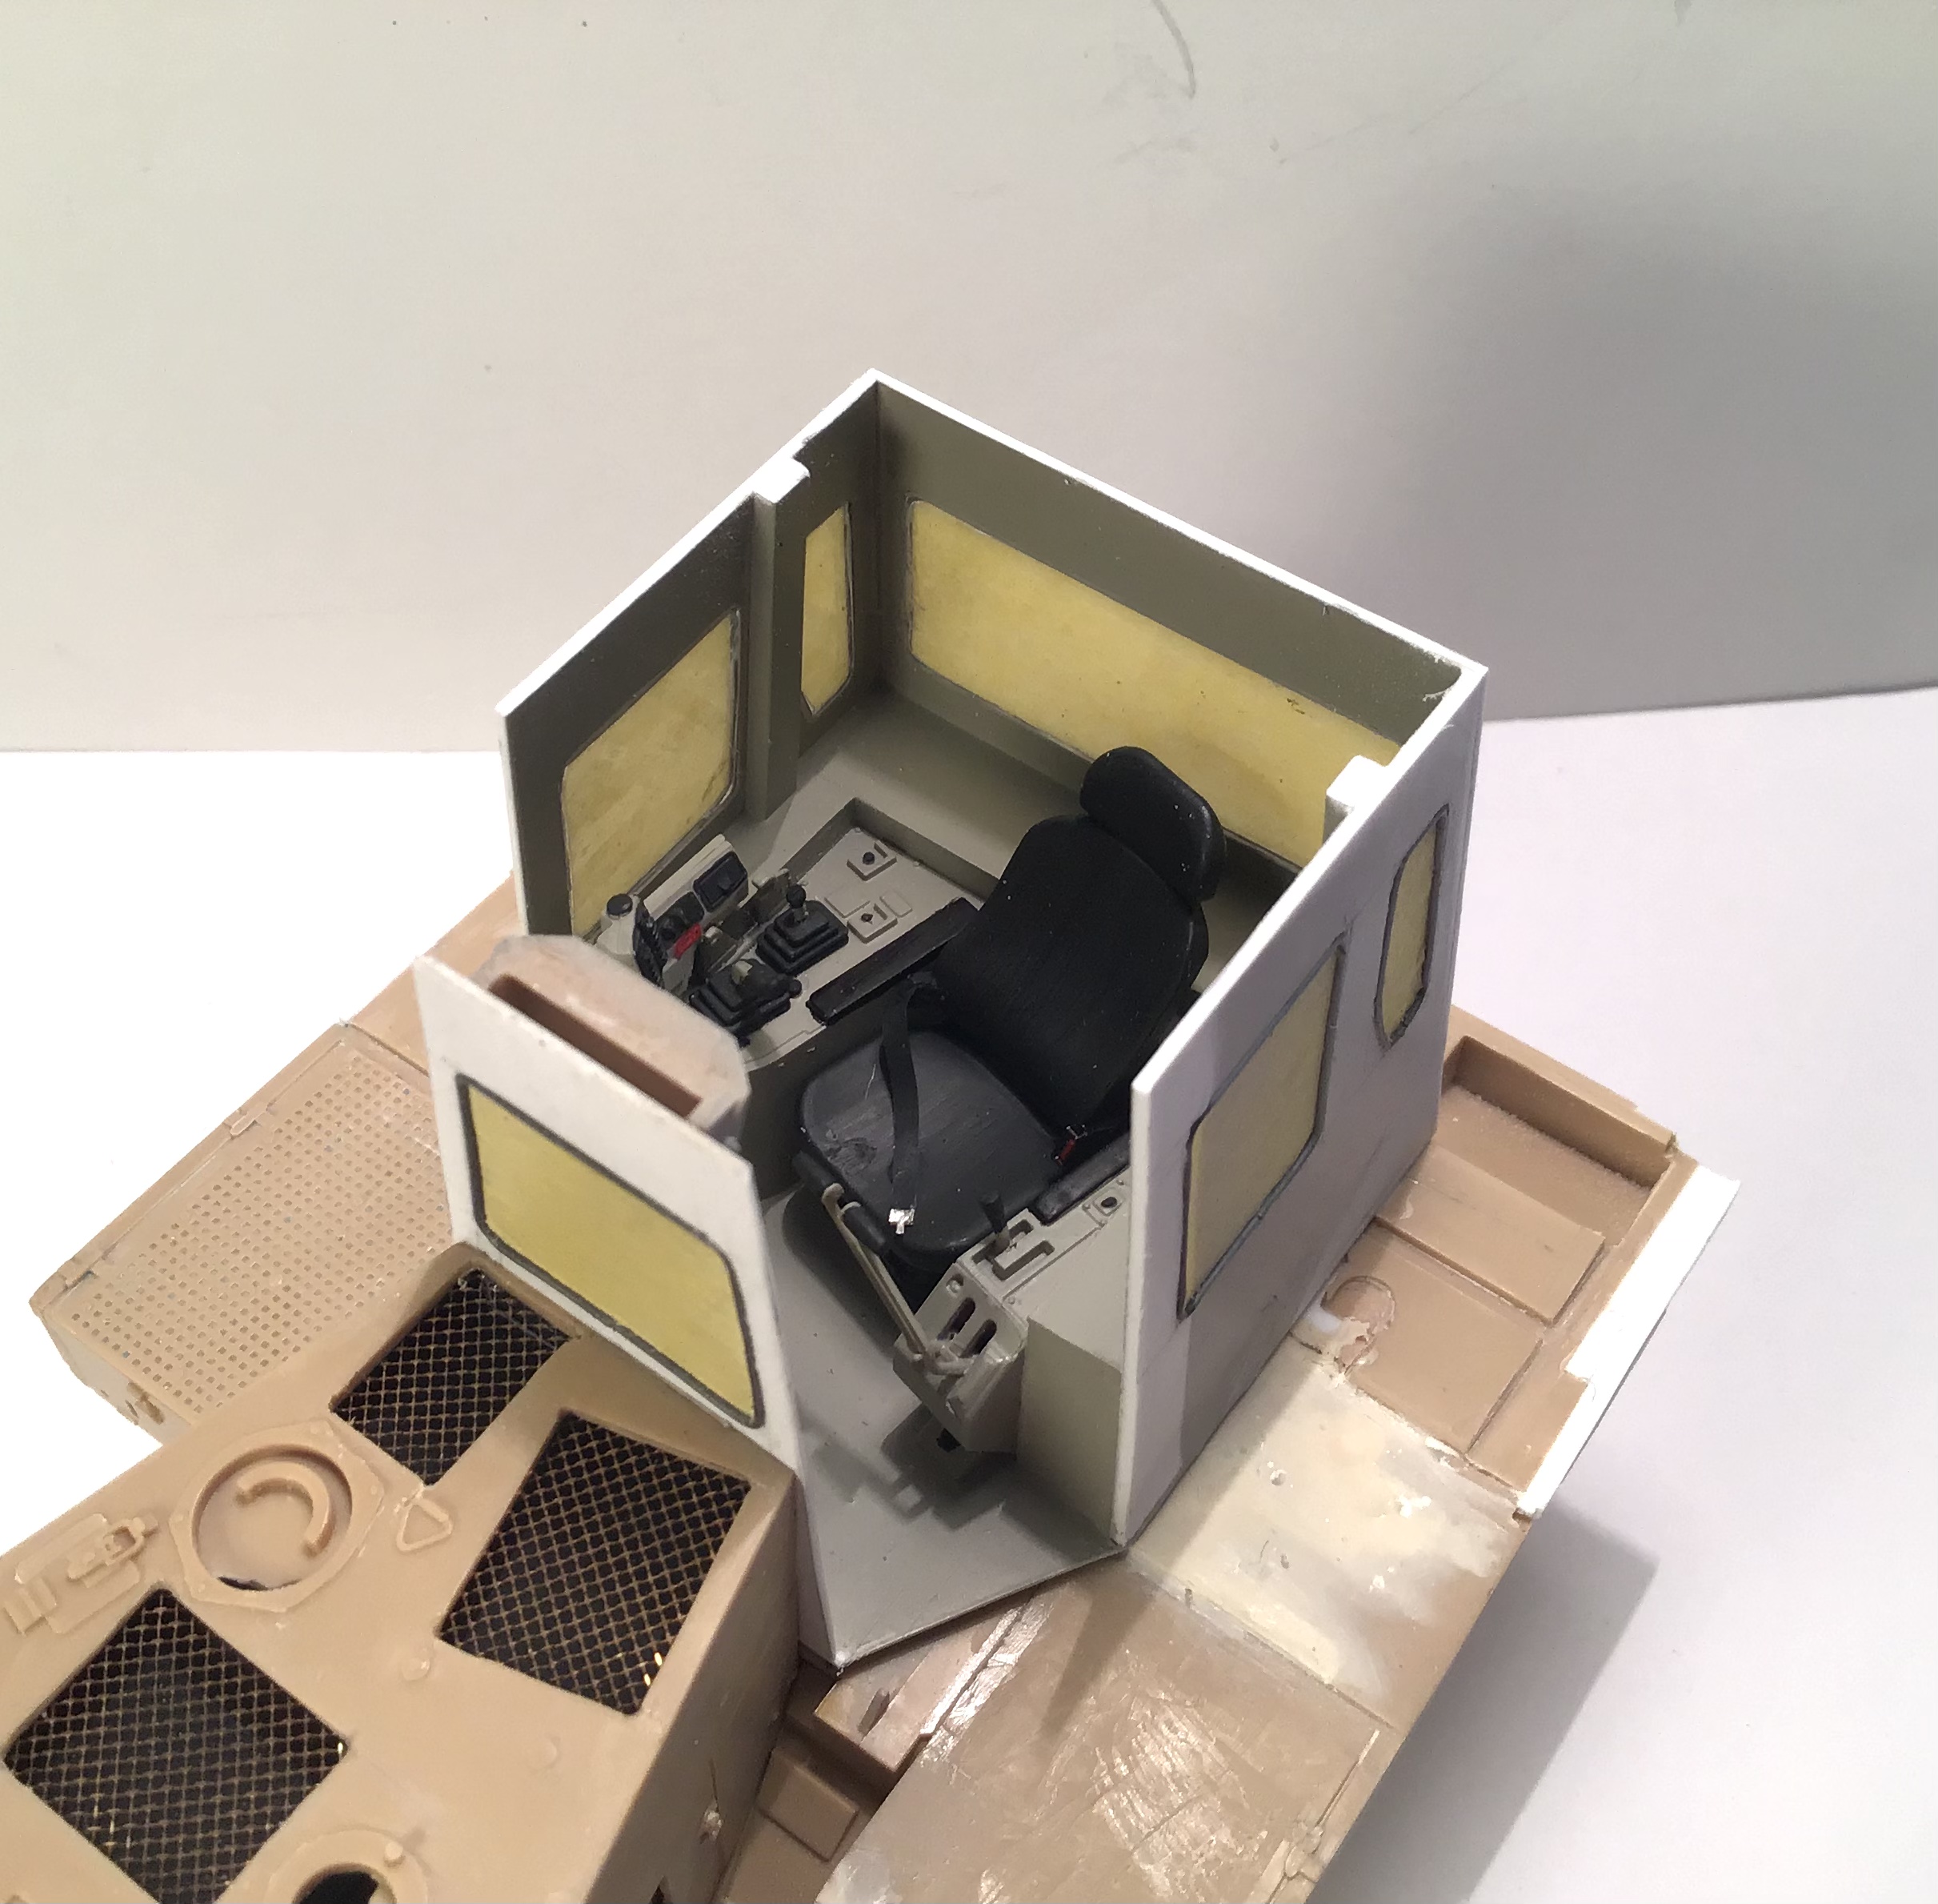
In the interest of full disclosure I didn’t do a proper job of cleaning the inside of the glass before buttoning up the cab. When I unmasked the exterior after paint the glass was a mess inside. I got lucky and was able to pry of the glass on one door and reach in with a cotton swab moistened with Windex.
Not perfect but much better.
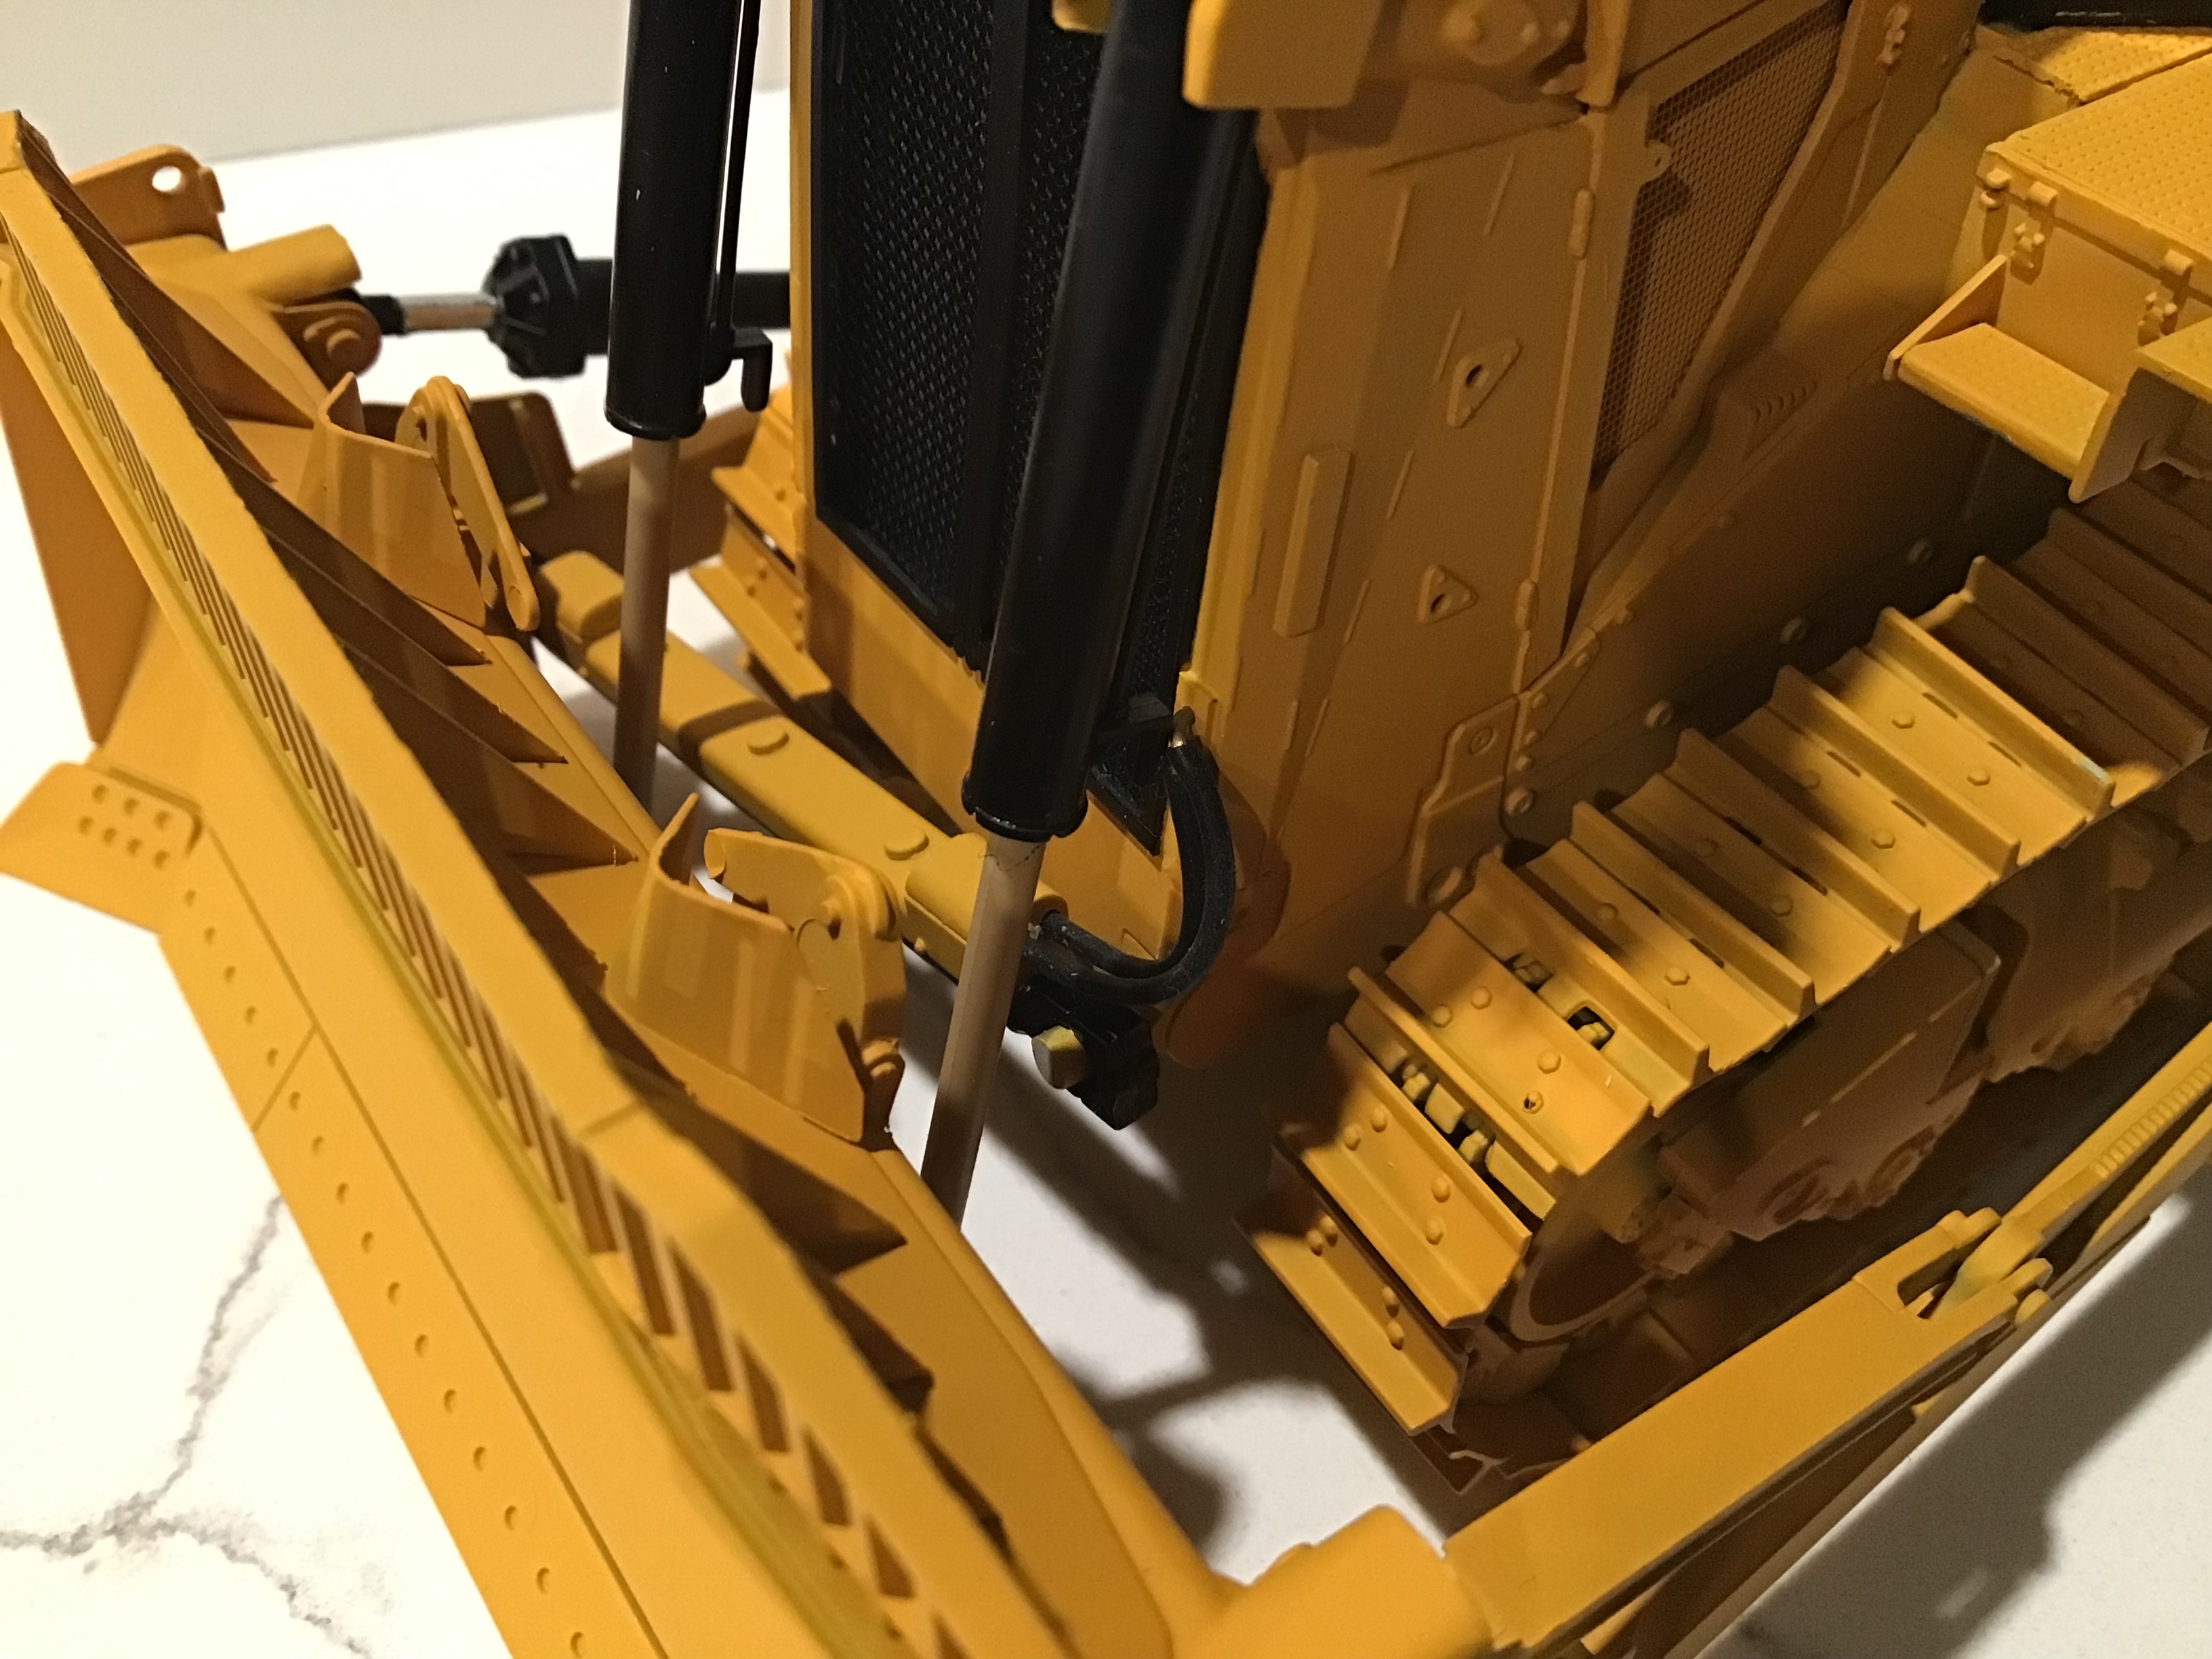
I did the rams on the hydraulic cylinders for the ripper with Mylar cut from a balloon and fastened with Microscale foil adhesive.
Thanks for looking and Merry Christmas to all.
Richard
14 Likes
Looks just out-friggin-standing Richard!
2 Likes
Looks exactly as I’d expect to see a D9R at the yard.
Great work. 
2 Likes
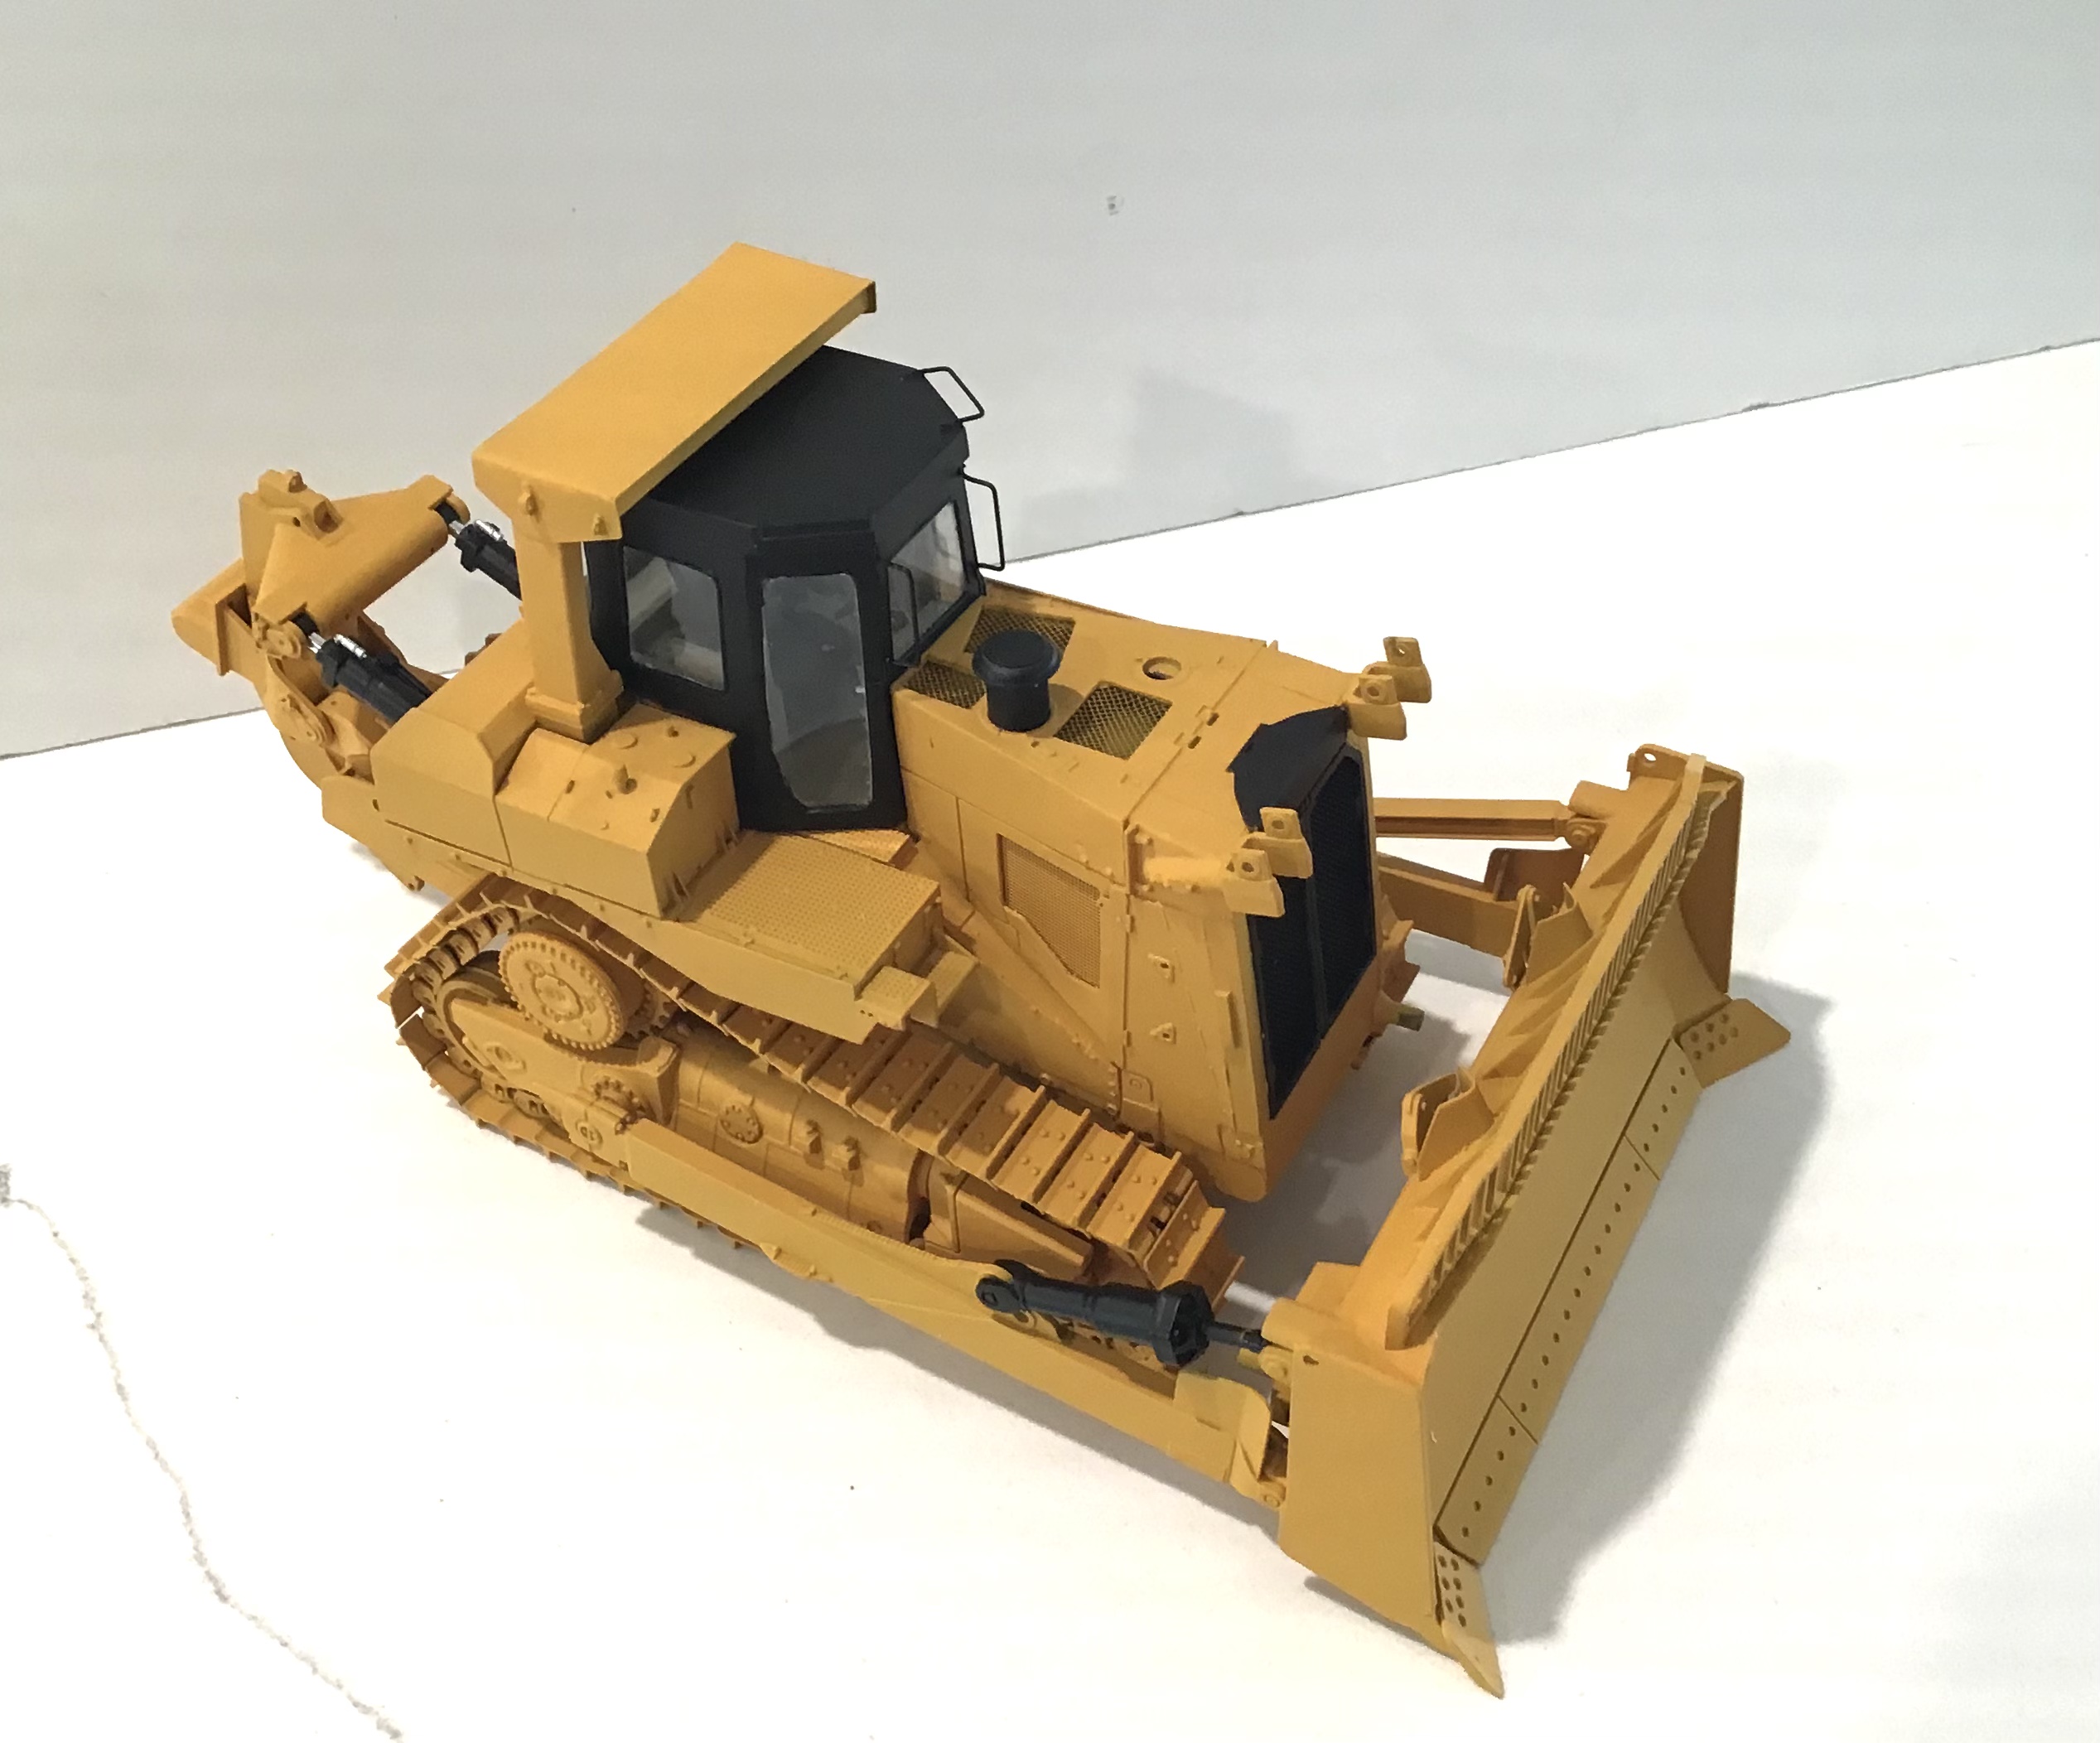
I’ve taken this as far as I dare until I get my masks for lettering done -
Hydraulic hoses installed on ripper -
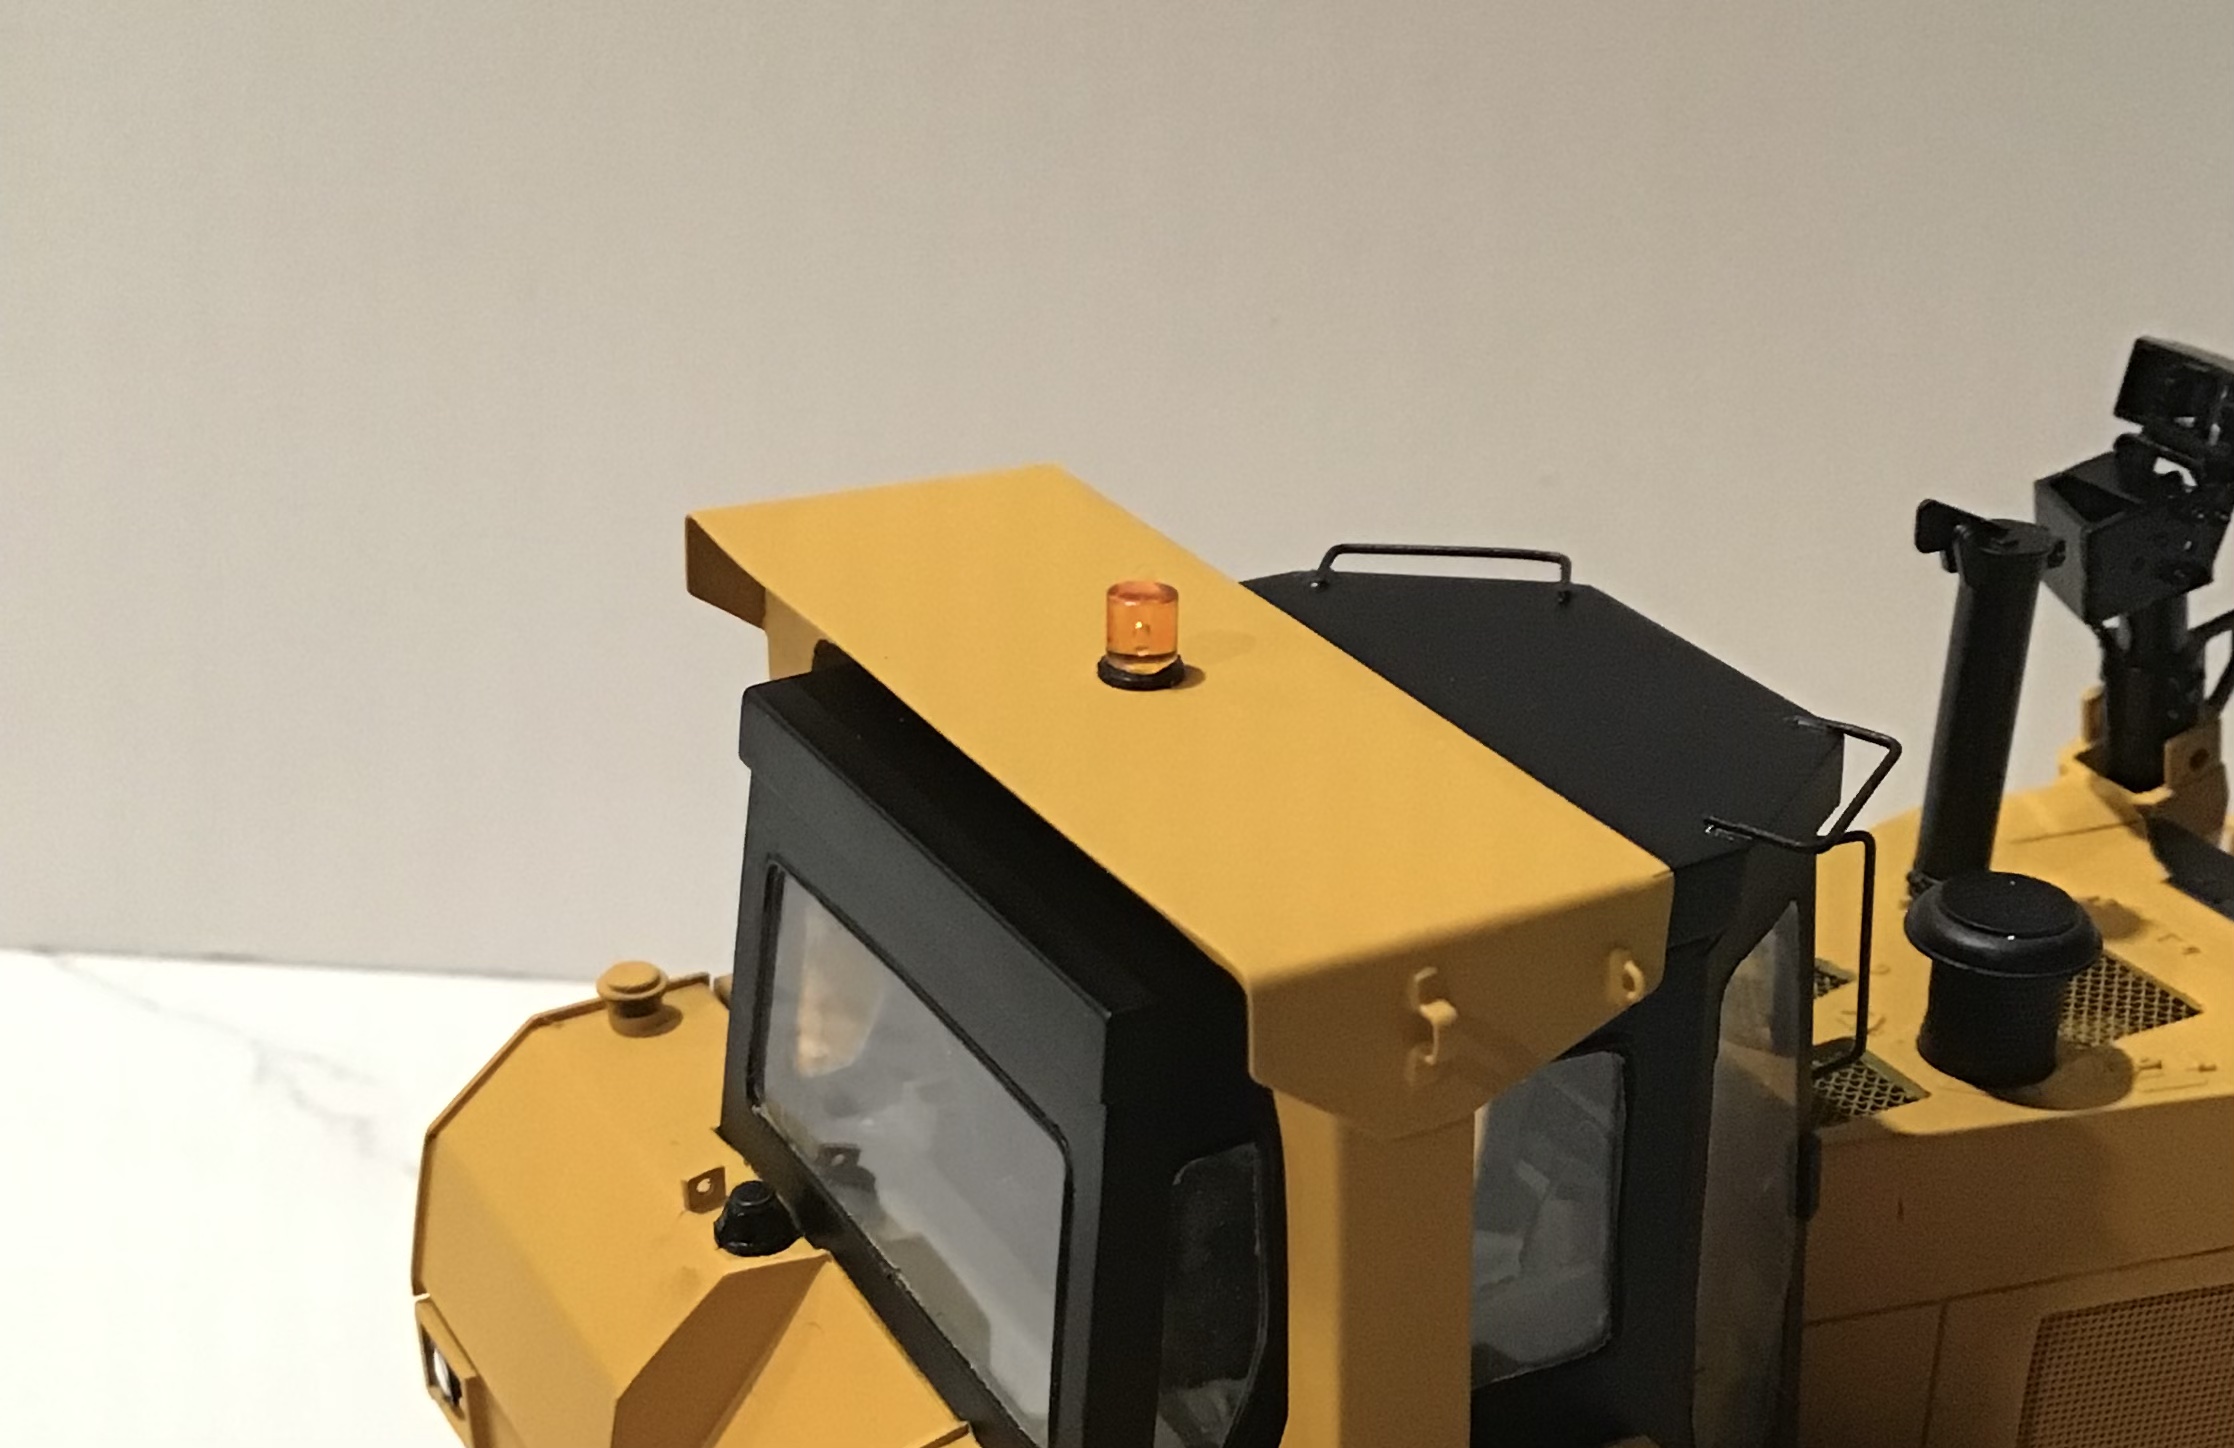
I made a beacon for the ROPS from a piece of clear sprue that had an air bubble cast in - perfect for the bulb. Sprue cut to size and polished and painted clear orange, mounted on plastic disc and cemented to ROPS -
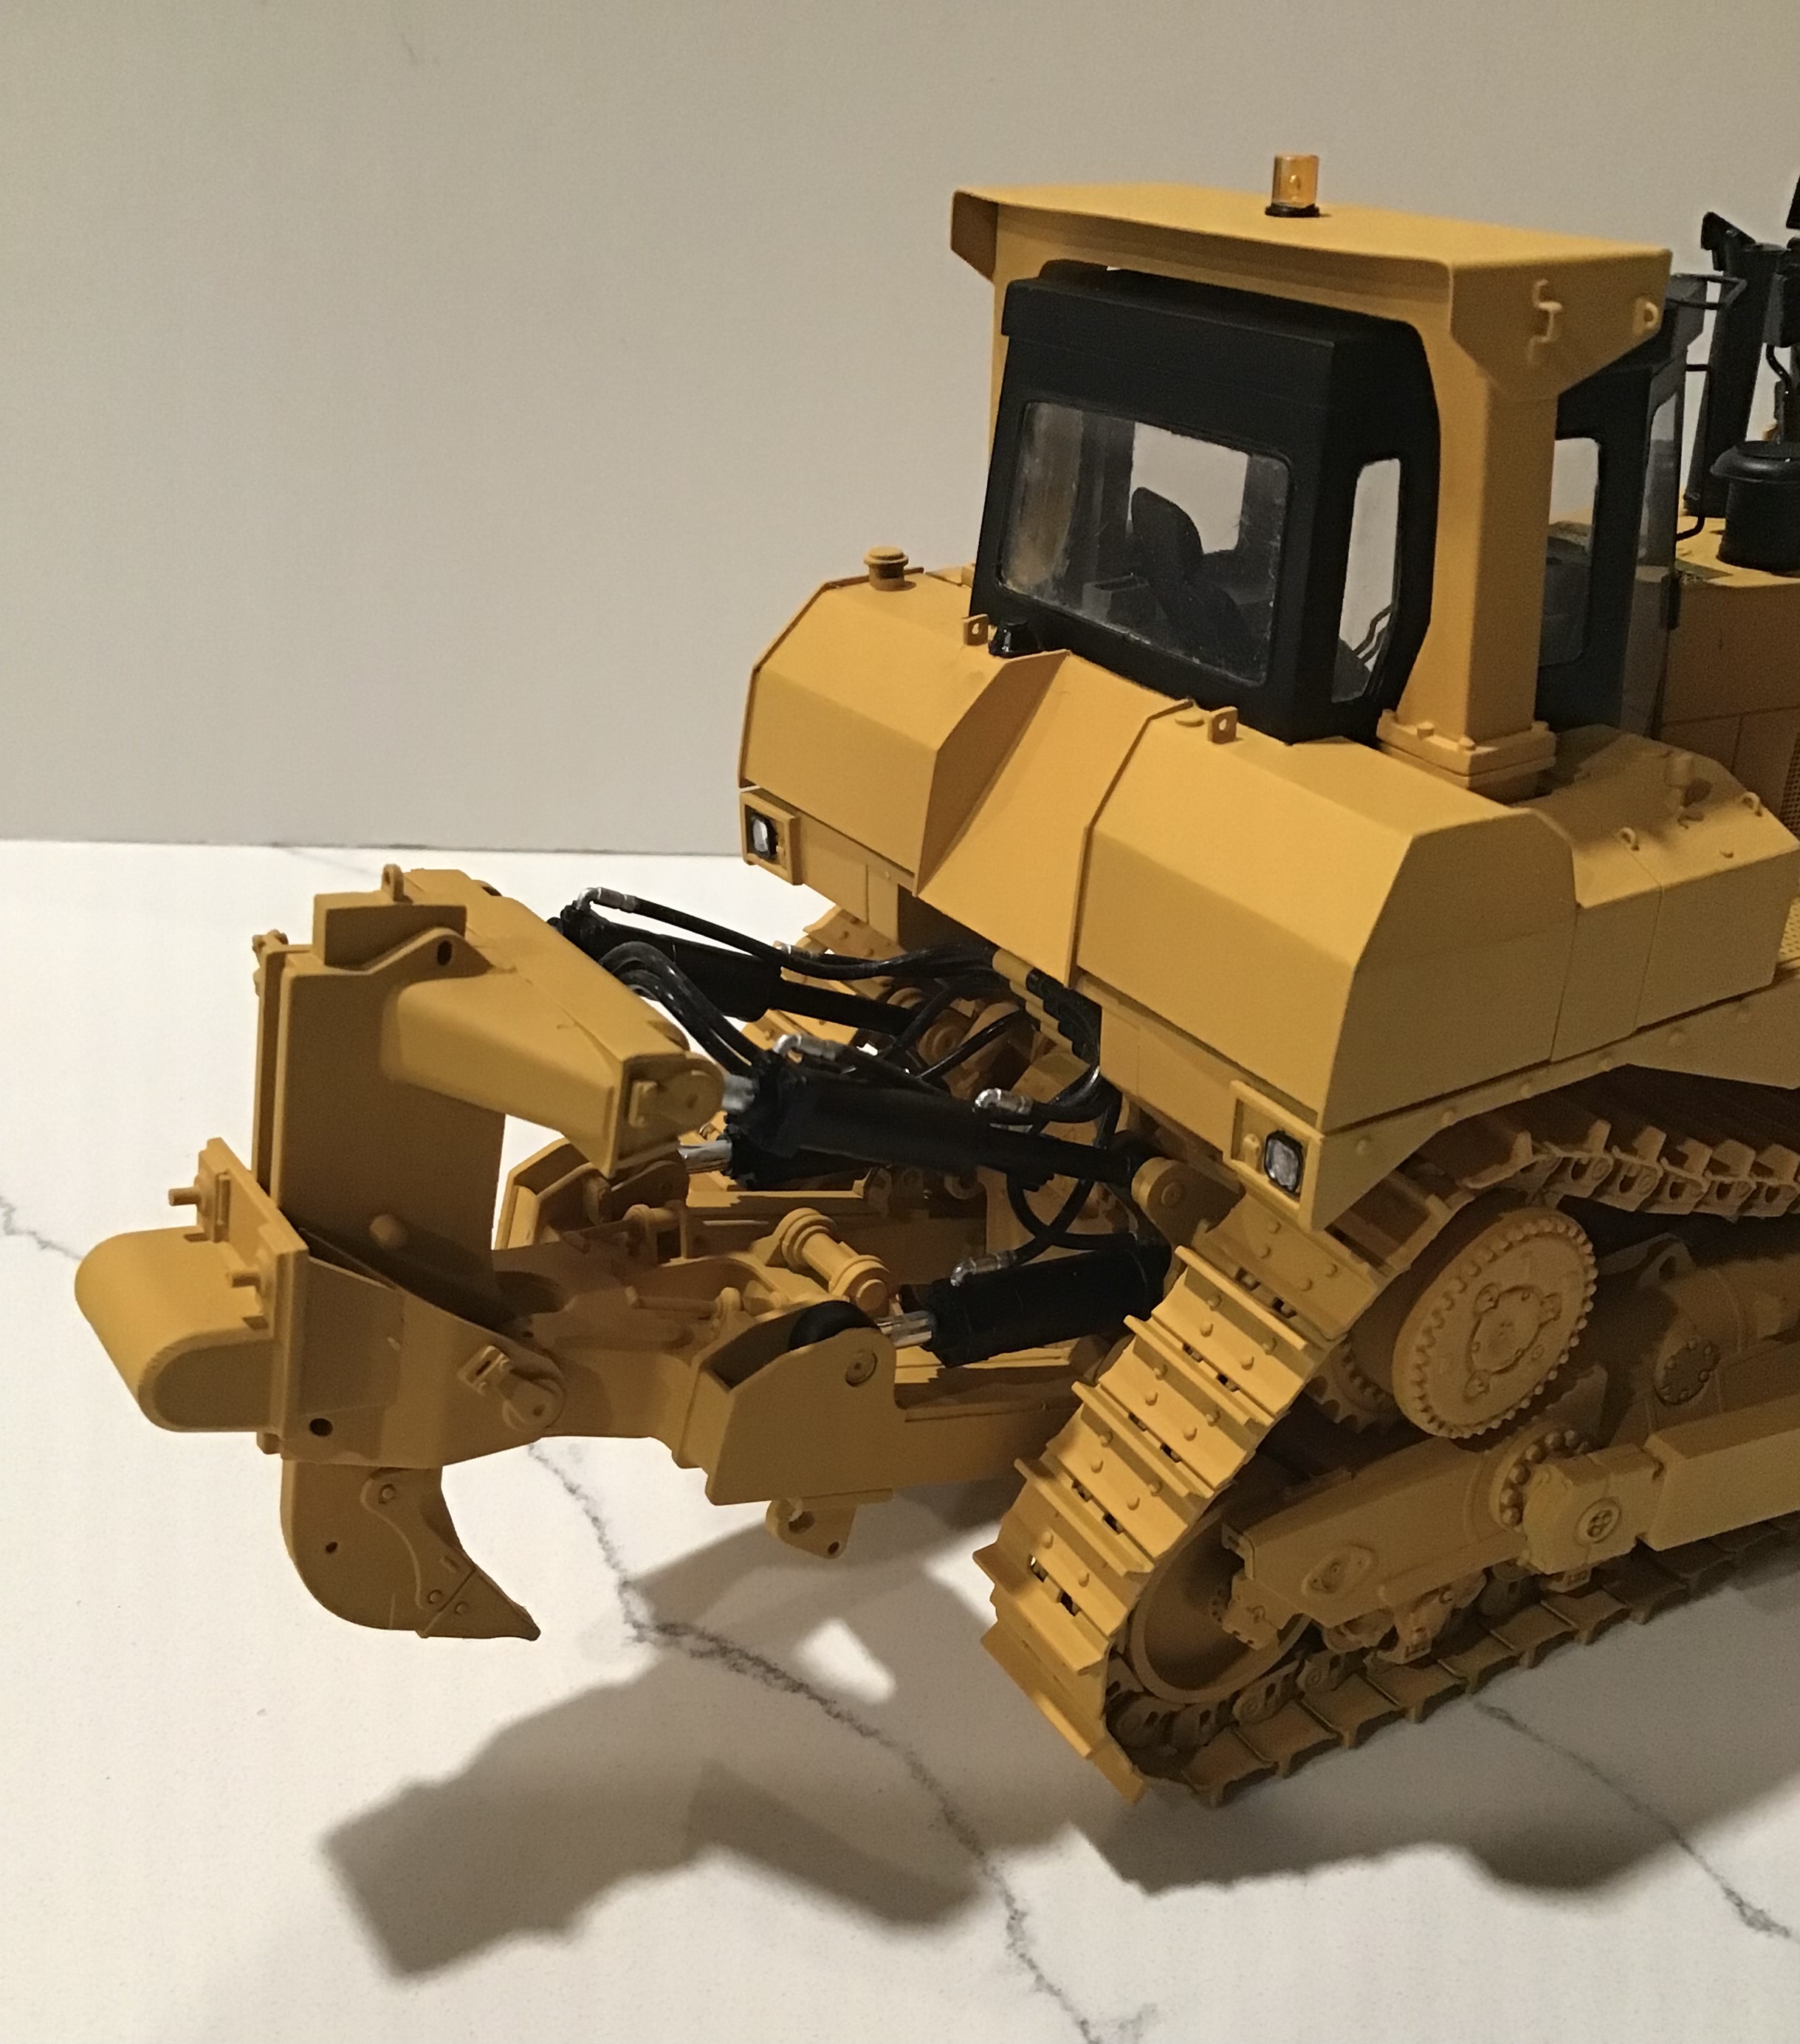
Blade lift cylinders painted - lights installed - dry fitted -
hydraulic lines made up for blade tilt cylinder -
Working on masks - will post when they are done.
Thanks for looking and wishing all a Happy New Year !
Cheers- RT
15 Likes
Wow - does this look good! beautiful work 
Cheers
Nick
3 Likes
Incredible work Richard this is really a beauty.
2 Likes
What a fantastic work! Congratulations!
3 Likes
Very, very nice!
One of my favorite in-progress builds right now. Looking forward to seeing more as you continue on.
Thanks for sharing!
3 Likes
Thanks to all for the compliments. I am really enjoying this project . I am pleased with the way it is turning out . I don’t know why but all along I envisioned this as a new machine . Maybe a cop out because I was too lazy to get involved with an elaborate weathering process - LOL.
At any rate I am waiting for masks from my brother in law. Starting a simple base today - stay tuned and Happy New Year to all .
3 Likes