I can’t put my hands on it right now, so going on memory.
This is a ‘must-have’ if tou have an interest in WW2 Trucks
1 Like
Hey, hey. Coming aboard with an IBG 1/35 Chevrolet C15A Lorry.
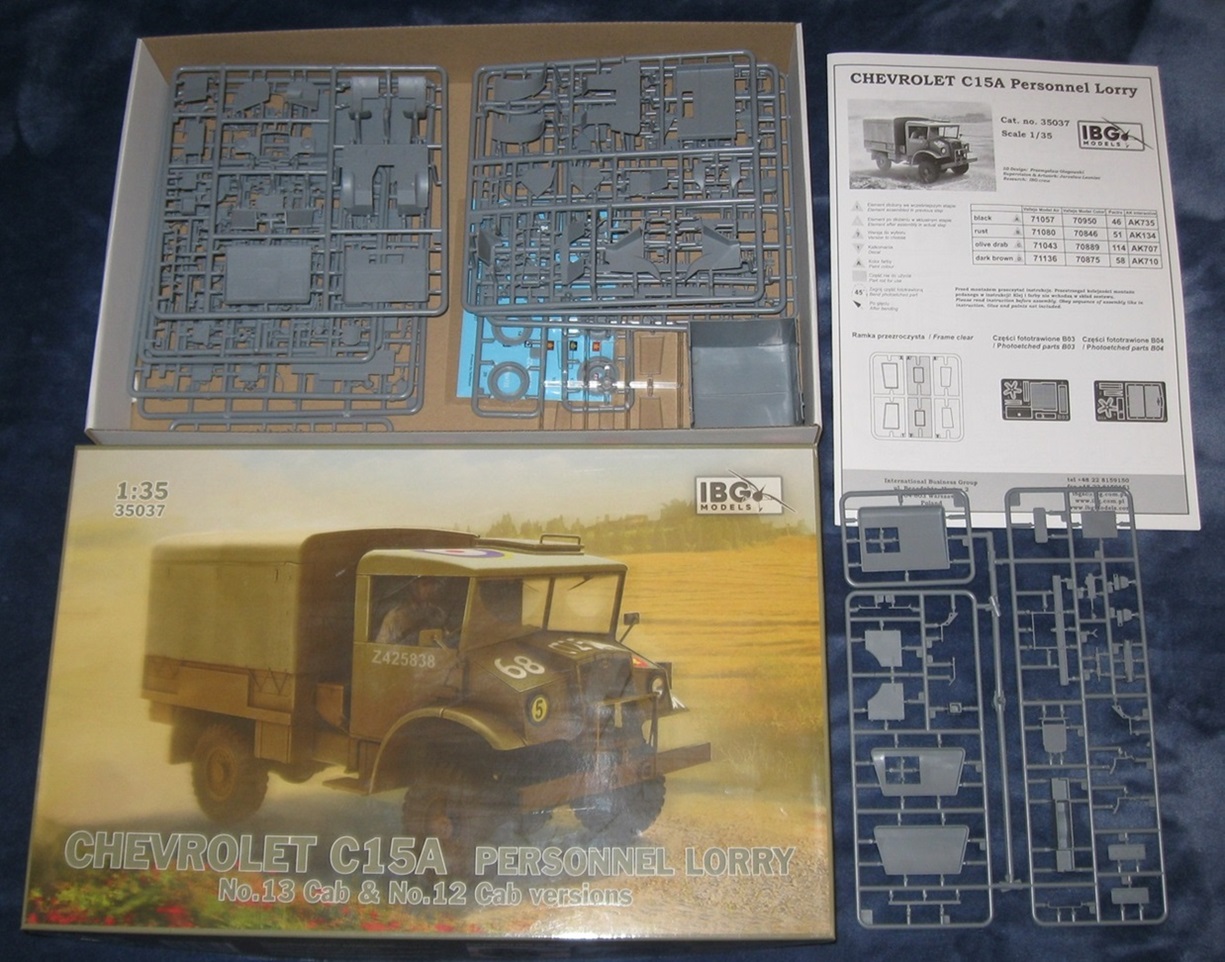
This one came home about a month ago. Having never built anything by IBG, and being on something of a truck binge, I want to give this model a try. It looks really nice in the box and is remarkably devoid of difficult ejector pin holes.
I have two models to paint in front of this one so the start will be slow. Who am I kidding? I will probably drop everything to work on this.
…
Also, Convoy! Part 2 ended up in the Finished Campaigns section. It needs moving to the Active Campaigns section.
4 Likes
That Chevy looks tasty - I’ll watch with interest as it might spur me to get one!
2 Likes
It can be built it as Cab 12 or Cab 13, with or without the canvas cover, giving 4 possible versions in the box. Tires are plastic. It reminds me of an ICM truck model.
1 Like
Fixed. I don’t know how that happened. It was in the Active section when I made it Active at the start of the campaign. Huh.
2 Likes
Good question! I noticed Staff Jim has been editing a number of campaigns over the past couple of days - he may have accidentally moved it.
4 Likes
About two days ago, Jim created 4 new wrapper categories in the Campaigns area, then sorted all campaign discussions into those new categories. Convoy 2 accidentally ended up inside the wrong wrapper. Stuff like that happens regularly when working with databases. ![]()
2 Likes
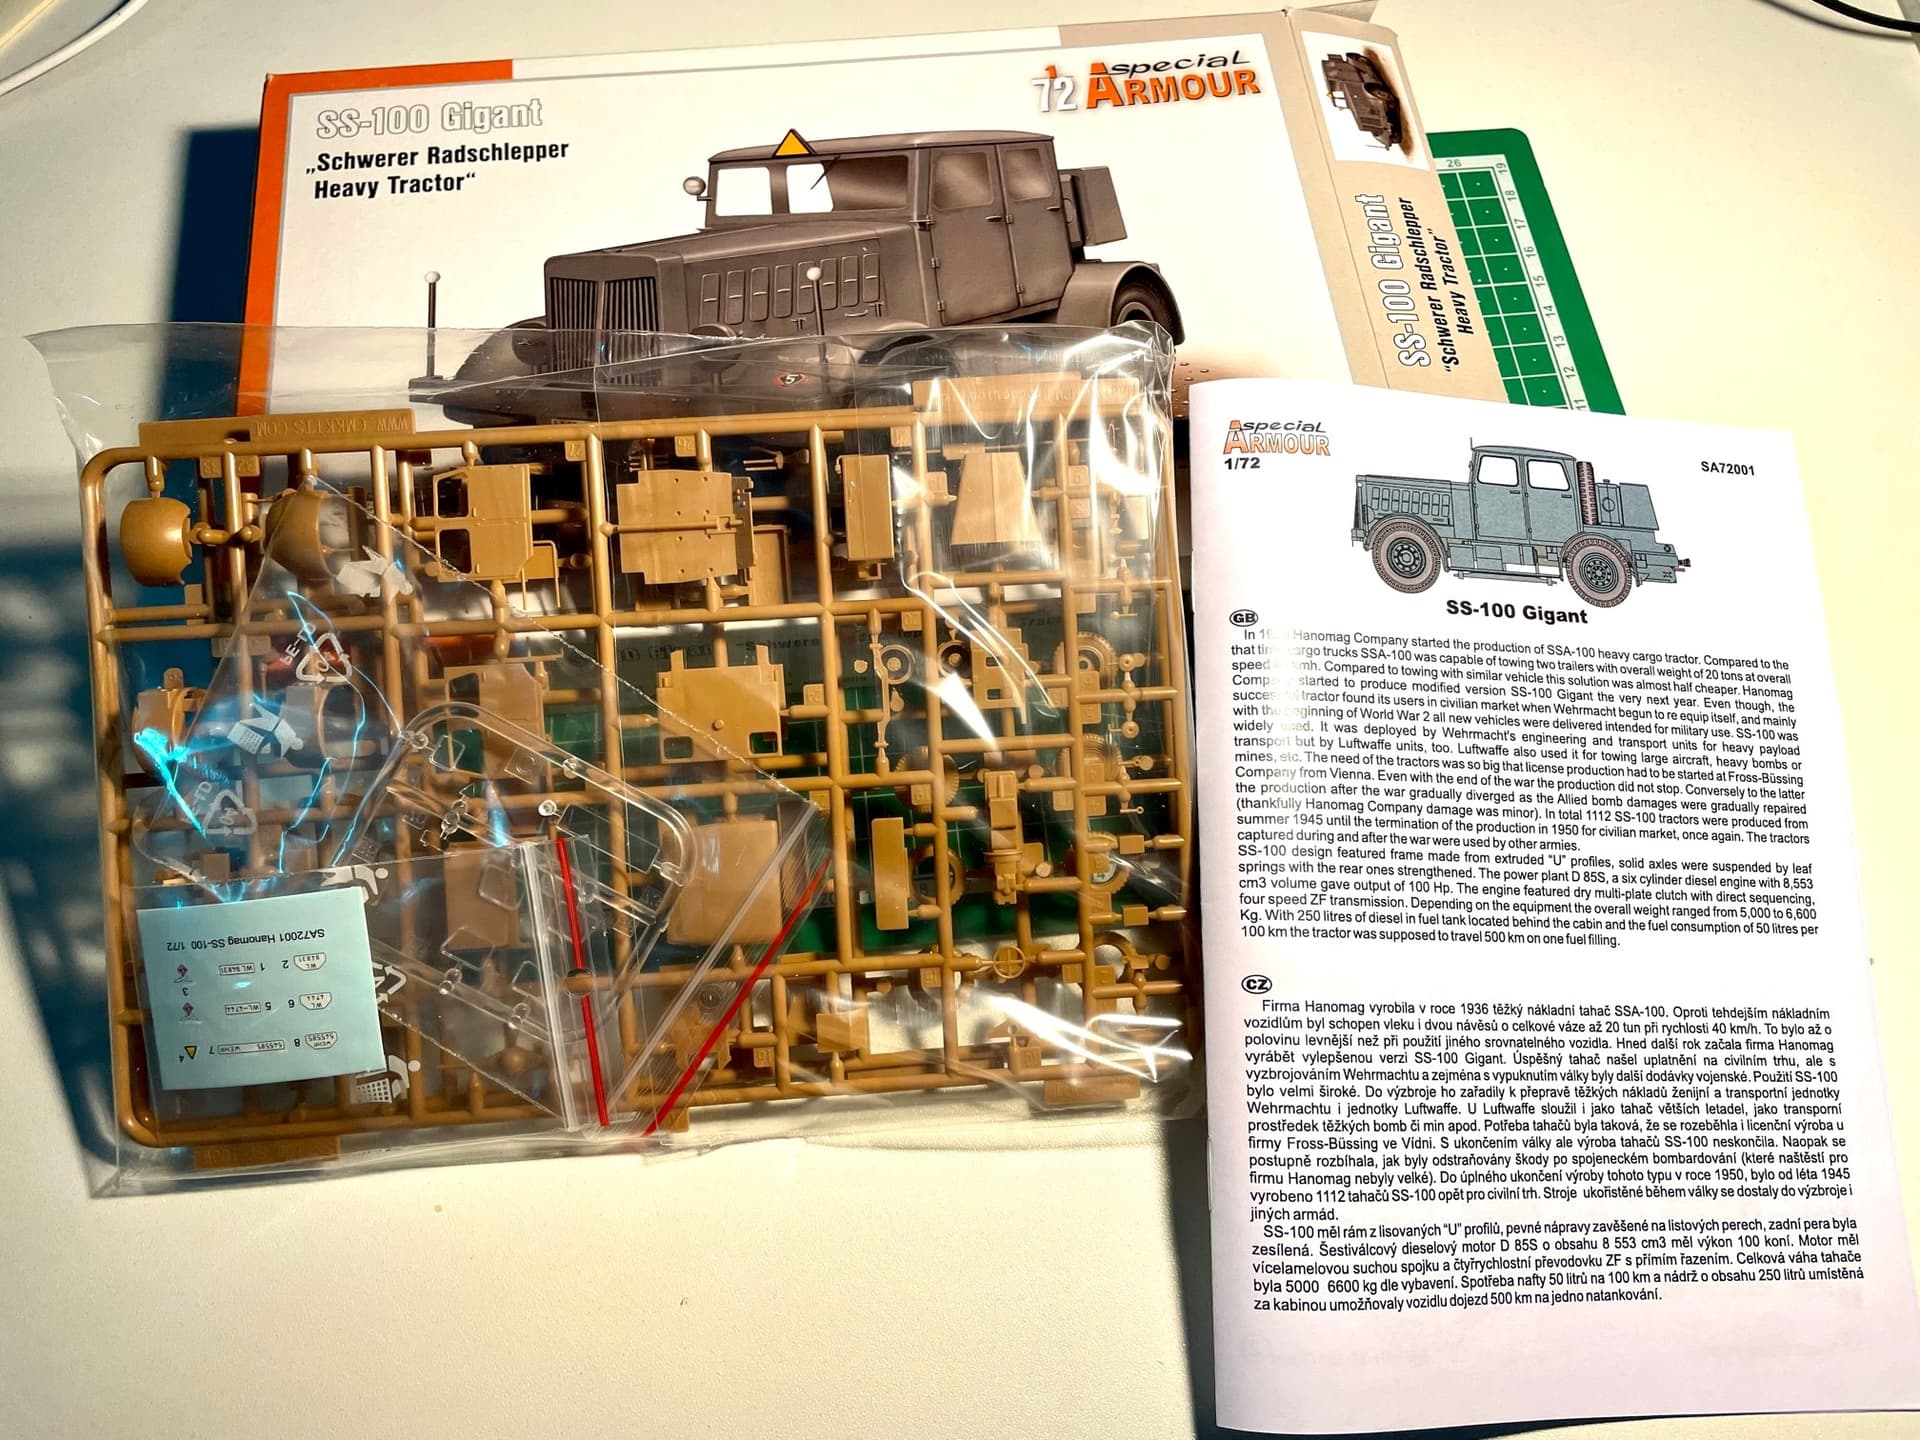
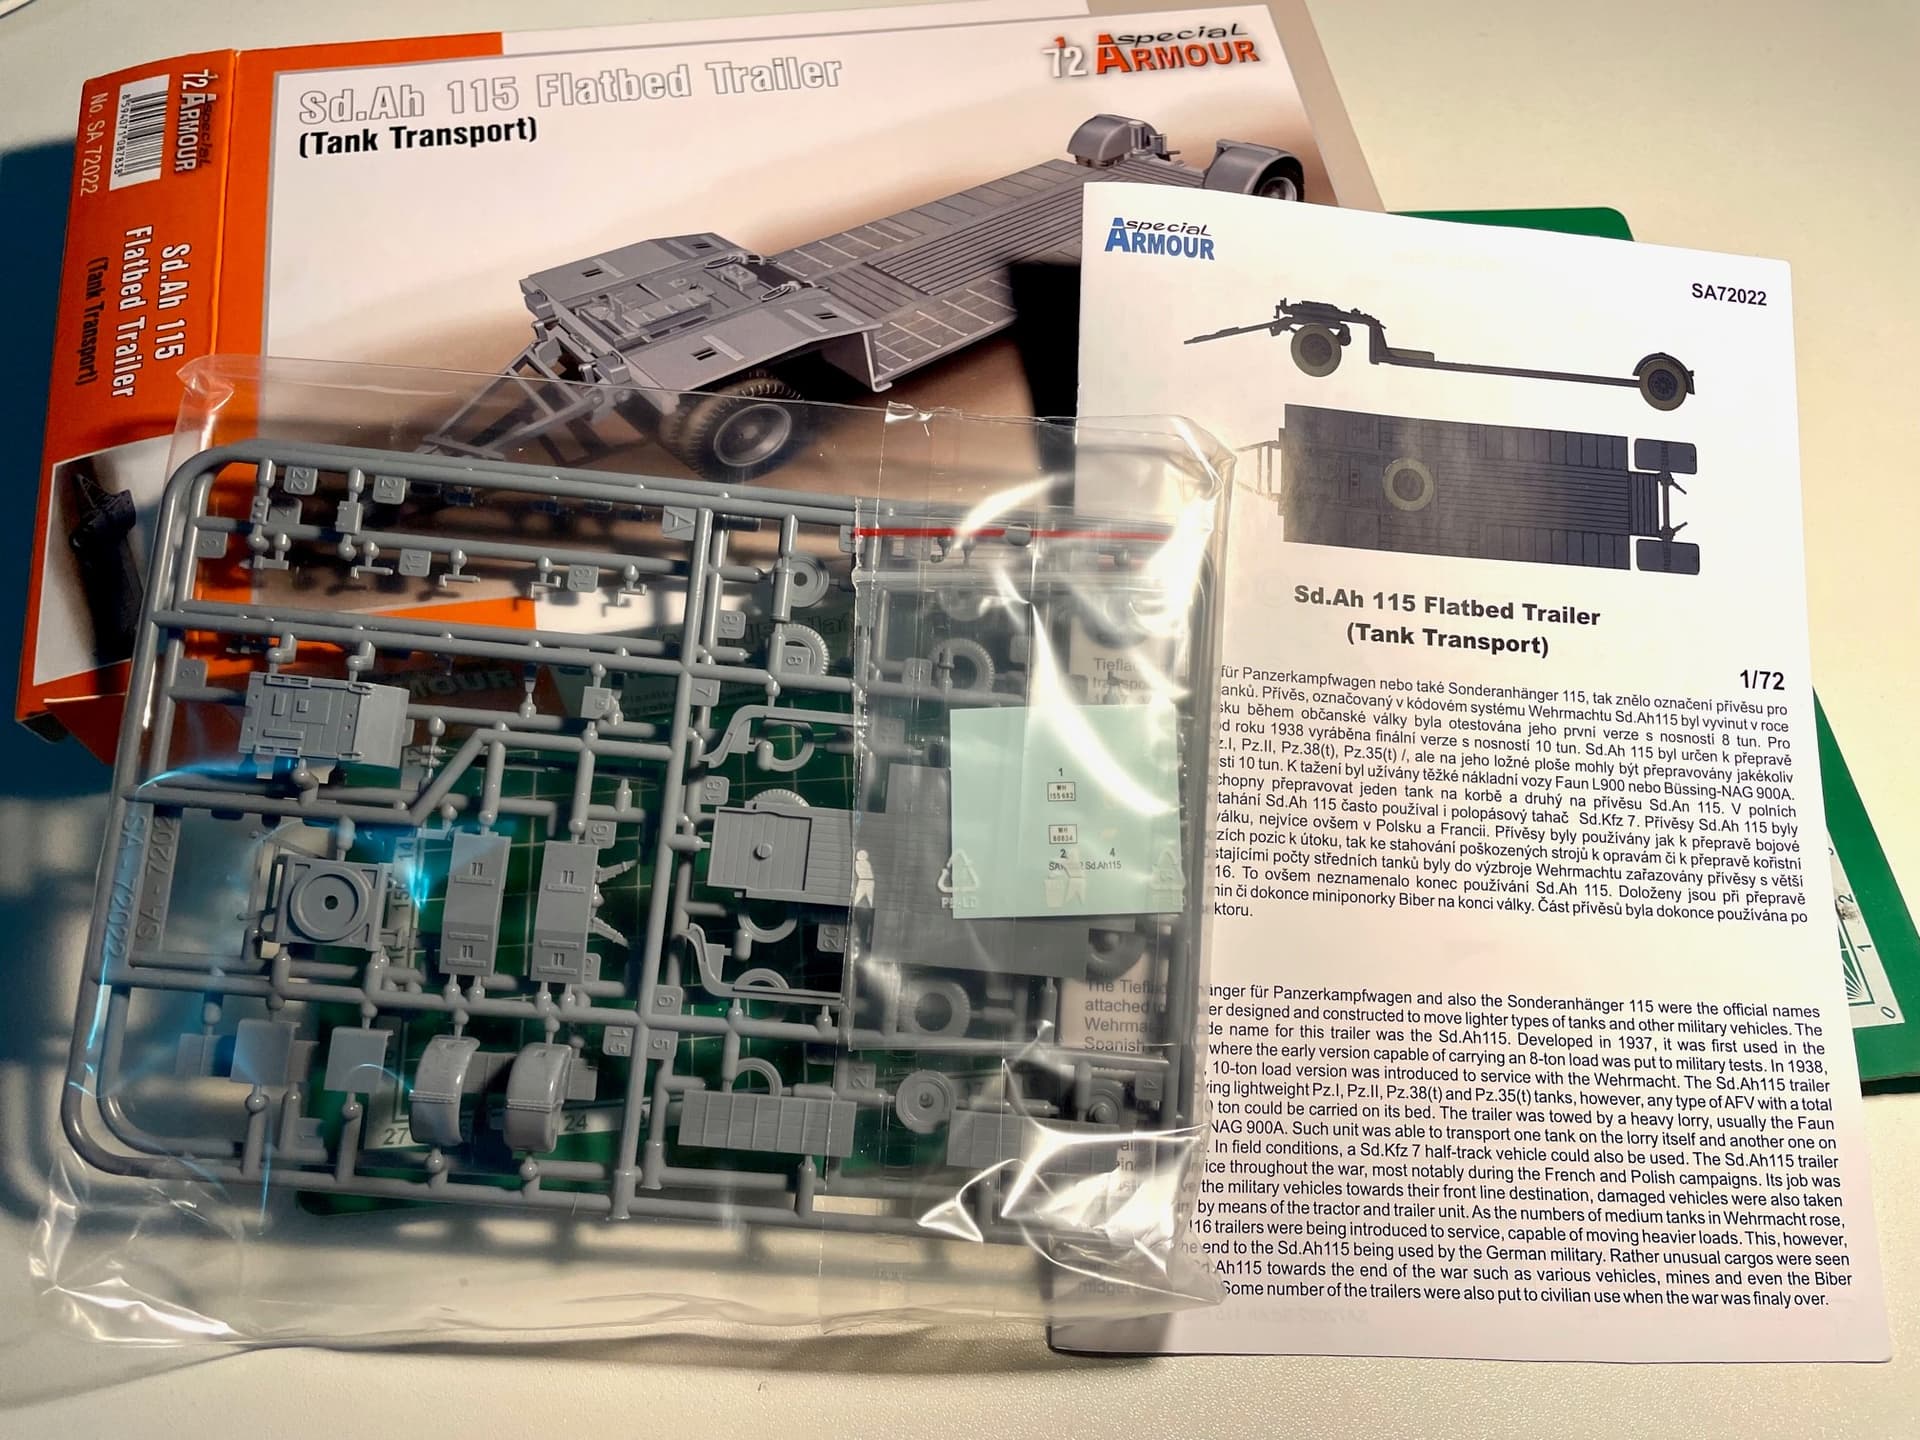
Well another entry for me, I will get one of them finished as I’m sort of building my own convoy of tank transporters through time.
So here we have a Hanomag SS-100 Gigant and a Sd.Ah 115 trailer which will have a Pz-38(t) as a load.
And several hours later…
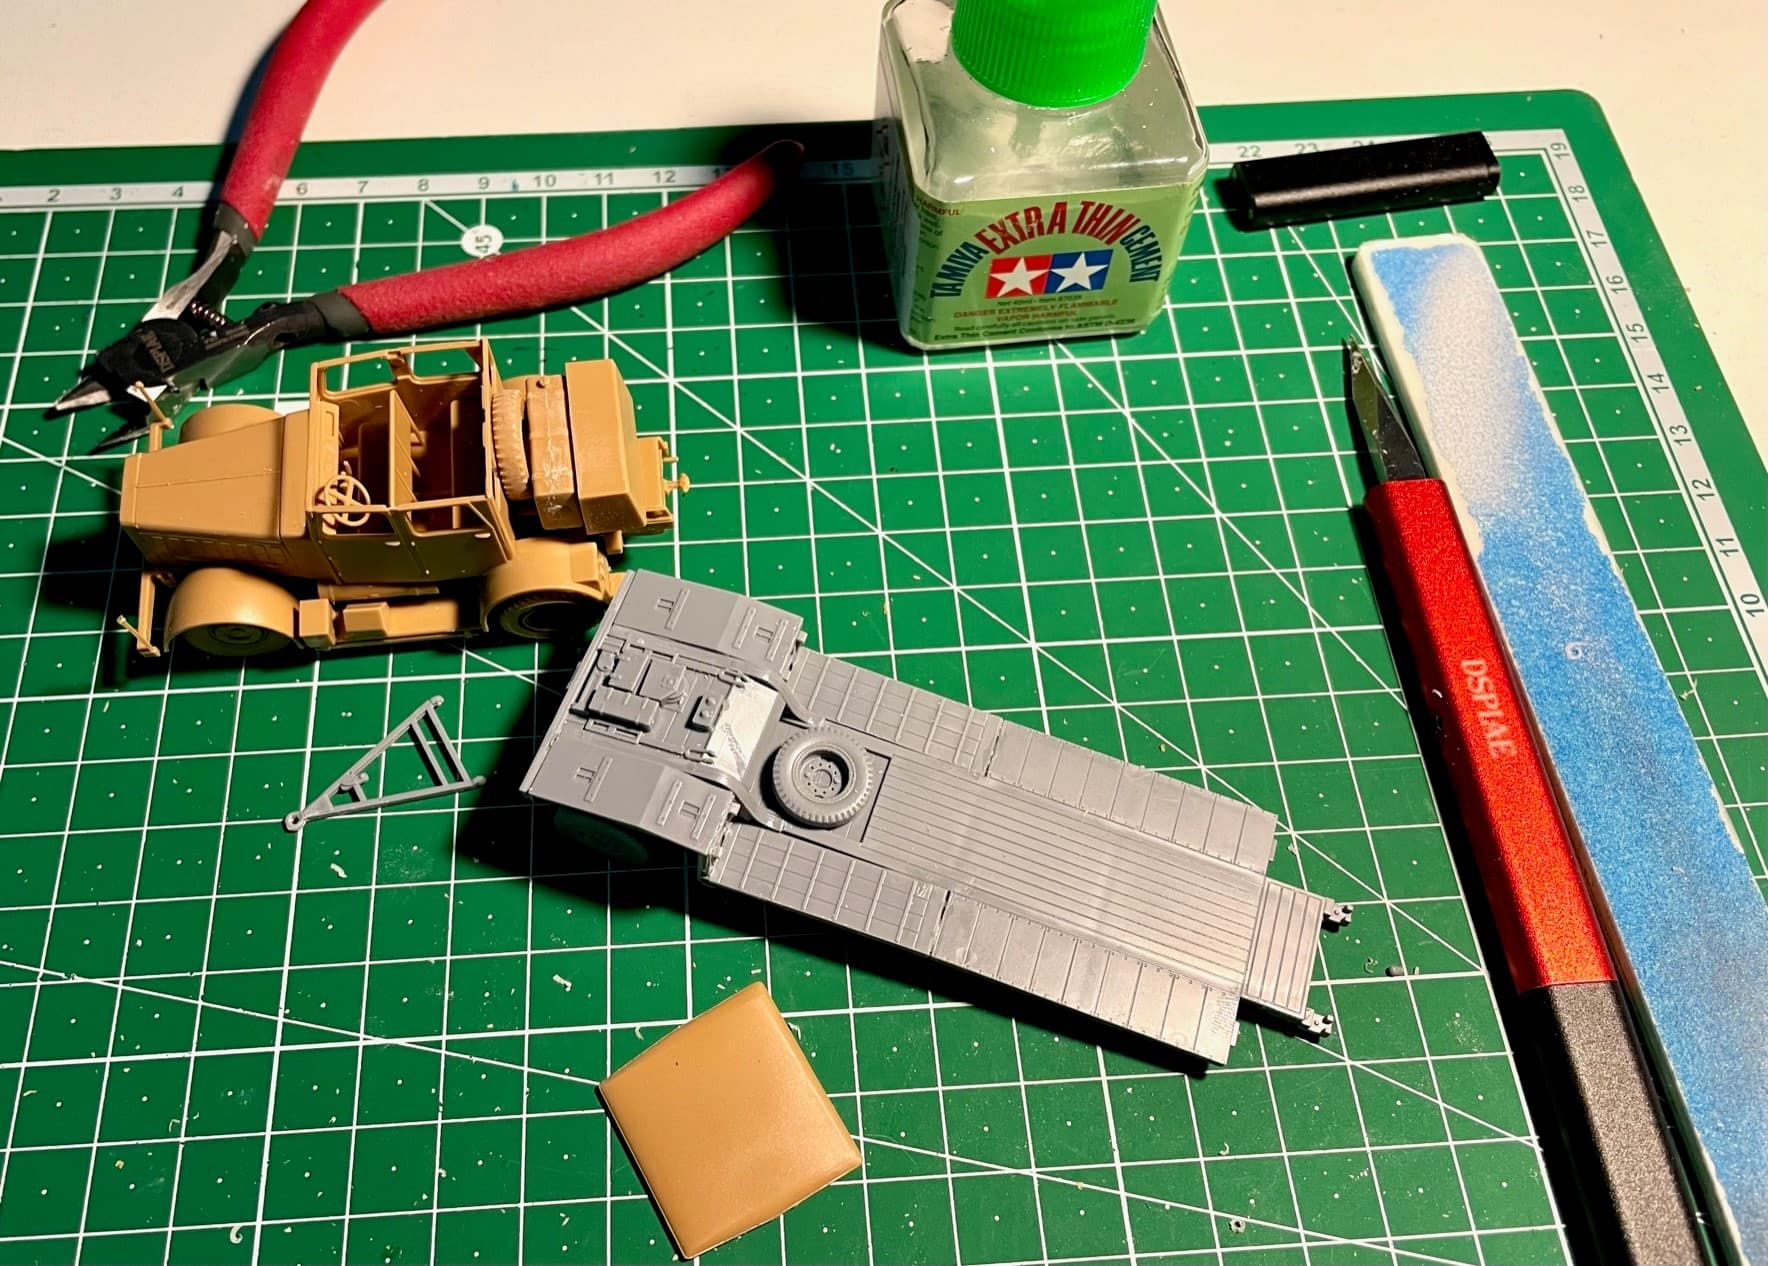
4 Likes
Lookin good!
IBG 1/35 Chevrolet C15A Lorry Cab 13

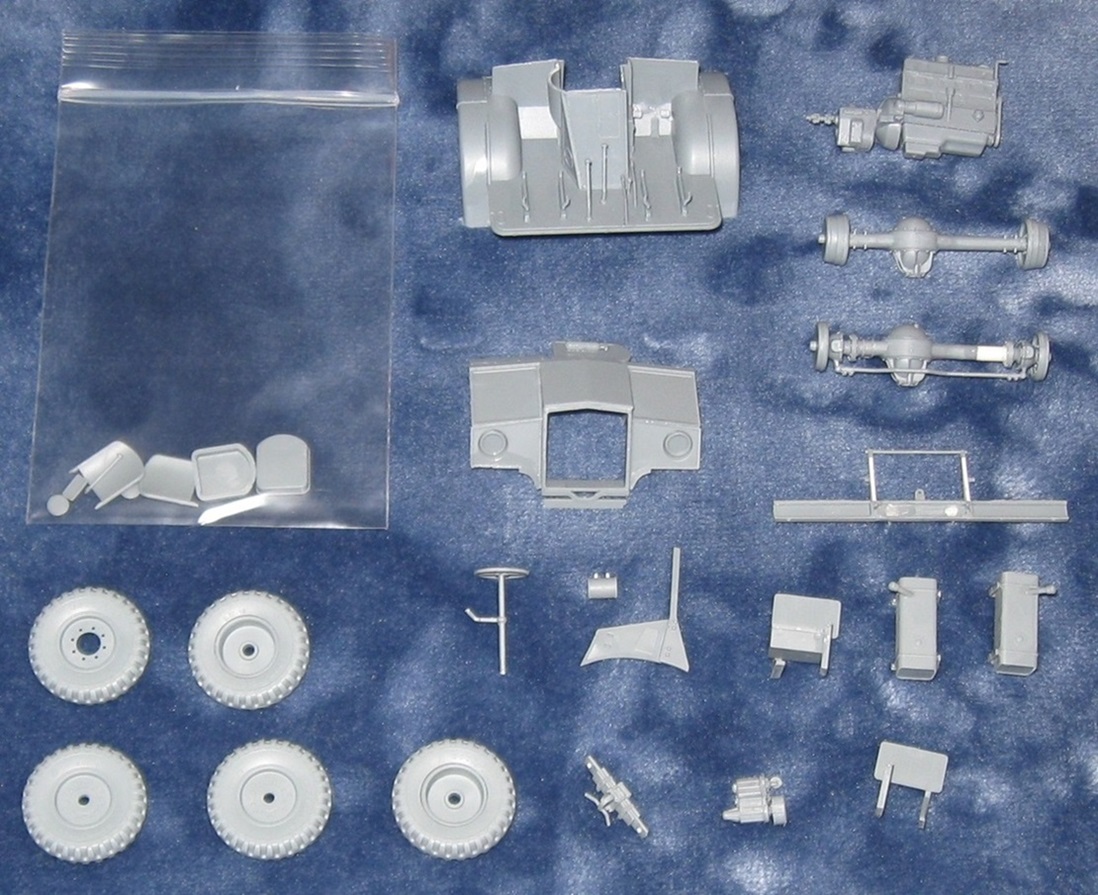
The first instruction calls for assembly of 4 wheels and one spare. After carefully testing fitting the first two wheel halves, matching pins at the 2am and 10pm positions, they were glued together. And then…disaster. Yes, I managed to mess up the model on the first two parts. For whatever reason, the wheel halves would not glue together level with one another. After pulling them apart, shaving, and gluing three or four times, I finally pulled out the putty and filled the seam all the way around the tire. The next 4 tires went together without much trouble. Weird.
For the next three hours things went quite well. The model is very reminiscent of a recent offering from ICM. And then…disaster. After gluing together the front differential, I noticed one side was very oddly shaped. Huh. As I prepared to attach the next part I realized some of the axle housing…is not there! Yes, ladies and gentlemen, we have a good, old fashioned, short shot! Whoo Hoo! In a minor miracle, this short shot affected both differential parts in the exact mirror image of one another. What are the odds of that?
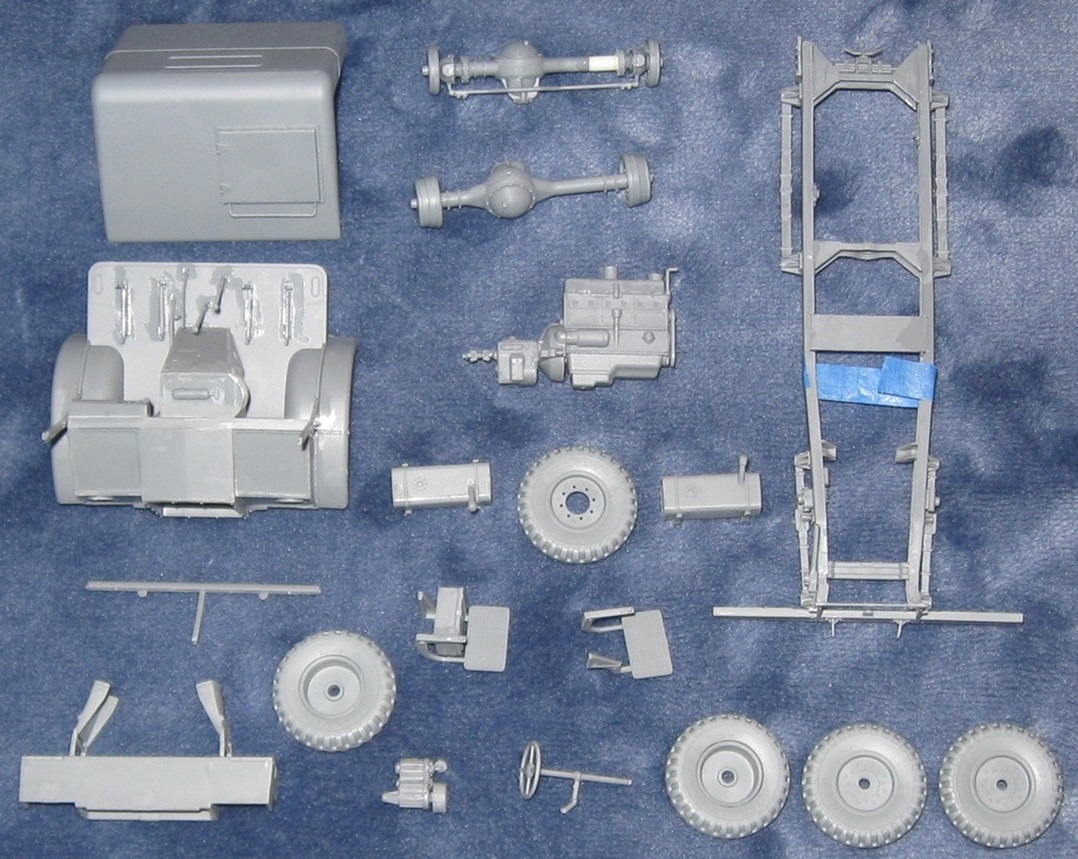
The Chevrolet Field Artillery Tractor by IBG contains the exact same sprue so I pulled that out for comparison and took a picture. Next, I chopped off part of the axle housing to get a clean edge and used rod stock to rebuild it. The rebuilt part should do the job.
At this point I should mention the differentials and axle housings are beautifully engineered in such a way as to ensure wobbly wheels. They should be designed like the kid’s toy with doughnuts that stack on a spindle. Instead, they are designed like a stack of checkers. The worst connection is between wheel and brake drum. Instead of taking advantage of all the contact area available, the designer made the connection absolutely tiny, again, sure to result in wobbly wheels. When the time comes, I will bulk up the wheel to brake drum contact surface to make things rock solid. That should also square up all 4 wheels.
Things were moving along great on Day 2. The quality of molding and engineering is really top notch. And then…disaster. The instructions call for assembly of the cab in such a way that insures improper alignment and failure. As usual, I bumbled right into that. With great care, I pulled apart the cab, breaking some stuff, , then breaking some more stuff, and then started putting it together in a way less prone to result in a borked cab.
This model is truly lovely but I must be very careful not to follow the instructions. Kinda funny how often that is the case.
3 Likes
Doug, whether you realize it or not, taking this all in stride, you are becoming an experienced modeler!
2 Likes
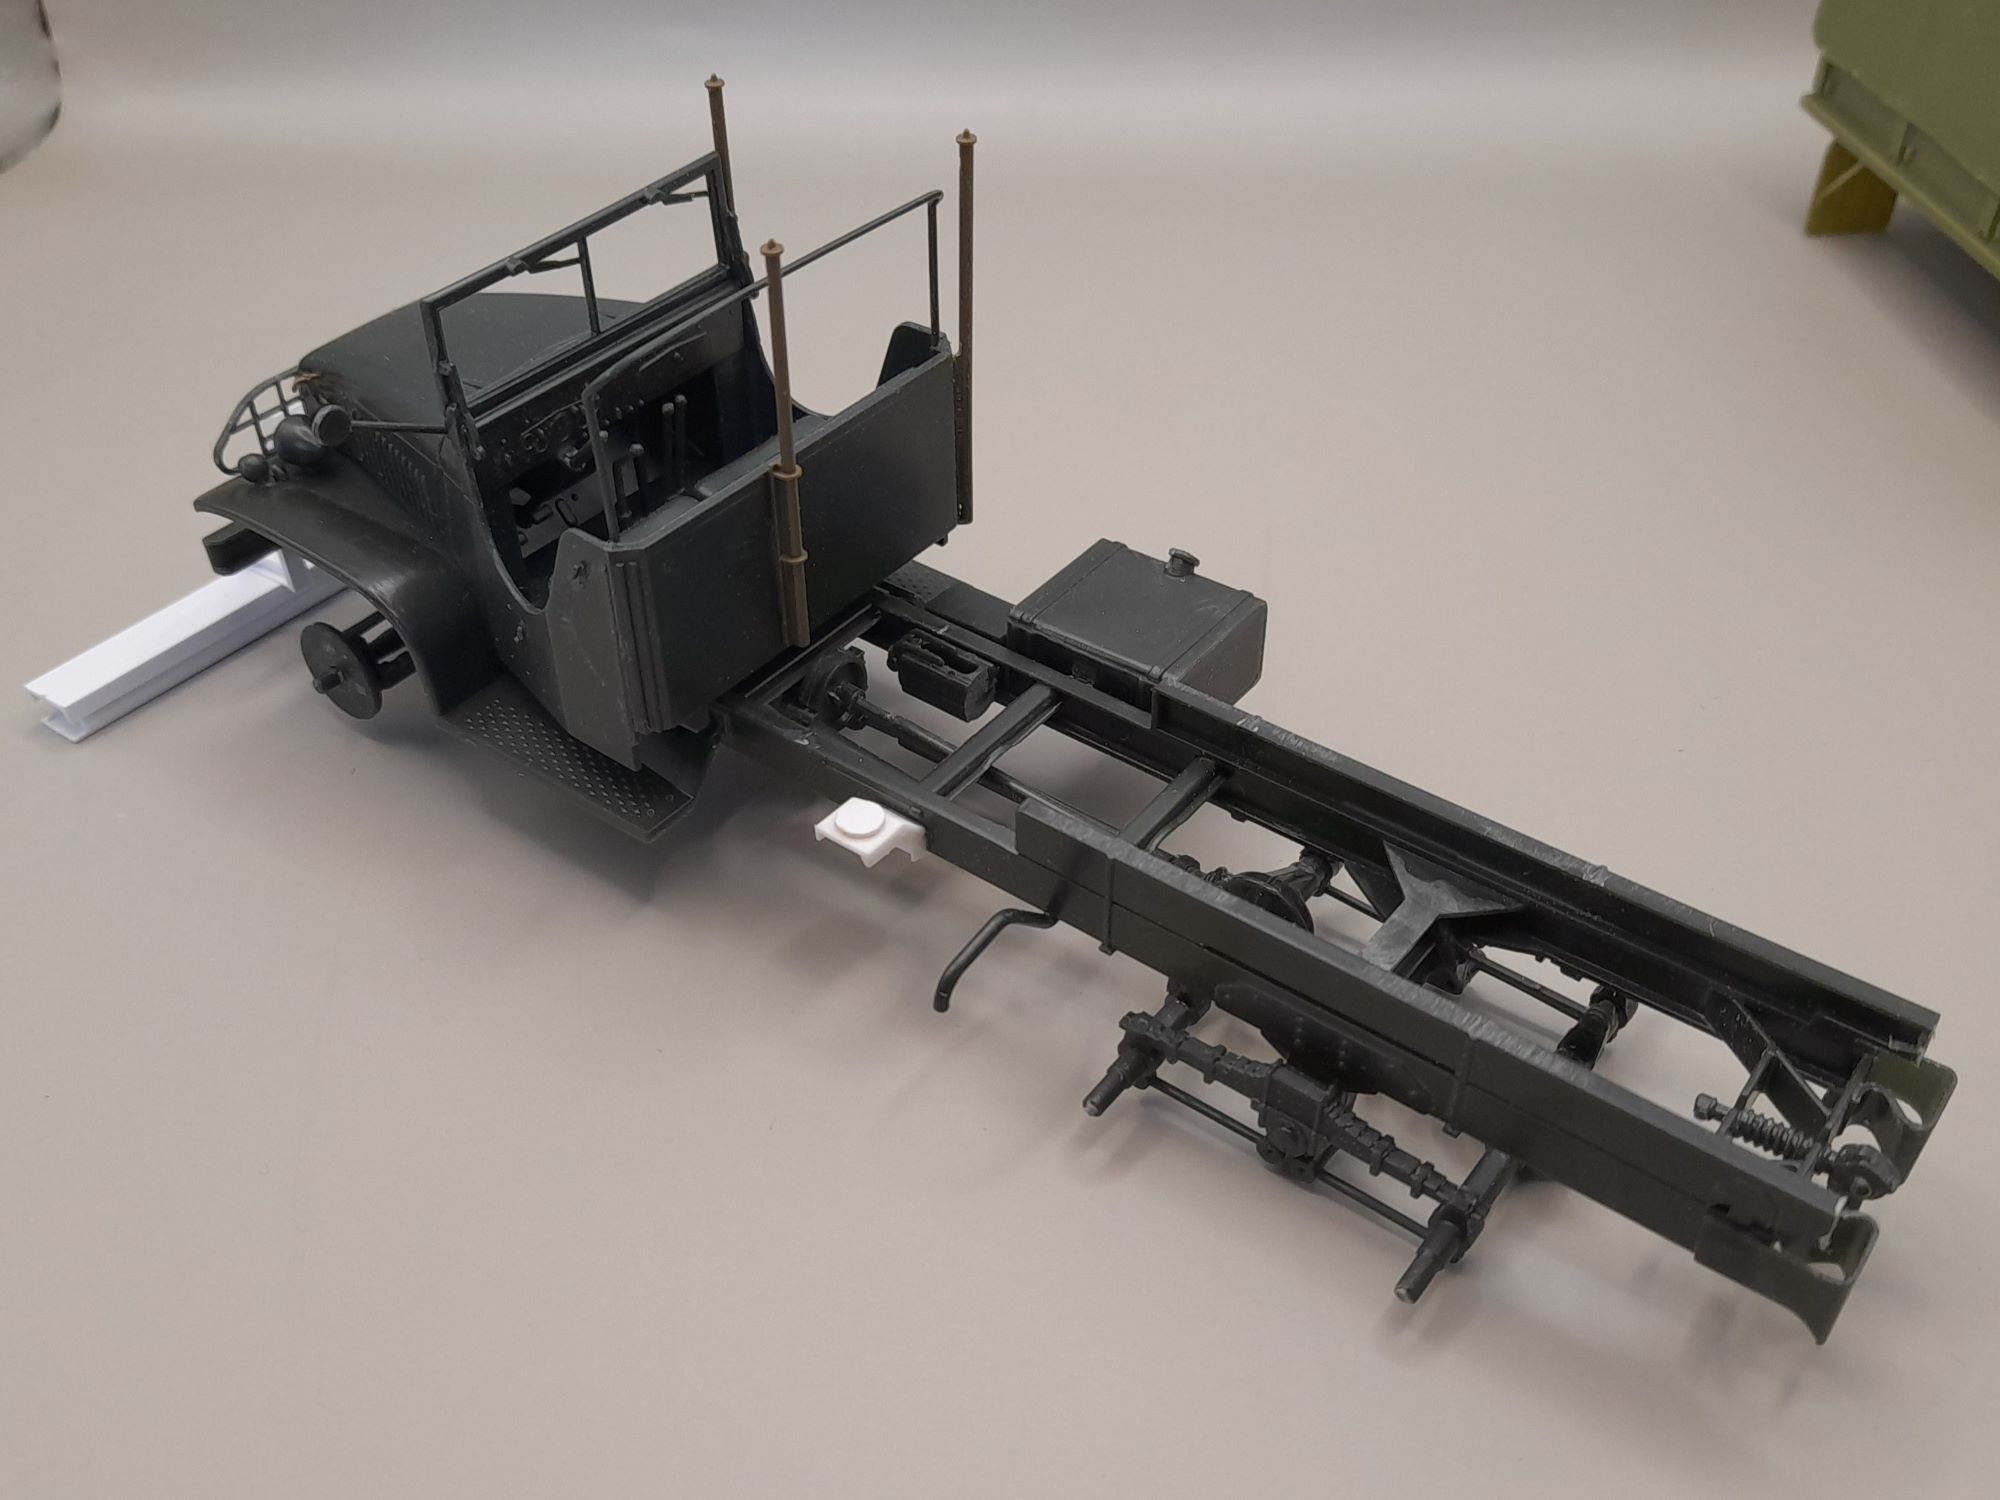
IBG 1/35 Chevrolet C15A Lorry Cab 13 - Day 4 (4)
Day 3 was spent trying to assemble the cab, letting glue dry for long periods between each step. That did not work. On Day 4, the cab was torn down and rebuilt 4 more times. On the first try, the cab nose would not sit flush to the fenders without significant application of force. This force skewed the entire cab. On the second try, I realized the goal posts for the windshield need to stand perfectly vertical or the roof will be out of alignment. One goal post was leaning out. On the third try, I discovered some of my reinforcing pieces were causing a second alignment problem. On the fourth try, everything finally lined up and connected without any application of force. Many reinforcing pieces were now added inside the body, followed by putty to fill a few small gaps.
With the cab finally built, the back of the cab and roof were built up as a separate assembly. This fits perfectly with the cab nose and windshield frame, validating work to properly align the cab nose.
The rest of the day was spent building up the frame. There are a few ejector pin marks to deal with.
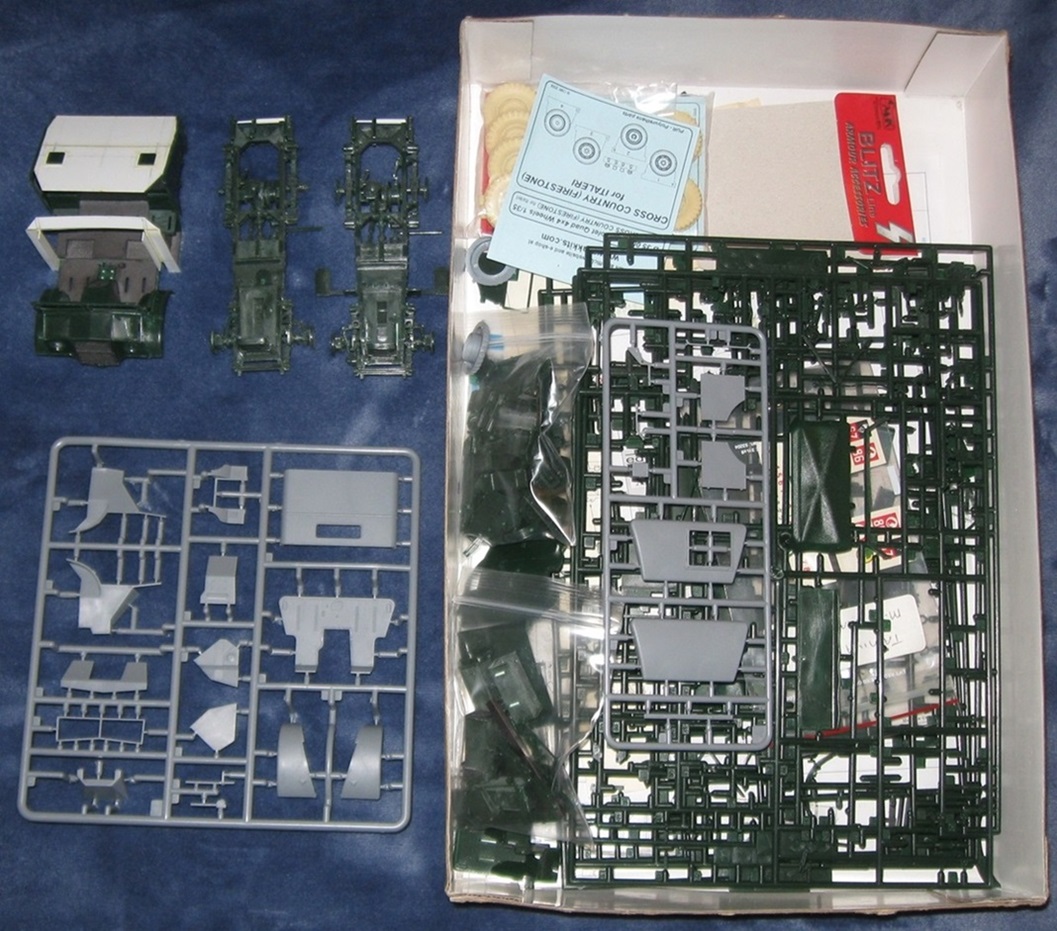
Many years ago, I purchased two Peerless Max Chevrolet Field Artillery Tractors from a vendor at a model show for $5 US. He assured me that there are enough parts for one complete model. There are not! The beetle back in the box was very obviously left out in the sun to melt, rendering it unusable.
Perhaps 6 or 7 years ago, I pulled out these models and attempted to build one. My hope was to scratch build a new beetle back. While doing this, I realized the models have some spare parts for building a different sort of vehicle–a Canadian Military Pattern truck.
I had a horrible realization on Day 3 of this project. The leftover parts from the IBG C15A might allow me to resurrect one of the Peerless Max Field Artillery Tractors as another C15A. The IBG model gets Cab 13. The Peerless Max model gets Cab 12.
Such a project requires building a second truck bed from scratch. However, if the IBG C15A is built as an open top vehicle, the Peerless Max C15A can be built with the canvas cover, making it easier to scratch build a second bed.
If this is to happen, the effort must be made while the IBG C15A truck bed parts are available to measure and reproduce.
The question is, should I even bother trying to resurrect those two old models?
…
@SSGToms While working on the Guided Missile Frigate, I kinda decided it was my bachelor’s thesis in model making. It felt really bad to walk away from it.
4 Likes
You mean there’s an actual question? Of course you should! Otherwise you’ll regret it for a long time…
4 Likes
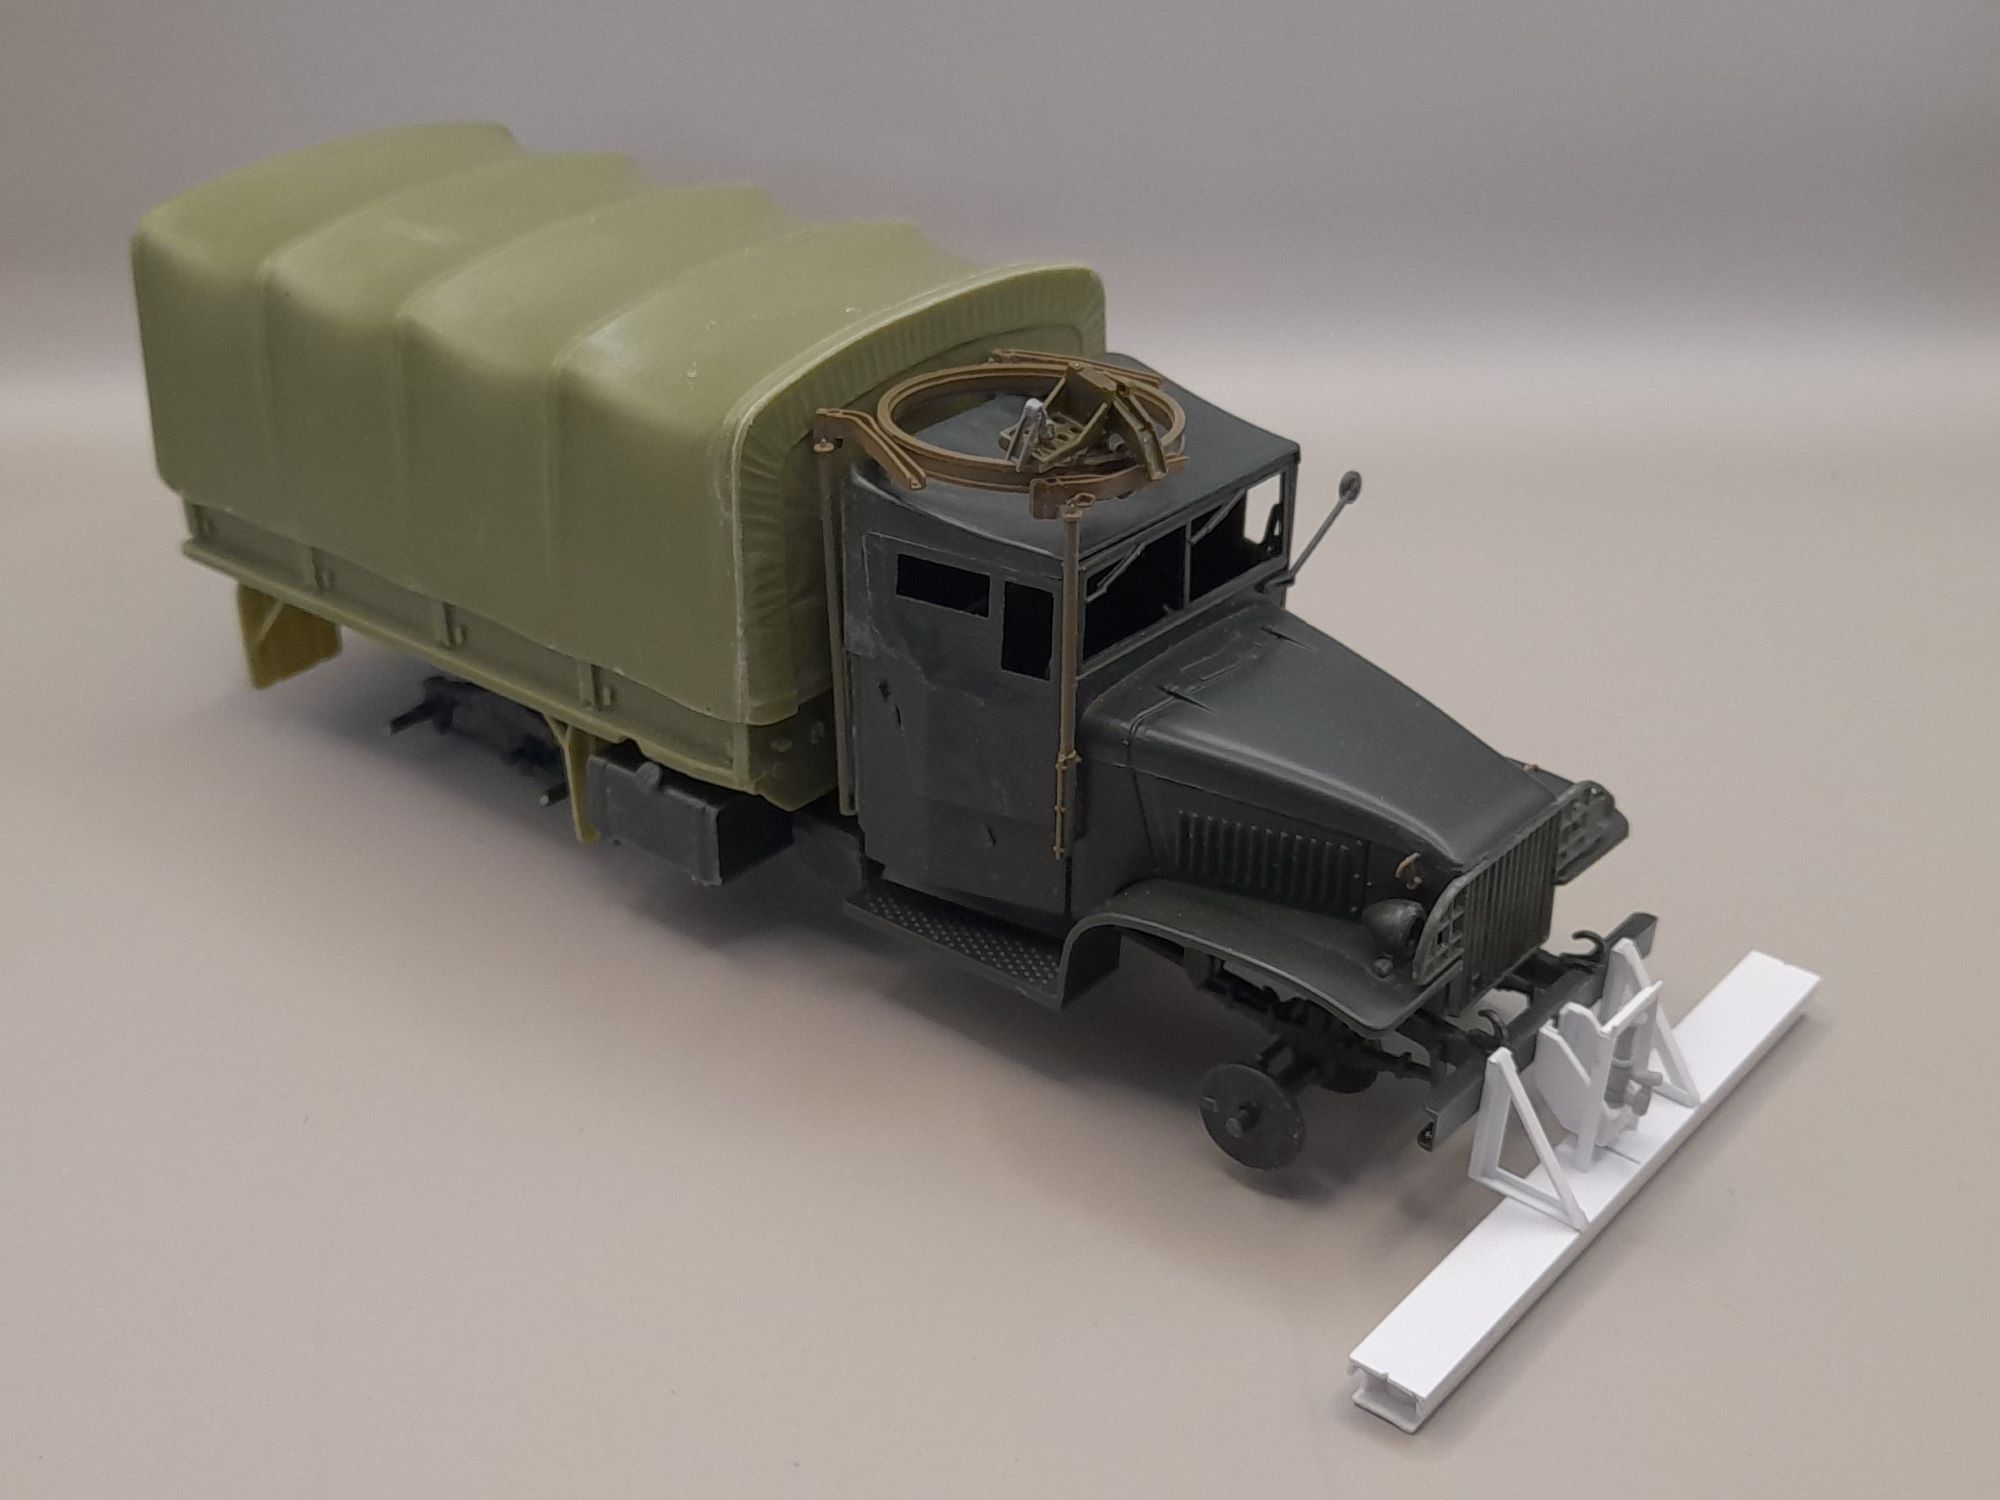
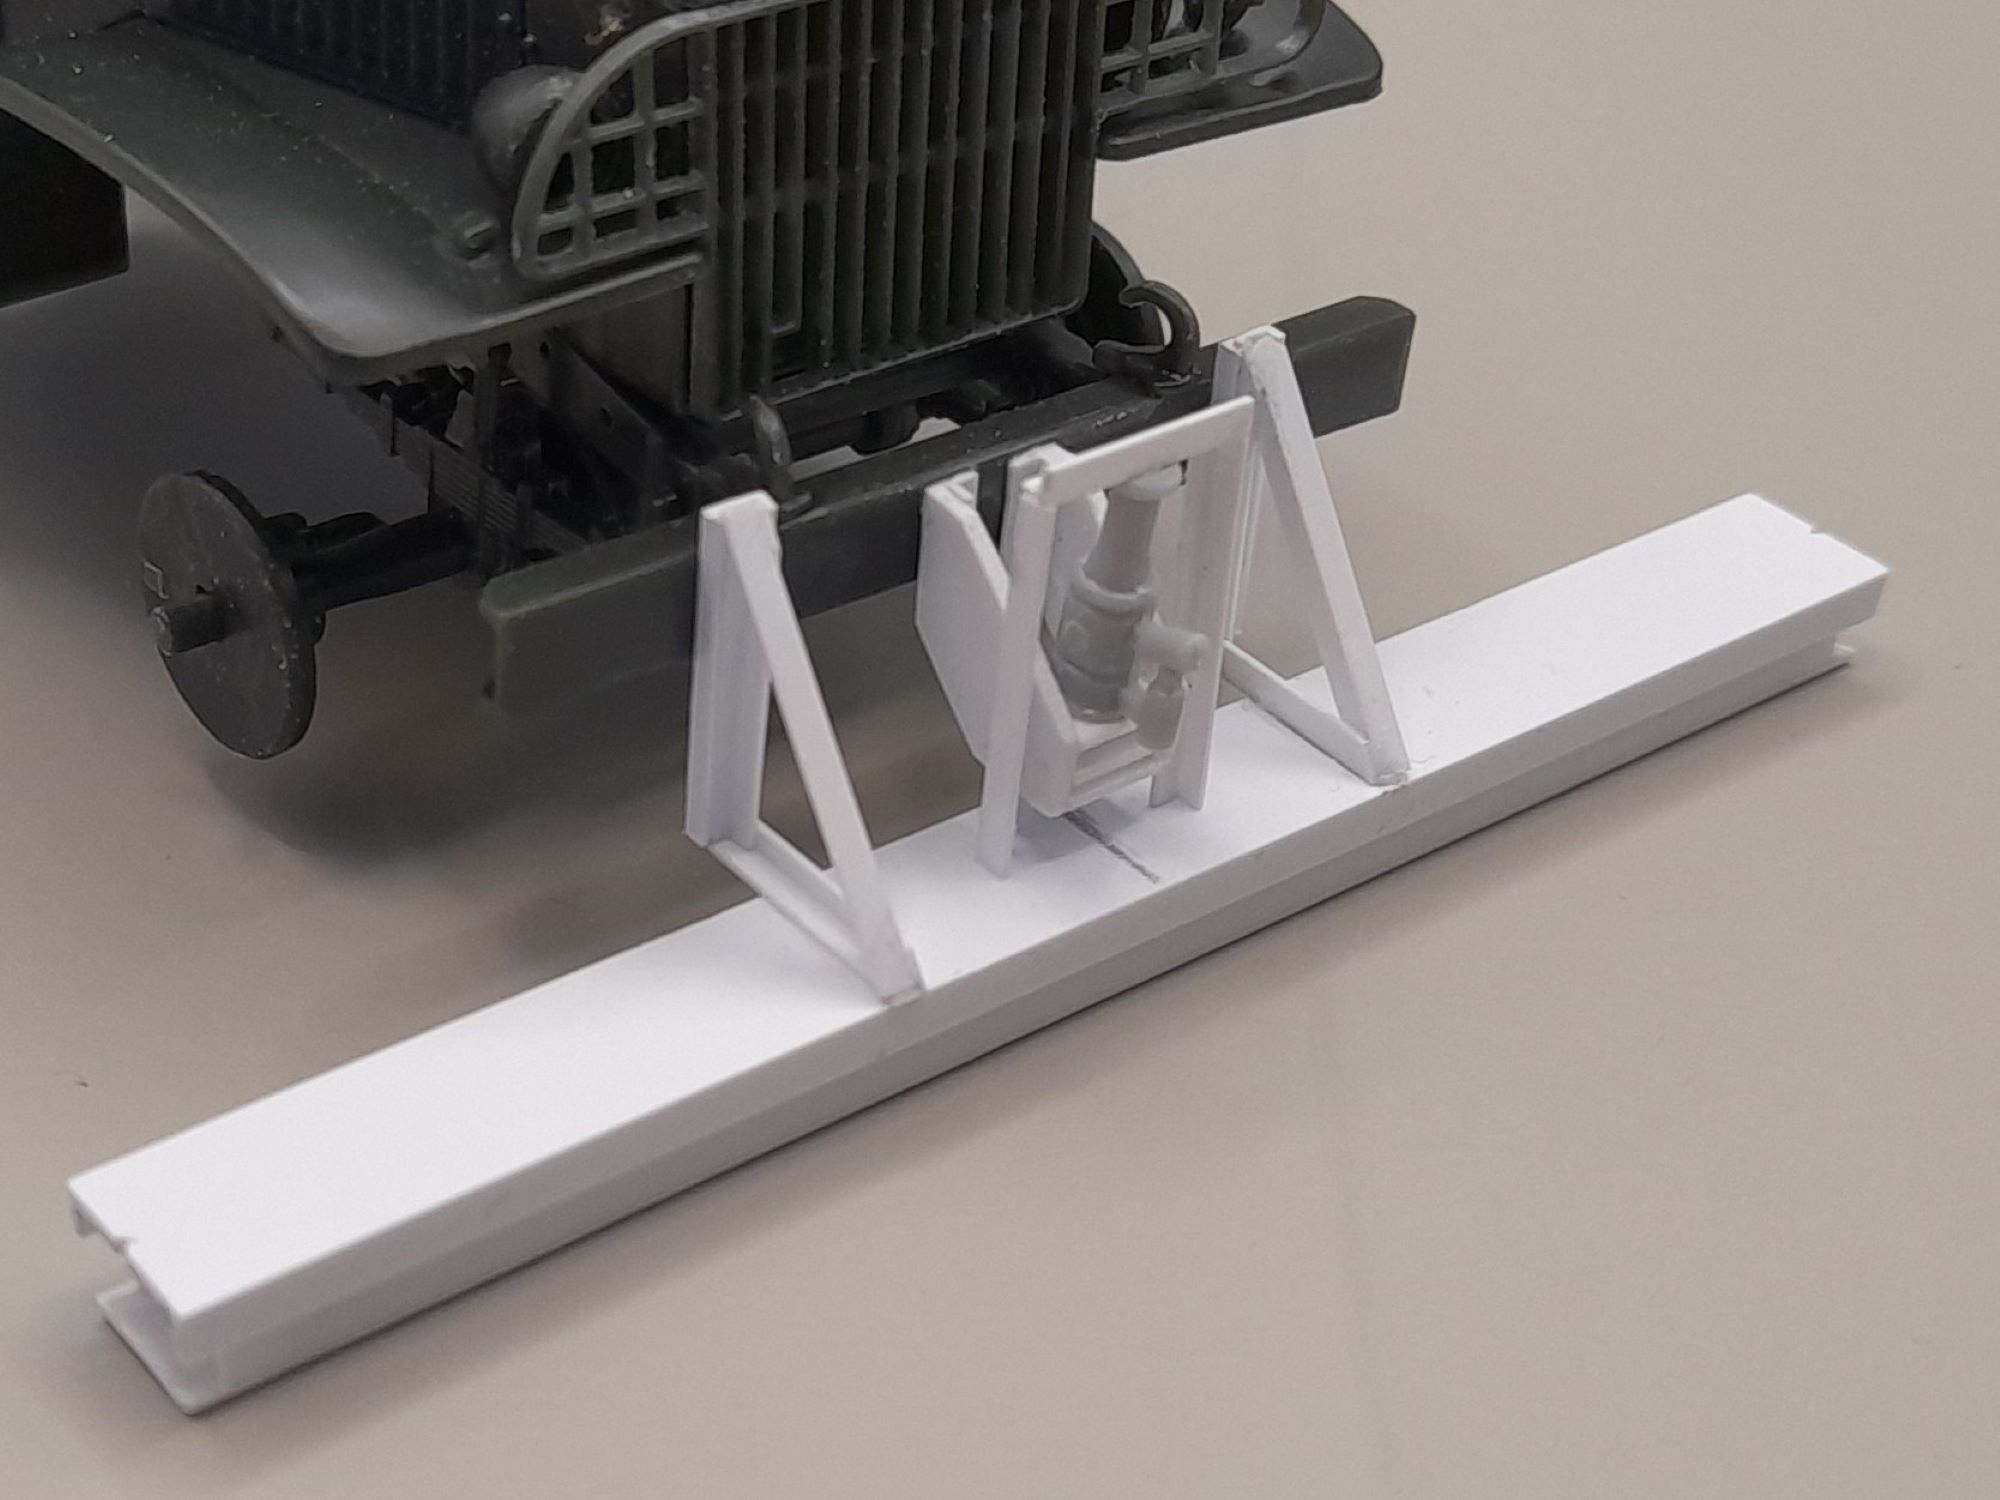
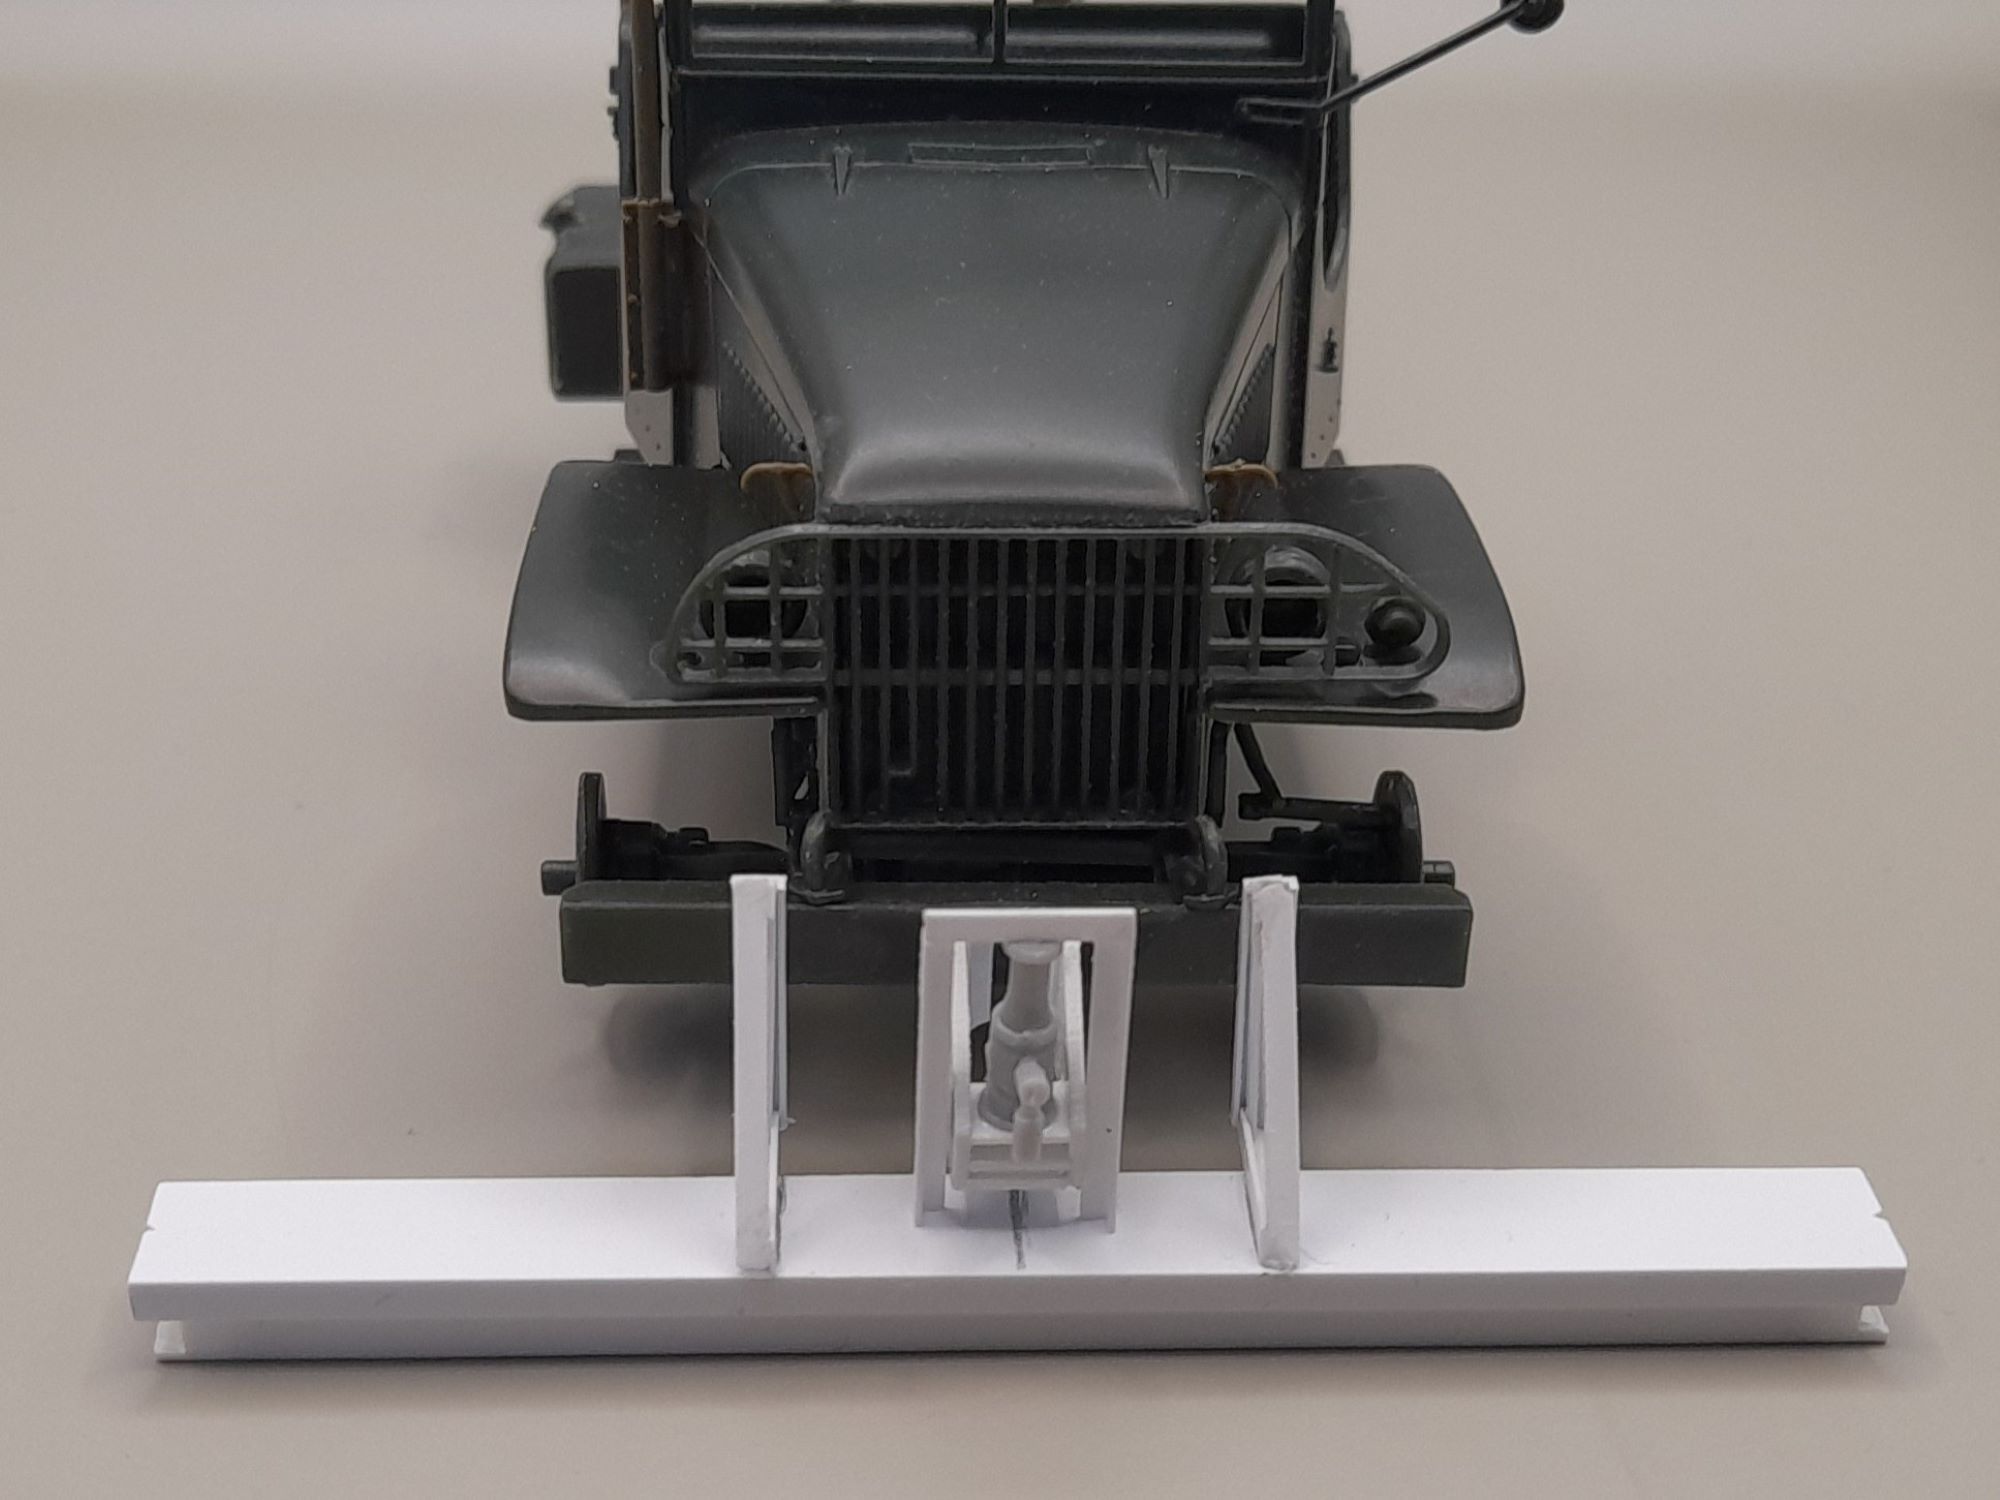
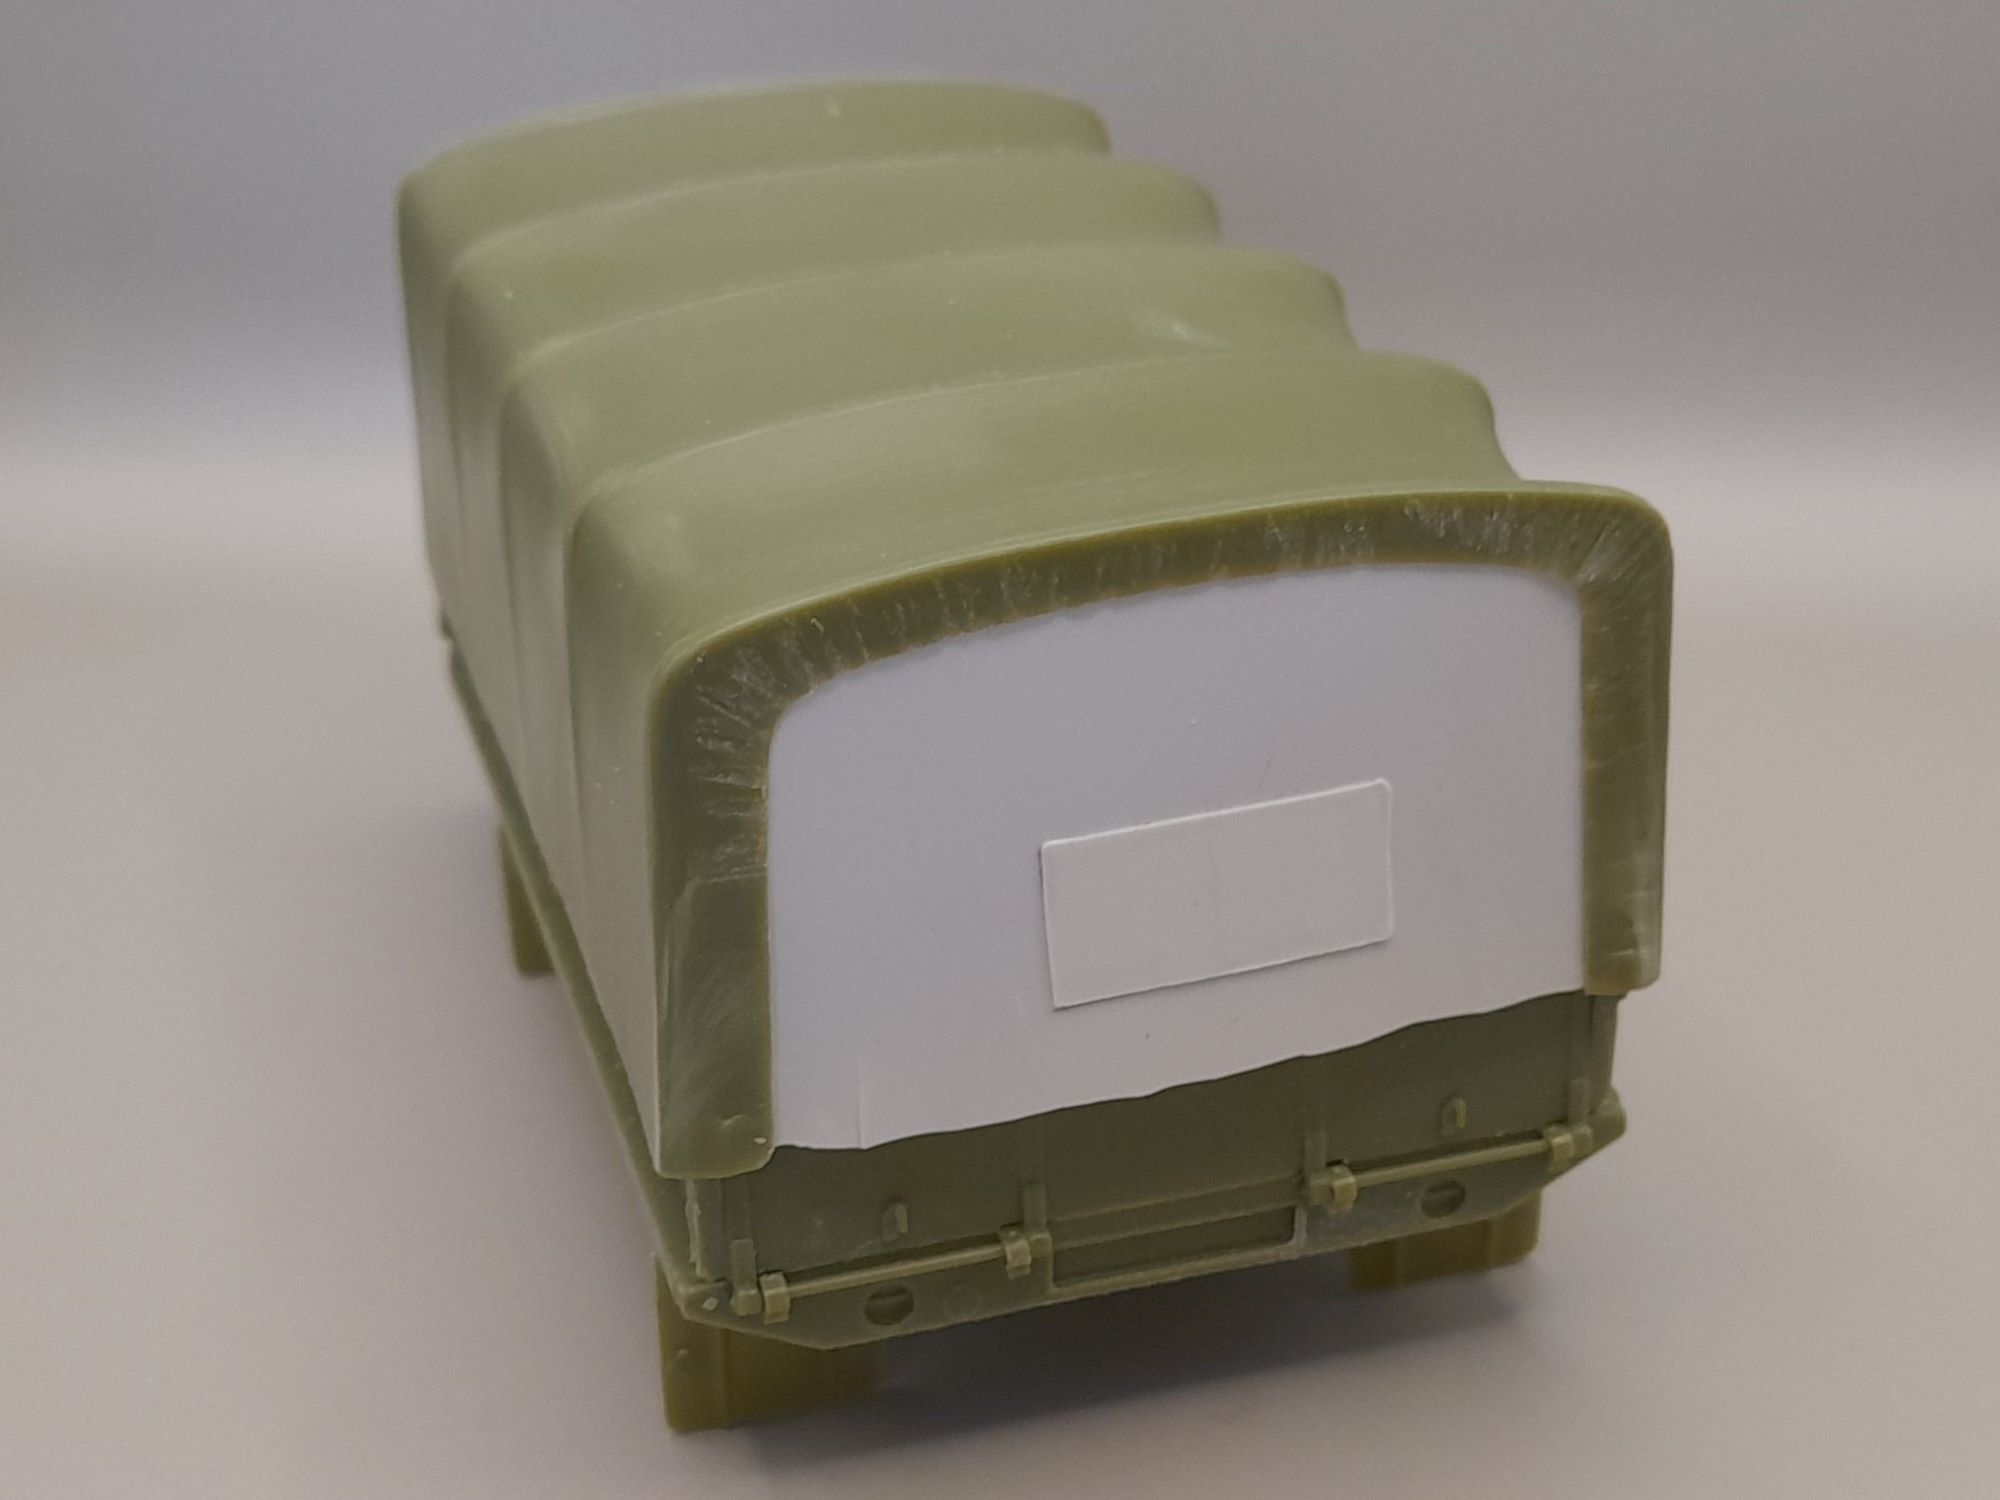
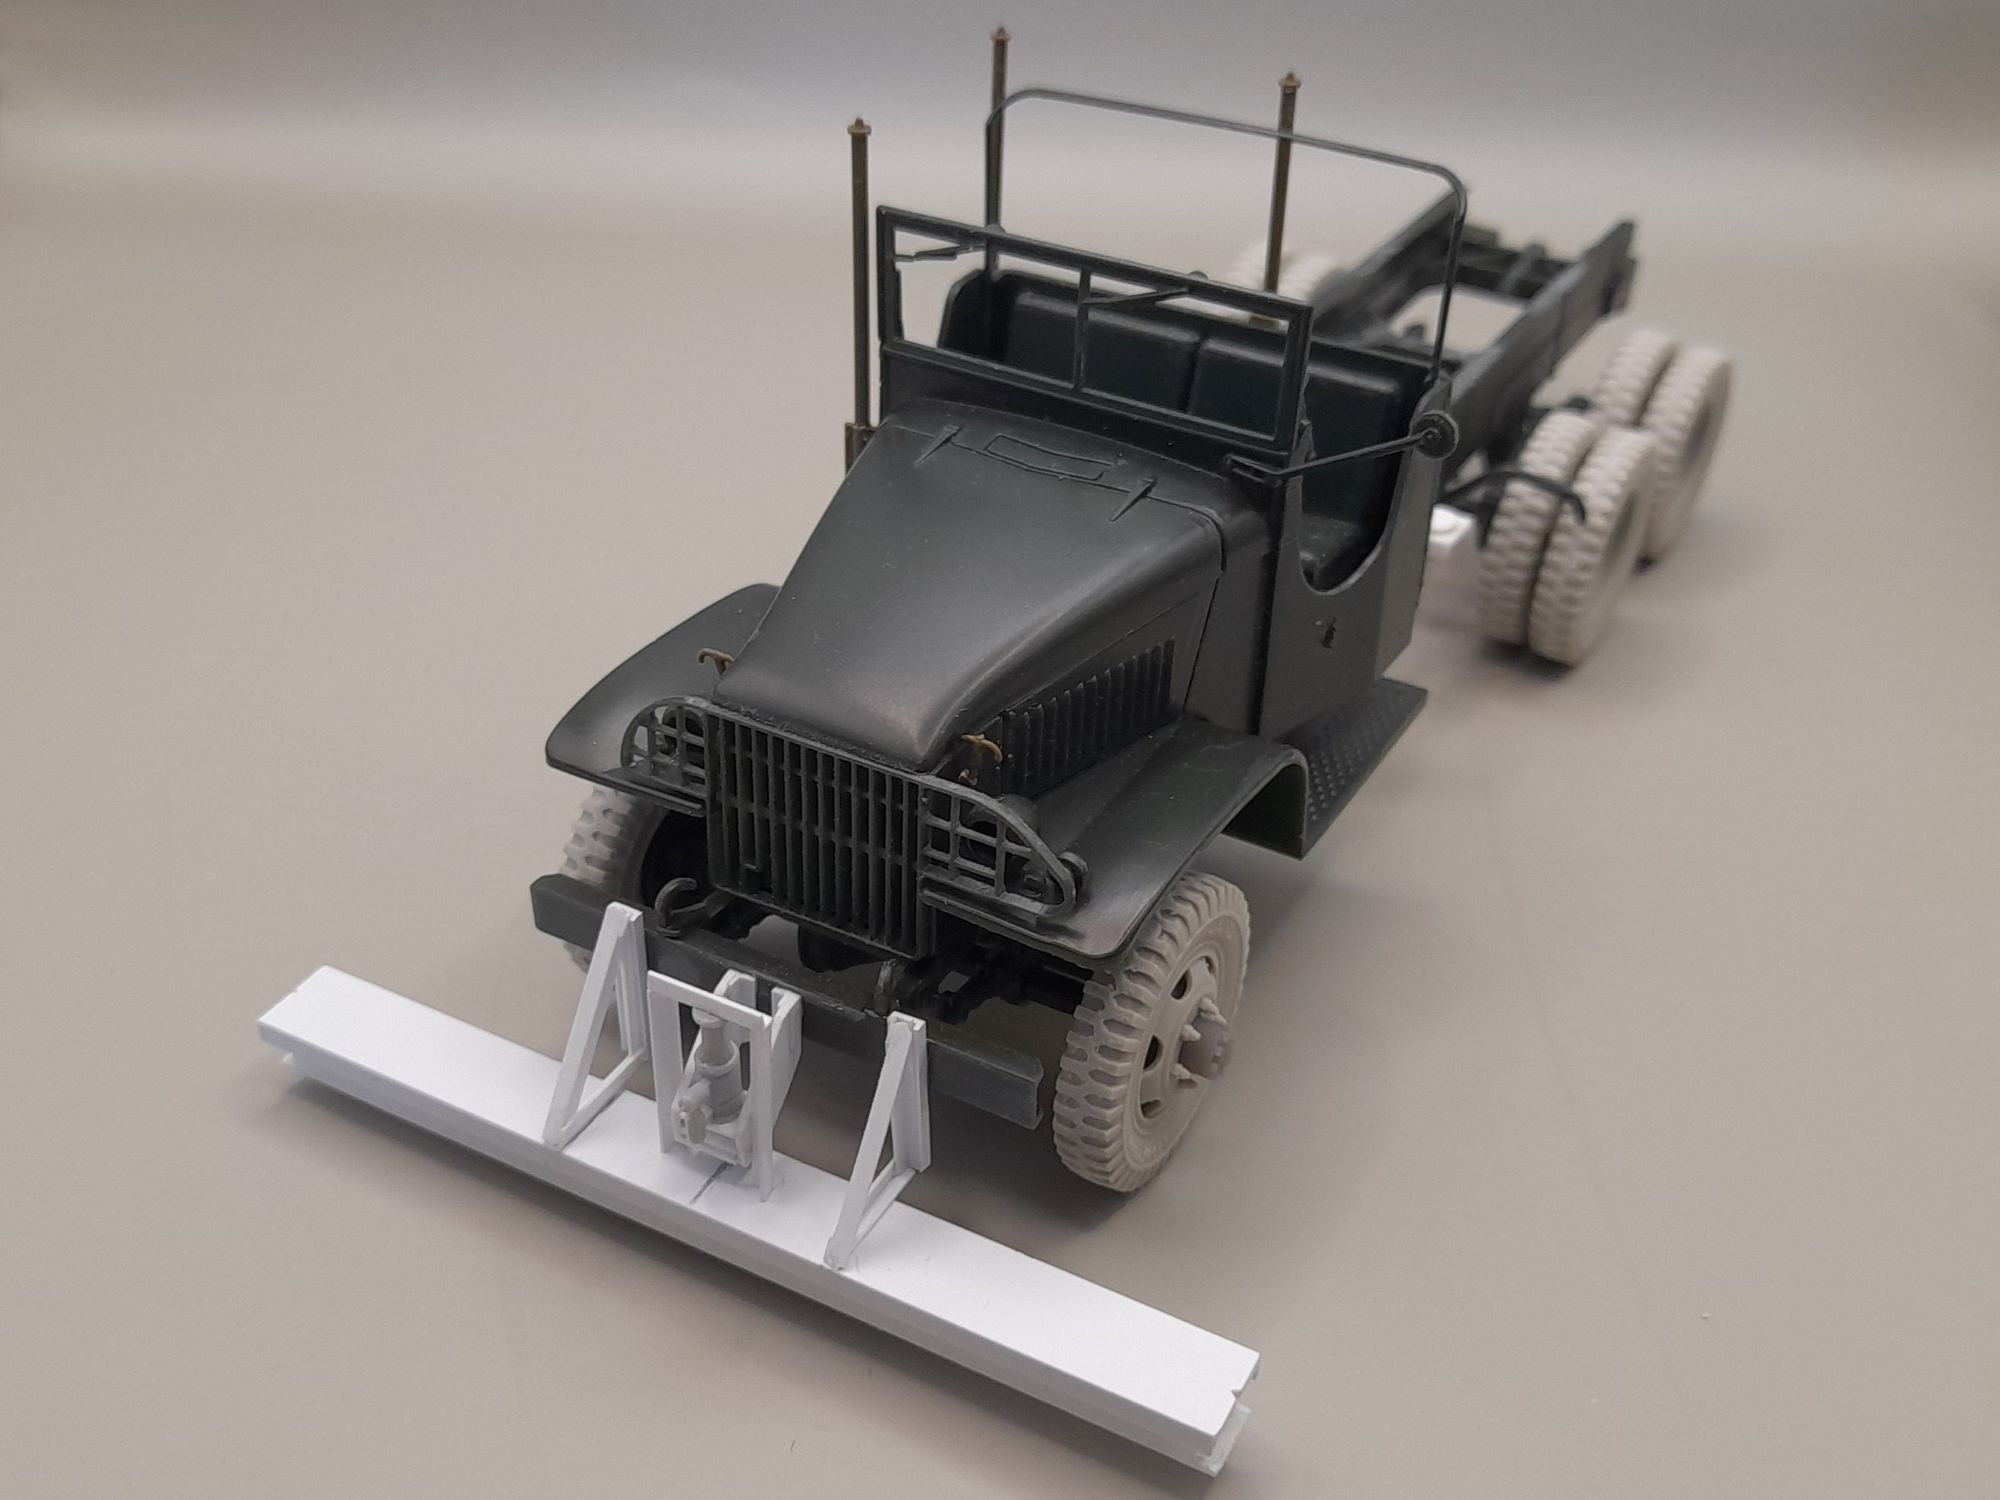
Here’s my build so far! Started with the Italeri truck cab and frame (kit 205), added the cargo bed and cover from the Heller CCKW, and some resin wheels from Panzer Art. The sweeper head is Evergreen shapes, and the bottle jack (for height adjustment) is from the Italeri Shop Tools set.
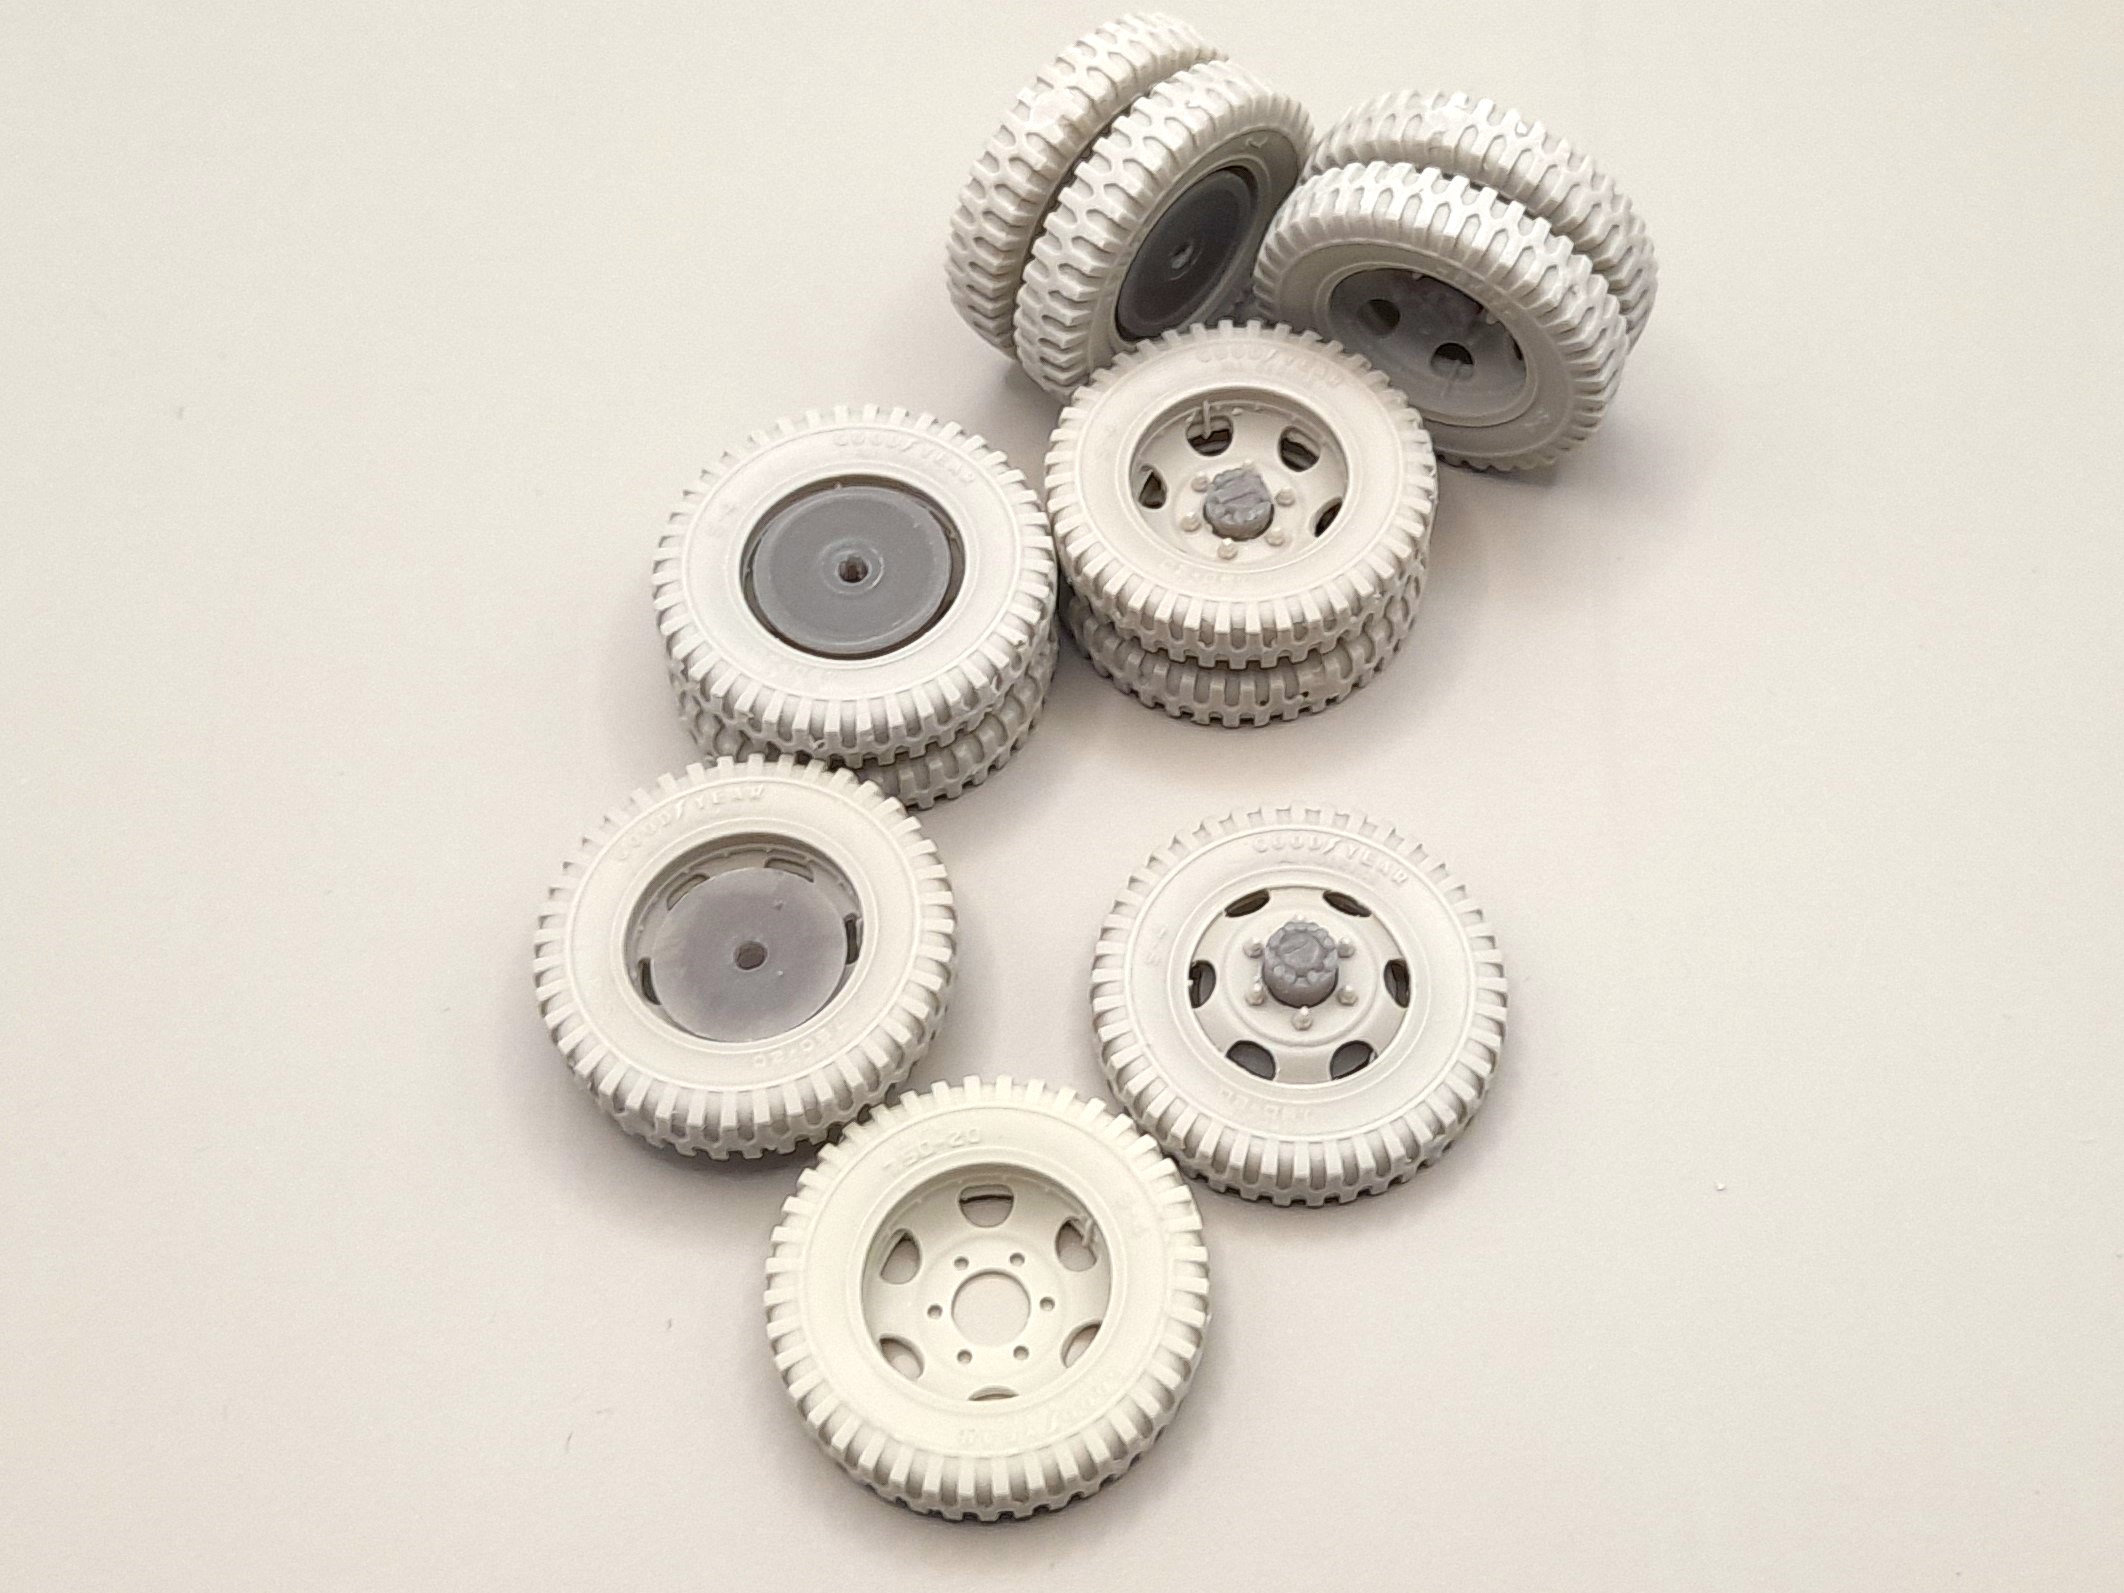
I used the Heller bed because I’d already stolen the Italeri parts for another build, and Heller has the canvas cover. The rear curtain was scratched from 0.010" sheet so I didn’t need to sort out the interior! The resin wheels are a must because the Italeri ones are too small, but as Panzer Art doesn’t give the necessary hubs I designed a set in CAD and uploaded it to Shapeways (I’d post a link but SW is once again broken!) to print. The holes need reamed out as is usual with 3D prints…
The biggest surprise for me was that the rear wall of the Italeri cab is a good 3mm wider than the Tamiya one!

9 Likes
IBG 1/35 Chevrolet C15A Lorry Cab 13 - Day 7 (7)
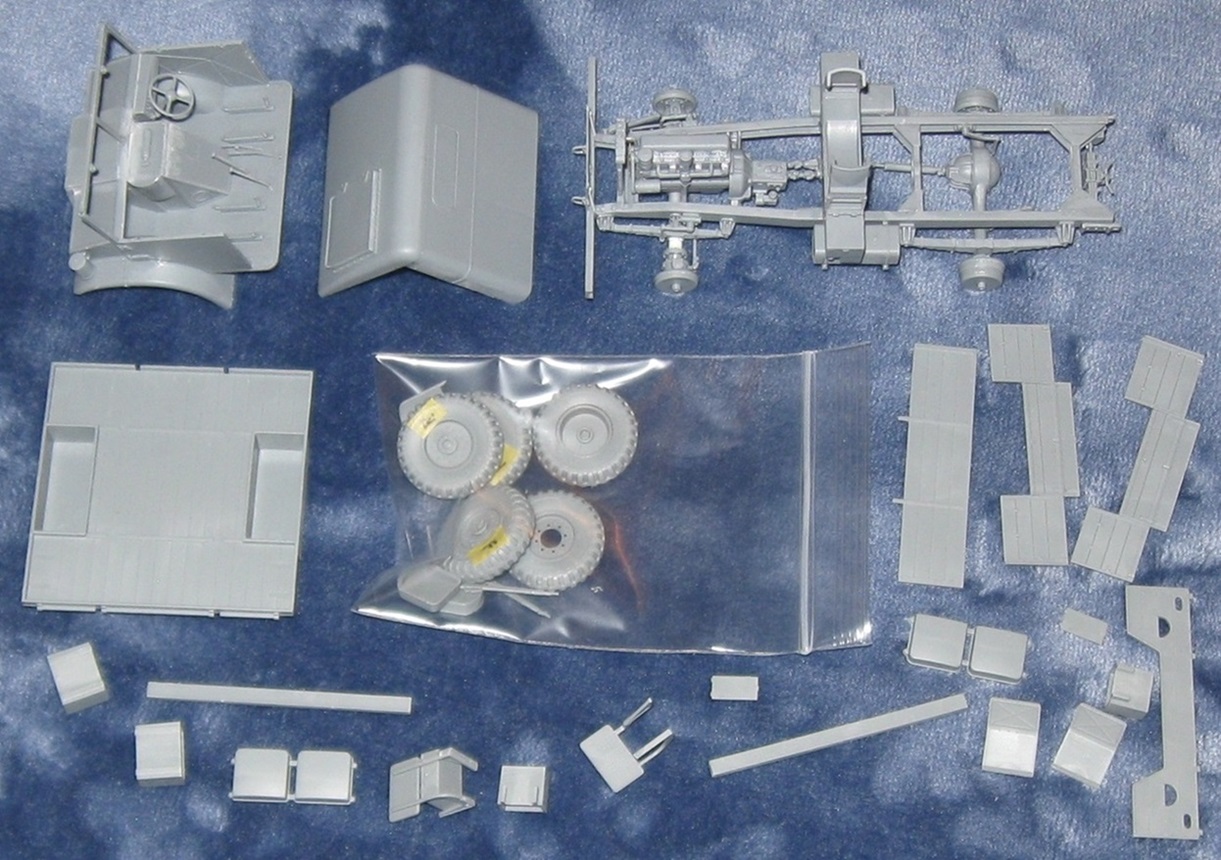
This should turn out okay despite my usual menagerie of minor mistakes. Almost all bed parts are ready for assembly.
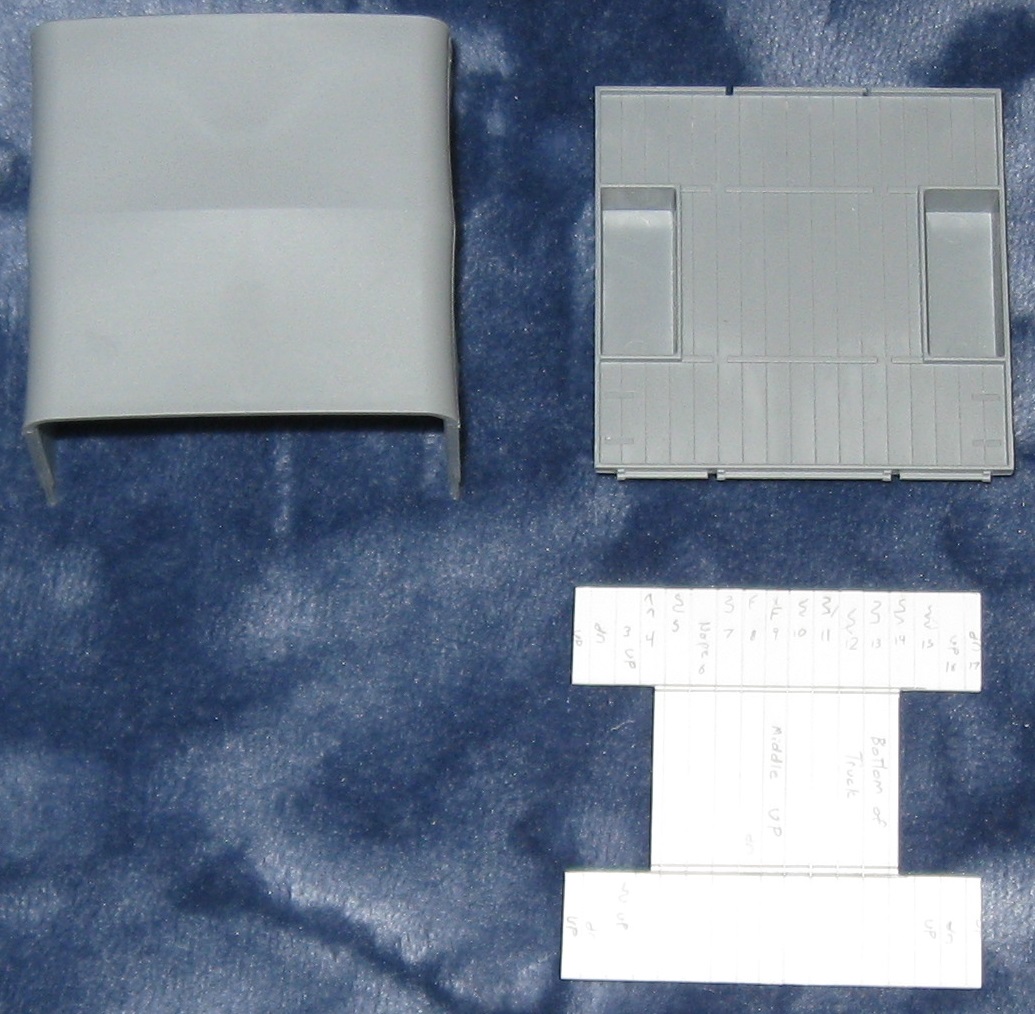
Duplicating the bed of the IBG lorry seems easy enough, but spacing the slats correctly proved impossible. My attempts to cut accurate strips to a tolerance less than a fraction of a millimeter, using various methods, have not succeeded.
It turns out the IBG and Peerless Max chassis are somewhat different. The Peerless Max model includes a rear winch and extra set of leaf springs supporting the rear axle. Did any C15A Lorry have those springs and the winch? That is a purely academic question. Exactly no one cares if my Peerless Max C15A Cab 12 lorry is accurate below the waterline. Or anywhere else. I’m telling a fib. I kinda care.
I may fabricate some boxes and crates and stuff for these lorries to carry. What would a real C15A lorry carry? That is another academic question. I kinda see the army as ‘camping with guns’ and will proceed on that theme.
3 Likes
Love the work.
Could the Tamiya kit and accessories set be used instead? I am sure you went with what was on hand.
With the Tamiya kit, do you need your banjo axle set or can the kit axles work? I can never keep those straight. The canvas cover could be sorted by scratch or aftermarket.
I am curious on the side profile of the magnet. Looks like a short u channel on top and a tall u channel inside the top u on the bottom.
1 Like
Hi Ryan, the Tamiya truck would work - as you say I just went with what I had handy. (My truck spares collection looks like the back room of Frankenstein’s lab…) You could even use the Heller truck, but I’d already earmarked the Heller frame for another project. I don’t know if the truck in the pic has Timken or Banjo axles, so either is OK. (The two axle types were built in roughly equal numbers, and despite the obvious differences in parts supply, the Army listed them both as the same item!) I just used the kit axles, and all the current CCKW kits use Timkens.
I eyeballed the magnet bar, which to me looked like a deep channel - effectively a box-section open at the top, with another dropped over to cover it. So I made the bottom from square Evergreen tube with one side cut off to give the right height and open top (Evergreen channel sides are too low), and the lid was Evergreen C-channel of the next size up. I made it a scale 10ft wide. Note the two triangle supports seem to ride in a channel for height adjustment and are not fixed directly to the bumper…
2 Likes
I did note that after studying the photo for few minutes. I knew you won’t have it all welded to the bumper otherwise the height couldn’t be adjusted. ![]()
1 Like
I did find these photos (some on missing lynx as well)
where Ilian took a slightly different approach to the magnet but mostly similar. Looks like he added some warning flags on the ends of the magnet.
1 Like
I saw his build. (I do have the width indicators in the pile - I just need to decide how to blacked the stainless-steel wire!) I’m not sure about his rejection of the ration-can story though - I agree that it won’t pick up glass, but some clearance is better than none.
I’m also assuming the darker ends of the beam are painted red…
2 Likes