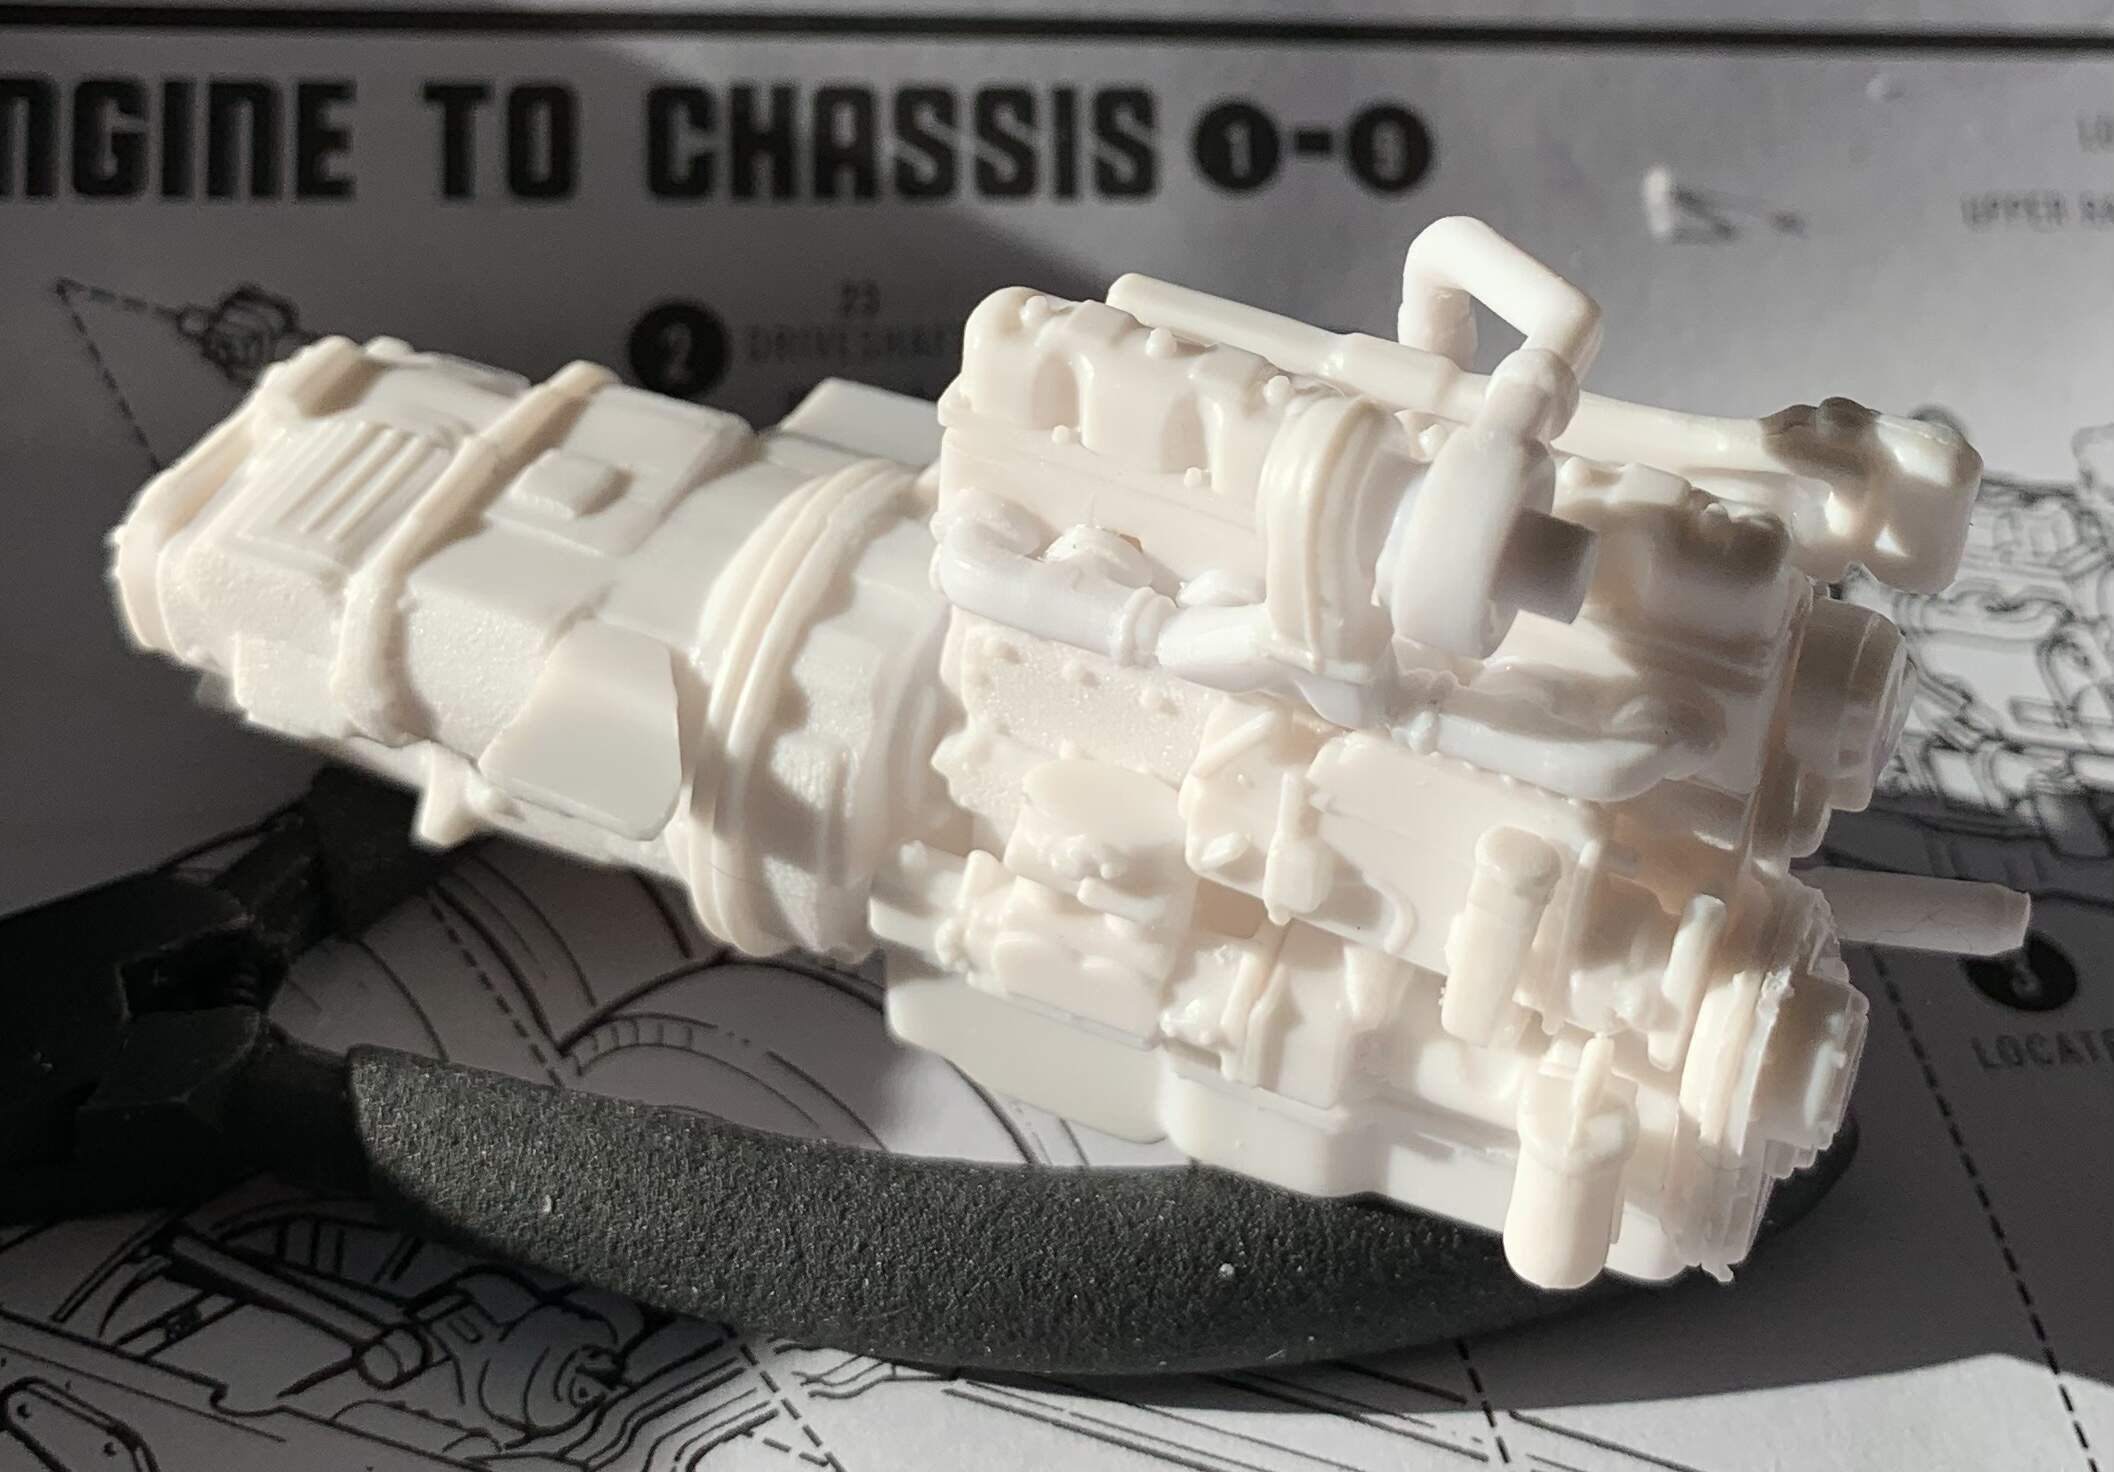
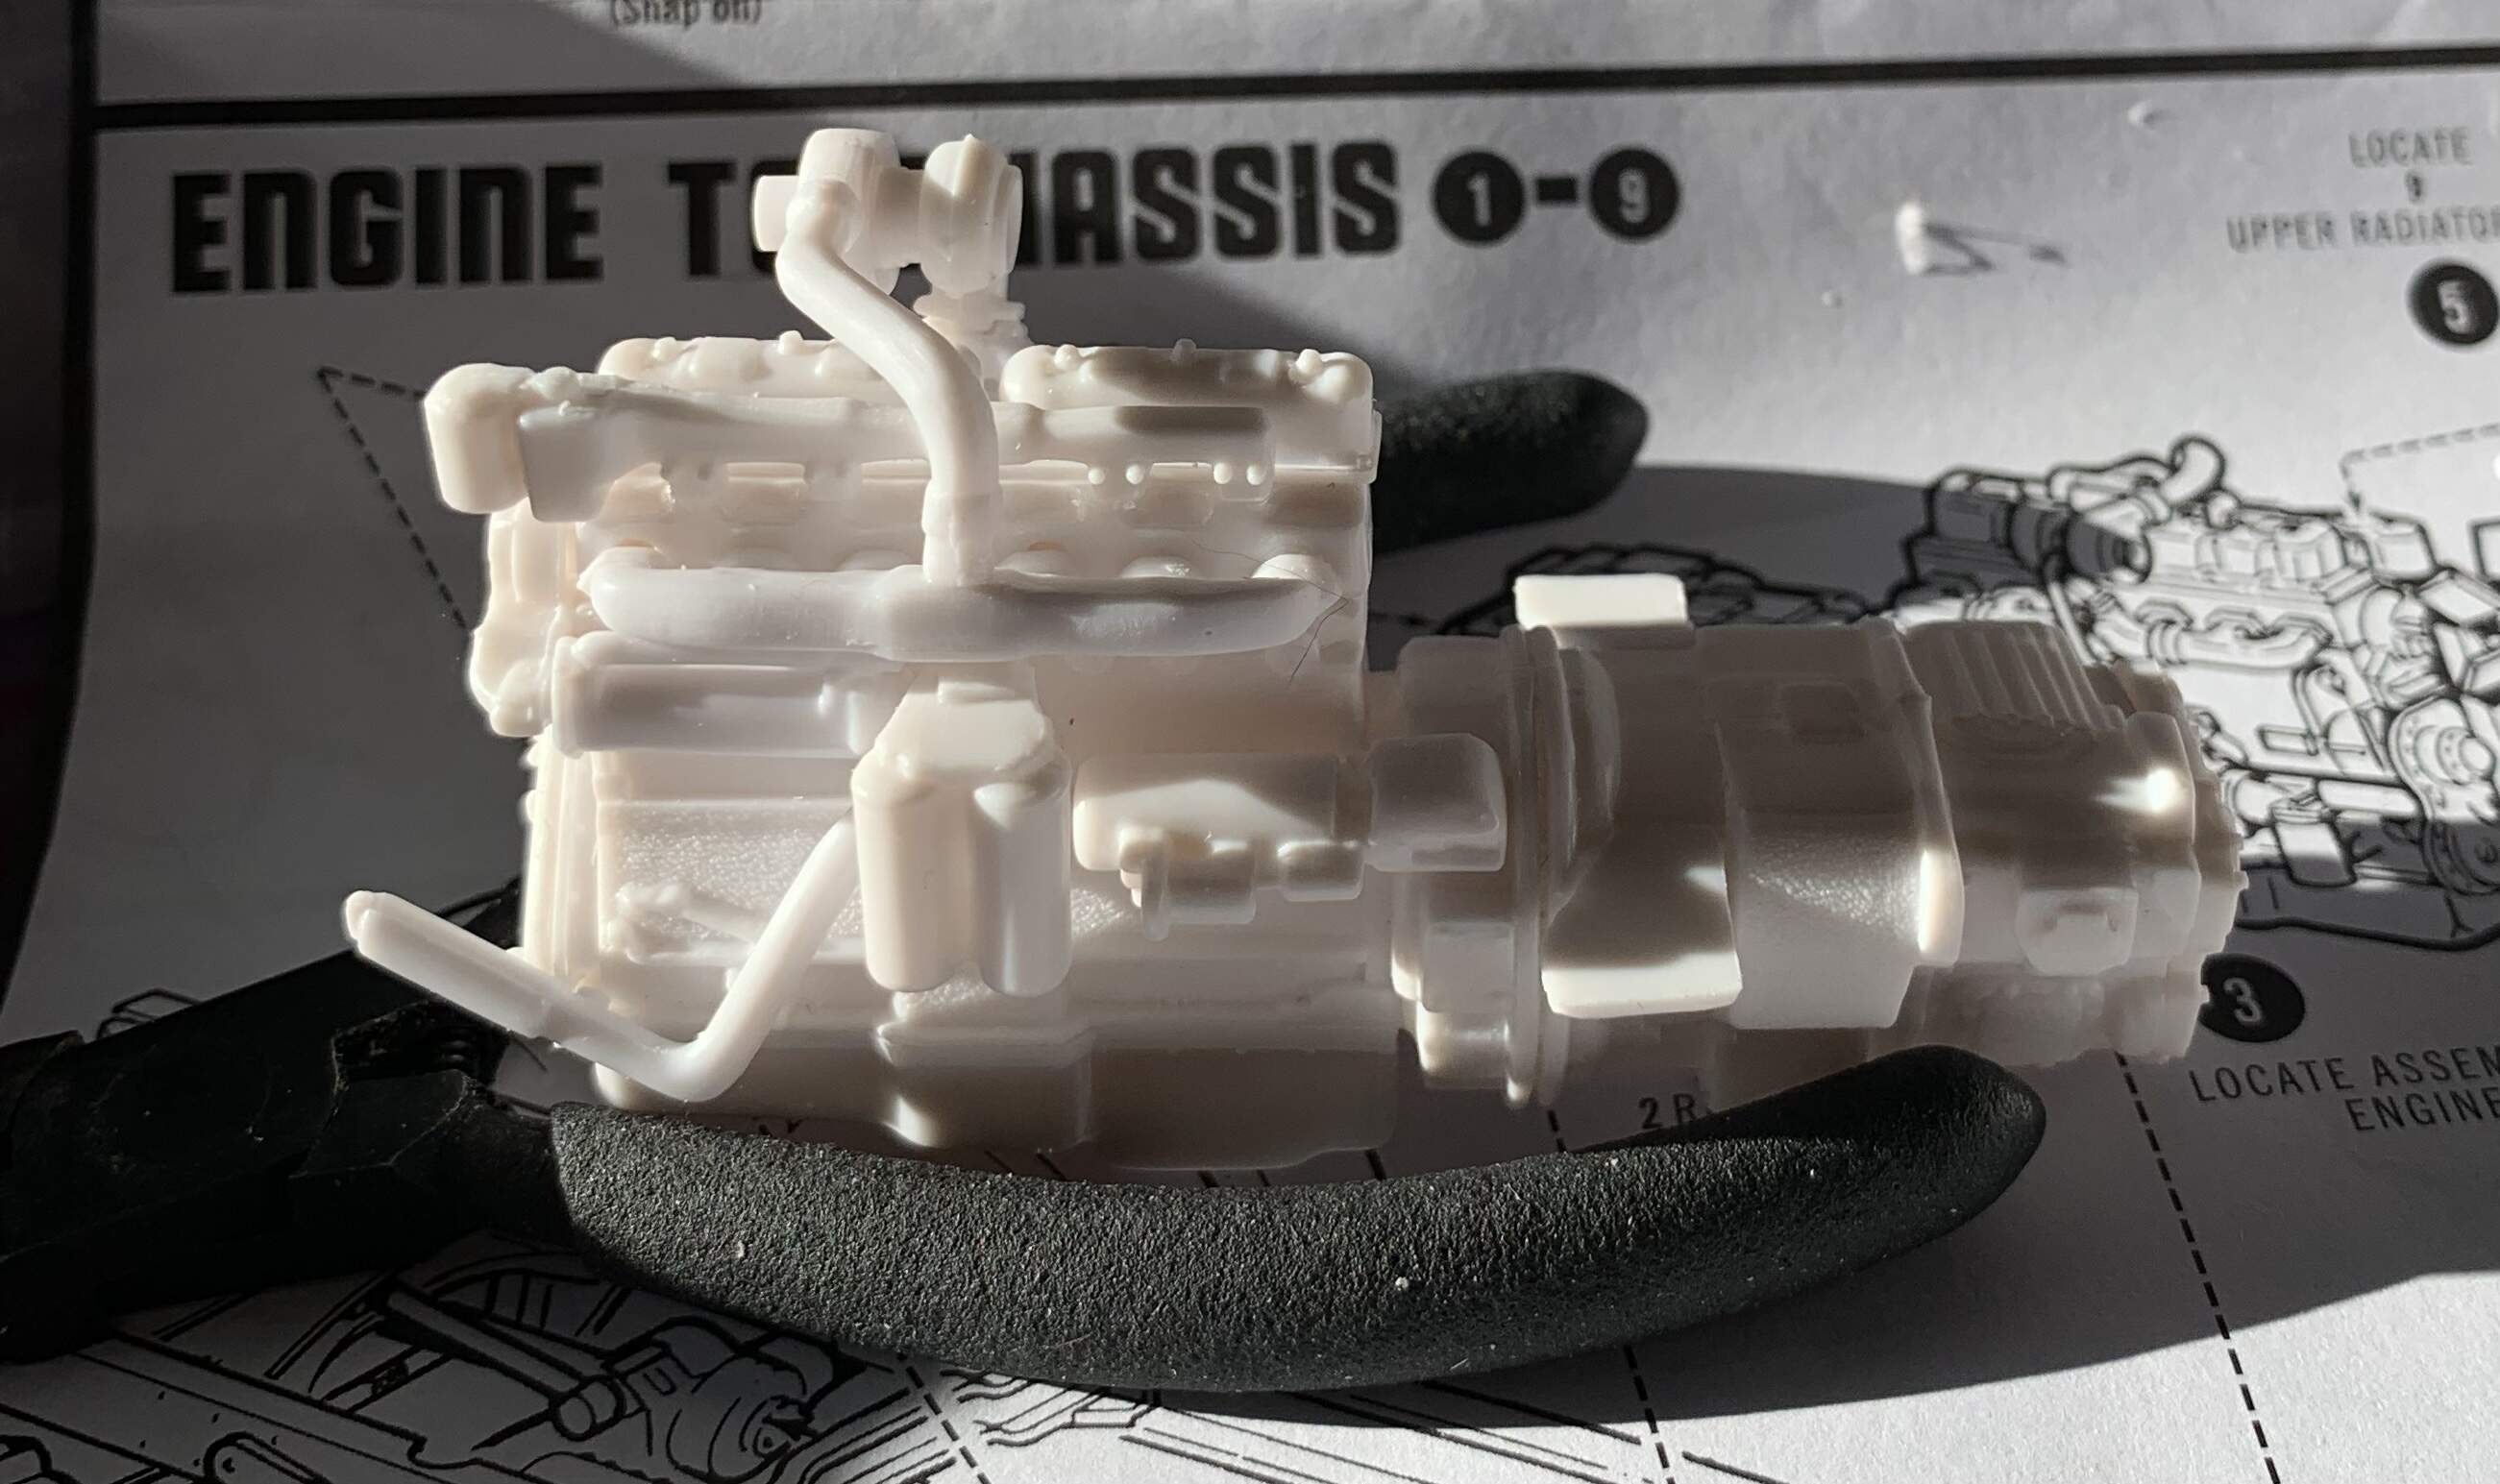
I like the philosophy but is plenty of parts, no need to add extra.
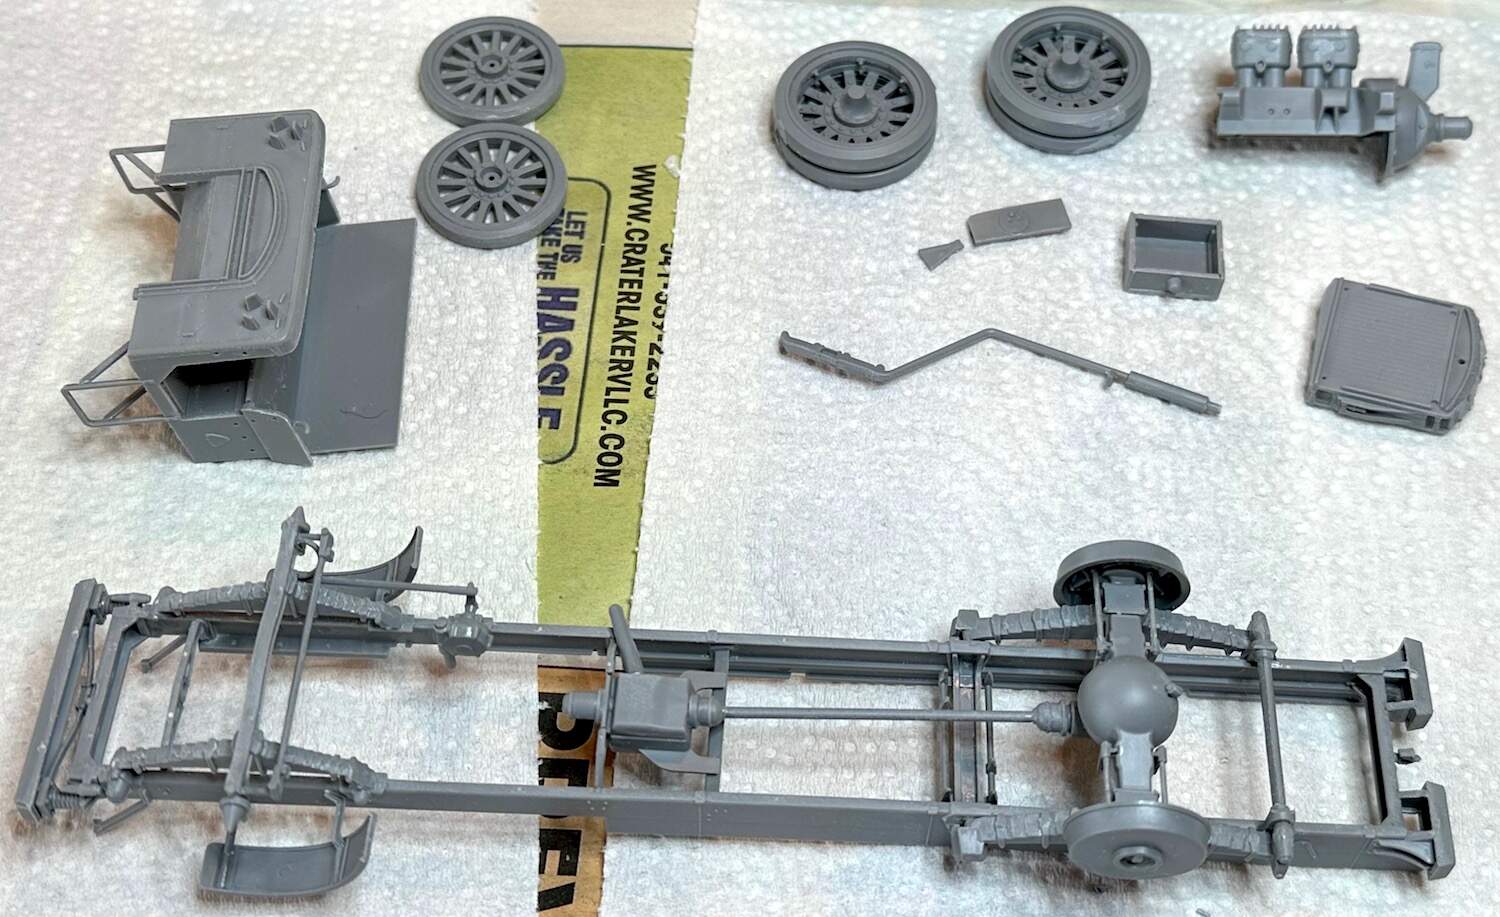
Efforts so far this weekend. There is still a few more parts to go on.
I like the philosophy but is plenty of parts, no need to add extra.
Efforts so far this weekend. There is still a few more parts to go on.
Now that’s looking like an engine buddy… Just those few additional parts have totally changed its appearance… Nice work Ryan ![]()
Thanks John. ![]()
Pinched nerve (again). I’ve been suffering chronic back pain due to my stint in Bosnia. Surgery in 1998 and went bad again in 2000. The docs have done a variety of things to my back since. Unfortunately, nothing has worked (shots, PT, implant, etc.). Now another disc is causing the nerve to get squished some and I’m waiting on the referral to go back to the pain management doc for a shot that may alleviate the (almost) crippling pain I get every few days. Freakin’ miserable. So, no fire extinguishers needed. ![]()
Mike
Nice work! I’m guessing those parts are a bit chunky - lol - probably not exactly seamless construction on parts like the turbo cross-over!
Cheers
Nick
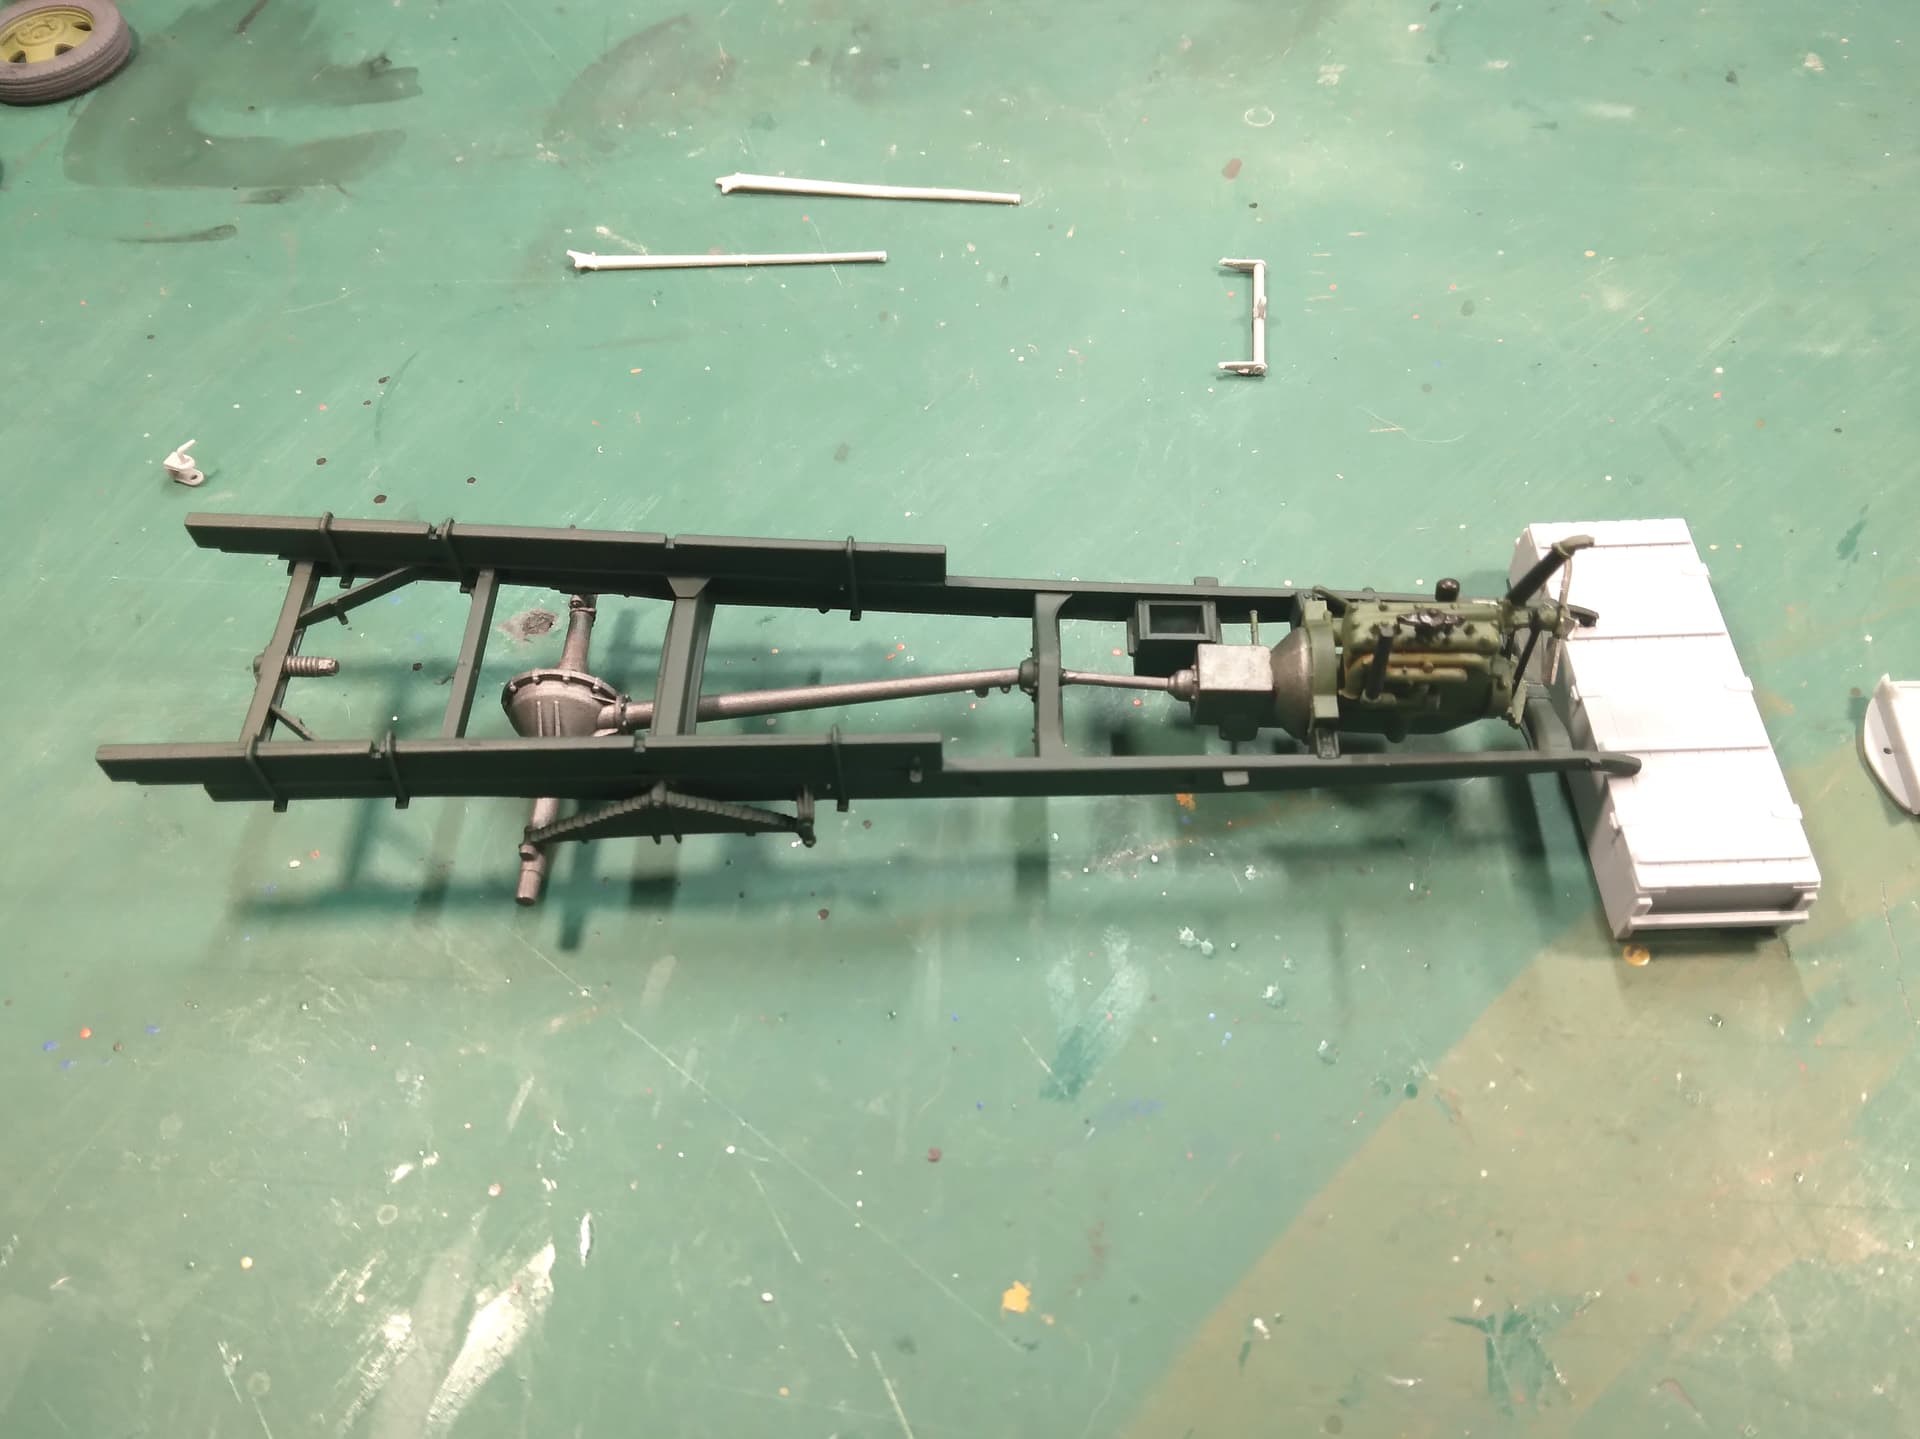
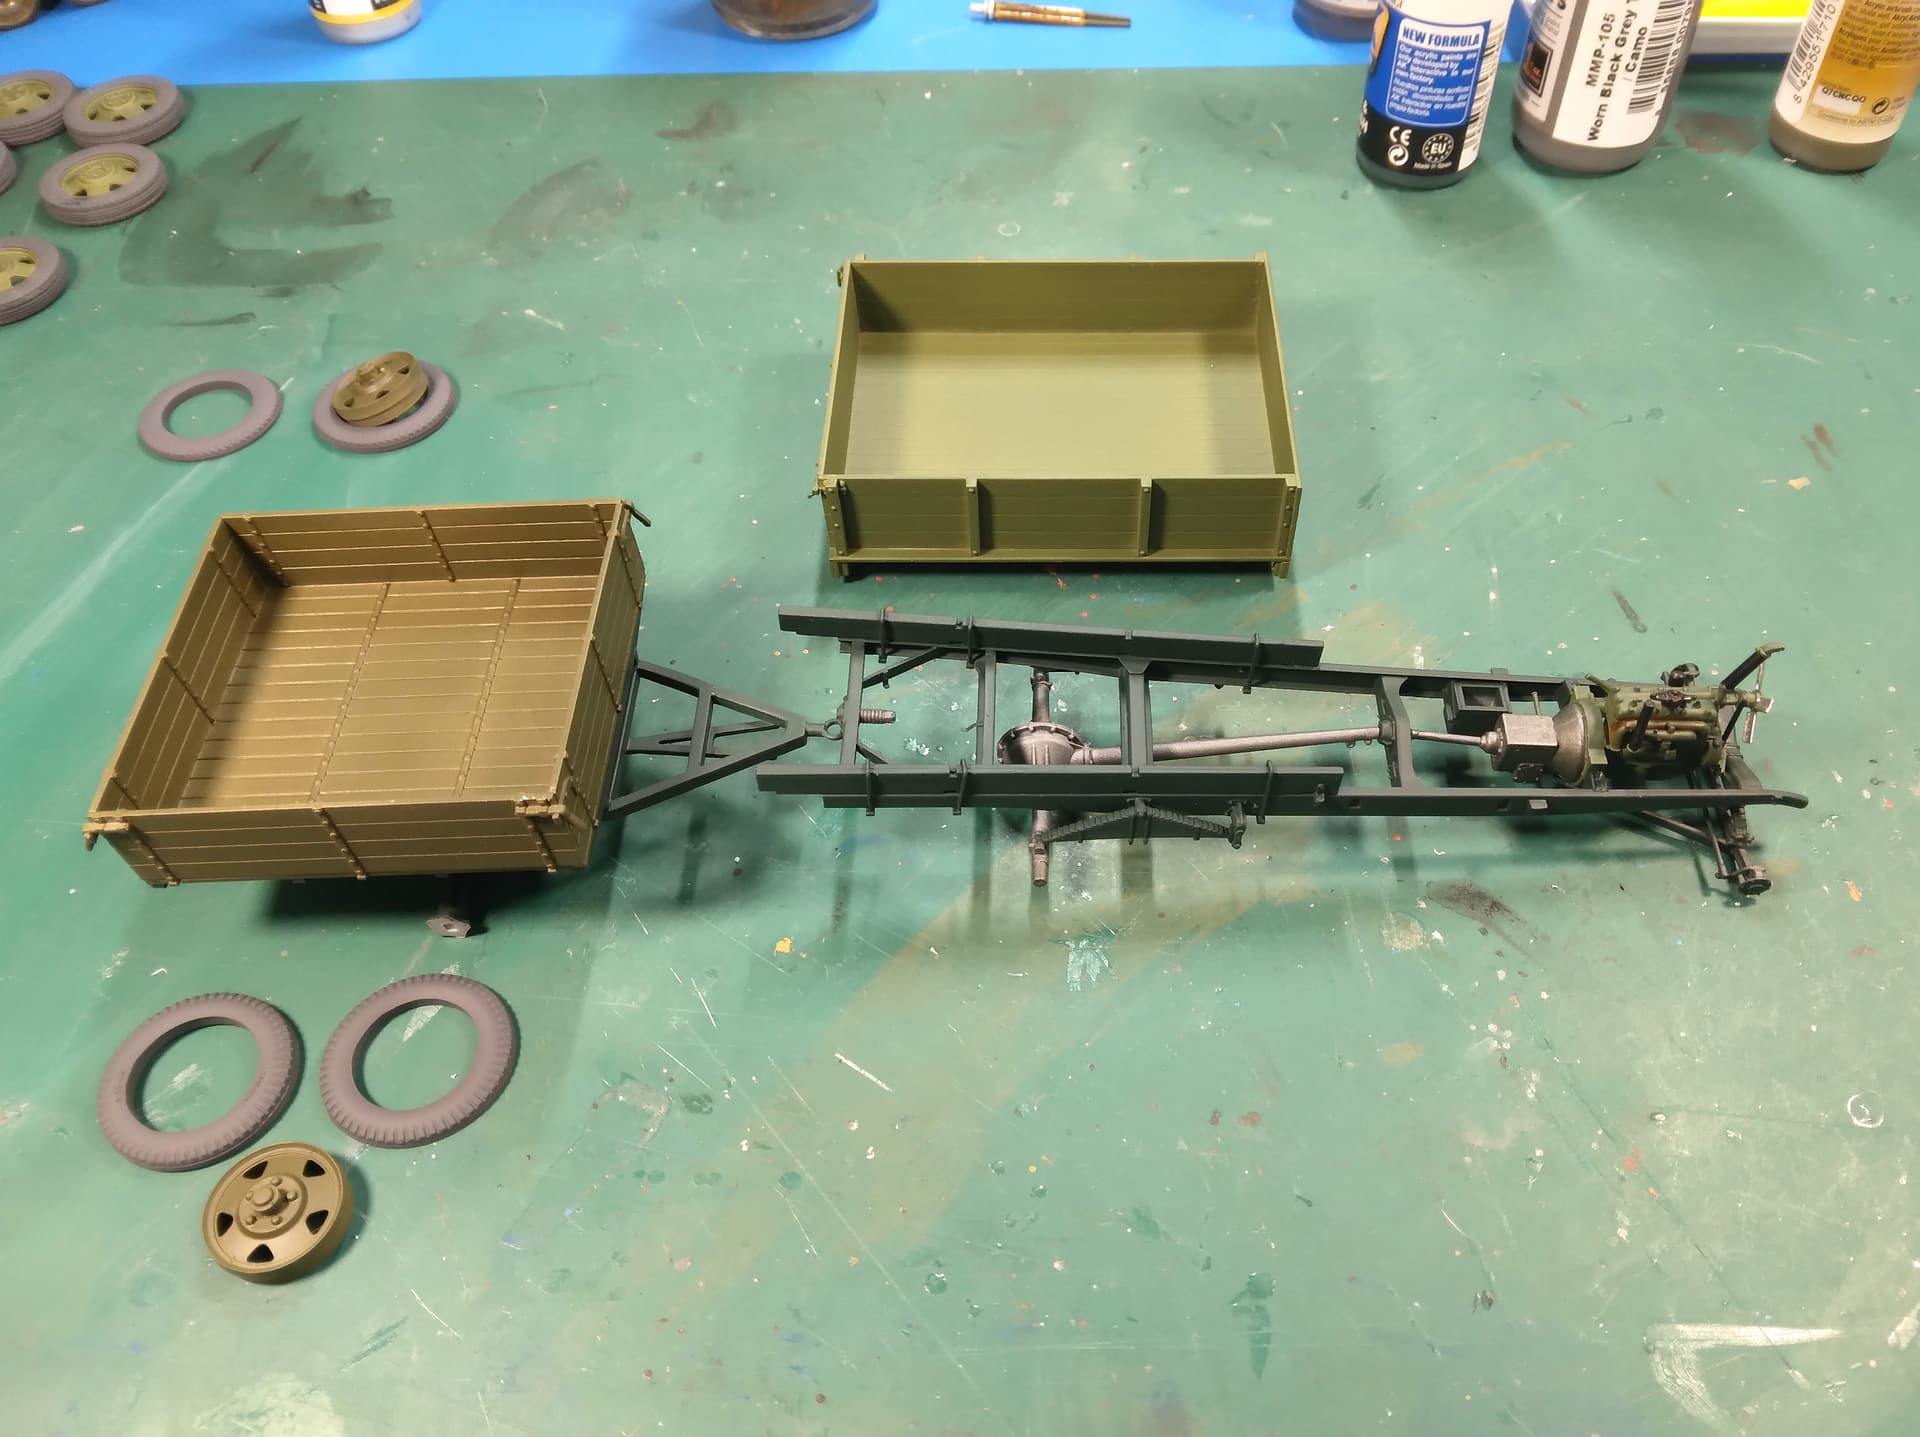
More on the undercarriage.
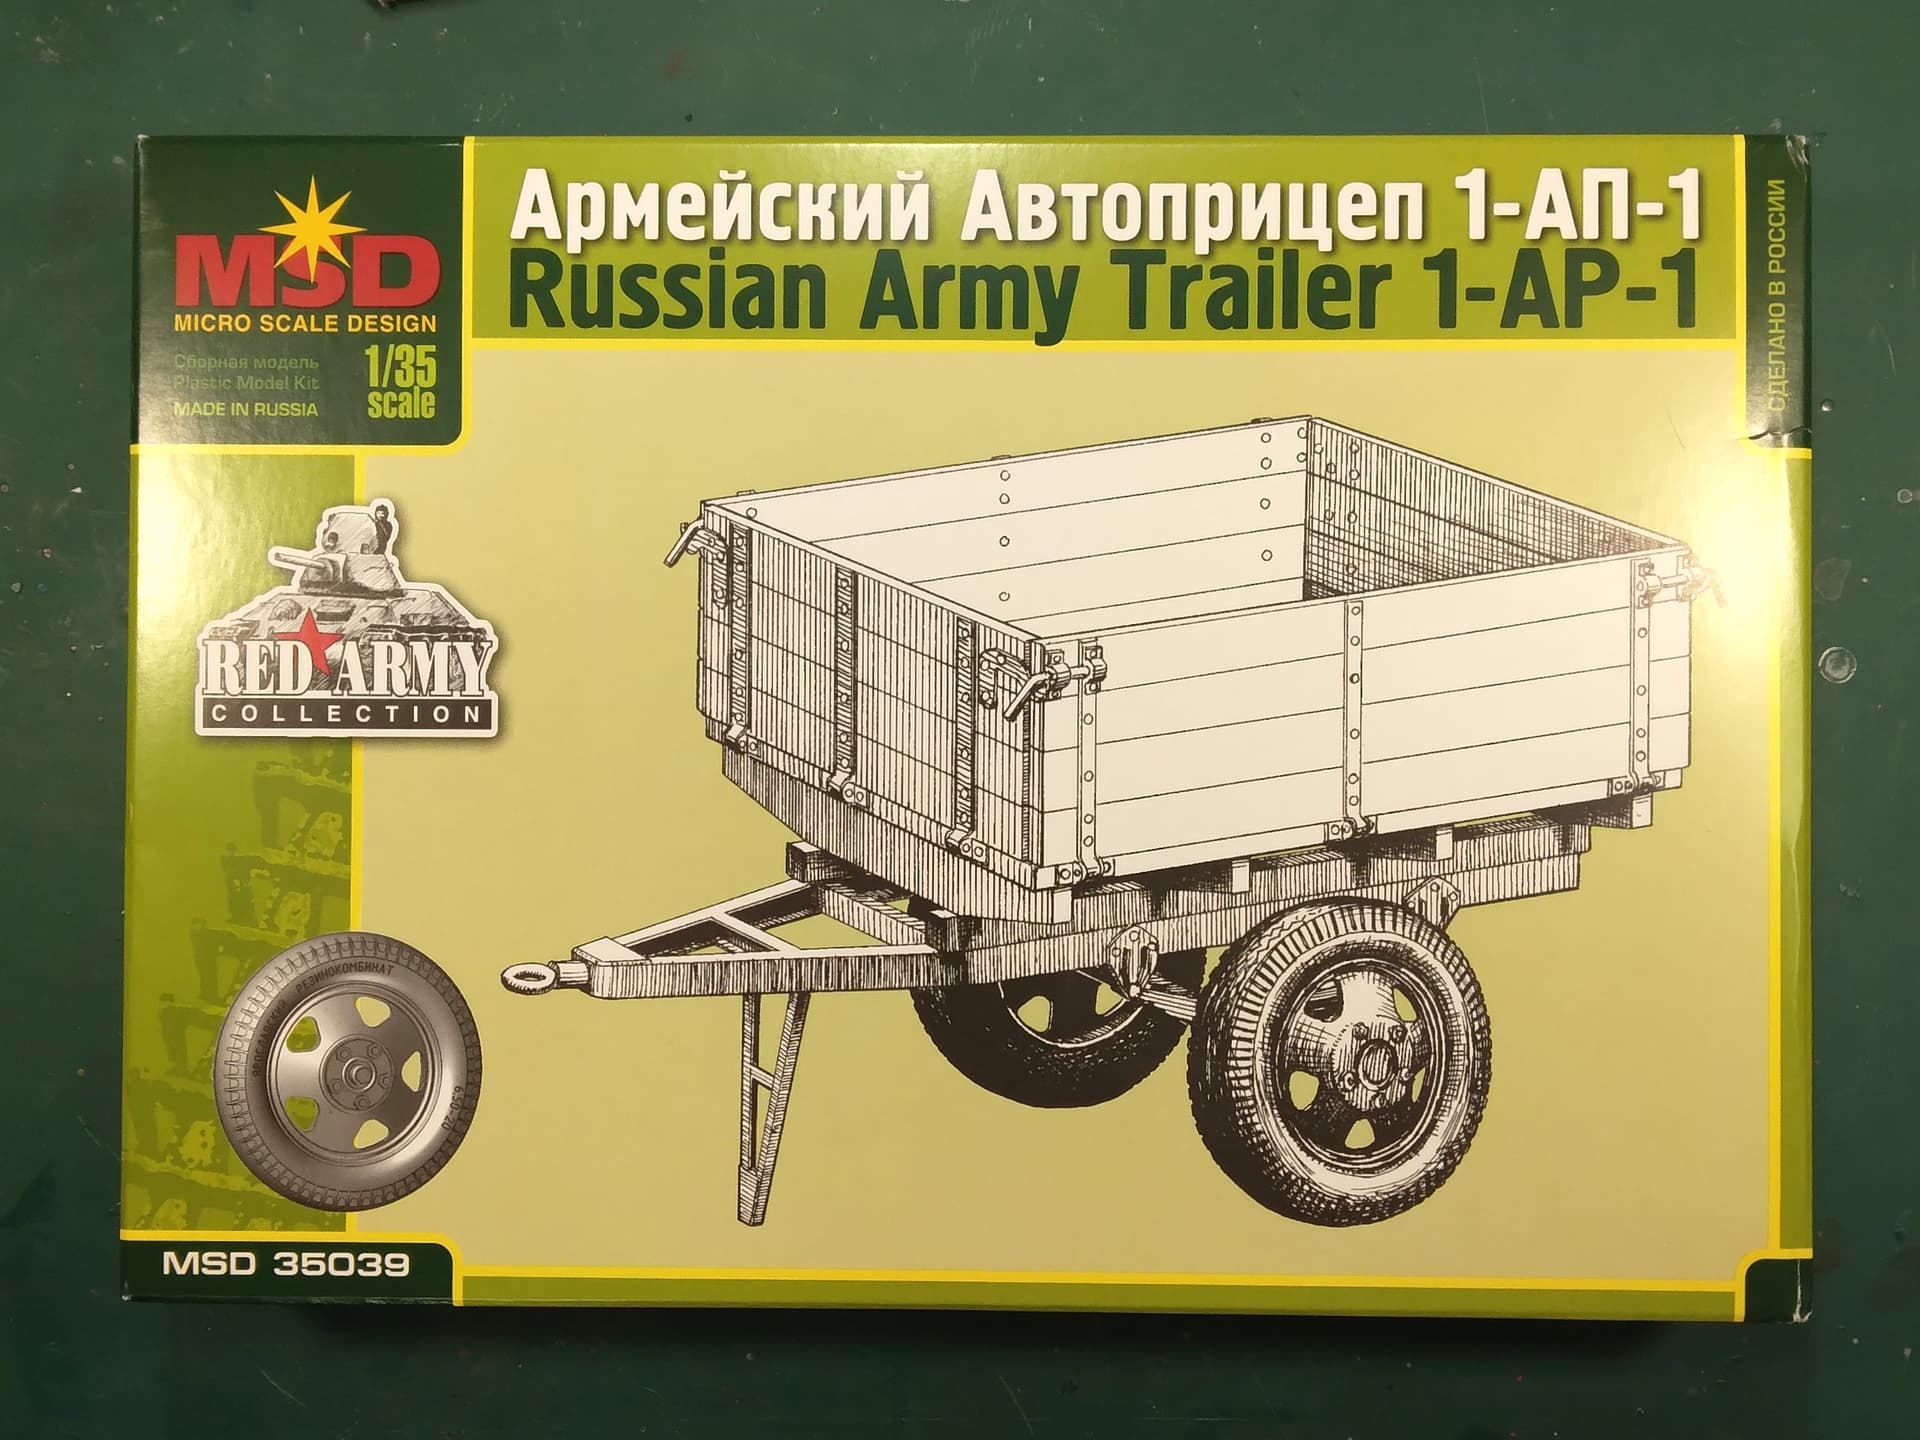
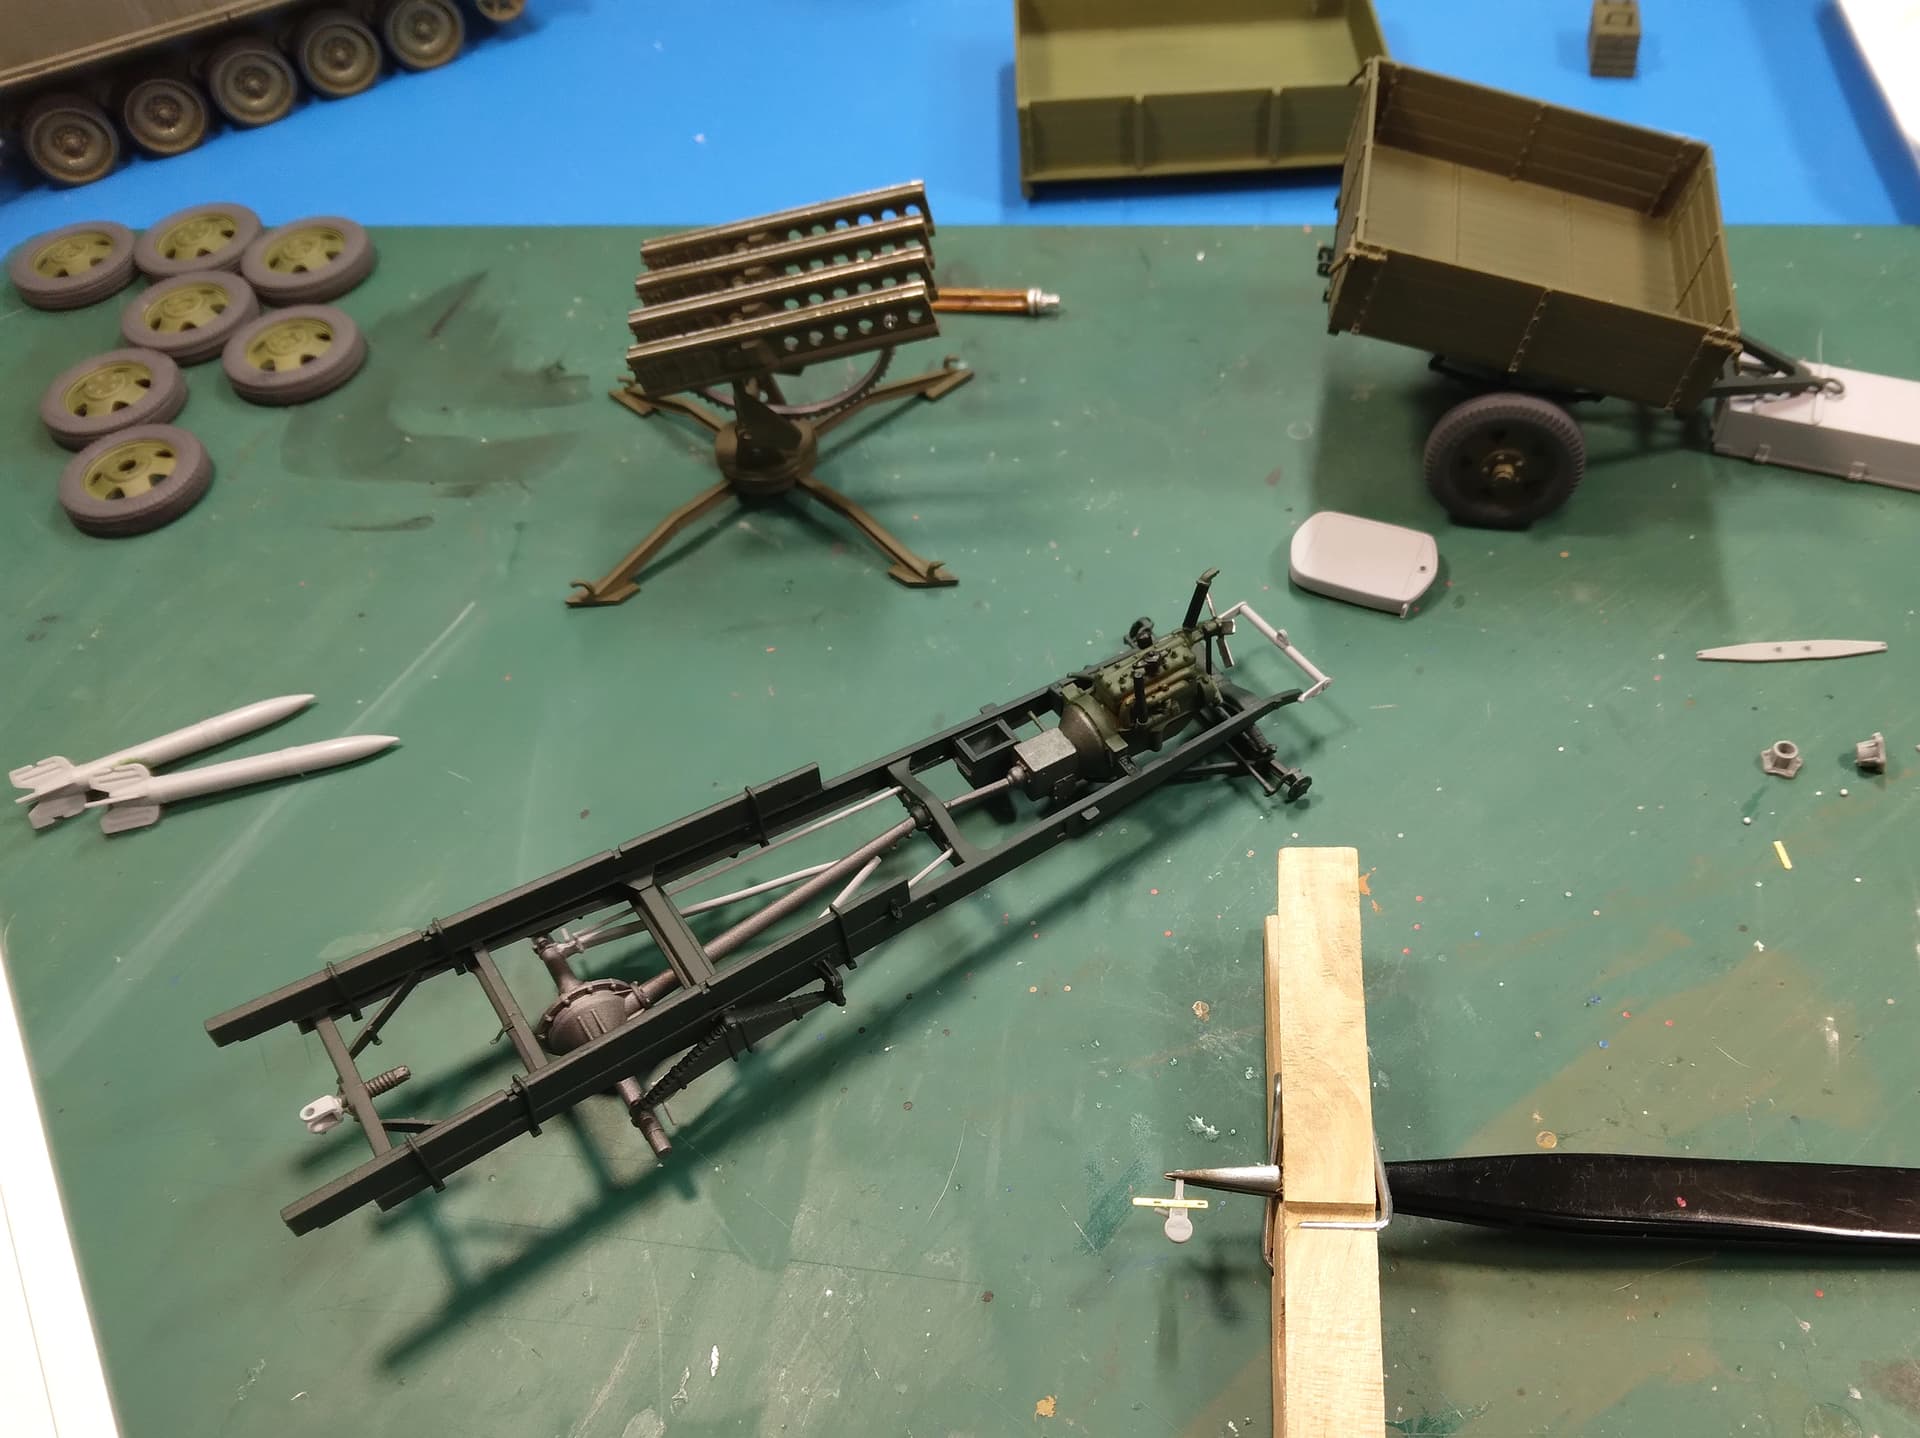
The white metal kit only came with four rockets. Somewhere along the way I picked up a set of rocket crates and rockets (unfortunately there were only two rockets in the kit and maybe 10 crates (?) ![]() ). Oh, and I have a Russian trailer by Micro Scale Design, the Russian Army Trailer 1-AP-1. With so many crates left and no more rockets, I may build the trailer and attach it to the GAZ-MM (the tow pintle is a 3-part affair [just above the truck frame on the left]). I’ve left off the piece that’ll go through the pintle so I can add the trailer if I go that route.
). Oh, and I have a Russian trailer by Micro Scale Design, the Russian Army Trailer 1-AP-1. With so many crates left and no more rockets, I may build the trailer and attach it to the GAZ-MM (the tow pintle is a 3-part affair [just above the truck frame on the left]). I’ve left off the piece that’ll go through the pintle so I can add the trailer if I go that route.
Mike
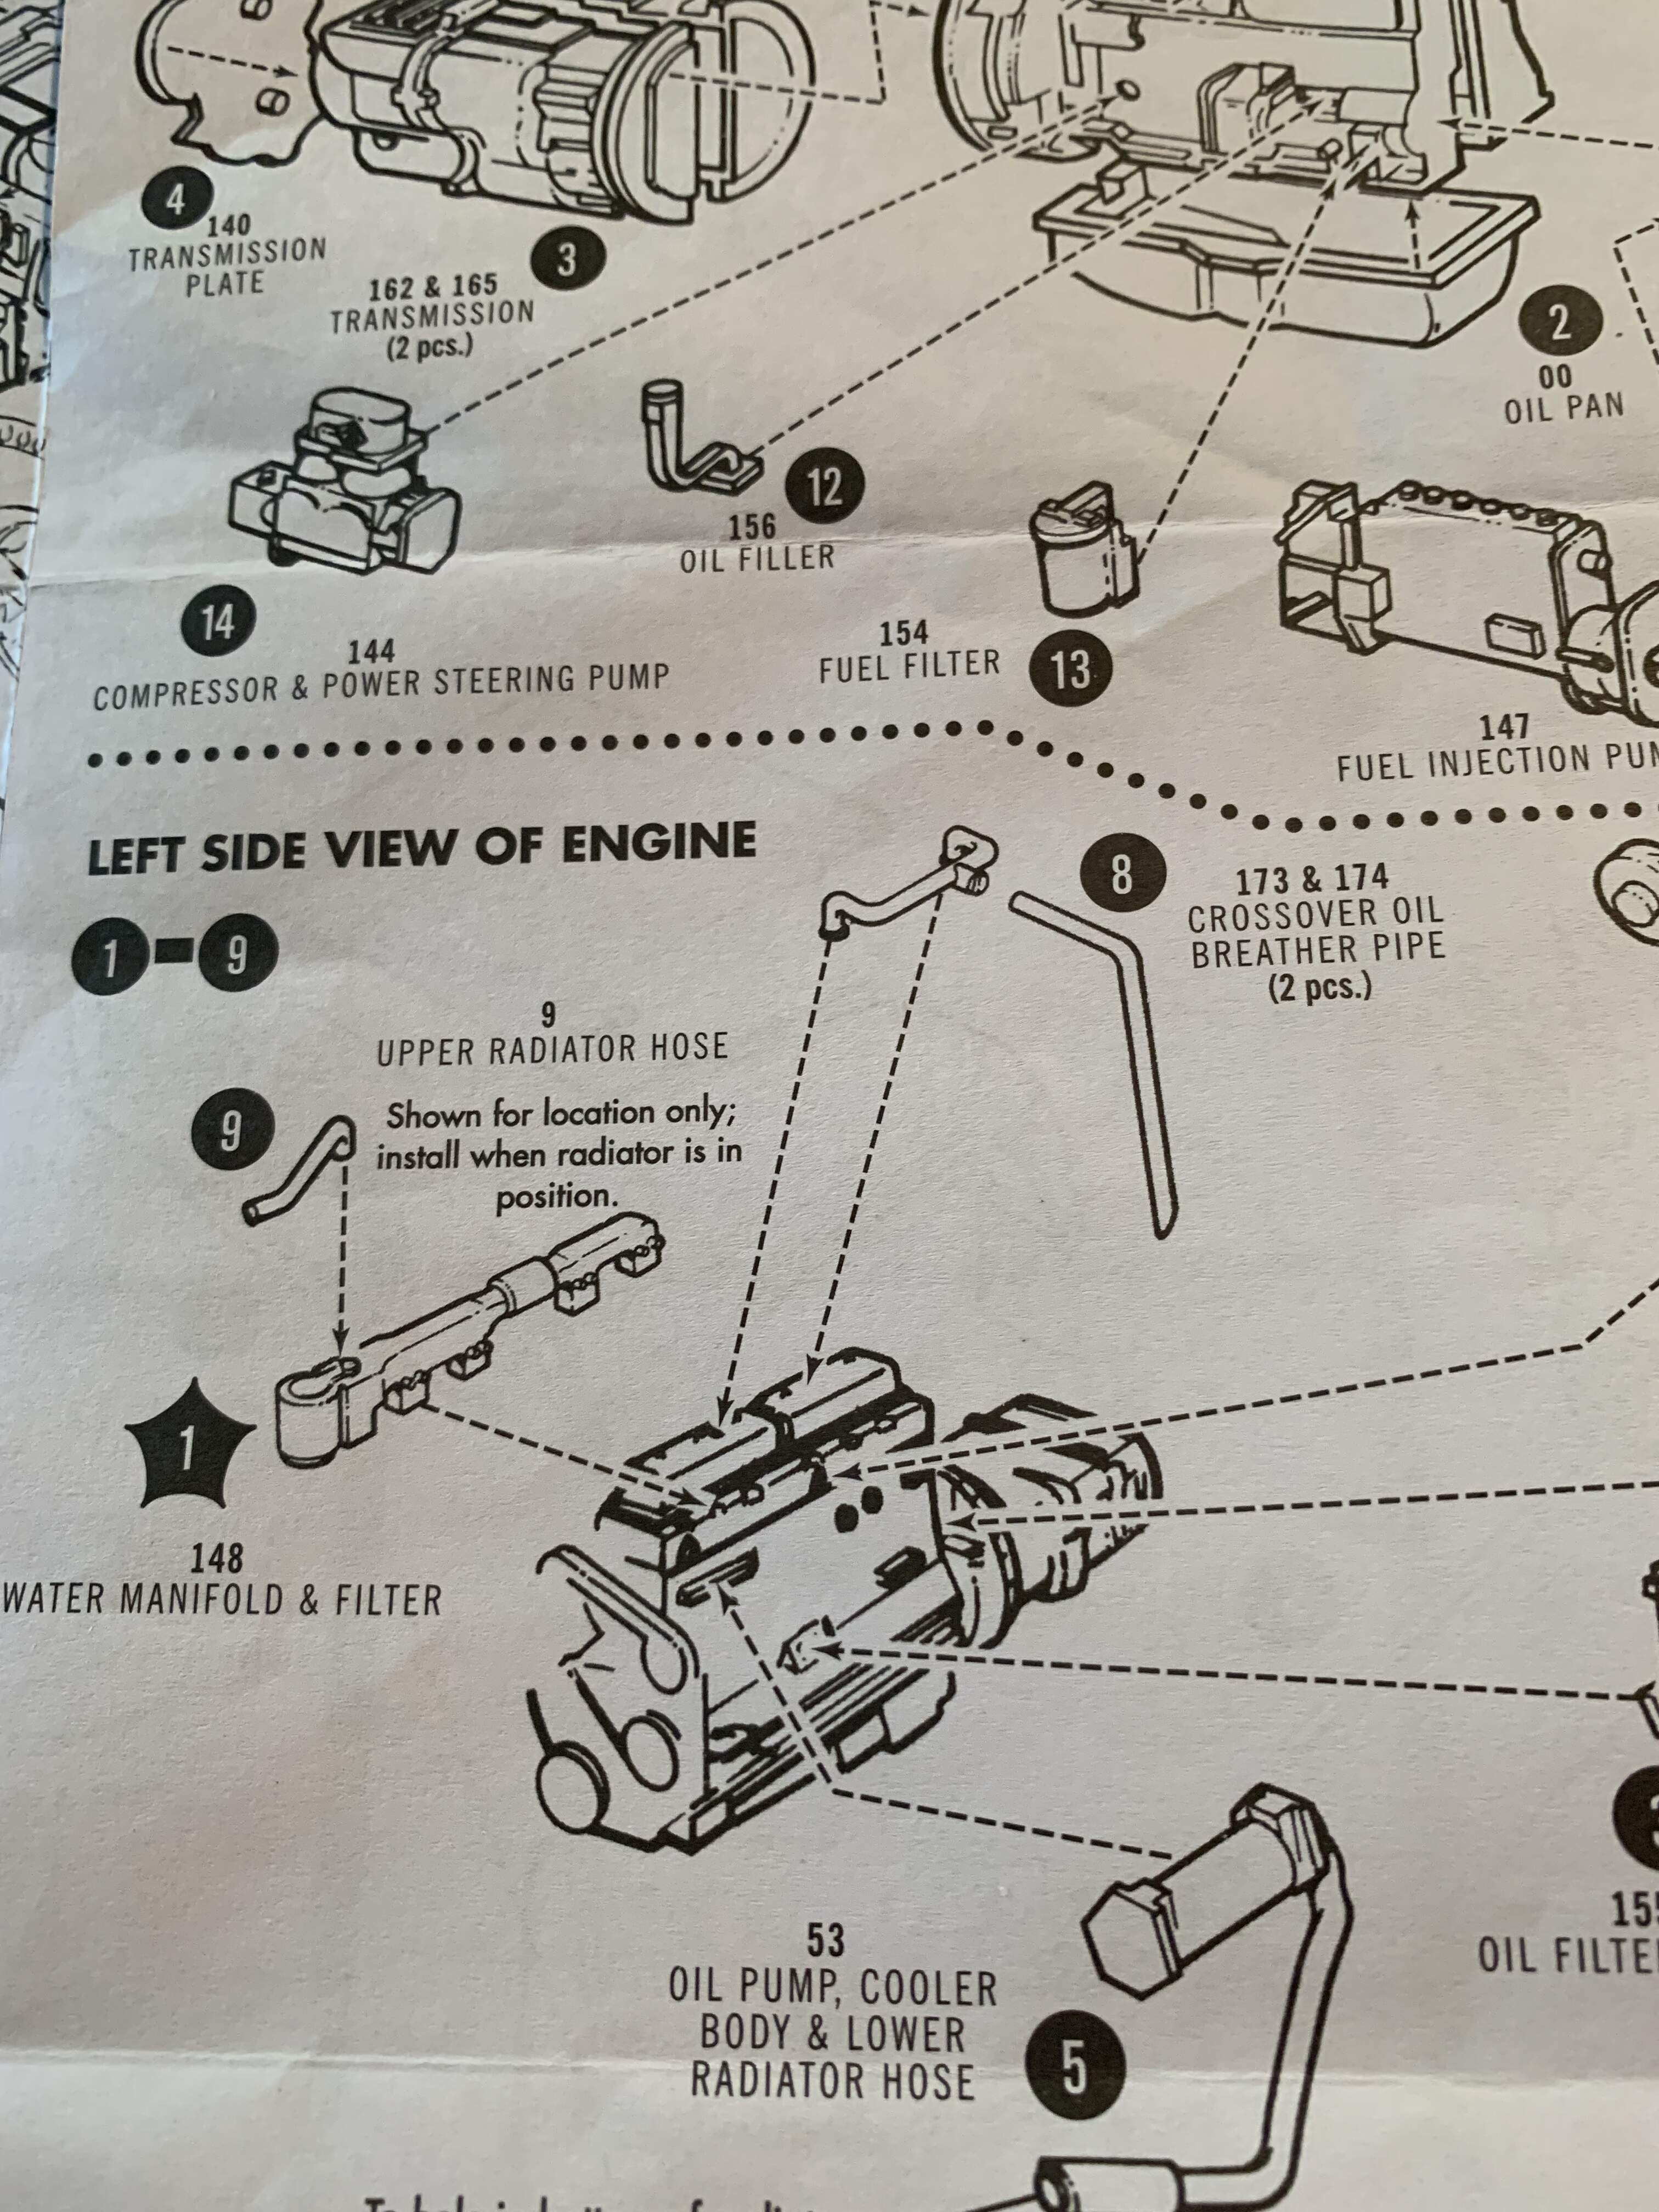
A bit more work got done on the Standard Liberty truck. The chassis is more or less done. The motor provided some fun as the instructions proved not just misleading but actually wrong. There are two cylinder heads and they are different. If you do as instructed as I did, the holes for the ignition looming tube will not line up. No biggie, that tube can be mounted anyway with wire mounts or maybe by just gluing it straight on. In another spot, the instructions would have you mount the fan drive pulley on the front engine mount. If you do that, the parts will not be happy & the motor will not fit in the chassis.
Do kit makers test their kits with real modelers of various ages & skill levels? They used to back in the day and such errors were rare.
A bit of work got done on the cab also. Its time to figure out what parts to assemble & what parts to leave until later.
Paul
The turbo seemed actually good…shockingly. It’s the radiator hose and oil crossover left. Edit, forgot the Turbine oil drain.
Getting closer to having to deal with the frame and warped floor.
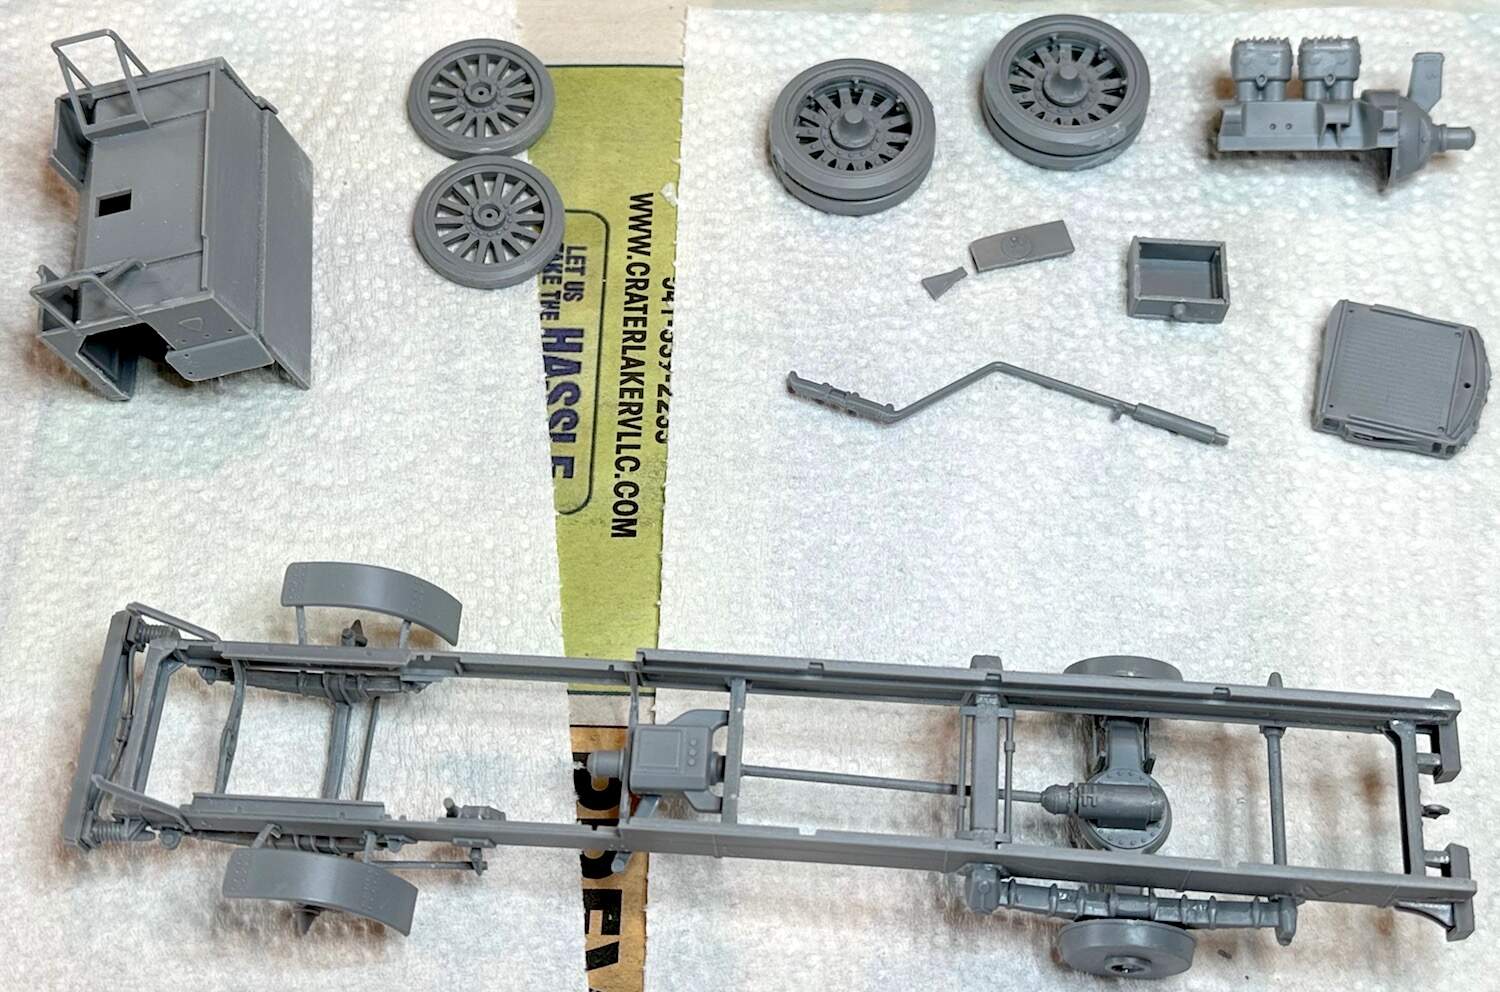
So, as mentioned, here’s the trailer I have:
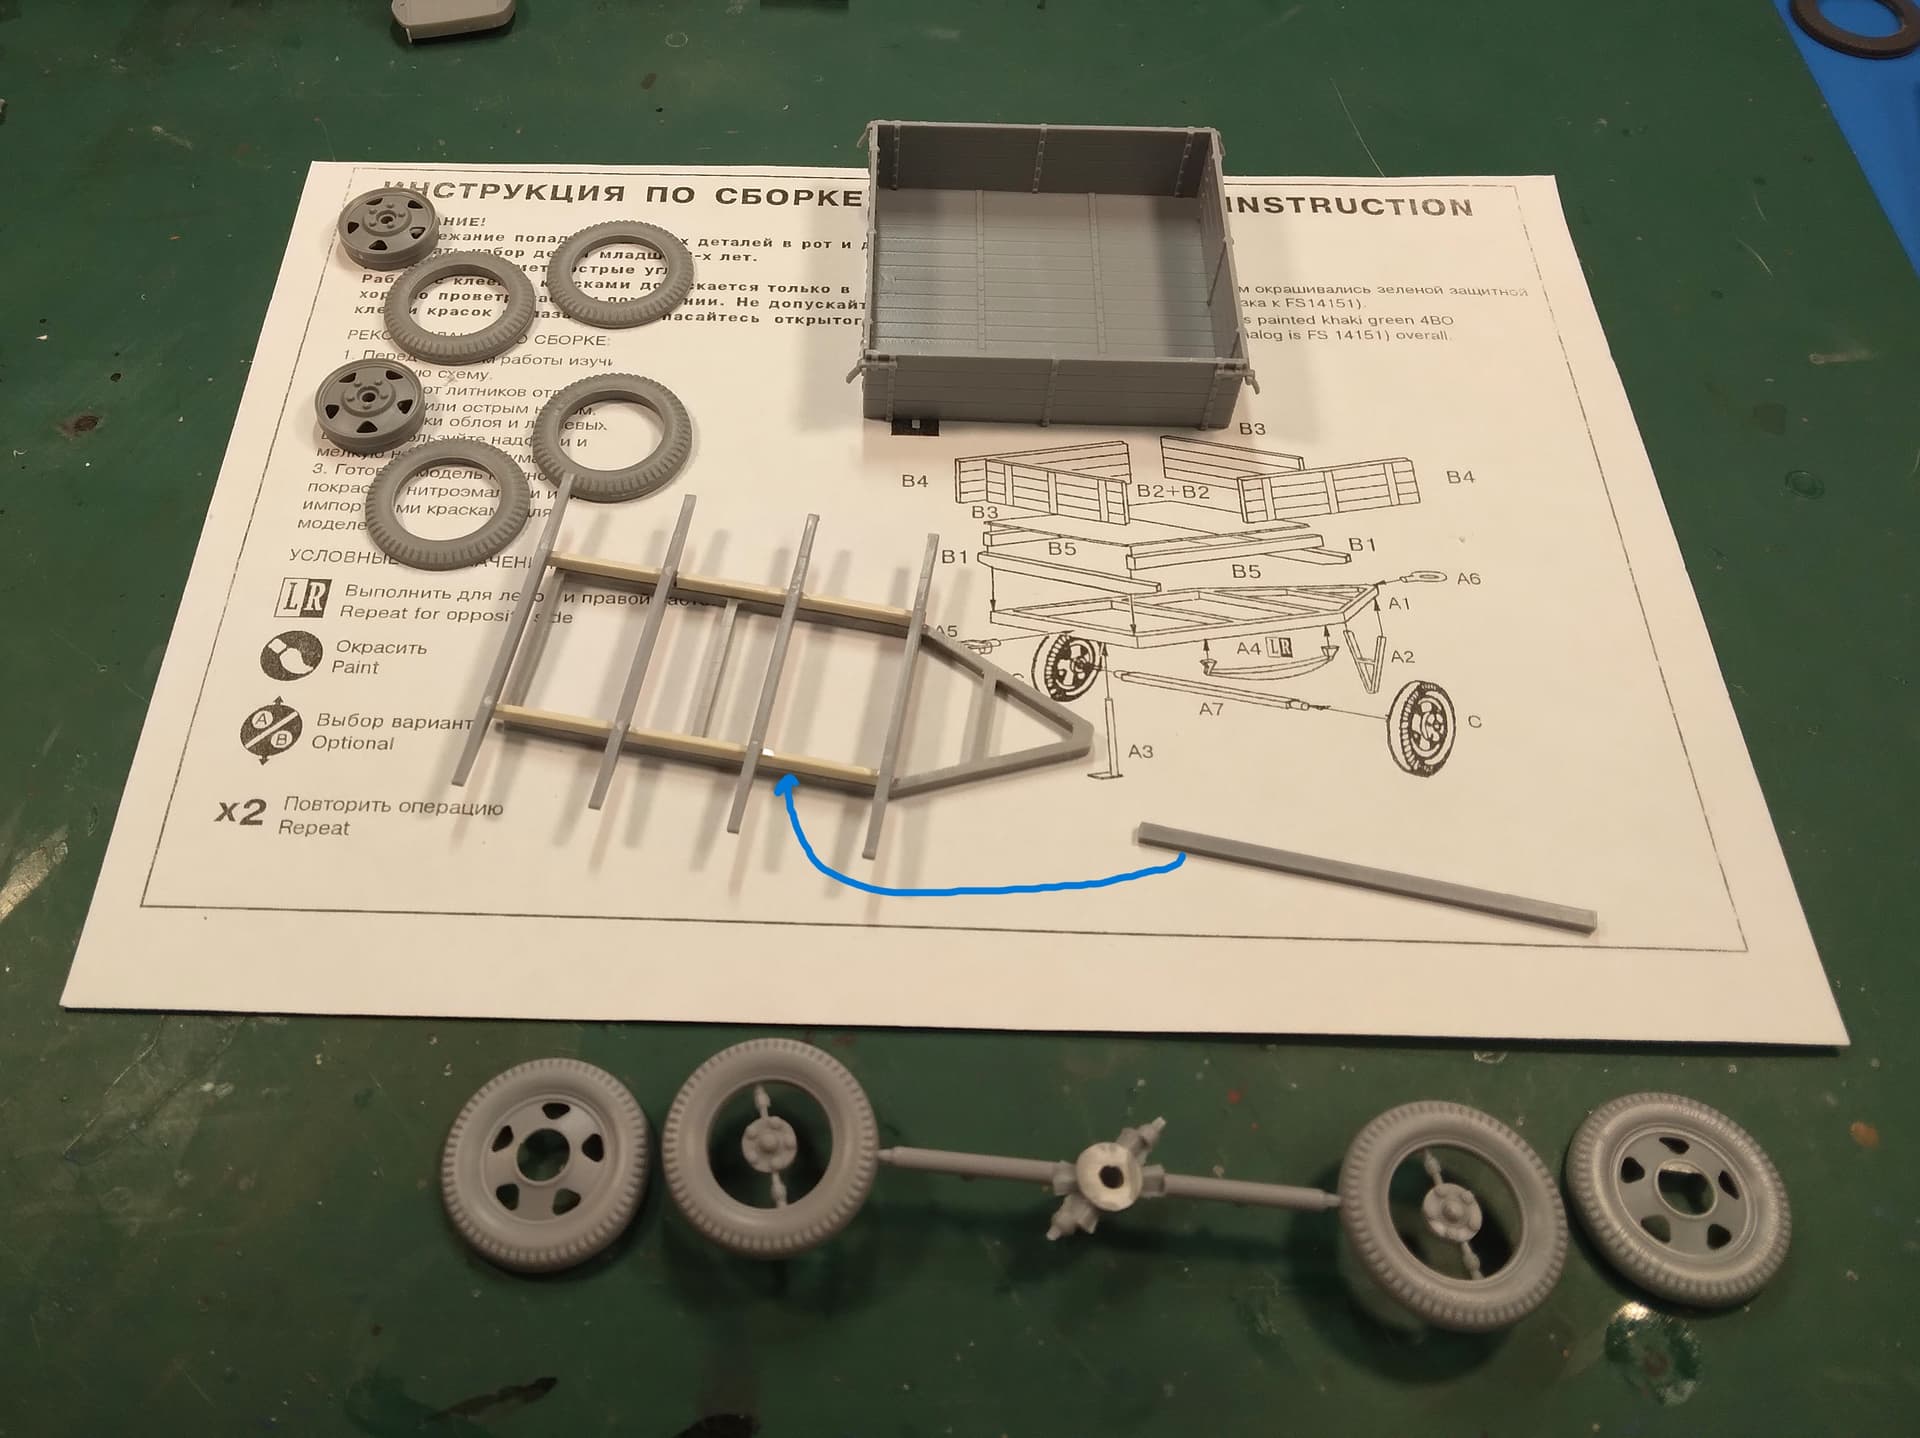
Extremely simplified instructions that really don’t match artwork. Rather rough moldings. Two sets of wheels/tires of which I’ll figure out which i want to use after they’re assembled. And, missing one of the supports for the top of the frame (see arrow) so I made two new ones out of scrap.
Primer tomorrow.
Mike
Thought it might be nerve damage. Sorry to hear it - I know it sucks. But I couldn’t resist the fire-safety gag!
The GAZ has legs now and so does the trailer.
There is a difference between Ammo Mig and Vallejo Russian Green 4BO. Trailer is Vallejo and the GAZ’s box is Mig. However, that’s a good thing IMO.
Truck’s running gear was installed and balanced so hopefully all four wheels rest evenly on the ground. I still have about a dozen tiny and/or skinny pieces for the underside to paint and install. Fragile.
Mike
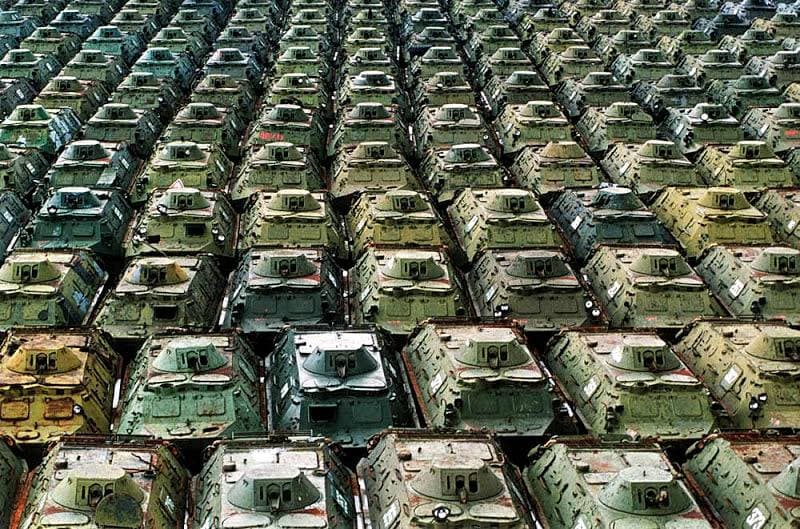
I think there was probably a very wide variation of colors used in the Soviet vehicles. A modeling pal sent this picture to me a few years ago:
This is a post war image but I imagine the variety was just as broad in earlier times.
Paul
Yup. Russian quality control was never their strong point. Paint batches are only as good as the quality and type of ingredients used. Then you have variation when it is hand thinned and with what it was thinned with.
Где Уолдо? ![]()
Hello gents,
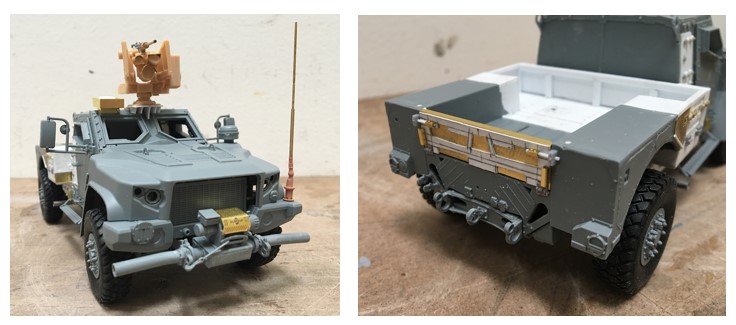
Making progress on the JLTV. I started this build, eyeballing and guessing what parts look like using inet photos…then, once I was well into it, realized @18bravo might have images of this, and of, course…he does.
So, I eventually looked at what turned out to be a great collection of detailed images from Rob to discover that in some places, I guessed correctly, and, surprise! others, well, I didn’t. Yes, probably a better idea to start with the photos… I fixed what seemed reasonable to fix, and am living with the rest (such as, the tailgate should be about 2 scale inches lower than I made it) :
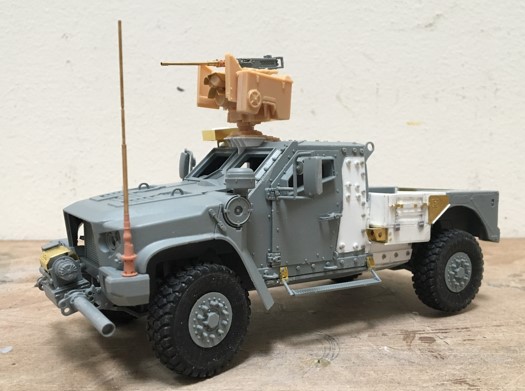
Beauty eh? it’s coming along. Sort of funny, I based the CROWS on an image I found on line. In addition to this unit not exactly matching the photo, I can also report that the unit I built is from a Panda kit, and in case any of you have forgotten, well, their MATV kit leaves something to be desired, and this was no exception. I encourage any of you thinking of building an MATV to consider some of the other options on the market, and I’ll leave it at that.
My gripes aside, this is shaping up:
The Sabre kit has turned out to be pretty good - parts go together as they’re supposed to, the don’t require too much clean up, and the plastic glues together easily. I did pin a few parts - like the mirrors, as I can say with relative confidence, that if I didn’t, I would likely snap them off eventually.
While the bed conversion looks pretty simple, it required a fair amount of cutting and carving of the kit parts, and adapting materials to get it to work.
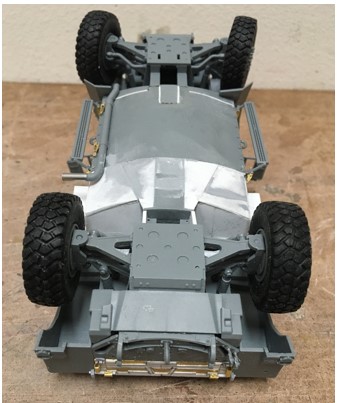
While this kit is fairly detailed, it is in some ways, as auto model makers say, something of a curbside kit. While Sabre did a nice job making the suspension modules user friendly, and reasonably detailed, there is not much else included on the underside, but, as there is indeed the hull, that might be fine, as when built, you couldn’t see the engine, drivelines etc anyway.
My compulsive instinct is making me think it would be a good idea to cut out the circle shapes located under the suspension cores…or not ![]()
Hoping to get this painted in the next few days -
Cheers
Nick
Heck, if you opened the tailgate no one would know!
The mini Stalin’s Organ is, uh…erect.
Hopefully tomorrow I can finish the GAZ’s underside and install the wheels and the two for the trailer. The parts are primed and ready for paint and installation.
The truck will get the three-color camo; tan, green, and brown and I think I’ll just to green and brown on the trailer’s box.
Because I am now going to use the trailer, I think the launcher is going to be without the rockets mounted. I have six crates for the rockets and four will easily fit within the confines of the trailer; all six if I add straps. I like the idea of the rockets being displayed, so maybe I’ll strap down five in the trailer and have an open crate in the truck’s box(?). The plastic rockets are nicer than the metal versions - cleaner overall. We’ll see how the displaying goes.
Mike
I would. May not be seen so much, but it’ll look better IMO.
Mike