
@ petbat, Are you changing your callsign to petyoda? Hmmm…
—mike ![]()
Yodabat… hmmm. Consider, I will…
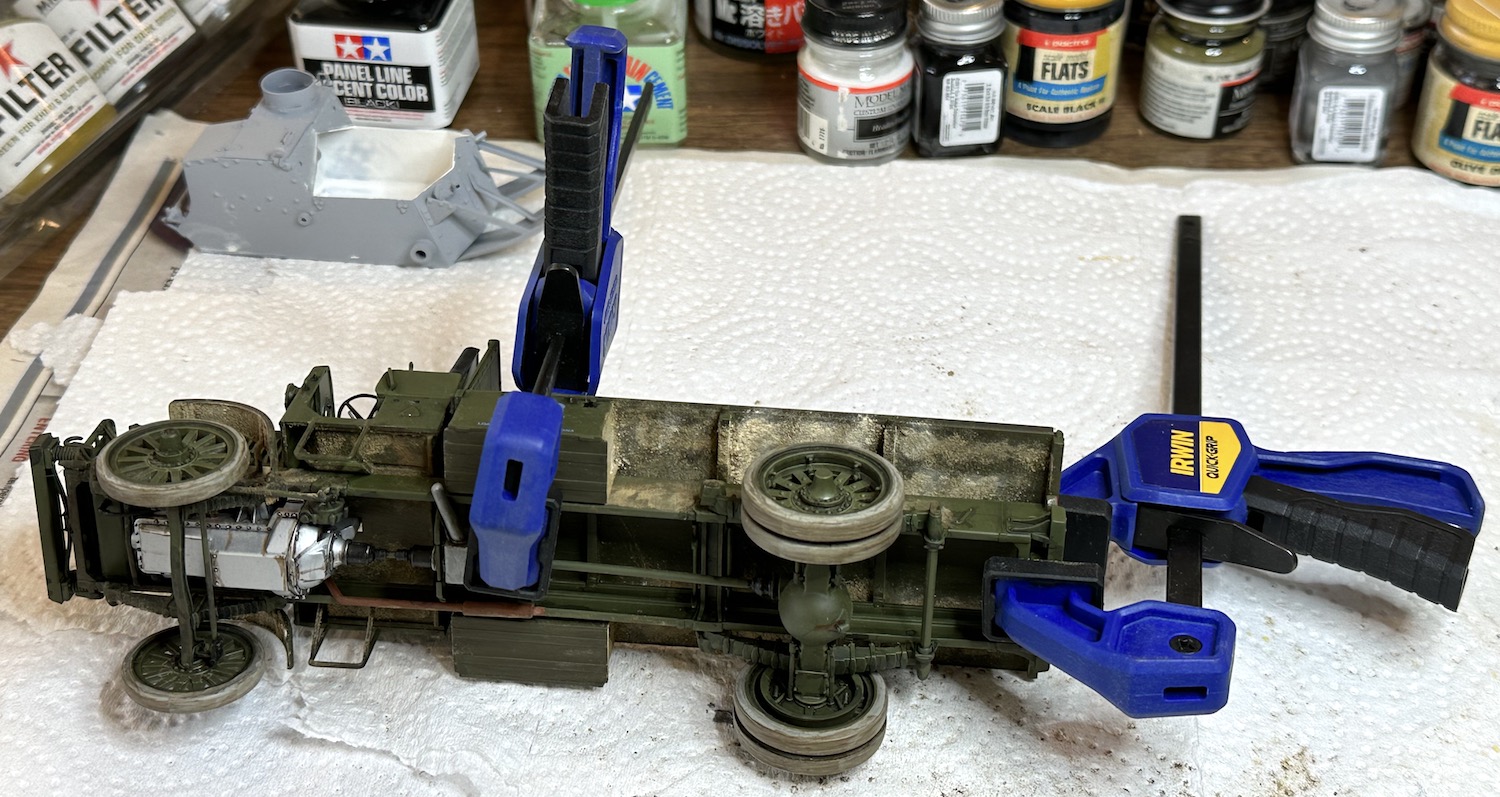
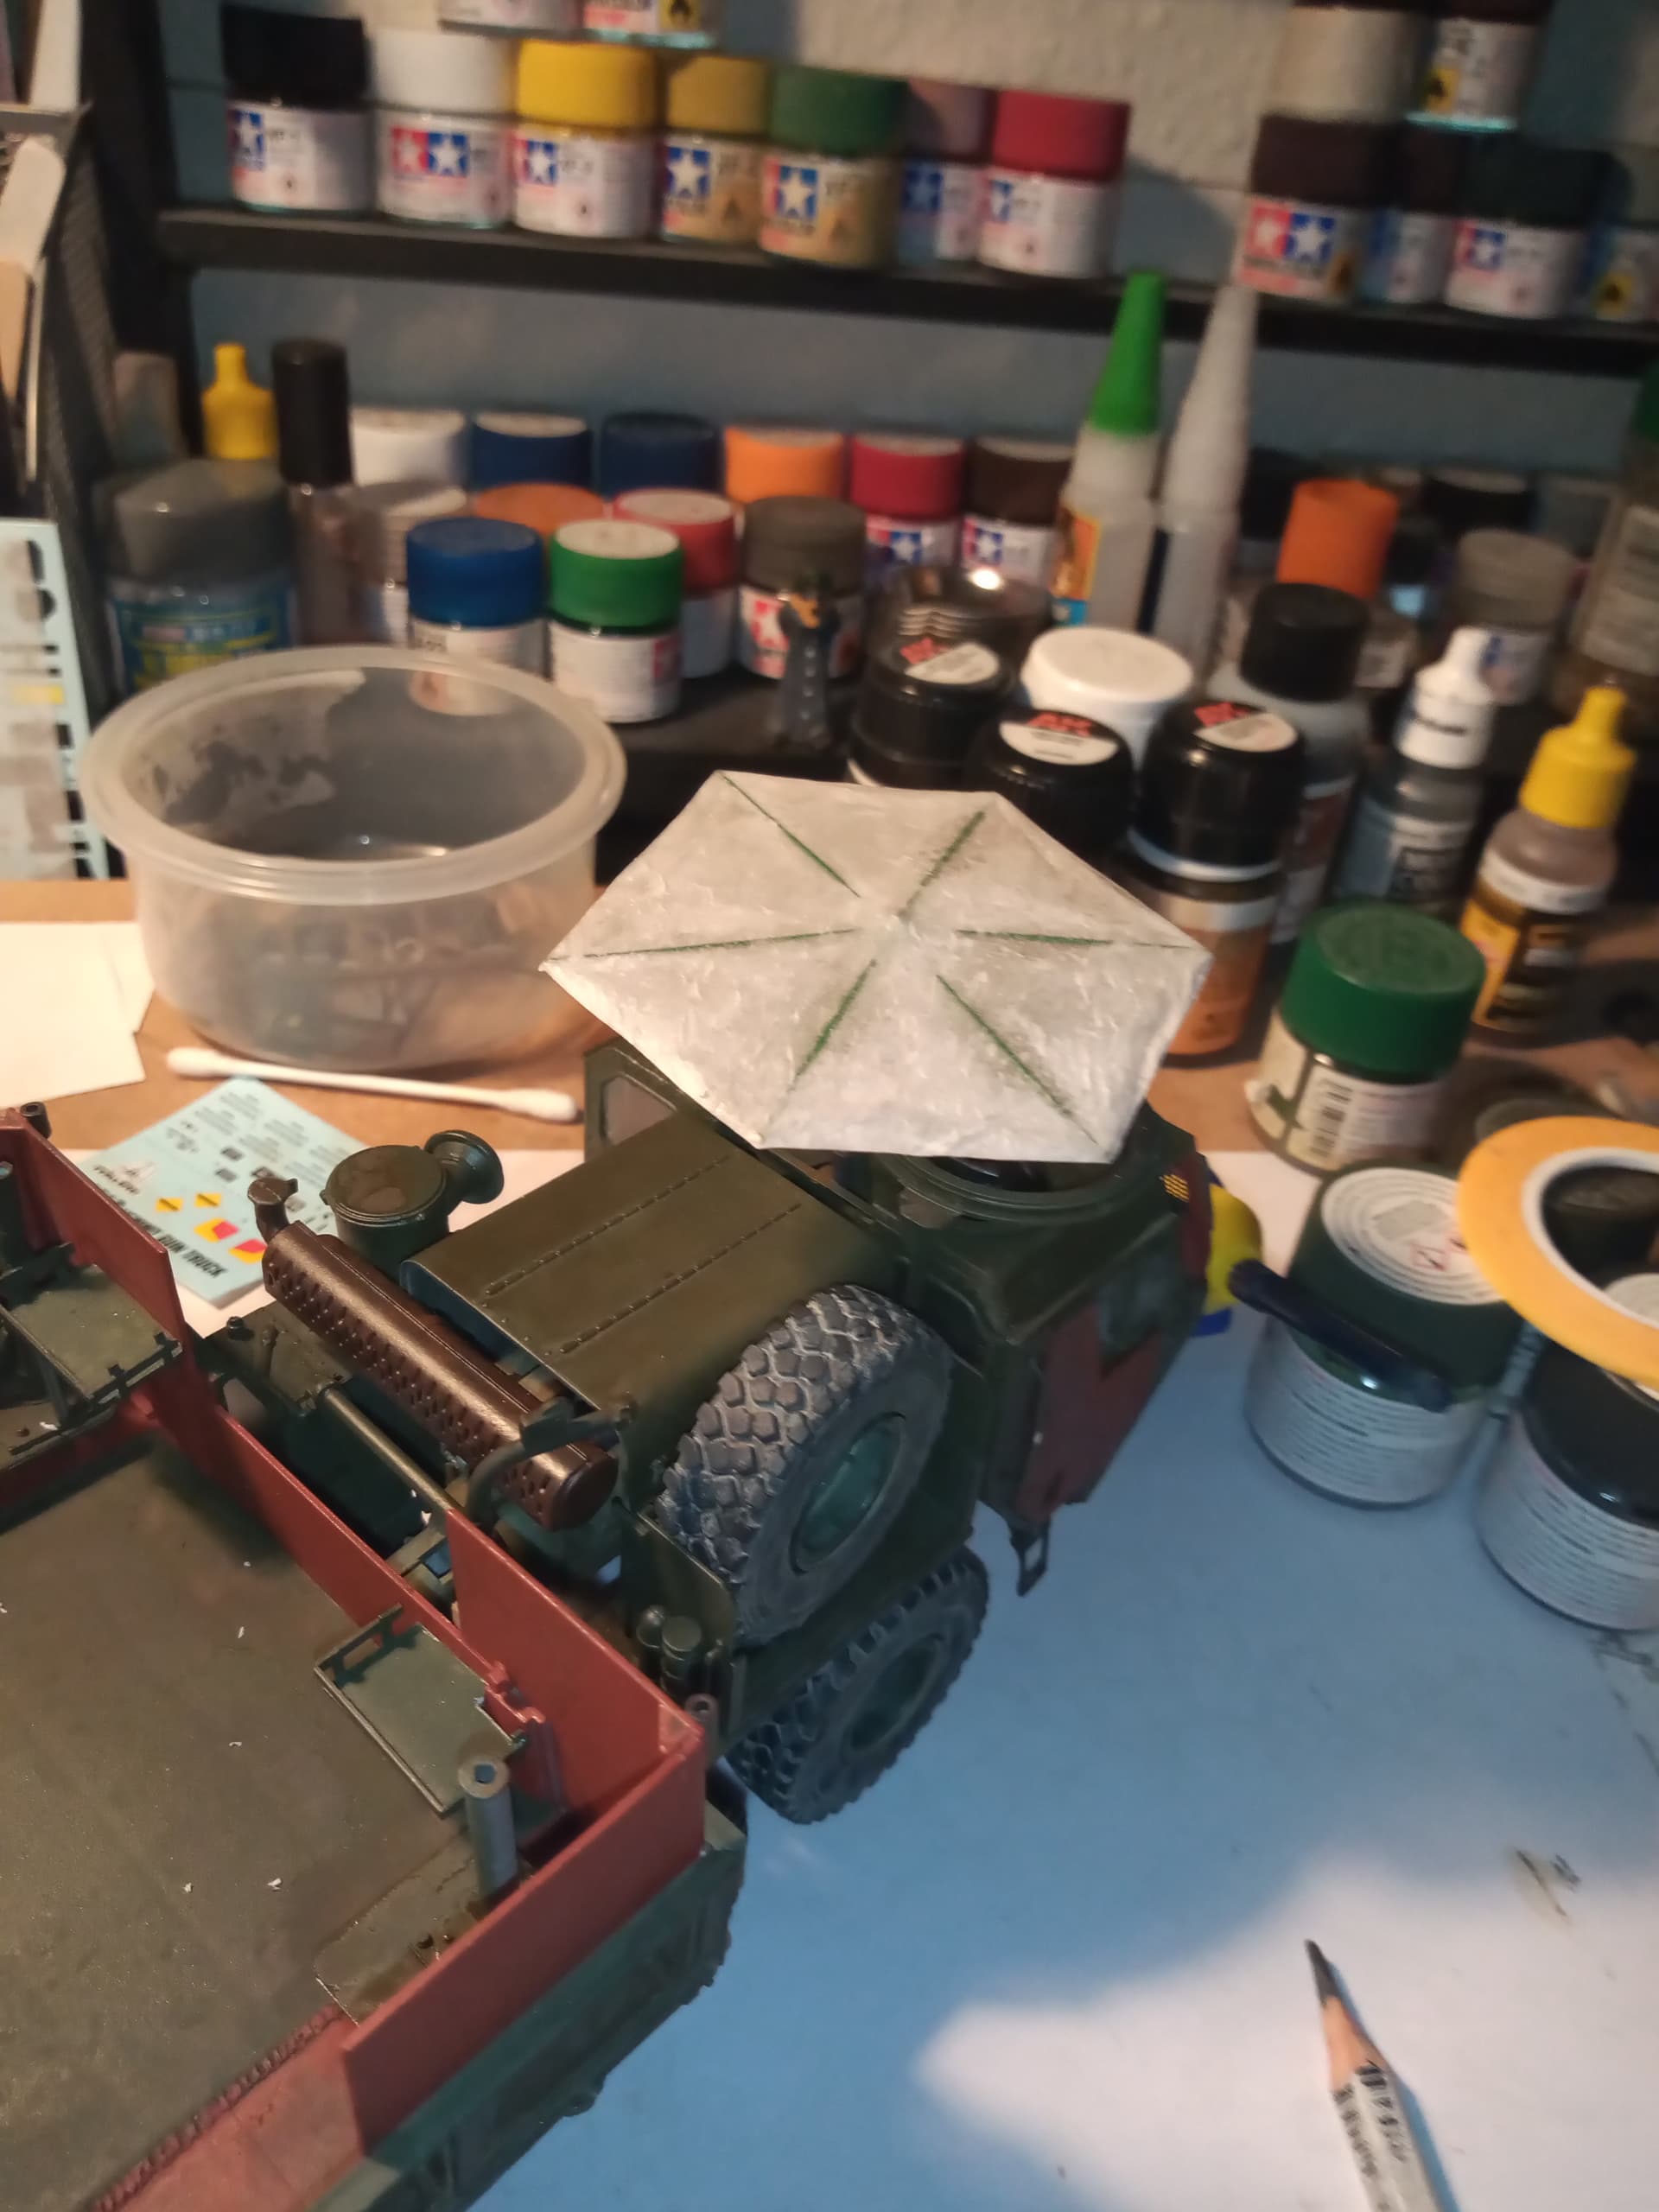
Quick dry fit of the gun truck guns …
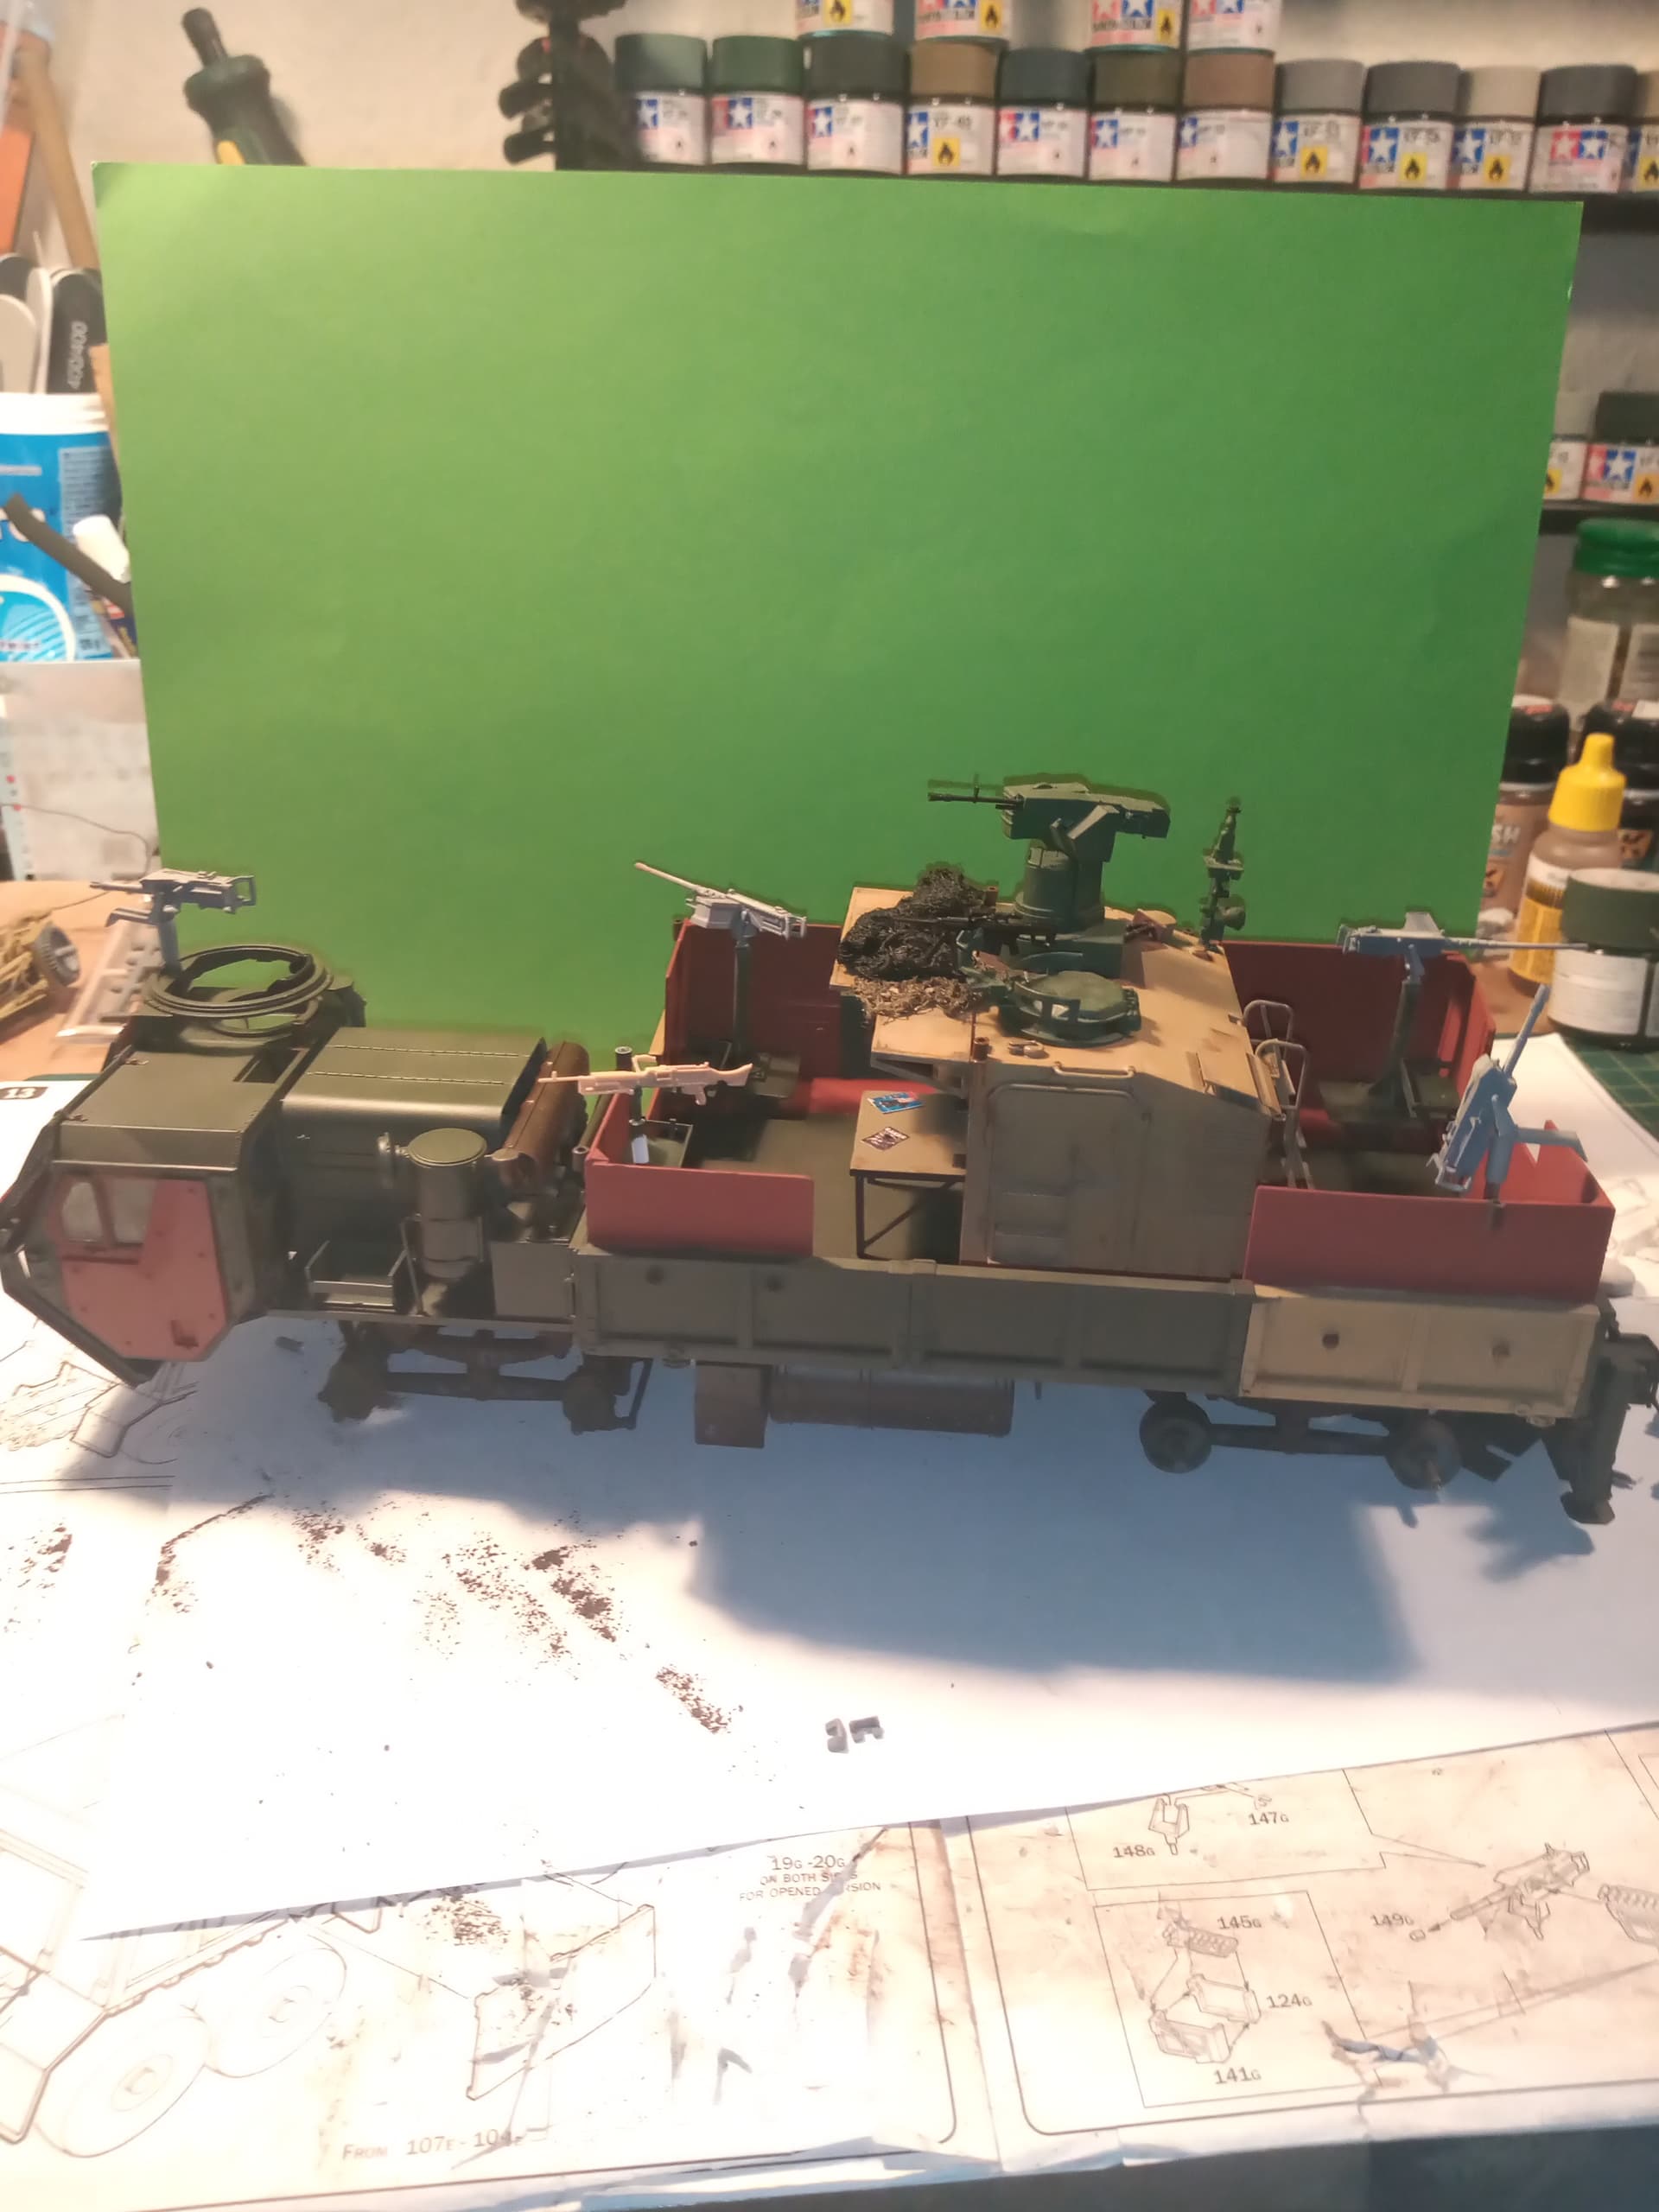
Not sure if I will fit everything… It certainly looks like it could pack a punch if needed ![]()
Do, or do not. There is no try. ![]()
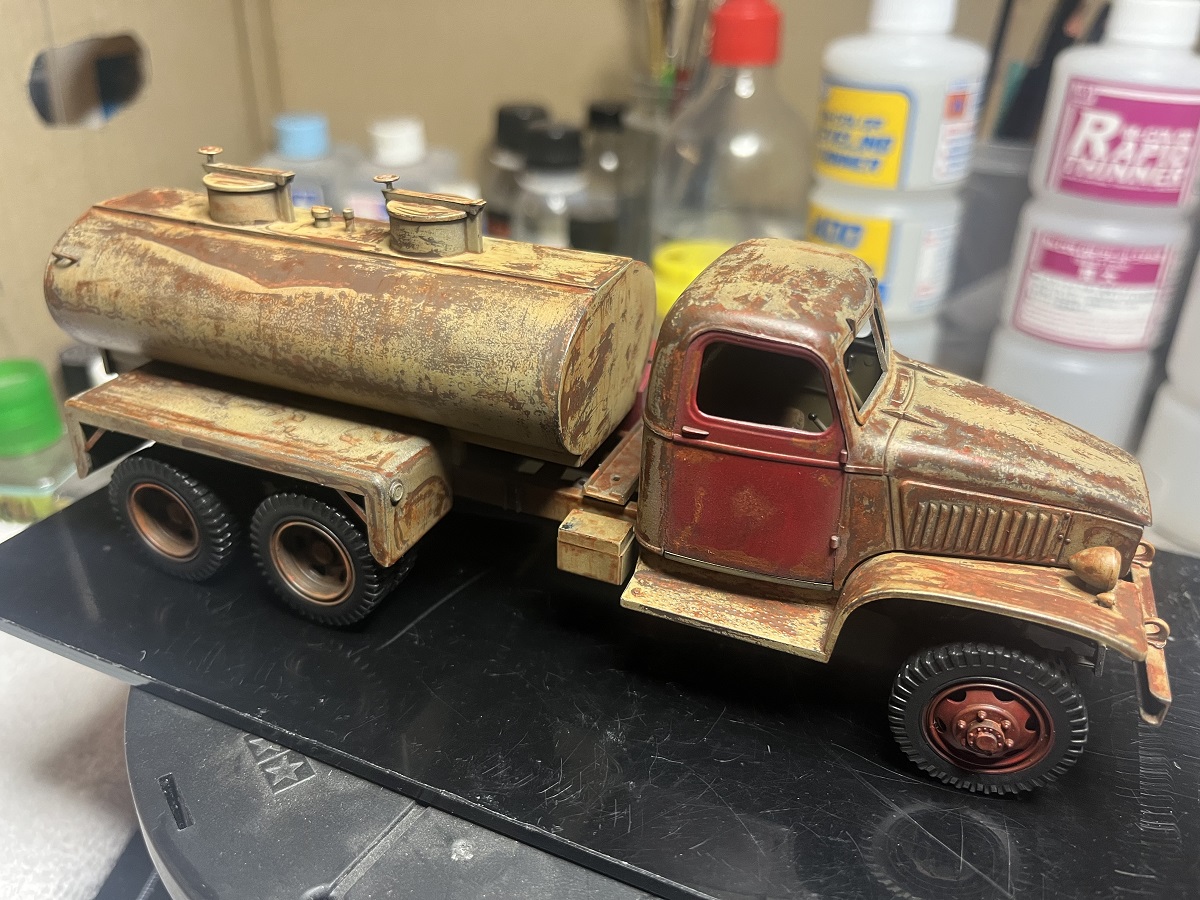
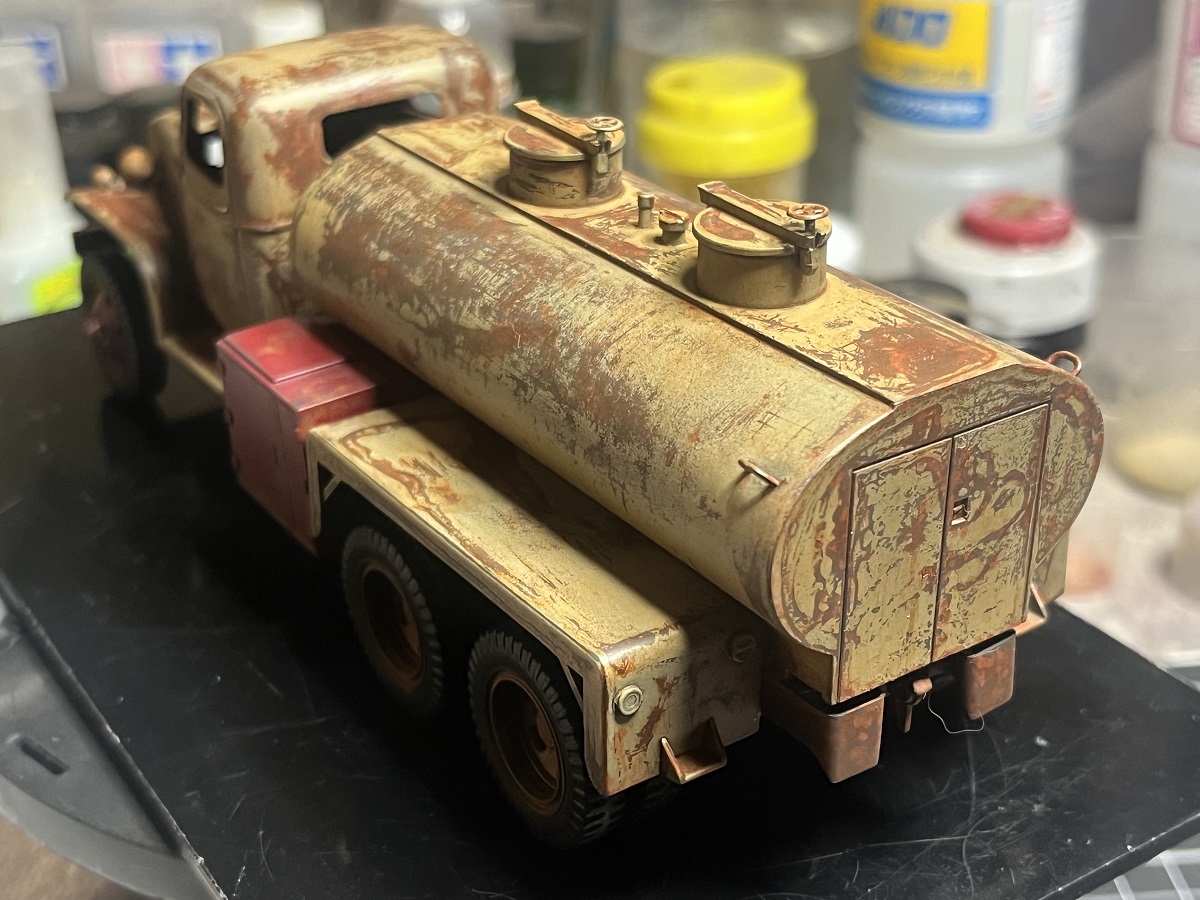
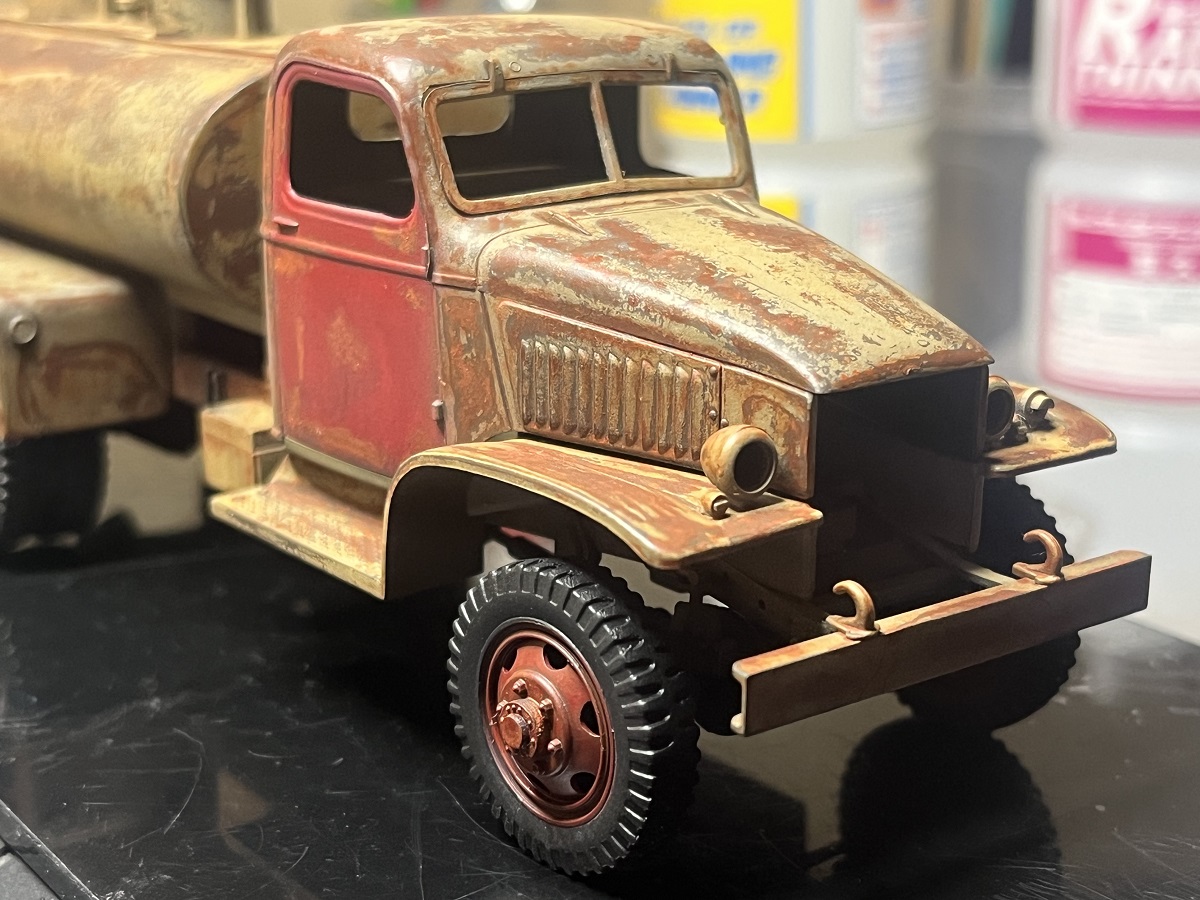
Some big steps forward on the crusty old tanker build!
I locked all of the oil work in with Dullcote, then detailed the tie-downs on the timber rails and gave them a final light wash with brown PLW.
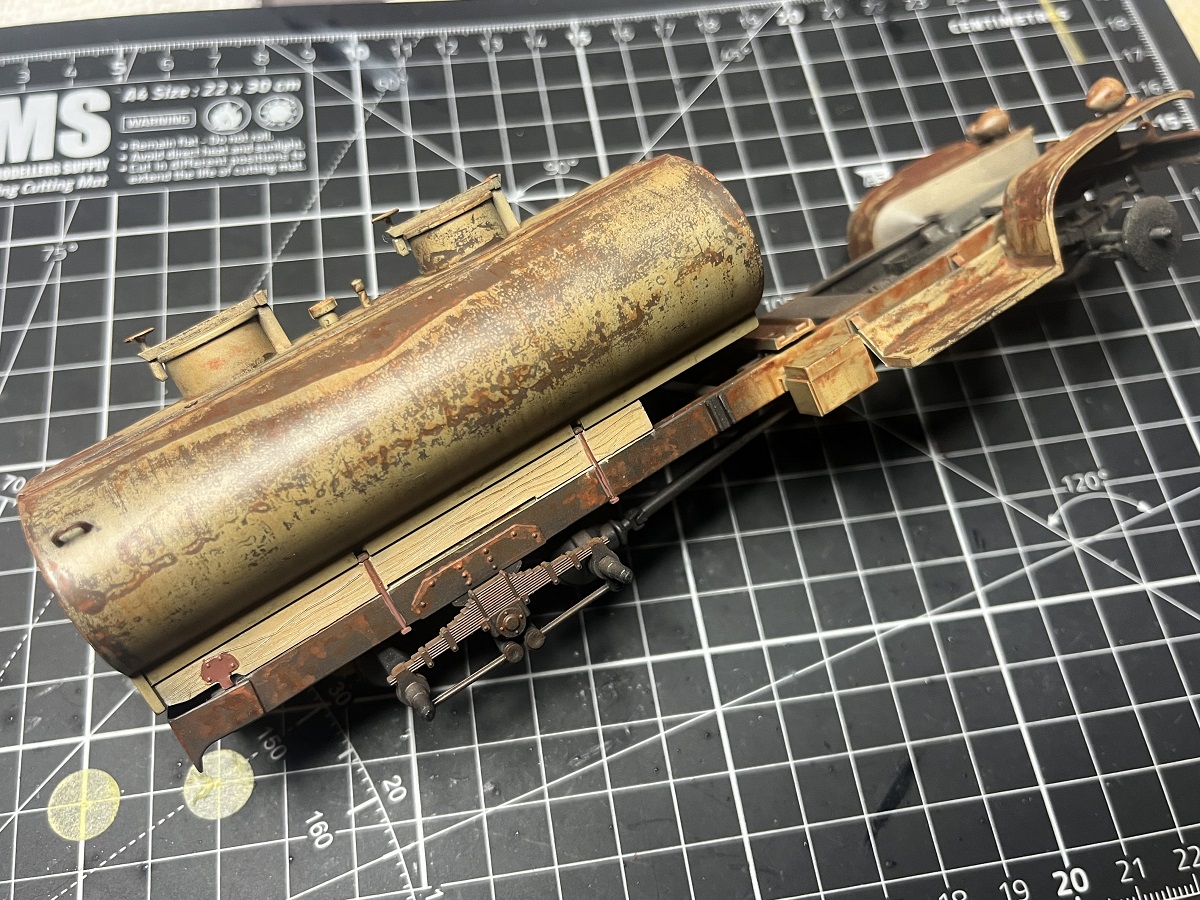
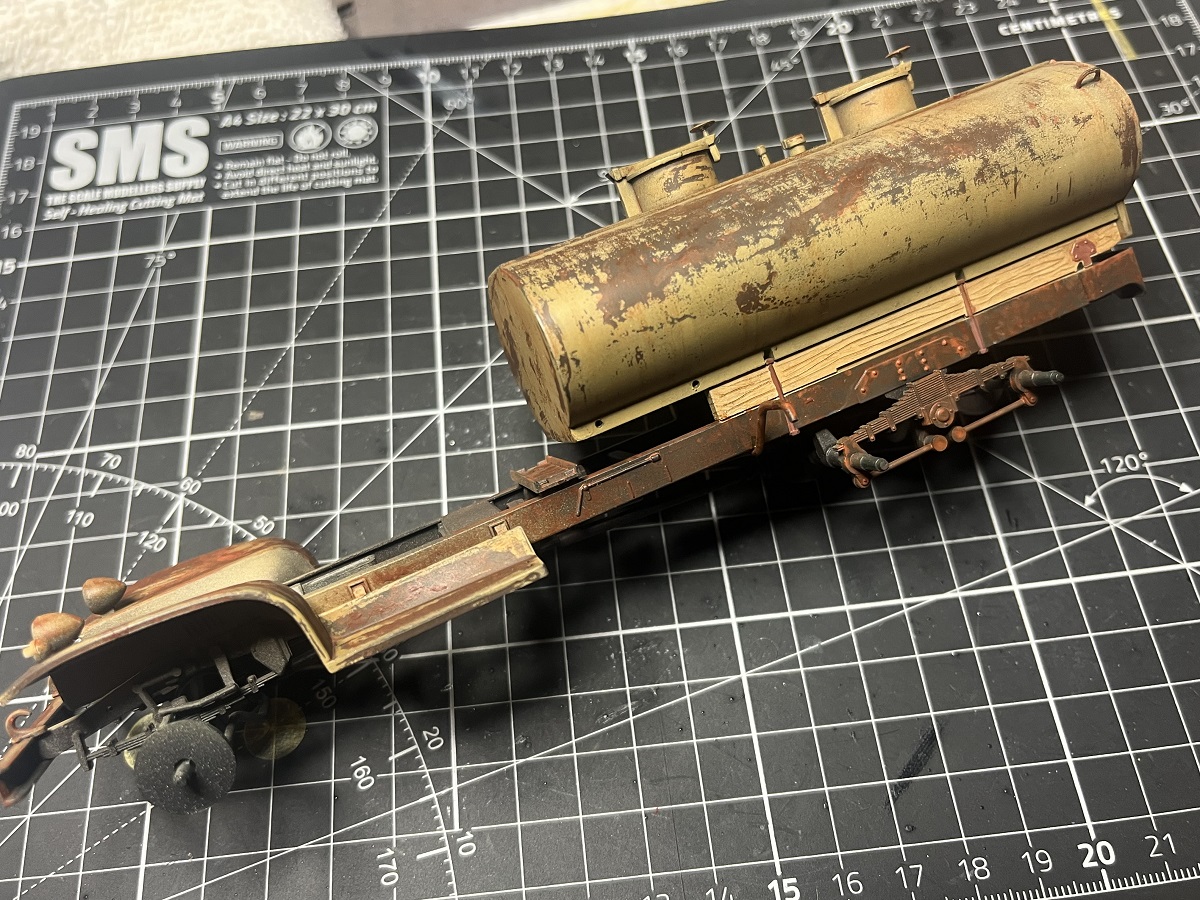
The main tank, rear guards and red toolbox are fixed in place. The cab and wheels are dry fitted to see how it all looks together.

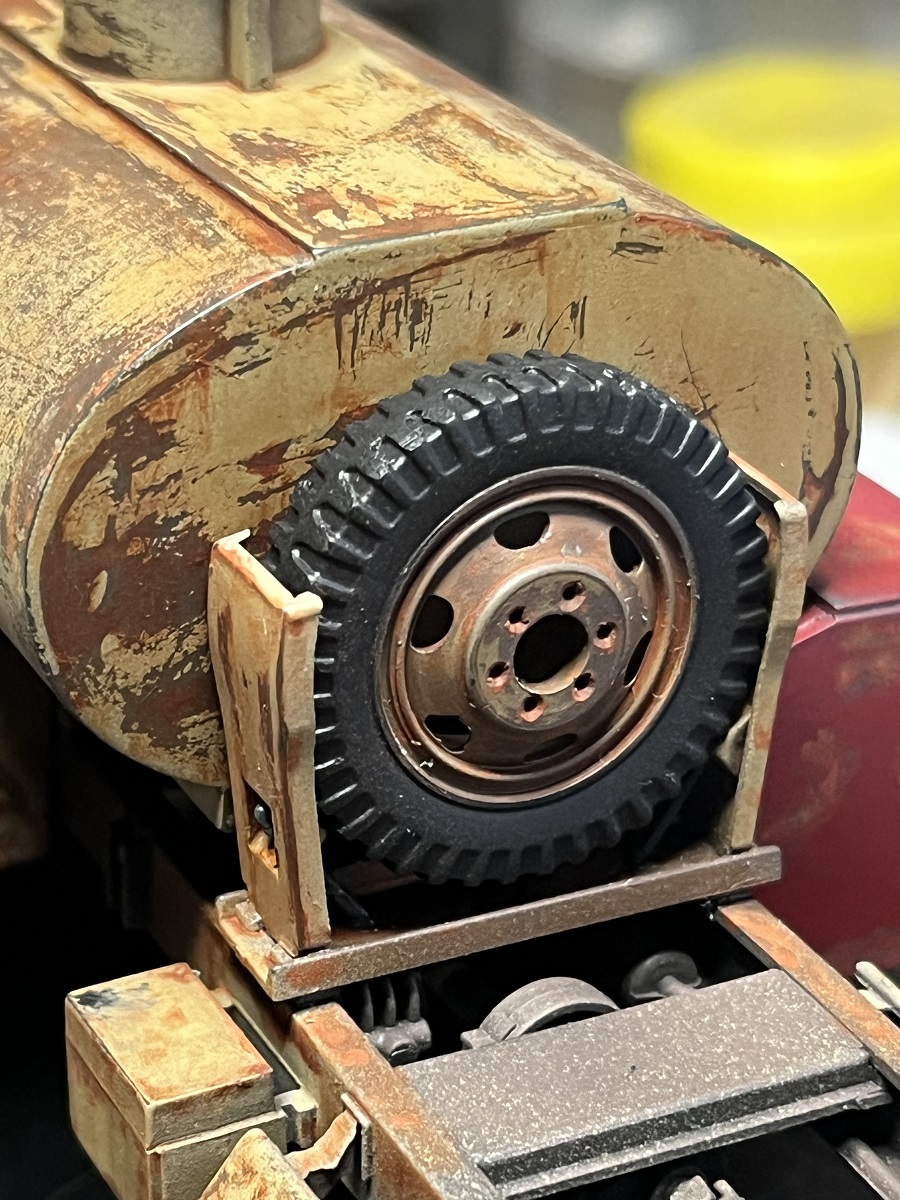
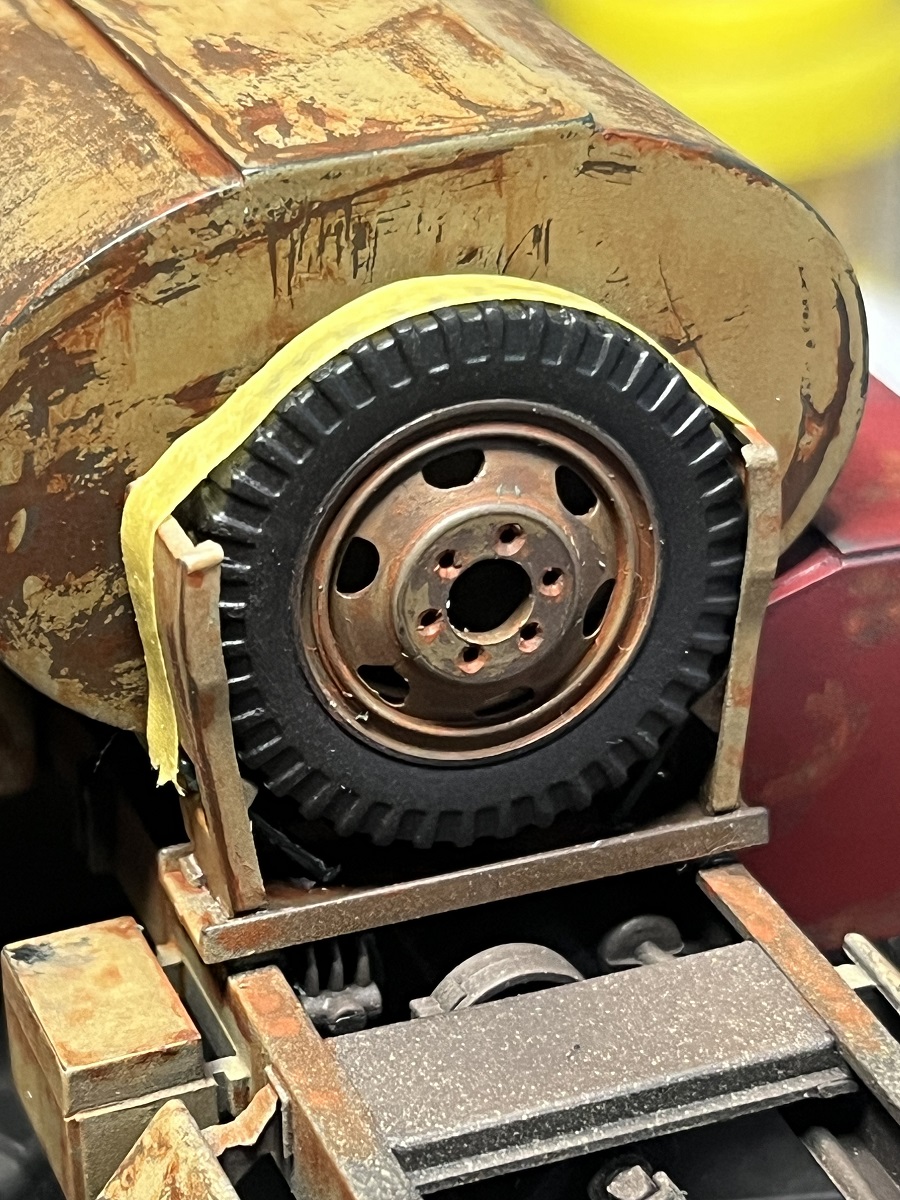
The spare wheel carrier was set in place with white glue to give some time to adjust, then the dry-fitted spare taped in place while it cures.

Cheers, D
I’m going to say it every time you do a post with this beauty … That tank and chassis finish and the tones are phenomenal… Just brilliant ![]()
That rusty finish is truly amazing. It’s a picture to stare for hours and never get tired. Fantastically brilliant.
Coming along very nicely. Love those tasty red tones! ![]()
![]()
—mike
I LOVE that tanker! It is a real inspiration to try something like it myself.
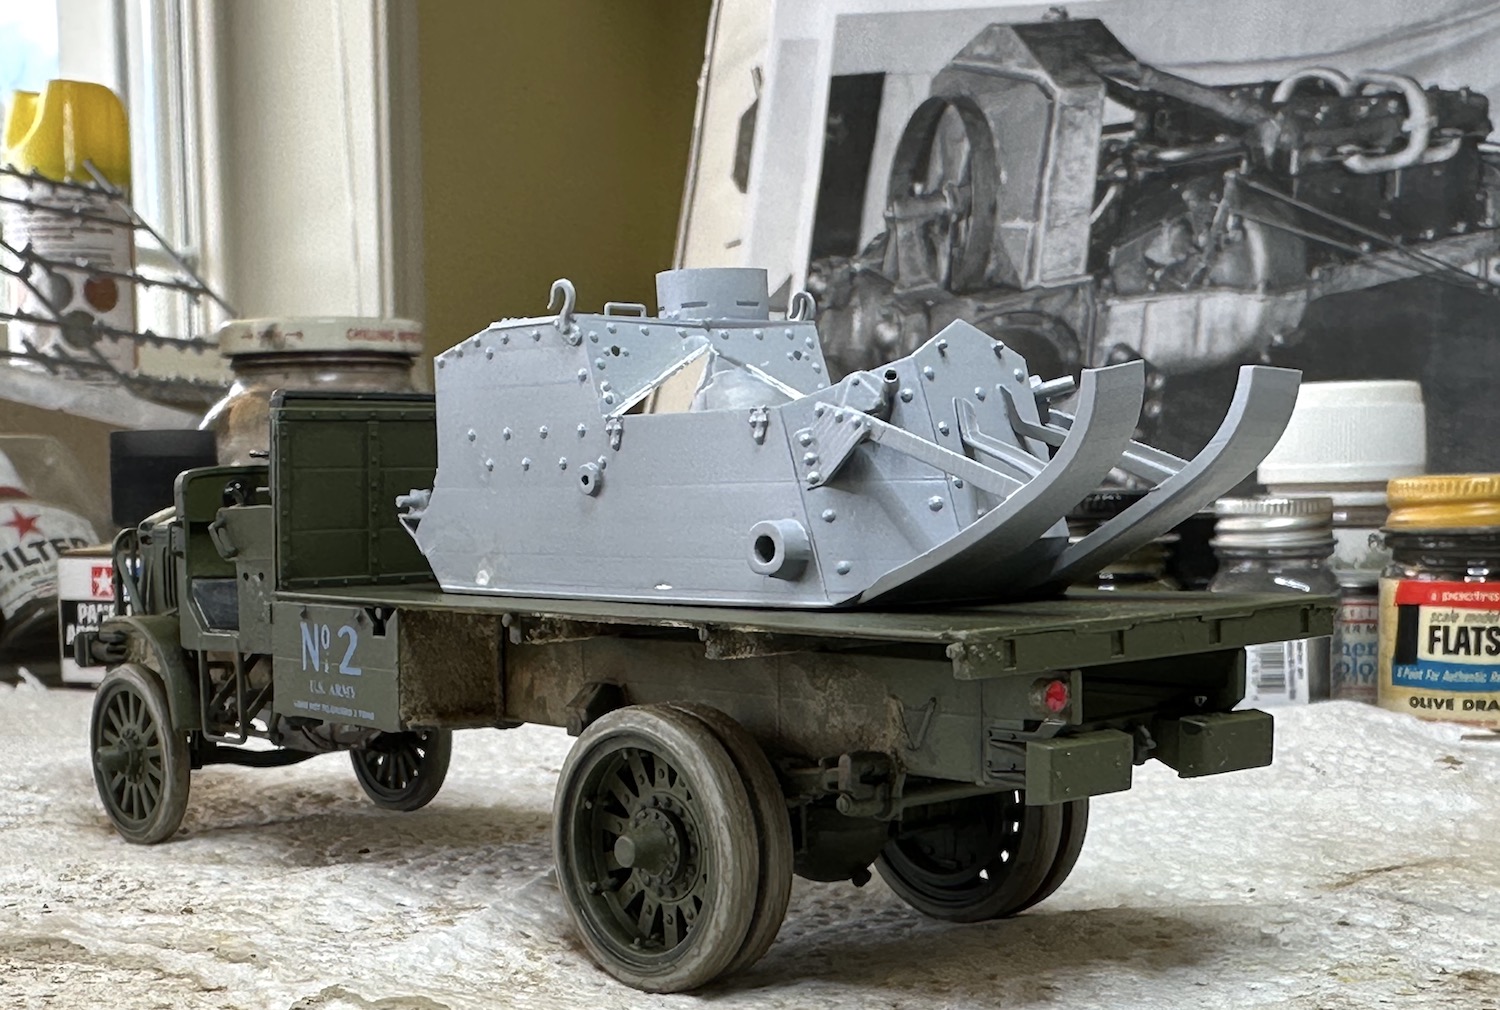
I got a bit more work done on the Liberty Truck. The bed is now on along with the cab & controls. I added a spark control lever to the steering column by guesswork as I had no pictures that showed what it looked like. The truck is shown next to the Mk. VIII International tank which is nearly complete. I’m just dithering on how to weather it. The last picture shows the cargo the truck will be carrying.

Paul
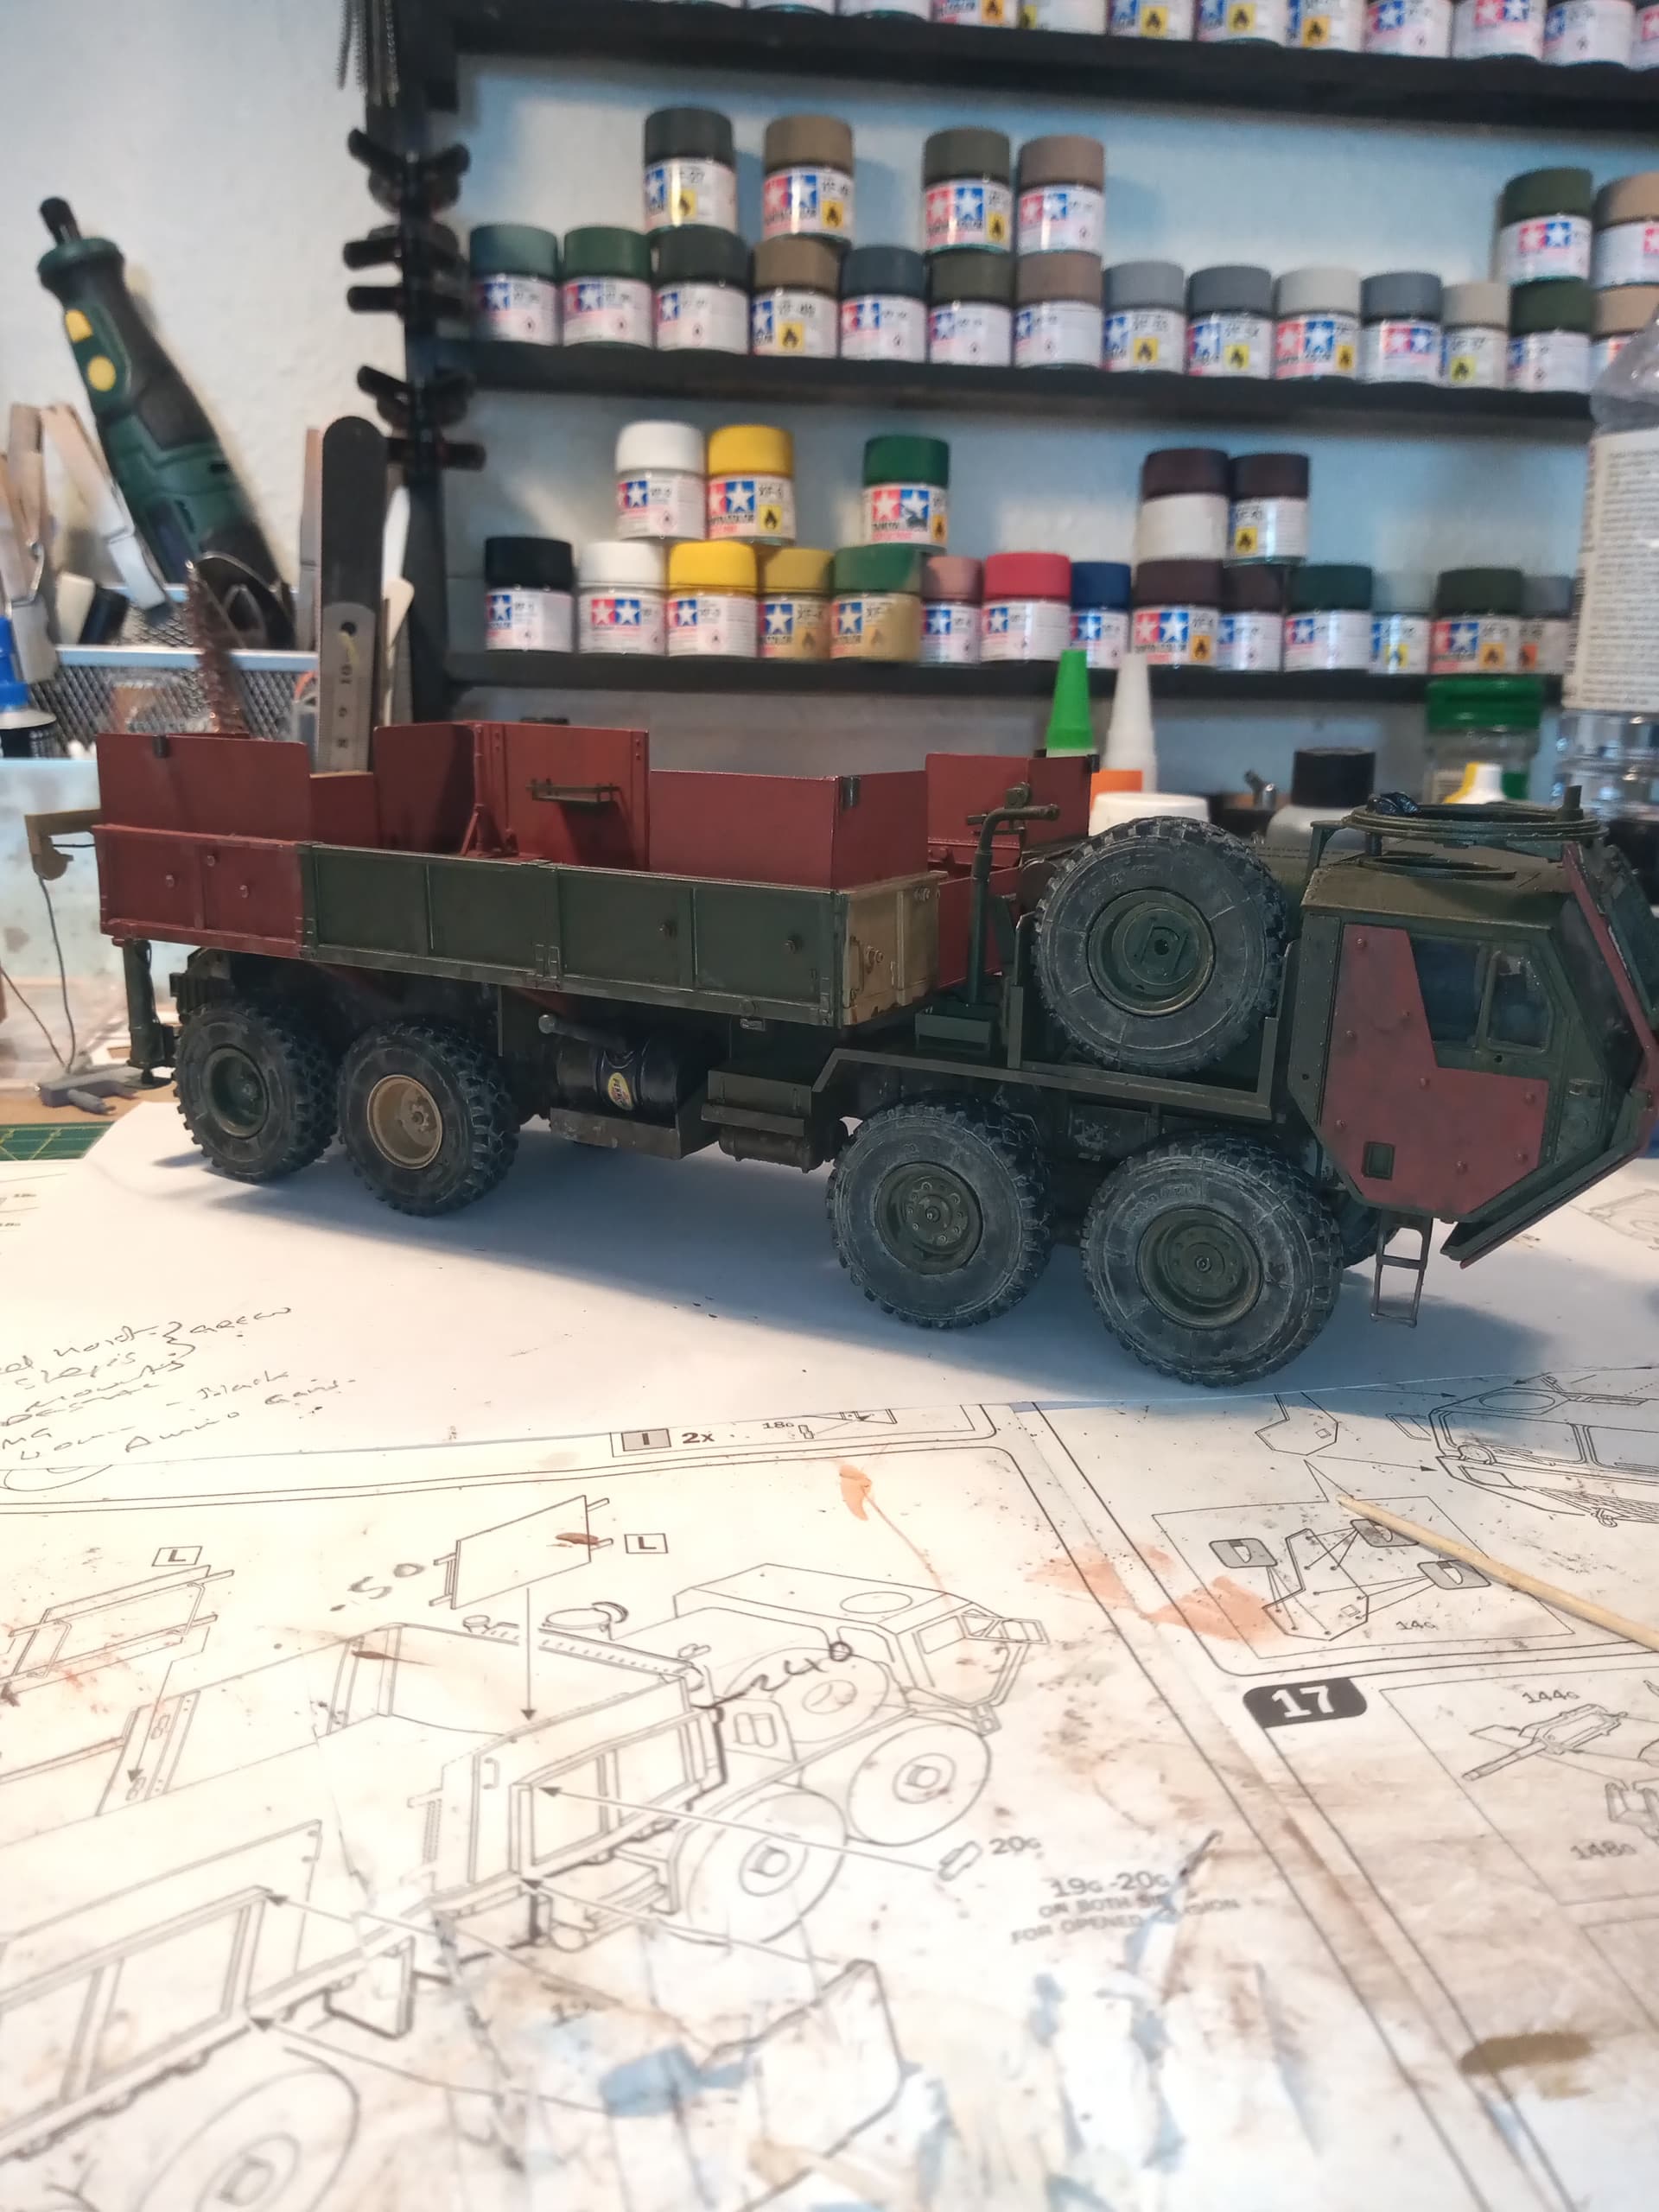
It’s looking a bit more like a truck now…
Wheels are on… Need to find a sensible place for the 2nd spare wheel…
Really coming together now John. The patchwork paint really keeps the interest level up.
The spare will likely need to in reach of a jib crane or something. Be interesting to see what you come up with there.
Have decided on placing the 2nd spare on the rear RH corner it can sit behind the job boom and out of the line of fire from the rear right MG in that corner. Just need to drill a hole for it into the upper panel.
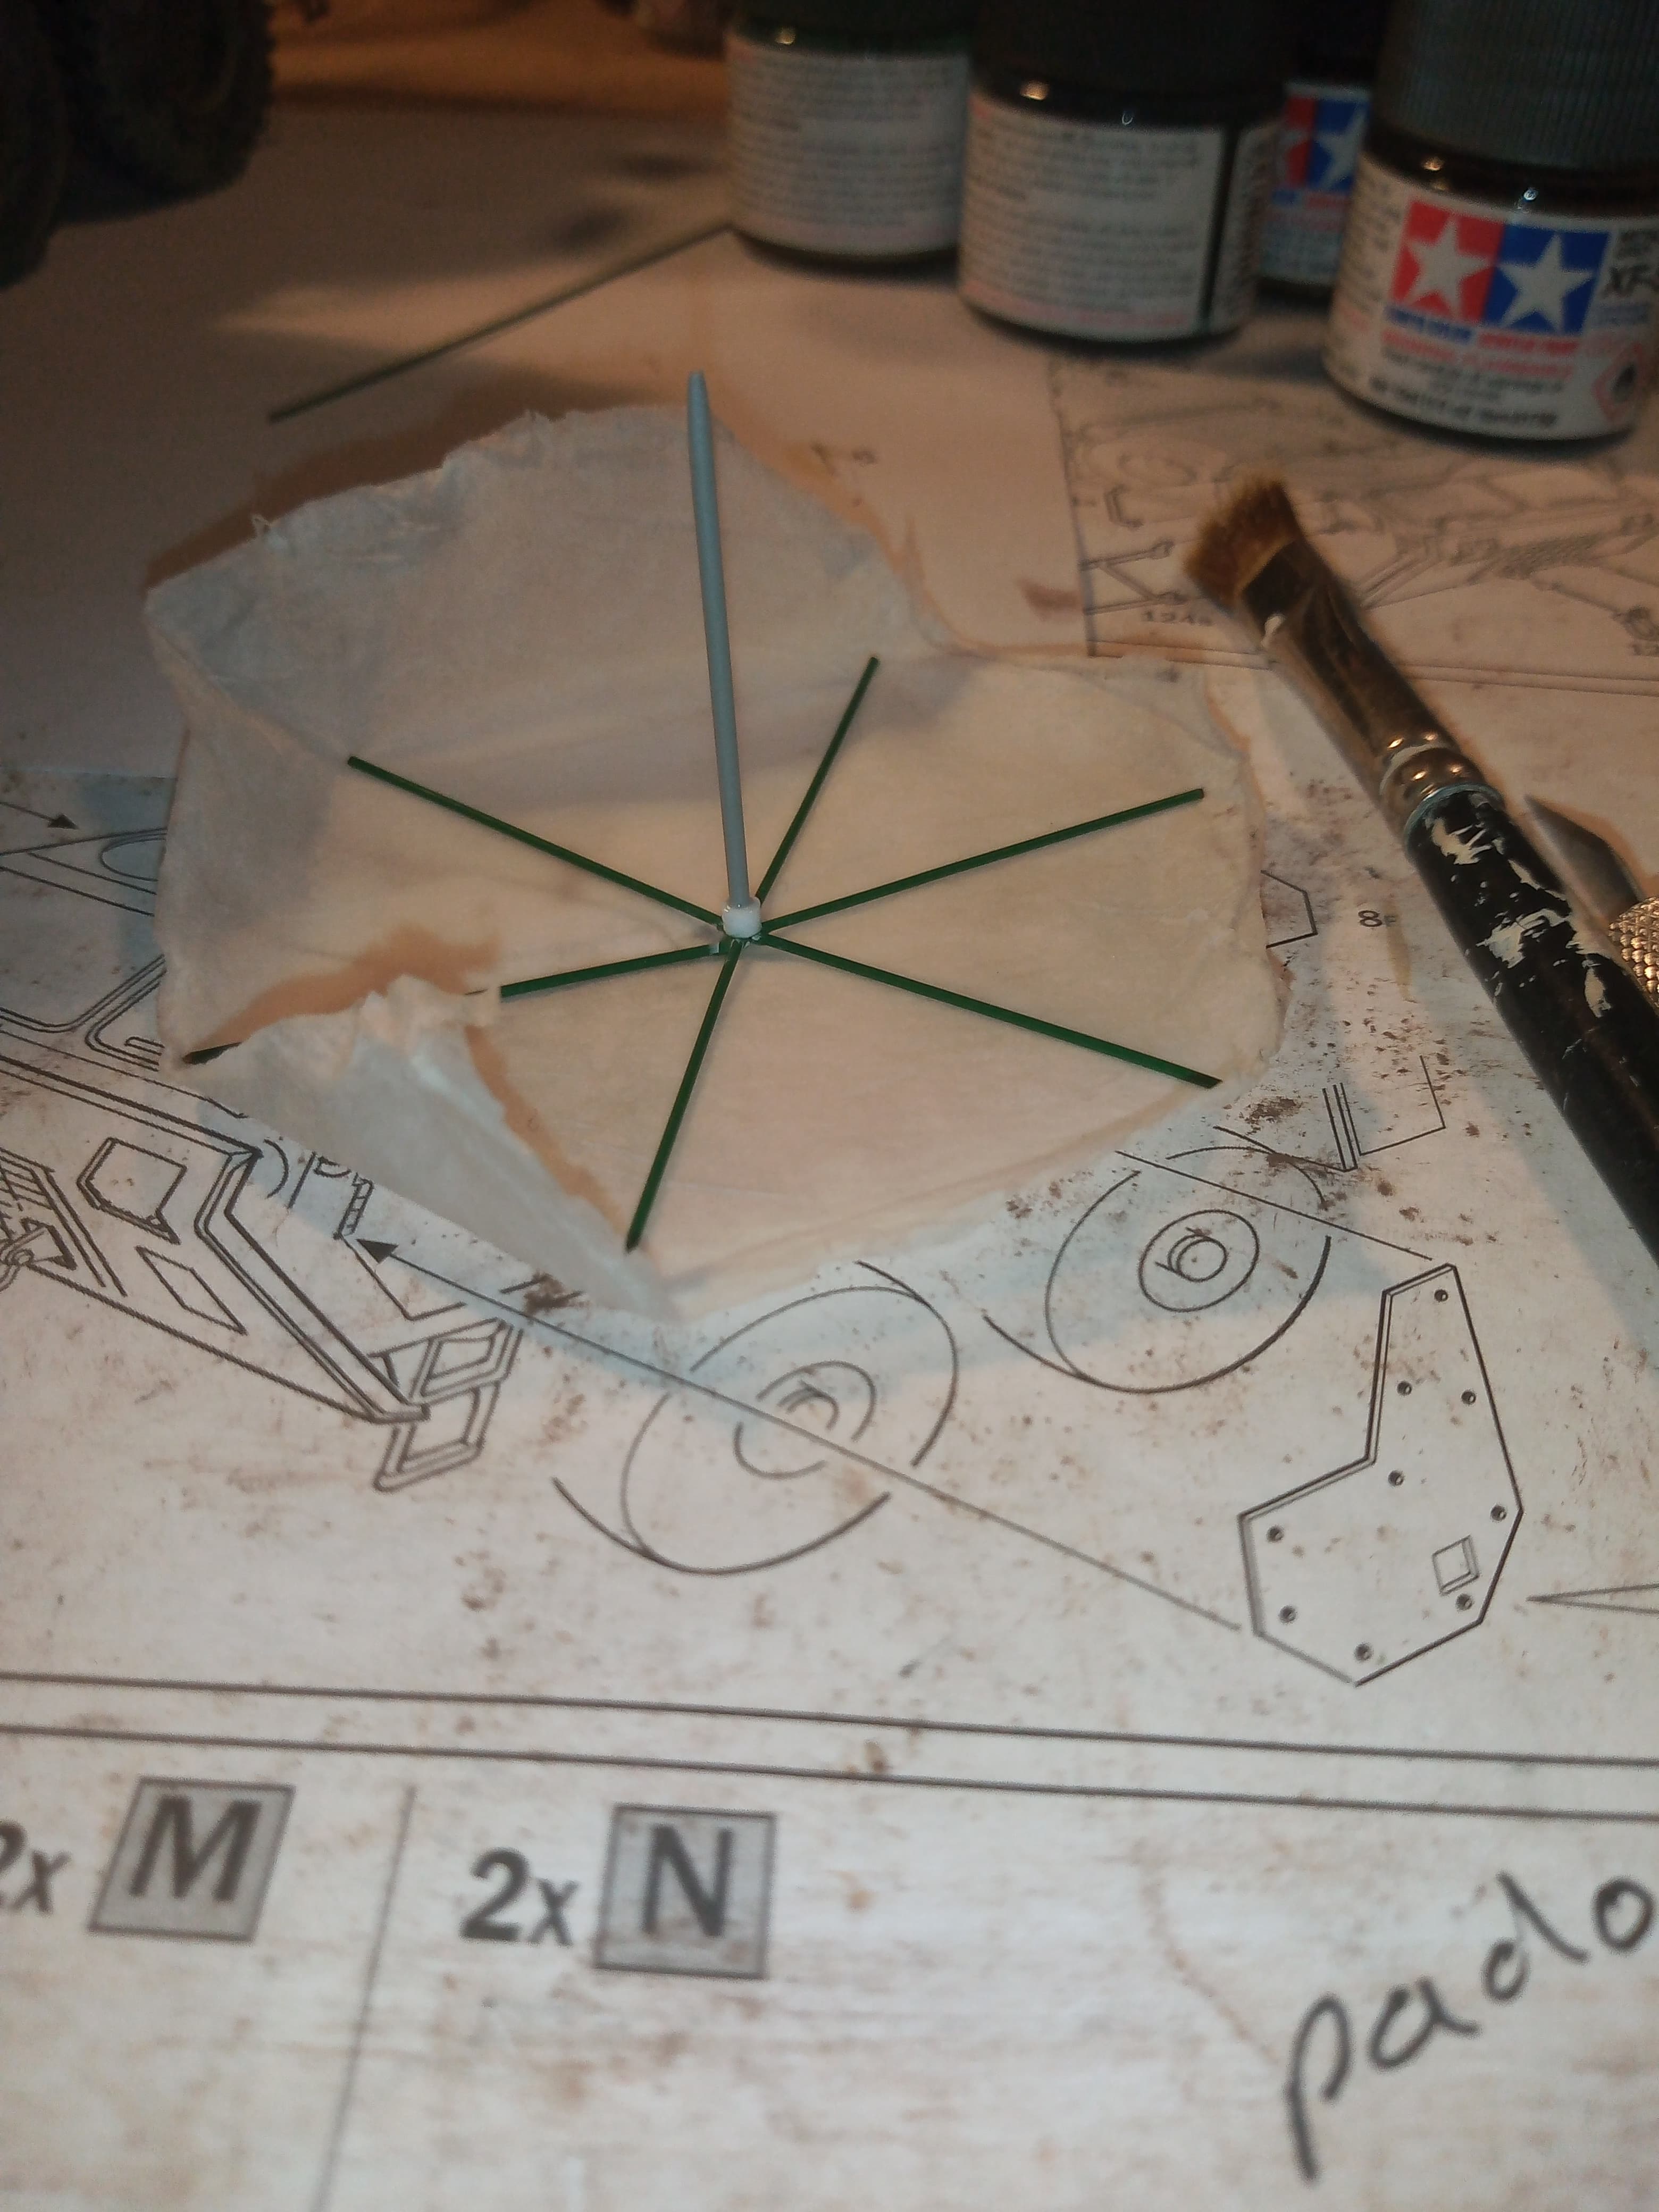
Started making the rear area cam pole frame and the parasol for the cab cupola…
The first of the cam pole frames.
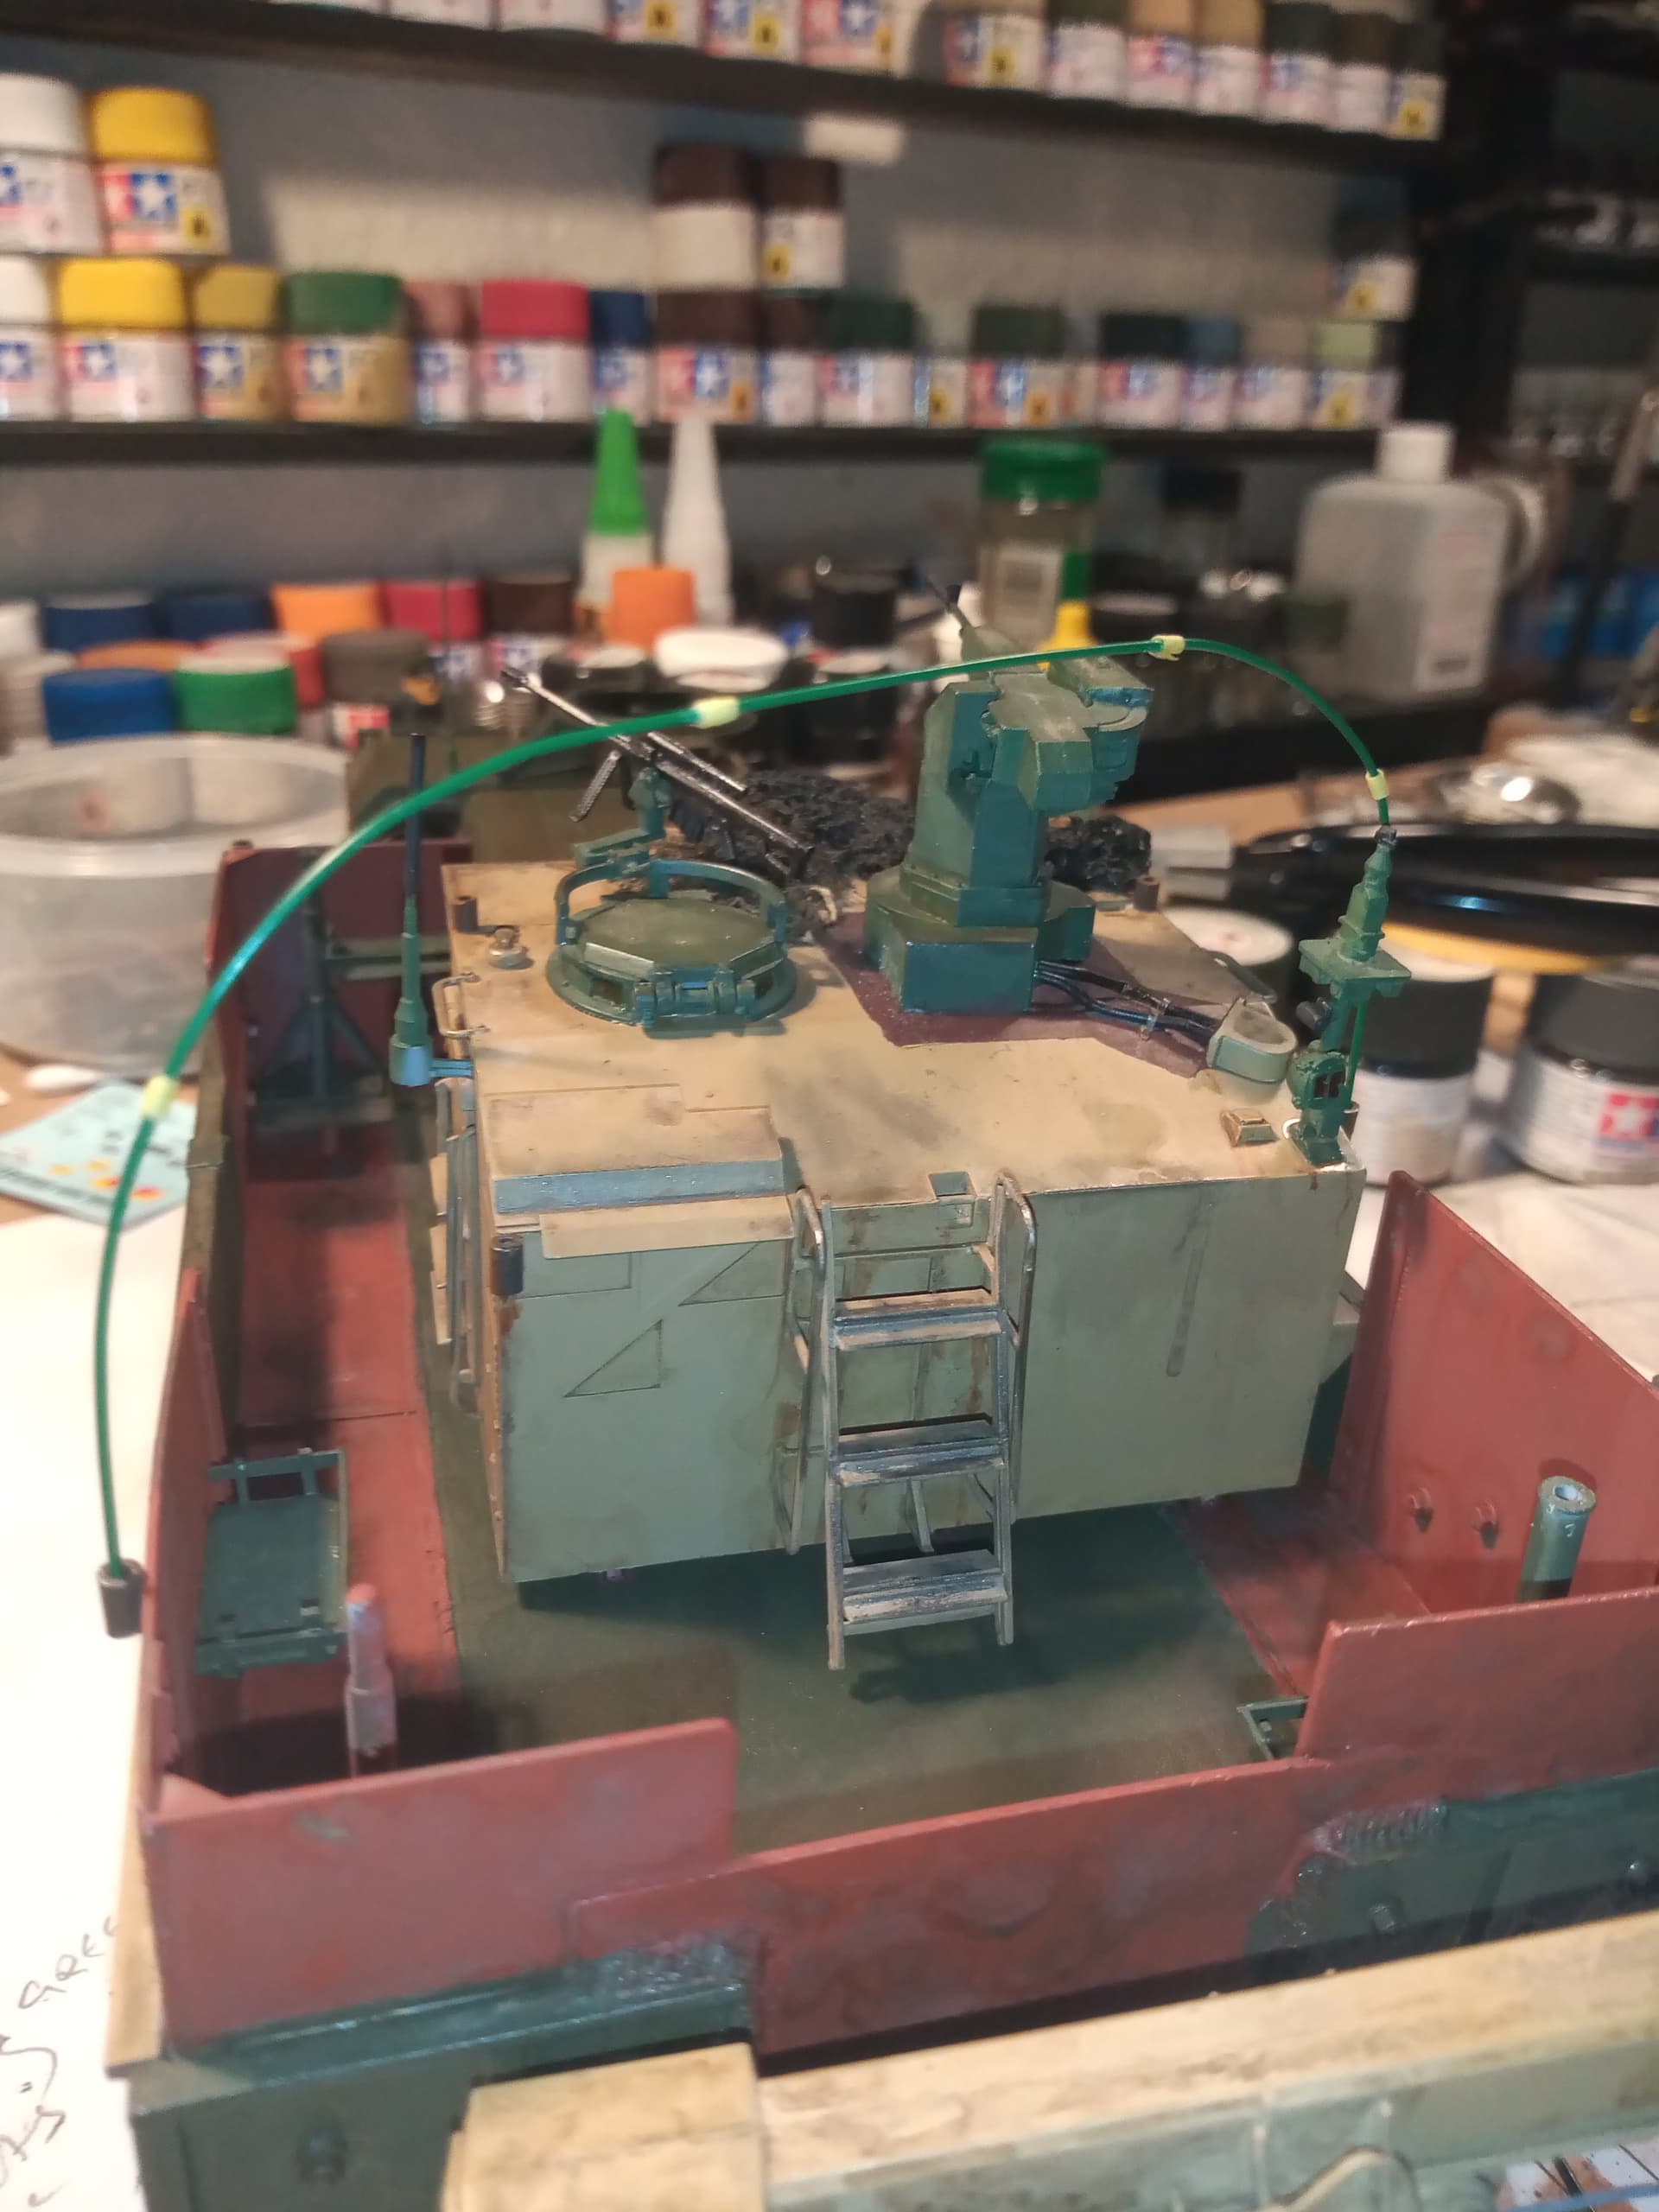
The small yellow bits are masking tape to look like the cam pole end where the rods slot into each other. Have one more to do, and will also try and do a few individual poles with a cam net spreader on the end if it’s not to fiddly…
Now the parasol.
I think I showed the frame for it a while ago ? Anyway, it was 6 cut lengths of green florist wire set up in a spoked shape, a 2mm section of hollow rod was superglued on the centre of the spoke where all the wire ends met up, then a length of plastic rod (a Panther axle cut down) was glued into the hollow part to act as the handle part
I cut a rough area for the umbrella canvas from unmarked white tissue, then laid that on cling film and brushed neat PVA white glue over it and let it saturate it.
Peeled that away and laid it over the parasol frame … Trying to get it as taught as possible.
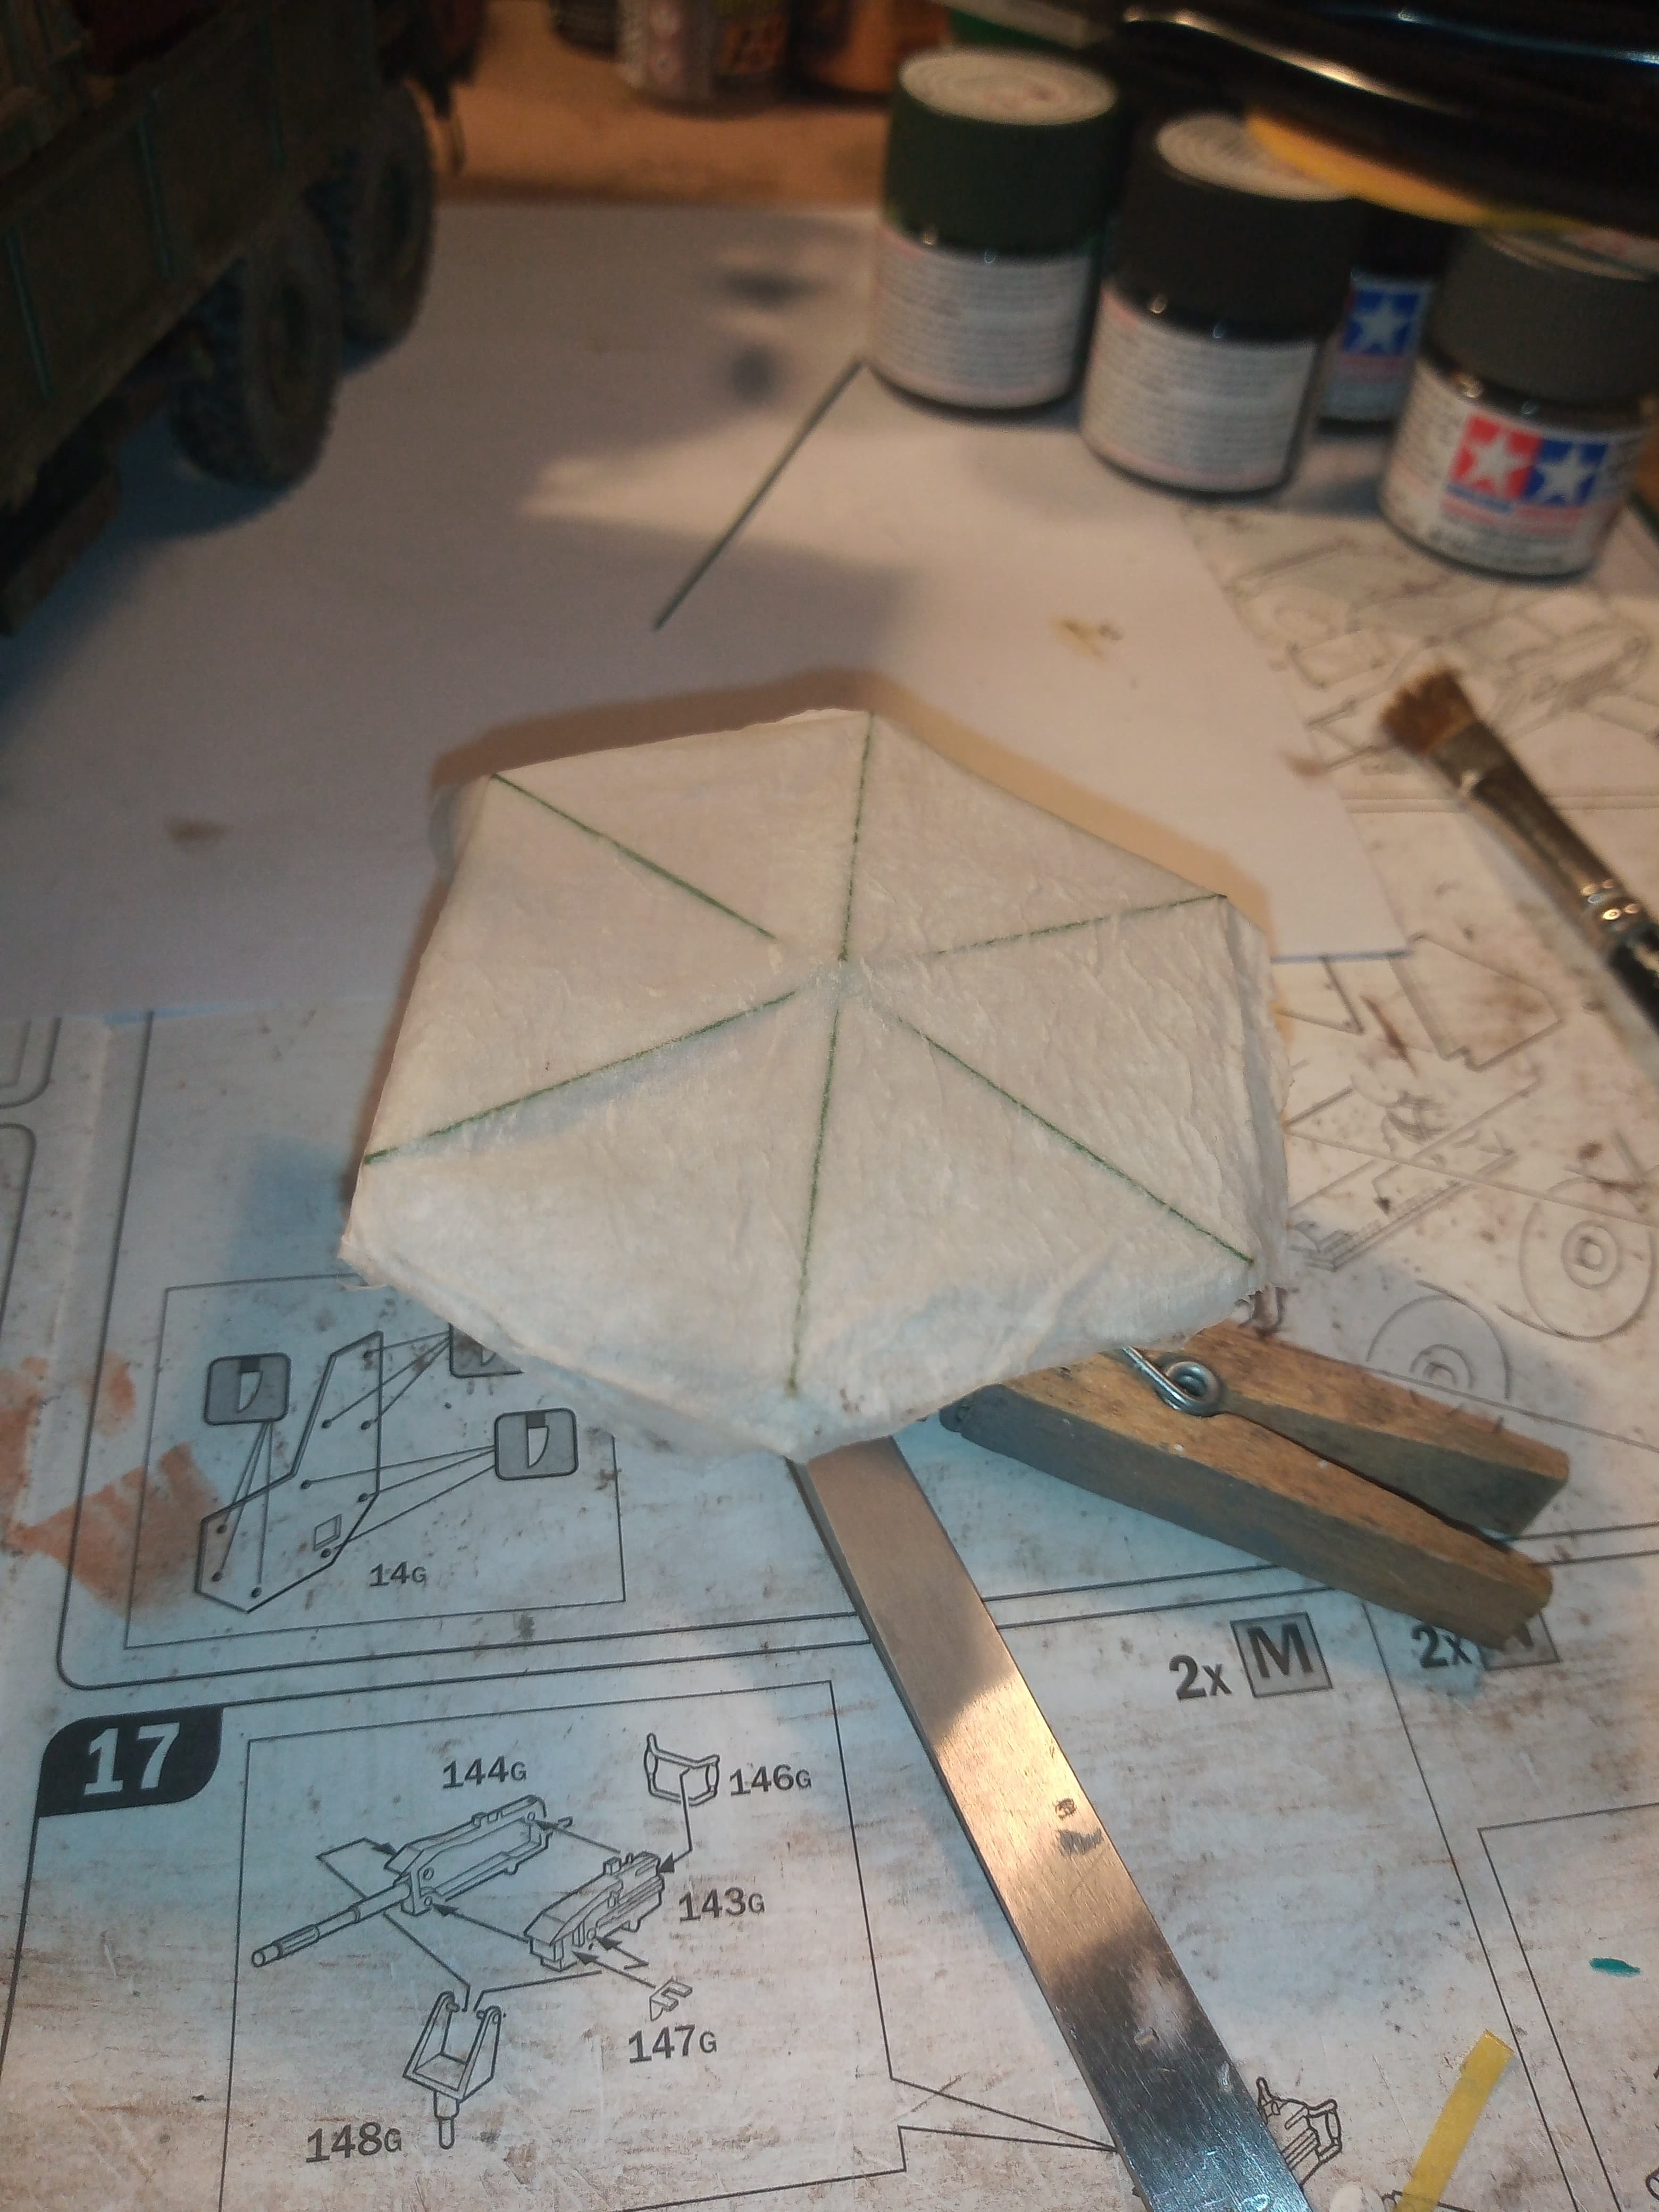
The long outer edges will be trimmed once it’s all dry.
Gave that another brushing of PVA and will now let that dry and paint it…going add some colour to the whole build with this part to make it an area you get drawn to …
Hello gents - I’m calling the SOCOM RG 33 done:
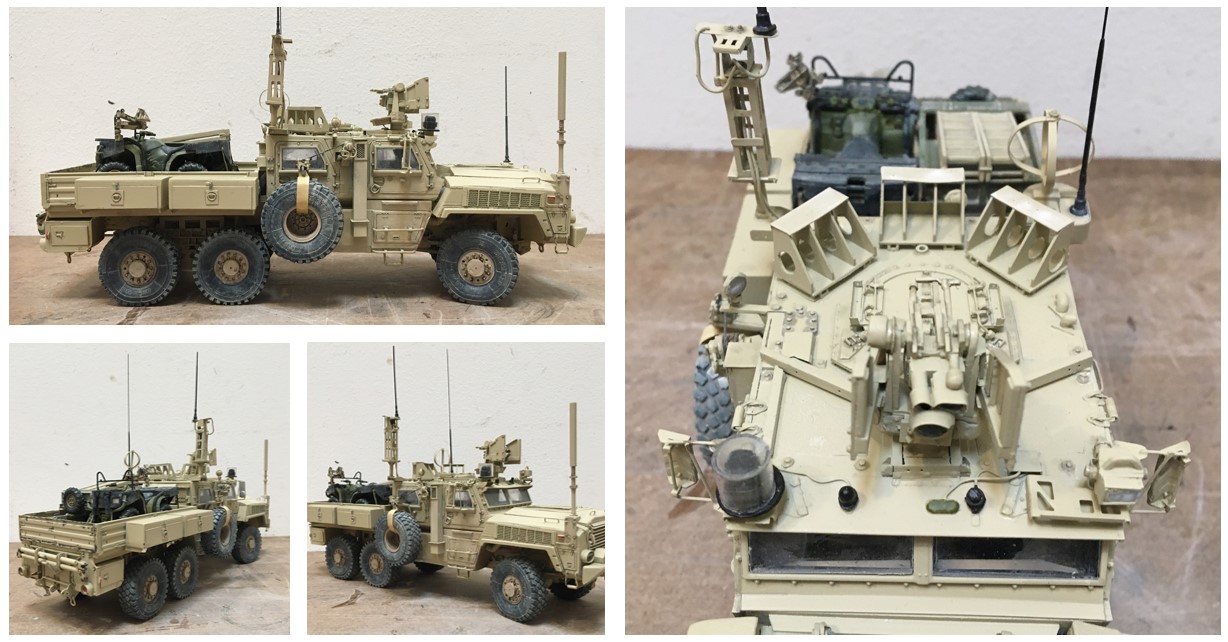
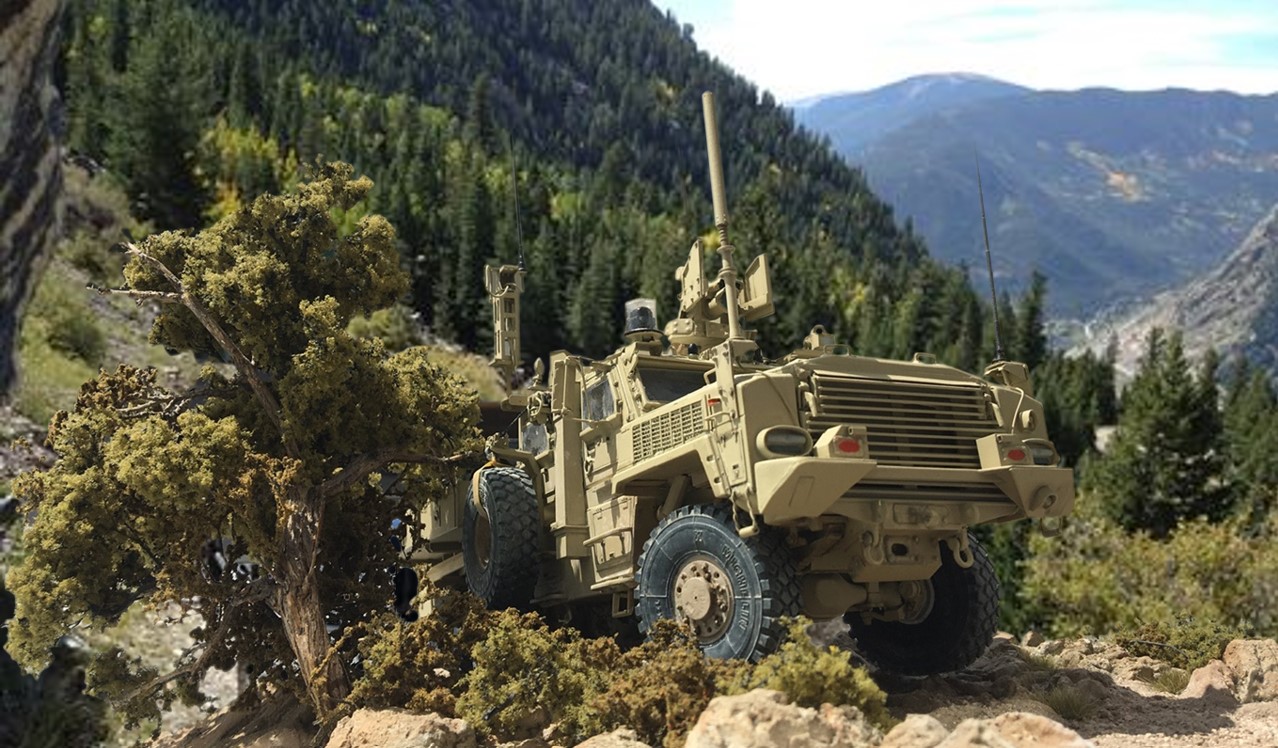
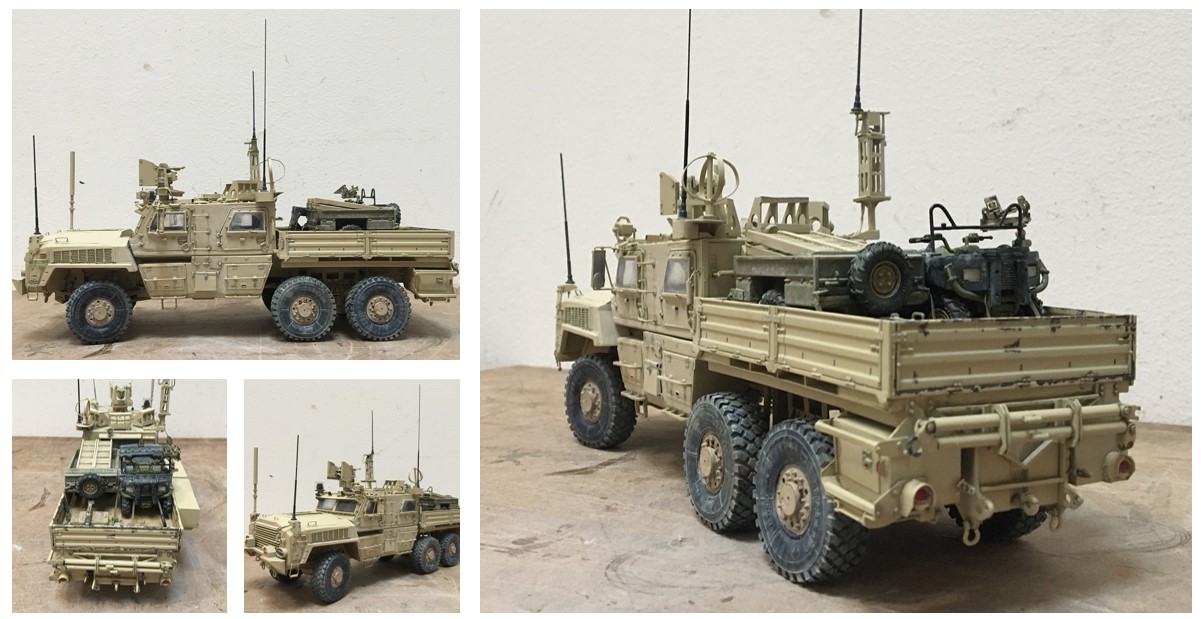
This turned into much more of a build than I expected, and I really enjoyed it!
Next, well, I’m going to try and convert a 6x4 Scammell Pioneer into a 6x6 Scammell Explorer!
Cheers and happy model building!
Nick
Wow, That is exceptional Nick. So much fantastic detailing during this build, its almost scratch built … Love the un-gunned RWS, really a nice way to show off all its detail which is normally hidden.
The quad and trailer as cargo is really good and shows the off the RG’s impressive size as well…
The mock up out door picture… Brilliant and looks totally real. Really amazing work ![]()
That is one sweet vehicle Nick. You did a fantastic job on it from go to whoa.
Beautiful build Nick, really great job!
Scammell 6x6 Explorer sounds outrageous, exactly what I would expect from you mate!
Cheers, D
You are the man Nick, that is one splendid looking pickup truck. ![]()
Cajun ![]()
Getting into the detail painting, fiddly little additions and adding additional bits and pieces as I think of them… Which isn’t helping lol.
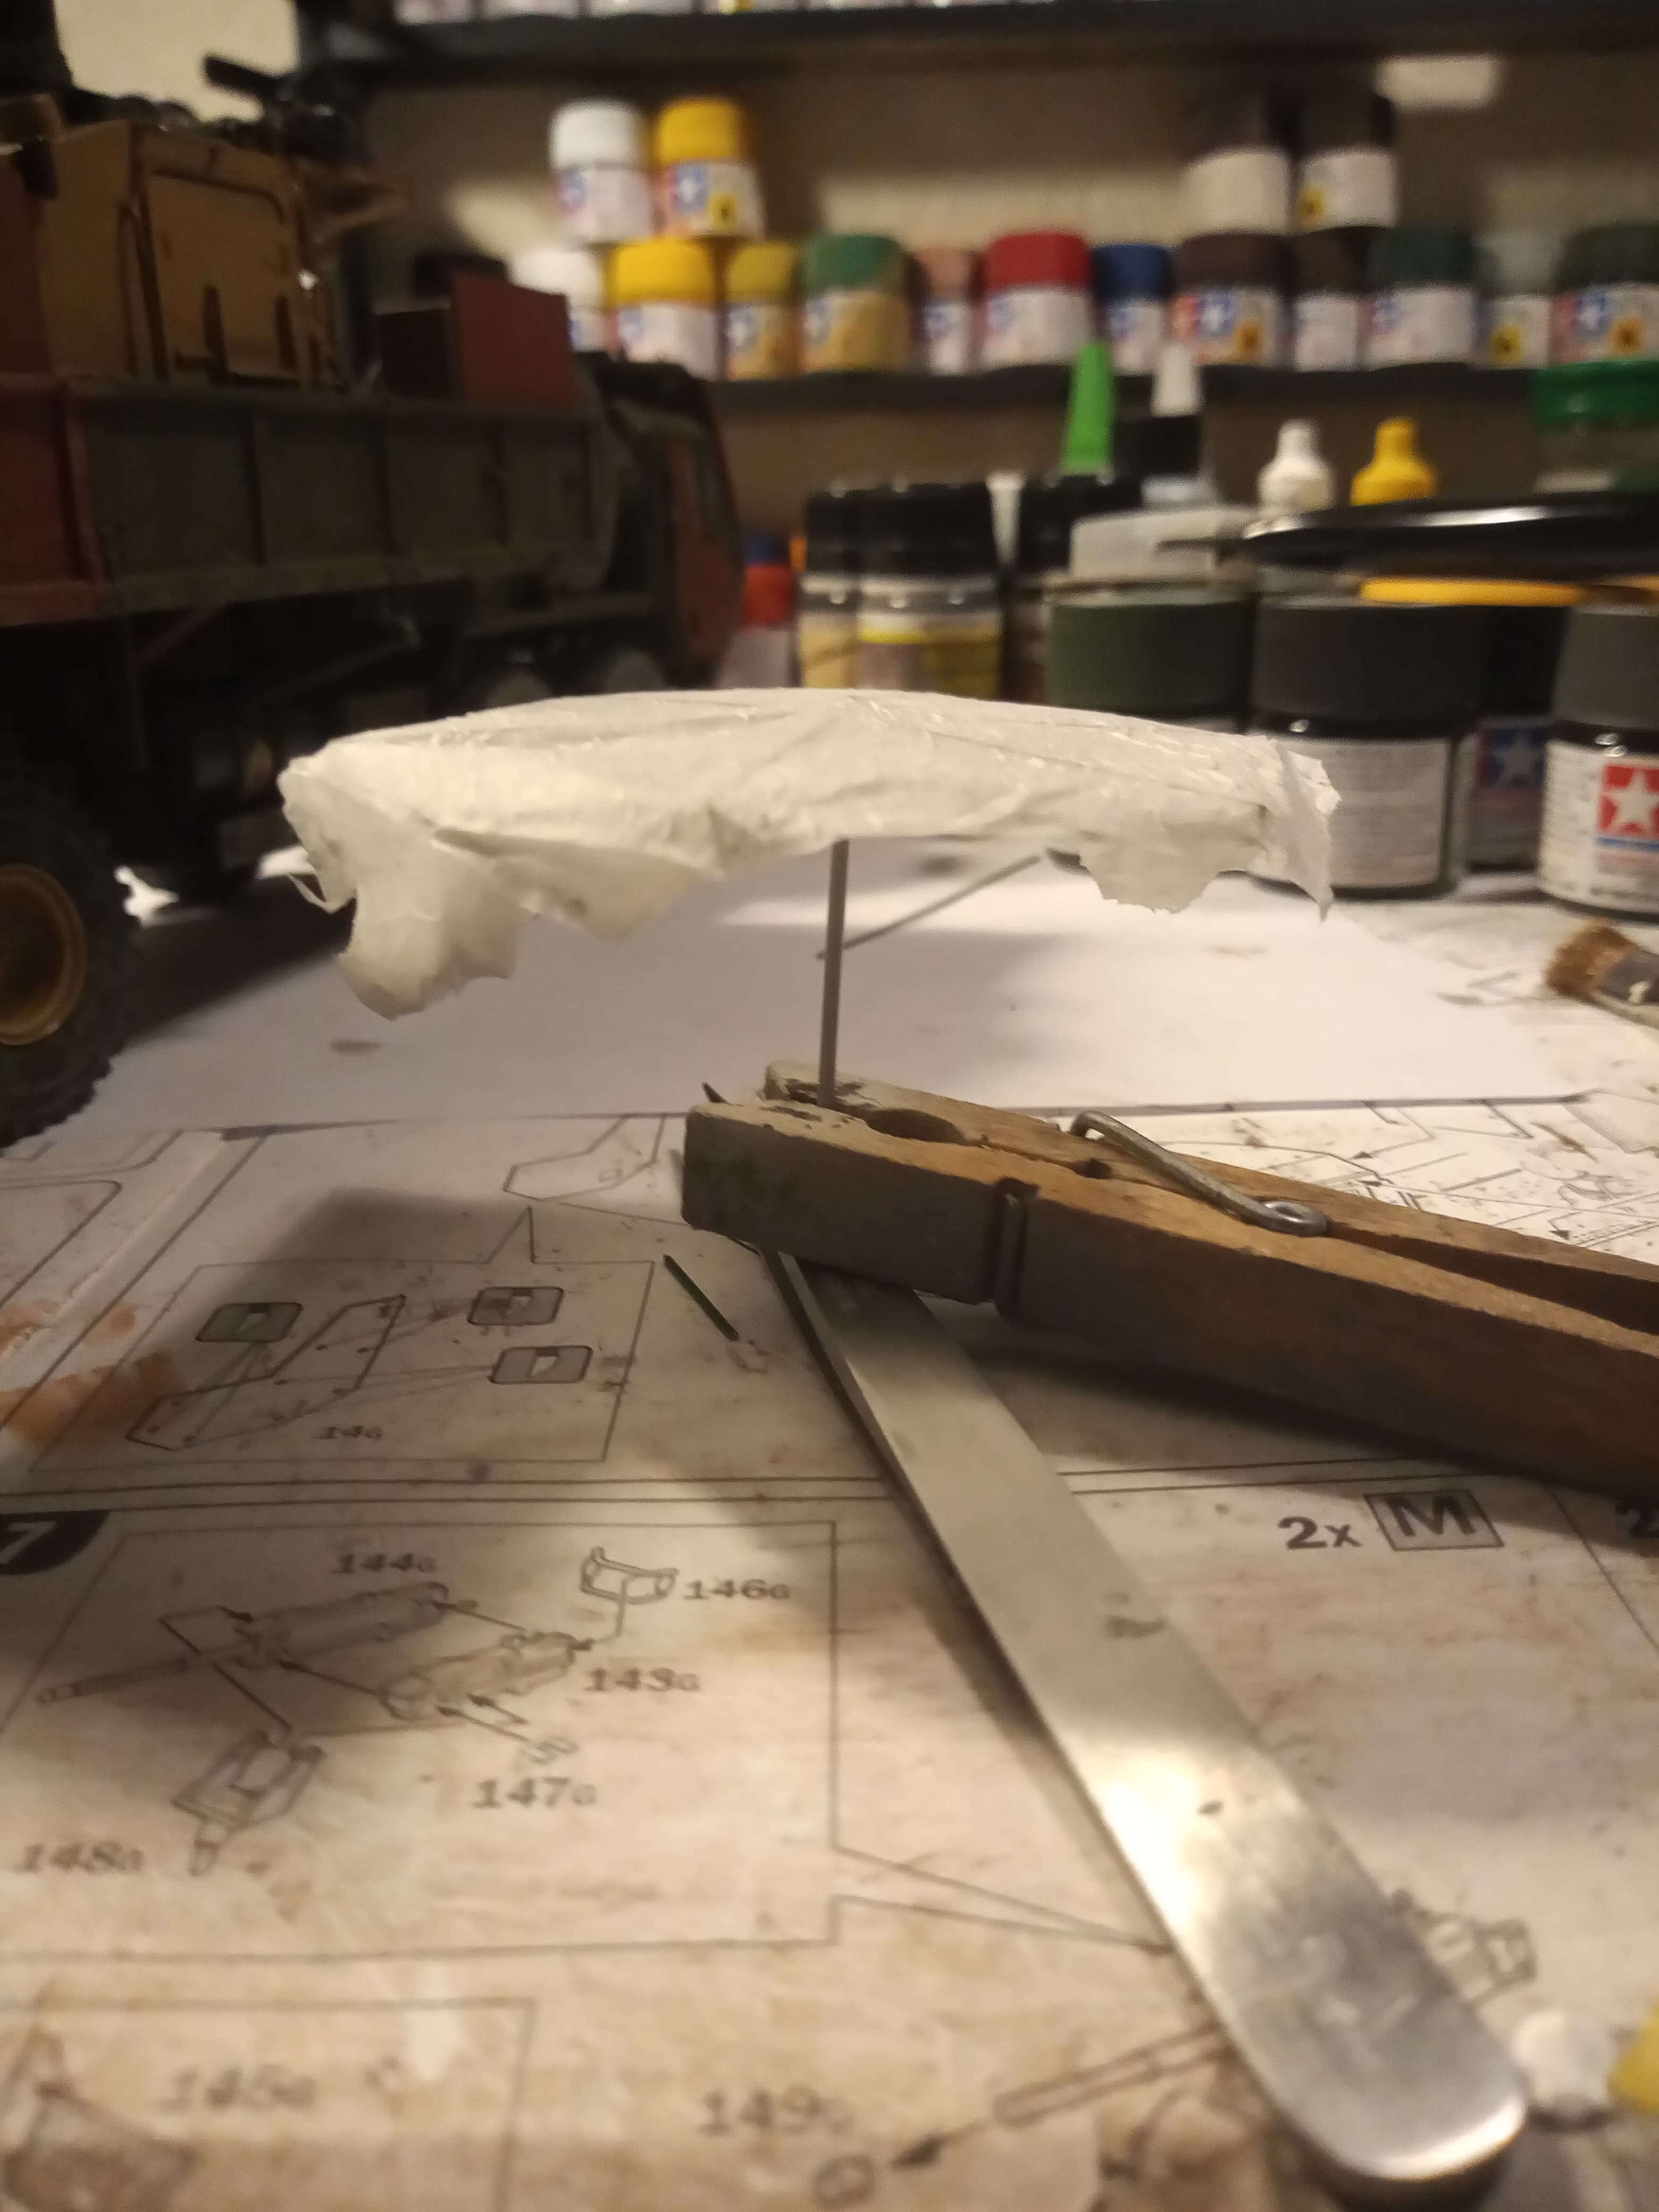
The tissue parasol/ umbrella dried, so I trimmed that into shape.
It has a decent look and I’m happy how it turned out.


That will be getting a nice contrasting splash of colour … … Something from my Regimental history … ![]()
The 2nd spare wheel mount and lowering sling needs a bit more work and painting, which will hopefully be finished tomorrow night.
Also finished the 2nd cam pole frame, and will try the 2 individual upright poles with the mushroom spreaders on top tomorrow night…
I think that looks better than decent! I’ve tried using the miniart umbrella, and it would be generous if I said my result were decent!
Cheers
Nick