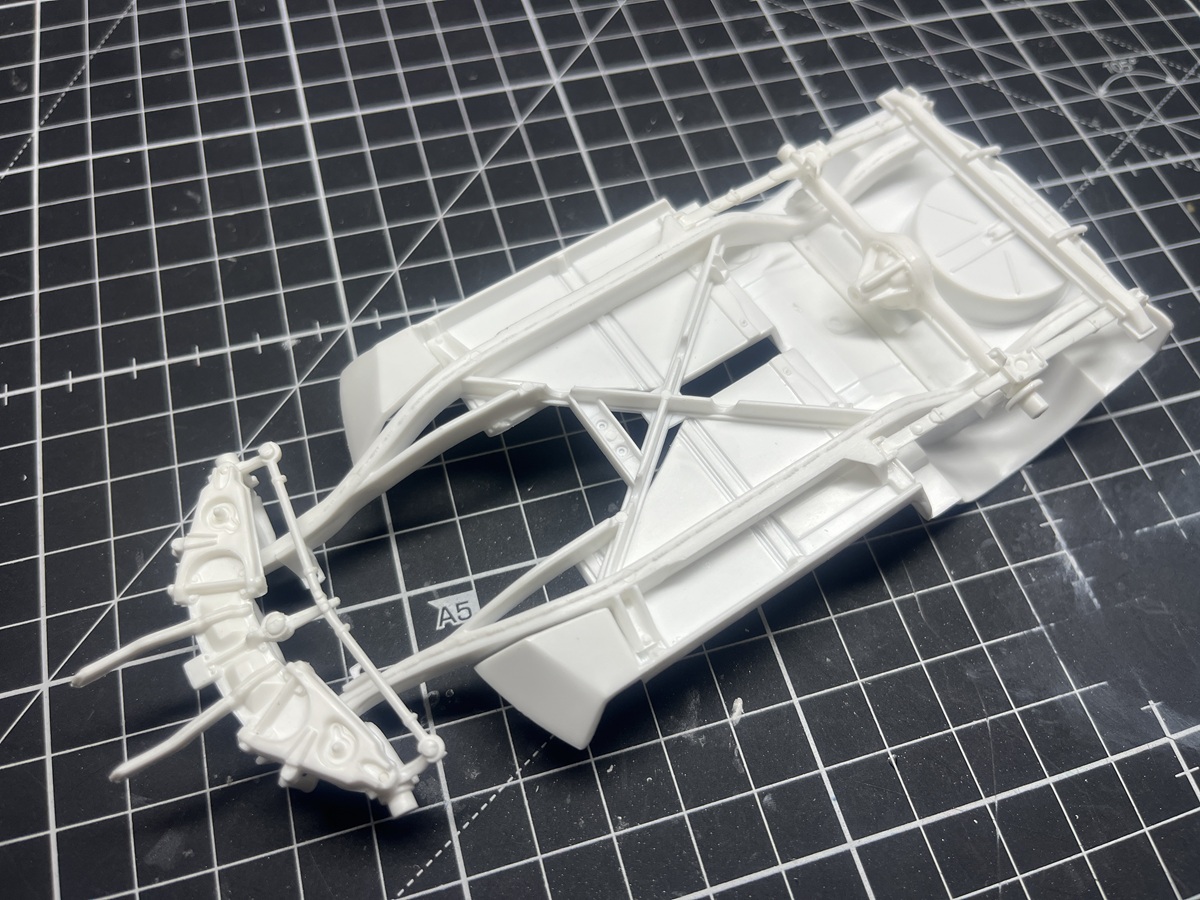
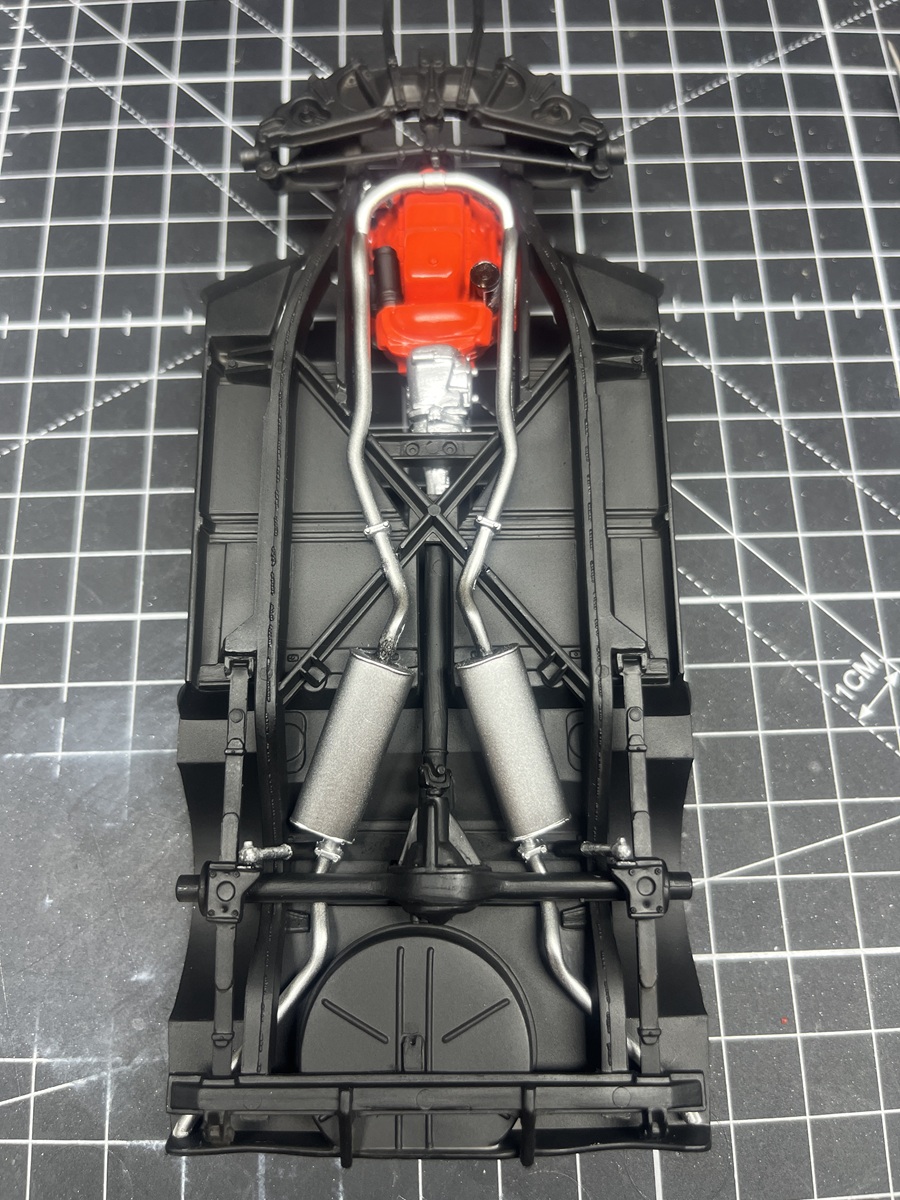
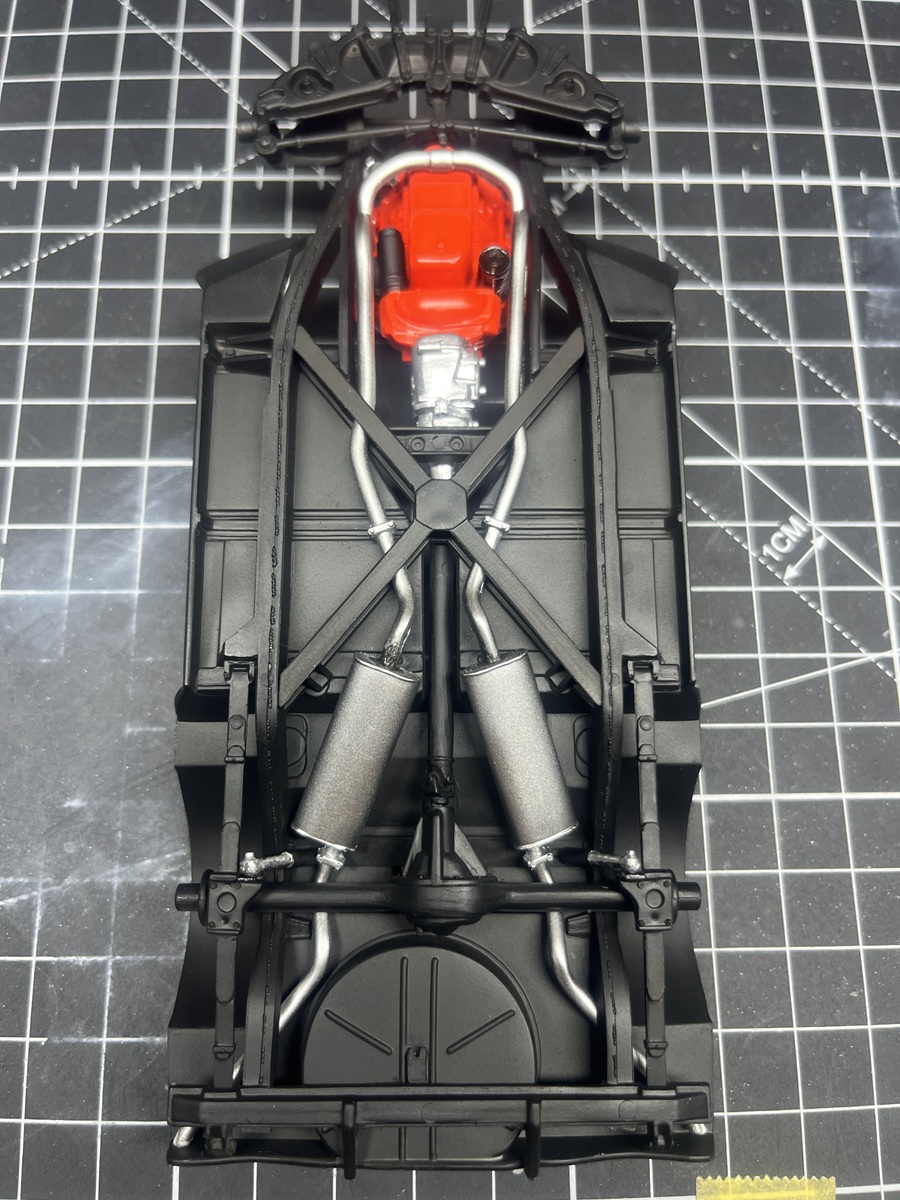
A quiet New Years Day today with some bench time to kick off 2026 was great. I decided to go a bit thrill seeker and deviate from the instructions first up. I dry fitted and clamped the bare chassis to the floor pan to see if I could cement them together prior to priming and still get the dual exhaust in place under the diff. By leaving the exhaust system in 3 pieces I could make it work.
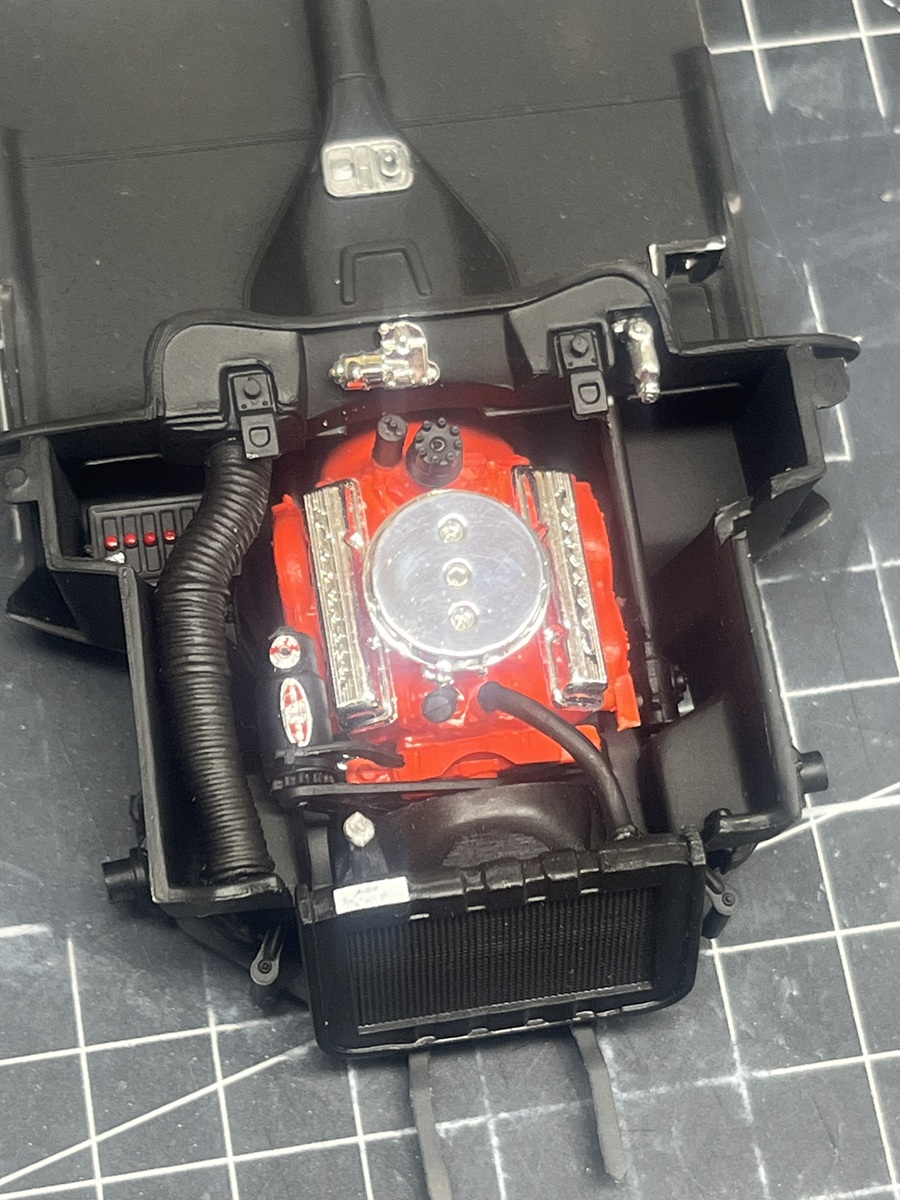
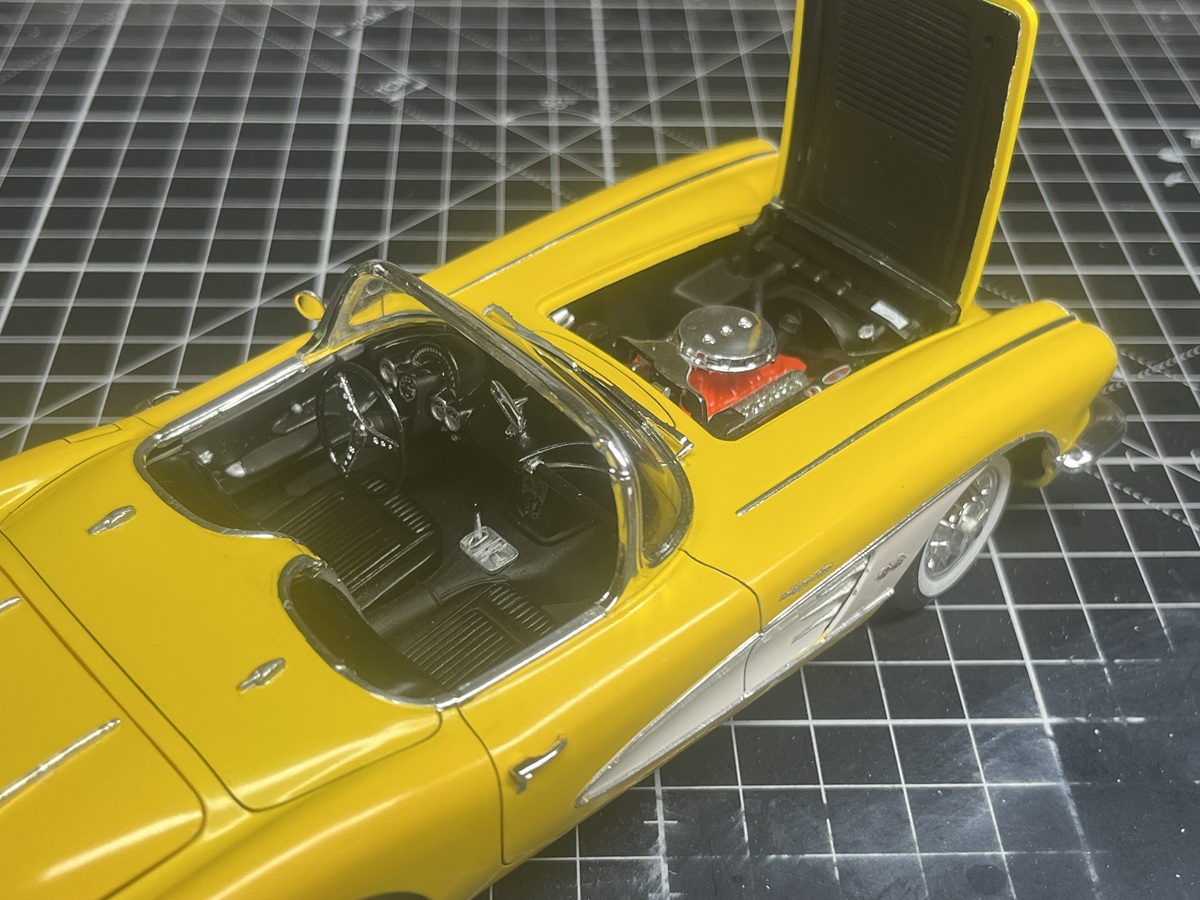
I loaded up with MS1500 Black and primed a bunch of parts and sub assemblies, then shot the engines (‘58 and ‘59) and started adding the details to the ‘58.
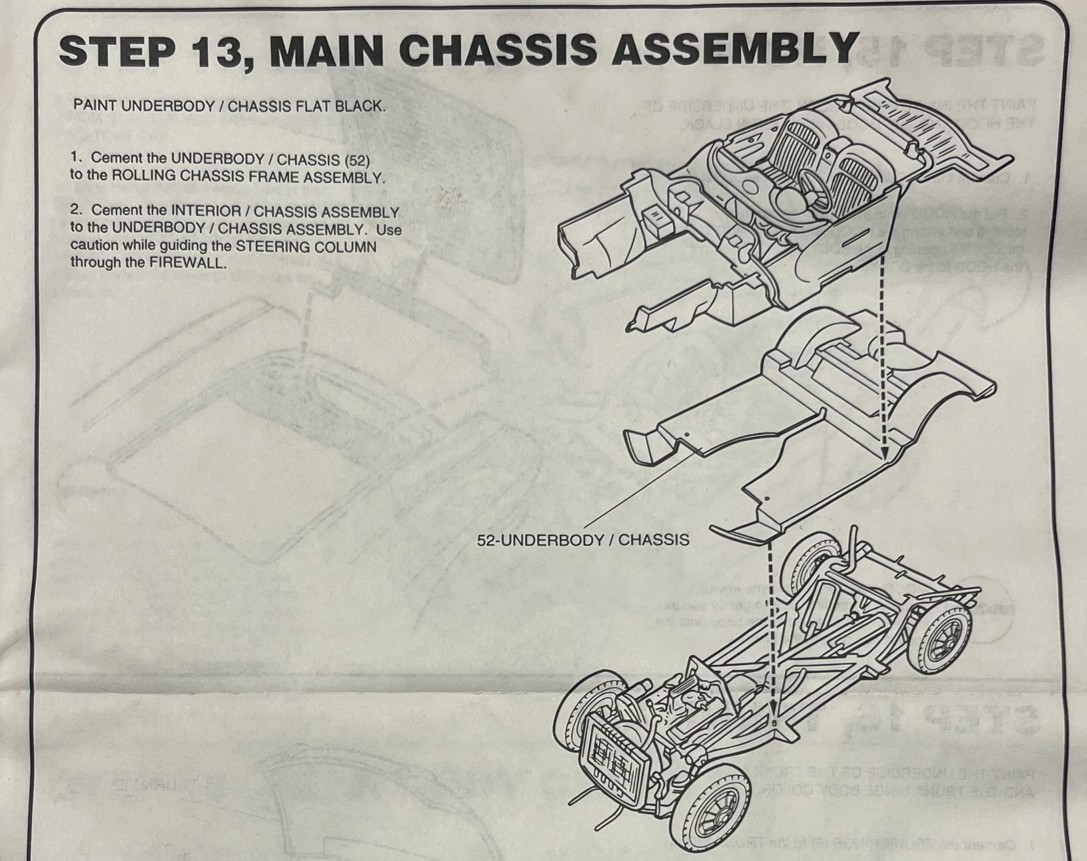
Some more progress last night. I assembled the wheels and test fitted them, all good so far. I’ve left the front wheels steerable at this point. The engine is fixed in the chassis, so I test fitted the interior tub and engine bay section to make sure everything will slide together with clearance and not knock the accessories off the engine later. Again, all looking good.
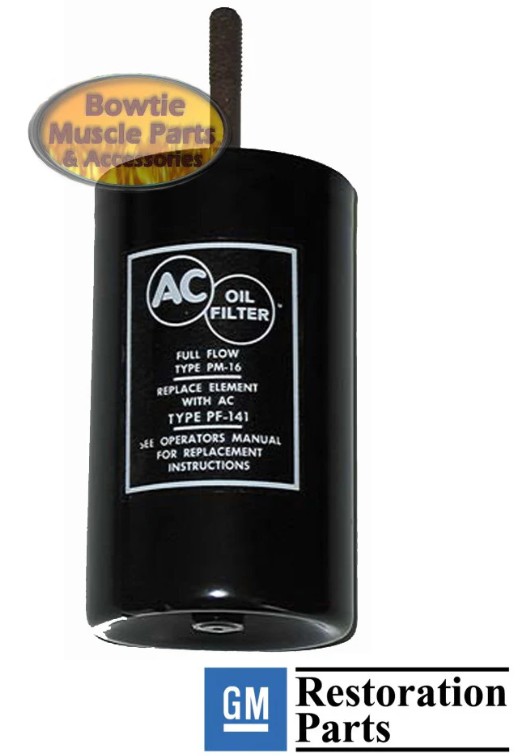
You might recall earlier in the thread that the kit was second hand and water damaged when I bought it, time now to test if the decals are still usable with the little detail on the oil filter. I found a reference image online, restoration websites are great for this info. It took some time to loosen the decal from the sheet, but using Mr Hobby Setter and Softer it looks like I might get away with it.
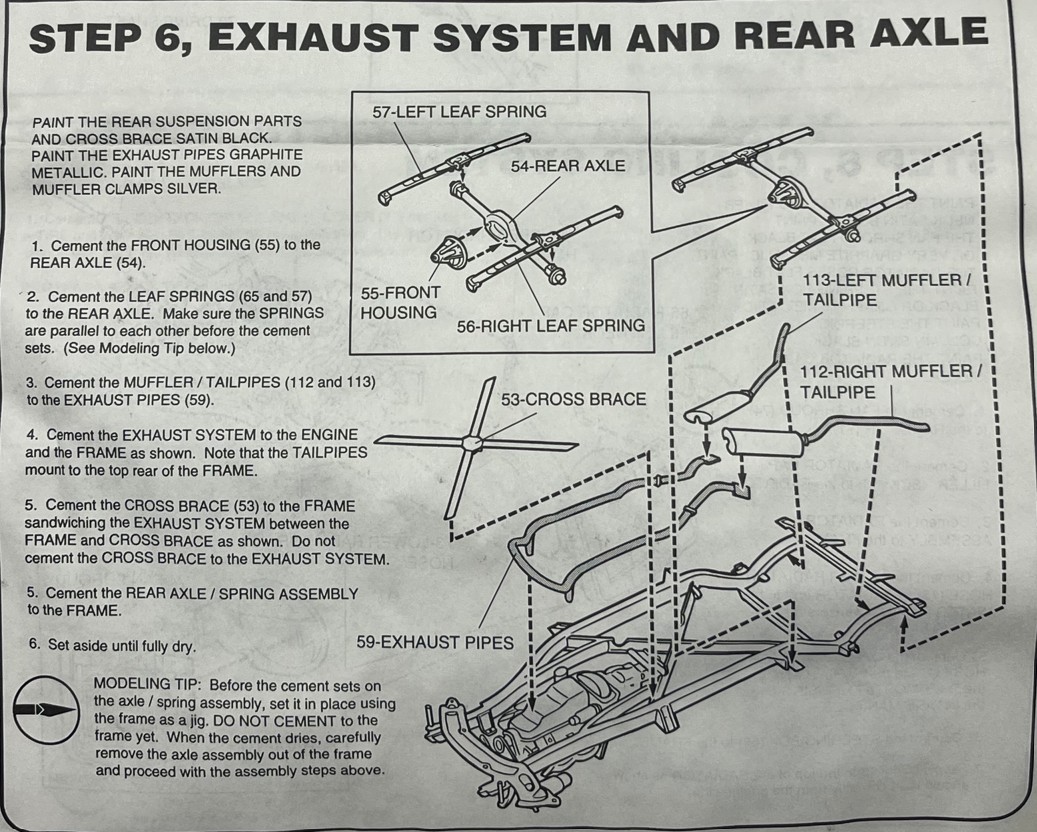
Finished off the underside with the tail end of the exhausts, cross brace, and the shock absorbers on the leaf springs, and fixed the oil filter in place.
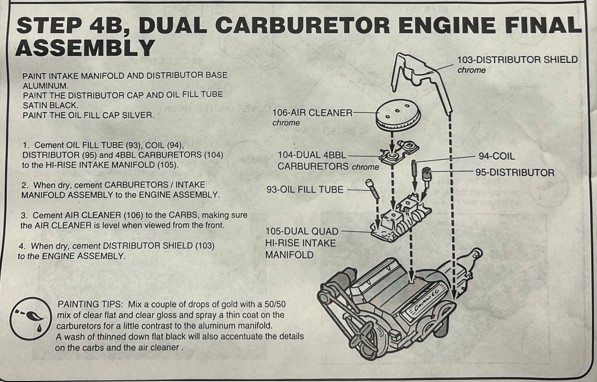
I still need to fit the Distributor Shield to the engine, but the attachment points are dubious and it’s likely to get knocked off again (at least 6 times knowing me ) so I will leave that for later.
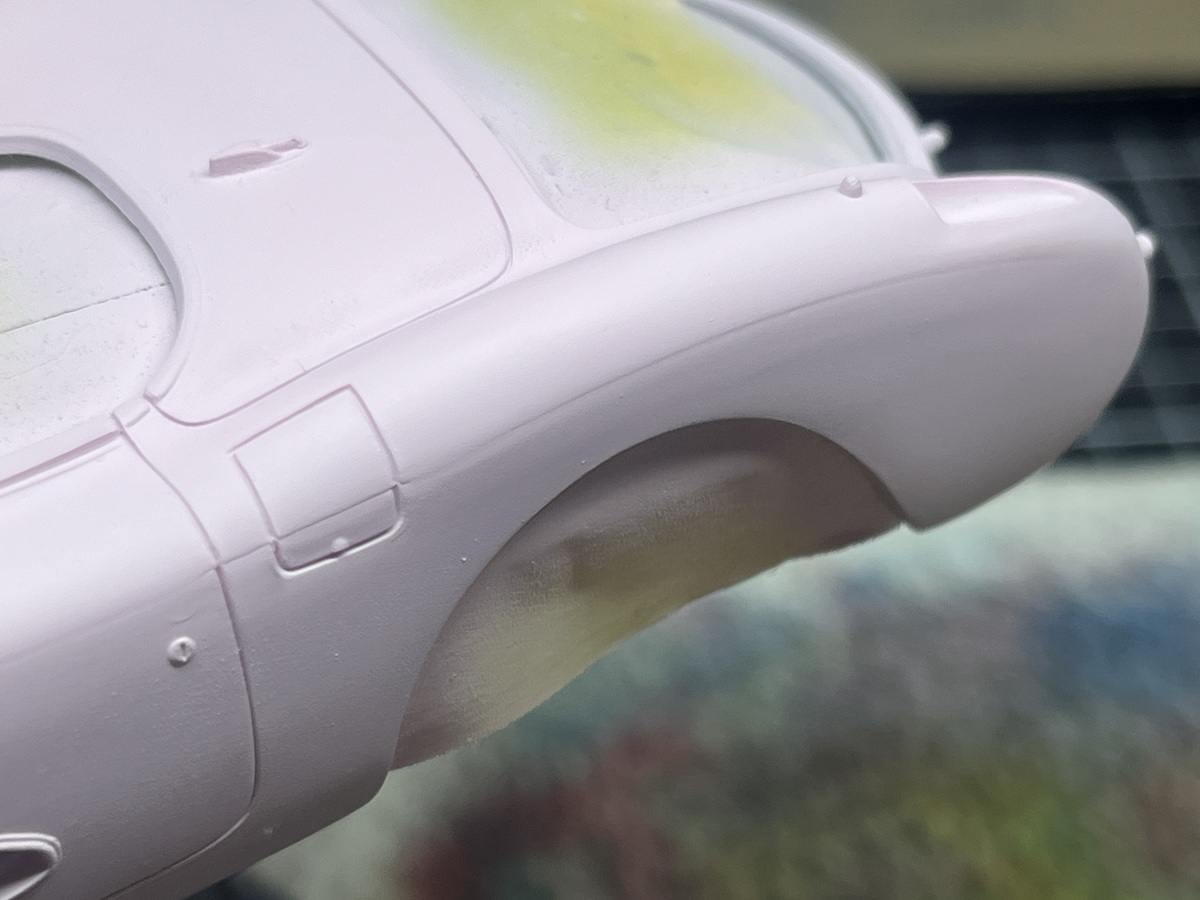
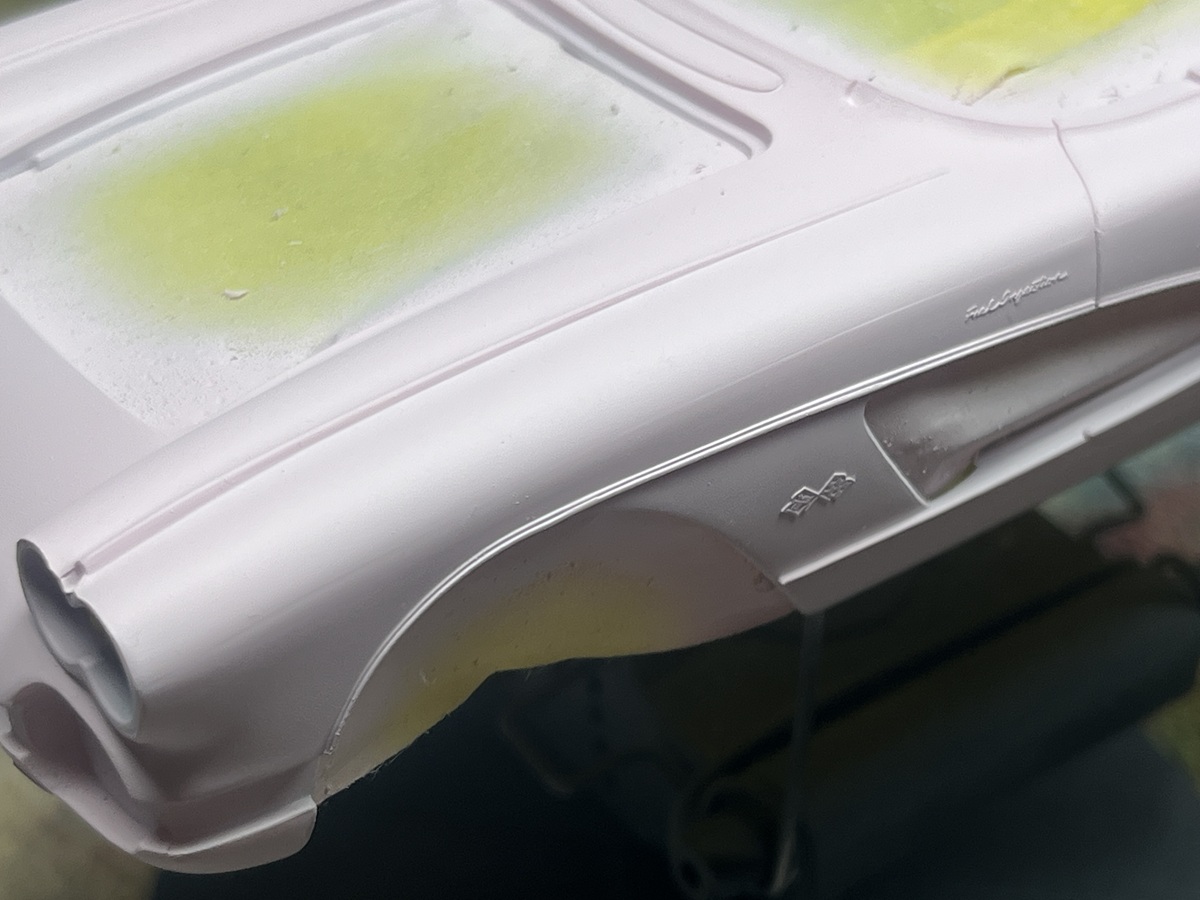
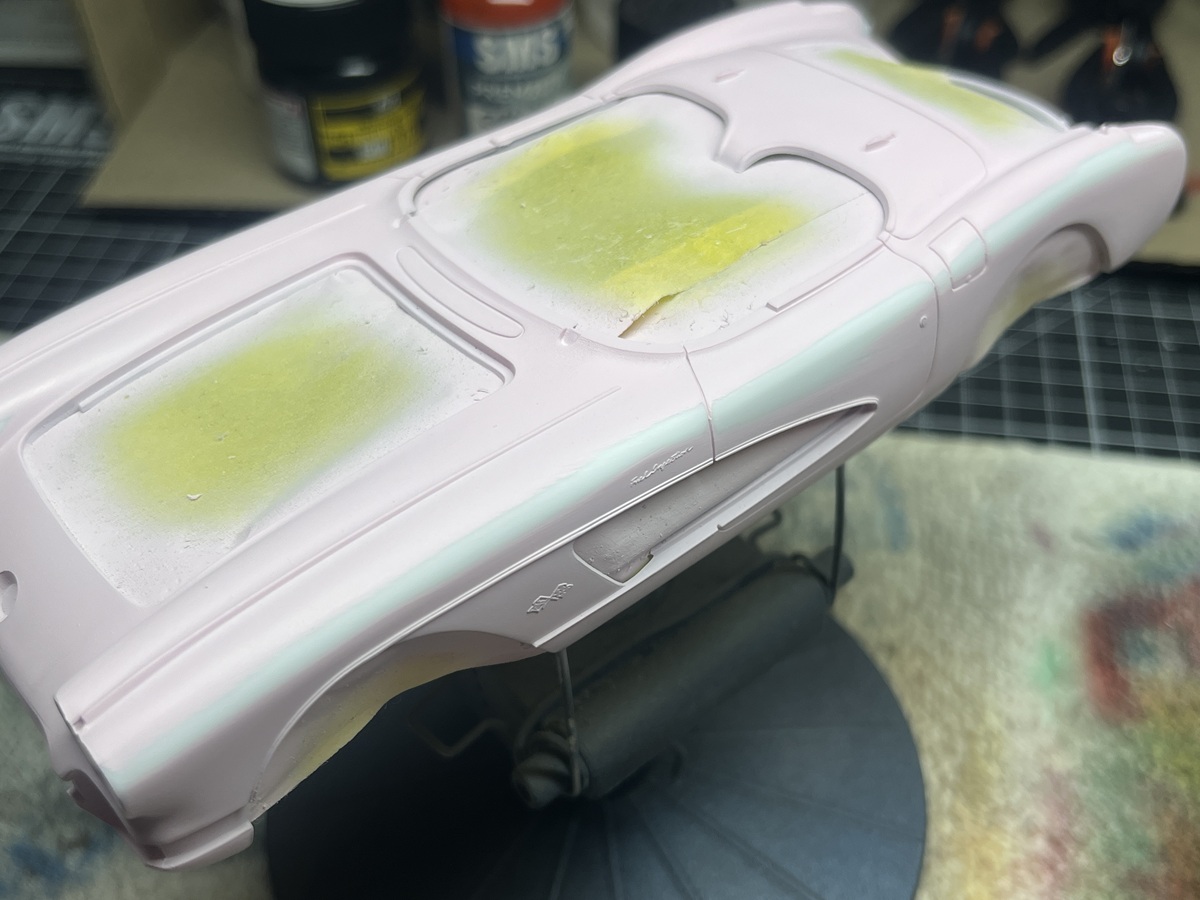
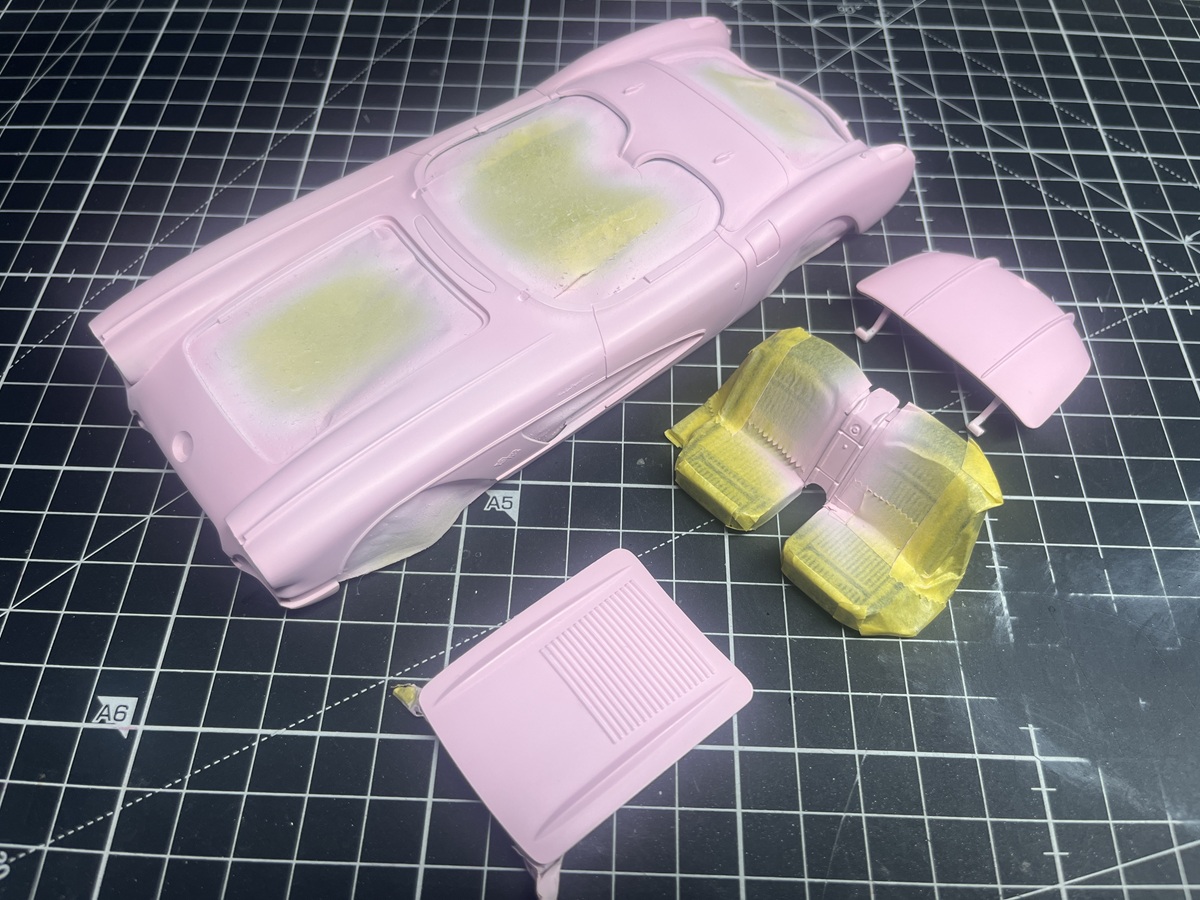
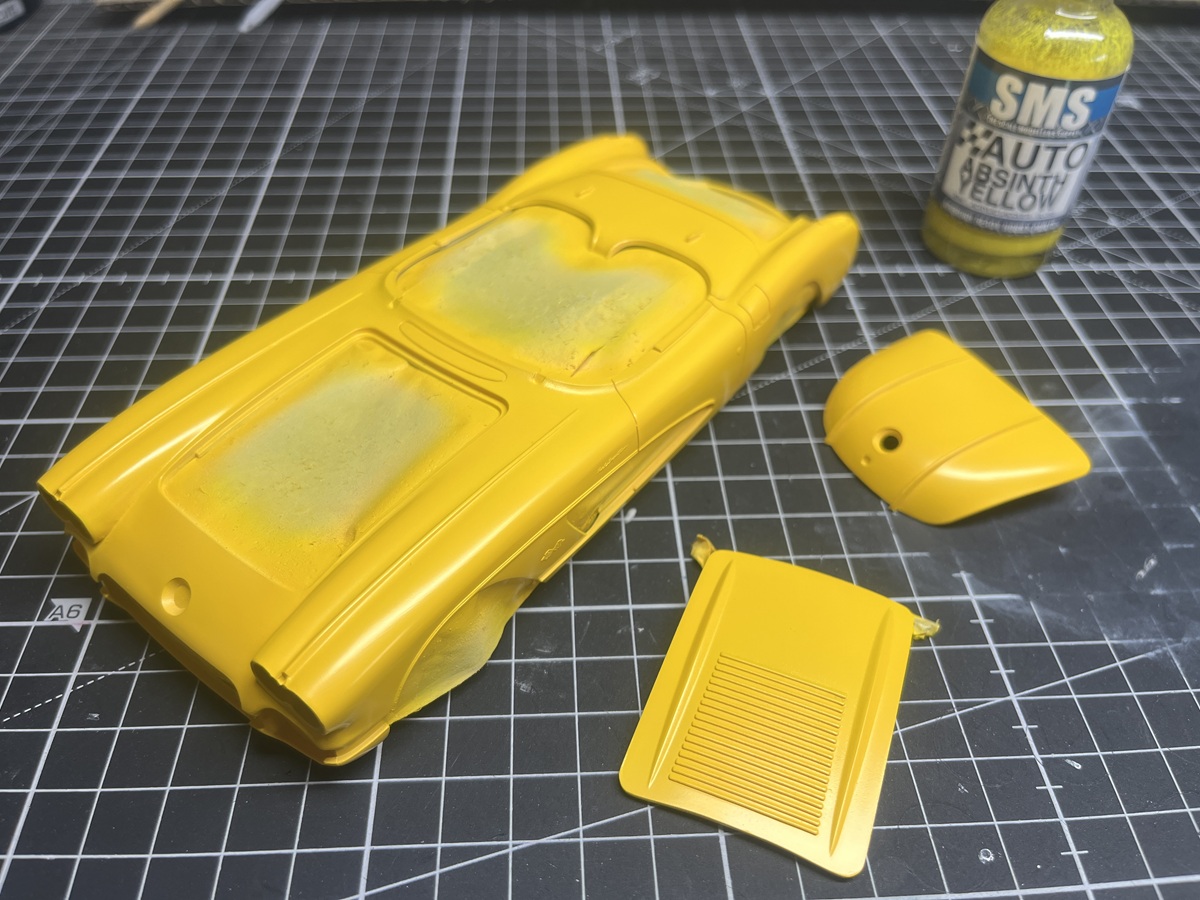
Time to prime! I keep hearing that Yellow top coat is best applied over pink primer so I tinted some MS1500 White with a couple of drops of SMS Red, thinned with about 60% MLT and shot a mist coat and then 2 heavier coats to see what work needs to be done on the body. As usual the primer didn’t let me down, there are lots of seams to re-work that were hard to see on the bare gloss white plastic.
I’ve managed to get the body and parts cleaned up, primed and wet sanded ready for the Yellow colour coat, but it hit 44°c (111°f) in my town just north of Melbourne today so not ideal for the airbrush. We have a couple more days of similar conditions headed my way so I will spend my bench time prepping parts and working on sub assemblies until the weekend.
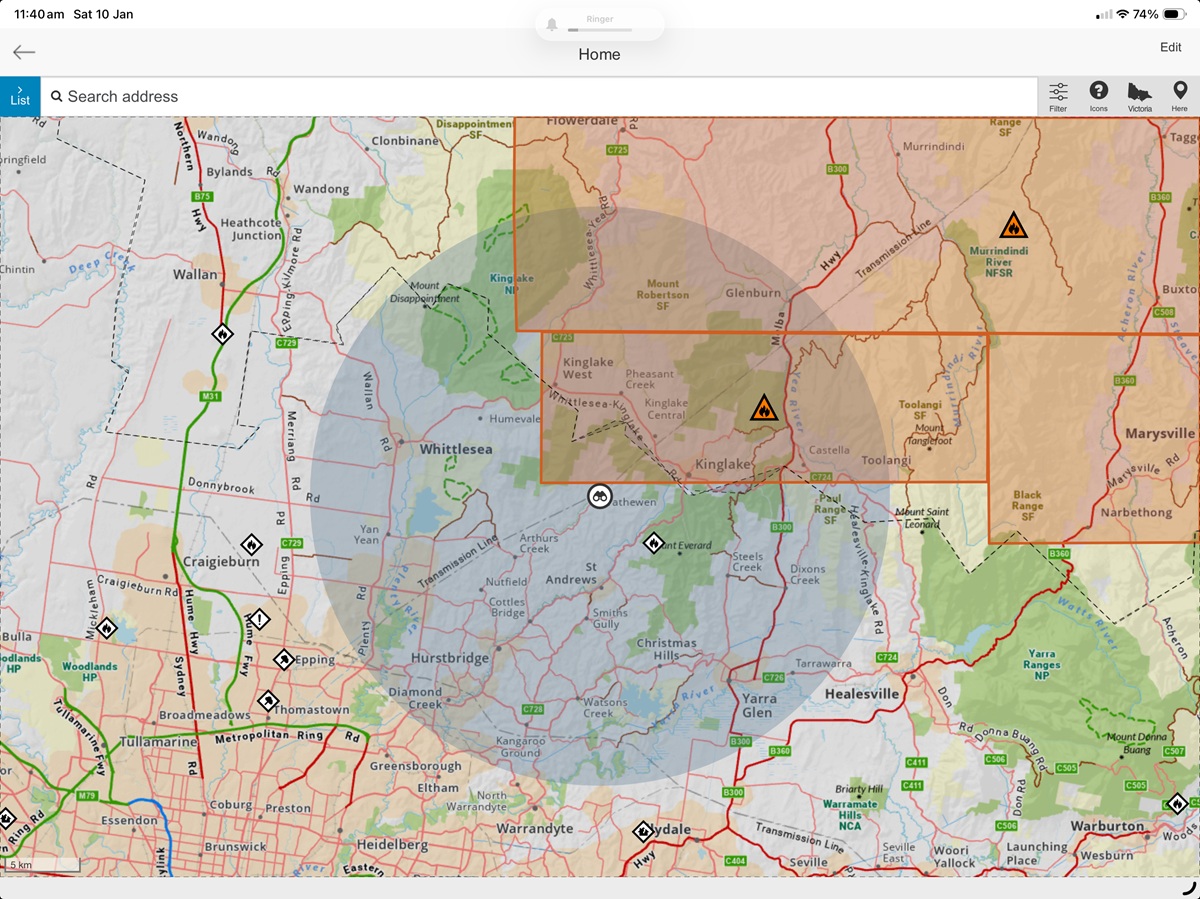
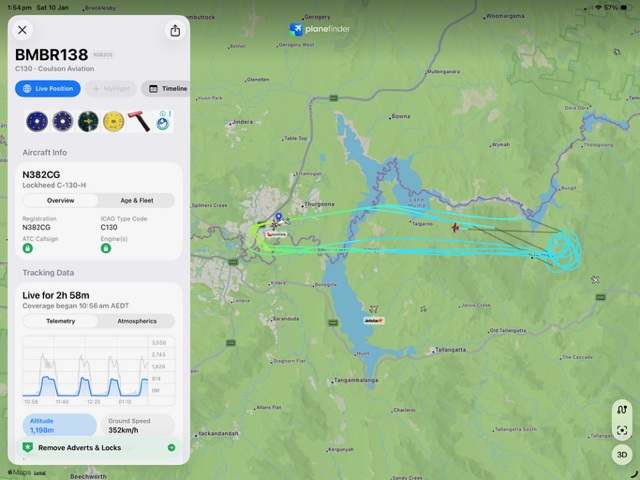
Well the extreme hot and dry turned into some very wild bushfires over the past few days, several still burning out of control and before the SW wind change it got very close to me needing to evacuate. The image below from the Victorian Emergency Services APP shows just how close . A constant buzz of firefighting aircraft and helicopters doesn’t make for a relaxing time at the bench.
The immediate risk in my area has passed, but the fight is ongoing in multiple regions around the state. Huge respect and thanks to the professionals and volunteers who put themselves at risk and work tirelessly to protect lives, animals and properties. To give an idea of the scope of the fire, the grey circle around my home is 25km diameter on this current status screenshot.
I hope you and your family get to stay put and avoid the fires heading your way. Having lived in the lesser state of NSW and being 40km away from the fires, the fallout from ash and smell of smoke can be pretty bad as a side effect.
So glad that conditions have eased now. A cooler few days, still a lot of fires burning but not out of control.
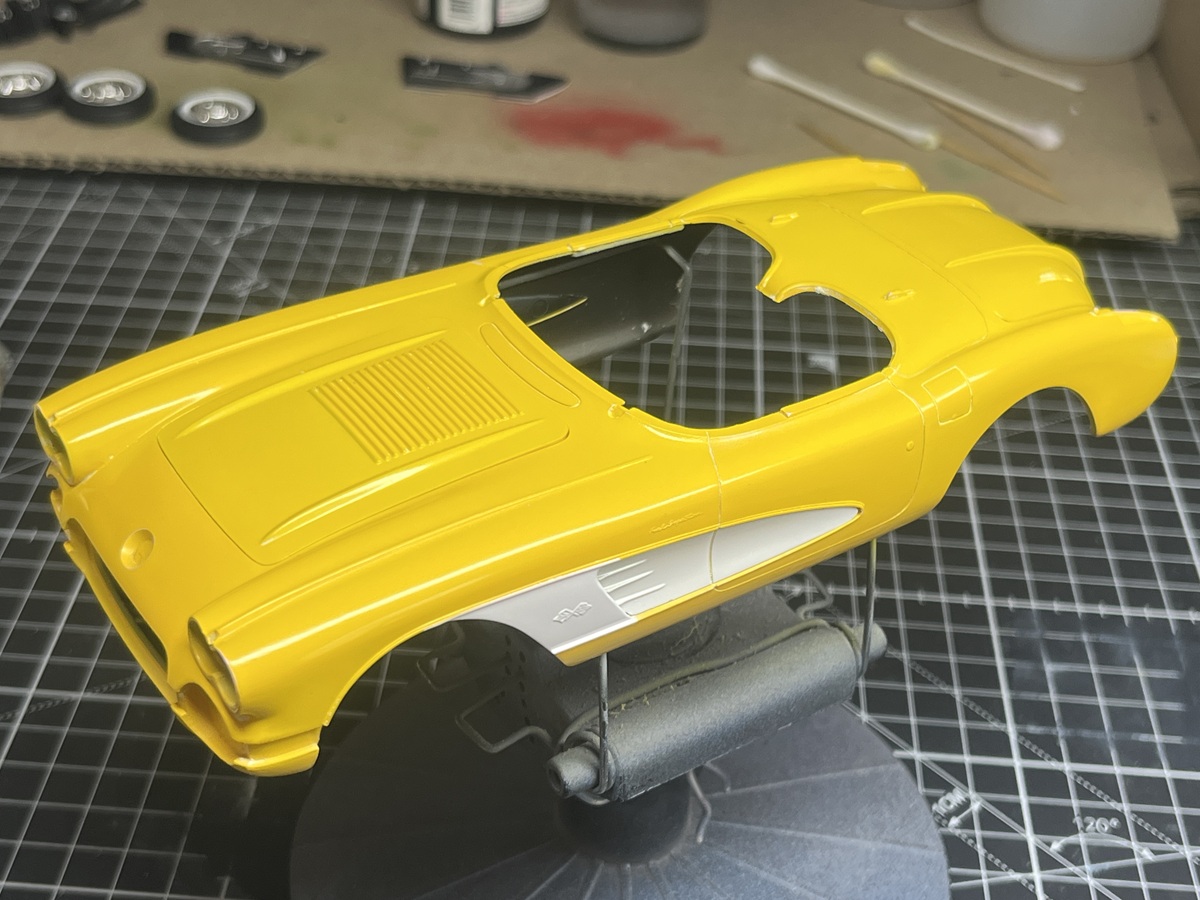
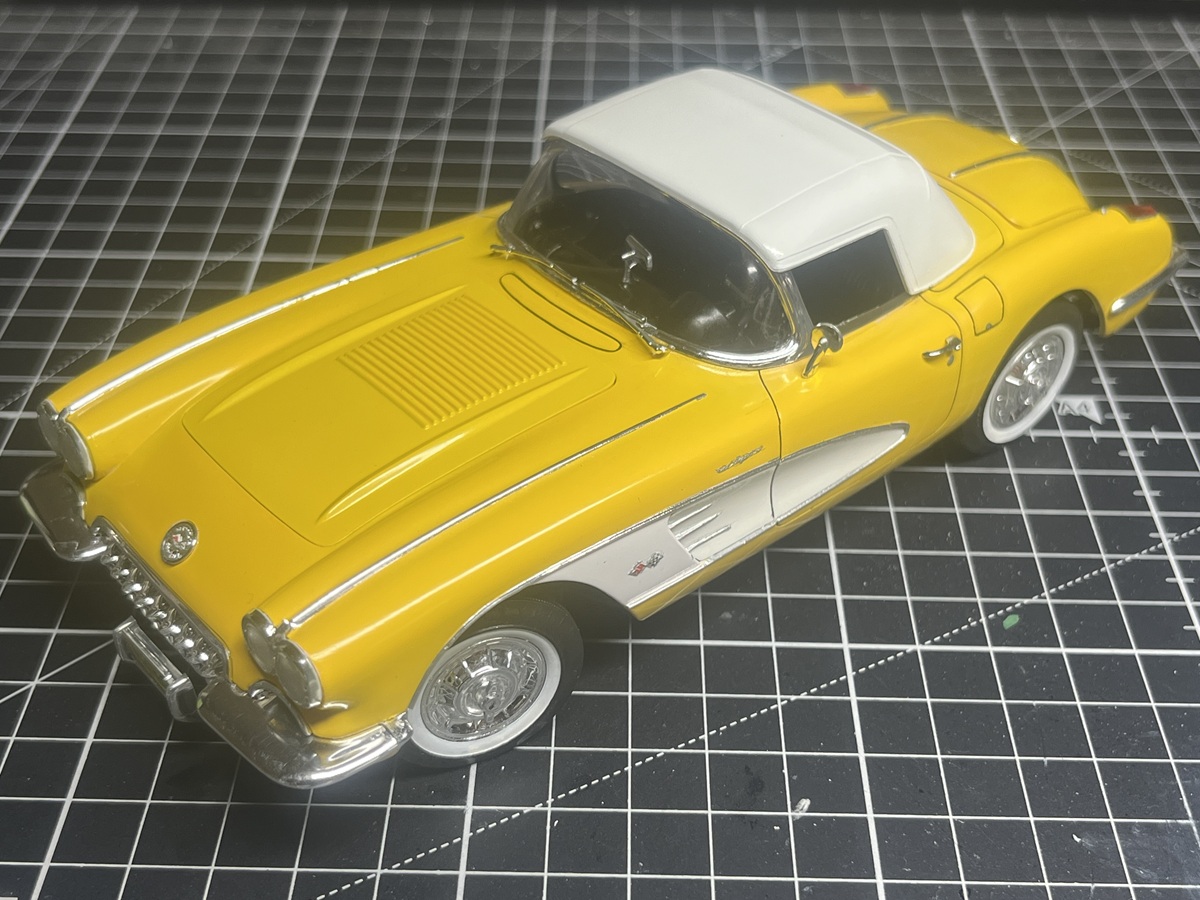
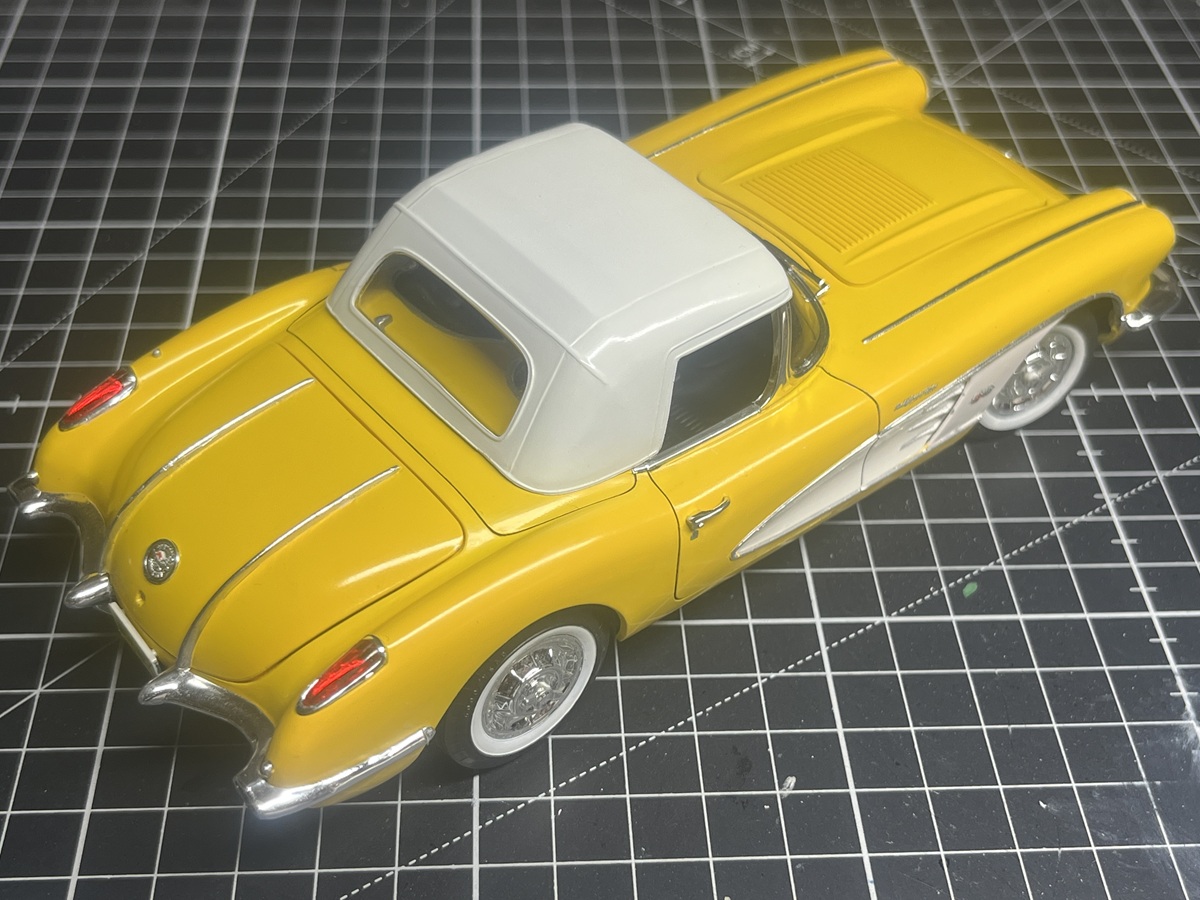
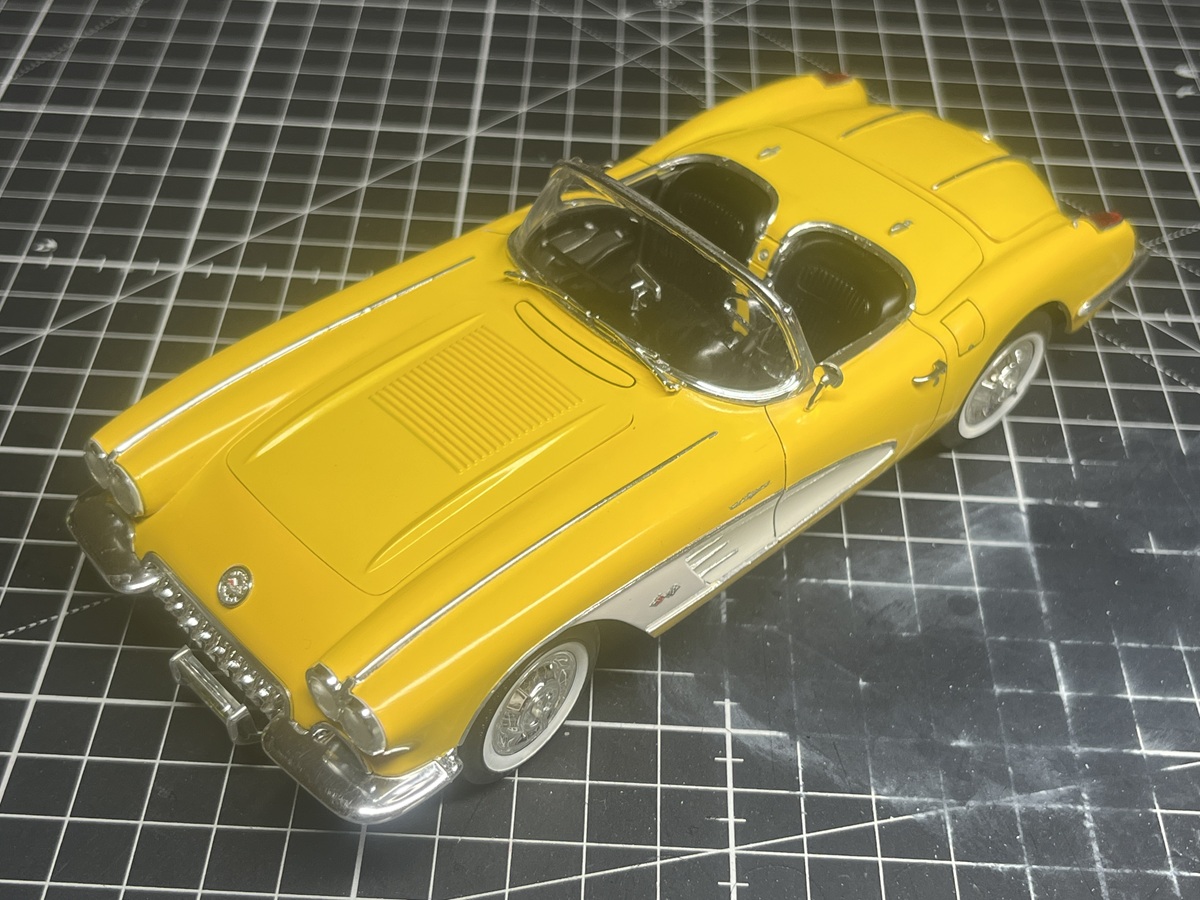
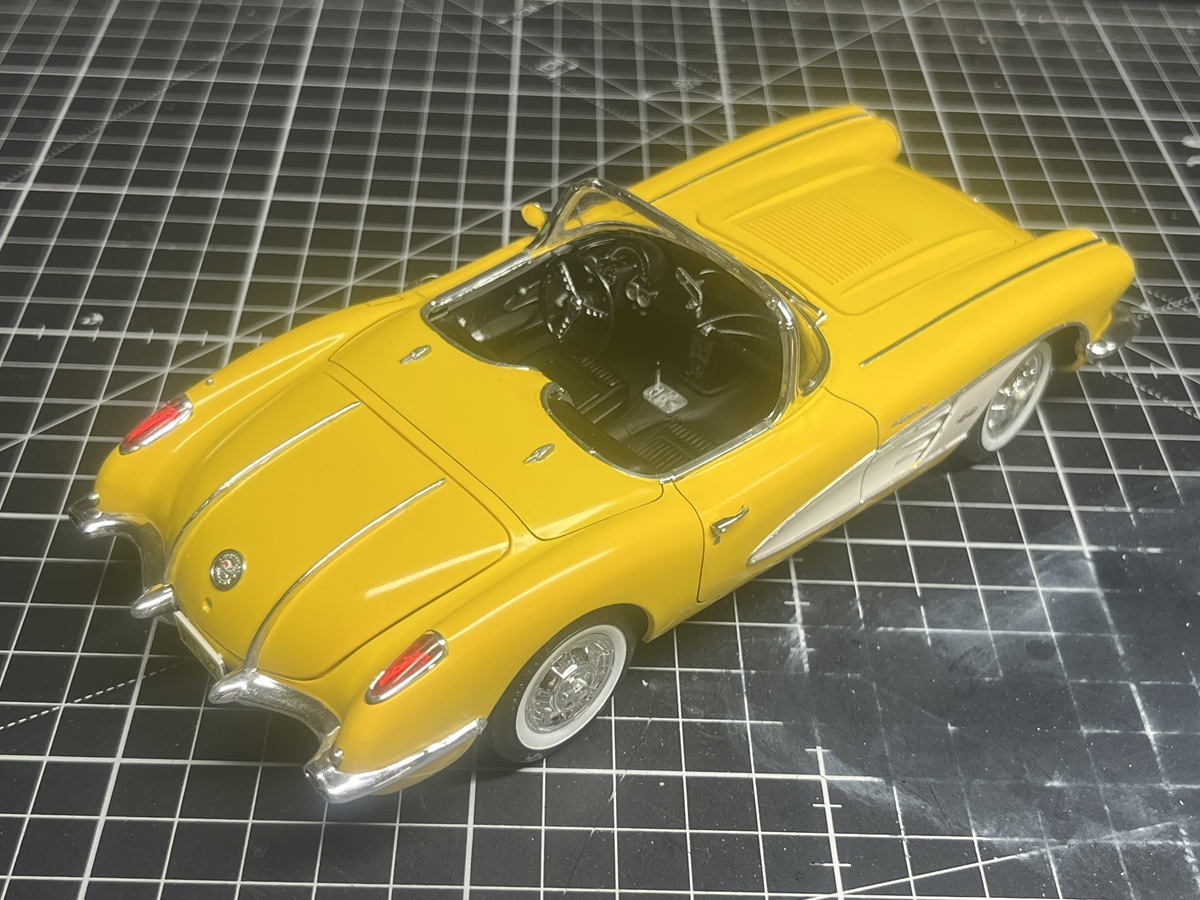
I got a couple of top coats on the ‘58 body, left a day to fully cure, then wet sanded with an 8000 grit pad followed by a polish using Q-tips and Tamiya Fine Polishing Compound. I’m thinking I might even skip the clear coat on this build, the shine on the polished paint looks quite good.
The RH section only has been polished here to show the difference.
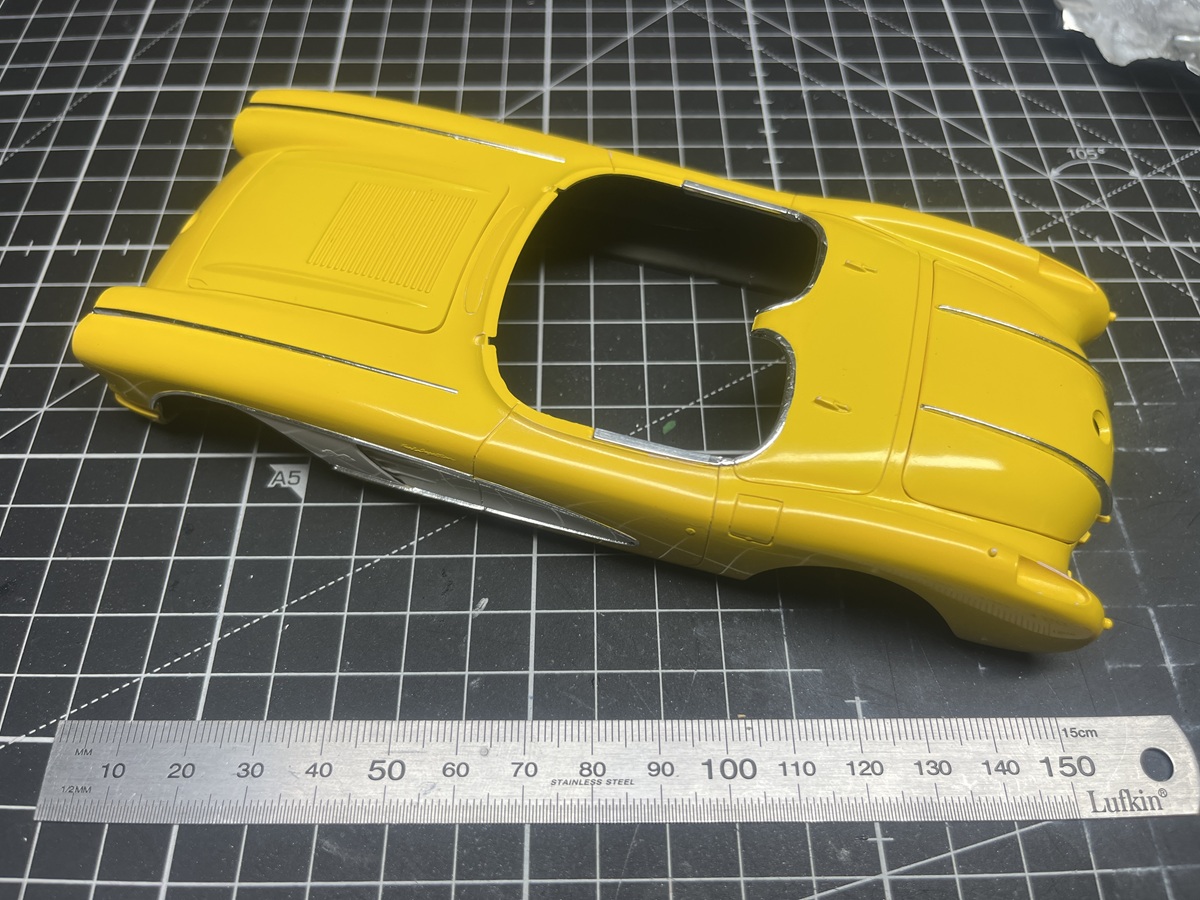
And here is the whole body after polishing. I still have to mask off and spray the cove sections in White, then give them a polish, then I might give the whole thing a final cut with Tamiya Finish Compound.
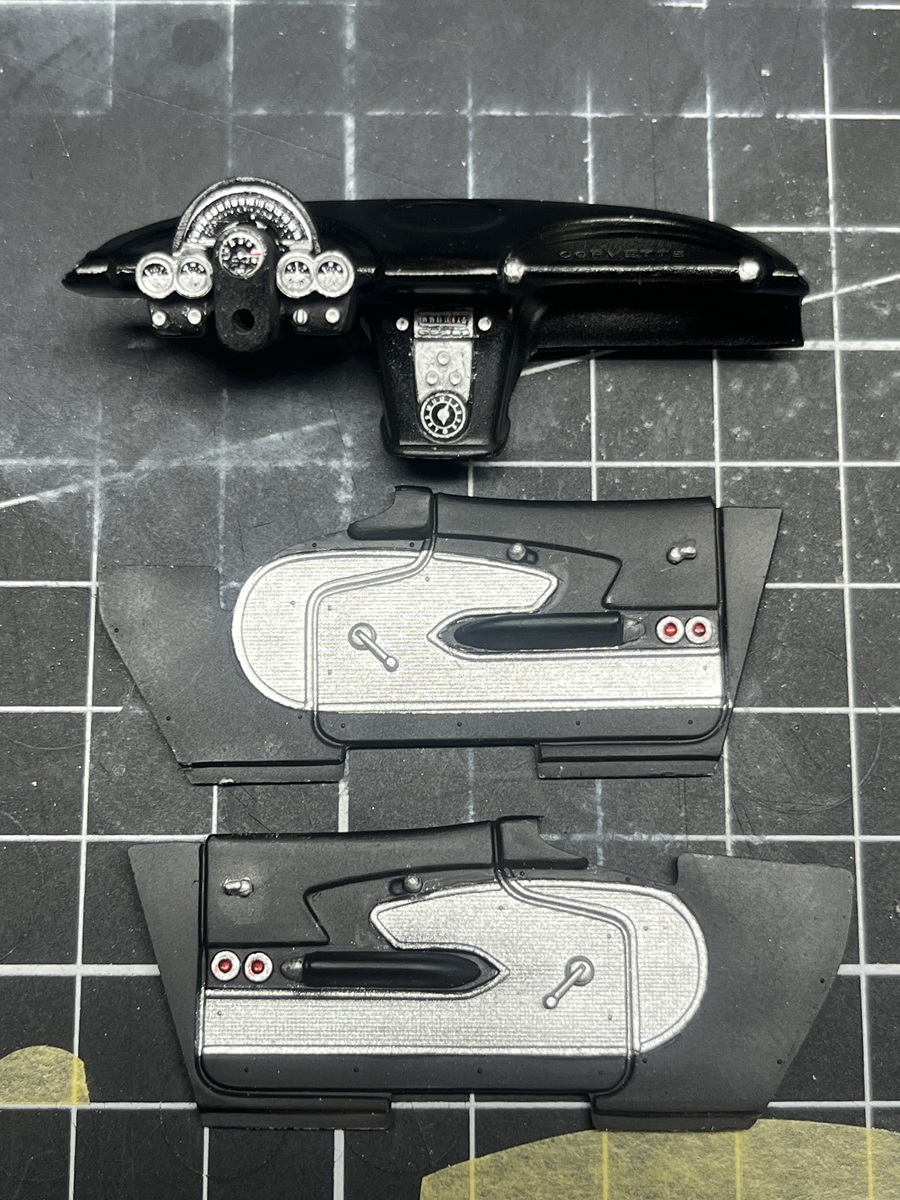
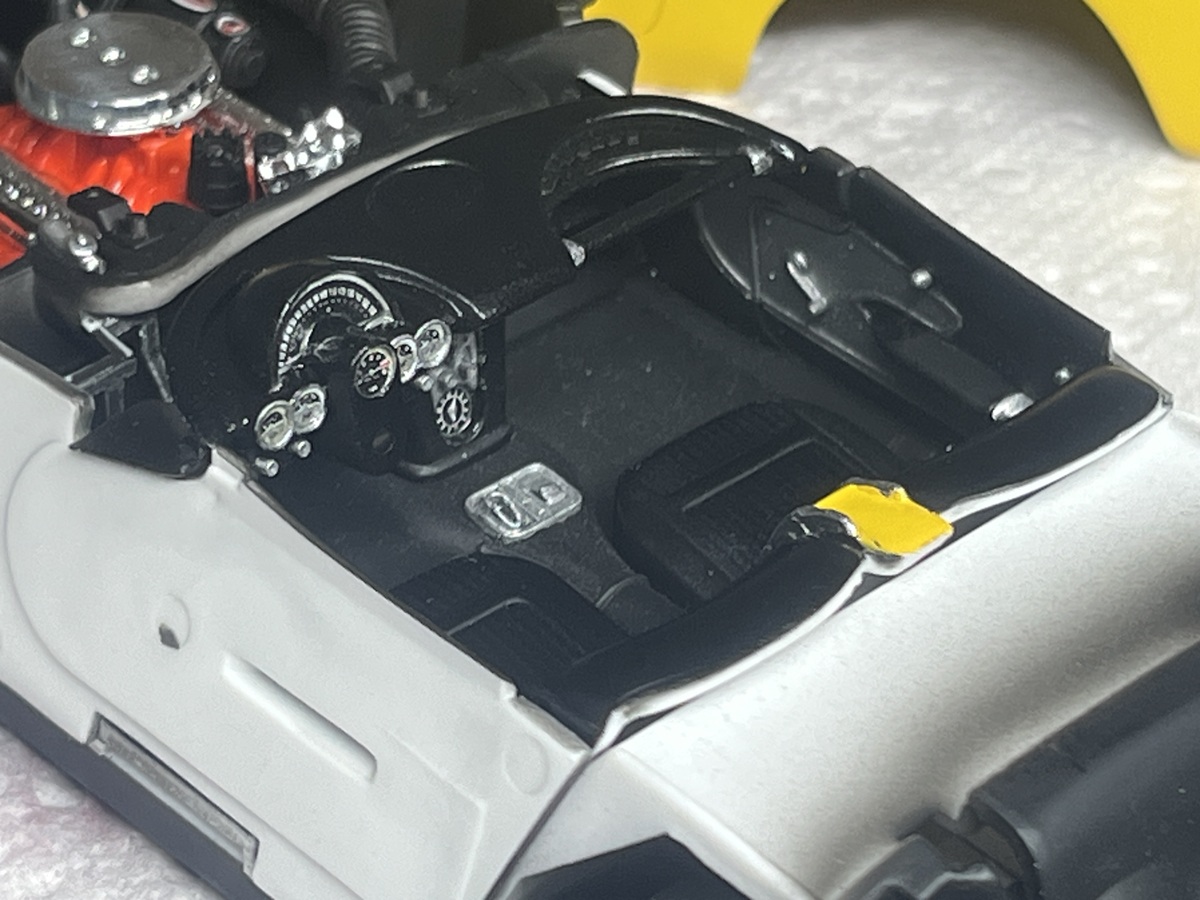
Masked and painted and detailed the door inner skins. Detail painted and added decals to the dashboard. Still need to add some clear gloss to the dial faces.
On the clear coat, if it were me, I’d still apply it, even though the colour looks amazing, as it gives a real sense of depth to the assistance… just my 2c…
@Russelle I hope you didn’t get caught up in those flash floods, terrifying images coming through. They copped 177mm of heavy rain in 6 hours, crazy stuff.
I’m still on the fence about the clear coat, just need to make a decision before I start on the BMF.
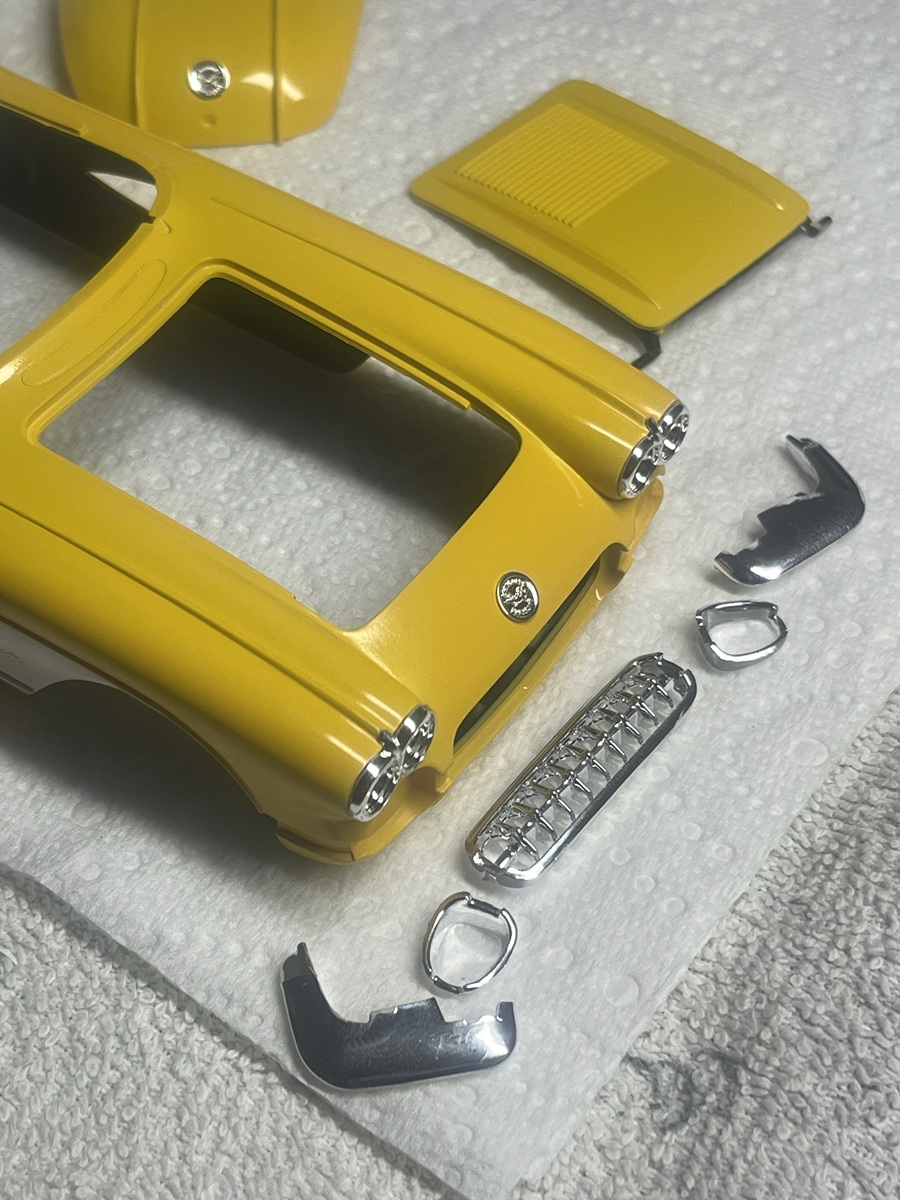
I panted the small chrome trims on the side coves, they were too small to take the BMF.
After finishing the BMF I detail painted the smaller chrome spots like door locks and soft top cover catches, then started on the assembly of the tub (door inner cards and dashboard).
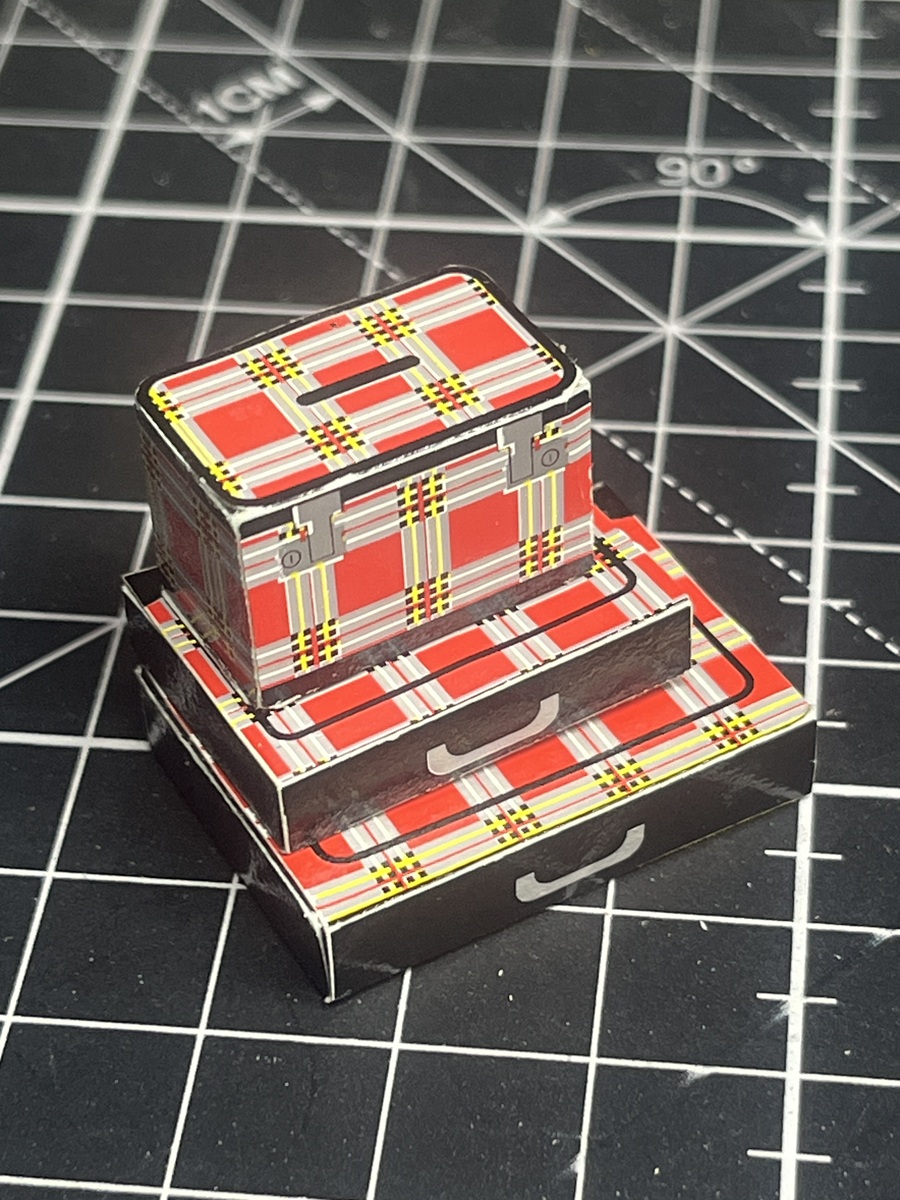
A little side-trip, on the decal sheet are a set of luggage items to cut out, fold and glue. I cut them out, folded them and glued them as instructed and guess what, they don’t fit in the trunk
Oh well, nice distraction while the glue dried on the Covette build.
Back to business, I spent a couple of hours today on the fiddly bits, detail touch-ups on the chrome and fixing clear parts in place. One thing I love about lacquers is that I can slosh on the PLW and clean it up with no fear of staining.
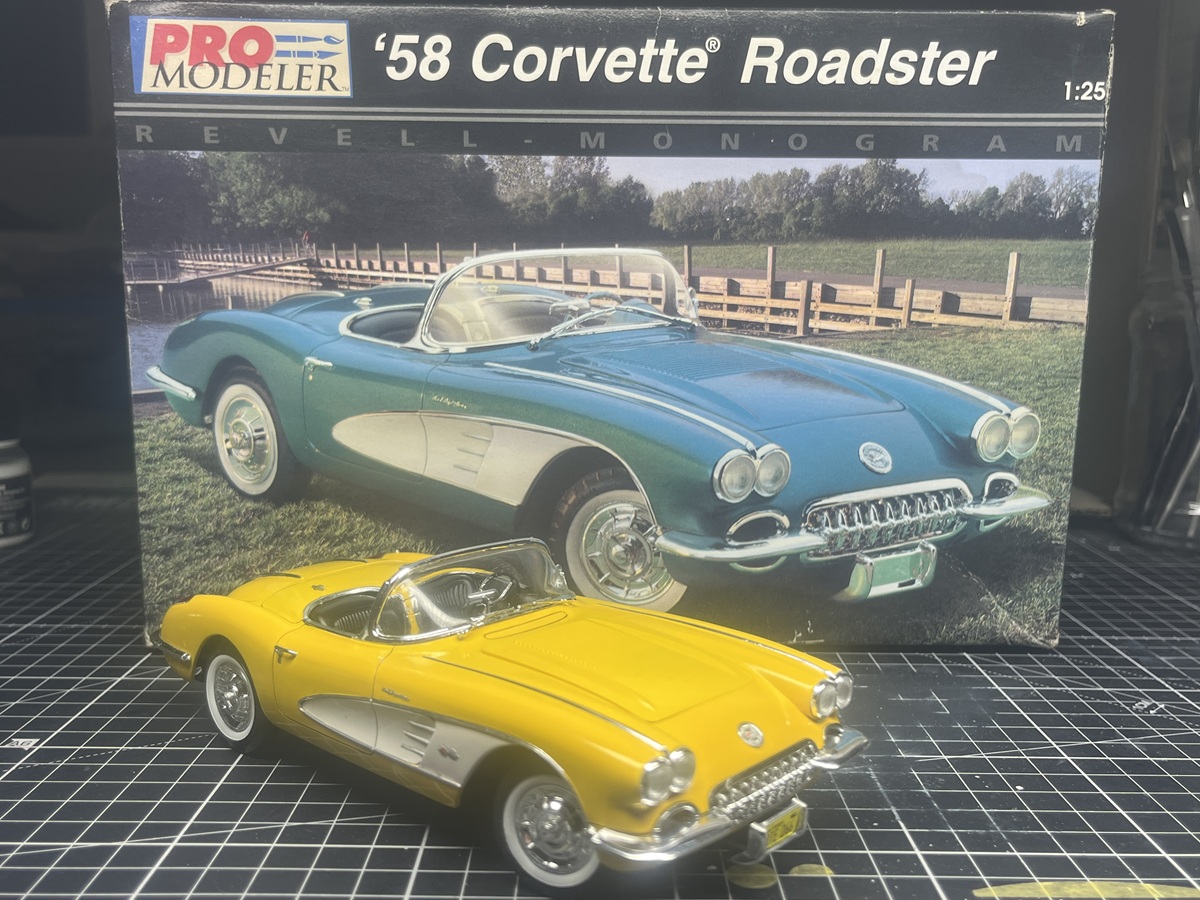
The Revellogram ProModeller kit was quite good to build, a couple of fit issues and a bit of flash here and there but nothing unexpected for a kit that’s 30-odd years old.
I suppose I need to get the family out of the display cabinet and get a group photo now.
I’ve done some work on the ‘59 as well, decided on a colour for the body after some trials, and will post a progress report soon.


