Clever use of your old chilli plant Stephen, it does look the part. The rest of the basework is also starting to come together nicely, 
 .
.
G, 
Clever use of your old chilli plant Stephen, it does look the part. The rest of the basework is also starting to come together nicely, .
G,
Thanks G.
I keep anything that looks like it could be useful.
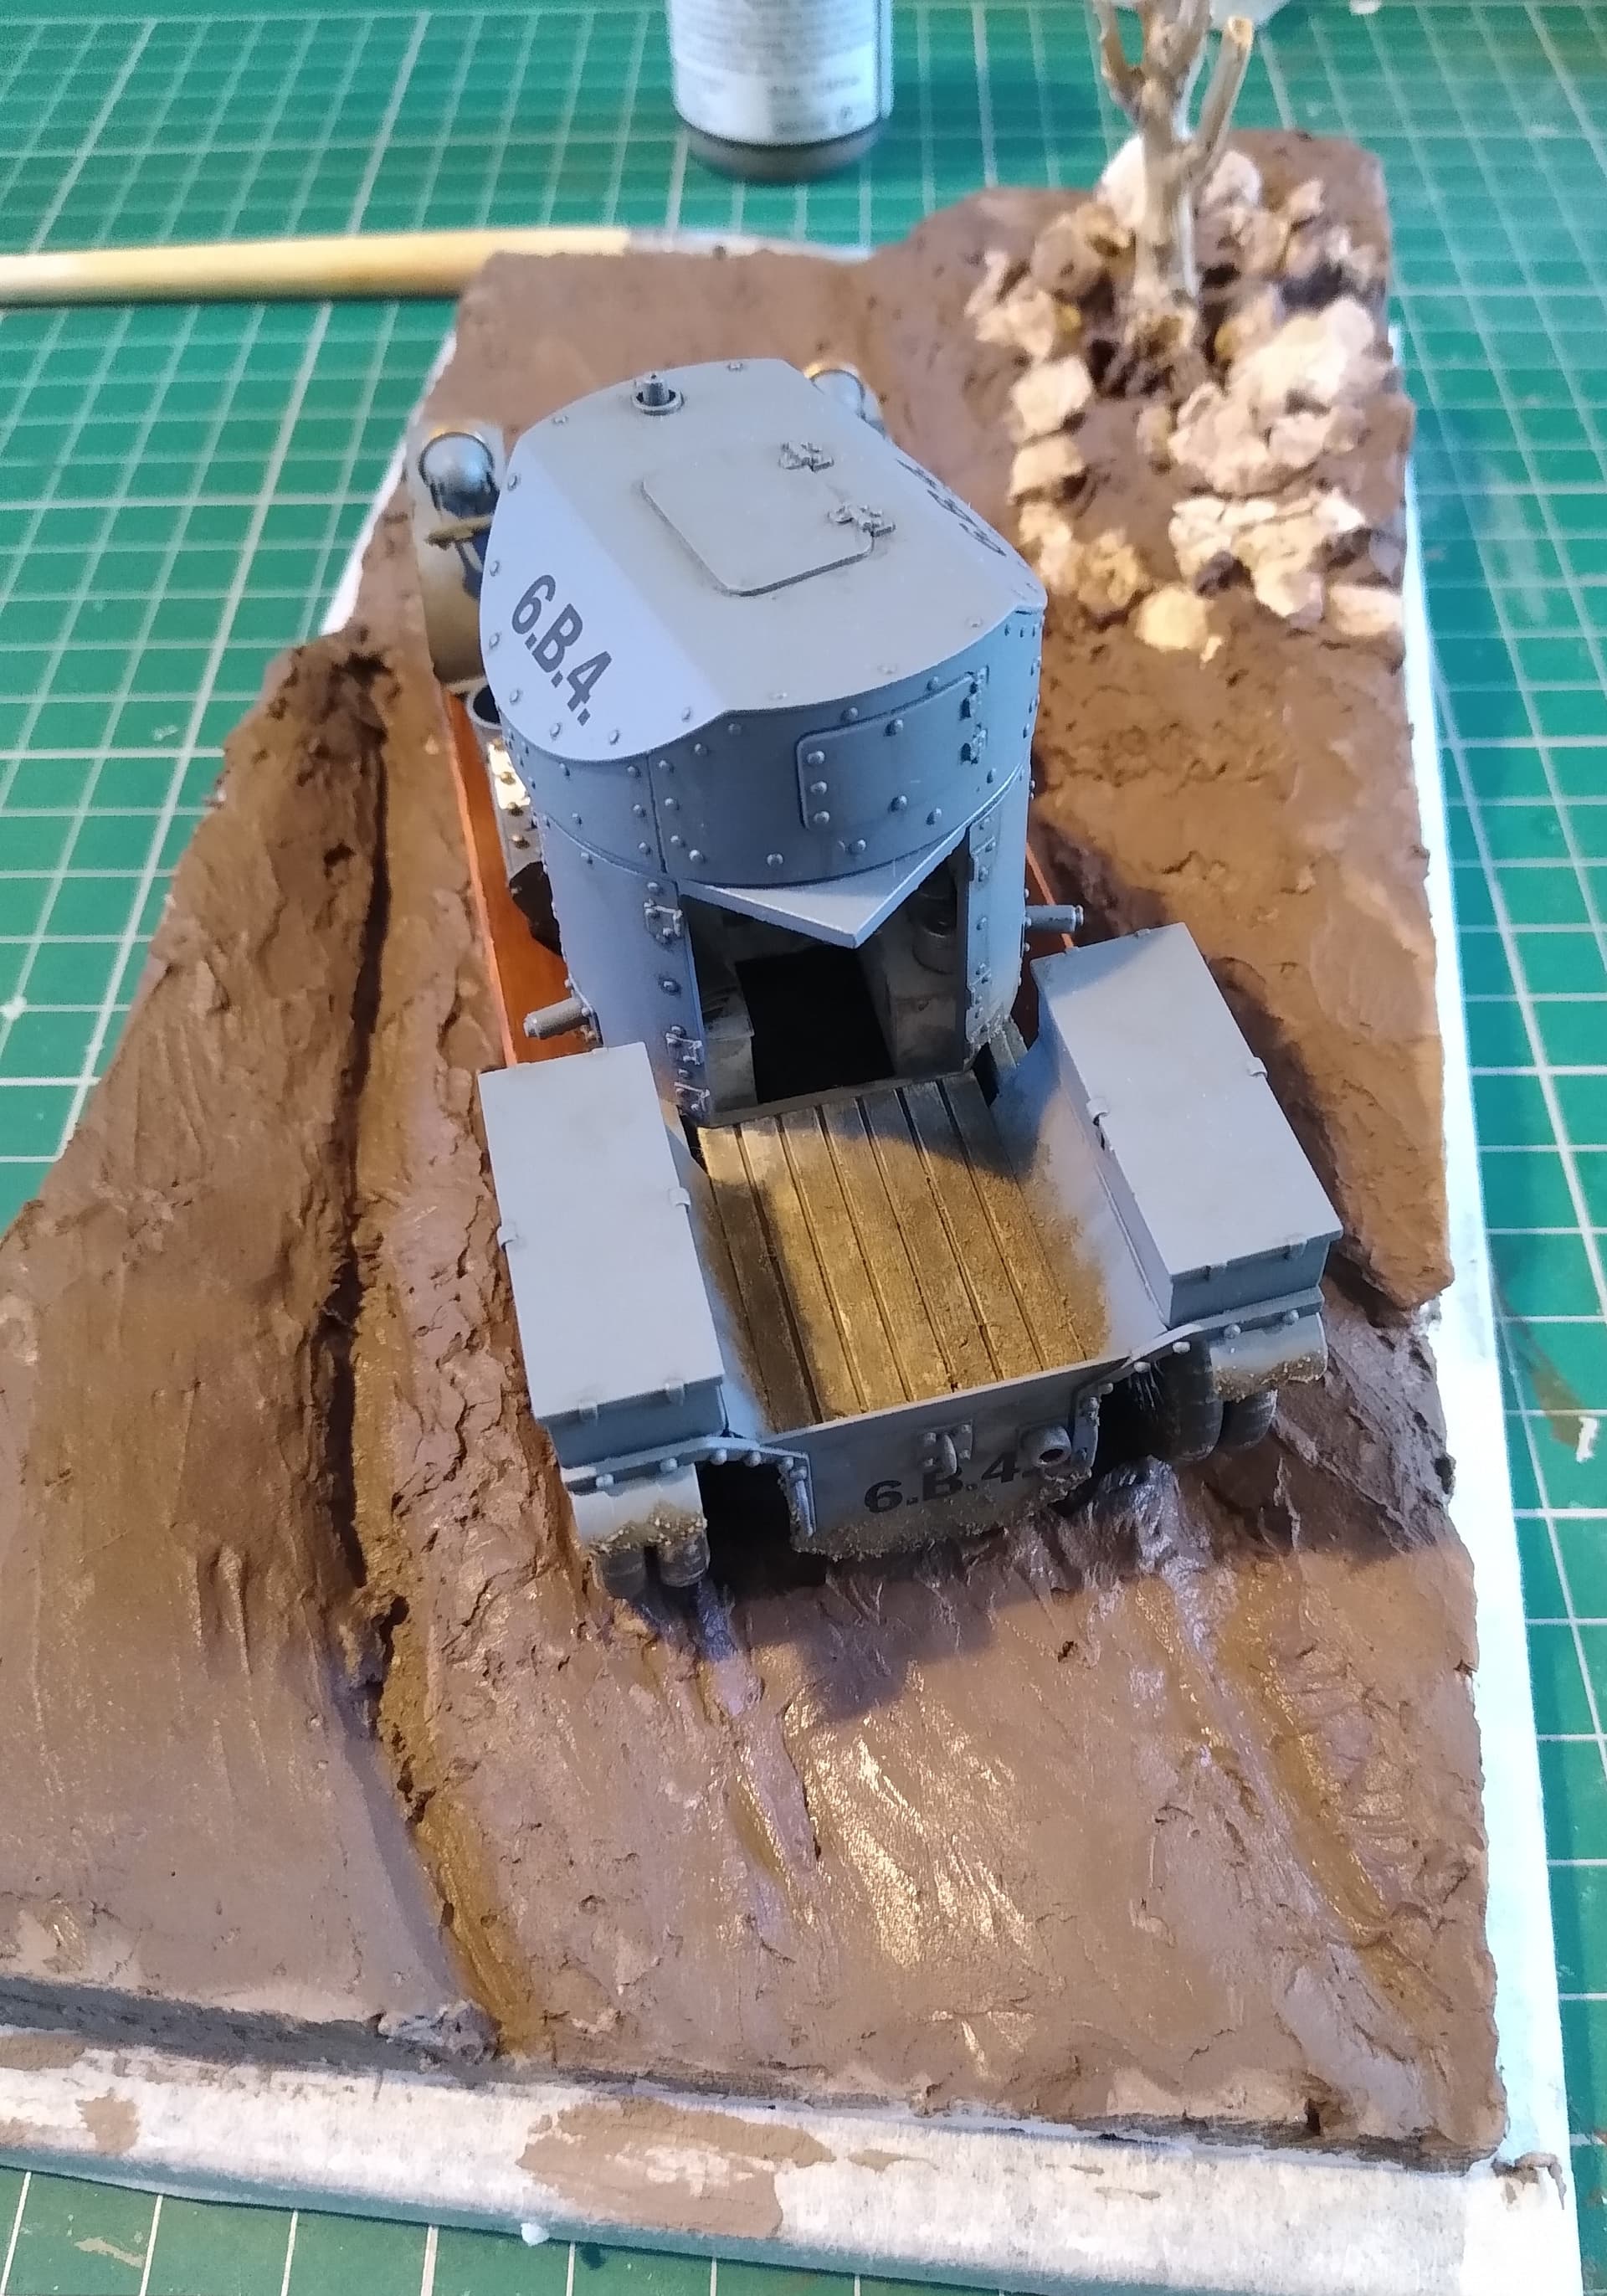
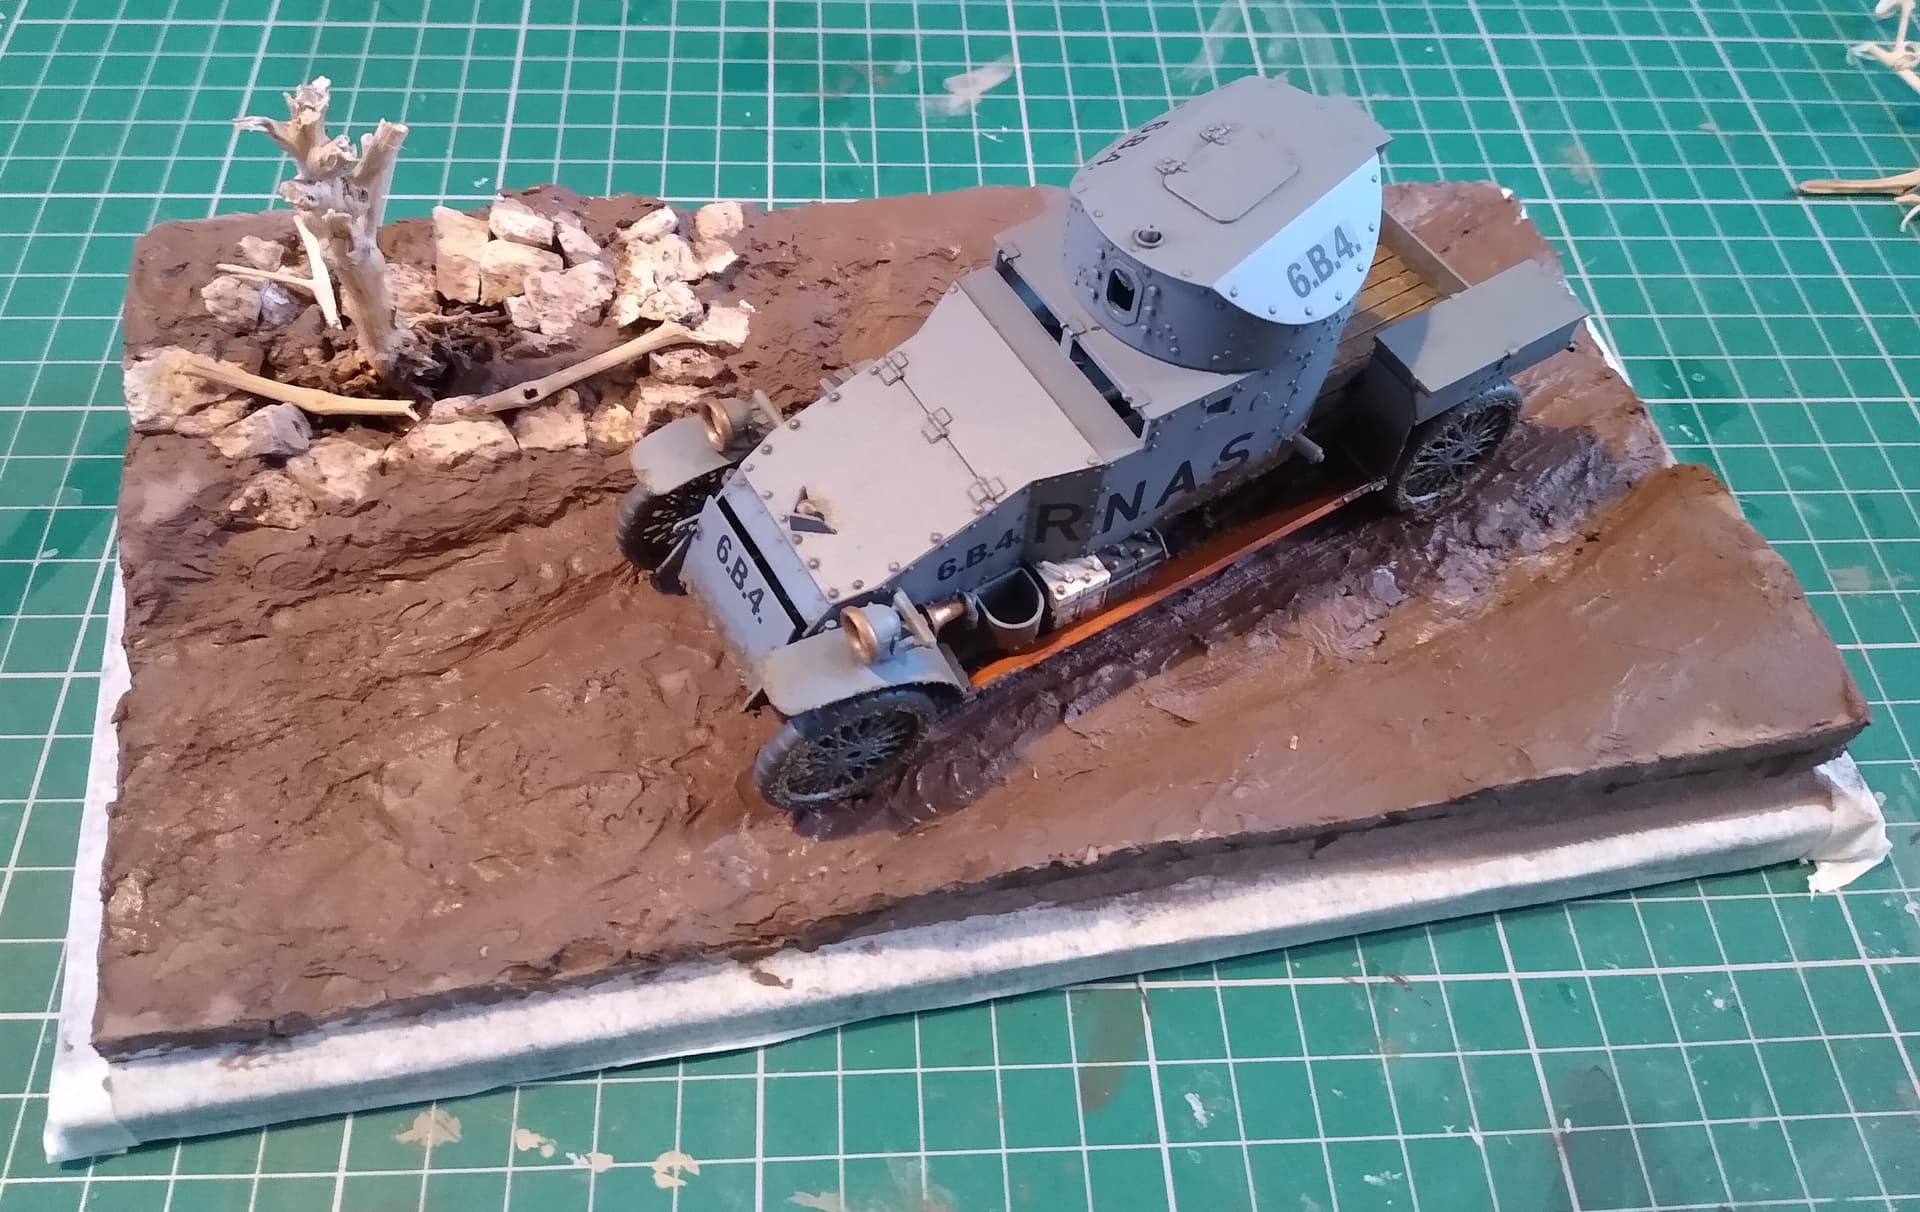
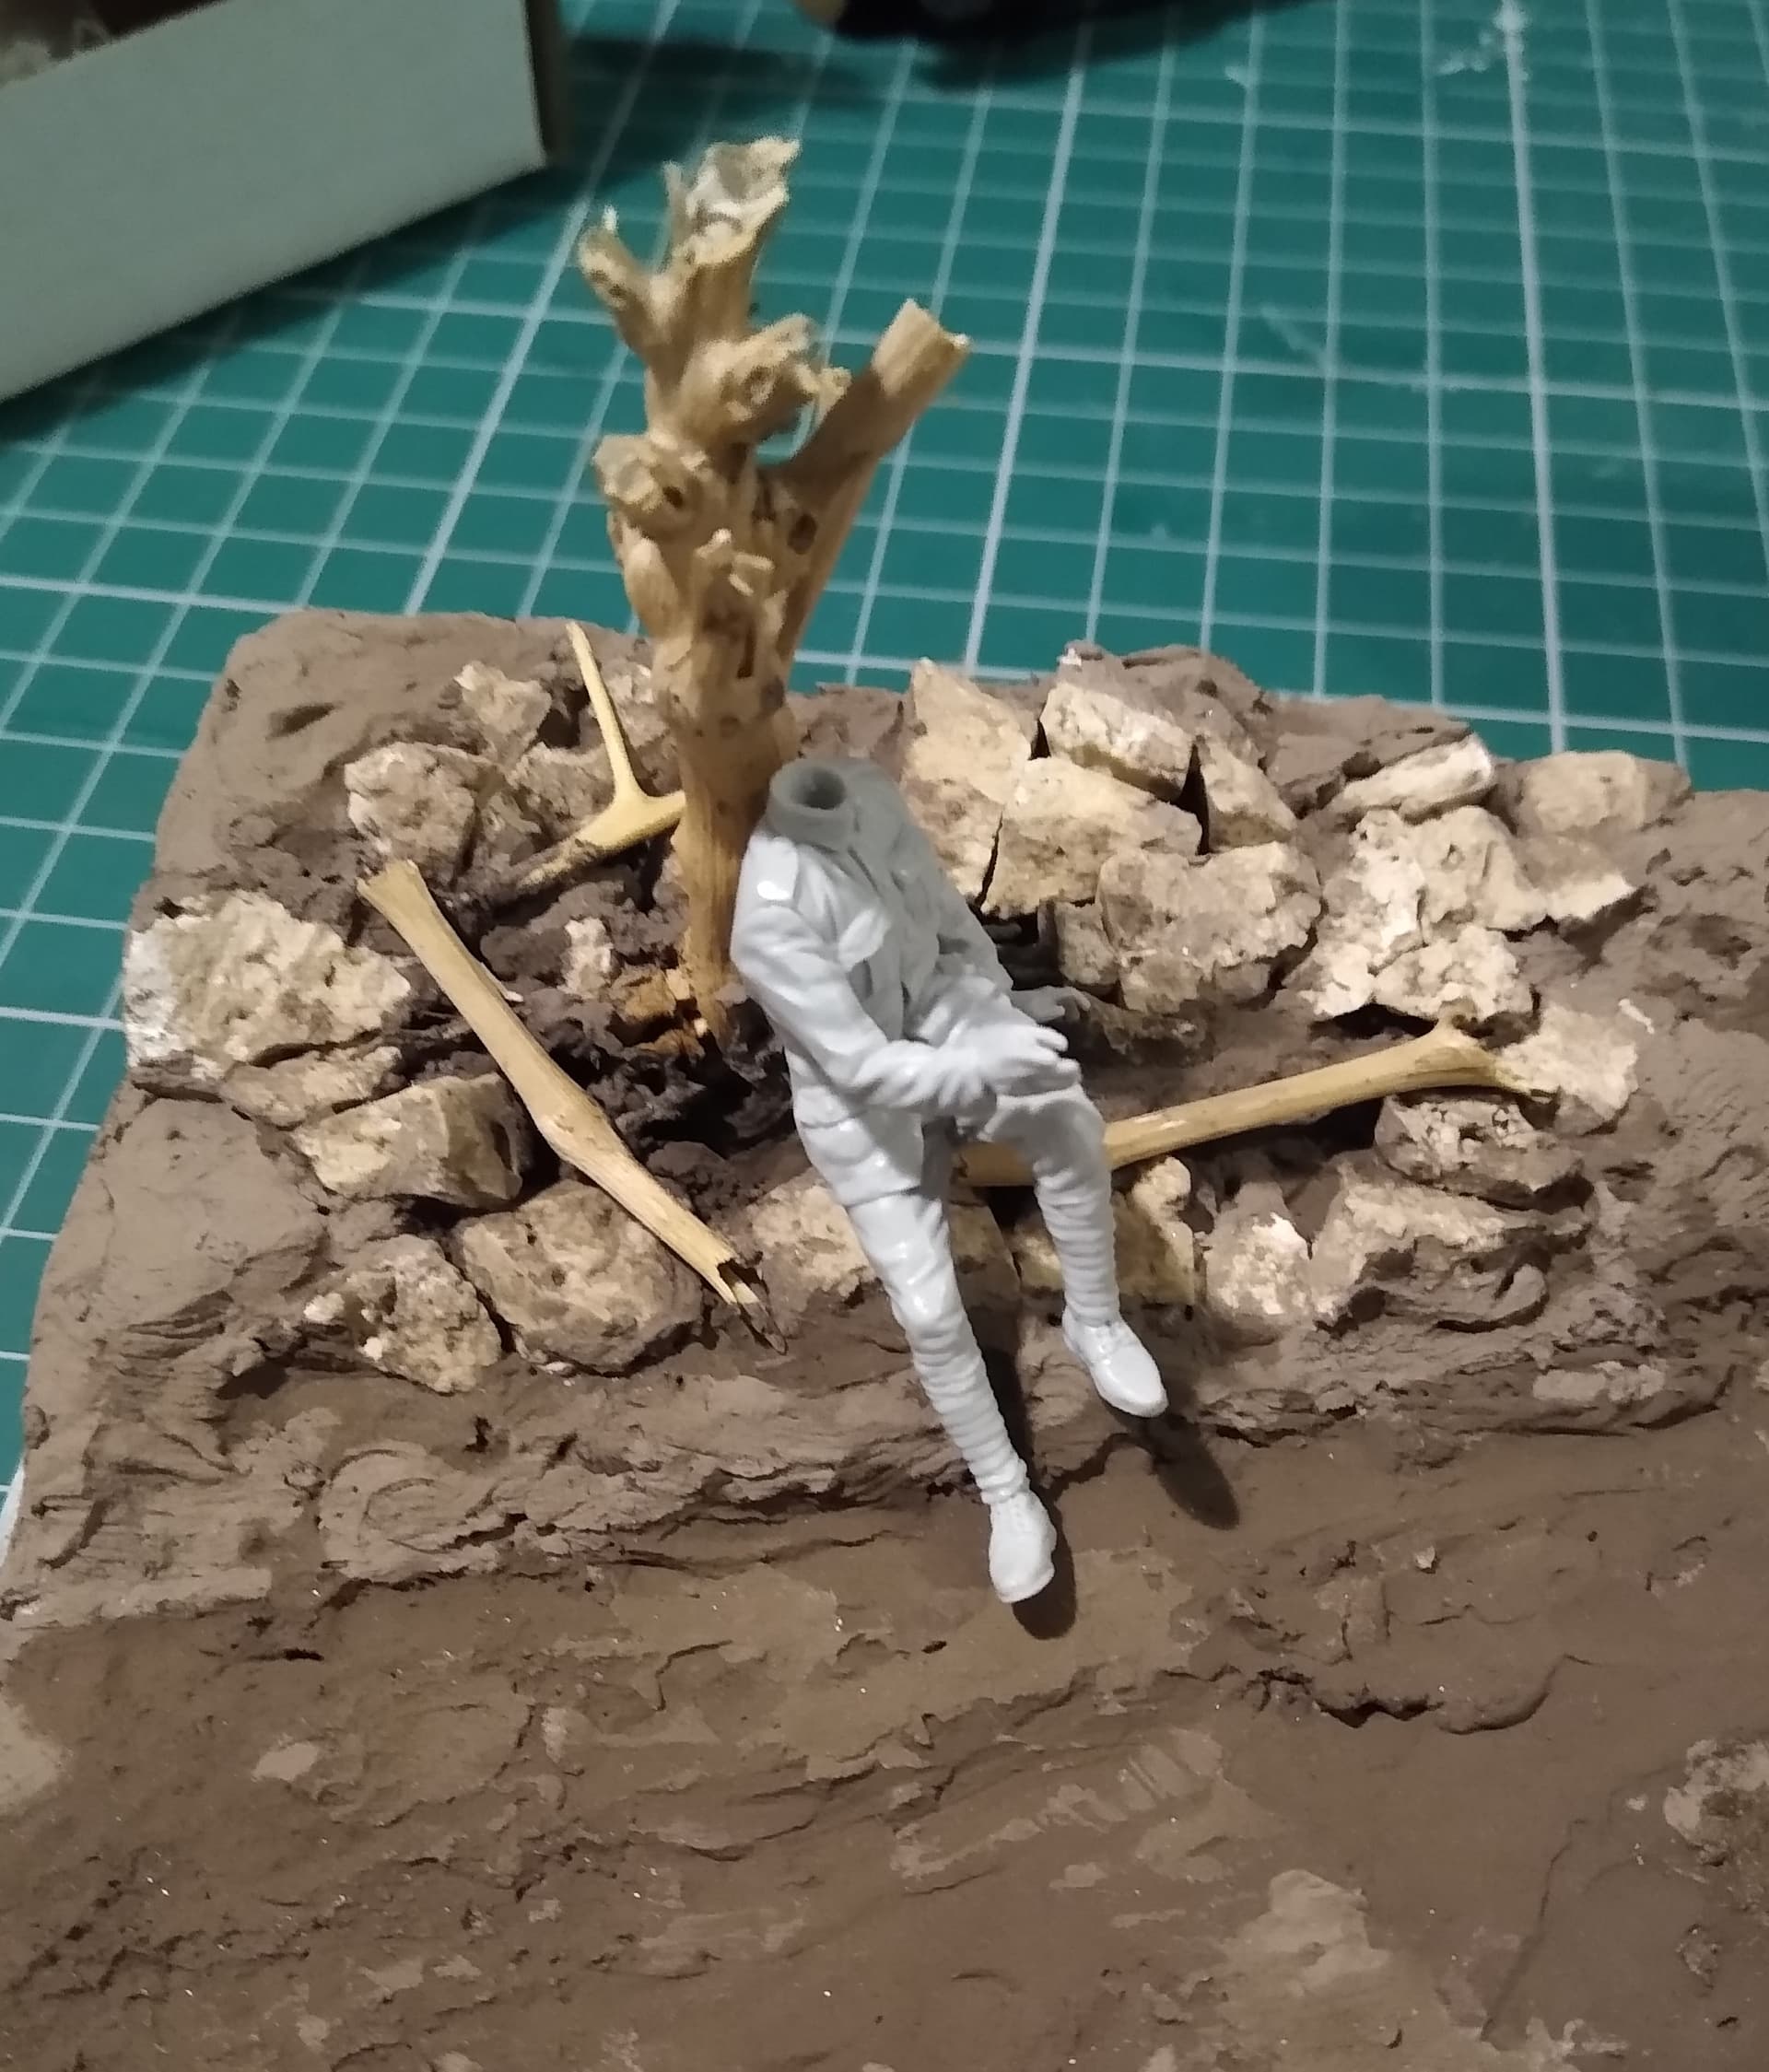
Added the groundwork today. Used a mix of wall filler, raw umber poster paint and some weathering pigments. The car’ just dry fitted to help making the tyre ruts. When it’s all dry I’ll use the same weathering paints as on the car to blend it into the track. I’ve also dug out the various grasses, bushes and other scenic bits from storage in the loft. My aim is to have the car in an early autumn setting, as after about this date their use became more limited as the war ground to a halt.
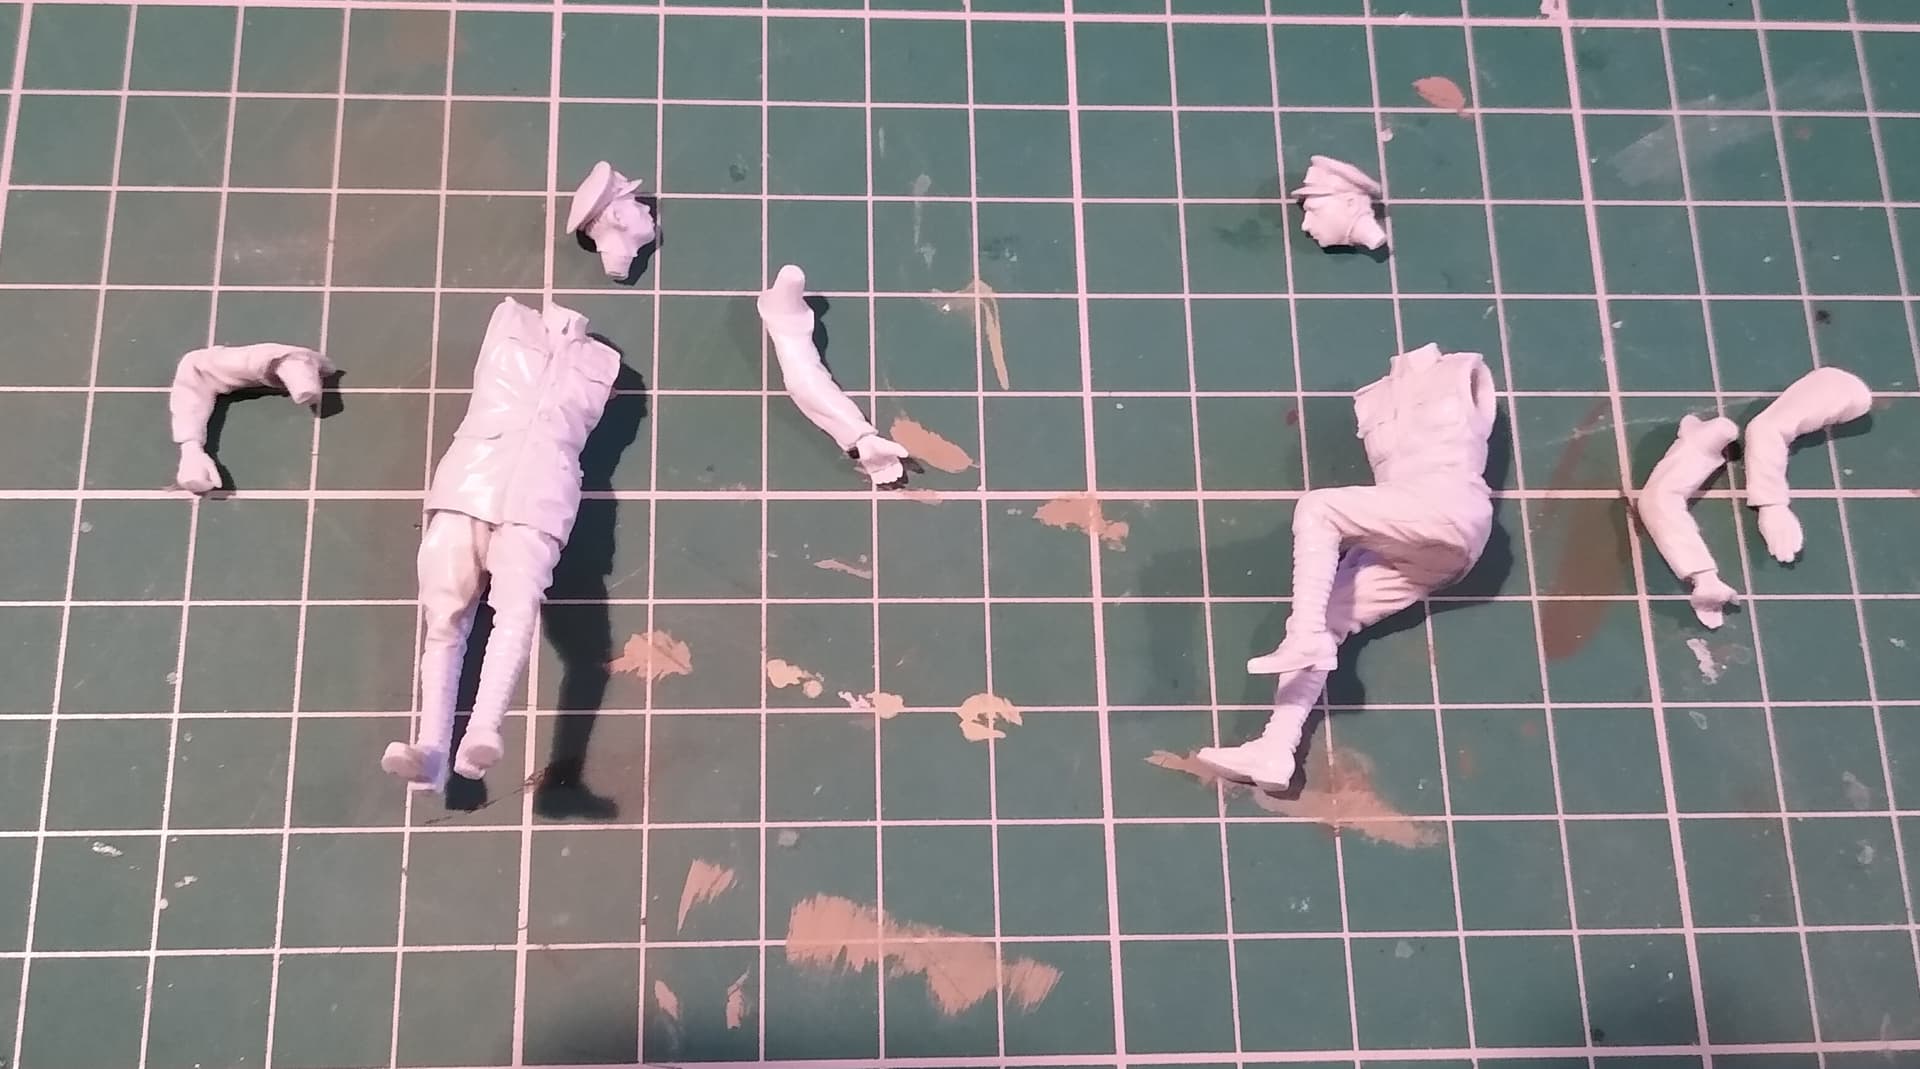
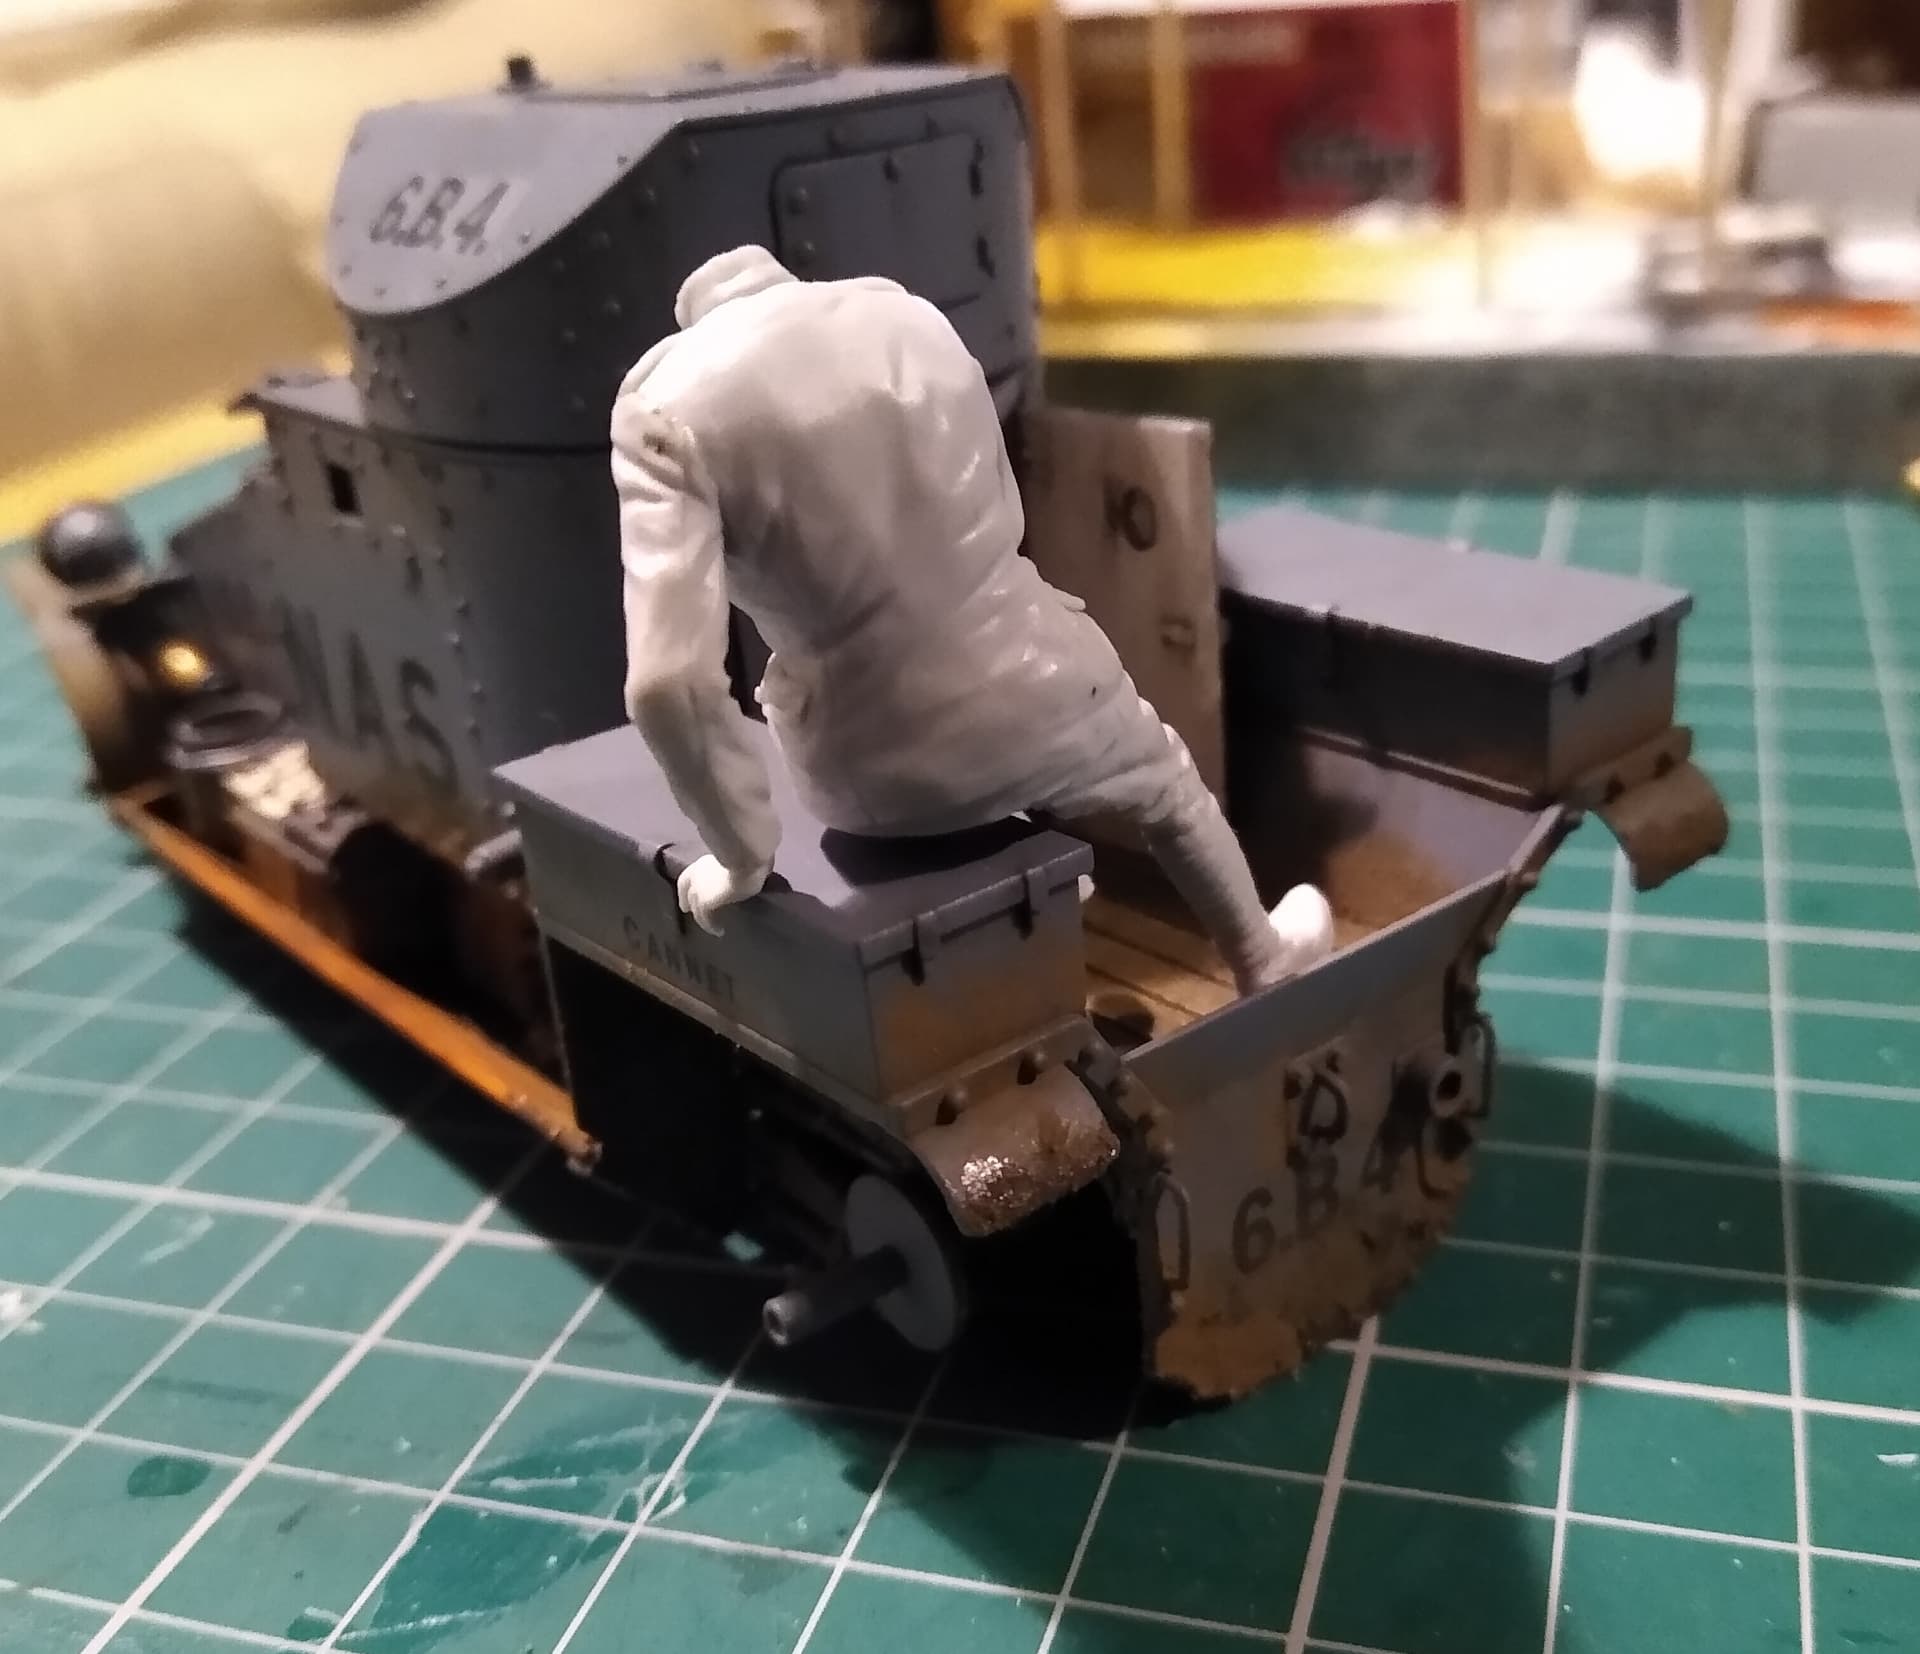
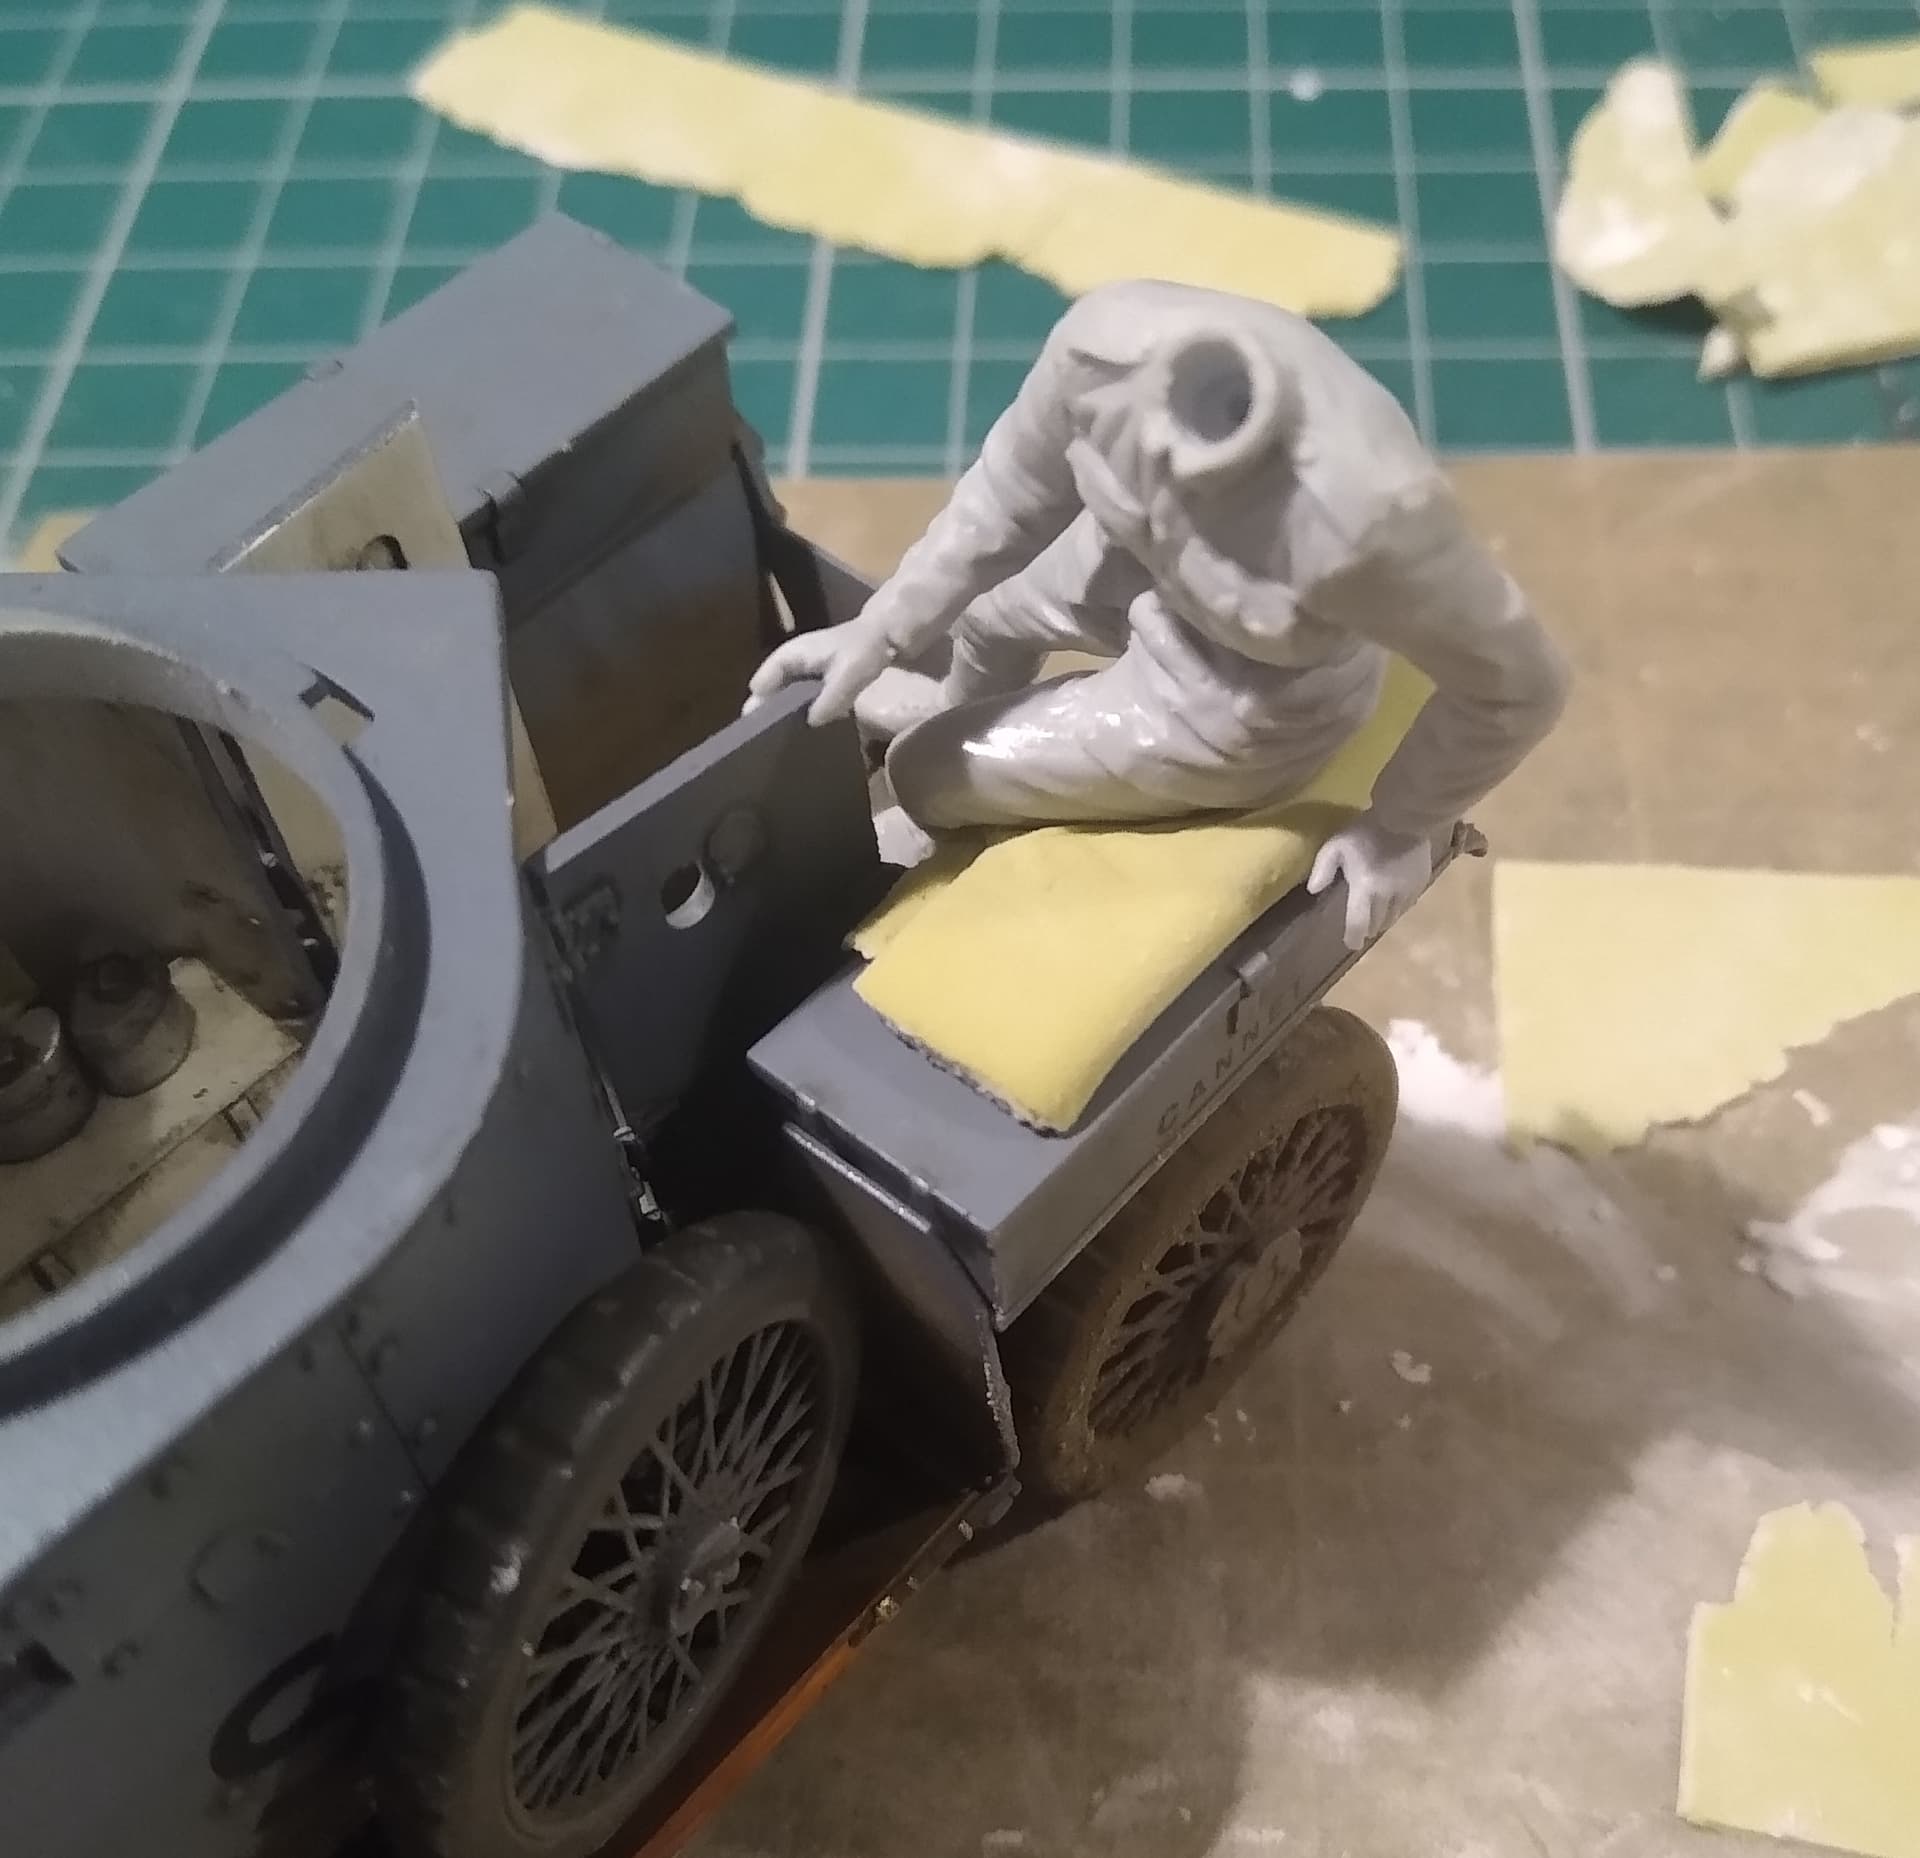
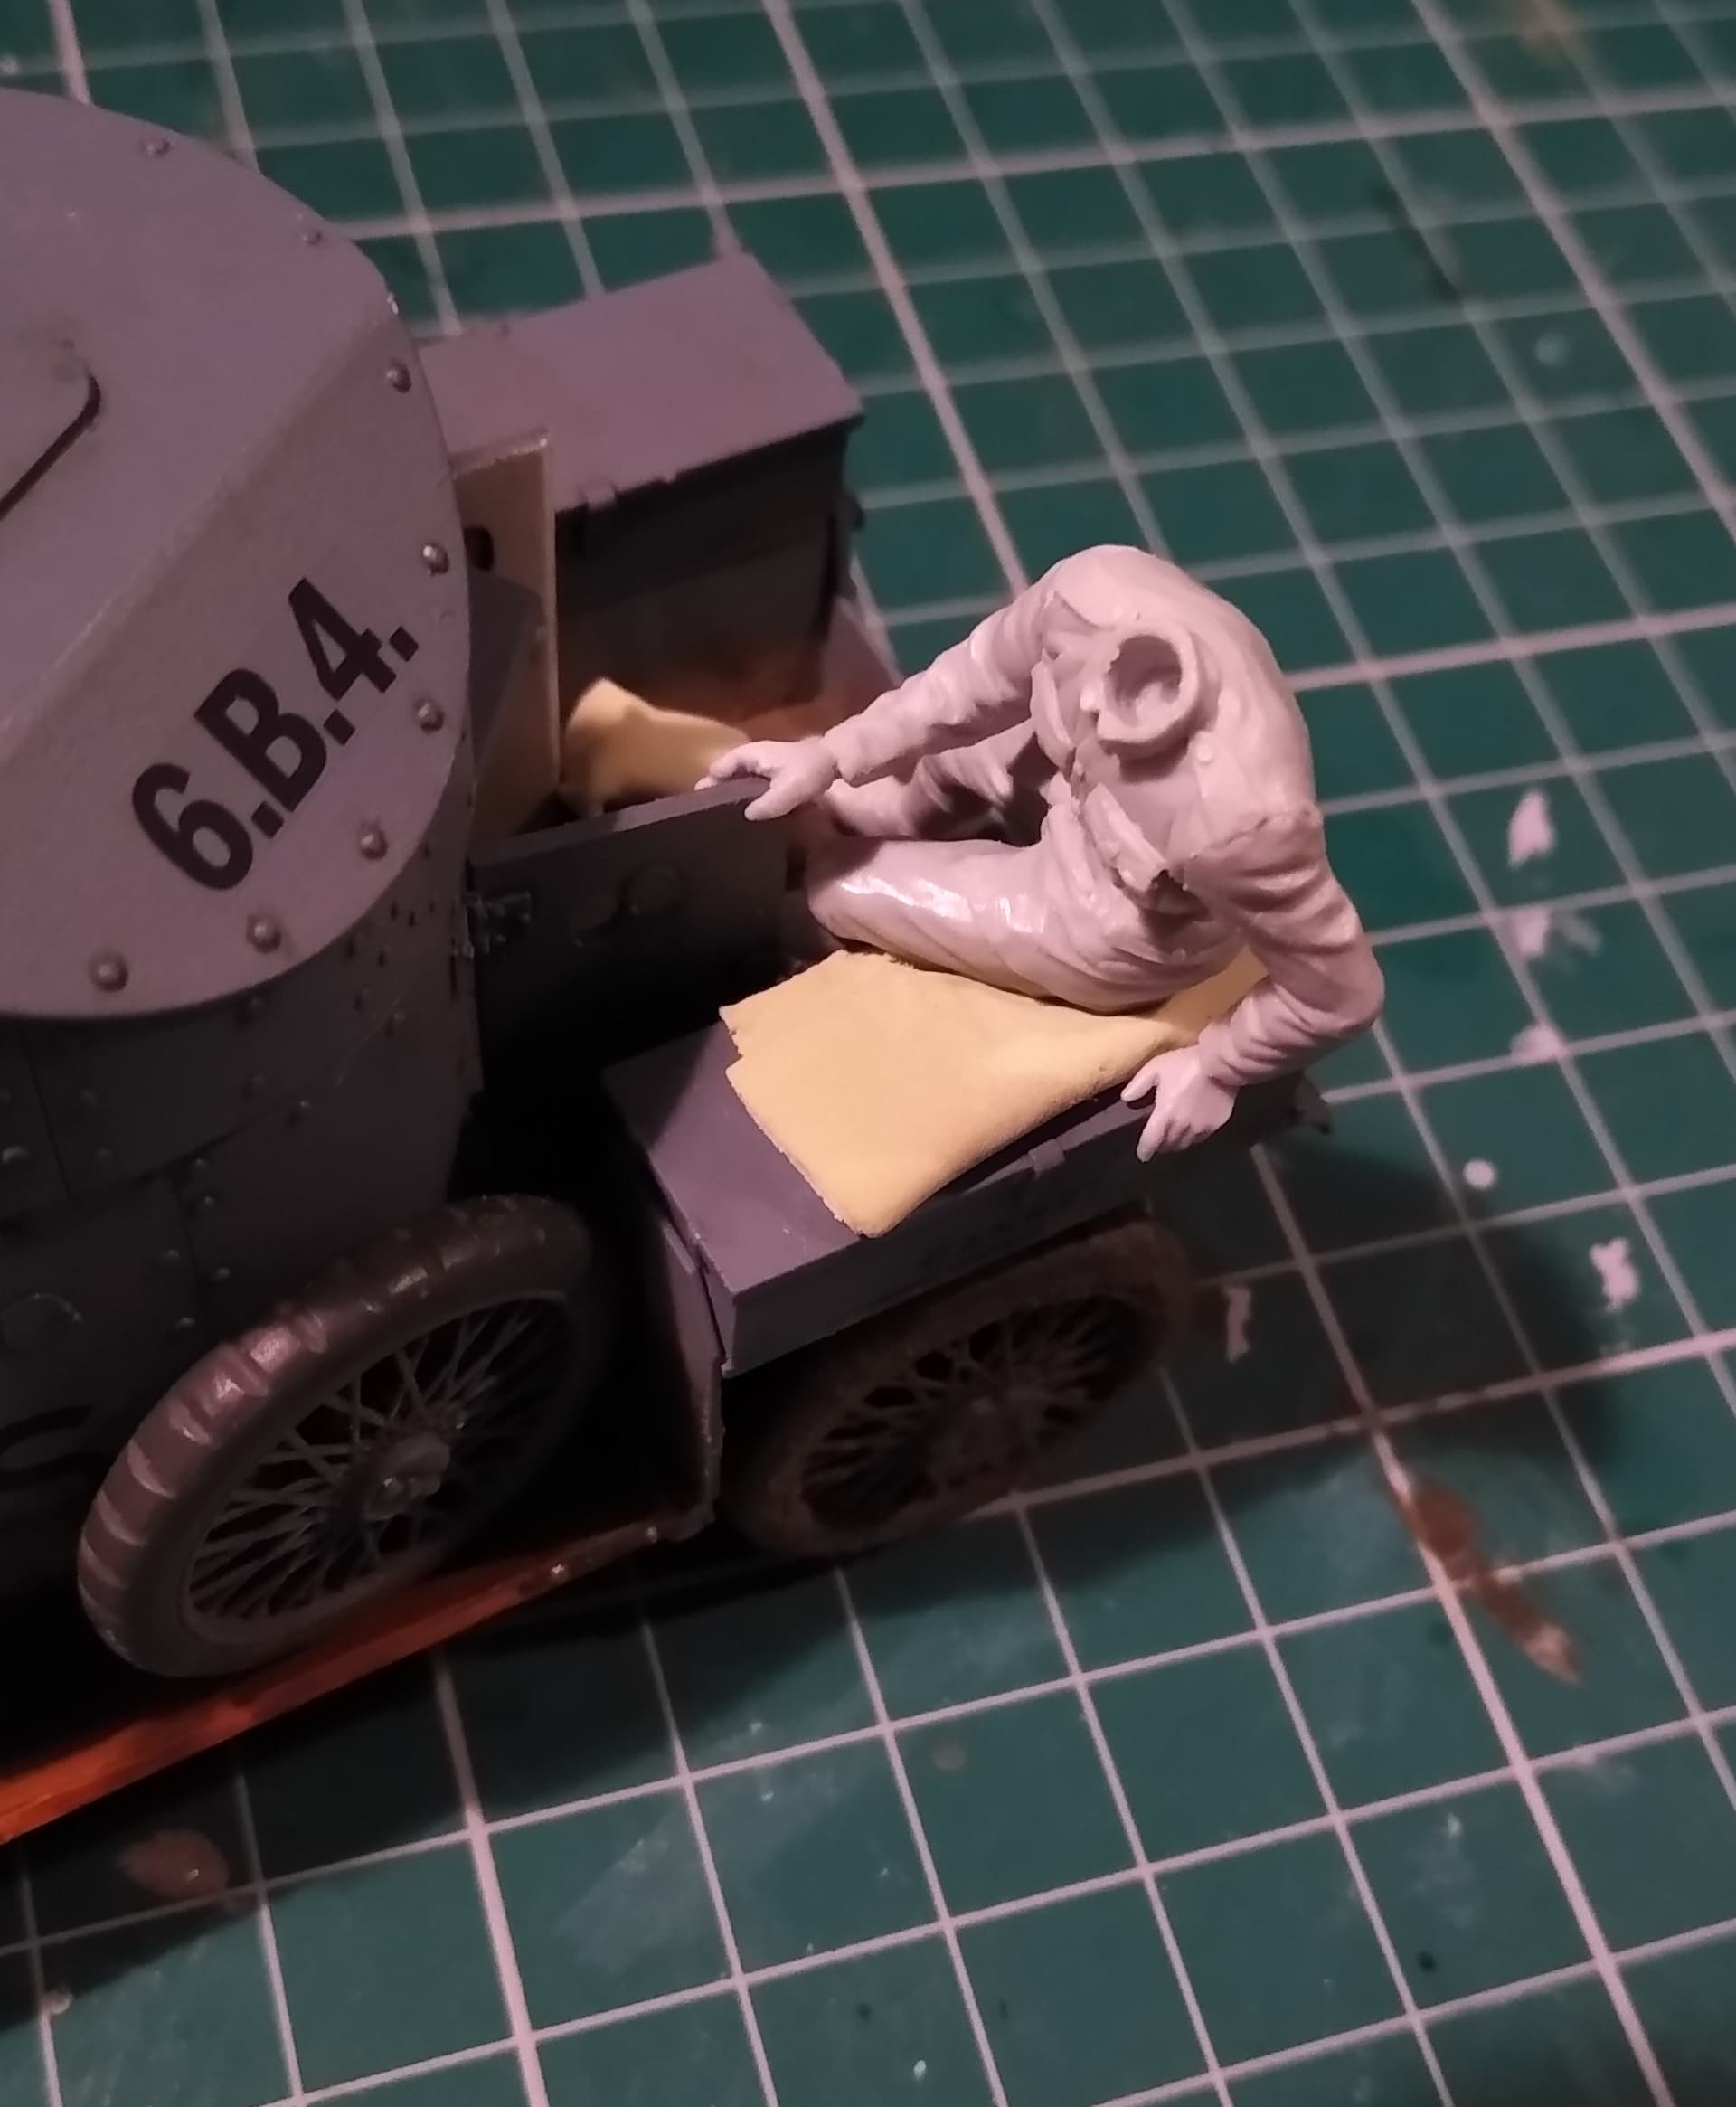
While it’s drying, I made a start cleaning up the crewmen. These are really nicely cast. Only the pour stubs to cut away and sand back. Practically no mould lines or bubbles in the casting.
When assembled, they should go in the back like this. And although it does like they’re about to hold hands, they’re supposed to be leaning on the door!
And that’s about it for today. Back at work tomorrow, so probably won’t get much chance to do anymore until the weekend.
Thanks for looking.
Managed a bit of work today.
Fitted the front visor, doors, some mud on the wheels.
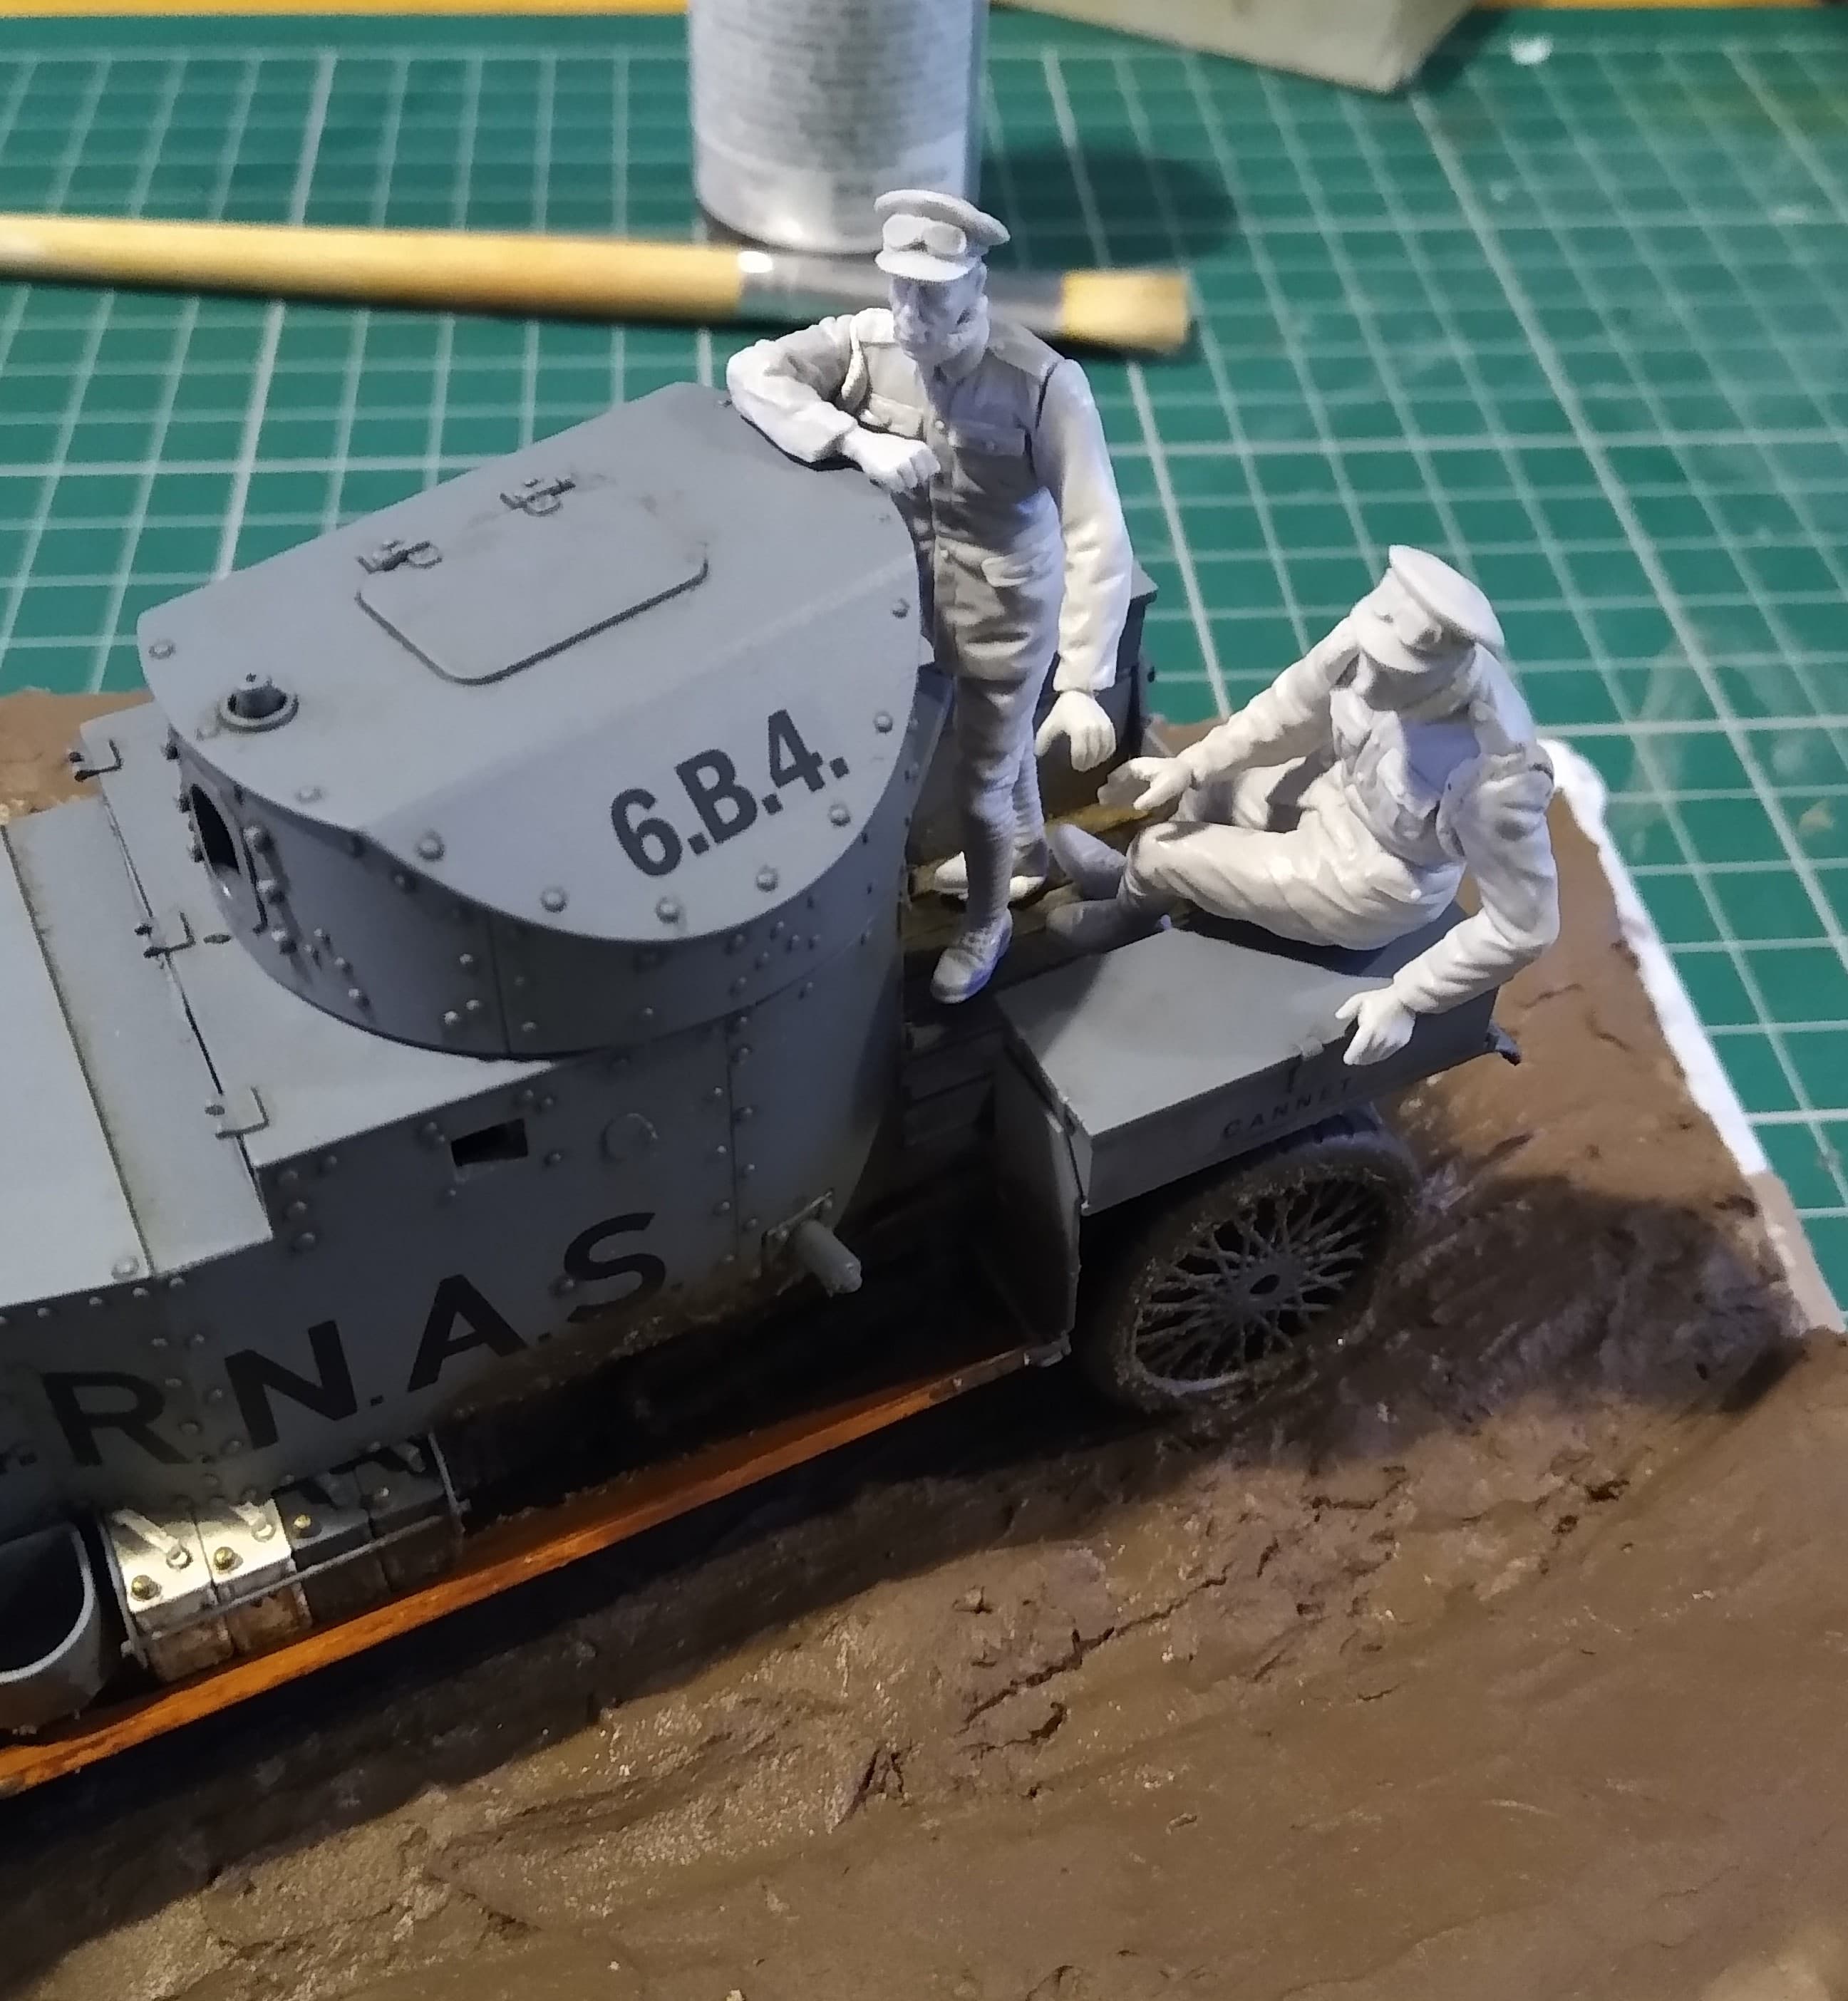
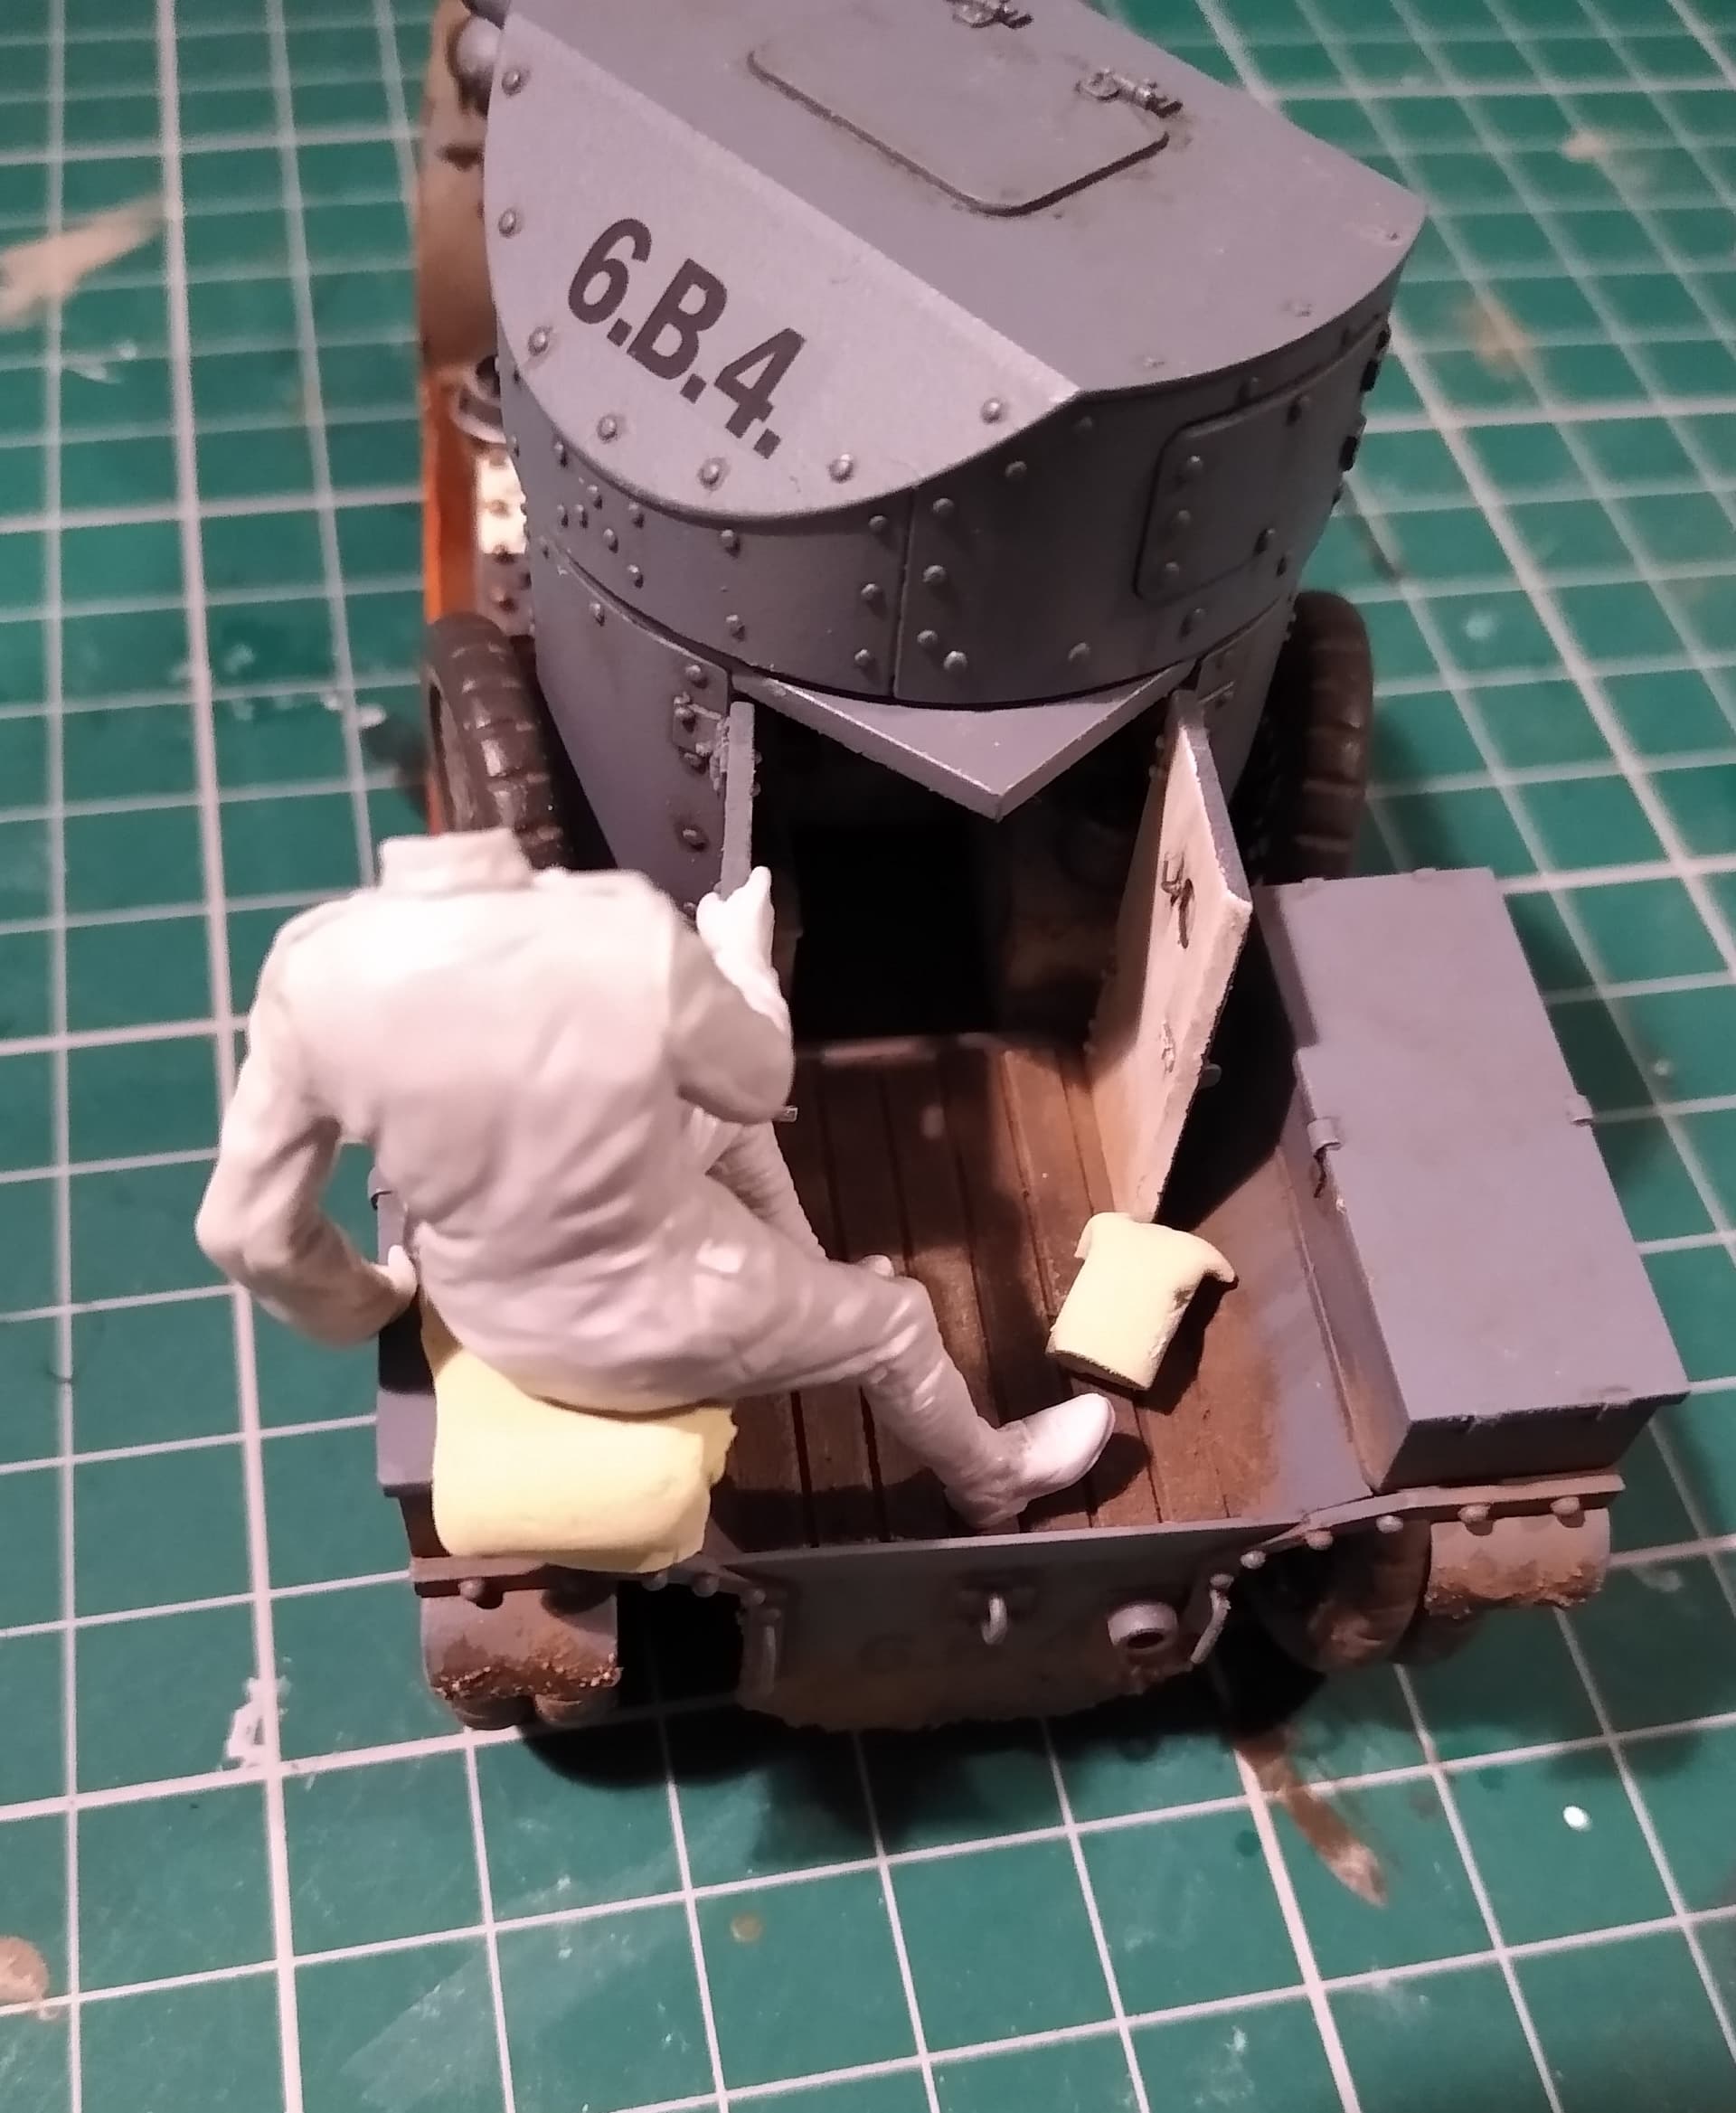
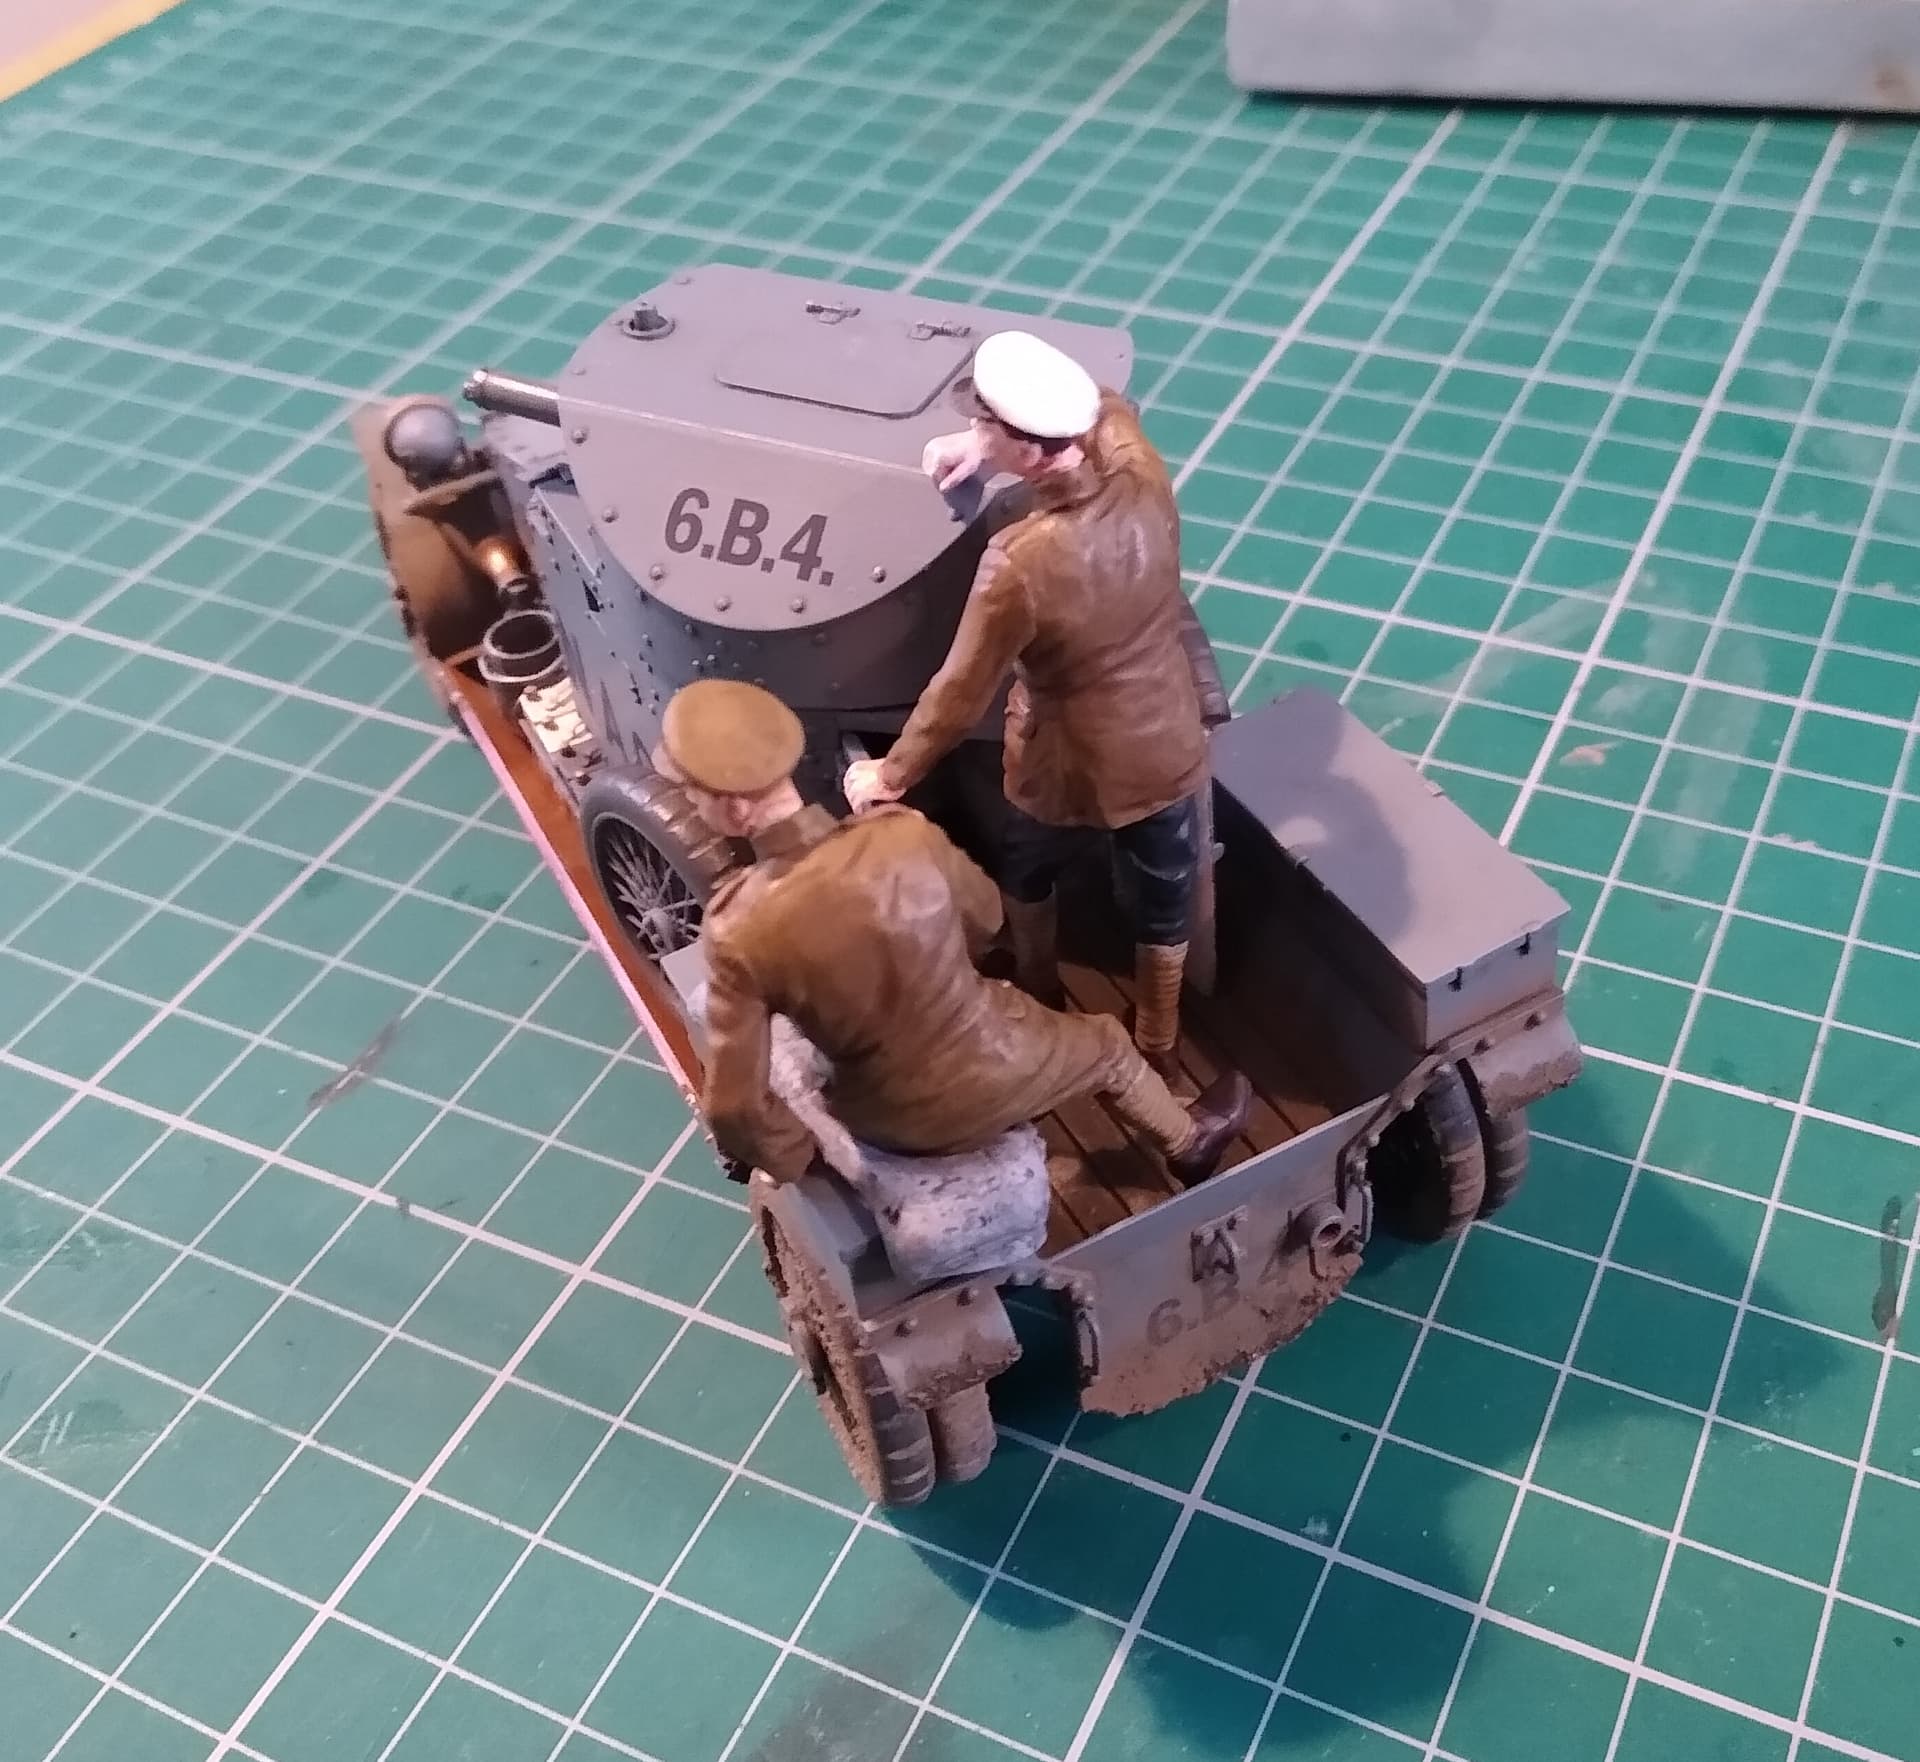
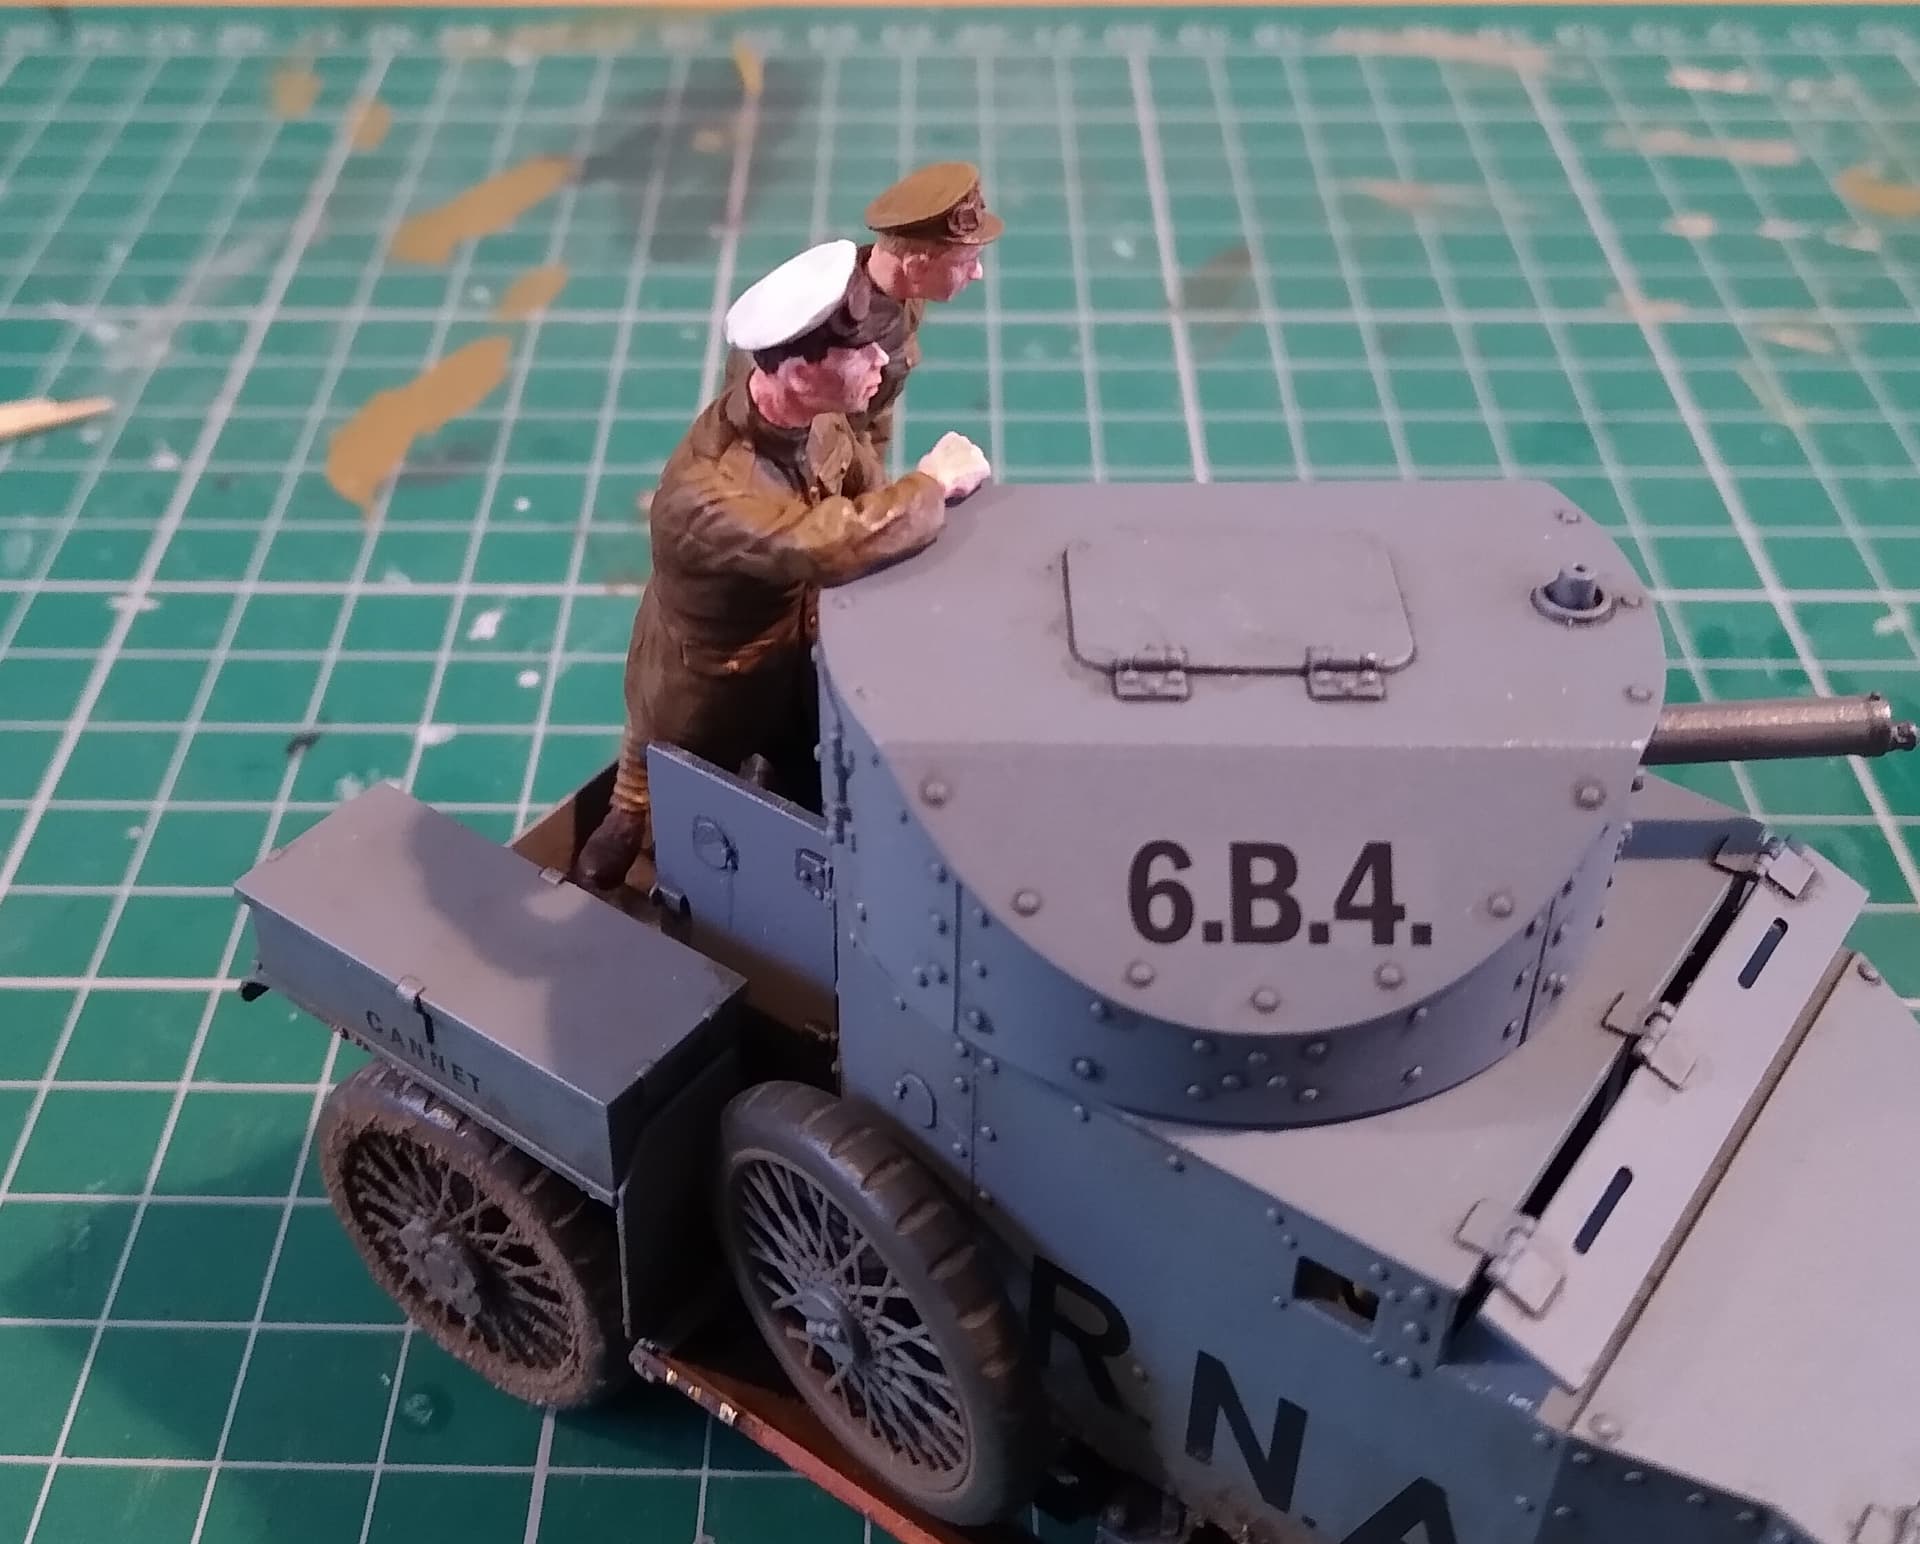
And assembled the crew. Their arms are keyed to fit in place, so there’s not much room for movement. Test fitted them in place and they will need a bit of jiggling. The seated figure in particular, as he is performing some sort of levitation trick. I think a rolled up milliput tarp should solve it. The standing figure fits a little better, straightening his right leg out should help.
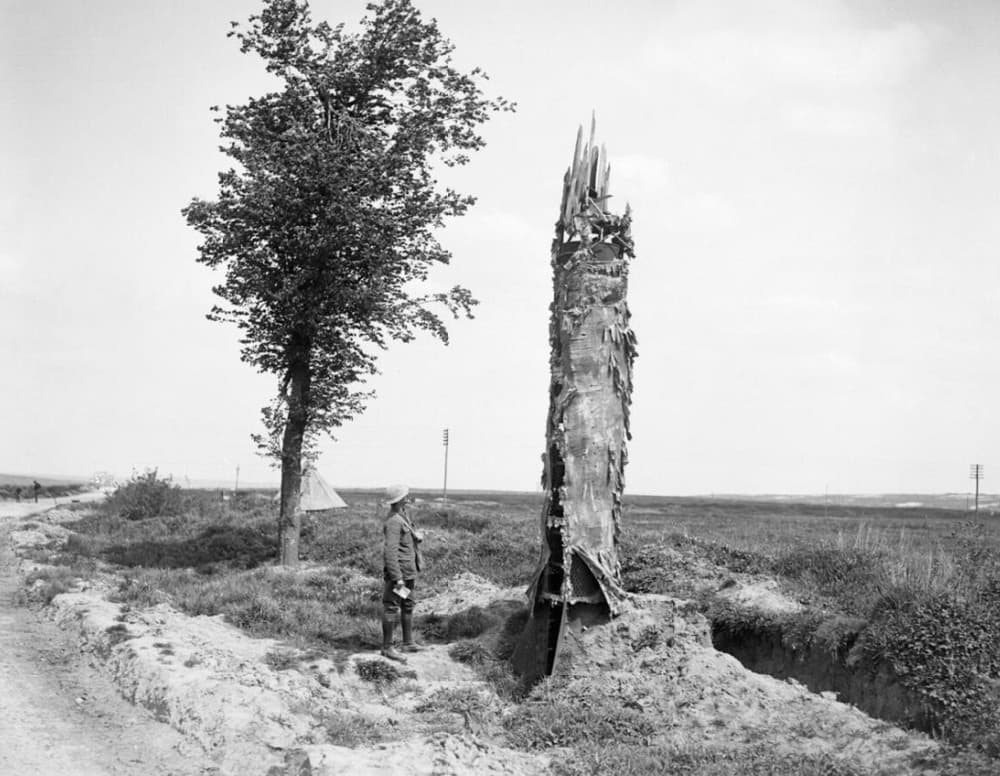
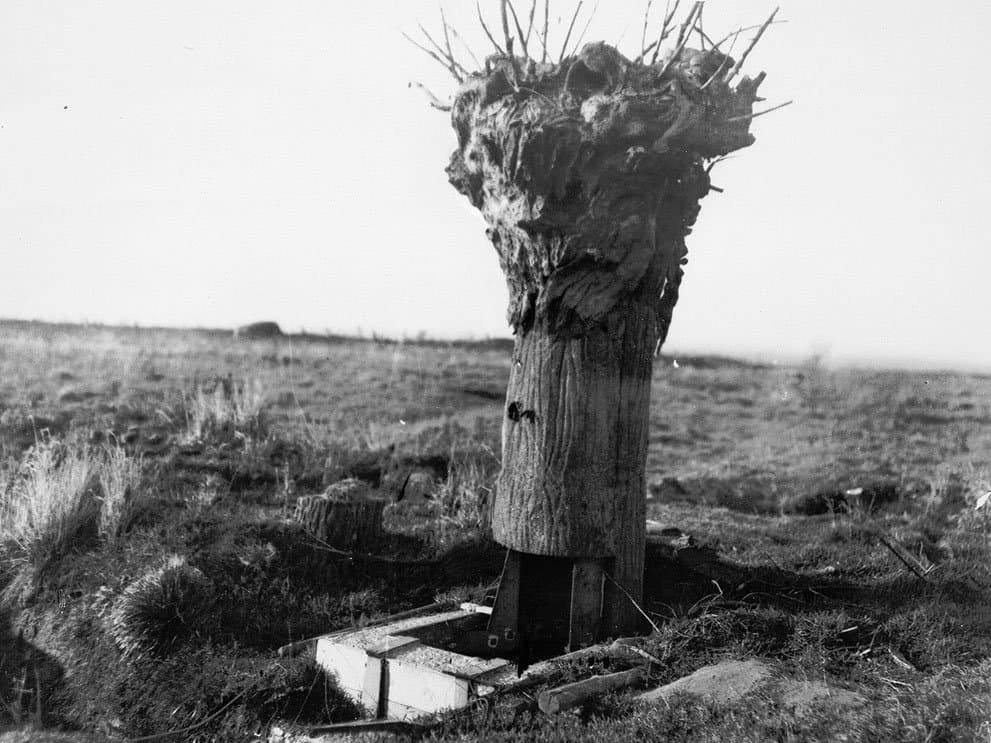
The observation trees!
Now that would make an interesting project.
I was thinking that the Lanchester might be passing a German observatree and the entrance hatch would be facing towards the corner of the base plate so as to be hidden for the soldiers in/on the car but visible for those viewing the diorama from the outside.
German observer dead or alive is optional …
Unfortunately it’s a bit too small for an observation tree.
Although, that is a brilliant idea! I’ve got a bunch of other WW1 vehicles and figures in the stash, so will certainly try to do something like that in the future. Thanks.
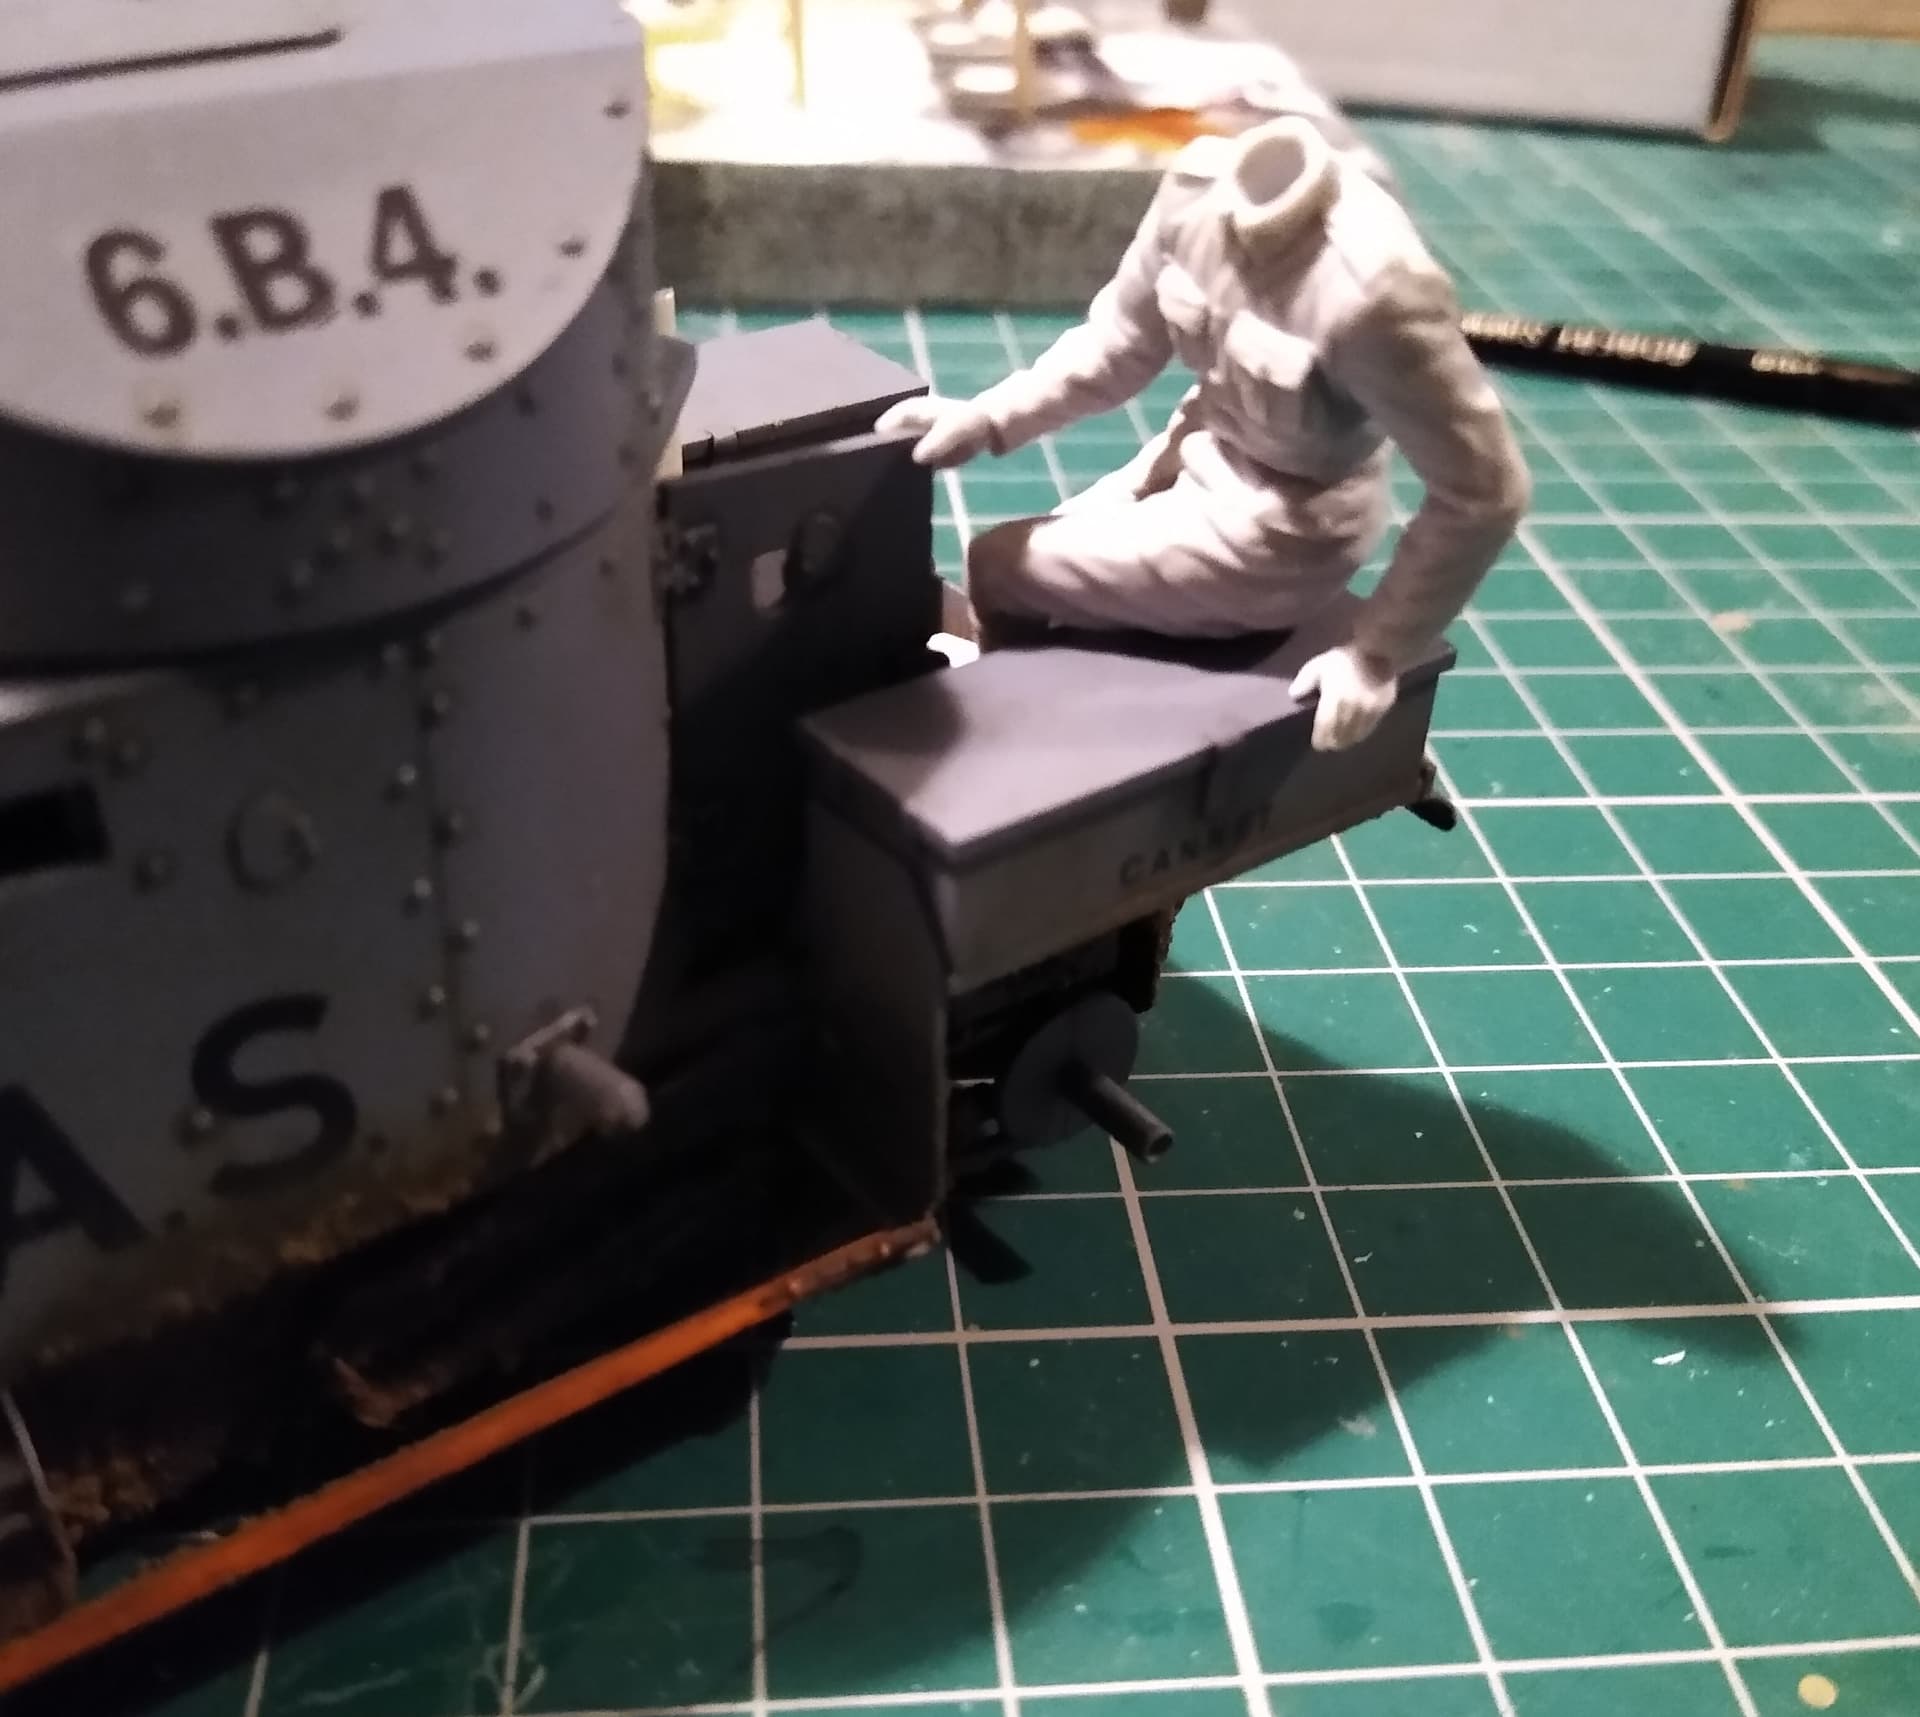
I think that’s solved the problem. We’ll see if he still fits correctly when it’s all set. Plenty of milliput in the packet if not.
Would the roll of tarp be soft enough for his “derrière” to make an indentation?
Yes, I’ve pushed him in just enough so both his hands are holding the door and sides of the bin.
If it doesn’t work out I’ll try again. I might have made too much of it. We’ll see how it goes.
I think what Robin means is, would the tarp actually recess that much in real life? Canvas is very thin and dense.
If it were a woollen blanket roll it would be different, but the length would need to be half what you have. Given the rough ride these things gave passengers, it would not be out of the question for the soldier to grab a blanket roll from out of the cargo bay and put it on the box to save backside bruising!
Good point.
To be honest this was about the only solution I could think of to solve the problem of the gap under him. A wool blanket makes sense.
It’s a first attempt so I’ll see how it all looks and fits when it’s set.
Plenty more milliput in the roll if it looks crap.
It was an open question. Not leaning either way, more to be taken as:
Have you considered ‘indentation by posterior’ or is the rolled tarp/blanket
stiff as sheet metal or is it soft.
Canvas tarps can be fluffy/springy if they haven’t been rolled to be compressed.
Especially if the tarp has been folded once or twice in one direction and folded
again in another.
Flattened folds which, if not loaded by soldierbutt, would be rounded.
Maybe too “fluffy”
More like what I was thinking
That’s helpful stuff thanks.
To be honest this is only the second attempt I’ve made using rolled out milliput, so I think I need to practice more.
The last was on a 1/72 Sherman years ago, back when I was only working in small scale (just didn’t have the space for 1/35). Was never happy with how it looked at the time.
I might try and bend up his right leg at the knee. His foot is resting on the floor and if I can bring it up, it might help lower him down a bit.
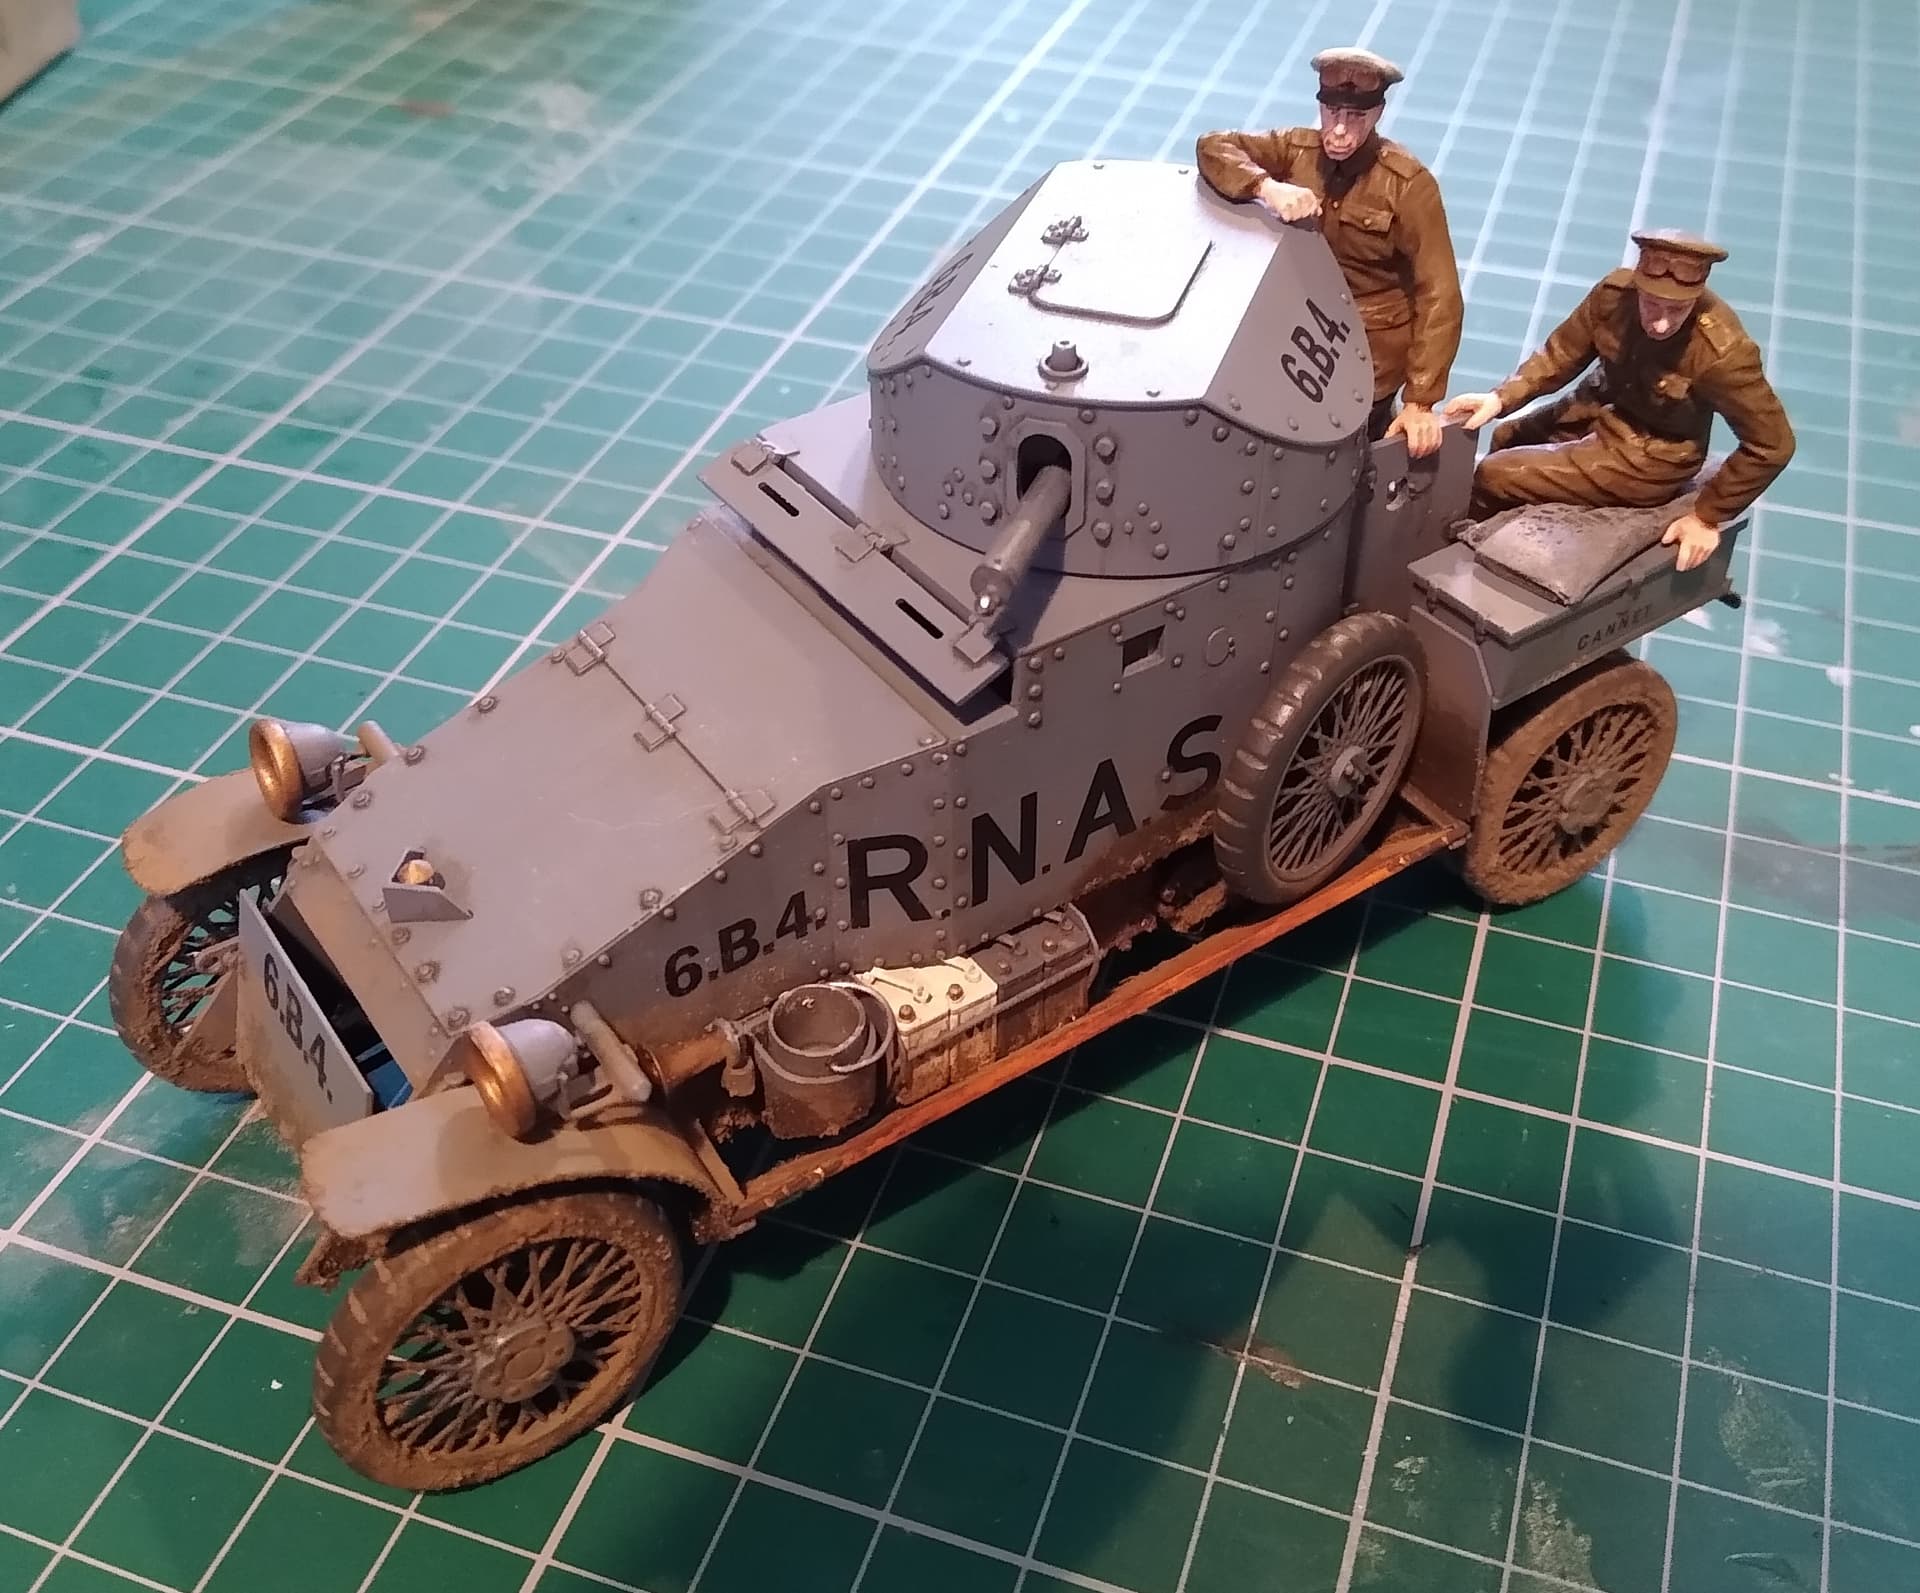
The car is know complete and I’m not going to let this guy this stop me in my tracks while I’m on a roll here!
Weeelllll,… you have rolled two more tarps from Milliput than I have 
It’s something I think will definitely improve with practice.
I’ll keep at it.
First chance I’ve had to have a look at this all week.
Work has been stressful this week and my other half has not given me a chance to sit down today. Several hours wasted with shopping and then wrestling with a broken washing machine to make way for its replacement next week.
Real life. Who needs it?
I’m happy with how he’s sitting now. Time for some paint.
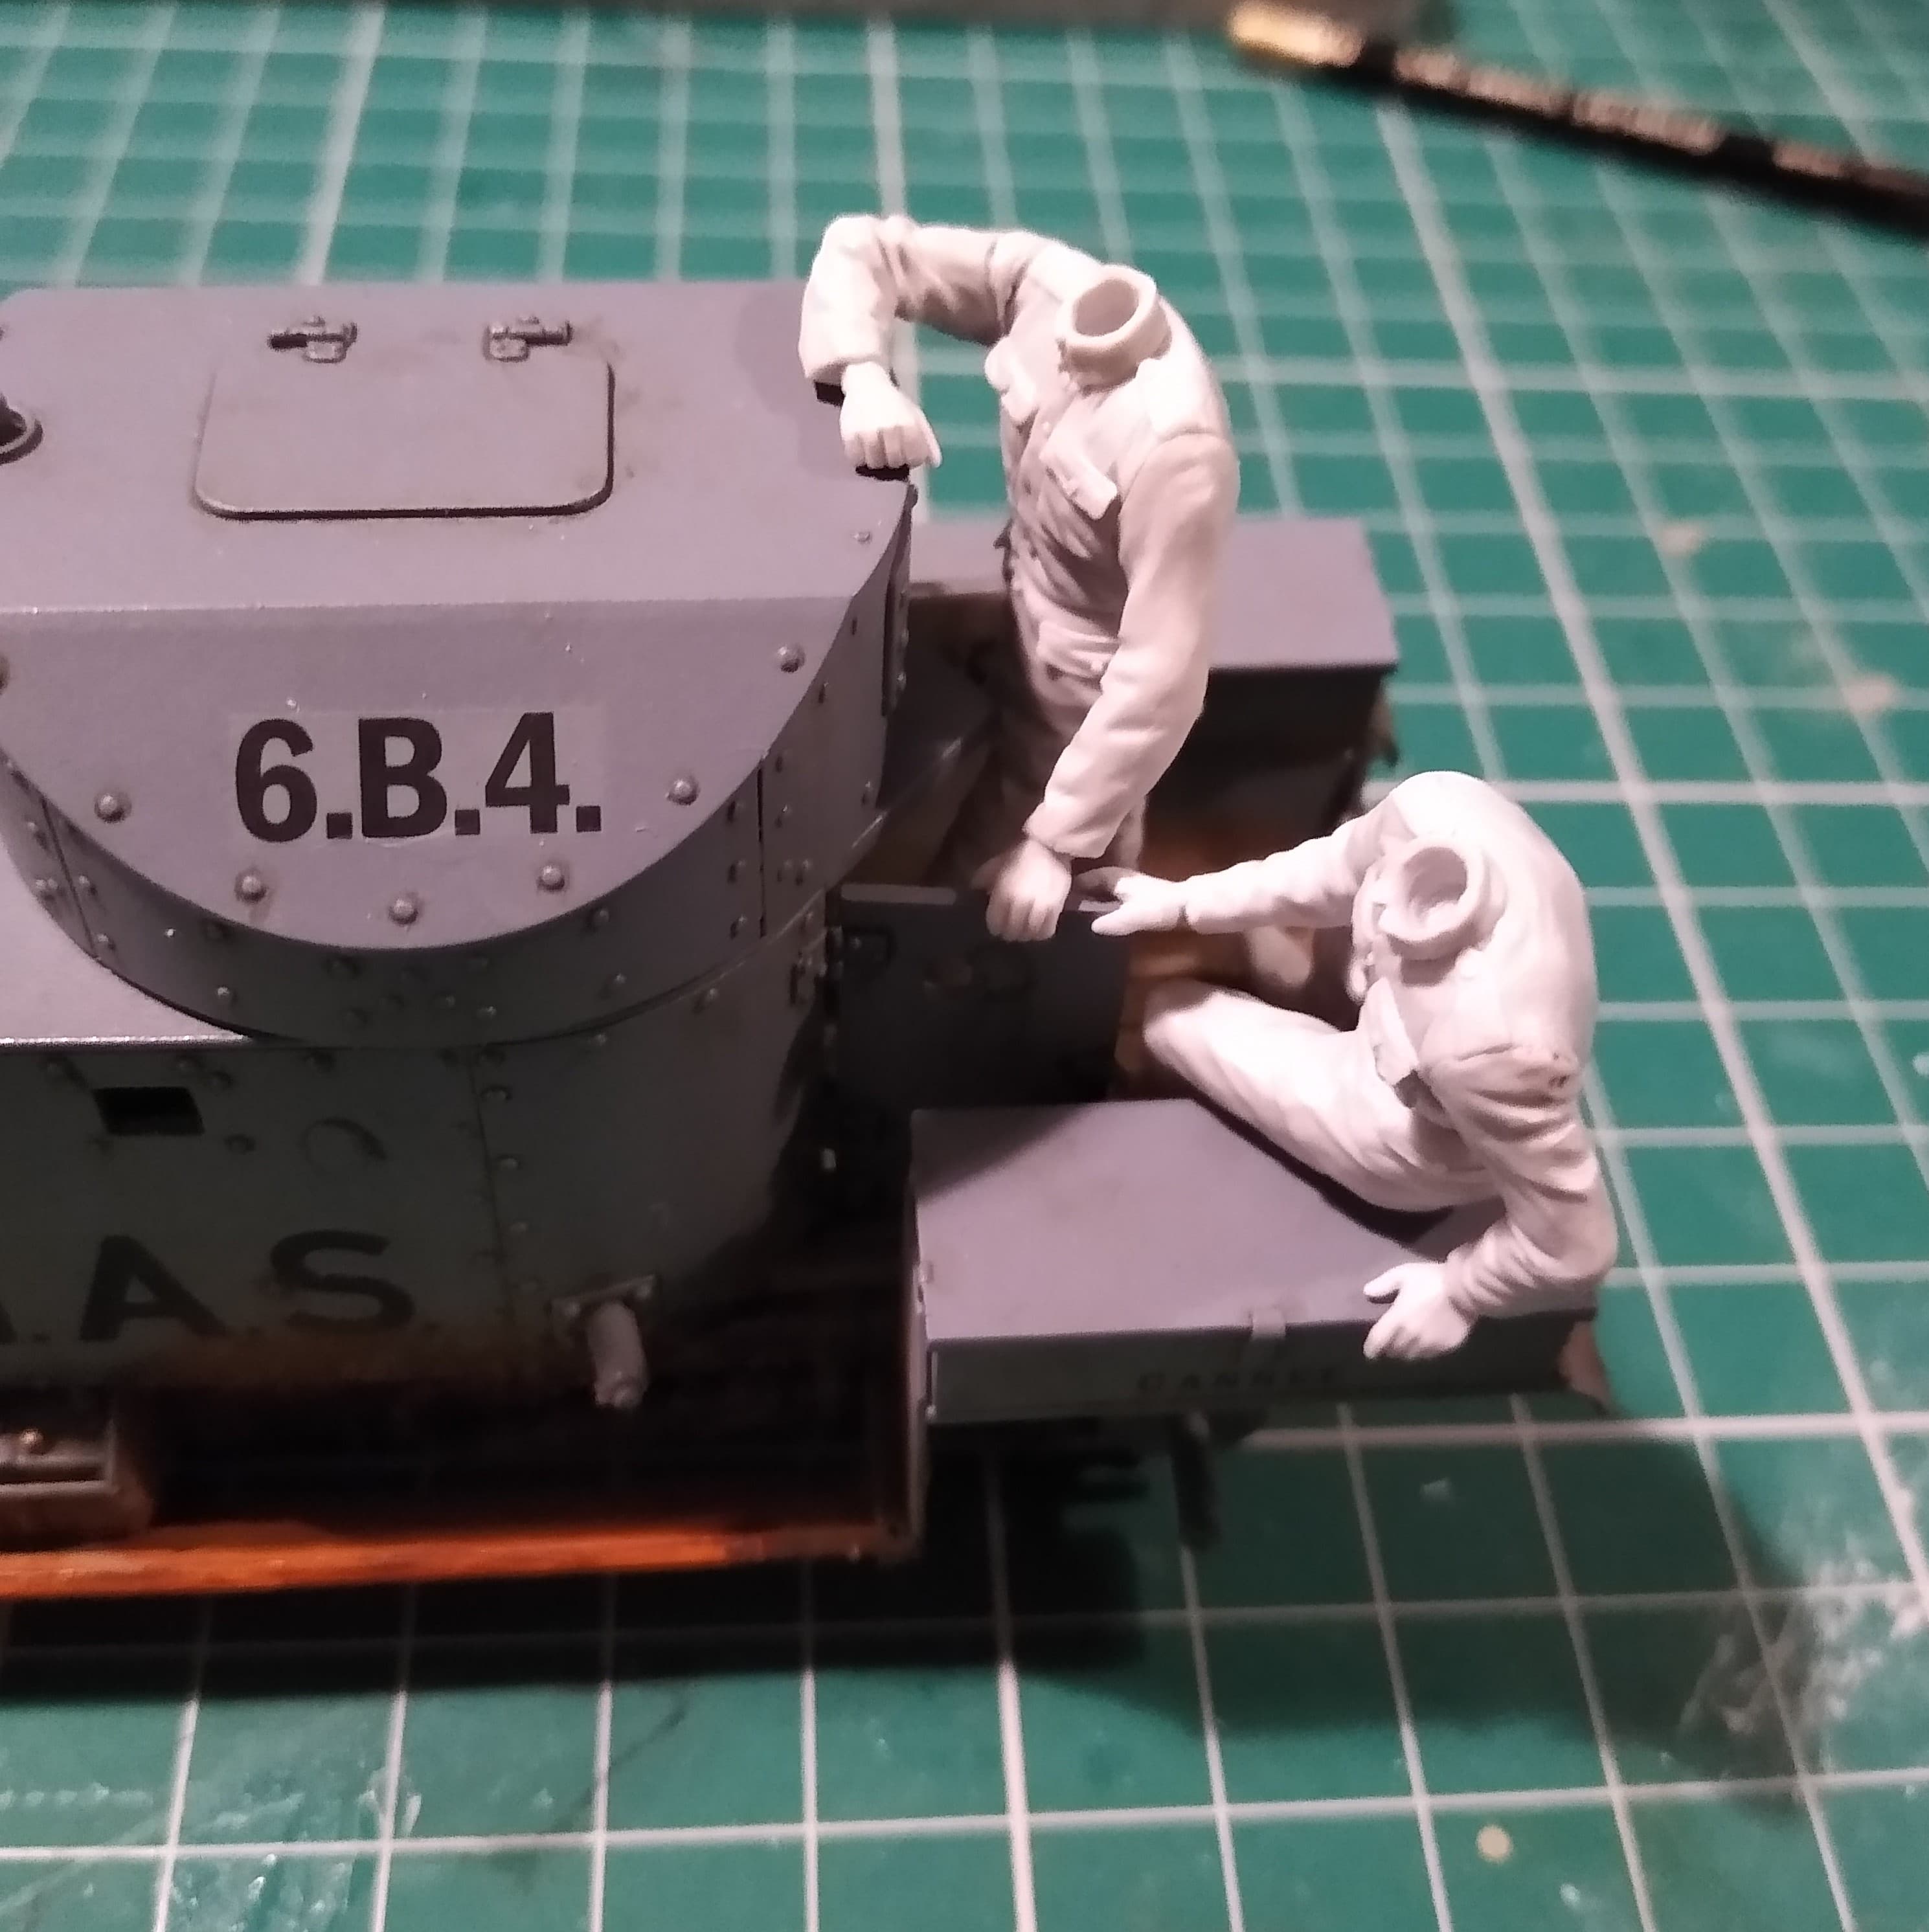
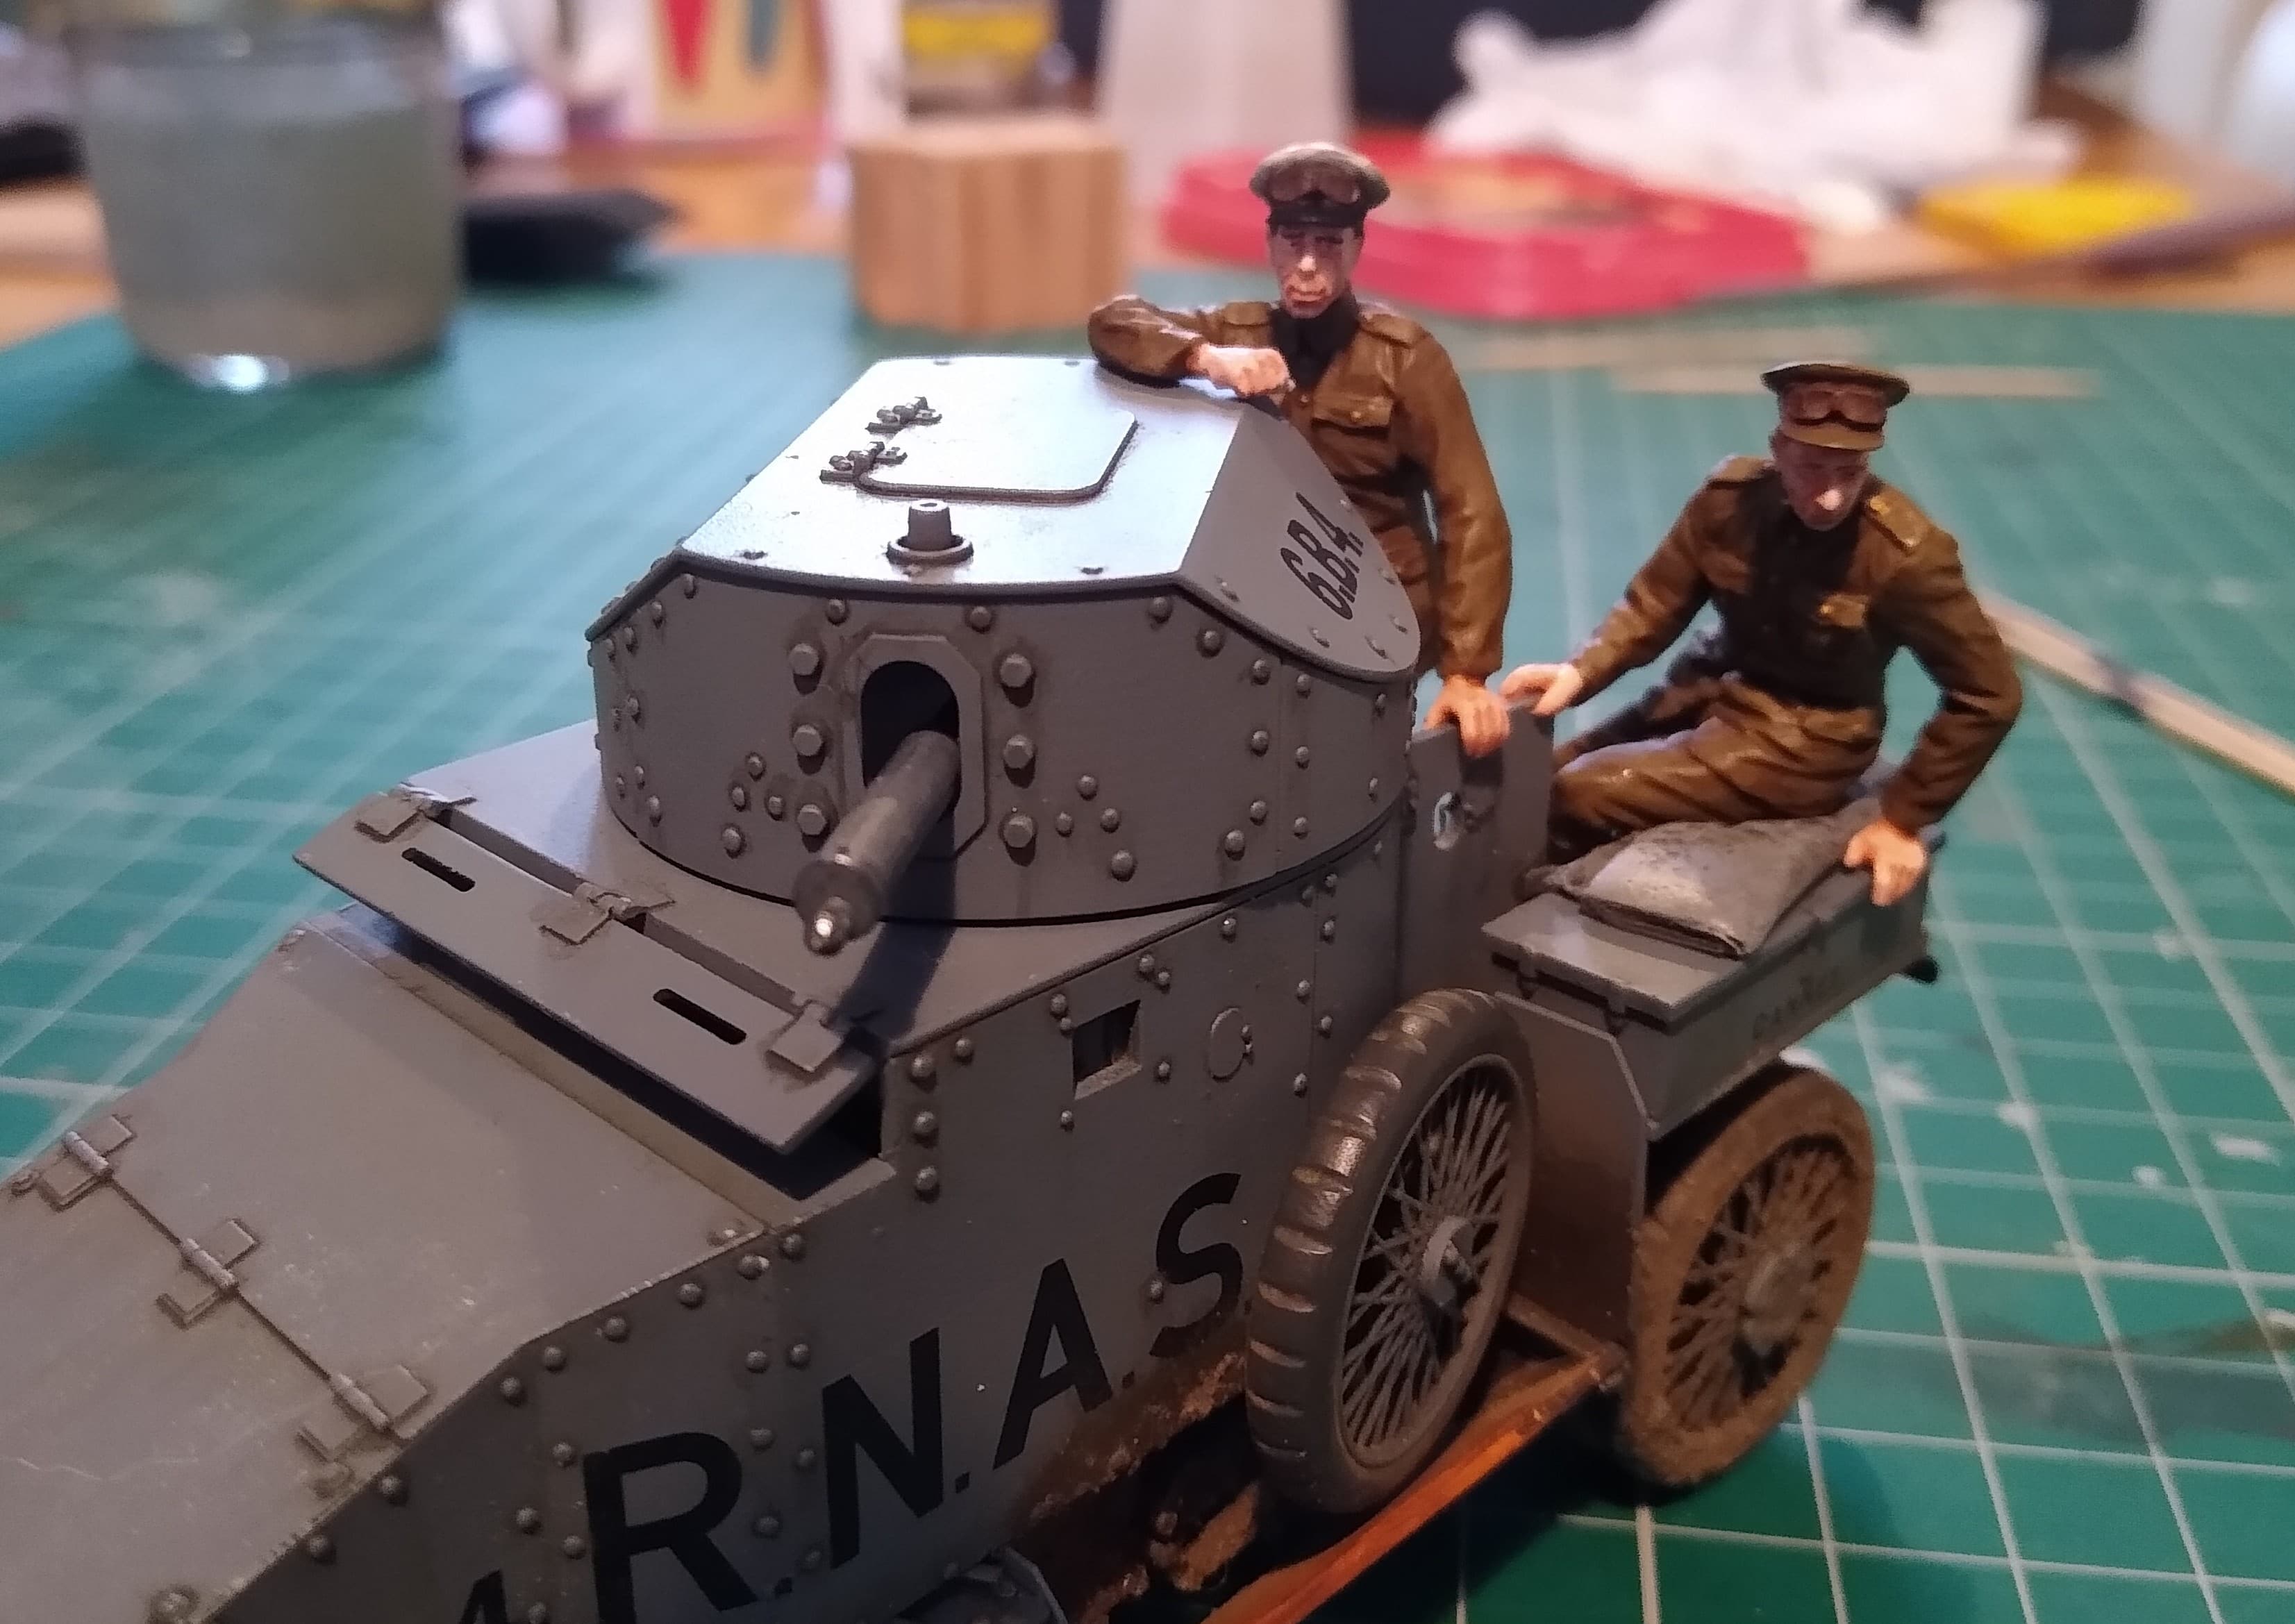
Have spent the last few days concentrating on getting the crewmen painted. Photo quality isn’t the best. Had a bit of difficulty getting my phone’s camera to focus in on the heads.
Looking at what photos I could find of RNAS armoured car crews, I did notice a mix of the older Navy and khaki uniforms. So, I decided to give the standing figure his old Navy trousers and cap. Adds a bit of variety.
Still need a bit of touching up, some details painting and a dark wash for the shadows, then they’re done and ready for final fitting.
Some more work on the base and finished off the figures.
I painted the track with Vallejo’s European Splash Mud, the same as I used on the cars lower surface. It should all blend in together when it’s finally fitted.
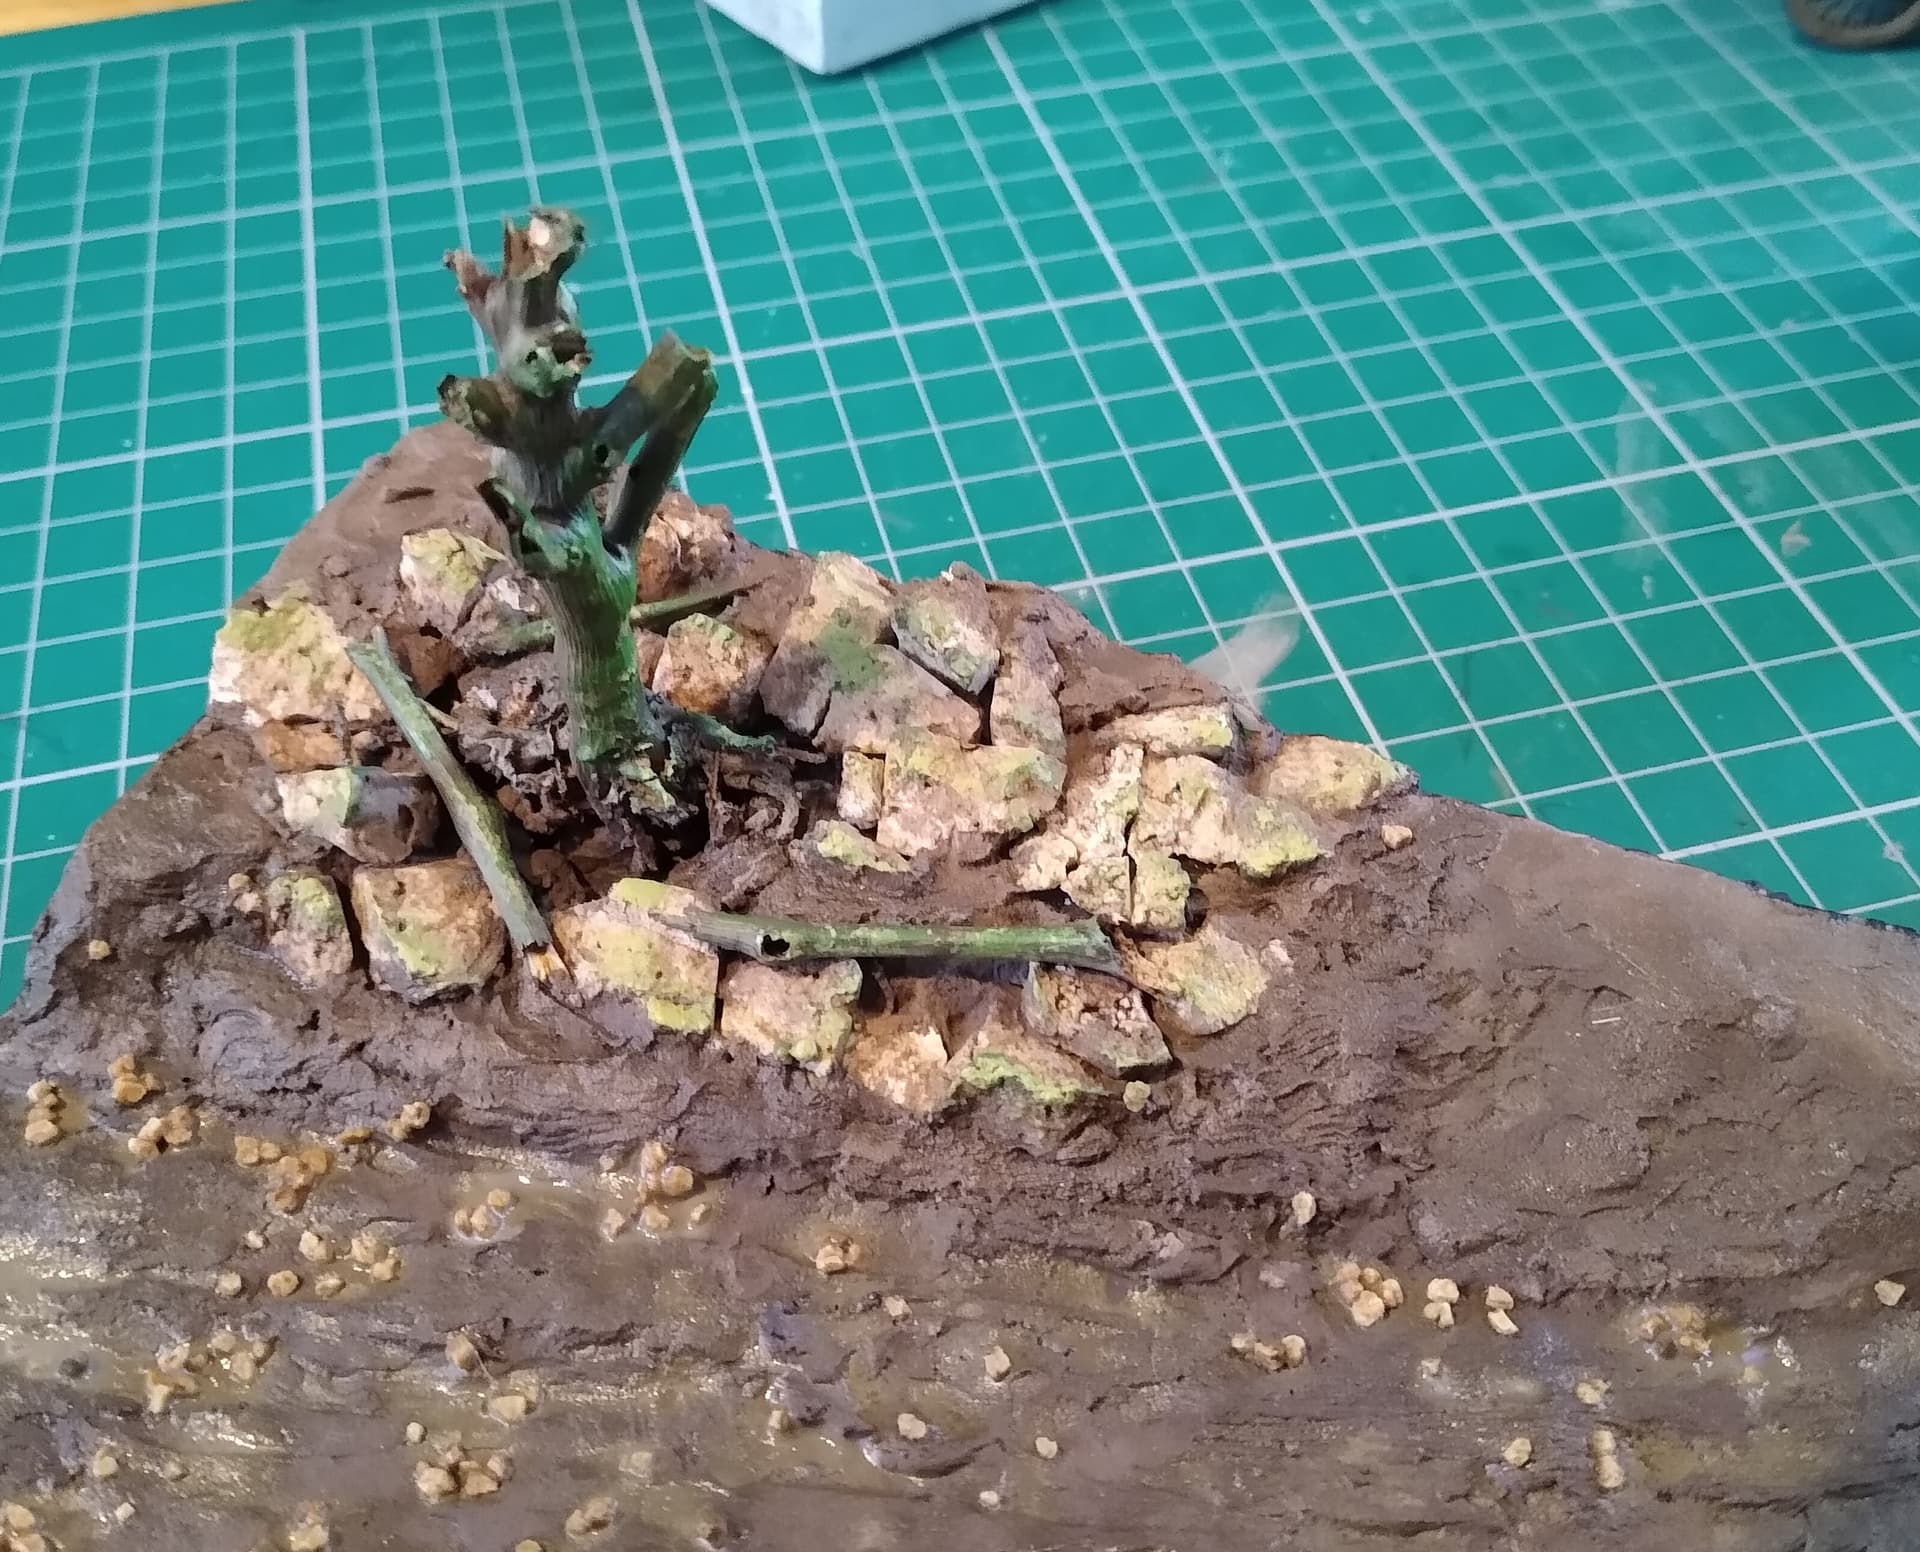
The dead tree was dry brushed in shades of brown and grey. Then I applied shades of green with a sponge along one side of the trunk to replicate moss. I think it would have benefited from a texture applying first, but looks ok and it’s something to keep in mind next time. I’ve found some precut paper Ivy vines I’ll stick to the tree, so it’ll probably hide some of the moss behind the leaves.
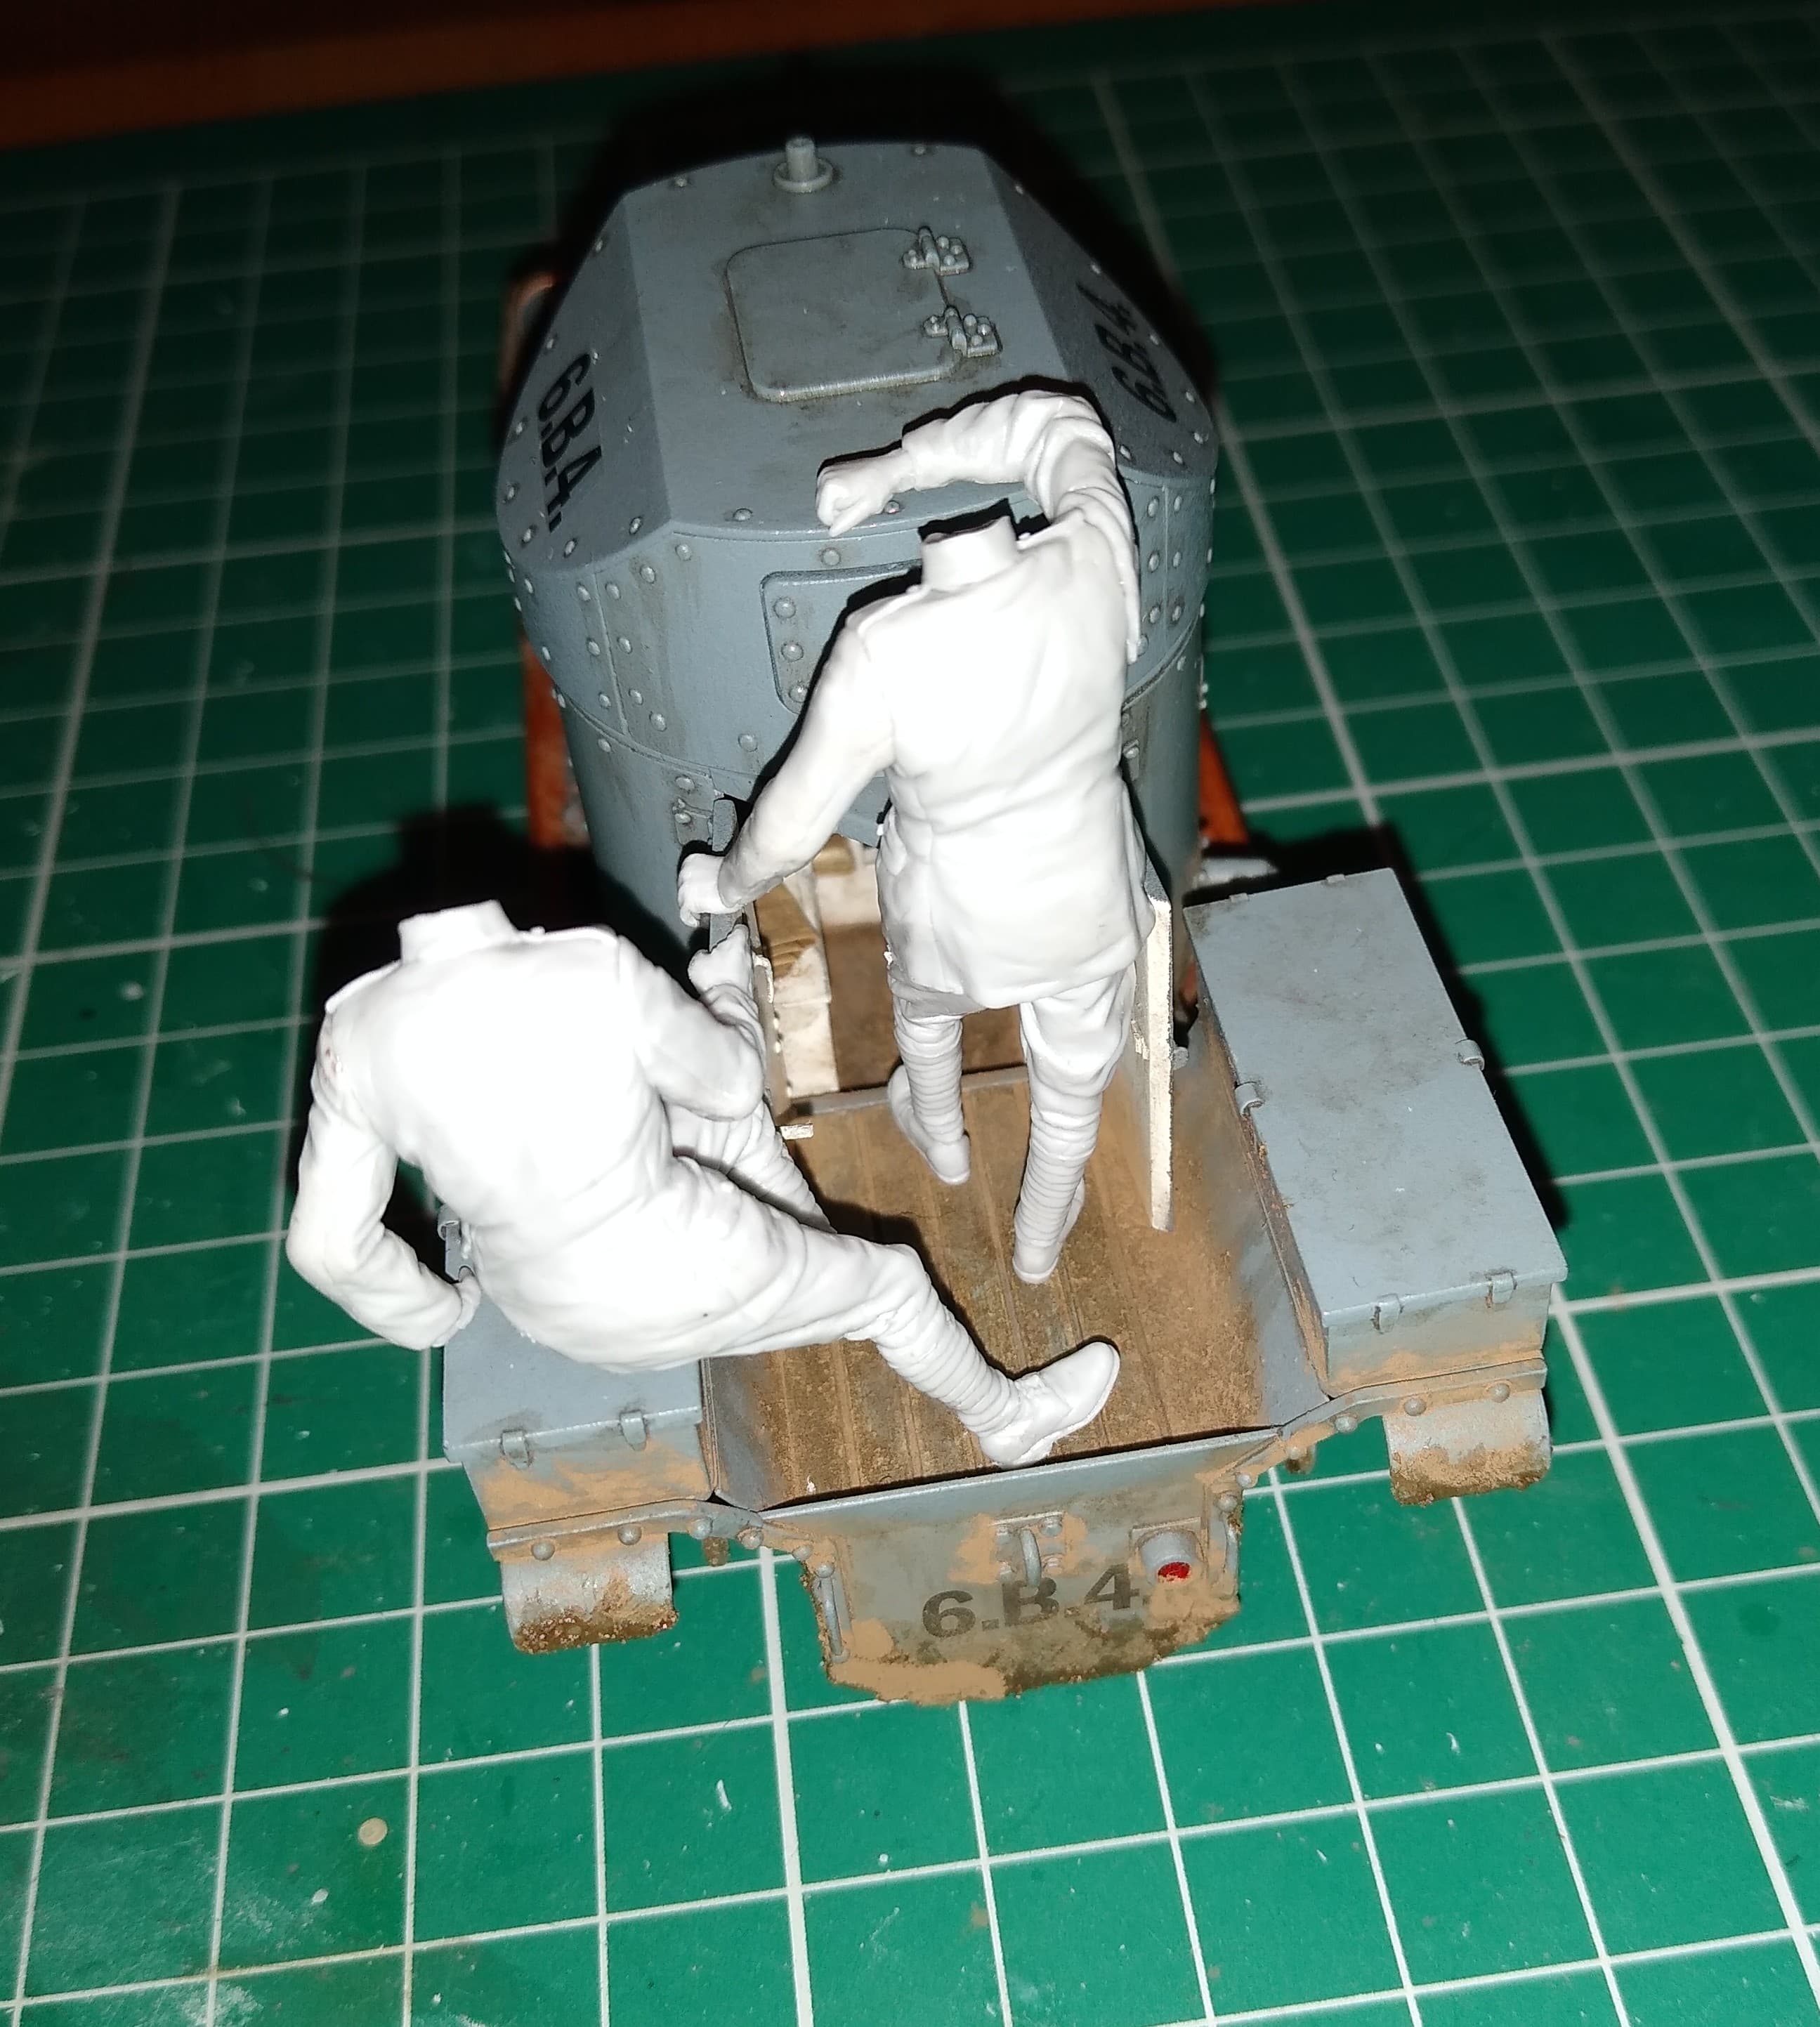
And finally the crew. Don’t think they turned out too bad. I used Games Workshop Sepia wash on the khaki and matt Nuln oil on the dark blue for shadows. I think they could do with a light overspray with Tamiya clear Matt to take the slight shine off. Will see how they look after a night drying. They’re just loosely fitted at the moment. I’ll glue their heads last of all to be sure they’re looking in the same direction.
Getting very close to the finish line now.
Great job on the figures Stephen, the vehicle will look outstanding once displayed on your excellent base, 
 .
.
G,