Thanks, it’s good to take a break from all the wood dust from sanding the Bluenose II. B-17 and this one for a little bit.
1 Like
Admirable dedication to staying the course here HG, love your work as always!
Cheers, D
1 Like
Thanks Brother! Every comment gives me a boost to complete it.
I’m sorry for your trouble, kind sir.
As the recipient of this largesse, I hafta say I thought this would be easier with the custom made cowling Jean Luc Formery was kind enough to give me years ago. Check out his double build here of the same kit, in the archives.
You had said you’d take a different approach with the parts, and once again it looks to me like you’re improving on the near-perfect!
I’m in awe, as usual.
3 Likes
HG, glad you are hanging in there. Your Hawk should be ready to leave the nest soon.
I’m interested in looking at your work area, too.
1 Like
Thanks my Friend, sure do appreciate the kind words. My work area is the entire house. Frank has one leg and is over 300lbs. There are many times when he needs help getting into bed and other places.
The effort would not be placed if it were anyone else, but thanks for letting me vent. ![]()
Quick update while epoxy hardens on the B-17.
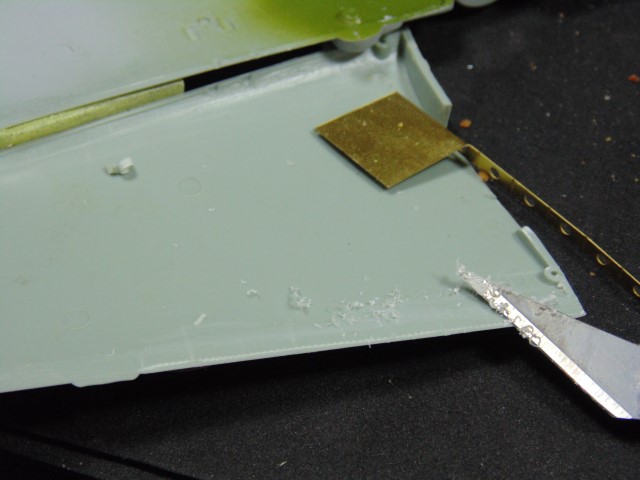
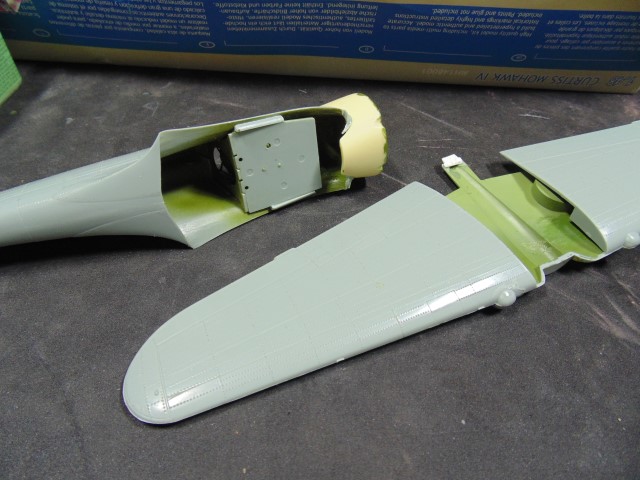
Naturally, you’ll need to shave down some material in different places.
Top and bottom.
One issue is the length of the resin flap vs the length of the PE. To make it look correct remove the bit of plastic that butts up to the aileron and save it to add to the resin flap later.

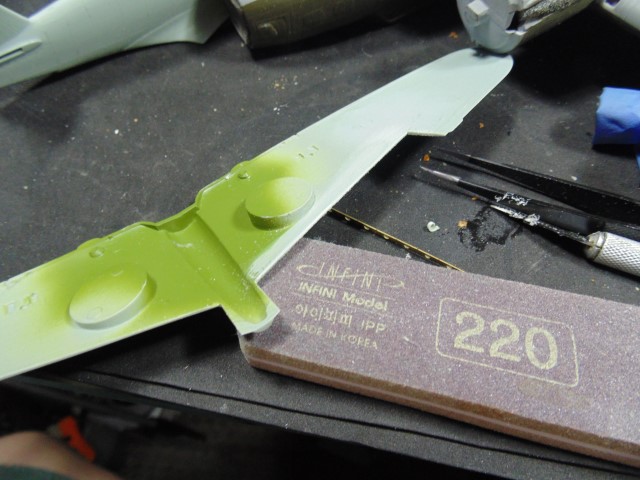
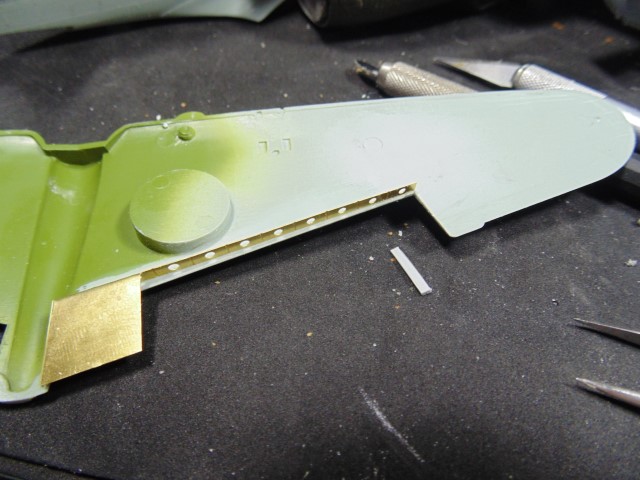
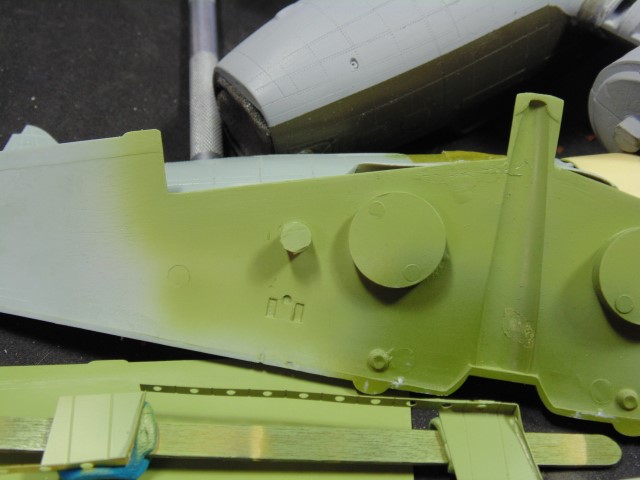
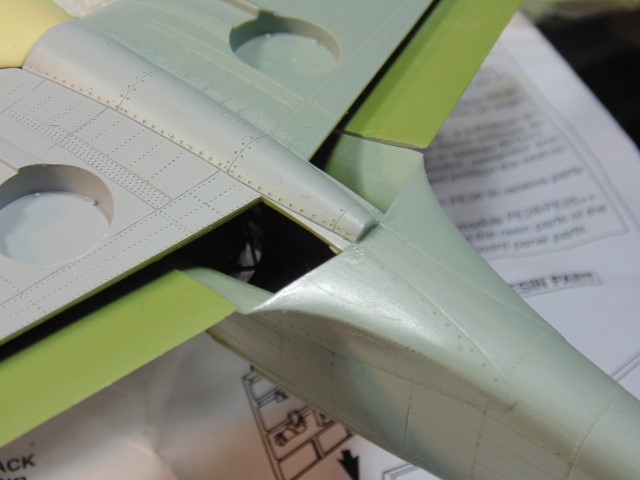
To get the upper wing to seat properly I have install the PE part then sand down the inside rear of the upper wing. As you can see in the lower part the entire connection hole and trailing edge had to be sanded. Later I’ll add a support post to stiffen the wings.
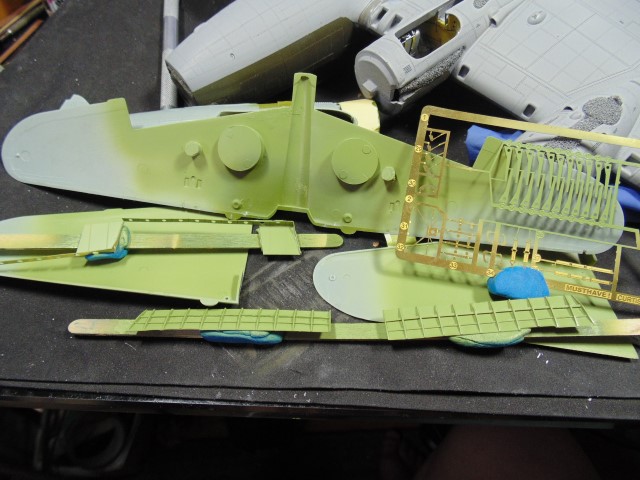
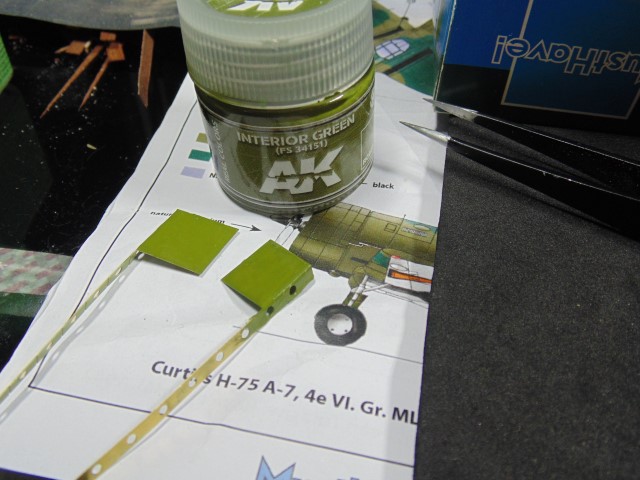
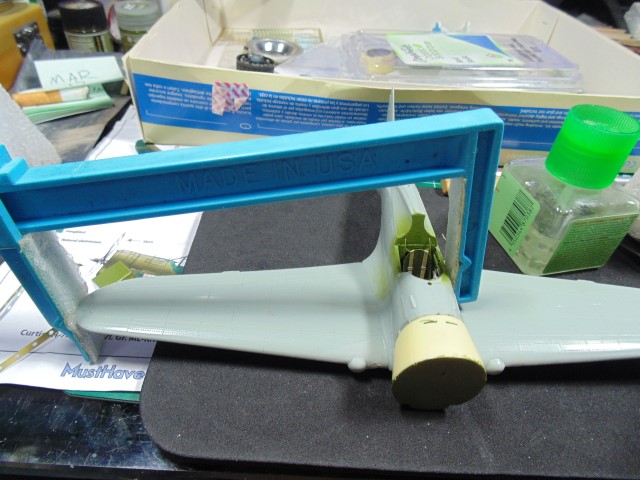
And here’s the entire shootin’ match all primed with yellow green interior.
And the support post I mentioned earlier. Just slowely sanded it until it was correct with the wing root of the fuselage.
Note the B-17, work has been done on it too, but thta’s for Brian to post.
Thanks.
6 Likes
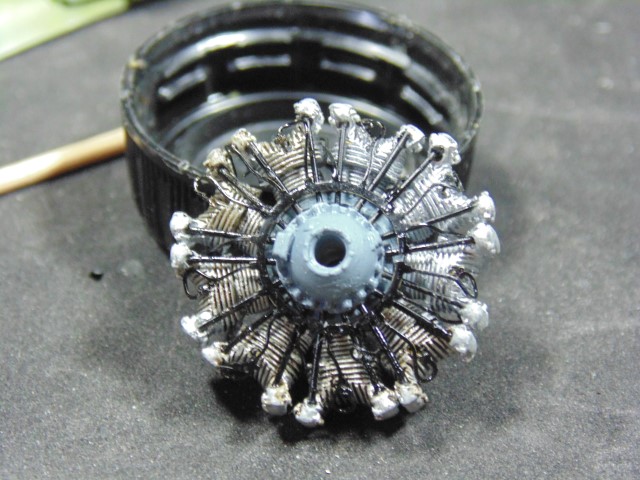
Engine…

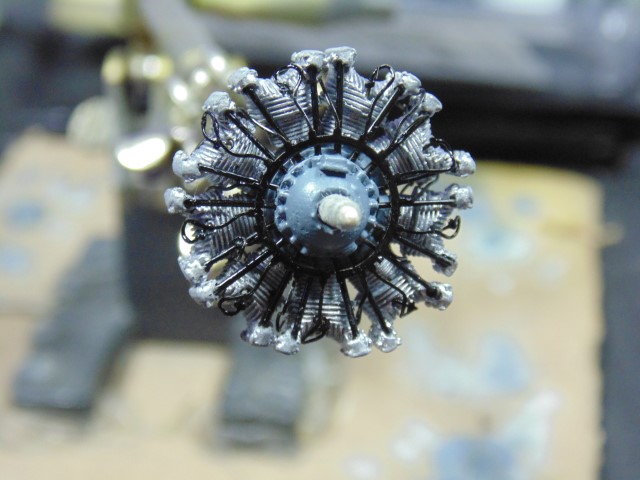
Done, unless Brian wants some grease staining.
Regardless, onto the wing and fuselage assembly.
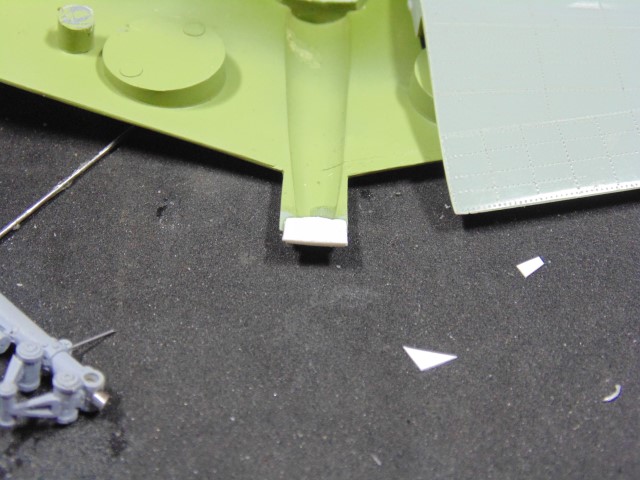
Used four strips of 0.3mm plastic to make a bridge. Test fitted to see how many needed to be removed to make the two points flush, cutting at the back of this part.
Thanks.
8 Likes
Man, that engine is really nice. I just love the wiring of the sparkplugs.
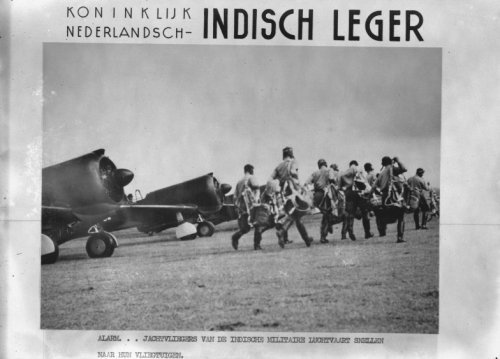
Let me just suggest the lightest of staining around the cylinder heads. The bird should be as delivered to the NEI, after camo painting, see below
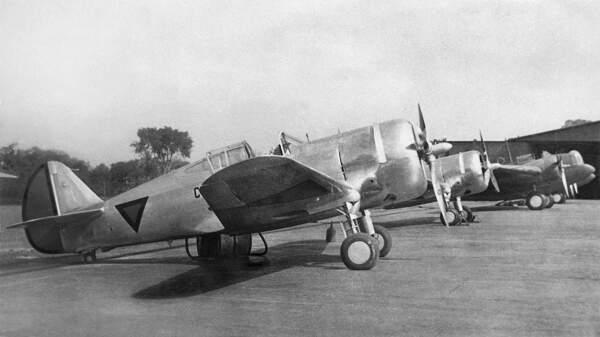
The caption at the link reads: Newly assembled Curtiss Hawk 75A’s with camouflage paint still to be applied, at Andir (near Bandung, Java), May 1940.
but with an engine that has been run a bit.
Here are two more historical photos for “atmosphere” and inspiration.
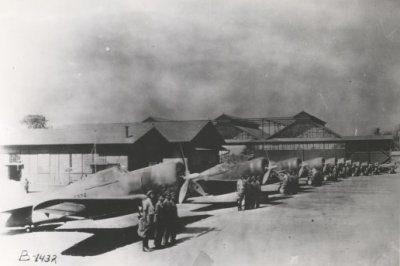

Before the shooting started, of course. When I first discovered the group shot in Curtiss-Wright’s archives (or what was left of them) in the early 80s, it was clear it was a Company publicity shot. The caption was “On Guard.”
This model sure requires a lot of “accurizing” work. The finished product will be stunning!
3 Likes
Hey Fred,
Glad you dropped by. This work station is the smaller, more comfortable, of the two. Is there anything in particular you’d like to know?
Excellent information WITH PICTURES as always. Thank you. Next shot will have grease (not black) oil on the heads.
Hi All,
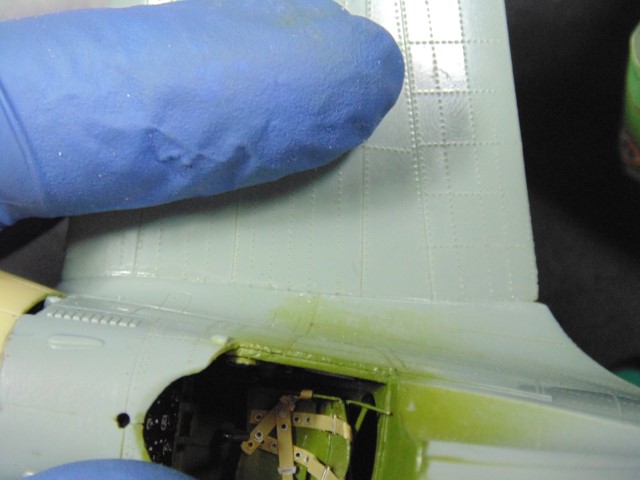
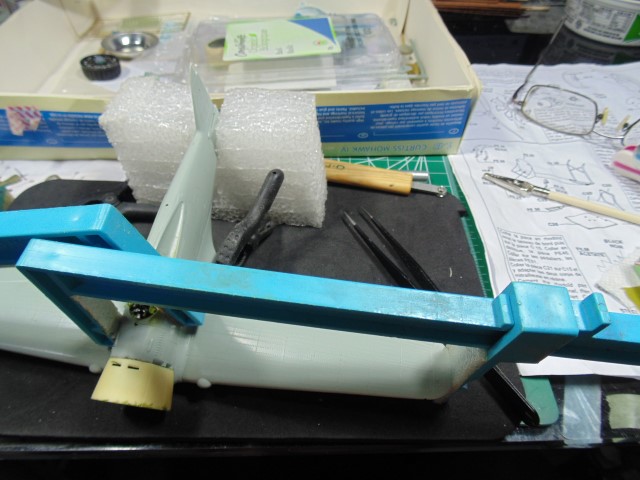
The upper an lower wing halves looked more like a WWII X-wing fighter than a Mohawk. A couple of days in the bench vise with formed wood blocks fixed their wagon real good.
Will let them rest a spell before clean up.
Here you can see the before and after of the engine greasing. The darker shade will lighten up of course, but you get the idea. These plastic bottle caps make storage bins.
More when completed.
6 Likes
Looking damned good HG ![]()
1 Like
Than you Tim,
Means a lot coming from you.
Nice thread to jump into and catch up with. Crazy panel line creations, but certainly worth the effort ![]()
1 Like
Thanks John,
Yup! Only at AeroScale can you get 60 thousands pricks to show up in a such a small space. BHAHAHA. Hope that made you smile.
2 Likes
lol … ![]()
![]()
![]()
1 Like
Back after a bout of quarterly #@&%*# crap!
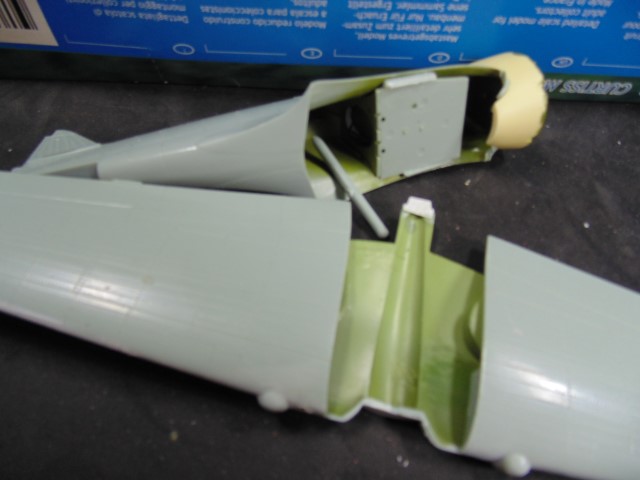
The sprue rod will painted and used as a support at the back of the underside and glued to the headrest interior. There simply isn’t enough strength at the belly spine with all the material which had to be removed for the PE flaps. It’s painted because there is a large oval that can be easily seen by Brian when he looks into the interior.
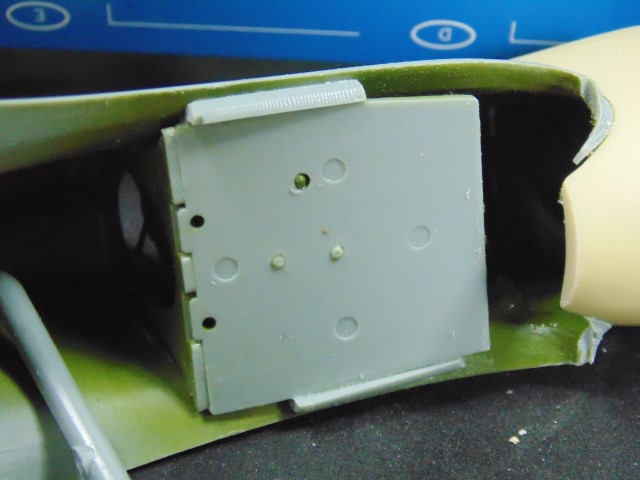
Same here with the floor and these half round lengths, just not enough support and especially consider shipping.
Belly spine cemented and you see the gap behind the cockpit. When this sets a little I’ll put that rod in. Also, you can see why I added that tab under the edge of the back of that belly tip.
And the same song with the interior of the flap sections.
Had to hold this for an hour to get it to set enough while lining up.
With it set enough I was comfortable with adding an F clamp and the root staying put.
Same deal with the port side and a little clamp to keep the trailing edge aligned. The pressure on these F clamps is enormous so adding all the interior supports (including in front of the cockpit) really are helping. This goes back in the box for a week to completely set.
Later and thanks.
6 Likes
Little did I realize how much magic would be needed to make this “Must Have” into a masterpiece. Once again, I am struck by the sheer creativity at work here. F Clamps to perfect wing dihedrals! ![]() Who knew? Something I could not imagine, much less do.
Who knew? Something I could not imagine, much less do.
Thanks, HG. Somewhere the ghost of a Dutch aviator is smiling.
2 Likes