Well, I’ve got to do something since I’m not building. ![]() But thanks, Richard.
But thanks, Richard. ![]()
1 Like
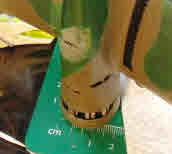
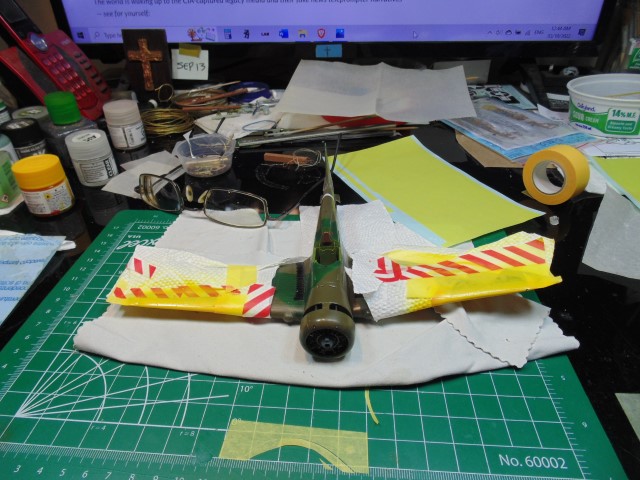
Engine Repair, or What’s Wrong with this Picture?
I don’t think H.G. will mind if I comment on what follows. It’s in service of getting the best accuracy possible in this build.
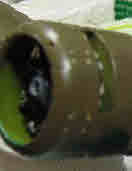
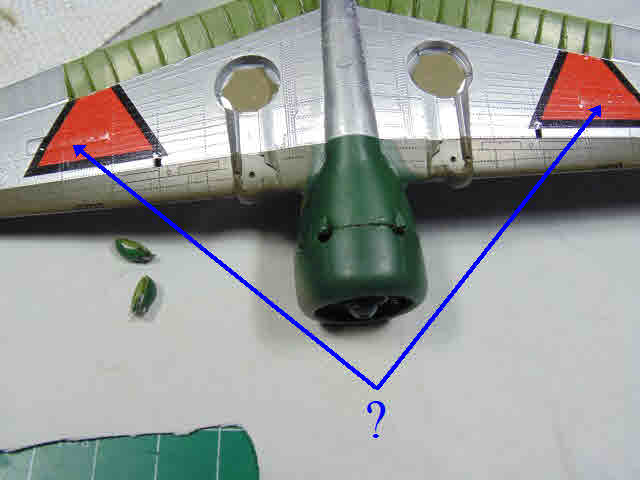
So, what’s wrong with this picture?
Someone? Anybody?
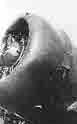
How about now?
I could reference a famous line from Ed Wood’s “Plan 9 from Outer Space”, but those familiar with the film know what happened to the speaker.
No, no, let him finish!
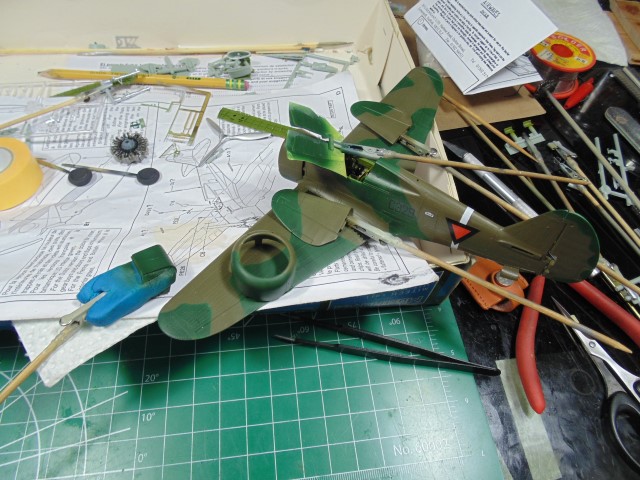
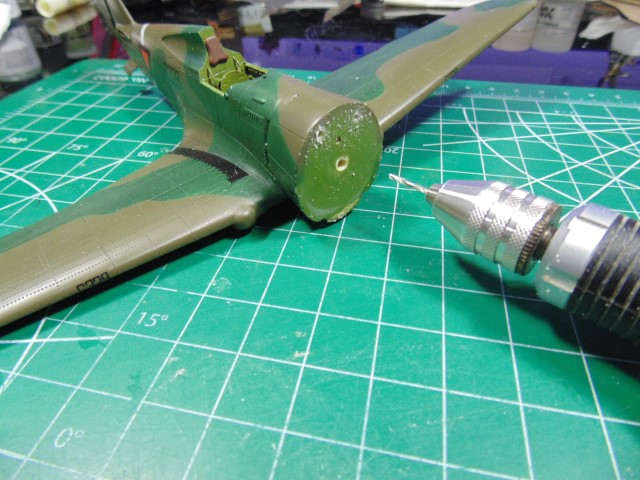
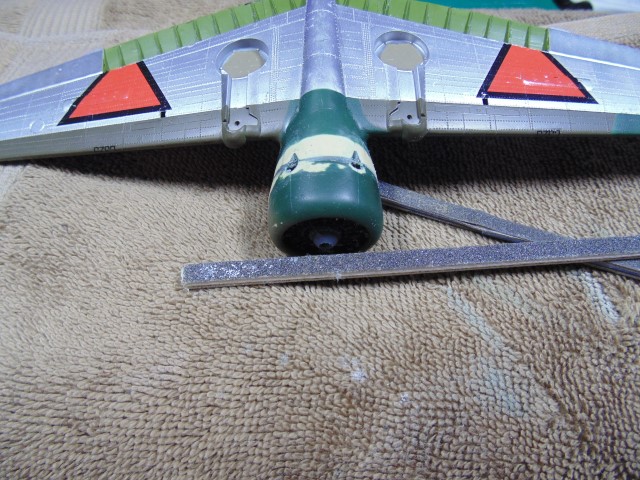
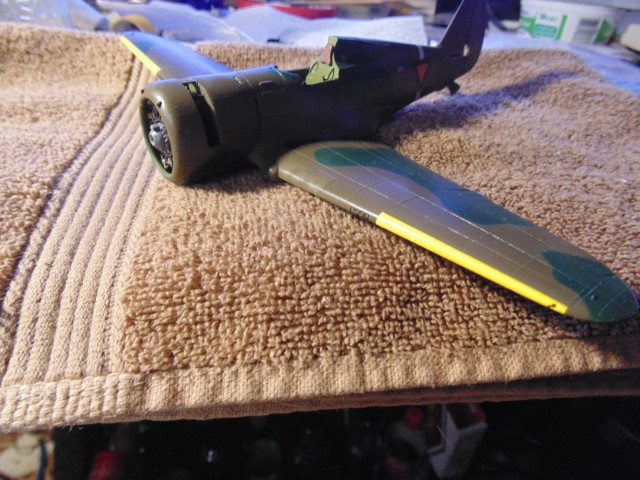
So, we realize the model’s engine is located too far back into the cowling.
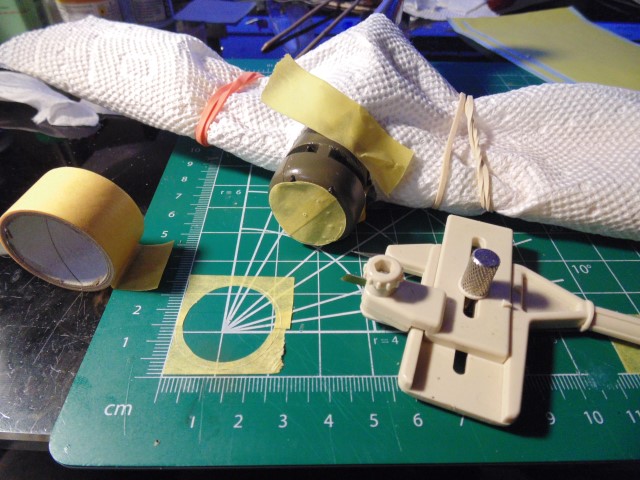
But, no worries, the fix is in. Even in Jean Luc’s modified cowling to match the model’s Wright Cyclone engine, the kit’s plug to move the single cylinder bank engine to the edge of the opening must needs be used.
with some modification:
But, is there not another problem not planned for by the “Must Have” parts aggregators who kindly collected all the stand-alone goodies, like those brass cowl flaps – without, I daresay, bothering to actually build one of these exotic things to see if it all hangs together?
Sadly, yes.
Can you say, “I see yer problem right there?”
Well, I couldn’t, but H.G. did.
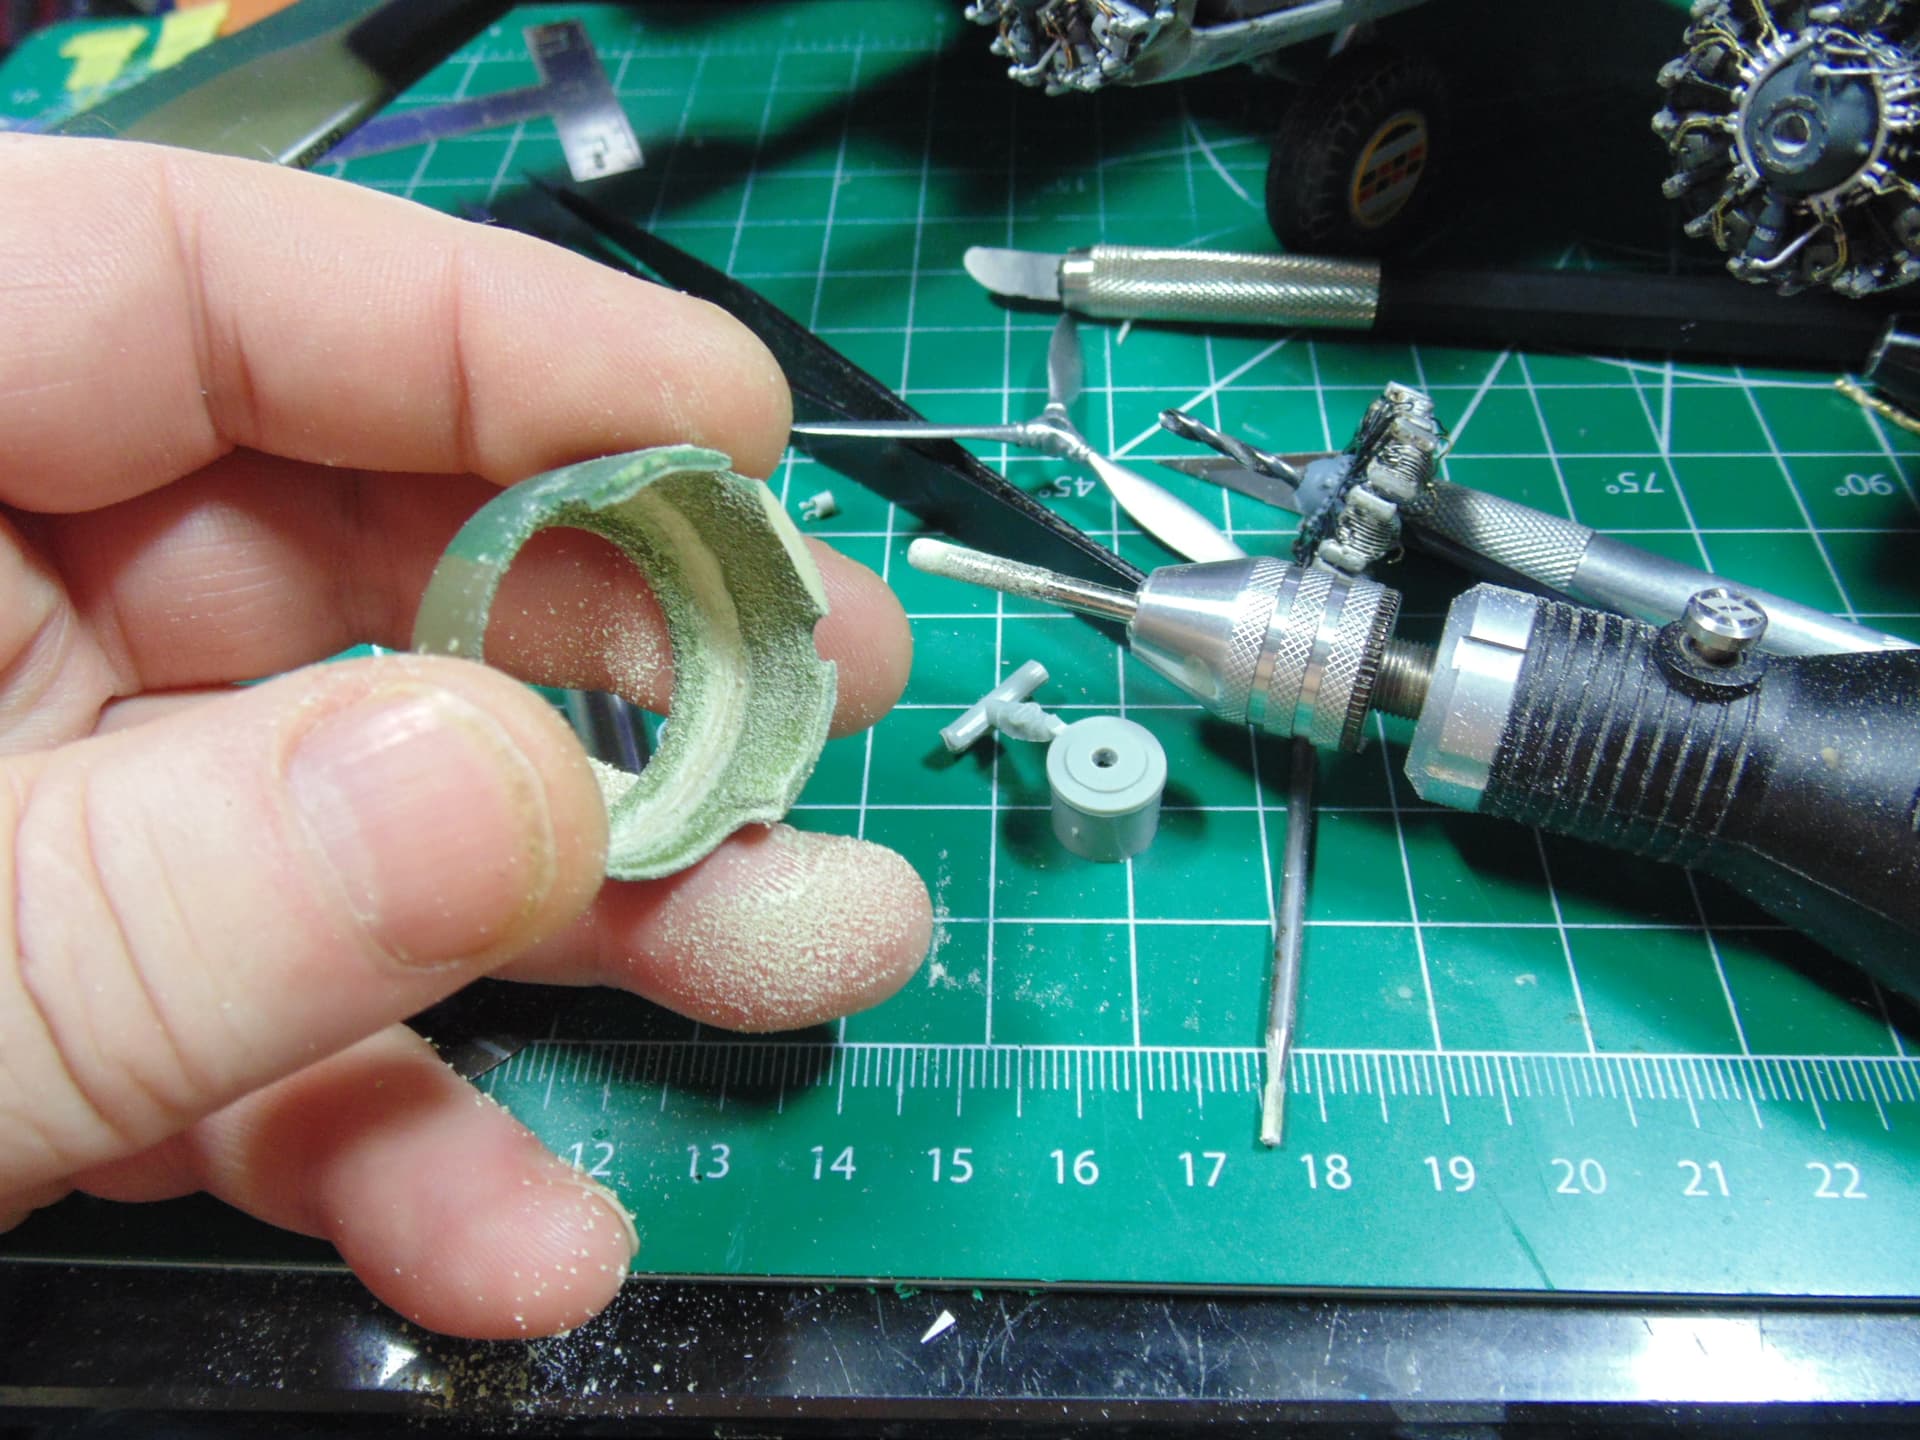
Moving the engine forward means those open cowl flaps will not give a view of the cylinders, which will be shifted forward, but instead just expose the naked plug, which will not look realistic at all for those looking inside the cowl flaps. A curved exhaust pipe for each cylinder head must needs be added at a minimum.
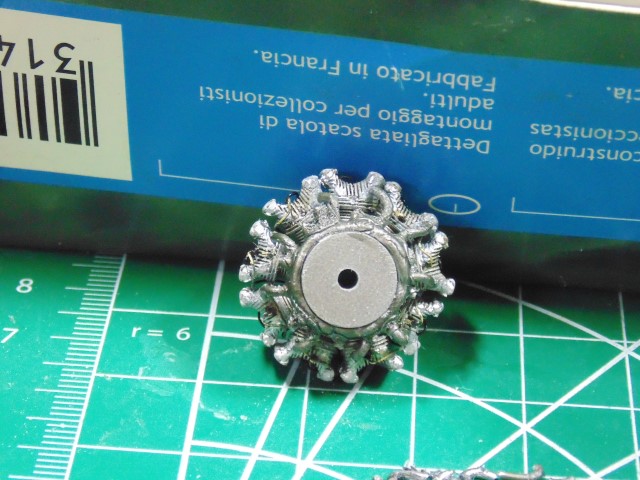
I was ready to donate a Vector R-1820 engine, which has that assembly,

but H.G. said no, he was already working on a solution.
And here it is, a work in progress.
If it was me, I would simply say, “I can’t even.”
7 Likes
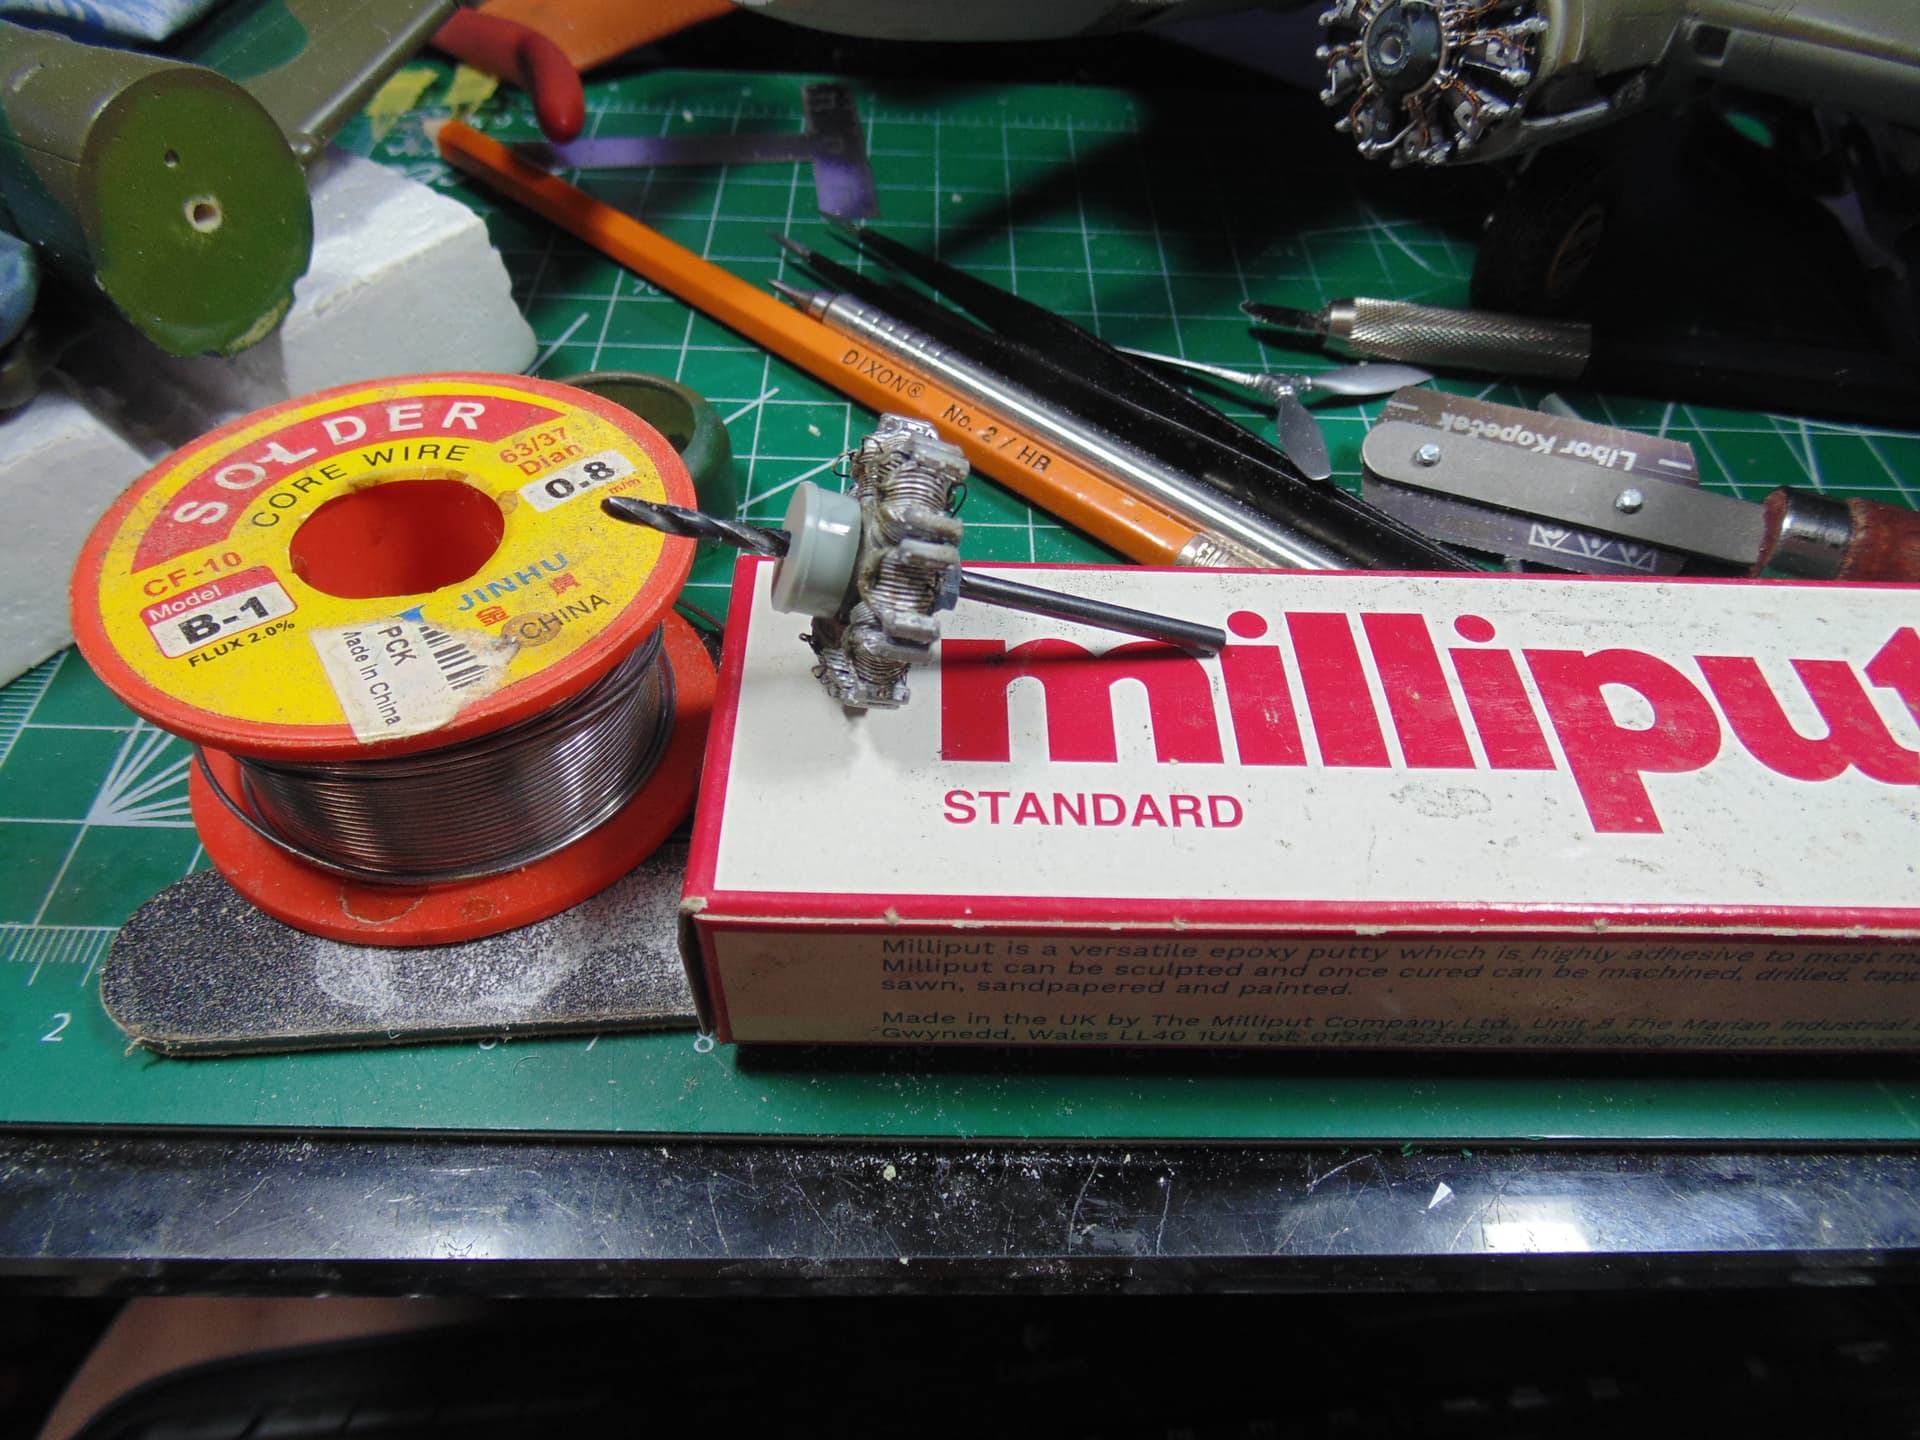
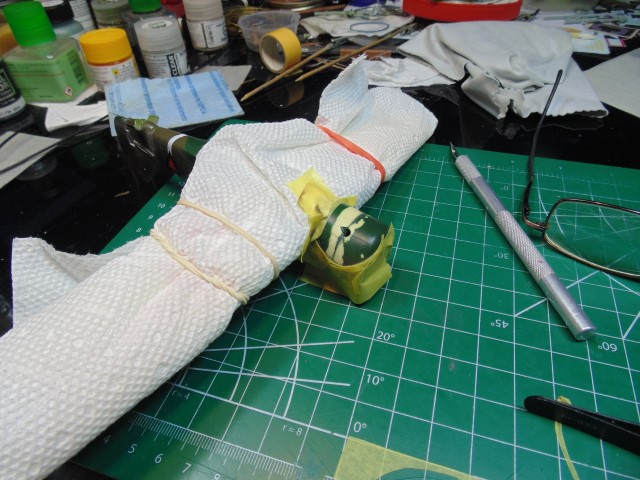
Hi Guys,
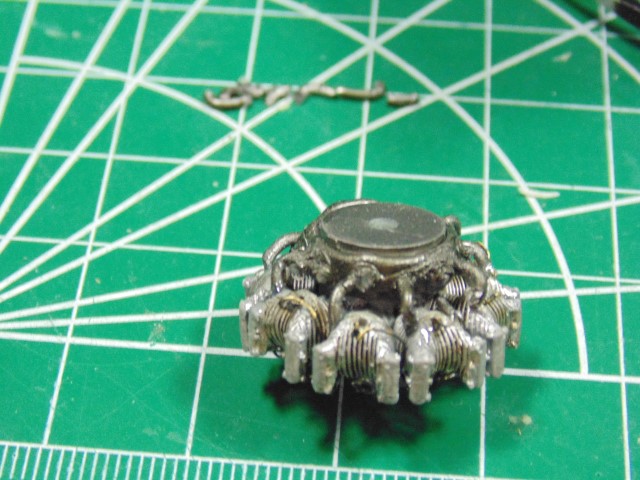
This short update took over a day to make HA HA! The exhaust is also washed and sprayed in burnt metal now for a better look. I still need to work out the location details, but there’s still some work to do.
The resin was cleaned, yet the paint, obviously, lifted. I’ve mildly sanded it… don’t ask about primer because it pitted it.
Ready for a clear coat and then some panel line and rivet details. Hope you like this Brian!
Thanks everyone, all comments are welcome and appreciated.
7 Likes
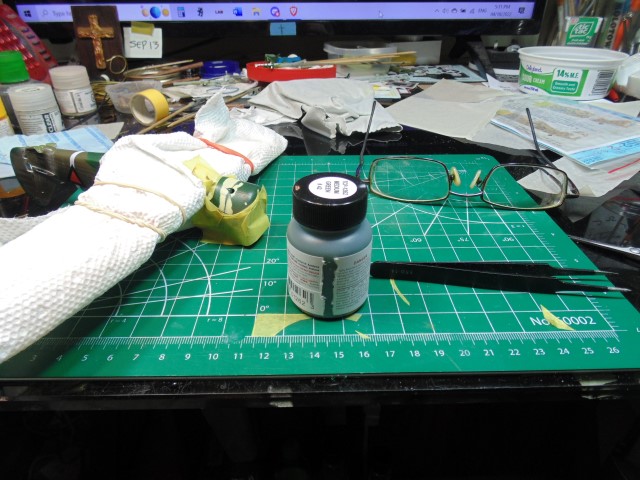
by the way, the exhaust ring still needs accuracy work… please stand by.
1 Like
Lookin’ Good! Thanks.
1 Like
Hi All,
Just a quick update on the Hawk.
You’ll have to core out the center to make either a tube or thick pin to fit the assembly up. No big deal, it’s modeling and time.
Used some AK burnt iron color for the exhausts, yet still have some fine touch-ups to do.
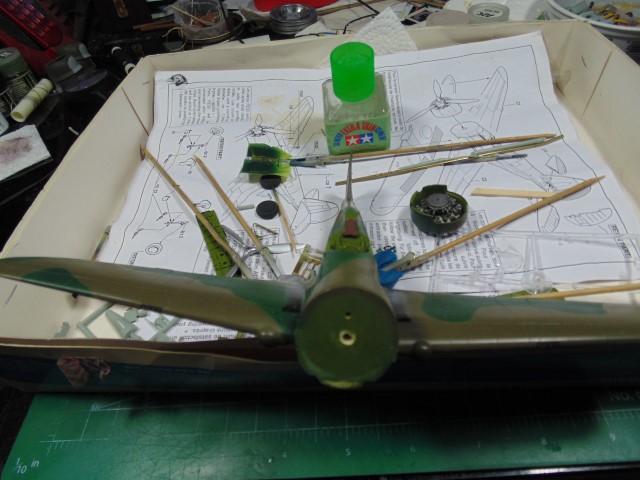
Head rest installed.
This took a while and worth it.
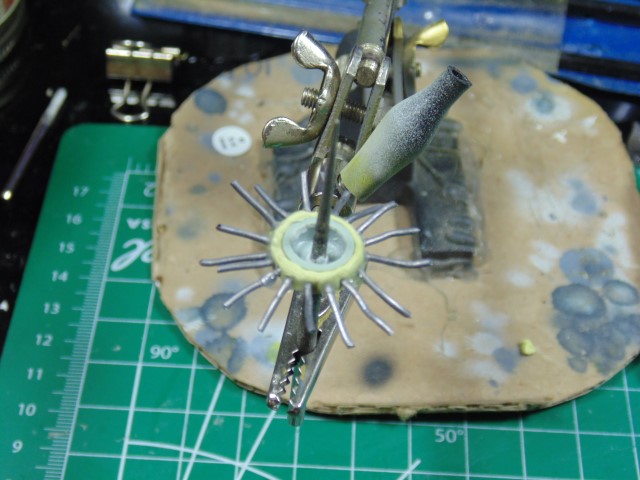
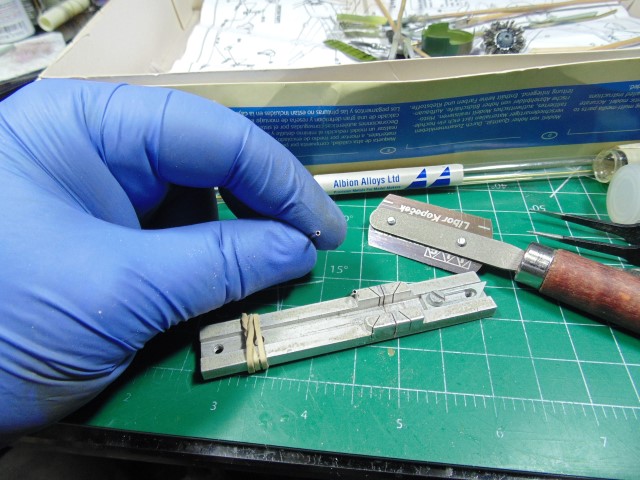
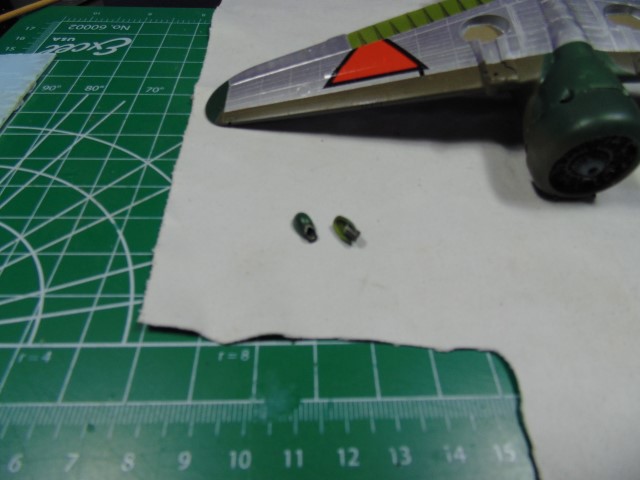
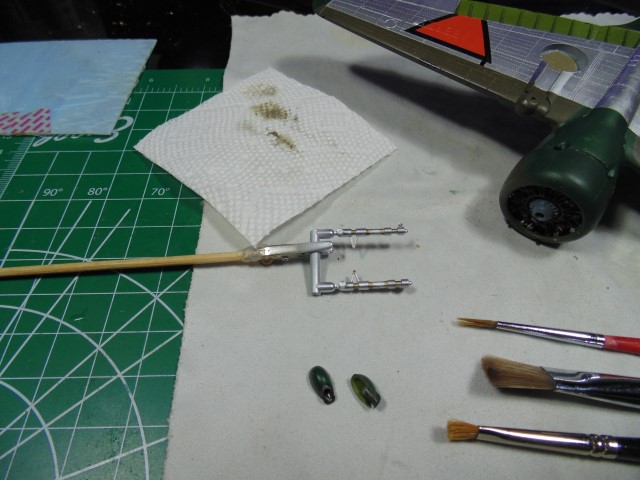
Use a reaming tool to clean out the burrs, then select a proper size to replicate the MG caliber.
Best of health everyone.
3 Likes
Hi Guys and Gals,
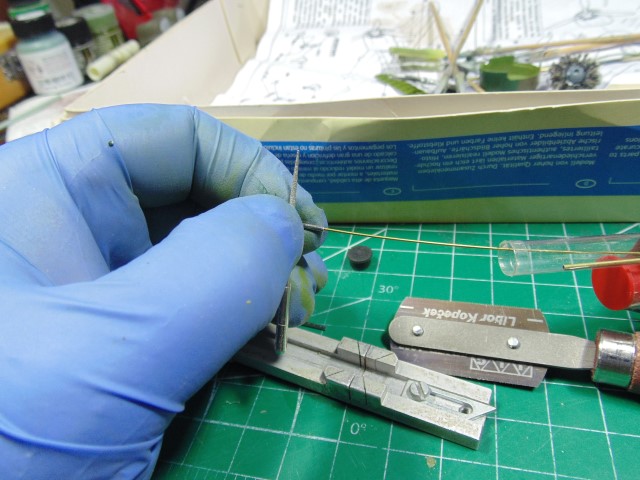
Seriously stressed for time so this is a brief update. These MG barrels took many hours. Getting the two sizes of metal to fit/slip into one-another works much better when you finely sand the surface.
Used a touch of Liquitape to temporally marry up the parts for the best fit.
A rotary tool dug out the holes in the resin after pre-fitting test holes.
A little red on the fuel cap.
Then a drill to make an indent for the “positioning light”. Put some silver behind it prior to using a fine applicator with the blue paint.

Took a day, but small details add so much to someone with a keen eye.
Kindly,
HG
4 Likes
Wonderful work there, HG! Those small details add always some eye catching. And you’re right, modeling is always time consumpting but the result makes it worth.
Greetings across the big pond
Torsten ![]()
1 Like
The pond is getting slimmer!
Thank you for the kind words!!!
Sure am a follower of your work.
1 Like
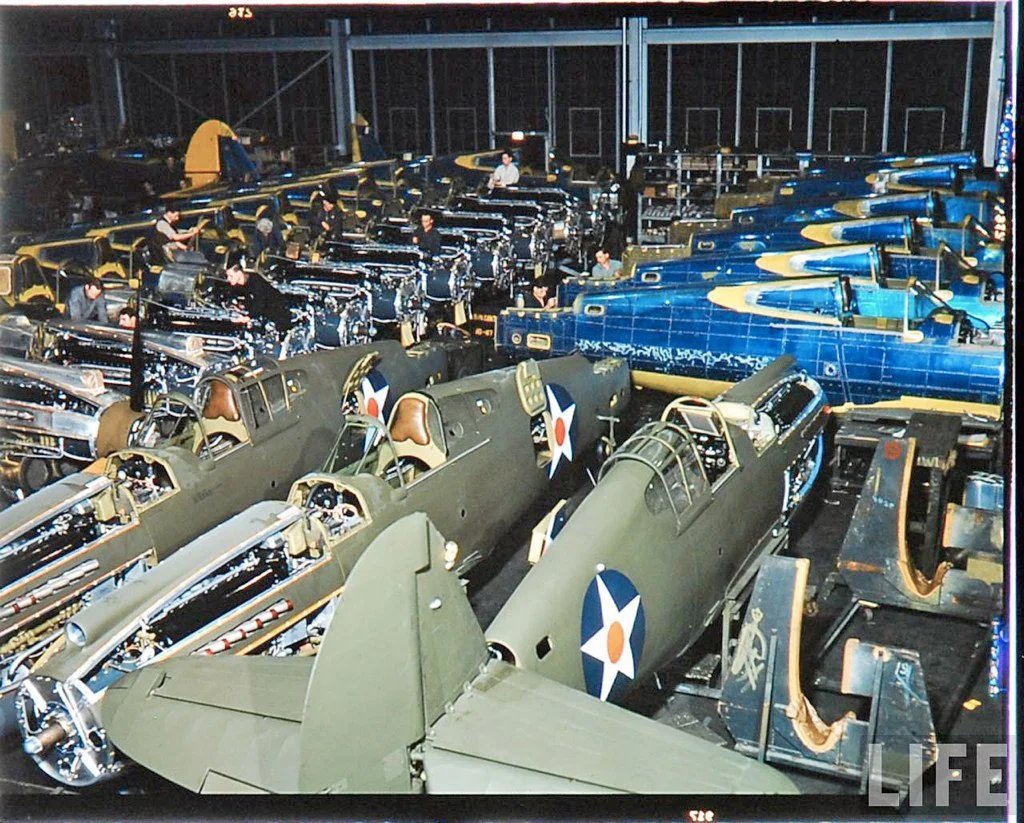
Absolutely great looking. What I also really like about the subject is how I can identify with it as a former Curtiss-Wright employee who knew one of the test pilots at the Buffalo plant where it was built.
If you have never heard of Herbert O. Fisher, check out his bio. In particular, this:
After leaving the military in 1933, Fisher joined Curtiss-Wright, and was assigned to test pilot duties. In checking out aircraft off the production lines at the Buffalo, New York plant, on his first day, he flew 10 aircraft.[N 2] During his 15 years with Curtiss-Wright as Chief Production Test Pilot, Fisher recorded thousands of test flight hours in the Curtiss C-46 Commando, Curtiss P-36/Model 75 Hawk, Curtiss SB2C Helldivers, Curtiss P-40 Warhawks and Republic P-47 Thunderbolt fighters.[N 3] He flew 2,498 P-40s in his role as a production test pilot.
I have no doubt that he tested at least one of the Dutch H-75s.
Here is a picture of him in the center:
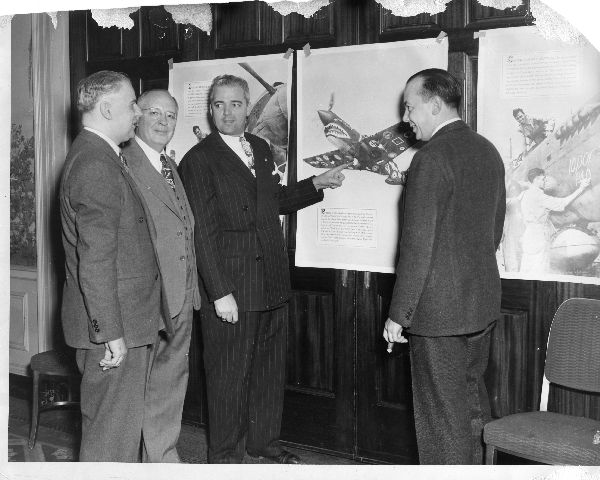
The factory in Buffalo was quite a site back in the day.
4 Likes
Hi Friends,
Trying to keep on top of things during family loss in the east coast of Canada due to “Fiona”. Not looking for sympathy, yet honoring the one lost.
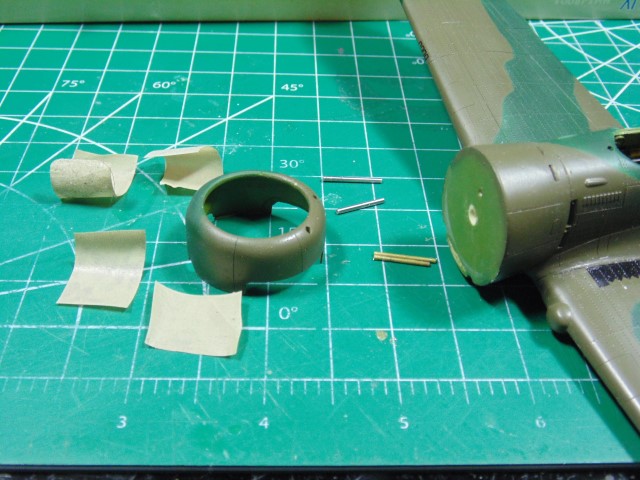
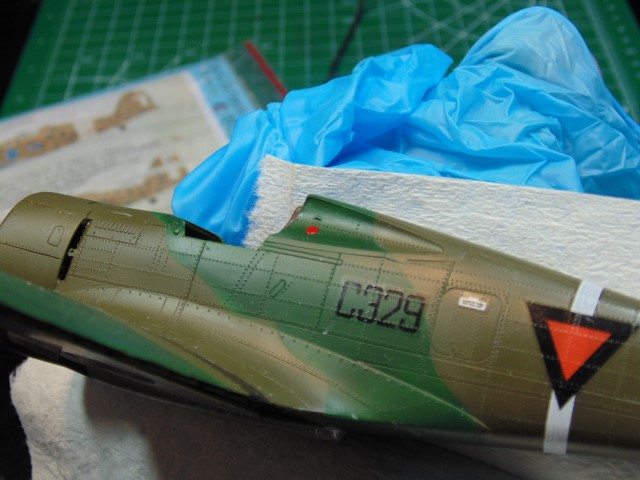
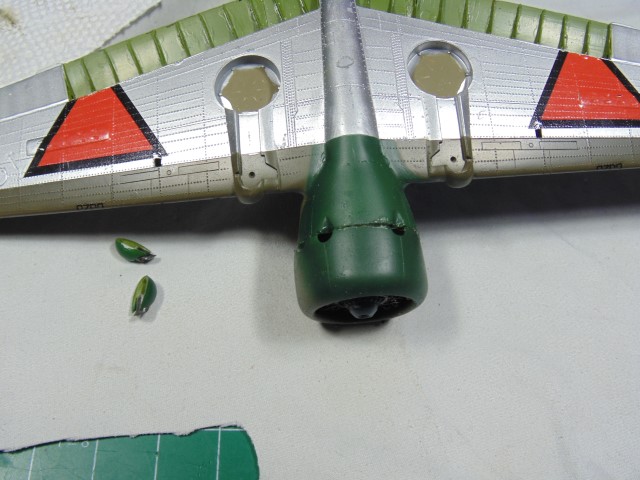
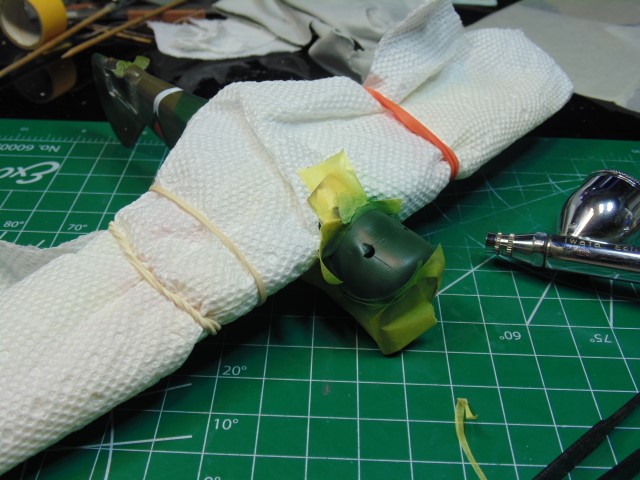
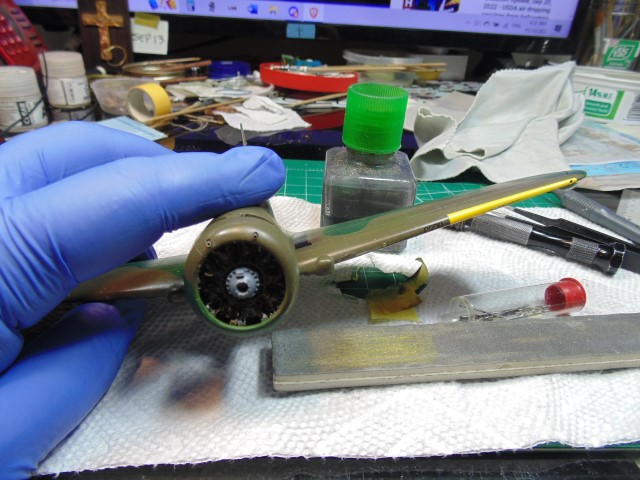
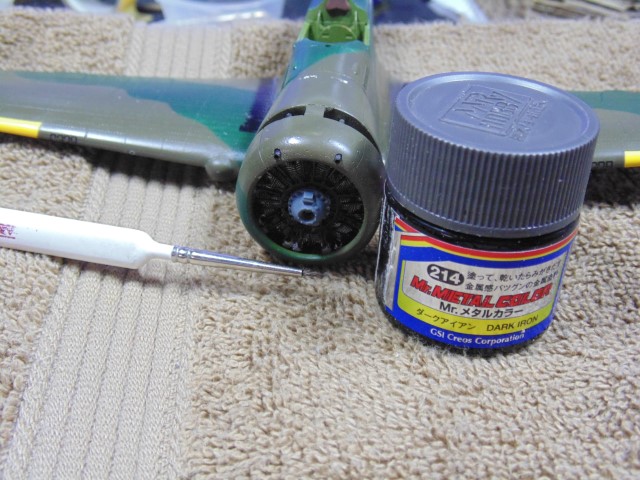
You can see I’ve drilled some holes in the resin for the hand made gun barrels. Brian’s excellent pictures allowed me to estimate the width they protrude from the cowl.
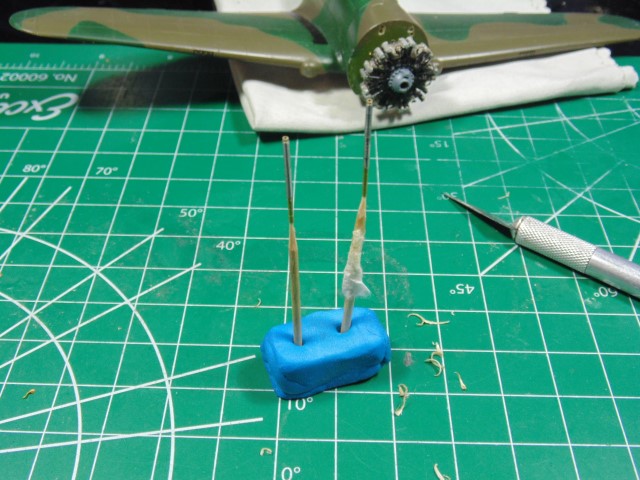
I didn’t want just a tube though, meaning a touch more realism. Slipping in a smaller diameter brass tube looks much better and “I feel” realistic. Mr. Metal Color 214 is an excellent gun metal color. It also, when dried, dry-brushes to a terrific sheen. Make sure you fine sand the metal for a better fit and good attachment for the CA glue to stick. Use a slow gassing CA (such as BSI “insta-flex”… NOT BEING PAID for the endorsement!) so you have time to adjust the look. Meaning you have time to work with it.
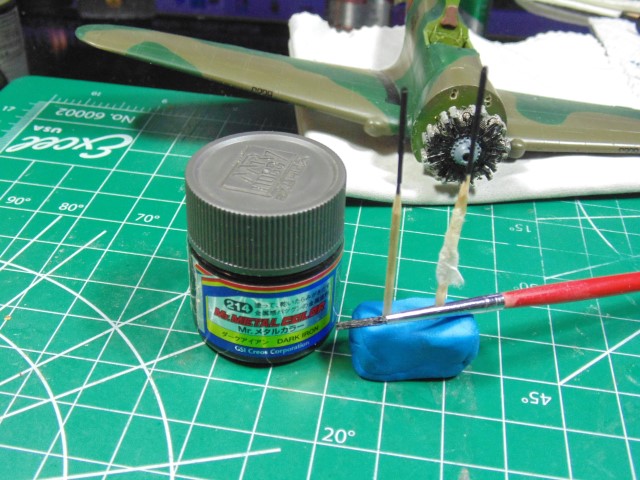
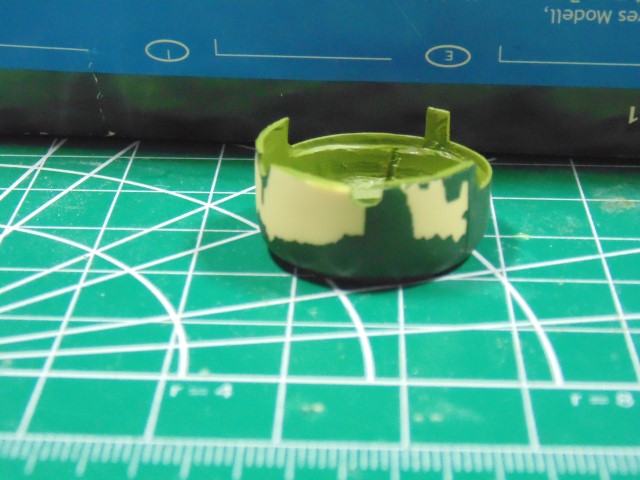
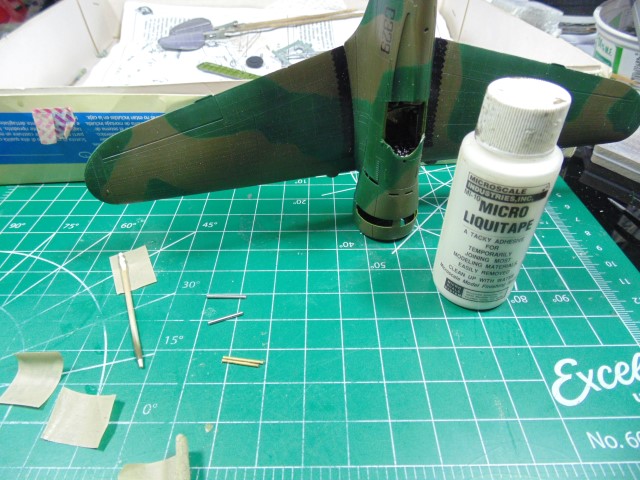
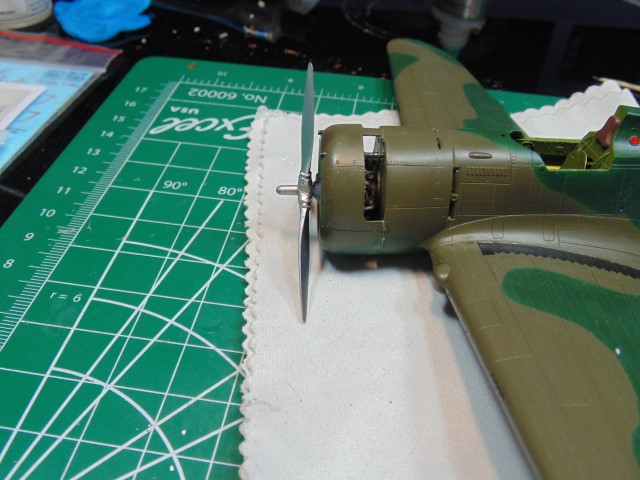
The cowl is not complete and was a gong show to pre-fit by my own doing because of the added metal and aligning that up with the engine cylinders. The tip of the prop needs to be sharpened, as per Brian’s welcomed post, to get it to look right. Hopefully the distance is accurate enough.
Please remember, this all has to be fine worked and I pray will make him happy. In the mean while let’s get working on assembling some smaller, yet important bits. As you’ve read before the exhausts ports were painted. Now they are in the covers.
I added a touch of artist oil to the landing gear. Later I’ll feather this off, again a small detail.
The decals were great in many ways, yet didn’t fully bed down. Happens to the best of us, right? Even after 40 years in the hobby HA HA yah pull your hair out. Have to figure out what these indents are for and if to puncture the decal slightly to add some dark grey wash. To be continued…
Now to adjust the resin cowl parts. It took some time to get to this point due to the warping in the resin. Not to fret though, there’s always solution. The gap is filled with my own styrene filler formula.
Consider placing your replica on soft towel (or something) to protect painted surface because you have not sprayed a clear coat to cover the surface yet. Also, if you have the means, wear glove when handling it. More on this soon. Heavy and fine sanders used to smooth the surface and later replace the panel lines and rivets.
Guys, I know this post was a little bit more wordy, but I’m an author…
Kindy,
HG
8 Likes
Answering Some of HG’s Questions, and some “Final Details.”
As the future recipient of this jewel, I feel obliged to provide HG with the best info available about this uber-rare warplane. Here I was very lucky to find two publications, one online, and the other in hard copy.
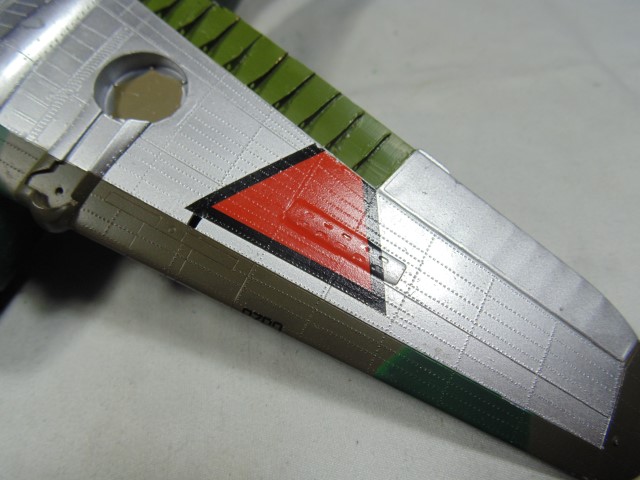
In his last post, HG looked at the lower wing and said:
Have to figure out what these indents are for and if to puncture the decal slightly to add some dark grey wash.
He’s talking about these things, below:
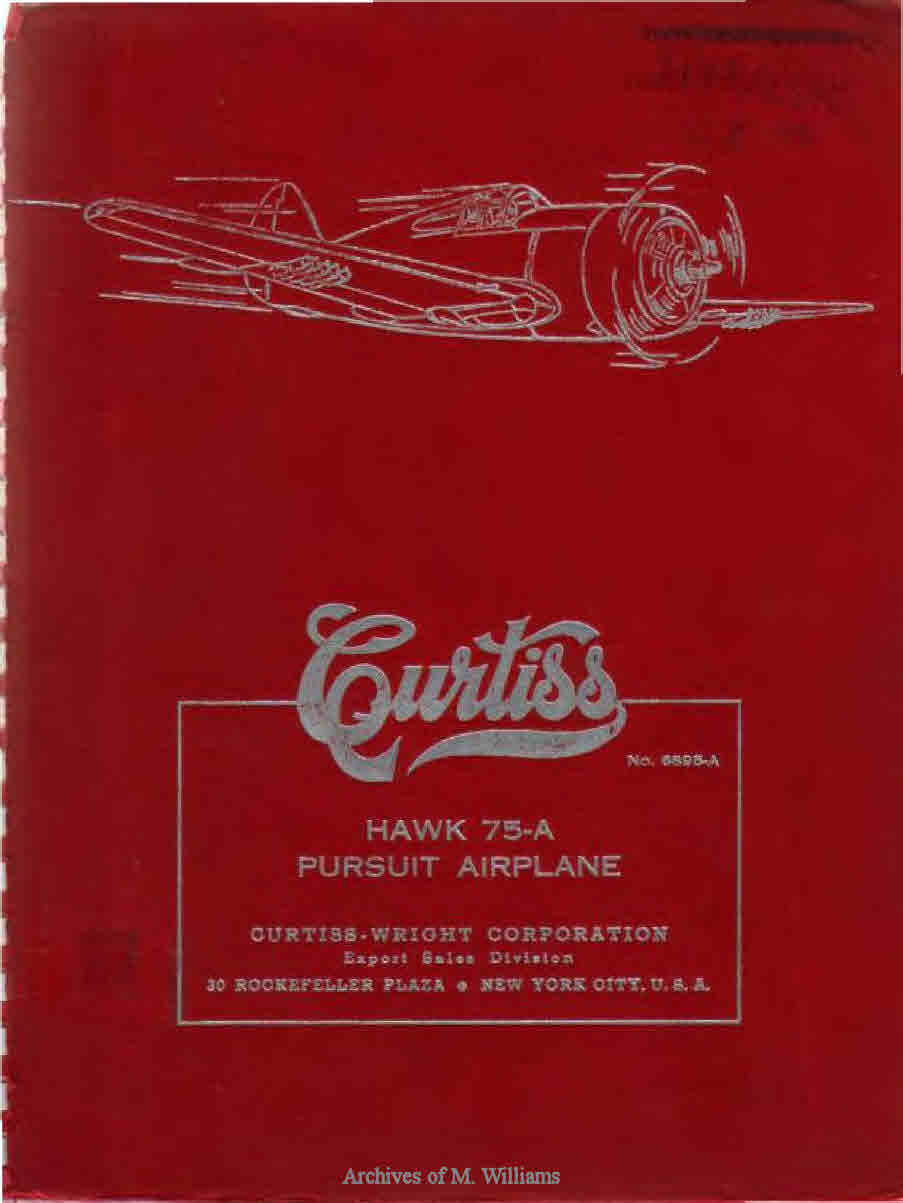
And truth be told, I wasn’t so sure myself. So I searched online and found this gem of a brochure, titled Curtiss Hawk 75-A Pursuit Airplane.
Oh, Baby, where have you been all my life?!
And you, too, can download your very own copy right here.
Who knew!? It’s the genuine article for sure, as I know that C-W’s HQ at this time was in Rockefeller Center, New York City, U.S.A.
And it does, indeed, provide an answer on page 16.
So no, these aren’t going to be sanded off, and new orange triangles put on.
There is another reason for this, found in a hard copy book one could get at Aviation_Megastore.com, but at an obscene, unaffordable price when you factor in their fixed, overseas shipping cost..
Pretty recent, BTW, it only came out in 2021, what, 80-82 years after the events it chronicles. But not worth the price I’d have to pay there. So, I did some further online shopping and found a French Hobby Shop with one copy for sale at a reasonable cost, and ordered it. It came last week.
It is worth it, because the book has another, fuller account of the death of Paul van Breen, C329’s pilot on 12/21/1941.
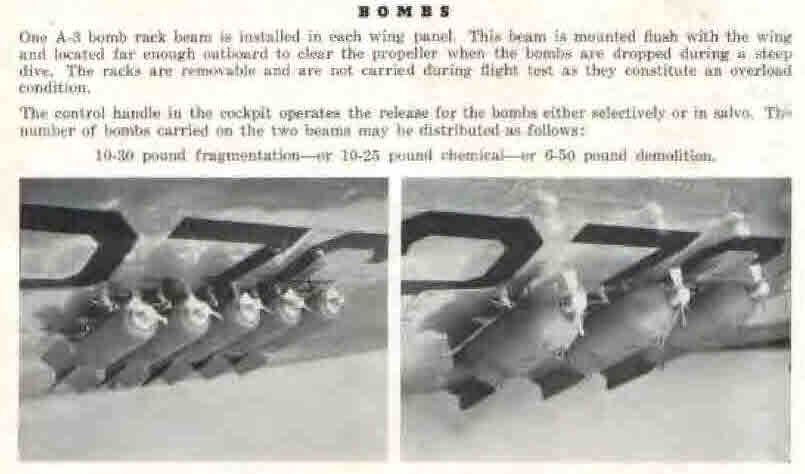
The mission for that day was to bomb the railway junction near Sengora in Siam and to conduct general reconnaissance. Four aircraft were assigned to fly the mission in two pairs, and the narrative indicates that each aircraft carried two 50 lb. bombs.
I’m going to assume that they were the kind of 50-pound demolition bombs shown in the Curtiss brochure below, one on each wing.
Van Breen was in the second pair of aircraft to take off, between 4 and 4:30 AM. The weather was “very bad.” Despite this, the pilots were ordered to keep their navigation lights off and not to use their radios. Unsurprisingly, the collision that killed him and the other pilot followed, capped off by the explosions of the four bombs when the two aircraft hit the ground.
I’ll ask HG if it’s worth the time and hassle to cobble together two 50-pound bombs for this baby. Of course, just the kinds of items for which we have spares boxes.
The Dutch Profile book also has further information on the markings of the aircraft on this day. A profile of C329 with two yellow bands on the outer wing leading edges, as you can see below

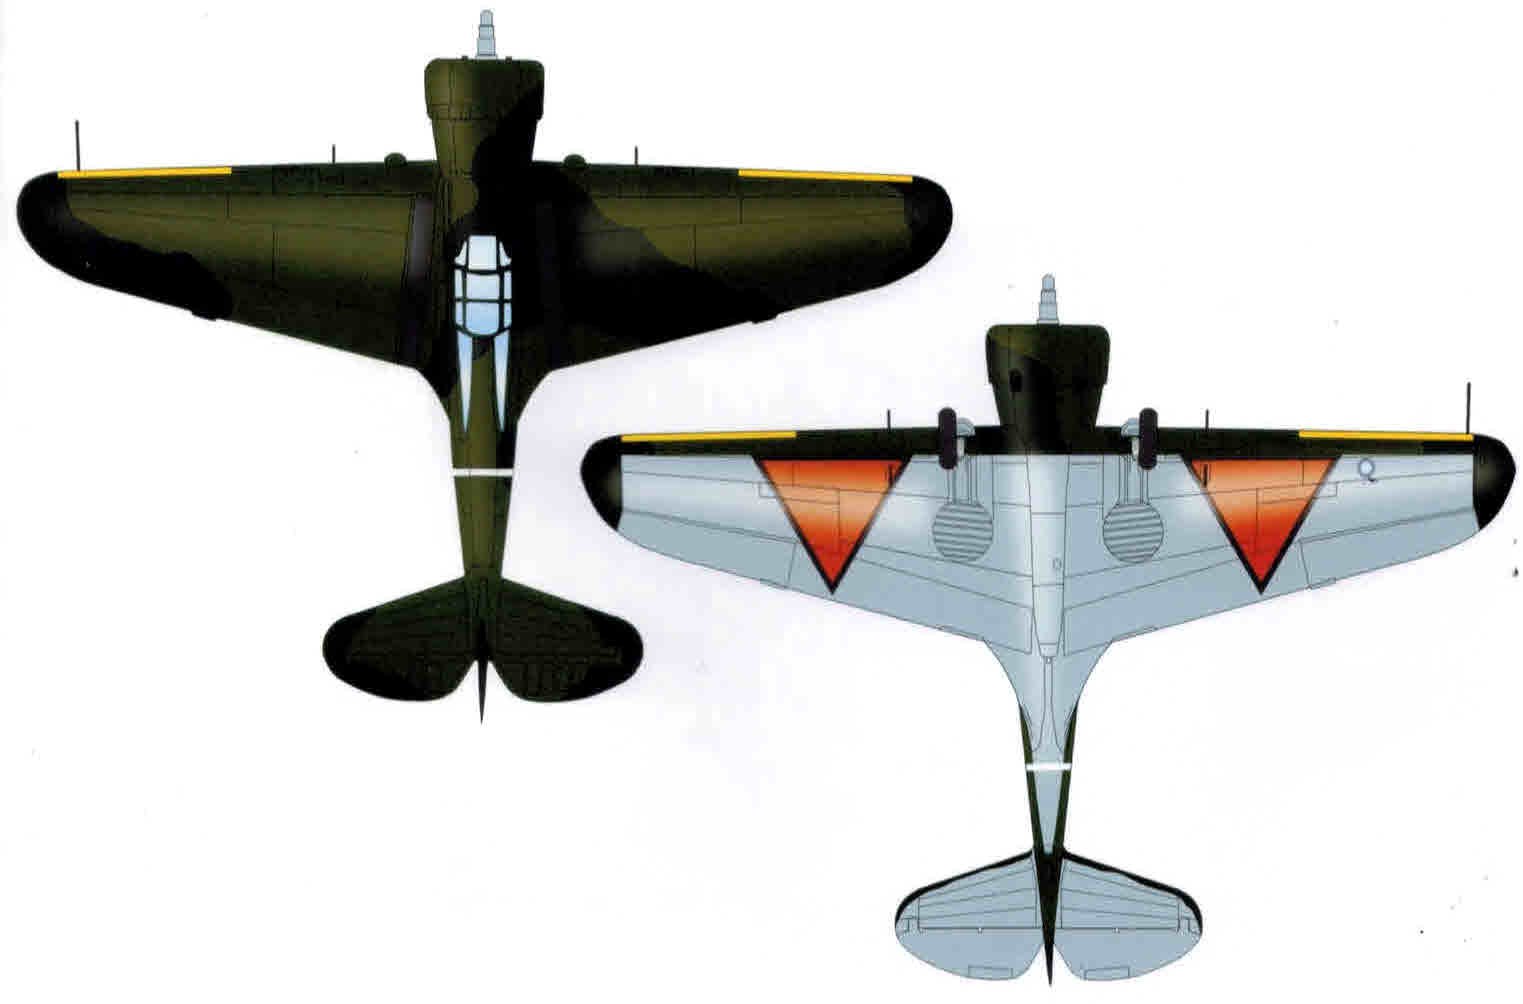
So, we will go ahead and add them to the scheme.
I have to say I was reluctant to do this, not just because of the pain involved in adding a yellow band to an already painted wing, but also because I didn’t want to rely just on the profile artwork since there are so many other pictures of these aircraft without these bands. However, I have been persuaded it is real by the following picture in the book,

Here’s the caption.
All in all, VERY obscure stuff, but I like it that way!
Back to you, HG.
5 Likes
Fantastic post, but let me get the yellow forward wing tips done. I don’t know if I have any spare 50lbs in the stash, we’ll figure something out. I do like the idea of the look, yet it will take many hours to pull that off. Not the bombs but those tiny 1/48 racks.
Right now I’m masking…UGH!
2 Likes
To be discussed. Glad you liked the post.
1 Like
Hi Guys and Gals,
MASSIVE thanks JIM STARKWEATHER for your incredible work giving us modelers a place to post.
Burned the midnight oil masking and spraying.
Even after a few clear coats of semi-gloss (yes they were fully hardened) I was horrified that these small decals would lift off. I bought 2mm precut stripes of Mr. Hobby at Sunward Hobbies specifically for this job after reading and studying the instructions.
Obviously, having no idea things would change with additions, boy did they come in handy. Yes, I have a cutting sheet plate. These saved me a huge amount of time and time is money, right? Lay down one 2mm bit than attach a larger tape to some shielding and press that on.
Now to prep masking off the cowl work, but I wanted to get the wing color on first.
I always de-tac my tape and sometimes even twice. Naturally, that depends on the spot needed to be taped, but my point is to press down the de-tac tape firmly before spraying. This lesson’s the chance of under-spray.
Good grief, looks more like a surgery ward than an artist’s studio ha ha…
Thanks for viewing and ALL comments are welcome. We’re here to support one another.
Kindly,
HG
6 Likes
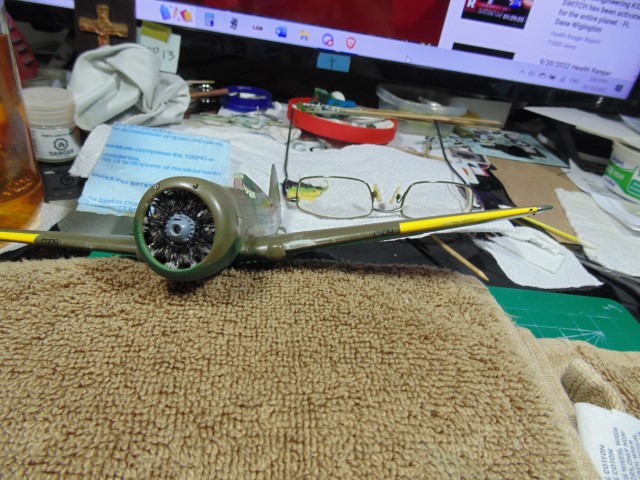
OOPS, forgot a shot and please forgive the dim light. It eases my Parkinson’s.
Circle cutter to make the mask to cover the engine and a heavy/thick paper towel jacket for the repair paint job.
All the best!
3 Likes
Thanks AssieReg, LightSpeed and justsendit. Many hours put into this and likes are very motivating.
Hi Guys,
Super quick update.
Masking is done and the repairs are in progress.
Had to spend a few “minutes” getting the curves right, yet was worth it to literally pull this off LOL.
Tru-color paint is incredibly color accurate and the cool thing is, right out of the jar you can do touch-ups… no thinner, no reducer and no freaking BS. Peal a strip off the label to know how low your jar is though. Hand paints like a dream too. (NOT paid for this endorsement!!!)
Now to affix the detail parts.
Excellent health everyone,
HG
4 Likes
Procurement: Bombs and Curtiss Prop Logos
As HG’s work progresses the need for additional items becomes evident.
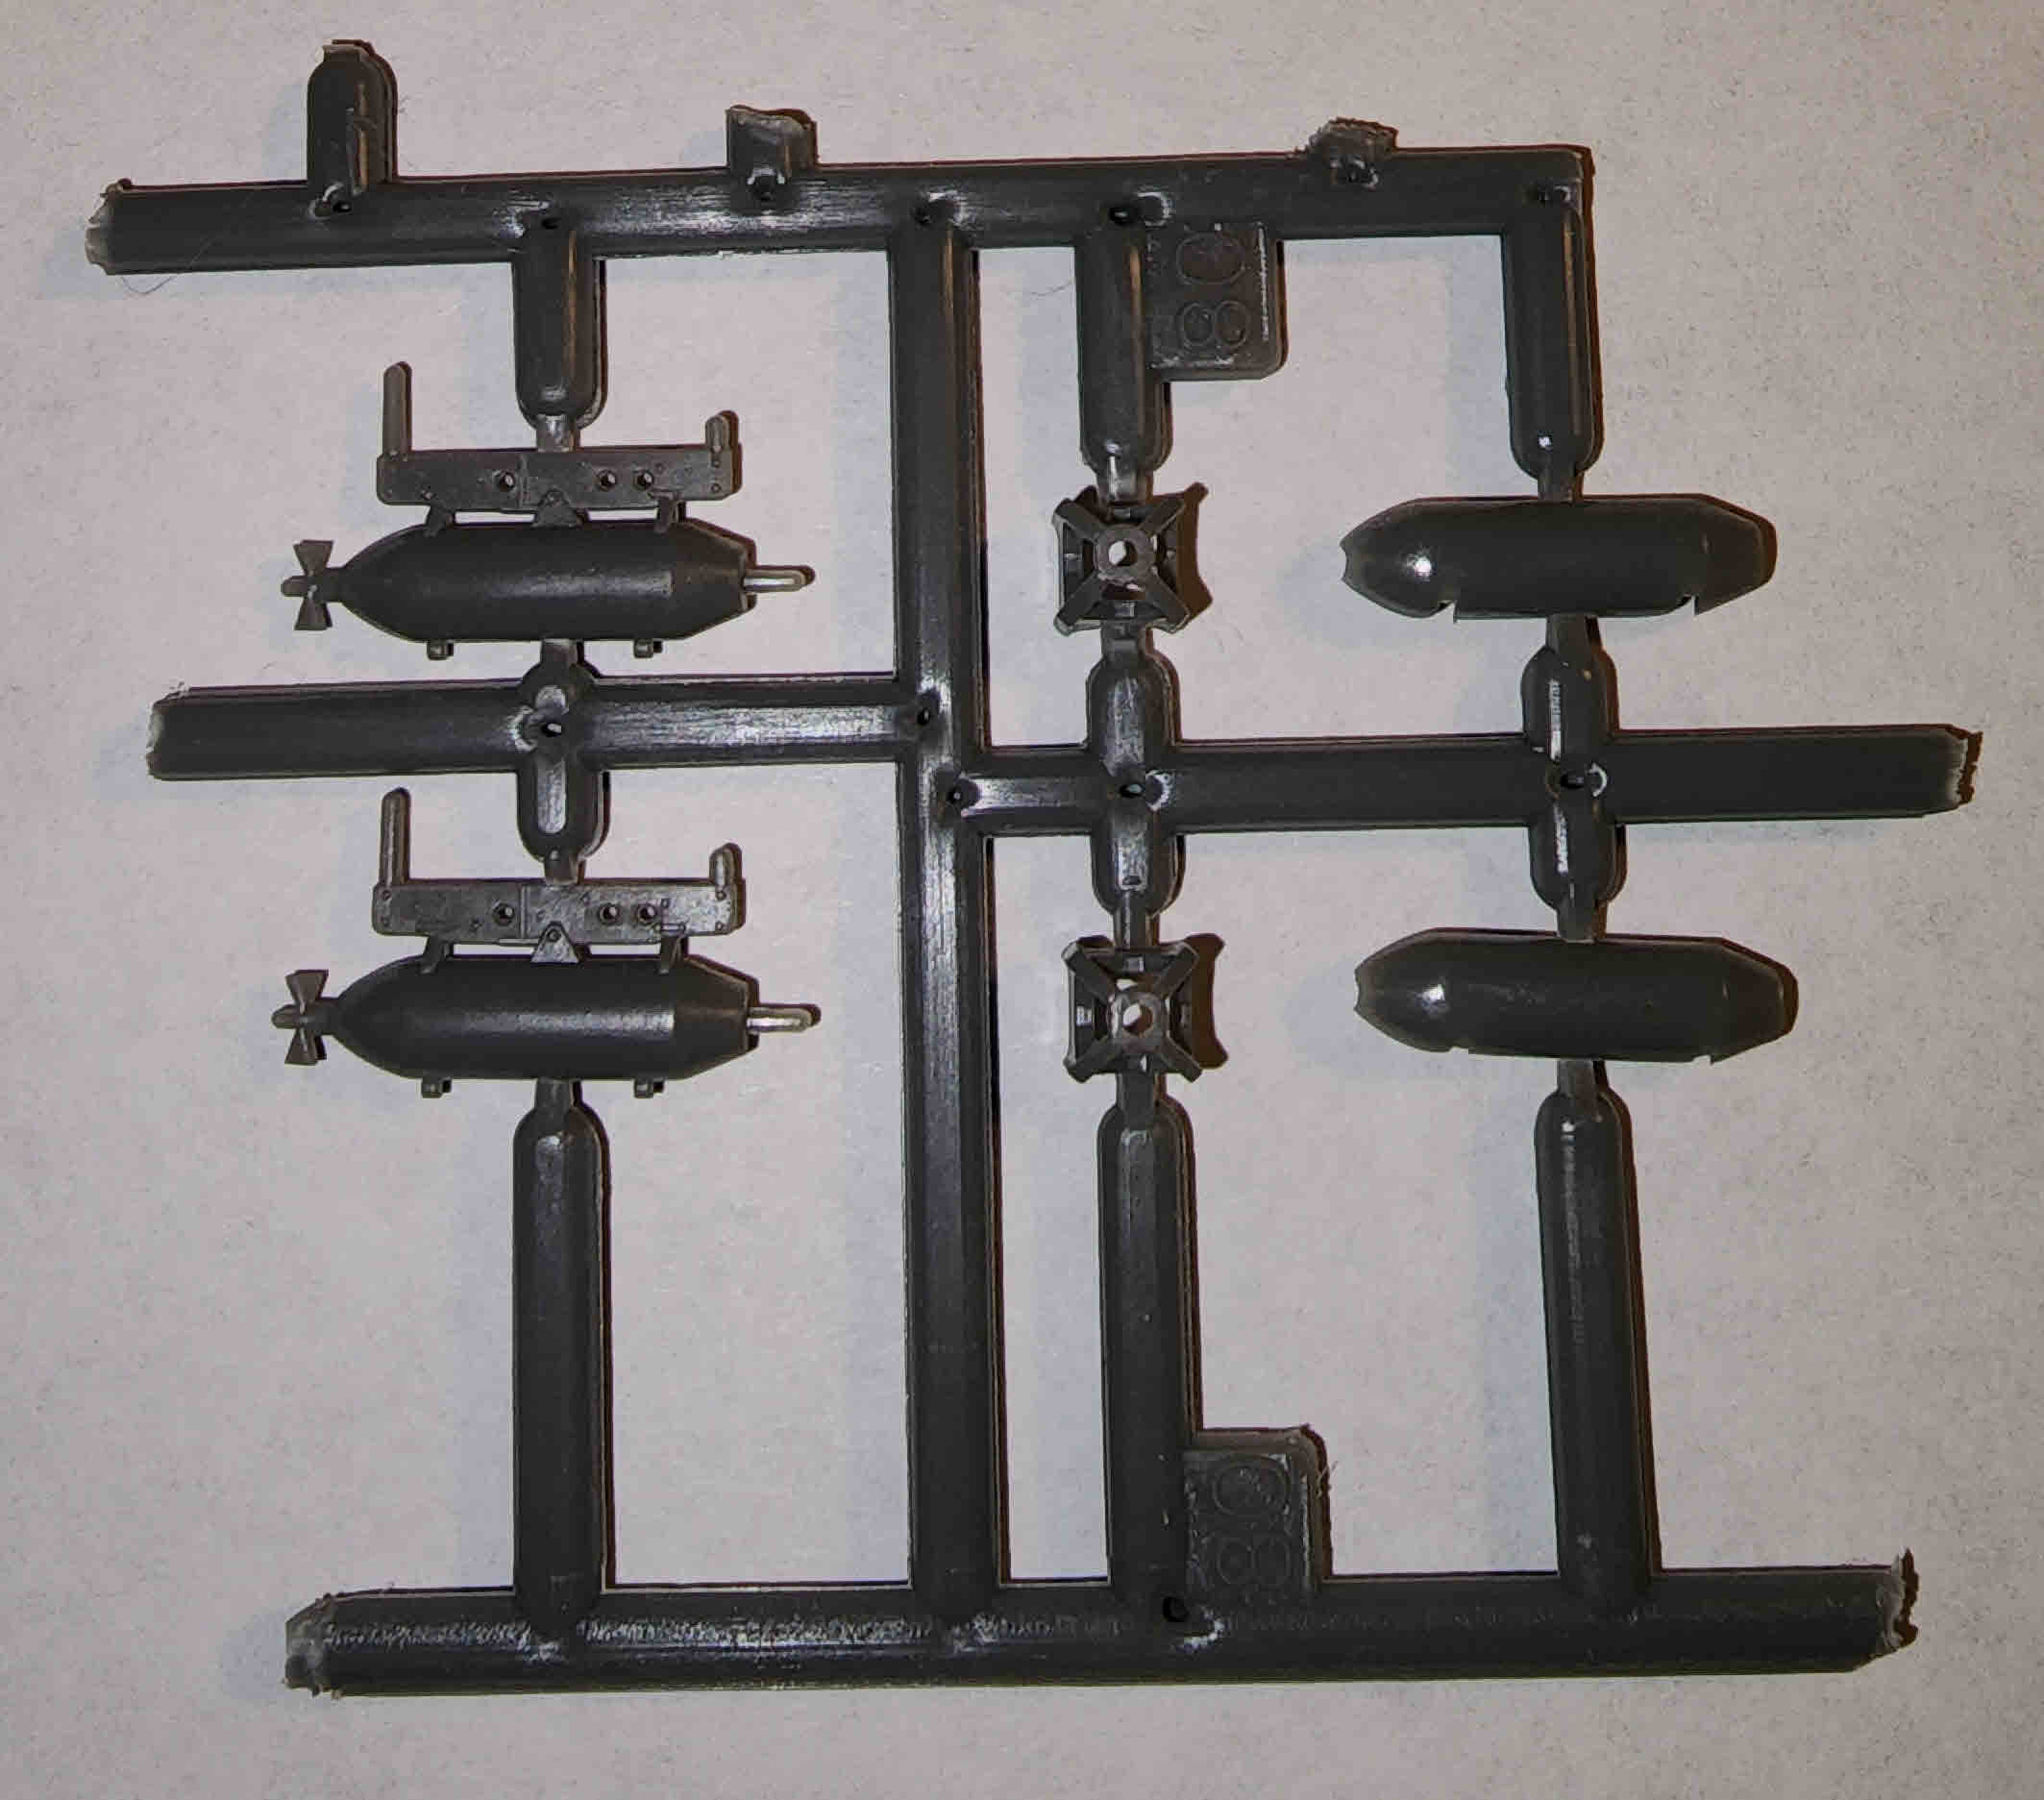
We are going to outfit this model with one 50 lb. GP bomb on each bomb rack, per the information available about the pilot’s last, fatal flight in C329. We will put one bomb in the center of each rack.
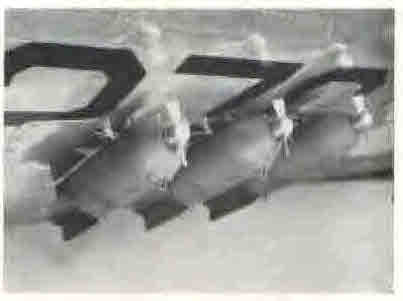
Where to find the bombs? Well, a near-perfect match is available in the Accurate Miniatures SB2U-1 kit:
I’ll leave the necessary modifications in HG’s capable hands.
Now to the prop logos and stenciling.
For those who have never seen the real thing (and I have one! ![]() ) here’s what the Curtiss Electric logos on the blade
) here’s what the Curtiss Electric logos on the blade
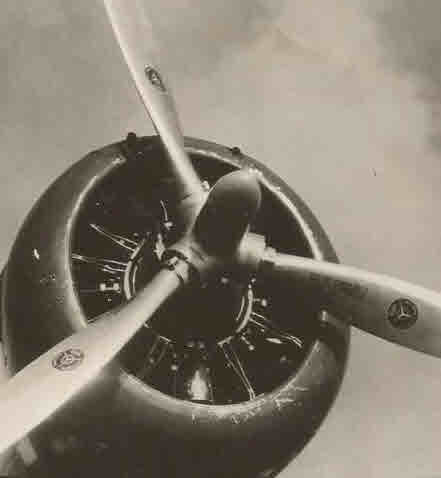
look like close-up.
I’ve ordered some in 1/48, and as to the inboard black stenciling nearer to the prop hub, I’m searching my decal spares. The best suspects will probably be P-38 or P-35 kits. We’ll see.
3 Likes
Hi All,
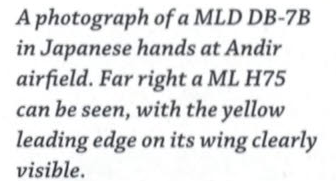
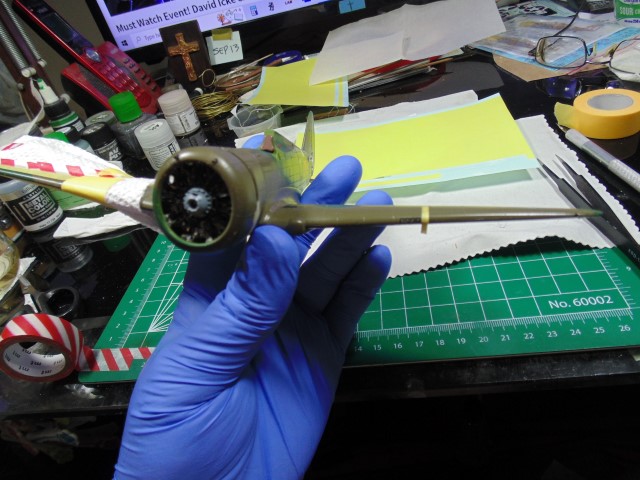
Time for those minor, yet necessary, touch-ups.
As Brian, rightfully, pointed out there were a few miss shots in the left wing parts. I’ll take of those now.
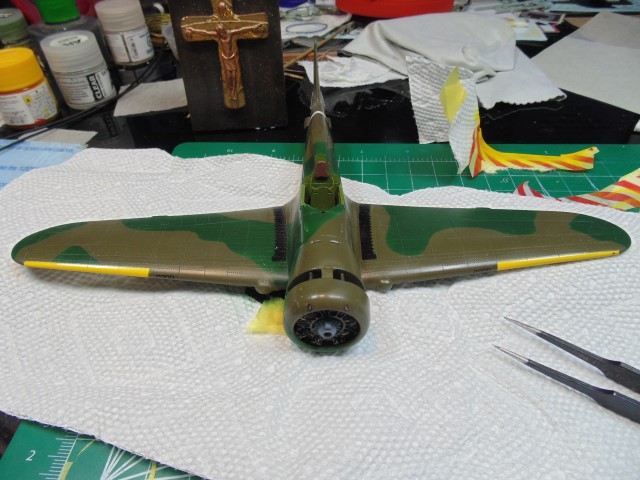
I used some dark sprue-goo to fill the olive area and some lighter goo-filler for the yellow edge. This way you’ll not have to do hours of re-masking. Just set your airbrush on low pressure and thin the AK paint 6 drops to 5 thinner/paint.
Both spots have dried and are now sanded.
Sprayed and ready to move on. Don’t fret if the glossy finish looks off, the dull coat will hide that. Also, note the wing MG holes have been drilled out to match the kit parts.
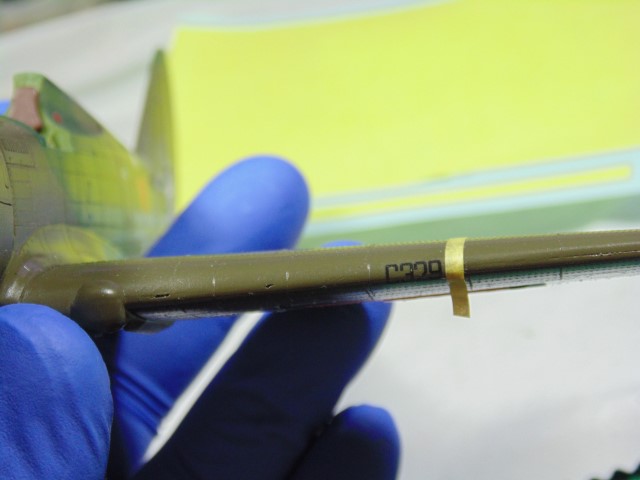
Brian noticed an ever so slight over length in the right gun barrel tip. I paid for tools, so why not use them. Use a square tool then butt it up to the tail and cowl, next look over the barrels to estimate the needed reduction. Then simply take the time to fine sand off the excess. Sure, it’ll take some time but it’s worth it. Then some 214 for the paint touch-ups and the engine wiring as well.
Moving on, this kit has a hole for an RAF antenna post version. Brian says to just fill it… thy will be done.
There were many other slight fixes done, but you are all talented modelers and I won’t bore you with those.

I’m just sharing the methods I use. Please don’t take this as a tutorial. Much respect to ALL who are in this community.
Kindly,
HG
5 Likes